
Felons is Chapter 7 in A Plague Tale Requiem. This walkthrough will guide you through all objectives of Chapter 7: Felons.
 Felons
Sub-Chapters and Objectives:
- Arrival at the Beach
- Catch Up with Hugo
- Cross the Beach
- Passage in the Caves
- Cross the Caves
- Reach the Shipwreck
- Open a Way for Arnaud
- Get Out of the Caves
- Reach the Shipwreck
- More Rats
- Find the Smuggler’s Hideout
- The Combat According to Arnaud
- Reach Sophia’s Boat
- The Fishing Village
- Reach Sophia’s Boat
- Dry Dock
- Free Sophia’s Boat

Arrival at the Beach
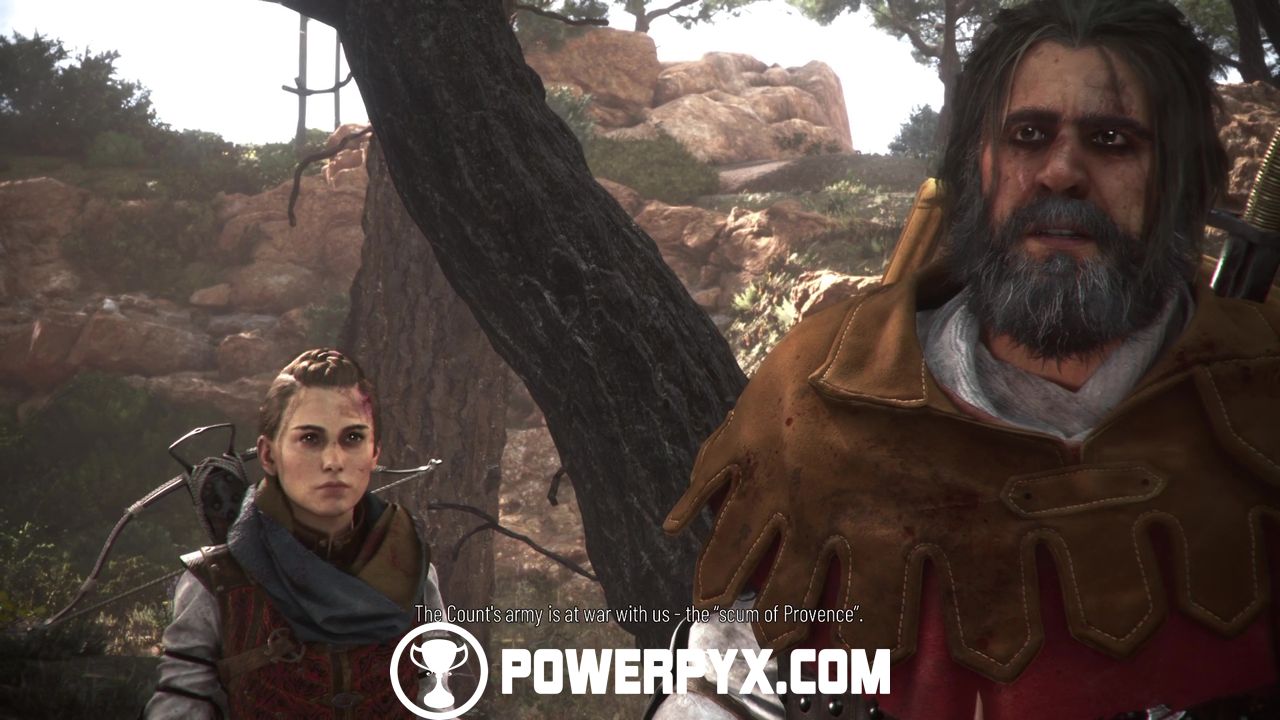
Hugo and Amicia have wandered alone into the county of Provence, looking for the boy’s prophesied island. Hunted by the Count’s troops, they made it through the labyrinth of an old quarry. Severely injured by Arnaud, Amicia grew weaker and weaker, forcing Hugo to unleash his evolving powers over the rats. Eventually though, Hugo lost control of the horde, resulting in a massive rat wave. An unexpected figure shows up. A friend or a foe? As it turns out, Arnaud himself saved us because he needs Amicia’s and Hugo’s help to survive! In fact, Arnaud’s faction is at war with the Count and he’s now a wanted man. Amicia and Hugo accept to protect Arnaud and in return he will lead them to the island.
Catch Up with Hugo
When you’re able to control Amicia again, walk up the hill to Hugo until you unlock a new cutscene, revealing that Arnaud is willing to escort us to a new boat which can get us to the island much faster.
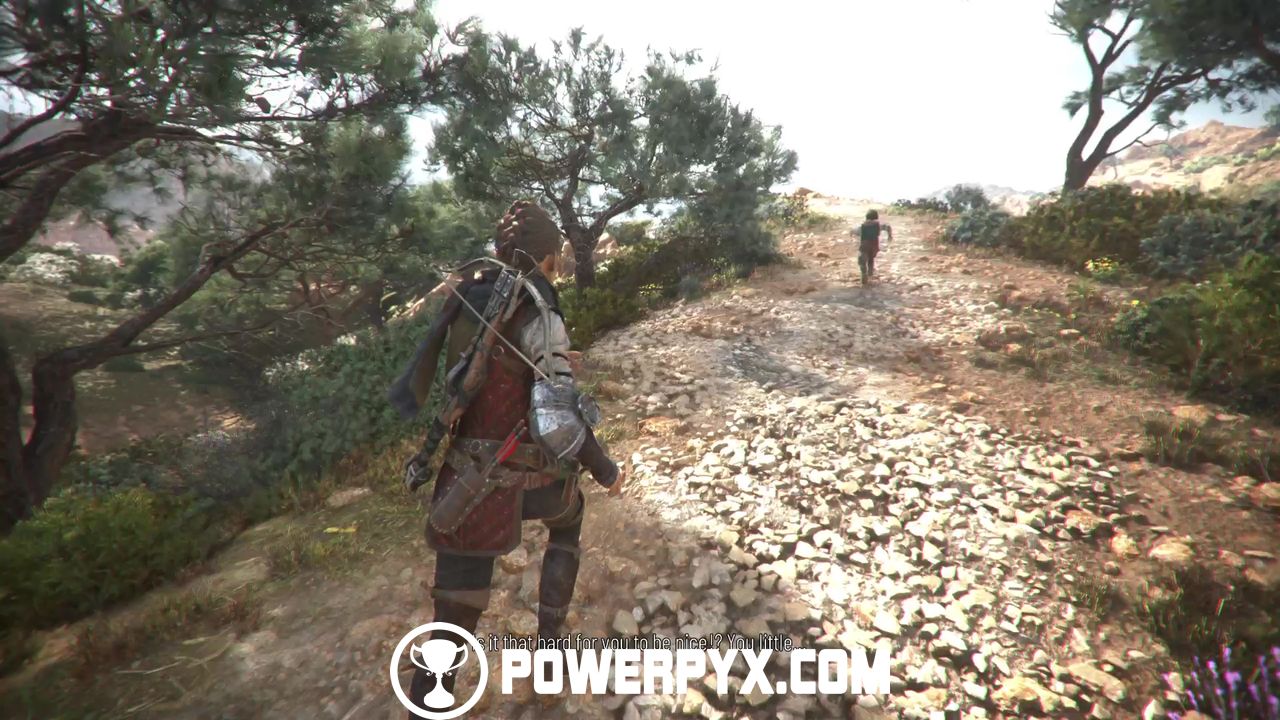
Cross the Beach
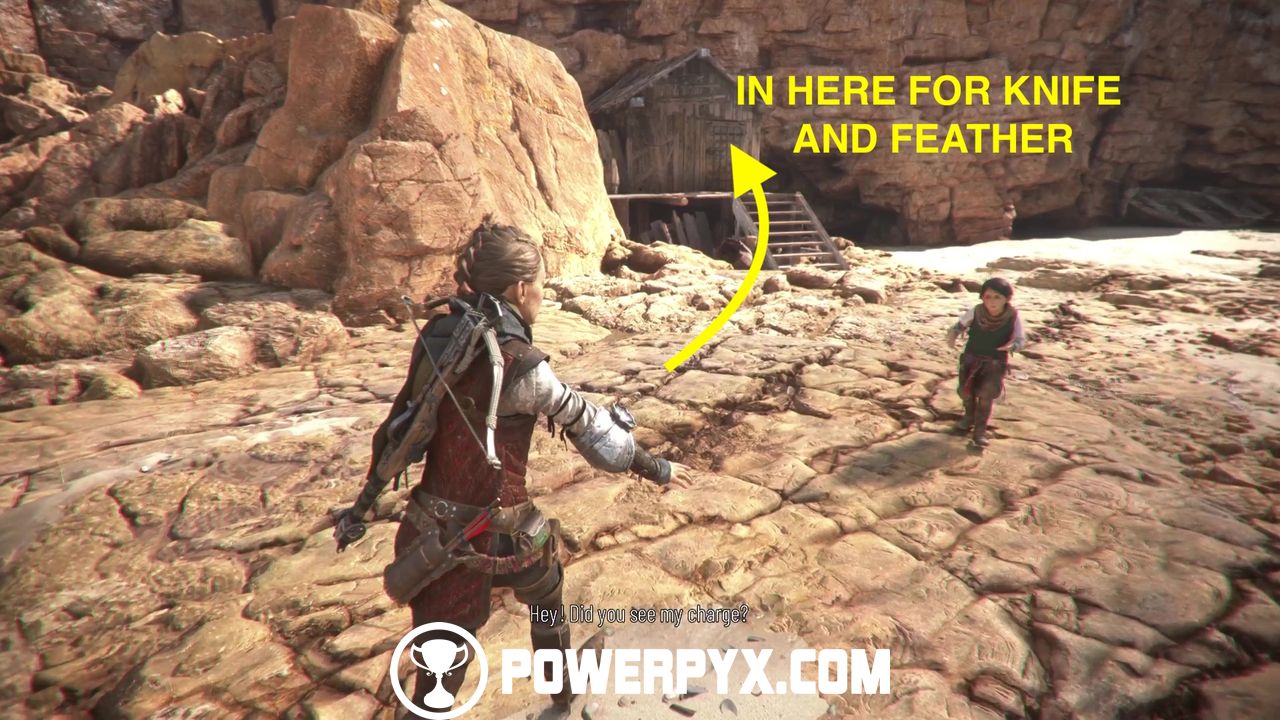
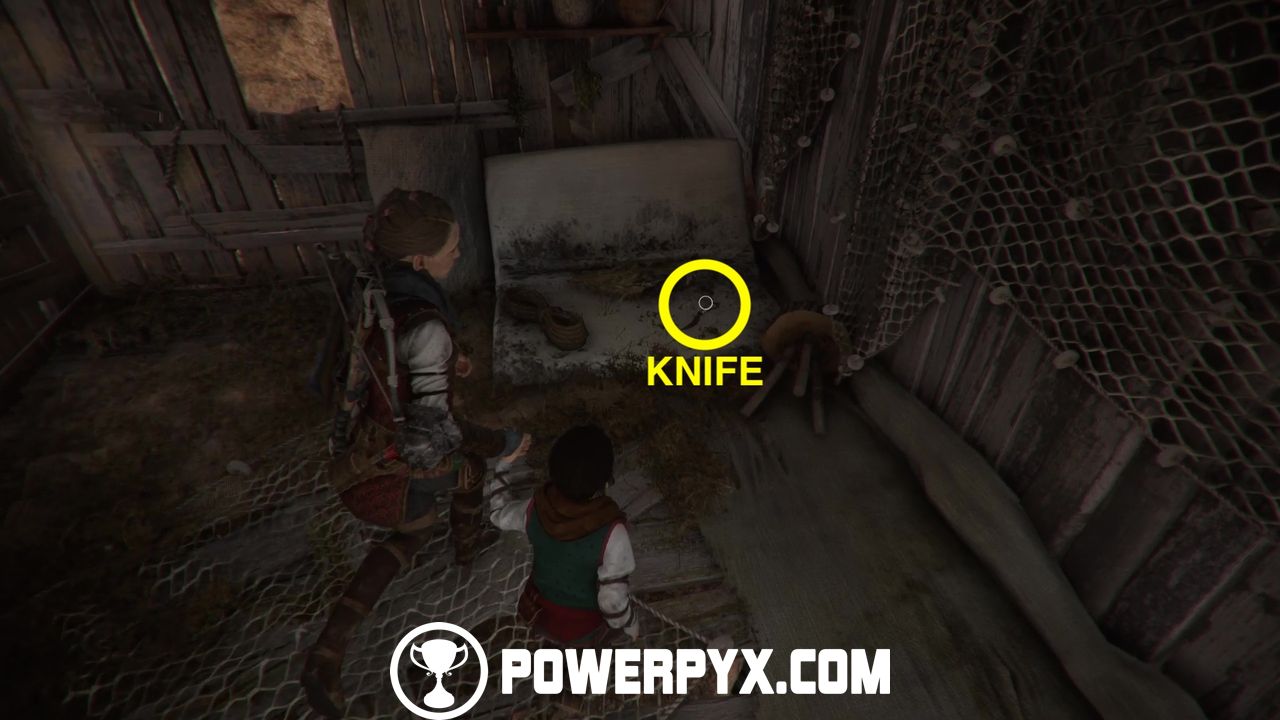
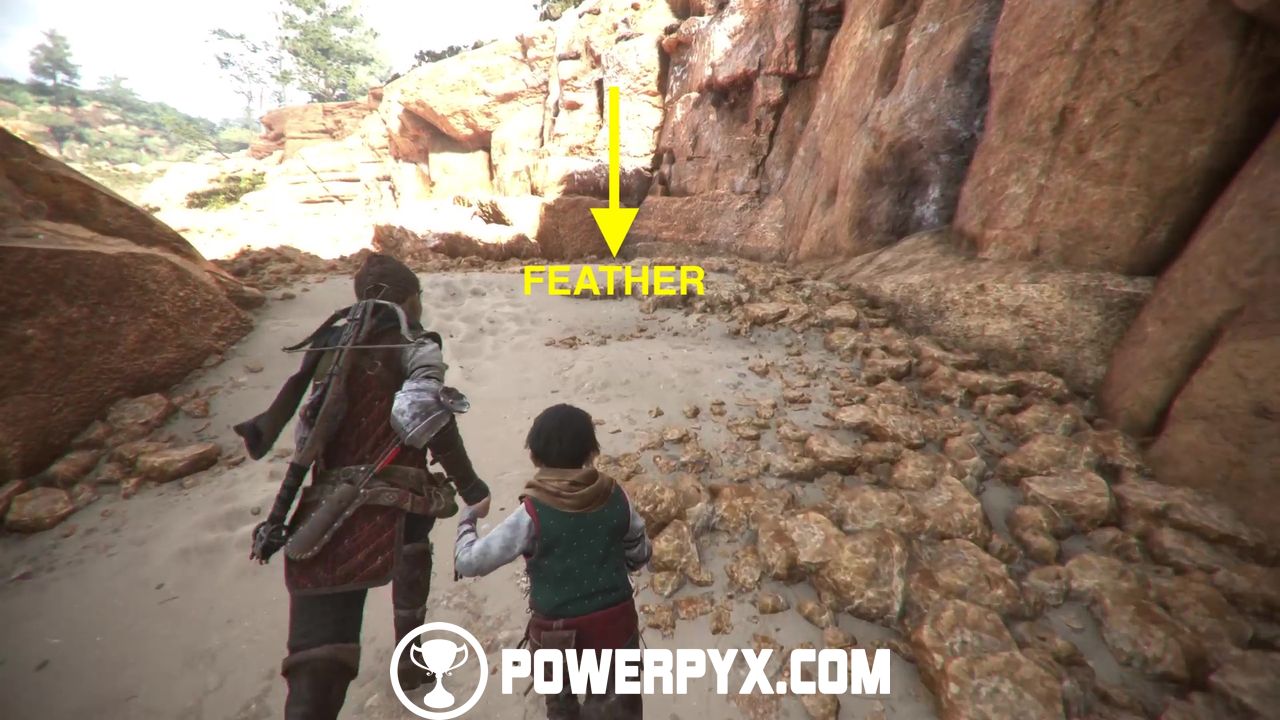
Follow Hugo and Arnaud down the cliff and, after Hugo has charged into a flock of seagulls, you should notice a small wooden hut on your left. Enter the hut and grab the knife from the mattress, then exit through the left window, open the chest from the back, and continue along the trail to find Hugo’s Herbarium #6/12 / (Feather 2/7): Black Headed Gull.
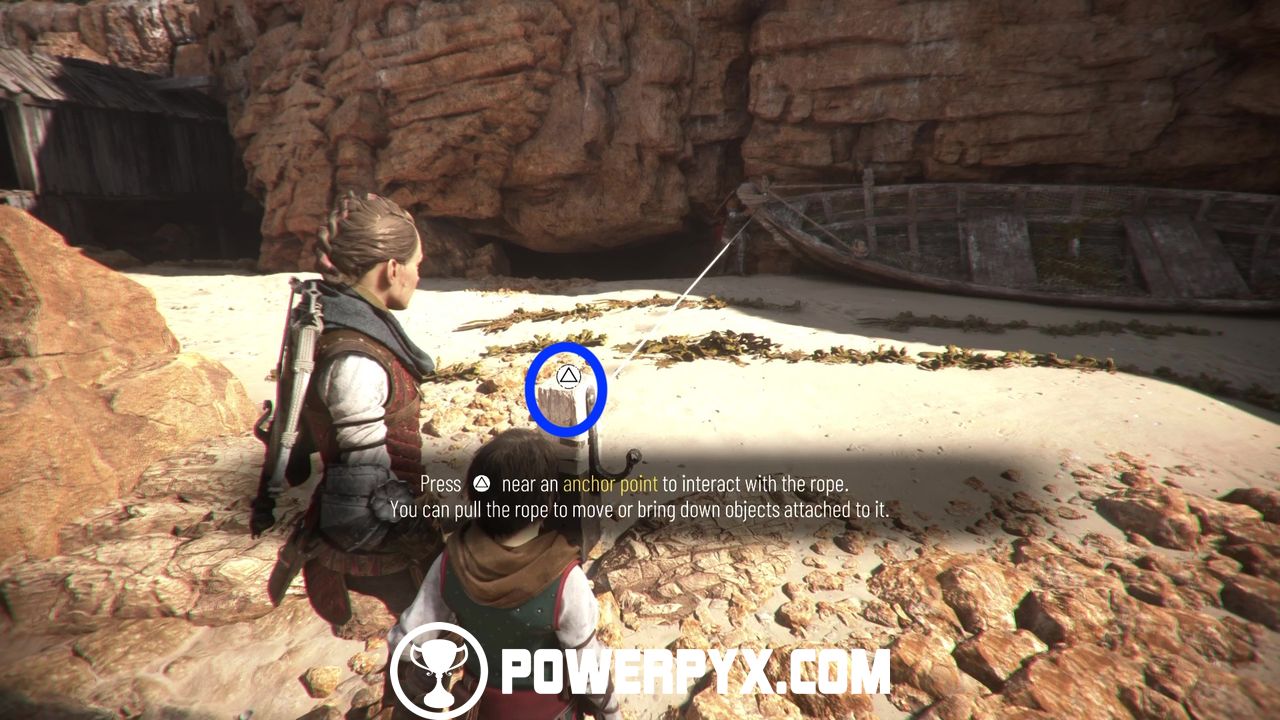
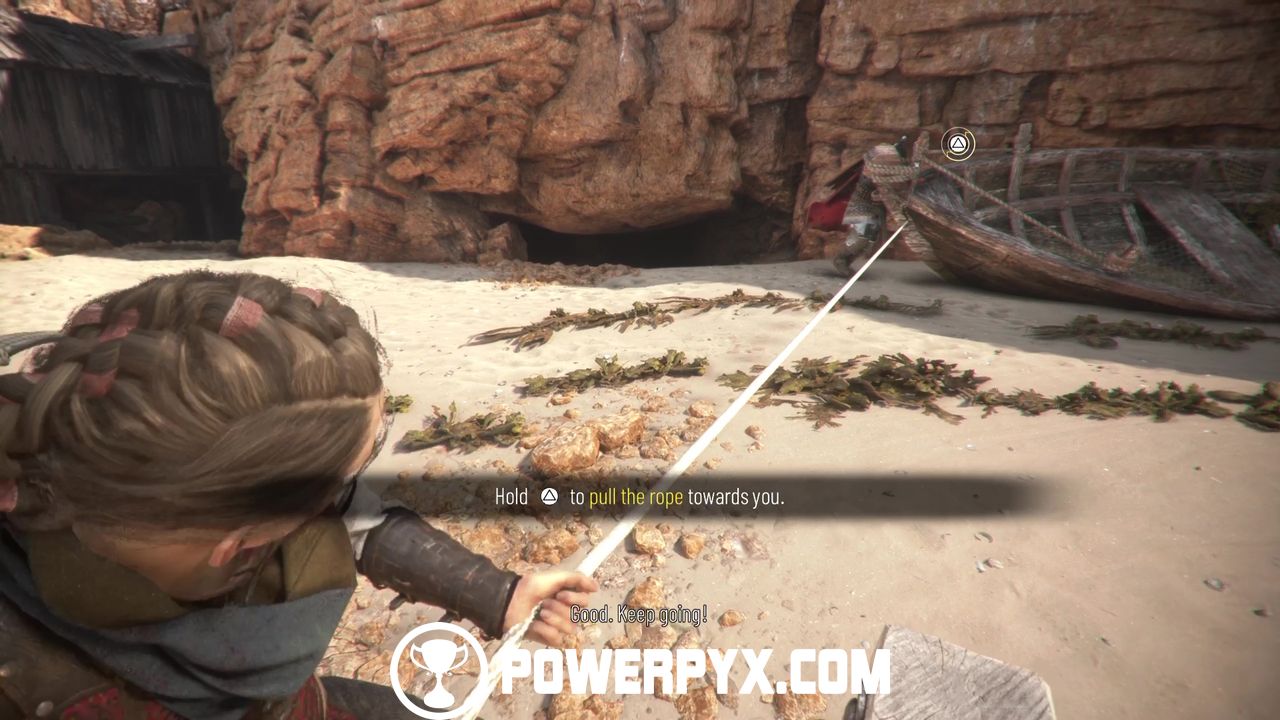
Now retrace your steps to the beach and follow Arnaud to the small boat by the cliff. Interact with the anchor point by pressing  /
/  , then hold to pull the boat towards you.
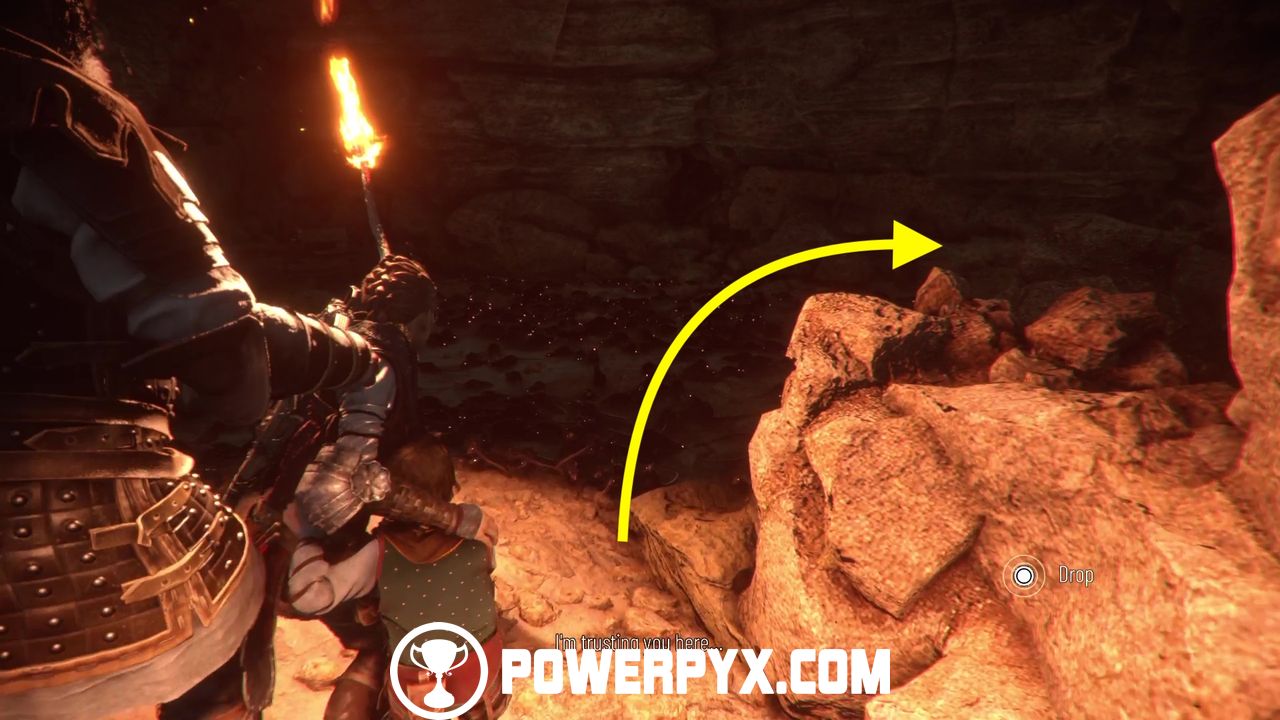
However, a new swarm of rats will come out of the cliff. Use Hugo’s ability to control the swarm, and lead them to the other side of the cliff through the left opening at end of which is a swordfish carcass they can munch on.
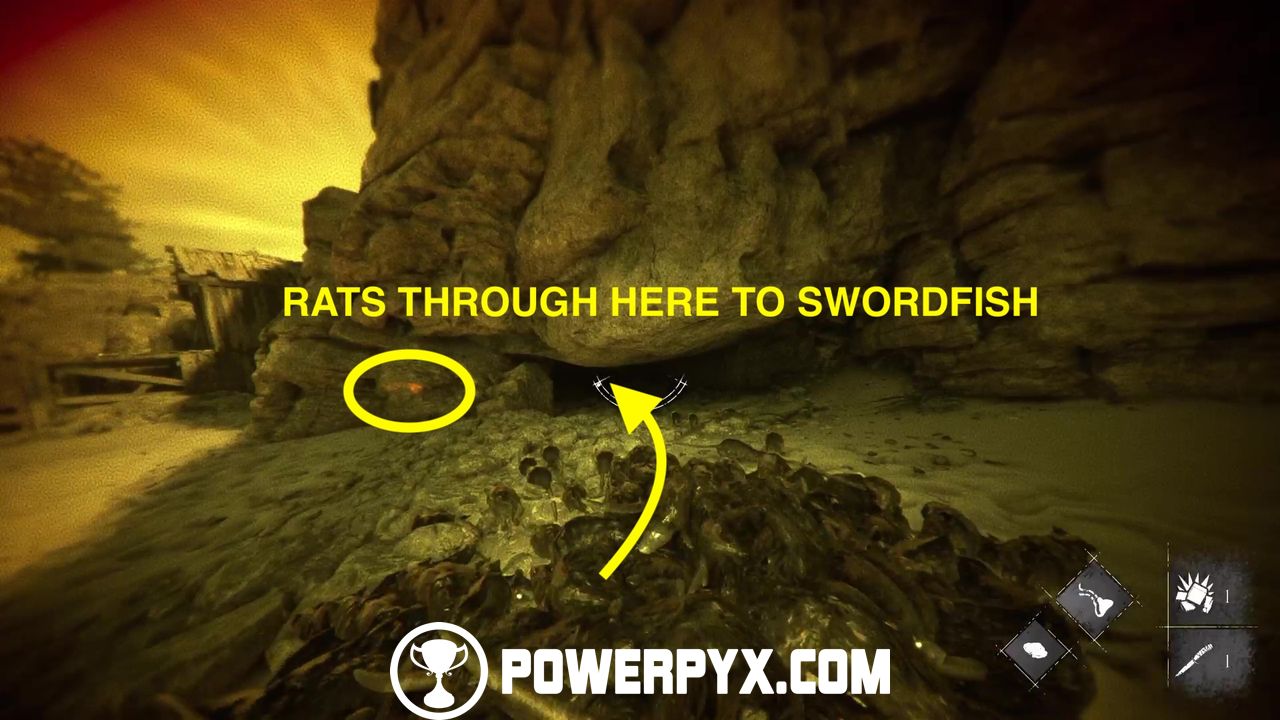
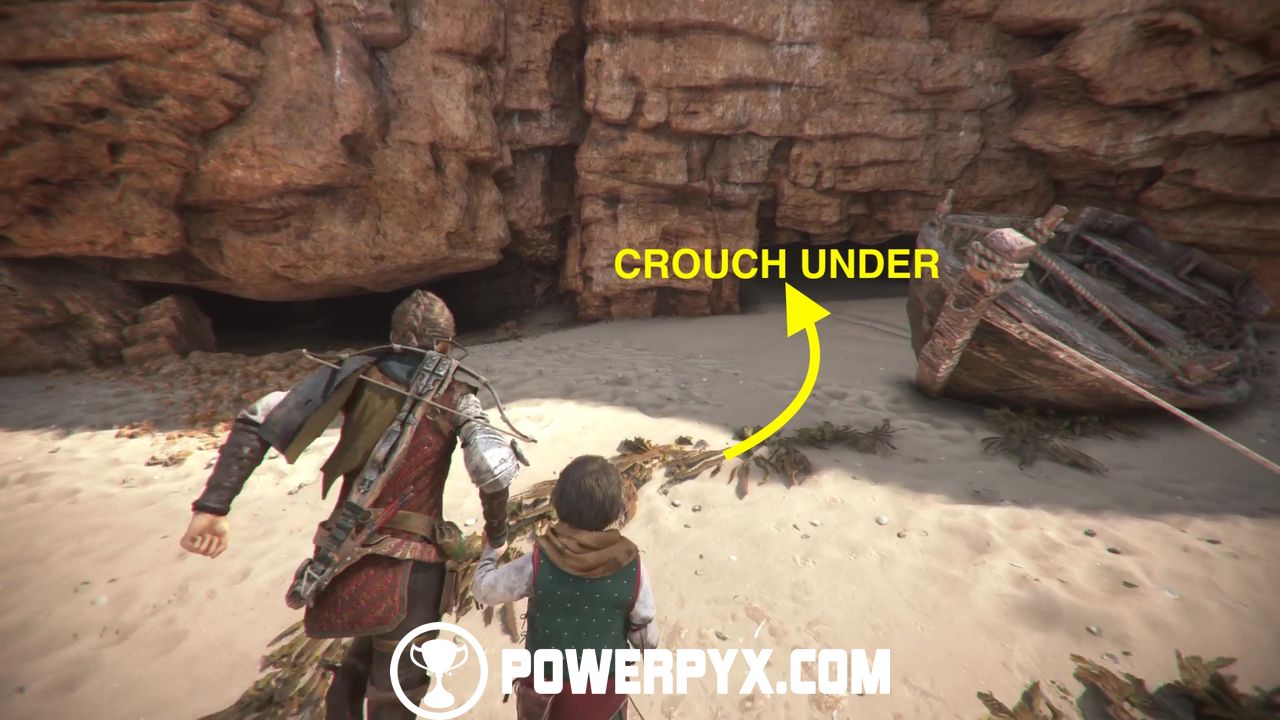
When you reach the carcass, you’ll be able to continue. From now on, every time you use Hugo’s ability to control the rats, Hugo’s stress level will progressively increase. If Hugo’s stress level reaches its limit, you won’t be able to use his ability anymore. Now crouch under the opening the swarm came out from and continue on.
Passage in the Caves
Cross the Caves
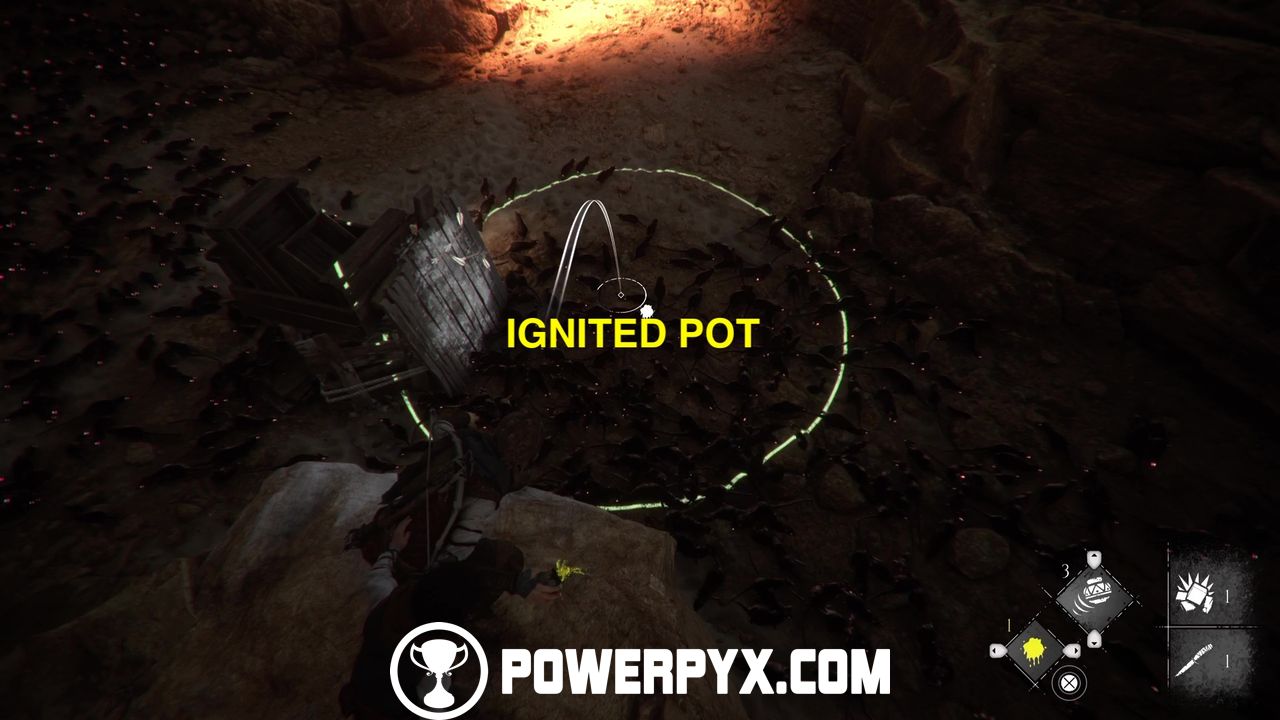
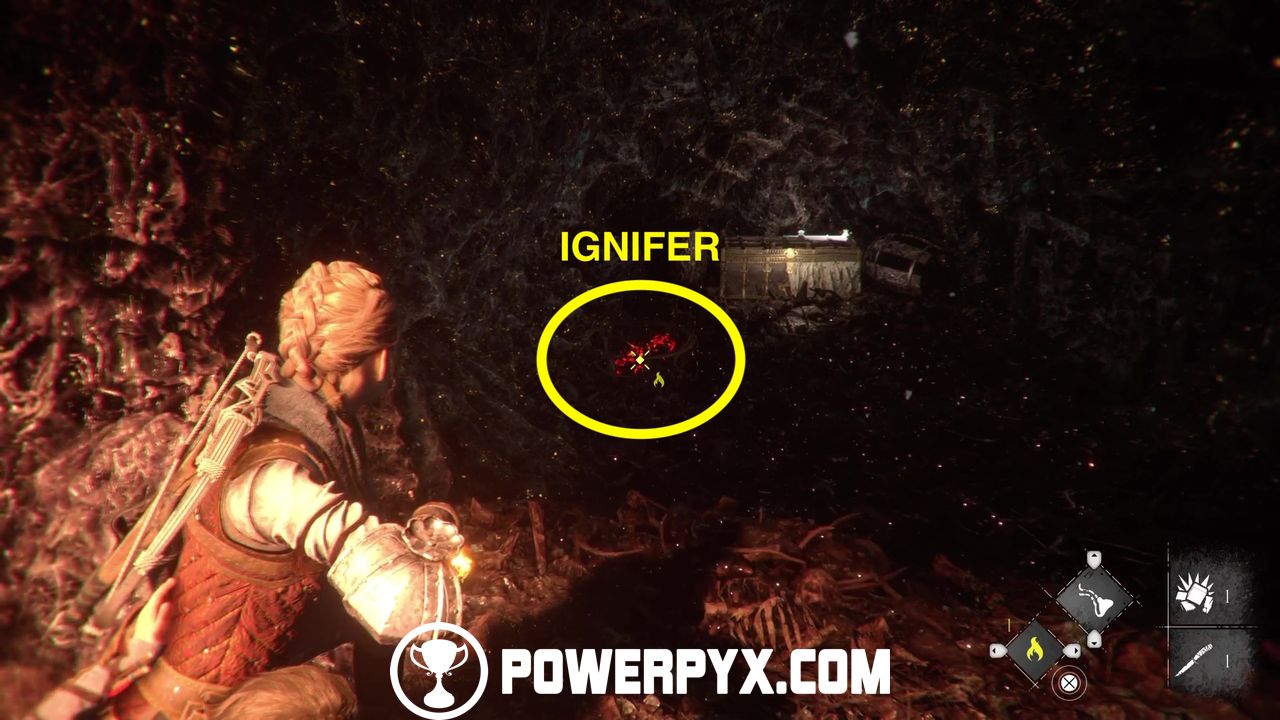
Run up the cave cliff to find more rats. As Amicia, cast Ignifer at the lantern in the distance, then tar on it.

Lastly, throw an ignited pot next to where the fence is to scare away some more rats and make it up the cliff near the lantern.
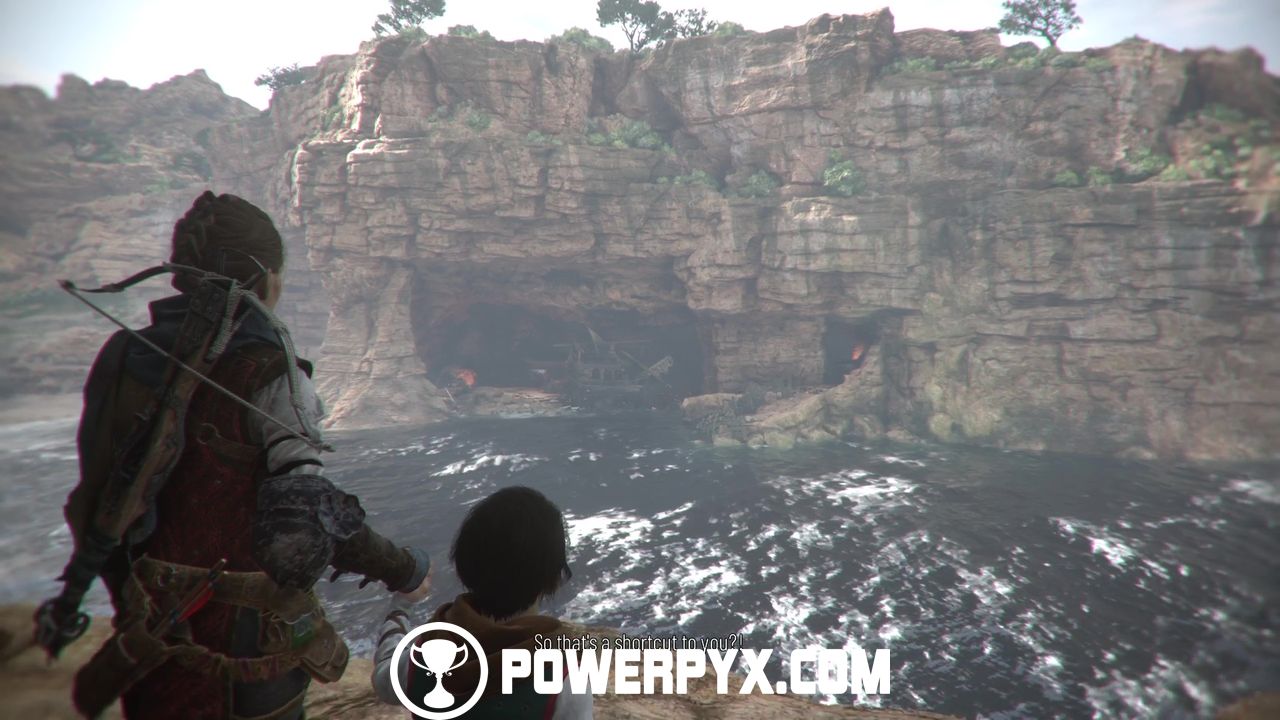
Reach the Shipwreck
From here, Arnaud will point out our destination, which is on the other side of the cliff where the shipwreck is.
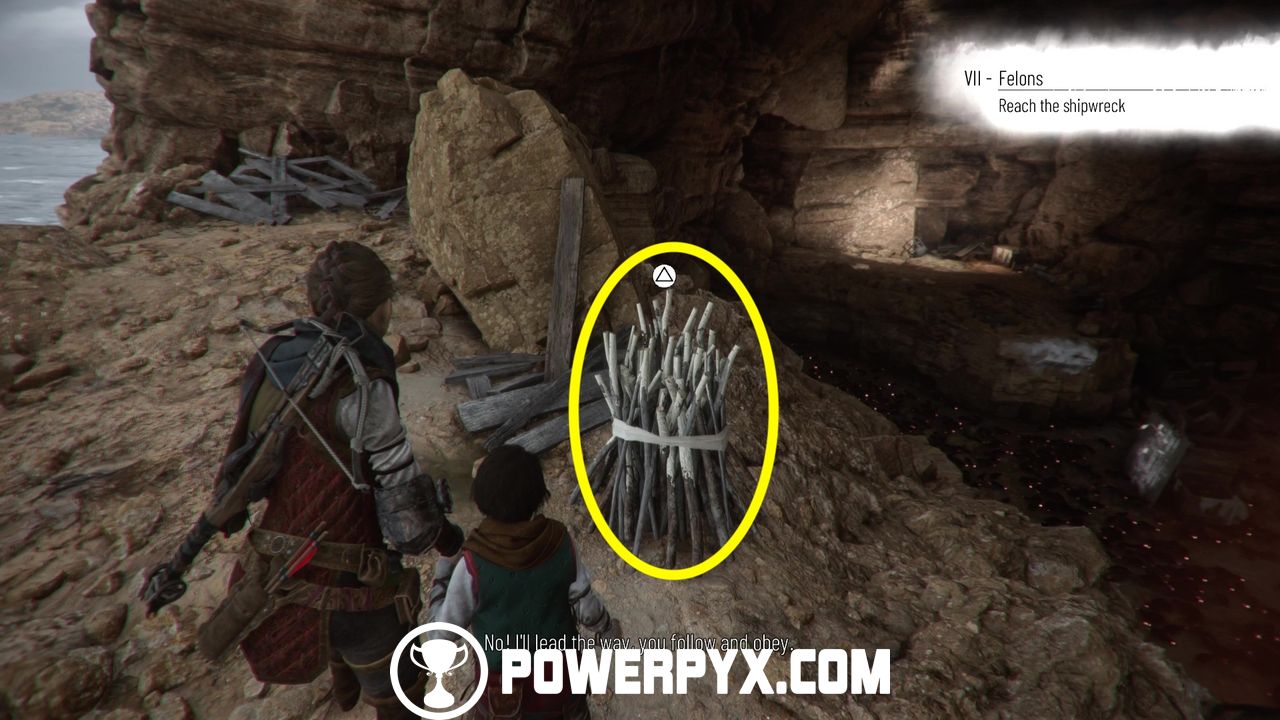
Grab a stick from the stash and go back down. Light it up using the lanterns and go around the rock to find a new lantern.

Now go down the slope and interact with the anchor point to pull a cart with a brazier to your location.

Ignite it and start pushing it, flanking the left side.

You should eventually run into an opening with a tool chest and upgrade materials at the end. Simply light up the brazier to access it. There are also more upgrade materials on the ground here, by a corpse.

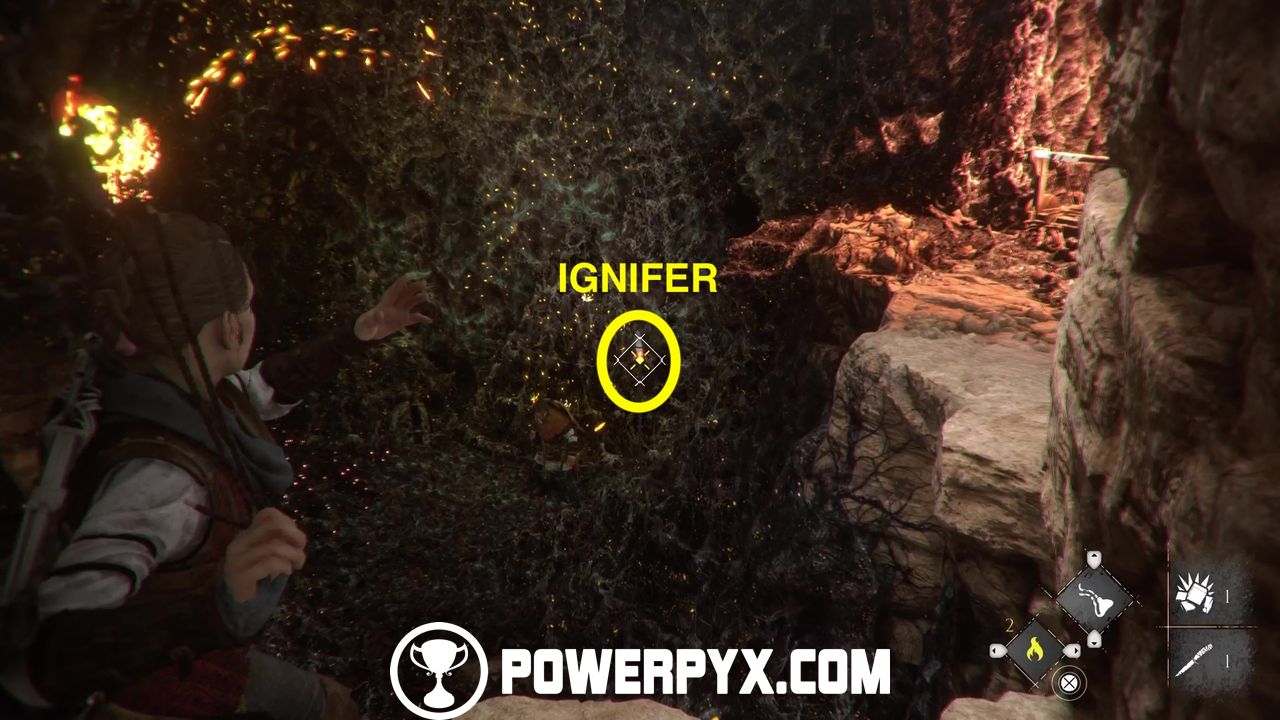
Go back and resume pushing the cart up the nest. Shimmy along the ledge and then cast Ignifer at the lantern in the pit near Arnaud to save him from certain death.

Climb down the ledge and Hugo will notice Episanguis and Amicia will ask Arnaud to throw a sample to her. Now  + / to instruct Arnaud to throw it.

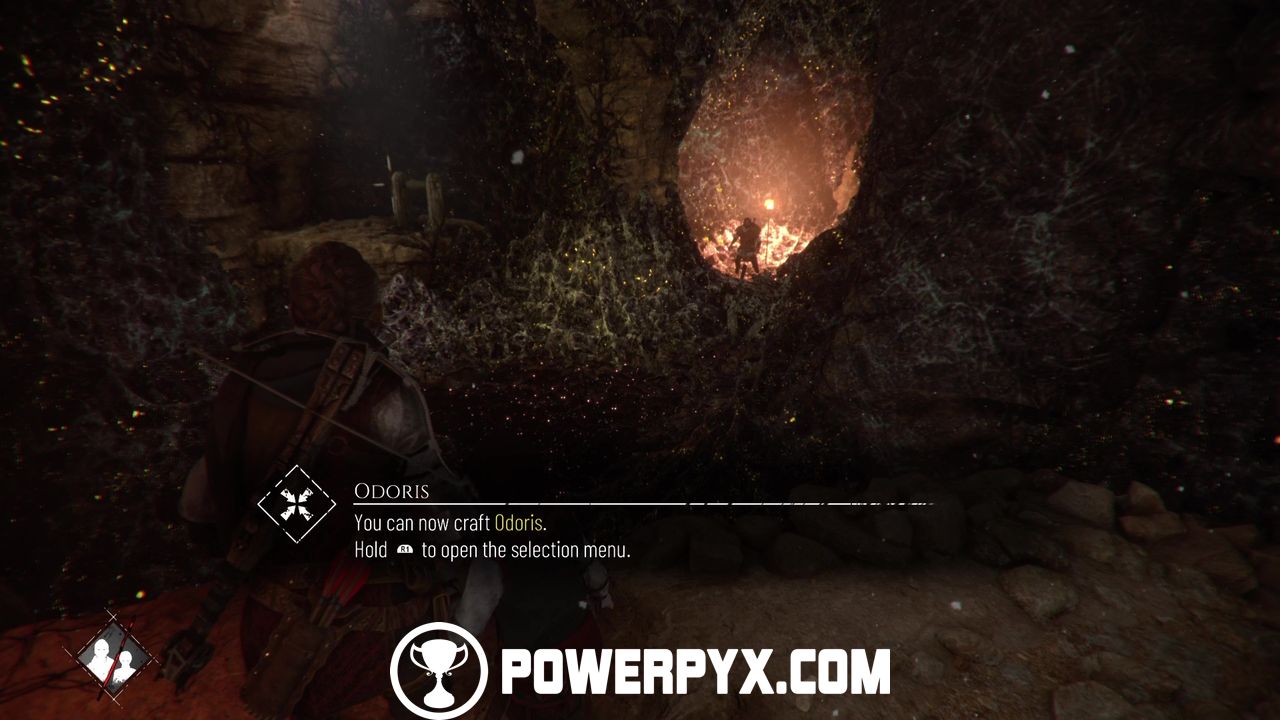
We can now craft Odoris, a powerful alchemical substance that lures the rats into a specific location for some time.  /
/  to open the selection menu and
  three times to craft Odoris.
Open a Way for Arnaud
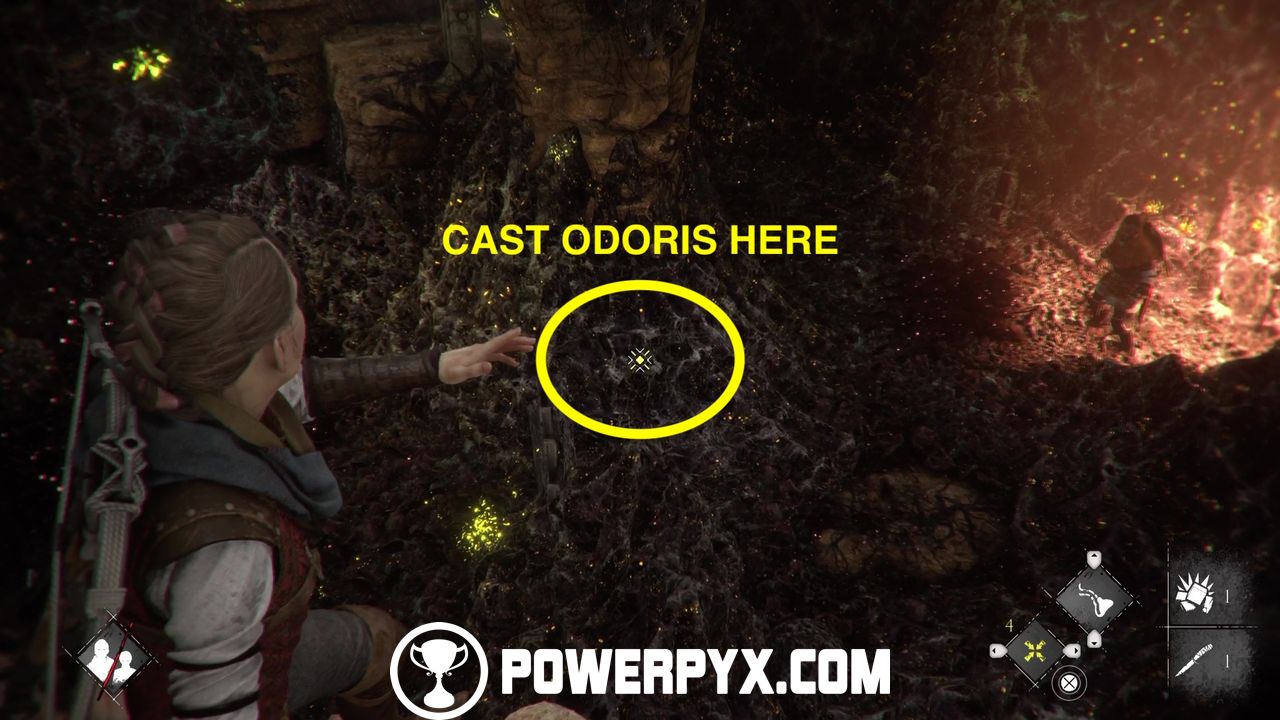
Go back up the cliff and cast Odoris at the yellow crystals right in front of Arnaud and he will be able to reach the crank on the other side. The crank releases a plank with bolts on it.
Shoot the plank with an Odoris bolt and then instruct Arnaud to release the crank. This will attract all rats into the plank, making it safe for Arnaud to regroup with us.

Get Out of the Caves
Now we can continue on and out of the caves and for the shipwreck. However, there’s a new nest of rats in front of us and no seeming fire source for us to use. Arnaud offers Amicia to set his shield on fire, which will then be used to clear a path through the nest and get to the other side. So, set Arnaud’s shield ablaze and then interact with it and start walking to the end of the tunnel.


Reach the Shipwreck
We’re now out of the caves and a couple of feet away from the shipwreck. Climb down the ledge and keep going straight ahead. There’s a workbench on the left side of the beach here if you’d like to upgrade Amicia. Keep the left side of the cliff and there are some upgrade materials on the sand by the wooden shipwreck.

Then, turn 180° to find a ledge you can climb on. Continue along this path and interact with the / prompt at the end to obtain Souvenir #11/21 The Survivor.

More Rats
Find the Smuggler’s Hideout
Wade through the water and, surprise surprise, more rats. You should see a rock with a chest. Shoot Odoris behind the rock to quickly get rid of all the rats in the way, then continue to the chest for materials.

From here, ignite the bonfire and cast Odoris at both of its sides to get rid of all rats and safely cross to it.


Grab a stick, light it up and make it into the boat’s lower deck where the torch is.

Grab the torch and turn around to find a chest with some upgrade materials behind the crates. You should now notice another torch holder diagonally from the one you got the torch from. Place the torch here and make it to the upper deck of the boat using the crate near the torch holder.

Continue along until you see a haystack on your left amongst some rats. Light it up, climb down and quickly open the chest for materials before the fire in the haystack dies down.

Climb back up where you came down from and continue to the opposite side. There’s a plank against a rock here that you can use to lure the rats to with Odoris. This way you can safely climb down and quickly open the chest.

Now climb back up and return to the lower deck. Retrieve the torch and wade through the rats. There’s a new torch holder to your left, by a ledge. Place the torch here and ignite the nearby bonfire.


Then, interact with the anchor point to pull down a crate for Odoris.

Cast it at it to lure the rats away and continue on up the cliff.

There’s a guard here to eliminate, so use a bolt to quickly do so.

Then, cast Odoris on the left side to lure all rats away and continue on.

Stay in the sun and cast more Odoris on both sides of the brazier, then make it to the brazier.


Now, cast Odoris again at the plank and go back down the shipwreck platforms. You should now see a Secret Chest on the deck in the distance. Crouch under the deck and then open up Secret Chest #5/10.

Now go back down the deck, crouch under it and interact with the coffin to continue on. There’s water to cross now, but Hugo is scared of the waves. Arnaud offers to carry him.

Wade through the water and climb up the ledges, then squeeze through a cranny for a new cutscene during which we make a new acquaintance, Sophia, captain of the smuggler’s hideout. Arnaud asks Sofia if he can borrow her boat to get to the island and she accepts to join the crew.


The Combat According to Arnaud
Reach Sophia’s Boat
We’re now on our way to Sophia’s boat, but we’re ambushed by more of the Count’s men. Arnaud will automatically take care of them, in his own way. After Arnaud defeats the first soldier, you can command him to take care of more enemies from now on, especially those wearing helmets, Amicia’s Achilles’ heel.

Climb down the hill and go right towards the shore. Flank the shore and you’ll eventually come across a shipwreck. By the rocks, before the shipwreck, is a knife.

Now continue past the shipwreck and up the ledge.

There’s an enemy here surrounded by rats. Have Hugo take control of the rats and start clearing out the beach from those enemies not carrying a fire source.

When you’re done, resume control of Amicia and, since you drove the rats away with Hugo, have Arnaud take care of the first enemy. Then, continue through the beach, instructing Arnaud to kill incoming enemies, making sure he is never surrounded.

There’s also an anchor point a few meters from the beach that can be interacted with to pull a small boat with a tool chest towards you and get the upgrade materials.

Then, enter the cave.

Now kill the two soldiers with your crossbow and continue on, letting Arnaud take the chunky armored soldier. You can shoot the armor weakpoint on his back with the stone sling, thus stunning him, Arnaud will do the rest.


While Arnaud takes care of him, continue straight ahead through the cave and get rid of the two soldiers below, respectively with a bolt and a headshot.

Interact with the coffin to squeeze through the gap and immediately after, turn left and climb up the ledge to enter a cave.


Grab the torch and continue on until you can interact with a wall for Souvenir #12/21 The First Men. Now put the torch back into the holder and exit the cave. Continue on until you reach a fishing village.
The Fishing Village
Reach Sophia’s Boat
At the fishing village, take care of the first two guards with a headshot on each.

Then, go up the stairs on the right and instruct Arnaud to take care of the enemy inside the hut.


Continue on, occasionally having Arnaud take care of enemies or killing them with headshots when possible. Continue on the wooden paths until you can find another hut on your right by the sea with a chest. Before continuing on, take some time to explore the surrounding area for resources. This area is relatively devoid of enemies, so it shouldn’t be too much of a fuss. You can always have Arnaud take care of threats if any come your way. It’s also worth noting that there is a tool chest here for upgrade materials, but can only be pulled down using the anchor point by the shore towards the end of the village.


When you’re done scouring the village, open the door at the end to trigger a new cutscene. Arnaud, realizing that Amicia is still in pain, brings Hugo to the boat and lets her rest. Meanwhile, Sophia gets caught and throttled by a guard, but Amicia stabs the guard and saves her. Follow Sophia out of the hut to trigger a new objective.

Dry Dock
Free Sophia’s Boat
The boat is stuck and we need to free it. While on the boat, operate the crank at the prow with Arnaud to raise the anchor.

However, the anchor is stuck and must be freed. Approach the other side of the deck, opposite the one you boarded the boat from and throw a rock at the trapdoor on the other side to open it, then at the swordfish to drop it. The rats will scamper towards it, allowing you and Arnaud to pass.


Instruct Arnaud to operate the chain crank that clogs the anchor and shoot the chain when the ring is exposed.


Now return to the boat and interact with the crank anchor again.

Go upper deck now and operate the rope opposite Arnaud and hold / to pull.

Amicia’s side of the sail is stuck though, so head back to the pier and shoot the lock on the sail to fully untangle it.

The boat is ready to set sail for the island. La Cuna, here we come!

This concludes Chapter 7 “Felons” in A Plague Tale: Requiem. Now Chapter 8 “A Sea of Promises” starts.
For all other chapters in A Plague Tale: Requiem check out the full A Plague Tale: Requiem Walkthrough.
Leave a Reply