PowerPyx.com

PowerPyx

  • Trophy Guides
  • Game Guides
  • Wikis
  • Reviews
  • Next Guides
  • Contact
Show SearchHide Search
Home » Game Guides » Borderlands 3 » Borderlands 3 All Hijack Target Locations (Vehicle Upgrade Parts)

Borderlands 3 All Hijack Target Locations (Vehicle Upgrade Parts)

September 30, 2019 by PowerPyx Leave a Comment

Borderlands 3 (BL3) has 10 Hijack Target Locations that reward you with vehicle parts to upgrade your cars. They also count as Crew Challenges (Collectibles) and are needed for 100% game completion. This guide shows all of them. Getting 10 vehicle parts unlocks the Mechani-Cool trophy or achievement but it doesn’t have to be the 10 from the Hijack Challenges (vehicles that drive around randomly earn you parts too).

The vehicles you find during these Hijack Target challenges have fixed upgrade parts, while the ones that drive around randomly only get you random ones. Getting to the vehicles involves some climbing or manipulating power buttons / electric cables. After entering the vehicle, drive it back to a Catch-a-Ride station to unlock the new vehicle upgrades (body, paint job, driver weapon, armor, wheels, mod). At the Catch-a-Ride you can also choose between the 3 main vehicles (Outrunner, Technical, Cyclone) and customize them with the new parts.

None of the Hijack Targets are missable! You can still get all of them after the story in free-roam. To keep track of which ones you got, either look at their icons on the map (uncollected ones are green, collected ones are a faint blue) or press L3 / Left Stick on the world map and D-Pad Right to scroll to “Challenges”.

Once you get close enough to a Hijack Target it gets marked on the map. If you haven’t been to a mentioned area yet you must advance the story further. You go to all listed areas automatically as part of the main storyline.

Note: The Hijack Targets give 10 fixed and unique vehicle parts but there are many more parts that you get randomly from vehicles driving around the maps. You can steal those too and drive them to a Catch-a-Ride vehicle station to earn their parts. Each planet features vehicles with new parts.

#1 – Outrunner’s Heavy Armor

Location: Pandora, Ascension Bluff

The trick here is to hit the button at the end of the yellow cable (screenshot 2). This turns on the power and opens the nearby door so that you can drive away in the vehicle.

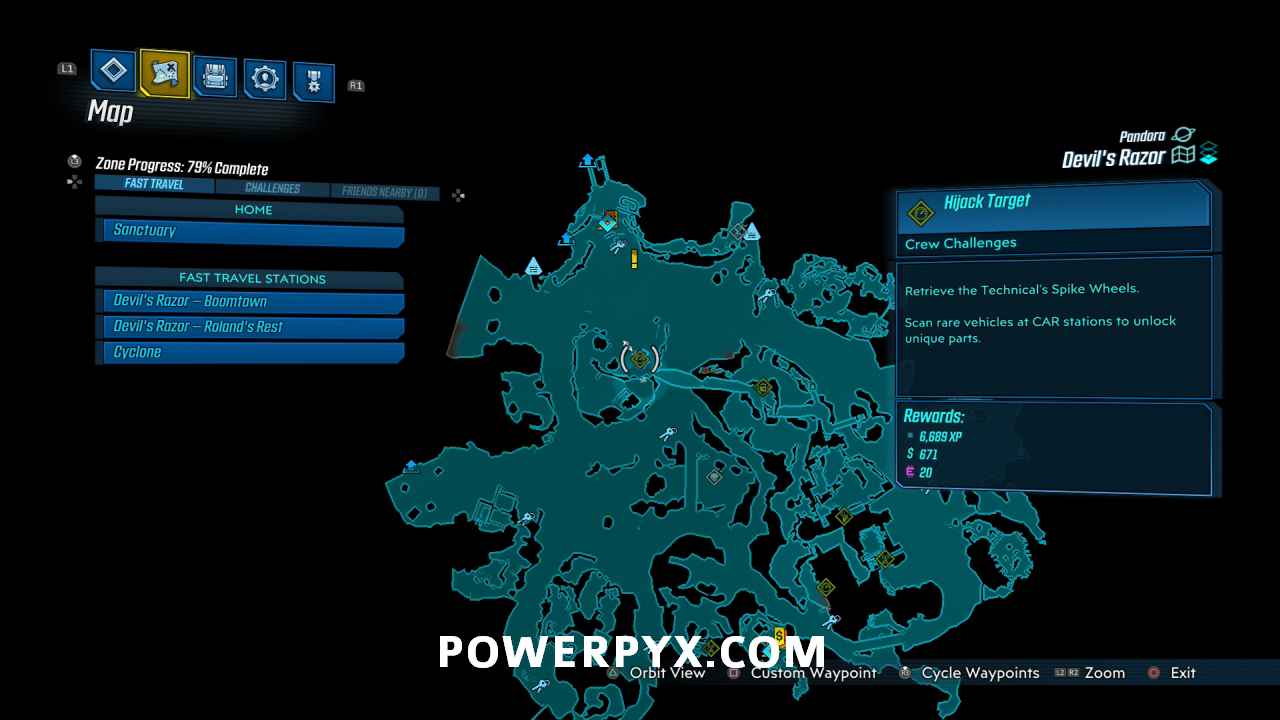
#2 – Technical’s Spike Wheels

Location: Pandora, Devil’s Razor

You reach Devil’s Razor during your 2nd visit to Pandora (Main Mission: Blood Drive). This vehicle is parked on a rooftop. Climb the house (screenshot 2) to retrieve the vehicle and drive it off the roof.

#3 – Outrunner’s Zip Wheels

Location: Pandora, Devil’s Razor

Climb the scaffold with the yellow ledges under the vehicle (screenshot 2). Then drive it off the ramp.

#4 – Technical’s Tire Launcher

Location: Pandora, The Splinterlands

Found in the Homestead area, you must hit the button at the end of the yellow electricity cable. Then the garage door to the hijack target vehicle opens up. Climb up the building where the vehicle is parked in to find the button at the top (screenshot 2).

#5 – Technical Sticky Mines

Location: Promethea, Meridian Outskirts

This marker won’t show up until you’re right next to the vehicle, it’s one of the trickier ones to find. But it’s easy to reach – all you need to do is climb up to the vehicle via the yellow ledges (screenshot 2).

#6 – Cyclone’s Sonic Booster

Location: Promethea, Meridian Metroplex

This vehicle is behind a yellow energy barrier. To open the barrier you must “fix” the yellow power cable that is wired to it. From the barrier, follow the yellow power cable and shoot the 3 red targets above it (on the pipes) – this makes water flow out and electrifies the gaps between the cable (screenshot 2-4). After you shot the 3 targets, press the power button at the energy barrier.

#7 – Outrunner’s Razor Wings

Location: Eden-6, Floodmoor Basin

This is one of the harder vehicle hijacks. The only way to reach the vehicle is to jump to it from a ramp on the cliffs above it (screenshot 2 – the cliffs near Knotty Peak). Climbing to it is not possible. It’s a far jump, use your boost to make it. But you can’t go too fast or too slow. If you ram into the vehicle it might explode. The best vehicle for this jump is the Cyclone.

#8 – Cyclone’s Wide Wheel

Location: Eden-6, Floodmoor Basin

Jump around the corner of the building where this vehicle is at. Then you land on the “balcony” where the building is parked and can drive it away.

#9 – Cyclone’s Digithruster

Location: Nekrotafeyo, Desolation’s Edge

This one’s easy – simply melee the red vines of the garage where the vehicle is parked. This destroys the vines and you can enter the vehicle.

#10 – Outrunner’s Energy Cell

Location: Nekrotafeyo, Desolation’s Edge

This vehicle is behind a yellow energy barrier. To make the barrier shut off, you must follow the 3 yellow power cables connected to it and shoot the generators at the end of each one (screenshot 2-4).

That’s all 10 Hijack Target Vehicle Challenges in Borderlands 3 (BL3).

For all other Collectibles and Crew Challenges check out our full Borderlands 3 Wiki & Strategy Guide.

« PrevBorderlands 3 All Typhon Log Locations & Dead DropsNext »Borderlands 3 All Crimson Radio Locations
Share
Tweet
Shares 0

Filed Under: Borderlands 3, Game Guides

Leave a Reply Cancel reply

Your email address will not be published. Required fields are marked *

Youtube 885,000Subscriber
Facebook 10,006Fans
Twitter 11,458Followers

Latest Trophy Guides

It Takes Two Trophy Guide

Hitman 3 Trophy Guide

Cyberpunk 2077 Trophy Guide

Assassin's Creed Valhalla Trophy Guide

Call of Duty: Black Ops Cold War Trophy Guide

Demon's Souls PS5 Remake Trophy Guide

Spider-Man Miles Morales Trophy Guide

Astro's Playroom Trophy Guide

Sackboy: A Big Adventure Trophy Guide

Red Dead Redemption 2 Trophy Guide

Latest Game Wikis

Hitman 3 Wiki

Cyberpunk 2077 Wiki

Assassin's Creed Valhalla Wiki

Ghost of Tsushima Wiki

The Last of Us 2 Wiki

Final Fantasy VII Remake Wiki

Pokemon Sword & Shield Wiki

Borderlands 3 Wiki

Sekiro Shadows Die Twice Wiki

Red Dead Redemption 2 Wiki

God of War Wiki

Far Cry 5 Wiki

Recent Posts

  • Balan Wonderworld All Balan Statues Locations
  • Balan Wonderworld: Chapter 2 Balan Statue Locations
  • Balan Wonderworld: Chapter 1 Balan Statue Locations
  • It Takes Two Trophy Guide & Roadmap
  • It Takes Two All Minigame Locations

Borderlands 3 Wiki

  • Wiki Home
  • Walkthrough
    • Children of the Vault
    • From the Ground Up
    • Cult Following
    • Taking Flight
    • Sanctuary
    • Hostile Takeover
    • The Impending Storm
    • Space-Laser Tag
    • Atlas, At Last
    • Beneath the Meridian
    • Hammerlocked
    • Lair of the Harpy
    • The Guns of Reliance
    • The Family Jewel
    • Going Rogue
    • Cold as the Grave
    • Blood Drive
    • Angels and Speed Demons
    • The Great Vault
    • The First Vault Hunter
    • Footsteps of Giants
    • In the Shadow of Starlight
    • Divine Retribution
  • Side Missions
    • Powerful Connections
    • Bad Reception
    • Golden Calves
    • Dump on Dumptruck
    • Under Taker
    • Skag Dog Days
    • Head Case
    • Just a Prick
    • Healers and Dealers
    • Maliwannabees
    • Rise and Grind
    • Dynasty Diner
    • Kill Killavolt
    • Porta Prison
    • Proof of Wife
    • Holy Spirits
    • Invasion of Privacy
    • Opposition Research
    • Technical NOGout
    • Ratch’d Up
    • Don’t Truck with Eden-6
    • Get Quick, Slick
    • On the Blood Path
    • The Kevin Konundrum
    • Witch’s Brew
    • Sacked
    • Malevolent Practice
    • Irregular Customers
    • Capture the Frag
    • Swamp Bro
    • Dynasty Dash: Eden 6 / Floodmoor Basin
    • Rumble In The Jungle
    • Sell Out
    • Raiders of the Lost Rock
    • Pandora’s Next Top Mouthpiece
    • ECHOnet Neutrality
    • The Feeble and the Furious
    • Dynasty Dash: Pandora / Devil’s Razor
    • Buff Film Buff
    • Boom Boom Boomtown
    • Sheega’s All That
    • Life of the Party
    • The Homestead
    • The Homestead (Part 2)
    • The Homestead (Part 3)
    • Just Desserts
    • Let’s Get It Vaughn
    • The Demon in the Dark
    • Childhood’s End
    • Wildlife Conservation
    • Cannonization
    • Bad Vibrations
    • Fire in the Sky
    • Homeopathological
    • It’s Alive
    • Transaction-Packed
    • Baby Dancer
    • Kill Demoskaggon
    • Kill Borman Nates
    • Kill Wick and Warty
    • Kill Urist McEnforcer
    • Kill Dinklebot
    • Kill Power Troopers
    • Kill the Grogans and Their Mother
    • Kill IndoTyrant
    • Kill El Dragón Jr
    • Kill Red Jabber
    • Kill The Unstoppable
    • Kill Maxitrillion
    • Kill Rakkman
    • Kill Road Dog
    • Kill Tarantella
    • Kill Captain Thunk and Sloth
  • Boss Guide
  • All Named Locations
    • Pandora
    • Promethea
    • Athenas
    • Eden-6
    • Nekrotafeyo
  • Circles of Slaughter Locations
  • Proving Grounds Locations (Trials)
  • Eridian Writings (Slabs)
  • Red Chests
  • Crew Challenges
    • Hammerlock’s Legendary Hunts
    • Zero’s Targets of Opportunity
    • Typhon Logs & Dead Drops
    • Hijack Targets (Vehicle Parts)
    • Crimson Radios
    • Dead Claptraps
    • Pieces of Resistance
    • Mayor’s Killer Looks
    • Torgue’s Marketing Mistakes
    • Hammerlock’s Occult Hunts
    • Gaige’s Gifts
    • Mancubus’ Eldritch Statues
    • Creature Feature Film Reels
    • Sato’s Saga Journals
    • Sato’s Caches
    • Good Prospects
    • Skin to Win
    • Gehenna’s Most Wanted
    • Signal to Noise Probes
  • How to Invite Friends to Co-Op
  • How to Reset Skill Points
  • How to Get Eridium
  • Duplication Exploit & Infinite Money
  • Easter Eggs
  • Trophy List
  • Trophy Guide
  • DLC #1: Moxxi’s Heist of the Handsome Jackpot Trophy Guide
  • DLC #2: Guns, Love, and Tentacles Trophy Guide
  • DLC #3: Bounty of Blood Trophy Guide
  • DLC #4: Psycho Krieg and the Fantastic Fustercluck Trophy Guide
  • Terms of Service
  • Privacy Policy
  • Cookie Policy
  • Review Policy
  • YouTube
  • Facebook
  • Twitter

© 2008-2021 PowerPyx.com, all rights reserved.