Chapter 13: Where Angels Fear to Tread is the 13th story mission in Final Fantasy 7 (VII) Rebirth. This walkthrough will guide you through all objectives of the Where Angels Fear to Tread Main Mission.
Area: Northwood
Objectives:
- Northern Voyage
- Ancient Awakening
- The Materia Beckons
- Into the Labyrinth
- One Step Ahead
- Chasing Waterfalls
- Hall of Life
- Divergent Paths
- Lifestorm
- Ambush
- Keep Trying
- Vessel of Life
- Forging Ahead
- Turk Trackers
- A Way Across
- Crossing the Rapids
- The Looming Monument
- The Hunt Begins Anew
- Practice Made Perfect
- Interference
- Further Interference
- Try, Try Again
- In His Footsteps
- Hall of Resurrection
- A Grave Injury
- An Ancient’s Purview
- To Each Their Trial
- The Trial of Red XIII
- The Trial of Tifa
- The Trial of Yuffie
- The Trial of Barret
- The Trial of Aerith
- Corridor of Effigies
- The Trial of Cloud
- The Materia Awaits
- Before the Fall
- Arrival
- Dreams of Oblivion
- Within Our Grasp
- All Falls Down
- In Wicked Hands
Northern Voyage
From the start of the chapter, you’ll be in the Tiny Bronco. This is the last opportunity you have to do any side activities before progressing the story, as once you go to the Northwood you’ll be locked in until finishing the playthrough.
Chapter 13 – All Side Content Cleanup
Do the cleanup before driving all the way north in Meridian Ocean.
Lots of side quests will have appeared throughout Chapter 12 which we’ll clean up now in one go.
11 Side Quests:
- Hustle and Grind
- Beneath Still Waters
- Tides of War and Worry
- Gold Cup or Bust
- Trouble in Paradise
- Sand and Circuses
- Escape from Endless Writer’s Block
- Woodland Vigil
- Victim of Circumstance
- Lament of the Damned
- Can’t Stop Won’t Stop
Minigames Cleanup:
New minigames have appeared throughout Gold Saucer. Recheck all Minigames there and finish as many as possible, especially the Musclhead Museum to level up. To unlock the final Side Quest Can’t Stop Won’t Stop you will need to have cleared the minigames anyway, and you must have won the Chocobo Racing Gold Cup for Side Quest Gold Cup or Bust. Some of the combat challenges are very high level, if you find this too difficult you can leave them for now and come back after the story via Chapter Select (your level and equipment from Chapter 14 carries over back to Chapter 13 when using Chapter Select).
After finishing all side quests you also unlock Sephiroth in 3D Brawler (Gold Saucer > Wonderment Square). Beat him for trophy  Polygonal Prizefighter. You can pause-buffer in 3D Brawler, meaning you pause whenever the opponent is about to attack to see what attack they will use and how to dodge it.
Queen’s Blood:
All opponents are now available for Queen’s Blood. Also some new cards are for purchase.
- Queen’s Blood Booster Pack: Carnival of Carnage (072 Black Bat, 075 Adjudicator, 076 Yin & Yang) – Purchase from Queen’s Blood Vendor at Costa del Sol for 500 gil (contains 3 cards).
- Queen’s Blood Booster Pack: The Turks (128 Reno, 129 Rude, 130 Elena, 131 Tseng) – Purchasable from the Costa del Sol Queen’s Blood Card Vendor at the start of Chapter 13.
- Queen’s Blood Card: 142 Ultimate Party Animal – Won from Shinra Middle Manager during Can’t Stop Won’t Stop side quest.
- Queen’s Blood Card: 119 Dyne – Complete One Shot, One Kill at Card Carnival in Costa del Sol.
- Queen’s Blood Card: 123 Gi Nattak – Complete Curse of the Gi at Card Carnival in Costa del Sol.
- Queen’s Blood Card: 086 Cloud – Complete Collector’s Card: Cloud at Card Carnival in Costa del Sol.
- Queen’s Blood Card: 087 Barret – Complete Collector’s Card: Barret at Card Carnival in Costa del Sol.
- Queen’s Blood Card: 088 Tifa – Complete Collector’s Card: Tifa at Card Carnival in Costa del Sol.
- Queen’s Blood Card: 089 Aerith – Complete Collector’s Card: Aerith at Card Carnival in Costa del Sol.
- Queen’s Blood Card: 090 Red XIII – Complete Collector’s Card: Red XIII at Card Carnival in Costa del Sol.
- Queen’s Blood Card: 091 Yuffie – Complete Collector’s Card: Yuffie at Card Carnival in Costa del Sol.
- Queen’s Blood Card: 092 Cait Sith – Complete Collector’s Card: Cait Sith at Card Carnival in Costa del Sol.
- Queen’s Blood Card: 093 Cid – Complete Collector’s Card: Cid at Card Carnival in Costa del Sol.
- Queen’s Blood Card: 094 Vincent – Complete Collector’s Card: Vincent at Card Carnival in Costa del Sol.
- Queen’s Blood Card: 077 Diabolic Variant – Won from Riana in Costa del Sol.
- Queen’s Blood Card: 074 Rictus – Won from Dokaccha in Costa del Sol.
- Queen’s Blood Card: 079 2-C SOLDIER Operator – Won from Maahir in Costa del Sol.
- Queen’s Blood Card: 121 Specimen H1024 – Win Gimmick Battlefield: High Ground.
- Queen’s Blood Card: 120 Anuran Suppressor – Win Support Card: Don’t Fear, MAI’s Here.
- Queen’s Blood Card: 122 Crimson Mare Mk. II – Win Gimmick Battlefield: Vertical Integration.
- Queen’s Blood Card: 124 Forgotten Specimen – Win Gimmick Battlefield: High Ground.
- Queen’s Blood Card: 132 Rufus – Win Gimmick Battlefield: Back to the Wall.
- Queen’s Blood Card: 102 Leviathan – Achieve Bronze on Extreme Survival.
- Queen’s Blood Card: 097 Ramuh – Won from Lidrehl at Ghost Square, must be Rank 8 to face him.
- Queen’s Blood Card: 144 Emerald Witch – Won from Vincent at Shinra Manor in Nibelheim, must be Rank 9 to face him.
- Queen’s Blood Card: 145 Shadowblood Queen – Won from Shadowblood Queen at Gongaga Ruins, must be Rank 11 to face her. –> Final Queen’s Blood opponent
- Queen’s Blood Card: 104 Bahamut – Achieve Bronze on Nightmarish Survival at Queen’s Blood at Gold Saucer, must be the highest Queen’s Blood rank before you can play this.
Pirate’s Treasure Map:
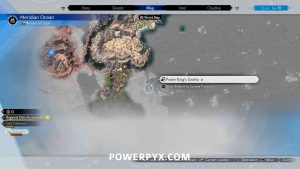
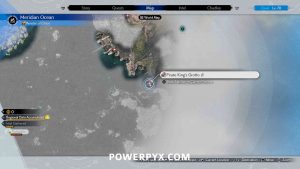
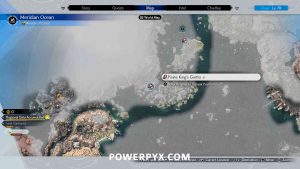
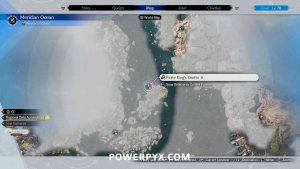
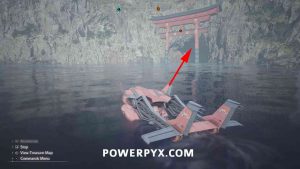
At the start of Chapter 12 you will have found a purple chest on the docks of Costa del Sol. You must use the Tiny Bronco waterplane to find the Pirate Grottos. These unlock an item transmuter recipe that you need to play two of the Legendary Combat Challenges later (unlocked after beating Gilgamesh, we’ll get to that). Here are the 4 pirate grottos:
World Intel & Gilgamesh Superboss:
The last big thing you want to do here is clean up your remaining 2 Phenomenon Intel in Corel (unlocked at end of Chapter 12). After collecting all Protorelics Chadley will give you a call to say a new area has appeared – that’s Gilgamesh Island in the northeast of Meridian Ocean. There you will find the last 4 Phenomenon Intel and the Gilgamesh Superboss. Let’s do this first and then go through remaining cleanup.
Corel – 2 Phenomen Intel:
After collecting all Phenomenon Intel you can access Gilgamesh Island in the northeast of Meridian Ocean:
Here you need to do the last 4 Intel.
Meridian Ocean – 4 World Intel:
The intel will require you to defeat some double boss summons, and you must have unlocked their summoning materia from Chadley’s VR Combat Simulator first. The above guide has strategies and tips. Odin is the hardest one. If you struggle with this, you can ignore it for now and finish the main story, then come back via Chapter Select after the story. Then you will be a higher level and your Materia will be leveled up some more. Plus you find good equipment throughout Chapter 13.
Gilgamesh (Superboss):
After you did the 3 intel on Gilgamesh Island, the gate to Gilgamesh opens up. You find him in the garden on the right side behind the building. If you made it this far he’ll be relatively easy in comparison. He only uses physical attacks so cast Barrier. He is weak to fire so use Yuffie’s Fire Ninjutsu to exploit him. If you are having trouble you can grind XP/AP in the Combat Simulator or Musclehead Museum, or come back after the story in Chapter Select.
Continue Story
When you are ready to continue, drive the Tiny Bronco all the way north through the ocean to reach Northwood and stop at the dock. You’ll get a final confirmation before landing, as once you get out of the vehicle you’ll be unable to return.
Ancient Awakening
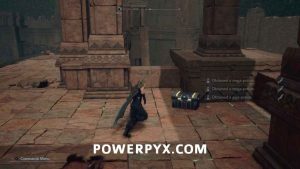
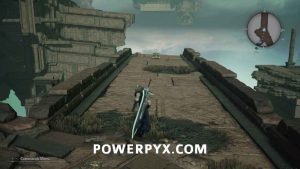
Use the nearby rest point if needed, then you can follow the path north into the forest. After the scene at the edge of the temple, you can go down to the platform before the bridge and on the left side there is a chest that contains 2 x Mist Mega-potions.
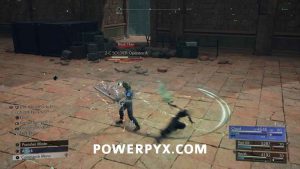
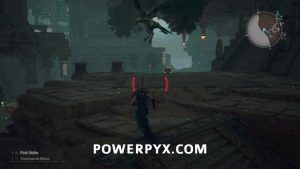
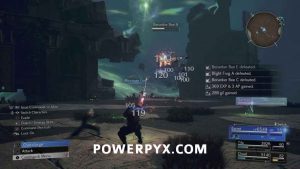
Head across the bridge to the first area, where you will encounter several Shinra troopers. There will be a new type here, the 2-C SOLDIER Operator. These are much stronger than normal troops, using primarily melee attacks. Like all human enemies though they are weak to Fire, and you can pressure them by directly blocking their melee attacks. Continue defeating the groups of soldiers as they appear in this first area to progress.
Once all the enemies are defeated you are meant to go down the central path to progress, but first, you can walk down the two side paths to the open structures where you can find breakable crates along with chests containing an X-potion on the right, and a Dry Ether on the left.
When ready to continue, follow the path ahead up to enter the temple.
The Materia Beckons
Inside the temple, follow the path ahead through the next door where you will need to deal with another few Shinra soldiers, then can go through the next door.
Into the Labyrinth
One Step Ahead
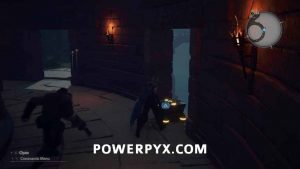
To start making your way through the labyrinth, take the path leading to the right. At the wall at the end before turning left you can find a chest that contains 2 x Giga-potions.
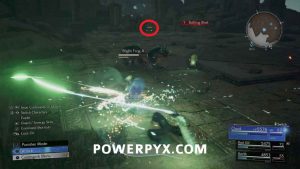
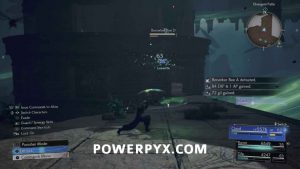
Keep following the path off the right, where you will encounter two new types of enemies, Blight Frogs and Cthonilizards. Blight Frogs are fairly weak and can be taken out quickly without specific moves, though they are weak to Ice if you want to deal with them as fast as possible. The Cthonilizard will counter during their ambush move, so the easiest way to deal with them is to actually hit them with Ice which will pressure them.
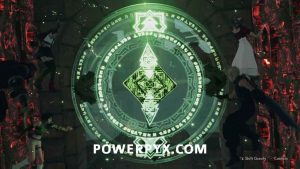
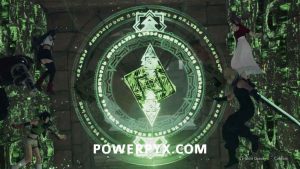
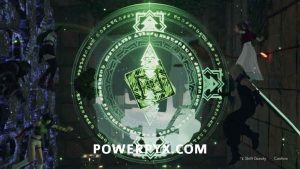
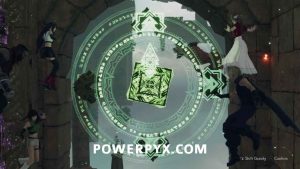
Head up steps ahead where you will encounter the first star chamber of the area. For the next section, you will be using these rooms to shift gravity around, allowing you to progress through the labyrinth. In the Rubystar Chamber, shift gravity to be pointing upward to continue.
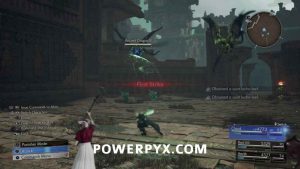
Follow the path down to the next area where you will encounter another new enemy, the Ancient Dragon. These can be somewhat annoying as they will cast Reflect on themself which stops ranged magic attacks. To effectively attack them you want to avoid their Southern Cross attack where they drop onto the ground, then hit them before they fly back into the air to pressure them.
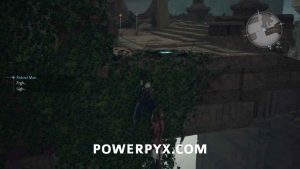
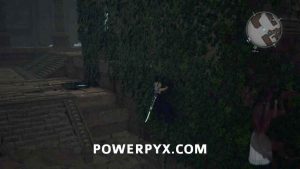
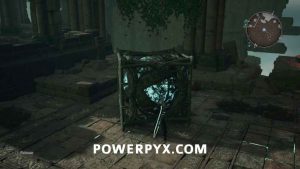
After they are dealt will follow the path ahead and to the right. There will be a wall of vines you need to climb up. Climb up to the right where you can find a purple chest that contains the Slipstream Saber weapon for Cloud.
Climb back onto the vines and this time continue left to continue.
Head into the nearby Jadestar Chamber, where you can shift the gravity to point downward to continue.
Immediately on the next platform, you can go to the southwest corner where there is a chest that contains a Hi-ether.
Follow toward the objective where you will need to deal with a pair of Cthonilizards and an Ancient Dragon. Follow the path after them and there will be a split, with the objective leading up a flight of stairs. Instead, you can turn to the left first where there is a large platform with a few enemies, and past the enemies a chest that contains an X-potion.
Turn back and then go up the stairs to continue to the objective. You’ll reach the Azurestar Chamber where you can shift gravity again. You first want to shift it to be pointing upward, where you can then grab the chest in the corner of the room that contains a Whistlewind Scarf. Then shift it again to point to the right to progress.
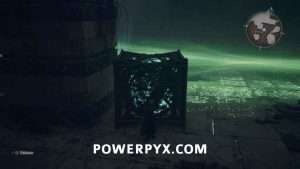
With the gravity shifted right you can climb along the wall to the left and up to continue. Follow the path to encounter a bunch of Shinra troopers. When they are dealt with, push the moveable box to the southeast corner of the area underneath some vines which you will then be able to climb up to the level above.
Chasing Waterfalls
You’ll see a couple of soldiers jumping down the waterfall, which is what you also need to do to progress. Before doing that though you can go down the path to the west for a chest that contains a Giga-potion. You can then go near the waterfall and jump down to continue.
Climb out of the water, then go around the north side of the first platform where there is a chest that contains a Mythril Ore.
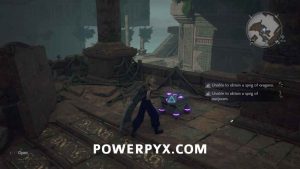
You can then follow the objective to the next platform where you will encounter some more enemies, then on the next level there will be two different star chambers. First enter the Amberstar Chamber and rotate the gravity upward. Follow the path here to a higher level where you can deal with a pair of Ancient Dragons, then follow the path to a dead end where you can pick up an EXP Up Materia.
Next, head back and enter the Mauvestar Chamber, and rotate gravity to point downward. On the platform you can reach after climbing some vines there will be an Ancient Dragon to deal with, and then you can open a chest that contains a Cetran Bangle.
Now finally to progress, in the Mauvestar Chamber rotate the gravity to be pointing upward. After follow the path out where you will reach the group of soldiers you spotted on the ceiling on the way in.
After the soldiers are dealt with, head into the room ahead where there will be a rest point that you can use before continuing.
Boss Fight: Red Dragon
- Weaknesses / Status Ailments: Ice
- Lesser Resistances:
- Greater Resistances:
- Immunities: Proportional Damage, Fire, Berserk, Stop, Slow, Poison, Silence, Sleep, Petrify, Stone, Morphable Items
- Absorbed Elements: —
- Items Dropped: —
- Rare Items Dropped: —
- Stealable Items: —
- Assess Info: Striking the scorched pillars and bringing them down on the dragon will pressure it. Destroying one of its wings while it is flying will cause it to plummet, pressuring it. Attacking its chest will reduce the range of Crimson Breath.
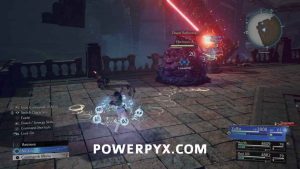
Red Dragon is a tough enemy with lots of moving parts. Firstly, make sure you remove all Fire elemetal attack Materia as Red Dragon is immune to it, and swap it for Ice magic. There are four pillars in the arena which occasionally the dragon will set on fire, and they become targetable. They’re also useful to hide behind when it does its Flamethrower attack. Always use this chance to attack them to bring them down on it and get a small window of pressure as you aim to build its Stagger bar as always.
In the early part of the battle, the dragon has a Head as an extra body part which you should take out immediately (it will regenerate) as this limits its attacks and grants extended pressure. Halfway through the battle, the dragon will fly off to a higher ledge and spout a ‘Chest’ body part, which you should make your immediate priority. Hit it with a Limit Break and destroy it before the dragon uses Crimson Breath as it will significantly reduce its range. This attack turns part of the floor into lava, so you want to avoid it as much as possible, which is extremely difficult if it has full range.
After this, the dragon will start flying around the arena so if you have a ranged character or strong Ice magic on someone like Cloud, hit its wings so it plummets to the ground and grants you further pressure. Just make sure to maximise the Stagger time by banking your Limits, raising Tifa’s Chi and using Aerith’s Ray of Judgement.
Hard Tips: You can use whoever you want for this fight, but it’s recommended to have a ranged character to be able to attack it while it’s flying. Whoever you bring, equip them all with Elemental-Ice in their weapons. Even though the dragon breathes fire, it’s not actually fire element so there’s no point putting Elemental-Fire in your armour. You will also want to bring Magnify-Barrier on someone.
When it breathes fire in the first phase, hide behind the pillars to weaken them, then destroy them to pressure the dragon, but make sure the dragon is close enough for the pillar to hit it. Repeat this for all pillars until you reach the second phase, which occurs just before half HP, and try to keep some ATB ready for the second phase. Use your saved ATB to cripple its wings and bring it to the ground, then try to do as much damage as possible before it does Crimson Breath III. Unfortunately on Hard, crippling the chest won’t weaken this attack at all and it will cover the entire arena. In fact it’s better to completely avoid crippling the chest, as this will force it to do Crimson Breath III even sooner. This is where that Barrier comes into play, make sure to have ATB with whoever has this equipped when the attack starts and cast Manaward on the whole team to minimise the damage taken. Heal up afterwards and continue pummeling. With any luck you will manage to defeat it before it manages to get a second Crimson Breath attack off.
Once the boss is defeated, head through the door ahead and follow the path until you reach an elevator you can use to continue upward.
Hall of Life
Walk to the platform ahead for a scene.
Divergent Paths
After the scene, the party will be split up, with Cloud continuing with Barret and Tifa. Rest at the nearby spot if you need, then continue on the path ahead. You’ll encounter another new enemy now, called a Berserker Bee. These enemies are pretty weak but will attack in large groups and can therefore be slightly annoying. They are weak to Wind, so casting Aero on them (which sucks them together) can be used to clean them up very quickly.
Defeat the bees, then keep heading toward the objective through a group of Shinra soldiers. Immediately after you hop a short wall, then look to the left where there is a purple chest that contains the Járngreipr weapon for Tifa.
Head down the stairs nearby, and continue along the path down the vines and shimmying around the wall. In the next area you are meant to cross an area with Lifestream winds to continue, but first should go west toward the large open platform. Defeat the swarm of Bees and Frogs, then you can find a chest along the west wall that contains a Cosmotite Ore.
Head back to the main path and for the first section you will need to wait for the Lifestream wind to temporarily stop, allowing you to run past.
Lifestorm
Run past the second wind while moving to the left. Here there is a moveable block that you need to push toward the third Lifestream wind, which will block it allowing you to progress toward the objective.
Deal with the enemies ahead, then climb the vines into a circular room with some more Shinra troops. Deal with them then continue forward, where there will be a short section where you run across some collapsing structures. Immediately after in the next circular room, you can run to the east side where there is another chest that contains 2 x Giga-potions.
Ambush
In the next room, you’ll encounter a trio of SOLDIER Operators. Remember that you can pressure them by blocking their attacks to take them out quickly.
Keep Trying
Now switching to earlier, you’ll be playing as Aerith, with Yuffie and Red in your party immediately after the group was separated. You can use the nearby rest spot to get set up, then head through the door into the next room.
Vessel of Life
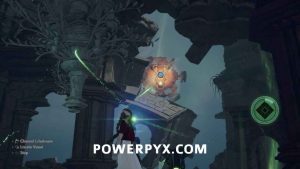
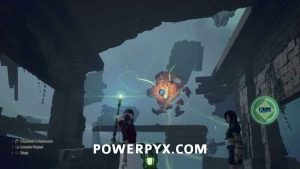
Here you will be told about the new mechanic Aerith has, which allows her to absorb Lifestream energy to solve puzzles throughout the temple. You can then stand on the marked red sopt and aim upward at the vessel, then rotate  to deposit the energy.
Follow the newly opened path ahead to the next area, and you will be told about absorbing the Lifestream energy. You can find this from defeating enemies and destroying the crystals you can find throughout the temple, so always make sure to destroy these and hold  when prompted.
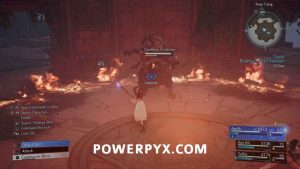
In the other room ahead you can find a new enemy, a Panthera Protector. These enemies will summon a ring of fire around them to keep you nearby, but you can remove it by pressuring them after dealing enough damage. They are weak to Electric which is helpful to pressure them quickly.
Make sure to absorb the energy from the energy from the enemies and breakables, then use it on the two vessels in the middle of the area to repair more of the path.
You should first head toward the structure to the east, where you can find a chest in the corner that contains a Hi-Ether. Don’t worry about the other chests as you won’t be able to reach it yet.
Head back to the other repaired structure and take the stairs down. In the room right at the bottom of the stairs, you can find a purple chest that contains the Gambanteinn weapon for Aerith.
Continue ahead and there will be a spot with a total of 5 vessels you need to charge. You need to do them in this specific order to be able to collect all items. First, pray to pull up all the nearby energy, then fill the vessel to the east.
Head around the back of the structure with the water in it to find a chest that contains an Elixer.
Break all the crystals to get more energy and then go back to the area with the vessels. Next, fill the vessel second clockwise of the first one (almost directly south).
Head into this new area to the south, where there will be a bunch of enemies and a number more crystals to break to generate energy. In the room to the southwest, you can find a chest that contains a Sapphire.
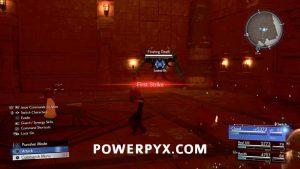
In the western room, you will encounter a new enemy, a Floating Death. These big eye enemies can be more effectively dealt with by first using either Red or Yuffie to attack them with melee to hit their eye, then after they cast Mana Shield switch to Aerith to hit them with magic attacks.
In the southeastern room you will encounter a couple of other enemies, including another new enemy called a Kelzmelzer. These bugs aren’t very strong and have no specific weakness, but can be annoying due to using poison attacks. You can pressure them by hitting them with ATB attacks. After dealing with this group you can pick up a Steadfast Block Materia from the same room.
Collect all the energy from the area and head back to the main area, then fill the vessel to the west.
In that single room there aren’t any items, but several Blight Frogs and breakables for more energy. After picking it up head back and fill the vessel to the southeast.
Head toward the repaired tower defeating the enemies on the way, then go up the stairs to find the chest you couldn’t pick up earlier, which contains a Cetran Armband.
Finally, head back to the main area, and fill the final vessel to progress to the next section.
Forging Ahead
Switching back to playing as Cloud and the others, you’ll immediately be in a fight against a couple of Blight Frogs and a Panthera Protector. Deal with them, then progress out of the room ahead.
Turk Trackers
After spotting the Turks ahead, you can use the nearby rest point, then continue toward the objective.
A Way Across
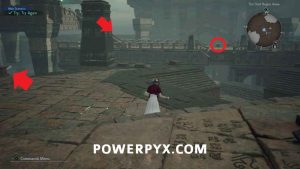
After the scene of the Soldiers getting blown away, go immediately right where there is a push block. Drag it over to the northeast ledge where you can push it off into the Lifestream, which creates a path for you to continue forward.
Crossing the Rapids
There is another larger gap you need to cross. Before continuing up to the next level up the stairs, go into the nearby building where there is a purple chest that contains the Battle Cry weapon for Barret.
Go up past the first two enemies to where there is another push block. Push it off the ledge in a similar manner to before, then go up to the top platform.
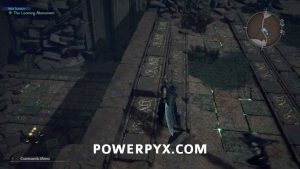
The Looming Monument
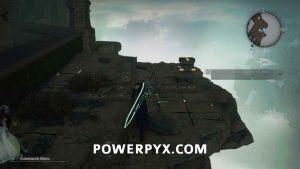
You need to find a way to knock down the block off the pillar. Before doing that, drop down off the ledge to the south where there is a chest that contains a Circlet.
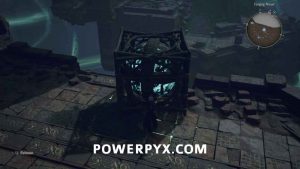
Head back up to where the pillar is and grab the bottom part with  . Spin this around for a short period until an enemy shows up.
The enemy you have to fight now is called an Ironclad. During this fight the objective isn’t so much to defeat the enemy, as it is to make the enemy knock the tower down. Your goal is to stagger the enemy, which will knock over the tower and the block. Watch for the Ironclad to use the attack Sharpen, which causes it to become pressured. When this occurs you want to use attacks each of the character’s “Focused” attacks to push it to stagger as quickly as possible. If you don’t get it during the first pressure you can wait for it to use Sharpen again, and should be able to easily stagger it the second time.
Once the block is knocked over you can finish defeating the monster. Then, push the block off the edge once more to destructively create a bridge across the next gap.
Cross over to the other side, then go left first where you can open the chest you could see early to obtain a Revival Materia Earrings.
Head back and keep following the path to the right. Before going into the next room with enemies you can find another chest near the ledge that contains a Mist Giga-potion.
Defeat the Panthera Protectors in the next room, then continue ahead to where you can find a rest point. Make sure you’re healed up and then take the path leading to the right. Help Rude and Reno defeat the couple of enemies that are attacking them.
Boss Fight: Rude & Reno
- Weaknesses / Status Ailments: Wind (Rude), Fire (Reno)
- Lesser Resistances: Petrify (Rude), None (Reno)
- Greater Resistances: Stop, Sleep (Both), Thunder (Reno)
- Immunities: Proportional Damage, Slow, Silence, Stone, Morphable Items (Both)
- Absorbed Elements: —
- Items Dropped: Mega-Potion (Rude), Ether (Reno)
- Rare Items Dropped: —
- Stealable Items: Mega-Potion (Rude), Fortitude Ring (Reno)
- Assess Info: Hitting him with multiple powerful offensive abilities while his guard is up will pressure him. Interrupting his synergy strikes will also pressure him (Rude). Evading his counters or countering him with powerful offensive abilities will pressure him. Interrupting his synergy strikes will also pressure him.
This fight is tougher than the earlier one as the two, particularly Rude, are more aggressive and it’s hard to get hits in without being interrupted. Your best opportunity is when he used Shockwave and you can dodge roll behind him for a few hits. For Rude, use your Wind magic and abilities, and on Elena use Lightning. Use Aerith as your healer, creating a Ward and using Pray/Curaga to keep health topped up while your other party members (Cloud and Tifa are good) use their abilities and physical attacks.
Hard Tips: This fight will occur immediately after fighting some regular fiends alongside them, so make sure you’re healed up before killing the last of these enemies. For the actual fight, Reno is weak to Fire but resistant to Lightning, and Rude is weak to Wind, so you know the drill: Elementals in your weapons. You should be familiar with Rude by now, but with Reno you will want to either evade his counters or counter him yourself with offensive abilities (like Counterstance) to pressure him. This will be much easier than the last Rude & Elena fight.
The Hunt Begins Anew
Back to earlier again with Aerith and the others, follow the now open path ahead, remembering to pick up Lifestream particles as you go.
Practice Made Perfect
In the next room you can use the rest point, then go through the door leading into the room on the right. You can find a large particle in there, along with a Subversion Materia in one of the open doorways.
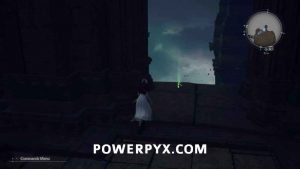
Head back to the main area and start channeling into the far vessel.
Interference
You’ll now need to go to two spots nearby to stop the enemies from blocking you. First head to the right side where you will encounter the enemies interfering, a new type called Hecteyes along with another Floating Death. Hecteyes will become pressured by hitting them with either Fire, Lightning, or Ice that they are not absorbing (the spell they are currently attacking with). This is easily done by switching Yuffie’s elemental ninjutsu to one of the other two elements and using throw to quickly apply it.
Further Interference
Next, go to the left side where you can jump a small gap to the next room. Turn left immediately to find a purple chest that contains the Brisingamen weapon for Red.
Keep following the path leading left, dealing with the enemies as you go. If you go as far west as possible there is a room with a bunch of Frogs and Bees, after defeating which you can a chest containing a Cetran Armlet.
Continue along the path north where you will encounter another two Hecteyes, deal with them to fix the interference.
Try, Try Again
With both sets of enemies dealt with, head back to the central platform where you can channel to the vessel again to proceed. The correct path to take forward is down the stairs immediately in front of you, but you are able to go left and loop around to the now accessible platform ahead for a chest that contains an Astral Remnant material.
Head back and make sure to heal again at the rest point. If you want you can make sure to run around and pick up any Lifestream particles to increase the buffs Aerith has, as they will help in the boss fight ahead. You can then proceed down the stairs.
Boss Fight: Elena & Tseng
- Weaknesses / Status Ailments: Ice (Tseng), Lightning (Elena)
- Lesser Resistances: None (Both)
- Greater Resistances: Stop, Sleep (Both)
- Immunities: Proportional Damage, Slow, Silence, Stone, Morphable Items (Both)
- Absorbed Elements: —
- Items Dropped: —
- Rare Items Dropped: —
- Stealable Items: —
- Assess Info: Blocking or evading his combo finishers will pressure him for a short while. Once he has recovered, he will begin to charge up for a powerful technique. Inflicting enough damage while he is charging will presure him (Tseng). Hitting her with two powerful offensive abilities or interrupting her synergy strikes will pressure her (Elena).
Keep in mind that Tseng is vulnerable to Ice, while Elena is susceptible to Lightning, thus equip your Materia to take advantage of those. Tseng is tricky and you haven’t faced him before, but is best tackled by blocking or evading his string of combo finishers. He unleashes a number of attacks in succession, so focus on dodging or parrying each one if you’re confident. Attacking him during this stage would be unwise as he will just counter you or hit you faster. Just wait until he’s left vulnerable after missing the final strike and he will be pressured, at which point trying and hit him with your ‘Focus’ abilities to build stagger. After this pressure, he will start to charge up so this your time to use your strongest Ice spells because inflicting enough damage will pressure him for much longer in this phase. Elena presents exactly the same challenges as earlier in the game, bar having more health and dealing more damage. Use your stronger ATB abilities for her and make sure if you see her gearing up for her synergy strike and adopting Rogue Stance that you hit her with everything you’ve got so she pressures rather than does powerful attacks with Tseng.
Hard Tips: Another Turks fight. Tseng is weak to Ice and Elena to Lightning, so equip accordingly. Tseng is pressured by blocking or evading his combo finishers. He will do 4-5 attacks in a combo, so make sure to dodge them all and don’t try to attack him until he gets pressured from missing the last hit. Elena is more of the same that you’ve dealt with in the past, just be careful of her Rogue Stance and synergy attack with Tseng.
In His Footsteps
After the boss fight the party will be reunited, and you can continue forward into the next area and take the elevator.
Hall of Resurrection
Follow the path through the door into the next large area.
A Grave Injury
In the next room run over and interact with Tseng.
An Ancient’s Purview
Interact with the altar in the center of the room.
To Each Their Trial
Now still as Aerith, head over to the marked door and walk down the hallway. The next sections are short linear story sections involving each character by themself, occurring back to back. To start, interact with large statue while still playing as Aerith.
The Trial of Red XIII
As Red, you will be in an environment like the cave under Cosmo Canyon. Follow the path running along the wall until the environment changes, then press  and
and  when prompted.
The Trial of Tifa
As Tifa, you will be in an environment that looks like Nibelheim. Climb up the water tower, then follow the linear path.
The Trial of Yuffie
As Yuffie, you will be on a large climbing wall like a scene in INTERmission. Climb up the wall and follow the glowing spots, then in the room use the grapple points to swing to the final area.
The Trial of Barret
As Barret, you will be in an environment that looks like Corel. Follow the linear path through each scene, hitting the required buttons at the end to progress.
The Trial of Aerith
As Aerith, you will first be in a train car. Look around when prompted and hold  to interact with the glowing spots. After this you will be in the Midgar slums, follow the linear path through the the end where a scene occurs, then walk back in the direction you came from.
After completing Aerith’s trial, all of the characters return to the central area where Cloud is still waiting. Head through the now-open door to the north.
Corridor of Effigies
Follow the path ahead toward the objective.
The Trial of Cloud
As Cloud, you will be in an environment that looks like a destroyed reactor. Follow the linear path ahead through the scenes.
The Materia Awaits
After the scenes with Cloud, continue ahead and go down the circular staircase as far as you can. Defeat the enemies in the next room, then continue into the room where the path splits. Take the path on the right first to reach a dead-end room with a Floating Death, and a chest you can open that contains a Cetran Bracer.
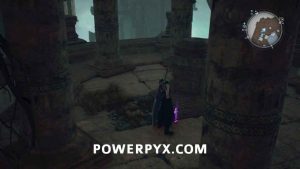
Head back up and then look to the left when passing through the room with the path split where you can find the final purple chest that contains the Fuma Shuriken weapon for Yuffie.
Continue forward where you will encounter a new enemy, the Moss-Grown Adamantoise. These very tanky enemies will put up a counter shield in front of them to block your attacks. After a while, they will also start constantly shooting homing magic at you if they are not pressured. You can pressure them by hitting them from behind while they have Counter up, or more easily by hitting them with any Fire attack, with Fire magic hitting them around their Counter shield.
Once it is defeated continue into the next room. On one of the raised platforms you can find a chest that contains an X-potion.
Continue forward and you will be back in the circular staircase. Instead of continuing down, first go up as far as you can where you can find the opposite side of the blockage from before where you can find a chest that contains an Elixir.
You can then follow the stairs to the bottom to continue.
Before the Fall
In the next area, you will start being shown scenes about Cetra history. Head through the first room where you will need to fight a Panthera Protector and a Floating Death.
Arrival
Once these enemies are defeated, continue through into the next room for more history. In the next room you will fight another Panthera Protector along with a Moss-Grown Adamantoise. Deal with the Protector first as it is much weaker, then you can focus on the Adamantoise on its own like you did before.
Dreams of Oblivion
Once those enemies are defeated make sure to use the nearby rest point, then continue for the final part of the history lesson.
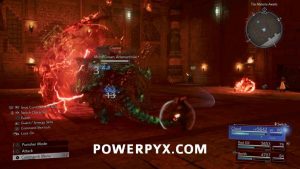
Boss Fight: Demon Gate
- Weaknesses / Status Ailments:
- Lesser Resistances: Fixed Damage
- Greater Resistances:
- Immunities: Proportional Damage, Berserk, Slow, Stop, Poison, Silence, Sleep, Petrify, Stone, Morphable Items
- Absorbed Elements: —
- Items Dropped: —
- Rare Items Dropped: —
- Stealable Items: —
- Assess Info: Draws the walls inward to narrow the field of battle. Inflicting enough damage while it gathers strength to move will both interrupt and pressure it. It unleashes elementally aspected attacks from its enormous hands, but striking it with an opposing element will interrupt its assault.
Notoriously one of the hardest fights in the original game, Demon Gate is a little easier this time but does have the caveat of a second Gate joining the fight to pincer you when the first one reaches half health. Don’t worry about that at first though, and instead focus on trying to keep distance between yourself and the wall. The primary concern is the Encroach move where it will draw the walls closer, not only intensifying its aggression but naturally shrinking the area you have to dodge and move. To stop this tactic, unleash all your ATB gauge to pressure it and prevent the arena from shrinking. Upon reaching half health, a second Demon Gate materialises. Should the arena shrink to its smallest size, both walls will incessantly barrage you with attacks and it becomes very tricky to survive, so it is recommended to save your ATB charges and Limit Breaks for when it is gathering strength to interrupt and pressure it.
Demon Gate lacks any specific elemental vulnerabilities, though it sporadically infuses its assaults with one of the four elements. Therefore, trying to cover all four elemental bases with Materia because using the opposing element will stop this attack.
Hard Tips: Demon Gate doesn’t have any specific elemental weaknesses, but it does occasionally imbue its attacks with one of the four elements, and these can be countered by using the opposite element, so it is worth having each elemental materia on you, and potentially Elemental in the armour to nullify 1-2 of these elements.
The main thing to look out for during this fight is Encroach, when it does this attack it’ll draw the walls into you and get more aggressive, so when you see it unload all your ATB to try and pressure it to stop it shrinking the arena. At half health a second Demon Gate will appear, and if they manage to shrink the arena to the smallest size they will constantly unleash attacks. If you get a Limit Break, save it for this moment so that you can deal heavy damage on one Demon Gate while also becoming invincible, as it is likely your other teammates will die during this assault. As this is the last boss fight for this chapter, feel free to go all out with your MP.
Within Our Grasp
After the boss is defeated, follow the linear path ahead.
All Falls Down
After the scene, follow Vincent on the path out of the temple.
In Wicked Hands
In the final section, follow the linear path ahead to complete the chapter.
This finishes Chapter 13: Where Angels Fear to Tread in Final Fantasy VII Rebirth.
Next Up: Chapter 14: End of the World
For all other Mission Walkthroughs, check out our complete Final Fantasy 7 (VII) Rebirth Walkthrough.









Rodrigo says
there is a yellow materia that i cant seem to reach in the labyrith area.. i dont know what to do
Mike says
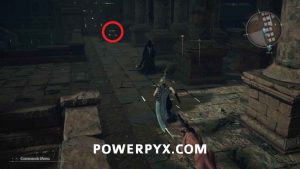
I noticed that too. Apparently, you can get it when by an earlier gravity-shifting room (ruby-star chamber) by jumping down from that room. It’s a 5 star chakra orb, by the way.
In terms of timing within this chapter, it’s right before you get the slipstream saber for Cloud. Hope that helps!
Karen says
If you clumb the walls after your first encounter with Ancient Dragons then you can get it. There’s some walls on the left ( left when facing the area you need to go) that are climbable.
Alex Millar says
In the Halls of Trials, one of them contains an AP UP.