
Chapter 7: Those Left Behind is the 7th story mission in Final Fantasy 7 (VII) Rebirth. This walkthrough will guide you through all objectives of the Those Left Behind Main Mission.
Area: Mt. Corel
Objectives:
- Toward Mt. Corel
- Mountain Trek
- Split Up
- Shinra Helicopter
- Interlude: Episode 2
- Knock at the Door
- Mother and Daughter
- To the Summit
- Unlock the Gate
- Recon Unit Captain Kisaragi
- Corel Reactor
- State of the Reactor
- Brave Leader Yuffie
- For the Cause
- Leaving the Reactor Behind
- Reach the Control Panel
- Conveyor Power Source
- Get a Grappling Hook
- Activate the Generator
- Unlock the Elevator
- Continue Your Search
- Reach the Generator
- Unlock the Elevator
- Ruling the Roost
- Lower the Drawbridge
- Set Their Route
- Buckle Up
- Crossing the Bridge
- Back in Corel
- Tifa’s Acquaintance
- Ropeway Bound
Toward Mt. Corel
At the start of the Chapter you will still be in Costa del Sol, and need to make your way over to Mt. Corel to progress the story. If you want to first though there is a bunch of new side quests now available in the town, along with having the eastern Corel open-world area available to explore.
Side Content: Corel
9 World Intel:
- Now is a good time to collect all World Intel you have access to (2 Towers, 2 Fiend Intel, 1 Divine Intel, 2 Lifesprings, 1 Excavation Intel, 1 Moogle Intel). Note that you can’t reach the south of Corel Region, the full region becomes accessible in Chapter 9. So grab what you can now, then grab the rest in Chapter 9. See Corel Region World Intel Locations.
3 Side Quests:
- Side Quest: The Saga of the Seaside Inn – started at Johnny’s Inn. Note that you can’t complete the entire quest during Chapter 7, it can only be completed after reaching Chapter 9 when all of Corel Region is accessible.

- Side Quest: Rendezvous in Costa del Sol – started at the beach of Costa del Sol.

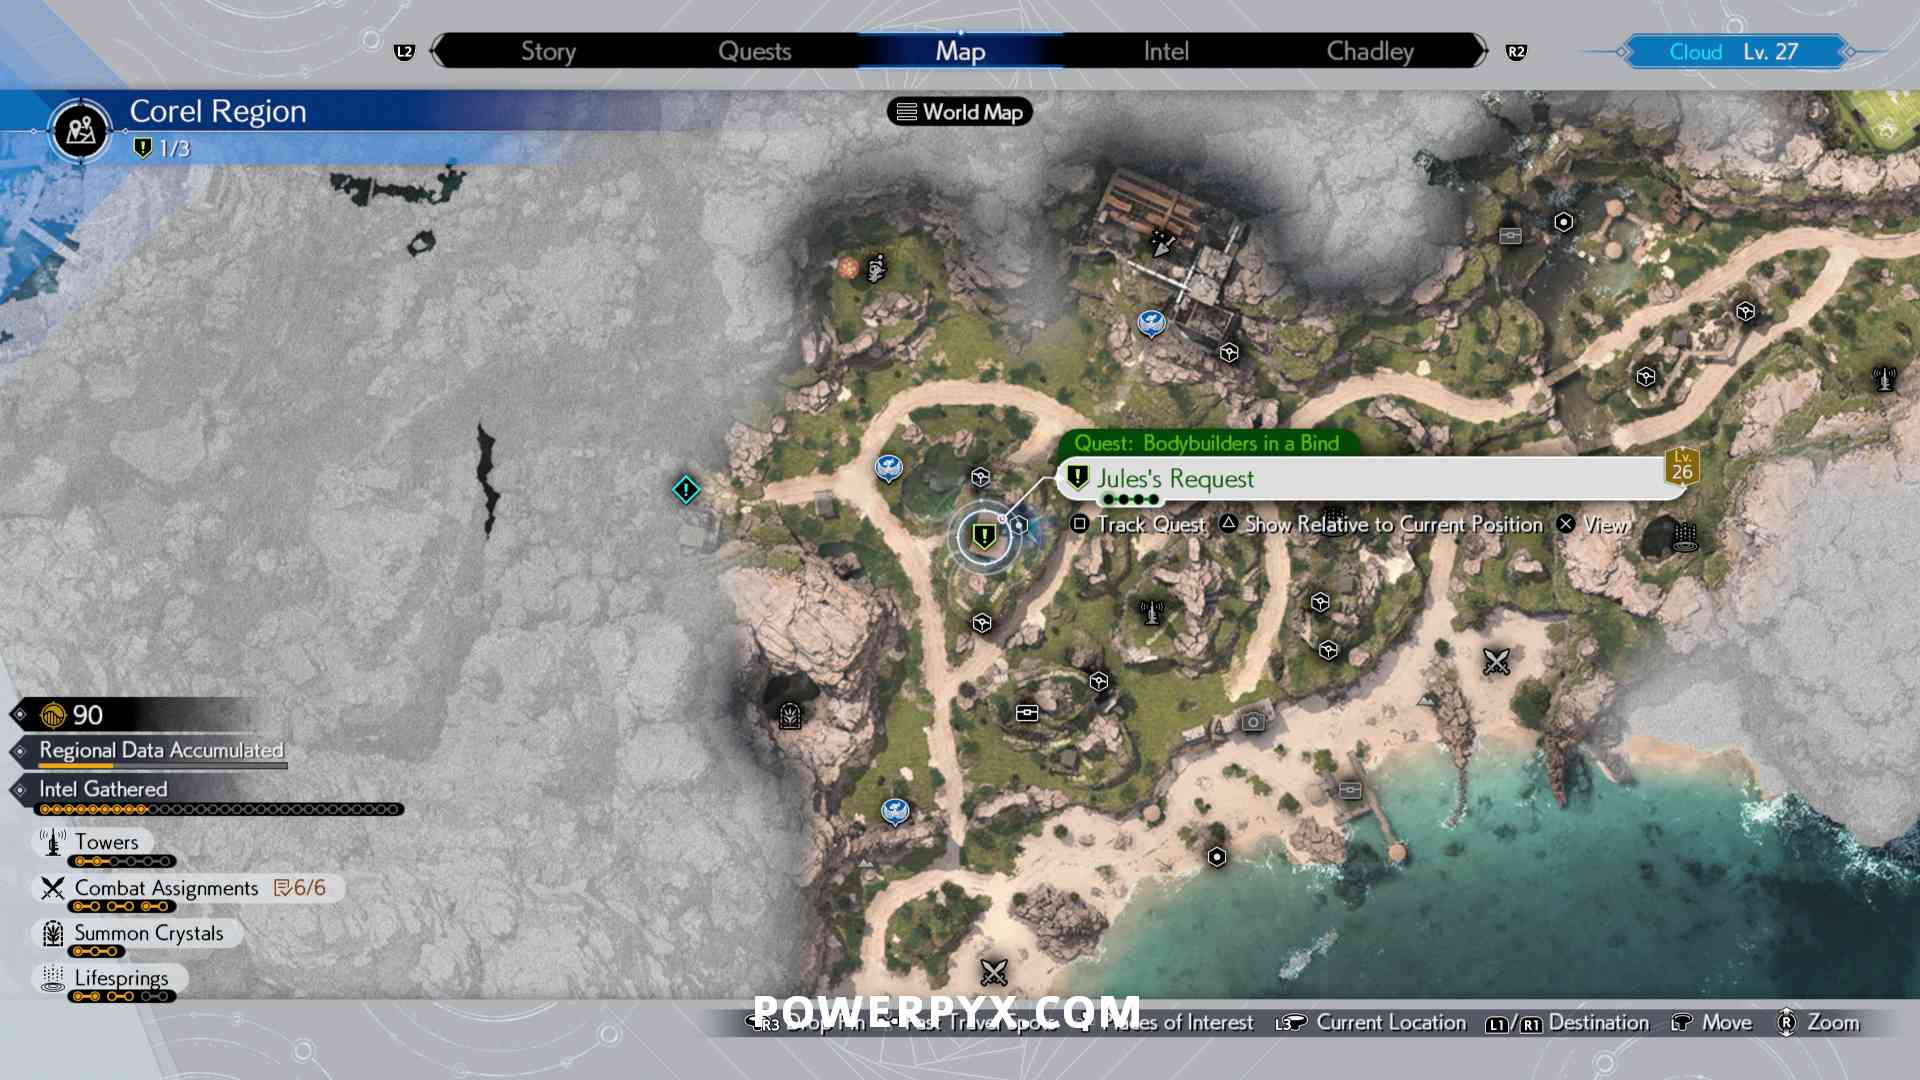
- Side Quest: Bodybuilders in a Bind – started at the Training Gym, on a hill along the roads going south-west from Cost del Sol (available after Side Quest: Rendezvous in Costa del Sol).


When you are ready, you can start making your way to the marked location to the west at the edge of the explorable open-world area.

If you are skipping the side content for now, it is recommended you stop at the Chocobo Tack Shop on the way out of Costa del Sol and buy the Rent-a-Bird Membership for 300 Gil, as this allows you to use the Chocobo in the area between Costa del Sol and Mt. Corel.

Mountain Trek
Once you reach the mountain, you can start following the crew up the path ahead. There are some materials along the way you can grab, but nothing important otherwise, so just make your way after Yuffie and the others who went ahead.
Split Up
Once you reach a point partway up the party will split up, with Aerith and Red staying with Cloud while the others go ahead. They’ll be your party members for the first portion of the next area, so you can get them set up now and use the nearby rest spot. Before progressing further you can go left of the rest spot where you can find a purple chest containing the Wizard’s Rod weapon for Aerith, along with an Evenervation Materia.

When ready you can start making your way up the path to the right. Shortly you’ll encounter your first new enemy, the Sandhog Pie. You’ll encounter these enemies throughout the area ahead, so having Snow Flurry and the non-magic Ice commands like that on the characters makes cleaning them up throughout the area very quick.

Keep making your way up the path ahead. If you take the stairs to the right this works as a bit of a shortcut, skipping a large area with just enemies and materials. If you do opt to explore that area you can find a chest in the metal structure that contains a Ruby.

Continue up the main path, past another metal structure where you can see the stopped cable car. You’ll encounter another new enemy for the area, called a Heatseeker. Unlike their name would suggest they are weak to Fire, which can be used to quickly clean them up.

Keep following the path ahead to the next metal structure, where you can spot a yellow arrow left by the rest of the party pointing to the left. Instead of following that, first, go to the right through the metal structure to another large side area.

Hug the right wall where you can find a small hole with stairs leading down, leading to a ledge where you can find an MP Up Materia.

Head back up to the main path, and keep hugging the right wall. Just past some scaffolding, you can find a small dead end with another chest containing 3 x Gold Dust.

Slightly past there is another group of enemies, then another arrow pointing up a climbable wall. You can go up here, or slightly further on if you want to fight some more enemies to pick up some more materials.

Whichever path you take you’ll eventually reach another spot pointing you upward.

Immediately afterward there is a small path split. Going up the stairs left is where you progress, but you can also go across the small river where there is a chest containing 1 x Mythril Ore. There is also a ladder on that side that will take you up to the same spot that following the long set of stairs upward will, so you can take either path.
Keep following the now linear path up the mountain through the next groups of enemies. You’ll encounter another new enemy here, called a Bagnadrana. These are immune to physical attacks from the rear, so to deal with them either attack them during their Subdue attack or use Ice attacks which they are weak to.

Shinra Helicopter
Shortly ahead a Shinra helicopter flies ominously over. Keep following the path leading toward it through the rest of the enemies. After climbing a short wall there will be a rest point you should stop at and get ready for the boss fight at the end of the path ahead.
Boss: Custom Valkyrie

- Weaknesses / Status Ailments: Lightning, Wind
- Lesser Resistances: Stop
- Greater Resistances:
- Immunities: Proportional Damage, Berserk, Slow, Poison, Silence, Sleep, Stone, Petrify, Morphable Items
- Absorbed Elements: —
- Items Dropped: —
- Rare Items Dropped: —
- Stealable Items: —
- Assess Info: Inflicting enough damage by exploiting its elemental weakness will pressure it. While it is using Cooling Protocol, it will become easier to pressure.
Custom Valkyrie can be quite annoying since it likes to fly around and spray fire in the arena, and it isn’t too big of a space so it can be hard to evade. Even if you evade its fire jet attacks, the fire stays burning on the ground so you’ll likely run into it and take damage while trying to manoeuvre towards the boss.
The good news is that it is weak to two elements, so pressuring it is fairly easy as you should have numerous Wind and Lightning spells or abilities by now. Not only that, similar to Grasptropod, it will need to cool down after a number of attacks and this is a great time to hit it with either elemental abilities or you strongest attacks and build the Stagger bar. You won’t have Tifa for this fight as you’re locked to Aerith and Red XIII, so try and save your Synergy Abilities and Limits for the Stagger phase to ensure you do as much damage as you can at this point. Other than that, you can block the boss’ machine gun and missile attacks and then just try and do your best to dodge the fire moves. When it finishes an attack, it will always take a moment to recharge before it attacks again, so use this time to press your own attack.
Hard Tips: While Custom Valkyrie is weak to lightning and wind, it is best to put Elemental-Fire into your armours as this will completely nullify the majority of its attacks. Put Lightning and Wind on Aerith so you’re still able to exploit its weaknesses with regular spells. Use Arcane Ward combined with spells as Aerith to pressure it, and use Red and Cloud to attack whenever it is low to the ground or using Cooling Protocol. This is the last combat section for these characters in this chapter so feel free to use as much MP as needed.
Interlude: Episode 2
Knock at the Door
After some scenes, you will be temporarily playing as Zack. Head over and open the door.
Mother and Daughter
Follow the other character upstairs, which plays out the rest of the scene.
To the Summit
Unlock the Gate
Back playing as Cloud, interact with the switch to open the gate, then follow the stairs up to the top.
Recon Unit Captain Kisaragi
You’ll meet back up with the rest of the party who now rejoin you, then you can continue following the path ahead.
Corel Reactor
Follow the path around to reach the reactor.
State of the Reactor
Brave Leader Yuffie
Follow behind Yuffie for another scene in the reactor.
For the Cause
You can then follow behind Barret out of the reactor area.
Leaving the Reactor Behind
Interact with the elevator panel to travel down, then follow the path ahead. When you reach the open area you are meant to go up the stairs to the right to progress, but you can first go left around the building for a chest containing 1,700 Gil.

Reach the Control Panel
At the next rest point, the team will split up again, this time with you playing as Yuffie with Barret and Tifa in your party. Yuffie works somewhat like Barret in that she can use her weapon to destroy far-off items while exploring, typically to obtain extra consumables or materials.

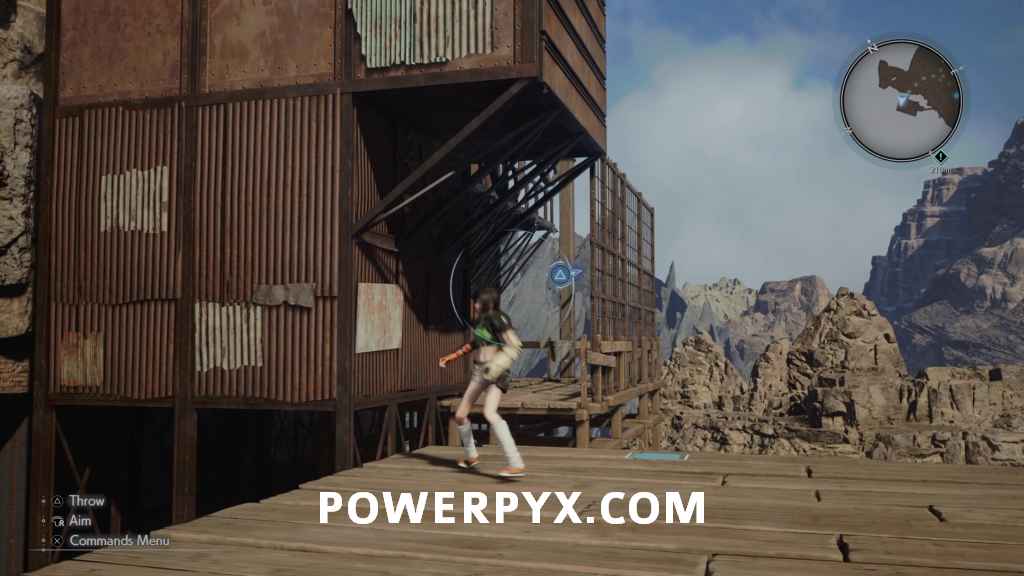
Follow the linear path ahead through the first group of enemies. You will then need to aim at the metal structure and throw Yuffie’s weapon to break the wire, which opens the door to progress.

Conveyor Power Source
In the next room you need to turn on the power to progress up the yellow conveyor.
Get a Grappling Hook
Head near the large gap to prompt Barret to point out the grappling hook nearby. Pick it up off the table.

Activate the Generator
You can then use the grappling hook to swing across the gap, allowing you to reach the switch that turns on the convery. Make sure to also open the nearby purple chest that contains the Twin Viper weapon for Yuffie.

Once the power is on swing back over and then you can jump on the conveyor to reach the next floor. Just above the group of enemies, you can throw to knock down a ladder, allowing you to reach an upper platform that contains a Hi-ether.
Drop back down and go northwest to the open outdoor area. Defeat the group of enemies and then you can climb up the nearby wall, where at the top you can find a chest that contains an Emerald.


Unlock the Elevator
To progress further you’ll need to get the elevator working for Tifa and Barret. First, grapple out to the open area and drop onto the first platform, then turn around and throw Yuffie’s weapon to drop another grapple point. From here you can grapple across the two to a platform with a chest containing 5 x Zinc Ore.


On that platform turn back around and you can grapple to the climbing wall to continue upward.

In the next room defeat the Spearhawk, then interact with the panel to bring Tifa and Barret up on the elevator.

Continue Your Search
Continue along the linear path. Once you return back outside there is a small side thing you can do. Climb up the nearby wall, which will allow you to aim at a wire behind a metal fence. Breaking the wire causes a large number of boxes to fall out, which award a bunch of consumable items when broken.
Take the zipline across toward the objective, then drop back off the platform you land on to reach another chest, which contains 3 x Exquisite Beast Hides.

Climb back up and continue toward the objective until you reach a rest point. In the next area, you’ll encounter a new large enemy, the Cockatrice. These large birds are weak to fire, so switching Yuffie’s Ninjutsu element is very helpful. You can also pressure them by blocking their attacks or evading the named attacks Swoop and Cock-a-Doodle-Kick.

Once it’s defeated, climb the nearby wall to an upper platform where you can walk over and throw to drop a ladder.

Drop down and climb the ladder to reach the other platform. From here you can swing across a series of grapple points, which lead to a chest containing an Illusionist’s Armband.


Reach the Generator
Take the zipline back down, then go down the nearby stairs (or slide down the pole) to reach the area below. There will be another pair of Cockatrice to deal with, then you will need to reach another generator to turn on the next conveyor. Swing across the series of grapple points until you reach the spinning structure, then you will need to spin this grapple point over to reach the platform. You can do this by pushing forward to swing toward the platform, then letting go so Yuffie doesn’t swing back and move the grapple point. Repeat a bunch of times until you can swing and drop to the platform and pull the switch.

Before heading back you can also open the nearby chest that contains 3 x Exquisite Beast Spines.
Before going up the conveyors, go out the small side area to the left. Outside on the ledge past the group of enemies, you can find a purple chest containing the Barrage Blaster weapon for Barret.

Once you’re ready you can take the first conveyor back up to the rest point, then the second one up to the next floor to continue. After defeating the group of enemies you can climb up some nearby ledges to pick up an Empowerment Materia.

Unlock the Elevator
In the next room, you’ll split off again and need to activate another elevator. Throw to activate the green switch, which will drop a grapple point you need to grapple to and then wait on.

Once the grapple point moves back up, you can then swing across the series of grapple points ahead. Any boxes in the way you can swing through to potentially get extra items.

Continue along the grapple path until you reach another rotating spot. Swing continually to the left to rotate the grapple point, then swing into the button to lower the grapple, which you can then ride back up.

In the next room, there will be a rest point along with the elevator switch, but first, you need to deal with a Bomb enemy. These aren’t weak to specific elements, but you can deal it easily enough by throwing Yuffie’s shuriken and then staying at a distance so it can’t hit you, dodging away further if it gets off self-destruct before you defeat it. Once it is dealt with use the panel to bring Tifa and Barret up on the elevator, then make sure you’ve used the rest point.

Ruling the Roost
To continue, interact with the red door directly to the right of the rest point.
Boss Fight: Gigatrice
- Weaknesses / Status Ailments: Fire, Poison
- Lesser Resistances: Stop, Sleep
- Greater Resistances:
- Immunities: Proportional Damage, Wind, Berserk, Slow, Silence, Stone, Petrify, Morphable Items
- Absorbed Elements: —
- Items Dropped: —
- Rare Items Dropped: —
- Stealable Items: —
- Assess Info: Inflicting enough damage while it is in the air will pressure it and force it to descend. Using elemental magic on the cyclones it conjures will imbue them with elemental energy. It will become pressured if hit by one of these enhanced cyclones.
While it looks menacing, Gigatrice is one of the easier bosses. Firstly, make sure Tifa has Fire or Poison Materia equipped to her otherwise she will spend large portions of this fight having no use since her melee attacks can’t hit the flying Gigatrice. Have Barret use his ranged attacks to build ATB whilst Yuffie should use her Fire Ninjutsu to target Gigatrice’s weakness. In the initial part of the fight, start whittling down its health with ranged attacks and Fire/Bio magic from Tifa. Its attacks aren’t too dangerous bar its Aero magic since the rest are all AoE and you can see when it is charging up an ability, so just run away to dodge them.
Once it is on the ground, you can start building the Stagger bar with Tifa as well as continuing your attacks with the others. If possible, try and activate Synergy Abilities that will either split your ATB into three charges or grant you extended Stagger as by this point it should be close to it. When it’s at half health, Gigatrice will start conjuring cyclones. It is possible to use magic attacks on these and they will become affected with that element, and if they hit the Gigatrice it will presure it (except for Wind element), but this is more hassle than it’s worth and it is best to just focus on the main enemy. At the halfway point you should have access to a Summon by now, so Ifrit or Phoenix is a good choice and if you did a Synergy Ability to have 3 charges, you should easily build enough ATB quickly to use their second abilities which Gigatrice is weak to. Work towards filling its Stagger for a second time and you should pretty much be done, especially if you use Tifa to increase the %.
Hard Tips: Equip Tifa and Barret with Elemental-Fire in their weapons, and Yuffie with Elemental-Wind in her armour as she can just use Fire Ninjutsu. Make sure to also have Poison equipped to someone and keep it poisoned throughout the fight. It may also be worth equipping Ribbons and/or Safety Bits to be immune to its petrification.
Lower the Drawbridge
Once the boss is defeated, head over and interact with the panel to lower the drawbridge for the others.

Set Their Route
Back on the lower level, you’ll be playing as Cloud again with Aerith and Red. You can now follow the path along the track that has been opened with the drawbridge lowering. Follow the path defeating any enemies on the way until you reach the required switch. Your choice here is effectively a relationship interaction for Yuffie and Barret, with the choice you make giving a boost to that character’s relationship level. Leaving the switch left is positive for Barret, but switching it to the right is positive for Yuffie.

After deciding what you want to do with the switch you can go up the path to the left where you can find a zipline. Go down this zipline to the lower level and deal with the group of Bloatfloat, then go in the small shack for a chest containing a Safety Bit accessory.


Once done here go down the nearby ladder (you can also get up here with the ladder from the right path) then follow the tracks to the end and interact with the console to let the others know the track is good.
Buckle Up
Back as Yuffie, head over and interact with the mine cart on the tracks. This will trigger a minigame where you can shoot boxes as Barett during the mine cart ride. This minigame isn’t needed for any trophies so it doesn’t matter what score you get here.

Crossing the Bridge
With the party back together, you can head across the bridge into the town of Corel.
Back in Corel
After the initial scenes, you can start exploring around the town. Before trying to go to far though it would be recommended you reach the final objective as some more activities become available.
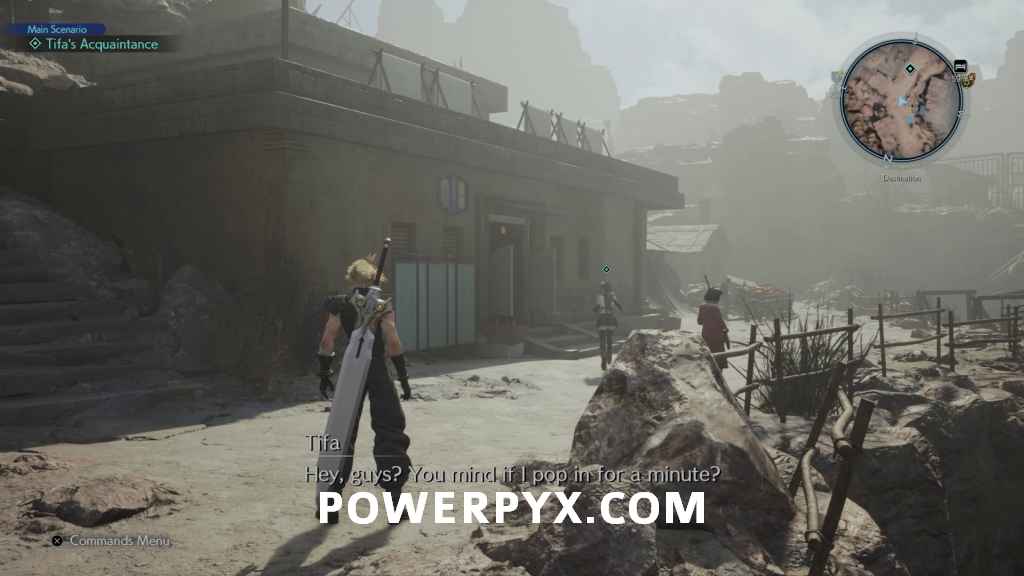
Tifa’s Acquaintance
Continue on the path up to the higher levels of town. Once you reach the highest level before the ropeway Tifa will go over to the nearby building, follow her in for a scene.
Ropeway Bound
Now your final objective is to head over to the ropeway to the Golden Saucer. All of the activities are available within Corel now, so if you want to do the side content before continuing now is the time to do it.
Side Content: Corel
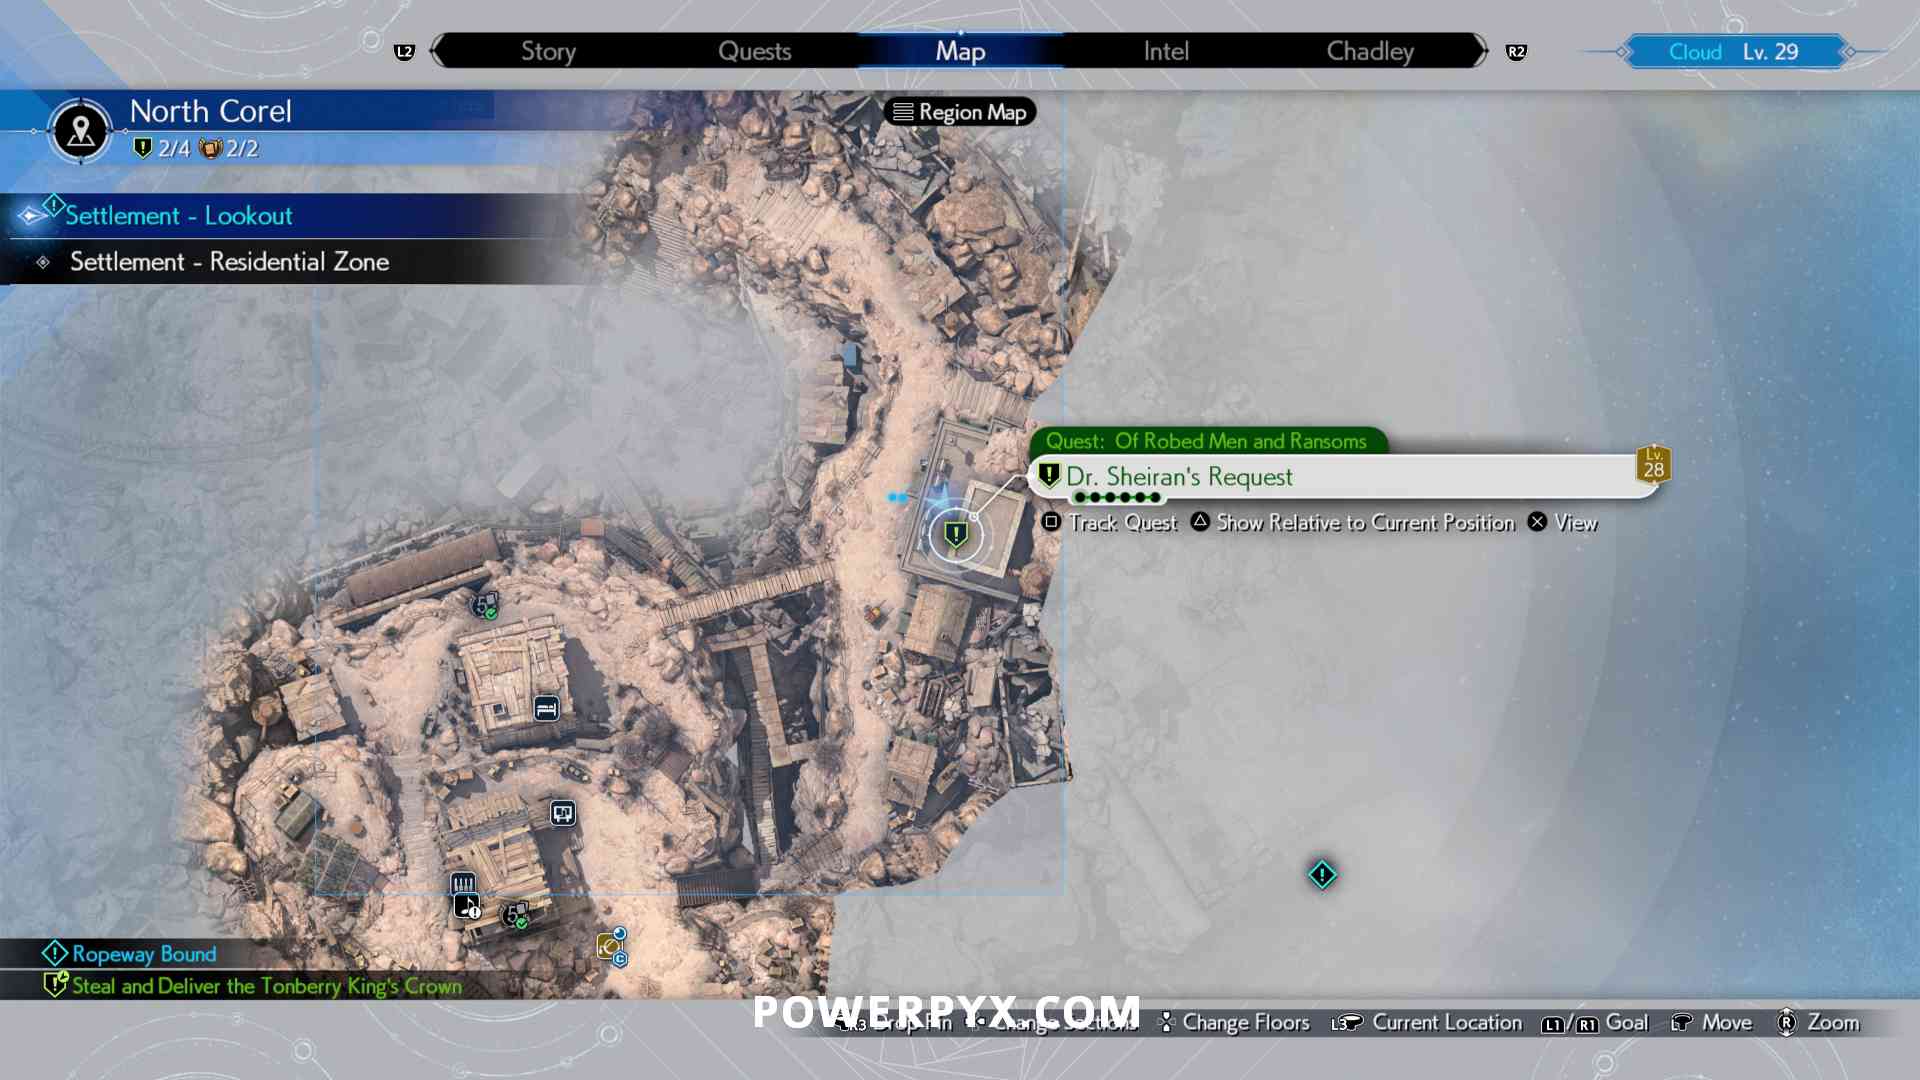
1 Side Quest:
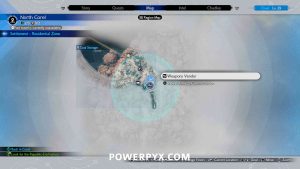
- Side Quest: Of Robed Men and Ransoms – started in the North Corel settlement

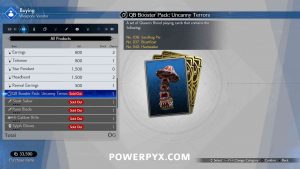
Queen’s Blood:
- Queen’s Blood Booster Pack: Uncanny Terrors (036 Sandhog Pie, 037 Bloatfloat, 040 Heatseeker) – purchasable at Weapon Vendor in North Corel for 500 gil (contains 3 cards).
- Queen’s Blood Card: 039 Cockatrice – Won from Rolf upstairs in North Corel.
- Queen’s Blood Card: 041 Bomb – Won from Biff inside the bar upstairs in North Corel.


1 Piano Song:
- Sheet Music: Barret’s Theme – on the piano inside the bar.

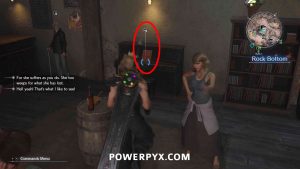
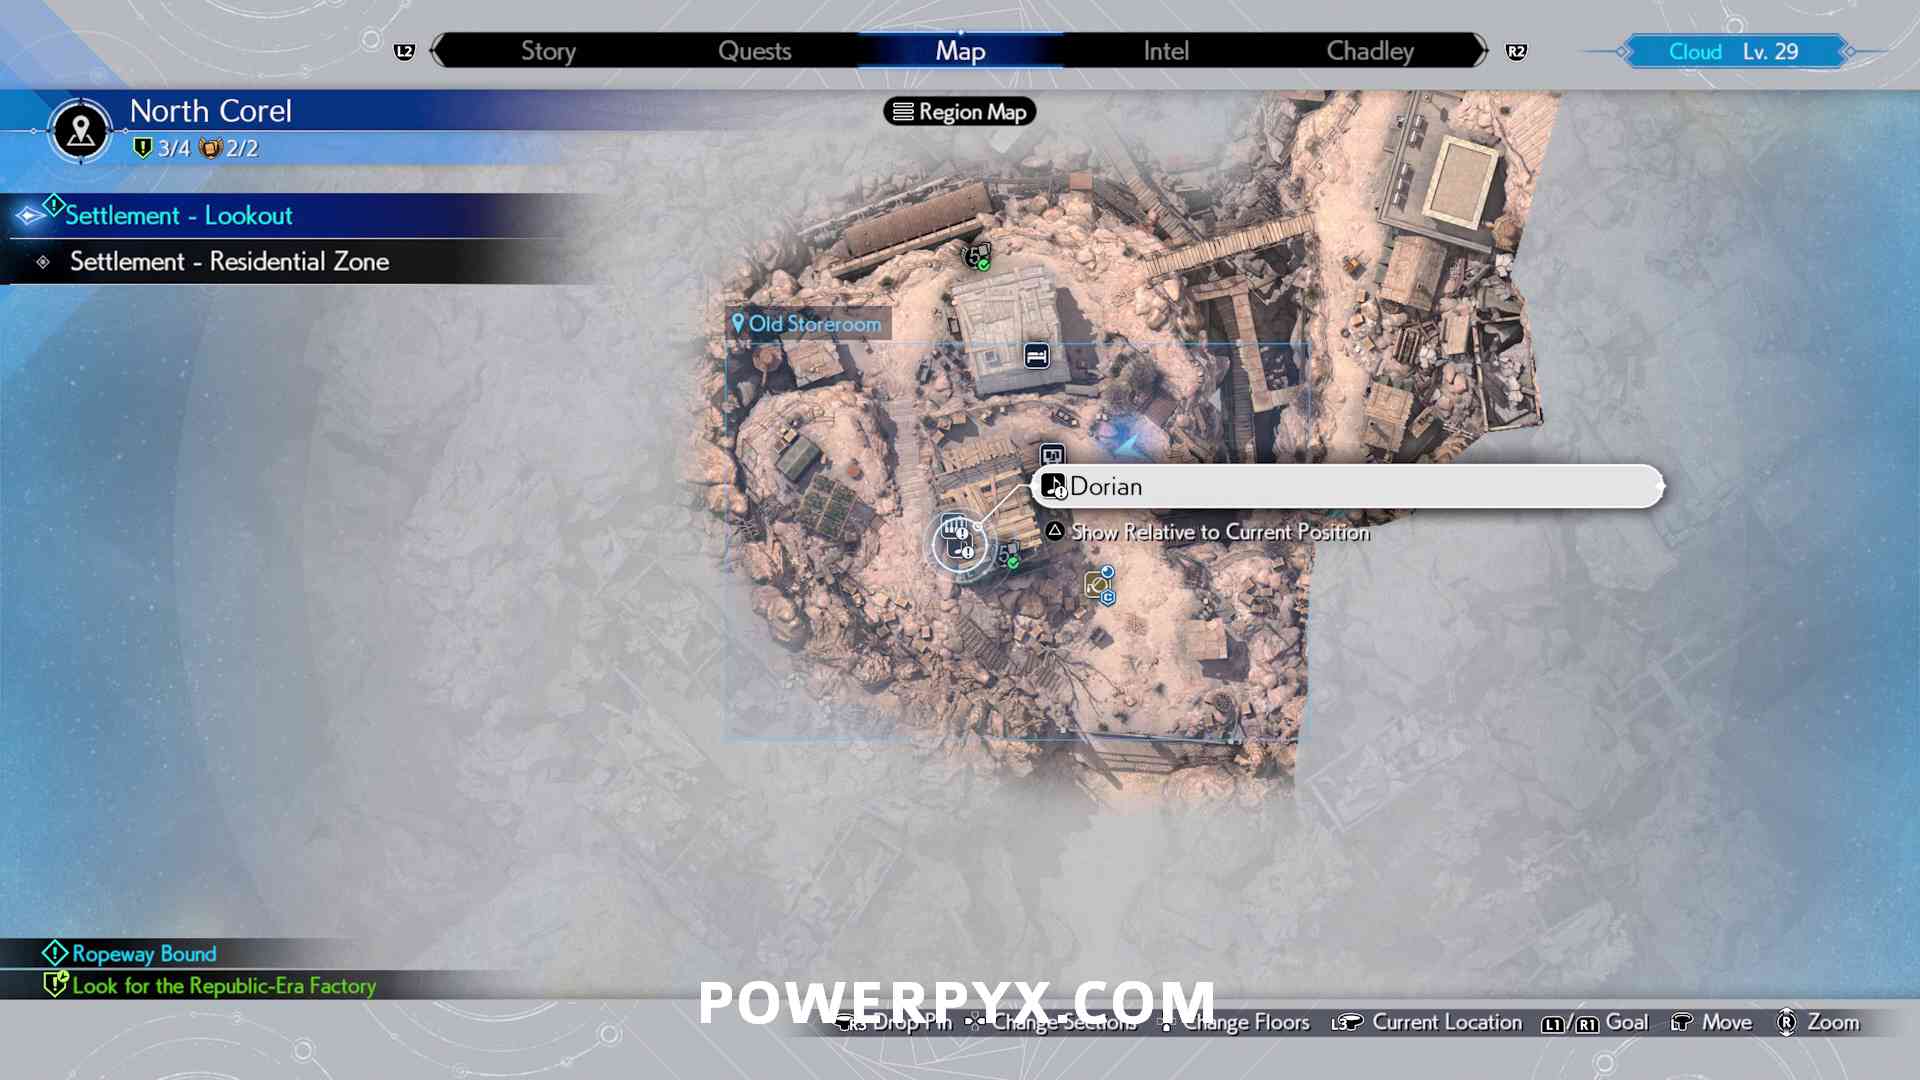

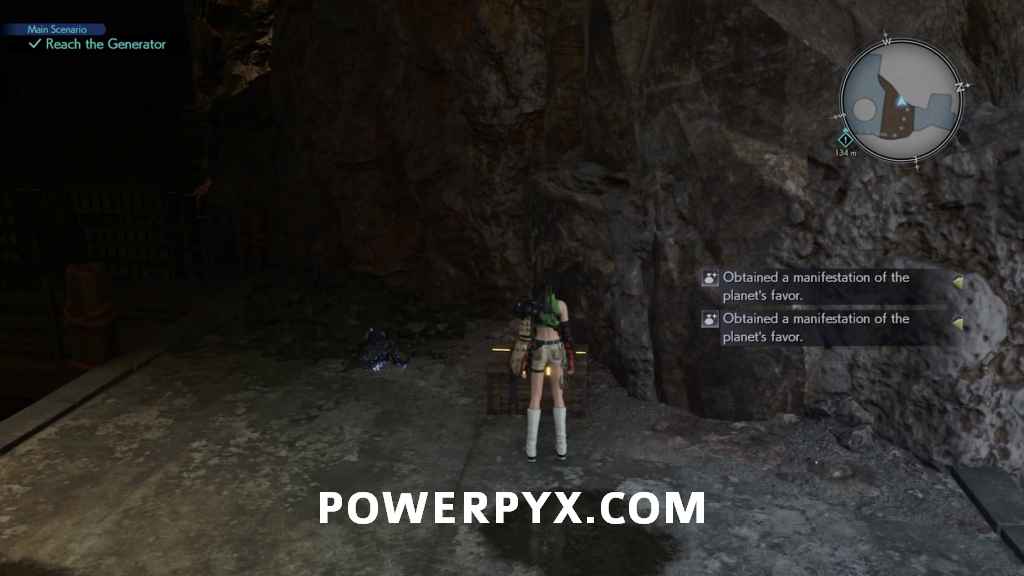
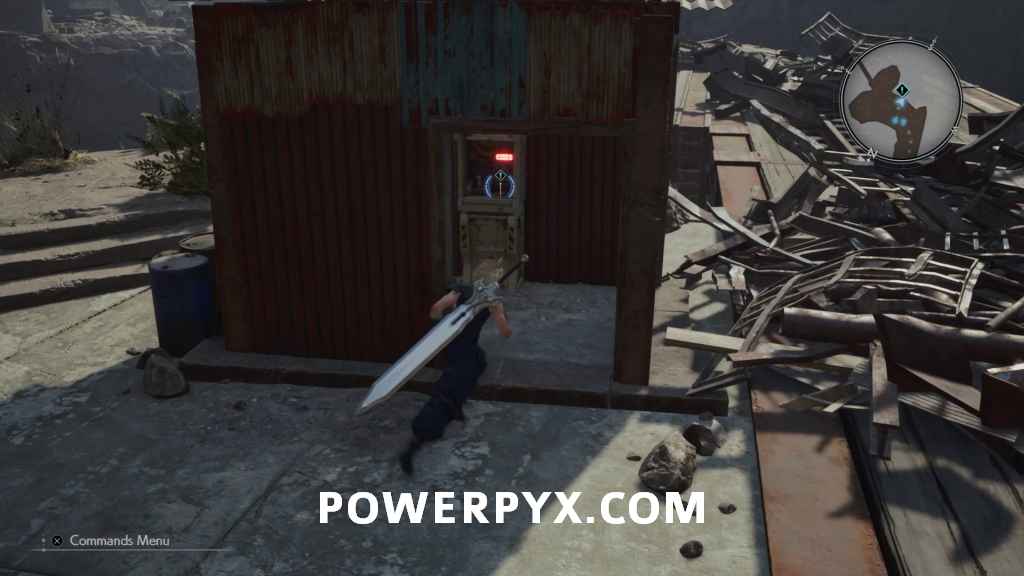
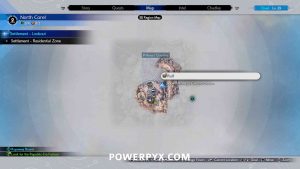
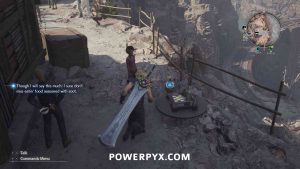
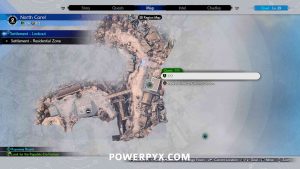
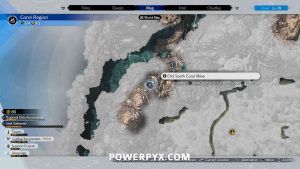
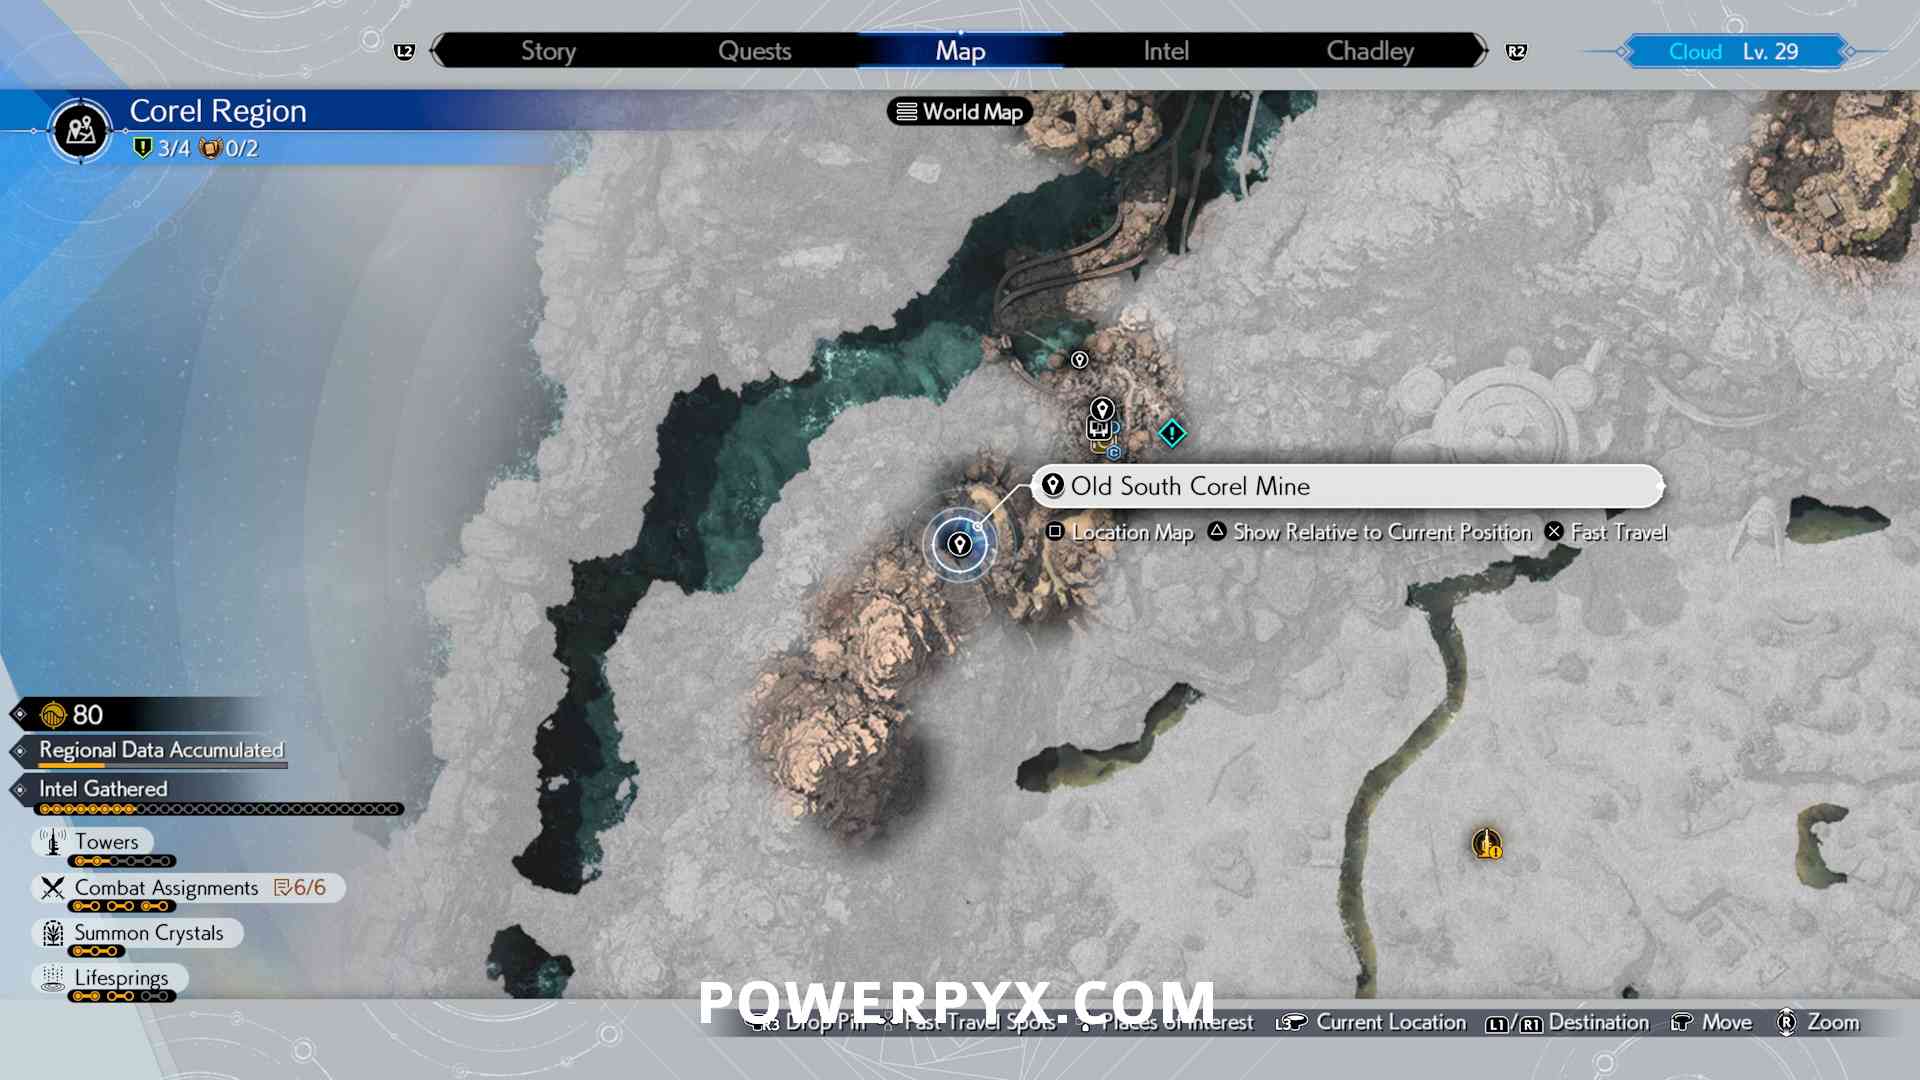
1 Weapon:
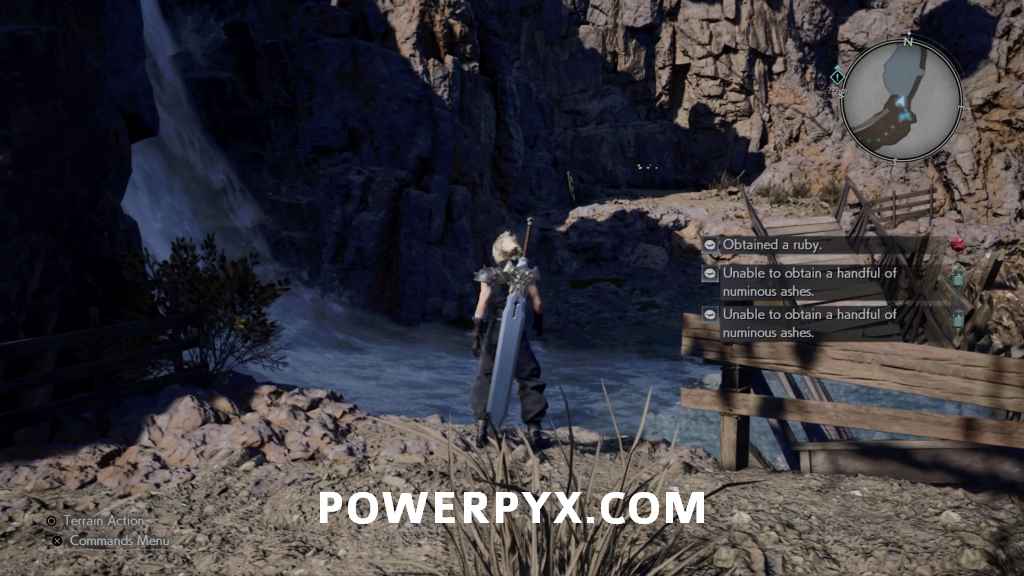
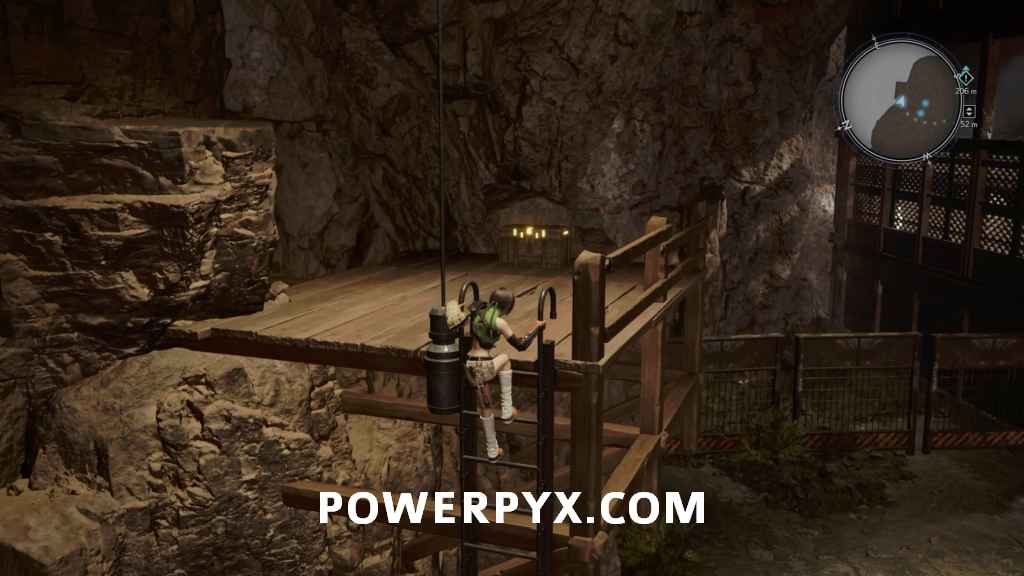
- Weapon: Amethyst Collar (Red XIII) – inside the Old South Corel Mine, directly on your right as you enter. You will have to progress into Of Robed Men and Ransoms side quest to access this (the door to the mine is closed until you accept the quest). The 1st image below shows the quest starting point. The 2nd image shows the mine entrance, the 3rd/4th show the location inside the mine.


When you are ready to continue, follow the path all the way up to the ropeway and confirm you are ready to leave to complete the chapter.

This finishes Chapter 7: Those Left Behind in Final Fantasy VII Rebirth.
Next Up: Chapter 8: All That Glitters
For all other Mission Walkthroughs, check out our complete Final Fantasy 7 (VII) Rebirth Walkthrough.
GearlessDrew says
Using the Materia vendor in North Corel as a starting location walk up the wooden ramp and follow the Ropeway sign pointing left. Walk up the stone stairs and keep your camera pointing right. About halfway up the staircase there’s a Revival Materia you can grab. Didn’t see this mentioned.
Cc says
Just got this also from this comment, thank you!!