
Chapter 2: Fateful Encounters is the 2nd story mission in Final Fantasy 7 (VII) Remake. This walkthrough will guide you through all objectives of the Fateful Encounters Main Mission.
Chapter 2: Fateful Encounters starts when you complete Chapter 1: The Destruction of Mako Reactor 1.
Area: Sector 8
Requirement:
Objectives: Complete Chapter 1: The Destruction of Mako Reactor 1
- Use the Escape Route
- Reach the Sector 8 Station
- Follow Him
- Taking a Detour
- Evade Pursuers
- Flight through the City
- Climb to the Roof
- Break the Blockade
- Last Train
Use the Escape Route
Immediately after Chapter 1 ends, you will be in a tunnel with the group continuing your escape from the reactor area. After going under the collapsed section before turning right there is a chest you can open that contains 2 Potions.
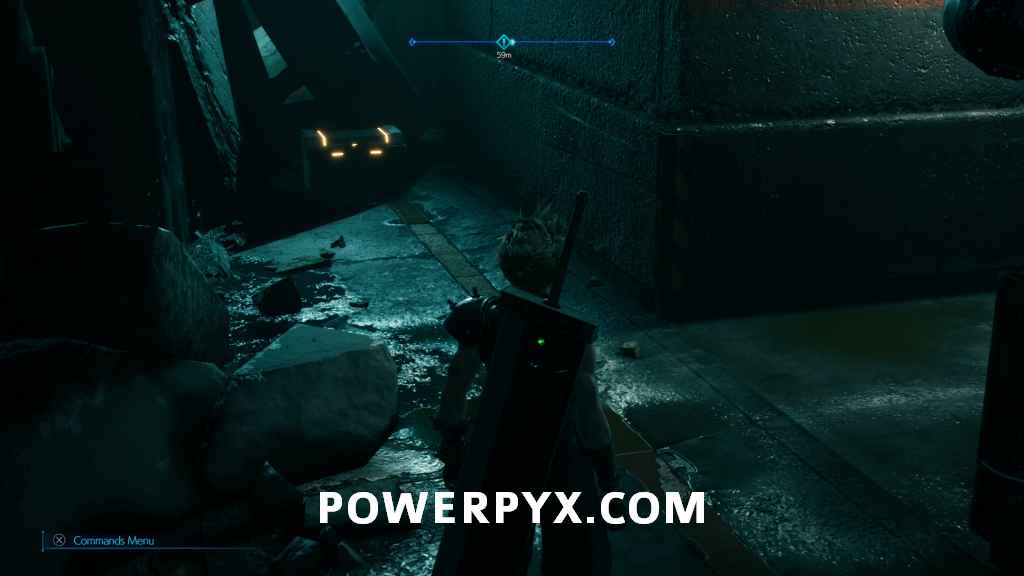
After exiting out the door Jessie blows open you’ll have another short cutscene, then be told to follow the group again. On the right before going up the stairs is another chest that contains an Ether.

Continue along the path, and after some dialogue you will be given Healing Materia, and prompts you with the tutorial for slotting Materia into your weapons and armor to equip them. After slotting it you can exit out and continue forward.
Reach the Sector 8 Station
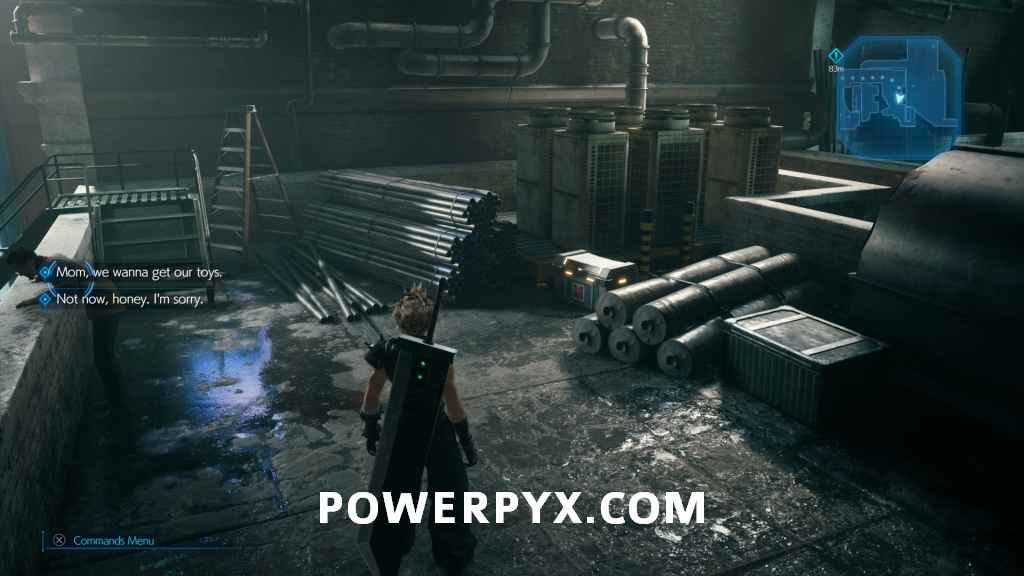
Go forward and to the left, right in front of the ARCADE building beside a vehicle will be another chest containing 2 Potions.

Progress forward along the path, after climbing the stairs before walking on to the rubble there is a chest that contains 3 Grenades. Continue along the linear path until you reach another cutscene.

Follow Him
Follow the main story path until the end of the cutscenes, you cannot deviate or pick anything up in this section.
Taking a Detour
After the cutscene you can continue along the linear path. After reaching the rooftop where it points the reactor out to you again there will be another chest before you go down the other side, containing 3 Potions.
Head down the ladder and progress West down the street, you can’t go East where the soldiers are because the game blocks you currently. Go down the other direction for a cutscene where you will meet a new main character. Respond to her with “How much?” and she will give you a Yellow Flower. After a but more cutscene a group of Security Officers will try to stop you, and you now need to deal with them.

Evade Pursuers
Go down the East path first that you were stopped going down before and defeat the two Security Officers and the Guard Dog. When they are dealt with pick up the nearby purple orb to obtain an HP Up Materia.

Next head down the alley that the girl was shown running down during the cutscene. The end will be blocked, but you can open a nearby chest to obtain a Hi-Potion.

Head to the South now towards the group of enemies. Defeat them then pick up another nearby purple orb to obtain a Deadly Dodge Materia.

Go down the East street now towards the Security Officer and the two Guard Dogs. After defeating them there is a chest at the end that contains a pair of Power Wristguards.

Continue South to the area with the fountain, and you will now have to deal with a few waves of enemies. First it will be two Officers and a Dog, then four Officers, followed by two Shock Troopers, and finally four more Officers.
Flight through the City/Climb to the Roof
After they are all defeated you will need to look for an alternate route. A nearby ladder is marked so that you can get onto the rooftop. Before climbing it open the nearby chest to obtain 2 Grenades.

After climbing the ladder some enemies will appear behind and start shooting at you. Ignore them and keep progressing along the rooftop.
Break the Blockade
After climbing back down one ladder there will be a nearby chest that contains an Iron Bangle. This is stronger than your Bronze Bangle and has a Materia slot in it, so you should swap to it and slot in one of the Materia you picked up earlier.
 |
 |
Continue down the next two ladders to return to ground level, then proceed along the path. In the next area there will be three more enemies, with a new human enemy named a Riot Trooper that appears. These enemies have a large shield that they carry around, so you need to try and attack them from behind. If you hit the front of the shield while they are guarding it will stagger you momentarily and interrupt your combo. They are weak to Fire though, so if you have an ATB charge you can hit them with Fire to deal huge damage or even instantly take them out.

Continue forward and you’ll reach a long stretch of road with three more riot troopers and a handful of Officers that block your path. Once they’re dealt with go East and you can head up some stairs to the upper side area. Behind a number of tables and chairs, you can find another chest containing an Ether.

Follow the road further and you’ll fight another Riot Soldier and two more Guard Dogs. Just past them you can go into a short blocked off section of road with another chest, which contains a Hi-Potion.

Continue forward and you’ll be blocked by a number of vehicles carrying a large number more troops. With the group that spawns behind you there will be a named Riot Trooper called The Huntsman. He has much more health than the normal Riot Troopers, but can be dealt with in a similar manner. Don’t attack him when his shield is up, then hit him from behind. If you hit him with Fire it will drop him into Pressure state, allowing you to put in a large amount of damage and getting him into Stagger. Once he is dealt with you will have a cutscene and exit the area.
 |
 |
Last Train
Now on the train with the group, proceed up towards the front. After squeezing past some wooden crates you can turn around to find a chest with 100 Gil in it. In the first car with all the passengers you can stop and talk to each of the group members, then proceed into the next car for a cutscene with Barret. Speak to him if you want, then go to the front and speak to Jessie to finish the chapter.
This finishes Chapter 2: Fateful Encounters in Final Fantasy VII Remake. Now the mission Home Sweet Slum starts.
Next Up: Chapter 3: Home Sweet Slum
For all other Mission Walkthroughs, check out our complete Final Fantasy 7 (VII) Walkthrough.
Andy Garcia says
There is a chest right after you squeeze between boxes when you first get on the train it has 100 gil.
jeff says
anyone having problem at the check the route mission whereby barret is not there for you to talk to ?
nairilee says
You get the flower from Aerith regardless of which option you choose. Choosing the “not interested” option leads to some very funny dialogue from Aerith.
Dale says
Um, the treasure I got below the ARCADE sign in the beginning of the chapter was 50gil, not potions. Idk if difficulty changes the item. Im playing on normal.
darcy says
i found a hp green ball how do i install this