
Chapter 4: Mad Dash is the 4th story mission in Final Fantasy 7 (VII) Remake. This walkthrough will guide you through all objectives of the Mad Dash Main Mission.
Mad Dash starts when you complete Home Sweet Slum.
Area: Corkscrew Tunnel/Sector 7 Employee Housing Area
Requirement: Complete Chapter 3: Home Sweet Slum
Objectives:
- Motor Chase
- To Sector 7
- Homecoming
- The Jessie Job
- Sector 7-6 Annex Infiltration
- A Little Diversion
- Rendezvous at the Empty Lot
- Return to the Slums
- To Wedge’s Place
- Remaining Payment
- Slum Wisdom
- Sudden Attack
- A New Operation
Motor Chase
Right from the start of this chapter you are on a bike, traveling along the train tunnel with Jessie, Biggs, and Wedge. This is the section of the game where you can earn the trophy Biker Boy, which requires you to complete this bike section with above a certain amount of health left. There are basically two sections to this area, the first where you only have normal enemies on bikes and after a while a few drones, then the second section where you have a sort of miniboss where you are fighting another SOLDIER on a bike. For the first section it’s relatively easy to avoid damage. Watch the direction the enemies point their guns in, as that is where they will shoot after a short period. If they’re aiming to the side they’re normally trying to shoot at the other bike, so you can get on their other side and hit them. If they aim behind they’re typically aiming at you, so just move out from directly behind them. After a while they enemies will start to drop grenades, which they hold out just to their side for a significant period of time before throwing ahead or dropping just behind them to try and hit you. The drones that show up will either cause a large electrical area attack around them on track level, or track you from above for a short period before firing a shot at you.
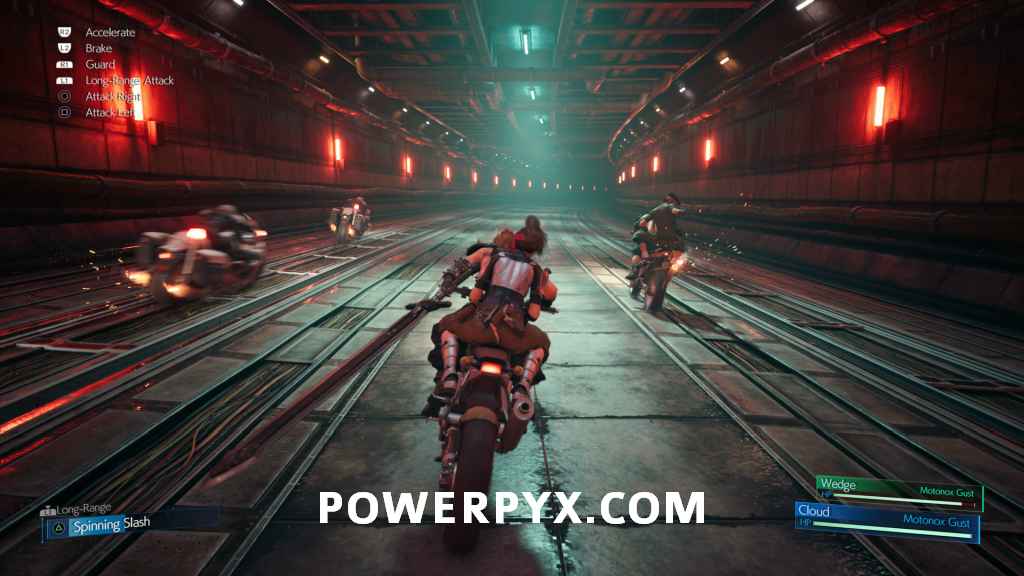
After you exit the tunnel you’ll then have to deal with the SOLDIER, named Roche. He is the only enemy during this section, but has much more health and a series of attacks that you have to continually dodge to avoid damage, such as waves generated by his swords, or large lightning bolts that strike the ground directly in front of you. When you can get beside him he will also swing his sword at you, even while you are attacking him. Make sure you use your ranged special with  +
+  to deal large chunks of damage if he is farther away from you.

Continue whacking at him and avoiding his attacks until he runs out of health, then this section will end. If you completed it without losing too much health (somewhere above half) Jessie will congratulate you on your skills in the following cutscene, earning you Biker Boy. If you didn’t get it you can either reload the save from right at the end of Chapter 3, or return to do this using Chapter Select once you complete the story.

To Sector 7
After you get getting off the bike follow the group up the stairs, then pull the switch at the top.
Homecoming
Follow the group over to the objective, then wait beside the house when Jessie tells you to.
The Jessie Job
After a short scene, go around the back of the house to the rear door, then into the room on the right. Search the yellow suit in the corner of the room, then head back out the rear door. To the front of the house.

Sector 7-6 Annex Infiltration
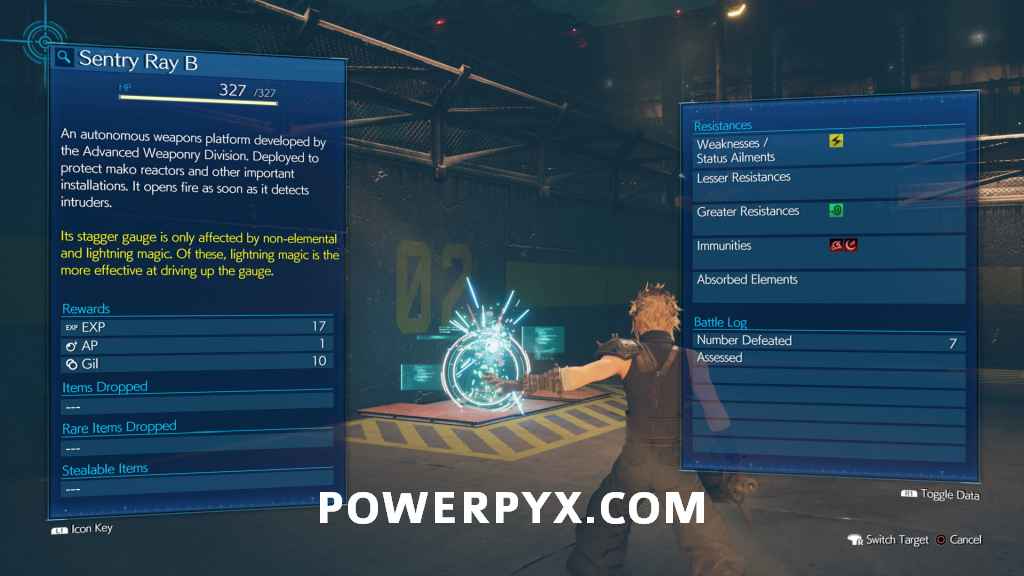
Jessie explains to the group what she needs them to do, then heads off. Follow Biggs and Wedge along until they stop at a wall. They’ll point out a vending machine nearby that you can stock up. Back past this vending machine in a corner by a table you can find a chest containing 2 Hi-Potions. If you go down the nearby stairs you can also enter a training area where you can defeat some sentry turrets for normal battle rewards and a training bonus. When ready to continue, speak to Biggs again.
 |
 |
A Little Diversion
Jessie sends up the flare, then you can head forward through the gate. Inside this area you will have to fight a large number of Security Officers to start off. After clearing the first wave, some more will appear along with a handful of Grenadiers.
 |
 |
After clearing out those waves you will then need to deal with a single Riot Trooper and Elite Security Officer. There will also be two missile launcher above that were pointed out in the cutscene that shoot missiles down towards you every so often.
 |
 |
After clearing those two Biggs will push down one of the launchers, then a single Shock Trooper and Elite Grenadier will appear. After they are defeated Biggs pushes down the other launcher.
 |
 |
A large number of guard dogs will now appear. Wedge comes over and distracts a number of them, so you don’t actually need to fight every single one at once. Use magic if you can to inflict a large amount of stagger on them, watch for their Throat Bite attack as this will knock you to the ground and hold you there if it connects.

Finally, you have two Sweepers that will appear out of garages. The game will now let you know about your summon gauge and how it works, then you are able to summon Ifrit when the bar fills fully. You can then use it’s abilities in place of your ATB charges to perform useful moves, as well as it performing an Ultimate Attack when its summon bar runs out.
Boss Fight: Roche
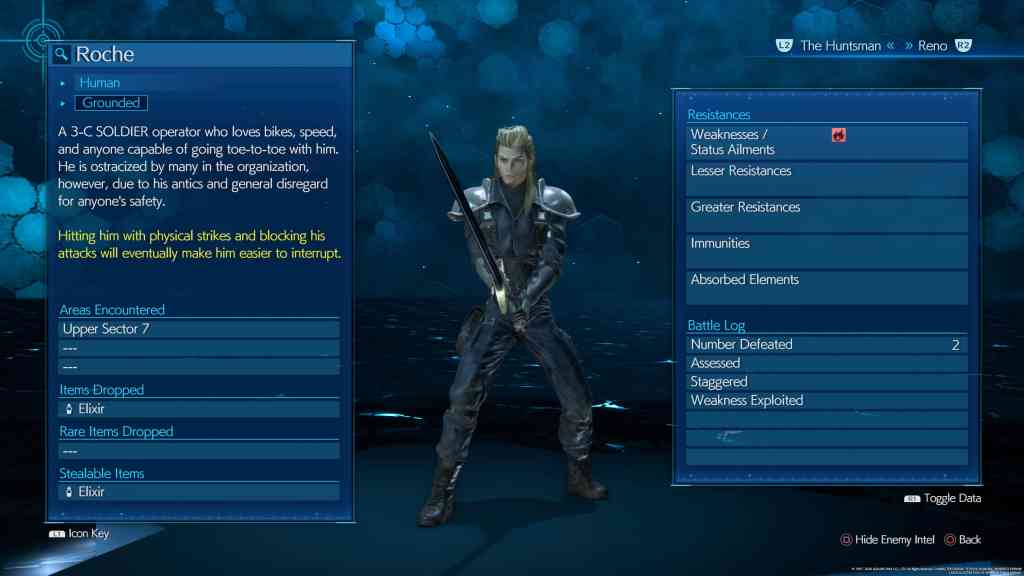
Roche starts off by using an Elixir on you to restore your HP and MP to the maximum. It’s nice someone in this game wants a fair fight! This fight is more of a duel than other boss battles, and there will be more of these to come down the line. This means fewer, if any, wide AoE attacks and targeting distant targets and more learning attacks and how to dodge them.
As such, you’re far better off using Punisher Mode for this fight and all future duels. The smaller arena means your reduced speed won’t matter as much and most importantly, holding  to Guard will automatically counterattack any physical damage you receive from his Plunge and Combustion Sword attacks. Even better, he will Stagger quicker from physical attacks (which are stronger in Punisher Mode) and from Guarding. Use your ATB charges to hit him with Focused Thrust when he’s ‘Pressured’ or your strongest Fire magic (his weakness) to build his Stagger bar. Once he’s Staggered, hit him with your strongest physical attacks, Triple Slash and hopefully your Limit Break if it builds up.
This is another easy one; just remember to not get too greedy with physical attacks as he’ll retaliate quickly, and remember to heal and keep your Guard up at all times. Dodge his magic attacks with  . The more health he loses, the more aggressive he gets, but you can still block all of his attacks.
Hard Difficulty Tips: This is the first battle where the brilliance of Counterstance comes into play, a weapon ability picked up from the Twin Stinger weapon. You’ll see in this fight how overpowered it is when used correctly. Firstly, make sure you have Elemental-Fire Materia on your weapon to give you an extra edge against him, and it’s also worth having a Time Materia so you can cast Haste on yourself for quicker ATB.
Then when you see ‘Plunge’ appear above his head or he’s going to strike you with a physical attack, quickly select Counterstance (it’s worth having it on a shortcut) and you’ll not only block the attack but deal a huge counter that takes off a large chunk of life and boost the Stagger bar.
Since Roche replenished your MP, you also have some leeway to hit him with a couple of Firagas (especially when he’s Staggered) which again does huge damage. With these tactics, you should destroy Roche with ease.
Rendezvous at the Empty Lot
After defeating Roche you’ll be back outside the compound with Biggs. Follow him out to the empty lot from before to meet up with Jessie.
Return to the Slums
Follow Jessie now out of the area. After going through a door and down some stairs you can pick up a Revival Materia on the left side.

To Wedge’s Place
After landing follow Wedge, you’ll stop by to check if Biggs and Jessie are back before reaching his place.
Remaining Payment
You can now head back over to Jessie’s place, where she’ll give you a Barrier Materia for your remaining payment. Respond to her how you want during the conversation.
Slum Wisdom
Finally you can head back to Cloud’s apartment. Select “Sleep until tomorrow” if you don’t want to do anything around town.
Sudden Attack
After some cutscene Cloud will wake up, and the area will be swarming with strange ghost looking enemies. These are called Mysterious Spectres, and while not very strong they take reduced damage from physical attacks, so they are better to use magic on to quickly increase stagger.

After defeating this first group head towards Seventh Heaven to meet up with the others. When you reach there group there will be a new named enemy called an Enigmatic Spectre that is much stronger than the rest. If resists damage even more, so to damage it you first need to attack the other Spectres. After a while the Enigmatic will become Pressured, at which point you should focus it instead to try and get it to stagger. After it’s defeated the fight will end.
A New Operation
Jessie is injured during the Spectre attack, so Cloud is commissioned to join in. Barret gives you some extra money to get supplies, then when you’re ready head down to the station. On the way out you can stop by the vendor just before the station proper to buy the track 4. Barret’s Theme (if you haven’t already bought it in Chapter 3).

Go up to the station platform and speak to Barret, agreeing to leave when you’re ready.
This finishes Chapter 4: Mad Dash in Final Fantasy VII Remake. Now the mission Dogged Pursuit starts.
Next Up: Chapter 5: Dogged Pursuit
For all other Mission Walkthroughs, check out our complete Final Fantasy 7 (VII) Walkthrough.
Leo H says
There is a mistake here: the trophy Biker Boy is bound to the amount of hits you take that slow you down. You can max. take two hits. With the third Jessie says something like “Hit the breaks if you cannot avoid attacks”, which disables the trophy. Those hits are dealt by the orange bombs thrown by the soldiers, the electric attacks of the drones and of course all lightning attacks from Rocce. Restarting from the last checkpoint does not work, you have to do the sequence in one piece.
PowerPyx says
This is interesting, will look into that.
I figured it’d just be health-based, but what you write also makes sense.
Leo H says
Don’t get me wrong, might be a combination. But I figured through my attempts that all dialogue is scripted through the whole sequence (Yes, I had to play it quite often :D ). Only thing that differs was the timing of that sentence, which comes, when you take your third slow-down-hit. In the last attempt where I only got one hit, Jessie didn’t say that particular phrase and in the end the trophy was unlocked. I did a run with >90% health before and I didn’t got anything, probably because I was hit more often. BTW love your work! For platinum your site and vids are the way to go!
WillieWangWang says
I got the “hit the brakes” comment from Jessie, and the trophy still popped for me.
MZCutter says
I guess it is only health based (or mostly) – I finished the whole sequence on normal, had ~75% health, got the Jessie brake comment. I finished the before Roche part flawless, except for the last bike I destroyed – it glitched out somehow before me, that it followed even though I was dodging the same like all others. Was so pissed. Then Roche hit me once with a small lightning slice, two thunders (comment from Jessie), one thunder smash and then another thunder. But he didn’t hit me with a sword or the big thunder slice… I finished and was like… Shit, probably lost it at about 2-3%… Then got the trophy and the kiss, woohoo!
Hope this comment gives you all hope ;)!
larry says
doing it in hard (the bike thing) it reward you whit something ???
PowerPyx says
Nope, no reward.
larry says
thx u saved me some hour LOL
Jon says
On Hard Roche doesn’t restore your HP/MP
BodyChipper says
HP at least gets refilled when you sleep in the next scene, but odd that it doesn’t restore MP also since it is “resting”
M says
i did the biker boy trophy three times in a row all three times she said i passed the test but the trophy wont pop for me for some reason