
Resident Evil 4 Remake has 39 Treasure Locations in the Village. Finding all Village Treasures indicated on the treasure map unlocks the Bandit trophy & achievement. The Village section is only playable in Chapters 1-6.
For other regions refer to:
All Treasures are missable and must be found within a single playthrough for the trophy and achievement. Your Treasure Progress does not carry over into the next playthrough. There is no free-roam and no chapter select after the story. As you advance the story all areas gradually become inaccessible and cannot be revisted. So make sure you collect everything at the first opportunity.
It’s recommended to keep a Manual Save at the start of each chapter. If you miss something you can reload that save and recollect everything from there instead of having to start a New Game from scratch. If you die or reload saves you must recollect everything since the last checkpoint. Some collectibles can’t be reached on the first visit because you will be missing the necessary key items. You will revisit those locations later. Key Items needed for Treasures are also included here (such as Small Keys to open locked drawers).
Owners of the Deluxe Edition with the “Treasure Map: Expansion” DLC will have some extra Treasures spawning in the game, but those DLC treasures are not needed for trophies & achievements. This guide is based on the Standard version of the game without the DLC.
Chapter 1
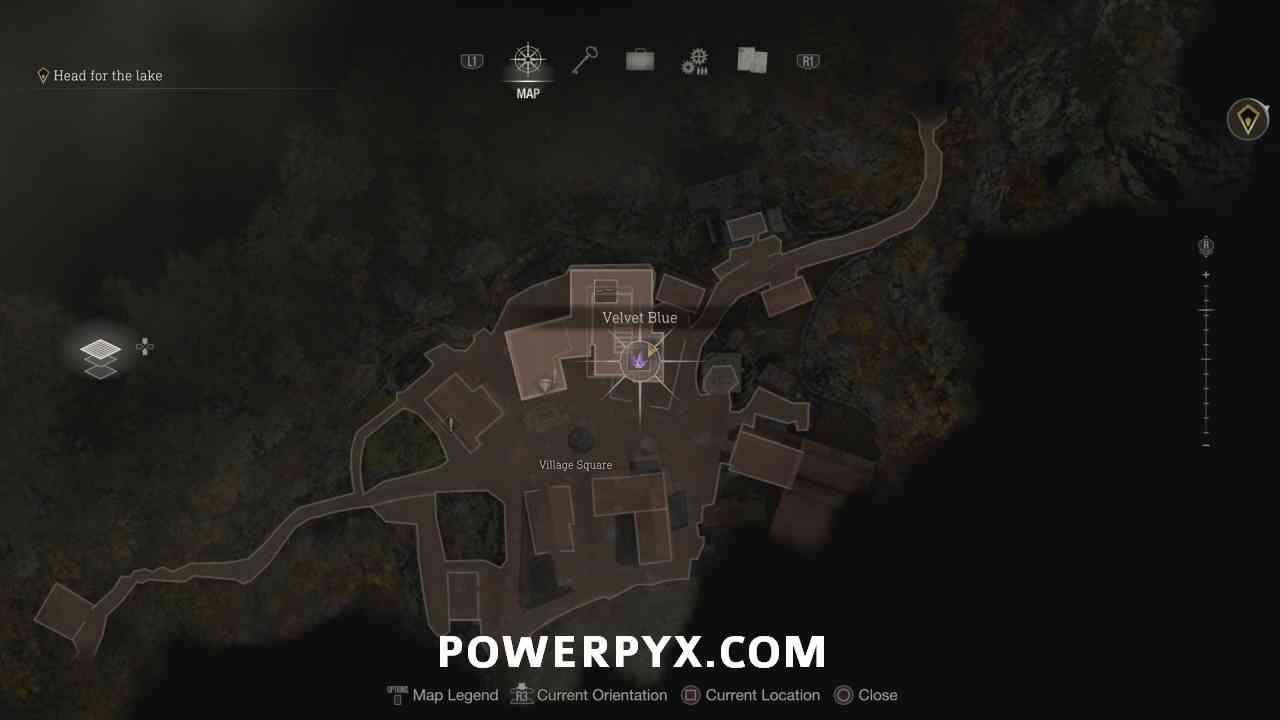
Treasure #1: Velvet Blue
In the Village Square, go upstairs in one of the houses on the left, there you find a shotgun on the wall. To the right of the shotgun is a breakable window, jump through it to enter the roof, the treasure is located on the roof.

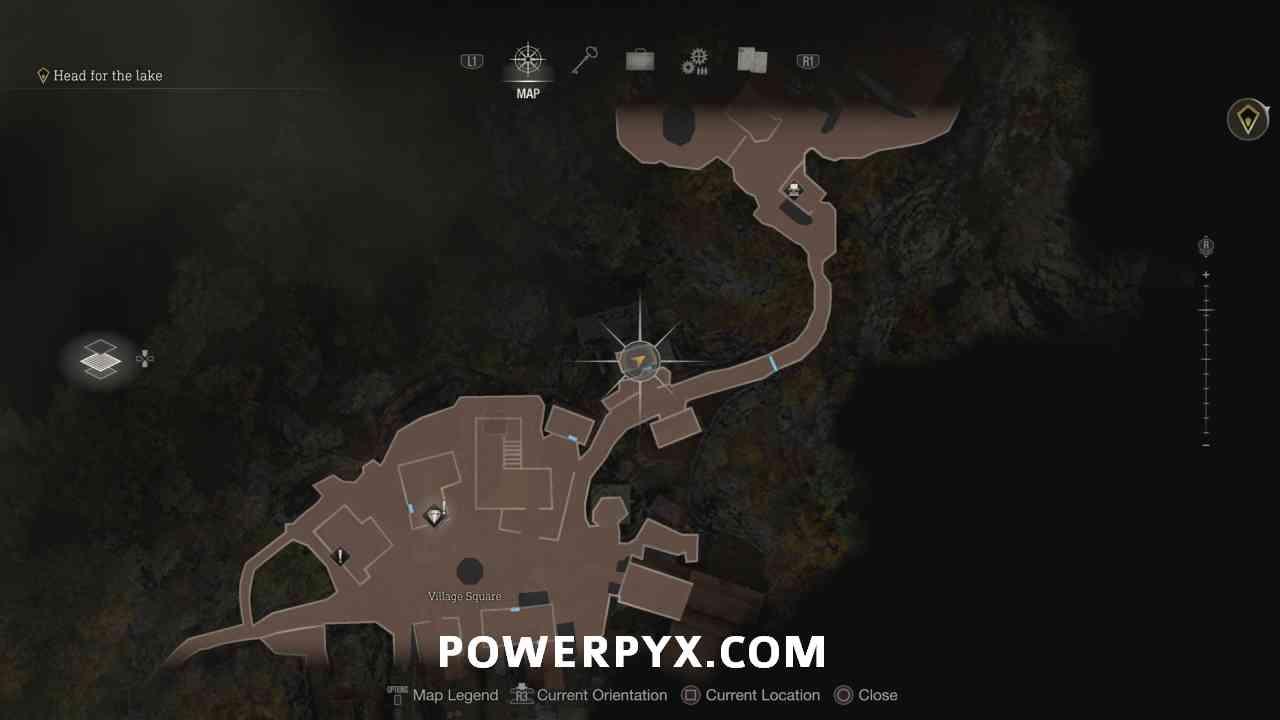
Treasure #2: Ruby
In the village after you first encounter a chainsaw-wielding enemy, in the last shed on the left of the village, before the gate where the chainsaw enemy spawned from.

Treasure #3: Pearl Pendant
On the left side of the Farm, shoot the silver container hanging off the windmill. Try to shoot it when it is not above the well to avoid the treasure getting dirty, this allows you to sell it for more money later but it counts as a Collectible either way.
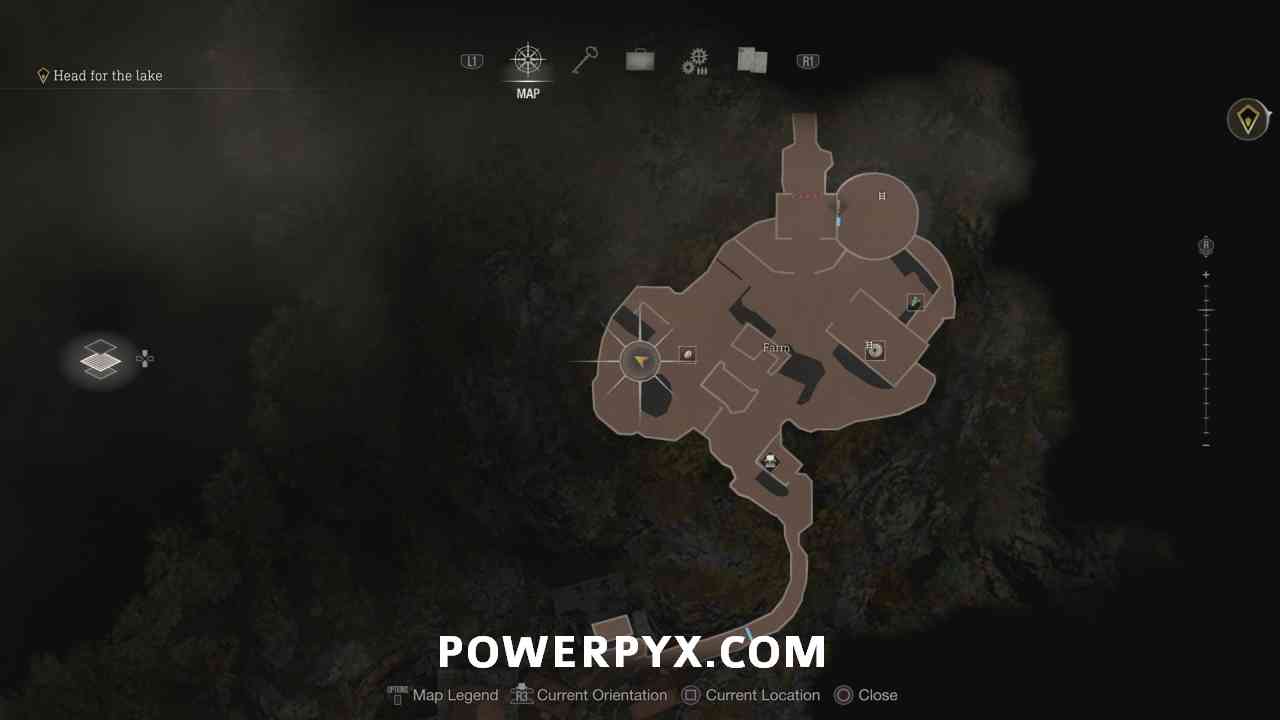

Treasure #4: Flagon
Climb up in the windmill, then jump down the balcony on the side of the windmill to get behind the wooden fence below. There’s a treasure chest at the end of the fence.


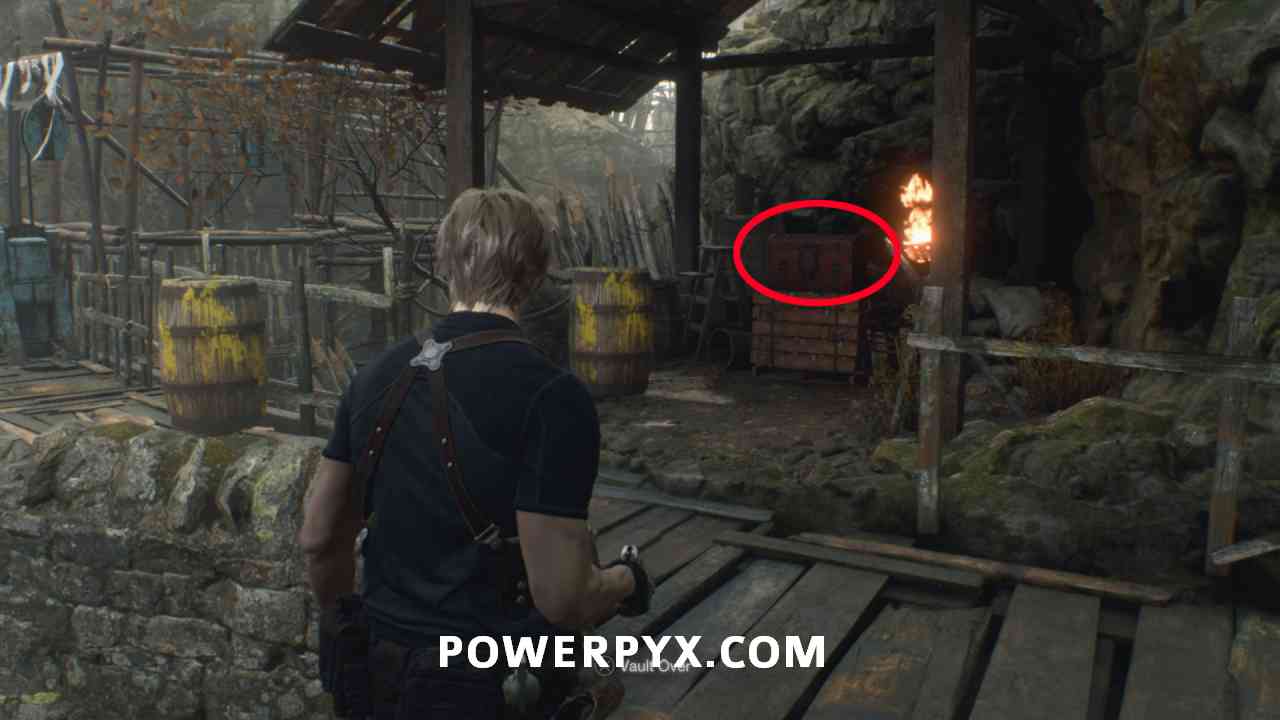
Treasure #5: Ruby
After picking up the Flagon, shoot the lock on the door to enter the big barn. Find this Ruby in the corner. Also pick up the Kitchen Knife & Wooden Cog in the same room.


Chapter 2
Treasure #6: Sapphire
In the Abandoned Factory, after you are given a tutorial how to Parry, it’s in the 2nd oven on the left.


Treasure Map: Village
Bought from Merchant, in the “Trade” section, costs 1 Spinel (reward from Merchant Requests). This will mark all remaining Village Treasures on your map and makes them significantly easier to locate.

Treasure #7: Ruby
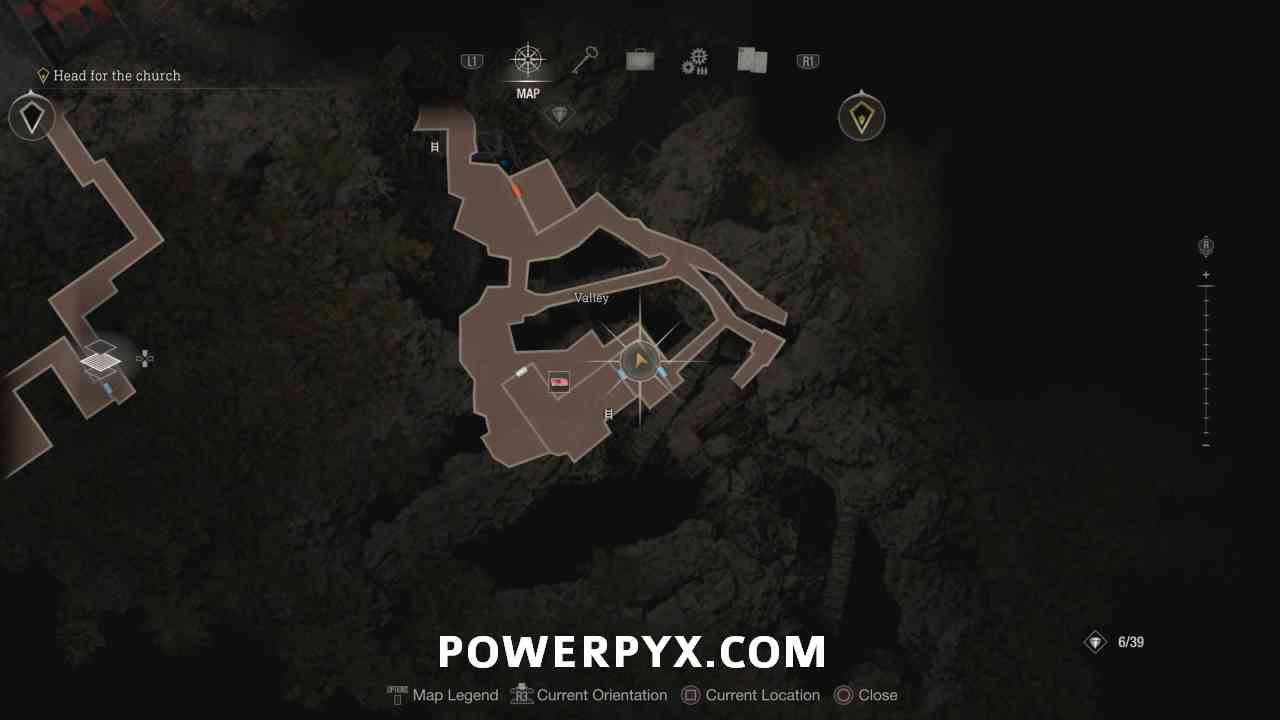
After the first Merchant you will enter an area with lots of enemies called “Valley”. Treasure is in a chest in the northmost part of this area, uphill.

Key Item: Small Key (needed for Treasures)
Still in Valley area. In a house in the south, inside the little box. Needed to open locked drawers for treasures.
Treasure #8: Elegant Mask
Return to the merchant and go back inside the factory where you came from previously. Now use the Small Key on the locked drawer behind the gate, where you recovered your equipment earlier.


Treasure #9: Sapphire
After using the Hexagonal Emblem on the gate, go through that gate and crouch under the boxes on the left, then open the treasure chest at the end of the path.


Treasure #10: Sapphire
From the last treasure go upstairs to a wooded area, it’s hanging from a tree in the middle. Looks like a silver bell, shoot it down and pick up the treasure from the ground afterward.


Treasure #11: Pearl Pendant
Same area as before, there’s a well on the left side. First you should shoot the stick behind the well so that the treasure doesn’t get dirty when it falls down (can sell it for more money). Then shoot the silver bell hanging from the well and the treasure will land safely on the lid.


(Emerald)
(Dropped by the chainsaw-wielding enemy that spawns after the previous 2 treasures, but does not count as a treasure/collectible, not needed for anything)
Treasure #12: Ruby
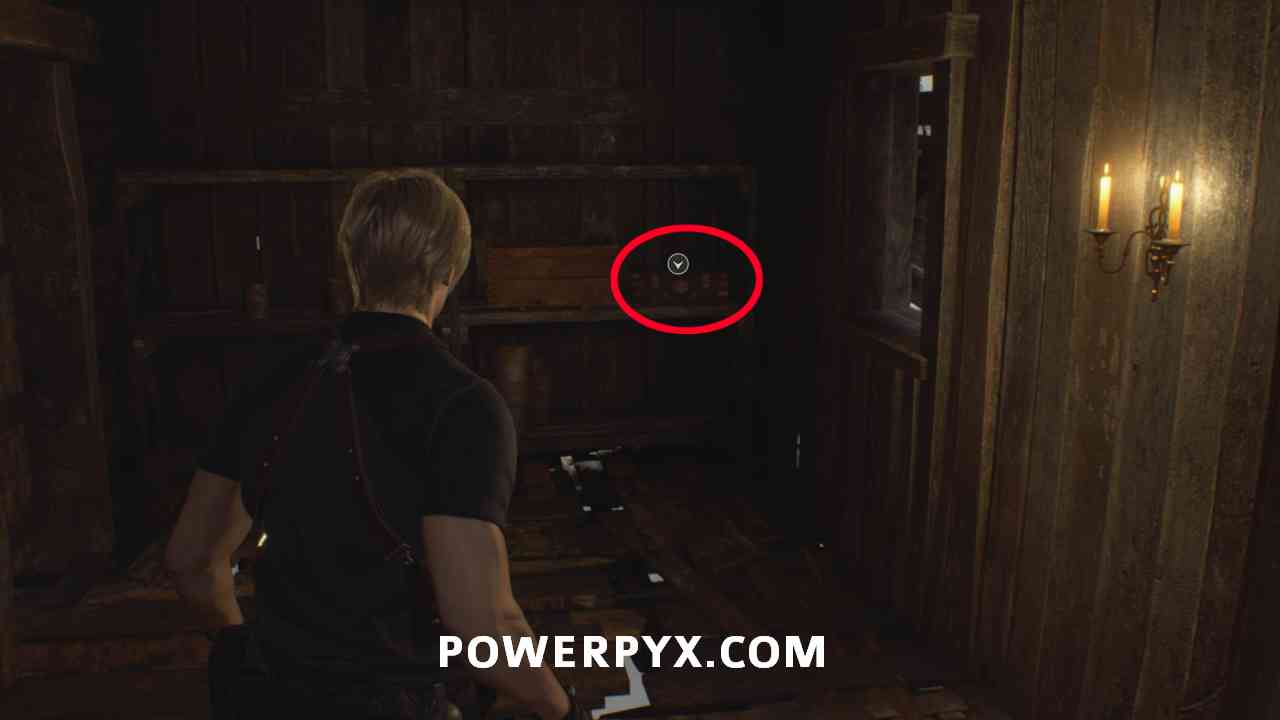
In the next house you enter, in the drawer in the entry hallway, downstairs.


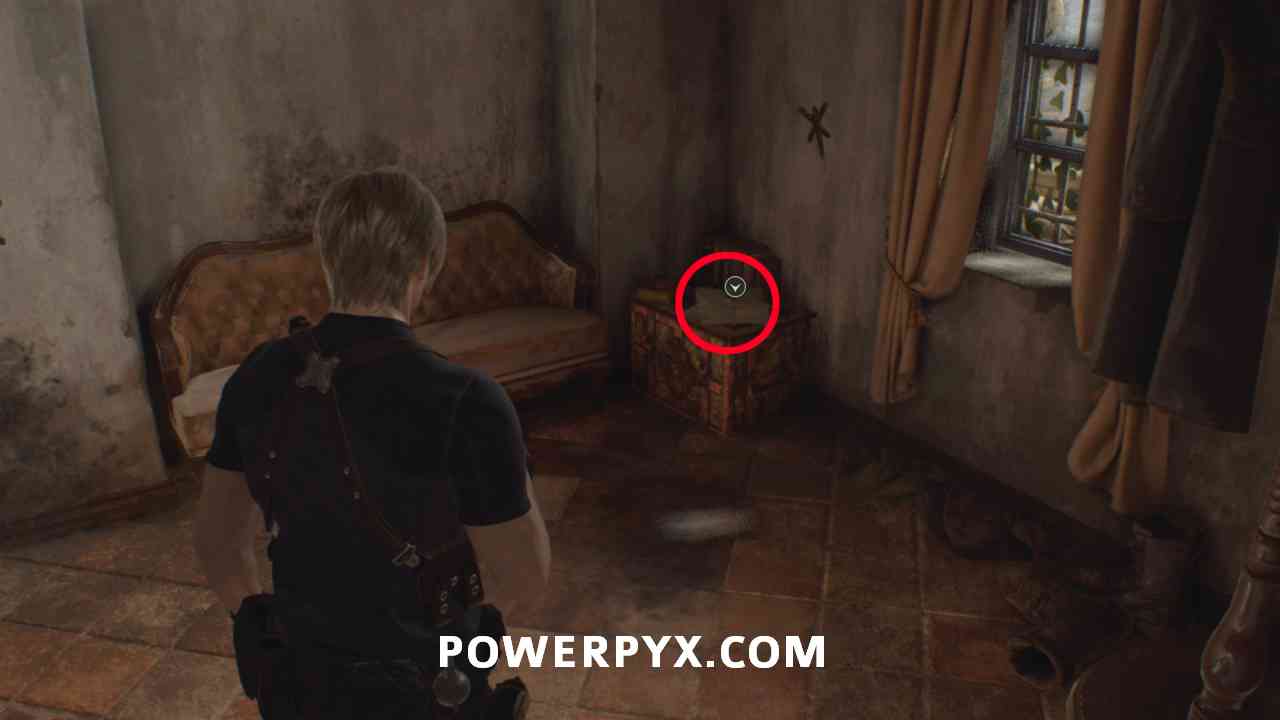
Key Item: Small Key
In the same house, in the corner of the main room downstairs.

Chapter 3
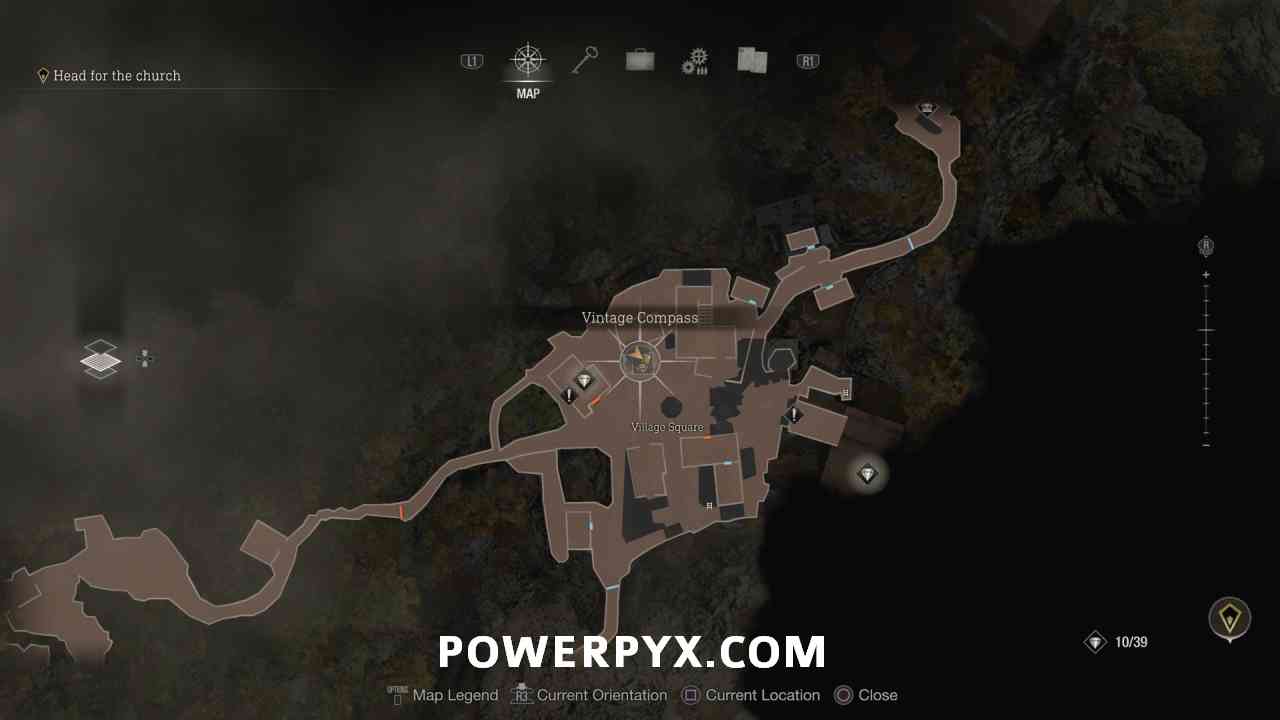
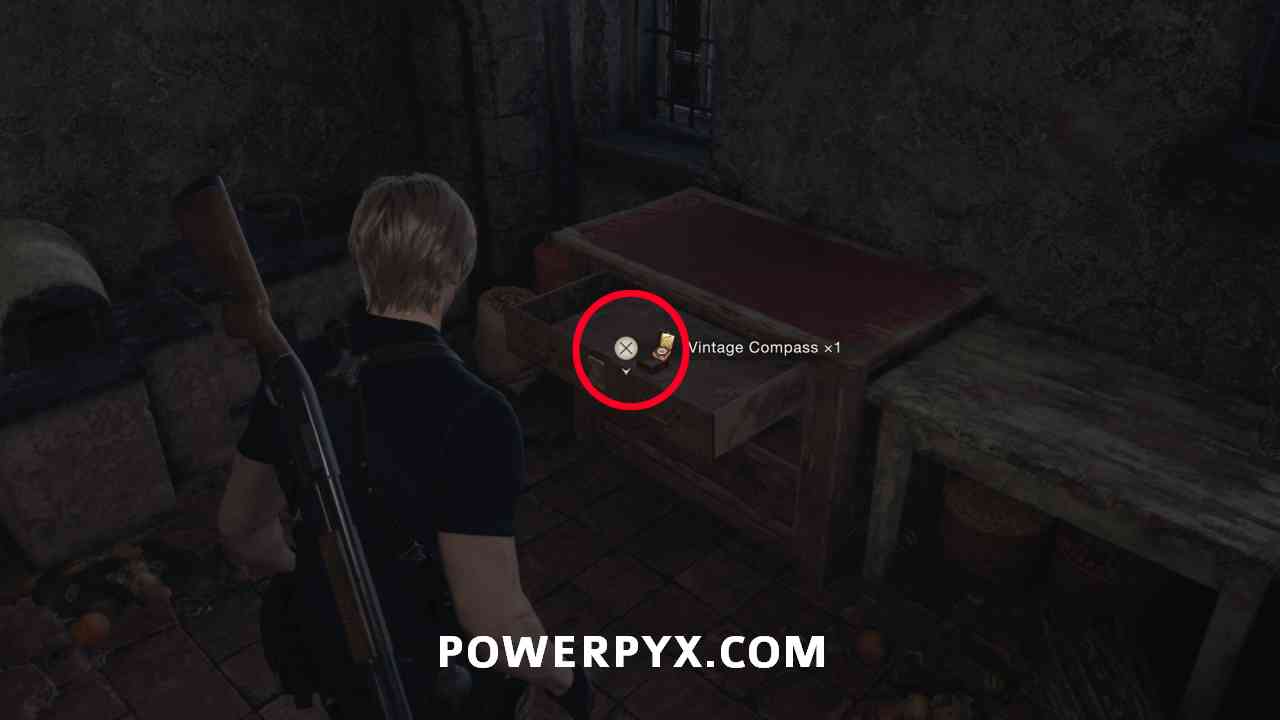
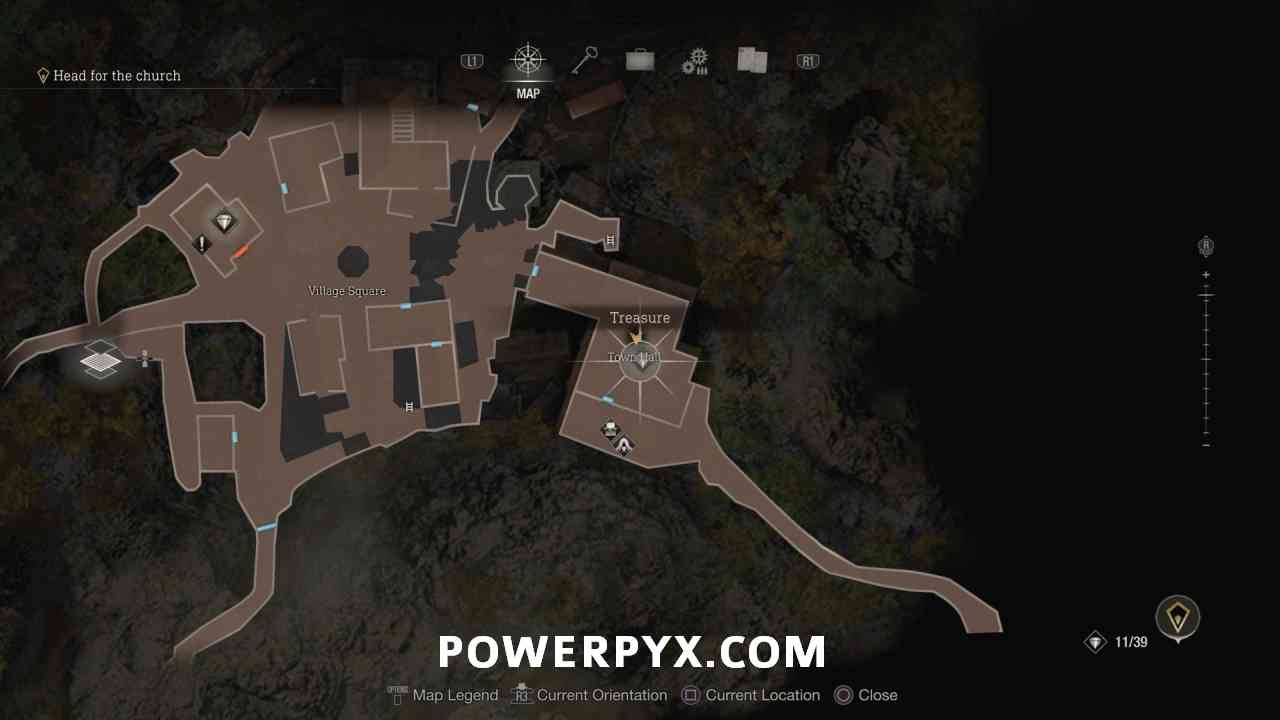
Treasure #13: Vintage Compass
Back at the Main Village Square, inside the drawer of a small house. Requires the Small Key from the house at end of Chapter 2.
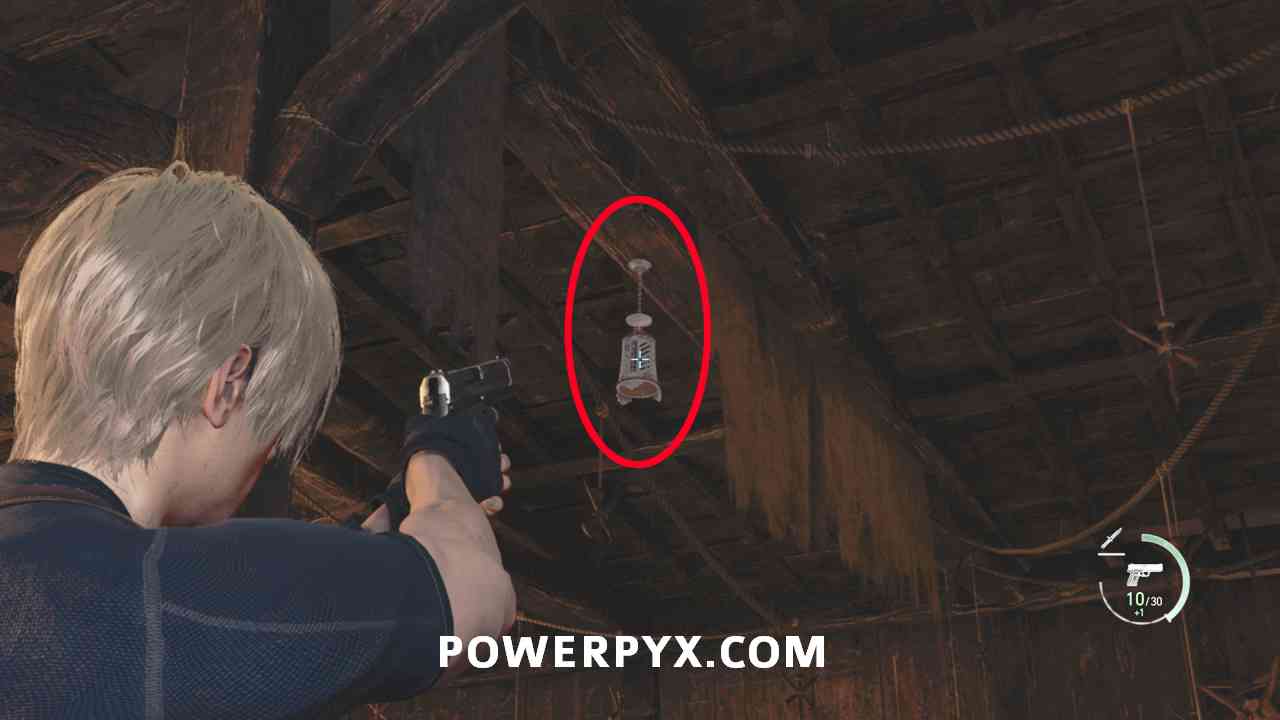
Treasure #14: Velvet Blue
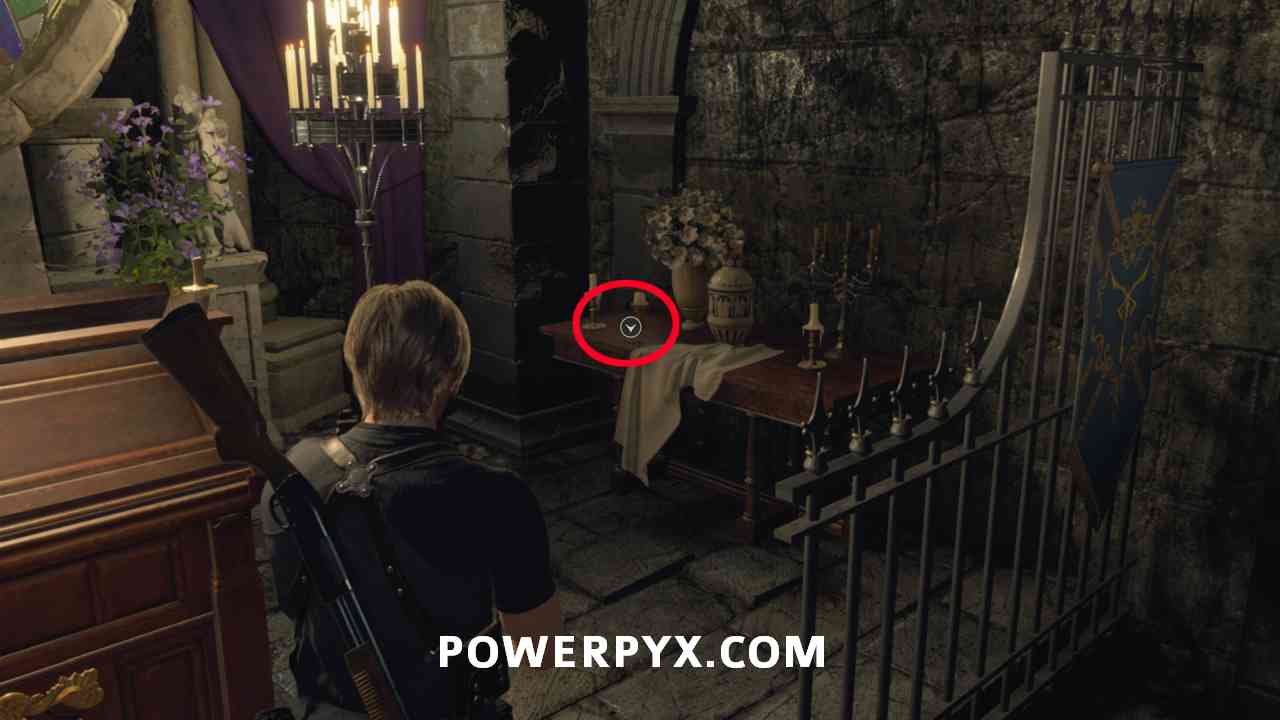
After picking up the treasure, use the Insignia Key on the Town Hall door at the Village Square. Inside the Town Hall you will find a silver container hanging from the ceiling, shoot it down.
Treasure #15: Elegant Headdress
After going through a graveyard you will reach the church. Outside the church follow the path on the right all the way to the end to find a treasure chest and request letter. (outside the typewriter save room).

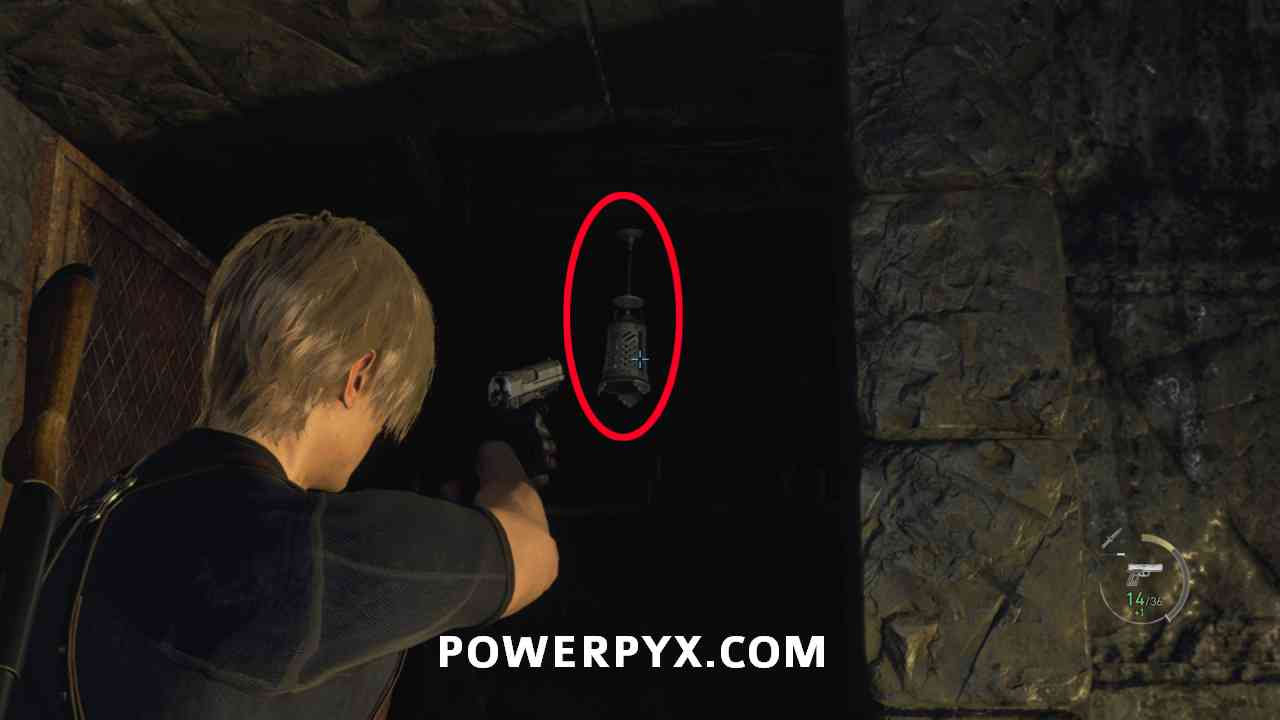
Treasure #16: Ruby
In the Quarry area where you get attacked by some dogs, there is a lamp you can shoot down from the wires above.


Treasure #17: Antique Pipe
In Fish Farm, in the flooded area on the right side, shoot down the silver container.


Key Item: Small Key
In the little shed on the left at the end of the Fish Farm. Next to the building where you pick up the fuel.


Treasure #18: Brass Pocket Watch
Do not escape with the boat yet. Instead, backtrack to the merchant, drop down the ladder next to him, open the locked drawer with the small key for this treasure.


Chapter 4
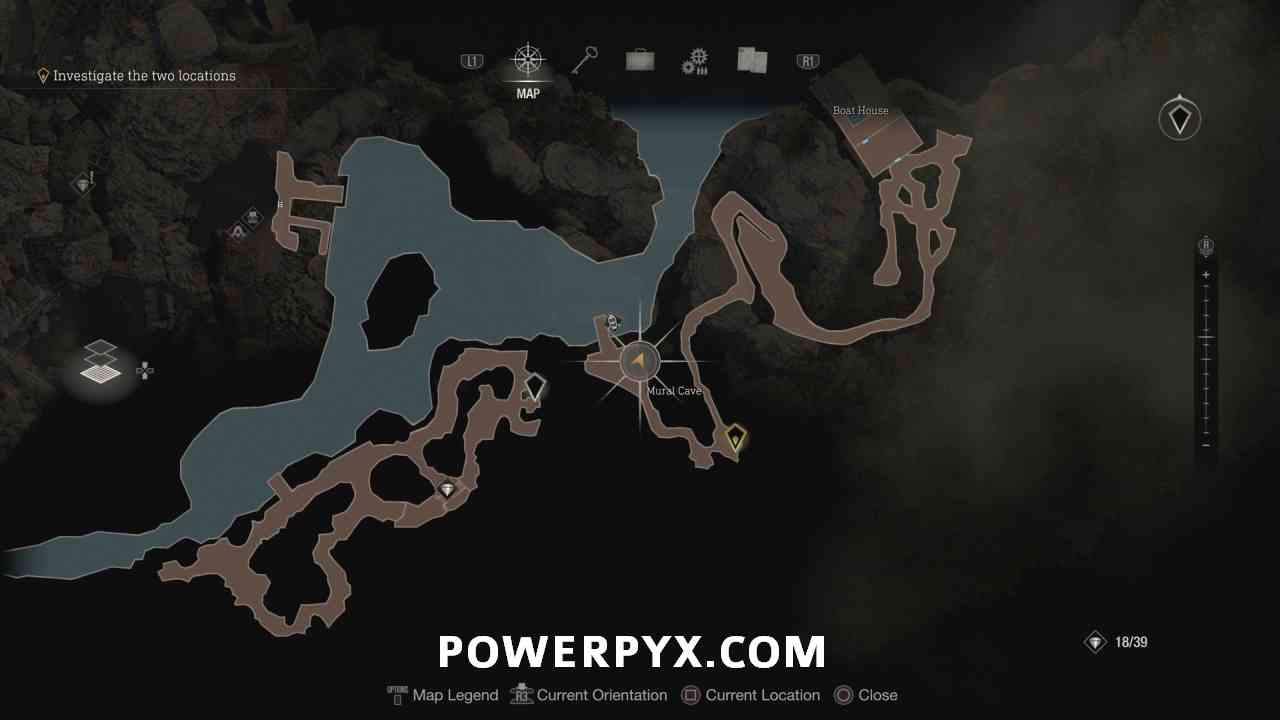
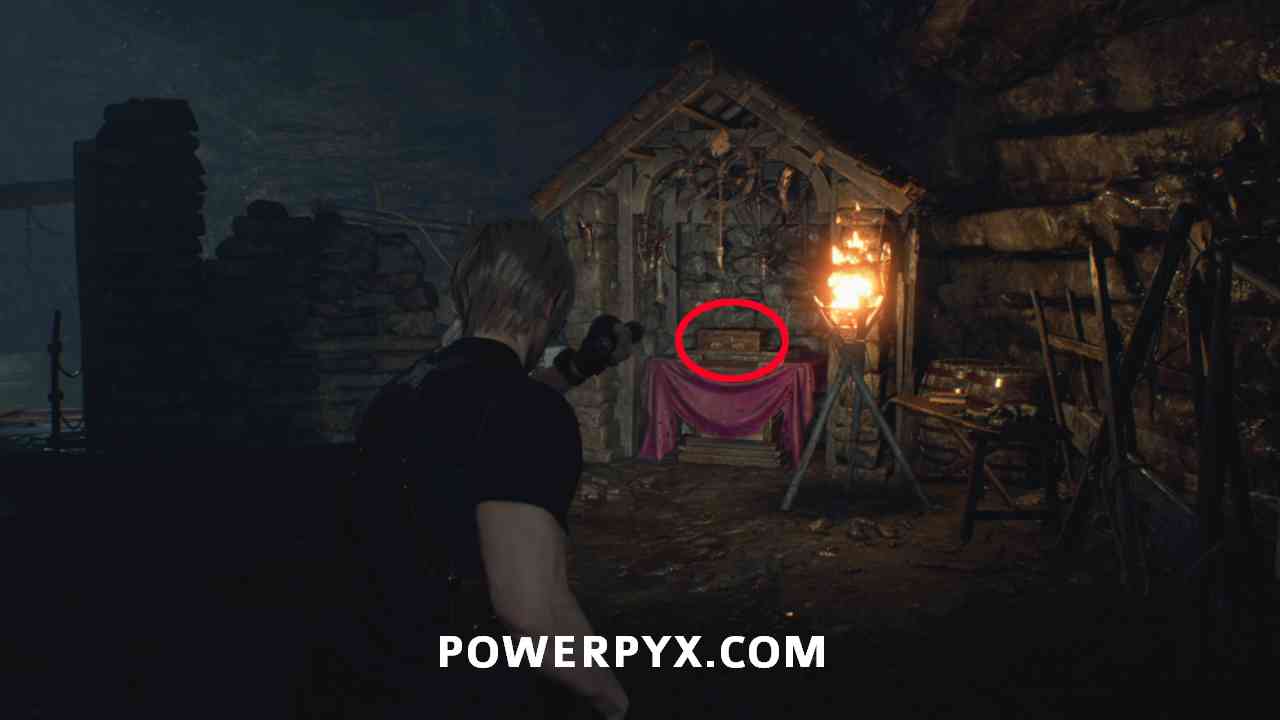
Key Item: Old Wayshrine Key (needed for Treasures)
Inside the Mural Cave when you reach the underground lake, turn right before entering the lake to find this on a small altar. This allows you to open Wayshrines that were previously inaccessible.
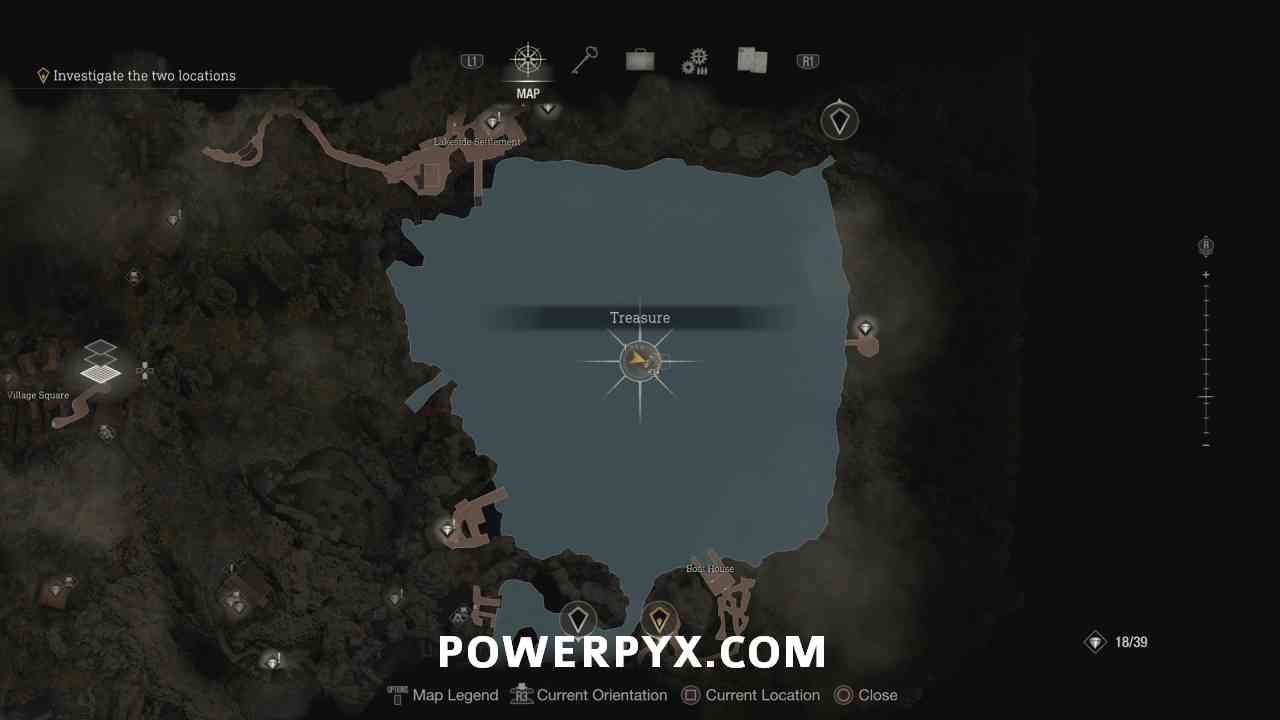
Treasure #19: Alexandrite
Found on the shipwreck in the middle of the lake, in a chest.


Treasure #20 + Weapon: Red9 Pistol
Same place as the previous treasure, on the same boat.

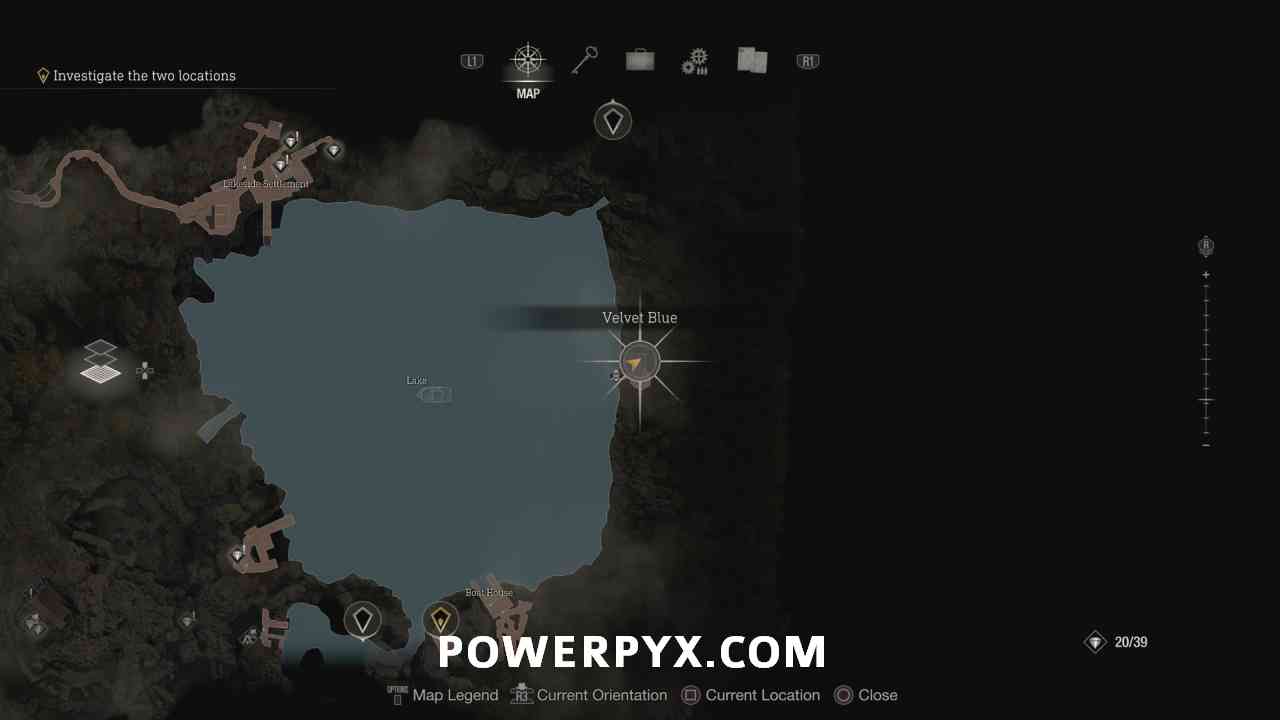
Treasure #21: Velvet Blue
On the little island in the east of the lake, where the chicken farm is, on a barrel.

Treasure #22: Pearl Bangle
Use the Old Wayshrine Key on the altar in Lakeside Settlement (northwest area of lake).


Key Item: Small Key
In Lakeside Settlement, open the gate with Insignia Key, then climb up the ladder to a wooded area. The small key on a cart, needed for the next treasure.


Treasure #23: Gold Bar
Now that you have the small key, enter the house in Lakeside Settlement and open the drawer in the first room on the left.


Treasure #24: Red Gemstone Ring
Same house, go to the end of the house and drop down into the dark basement. Treasure is at the end of the basement where Chapter 1 ended.


Treasure #25: Ruby
Same room as the last key item, upstairs, shoot down the silver container.

Treasure #26: Depraved Idol
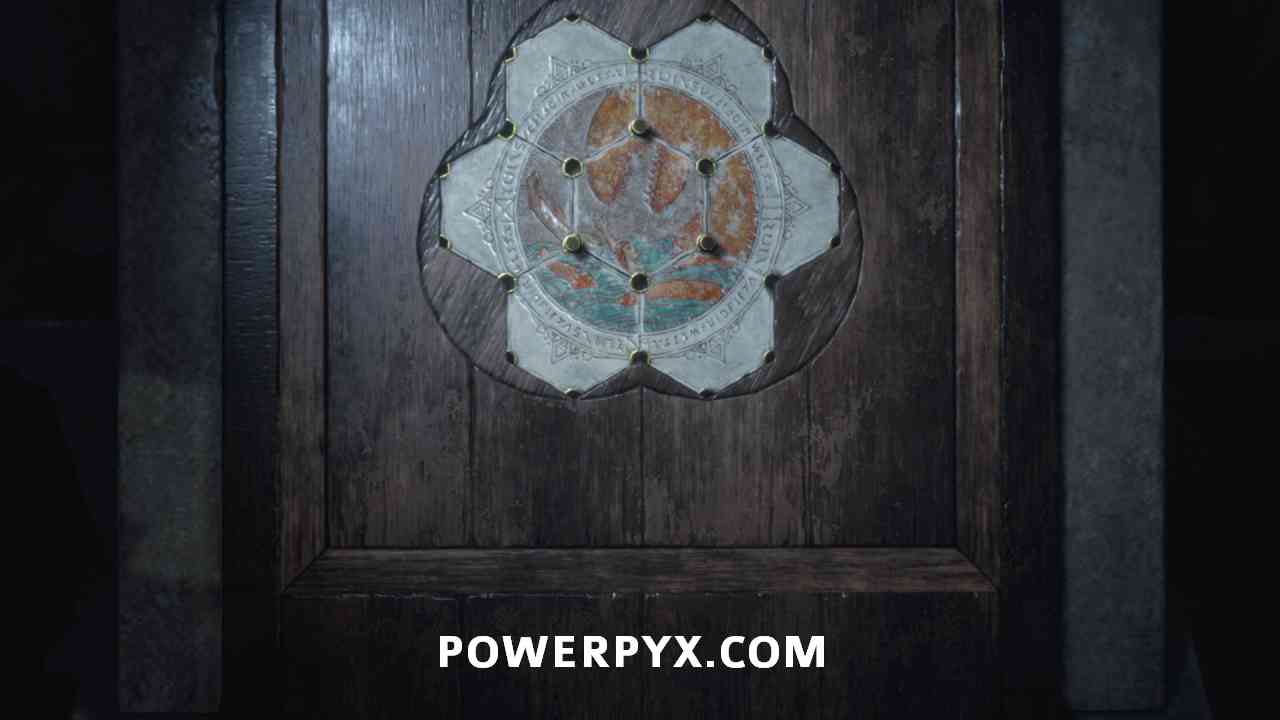
It’s highly recommended to make a manual save before this puzzle! It can be solved in 2 moves if you do it correctly but if you mess up it can get very complicated and take a long time of trial and error to fix it. Park the boat on the west side of the lake where you entered it in Chapter 3 before the boss fight. There you find an altar where you can insert 3 Hexagon Pieces (1 in Fish Farm, 1 next to Merchant in Quarry Cave, 1 in cave in north-east of Lake where you go to pick up a key item). Spin them like in the image shown below to receive the treasure. On Assisted/Standard it takes 2 moves: Spin the left side once, then spin the top side once. On Hardcore/Pro: Spin right side x2, Spin left side x2, Spin top x1. If you made a mistake it’s faster to reload the last save and retry it from the start, otherwise it can get very confusing after making too many wrong spins.

Treasure #27: Splendid Bangle
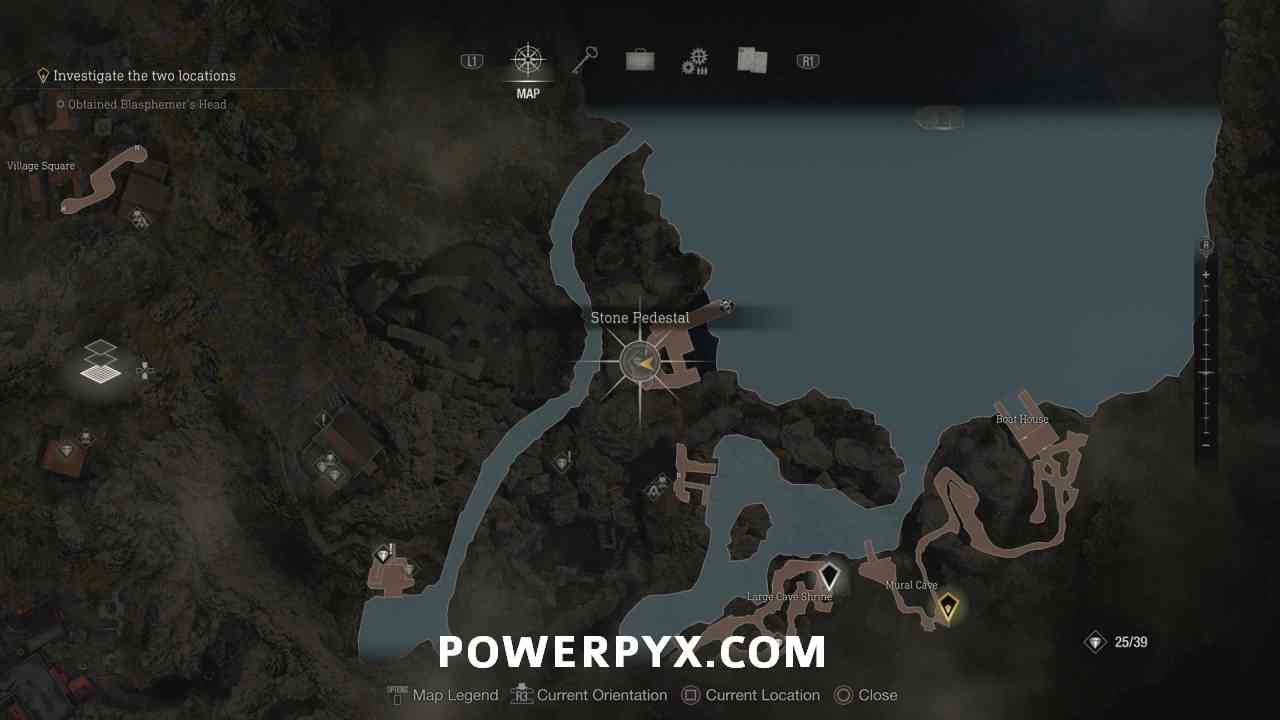
Drive the boat through the tunnel on the west-side of the lake. After the cave you can get off the boat and use the Old Wayshrine Key to open a shrine and get the treasure.


Treasure #28: Alexandrite
Just above the previous treasure shrine to the right hangs a silver bell. Shoot it down to get the treasure (you passed by it earlier after exiting the church so you might already have shot it down then but couldn’t collect it earlier).


Treasure #29: Velvet Blue
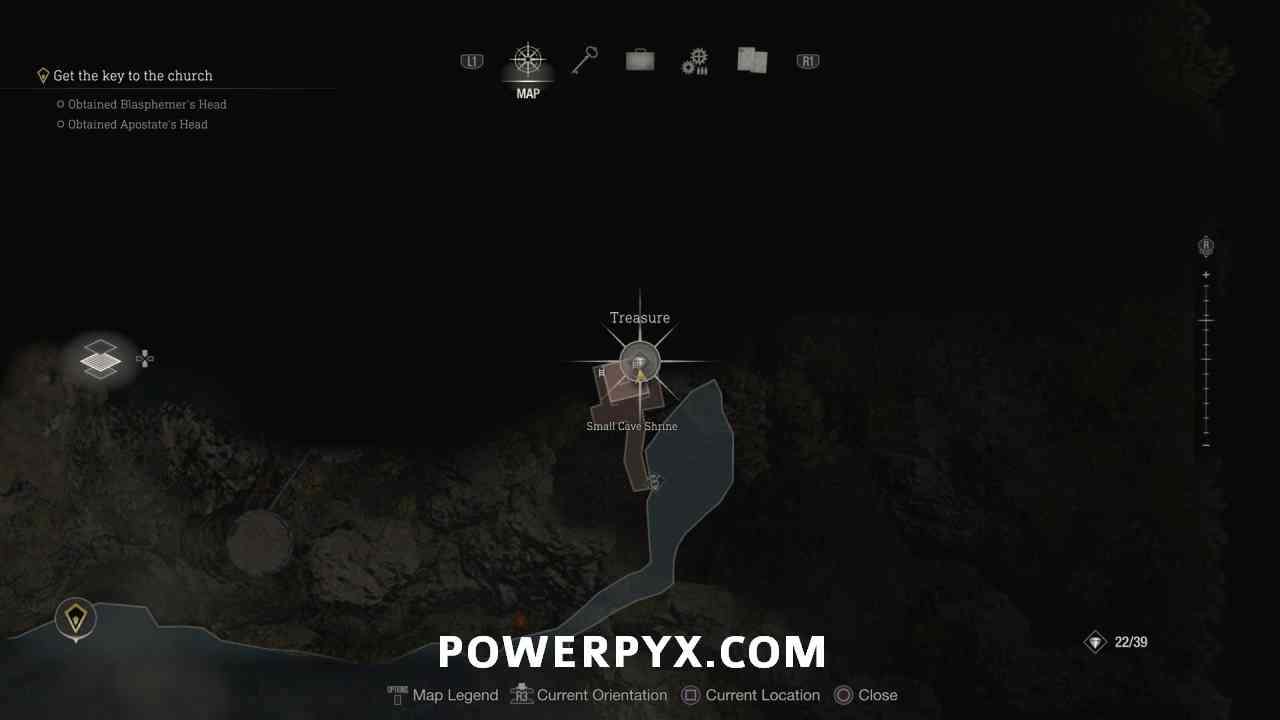
Take the boat to the very south-west of the lake, through the dripstone cave. There you can get off the boat on the path to Large Cave Shrine. Shoot down the hanging silver container from the ceiling to get the treasure.


Treasure #30: Butterfly Lamp
Return to the merchant in the southwest of the lake, go through the doors next to him to backtrack towards the church (path you took in Chapter 3). Use the Wayshrine Key on the Wayshrine.


(Yellow Diamond)
(Dropped by Ogre boss, but doesn’t count as a treasure, not a collectible)
Key Item: Small Key
After using the Insignia on the church gate and entering inside, it’s to the right of the altar. Use this key on the drawer in the save room of the church (see next treasure).
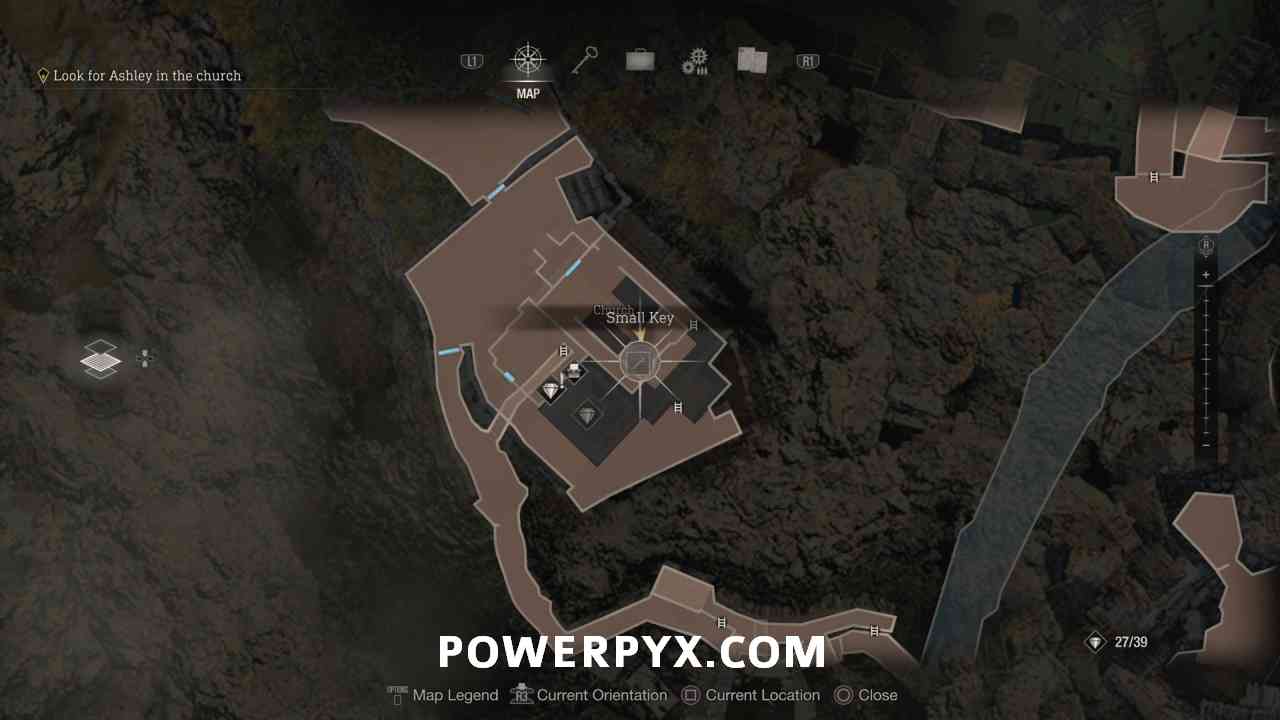
Treasure #31: Yellow Diamond
In the typewriter save room of the church, use the small key to open the drawer.


Chapter 5
Treasure #32: Yellow Diamond
At the very start of Chapter 5, turn around and enter the room where Chapter 4 ended. Shoot down the silver container hanging from the ceiling. This is still inside the church, upstairs.
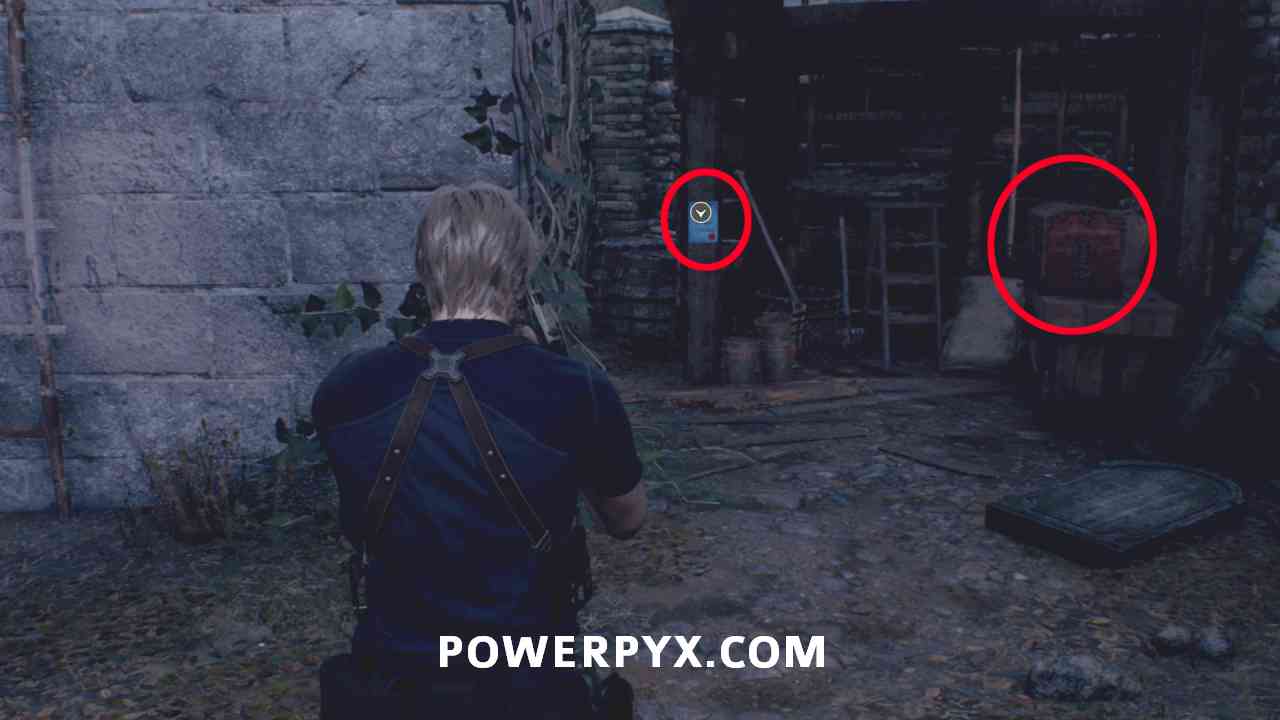
Treasure #33: Elegant Bangle
In Village Square, after defeating the enemies go to the last house and interact with the yellow ledge on the side to boost Ashley up. She will open the door, then you can find a blue chest inside.


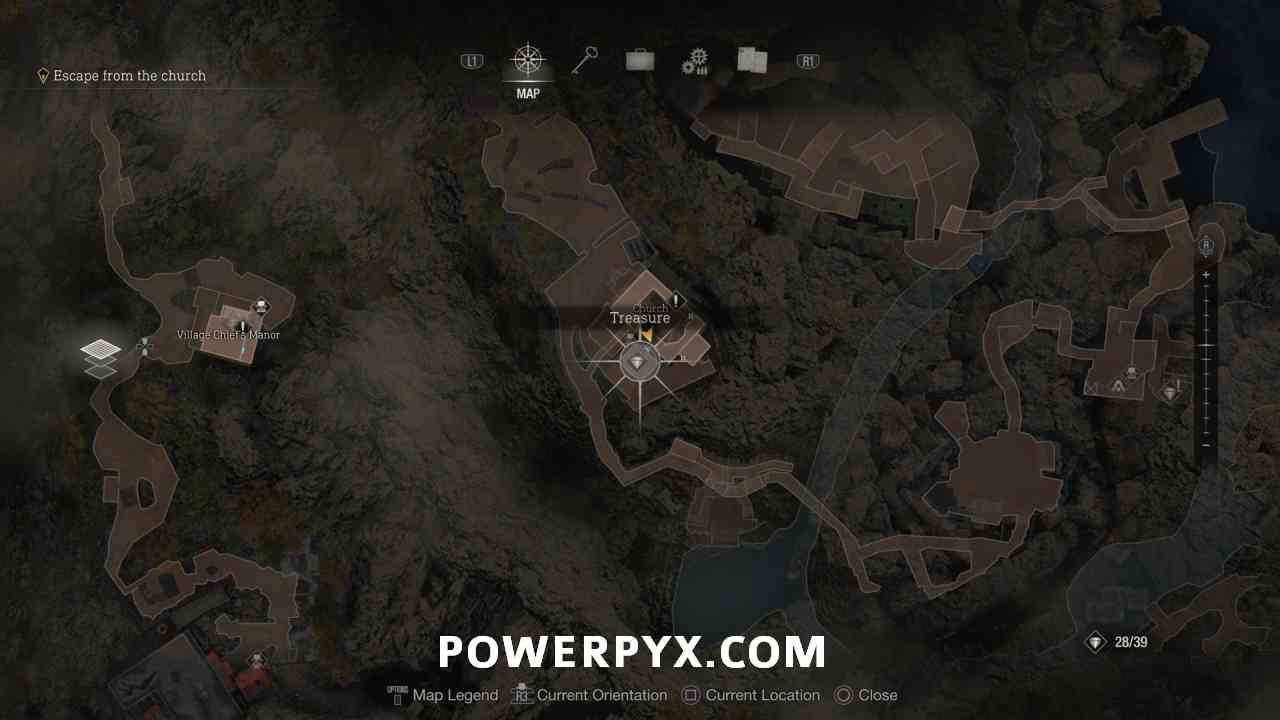
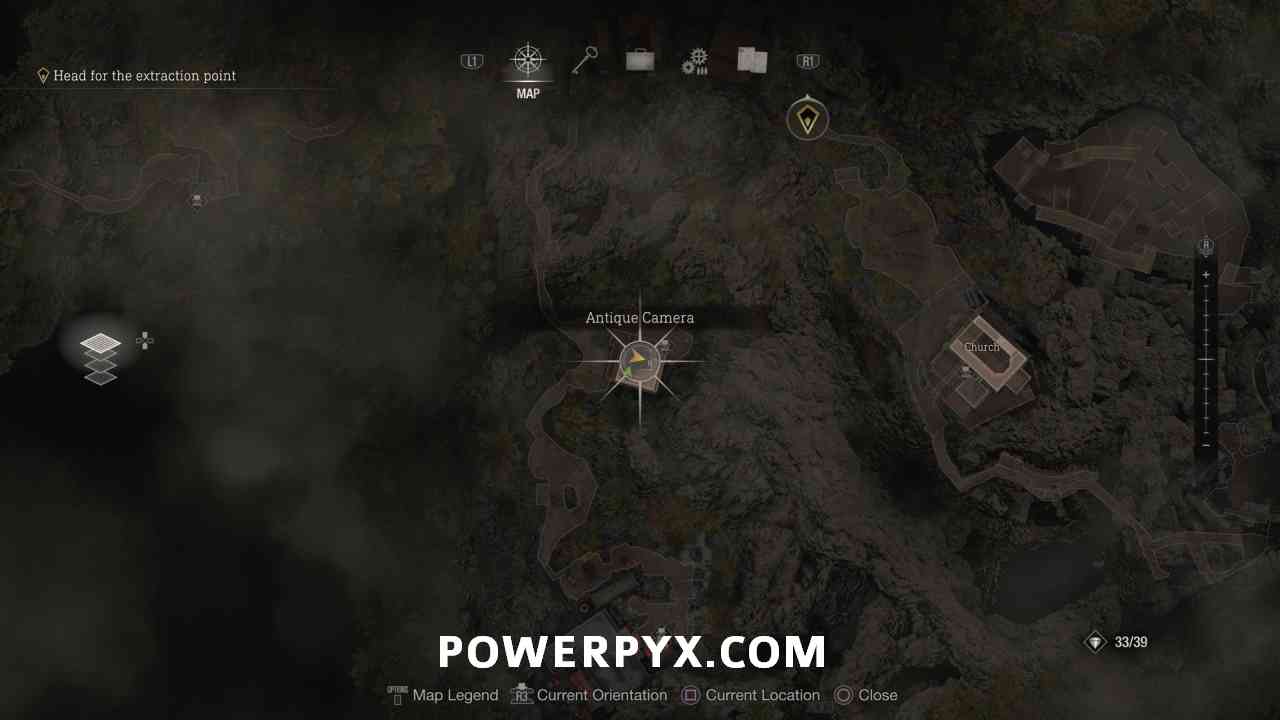
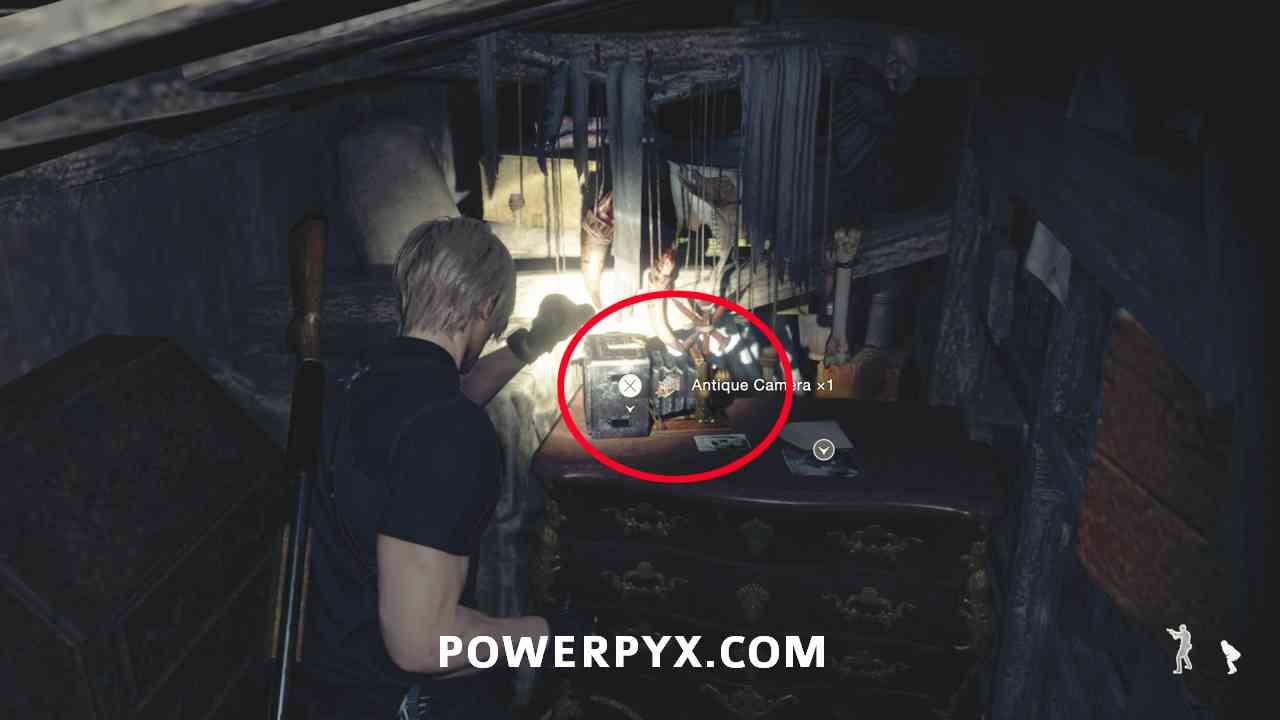
Treasure #34: Antique Camera
Found in the attic of Village Chief’s Manor (south of Village Square). In the upstairs bedroom you can boost Ashley up the ladder and then climb to the attic. At the end of the attic must crouch under a wooden plank and then find it on a shelf.
Treasure #35: Antique Pipe
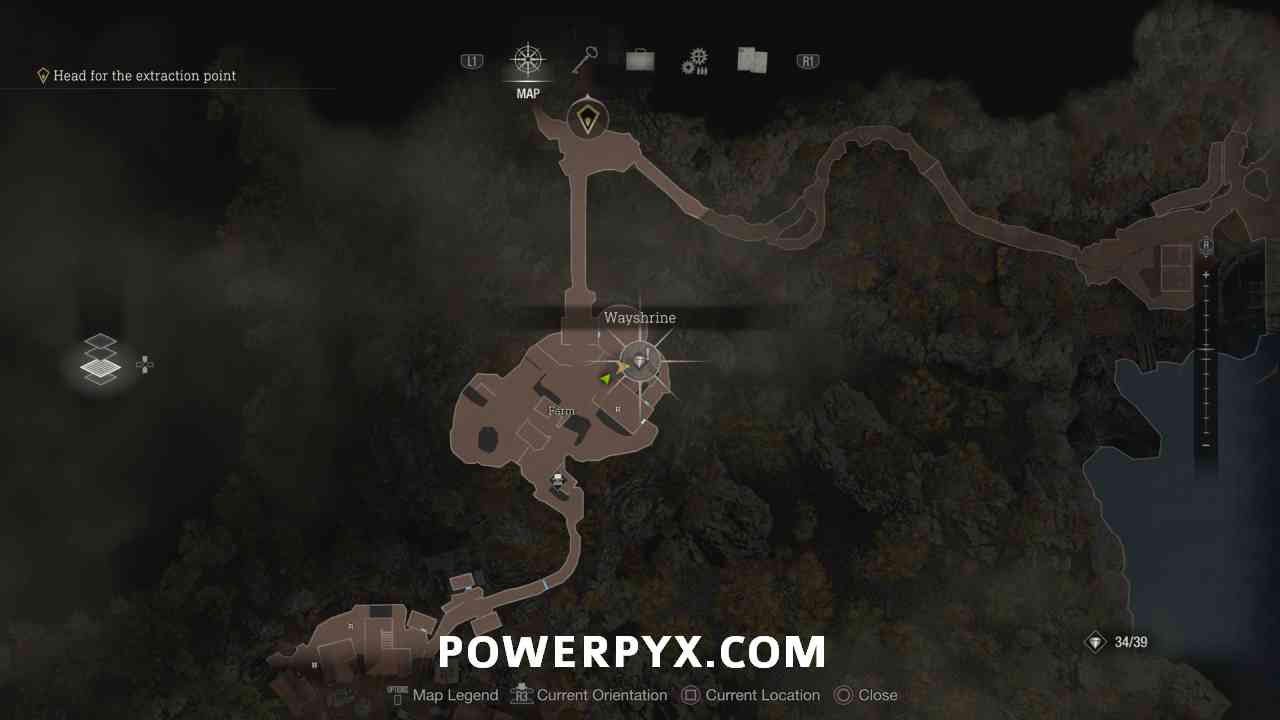
At the farm, from the Wayshrine. Now that you have the Wayshrine Key you can interact with it for the treasure.

Chapter 6
Treasure #36: Yellow Diamond
After the first typewriter save room, go through the next door and defeat the enemies there, then go up the stairs on the left to find this in a chest.


Treasure #37: Chalice of Atonement
After going through the next gate, enter the first house on the left to find this in a chest.


Treasure #38: Elegant Headdress
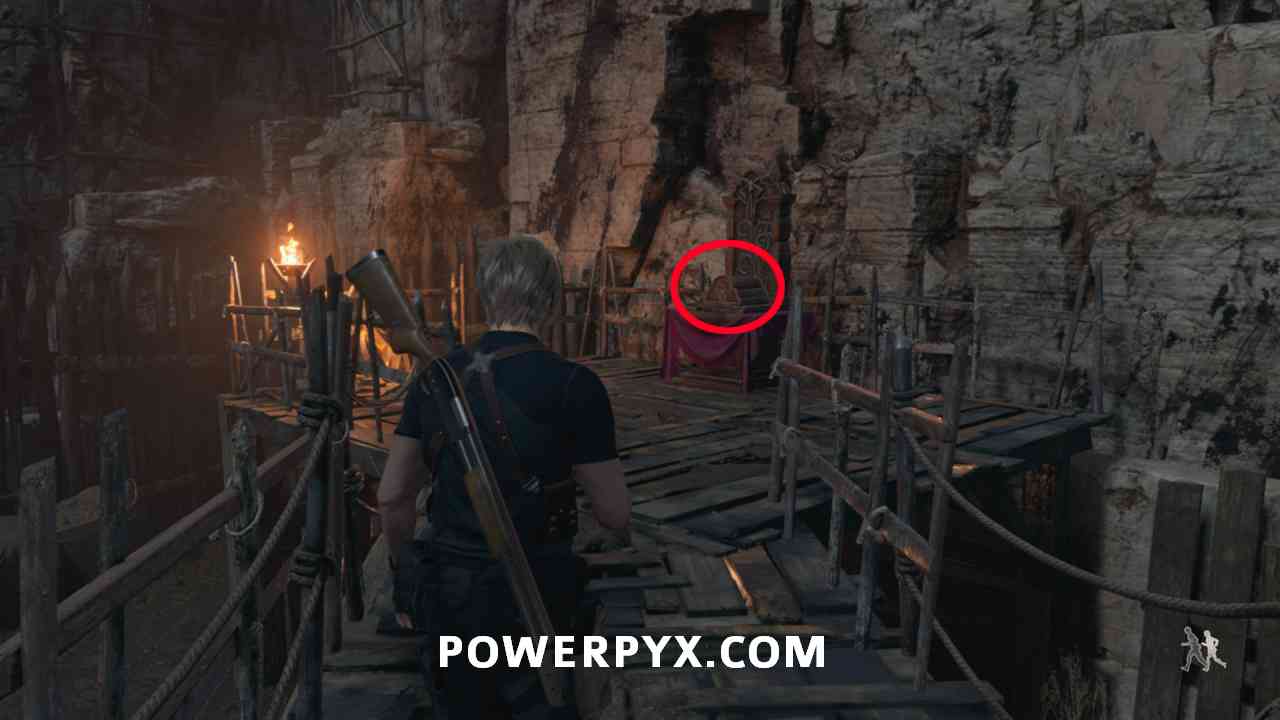
In the “Checkpoint” area. The Treasure is here upstairs, from a Wayshrine (use Wayshrine Key).

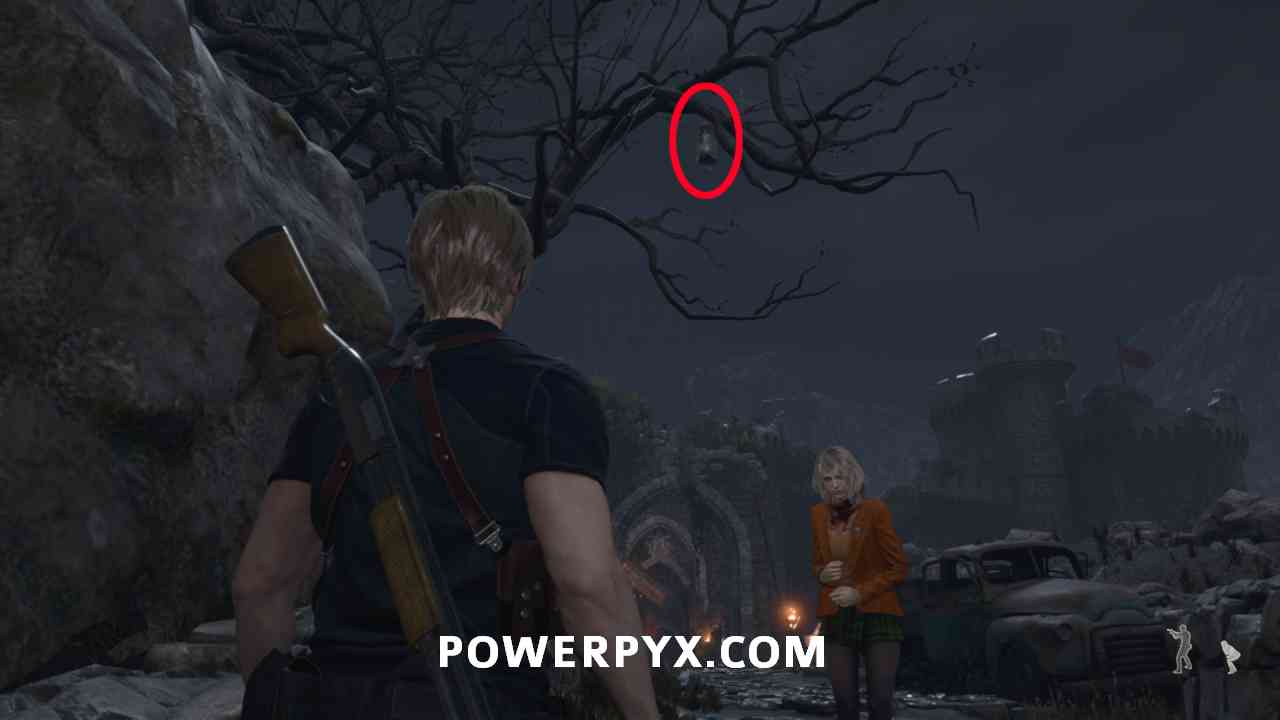
Treasure #39: Emerald
After leaving the Méndez Boss area, shoot down the silver container hanging from a tree, next to an old car.

That’s all 39 Village Treasures in RE4 Remake. For all other Treasures and Collectibles refer to Resident Evil 4 Remake Collectible Locations Guide.
Leave a Reply