
Case 02: The Rabbit Hole is a Main Mission in Gotham Knights. This walkthrough will guide you through all Sub-Chapters and Objectives of the Case 02: The Rabbit Hole main story quest.
Requirement: having completed Case 01: Batman’s Last Case
Reward:
- Subcase 2.1 – AKA Oswald Cobblepot: 2,500 XP
- Subcase 2.2 – The Powers Club: 3,750 XP
Mission Info: When we Finally got Penguin to talk to us, he brought up an old Gotham City folk tale – the Court of Owls, a secret group that controls everything. He seems convinced it’s more than just a story, and pointed us at the Powers Club for more information. The Powers Club is an old-money “gentlemen’s club”. They are probably hiding something. Whether it’s the Court is anyone’s guess.
Objectives:
- 2.1 – AKA Oswald Cobblepot
- Reach the Iceberg Lounge
- Talk to the Penguin
- Talk to the Penguin – Defeat the Penguin’s Guards 0/8 – BONUS: Perform Silent Takedowns
- Talk to the Penguin – Reach The Penguin’s Office
- Exit the Iceberg Lounge
- Return to the Belfry
- Talk to Alfred
- Listen to the Recorded Message
- Check the Evidence Boards
- Exit the Belfry and Patrol Gotham City
- Reach the Criminal Deal
- Stop the Deal Between the Two Gangs – Defeat all Enemies 0/10 – Retrieve the Modchips 0/3 – BONUS: Perform Grab Strikes 0/3 – BONUS: Perform Perfect Attacks 0/3
- Reach the Hideout
- Stop the Organ Theft – Locate and Scan the Cryogenic Containers
- Stop the Organ Theft – Retrieve the Cryogenic Container
- Stop the Organ Theft – Reach Thompkins’ Mobile Clinic
- Reach Foxteca
- Talk to Lucius Fox
- Visit Detective Montoya
- Reach the Iceberg Lounge
- Enter the Iceberg Lounge
- Talk to the Penguin
- Talk to the Penguin – Defeat the Penguin’s Guards 0/7 – BONUS: Avoid Taking Damage
- Talk to the Penguin – Reach The Penguin’s Office
- Locate and Destroy the Bugs 0/3
- Pick Up the Bottle of Whisky
- Exit the Iceberg Lounge
- 2.2 – The Powers Club
- Check on Alfred and his Evening Meeting
- Reach Powers Club
- Enter Powers Club
- Enter the Club
- Defeat the Security Guards
- Use AR to Scan the Area
- Scan the Hidden Mechanism
- Find a Way to Activate the Mechanism – Follow the Wires
- Find a Way to Activate the Mechanism – Clear the Guards from the Club – Use AR to Scan for Clues – BONUS: Remain Undetected
- Find a Way to Activate the Mechanism – Press the Button
- Find a Way to Activate the Mechanism – Use AR to Find the Other Switch
- Find a Way to Activate the Mechanism – Flip the Switch
- Find a Way to Activate the Mechanism – Follow the Activated Wires
- Follow the Blood Trail
- Continue Following the Blood Trail
- Use AR to Scan for Clues
- Activate the Spotlight
- Solve the Puzzle
- Defeat the Court of Owls Guards 0/4
- Find where the Blood Trail Leads
- Defeat the Court of Owls Guards 0/5 – BONUS: Perform Silent Takedowns 0/3
- Defeat the Remaining Guards 0/8
- Continue Following the Blood Trail
- Follow the Blood Trail
- Untie the Prisoner
- Escape the Trap
- Find a Way to the Surface with the Key
- Return to the Belfry

2.1 – AKA Oswald Cobblepot
Reach the Iceberg Lounge
Leave the Belfry and proceed to the yellow marker. On the rooftop, enter the building.

Talk to the Penguin
We’re now inside the mansion of the Penguin. Go through the door.
Talk to the Penguin – Defeat the Penguin’s Guards 0/8 – BONUS: Perform Silent Takedowns
Continue downstairs and get rid of all the Penguin’s guards. If possible, try performing three Silent Takedowns for some extra XP.
Talk to the Penguin – Reach The Penguin’s Office
Once you’ve cleared out the area, continue on upstairs and through the door.
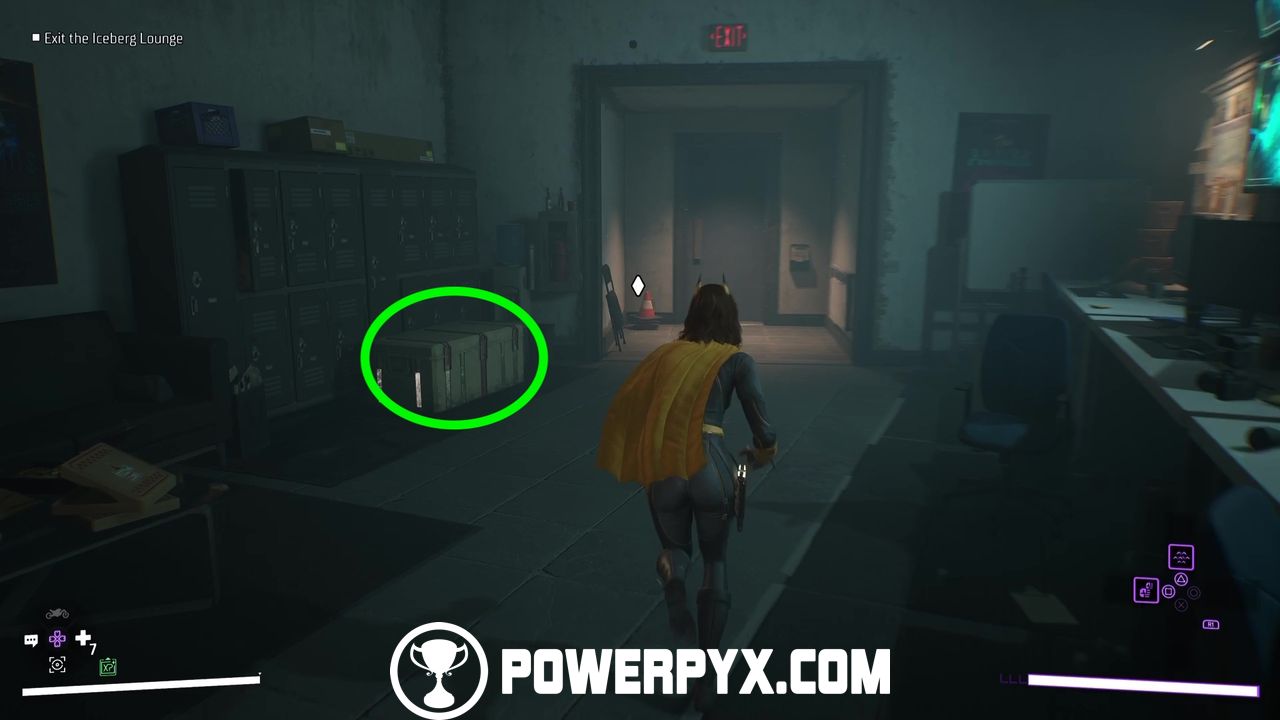
Exit the Iceberg Lounge
With the Penguin not wanting to help us, we can leave the building. Follow the waypoints out of the building, not forgetting to open the chest right before the exit.
Return to the Belfry
Open up the map and  fast-travel to the Belfry to regroup with and inform the others.
Talk to Alfred
At the Belfry, approach Alfred to talk to him. To get the Penguin to talk, we need to get his attention some other way.
Listen to the Recorded Message
Approach the recorded message from Lucius Fox near the console and listen to it.

Check the Evidence Boards
Now approach the Evidence Boards. Hover over the Leads section and press  /
/  for a quick overview of the challenges awaiting us outside.
Exit the Belfry and Patrol Gotham City
When you’re ready, exit the Belfry to continue on. Once outside,  to open the list of available activities and
  /
/  on The Rabbit Hole, then
  /
/  . Here’s a list of all the activities we need to complete to continue on with the story. We’re going to start with The Penguin’s Criminal Deal, which is the West End district.
Reach the Criminal Deal
Make your way to the location in West End.

Stop the Deal Between the Two Gangs – Defeat all Enemies 0/10 – Retrieve the Modchips 0/3 – BONUS: Perform Grab Strikes 0/3 – BONUS: Perform Perfect Attacks 0/3
At the location, defeat all enemies and then retrieve the mod chips from the briefcases. If possible, try to perform three grab strikes and perfect attacks for some extra XP. Now we’re going for The Penguin’s Organ Trafficking, which is in Robinson Park.
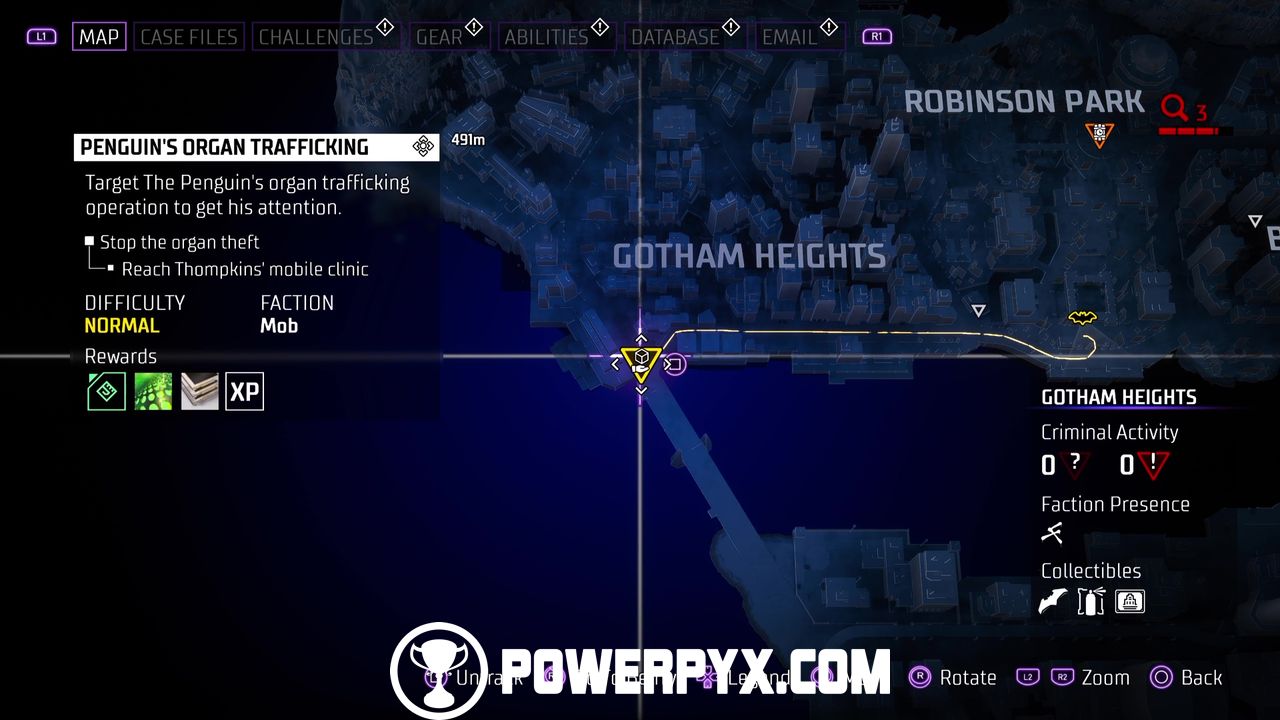
Reach the Hideout
Make your way to the location in Robinson Park.

Stop the Organ Theft – Locate and Scan the Cryogenic Containers
At the location, you need to stop an organ theft, locate and scan some cryogenic containers. Hold  to enter AR View and look for the white glowing item near the ambulance. Once you’ve identified it, clear out the area of all enemies to proceed undisturbed, paying extra attention to the cameras or disabling them if you wish.

Stop the Organ Theft – Retrieve the Cryogenic Container
Now pick it up.
Stop the Organ Theft – Reach Thompkins’ Mobile Clinic
As soon as you pick it up, a countdown will start during which you need to reach the next location. So, open up the map to know where you need to go, call up your Batcycle, and head there.
At the location, talk to Dr Thompkins. Now we’re going for Lucius Fox, who is located in Otisburg.
Reach Foxteca
Make your way to the location in Otisburg.

Talk to Lucius Fox
After the cutscene with Fox, talk to him again and this will complete this challenge. Now we’re going for Detective Montoya.
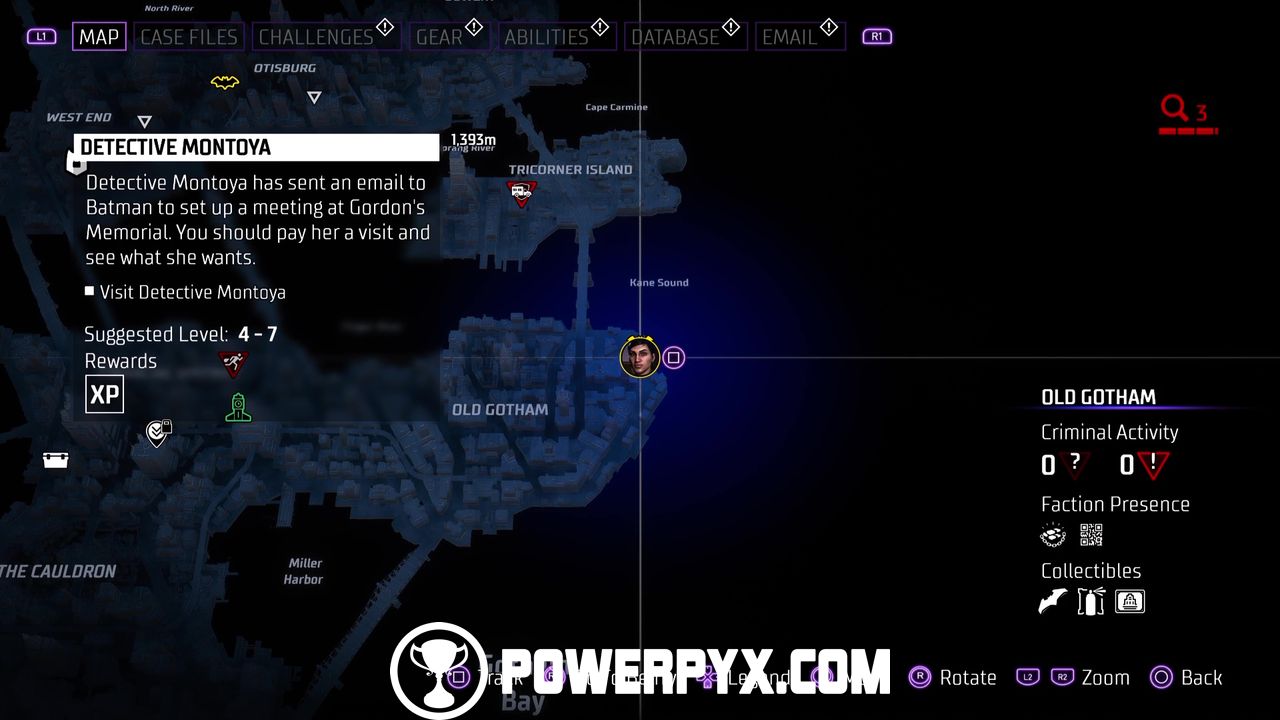
Visit Detective Montoya
Make your way to the location in Old Gotham.
Reach the Iceberg Lounge
Now we’re ready to head back to The Penguin’s mansion.

Enter the Iceberg Lounge
Once on the rooftop, enter the lounge.
Talk to the Penguin
As before proceed through the doors.
Talk to the Penguin – Defeat the Penguin’s Guards 0/7 – BONUS: Avoid Taking Damage
In the new room, defeat all of Penguin’s Guards. If possible, stay out of harm’s way for some extra XP.
Talk to the Penguin – Reach The Penguin’s Office
Once you’ve cleared out the area, continue on upstairs and through the door.
Locate and Destroy the Bugs 0/3
Someone’s bugged the Penguin’s office. We need to find the bugs and destroy them. One bug is below the Penguin’s bust, another one is behind the Penguin himself, and the third one is by the lamp on his desk.


Pick Up the Bottle of Whisky
Now approach the liquor cabinet and grab the bottle of whisky.

Exit the Iceberg Lounge
We now have a new heading. Head downstairs and exit the Iceberg Lounge
2.2 – The Powers Club
Check on Alfred and his Evening Meeting
Head to Alfred’s location in Tricorner Island. Reach the rooftop for a new cutscene.

Reach Powers Club
Now head to the Powers Club in Old Gotham. Enter the greenhouse through the rooftop.

Enter Powers Club
Now proceed through the doors.
Enter the Club
Continue along the hallway to access the Club.
Defeat the Security Guards
Now drop down and defeat the two guards.
Use AR to Scan the Area
Now press to activate AR and scan the yellow trails on the floor.

Scan the Hidden Mechanism
Next, scan the red hidden mechanism under the floor.

Find a Way to Activate the Mechanism – Follow the Wires
After scanning the mechanism, you should now have wires highlighted in your AR view. Follow them by going upstairs and opening the door.
Find a Way to Activate the Mechanism – Clear the Guards from the Club – Use AR to Scan for Clues – BONUS: Remain Undetected
Now continue along the hallway and into the enemy-ridden area. Here, clear out the enemies. If possible, stay undetected for extra XP. Then, as if you were entering the place for the first time, scan the bust found inside the left room.
Find a Way to Activate the Mechanism – Press the Button
Now press the button on the bust. That’s one switch taken care of. Now we need to find the other.

Find a Way to Activate the Mechanism – Use AR to Find the Other Switch
Next, go to the other room and analyze the book in the corner.
Find a Way to Activate the Mechanism – Flip the Switch
Now press the button inside the book. That’s the second switch taken care of.

Find a Way to Activate the Mechanism – Follow the Activated Wires
Return where you’ve fought the two guards and activate the lamp from the wall.

Follow the Blood Trail
Head down the secret stairs and open the door.

Continue Following the Blood Trail
Continue to the nest room and approach the paintings on the wall.
Use AR to Scan for Clues
Now scan the spotlight at the start of the room.
Activate the Spotlight
Activate the spotlight to reveal a yellow wire and several eagle statue pieces that if looked at from a certain angle align with the shadow on the painted walls.

Solve the Puzzle
The goal of the puzzle is to rotate the pieces to drop a shadow on the wall that looks like a bird facing to the right. The “shadow bird’s” head and talons must face to the right side, not the left.
If you haven’t interacted with any tables yet, the solution is as follows (you can pause the game and return to Main Menu, then press Continue to reset the Puzzle):
- Figure 1 (Talons) = 1 Click
- Figure 2 (Beak) = 2 Clicks
- Figure 3 (Wing 1) = 3 Clicks
- Figure 4 (Wing 2) = 3 Clicks (it may take a fourth click to trigger the cutscene)
The painted wall should now open up – see the finished shadow bird below:


Defeat the Court of Owls Guards 0/4
Defeat the guards.
Find where the Blood Trail Leads
Head downstairs and open the door, then grapple up and onto the balcony above.
Defeat the Court of Owls Guards 0/5 – BONUS: Perform Silent Takedowns 0/3
Clear out the area of enemies. If possible, perform Silent Takedowns for extra XP.
Defeat the Remaining Guards 0/8
Now defeat the next set of guards coming your way.
Continue Following the Blood Trail
Now we can resume following the blood trail. Open the central doors.
Follow the Blood Trail
Continue following the blood trail through the lairs until you see a man tied to some owl’s wings.
Untie the Prisoner
Approach the man and untie him to save him and trigger a new cutscene.

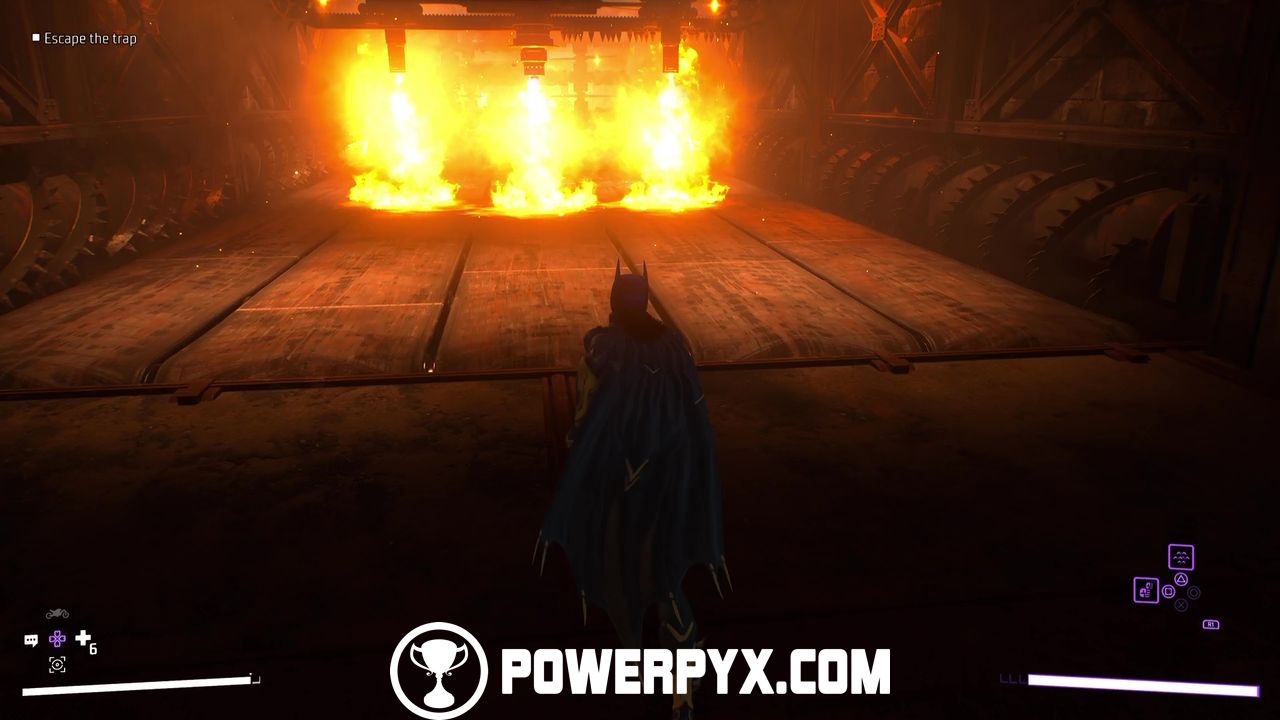
Escape the Trap
We now need to escape a trap in true Riddler’s fashion, avoiding blades and fire. Just run through the traps and time your movements well to not get killed.
Find a Way to the Surface with the Key
Continue through the cave until you eventually can squeeze through a wall.
Return to the Belfry
Time to get back to base. So, open up your map and to return to the Belfry.
This finishes Case 02: The Rabbit Hole in Gotham Knights. Up next is Case 03: In the Shadows.
For all other Main Missions, check out the complete Gotham Knights Walkthrough.
Leave a Reply