
Red Dead Redemption contains 4 Ambient Challenges with 10 ranks each to reach legendary status. Every rank requires completing a little task. Completing all 10 ranks of a single Ambient Challenge unlocks the Frontiersman trophy / achievement. Completing all ranks of all challenges is required to attain 100% Completion for the Redeemed trophy / achievement.
You can only make progress on a task after you reach that rank. Even if you completed the requirement previously, it will not count retroactively and must be completed again if you didn’t have the task activated. Be sure to camp and save your game often while working towards the challenges, since gaining a rank does not trigger an autosave! You can track your progress on the menu screen under Journal > Challenges.
The expansions also include challenges, these will be listed at the end of the guide and are NOT needed for the main game 100% completion.
This guide is updated for the Remaster on PS4 / PS5 / PC / Xbox Series S/X / Nintendo Switch 2 / Mobile.
Main Game Challenge 1: Master Hunter
This challenge will start the first time you kill and skin a coyote. Common locations for the animals you’re looking for are listed below, but if you’re having trouble finding them don’t forget to use bait.
- Rank 1: Collect 5 coyote pelts – Kill 5 coyotes, skin the carcasses and collect their pelts
Commonly found in packs in Cholla Springs and the surrounding areas, usually the first time you encounter them you’ll be able to kill all 5. - Rank 2: Collect 5 deer pelts – kill 5 deer and skin them
Be sure that you aren’t shooting at deer with antlers because bucks will not count towards this rank. - Rank 3: Kill 5 wolves with your melee knife and collect 5 wolf pelts
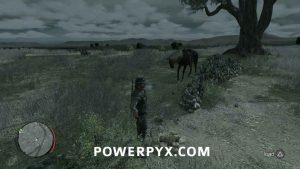
Find these early in the area around Rathskeller Fork or Rio Del Lobo. Like coyotes, they run in packs. - Rank 4: Collect 5 boar tusks and 3 armadillo carapaces in addition to those you already have
Though the description says that you need tusks and carapaces, as long as you kill and skin them it doesn’t matter what materials you get. Boar can be found in the swampy area east of MacFarlane Ranch near Stillwater Creek. Later, they are also abundant in West Elizabeth, mostly in the area to the south of Manzanita Post. - Rank 5: Kill 2 cougars with your melee knife and collect 2 cougar pelts
Cougars are dangerous, so be sure to stock up on medicine when you attempt this. Feel free to soften them up with a pistol shot before finishing them off with the knife. When they try to run away so they can charge you again, follow them and knife them as they turn. They sometimes hunt in groups, so watch out for others before you skin the first, and save as soon as you’re done. Find cougars in Rio Bravo around Fort Mercer, and along the northern edges of Cholla Springs and Gaptooth Ridge. - Rank 6: Collect 5 raccoon pelts, 5 skunk pelts, and 5 fox pelts in addition to those you already have
Raccoon and skunk are common around Hanging Rock, and fox can be found around Rio del Lobo or Rio Bravo, as well as the area south of Armadillo. - Rank 7: Collect 5 elk meat and 5 bighorn skins in addition to those you already have
This will have to wait until you have access to Tall Trees, since you can only find elk there. Luckily bighorn sheep are also common there, both of which can be found in the snowy area north of Manzanita Post. - Rank 8: Kill a bear with your melee knife and collect a bear pelt
Soften them up with a few rifle shots before moving in. As long as the killing blow is from the knife, your kill will count. Keep an eye out for other bears that may still be in the area. Bears are common in Tall Trees, especially in the area north of Manzanita Post. - Rank 9: Search Ojo Del Diablo for “Khan,” the legendary jaguar, and collect his pelt
If you approach Ojo Del Diablo you should get a message and see a yellow dot on your mini-map indicating Khan’s location. If that doesn’t happen, kill a few animals in the area then move away for a bit before coming back. Khan moves like a slightly bigger, faster cougar. Use Dead Eye as soon as you can target him. - Rank 10: Search Aurora Basin, Stillwater Creek and Nekoti Rock for “Lobo” the legendary wolf, “Gordo” the legendary boar and “Brumas” the legendary bear and collect their pelts.
The same info for Khan also applies to the other three legendary animals. Follow the dot on the minimap to find your prey.
Main Game Challenge 2: Sharpshooter
This challenge will begin the first time you shoot a flying bird.
- Rank 1: Shoot and kill 5 flying wild birds
Use Dead Eye, or be sure to lead the bird when firing. - Rank 2: Shoot and kill 5 rabbits
Literally everywhere. Common around Hennigan’s Stead, Cholla Springs, and in the area of Armadillo. - Rank 3: Kill 5 coyotes before any coyote damages you
Since coyotes hunt in packs, this can often be accomplished with single use of Dead Eye. The simplest way is to draw them by running away from the pack until they all fall in behind you in a clump, then use Dead Eye on the group. - Rank 4: Kill 5 flying birds from a moving train
Hop on a train and use the ladder attached to the cargo car to reach the roof. - Rank 5: Kill any 2 different types of wild animals in 1 Dead Eye meter
Look for any animals on the ground in an area with a lot of birds for a quick solution to this. - Rank 6: Shoot the hats off 2 different people’s heads
Hideouts are a great place to go for this, particularly Twin Rocks which is occupied by the Walton Gang with their ridiculous top hats. If you find yourself having difficulty hitting the hats without also scoring a head shot, try aiming for the brim of the hat instead. Use Dead Eye and a Rolling Block Rifle for easiest execution. - Rank 7: Kill 3 bears with a single headshot each
Use Dead Eye and line up a headshot with a Buffalo Rifle or Rolling Block Rifle for a one-shot kill. - Rank 8: Shoot the hats off 2 people’s heads and disarm 2 people
Head back to Twin Rocks for two more hat shots and disarms. - Rank 9: Kill any 6 wild animals (birds apply) without reloading or changing weapons
The description gives away the easy target: birds. They’re abundant, particularly vultures, and will die in a single hit. Use Dead Eye and a large capacity weapon, like the Evans Repeater which has an unnecessary 22 shots before you’ll need to reload. - Rank 10: Disarm any 6 enemies without reloading or changing weapons
Another trip to Twin Rocks, bringing along your handy Evans Repeater and its 22 shots. Use Dead Eye to line up on the weapon directly.
Main Game Challenge 3: Survivalist
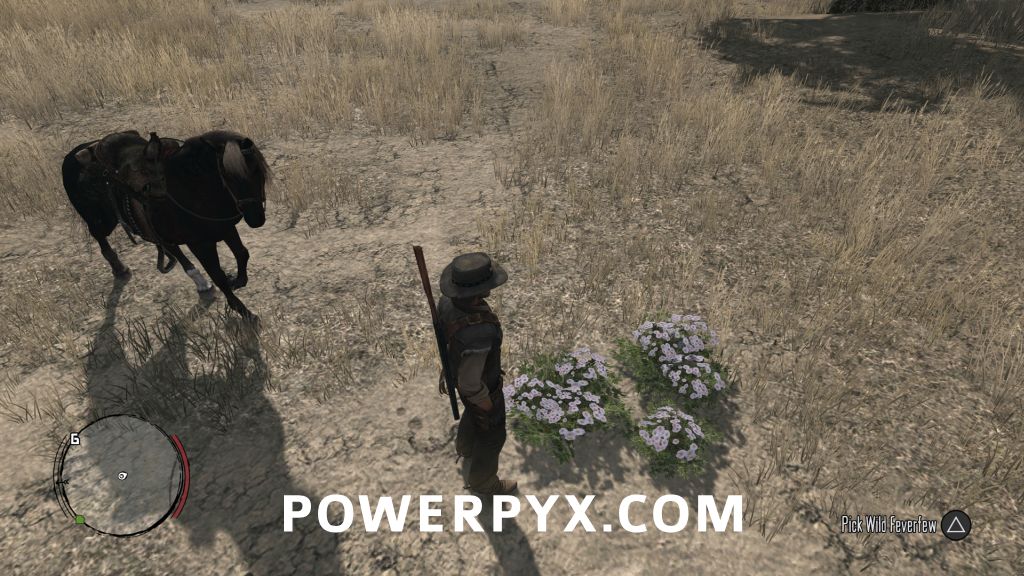
This challenge will begin after picking your first Wild Feverfew.
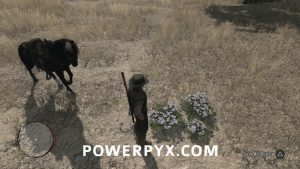
- Rank 1: Collect 6 Wild Feverfew, found in Hennigan’s Stead and Cholla Springs
Common and easy to spot.
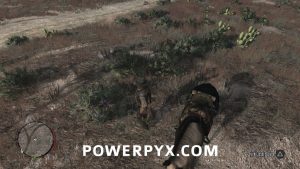
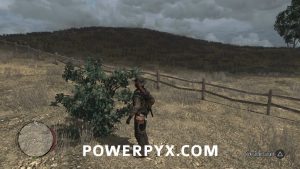
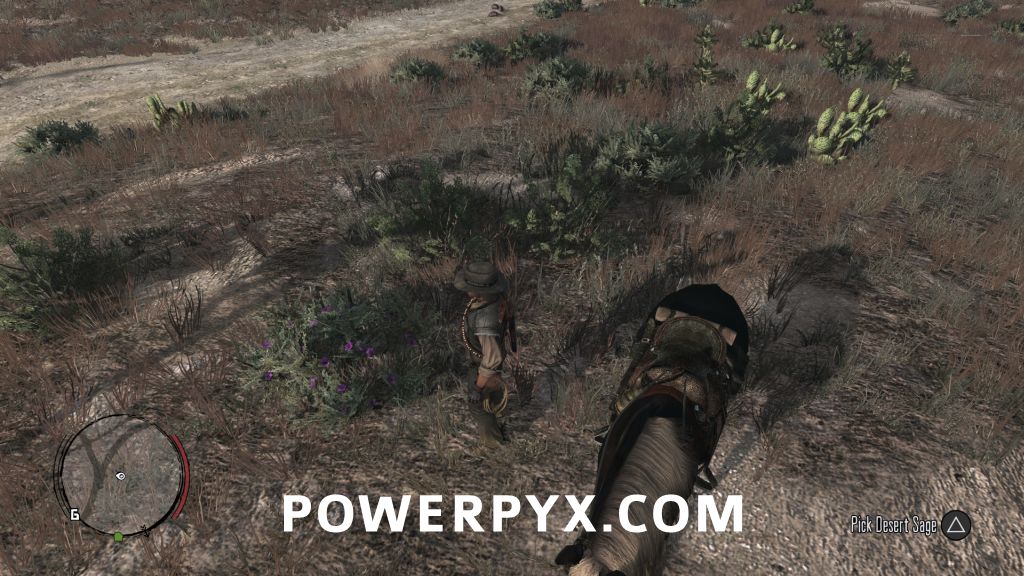
- Rank 2: Collect 6 Desert Sages in addition to any you may already have. They are found in and around Gaptooth Ridge
A medium sized green bush with purple flowers.
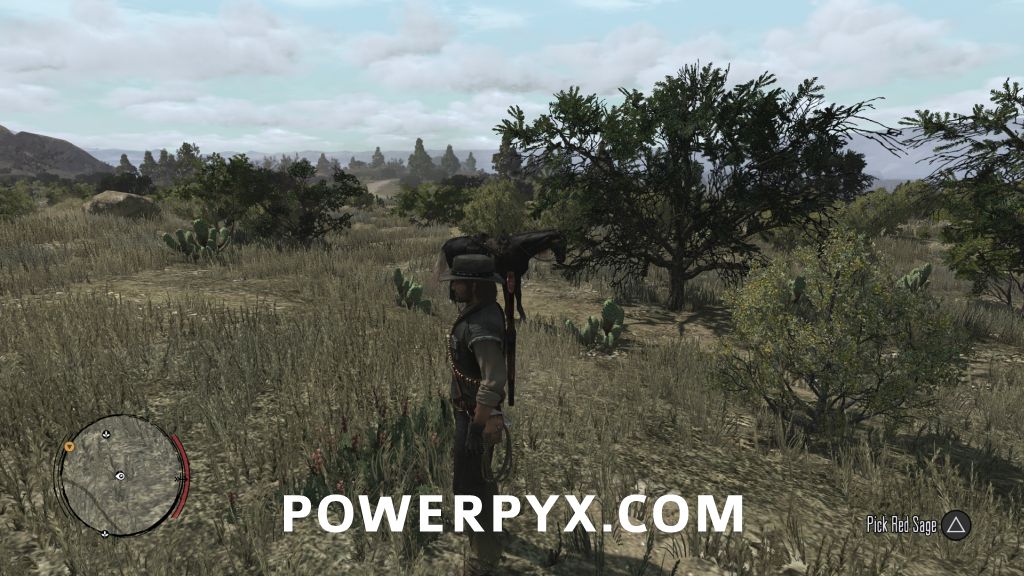
- Rank 3: Collect 4 Red Sage plants in addition to any you may already have. They are found in and around Rio Bravo
The hardest of all the plants to find, due to its low profile and dull red color. They barely stand higher than the normal scrub grass, and almost look like very short wheat. Well worth buying a Survivalist Map when trying to find these.

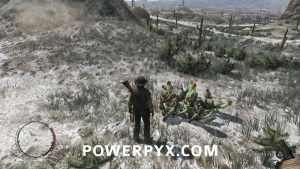
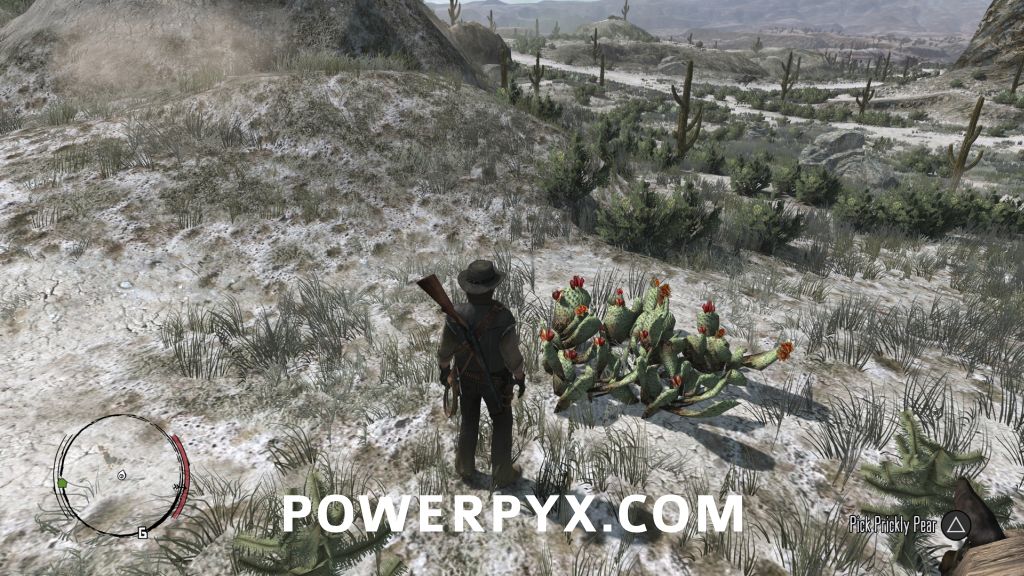
- Rank 4: Collect 8 Prickly Pears in addition to any you may already have
They are found in and around Punto Orgullo – medium height patch of cacti with bright orange/red flowers on top.
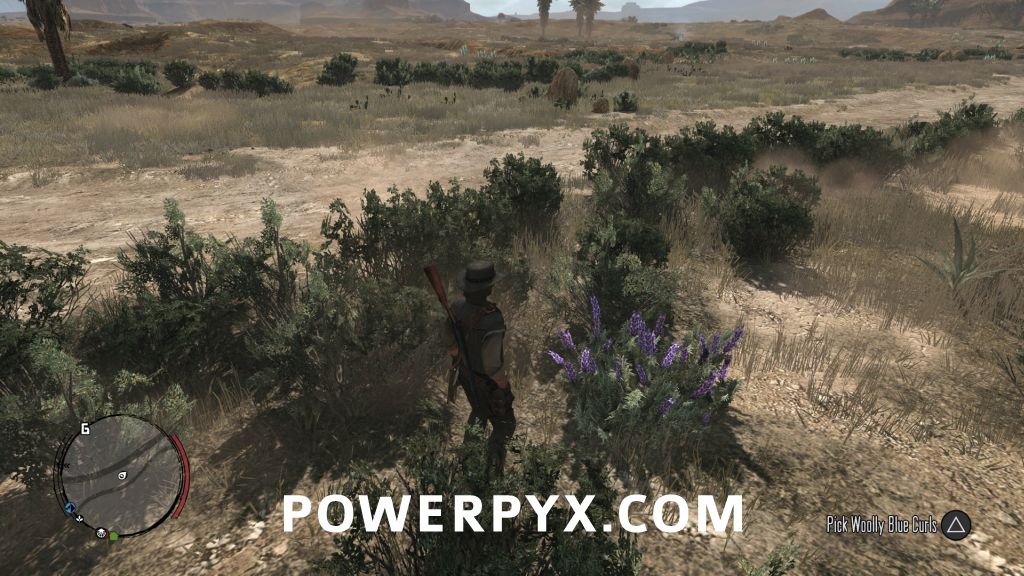
- Rank 5: Collect 7 Wooly Blue Curls in addition to any you may already have
They are found in and around Perdido – Not blue at all. Look for a medium height patch of green leaves with tall sprigs of purple flowers.

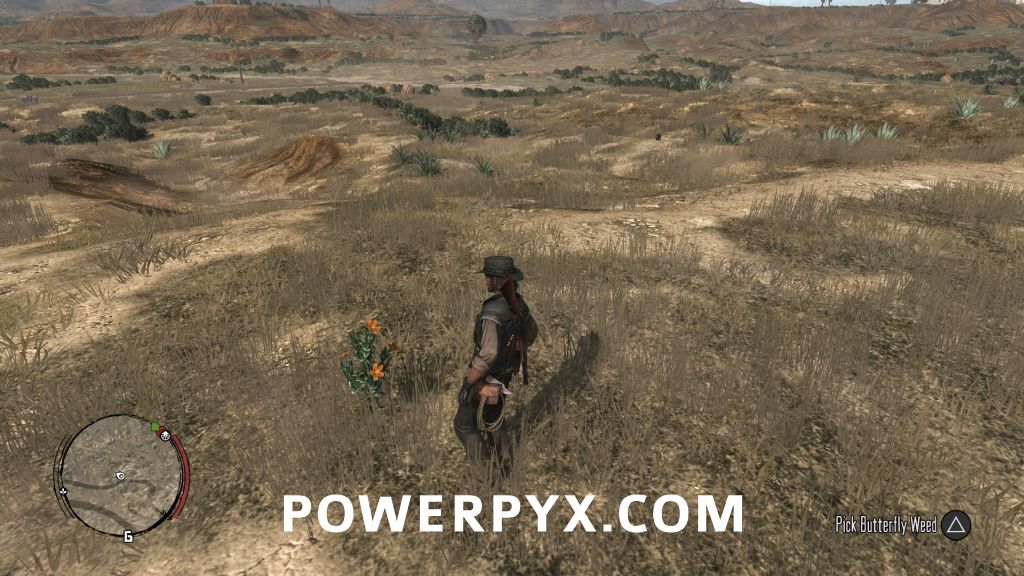
- Rank 6: Collect 8 Butterfly Weeds in addition to any you may already have
They are found in and around Diez Coronas – Easy to spot, tall thin green bushes with bright orange flowers.

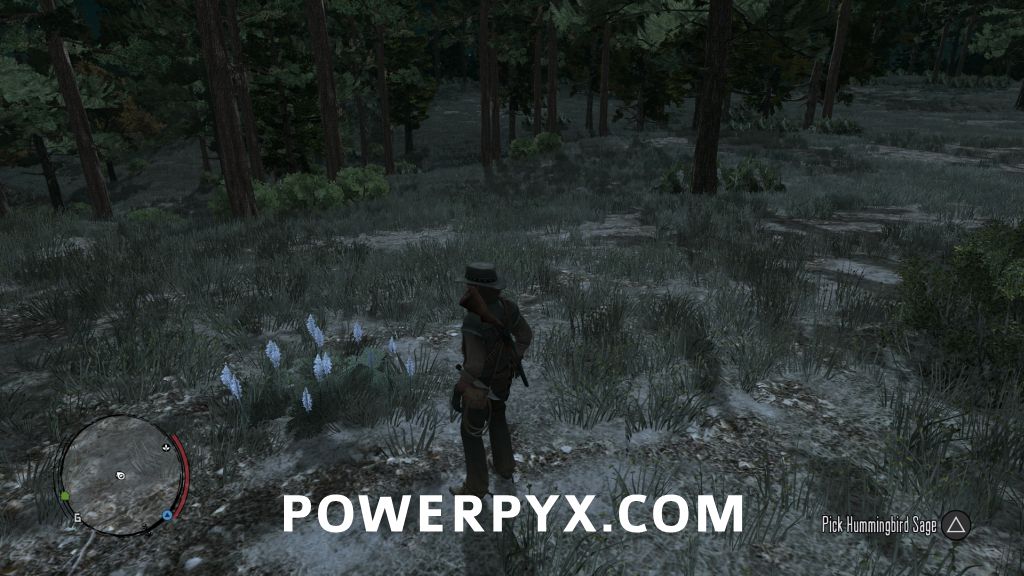
- Rank 7: Collect 10 Hummingbird Sage plants in addition to any you may already have. They are found in and around Tall Trees
Easy to spot, whitish sprigs that stand above the patch of green they grow from.

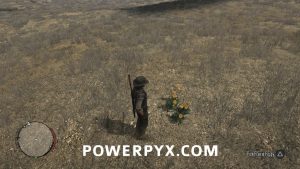
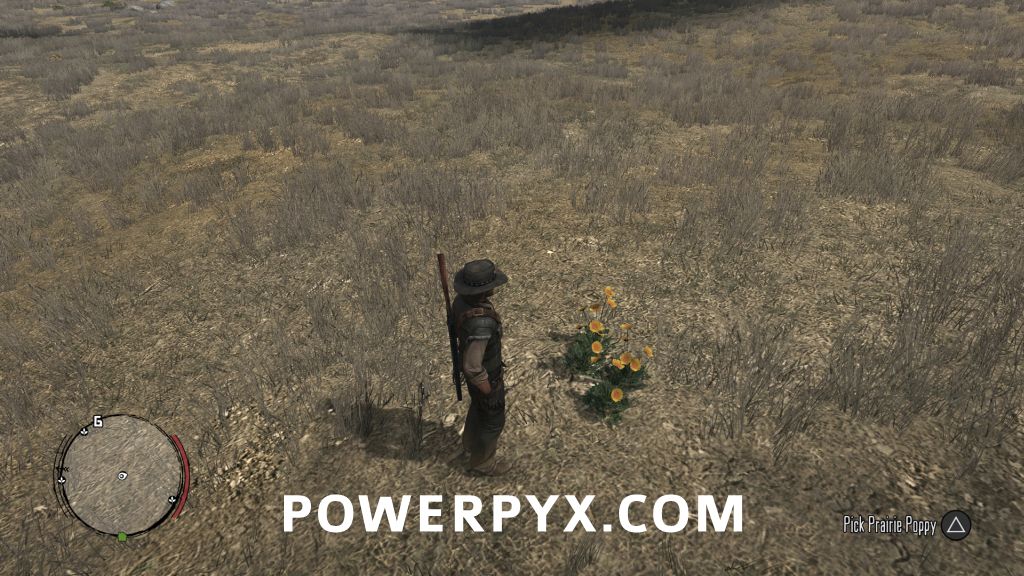
- Rank 8: Collect 12 Prairie Poppies in addition to any you may already have. They are found in and around the Great Plains
Patches of bright yellow flowers.
- Rank 9: Collect 15 Golden Currants in addition to any you may already have. They are found in and around the Great Plains
Tall green bushes with wide branches that stand out against the landscape.
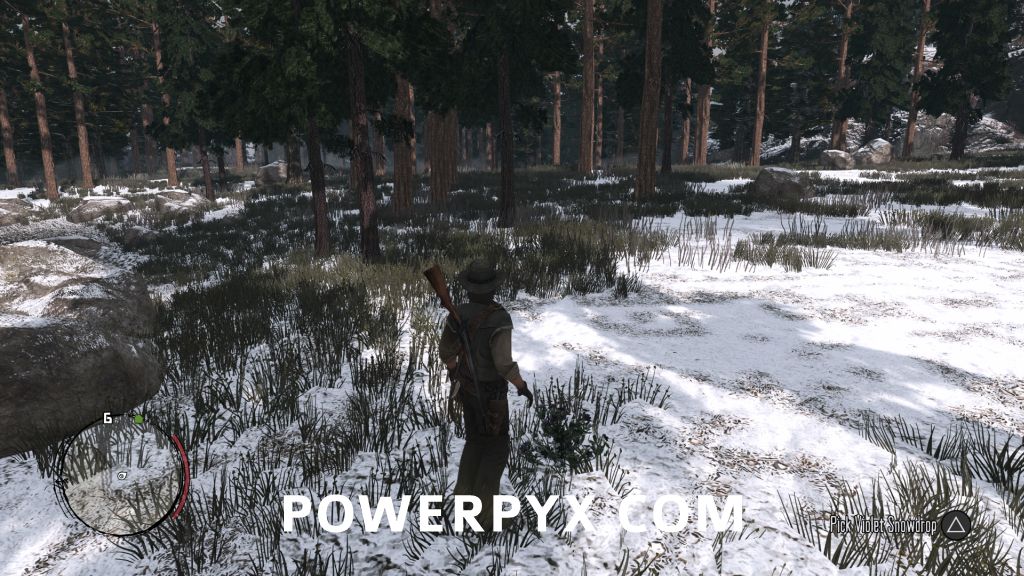
- Rank 10: Collect 10 Violet Snowdrops in addition to any you may already have. They are found in and around Tall Trees. Also collect 2 more of every other herb available
Violet Snowdrops are tiny patches of deep purple flowers. And in case you thought you were done, a nasty surprise for you. Use a Survivalist Map and fast travel to go all the way around the map again for two more of the other 9 herbs you’d already found.

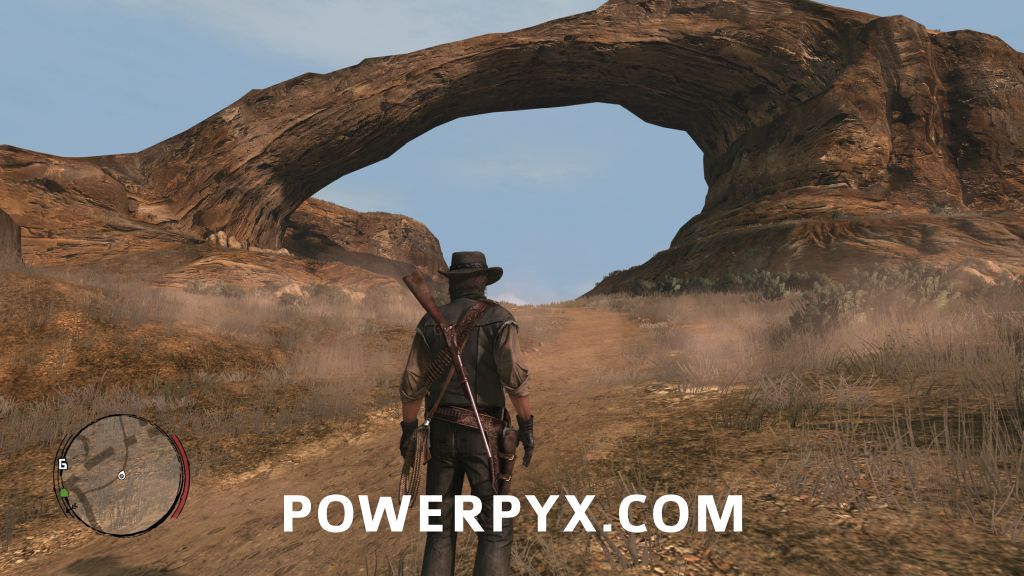
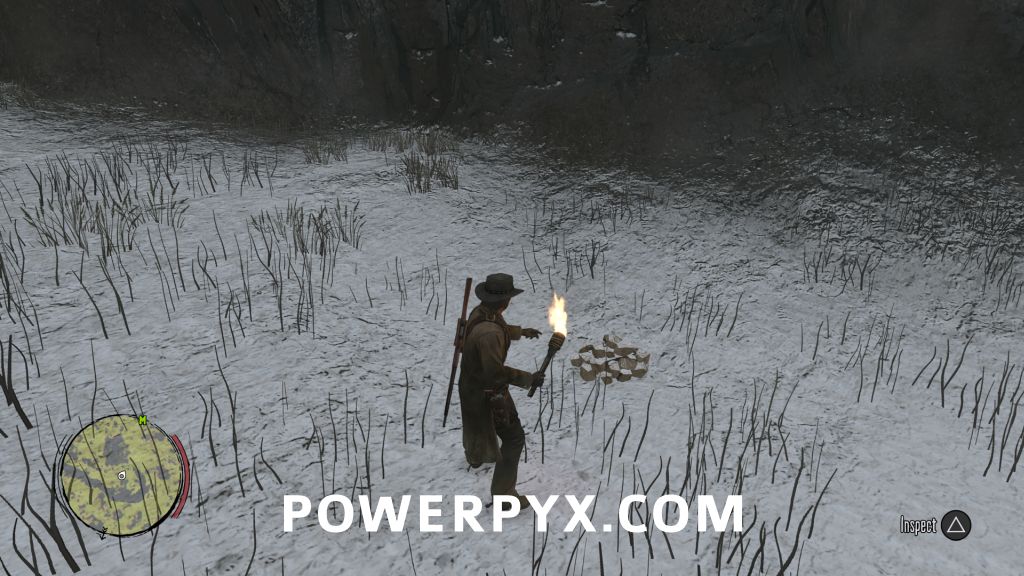
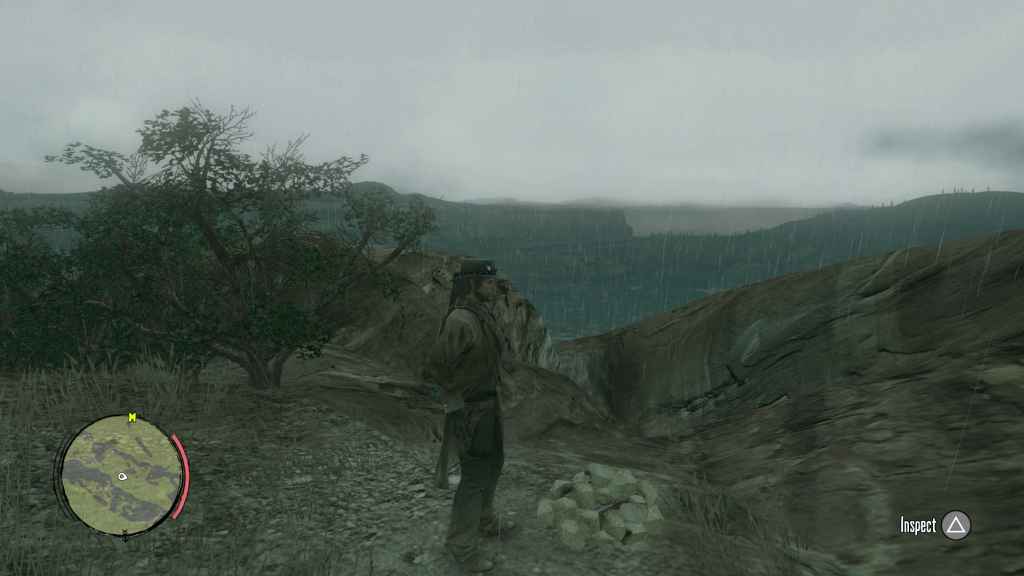
Main Game Challenge 4: Treasure Hunter
This challenge is somewhat unique as it begins through a random event on the map. If you see a man hiding behind a wagon with two dead horses, who is being attacked by two bandits, ride in and save him and he will give you the first treasure map (or if you’re too late, you can take it off his corpse). Strangely enough, this will begin the challenge and give you Rank 1 at the same time. Each treasure found will also contain a new map that will lead you to the next location and rank.
- Rank 1: Automatic when you get the first treasure map

- Rank 2: Rhodes’ Gold

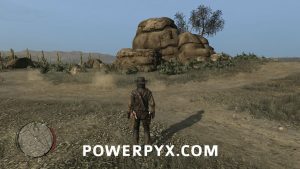
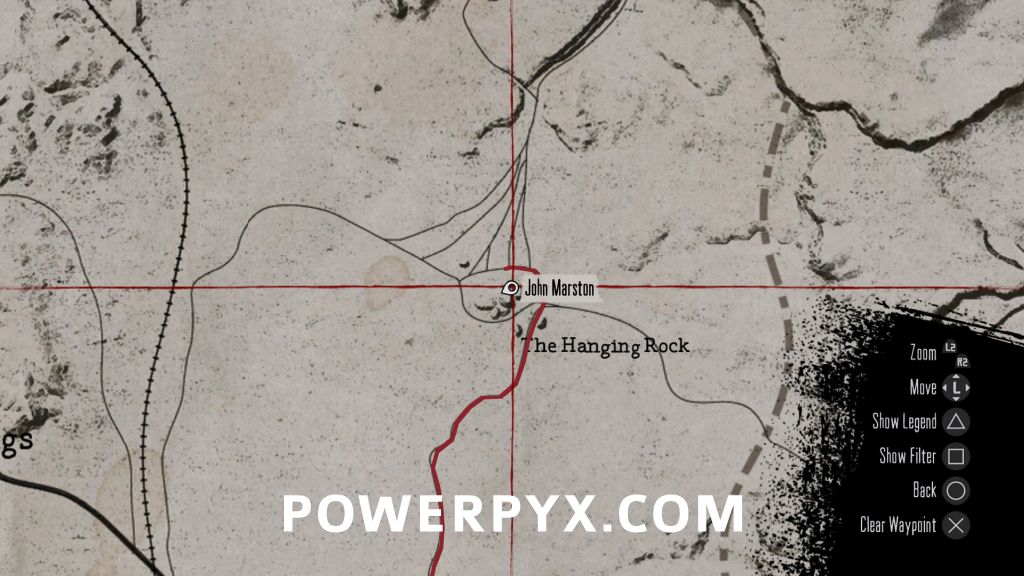
Directly behind Hanging are two slightly smaller rocks. Go between them and look for a conspicuously stacked group of rocks right in the corner, against Hanging Rock.
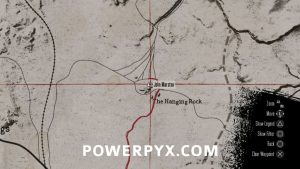
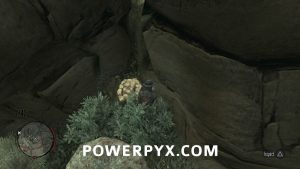
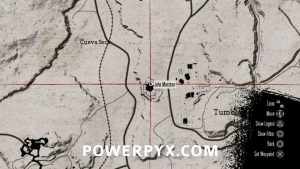
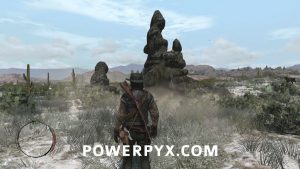
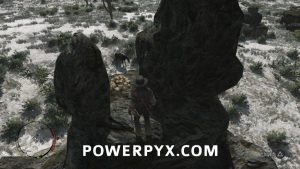
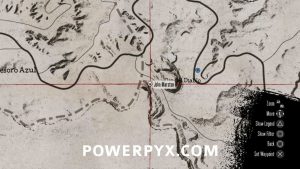
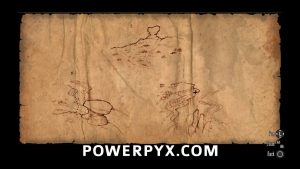
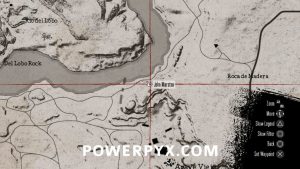
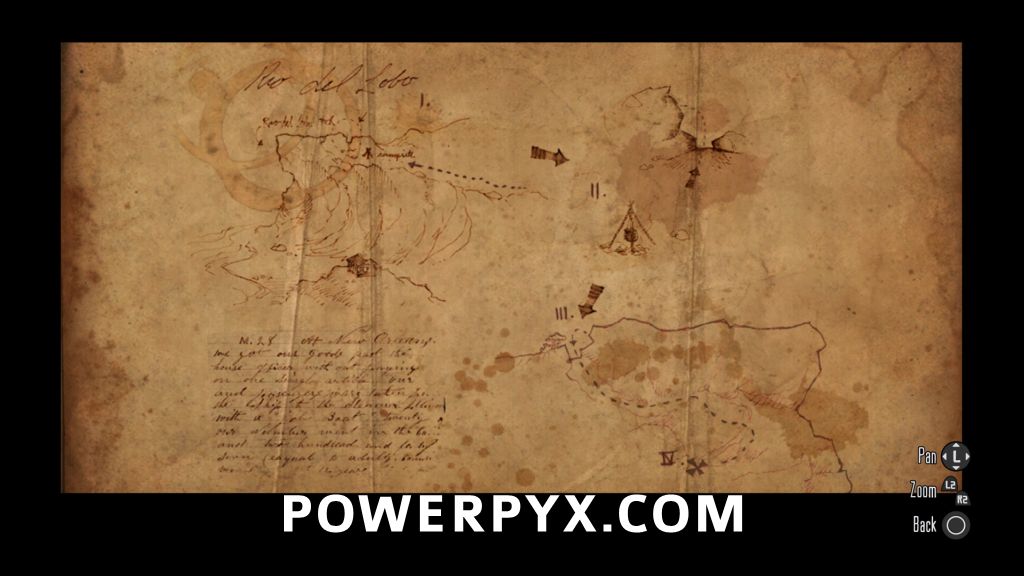
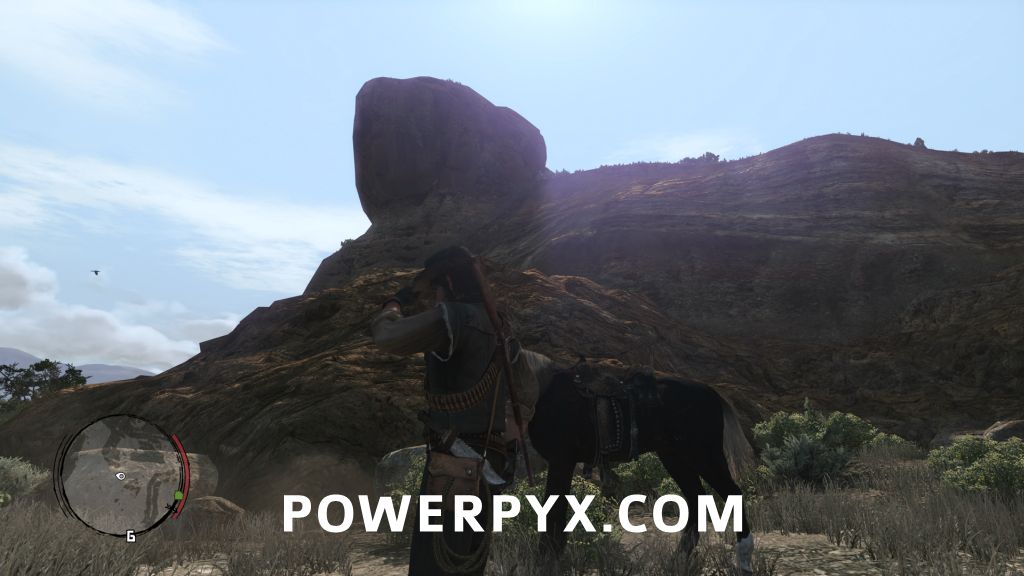
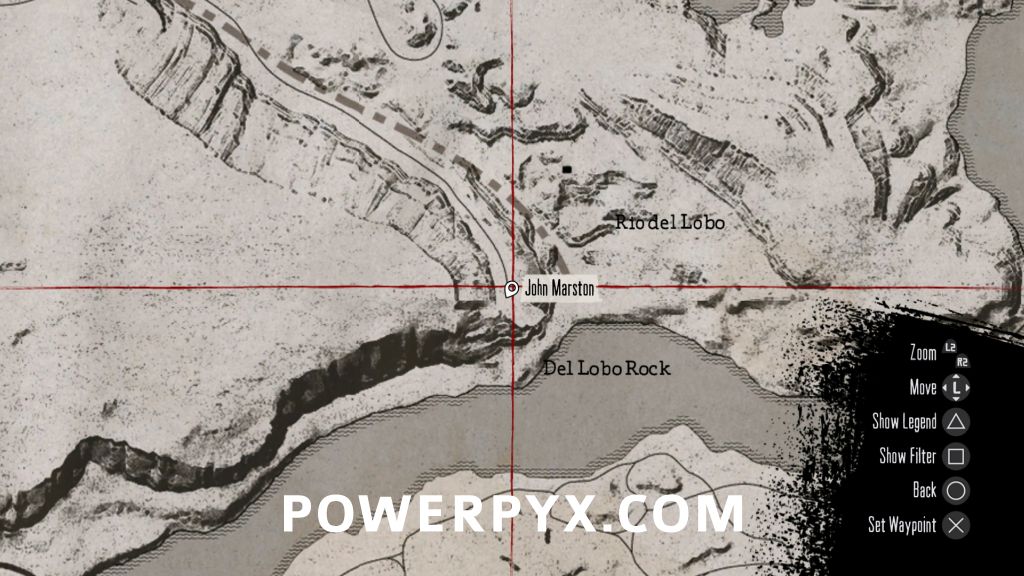
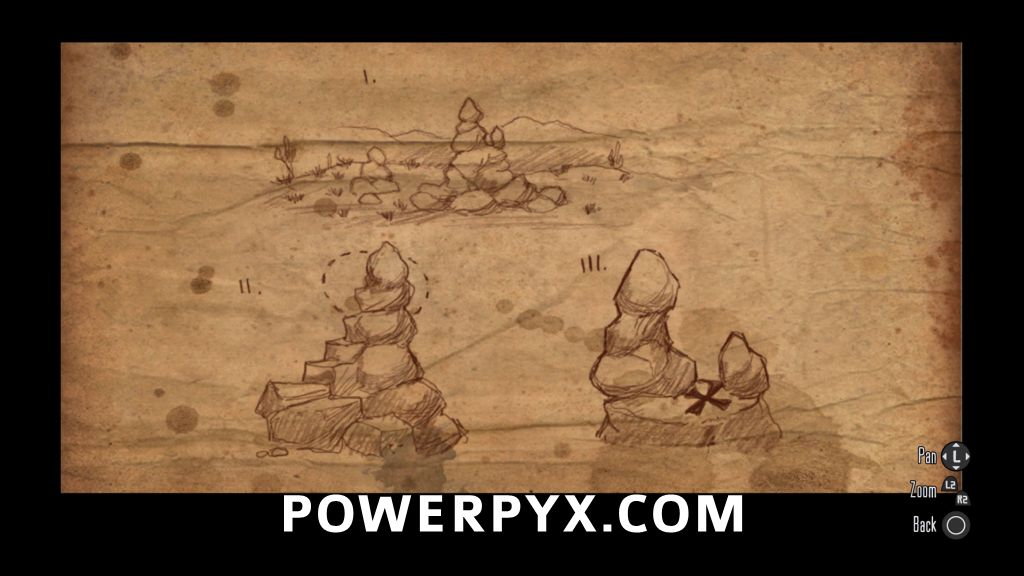
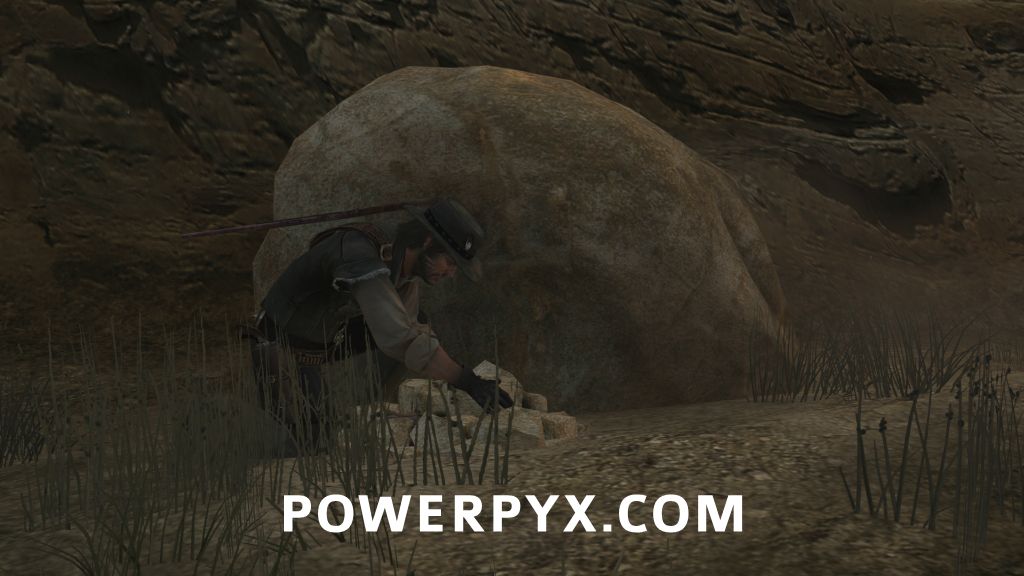
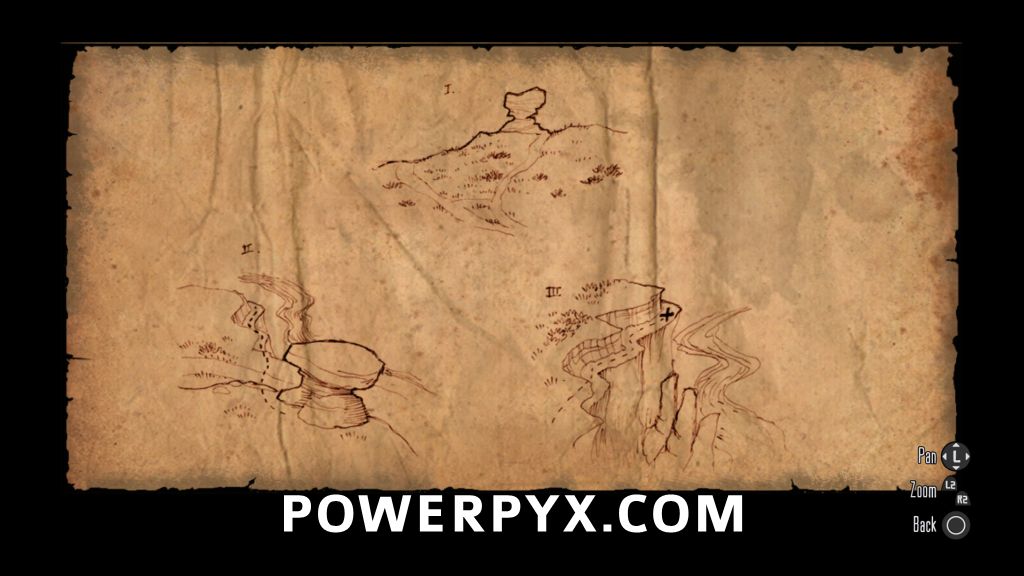
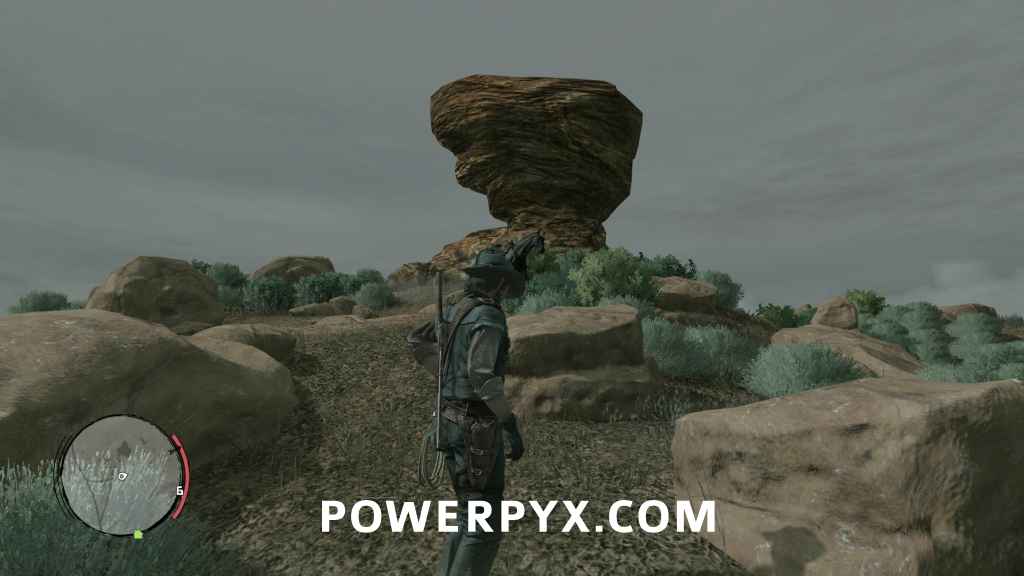
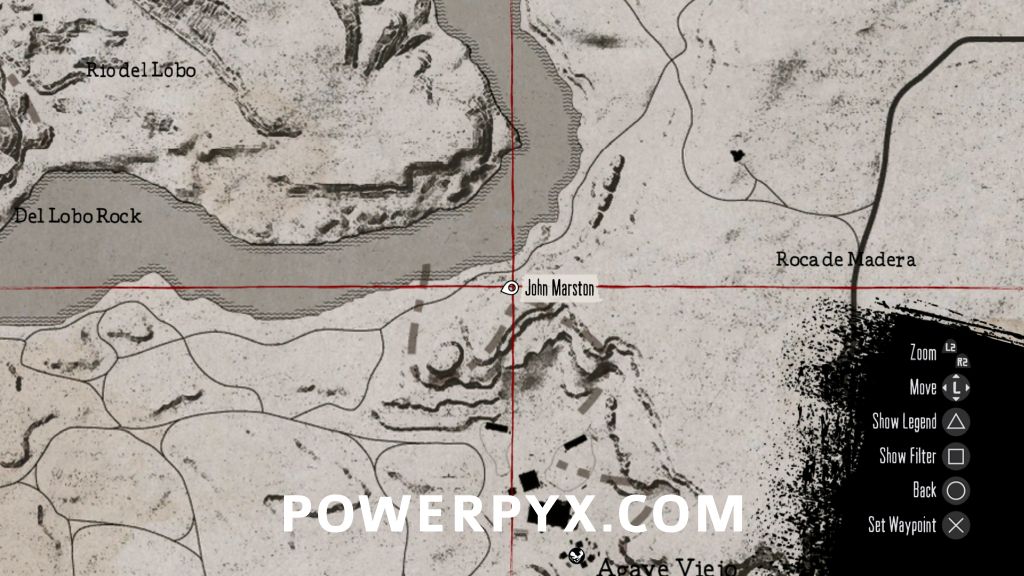
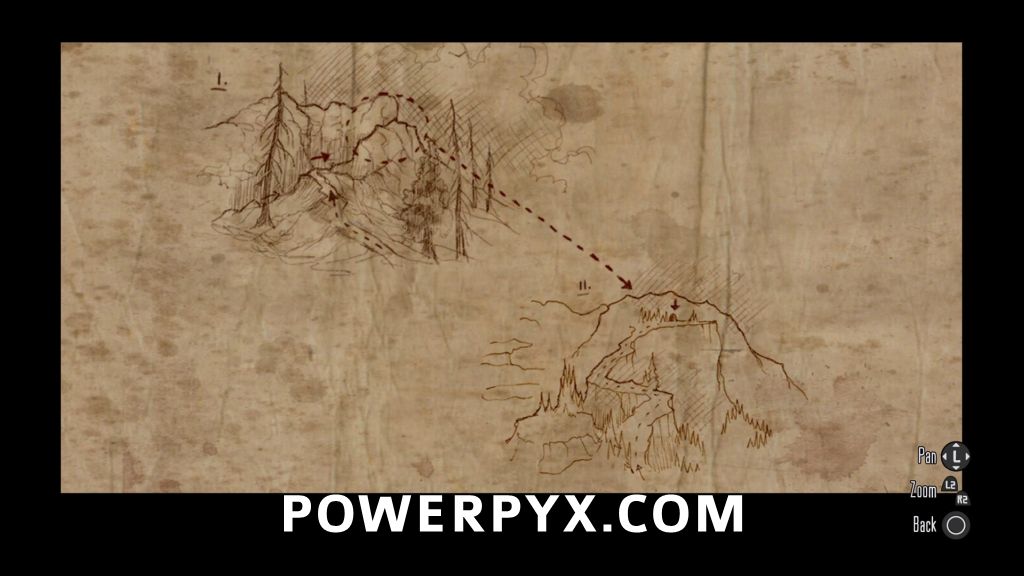
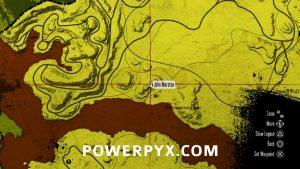
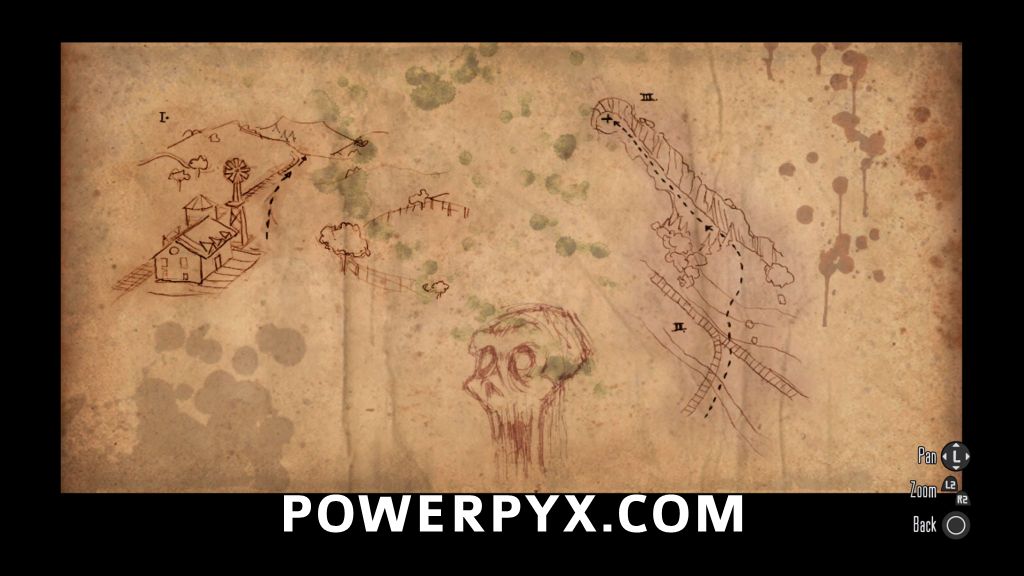
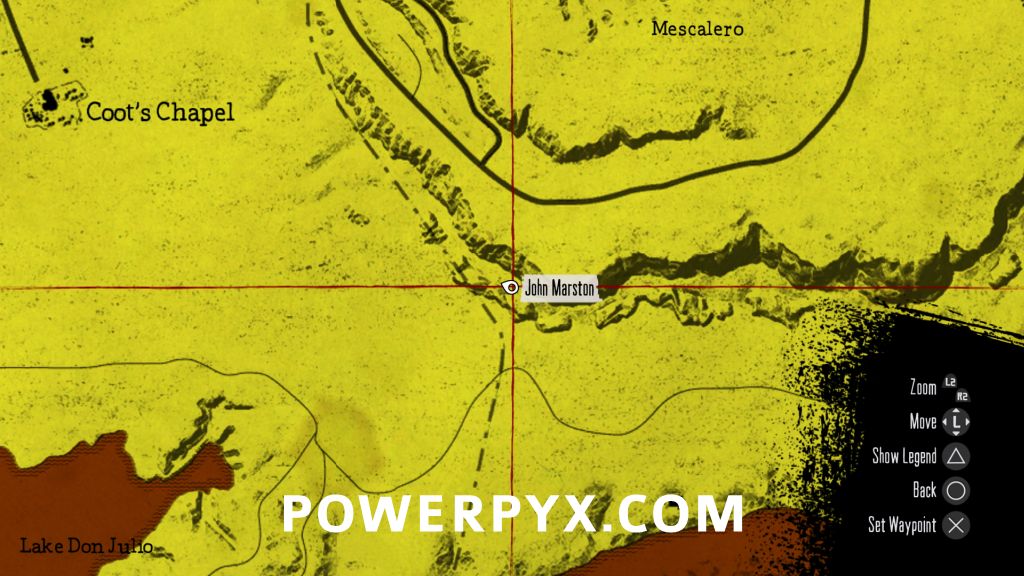
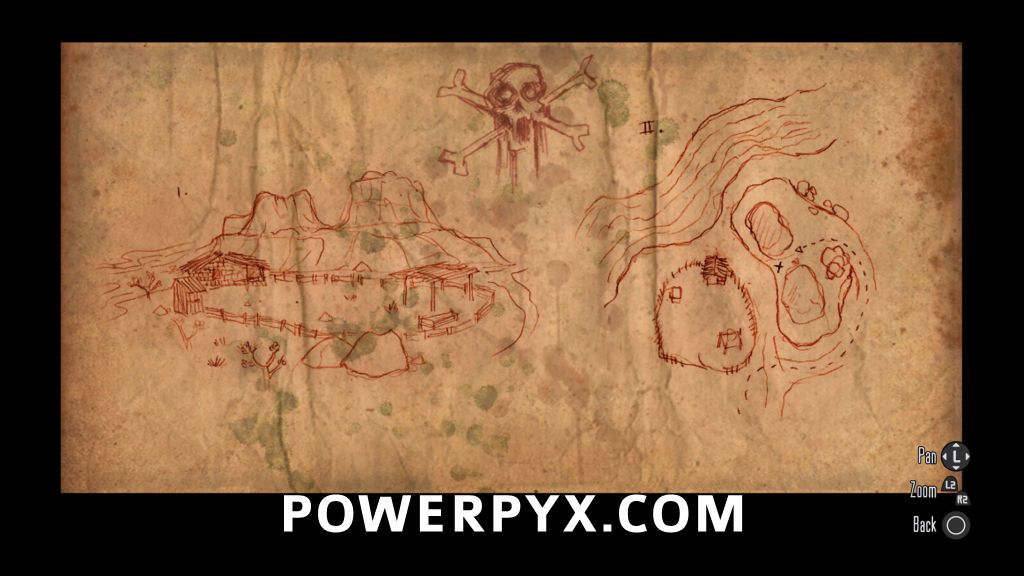
- Rank 3: Jackson’s Gold


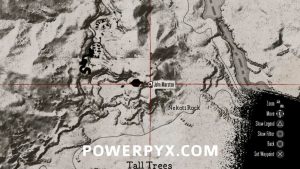
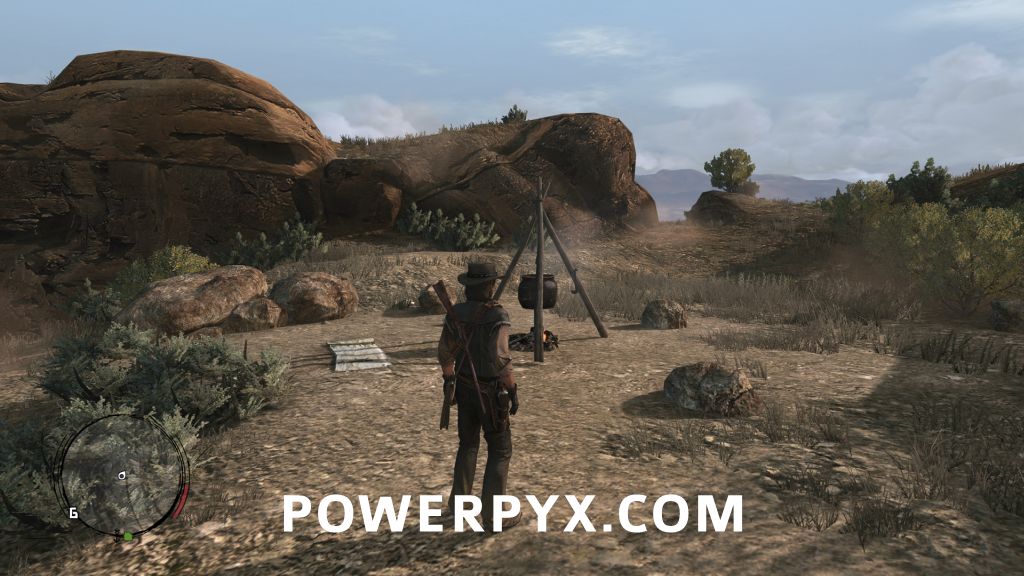
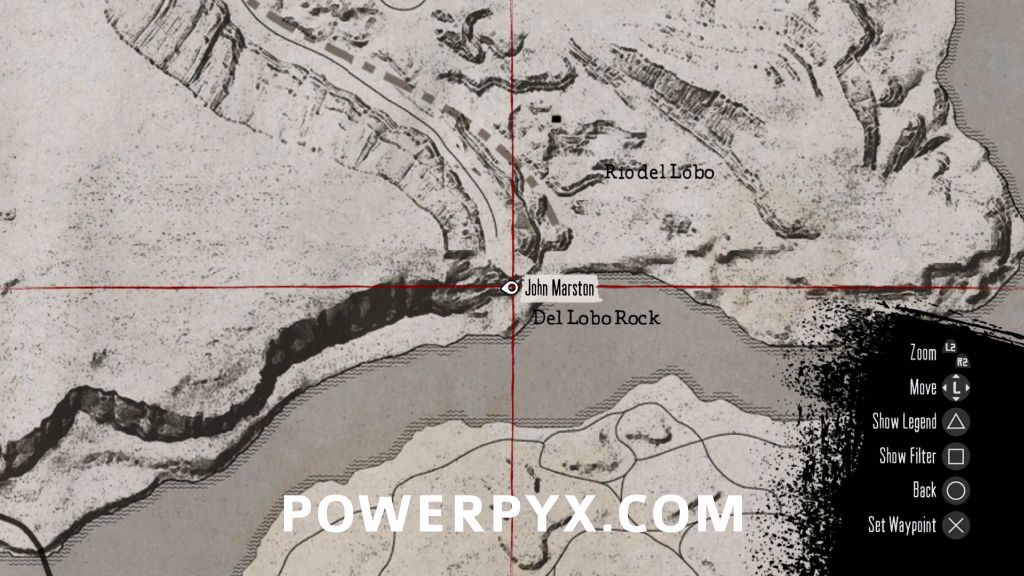
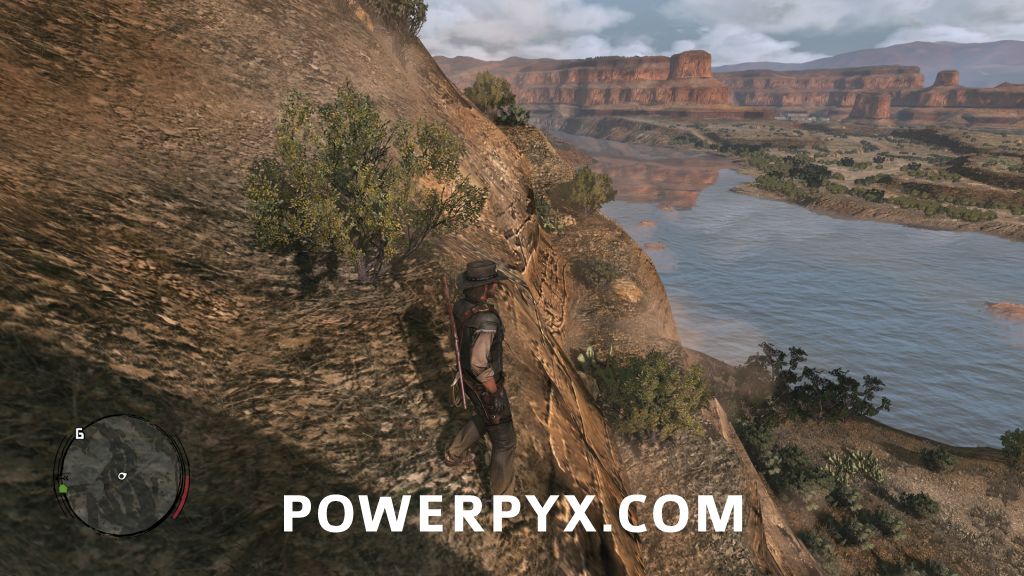
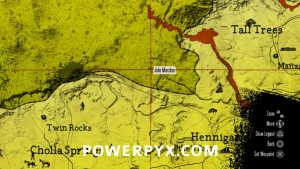
Even though the first picture shows Del Lobo Rock from the bottom, you don’t need to go there. As you’re heading down the road southeast of Riley’s charge, keep following the road to the camp at the top. Due south of the cookfire is the gap labeled as II on the map.


Go through and follow the path to find a place where you can drop to a path below that has the familiar pile of rocks at the end.
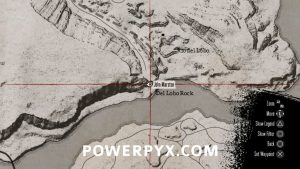

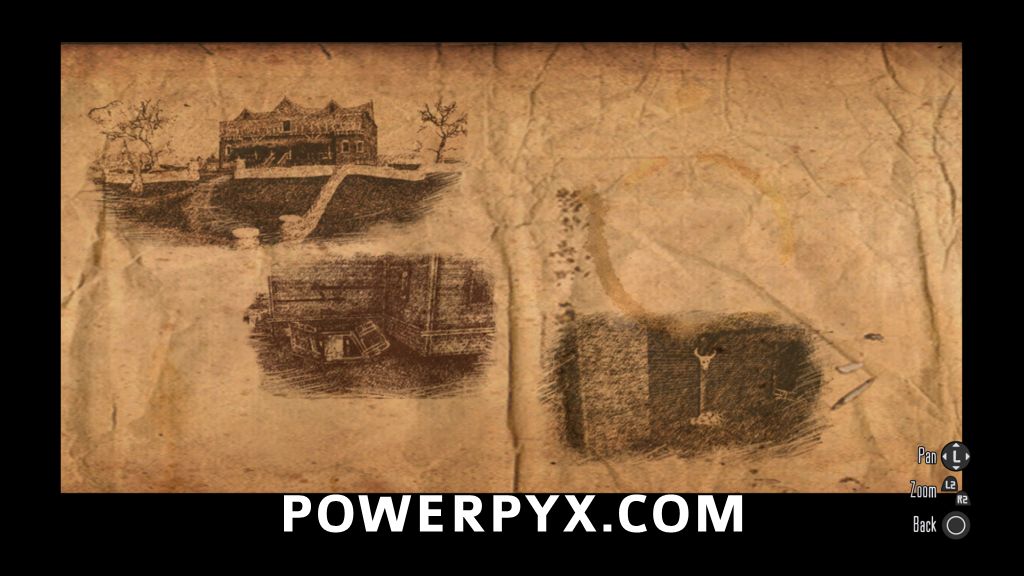
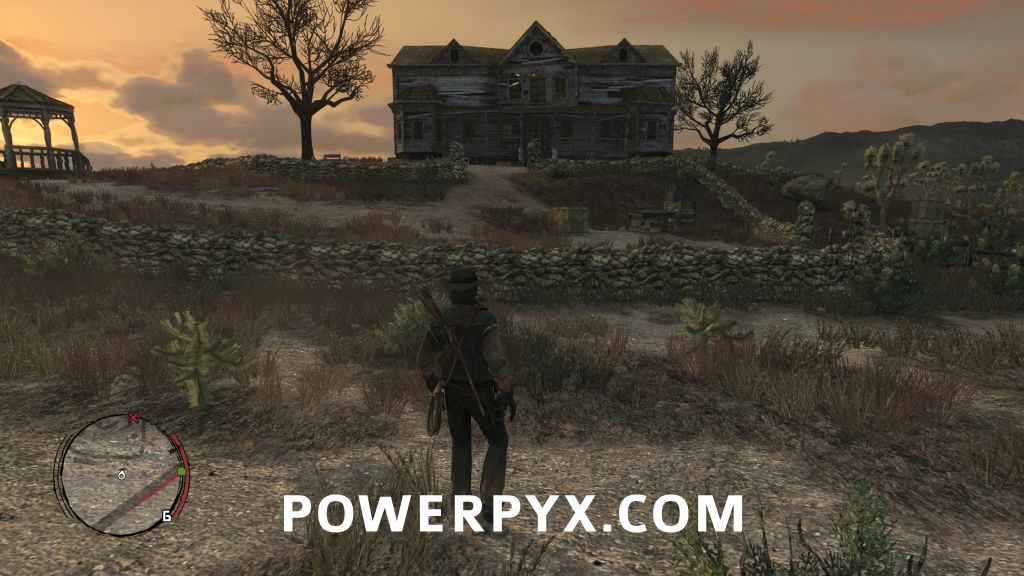
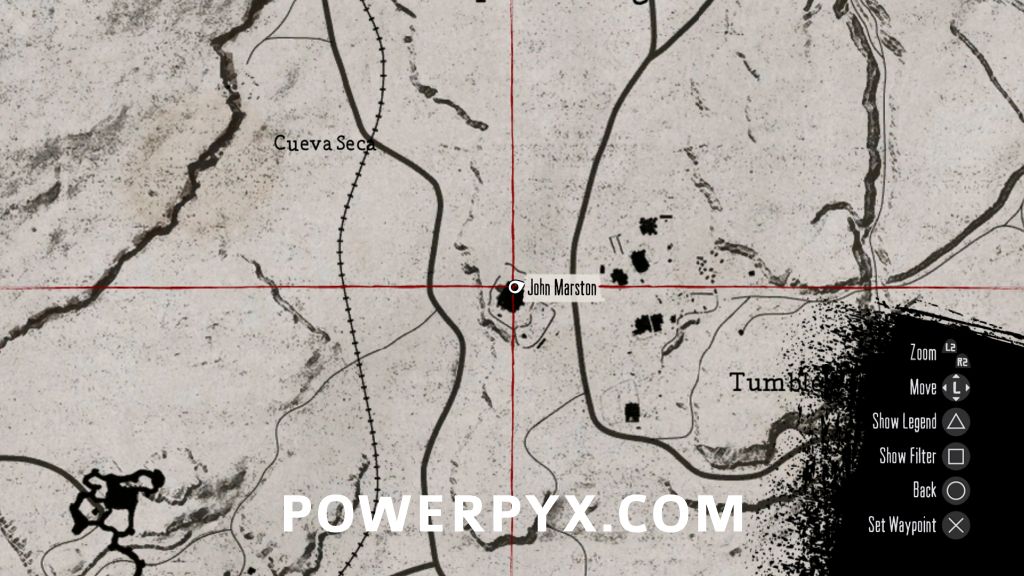
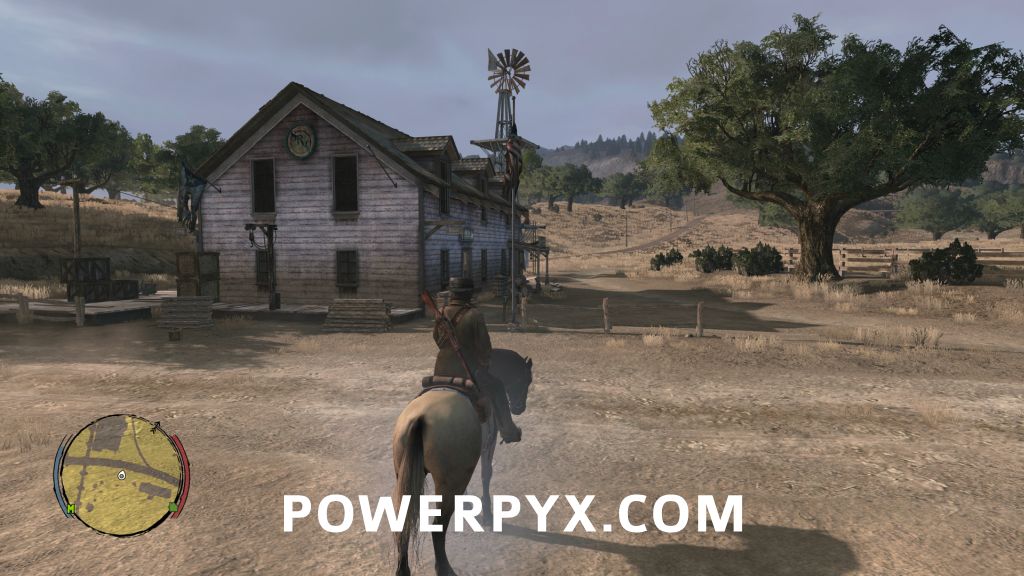
- Rank 4: Calhoun’s Gold


In the basement of the ruined mansion west of Tumbleweed. Enter through the cellar doors on the south side, and find the rocks in the basement by the west wall.

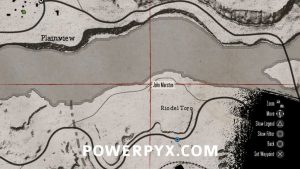
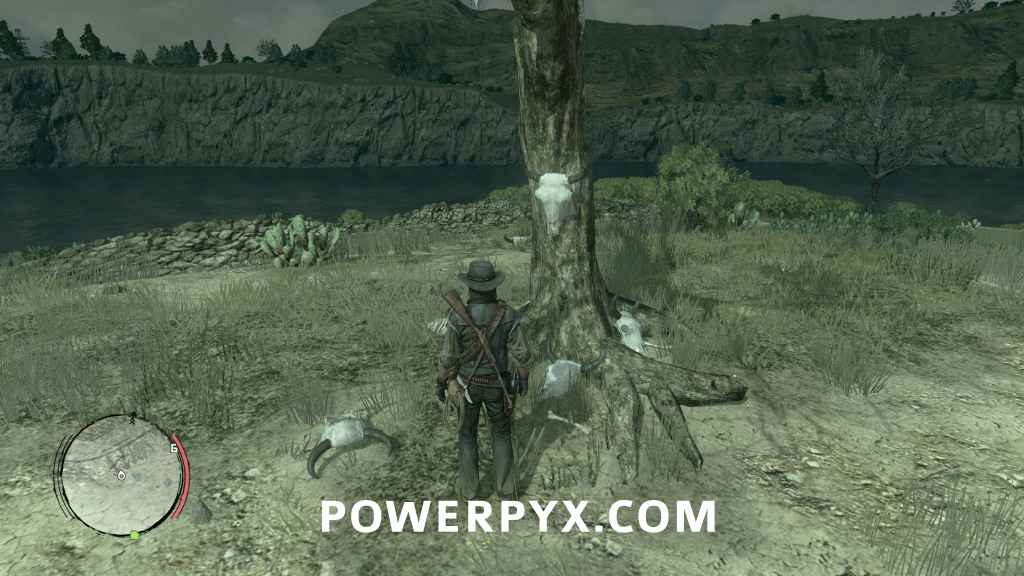
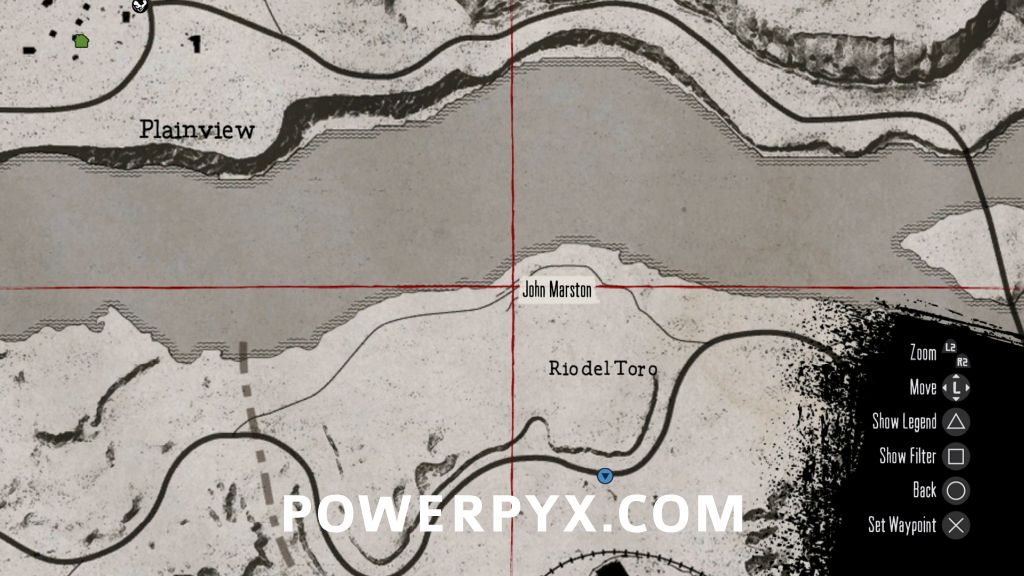
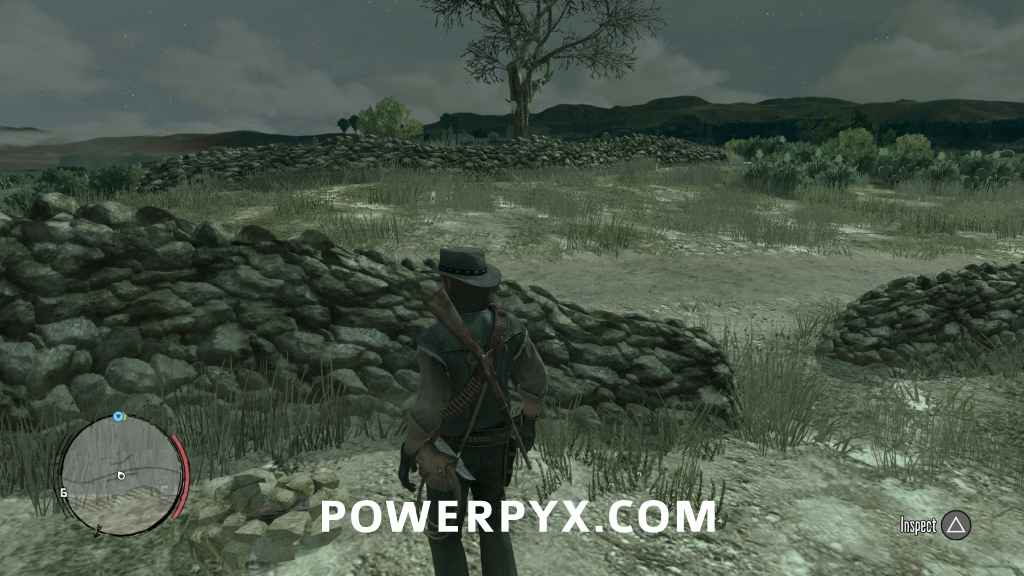
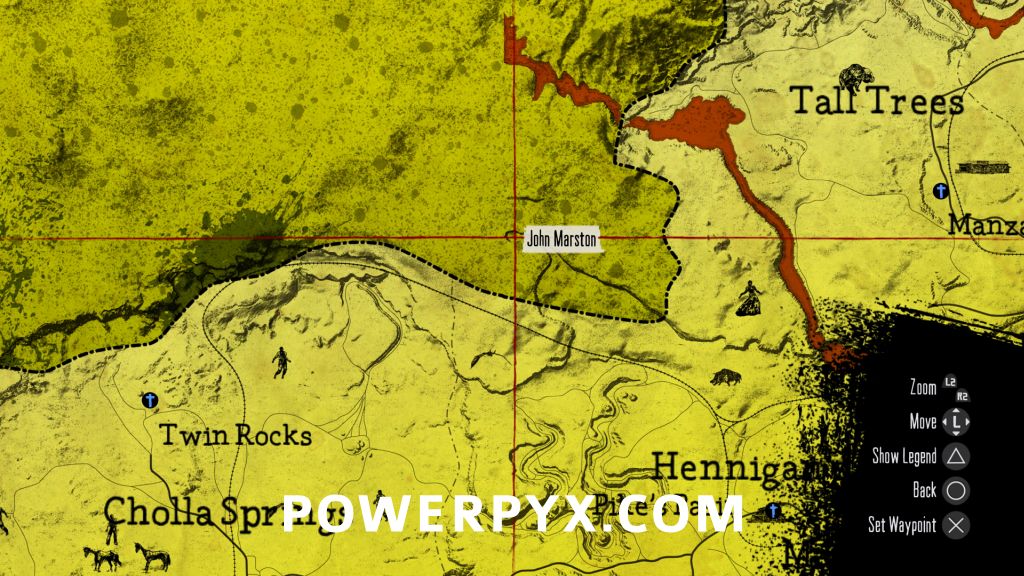
- Rank 5: Tubman’s Gold

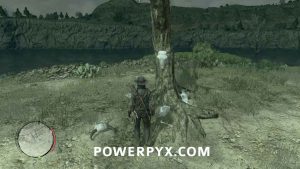
The tree with the cow skulls is north of Chuparosa in Rio del Toro. From the tree, head north towards the river and around the wall on the other side of the road.
- Rank 6: Brown’s Gold

Head to Crooked Toes, just south of Puerto Cuchillo. The pile of rocks is right on top of the rock formation between the “toes”.

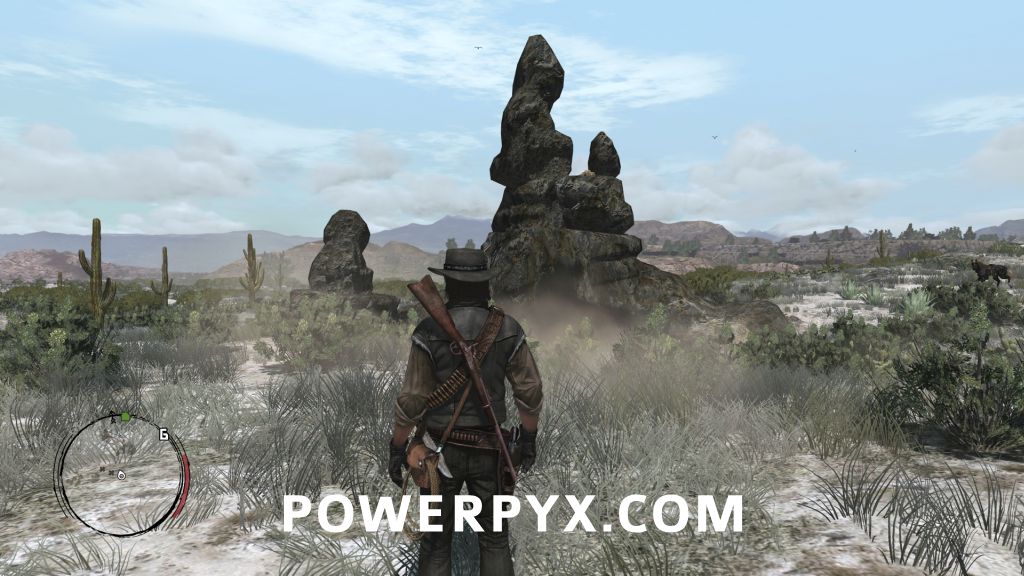
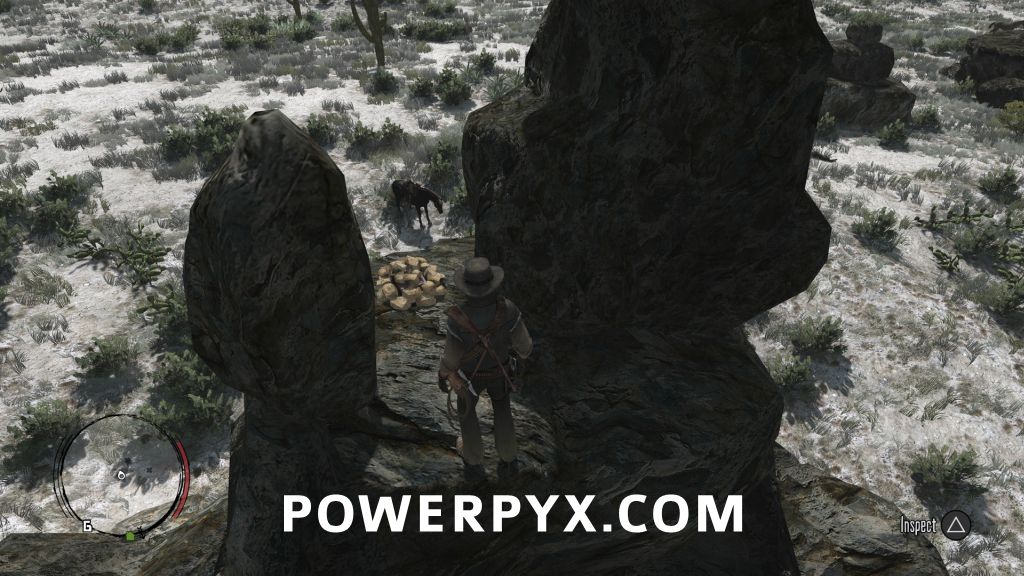
- Rank 7: Douglass’ Gold


Clearly a drawing of Ojo del Diablo, I don’t think Douglass tried that hard to hide his treasure. The pile of rocks is right at the end of the path on the southwest side of the eye.

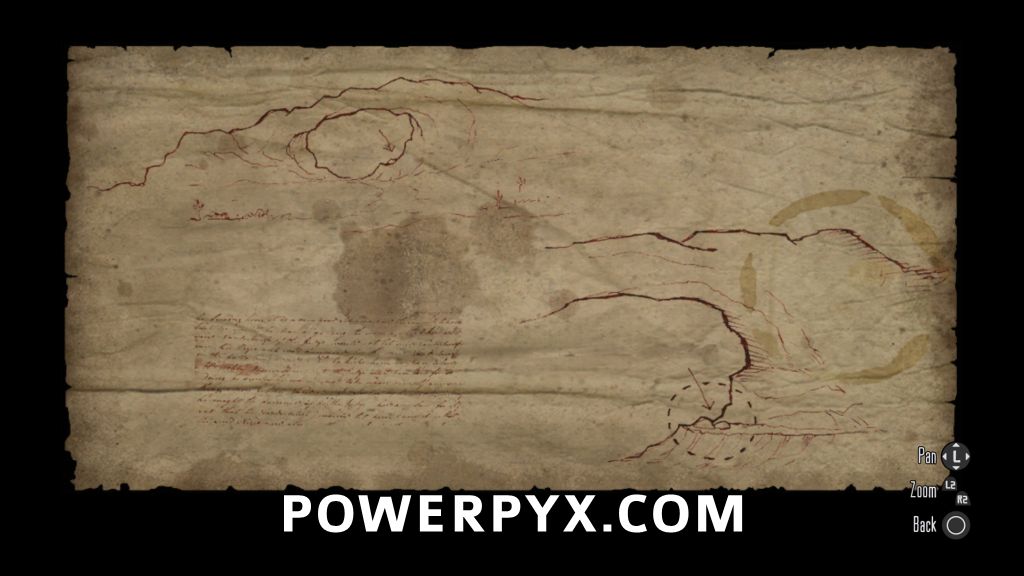
- Rank 8: Garrison’s Gold

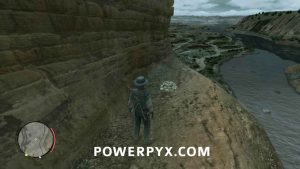
Again, John Marston benefits from a lazy treasure owner. The rock formation is Roca de Madera. From the rock, look to the southwest and you’ll see a path along the cliff just below the top. Follow that path all the way to the end to find the rock pile at the end.
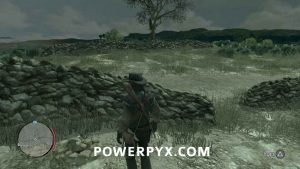
- Rank 9: Pickett’s Gold

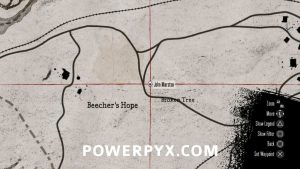
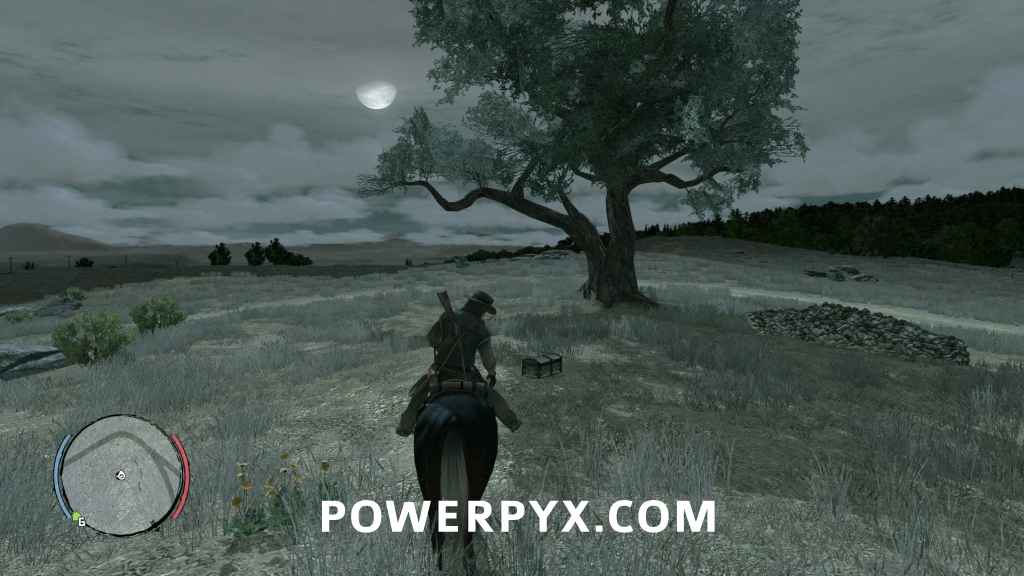
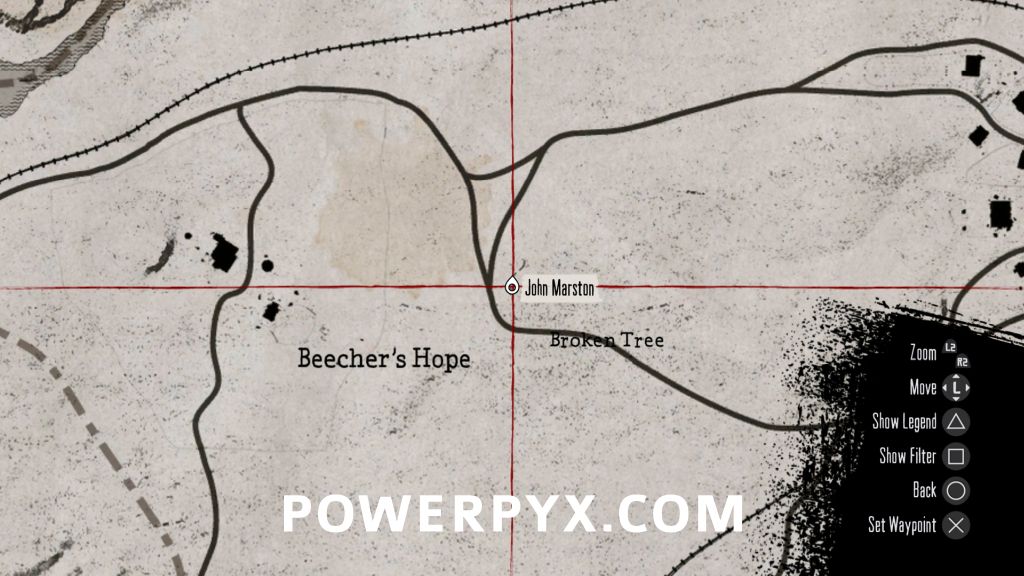
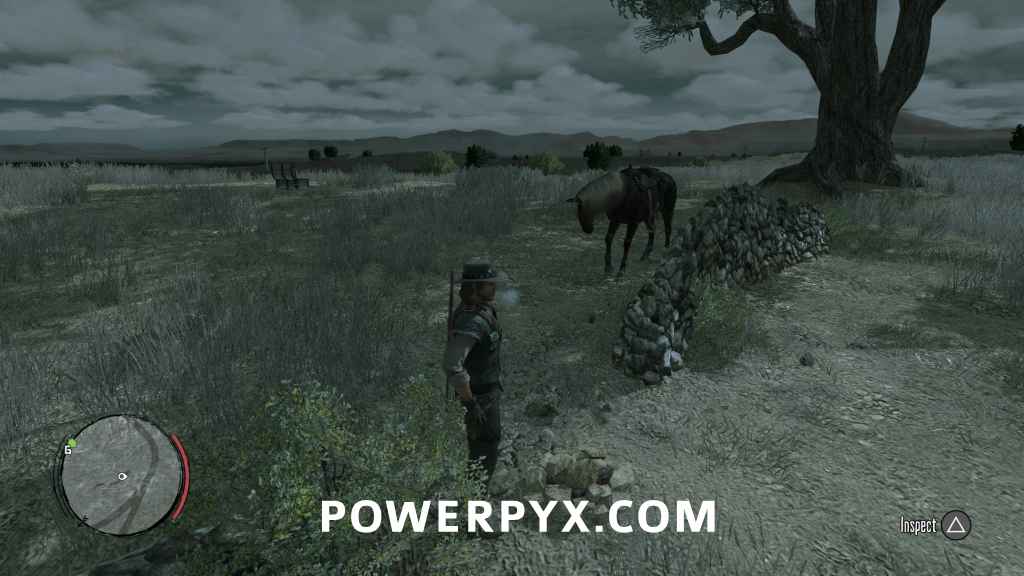
Bad luck Pickett, you buried your treasure in John Marston’s backyard. Head to the Broken Tree just east of Beecher’s Hope. Right at its base is a broken wall that has the pile of stones between two sections of wall.
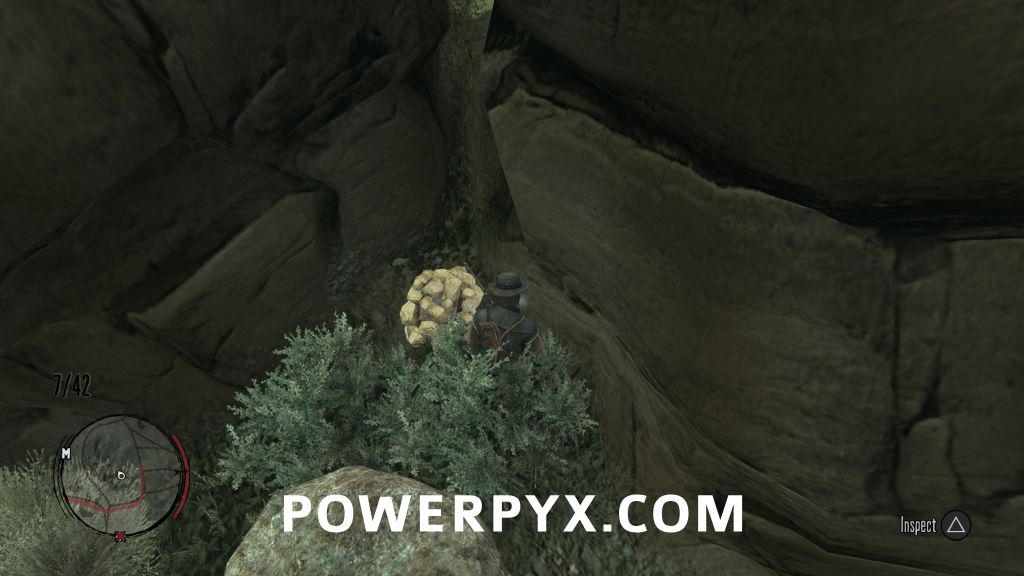
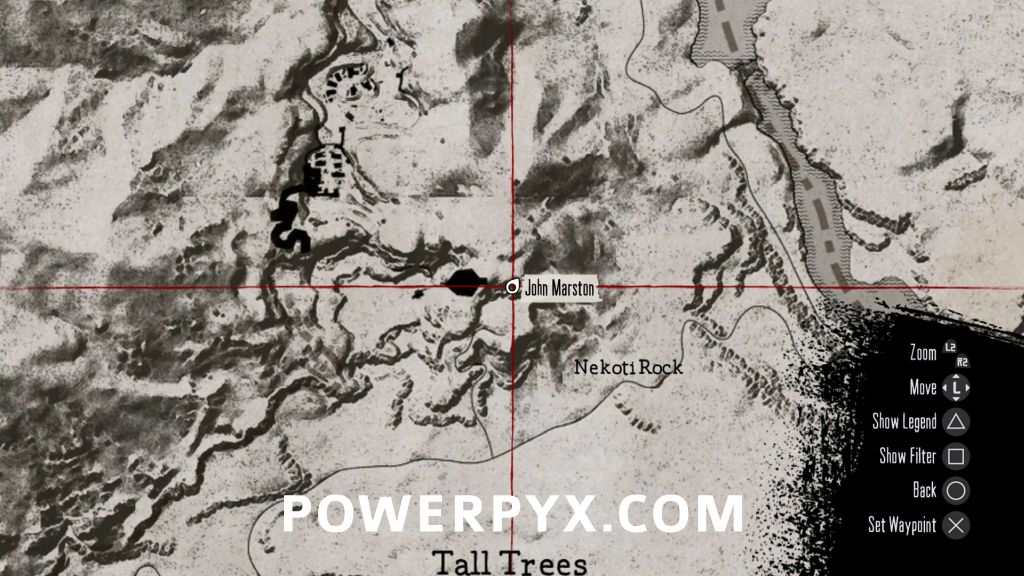
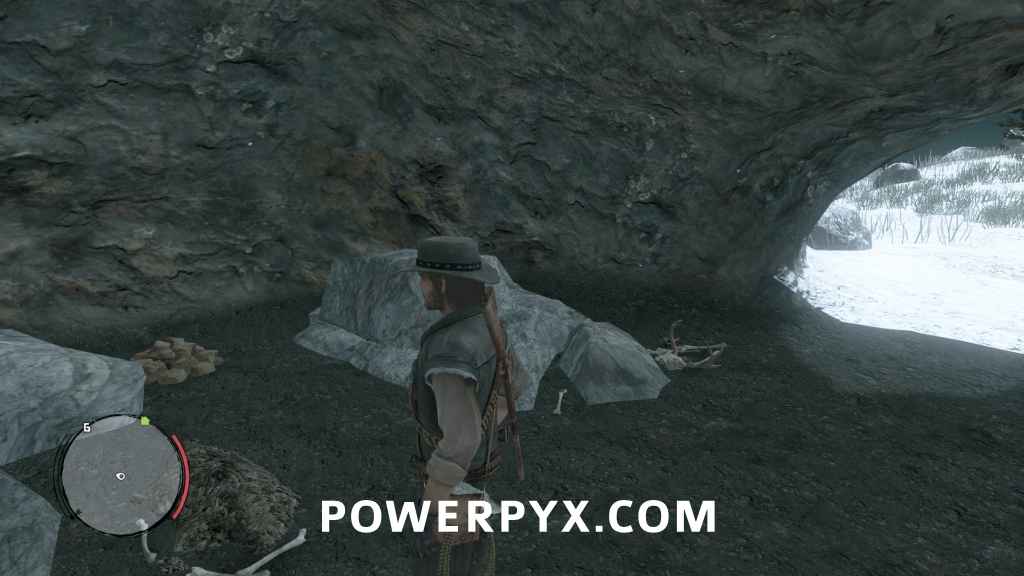
- Rank 10: Stonewall’s Gold


This treasure is in the bear cave north of Manzanita Post, the same one you’ll find while on “Spare the Love, Spoil the Child”. The rock pile is inside the cave against the far wall.


Legends and Killers DLC Challenge: Tomahawk
In the original 2010 release, the Tomahawk Challenges were added through the Legends and Killers DLC. It’s automatically included in the Remaster on PS4 / PS5 / PC / Xbox Series S/X / Nintendo Switch 2.
Completing all Tomahawk Challenges unlocks the Axe Master trophy / achievement, which is required for Platinum in the PS4/PS5 Remaster, but is not needed for 100% main game completion.
Unlock Requirement: Tomahawks can be purchased at Manzanita post, which will not only reveal the Tomahawk Mastery Challenge but it will also complete the first rank as well. To get legendary rank, you must complete the 5 ranks.
- Rank 1: Purchase the tomahawk from the general store at Manzanita Post
- Rank 2: Kill one enemy with the tomahawk used as a throwing weapon, one as a melee weapon, and one from horseback
Using /
/  to aim, you can use
  /
/  to throw the tomahawk. Use this to kill an enemy at range from horseback, then while on foot. After that, release / and run into melee range of an enemy and press / to chop them with the tomahawk.
 - Rank 3: Kill a flying bird with a tomahawk without using deadeye
Any place that you generate a large number of corpses will attract circling vultures. The Twin Rocks hideout has an accessible roof that will bring you into easy range to kill vultures in the area. - Rank 4: Kill 5 enemies in a row without missing with the tomahawk
Don’t even try to throw the tomahawk. Instead get into melee range and execute five people with it to complete this easily. - Rank 5: Complete a Gang Hideout using only tomahawks
Twin Rocks is small and easy, but it also has two guys who live on top of rocks. You’ll either waste a lot of tomahawks trying to judge the arc correctly or you’ll have to climb up to chop them in the face, which is actually faster. The rancher’s daughter will likely die, but once you kill the last enemy it will still count as completed.
Liars and Cheats DLC Challenge: Explosive Rifle
In the original 2010 release, the Explosive Rifle Challenges were added through the Liars and Cheats DLC. It’s automatically included in the Remaster on PS4 / PS5 / PC / Xbox Series S/X / Nintendo Switch 2.
Completing all Explosive Rifle Challenges unlocks the Master Exploder trophy / achievement, which is required for Platinum in the PS4/PS5 Remaster, but is not needed for 100% main game completion.
Unlock Requirement: The Explosive Rifle can be purchased from the gunsmith in Blackwater, which will not only reveal the Explosive Rifle Mastery Challenge but it will also complete the first rank as well. To get legendary rank, you must complete the following:
- Rank 1: Purchase the Explosive Rifle from the gunsmith in Blackwater
- Rank 2: Kill 5 enemies who are taking cover with the Explosive Rifle
Head to any gang hideout, and wait for enemy to hide behind cover. Kill them with the explosive rifle indirectly, by splashing the explosion off the ground, the wall behind them, or some other object in the area that will cause them to be hit by the explosion while they remain hidden. - Rank 3: Kill 3 enemies with a single shot
The first part of Pike’s Basin has a small group of enemies far away from the others. Hogtie three gang members then pile them in one place and shoot them with the Explosive Rifle. - Rank 4: Kill 2 wild animals in 1 shot with the Explosive Rifle
Any pack of coyotes or wolves, wild horse herd, or flock of birds will do for an easy completion. - Rank 5: Obtain and change into the US Army Uniform. Kill an enemy with the Explosive Rifle while wearing the US Army Uniform
Undead Nightmare DLC Challenges
There are 4 challenges that need to be completed for 100% completion in Undead Nightmare to unlock the Zed’s Dead, Baby trophy / achievement.
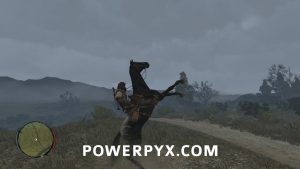
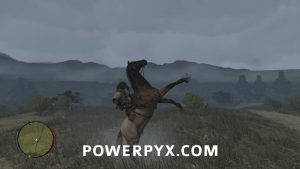
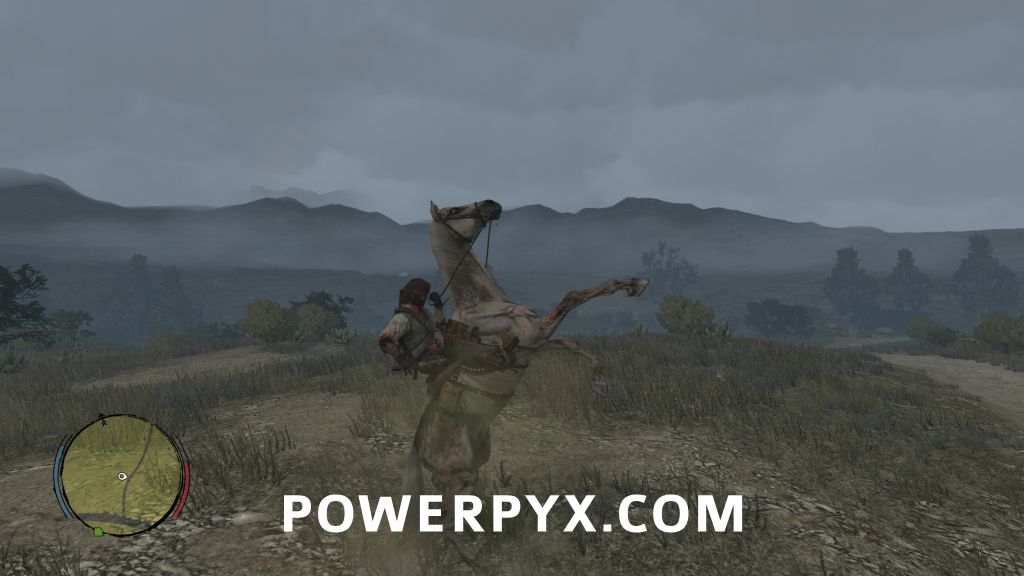
Undead Nightmare DLC Challenge 1: Four Horses of the Apocalypse
- Rank 1-4: These ranks represent finding and breaking the Four Horses of the Apocalypse. This can be accomplished in any order. When you are in the vicinity of one of the horses, you will receive a message that a mythical creature is nearby and a blue circle will appear on your map showing your search area.
- Pestilence
Spawns all over West Elizabeth

- War
Spawns in New Austin, usually in Gaptooth Ridge and on the west side of Cholla Springs.
- Famine
Spawns all over Nuevo Paradiso
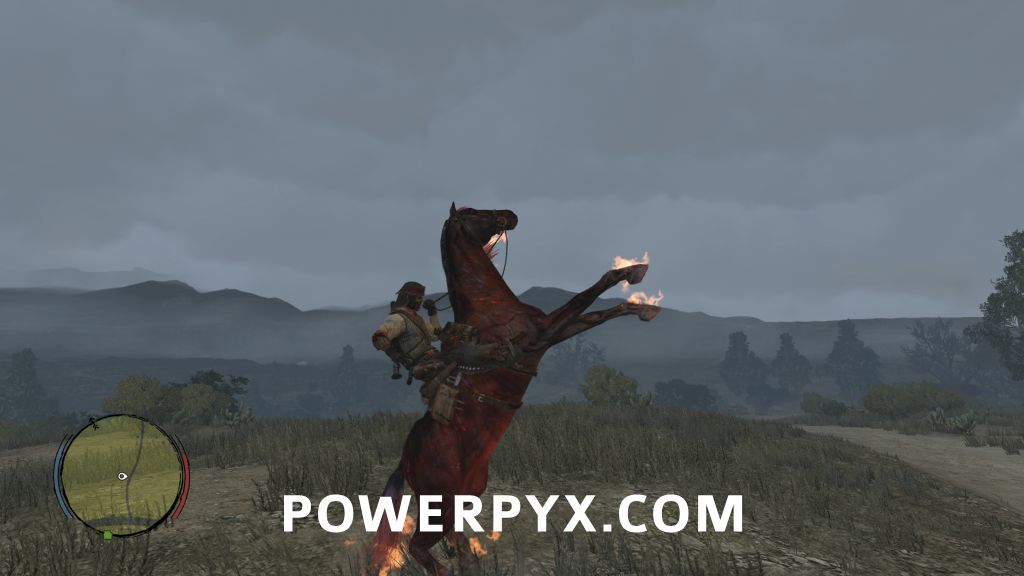
- Death
Spawns in New Austin
- Pestilence
- Rank 5: Kill one of each type of undead using Death’s power
While riding death, any human undead you trample will immediately die. Run up Jorge’s Gap and you’ll get at least 3 out of 4, then head to Gaptooth Ridge to get a Retcher to finish off the challenge.

Undead Nightmare DLC Challenge 2: Undead Hunter
- Rank 1: Kill 100 Fresh Undead and 25 Bolters
Fresh Undead are the regular walking dead you find everywhere, while Bolters are the ones that drop to all fours to run. It won’t take long to rack up these kills in regular play. - Rank 2: Kill 25 more Bruisers and 15 more Retchers
Bruisers are the heavyset undead that shoulder charge you, and Retchers are the undead with glowing green patches that spit at you. - Rank 3: Use a single explosion of a Retcher to kill two other undead
This can be done at the gate of El Presidio, where Retchers will spawn in the middle of a group of undead. Use Undead Bait to group them up before shooting the Retcher in the head to trigger the explosion. - Rank 4: Kill 2 undead bears, 5 undead wolves, and 3 undead cougars using a torch
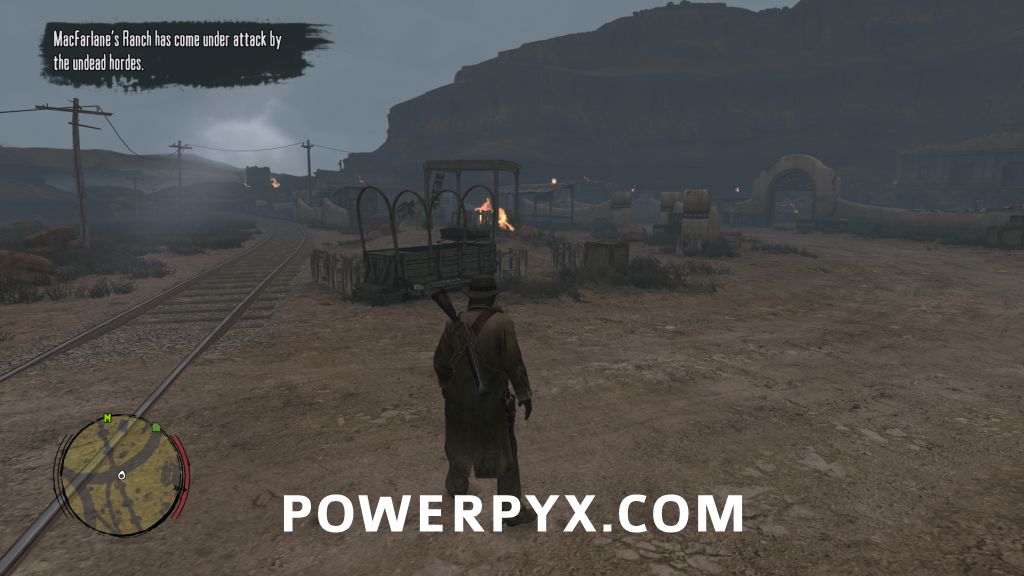
The Horse of the Apocalypse Pestilence cannot be killed, so use it to hit all these undead with your torch from horseback. Just be careful that there aren’t any human undead around who can pull you down from your saddle, especially when hunting bears and wolves in Tall Trees. Cougars spawn there as well, but less commonly. The Gaptooth Ridge area east of Cueva Seca is a good place, as is Rio Bravo. - Rank 5: Find and Kill the Chupacabra
This will also unlock the Chupathingy trophy. The Chupacabra can spawn all over Nuevo Paradiso, but it spawns most commonly near Torquemada. Use Pestilence again and kill it from horseback with a rifle round or two.
Undead Nightmare DLC Challenge 3: Undead Treasure Hunter
- Rank 1: Find the first map in a chest at a wilderness camp and find the treasure
You will find the treasure map during one of two ambient events. Either the man eating human parts by a campfire, or the scientist with the gatling gun, both of which have treasure chests in their camp. Looting the chest will randomly give you the treasure map. Use the treasure map from your Kit menu to look at it.


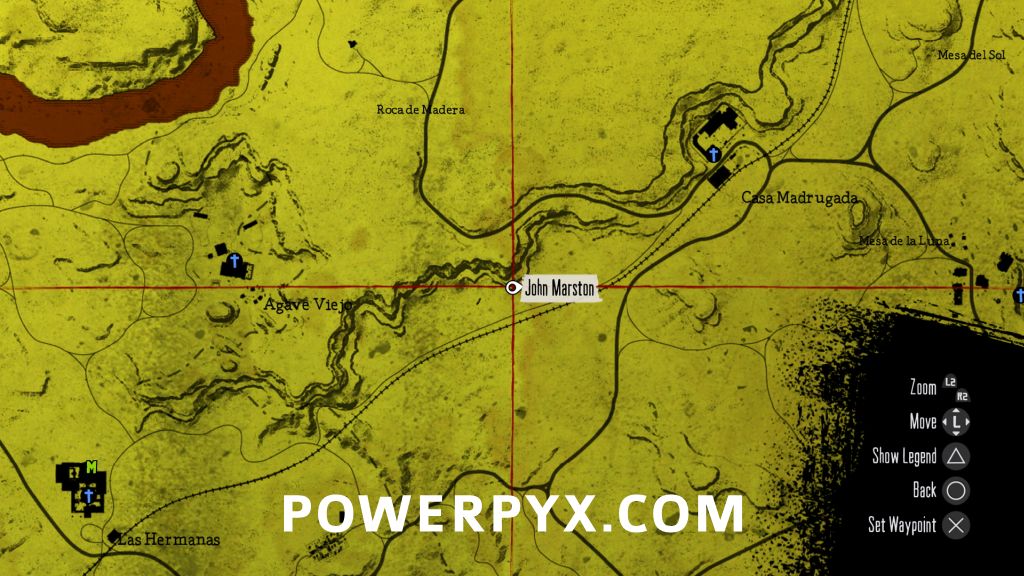
The small train station and windmill next to MacFarlane’s Ranch is the first landmark on the map. From there, head north from Pike’s Basin and ride over the train tunnel to find a long uphill ride into the snowy peaks to the very end of a box canyon where you’ll find the familiar rock pile in the open.

- Rank 2: Starting at Venter’s Place, look to the east to find the cliff and trees in the treasure map.

Head east, but swing a bit north to find the path up to the ledge that has the rock pile with the treasure.
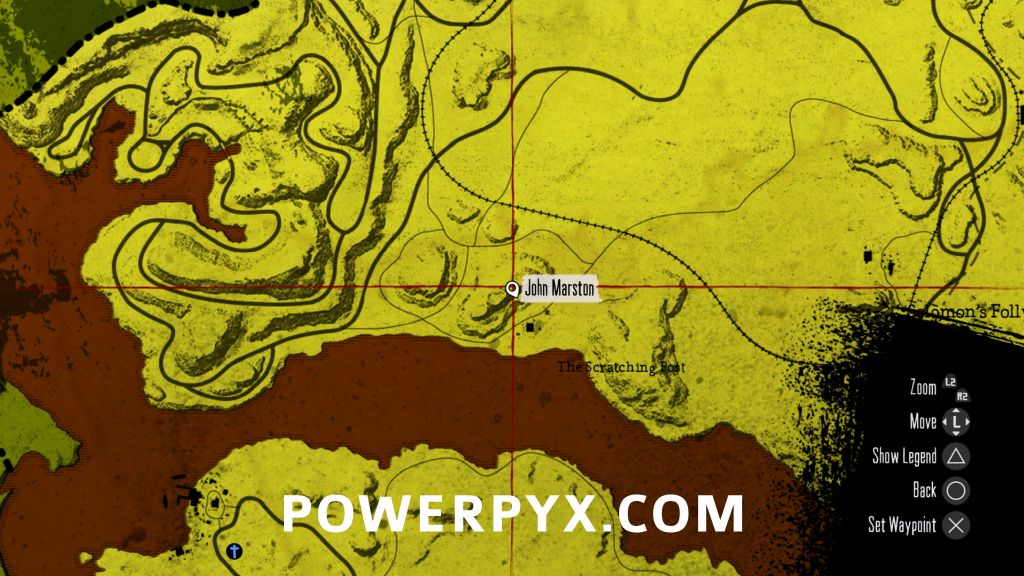
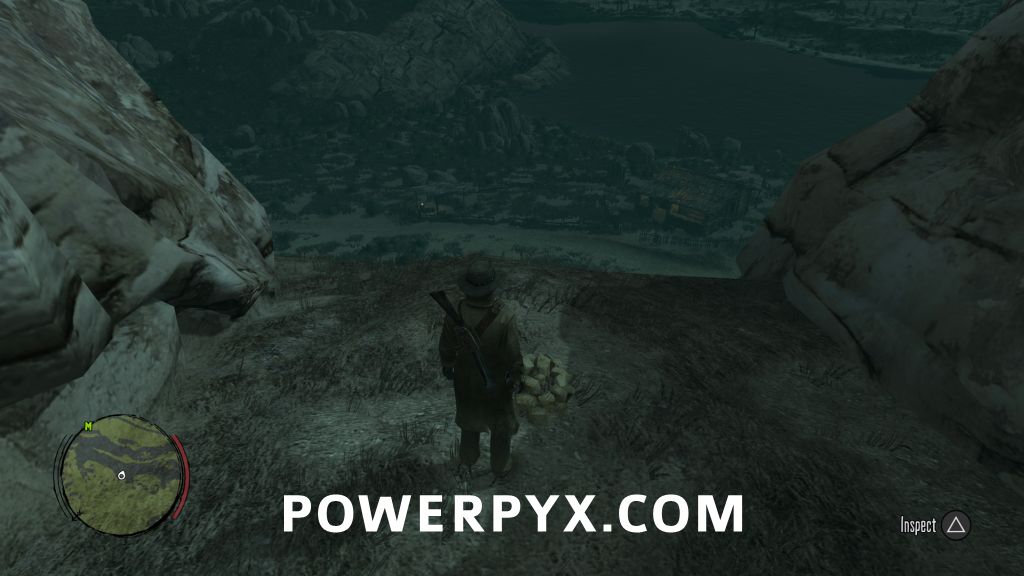
- Rank 3: This treasure is on the cliffs above The Scratching Post. Look to the north.


As shown on the map, loop around to the back of the rock to find the path to the top.

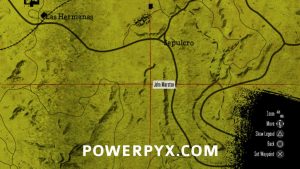
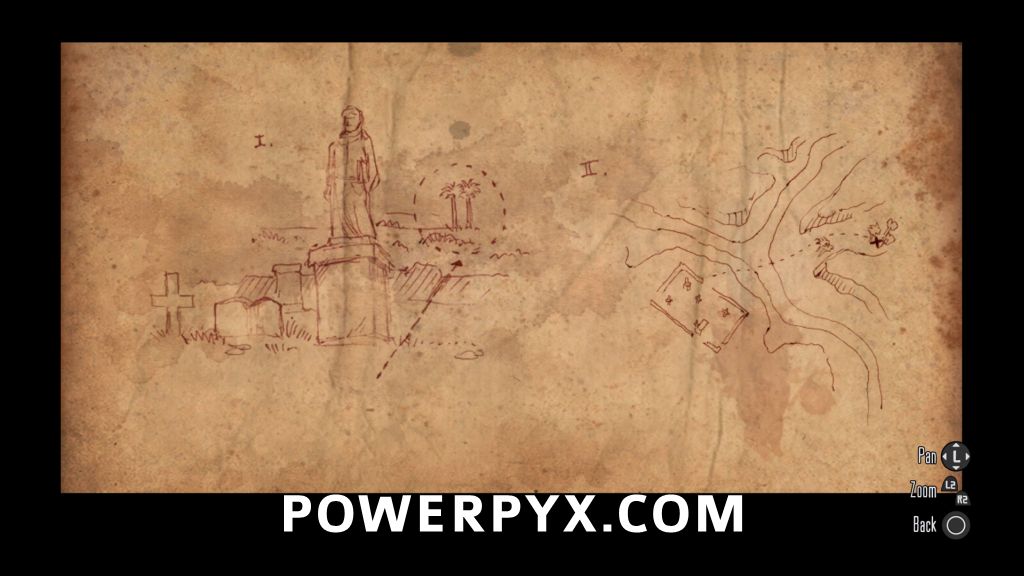
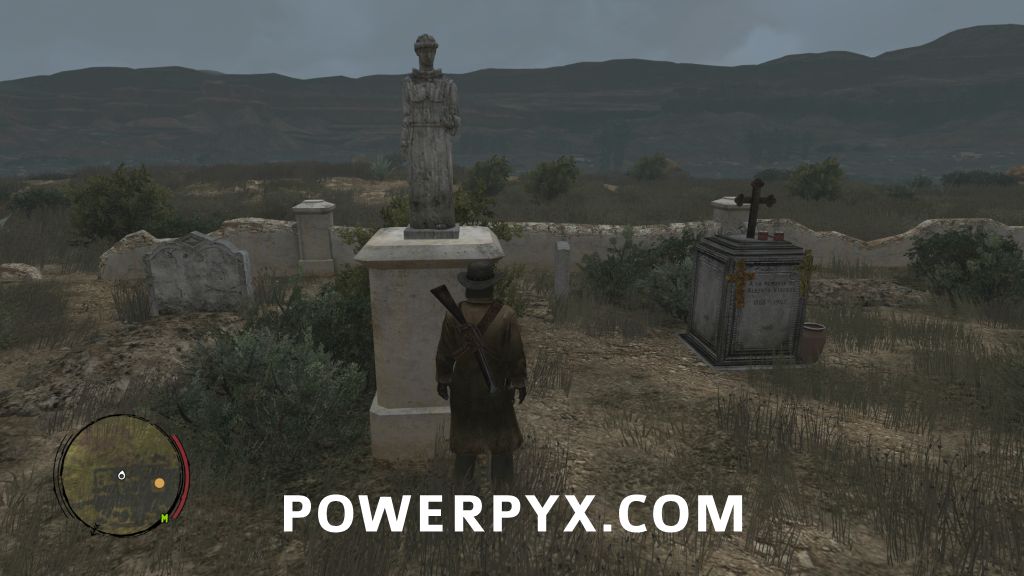
- Rank 4: Starting in Sepulcro there are two statues like this, but only one that has palm trees in the background.


Follow the path shown in the second part, to find a group of three trees with the rocks between them.
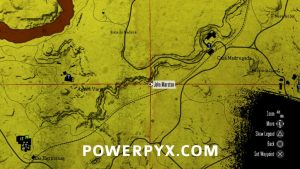
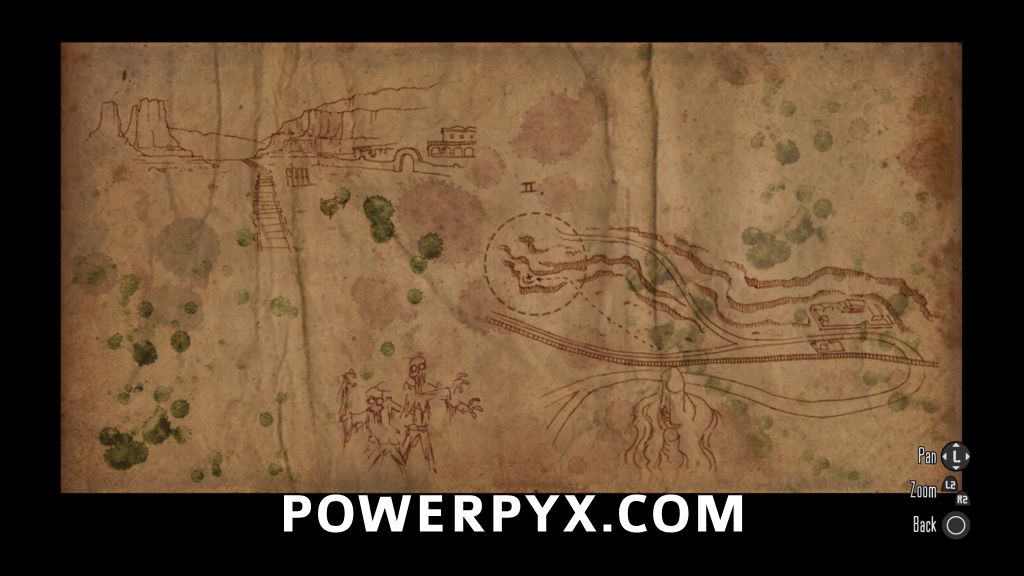
- Rank 5: The map shows the recognizable arch of Casa Madrugada. Follow the train tracks to the southeast.


When you’re roughly due north of Sepulcro, look for a path to get up on the ledge at the base of the cliffs. The rocks with the treasure will be right out on the edge of the ledge.


Undead Nightmare DLC Challenge 4: Undead Sharpshooter
- Rank 1: Kill 5 undead in 10 seconds using a gun
Use Dead-Eye to mark and headshot 5 normal zombies. - Rank 2: Headshot 10 undead in a row
You can’t use Dead-Eye for this rank, but you can change your targeting to Casual to automatically snap to a head shot. Avoid shooting Retchers, as their explosion will count as a regular kill and you will have to start again. - Rank 3: Kill 5 flaming undead in one Dead-Eye meter
Find a group of zombies to hit with a Fire Bottle then quickly switch to a revolver and go into Dead-Eye to kill them all before the fire finishes them off. - Rank 4: Kill one of each undead type in one Dead-Eye meter
A group of 10+ undead spawn outside El Presidio, and all four types can spawn there. If you save your game there, you can reload until you get all four types at once. Climb up on the left tower with the cannon, then use Dead-Eye to kill them all at once. You can also use an Undead Bait to group them together, in case there are undead against the wall below you to bring them out where they can be killed easily. - Rank 5: Get 5 undead sniper kills in 8 seconds (can’t use Dead-Eye)
The gates of El Presidio is good for this as well, but this time you’ll be doing this from the ground facing the gates from the outside. Run away from the undead so that they group up behind you, then throw an Undead Bait behind them to distract them. Then you can use the Rolling Block to pick them off one by one while they mill around the bait in a tight group. Alternately, you can get into melee range and use executions to kill 5 in quick succession, but that is more dangerous and difficult to do consistently with a sniper rifle.
More RDR Remastered Guides:
- 100% Checklist
- Challenges
- Treasure Locations
- Hideouts
- Gold Medals
- Stranger Tasks
- Trophy Guide & Roadmap
Leave a Reply