
Romeo is a Dead Man has 93 Collectible Locations spread across the game, and all of these are required to obtain the following trophies:
- 36 Badges – Romeo is a Laden Man

- 26 Research Notes – Romeo is a Well-Read Man

- 24 Documents – Romeo is a Well-Read Man
- 7 Pins – Romeo is a Decorated Man
Badges are equippable buffs that can be found in floating purple tesseracts, given as rewards or purchased from Shiroyabu. Research Notes and Documents are pieces of paper that have a white glow, making them easy to spot. These are generally found in the open and are not too difficult to find. Documents are mostly story-related, with many being unmissable. Pins are buffs that give you new abilities or expand your slots, and these are automatically obtained through story progression.
This guide is broken down into chapters, but everything can be obtained in post-game. Collectibles are listed per chapter at the earliest stage you can obtain them.
Chapter 1: Embers
Pin 1: Mercury
Automatically obtained after defeating the boss, Everyday Is Like Monday.
Chapter 2: Hubris
Pin 2: Venus
Automatically obtained after the briefing on board The Last Night.
Research Note 1: The Beginning of an Uncertain World
After the briefing and gaining access to new rooms, this will be in the Storage Room.

Research Note 2: Fish Don’t Notice Water
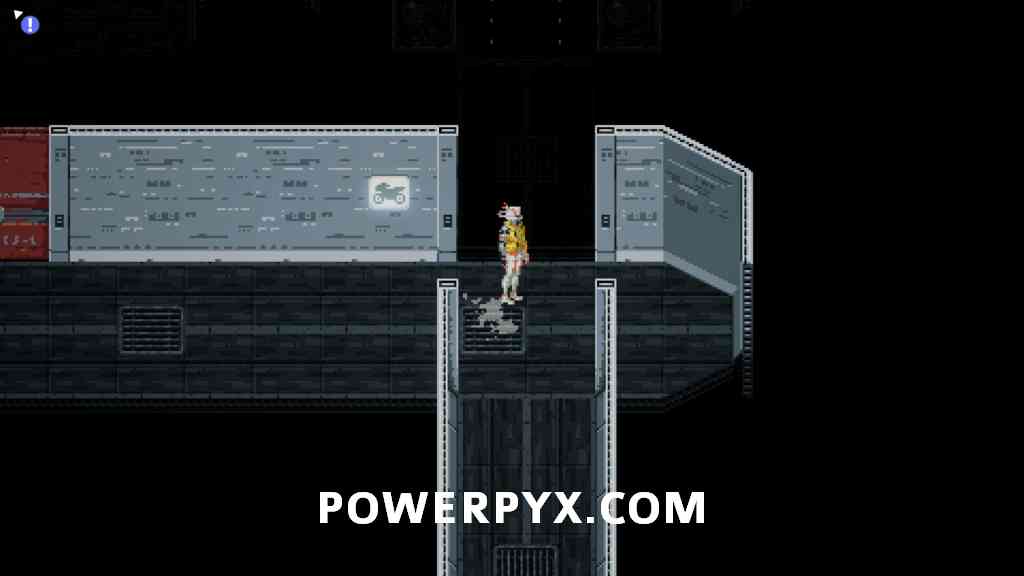
After the briefing and gaining access to new rooms, this will be at the far back of the Hangar, past the bike.

Research Note 3: Violent and Chaotic
South from the Hangar, past the door to the Balcony, you will find this at the end of the corridor.

Research Note 4: I Want You to Understand
Enter the Balcony that you walked past and stand on the right ledge. You will be able to spot a floating note. In the northwest of the balcony area, there is an opening that you can walk out onto an invisible bridge. Follow it around to collect the research note.


Research Note 5: Appear, Invade, and Spread
Once you enter 1983 Deadford Shopping Mall, enter the Babylon store next to where you start. This will be on a counter in the corner.


Research Note 6: Like a Scab
On the other side of the mall will be a food court, this will be on a table.

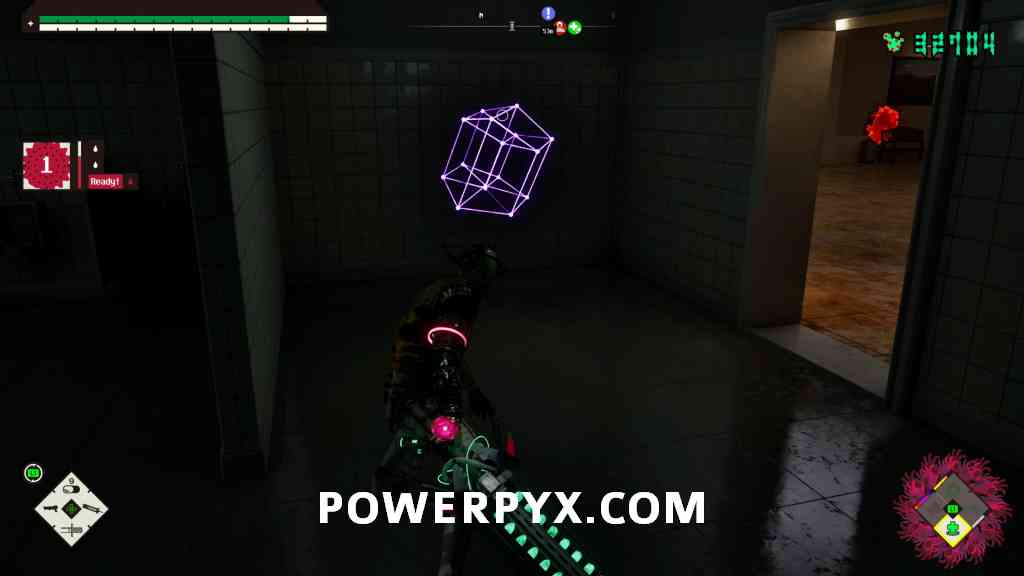
Badge 1: Myopia
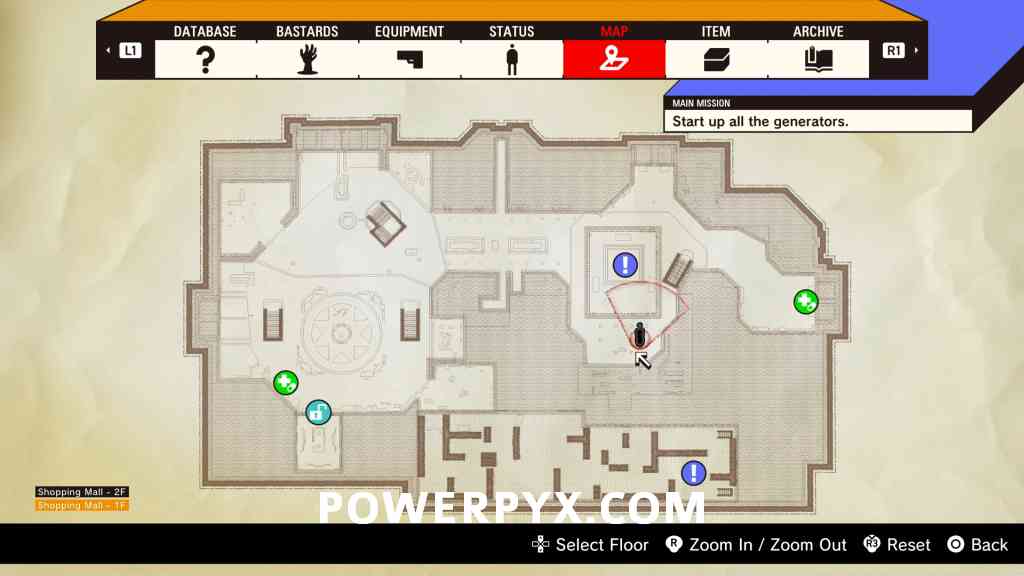
After completing the generator in the caged area, you will enter a Nirvana TV. Head up the stairs in front of you and turn left, going through the first door. Follow the corridor in here to find this in a purple tesseract.


Badge 2: Angel’s Face
After entering the storage area via the Nirvana TV, this will be on top of a pallet. Go up the nearby stairs and jump across to it.


Research Note 7: Space-Time Disturbing Abberation
After completing the generator in the storage area, ignore the Nirvana TV and go up the stairs to the north. Follow it to the end to find this on the ground.


Badge 3: Magnetic Fields
After returning to the main area of the mall through a Nirvana TV, the liminal wall that was previously blocking your path should be destroyed. Go down the hall where it was blocking to find this around a corner.

Research Note 8: Purification
On the second floor of the mall. Inside the Hardware Tools store, sitting on a bench.


Pin 3: Mars
Automatically obtained after defeating the boss, Enhanced Phantasm.
Chapter 3: Plight
There are no collectibles in this chapter.
Chapter 4: Reinvention
Badge 4: Ghost-o-rama
After completing SilverSox’s trial and returning to The Last Night, you will be able to speak to him to refight bosses. Complete Everyday is like Monday on Normal to unlock Hard mode, then complete Everyday is Like Monday Z on Hard under par time to receive this badge.
Badge 5: Guilty Pleasure
After completing SilverSox’s trial and returning to The Last Night, you will be able to speak to him to refight bosses. Complete Enhanced Phantasm on Normal to unlock Hard mode, then complete Enhanced Phantasm Z on Hard under par time to receive this badge.
Badge 6: Lost and Found
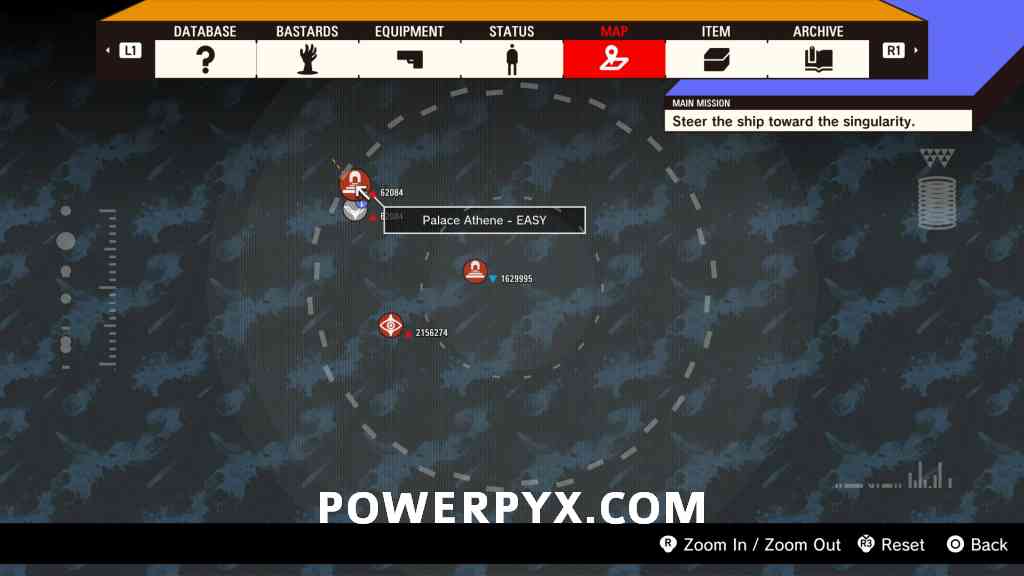
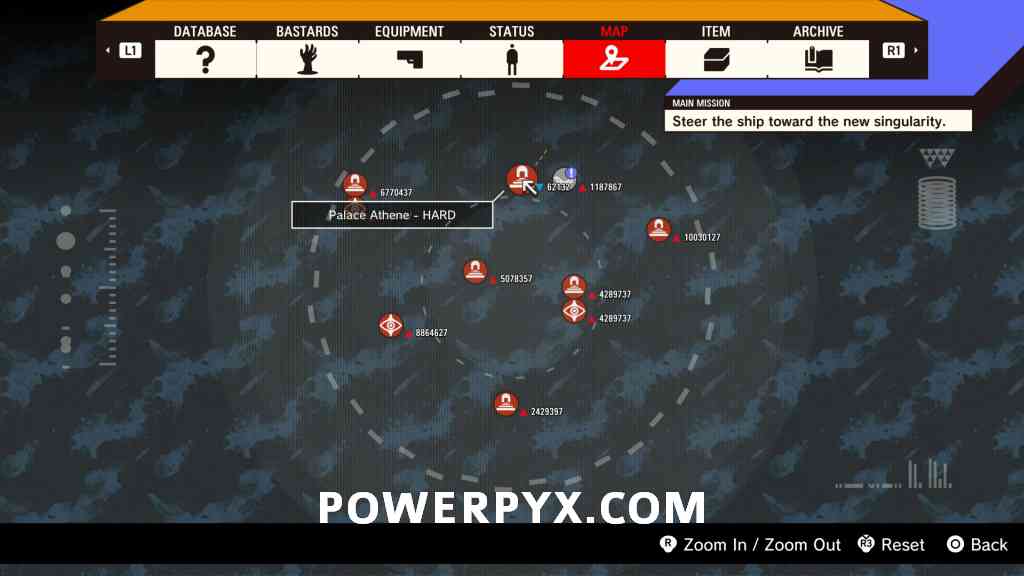
Once you are ready to fly into the next Dimensional Seer, you will be able to look around space to spot two Palace Athene – Easy rifts. Fly into one of these and clear the rooms to be rewarded with this badge at the end.


Research Note 9: Be Silent
Once you enter 1968 Deadford City Hall, immediately turn around and approach the fountain to find this on the side of it.


Research Note 10: Like a Backdoor
Before entering City Hall, head behind it to find a heap of green tesseracts and this note in the middle.


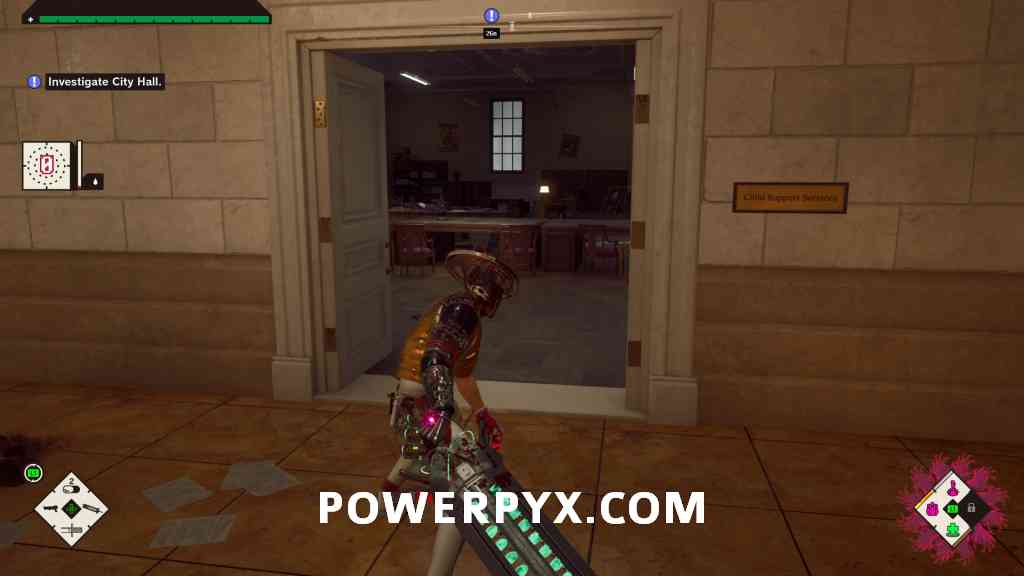
Research Note 11: “It” Has Always Been There
Once inside City Hall, turn left and enter Child Support Services to find this on a desk.


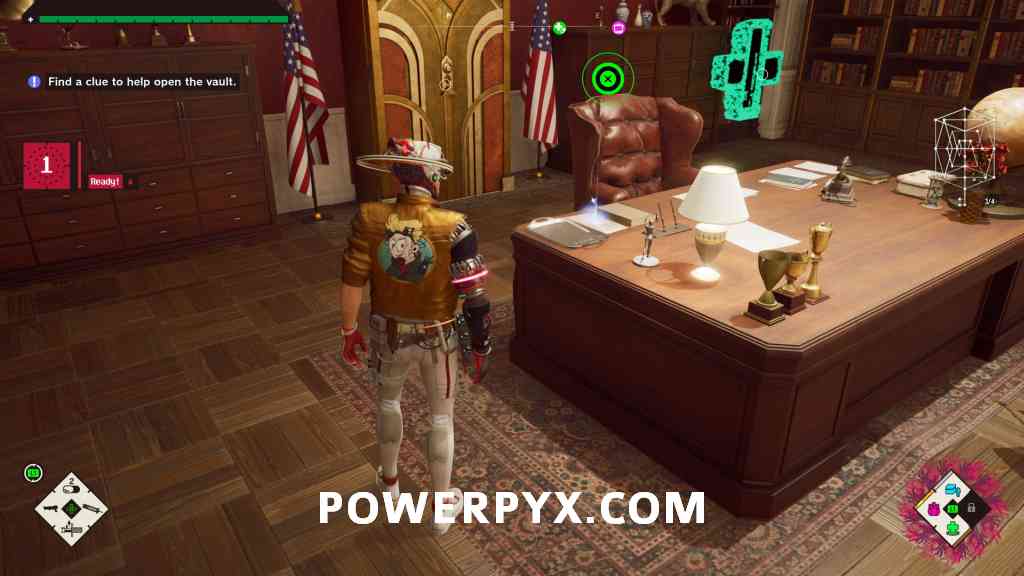
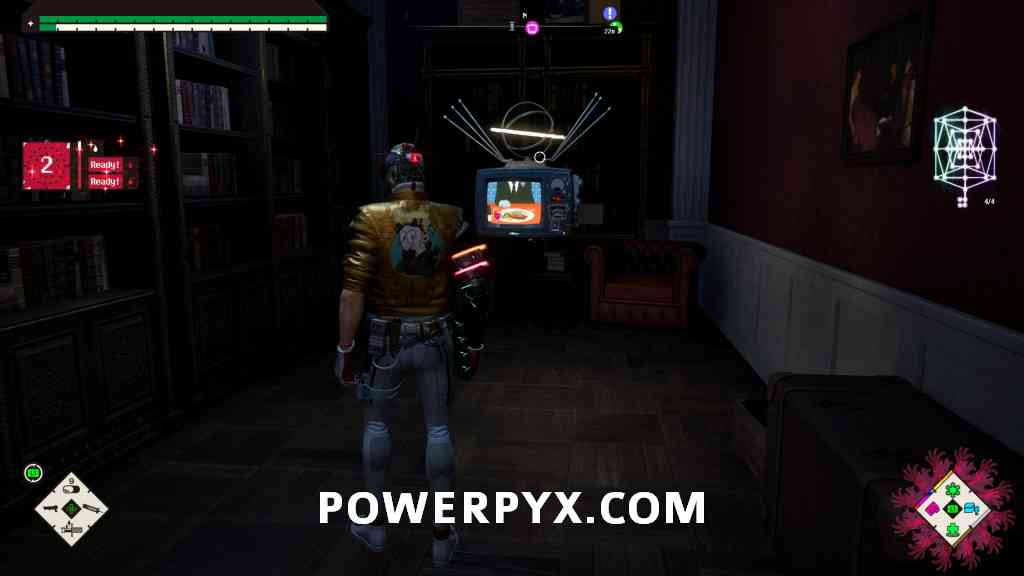
Document 1: Memo: I’ll be waiting
After going through the second Nirvana TV and arriving in the Mayor’s Office, this will be on a coffee table next to you.


Document 2: Memo: I always looked forward to it
In the same room, on the Mayor’s desk.
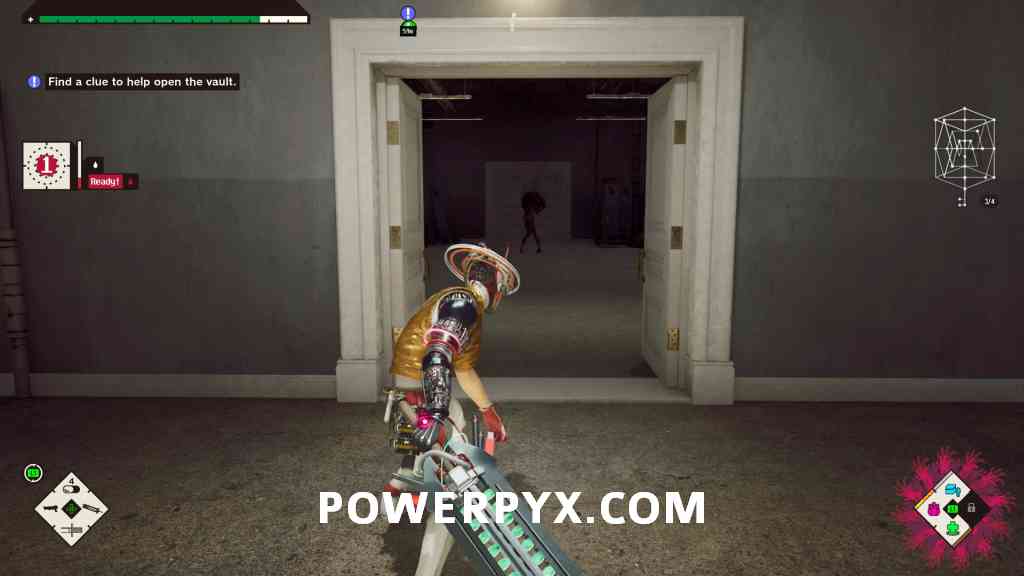
Document 3: Memo: You were so cute
After going through the Nirvana TV into the Underground Basement, this will be in the room where you fight a Punisher. This will be on the ground in the back.


Research Note 12: What Do You Know?
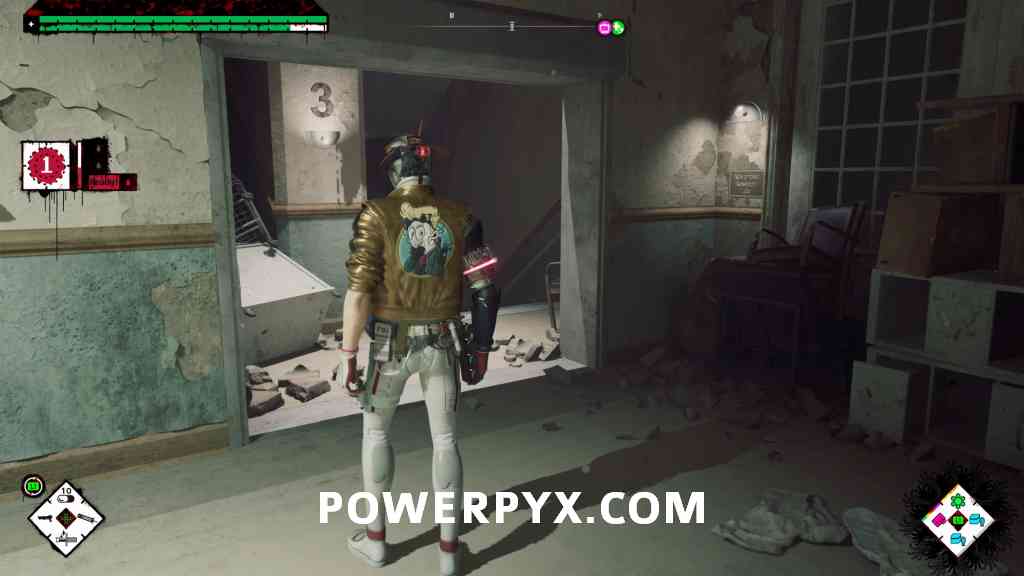
In the same room will be a purple tesseract containing a basement key. This opens the room in the middle of this area. Inside will be a note on some boxes. There are also two Exorcist Swords in this room.


Document 4: Memo: I was daydreaming
After going through another Nirvana TV and arriving in the County Clerk’s Office, this will be on the desk.

Badge 7: Nurse’s Mercy
Now head down into the basement via the stairs, which should now be accessible if you’ve been using the Exorcist Swords to destroy the white Liminal Walls inside the Nirvana TVs. This will be in a short corridor, opposite a door leading into the previous section of the basement.

Badge 8: Hyperopia
Much like the previous badge, this will be accessible if you have destroyed the white Liminal Walls inside the Nirvana TVs. While standing in front of the Mayor’s Office, head left down the corridor to find this near a Space-Time Pharmacy.


Pin 4: Jupiter
Automatically obtained after defeating the boss, Death Changeling.
Chapter 5: Atonement
Badge 9: 1%er
Speak to SilverSox in the Trial Room. Complete Death Changeling on Normal to unlock Hard mode, then complete Death Changeling Z on Hard under par time to receive this badge.
Badge 10: Standing
Once you are ready to fly into the next Dimensional Seer, you will be able to look around space to spot two Palace Athene – Normal rifts. Fly into one of these and clear the rooms to be rewarded with this badge at the end.


Research Note 13: He Who Controls Space-Time
Once you enter 1992 St. Impius Asylum, enter the building to find this on a coffee table to the right, near the Space-Time Pharmacy.


Research Note 14: From the Base of a Black Cherry Tree
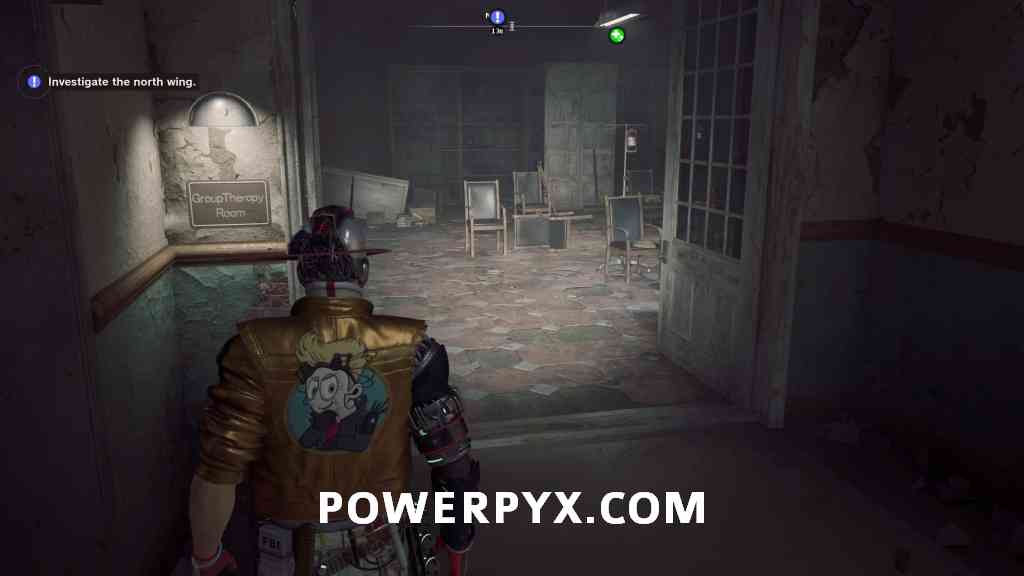
Go into the North Wing and enter the Storage Room on the left to find this on a chest of drawers.


Document 5: Night Shift Report
Head upstairs and enter Group Therapy Room to find this on a desk to the right.
Document 6: Dennis’ Remnant Psyche
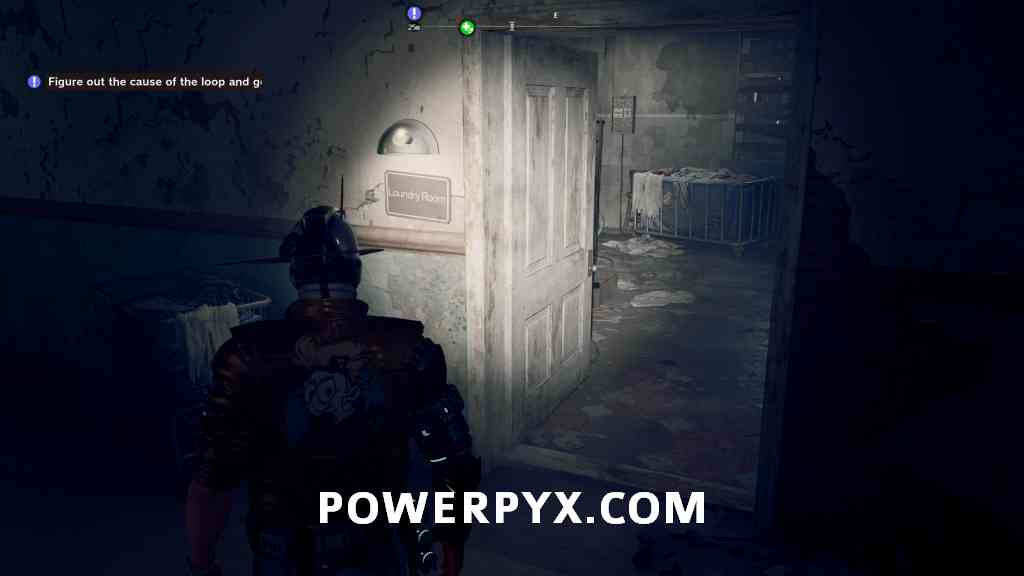
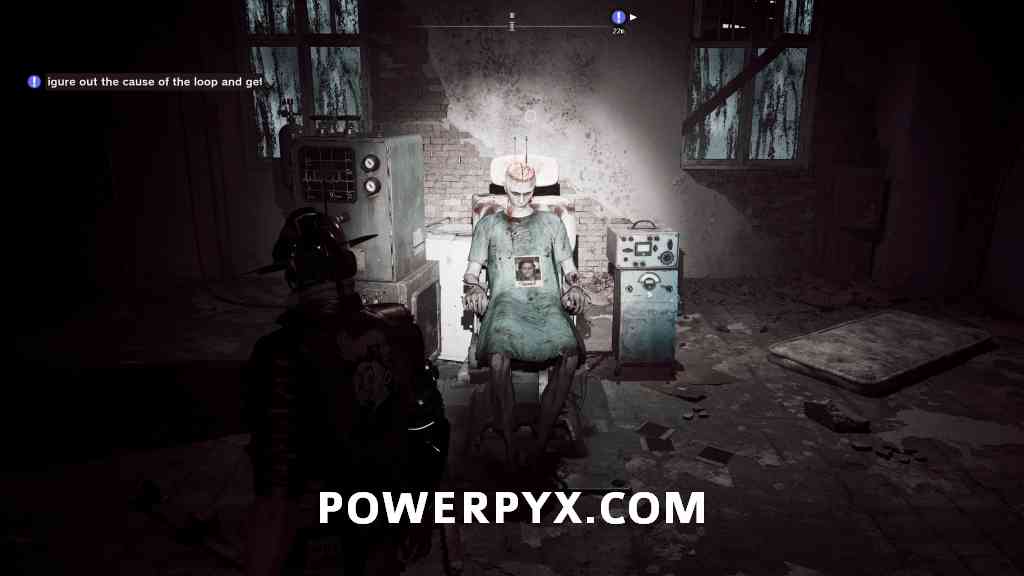
Once you start the third loop of the North Wing, enter the Laundry Room to your right and interact with the washing machine. Turn around and interact with the shadowy figure to receive this.


Document 7: Luc’s Remnant Psyche
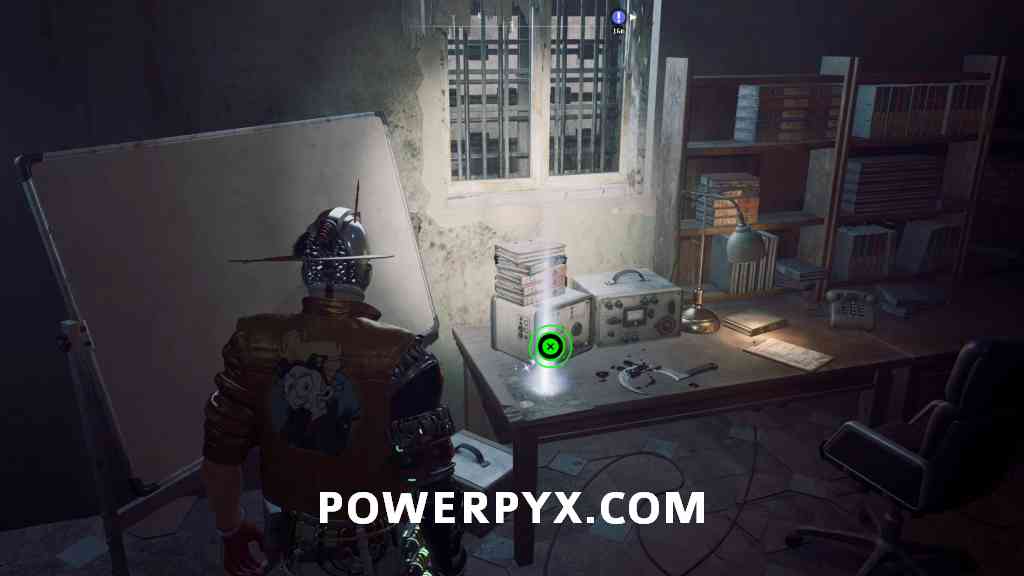
Continue looping until you find a radio you can interact with in Group Therapy Room on the second floor. This will make another shadowy figure appear near the door with this document.


Document 8: Teddy’s Remnant Psyche
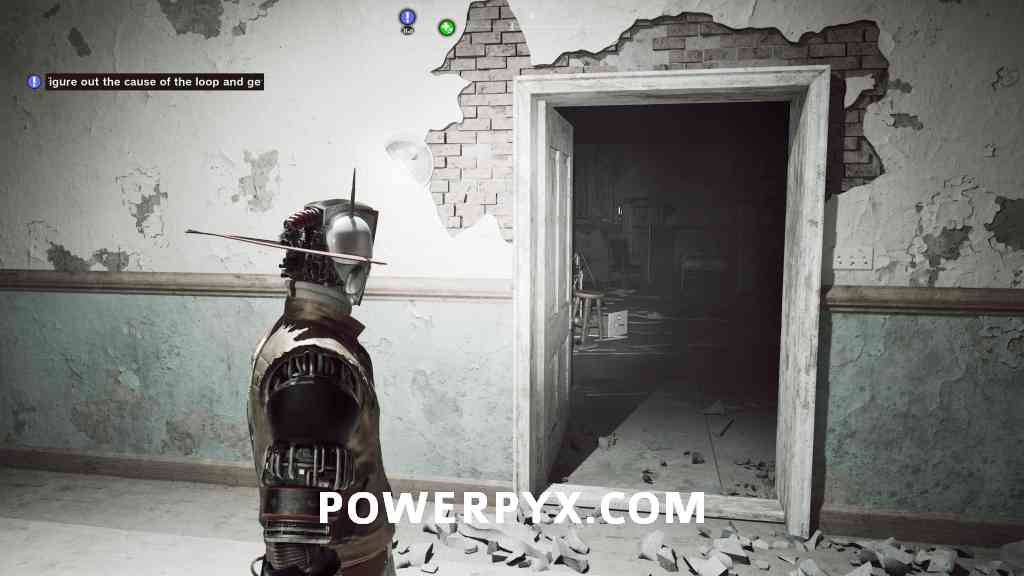
Go through the Assisted Wash Room into the Pathology Lab to interact with another radio. Go to leave the room and interact with the shadowy figure to receive this.


Document 9: Maddison’s Remnant Psyche
After another loop, enter the Assisted Wash Room for another radio and document.


Document 10: Patrick’s Remnant Psyche
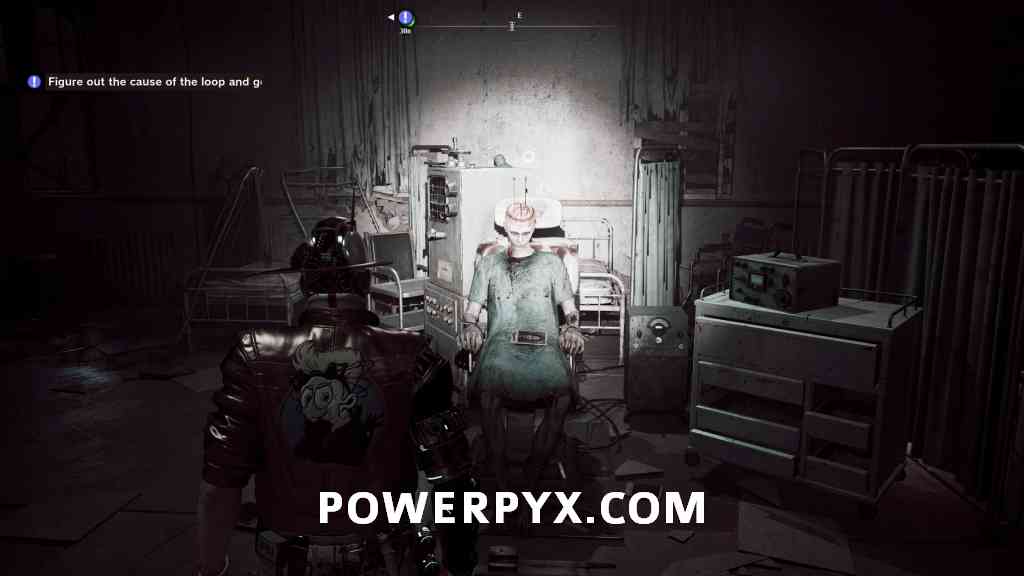
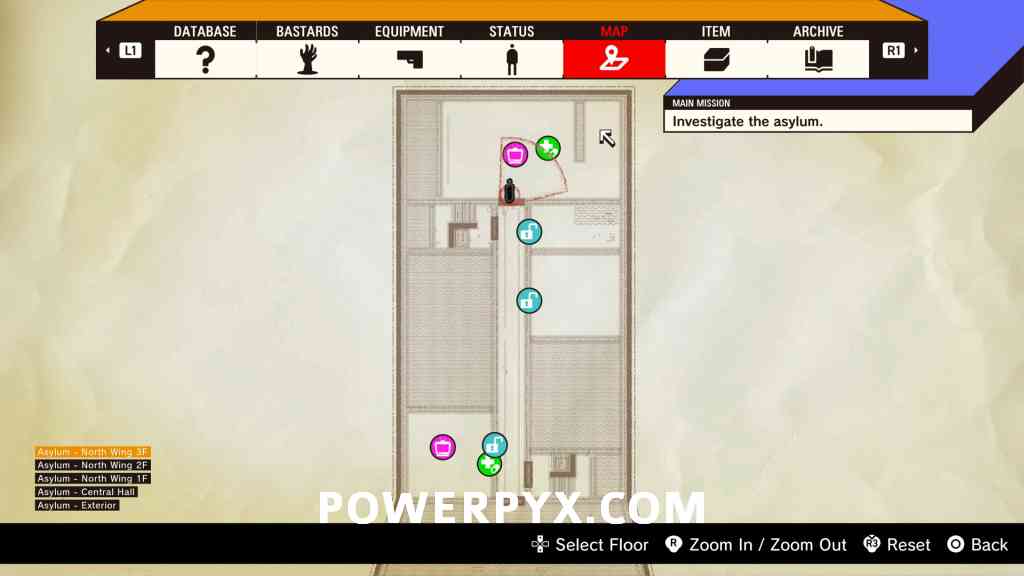
After another loop, enter Room N304 and complete the brain puzzle for another shadowy figure and document.


Research Note 15: Then They Woke Up
Further down the hall in Room N301, sitting on a table.


Document 11: Rosemary’s Remnant Psyche
Go down the stairwell and enter the first room on the right, then complete another brain puzzle.

Document 12: Randall’s Remnant Psyche
Go into Storage Room for another brain puzzle.

Research Note 16: On the Rope
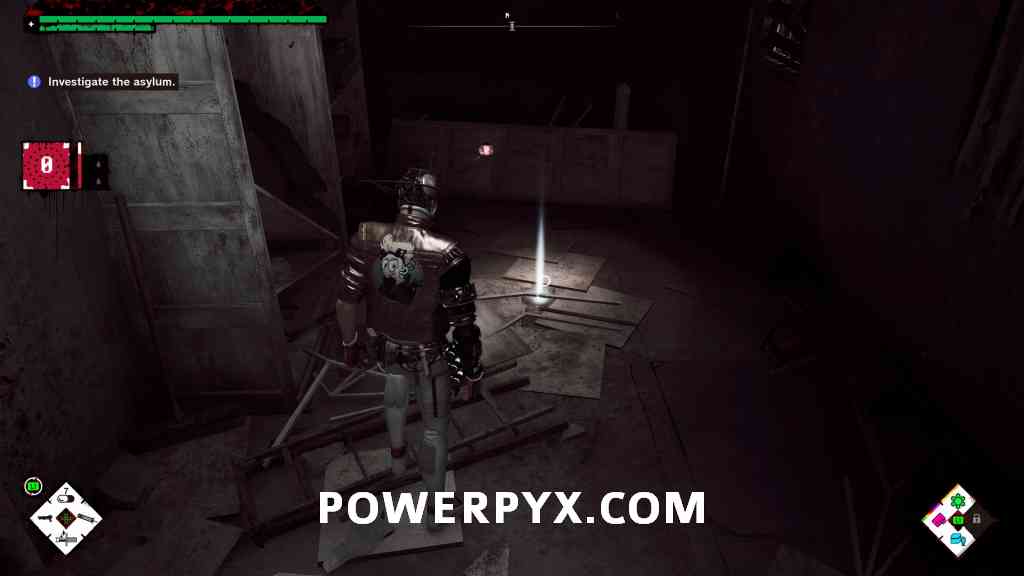
Once you finally enter the Advanced Research Lab with the Nirvana TV in it, head to the right to find this on the floor.

Badge 11: Chill Days
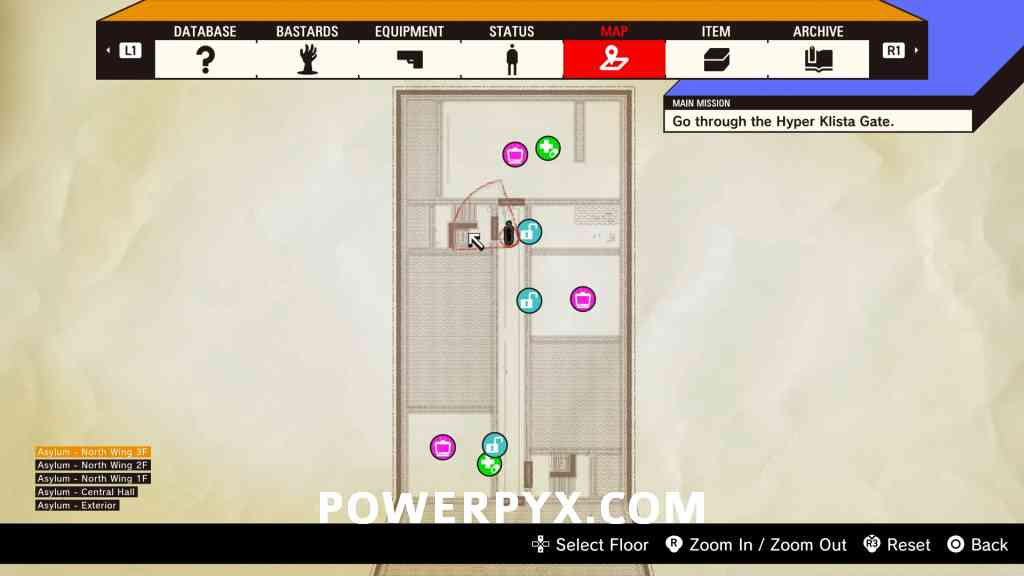
Access the hallway of North Wing 3F via the Nirvana TVs, then go down the northern staircase to find this on 1F.

Pin 5: Saturn
Automatically obtained after defeating the boss, Fused Reanimated.
Chapter 6: Conflict
Badge 12: Heartbreaker
Speak to SilverSox in the Trial Room. Complete Fused Reanimated on Normal to unlock Hard mode, then complete Fused Reanimated Z on Hard under par time to receive this badge.
Badge 13: Hilltop Castle
Once you are ready to fly into the next Dimensional Seer, you will be able to look around space to spot two Palace Athene – Hard rifts. Fly into one of these and clear the rooms to be rewarded with this badge at the end.


Research Note 17: To Put it Bluntly
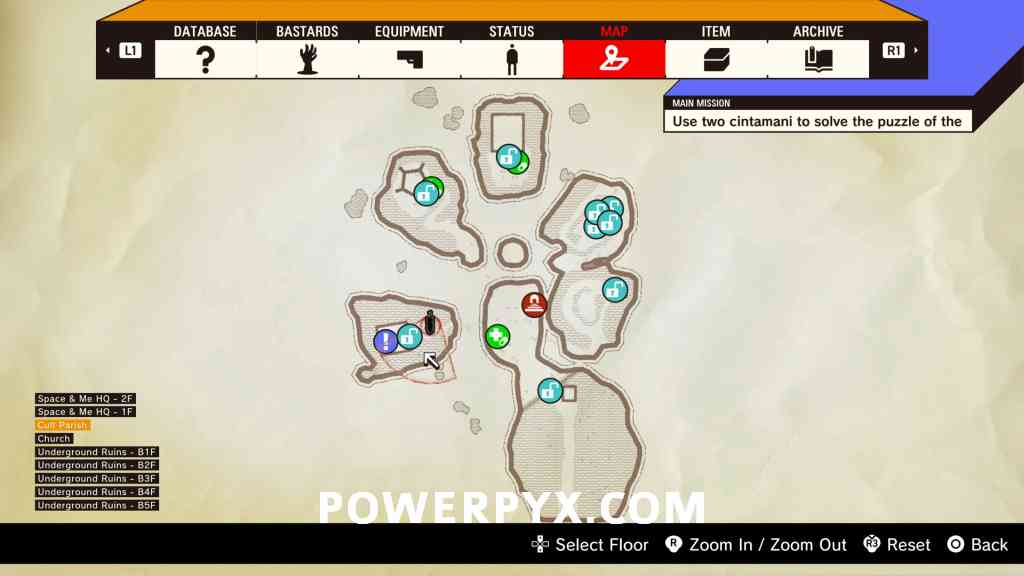
Once you enter 1978 “Space & Me” Cult – Parish, run to the end of the path you are on to find this on a picnic table.


Document 13: Follower Malachi’s Journal
Open the gate and go left to find this on a cart.


Document 14: Follower Silas’ Journal
Once you use the Cintamani orb to open up the purple path on the right, follow it to find this on the ground in the middle of the area, near all the enemies.


Document 15: Follower Verity’s Journal
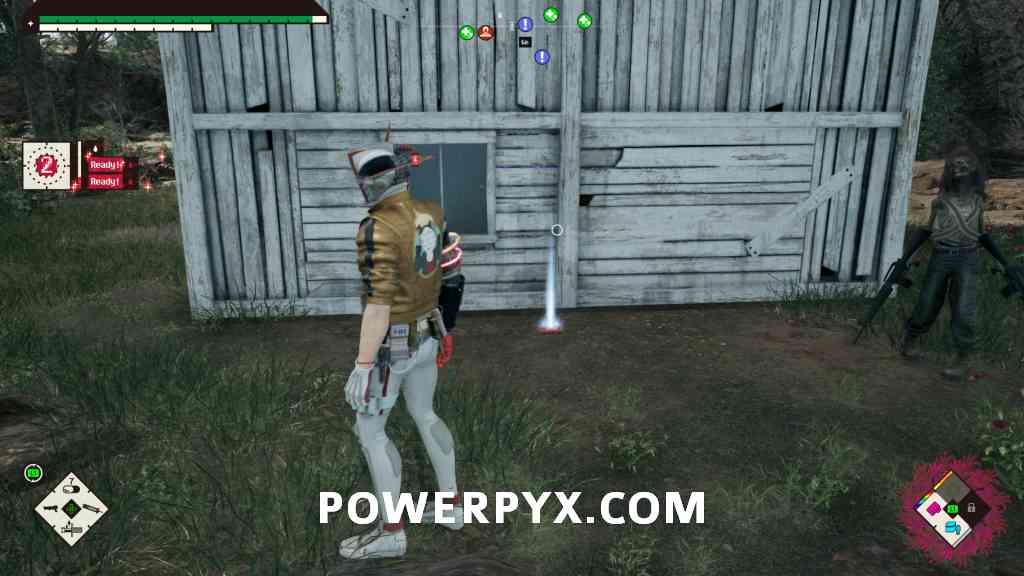
Now go behind the white building instead of entering it to find this on the ground.

Document 16: Follower Enoch’s Journal
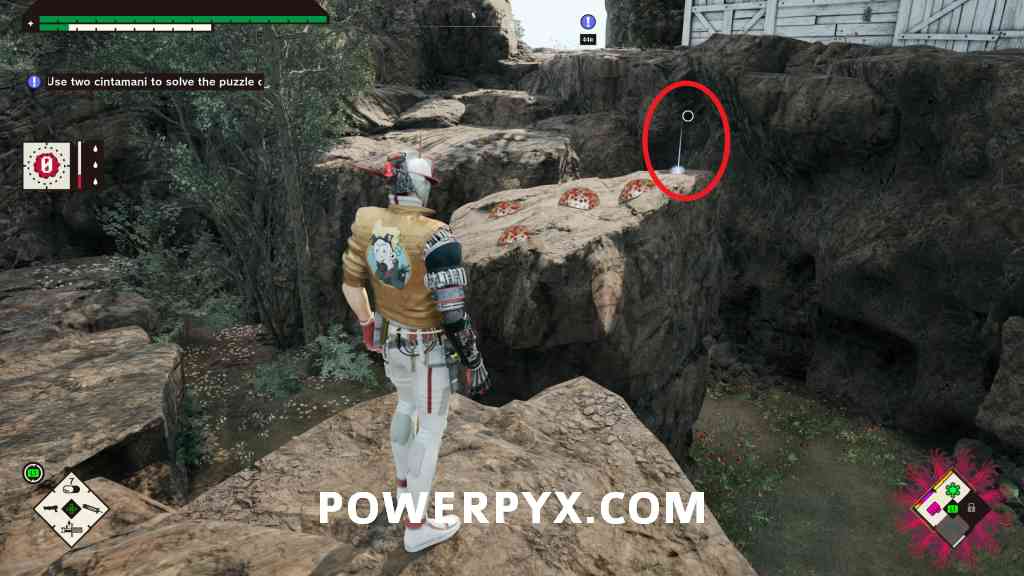
Once you have the second Cintamani orb, use them on the pedestals to open the red and white path on the left. Jump up the rocks where the birds are to find this on a rock with some Emeraldas.

Badge 14: Pedro Brothers
Once you have the third Cintamani orb, return to the pedestals but don’t remove the previous orbs. Place the third one in the green pedestal, then return down the path you came from. Next to the building will be path leading down to a purple tesseract, which will now be accessible.


Badge 15: Testosterone + Document 17: Follower Caleb’s Journal + Document 18: Follower Brice’s Journal
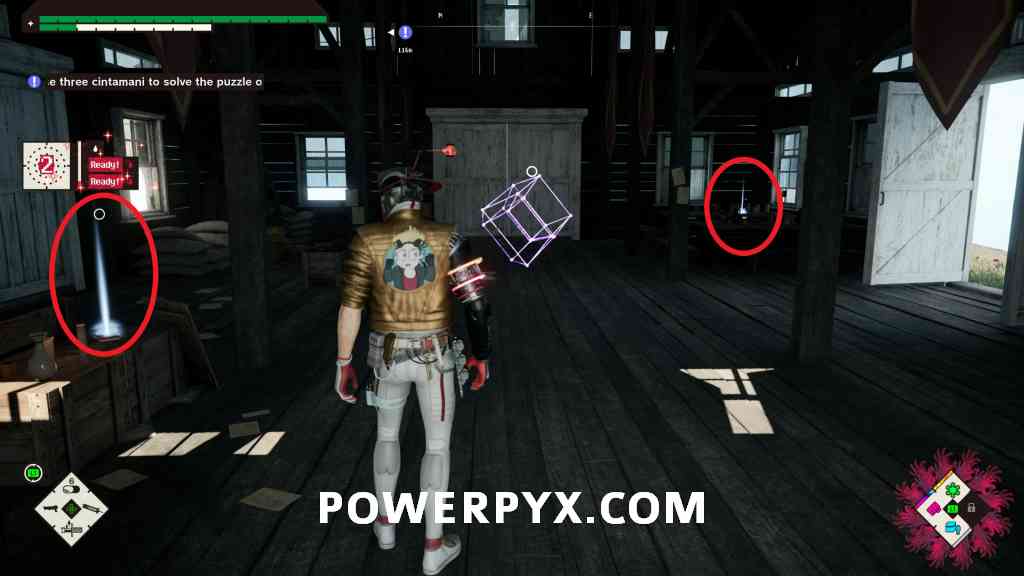
Now place the orbs in the orange and purple pedestals to open up an optional path. Follow it all the way through the traps and onslaught of enemies to find a large building with four entrances. Kill all the enemies inside, then go in to find a purple tesseract and two documents.


Document 19: Follower Obadiah’s Journal
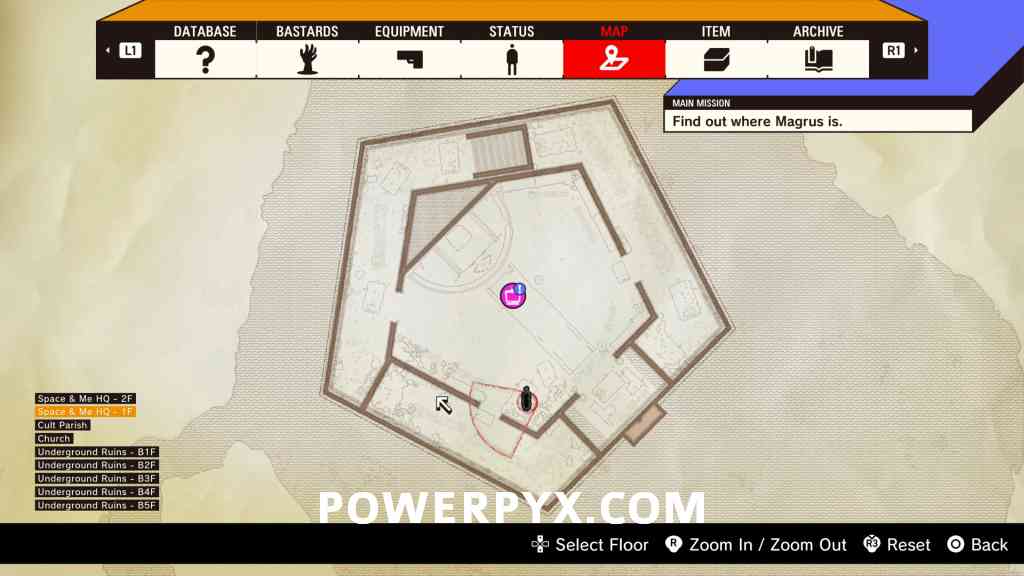
Once inside Space & Me HQ, head downstairs to where the Nirvana TV is located to find this on a bench near it.


Research Note 18: All of Them
Enter the door directly next to the previous document to find this on a coffee table.

Document 20: Follower Shiloh’s Journal
Now go into the hallway opposite the stairs to find this on the ground.


Document 21: Follower Thaddeus’ Journal + Document 22: Follower Asher’s Journal
After defeating the Executioner in the Church, these will be on the floor by the entrance.


Badge 16: Calamity Star
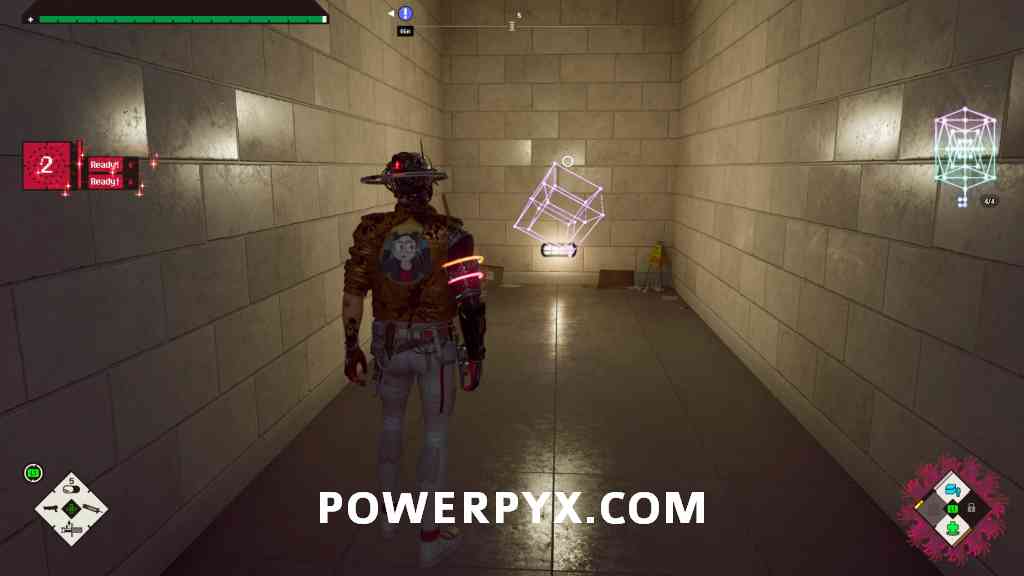
In Underground Ruins – B3F, after you unlock a door into a room with a Space-Time Pharmacy, you will end up in a long room. Partway up the path where the sniper Rotter is located, turn around and there will be a breakable wall. Break it and follow the path onto an elevator platform will lower halfway when a Flab walks onto it. Instead of killing it, you will want to walk into the alcove and lead the Flab onto it, so that the elevator rises back up, allowing you into a new room. Climb up the series of ladders to find a purple tesseract. Make sure to walk around the room to collect it, as if you walk into the middle of the room, the floor will collapse.


Badge 17: Vicious Shock
After going through an area where Jenny opens doors for you, you will be a large room with a hole in the middle, with a purple tesseract opposite you. Take the path to the right, ignoring the door. Keep following until you can go down to the purple tesseract.


Research Note 19: Spasm
Go back to the door you ignored and head inside. Kill all the snipers and go up the spiral staircase to find this on the ground, right next to a door leading back to the beginning of the area.


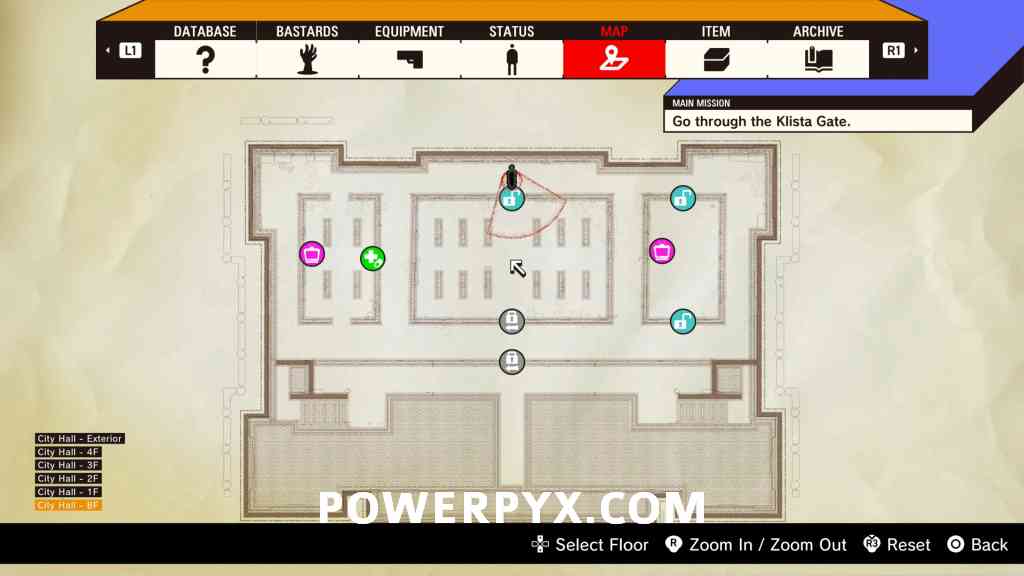
Research Note 20: Thracian Blood
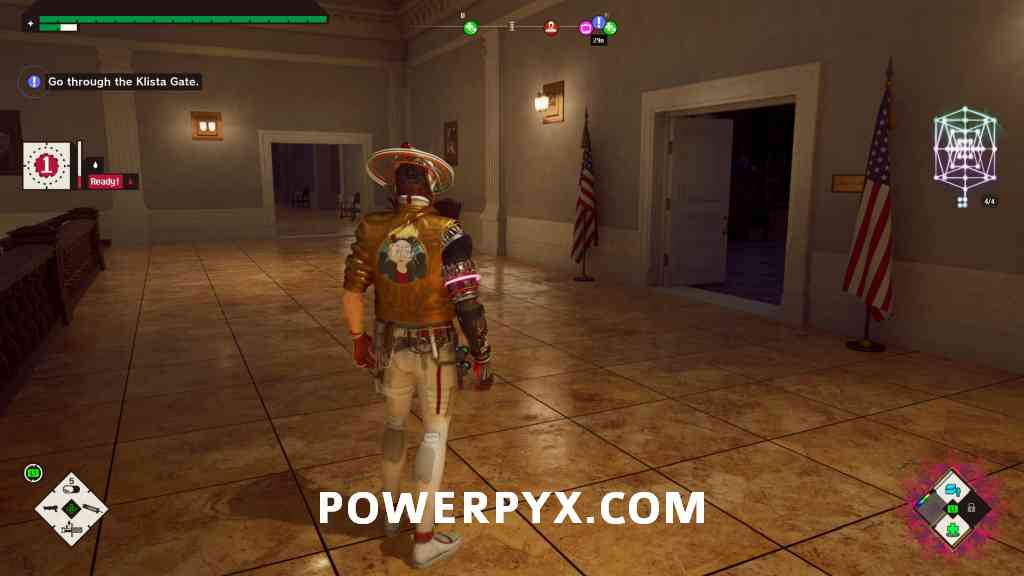
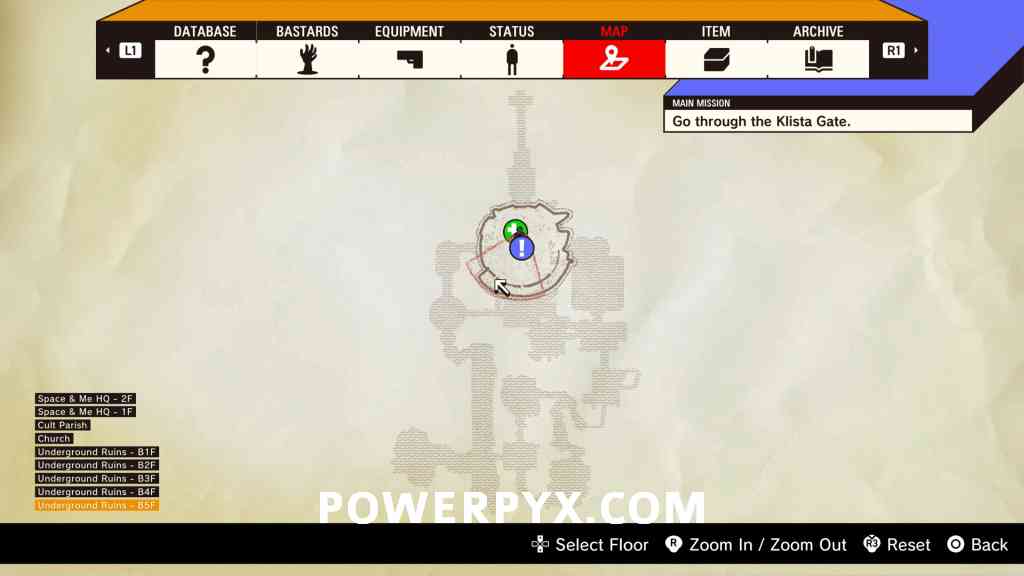
Once you descend to the Klista Gate, ignore it and go through a door at the back of the area. This will be on a desk as soon as you go through.


Pin 6: Uranus
Automatically obtained after defeating the boss, Enhanced Magrus.
Chapter 7: Existence
Badge 18: Finger on the Trigger
Speak to SilverSox in the Trial Room. Complete Enhanced Magrus on Normal to unlock Hard mode, then complete Enhanced Magrus Z on Hard under par time to receive this badge.
Document 23: Invitation from Juliet
Automatically received after speaking with Kimberley in the Briefing Room.
Badge 19: Bastardization
Once you are ready to fly into the next Dimensional Seer, you will be able to look around space to spot two Palace Athene – Very Hard rifts. Fly into one of these and clear the rooms to be rewarded with this badge at the end.


Research Note 21: There Were Three of Them
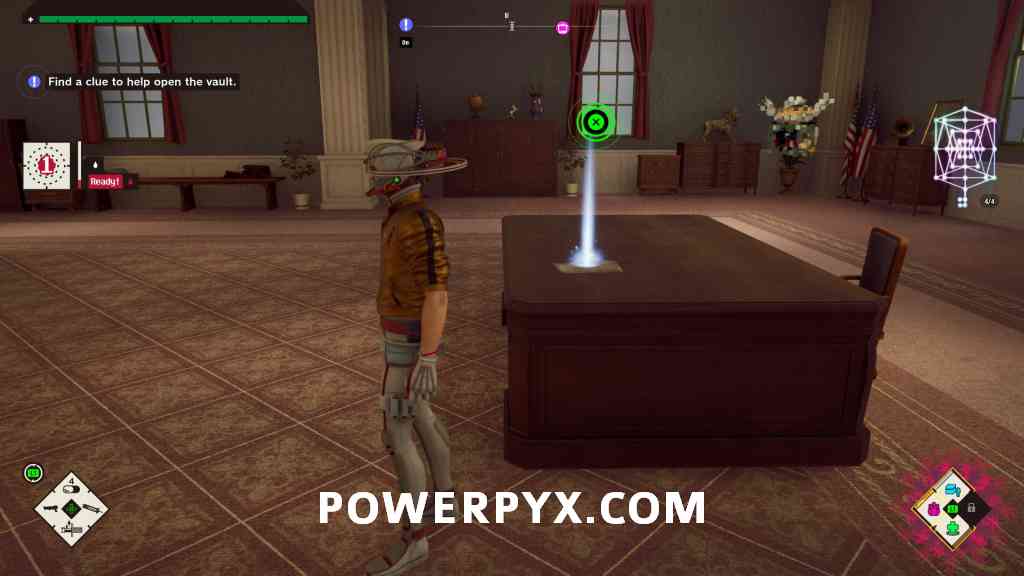
Once you enter 2000 Deadford City Hall and need to start navigating through Nirvana TVs, head up to City Hall – 3F to find the Vault Key in the western bathroom. Now keep going through Nirvana TVs until you end up inside the Mayor’s Office. Use the key on the vault, then input the same code as previously: 9 (Right) – 7 (Left) – 4 (Right) – 12 (Left). Enter the vault to find this inside.


Document 24: Memo: Clock Tower
Inside the small library where the next Nirvana TV is located, to the side.


Badge 20: Booger Baby
Now enter the Nirvana TV in the library and look over the edge to the left. There will be a resonator and green tesseract below you. Fall off the ledge and you should land on a platform, then you can fall the rest of the distance to the resonator (you will need high HP to survive this). Interact with it to create a platform in front of you. Now you must return to City Hall – 4F and enter the Nirvana TV in the western corridor. From here, drop off onto the new ledge, then drop again and jump across to a purple tesseract next to a Nirvana TV.


Badge 21: Young Old Boy
Return to the library and enter the Nirvana TV again, this time make sure to complete the resonator on the opposite side of this platform before you go up to the next TV. Once you arrive on the rooftop, go down the eastern stairs to go through a Nirvana TV you made with the previous resonator. Go all the way down the staircase to get an exorcist sword for the liminal wall you walked past on the way down. Break the wall, then drop off the ledge to find this in a purple tesseract.


Chapter 8: Transcience
Pin 7: Neptune
Automatically obtained at the beginning of the chapter.
Badge 22: H(d)P
Speak to SilverSox in the Trial Room. Complete Death Changeling Parabellum on Normal to unlock Hard mode, then complete Death Changeling Parabellum Z on Hard under par time to receive this badge.
Badge 23: Galan Esmeralda
Return to Subspace Hills and ignore the first resonator. Run to the back of the open area to find this.
![]()
![]()
Badge 24: Dr. Perversion
Once you reach Subspace Hills – Area 3, as you are moving around towards the middle you will spot a ladder. Go around the wall to reach it, then climb to find a purple tesseract.
![]()
![]()
![]()
Research Note 22: Be Careful
After ascending some stairs to a Space-Time Pharmacy, this will be in the corner opposite.
![]()
![]()
Research Note 23: What I Don’t Want You to Misunderstand
After the scenes at the Director’s Office, go around the corner to find this on the ledge.
![]()
Research Note 24: Closing Space-Time
Once you cross a bridge from a resonator, there will be some stairs you can go down to another resonator. Over the ledge will be a platform with this research note that you can jump to.
![]()
Research Note 25: Power
Immediately in front of the Hyper Klista Gate.
![]()
Research Note 26: Two Crucial Elements + Badge 25: SilverEye
Directly behind the Hyper Klista Gate. If this is your last Research Note, you will also get a badge.
![]()
Post-Game: Aeons
After defeating the final boss and finishing the game, you will be able to save a Clear Game save. With this you can either continue playing the post-game to clean up anything you missed (including the last two unlocks at the Room of Trials), or go into New Game+. If you choose to do post-game cleanup and then go into NG+ later, you will need to re-fight the final boss and make a new Clear Game save to keep your post-game progress.
Badge 26: Tungsten Revolution
Speak to SilverSox in the Trial Room. Complete The Last Of The Famous Intergalactic Naked on Normal to unlock Hard mode, then complete The Last Of The Famous Intergalactic Naked Z on Hard under par time to receive this badge.
Badge 27: People of Earth
Speak to SilverSox in the Trial Room. Complete Boss Rush on Normal to unlock Hard mode, then complete Boss Rush Z on Hard under par time to receive this badge.
Shiroyabu Shop
Shiroyabu on board The Last Night will sell items, with his stock increasing as you progress the story. Not only can you directly buy Sentreys, but he also stocks Badges.
Badge 28: Katana Karen
1000 Emerald Flowsion from Chapter 4: Reinvention onwards.
Badge 29: Magnum Mike
1000 Emerald Flowsion from Chapter 4: Reinvention onwards.
Badge 30: Bomb Betty
1000 Emerald Flowsion from Chapter 4: Reinvention onwards.
Badge 31: Shotgun Sharon
1000 Emerald Flowsion from Chapter 4: Reinvention onwards.
Badge 32: Fist Frankie
1000 Emerald Flowsion from Chapter 4: Reinvention onwards.
Badge 33: Rifle Rafael
1000 Emerald Flowsion from Chapter 4: Reinvention onwards.
Badge 34: Spear Spencer
1000 Emerald Flowsion from Chapter 4: Reinvention onwards.
Badge 35: Bazooka Barbara
1000 Emerald Flowsion from Chapter 4: Reinvention onwards.
Badge 36: Malignant Dawn
100,000 Emerald Flowsion from Chapter 7: Existence onwards.
Leave a Reply