
Red Dead Redemption (PS5/PS4 Remaster) Trophy Roadmap
- Estimated trophy difficulty: 4/10
- Approximate amount of time to platinum: 60-80 hours
- Offline Trophies: 52 (1
 , 3
, 3 , 4
, 4 , 44
, 44 )
) - Online Trophies: 0
- Number of missable trophies: 1 ( Spurred to Victory)
- Glitched trophies: 0
- Does difficulty affect trophies?: No
- Hardest Trophy: Redeemed
- Minimum Playthroughs: 1
- PS4/PS5 Autopop & Save Transfer: Only partially (see Autopop section below Roadmap)
- PS4/PS5 Crossbuy: Yes
- Do Cheats disable Trophies?: Yes
- Free-Roam / Mission Select after Story?: Yes
- New Game+ Mode?: No
- Supports Manual Saves?: Yes (3 manual slots, 1 autosave slot)
- Release Date: December 02, 2025 (PS5) / August 17, 2023 (PS4)
 , 3
, 3 , 4
, 4 , 44
, 44 )
)Introduction
Welcome to the Red Dead Redemption 1 (PS5/PS4 Remaster) Trophy Guide! This remaster brings Rockstar’s 2010 classic back to modern consoles with native 4K visuals, improved performance, and the full Undead Nightmare expansion included. The native PS5 version also features 60FPS. Set in the last days of the Wild West, John Marston returns for a journey of redemption across the rugged frontier. You’ll hunt outlaws, tame horses, and explore a massive open world packed with side activities and challenges. The trophy list remains largely faithful to the original PS3 version, with Undead Nightmare trophies replacing the online content. Earning the Platinum trophy will take around 60-80 hours, with most of your effort going towards the 100% completion trophy,  Redeemed, which will require story completion and finishing tasks from Strangers, Bounty Hunting, Minigames, doing all Challenges, and exploring the entire world map.
Step 1: Finish the Story, Stranger Tasks, Challenges
Complete all 57 Story Missions and 18 Stranger Tasks which will take you all over the map and unlock weapons and outfits for purchase. To be more efficient, try to make progress on the Ambient Challenges as you play through the game. Just keep an eye on your Challenge Progress under Journal > Challenges, and if you need help with a challenge refer to the Challenge Guide.
Step 2: 100% Completion
Clean up everything needed for 100% Completion to unlock Redeemed and do other leftover trophies, with the possible exception of  Mowing Them Down, depending on how many mounted weapon kills you have by the end of the game. It is significantly easier to get mounted kills in Undead Nightmare, so unless you are close to the 500 you need, it might be faster to start over again in Step 3 than to grind your way to 500 in the main game.
Step 3: Undead Nightmare
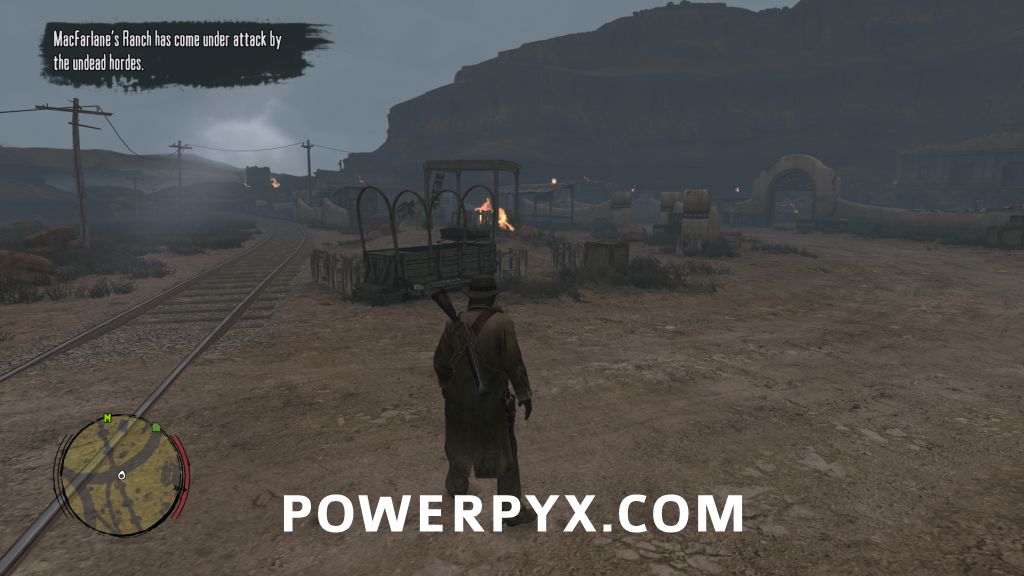
Undead Nightmare was a DLC of the original 2010 release, but in the PS4/PS5 Remaster it’s preinstalled and is needed for Platinum (no longer a separate DLC list). Play through Undead Nightmare mode, complete all Survivor Missions, Side Missions, and clear all 23 Territories. Complete  Spinning Plates during this step too (have every territory saved at the same time). Keep watch for the Four Horses of the Apocalypse, and break them where you can. Just like with the main game, you should work on the Challenges as you play through this mode. Frequently look at your Challenge progress and the current pending task, if you need help refer to the Undead Nightmare Challenges.
Step 4: Cleanup
Clean up any remaining trophies and requirements needed for Zed’s Dead, Baby (100% Completion in Undead Nightmare). Also do any combat trophies that you may not have completed in the main game, the kills will count in Undead Nightmare too.
PS5 Trophy Autopop Criteria for Imported PS4 Saves
If you already have a completed save from the PS4 version, importing it won’t automatically unlock previously earned trophies. However you still can save yourself some trouble by re-qualifying for the unlock criteria to trigger the unlock. In most cases you will get credit for your progress and eliminate the grind that some of the trophies represent. The trophies that you can trigger a faster unlock are:
- Story trophies will need to be re-completed by replaying the associated 7 missions in the Stats > Missions menu.
- That Government Boy: Replay “Exodus in America”
- Land of Opportunity: Replay “The Assault on Fort Mercer”
- Sons of Mexico: Replay “The Gates of El Presidio”
- No More Fancy Words: Replay “An Appointed Time”
- A Savage Soul: Replay “At Home with Dutch”
- The Benefits of Civilization: Replay “And the Truth Will Set You Free”
- Into the Sunset: Replay “The Last Enemy That Shall Be Destroyed”
- Hideout trophies require re-completion of any one of the Hideouts listed in the trophy description.
- Austin Overpowered: Re-complete any one of the Twin Rocks, Pike’s Basin, or Gaptooth Breach Hideouts
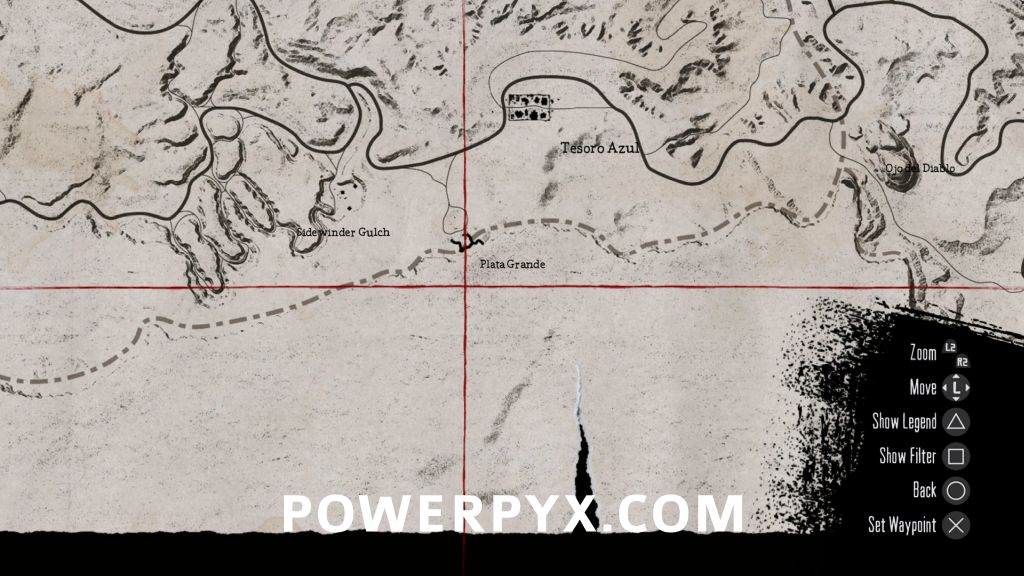
- Evil Spirits: Re-complete either the Tumbleweed or Tesoro Azul Hideouts
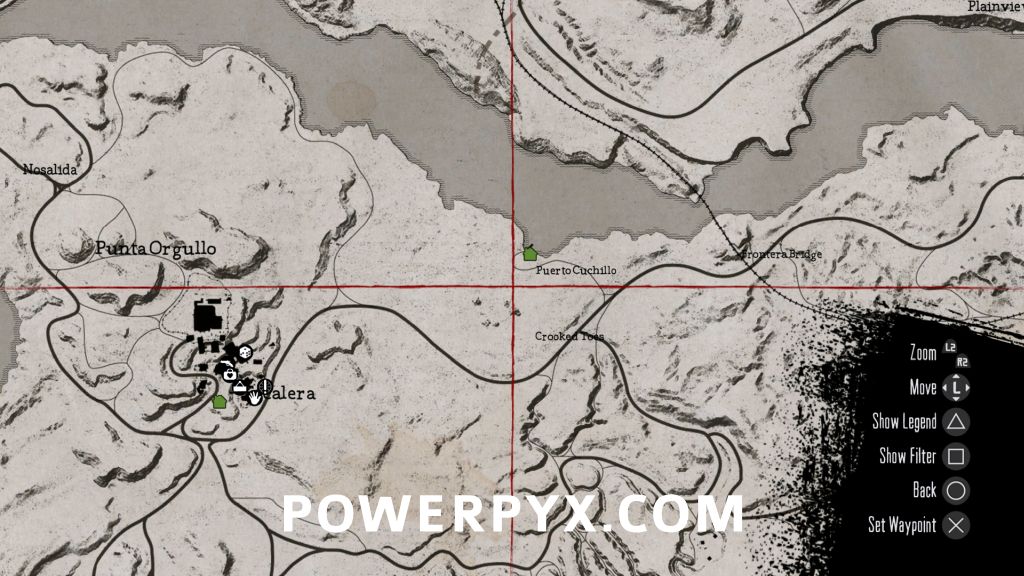
- Instinto Asesino: Re-complete either the Fort Mercer or Nosalida Hideouts
- Fightin’ Around the World: Knock out one person in any saloon
- Buckin’ Awesome: Break any one of the three horses listed in the trophy description
- Bearly Legal: Kill and skin one bear (this may autopop from any animal kill randomly)
- More than a Fistful: Gain any amount of money
- Man of Honor / Chivalry’s Dead: Your fame rank can remain at maximum, but you’ll have to gain/lose Honor to trigger the unlock
- If you are already at Hero Honor rank, you will have to lose enough Honor to go down to Peacemaker, then re-gain Hero by performing good deeds
- If you are already at Desperado Honor rank, you will have to gain enough Honor to go up to Road Agent, then lose it again to return to Desperado
- Redeemed: Complete any of the required criteria again, such as defeating a Hideout or getting a gold medal in a combat mission
- Mowing Them Down: Get one kill with a mounted weapon
- In a Hail of Bullets: Get one kill with a pistol or revolver
- Long Arm of Marston: Get one kill with a rifle, repeater, or shotgun
- Bullseye: Get one more headshot
Useful Tips, Tricks and Guides:
Red Dead Redemption 1 (PS5/PS4 Remaster) Trophy Guide
 |
Legend of the West You’ve become a true legend of the West! |
|
| Earn all other trophies in the PS4 / PS5 Remaster of Red Dead Redemption to unlock Platinum. | ||
 |
That Government Boy Complete “Exodus in America”. |
|
| Story-related trophy, cannot be missed. You will unlock this trophy after completing the story mission “Exodus in America”. | ||
 |
Land of Opportunity Complete “The Assault on Fort Mercer”. |
|
| Story-related trophy, cannot be missed. You will unlock this trophy after completing the story mission “The Assault on Fort Mercer”. | ||
 |
Sons of Mexico Complete “The Gates of El Presidio”. |
|
| Story-related trophy, cannot be missed. You will unlock this trophy after completing the story mission “The Gates of El Presidio”. | ||
 |
No More Fancy Words Complete “An Appointed Time”. |
|
| Story-related trophy, cannot be missed. You will unlock this trophy after completing the story mission “An Appointed Time”. | ||
 |
A Savage Soul Complete “At Home with Dutch”. |
|
| Story-related trophy, cannot be missed. You will unlock this trophy after completing the story mission “At Home with Dutch”. | ||
 |
The Benefits of Civilization Complete “And the Truth Will Set You Free”. |
|
| Story-related trophy, cannot be missed. You will unlock this trophy after completing the story mission “And the Truth Will Set You Free”. | ||
 |
Into the Sunset Complete “The Last Enemy That Shall Be Destroyed”. |
|
| Story-related trophy, cannot be missed. You will unlock this trophy after completing the story mission “The Last Enemy That Shall Be Destroyed”. | ||
 |
Nurture or Nature? Complete “Remember My Family”. |
|
| Story-related trophy, cannot be missed. You will unlock this trophy after completing the story mission “Remember My Family”. | ||
 |
High Roller Win over 2000 chips in a hand of Poker. |
|
| In order to be able to win 2000 chips, you will need a table with a minimum of a $50 buy-in (500 chips per player) and four opponents. The pot of a single hand must be over 2000 chips. If you keep raising the bet slowly, never by more than double the current raise, you might be able to trick the other players into betting enough of their chips to make the pot over 2000. In fact if you have enough chips left to bring the pot over 2000 chips yourself, you can go all in to make up the difference. Then all you have to do is win the hand. To improve your chances, use the Elegant Suit that you can buy in Thieves’ Landing. It will allow you to cheat, potentially swapping in a useful card to win a hand.
An easier way is to replay the mission “Lucky in Love” from your Stats > Missions menu, where the mission setup has a table with four players and you will automatically be dealt a winning hand. Keep slowly raising the bet, never more than doubling the current raise to avoid spooking the other players, and try to get the pot over 2000 chips. You will have two hands to try to make this happen before you will be accused of cheating. If you haven’t managed a 2000 chip pot by that point, quit the mission, and replay it again. |
||
 |
No Dice Complete a game of Liar’s Dice without losing a single die. |
|
Liar’s Dice is an interesting game of logic and bluffing that you can play in Thieves’ Landing, Escalera, and Casa Madrugada, each with a $20 ante. Each player starts with five dice. Each turn all players shake their dice in a cup, then bring it down on the table with the opening down so no one can see your dice. The starting player will have to bid (i.e. guess) how many dice of a particular number value there are at the whole table based only on what they can see under their own cup, and the other player’s actions. For example, let’s say the first player bids that there is one 3 (1 x 3). The next player in sequence has four choices:
If the next player chooses to bid then the play continues to the next player in sequence, otherwise it triggers a showdown where everyone reveals their dice. If the bid was correctly called out as a bluff then the bluffing player loses a die, otherwise the player who called them out loses a die. Declaring a bid “spot-on” (which is to say exactly correct) is a riskier venture. If there are less or more dice of that value on the table, then the declaring player loses a die. But if the player declaring the bid is “spot-on” happens to be correct, then all other players lose a die (including the player that made the bid!). Strategies:
Save your game before you start. Worst case scenario, you can quit any game that’s not going your way and just sit down at the same table and ante another $20 to try again. If you lose too much money, reload your save and try again. |
||
 |
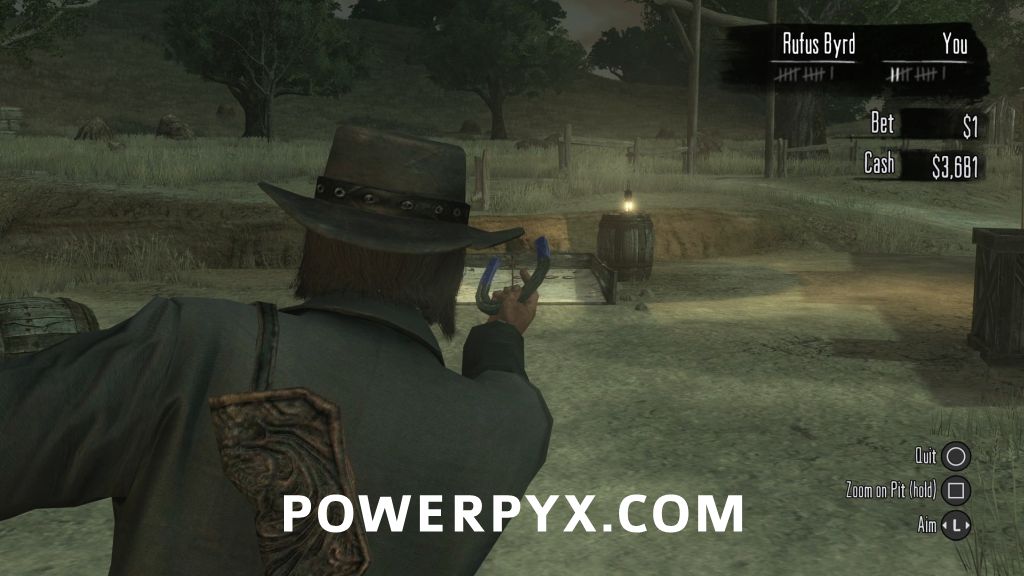
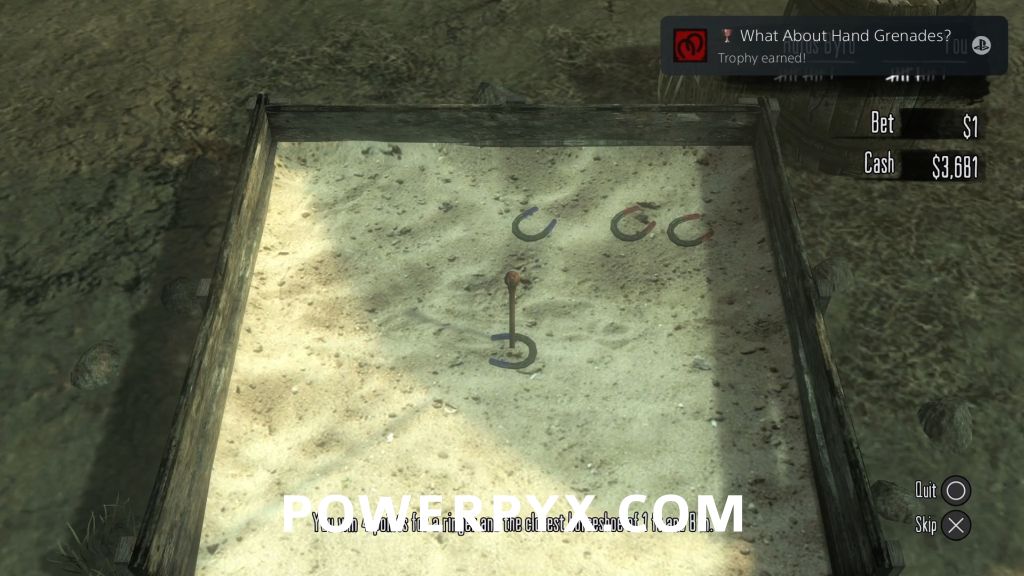
What About Hand Grenades? Get a ringer in a game of Horseshoes. |
|
Horseshoes is one of the many minigames in Red Dead Redemption, and potentially the most irritating. Using the  / /  button to aim, use the heels of the horseshoe and the ends of your fingers as a guide to line up on the stake as seen below. button to aim, use the heels of the horseshoe and the ends of your fingers as a guide to line up on the stake as seen below.
Once you’ve got your swing aimed properly, use the right stick to pull back
|
||
 |
Austin Overpowered Complete Twin Rocks, Pike’s Basin, and Gaptooth Breach Hideouts. |
|
| » Red Dead Redemption – All Gang Hideout Locations | ||
 |
Evil Spirits Complete Tumbleweed and Tesoro Azul Hideouts. |
|
| » Red Dead Redemption – All Gang Hideout Locations | ||
 |
Instinto Asesino Complete Fort Mercer and Nosalida Hideouts. |
|
| » Red Dead Redemption – All Gang Hideout Locations | ||
 |
Fightin’ Around the World Knock someone out in melee in every saloon in the game. |
|
| There are seven saloons in the game: Armadillo, Thieves’ Landing, Rathskeller Fork, Chuparosa, Escalera, Casa Madrugada and Blackwater. Luckily all of these locations are in your fast travel list, so it won’t take long if you find you’re missing one, but you might as well work on these as they come up during the story missions, at least until you can travel to Blackwater.
Save your game nearby, then make sure that you go into your weapon select menu with |
||
 |
Strange Things are Afoot Complete a task for a Stranger. |
|
| See People are Still Strange for details. |
||
 |
People are Still Strange Complete 15 tasks for Strangers. |
|
| » Red Dead Redemption – All Stranger Task Locations | ||
 |
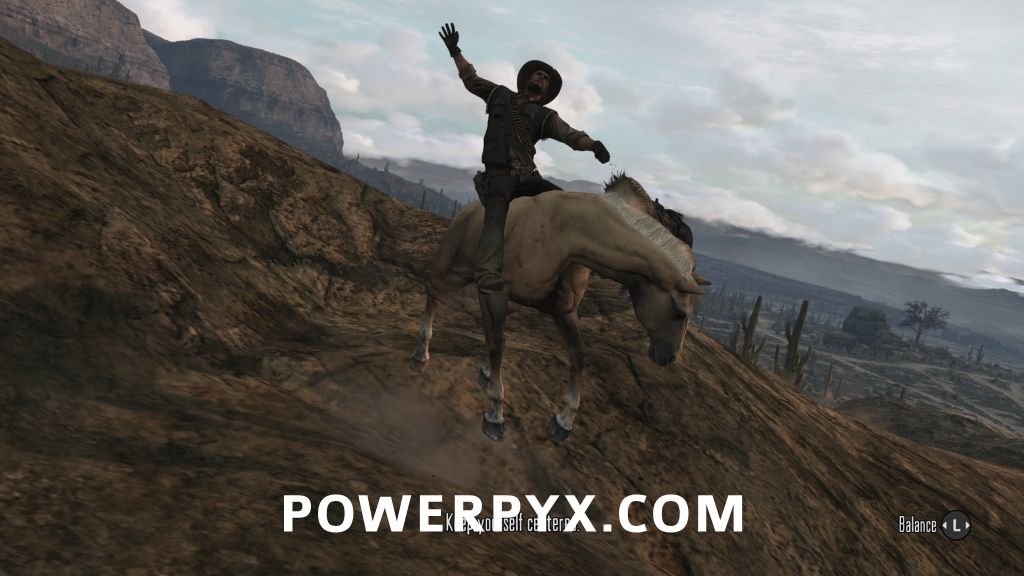
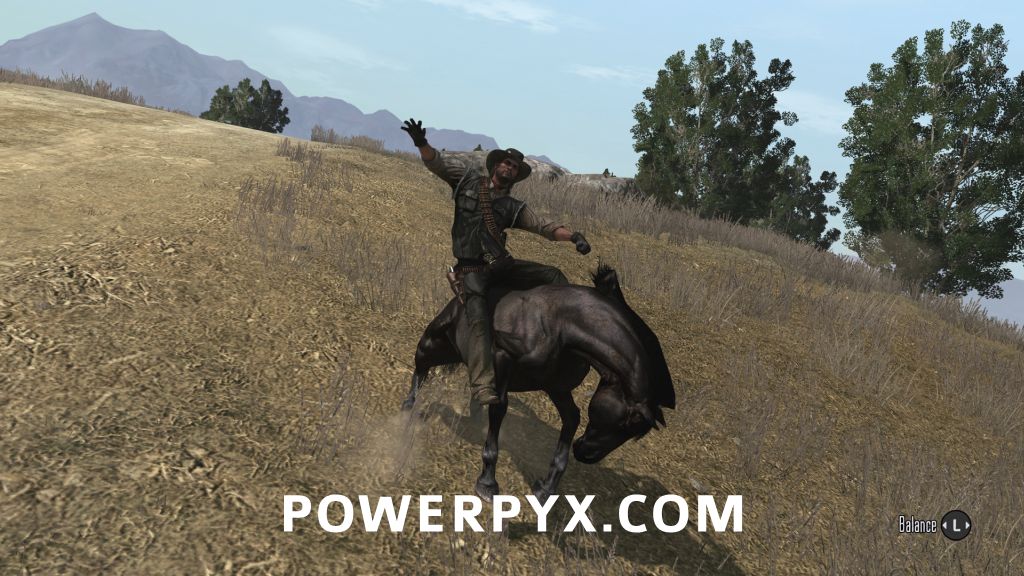
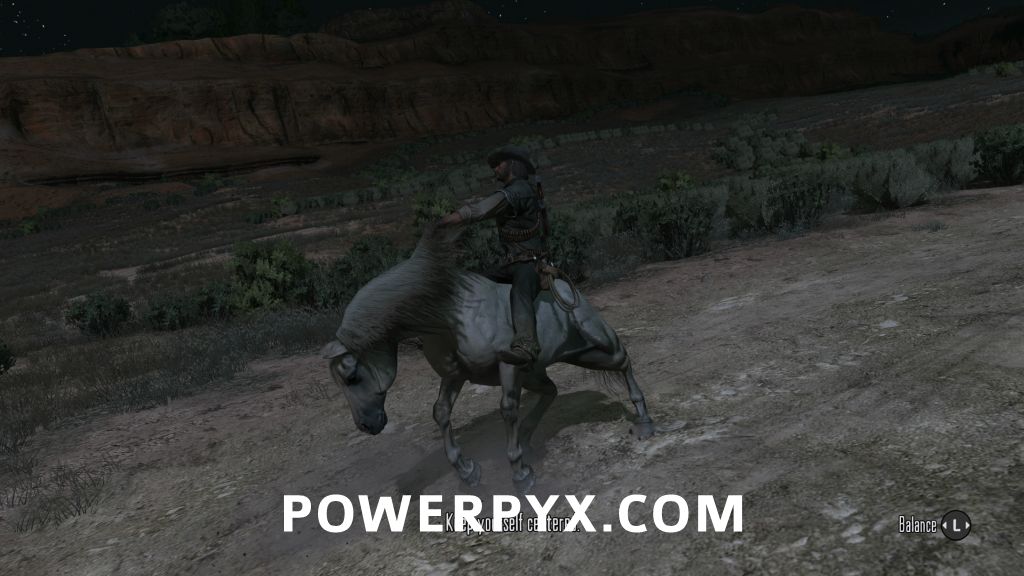
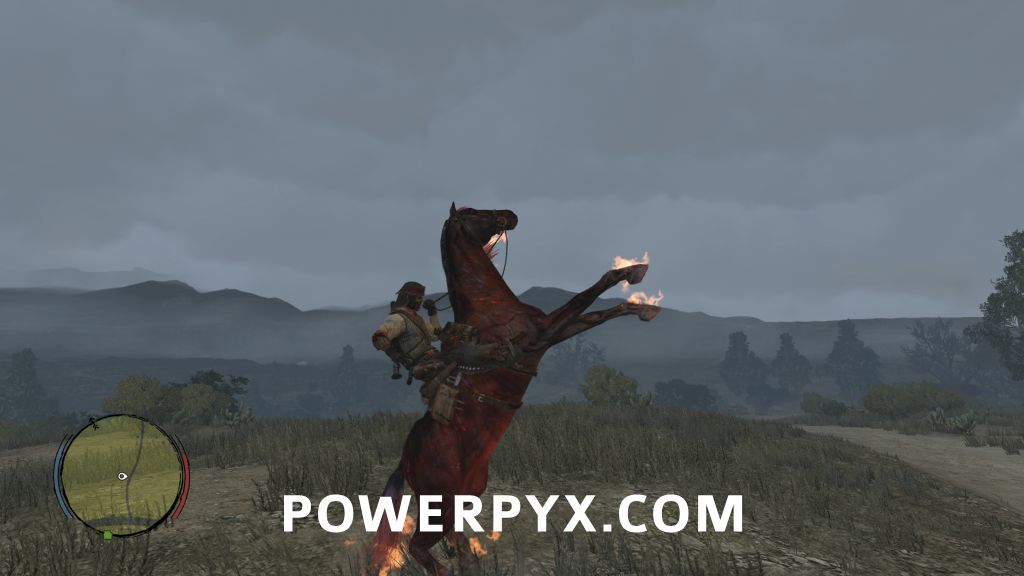
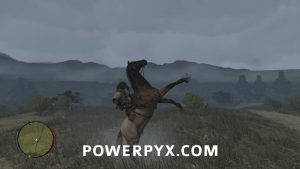
Buckin’ Awesome Break the Kentucky Saddler, the American Standardbred, and the Hungarian Half-bred. |
|
| All three horses are wild on the map, and must be lassoed and broken. Once you break each one, the game will save, and from that point on you will be able to purchase a deed for that kind of horse in general stores. Breaking the horse will be just like other horse breaking jobs, but it will take about twice as long. Try to keep Marston centered on the back of the horse and eventually it will stop bucking. There’s a chance that the horses will spawn with any group of wild horses in the area, but listed below are the places where it is most commonly found. If you find horses but not the one you’re looking for, ride till they’re out of sight and despawn, then ride back and check again.
Kentucky Saddler: Yellow-gold coat, usually found in the hills near the Hanging Rock.
American Standardbred: Glossy black coat, found in the Great Plains area around Beecher’s Hope.
Hungarian Half-Bred: White coat with a grey mane, usually found near Diaz Coronas.
|
||
 |
Clemency Pays Capture a bounty alive. |
|
| Bounty posters are posted either near the Sheriff’s office or the train station depending on the location. When there is one to be had, it will appear as a skull on the mini-map. They’re usually posted first thing in the morning. Grab one to take it, and read it to see where to go to find your target. The location will then show up as a red skull on your map. Keep an eye on your mini-map as you approach the location, because the target will always be in a large group of enemies. Regular enemies will still show up as a red dot, but the target will be a red skull on your mini-map.
Kill everyone but the target, then switch to your lasso and capture him. When he falls to the ground, run up and hog tie him, then call your horse. While waiting for your horse to get close, pick up the tied up bounty and then put him on the back of your horse. Then head to the jail marked on the map with a yellow circle, usually it will be the location closest to where you got the bounty, but always check to be sure. As you head back, you’ll be continuously harried by members of the bounty’s gang who will chase and shoot you. Be sure to kill them as soon as you can, using Dead Eye if there’s a lot at once, because they have a nasty tendency to accidentally/intentionally kill your bounty while trying to kill you. Once you approach the yellow X at the drop, it will automatically show a cinematic of the deputies leading the prisoner inside and you’ll get your full bounty, as well as the trophy. |
||
 |
Dastardly Place a hogtied woman on the train tracks, and witness her death by train. |
|
| When you have a lasso, you can attempt this. Trying to kidnap a woman from a town is tough, as if you are seen you’ll be trying to hogtie her while constantly taking gunfire. Chances are that either you, the woman, or your horse, will die. Instead, wait for one of the random events that show up as blue dots on your mini-map. One of them is a woman who tries to lure you into an ambush where four bandits are hiding behind a wrecked stagecoach. There’s also one where a woman just needs a ride and flags you down. Either one is a easier target than kidnapping some citizen from a town. Lasso her and put her on the back of your horse, then find the nearest train. Head for the nearest track you can reach in time before the train gets there, and dump your prisoner on the tracks. Then stand back and wait for your trophy (and your victim) to pop. | ||
 |
Exquisite Taste Purchase a rare weapon from a gunsmith. |
|
| There are five rare weapons in the game. You can buy the LeMat Revolver and the Semi-Auto Shotgun from the gunsmith in Escalera, and the Carcano Rifle, Evans Repeater, and the Mauser Pistol from the gunsmith in Blackwater. You will only need to buy one for this trophy, but you will need all five for Redeemed. |
||
 |
Bearly Legal Kill and skin 18 grizzly bears. |
|
| Bears are common in Tall Trees, especially in the area north of Manzanita Post. They usually come in twos and threes, so be very sure that there aren’t any more in the area before you start to skin any game. Use a strong rifle, like the Buffalo Rifle to bring them down, or Dead Eye to lock in multiple head shots. | ||
 |
He Cleans Up Well! Obtain the Elegant Suit. |
|
| Buy the Elegant Suit scrap in the Thieves’ Landing tailor shop for $70, then use it from your inventory to unlock it. | ||
 |
More than a Fistful Earn $10,000. |
|
| This should come naturally through normal play of the game, and it is a running total so you don’t have to hoard money. Capture all of your bounties alive to double your rewards. At the end of the game when you’re doing Ambient Challenges and making the buffalo extinct, you can sell all your remaining skins and herbs for thousands of dollars. If you do the Treasure Hunter Challenge, that will give you 9 gold bars to sell for tons of money. | ||
 |
Frontiersman Obtain Legendary rank in any Ambient Challenge. |
|
| There are four Ambient Challenges you will have to complete while working towards Redeemed, and the first one you finish will earn you this trophy. Each challenge has 10 ranks, which you’ll have to complete all of to be considered legendary. Each rank has a task, which if you’ve already done before the task was active, you will have to do again. You can only make progress on a task after you reach that rank. Be sure to camp and save your game often while working towards the challenges, since gaining a rank does not trigger an autosave. You can track your progress on the menu screen under Journal > Challenges.
|
||
 |
The Gunslinger Score a headshot on any enemy using Expert targeting mode. |
|
| In your pause menu, select Options > Controls, find the Targeting Mode setting and set it to Expert. Then find any enemy and use your Dead Eye to line up a headshot. | ||
 |
Man of Honor / Chivalry’s Dead Attain highest Fame rank and either highest Honor rank or lowest Honor rank. |
|
| See Heading South on a White Bronco. |
||
 |
Gold Medal Earn a Gold Medal Rank for a combat mission. |
|
| Checking the Stats > Missions menu, you’ll see a bronze, silver, or gold Rockstar medal to let you know how you did. Unfortunately the game doesn’t show you what your targets are for each mission, only your best stats in each category, but it only tracks stats that are part of the medal criteria so if it doesn’t appear in the list you don’t have to worry about it. Luckily it is only tracking the best score you’ve ever gotten for each stat, so you can skip cutscenes and spray bullets for a faster time on one replay, then take your time for accuracy on a different replay.
The easiest mission to complete is the first one, “Exodus in America”. Skip all the cutscenes and run to the saloon. Skip the next cutscene, then run to your horse and follow Jake to Fort Mercer. Skip the cutscene, ride up to the marker, then skip the cutscene. You can get a gold medal time with 30 seconds to spare. |
||
 |
Manifest Destiny Kill the last buffalo in the Great Plains. |
|
| There are 20 American Buffalo that wander the Great Plains, and once killed they will not respawn. If you find a large herd, you can use Dead Eye and a heavy damage weapon like a Bolt Action Rifle or Semi-auto shotgun, but if you try to use the Buffalo Rifle, you’ll fire as soon as you mark one and will have to enter Dead Eye again if you want to mark others. If you can’t find any more, leave the area entirely and wait an in-game day before checking again. The remaining buffalo should have reappeared as a herd, allowing you to continue hunting. | ||
 |
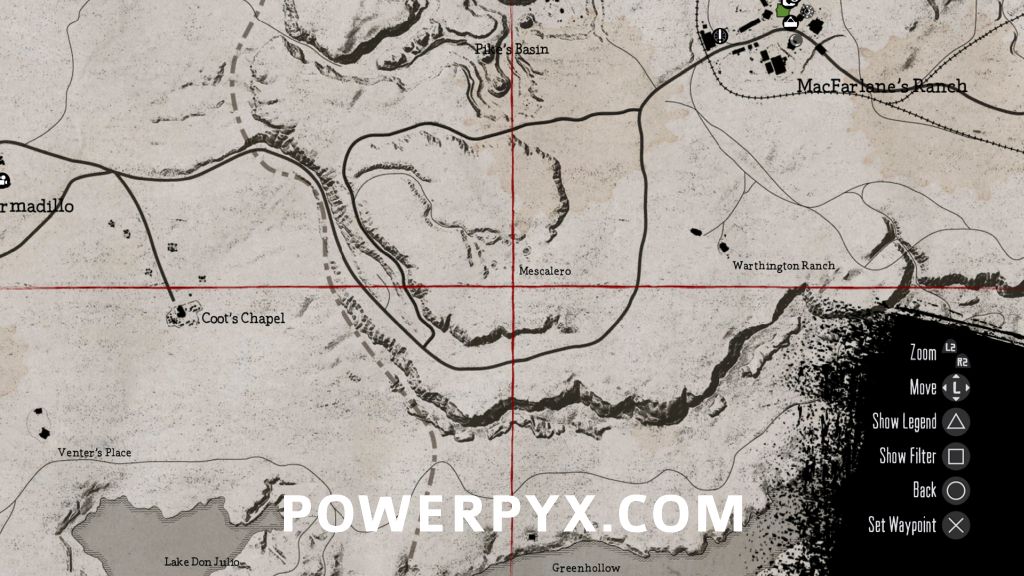
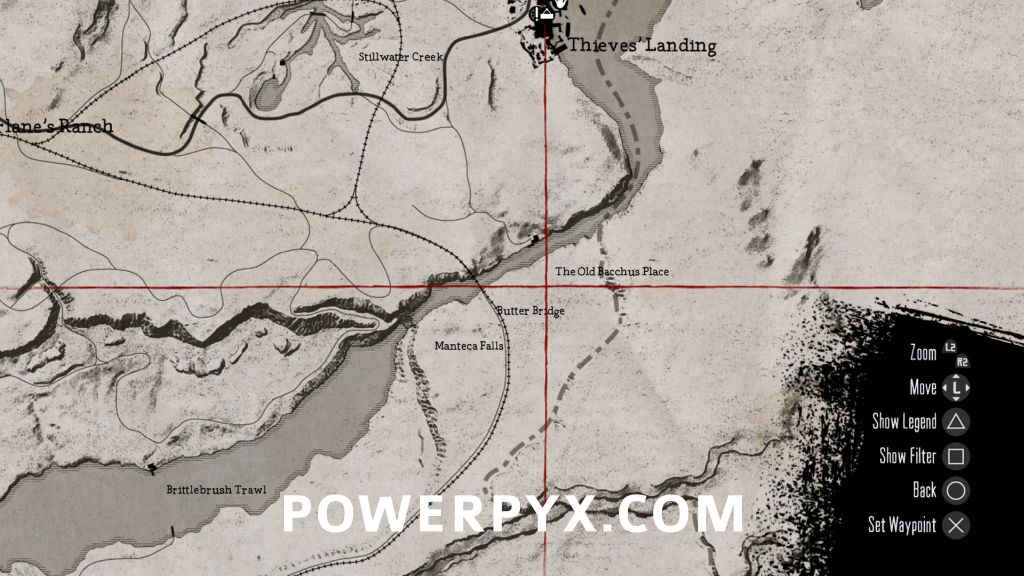
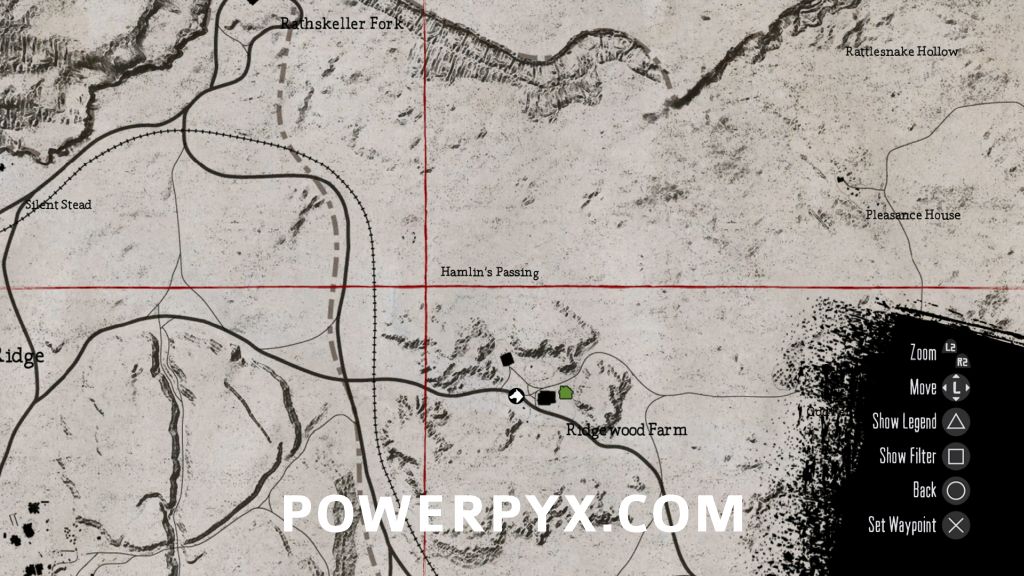
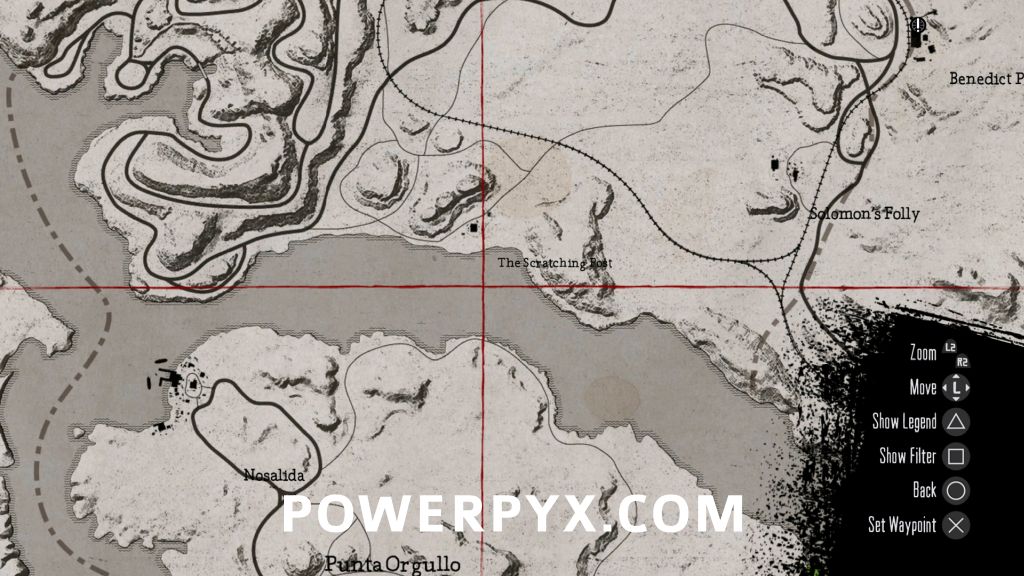
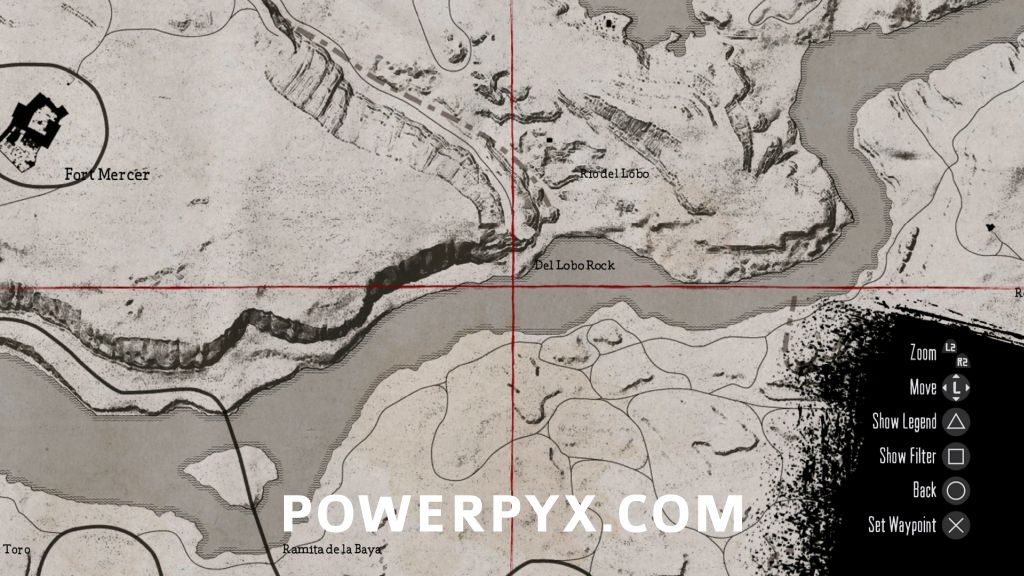
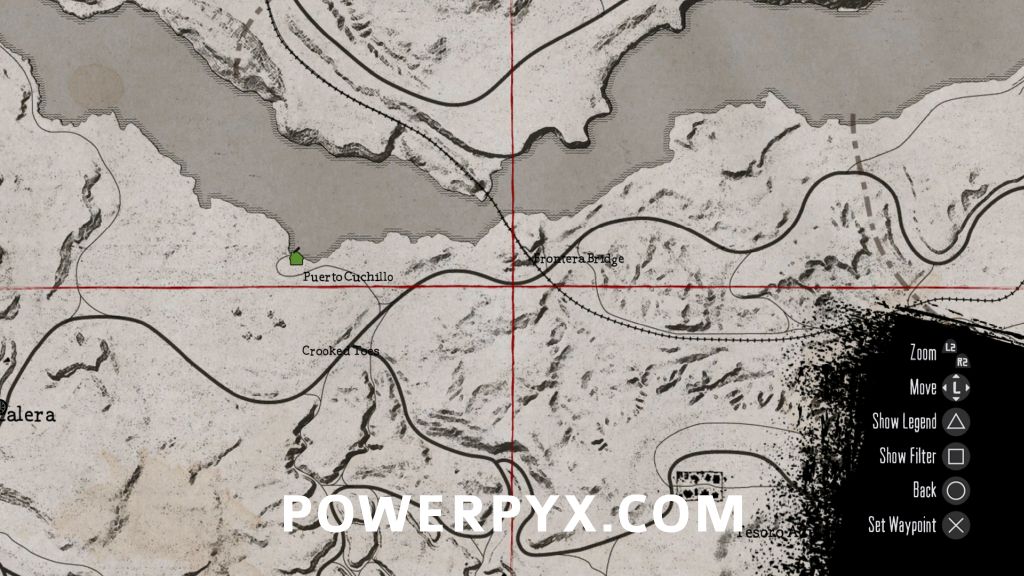
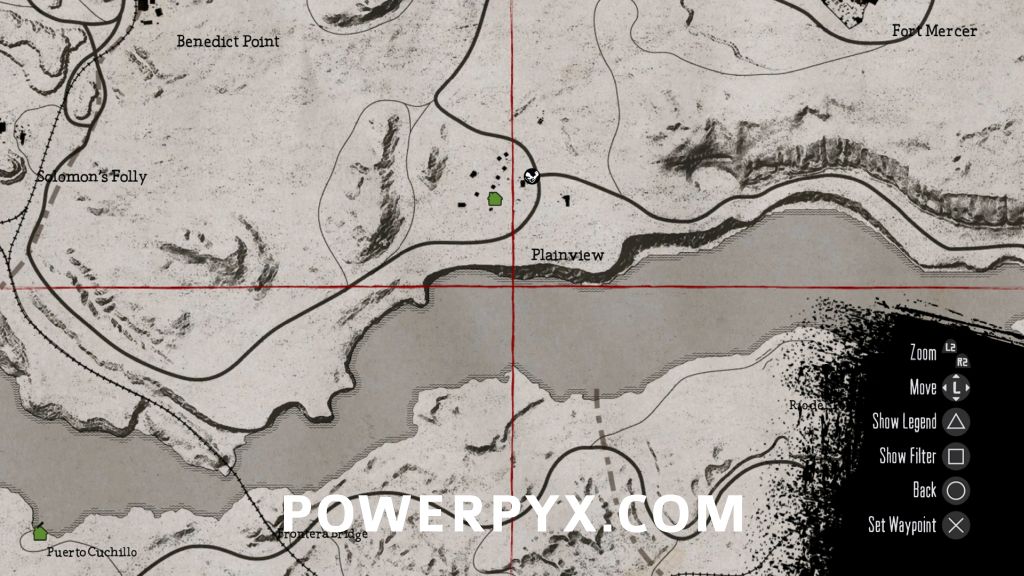
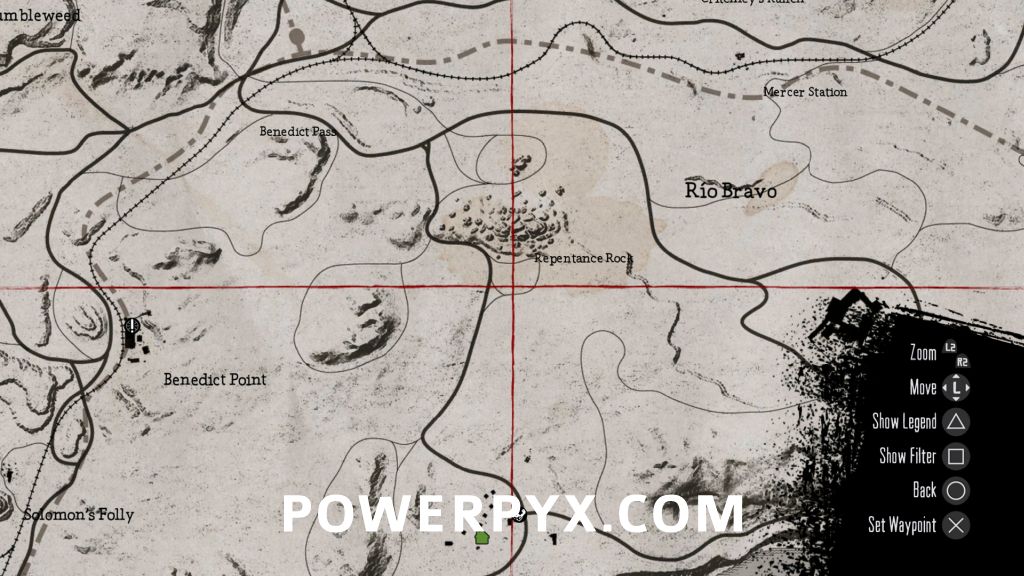
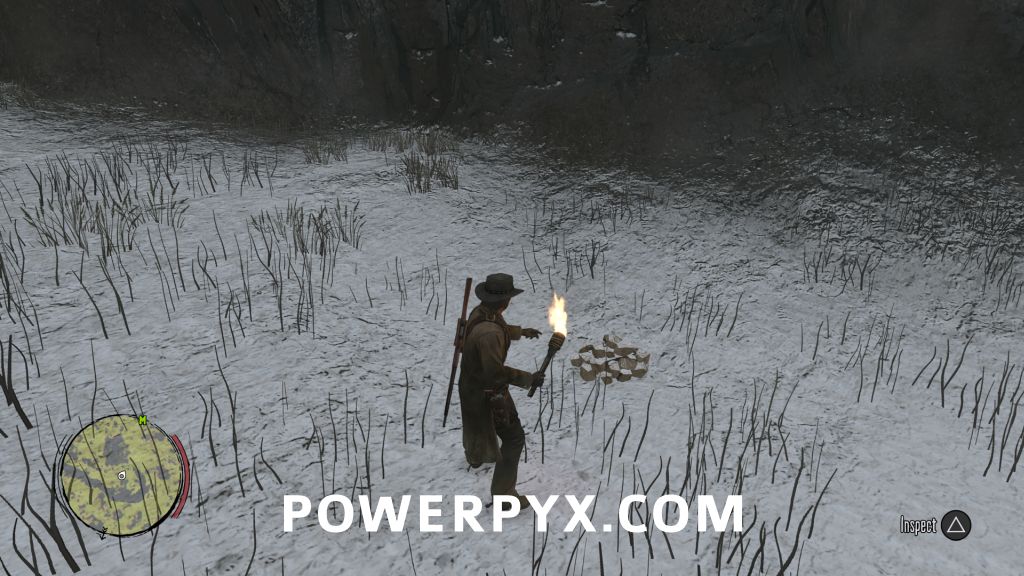
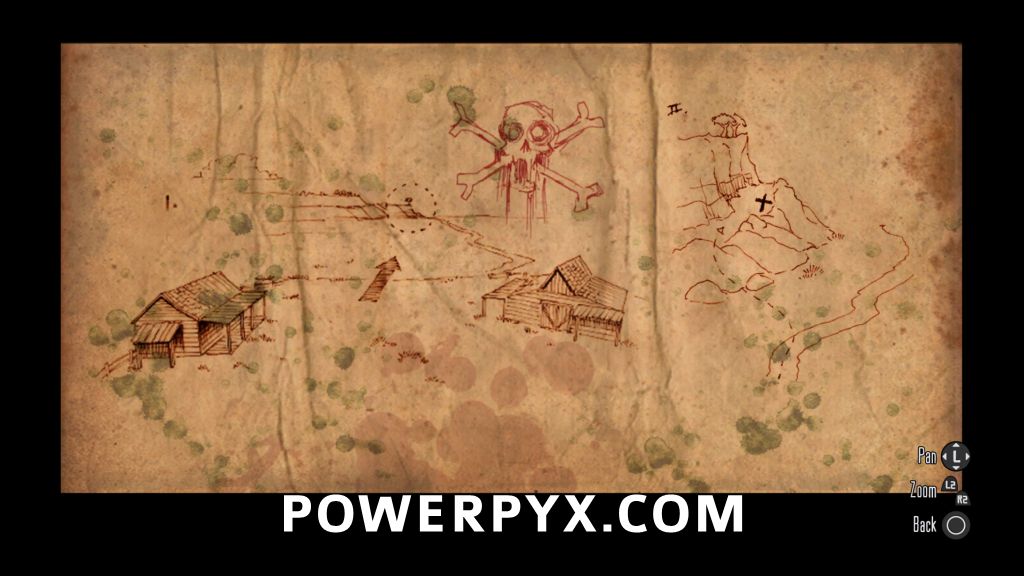
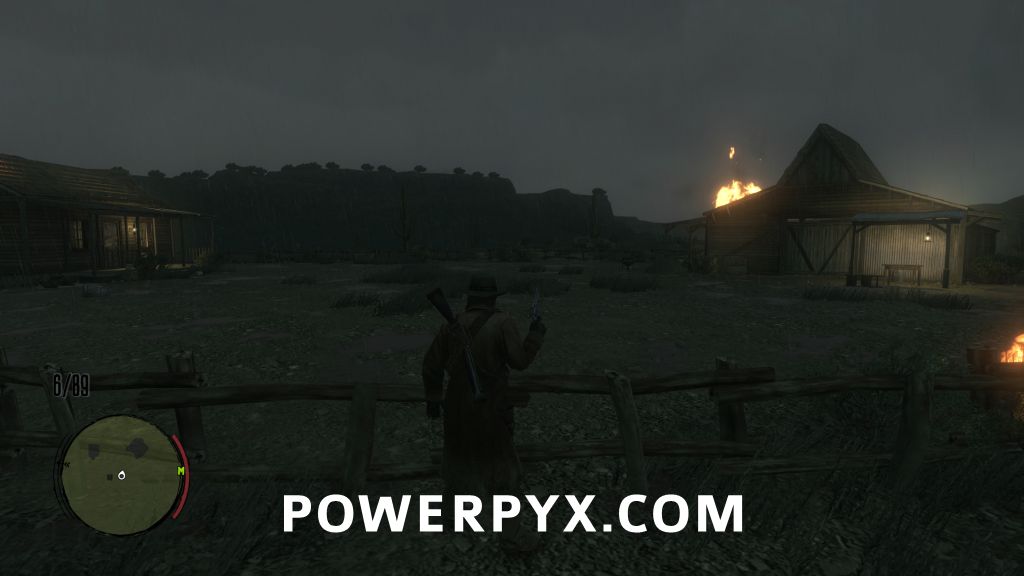
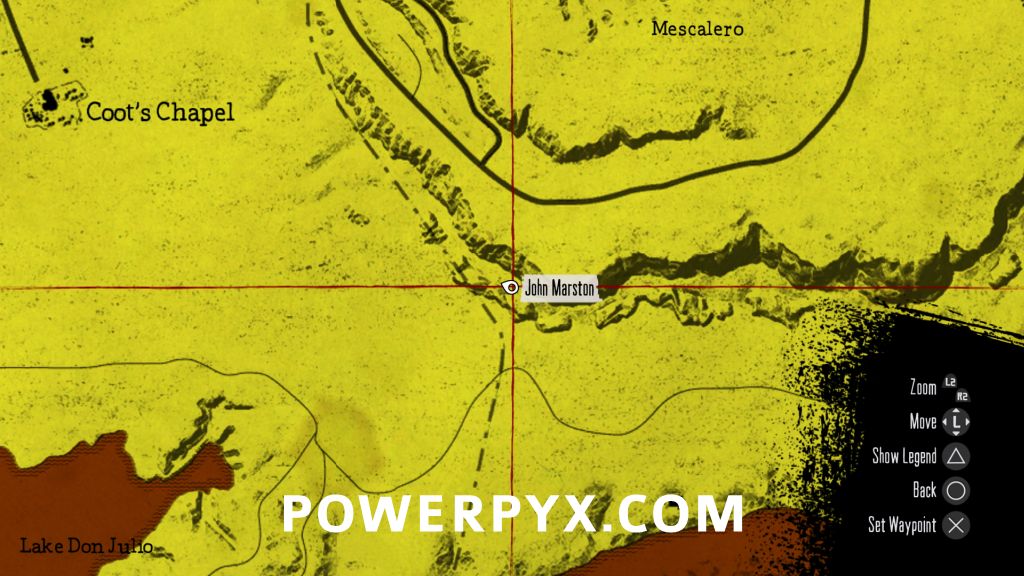
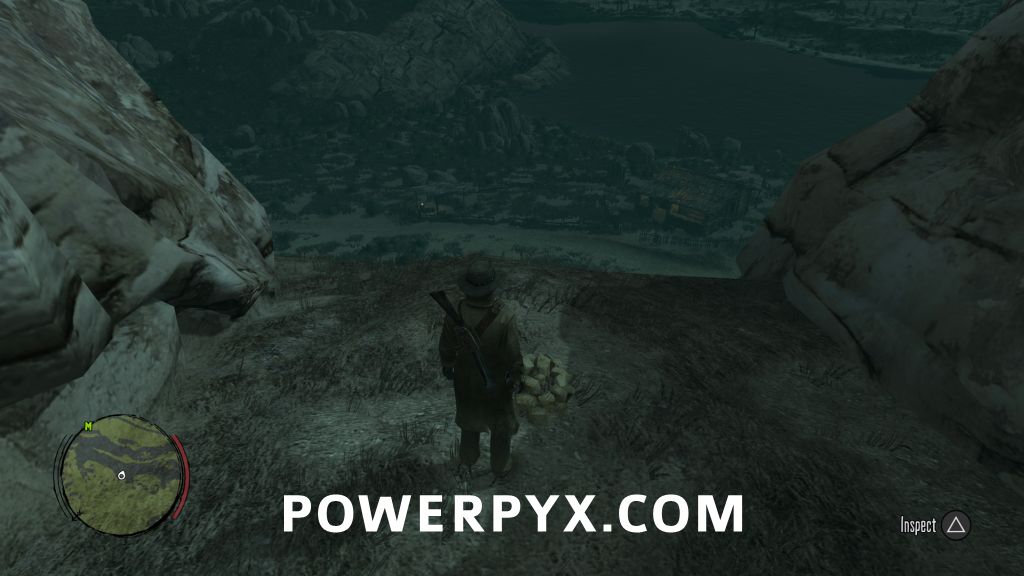
On the Trail of de Vaca Uncover every location on the map. |
|
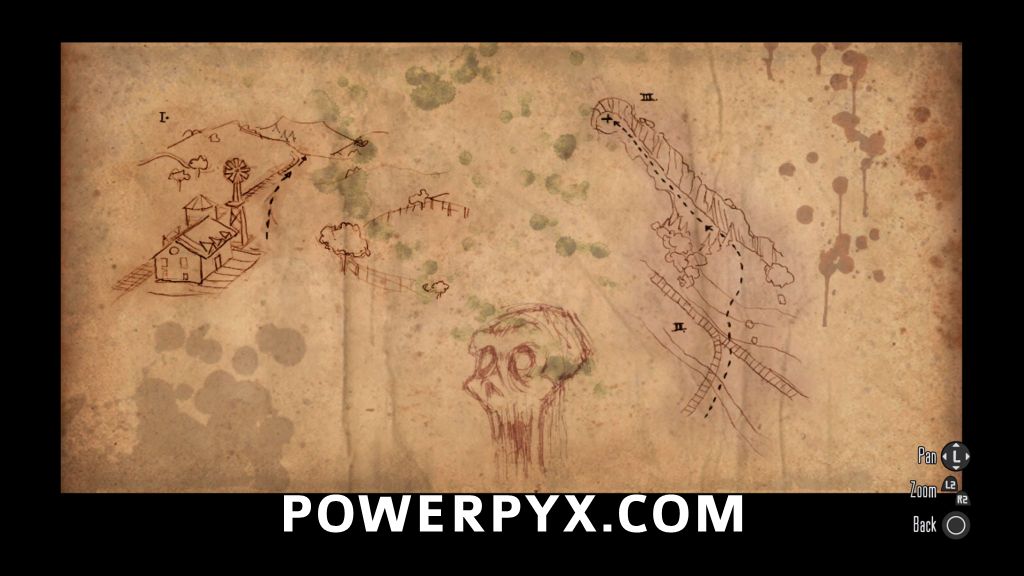
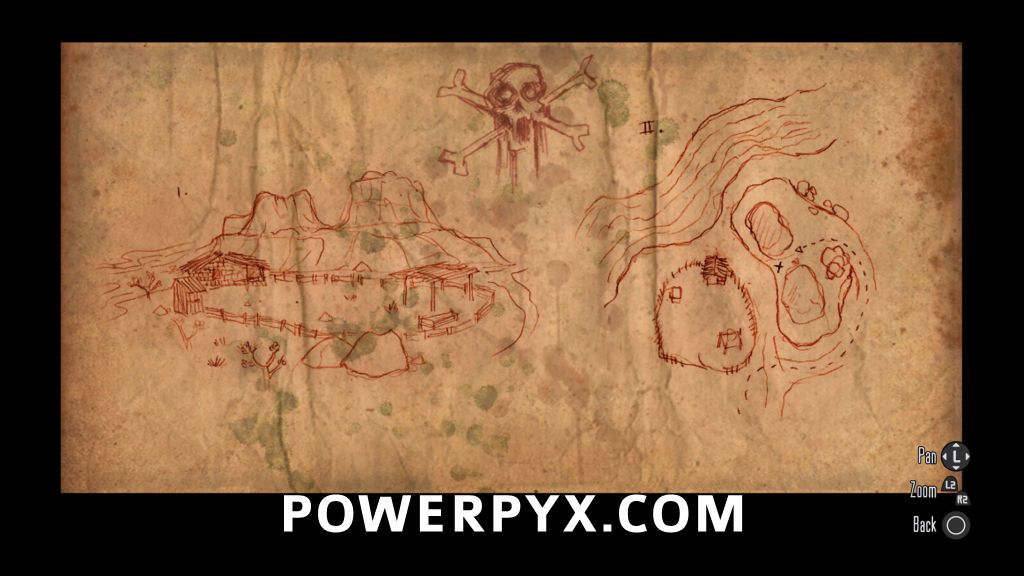
There are 94 locations on the map, most of which can be “discovered” by purchasing a territorial map from general stores in each area, then using them from your inventory screen. Here are the areas, the locations that are covered by each map, and the places to purchase them:
NOTE: In some versions of the game, there have been reports that after using the Territory Maps for an area it doesn’t correctly reveal all locations. If you do not have 94/94 locations after purchasing all the maps, check that the locations in red have been registered. See images below for locations:
|
||
 |
Friends in High Places Use a pardon letter with more than $5000 bounty. |
|
| See Heading South on a White Bronco. |
||
 |
Redeemed Attain 100% in the Game Completion stat. |
|
| For this you need to reach 100% completion. This trophy will take the most time overall to achieve, however it also includes effort towards other trophies so it isn’t that punishing. Each item on the below checklist contributes a certain amount towards 100%. | ||
 |
Spurred to Victory Complete 20 story missions without switching to a new horse at a hitching post. |
|
| This is best done from the beginning of the game, as 20 story missions represent just under half the total game length. In the very first mission before heading to Fort Mercer, you’re going to want to change to a better, more durable horse. The remastered versions of Red Dead Redemption were based on the original Game of the Year release, and because of this you will begin the game with a War Horse deed in your inventory. The War Horse is one of the fastest horses in the game, but more importantly it is also the only horse that can consistently survive a surprise cougar attack.
Once you’ve changed to the War Horse deed, you will then need to complete 20 story missions while keeping your horse alive and not using hitching posts until the trophy pops. Keep a backup save between missions in case your horse accidentally dies, so you can reload if necessary. During missions be sure to get off your horse at a safe distance from gunfights to keep them out of harms way, but the real dangers to horses are cougars and falling damage. The second you hear the characteristic yowl of a cougar, be ready to immediately go into Dead Eye. They are tough to see in the brush, so start running and look for movement behind you and shoot it. For heights, horses will usually stop before you ride them off a cliff but if you call them their pathfinding will sometimes cause them to slip over edges and potentially die. If your horse is in a precarious position, it’s sometimes better to just go to the horse rather than taking the chance it won’t accidentally kill itself. Some missions like “Wild Horses, Tamed Passions” force you to mount another horse. This is fine, as long as you don’t use a hitching post, but you should still switch back to your bonded horse as soon as possible. Horse death, using another deed, hitching a different horse, or being awarded the Dark Horse for dropping to Desperado Honor rank will reset your counter and you will have to reload or begin again. |
||
 |
Heading South on a White Bronco Evade the US Marshals while riding the Hungarian Half-Bred horse. |
|
| Combine your effort towards this trophy with Man of Honor / Chivalry’s Dead and Friends in High Places for maximum efficiency. Once you have access to Nuevo Paradiso, head to Diaz Coronas and look for a wild horse herd. Hungarian Half-Bred horses are recognizable for their white coat and grey mane.
If you don’t see one in the herd, ride away until the horses despawn then ride back and check again until you find one. Break the horse, then go to any general store and purchase the Hungarian Half-Bred deed just in case your horse dies while building up your $5000 bounty. Next you will need a Pardon Letter, which you can receive from Seth in “Exhuming and Other Fine Hobbies” (if you use your money to pay to clear your bounty instead of the letter, or they can be earned by completing Gang Hideouts. Finally, make a backup save and then you will be read to begin. Go to a large settlement in New Austin or West Elizabeth and start killing innocent civilians until you provoke a response from the law. Once a posse is after you, lead them on a chase across country. Lawmen are worth more bounty and they won’t run from you like civilians, so all you have to do is stay ahead of the pack and kill them as they come into range. This is also safer than getting pinned down in town, where you can be cornered and/or flanked. Keep a stack of medicine on hand anyhow, as their gunfire is both powerful and accurate. It is also worth losing your wanted status a few times so that you can camp and make a save in a new slot, just so you don’t lose your progress if the posse takes you down with a lucky shot. US Marshals will start appearing after you’ve killed at least 20 lawmen, but you may have to lose then re-gain your wanted status to make them start appearing. If you’re saving regularly this should happen organically, and at some point during your rise to $5000 you will earn |
||
 |
Mowing Them Down Kill 500 enemies with a mounted weapon in any game mode. |
|
| Get 500 kills using any mounted weapon. These kills are cumulative among all mounted weapons (cannons, gatling guns, etc.) and can be done in either the main game or Undead Nightmare. El Presidio is the location you’ll want to use to accomplish this, either on the mass of zombies in Undead Nightmare, or by killing enough lawmen to engage the Mexican army, then leading them to the fort where you can pick off an endless stream of soldiers. | ||
 |
In a Hail of Bullets Kill 500 enemies with any pistol or revolver in any game mode. |
|
| Get 500 kills using any pistol, or revolver. These kills are cumulative among all pistols and revolvers and can be done in either the main game or Undead Nightmare. You will likely get this without trying through regular play, since you’ll be using pistols and revolvers through most of the game. If not, Gang Hideouts offer a renewable source of targets in controllable settings, or you can get a bounty and pick off your pursuers until it unlocks. Try to go for headshots, and you can work on Bullseye at the same time. |
||
 |
Long Arm of Marston Kill 500 enemies with any rifle, repeater, or shotgun in any game mode. |
|
| Get 500 kills using any rifle, repeater, or shotgun. These kills are cumulative among all rifles, repeaters, and shotguns (including sniper rifles) and can be done in either the main game or Undead Nightmare. You will likely get this without trying through regular play but if not, Gang Hideouts offer a renewable source of targets in controllable settings, or you can get a bounty and pick off your pursuers until it unlocks. Try to go for headshots, and you can work on Bullseye at the same time. |
||
 |
Bullseye Get 250 headshots in any game mode. |
|
| Using any weapon, get 250 head shots in either the main game or Undead Nightmare. If you’re using Dead Eye regularly, you’ll probably rack up 250 headshots accidentally before you realize it. If you somehow come up short, run through some Gang Hideouts with your Rolling Block and use Dead Eye to guarantee a head shot. | ||
 |
Unnatural Selection Kill one of every animal species in the game in any game mode. |
|
| You can check to see what animals you’ve already killed in your pause menu under Stats > Misc. The description of this trophy is somewhat misleading as you are only expected to kill one of every wild animal species in the game. Domestic animals such as dogs, chickens, pigs etc. are not needed, and even though they will also be tracked in the mneu, you can safely ignore them. Also you may want to combine this with the Ambient Challenges since the Master Hunter and Sharpshooter Challenges both require you to kill specific animals, just so you don’t duplicate the effort.
The animals that you’ll need to kill are:
Note: You will also see Jackalopes on the end of the list, but they were not part of the original list of animals and are not needed for this trophy. If you want to kill one for the Expert Hunter Outfit, you can check around Pleasance House, or any place that rabbits are common. Every time a rabbit spawns, there is a very slim chance that it will spawn a jackalope instead. |
||
 |
Axe Master Complete all Tomahawk challenges. |
|
Tomahawks can be purchased at Manzanita post, which will not only reveal the Tomahawk Mastery Challenge but it will also complete the first rank as well. To get legendary rank, you must complete the following:
|
||
 |
Master Exploder Complete the Explosive Rifle Challenge. |
|
The Explosive Rifle can be purchased from the gunsmith in Blackwater, which will not only reveal the Explosive Rifle Mastery Challenge but it will also complete the first rank as well. To get legendary rank, you must complete the following:
|
||
 |
The Downward Spiral Complete “Curious Tales from Blackwater, USA” Survivor Mission. |
|
| Story-related trophy, cannot be missed. “Curious Tales from Blackwater” is a Survivor Mission given by Harold MacDougal in Blackwater after you complete “Love in the Time of Plague”. | ||
 |
Judge A Man By The… Complete “Cure For Most of What Ails You” and “Get Back in that Hole, Partner” Survivor Missions. |
|
| Story-related trophy, cannot be missed. “Cure For Most of What Ails You” and “Get Back in that Hole, Partner” are Survivor Missions. The first is given by Seth in The Old Bacchus Place, and the second by Nigel West Dickens in Fort Mercer. Both are unlocked by completing “Curious Tales from Blackwater”. | ||
 |
The Superior Dance Complete “Mother Superior Blues Survivor Mission”. |
|
| Story-related trophy, cannot be missed. “Mother Superior Blues” is a Survivor Mission given by the Mother Superior of Las Hermanas after you complete “American Imperialism” | ||
 |
All’s Right With the World Complete “On a Pale Horse”. |
|
| Story-related trophy, cannot be missed. You will receive this trophy upon completion of the Undead Nightmare story. | ||
 |
Spinning Plates Have every territory saved at the same time during the Undead Nightmare. |
|
| There are a total of 23 locations that need to be in a “Saved” state at the same time to get this trophy. Save every location that you discover as you pass by, then use the beds in safehouses to fast travel to previous locations if they come under attack. This happens every 1-2 in-game days, so it’s not overwhelming as long as you stay ahead of it. When a location comes under attack, all of their ammo chests will restock so loot them before you leave.
23 Locations:
|
||
 |
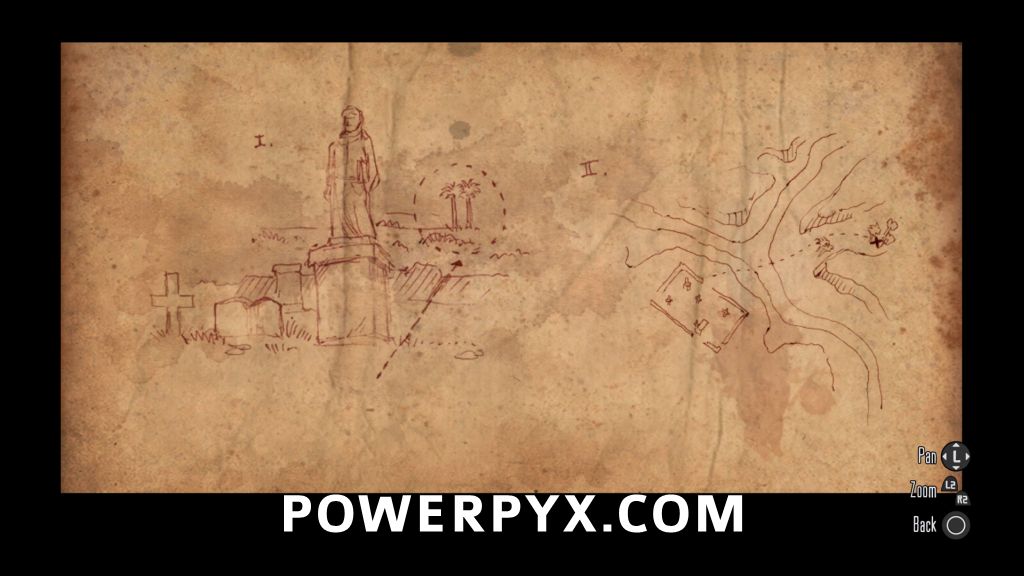
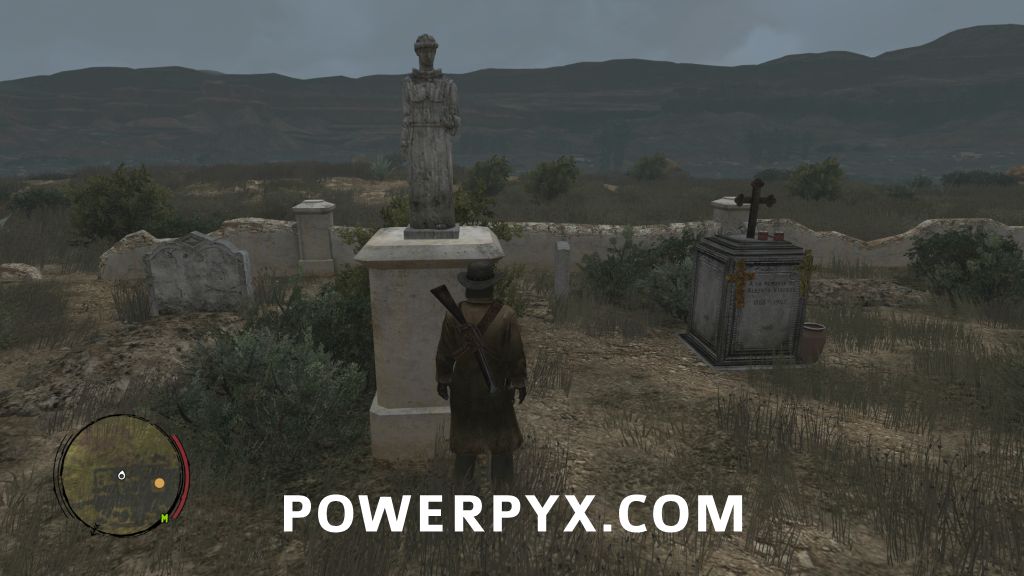
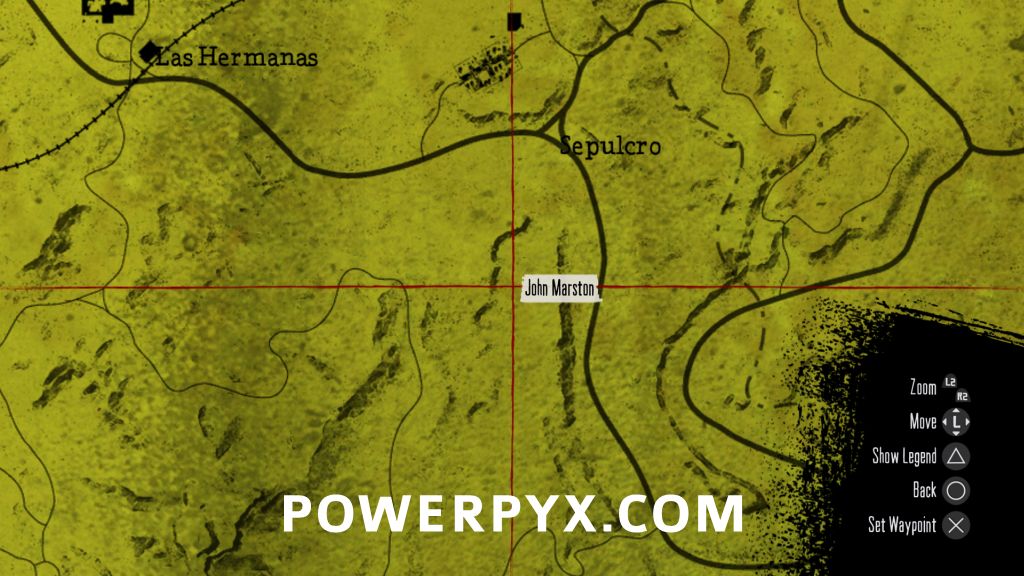
Zed’s Dead, Baby Attain 100% Game Completion statistic in Undead Nightmare. |
|
A smaller list to reach 100% than the main game, and relatively simple aside from one hunting challenge with a temperamental spawn. Credit for saving territories or cleansing graveyards is given the first time they are saved/cleansed. Your completion percentage will not decrease if they come under attack afterwards. For 100%:
|
||
 |
Mad Marston: The Trail Warrior Attain Rank 5 in all Undead Nightmare Challenges. |
|
| There are 4 challenges that need to be completed for this trophy and your 100%. Note that Tomahawk Mastery and Exploding Rife Mastery do not need to be completed. The four challenges that you need are:
Four Horses of the Apocalypse
Undead Hunter
Undead Treasure Hunter
Undead Sharpshooter
|
||
 |
Fan Service Find and break a unicorn. |
|
| The Unicorn will begin spawning after you have killed the chupacabra. It does not show a mythical creature circle on the map as the Four Horses of the Apocalypse did, but you will recognize it from its white coat, the rainbow trail behind it as it runs, and of course the horn on its head. It will spawn near Torquemada. Lasso and break it for the trophy.
|
||
 |
Chupathingy Find and kill a chupacabra. |
|
| The chupacabra will begin spawning as part of the Undead Hunter Rank 5 Challenge. See Mad Marston: The Trail Warrior for details. It looks like a wolf crossed with a ridgeback boar. Sit on Pestilence for safety, and kill it with a rifle round or two. |
||
 |
Six Years In The Making Find and kill a sasquatch. |
|
| You will find and kill multiple sasquatches in side mission “The Birth of the Conservation Movement”. | ||

 , then forward
  a couple times to build up momentum. For best results release a bit after the indicator, so you hit the stake about halfway up rather than coming up short if you don’t have enough momentum. As long as you aim as shown above you’ll be throwing on target, then all you need to do is dial in the timing of the swing. Watch how Marston moves, and you’ll see when you’re doing it properly if it looks like a fluid motion that builds up momentum. Games at MacFarlane’s Ranch are only $1 a game, so you can just play again if you don’t manage a ringer.
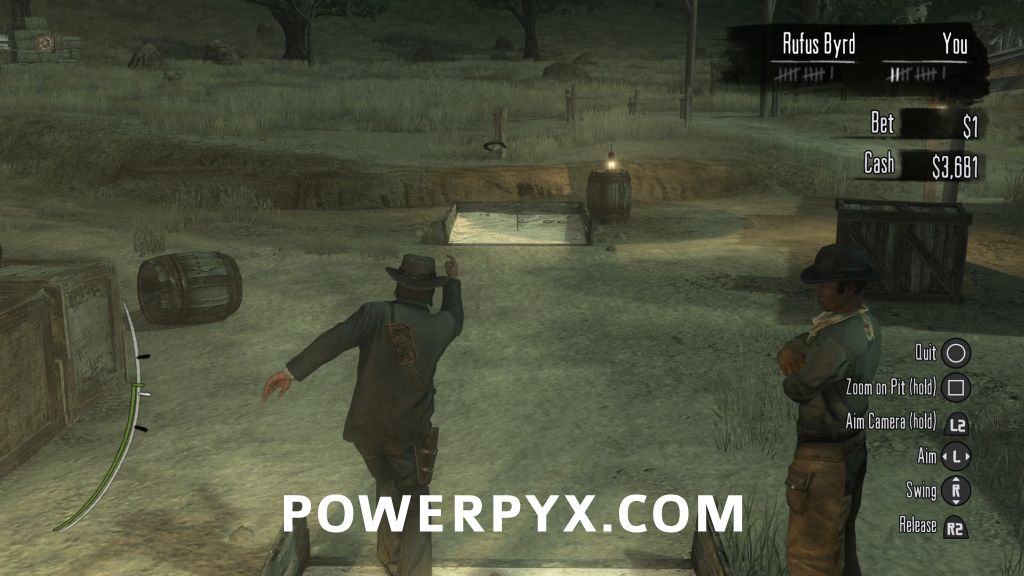
 /
/  and select “Fist” in the lower right. Then pick your target and punch away. Try not to pick a civilian or they will just run away, but anyone who is armed will stick around to finish the fight. You’ll have to knock them out for it to count. Once you do, get out of there because when they wake up they’re going to pull their gun! If you get mobbed by too many people at once you can reload your save and try again.


 (instead of the normal method using
  which will cause you to pay the bounty using cash) to finally unlock
  /
/  to throw the tomahawk. Use this to kill an enemy at range from horseback, then while on foot. After that, release
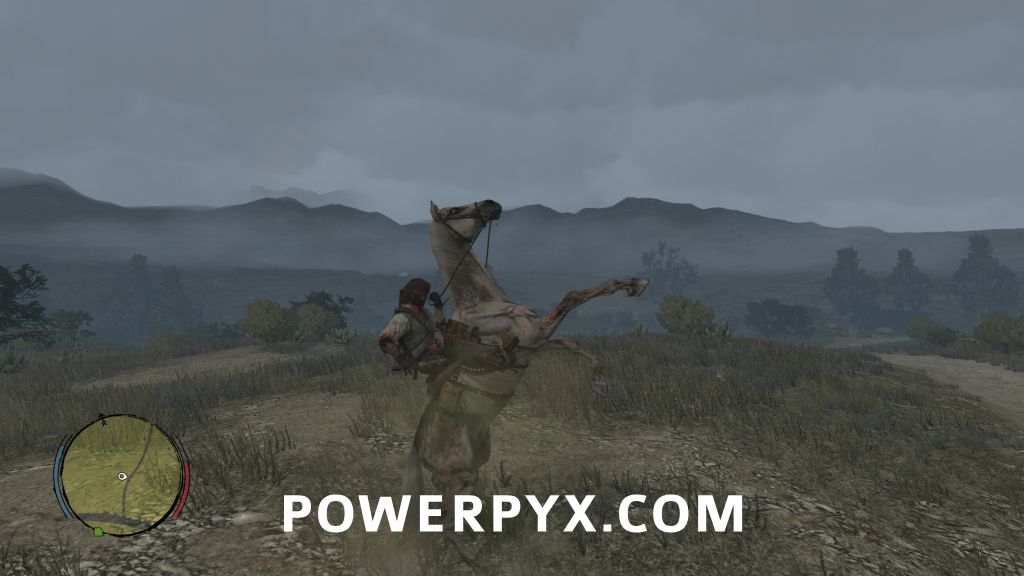


Lars says
I have Read that the Four Apocalypse Horses can glitch if you dont do them First time you see them in undead nightmare?
And that you need to complete all challenges in undead nightmare before you finish the last Story mission otherwise they can be missable?
Paulo says
What i need to to do if i don’t want that my ps4 save import to ps5? (I don’t want the autopop)
Lucho says
Does cheat mode affect obtaining trophies?
Nikki_boagreis says
The last trophy I need is for getting a ringer in a game of horseshoes.
Dave says
There is a glitched trophy not represented. If you compete the US Army prerequisites (scraps) before playing as Jack, you can’t wear the US Army Outfit. It will just show as all scraps completed and keep the black outline for the outfit for Jack. I bought the scrap as I was John, and now I can’t finish the challenges (explosive rifle mastery) because it requires you to have the US army Outfit on.
Chronichols says
You have to buy the scrap in Blackwater as Jack after the epilouge.
Big says
Unless this was an issue before as of the 8th of march, 2026 this should be all impossible because the piece of fabric can only be bought after the last main mission. John is dead by then and the fabric can only be purchased by Jack. I did EVERYTHING with John that I could. Couldn’t buy the fabric as it was unavailable. After the last mission done when playing as Jack it becomes available. So it’s weird to me when you say you bought the fabric as John.
ADS says
Love your work guys. I think you need to fix the “gold medal” trophy because it has to be a combat mission. “political realities in Armadillo” seems to be the best mission to replay. The one you in the guide didn’t work for me (it has no combat?).
Jill says
Here to agree with this comment. Political Realities in Armadillo is the easiest to do. Start the mission and run ahead to the sheriff’s office (the sheriff’s will complain, just ignore him). Skip the cutscene and whistle for your horse, get on to chase the target. Skip the cutscene and run to the cover marked by the X. Make sure to take the time to line up headshots to get the gold. Finish them all off and you should have it.
BubbasDank says
Guide was a big help, was able to get the platinum in right under 50 hours!
Volodymyr says
In the “Fightin’ Around the World” achievement, there is another saloon; it is located in Escalera.