
Case 04: The Masquerade is a Main Mission in Gotham Knights. This walkthrough will guide you through all Sub-Chapters and Objectives of the Case 04: The Masquerade main story quest.
Requirement: having completed Case 03: In the Shadows
Reward:
- Subcase 4.1 – Mark Hendricks: 6,000 XP
- Subcase 4.2 – The Orchard Hotel: 3,300 XP
Mission Info: We met with the head of security of the Orchard Hotel, Mark Hendricks. he saw something he shouldn’t and the Count of Owls tried to have him killed for it. This confirms it. Court Members will definitely be attending the Masquerade Ball. We’re going to find out who they are.
Objectives:
- 4.1 – Mark Hendricks
- Check the Evidence Boards
- Reach Mark Hendricks’ Last Known Location
- Locate Mark Hendricks
- Protect Mark Hendricks – Defend the Doors 100% – Defeat Wave 0/3 – BONUS: Defeat Enemies with Perfect Attacks 0/3
- Talk to Mark Hendricks
- Return to the Belfry
- 4.2 – The Orchard Hotel
- Enter the Orchard Hotel
- Reach the Ballroom – Avoid Detection
- Reach the Security System – Avoid Detection
- Disable the Security System – Avoid Detection
- Defeat the Security Guards
- Reach the Ballroom
- Eavesdrop to Identify Court Members
- Locate the Voice – BONUS: Remain Undetected
- Locate the Voice
- Reach the Voice’s Location
- Find the 13th Floor
- Open the Secret Door
- Search the 13th Floor for the Voice of the Court
- Defeat the Court Members
- Locate Evidence
- Activate the Projector
- Insert the USB Drive
- Remove the USB Drive
- Defeat the Court Members
- Search for a Way Forward
- Solve the Puzzle
- Search the 13th Floor for the Voice of the Court
- Talk to the Voice
- Defeat the Guards 0/8
- Return to the Ballroom
- Defeat Enemies 0/3
- Return to the Ballroom
- Defeat the Assassins
- Reach the Belfry

4.1 – Mark Hendricks
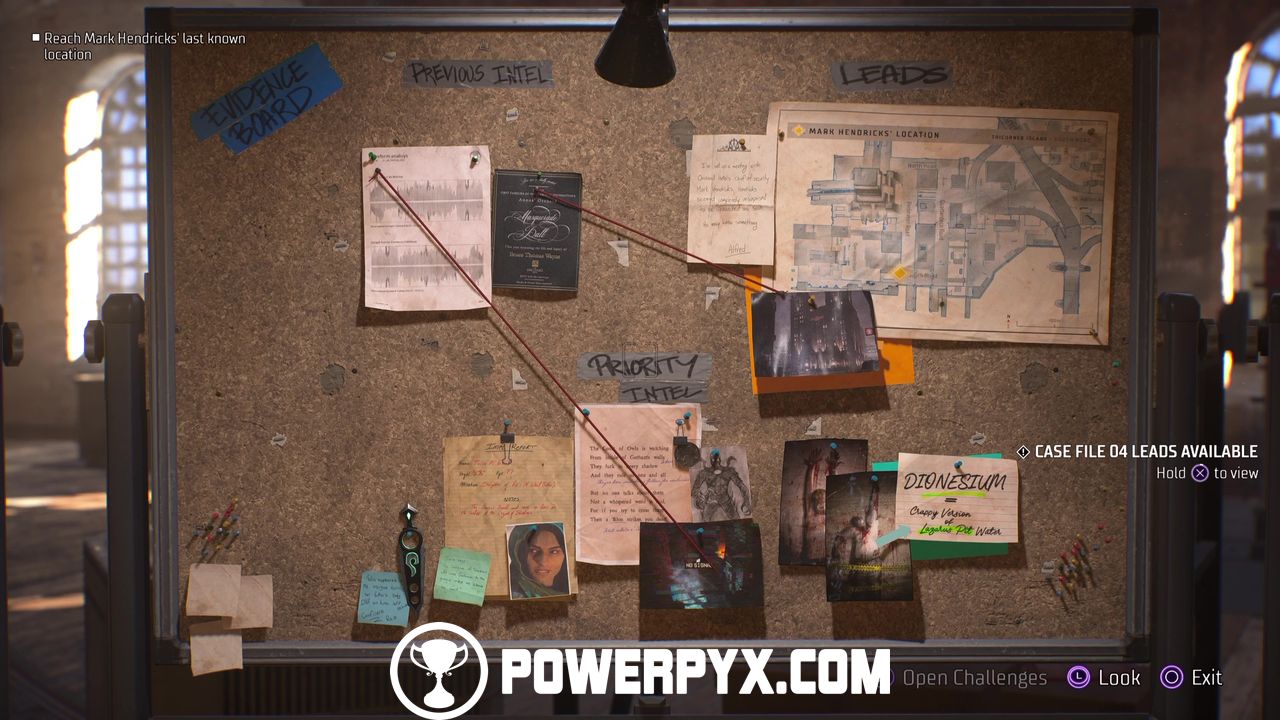
Check the Evidence Boards
Approach the Evidence Boards to examine the new evidence.
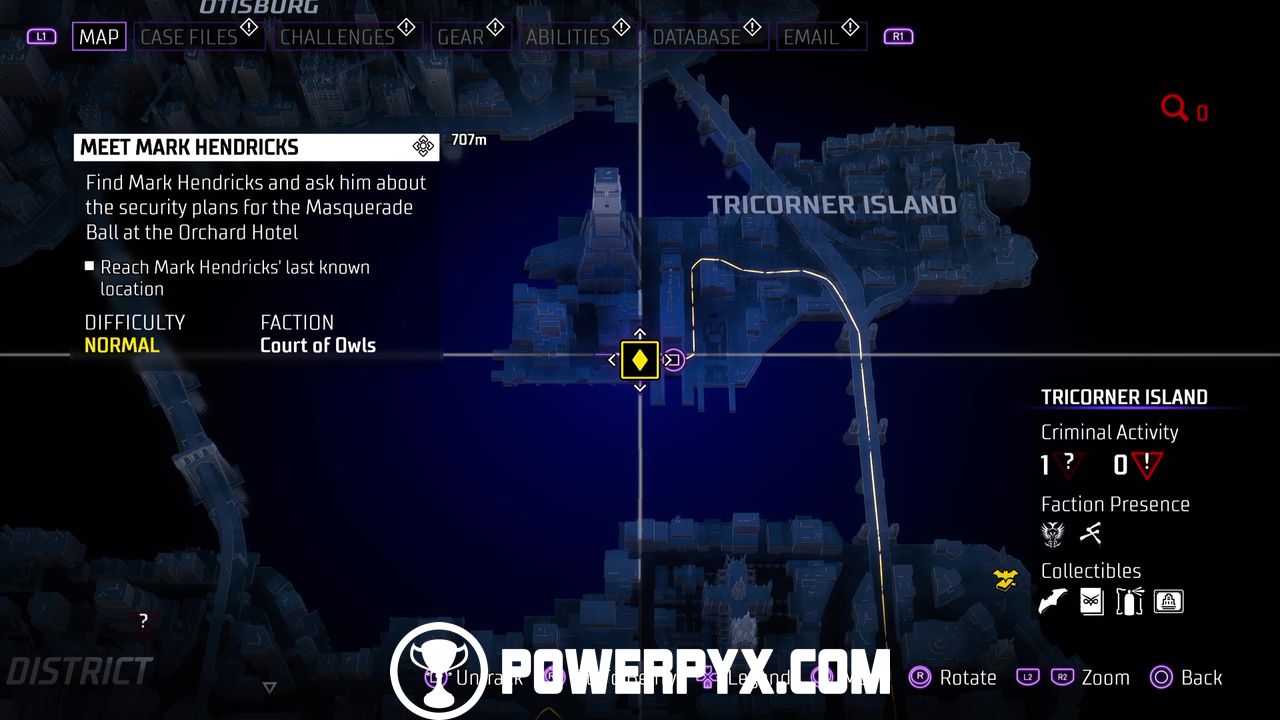
Reach Mark Hendricks’ Last Known Location
Exit the Belfry and make your way to the main yellow marker in south Tricorner Island. When you get to the location, wait around the area for 10-15 seconds until the new objective unlocks.
Locate Mark Hendricks
Now head to the new yellow marker in Tricorner Island.

Protect Mark Hendricks – Defend the Doors 100% – Defeat Wave 0/3 – BONUS: Defeat Enemies with Perfect Attacks 0/3
At the new location, drop down and start clearing out the enemies. You’ll have to defeat three enemy waves before the doors’ percentage drops down to 0. If possible, try to land three Perfect Attacks for some extra XP.
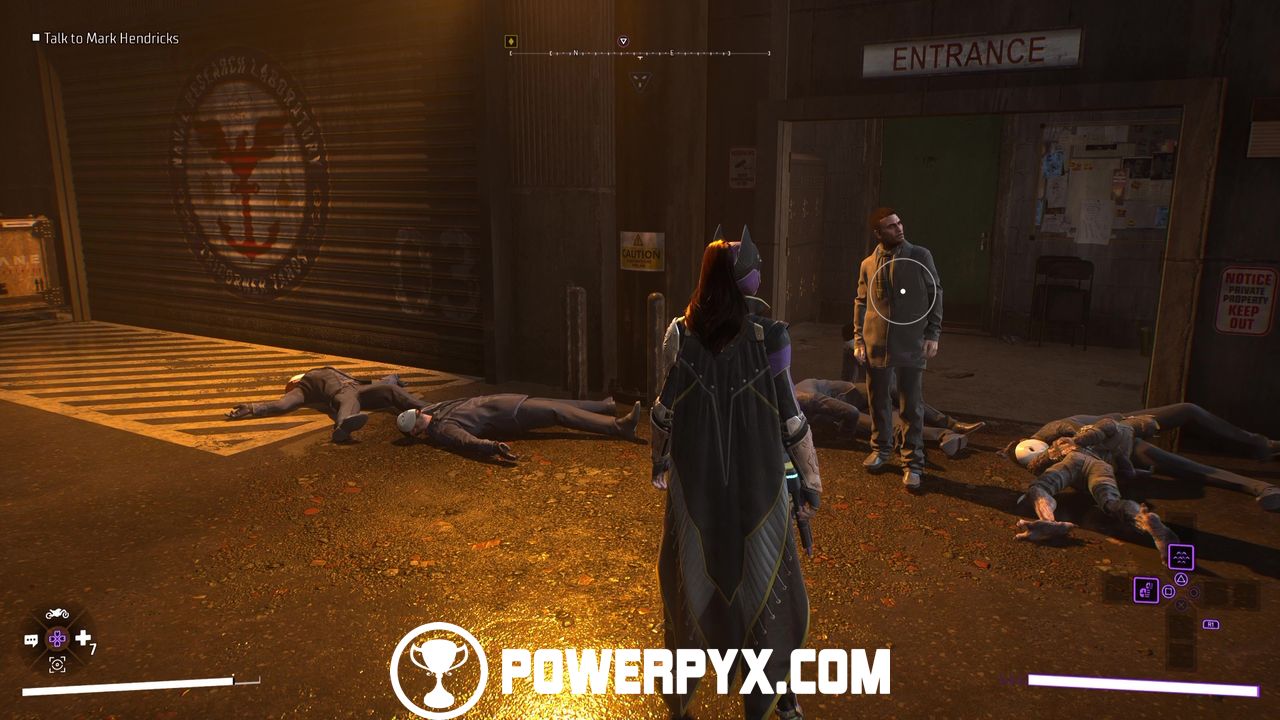
Talk to Mark Hendricks
Once the area is clear, Mark Hendricks will immediately come out the door, so you can talk to him.
Return to the Belfry
As usual, open up your map and  to get back to the Belfry to rendezvous with the others and get ready for your next step.
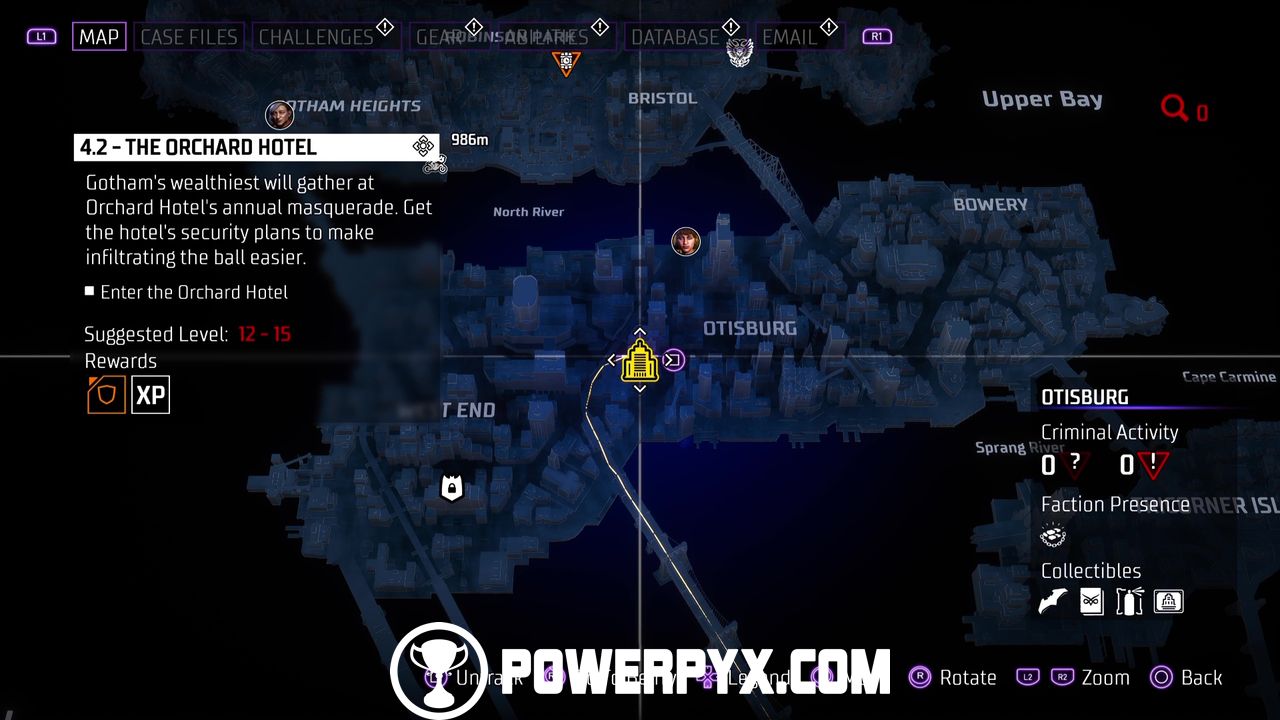
4.2 – The Orchard Hotel
Enter the Orchard Hotel
Leave the Belfry and make your way to the next yellow marker, the Orchard Hotel in Otisburg. The entry point is on a rooftop of the hotel itself.

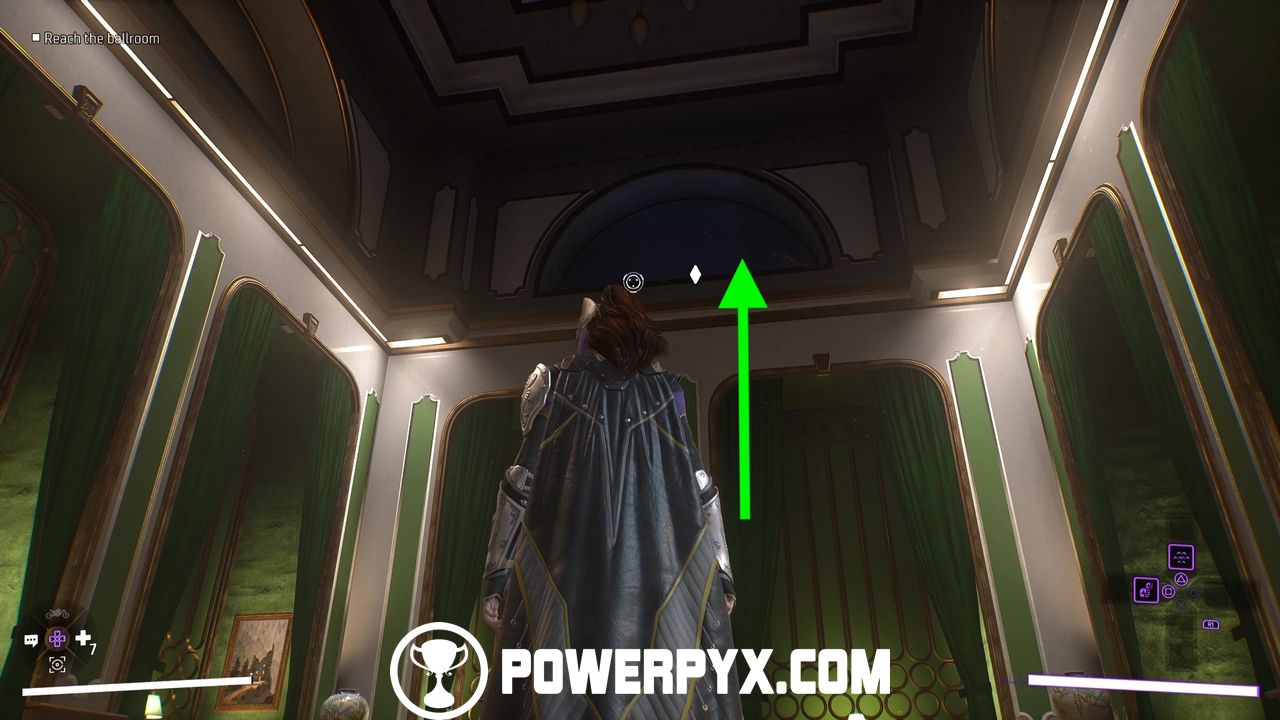
Reach the Ballroom – Avoid Detection
We need to head for the ballroom, but can’t get spotted. Crouch through the hallway until you get to the buffet area. Then, continue crouching along the wall until you get to a corner.

Here, stop and wait for the Court guard to walk away first.

When he moves, continue behind the couches and wait for him to leave behind the second pillar.
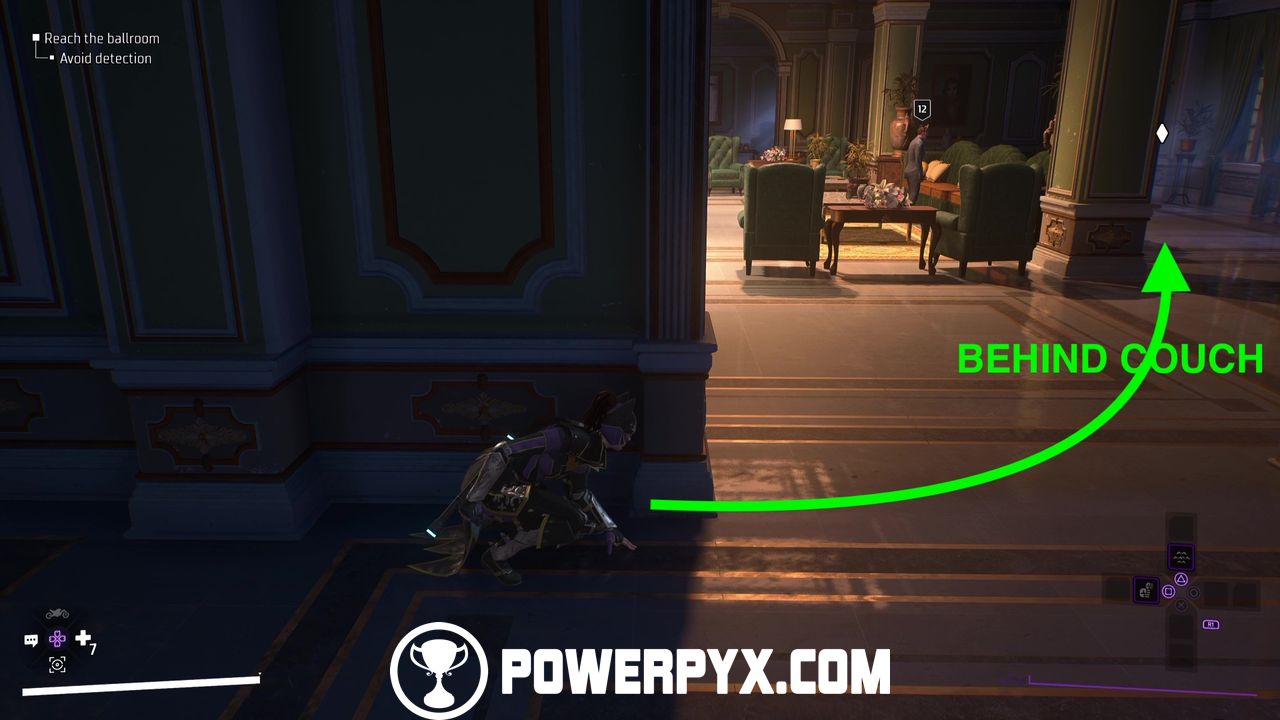
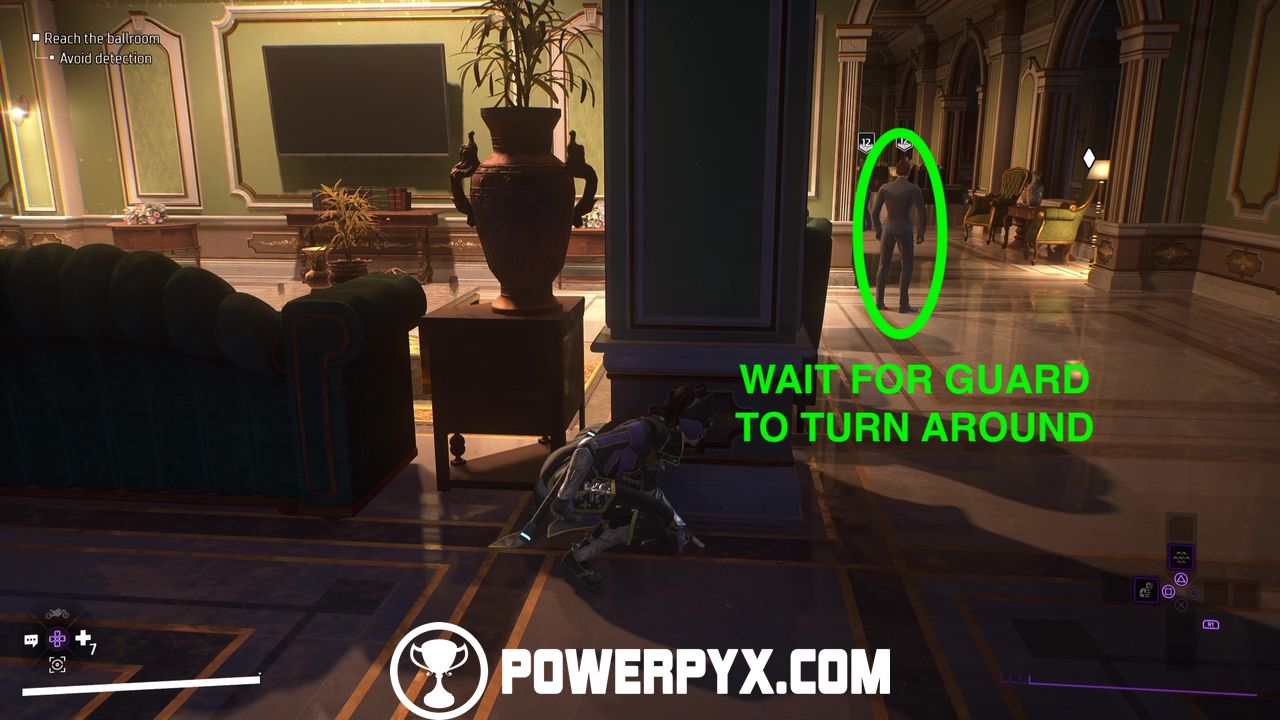
Keep following the white waypoint until you can open a door.
Reach the Security System – Avoid Detection
Now we need to reach the security system and disable it while still avoiding detection. Get past the first camera and around the corner, then stop. You should see a group of Court guards that can be easily snuck past as they’re not looking our way.
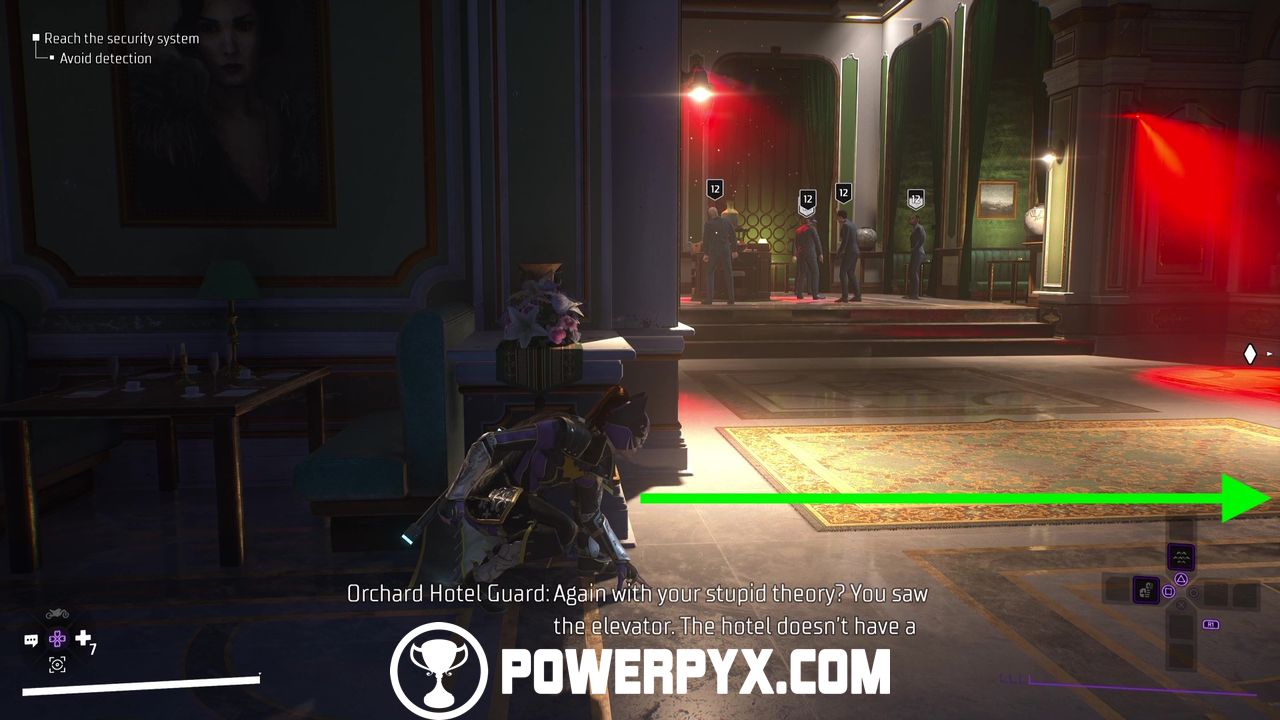
Before heading inside the security system room, make a slight detour to the left for a chest.
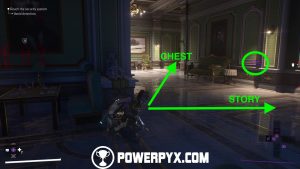
Now, enter the security system room.
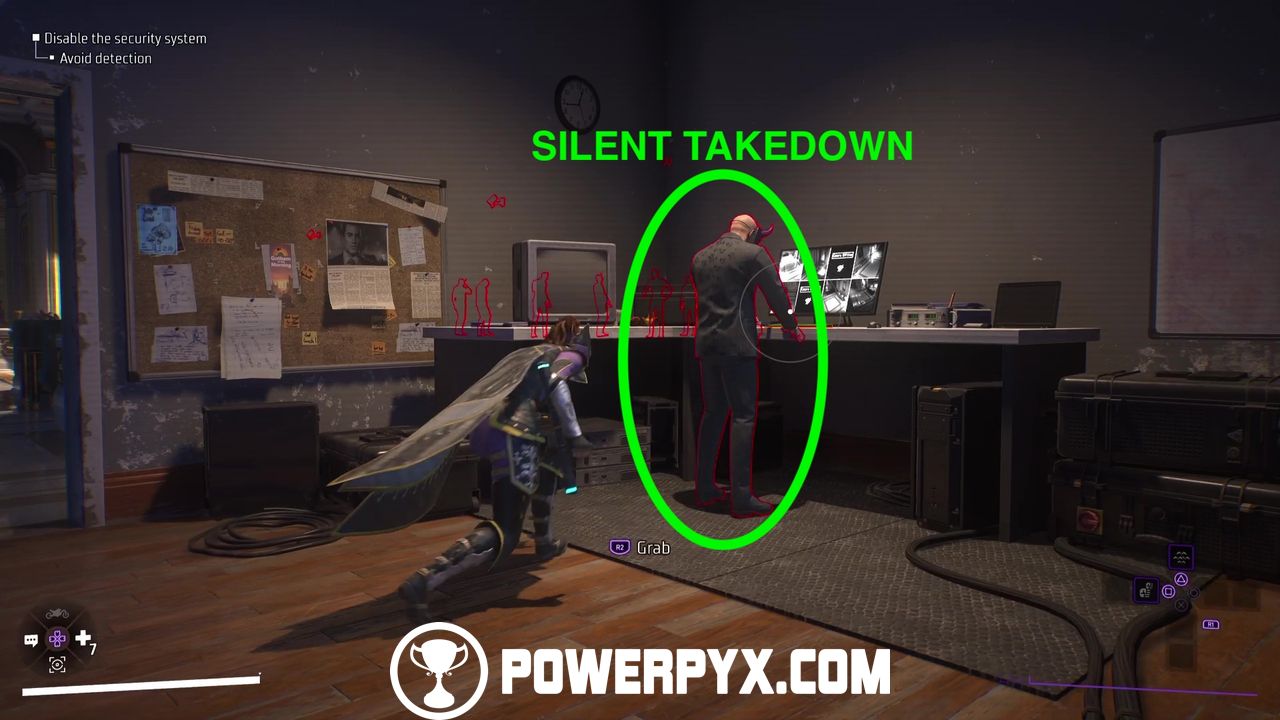
Disable the Security System – Avoid Detection
Silently take out the guard and then disable the security system.
Defeat the Security Guards
Now defeat the guards outside.
Reach the Ballroom
Go where the guards were gathered and the camera will point you to an opening above you can grapple to, then open the gate.
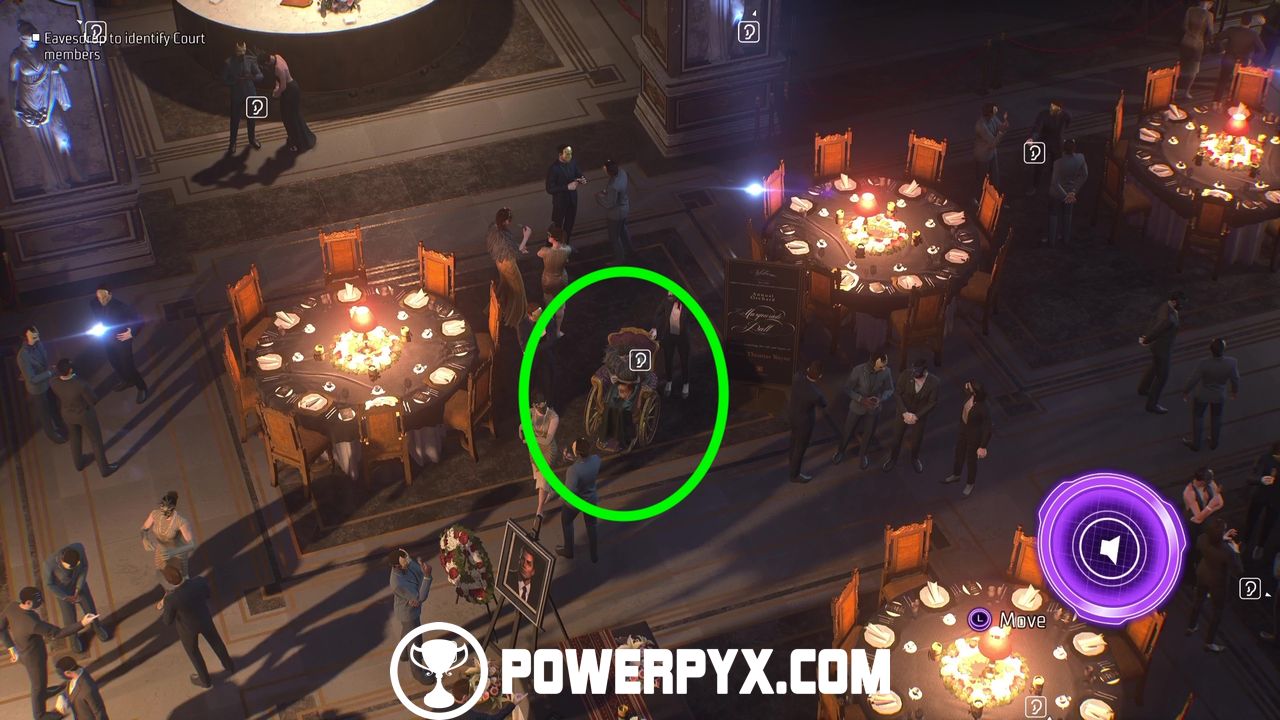
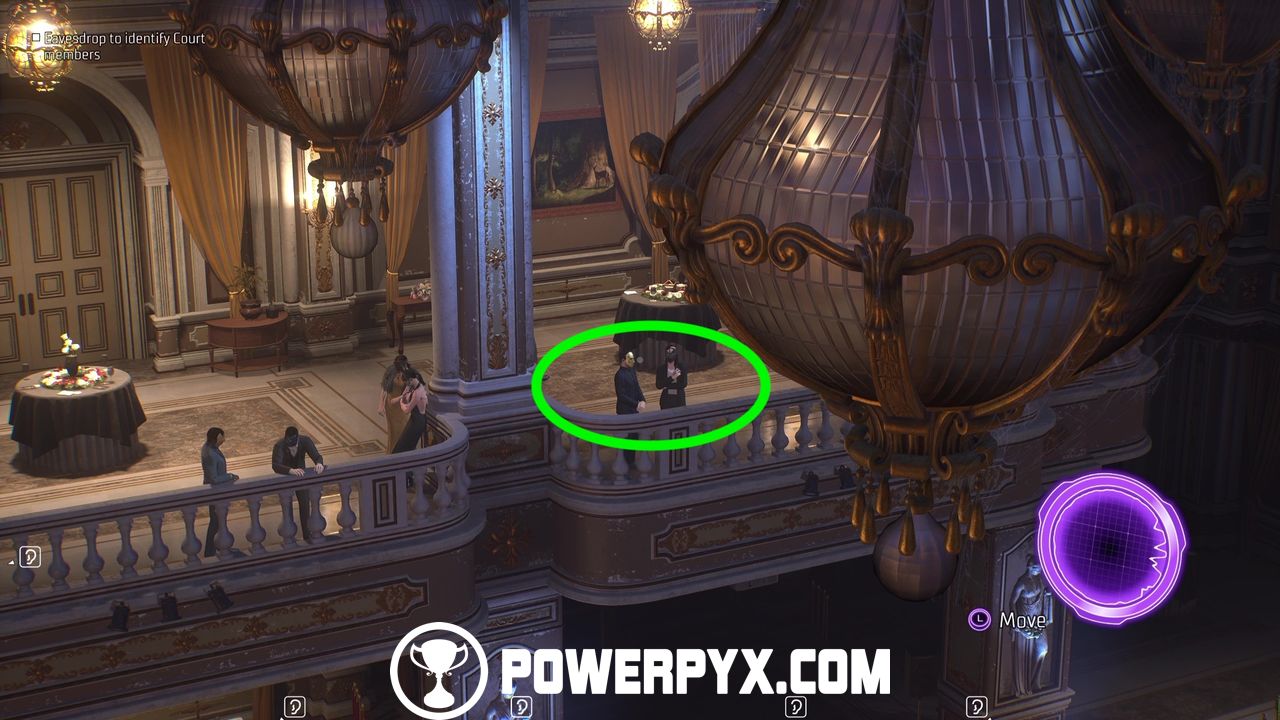
Eavesdrop to Identify Court Members
Here you need to eavesdrop on specific people. The people are: the lady in the wheelchair in the middle of the room, the two guests at the balcony above the lady in the wheelchair, and lastly the man with an owl mask in front of Bruce’s portrait photo showing up last. The man in the owl mask might not show up until you eavesdropped on all available conversations.

Locate the Voice – BONUS: Remain Undetected
Make your way back by means of the open-air vent. Go through the door until you see more Court guards. Defeat them all. If possible, don’t get caught for some extra XP.
Locate the Voice
Once you’ve gotten rid of everyone, there are two chests in the area which can be found using AR scan. Continue down the main hallway until you see an air vent as marked by a white waypoint.
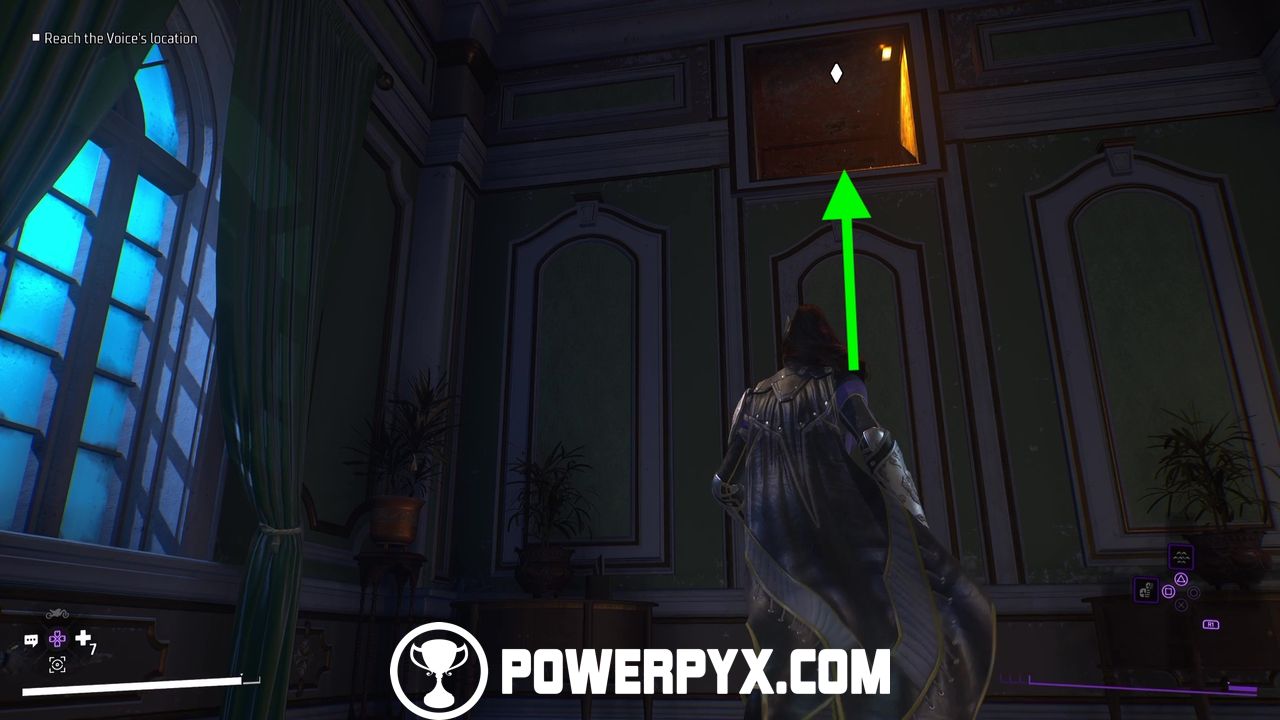
Reach the Voice’s Location
Climb up and through the air vent.
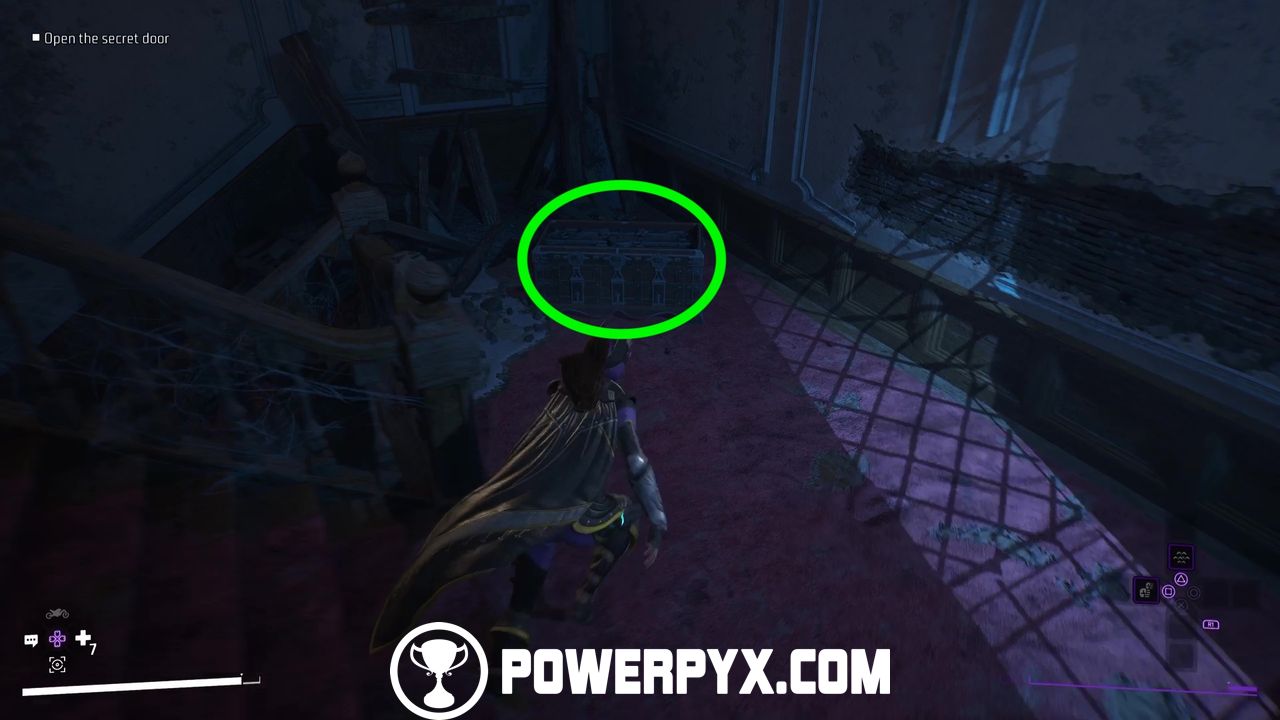
Find the 13th Floor
Interacting with the piano as the Voice did won’t work, so head through the doors. Continue down the hallway until you can open an Exit door leading to the stairwell. Keep going downstairs until you a secret door. Before continuing, keep going downstairs for a chest.
Open the Secret Door
Now interact with the secret door to open it.
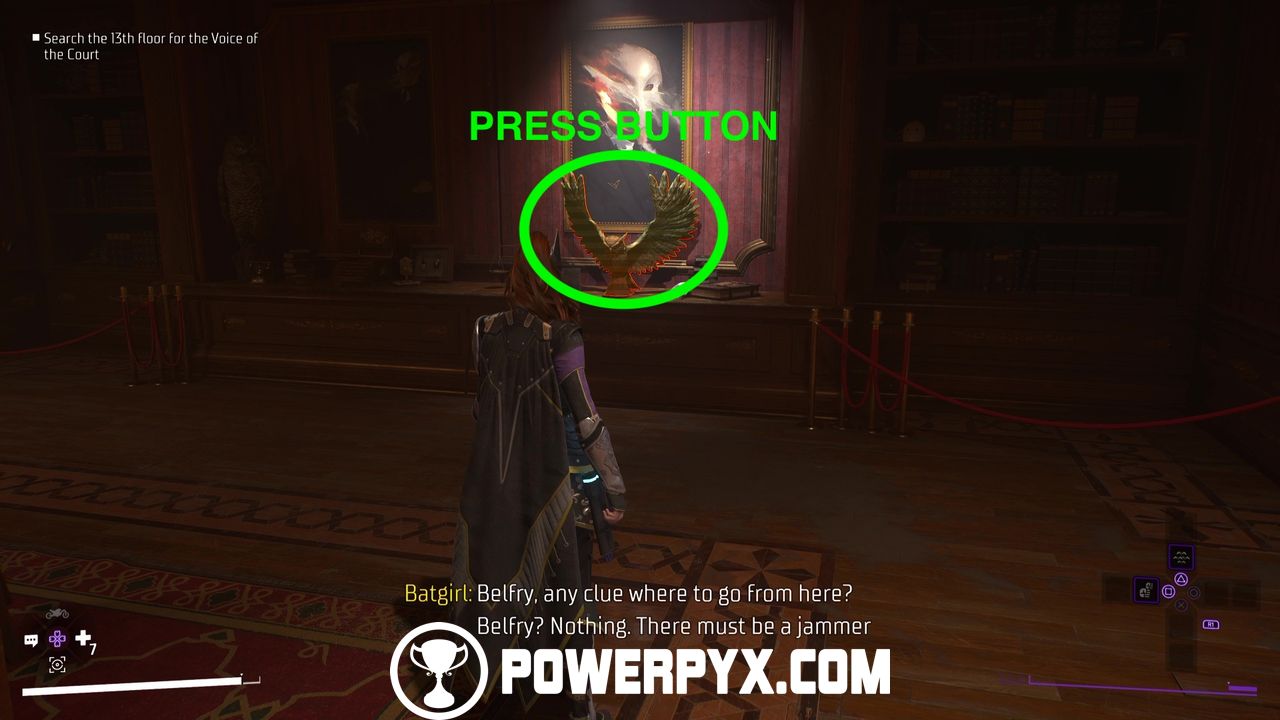
Search the 13th Floor for the Voice of the Court
Go down the hallway until you see a fireplace. Then, scan the place to find an owl statue sitting opposite the fireplace that you can interact with. Approach the statue and press the switch to reveal a secret hallway.
Defeat the Court Members
Continue down the hallway and three new Court members will show up. Get rid of them.
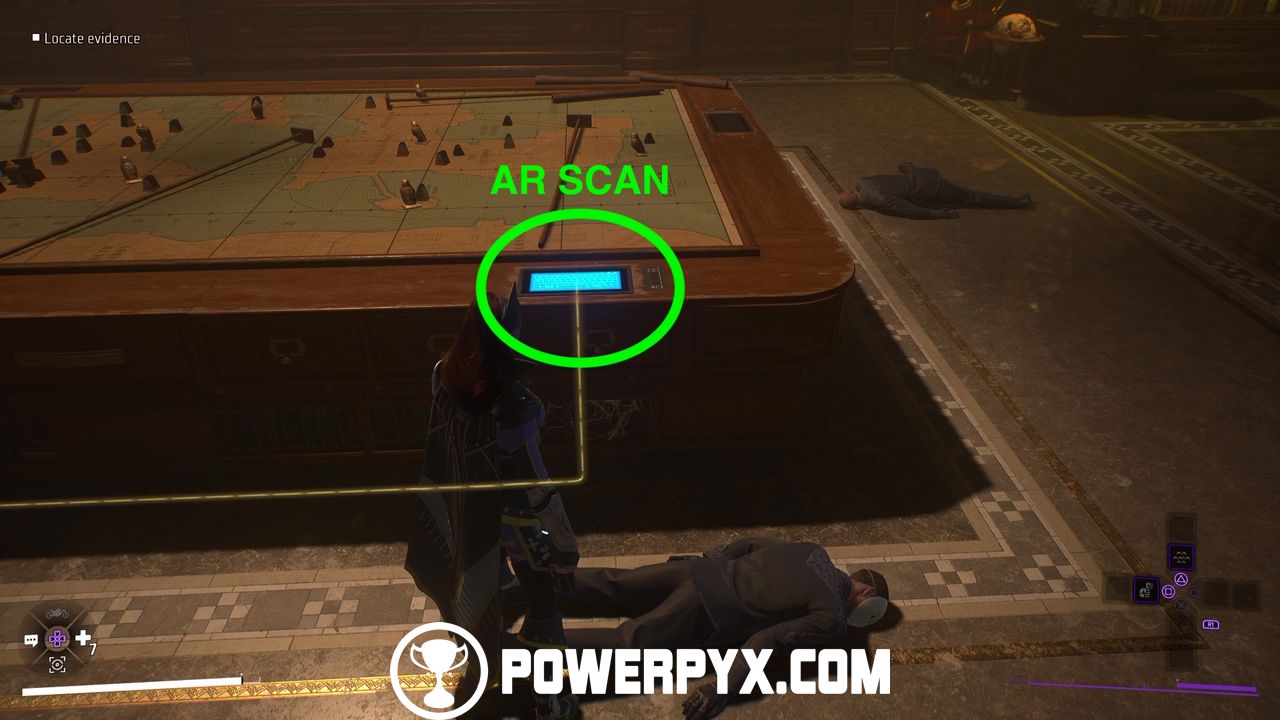
Locate Evidence
Now scan the touchscreen one of the Court members was interacting with.
Activate the Projector
Lastly, activate the projector by interacting with the switch next to the touchscreen.
Insert the USB Drive
Interact with the touchscreen again to insert a USB stick and get the evidence.
Remove the USB Drive
Now remove the stick. We’re done here.
Defeat the Court Members
Now defeat the two Court members.
Search for a Way Forward
Exit through the moonlit room the two Court members came out from to access a puzzle.
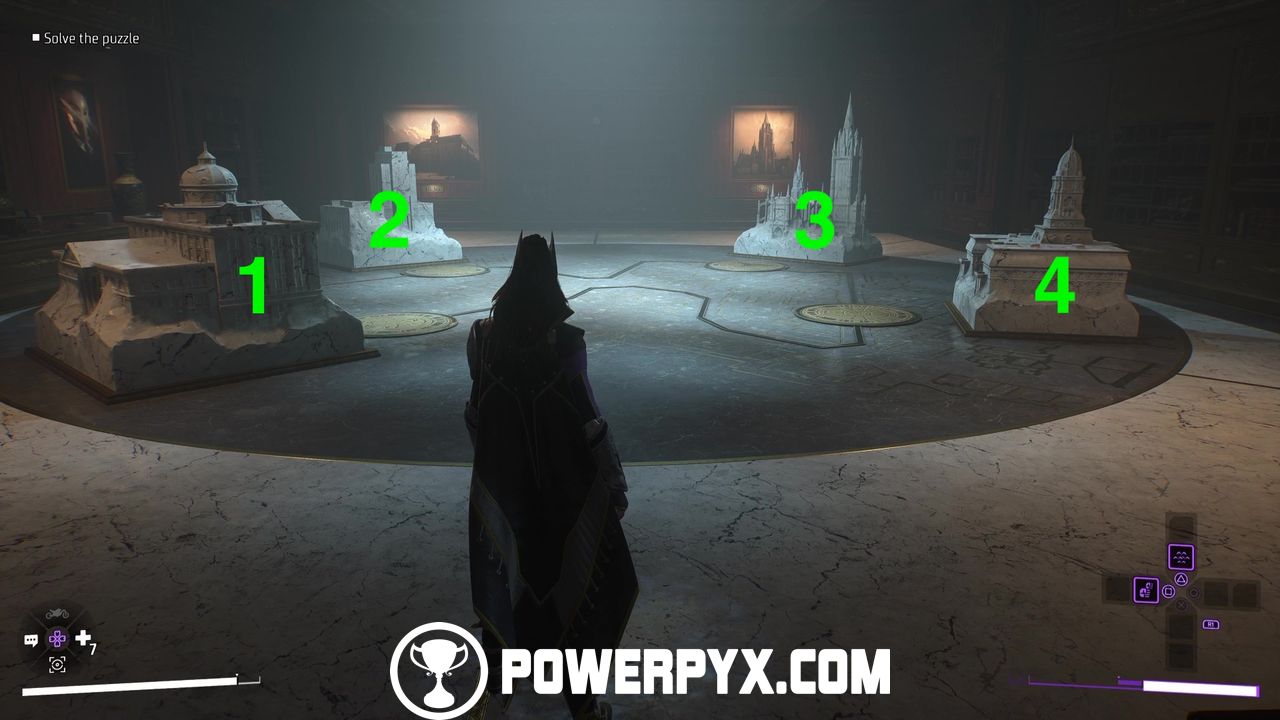
Solve the Puzzle
Here you have a large floor map with 4 Gotham buildings around it. To solve the puzzle, you need to step on the plates on the floor in the correct order, from oldest to newest. The correct order is given to you by the years found under the paintings in the same room. From the way we came in, we’re going to number the buildings 1 to 4, left to right. Now step on: 4-2-1-3. Solving the puzzle reveals a new secret compartment on the left side of the room.
Search the 13th Floor for the Voice of the Court
Walk along the hallway until a new door opens up in front of you.
Talk to the Voice
Enter the room and approach the painting on the left to trigger a new cutscene.
Defeat the Guards 0/8
New guards incoming! Time to get rid of them.
Return to the Ballroom
Now continue through the hallways and up the elevator shaft to head back to the ballroom.
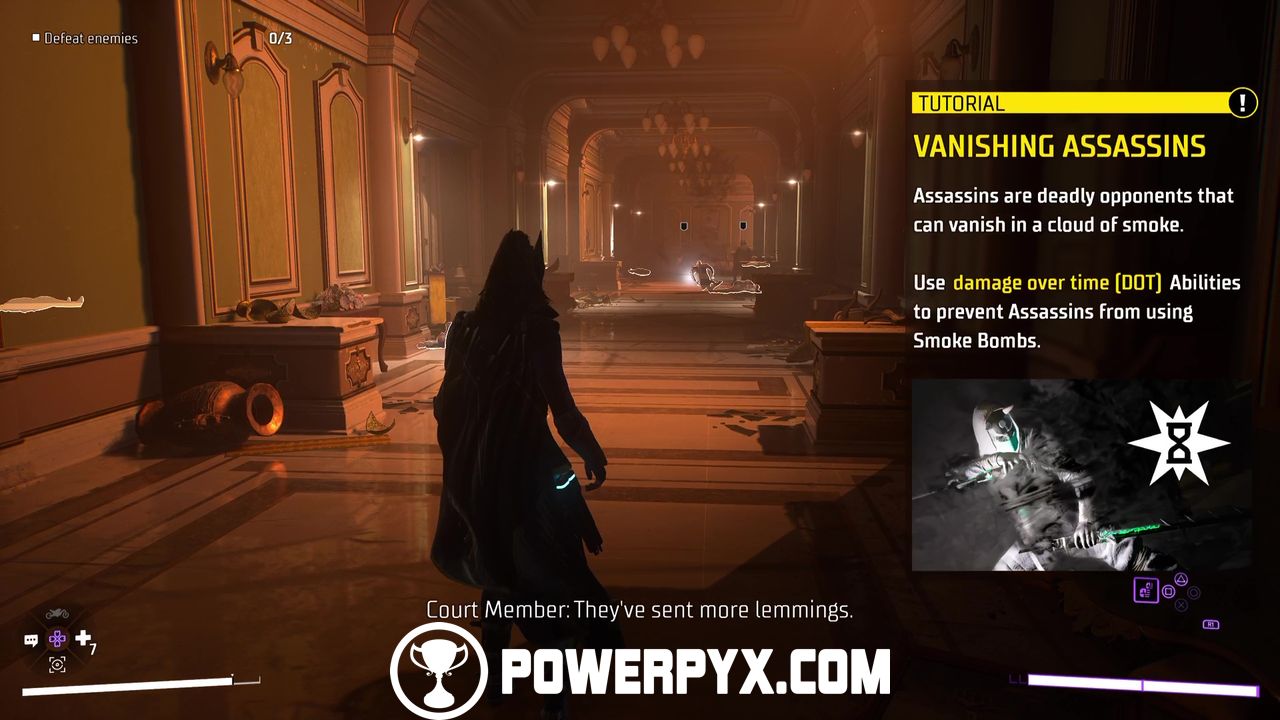
Defeat Enemies 0/3
As you make it back to the ballroom, you’ll be stalled by some enemies, including a new enemy type called the Assassin, who, for instance, can be defeated with elemental attacks.
Return to the Ballroom
Now resume your run back to the ballroom and drop down below.
Defeat the Assassins
In the ballroom you’ll have to fight League Assassins using a cannon to shoot at you. Avoid standing in the red circle when they’re about to shoot at you and land your attacks when you have a window of opportunity. If they disappear, stand still and when they reappear, quickly dodge their attacks.
Reach the Belfry
As usual, open up your map and to return to the Belfry.
This finishes Case 04: The Masquerade in Gotham Knights. Up next is Case 05: The Court of the Owls.
For all other Main Missions, check out the complete Gotham Knights Walkthrough.
Leave a Reply