
Resident Evil 9 Requiem contains various story puzzles, analyzer blood specimens, and safe codes. This Guide shows All Puzzle Solutions to help you solve them quickly. The solutions are the same on all difficulties, except safe codes which are different on Insanity. We’ll start with a handy short-form overview of every Puzzle in the game. You can use this on your speedruns when you’re already familiar with the game. Further below we’ll go through each Puzzle Solution in more detail with the location and required key items. You may also like our full Resident Evil 9 Requiem Walkthrough if you are unsure where ot go in between Puzzles.
Puzzle Solutions Overview
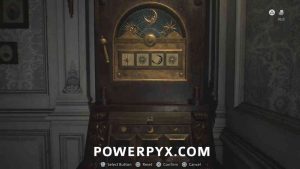
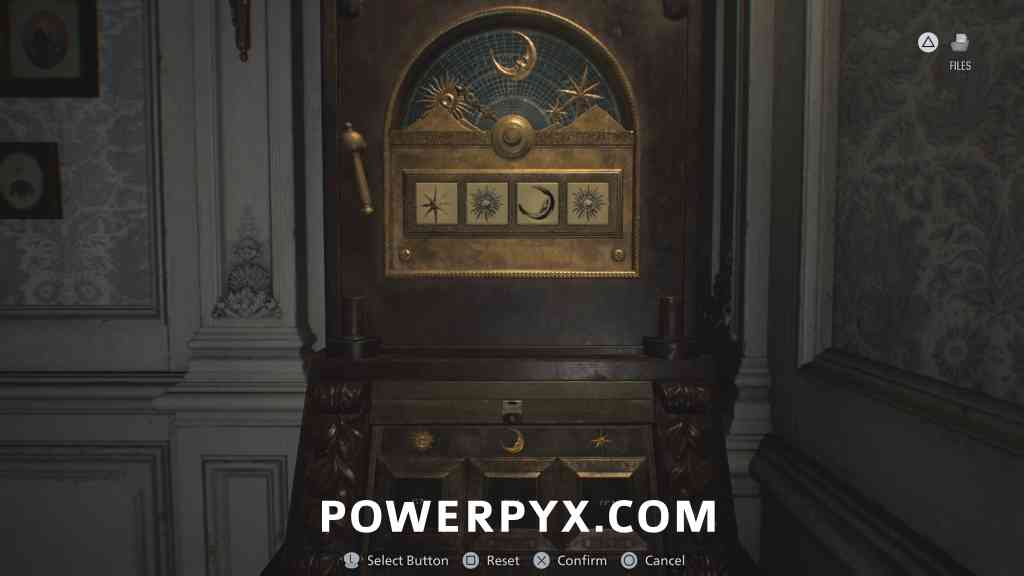
- Chairman’s Office Puzzle Box = Moon – Sun – Star – Moon

- Lead Researcher’s Office Puzzle Box = Star – Sun – Moon – Sun
- Organ Transport Box = Examine the Organ Transport Box from inventory > turn it and click on the back panel > set bottom right switch to HAND > get the right switch to the middle level > press Button 5 > press Button 2 > set bottom right switch to AUTO again.

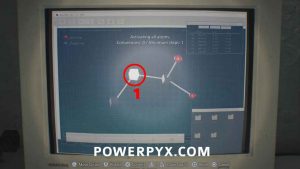
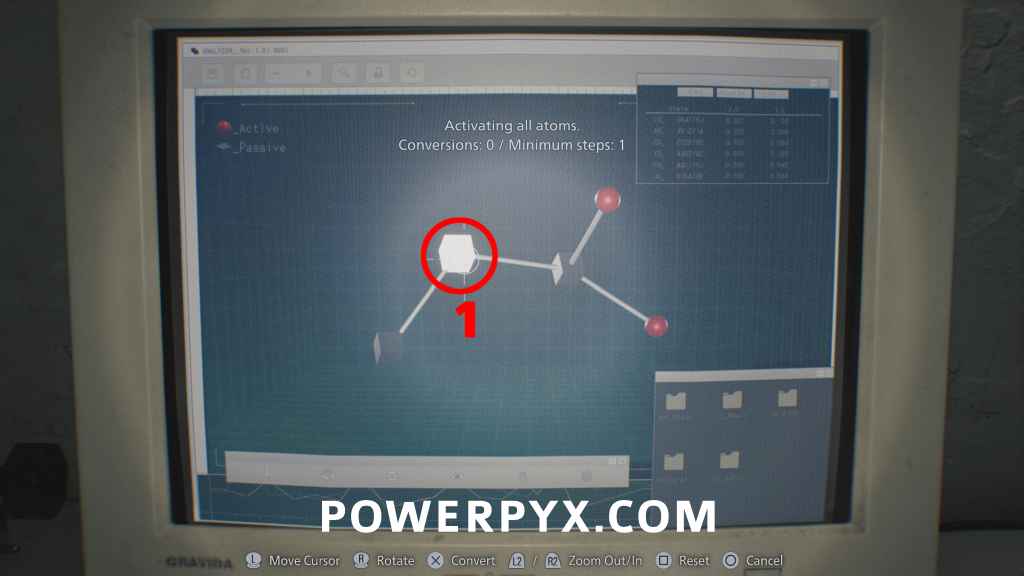
- Analyzer Blood Specimen (Denatured) = Click the left middle square.
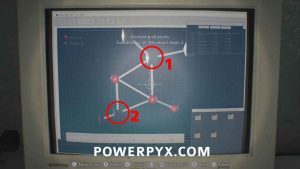
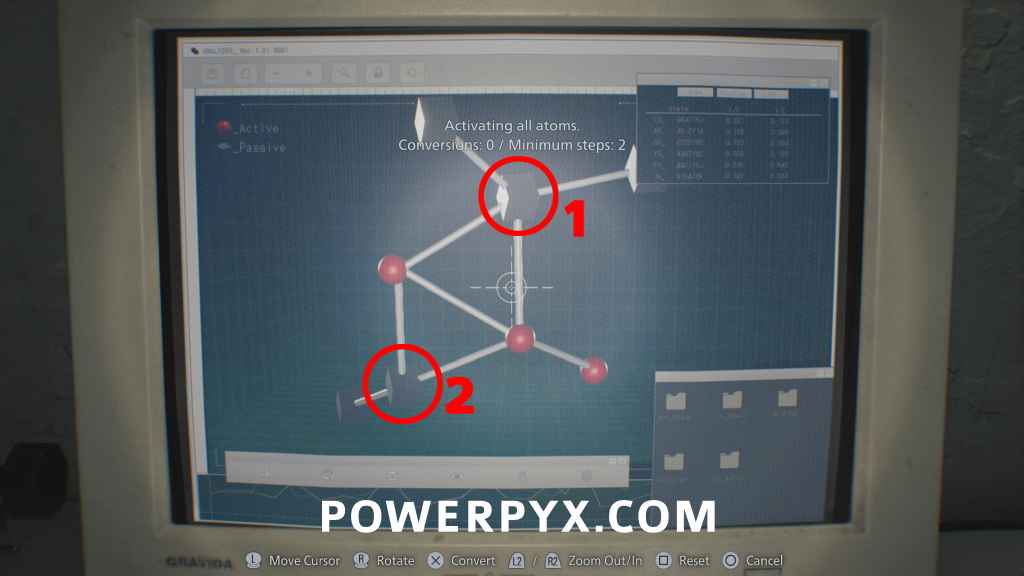
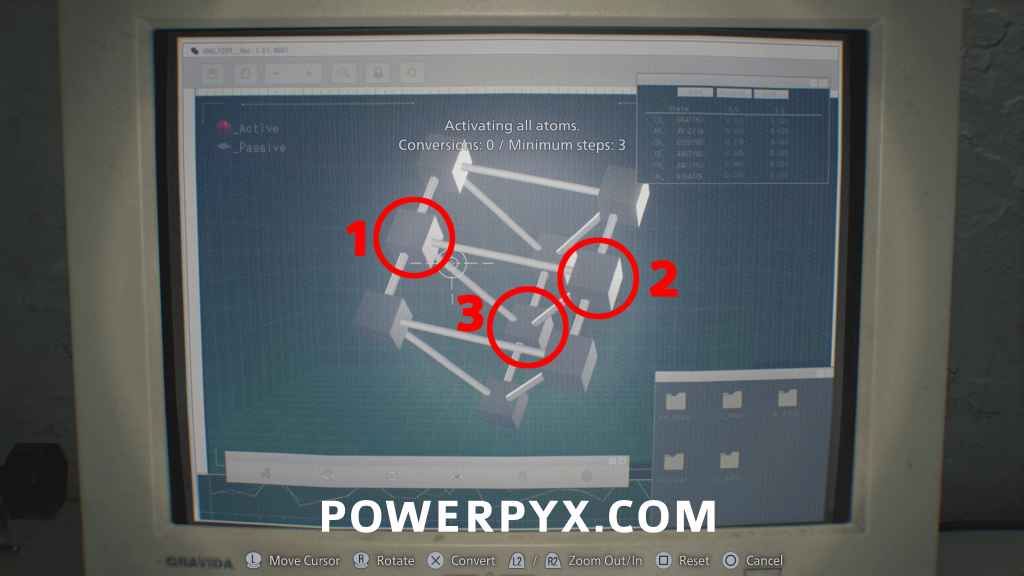
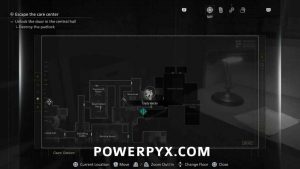
- Analyzer Blood Specimen (Converged) = Click top middle square > click 2nd square from bottom.
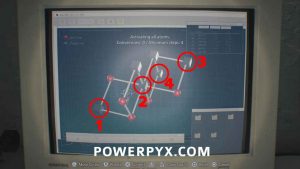
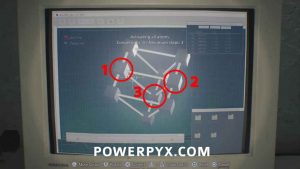
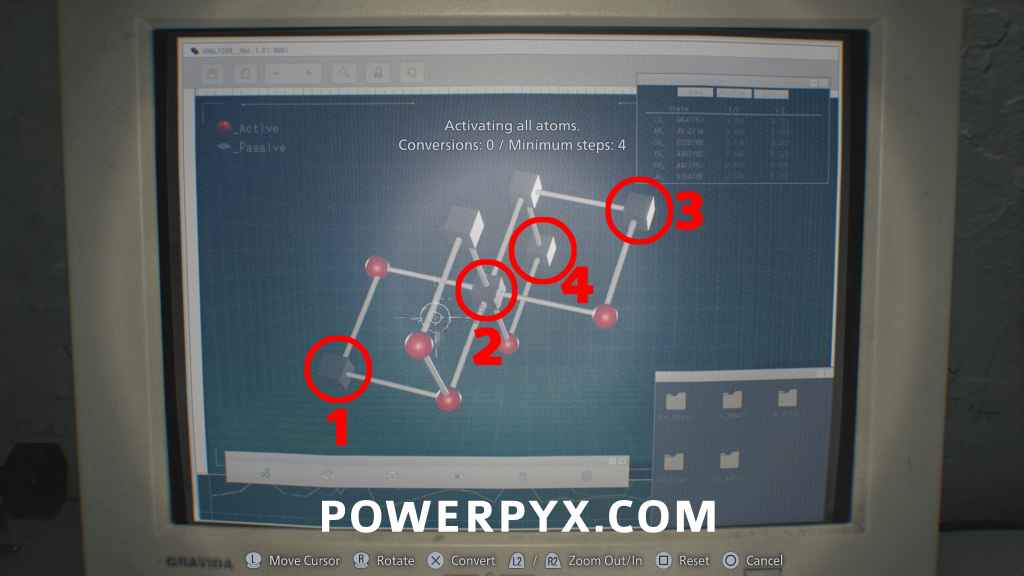
- Analyzer Blood Specimen (Reversible) = Click bottom-left corner square > middle square > top right square > second square from the topmost one.
- Analyzer Blood Specimen (Polymerized) = Exclusive to Insanity difficulty. Click middle left > middle right > middle bottom.
- Security Manager’s Office Puzzle Box (Braille) = Interact with the notebook on the table and with the Puzzle Box to get the Level 3 Wristband. Then use it on Emily’s cell and bring her to the Puzzle Box, she solves it automatically for you.
- VIP Suite Double Helix Puzzle = Interact with the wine bottle and rotate it to reveal the hidden Double Helix Model inside. Insert it on the lectern.
- Bar & Lounge Safe = Left 10 – Right 80 – Left 30 / Insanity: Right 20 – Left 50 – Right 30
- Examination Room Safe = Right 30 – Left 10 – Right 50 / Insanity: Left 50 – Right 30 – Left 90
- Basement Safe = Right 60 – Left 40 – Right 80 / Insanity: Left 70 – Right 50 – Left 20
- Sterilization Chamber Safe = Right 10 – Left 90 – Right 20 / Insanity: Left 80 – Right 50 – Left 0
- Monitor Control Room Safe = Left 50 – Right 60 – Left 80 / Insanity: Right 20 – Left 0 – Right 70
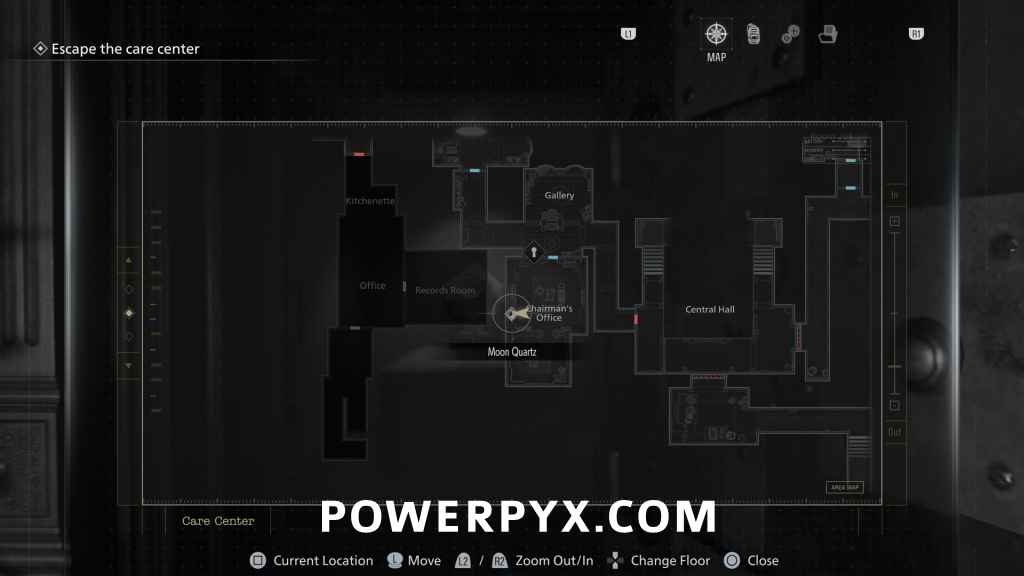
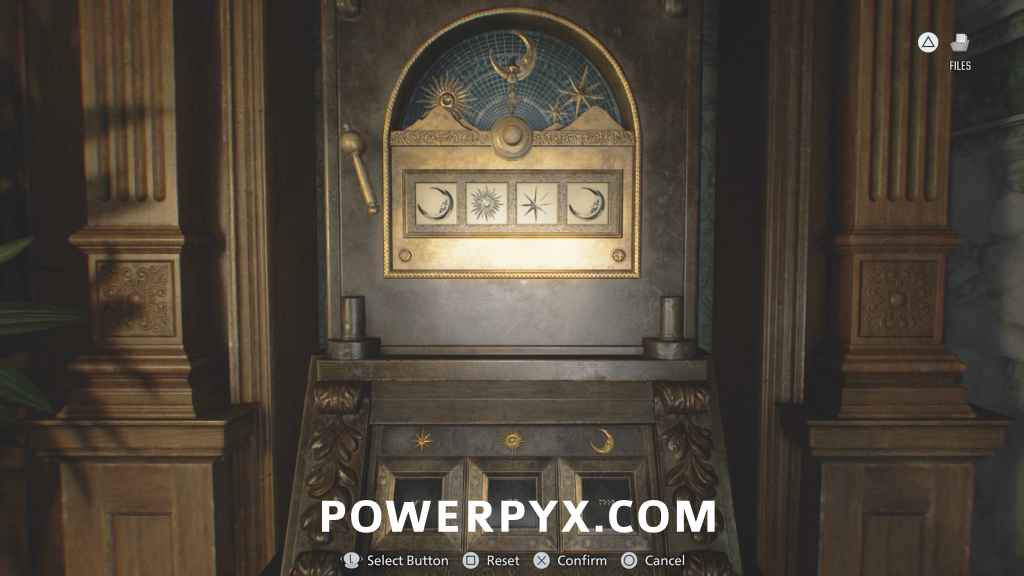
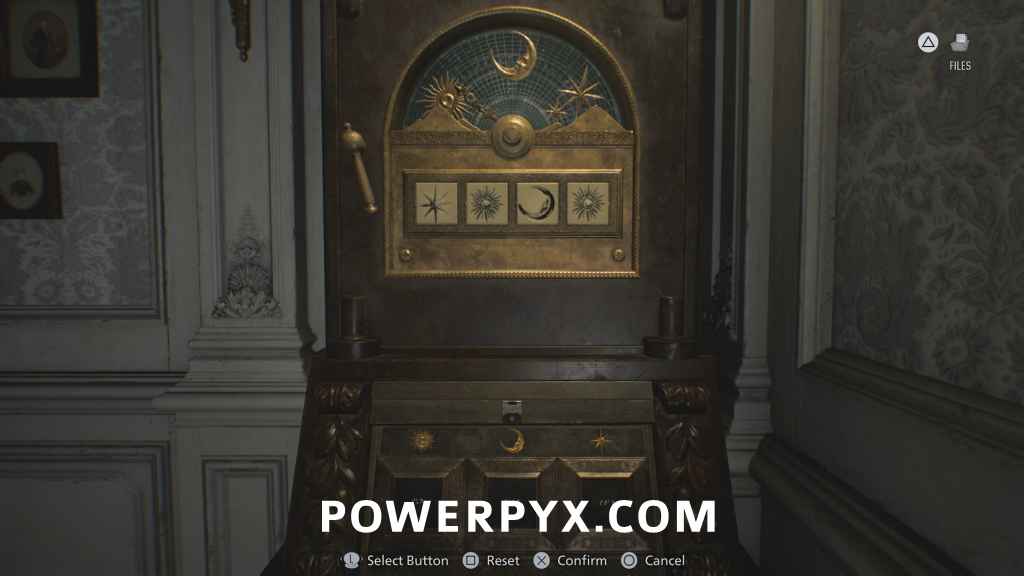
Chairman’s Office Puzzle Box
To find the solution you need to pick up the Pencil from the backroom in Chairman’s Office, then in the main office use it on the piece of paper to shade in the words. This reveals the solution.
- Location: Care Center > West Wing (2nd Floor) > Chairman’s Office
- Solution: Moon – Sun – Star – Moon
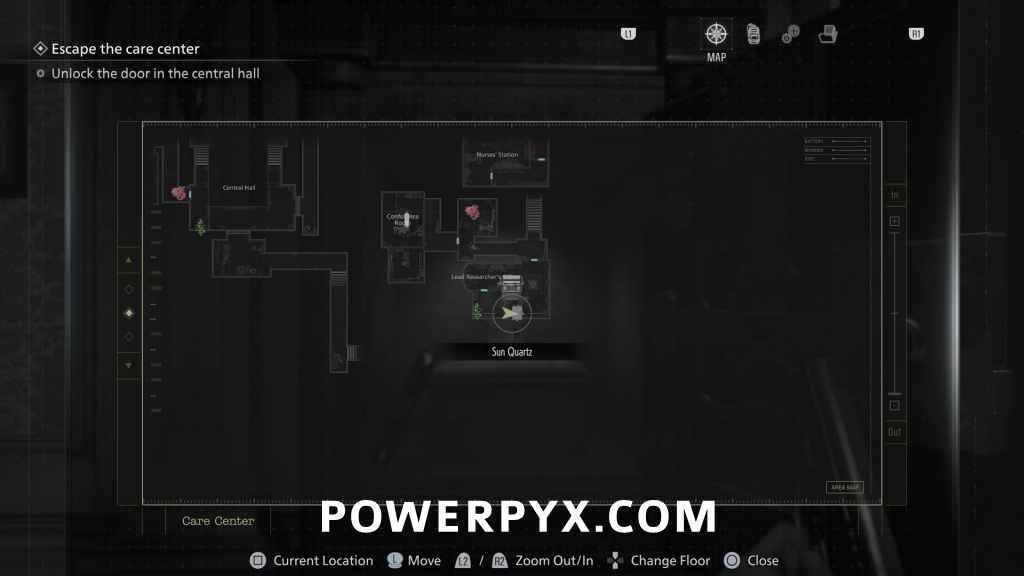
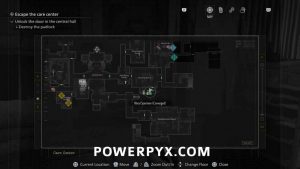
Lead Researcher’s Office Puzzle Box
First, you must get the Corrosive from the Conference Room, at the end of the hallway outside Lead Researcher’s Office (where the big Chunk enemy comes from). Then you use the Corrosive on the padlock to melt it away. Afterward, look at the photos throughout the office, on the background you can see the correct symbols.
- Location: Care Center > East Wing (2nd Floor) > Lead Researcher’s Office
- Solution: Star – Sun – Moon – Sun
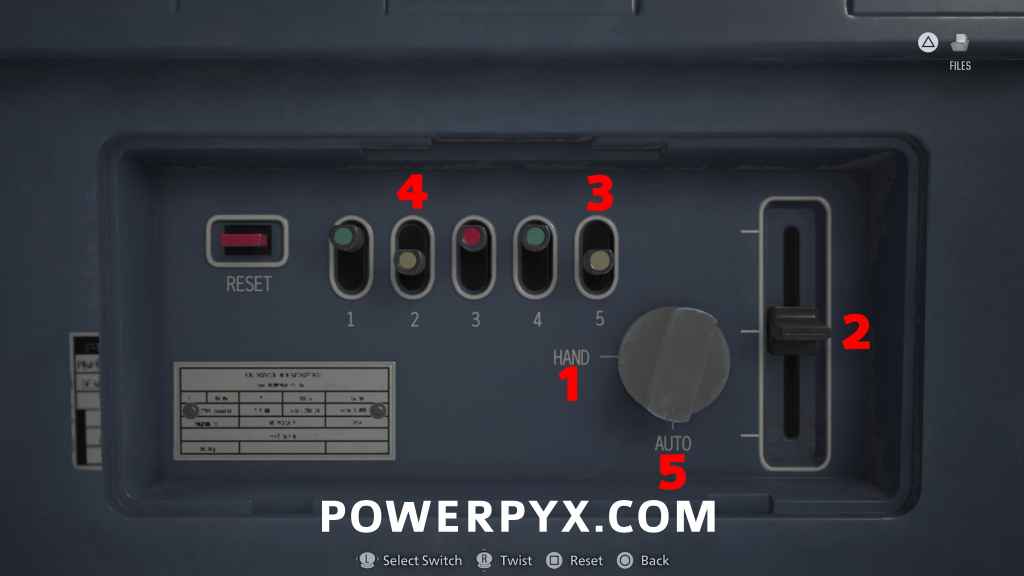
Organ Transport Box
After obtaining ID Wristband Level 1, you can use it in the corridor next to the kitchen to reach the Garage. You can open the Organ Transport Box immediately, but normally you’d get the solution from a file inside Lead Researcher’s Office Puzzle Box. You must inspect the Organ Transport Box from the inventory and press certain parts in specific order.
- Location: Care Center > West Wing (1st Floor) > Garage
- Solution: Examine the Organ Transport Box from inventory > turn it and click on the back panel > set bottom right switch to HAND > get the right switch to the middle level > press Button 5 > press Button 2 > set bottom right switch to AUTO again.
Analyzer Blood Specimens
You can find 3 Blood Specimens on Casual/Standard and an extra fourth on Insanity. They are all found in the Care Center.
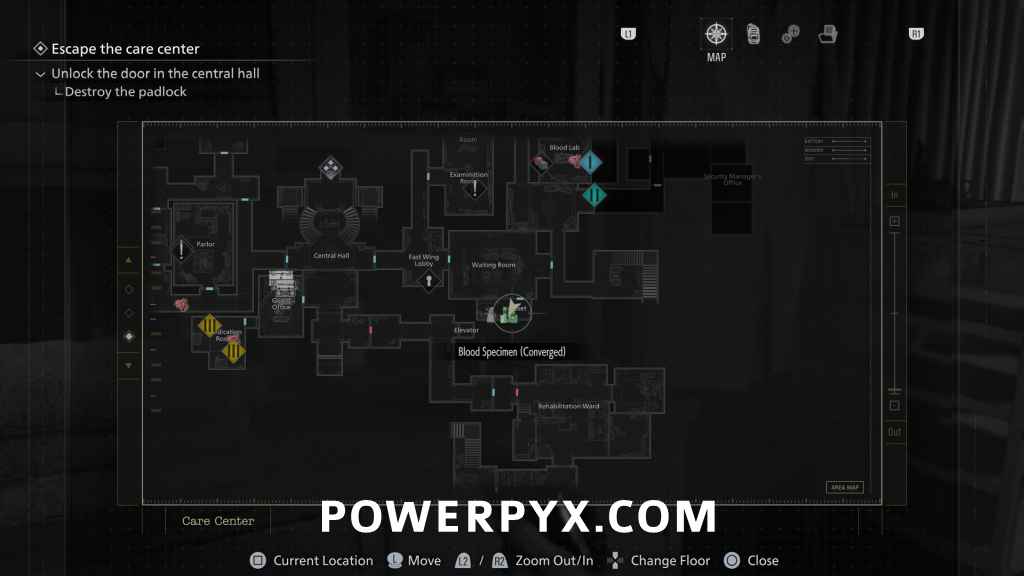
- Analyzer Blood Specimen (Denatured) = Found in Blood Lab. Click the left middle square.

- Analyzer Blood Specimen (Converged) = Found in Closet (through Waiting Room Level 1 Door Lock). Click top middle square > click 2nd square from bottom.
- Analyzer Blood Specimen (Reversible) = Found in Blood Lab side room, behind the locked door that requires the ID Wristband to open. Click bottom-left corner square > middle square > top right square > second square from the topmost one.
- Analyzer Blood Specimen (Polymerized) = Exclusive to Insanity difficulty, found in in Closet (through Waiting Room Level 1 Door Lock), where the “Converged” variant was on Casual/Standard. Click middle left > middle right > middle bottom.

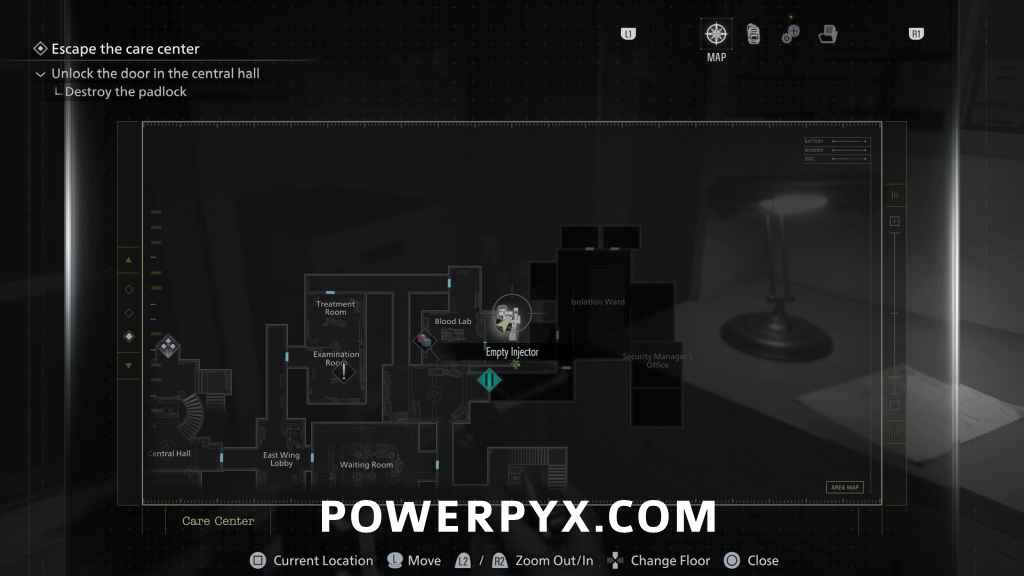
Security Manager’s Office Puzzle Box (Braille)
Despite being marked as a “Puzzle Box” on the map, it’s not really a puzzle – you just interact with the note on the table and interact with the Puzzle Box to get a cutscene. Afterward you grab the ID Wristband Level 3 from the table. Backtrack to Emily’s cell, through the safe room in Central Hall. Carry Emily to the Puzzle Box and she’ll open it automatically for you. Can clear out the zombies first by sitting Emily down on the couch in the safe room.
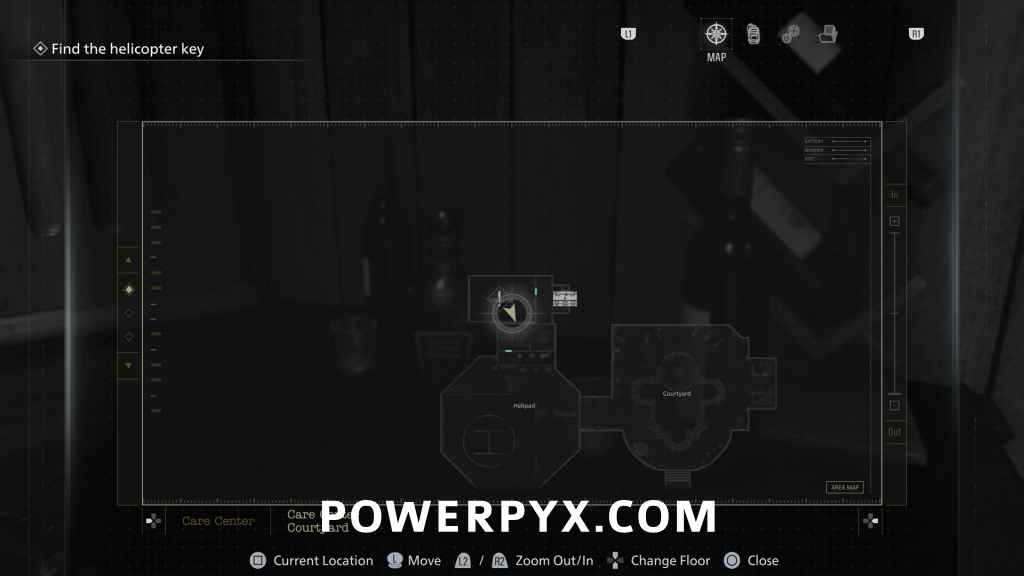
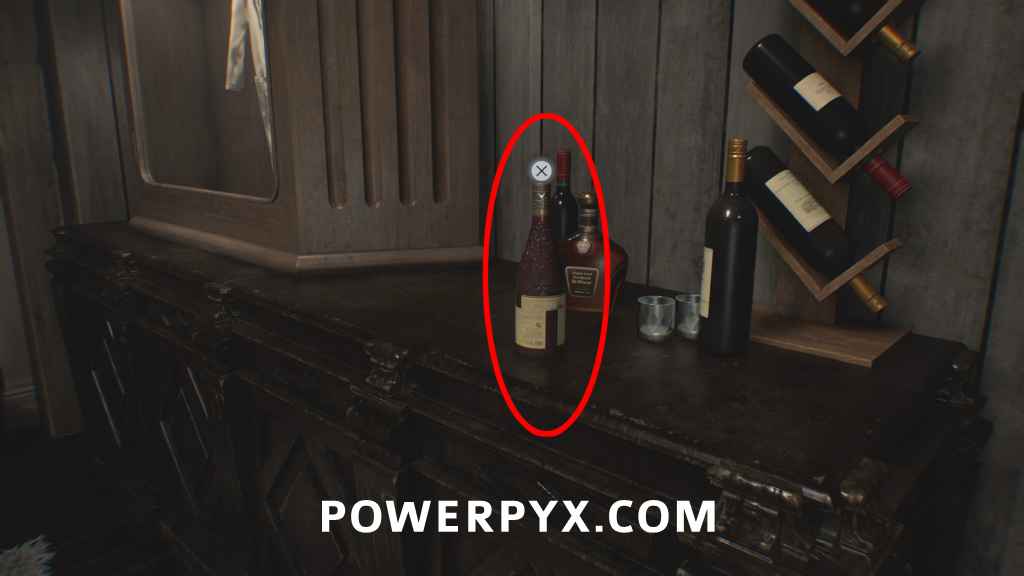
VIP Suite Double Helix Puzzle
In the VIP Suite you’ll find a lectern in front of the main desk with two helixes in it. You must interact with the wine bottle near the entrance, rotate it to reveal a Helix part inside. Insert it on the lectern. The other objects in the room are just distractions (the hourglass from the table isn’t used to solve it).
- Location: Care Center Courtyard > VIP Suite
- Solution: Open Wine Bottle to get Helix and insert it on the lectern.
Safe Codes
- Bar & Lounge Safe = Left 10 – Right 80 – Left 30 / Insanity: Right 20 – Left 50 – Right 30
- Examination Room Safe = Right 30 – Left 10 – Right 50 / Insanity: Left 50 – Right 30 – Left 90
- Basement Safe = Right 60 – Left 40 – Right 80 / Insanity: Left 70 – Right 50 – Left 20
- Sterilization Chamber Safe = Right 10 – Left 90 – Right 20 / Insanity: Left 80 – Right 50 – Left 0
- Monitor Control Room Safe = Left 50 – Right 60 – Left 80 / Insanity: Right 20 – Left 0 – Right 70
These are all of the proper “main puzzles” in Resident Evil Requiem. Everything else is just a matter of finding and using key items. If you get stuck anywhere else, refer to the full Resident Evil Requiem Walkthrough.
Leave a Reply