
The Outer Worlds 2 Trophy Roadmap
- Estimated trophy difficulty: 4/10
- Approximate amount of time to platinum: 75-125 hours
- Offline Trophies: 49 (1
 , 1
, 1 , 13
, 13 , 34
, 34 )
) - Online Trophies: 0
- Number of missable trophies: Technically everything non-story related is missable, but there are 10 main missables: 5 playthrough-spanning missables –
 Rift Drifter, Anti-Consumerist, One For All,
  All For One, Maximum Gun. 3 mutually exclusive faction questlines – Corporation Cooperation, OA: Objectives Accomplished, AC: All Complete. 2 mission-specific – Capture The Archive The Hard Way, Well Dressed.
 - Glitched trophies: 1 trophy is bugged and unobtainable – All for None
- Does difficulty affect trophies?: Yes, must beat the game on the highest difficulty “Very Hard”
- Do difficulty trophies stack?: Yes, beating the game on “Very Hard” also unlocks the trophies for beating it on hard/any difficulty
- Hardest Trophy: Very Hard
- Minimum Playthroughs: 1 (but 2 is recommended and more efficient)
- PS4/PS5 Autopop, Save Transfer, Crossbuy: No, the game doesn’t have a PS4 version
- Free-Roam / Level Select after Story?: No, there is no free-roam and no mission replay after the story.
- New Game+ Mode?: No
- Supports Manual Saves?: Yes (50 manual save slots, 3 autosaves)
- Release Date: October 24, 2025 (Premium Edition) / October 29, 2025 (Standard Edition)
 , 1
, 1 , 13
, 13 , 34
, 34 )
)Introduction
Welcome to the Outer Worlds 2 Trophy Guide! The trophy list has a mix of combat-based, progression-based, and collectible-related trophies. While some collectibles are missable due to requiring particular skills/perks, you don’t have to collect all of them, and there are more than enough to get the 100/125 that you need regardless of your skill/perk choices. Expect a time-consuming list that rewards thorough play and experimentation with different builds and gear.
While it is technically possible to complete the game in a single playthrough (with strategic backup saves, similar to how Fallout: New Vegas was structured), it adds so much additional time that it ends up being less efficient than doing two separate runs. Very Hard is manageable on its own, but it becomes so much more time-consuming with Anti-Consumerist because you can’t spend money on needed recipes, weapons, armor, ammo, trauma kits, inhaler charges/primers, services (like healing), or bribes. So doing a Story difficulty playthrough first is easier and more efficient overall.
General Info
- Don’t provoke the Factions: If your reputation with Auntie’s Choice or the Order of the of the Ascendant becomes low enough you will be labeled as “Kill on Sight”. This means that you won’t be able to take their quests, use their vendors, or in the case of some secure areas you’ll be barred from entering entirely. If this happens before you get Corporation Cooperation, OA: Objectives Accomplished, and AC: All Complete, you will not be able to unlock all of those trophies on your playthrough.
- Enemies do not respawn: Once you clear out an area, it will remain empty unless a new quest is loaded in that area (such as a bounty). Therefore kill-related trophies like Maximum Gun should be started early.
- Save frequently in different slots: The game lets you keep 50 manual save slots, so it’s a good idea to keep a permanent save from the start of each area, and every few hours in between, then you have plenty of backups if anything goes wrong.
- Your build will radically affect your playtime: Especially on Very Hard, the Perks and Flaws you take in the game can make your playthrough ridiculously easy or virtually unplayable. See the Roadmap for tips for the best Perks and Flaws.
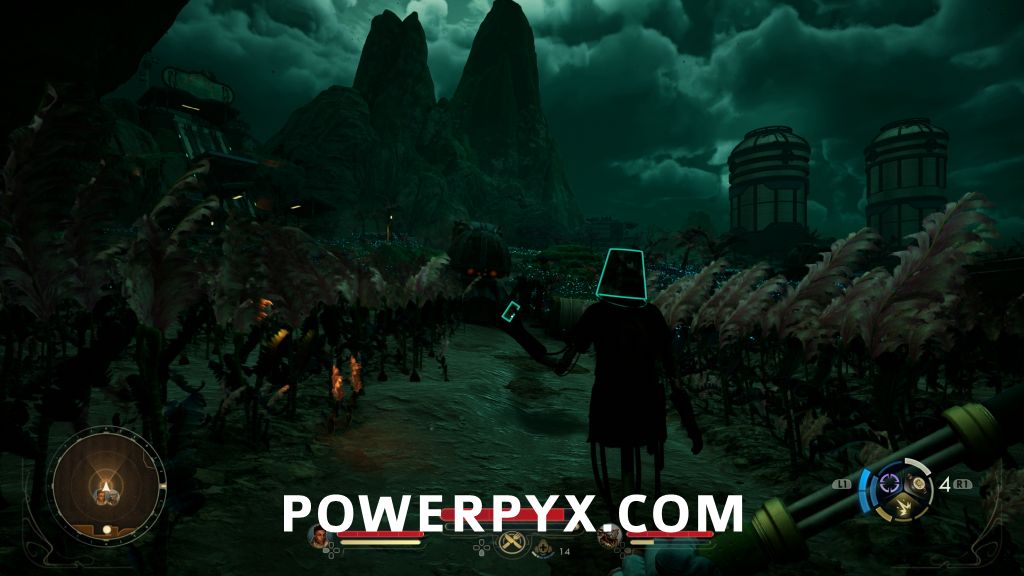
- Battle Helm of Ptero-Bane: Find this helmet on a scarecrow’s head in the starting town of Fairfield.


While you’re wearing this helmet and standing still, you will gain the Incognito status. This means that you’ll be able to effectively steal and pickpocket anyone right in front of their face. You can use that for Sneak Attacks too, which means it’s still useful for Very Hard. Just remember that the second you move, you’ll be visible again and detection meters will start to increase until you stop moving. You can move a bit at a time to close the distance with an enemy for tricky sneak attacks. Also if enemies become alerted you can’t gain the Incognito status, so you won’t be able to use Ptero-Bane to get away in the middle of combat. Note: This may be a bug, but if you have nameless NPCs in the area, weirdly they ignore the Incognito status (the area just off the landing pad in Free Market Station for example) and will still witness your theft. So to be safe, always save before stealing.
Step 1: Story Difficulty Playthrough, Don’t Spend Money/Bits, Get All Collectibles & Trophies
For the first playthrough you should play on Story Difficulty. For Anti-Consumerist you must not spend any money (called Bits) for any reason. You also can’t pay for bribes during dialogue, can’t pay for healing, and can’t buy any items. On Story difficulty your lack of purchases won’t be that much of a problem. Also try to get all collectibles and trophies during this playthrough, with the exception of beating Hard/Very Hard. Carefully read the section below on Mutually Exclusive Questline Trophies to combine them into one playthrough. It’s good to start with the Innovative trait to make your crafting go further. Lockpicking is very useful, as is pickpocketing and stealth to be able to steal items since you can’t buy them. Another trophy to be aware of is Winning Hearts and Heads which requires the Psychopath and Serial Killer traits. If you find you have extra perks to spend, you can take these perks and make it part of your run. Otherwise, you can save two perks, make a save, get the trophy, and reload.
Collectibles
Pitchball/Tossball Cards span across the entire game, you need 100 of 125 for trophies. Some are only reachable with specific skills/perks, so you won’t be able to collect all 125 in one playthrough. However, there are more than 100 cards that are available regardless of your build. Every other collectible type is confined to its own area. Below is everything you need to collect.
- 100 of 125 Pitchball & Tossball Cards – spans across all areas
- 33 Localized Rifts – exclusive to Arcadia region
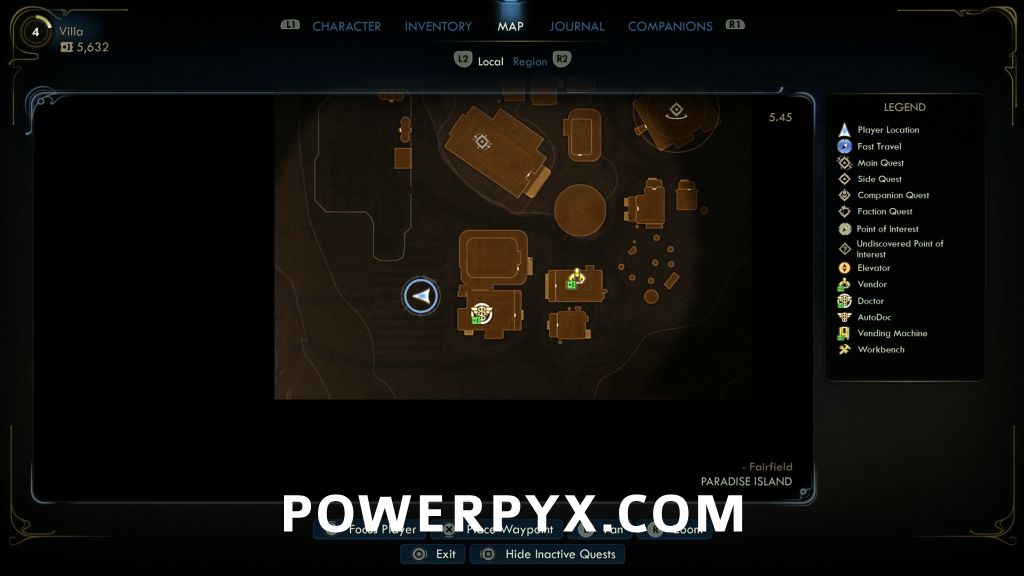
- 10 Science Adventures Quarterly – exclusive to Paradise Island region
- 5 Mural Pieces – exclusive to Golden Ridge region
- 5 Grounding Stations – exclusive to Praetor region
- 4 Excogitation Audio Logs – exclusive to Cloister region
Mutually Exclusive Faction Questline Trophies
There are 3 trophies tied to questlines, all of which are mutually exclusive (doing one locks you out of the other two).
- Corporation Cooperation – Convinced Auntie’s Choice and the Order of the Ascendant to work together
- OA: Objectives Accomplished – Completed all faction quests for the Order of the Ascendant
- AC: All Complete – Completed all faction quests for Auntie’s Choice
With some clever save game reloads you can still combine them and save yourself from additional playthroughs. Whichever outcome you want to keep for your main story should either come third, or you can make a separate manual save after each questline and reload the one you want to finish the story with.
Step 1: After completing “Fiends in High Places”, complete shared Faction Quests.
- “Now Hiring: Invaluable Disposable Agent” for Auntie’s Choice.
- “A Study in Disruption” for the Order of the Ascendant.
- Clear out all the Protectorate enemies in Spireton.
Step 2: Complete second set of Faction Quests, but don’t turn them in.
- “Mysteries of the Mental Modulators” for Auntie’s Choice.
- “Crash Course in Telemetry” for the Order of the Ascendant.
Step 3: Make a Manual Save. This will be your starting point for the three branching paths for the trophies listed below. When you earn the trophy, make a manual save in a new slot so that in Step 5 you can keep whichever outcome you want for the endgame.
Step 4A: Order of the Ascendant Path
- Turn in “Crash Course in Telemetry” and at the end of the mission, when you get to speak with Bishop Rush Basar, make it clear that you believe the Order should take control of the Archive and that negotiations are a mistake.
- Capture the Archive without calling in backup (See Capture the Archive the Hard Way).
- Complete “Complications with the Computronic Cerebrum”, making sure that you’ve repaired Thermal Transfer and reactivated the lift to Spireton.
- Complete “Methods of Applied Force” by handing the Calcaduceus over to Junior Seer Amaryllis.
- Complete “Agenda for Altered States”.
- Complete “Advanced Tessellation Theory”.
- Complete “The Final Lesson” and choose to kill Auntie Cleo.
- You unlock OA: Objectives Accomplished
- Make a manual save in a new slot.
- Reload save from Step 3.
Step 4B: Auntie’s Choice Path
- Turn in “Mysteries of the Mental Modulators” and at the end of the mission, when you get to speak with Auntie Cleo, make it clear that Auntie’s Choice should take control of the Archive and that negotiations are a mistake.
- Complete “Complications with the Computronic Cerebrum”, making sure that you’ve repaired Thermal Transfer and reactivated the lift to Spireton.
- Complete “Recall Order for the Trifurcated Brain” by handing the Calcaduceus over to VP Ursula Ormsby.
- Complete “The Last Day of William Wray”
- Complete “The Mechanical Matriarch”
- Complete “Head Games of the Marketing Maven” and choose to kill Bishop Ruth Basar.
- You unlock AC: All Complete
- Make a manual save in a new slot.
- Reload save from Step 3.
Step 4C: Corporation Cooperation Path
- Turn in both “Mysteries of the Mental Modulator” and “Crash Course in Telemetry”, agreeing with both factions that you will negotiate on their behalf.
- Complete “An Equitable Arrangement”. Which precise responses you will choose will depend on your character’s build (ie. which skill checks you can pass), but the goal is to compromise so that the deal is relatively fair. For example, give control of the Archive back to the order but have them run computations for Auntie’s Choice, the Order keeps the skip drive technology but Auntie’s handles the production. If you find that your skills won’t let you reach a fair deal, reload your save and try a different tactic. Having a high Speech skill will make it easier, but you don’t need to use Speech at all to strike a deal.
- You unlock Corporation Cooperation
- Make a manual save in a new slot.
Step 5: Reload Your Save for the Chosen Outcome and continue to play!
Step 2: Very Hard Difficulty Playthrough
Start your second playthrough on Very Hard and remember to never lower the difficulty in the settings. Your choice of skills, perks and playstyles will radically impact how difficult Very Hard is, and how long it will take you to complete your playthrough. Very Hard is a bit of a misnomer, because with the right build it’s not that hard at all. Here are some general tips for builds to help survive Very Hard:
- To maximize your ability to open doors and find items, it’s best to take the Lucky and Brawny traits. Lucky also gives you +5% critical chance, and Brawny allows you to knock over hostiles by sliding or sprinting into them, which can be helpful if you get ambushed.
- With two positive traits, you will be forced to take a negative trait. Abrasive isn’t terrible unless you still have faction trophies that you have to do, otherwise the only consequence is that some vendors will be more expensive. Sickly is a non-starter for Very Hard as you will have -15% base health and -15 Toxicity Crash threshold, so not only will your health be low, every time you heal yourself you’re much more likely to crash causing a reinforcement loop that ends in your death. It is worth seriously considering taking the Dumb negative trait. At first it may seem restrictive, only having access to 8 of 12 skills during your playthrough, but what they don’t make clear is that it is your choice which 5 traits to lock yourself out of. Regardless of your play style, forcing yourself to concentrate on what your character does best will actually make your job on Very Hard much easier, particularly if you take the Easily Distracted flaw at level 4 (see below). So while you’ll have fewer skills overall, your scores in them will be much higher leading to far better damage values.
- When you reach Paradise Island, use Rookie’s Reward (See Maximum Gun) until you can afford to buy The Rattler and a Plasma Barrel mod in Fairfield. That will carry you through the first half of the game, and reduce the amount of ammo you’re going to need to buy.
- Plan out what Perks you want to take in the future, and favorite them so that you can see what Skill values you’ll need to have to meet their requirements. There are a lot of great perks and what you will end up taking will be determined by your play style, but here are a few of the best that are fairly universal and some of the bonuses that stack up when combining them:
- Secret Recipe: Explosives deal full damage across their entire blast radius, meaning that even a glancing blow is as good as a hit. And if you hit multiple enemies, it applies full damage to all of them at the same time, killing them even faster.
- Penetrating Shots: +50% armor penetration towards the end of the game when you’re running into armored enemies more frequently (essentially every elite and boss enemy in the game), this perk will be the difference between life and death. No longer will you have to switch to a new weapon to burn their armor away with plasma or corrosion, just keep firing your main weapon and chew through it in seconds.
- Hail of Lead: +2% Damage per shot, stacking until you stop hitting a target for a few seconds or swap weapons. Basically a bonus where you’ll need it most, bosses and elites. The more damage an enemy would normally absorb, the more effective every bullet you fire is going to be.
- Serendipitous Slayer: +10% Critical Chance. Critting with the explosives combo above is ridiculously damaging, so anything that increases your chances will be beneficial.
- Trophy Hunter: +5% Critical Chance, and an additional +15% Critical Chance against strong enemies.
- Gun Runner: -50% Ranged Weapon spread, and -50% penalty to accuracy while moving. Using an SMG or Burst Assault Rifle means more fire on target, exponentially improving your long range performance.
- Deep Drums: +50% Magazine Size on Assault Rifles / Special Weapons. More bullets in the gun means less time reloading.
- Point Blank Artist: +100% Sneak Attack Damage, +30% Damage to near enemies, -15% Damage to far enemies. The vast majority of encounters are going to be fought at close range, where the damage bonus really helps, even moreso if you can manage a Sneak Attack.
- Pharm-Thusiast: An extra primer slot and -25% toxicity from the Medical Inhaler. On Very Hard, you’re going to be doing a lot of healing, and toxicity is going to build up fast if you’re not careful.
- Pitch/Tossball Winger: Explosives builds are very powerful, so maxing your Explosive skill makes for a particularly dangerous combo with this perk. +30% Explosives damage is huge, and if you have Explosive Rounds in a SMG or Burst Assault Rifle you become a force to be reckoned with.
- Space Ranger: If you have a Speech focused build, an extra +2.5% Damage per point of Speech is a massive boost for an otherwise non-combat skill.
- Contingency Screen: Your Gas-Energy Deflection Apparatus activates automatically at 25% health, giving you an extra buffer when things get rough. It will give you an extra couple hits in an emergency, and will probably be the difference between being able to heal with the Medical Inhaler and having to use a Trauma-Kit to revive after you are downed.
- Intimidator: Damage to enemies will frighten them for a short duration, causing them to flee. The fewer enemies shooting at you simultaneously the better, helping you with crowd control in larger engagements.
- Flaws can be as useful as Perks, if you get the right ones. Unlike perks, they all have a downside but if you pick the ones that complement your playstyle the benefits will far outweigh the penalties. They will be offered to you based on what you do, and you’re not forced to take any that you don’t want, so here’s how you get the best ones and what they’ll do for you:
- Easily Distracted: Put at least five skill points into five different skills, so you can get it as soon as level 4. You’ll get an extra skill point per level (up to 26 free skill points for your trouble), but the downside is that you can only add skill points to your lowest non-zero Skill or a skill that you have no points in at all.
- Overprepared: Keep reloading before your clip/magazine is empty, but this one will take a while to get. Taking this will give you +50% Magazine size (great with Deep Drums), but will give you a -40% damage debuff for 8s if you use up a whole clip but otherwise no downside. As long as you keep reloading early, you’ll never have to deal with it.
- Technophobia: This will come up by fighting a large number of mechanicals, granting you a +20% damage to mechanicals. The buff works both ways however, and you’ll take +20% damage from them as well. Pair it with the explosive and armor piercing buffs above and they won’t live long enough to do that damage.
- Tunnel Vision: Have two weapons equipped, but only use one weapon consistently. If you do all the side quests and always use one weapon, it’s possible that you can unlock this Flaw before leaving Eden. You will trade a weapon slot for another +25% Armor Penetration which, when stacked with the Explosive and Armor Penetration Perks above, makes you even more deadly than before.
- Even if you’ve already gotten Whew, That’s Enough! trophy in your Story Difficulty run, it’s worth picking up as many Pitchball / Tossball cards as possible for their stat bonuses. In addition, the Pitchball Machine you can buy from Free Market Station will increase damage for every Pitchball / Tossball card you have, which can make a huge difference in boss fights or large crowds.
- In Matriarch’s Mercy on Dorado, you can take the quest “Bounty: Jan Dunsany” from the terminal. Kill Jan Dunsany and you can loot an item called the Bomb Suit Helmet, which has a unique mod called Lit Fuse which will grant you temporary health every time you deal Explosive damage. If you pair the Explosives / Armor Penetration tips above with this helmet you will be significantly harder to kill.
Useful Tips, Tricks and Guides:
- Pitchball & Tossball Card Locations
- Localized Rift Locations
- Science Adventures Quarterly Locations
- Mural Locations
- Grounding Station Locations
- Excogitation Audio Log Locations
The Outer Worlds 2 Trophy Guide
 |
You’ve Given 110% Unlocked all other trophies |
|
| Earn all other trophies in The Outer Worlds 2 to unlock platinum (no DLC needed). | ||
 |
The Outer Worlds 2 Completed the game on any difficulty |
|
| See Very Hard. |
||
 |
Welcome to Paradise Island Landed on Paradise Island |
|
| Automatic story-related trophy, cannot be missed. Unlocks after finishing the second Main Quest “Recalling the Score”. | ||
 |
Vexed the Vox Infiltrated and escaped the Vox Relay |
|
| Automatic story-related trophy, cannot be missed. Unlocks after finishing the third Main Quest “The Saboteur of Paradise”. | ||
 |
Desperate Times Call For Monastic Measures Stopped de Vries’ conspirators in Alexandra Monastery |
|
| Automatic story-related trophy, cannot be missed. Unlocks after finishing the fourth Main Quest “On the Trail of the Traitor”. | ||
 |
Left To Your Own Device Acquired the Rift Anomaly Modulator |
|
| Automatic story-related trophy, cannot be missed. Unlocks during the seventh Main Quest “An Instrument to Unfold Space & Time”. | ||
 |
Revive The Archive Restored the Archive to its fully functional state |
|
| Automatic story-related trophy, cannot be missed. Unlocks after finishing the eighth Main Quest “A Complication with the Computronic Cerebrum”. | ||
 |
Hard Completed the game on Hard difficulty |
|
| See Very Hard. |
||
 |
Very Hard Completed the game on Very Hard difficulty |
|
| When you start the game, select Very Hard difficulty and complete the entire game without changing it. This will stack with your lower difficulty trophies, Hard and The Outer Worlds 2, so you will be able to complete everything in a single playthrough if you want to do so.
For the best builds and strategies refer to Step 2 of the Roadmap above. |
||
 |
Elemental Maelstrom Killed a single enemy that has been affected by all possible damage types |
|
| There are six damage types in the game: Physical, Plasma, Corrosion, Shock, Frost, and N-Ray. Once you have modded weapons or grenades of all six damage types, find an enemy that won’t die quickly and inflict all six damage types before you kill it to receive the trophy. These don’t have to be a damage over time effect to count, just as long as they take some damage of that type it will suffice.
While this can be accomplished with the Spectrum Dance Saber, it is easier to do with six weapons of the appropriate damage types. |
||
 |
Flawed Hero Accepted 3 Flaws |
|
| Actions you take during the game will periodically prompt you to take flaws, based on the way you play the game. When asked, accept three flaws that won’t horribly impact your playthrough and you will receive this trophy. | ||
 |
Level 30 Reached Level 30 |
|
| Self-explanatory, simply earn enough experience to reach Level 30. | ||
 |
Capture The Archive The Hard Way Took control of the Archive without any backup |
|
| MISSABLE: Don’t call for backup
When you are tasked with re-taking the Archive on Cloister, you must not call for backup by activating the lift until you have possession of the Calcaduceus and open the door to UENIAC. Defeat all the Protectorate forces on the bridge and all the turrets then go inside to speak with Assessor Torbert Ostergard. Either convince him to give you the Calcaduceus willingly, or kill him and take it. Then access UENIAC’s chamber by interacting with the brass vacuum tube looking object at the top of the stairs and granting yourself operator privileges, which will unlock the trophy. |
||
 |
Never Seen Killed 50 enemies with Sneak Attacks |
|
While crouched and in stealth, sneak up behind any enemy who you can kill in a single blow and you will be prompted to press  to perform a Sneak Attack. Do this 50 times to earn this trophy. to perform a Sneak Attack. Do this 50 times to earn this trophy. |
||
 |
Skilled Raised a Skill to level 20 |
|
| Put 20 points in any skill to earn this trophy. | ||
 |
One for All Recruited all companions |
|
| MISSABLE: Some companions may be unrecruitable or die before being recruited based on your actions.
There are six companions available throughout the game. The first 2, Niles and VALERIE, are recruited automatically from the beginning of the game. After this you have the opportunity to recruit 4 more. The order you encounter them may vary depending on which worlds or stations you visit first.
|
||
 |
All for One Completed all companion quests |
|
| MISSABLE: Some companions may be unrecruitable or die before being recruited based on your actions.
Each companion has a series of quests that are tied to unlocking their mod kits. These will gradually become available as you unlock locations, and usually the first sign that a quest is available will be the companion mentioning that they need to talk to you while out exploring the world or if you run into them on the Incognito. Complete all missions listed below for this trophy:
|
||
 |
All for None Had every living companion die or abandon you for good |
|
| BUGGED: This trophy is currently unobtainable
Through your actions or choices, cause 5 out of the 6 companions to die or quit (VALERIE will never leave you). Alternately, you can speak to them and tell them to go and they will. 4 will leave normally, but you’ll have to take Aza with you planetside if you want to give her the boot. She will fly into a rage and try to murder you, so you’ll have to kill her. |
||
 |
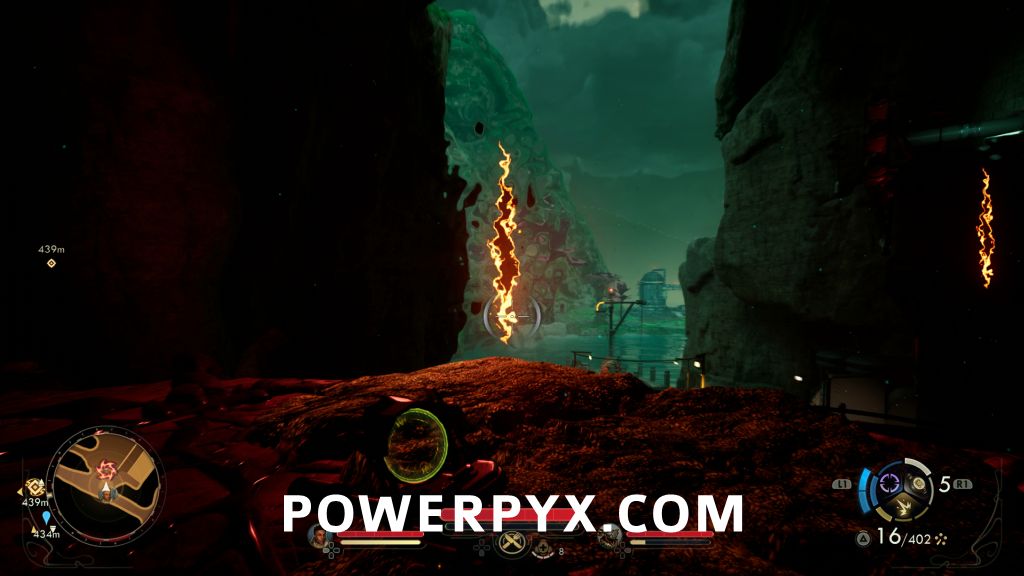
Rift Drifter Explored all of the localized rifts around Arcadia |
|
| MISSABLE: Technically missable, but as long as you keep your “Point of No Return” save, you’ll be able to reload and get any you’ve missed.
There are 33 Rifts in the game. Any time you get near one, it will be marked on your map for future reference. Once you have the Rift Anomaly Modulator (automatic story unlock in 7th Main Quest), interact with each rift to open them. |
||
 |
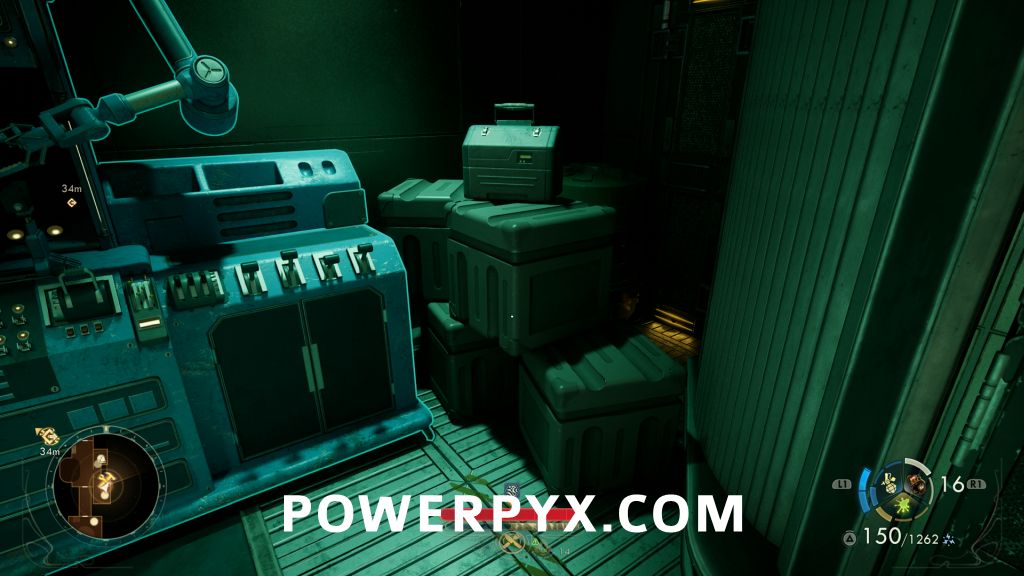
Maximum Gun Fully leveled-up Rookie’s Reward |
|
| MISSABLE: Enemies do not respawn, and it takes a reasonable length of time to level up Rookie’s Reward to level 30 so you need to start working on it before the end of the game.
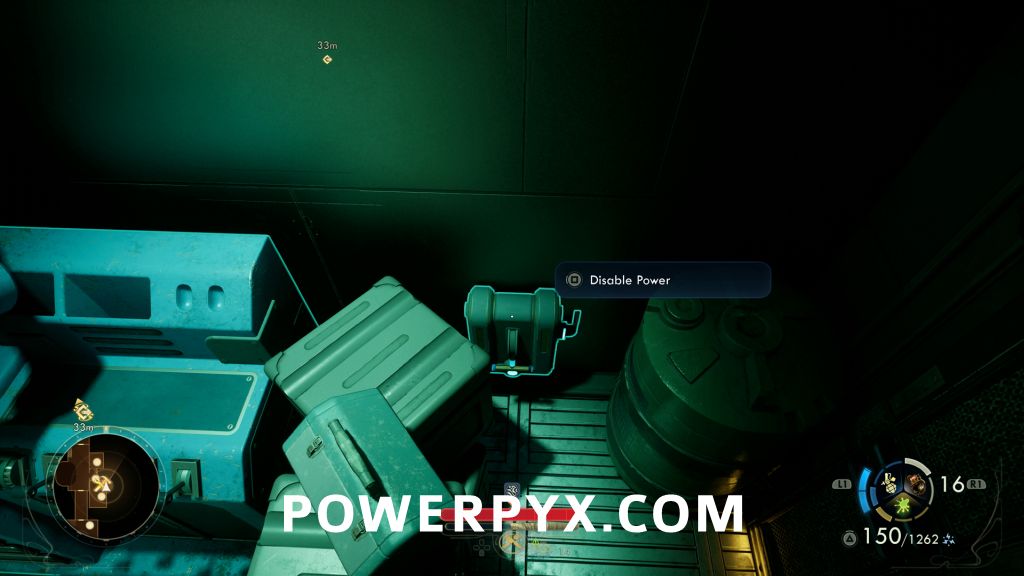
Rookie’s Reward is a unique weapon that can be found on the Incognito after you return from Horizon Point Station. In the room with the workbench and lockers, there is a weapons locker that requires Lockpick 11 to open, but there’s also an easier way: Look at the pile of crates next to the workbench.
Hidden behind that pile is a switch, that will allow you to disable the power to the electronic lock and open it right up for you to take.
It will start off at level 1, but every time you shoot something it will gain a little bit of experience. Watch the green meter on the back of the gun to see your progress to the next level. Each time it levels up, you’ll get a burst of confetti, a party horn sound and the gun will improve its damage, rate of fire, ammo capacity and recoil. Rookie’s Reward maxes out at level 30 which takes a fair amount of time to reach, but it’s not a bad starting weapon either and levels up fairly quickly at first, so you’re better off starting to use the gun early to get it out of the way while it can be helpful to you. |
||
 |
OA: Objectives Accomplished Completed all faction quests for the Order of the Ascendant |
|
| See Corporation Cooperation. |
||
 |
AC: All Complete Completed all faction quests for Auntie’s Choice |
|
| See Corporation Cooperation. |
||
 |
Corporation Cooperation Convinced Auntie’s Choice and the Order of the Ascendant to work together |
|
| Corporation Cooperation is tied to the faction trophies OA: Objectives Accomplished and AC: All Complete, and all three are mutually exclusive and will lock you out of the other two. While you can do each on a separate playthrough, that represents a substantial investment of time. Instead, after completing the first missions in the sequence you can make a save at a critical moment in the story, you can then reload from that save and not have to repeat the entire mission tree again. Whichever outcome you want to keep for your main story should either come third, or you can make a separate manual save that you can then come back to at the end.
Step 1: After completing “Fiends in High Places”, complete shared Faction Quests.
Step 2: Complete second set of Faction Quests, but don’t turn them in.
Step 3: Make a Manual Save. This will be your starting point for the three branching paths for the trophies listed below. When you earn the trophy, make a manual save in a new slot so that in Step 5 you can keep whichever outcome you want for the endgame. Step 4A: Order of the Ascendant Path
Step 4B: Auntie’s Choice Path
Step 4C: Corporation Cooperation Path
Step 5: Reload Your Save for the Chosen Outcome and continue to play! |
||
 |
A Stiff In The Rift Jumped into a rift (and died) |
|
| Rifts look like a wavy red/orange tear in reality. Come into contact with any of the 33 in the game and you will immediately die, and earn this trophy.
|
||
 |
Go Out With A Bang Killed 3 enemies with a single shot of the Big Bang |
|
| In EARL on Cloister, you’ll find a switch puzzle that you’ll have to solve to open one of two doors. Flip the switches as shown below to open the door leading to the Big Bang, which will be prominently displayed directly across from the door as you enter:
Hold |
||
 |
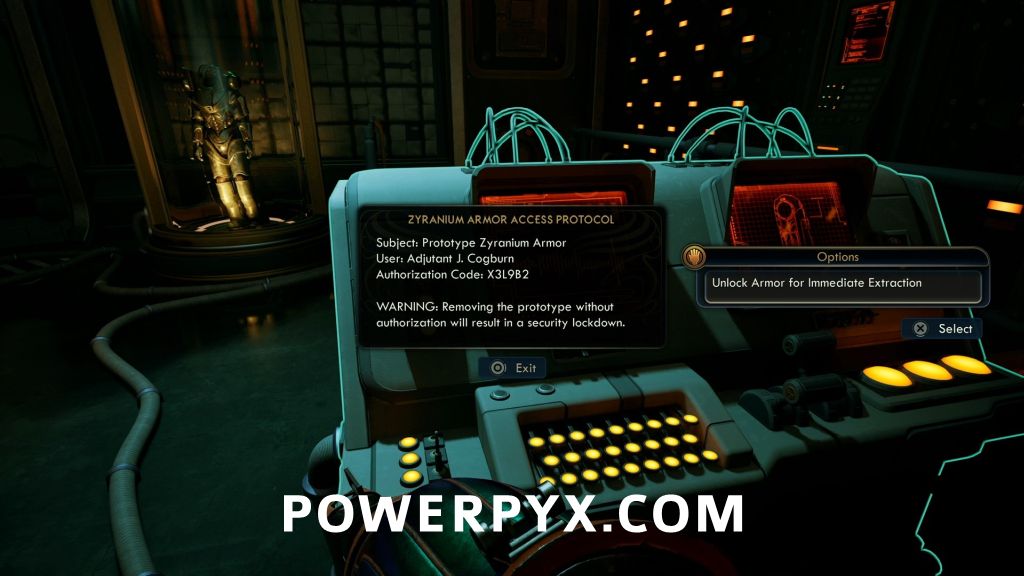
Float Like A Butterfly, Sting Like A Bee Killed 5 enemies while hovering in the Zyranium Automech Suit |
|
| The Zyranium Automech Suit can be found on Praetor in the Automech Production Facility. In the second floor at the end of a long hallway, you’ll find the armor in a tank that is opened using a nearby console.
Once you have the armor on, press |
||
 |
Scary GARY Adversary Killed 5 enemies with Gary’s tendrils |
|
| Once you have the Rift Anomaly Modulator (automatic story unlock in 7th Main Quest), head north of Fairfield to find two Auntie’s Choice troopers messing around with a rift. Trooper Gary will be destroyed by the rift, but then if you open it, you’ll find Gary’s reconstituted body hovering in the air. If you interact with it, you’ll collect Gary’s semi-sentient armor. Wear the armor into combat, and you’ll find that Gary will regularly lash out against hostile enemies in the area and do a decent amount of damage to them. As long as Gary gets the killing blow it will count, so feel free to soften them up with gunfire first.
|
||
 |
Dance Dance Disfiguration Killed 10 enemies with the Spectrum Dance Saber while in Spectrum Rainbow mode |
|
| Once get access to Free Market Station, make sure that you have at least 15 Pitchball/Tossball Cards, then head to the 2nd Choice Saloon. Upstairs you can talk to “Fiona F. Walker” and show her your collection to autocomplete the quest “A Collection of Rogues”. After beating her collection, she’ll enter the next room, then offer a selection of rare items including the Spectrum Dance Saber. You can buy it, or if you are wearing the Battle Helm of Ptero-Bane, you can go Incognito and steal the saber right off the display stand in front of her.
Equip the saber, and approach some enemies. After you swing it for the first time, you’ll hear the beat start and you’ll see musical symbols appear on the screen. “<” and “>” symbols will appear on the left and right side of the screen moving inward towards symbol outlines in the center. Press |
||
 |
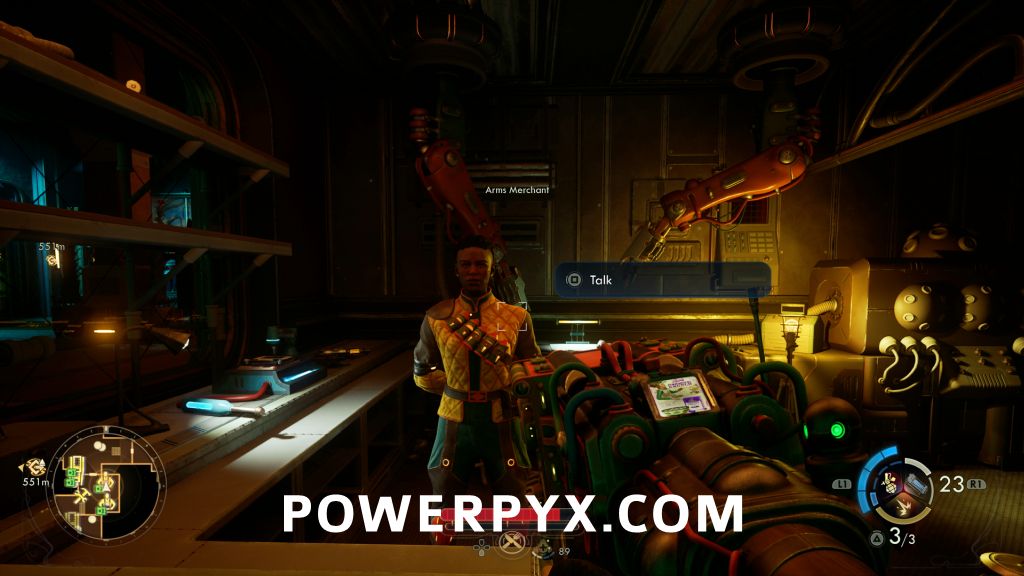
Ad Hominem Homicide Killed 10 enemies that are taunted by the Popup Gun’s Ad Drones |
|
| MISSABLE: Only available through Auntie’s Choice. Must not get Kill on Sight reputation level before purchasing weapon.
You can buy the Popup Gun on the ACS Undisputed Claim in the Head Office Tower section from a vendor that is marked on the map as “Auntie’s Weapon Shop”, but is shown as “Arney’s Armory” when you’re in the shop screen.
When you fire the gun, it will launch a drone on a grenade-like arc. Where it lands, it will start taunting nearby enemies. There are only three drones in the gun, and if any drones are destroyed, it will automatically reload them into the magazine. If you press reload, it will detonate all of the drones and damage creatures in the immediate area, but it doesn’t do a significant amount of damage. The more effective method is to fire all your drones near an enemy, and when they become affected by the Drone’s taunts, you’ll see a red glow appear around them. After that, you can kill the taunted enemy with any weapon and it will count. It’s important to note that you will have to make all 10 kills in a single session before reloading or continuing a previous save, which will reset your progress. As with most of the weapon based trophies, the easiest place to accomplish this is on board the ACS Undisputed Claim. Save before you start and then once you have the trophy you can reload your save to revert your faction standings. |
||
 |
Stop Hitting Yourself Killed 15 enemies using only Armageddon |
|
| You will find Armageddon in a rift on the 1st Floor of Interstitial Reconfiguration. Open the rift, and Armageddon will appear on a stand in the room.
It’s important to note that you will have to make all 15 kills in a single session before reloading or continuing a previous save, which will reset your progress. As with most of the weapon based trophies, the easiest place to accomplish this is on board the ACS Undisputed Claim. Save before you start and then once you have the trophy you can reload your save to revert your faction standings. |
||
 |
Stompy Killed 5 enemies by stomping on them after hitting them with the Shrink Ray |
|
You can find the Shrink Ray in a sealed up research lab in the Crabbles Spawning Grounds on Paradise Island. Using the Rift Anomaly Modulator (automatic story unlock in 7th Main Quest), climb up the platforms to reach the roof where you’ll find the shrink ray in a locker. Equip the gun and hold down  to charge the gun, then shoot an enemy and watch them shrink (powerful enemies may require multiple shots to trigger shrinking). Once they’ve shrunk, run over them to squish them underfoot. to charge the gun, then shoot an enemy and watch them shrink (powerful enemies may require multiple shots to trigger shrinking). Once they’ve shrunk, run over them to squish them underfoot.
Note: If you don’t have the Rift Anomaly Modulator yet, it is possible to reach the Shrink Ray early using a glitch. Using the P.A.L.E. gadget to double jump against the broken pipe, if you keep hitting the jump button you are sometimes able to trigger a second double jump which can let you reach the roof, but it doesn’t happen consistently and is difficult to land on the roof when it does. |
||
 |
Waylaid Grenades Shot 3 grenades out of the air |
|
| The trophy description should actually read, “Shot 3 different types of grenades out of the air.” If you keep shooting the same kind of grenade, only the first one will count.
Luckily you can do this yourself using by using the Tactical Time Dilation Device. Simply look up, throw a grenade, then use the gadget to slow time. Aim at the grenade and shoot it in mid-air to make it explode. Make sure to change to a different grenade type before repeating twice more to get the trophy. |
||
 |
Chemically Dependent Crashed 20 times with the Medical Inhaler |
|
| Every time you use the Medical Inhaler, you’ll notice that your Toxicity meter below your life bar will fill up a little and then slowly drop. If you continue to use your Medical Inhaler to heal before your Toxicity gauge drops back to 0, your Toxicity values will start to stack up. If you fill the bar, you will crash and not be able to heal for a while. Crash 20 times to get the trophy. | ||
 |
A Journey Of A Thousand Miles Collected 1 Pitch/Tossball card |
|
| See Whew, That’s Enough! |
||
 |
Whew, That’s Enough! Collected 100 Pitch/Tossball cards |
|
| There are a total of 125 Pitchball & Tossball cards hidden in the game, but for the trophy you only need any 100 of 125. This allows you to skip any 25 of them. However, many of them are inaccessible without certain perks and/or skills, so you really can’t afford to miss any that are available to you in each area.
» The Outer Worlds 2 All Pitchball & Tossball Card Locations |
||
 |
Auntie’s Old Acquaintance Met Amos |
|
| MISSABLE: Must not get “Kill on Sight” reputation level with Auntie’s Choice before you get the trophy.
When you reach the ACS Undisputed Claim, you will encounter someone on board who will say that you dropped something. Talk to them to get an All-Access Pass to the Profit Mover Tramicular, which will let you reach the Back Deck Steerage area and talk to Middle Manager Twombly. He will give you the “Forbidden Secrets of the Undisputed Claim” quest, which will allow Amos to randomly spawn in The Value-Added Esplanade. When you see a janitor that has a security detail, talk to Amos and you’ll get the trophy. |
||
 |
Hatchling Catcher Collected 5 pets for your ship |
|
You will encounter many pets over the course of the game, either as a result of quests, random encounters in the overworld, or available for purchase in stores. If you have the premium edition, you will also get a free Sprat pet automatically. Own any 5 pets to get the trophy:
|
||
 |
Hatchling Hunter Killed a total of 50 Raptidon Juveniles, Crabble Hatchlings, Mantiwasps, Spiderlings, or Critters |
|
| Over the course of the game you’ll kill so many groups of creatures that it’s impossible not to kill their young. Even if somehow you don’t manage to get this without trying, you can kill the random critters like Sprats that run all around the overworld and respawn frequently. | ||
 |
Winning Hearts and Heads Collected 20 human hearts |
|
| To get this trophy will need the purchase the Psychopath and Serial Killer traits. After that, there will be a chance to automatically harvest the heart of any human you kill, repeat until you get 20. If you don’t want to spend two traits on this trophy, you can save up two perks then reload when you earn the trophy. | ||
 |
Corpse Warper Melted 20 bodies with Auntie’s Acidic Dematerializer |
|
The first time you talk to VAL about the High Security Lockboxes, she will tell you about the Advanced Decryption Keys needed to open them. Talk to her again, and she’ll give you one for free. The first box you open will contain Auntie’s Acidic Dematerializer gadget. This will allow you to melt any corpses you find, preventing them from being discovered by any still alive enemies in the area. Simply switch your gadget to the Dematerializer, point it at a body, and press  to melt it down to a puddle of goo. Once you melt 20 bodies, you will receive the trophy. to melt it down to a puddle of goo. Once you melt 20 bodies, you will receive the trophy. |
||
 |
Anti-Consumerist Completed the game without spending a single bit |
|
| MISSABLE: Spending money for any reason will disqualify you for this trophy, including bribes during dialogue and some armor/weapons that consume bits
Simple in theory, just don’t spend any money throughout the entire game until you get the trophy. This is much easier if you do this on Story Difficulty. It’s not recommended to do this on Very Hard as it would be much more difficult when you can’t buy items from vendors, vending machines, or pay for healing. You will have to craft, scrounge or steal everything you need during the game, so Sneak is useful to steal items you’ll need, while Engineering and Science skills are useful to craft ammo. |
||
 |
SA Quarterlies Quantified Found all volumes of Science Adventures Quarterly on Paradise Island |
|
| » The Outer Worlds 2 All Science Adventures Quarterly Locations | ||
 |
Golden Ridge Murals In Plural Found all of the mural pieces on Golden Ridge |
|
| » The Outer Worlds 2 All Mural Pieces Locations | ||
 |
Praetor Towers Powered Recalibrated all of the grounding stations on Praetor |
|
| » The Outer Worlds 2 All Grounding Stations Locations | ||
 |
Cloister Excogitation Logs CEL-ebration Found all of the Excogitation audio logs on Cloister |
|
| » The Outer Worlds 2 All Excogitation Audio Logs Locations | ||
 |
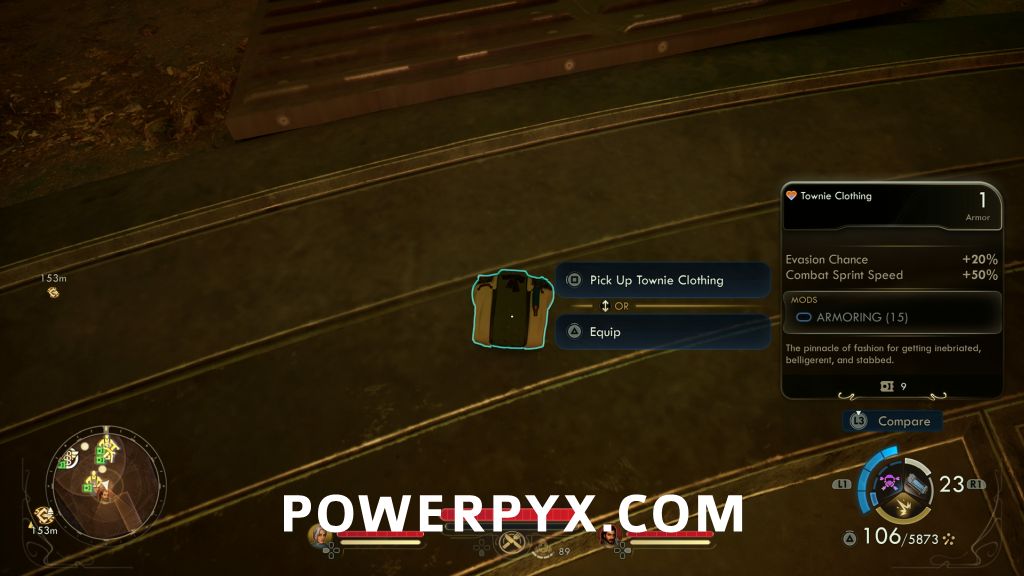
Well Dressed Defeated the Consul while wearing clothing instead of armor |
|
| MISSABLE: You must have an item of clothing before travelling to the Reconstituted Horizon Point Station. You must kill the Consul.
In “Sins of the Past on the Precipice of the Future”, before you enter the Command Deck on the Providence you have to remove your armor and put on any clothing item that isn’t listed as Light, Medium, or Heavy under the armor value. Use an item like Townie Clothing which shows “Armor” under the armor value, but isn’t actually considered armor.
You will have to then fight and kill the Consul to get the trophy. If you convince him to surrender with a Speech check, it will not count. |
||
 |
Destroyer of Worlds Reached the lowest possible standing with Auntie’s Choice and the Order of the Ascendant |
|
| Make a manual save before you do this trophy to undo the reputation damage. Then go on a rampage through ACS Undisputed Claim and Laplace’s Garden. You’ll have Kill on Sight status in short order. | ||
 |
Everything Must Go Earned 50,000 bits by selling items to vendors |
|
| Over the course of the game this should occur without needing to farm it. Otherwise you can make a save game, sell everything in your inventory and then reload once you have the trophy. | ||
 |
Upgrades Available Applied modifications to 10 weapons or armors |
|
| At any workbench (or using Niles’s Field Tinkering ability), apply 10 modifications to any weapons or armor in your inventory that have empty modification slots. | ||


 to jump, then press and hold


Anonymous says
Thank you for the trophy guide. I was disappointed to find out that the initial trophy guide for The Outer Worlds 2 on this website was cancelled and thought it would never happen, so I’m glad to be wrong. I’m surprised it can take as long as 75-125 hours to earn the Platinum trophy, since the first game took me nearly 50 hours to complete in comparison (I wish there wasn’t a trophy for the hardest difficulty in an RPG like this). It’s annoying that Obsidian Entertainment still haven’t fixed all glitched trophies so that the Platinum trophy is finally obtainable for everyone (hopefully they do it soon). I personally would prefer to be able to spend money in my first playthrough, but I don’t want to do more than 2 playthroughs, so I wonder if I can get away with spending nothing on the hardest difficulty…
Middle-Aged-Gamer says
All for None
Inez Silang, Marisol, and Tristan Rao (Niles maybe too) react angrily when you perform a steal kill on civilians of their respective factions.
These three (four) will approach you shortly after the kill, giving you several options. One of these options angers the teammate.
If you do this often enough, the teammates will leave you.
(Special events, such as the one involving the Vox space station, accelerate the defection.)
to kill:
– Aza … You just need to kick Aza out of the team and she will attack you afterwards, and you have to kill her.
– At the end, Niles can fly the ship into the anomaly and dies as a result.
– Valerie (maybe like Niles or unkillable)
combination of trophies:
“Dance Dance Disfiguration” + “Elemental Maelstrom”
While working towards the “Dance Dance Disfiguration” trophy, you can use the “Spectrum Dance Saber” on a bounty target (fully recharging it multiple times if necessary) and you will also get the “Elemental Maelstrom” trophy.
“Float Like A Butterfly, Sting Like A Bee” + “Go Out With A Bang” + “Destroyer of Worlds”
When attacking Laplace’s Garden on Cloister for the “Destroyer of Worlds” trophy, many guards will barricade themselves in Ruth’s Residence.
They’ll stay in the entrance area of the estate, especially since there are 10+ NPCs crammed into a small space.
With just a single shot from the Big Bang weapon, you can easily kill 5 enemies. Since you have to charge this weapon and only need to hold it while charged, you can easily use the Zyranium Automech Suit’s hover mode.
If you kill Aunt Clio first to get the highest wanted level there, and then kill Ruth with the Big Bang shot, you can snag a total of 3 trophies… at least you could, if the Big Bang trophy weren’t bugged.
“Never Seen” + “Corpse Warper”
Self-explanatory.
Kagain says
Glad you guys got around to making this guide. Good job!
Powerfrix says
Are you guys doing a red dead redemption ps5 trophy guide
JWStoney says
The “unmissable” story trophy “Desperate Times call for Monastic Measure” can be bugged/glitched. I completed the entire section, have moved on and gotten additional story trophies, but the trophy is still no complete for me. I have found some reddit discussions about this happening to other people and am currently corresponding with Obsidian support about the issue. EXTREMELY frustrating trophy issue.
HZ says
I also did not unlock this trophy.
Littlejay says
Getting rid of all companions is just telling them to leave on Xbox. You have to fight one of them, but the rest just look sad and go away.
Middle-Aged-Gamer says
Unfortunately, this doesn’t count towards the trophy.
In PS, there’s a tracker that counts how many crew members have died or left you. And with this method, unfortunately, only the kill counts.
Battlefield 1969 says
Any chance you guys might still do a guide for Digimon Story Time Stranger?
Cuthpaste says
It’s been a month since the last update and there’s no word from the devs. This doesn’t seem like a safe buy if you want the plat.
Battlefield 1969 says
“Go Out With a Bang” has been fixed with the new patch apparently.
TigerlilyJules says
Tristan’s quest Casting off the Veil is glitching for a lot of people making the all for one trophy unachievable. Does anyone have a solution other than start all over?
Oscward says
Has there been any word from Obsidian when the ‘All for none’ trophy is going to be fixed? Appalling that it’s taken them this long to address it!