
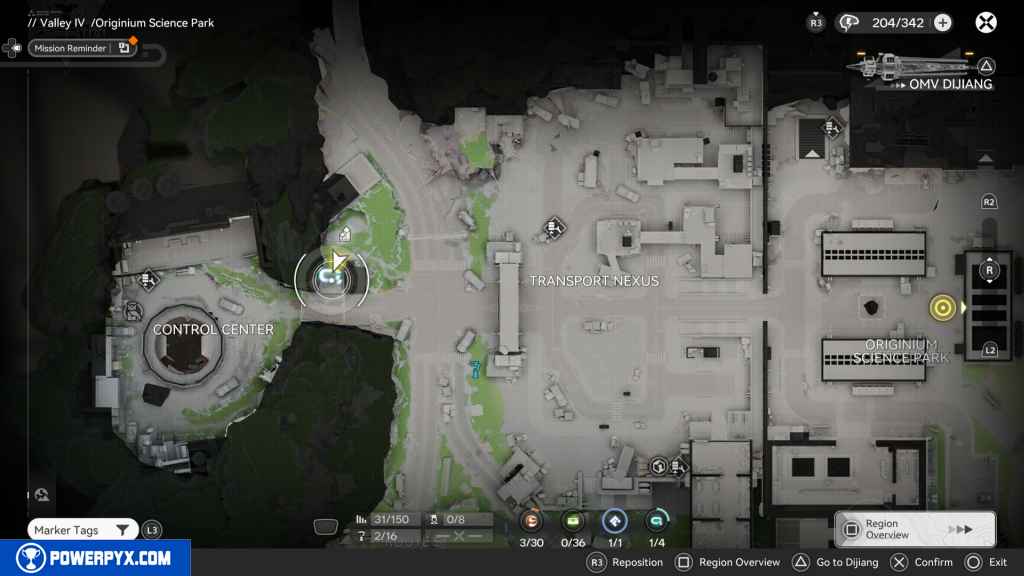
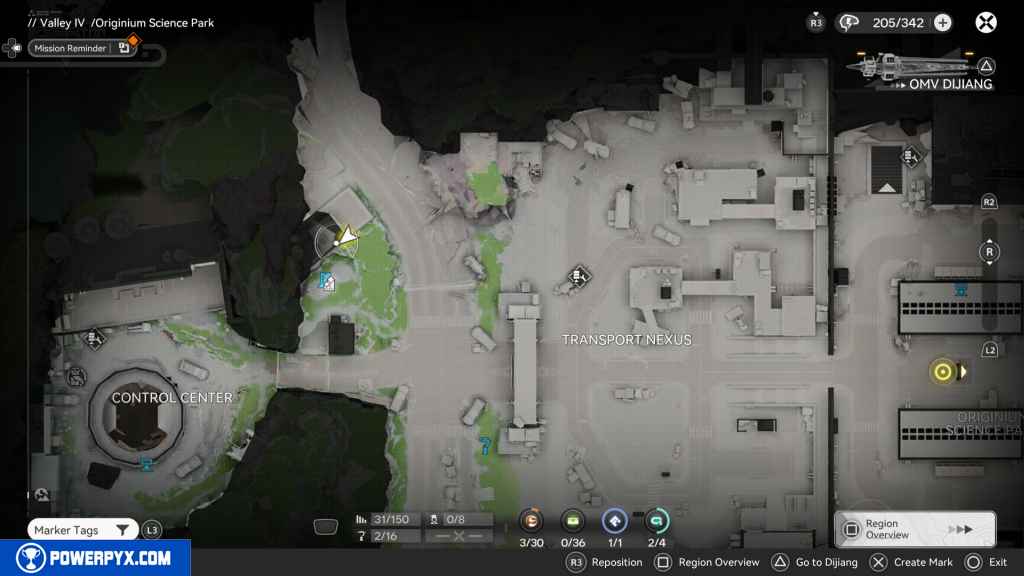
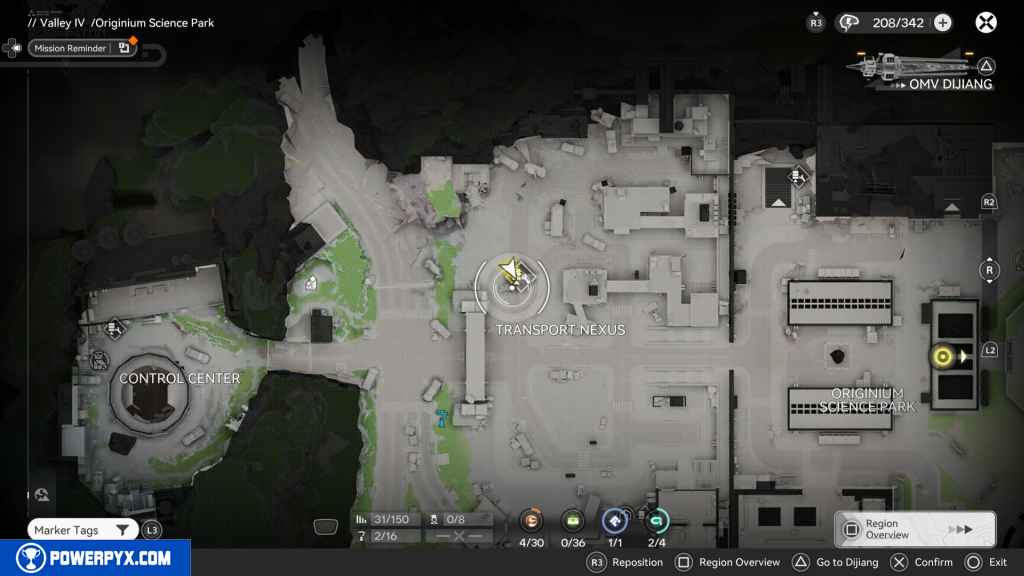
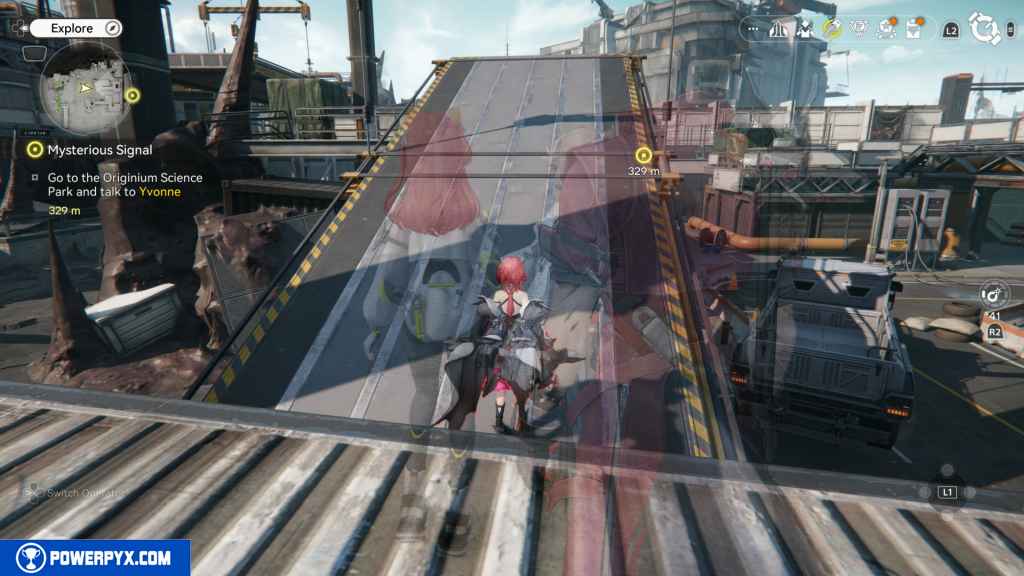
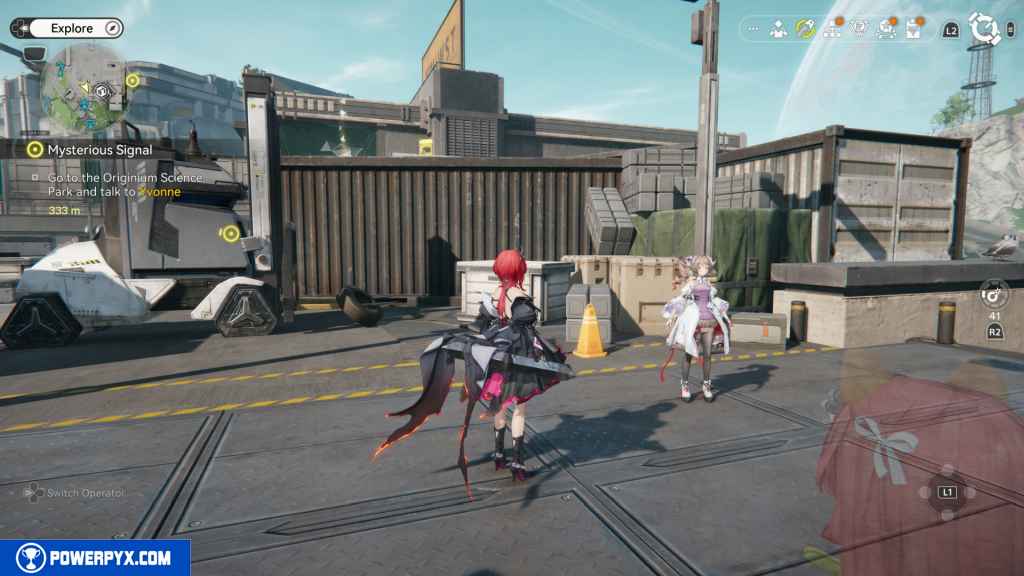
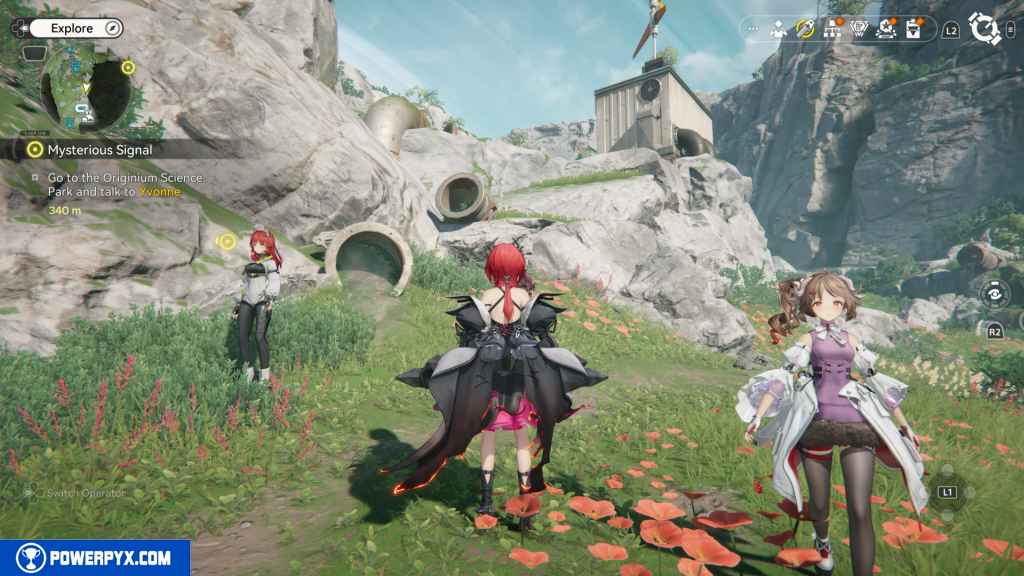
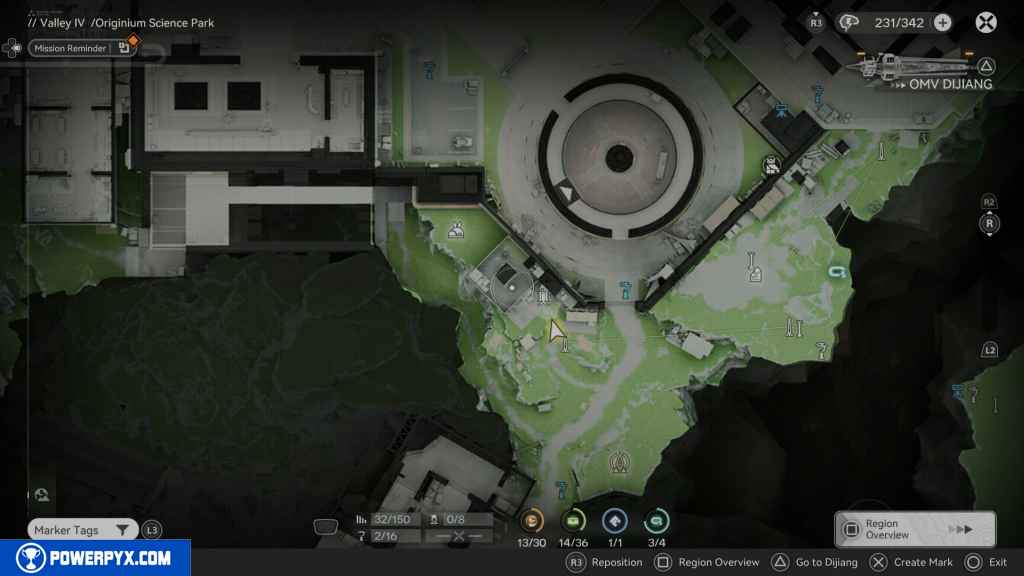
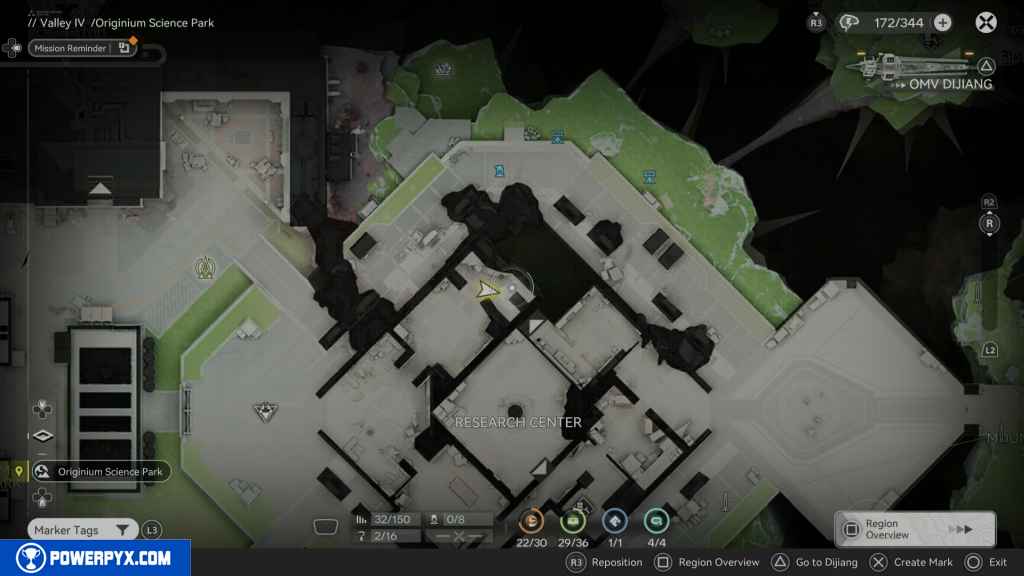
Originium Science Park contains 139 Collectible Locations in Arknights Endfield. This walkthrough will guide you to all the collectibles in the Originium Science Park Region. Everything that’s needed for 100% completion is included.
- Aurylene: 30
- Crates: 36
- Protocol Dataloggers: 4
- SOS Repair Bots: 3
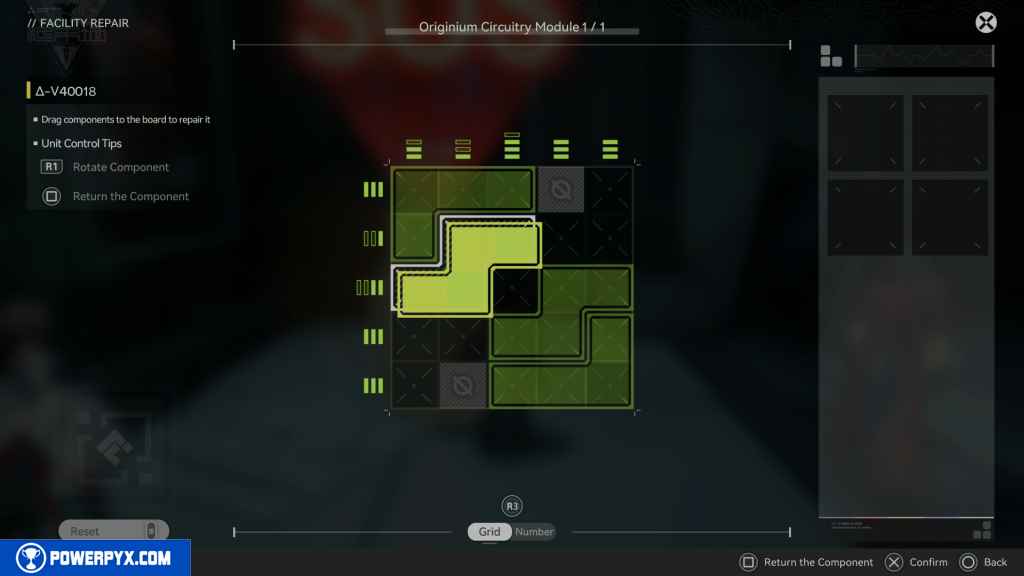
- Repair Logic: 1
- Gathering Points: 59
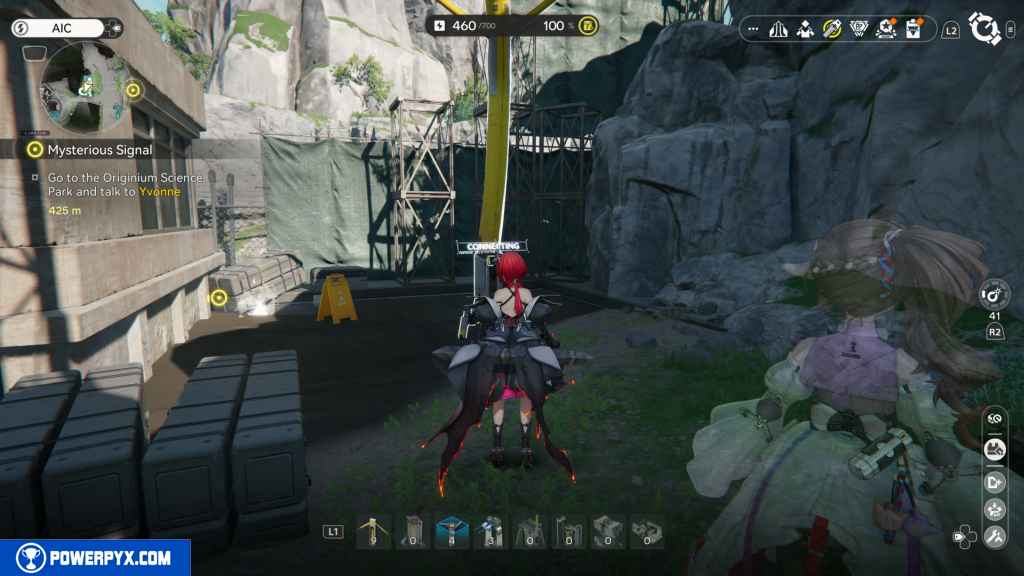
Complete These Quests To Unlock All Areas In The Originium Science Park
- Play through the story until you complete Main Mission 18 – Down The Hill.
- Side Mission – Explosive Rescue
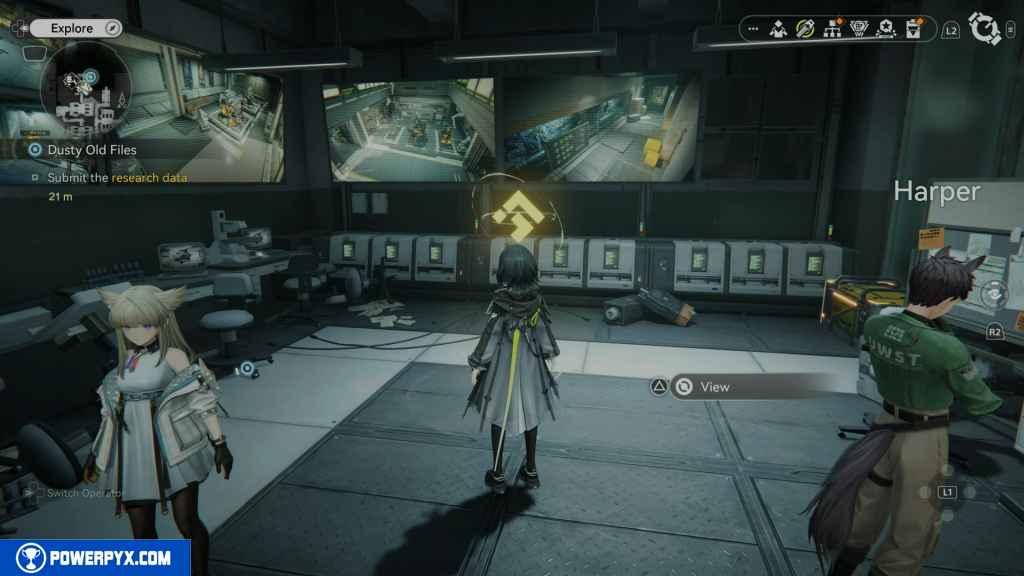
- Side Mission – Dusty Old Files
- Side Mission – Illusion
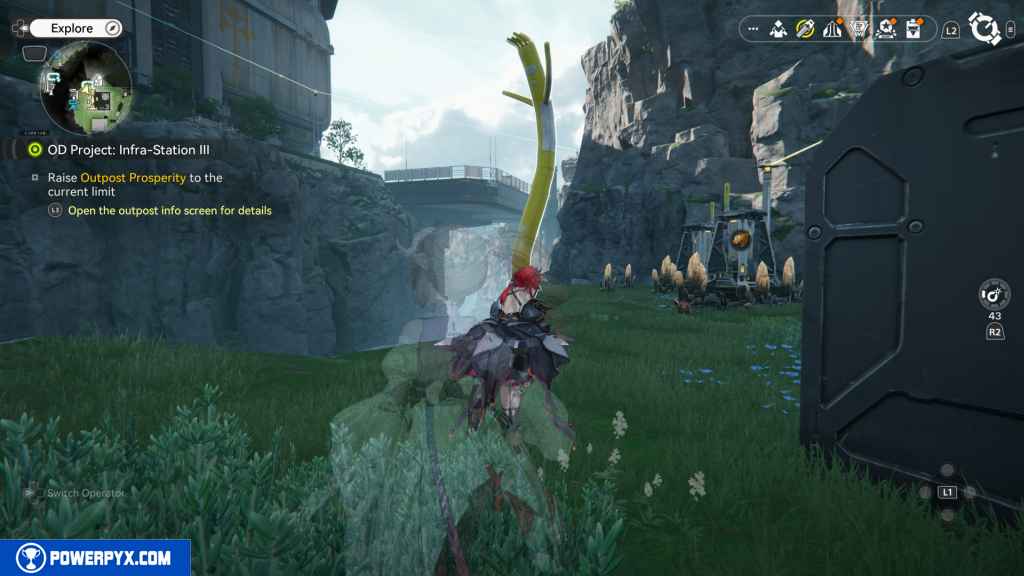
- Exploration Mission – OD Outpost: Infra-Station II. You must raise your Infra-Station prosperity to level 2 and complete the mission to unlock the Control Center location.
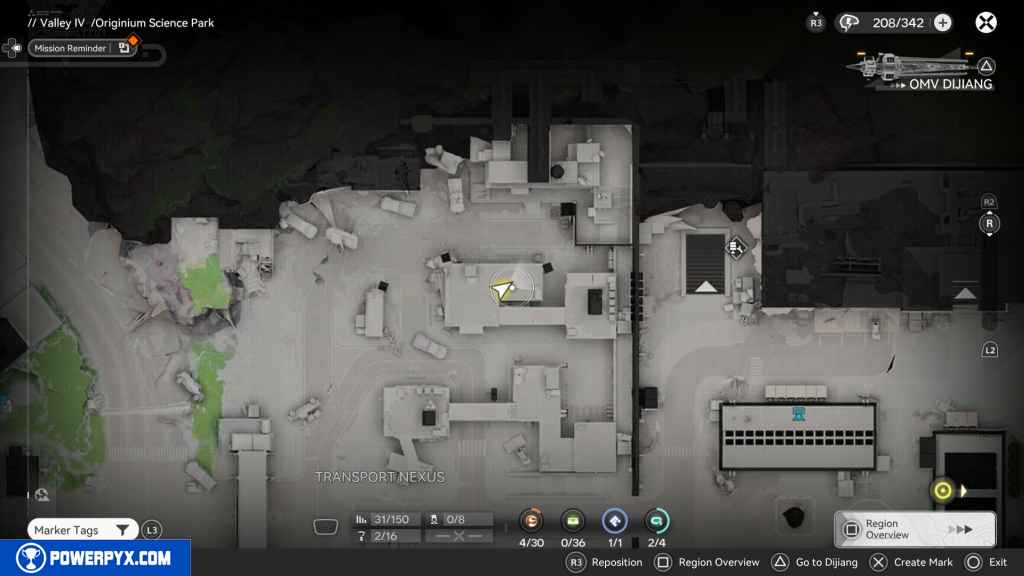
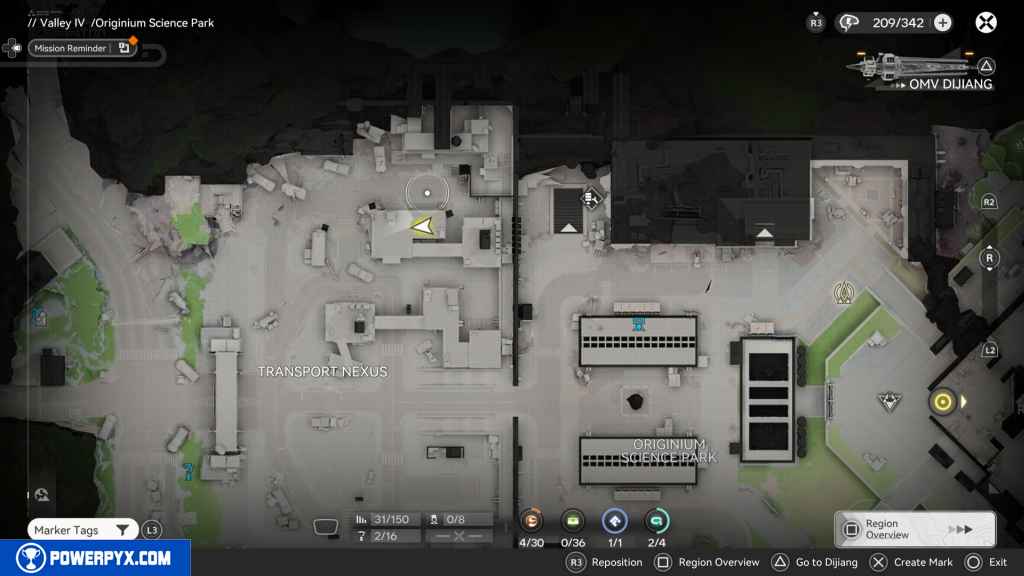
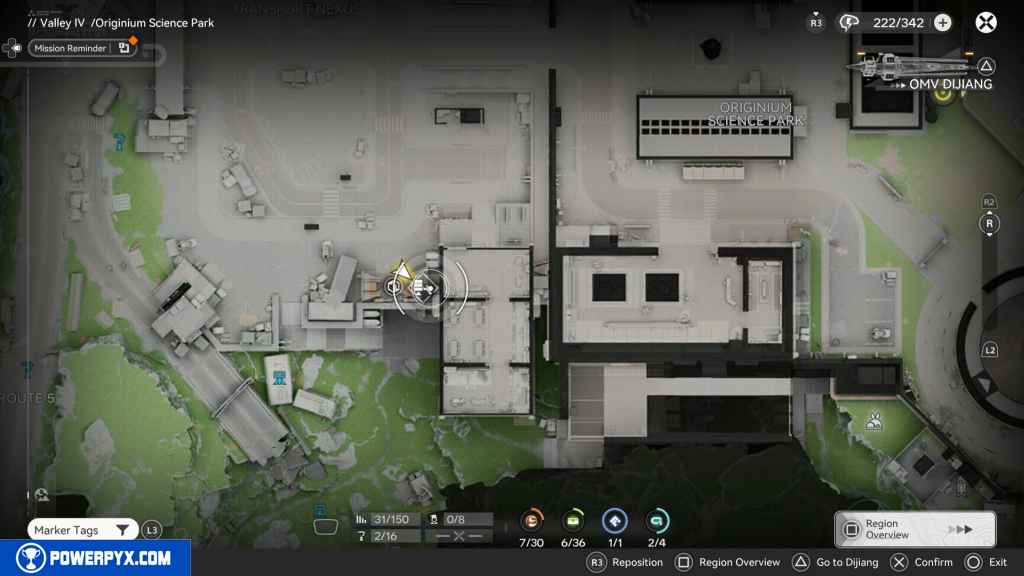
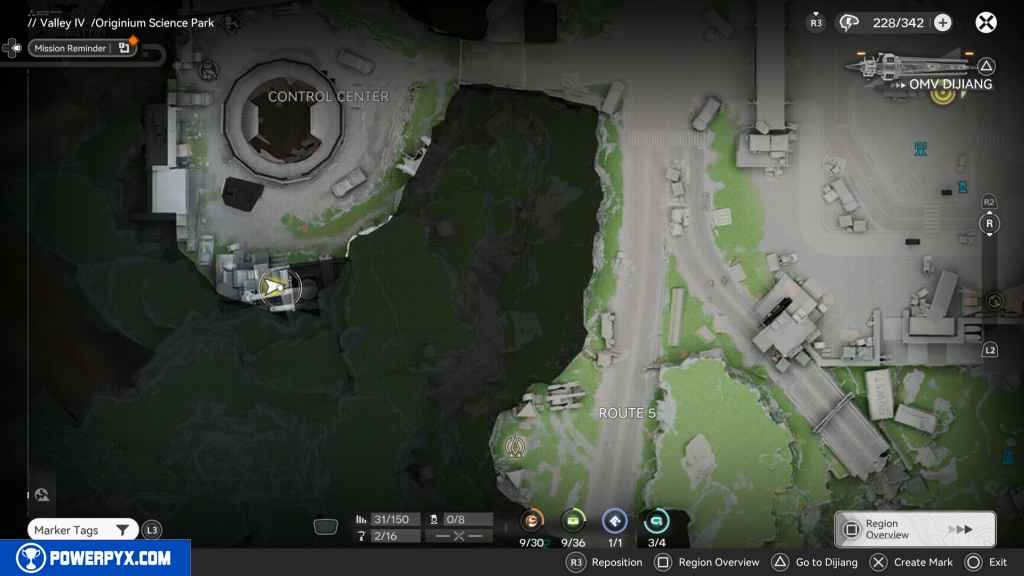
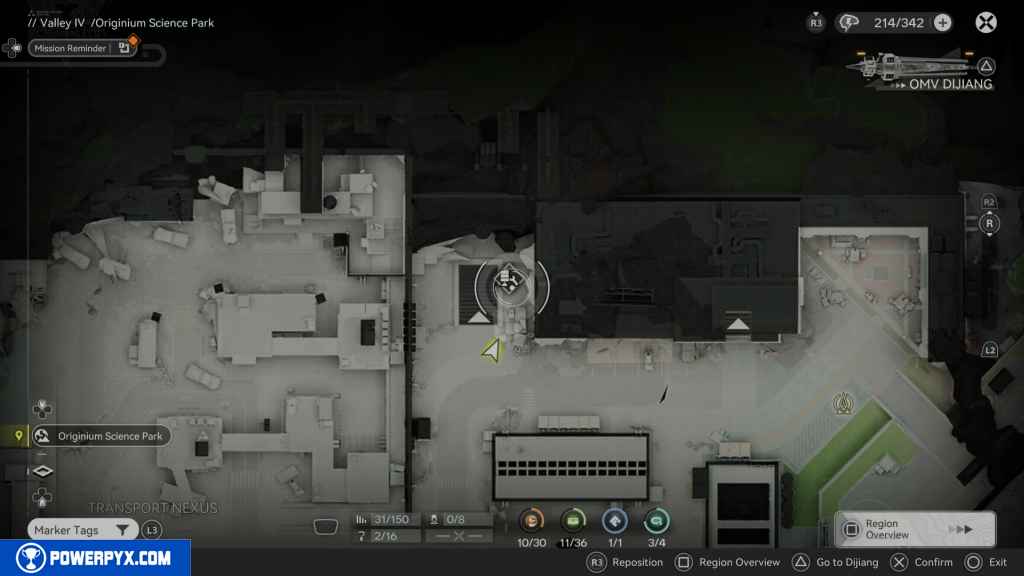
Collectibles Overview:
Collectibles
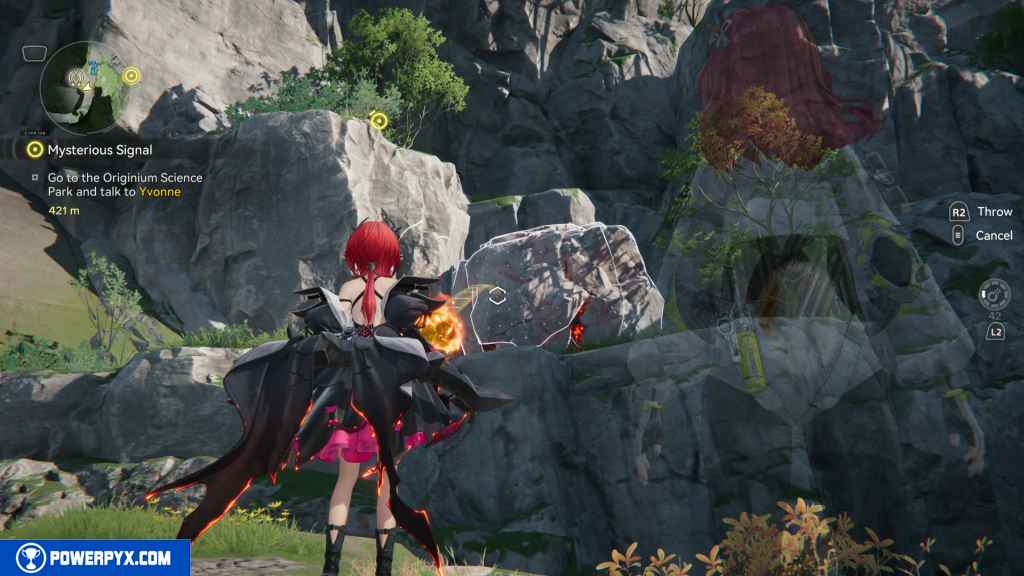
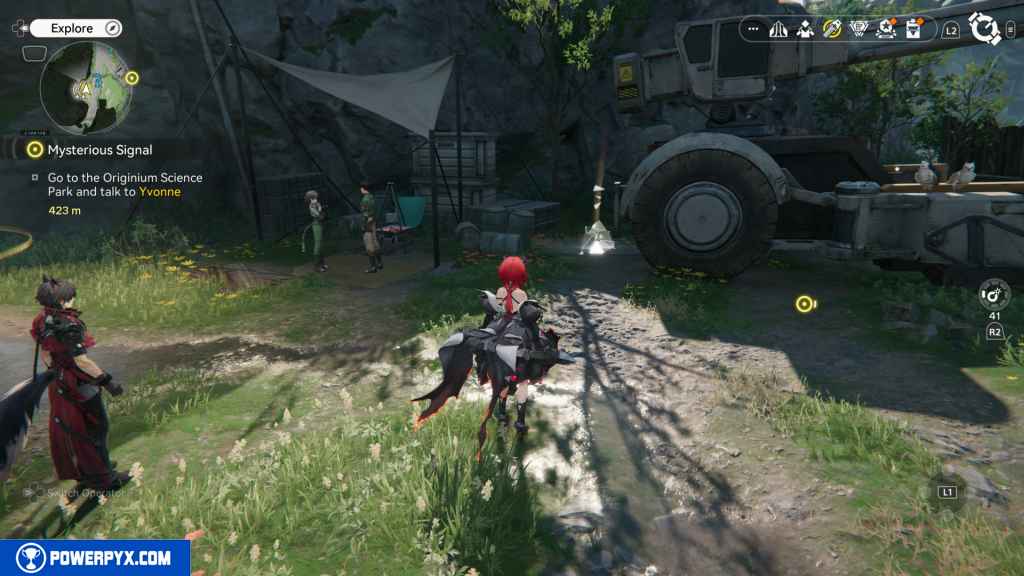
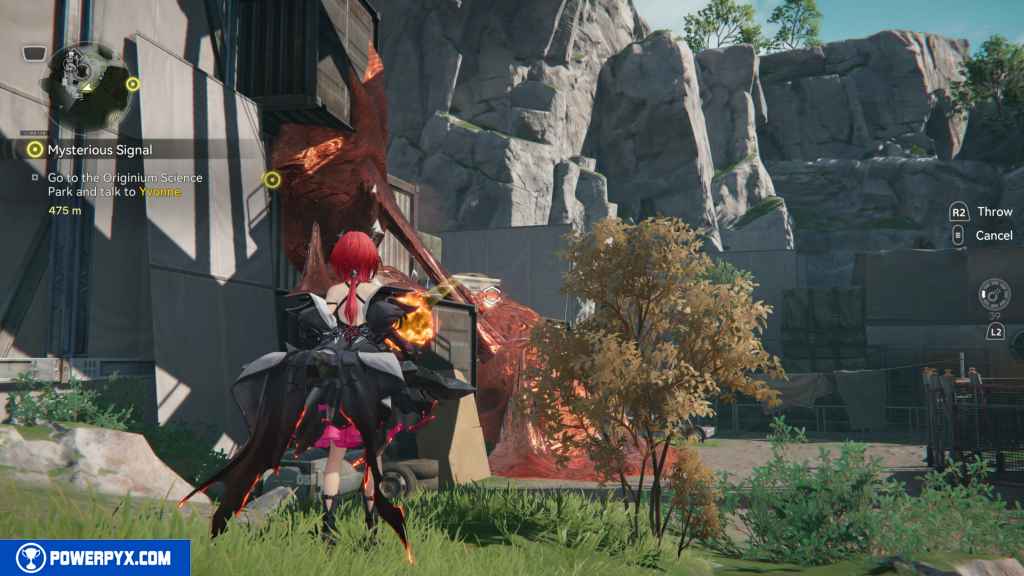
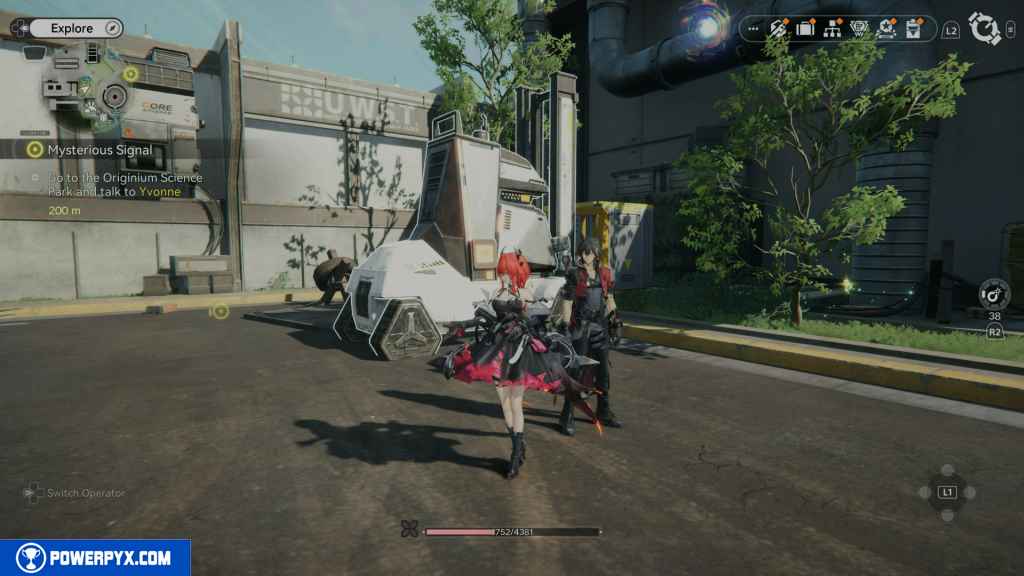
1 – Aurylene 1
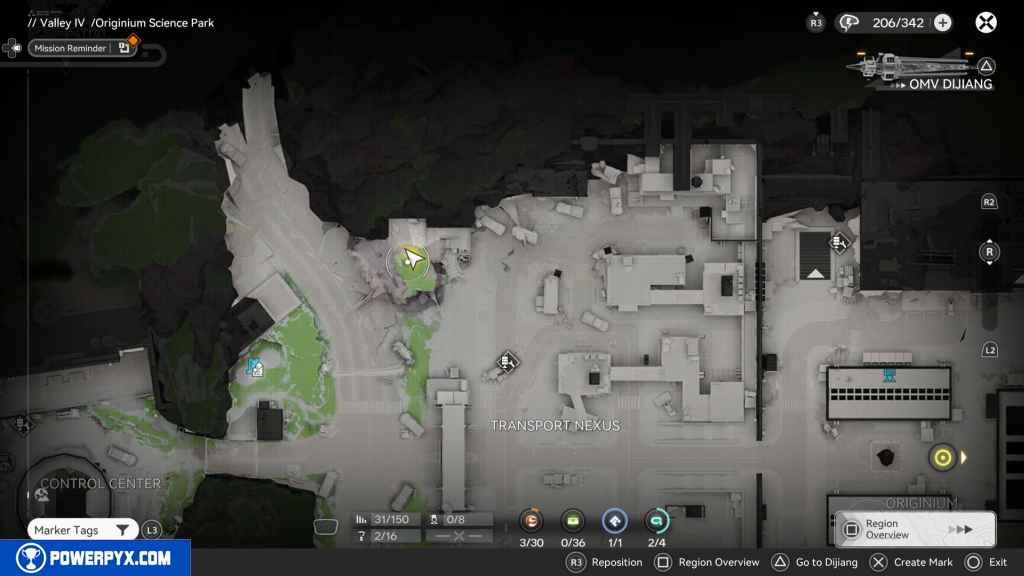
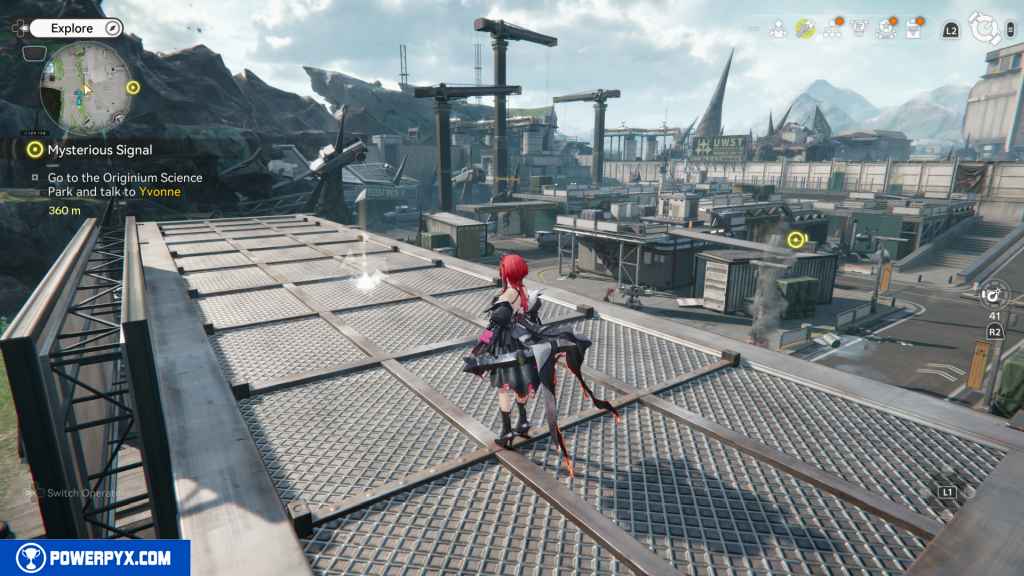
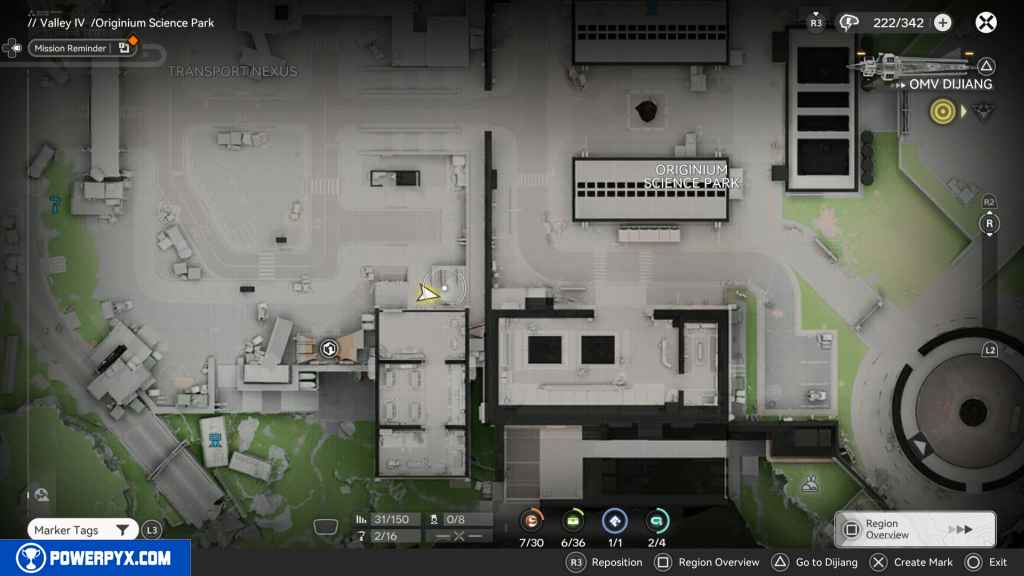
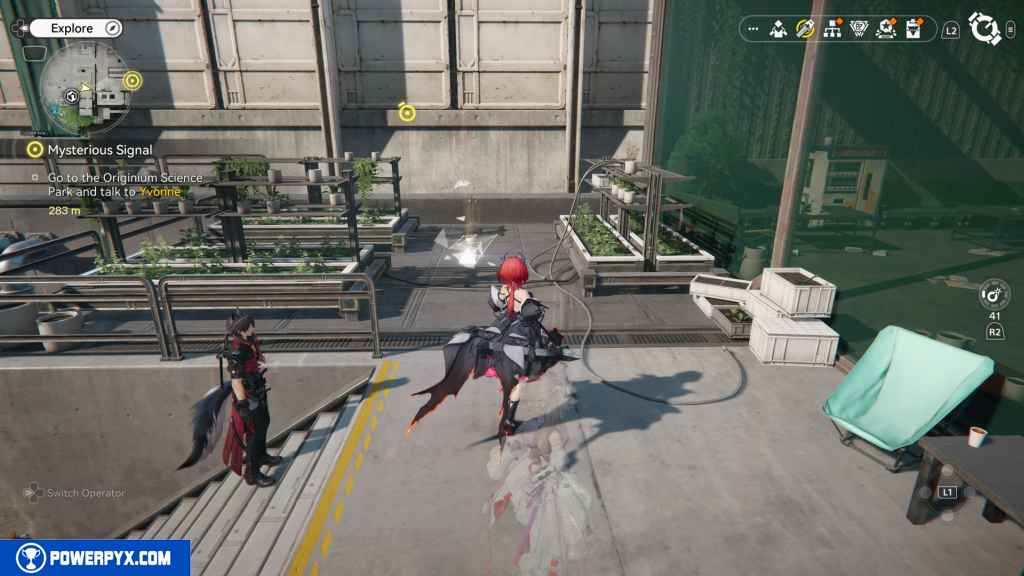
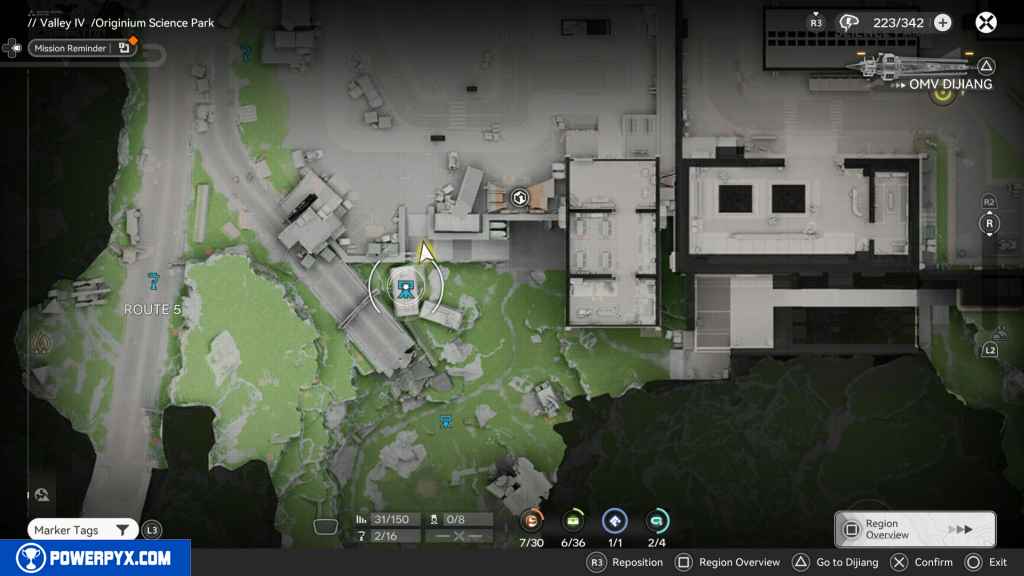
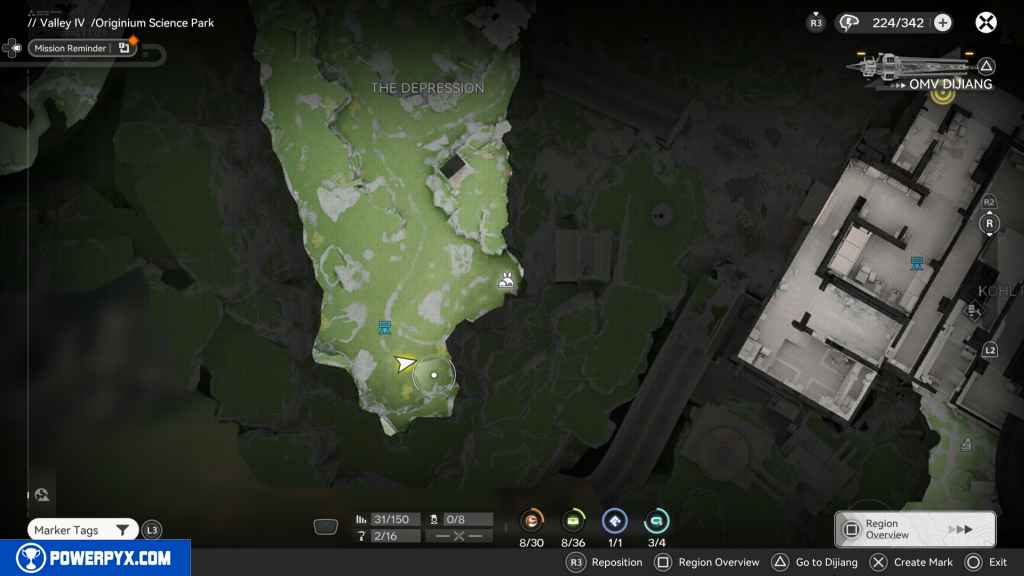
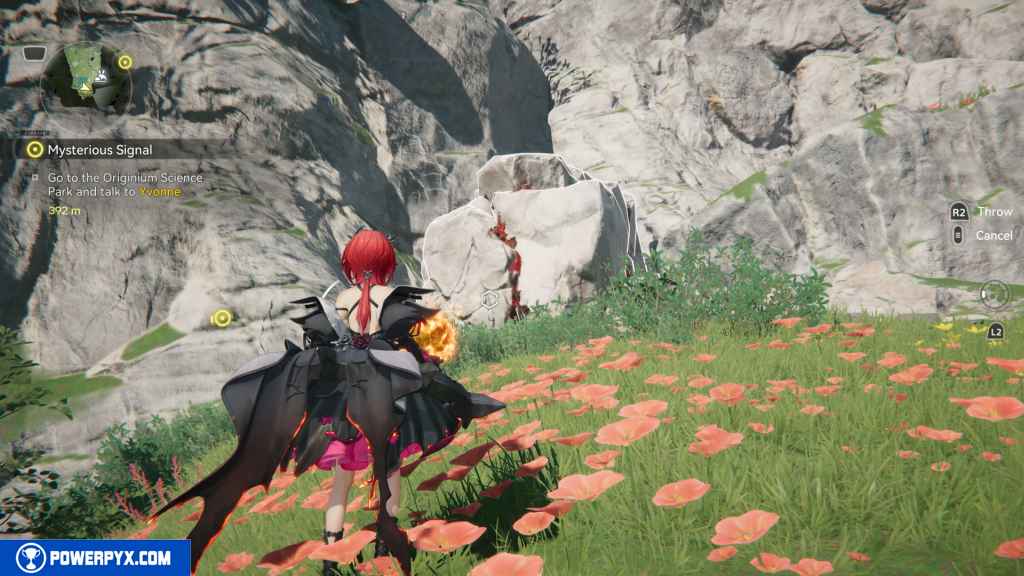
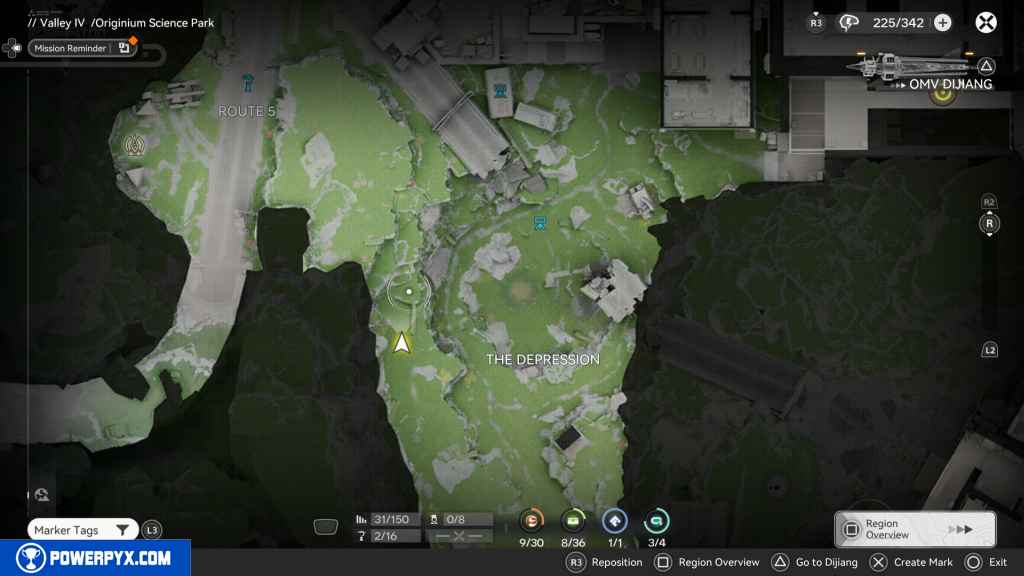
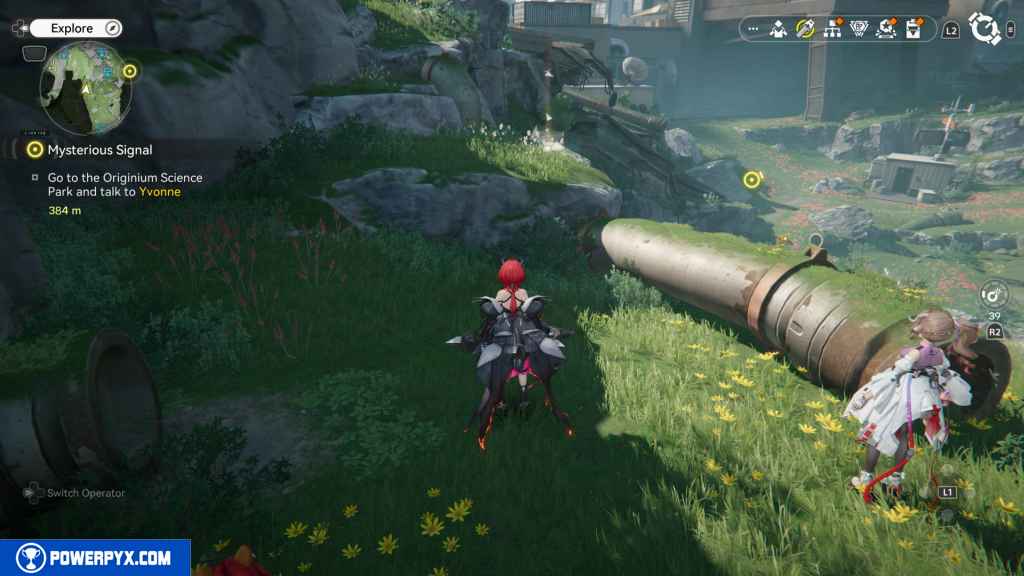
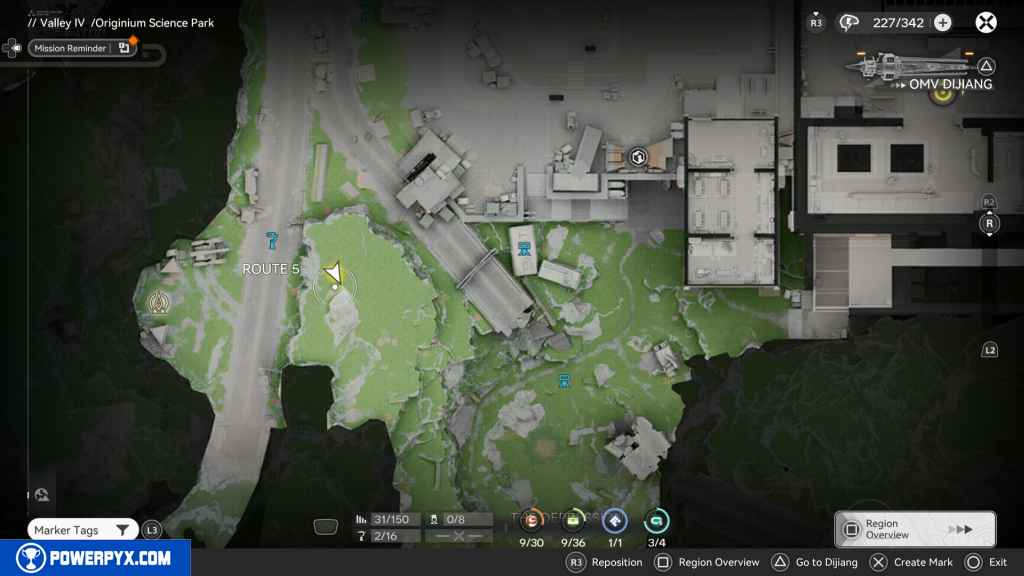
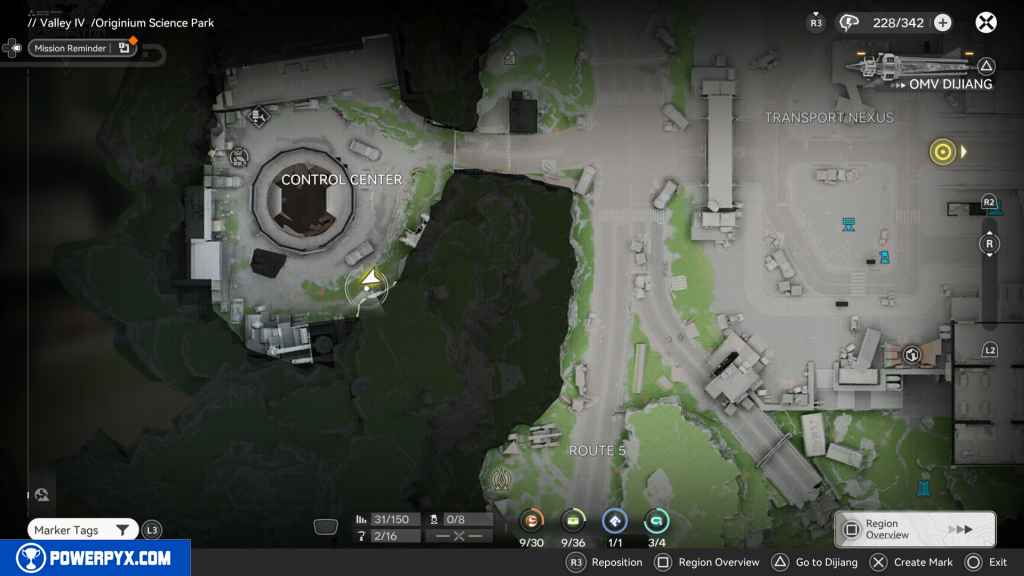
Begin at the TP point on Route 5. Look south and up to find a destructible rock and throw an incendiary explosive at it to blow it up and reveal the Aurylene.
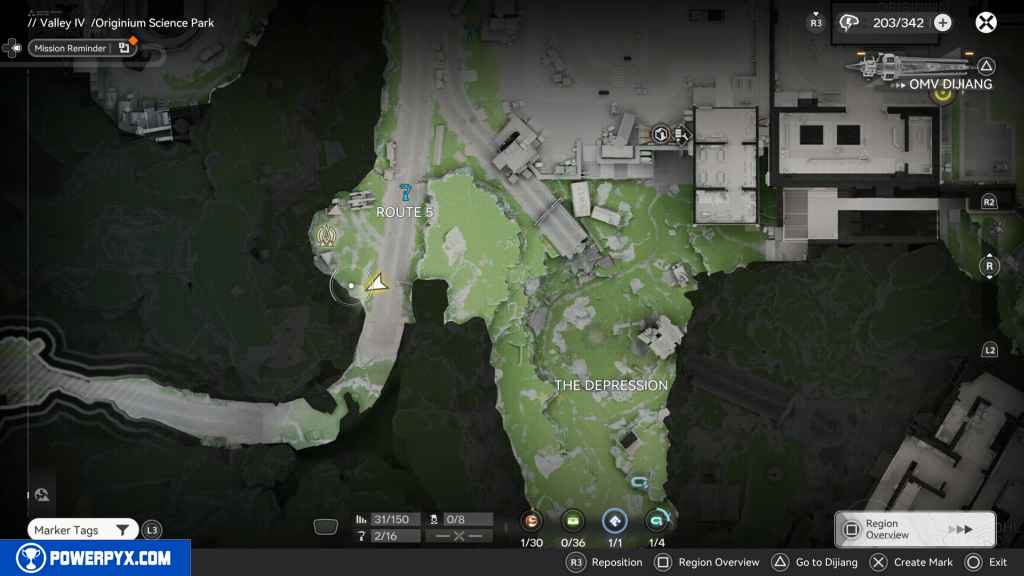
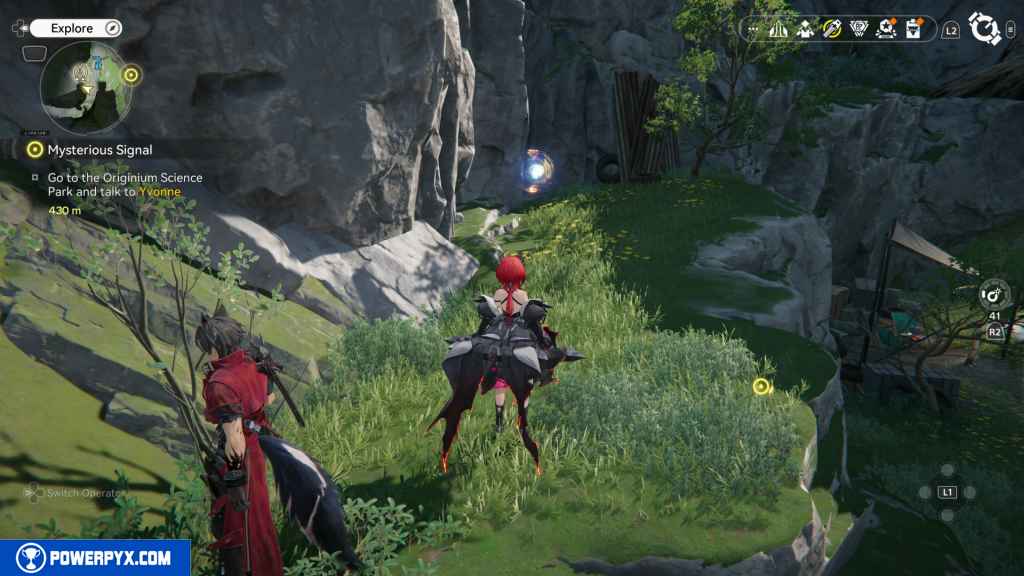
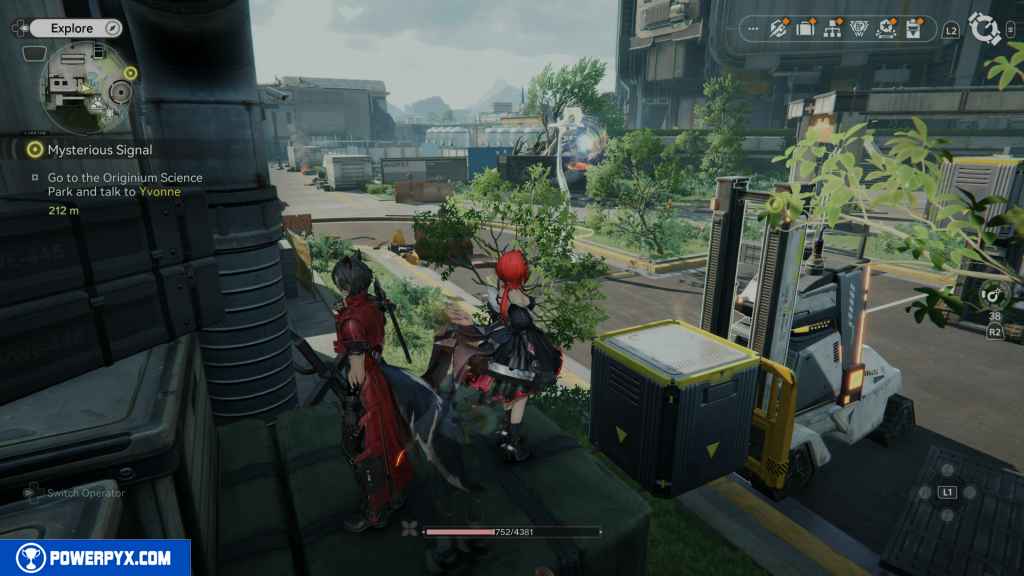
2 – Gathering Point 1
The Gathering Point is located in the camp with the TP point. Look north, right next to the construction vehicle.
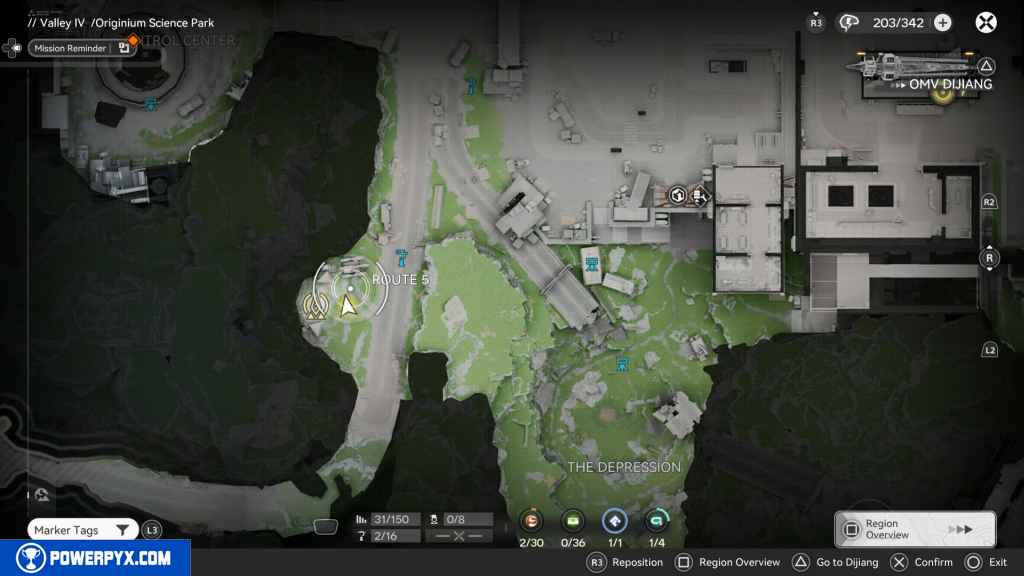
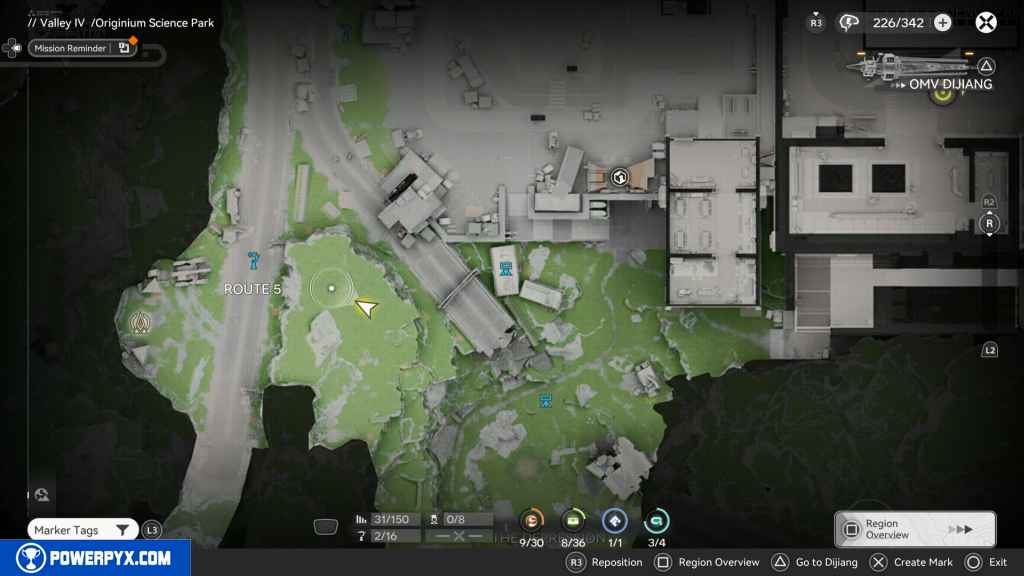
3 – Aurylene 2
Located on top of the truck at the intersection north of Route 5.
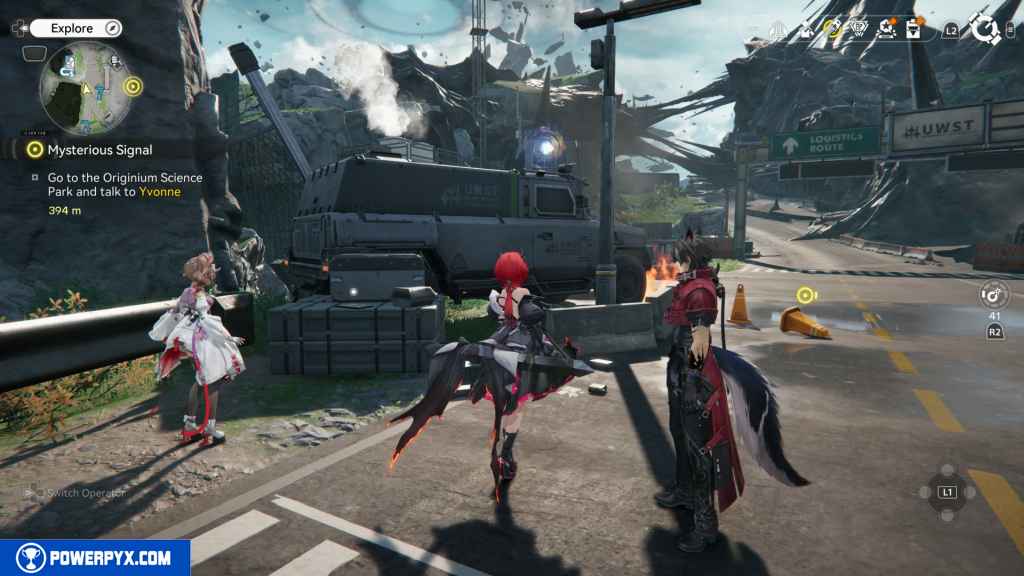
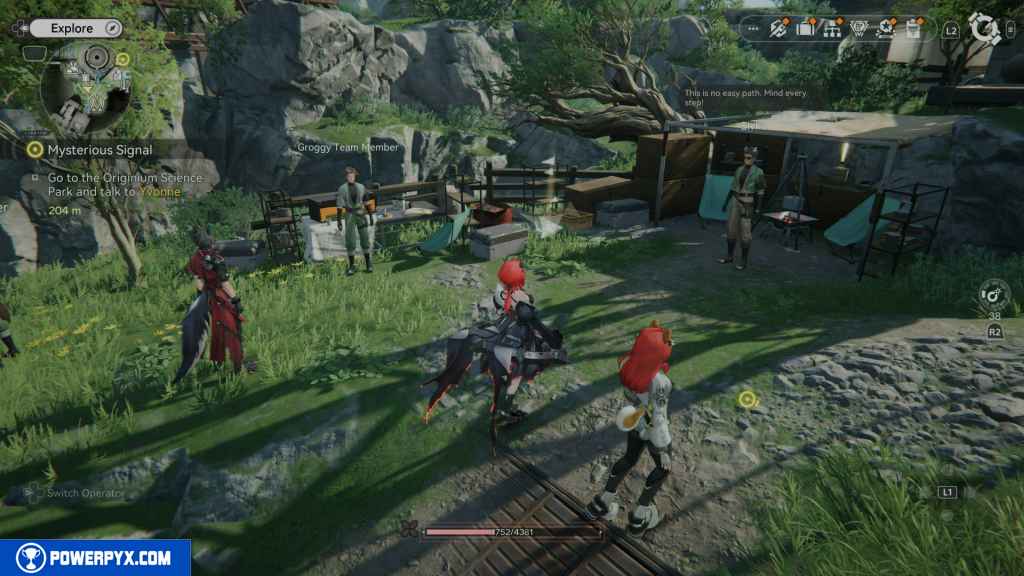
4 – Gathering Point 2
East of the last Aurylene, next to another truck, is the Gathering Point.

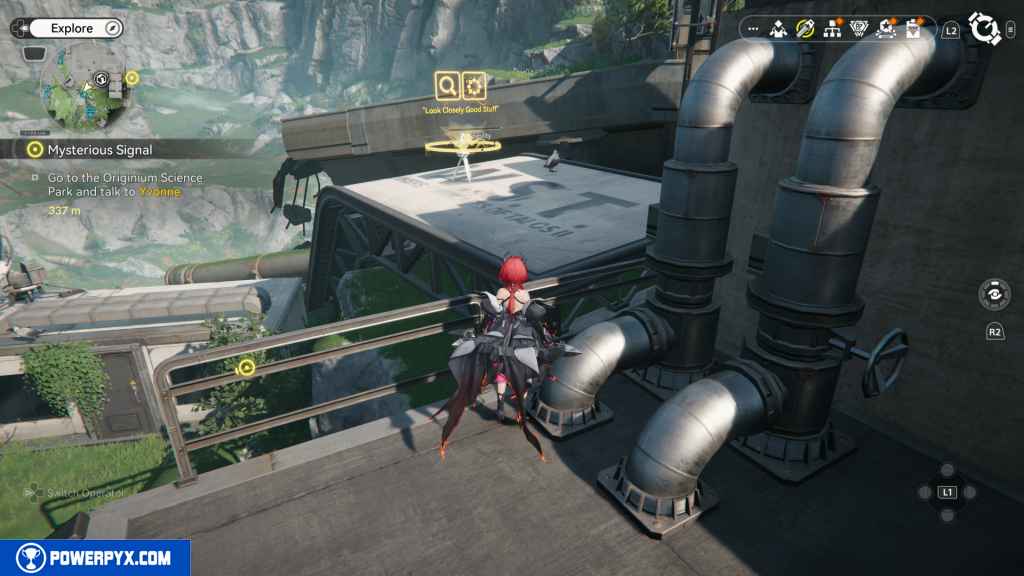
5 – Prototype Datalogger 1
Head northwest up the hill to a mining spot. Turn around from the mining spot and find the Datalogger.
6 – Gathering Point 3
On the left side of the Datalogger on the ground is the Gathering Point.
7 – Gathering Point 4
Head up the road to the north, turn west, and climb up the consumed building. Head around to the west of the building, and you should see the Gathering Point.
8 – Aurylene 3
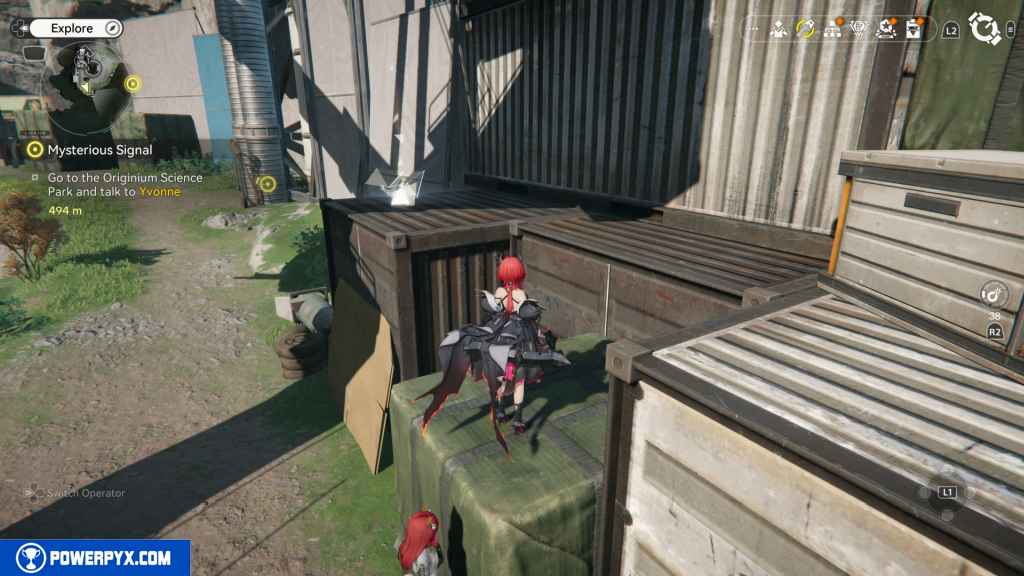
This next Aurylene is behind a Blight that must be destroyed with an Industrial Explosive. It’s located east of the last Gathering Point. If you have completed the Side Mission – Illusion, you’ll have already accessed this area. Climb up the crates to the top of the of, and you should find the Aurylene at the top.
9 – Gathering Point 5
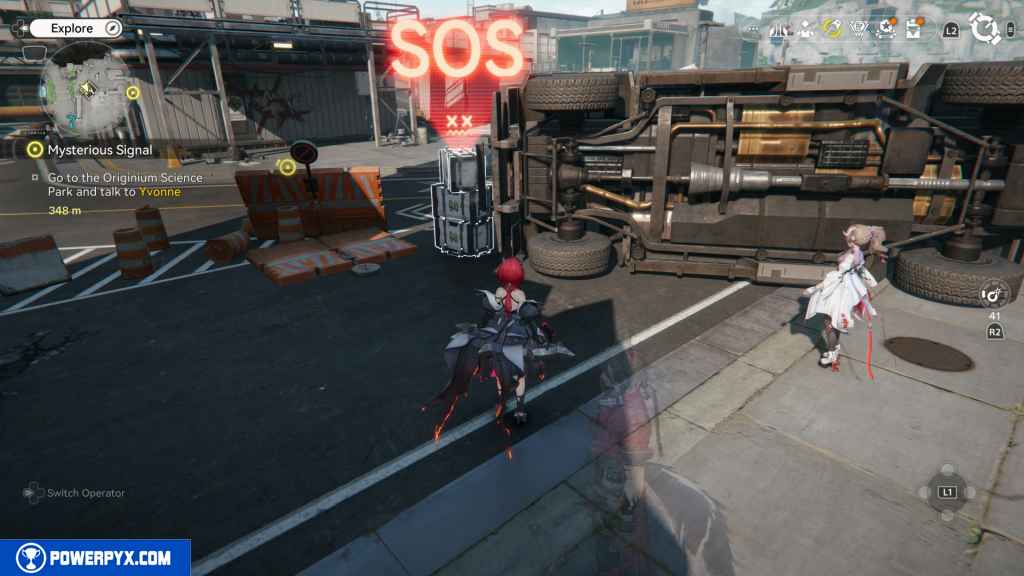
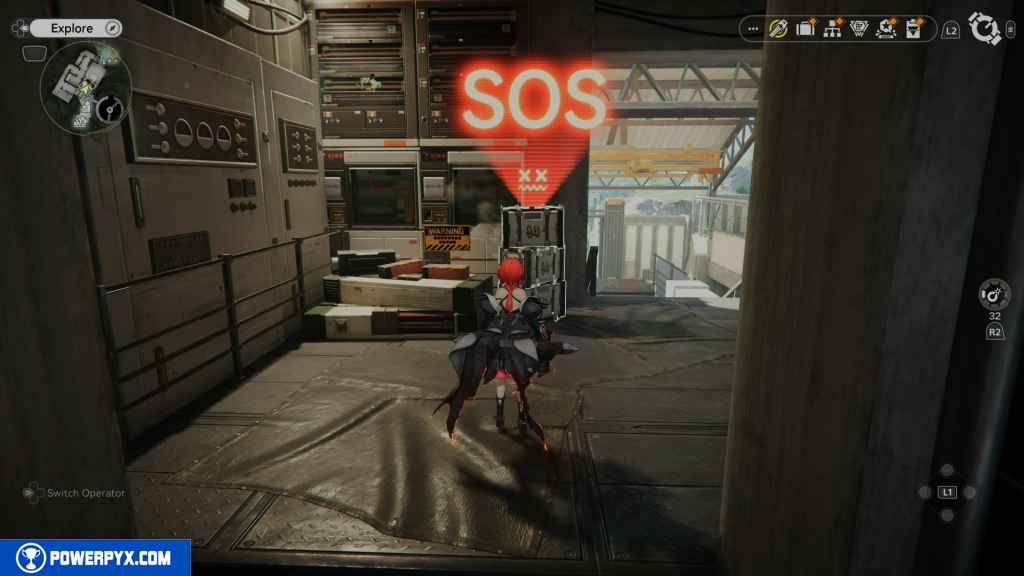
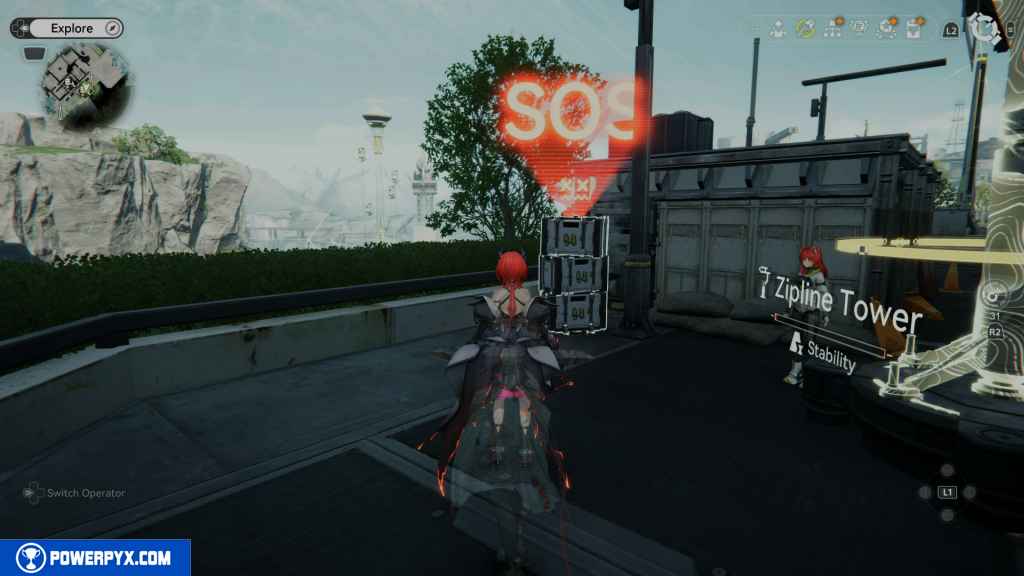
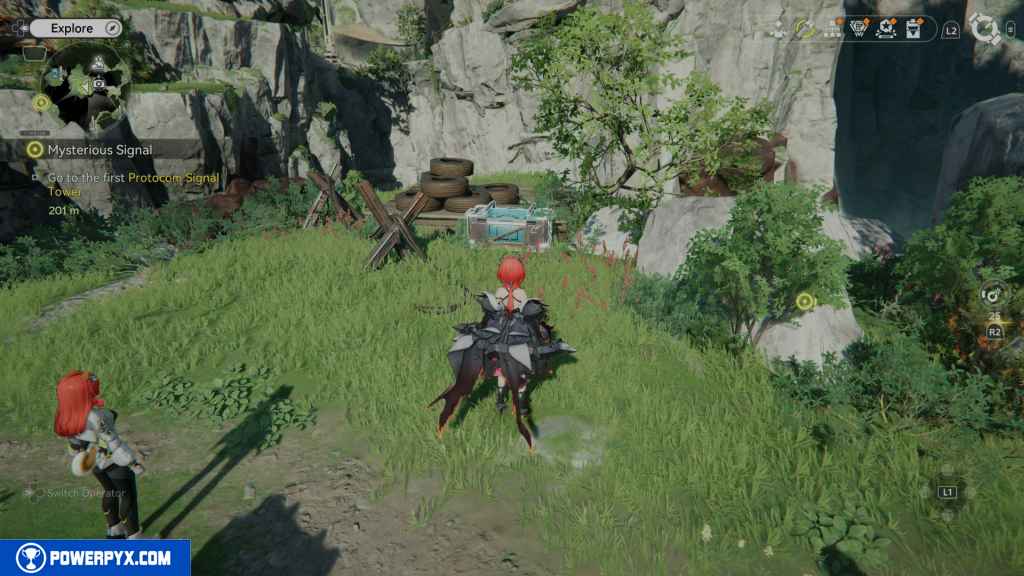
Head south from the Aurylene and you’ll see a flipped-over truck next to the SOS Repair Bot. To the west of the truck is a large green crate. On top of that crate is the Gathering Point.
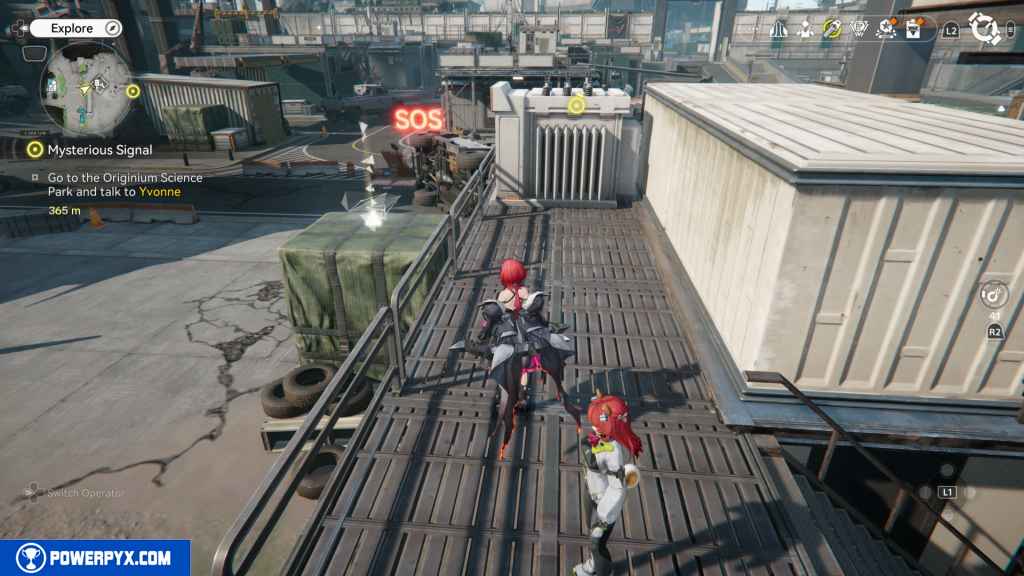
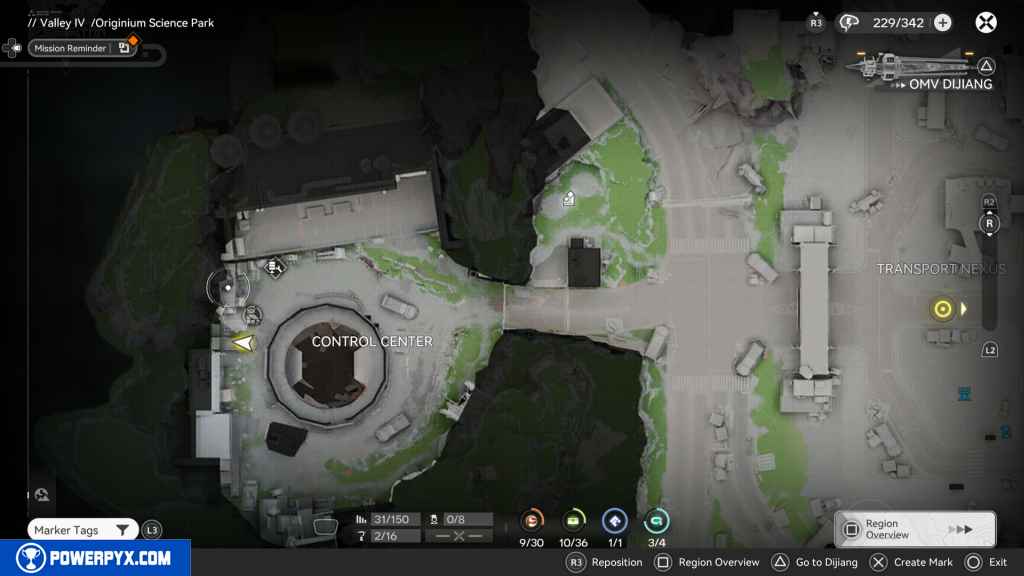
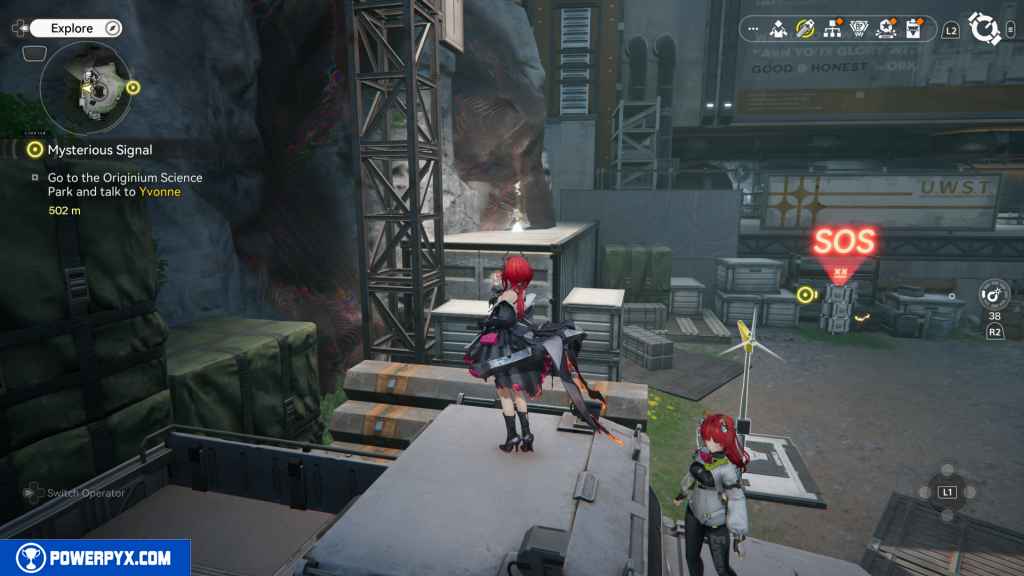
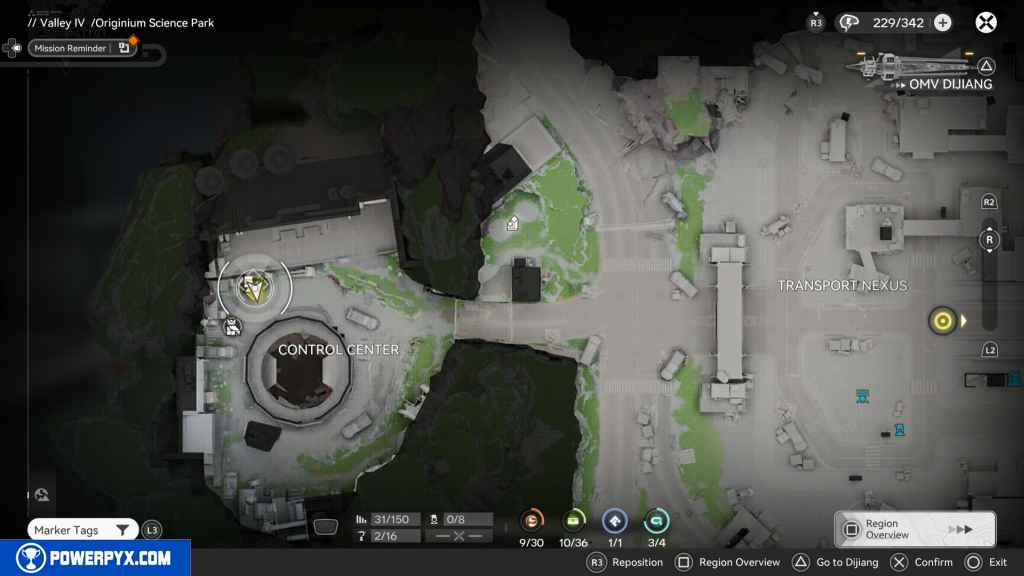
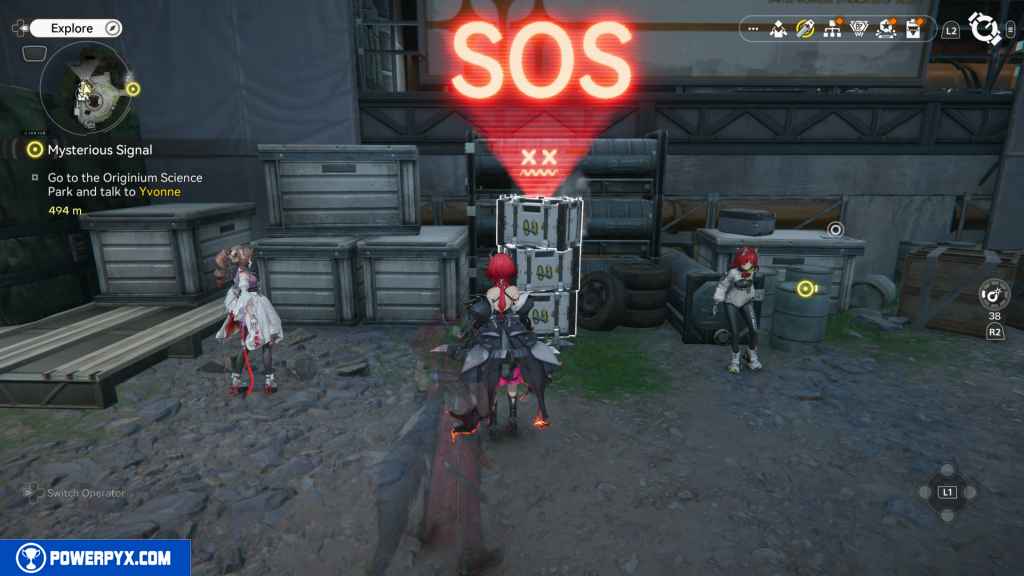
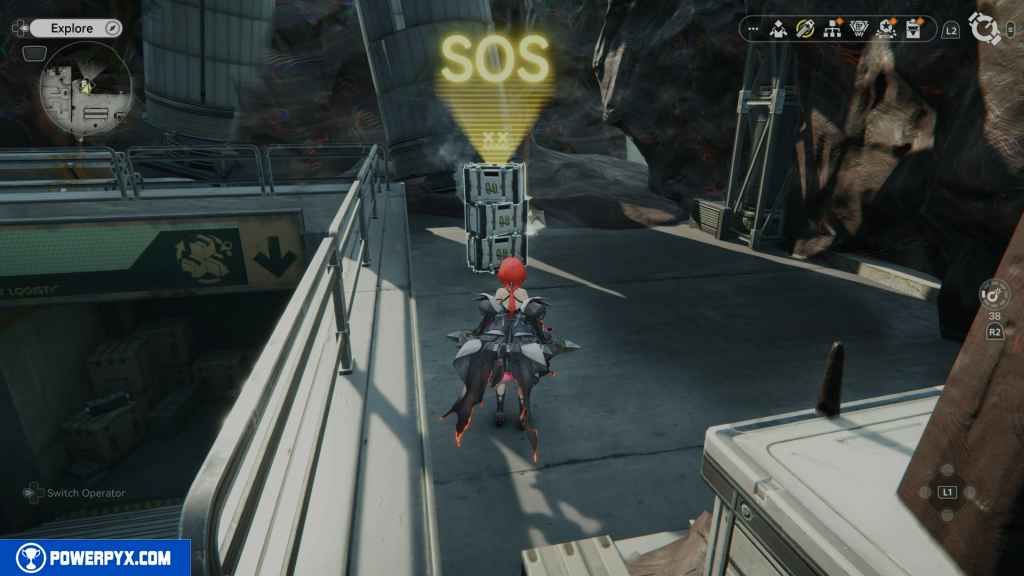
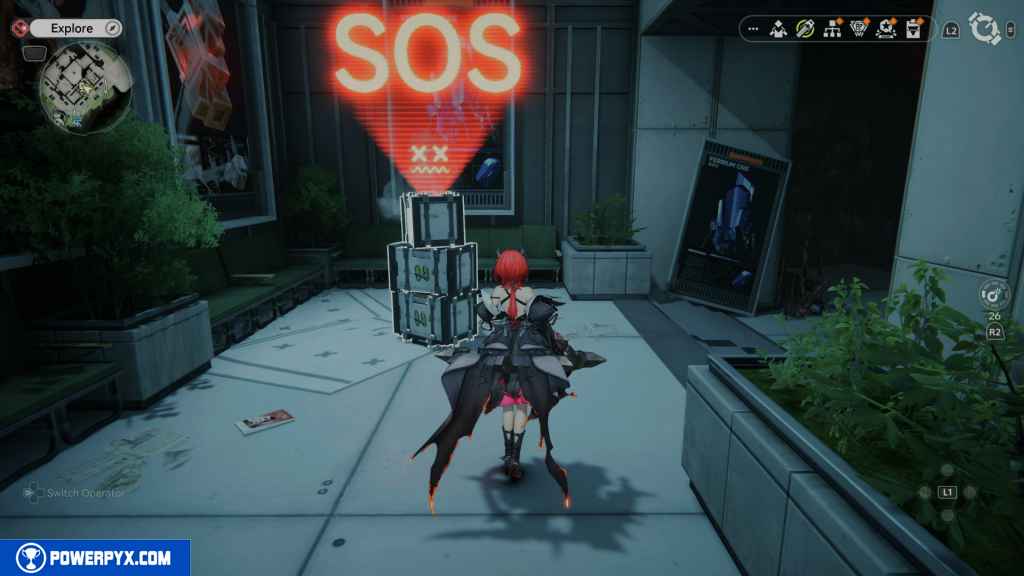
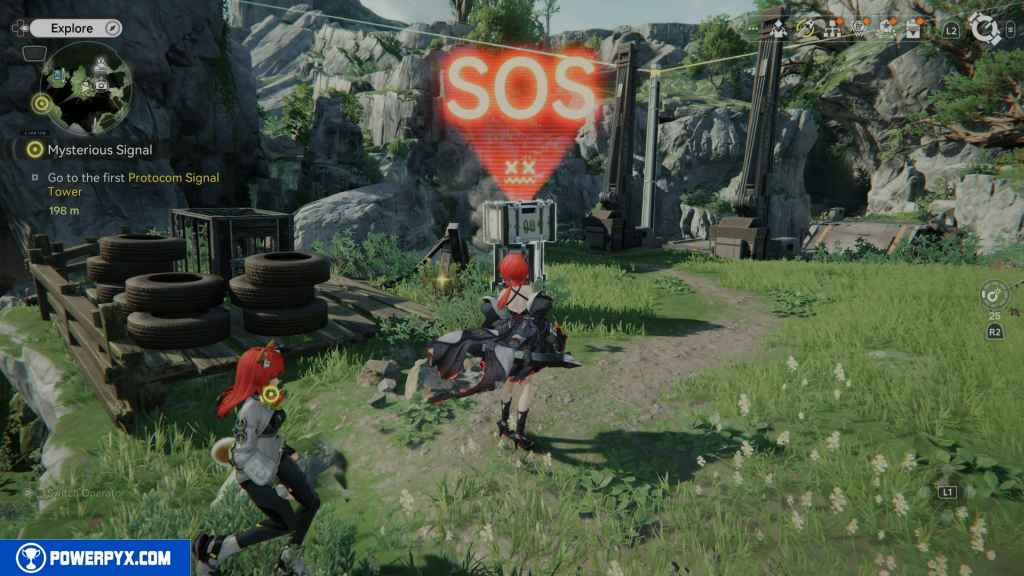
10 – SOS Repair Bot 1
The SOS Repair Bot is located right next to the turned-over truck.
11 – Gathering Point 6
Look to the north east, and you’ll find some crates you can climb up. Head up, and you’ll jump on a seesaw platform.

Jump to the next area, and you’ll see the next Gathering Point.
12 – Aurylene 4
As you were climbing up the crates, you would have seen an Aurylene move away from you. From the Gathering Point, turn west, and you should see some more crates to jump up and onto another seesaw platform. The Aurylene is at the very top of the seesaw platform, so sprint up and grab it.
13 – Gathering Point 7
From the Aurylene, make the jump to the next seesaw platform and run to the end, and jump up to the highest point. Look to the west, and you should see the next Gathering Point.
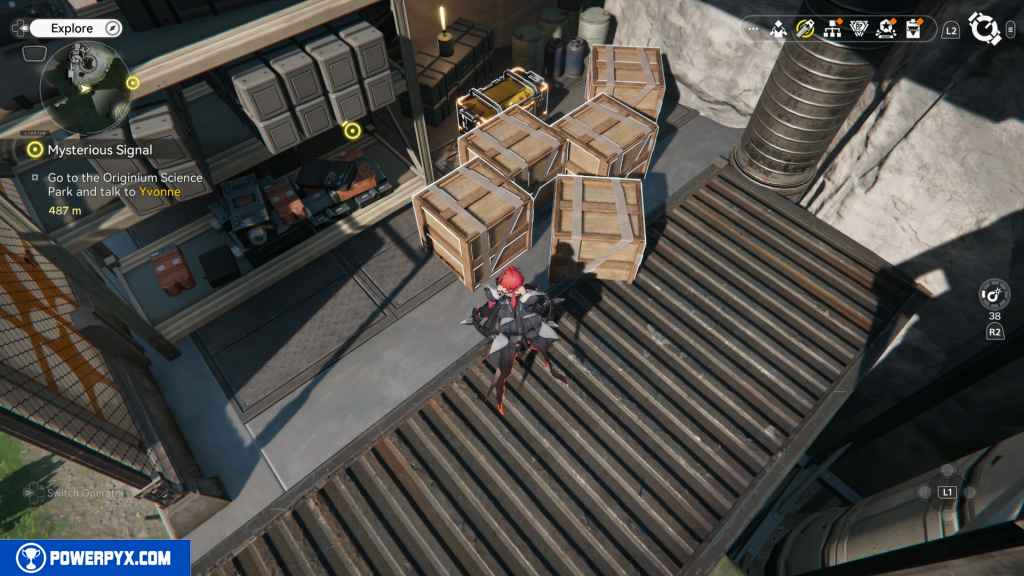
14 – Crate 1
Turn west from the Gathering Point and look for the crate in the bed of the truck impaled by the spikes. Jump to the truck and collect the crate.
15 – Crate 2
The next crate we will pick up is located east of the last Gathering Point. Grab one of the moving platforms and place it next to the platform with the crate.
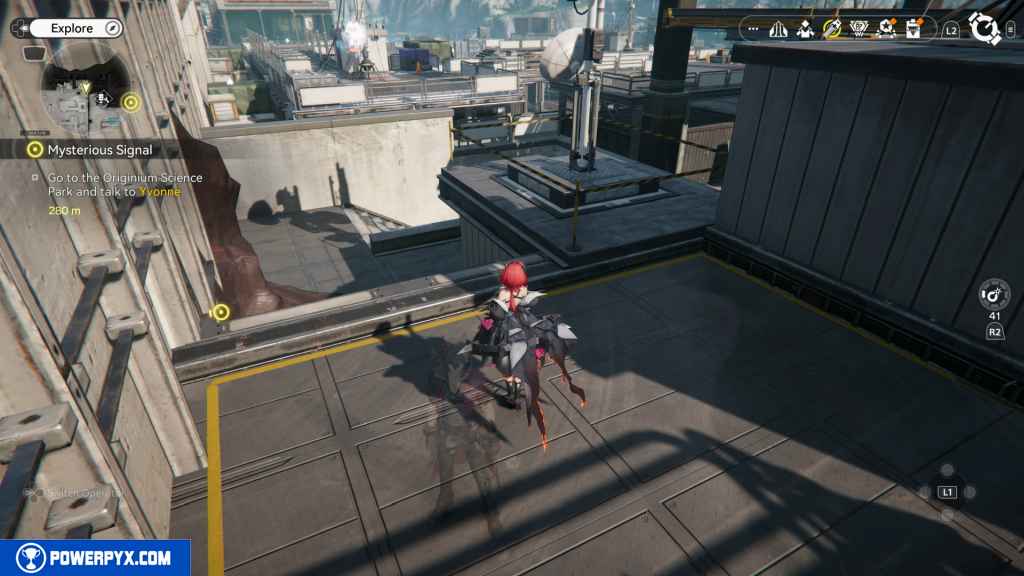
16 – Aurylene 5
Grab one of the crates and place it on the pressure plate to unlock the electric barrier. Head on through, and you should see this Aurylene floating near the antenna.
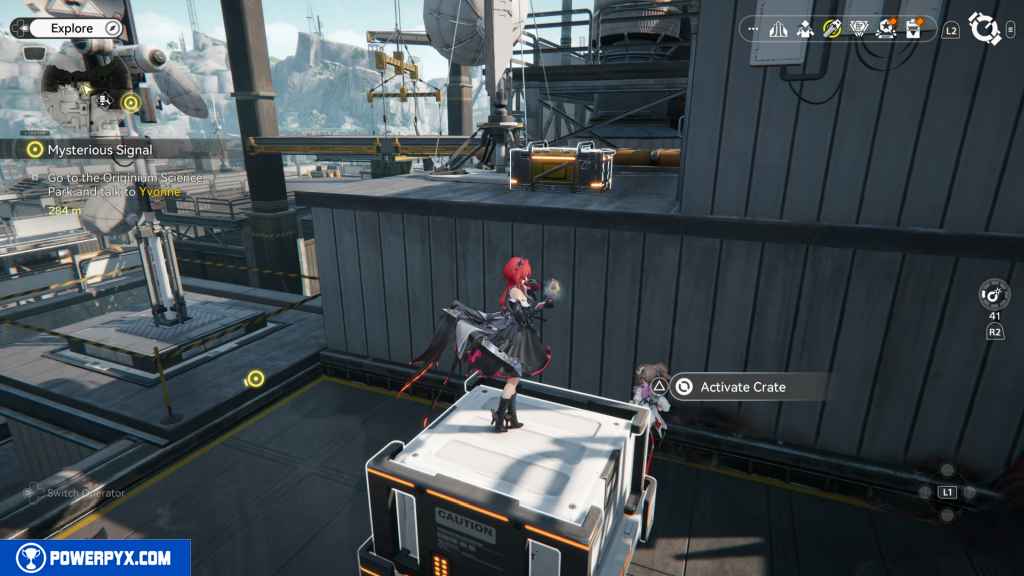
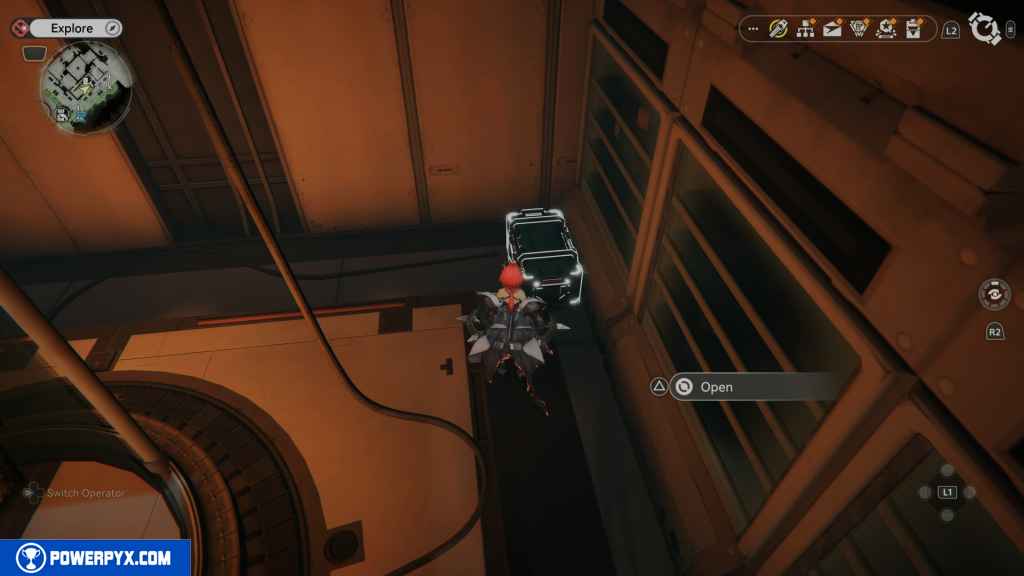
17 – Crate 3
Go back and grab one of the crates and take it to where you grabbed the Aurylene. Place it down before the drop-off, and look for the chest up top, next to an antenna.
18 – Gathering Point 8
Head back up to the area where you first climbed up the crates and jumped on the first seesaw. Instead of heading north to the other two seesaws, continue east along the path, and you should see the next Gathering Point on top of another green crate.
19 – Gathering Point 9
Turn left and look north to find the next Gathering Point from the previous location.
20 – Aurylene 6
From the last Gathering Point run back up the crates, and you should see this Aurylene on the bridge.

21 – Crate 4
Run across the bridge and follow the path on the platform, and you should see the crate to the north.
22 – Crate 5
From the last crate, jump north over the ledge and back onto the ground floor. Turn right, head around the corner, then go east, then south. You should see the crate inside a container.
23 – Gathering Point 10
From the last crate, head back west to where the overturned truck and the SOS Bot are located. From there, look southeast, and you should see another container. Look inside to find the next Gathering Point.
24 – Gathering Point 11
South of the container, look for the Gathering Point on top of another green crate.
25 – Crate 6
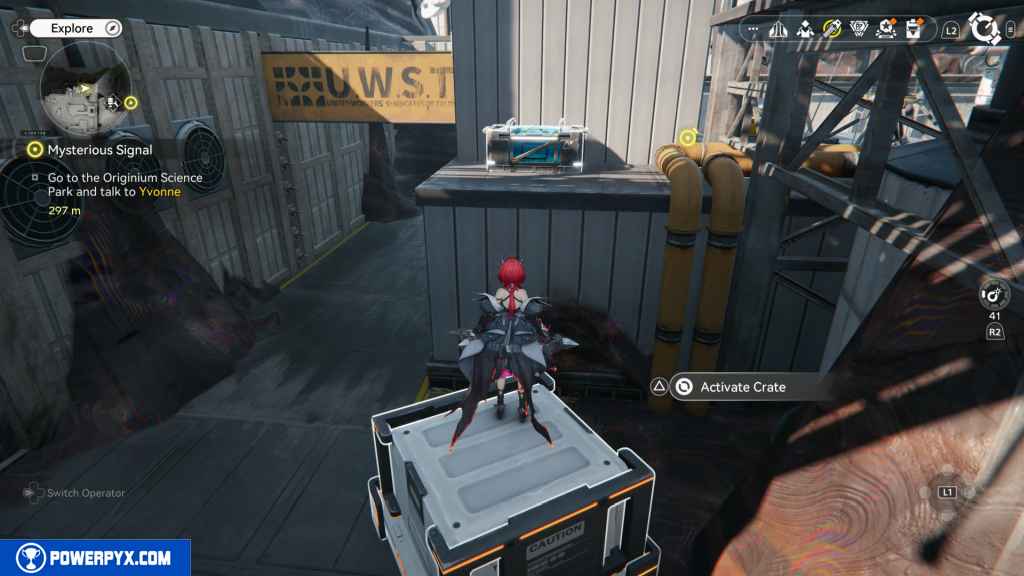
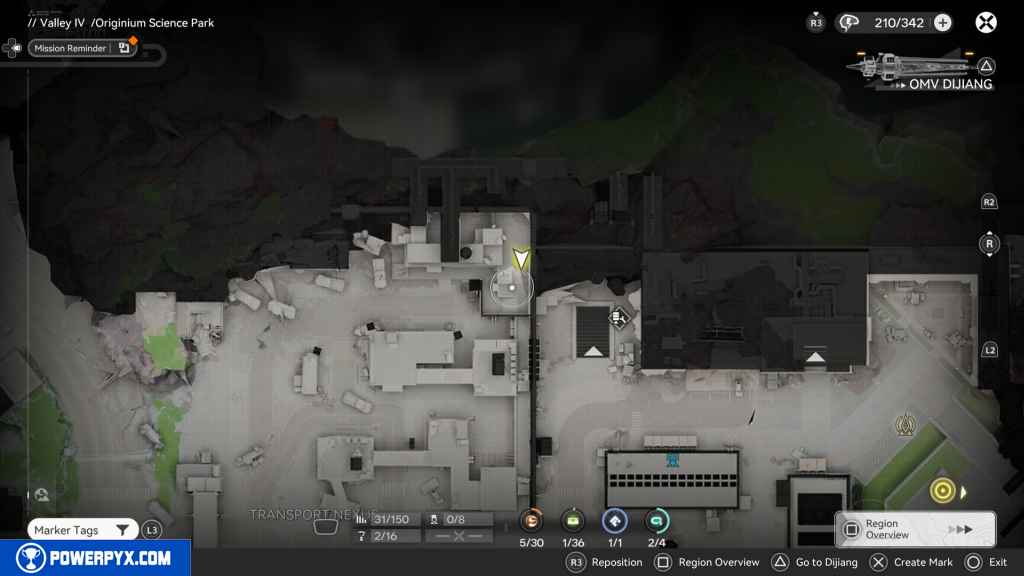
In the same area of the Gathering Point, look for this chest behind some breakable boxes.
26 – Gathering Point 12
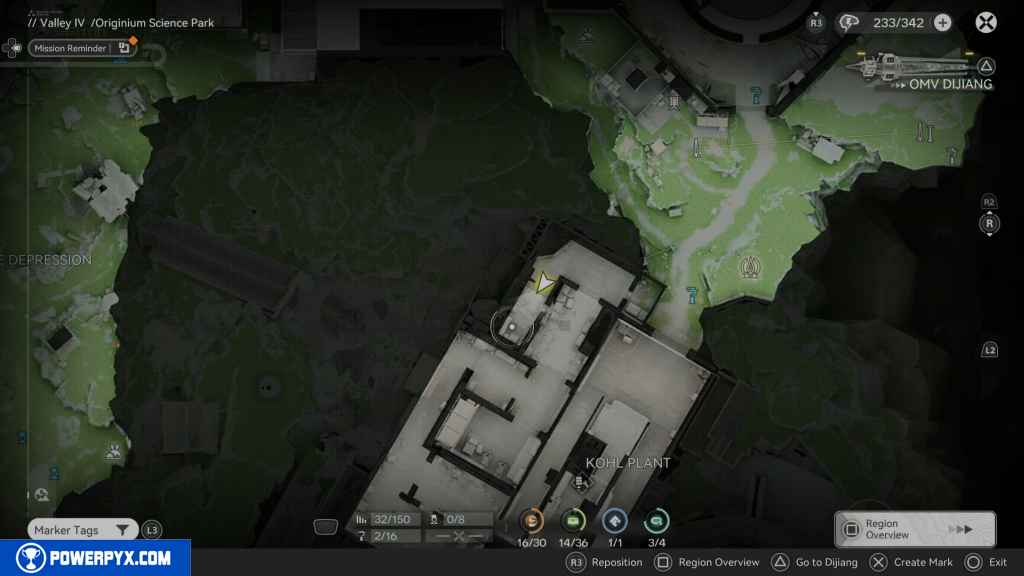
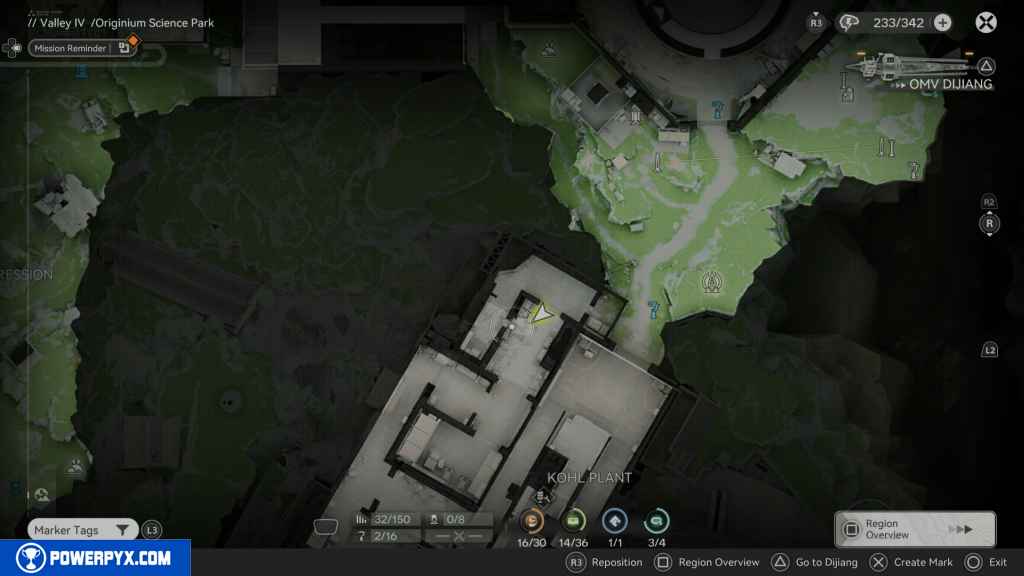
Look south west, and you should see another truck surrounded by a bunch of crates. On top of the truck is the Gathering Point.


27 – Gathering Point 13
The next Gathering Point is located at the very top of the overpass to the west. Head west and take the south stairs up. Jump up the crates and then up to the top of the overpass. You should see the Gathering Point.

28 – Gathering Point 14
Head south to the weird metal shack. Look for the forklift on the east side and an open container. Look inside for the Gathering Point.
29 – Gathering Point 15
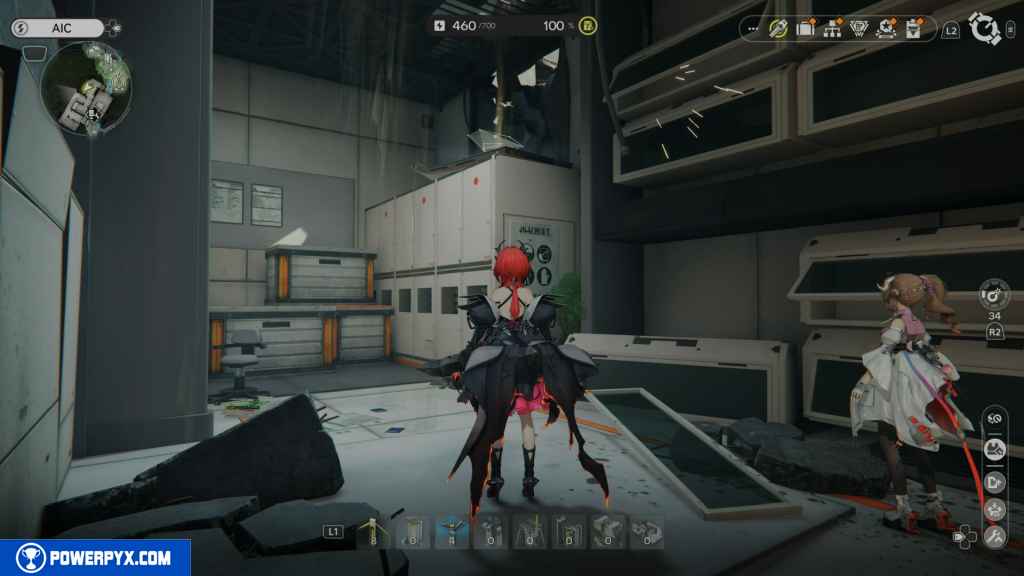
In the same area, head up the stairs and jump up the crates to find the next Gathering Point.
30 – Gathering Point 16
Jump down from the container and look at the road. At the end of the broken road is the next Gathering Point.
31 – Gathering Point 17
Return to the container structure and head east. You’ll see another forklift and a container with some crates. The Gathering Point is at the top of the container.
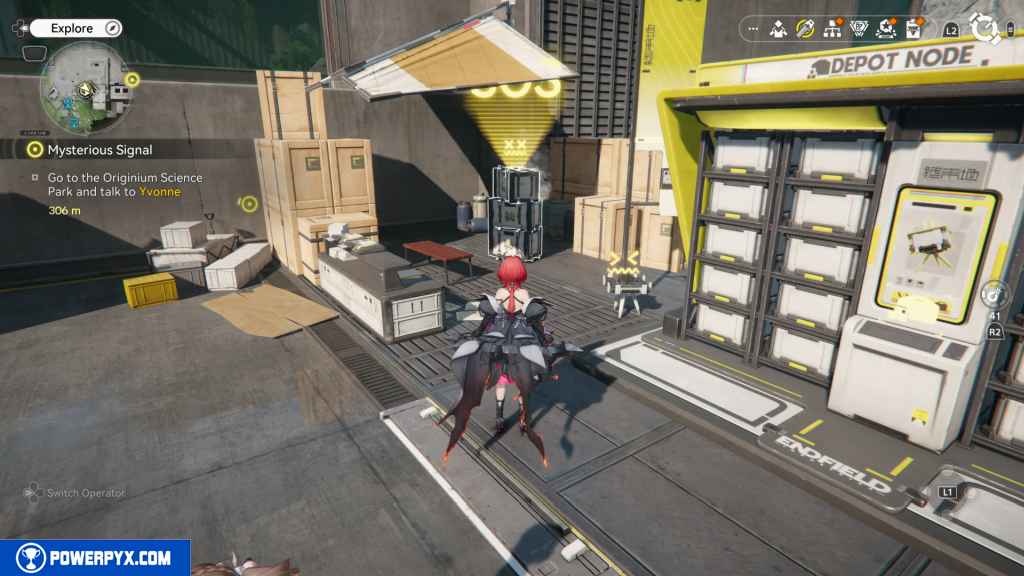
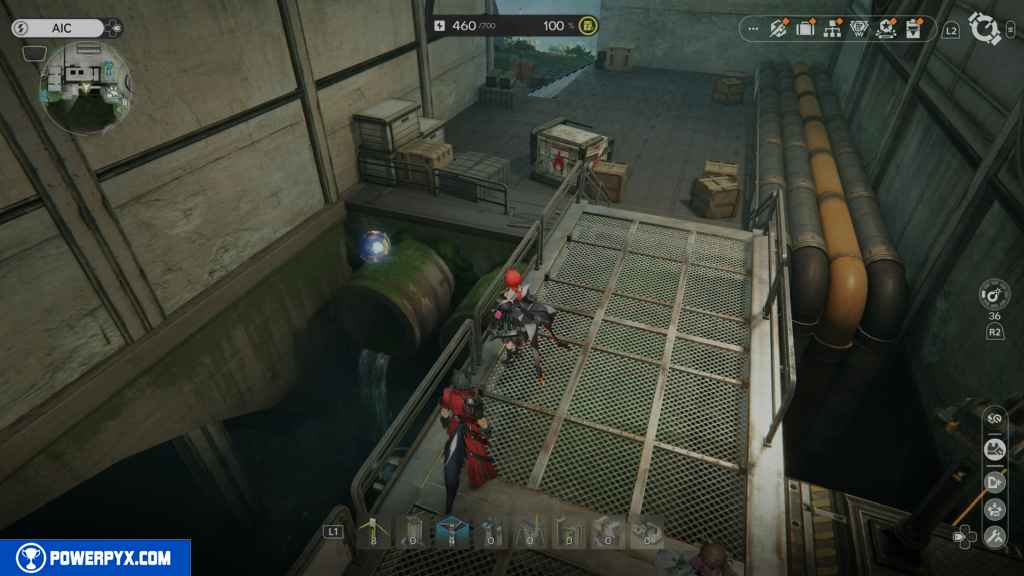
32 – SOS Repair Bot 2
Further east, right next to the Depot Node, you’ll find the Repair Bot.
33 – Gathering Point 18
Head east from the SOS Repair Bot and go up the stairs. Before entering the building, look to the left for the Gathering Point.
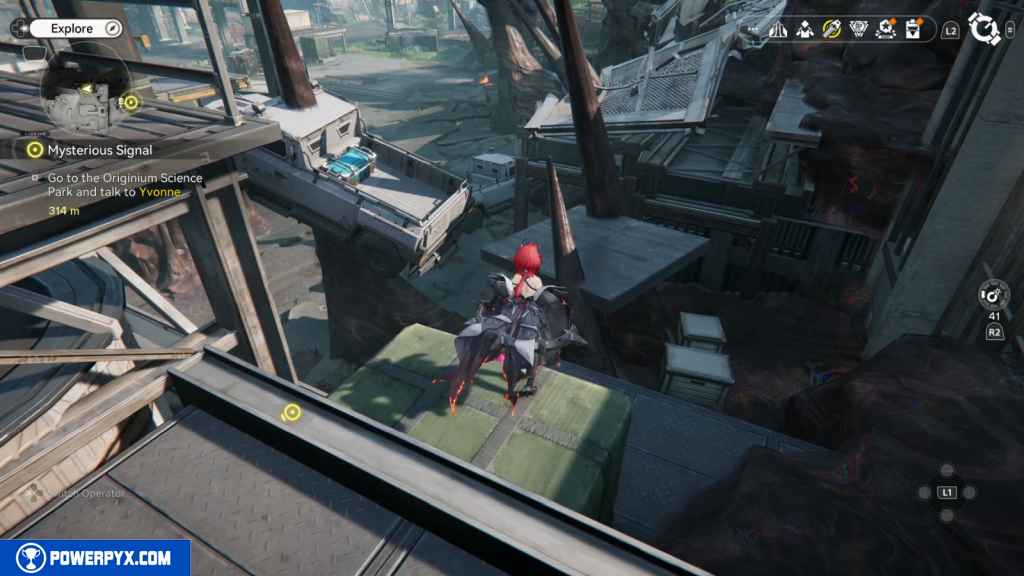
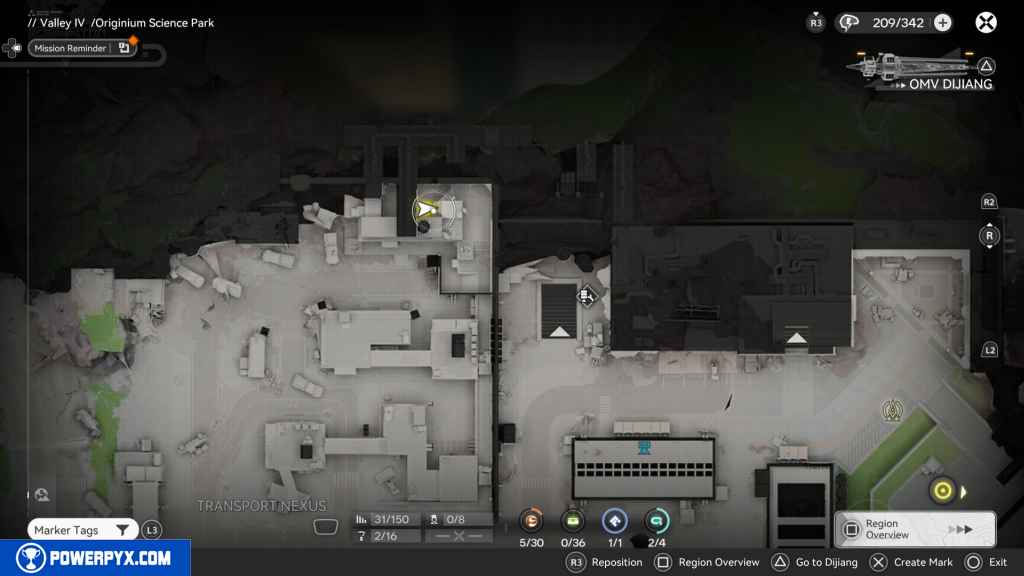
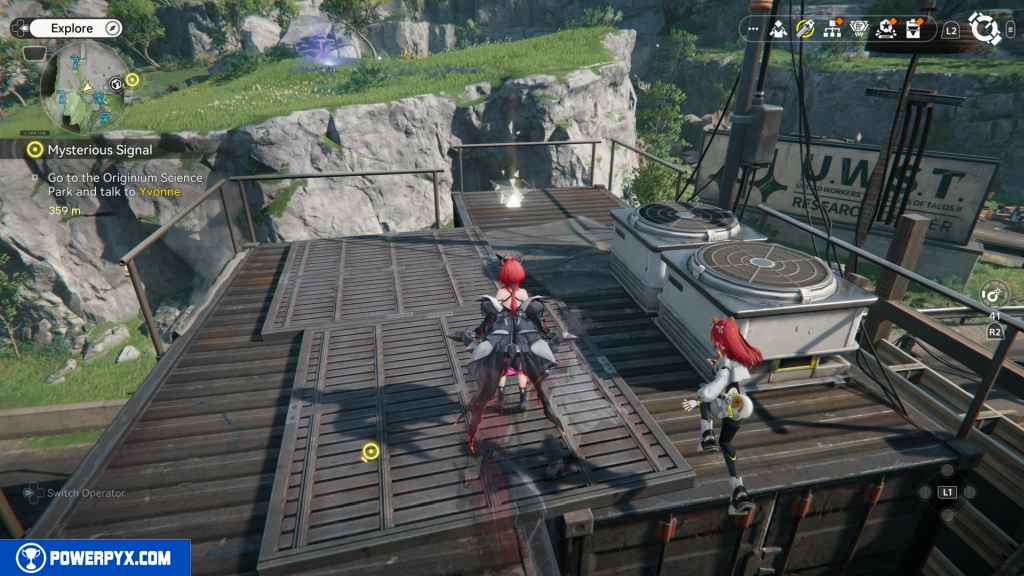
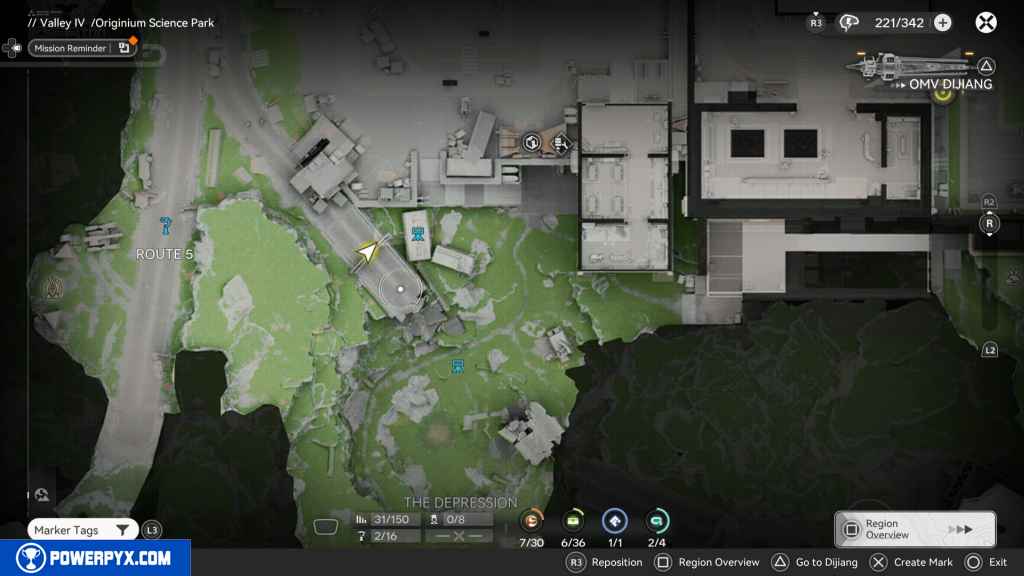
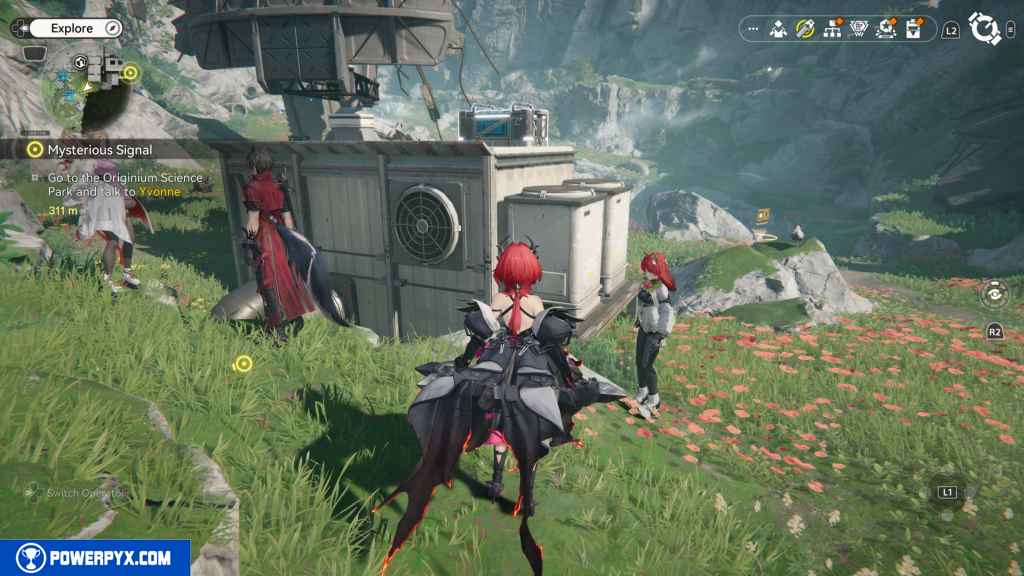
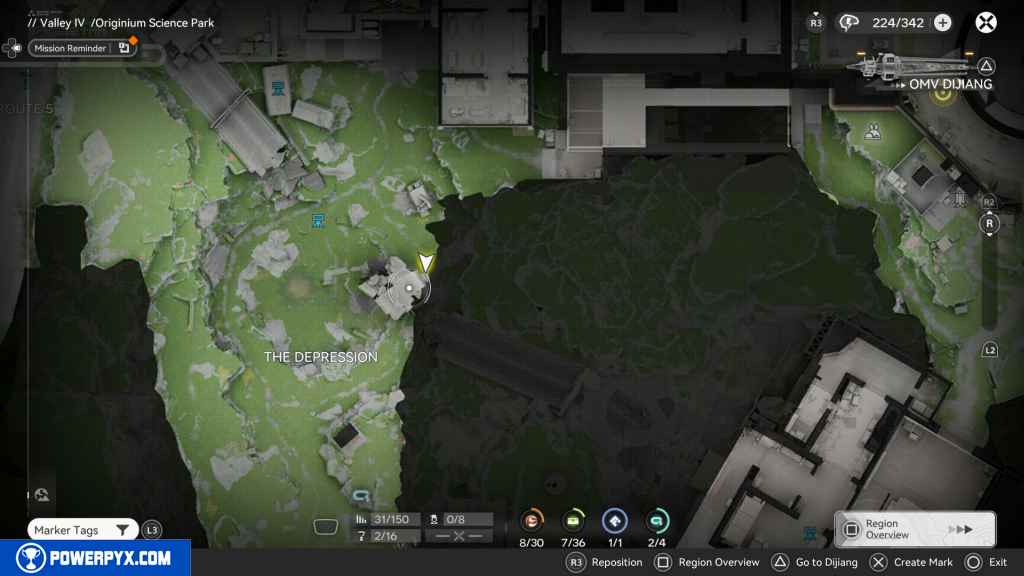
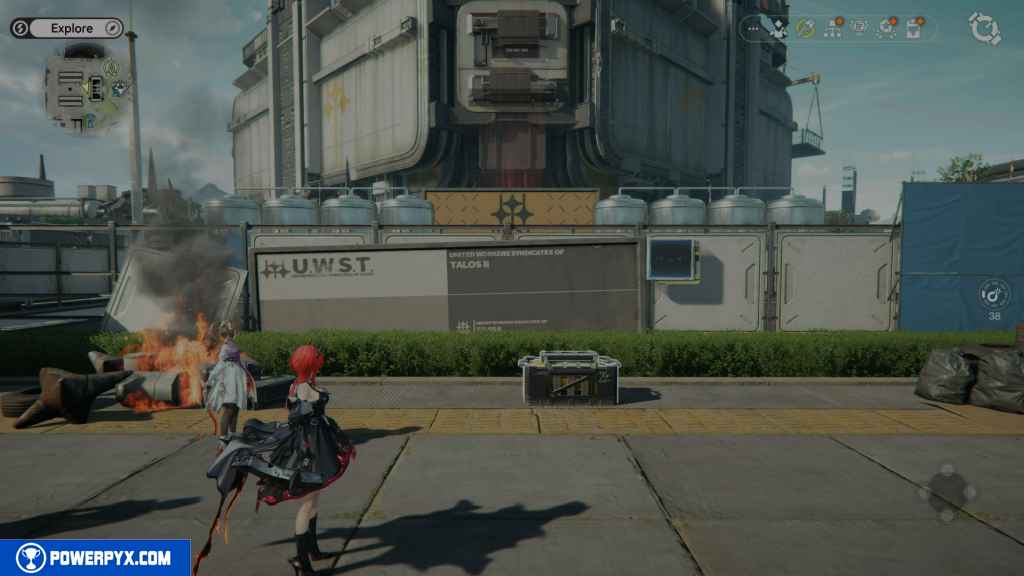
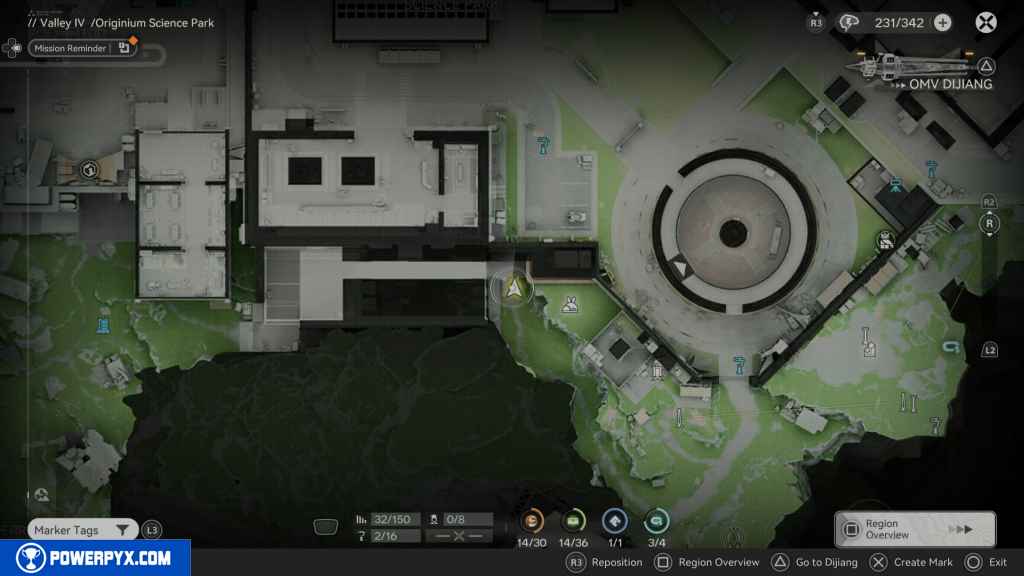
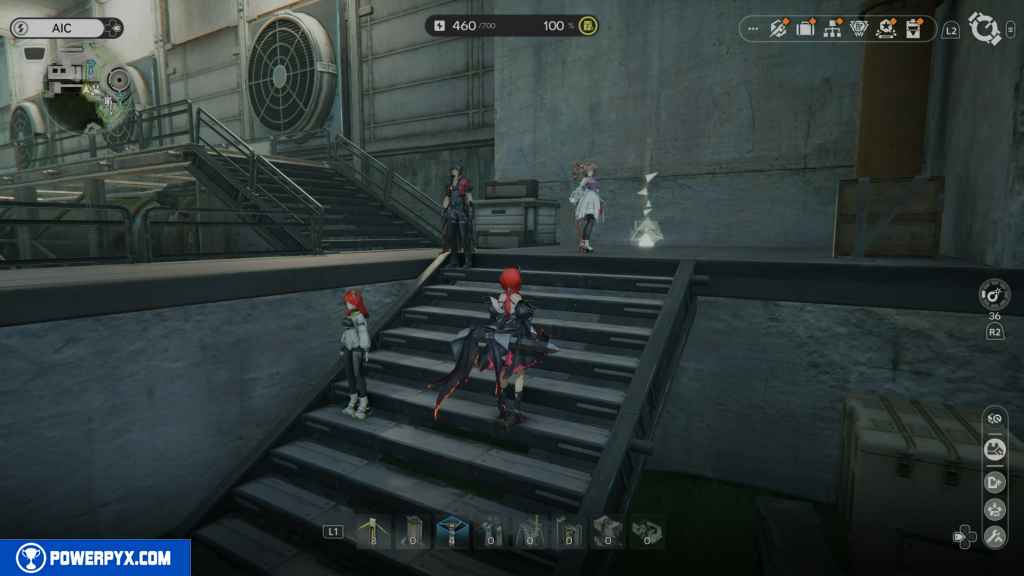
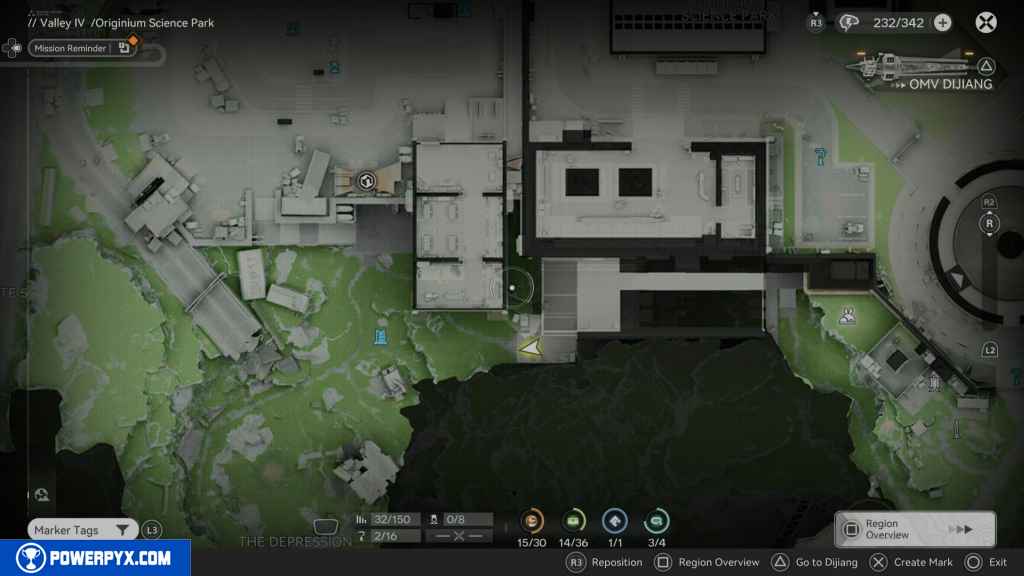
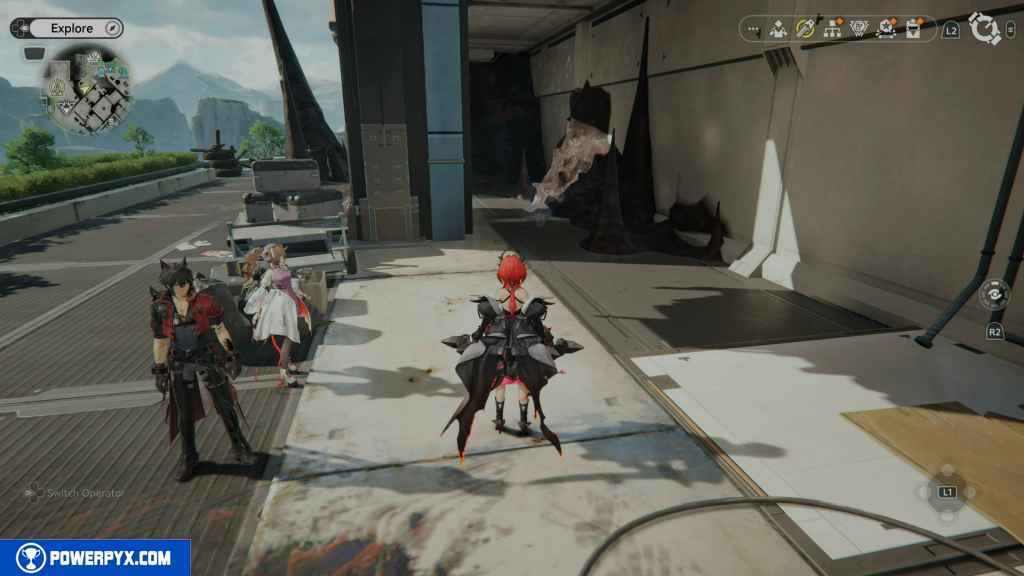
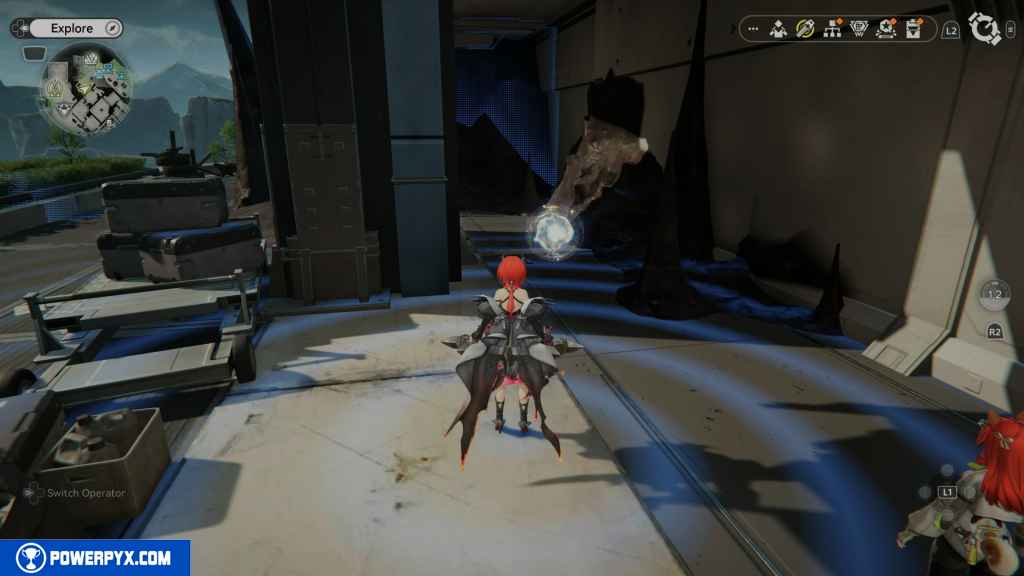
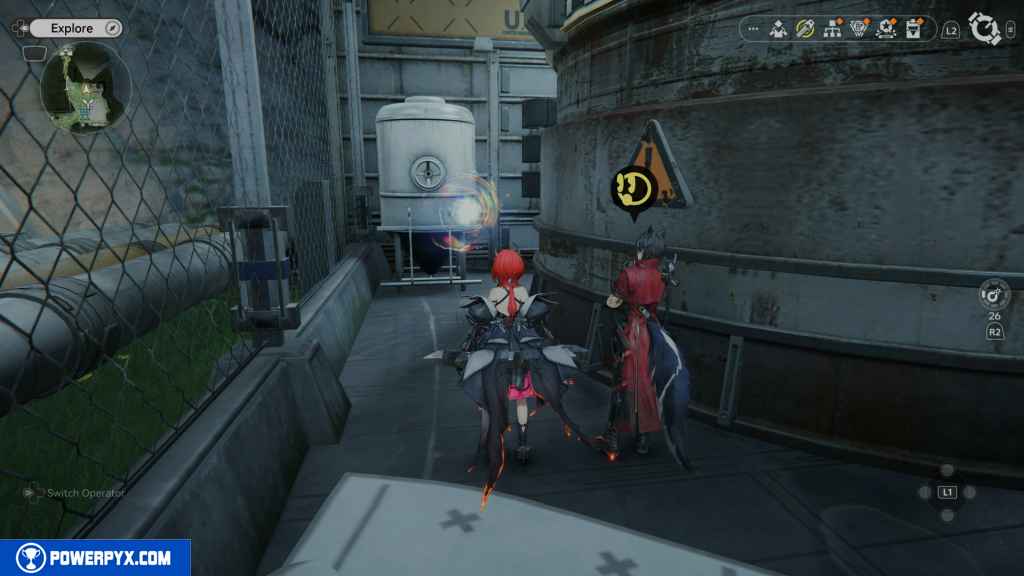
34 – Aurylene 7
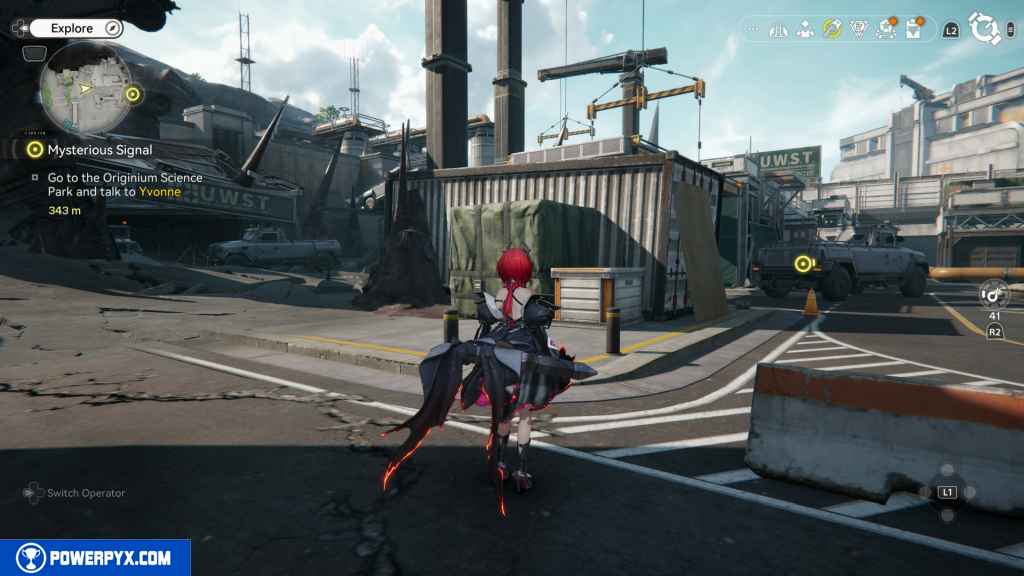
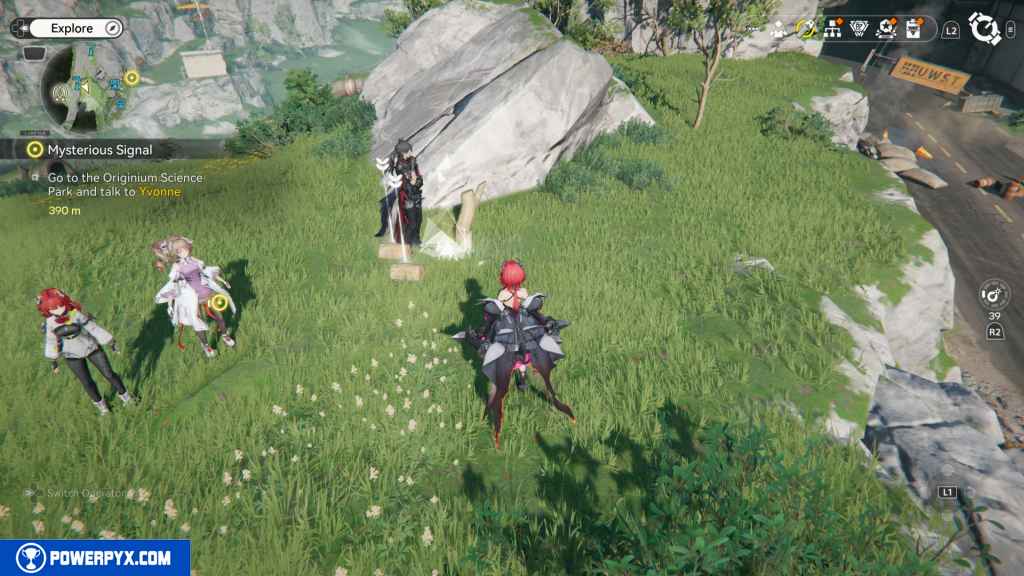
Go back west and look for the path leading down into The Depression. You’ll head down this path for the Side Mission – Illusion. Instead of heading all the way down, you should see an abbarition on the white UWST sign over the railing. Jump to it and use your scanner  on the PS5 controller. It will appear and take off. Chase it down and collect it.
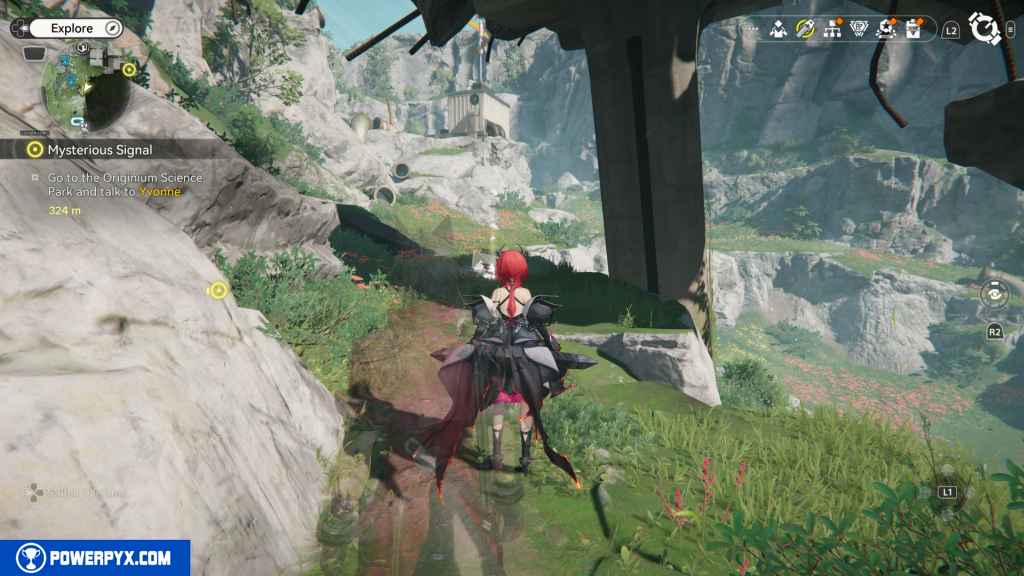
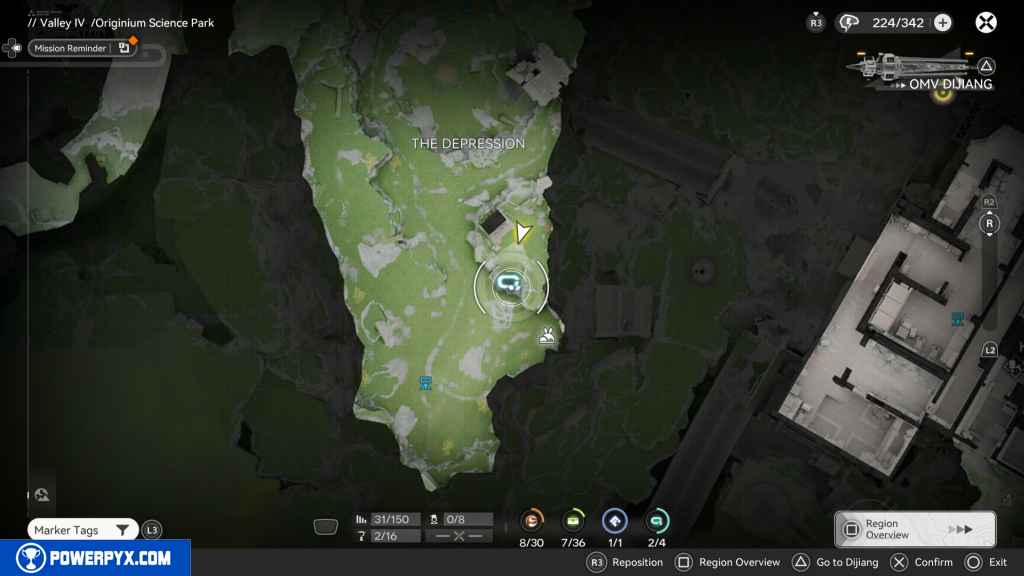
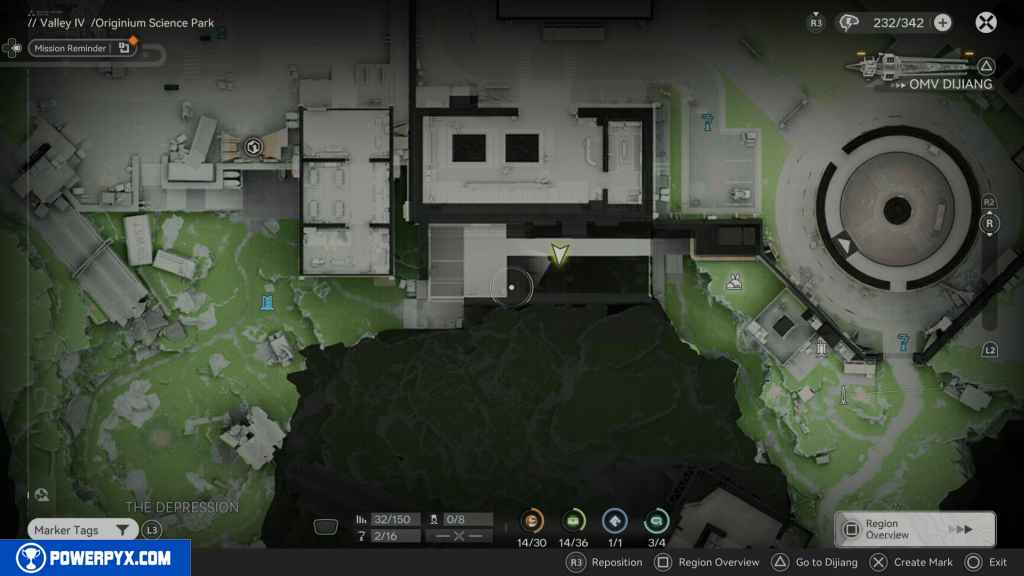
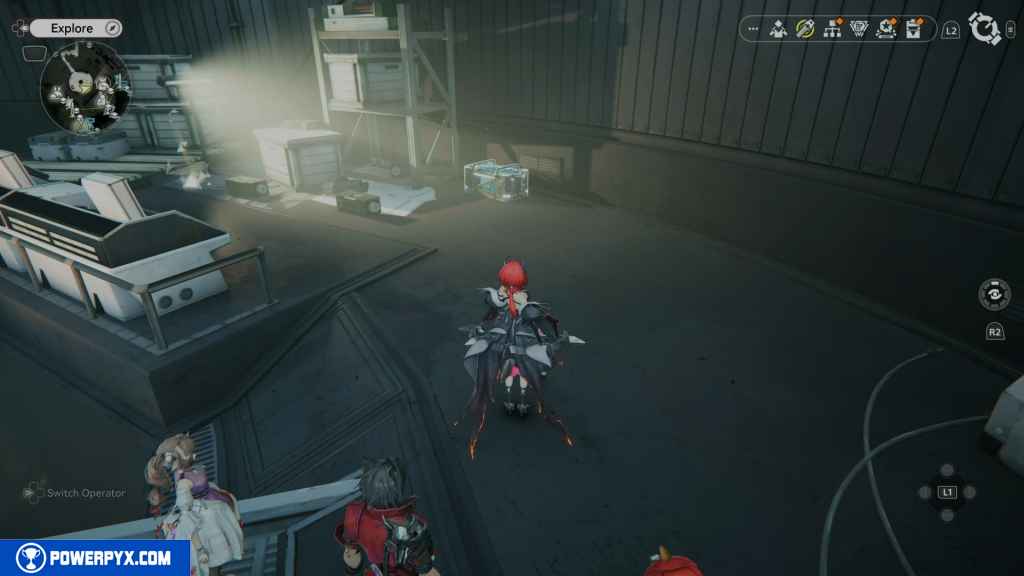
35 – Gathering Point 19
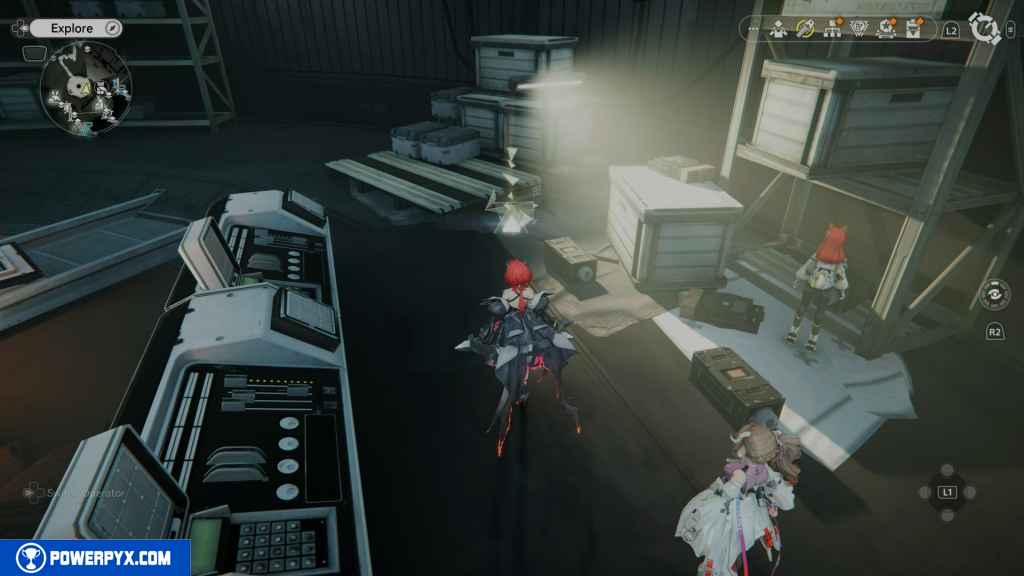
Head down the path to The Depression, then to the small building with the antenna in the southeast. You should see three boxes you can destroy. Behind them is the Gathering Point.
36 – Crate 7
Look at the roof of the building next to the Gathering Point, and you should see the next crate.
37 – Gathering Point 20
Head south from the building and under the broken bridge, and you should find the next Gathering Point.
38 – Prototype Datalogger 2
From the Gathering Point. Head south and you’ll find some rocks leading up to a building at the top. Jump up these rocks and find the Datalogger.
39 – Crate 8
Continue south, and you’ll run into a Red Landbreaker standing over a crate. Defeat him to unlock it.
40 – Aurylene 8
Look east from the crate, and you’ll find a rock that can be destroyed using the Industrial Explosive. Blow it up, then continue up the path it opens. Blow up the next rock.
Jump up the pipe to find the Aurylene.
41 – Gathering Point 21
From the Aurylene, look northeast, and you should see the Gathering Point on a small ledge.
42 – Gathering Point 22
Head north up the path on the west side. Run up until you see the Gathering Point on your right side.
43 – Crate 9
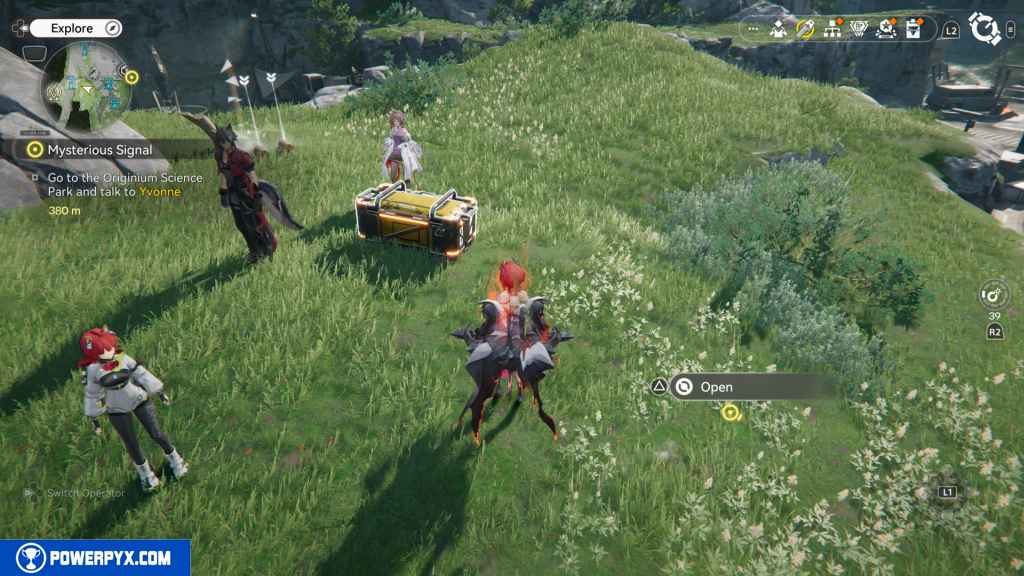
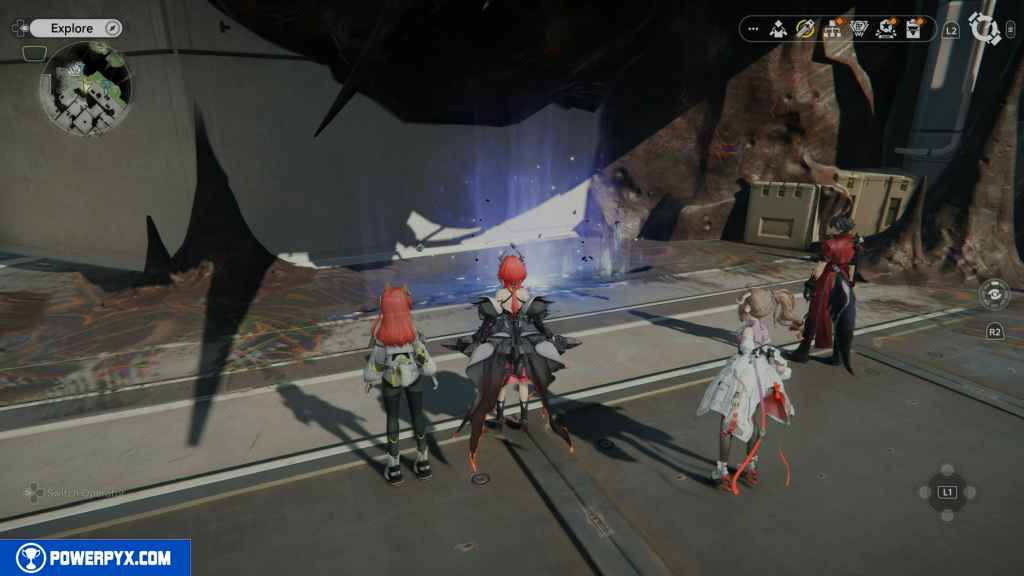
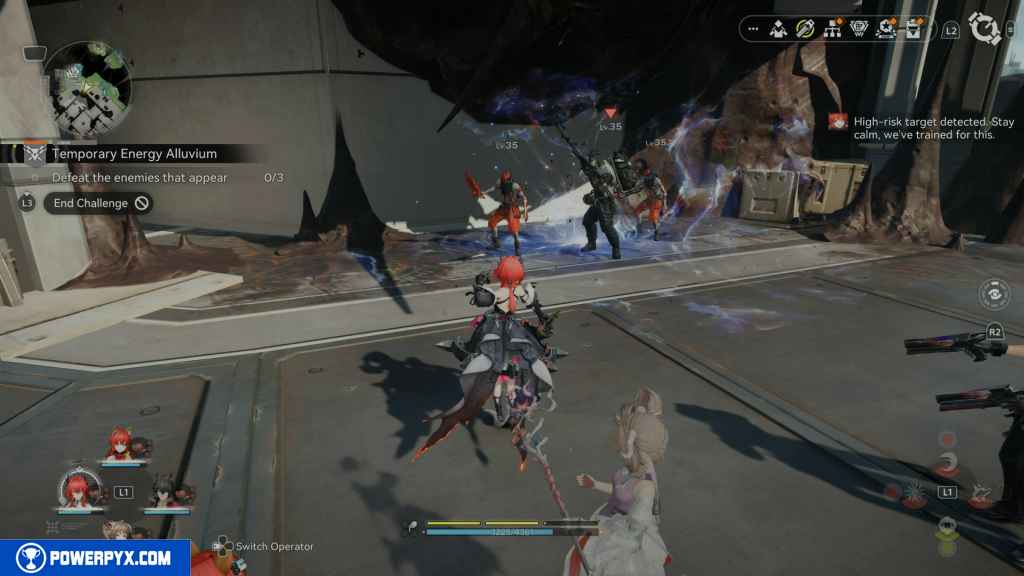
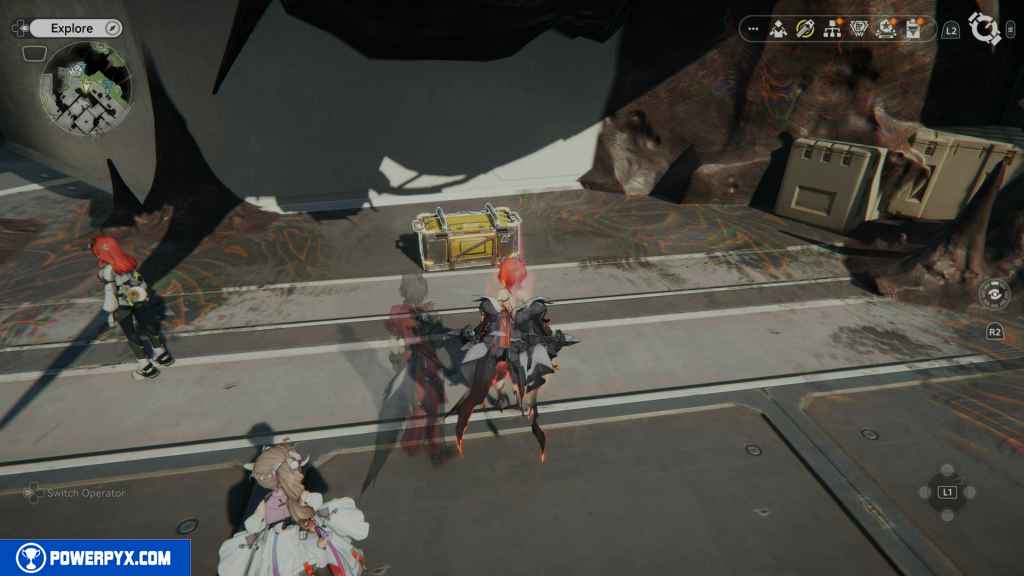
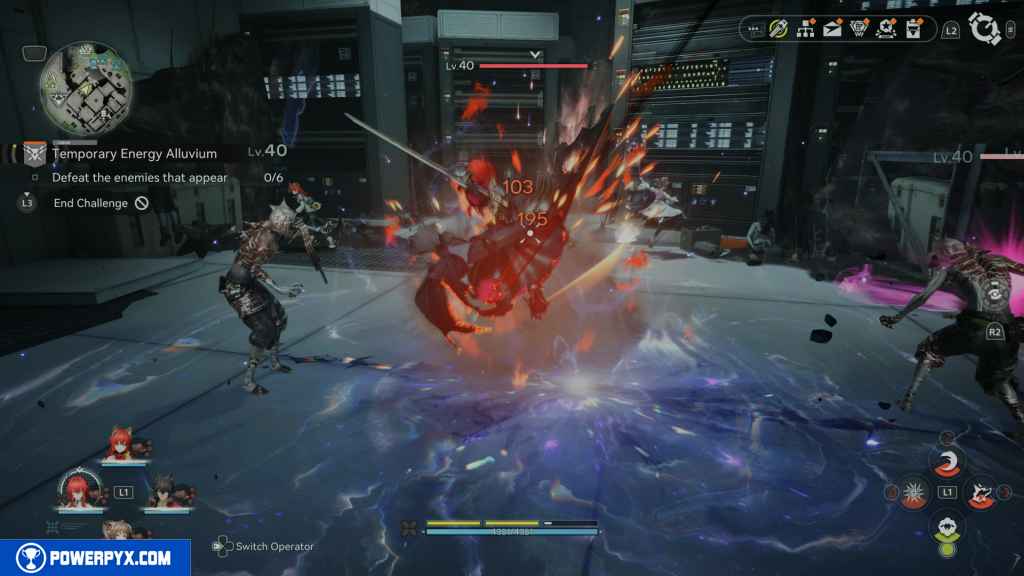
Continue up the path, and you should reach the top overlooking Route 5. The next crate is unlocked once you complete the Energy Alluvium. Activate it and defeat the enemies to pop the crate.
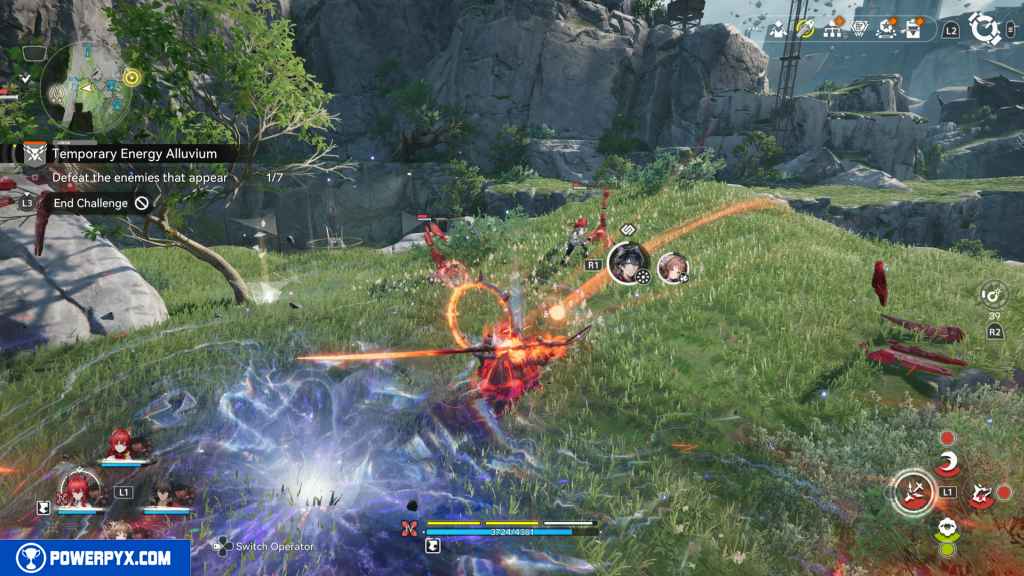
44 – Gathering Point 23
West of the by a tree, and the Energy Alluvium is the next Gathering Point.
45 – Gathering Point 24
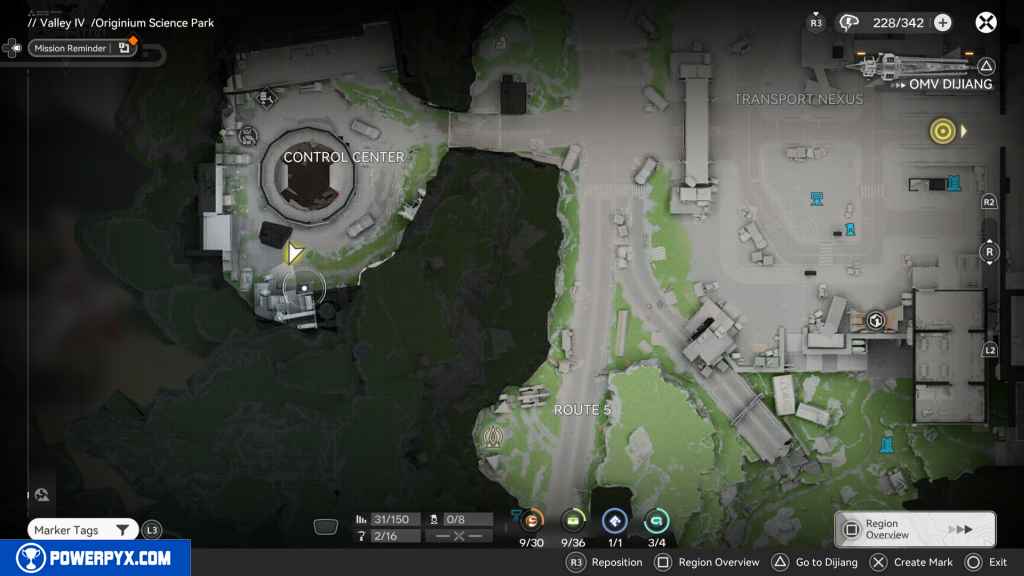
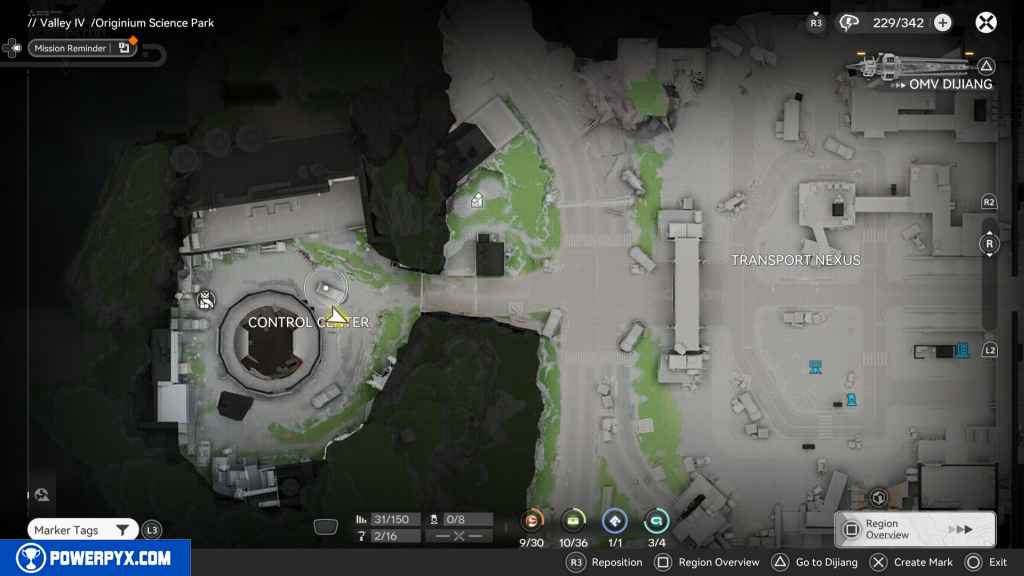
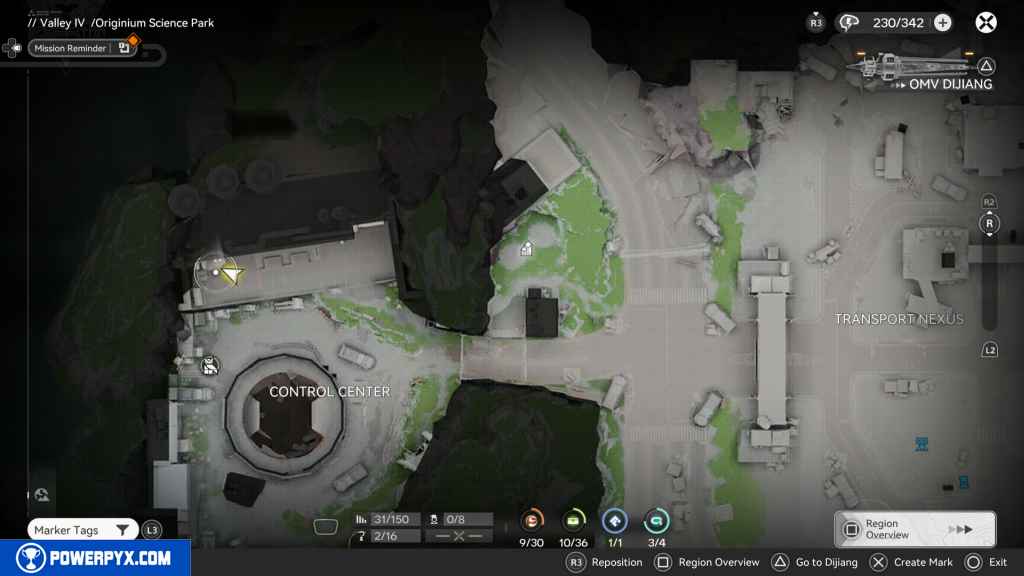
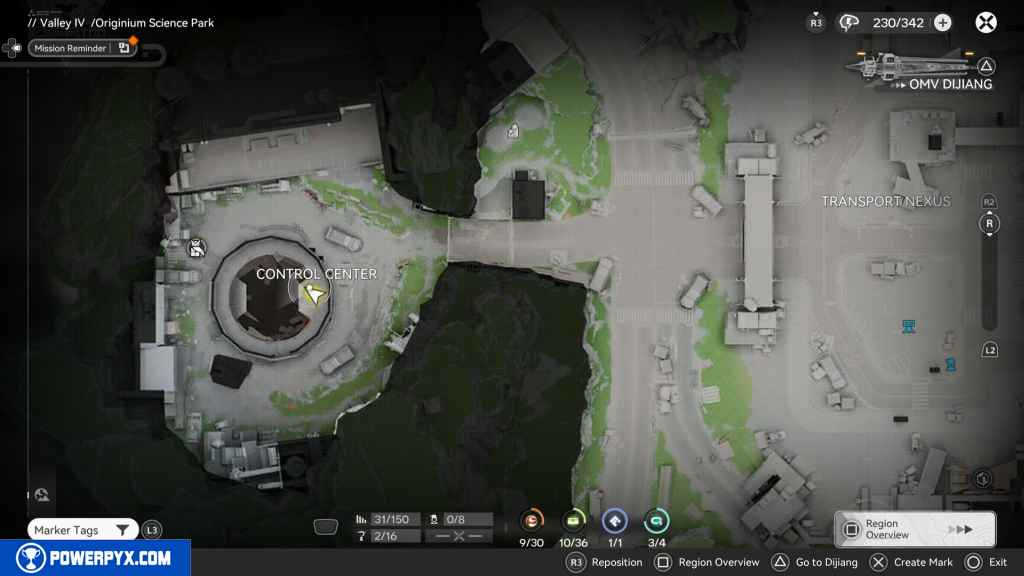
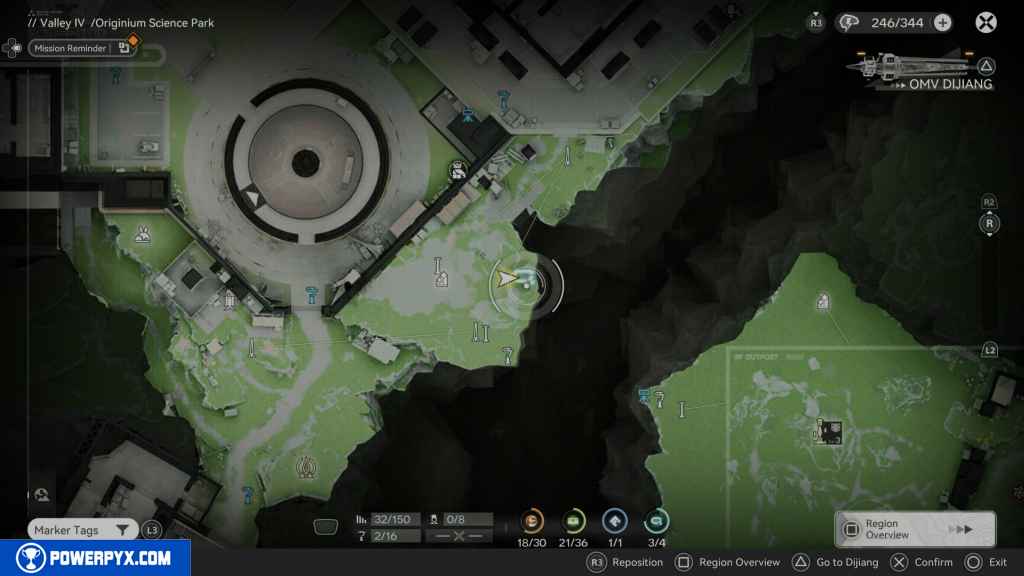
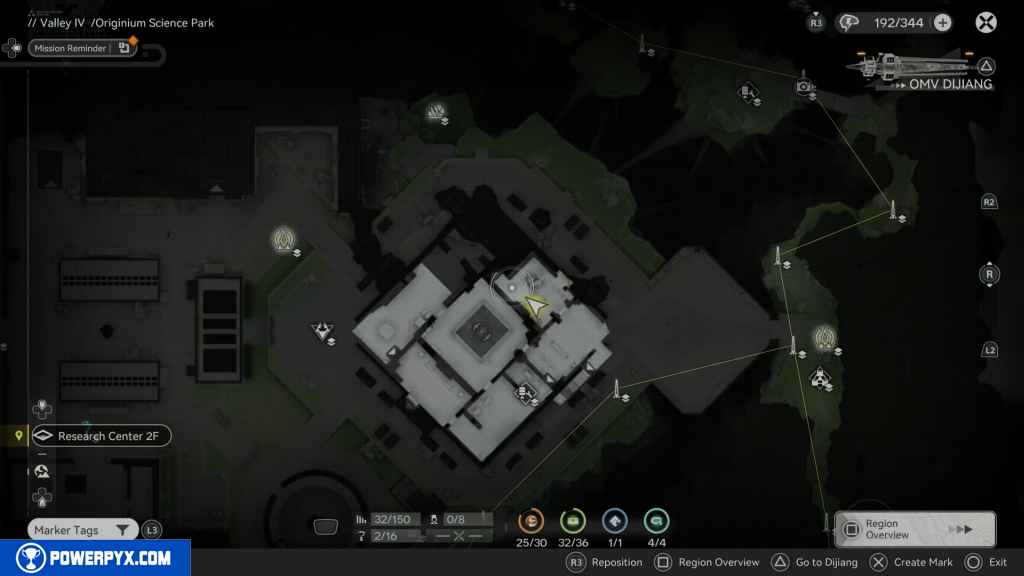
Head to the Control Center located to the west. You must complete Exploration Mission – OD Outpost: Infra-Station II. You must raise your Infra-Station prosperity to level two and complete the mission to unlock the Control Center location. Once inside, turn left and head south on the upper cliff side. When you approach the green boxes, you should see the Gathering Point on the ground.
46 – Gathering Point 25
Continue down the path until you see the Blight. Use an Industrial Explosive to blow it up. Climb up the crates that are revealed and find the Gathering Point on a container on your left.
47 – Crate 10
Continue climbing the crates and containers until you reach the top. The crate is located next to some breakable boxes.
48 – Gathering Point 26
Head north and stick to the west side. When you reach the large truck, look to the left, and you should see the Gathering Point on top of a container.
49 – SOS Repair Bot 3
East of the Gathering Point is the next Repair Bot.
50 – Gathering Point 27
Head east from the Repair Bot and look at the truck’s roof.
51 – Gathering Point 28
Head inside the small facility to the north and run all the way to the east to find this Gathering Point.
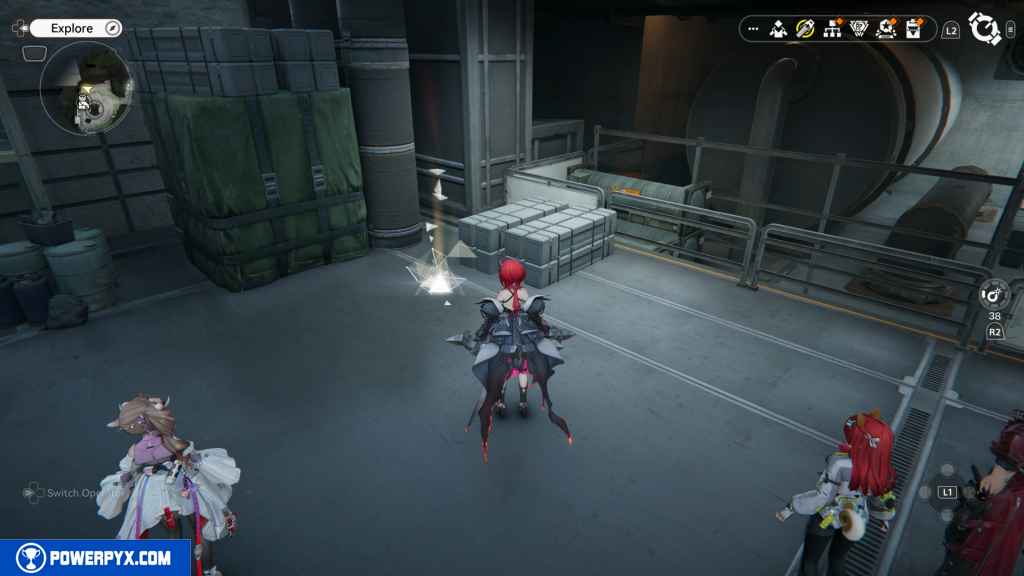
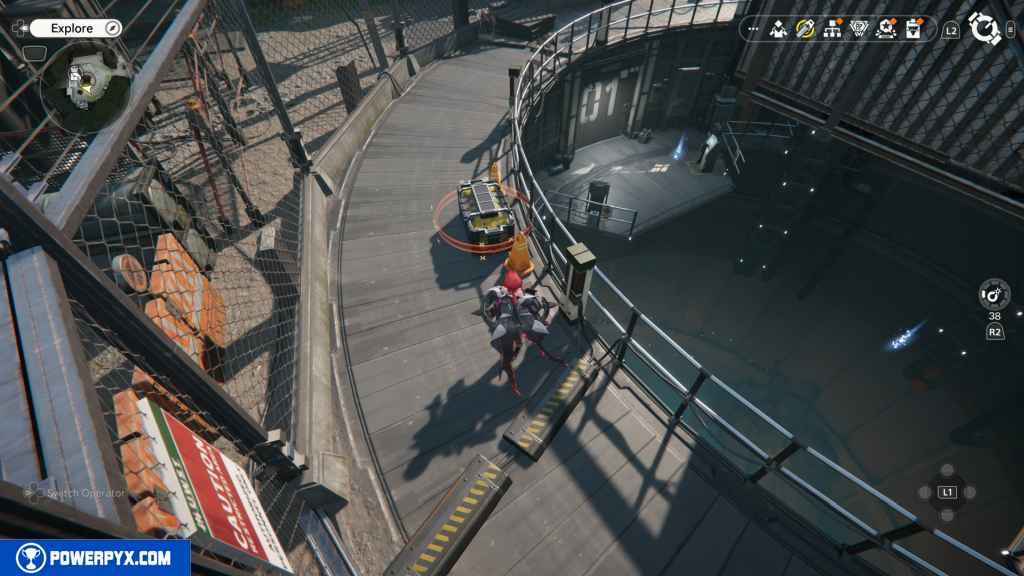
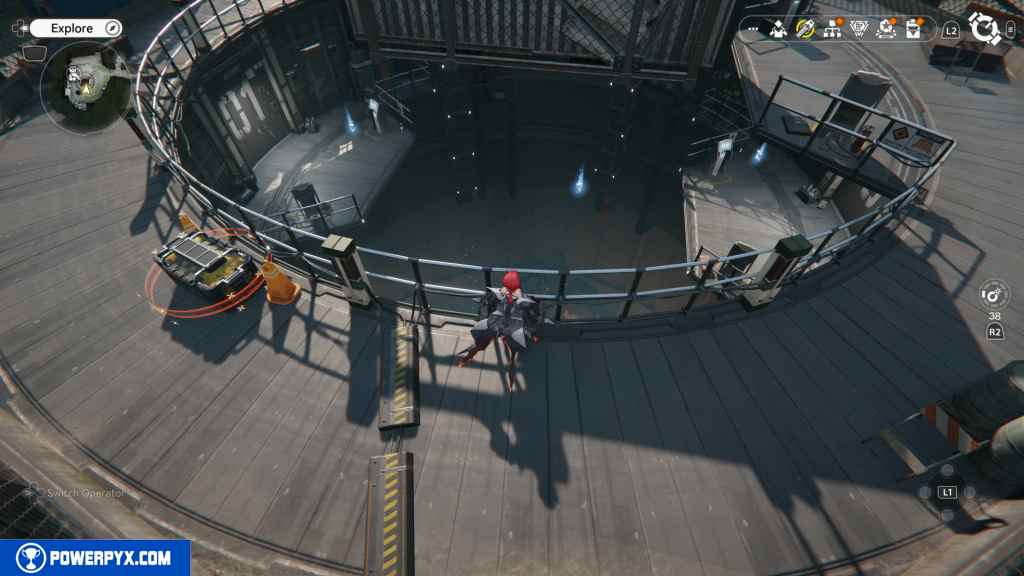
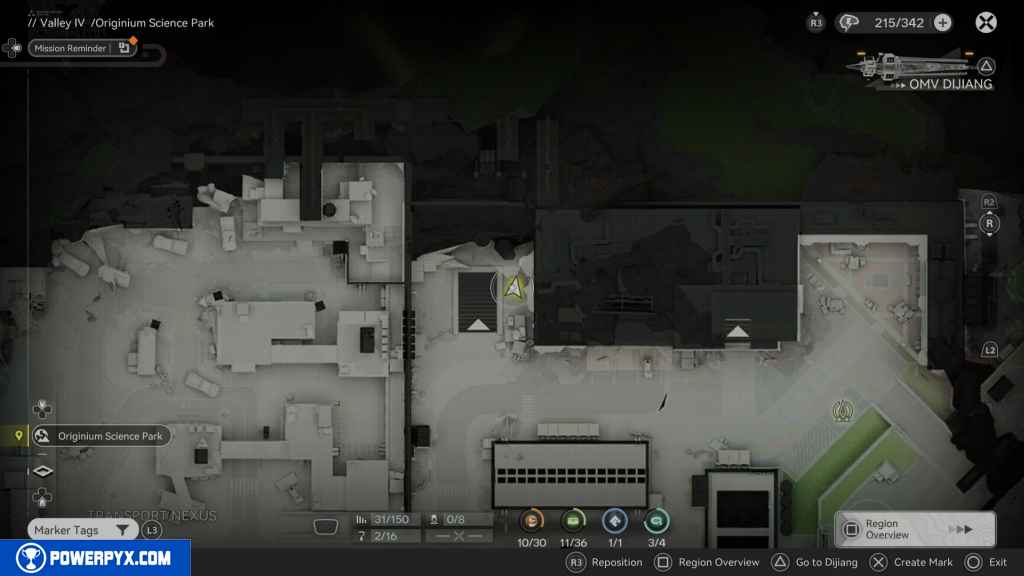
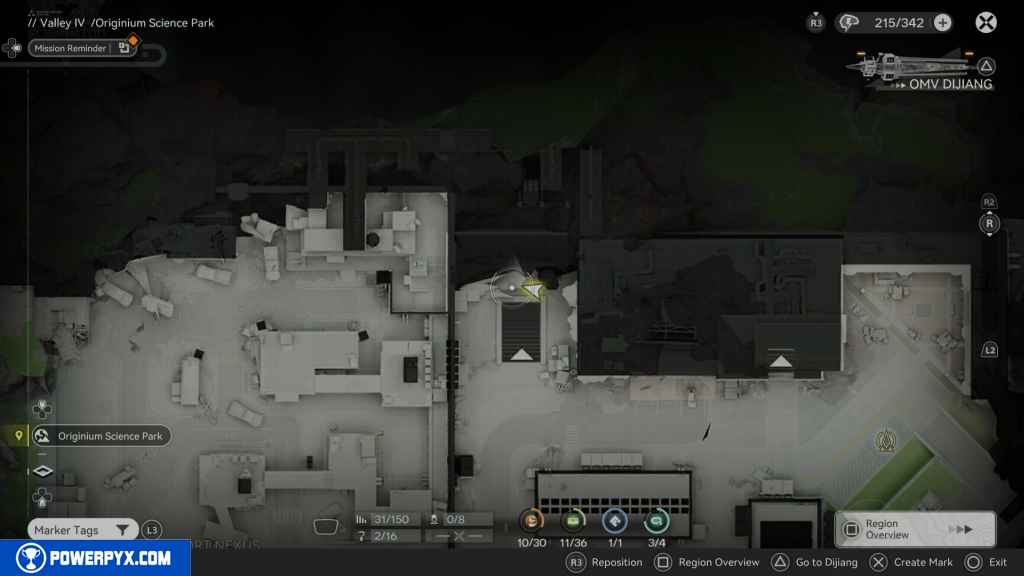
52 – Aurylene 9
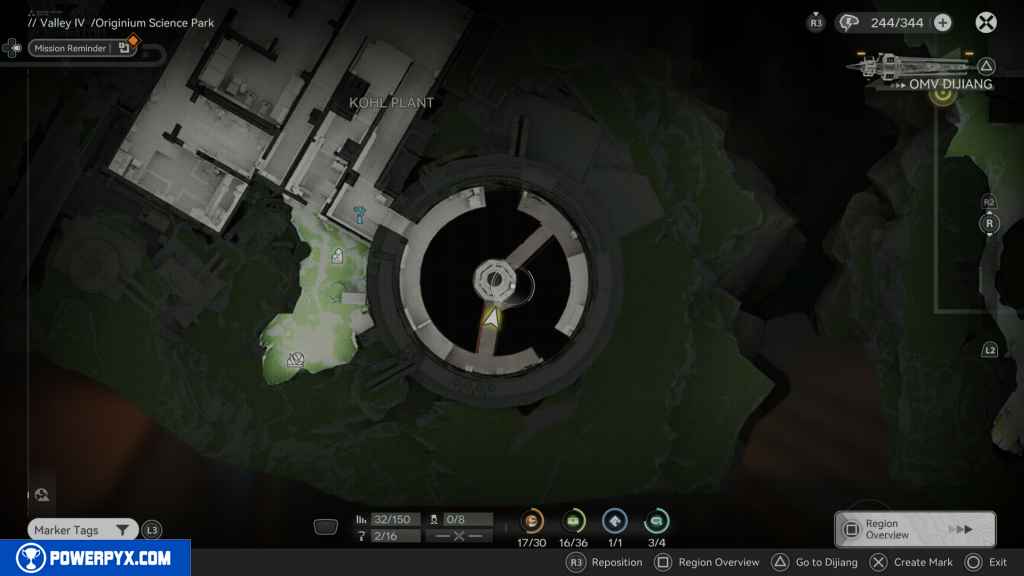
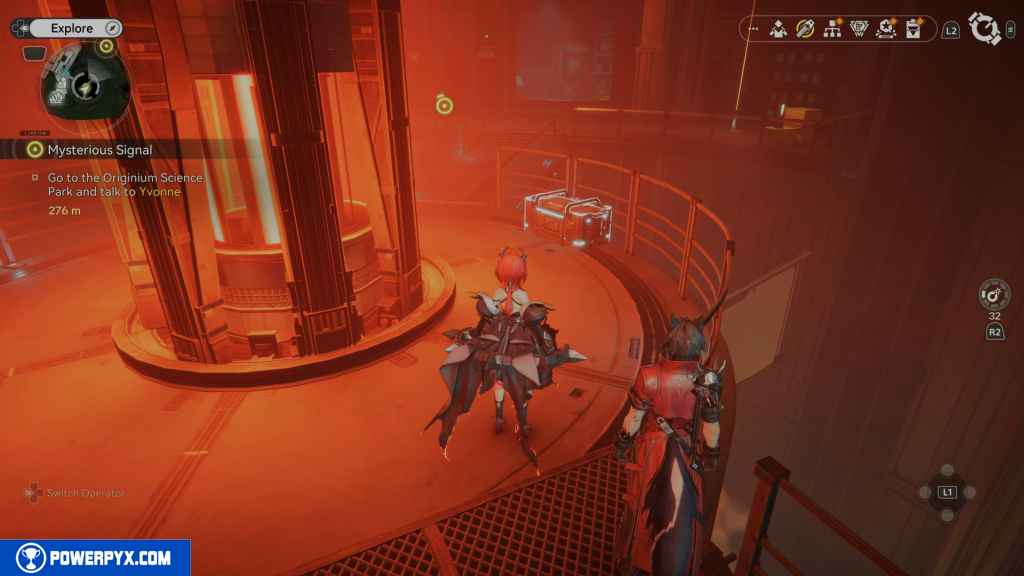
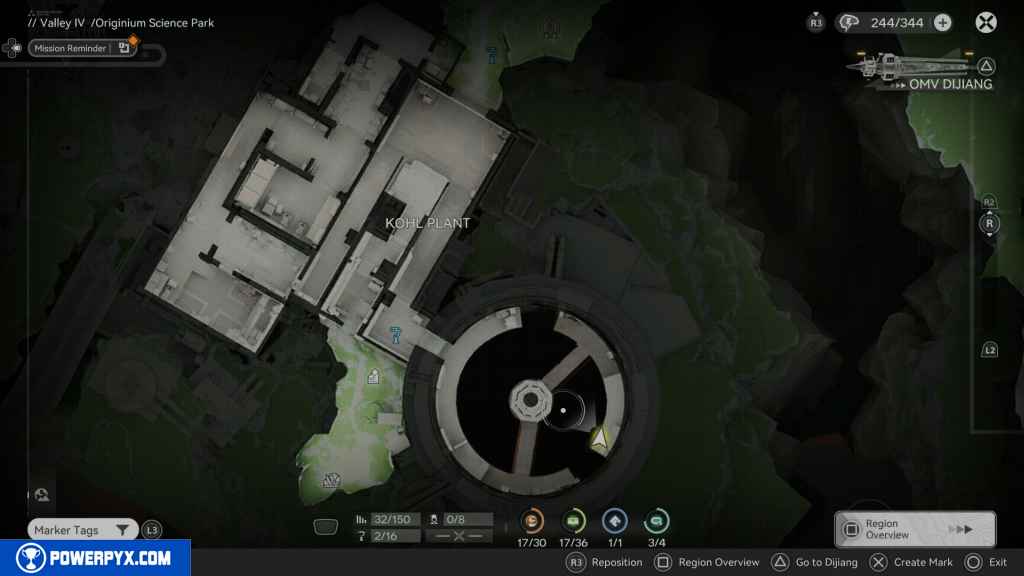
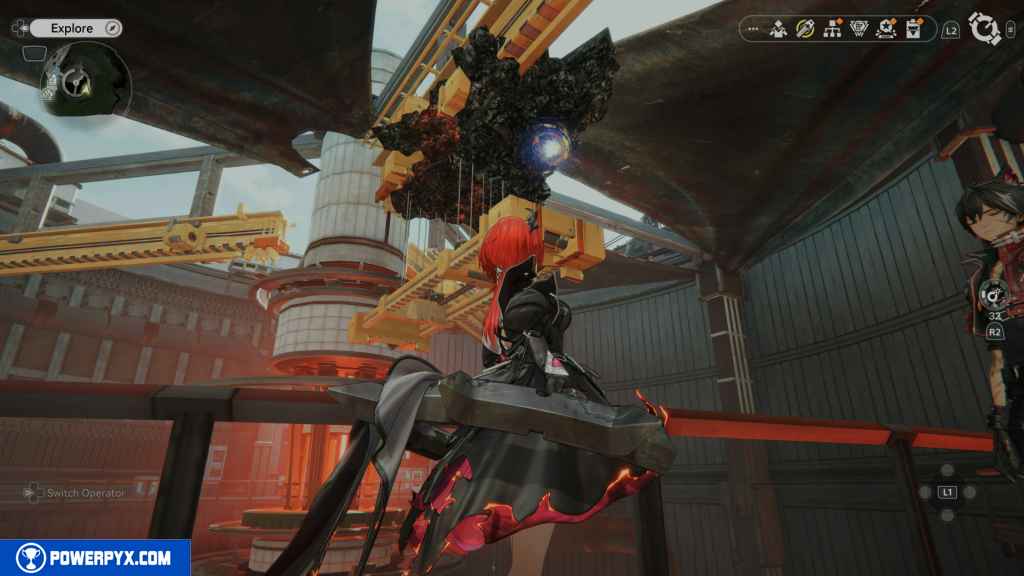
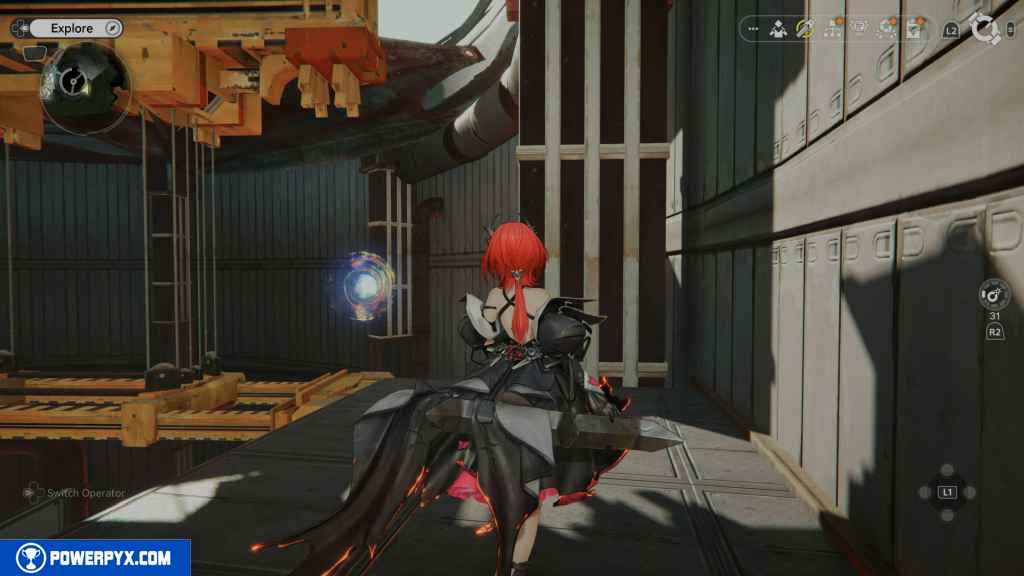
Head back to the center crater, where the big container hangs in the center. Go around to the right, and you should see two control panels. One to lower the container and another to rotate it. Hit the rotating panel to turn the container. Jump in and grab the Aurylene.
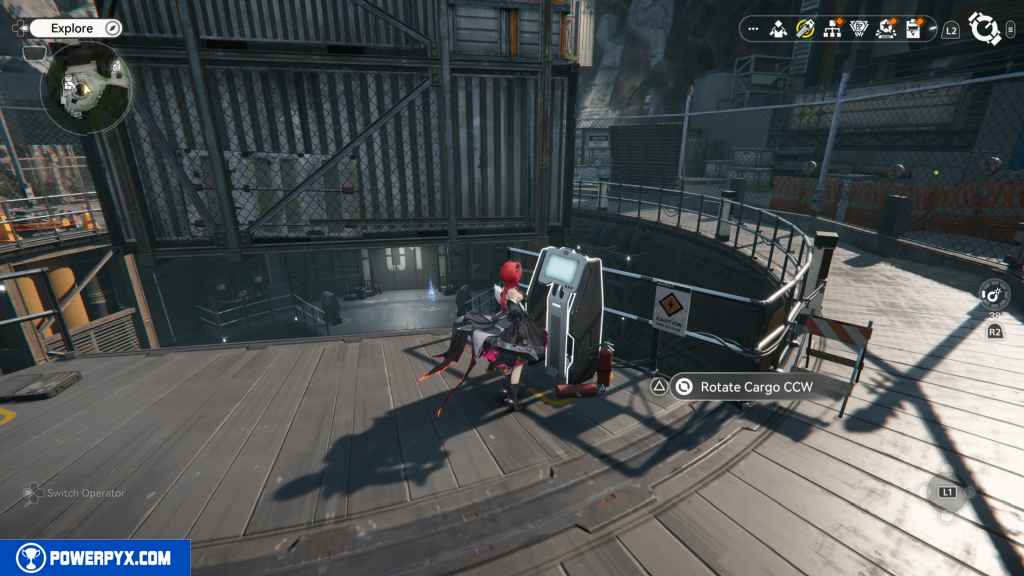
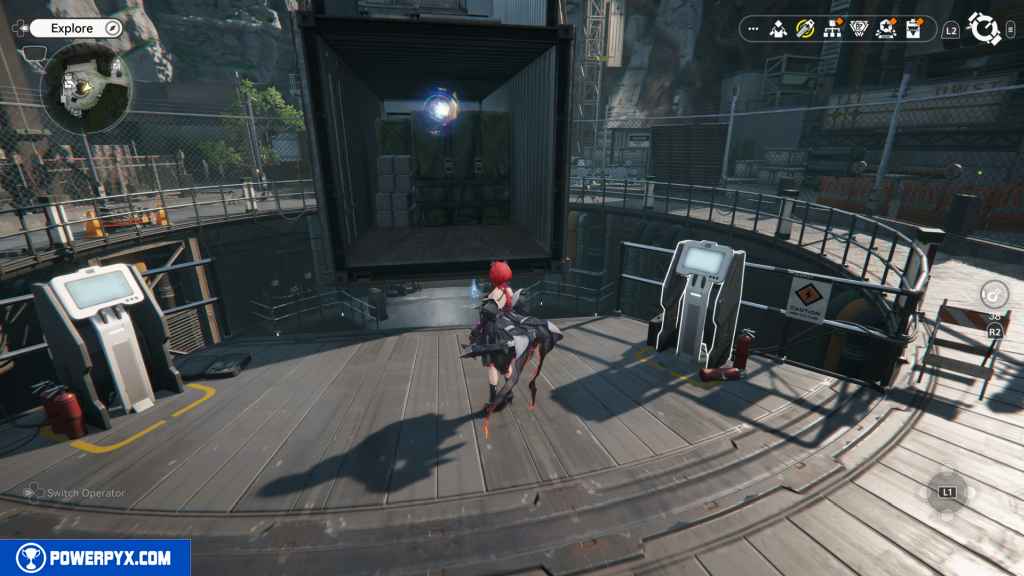
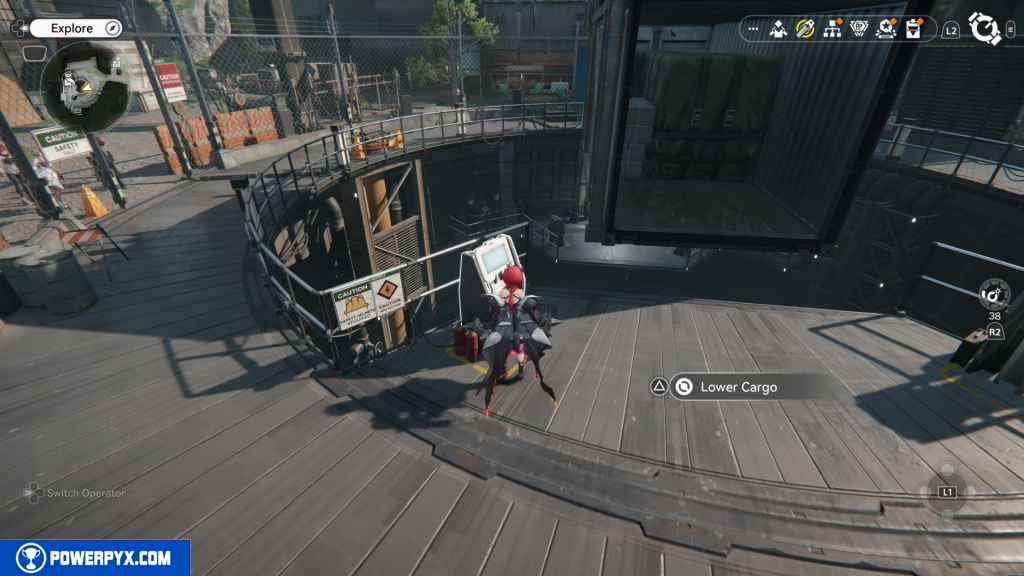
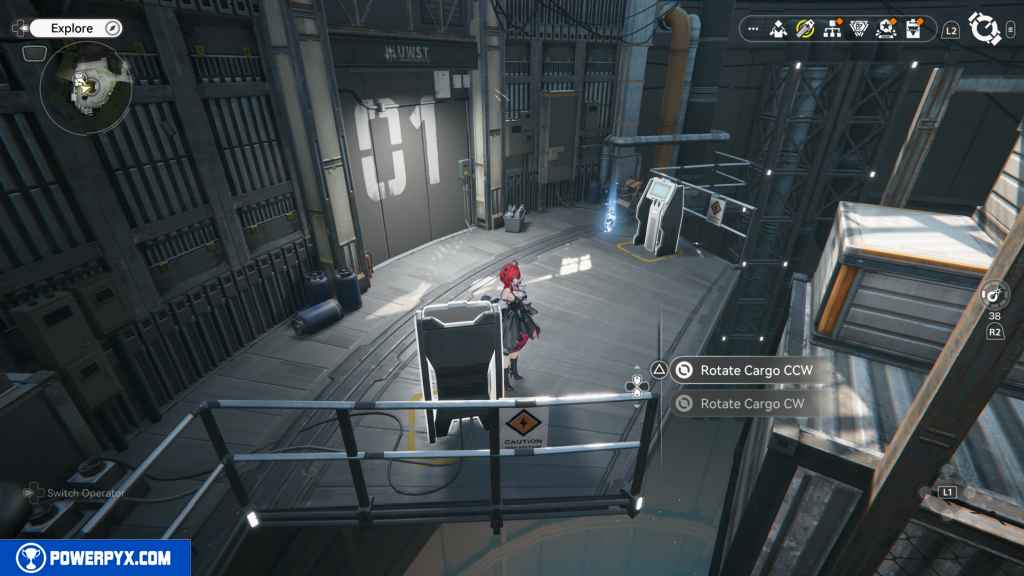
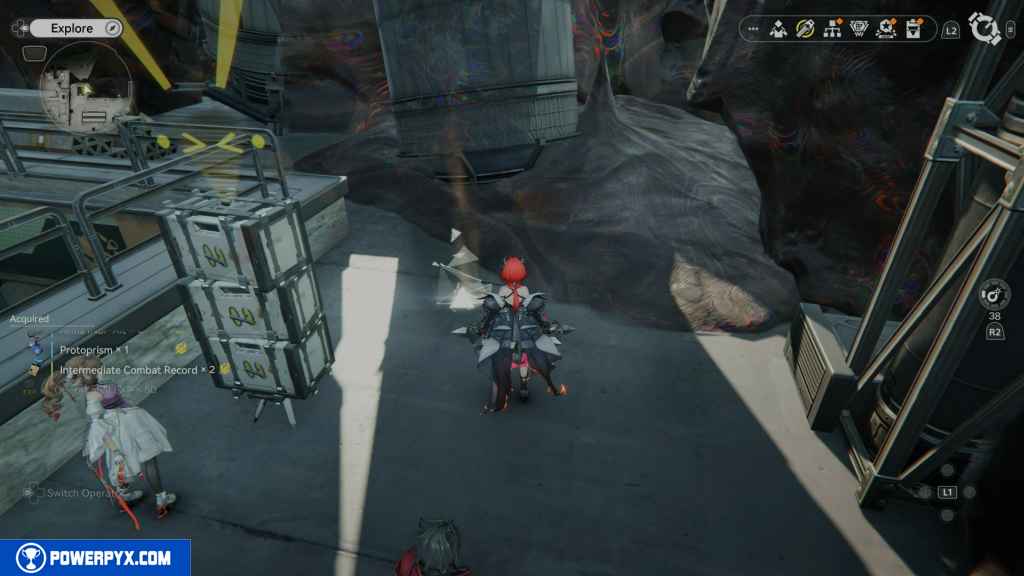
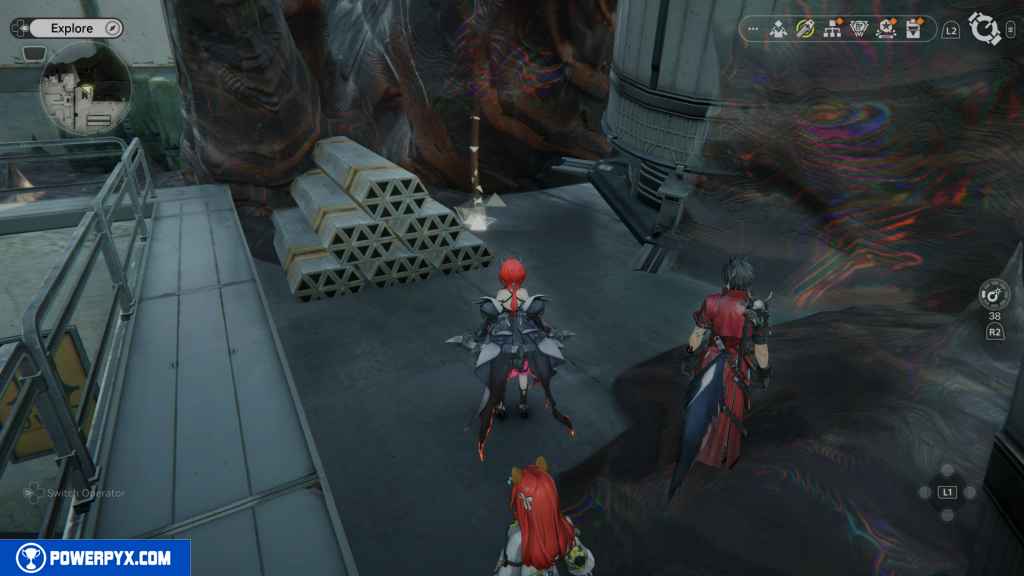
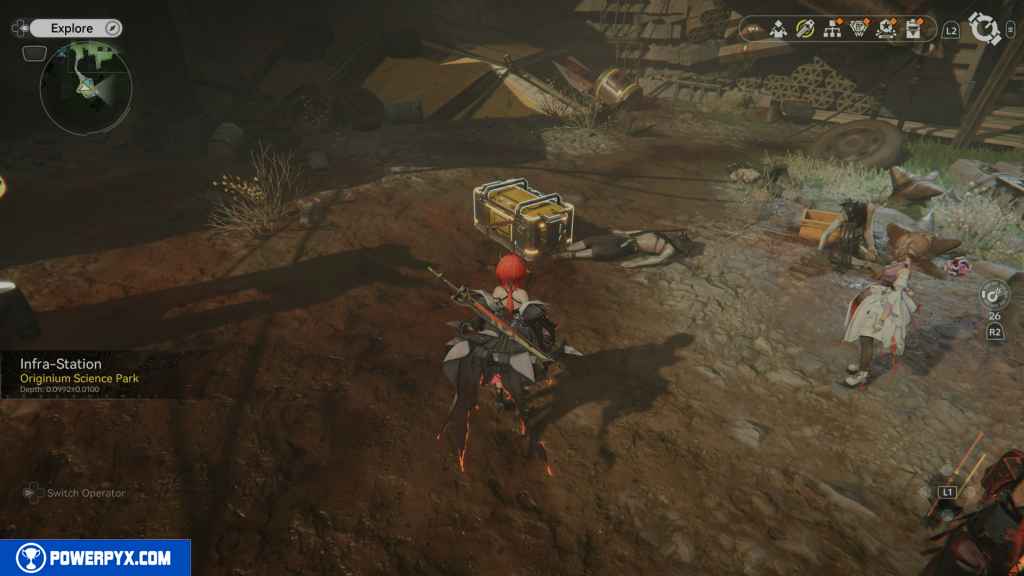
53 – Crate 11
To unlock this crate, which is sitting right in front of the entrance to the center area, you need to grab the three blue keys you can see inside the hole.
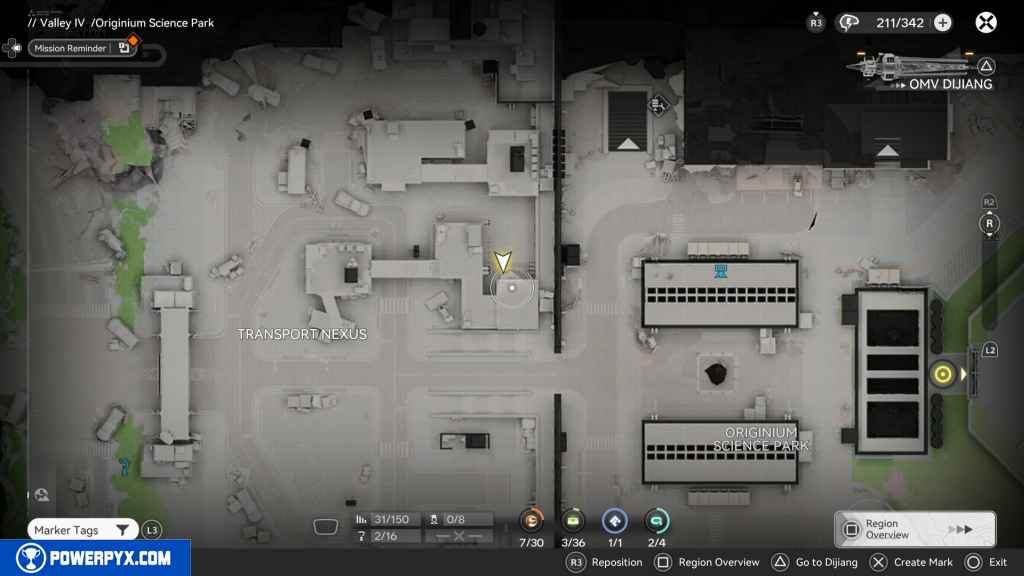
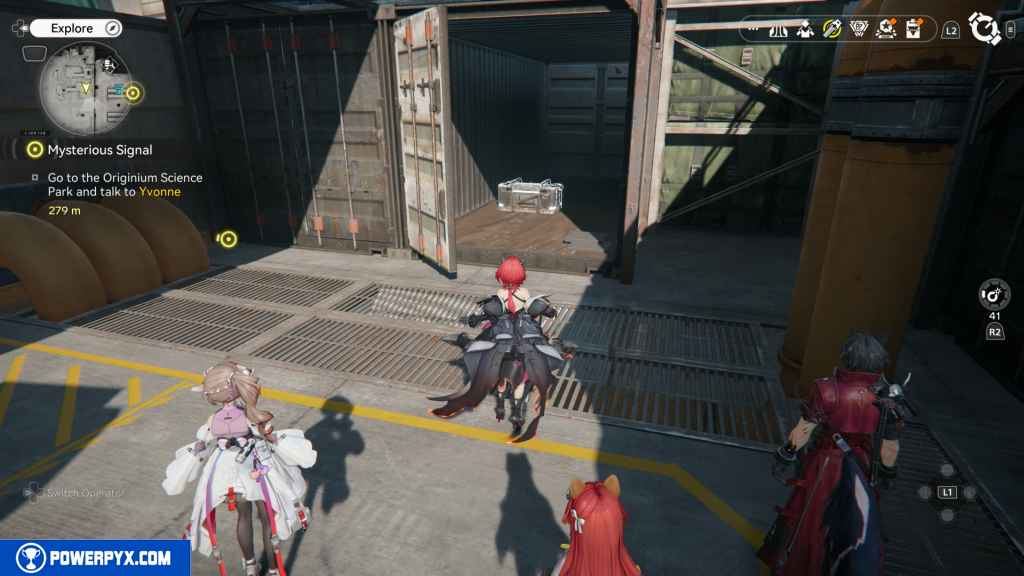
Select the control panel on the right and lower the container. Jump on top of it and jump to the opposite side to grab the first Key. Jump back onto the container and run across until you fall onto the next platform with the Key. You can also grab the other Key inside the container. Climb back up to the crate and collect it.

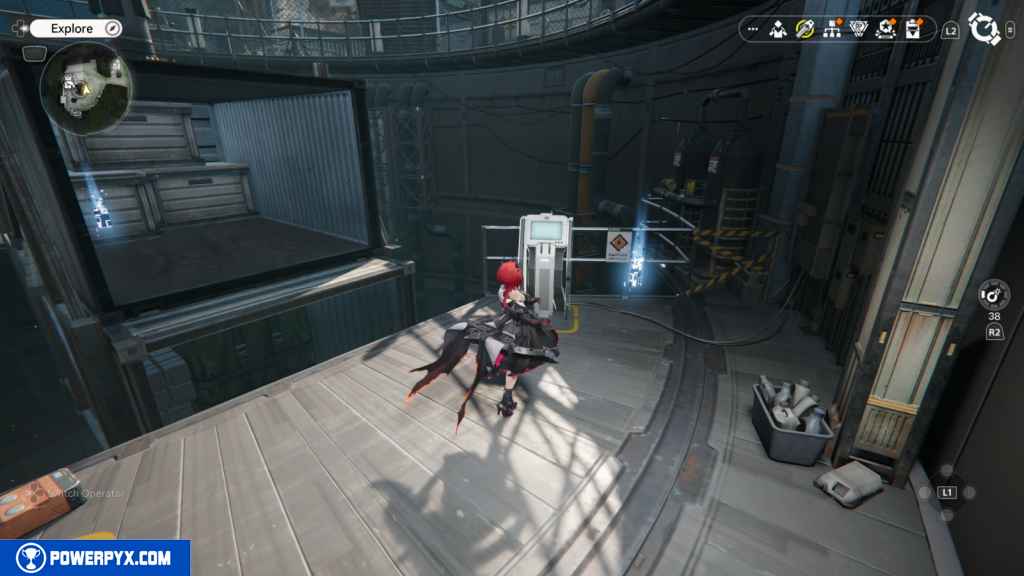
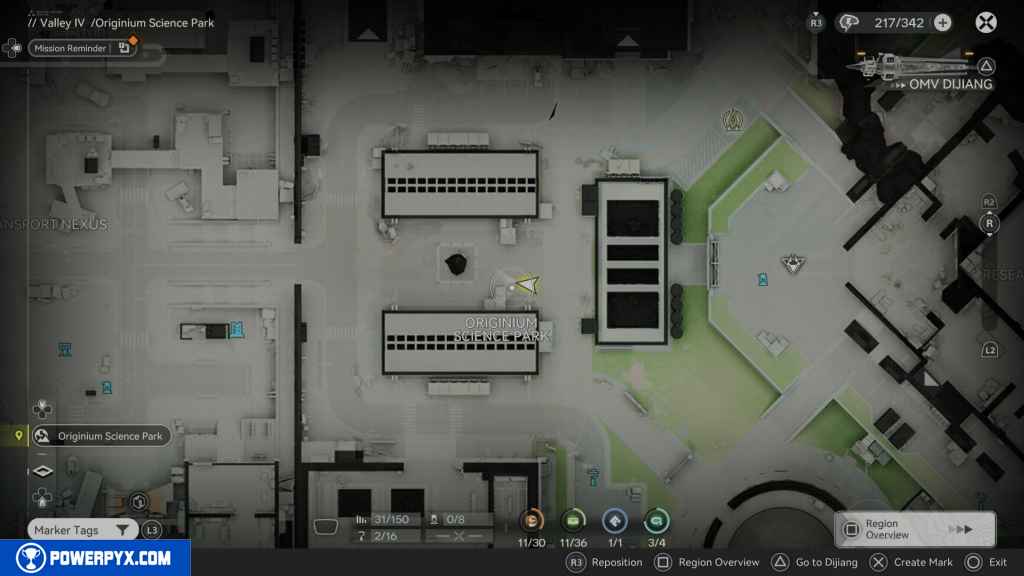
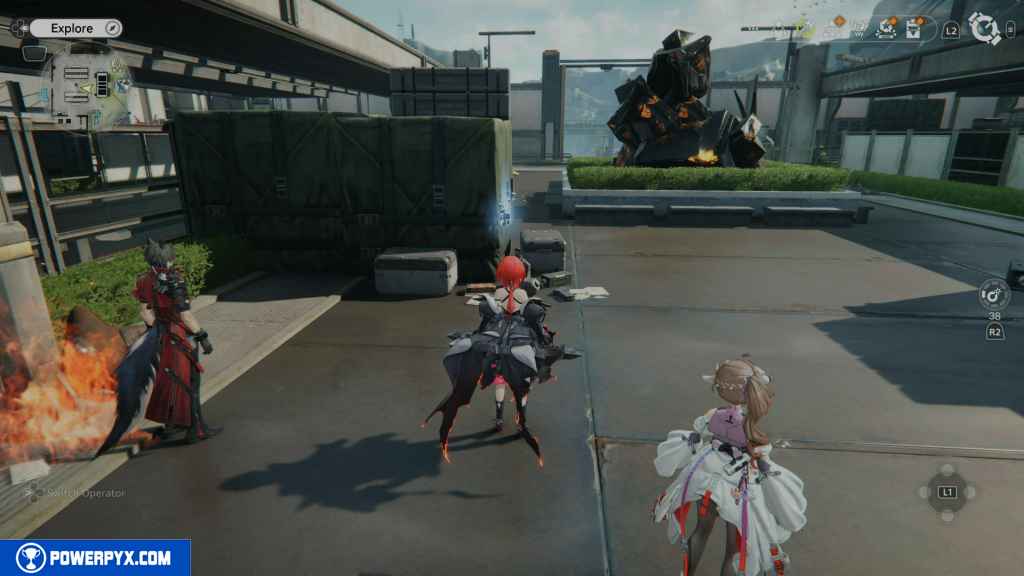
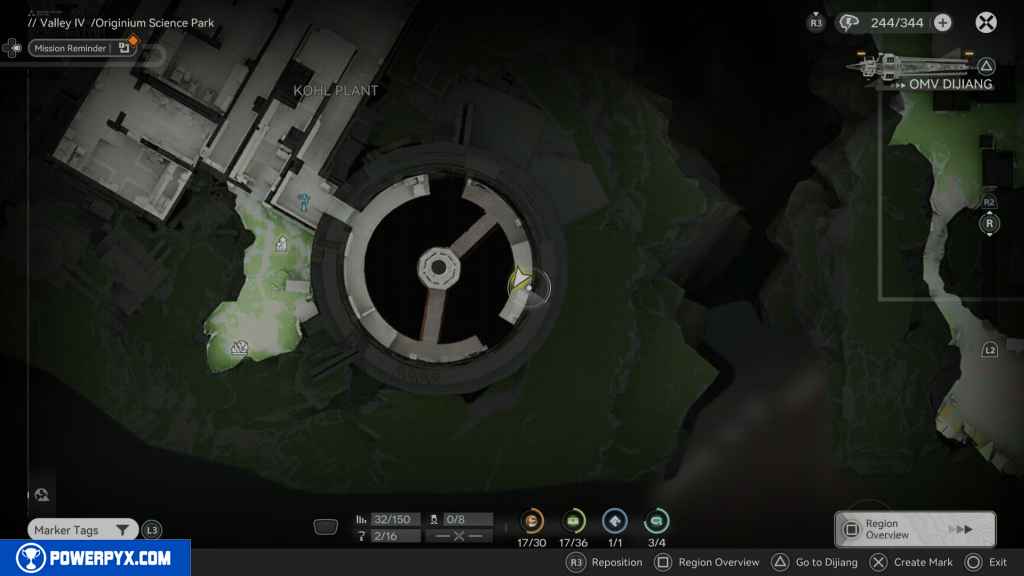
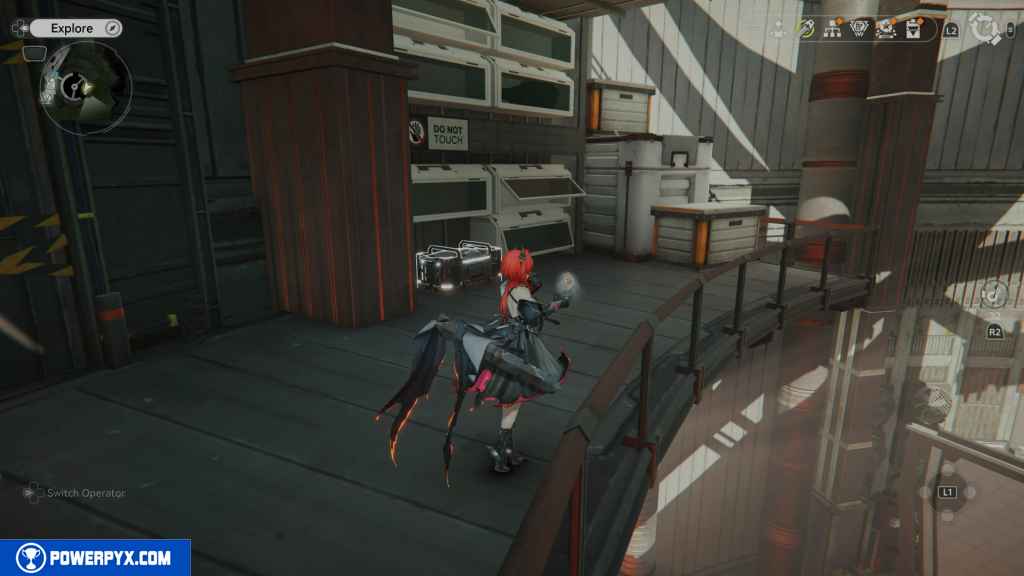
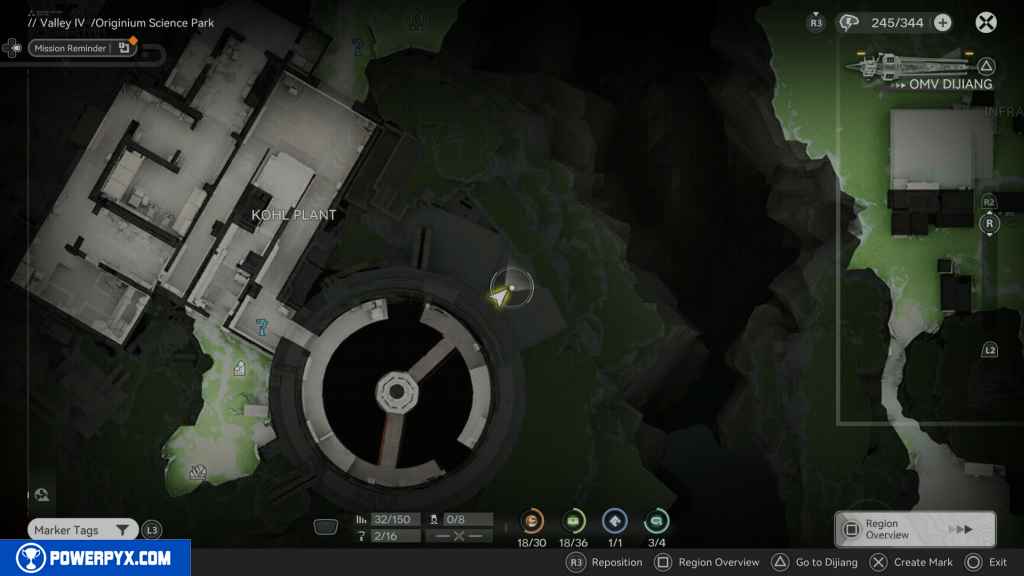
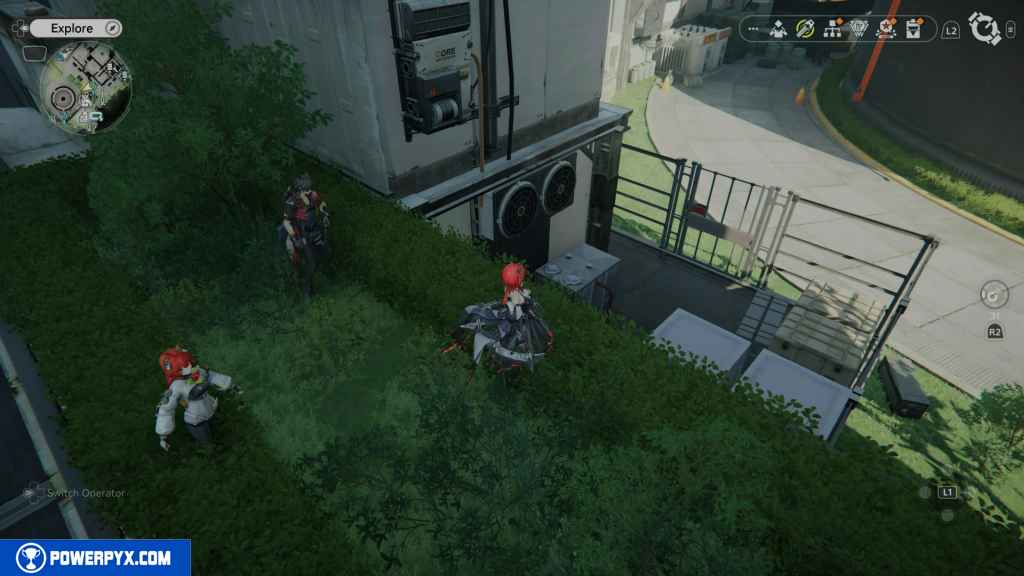
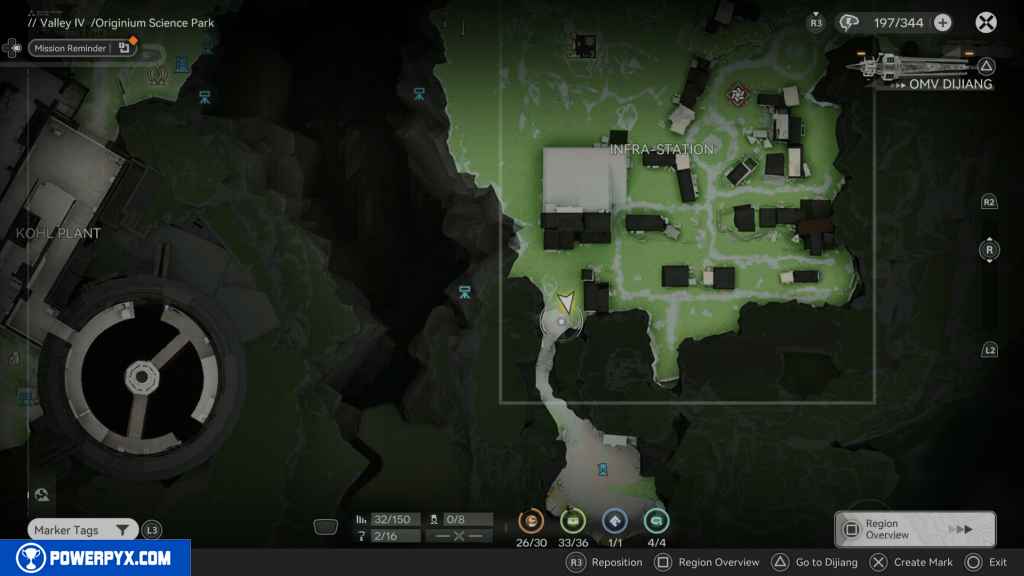
55 – SOS Repair Bot 4
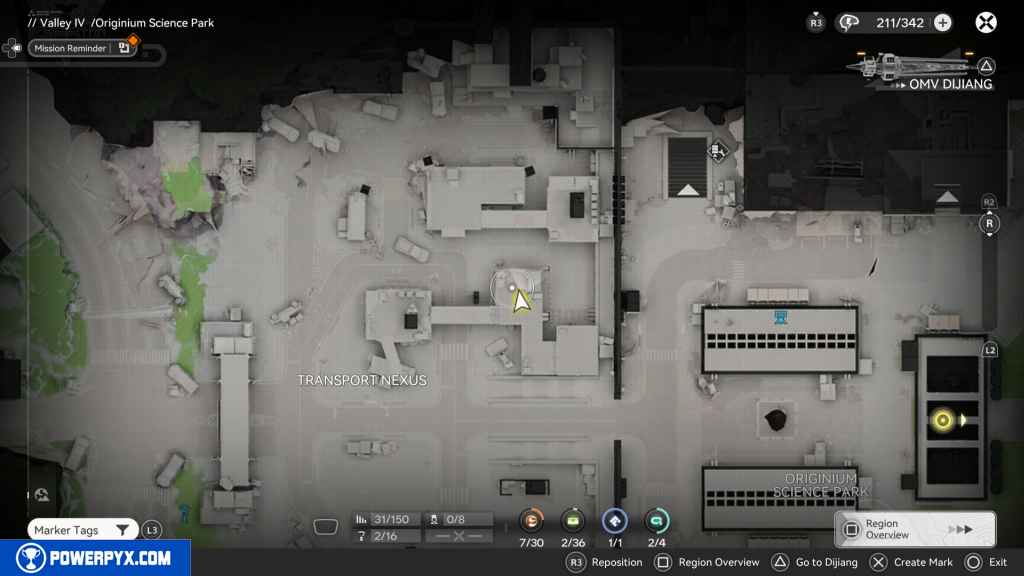
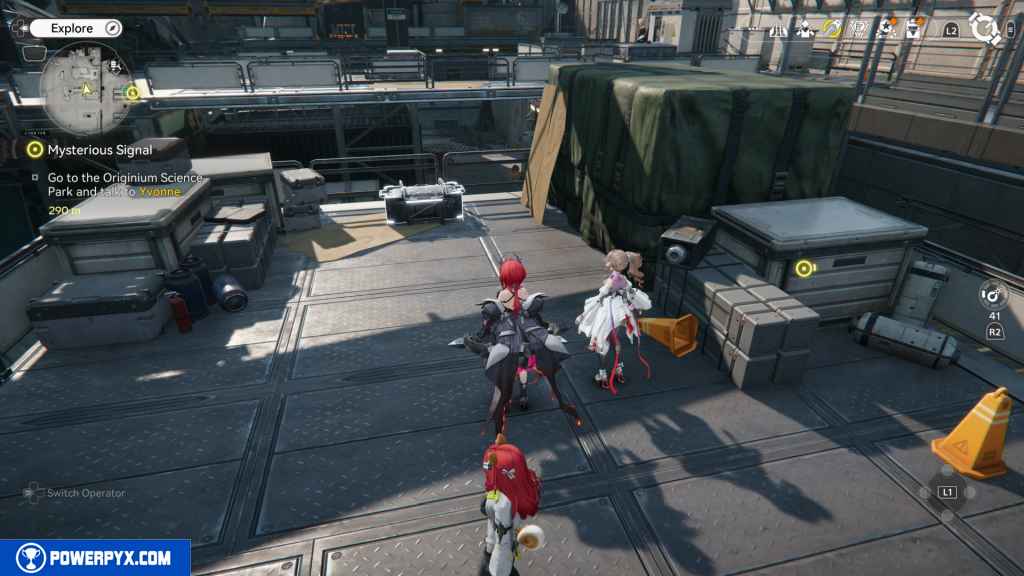
Head east through the large doors into the Originium Science Park. Turn left and head north, look to your right, and you should see an SOS Repair bot behind some crates. Jump onto those crates and to the SOS Bot.
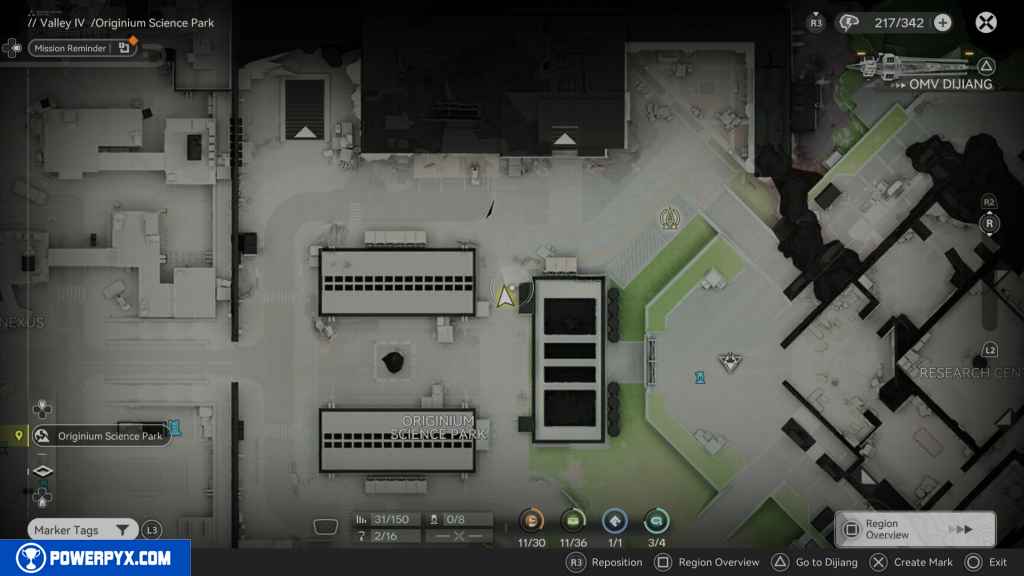
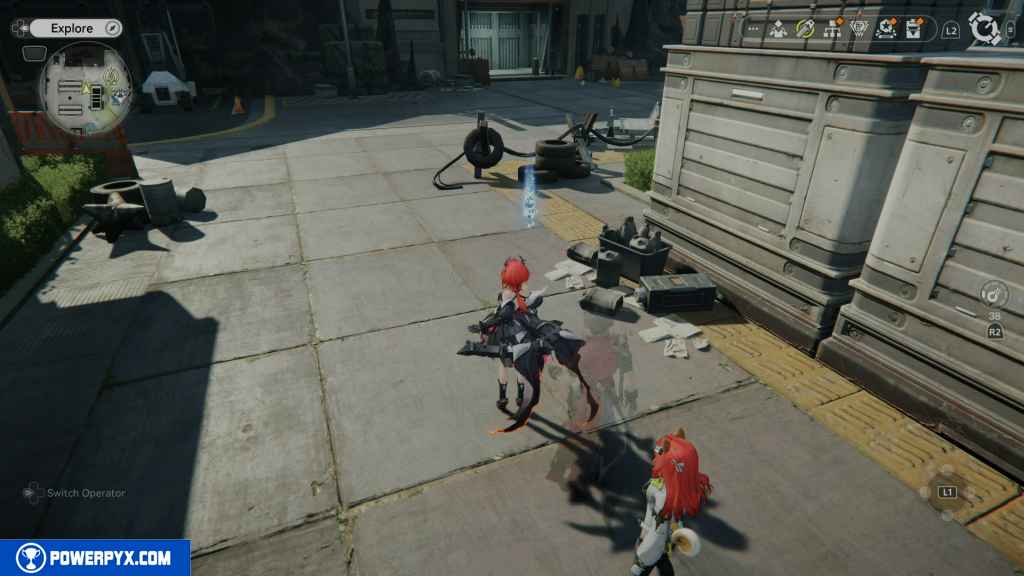
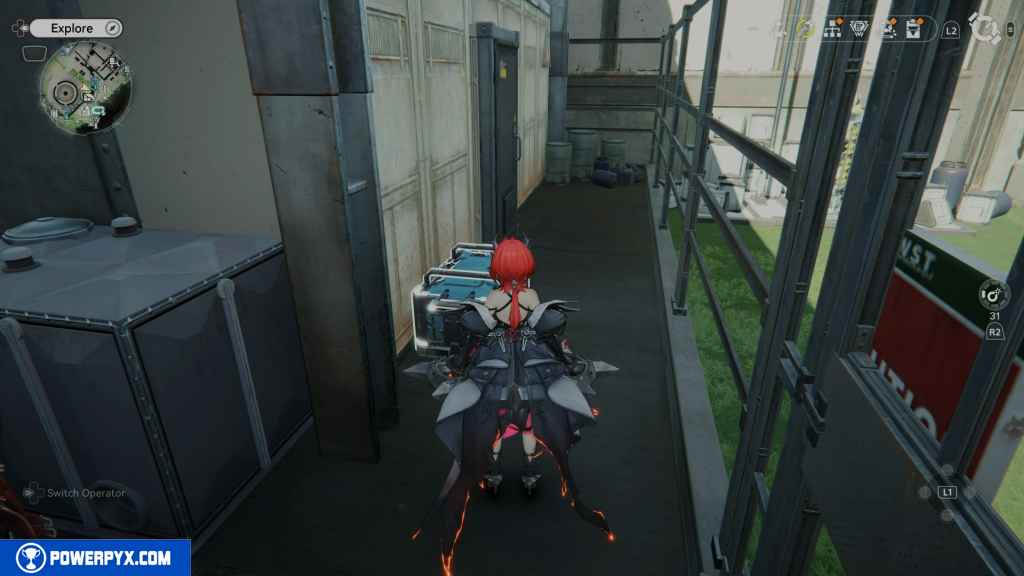
56 – Gathering Point 29
Right behind the SOS Repair Bot is the Gathering Point.
57 – Gathering Point 30
From the last Gathering Point, look to the left, and you should see it behind some pipes. Run around the guardrail to reach it.
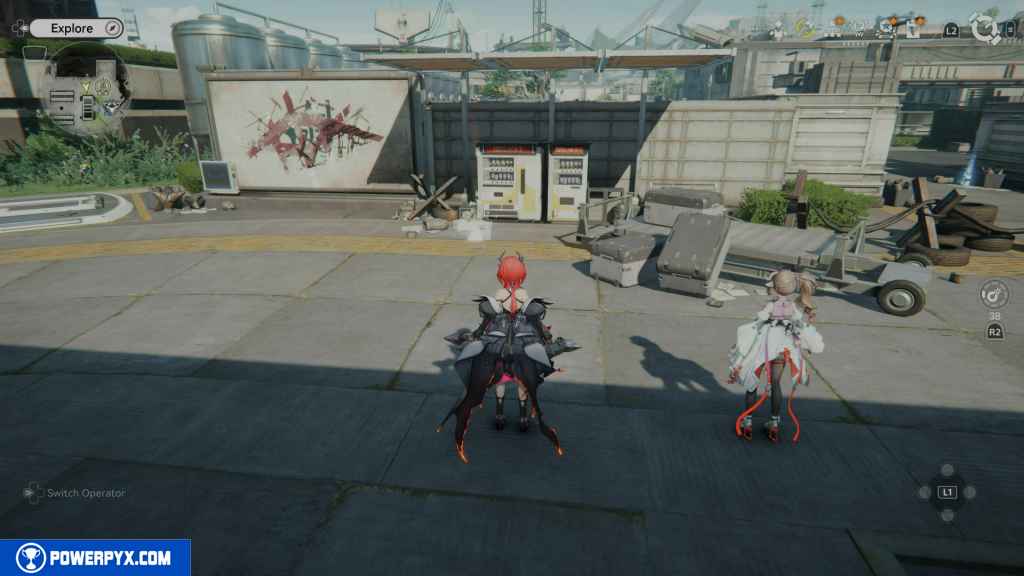
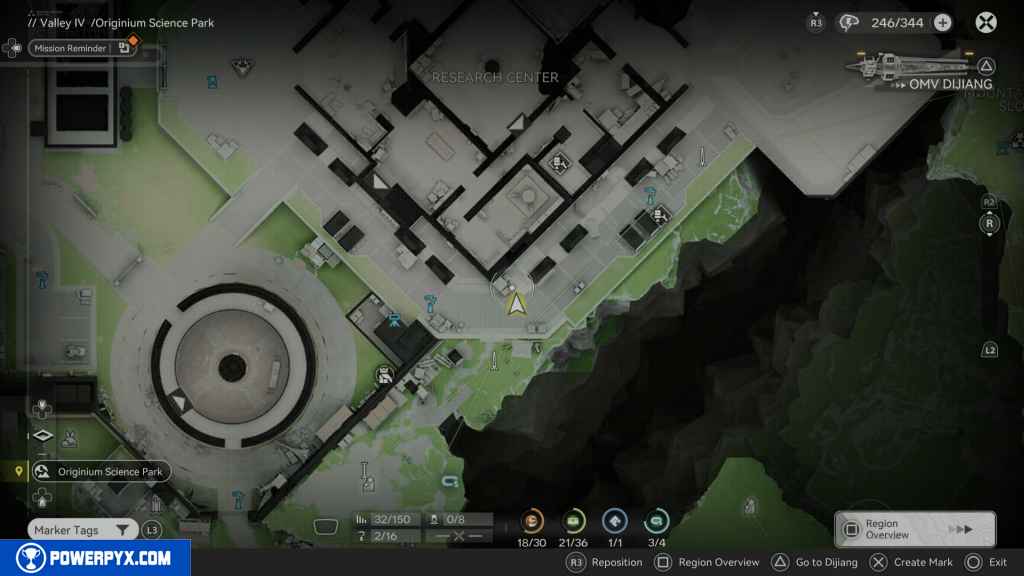
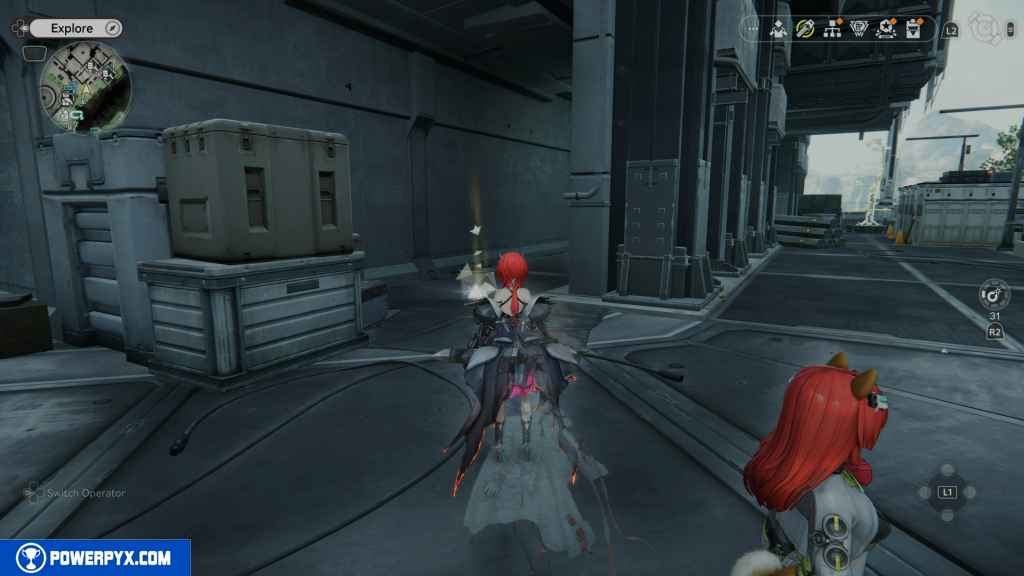
58 – Gathering Point 31
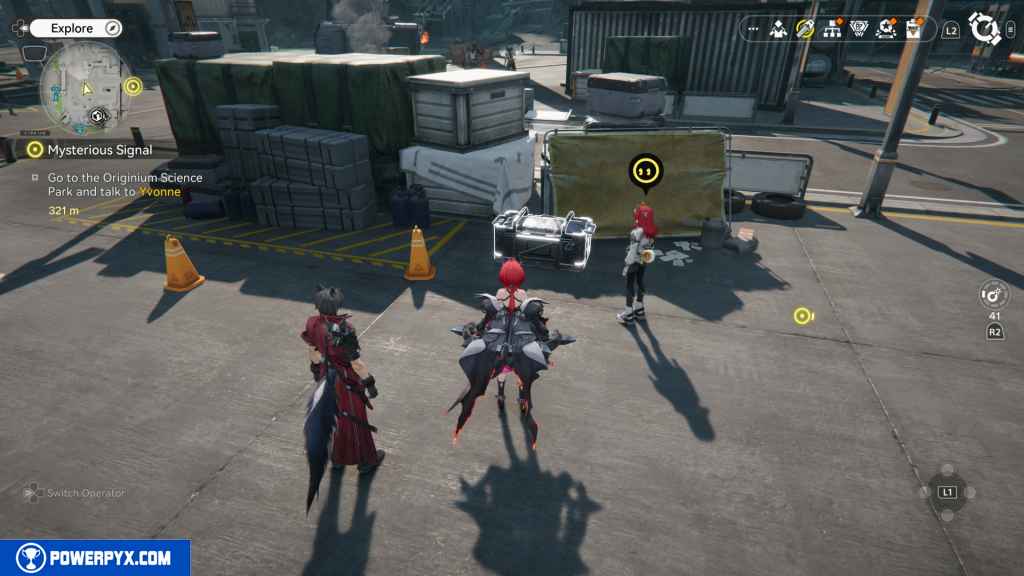
Head east and keep going until you see the gathering point by the vending machines on your right.
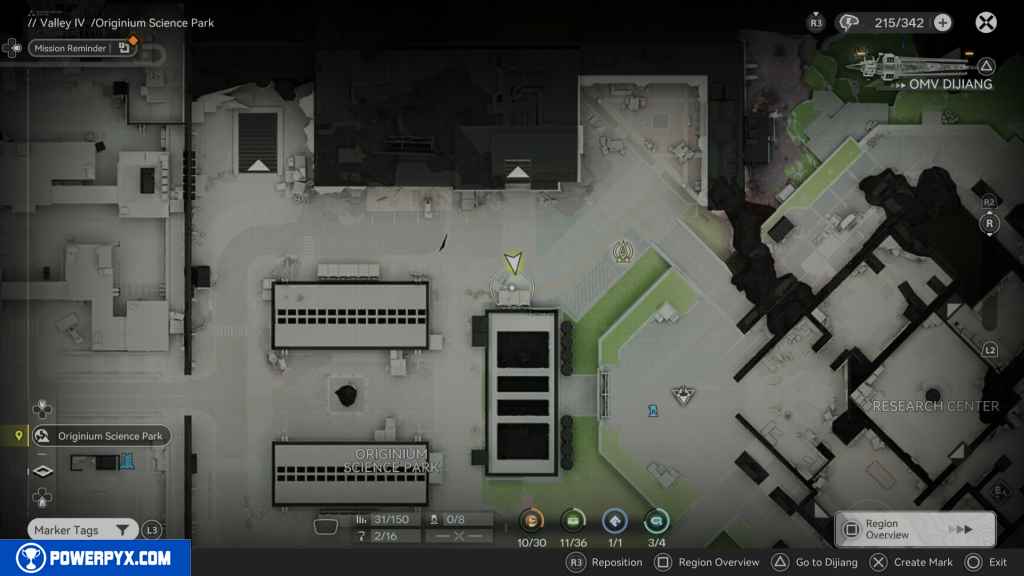
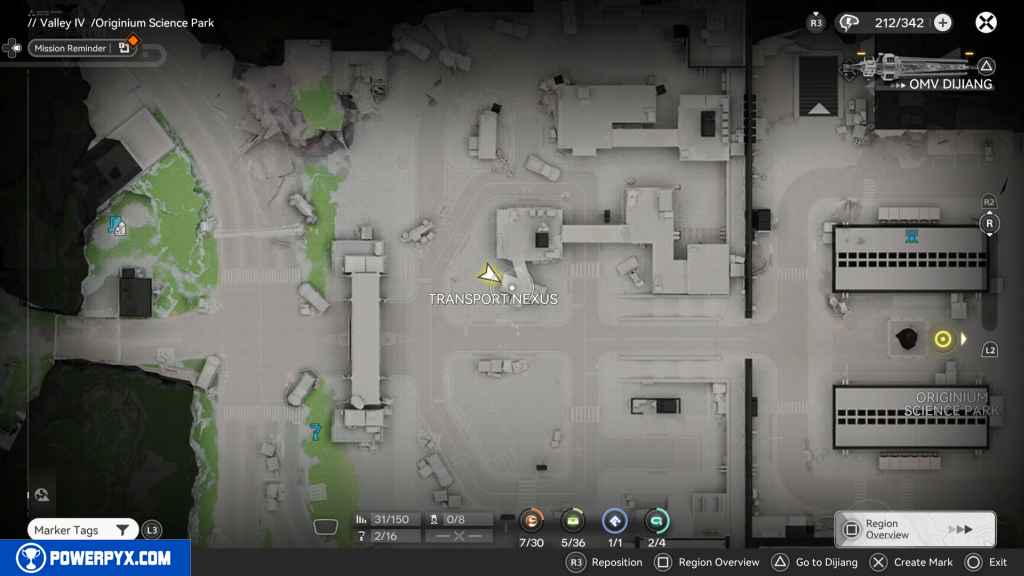
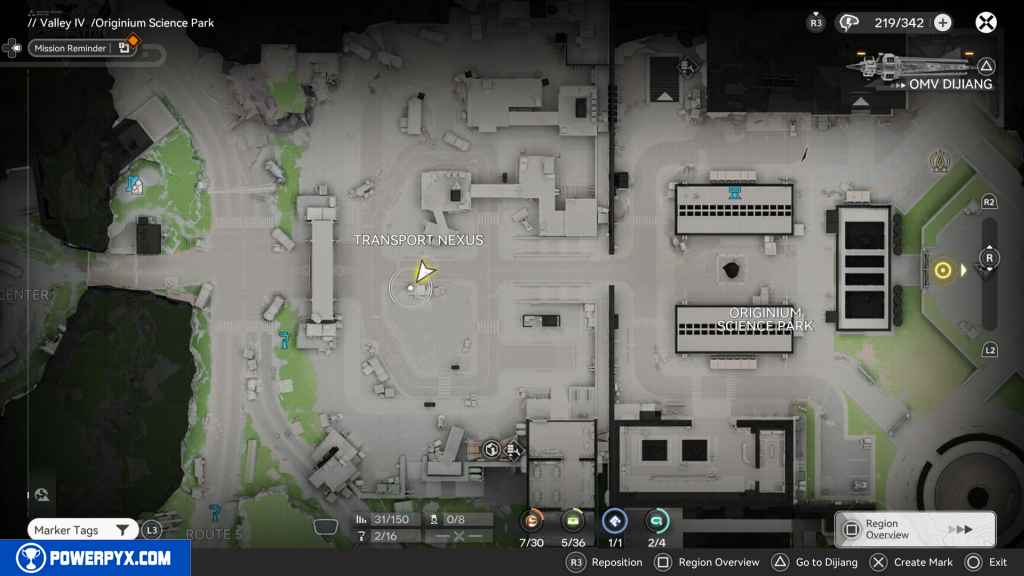
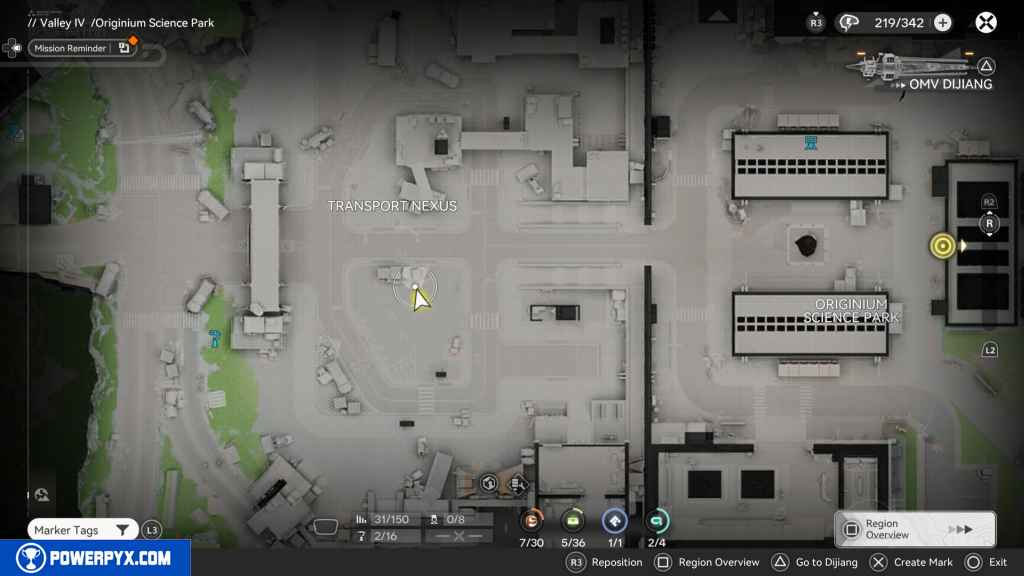
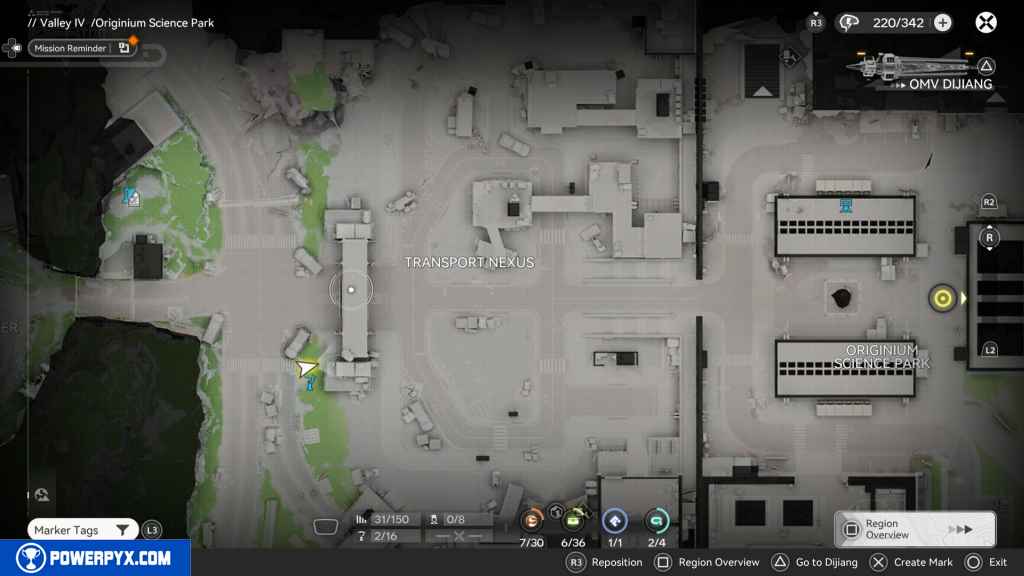
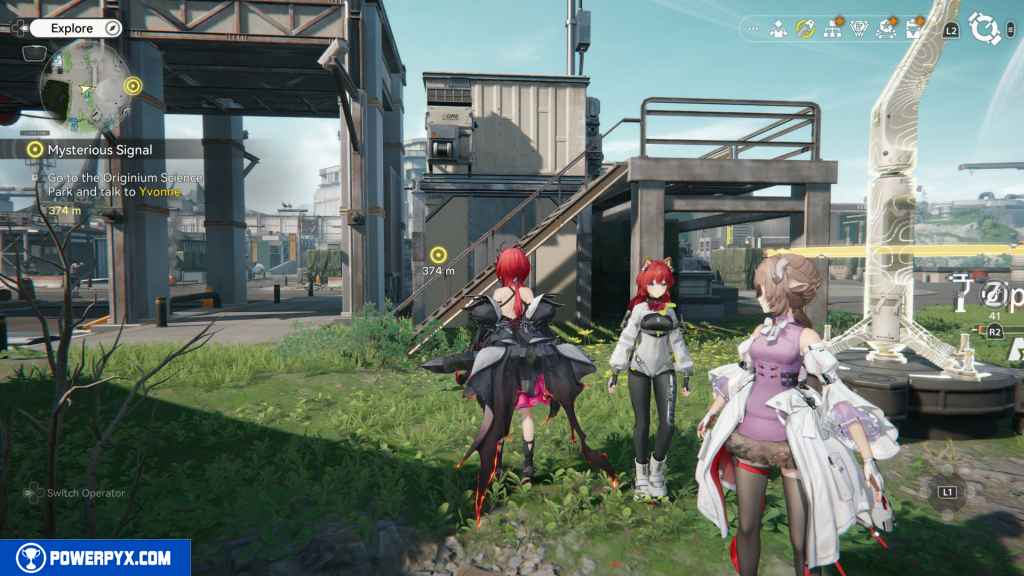
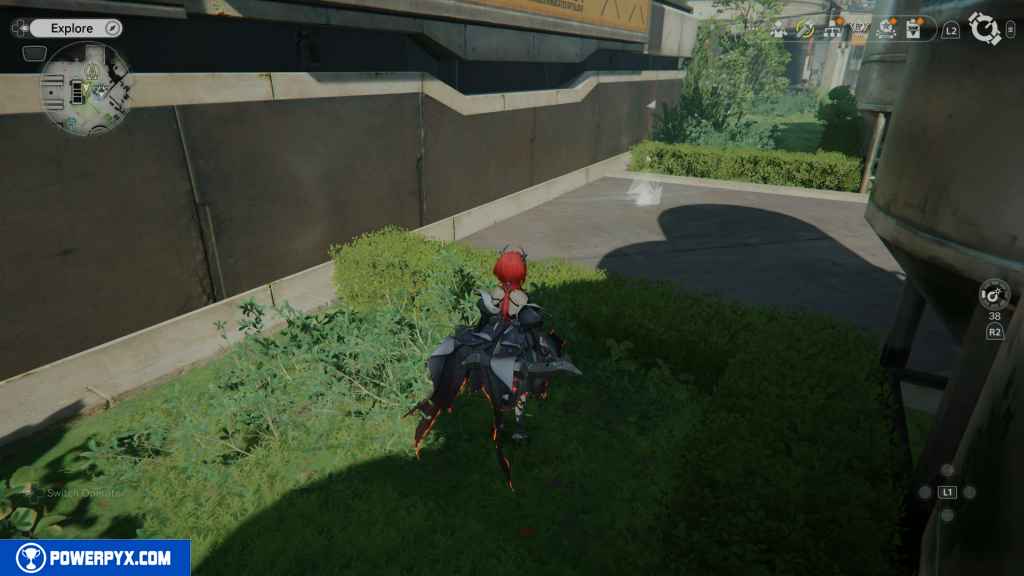
59 – Gathering Point 32
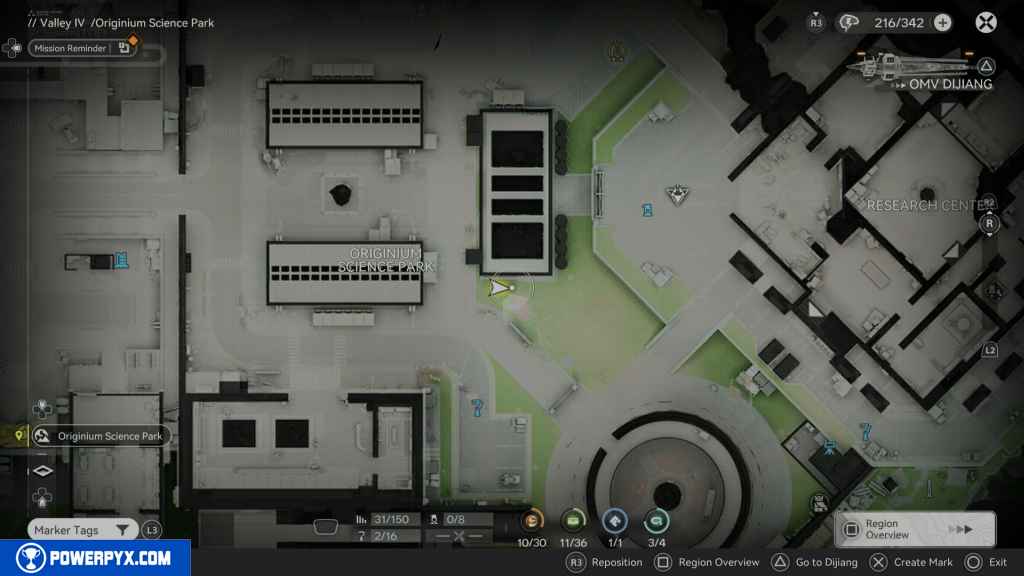
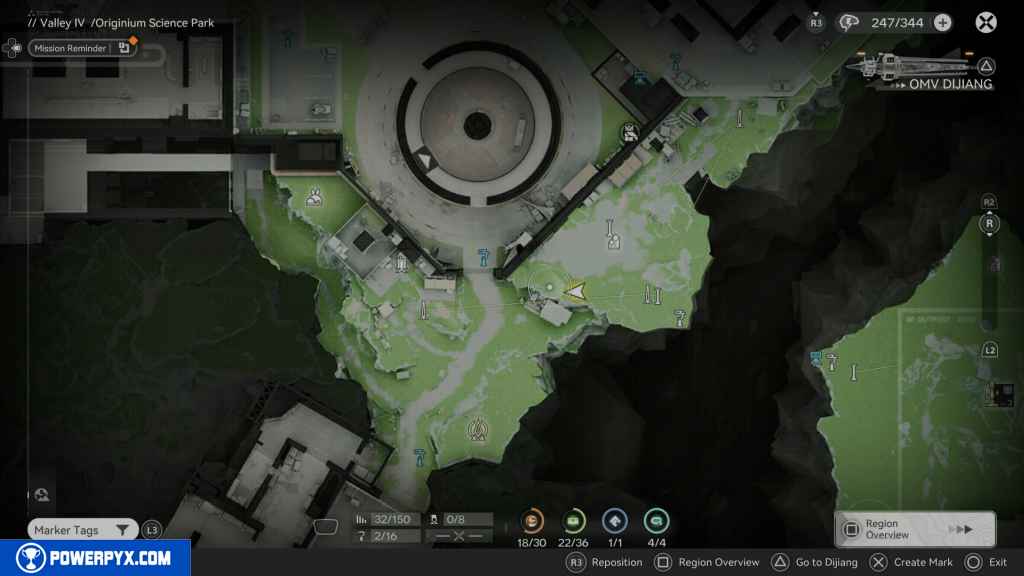
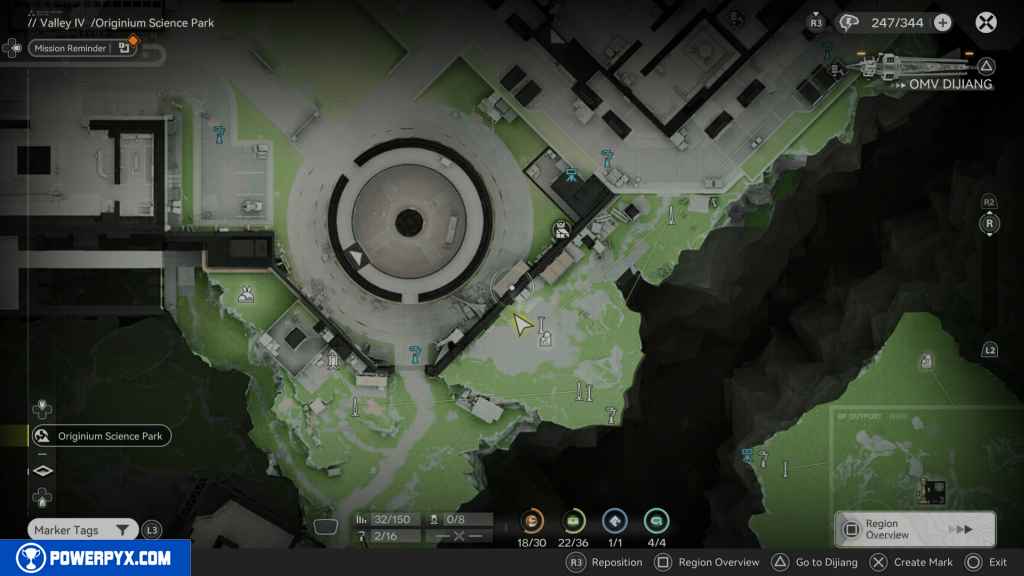
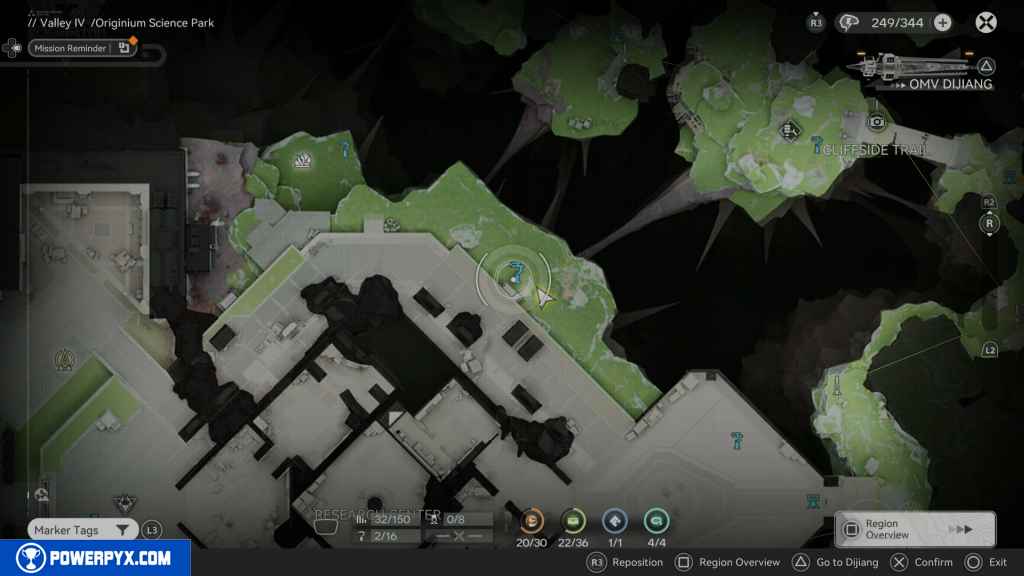
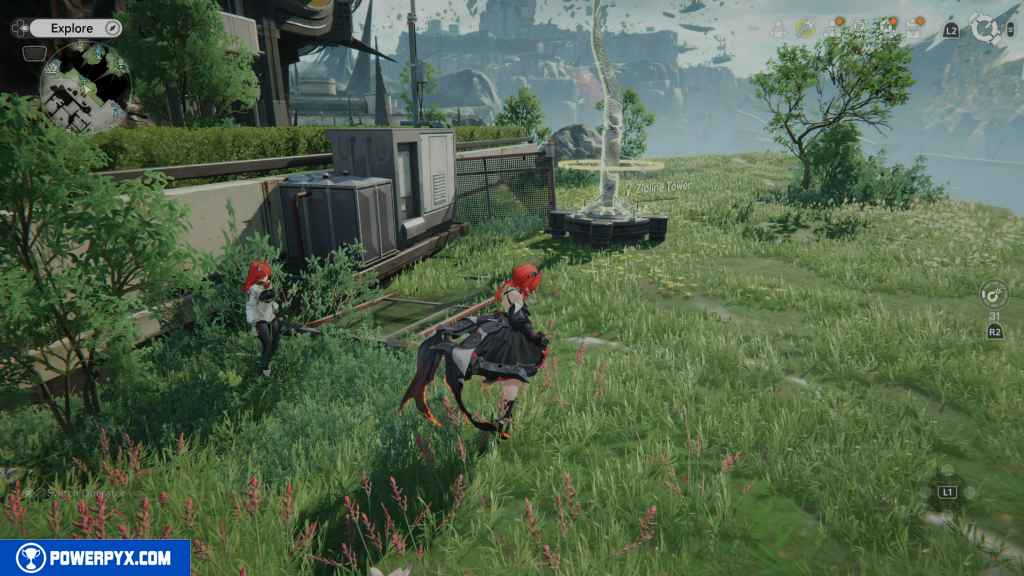
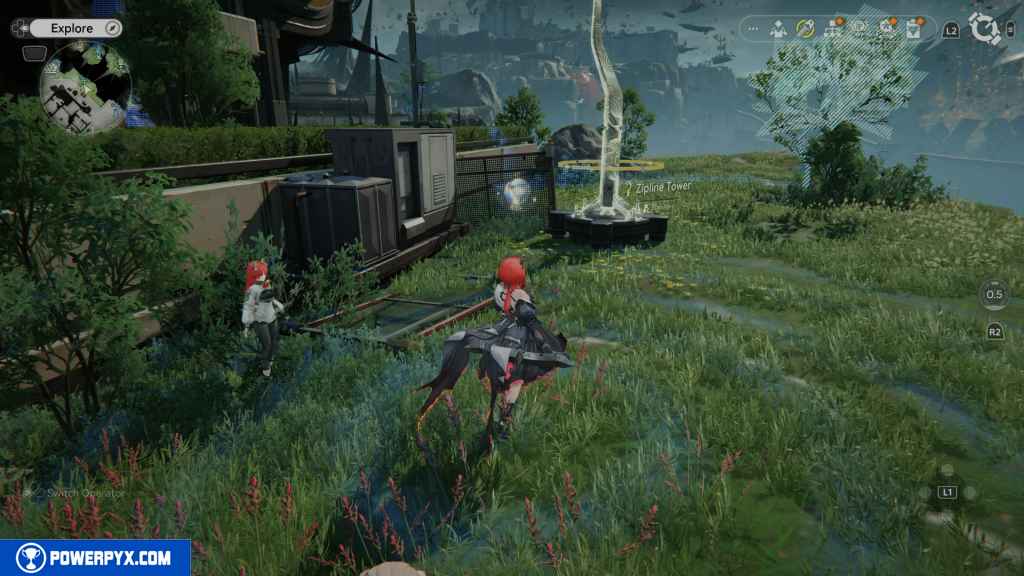
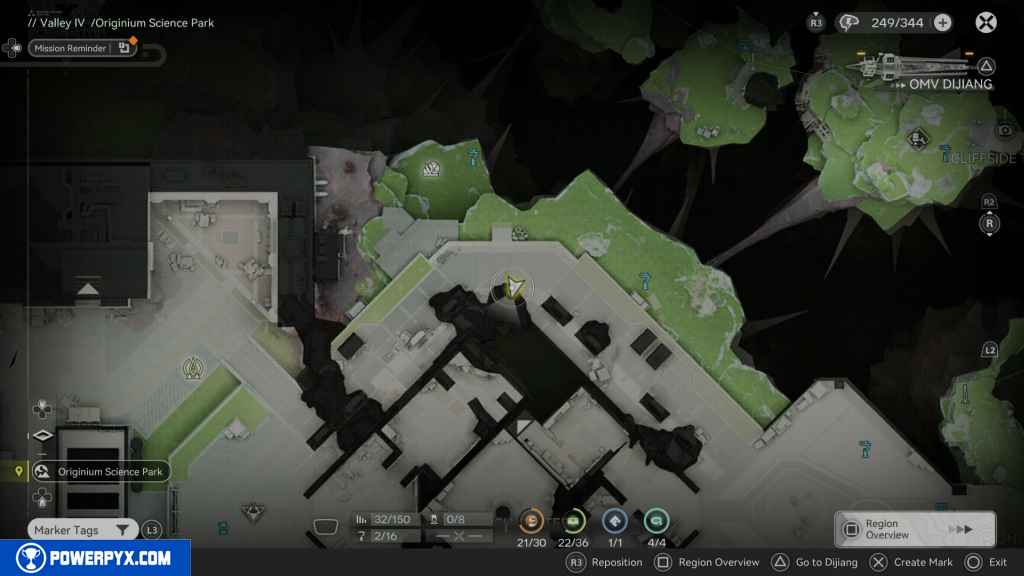
Head to the TP point and turn right. Head south through the grassy area, and you’ll find the next Gathering Point.

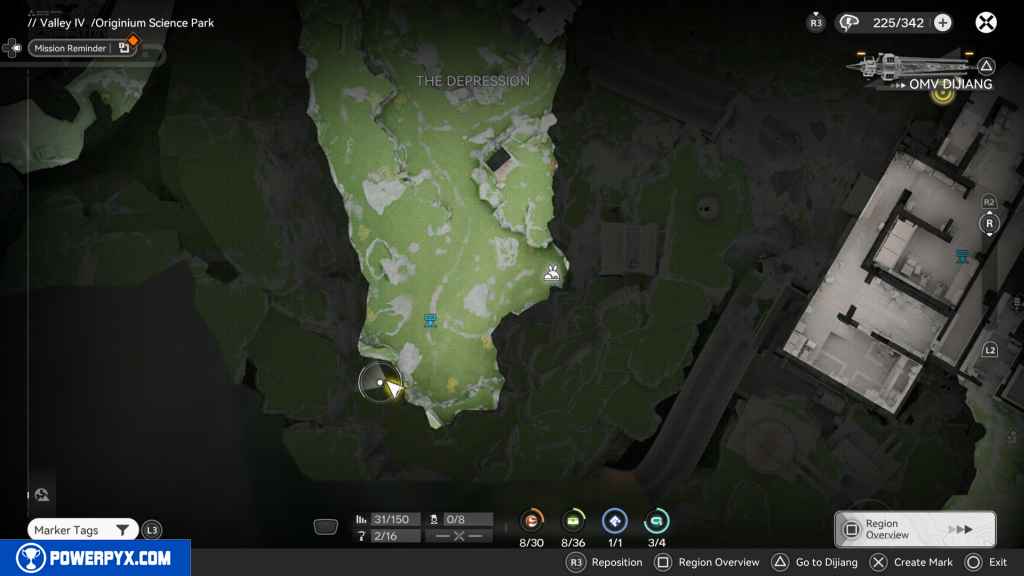
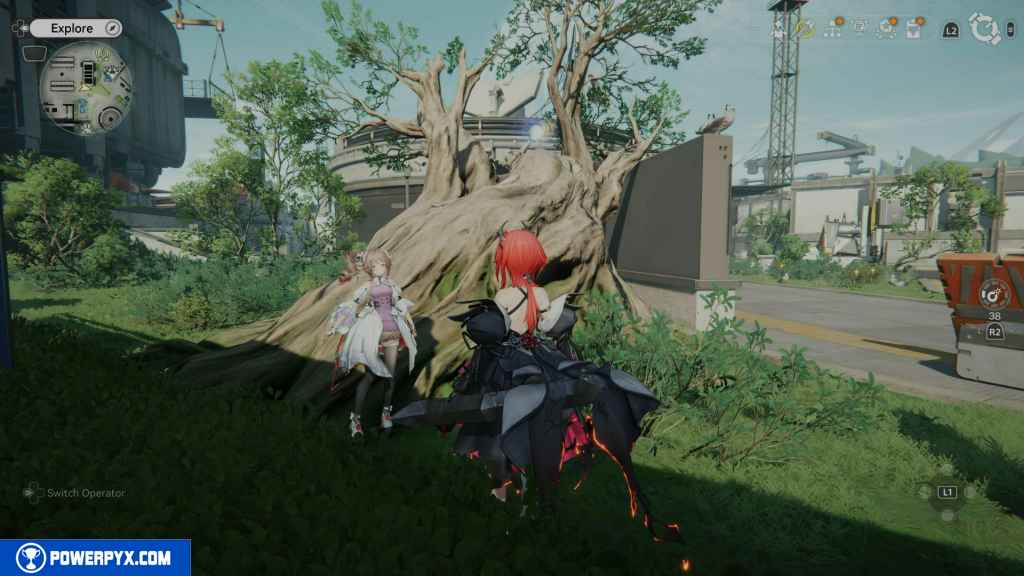
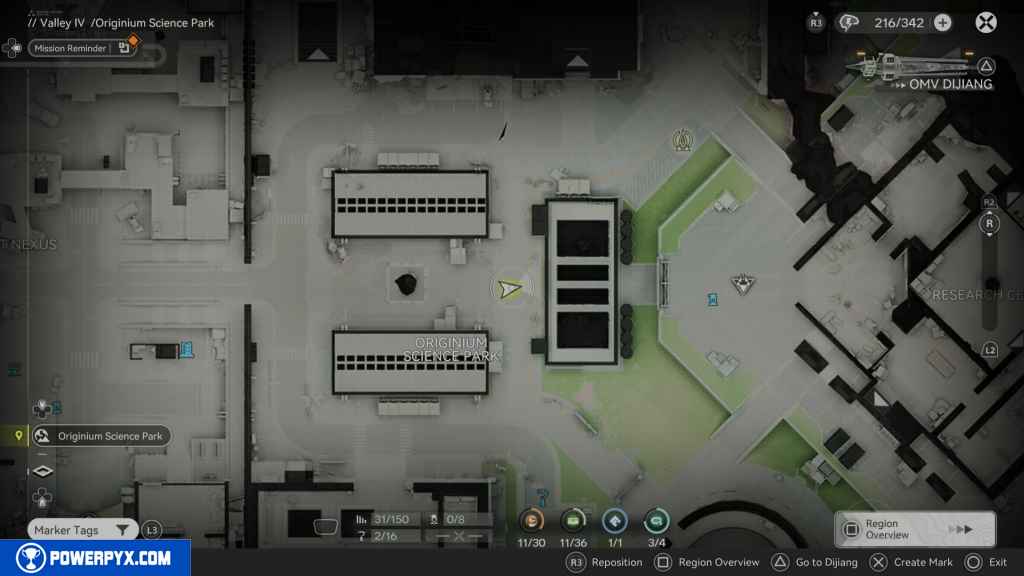
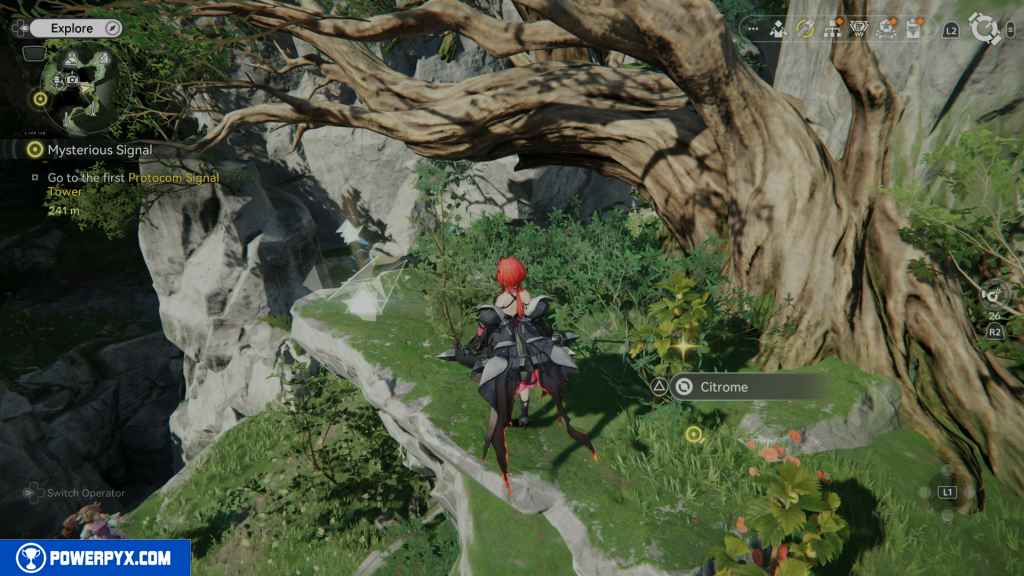
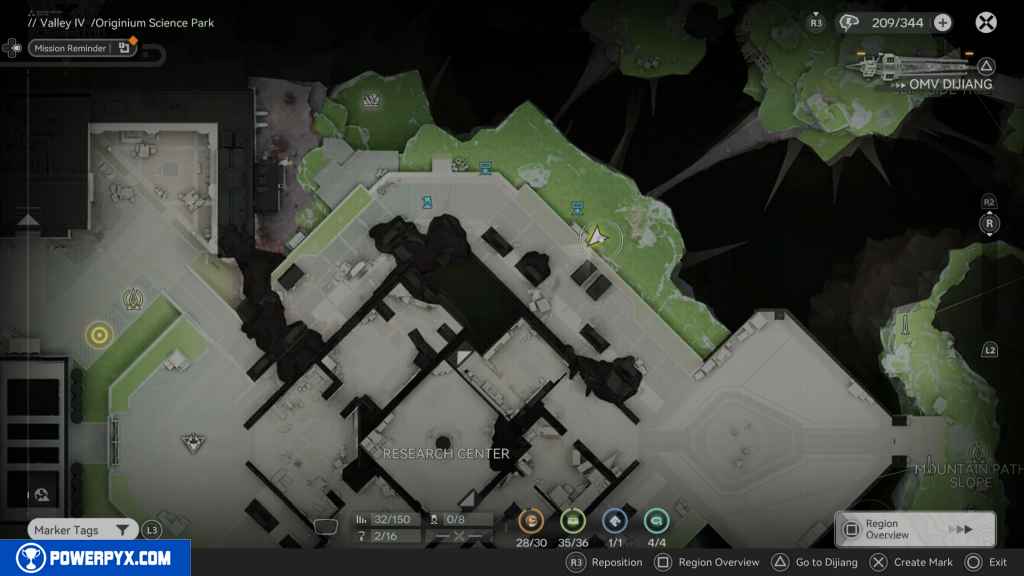
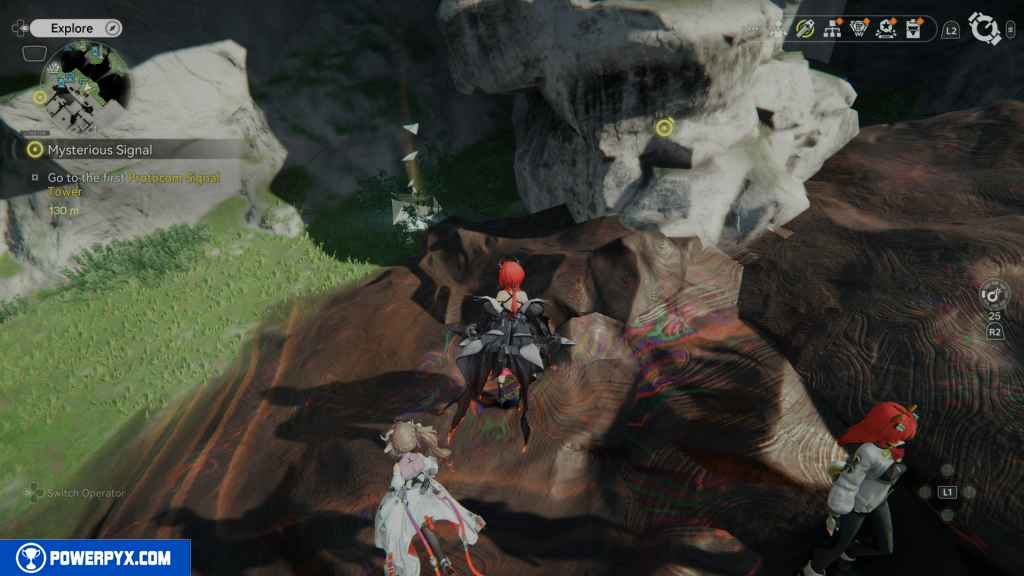
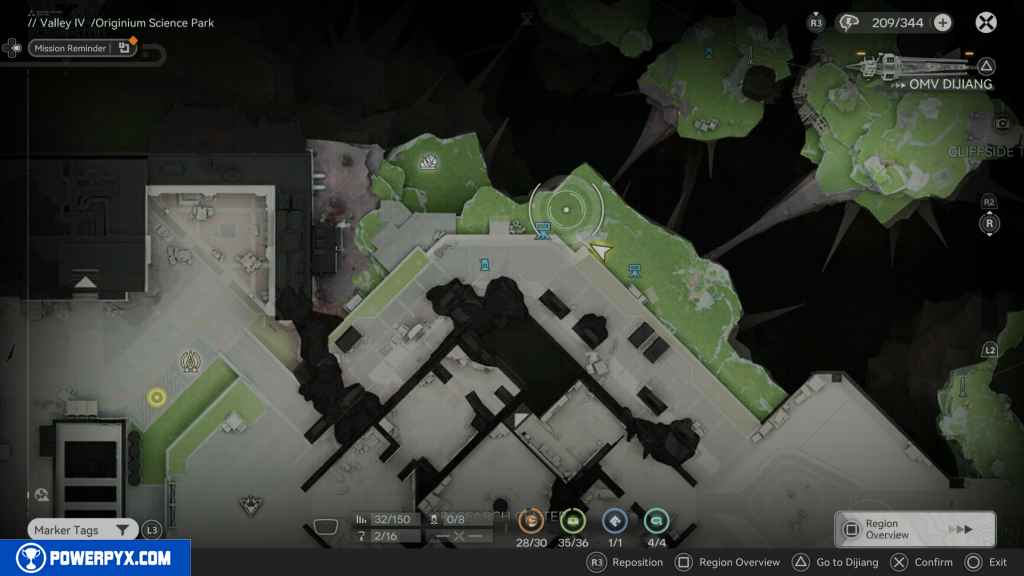
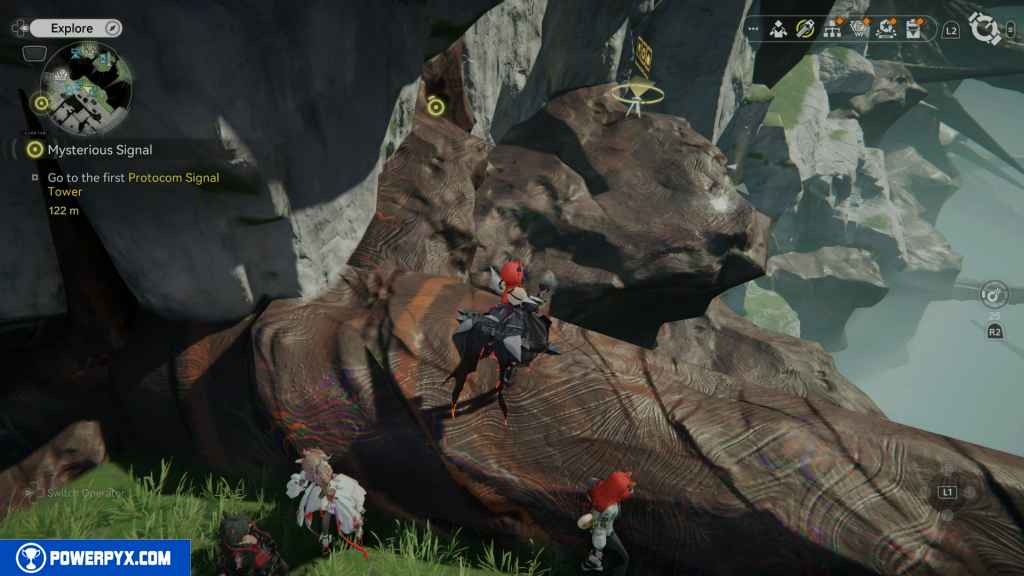
60 – Aurylene 10
Keep heading south until you see a large tree root. At the top of that tree is the Aurylene.
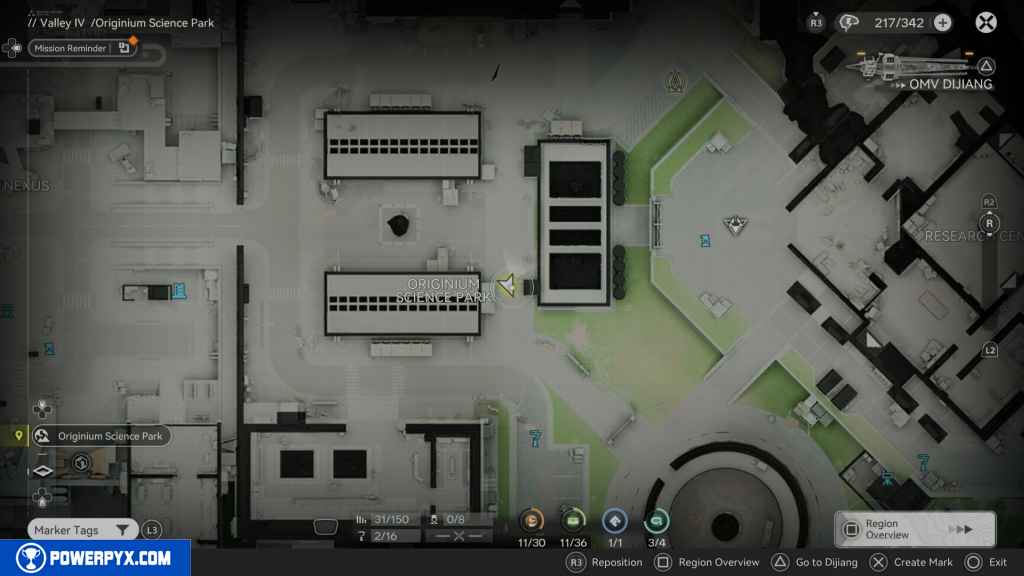
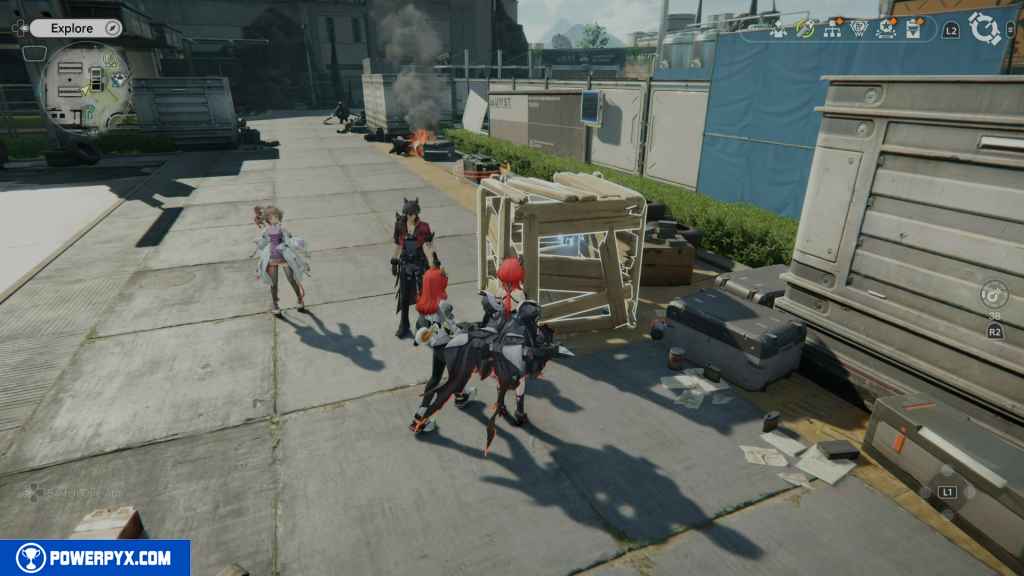
61 – Crate 12
This crate requires you to acquire three blue keys. From the tree trunk, head west and then north. Defeat the Landbreakers in the middle of this area, and you should see the locked crate.

The first Key is in the box you can break south of the chest.
The next is at a green box.
The last Key is to the north.
This unlocks the crate. Go and collect it.
62 – Crate 13
Head southwest from the last crate and enter the museum building with the large rocks. Head south and hand around the counter on your right, and you should find the crate.
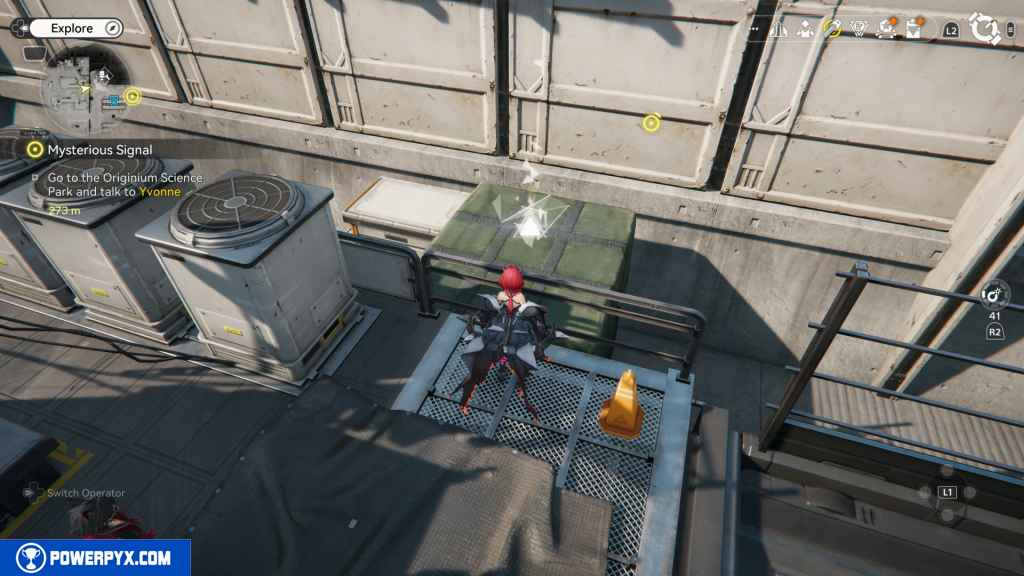
63 – Aurylene 11
Turn around and go east into the small storage room. On your right as you enter the room is the Aurylene.

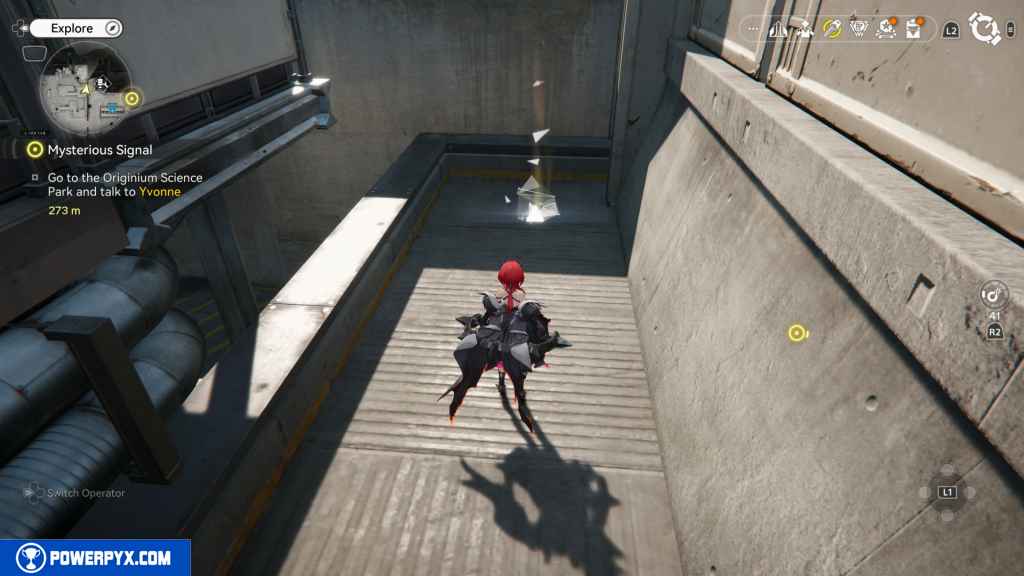
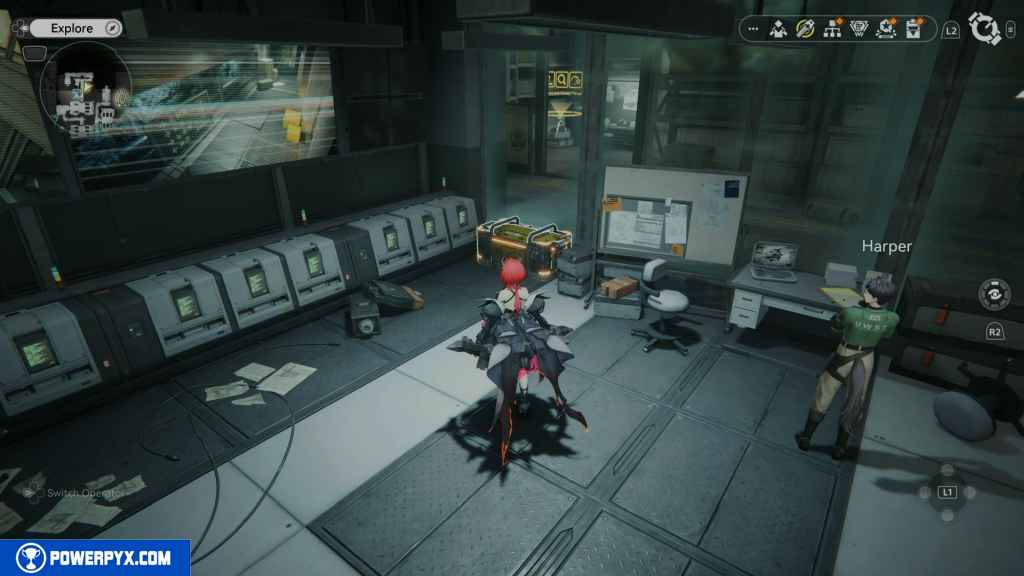
64 – Gathering Point 33
In the same room, look north, and you should see the Gathering Point on a desk on your left.
65 – Crate 14
From the same room on the northeast corner is the crate.
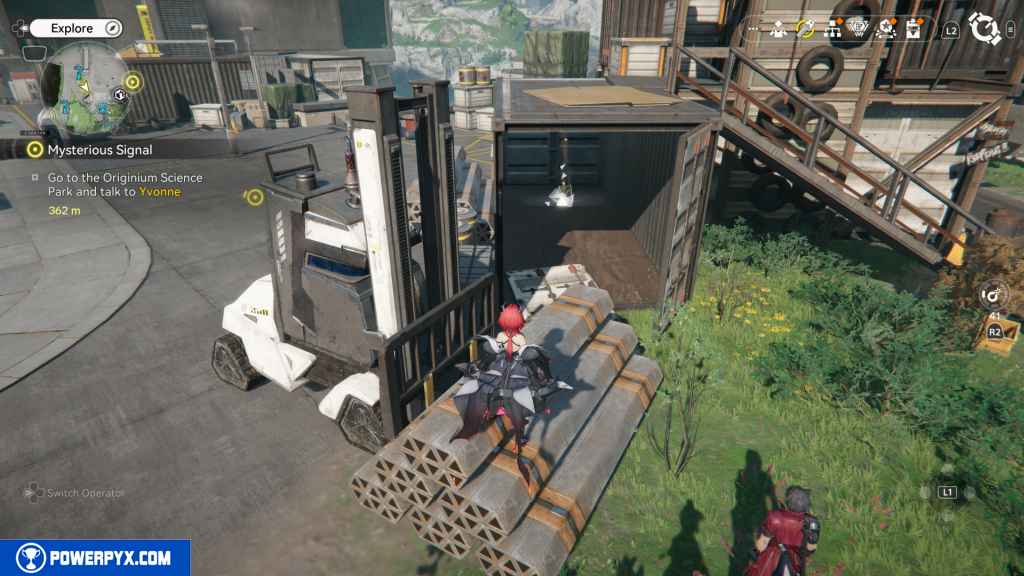
66 – Aurylene 12
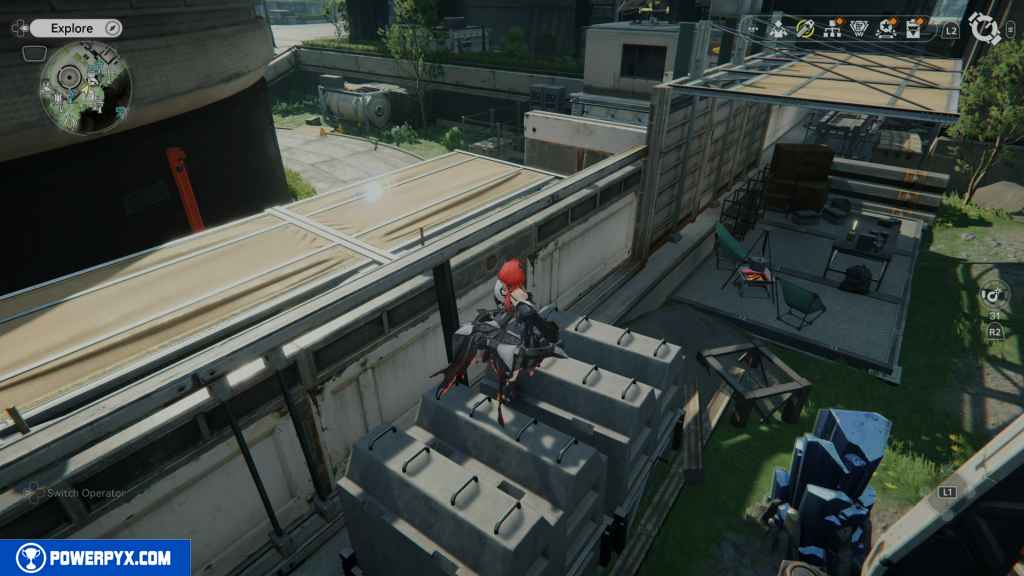
Leave the building and turn east. Go all the way down until you can turn south. Head south and you should see the Aurylene on top of a crate lifted by a forklift. Activate the forklift next to the Aurylene. Then head to the crates on the west. Jump up onto the crates, then onto the green box.


Jump to the box on the forklift, then jump up and grab the Aurylene.
67 – Gathering Point 34
Go in the direction of the Kohl Plant. Go through the large doors and come out to the field. Turn west and run up the small camp. The Gathering Point is on your left.

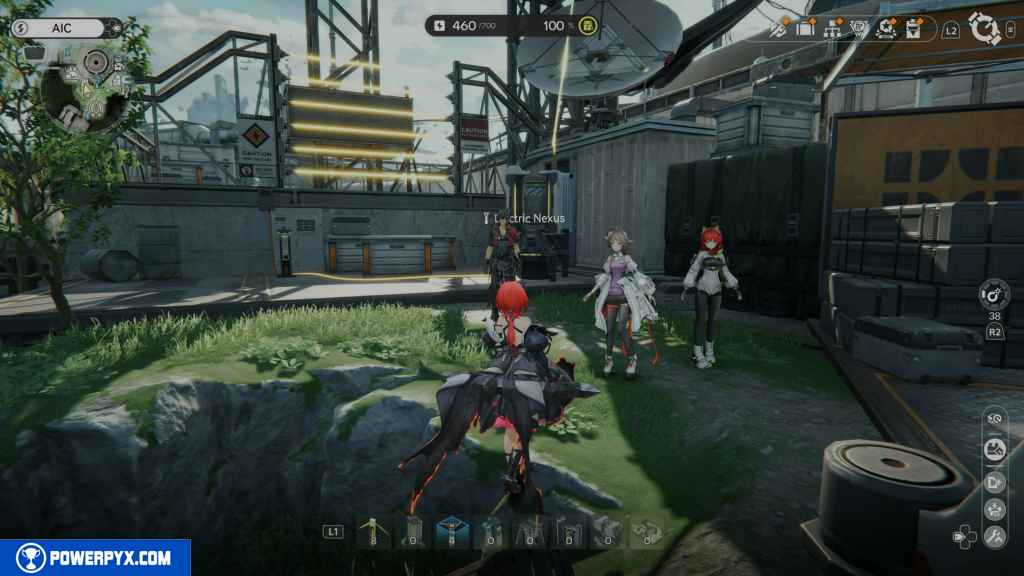
68 – Gathering Point 35
To reach the next area up the hill, you need to route power to the Electric Nexus to unlock the electric gate. Once you’ve done that, head past the electric gate to find the Gathering Point.
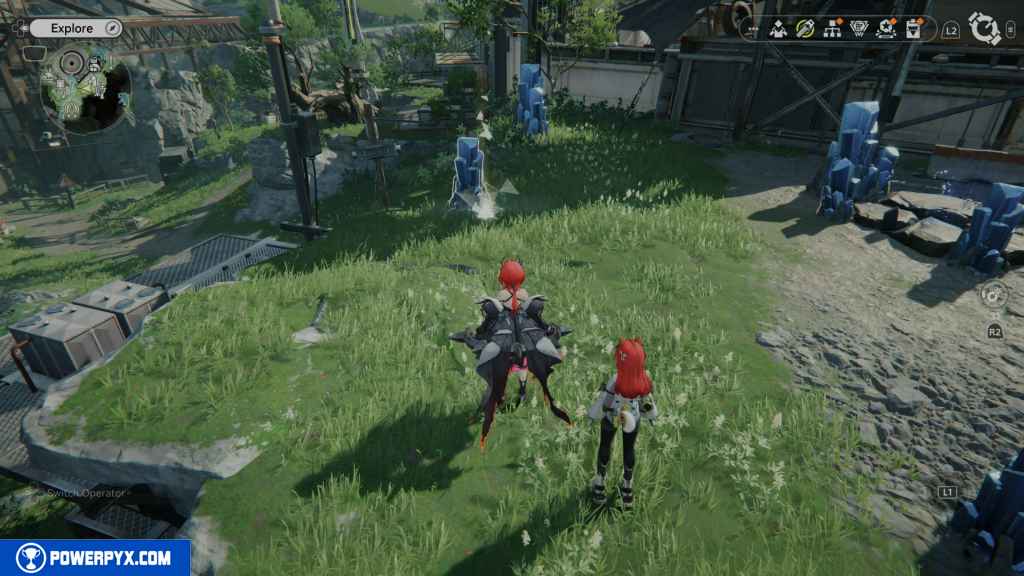
69 – Aurylene 13
Jump up the crates next to where the Gathering Point was. You should see the Aurylene moving around at the material gathering point.
70 – Gathering Point 36
Drop down to the west, and at the top of the stairs heading north, you’ll find some explodable boxes. Blow them up with an Industrial Explosive to reveal the next Gathering Point.
71 – Aurylene 14
Run across the bridge to the west, and you should see the Aurylene on top of a pipe.
72 – Aurylene 15
Continue west, and before going down the stairs, look to your right, and you should see the Aurylene moving around. Jump up the rocks to grab it.

73 – Gathering Point 37
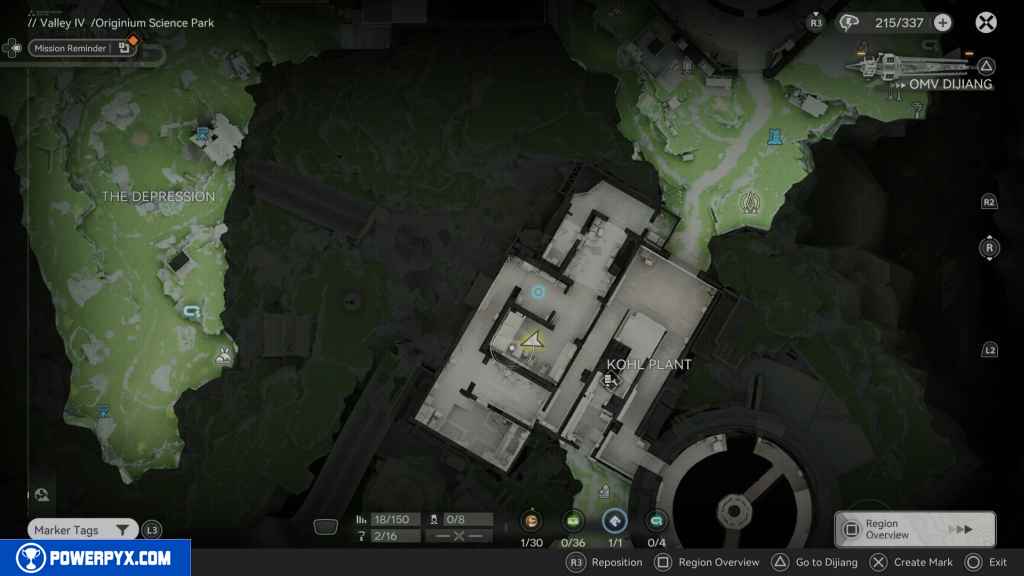
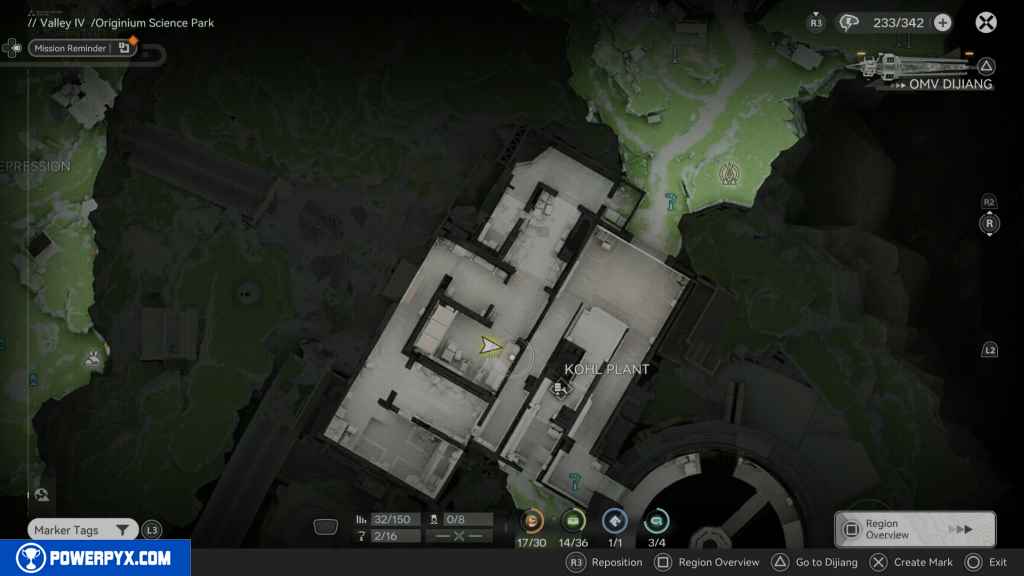
If you haven’t completed Side Mission – Explosive Rescue, now is the time to do it. Head to the Kohl Plant and begin the mission. Follow the path until you have to climb some boxes to blow up some explosive boxes blocking a door through a crack in the wall. At the top of these boxes is the Gathering Point.
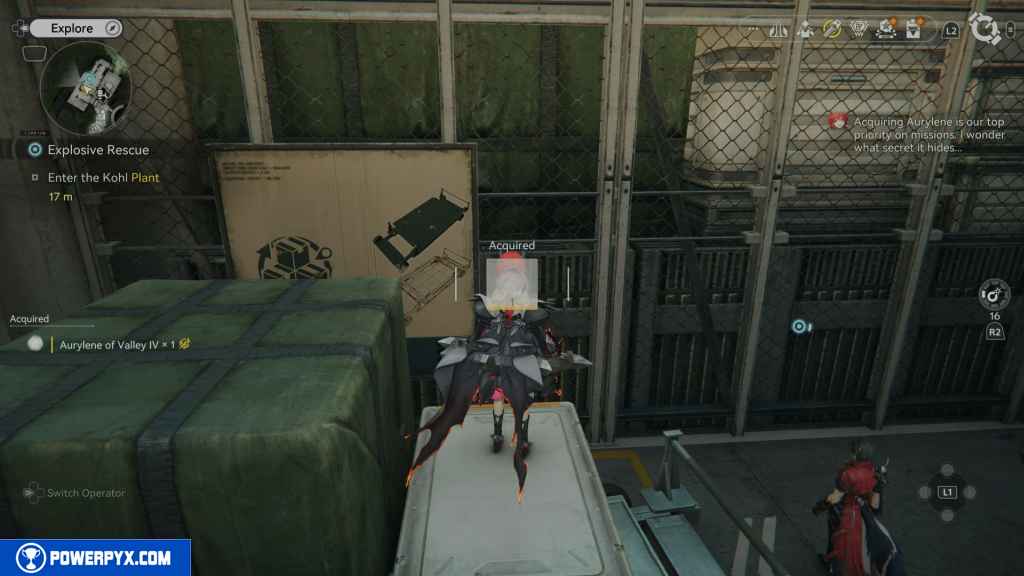
74 – Aurylene 16
Head into the room you opened, then look to your right for the Aurylene. Jump up the boxes to get it.

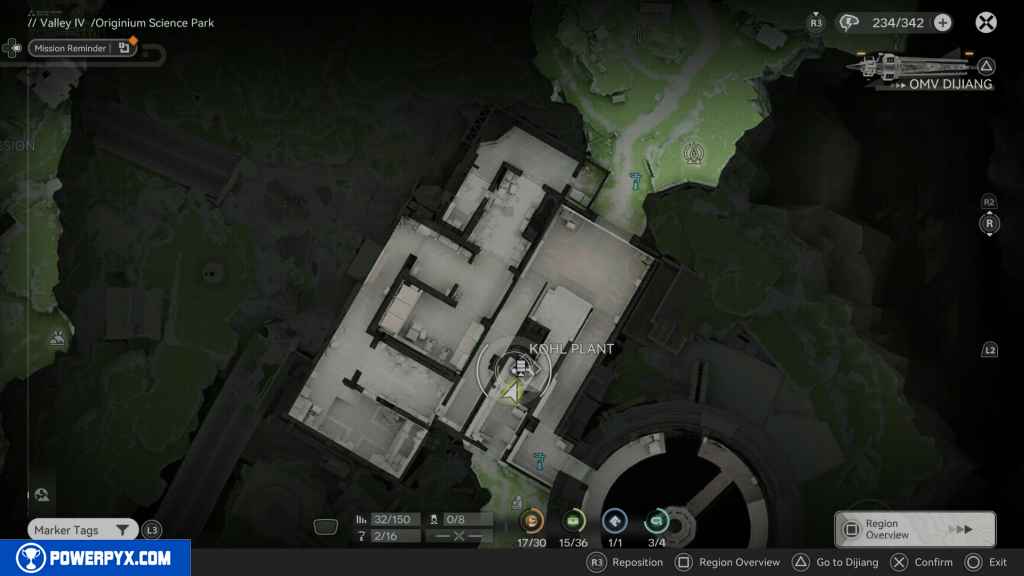
75 – Aurylene 17
Head through the electric gate, and you should see the Aurylene. It will move away from you and go up some boxes in the area with the forklifts. Jump up and grab them.
76 – Crate 15
East of the Aurylene in the same area, look for the crate between two shelves.

77 – SOS Repair Bot 5
Continue on the path until you reach the area where you have to blow up a wall to the west. Go inside and turn right to find the SOS Repair Bot.

78 – Crate 16
More down the stairs from the Repair Bot, heading north to find this chest on the roof.

79 – Gathering Point 38
Head inside the giant fan. On the right, look for the rope. Take it down and head east to find the Gathering Point on top of the conductor box.
80 – Crate 17
In the center of the fan belt, where there is a large glowing red light, you’ll find the crate.
81 – Crate 18
Continue on the path, and you should see another rope on your right side. Use it to go up, and the crate should be on the left.
82 – Aurylene 18
From the crate, turn around and look up. You should see the Aurylene. Use an Industrial Explosive to blow up the debris. The plate will start to move. To reach it, climb up the crates south of your location to reach the Aurylene.
83 – Crate 19
This crate is impossible to miss. When you walk through the door to leave, the giant fan will be right in front of you.
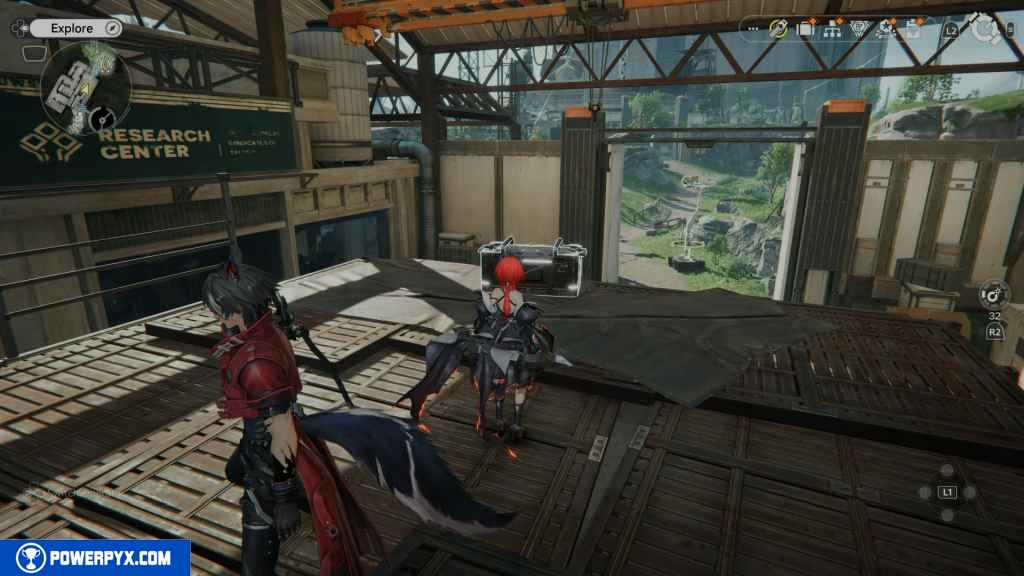
84 – Crate 20
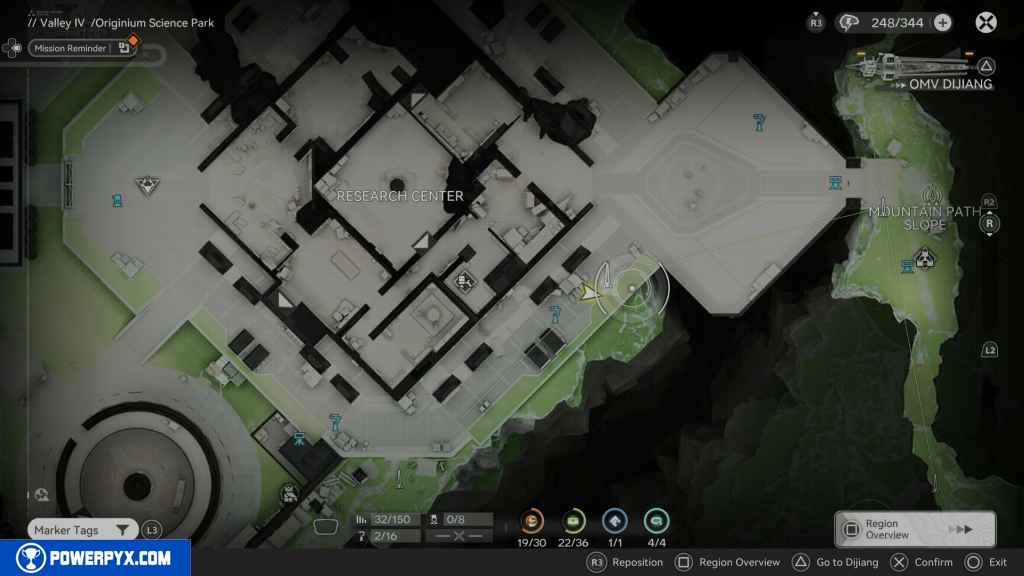
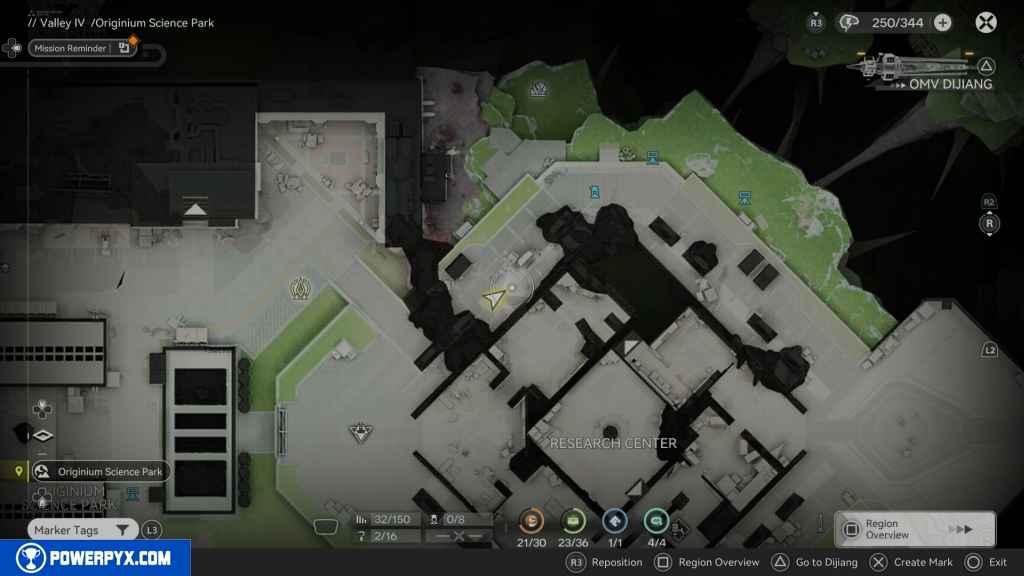
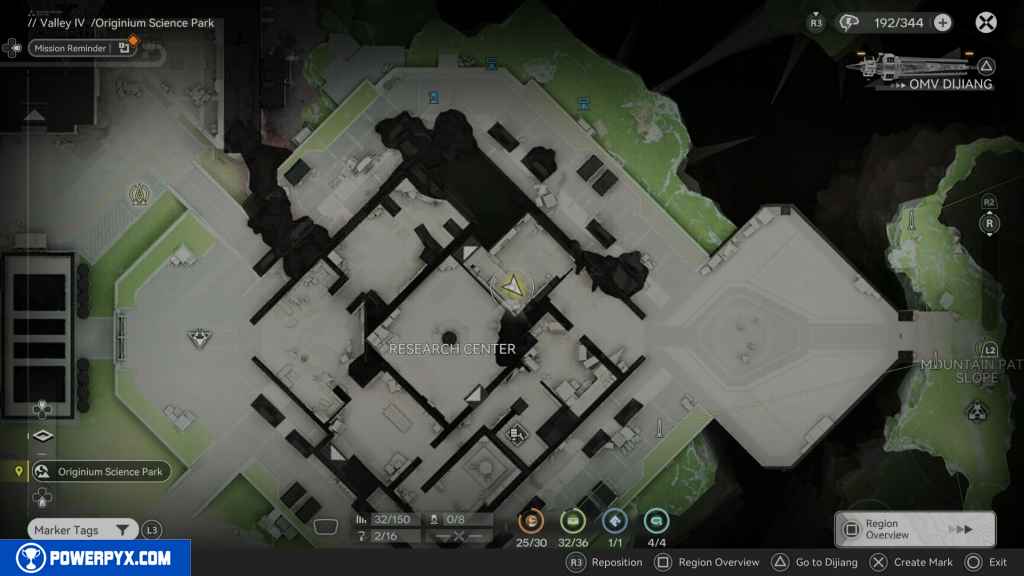
Now head to the Research Center. Instead of going inside, we will take the path southeast. Run down this path past some small buildings, and you should see a crate on the floor.
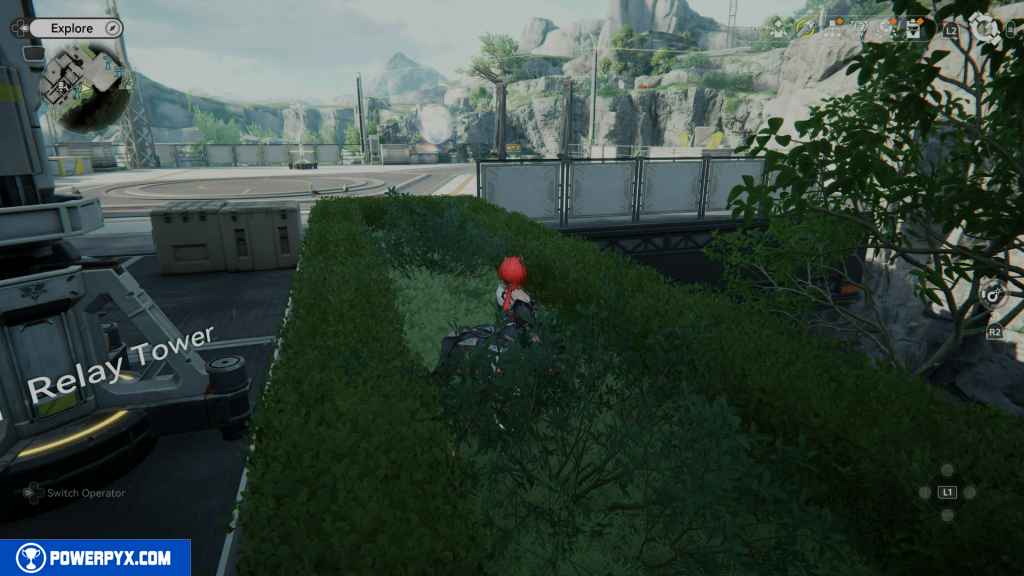
85 – Crate 21
From the last crate, look west and jump into the bushes. If you look down, you should see a small area with a locked gate. Fall into that area, and around the corner of the building is the crate.
86 – Gathering Point 39
Head back up to where you dropped down. Continue east and then north. Go around the boxes and the column to find the Gathering Point.
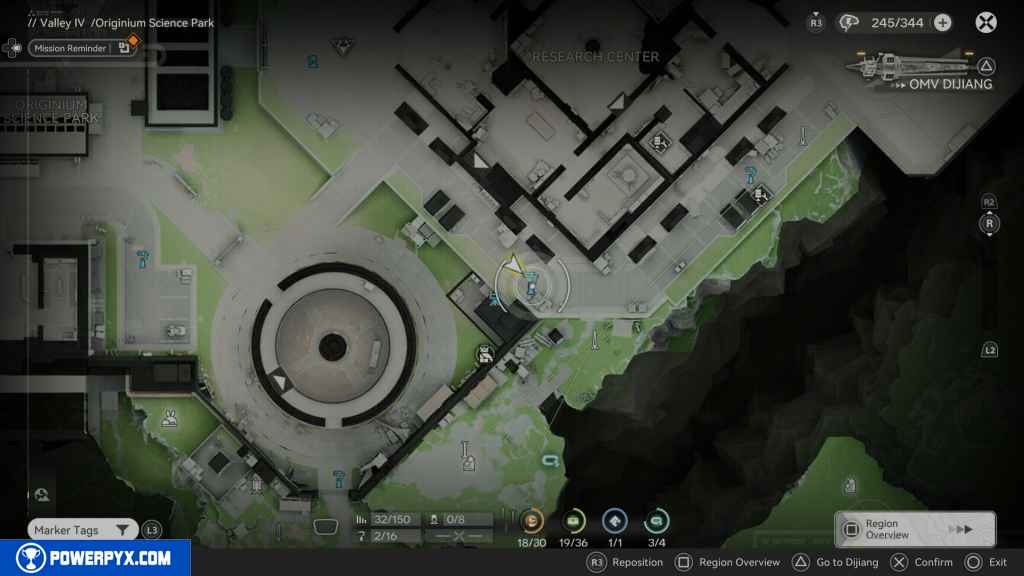
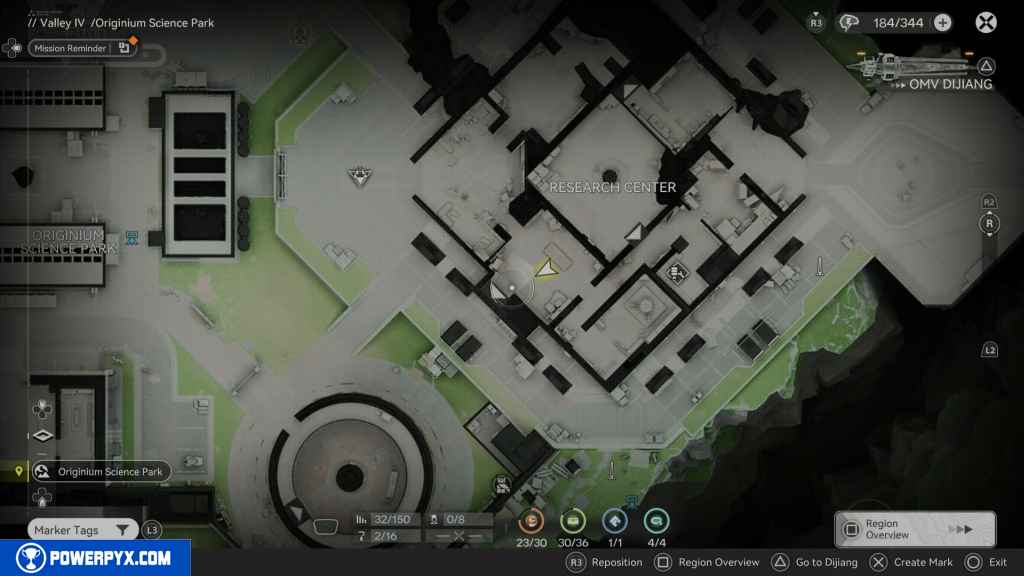
87 – Protocol Datalogger 4
Head south from the gathering point into the grassy area. Go around the mining areas to find the Datalogger at the edge of the cliff.
88 – Crate 22
South of the datalogger behind the rock is the next crate.
89 – Gathering Point 40
West of the crate, you should see the Gathering point by some minerals.
90 – Aurylene 19
Go north from the Gathering Point, and you should see some gray crates on the other side of those crates and the wall; you should see the Aurylene. Jump over the wall and grab it.

91 – SOS Repair Box 6
Go back northeast and continue until you reach the Repair Box on your right.

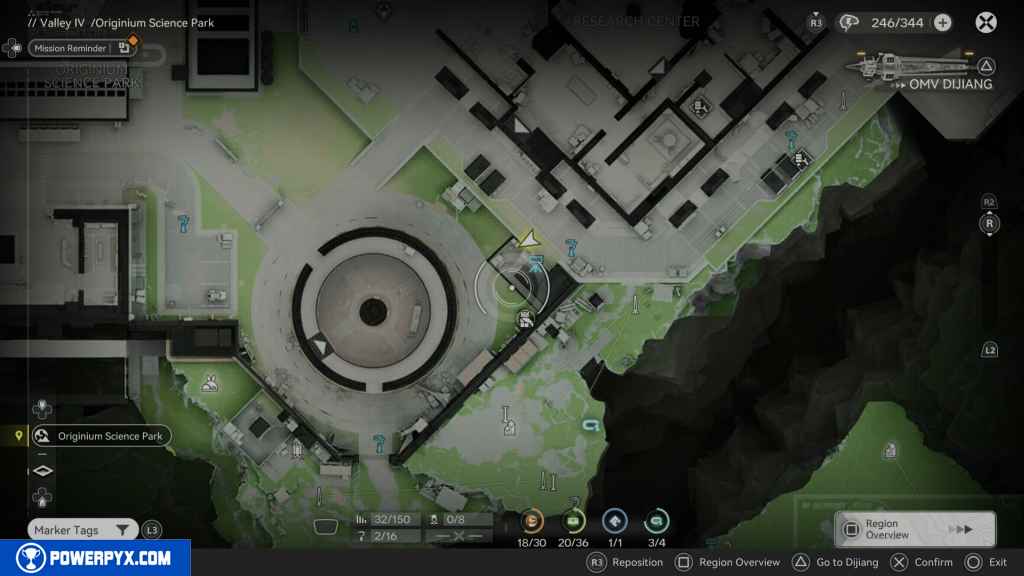
92 – Aurylene 20
A few feet north of the Repair Box in the bushes, you should see the next Aurylene. It will fly away. Chase it down and acquire it.
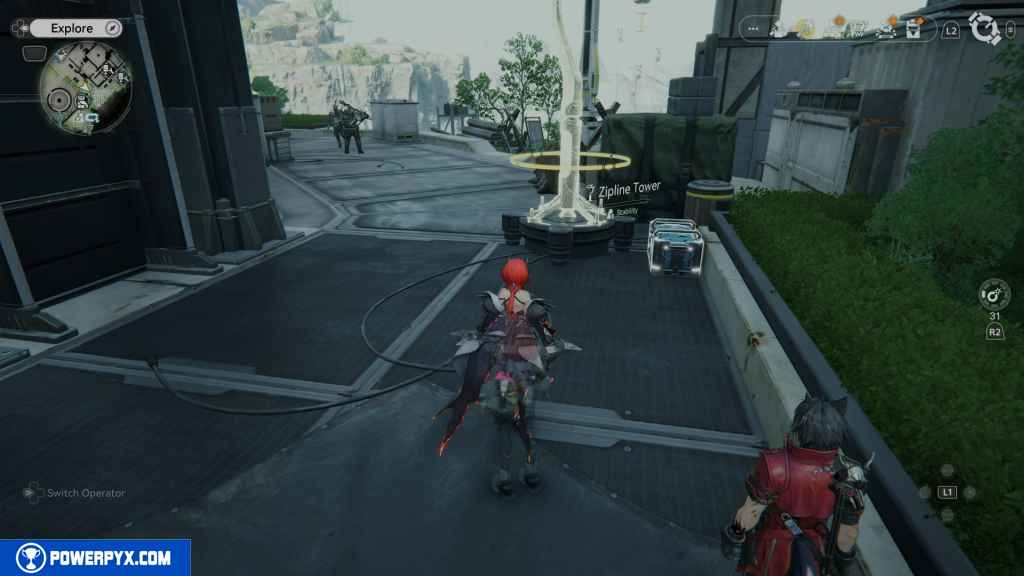
93 – Aurylene 21
Continue north until you reach the halfway point. You’ll see an old tree just over the side. This Aurylene is located in the grassy area with the two conductor boxes. Use your scanner on PS5 and it will reveal itself. Chase it down to acquire it.
94 – Crate 23
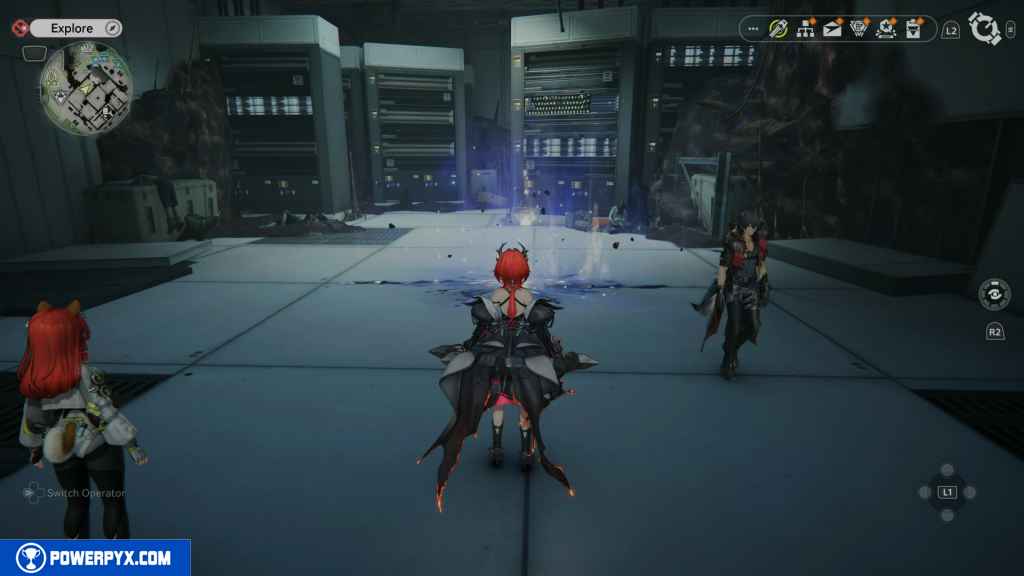
Head west, and you should see a glowing light on the ground. Activate the Energy Alluvium and defeat enemies until the chest pops.
95 – Aurylene 22
Continue around the building to the southwest, and you should find another hidden Aurylene. Use your scanner again to reveal it and grab it.
96 – Crate 24
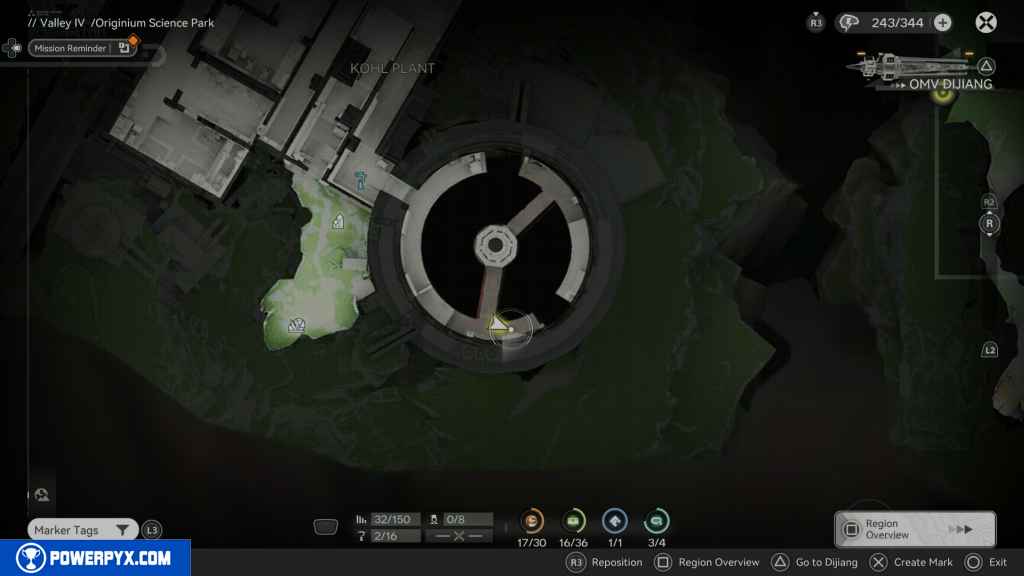
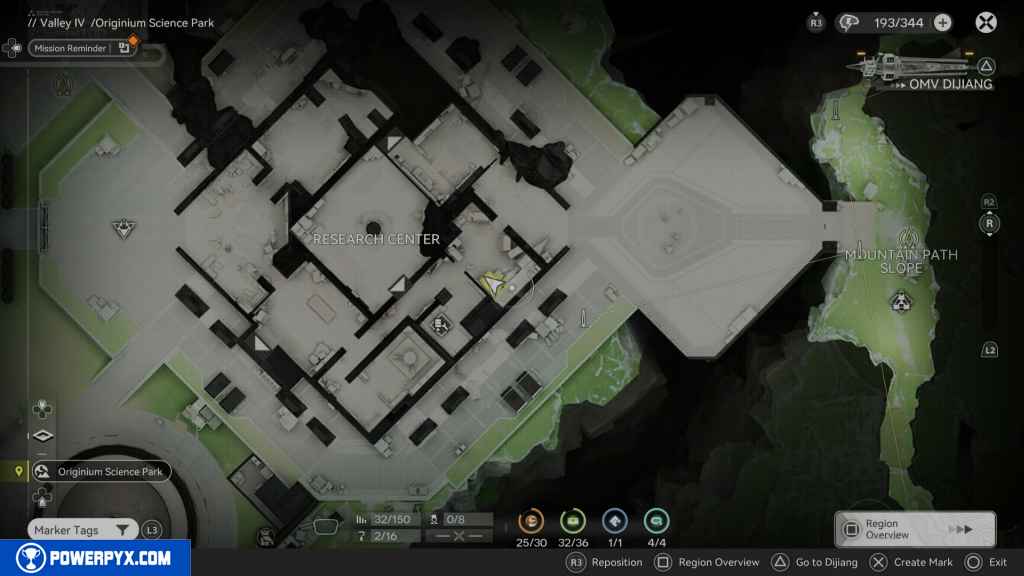
Return to the round building south of the Research Center. Head inside it and drop down to the Underground Area. On the east side of the room is the crate.

97 – Gathering Point 41
Next to the crate on your left is the Gathering Point.
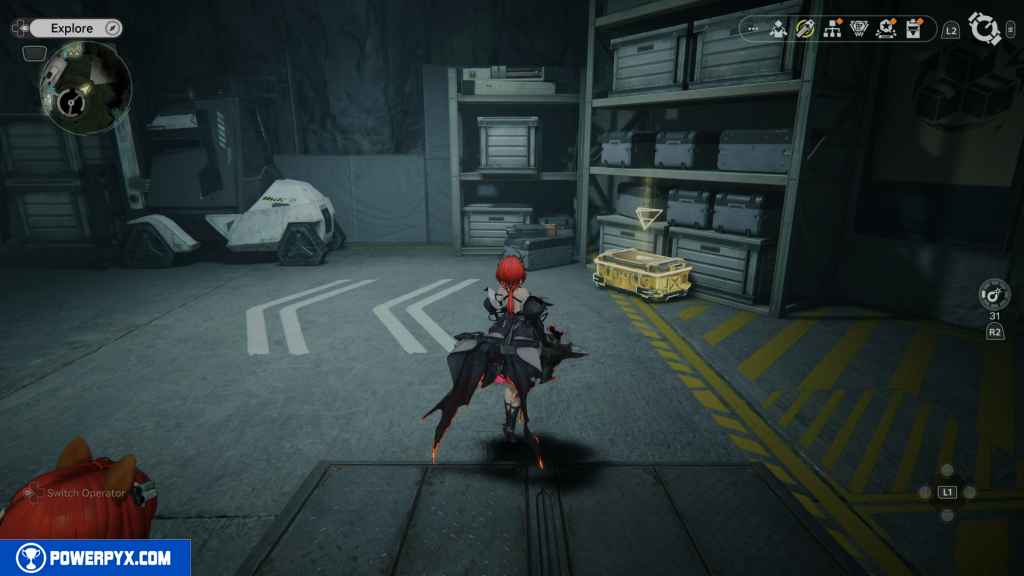
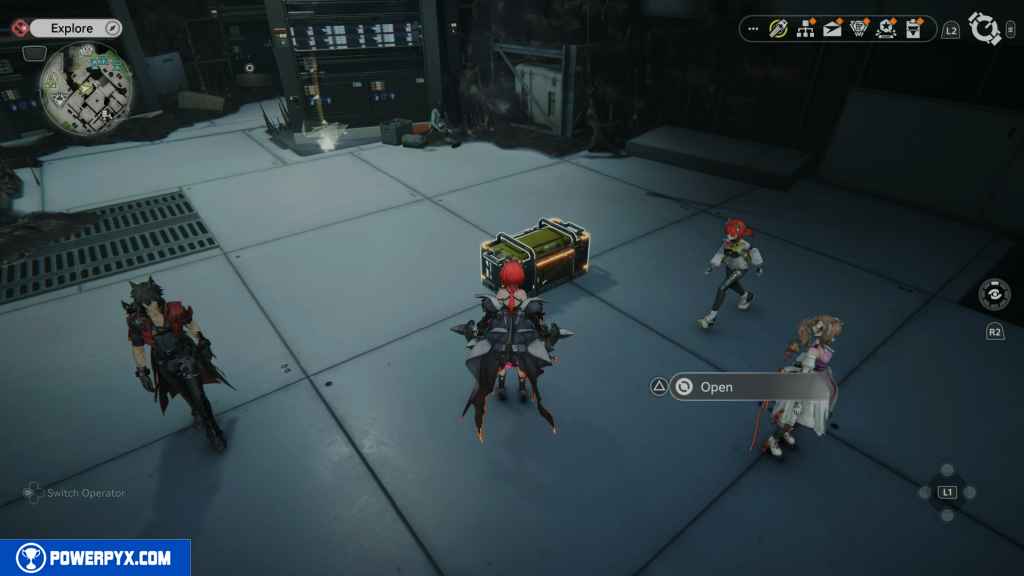
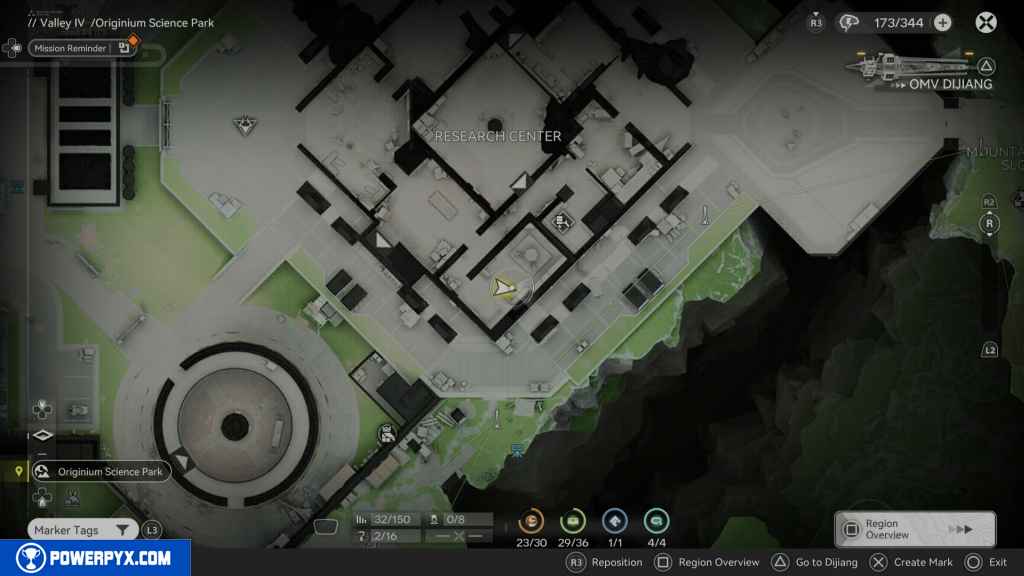
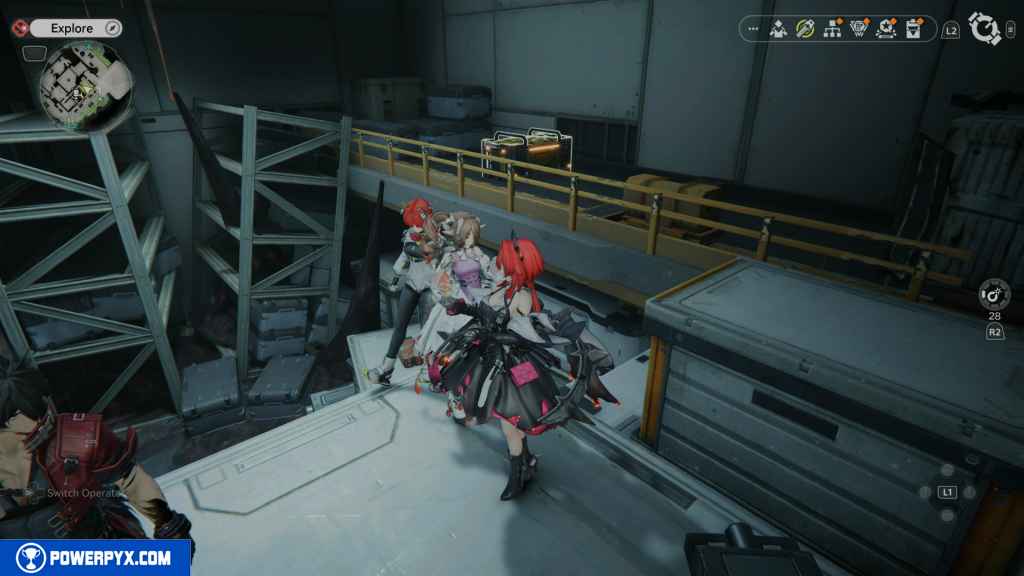
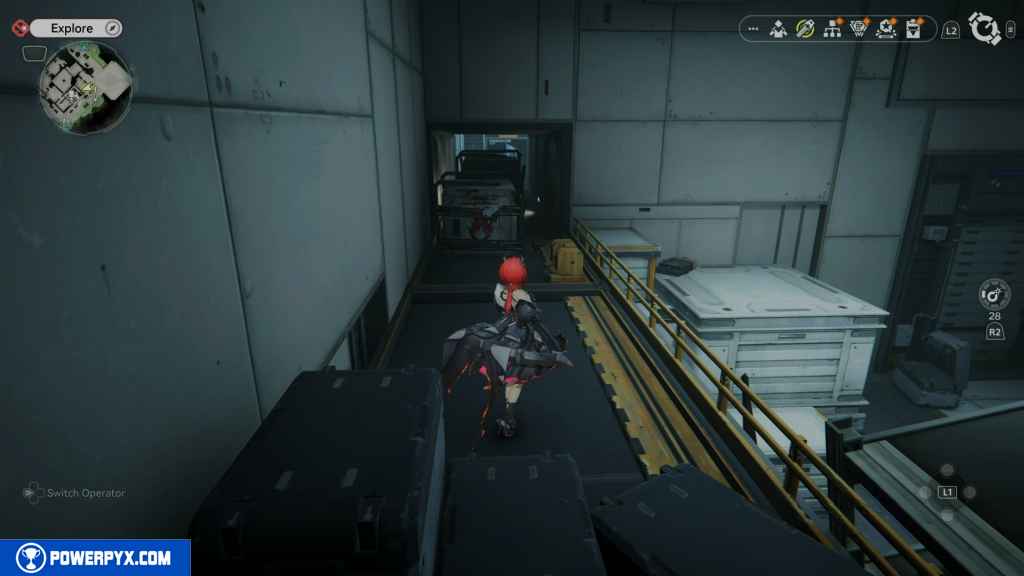
98 – Crate 25
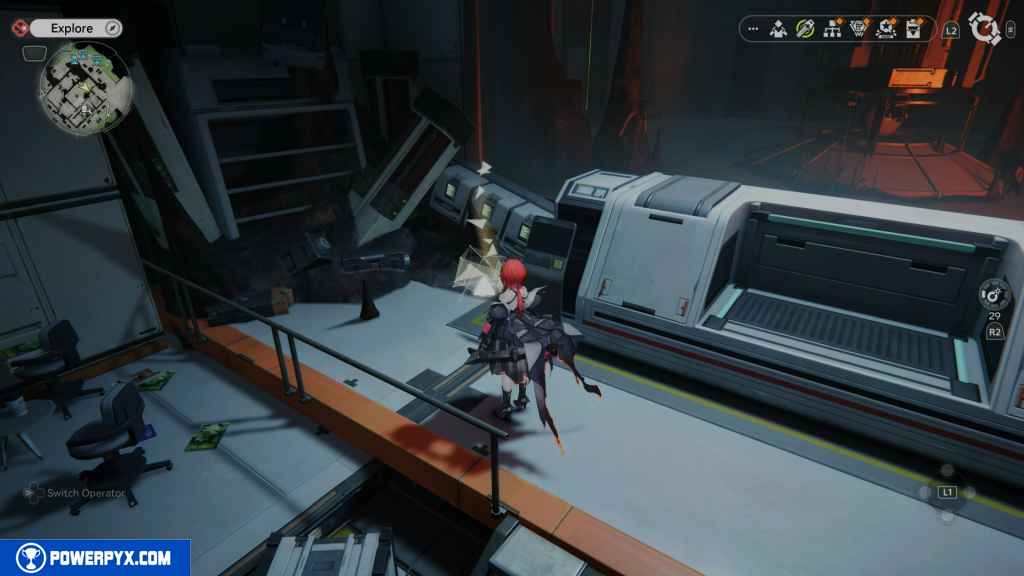
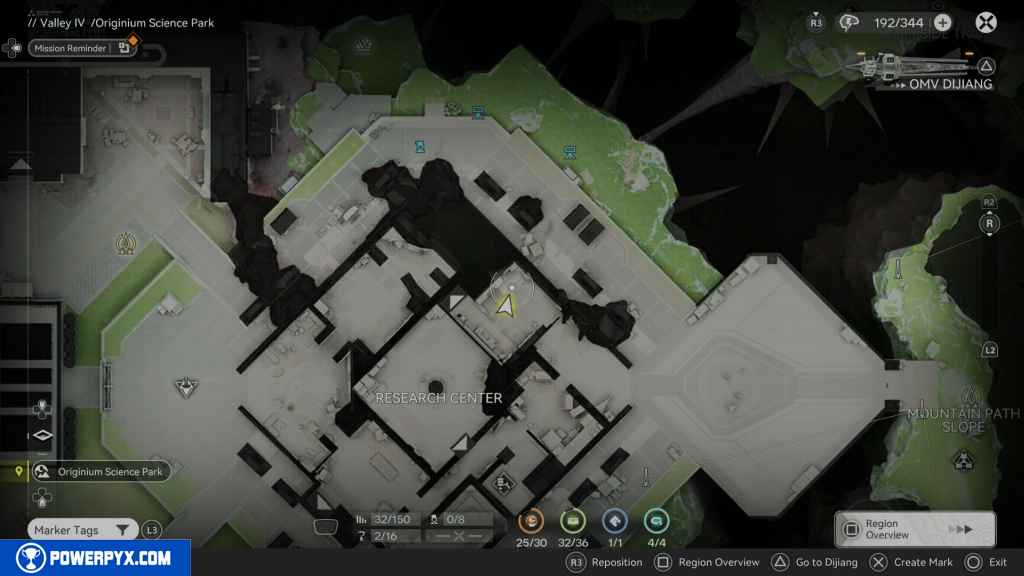
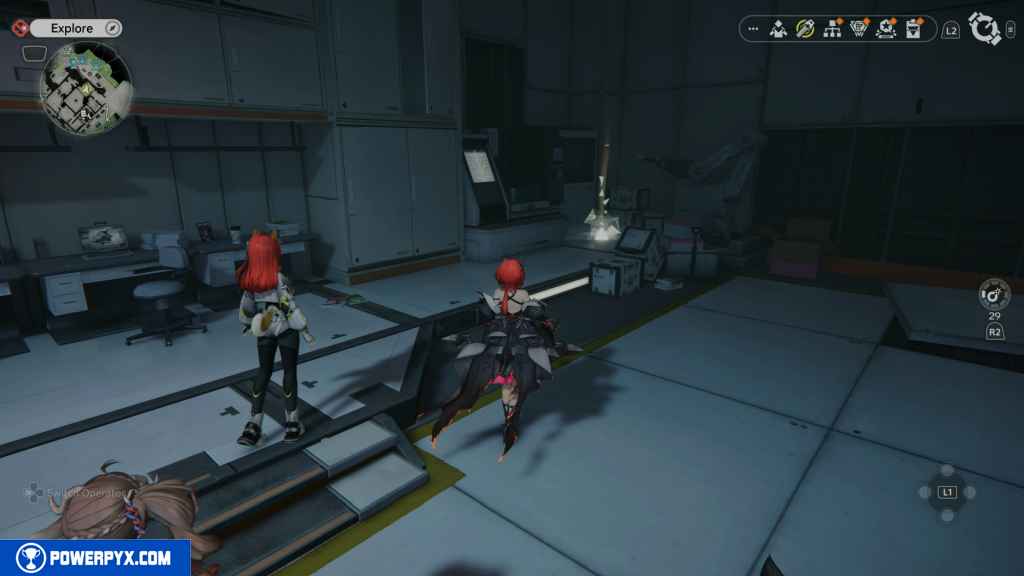
Continue into the facility. Run past the big research room to a T-Intersection. Turn right and head north. Continue north until you reach the elevator. On the right side, behind a bunch of boxes, is the crate.
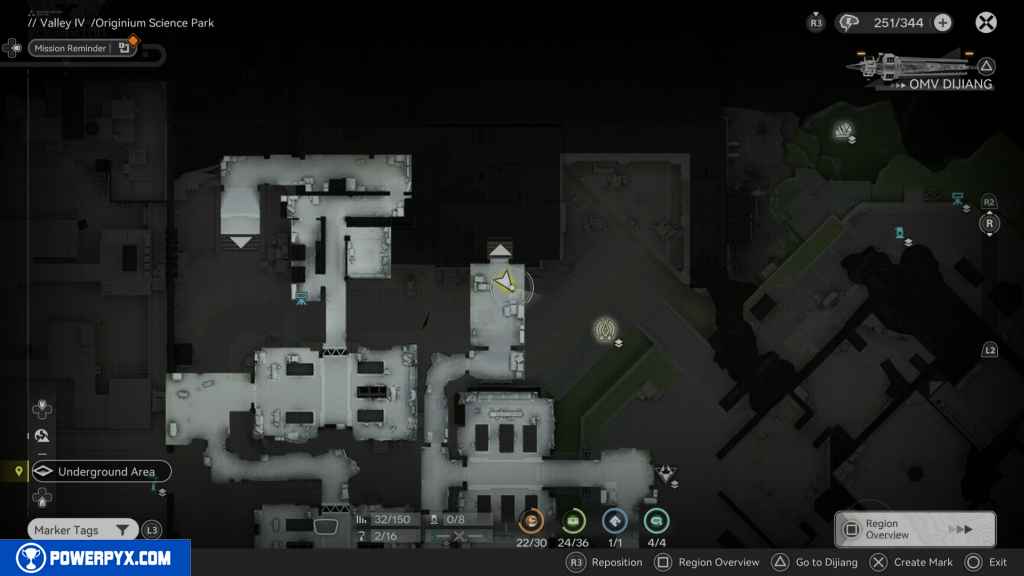
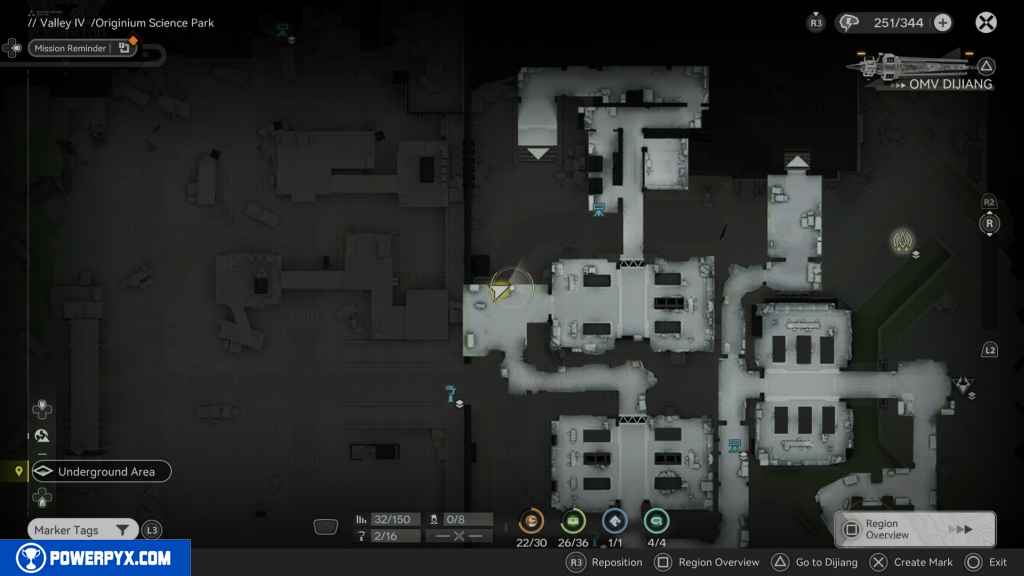
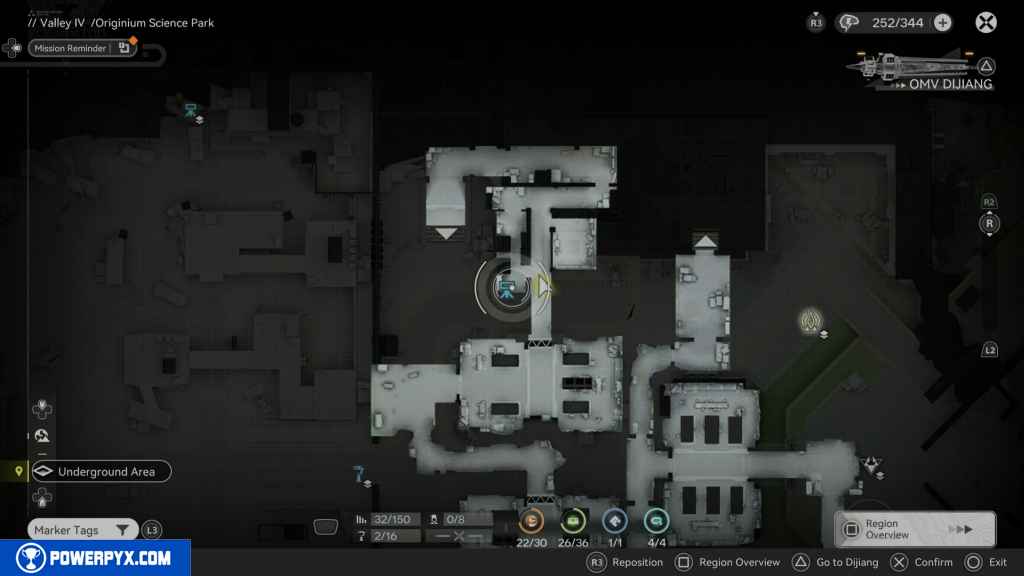
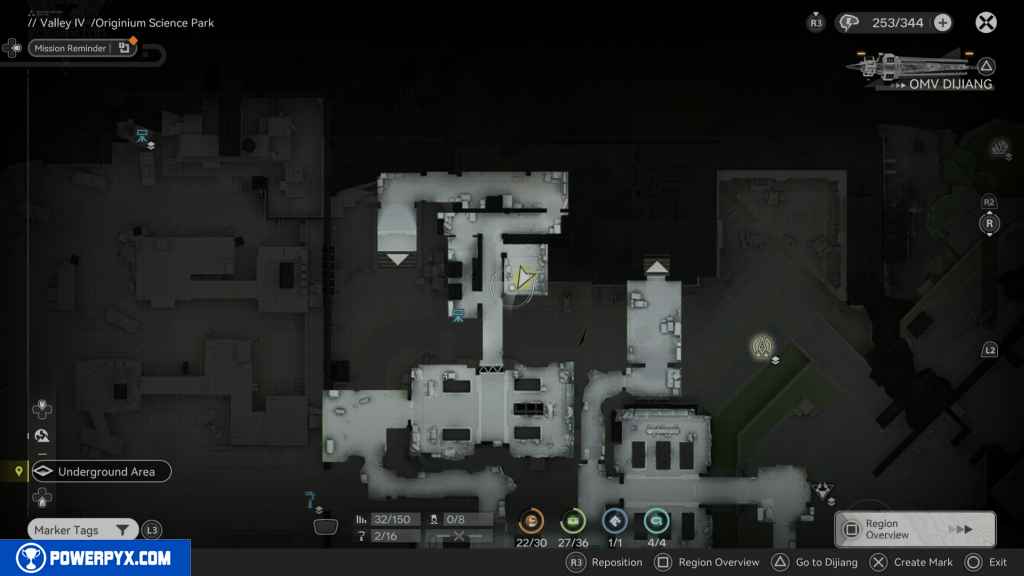
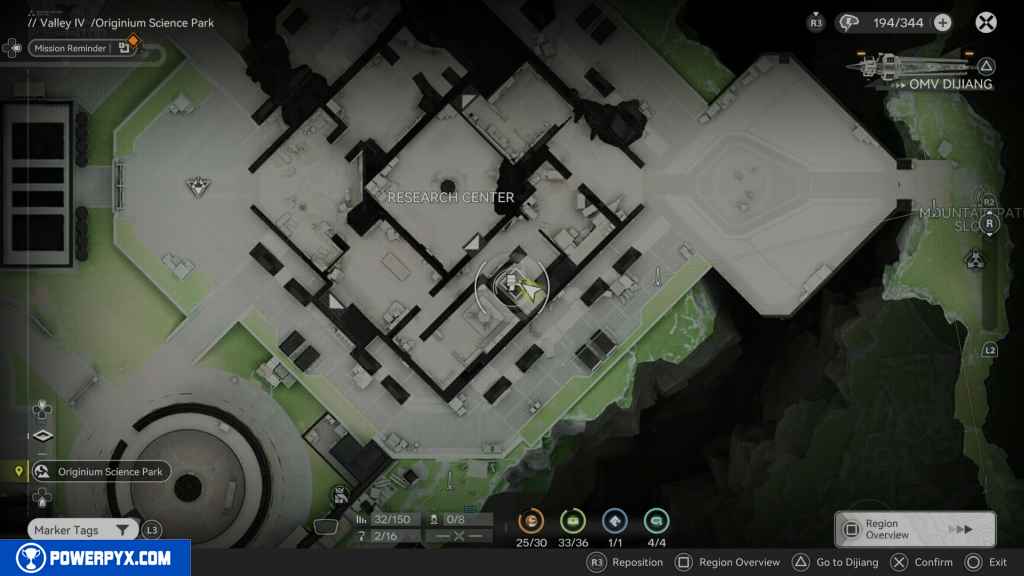
99 – Crate 26
Head back south in the underground. You must have completed the main story to the point where you unlock the ability to destroy Blight Cores—if you started the Side Mission- Dusty Old Files. Continue past the Blight and enter the next area for that quest. Follow it as far as you can past the next research area until you reach a room with a bunch of fences. On the left is the crate.
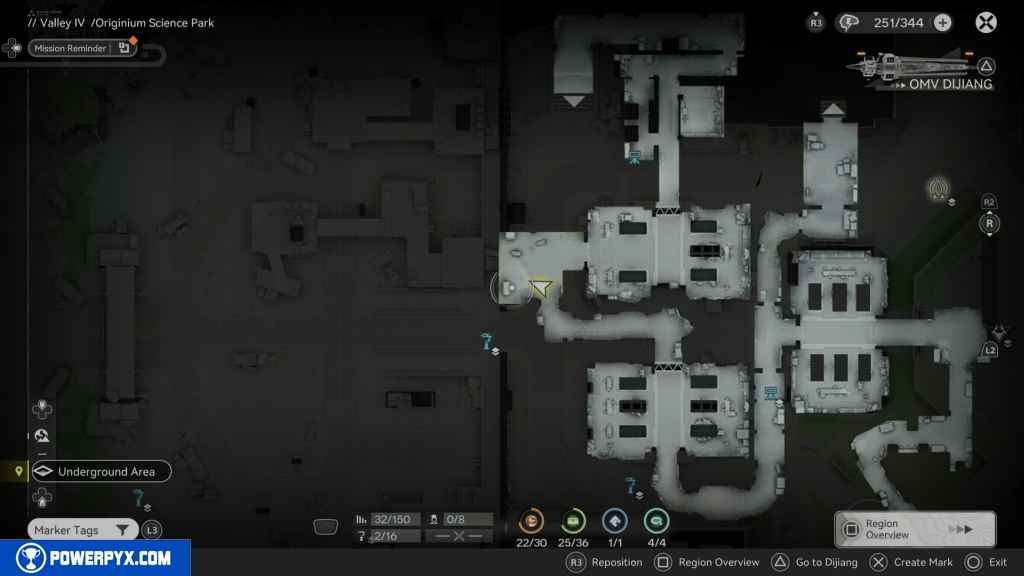
100 – Gathering Point 42
North of the crate is another Gathering Point behind the fence.

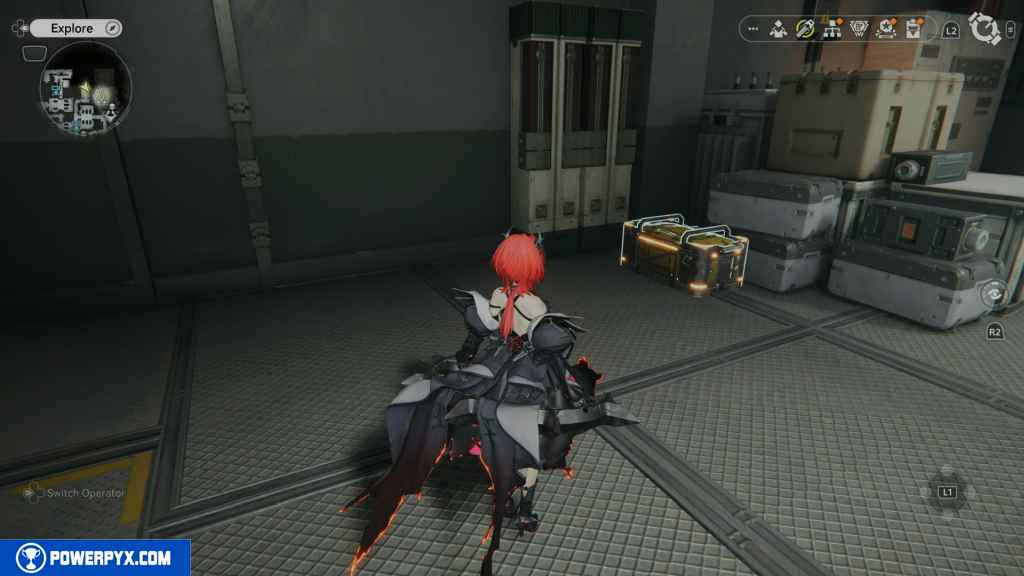
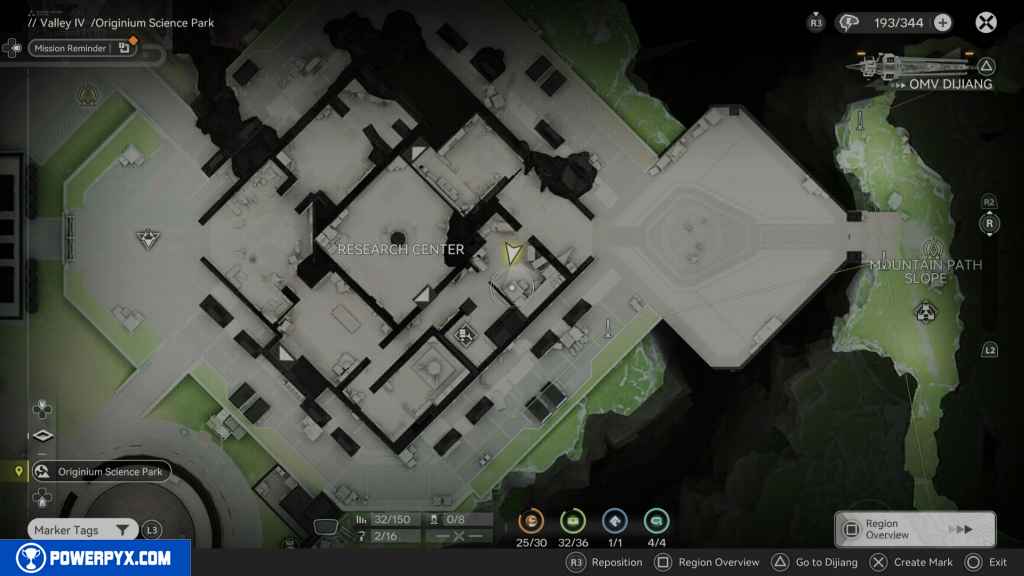
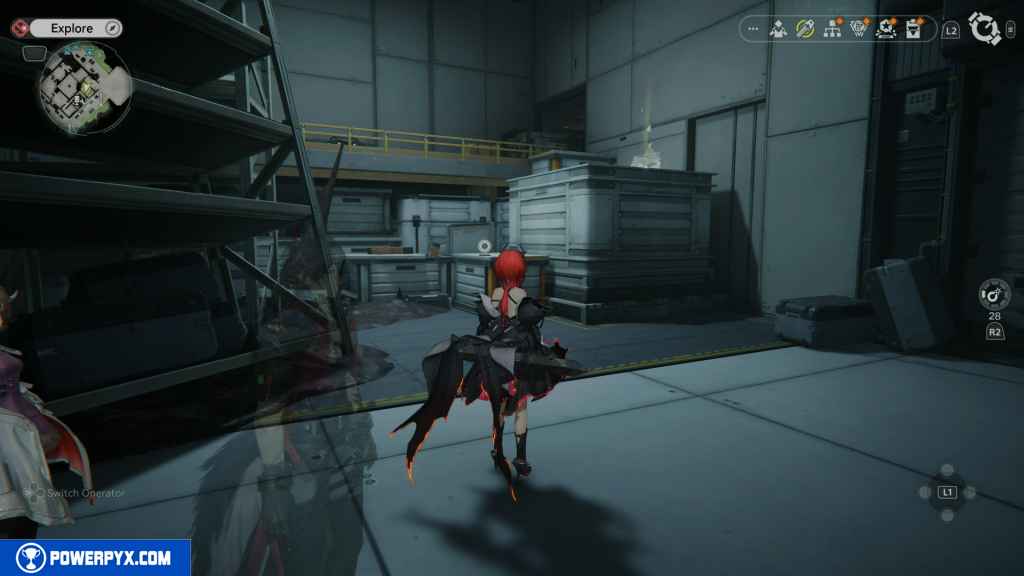
101 – Crate 27
Continue north until you see a supply room on your left. Go inside and immediately on your left, behind some breakable boxes on your crate.

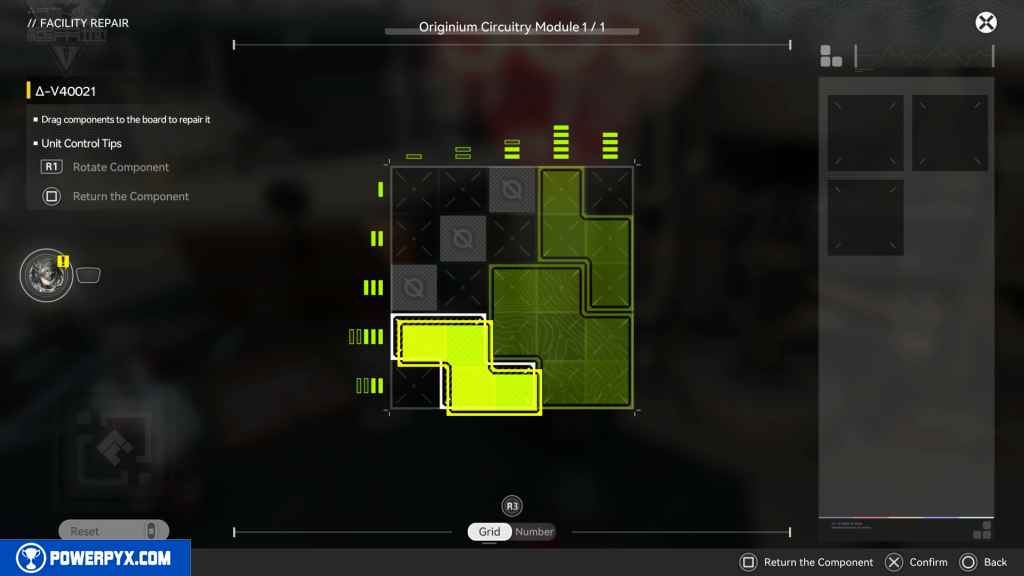
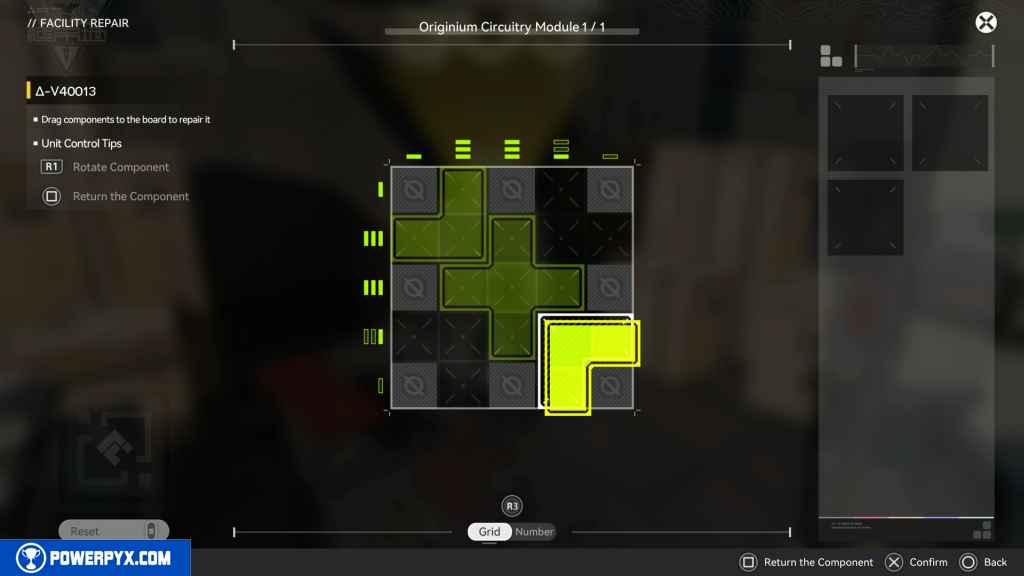
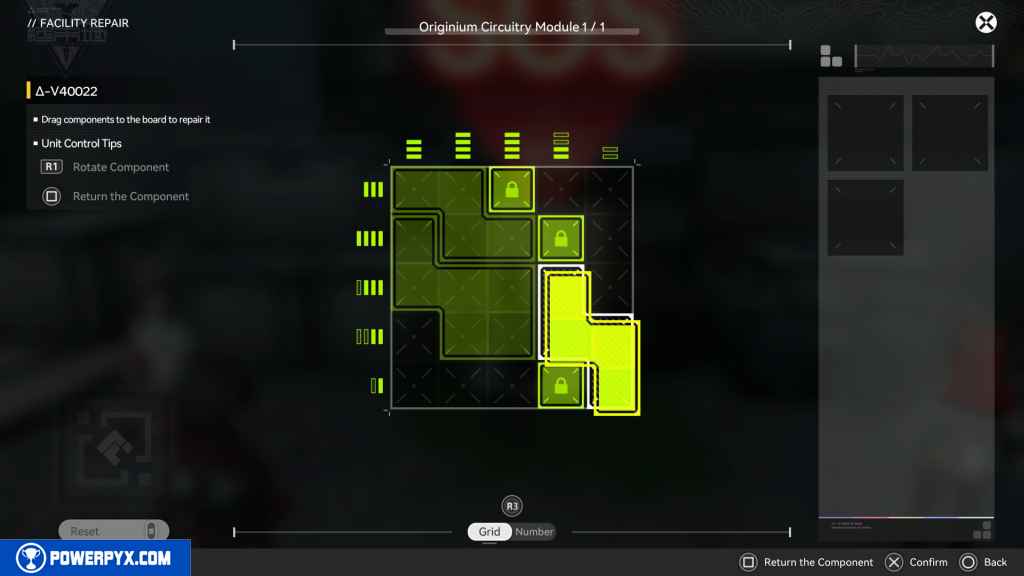
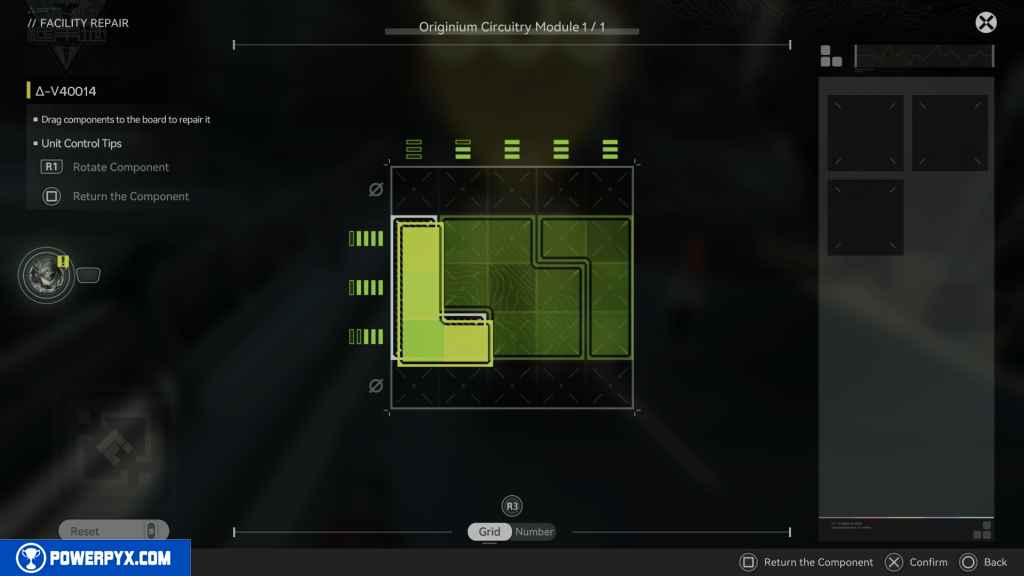
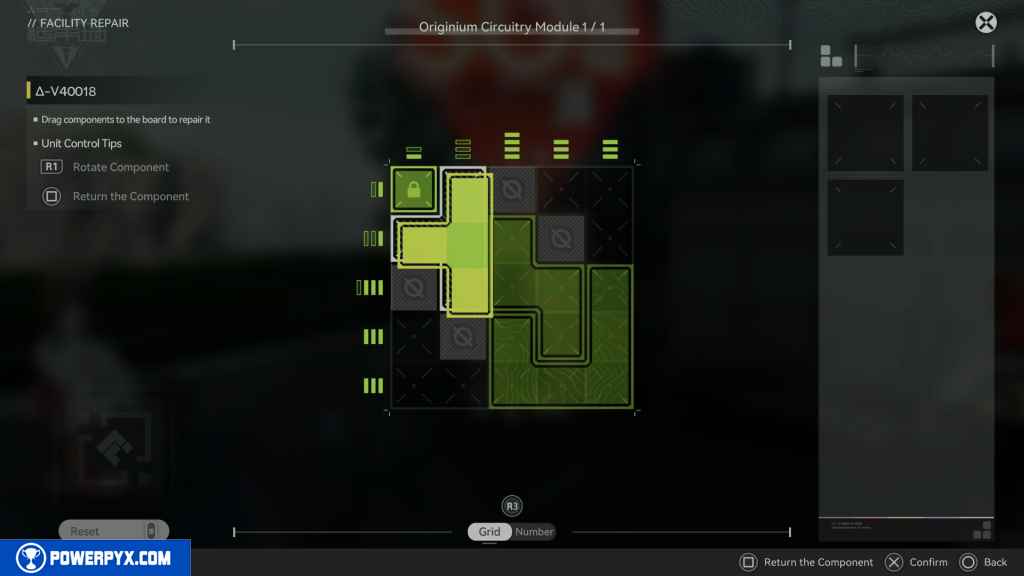
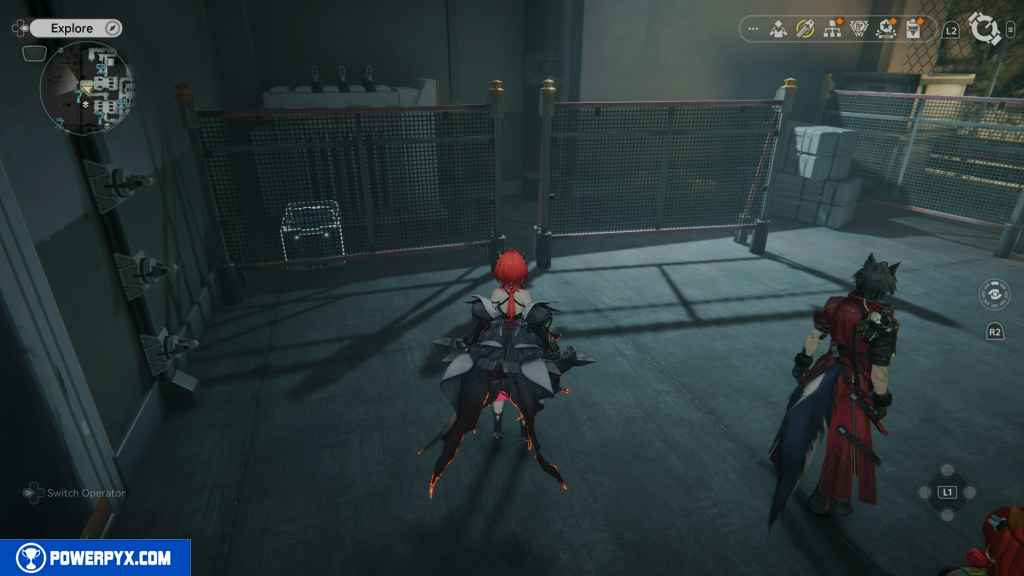
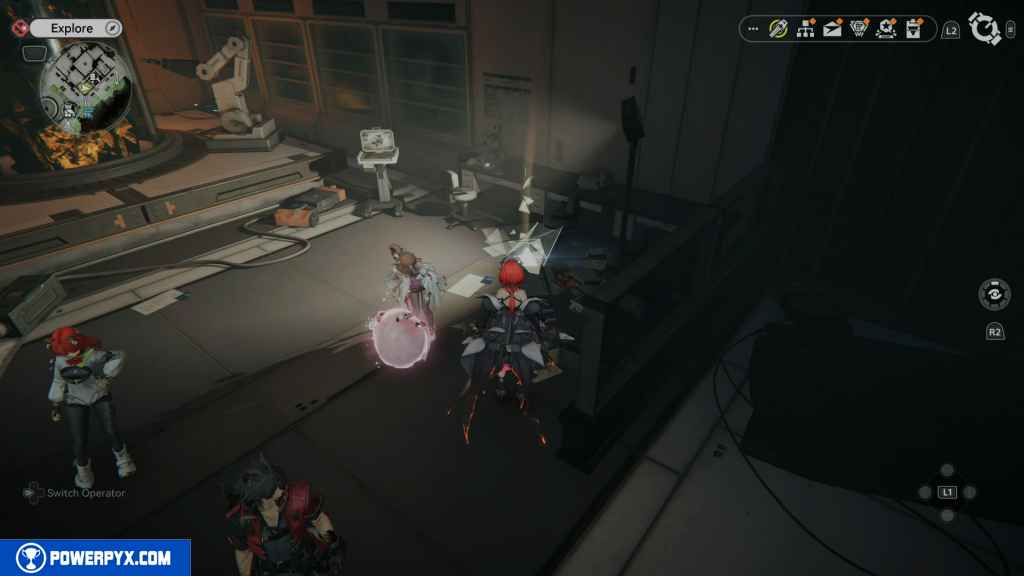
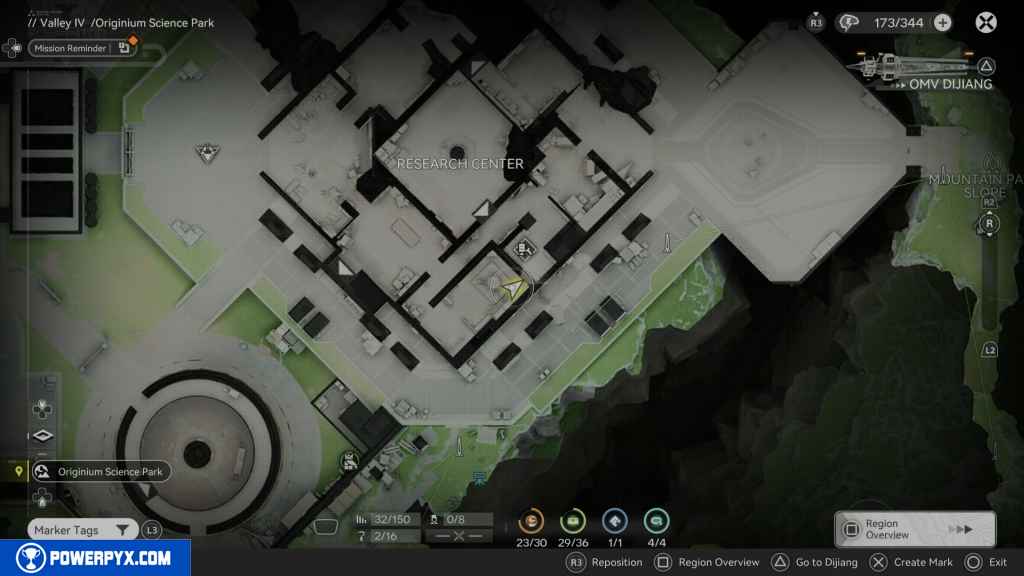
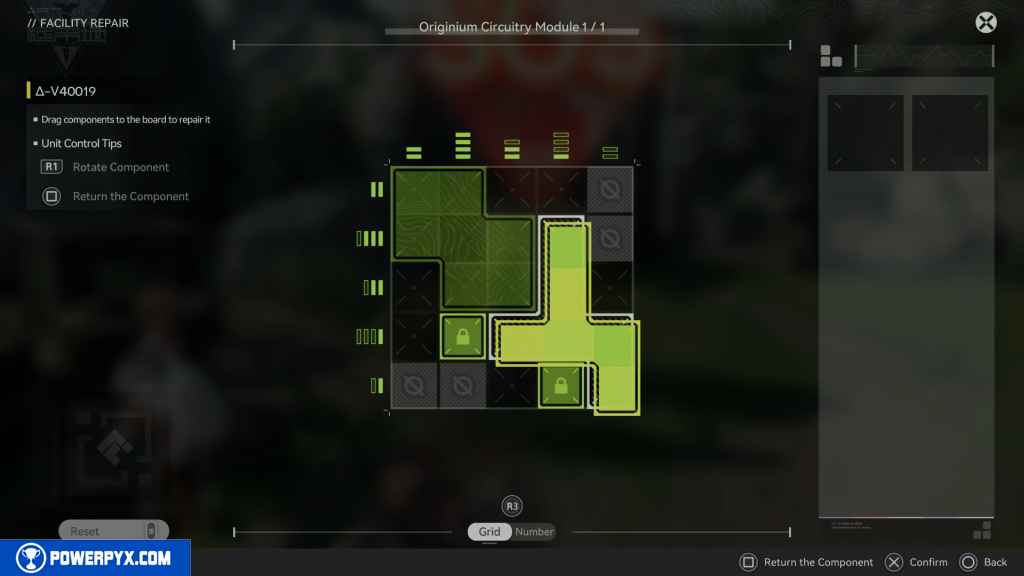
102 – Repair Logic
In the room east of the supply room is a Repair Logic. You need this repair logic to access an area in the Aburrey Quarry.
103 – Crate 28
In the same room, in the south corner, is the crate.
104 – Crate 29
Return to the Research Center and enter from the west entrance. Head inside and head north to find an Energy Alluvium. Activate it and defeat the enemies to unlock the crate.
105 – Gathering Point 43
In the same room, look for it on the floor north of the Energy Alluvium.
106 – Aurylene 23
Continue north in the room past the Gathering Point. You’ll find the Aurylene.

107 – Gathering Point 44
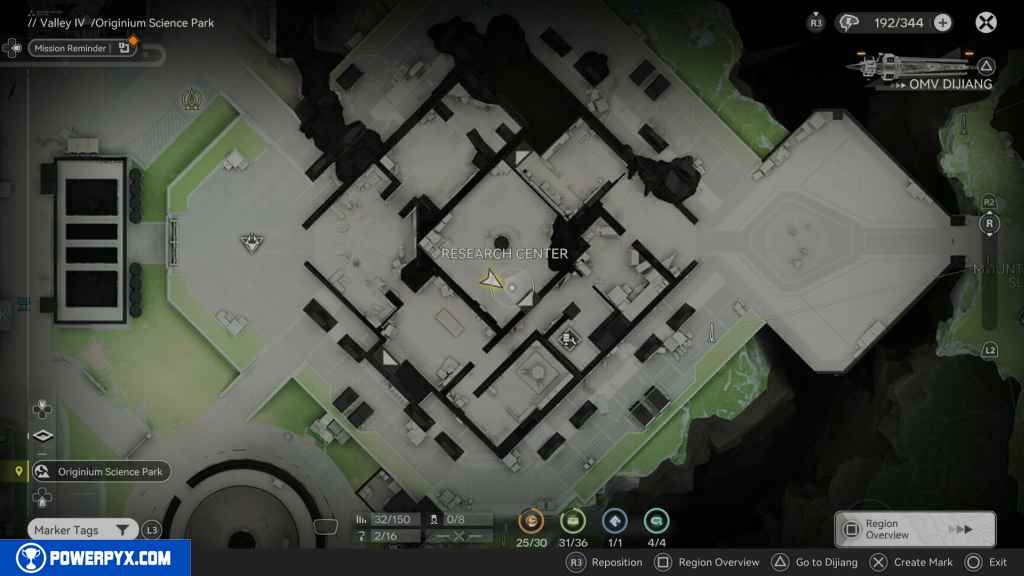
Return to the main entrance, and this time go southeast. Move past the first room and into a room with a large rock behind a cylinder being studied. The Gathering point will be on your right.
108 – Crate 30
In the same room, in the corner behind the rock cylinder, is the crate.
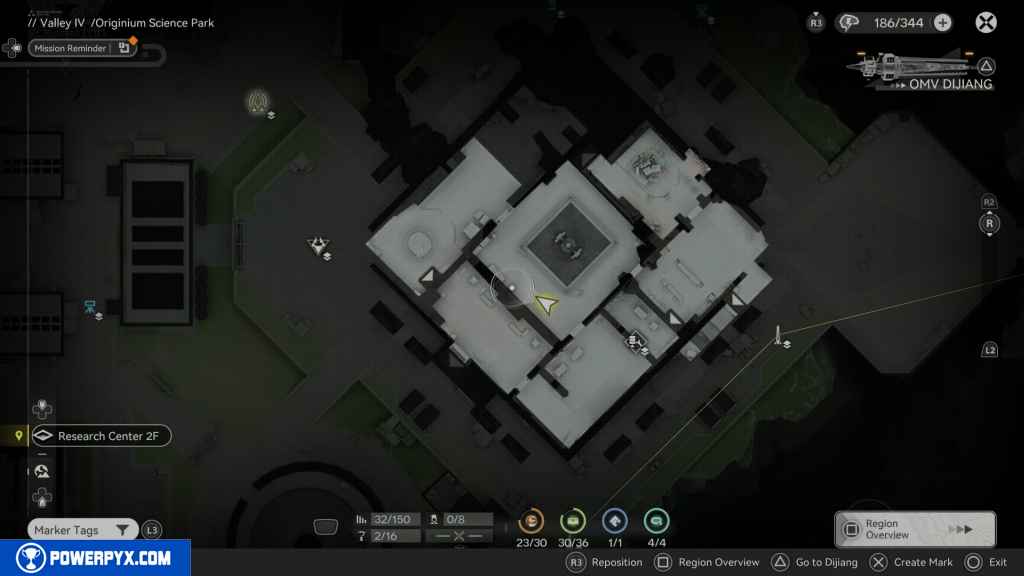
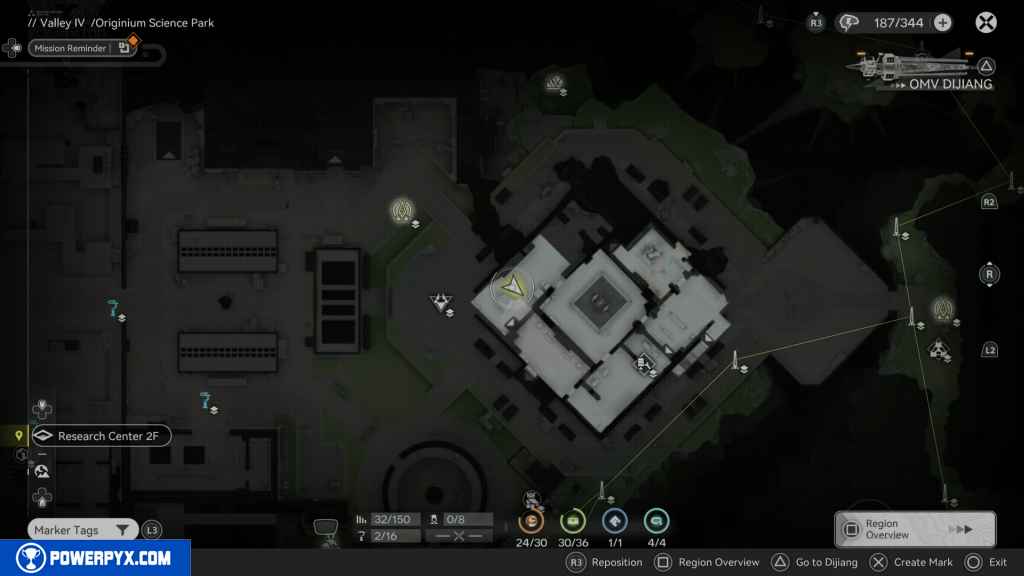
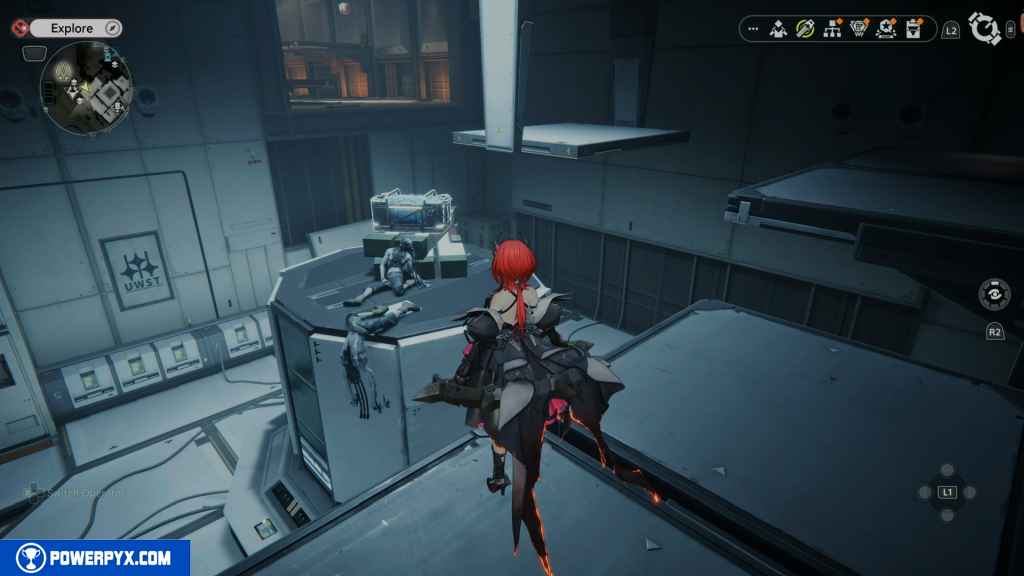
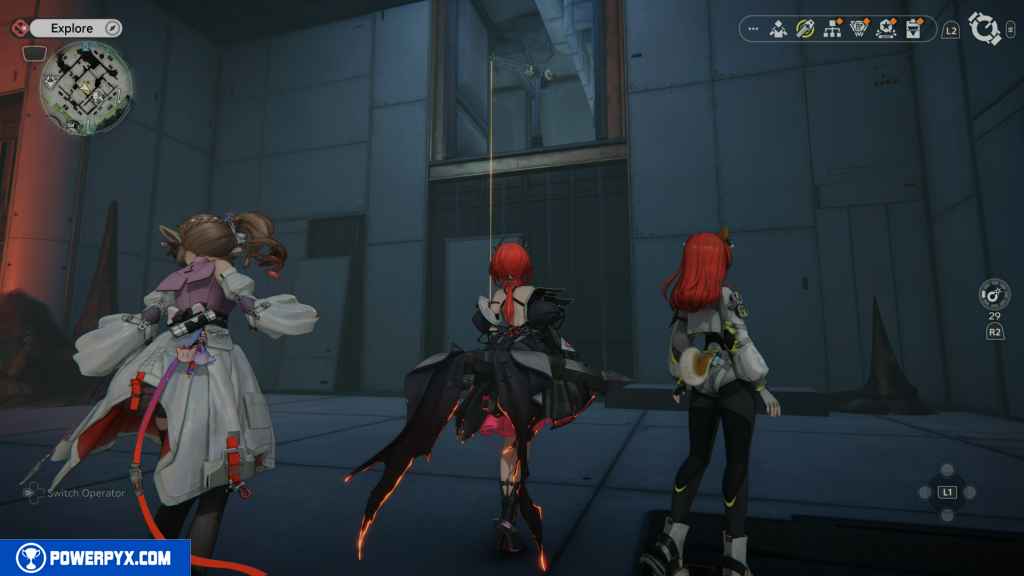
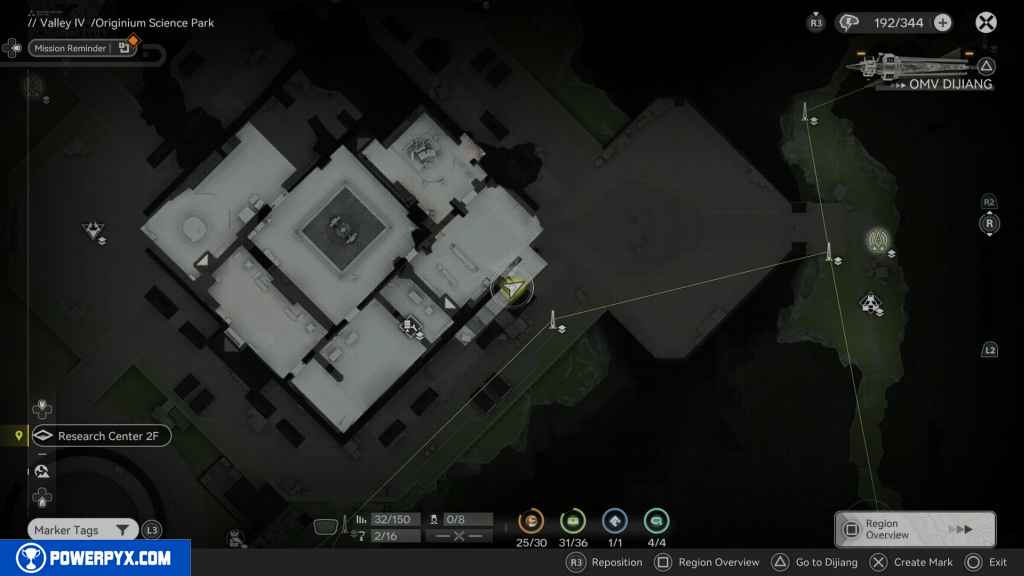
109 – Gathering Point 45
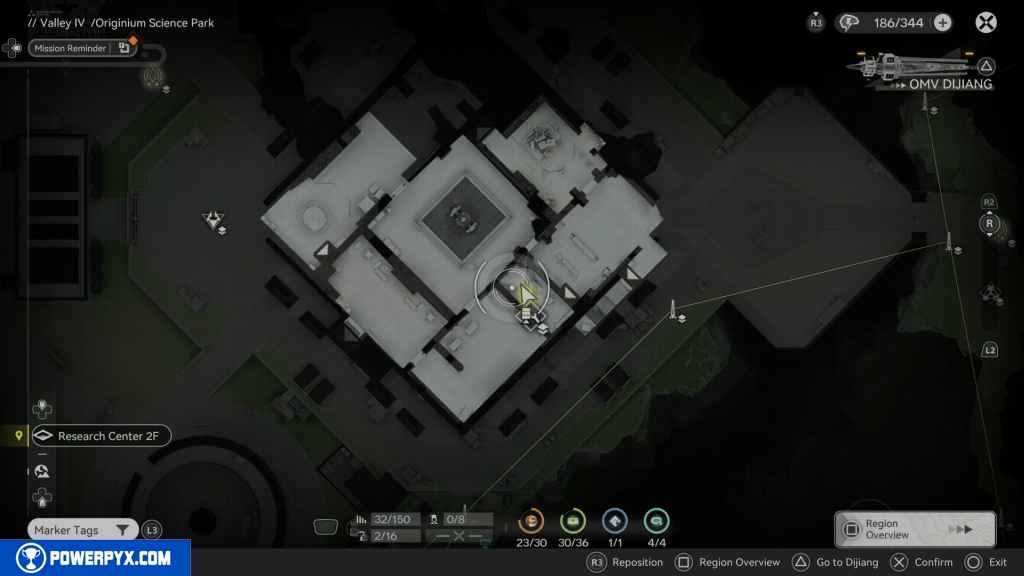
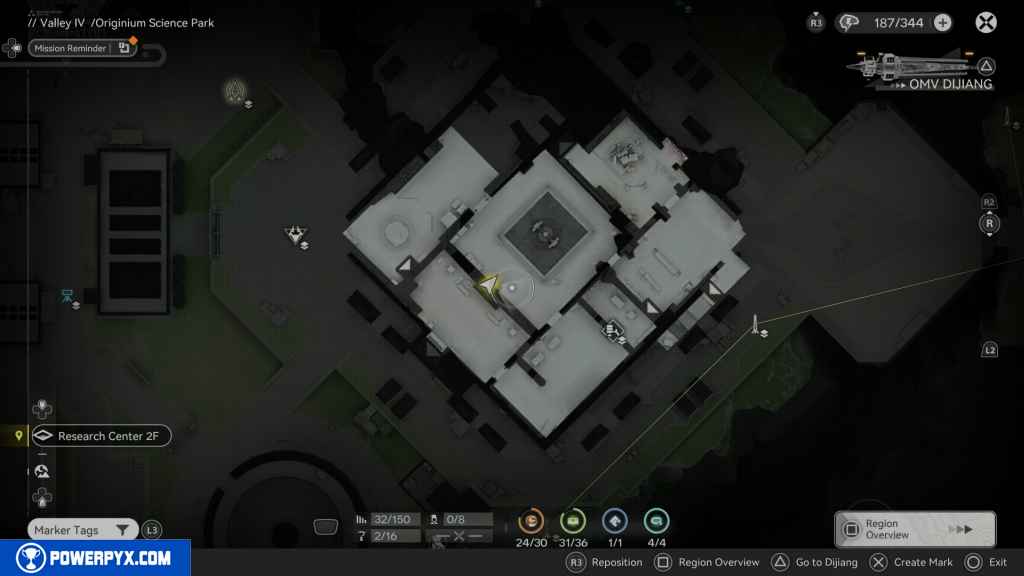
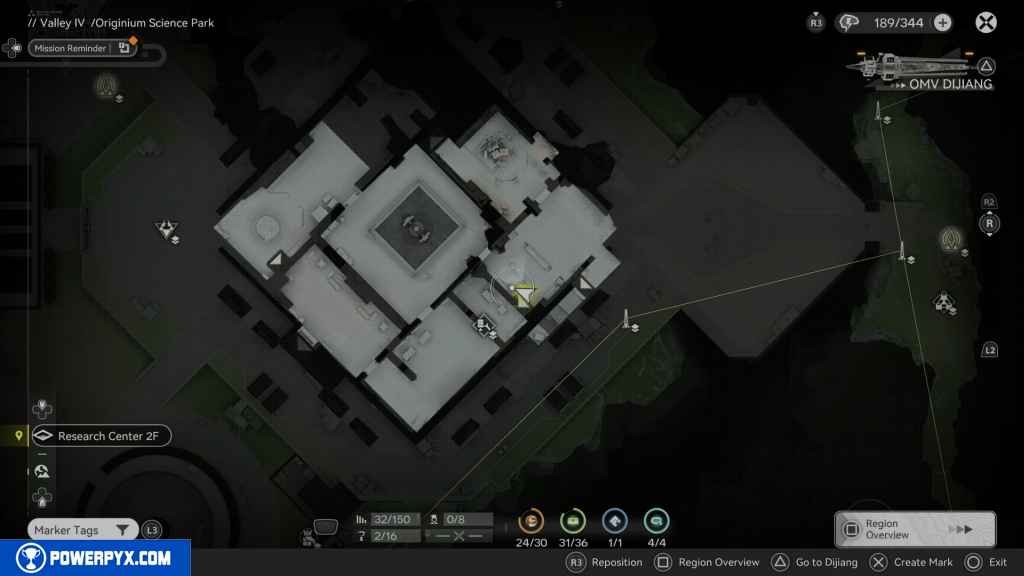
Head out of the room, back from where you came, and use the elevator on the southwest to go up to the second floor.
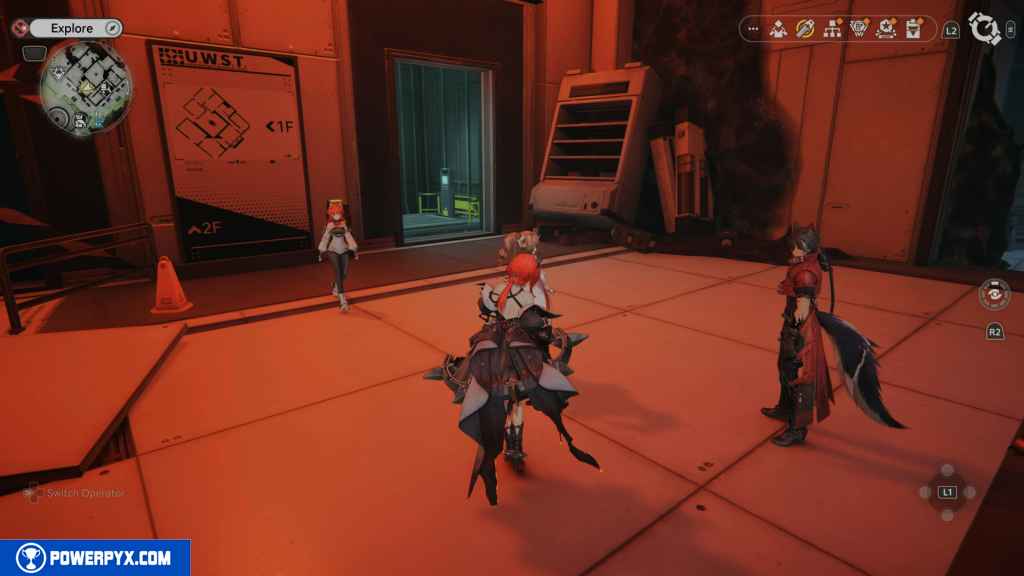
Turn right and go into the room with some dead Landbreakers. Look northeast to the room with the broken glass, and look to your left to find the Gathering Point.
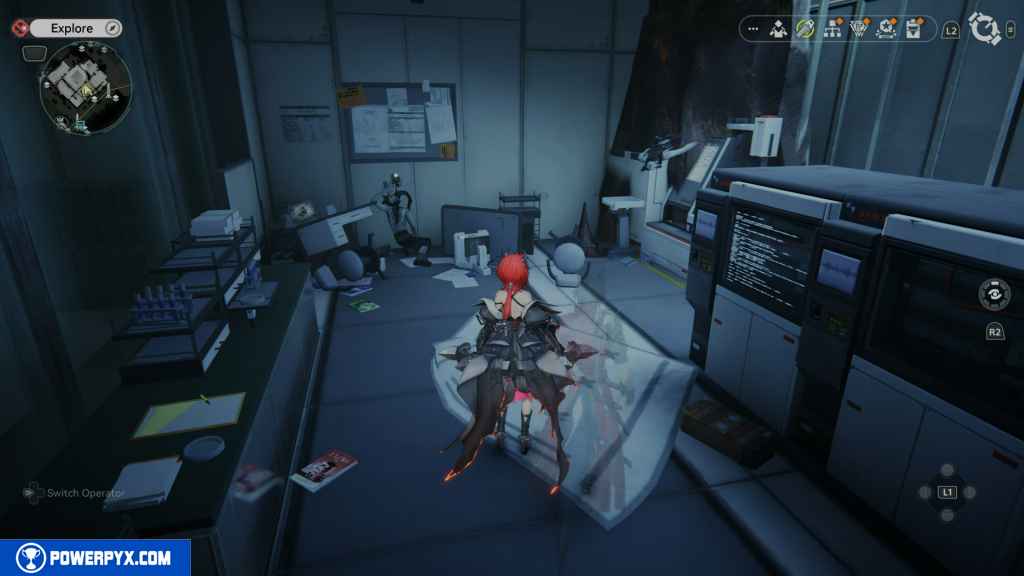
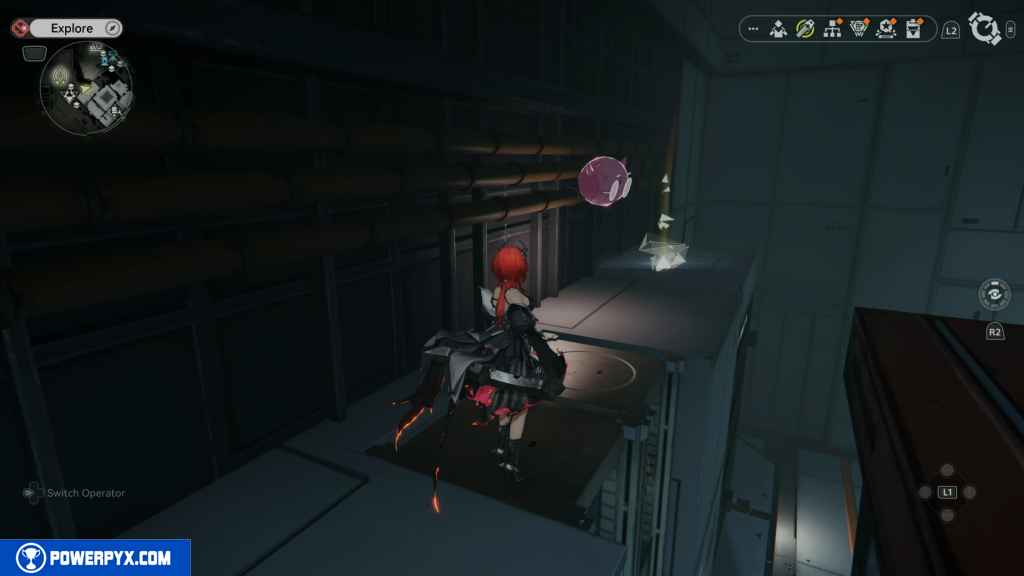
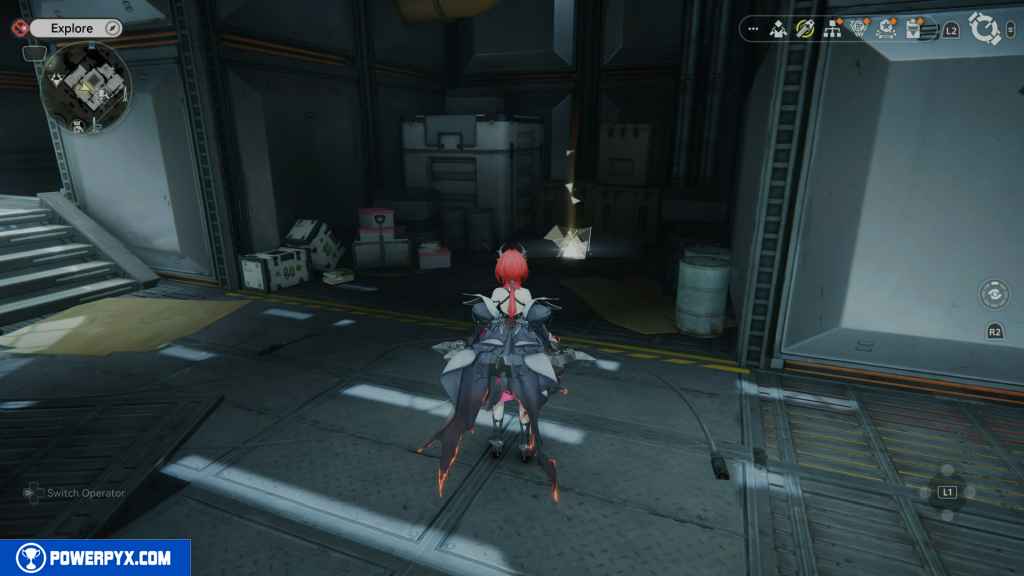
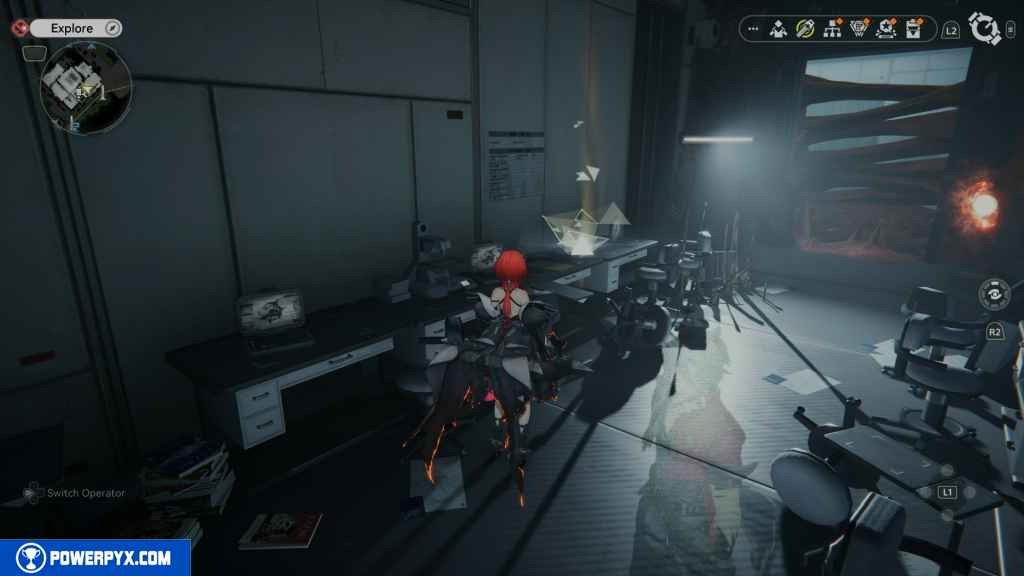
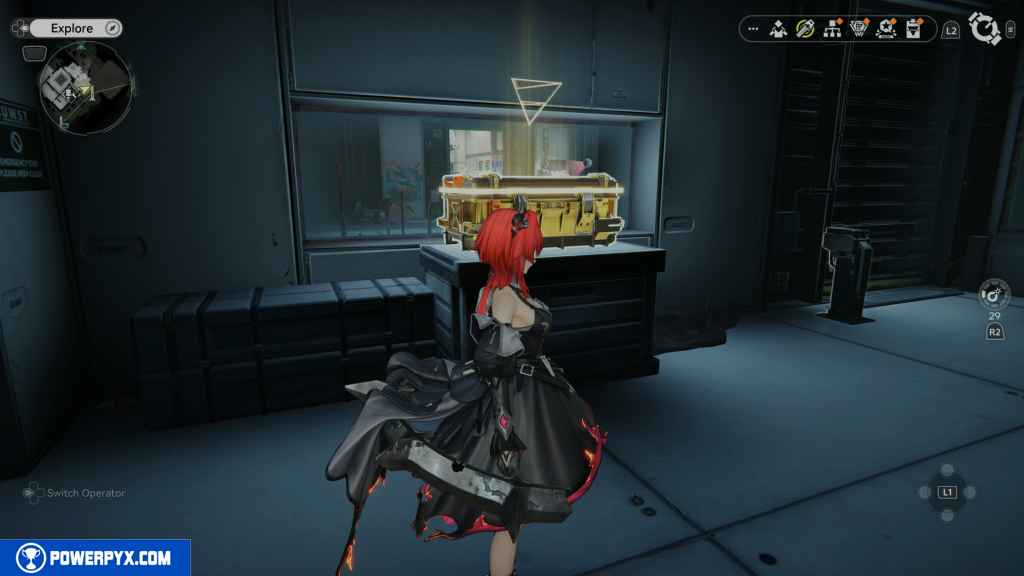
110 – Aurylene 24
Enter the room northwest of the central structure. On your left, you should see the Aurylene on the counter.
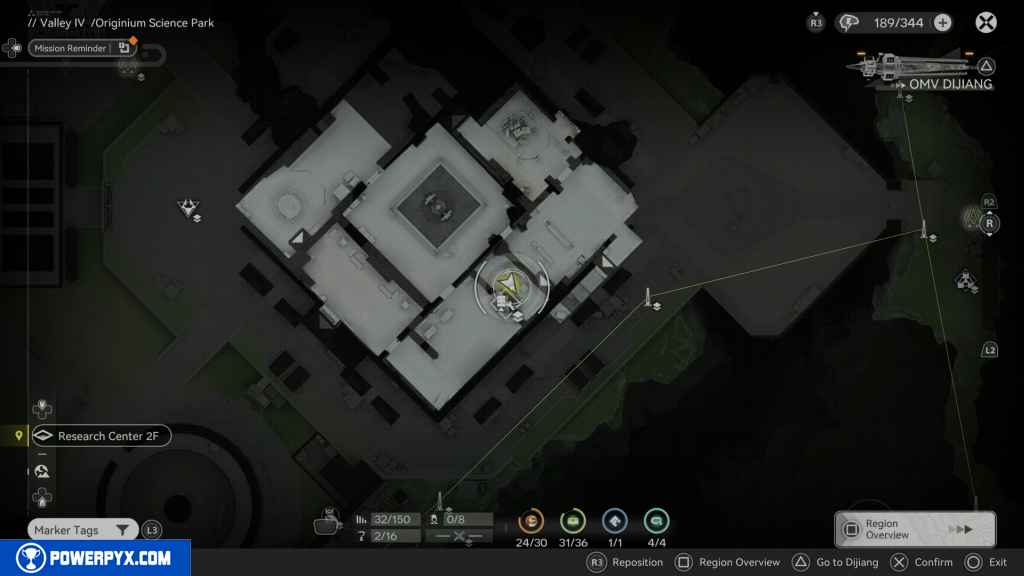
111 – Gathering Point 46
Go into the next room with the moving platforms to the northwest. Jump up the crates on the left and onto the moving platform. When it reaches the top, get off the platform, head to the right, and grab the Gathering Point.

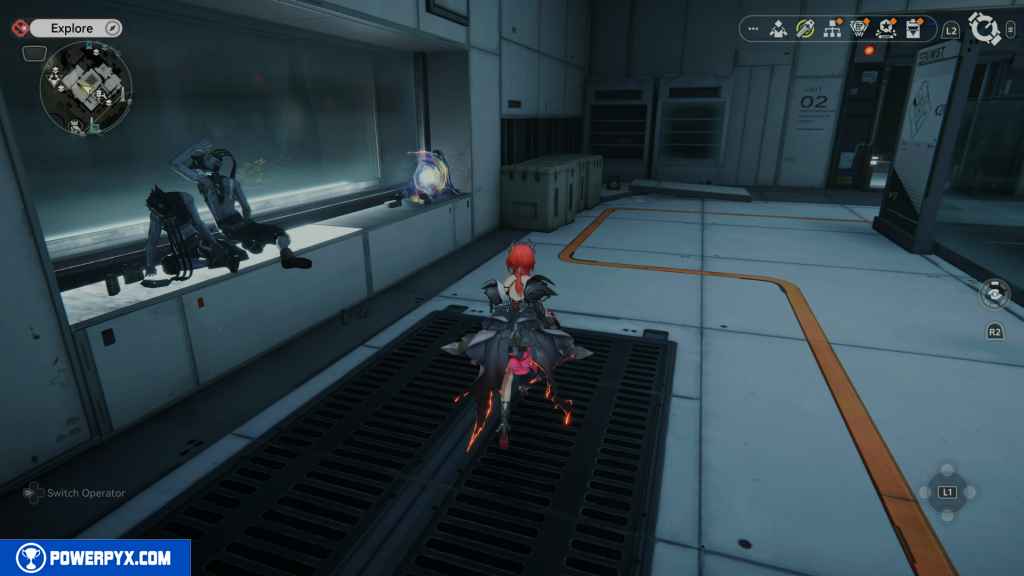
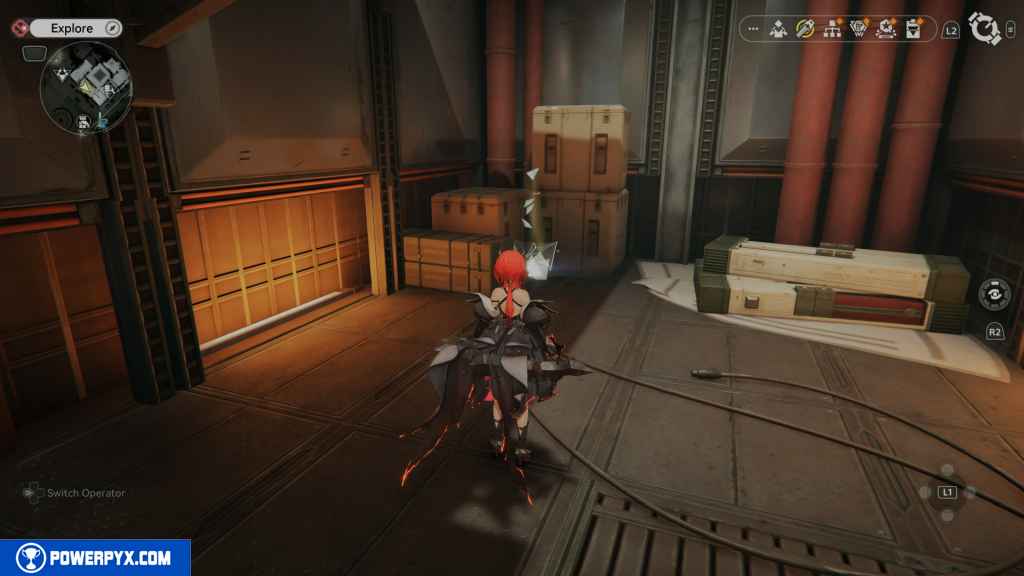
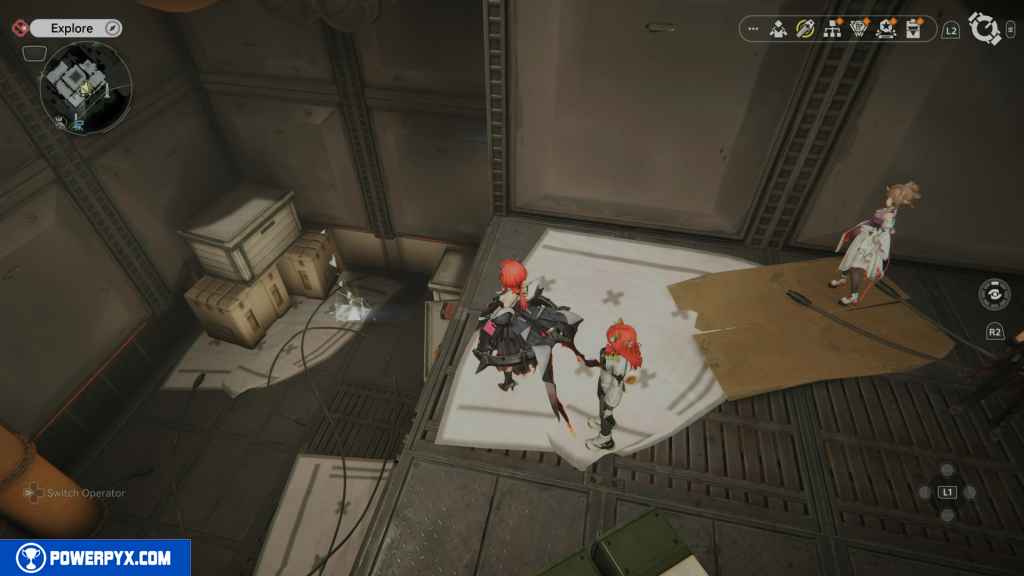
112 – Crate 31
Stay on the ledge and move southwest. You should see the crate on top of the cylindrical structure next to some dead Landbreakers.
113 – Gathering Point 47
Get on to the next platform and jump into the room with more platforming sections. Down the hall at the end is the Gathering Point.

114 – Gathering Point 48
Jump up the platforms in the room from the last Gathering Point to reach the next area. On your right, you should see the next Gathering Point.
115 – Gathering Point 49
Continue down the path until you reach a drop-off. At the bottom is another Gathering Point.
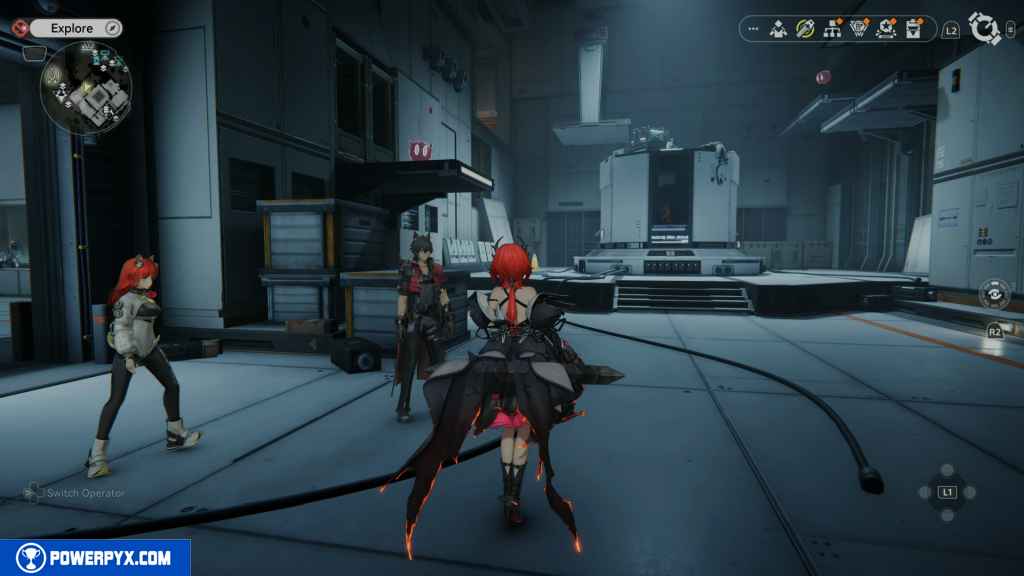
116 – Gathering Point 50
Fall into the large area and look to your left to find the Gathering Point on the desk.
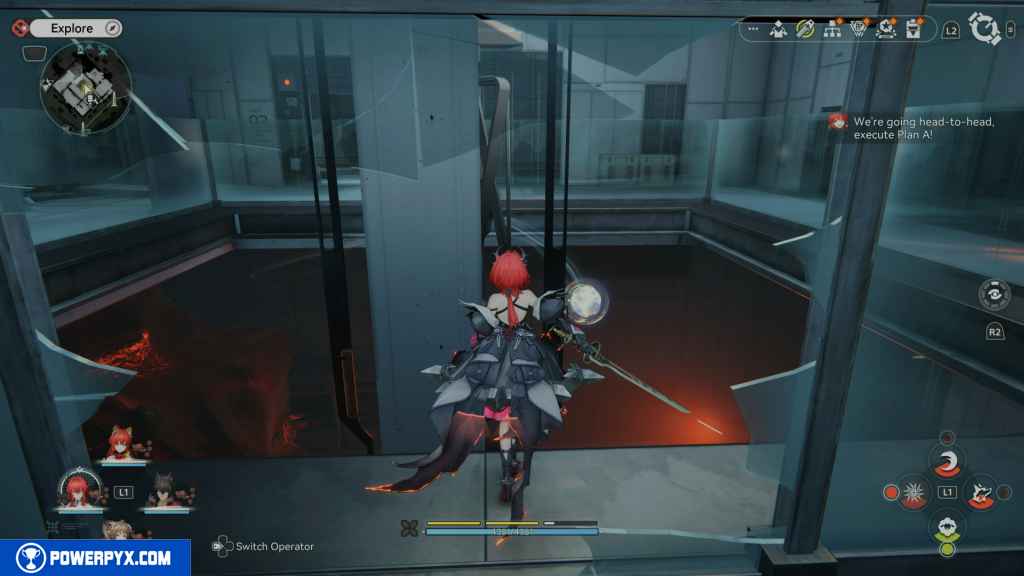
117 – Aurylene 25
If you’ve destroyed the Blight wall, walk through and look for the broken window to fall into the center area. You should see the Aurylene floating around. Jump up and grab it.
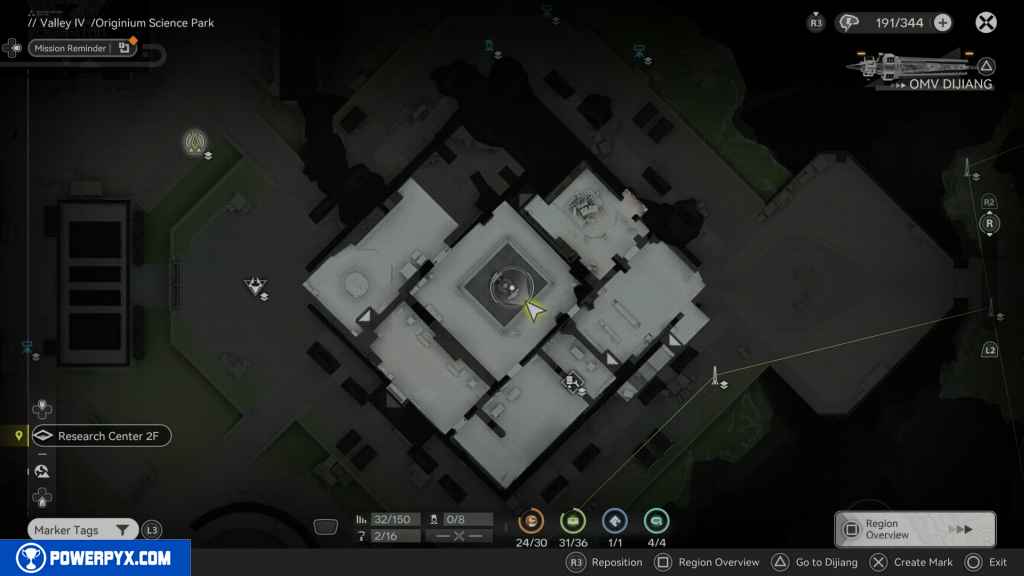
118 – Crate 32
Destroy the large Blight using an explosive. The core should be located at the bottom of the Blight, so look up to find it. Once destroyed, it should reveal a rope.
Use the rope to climb up and follow the path. Jump up some crates to find a crate on your left.
119 – Gathering Point 51
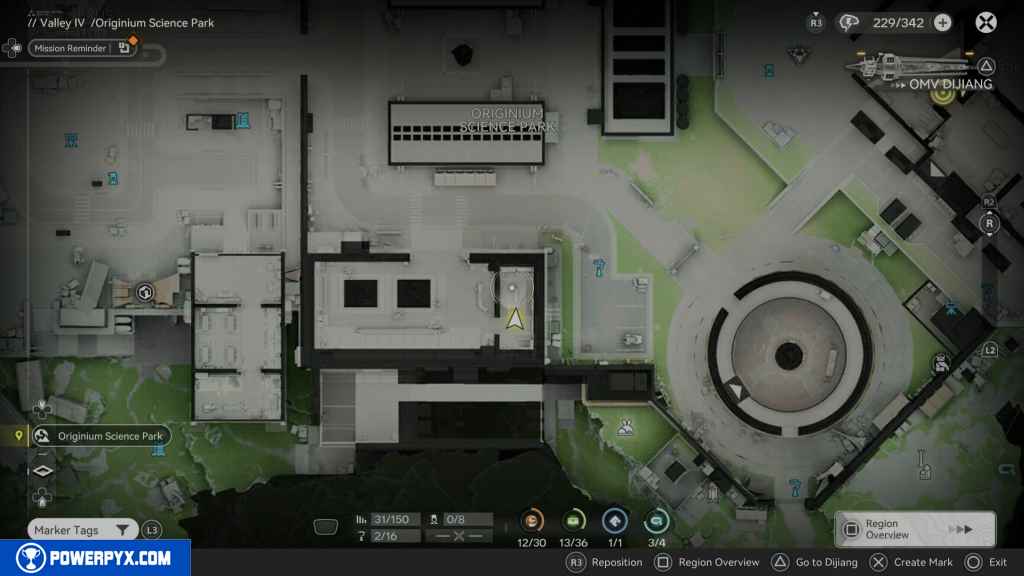
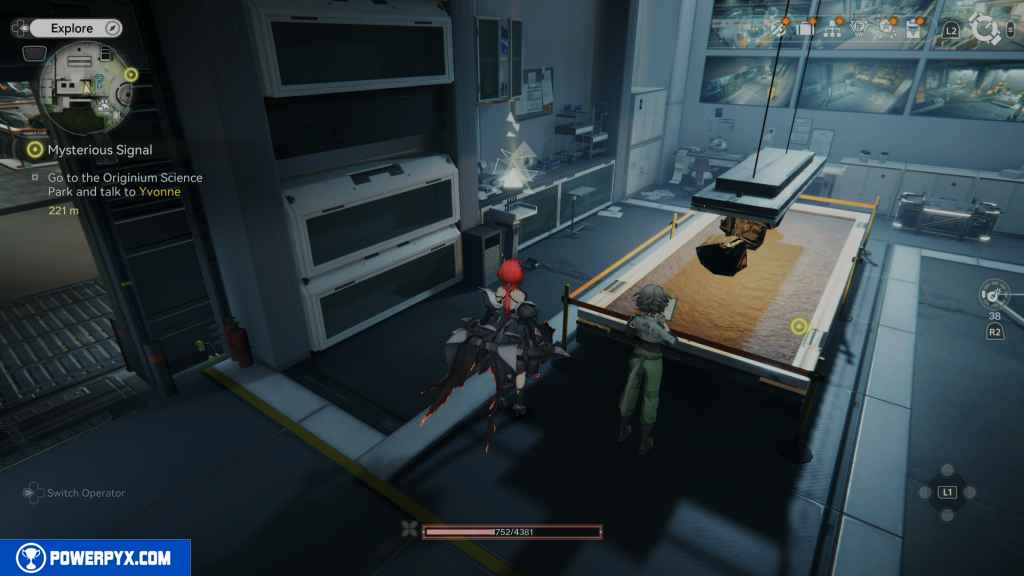
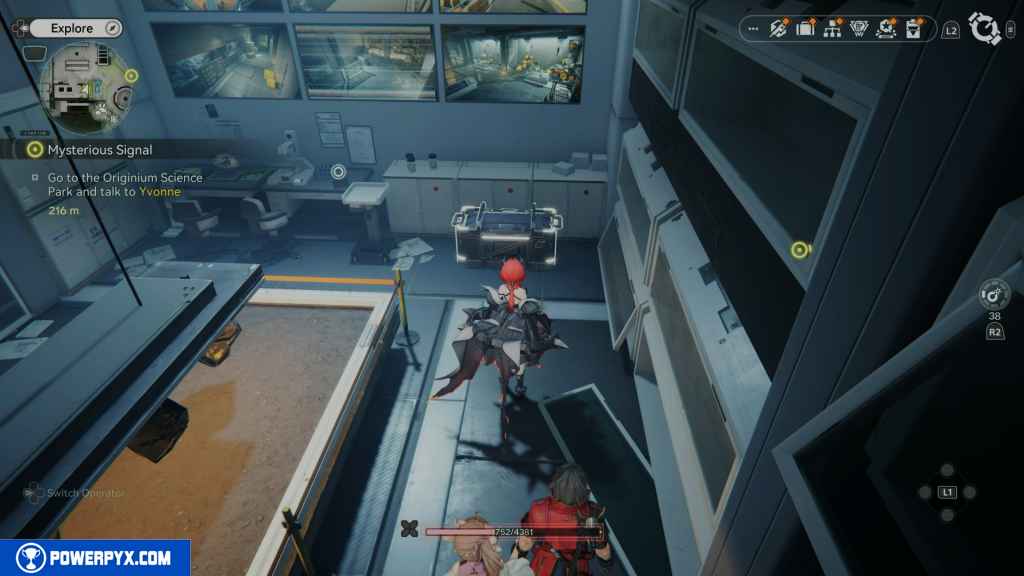
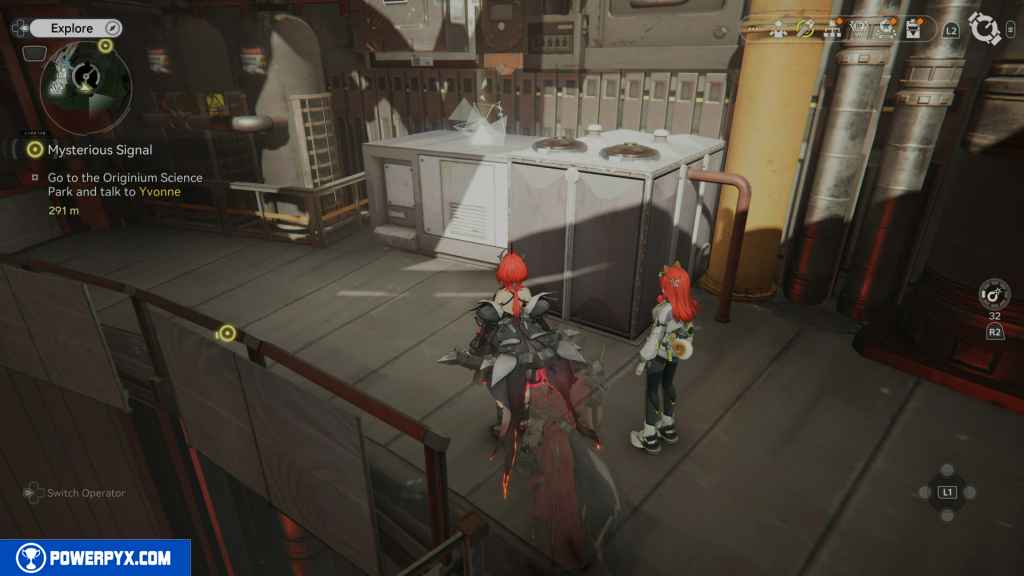
Go into Yvonne’s room, take the left path. You should see an elevator. If the elevator isn’t there, drop down.
Once at the bottom, you’ll find the Gathering Point on your right.
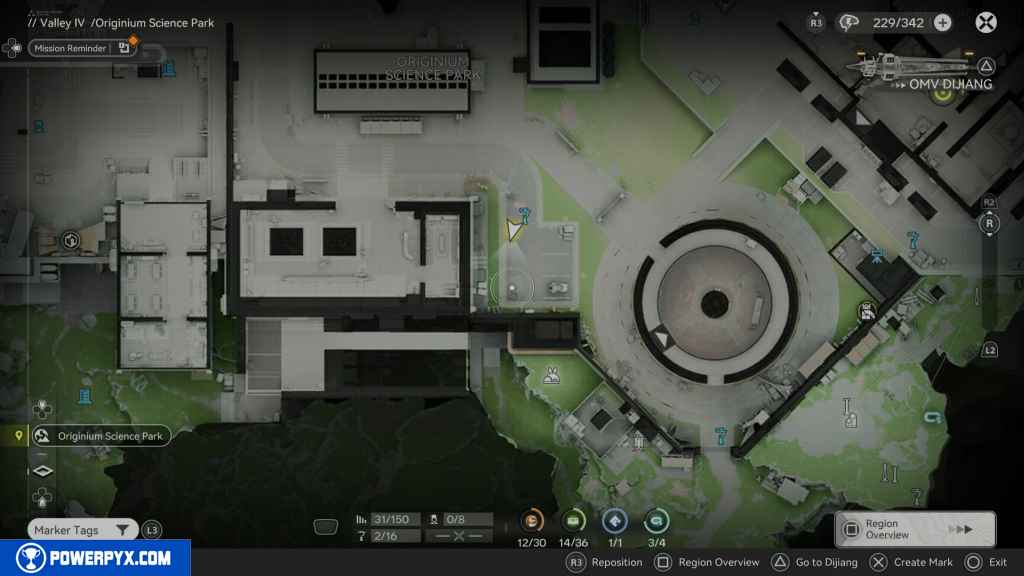
120 – Gathering Point 52
In the same room, on the opposite side of the last Gathering Point, will be the next one.
121 – Gathering Point 53
Head out of the room to where you should see the exit back outside. Instead, turn right and go into the room with the two explosive boxes. Blow them up and climb up the crates to collect the Gathering Point.
122 – Crate 33
While on top of the crate, turn around and on the platform behind you, you should see the crate.
123 – SOS Repair Bot 7
From the last crate, you should see two explosive boxes that block a new path. Blow them up and head through the tunnel.
You can drop down to find the SOS Repair Bot.
124 – Aurylene 26
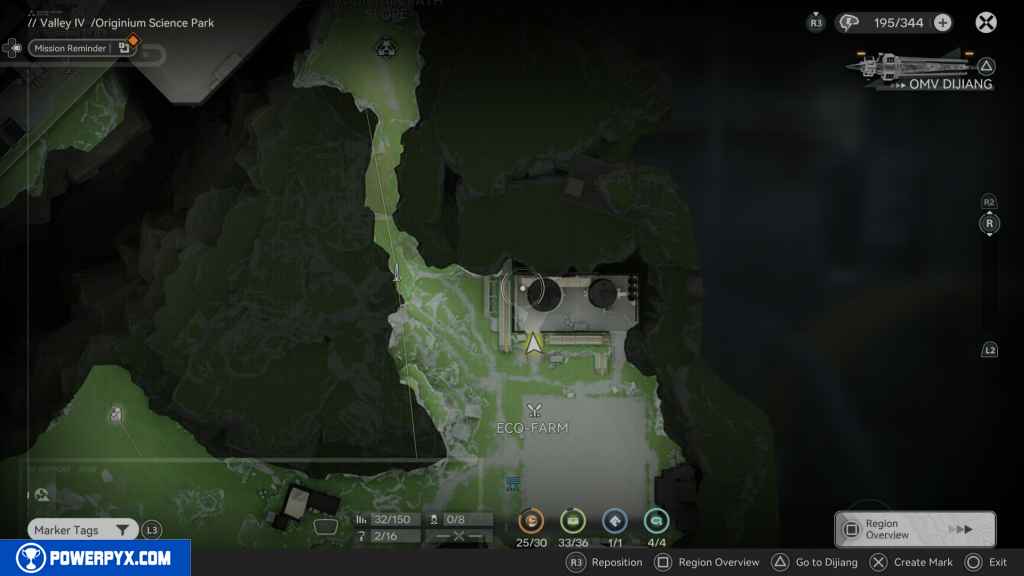
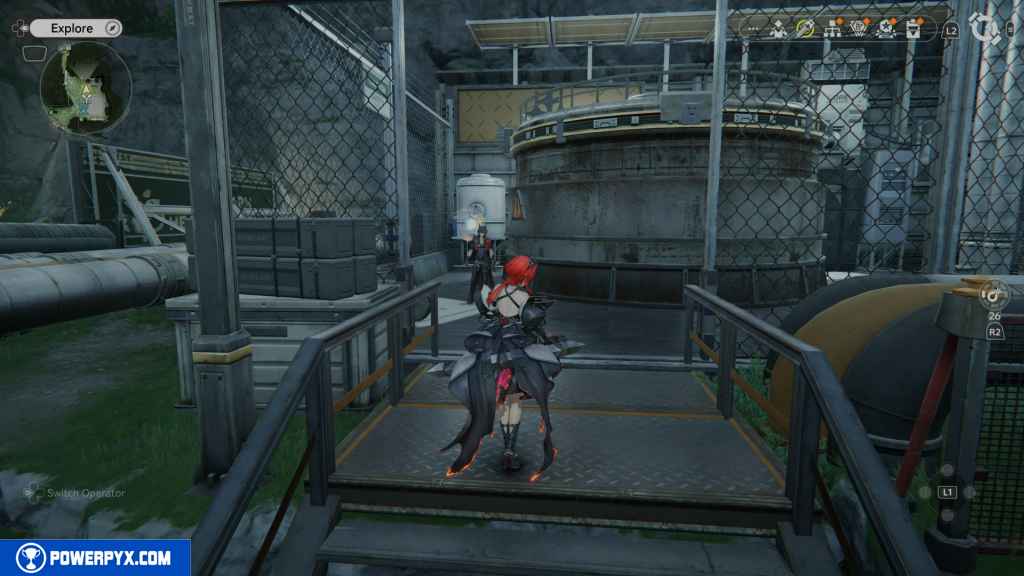
Head all the way southeast to the ECO-FARM, and look north where all the industrial buildings are. Go through the gate to find the Aurylene on your left.
125 – Prototype Datalogger 4
The final Datalogger is located north of the Infra-Station TP point.
126 – Aurylene 27
Go south as far as you can until you see a tunnel with an Aurylene inside it. Chase it until it lands on a brick and pick it up.
127 – Crate 34
Inside the area you just arrived in is another Energy Alluvium. Activate it and defeat the enemies to spawn the crate.
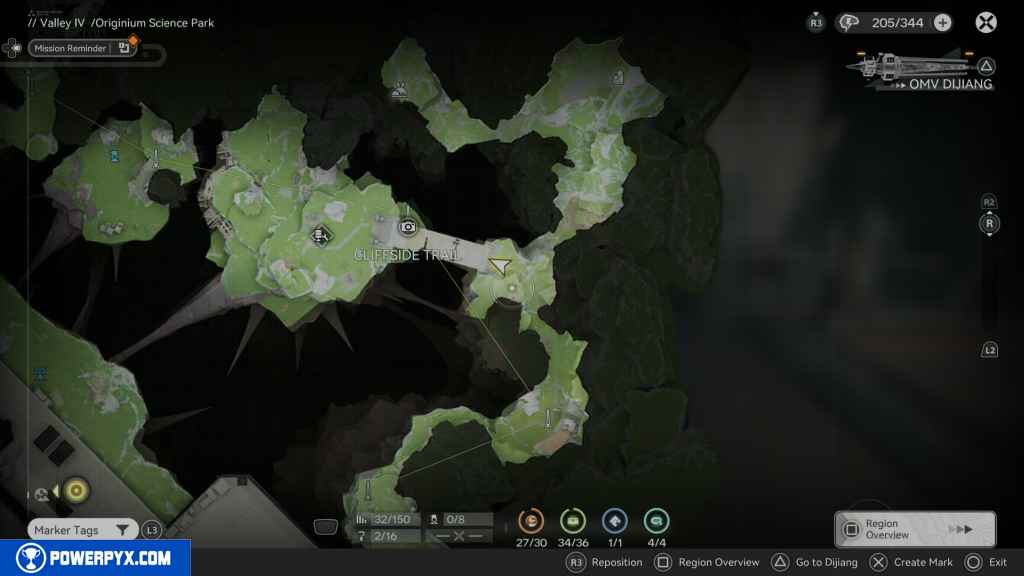
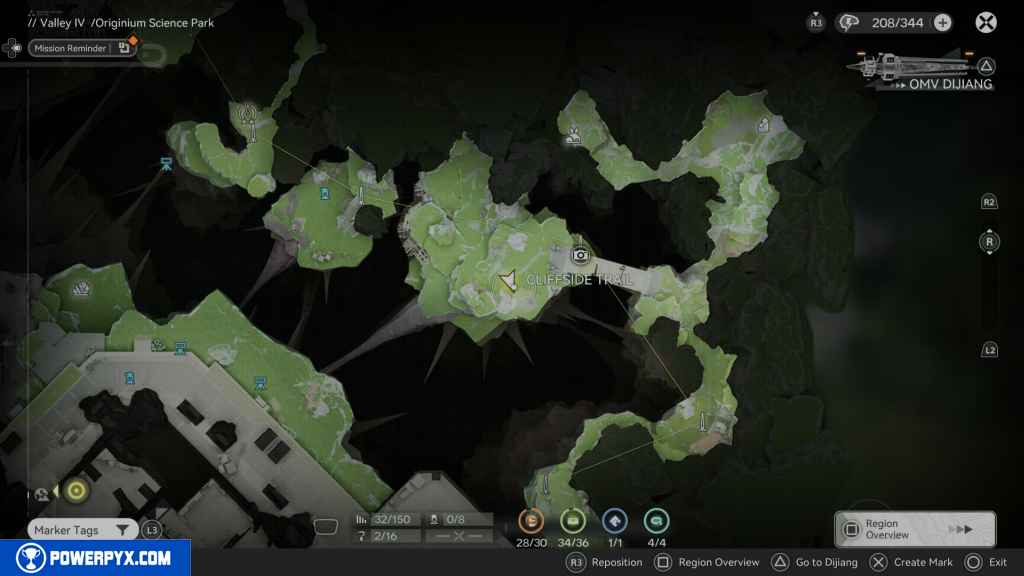
128 – Gathering Point 54
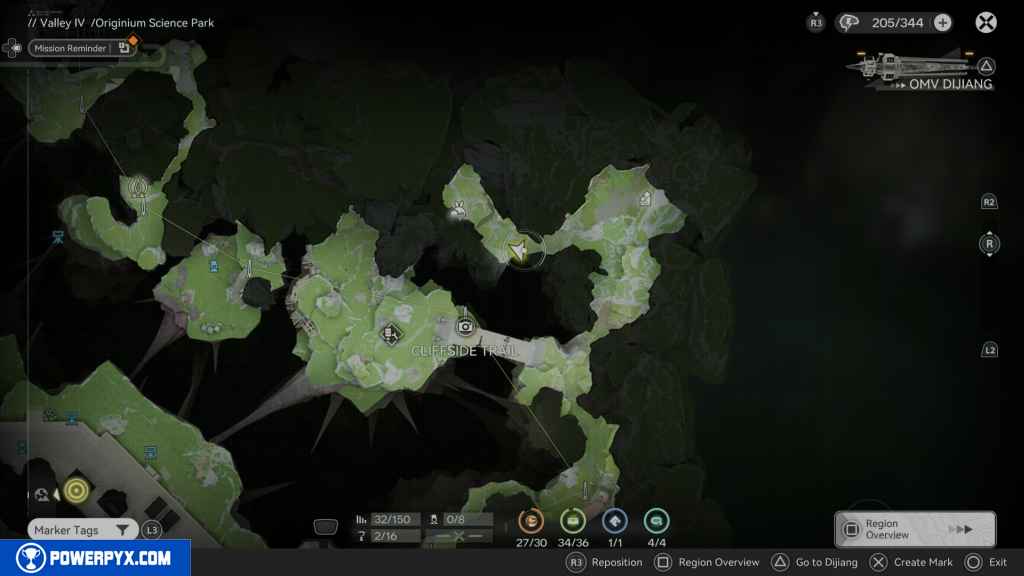
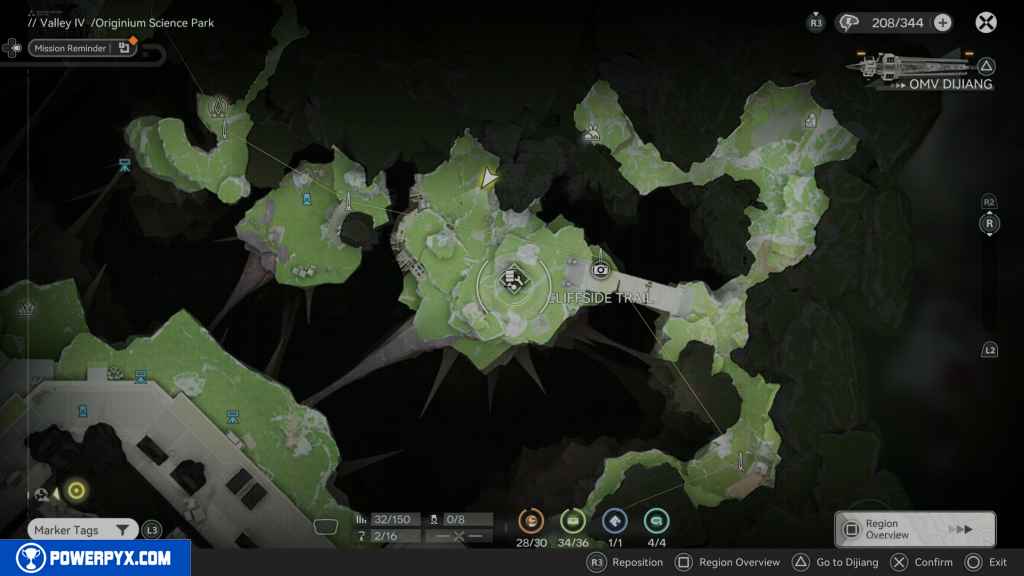
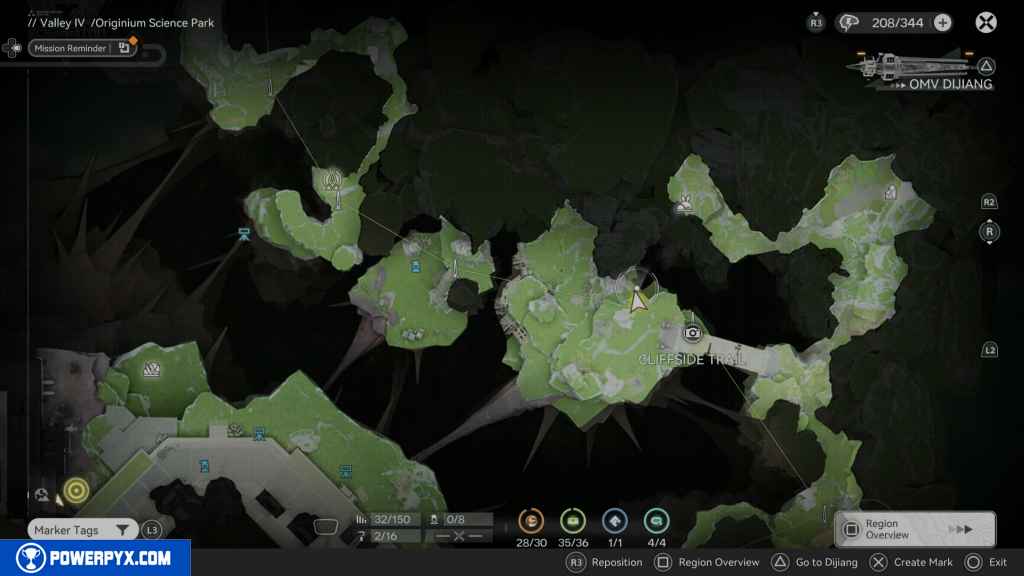
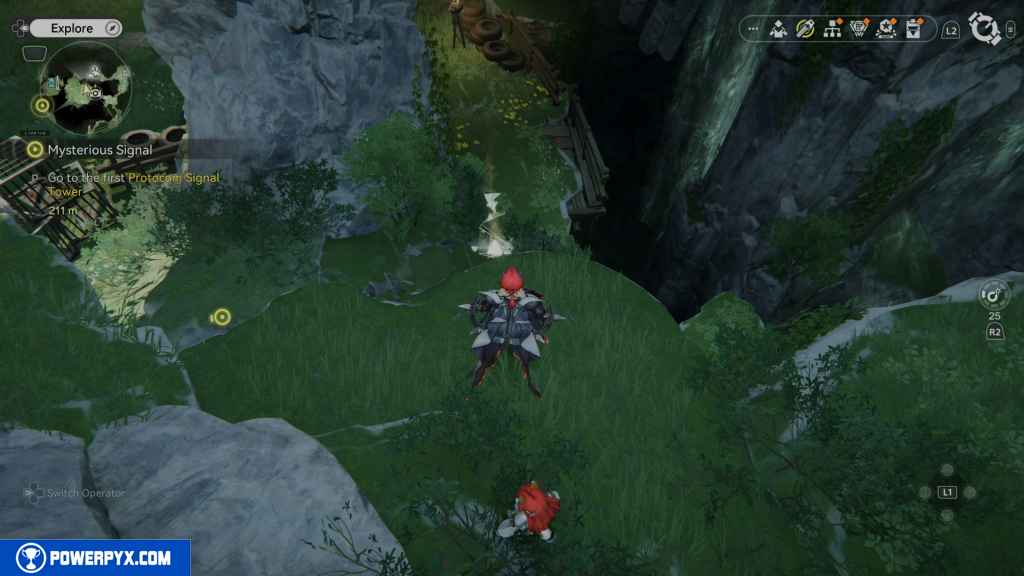
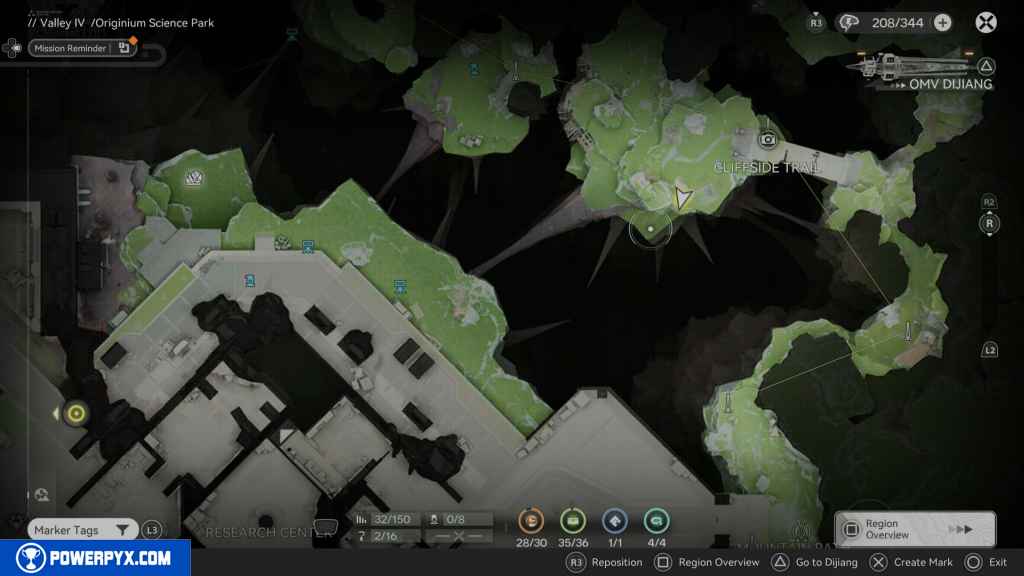
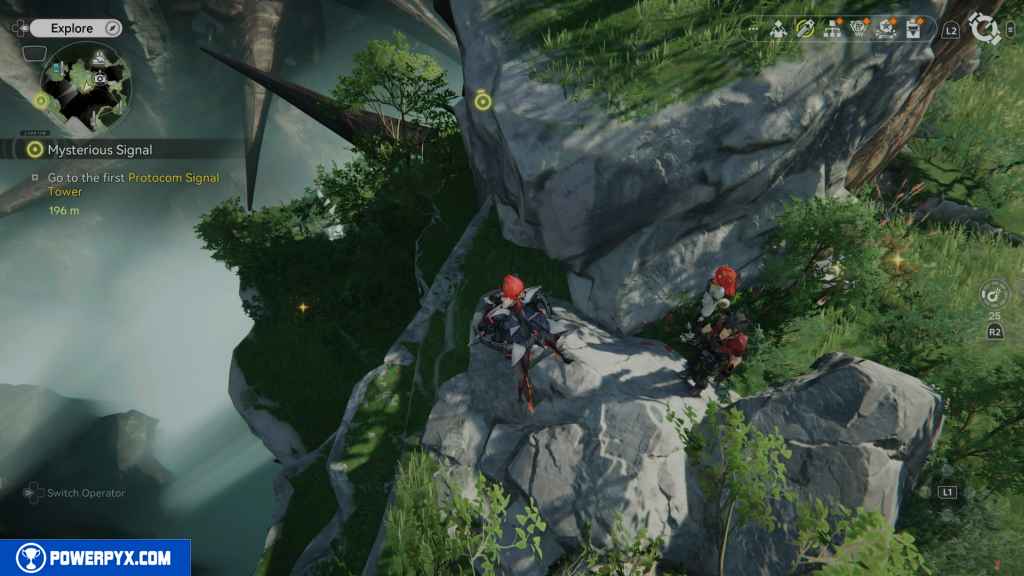
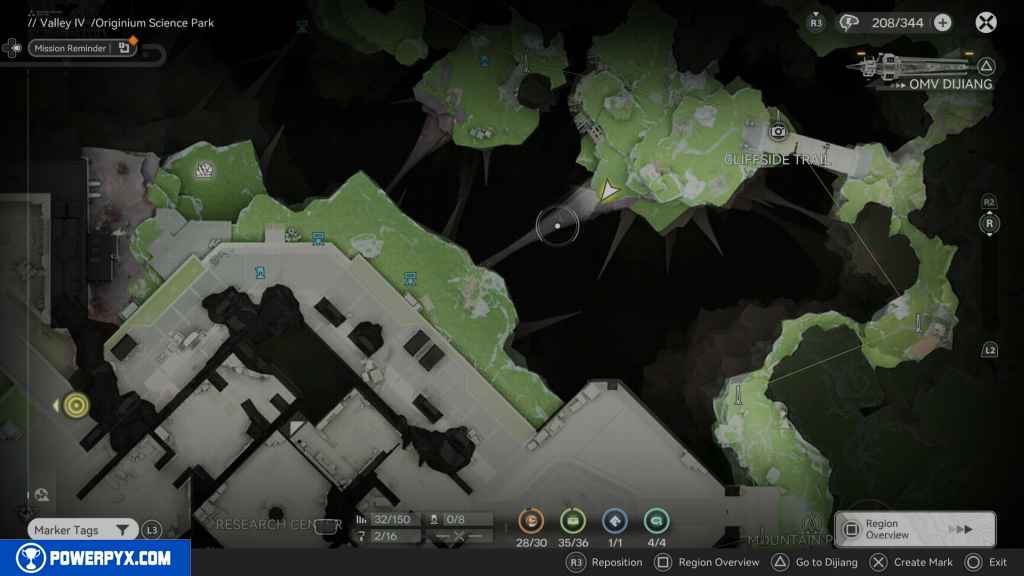
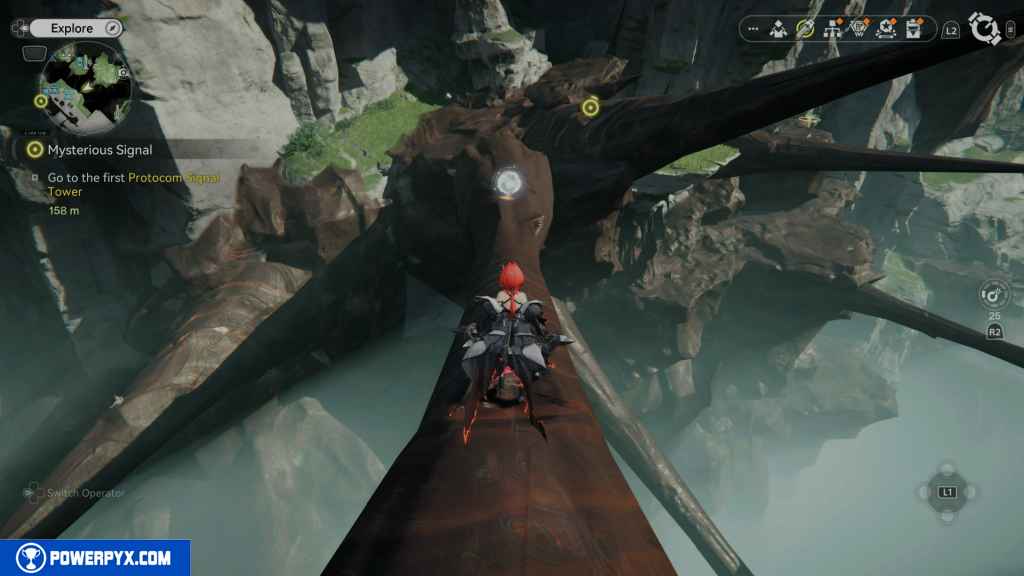
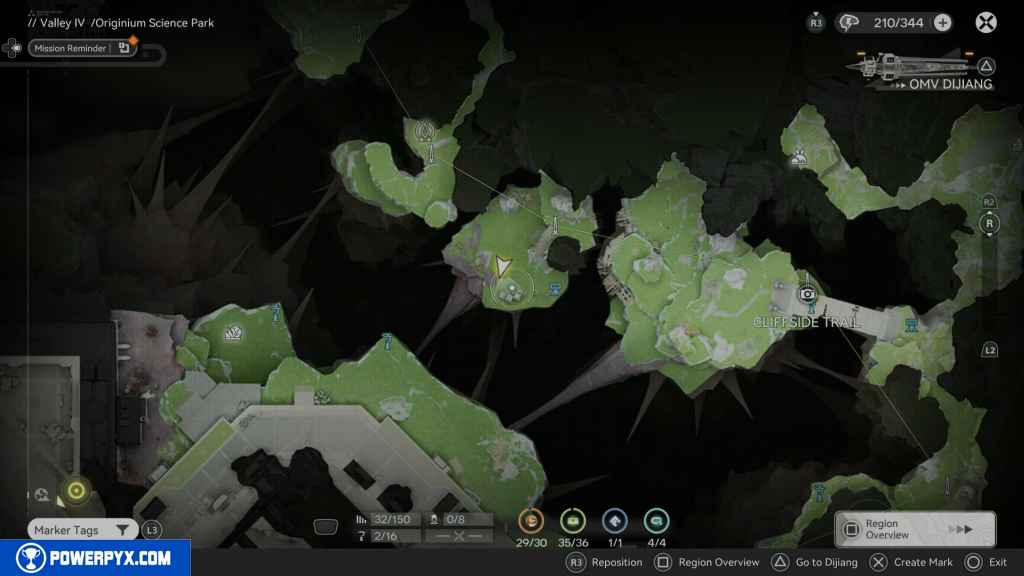
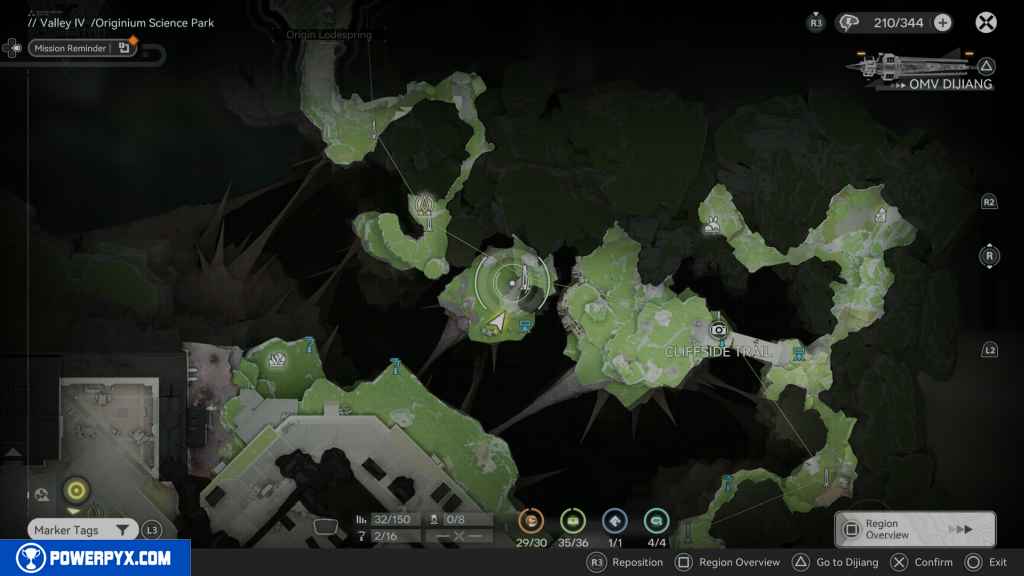
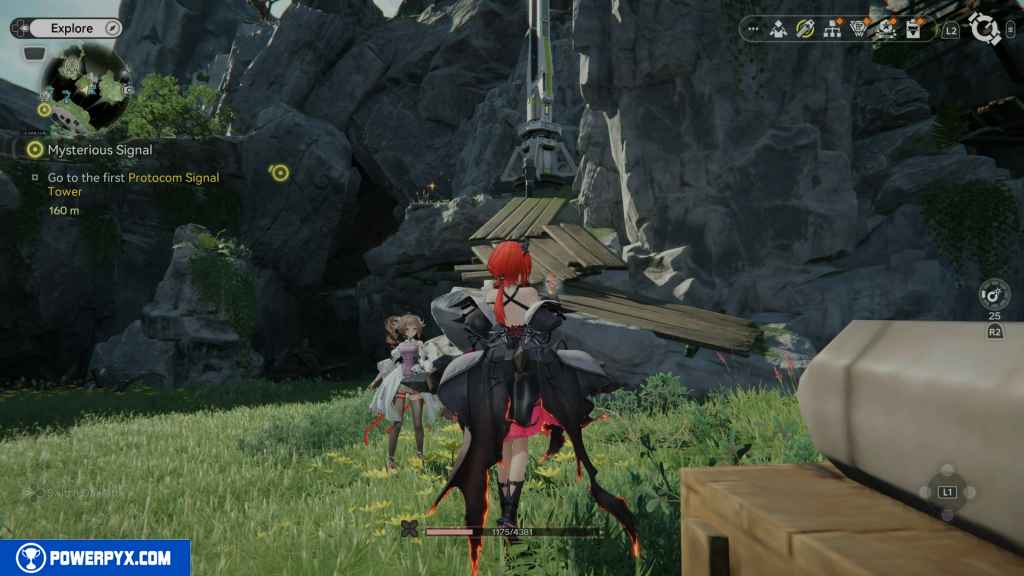
Head to the Cliffside Trail to the north. Head to the point when you reach the bridge. Before crossing, turn left, and you should see a rock platform to jump up. Jump on it and then jump to the top where the large tree trunk is. Next to it is the Gathering Point.
129 – Aurylene 28
From the same area, you should see the Blight blocking the path to some mining material. To get through this Blight, you have to find the core on the other side and use an Industrial Explosive to destroy it by throwing it over the gap. Once that’s done, follow the path as far as it will go, and you should see the Aurylene.

130 – SOS Repair Bot 8
Head west until you reach an area with many cages and boxes. Look south, and you should see a path leading up the hill. When you reach the top, you will find the Repair Bot.
131 – Crate 35
East of the Repair Bot, look for the crate.
132 – Gathering Point 55
West of the Repair Bot and the crate, look for the Gathering Point on the rock below where you are.
133 – Gathering Point 56
Head south from the last Gathering Point to the large tree trunk and the cliff. Look down behind the cliff for this Gathering Point.
134 – Gathering Point 57
Look west from the Gathering Point, and you should see an Aurylene on a Blight Spike. Run across the spike to reach it on the other side of the Blight Spike. Head toward it, and the Aurylene will move down away from you. Continue forward on the spike for the Gathering Point straight ahead.
135 – Gathering Point 58
Continue northwest on the cliff and the Blight, and you should see the next Gathering Point.
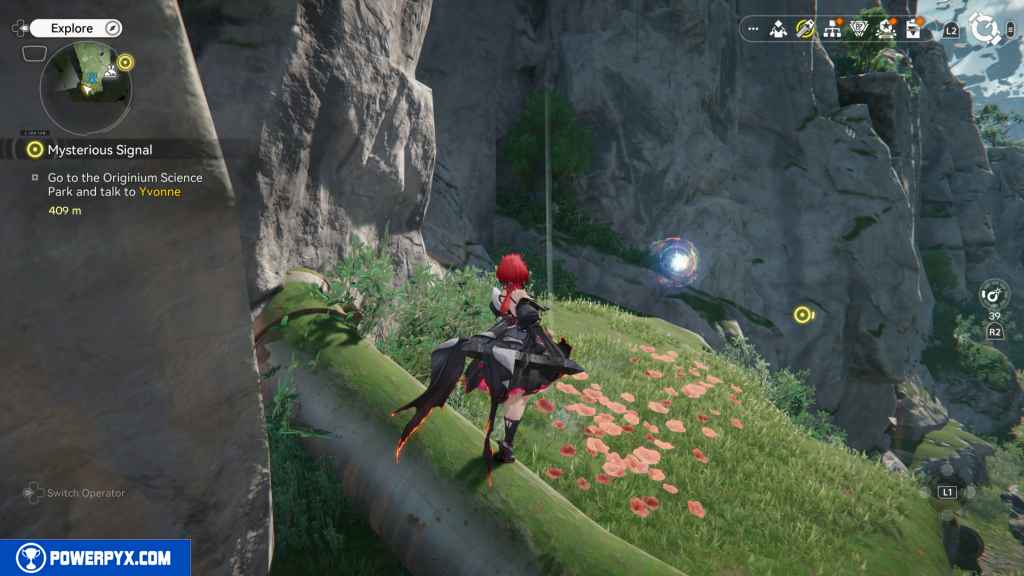
136 – Aurylene 29
From the last Gathering Point, look southeast again, and you should see the Aurylene that was on the Blight spike. Continue down the Blight, and you should reach it.
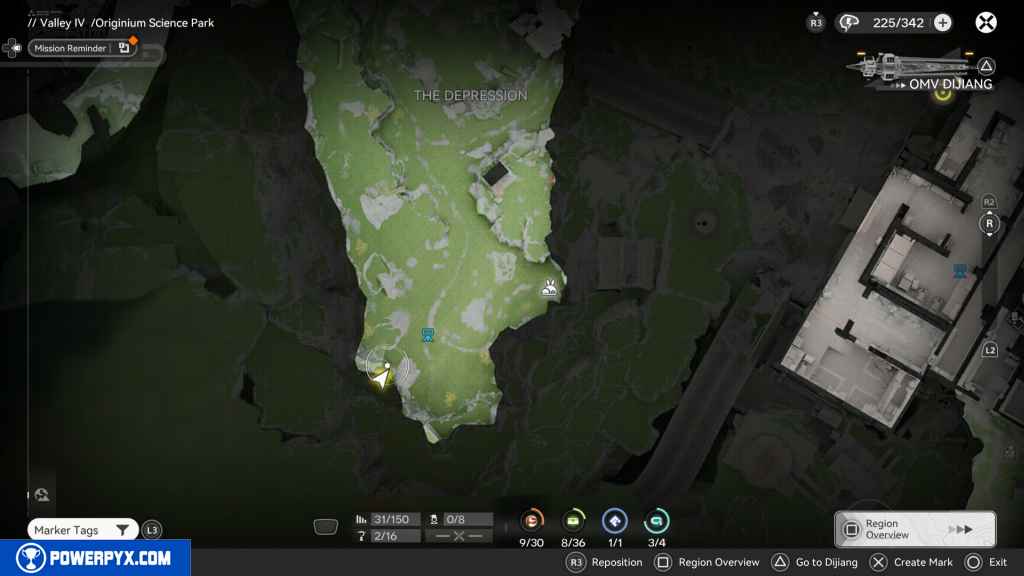
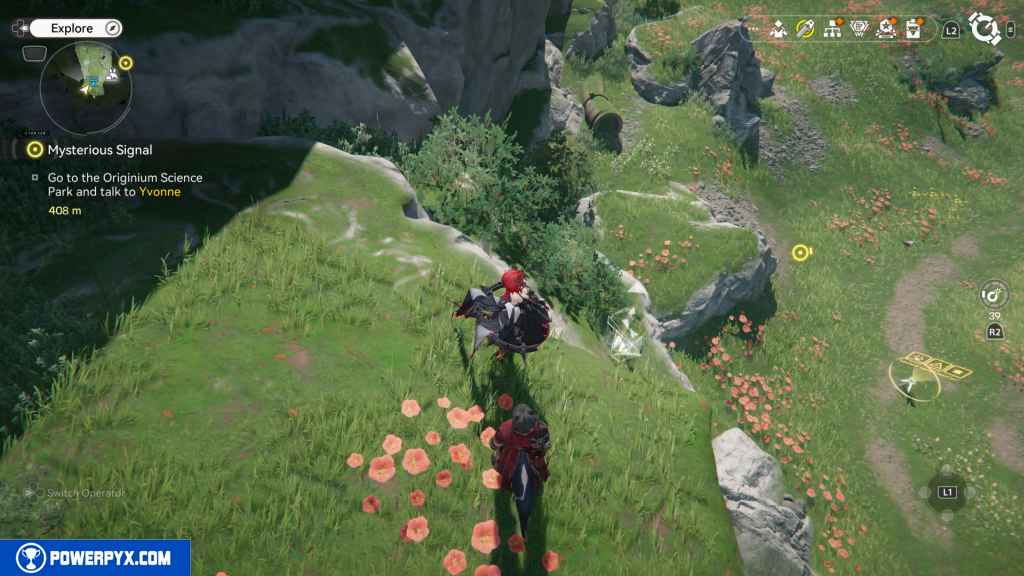
137 – Gathering Point 59
From the last Aurylene, you should see another Blight Spike leading back to the area you were at before, to the north. Take it, and in this area, look for the Gathering Point on a crate to your right.

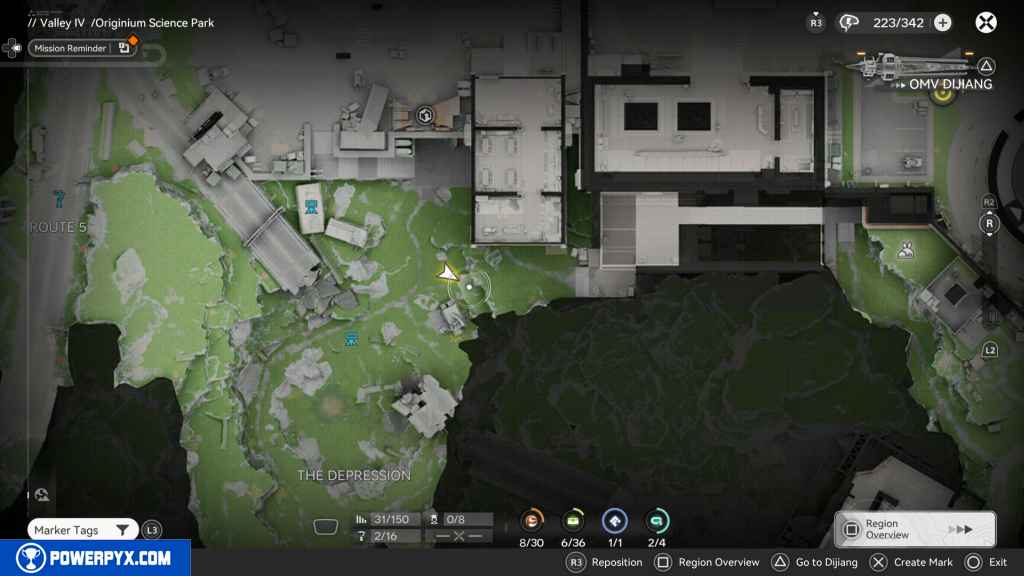
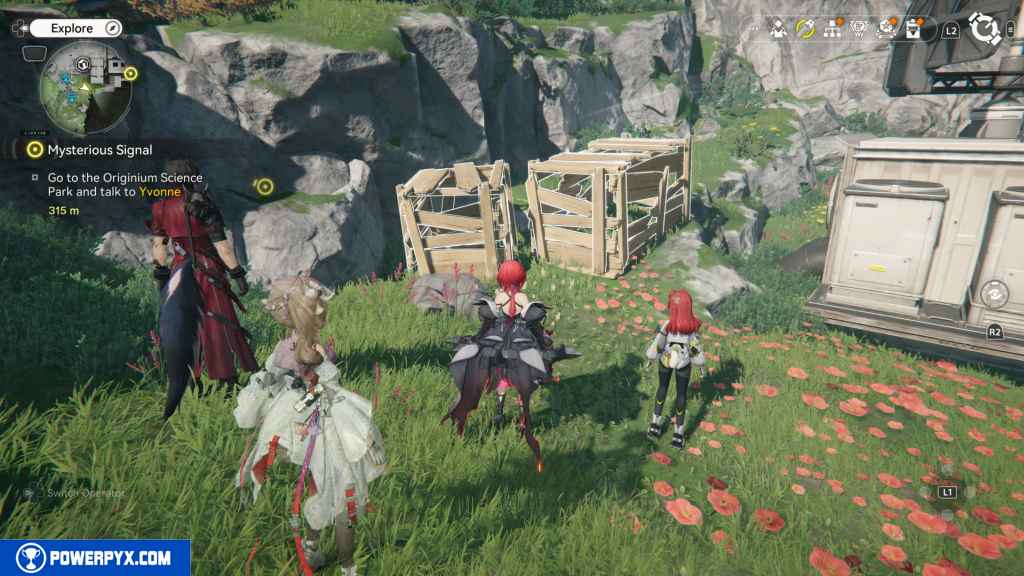
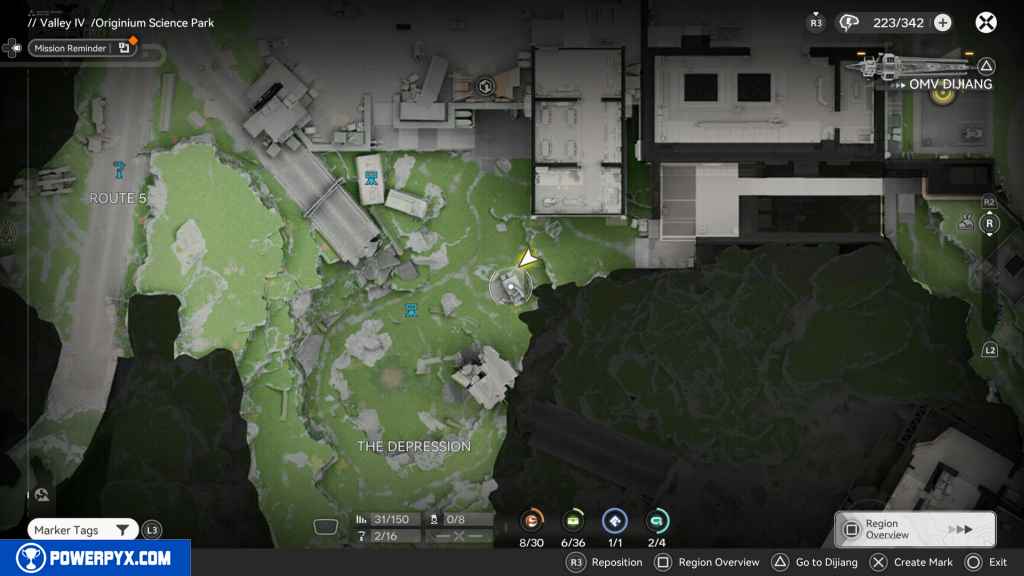
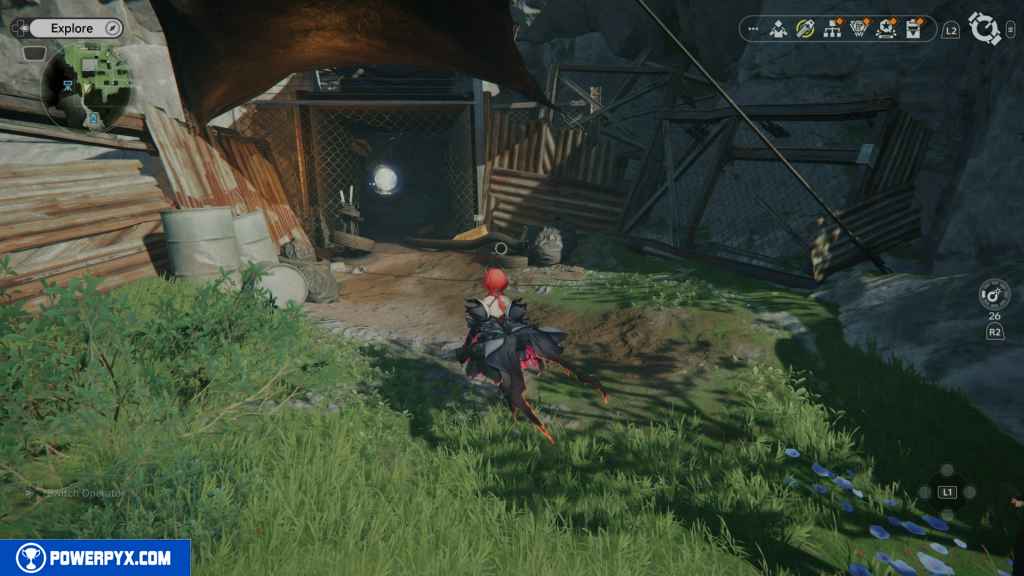
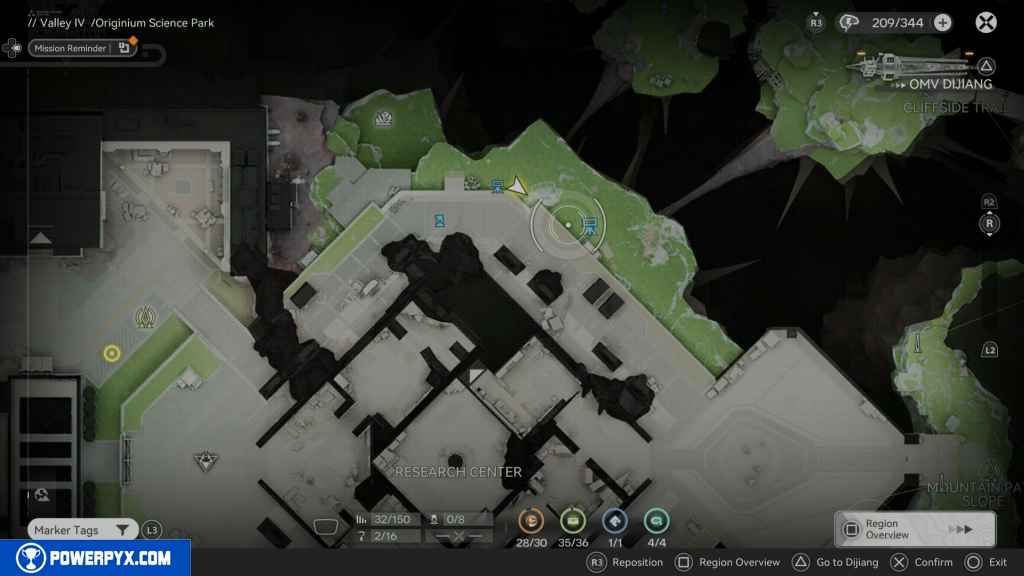
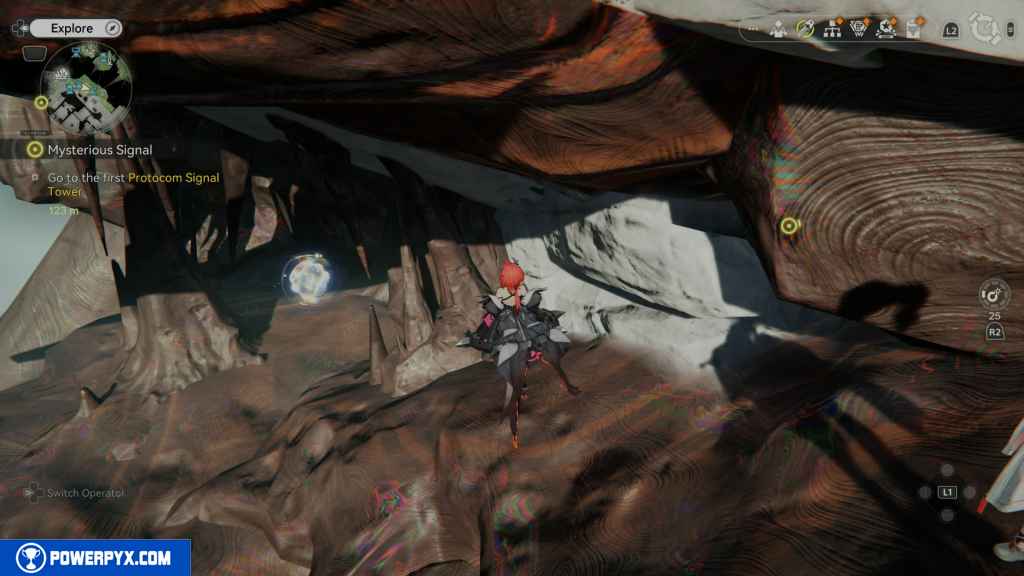
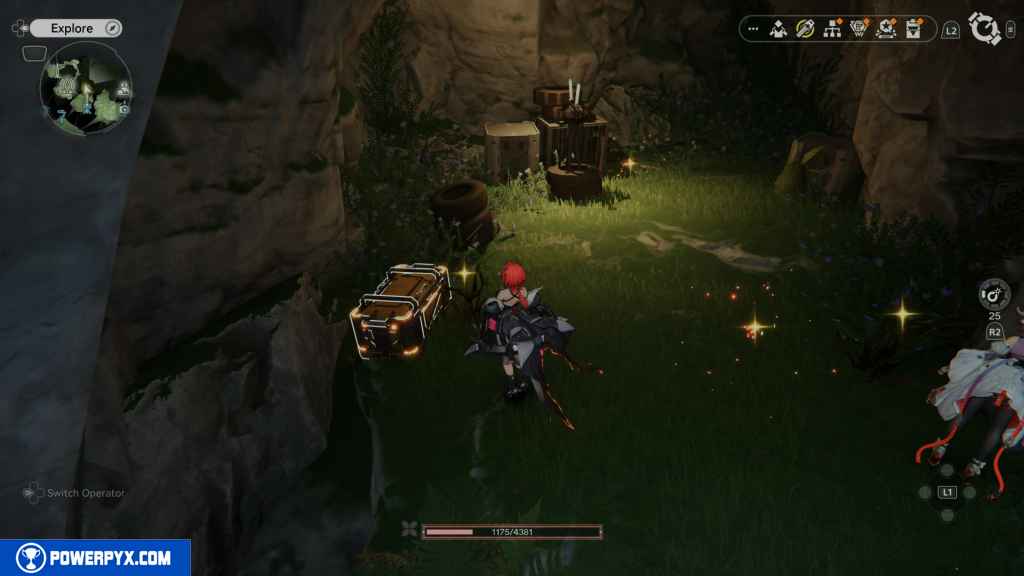
138 – Crate 30
The final crate to find in this area is located in a cave. Look north to some wooden planks going up some rocks on the left, which look like a cave opening leading inside. Right at the entrance on your left is the crate.
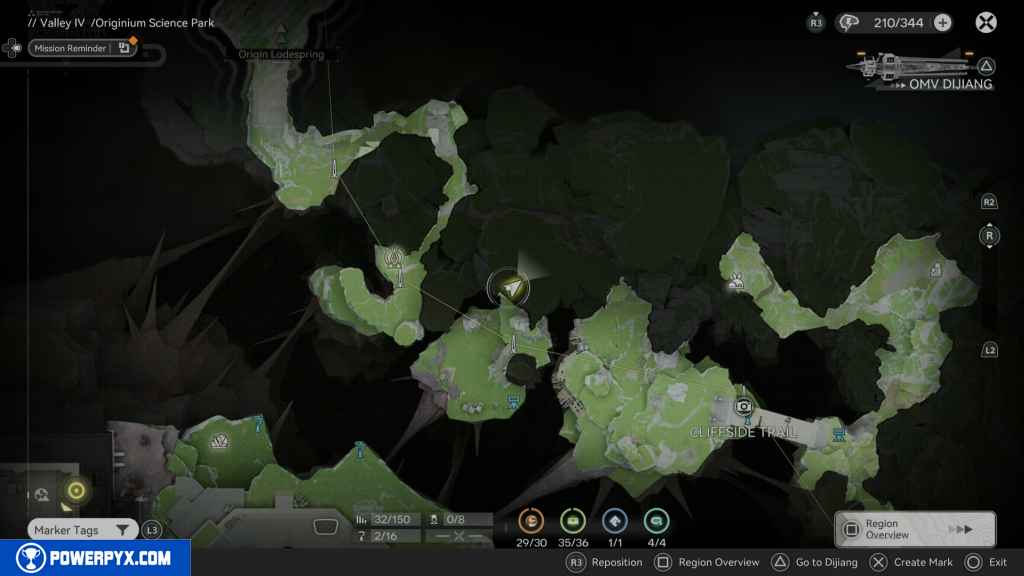
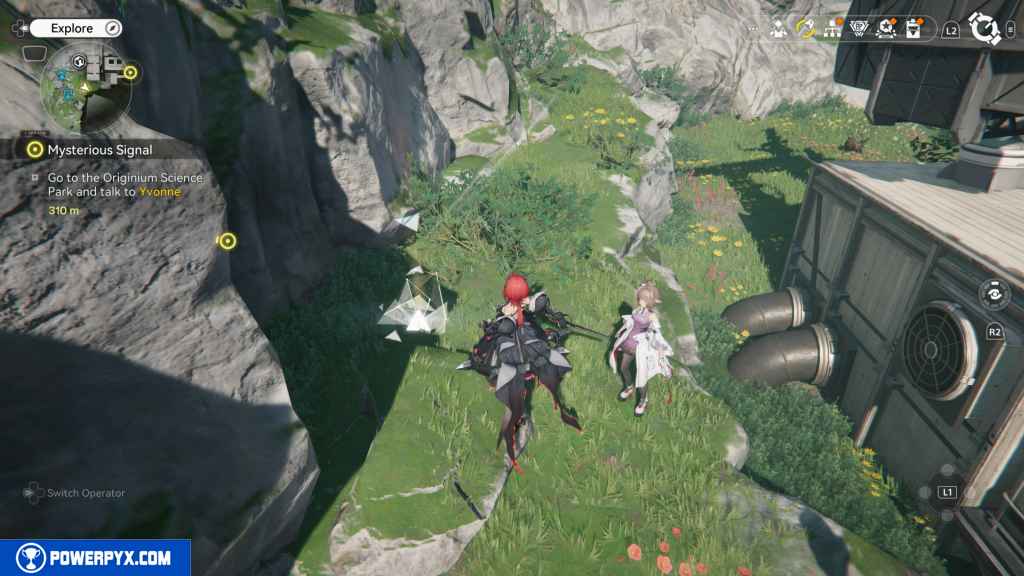
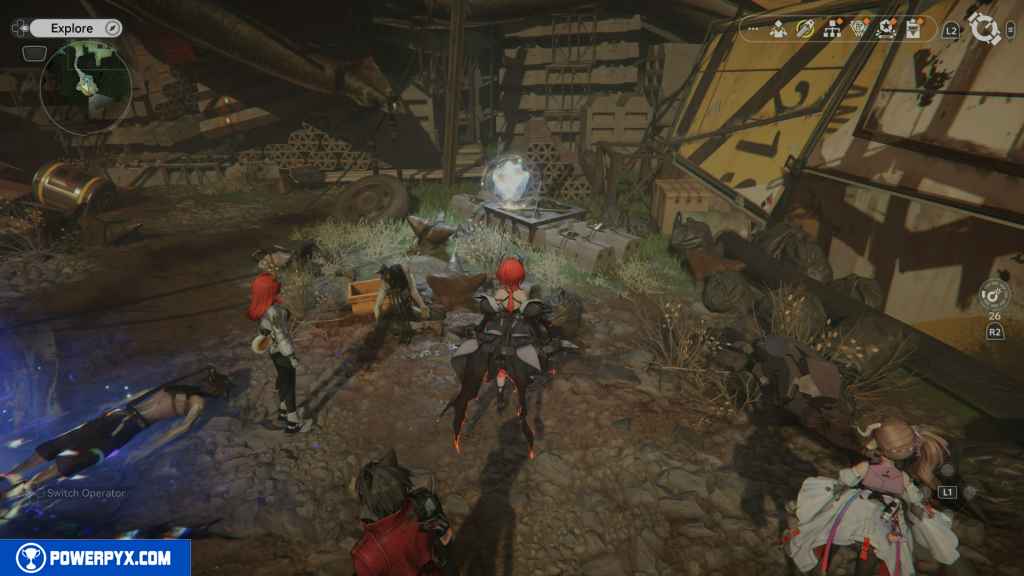
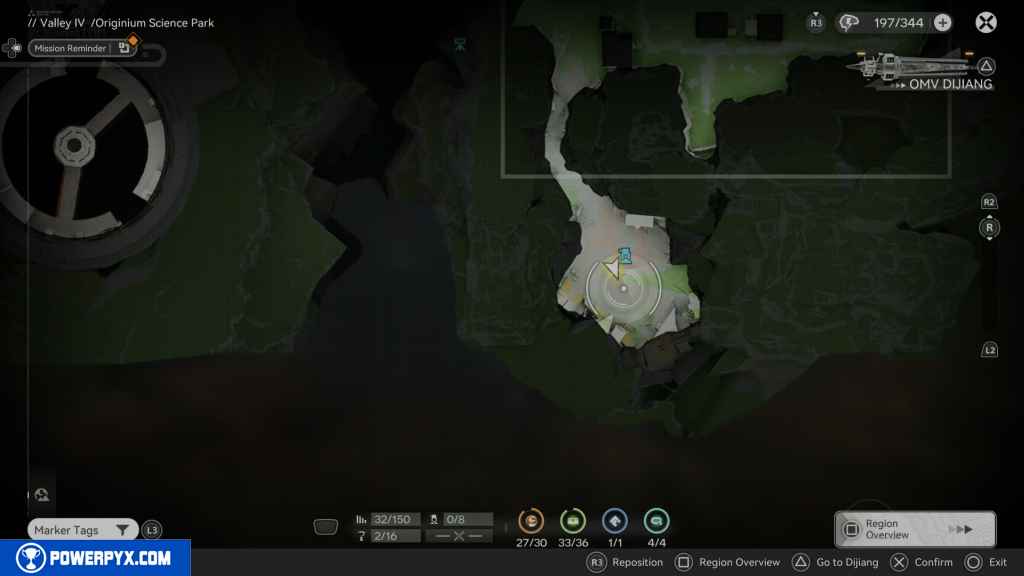
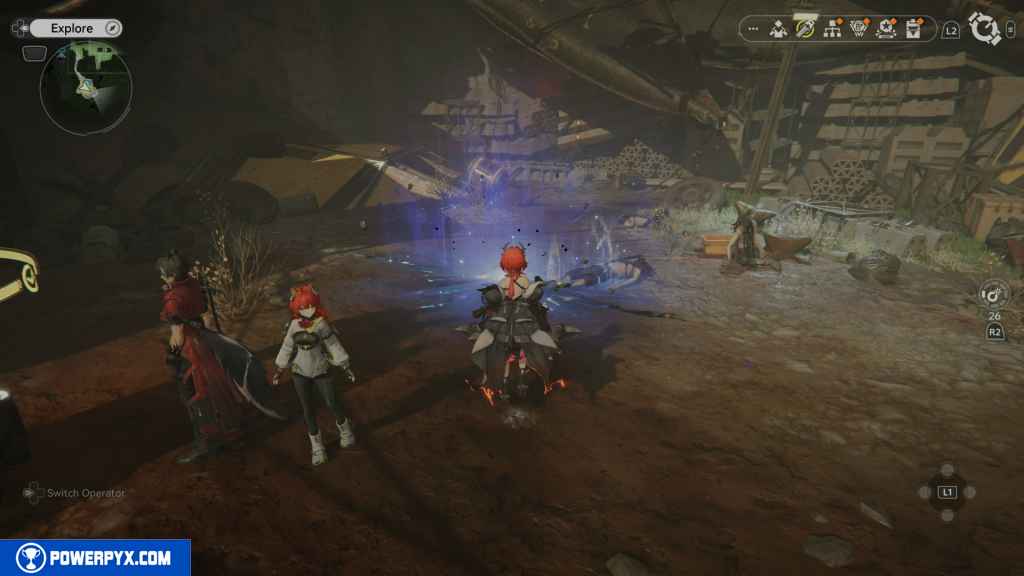
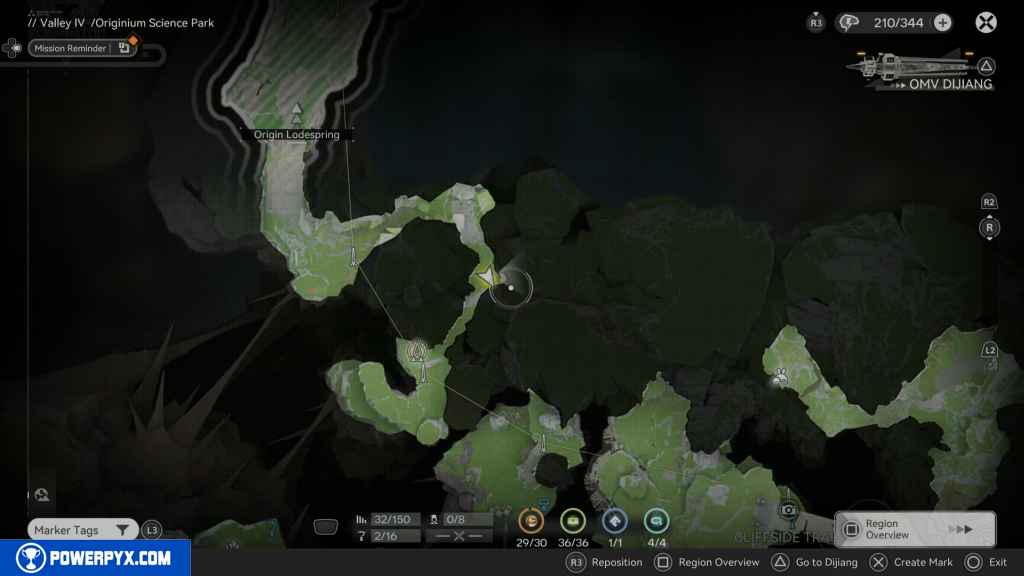
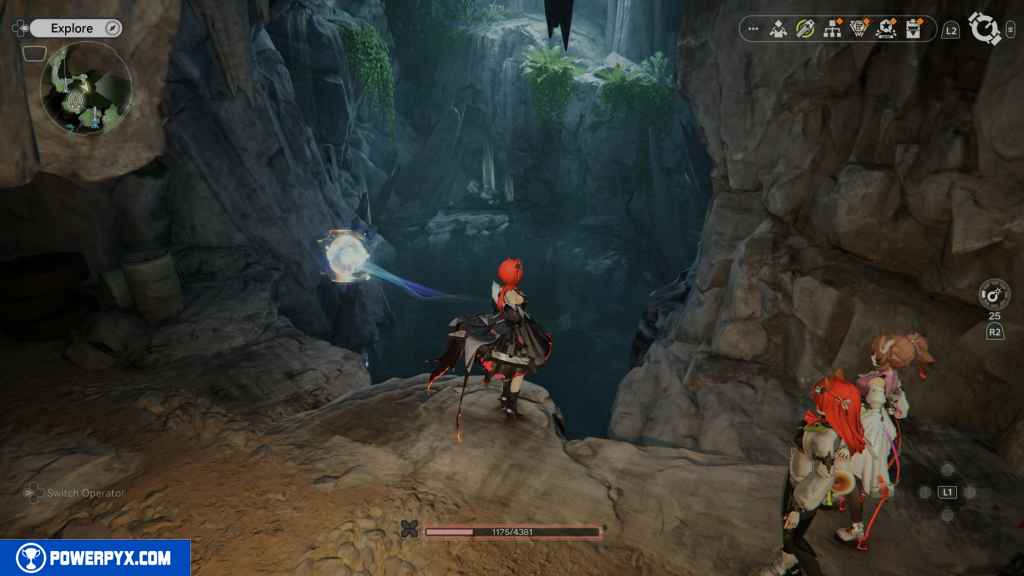
139 – Aurylene 30
Continue north past the TP point into the cave. Reach the area with water on your left, and you should see the Aurylene. It will begin to move. Just wait for it to reach you and claim it.
That’s 100% of the collectibles you can find in the Originium Science Park area in Arknights Endfield.
For all other regions, refer to the Arknights Endfield Collectible Guide.
Leave a Reply