
ARK is the 10th area in Resident Evil 9: Requiem. This 100% walkthrough includes all Collectibles, Trophies and Key Items.
For other Areas see Resident Evil Requiem Walkthrough.
ARK – Leon
Head After Grace
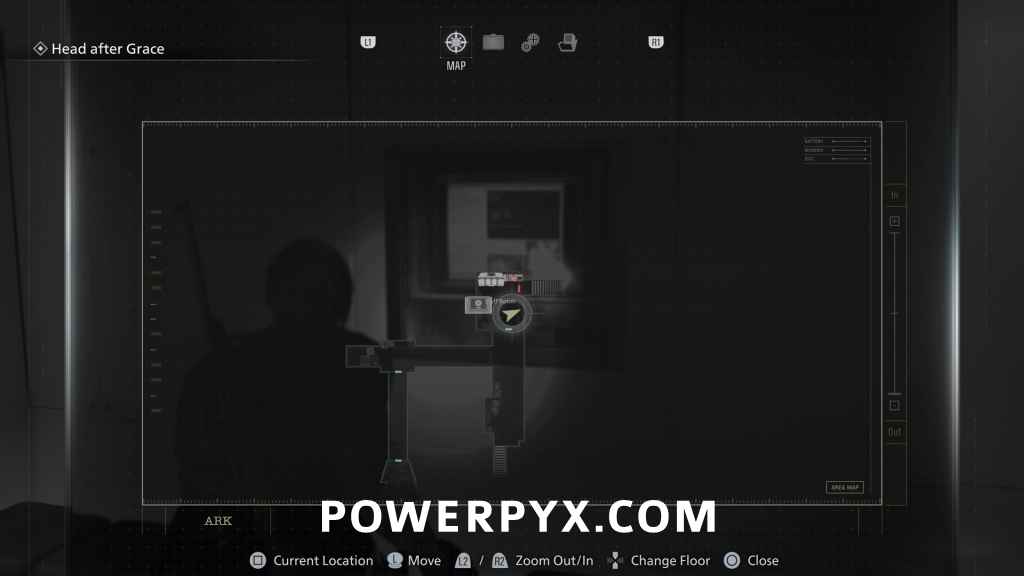
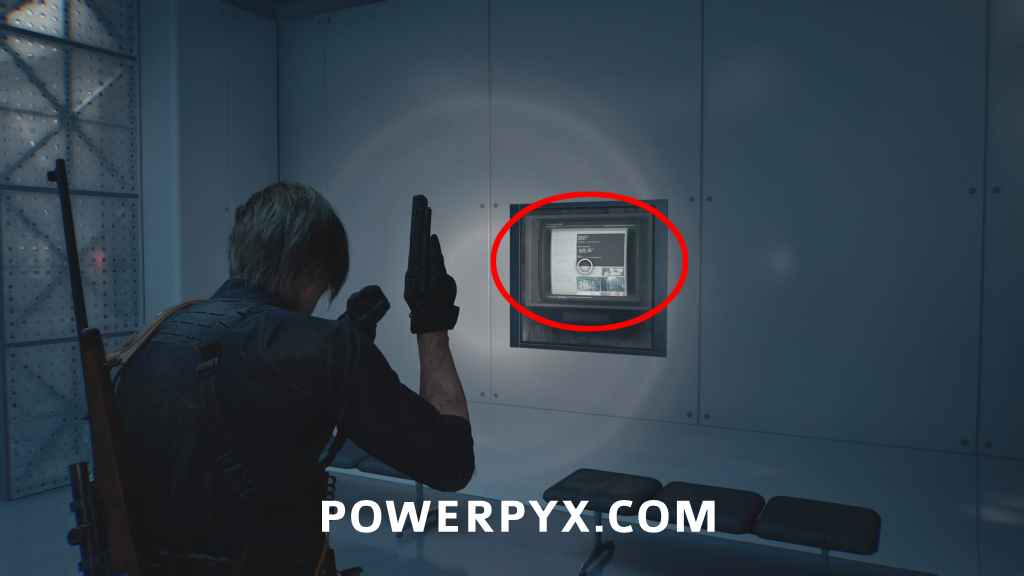
File #66 – N0-AH Status Report
After going through the decontamination tunnel, turn left and go through the green door to find a save point. Check the monitor on the wall.
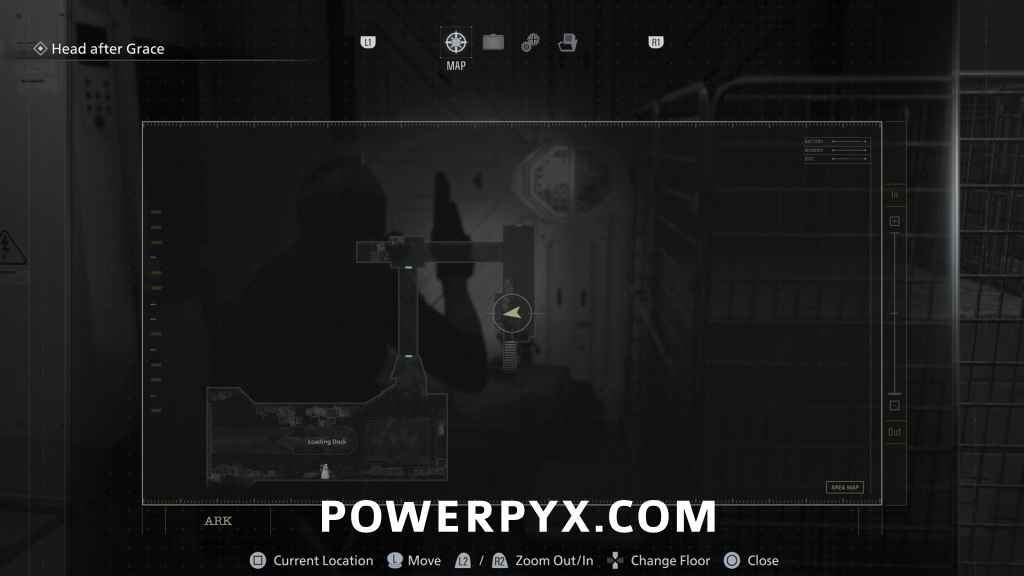
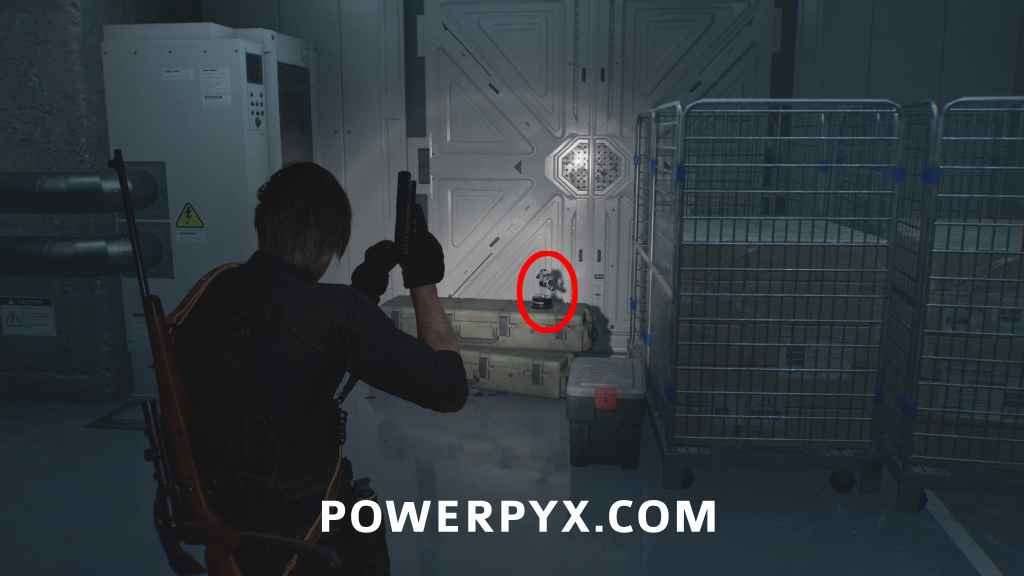
Mr. Raccoon #24
From the previous file, leave the save room, go straight and look right behind the boxes in the corridor, before going downstairs.
Take Out the Elite Guards
Go straight forward until you use a computer to trigger a cutscene. When you go back through the server room the lights will turn off and 4 armored enemies will enter from the door at the far end. If you are quick and have a grenade, you can aim and throw it at the doorway as soon as it opens and take out all enemies at once. If you miss one, be careful as they will try to get behind you in the room and can deal a lot of damage at once.

Run back to the save room if you need, then progress to the Stockroom. This area initially has another 4 enemies you want to deal with. They will be crouching behind cover and pop out to shoot you, and you can get them with sniper rifle headshots if you are quick enough. If one runs over to the left and you can’t see them anymore, you can go to the right and climb up onto the catwalk, then aim down into the next area to take out any remaining enemies before jumping down.
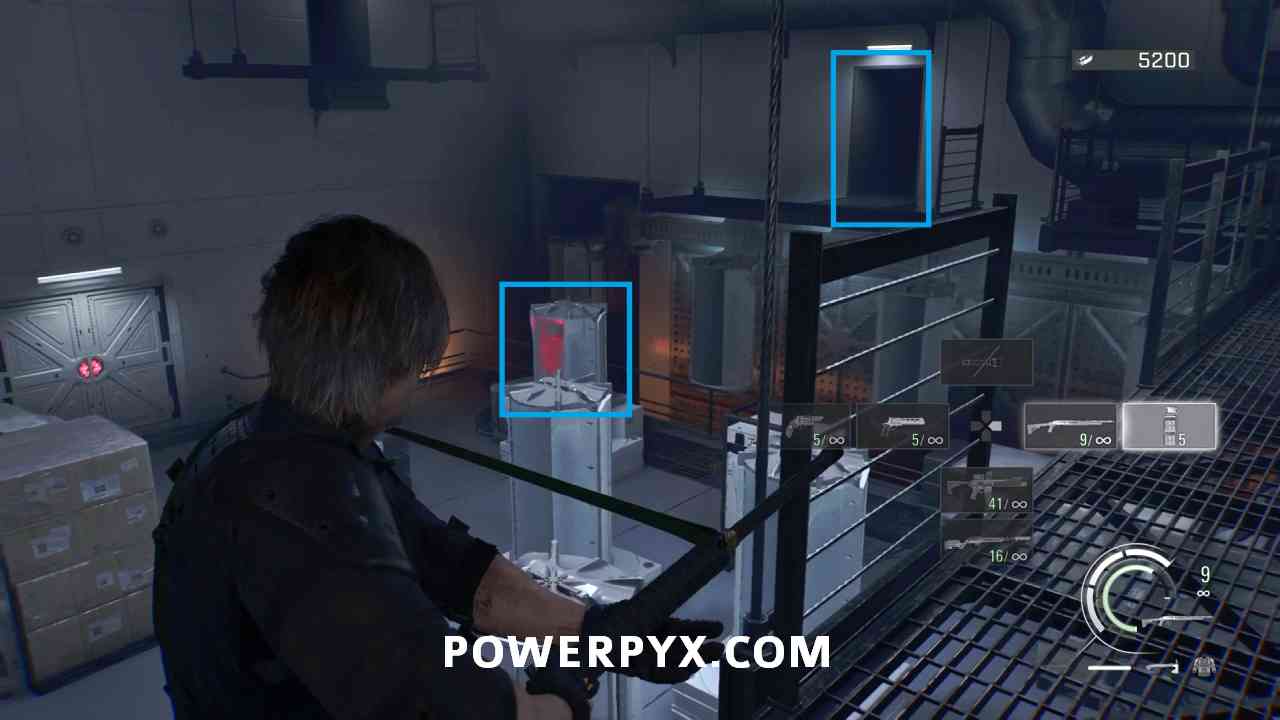
Once you drop down more enemies will drop into the room from the open doorway on the top right, along with a couple coming through the far door. To deal with them you can throw another grenade on the ground right below where they drop, most useful to deal with the shield enemy. You can then shoot the red tank on the left which will release a Licker that deals with the other enemies, then you just need to deal with the Licker before continuing.
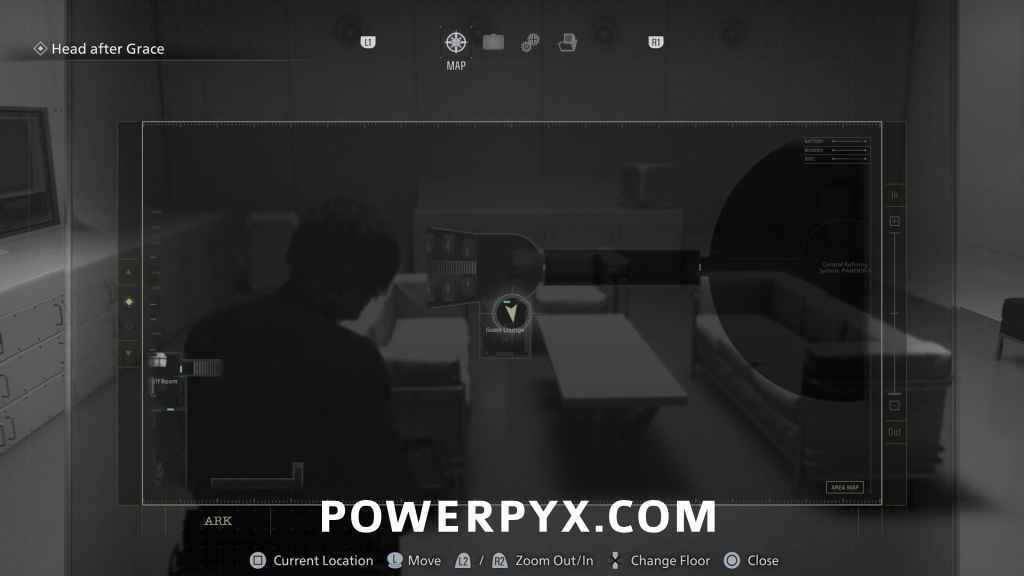
After Stockroom you enter an exhibition room with human mannequins where an AI voice speaks. Then go up the stairs with golden skeleton statues on either side. Enter the first green door on the right to reach Guest Lounge.
File #67 – Raccoon City Bioweapon Research – Report
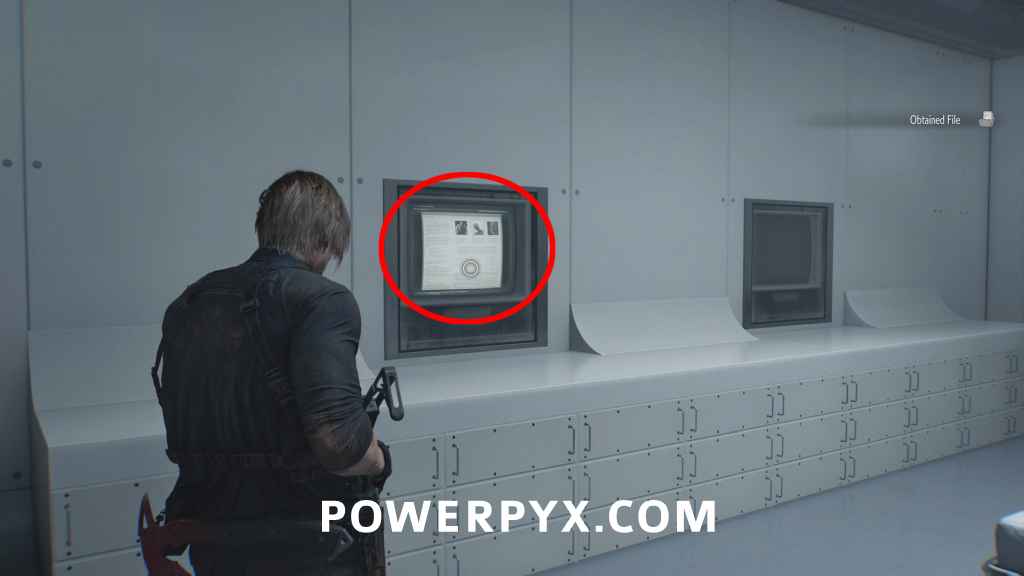
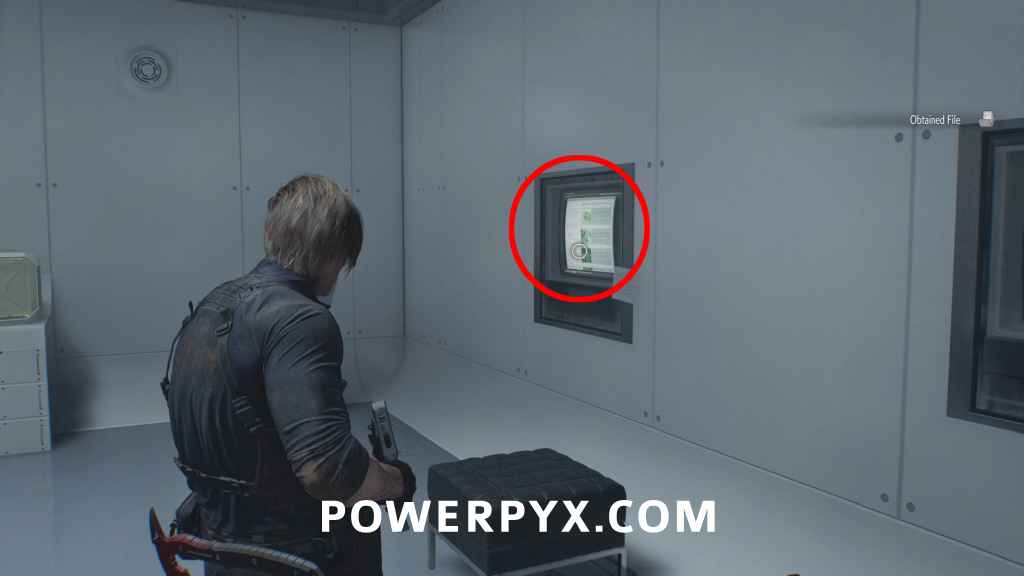
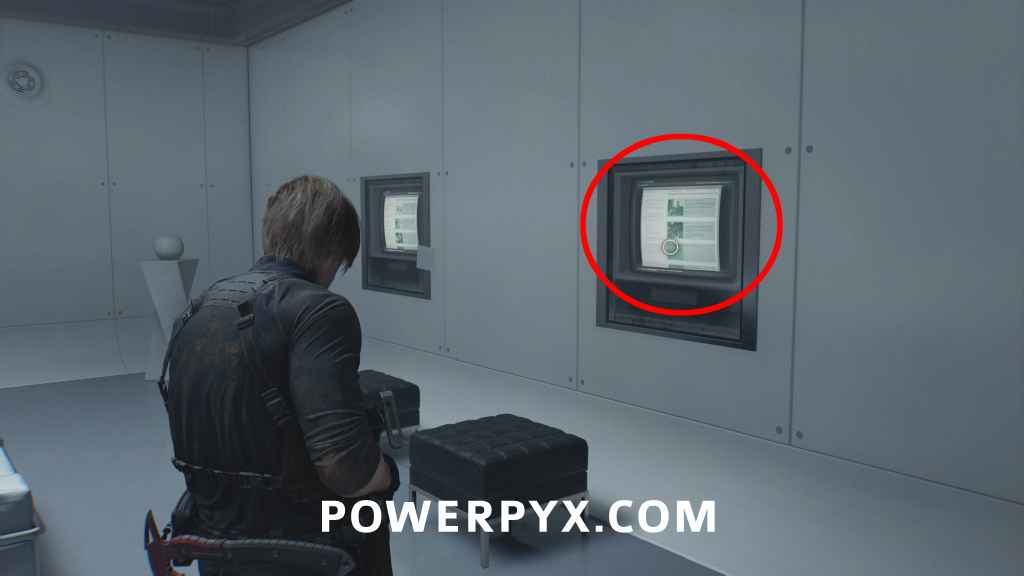
Guest Lounge: After going up the stairs with golden skeleton statues, enter the green door on the right to reach Guest Lounge. Check all 3 monitors on the walls for 3 files.

File #68 – Product Catalog 1 (2026)
Same as above.

File #69 – Product Catalog 2 (2026)
Same as above.
Eliminate the Commander
Continue forward and you will be knocked to a lower area to fight the Commander. This boss fight is intended to be primarily fought with the Hatchet, where you parry the enemies attacks and then get 1-2 swings in yourself before parrying again. The fight happens in specific segments where the Commander will do more attacks. These are divided by short cutscene segments where Leon and the Commander attack each other before you gain control again. After the first one they will attack twice in a row which you need to parry, then the next time they’ll attack three times in a row. Now after you deal enough damage he’ll cause a bunch of smoke to appear in the room and start running around. He’ll sometimes run away to shoot a gun at you, and you need to try and watch where he is to avoid damage and shoot back. In this section after you deal enough damage he will be defeated.
Weapon: Mortal Edge
After a boss fight, you can loot it from the boss. You can unequip your current Hatchet in inventory and click Equip on Mortal Edge, it does more damage and has better durability.
You can then continue up the stairs and then through the tunnel again to complete this section.
ARK – Grace
Find a Way Out of the Dump
Once you start as Grace follow the linear path until you can be boosted into a vent. Follow it and then drop down into the next room, then progress to the Safe Room.
Search for the Override Key
Follow the main path to the next room where you will automatically be shown the Lickers that are patrolling. The first one you can take out if you have a Molotov and a decent amount of handgun ammo, then careful enter the room while avoiding the glass on the floor.
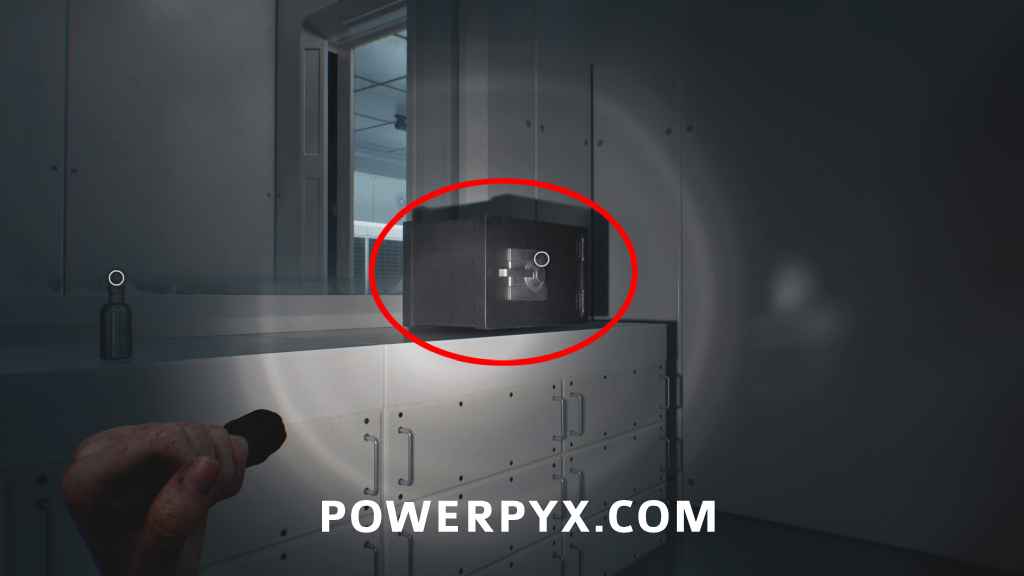
Safe #4
Sterilization Chamber: This sits on the window directly in front of where you enter the room past the first Licker.
Combination (Casual) = Right 10 – Left 90 – Right 20
Combination (Insanity) = Left 80 – Right 50 – Left 0
(Normally, the code is obtained from File #71 – Sterilization Chamber Safe, but you can already open it now before collecting the file).

Follow the path out of the room and watch for the Licker that will be on the ceiling. If you have another molotov you can do the same thing as the first one, otherwise try to avoid it for now.
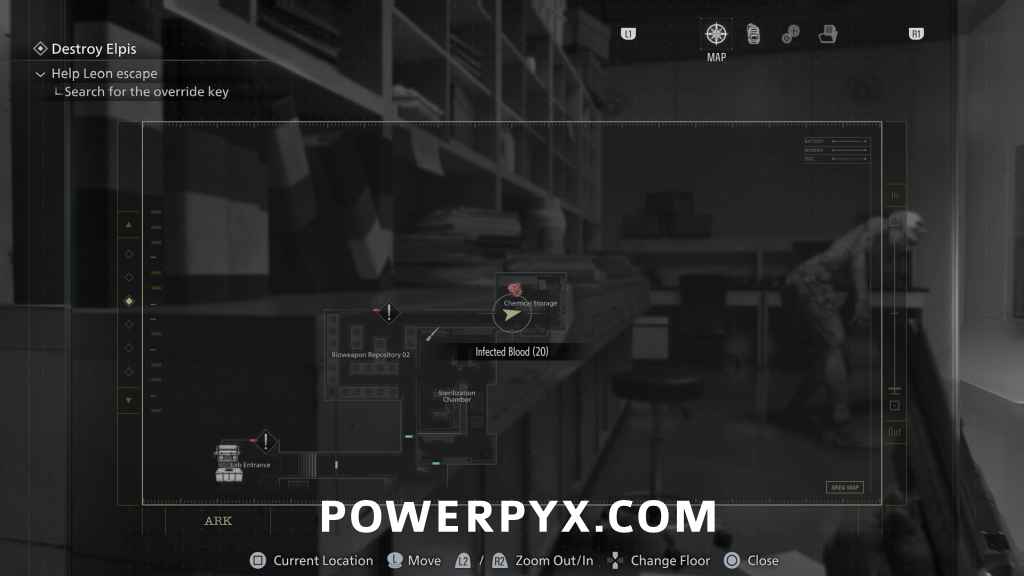
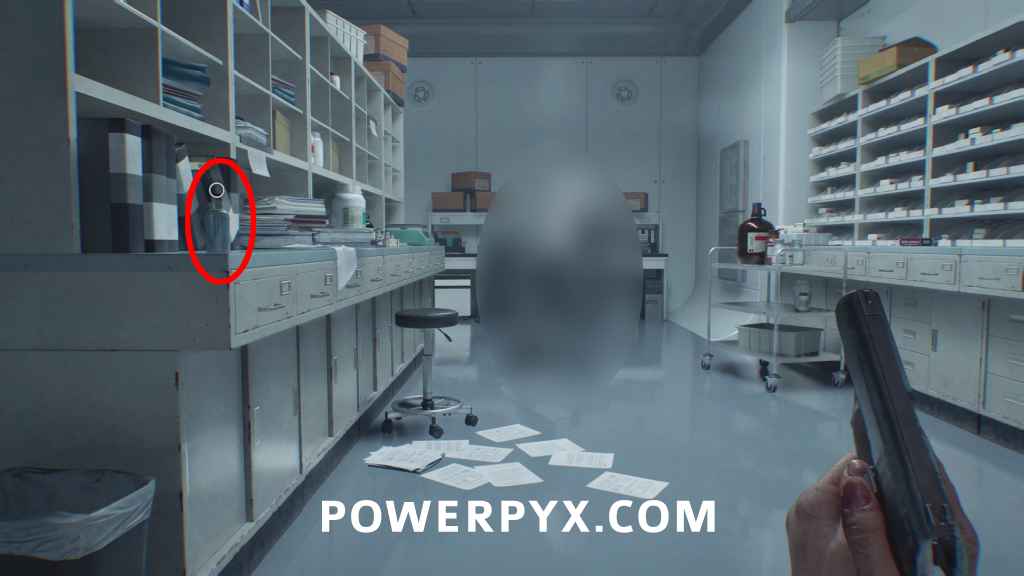
Weapon: Bottle of Acid
Chemical Storage: Go through the next room to reach Chemical Storage, it’s on the table where you enter. Acid is used throughout this section to deal with the Lickers, as one bottle hit will instantly kill them on all difficulties. Try to save it for later if possible, but you can also craft more in a bit.
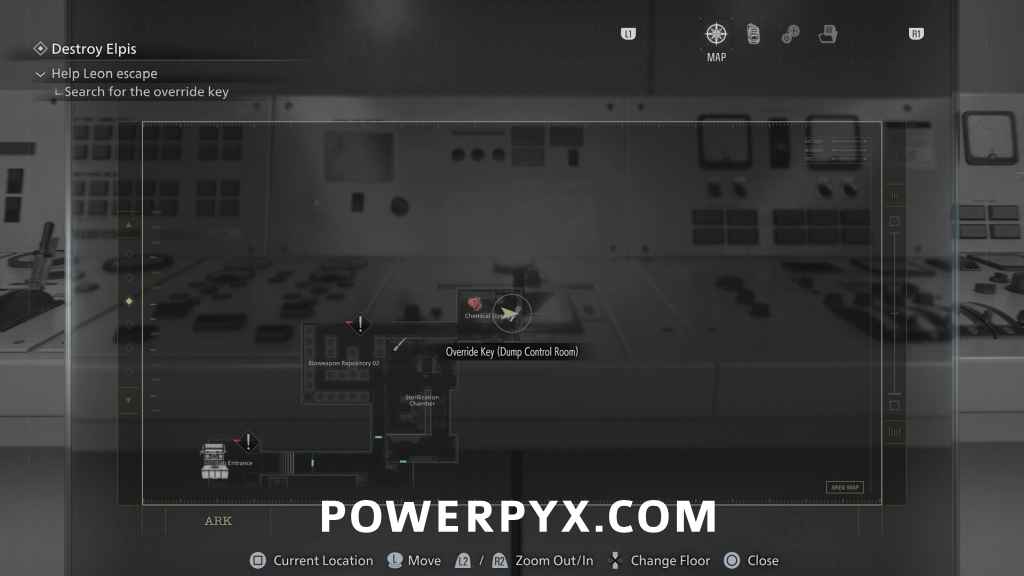
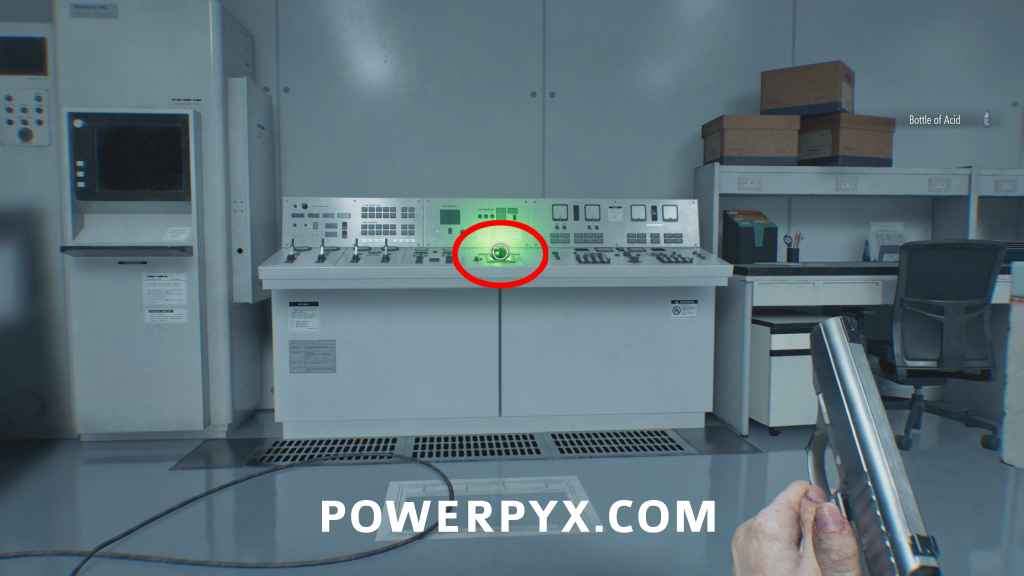
Key Item: Override Key (Dump Control Room)
Chemical Storage: At the end of Chemical Storage room, glowing green on computer panel. Be careful of the two zombies in this room.
Once you grab it carefully backtrack the way you came while avoiding the new enemies. You can go through the green door down the hallway for a shortcut to skip the lab area. Watch on the stairwell as there will be a Licker that appears, you can use the Acid on this one to get rid of it immediately. Then place the Override Key in the console to let Leon out of the room.
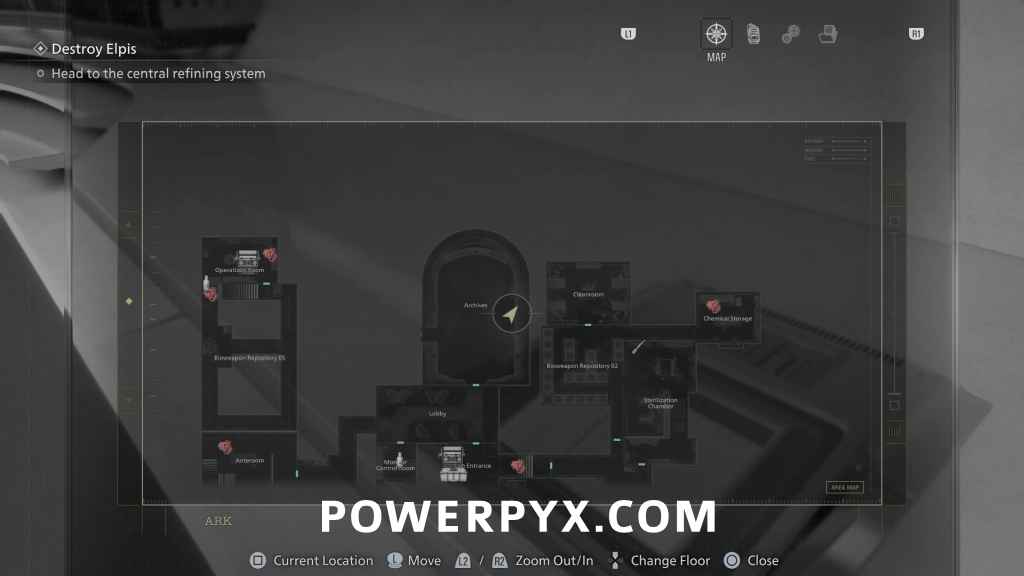
Head to the Central Refining System
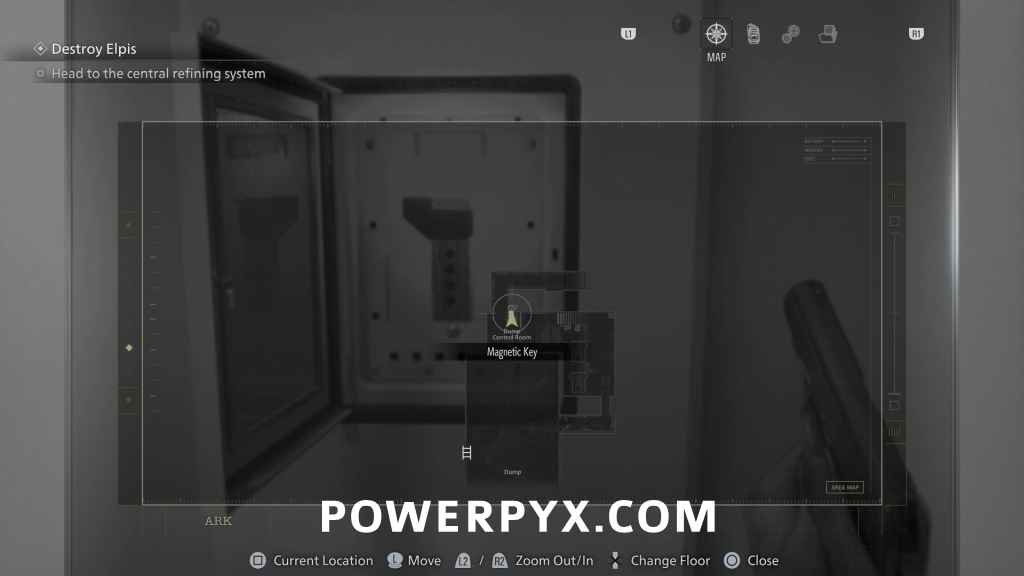
Key Item: Magnetic Key
Dump Control Room: After using Override Key in Dump Control Room and getting a cutscene, it’s in the same room on the wall, in green glowing panel.

File #70 – Access Log: 51st Assembly Minutes
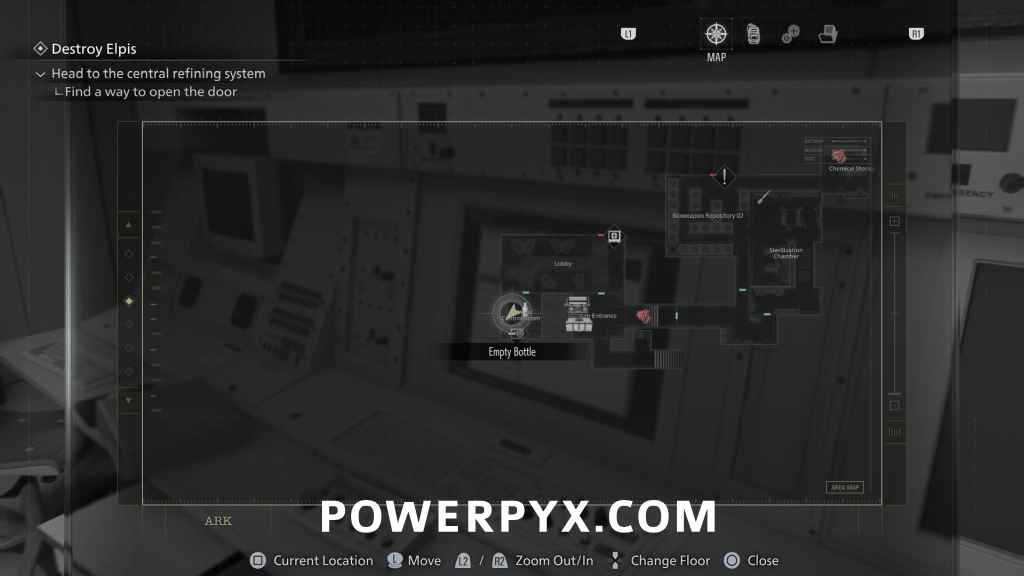
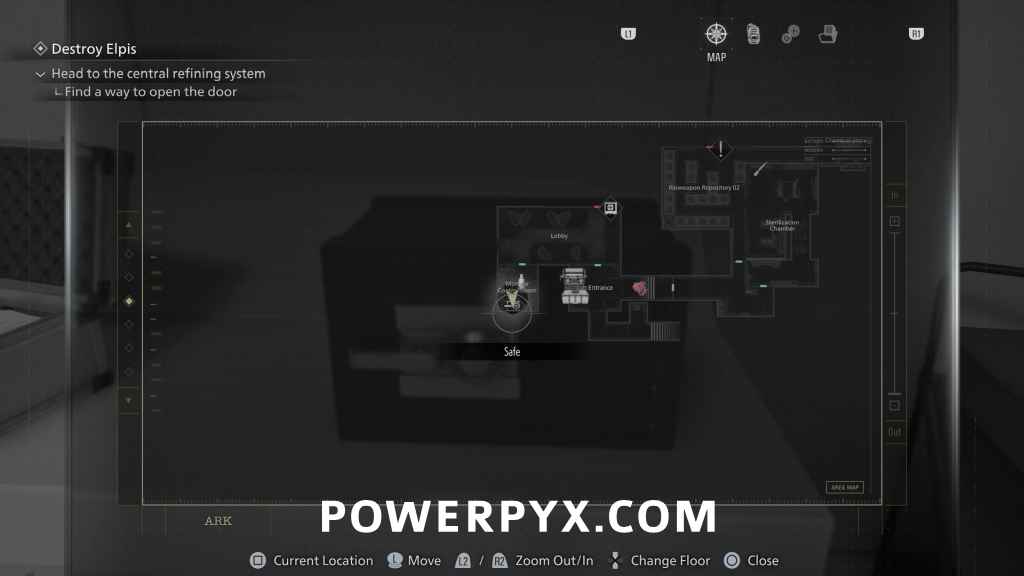
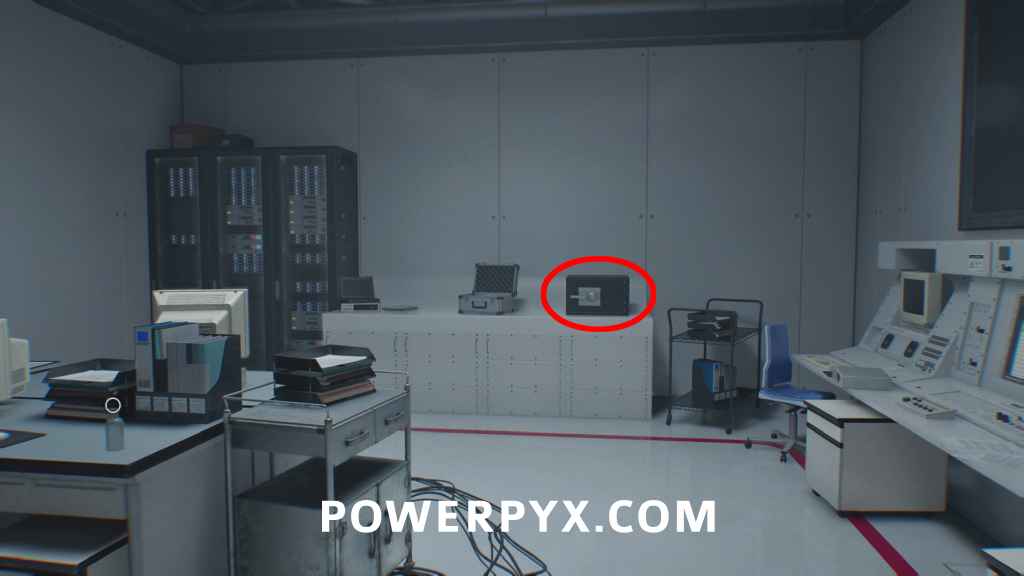
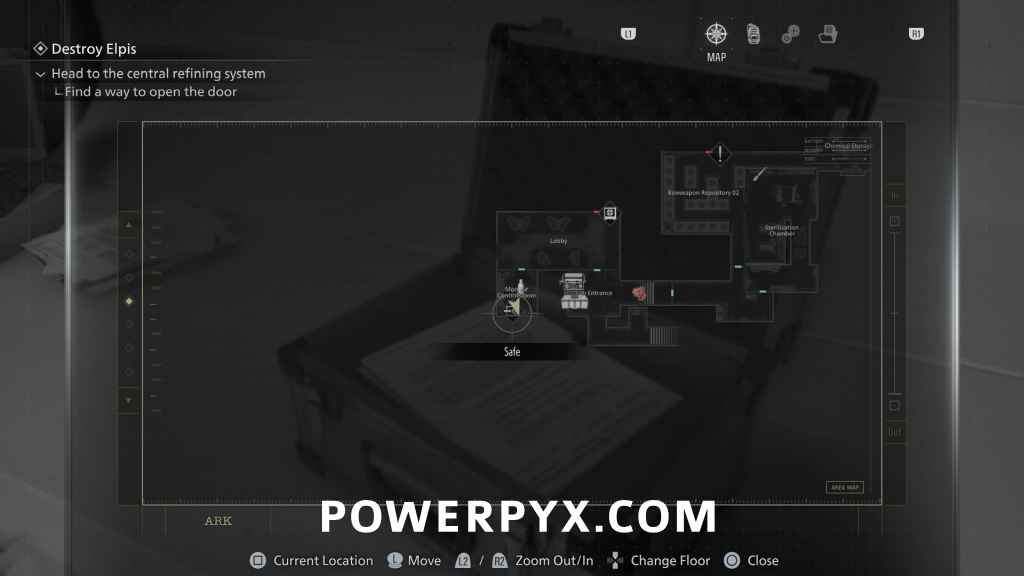
Monitor Control Room: After grabbing the Magnetic Key, use it on the red door by the typewriter upstairs. This leads to the “Lobby” with red floor paint. Enter the first green door on the left and inspect the monitor on the right side.

Safe #5
Monitor Control Room: Same room, on the counter. This is the final safe and unlocks  No Safe is Safe.
Combination (Casual) = Left 50 – Right 60 – Left 80.
Combination (Insanity) = Right 20 – Left 0 – Right 70.
(Normally, you get the code from File #72 – Monitor Control Room Safe, but you can already open it now).
Crafting Recipe: Bottle of Acid
Monitor Control Room: Same room, left of the safe.
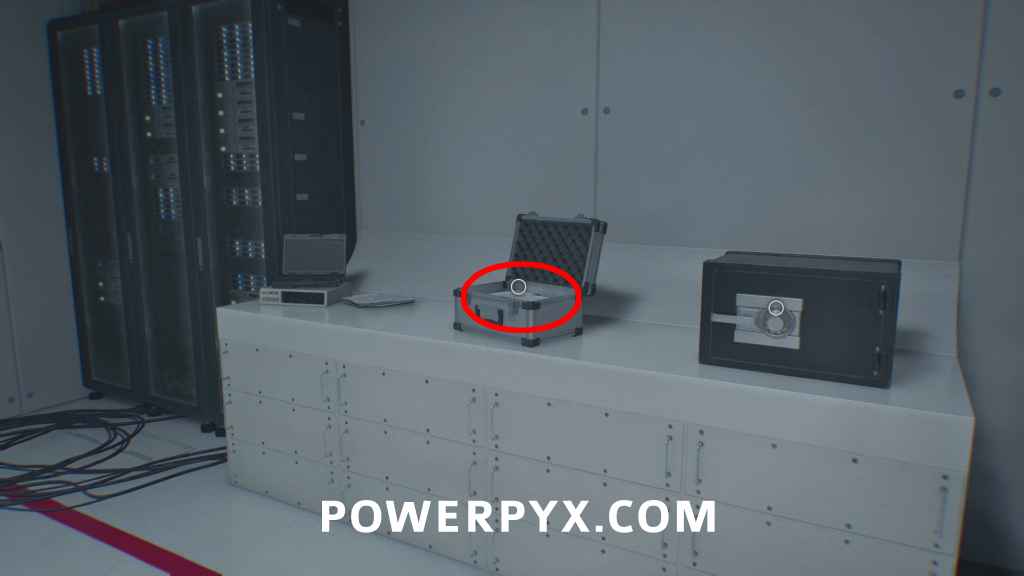
You should craft any Acid that you can now, as the next area has a bunch of Lickers that you don’t want to try shooting.
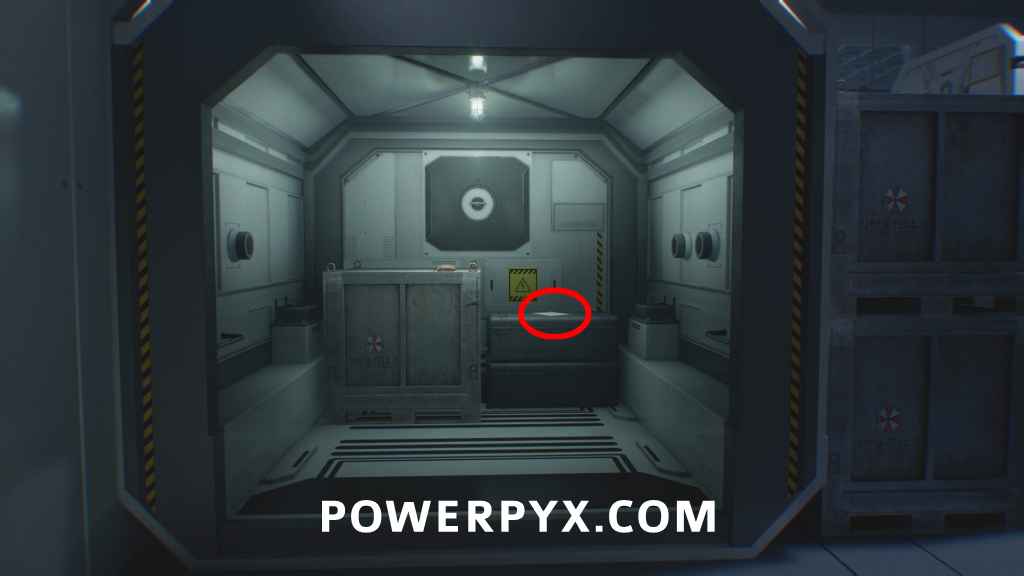
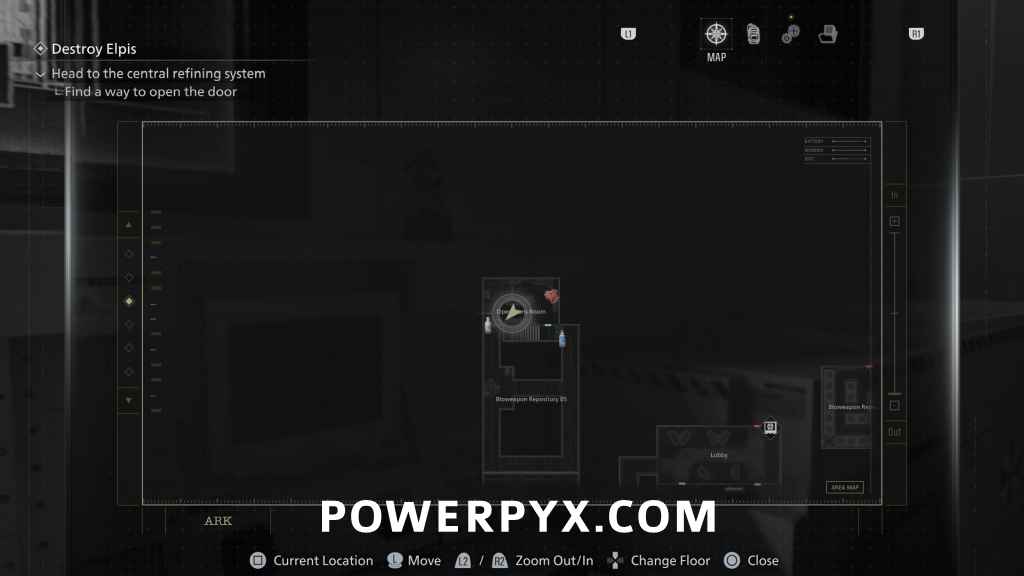
File #71 – Sterilization Chamber Safe
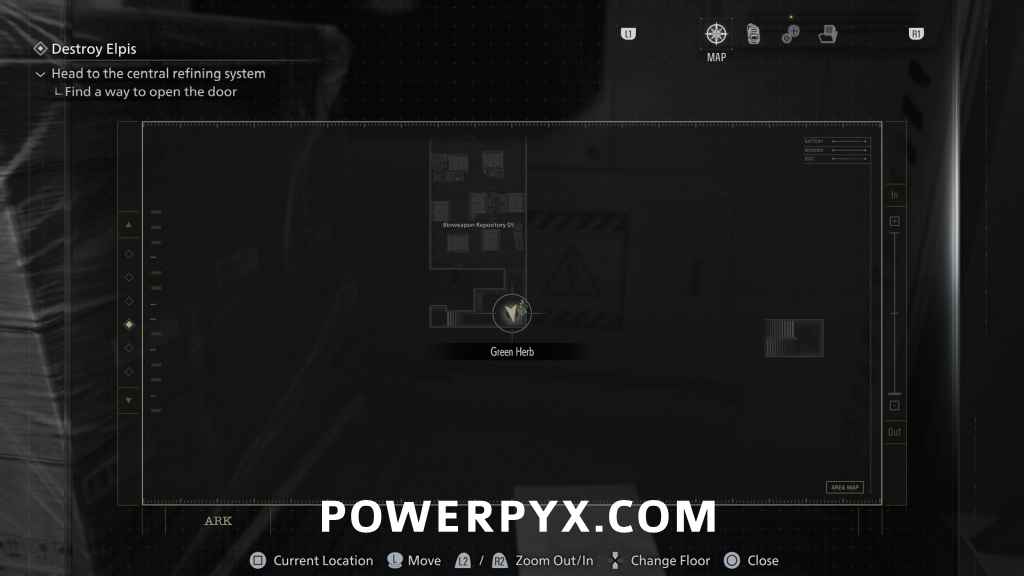
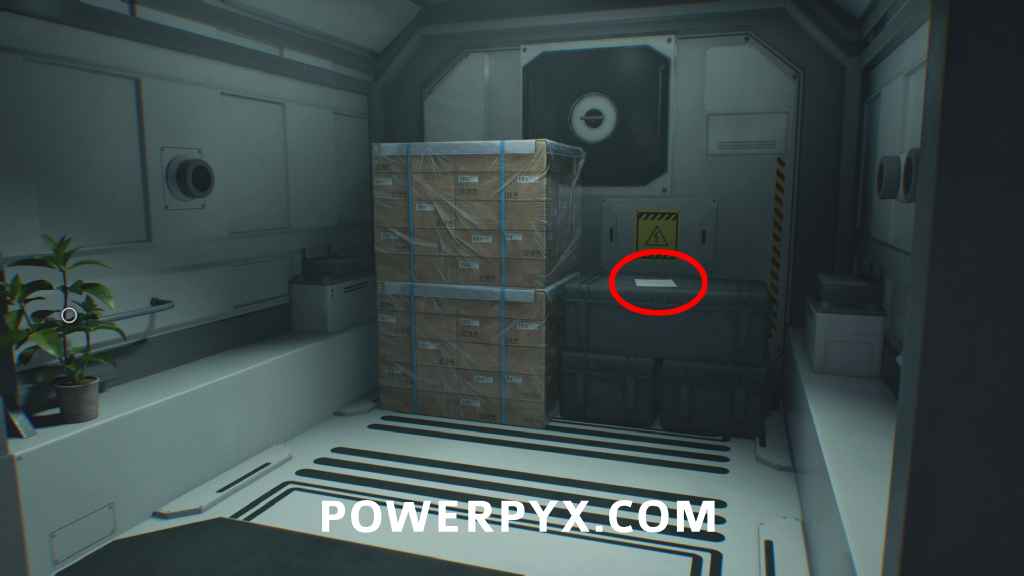
Anteroom: Go through the next green door to Anteroom and go downstairs. At the first corner check the right side to find it on a crate, before going into Bioweapon Repository 05.
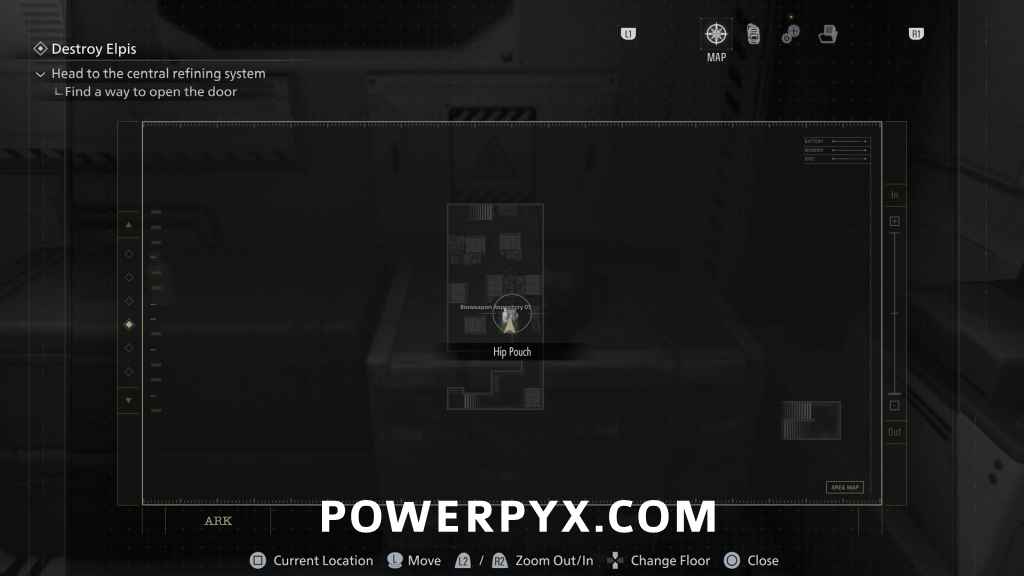
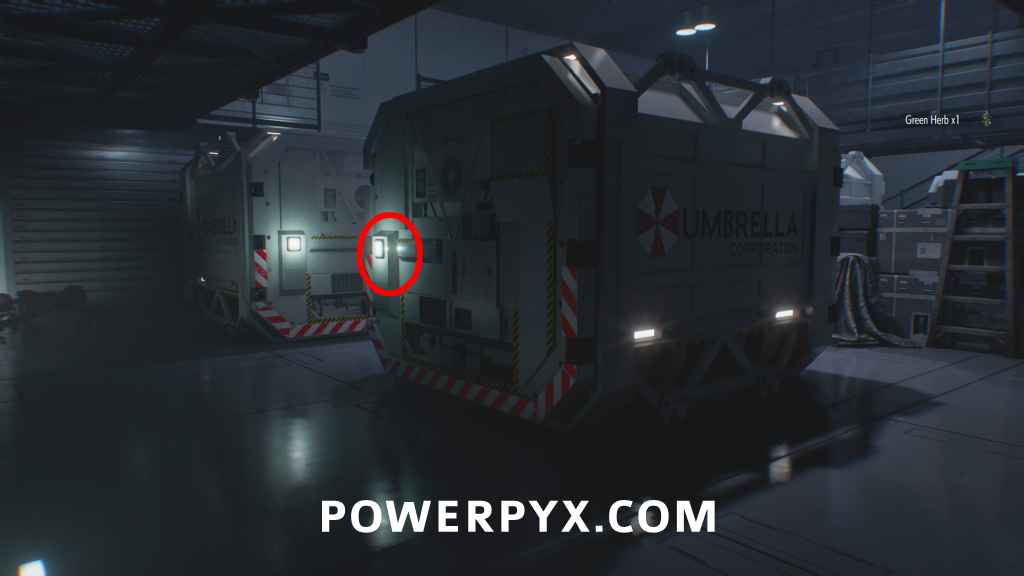
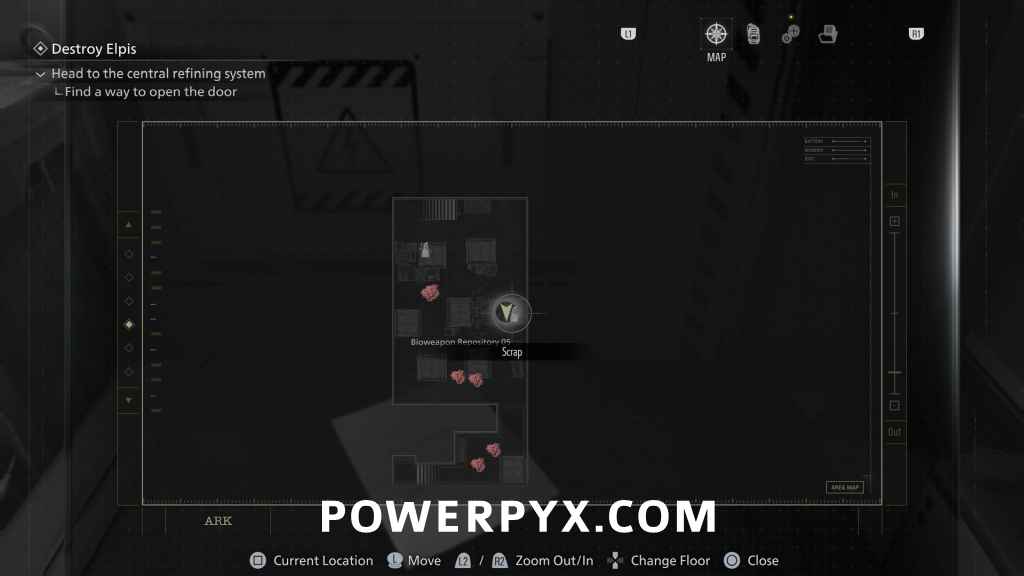
Hip Pouch
Bioweapon Repository 05: After the previous file, you enter a big room with containers and Licker enemies. Open the first container on the left to find the Pouch inside. Watch for the first Licker that will typically walk out around the corner of the container. If you had any extra molotovs, you can use them to attack another Licker over, then take out two at once with one bottle of Acid.
File #72 – Monitor Control Room Safe
Bioweapon Repository 05: Same room, in the middle row rightmost open container. There are many enemies in the room, clear them out with Molotovs and Acid Bottles and headshots. You find various crafting materials in the other containers here to regain ammo spent on the enemies.
Mr. Raccoon #25
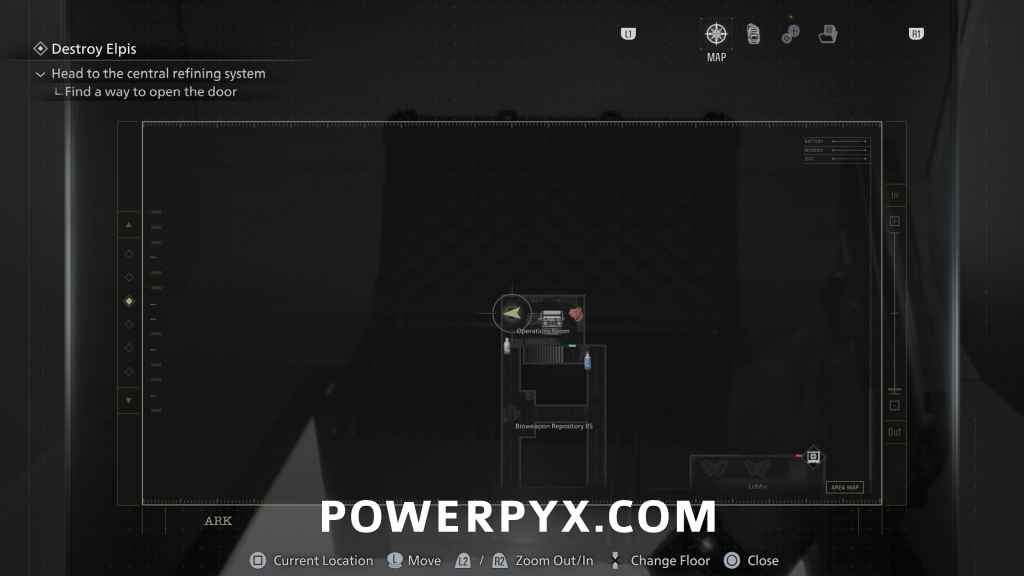
Operations Room: The next room you enter is the Operations Room, which will trigger an alarm. The final Mr. Raccoon sits there in front of the big monitor.

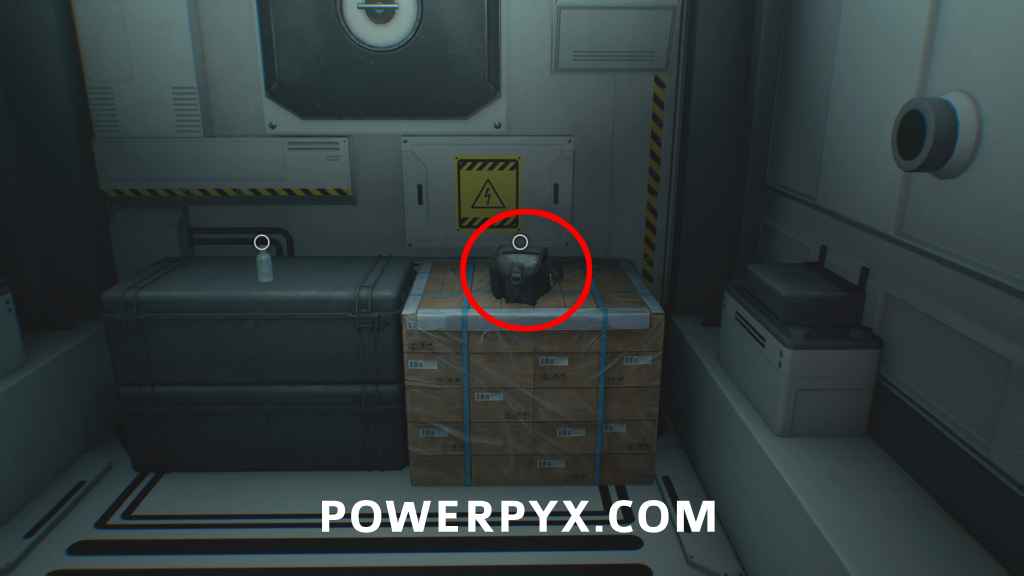
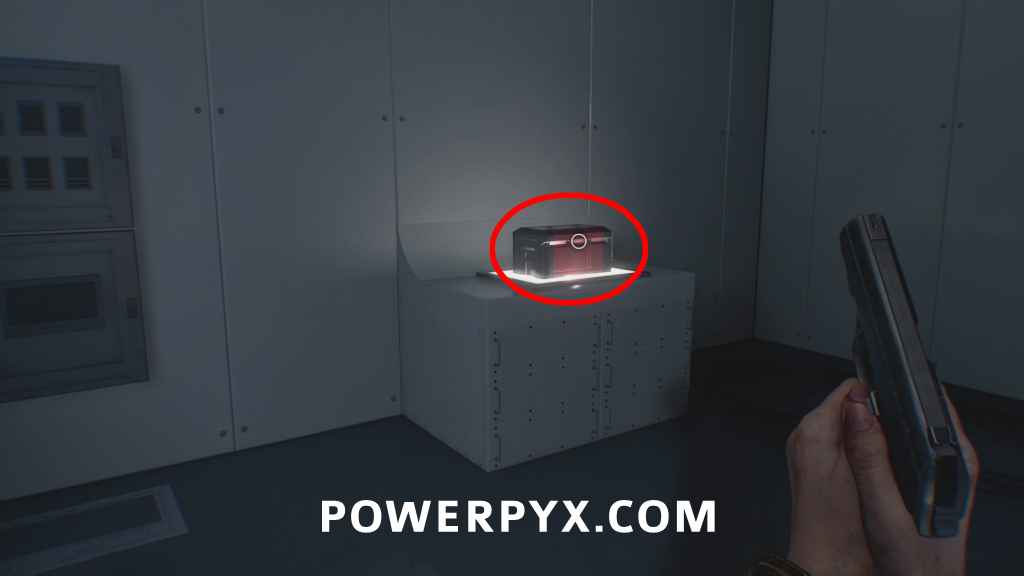
Key Item: Noblesse Orb
Operations Room: Next to the Mr. Raccoon in the red box.
After picking up the orb make sure you’ve grabbed any supplies you can in the room and then the bottle on the ledge on the left. Try to craft at least two Acid bottles here. Climb over the ledge, and then use an Acid on the Licker that is closest to you. There will be another on the far side of the walkway, if you have 2+ Acid you can use one more on it, if not then you can try shooting it from far away, or just avoid it. There are some extra supplies around the catwalk if you do take out the Licker.
Drop down to the lower level then go up the stairs toward where you entered from. Two Lickers will break through the window from the catwalk. Throw a bottle at the first Licker to kill it, which will also attract the other and deal some damage with the Acid, then you can shoot it a few times to finish it off.
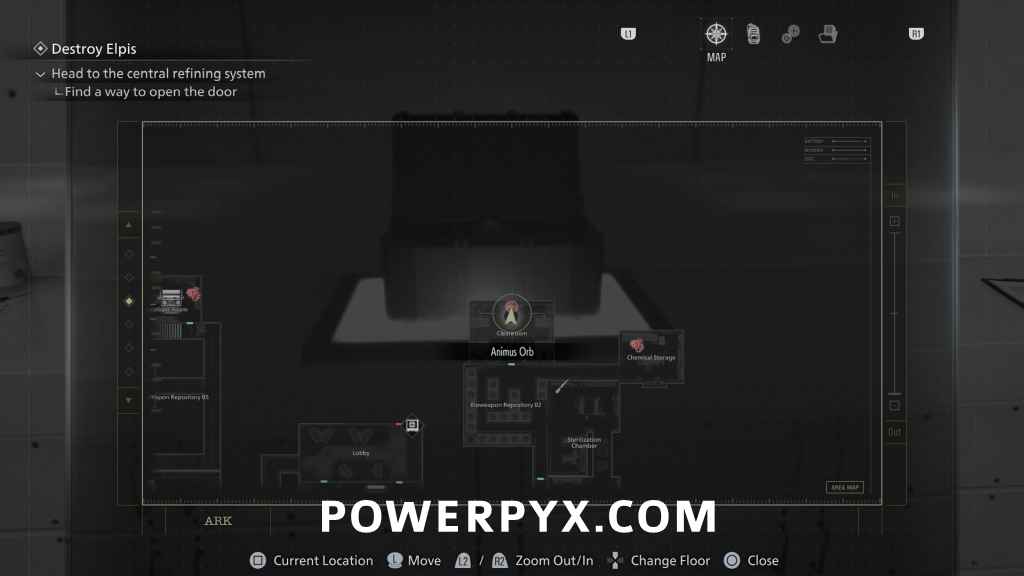
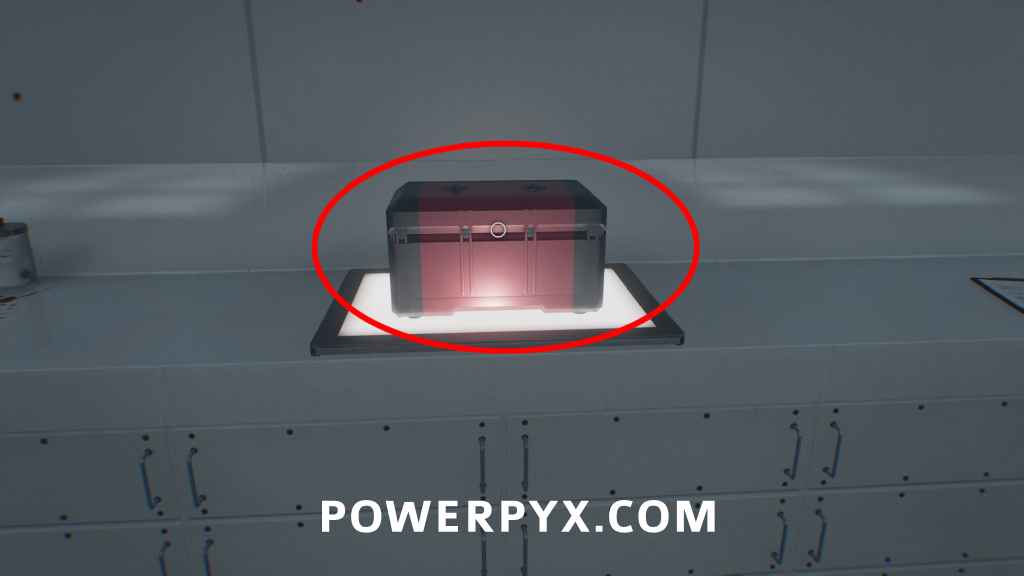
Key Item: Animus Orb
Cleanroom: Backtrack all the way upstairs to the first typewriter in the Lab Entrance (where you opened the first red door with Magnetic Key). Then go north to through Bioweapon Repository 02 and open the door there to reach the Cleanroom with a red box containing the item.
Be careful for new zombies that might be in this room, along with three more that will jump out of the tanks after you grab the orb. You can avoid these ones if possible and run back to the Save Room.
File #73 – Access Log: First Assembly Minutes
Archives: Use the 2 orbs in the “Lobby” (the room with red painted floor past the typewriter). This leads to the archives. On the right wall, check the last monitor. DO THIS BEFORE INTERACTING WITH THE BIG CONSOLE AT THE END OF THE ROOM (AREA END).

ARK – Leon Part 2
Head to the Central Refining System
When playing as Leon, climb up the ladder out of the Dump. Go through the corridor to find a save room ahead of you. Go through the next green door, go left through another green room. You reach a room with several Licker enemies, can do a trophy here.
Trophy: Cat Got Your Tongue?
While playing as Leon, press  /
/  to parry when a Licker attacks with its tongue (the crawling enemies with claws). If you time this perfectly you will perform a parry that cuts off the tongue and unlocks this trophy. Lickers don’t use this move very often so you need to move around until they do. The timing is also tricky, block just before their tongue touches you, it can take a few tries.
In the room with lickers jump down and press the red button on the console between the containers to the left from where you drop down. This opens the door on the west side to reach Generator Room. Press the red button in there. Then go up the stairs on the east of Bioweapon Repository 12 to reach System Management.

Key Item: Override Key (Bioweapon Repository 11)
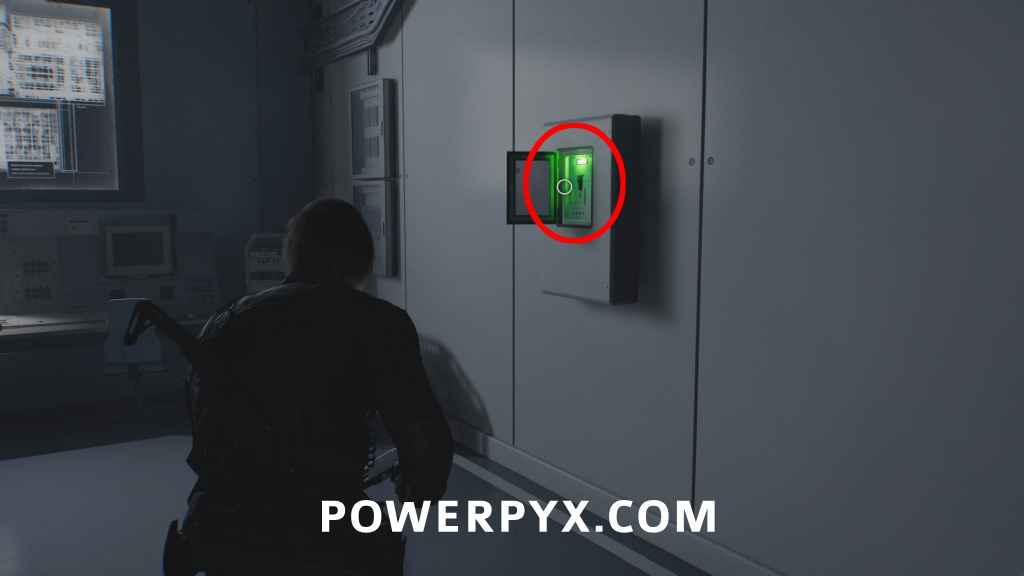
Systems Management: On the wall in Systems Management.
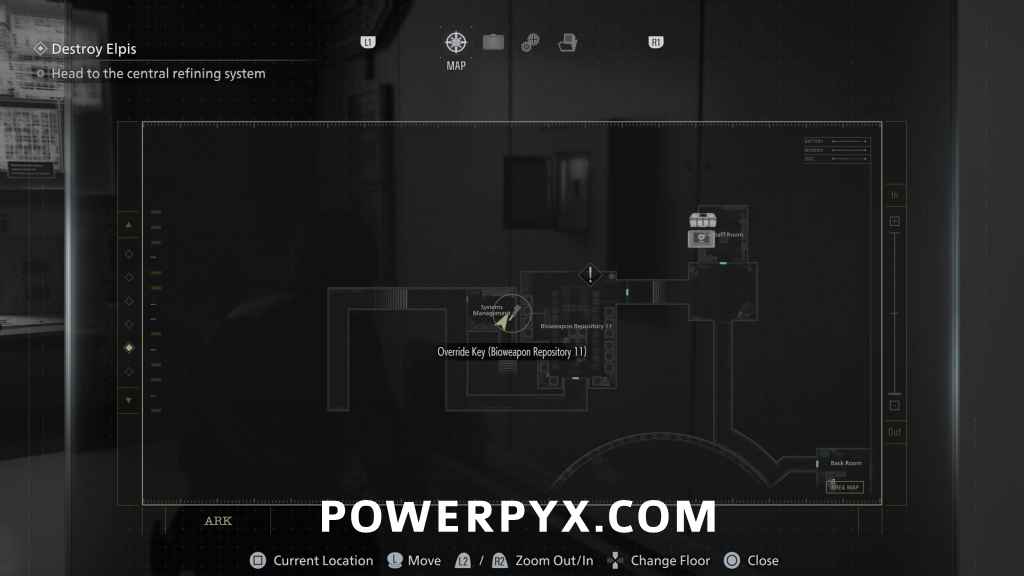
Backtrack the way you came from to Bioweapon Repository 11. When you enter the room on lower difficulties the ceiling will be covered in Lickers, which you need to deal with. You can use the explosive canisters to blow up most of them, along with a grenade or two if needed. On Insanity the Lickers won’t be there, you will deal with them in a moment.
Use the key on the red console. On Insanity difficulty the Lickers will start dropping into the room and you will need to deal with them first. You can stand in the corner with your back to the console and most of them should funnel to you from the opposite sides of the room. After the Lickers are dealt with (or immediately after using the override on lower difficulties) zombies will break out of the tanks around the room. If you have any grenades left this is a good time to use them as they aren’t helpful later. After the elevator opens you can enter, then follow the hallway to progress.
File #74: Alyssa’s Interview Notes + File #75: Letter from Patrick
Automatically obtained during next cutscene, unmissable. Case Closed trophy/achievement unlocks after the cutscene. If you missed a file you can view them from the files menu, and either find it on one of your next playthroughs, or if you have a manual save can grab them from there. For a list of files by in-game list order refer to Files List.
After the scene you will switch back to playing as Grace. Follow the path through the office, then up the elevator to where you meet Leon. After the scene you will have the choice that determines the ending of the game. Picking “Destroy Elpis” will immediately end the game without you fighting the final boss. This is the “bad” ending of the game and does count for the Insanity difficulty completion, but not for the Speedrun requirement. To unlock Hope and Requiem, you have to pick “Release Elpis” which then progresses to you fighting the final boss. If you want to try both endings, you can pick destroy first, then the game will prompt you to reload after the credits to pick the other option.
Defeat Victor
The final boss you play as Leon, in a two phase fight against Victor. The first phase you are fighting him as he walks around, somewhat similar to the Tyrant fight earlier. He will walk up and try to attack you with melee, which you can deflect with the Hatchet to avoid damage. Eventually he will jump away and start absorbing electricity. While he is doing this you can attack him, but watch for when he stops charging as he will at spots on the ground in a line toward you, followed by jumping toward you and dealing damage in an area on the ground. When you start seeing the ground effect for the line attack you can run to one side and keep running until after the jump to avoid the damage. He will then go back to attacking with melee, and repeat the electricity absorption until you deal enough damage to end the phase.
The second part of the fight he turns into a giant monster on the far wall. This part of the fight is sort of like the Plant 43 fight, where he primarily attacks with tentacles slamming on the left or right of you, which you can move back and forth to avoid or deflect if absolutely necessary. There will be bright growths that continually appear on his body that you need to shoot as they appear. The growths will alternate between being on his head, on the area near the floor, and on his arms. As you destroy them they’ll appear in new positions, until you deal enough damage and he picks you up. After a final melee quicktime event you will defeat him and complete the game.
NEXT: NEXT AREA
For all areas refer to Resident Evil Requiem Walkthrough.
Leave a Reply