
Rhodes Hill – Care Center Basement is the 3rd area in Resident Evil 9: Requiem. This 100% walkthrough includes all Collectibles, Trophies and Key Items.
For other Areas see Resident Evil Requiem Walkthrough.
Care Center Basement (Rhodes Hill) – Grace
Rescue Emily
File #35 – Special Directive for Raccoon City + File #36 Report on Raccoon City Syndrome
Both obtained automatically as soon as you play as Grace again (you get a popup “New File” in the top right corner after cutscene, can view it from Files menu).
File #37 – Staff Member’s Last Words
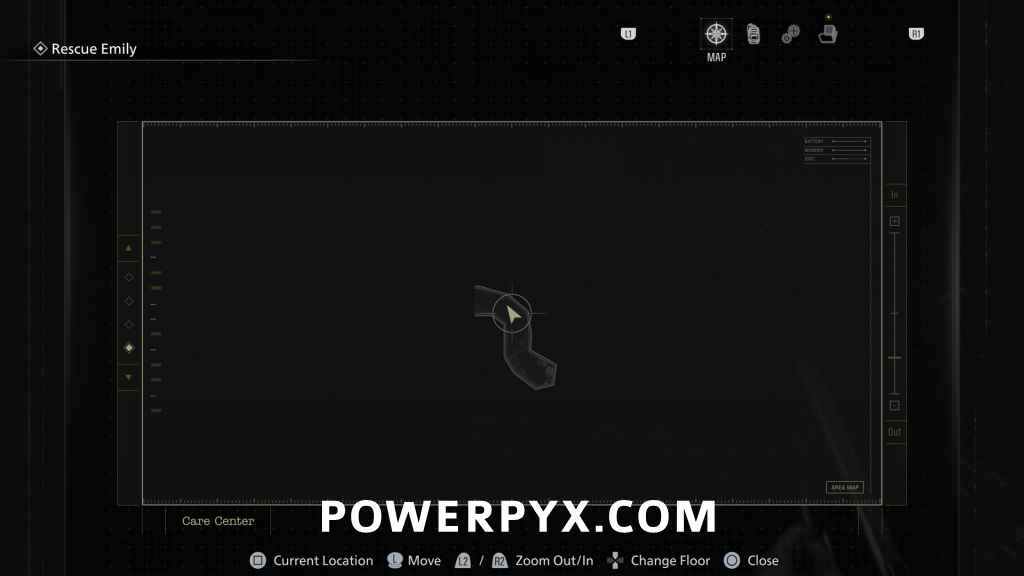
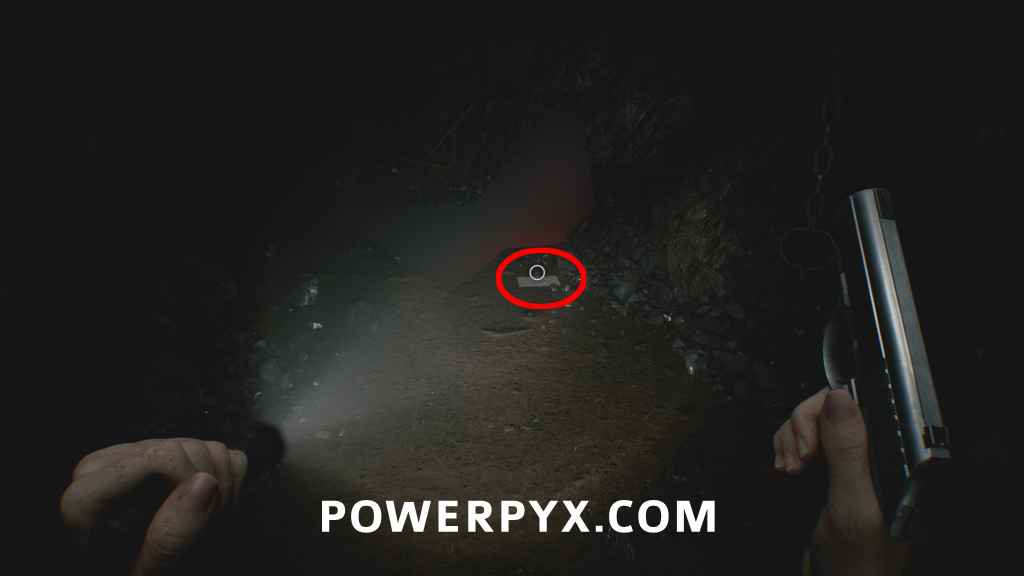
Immediately after you start playing as Grace, go forward a few steps to find it next to a corpse in the tunnel.
Follow the linear path forward through the dark area. You can’t enter any of the side areas yet, except the Save Room on the right with the light.
File #38 – Operation to Eliminate “The Girl”
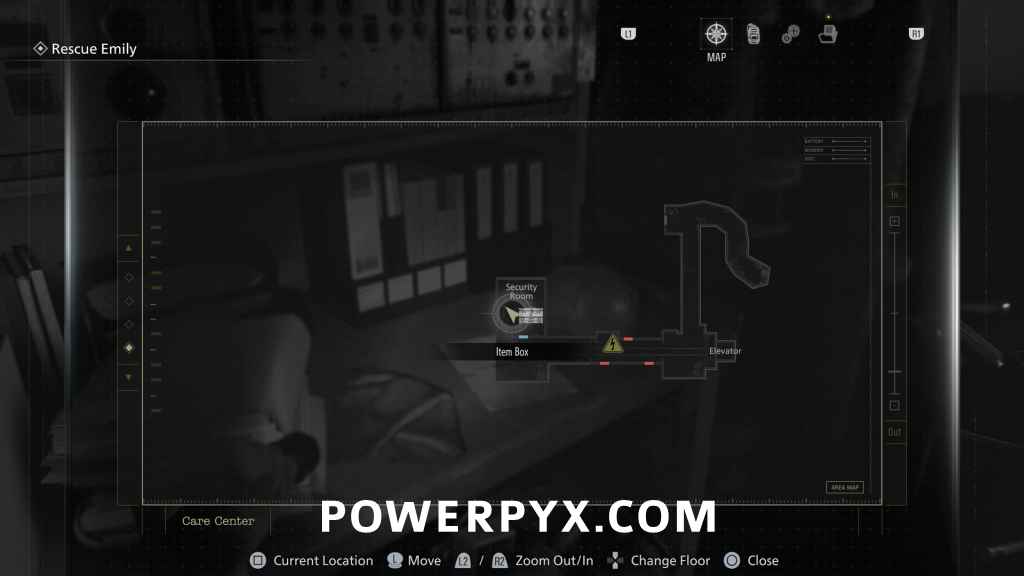
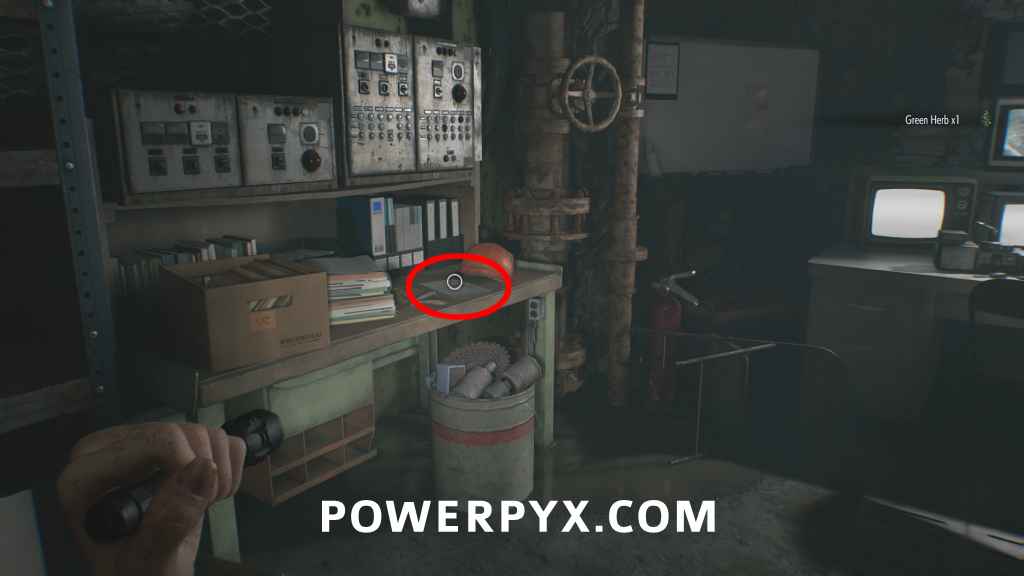
Security Room: Found in the next safe room with all the CCTV.
After finishing in the Save Room, exit and keep going right to the Holding Cells area. Ignore the zombies in the cells, you won’t need to interact with most of them and if you kill the one immediately in front it makes it harder to pick up an Empty Injector.
Unlock the Cells
File #39 – Unlocking the Cells
Holding Cells: After the next cutscene at the end of the corridor, above the lever you have to pull for story progression.
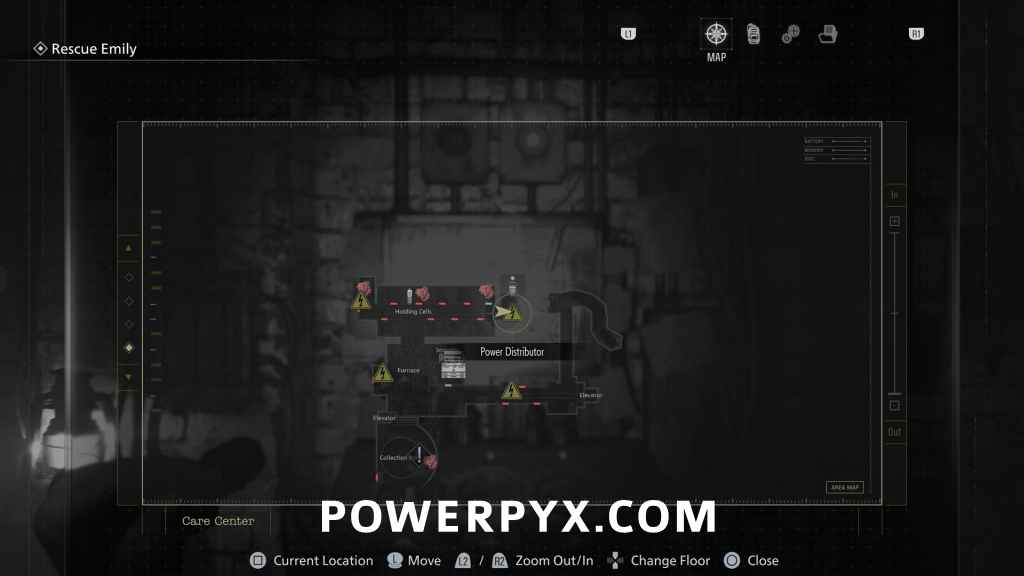
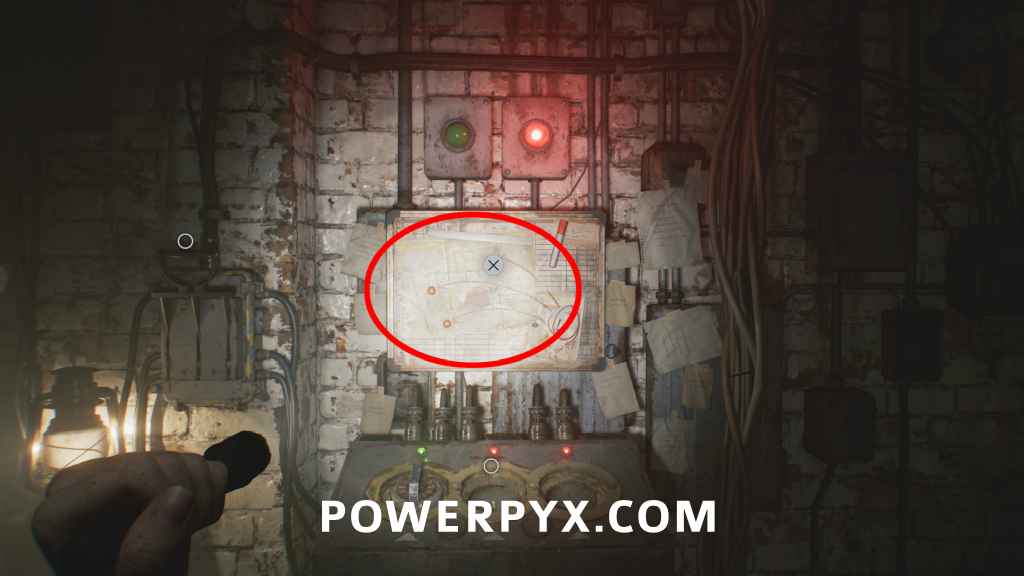
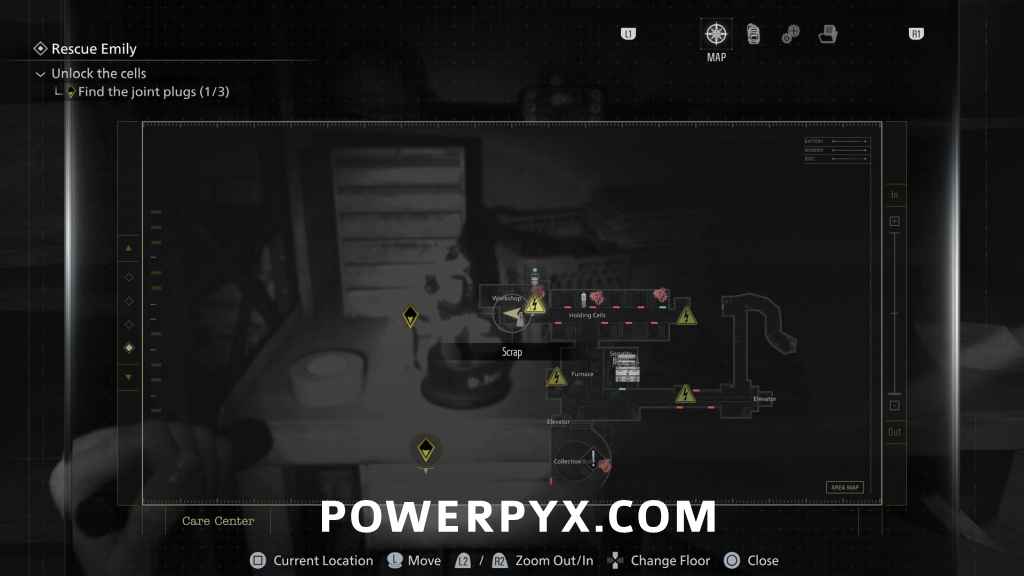
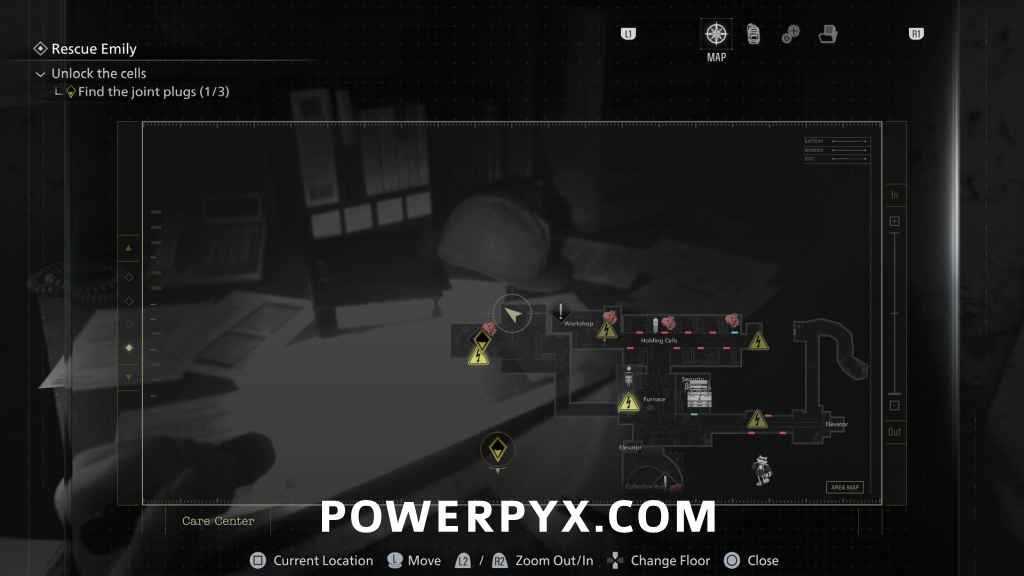
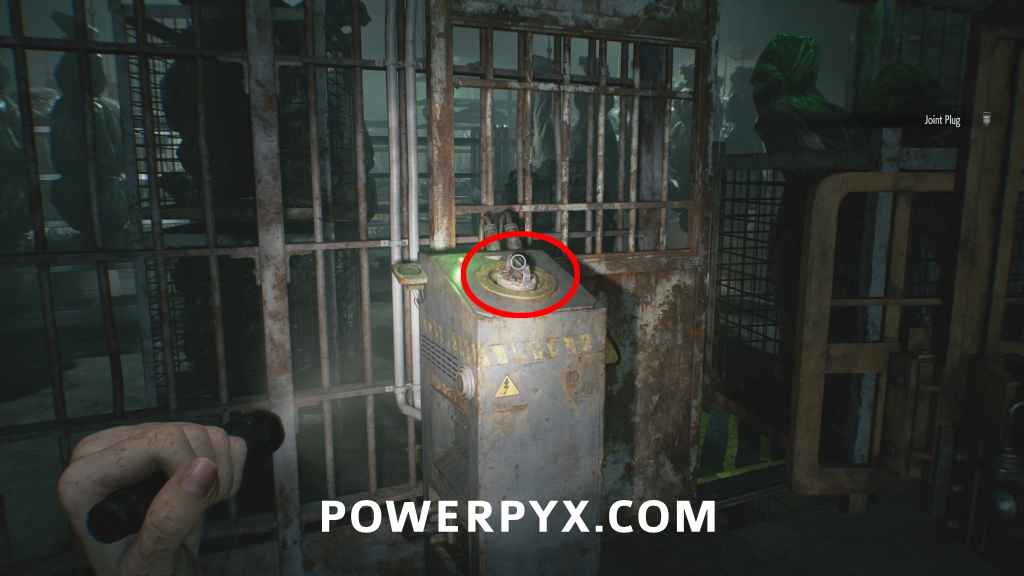
Key Item: Joint Plug #1
Holding Cells: same place as the file.
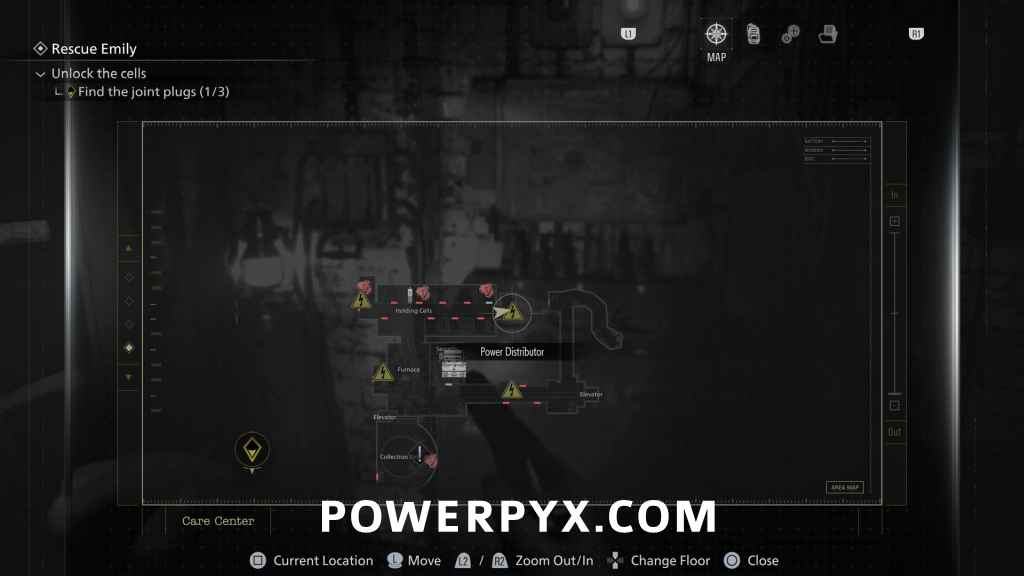
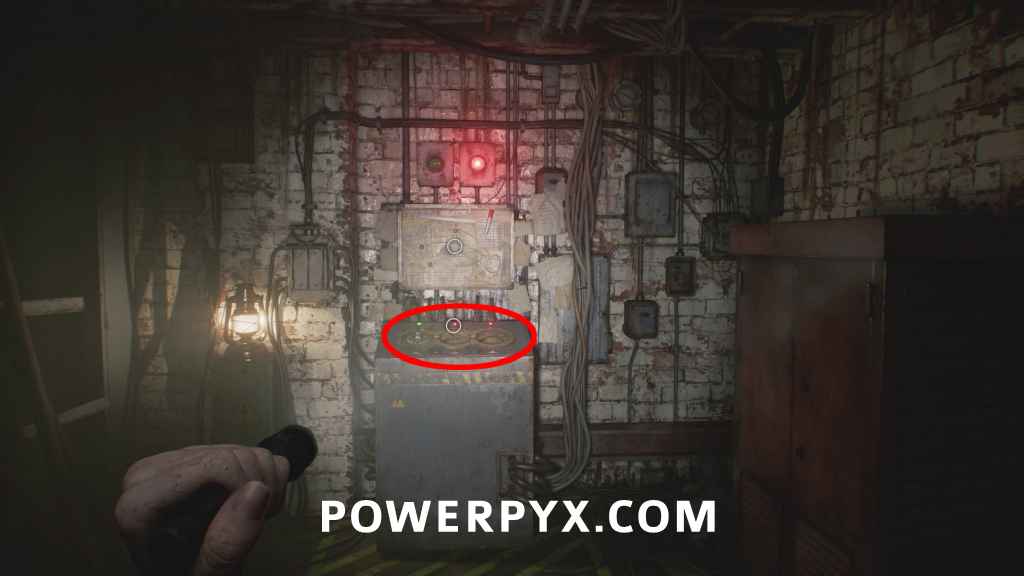
The Joint Plugs are used throughout this area to open doors, and you need all 3 to open the cells at this station. After picking up this first one, The Girl will appear in the hallway, stay back in the corner out of the way until she walks over to the central room so you can progress. Like before, The Girl can’t go into any of the lit areas, so you can use this to your advantage here to avoid her.
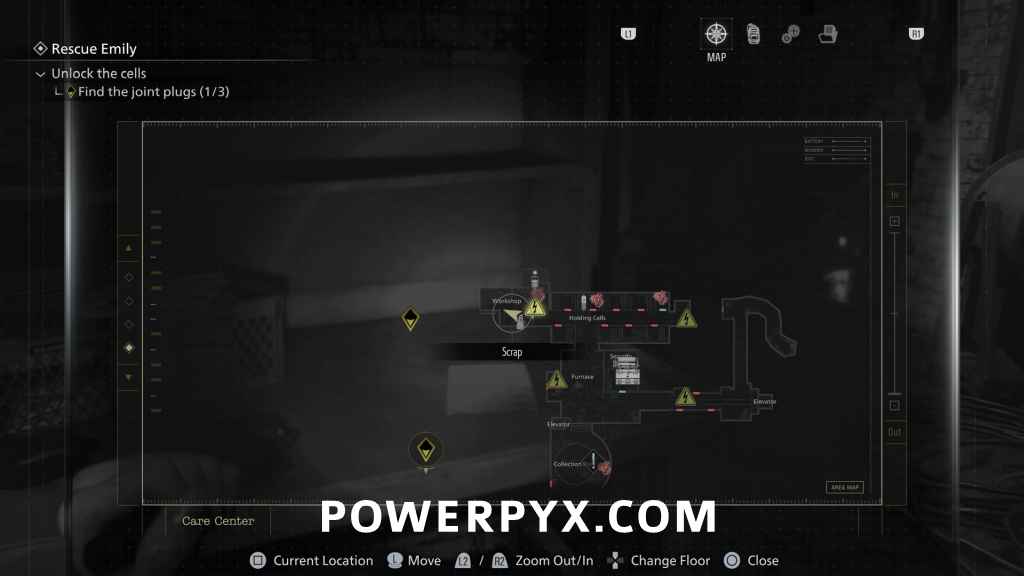
Mr. Raccoon #7
Workshop: At the opposite end of the Holding Cells corridor, insert the Joint Plug to open the door to the Workshop. Then you find this in front of you when entering the room, on the workbench.
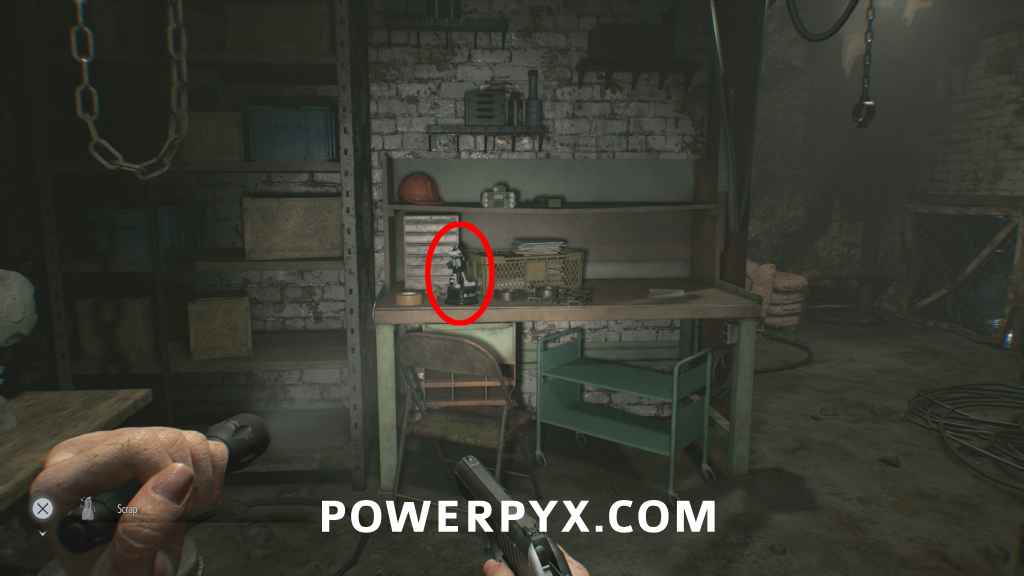
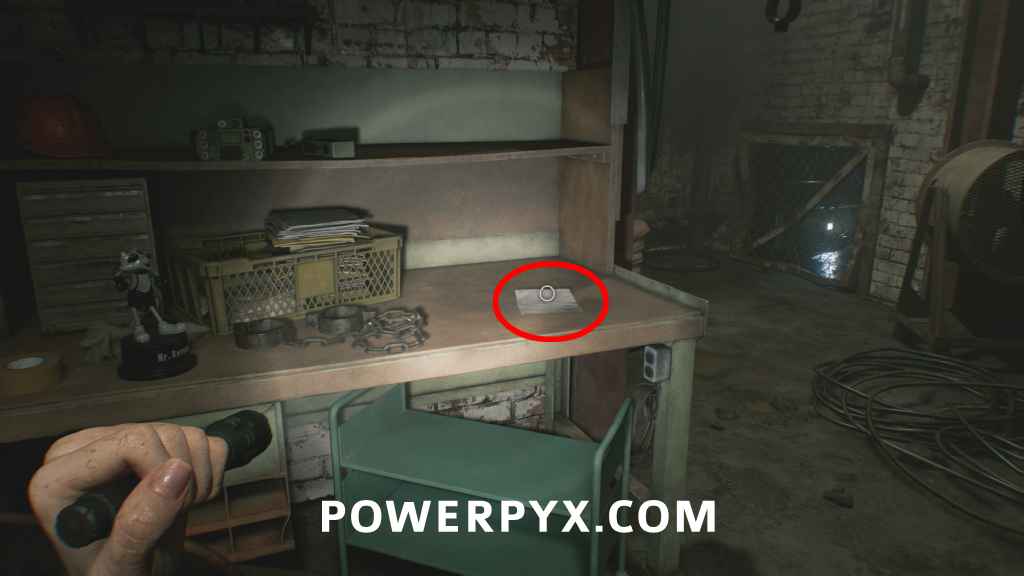
File #40 – Technician’s Note
Workshop: Right next to the raccoon.
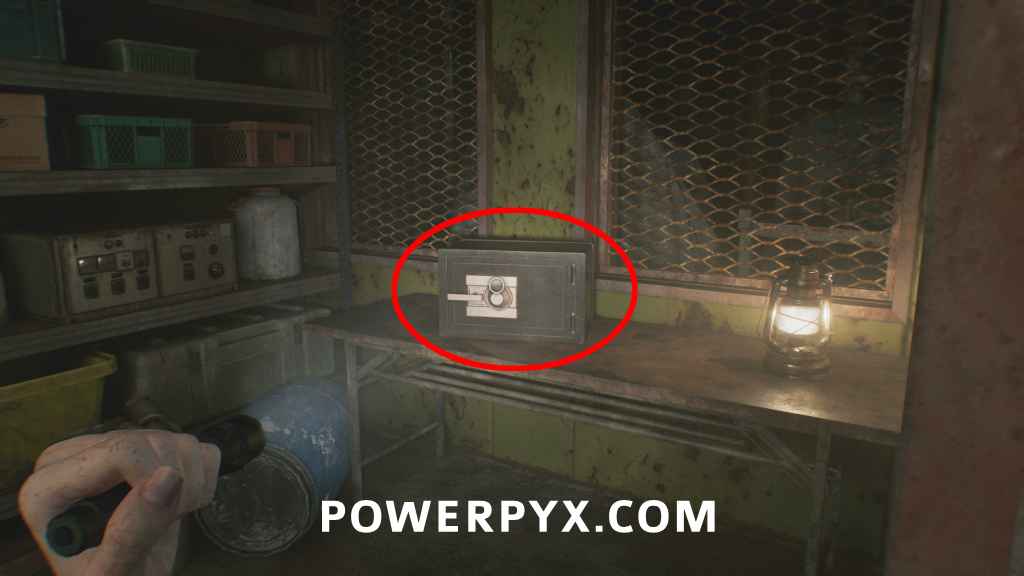
Safe #3 + Raccoon Roundup Map (Rhodes Hill)
Furnace: Take the Joint Plug out of the Workshop door and insert it in the Furnace room door (the central room). In the next room in a side office on the right you find the Safe. Contains a document that marks Mr. Raccoons on the map.
Combination (Casual) = Right 60 – Left 40 – Right 80.
Combination (Insanity) = Left 70 – Right 50 – Left 20.
(Note: the combination is obtained from File “Basement Safe Code” which was found as Leon, but you can open it even without the file).

File #41 – Security Guard’s Report
Furnace: same room as the safe.
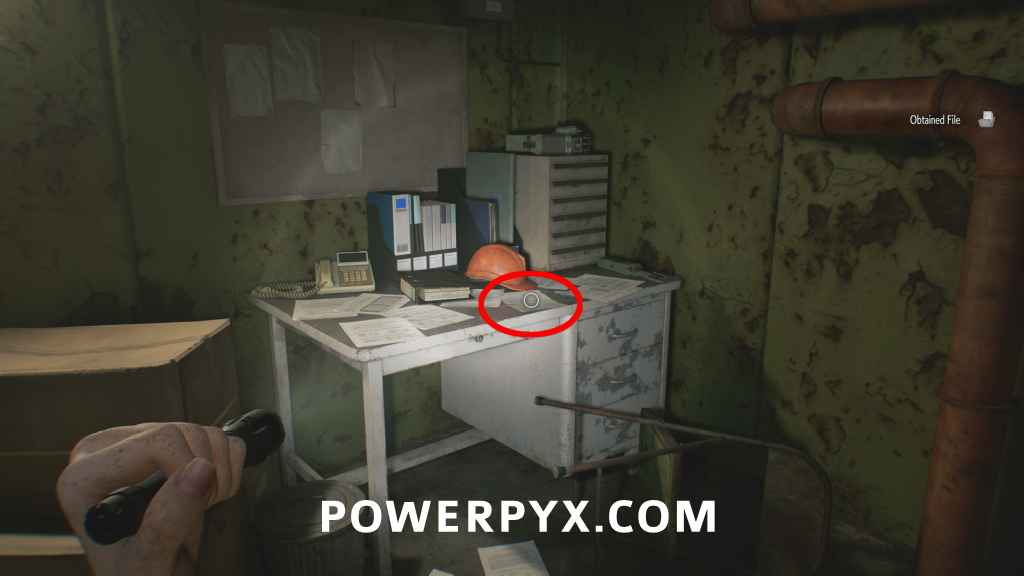
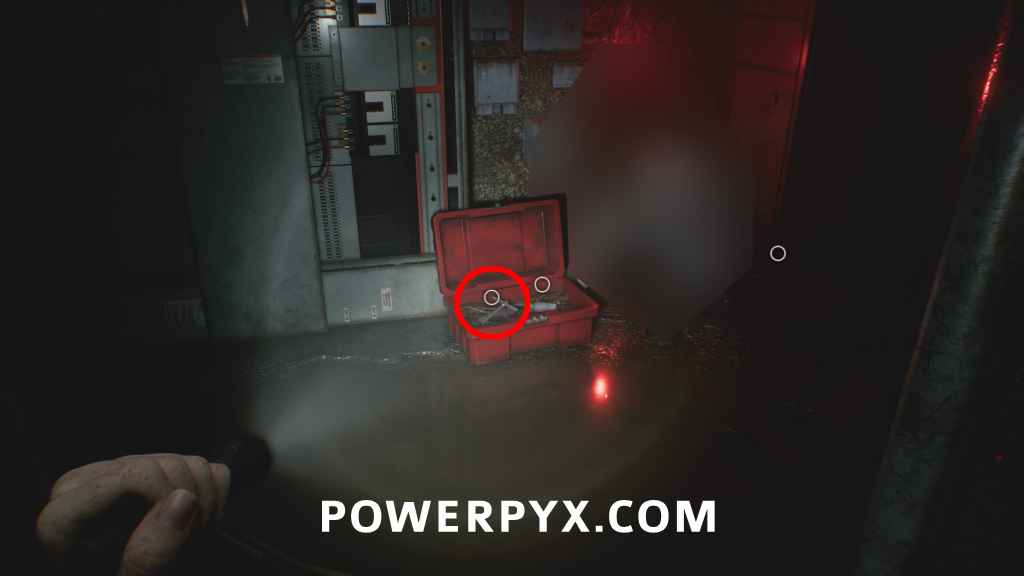
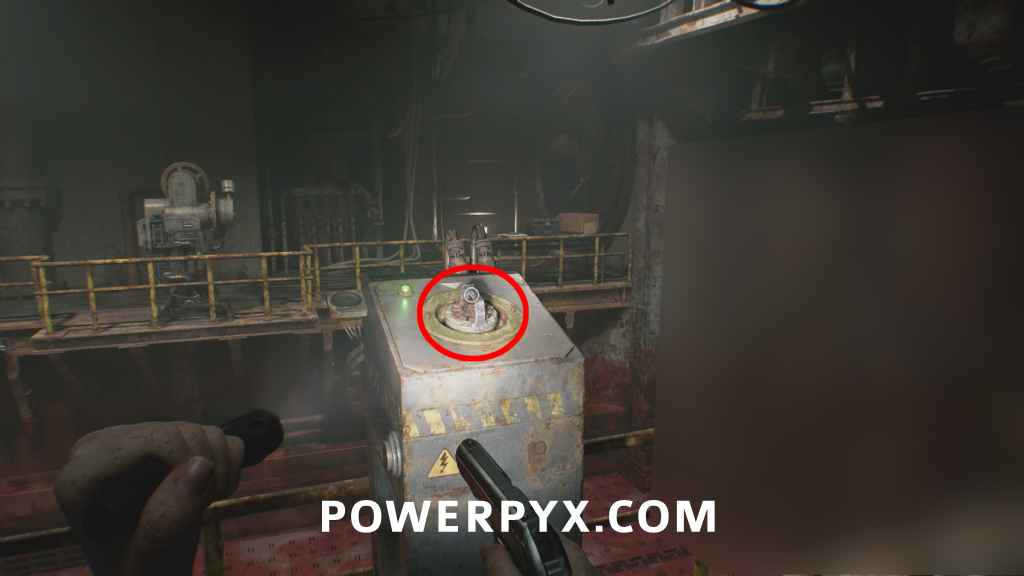
Key Item: Joint Plug #2
Furnace: same room, next to the forklift.
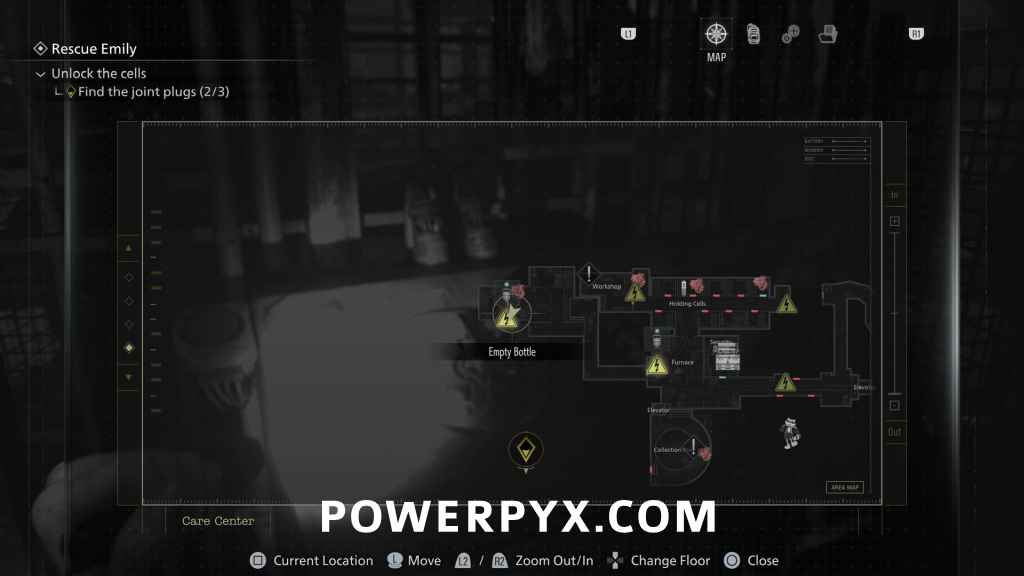
Now you can return to the central room either the same way you came, or crouching through the vent on the wall opposite the joint plug spot. You need to come through this way at least once to have it be opened by The Girl who drags an enemy through it, then it works as a partial shortcut. There is also a Lockpick in there on the ground if you go that way, which you can use on a locker in the Bunkroom.
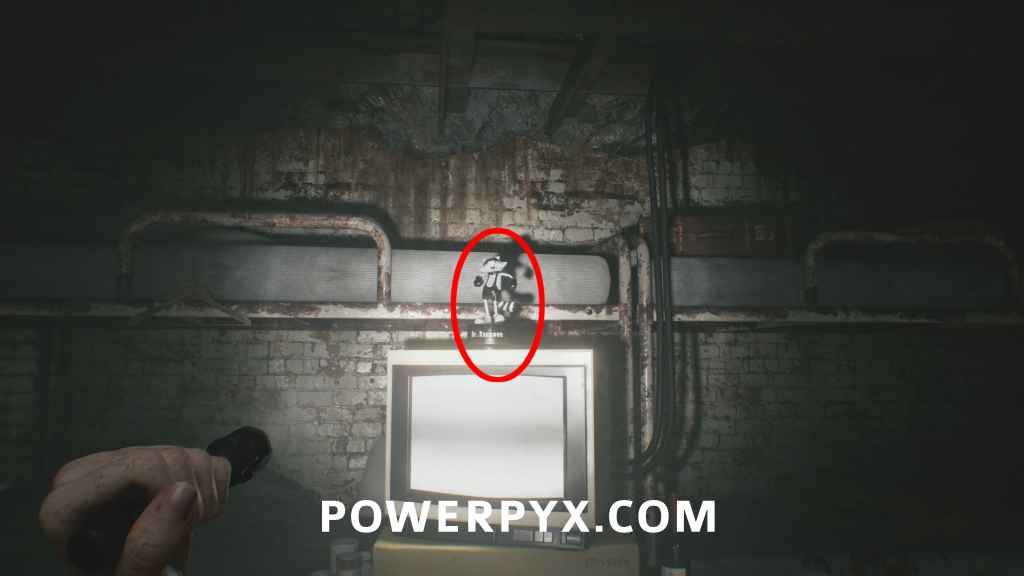
Mr. Raccoon #8
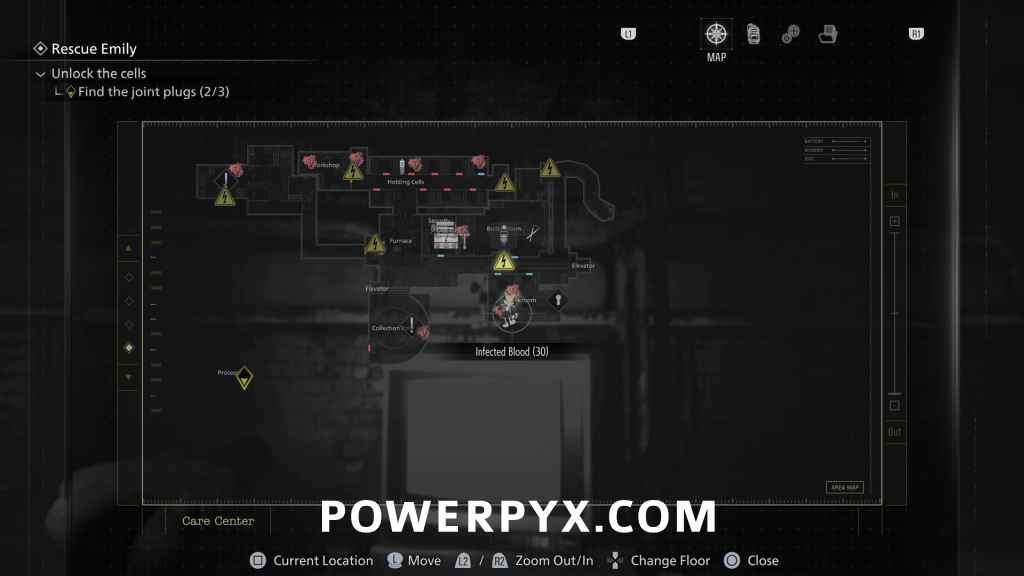
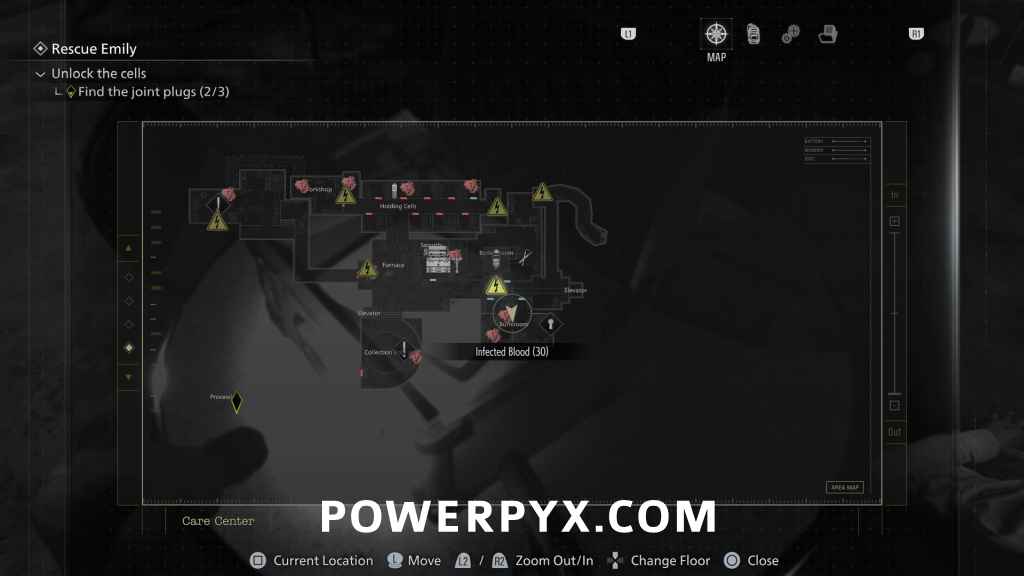
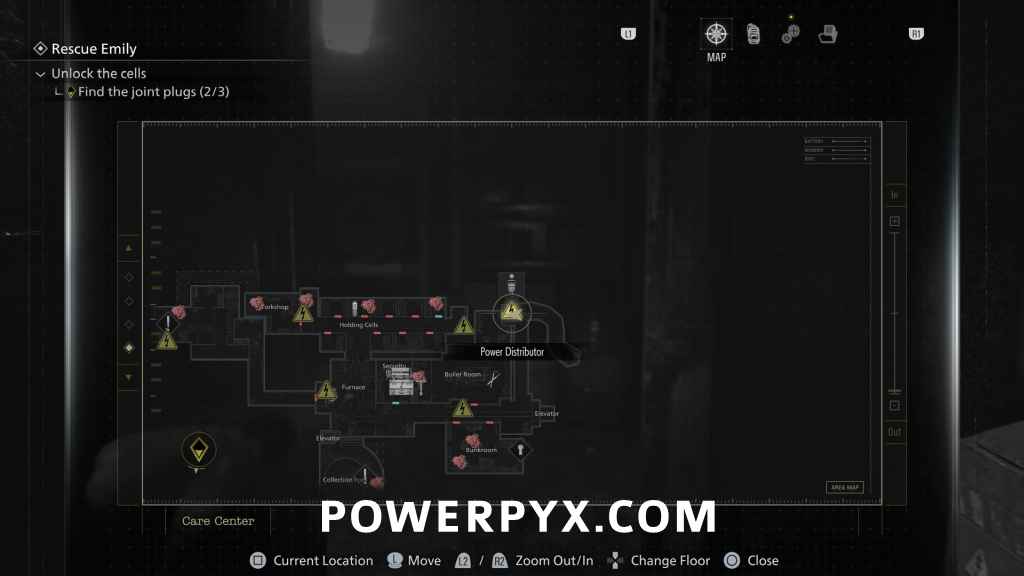
Bunkroom: Insert a Joint Plug at the Boiler Room, in the corridor to the right of Security Room on the map (marked with yellow “!” icon). This will open multiple rooms, you’ll want to enter the room to the right of where you inserted the plug, which is the bunkroom. The Mr. Raccoon sits on the TV.
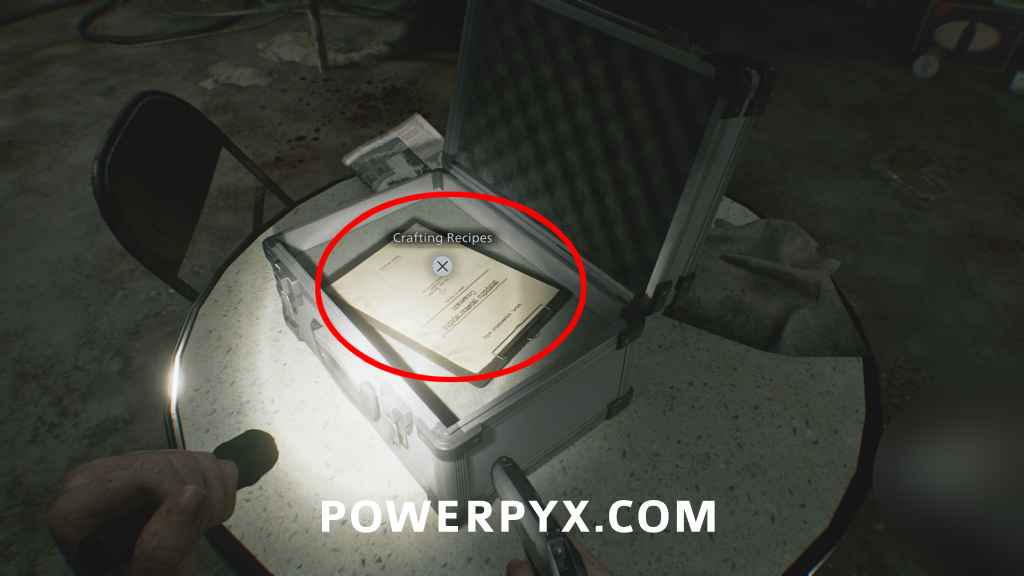
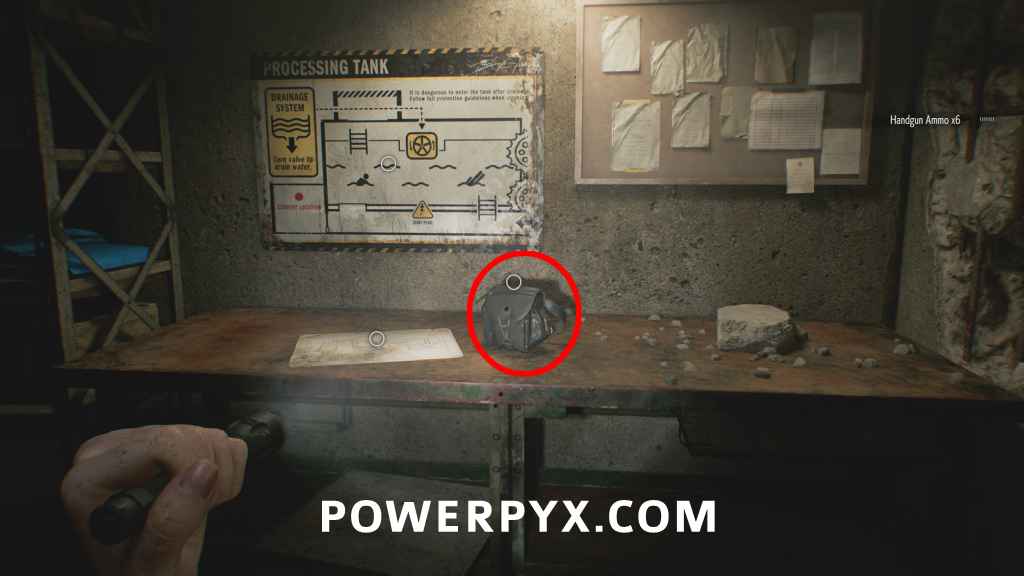
Crafting Recipe: Molotov Cocktail
Bunkroom: In the middle of the Bunkroom in a box on the table. (doesn’t count as a file).
Key Item: Square Socket Wrench
Boiler Room: Now take out the Joint Plug from the Boiler Room and backtrack to the start of the dark tunnel where you began this area (north-east corner of the map). Insert the plug in the door there to reach Boiler Room, push the crate, go through the fence, collect the wrench in the back of the room. If you have the plug inserted next to Bunkroom the water is electrified and will shock you, so must have taken out the plug there. You use the wrench on the button in the Collection Pool.
After you pick up the wrench The Girl will appear in the room, eating the zombie near where you entered. You will need to wait for them to finish, then they will walk around the room to the body near the wrench and eat it as well, which will allow you to exit. Stay on the opposite corner of the central structure and wait to see her move (she’ll generally move around whichever side is closer to you) then carefully sneak around the other way to exit the room. Make sure to remove the Joint Plug on the way out.
As you go back toward the Save Room The Girl will appear nearby again, you can quickly place a Joint Plug in the spot to open the Bunkroom again which will make her leave once she walks into the light, then you can pick it up again to progress through the Collection Pool room.
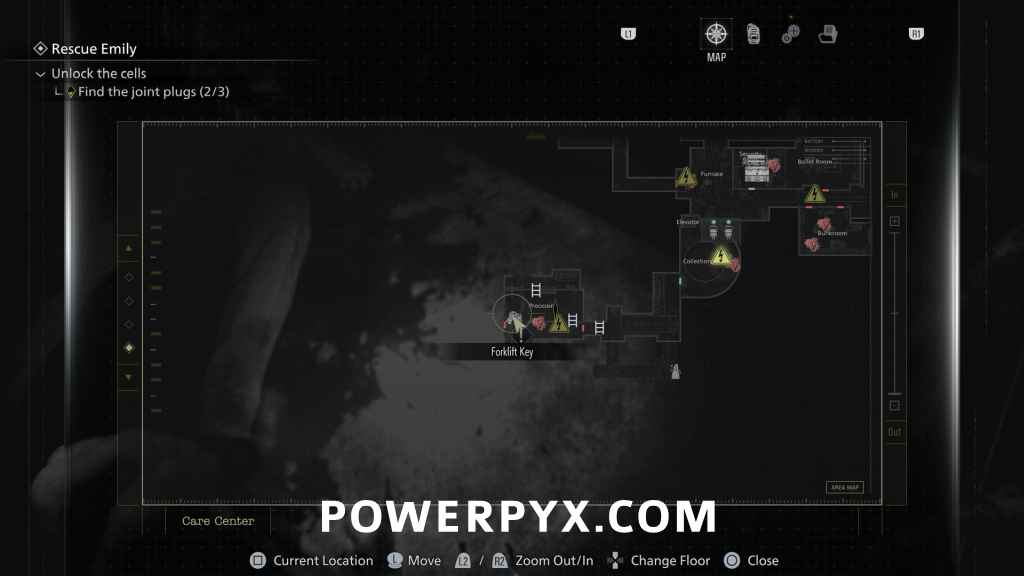
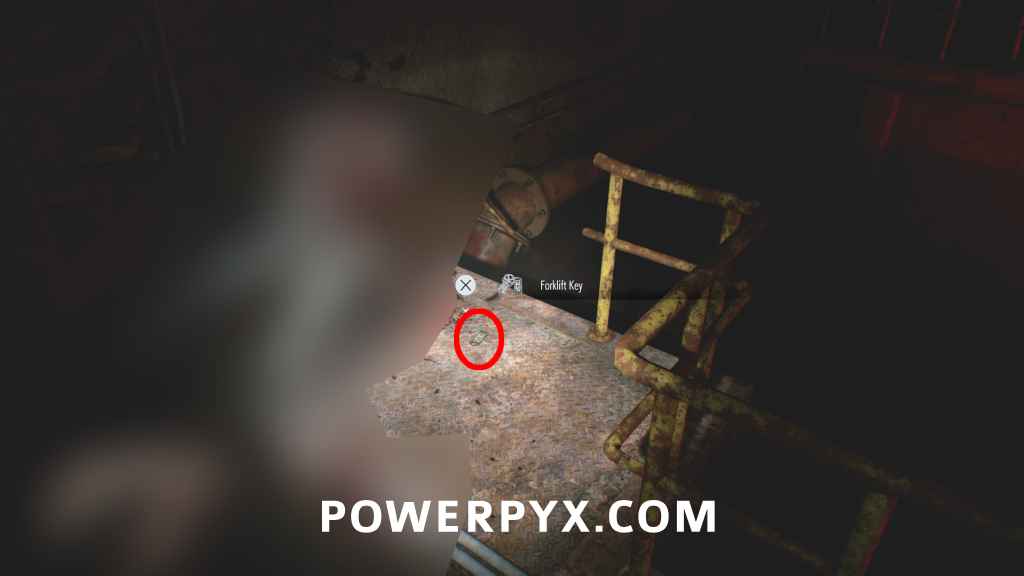
Key Item: Forklift Key
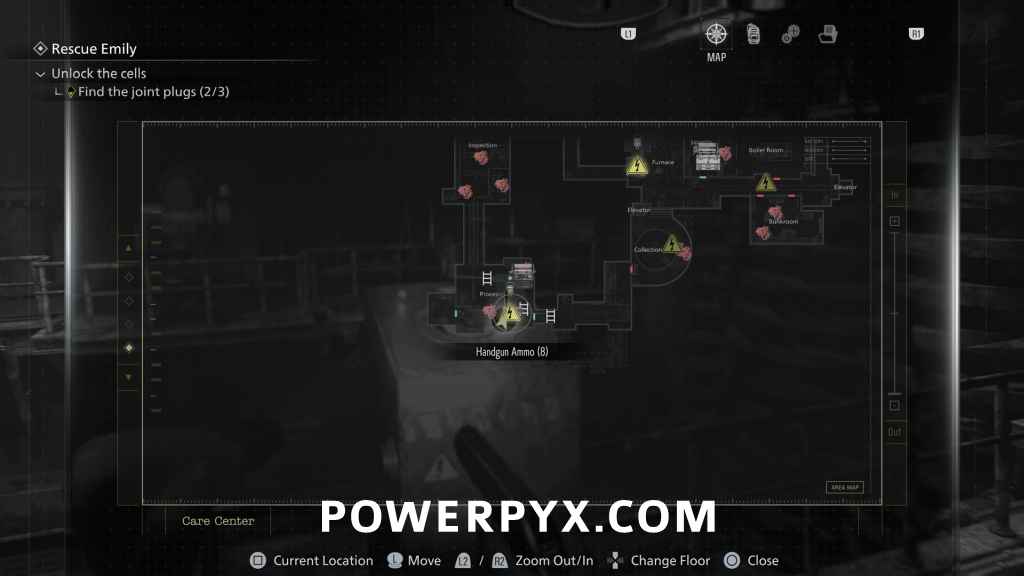
Processing: Go to the Collection Pool in the south of the map, use Square Socket Wrench on the console button, insert 2 Joint Plugs to power the door to Processing. At the end of the area you find the key next to the forklift on the floor.
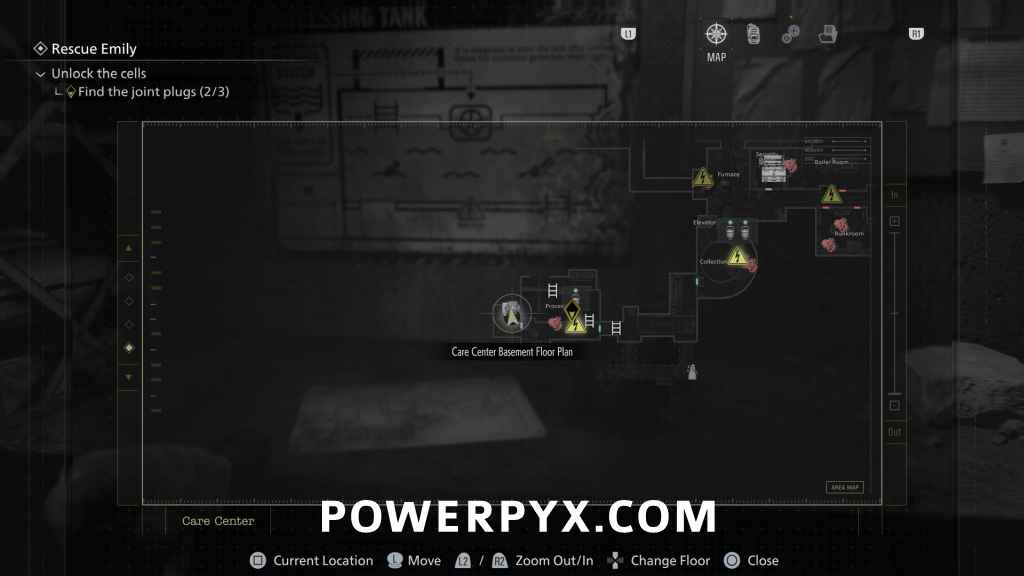
Upgrade: Hip Pouch + Map: Care Center Basement Floor Plan
Processing: Use the key on the forklift and go through the door to find these. Must keep the plug in the console here so the door is open, you can’t take this one yet.
Key Item: Joint Plug #3
Leave the plug in the console, backtrack to the forklift behind the Furnace door and bring the two plugs from Collection Pool with you. When you enter the room be careful as The Girl will be in there now, and you need to avoid her to reach the Joint Plug spot. You can hide in the side room until she walks by, then quickly rush the Joint Plug spot to turn on the lights and chase her off, then use the forklift key on the forklift there to raise it out of the way. Move with the hanging body bags (don’t flip the switch), until you can push a cart to make a shortcut, return to the start of the room and flip the switch. Go back through the shortcut and move with the corpse bags to the end of the room. Turn the wheel to drain the water, then you will have to drop into the area below. The conveyor will start moving while zombies are pushed into the blades, and you will have to survive on the conveyor until it stops. You should try to stay close to the wall away from the blades, and shoot zombies once in the head to stagger them, then push them into the blades if you have room. Once the conveyor stops you can climb the ladder and take the Joint Plug.
Afterward, head back to the other side you came from, crouch through the vent next to the typewriter. Flip the switch and use the elevator, recollect your other 2 plugs from the forklift and Furnace door. If you didn’t kill the zombie in the cell at the intersection it will push it open and you can grab an Empty Injector from the bed before leaving. Insert all 3 plugs in the Holding Cells corridor to open Emily’s cell (where you found the first plug). Quickly carry Emily to the elevator in the tunnel where you started this area.
After carrying Emily to the elevator you will automatically put her down, then need to interact with the pallet blocking the door and mash  to push it out of the way. After the elevator reaches the top The Girl will reach in the top to try and grab you, you can shoot her once then interact with the elevator door and mash again to open it and escape.
Key Item: Star Quartz
Automatically obtained after the elevator ride. You insert this and the Sun Quartz + Moon Quartz in the door in Central Hall to proceed the story.
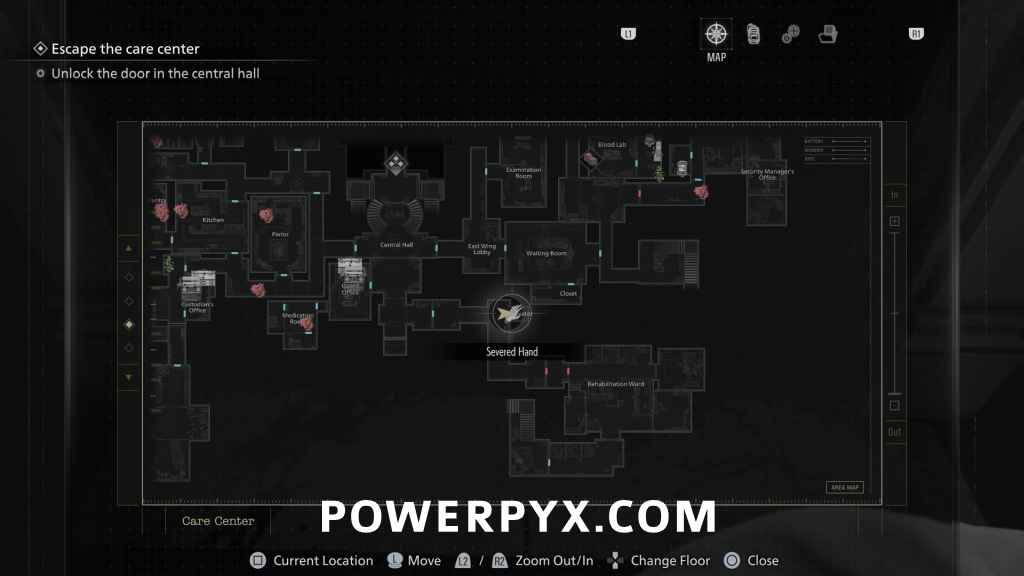
Key Item: Severed Hand
At the same time you get Star Quartz (after elevator ride), you can pick this up in front of the elevator door. Can bring it to the Analyzer in Blood Lab, solving it brings up a screen that says “Let’s play” with an Amino Acid sequence – the first letter of each corresponding amino acid spells out GLITCH. (not used for story progress, just an easter egg, not needed for trophies)
You have access to most of the main floors of the Care Center again, so if you have any items you can pick up you can leave Emily in the Save Room again while you run around. When you are ready to progress take any Quartz you have left and place them in the door in the central room to open it and exit to the courtyard.
NEXT: Rhodes Hill – Care Center Courtyard
For all areas refer to Resident Evil Requiem Walkthrough.
Leave a Reply