
Raccoon City – East Raccoon City is the 6th area in Resident Evil 9: Requiem. This 100% walkthrough includes all Collectibles, Trophies and Key Items.
For other Areas see Resident Evil Requiem Walkthrough.
East Raccoon City – Leon
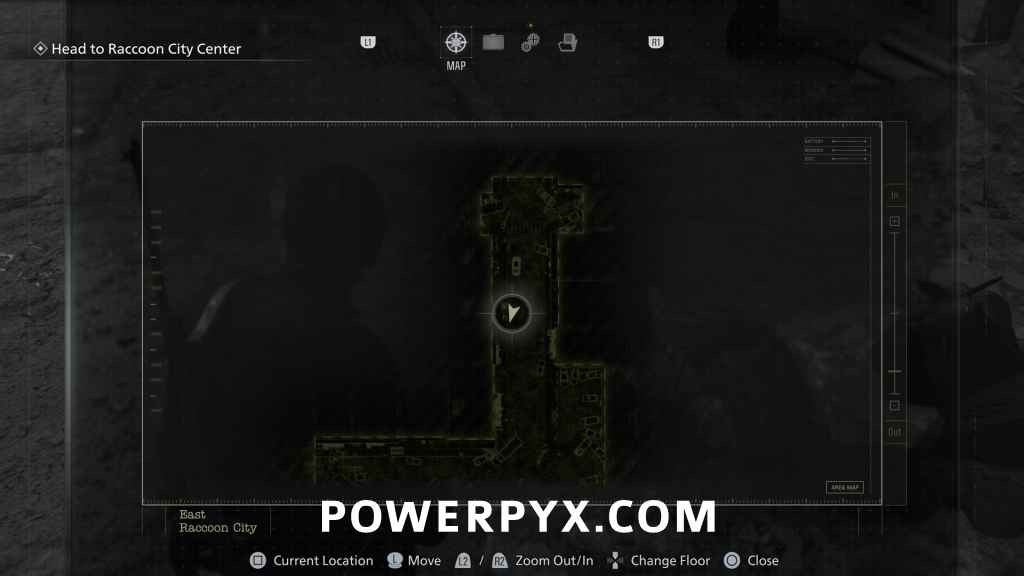
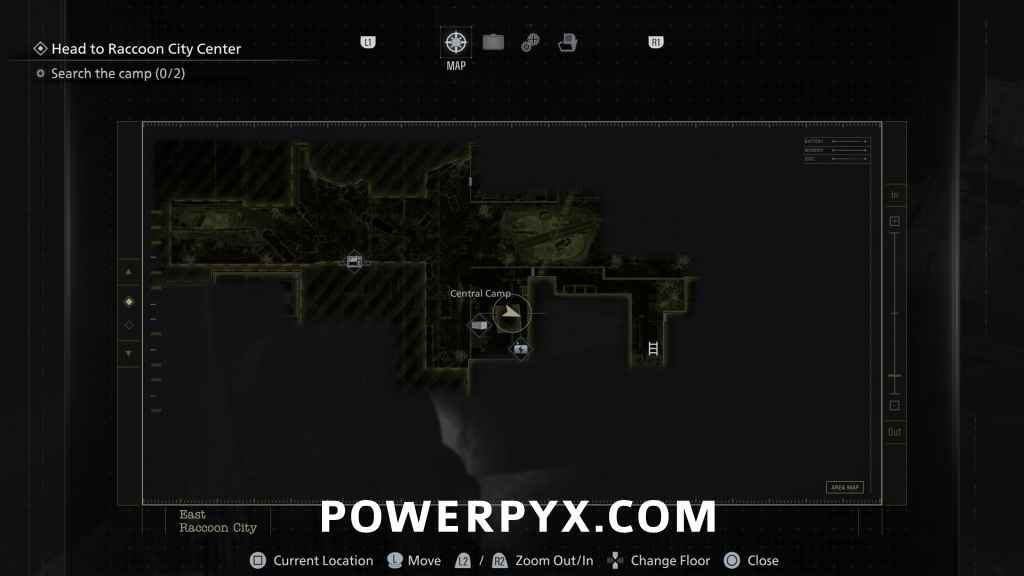
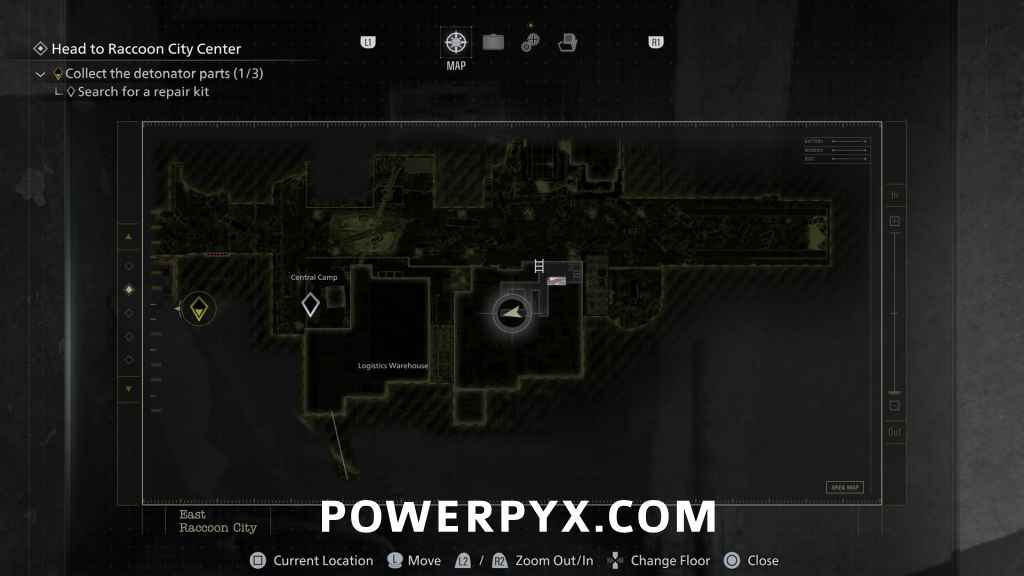
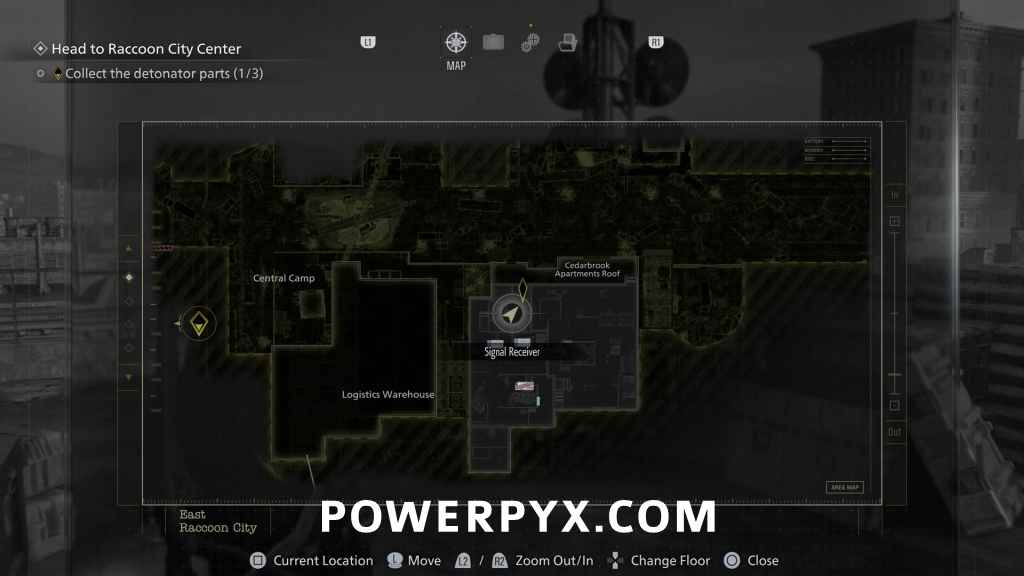
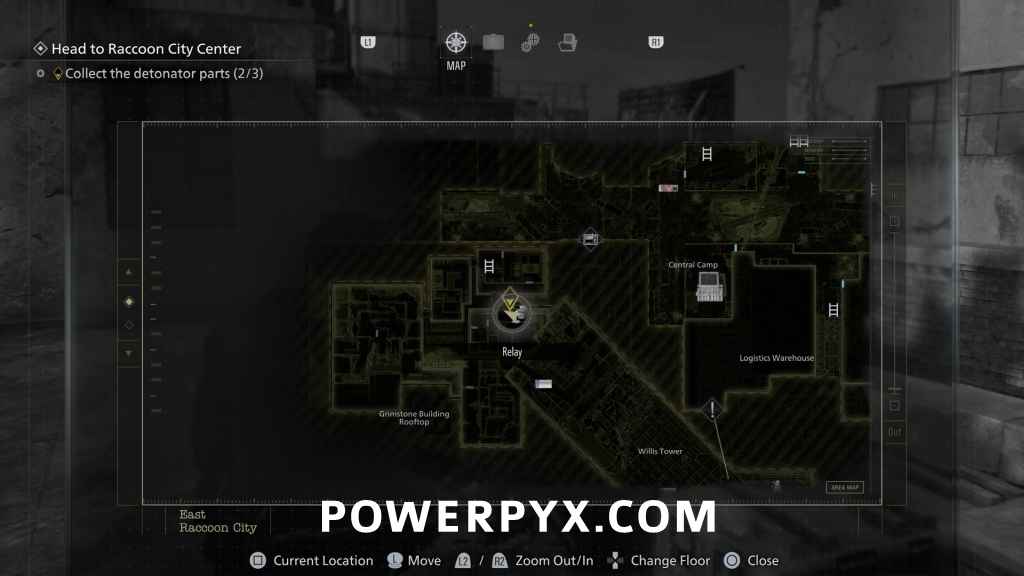
Head to Raccoon City Center
File #48 – Report on the Raccoon City Incident
Automatically obtained when arriving in Raccoon City as Leon (goes directly in your collected Files menu).
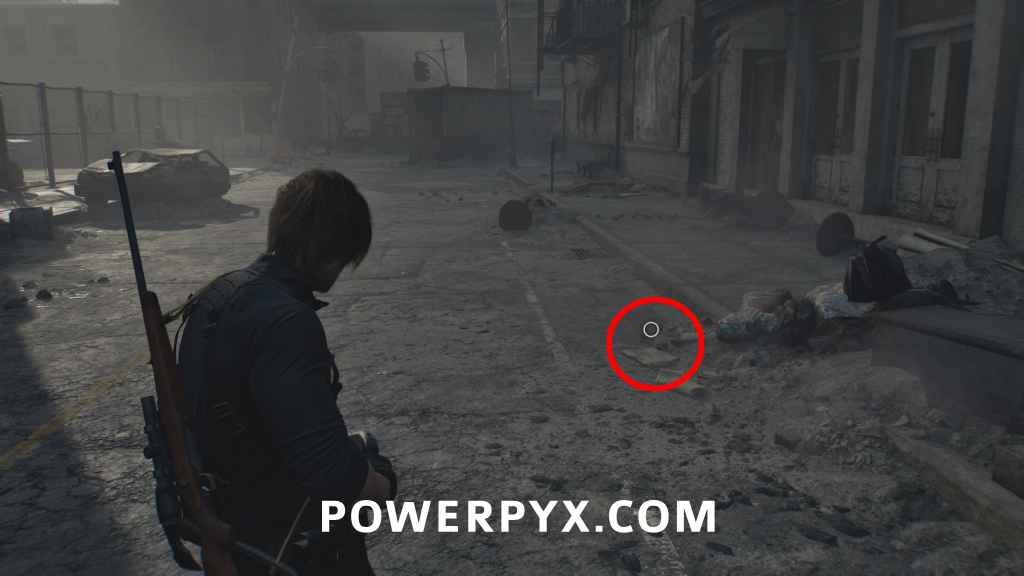
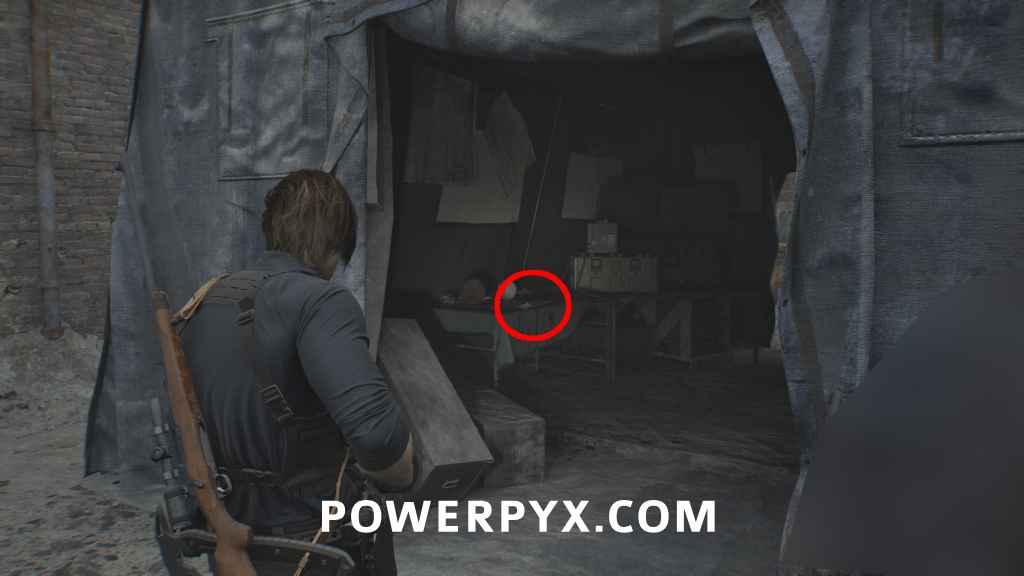
File #49 – Raccoon City Incident Newspaper
From where you start, go forward just a few steps to find this on the right, on the ground, near trash bags.
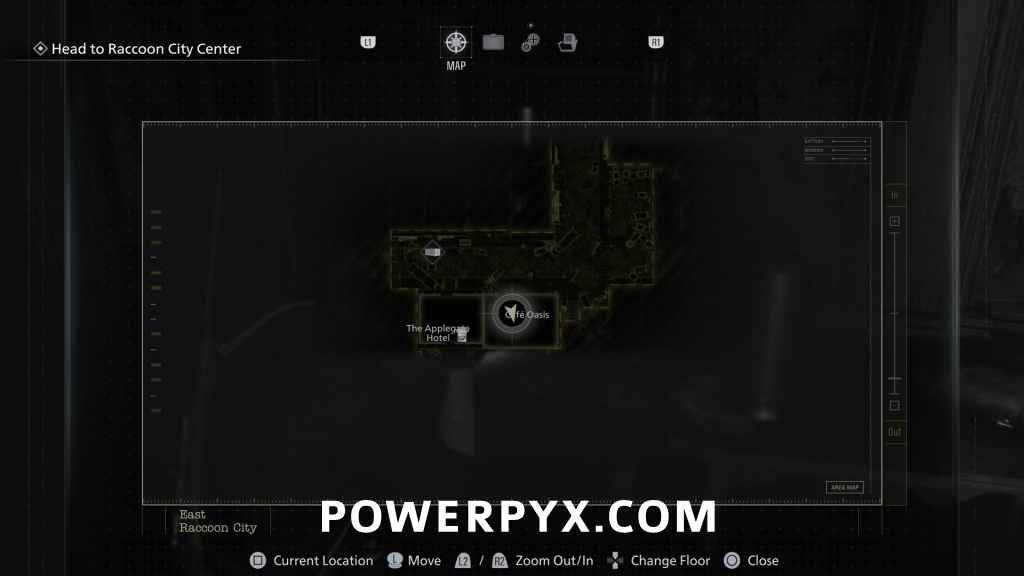
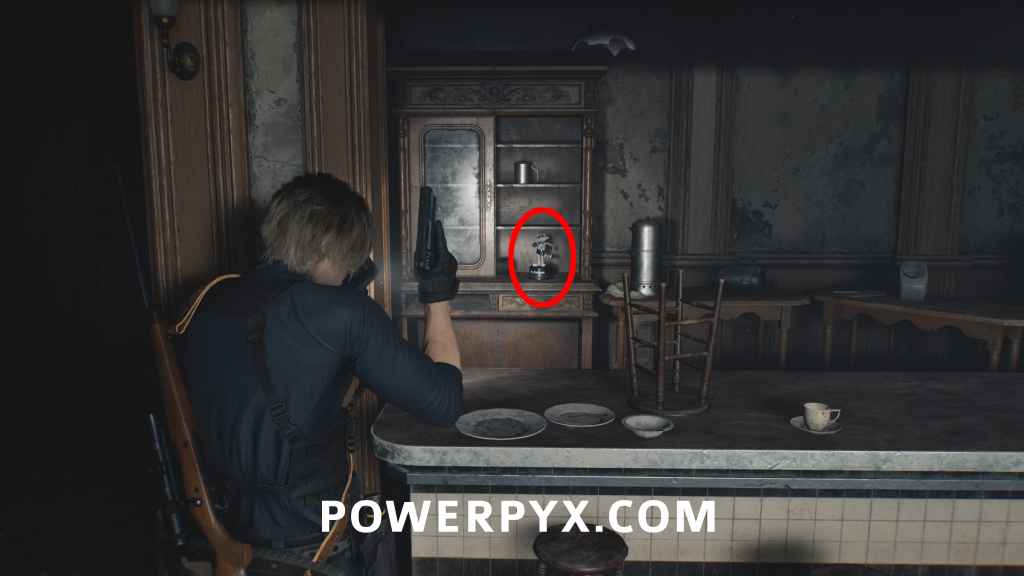
Mr. Raccoon #11
Café Oasis: From the start, go forward until you reach an intersection. At the intersection go right and enter the first open building to your left which is Café Oasis (before The Applegate Hotel). You find this behind the counter.
Go through the door in the Applegate Hotel, then follow the path forward into the building. After you are attacked by the giant enemy and are in the long hallway, walk forward until it breaks through the wall in front of you, then turn around and run all the way back to the other end. When it reaches you it will automatically knock you through the wall to the next area.
When you stand up turn around and then run to the far wall, then immediately turn right to go through a door. Keep following the path upstairs and once you pass the open wall on the left a number of small spiders will start appearing, shoot them as they appear before progressing.
Defeat the Giant Spider
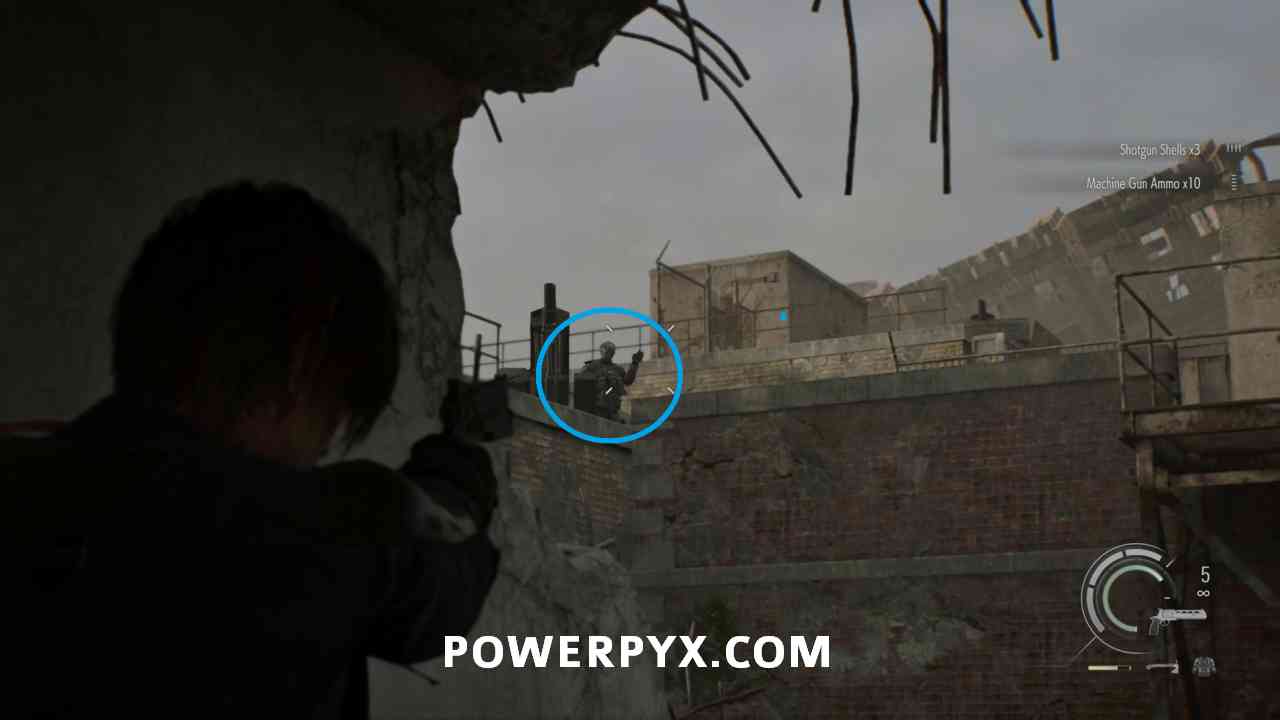
Once you climb the ladder you’ll be in an open area and need to defeat the giant spider. It crawls around the walls in the area making it somewhat hard to hit, but your main goal is to aim for the spot on its rear. You can make laps around the area clockwise climbing the ladder to reach the upper platform, which will force the spider to slow down and climb around to reach you. Be aware if the fight goes on long enough (likely on Insanity if you don’t have the Infinite RPG) then it will start spawning more of the small spiders that you will want to deal with quickly. It is also possible for the boss to grab you near one of the window and try to drag you out of the building, and you need to tap  to escape it.
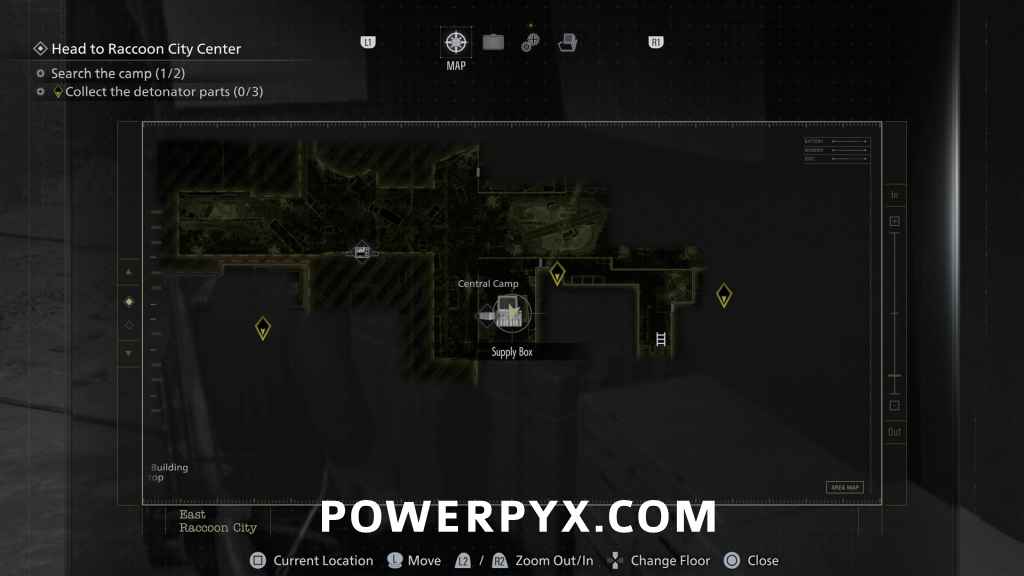
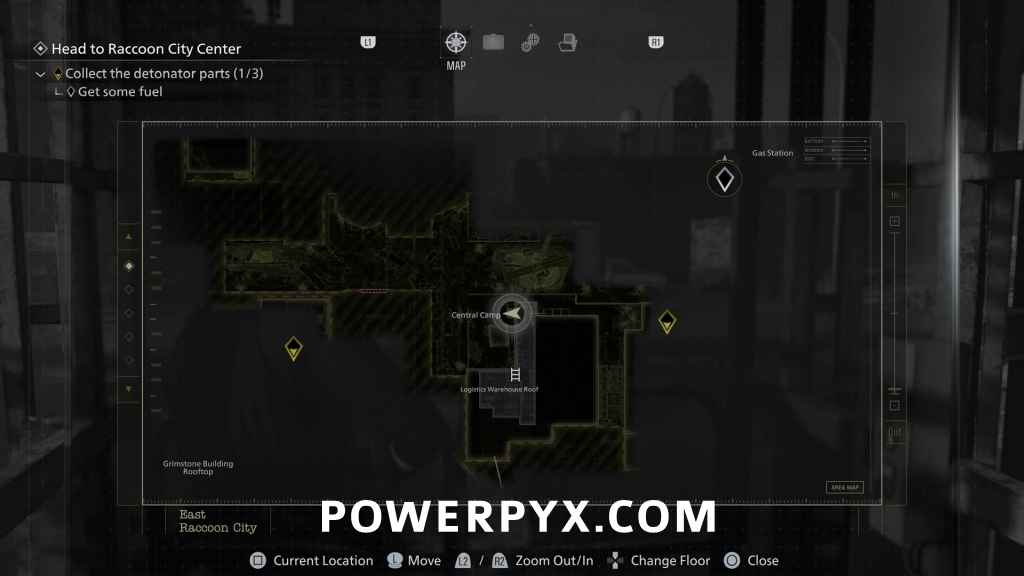
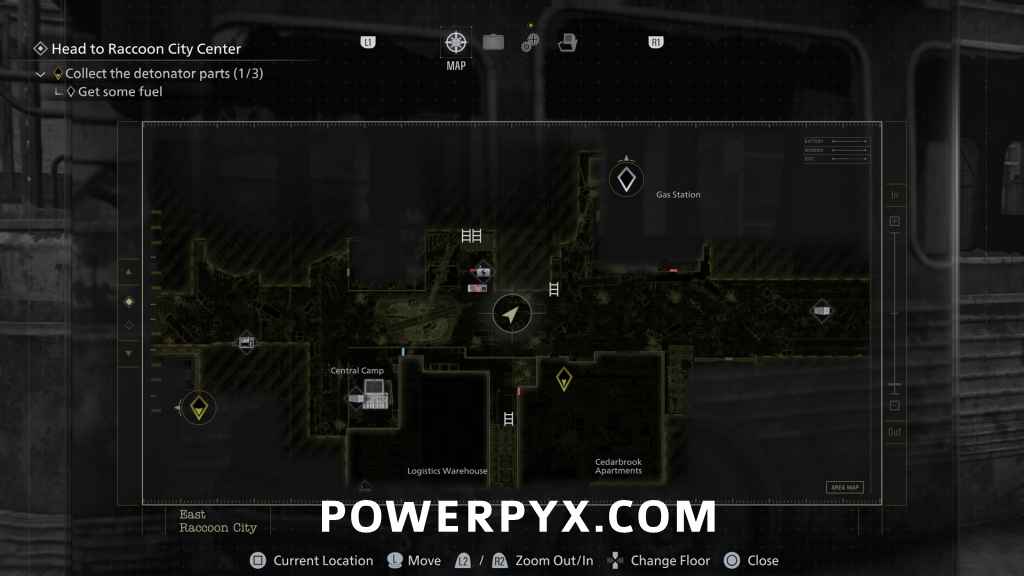
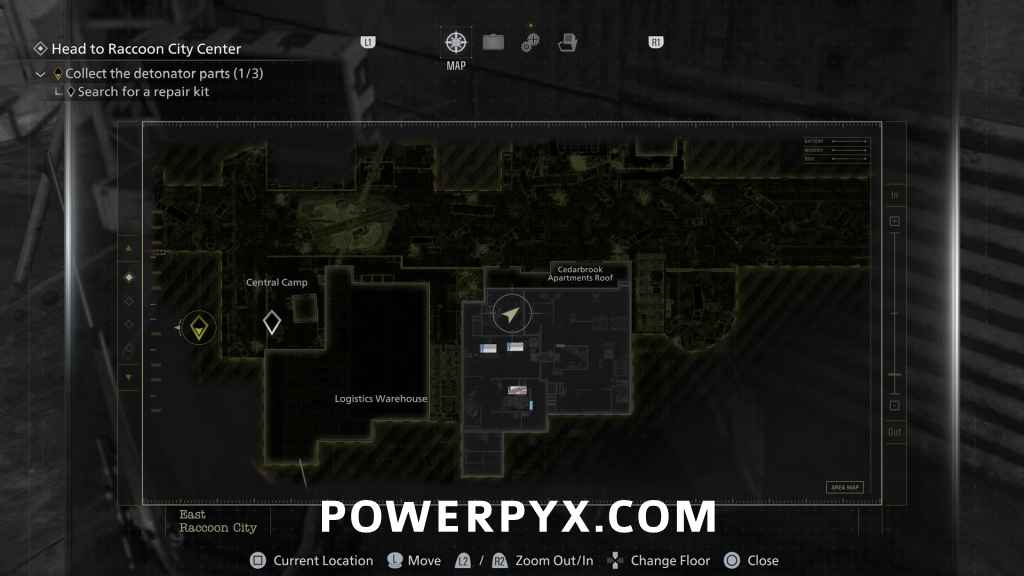
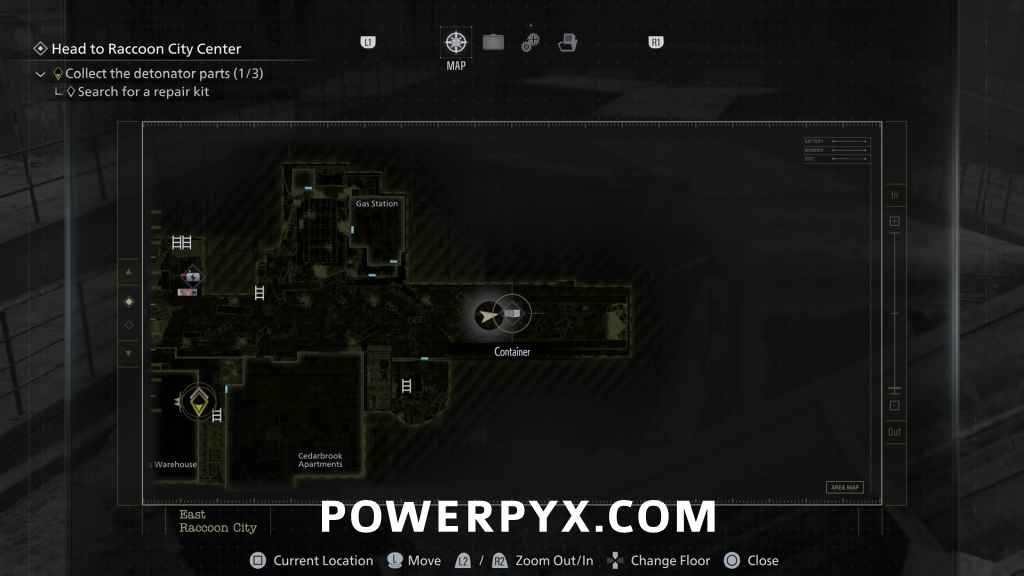
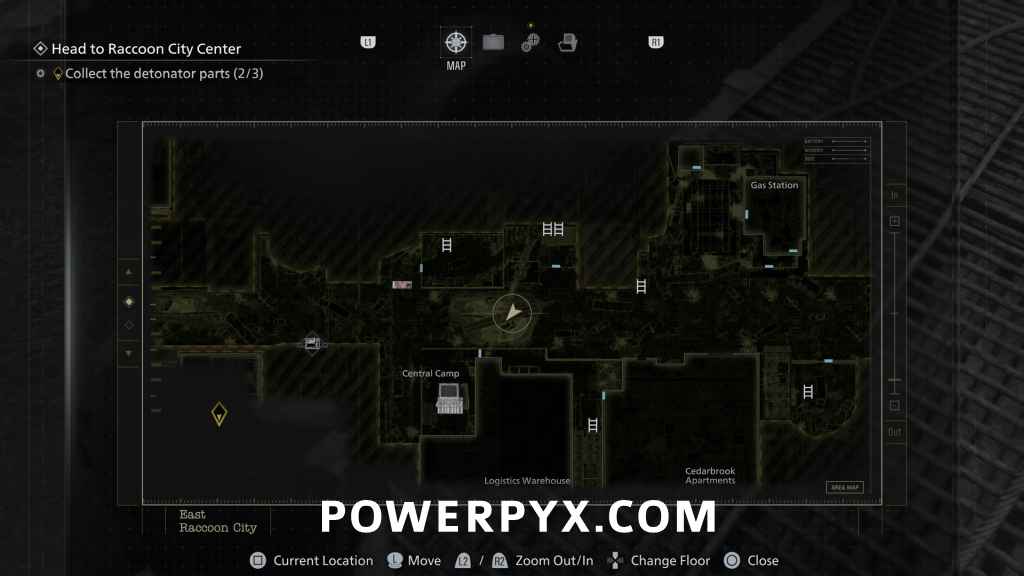
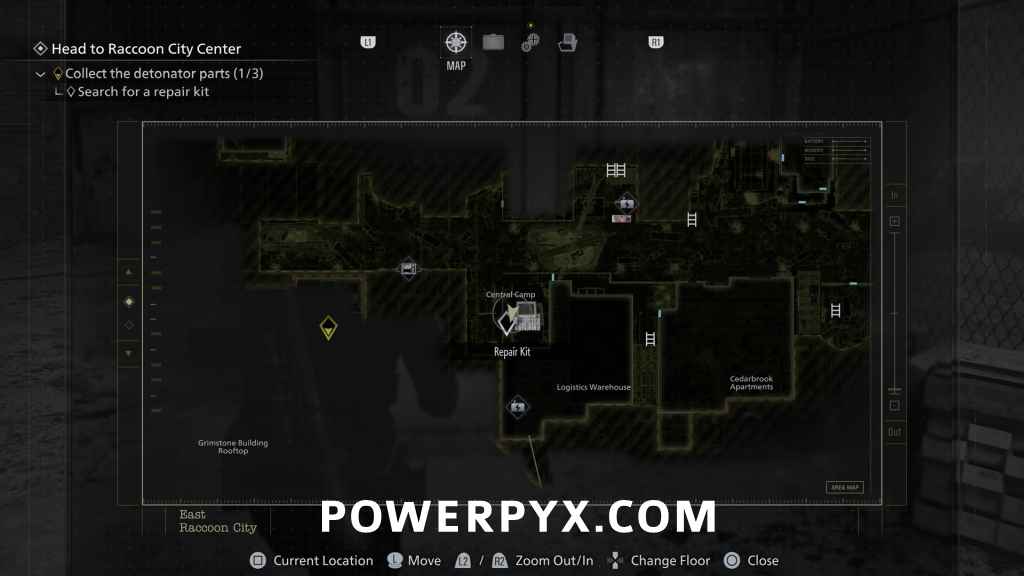
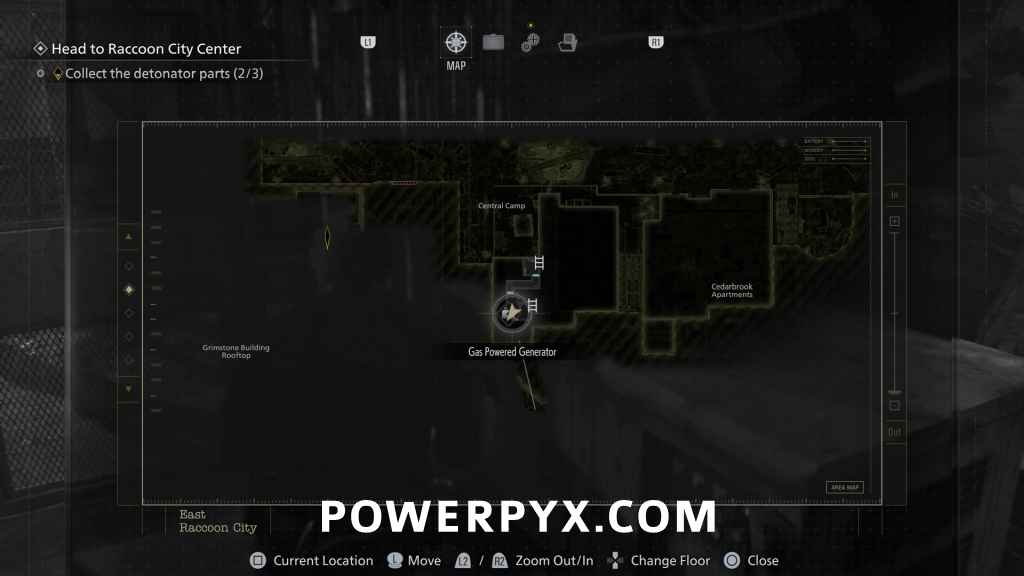
Collect the Detonator Parts
File #50 – Orders for the Engineer Corps
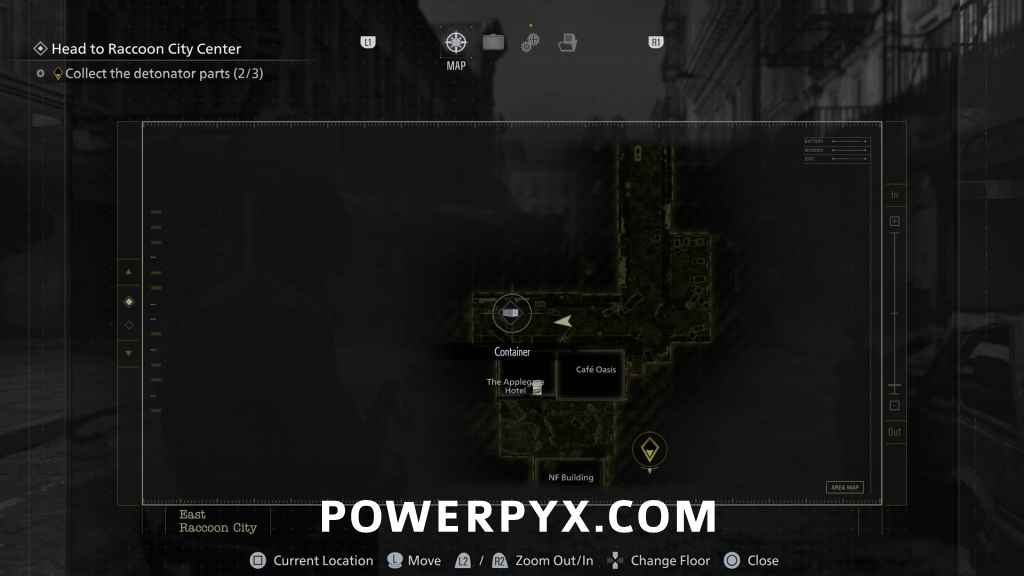
Central Camp: After defeating the spider you will be automatically dropped into a subway area, follow the path until you reach the Incomplete Bomb (cutscene a couple minutes later). Go left and enter the Central Camp, you find this inside the blue BSAA tent. You go there for story purposes automatically to turn on a power generator, then you get a save point in the same room as the file.
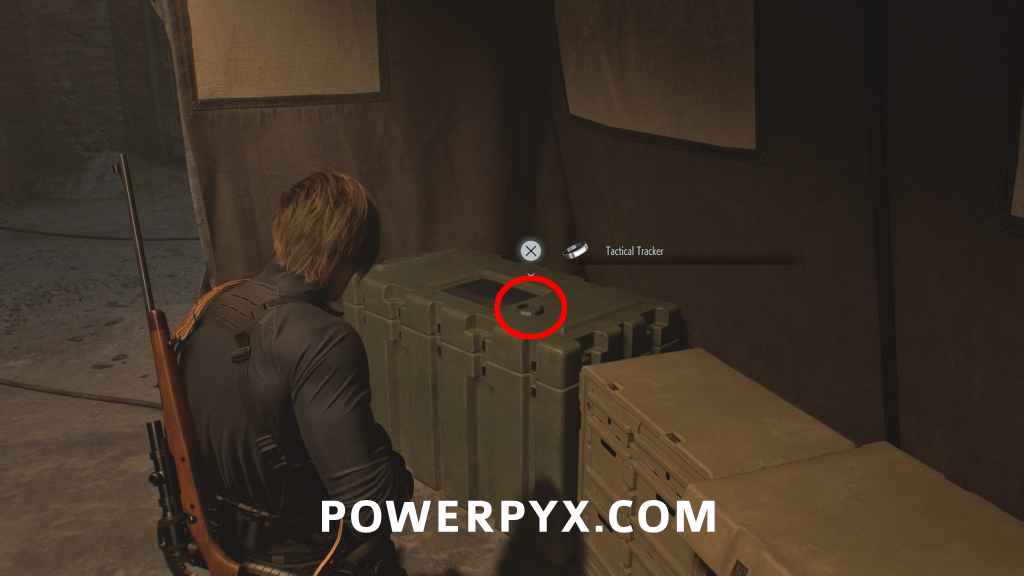
Key Item: Tactical Tracker
Central Camp: After using the power generator in Central Camp, you find this on the supply box next to the save point laptop. Killing enemies will give credits that can be traded for items at Supply boxes from now on.
Weapons/Upgrades: Silencer 9 (Pistol) + 990-TAC (Shotgun) + Stiri REVO3 A1 (SMG) + Body Armor + Case Upgrade (8×13)
Can be bought from the Supply Box in exchange for credits from killing enemies. Body Armor Lv. 2 is available after buying Lv. 1. You can use the combat axe infinitely to kill enemies, it can be resharpened anytime by pressing  +
+  /
/  +
+  and has infinite durability.
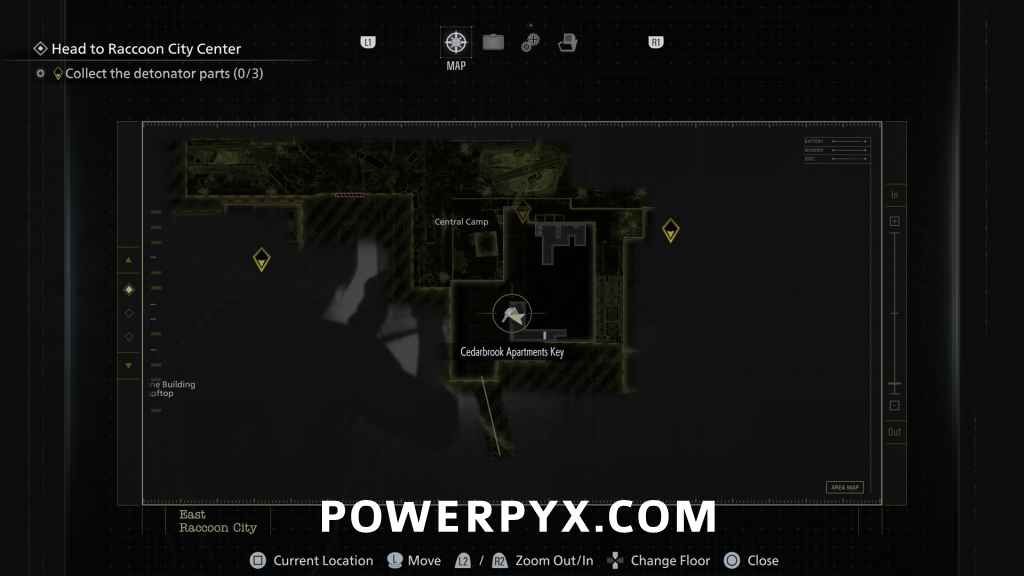
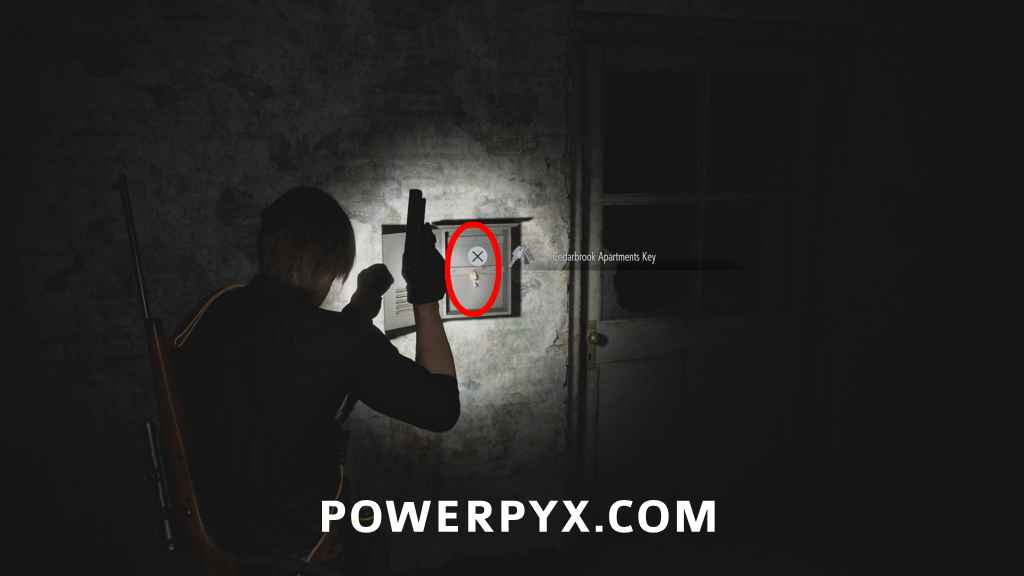
Key Item: Cedarbrook Apartments Key
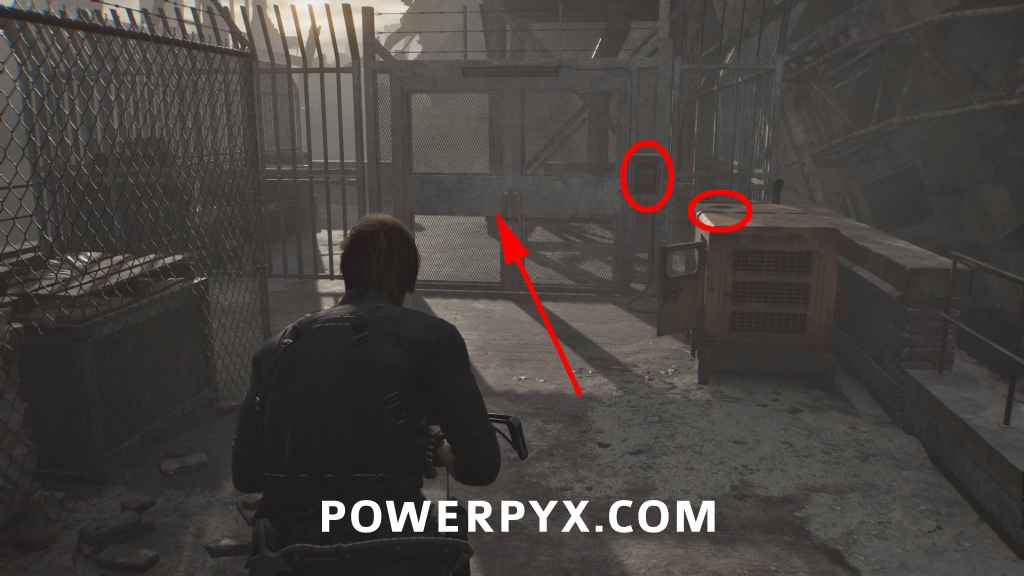
Logistics Warehouse 2F: In the back of Central Camp, press the red button on the wall to raise the shutter. Then advance through the Warehouse by shooting down the hanging crates until you reach a dark room on the 2nd floor. You find this hanging on the wall by the door. The enemies in this area appear out of the floor, so they aren’t able to be avoided or shot at before progressing. You can shoot down all three crates as soon as you enter and attempt to rush past, but in this section with Leon its generally better to try killing all enemies on a normal playthrough, as you will have more than enough ammo if you actively use the hatchet for finishers whenever possible and upgrade your weapons.
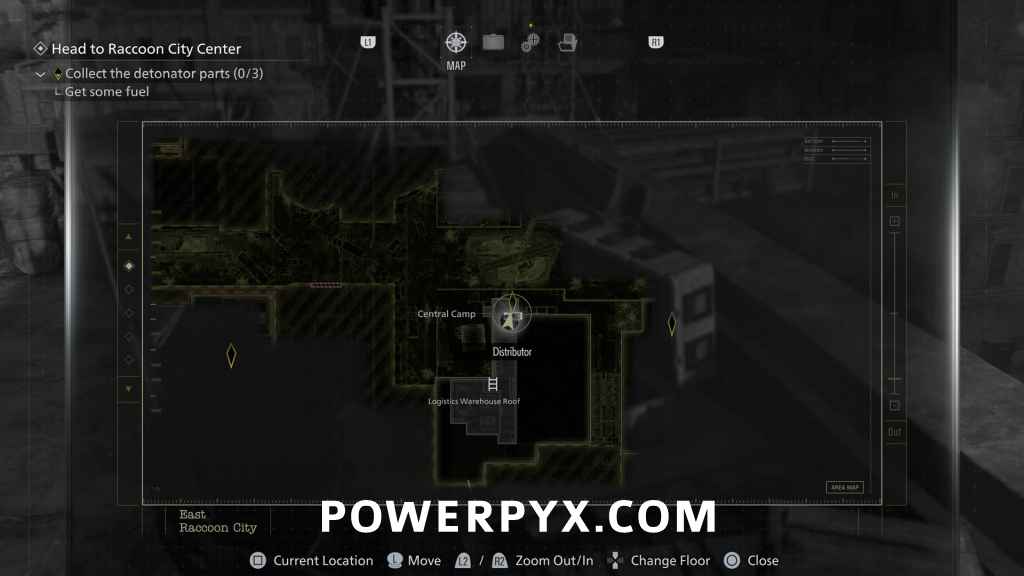
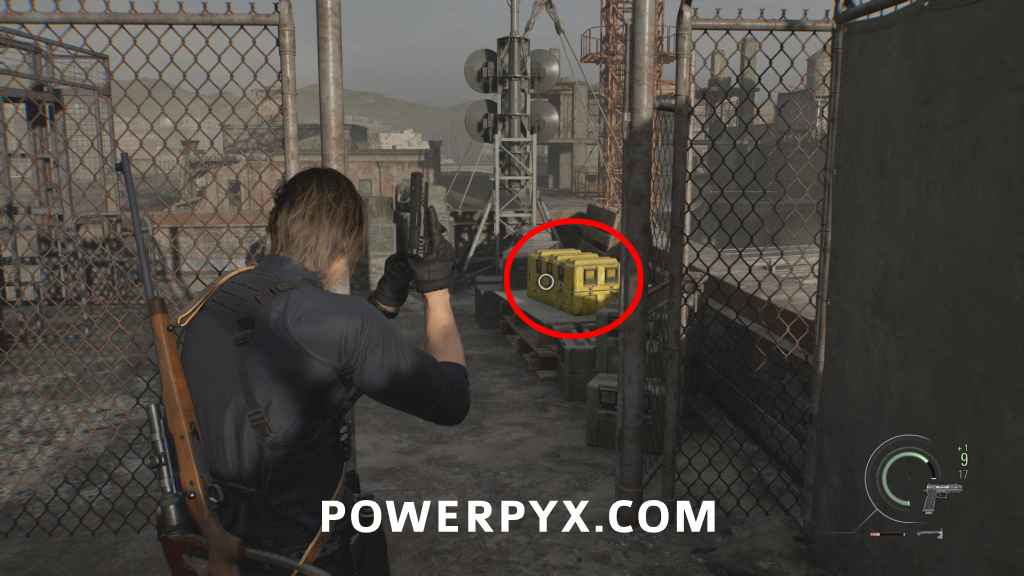
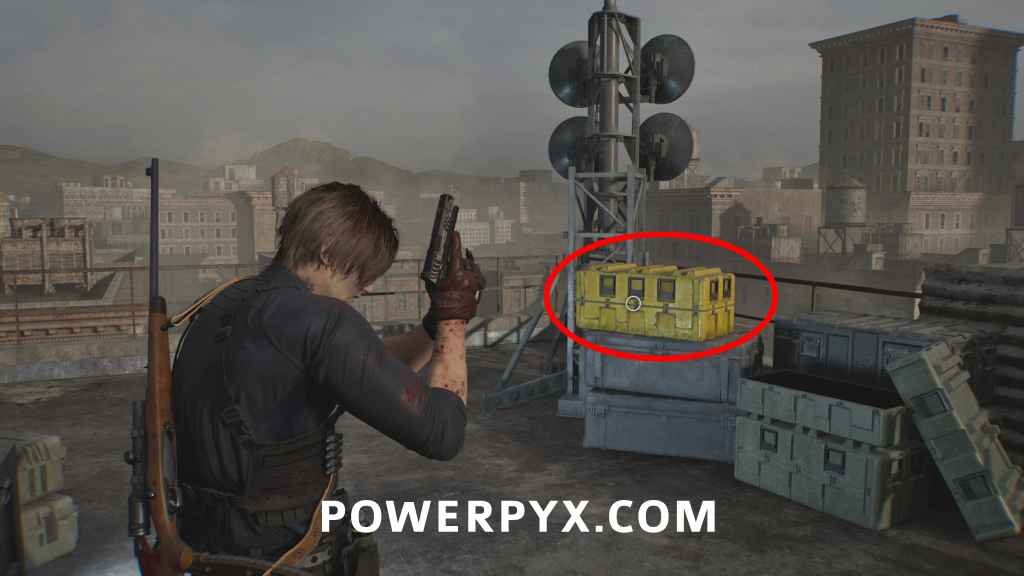
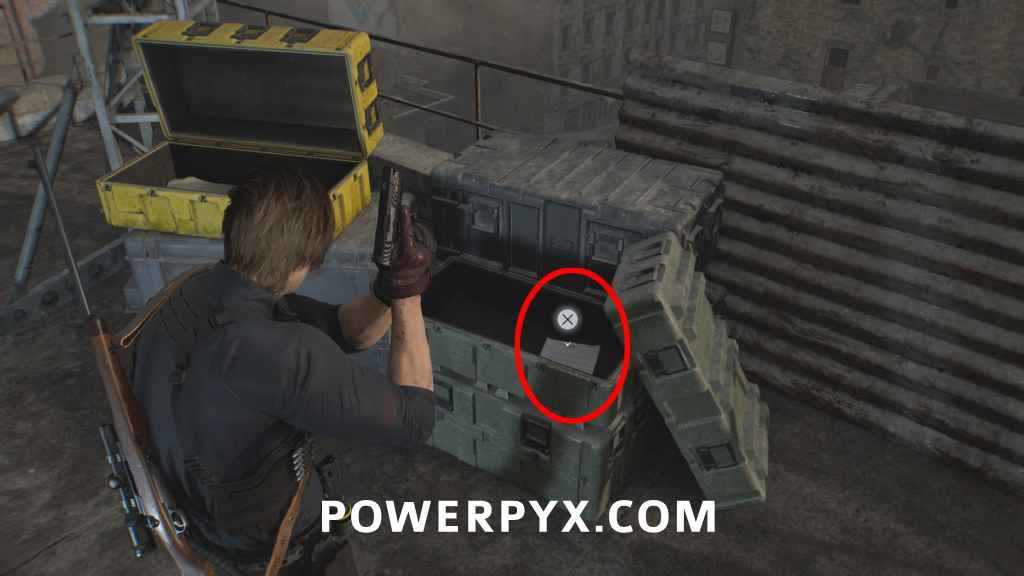
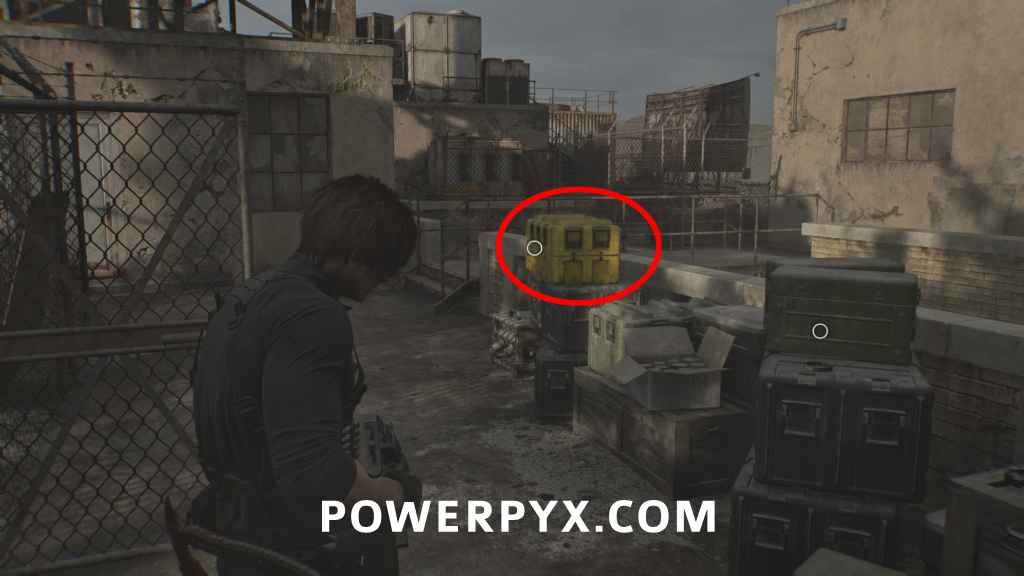
Key Item: Distributor
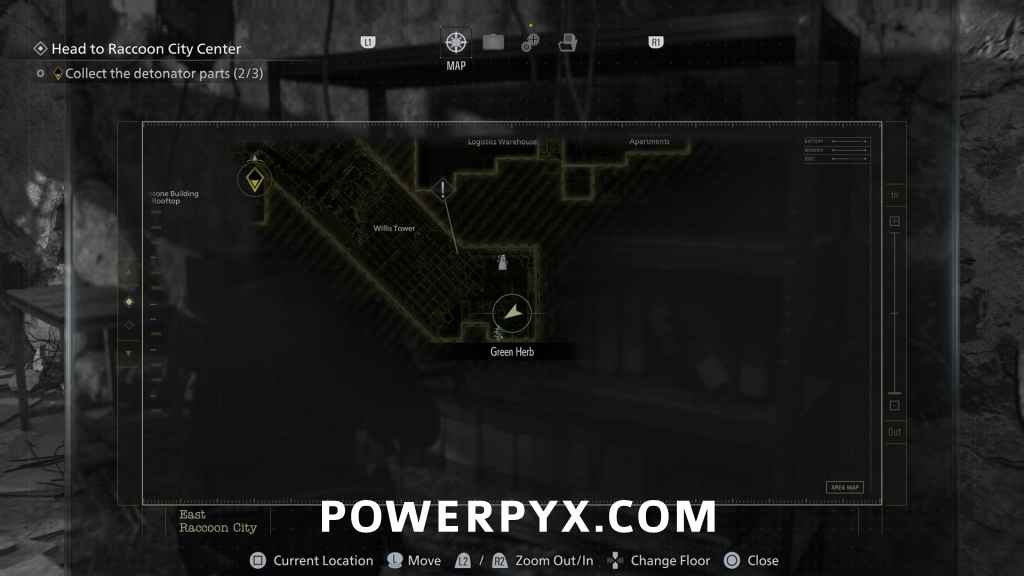
Logistics Warehouse Roof: Climb to the roof and then go left to find this is in a yellow box.
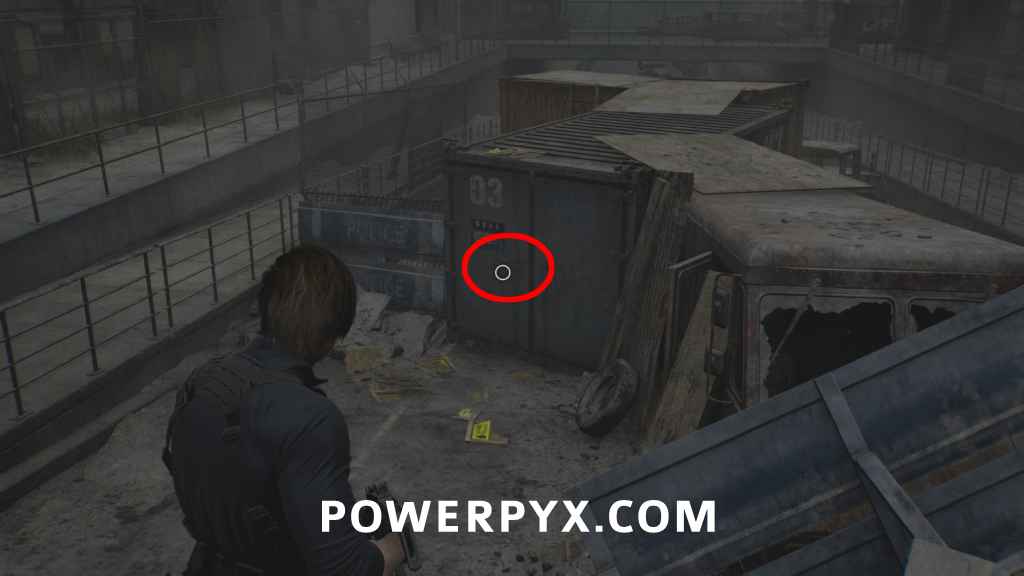
Mr. Raccoon #12
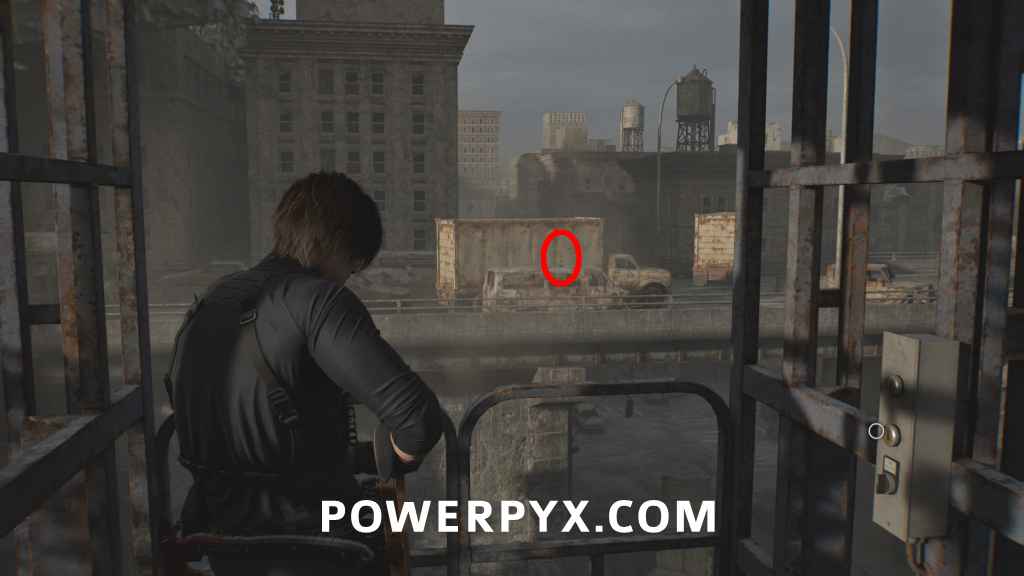
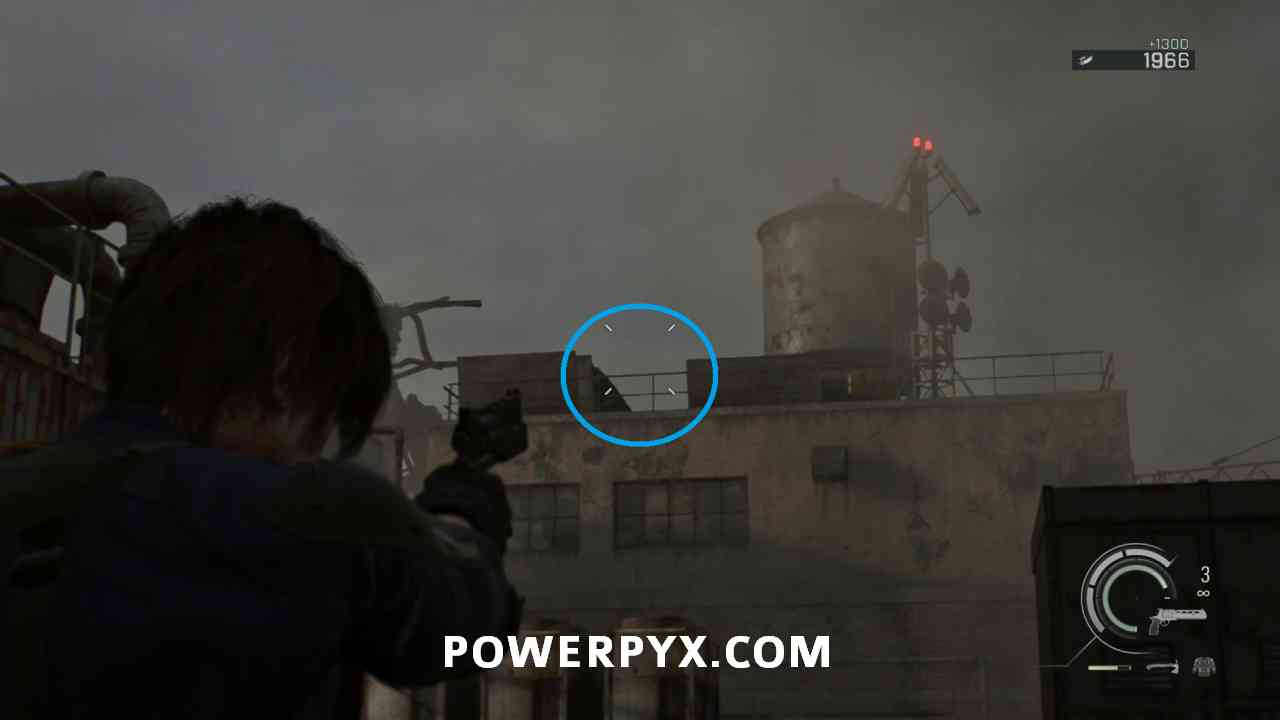
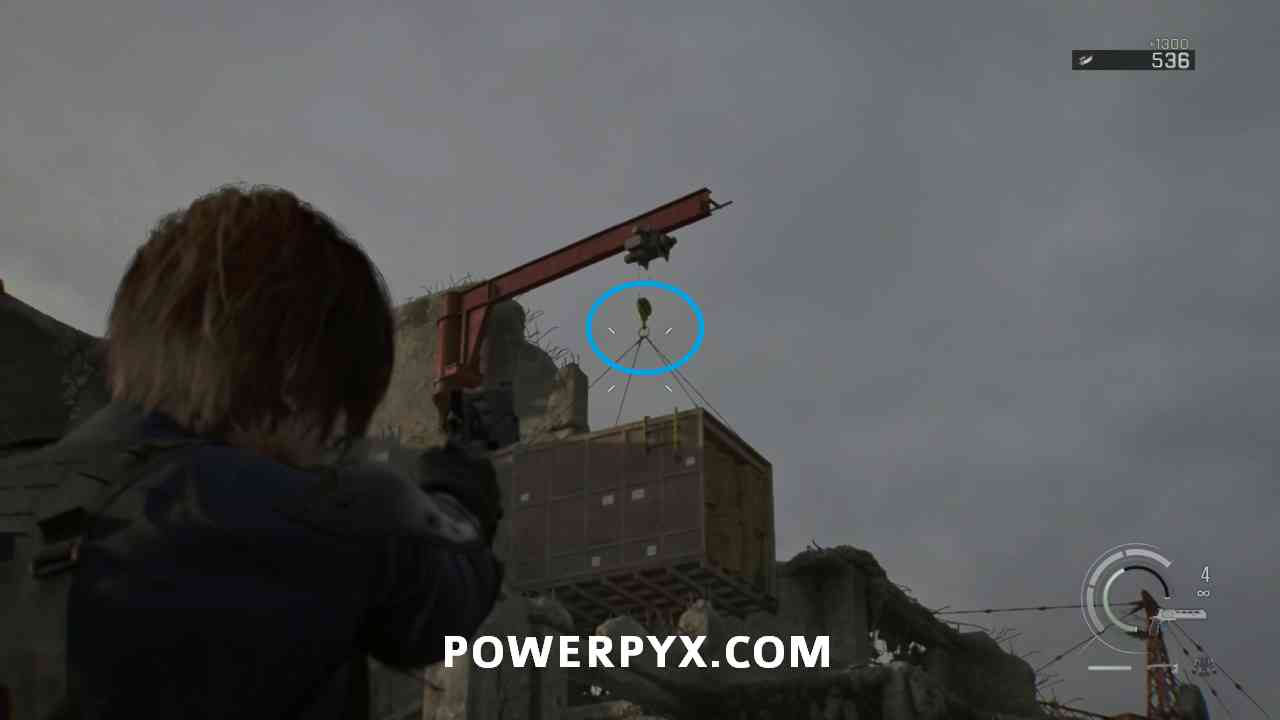
Logistics Warehouse Roof: After you pick up the Distributor you automatically use the binoculars to scout the area. Then turn around towards the elevator and look at the highway (facing East on the map). This sits on top of a car wreck on the highway, shoot it with the sniper rifle. On the van in front of a delivery truck.

Mr. Raccoon #13
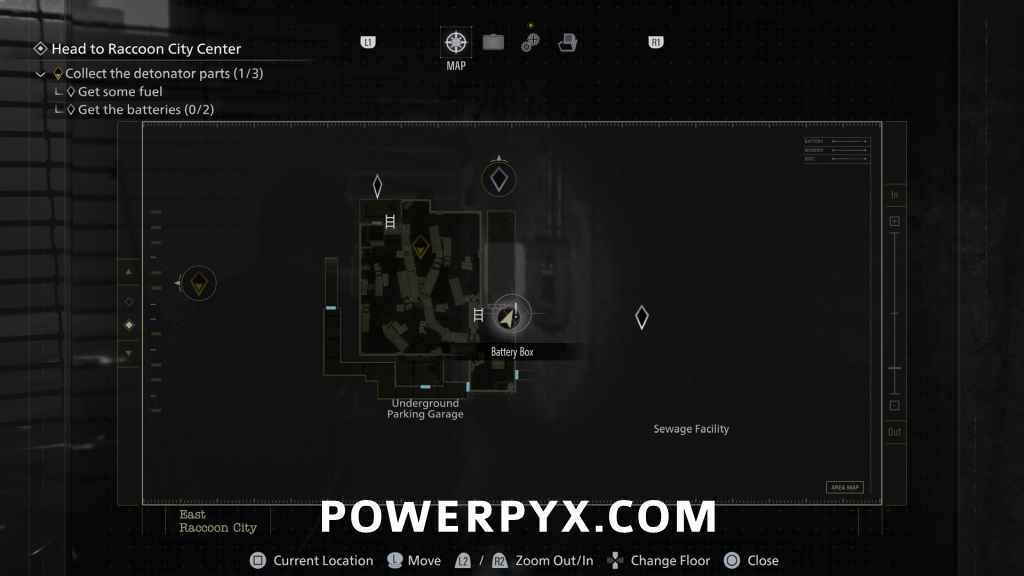
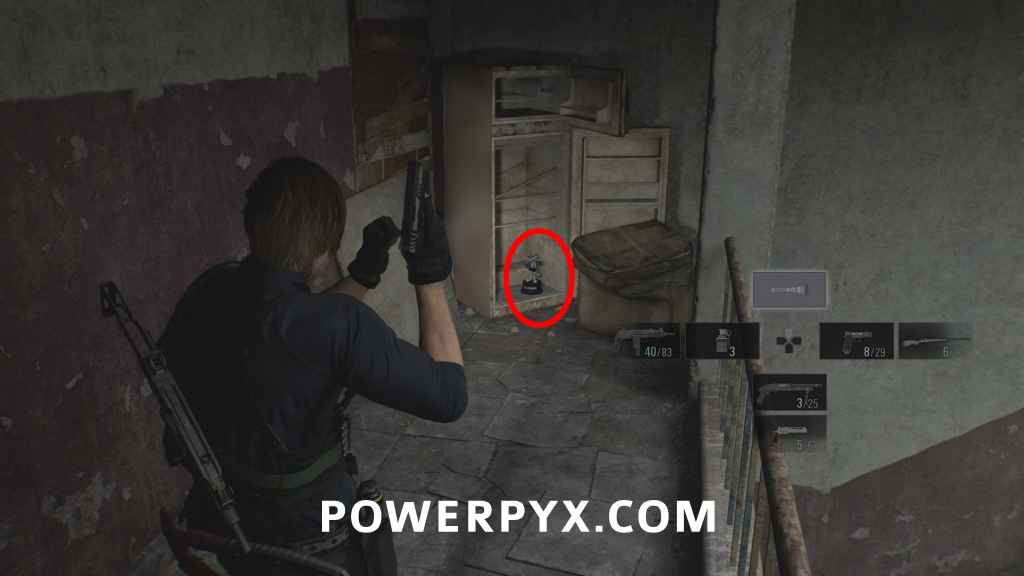
Underground Parking Garage: Use the Apartments key on the gate in the Central Camp, next to the elevator. Then enter the door on the right downstairs. When you reach the first enemy where you get a tutorial on stealth kills, enter the room on the left to find this on a box.
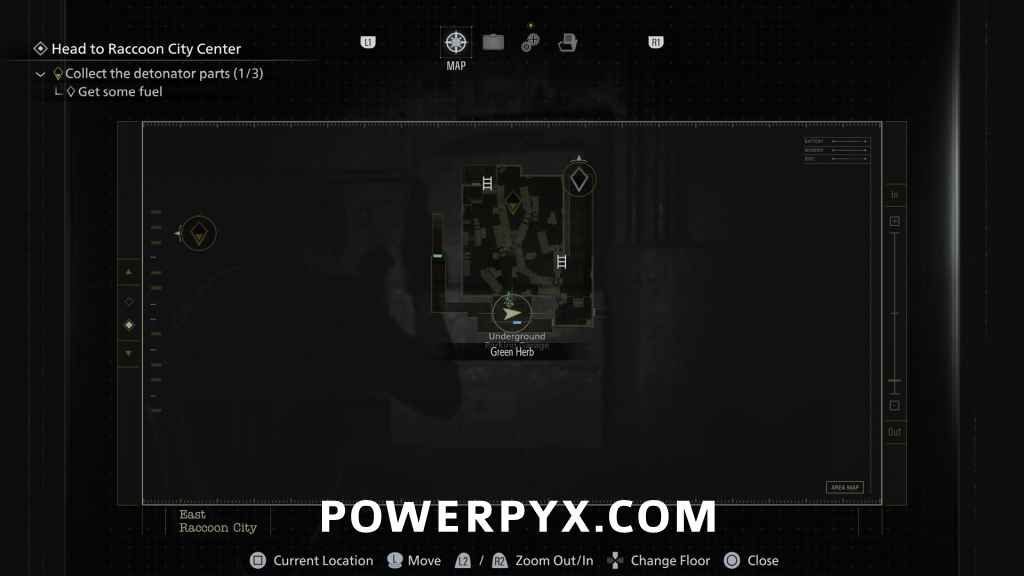
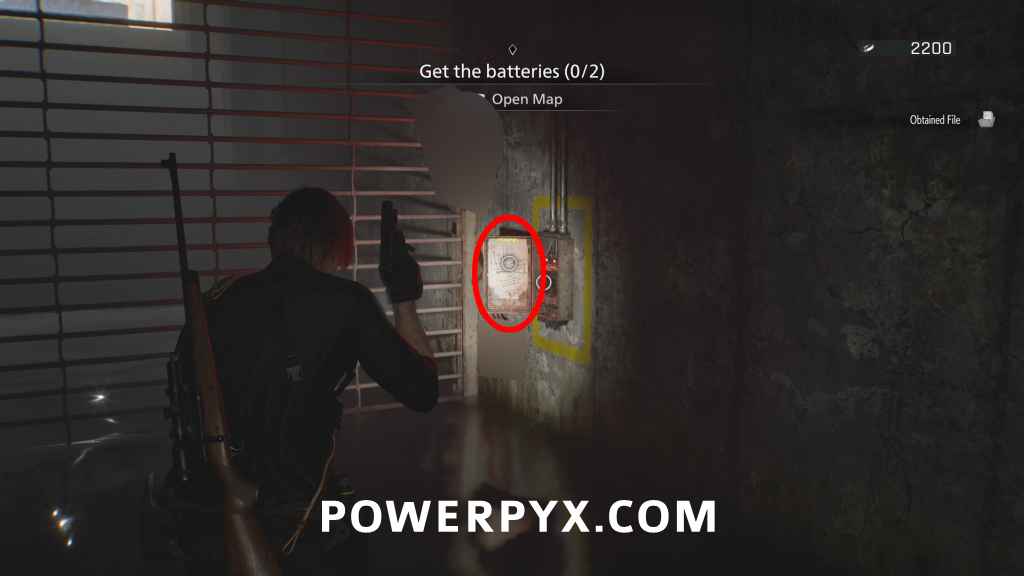
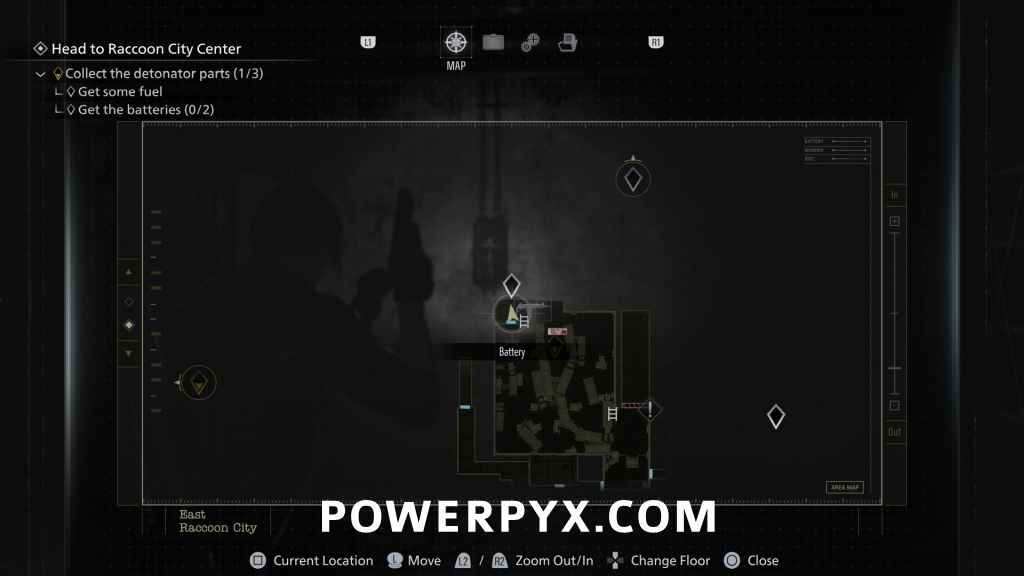
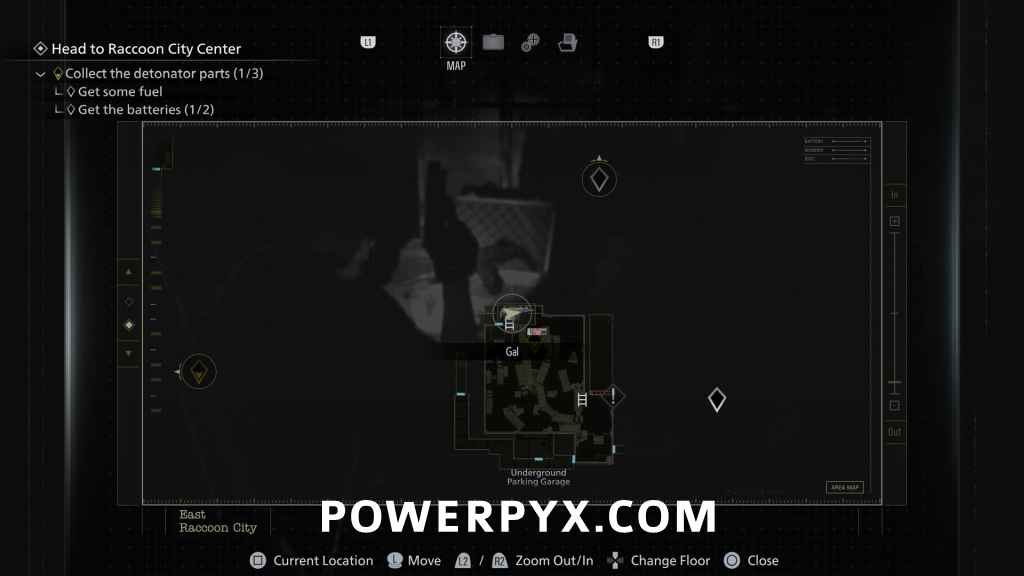
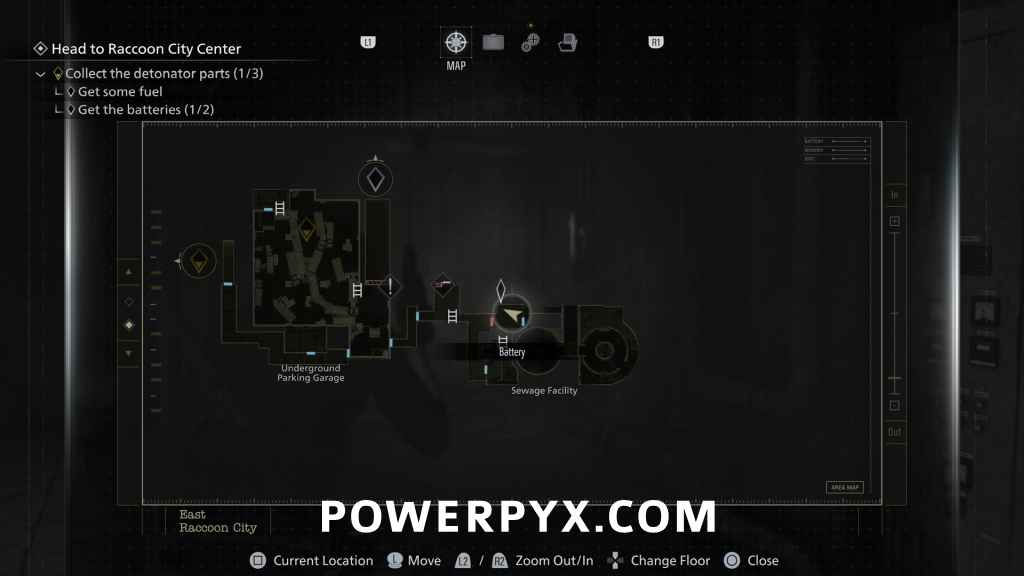
Get the Batteries
File #51 – Battery Storage Locations
Underground Parking Garage: From the previous location, enter the next section of the parking garage and turn left to find a flooded area with a single zombie. Inspect the red-lit box on the right of the gate.
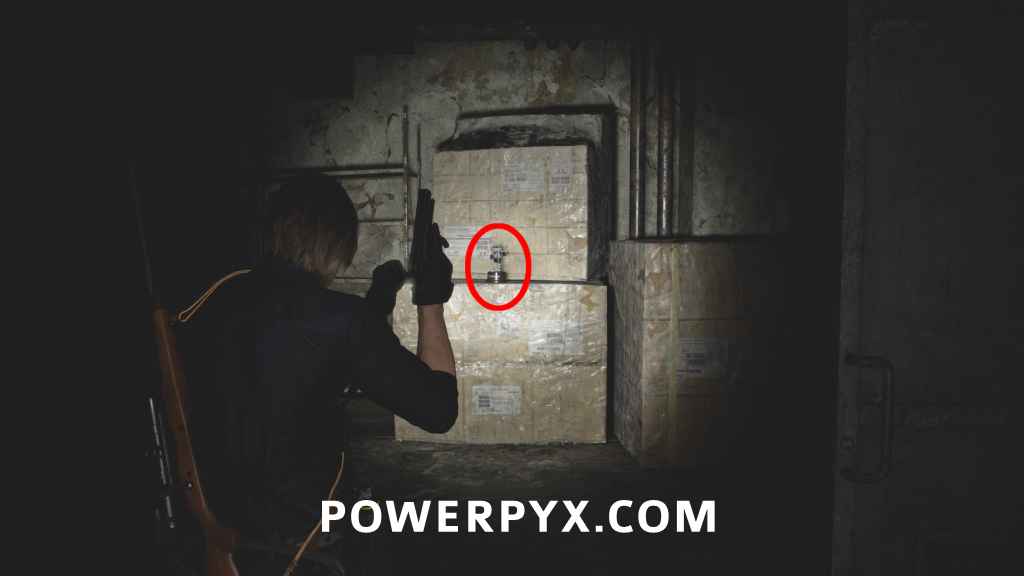
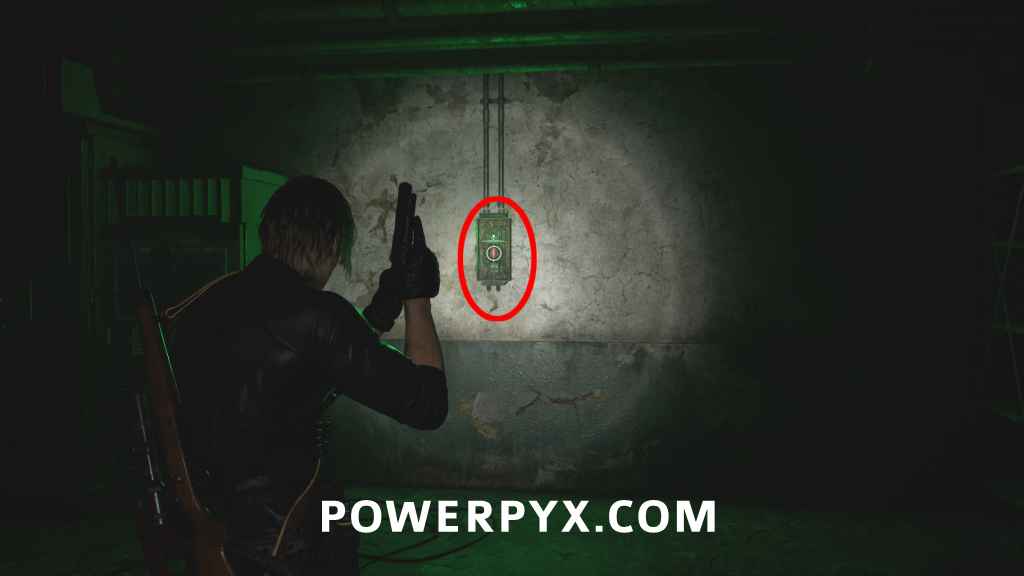
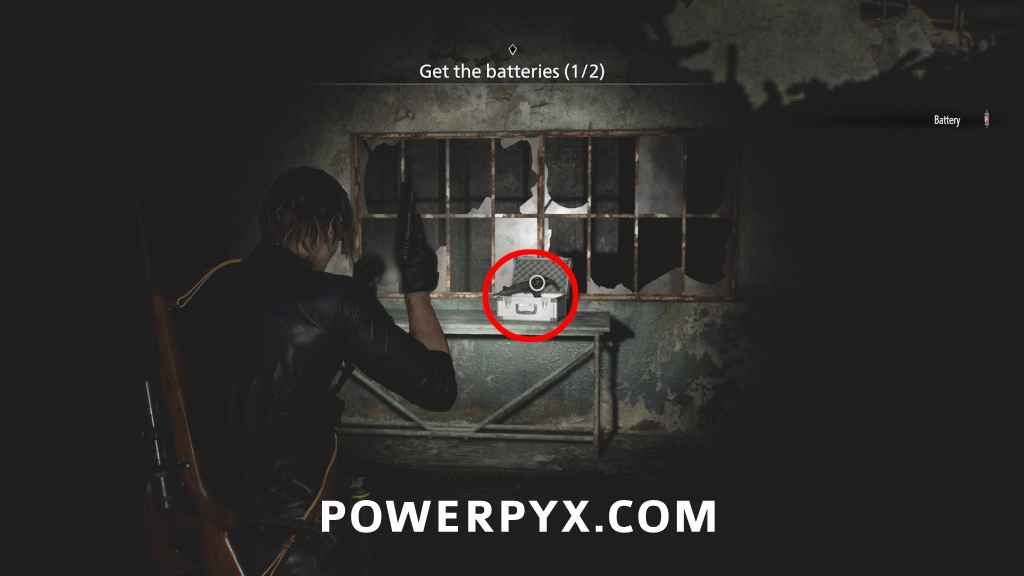
Key Item: Battery #1
Underground Parking Garage: From the box where you got the previous file, turn around 180° and climb over the ladder. Drop down to the lower are and here you need to progress to the north-west corner of the flooded garage. Enemies will appear from the water, but as long as you progress slowly they won’t appear until you reach the spot they are located. Some of the backs of the vans can be opened for more items, but note the one close to the battery location will have an enemy and an explosive in it. In the north-west corner the battery is on the wall in the small room.
Weapon: Gal (SMG)
Same room, in a silver box.
Afterward, climb the ladder in the same room and walk over the roofs to drop back down to the closed gate, insert the battery. Then go back up the stairs and through the blue door on the side to reach Sewage Facility.
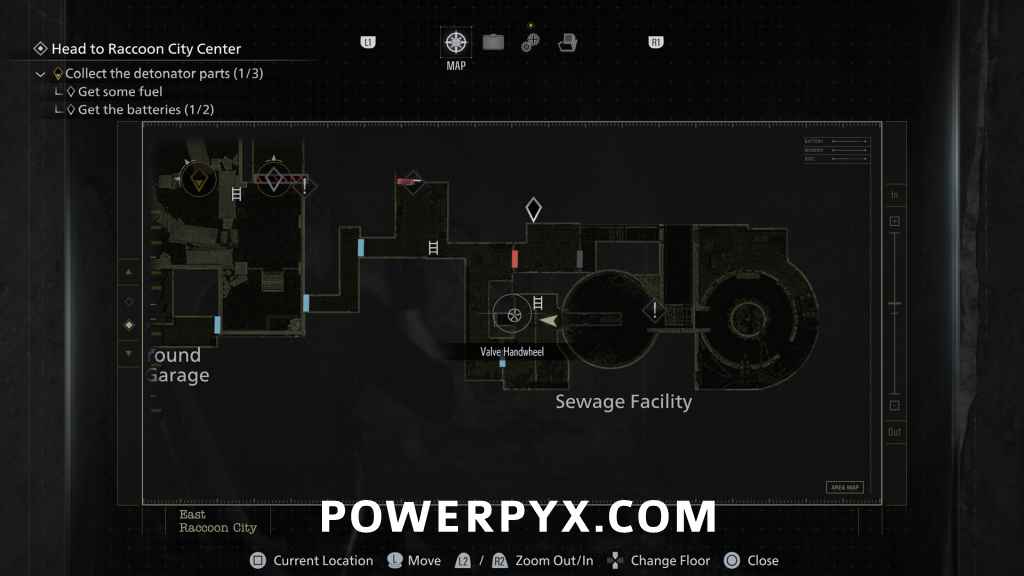
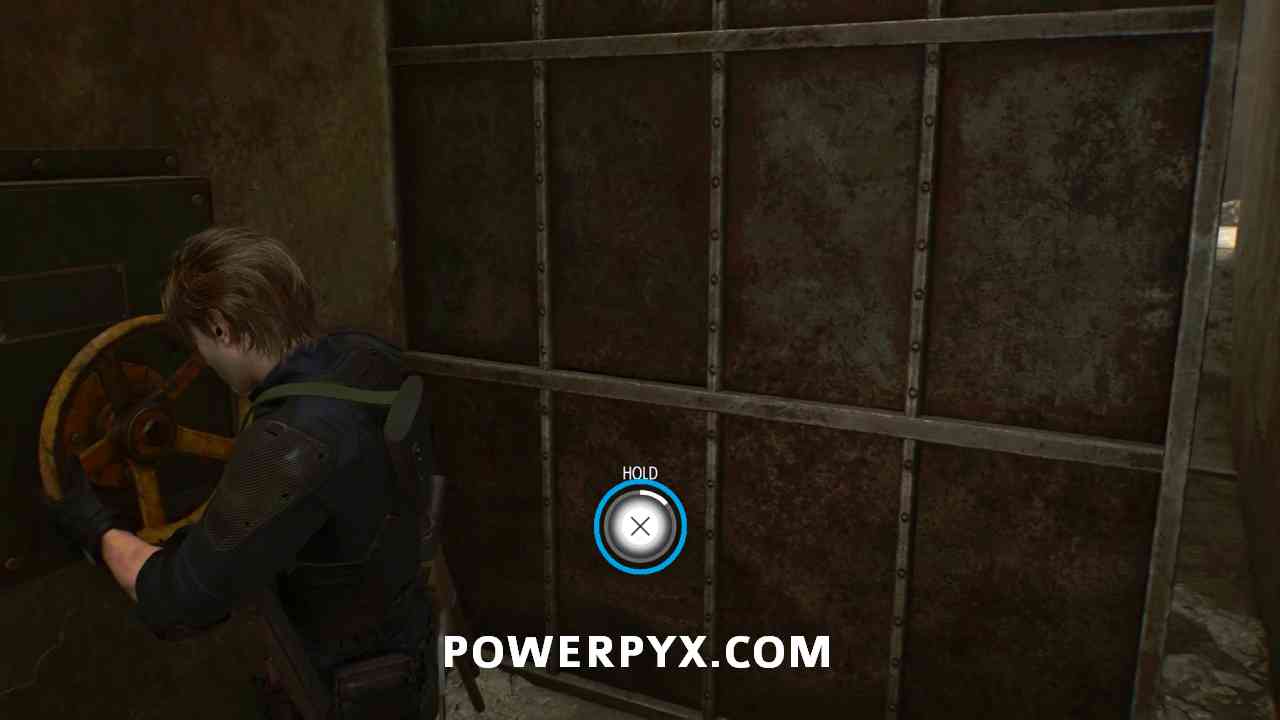
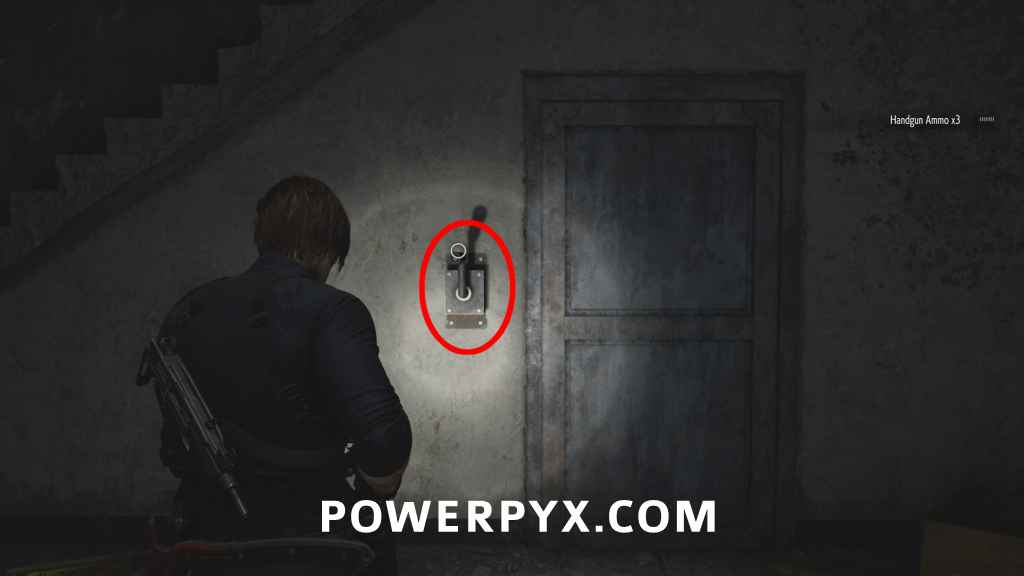
Key Item: Valve Handwheel
Sewage Facility: Found on the path through the sewage facility, after dropping down.
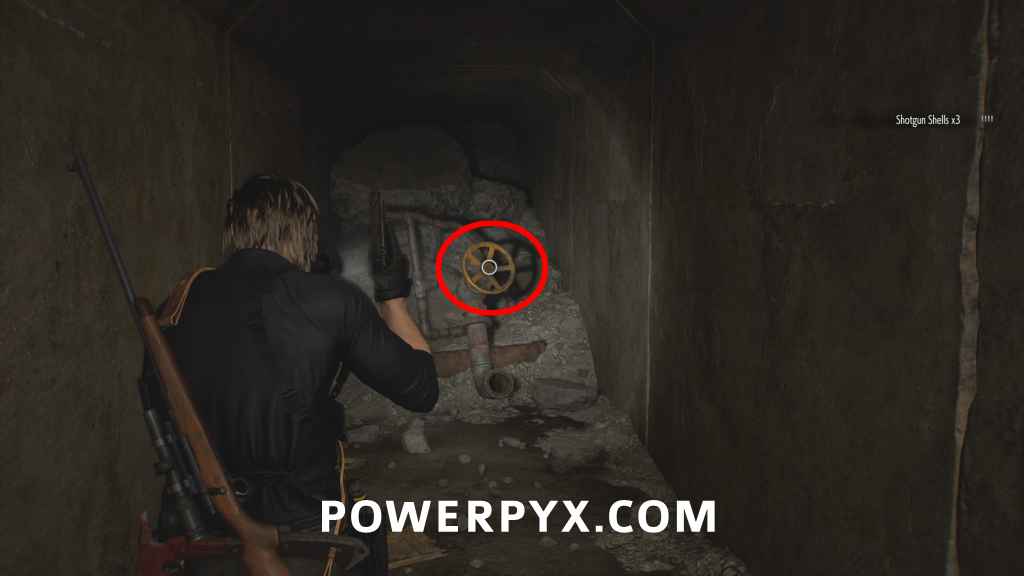
After you pick up the handwheel three enemies will appear from the ground in the area you are currently in, deal with them, trying to destroy their heads if possible. After they are dealt with interact with the spot on the wall to place the handwheel, then only hold until the icon is to around 20% then stop. The wall will keep moving past for now, but a large enemy like you faced in Rhodes Hill will start walking at you from the newly opened hallway. Back away and deal with it like you did before, and watch for any of the prior enemies reviving when you destroy its weak spots.
Key Item: Battery #2
Sewage Facility: After the enemies are dealt with return to the handwheel and finish turning it all the way to make a bridge you can walk over at the top of the room to reach the 2nd battery. Watch enemies in the other lower area before you reach the stairs if they didn’t come to you when the big enemy did.
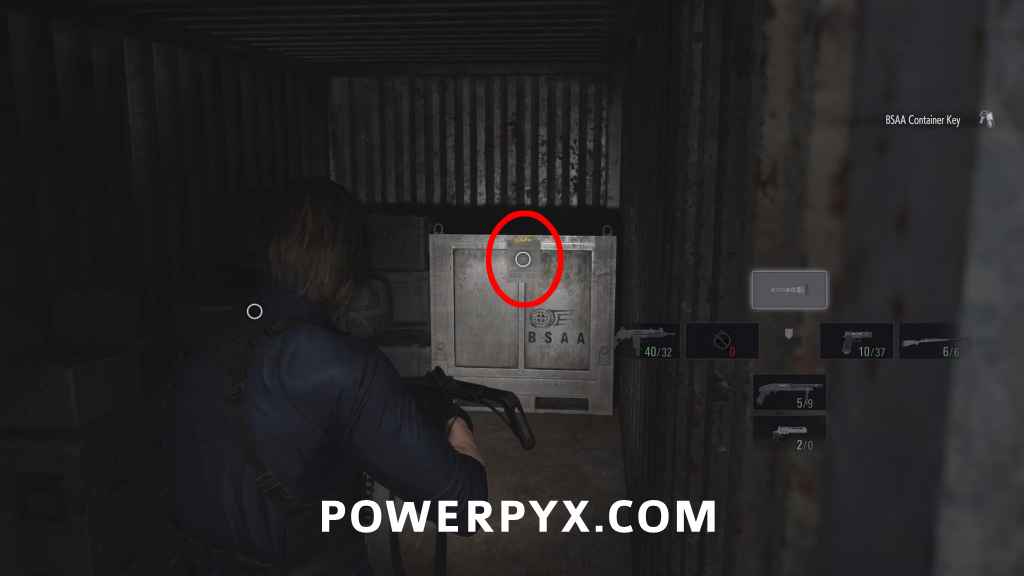
Key Item: BSAA Container Keys
Insert both batteries at the flooded garage gate. Then go forward and left to get a cutscene, you automatically get the keys from the cutscene. You need this to open the 3 BSAA Containers for  Crate Expectations, which we’ll collect soon.
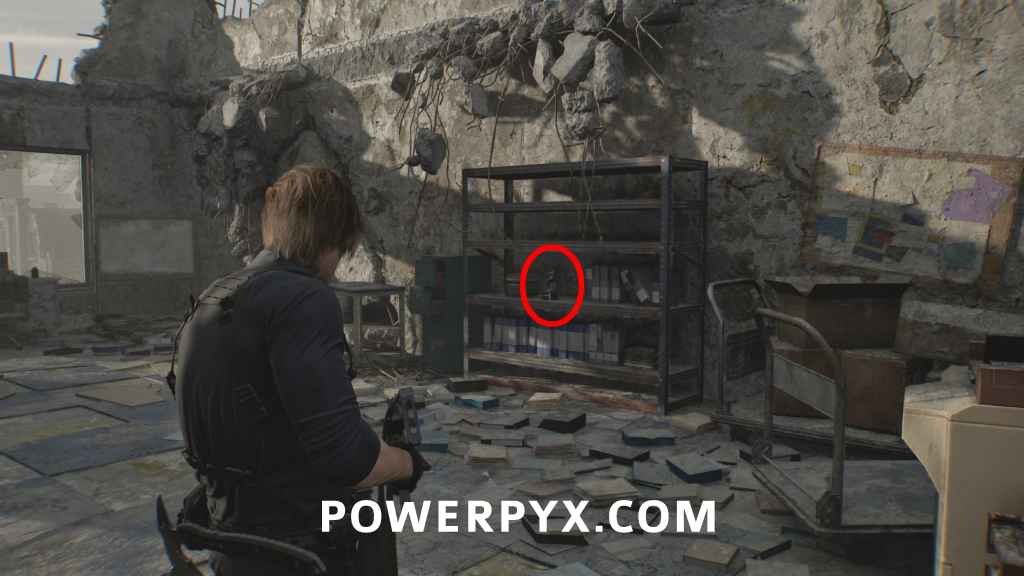
File #52 – Inventory List
After the cutscene where you get the BSAA Container Keys, to the immediate left in the open container (in front of entrance to Cedarbrook Apartments).
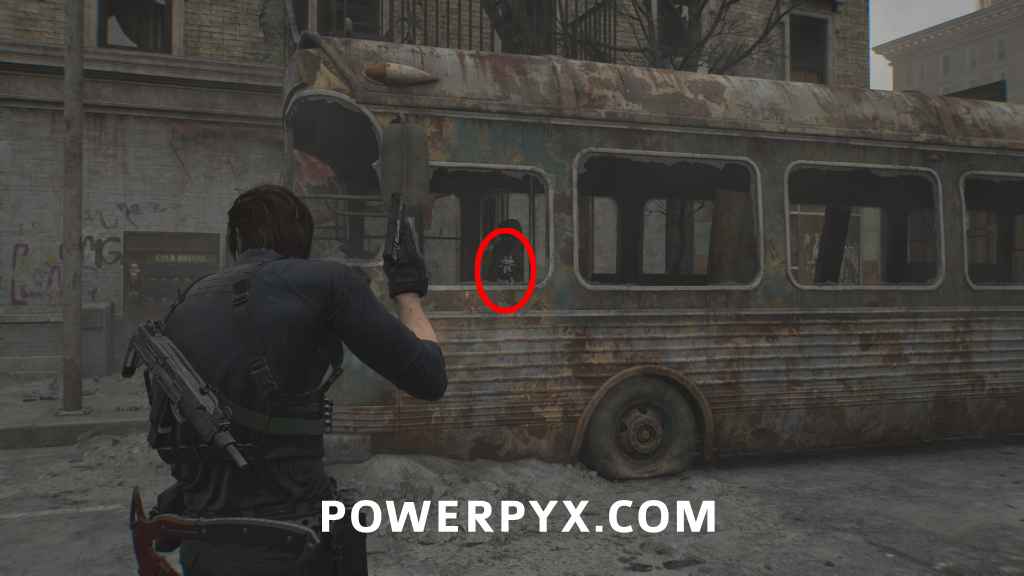
Mr. Raccoon #14
In the driver seat of the bus directly next to the previous file.
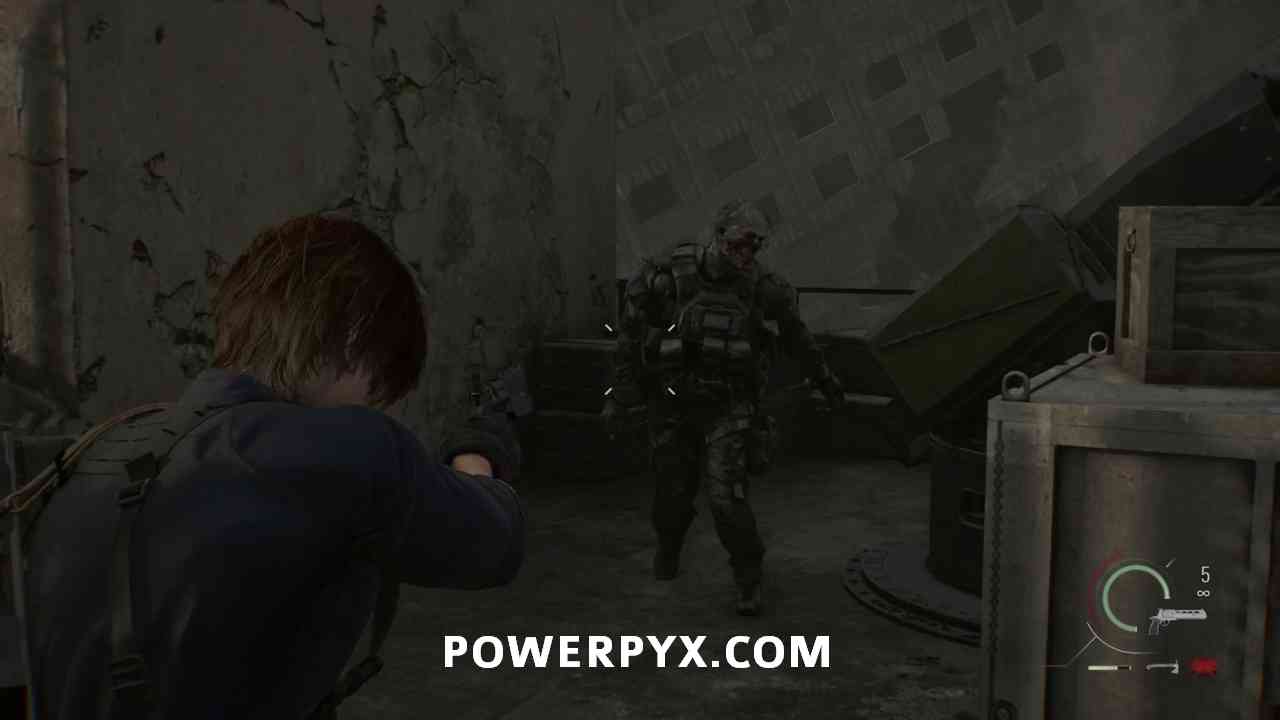
Enter the Cedarbrook apartments and make sure to loot the large grey containers for items. These are found throughout this area and typically have a few pickups of ammo in each. On the upper floor and when you drop down to the lower room you’ll first encounter the BSAA zombies. These are more heavily armoured than anything you’ve encountered previously, sometimes having helmets that will block one headshot. They occasionally also carry machine guns that they’ll spray in an arc across the area, so try to deal with these enemies quickly whenever you see them.
Key Item: Rusty Crank
Cedarbrook Apartments 1F: After dealing with the enemies crank the door on the bottom floor, which will also give you the crank. (You can use it on the apartments upper floor for story progression, and in the Sewage Facility which leads to some consumables) Be careful when cranking as this will start spawning
Mr. Raccoon #15
Cedarbrook Apartments: After getting the crank, go back upstairs in the Apartments and use the crank on the balcony gate. Climb the next ladder, then turn right to enter the upper floor of the apartments. Go right to the stairwell and walk to the back of the floor to find it inside an open fridge (don’t go downstairs).
Go back to the gate and continue up the stairs to the rooftop. In this area you will be attack by zombies that are shooting explosives as you progress across the rooftop. There are 4 total, 2 that you can deal with as you progress then another 2 you want to run up to. Watch for other enemies appearing on the rooftop as you progress.
The first mortar as soon as you reach the rooftop you can shoot by looking toward the red receiver, then down to the left.
Progress around the fence and watch for the second turret shooting at you from over the building, along with the two enemies that will appear from the left side of the building. You can let the mortar take them out, or you run back and forth a bit to bait it to shoot near the other enemies, saving you ammo. You can just see the mortar on the left past the second building.
Now climb up to the next level of rooftop and quickly make your way left, in the direction of the second mortar you shot. Be careful as there will be more enemies on the rooftop, along with the two mortars aiming at you, duck into the building if you need to avoid the mortar shots. The third mortar on the left is where you want to go, as you can then use this one to deal with the fourth mortar and clean up any enemies in the area.
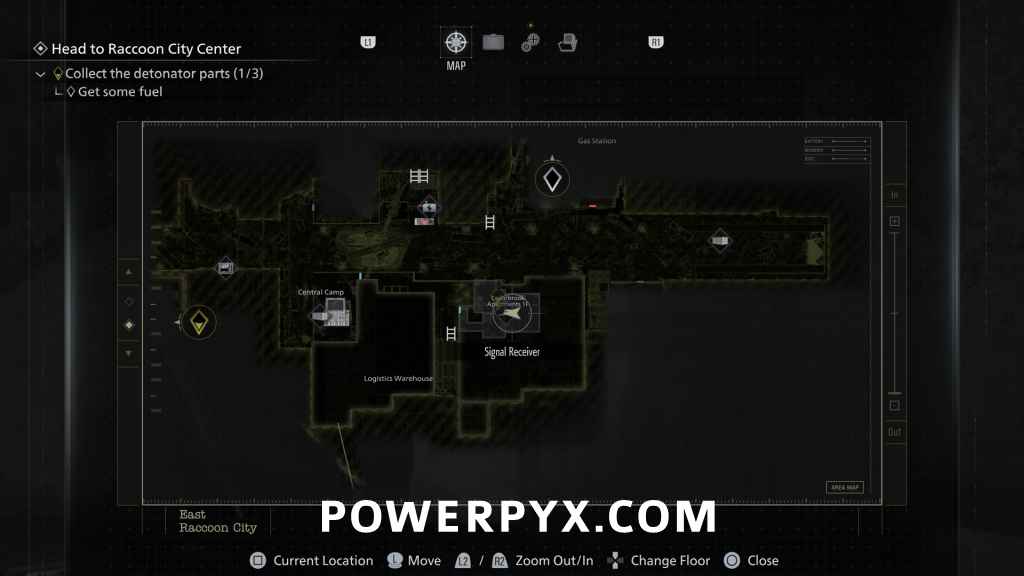
Key Item: Broken Signal Receiver / Distributor & Broken Signal Receiver
Cedarbrook Apartments Roof: After dealing with all the enemies, go across to where the fourth mortar is to find this in a yellow box at the end of the roof. Combine it with the Distributor.
File #53 – Engineer Corps Note
Cedarbrook Apartments Roof: Same place as the previous item, to the right of the yellow crate.
Now to head back, drop down and walk slightly toward the lower rooftop area where you just came from. As soon as you hear and see enemies spawn run back over to the third mortar and use it to deal with the enemies that are running onto the rooftop to save ammo. All but 2 of them should be alerted to you as soon as they spawn, with the remaining two being near the stairs up from the lower rooftop. Then make your way back down to street level.
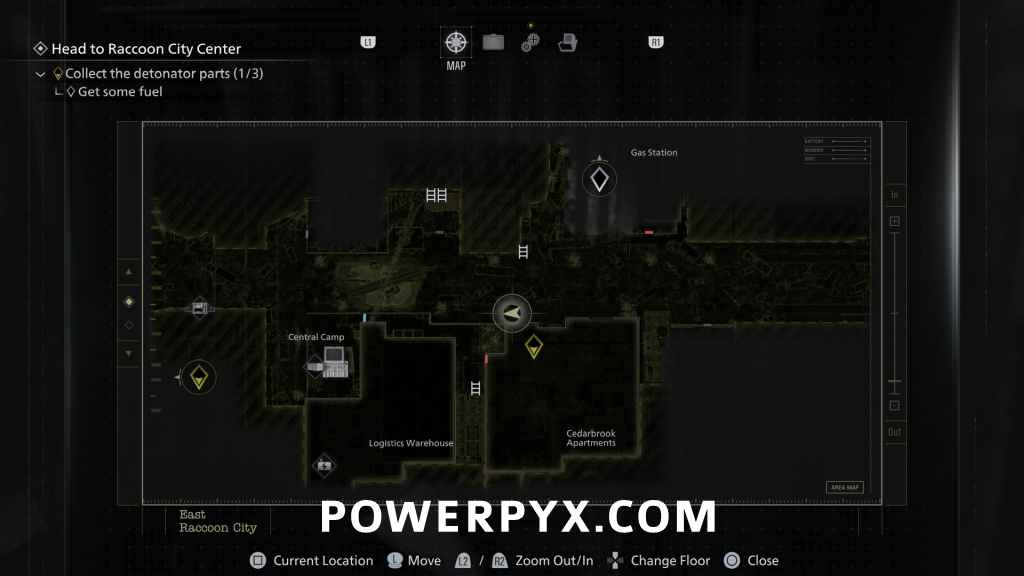
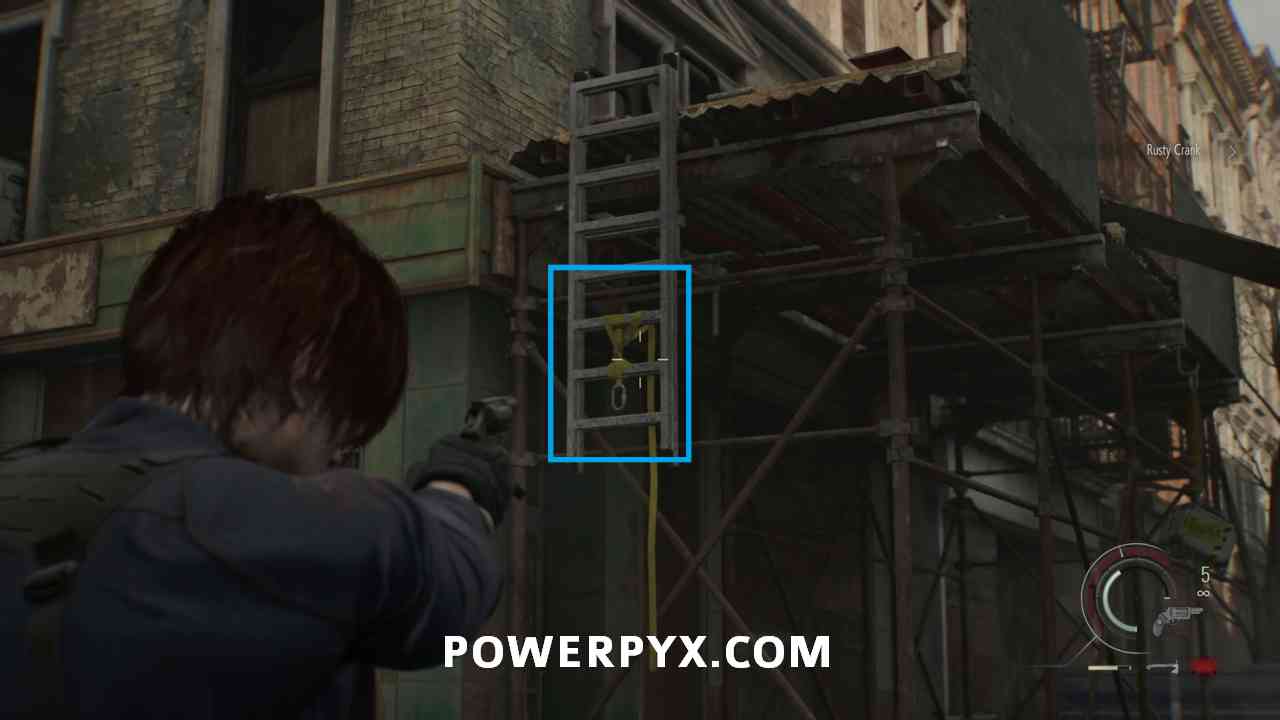
Get Some Fuel
Opposite the entrance to the apartments shoot the straps on the ladder to drop it, then climb up and walk across the platforms to drop into the gas station area.
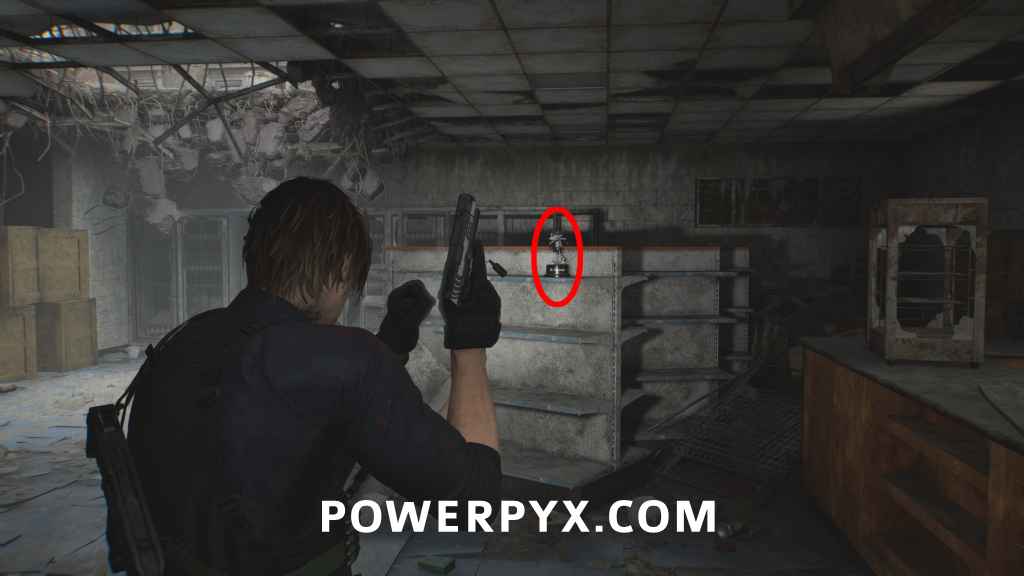
Mr. Raccoon #16
Shoot down the ladder on the street opposite the entrance to Cedarbrook Apartments, climb it to drop into the gas station. You find this inside the Gas Station, on a metal shelf.
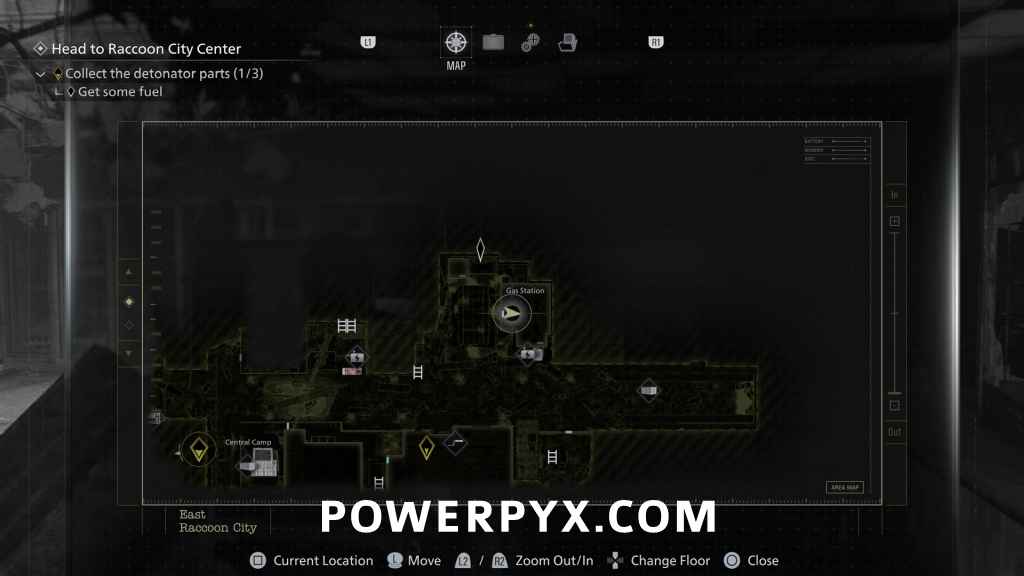
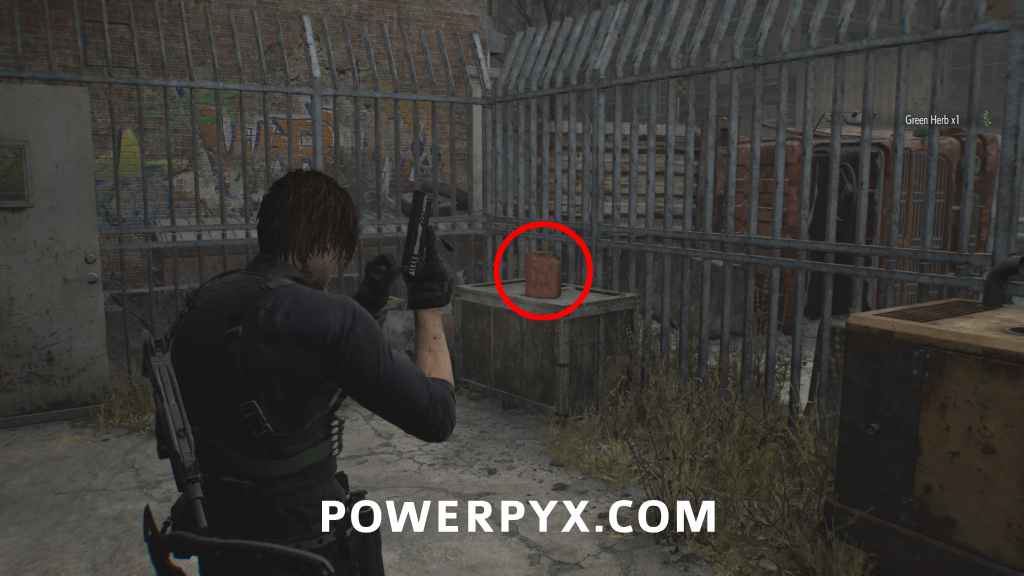
Key Item: Gas Can
Go through the Gas Station to find it near the gate locked by a generator.

After you pick up the gas can and try to go back through the building you will be attacked by an enemy with a chainsaw. Defeat them to have them drop it, then you can mostly stand in the entrance to the gas station and shoot at enemies coming toward you, as they will all be attracted to the chainsaw on the ground inside the gas station. The main enemy to look out for is another chainsaw enemy that will appear from the wall of vehicles opposite the gas station entrance after killing a few of the other enemies. This enemy has an armored head so normal headshots won’t deal a lot of damage to them. You can try fighting them with the chainsaw if you want, or use any explosives you’ve saved up to deal with them.
After all the enemies are dealt with, go to the north side of the gas station where you can interact with the large tank to fill up the Gas Can, then go back to where you originally picked it up and you can fill the generator to power the gate and open it, letting you return to the street.
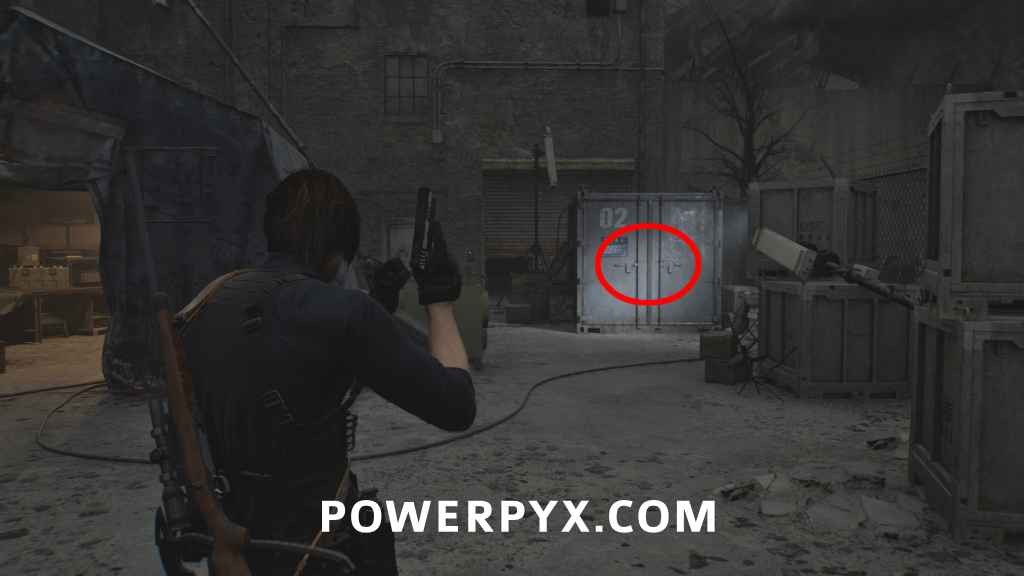
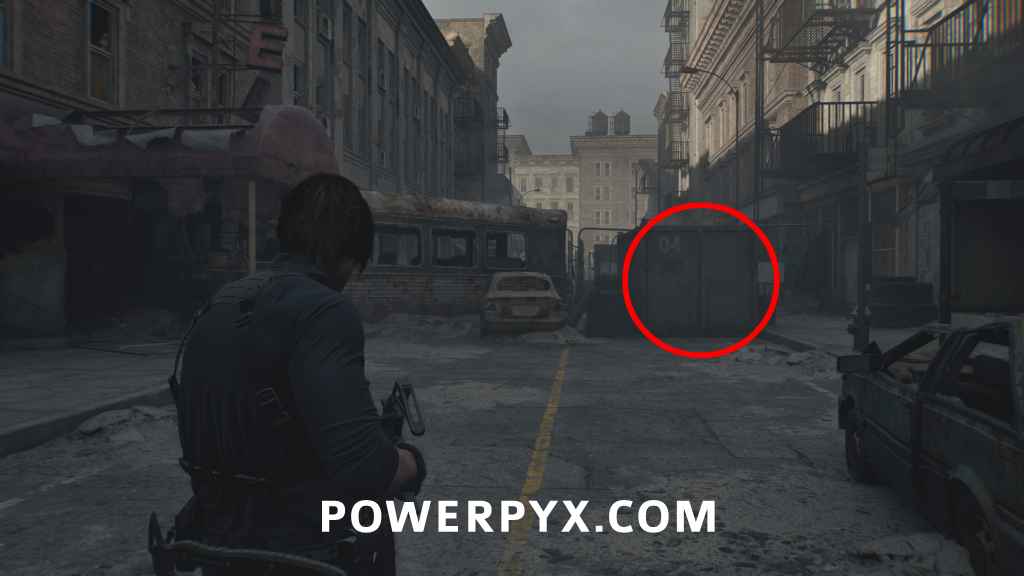
BSAA Container #1 + Weapon: Marksman 1A (Sniper)
At the east end of the main road between Gas Station and Apartments. At the end of the road climb up behind the truck to reach the big blue container. Use the BSAA Container Keys you got from the cutscene. The 3 containers get marked on the map when near them. (If the rifle doesn’t fit in your inventory you can still buy it at later supply boxes)
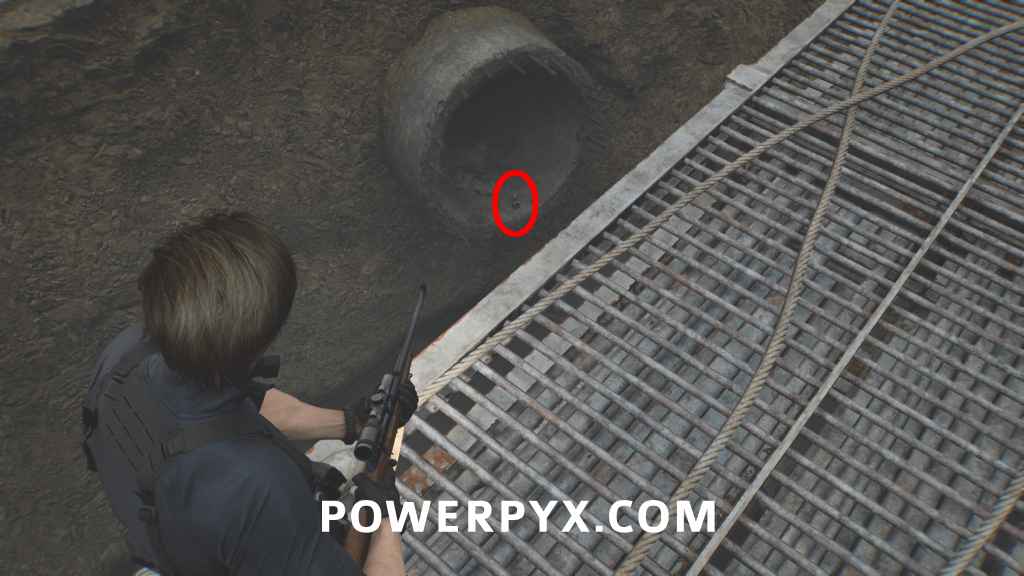
Mr. Raccoon #17
Go to the west end of the main road. At the end of the road is a big crane, flip the switch on it to make a shortcut back to the Central Camp. While going over the shortcut look down and to the left to see this in open sewage pipe.
BSAA Container #2 + Key Item: Repair Kit
Central Camp: Backtrack to Central Camp and open the big blue container there in the corner next to the tent. Inside you find a Repair Kit, use it on the Distributor & Broken Signal Receiver.
Mr. Raccoon #18
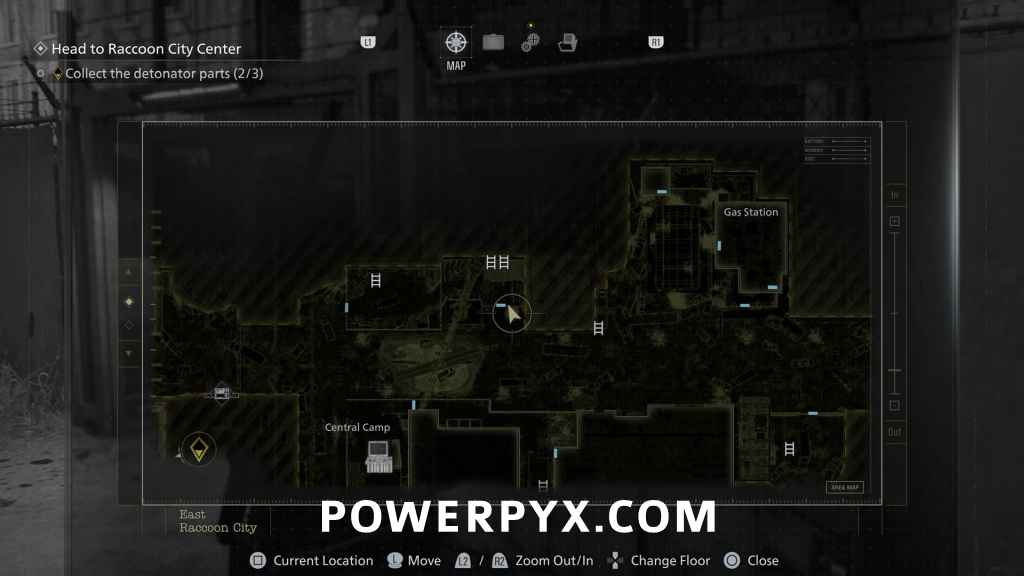
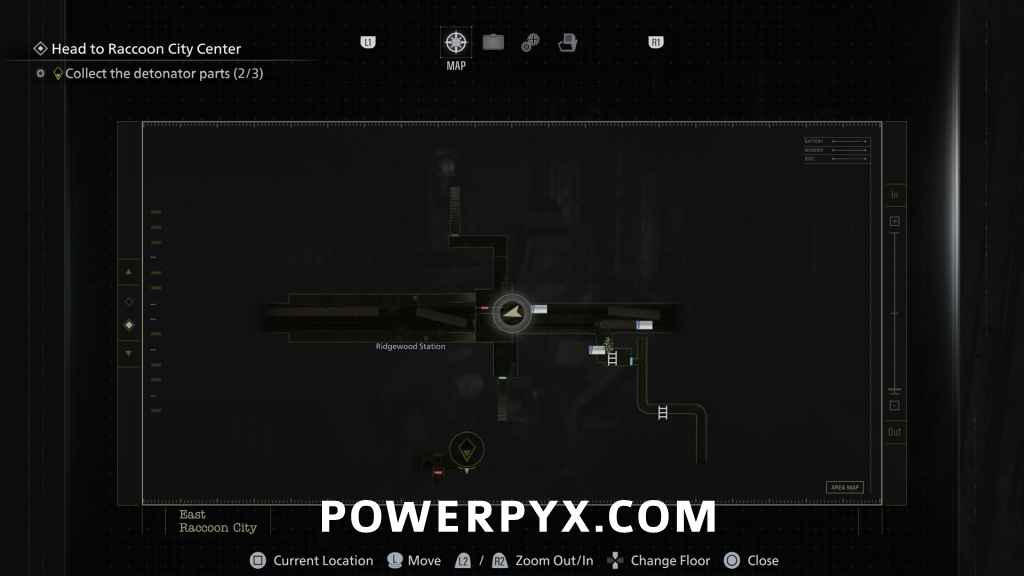
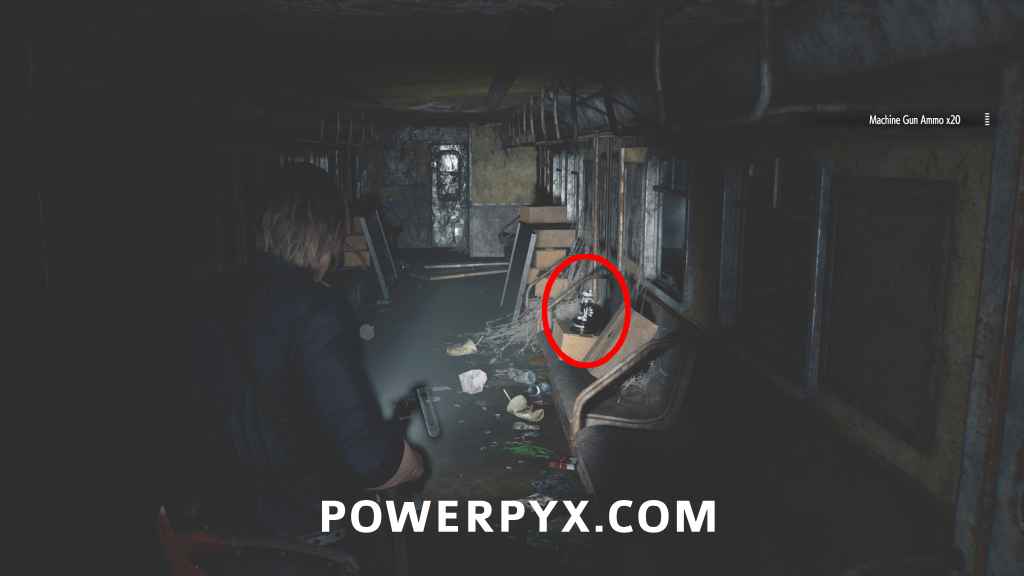
Ridgewood Station: On the main road between Gas Station & Central Camp, use the fuel can on the generator at the big crane. Go through the now-open gate at the generator until you reach a ladder that leads underground. Follow the path through the underground and you will automatically reach a train compartment where the Raccoon sits on a passenger seat. This path also leads back to the start of Raccoon City where the last BSAA Container is. (First two images show the generator entry point, last two images show the Raccoon)

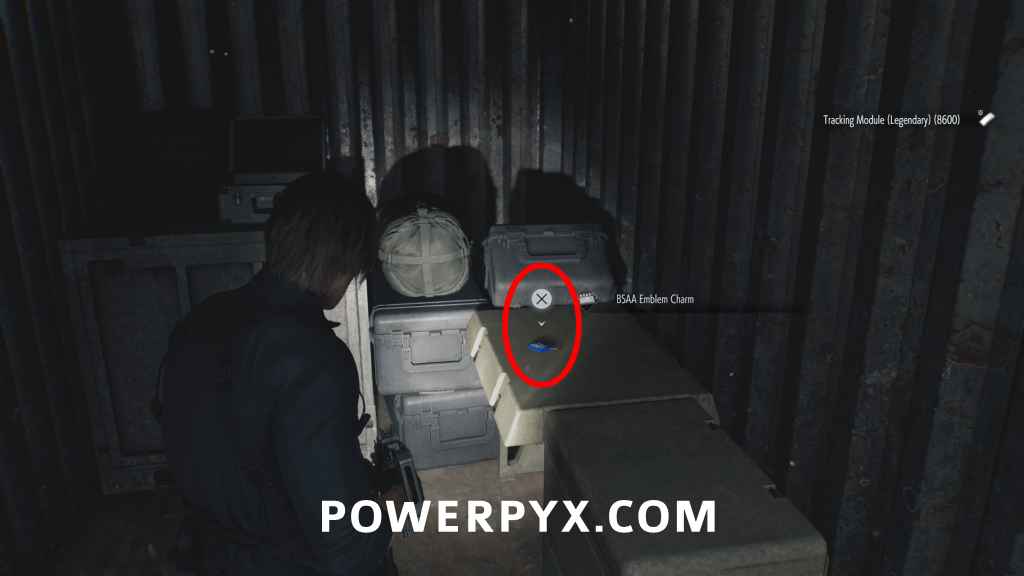
BSAA Container #3 + Charm: BSAA Emblem Charm (increases firepower only when the scope is not equipped)
From the previous location, keep going through Ridgewood Station until you exit back to where you first started Raccoon City. Open the container outside The Applegate Hotel, contains a charm.
Mr. Raccoon #19
Backtrack to Central Camp, go back through Ridgewood Station and after passing the first revolving door keep to the left to immediately go through another revolving door that brings you back to Central Camp. Use the elevator in Central Camp to reach the roof and climb down the ladder on the right. This leads to a generator, fill it with gas and press the red button, then use the zipline to reach Willis Tower. From where you land, go upstairs, turn right to follow the sofas into a room with the Raccoon on a shelf.
Now to progress through the rest of the tower, you need to shoot the wooden boards blocking the doors which will open paths for you to walk or jump across. Once you jump into the elevator shaft, stay on the left side until the one on the right drops, then move to the right to reach the end of the path.
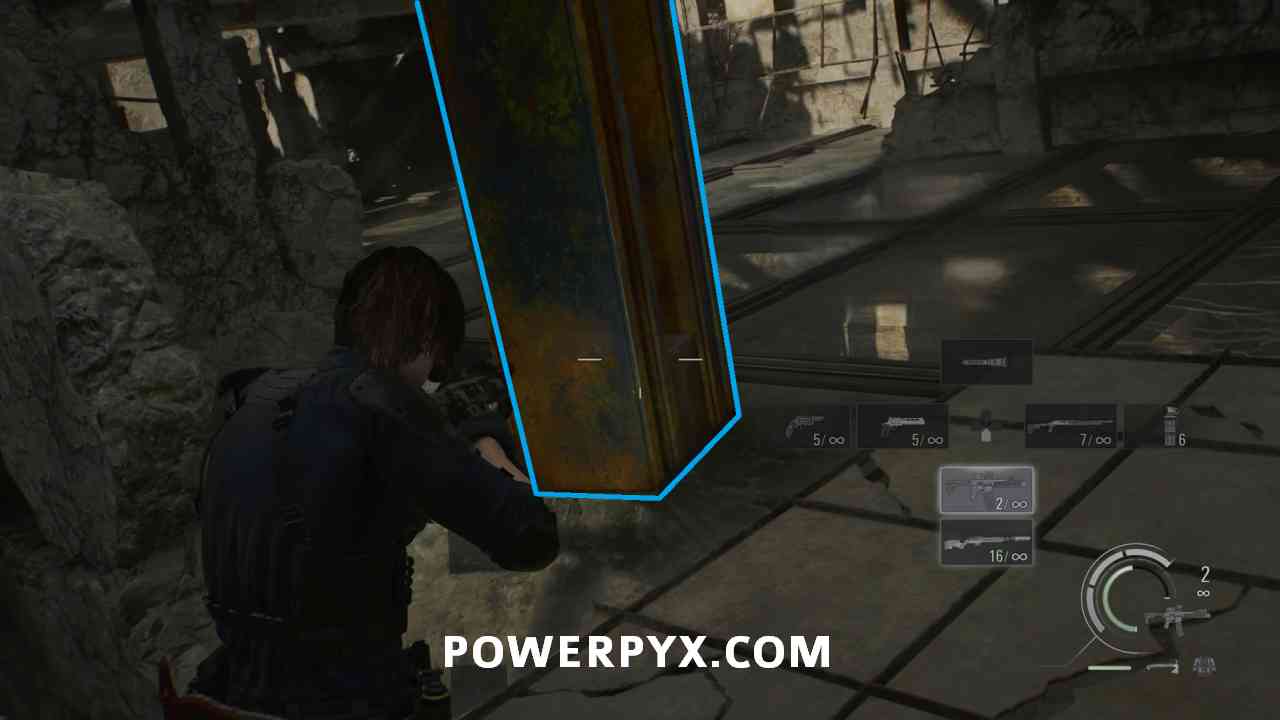
When you drop onto the area of glass windows, you can shoot the windows under the enemies to drop them and not need to deal with them. Two bullets through each window will break them, but but careful you don’t shoot anything to close to yourself. After going through the breakable door immediately turn right, carefully dropping the enemies in front, then turn to the left and shoot the glass underneath the metal pillar to drop it and create a path upward. Walk up the ramp and watch for more zombies above you. There will be a gun zombie on the platform above, one on the platform you are on, along with a zombie carrying a grenade that will walk toward you. Deal with them all then follow the path to the rooftop across.
Key Item: Relay / Detonator
At the end of Willis Tower. Combine with the other parts to get finished Detonator.
Destroy the Gate
Now that you have all the parts, you need to get back down to ground level. The door on the left leads to a save room and a box, then keep following the path to the right to progress along the rooftop. Your goal is to reach the two cranks on the red platform to get it working, then ride it down. To reach to the first one, you can drop the crate on the rooftop and climb it to the upper level, avoiding a bunch of the enemies and sliding down the ramp from the top level to the first crank.
After the first crank you can go through the door on the left back to the save room, then progress through the next area. Here there are a bunch of enemies you will need to clean up to get through, including a couple Blisterheads and another armored chainsaw enemy. You can stay farther back and take them out as they appear, they don’t approach you too quickly. Use the explosive on the upper level to deal a lot of damage to the chainsaw enemy when it walks by, which will make cleaning it up easier. You can then follow the path to reach the other crank, then activate the elevator. It will move slowly down, and enemies will start jumping on the elevator. You can stand against the button facing the opposite side and the zombies will all drop in front of you, allowing you to shoot them once each with the shotgun to know them off.
After the elevator descends enough you will be dropped to a lower area, run forward to the drain pipe and open the door to reach the street near the gate and the BSAA tent. You can still explore most of this area if you have any items you wanted to pick up, then when you are ready to progress interact with the gate to place the bomb.
Trophy: Road Rage
During the motorcycle section, shoot Victor to interrupt one of his attacks. He will have a red arrow over his head when he’s about to shoot the RPG at you, that’s when you need to shoot him. If you miss the trophy, quickly reload one of the last autosaves. The earliest opportunity is immediately when you see Victor on his bike for the second time.
For the rest of the bike section shoot any of the monsters that appear, then when you are first blocked by a fence and need to shoot an explosive to break it you will need to do this a few more times in a row while progressing.

NEXT: Raccoon City – Raccoon City Center
For all areas refer to Resident Evil Requiem Walkthrough.
Leave a Reply