
Here you can find a full Clive Barker’s Hellraiser: Revival 100% Walkthrough including all Collectibles, Trophies and Achievements. By following this you will earn Platinum / 1000 Gamerscore in a single playthrough.
A 100% Completion playthrough will take around 8-10 hours. The trophy-related Collectibles are 5 Firearms, 12 Crafting Recipes, 5 Pain Pillars, 5 Suffering Pillars.
Notes/Documents are not required for any trophies, they only provide extra lore. Everything is missable because there’s no Chapter Select. Once you leave an area you can’t go back. Be sure to pick up all items at the first opportunity before moving to the next area.
Headings in the guide are what is displayed in the Objectives menu, which is the only way to determine your current place within the story (there are no traditional “Chapters”). You can check these in that menu at any time, and the “higher-level” objective is listed on your save file as well.
Find Sunny
We Have Such Sights to Show You  – Enter the Labyrinth
Awarded when you enter the Labyrinth area through the wall. Follow the path through the Labyrinth until the end. There are a few looping areas, but the game eventually pushes you through the correct path. When you reach the area that looks like a real room, you need to turn around and go back into the dark hallway to progress.
What’s in the Box?! – Use the Genesis Configuration
This trophy unlocks at the end of the Labyrinth area when you are prompted to use the Genesis Configuration to move fire between two pillars, then move some blocks around to reach the end of the area.
Not Leaving Us so Soon, Are You? – Escape the Labyrinth
The Box. You Opened it. We Came – Complete the prologue
These two trophies unlock both in a row once you complete the first Labyrinth area.
Escape the Cult
Free Yourself
When you are stuck in the chair, look down at your arm and first interact with the nail in your hand, then the hook in your arm, then the stitches in your other arm.
A Waste of Good Suffering – Escape confinement
Crafting Recipe: Bandage 1/12
Available from the start of the game – 3 Cloth + 1 Chemicals
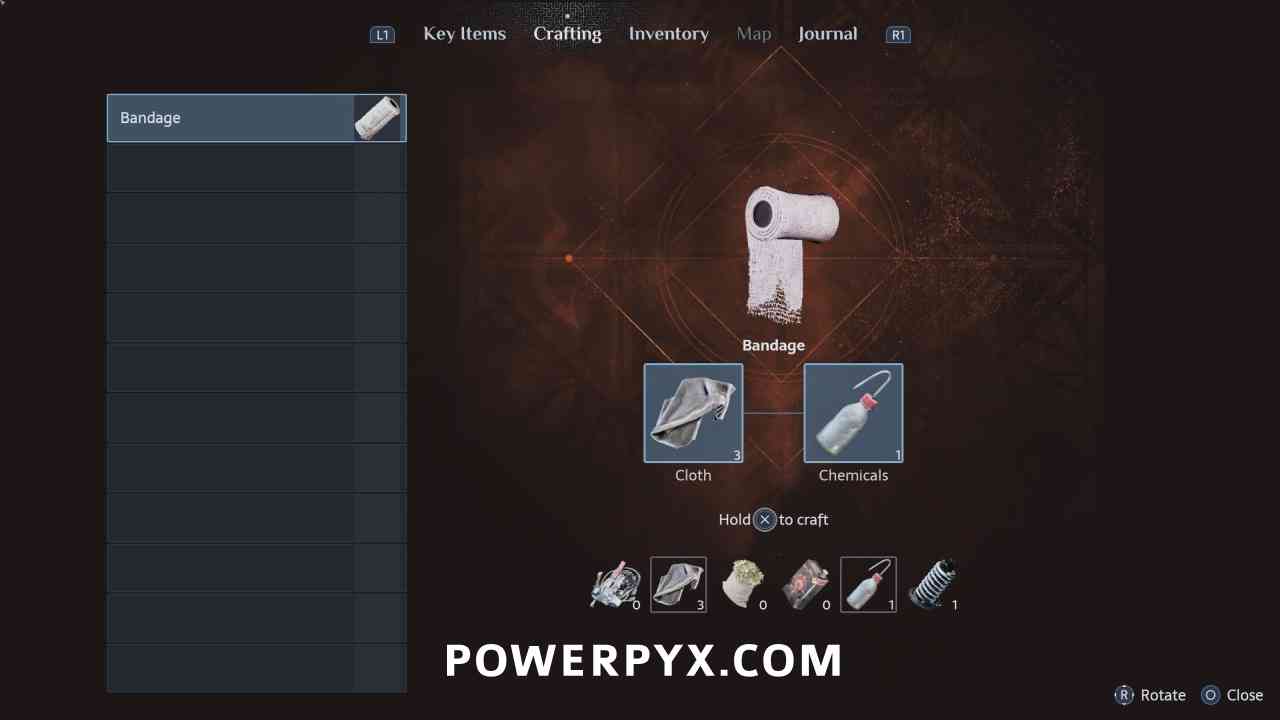
You can start collecting crafting materials as you progress. Materials that you find throughout the game are random, so we can’t specify exactly when/where to create items. For example if you make a save, break a crate, then reload the save the crate will have different items in it.
The game does not have any tracking as to which Crafting Recipes you have made, so you should keep track of this yourself as there is a limited amount of crafting materials throughout the game, so you don’t want to waste them making some of the less useful and more involved recipes multiple times.
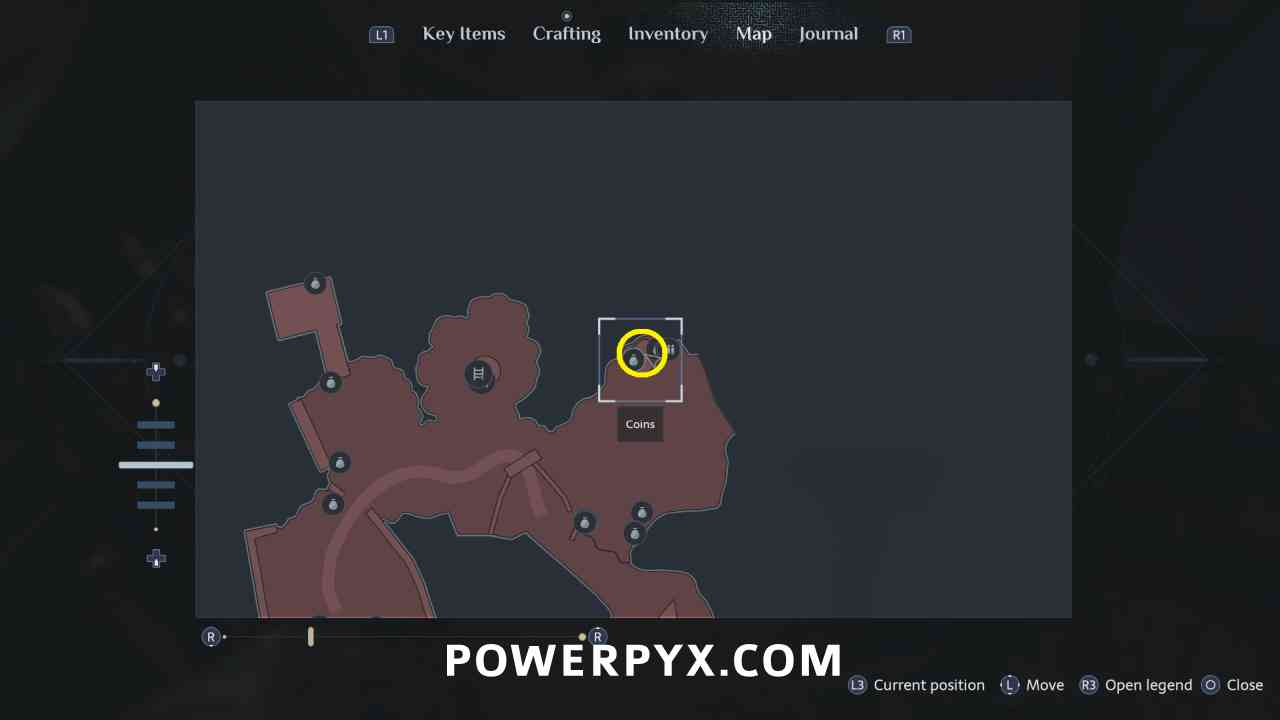
Look around and collect all coins as you go, it is not possible to buy every possible item from the shop and there is no way to farm coins, so you need as many as possible as you progress.
Collecting notes is not required, you don’t gain anything for collecting them, only if you personally want to read them.
Unlock the Door
In the first area go to doors at both ends of the hallway and pull the items from the bodies, then use them on the door in the middle.
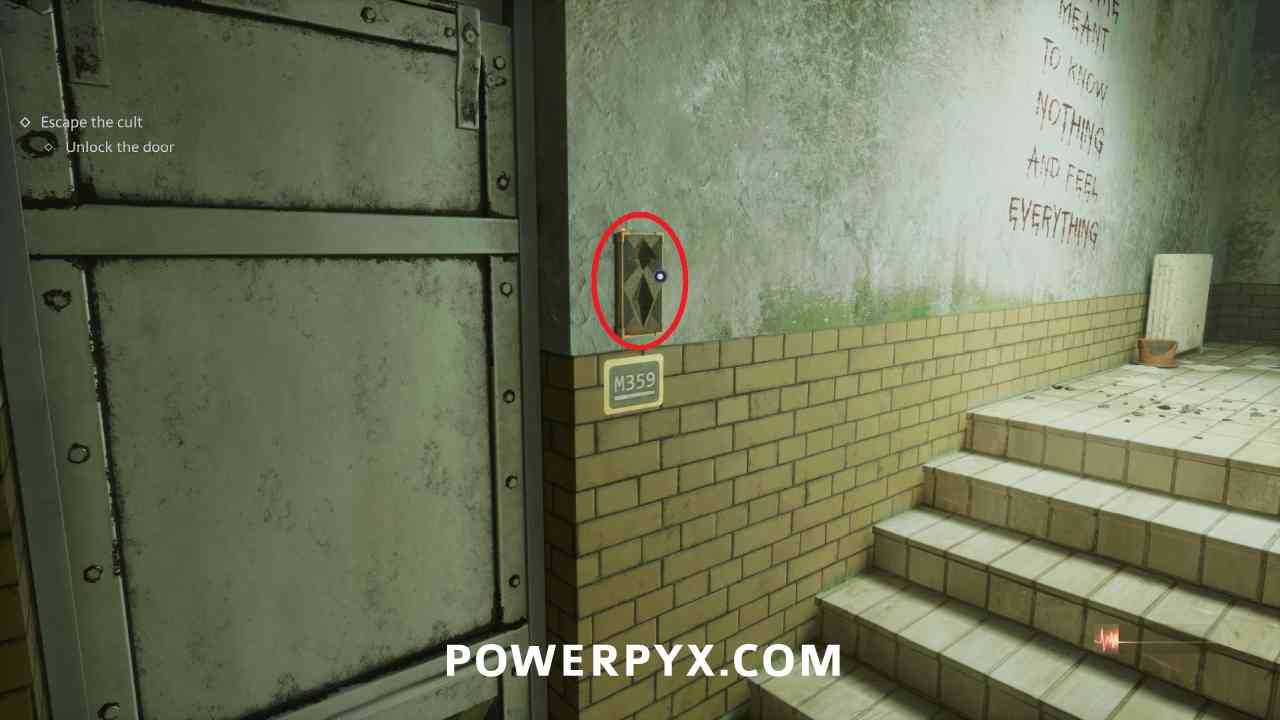
Key Item: Tongue Key
When you reach the office with the door with a face on it, you need to interact with the skull on the desk with the nails in it. Face the skull away from you, then press the nail on the left > back > right > top to obtain the key.
Sneak Past Bruno/Find the Keycard
To sneak past Bruno, crouch while following the path around the room. When he starts walking around the woman in the middle of the room, grab the keycard on the left of the table she is strapped to, then go to the back left corner of the room and use the keycard to get through the door.
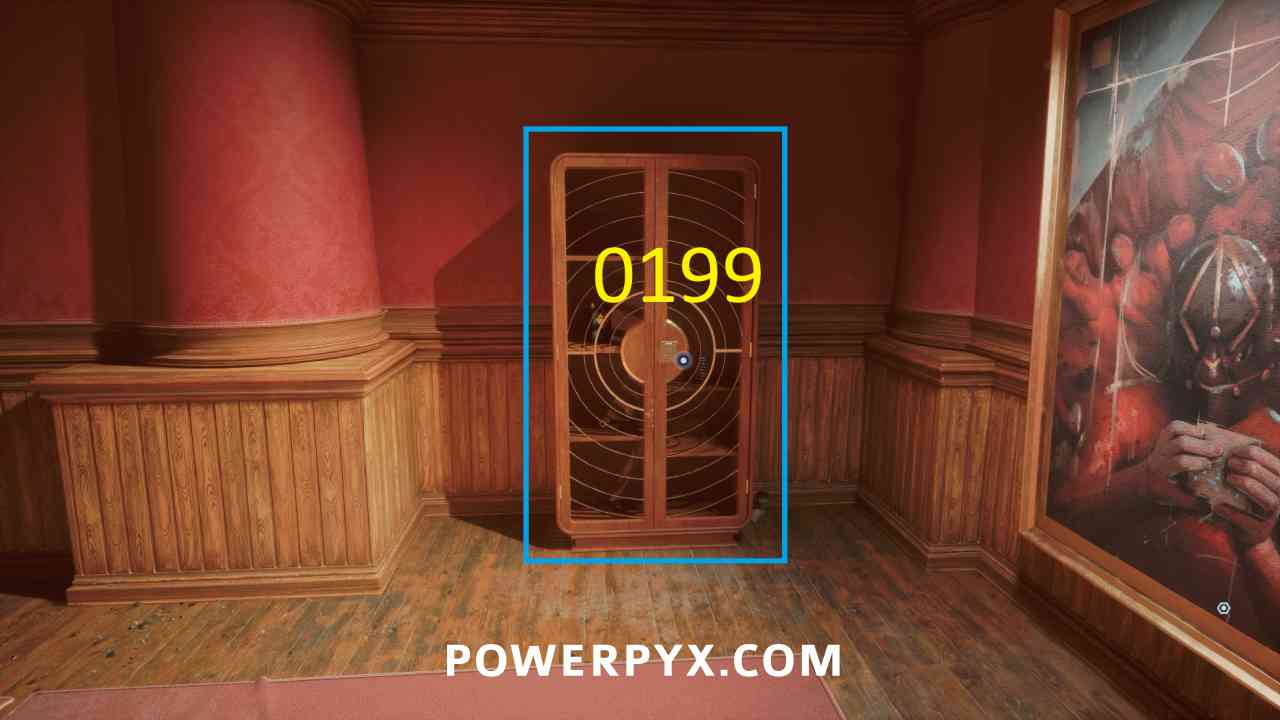
Keypad: 0199 / 9901
Cabinet in the hallway immediately after sneaking past Bruno. Code is the numbers on the plaques beside two of the paintings in the hallway. Try 0199 and it it doesn’t work try 9901.
Outrun the Chatterer
No Time for Argument – Escape from the Chatterer
The first Chatterer chase happens immediately after the save point in the hallway when you try to open the door. These chase sections require you to run through Labyrinth areas while avoiding the Chatterer. They will appear beside and in front of you, and you just need to keep running down paths where they aren’t present to progress out of the area.
Wetwork – Stealth kill 10 cultists without alerting anyone
In the next area you receive the knife, which you can use to stealth kill enemies. You should aim to do this whenever possible, against both Cultists and zombie enemies (called Unworthy in-game). Normal melee weapons break after use, but the knife doesn’t and is what is used in stealth kills, so you should typically always try for stealth kills to save melee weapons and ammo for when needed.
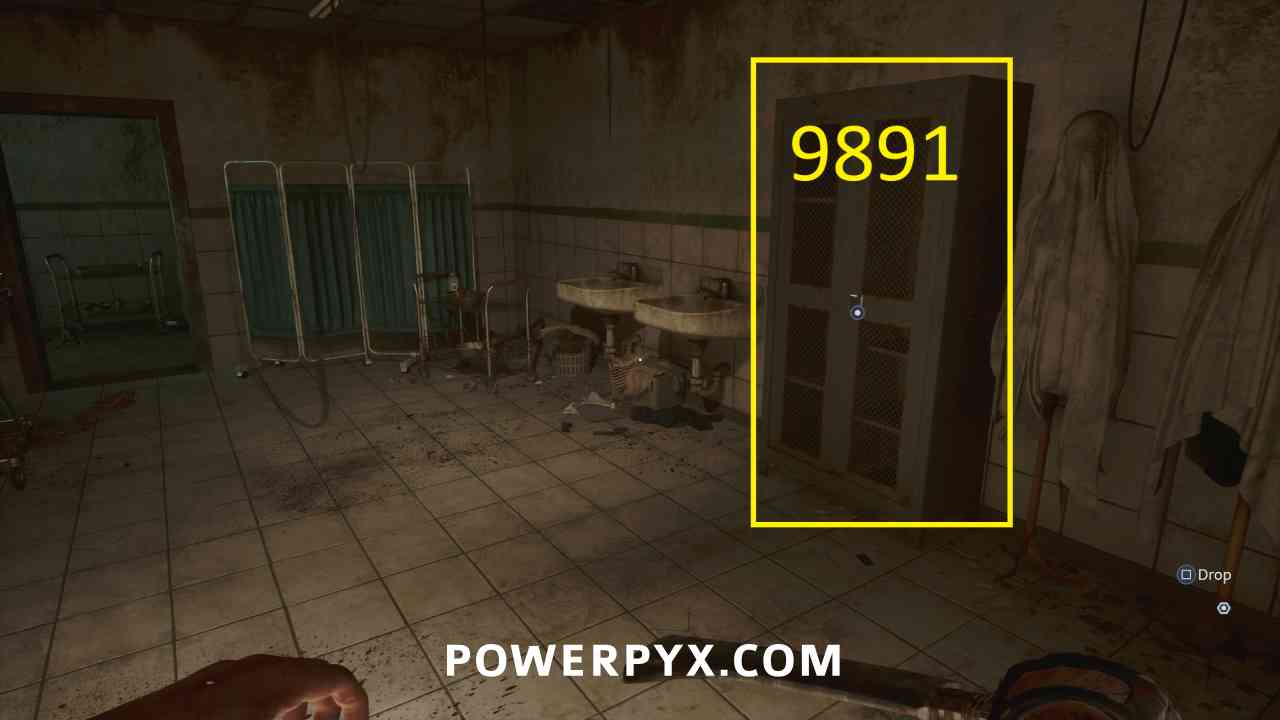
Keypad: 9891
Cabinet in the area just after the room full of bookshelves with the two enemies. Code is the numbers tattooed on the back of the body in the tub nearby.
Firearm: Pistol 1/5
Automatically obtained after picking up the flashlight and resetting the power to open the metal door.
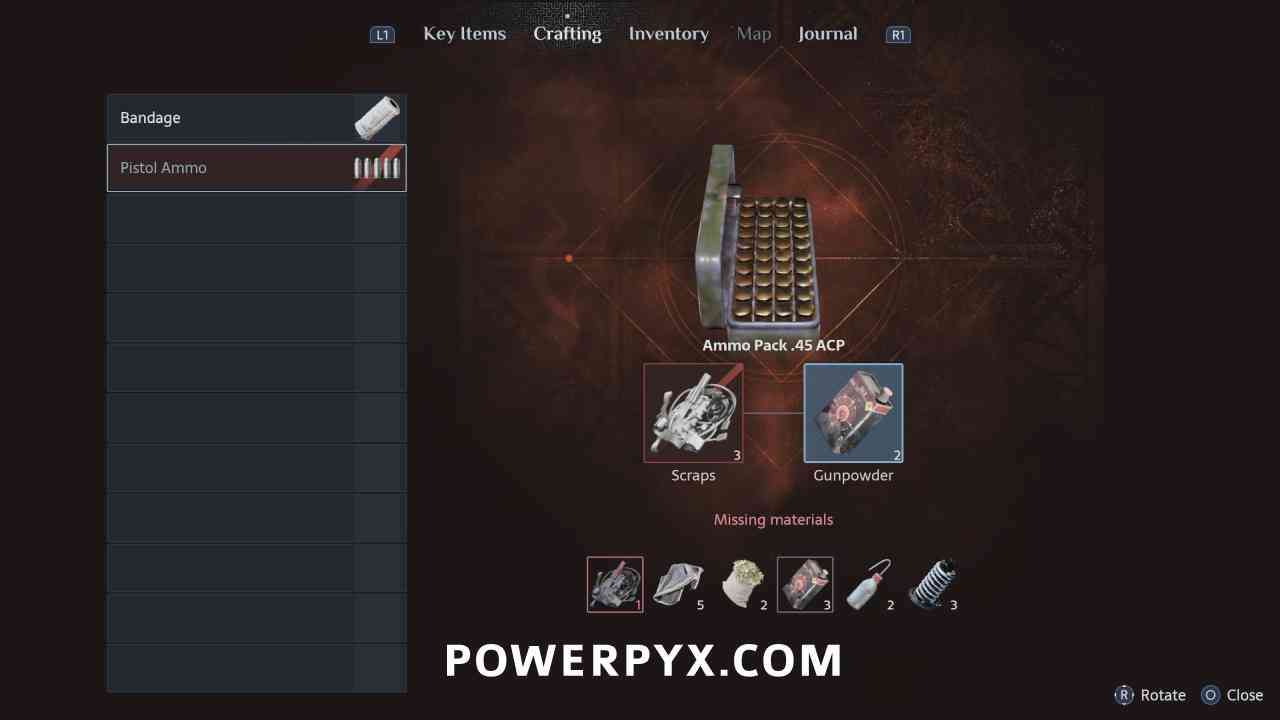
Crafting Recipe: Pistol Ammo
Automatically obtained at the same time as the Pistol – 3 Scraps + 2 Gunpowder
Inventory Upgrade
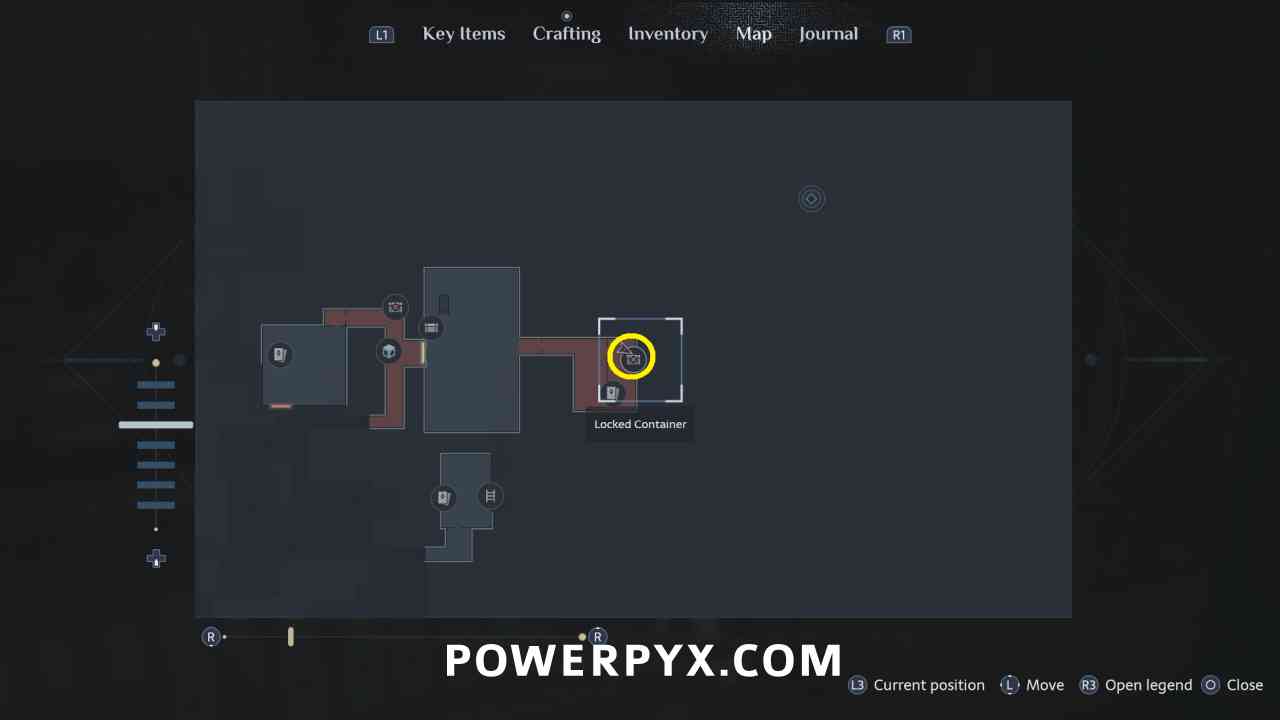
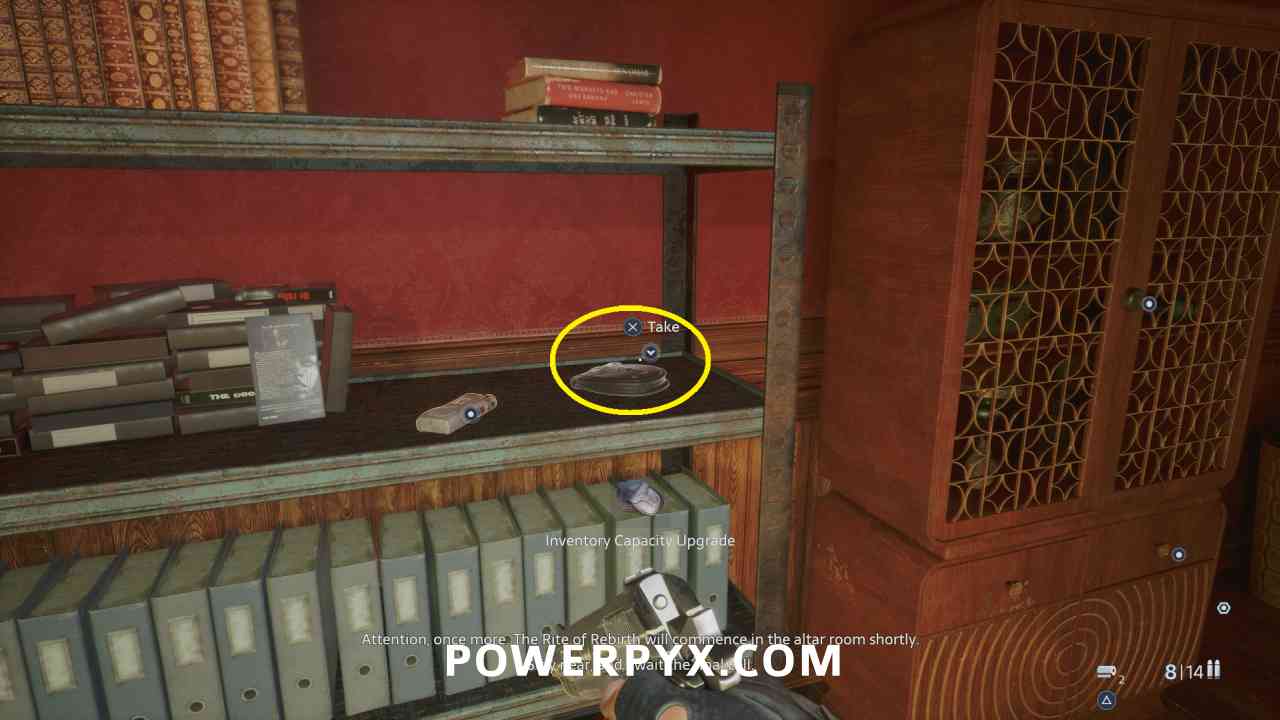
When you reach the large room with the statue, to the east in the security office on a shelf beside a locked cabinet.
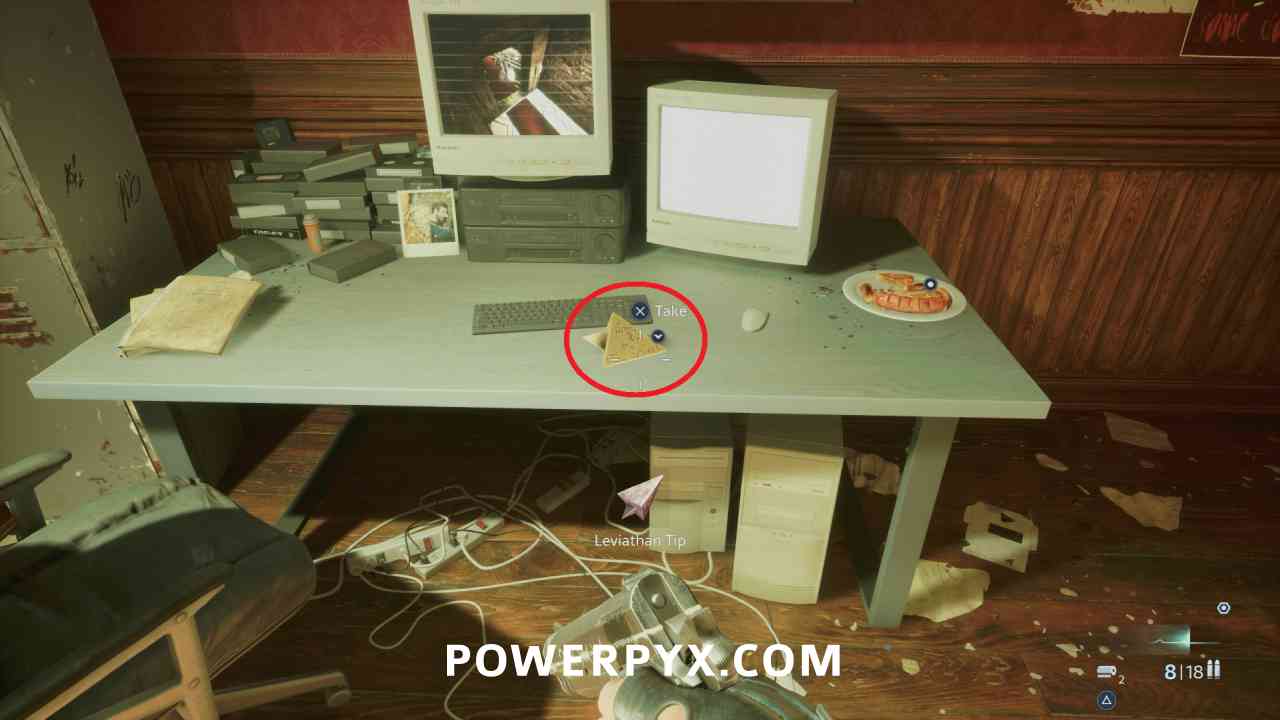
Key Item: Leviathan Tip
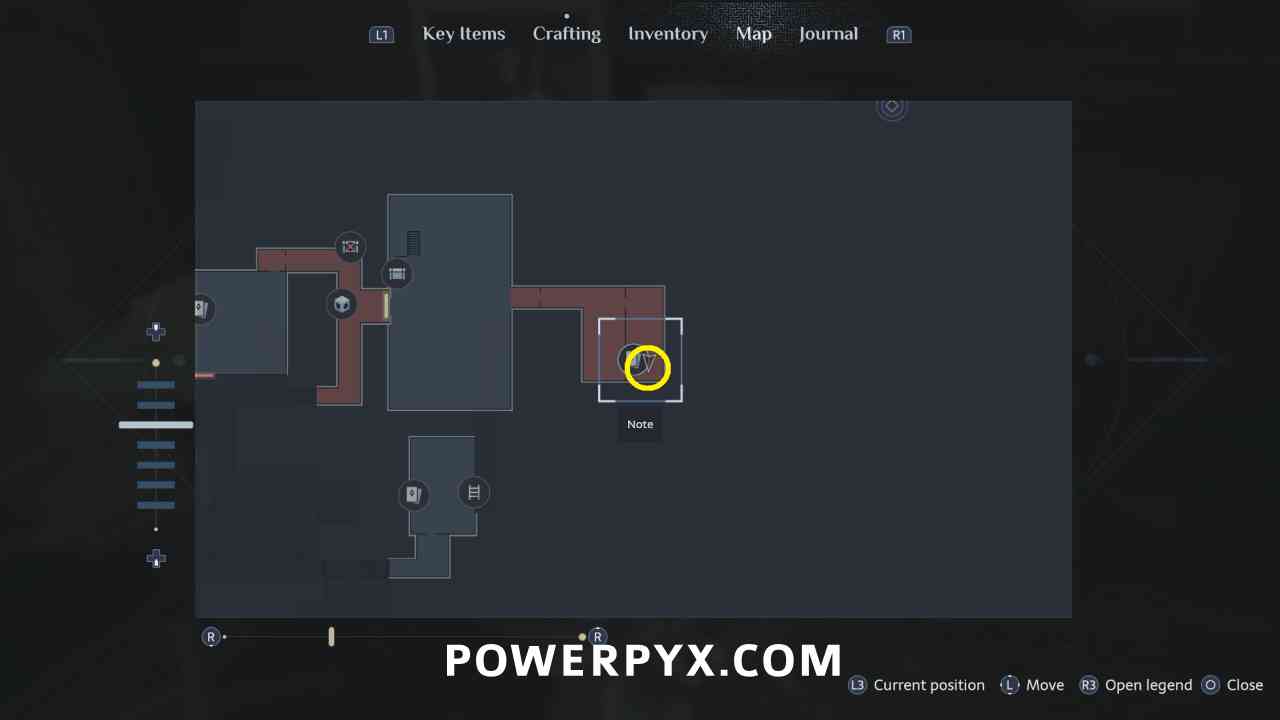
In the security office on a desk.
Key Item: S&M Duckie
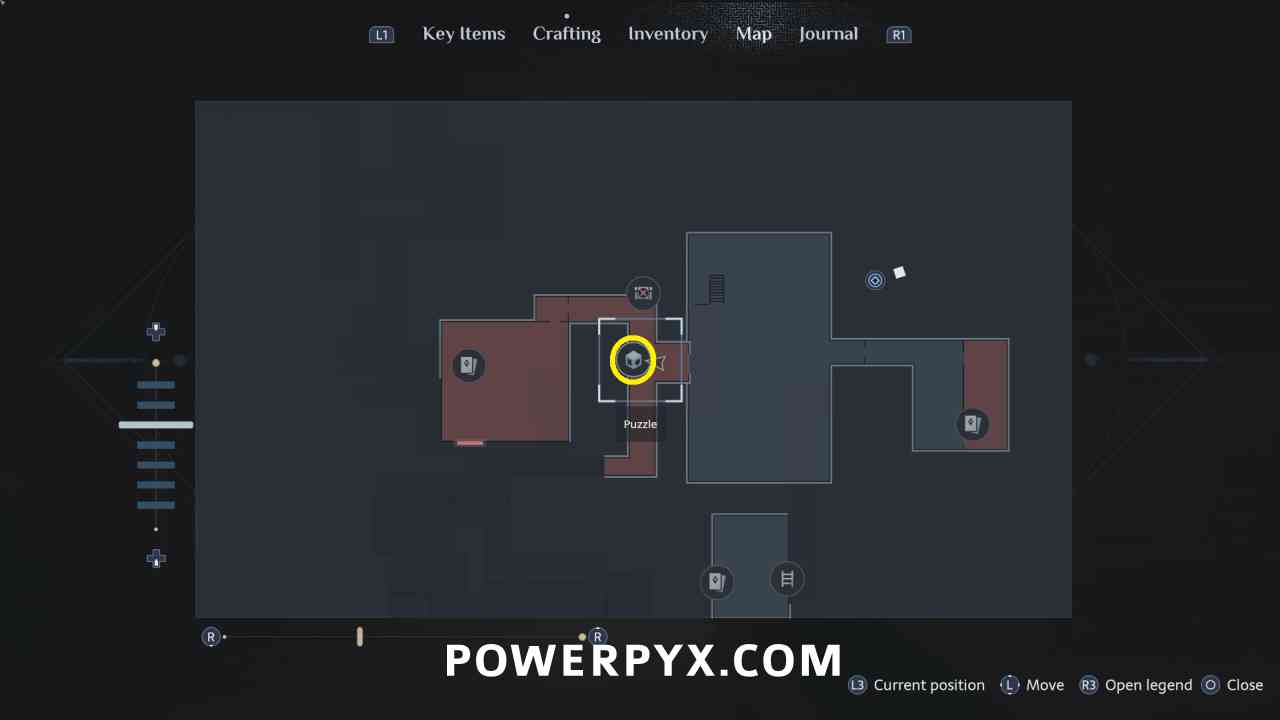
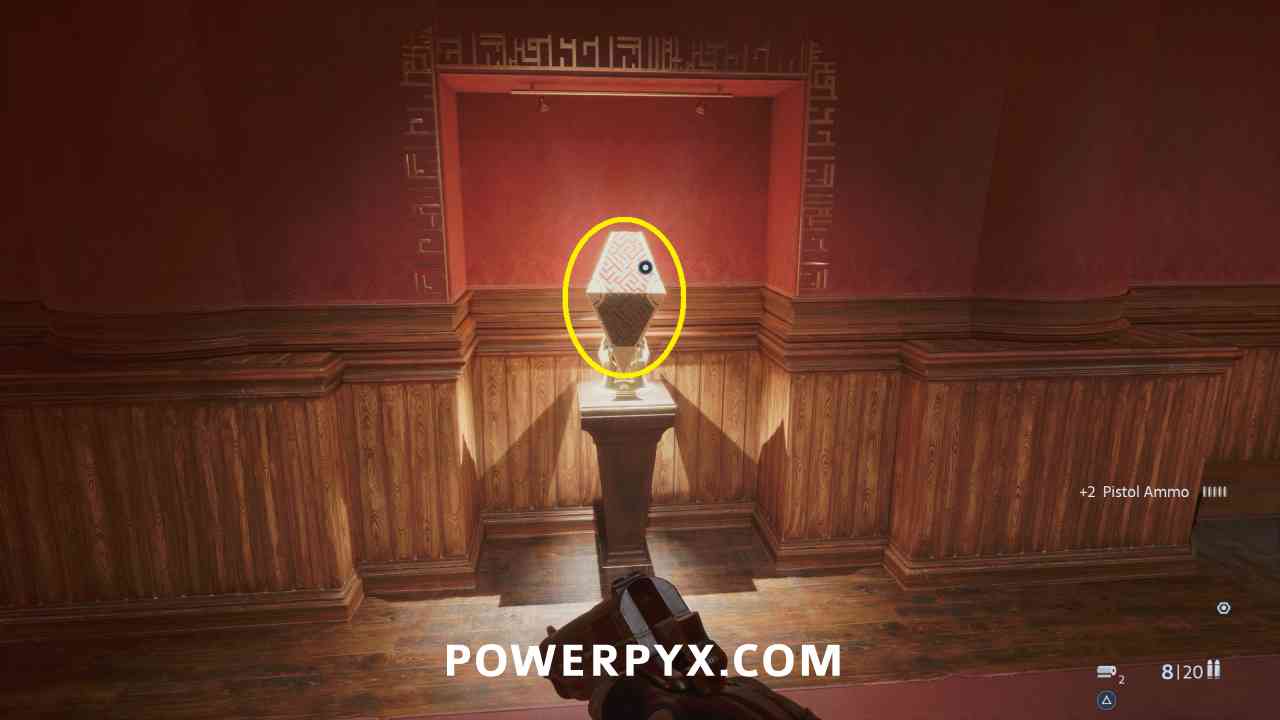
Go through the door on the west side of the large room to reach the hallway that you were in previously. Interact with the diamond statue and place the Leviathan Tip on top, spin the three sections so that the pattern matches together to obtain the Duckie.
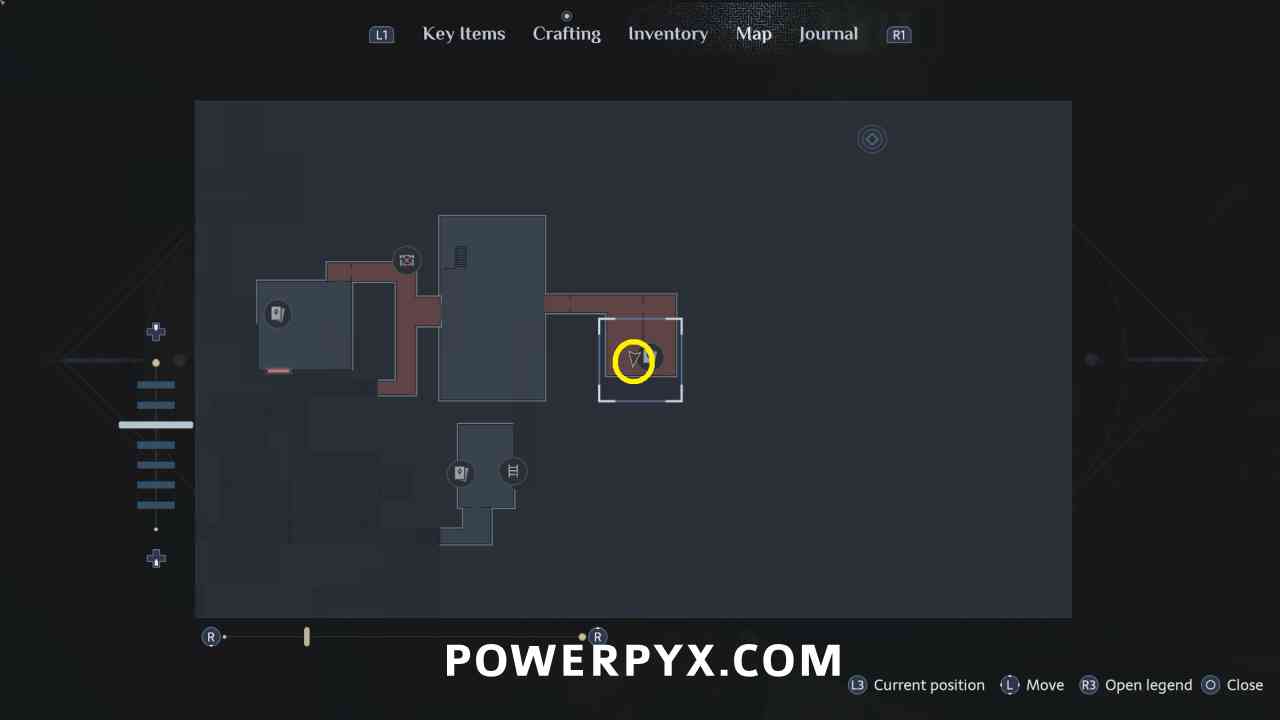
Go back to the room near the security office and use the S&M Duckie on the keypad to open the door.
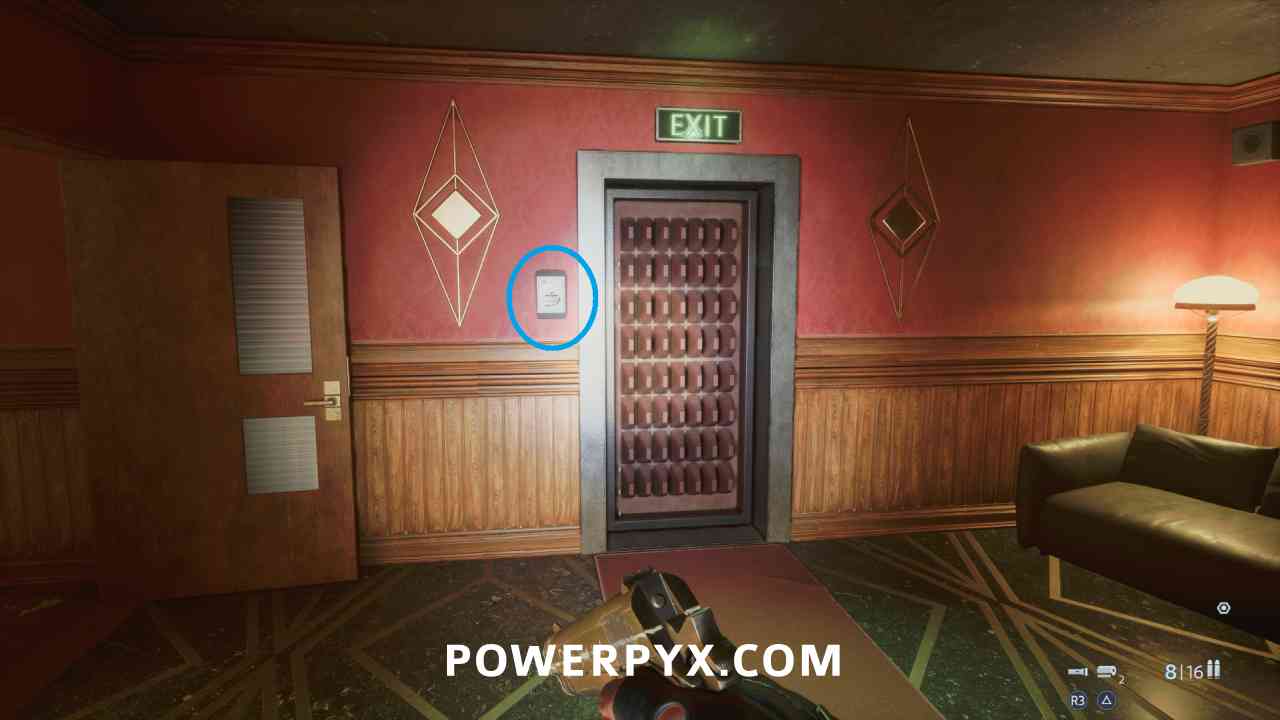
Enter the VIP Area/Appease the Girl to Get the VIP Token
In the club area go to the room in the southeast corner to speak to the girl in the white outfit on the bed. She wants you to get some items before she’ll give you the key to the VIP room.
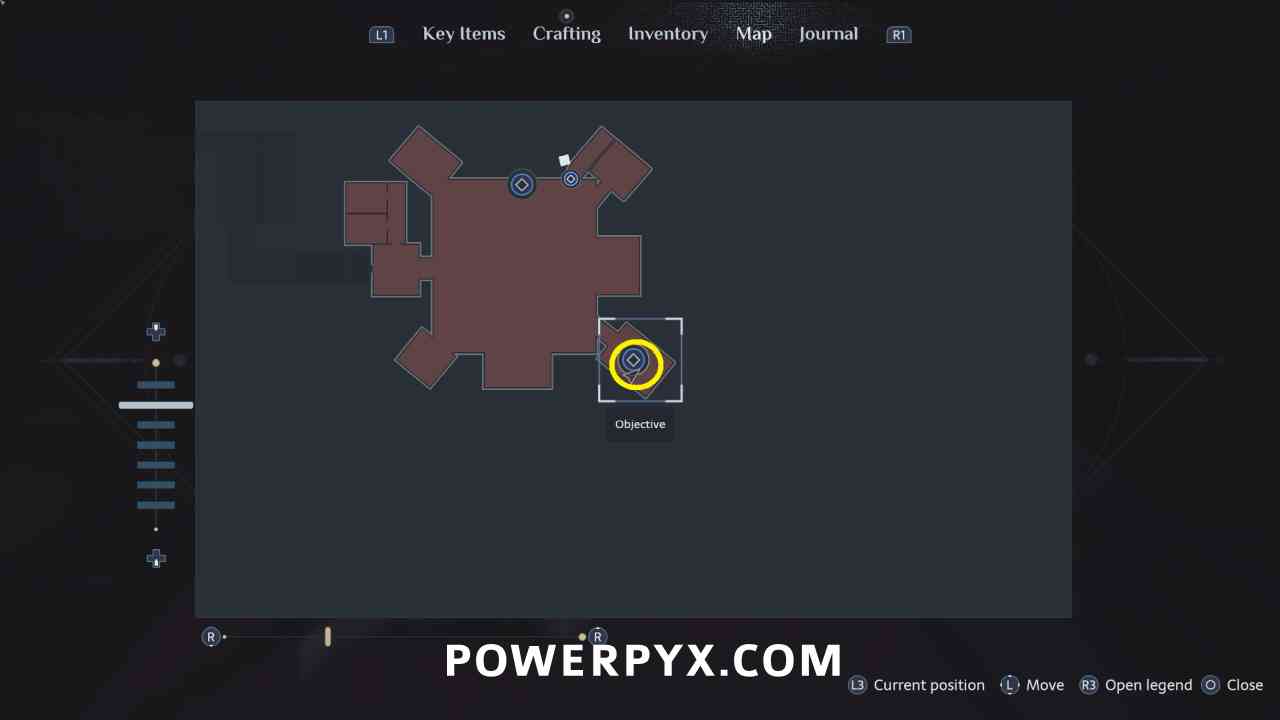
These items are on the ground in the southwest room.
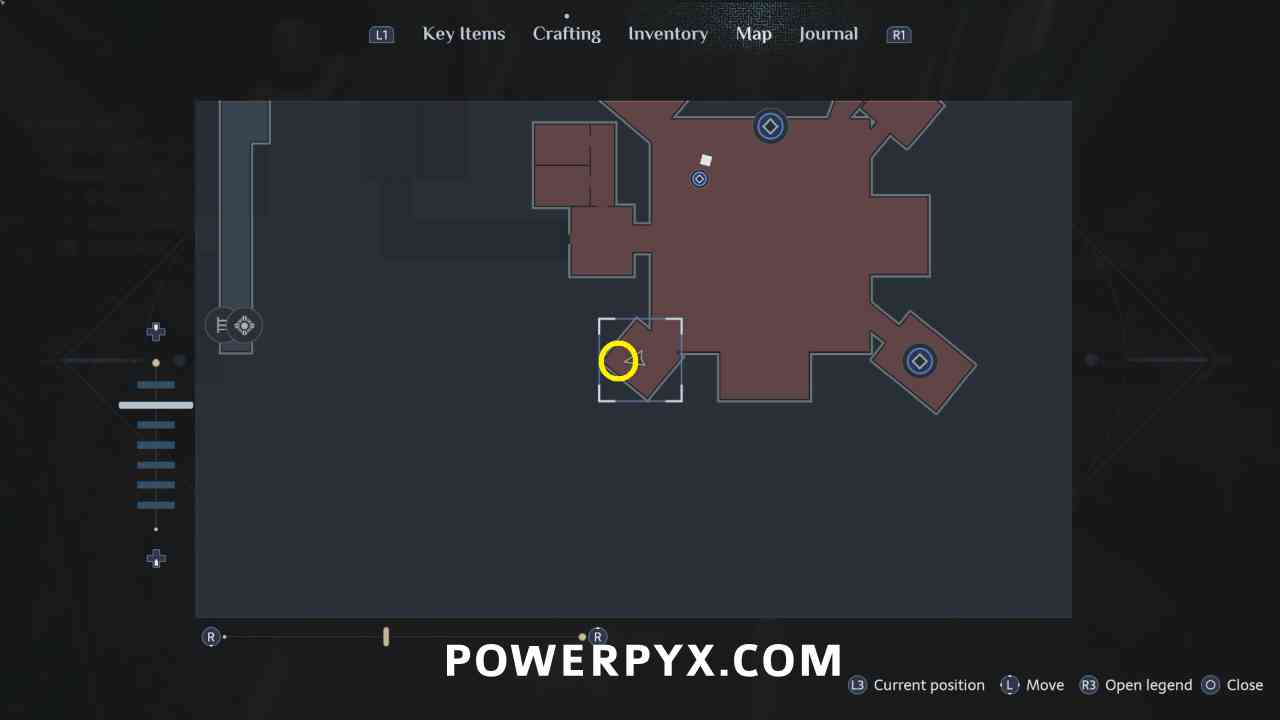
On a table in the northwest room.
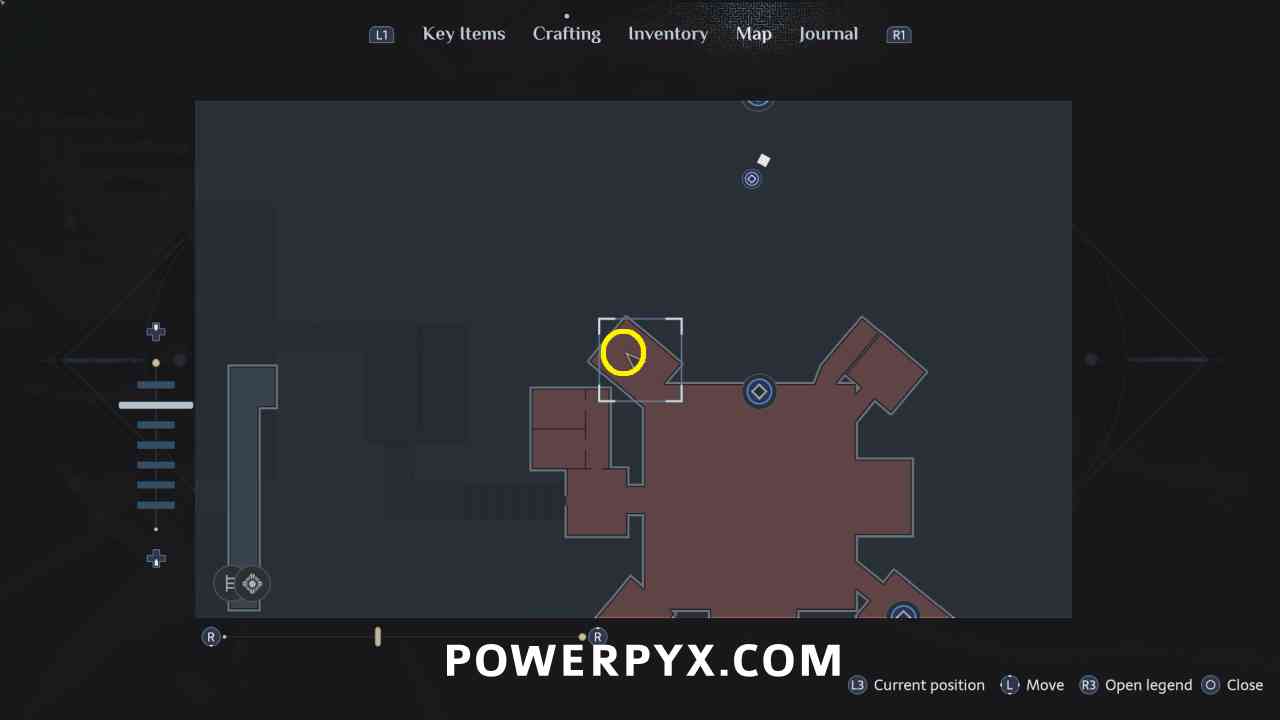
And on a shelf in the northeast room.
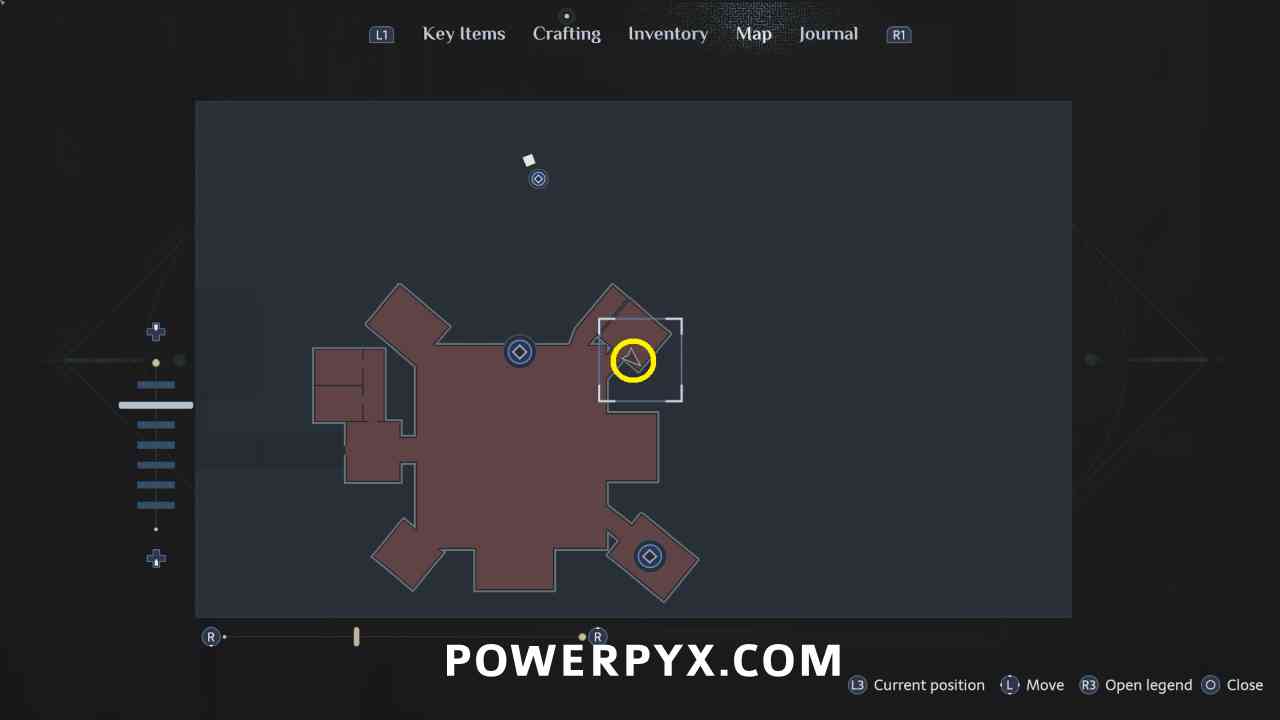
Key Item: Bunny Toy
Once you have all three items go back to the girl and finish the interaction with her to receive the key, go through the door on the north side of the room.
Take Back the Genesis Configuration
After trying to leave the area, go back along the path and through the glass door. Go into the hallway and after the save point interact with the coat on the chair and go through the door.
Escape Charlotte
Only Nightmares Last Forever! – Escape from Charlotte
In the next section you are running away from Charlotte, similar to the Chatterer chase. Run away from them following the hallways, and take the path opposite of where you see them.
Get to Safety
Portable Guillotine – Behead 3 or more enemies with the same melee weapon
Starting in the next area you first encounter Unworthy (zombies). These enemies take more damage than Cultists, and have a unique mechanic where after you damage them enough they start flashing blue and you can kill them using the Genesis configuration by interacting with them. For this trophy though you need to behead 3 of them with the same weapon without it breaking. You can do this by shooting the enemy until they start flashing blue, then melee in the head with a blade weapon. It’s recommended to fully fix a weapon at this point, then only use it to behead 3 enemies in a row here. You can do this on the first two enemies you encounter one at a time, then one of the three enemies in the sewer room after you execute two of them.
What’re Ya Buyin? – Spend 666+ coins in the shop GLITCHED
What’re Ya Sellin? – Earn 999+ coins from sales GLITCHED
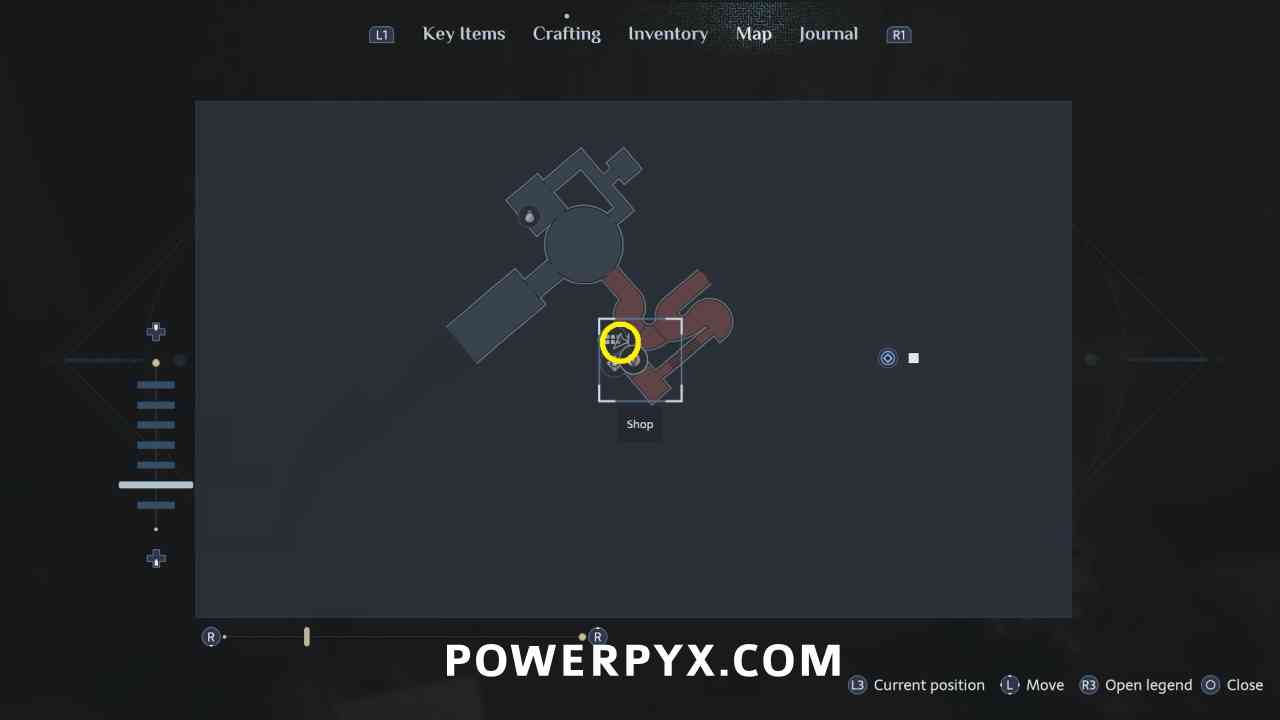
When you climb up the next ladder you encounter Zora at the first shop. You want to make a manual save first, then immediately earn these two trophies by selling everything from your inventory, and buying items from Zora. You can use the Buyback section to rebuy the items that you purchased, then sell them back to her. If you don’t do this immediately at the first shop the PS5 tracking on these two trophies can break and then you cannot earn the trophy until it is fixed.
At shops you can sell any items that are marked as “Treasure”, these have no purpose other than to sell. You can also place any unwanted items into storage chests that are always at shops. There are some storage chests not at shops, and you can place Treasure items into them and then when you reach the shop next sell the items out of storage without pulling them to your inventory.
Pistol Upgrade: Hair Trigger
Available from Zora at first shop for 150 coins
Pistol Upgrade: Extended Magazine
Available from Zora at first shop for 180 coins
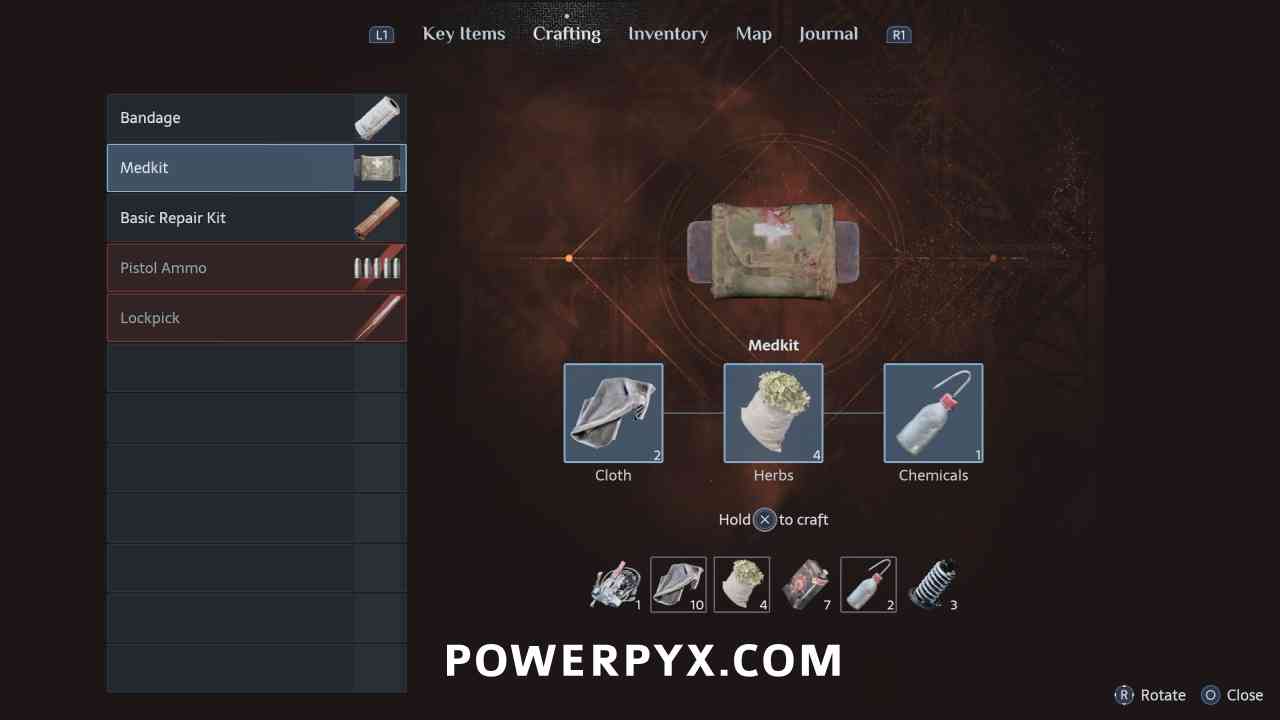
Crafting Recipe: Medkit
Purchase from Zora at first shop for 200 coins – 2 Cloth + 4 Herbs + 1 Chemicals
Crafting Recipe: Lockpick
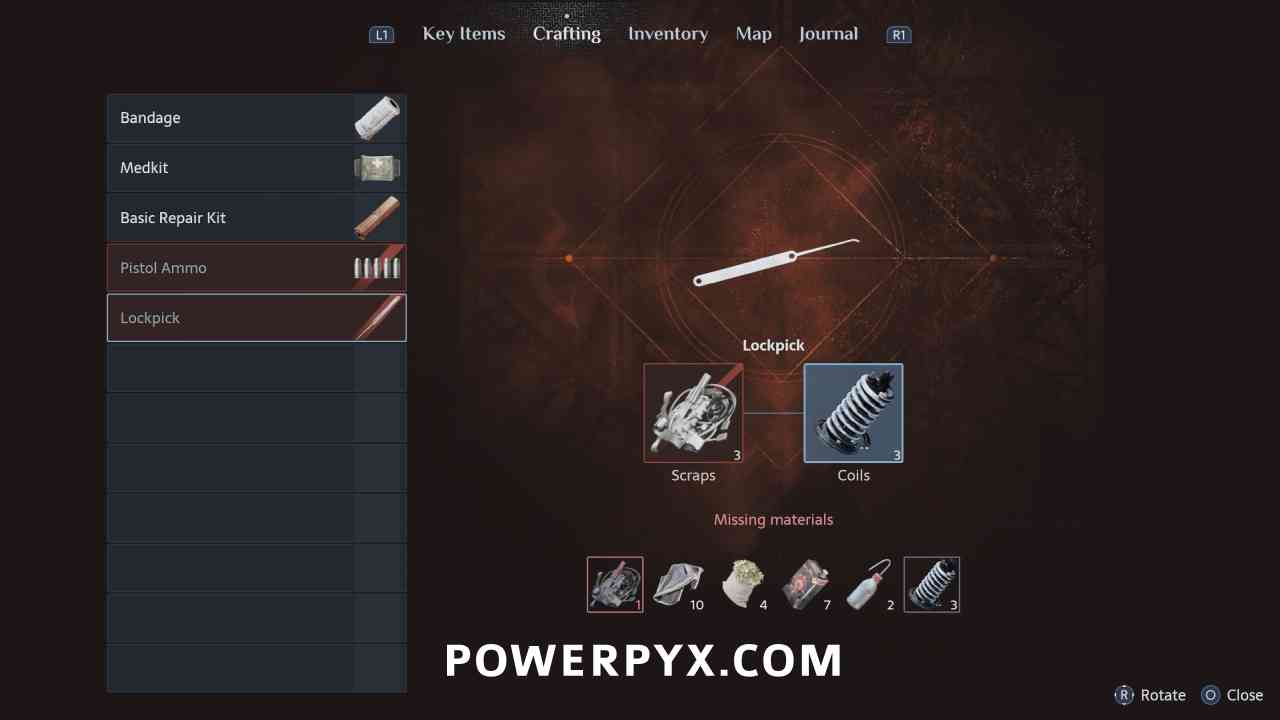
Purchase from Zora at first shop for 120 coins – 3 Scraps + 3 Coils
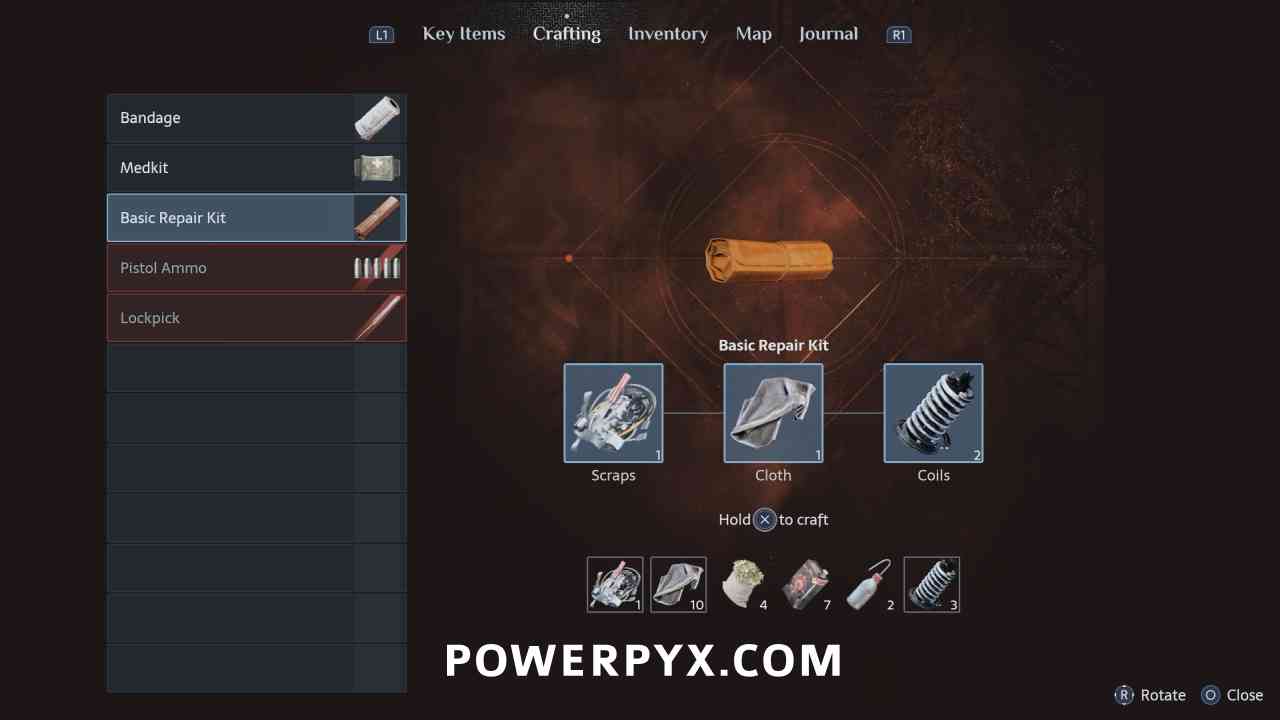
Crafting Recipe: Basic Repair Kit
Purchase from Zora at first shop for 120 coins – 1 Scraps + 1 Cloth + 2 Coils
With Great Power – Unlock the Telekinesis power
After exiting the sewer area, you unlock the Telekinesis power. This allows you to pick up objects in the environment and throw them at enemies when you have available Suffering (the blue bar on the lower left). You regain Suffering by damaging enemies, or by killing enemies with the Genesis Configuration when they are flashing blue.
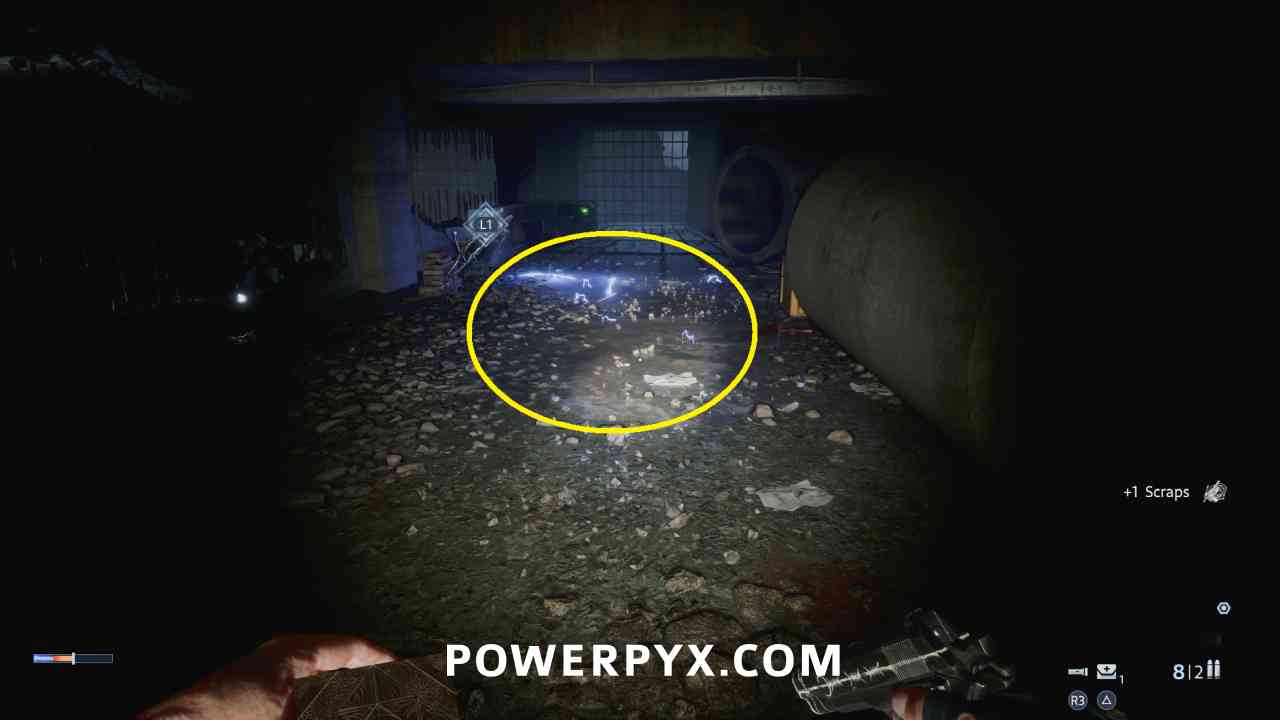
Hairraiser: Revival – Die from electric shock
When progressing through the next area you eventually encounter an area with electrified water on the ground. Wait until the next manual save point in the next room, then walk back and into this water to die and earn this trophy.
Key Item: Van Key
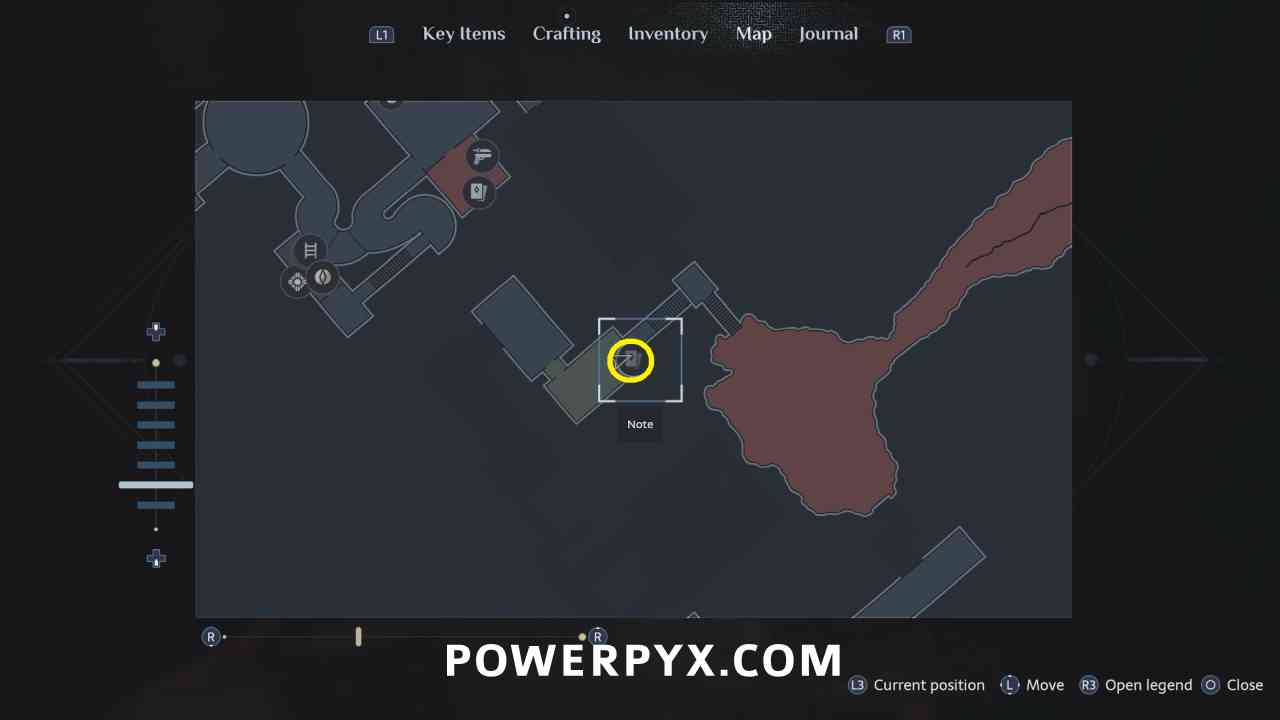
When progressing through the area, this is beside a body in the room with the armoured zombie. Use this on the back door of the van in the outdoor area to progress.
After going through the van there is another section where you are being chased by Charlotte, follow the path through the woods going down the opposite path as where you see here.
Find a Way Out of the Graveyard
Firearm: Shotgun
After falling into the graveyard area and fixing your foot, this is on a body directly beside you.
A Quiet Place – Escape the graveyard without throwing anything or being seen
When you drop into this area DO NOT PICK UP ANY BOTTLES OR STONES. Save immediately at the save point on the left in the church.
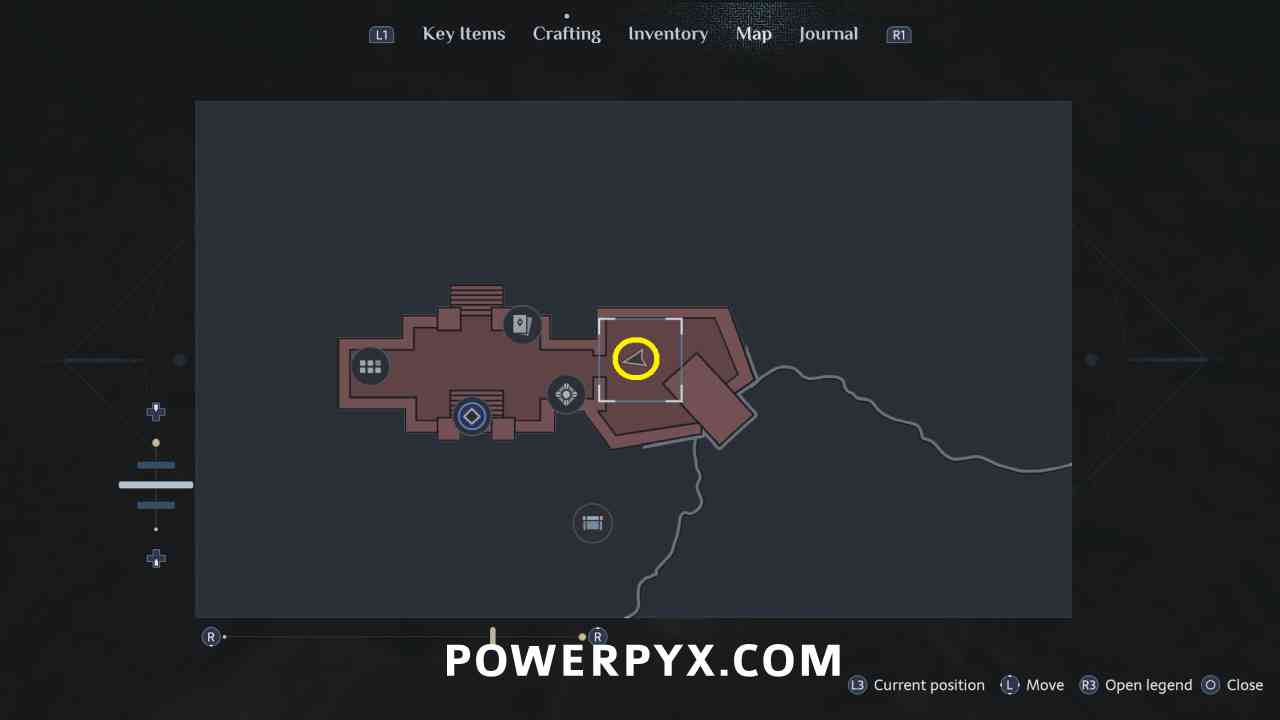
Through the rest of this section you need to avoid all enemies and don’t use Bottles or Stones to throw to distract them. You can follow the paths in the below image, on the way to the house follow the yellow path, on the way back follow the red path.
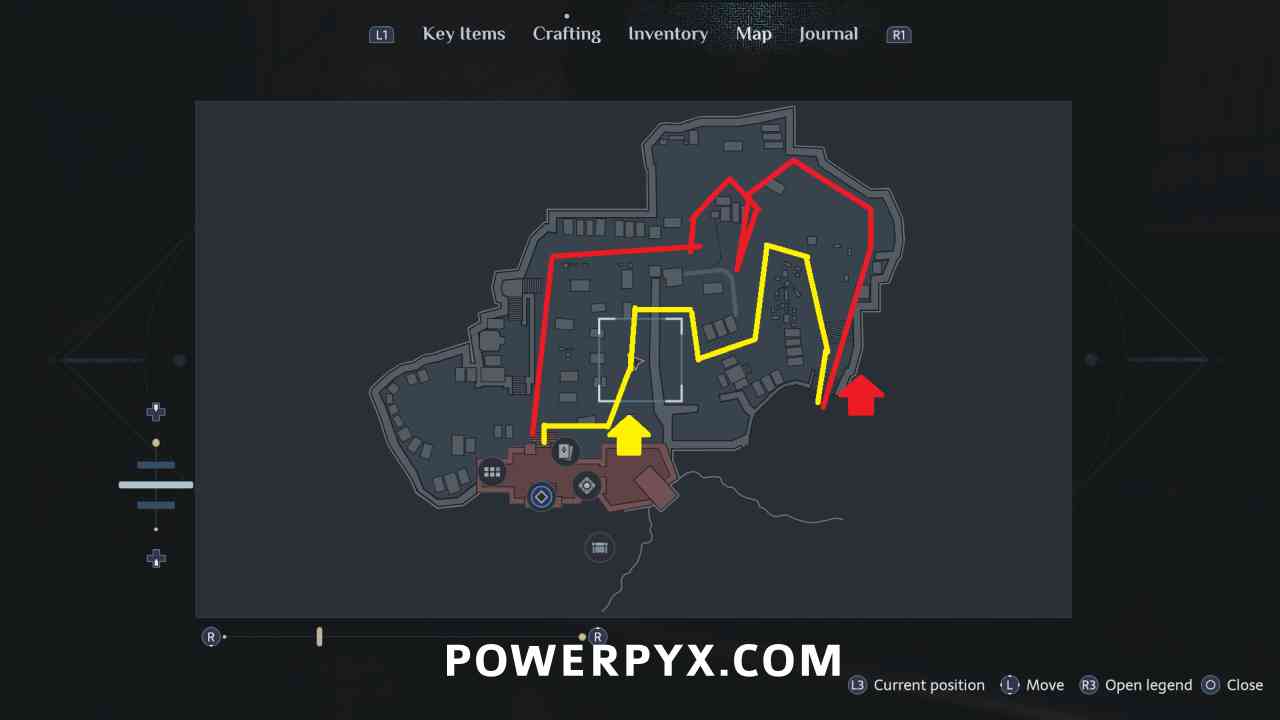
This graveyard consists of two area, first where you must avoid a group of Cultists, then on the way back where you must avoid Charlotte. The first section with the Cultists you can avoid them by going to the east edge of the first area. Wait for them to walk out of the middle path, then continue wrapping around east until you crouch under a wall into the eastern part of the graveyard, where there are no Cultists and you can walk to the shack in the southeast. When you reach the shack successfully make a new manual save to reload.
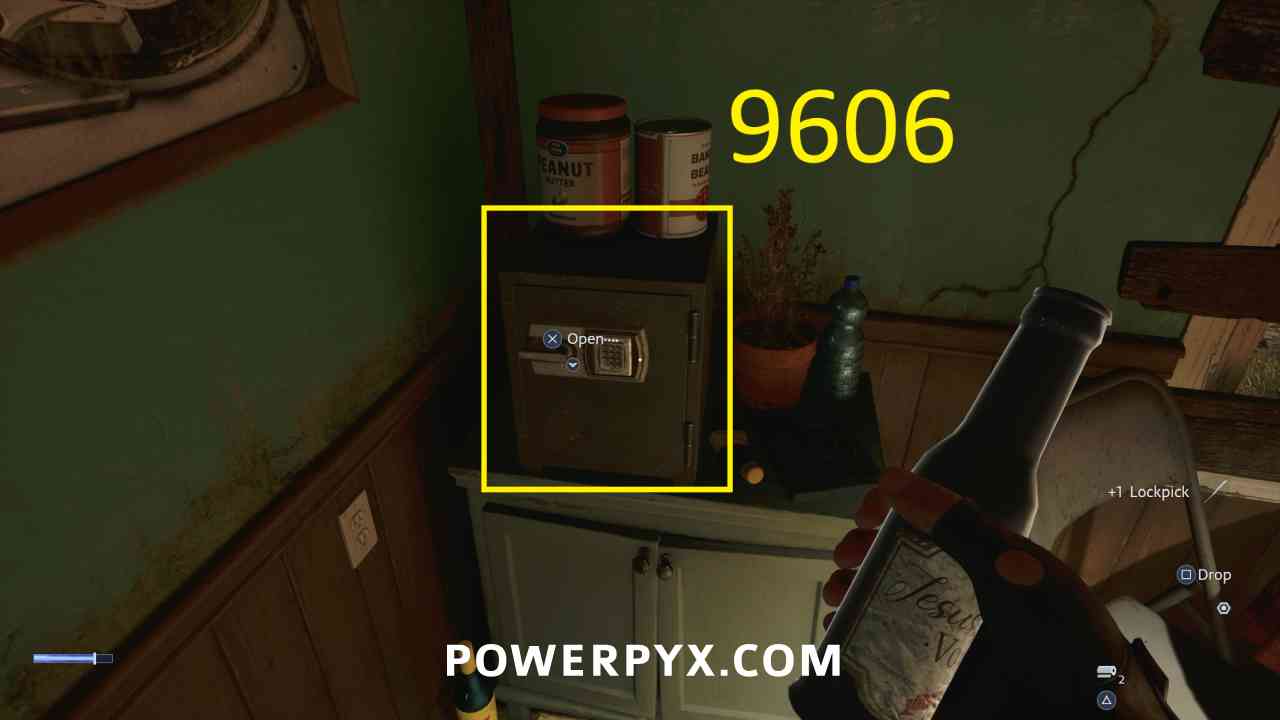
Keypad: 9606
Safe located inside the house on the southeast corner of the cemetery.
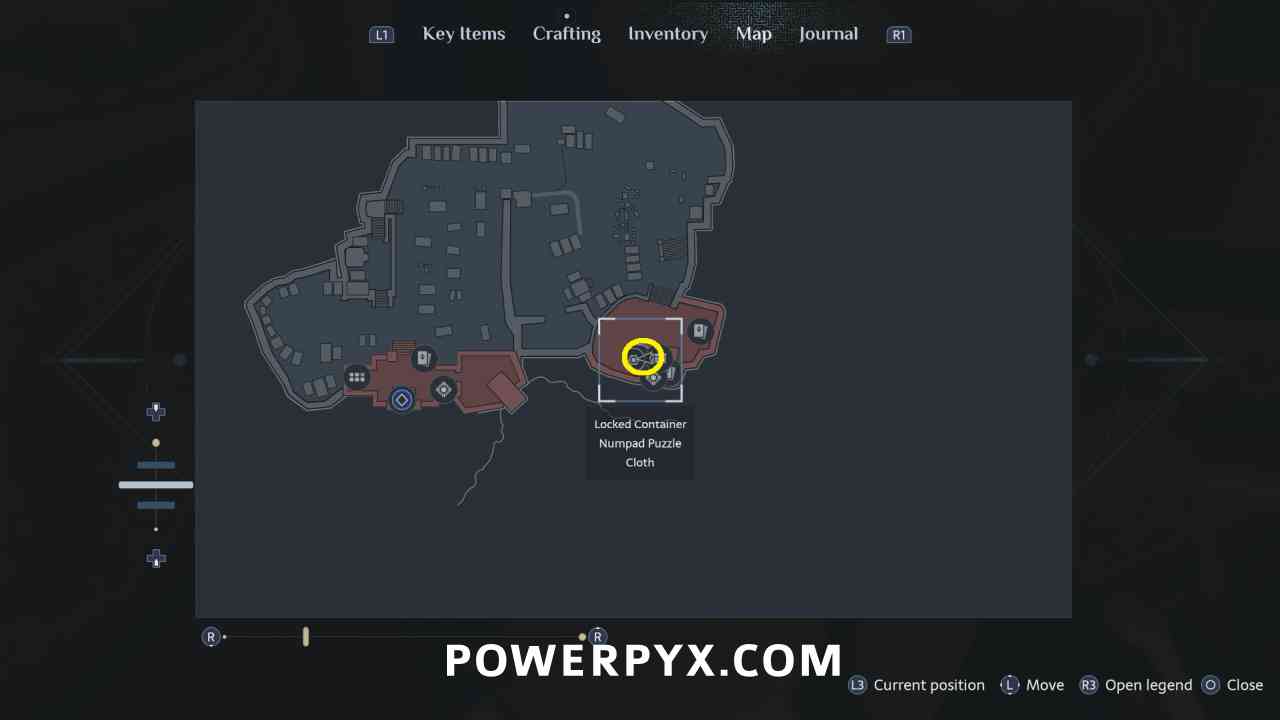
Pistol Upgrade: Oversized Magazine Release
Inside the safe opened with above keypad.
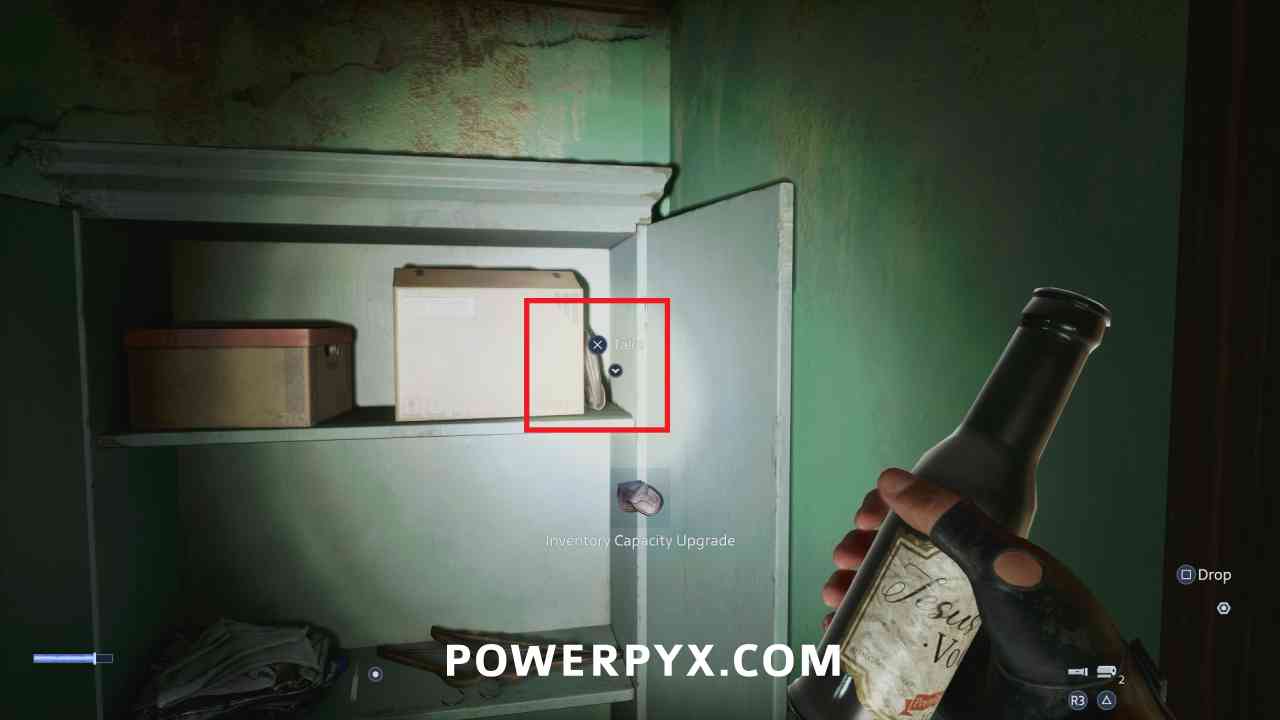
Inventory Capacity Upgrade
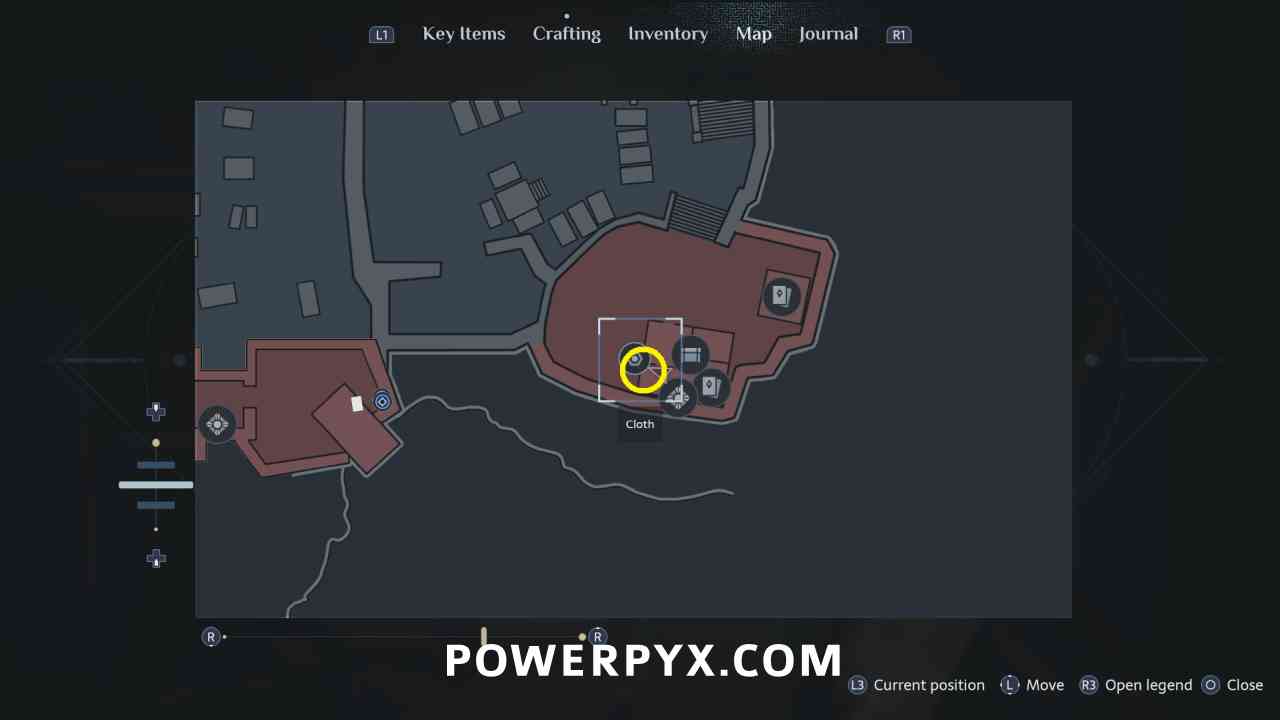
In the green cabinet in the room with the save point.
On the way back after obtaining the statue key from the shed, you now need to avoid Charlotte. The monster patrols around the east area of the graveyard, moving in different loops depending on how far you progress. You need to be crouching and following behind her, staying in the bushes around the area to stay out of sight. You know you are correctly hidden in the bushes because there is a crossed out eye icon on the bottom right. This section seems somewhat finicky as certain bushes you can not be that far into, and if the monster walks directly by you then you may be “spotted” (Aiden will say something and the HUD will appear). The easiest way to escape the area is to follow behind the monster staying in the bushes, then when you reach the center of the area you want to go south back along the path how you entered this area. Then when the monster goes all the way south turn around and loop around to the northwest where you crouch under a tree. The monster then doesn’t enter the side of the map the Cultists were in before, so you can head back to the church and the trophy will unlock when you interact with the door and place the key to exit the graveyard.
Burn? Oh, Such a Limited Imagination! – Set Charlotte on fire
Awarded when you shoot the lantern in the Church to escape the area.
Demons to Some, Angels to Others… – Talk to a Cenobite
Awarded after the next cutscene after leaving the church.
Free Sunny’s Soul
Pain Pillar #1 (Health Increase)
After the first hallway with the spinning diamond obstacle that moves back and forth, turn right at the next intersection with the bloody hole in the wall to find a room with 4 more of them in a row, and the Pillar Artifact on the other side.
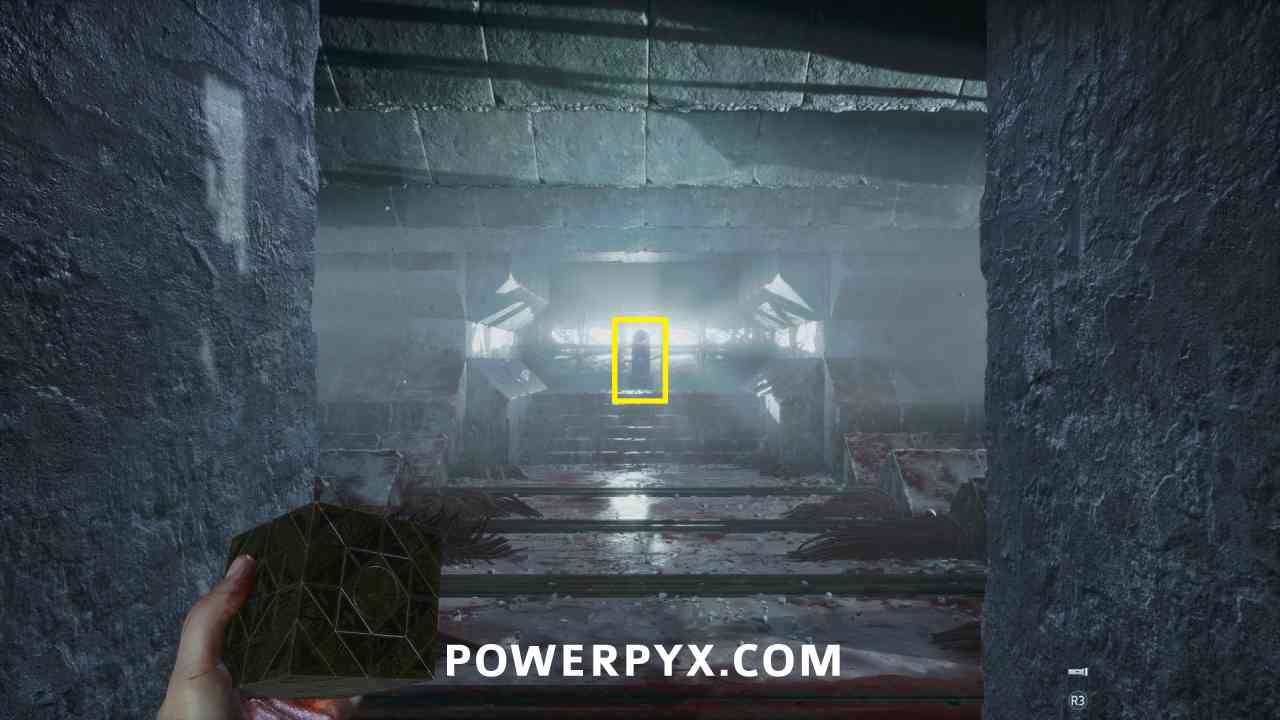
The Further Regions of Experience – Activate a Labyrinth pillar artifact
Awarded after activating the first Pillar Artifact.
Puzzle Me This – Complete 3 Labyrinth puzzles
Awarded after completing the traversal puzzle where you spin the tube you are walking on with the spinning traps on it.
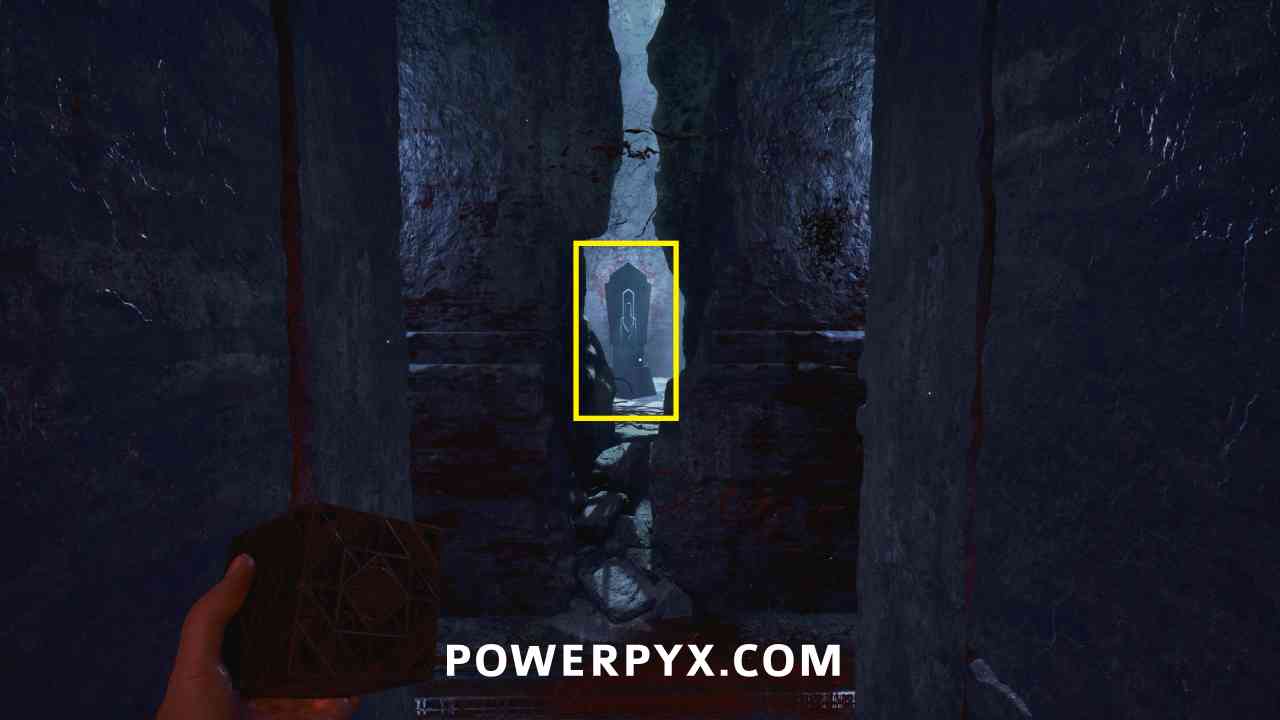
Suffering Pillar #1 (Suffering Increase)
After the section where you need to run past the spikey walls while the roof moves down, turn left at the next intersection with the red light coming from the wall and you can see the pillar in front of you in an area where there are rotating traps moving counterclockwise around the track in the area.
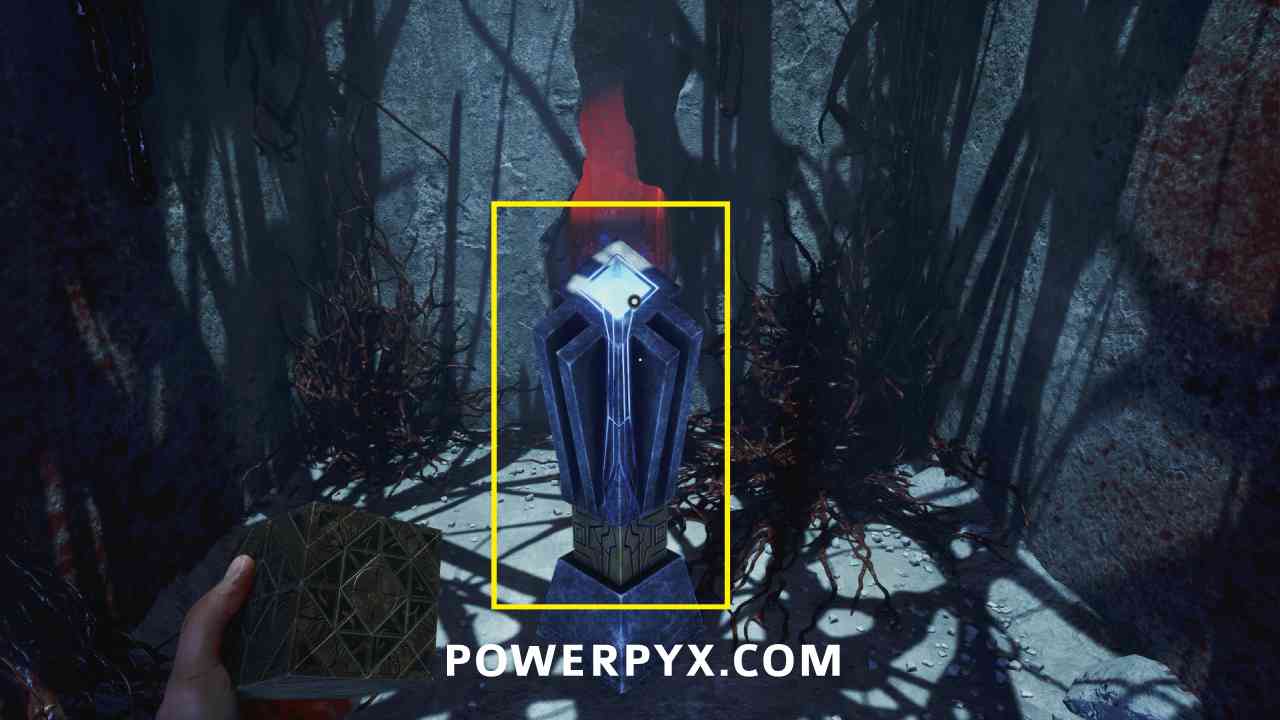
Suffering Pillar #2 (Suffering Increase)
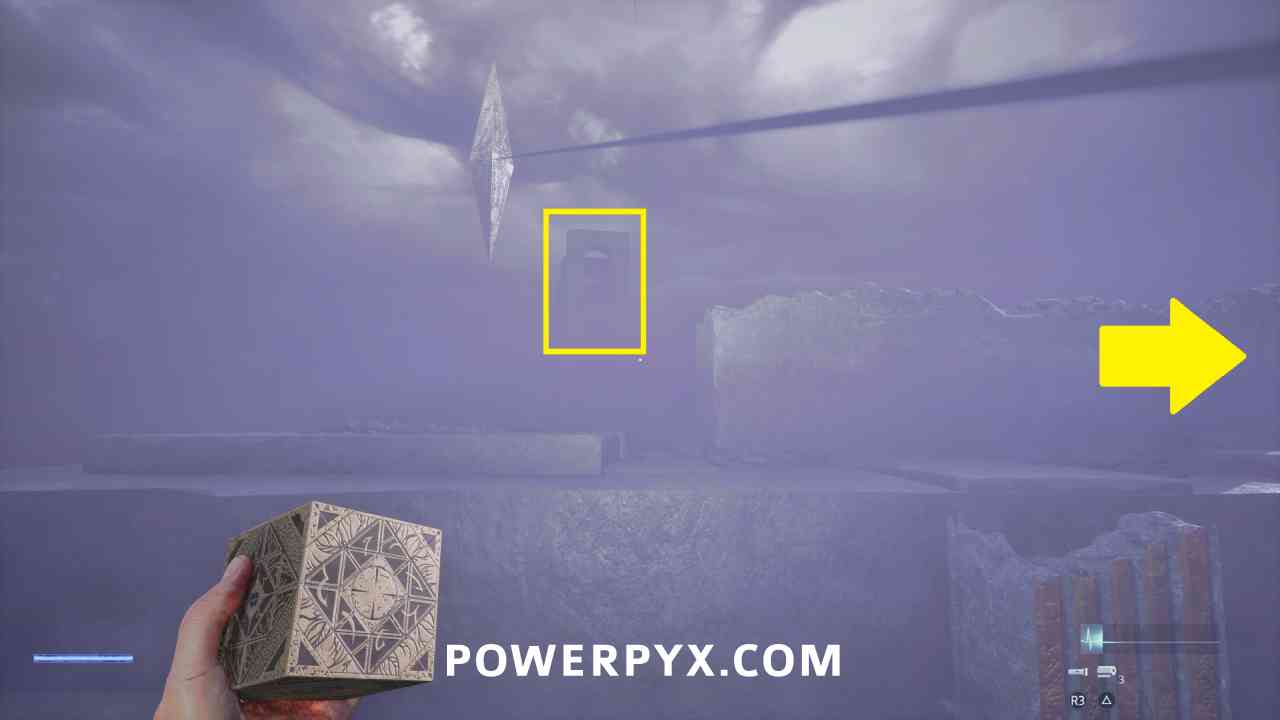
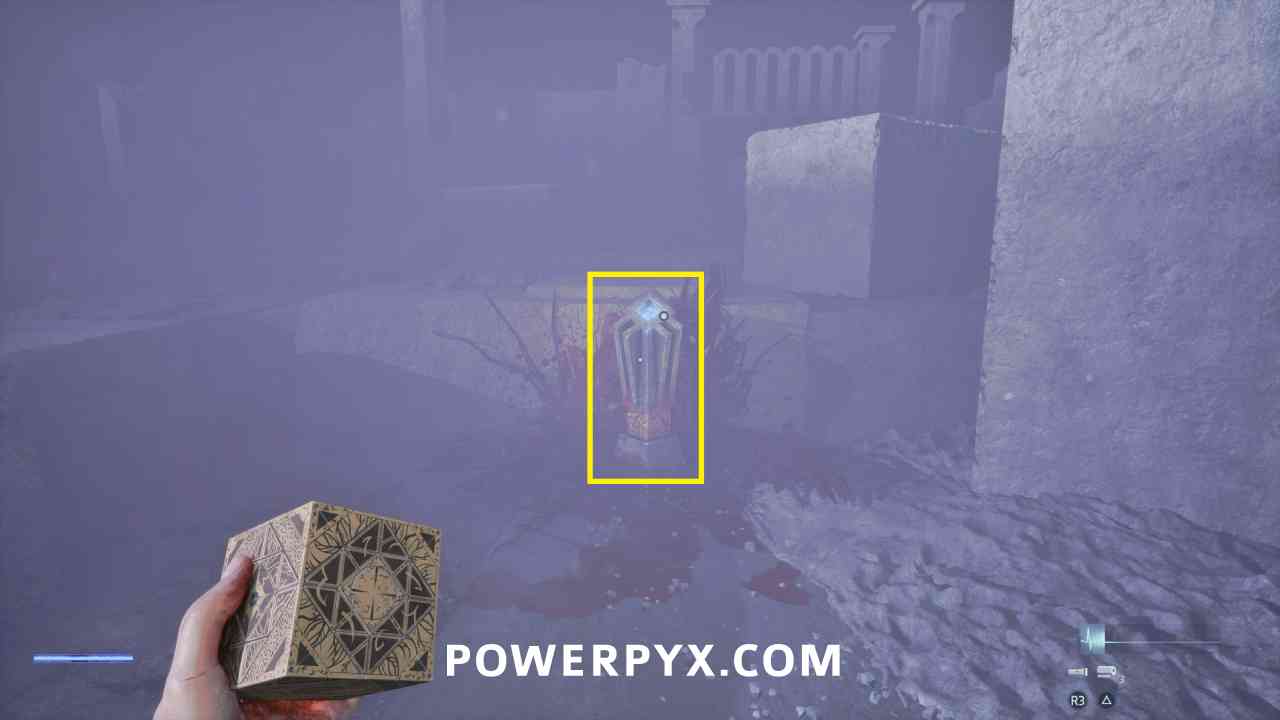
When moving through the section where you can see the Leviathan in the distance and The Chatterer keeps appearing around you, progress until the spot where you see some arches in front of you. Immediately turn around to find the Pillar behind you. If you reach the arch with the two blue flames and gold accents you’ve gone too far.
Run, Aidan, Run! – Escape from the Chatterer, again
The next Chatterer chase occurs on the way out of this Labyrinth area. Like before you just avoid it by going down paths where it is not present. This time you will also need to move some blocks out of the way using the Genesis Configuration. During the middle of the chase you will be transported to a jail cell and beat up a prisoner, then be returned to being chased. When you reach the open room full of pillars you need to go to the one side and move the one block down, then the other block to the left wall to push a button which opens the exit door.
Welcome to Oblivion – Reach the Field of Souls
Unlocks at the same time as finishing the Chatterer chase.
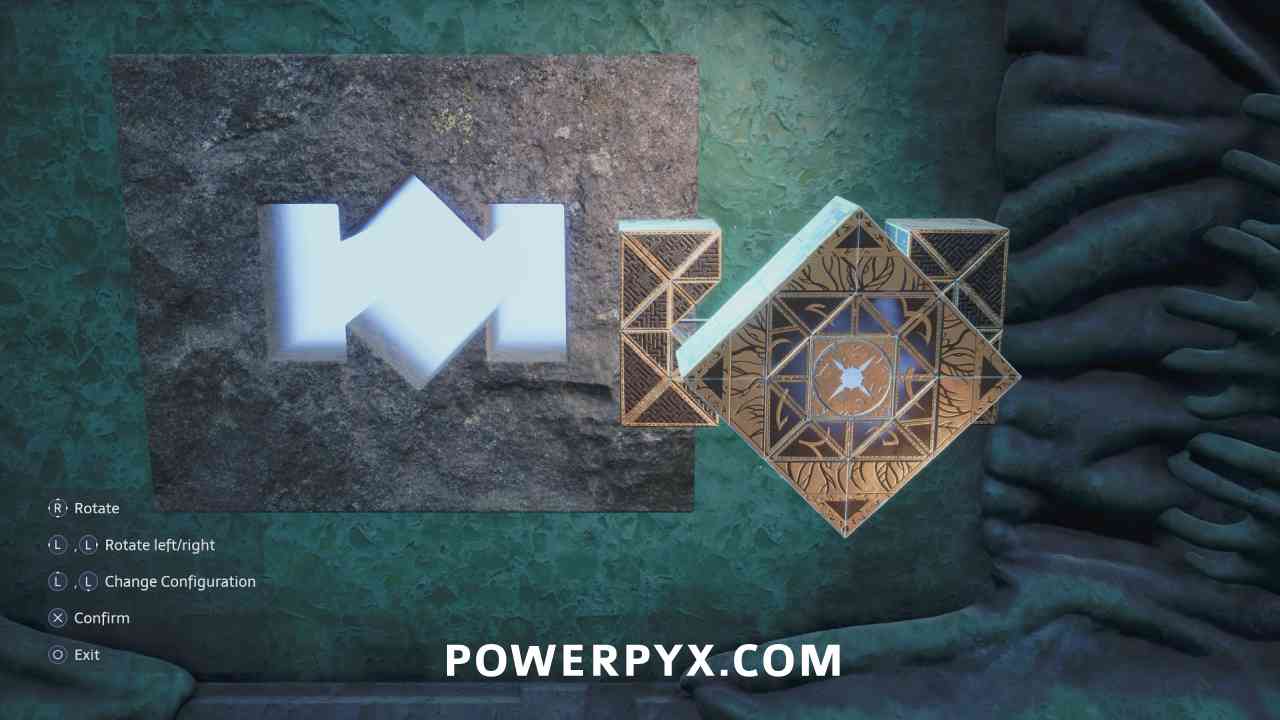
Run through the area until you reach the pillar, rotate and shift the Genesis Configuration until you make it the shape to fit in the slot.
Exit the Labyrinth
Every Drop of Blood You Spill…  – Resurrect Sunny
Unlocks when you exit the Labyrinth.
Puts More Flesh on My Bones – Begin the hunt for the hearts
Unlocks after the next cutscene when you gain control back in the apartment.
Open the Gate to Charlotte
Pistol Upgrade: Heavy Grain Bullets
Available from Zora at second shop for 160 coins. Purchasing this is recommended.
Shotgun Upgrade: Lightweight Forend
Available from Zora at second shop for 150 coins
Crafting Recipe: Advanced Repair Kit
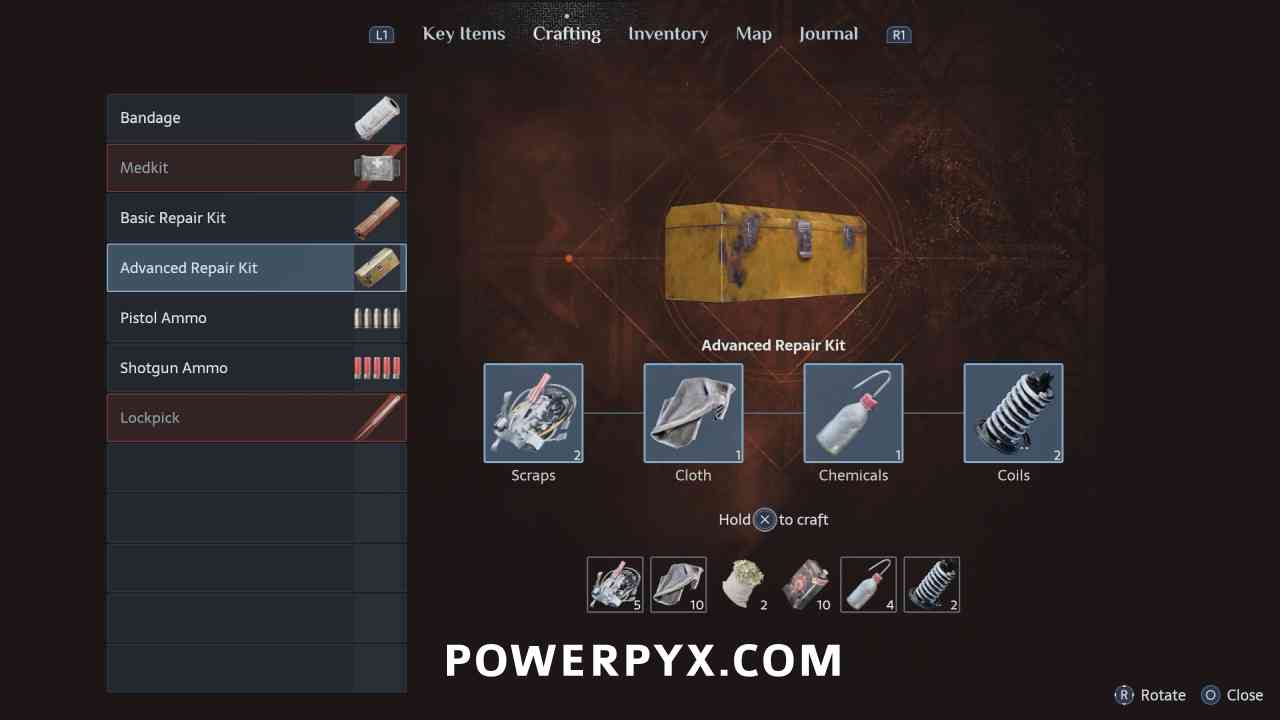
Purchase from Zora at second shop for 180 coins – 2 Scraps + 1 Cloth + 1 Chemicals + 2 Coils
Crafting Recipe: Ammo Pack 12-Gauge (Shotgun Ammo)
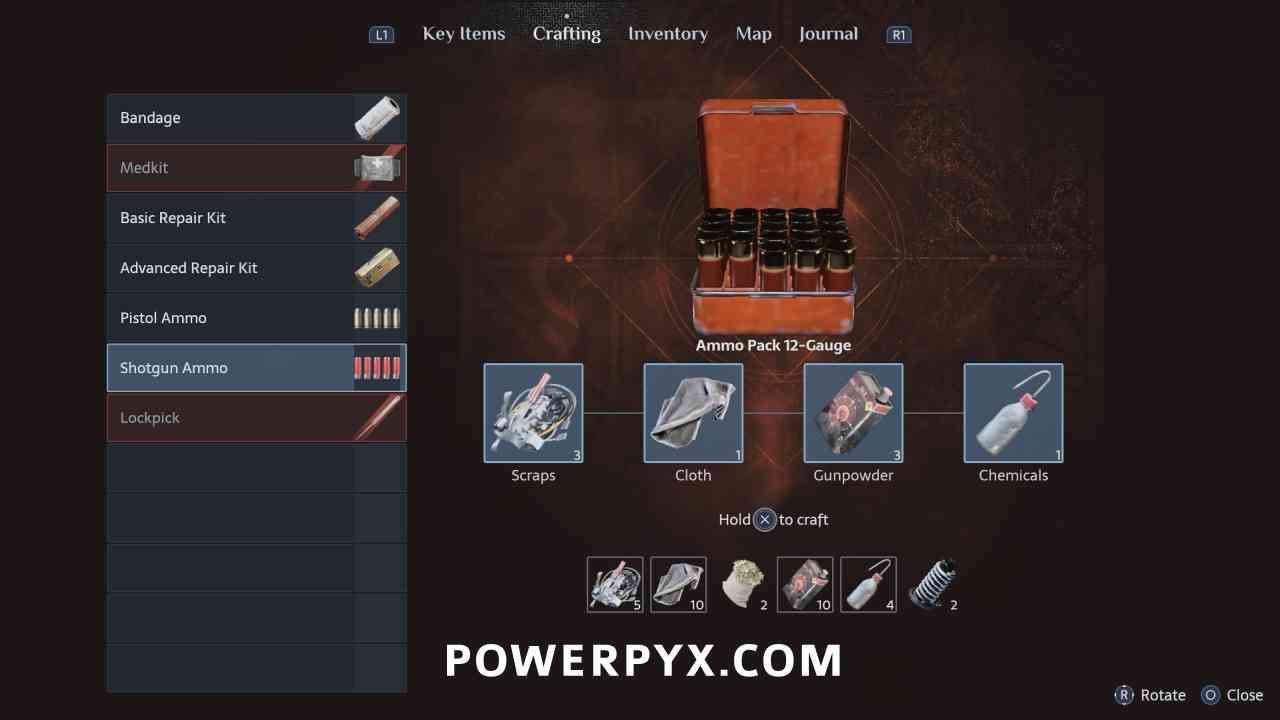
Purchase from Zora at second shop for 220 coins – 3 Scraps + 1 Cloth + 3 Gunpowder + 1 Chemicals
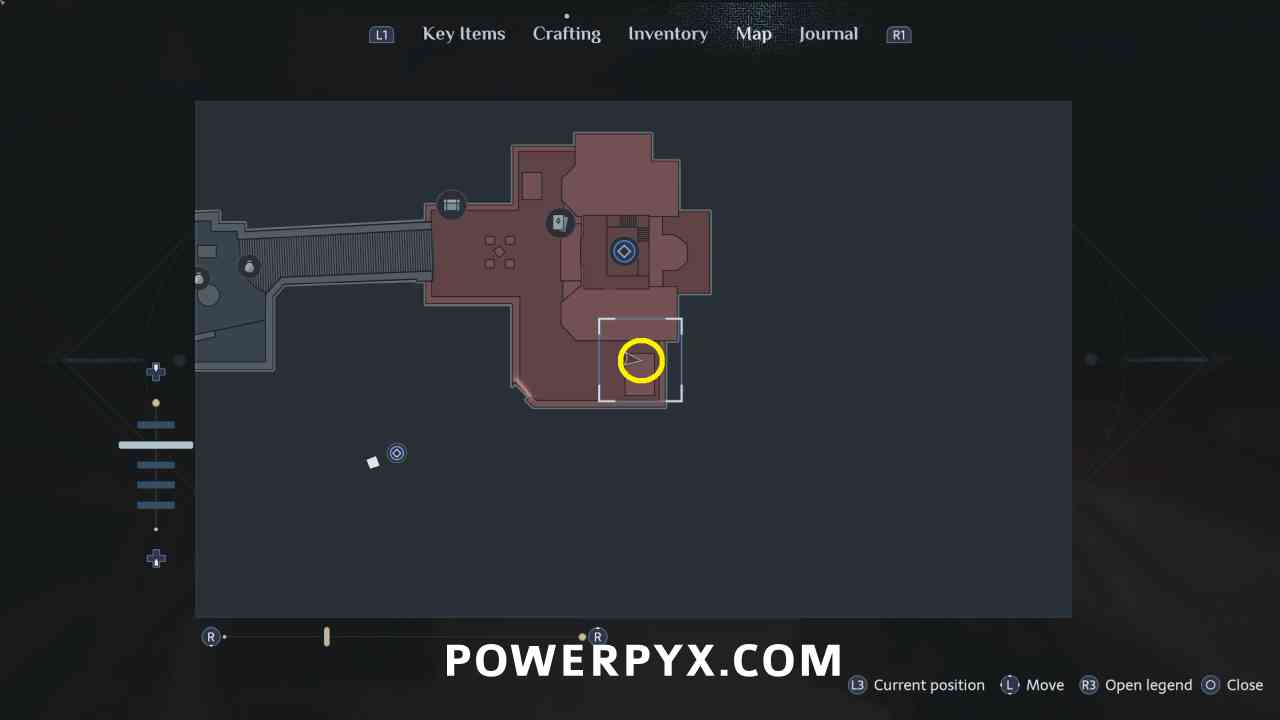
Find a Statue’s Missing Part
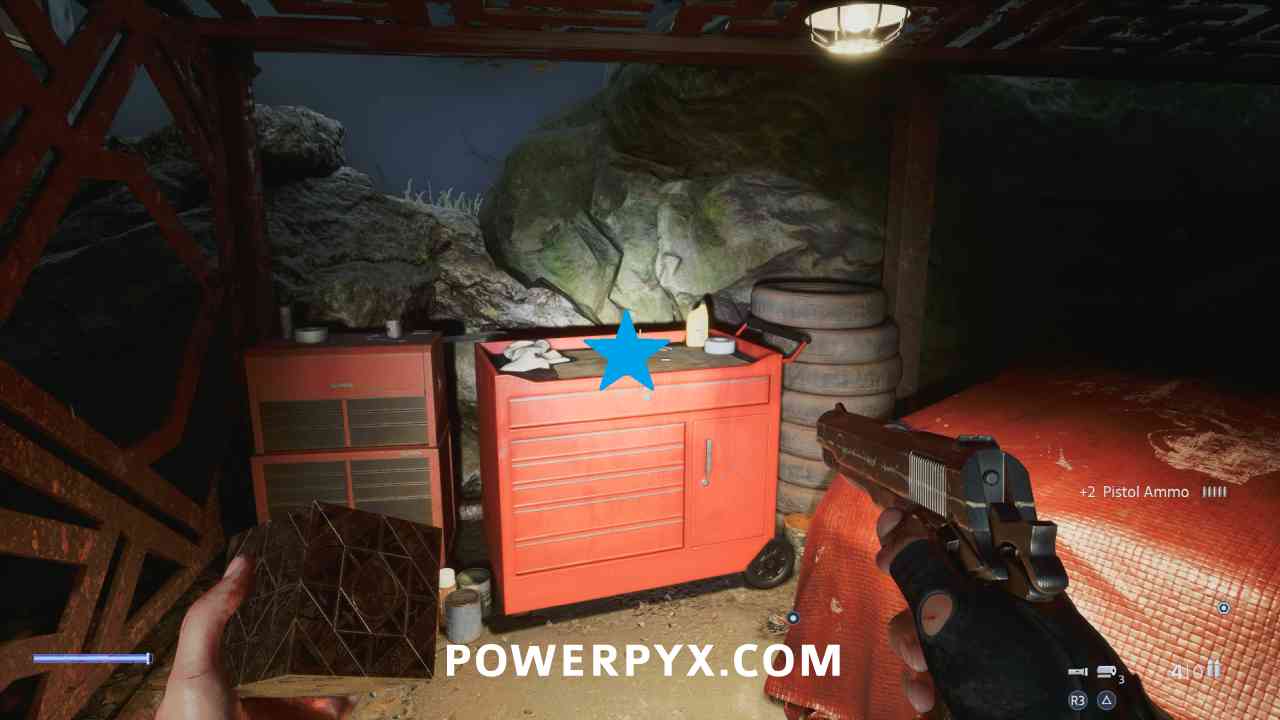
Key Item: Bolt Cutters
To the south of the Mansion, in the small shed on the toolbox.
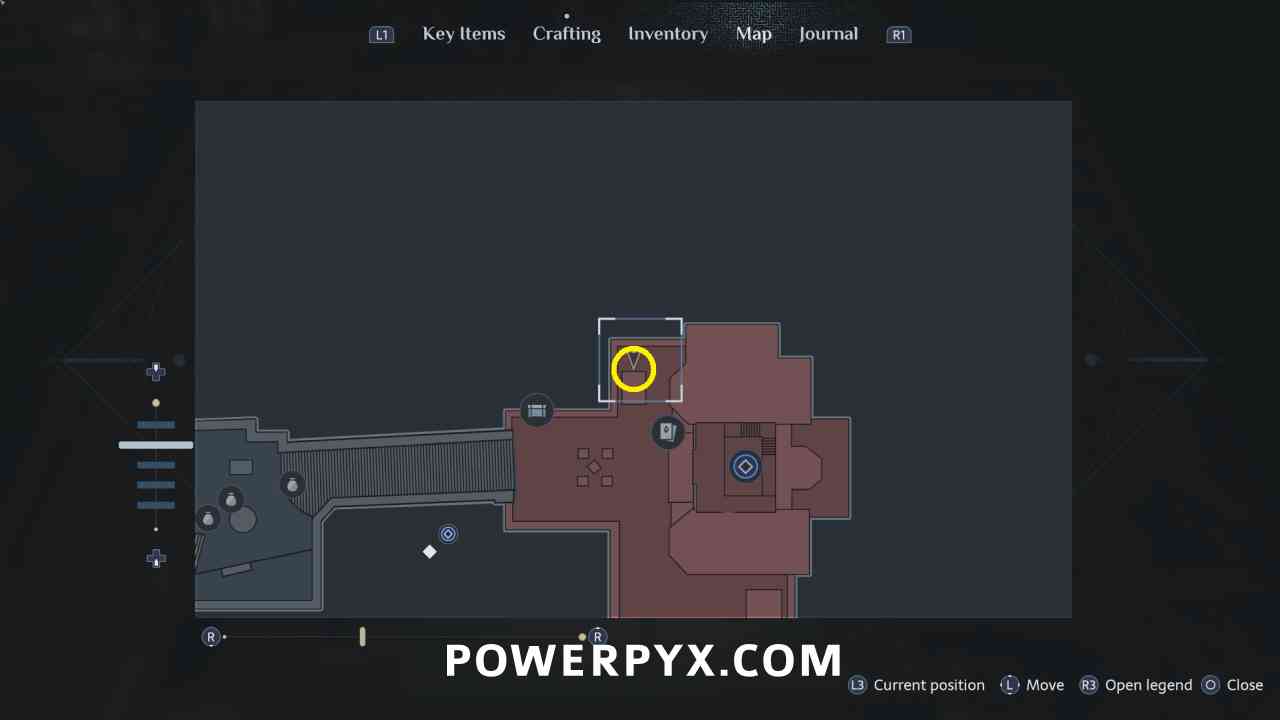
Go to the northwest of the Mansion and interact with the chain on the door, using the Bolt Cutters to open it.
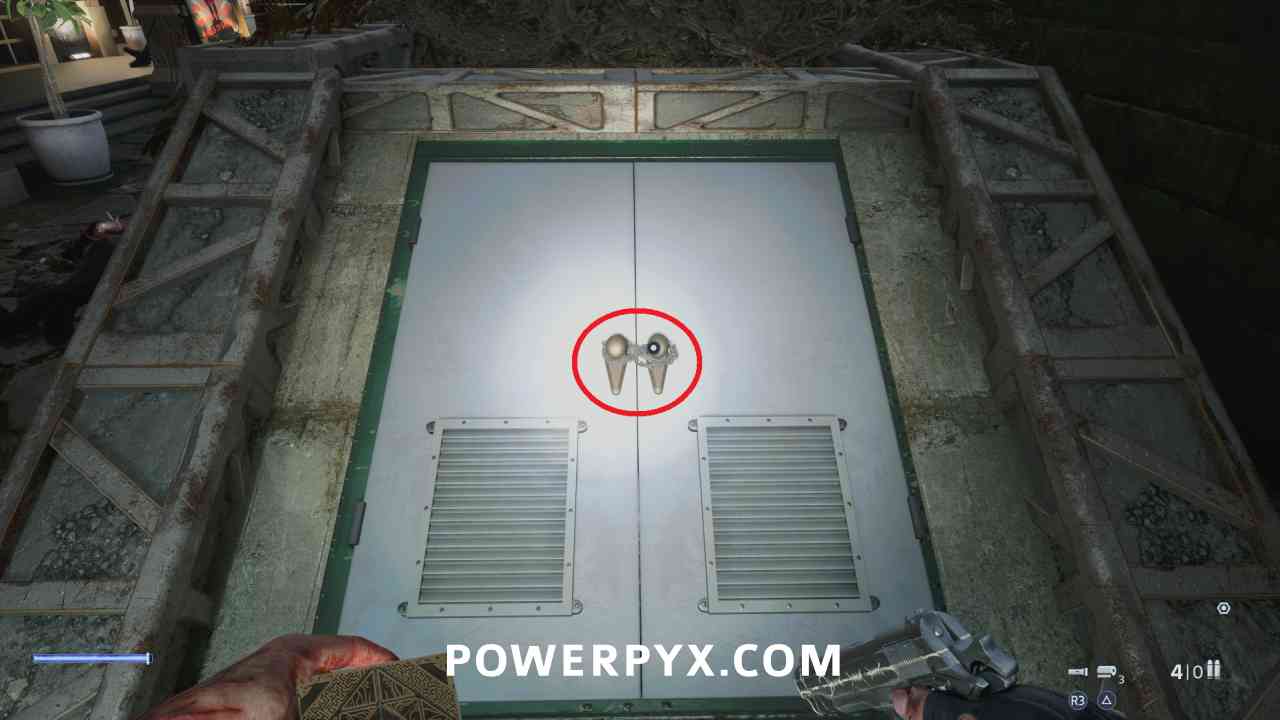
Come to Daddy – Defeat Bruno
In the next area you are attacked by Bruno. You will need to use most of your current resources to defeat him, as he takes a lot of damage. Try to use the throwable items around the room first, then your Shotgun ammo as this does the most damage to bosses. After you defeat Bruno make sure to pick up Bruno’s Scalpel from the floor which you can sell.
Firearm: SMG
On the upper floor of the mansion, unlock the large safe by spinning the discs to get the 4 gold sections in the middle and the left/right/bottom slots touching the middle.
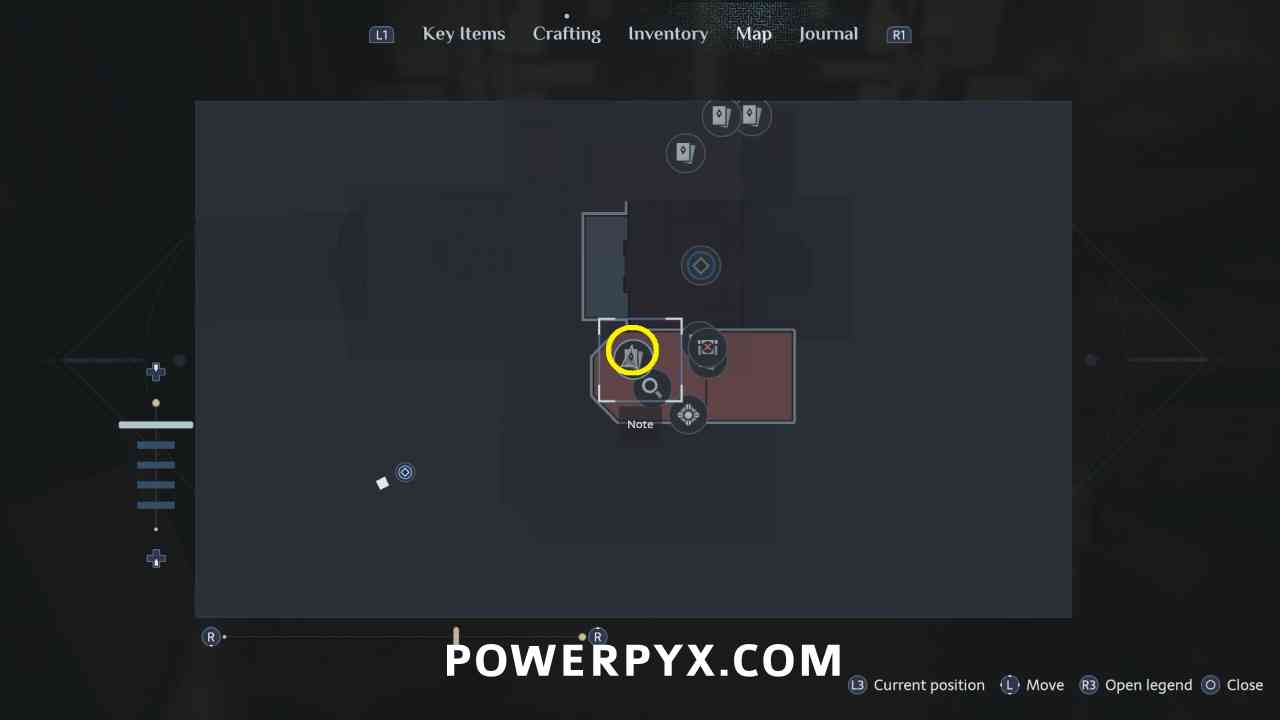
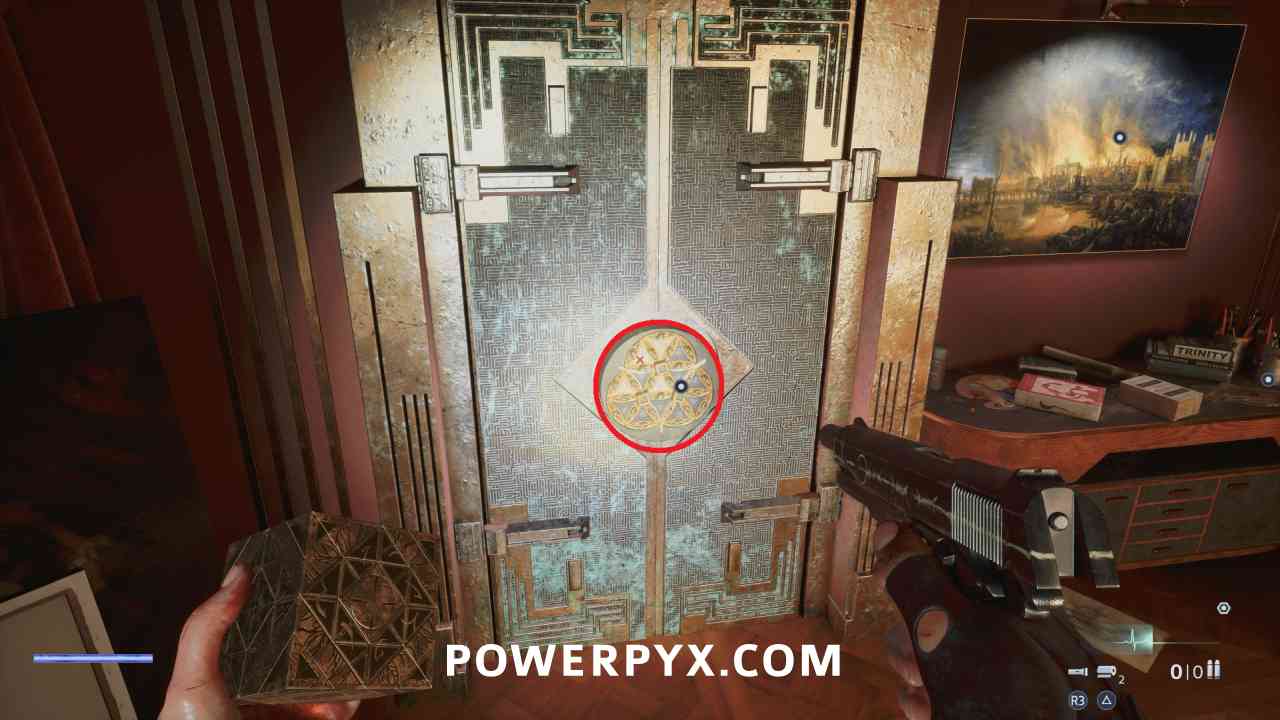
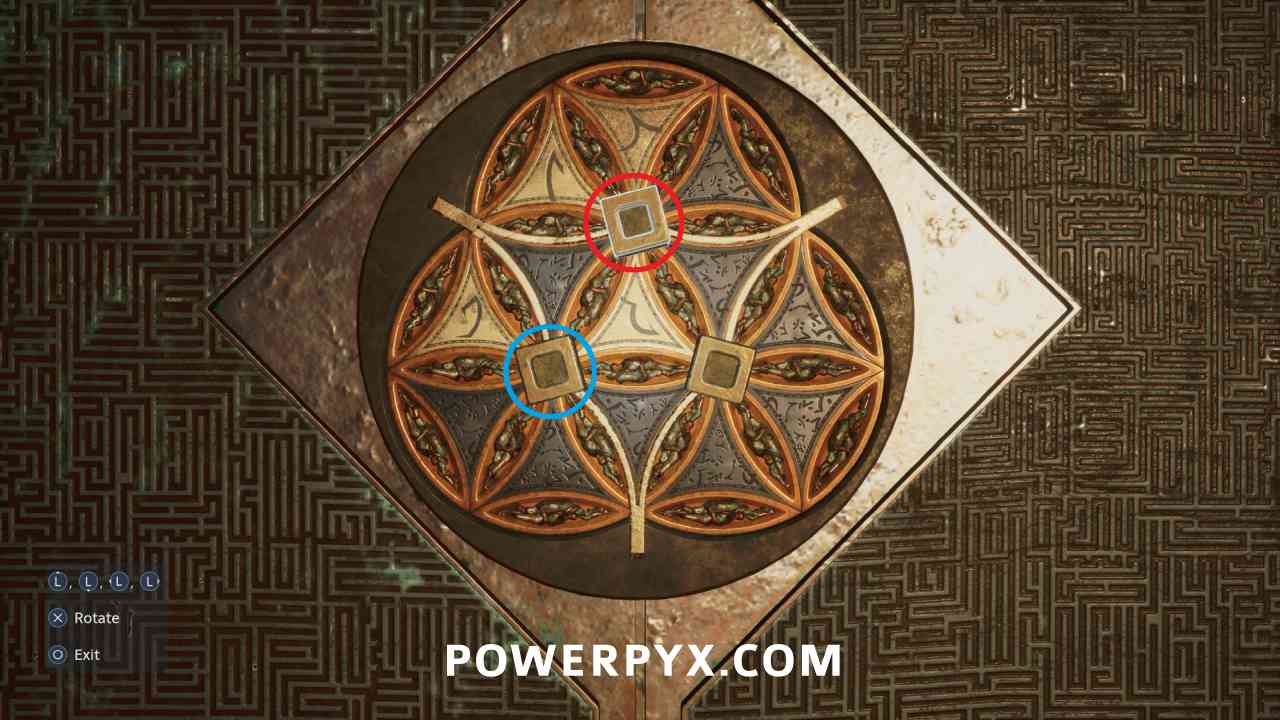
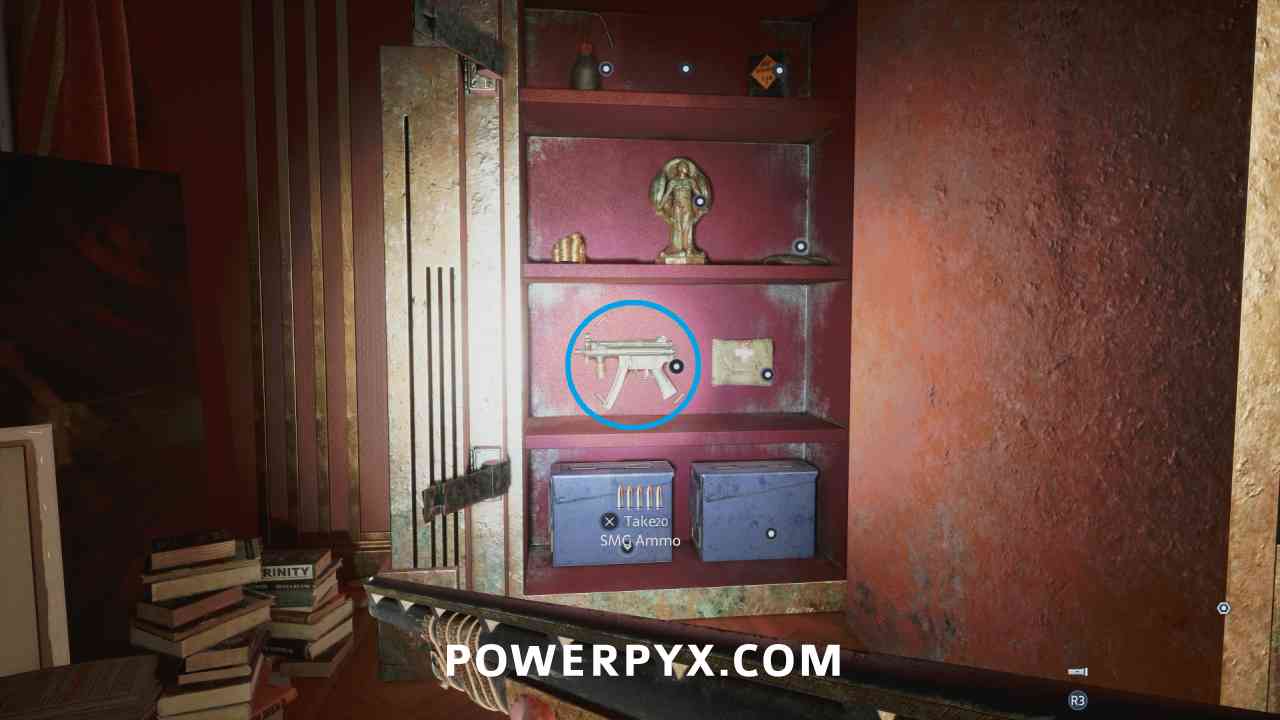
From the starting position spin the spots: Left, Top, Top, Top, Top.
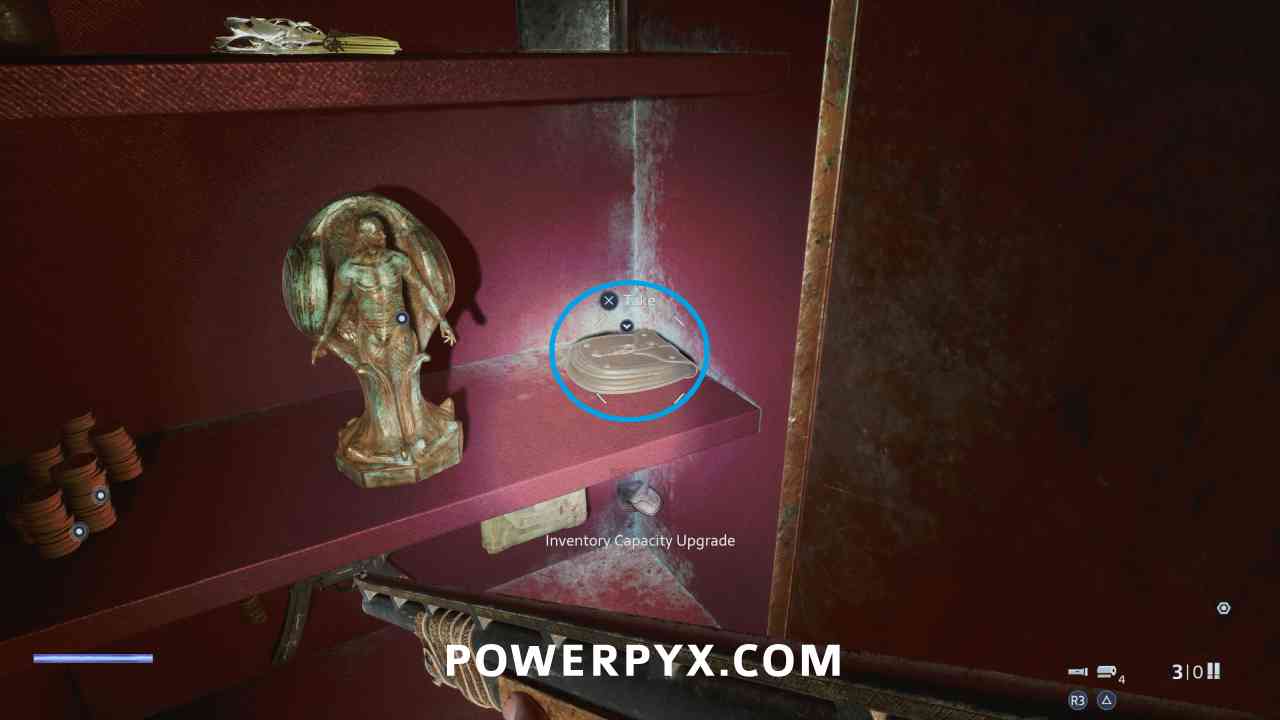
Inventory Capacity Upgrade
In the safe with the SMG.
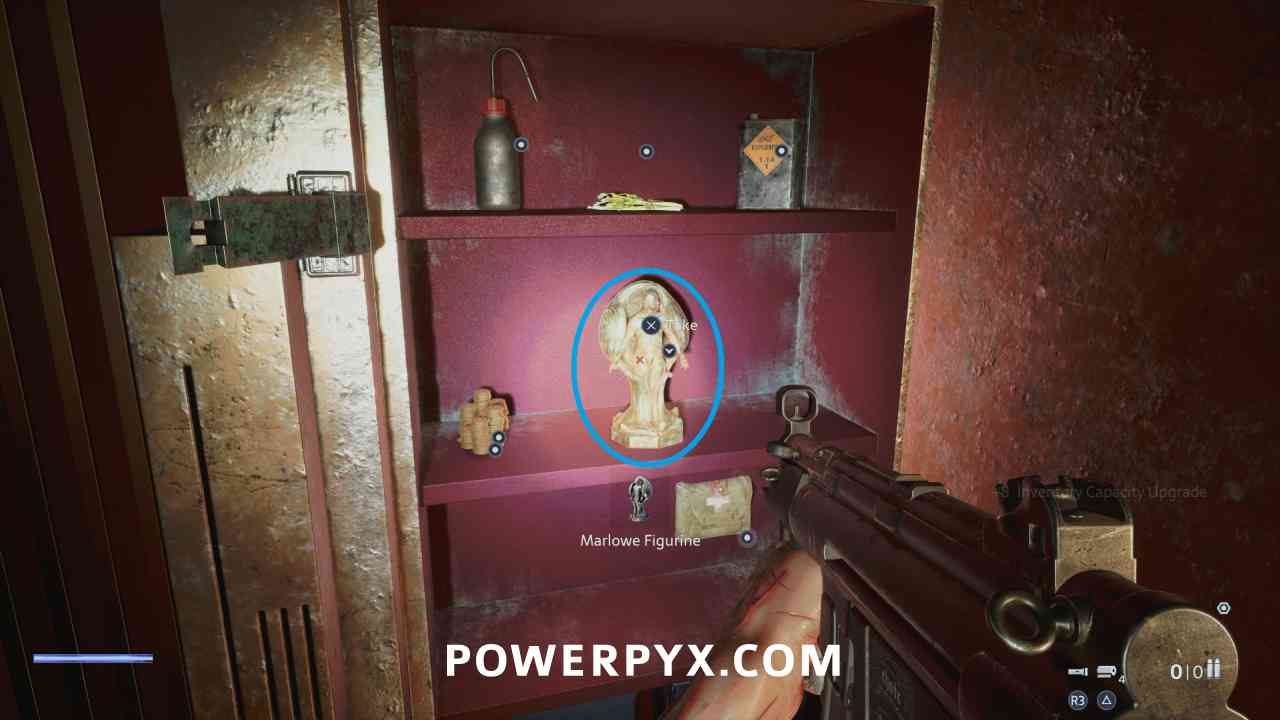
Key Item: Marlowe Figure
In the safe.
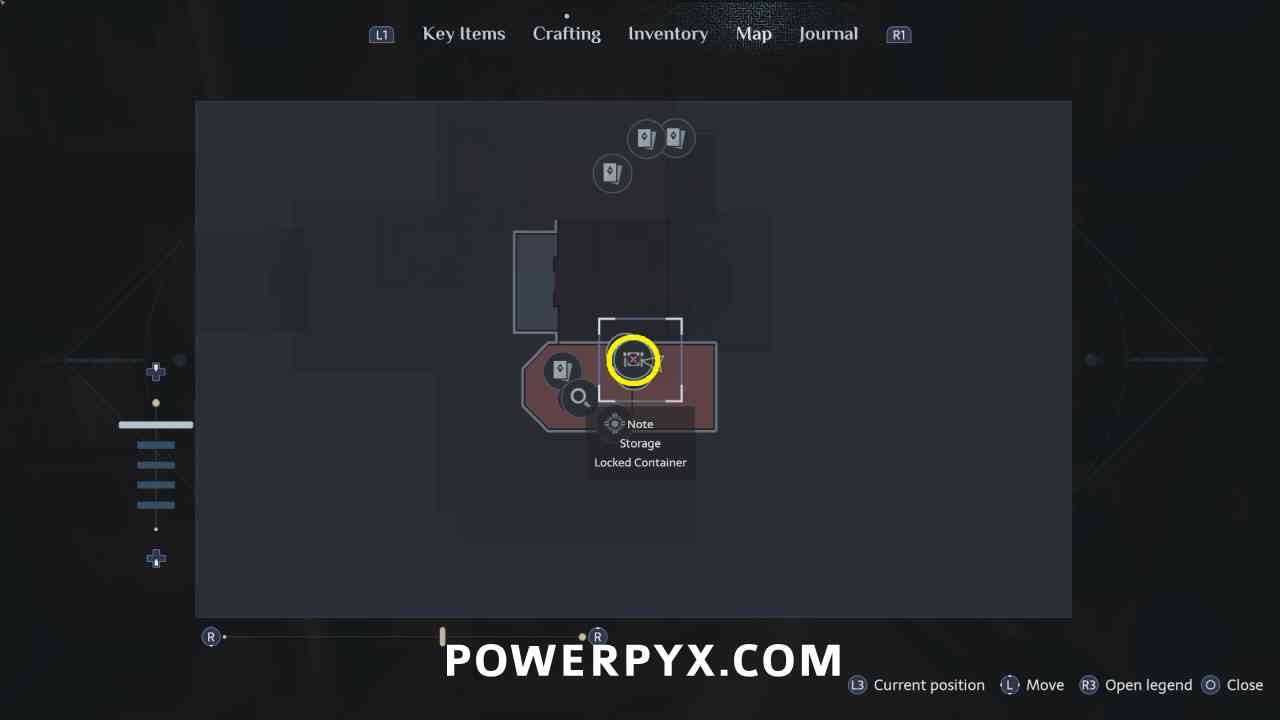
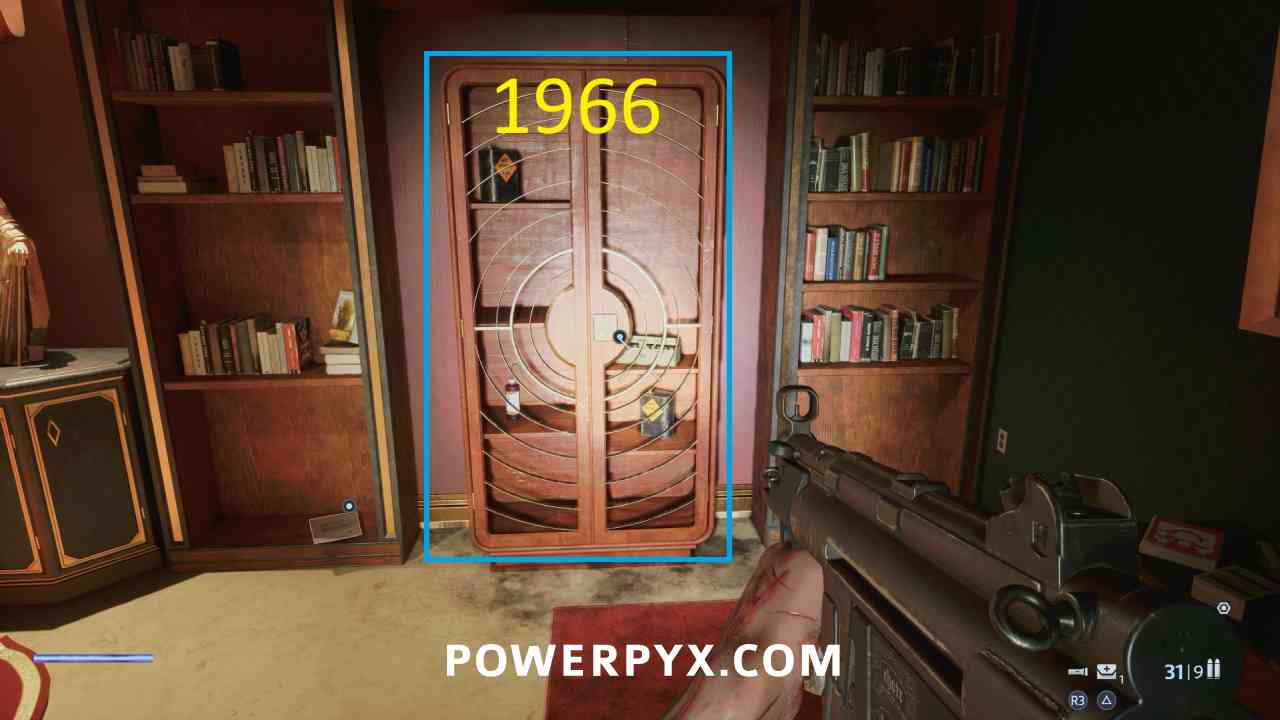
Keypad: 1966
Cabinet in the southeastern room on the top floor. Date on back of the painting in the one room + 300 as shown on the note left of the cabinet.
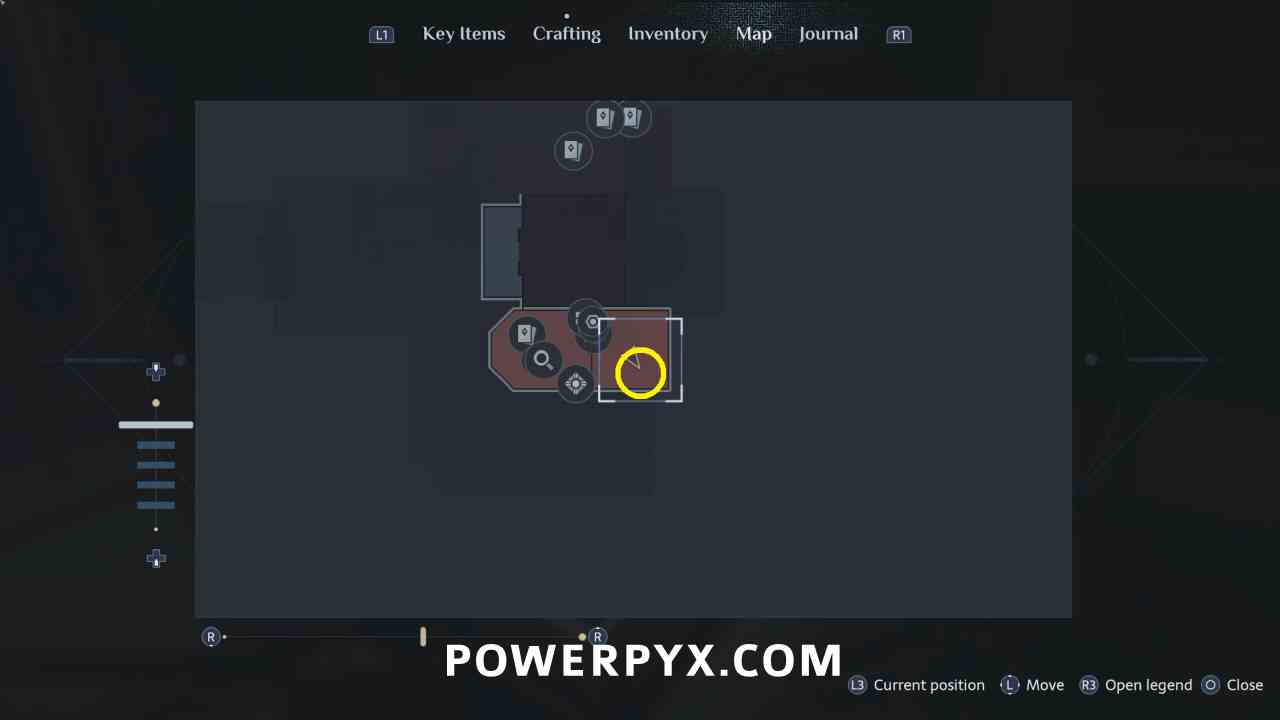
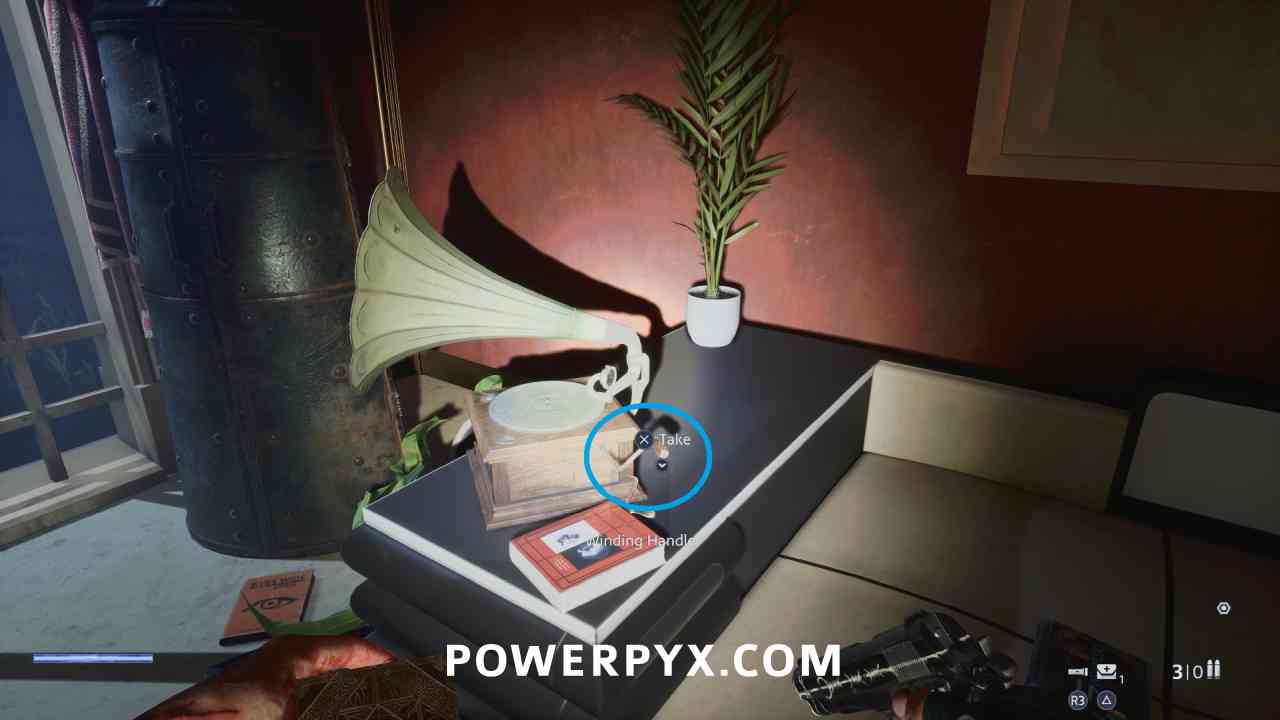
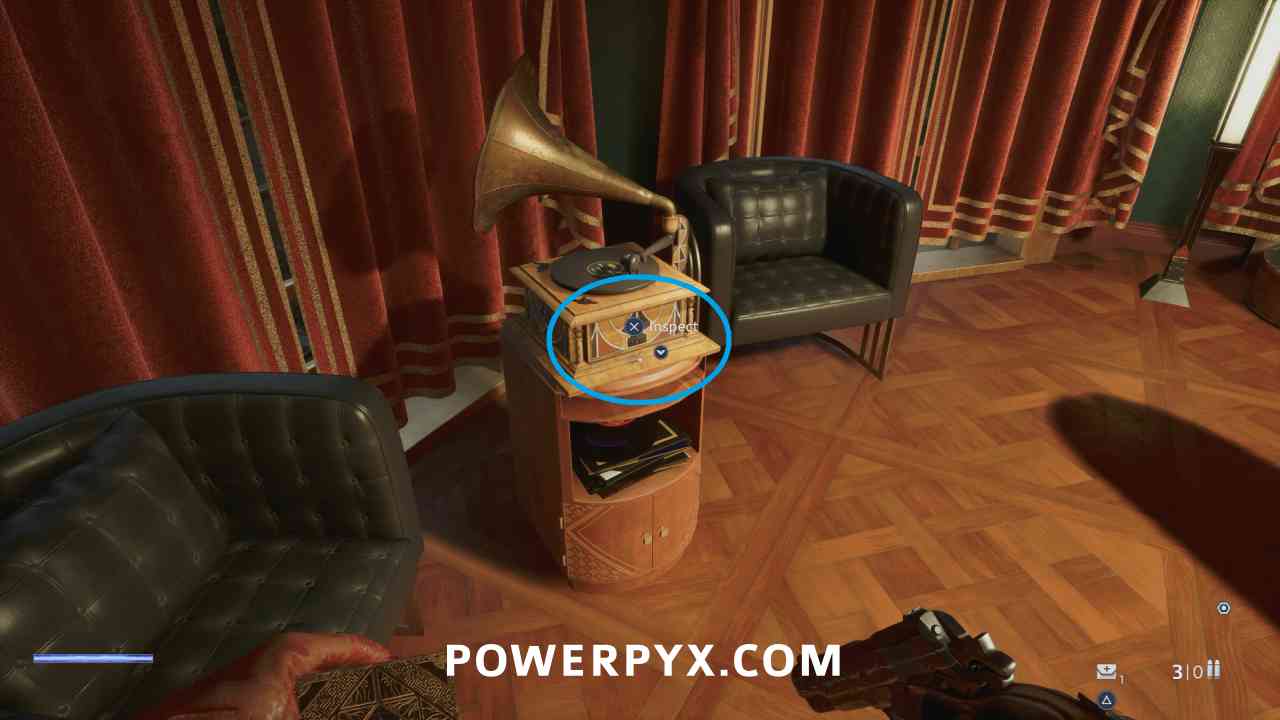
Key Item: Winding Handle
Take it from the gramophone in the southeast corner of this room.
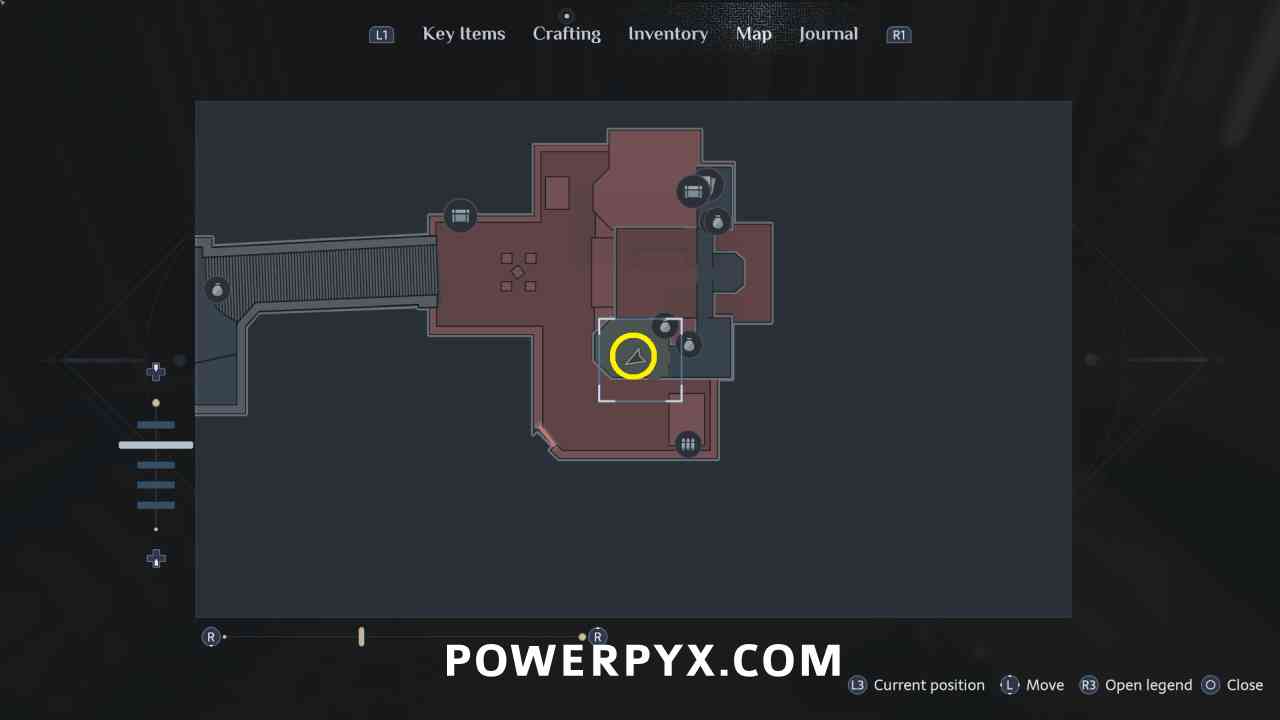
Key Item: Bruno Figure
Go downstairs to the dining room to the south, use the Winding Handle on the gramophone to obtain the Bruno Figure.
Key Items: Resurrection Key + Statue’s Hand
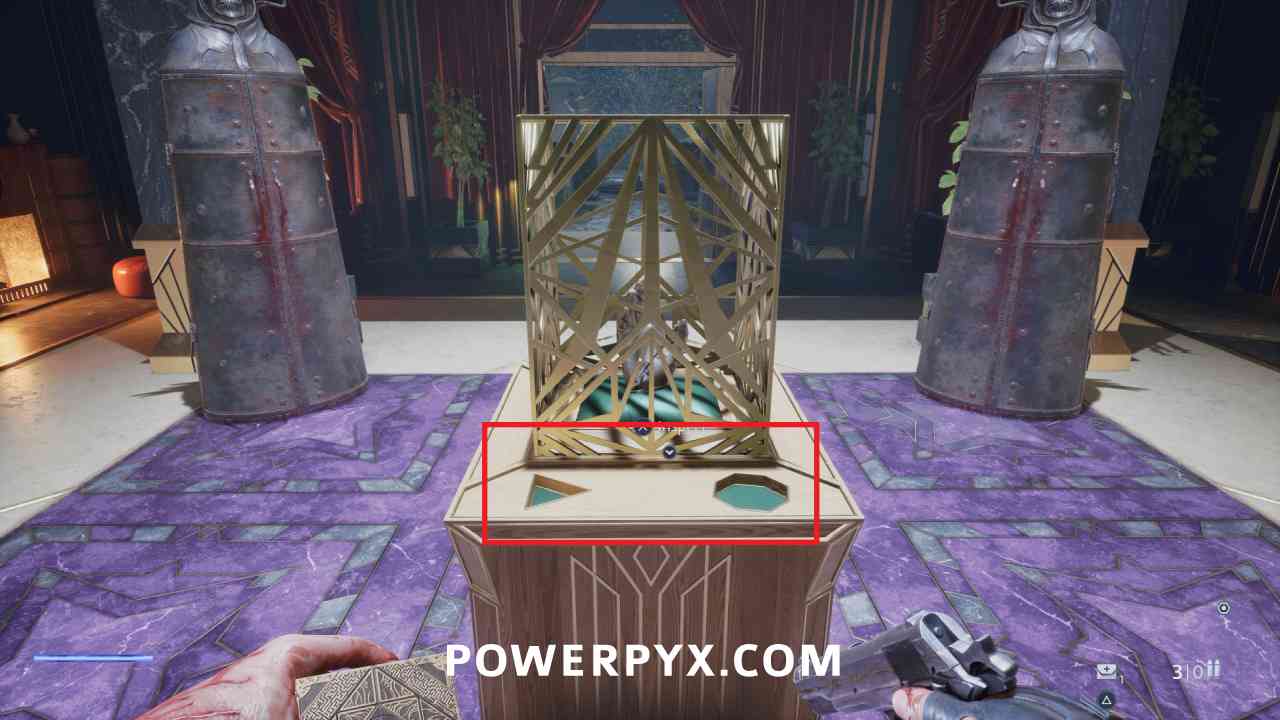
In the center of the area, use the Marlowe Figurine and Bruno Figurine on the pedestal to obtain the Statue’s Hand.
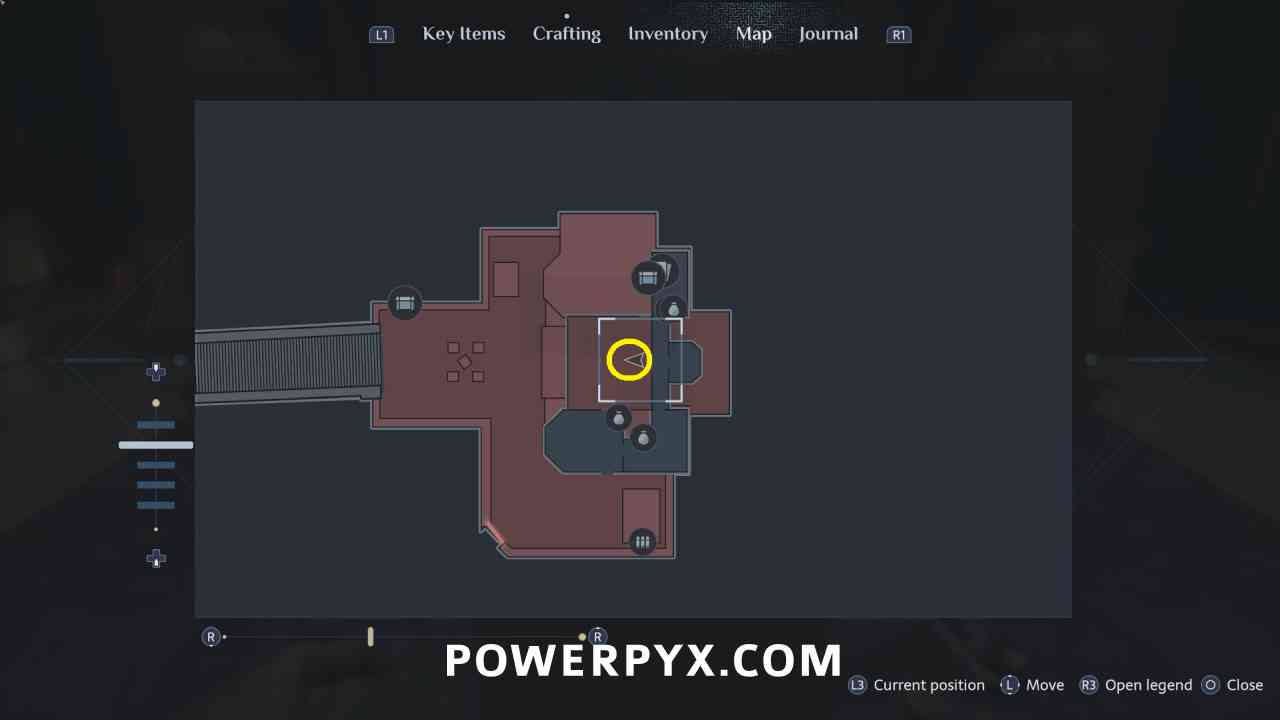
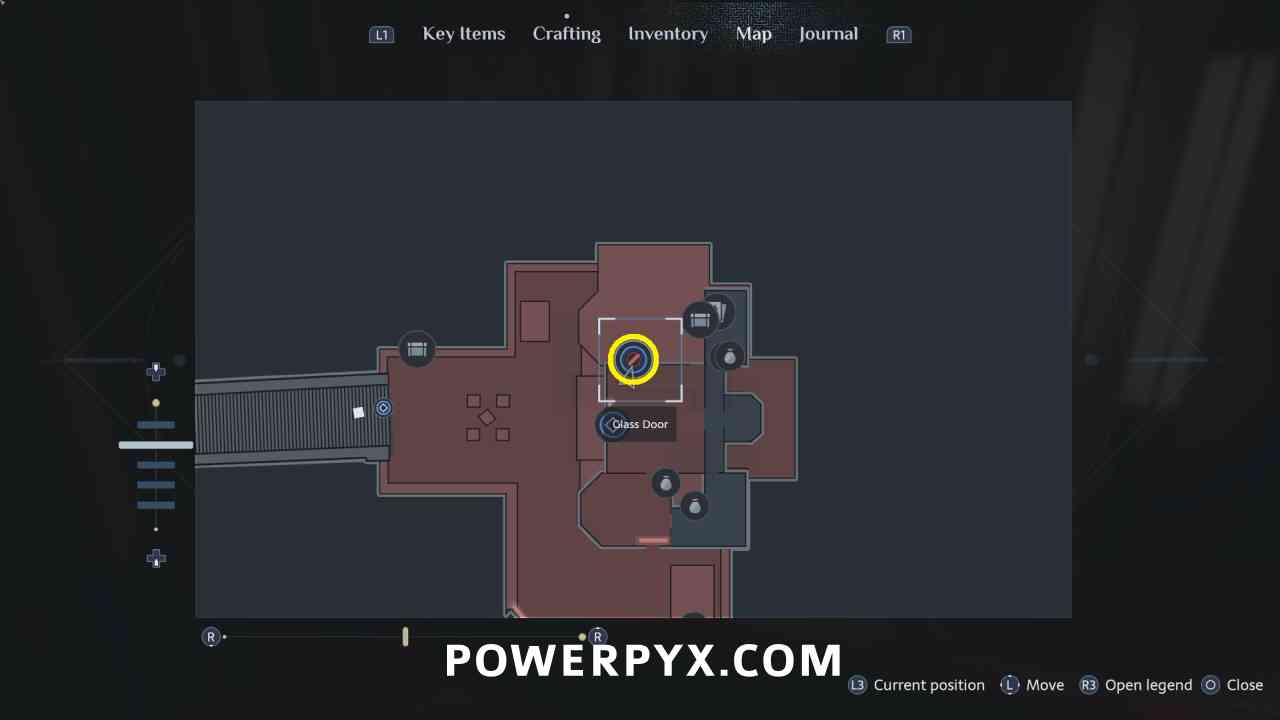
After defeating the two enemies use the Resurrection Key on the Glass Door in the northwest corner of the room.
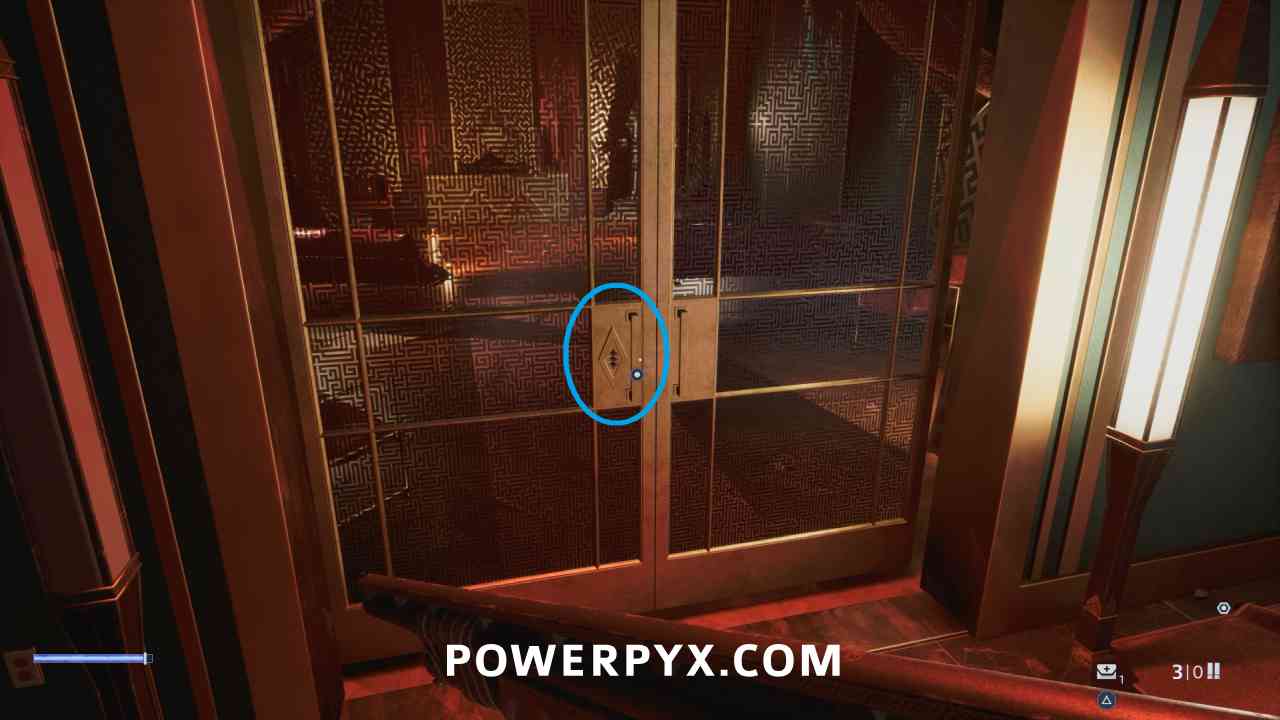
Escape the Sacrifice Room
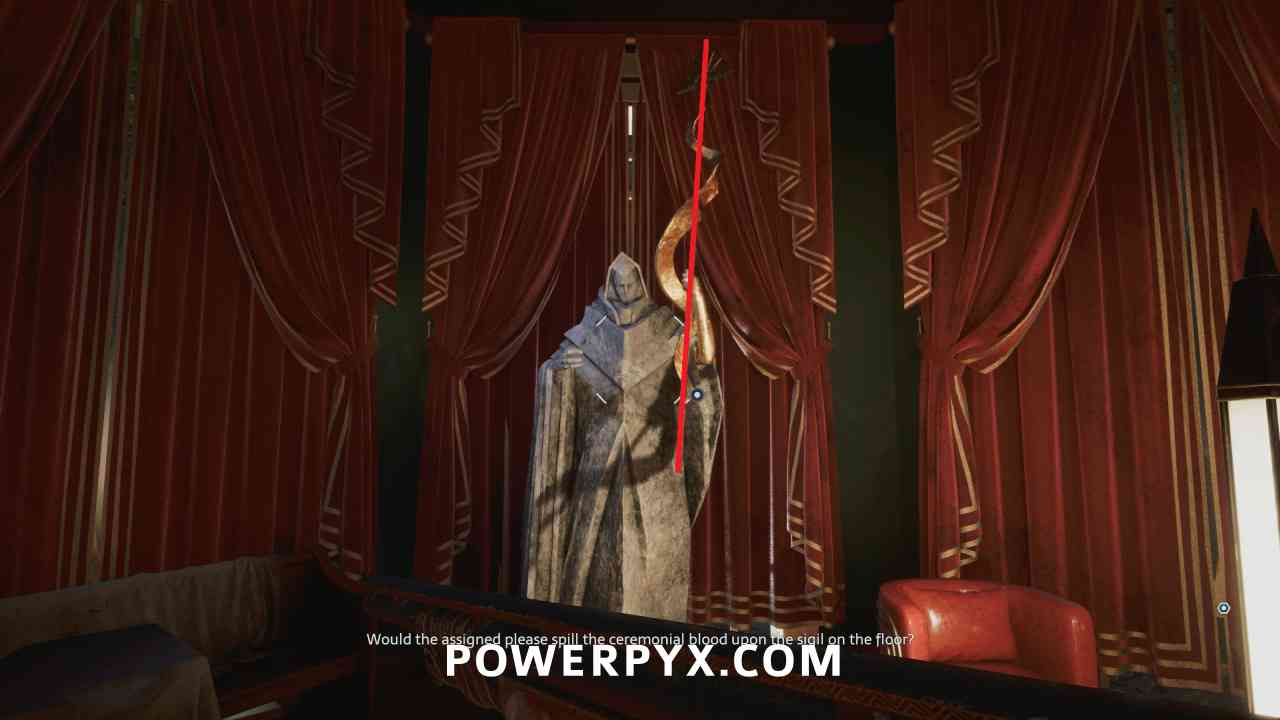
Inside the room, you need to interact with the statues so they look like the statues in the painting. Spear is pointing straight up.
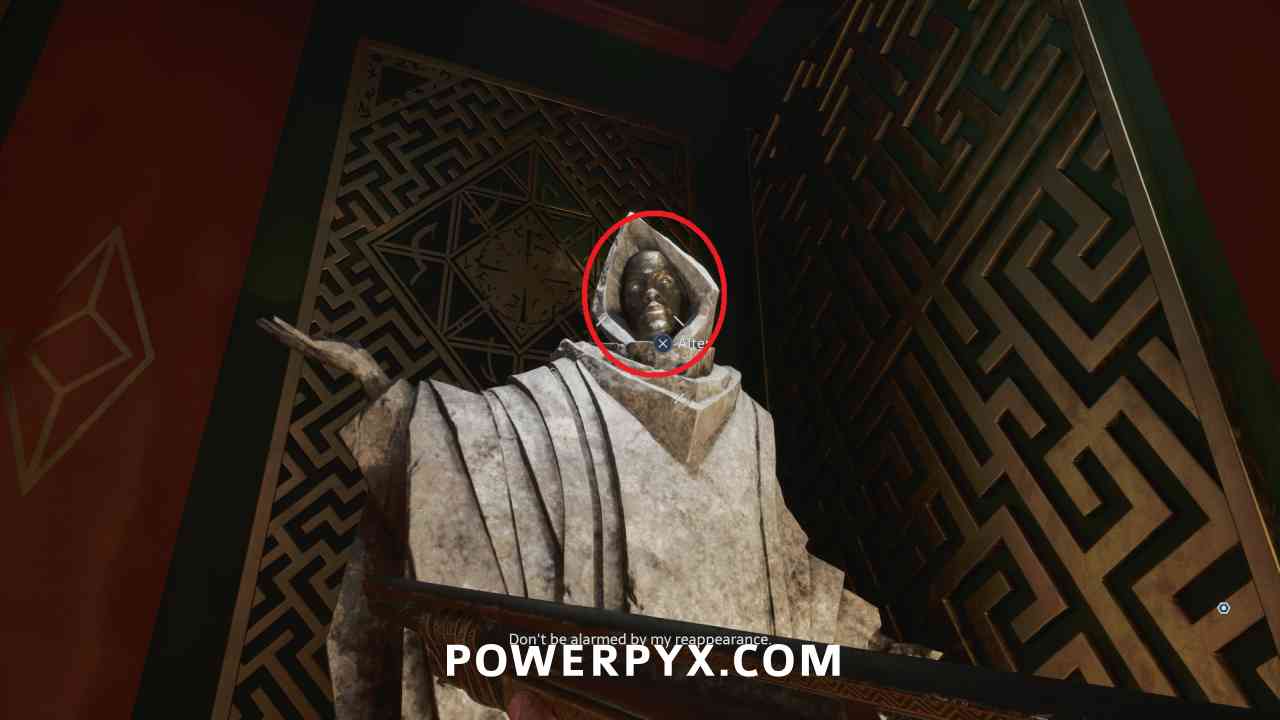
Face is a normal person face (the one after the skull).
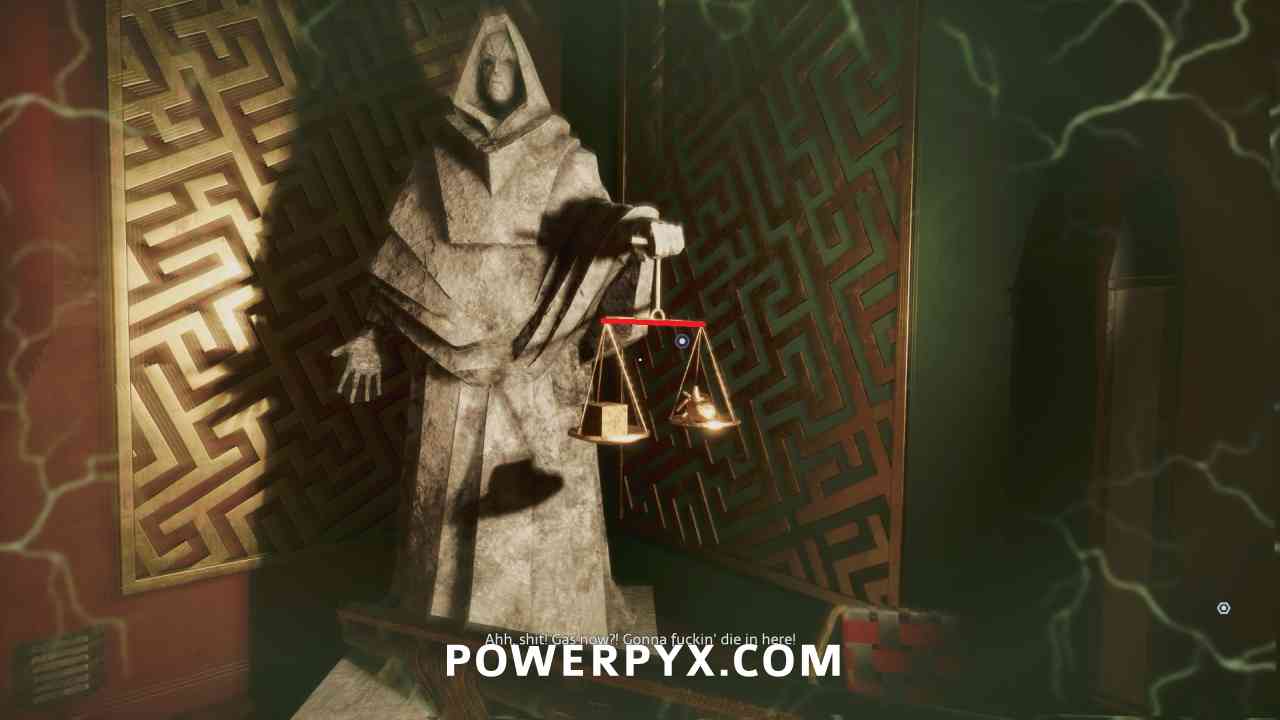
Scales are horizontal. This moves the painting out of the way so you can exit.
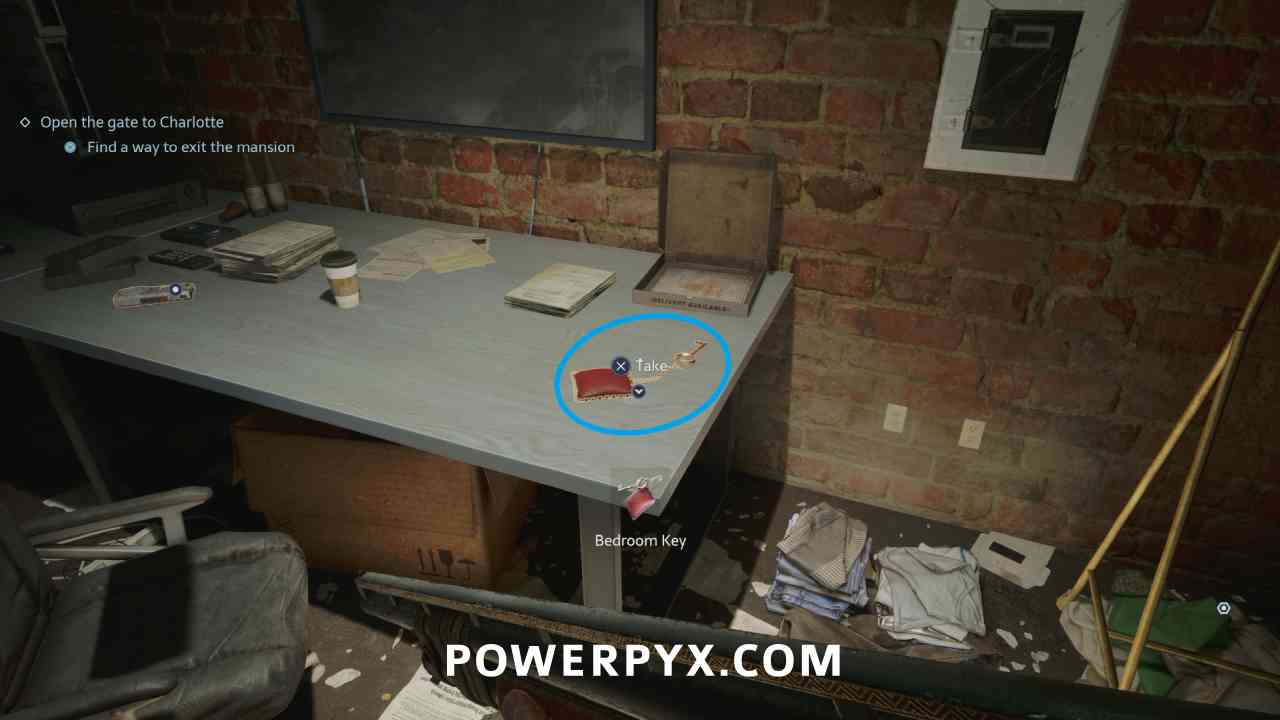
Key Item: Bedroom Key
On the table in the room behind the painting.
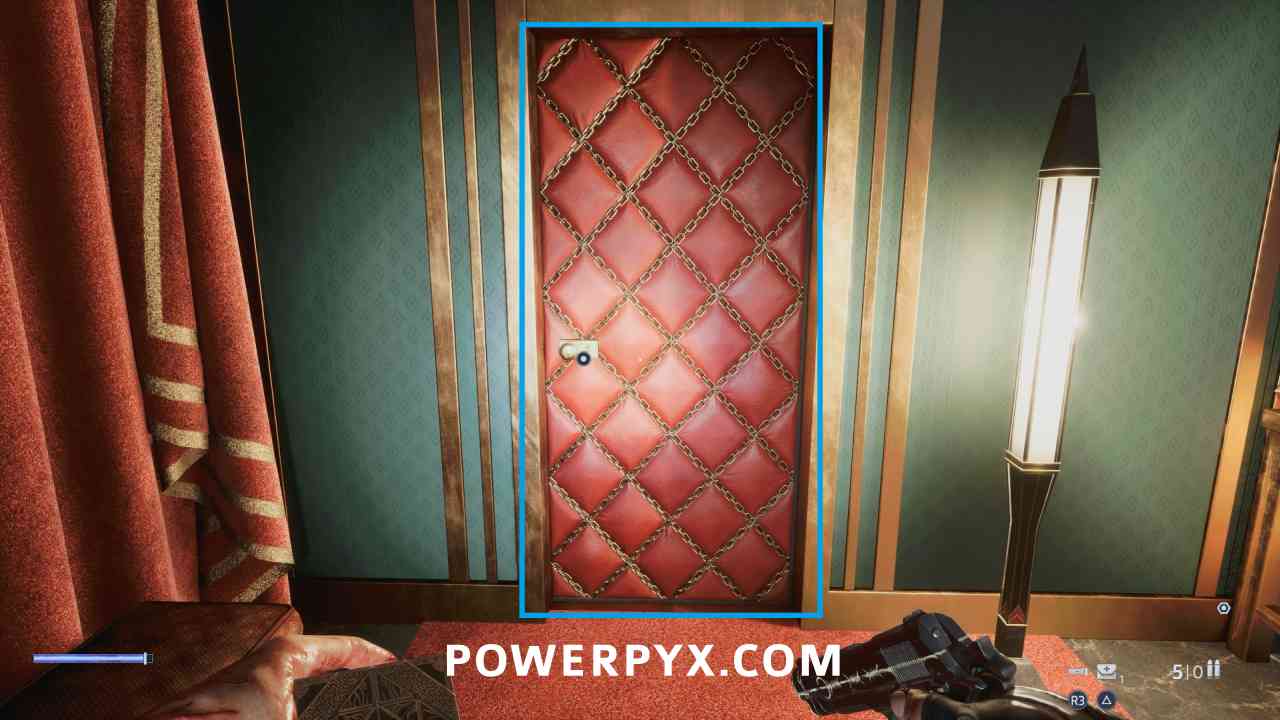
Go upstairs to the door covered in gold chains to use the Bedroom Key.
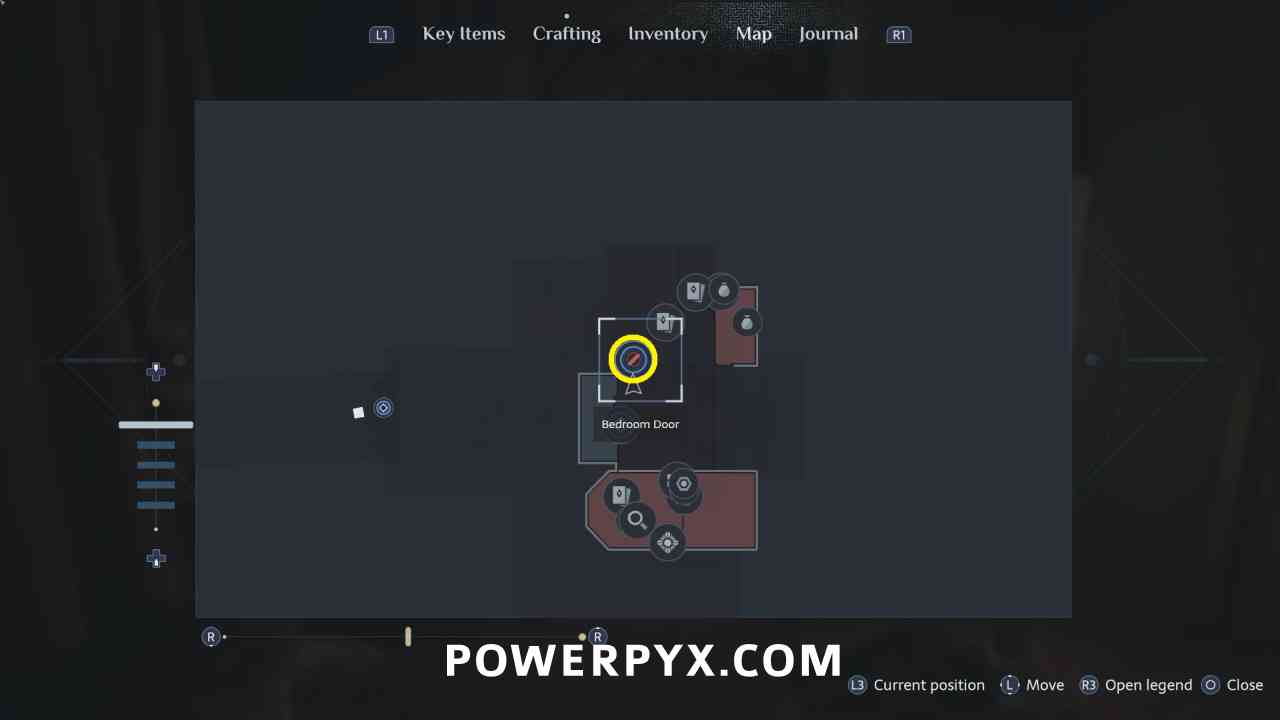
Find a Way to Exit the Mansion
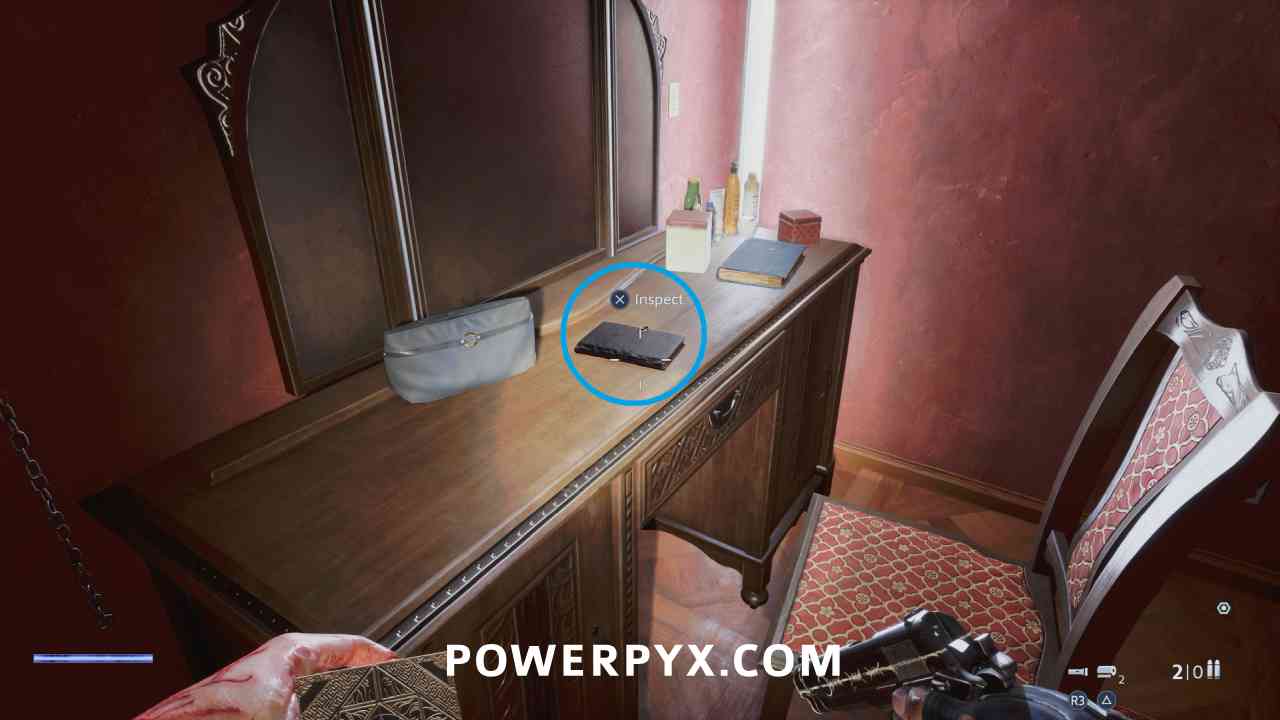
Key Item: Security Card
Inside inspect the book on the table to obtain the Security Card. Use it on the front door downstairs to exit the mansion.
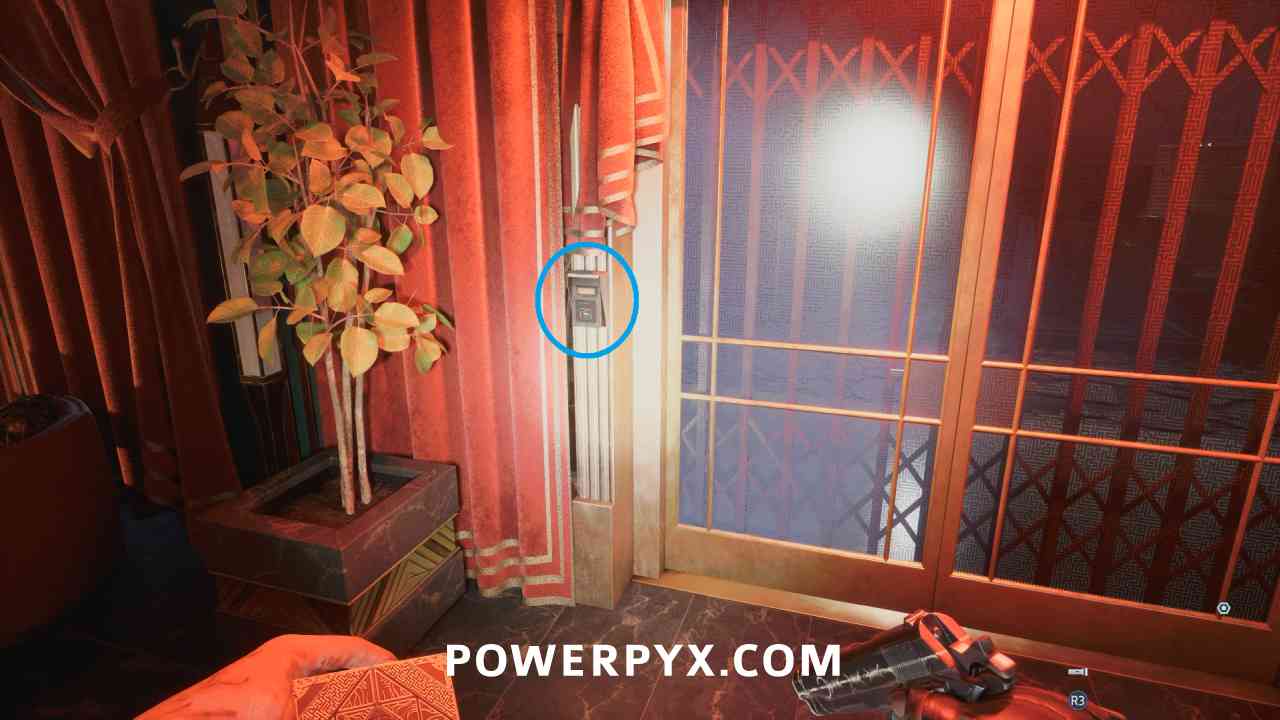
Shotgun Upgrade: Extended Mag Tube
After collecting the Statue’s Hand and exiting the mansion, available from Zora at second shop for 200 coins
SMG Upgrade: Supersonic Bullets
After collecting the Statue’s Hand and exiting the mansion, available from Zora at second shop for 300 coins. Purchasing this is recommended.
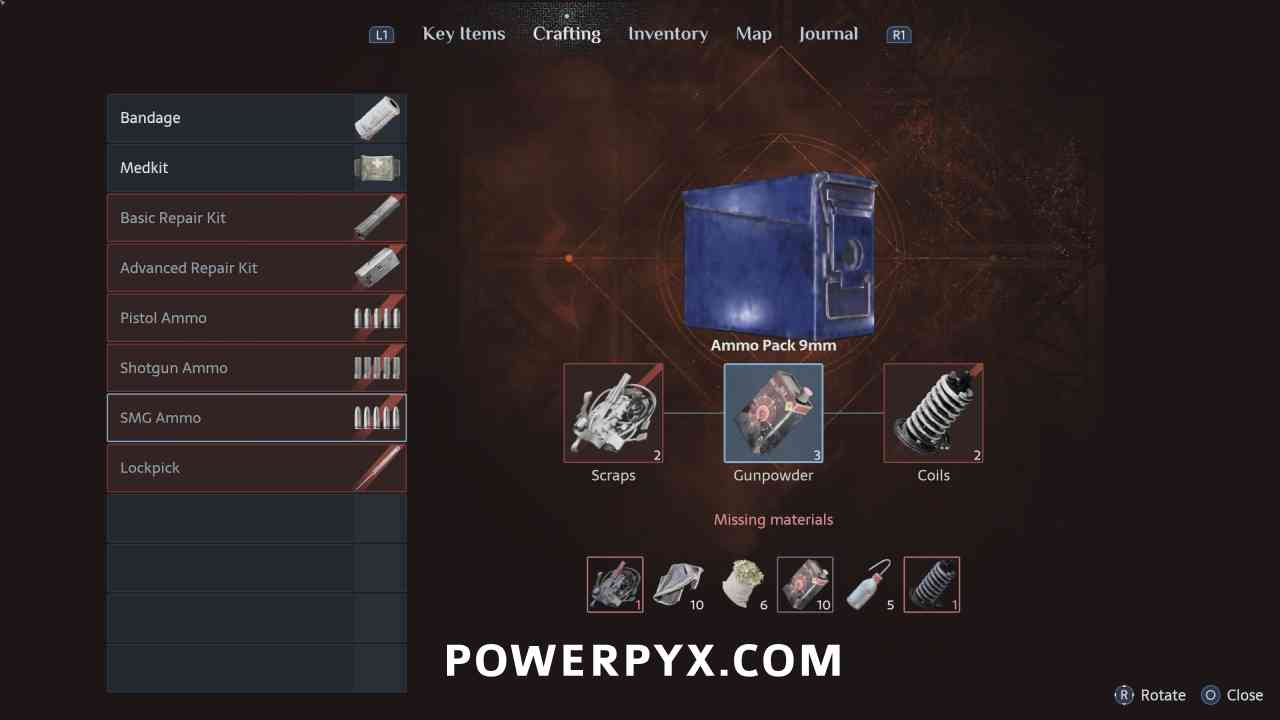
Crafting Recipe: Ammo Pack 9mm (SMG Ammo)
After collecting the Statue’s Hand and exiting the mansion, purchase from Zora at second shop for 140 coins – 2 Scraps + 3 Gunpowder + 2 Coils
Complete the First Statue
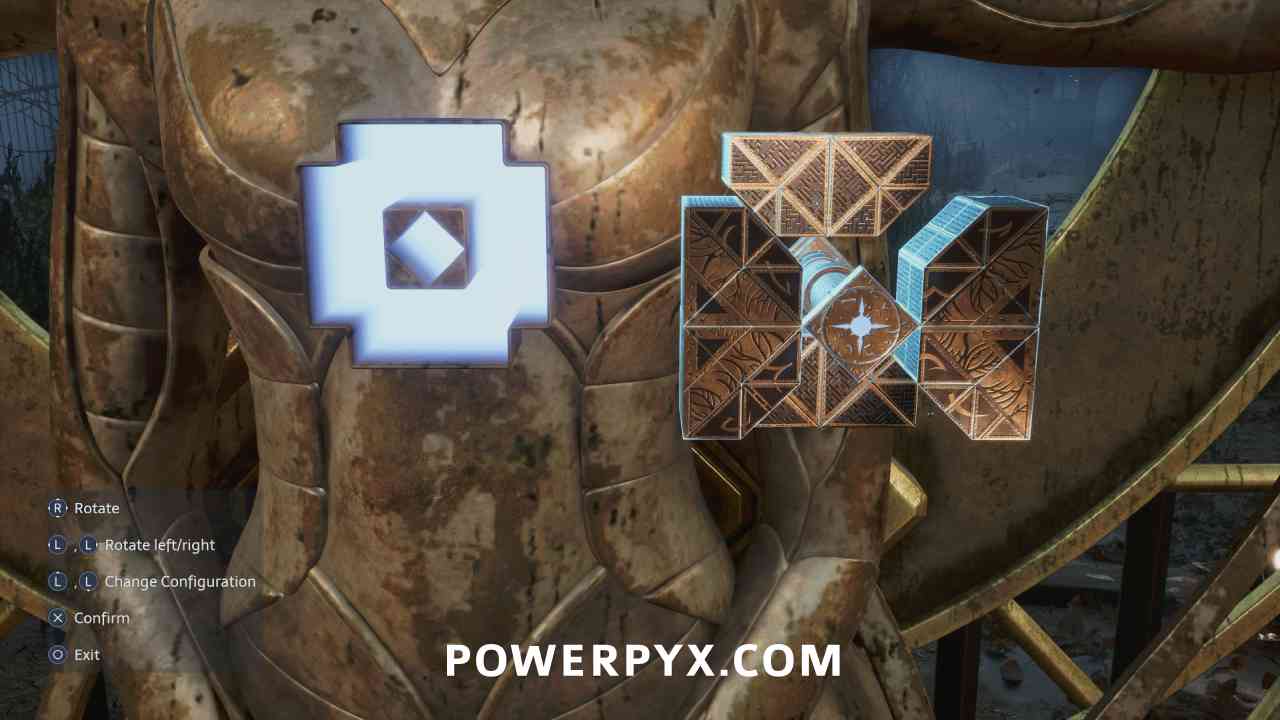
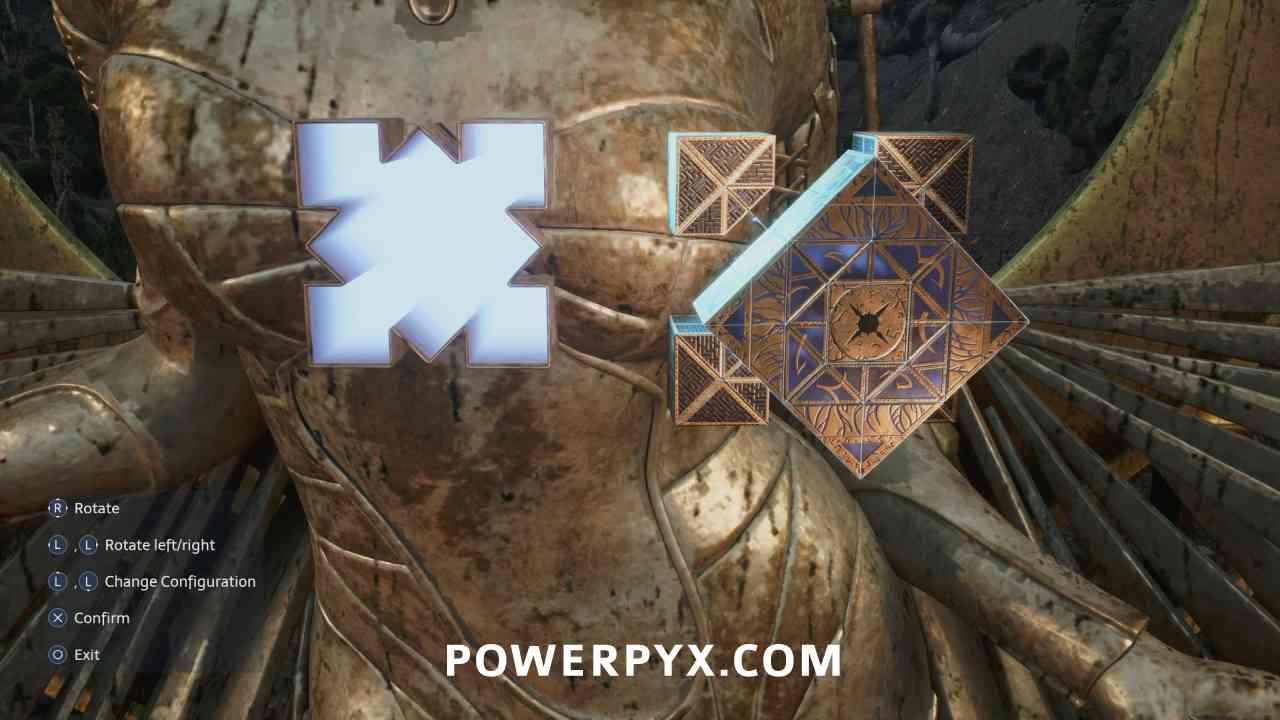
Use the Statue’s Hand on the gate to the east, and change the Genesis Configuration to fit in the slot.
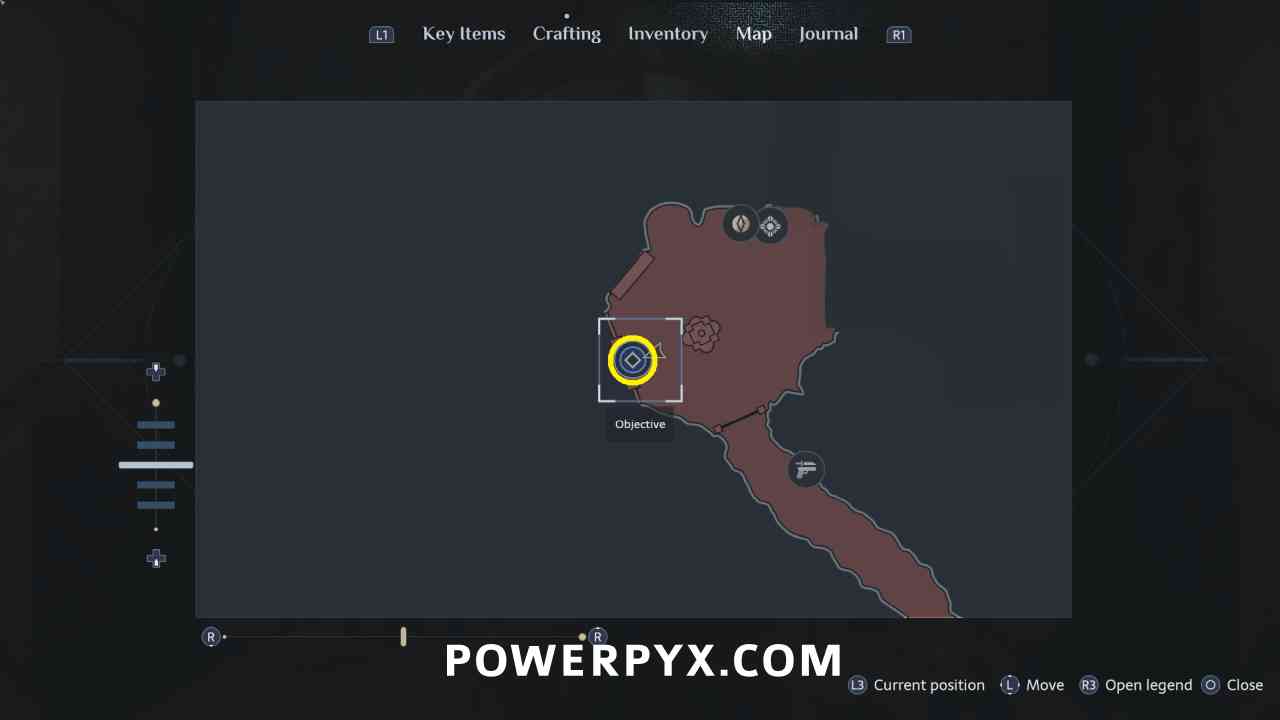
Find Another Missing Statue Part
Pistol Upgrade: 45 Super Rounds
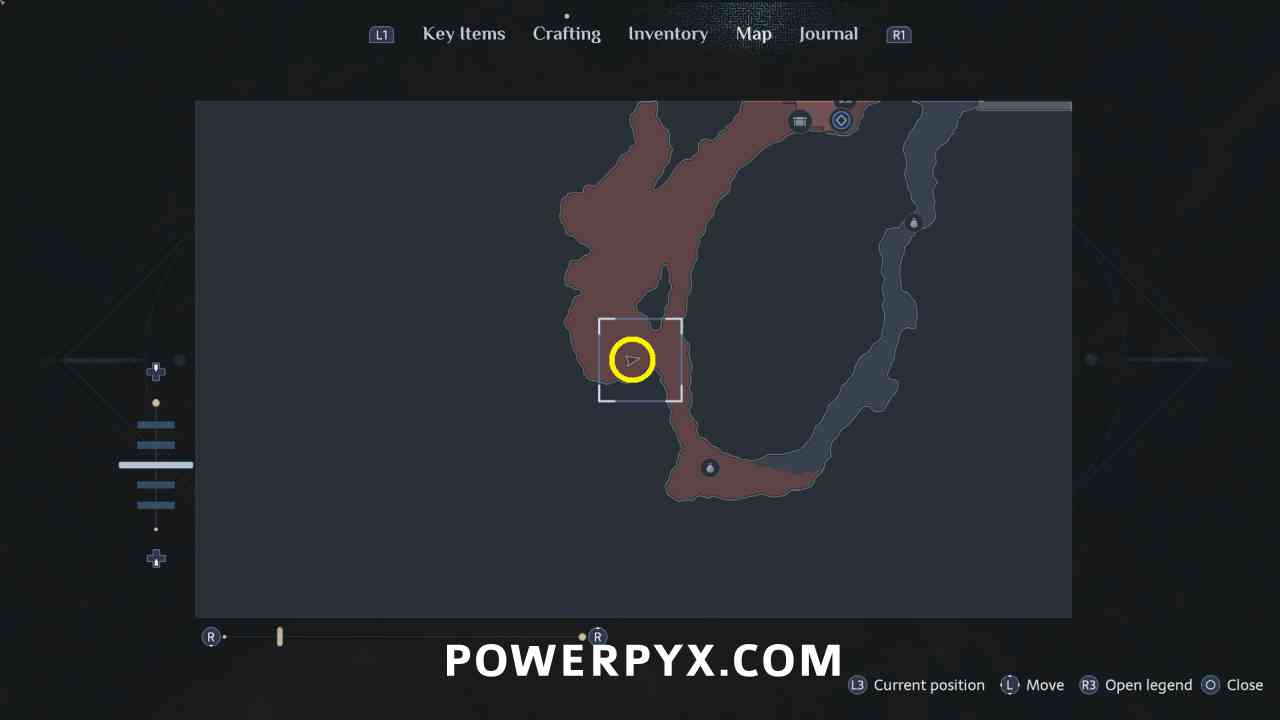
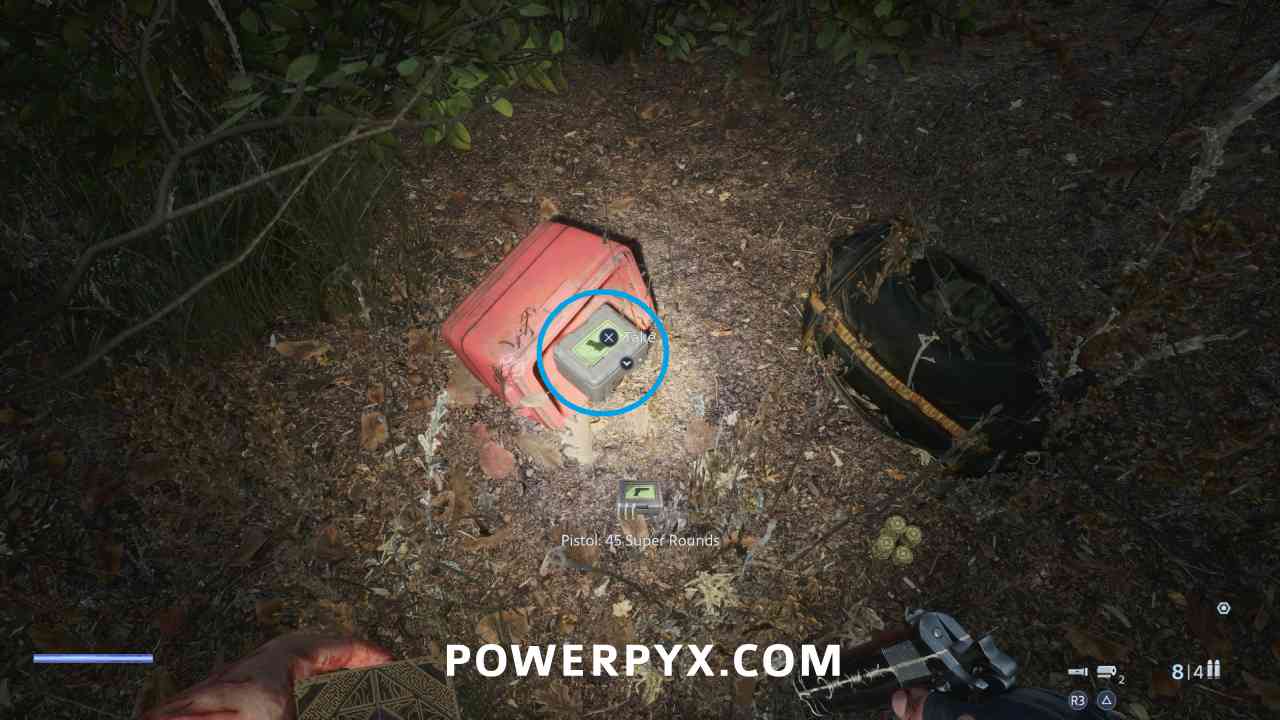
While progressing through the next area to the west there is a campground area with an exploding enemy. South in a dead end this is on the ground.
Key Item: Statue’s Head
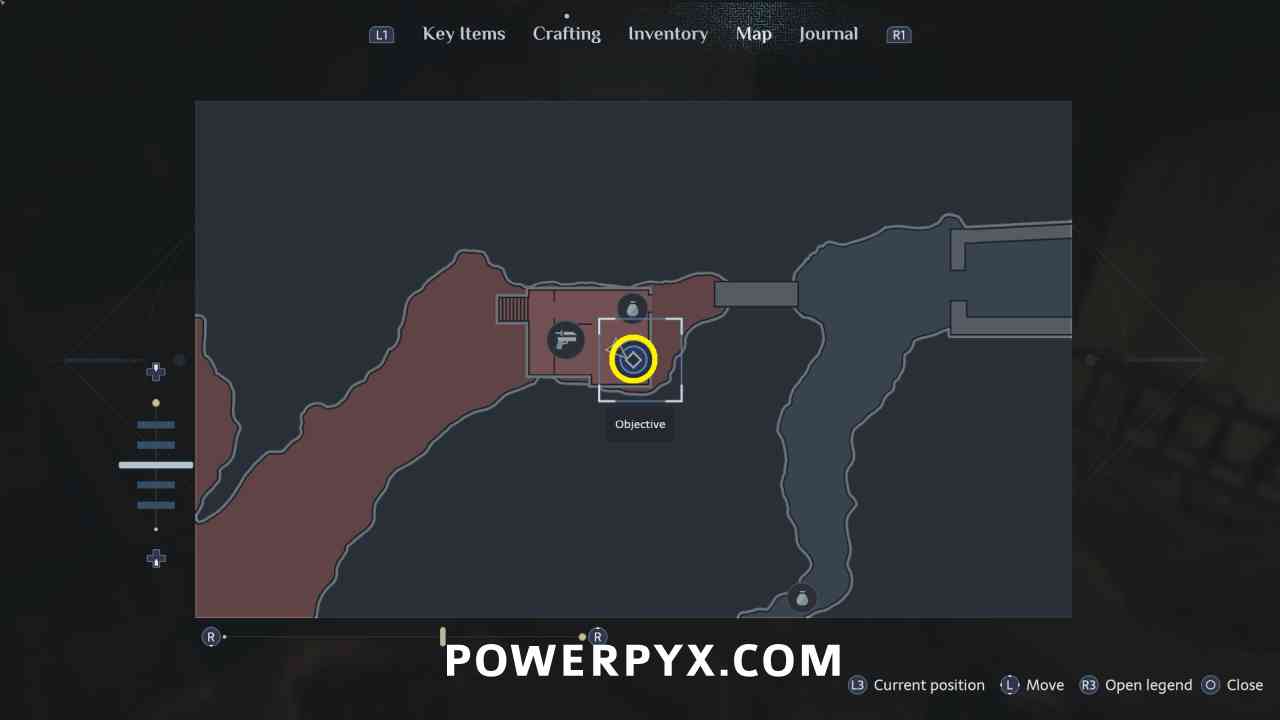
In the cabin at the end of the path on a chair. After picking this up you will start being attacked by large groups of enemies in the shack. You can grab boards from the north room to put on the windows to slow them down from getting inside while you fight them.
Complete the Second Statue
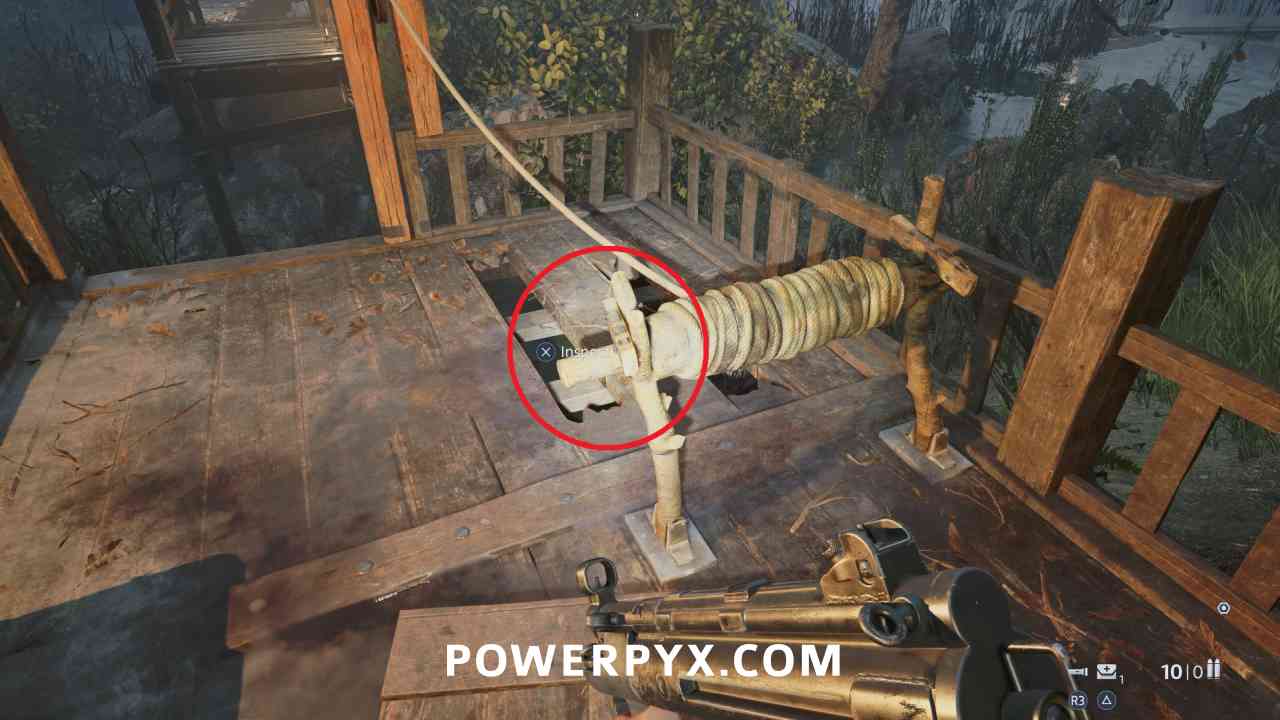
Key Item: Crank Handle
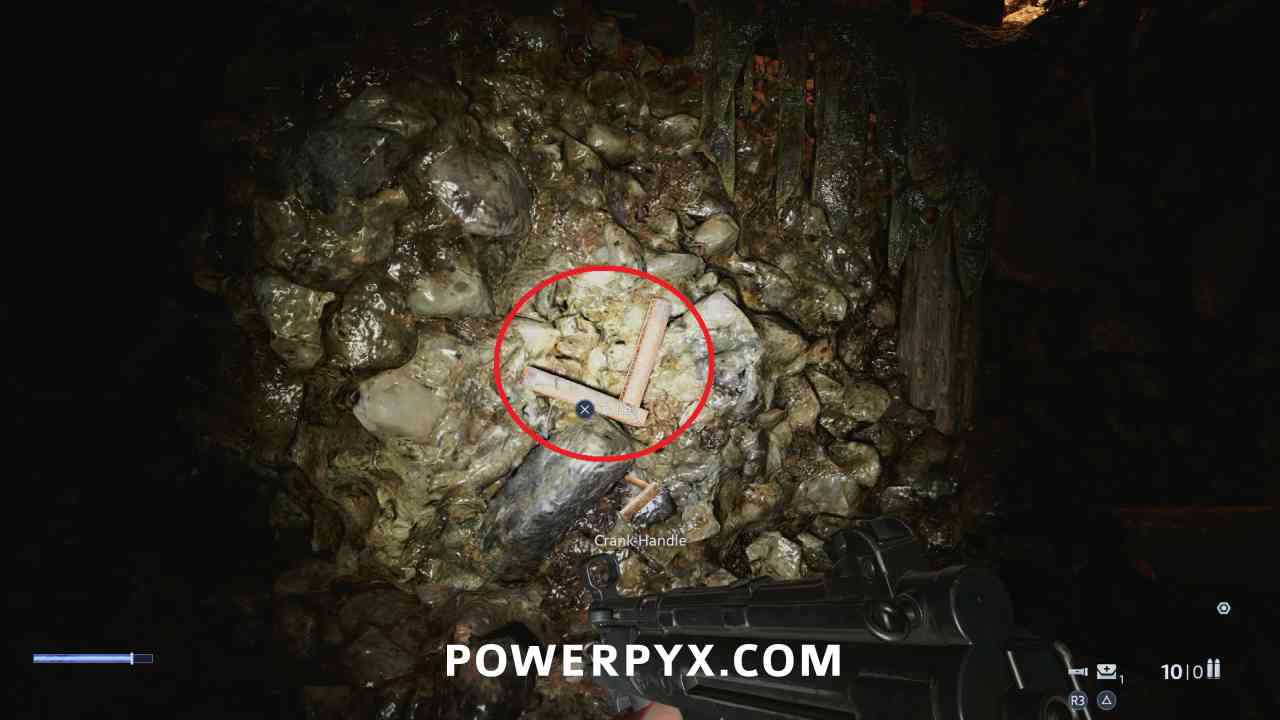
After you defeat enough enemies and get dropped through the floor, go around the corner to pull this from the wall. Climb back out of the hole and use it to extend the bridge out the front door of the house.
Firearm: Revolver
After collecting the Statue’s Head from the swamp area, purchase from Zora at second shop for 300 coins
Shotgun Upgrade: Dragon Breath Rounds
After collecting the Statue’s Head from the swamp area, available from Zora at second shop for 360 coins
Revolver Upgrade: Scope
After collecting the Statue’s Head from the swamp area, available from Zora at second shop for 250 coins
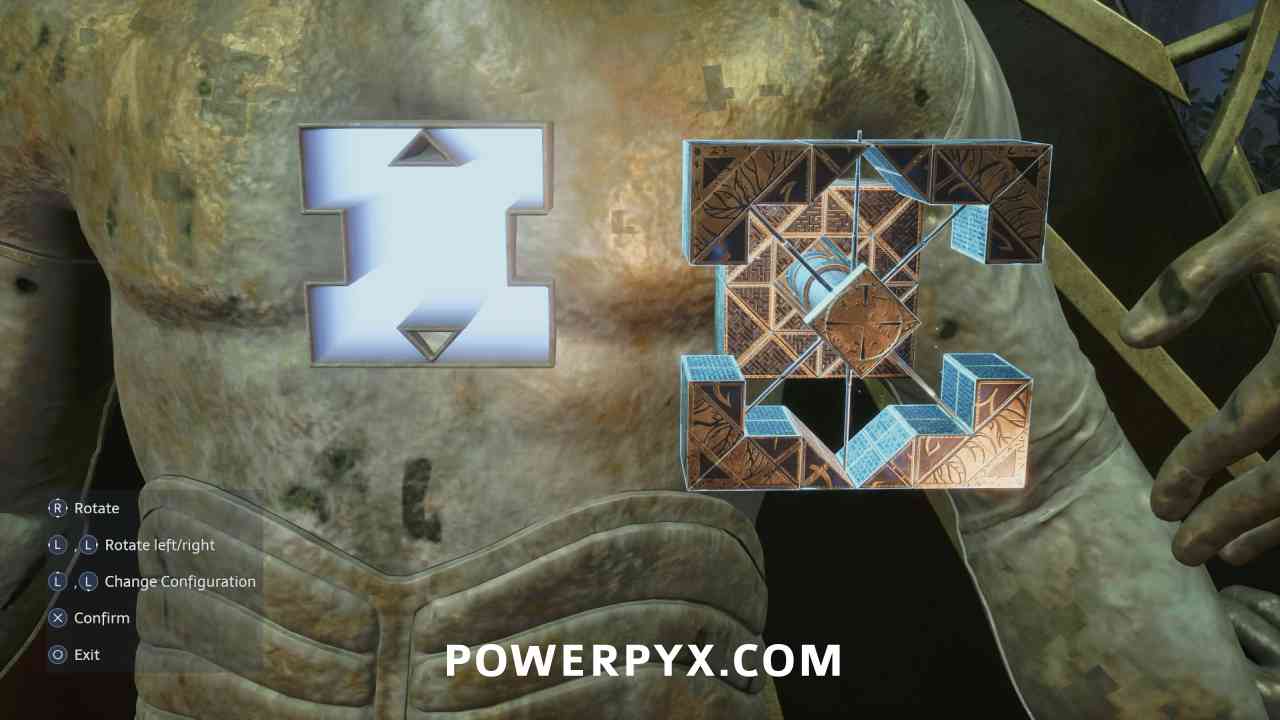
Use the Statue’s Head on the gate to the northwest, and change the Genesis Configuration to fit in the slot.
Find the Statue’s Tongue
Sticks and Stones – Use a stone to kill an enemy
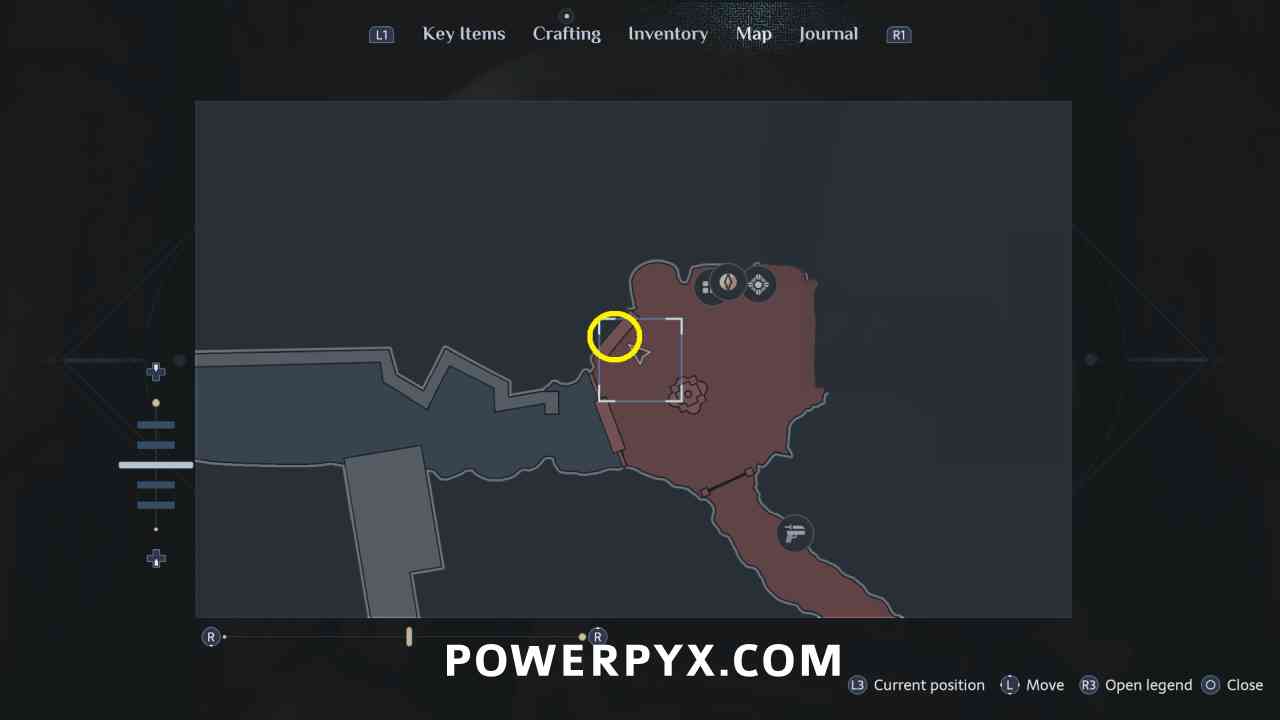
The next area is the best spot to earn this trophy. After you gain the ability to pull and throw fire, run back toward the mansion to the east and pick up a stone off the ground and carry it with you. When you run into a normal zombie (not one of the exploding ones) drop the stone on the ground and shoot them until they start flashing blue. Quickly pick up the stone and run over to the enemy and throw it at them to kill them.
Key Item: Puzzle Block #1
After gaining the ability to drain and shoot fire, go to the east of the area and this is in the hand of the body hanging in the pagoda.
Inventory Capacity Upgrade
South of the pagoda, this is in a safe in the shack at the top of the hill.
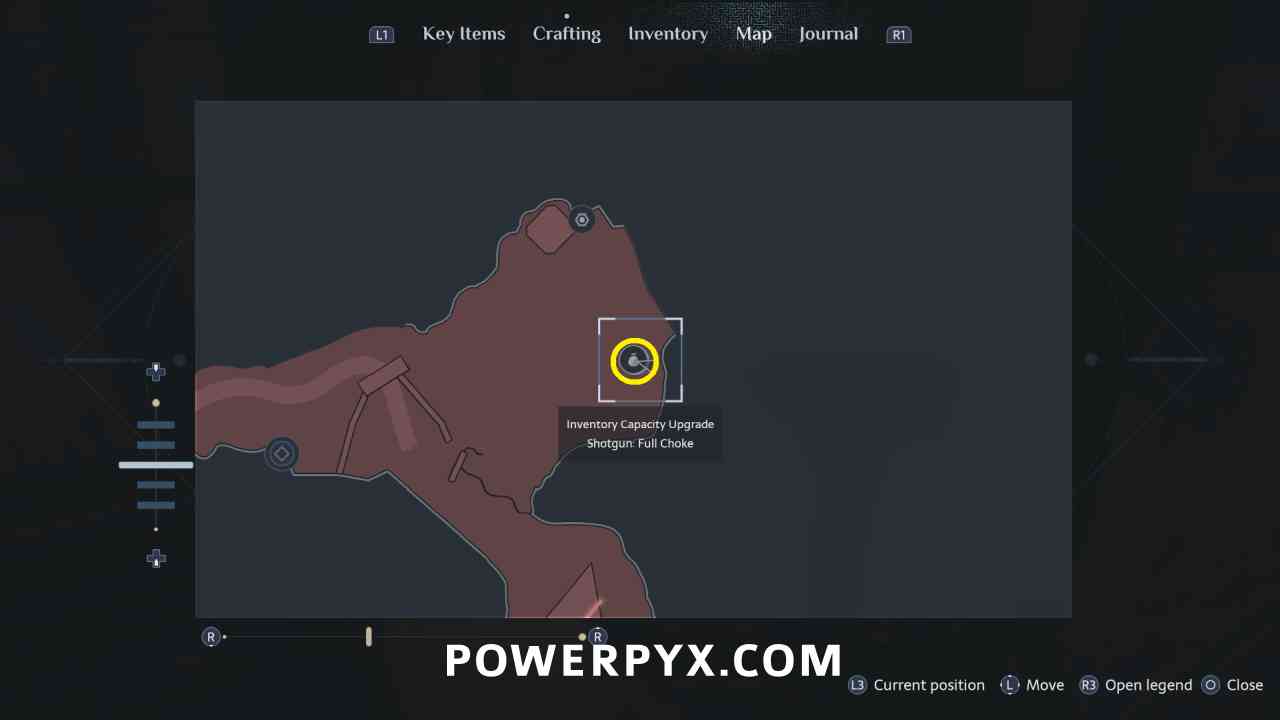
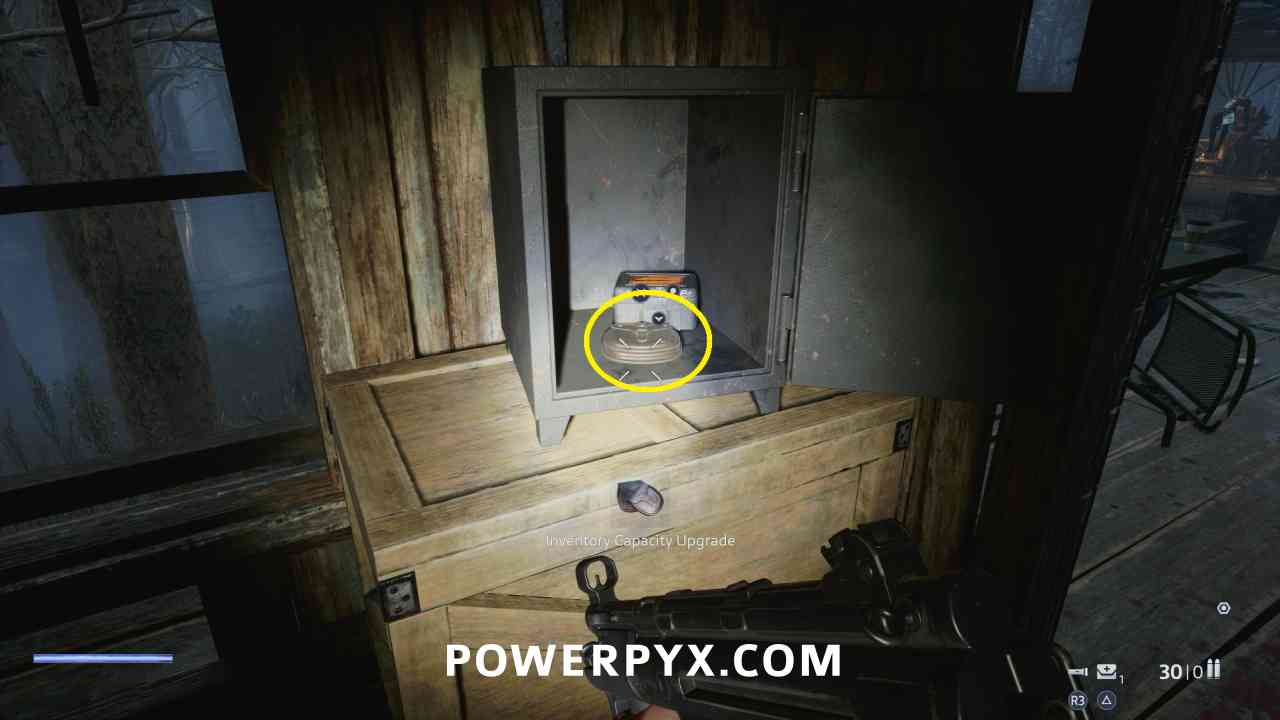
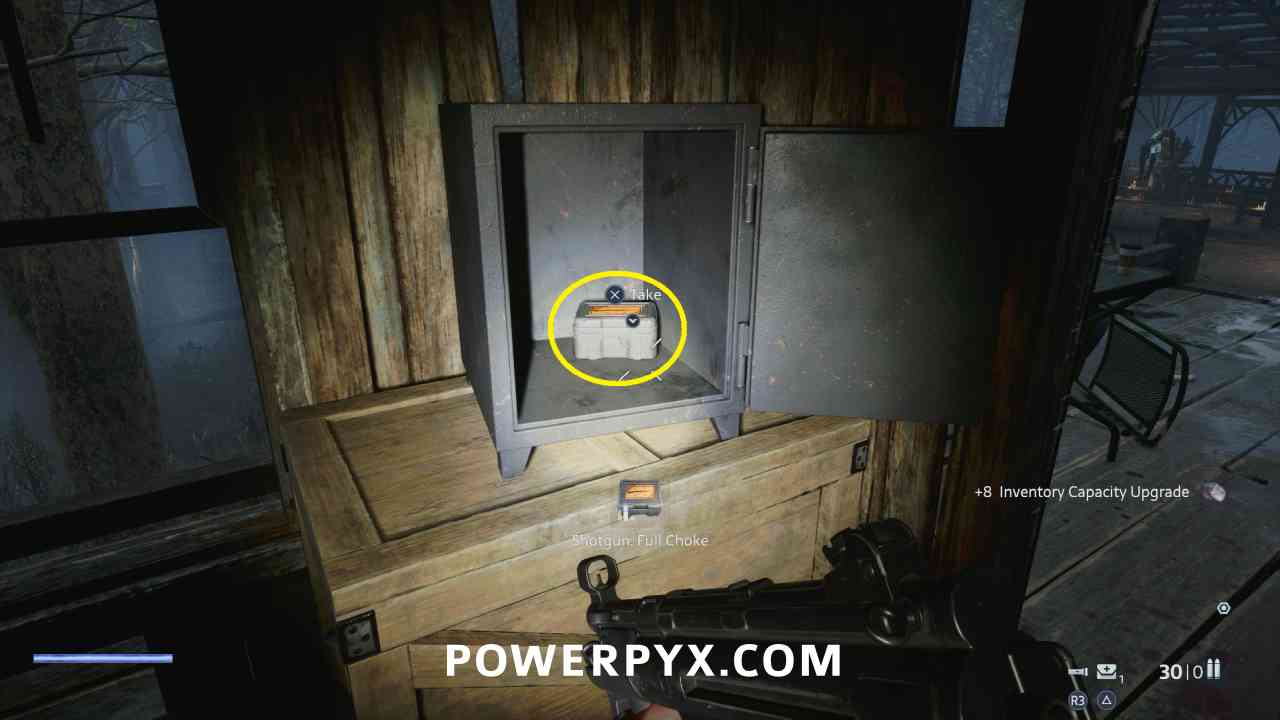
Shotgun Upgrade: Full Choke
In the same safe as the Inventory Upgrade.
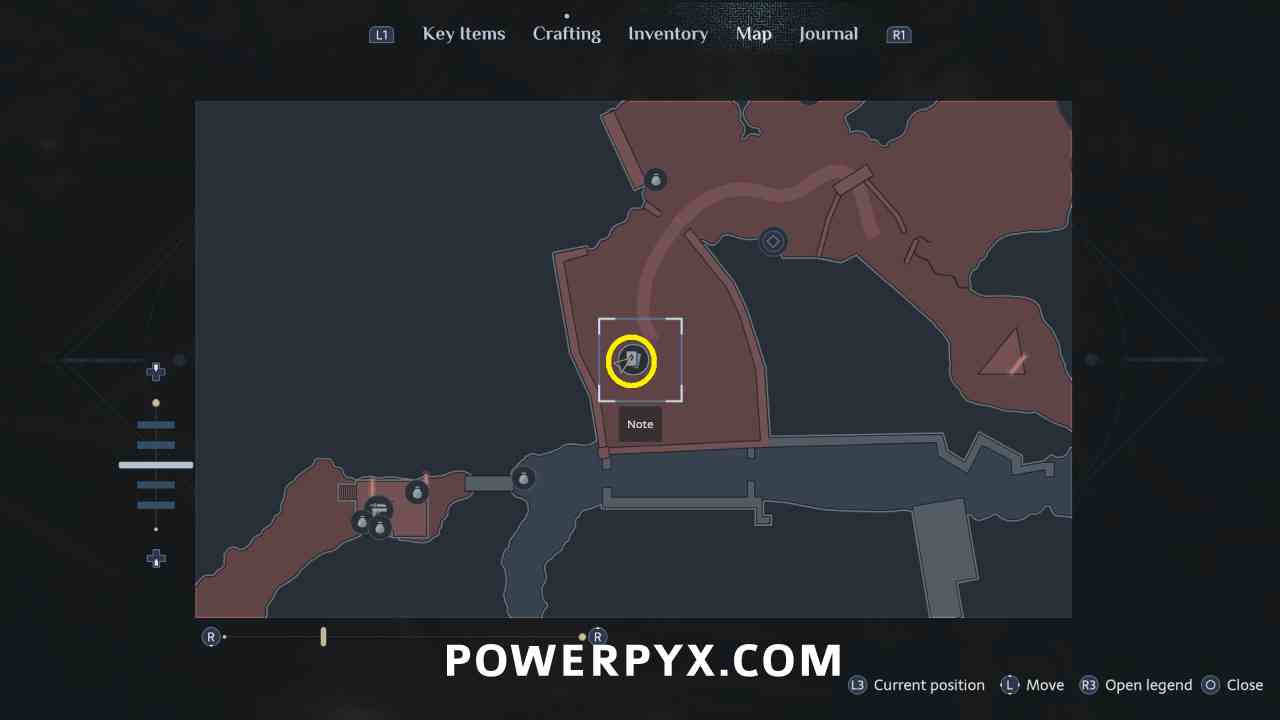
Key Item: Puzzle Block #2
To the southwest of the area, sitting on the carousel with the body strapped to it.
Red Dead Damnation
Shoot every bottle at the docks shooting range
MISSABLE
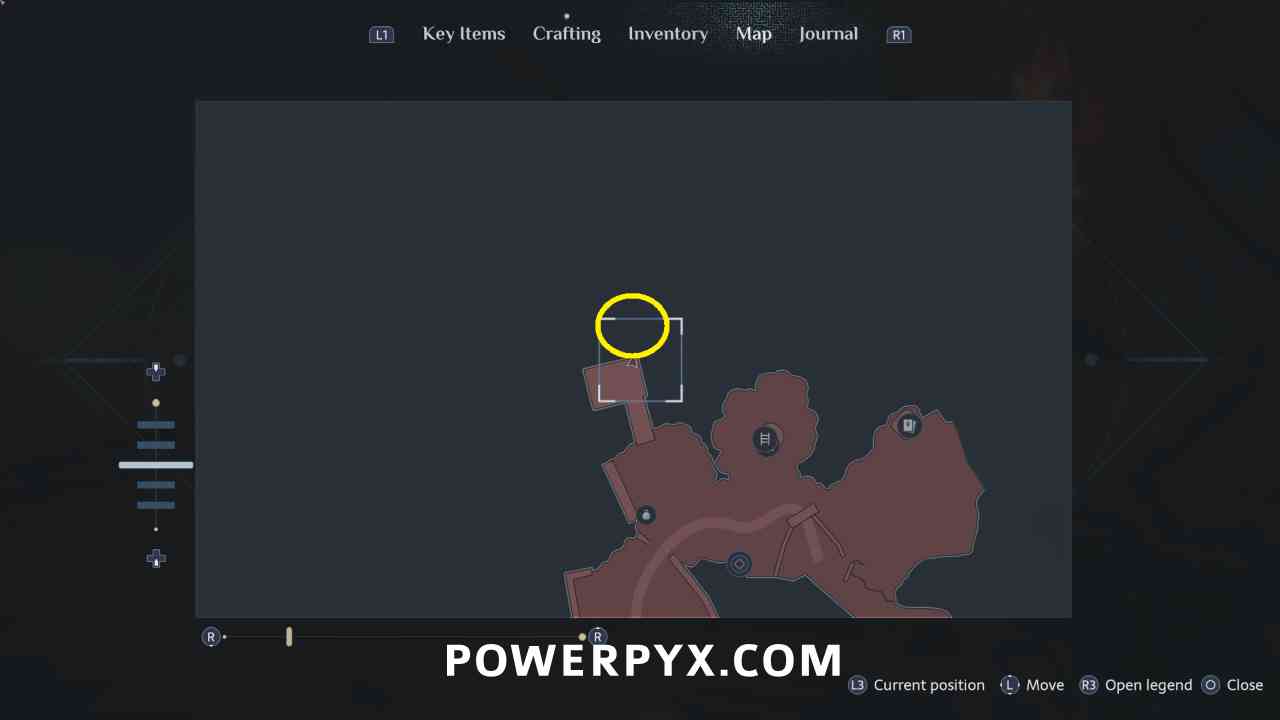
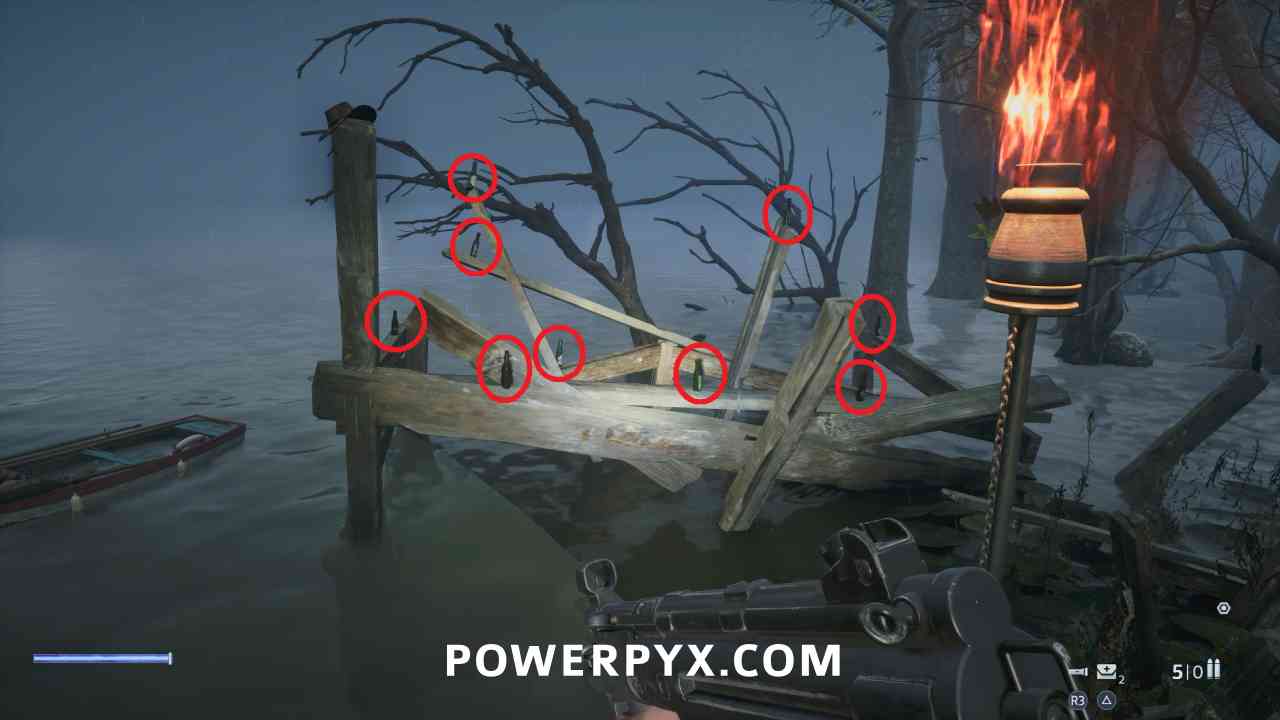
This trophy is earned by shooting all 9 of the bottles to the right of the boat you pull in to obtain one of the puzzle boxes. It’s recommended you save and do this before pulling the boat, because pulling the boat spawns a bunch of enemies. Note that if you run out of ammo and leave the area to obtain more all of the bottles will respawn, so you need at least 9 bullets (preferably for the Handgun) to shoot them all at once. You don’t gain anything for shooting the bottles, so it’s recommended to save and then reload after shooting the bottles.
Key Item: Puzzle Block #3
After pulling in the boat, this is sitting inside.
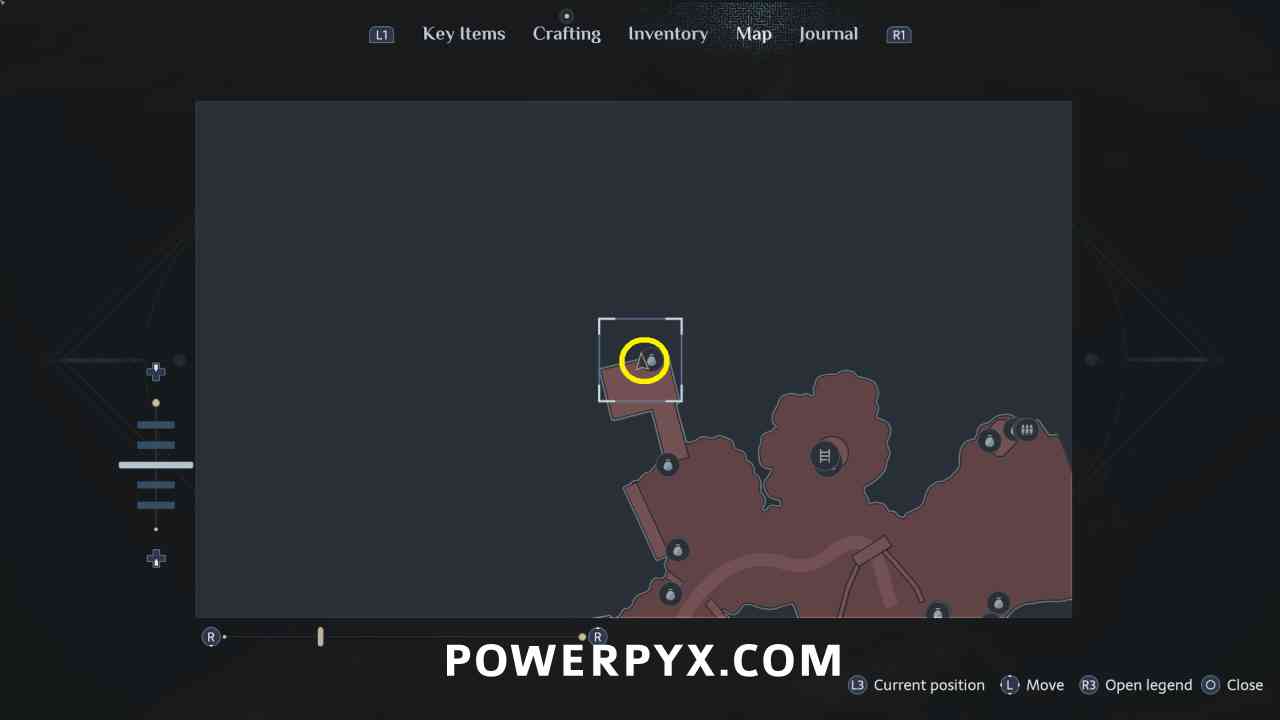
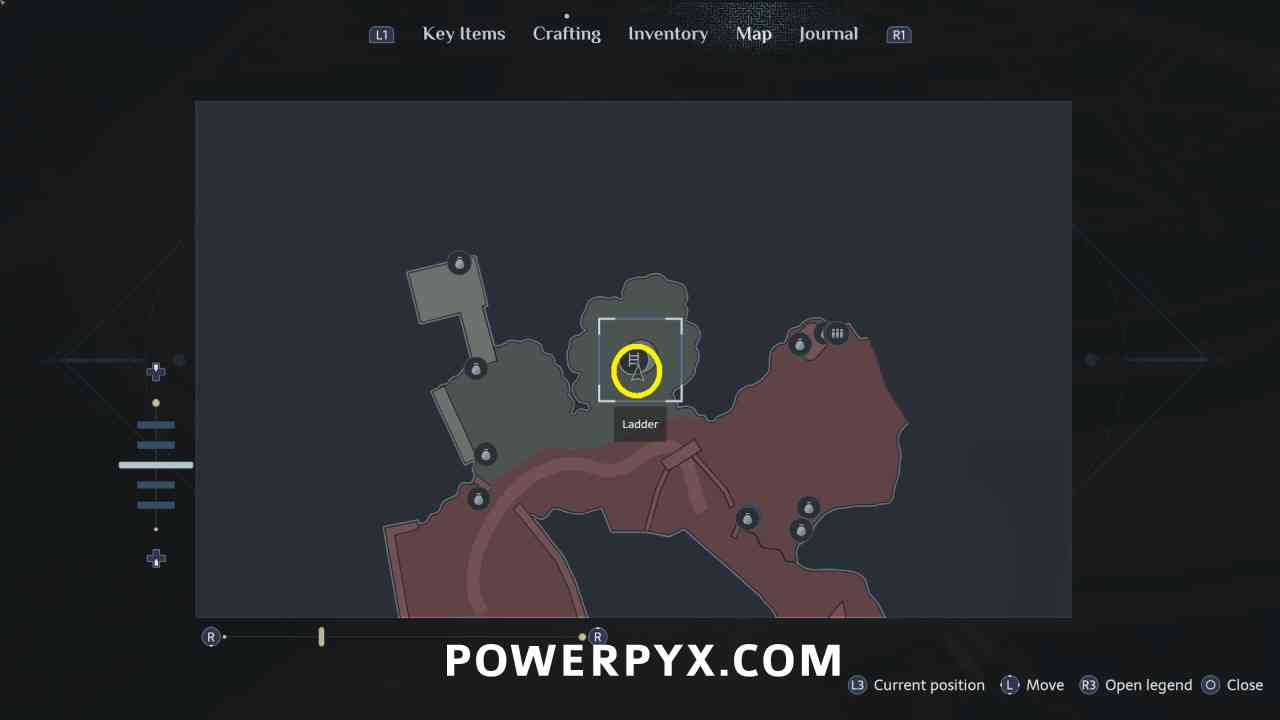
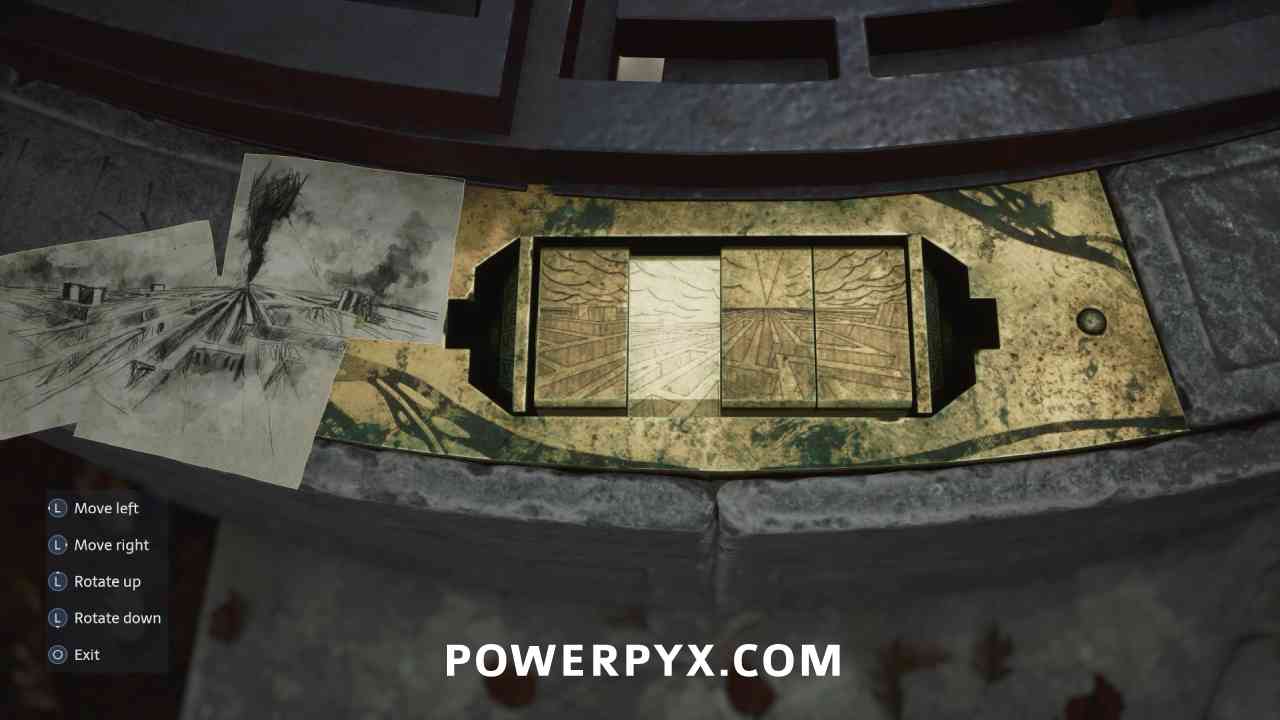
Go to the center of the area to the well and place the three puzzle blocks. Rotate the blocks so they match the drawing sitting to the left. Enemies spawn in the area after finishing the puzzles, you can run around the area to avoid them while the well opens.
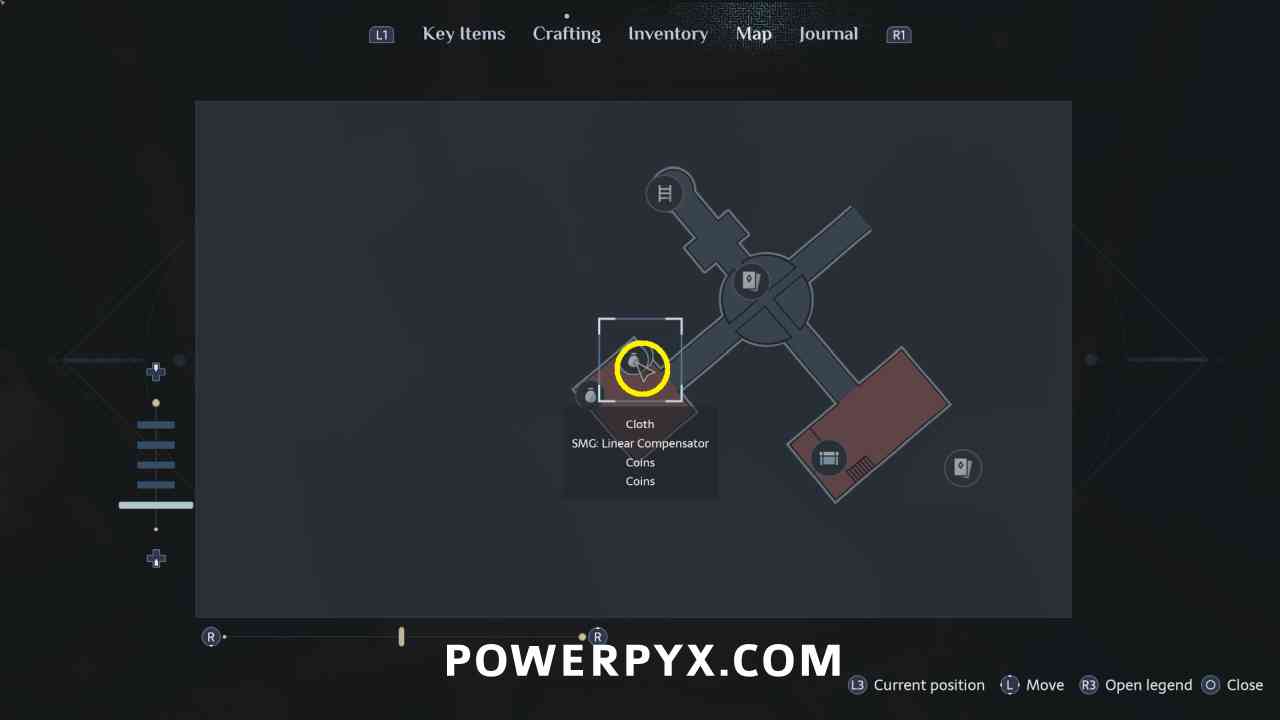
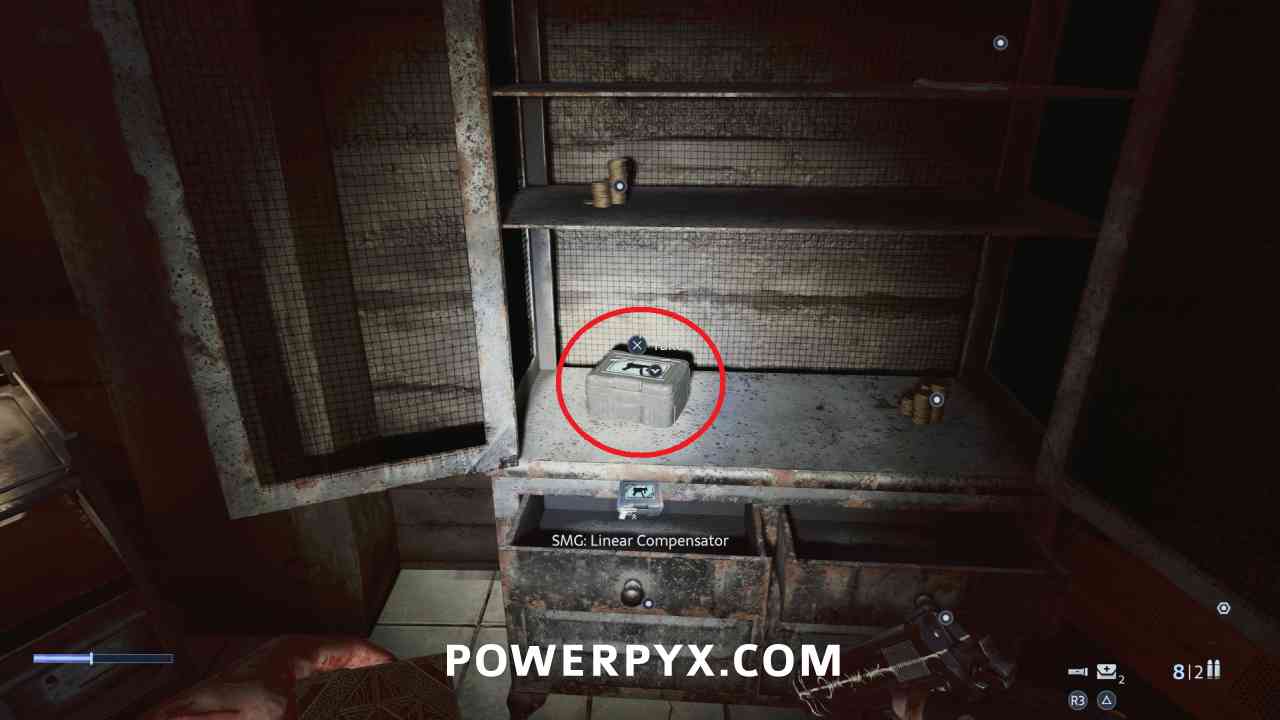
SMG Upgrade: Linear Compensator
After using the 4 puzzle boxes to go down the well, this is in the southwestern room in the cabinet opened with a lockpick.
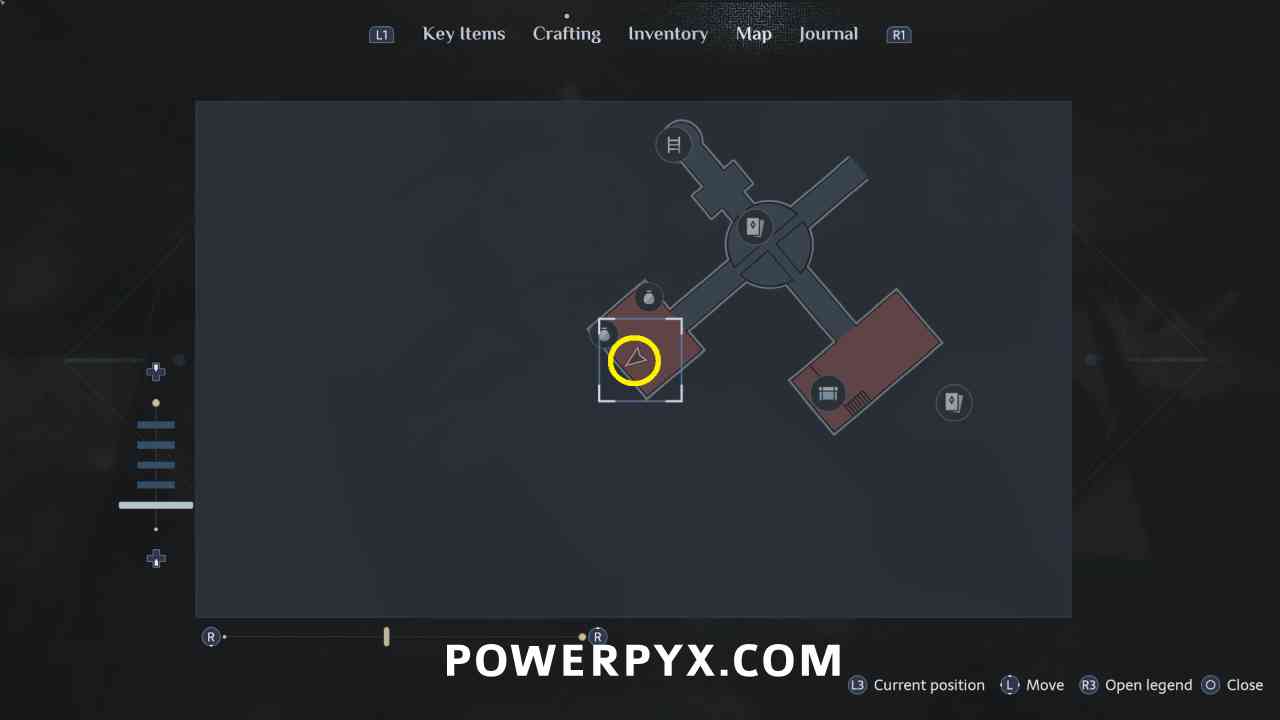
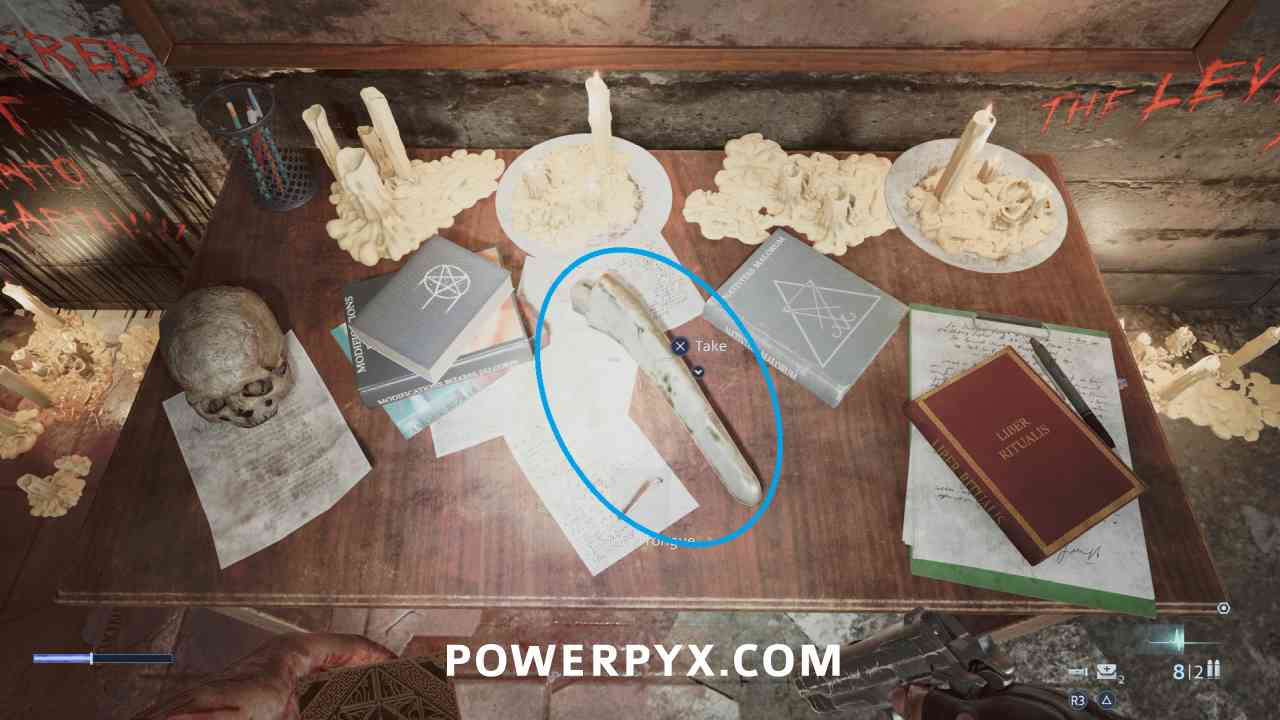
Key Item: Statue’s Tongue
In the southwestern room on the table.
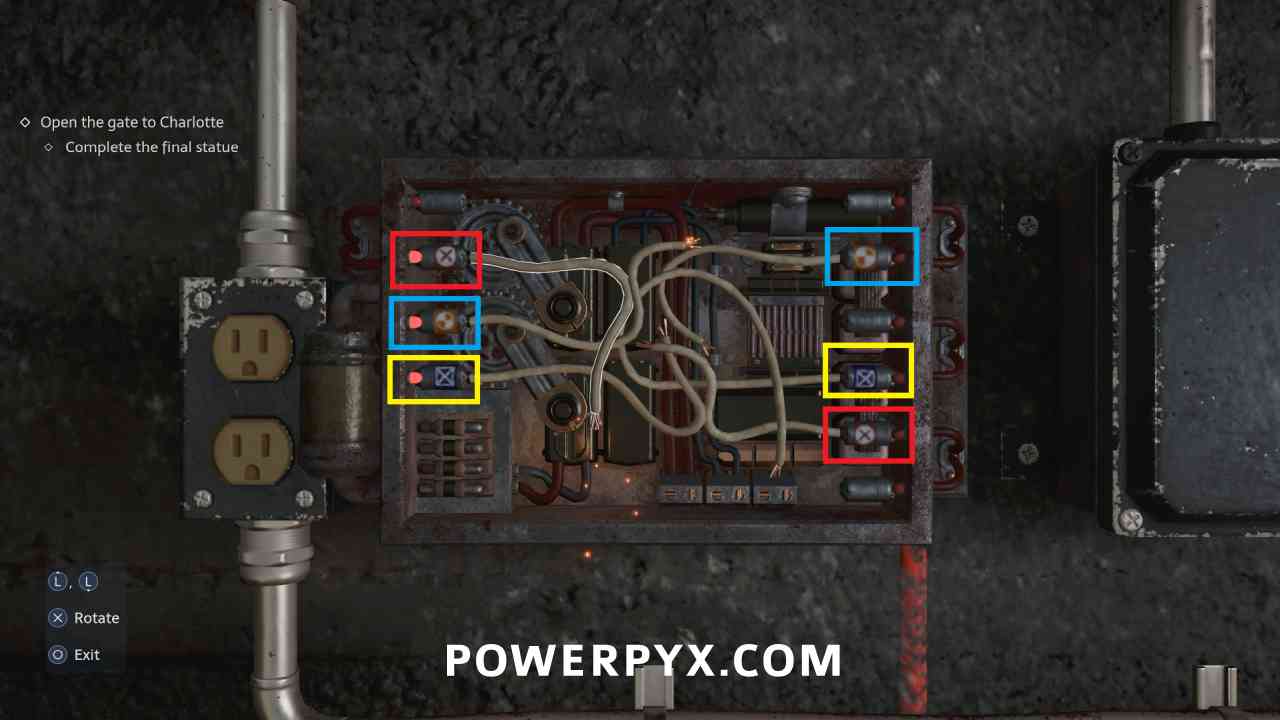
Complete the Final Statue
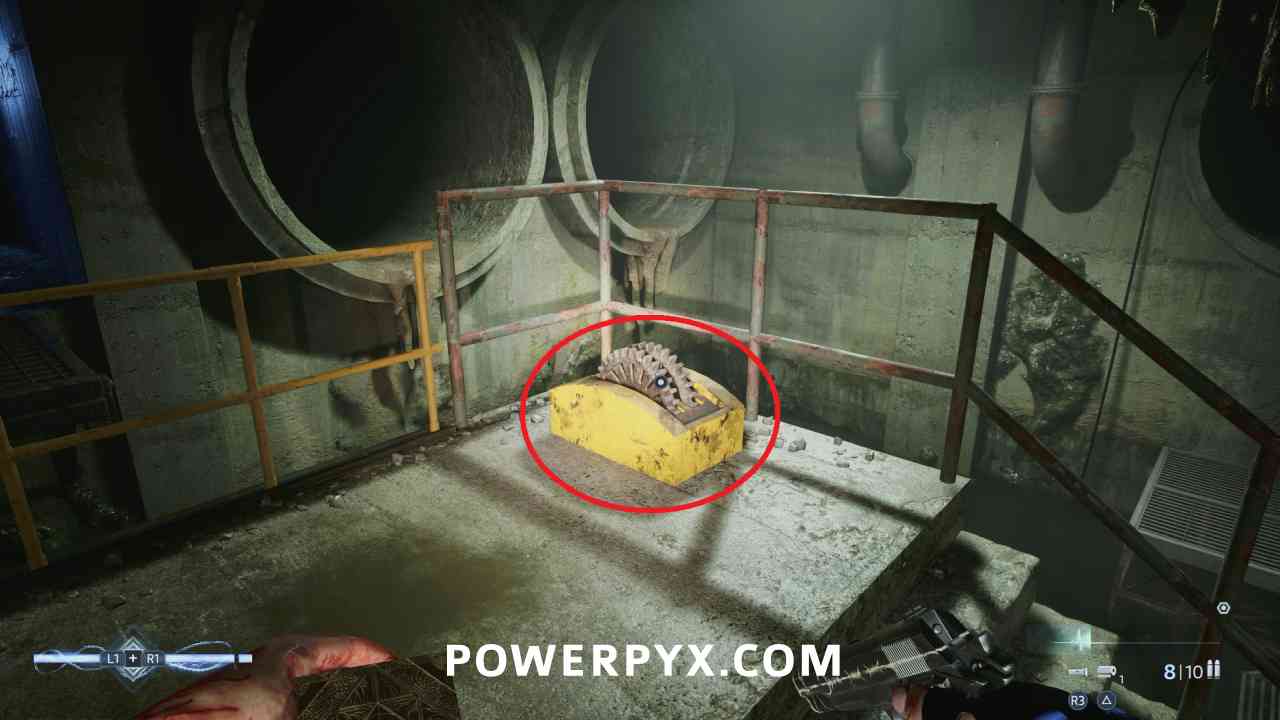
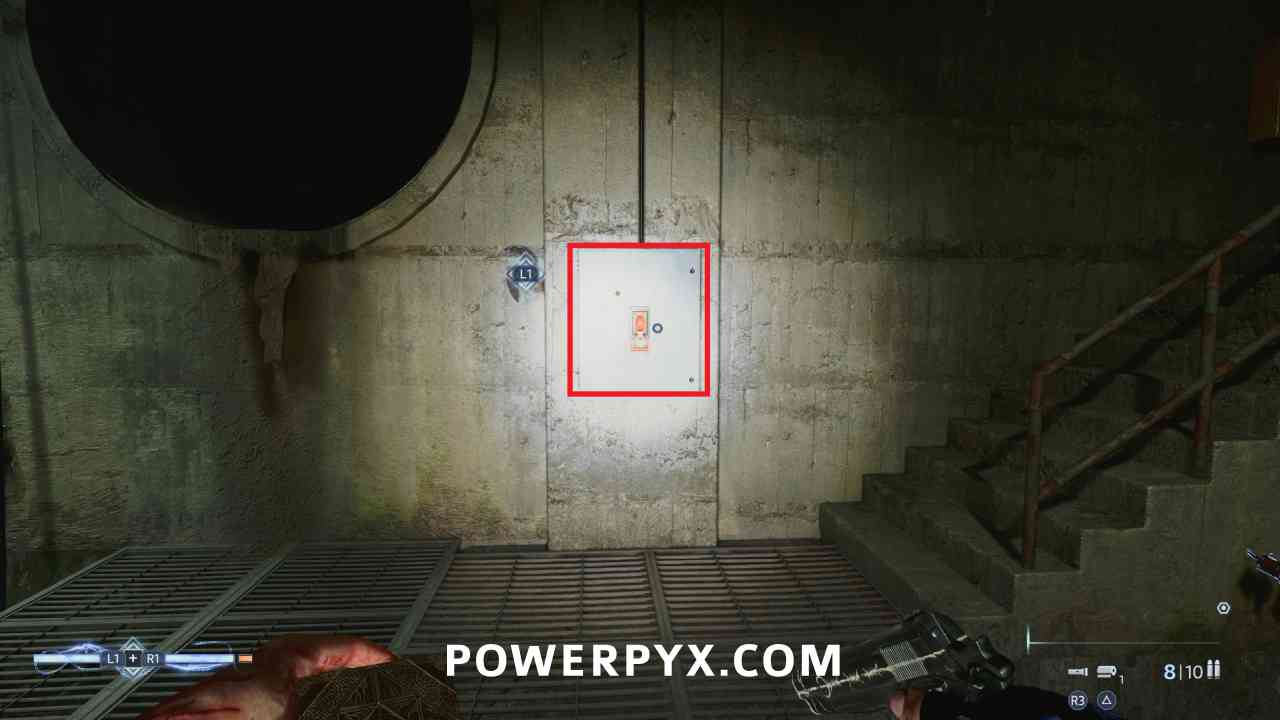
To exit the area, interact with the electrical panel on the wall in this room and match the wives so the symbols on the left connect the symbols on the right.
SMG Upgrade: Drum Magazine
After collecting the Statue’s Tongue from the underground area, available from Zora at second shop for 250 coins
Revolver Upgrade: Internal Frame Weights
After collecting the Statue’s Tongue from the underground area, available from Zora at second shop for 150 coins
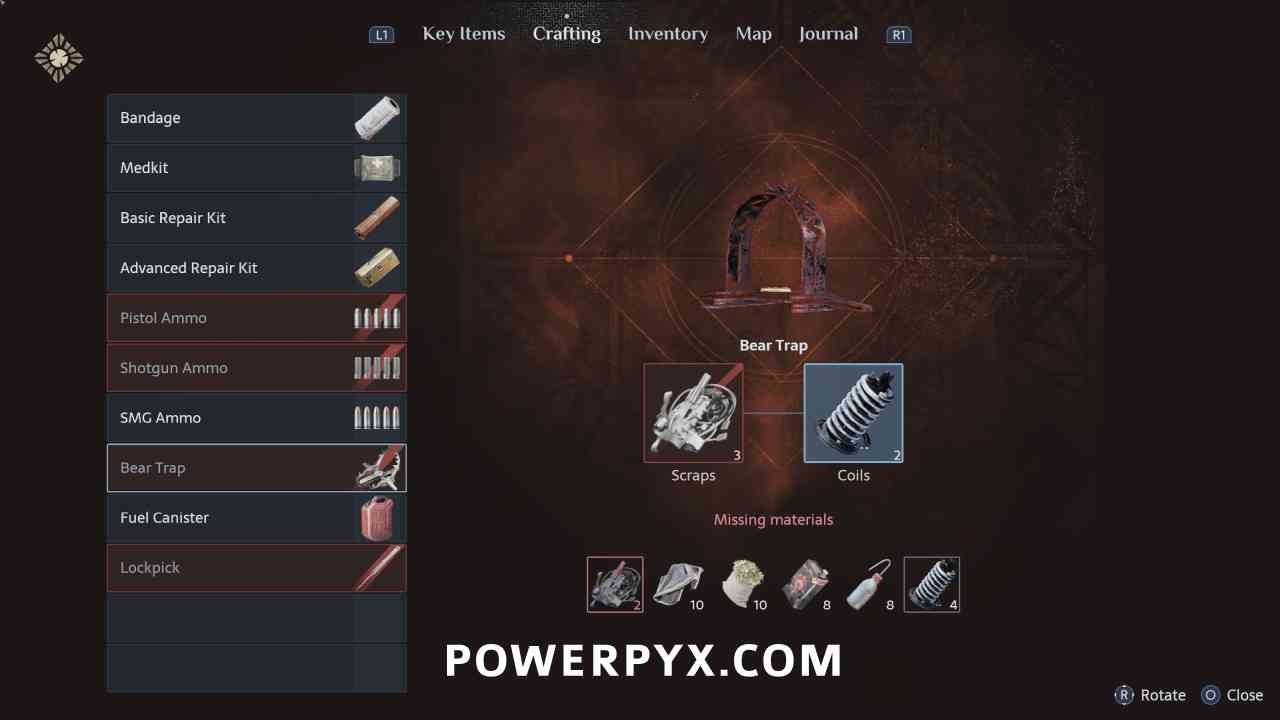
Crafting Recipe: Bear Trap
After collecting the Statue’s Tongue from the underground area, purchase from Zora at second shop for 120 coins – 3 Scraps + 2 Coils
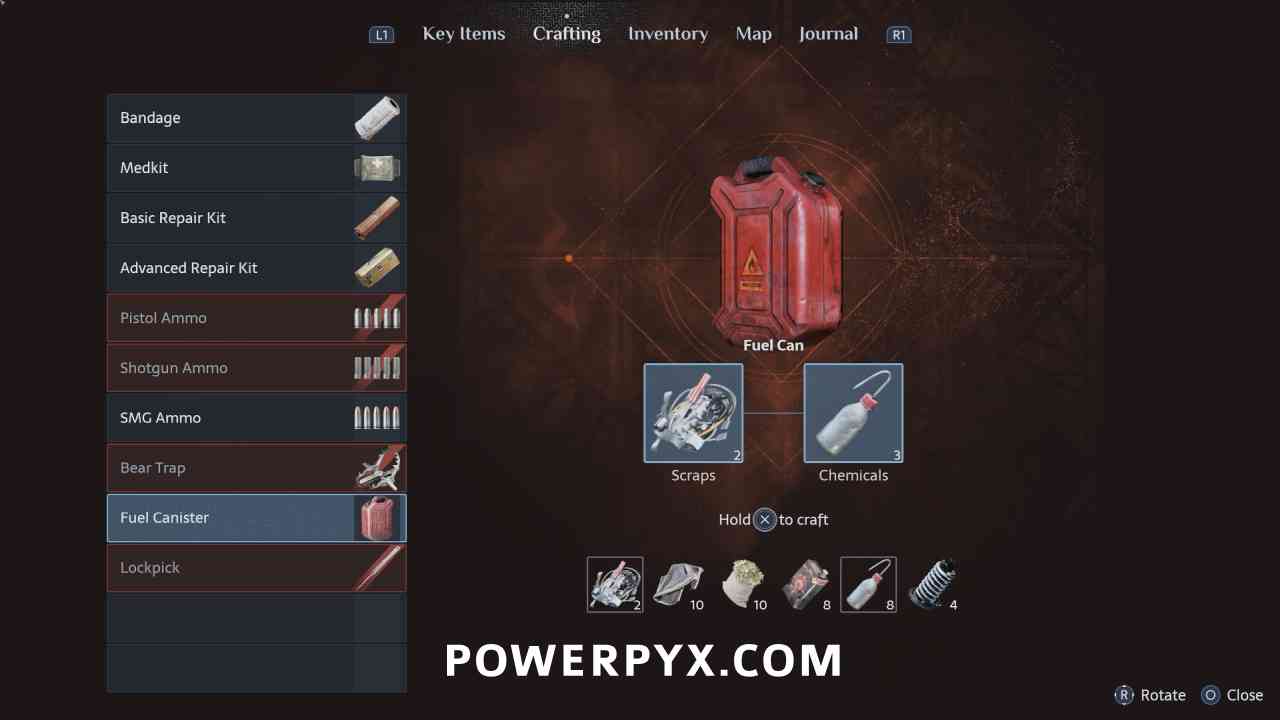
Crafting Recipe: Fuel Can
After collecting the Statue’s Tongue from the underground area, purchase from Zora at second shop for 180 coins – 2 Scraps + 3 Chemicals
Use the Statue’s Tongue on the gate to the south, and change the Genesis Configuration to fit in the slot.
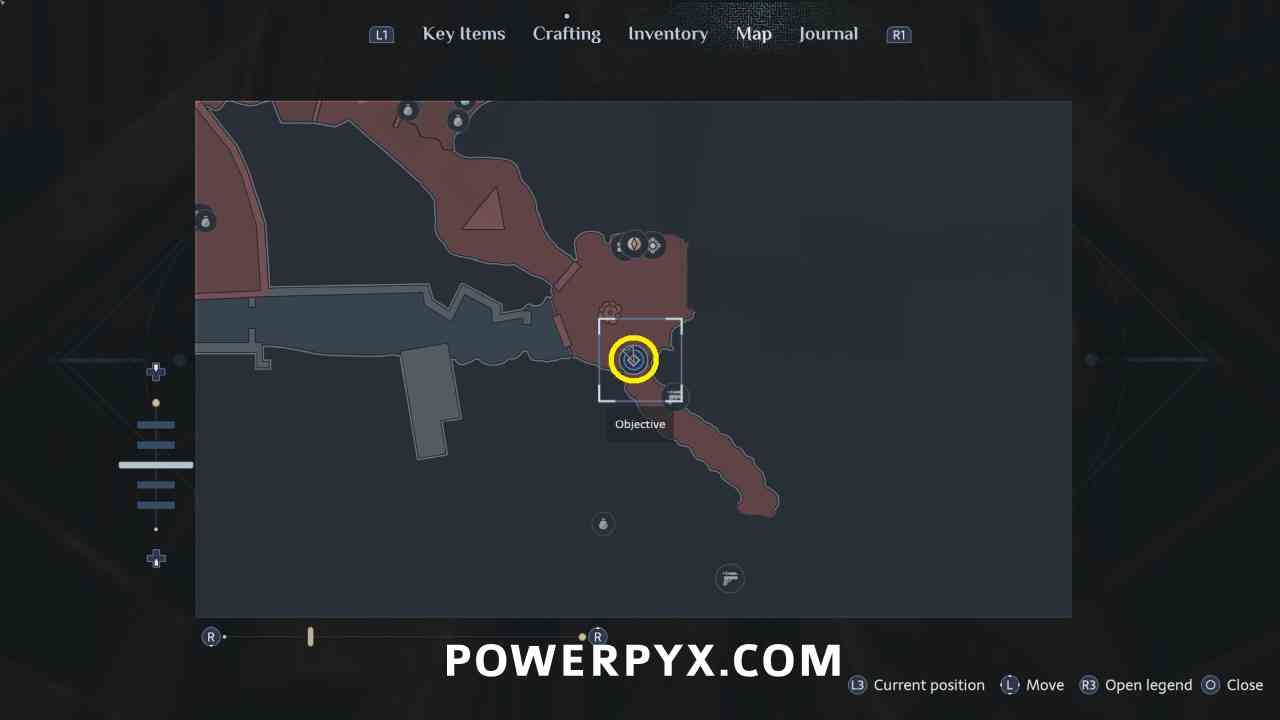
Claim Charlotte’s Heart
Heart on Fire – Defeat Charlotte
Follow the path to enter where Charlotte is located. You can run around the area and break all boxes and collect ammo before the enemies spawn. When the police drive into the area, you can ignore the enemies as the police will shoot all of them.
After Charlotte is defeated make sure to pick Charlotte’s Crown up off her body to sell.
Give Charlotte’s Heart to Sunny
Suffering Pillar #3 (Suffering Increase)
After entering the Labyrinth immediately after defeating Charlotte, this is directly in your path after the save point.
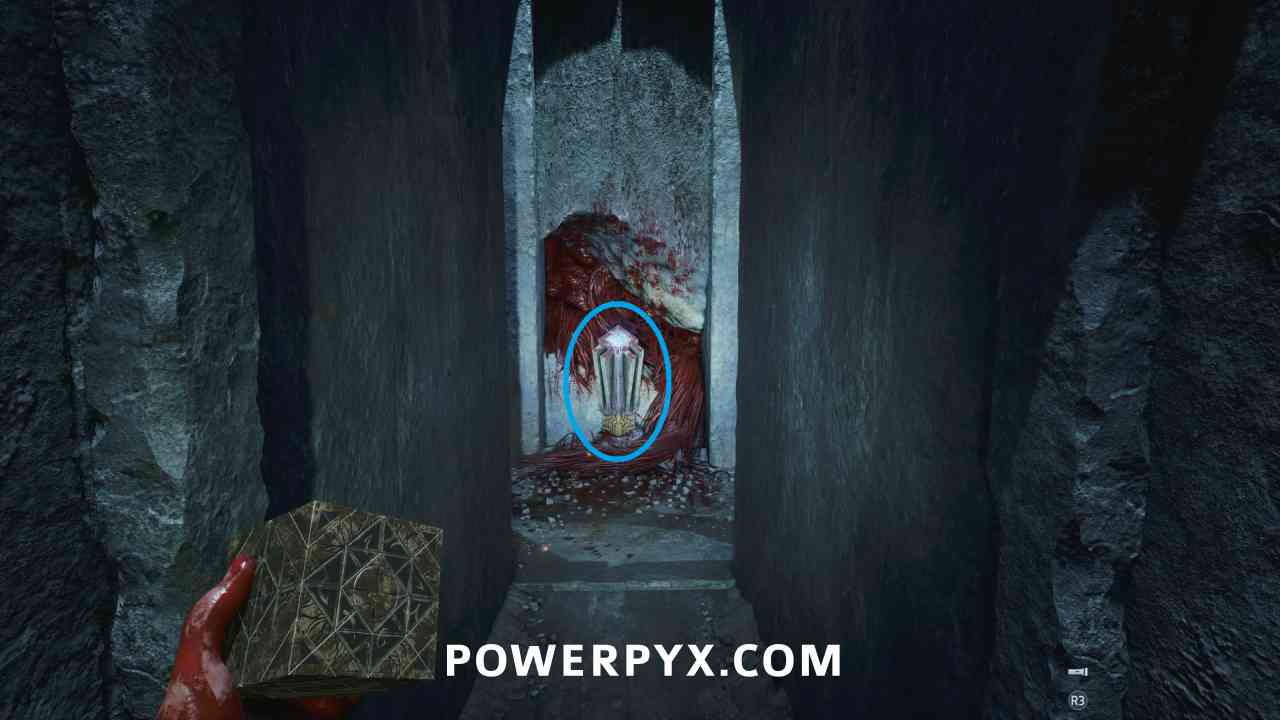
Pain Pillar #2 (Health Increase)
Follow the main path until you pass through the pair of spikes coming out of the left and right walls. Turn left at the intersection and walk to the dead end to see the area ahead where the Pain Pillar is located spin. Walk back through the wall spikes and turn right to find the path that now leads to the Pain Pillar.
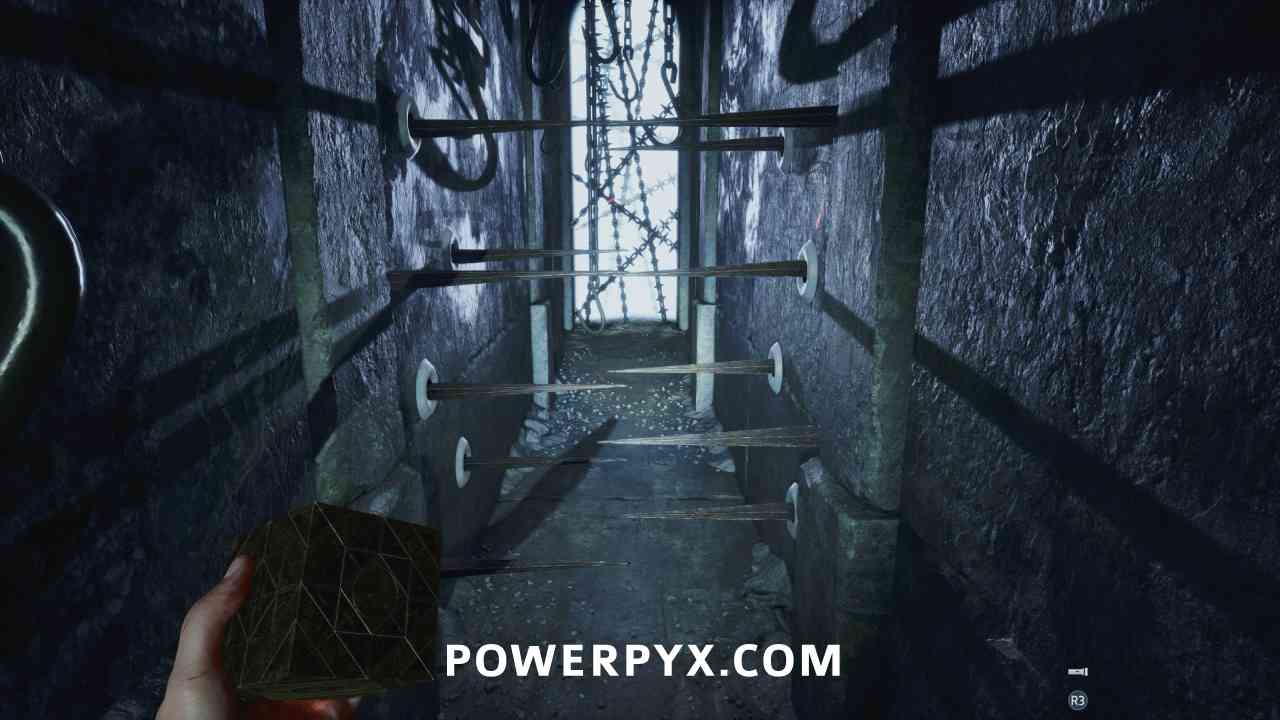
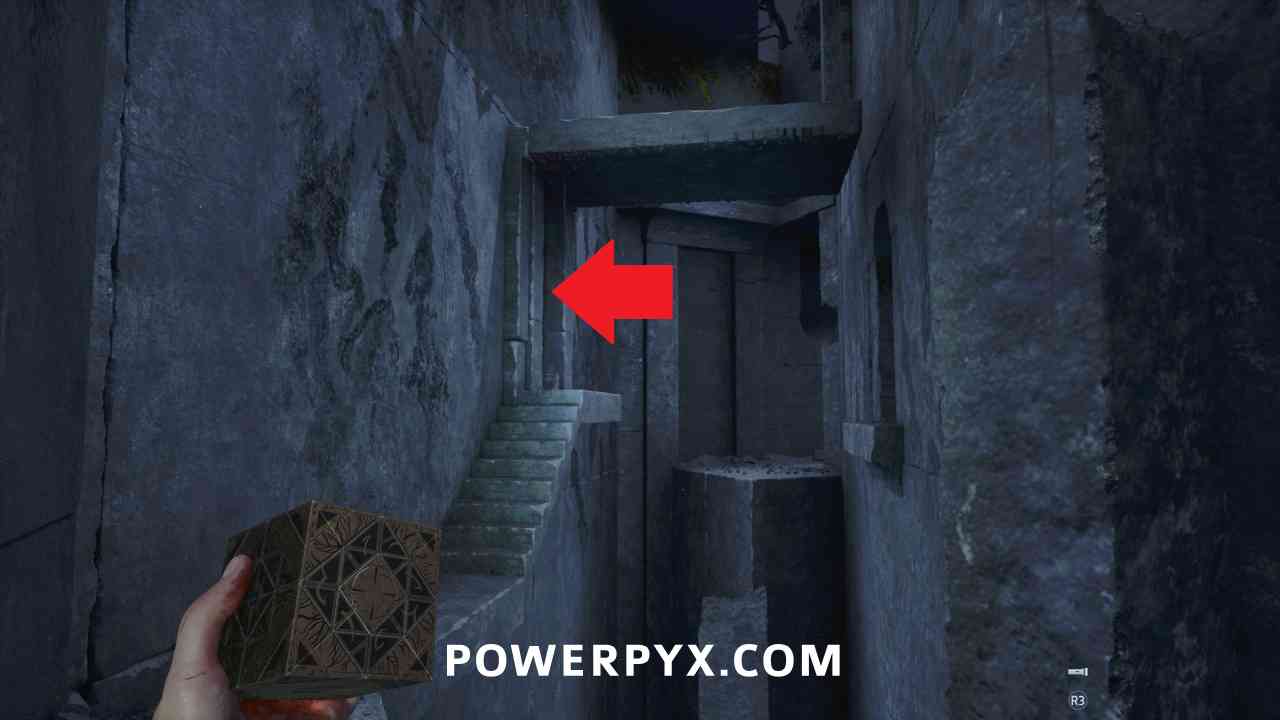
When you reach the hallway with the switch on the floor, stand on it and move the block to the right under the door to block it. Run to the end of the hallway and shoot the fire at the other block to allow you to move it out of the way and continue.
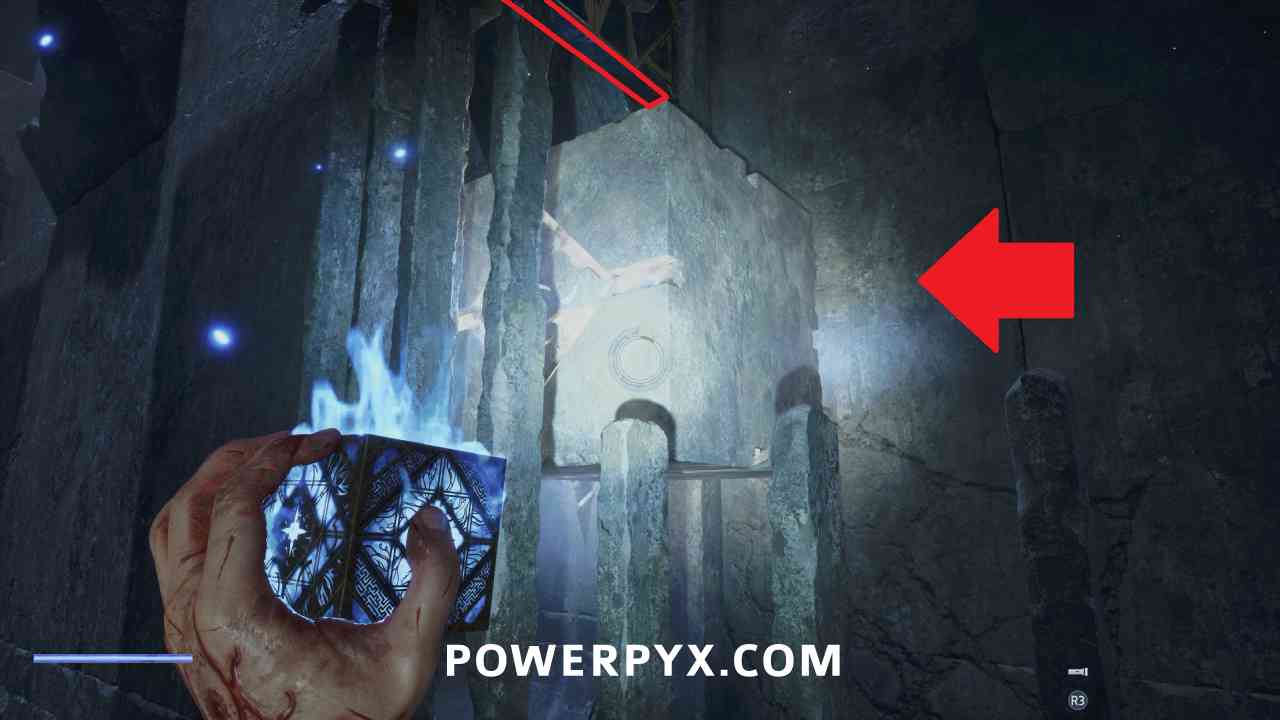
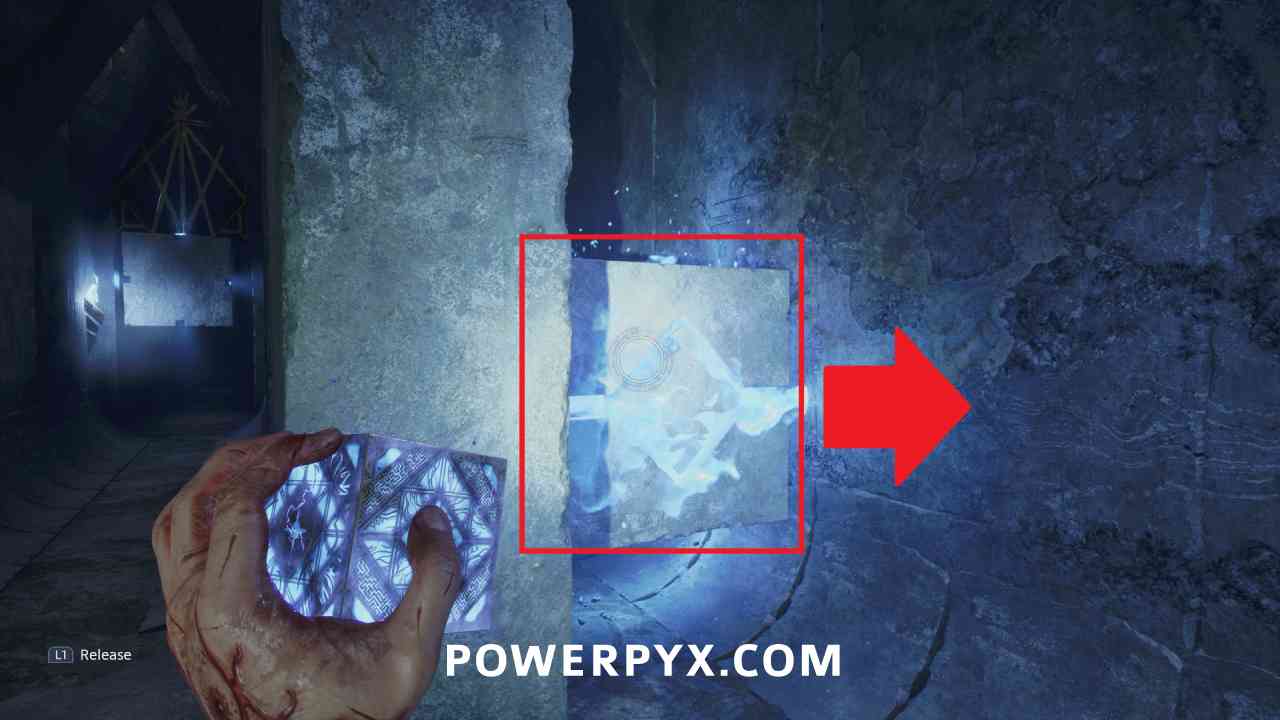
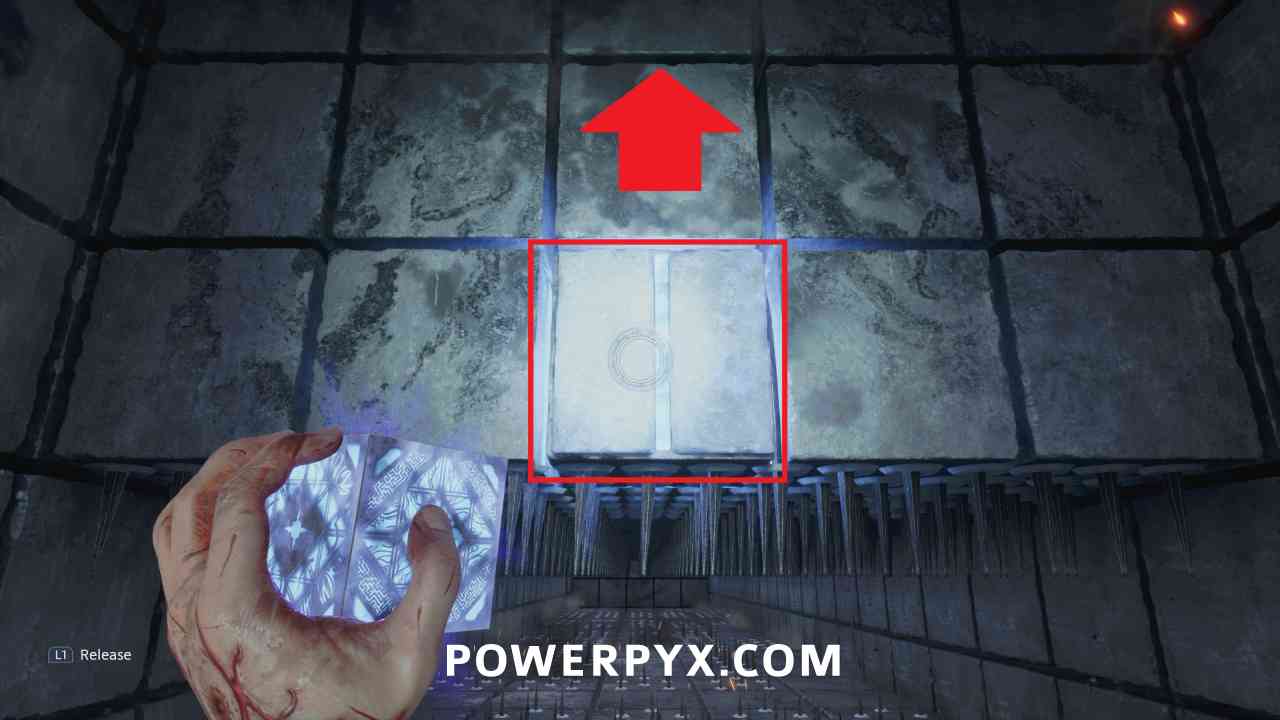
In the next room you need to move the ceiling up to the top, then quickly run across the room without being hit by the floor spikes to reach the exit. There isn’t a full clear path across the area, so you will need to run over some spots with spikes.
In the next looping house area, progress forward and interact with the phone on the left. Walk forward slightly then turn back and interact with the phone again, then interact with the picture that comes out of the printer.
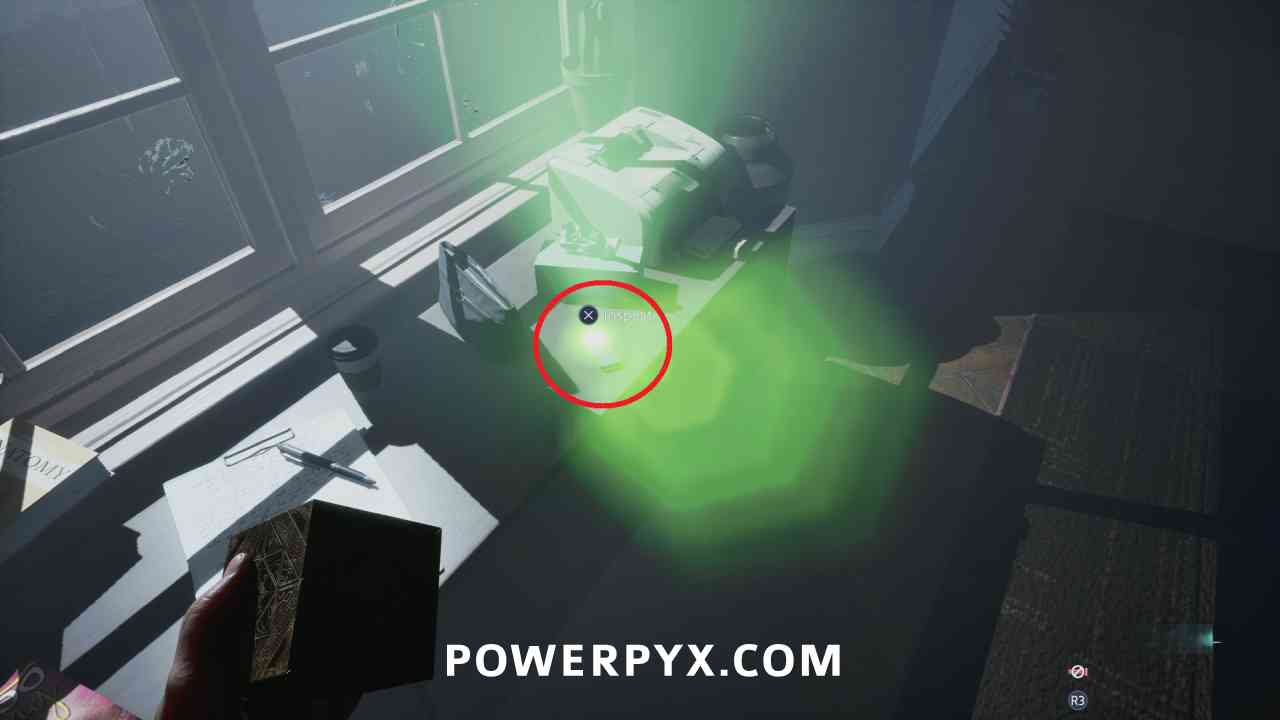
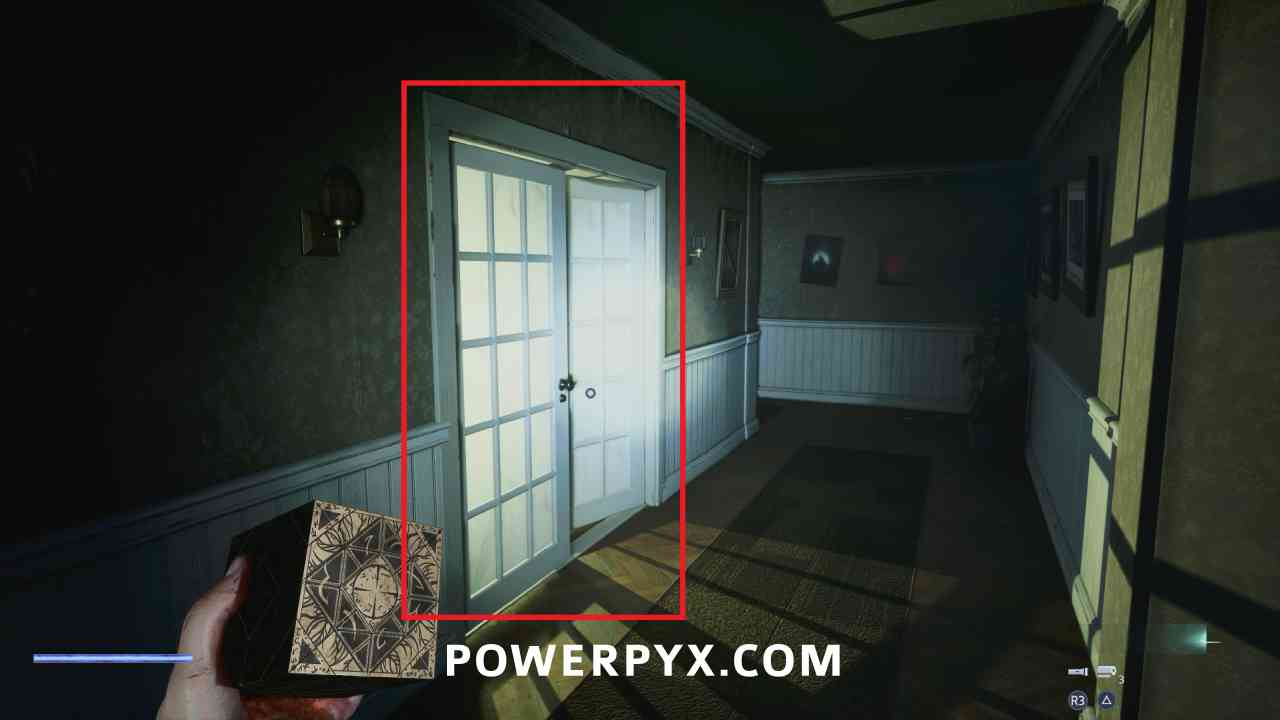
In the next loop, walk forward toward the stairs, then turn around and you can enter the double doors in the hallway. Pick up the pink case from the table. After this continue through the loop one more time to return to the apartment.
Hunt Marlowe
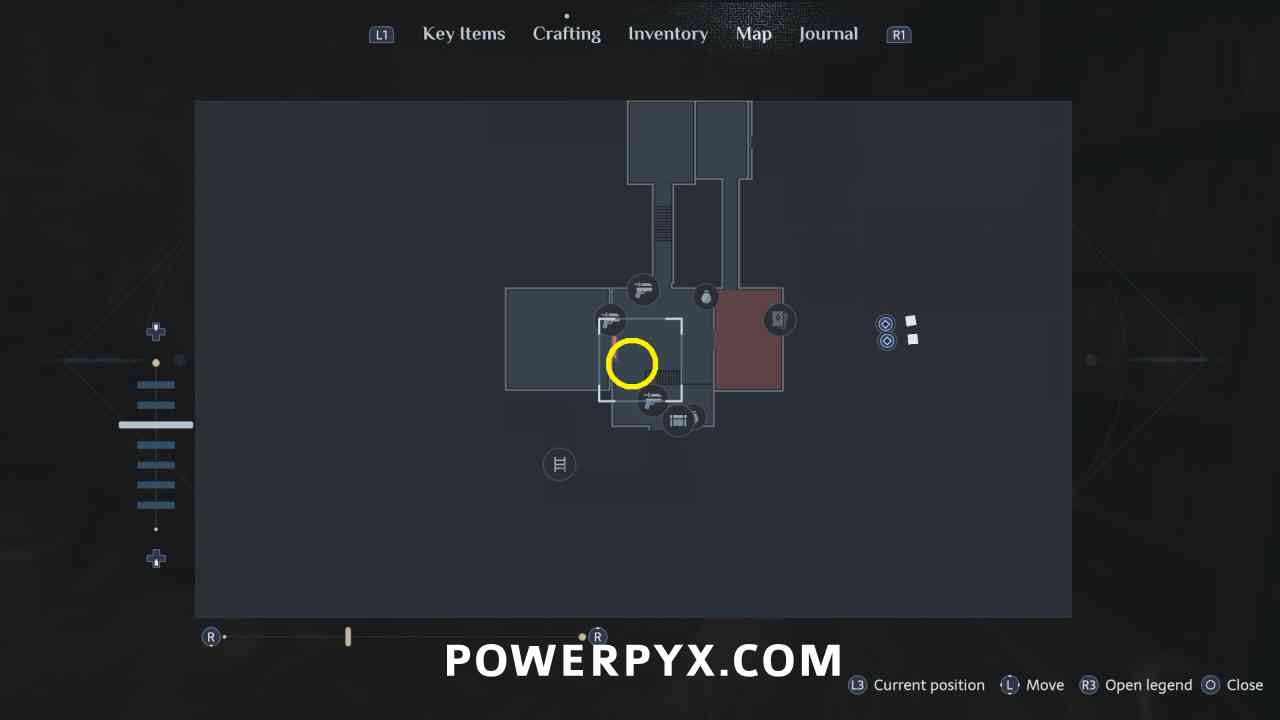
NOTE: Currently the maps in this area seem to be buggy. The map areas may not display for you, or show you in the incorrect location.
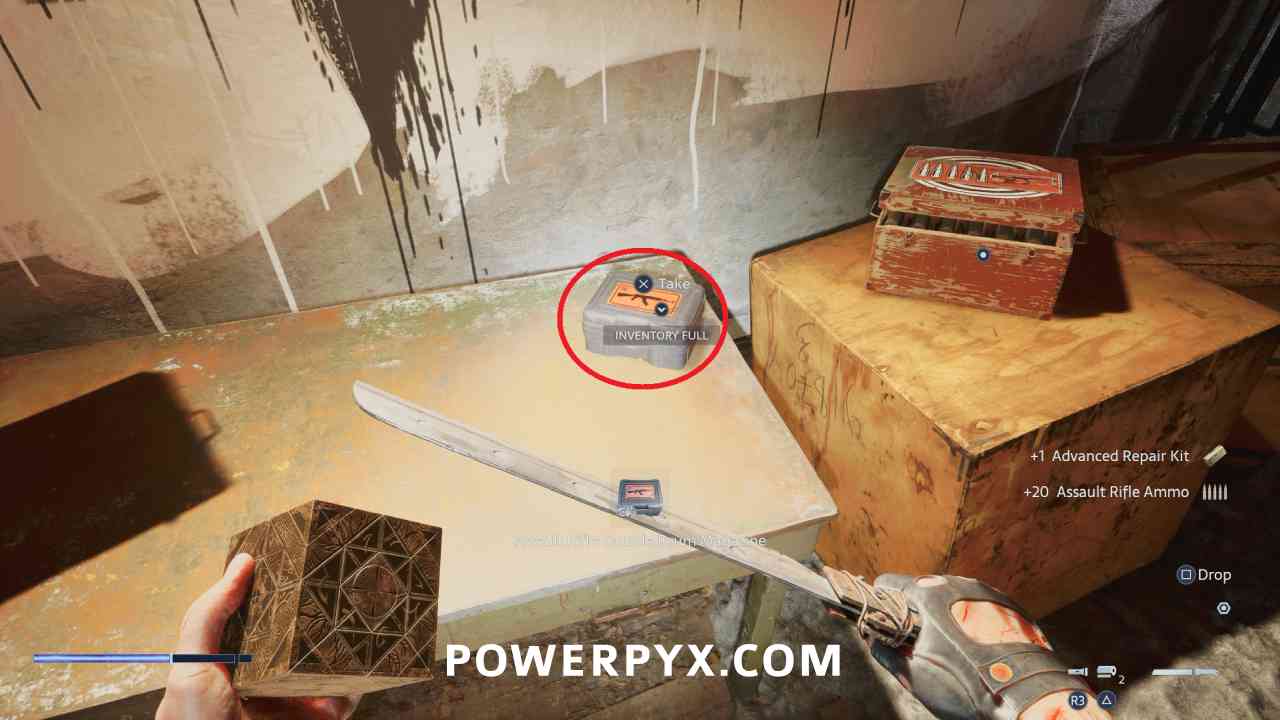
If you don’t want to purchase the Assault Rifle now you can wait, but you can buy it and then just stick it in Storage until later. It is needed for the last miscellaneous trophy for killing 2 enemies with a single shot due to an upgrade for it available later in this area.
Firearm: Assault Rifle
Purchase from Zora at third shop for 450 coins.
Guns, Lots of Guns – Acquire all firearms
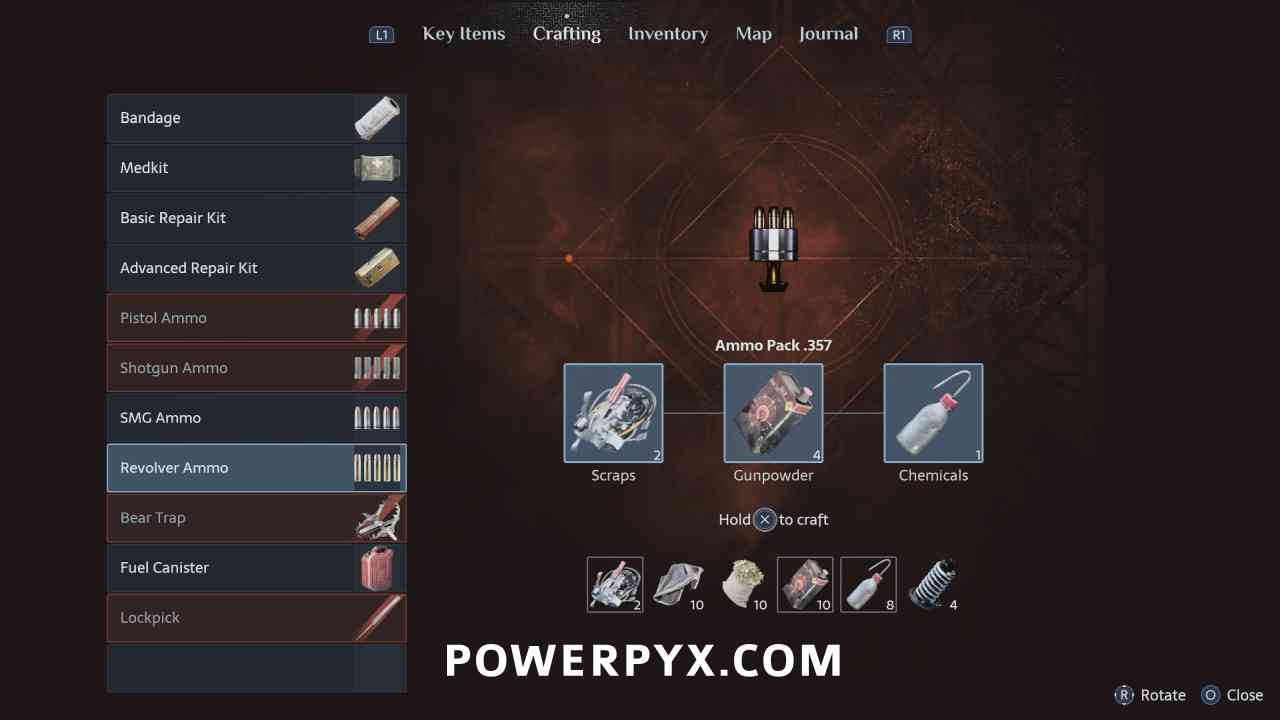
Crafting Recipe: Ammo Pack .357 (Revolver Ammo)
Purchase from Zora at third shop for 180 coins – 2 Scraps + 4 Gunpowder + 1 Chemicals
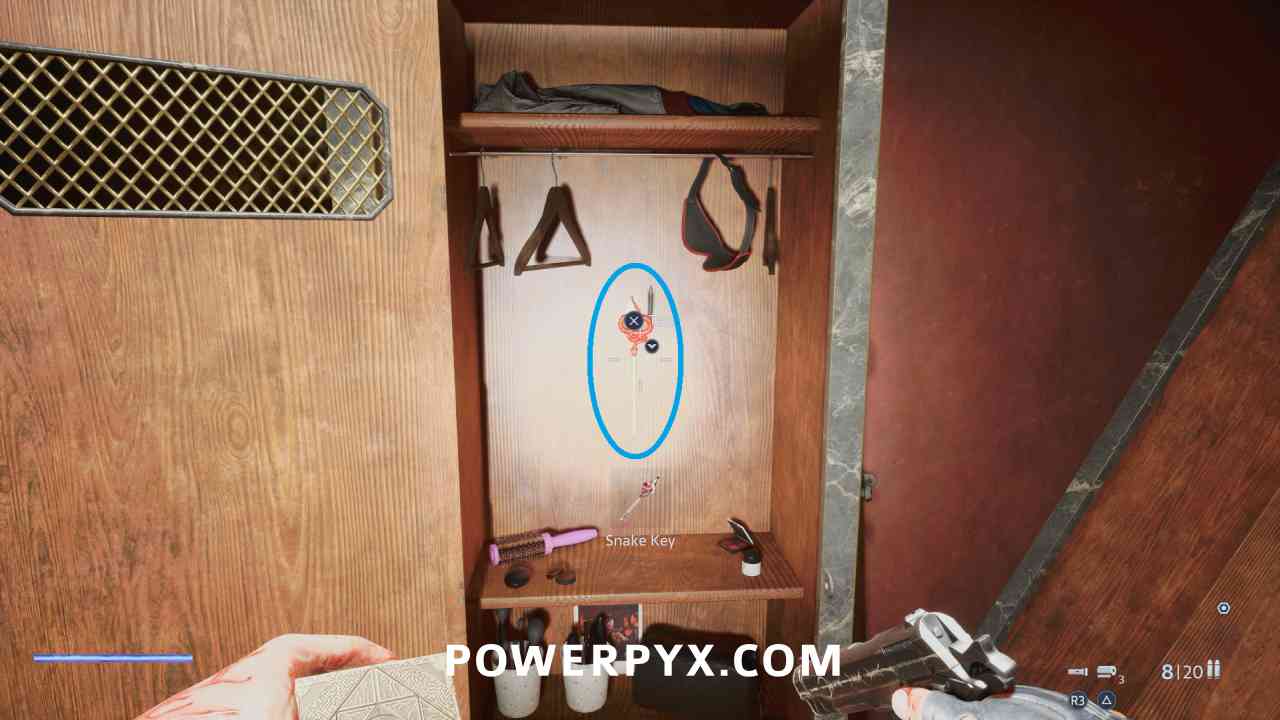
Key Item: Snake Key
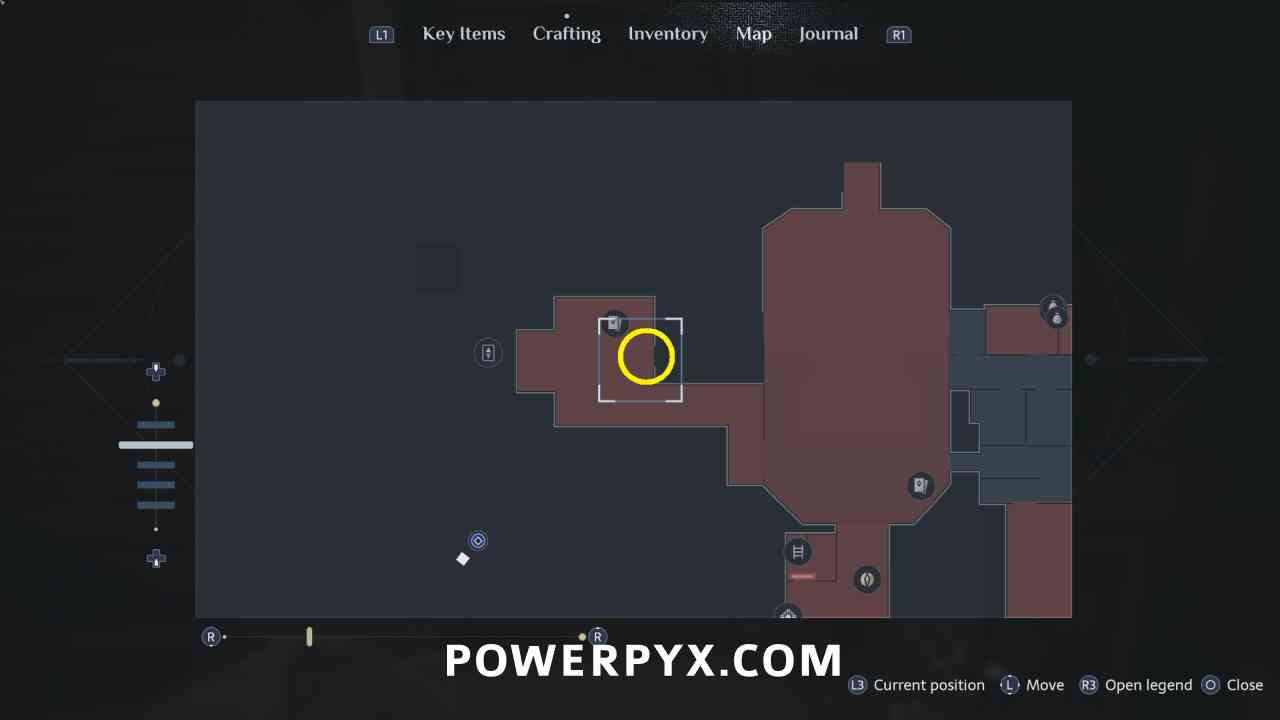
In a cabinet in one of the rooms to the east of the large central rooms.
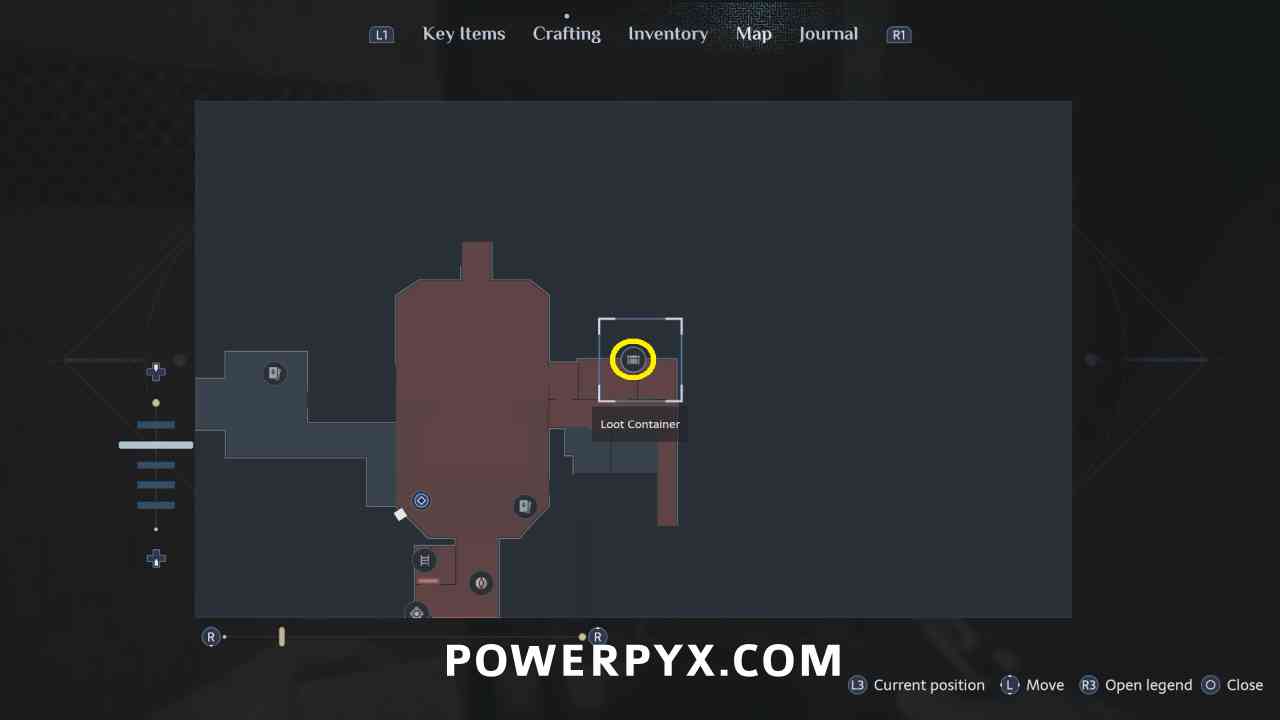
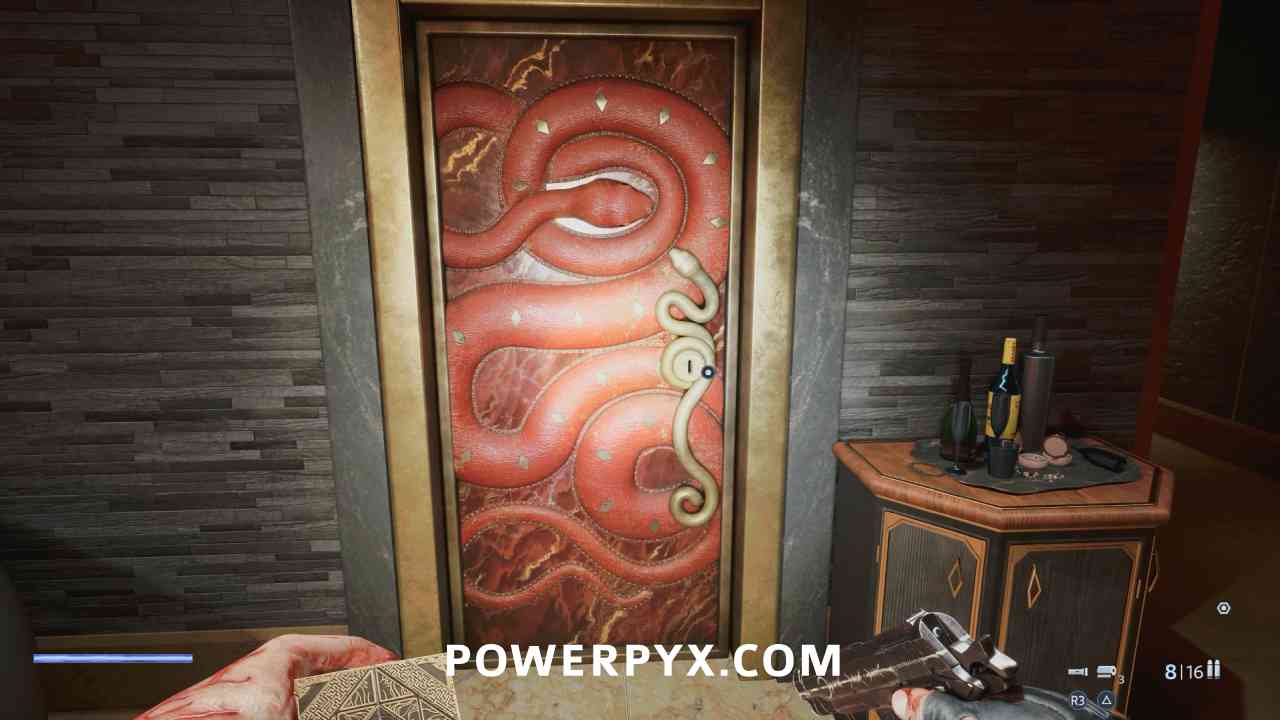
Go back near where you entered and use the Snake Key on the door with the snake images on it.
Enter the Voyeur Room
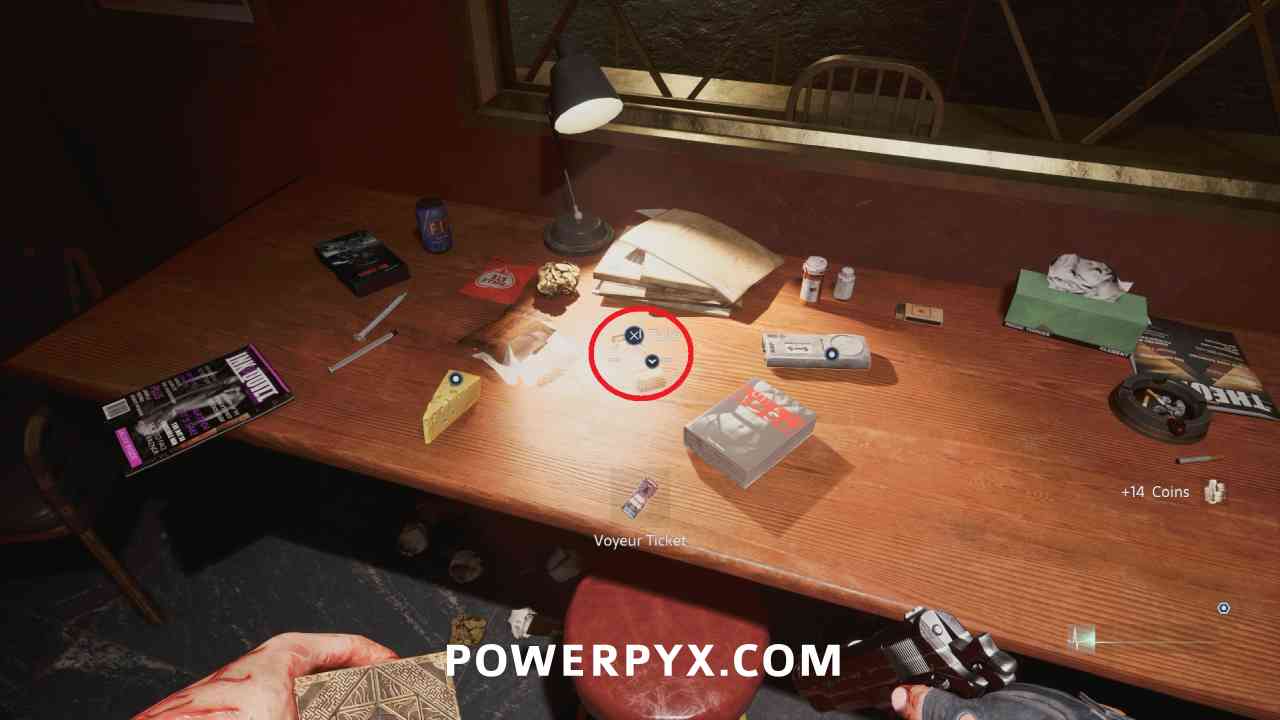
Key Item: Voyeur Ticket
On the table immediately to the right in this room.
Keypad: 1952
Around the corner from the table with the Voyeur Ticket. Code is from pictures located around the area.
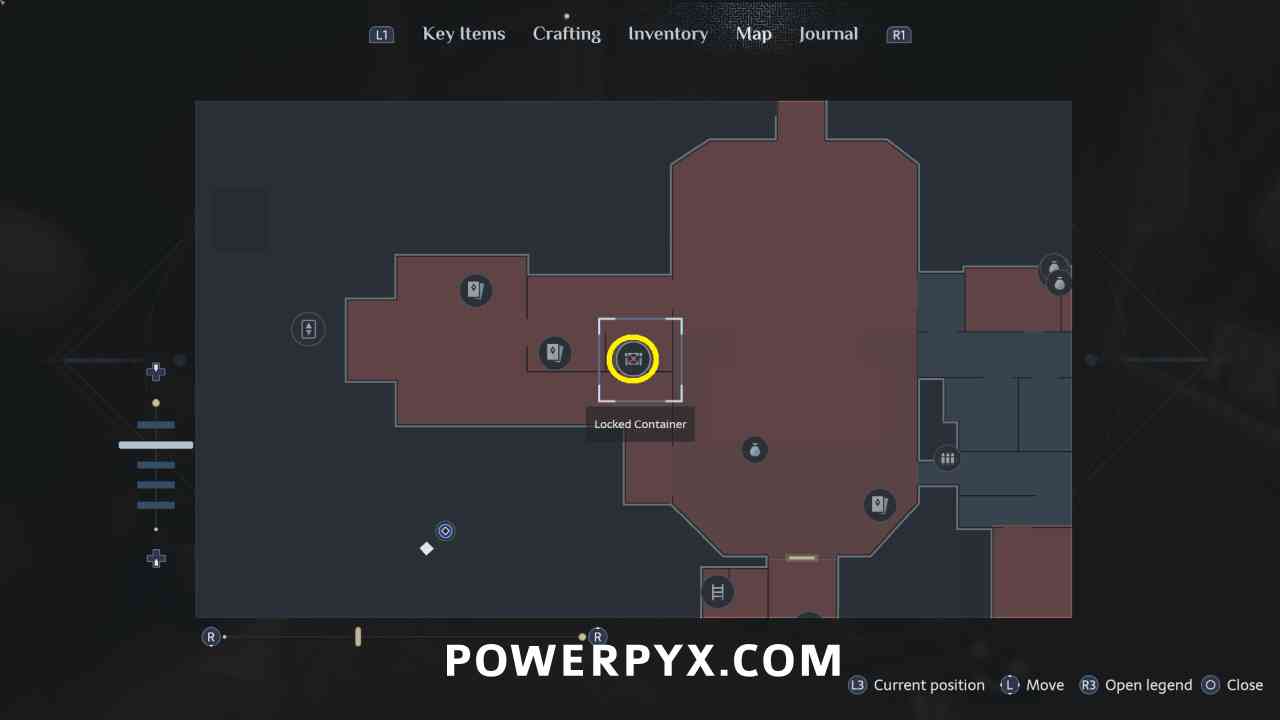
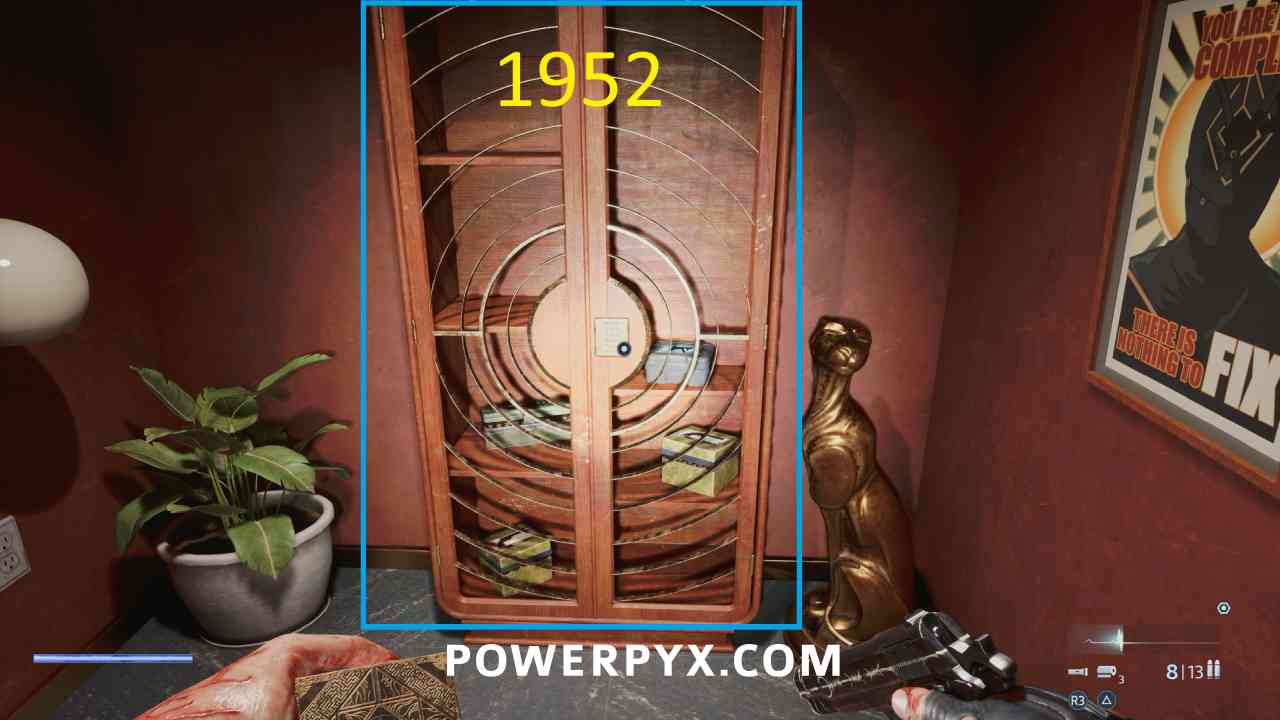
Codebreaker – Unlock 5 numpad locks
SMG Upgrade: Laser Pointer
Inside the keypad cabinet in the Snake key room.
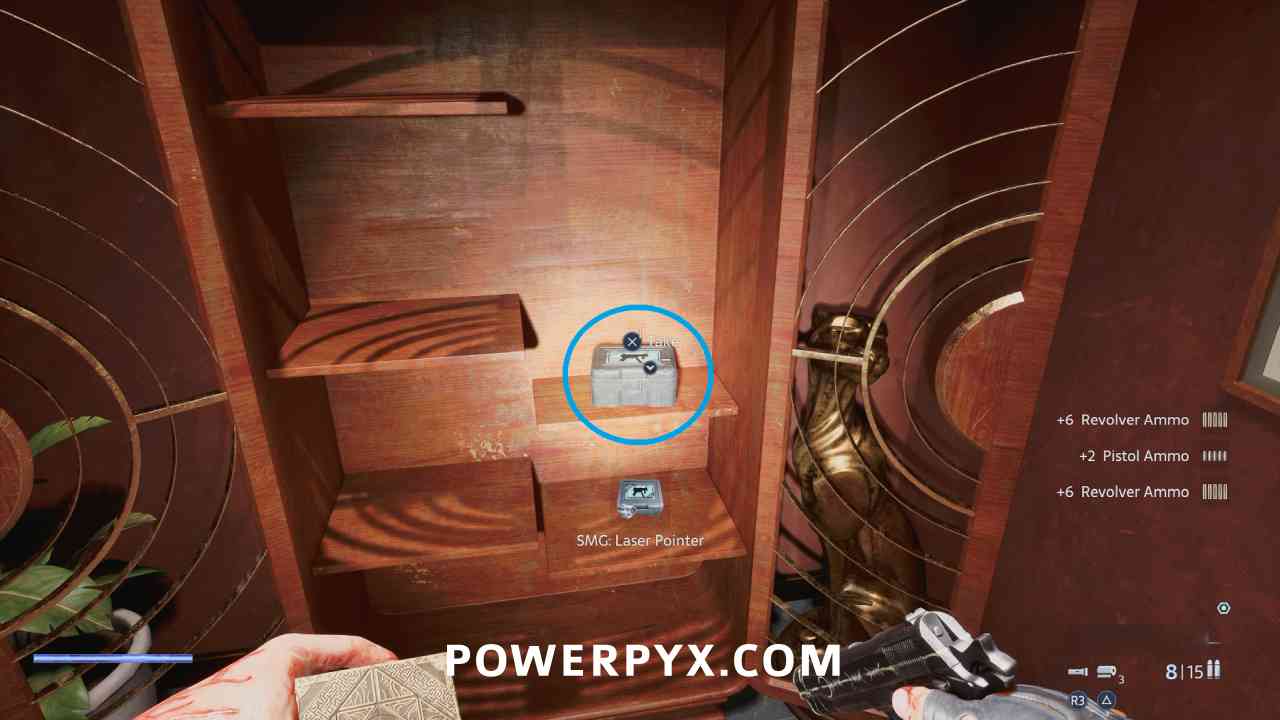
To progress go to the red door with the stars on it on the east side of the area and use the Voyeur Ticket in the machine.
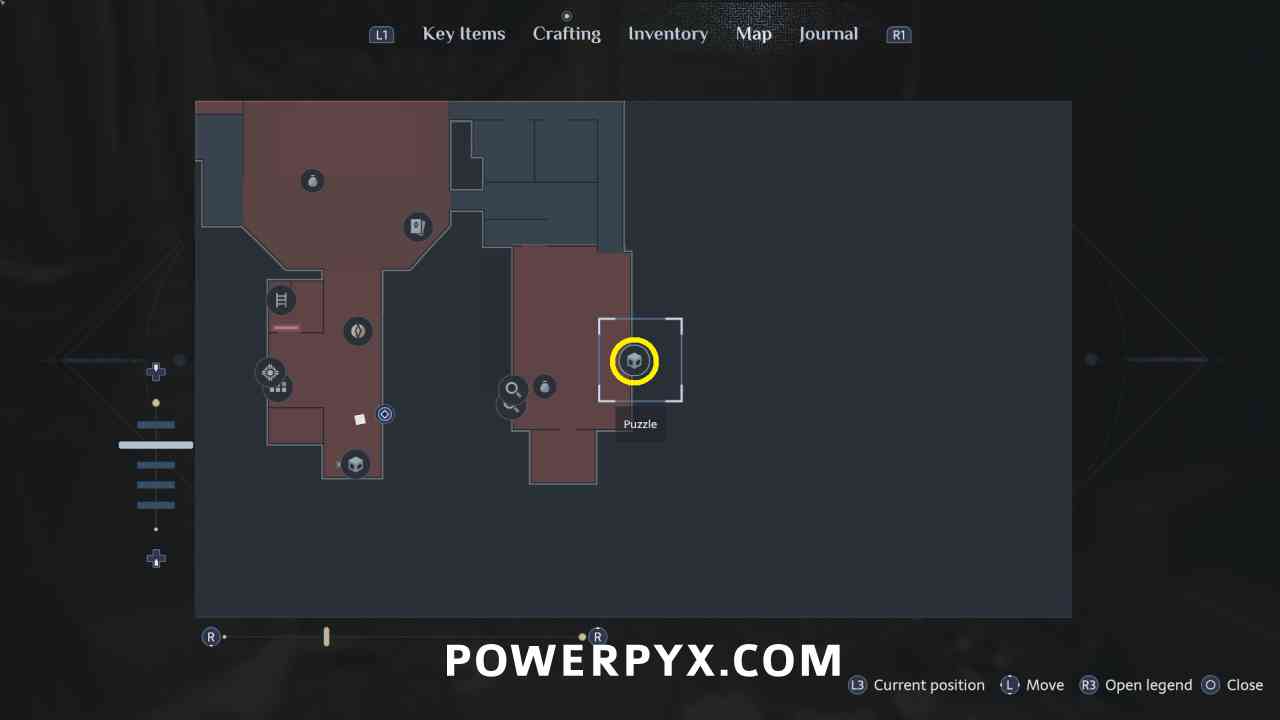
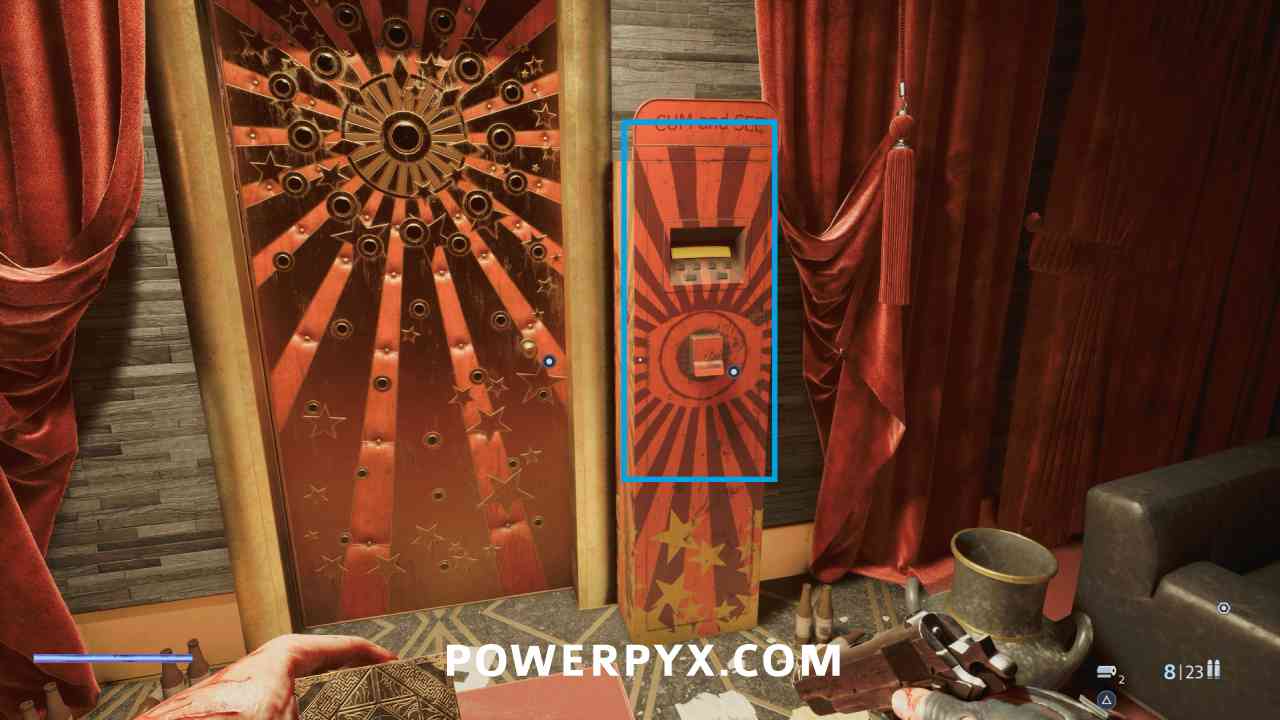
Key Item: Peephole Inset
Progress and defeat the multi-arm miniboss, then this is at the bottom of the ladder that leads back to the shop.
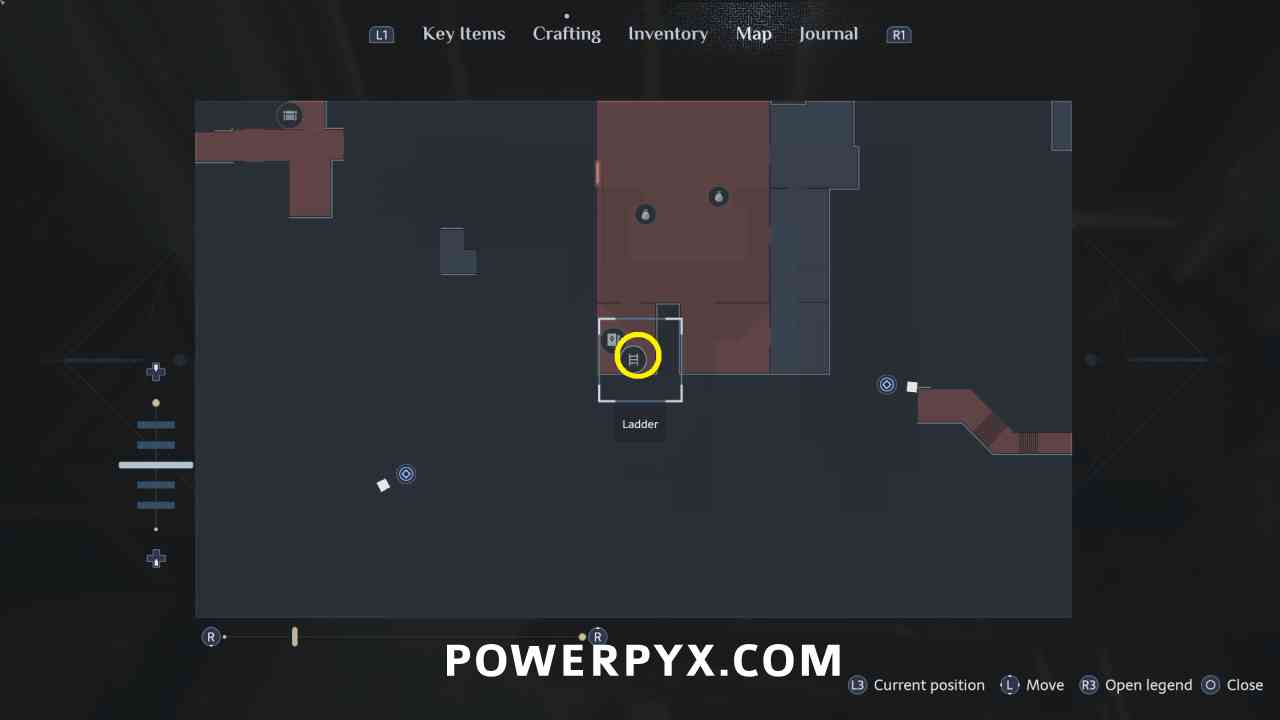
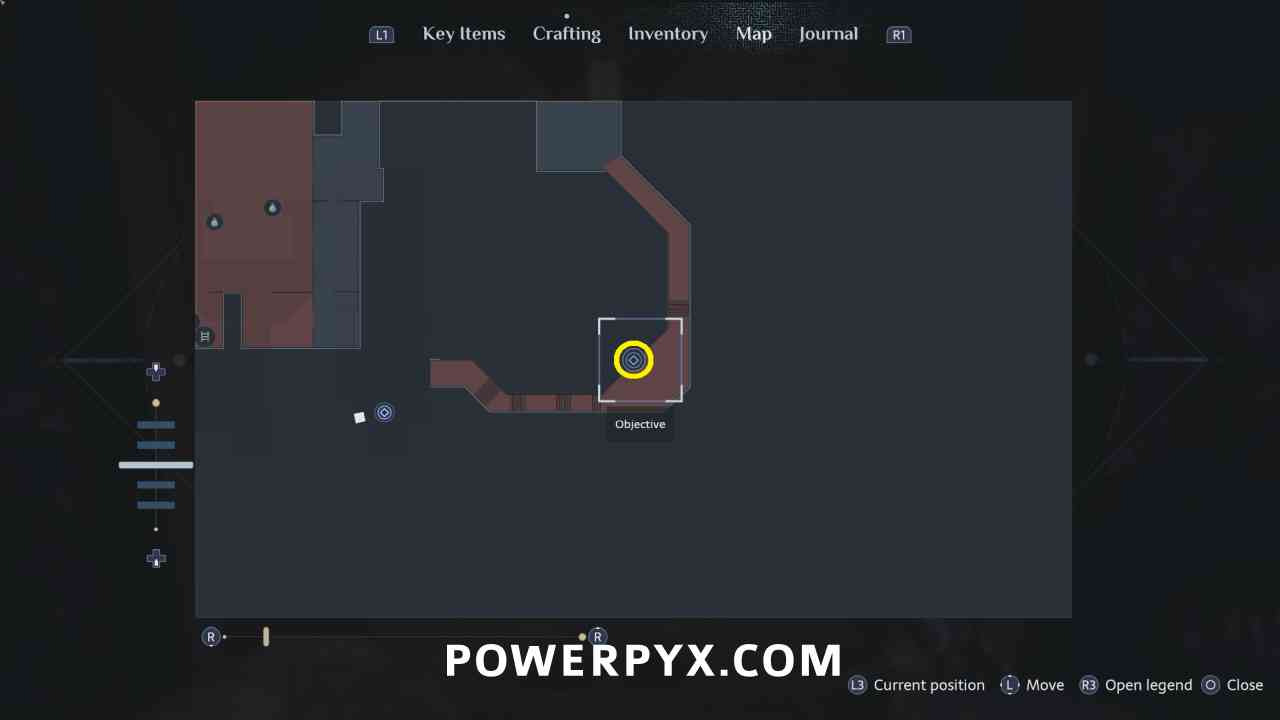
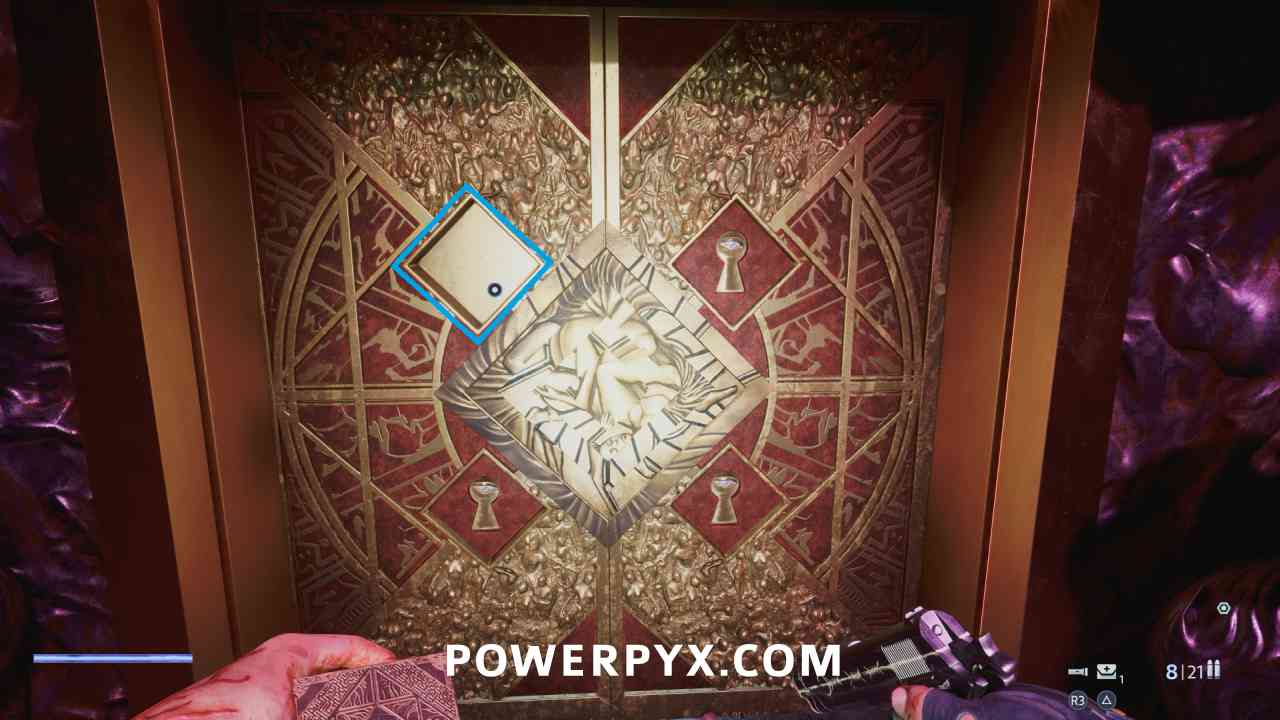
Follow the path back to the gold and red door you passed earlier, insert the Peephole Inset. You then need to rotate the inner diamonds so that they all line up. Start by rotating all of them except the inside and moving out, as the rings always rotate the ones outside of them, then when they all match rotate them all to line up with the outer edge.
Get the Genesis Configuration Back
So Much for the Cat and Mouse Shtick – Sneak past Sister of Mercy
When you enter the room the Genesis Configuration is thrown through a wall at the top. You need to avoid the Sister of Mercy and climb the stairs to the top of the room and go through the hole. You can pick up bottles and throw them across the room to get her to move away from you.
Inventory Capacity Upgrade
If you go around the left side of the lower area first there is a dead end with this upgrade stuck to the back of a chair with a body on it.
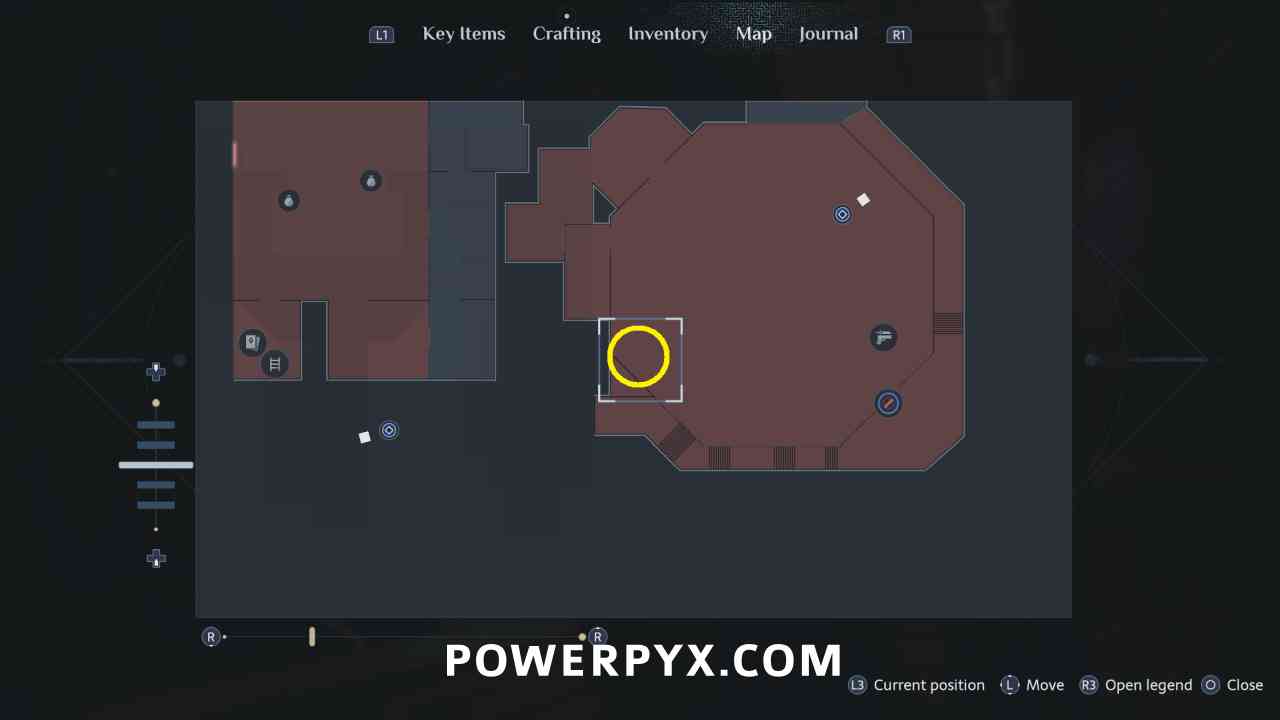
In the Labyrinth keep following the path until you reach the open area to pick up the Genesis Configuration. In this area you are primarily avoiding blades that come out of the walls and you have to run before them.
Exit the Labyrinth
Suffering Pillar #4 (Suffering Increase)
Progress to the room where you need to spin the octagonal sections to make paths. The Pillar is on the third section. You will have to spin the second and third section to make a path to this before progressing past this room.
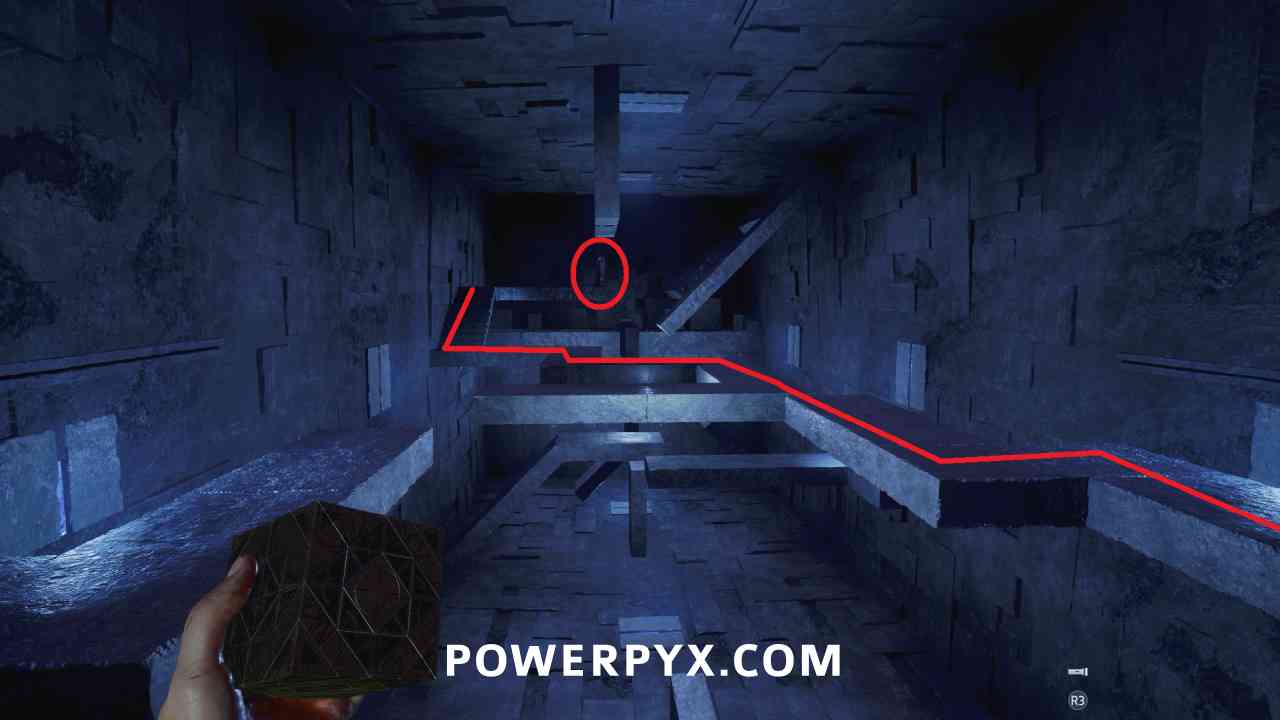
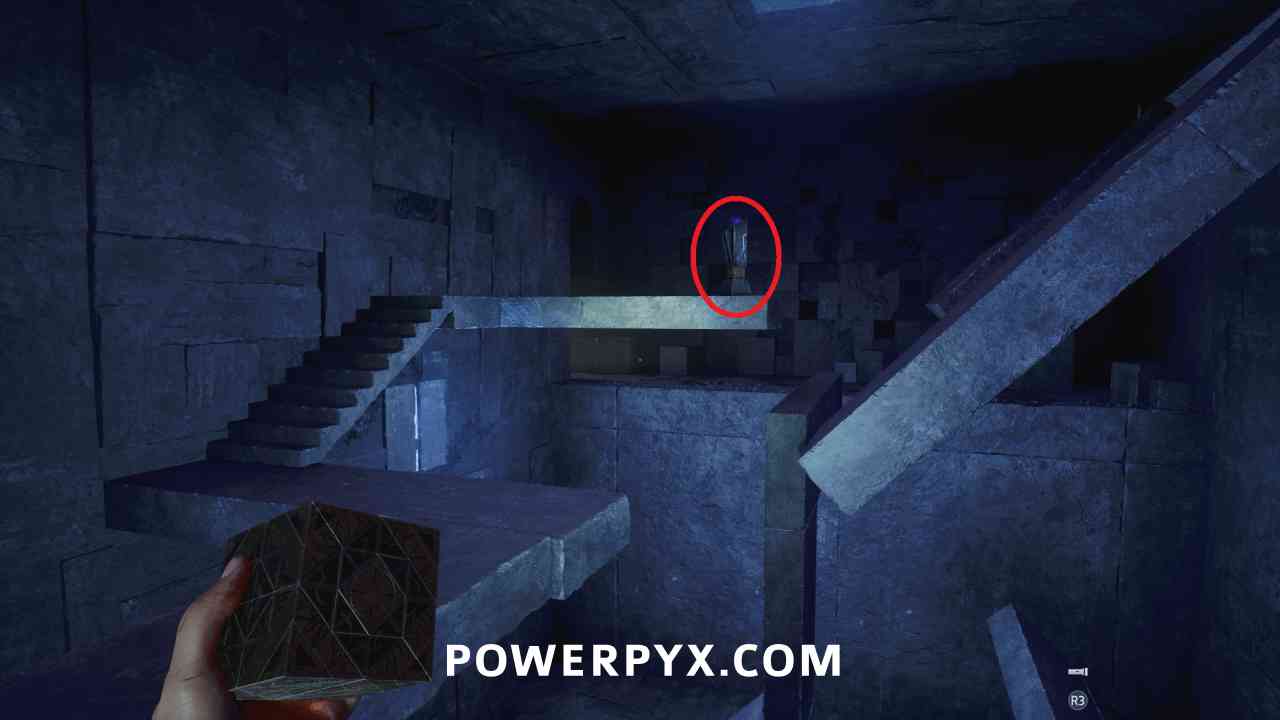
Pain Pillar #3 (Health Increase)
After climbing the ladder, you are in a room with some moving staircases. On the left side of the room are two Labyrinth Cubes you need to move even with the platforms they are in between, then use the fire on the pillar in the room. Follow this path past the pillar around to where you can interact with the Pain Pillar.
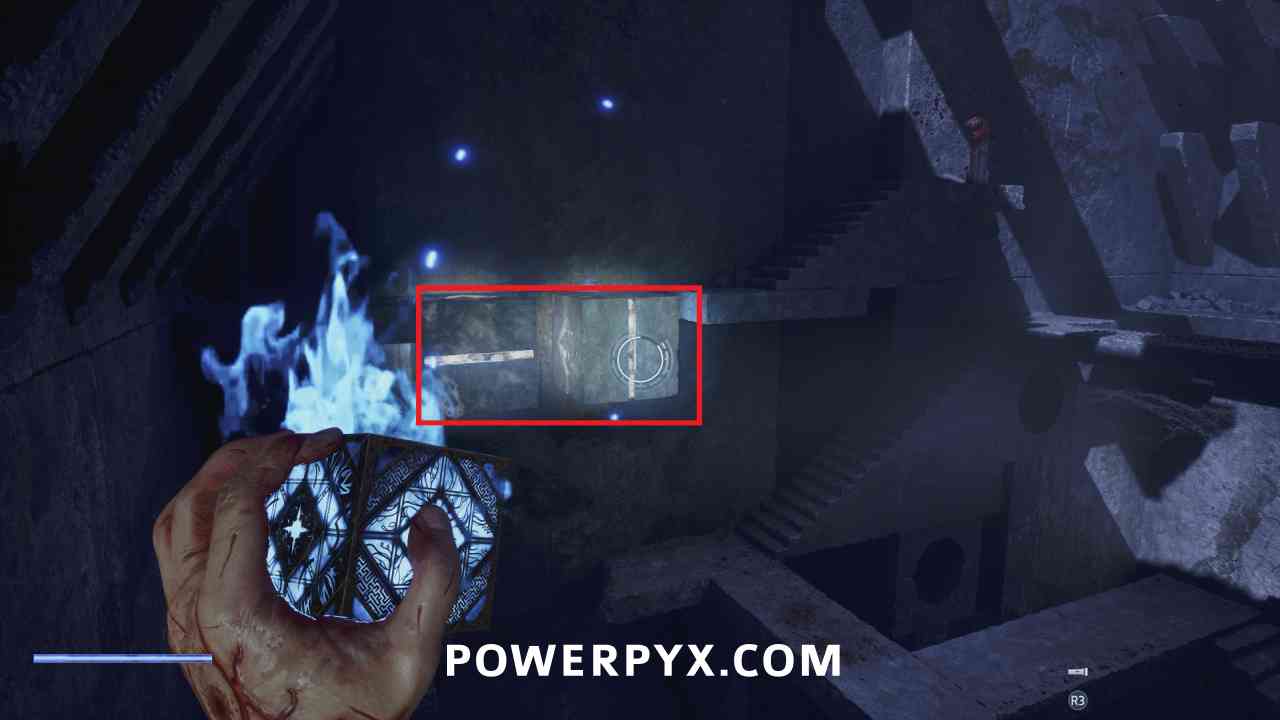
I Can Do This All Day – Escape from the Chatterer, yet again
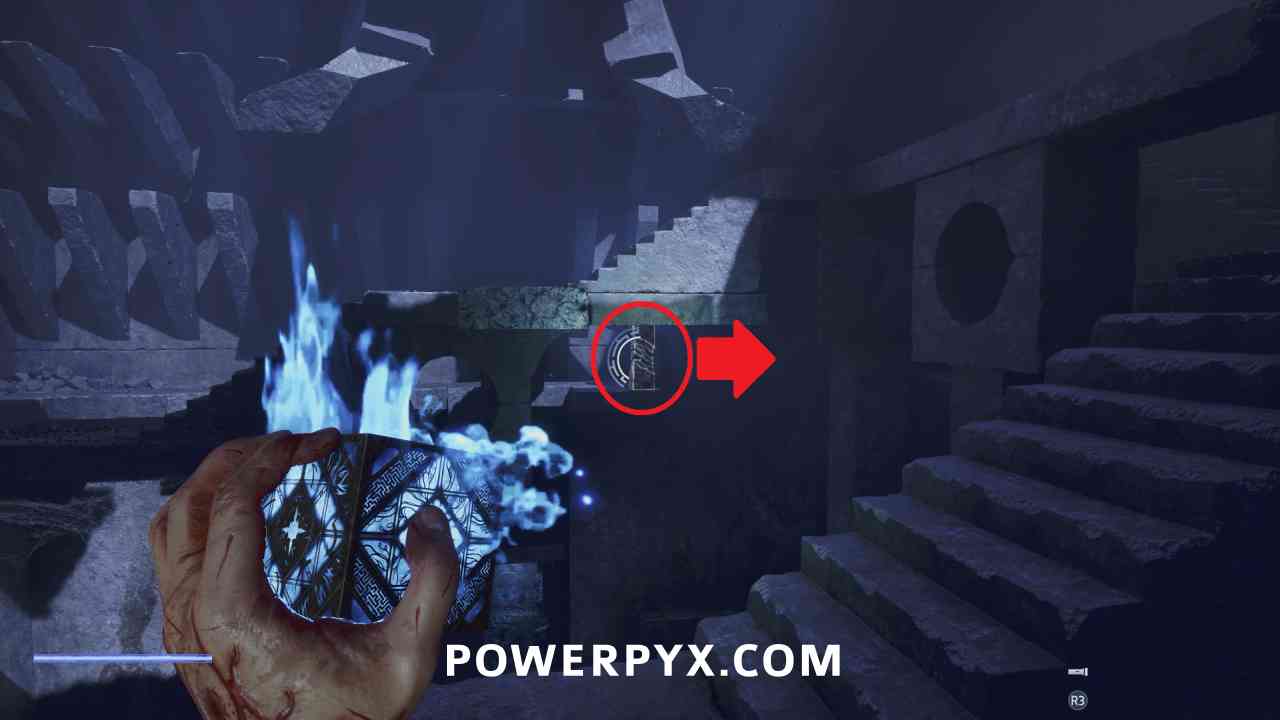
After going to the bottom of the area and through the club have the final Chatterer chase, this functions the same as before. There is a room with spinning blades and a block you need to move down to walk across. When you reach the hallway with the paintings go through the door, then interact with the items on the table 3 times to return to the chase sequence.
Unlimited Power! – Unlock the Hellchains power
In the Land of the Pig, the Butcher is King – Rip apart 69 enemies using Hellchains
When you finish the chase you unlock the Hellchains power. In the room you are in with all the enemies attack them until you regain all your Suffering, then hold shoulder buttons to use it, aiming at all enemies in the room to hook them and instantly kill them. You can reload the most recent autosave and do this a few times to earn the trophy for 69 total kills and not need to worry about it later.
Get to Marlowe
Key Item: Embossed Block
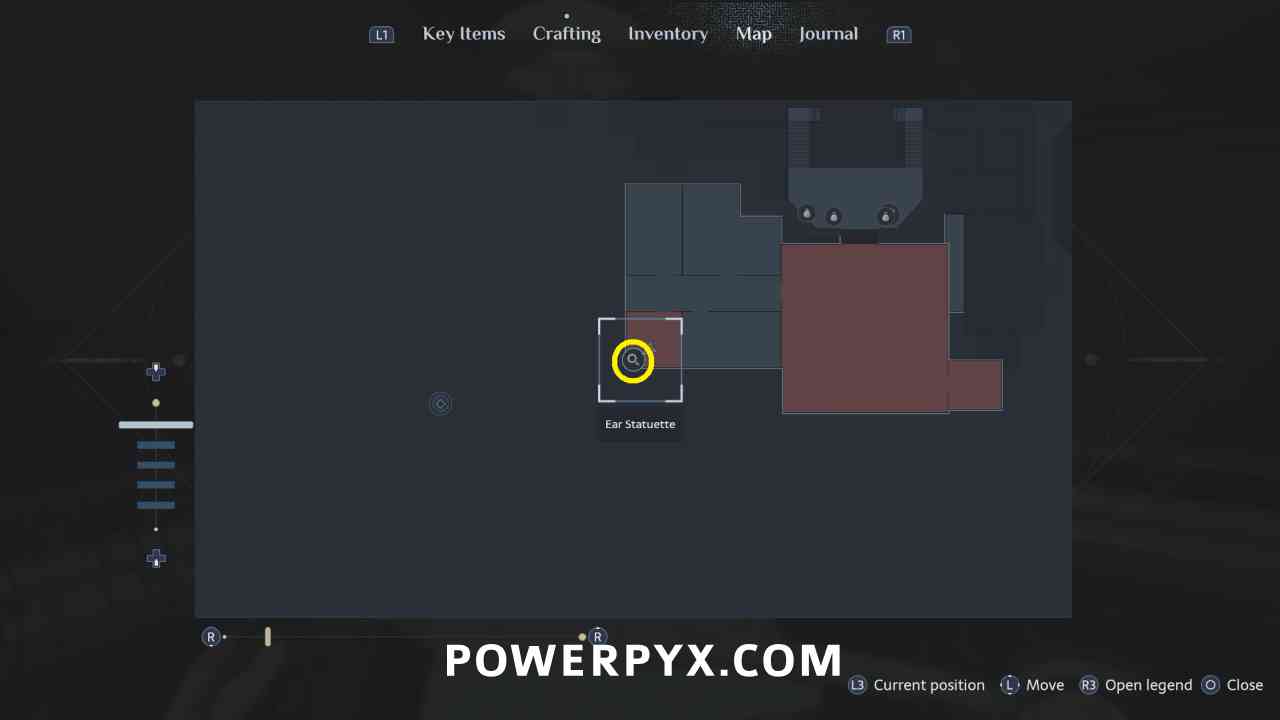
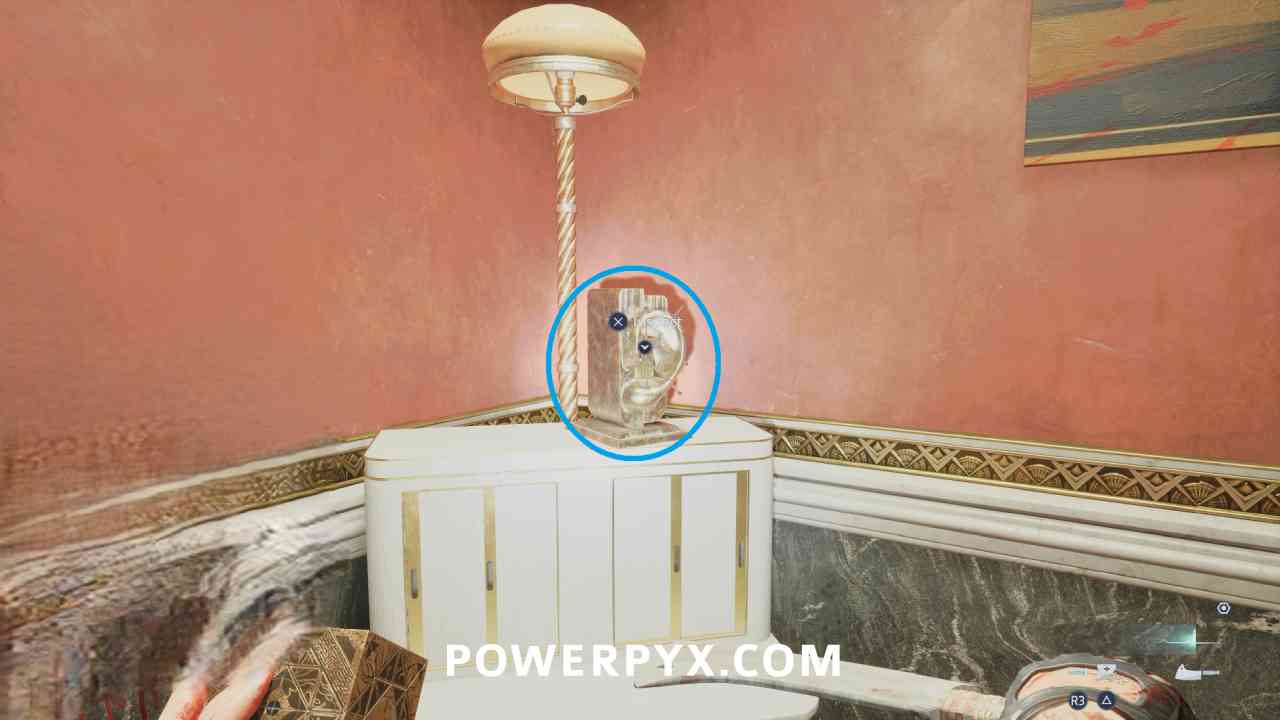
Go to the southwest room on this upper floor and interact with the block that looks like an ear. Pull out the nails in the order they are sitting front to back to obtain the item.
Revolver Upgrade: Fine -Tuned Barrel
After returning from the Labyrinth, available from Zora at third shop for 160 coins
Assault Rifle Upgrade: AP Rounds
After returning from the Labyrinth, available from Zora at third shop for 180 coins. Purchasing this is recommended.
Buy this upgrade now because it is going to used it in the next area for the final misc trophy. Put it on the Assault Rifle and bring it with you.
Assault Rifle Upgrade: Steel Slant Brake
After returning from the Labyrinth, available from Zora at third shop for 150 coins
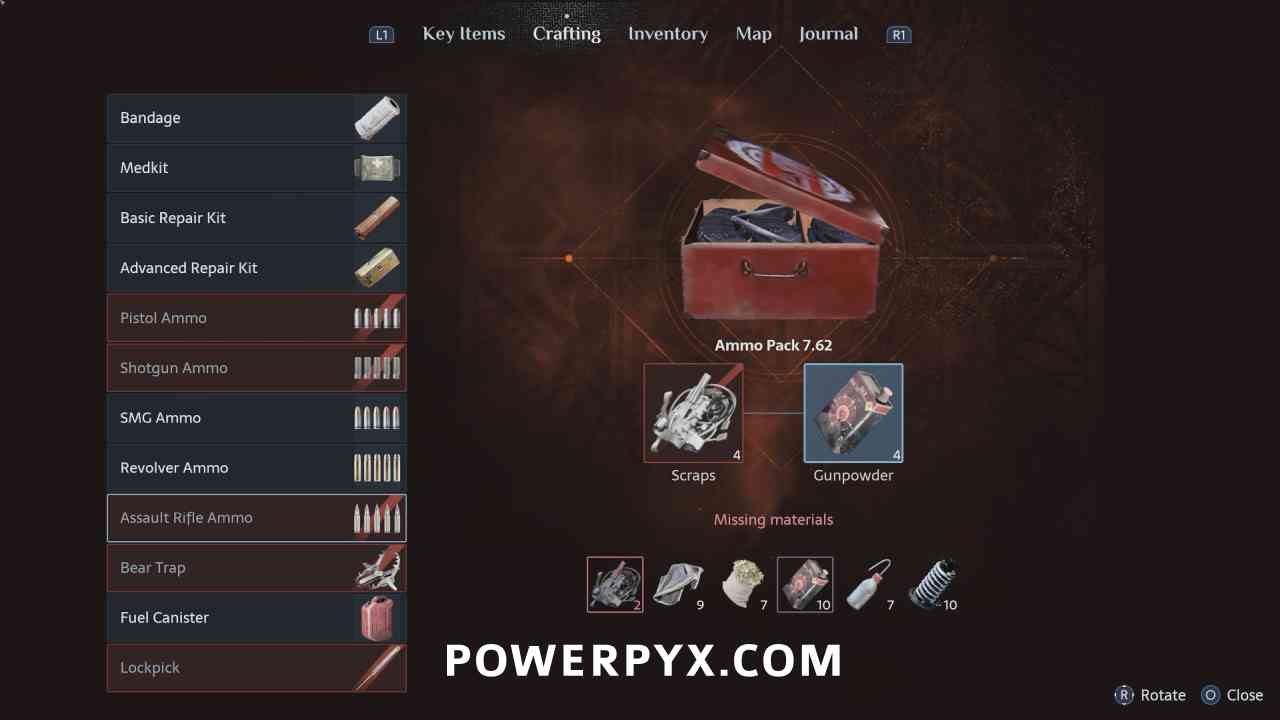
Crafting Recipe: Ammo Pack 7.62 (Assault Rifle Ammo)
After returning from the Labyrinth, purchase from Zora at third shop for 200 coins – 4 Scraps + 4 Gunpowder
Librarian – Collect every crafting recipe
Artificer – Craft every craftable item
You can now craft all possible items now that you have obtained all recipes.
Go to the north end of the main room and interact with the door to place the Embossed Block. Spin the blocks to match the positions displayed in the four paintings on either side of the door.
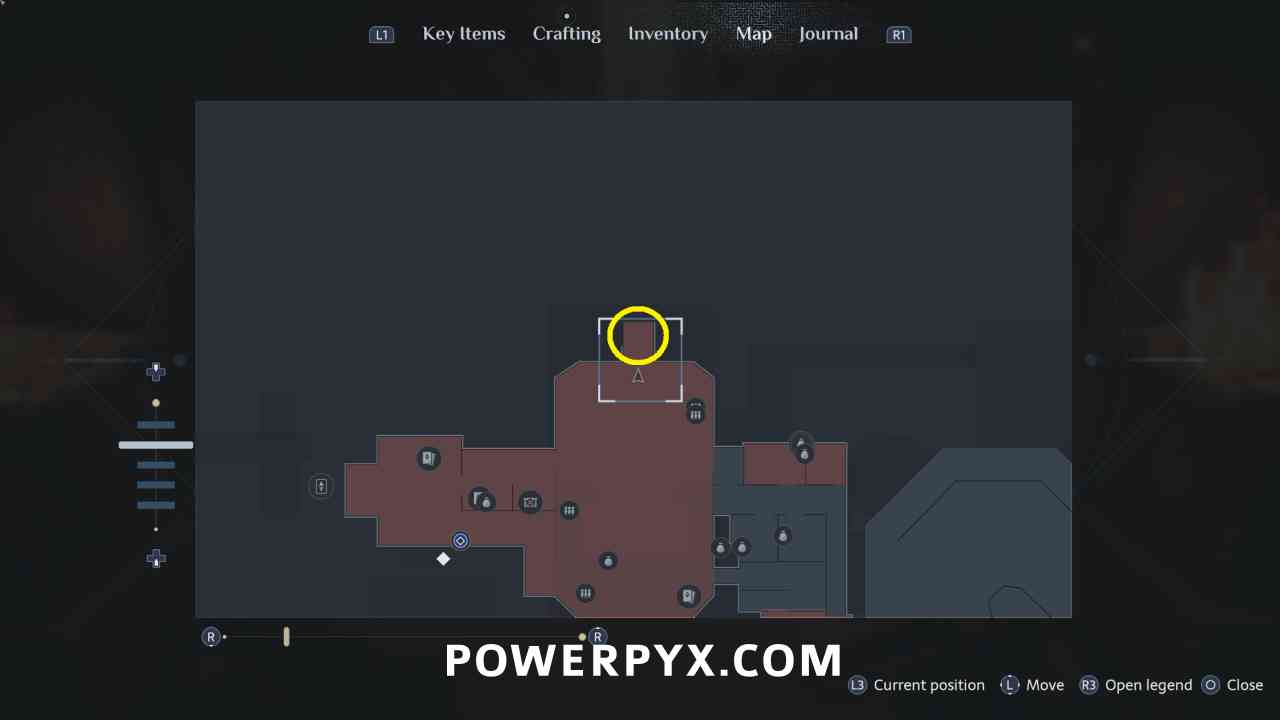
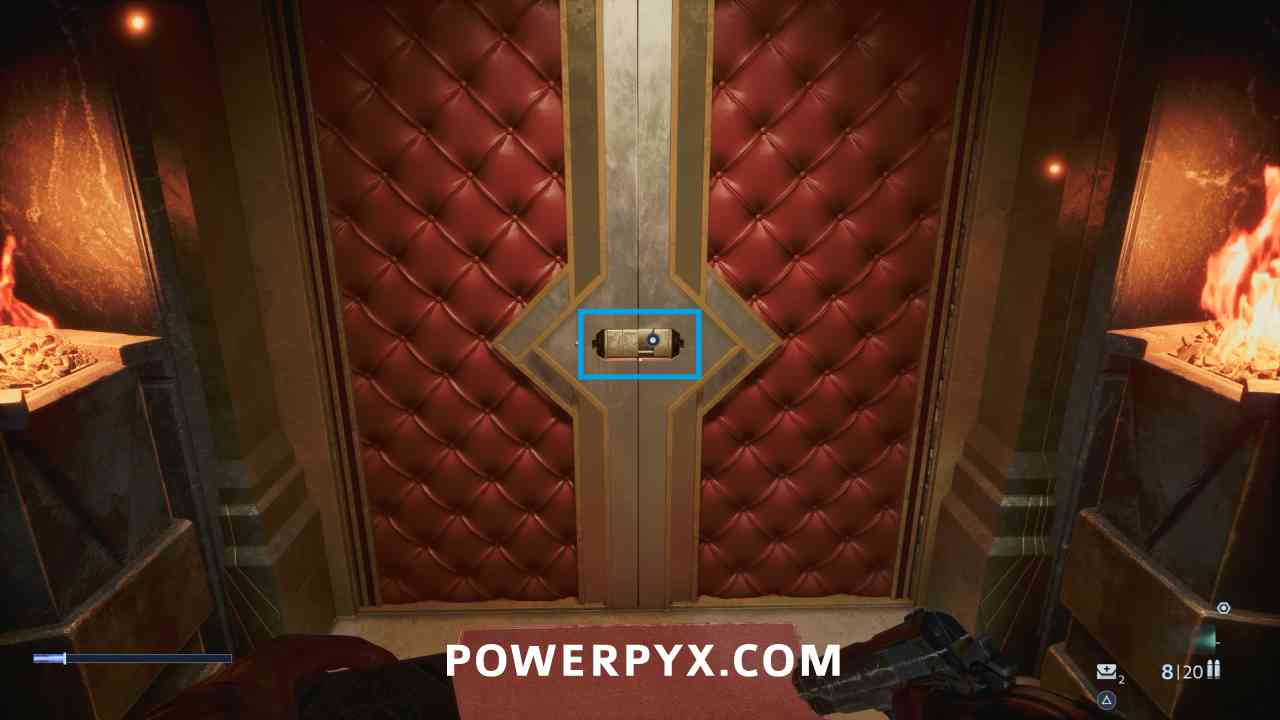
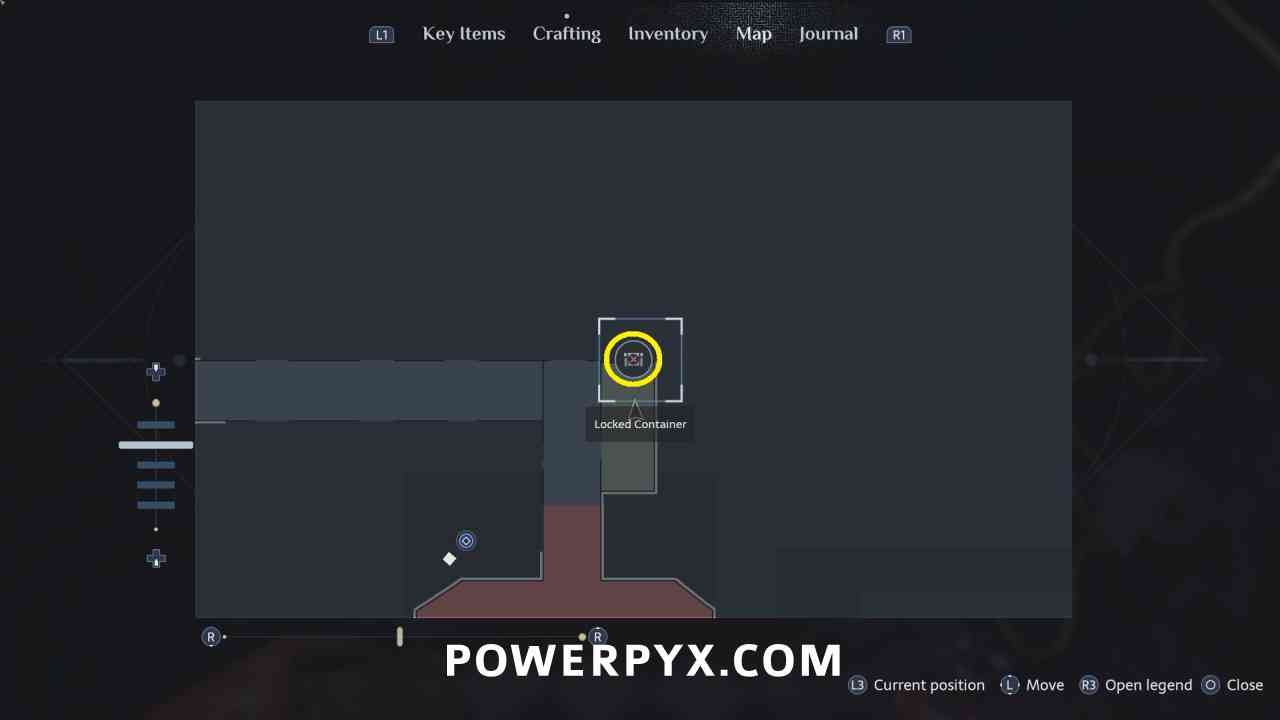
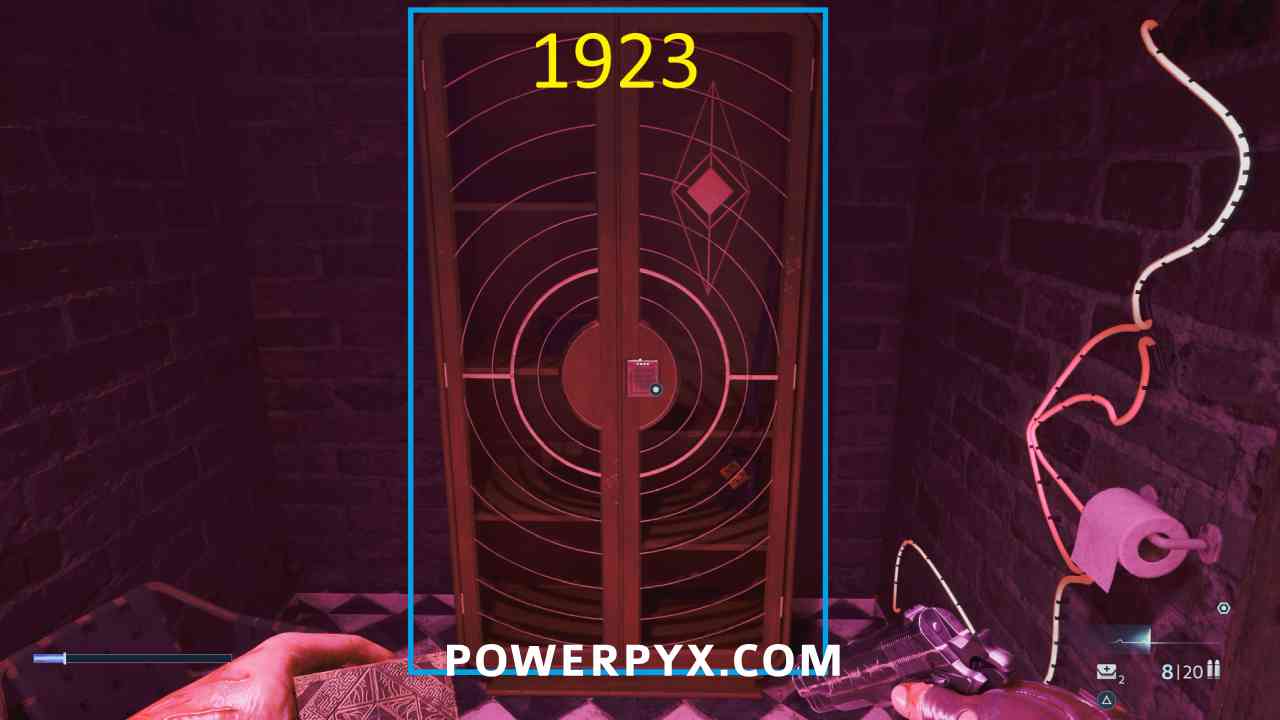
Keypad: 1923
After going through the puzzle box door this is in the room immediately to the right, code is from picture in the next room.
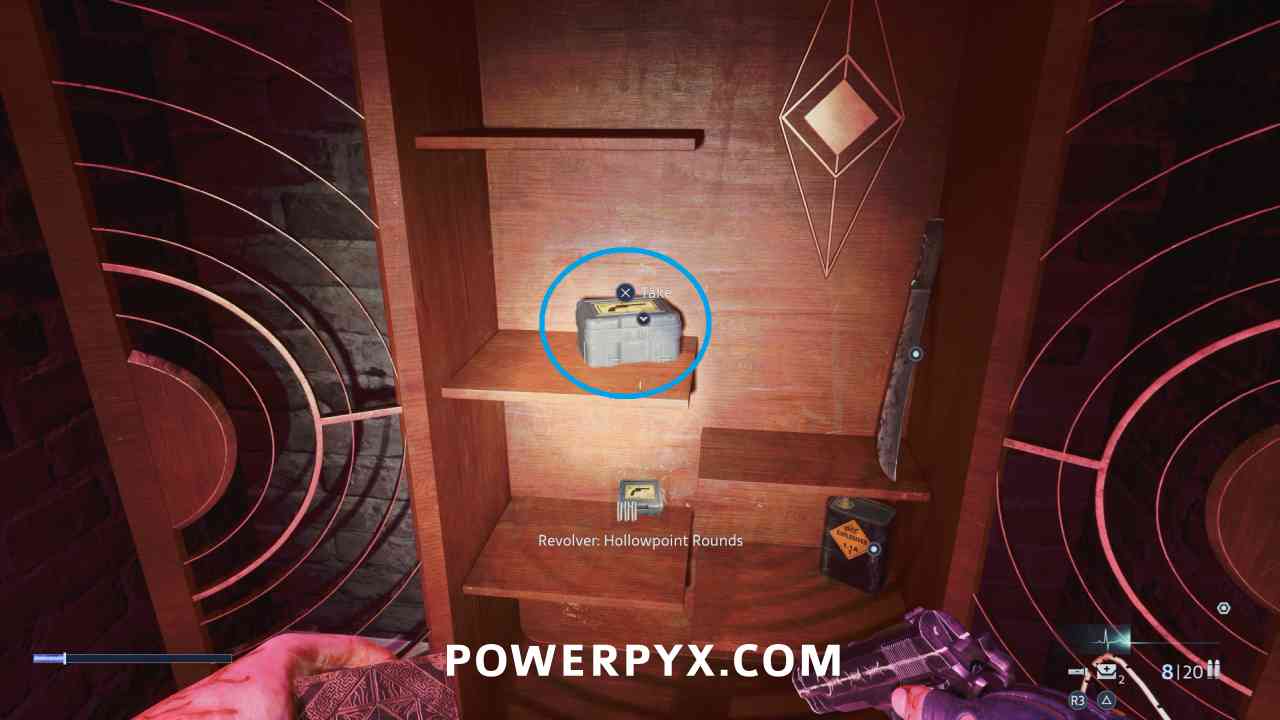
Revolver Upgrade: Hollowpoint Rounds
In the keypad cabinet.
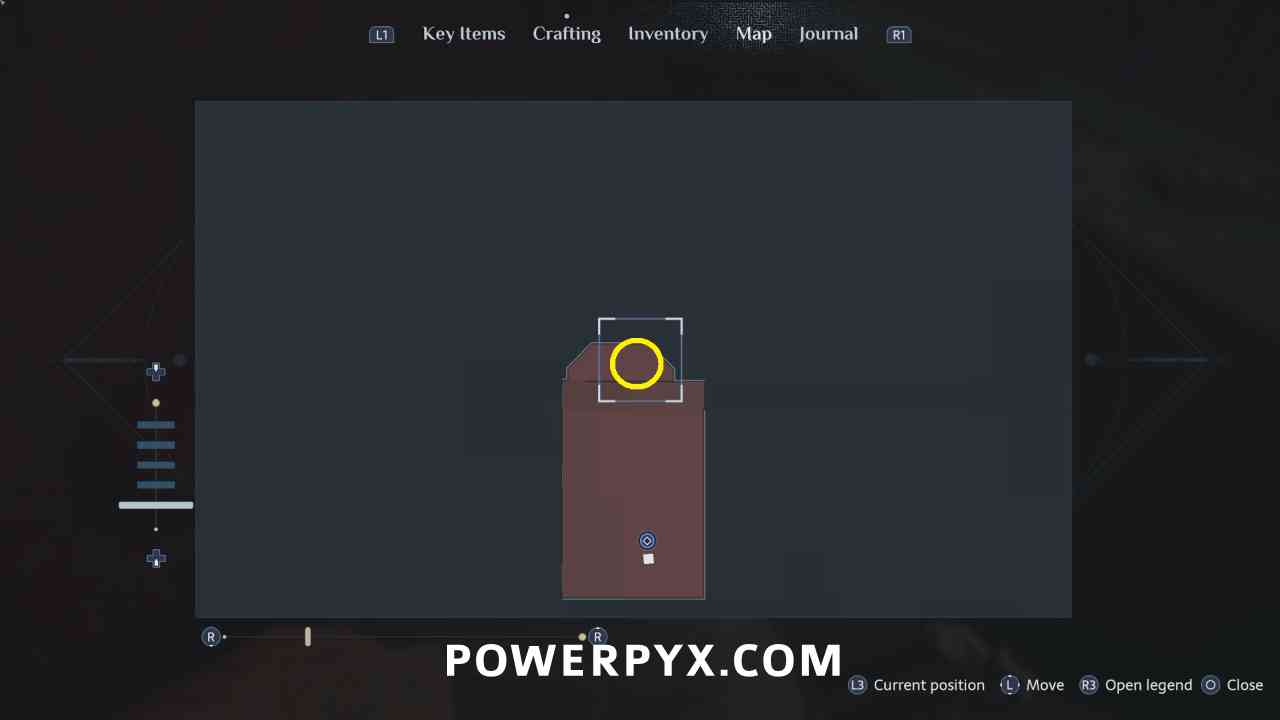
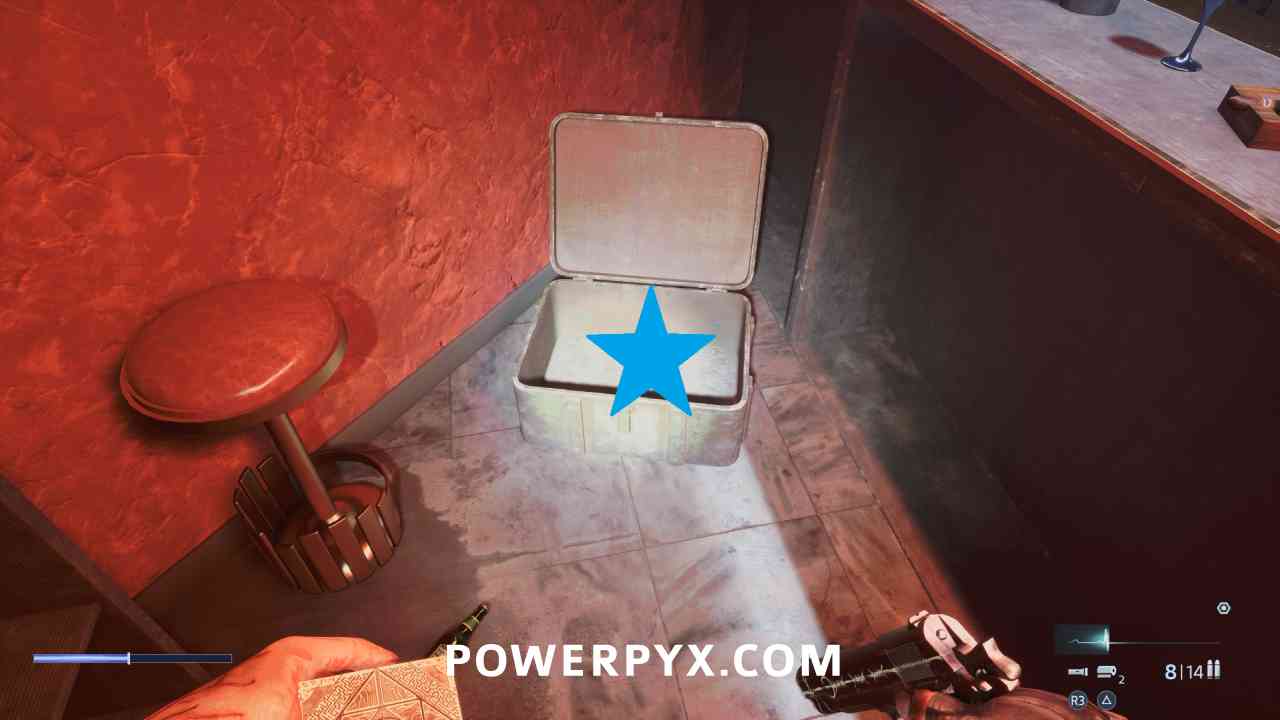
SMG Upgrade: Skeletonized Bolt Carrier
In the room with the waterfall, on the lower floor in a suitcase behind the bar.
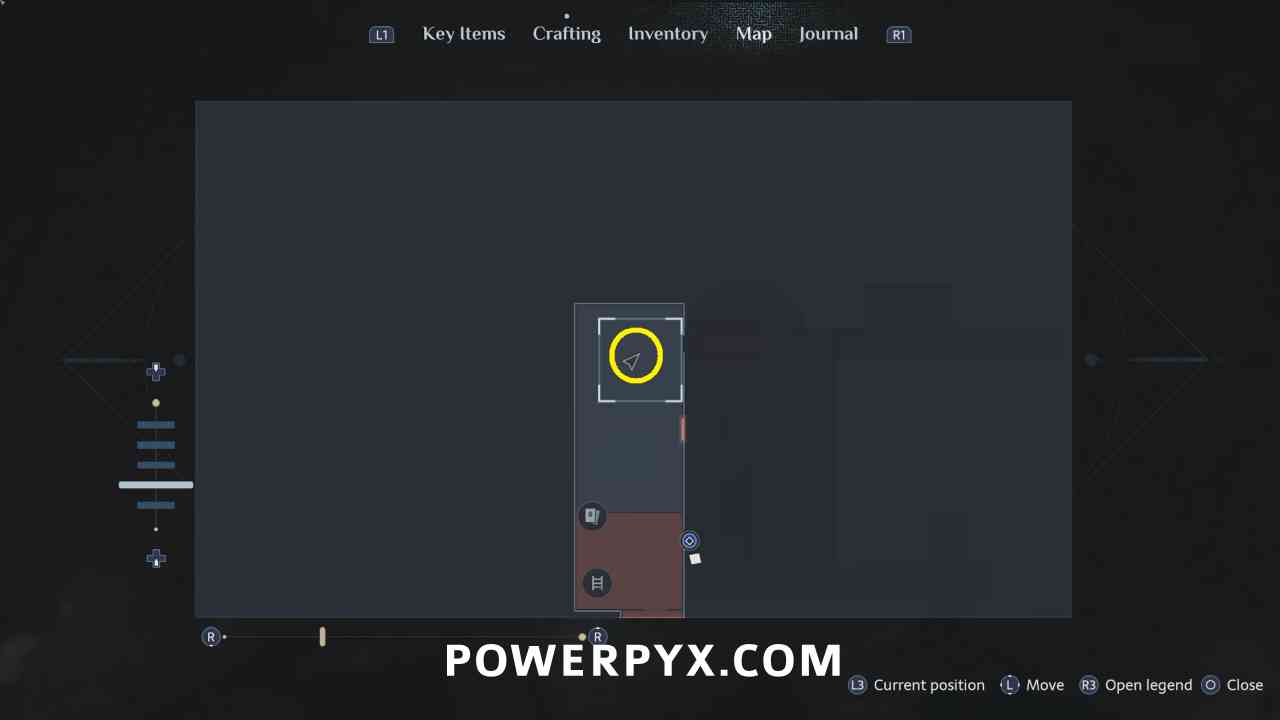
Key Item: Hobby Horse
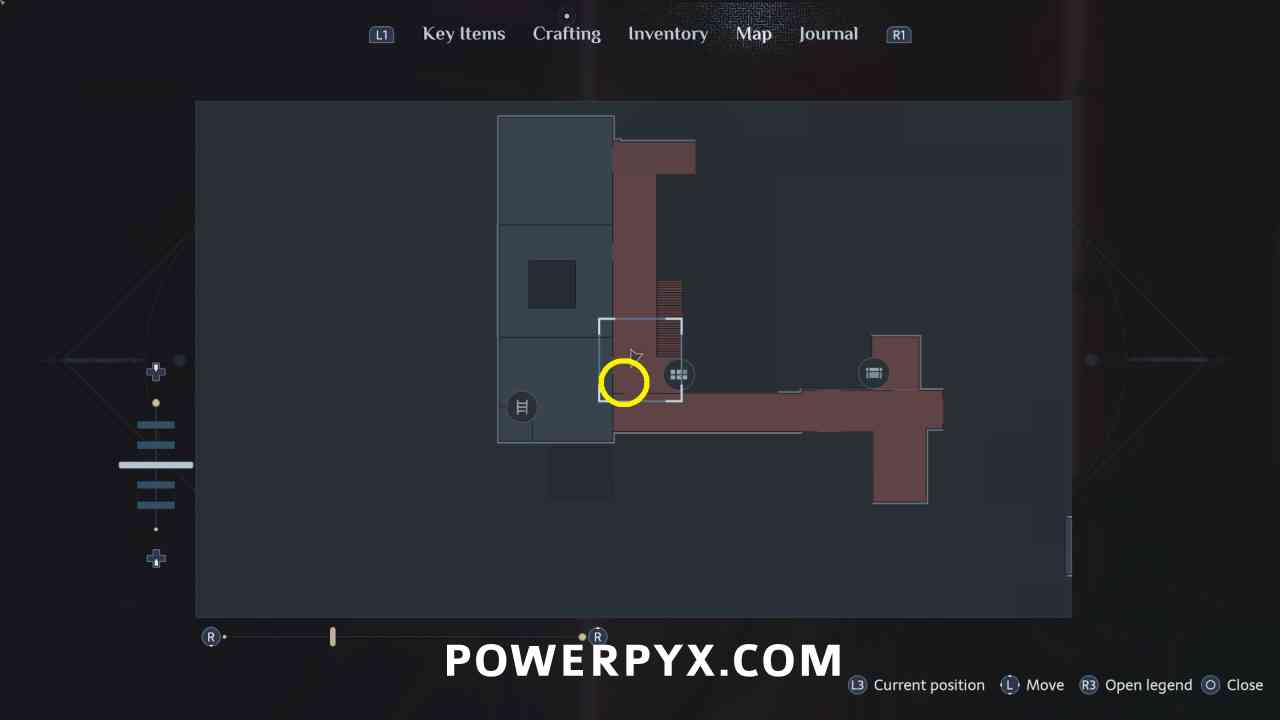
After climbing the ladder in the southwestern room, drop through the hole and this is in the northwestern room by a body.
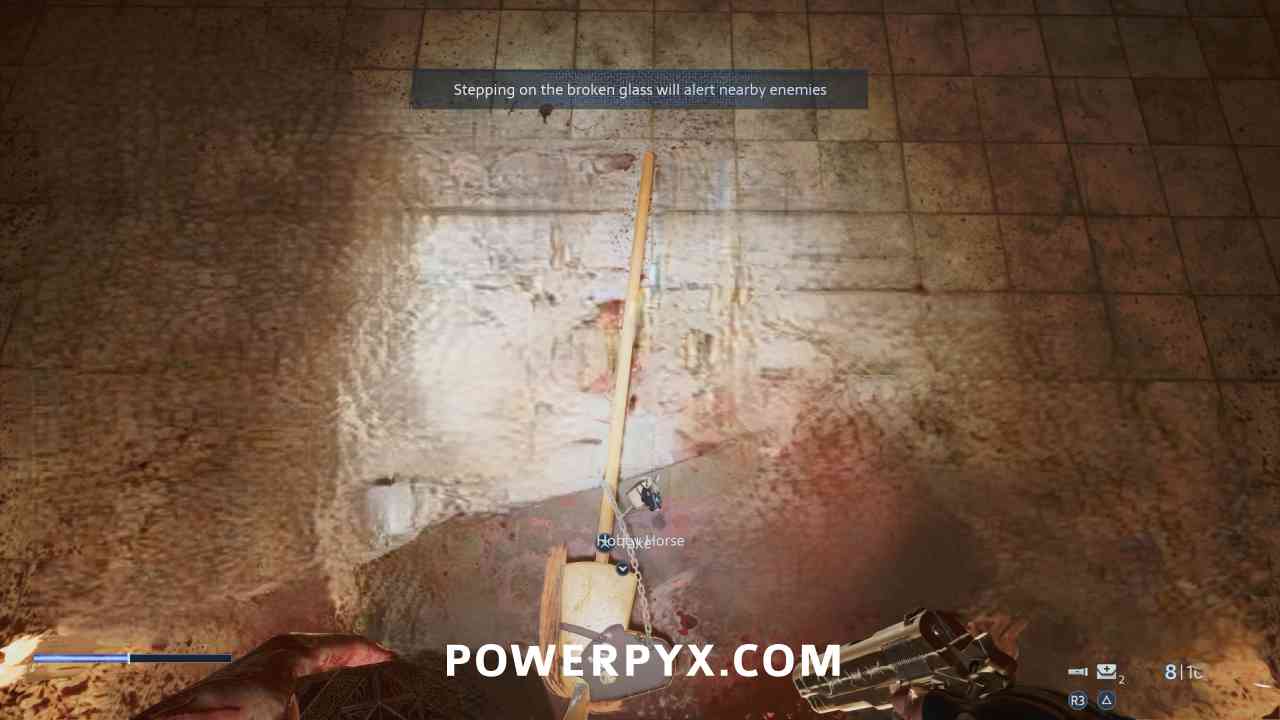
Trickshot – Kill 2 or more enemies with a single shot
After picking up the Hobby Horse and opening the door, a bunch of zombified Cultists will start running at you and attacking you. They are extremely weak, so you want to take out the Assault Rifle with the AP Rounds attachment, line up two of the Cultists, and shoot them and it should kill 2 of them with one bullet. There are 2 that immediately spawn in front of you when you open the door, if it doesn’t work on them run straight forward into the bathroom they came from and turn around, and around 8 more will run at you in the bathroom. If you kill all of them without earning the trophy then you can reload the previous autosave to try again, though note this puts you back when you first entered this area so will need to pick up all items starting from the SMG Upgrade again.
Use the Hobby Horse on the keypad at the top of the stairs.
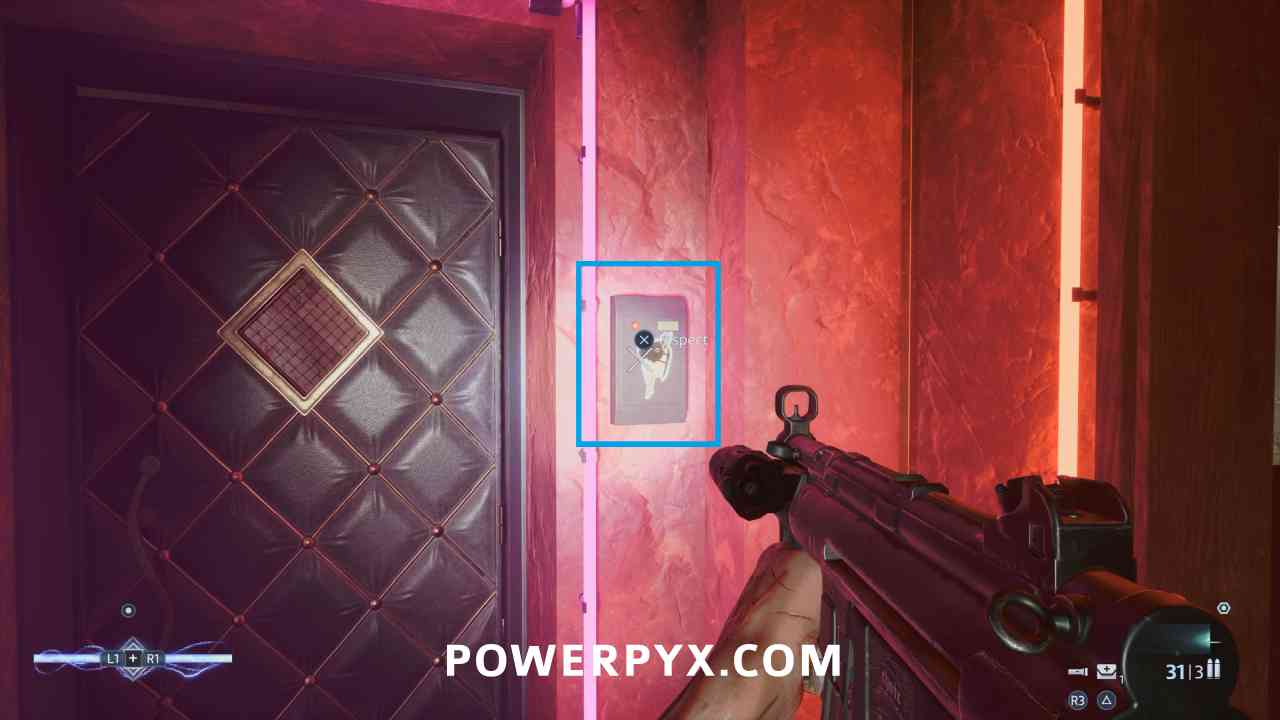
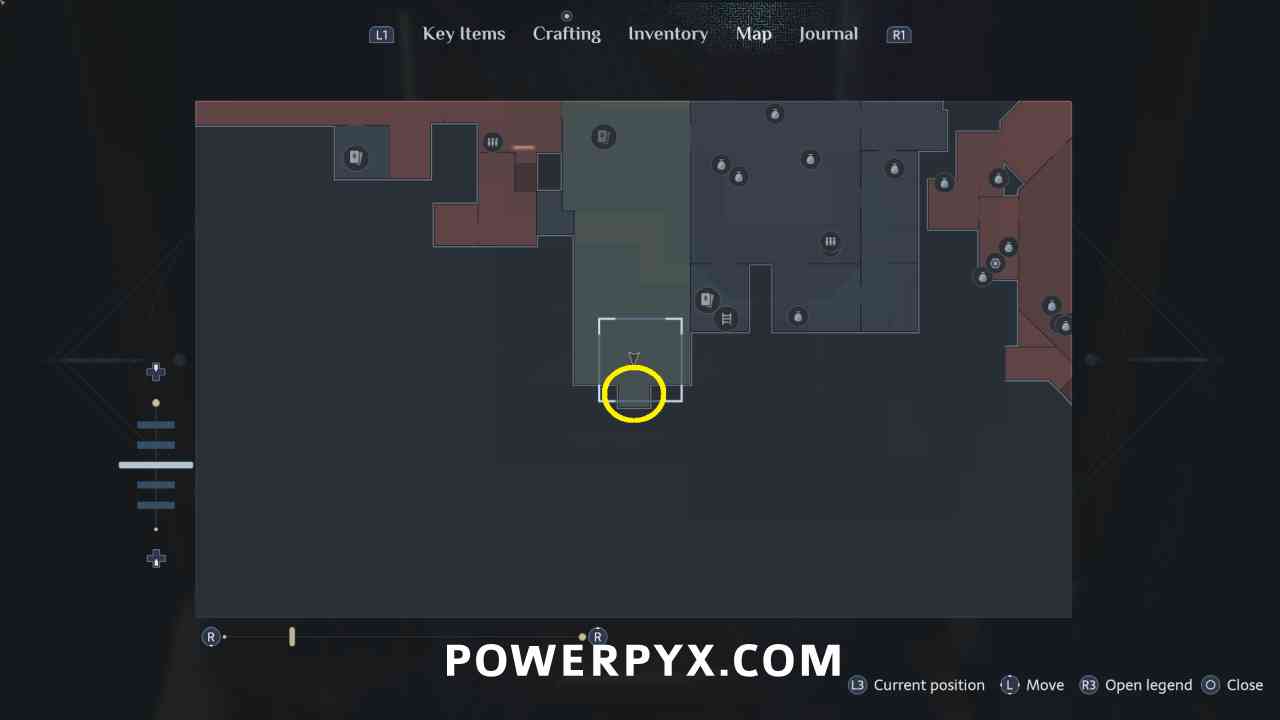
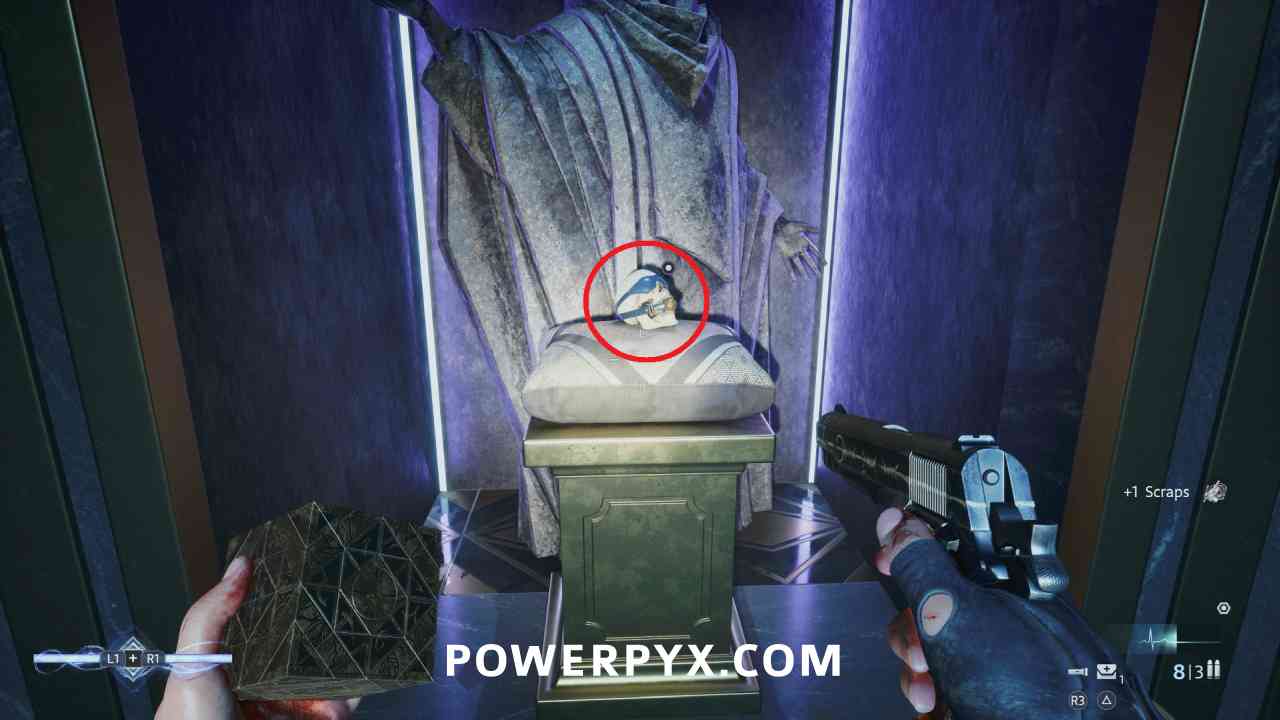
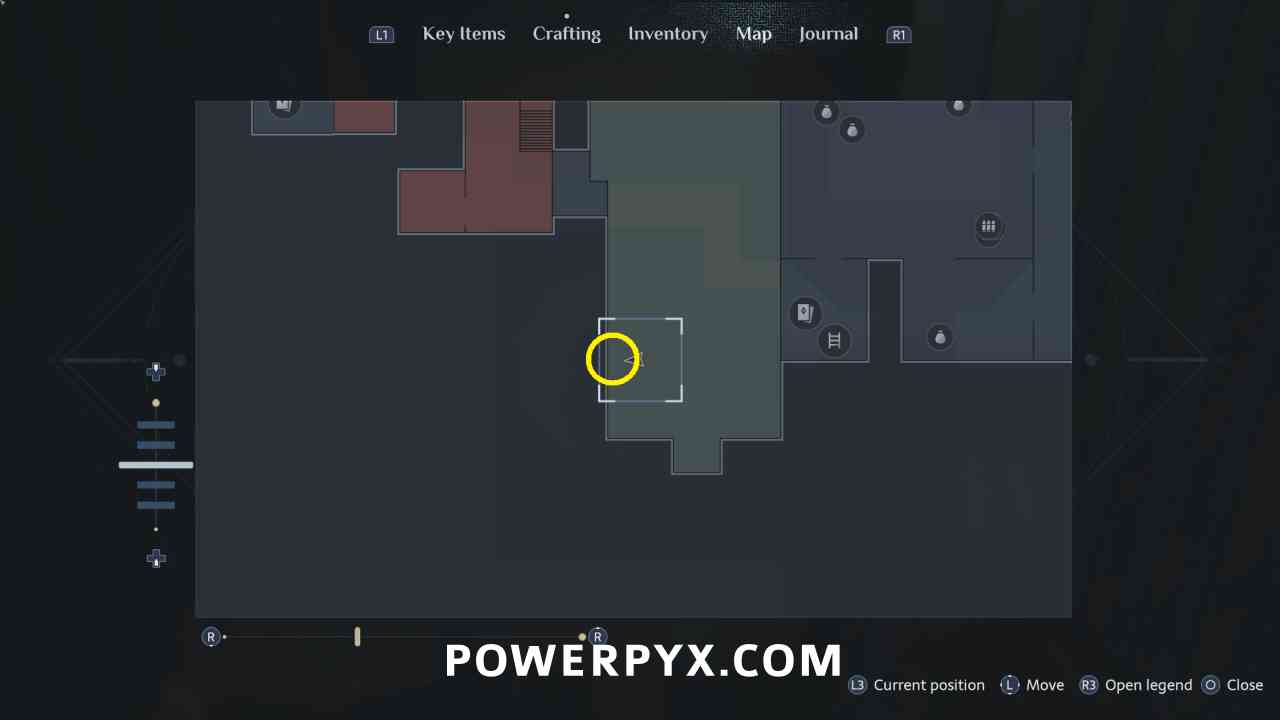
Key Item: Gagged Skull
Progress into the large open room and go to the south where this is on a pedestal.
Assault Rifle Upgrade: Overloaded Cartridges
After defeating the blob enemy, on a pedestal on the west side of the room.
Lord of War – Fully upgrade a firearm
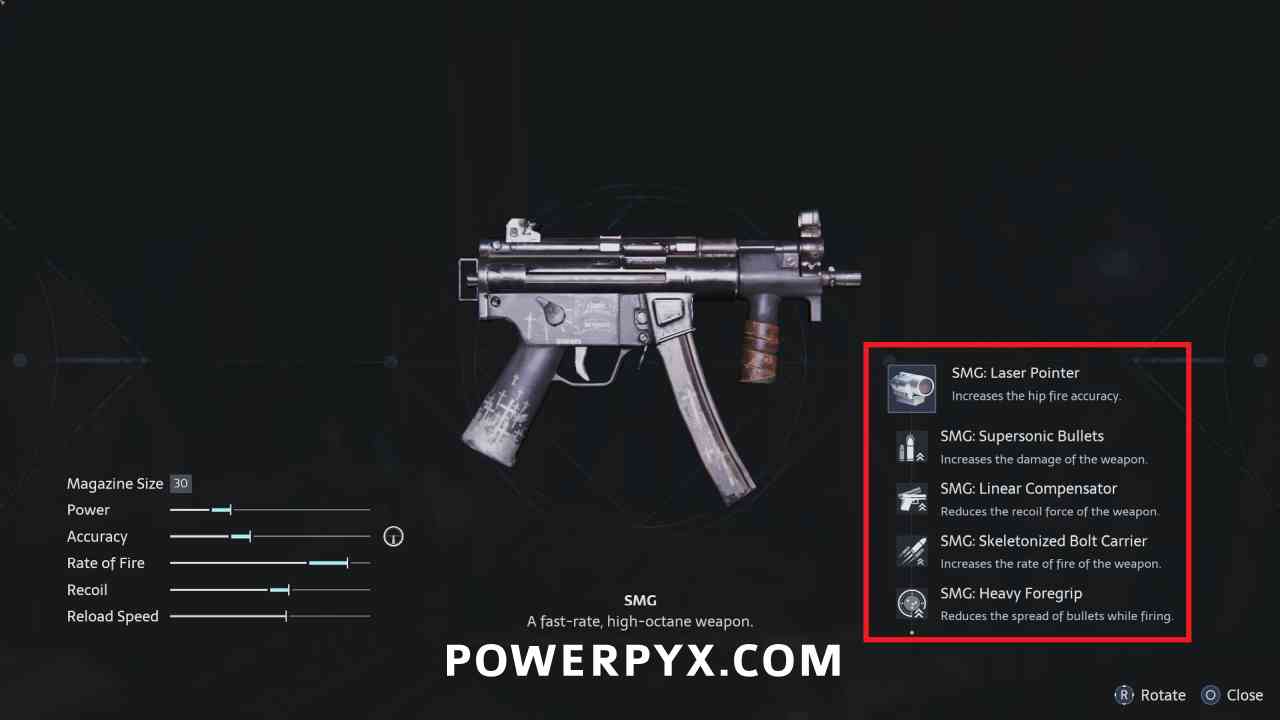
Back at the shop, purchase the SMG Heavy Foregrip and put this on the SMG to earn this trophy. If you had the Drum Mag on, you may have to switch for the Laser Pointer for the trophy to unlock, even though all slots are filled.
You can then place the Gagged Skull in the door left of the shop to continue.
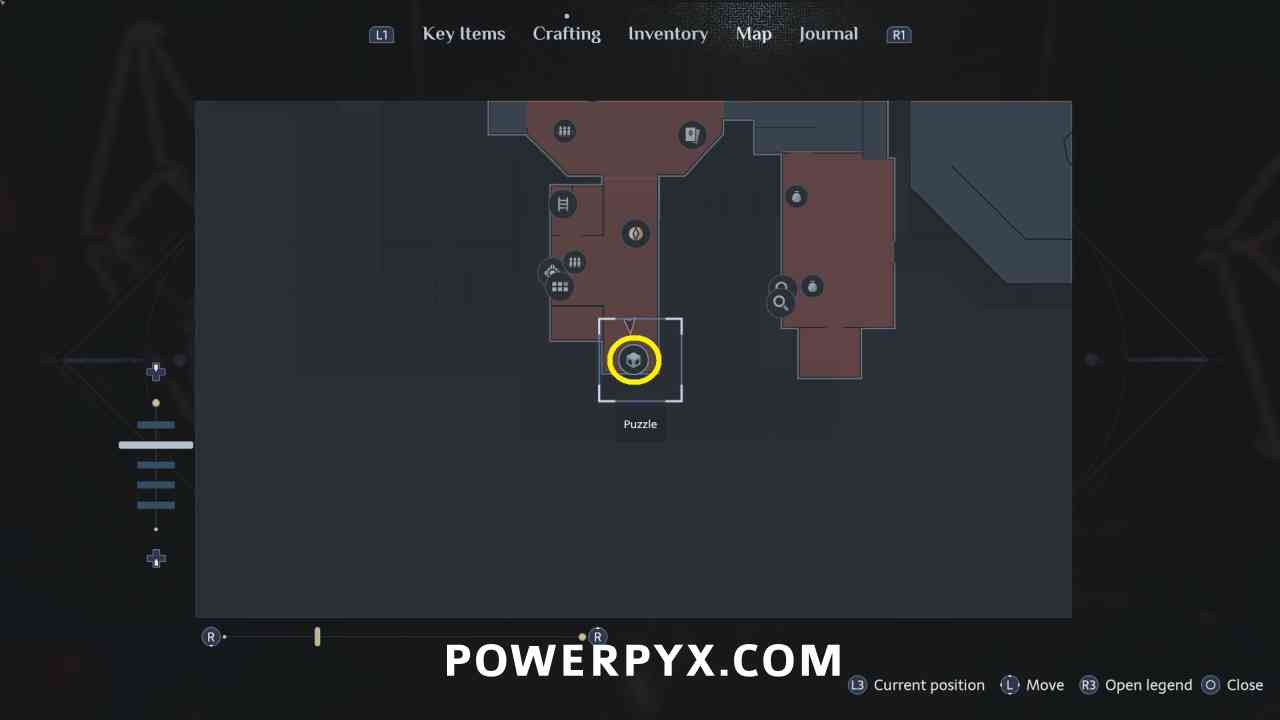
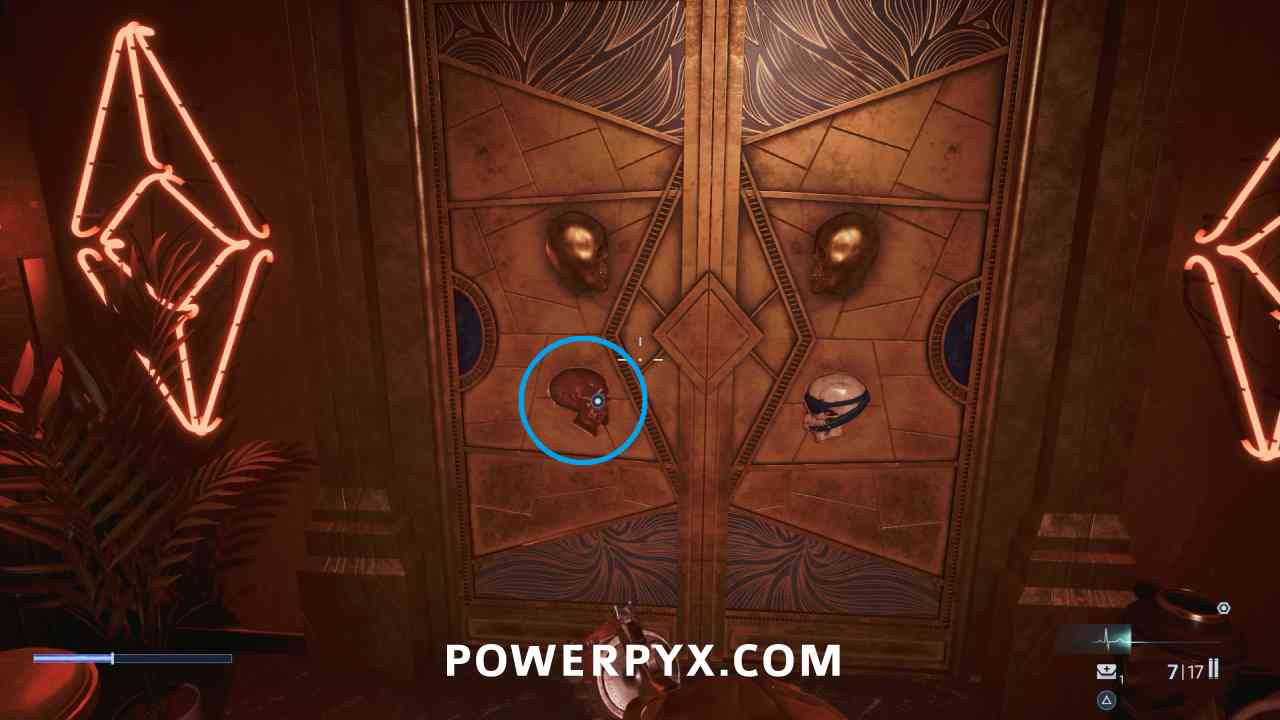
Claim the Sister of Mercy’s Heart
No Mercy – Defeat the Sister of Mercy
The Sister of Mercy flies around the room, so you primarily need to attack her with ranged weapons. She primarily attacks by throwing knives at you, which you should stop attacking her when she does and dodge them until she stops throwing. When she reaches 2/3 and 1/3 health the area will turn red, and after around 10 seconds she will start moving toward you from across the room to try and grab you. You need to attack her a few times when she does this, then she’ll drop to the ground and you are prompted to use Hellchains on her.
Make sure to pick up the Sister of Mercy’s Whip off her body when she is defeated to sell later.
Give The Sister of Mercy’s Heart to Sunny
Pain Pillar #4 (Health Increase)
Immediately after defeating the Sister of Mercy, on the main path when you enter the Labyrinth area.
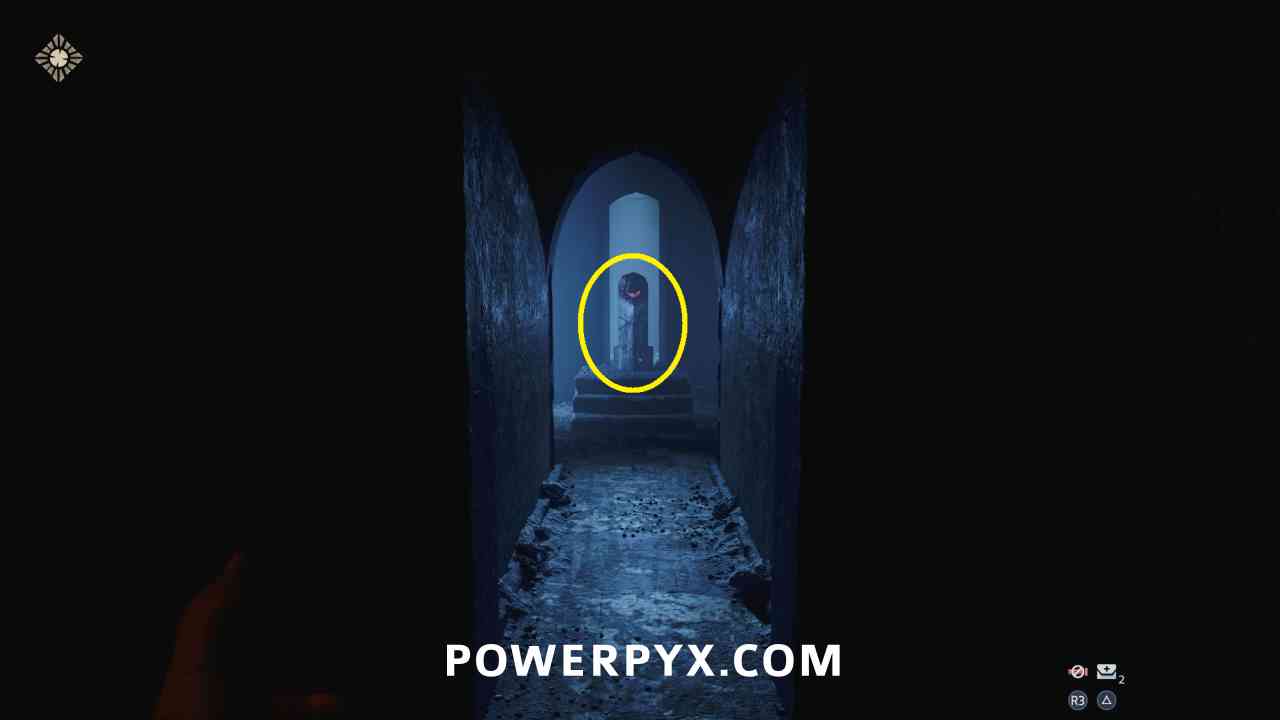
Note: The trophy for all 5 Pain Pillars seems to possibly unlock early here.
Hunt Marlowe
Suffering Pillar #5 (Suffering Increase)
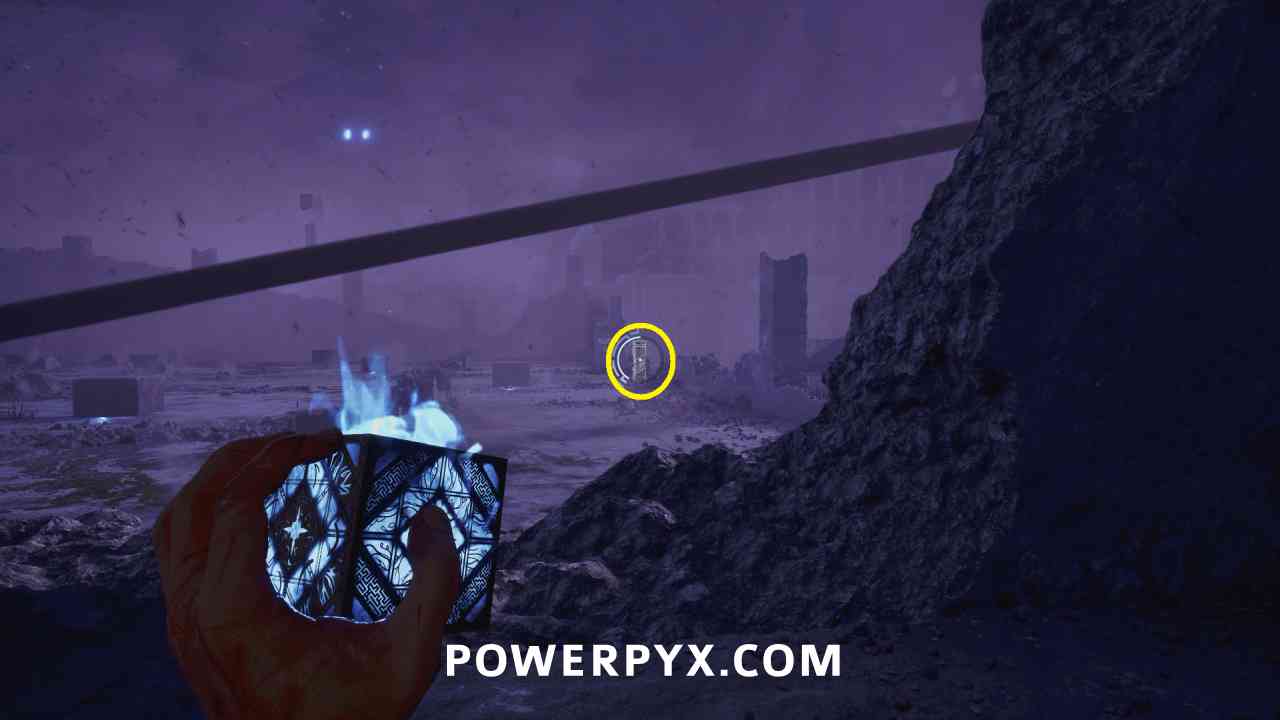
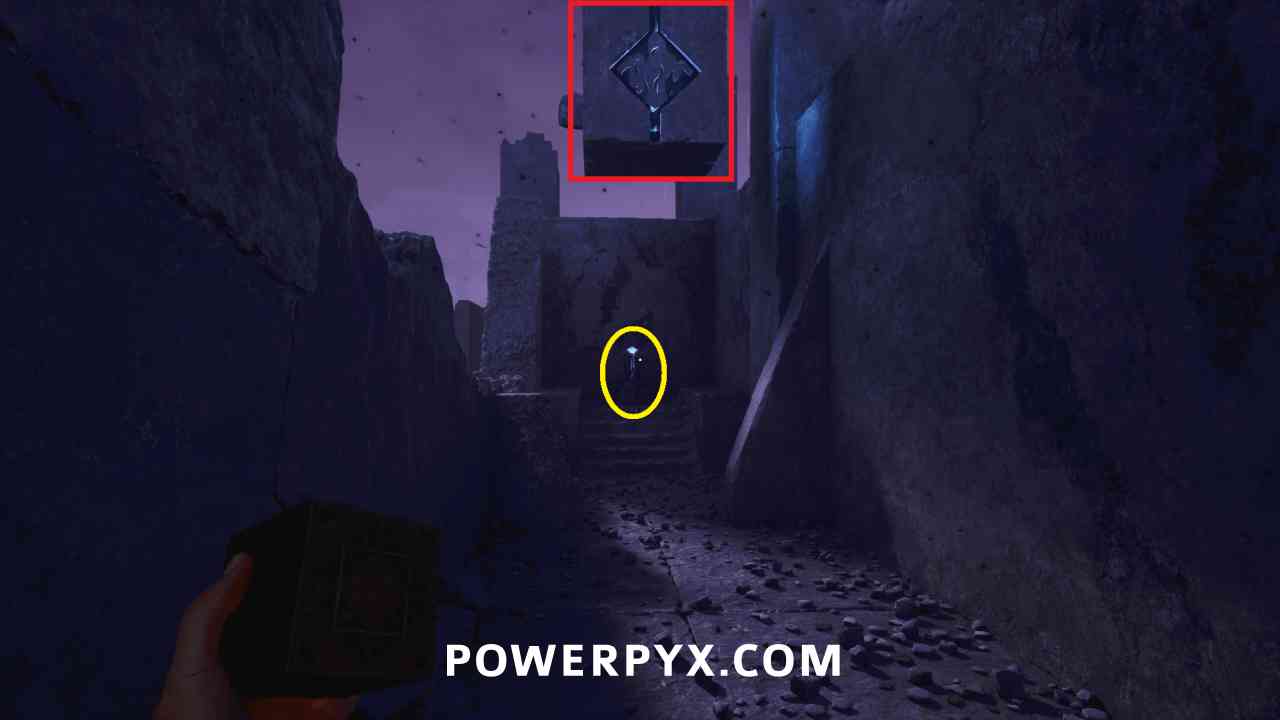
When you are in the open area with the Leviathan beam moving around, you need to progress near the front where there is the flame in the middle. Pick it up and shoot it to the right to the block.
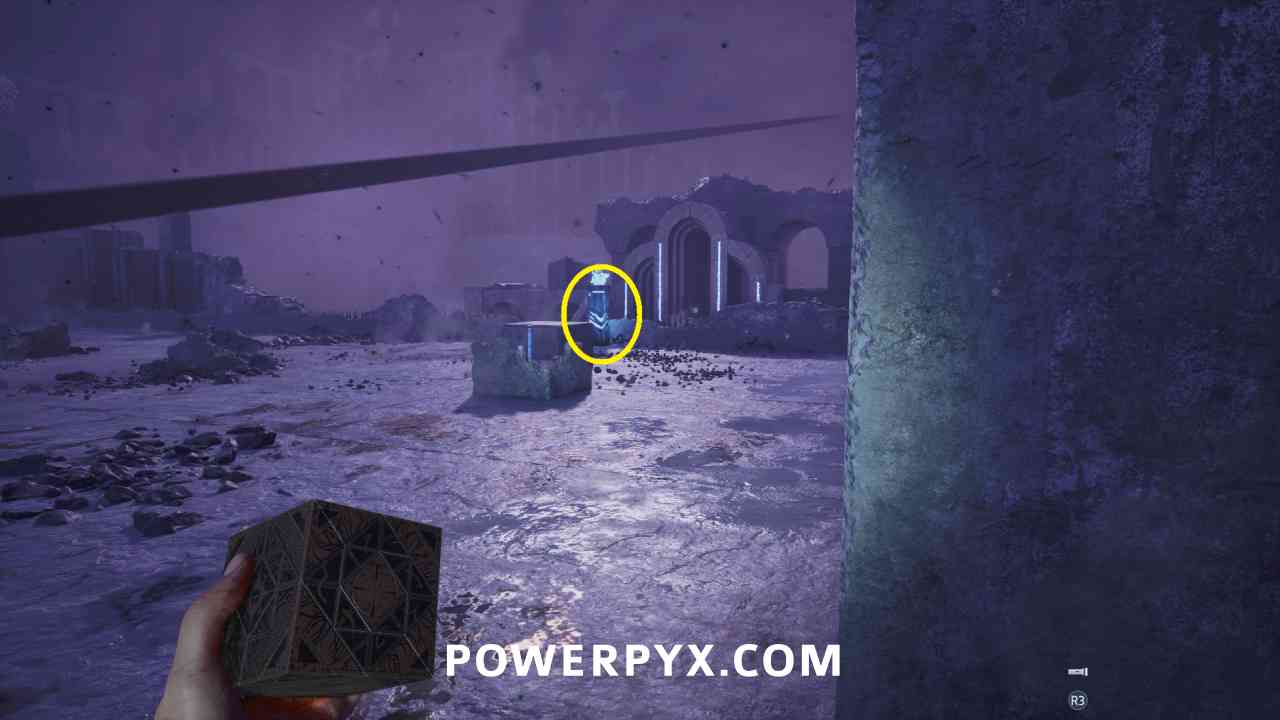
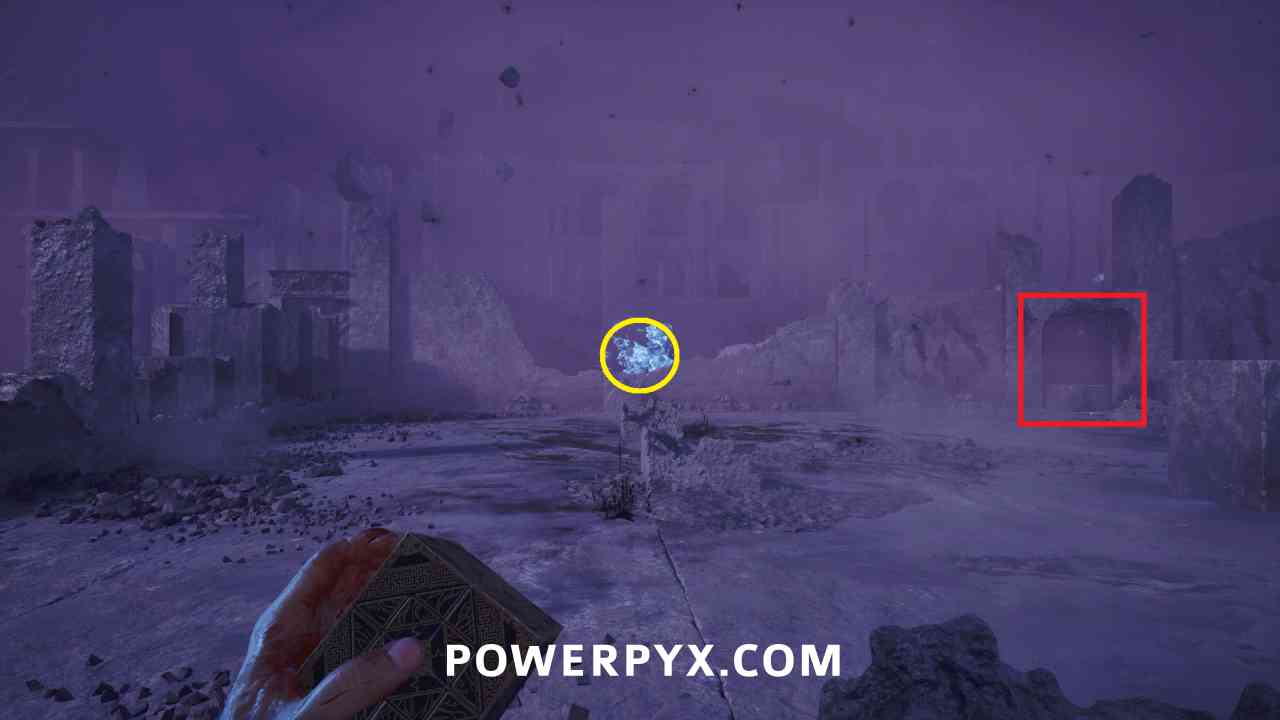
Then go into that side area where you can move the block up to reveal the Pillar. You then need to take the fire back and shoot it back at the pillar to open the path out of the area. Note that if you die at any point by staying in the beam too long you are stuck back at the manual save point, the game doesn’t checkpoint in this area.
Pain And Pleasure, Indivisible – Find and activate every suffering pillar artefact
Use the Elevator
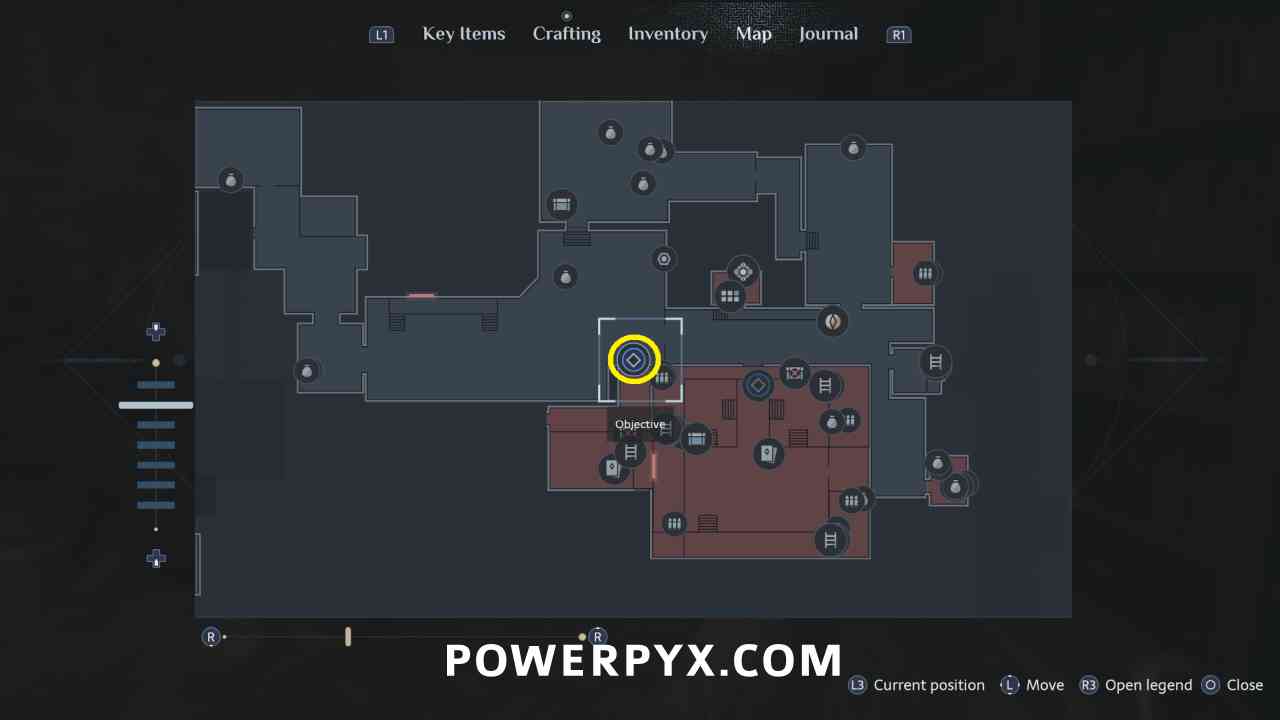
Note: This area also currently has a very buggy map, and most of the area does not display correctly at first.
Assault Rifle Upgrade: Lightweight Recoil Spring
Available from Zora at fourth shop for 150 coins
This is the last shop location where you have more time to do things, and all items that can be purchased are now available. Make sure you’ve purchased all recipes. The final shop location of the game is right before the final boss, at which time you don’t have the opportunity to collect any more materials or defeat other enemies.
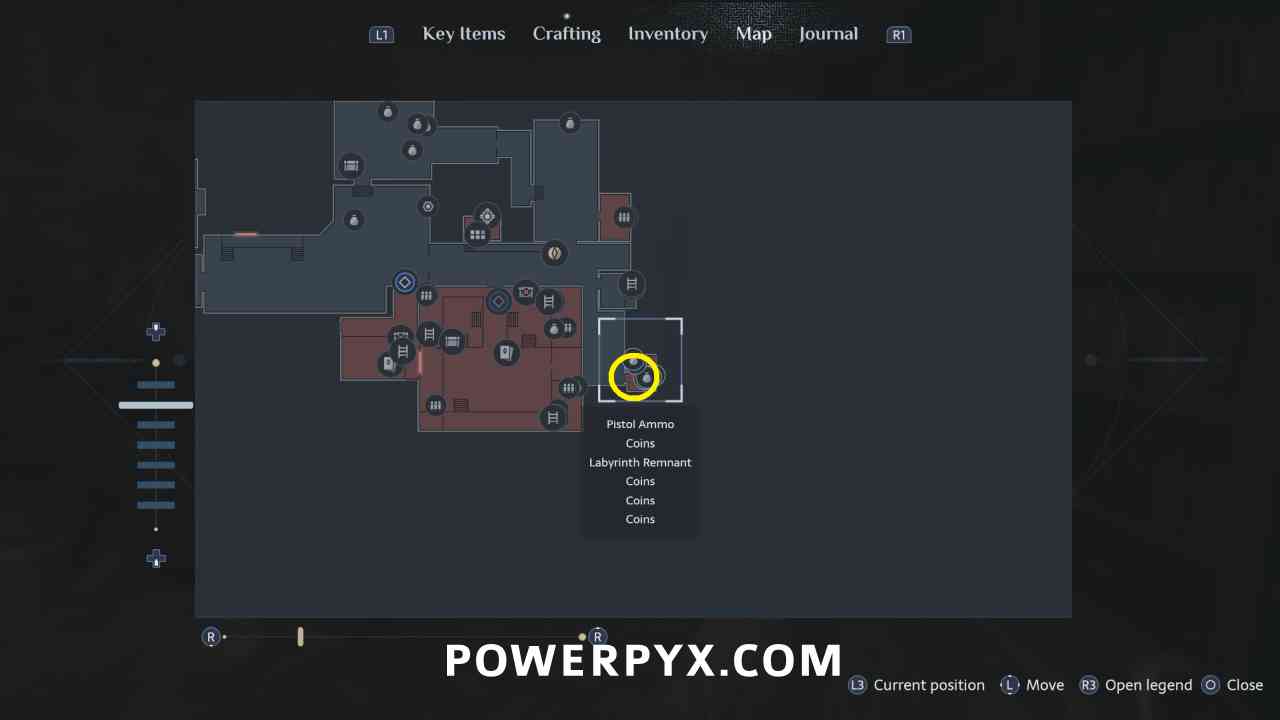
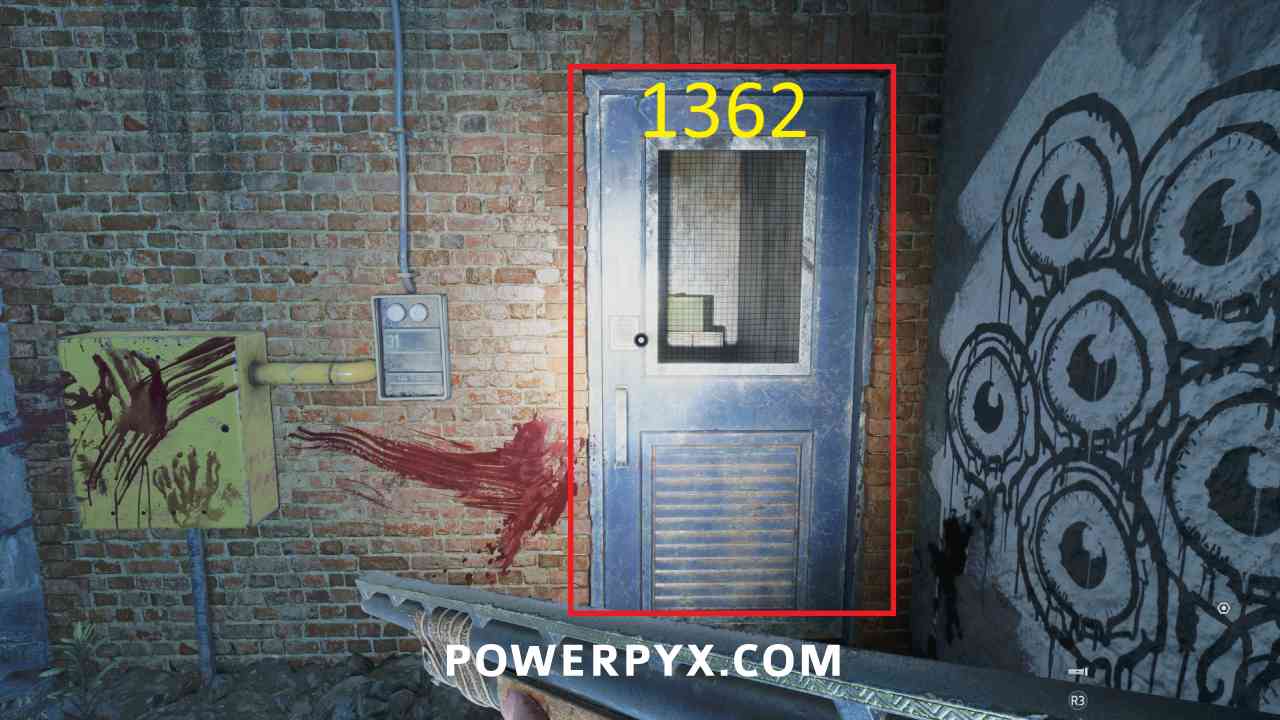
Keypad: 1362
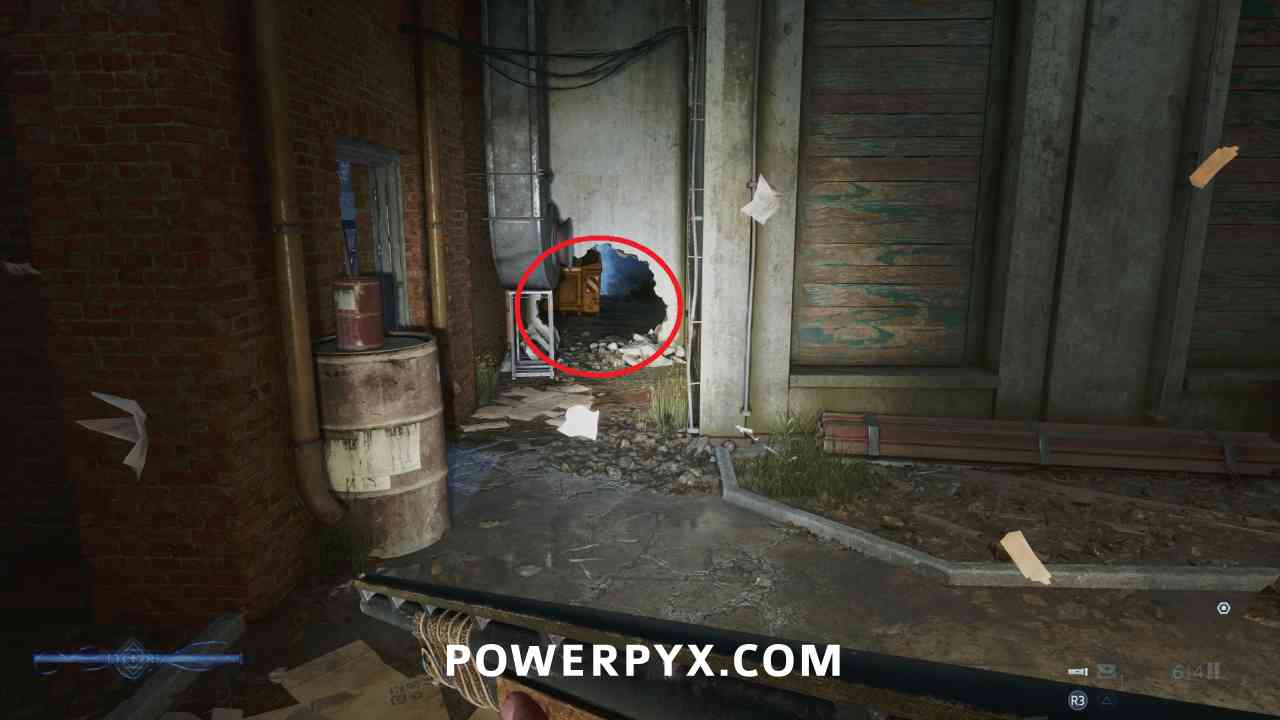
South of the fourth shop in a dead end area. Numbers are on statues in the next area that you are able to access later, but you can open the room now.
Assault Rifle Upgrade: Heavy Lower Handguard
In the room unlocked with the keypad.
Inventory Capacity Upgrade
In the room unlocked with the keypad, on the ground beside the body.
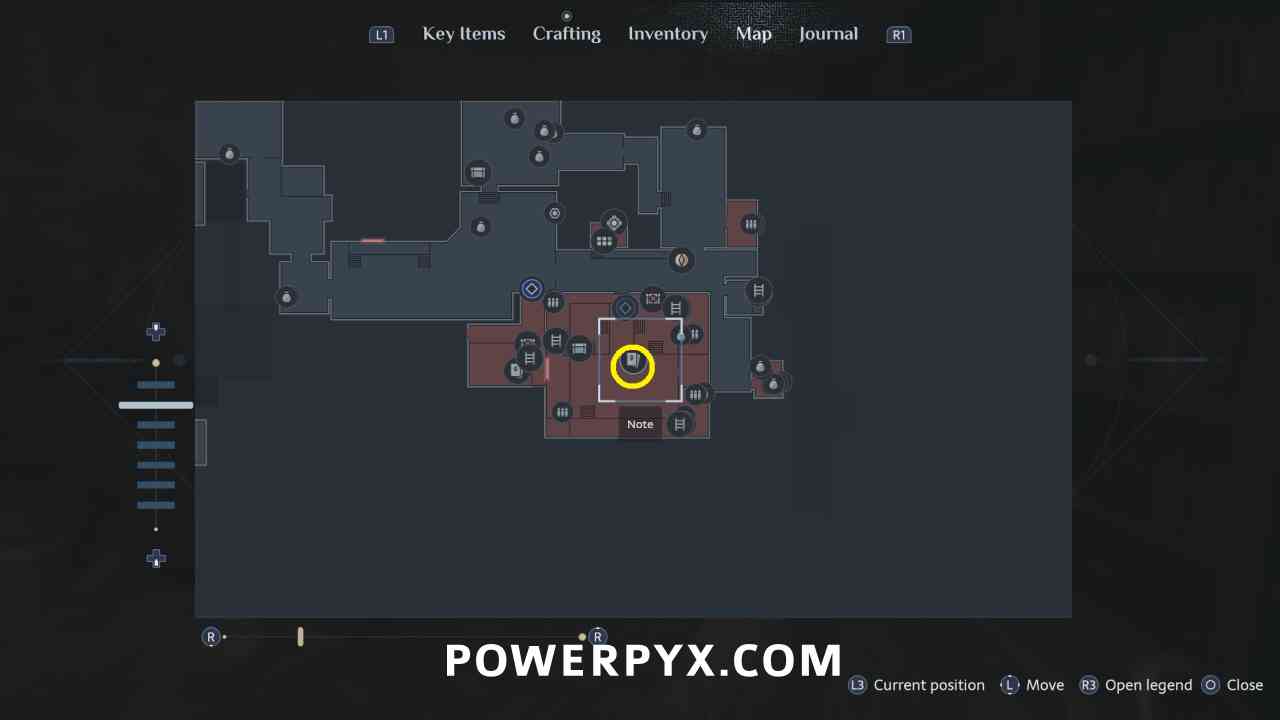
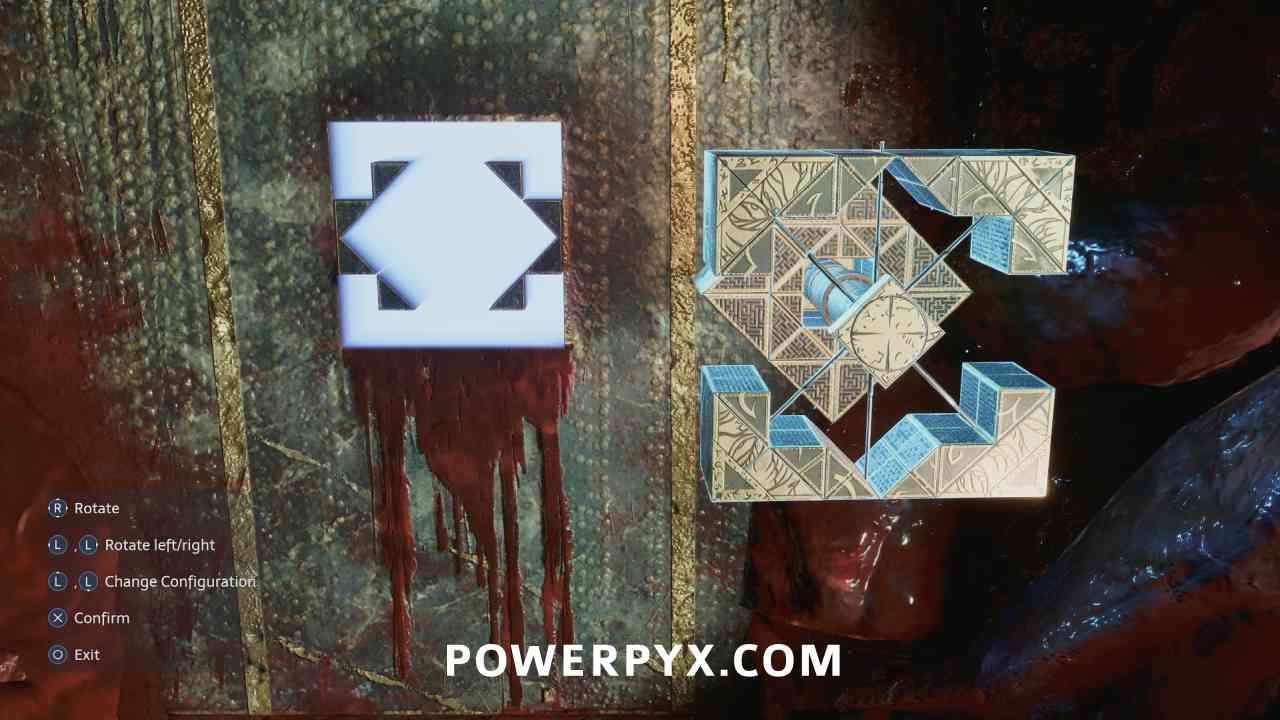
Key Item: Heart-Shaped Inset
Go into the room with the enemies opposite the shop and interact with the middle of the pillar, changing the Genesis Configuration to fit the slot.
Use this on the door to the right of the shop.
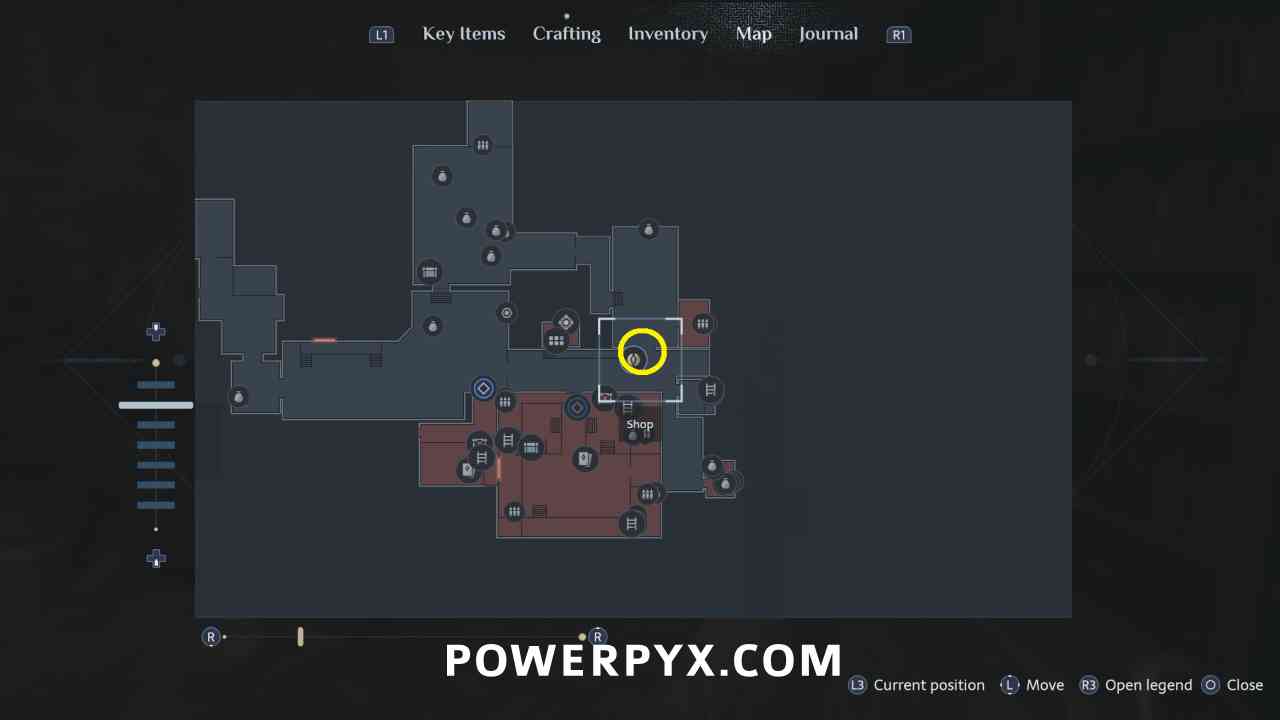
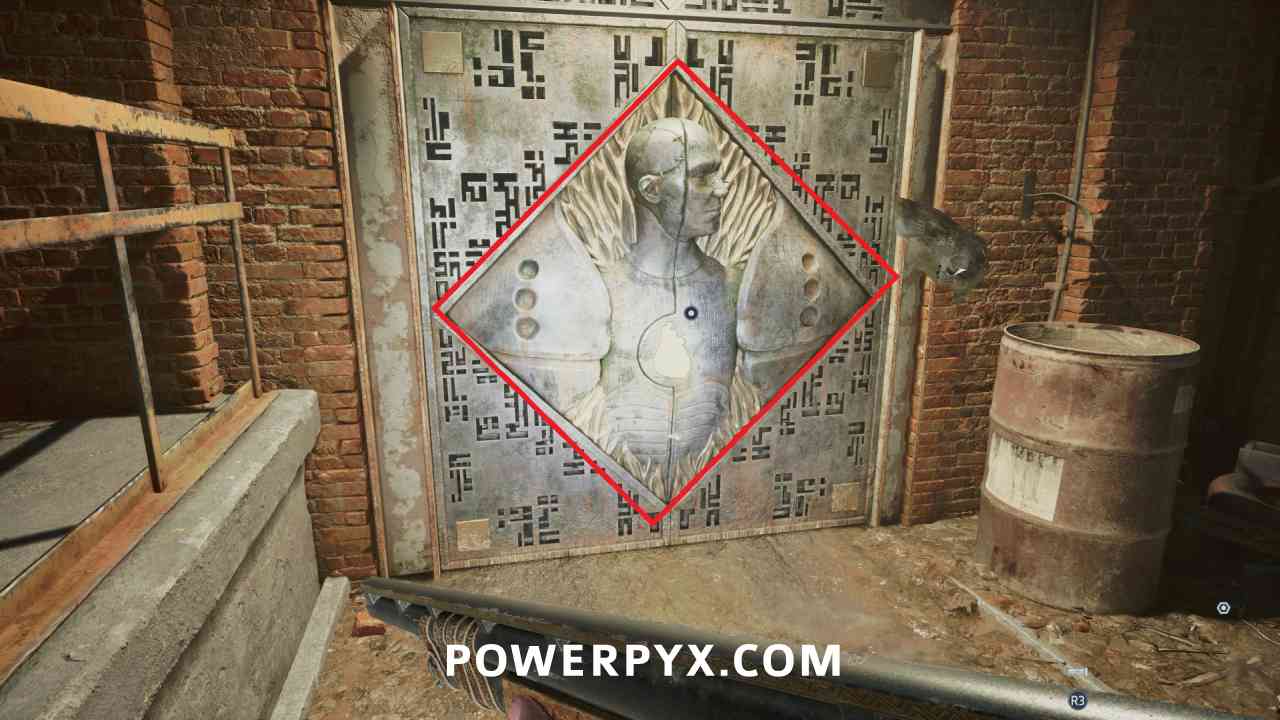
The next area has more of the zombified Cultist enemies, so it is another opportunity to earn the Trickshot trophy if you didn’t earn it earlier.
Find and Use the Missing Bell
Assault Rifle Upgrade: Double Drum Mag
In the next area go through the room with the Cultist enemies to where there are the two spinning Labyrinth traps, this is on a table behind them. Run and slide through a gap in the second trap. You can then step on the button to the right to stop the traps and make getting out either.
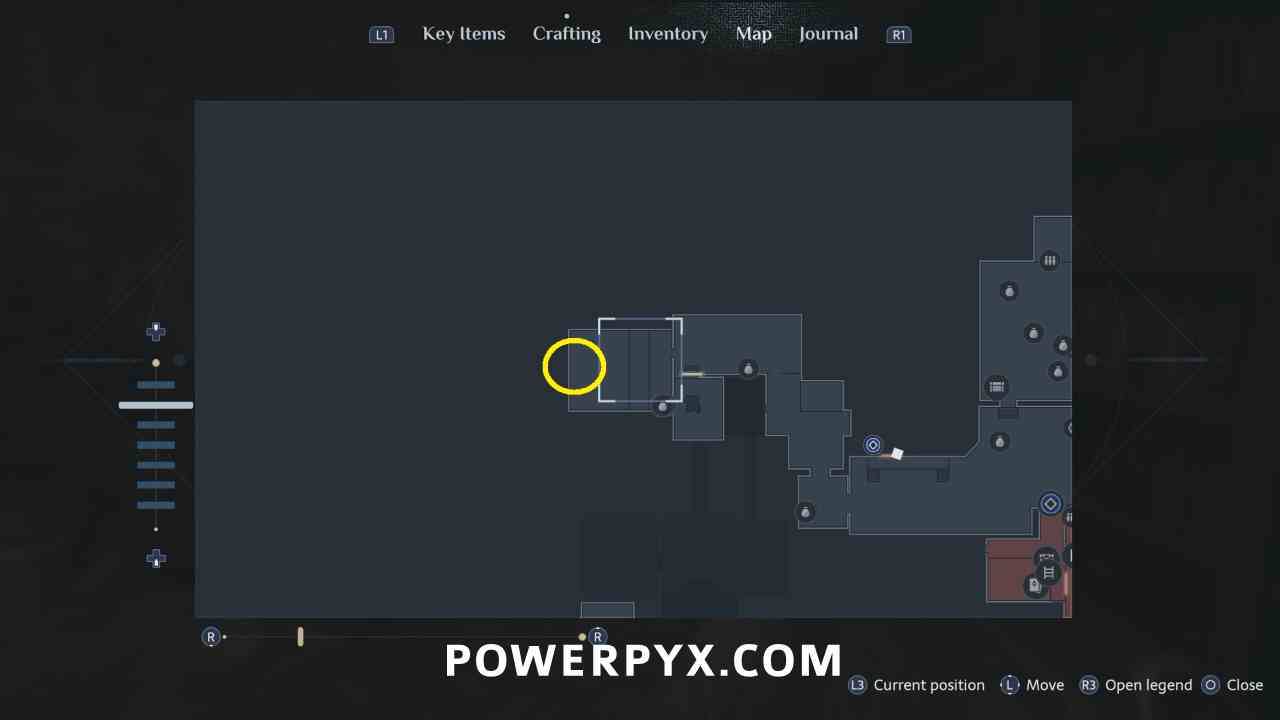
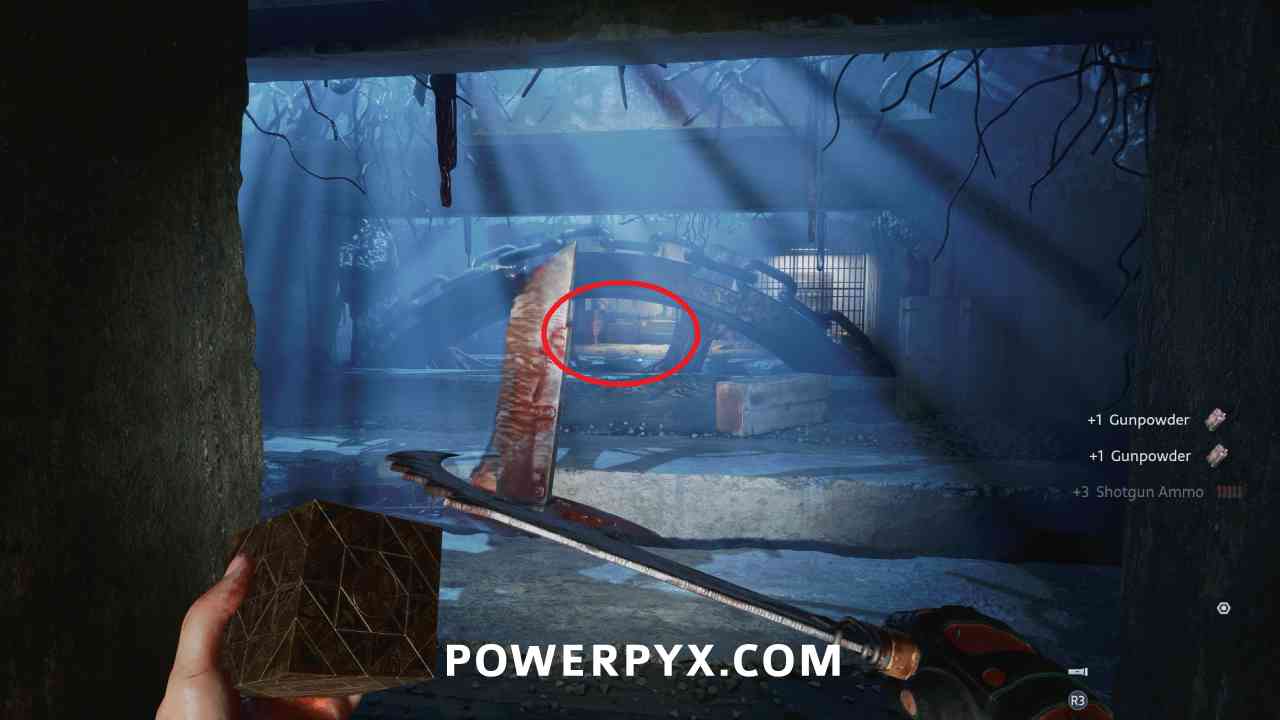
Key Item: Spirit Warding Bell
Go through the door and drop into the next area, then interact with the music box on the table. Spin it around backwards to make it play, then pick up the bell from the drawer in the front.
Come Here, Damn You, I want to Touch You  – Defeat Bruno, again
You will then fight Bruno again. This fight is largely the same as before, but you have access to a lot more weapons. The quickest way to beat him is to set him on fire, then shoot him up close with the shotgun as it does the most damage. After you take half his health, he’ll go through a hole in the wall and you’ll have to follow him back to the prior room.
Reclaim the Genesis Configuration from Bruno
After the fight he steals the Genesis Configuration from you, but this isn’t a big deal as there aren’t many enemies to fight between now and when you get it back.
Note: The door to the shop may bug here and so you can’t get inside. You can still access the storage box through the gap though if you need to deal with inventory.
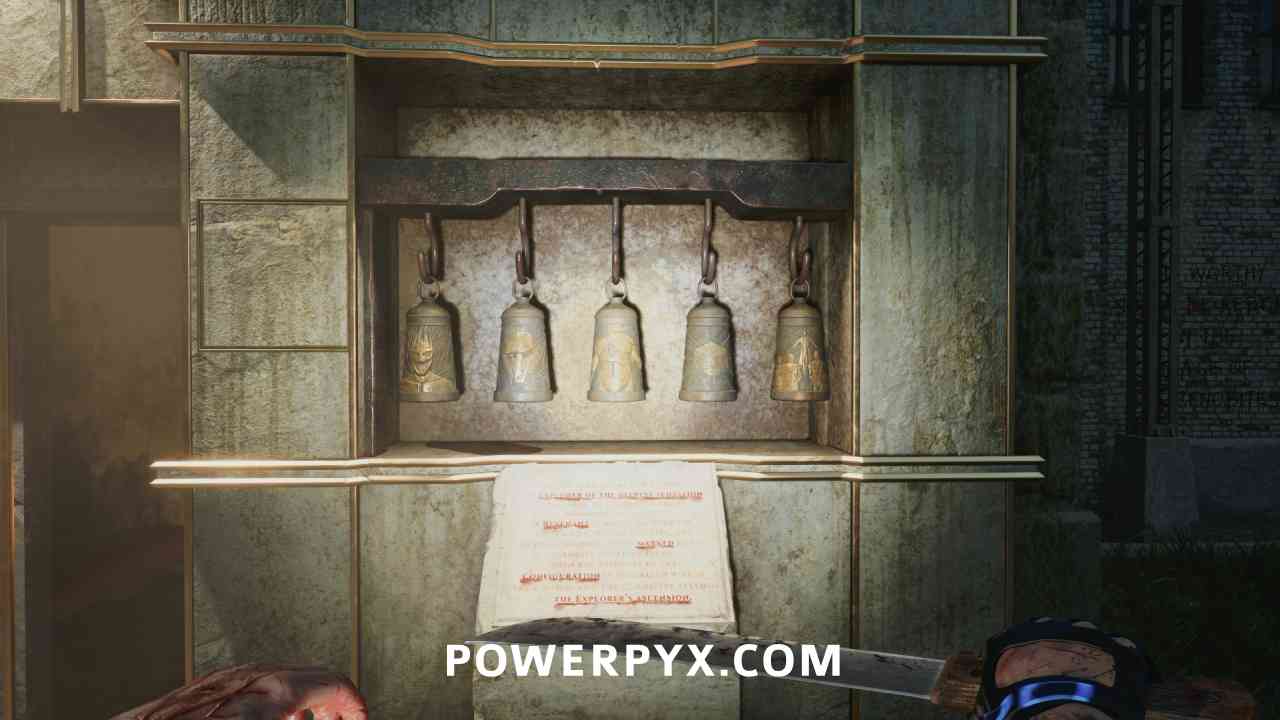
Go to the bells near the statue and place the Spirit Warding Bell. Switch them into the order that matches the text below: Marlow > Bruno > Mark > Genesis Configuration > Ascension
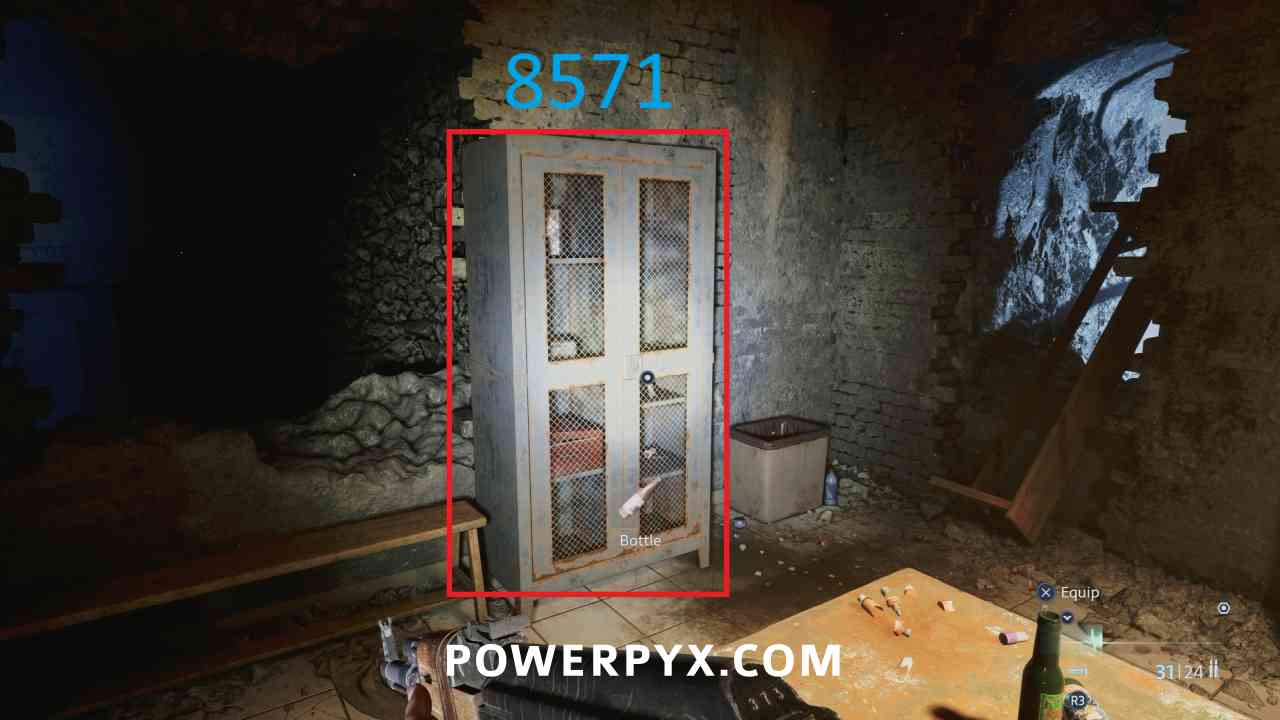
Keypad: 8571
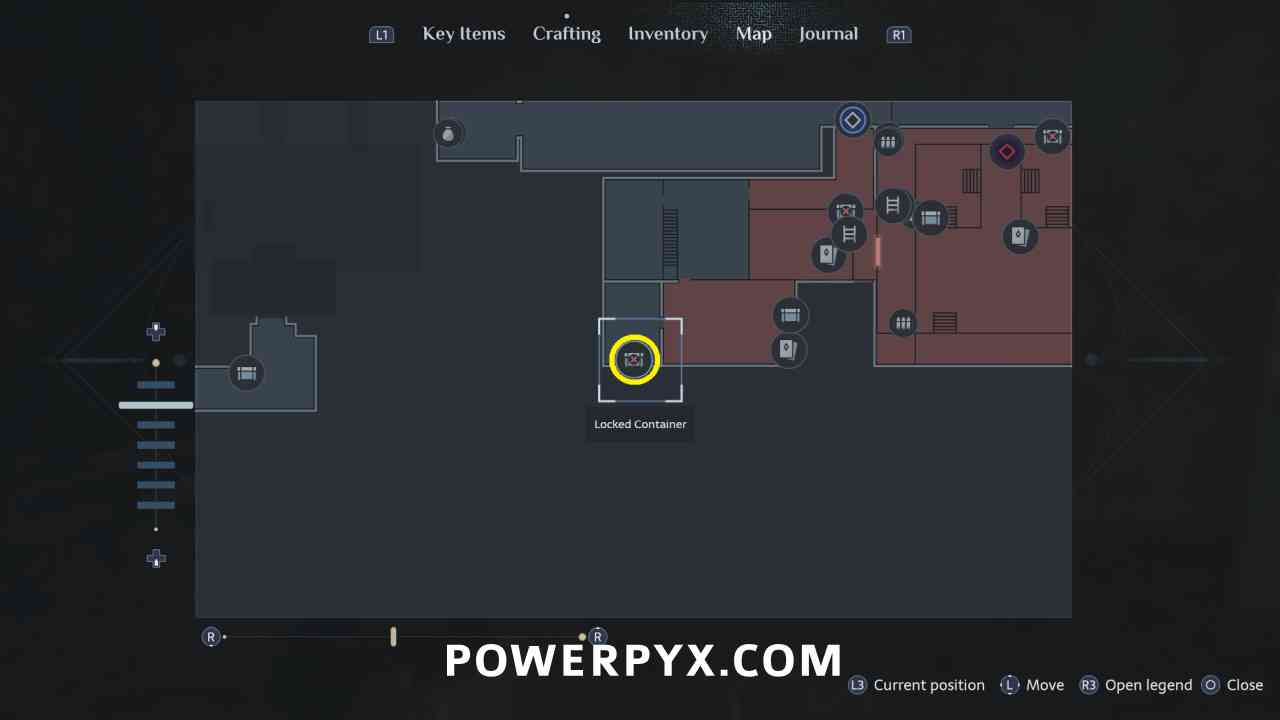
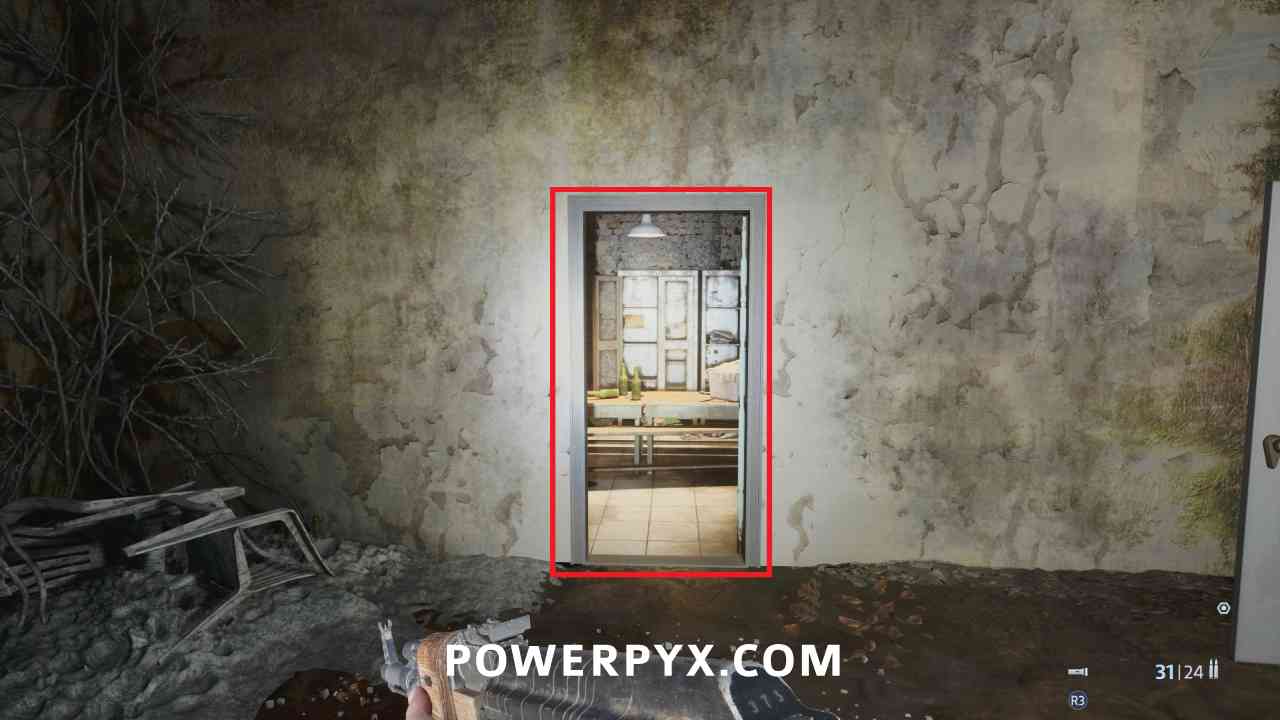
Cabinet in the room that appears after the spinning trap goes across the room. Numbers from the two TVs in the area.
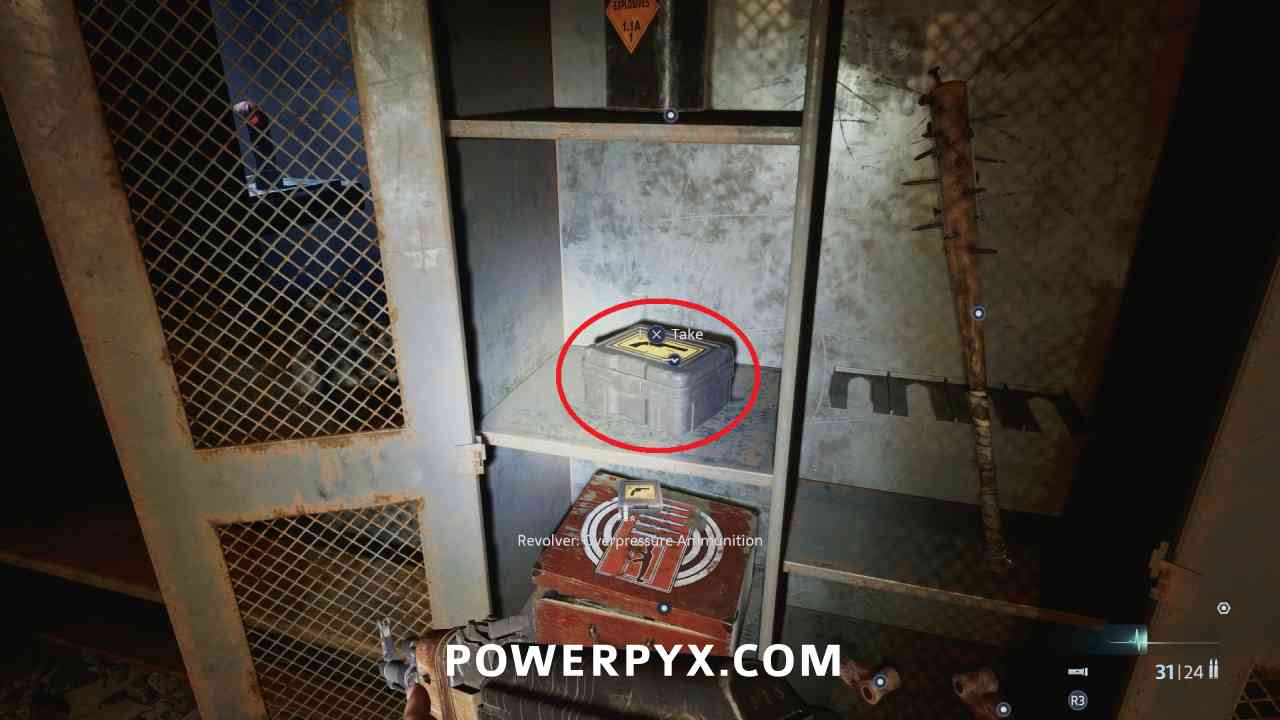
Revolver Upgrade: Overpressure Ammunition
In the cabinet opened with the keypad.
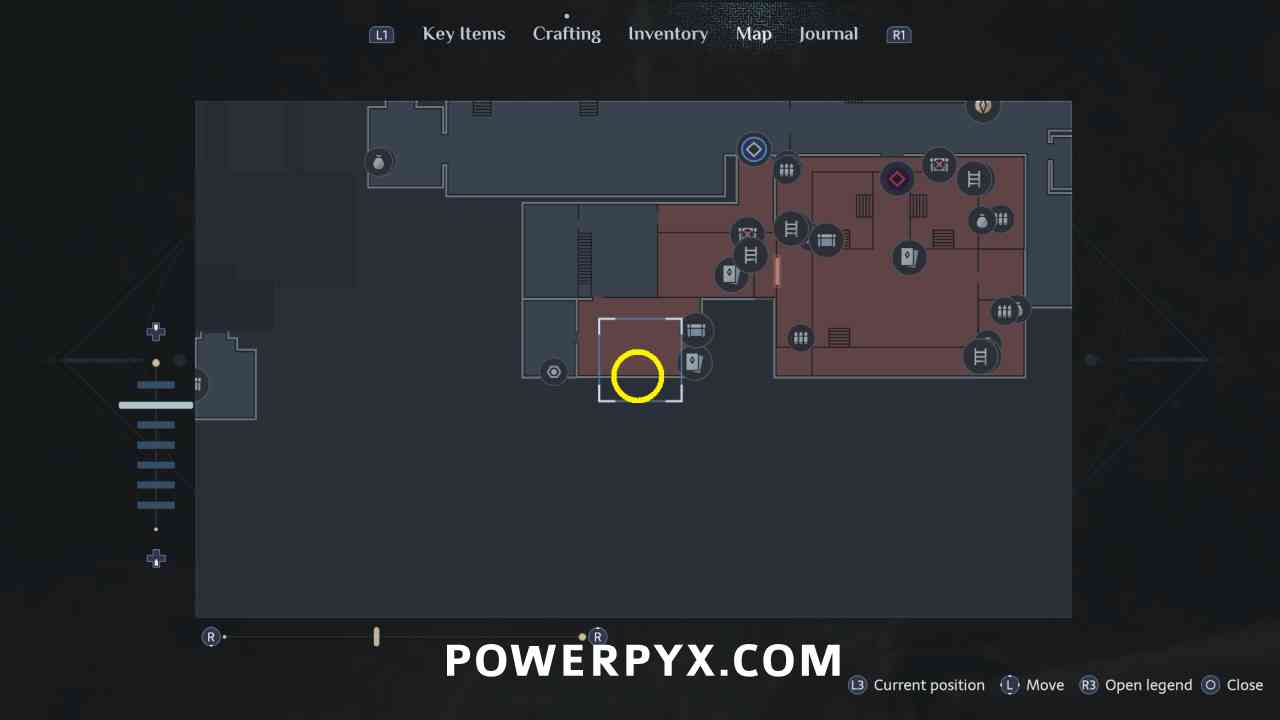
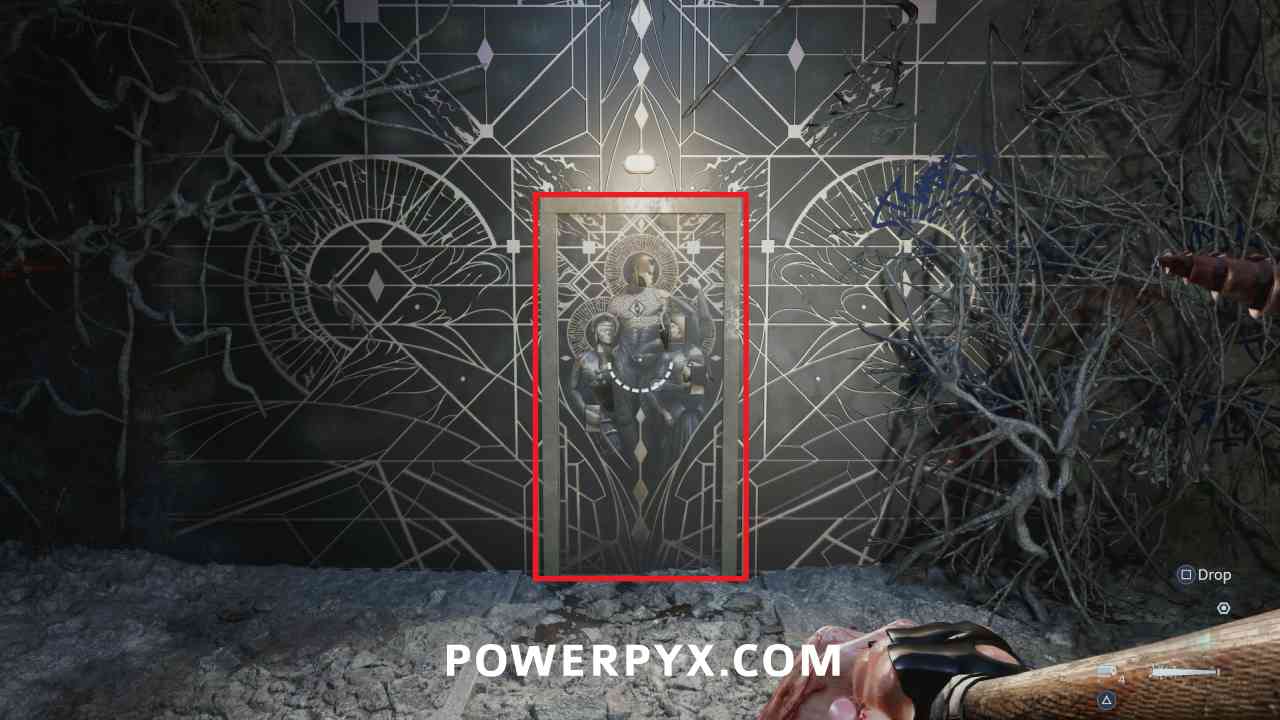
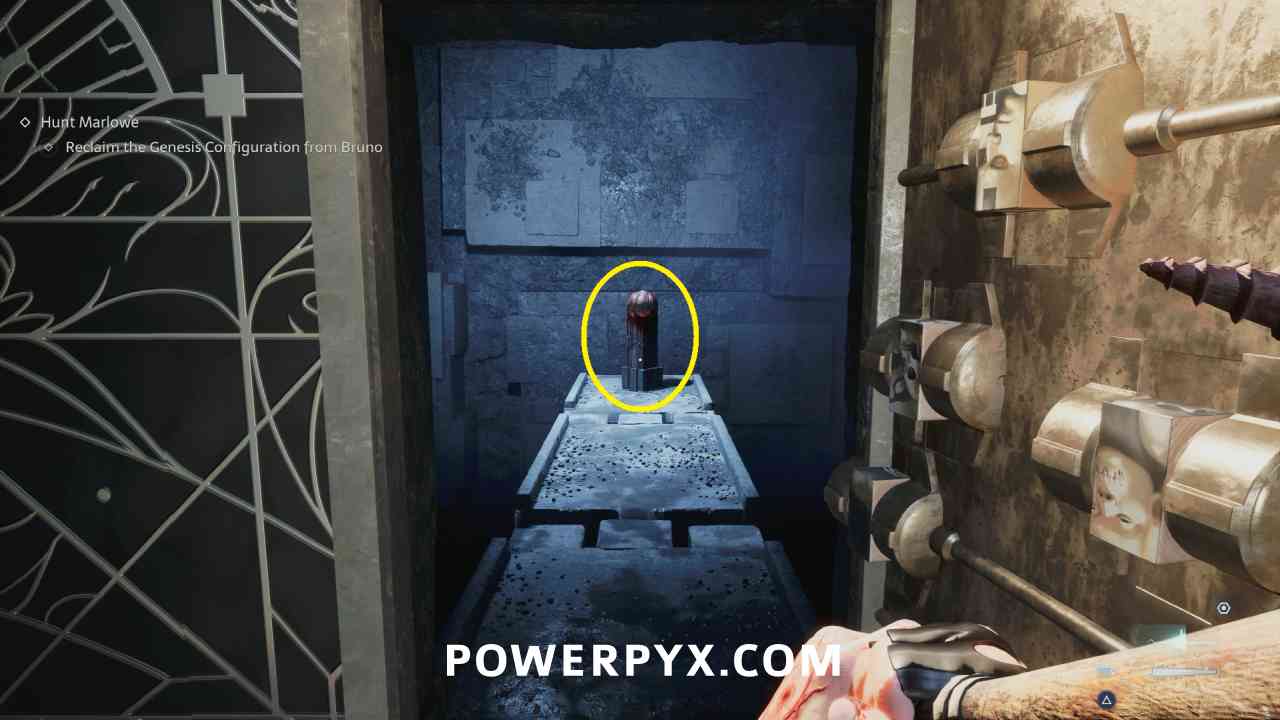
Pain Pillar #5 (Health Increase)
Interact with the painted door and flip the spots in the wall to correctly fill the picture, then the Pillar is on the other side of the door.
There Are No Limits – Find and activate every pain pillar artefact
Key Item: Elevator Key
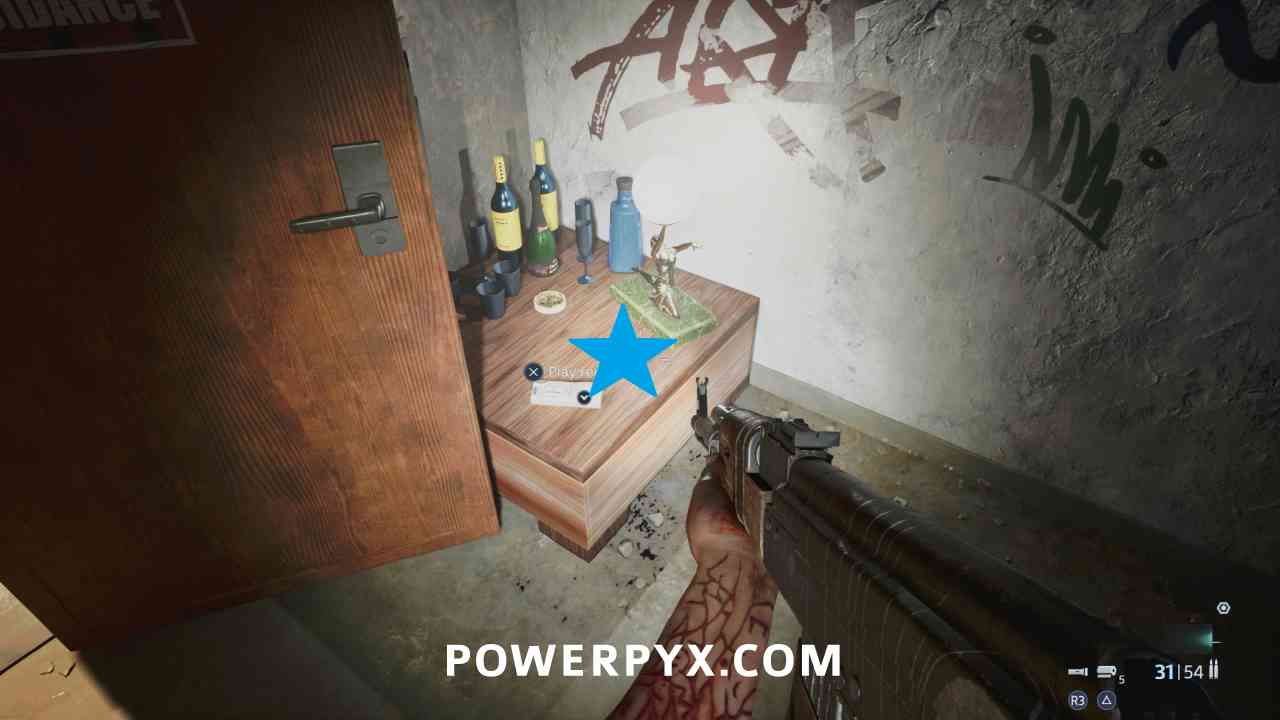
Follow the path into the room with all the TVs on the west wall. This key is on the table in the southeast corner.
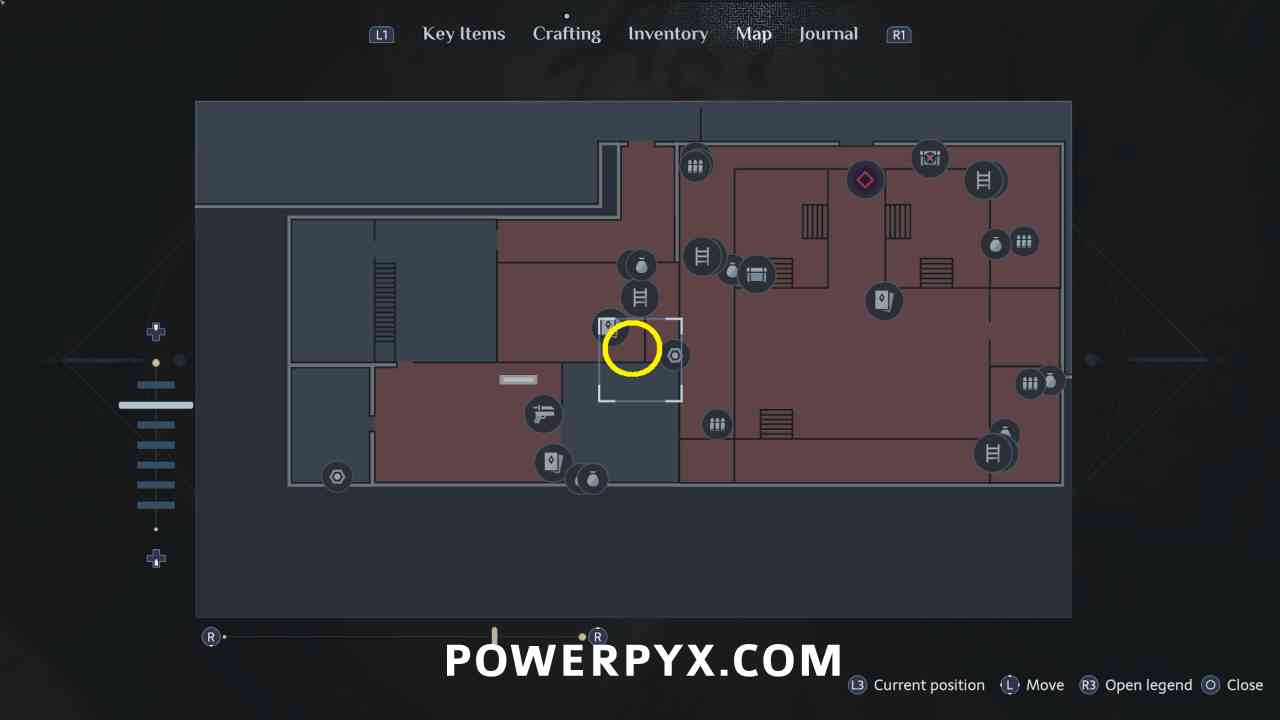
Use this on the elevator in the room with the pillar. When you do this, a bunch of enemies will start spawning in this room that you will need to defeat to progress.
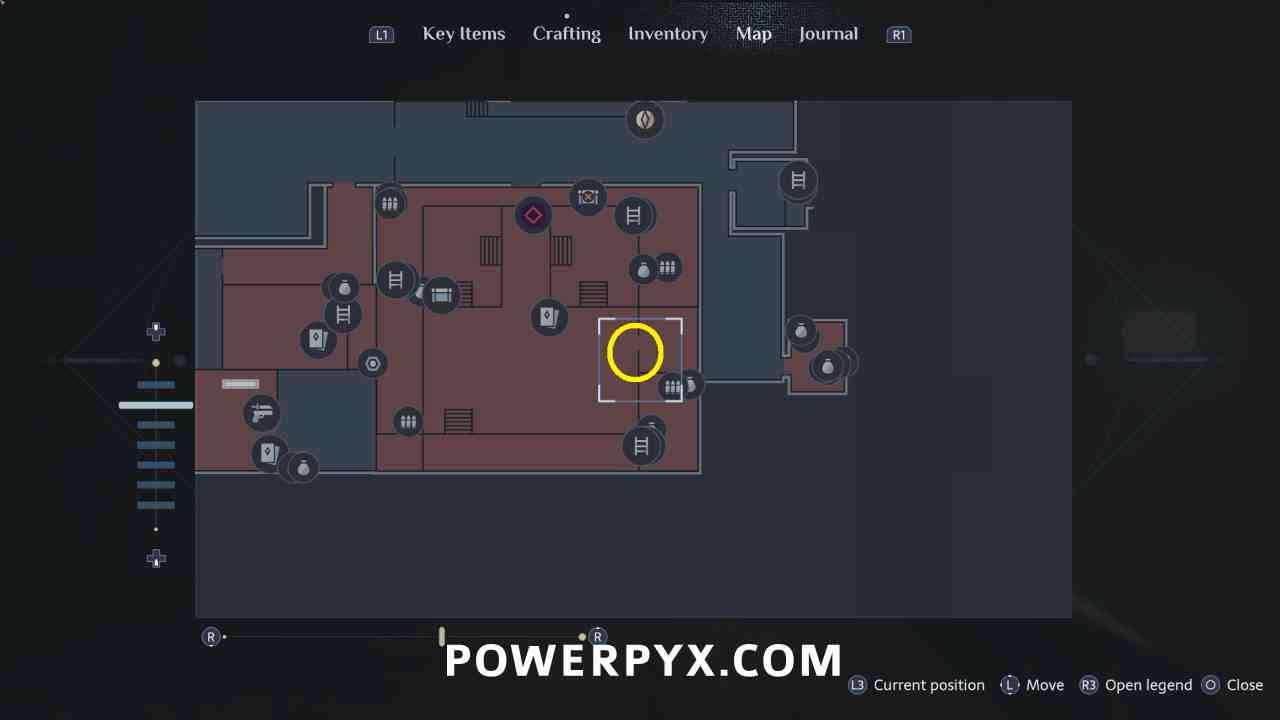
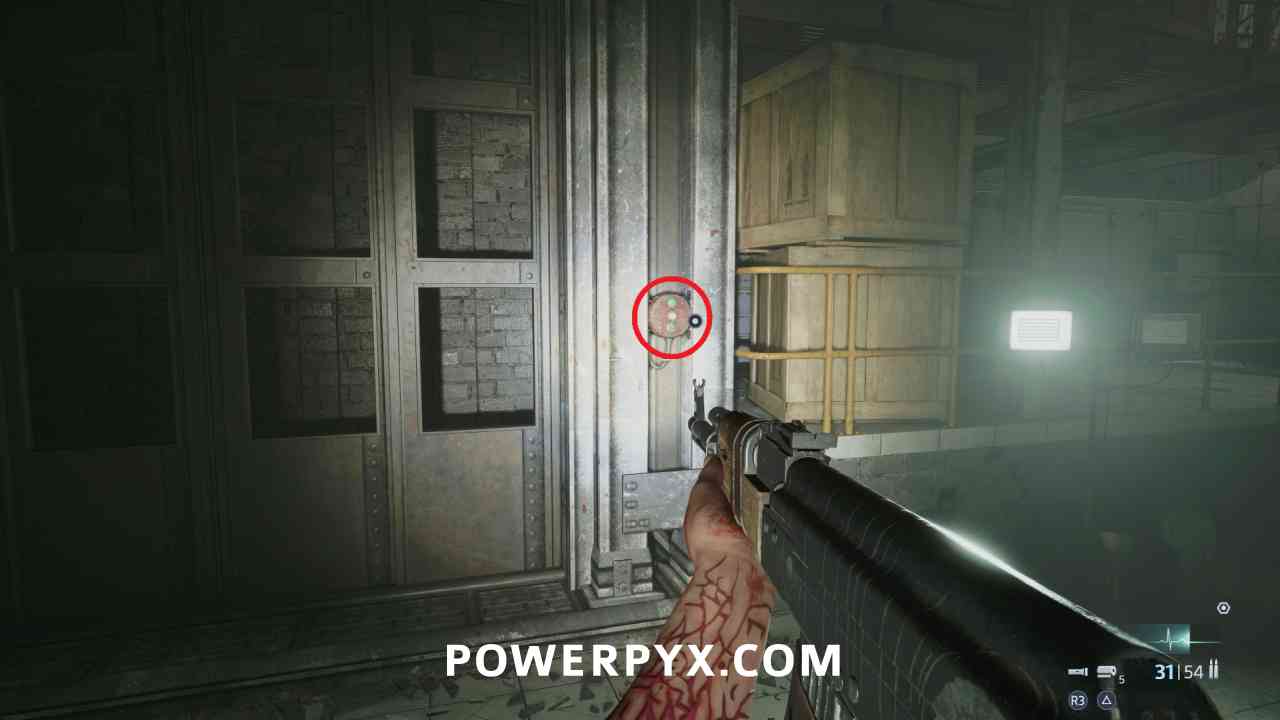
Hunt Marlowe
After getting the Genesis Configuration back from Bruno, you can pick up his mask from the floor to sell at the shop.
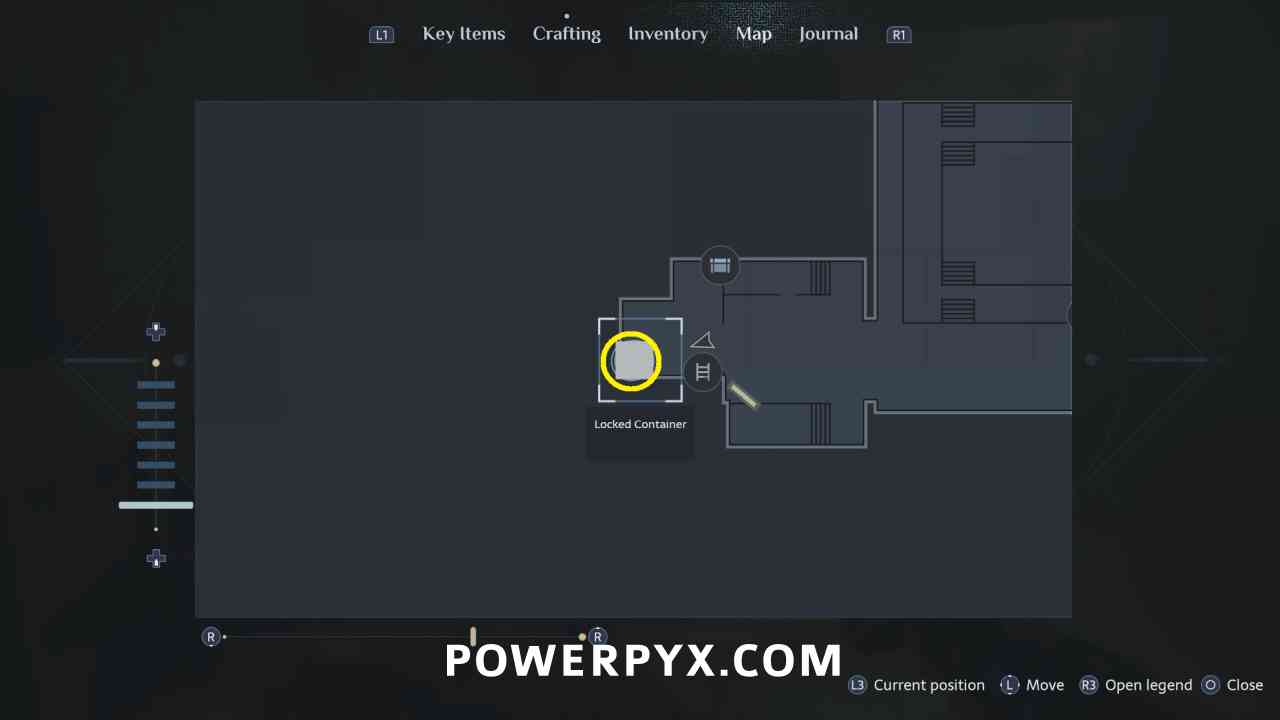
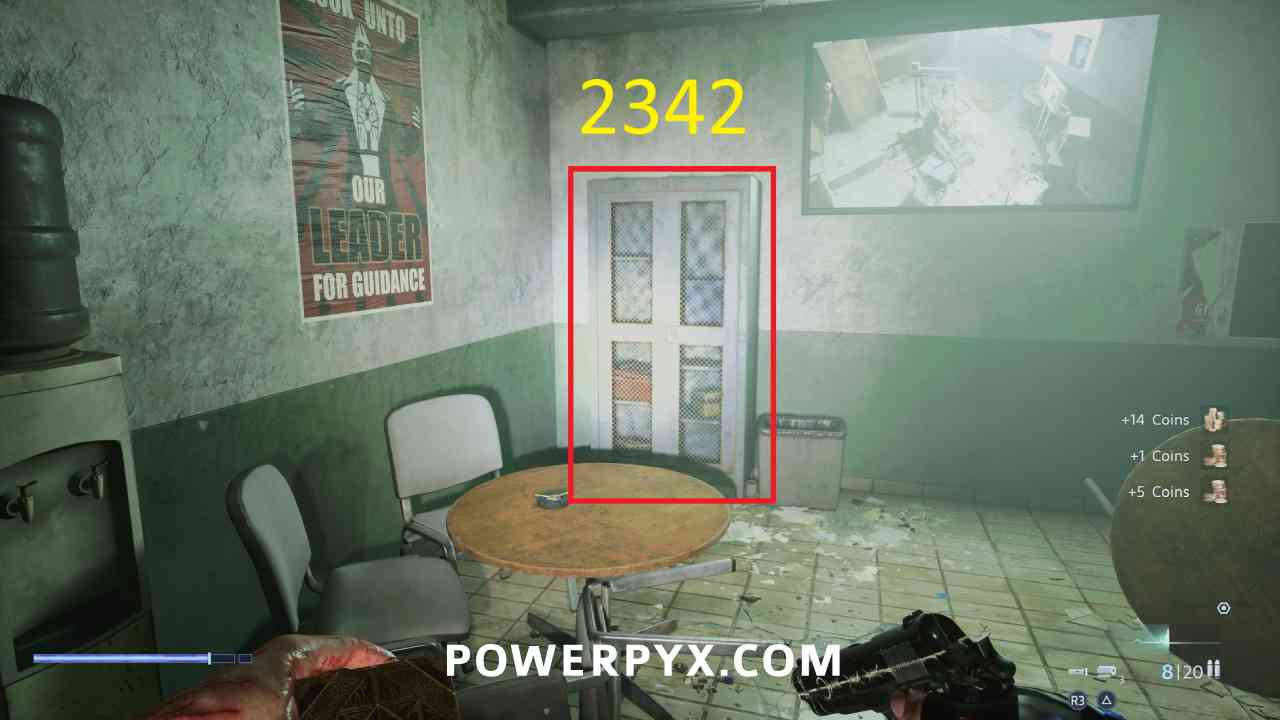
Keypad: 2342
Cabinet in the same room as the ladder to climb in the next area. Numbers are on the walls facing away from the cabinet. If your inventory is full there is a storage chest in the next area you can use, then run back to pick up items.
The next large sewer room is a good possible spot to get both In the Land of the Pig, the Butcher is King and Trickshot if you didn’t earn them previously. The area is full of zombies you need to defeat, so you can farm Hellchain kills if you didn’t previously. If you need Trickshot, then the way to earn it is by shooting the enemies until you have two at the same time that are flashing blue, then line them up and shoot both with the Assault Rifle with the AP Rounds attachment. You can reload the latest autosave to be placed back at the start of the area before you drop into the sewer if you need to try again.
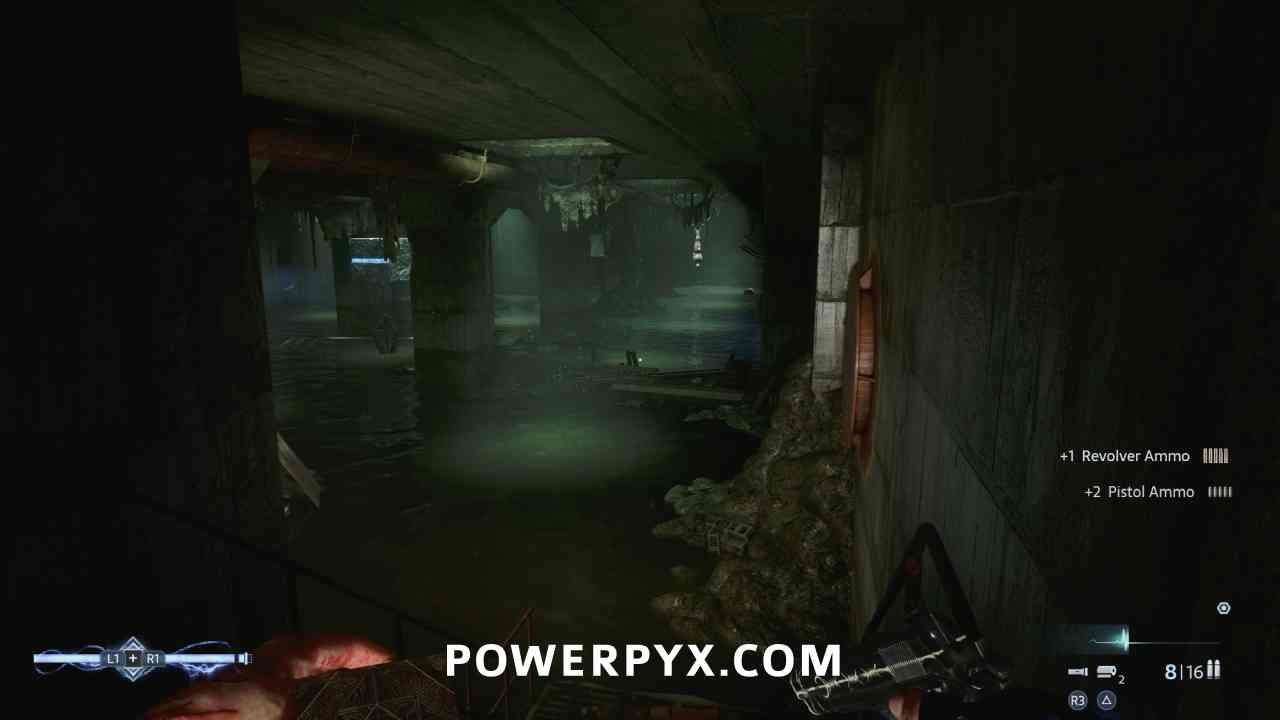
To progress you just need to go to the far side of the area and try to go down the path, and you will be stopped and need to defeat a blob enemy. You don’t actually need to defeat any of the other enemies, but there is a bunch of ammo around the area if you want to pick it up. You can easily kill the zombies in the area by moving around the blocks with blades spinning underneath them.
Key Item: Lever
Progress until you reach the room with the two pools of water and the electricity switches on either side. You need to turn off the power to the south part of the room, then flip over the bodies in the water to find the lever. You then use it on the spot at the top of the stairs. Enemies will spawn into the room while you wait for the bridge to exit, you can run laps around the room leading them through the water areas, then flip the switches to electrify the water and kill the enemies. You can only have one of the switches on at a time, when you flip one it turns the other off.
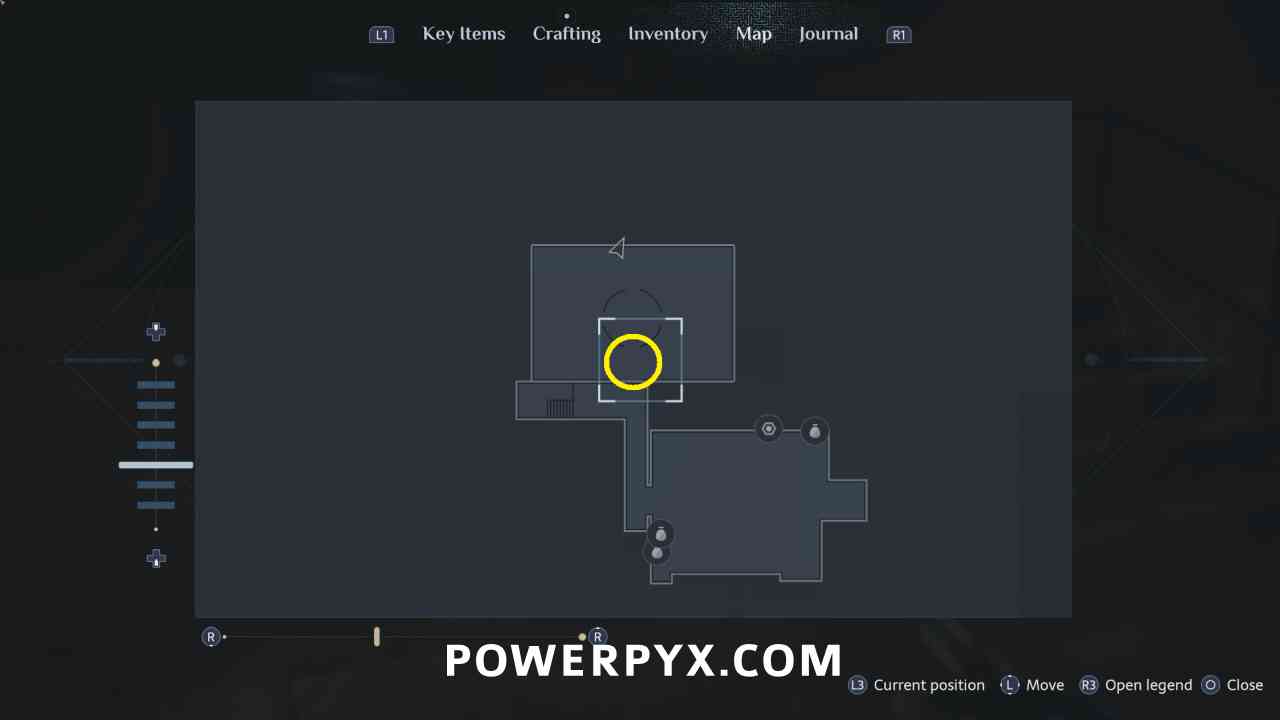
Progress through the rest of the areas and you will encounter the final shop after climbing out of a trapdoor. If you hadn’t purchased and made recipes this is your last opportunity if you have materials to do so. When you go to the next area you just fight Marlowe and then progress to the end of the game. You don’t need any melee weapons for the next fight so you can sell them. You primarily want Shotgun ammo for dealing most damage, then Revolver/SMG/Assault Rifle for in between.
Go to Hell! – Defeat Marlowe
Marlowe is much easier than prior bosses. You first need to shoot the three bodies that are on his back, which will stun him. Primarily do this with the Revolver/SMG/Assault Rifle. When you destroy all three it will stun him and you can use Hellchains to open up the “mouth” of the monster to reveal his real body, and you can run up and shoot his real body with the shotgun to do a ton of damage. When you get half of his health down you will move to the other part of the area, where you will need to repeat the same thing shooting the bodies on the back, then his real body. You can then run up and interact with him to kill him with the Genesis Configuration.
Give Marlow’s Heart to Sunny
You can then go through the entrance to the Labyrinth to the boss arena to return to the apartment and give the final heart to Sunny.
Return to Sunny
After the scene you will be in a new Labyrinth area, you need to run forward to the red gate while avoiding the spots in the platform that are falling apart and using the Labyrinth blocks to progress forward.
Tear Your Soul Apart – Complete the Ritual of Rebirth
Make Your Choice
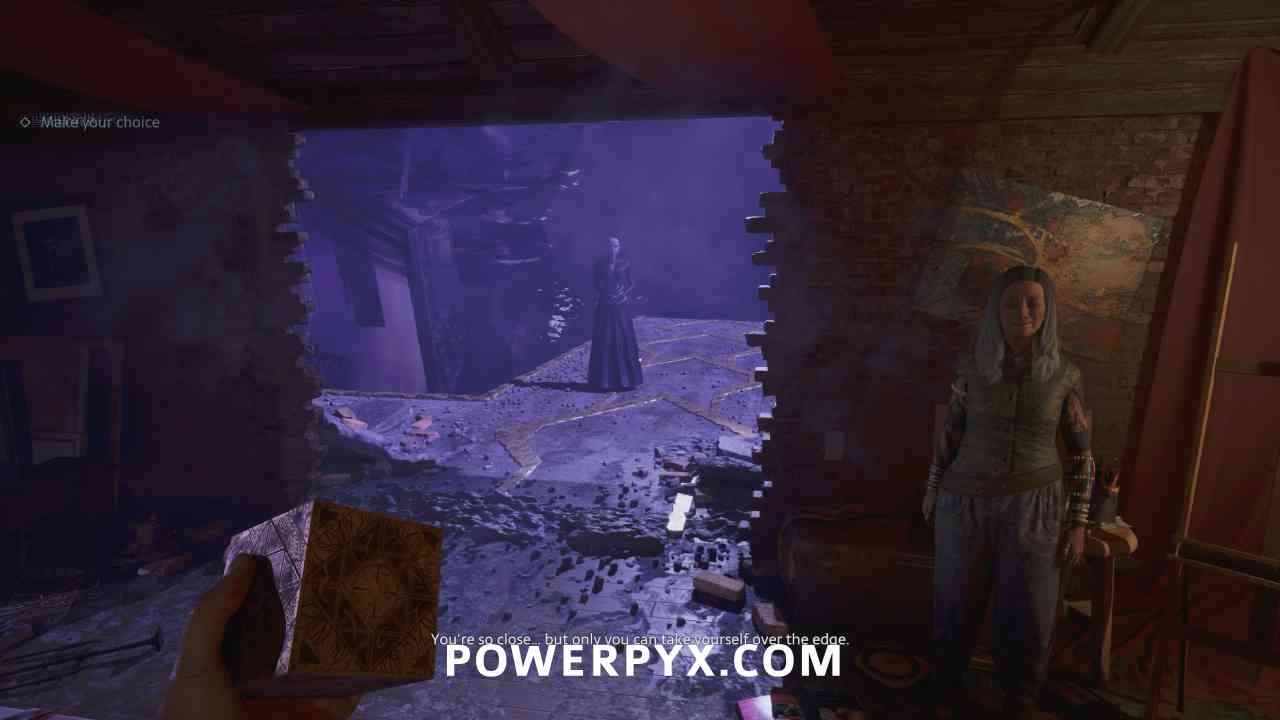
When you reach the end you are taken back to the apartment, and can trigger your ending choice.
Experience Beyond Limits – Finish the story by accepting the Cenobites’ offer
Human After All – Finish the story by denying the Cenobites’ offer
The choice between the two endings is triggered by whether you walk through the hole in the wall after the Cenobites, or stay in the room until the wall closes. Once you are back at the main menu you can reload your final autosave to be put right back at the final choice, then do the opposite to earn the other trophy.
Schinotrax says
First code is 9901, not 0199
PowerPyx says
We’ve updated it to include both codes. Wonder if it’s randomized or they changed it with Day One Patch. If you spot any differences in other codes please leave a comment.