
GTA 6 (Grand Theft Auto VI) Trophy Roadmap
- Estimated trophy difficulty: 4/10
- Approximate amount of time to platinum: 200 hours
- Offline Trophies: 55 (1
 , 2
 , 6
 , 46
 )
- Online Trophies: 0
- Number of missable trophies: Potentially 1 – Positive Mental Attitude as the first meditation is missable in Chapter 1 (see note in Step 1)
- Glitched trophies: 0
- Does difficulty affect trophies?: No, there are no difficulty settings, it’s one and the same difficulty for everyone
- Hardest Trophy: A Long Road (attain 100% completion)
- Minimum Playthroughs: 1
- PS4/PS5 Autopop, Save Transfer, Crossbuy: No, game doesn’t have a PS4 version
- Free-Roam / Level Select after Story?: There is still free-roam after the story, but no mission replay
- Do Cheats disable trophies?: Yes, Cheats disable trophies and saving the game – see Cheats List
- New Game+ Mode?: No
- Supports Manual Saves?: Yes, 15 Manual Save Slots & 1 Autosave Slot – because there’s no mission replay it’s recommended to keep a save at the start and end of each chapter (10 saves), then rotate between the remaining 5 saves for your free-roam cleanup.
- Release Date: November 19, 2026
Introduction
Welcome to the GTA 6 (aka GTA VI, Grand Theft Auto VI) Trophy Guide! The trophy requirements are relatively lenient. There are no mission gold medals and no mission replay function. The biggest overall requirement is finishing the 100% Completion Checklist, but this doesn’t require everything. It’s closer to 60% true completion, with most side quests not being required, and collectibles only partially required. You only need to scan 200 of 277 Base Model Vehicles and study 100 of 255 Animals by looking at them through the binoculars. The story is divided into 5 Chapters and takes around 60-80 hours. After the story you continue in free-roam and everything needed for the 100% Checklist is still accessible. The gold medals for shooting ranges and racing challenges aren’t too difficult and you only need 70 of 80 Challenges, allowing to skip the hardest ones. Play the game however you like, do as much side content as you want and clean up the rest after the story.
Step 1: Finish Story + Complete Optional Missions, Scan Vehicles & Animals [60-80 Hours]
Just finish the story and enjoy the game. The 100% Checklist isn’t viewable until after the story, but any progress you make during the story will already count toward it. Feel free to work on any side content you find or do it all after the story. There are no mission gold medals this time, so you don’t need to watch out for hidden objectives.
1 Potentially Missable Trophy:
- Positive Mental Attitude (meditate at every spot across Leonida): there is 1 missable Meditation during Chapter 1 at Jason’s house. After Chapter 1 – Main Mission: Down to Earth, you can talk to Lucia in the kitchen in the morning, she will say “You know what I’m gonna do? Meditate”. She then goes to the balcony. Follow her and choose “Accept”. Then she shows you how to meditate. This meditation does increase the counter +1 in the Progress Menu but isn’t marked as a “Meditation Spot” like the rest, so is currently unclear if it’s required for the trophy or not. See Meditation Locations.
Timer-Savers:
- Optional Missions – complete Optional Missions as they appear. Optional Missions include the purple icons and the black icons with pink letters (whereas main missions are pink icons with black letters). These often introduce you to new game features and you need to complete any 100 for the 100% Checklist.
- Scan Vehicles – scan any new vehicles you come across using the Waink app by holding
 and then
 /
 . For 100% Completion you need to scan any 200 of the 277 base model vehicles. If you start early you will get it done naturally throughout the story. Also scan boats and aircraft.
- Study Animals – study any new animals you come across using the binoculars. Hold
 to select binoculars from weapon wheel, zoom in with and hold to study. For 100% Completion you need to study any 100 of 255 animals. Every breed of dog and cat counts separately too. Unlike Red Dead Redemption 2, you don’t need to hunt and skin the animals, just studying any 100 of them is enough.
- UI Notifications – turn on all UI settings for progress & collectible notifications. This is helpful to keep track of new discoveries and how your actions affect your criminal profile.
Note regarding missable content (this doesn’t affect trophies):
There is a bunch of missable content, but it doesn’t impact trophies or 100% completion. Just for peace of mind so you know this won’t lock you out of platinum:
- Many optional missions disappear after a while (black icons with pink letters). This doesn’t matter for trophies.
- Some quest givers become temporarily unavailable during the story, for example Kenton who has a trophy. All trophy-related characters become available again later in the game so don’t worry about this. All trophy-related quest givers are still there after the story in free-roam.
- Some fences (people you sell stolen goods to) become permanently unavailable. This doesn’t impact any trophies or 100% requirements as you gradually unlock new fences. The ones that disappear don’t have any quests.
- A few magazine collectibles are in story buildings that become permanently inaccessible, but this doesn’t impact trophies as they also spawn in other locations and you don’t need all of them for trophies.
- Some quests have an “hourglass icon” and are time-sensitive. They fail after a while but they are not relevant for trophies. If you do all quests as they appear you won’t have to worry about it.
- Open world Strangers & Freaks are still there after the story. You don’t have to worry about these.
- Criminal Profile only affects how police treat you. The lower your profile, the higher the chance they shoot at you on sight. You can do all content with a violent profile. However, the Irredeemable profile is permanent and should be avoided because cops will be more aggressive.
- The relationship status of Jason/Lucia doesn’t matter for trophies.
In summary: just keep a look out for the Chapter 1 meditation and don’t worry about anything else.
» GTA 6 Full Walkthrough – All Missions
Step 2: 100% Completion Checklist & 70 of 80 Challenges [100 Hours]
After the story you are returned to the open world and unlock the 100% Completion Checklist under Progress > Stats > 100% Completion.
The requirements are very lenient. It’s closer to 60% true game completion. The majority of side quests aren’t needed at all. Many collectible types aren’t required and others are only partially required. The only tasks that require everything are Robberies, Underwater Discoveries, Shooting Ranges, Drone Races, Bret’s Quests. You only need 70 of 80 challenges for 100%, allowing you to skip the hardest ones.
» GTA 6 100% Completion Checklist & Guide
» GTA 6 All Challenges
Step 3: Strangers & Freaks, Miscellaneous Cleanup [10 Hours]
You should have most trophies automatically after finishing the 100% Completion Checklist. The Strangers & Freaks aren’t needed for 100% so you might still need to clean these up. If you have anything left you can clean it up quickly now.
» GTA 6 All Strangers & Freaks (Side Missions)
Useful Tips, Tricks and Guides:
- GTA 6 Wiki & Strategy Guide
- 100% Guide & Checklist
- Main Walkthrough – All Missions
- Strangers & Freaks (Side Missions)
- Cheats
- Collectible Guide – Progress Database
- Full World Map
- Money Guide – How to Get Money Fast
- Criminal Profile Explained
- How to Get Ultimate Edition Rewards
- How to Fast Travel
- How to Get New Personal Car
- How to Get Key Cloner
- How to Play in First-Person View
- How to Summon Vehicles
- How to Switch Between Playing as Lucia & Jason
- How to Fence Stolen Goods
- How to Increase Character Stats (Health, Cardio, Focus)
- How to Get Body Armor
- How to Get Parachute
- How to Get Military Tank
- How to Get Military Fighter Jet
- How to Get Grenade Launcher & Rocket Launcher
- How to Get Sniper Rifle
GTA 6 (Grand Theft Auto VI) Trophy Guide
Vice Got a Price! 
Congratulations! You’re a Leonida Legend.
Earn all other trophies in GTA VI singleplayer to unlock platinum (no multiplayer and no DLC required).
Just Like Paradise 
Complete Gone Fishing.
Automatic story-related trophy, cannot be missed. Unlocks after the first main mission in Chapter 1 – Gone Fishing.
Paradise Lost
Complete Chapter 1.
Automatic story-related trophy, cannot be missed. Unlocks after completing the first main mission in Chapter 2 – What’s in the Bag?.
T**s Ass Drug Money
Complete Chapter 2.
Automatic story-related trophy, cannot be missed. Unlocks after completing the first main mission in Chapter 3 – Welcome to Vice City.
Vice City, Baby!
Complete Chapter 3.
Automatic story-related trophy, cannot be missed. Unlocks after completing the first two main missions in Chapter 4 – Ocean Beach & Another Life.
Top of the World, Ma
Complete Chapter 4.
Automatic story-related trophy, cannot be missed. Unlocks after completing the final main mission in Chapter 4 – Starting From Zero.
You Gotta Know When to Get Off 
Complete the final mission.
Automatic story-related trophy, cannot be missed. Unlocks after completing the final main mission in Chapter 4 – Starting From Zero.
Trust
Complete Breakfast Run.
Automatic story-related trophy, cannot be missed. Unlocks during Story Chapter 2 – Main Mission: Breakfast Run.
Break the Bank
Complete the Cartel Heist.
Automatic story-related trophy, cannot be missed. Unlocks during Story Chapter 3 – Main Mission: The Cartel Heist.
Family Matters
Complete Child’s Play.
Automatic story-related trophy, cannot be missed. Unlocks during Story Chapter 4 – Main Mission: Child’s Play.
DWNFALL
Complete Headliners.
Automatic story-related trophy, cannot be missed. Unlocks during Story Chapter 4 – Main Mission: Headliners.
Hi-Jacked
Complete VCIA Takedown.
Automatic story-related trophy, cannot be missed. Unlocks during Story Chapter 4 – Main Mission: VCIA Takedown.
Snow Storm
Complete Operation Savage Glory.
Automatic story-related trophy, cannot be missed. Unlocks during Story Chapter 5 – Main Mission: Operation Savage Glory.
A Long Road
Attain 100% Completion.
The 100% checklist is unlocked after the story under Progress > Stats > 100% Completion. Progress made during the story already counts. Nothing toward 100% is missable, everything is doable after the story in free-roam. The requirements are very forgiving, it’s not a true 100% completion. The majority of collectible types and side quests aren’t required at all. Of the collectibles and activities that are required you typically only need 70-80%. Overall the 100% completion checklist is closer to 60% true completion.
Time-Savers:
- Complete all Optional Missions as they appear. You need to complete any 100 Optional Missions for the 100% Completion Checklist (there are more than needed). Optional Missions include the purple icons and the black icons with pink letters (whereas main missions are pink icons with black letters). Each of the vehicle deliveries of Moses and Randy counts too. Each Meditation Spot counts as +2 if you do it with both Jason and Lucia. There are a few missable optional missions during the story, but it doesn’t matter because there are much more than 100 optional missions total (easily 200-300+). You will automatically get 100+ optional tasks while working on all other trophies. It’s still good doing everything at the earliest opportunity as the optional questlines often introduce you to new game features.
- Scan any new vehicles you come across using the Waink app by holding and then (automatic unlock in Chapter 1). For 100% Completion you need to scan any 200 of the 277 base model vehicles. If you start it early you will get it done naturally throughout the story. Also scan boats and aircraft.
- Study any new animals you come across using the binoculars. Hold to select binoculars from weapon wheel, zoom in with and hold to study. For 100% Completion you need to study any 100 of 255 animals. Every breed of dog and cat counts separately too. Unlike Red Dead Redemption 2 you don’t need to hunt and skin the animals, just studying any 100 of them is enough.
» GTA 6 – 100% Completion Checklist & Guide
Cunning Stunts 
Complete 250 Stunts.
Complete any 250 of 397 stunts. For the 100% Completion Checklist you need to complete 300 stunts.
There are 4 categories of stunts: 130 Stunt Jumps (jumping over ramps), 202 Under the Bridges (flying under bridges), 40 Knife Flights (flying between buildings), 25 Base Jumps (parachute challenges). You can mix between the 4 categories to reach 250 stunts total. Just pick what’s easiest and quickest for you. Under the Bridges are the quickest to do.
You can track progress by region under Progress Menu > Activities > Stunts > press  on the stunt category to view progress by region. You can also track them by name on the Map to compare against the collectible guides below: Map > Exploration (Magnifying Glass icon) > Stunt Spots > this will show a list of found and completed Stunts. They all have a unique name and stay marked on the map after completing them.
The Stunts also have challenges when you scroll over their map icons, but these aren’t required. Just performing the stunt once will count as “completed”. There’s a tracker for total progress on the trophy too (in the trophy list), and after the story you can see total progress in the 100% checklist.
» GTA 6 All 130 Stunt Jump Locations
» GTA 6 All 202 Under the Bridges Locations (coming soon)
» GTA 6 All 40 Knife Flights Locations (coming soon)
» GTA 6 All 25 Base Jumps Locations (coming soon)
Master of None
Try each type of activity once.
The trophy tracker counts 9 types of activities. You can view activities by pressing Touchpad > Progress > Activities. When you scroll over them in this menu it shows how many you’ve done. You must do each type at least once. You will be introduced to most of these automatically from the main story and the rest get marked when unfogging the map. On the map you can filter for “Activites” (blue dumbbell icon) and most of these will be marked with blue icons. While working on all other trophies and 100% checklist, you’ll actually do one of each automatically, so don’t worry about this at all.
- Fishing
- Hunting
- Golf
- Shooting Ranges
- Pool
- Basketball (scoring hoops)
- Playing a Video Game
- Win a Car Race / Race Challenge / Top Fun Drone Race
- Perform a Stunt
The Shootist
Earn a gold medal in all Shooting Range challenges.
» GTA 6 All 12 Shooting Range Locations & 42 Gold Medals
Top Fun
Win a Top Fun Drone Race at every location.
» GTA 6 All 14 Top Fun Drone Race Locations (42 Drone Races)
Earn Cash, Not Kudos
Win 20 different races.
» GTA 6 All 40 Unique Race Locations
Baited My Tackle
Beat Cal in a fishing challenge.
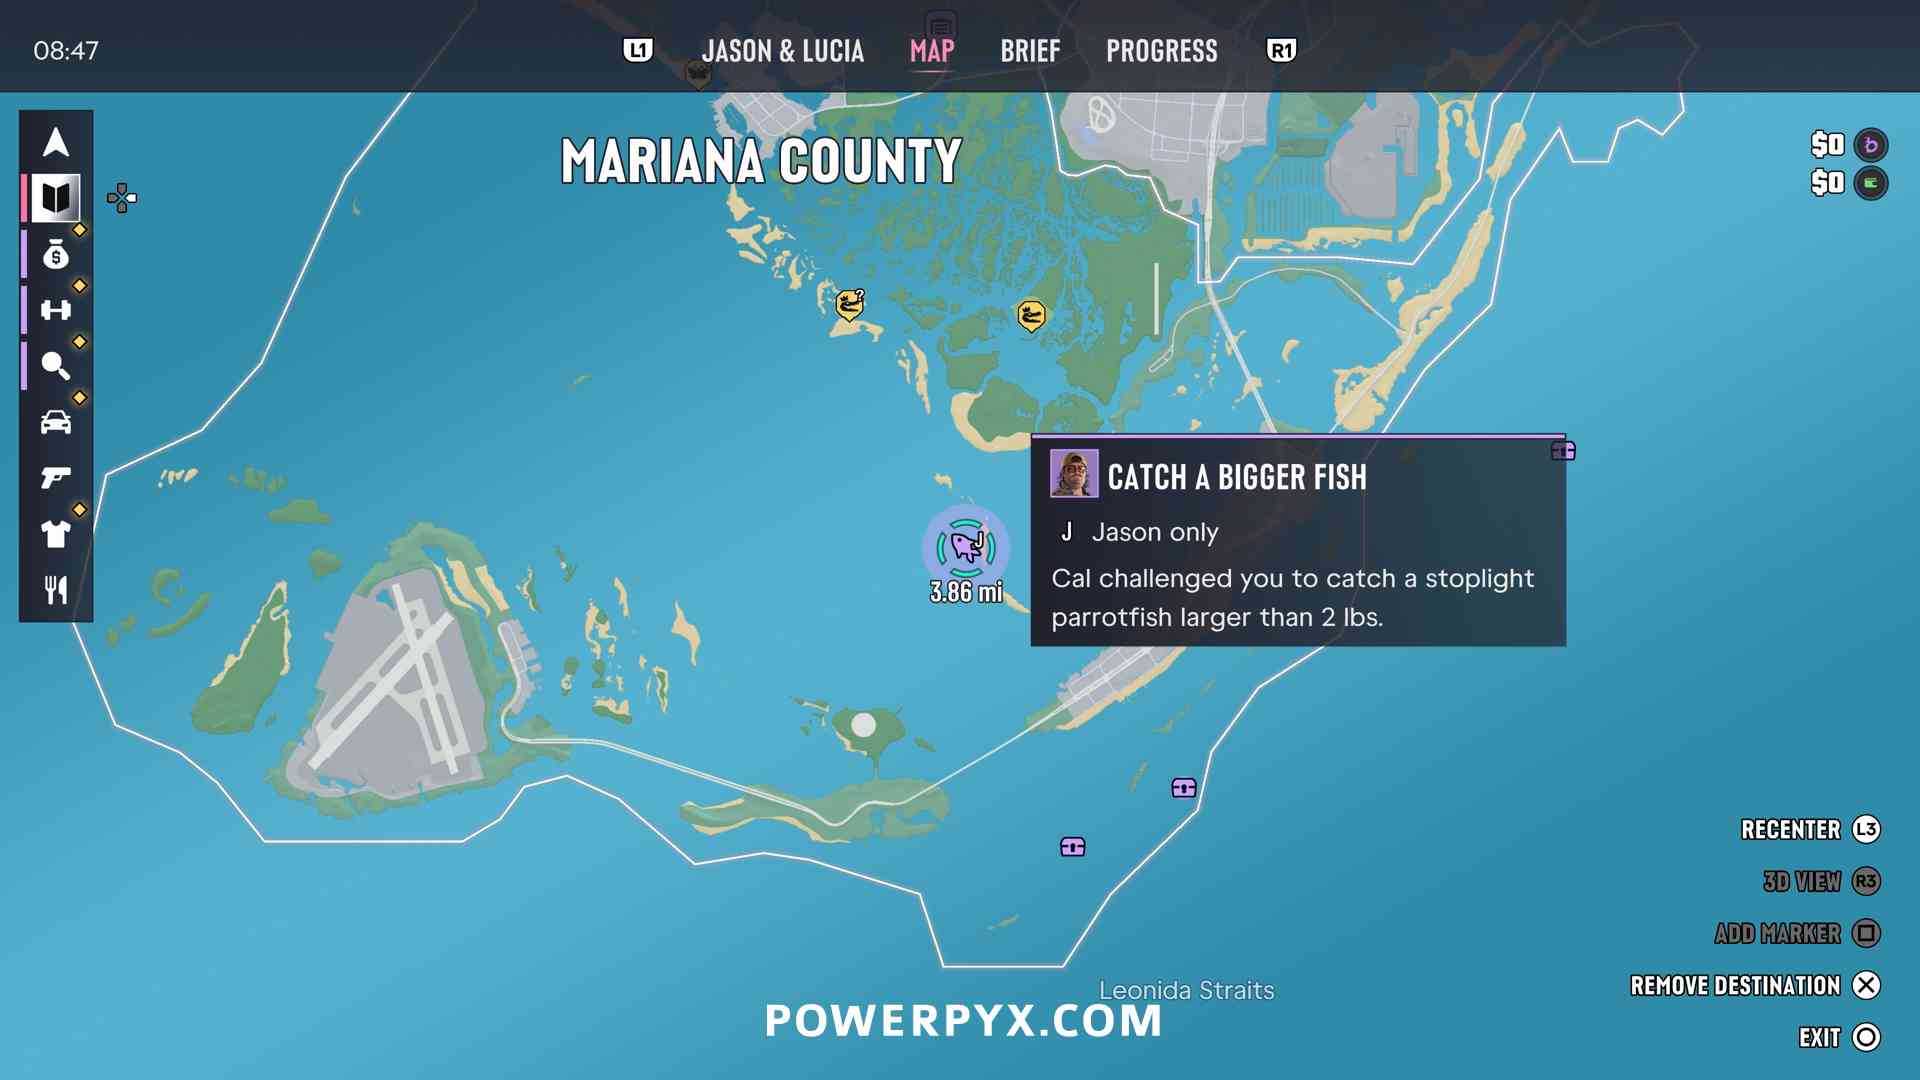
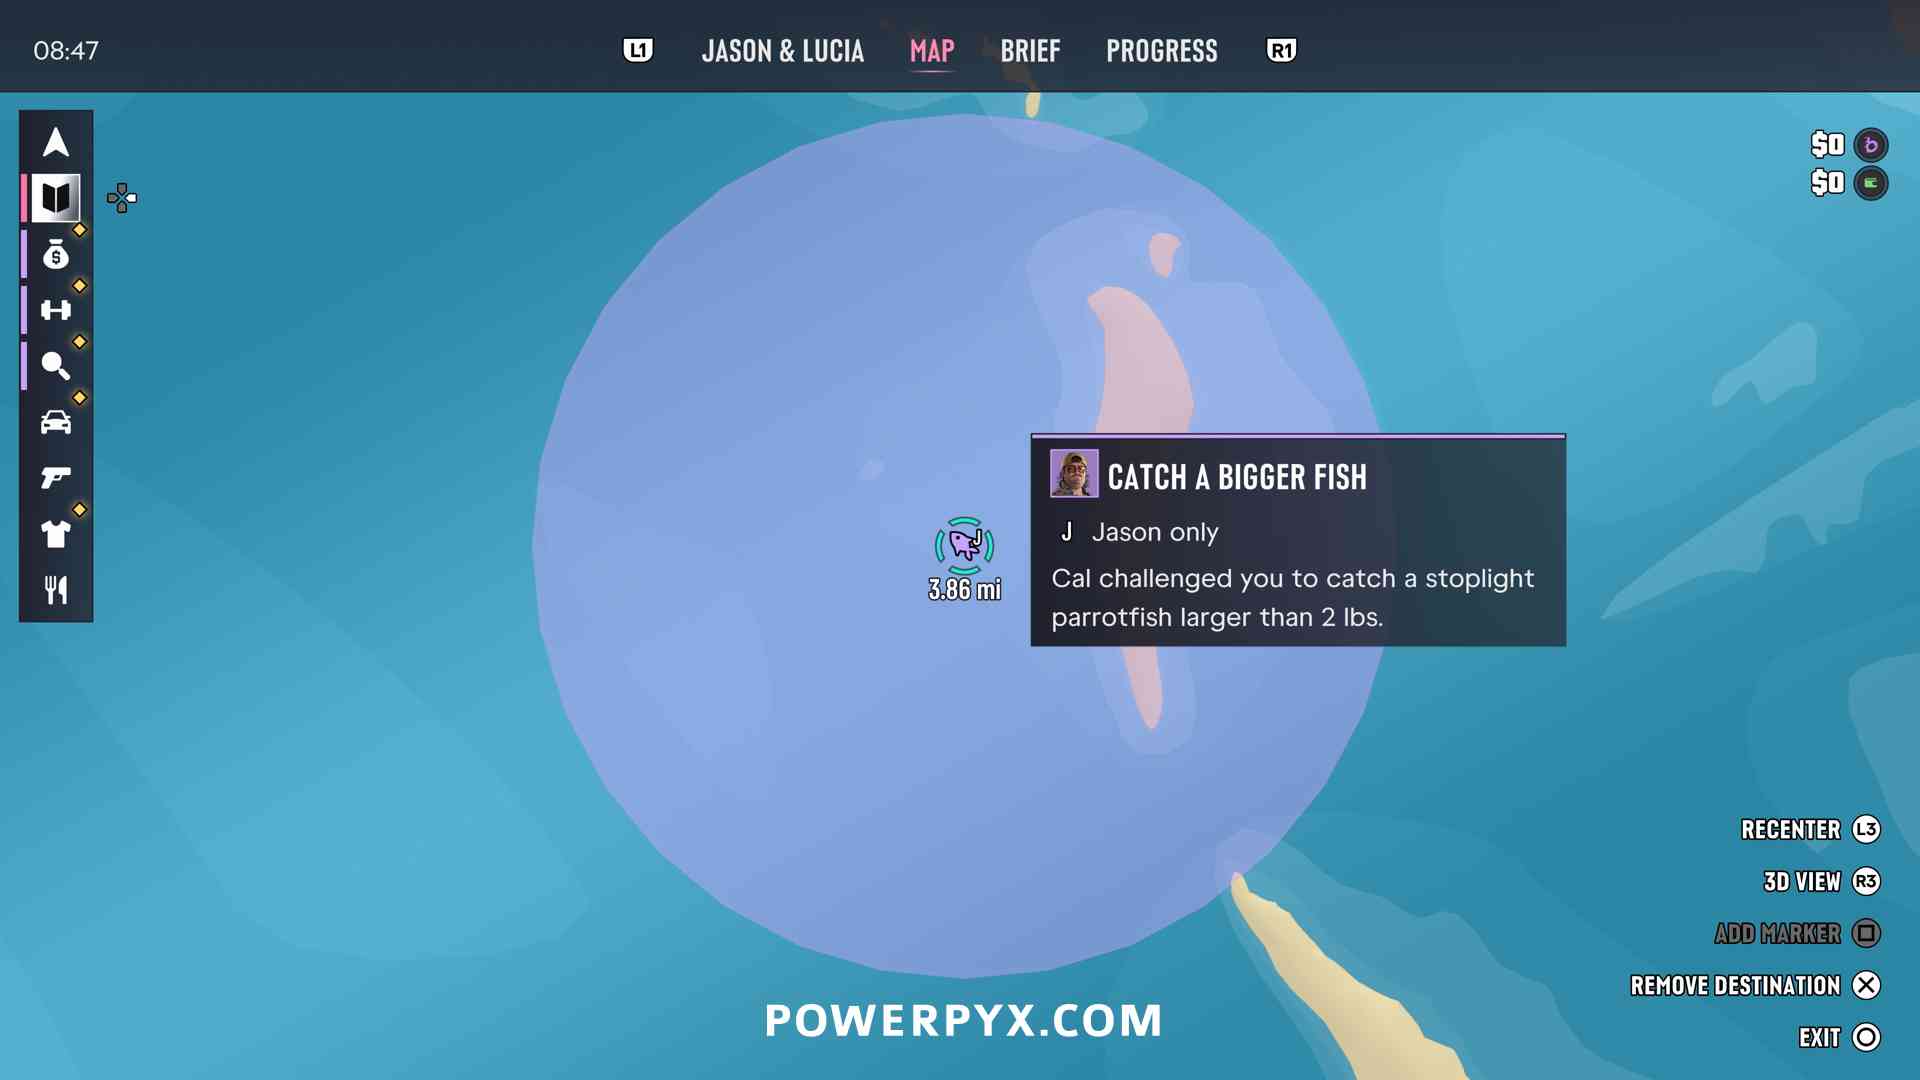
At some point after Chapter 1 – Main Mission: Feng Shui (Meet Cal), your friend Cal will send a text message that marks a fishing location with a purple icon on the map. Follow Cal’s fishing questline to unlock this.
Stick Fiddler
Complete an arcade game.
There are 4 Arcade Games (called “Video Games” in-game): Tenebrae Lux, Street Trash III, Time Jackers Rewind, Bang For Your Buck.
The first 3 of these are playable at the TV in your home by interacting with the controllers. You can already do this during Chapter 1. During some story sections this is temporarily unavailable but you can still do it after the story too. The 4th game “Bang For Your Buck” is found at arcade machines throughout the world. To “complete” a game you must finish all levels in it at least once. You don’t need to beat all challenges, just reach the end of a game. It doesn’t matter on which game you do this, pick whatever you like best.
» GTA 6 All 4 Video Game Locations (Arcade Games)
Road to Rehabilitation
Complete the final mission for Andy.
Andy’s optional questline gets marked automatically in Chapter 3. It’s exclusive to Lucia. At some point during Chapter 3 while playing as Lucia, you will get a call from Andy. Then she texts you her home address which marks the questline on the map in Belville. All quests are still available after the story.
Complete the following 5 Andy quests:
- Climbing the Cellerichain (Part 1-3)
- Pay the Cellerica Fee
- Peach! (Join the Cellerica Initiation)
- Read the Label (Retrieve the Cellerica Van)
- Puff Puff Pass (Meet at the Warehouse) – Road to Rehabilitation
This Was No Boat Accident
Complete the final mission for Kenton.
Kenton’s optional questline gets marked automatically in Chapter 1. A while after Chapter 1 – Main Mission: Island Dreams (Work for Kenton) he will call you, then he gets marked by the green “KR” icon in Key Lento. All his quests are still available after the story.
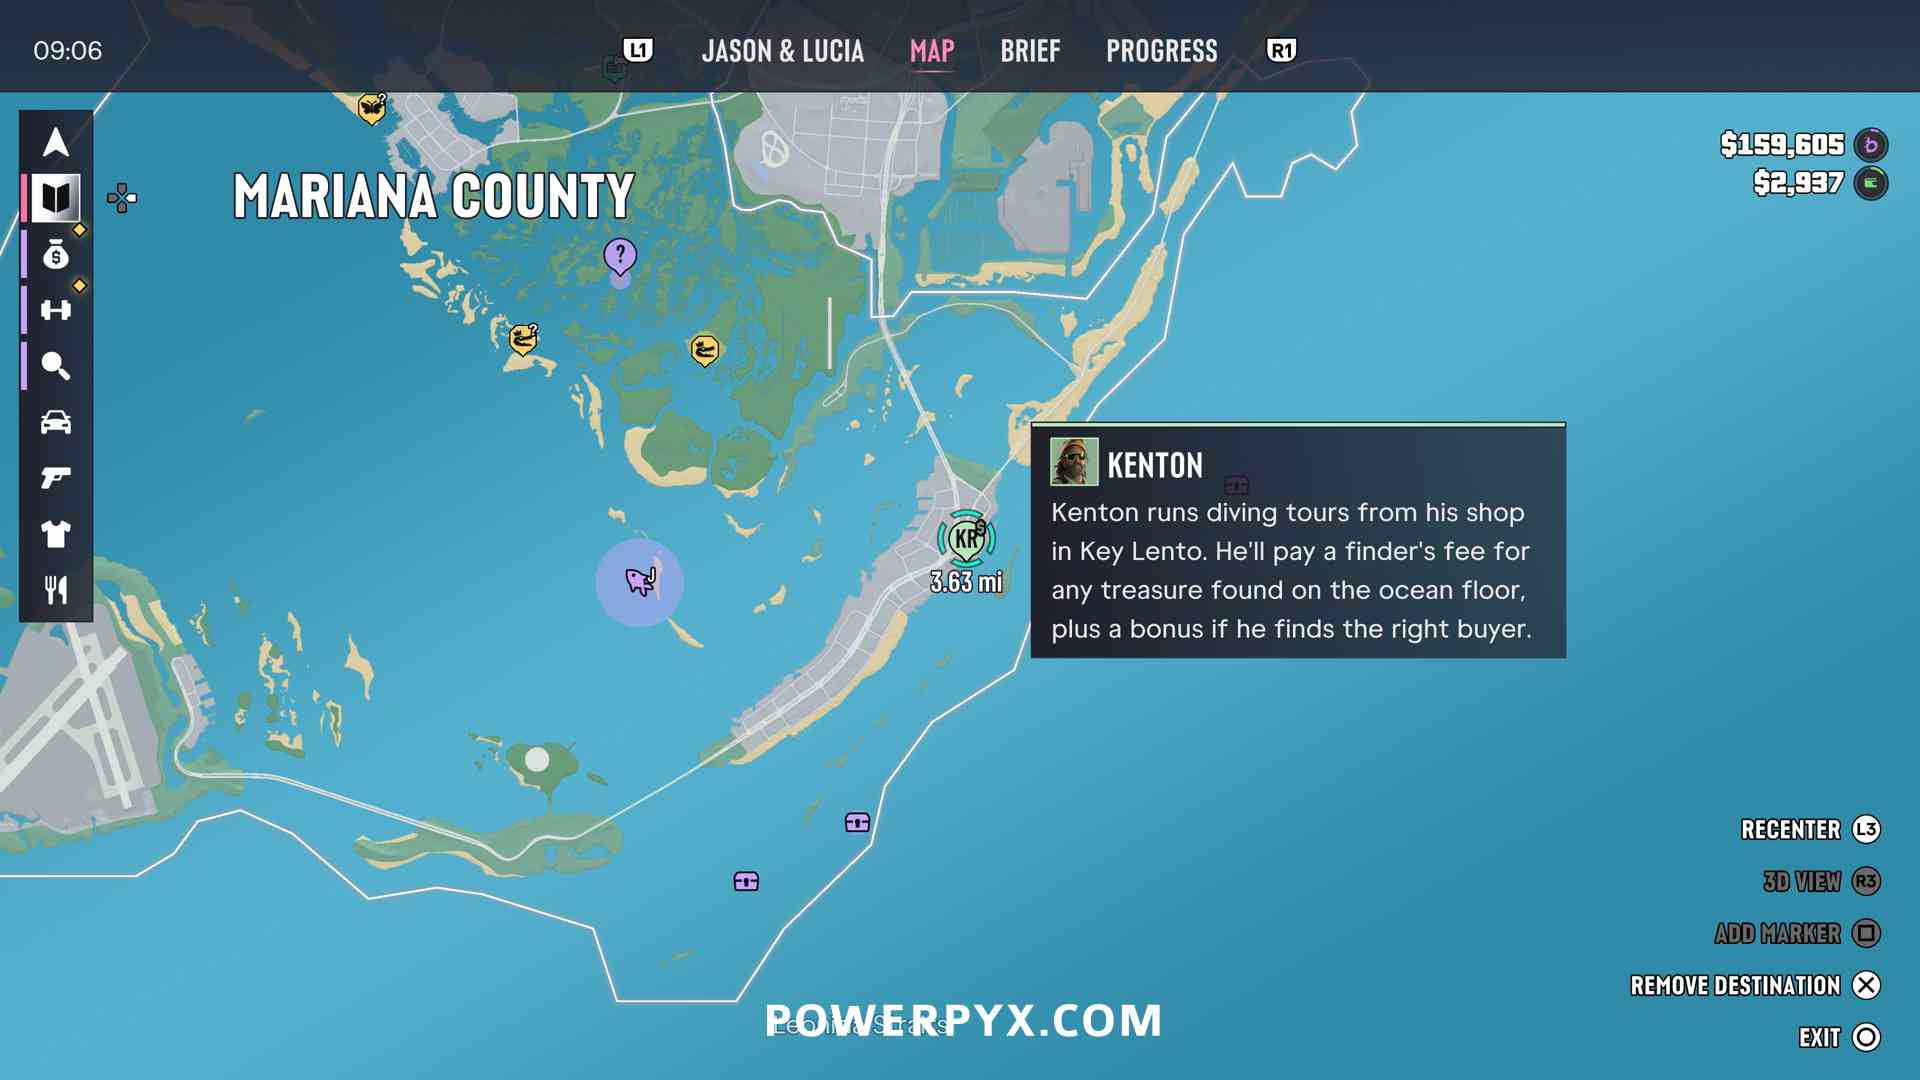
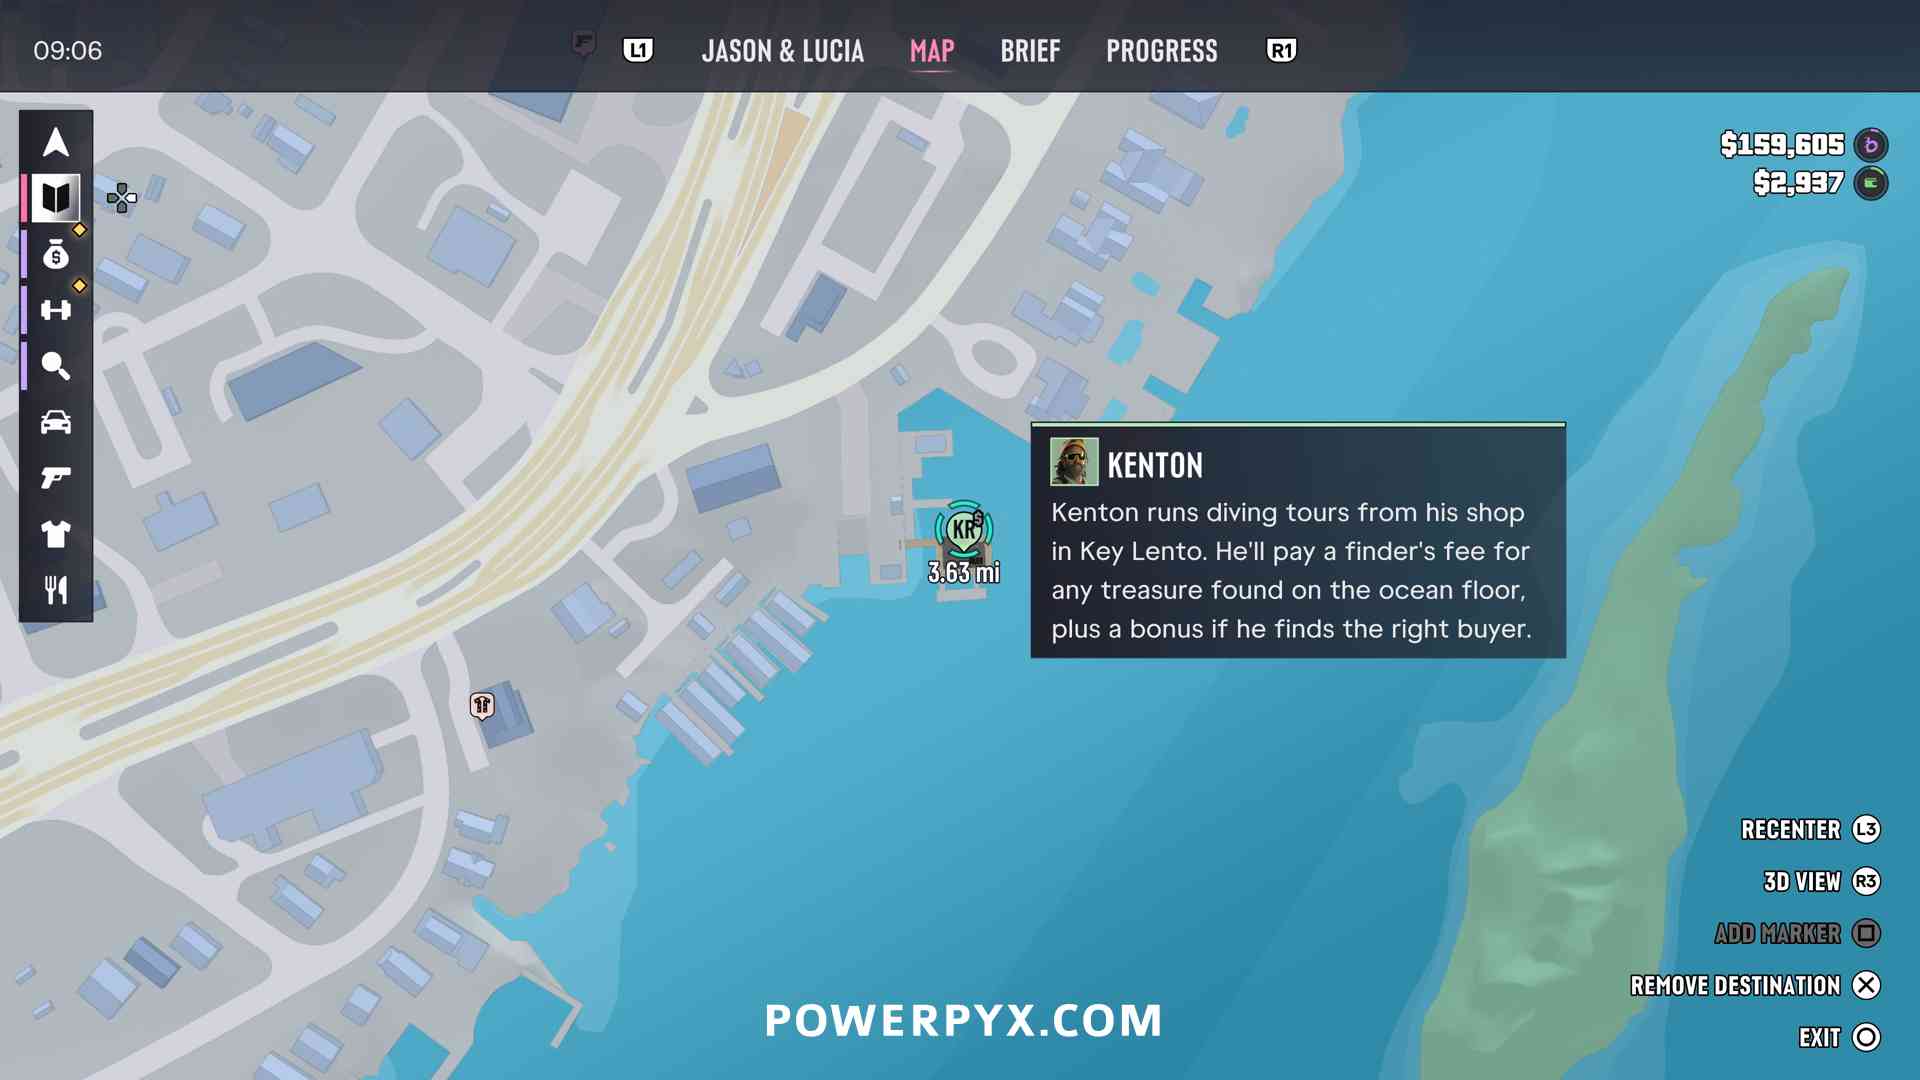
He offers multiple sets of treasure diving quests (shipwrecks). He marks purple treasure chest icons on the map for you. Find the underwater treasures and bring them back Kenton. While diving you can use the metal detector to dig up the treasure from the ocean floor.
After turning in the first set of treasures he calls you to come back to his shop, then he calls you again and marks more locations on the map. In total he wants you to clear 7 shipwrecks for his questline.
You can keep track of this under Progress > Characters > Kenton Rees. Also under Progress > Collections > Kenton’s Treasures.
After Chapter 1 Kenton temporarily becomes unavailable. Kenton will be available again at some point in Chapter 2-3, while playing as Jason he will text you and his objectives come back, so he’s not missable. You can also speed it up by calling Brian as Jason later in Chapter 2, then Kenton texts you shortly after.
The Lone Rider
Complete the final mission for Billy.
Billy’s optional questline automatically gets marked after Chapter 2 – Main Mission: Coffee Break. It will then be marked at Thrillbilly Mudclub in Kelly County. All his quests are still available after the story.
Complete the following 5 Billy quests:
- Thrillbillies (Check Out the Mud Club)
- Twist Wrist, Smash, Grab (Join Billy on a Job)
- Mall Rats (Join Billy on a Job)
- The Impaler (Steal the Impaler)
- Hometown Heroes (Join Billy on a Job) – The Lone Rider
Strangers & Freaks
Complete 8 mission strands for strangers across the state of Leonida.
Strangers & Freaks are side quests you find in the open world. Only certain questlines count for this. Many of the optional questlines don’t count: Moses, Tyrone, Yasmani, Andy, Billy, Eddie etc. The game doesn’t count them as “strangers” toward the trophy. You can still find all of them after the story in free-roam. You can see how many you completed via the trophy tracker in the trophy list.
The following Strangers & Freaks are confirmed to count for this trophy:
Kirk (Skunk Ape / Mr. Mangrove)
- Search for the Skunk Ape (Skunk Apeology 101)
- Search for Tree Effigies
- Help Kirk Find Mr. Mangrove (Advanced Skunk Apeonomics)
Kyle
Yago
- Join a Street Race
- Bumper to Bumper (Mentor Yago)
- Race Against Yago
- Brother to Brother (Back Up Yago)
Pilot Pete
- The Last Mile: Passing the Torch (Recover Pete’s Plane)
- The Last Mile: Backseat Pilot (Deliver Packages)
- Pete’s Deliveries: Southpoint Airfield
- Pete’s Deliveries: Avery Allen & Co.
- Deliver Packages
…there are more strangers yet to be discovered.
Supply & Demand
Complete the final mission for Randy.
Randy’s optional questline “Randy’s Wish List” automatically gets marked after Chapter 3 – Main Mission: Clonin’ Keys, Makin’ GS (Steal the Zorrusso for Randy). During this mission you unlock the Key Cloner to break into high-end sports cars. You deliver a sports car to Randy as part of this story quest. He then gives you a list of 16 sports cars he wants. This can still be done after the story.
You can keep track of the cars he wants under Map > Robberies (money bag icon) > Randy’s Wish List. He will mark some cars for you automatically in fixed locations, but you can also steal them anywhere off the street. When you scan or enter a vehicle he wants, you will get a popup to deliver the vehicle to him. He will be marked by the green “RK” icon in the west of Vice City.
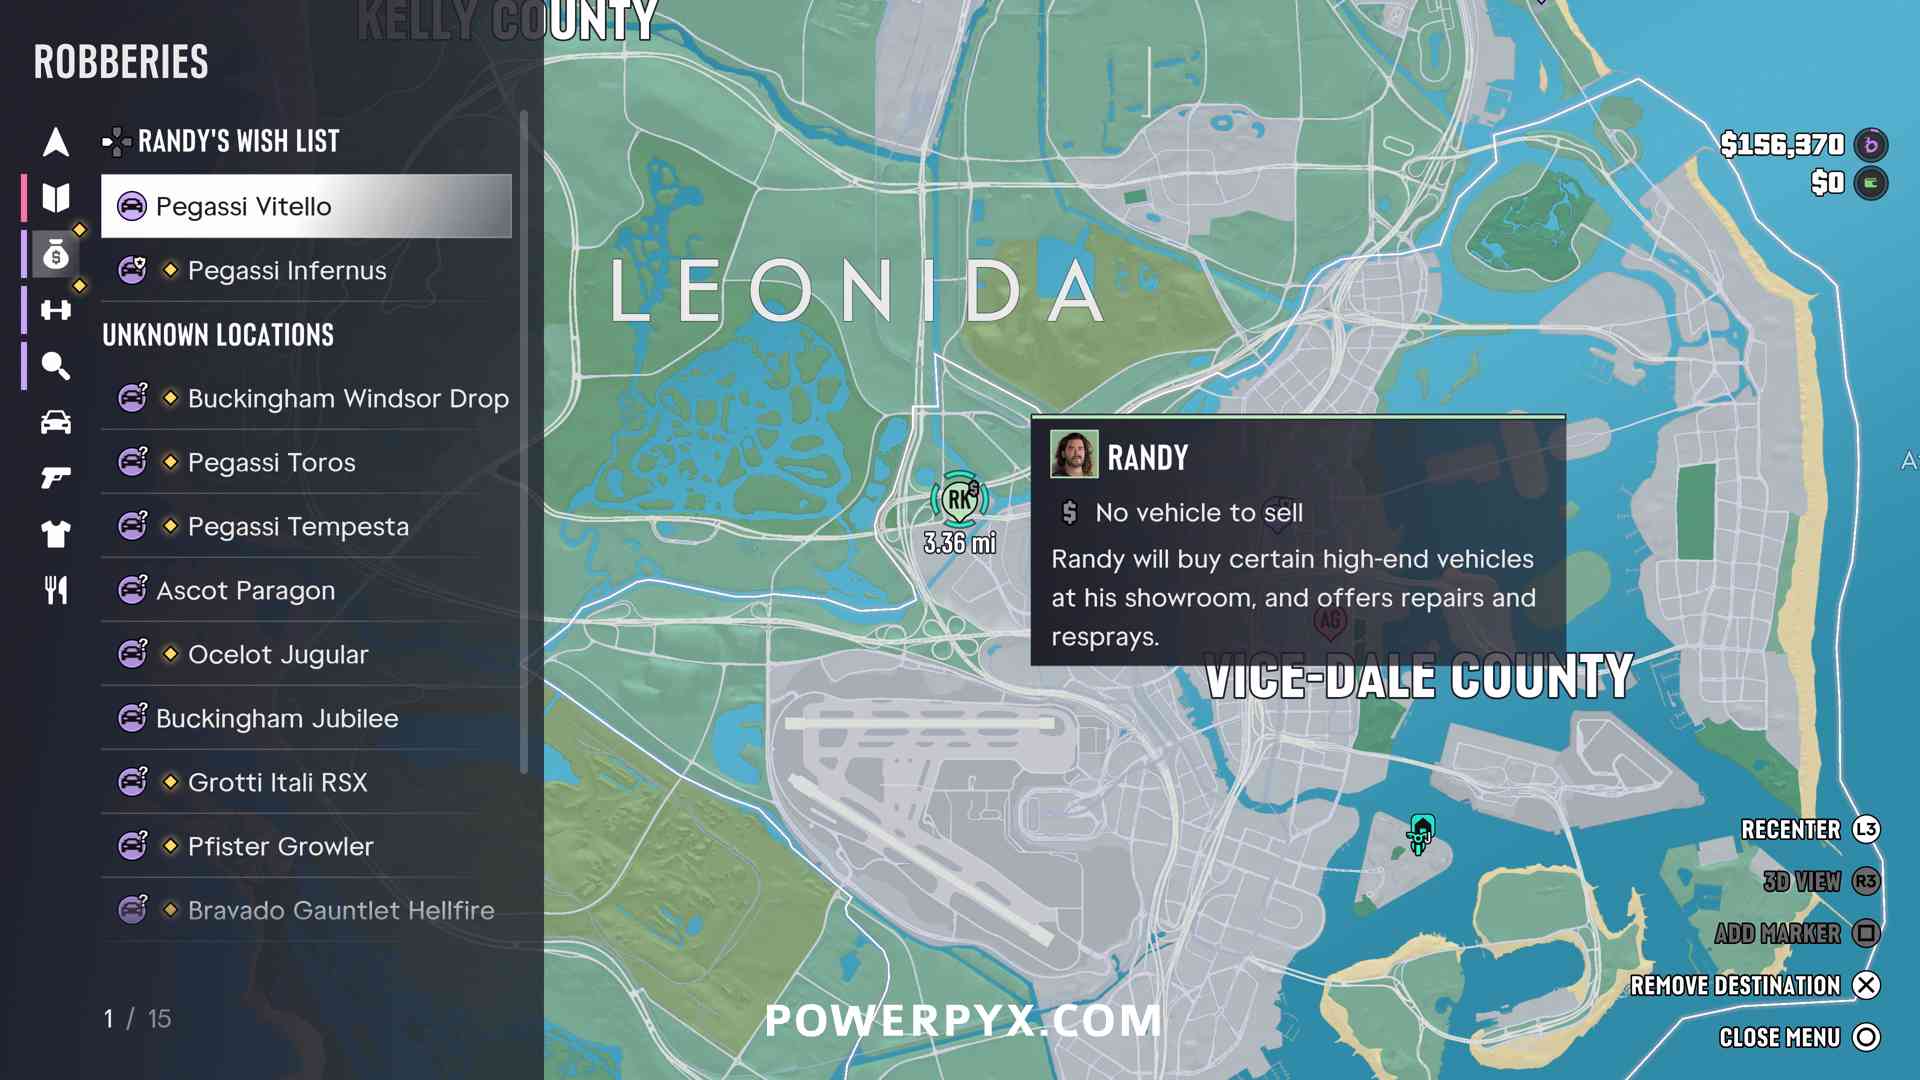
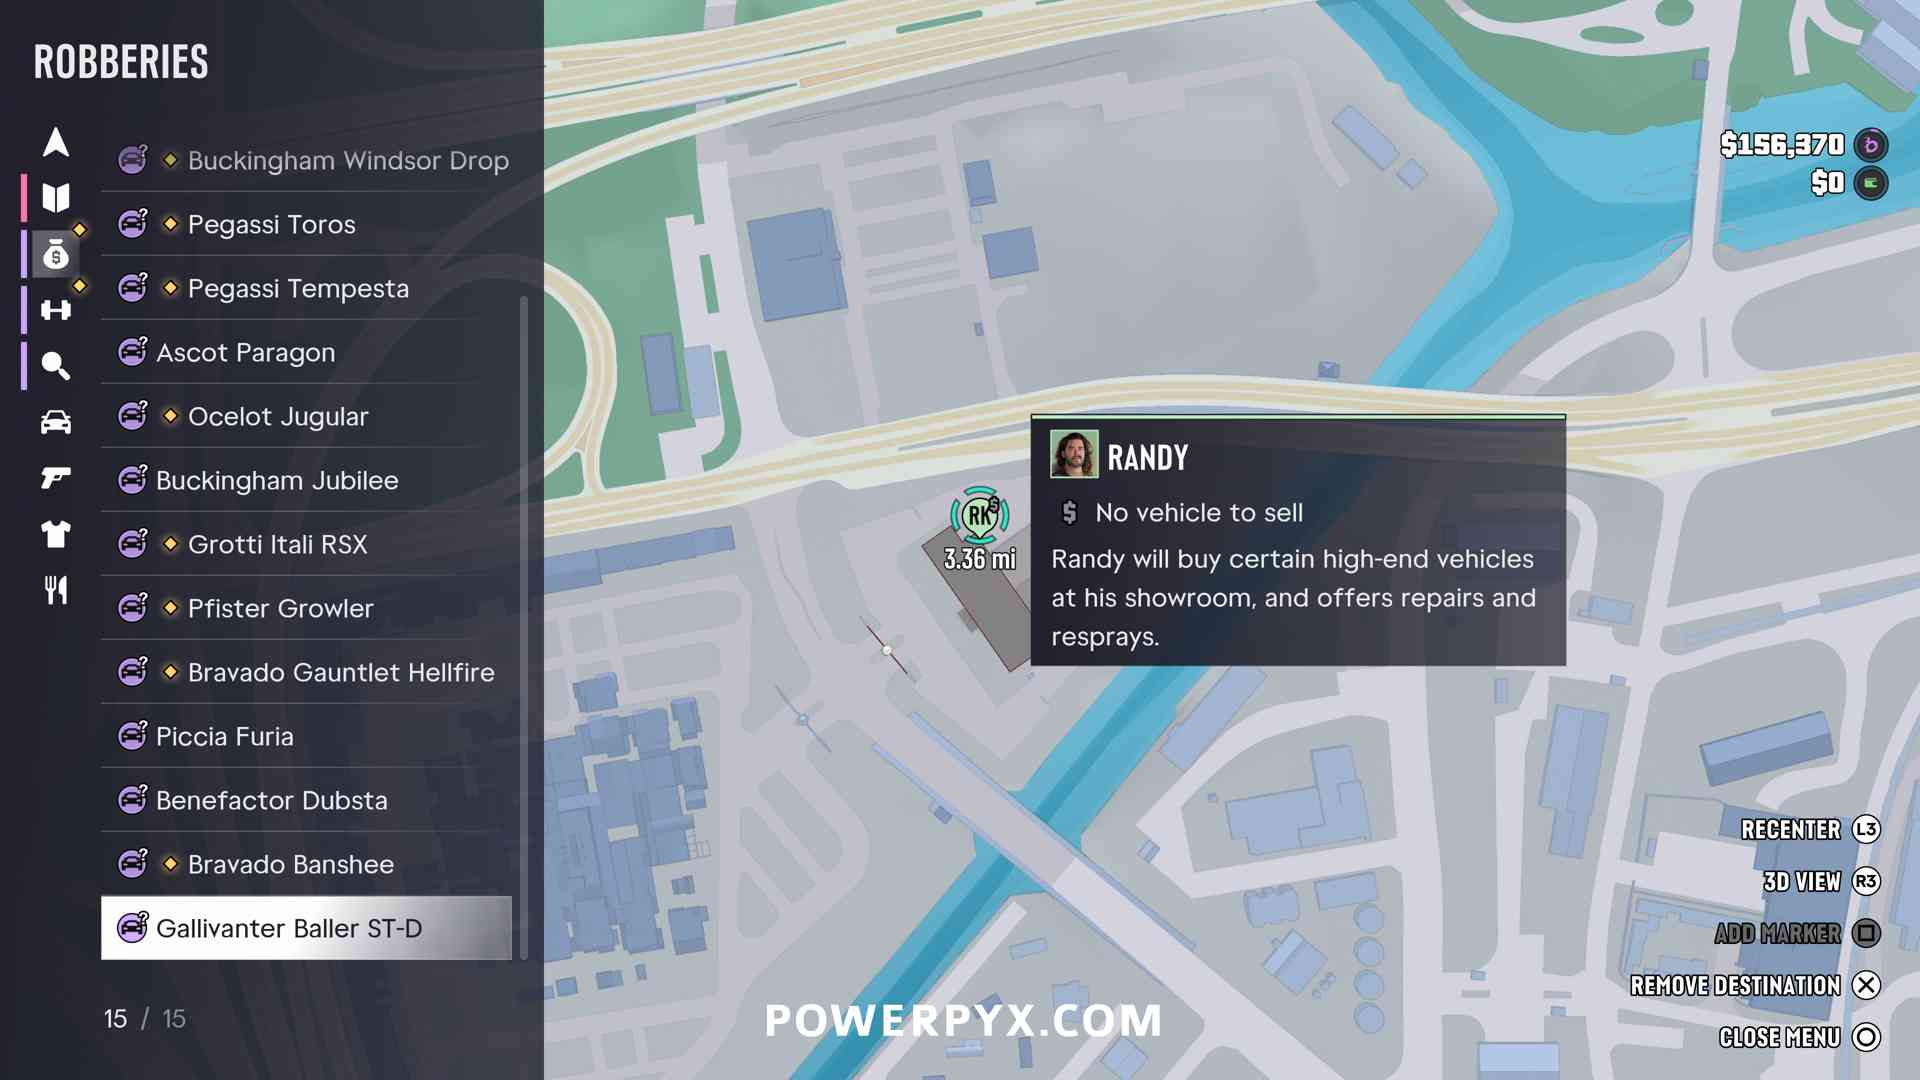
Scan high-end sports cars with the Waink app (hold ) to see if it’s on the wishlist or not. Then drive the car back to his garage. If you deliver it in good condition he will pay you more.
You can find the cars frequently in the east of Vice City at Vice Beach / Ocean Beach. They are often parked outside hotels or driving around. If you complete the ones he marks for you, he will mark new locations on the map.
Randy’s Wish List:
- Granforma Zorrusso – automatically delivered during Chapter 3 – Main Mission: Clonin’ Keys, Makin’ GS (Steal the Zorrusso for Randy)
- Pegassi Vitello
- Pegassi Infernus
- Buckingham Windsor Drop
- Pegassi Toros
- Pegassi Tempesta
- Ascot Paragon
- Ocelot Jagular
- Buckingham Jubilee
- Grotti Itali RSX
- Pfister Growler
- Bravado Gauntlet Hellfire
- Piccia Furia
- Benefactor Dubsta
- Bravado Banshee
- Gallivanter Baller ST-D
Spin On This!
Complete the final mission for Tyrone.
Tyrone’s optional questline automatically gets marked after Chapter 3 – Main Mission: Here, Kitty Kitty. It’s only available as Jason, not as Lucia. You will then see purple map markers for Synthetic Labs in Vice City. You must go to the labs and destroy them (they are part of the quest “Take Out Kitty Litter”). All of this is still available after the story.
After destroying enough labs, Tyrone will give his second quest “Spin On This” which unlocks the trophy.
Positive Mental Attitude
Meditate at every spot across Leonida.
There are 18 Meditation Spots across 10 different locations. You can meditate with Lucia and Jason at each spot, which counts as +2 meditations at the same location. You can track this under Progress > Collections > Exploration > Meditations.
Potentially Missable (Chapter 1 – Jason’s House Meditation): The first Meditation can only be done during Chapter 1 at Jason’s house. It becomes permanently unavailable after Chapter 1. At some point during Chapter 1, Lucia will talk about meditating and walks out to the balcony. For me this happened in the morning after Chapter 1 – Main Mission: Down to Earth (Meet Brian), but the timing might vary. After talking to Lucia in the kitchen in the morning, she will say “You know what I’m gonna do? Meditate”. She then goes to the balcony where the training equipment is. Follow her and you’ll get an optional quest popup. Talk to Lucia on the balcony by looking at her and choose “Accept”. Then she shows you how to meditate. This meditation does increase the counter +1 in the Progress Menu but it isn’t marked as a “Meditation Spot” like the rest, so is currently unclear if it’s required for the trophy or not. For the 100% checklist you only need 15 of 18 Meditations so it doesn’t matter for that. You can’t do the final Meditation until you unlock the ability to play both characters together (after Chapter 2: Coffee Break). It’s still undergoing confirmation if the missable Chapter 1 meditation is required to unlock this trophy or not. When I earned the trophy I had done the Chapter 1 meditation.
» GTA 6 All 18 Meditation Spot Locations
Fair Game
Hunt a unique animal for Bret.
Bret Vogel’s optional questline automatically gets marked at some point after Chapter 2 – Main Mission: Coffee Break. While playing as Jason you will get a text message from Bret Vogel that marks his first quest Veteran Hunted (Meet Bret) in Lummox County (Lucia can’t receive the message). This questline is exclusive to Jason. It’s still available after the story.
Go do Bret’s quest Veteran Hunted (Meet Bret). Afterward he marks hunting spots with purple icons on the map. His questline is about hunting different animals that he requests. Then bring the animals to Bret as Jason.
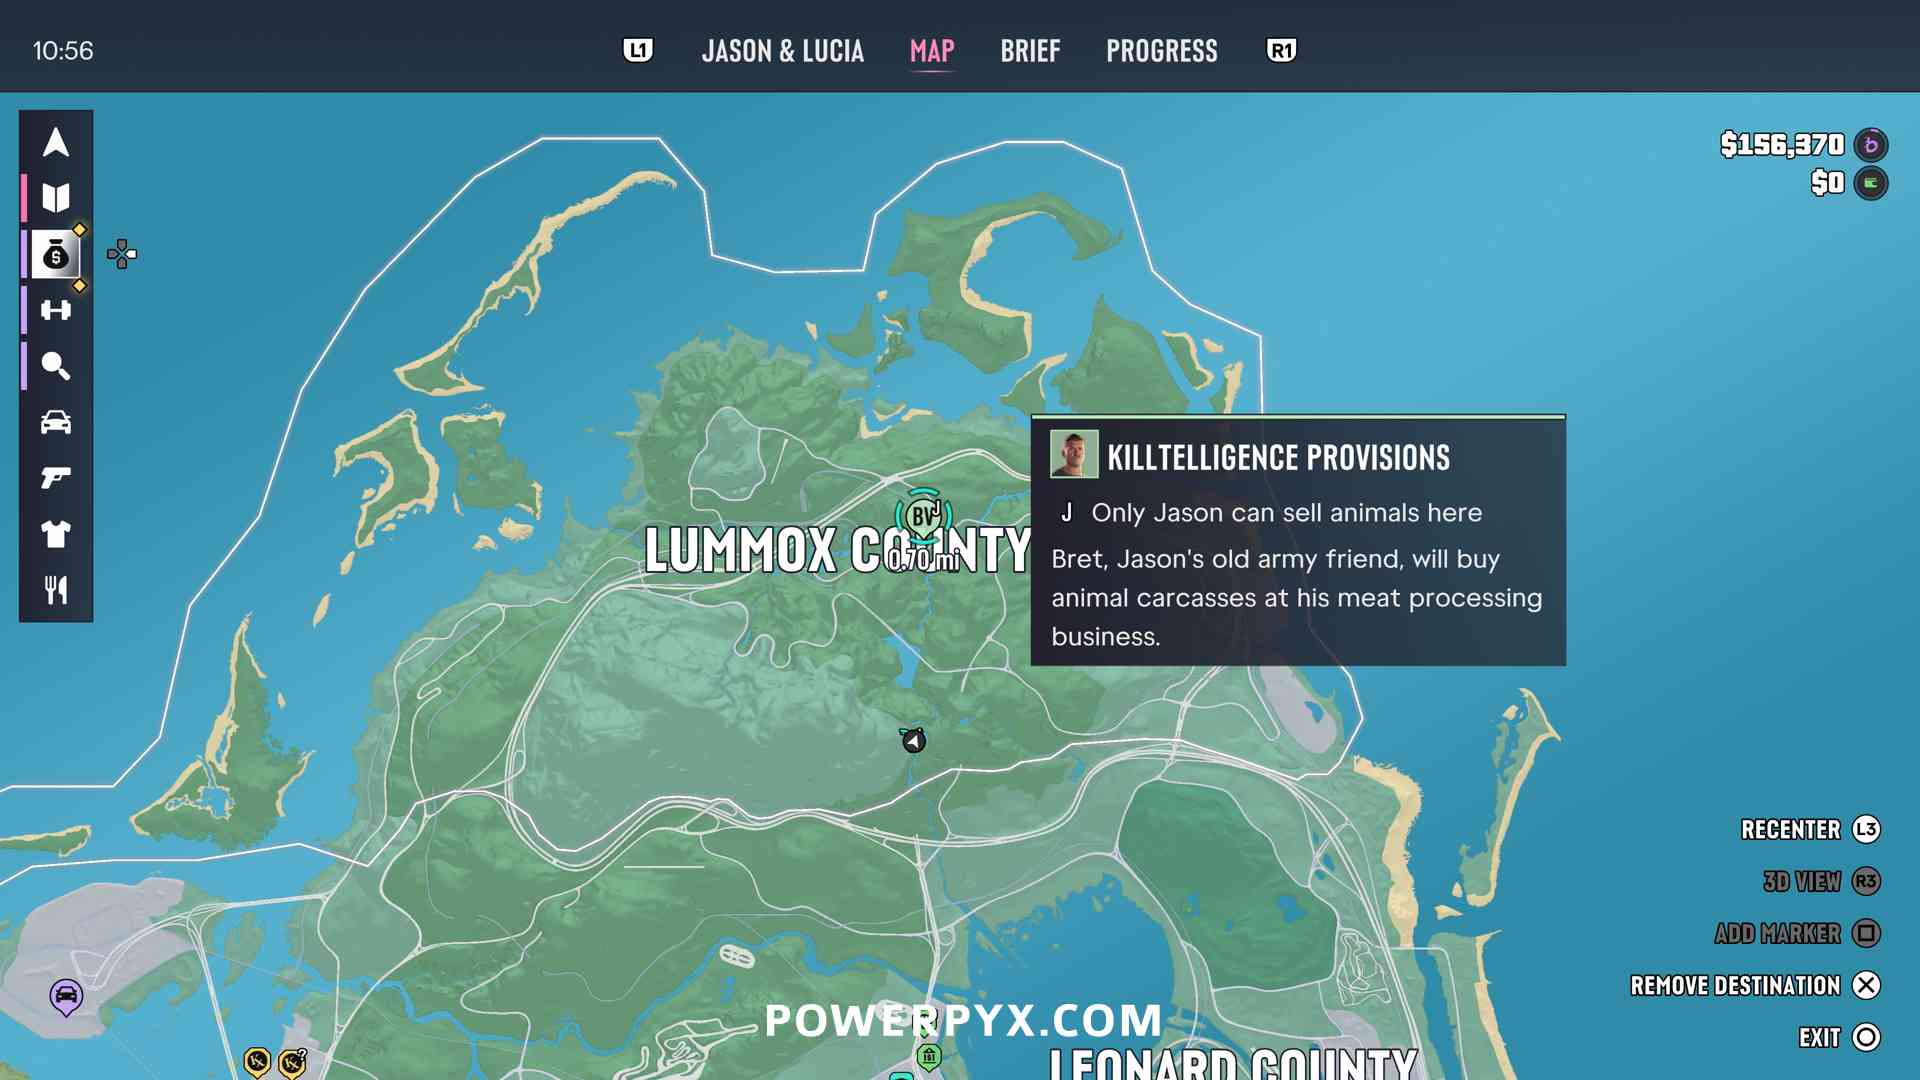
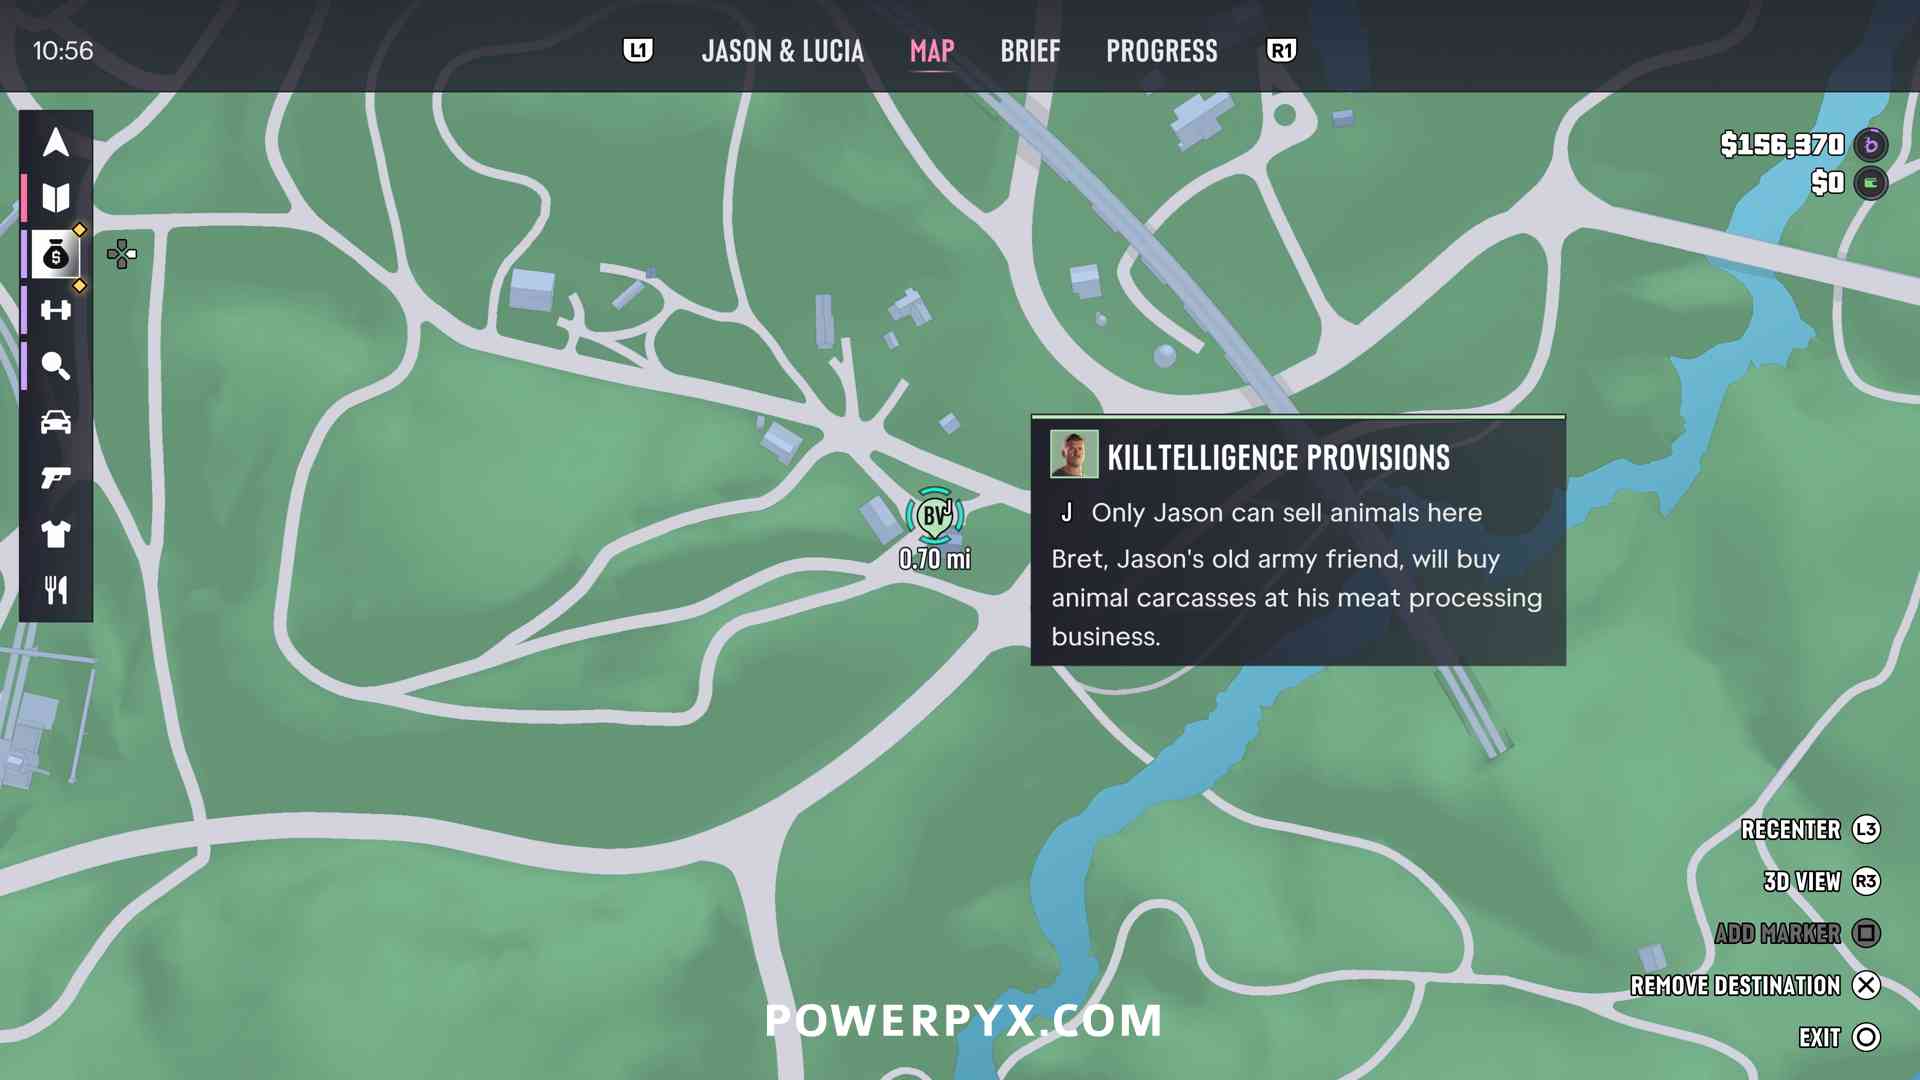
During Bret’s first quest he gives you the unique hunting rifle “Killtelligence SM-69”, you can retrieve it from any weapon locker at Ammu-Nations. Killing animals with one clean shot leaves them in pristine condition and pays more money but isn’t mandatory for the questline.
You can track these under Map > Activities (dumbbell icon) > Target Deck. There are 15 Target Decks total. You need to complete all 15 Target Decks for the 100% Checklist so should get this trophy naturally along the way. It’s still undergoing confirmation which animal exactly unlocks this.
Don’t Touch My Deck
Complete 3 Collectible Card sets.
» GTA 6 All 18 Collectible Card Set Locations
You WAiNKer!
WAiNK at 100 locations.
WAiNK scans are objects in the environment you can scan by holding and . There are more than 100, it doesn’t matter which 100 you scan.
One Last Thing
Complete 50 Challenges.
There are 80 available challenges, you only need to complete 50 for this trophy. For the 100% Checklist you will need any 70 of 80, so will unlock this trophy automatically along the way. There are 10 more than needed for any trophy so you can pick what’s easiest for you.
You can view and track the challenges under Progress > Challenges > check the “Completed” checkmark in the bottom right corner when scrolling over the challenge. A lot of these you will complete naturally while working on other trophies and 100% requirements. Keep it for one of your last trophies, then you’ll have a lot done without even trying. Then pick the easiest and quickest challenges you have remaining.
» GTA 6 All 80 Challenges Guide
Hot Together
Lose a 4 star Wanted Level with your partner and escape the heat.
The earliest you can do this is after Chapter 2 – Main Mission: Coffee Break. This is when you unlock the ability to free-roam together as Jason and Lucia at the same time. You can then call your partner by holding  and pressing
 .
Getting a 4-star wanted level is easy, just cause carnage until you reach 4 stars. Then the best way to escape is to use a fast sports motorcycle and cut through traffic to get out of the search area. If a helicopter is chasing you, shoot at it until it goes away.
Easiest method is to drive through the train tunnel north of Ambrosia (in Kelly County), the cops have trouble following you on train tracks and the helicopter can’t see you. See the path marked red below:
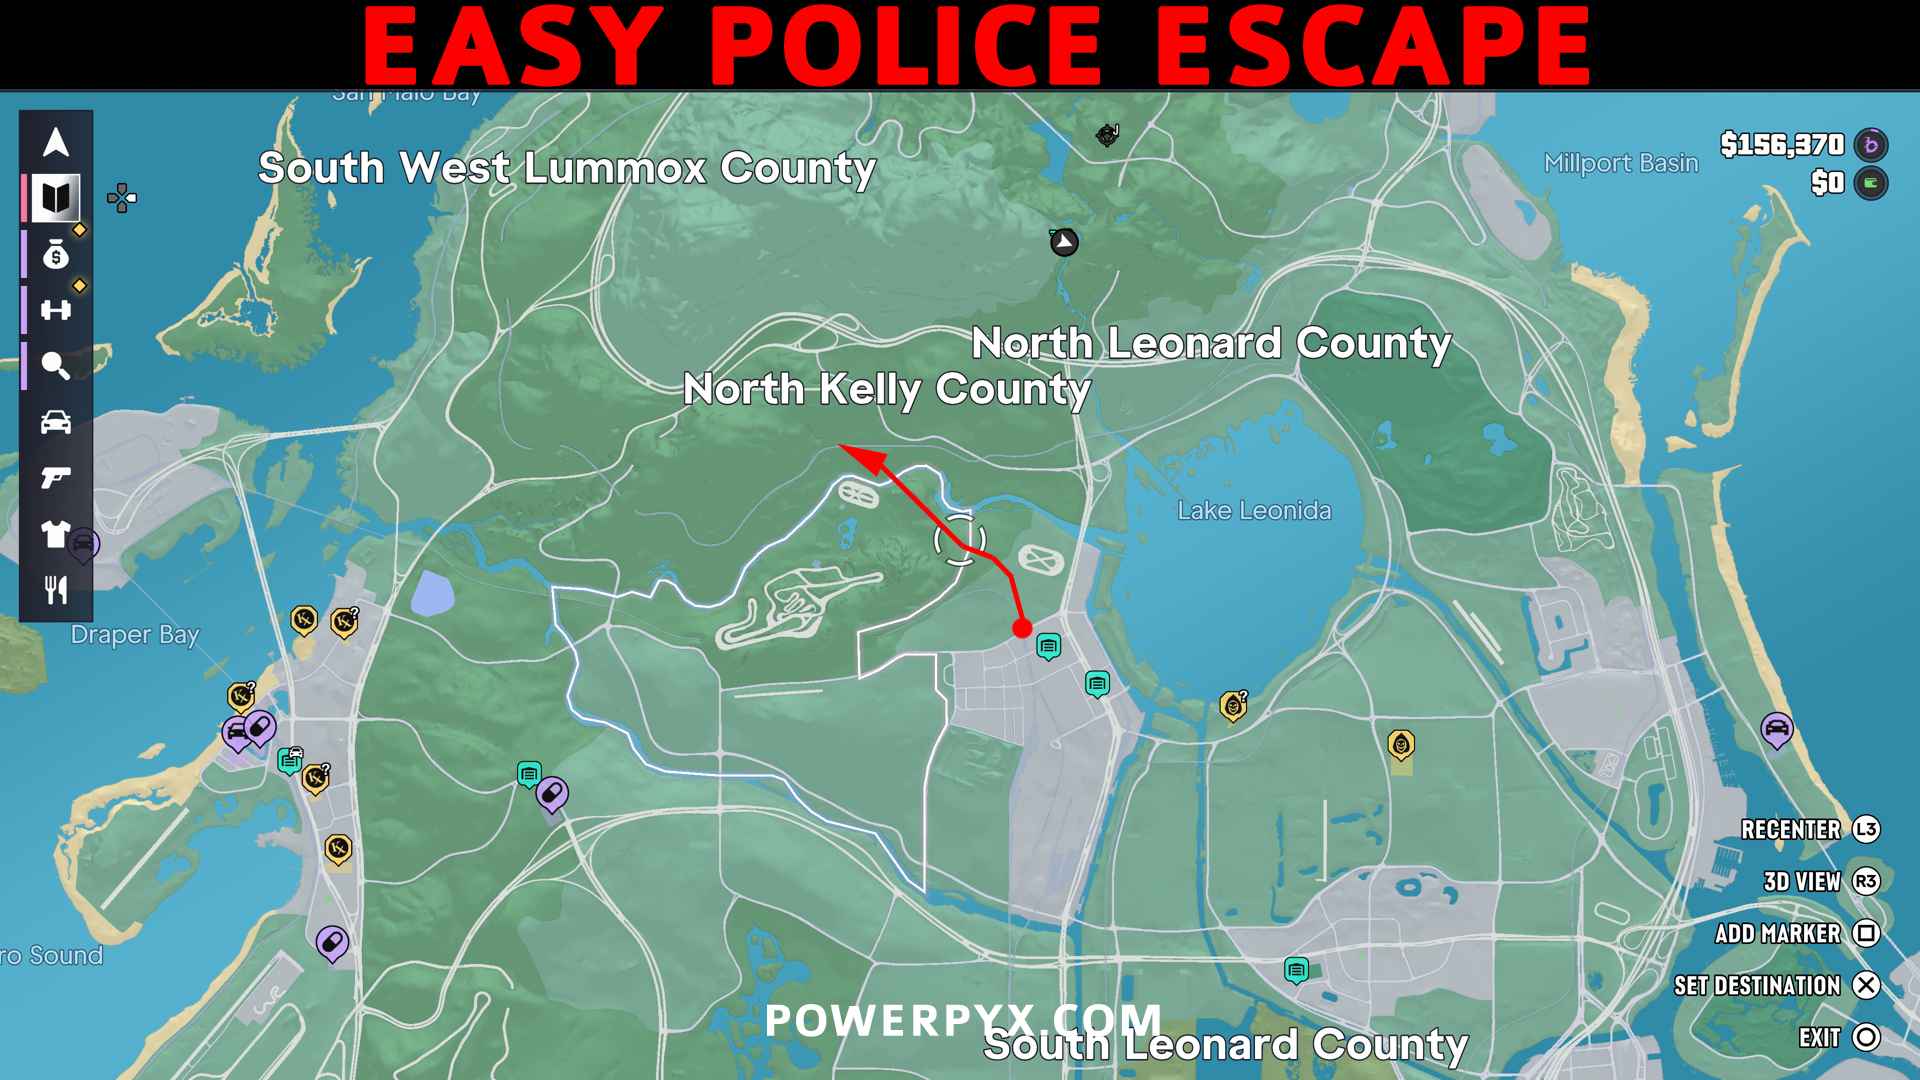
The trophy will unlock after you drive out of the red “heat” wanted zone (not after you leave the immediate blue/red flashing search area).
You will actually get this automatically during Chapter 4 – Optional Mission: That’s Where The Money Is… (Wait at the Cafe). This mission unlocks large bank vault robberies, which automatically give a 4-star wanted level. When you rob all the large bank vaults, which is mandatory for the 100% Checklist, you will always trigger 4-star wanted levels and have to escape, so you’ll get it automatically if you don’t have the trophy by then.
Retail Therapy
Rob 3 shops back-to-back with your partner without losing your Wanted Level.
You can only start doing this after Chapter 2 – Main Mission: Coffee Break, that’s when you can switch between both characters. Simply hit 3 robbery targets (green icons on map) while being chased by police the entire time. You’ll want to maintain the red/blue flashing wanted level (not the red heat level). Equip an armored vest and sticky bombs (bought at  Ammu-Nations) and Zombix/Adrenaline for healing (bought at
 Convenience Stores). Call your partner by holding and pressing . Then loot 3 shops in a row. If it doesn’t unlock after the 3rd shop, hit a 4th shop and keep going until it unlocks.
The trophy unlock is delayed, it pops half a minute after leaving the 3rd shop.
A good place to do it is at the 3 Jewelry Stores in the north of Vice City. They are available after Chapter 3 – Main Mission: Yasmani’s Jewelry Jobs:
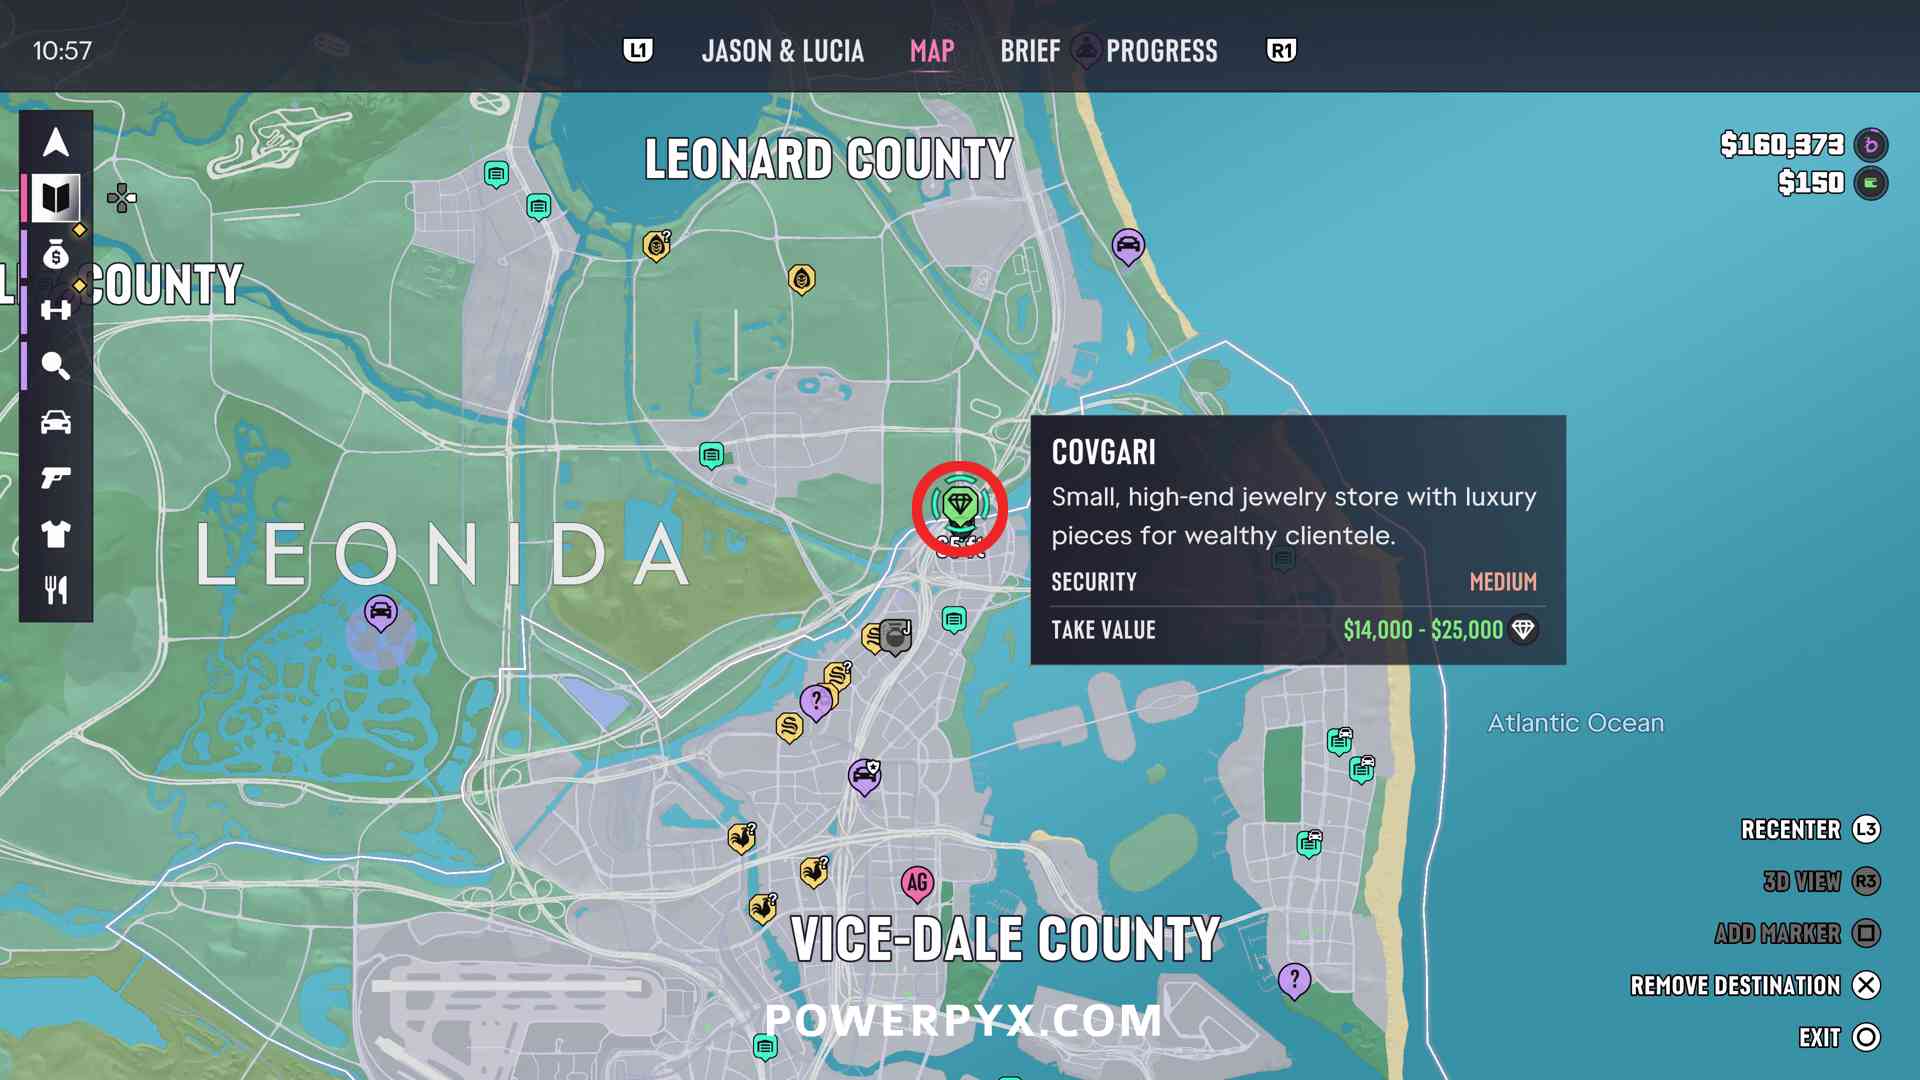
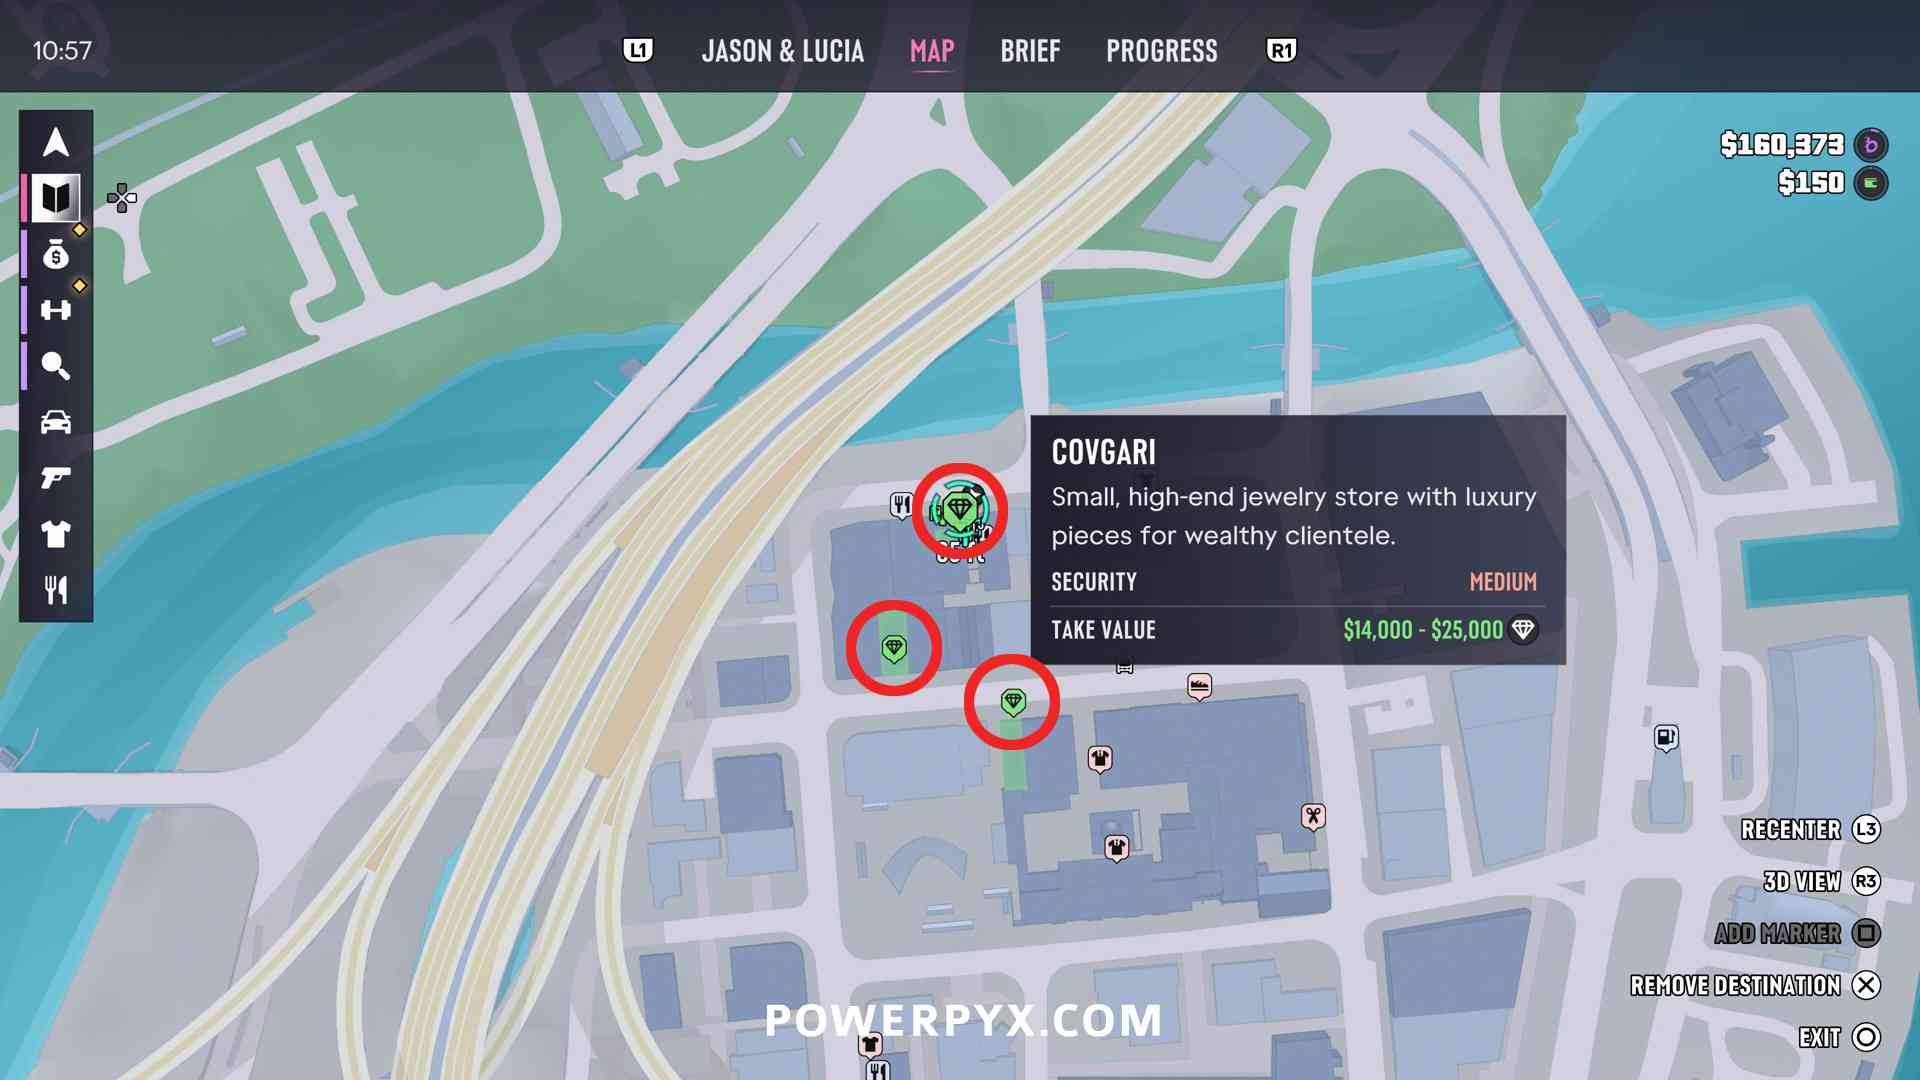
To make sure it counts, you’ll want to rob a couple items in each store and ideally go into the back room and break the safe with sticky bombs. If you leave the first store before police arrive, you may need to hit a 4th store.
Whip It Good
Discover 100 vehicles.
GTA VI features 557 vehicles at launch (cars, bikes, boats, helicopters, planes). The easiest way to discover 100 quickly is to use the “WAiNK” app from your phone (hold to instantly use it without selecting from phone). Then look at vehicles and hold to scan them. Just stand at a busy road and scan all the vehicles passing by. When you see new unique vehicles you haven’t seen before, scan them to add them to the database. Scanning the vehicles is enough, you don’t need to drive them. You need to scan 200 of the base model vehicles for the 100% Checklist, so will get this trophy automatically.
You can check your discovered vehicles via Touchpad > Progress > Vehicles > scrolling over each category shows the totals found.
Gunslinger
Take down 5 enemies in a single use of Combat Focus.
Combat Focus is activated with  + while aiming a firearm. This will slow time and highlights vulnerable spots on enemies. It drains the purple focus bar, seen in the top left corner of the screen below your health and stamina.
You have to kill or incapacitate 5 enemies in a single use of this, but the combat focus will only last a few seconds.
First, make sure you buff your focus by consuming food/drinks or washing your face/showering at home. Consume Adrenaline to extend the time of combat focus (hold > press ). Then line up 5 enemies (criminals at  Gang Operations), and defeat them quickly without missing a shot. It’s also good to wear body armor (bought at Ammu-Nations) so you can walk out of cover and get close to the enemies. Use an assault rifle like the Duke 556 as it’s more accurate than pistols and SMGs and shoots full-auto. The trophy doesn’t seem to work on soldiers, police, and civilians.
This will get easier as you progress in the game and level up your focus. There are 4 levels of focus, you can check it under Touchpad > Jason & Lucia > select character and scroll to “Focus” (purple eye icon). You increase Focus by playing Shooting Range Challenges, playing Golf, playing Pool, catching fish, and doing headshots at psychopath criminal profile. While working on all other trophies you will automatically reach Focus Level 4 and there’s a good chance you’ll earn the trophy naturally along the way too.
Catch Me If You Can
Make an unscheduled departure at VCIA.
This is unlocked by stealing one of the large passenger planes that’s docked to one of the departure terminals at VCIA (Vice City Airport). It doesn’t work with the passenger planes on the airfield, has to be one that’s connected to one of the passenger boarding bridges. Inside the plane go upstairs, enter the cockpit, drive the plane backward to the airstrip, take off and fly far enough away from the airport until the trophy unlocks.
The easiest plane is the one connected to departure terminals E3/E4. Drive through one of the fences around the airfield and head straight to the plane. Next to the boarding bridge are stairs with a door leading directly into the plane:
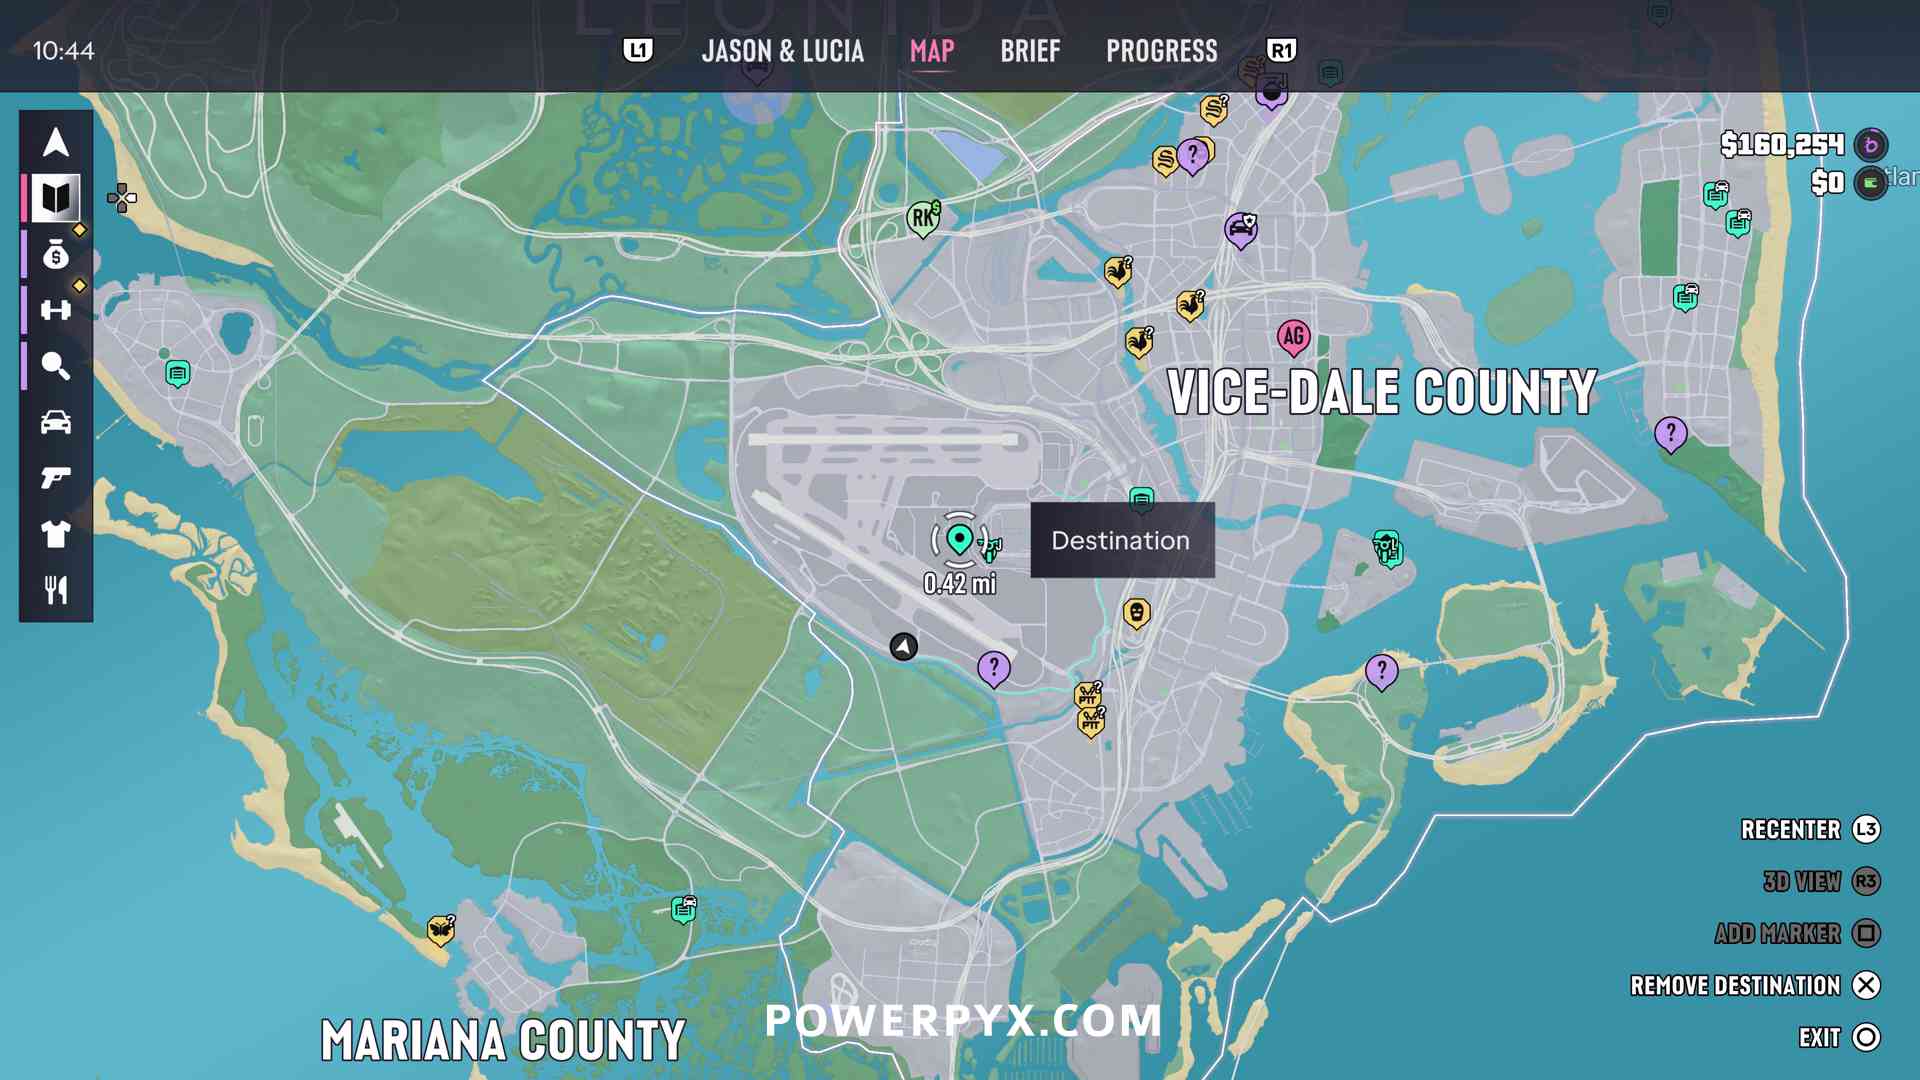
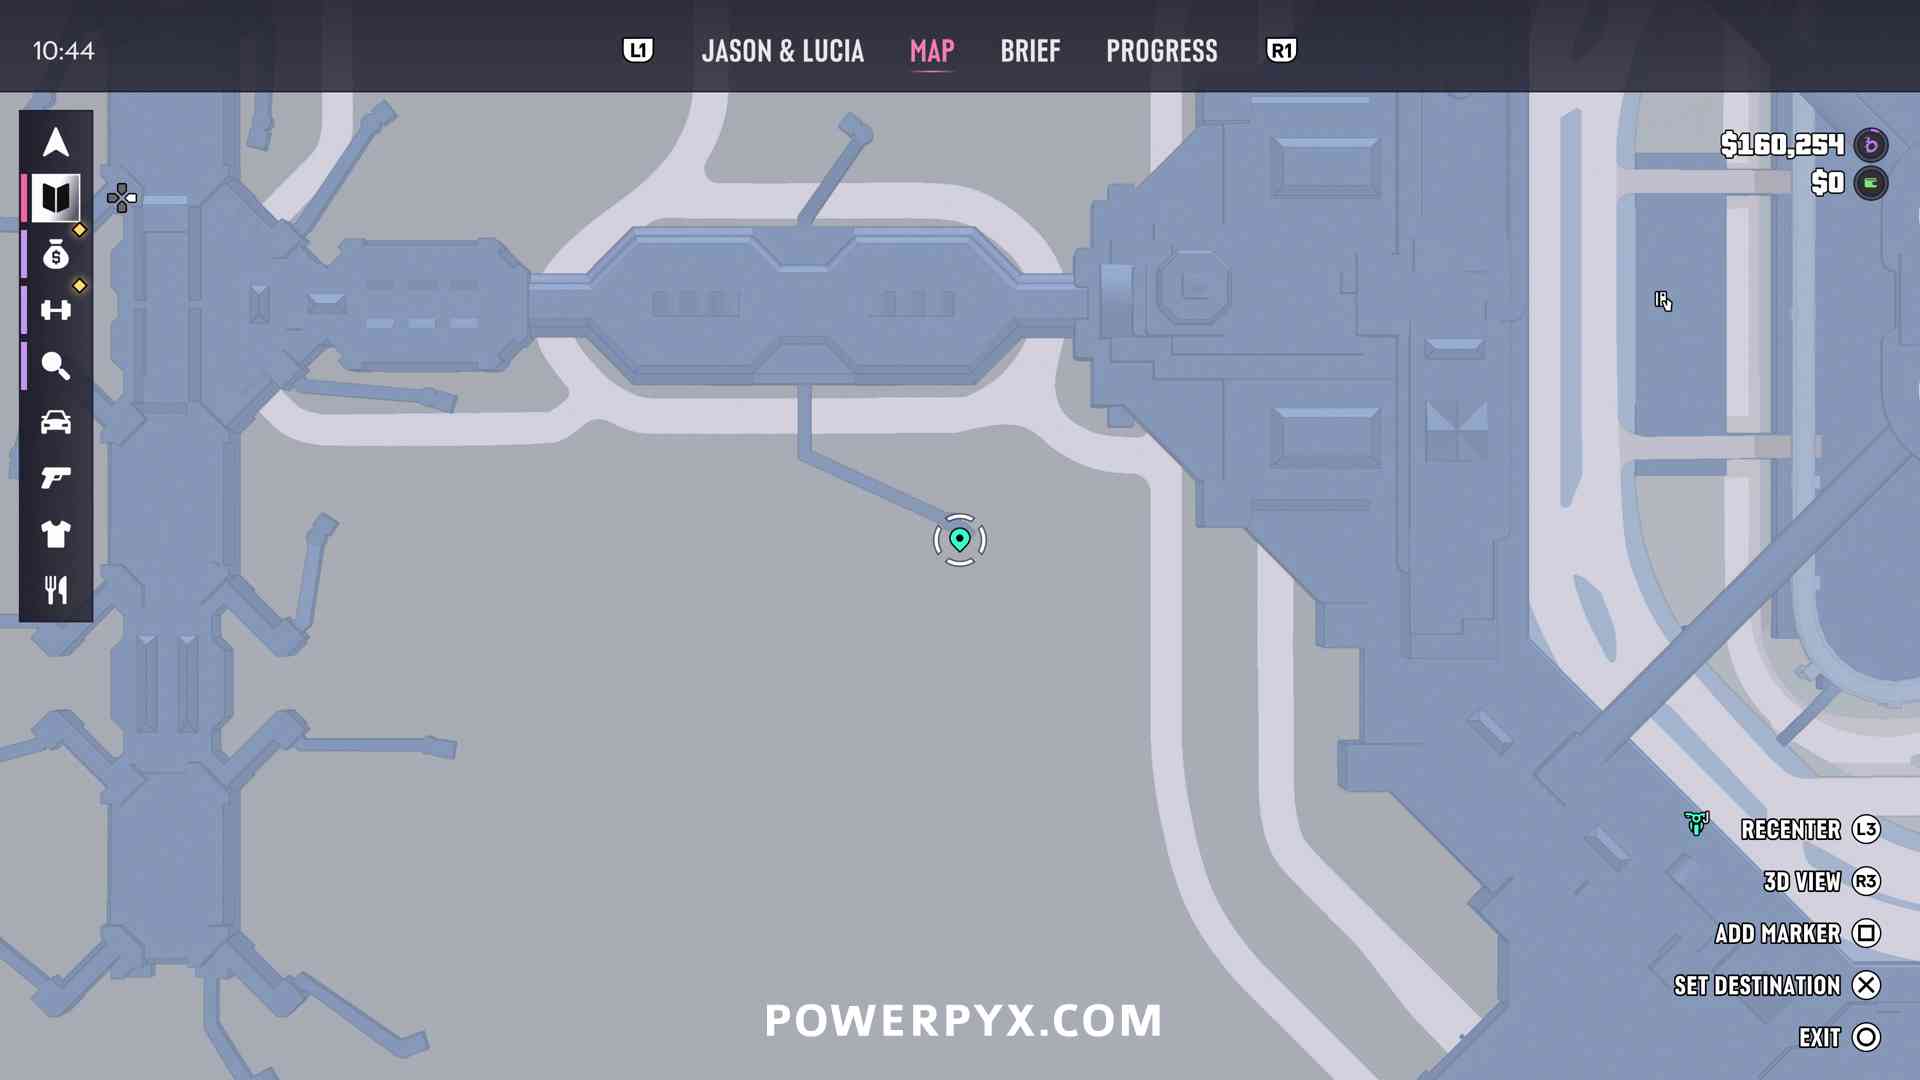
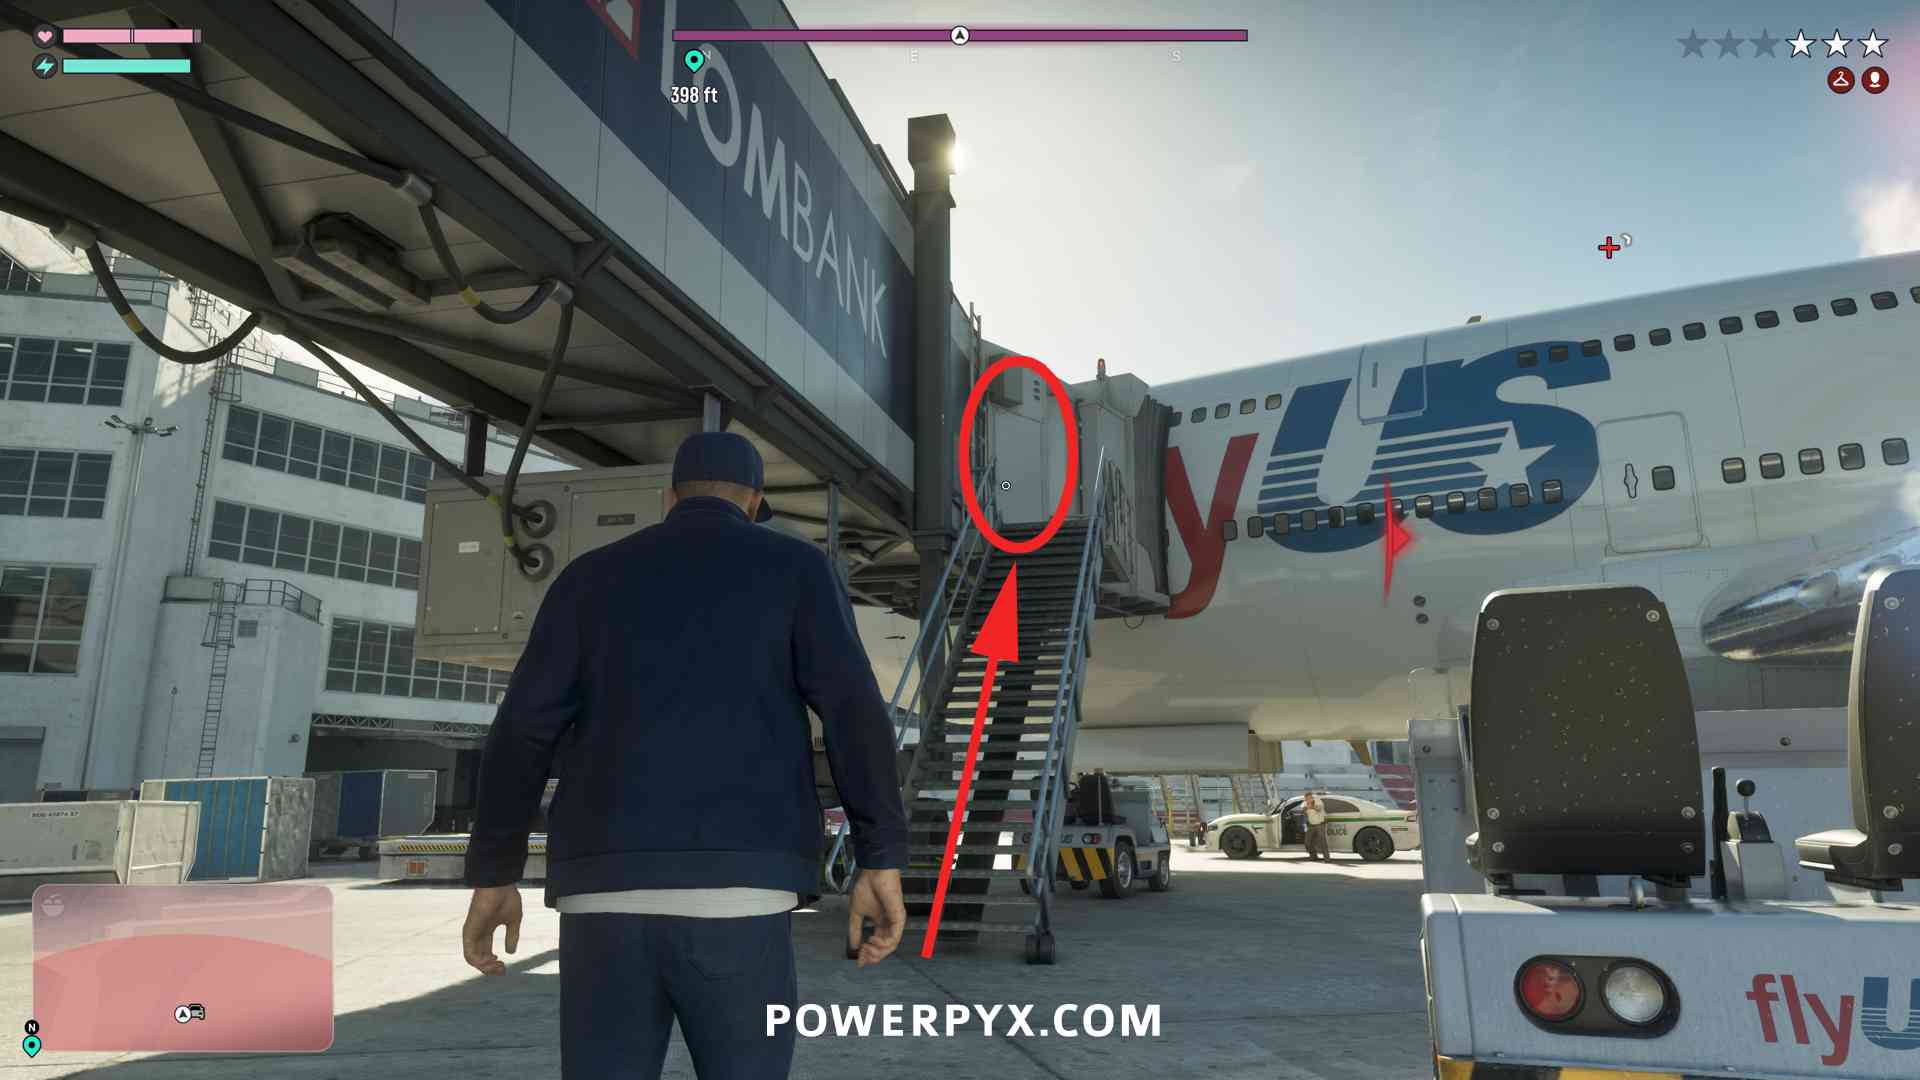
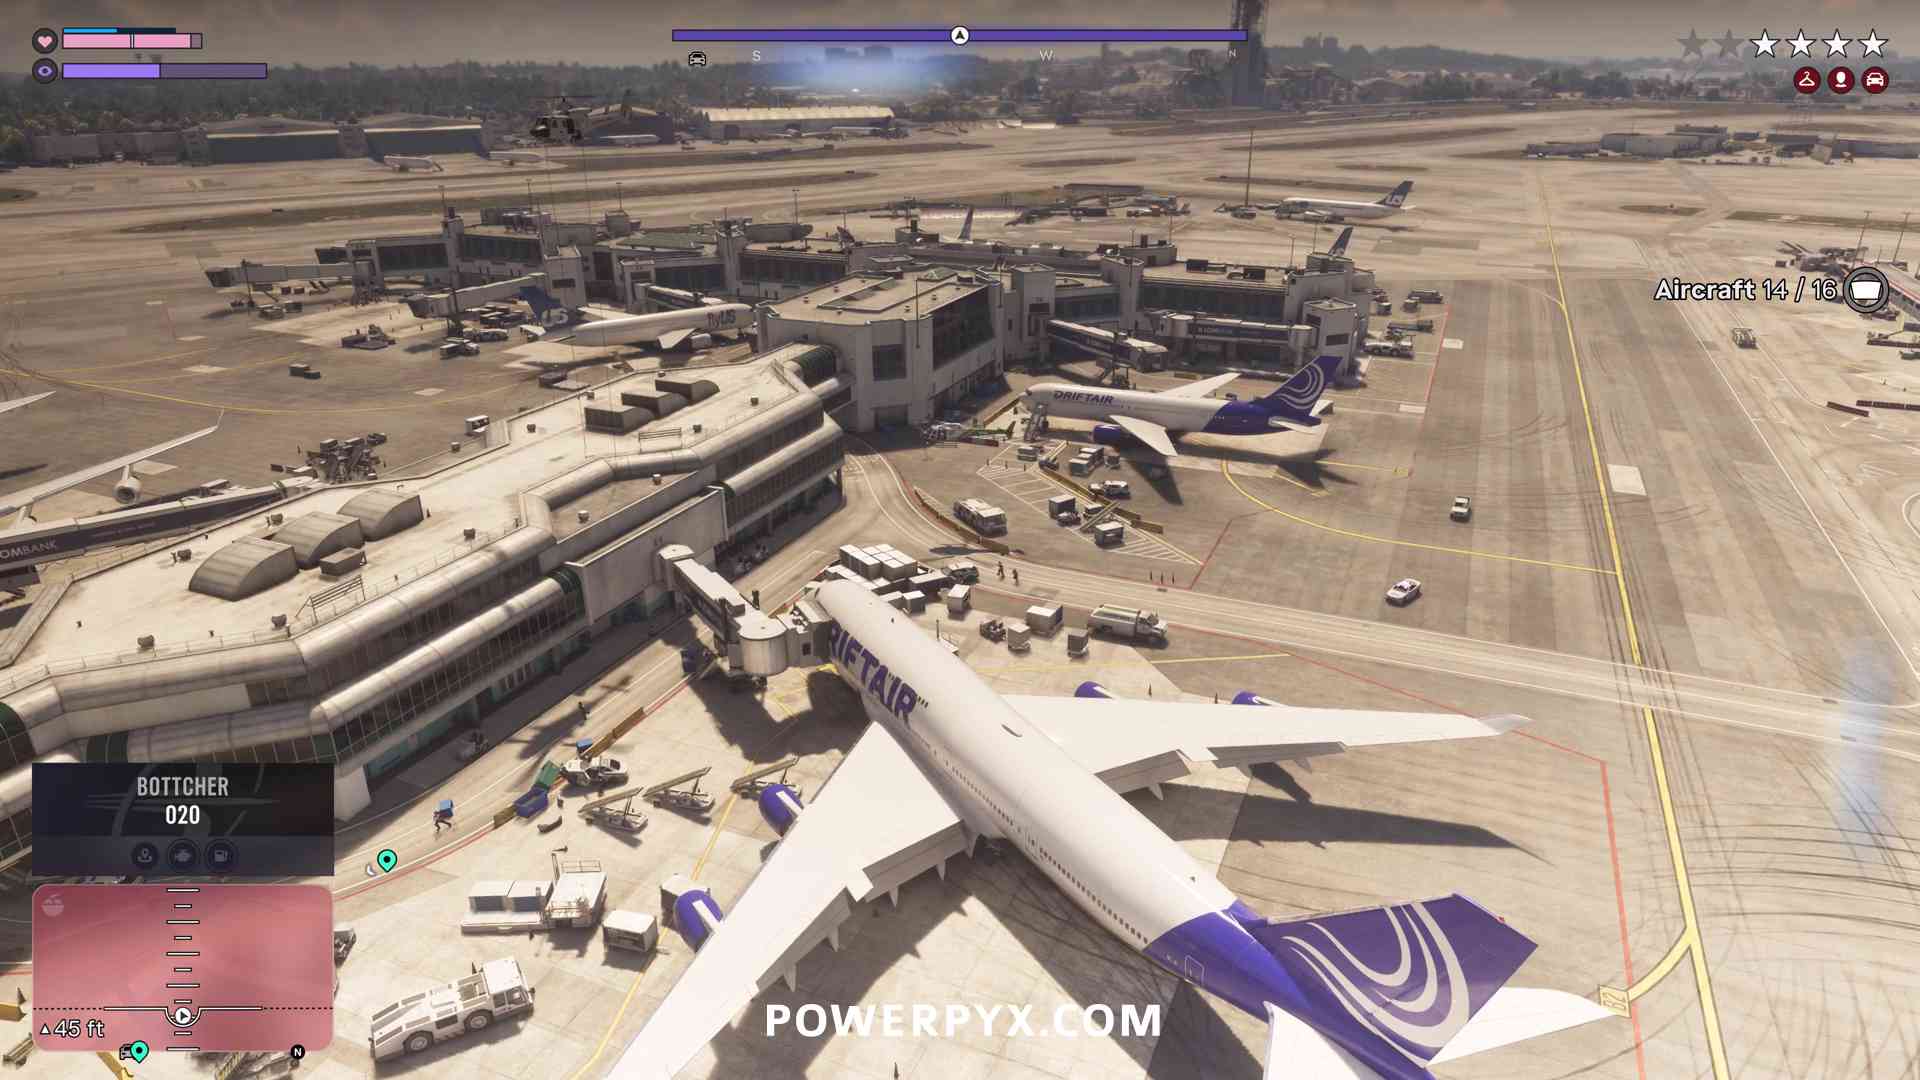
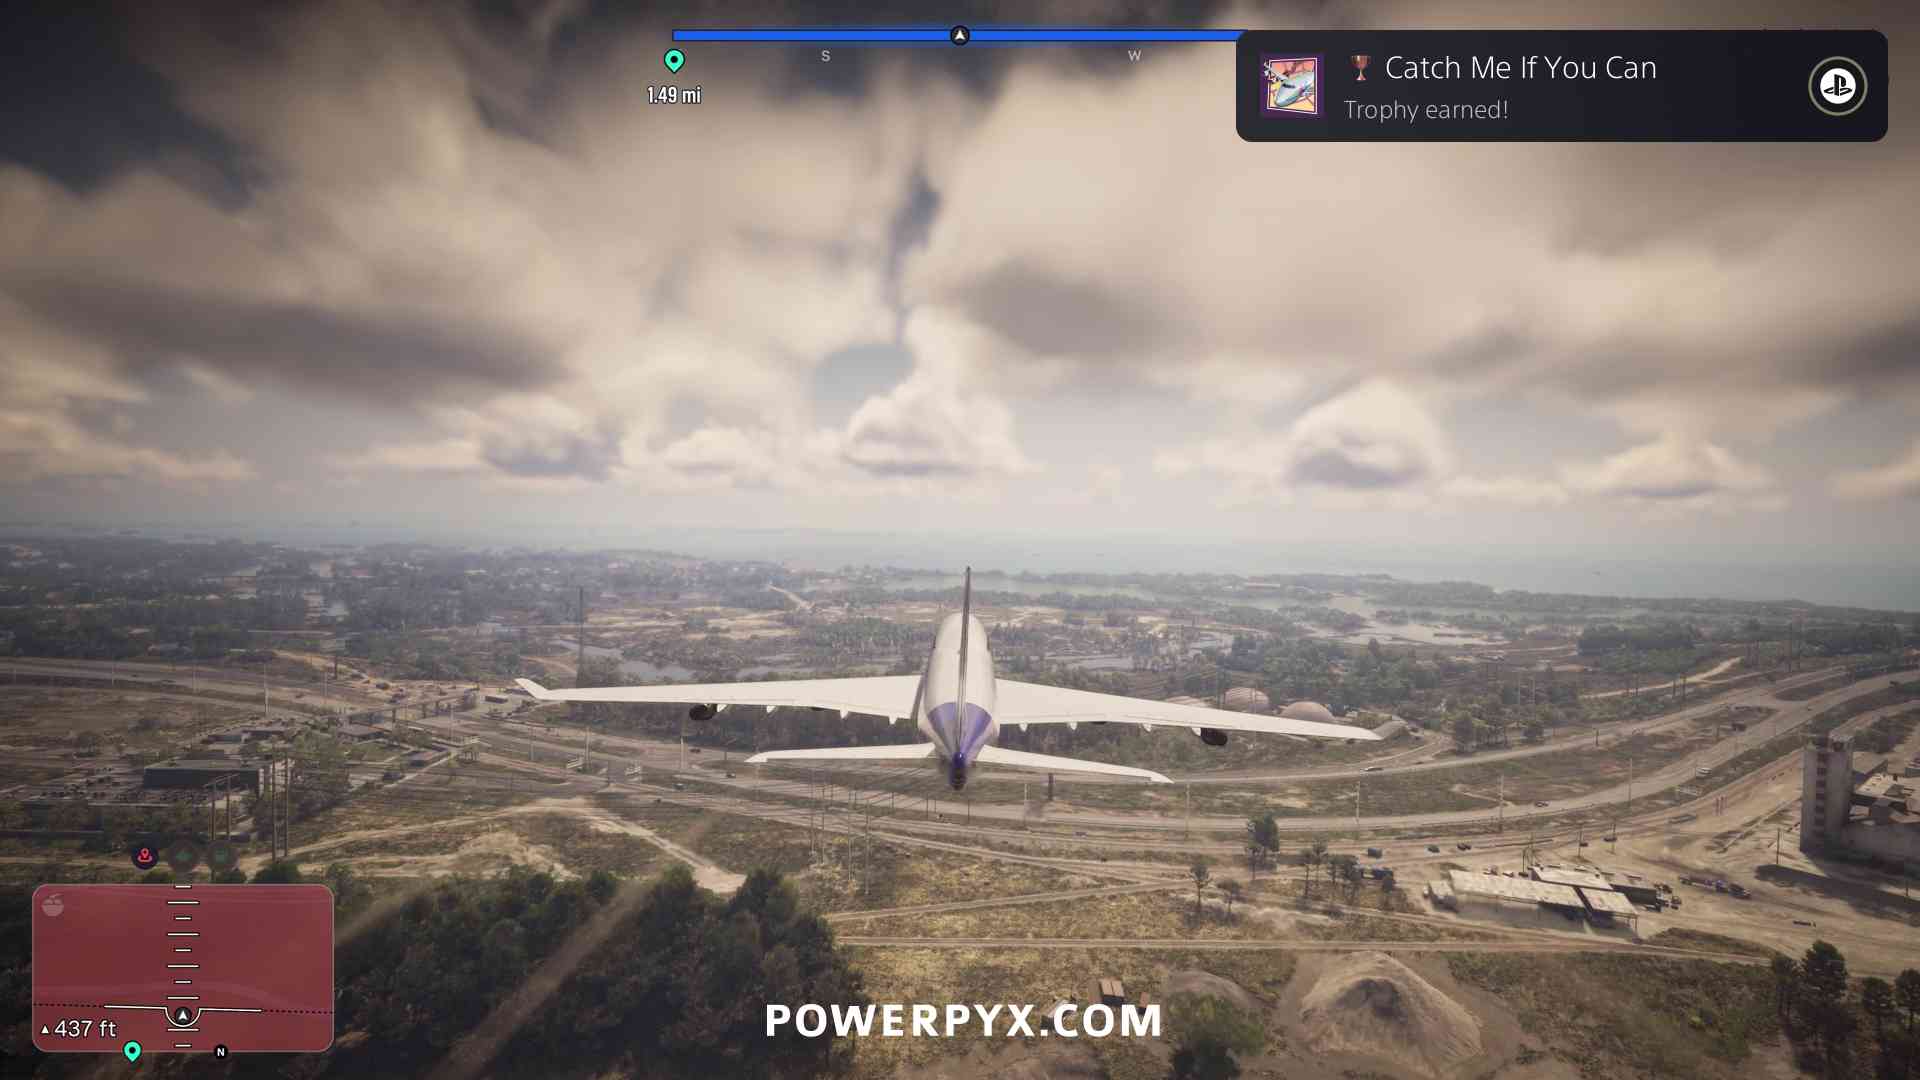
The trophy unlock is a bit delayed, you must fly 1km (0.6 miles) away from the airport. You can also enter the plane by going through the airport terminal on foot, you’ll find it docked to departure terminal E3/E4. Going over the airfield is faster though.
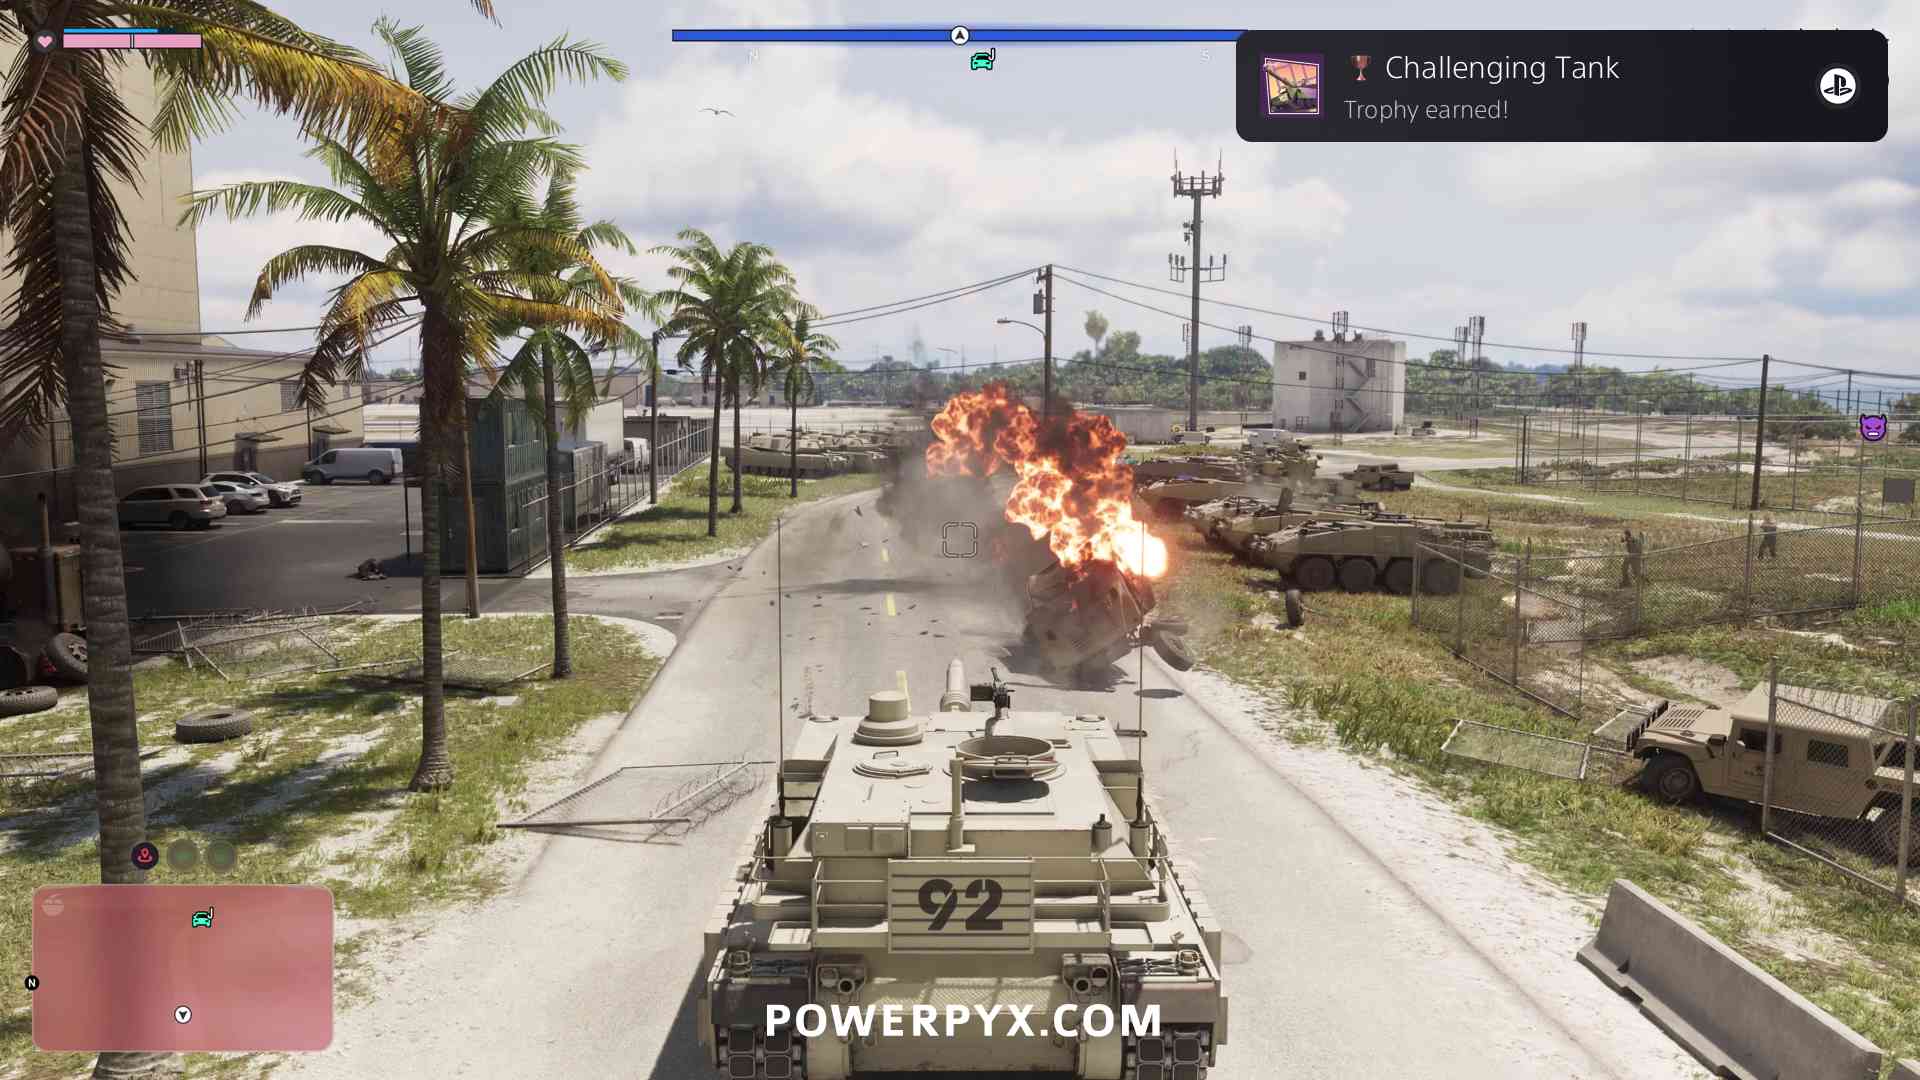
Challenging Tank
Kinda hot in these Rhinos.
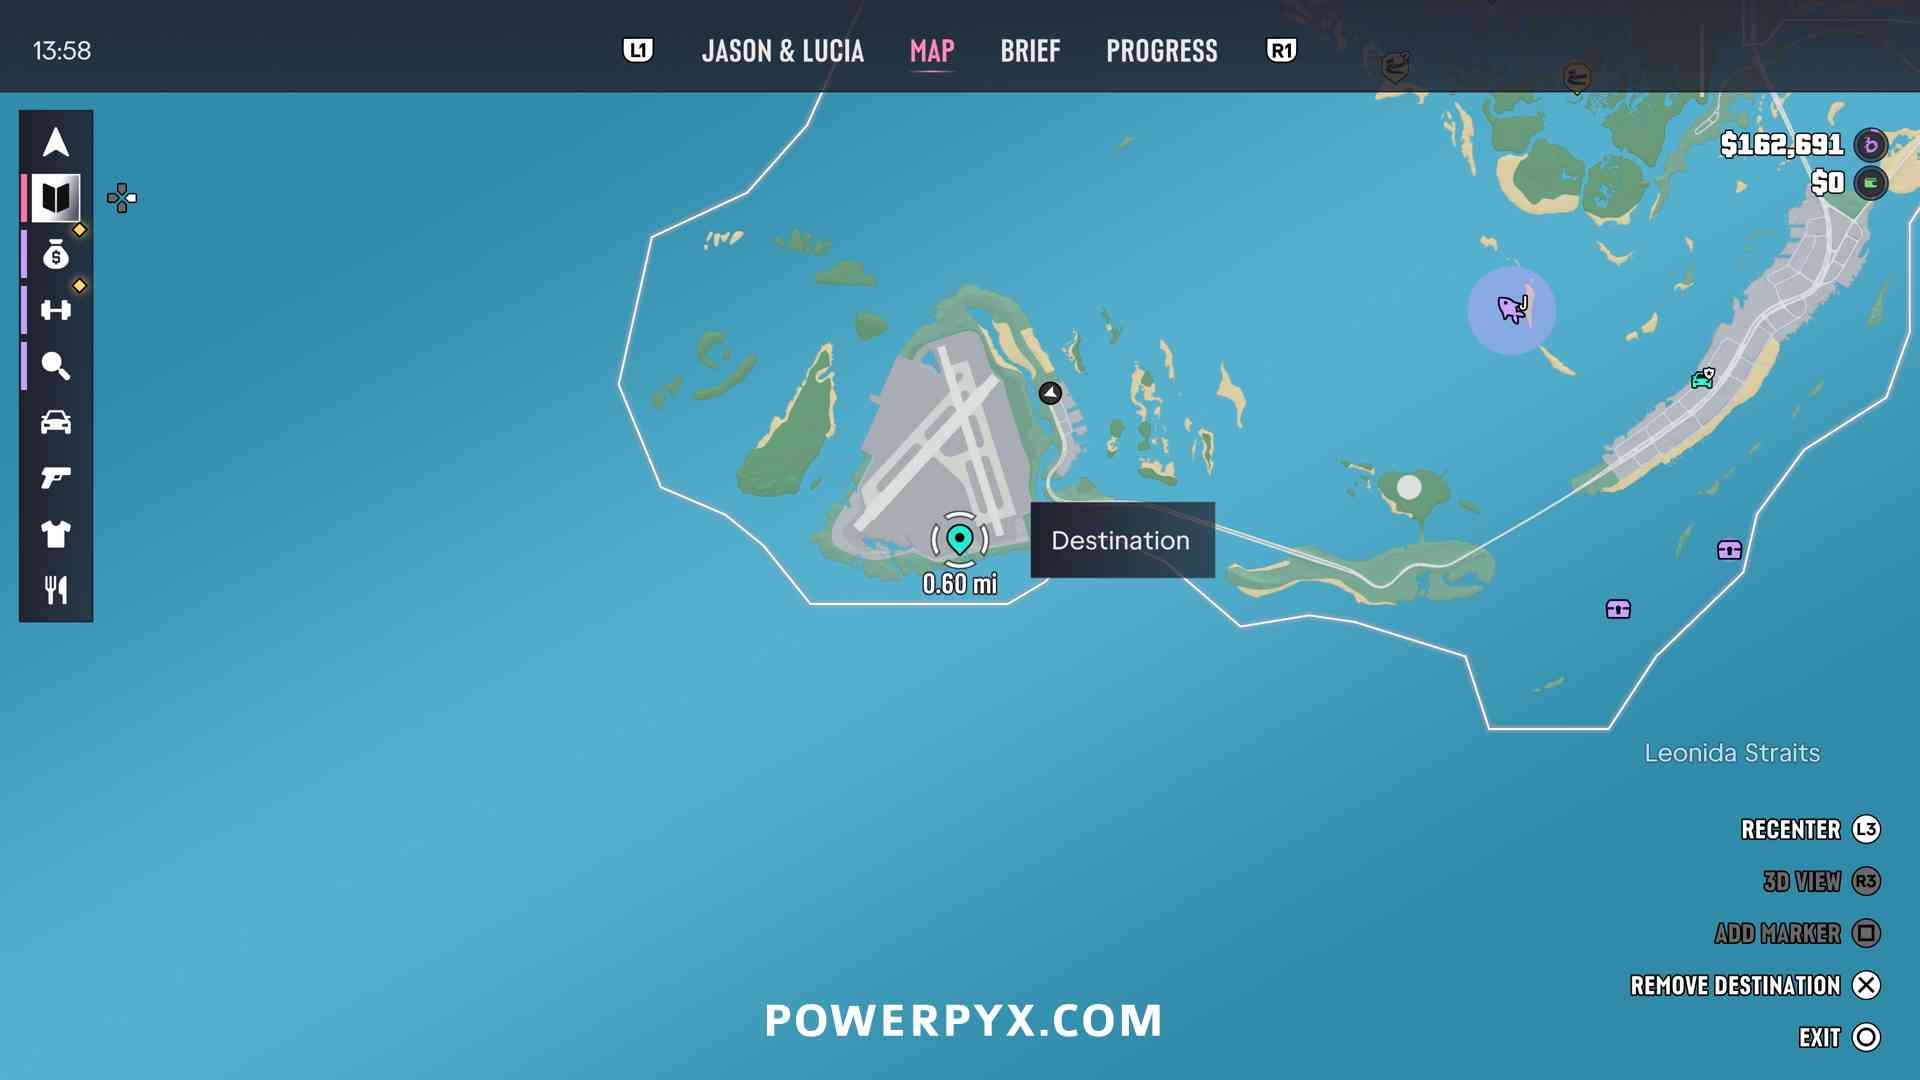
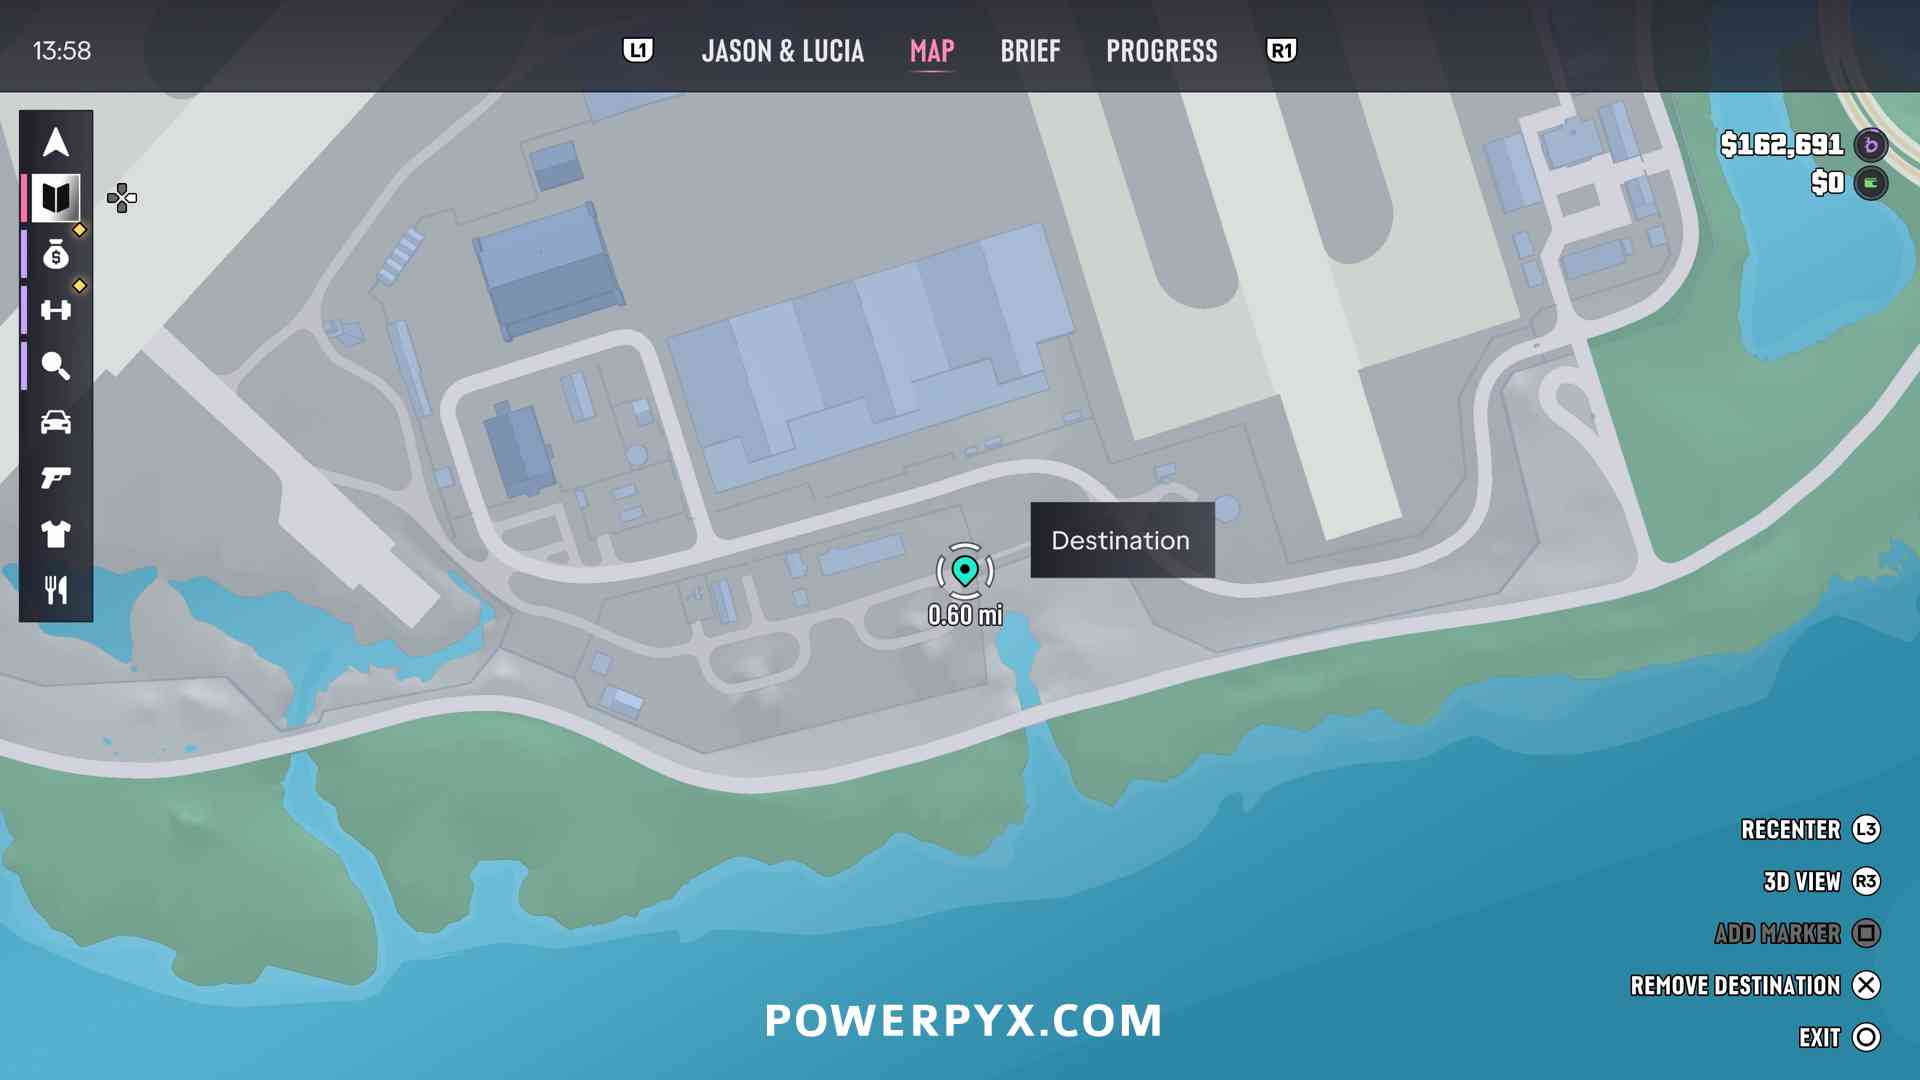
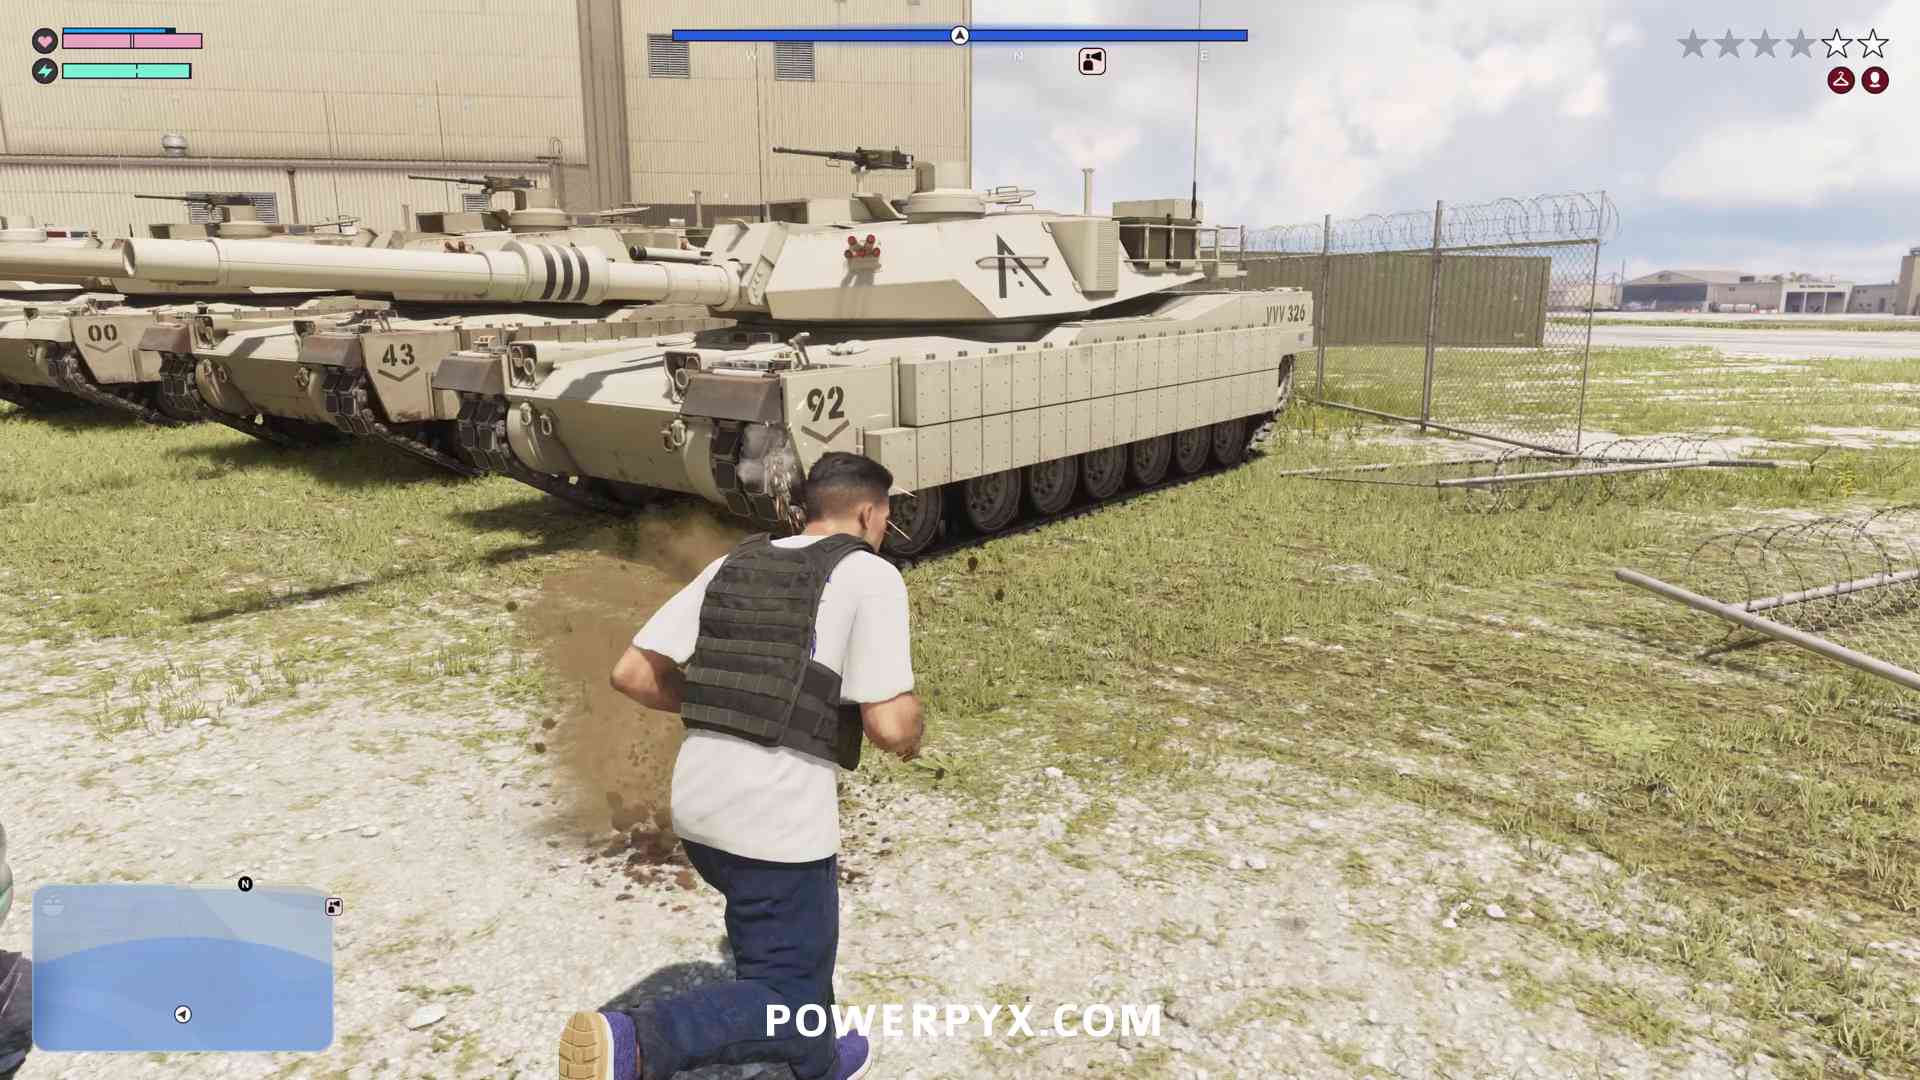
This is unlocked by stealing a military tank. You find these at Mile Zero Air Station, the island in the south-west edge of the map in Mariana County. The tanks stand in the south of the air base. Just drive through the gate or do the stunt jump next to the south-east entrance. Enter a tank and shoot some enemies until the trophy unlocks.
Sneakthief
Rob a jewelry store without being detected.
First, finish Chapter 3 – Main Mission: Yasmani’s Jewelry Jobs. This unlocks the “Snap Gun” to silently lockpick alarmed doors. The same quest also unlocks  Jewelry Store Robberies. They get marked automatically in unfogged map areas with a green icon.
You now need to break into a jewelry store through the backdoor using the Snap Gun. This gadget permanently remains in your inventory, you don’t need to equip it. When you approach a locked door you will get the prompt to kick the door (triggers alarm) or use the Snap Gun for the stealth approach. Enter the backroom, look for a note with the safe code, and use the code to loot the safe.
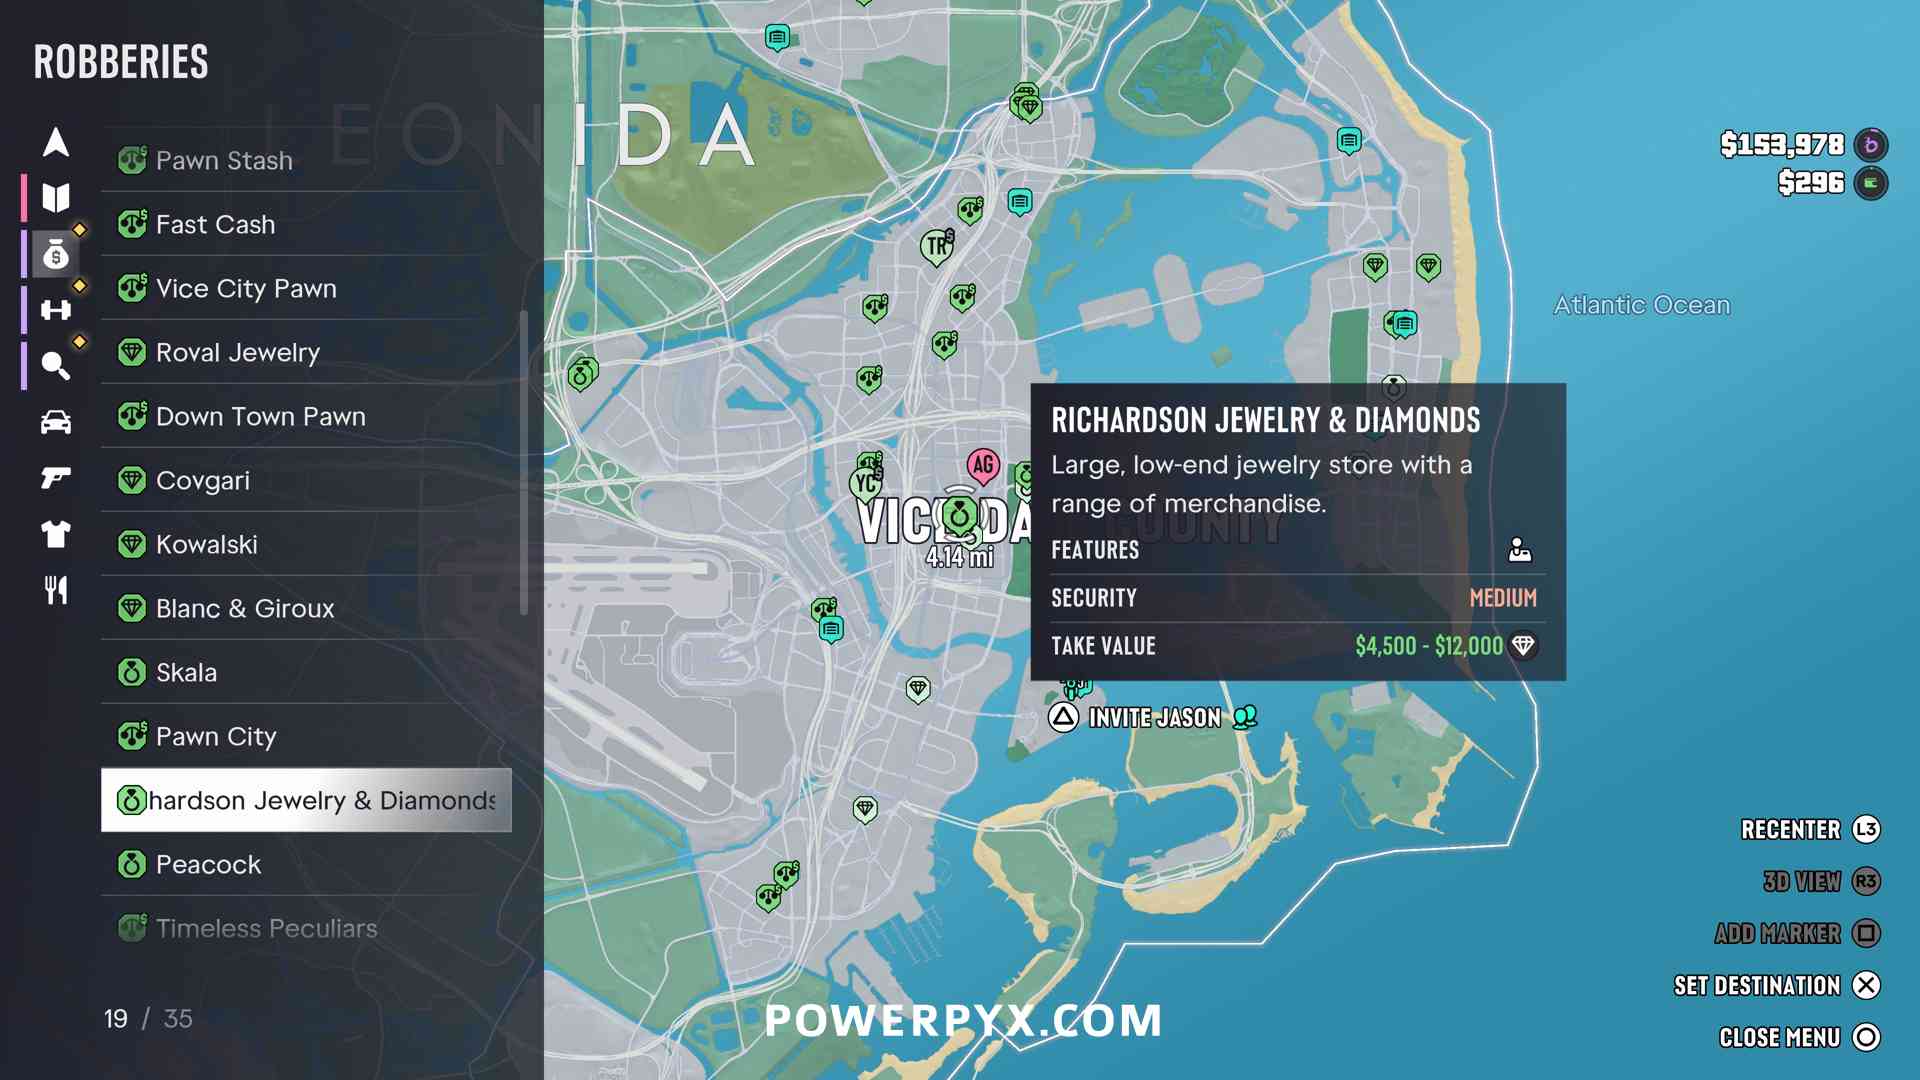
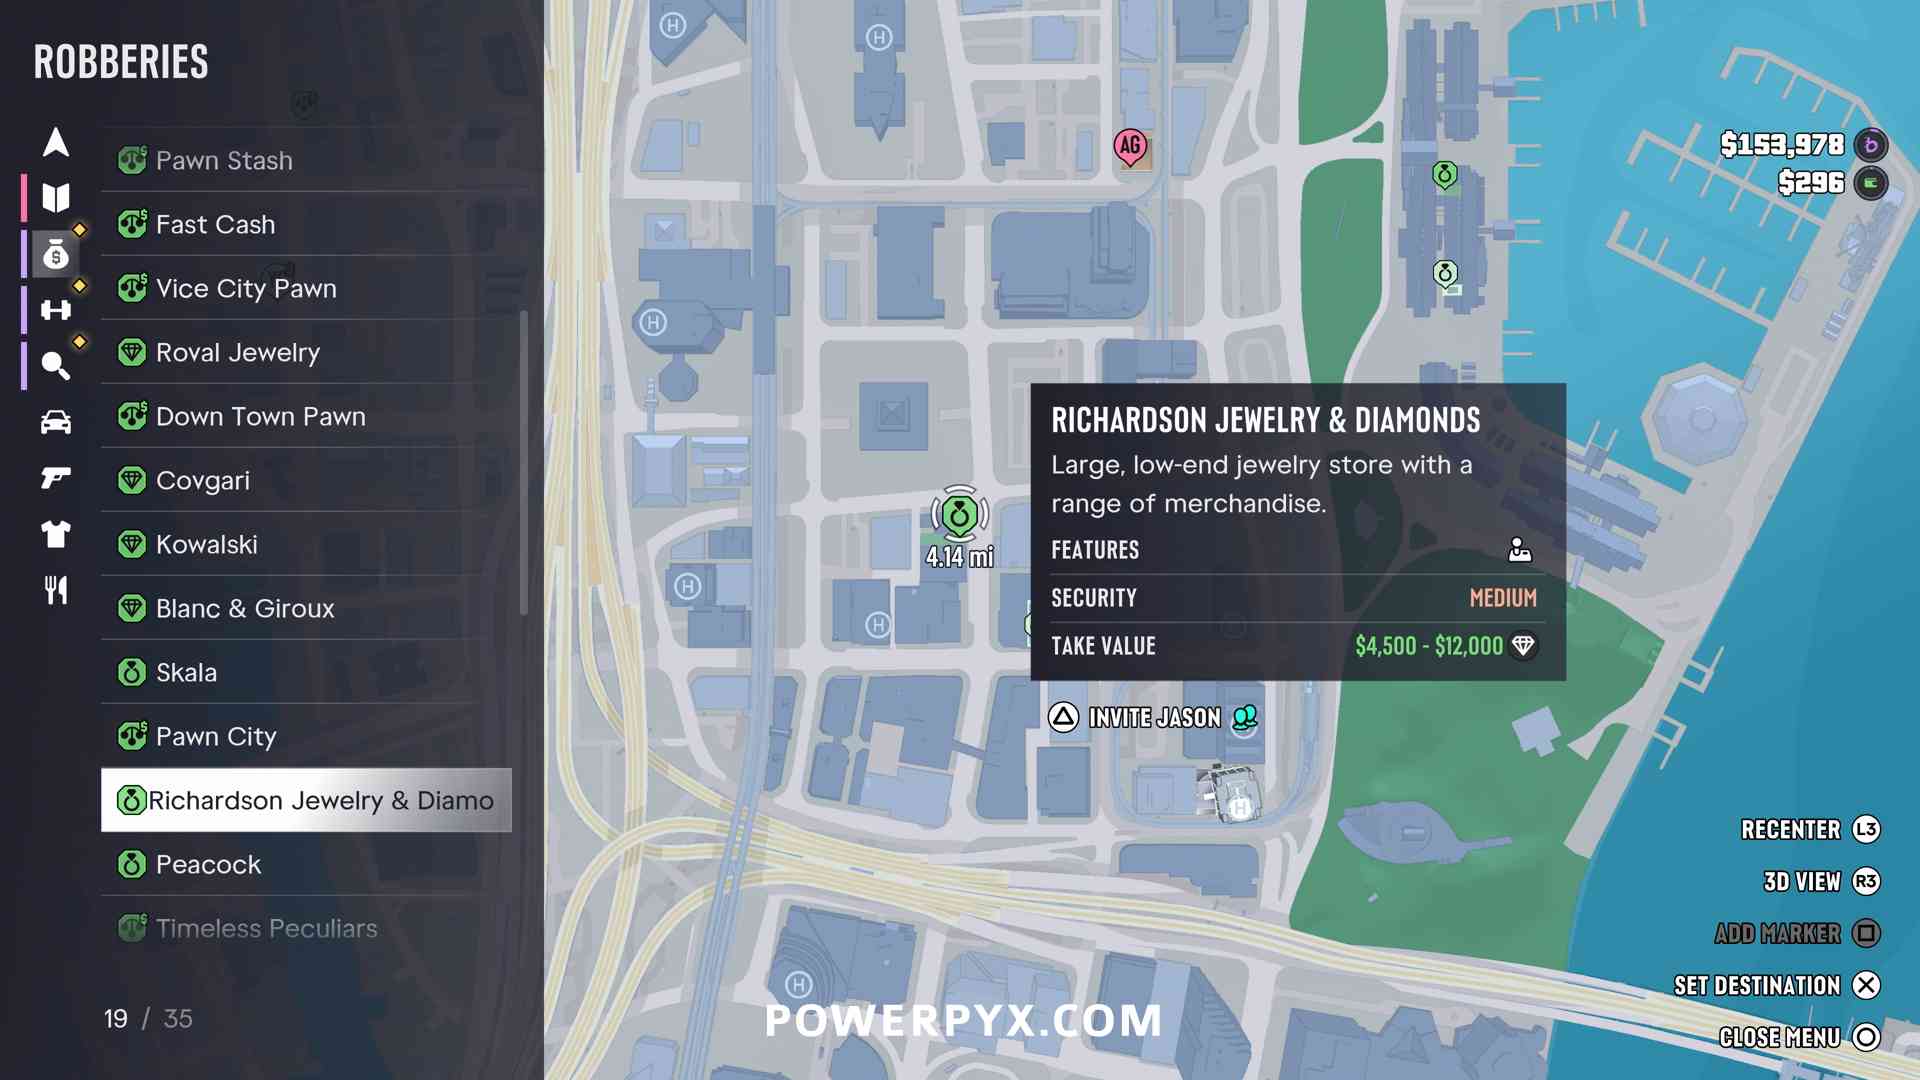
A good location for this is Richardson Jewelry & Diamonds in Vice City:
Maximum Withdrawal
Rob 5 Bank Vaults and escape.
First, you must finish Chapter 4 – Optional Mission: That’s Where The Money Is… (Wait at the Cafe). It automatically gets marked on the map from story progress. This mission is an introduction to bank vault robberies. You’ll do the first one automatically as part of the mission. You must tail a security van until it stops at a bank, then a guard carries a briefcase with cash into the bank and they open the vault. Quickly go in while the vault is open and rob it. You can’t carry all the cash yourself, must bring your partner and hold to hand off one bag.
After this quest you can pay Yasmani (the fence unlocked from in Chapter 3) for tips about security vans. If you haven’t done Yasmani’s previous quests yet, you must do those first (robbing 2 Payday Loans), then he sells tips about security vans for $10,000. This marks the security vans with a purple icon, follow them to the bank. Robbing bank vaults instantly gives a 4-star wanted level. Use a fast motorcycle to cut through traffic to get away from the cops. Then switch to another vehicle to become unrecognizable.
There are  8 Large Bank Jobs total. For this trophy you only need any 5, but for the 100% Checklist you need all 8, so will earn this automatically. When you scroll over their map icon it shows which vaults you’ve robbed. This is also the best way to make money in the endgame, you get up to $205,000 per bank.
» GTA 6 All 8 Bank Vault Locations
A Classic Blitz Play
Rob an Armored Truck and escape.
This is automatically unlocked in Chapter 4 – Optional Mission: That’s Where The Money Is… (Wait at the Cafe). It automatically gets marked on the map from story progress. That’s the same mission that unlocks Bank Vault robberies. Robbing the vault of a large bank automatically counts as robbing an armored truck. You tail the armored truck to the bank, then the guard carries the cash to the vault, quickly enter the vault to steal all the cash and escape the red heat radius or use a Pay ‘n’ Spray. You have to rob all 8 Large Bank Jobs for the 100% Checklist, so will get this automatically.
There’s also a method to get the trophy earlier: you can see armored trucks driving around Vice City near banks. Block their path, plant a sticky bomb on their back door and blow it up. The trophy unlocks only after escaping the red “heat” radius. You can find sticky bombs in the back of Yasmani’s shop after doing his quests (Yasmani’s Jobs). You unlock Yasmani automatically as a Fence from Chapter 3 – Yasmani’s Jewelry Jobs.
The Goodtime State
Explore all of Leonida.
For this you need to fully unfog the whole map. This is best done using a plane. Fly over all the areas with black fog on the map until the entire map becomes visible.
» GTA 6 How to Unfog the Map Fast (Best Plane)
Pest Control
Rob an Illegal Operation belonging to each gang.
There are 9 Gangs and 39 Illegal Gang Operations. For this trophy you only need to complete 1 operation belonging to each gang, but for the 100% Checklist you will need all 39, so will unlock this automatically. They get marked by yellow icons on the map when going near them. Many also get marked automatically from story progress. You can keep track under Progress > Gangs > scroll over a gang, in the bottom right it shows how many of their operations you robbed.
» GTA 6 All Illegal Gang Operation Locations
In The Beginning…
Enjoy a cocktail with a view on Ocean Beach.
This trophy is currently unknown.
Capital Offense
Smash your way out of a vehicle showroom in classic style.
This trophy is currently unknown.
Let’s Go Bowling
Follow-through at the Kolt & Associates’ bowling alley.
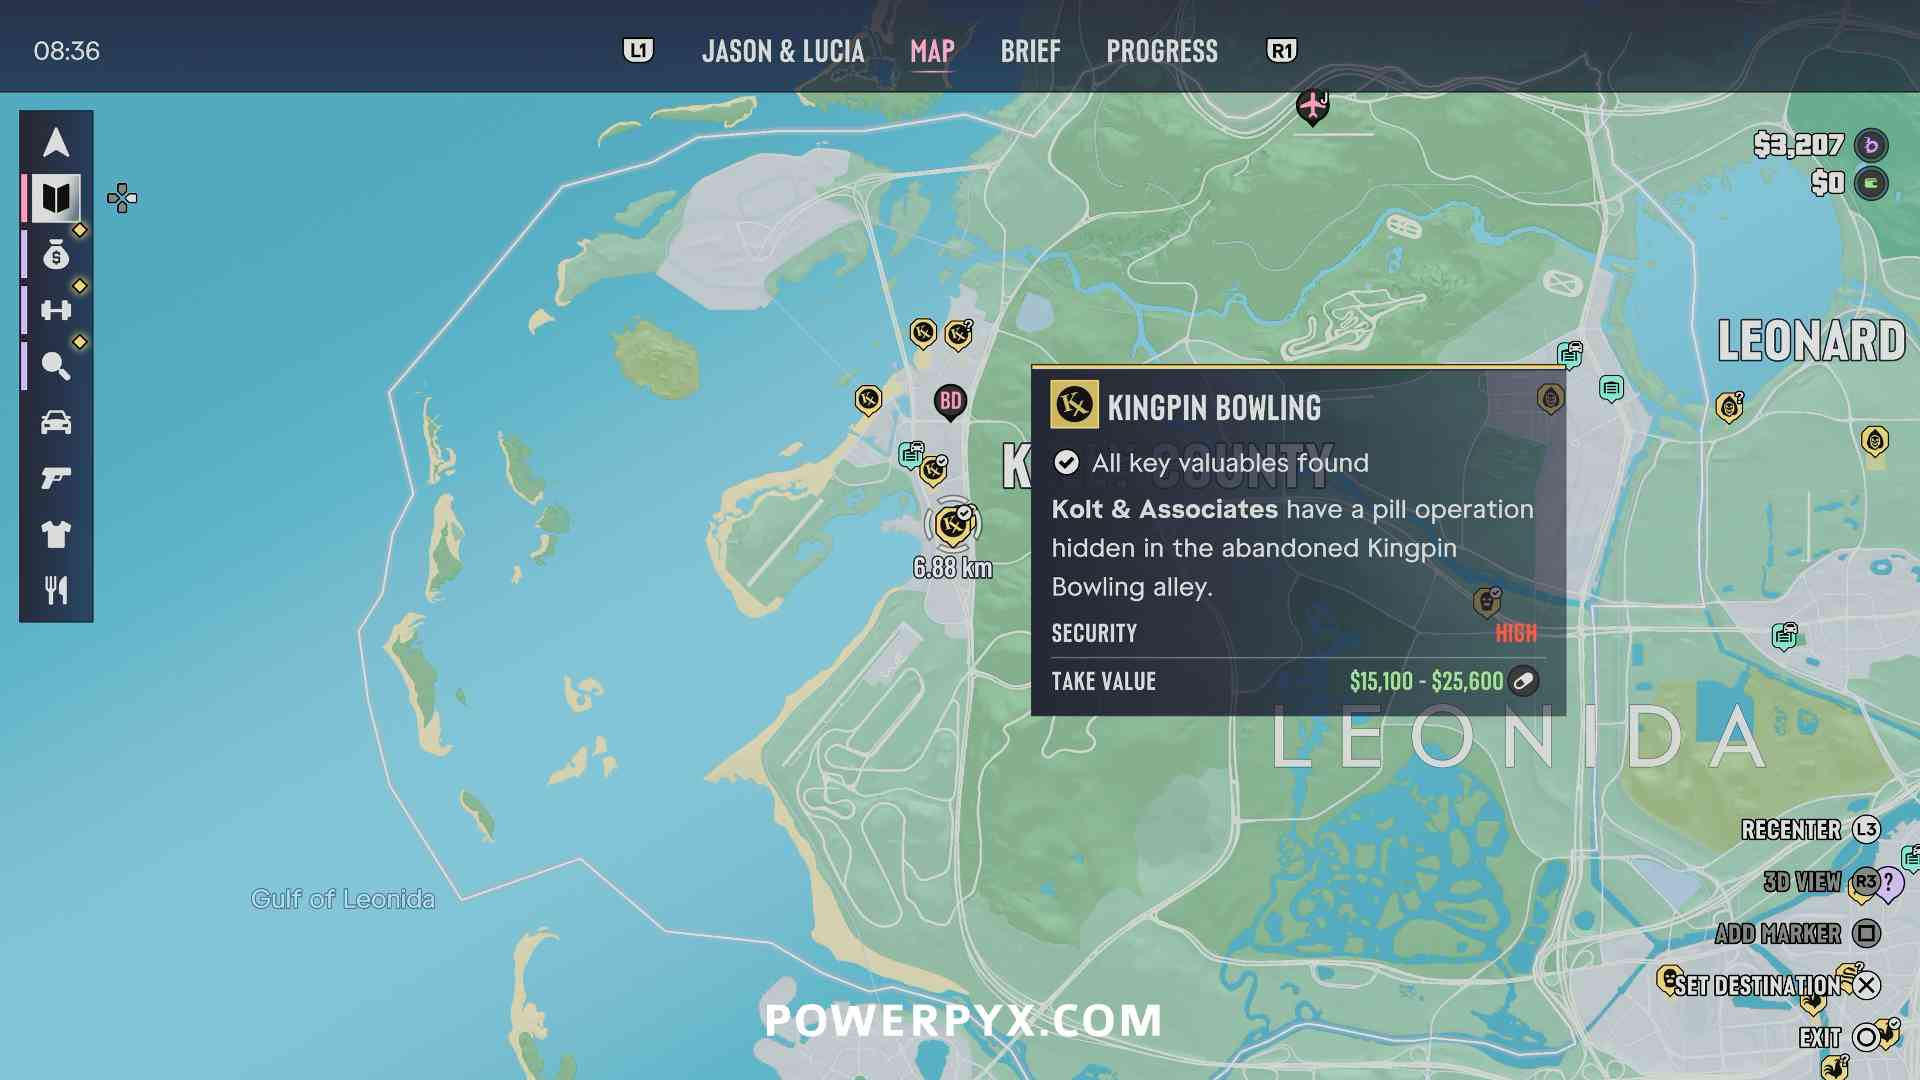
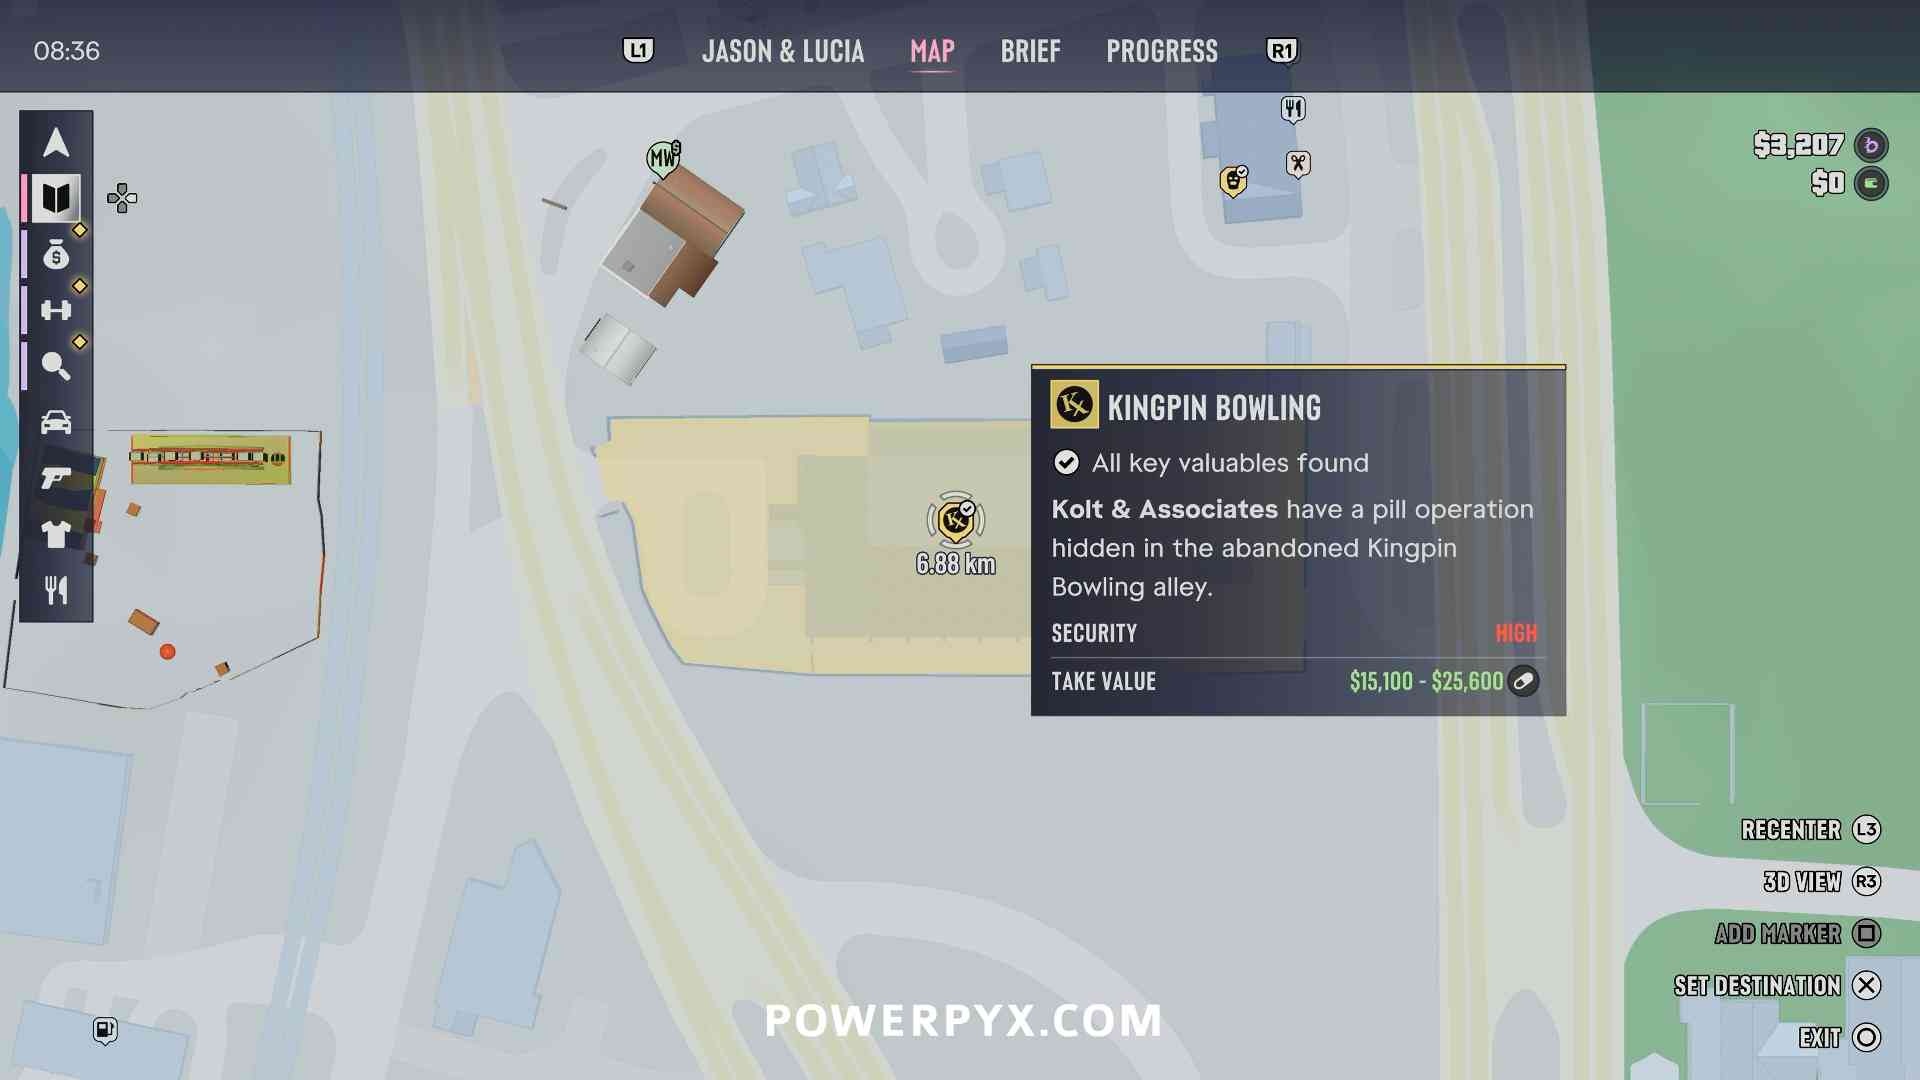
This is unlocked by stealing all 3 key valuables at Kingpin Bowling, one of the Gang Operations in Port Gellhorn. Before going there, buy Sticky Bombs from an Ammu-Nations, you need them to destroy the safe. You go there during Chapter 2 – Optional Mission: Hit Kingpin Bowling, it gets marked automatically during Chapter 2.
Inside the bowling alley you must pick up the 3 key valuables:
- The Luxury watch found in the office in the south-east office (it has a golden icon)
- The unique shotgun variant “Gutterball Moreland 850”, on the table in the north-east corner (it has a golden icon)
- Loot the safe in the office in the north-east hallway. You can blow it up using Sticky Bombs.
The trophy will unlock after you escape the police, not immediately when picking up the third item. Killing the enemies isn’t necessary for the trophy.
If you don’t rob all 3 items during the optional mission, you can wait until the robbery icon respawns (takes a long time), then go there again and just steal the remaining key valuables. So the trophy isn’t missable. You don’t need to steal all 3 key valuables in one go. For example, if you found 2 during the optional mission and then go back later to blow up the safe you’ll still get the trophy.
Personal Best
A partnership with mass appeal.
This is unlocked by having maximum strength with both characters Jason & Lucia at the same time. You can check your strength level via Touchpad > Jason & Lucia (select character) > scroll down to “Strength” (heart icon). You can only start doing this after Chapter 2 – Main Mission: Coffee Break, that’s when you can switch between both characters.
You increase strength by working out. You can buy a membership at a fitness club. Make sure you always go together with both characters (hold and press to call your partner). While you actively work out with one character, the other automatically completes their training. So you make double the progress. You can filter for fitness clubs on Map > Activities (dumbbell icon). There are lots of them all over Vice City. You can also work out at home after the story.
Actions Speak Louder
Choices made (for better or worse).
For this you need to perform 500 actions that affect your criminal profile. You can view how many of 500 you did by clicking the trophy in the trophy list. It’s recommended to turn on Criminal Profile notifications in the UI settings (Settings > UI > HUD Notifications > Criminal Profile = On). Whenever you do something that affects your reputation, you will see a little demon face on the right side of the screen.
 Professional – finishing objectives and robberies stealthily, destroying evidence, doing clean escapes from robberies
 Hardened – incapacitating enemies but not killing them (shooting them in limbs)
 Violent – killing enemies and civilians
 Psycho – killing large numbers of cops and civilians or driving over gravestones
 Irredeemable – a permanent status if you keep using excessive violence
There’s a good chance you’ll get this naturally while working on all other trophies and the 100% Checklist. It will happen passively, so don’t even worry about this. Every robbery and enemy encounter counts toward this. Should you still not have it when you’re done with all other trophies, you can farm it quickly by running over civilians and cops wth a car. Note that cops are more likely to shoot at you on sight when you are at psycho or irredeemable profile.
Bad Luck, I Guess
Second time’s the charm.
This trophy is currently unknown.
The Truth Is Out There
What the hell just happened?
This trophy is currently unknown.
Ten Pin
Bowl ’em over with a melee drive-by.
This trophy is currently unknown.
Dime on the Dollar
Earn $250,000 laundering Marked Bills through your contacts.
First, you must finish Chapter 3 – Main Mission: Credit Check (Meet Raul’s Crew), this unlocks the Dye Pack Jammer to launder marked bills. Then you can rob Banks and  Payday Loans and bring the marked bills to a Fence (Yasmani in Vice City pays the most).
You need to deliver a total of $250,000 in marked bills to Fence. This counts across all robberies, you don’t need to bring $250,000 at once. This will come naturally while you do all robberies for the 100% Checklist. The Bank Vaults give up to $205,000 in a single robbery within a few minutes, but those are only unlocked after Chapter 4 – Optional Mission: That’s Where The Money Is….
Treat Yo Self
Spend $100,000 across all shops.
Simply spend a total of $100,000 across all types of shops. Buying guns, car mods, and tattoos is the fastest method as these are the most expensive.
 14 Mod Shops
 19 Pay ‘n’ Sprays
- 24 Ammu-Nations (Gun Stores)
 67 Clothing Stores
 17 Footwear Stores
 18 Hair & Beauty Salons
 11 Tattoo Studios
 15 Electronics Stores
Little Boxes
Purchase all garage properties.
There are 8 purchasable garages and 4 story-related garages. For this trophy you only need the 8 purchasable garages. They cost a total of $160,000. Garages become available for purchase after Chapter 2 – Main Mission: Daily Driver (Steal the Crawler for Moses). You will receive a notification that a new app has been installed on your phone, called Vice City Real Estate. You simply buy the garages through the phone app. A quick way to make money is to do robberies, especially later in Chapters 3-4 when you unlock higher-value robberies.
» GTA 6 All 12 Garage Locations
On the Spot
Register 10 vehicles to the Scooter Bros app.
The Scooter Bros app is installed on your phone after Chapter 2 – Main Mission: Moses (Take A Vehicle to Moses). This app allows you to register stolen vehicles and have them delivered to your location wherever you are. To register 10 vehicles you must buy enough garages first (see Little Boxes). Each garage adds 1 or more parking spots to register more vehicles. Then drive stolen vehicles to Moses in Port Gellhorn, in his garage click “Respray” and “Register”. You unlock Moses from the same mission that unlocks the Scooter Bros app. Initially, he only accepts vehicles without trackers. Later in Chapter 3 you can also register cars with Standard Trackers and register them at any Pay ‘n’ Spray. Registering the vehicles costs money. If you want to keep expenses low, go for cheap low-end cars and bikes.
PowerPyx says
One of the best games ever made! Enjoy 🙂