
Onimusha Way of the Sword Trophy Roadmap
- Estimated trophy difficulty: 6.5/10
- Approximate amount of time to platinum: 60-70 hours
- Offline Trophies: 52 (1
 , 2
, 2 , 9
, 9 , 40
, 40 )
) - Online Trophies: 0
- Number of missable trophies: 0 (after story you can click “Continue” in main menu and it puts you back before final mission, can clean up everything from there)
- Glitched trophies: 0
- Does difficulty affect trophies?: Yes, must beat game on highest difficulty “Carnage” (unlocks after first playthrough in New Game+), and must beat all bosses in Boss Rematch arena on Carnage difficulty.
- Hardest Trophy: Glutton for Punishment, True Onimusha
- Minimum Playthroughs: 2 (one playthrough to unlock Carnage difficulty, followed by New Game+ on Carnage difficulty)
- PS4/PS5 Autopop, Save Transfer, Crossbuy: No, game doesn’t have a PS4 version
- Free-Roam / Level Select after Story?: There is free-roam up until the final mission “The Clash At Rendaino”, you can clean up all collectibles and side content before the final mission
- New Game+ Mode?: Yes and it’s needed for Carnage difficulty
- Supports Manual Saves?: Yes (1 Autosave Slot, 20 Manual Save Slots)
- Release Date: September 04, 2026
 , 2
, 2 )
)Introduction
Welcome to the Onimusha Way of the Sword Trophy Guide! To earn the Platinum on Onimusha: Way of the Sword, you will need 100% game completion, which means all collectibles and upgrades. You will also need at least two playthroughs, because Carnage difficulty isn’t available from the start and can only be done in New Game+ after beating the game once. Overall the trophies aren’t too complicated, just play till the final mission, clean up all collectibles from there, then beat New Game+ followed by the Boss Rematch mode.
Step 1: Complete the game on Action Difficulty up to the final mission “The Clash At Rendaino”
At the start you can pick between two difficulties “Story” (Easy) or “Action” (Medium). It’s recommended to start on Action difficulty to practice for Carnage difficulty, which unlocks after the first playthrough.
Play the game however you like until you reach the final mission “The Clash At Rendaino”. There is a Point of No Return prompt when trying to start the mission and you will have no free roam anymore. Nothing is missable up to this point, everything can still be accessed. After completing the final mission you will be brought back to this point.
Until this point try to save all the citizens you can and explore as thoroughly as possible. Prioritize buying the three skills Oni Vision: Treasures, Oni Vision: Treasures 2, and Oni Vision: Search Range. Together, these three Special Skills make it far easier to track down every collectible in the game. While exploring, get into the habit of holding  and repeatedly pressing
  so nothing of value slips past you.
Try not to use items you find such as Revival Mirrors on your first playthrough. These items will carry over to NG+ and will be more useful on that difficulty.
Step 2: Collectible Cleanup & Upgrades before Final Mission
Once you have completed the Main Story Missions do all remaining side quests, collectibles, and clean up any combat-related trophies that you may be missing at the bottom of the list. You can find items to trade for favor all over so make sure you pick up any items you find along the way.
Collectibles:
- 8 Mysteries of Kyoto – Demystified
- 18 Chance Encounters – No Job Too Small
- 36 Lion Dogs – For the Love of Dog
- 7 Oni Armaments – Oni Armory
- 9 Hozuki Pouches – Medical Marvel
- 15 Charms – Charmed Life
- 23 Genma Notes – Genma-ologist
- 54 Power Stones (Skill Upgrade Materials) – Well-Rounded
- 55 Oni Stones (Skill Upgrade Materials) – Well-Rounded
- 25 Fine Silk Cloths (Equipment Upgrade Materials) – Dressed to Kill
- 25 Tamahagane (Equipment Upgrade Materials) – Dressed to Kill
- Basic & Special Skill Upgrades – Well-Rounded
- Equipment Enhancements – Dressed to Kill
Path to Upgrading:
- Manually save your game once you have 150,000 Favor, this will be enough to upgrade your Charms. You can purchase items to trade for Favor at Yorimasa’s Monument but you also need 135,000 Red Souls to fully upgrade the Charms.
- Reload your save, upgrade all of your Hozuki Pouches.
- Reload your save, upgrade any 3 Charms you want to use at the start of your next playthrough and for the final mission. Upgrade all skills and equipment as far as you can, buy any items for upgrading you may need from Yorimasa’s Monument.
Before heading into the final mission you should only need the following trophies:
- Baited by Benkei
- Truly, Thank You
- Genma-ologist
- True Onimusha
- Glutton for Punishment
- The Winding Way of the Sword
- Well-Rounded
- Dressed to Kill
Once those are the only trophies left, upgrade anything else you may want and head into the final mission.
Step 3: Complete the Game
Head into the final mission and complete the game where you will earn the following trophies:
After finishing the first playthrough you will also unlock Carnage difficulty.
Step 4: Carnage Difficulty in New Game+
After the first playthrough you start New Game+ on Carnage difficulty. Along the way complete any clean-up you may have left, otherwise just play through the story. Once completed you should only have 1 trophy left for Boss Rematch arena.
The following DOES carry over into New Game+: Awakened Oni Abilities, any enhanced basic and special Skills, Hozuki Pouches and Pouch Enhancements, Items (though not enhancement materials), Charms and Charm Enhancements, Genma Notes, Lion Dogs.
The following DOESN’T carry over into New Game+: Mysteries of Kyoto, Chance Encounters, Clothing, Sword and Gauntlet Enhancements, Red Souls, Spirit Mirror unlock progress.
» Onimusha Way of the Sword Boss Guide (Carnage Difficulty)
Step 5: Boss Rematch
Once you have completed the game on Carnage you will receive a weapon that will make this portion of the game much easier. Complete all of the available Bosses in Boss Rematch on all difficulties to finish the Platinum.
Useful Tips, Tricks and Guides:
- Boss Guide (Carnage Difficulty)
- Collectible Guide
- Mysteries of Kyoto
- Chance Encounters
- Lion Dogs
- Oni Armaments
- Hozuki Pouches
- Charms
- Genma Notes
- Power Stones (Skill Upgrade Materials)
- Oni Stones (Skill Upgrade Materials)
- Fine Silk Cloths (Equipment Upgrade Materials)
- Tamahagane (Equipment Upgrade Materials)
Onimusha Way of the Sword Trophy Guide
 |
Peerless Earn all trophies. |
 |
| Earn all other trophies in Onimusha Way of the Sword to unlock Platinum (no DLC needed). | ||
 |
Onimusha Showdown Drive off Sasaki Ganryu. |
 |
| Sasaki Ganryu is the Arrogant Swordsman you meet at the end of the tutorial. You will recognize him from earlier but this time he has a gauntlet of his own. After taking out the 2 Thread Genma head into the Kiyomizu-dera Temple where you will encounter him for this fight.
Keep parrying his attacks and punish him with up to 3 Light Attacks. Do this to break down the red bar under his health to build up an Issen attack on him. Note that if you don’t apply pressure and he stops attacking, his stamina bar will recharge. Once prompted to do an Issen Attack and select the red target to do more damage and bring him to phase 2. Once his hat is off he will start doing jumping kicks you can evade and grabs you can evade or counter. You will want to evade the kicks, parry the sword strikes and counter the grabs during this phase to break down his stamina gauge but note that if you don’t apply pressure and he just stands there the stamina gauge will go back up. Keep attacking until he has no health left or the stamina gauge breaks again. Once at the end you will be able to Issen Attack to finish him off for now. You will receive your trophy after the cutscene. |
||
 |
Get Stuffed Defeat Daidara. |
|
| You will meet Daidara shortly after defeating Sasaki Genryu in a cutscene. You will head into the Oni Refuge and make your way toward the end of the path toward the mission marker.
Activate the Shrine Grounds Spirit Mirror and head into the room with the mission marker. The fight with Daidara is a bit different. Being so big his timing is much slower than any enemies you have fought so far. His attacks include swinging his cleaver in a circular fashion, a kick, charging at you and a heavy cleaver slam down. If there are orbs floating in the air and you do NOT collect them fast enough they will be absorbed into Daidara and make him enraged which will make him faster and stronger. It’s best to dodge the kick and the heavy slam downward. The swinging cleaver and the ramming attacks are easier to parry to break down Daidara’s stamina. Both of these can be followed up with a flurry of light attacks or a heavy combo. Either one should be aimed at his feet to break the armor on both legs so he takes decent damage instead of stamina damage. Continue attacking him until you Issen Attack him. Choose his legs and finish him off using regular attacks. Once his health bar is depleted it will start a cutscene. After the cutscene you will start phase 2. Phase 2 will have similar attacks and he will still absorb souls to become faster and stronger. Along with becoming enraged once he gets to half health he will enter a Blazing State. Once in this state he will have a longer weapon and add another flurry of attacks that starts with a slam down and then a spinning attack. These can all be parried as well. He will also get a grab attack which can be evaded. Continue parrying the attacks and dodging his grabs until his stamina bar is drained but make sure to keep the pressure up so the stamina bar doesn’t start refilling. Once it has dropped enough you can do an Issen Attack targeting his legs again. After the Issen attack you can take the rest of his health out with normal light and heavy attacks. Once defeated, a cutscene will play and you will get this trophy. |
||
 |
Twisted Fates Defeat Rasho-gan. |
|
| You will meet Rasho-gan in Kyoto at the end of the mission “Be Careful What You Wish For”. Once you interact with him in the cutscene following retrieving the 3 statues be ready for a fight.
Rasho-gan has a bunch of different attacks. Basic Sword swing that can be evaded or parried, a long range downward sword slash which can be parried but should be evaded, a giant bubble of blood shot at you that can be evaded or deflected back, a barrage of smaller blood bubbles shot at faster range. These can be blocked, parried, deflected or evaded. Rasho-gan also has a grab attack where he throws his hands up and lunges forward, this can be punished by evading into him for heavy damage to health and stamina. Once you take out the first bar of health phase 2 will start. In this phase he will get stronger and far more aggressive. He will also be in Blazing State from the start so you will want to evade anything that isn’t a normal sword swing. In this phase he will also have Mortal Kombat’s Scorpion style attack when you tosses a chain at you and pulls you in and attacks. If you stay aggressive during this phase you likely won’t see it as it’s meant to punish distance gameplay. Along with a house there are things like trees he will pick up with chains over his head and attempt to throw at you. These can all be avoided by dodging. Stay aggressive as the Stamina Bar regenerates really fast for Rasho-gan during this fight. Once you deplete his second stamina bar a cutscene will begin. After the cutscene you will receive this trophy. |
||
 |
Howling Wind Defeat Ifuu. |
|
| You meet Ifuu at the end of the mission “Windswept Kennin-ji. Ifuu is another unique boss that is well made. His attacks include normal Cleaver style attacks that can be deflect but be careful because if you deflect one another might follow still. There is a move where Ifuu will blow on the ground right ahead of him that sends you backward and then sends another breath toward you, this breath needs to be deflected back at the boss to keep the stamina bar draining instead of letting him recover. He has a grab that is easy to telegraph and reverse by evading into him.
Continue applying pressure at Ifuu and learn his timings. Deflect the breath attacks and parry each swing he takes at you. If he goes Berserk he will gain a charging attack that follows up by explosions right in front of him. Evade to the side to stop yourself from taking damage. Bring his health bar down to complete the first phase of this fight. During Phase 2 Ifuu will get a couple of new tricks. His attacks remain largely the same as his Berserk version but this time he will breathe in a lot of the air in the room, when this happens the sack behind his head will expand. Shoot that sack with an arrow to stun him. He also has another attack where he jumps in the air and shoots a tornado from his sack in a circular pattern, shoot the sack behind his head to drop him from the air onto the ground and attack. Play defensively and use his own attacks against him because deflecting his attacks does a lot of stamina damage. Once you deplete his second health bar he will be defeated and you will receive this trophy. |
||
 |
Dokyo’s Fixation Defeat the Greater Nue. |
|
| You will find Greater Nue in the Oikeniwa Pond Garden in the Kyoto Imperial Palace. This boss is very similar to the Nue you fought earlier only this one has more health and armor. The Greater Nue’s attacks include a headbutt and swiping paw combo, these can be blocked or parried normally. The Greater Nue will also do its charging attack where it runs at you and the jumping attack where it jumps at you. These attacks are best evaded and punished. The Greater Nue will also guard its head with its tail and you will need to use your Oni Power to break the guard. There is also a couple of new attacks such as when the Greater Nue will stand on its back legs and swipe at you with its Talons. These can be parried but it won’t always stop the combo so be ready to continue parrying. The Greater Nue will also have a new grab which you can reverse by evading into it. Its last new attack is will be when it lights its tail up red and sweeps it at you, this attack is un-evadable and requires a parry or block. Blocking this move will result in heavy stamina damage.
If the Greater Nue absorbs too many souls it will go berserk and start using lightning attacks. There will be a move where it stands on its rear legs and roars while lightning storms down in the spots that light up purple. The Greater Nue will also charge you filled with lightning leaving paths of lightning. These attacks can be parried or evaded. Keep attacking the Greater Nue until you break the stamina down to use a visceral. When selecting where to attack target the tail. It will do less damage than the head but you will cut off its tail. For a short amount of time following it losing its tail it will not be able to use its un-evadable attack and will not be able to guard itself with its tail. You can also interact with the tail and use it to throw at the Greater Nue for a lot of stamina damage. Keep breaking down the Greater Nue’s health until you completely deplete its health bar. Once you take out its first health bar it will have a second phase. During this phase the Greater Nue will automatically go into its berserk mode. In this mode the attacks remain similar to the first phase only the Greater Nue becomes far more aggressive. Repeat the process and watch for the lightning attacks. When you have your first chance at the Critical attack choose the tail again to get good stamina damage again right away. Once you take out the Greater Nue’s second health bar you will get a cutscene and this trophy will pop right after once you are tasked with killing Hinagiku. |
||
 |
Benkei: Out, but Not Down Defeat Benkei. |
|
| You will find Benkei during the mission “Bloodbath on the Bridge”. This is the only objective during the mission so be sure to be ready before entering the bridge.
Benkei will be unlike any of the other bosses you have fought so far. The only ways to do damage to him are by using Break Issen Attacks, Issen Attacks and attacks prompted by an indicator after a properly timed Reflex Dodge. Benkei wants you to Parry and Issen his attacks but be aggressive because if you let him idle too long his stamina will refill and it refills quickly. If he is just standing there bait out an attack by using some light attacks. Dodging and blocking don’t do any stamina damage so try not to rely on these unless necessary. Benkei’s attacks include swings from his glaive from the right, the left and from overhead. These can all be parried. Benkei has a side sweeping attack that will be followed up by an un-dodgable swing from the right also. These can be parried and you can tell it will be one of these attacks when he winds up for the swing and it takes a bit before he swings. He also will charge at you or do a left and right back and forth swing if you get too far from him, so make sure to stay close enough to not prompt one of these attacks although they can be parried also. Another move of his is when a kick, a punch and a jumping butt slam. These can all be evaded and if done with good timing can leave Benkei open to attacks. Continue doing stamina damage until it’s time for the Issen Break. When you do it you will notice that there are 6 points to attack. The first time you attack any of the points it will destroy the armor. Subsequent attacks in the same spot will do more damage. Aim for the head during these attacks to do subsequently more damage. If Benkei absorbs too many souls he will become enraged and his glaive will glow red and he will become much more aggressive. He will be faster and hit harder but other than that he will only change his moves by adding an overhead slam to combos using two glaives instead of just one. Parrying that move will do a lot of stamina damage. Depleting his health gauge will bring him into phase 2. This phase is identical to the one before it except he will be in his enraged state for the whole time. Continue baiting out attacks to be able to parry the overhead attacks that do massive stamina damage. Once you deplete his health for a second time you will complete this mission and unlock this trophy. |
||
 |
Crashing Lightning Defeat Burai. |
|
| You will find Burai in the same temple you fought Ifuu in earlier but not until the mission “A Tempest at the Temple”.
Burai has a smaller move pool including several swings of his glaive that can all be parried. Burai uses these spheres that shoot magic lightning from them. He will set two rows of these and you will see the front row start to have a purple beam, get out of the way of that beam as that is where it will shoot lightning. Once it shoots the lightning the row behind it will do the same, just step left or right to avoid the second beam. Burai will also send these orbs into the air above you, they will shoot in an X pattern directly downward, evade these with Focus Evade. After either lightning attack he will do a lunging attack forward, this can also be parried. Burai’s final moves include a kick and a punch, these can be evaded with Focus Evade. When Burai absorbs too many souls and enrages he will get a new move where he jumps off screen and comes crashing down as lightning right over your head. The timing on this is a bit trickier but it requires a focus evade. Evading too late or early will result in you being hit. Bring down his stamina and Issen Break his head. Once you destroy his first health bar you will enter Phase 2. Phase 2 will always start with the Lightning Attack he gets when getting enraged. He will be a bit faster and stronger but in Phase 2 he uses the same attacks as until he absorbs enough souls or is brought to half health. He will go into a Blazing state where he encircles himself in his orbs and they each shoot directly outward (Stand between the beams) but then he will slam them downward at you like a whip, this can be parried but it is easier to evade it. Note that Burai has a move where he will strike a pose and if you attack him while in that pose he will teleport behind you and quickly lunge at you with his glaive. Make sure either not to get greedy and accidentally hit him while he is in his pose or be ready to deflect quickly. Continue wearing away at his stamina bar and doing Issen Breaks. Once you deplete his second health bar you will receive this trophy. |
||
 |
Wide Awake Defeat Shuten Doji. |
|
| Shuten Doji can be found at the end of the mission “The Demon on the Mount”.
The First Phase of this fight is a fight against a drunkard. His attacks include using his cleaver to swipe at you up close which can be parried. He has a move where he staggers backward and follows it up with a swing forward from his cleaver. He also has a kick which can be Focus Evaded. He will attempt to fall out you, this must also be evaded and when he gets back up he does a spinning kick on the way up that can be evaded. If you Focus Combo any of these three attacks, it will interrupt his combo. He also has a move where he sucks you in with his bottle and does an un-evadable attack you have to parry. He also has a move where he will drop his bottle and light the floor on fire. When he does this you need to evade so you jump over the fire. Halfway through the fight he will drink a lot of his booze and light on fire. Shoot him with an arrow while he is inhaling to interrupt his attack that can’t be avoided. He will also remain on fire for the remainder of the fight. Try to use as little healing as you can here because a cutscene will interrupt the fight but there will be a second phase. Keep evading and parrying to open up the Issen Break windows and take out his health bar to initiate the cutscene. Dying after the cutscene will result in only having to start at Phase 2 but you will be starting there with the heals you have at the end of the first phase. During Phase 2 both Shuten Doji’s head and body will be on fire. You will be starting in your Oni form, take advantage of the bigger power here and Issen Attack every chance you get. Taking damage here won’t affect your health bar but it will take your Oni Gauge down giving you less time in the form. Try and get the stamina gauge down as far as you ran and right before the gauge is depleted hit the Oni Armament button to activate a big Oni attack. Once out of the form you will need to hold your own against both enemies. Shuten Doji’s body will continue doing the same attacks that Shuten Doji did in the first phase but will hit much harder. Keep an eye on the head though and make sure it isn’t swelling up. If it is, shoot it with an arrow to stop it from breathing fire all over. Usually when this happens the body also is winding up a big slamming attack you can parried or a slamming attack that he just slams the ground sending fire at you which can be evaded. Keep attacking until you Issen Break Shuten Doji which will give you back some Oni Gauge. Using your Oni Armament will also give you some Oni Gauge. The head and body have a rather hefty combo where the body swings at you that you have to parry, the head slams at you which you have to evade, then the body swings at you again which you need to parry and finally the head attempts a grab you need to evade into it. By the time you perform 2 Issen Breaks and use your Oni Armament once you should have enough to activate your Oni Power again and finish Shuten Doji off with Issen Attacks. Once the fight has concluded you will enter a cutscene, once out of the cutscene you will receive this trophy. |
||
 |
The Perfect Storm Defeat Ifuu and Burai. |
|
| Ifuu and Burai are found in the mission “Storm Chaser”.
Something to note – it doesn’t matter if you completely defeat one or the other first, nor does it matter if both are in the same phase, they will match up to a degree and both will require 2 health bars to be drained to win the fight. Ifuu will be the aggressive one during the fight and will be the first to attack. Both Ifuu and Burai will use the same attacks that they use in an individual fight but will also tag team their moves. Their attacks will follow the same patterns that if close together the will alternate attacks. After a combo and alternating attacks they will meet away from you and both do a lunging attack at the same time. This attack can be blocked or deflected, which will also sometimes cause Ifuu and Burai to attack each other on accident. If either Ifuu or Burai run out of stamina by deflecting this attack they will both be attacked with an Issen Break. Both will use attacks from their first phases unless they absorb souls in which case they will go ablaze. Doing so will make them much more aggressive but will maintain the same move-set. They will however gain a new double team attack, instead of a thrust forward Ifuu will thrust forward and Burai will do his Lightning attack from above. This can be blocked (it will still do a lot of damage) or deflect. Deflecting this attack will cause a lot of stamina damage. Depleting the health bar from either of the two will also put them into an ablaze state. During the second phase of the fight they will gain a third double team attack. It will consist of Burai encircling himself in his magic orbs while Ifuu will float above and swell his sack. You will need to shoot Ifuu out of the sky making him land on Burai. Don’t shoot until you make sure you aren’t in the path of the magic orbs. If you fail to connect with the arrow be sure to be ready for the slamming attack that Burai will follow up with. The final new attack that the duo will use is them both jumping onto an air sack and flying out of the arena. Lightning will start storming down all over the arena, dodge it as normal and at the end of the lightning storm wind will roll out along the ground outward from the center of the arena. As soon as those elements calm down they will swoop down and charge at you. Deflect this attack to avoid getting hit for a lot of damage. Deflecting this attack will also do a lot of stamina damage to the duo. Stay defensive during this fight and only punish after combo attacks. Issen Attacks are also very good in this fight but keep an eye on both enemies so they can’t attack you from off-screen. Once you deplete both health bars from both enemies you will get a cutscene and subsequently this trophy. |
||
 |
We Done Here? Defeat Sasaki Ganryu at Arashiyama. |
|
| You will find Ganryu at the Togetsu-kyo Bridge Spirit Mirror in the field to the side.
Ganryu will be very similar to the first time you fought him. Being defensive against him will work out better for you because Ganryu has staggered timings for his sword attacks. Ganryu’s sword attacks are plentiful including not only normal lunging sword attacks and attacks from a stand-still but also sword attacks from his demon. Be weary because not all attacks are a single attack and even if they are deflected Ganryu may still try to combo through. All sword swings can be countered with Issen, blocked or parried. Ganryu will also do a move where he slams his demons head right in front of him into the ground. This can be evaded and if you get the timing right Focus Evaded to punish the attempt. Keep an eye on the demon’s head to make sure it isn’t winding up a grab. Evade into the grab to reverse it. Another evadable attack is when Ganryu jumps into the air and attempts to slam his leg downward onto your head. Attack him until your first Issen Break where Ganryu will do an action cutscene, everything after this portion of phase one will remain the same unless you let Ganryu absorb too many souls. If Ganryu absorbs too many souls his demon will grow extra appendages and get more aggressive with the demon triple sword strikes. Ganryu will also get a new move where he twirls the demon in a braid above his head then swings it in a circle and follows it up with a slam straight ahead at you. Focus evading either the twirl or the slam will stop the combo from finishing and leave Ganryu open to a few hits. Once you deplete his first health bar he will automatically grow the demon on his back if it wasn’t already. Shortly into the fight he will reinforce the demon with armor. During this portion of the fight he will take less damage and become much more aggressive so be careful healing. Shortly into the second phase Ganryu will feed his sword to the demon who will imbue it with a demon magic. During this portion Ganryu becomes most aggressive and adds a couple more attacks to his move-set. First new move is when Ganryu shoves his sword into the ground at his side and sends waves of attack at your. These can be blocked, parried or deflected back at Ganryu. Ganryu will also rain some un-dodgeable attacks including a slash that can be parried, blocked or Issen Attacked through and a lunging forward un-dodgeable piercing attack. This can be parried or Issen Attacked through, blocking won’t be effective as it does heavy stamina damage and gets followed up by a jab through with all tentacles the demon has. Use your Oni Power early in the fight and by the end you should have been able to recover your oni gauge enough to use it a second time in this fight. Once you deplete his second health bar you will get a cutscene and this trophy. |
||
 |
End This Madness Defeat Dokyo. |
|
| You will find Dokyo at the end of Arashiyama. The entire fight is basically a gimmick fight and a chase sequence.
During the first phase Dokyo’s attacks will include throwing a barrage of projectiles at that you must evade. There will be orbs, laser bars and spikes. These can all do decent damage so avoid them at all costs. While evading them make your way toward Dokyo and try to get a quick combo in. Sometimes near the end of the combo Dokyo will send out a spinning top with spikes around it. This can be deflected back at Dokyo to end the combo and get some attacks in. Another attack is when Dokyo flies up into the air and has a growing mask start to circle around Dokyo. This growing mask needs to be shot with an arrow while circling around Dokyo to do damage to it. Dokyo will fall to the ground burning giving you an opportunity to rush in and attack with a quick combo. Another attack is when Dokyo stops you from moving and surrounds you with masks. These will turn into Kubi Akari which will chase you down and explode. Run toward the most recent one to spawn which will be on the left and run behind Dokyo so they explode as they pass by. Dokyo will sweep their arm up from the ground and create the oni torches from the ground in a straight line toward you, evade these coming up from the ground. Once in the air starting from wherever Dokyo it the torches will shoot fire out of either side, these can evaded also. Once evaded run up to Dokyo and try to get a couple of hits in. Dokyo’s last move is when it splits into 2 and creates a net between Dokyo and the clone. While they weave the net use Oni Vision and look for the one that gets surrounded in a gold aura, this is the original, shoot that Dokyo with a bow to stop the attack. If you get it right Dokyo will stumble leaving an opening for a quick combo. If you get it wrong the 2 Dokyo will switch sides and become really fast and continue the attack. During Dokyo’s second phase a lot of the attacks switch up a little bit. During the barrage attack Dokyo will spawn a machine that spits out the balls at you while Dokyo does the remaining projectiles. If Dokyo sends the spiked top at you and you deflect it back, keep an eye out because Dokyo will grab it and send it back to you once meaning you will have to deflect it a second time. The attack with the Kubi Akari will have all normal ones and an ablaze one. The originals will still explode like normal but the ablaze one will always try to grab you. This one can be evaded into in order to grab it and throw it back at Kubi Akari. The attack where Dokyo flies into the air and creates the growing mask will instead spawn two at the same time. Both of these need to be shot to send Dokyo falling to the ground. Those are the only real changes between the first and second phase of attacks however there are a couple more attacks Cokyo will use. The first one will be a staff strike that is sudden and gives little warning. This strike always comes after being in close range of Dokyo beyond a short combo after each of Dokyo’s attacks so be sure to expect it. The other new move of Dokyo’s is that Dokyo will rise into the air and create a giant sphere above them and start glowing the whole arena. Look along the ground and you will see a giant rock not breaking apart. You need to stand against that rock putting the rock between you and Dokyo. Once the attack finishes it will break the rock and Dokyo will fall to the ground. A piece of rock is left stuck in the ground, this piece can be grabbed with the action button and used to throw at Dokyo. Continue evading all attacks you can and punish Dokyo whenever you have an opening but don’t get greedy. Use your Onimusha form during the second phase of the fight. There aren’t any Issen Break chances during this fight so there won’t be a lot of orbs to replenish the gauge during the fight. Once you defeat Dokyo a cutscene will play and you will receive this trophy. |
||
 |
Baited by Benkei Defeat Benkei at Rendaino. |
|
| You will find Benkei again during the mission “The Clash at Rendaino” and the fight starts as soon as the mission is accepted. The first phase of this fight is the same as the first time you fought him on the bridge so there is no need to go over those moves again.
If you allow him to absorb too many souls he will go ablaze and you will have to fight Benkei with a plethora of new attacks. One new attack is a lunge backward while sending out wooden darts at you. The can be deflected back at Benkei if you react fast enough. Another new move is when he dodges backward and throws axes in a crescent motion. These can also be deflected if timed right. Sometimes this is followed up with a barrage of bombs shot out of a cannon, these can be ran from or evaded. Benkei also has a giant mallet that he will jump into the air and throw the giant mallet down at the ground where you are standing. You can evade this throw but be ready to evade again because the mallet will electrify the ground and blow it up after a few seconds. This also needs to be evaded to assure no damage is taken. Alternatively you can run out of the circular area before the ground explodes. Benkei will also add a grab to his move-set that can be reversed by evade toward Benkei at the right moment. He has a move where he sticks his glaive into the ground and thrusts the ground upward in a line straight at you. This needs to be evaded. His final new move is when he sticks a cannon on his shoulder and starts charging it up you need to shoot the opening with your bow to not take big damage. The biggest issue with Phase 2 of Benkei is how fast his stamina recovers and with him having many long range attacks and not staying too close the stamina is constantly refilling. Use your Bow and try to get a headshot in once in a while to stop the stamina gauge from refilling but don’t do it at the cost of taking an attack you otherwise would not have. If you use your Oni gauge near the start of the fight you will have enough time to recover it again and use it before the end of the fight. Once you defeat Benkei by draining his health-bar a second time you will get rewarded with several cutscenes and this trophy. |
||
 |
Truly, Thank You Defeat Minamoto no Yoshitsune. |
|
The final boss of the game, and by a wide margin the hardest and longest fight. The encounter unfolds across three full phases, so it’s worth equipping – and rationing – a specific loadout of consumables before you even step in:
You can carry a maximum of two of each, with the exception of Sun-Dried Hozuki, which is capped at one. Try to hold off using any of them until the second half of phase two and all of phase three, where they’ll matter most. Phase 1 leans mostly on straightforward one-on-one katana attacks, which are easily deflected. He frequently leaps into the air and tries to kick you in the face with both legs at once; play it safe with a deflect or parry, or, if you’re confident, go for a perfect dodge or an Issen counter instead — landing a perfect dodge or Issen counter will actually knock him to the ground, opening him up for a few free hits. He also leans heavily on white-glowing attacks here, deflectable or parriable only, most notably a combo of three massive white-glowing katana slashes: your response depends entirely on positioning — dodge these from a distance, but deflect them if you’re already up close, adapting on the fly. His slightly delayed hand-grab attack is one to avoid at all costs, either by dodging clear or countering it with Phase 2 always opens with him airborne, slamming down into the ground — the two things to watch for the moment it begins are the slam itself and the ground subsequently cracking open beneath you, so the instant you regain control, sprint as far away as possible; that’s the safest way to dodge both. He’s considerably more mobile here, both on the ground and in the air, and the safest overall approach is to lean on deflects rather than Issen counters — slower, but far more reliable. Bear in mind that regular attacks won’t dent his stamina bar at all in this phase, since he’s fully armored; his armor can technically be shattered with Phase 3 changes the rules entirely: he simply cannot be damaged by any attack unless you’re in your own Oni Awakening state. From here you have two viable approaches. If you’re confident with Issen, chain as many counters as you can to rack up blue and purple souls quickly; alternatively, lean on parries to fill the Blazing Gauge, then unload on him repeatedly while in Blazing State, which extracts the blue souls you need to fuel your Oni Power — once that’s ready, using it lets you extract purple souls from him as well. His attacks in this phase stay largely consistent with phase two, but the damage restriction above still applies regardless: without one of these two approaches, nothing gets through. One further mechanic to watch for: he’ll periodically pull you in toward him as he absorbs every soul in the arena — when that happens, do the same yourself, grabbing as many souls as you can to quickly top up your Oni Power and Oni Awakening gauges, because right afterward he unleashes a devastating slash that sweeps across the entire arena; connecting with it is essentially game over, so dodge it outright or counter it with Issen. Whenever your Oni Awakening gauge fills, transform immediately, land as many Issen counters as you can while transformed, and hold off on your |
||
 |
Mystery Solved Complete your first Mystery of Kyoto. |
|
| » Mysteries of Kyoto Locations | ||
 |
Demystified Complete all Mysteries of Kyoto. |
 |
| » Mysteries of Kyoto Locations | ||
 |
Life-Saver Complete your first Chance Encounter. |
|
| » Chance Encounters Locations | ||
 |
No Job Too Small Complete all Chance Encounters. |
|
| » Chance Encounters Locations | ||
 |
Serves You Right Defeat the Byakue at Kiyomizu-dera Temple. |
|
| You will find this Byakue behind the Oni Wall north of the Nio-mon Gate Spirit Mirror. You will automatically cross paths with this Byakue during the Chance Encounter “Ace Archer: Kiyomizu-dera Temple” as it will be near one of the Kubi Akari you need to shoot.
This Byakue is no different than other Byakue you have fought earlier. He has one health bar and should go down with 2 Issen Breaks. Evade when possible and punish it for the charging around the Byakue will try to do. Once you take this one out you will receive this trophy. |
||
 |
Citizen Savior Rescue 30 townspeople from marauding Genma. |
|
| Citizens are randomly attacked all over Kyoto. This trophy will require you to stop and assist citizens throughout Kyoto who are getting attacked by genma. Usually these are little battles that take a few moments to defeat the genma and then speak to the citizens. If you do not speak to the citizen it will not count toward this trophy.
Once you have assisted the 30th citizens and have spoken to them you will receive this trophy. |
||
 |
Selfish Selflessness Rescue a merchant that’s being attacked by Genma. |
|
| As you are going for the Citizen Savior trophy you will almost certainly come across a merchant along the way. This is completely random but will almost assuredly happen before hitting the 30 required for Citizen Savior. | ||
 |
No Dog Left Behind Rescue your first Lion Dog. |
|
| » All Lion Dog Locations | ||
 |
For the Love of Dog Rescue all the Lion Dogs. |
|
| » All Lion Dog Locations | ||
 |
Genma-ologist Collect all the Genma notes. |
|
| » Genma Notes Locations | ||
 |
True Onimusha Complete the game on difficulty level “Carnage”. |
 |
| For this trophy you will need to complete the game on Carnage Difficulty. To unlock Carnage Difficulty you will need to first complete the game on any difficulty. Then you can start Carnage difficulty in New Game+.
Items carry over from NG to NG+ such as Rivial Mirrors, Hozuki restoring items, healing items. Try not using these during your first playthrough to make Carnage much more managable Carnage does not offer Action Prompts so you will have a much easier time with Carnage if you complete the game on Action without those prompts. For tips and videos on completing the boss fights on Carnage Difficulty please refer to Onimusha Way of the Sword Boss Guide (Carnage Difficulty). |
||
 |
Second Helping Beat an opponent in a Boss Rematch. |
|
See  Glutton for Punishment below. Glutton for Punishment below. |
||
 |
Glutton for Punishment Beat all Boss Rematch opponents on all difficulty levels. |
|
| Boss Rematch is available in the Practice Grounds you unlock during “The Oni’s Apprentice”. You must go to Emma’s Hall and ring the Bell in the corner of the Hall to enter the practice grounds. Once inside, speak to Takamura and select “Boss Rematch” and select which Boss and which difficulty you want to play. Completing a Boss on the hardest difficulty available will complete all difficulties below it as well.
For tips and videos on completing the boss fights on Carnage Difficulty please refer to Onimusha Way of the Sword Boss Guide (Carnage Difficulty). |
||
 |
The Winding Way of the Sword Learn and upgrade all basic or special skills. |
|
See  Well-Rounded below. Well-Rounded below. |
||
 |
Well-Rounded Learn and upgrade all basic and special skills. |
|
| Enhancing skills can be done through the Spirit Mirror by selecting “Enhance Equipment/Abilities”.
These cost upgrade materials, particularly Power Stones & Oni Stones. » Power Stone Locations Upgrades: Issen:
Break Issen Combo:
Oni Bow:
Assassination:
Flat-Out Sprint: Available to purchase after the 1st Oni Portal for 2 Power Stone
Absorb Souls While Attacking: Available to purchase after the 1st Oni Portal for 2 Power Stone.
Charm Capacity 1 – Available to purchase after the 1st Oni Portal for 2 Power Stone.
Tab over to the Special Skills tab and select the skills you want to upgrade, these are your Special Skills. Oni Vision
Oni Strength: Destroy – Unlocked after defeating Rasho-gan.
Oni Agility: Wall Run – Unlocked during the “The Roots of All Evil” mission.
Oni Awakening
The Two Celestials (Unlocked when weapon is discovered)
Wind-Whipper (Unlocked when weapon is discovered)
Earth-Shakers
Firebird Flute
The Flashing Void
Still Water
|
||
 |
Looking Sharp Enhance a piece of equipment for the first time. |
|
| See Dressed to Kill below. |
||
 |
Dressed to Kill Enhance all equipment to the maximum level. |
|
| Equipment gets enhanced at the Spirit Mirror, automatically unlocked during the mission “The Oni’s Apprentice”. Once in the menu select the “Equipment Enhancement” tab where you can highlight which item you want to enhance.
These cost upgrade materials, particularly Fine Silk Cloths & Tamahagane. » Fine Silk Cloth Locations Clothing:
Clothing Proficiency Level 2 – 1 Cotton Cloth + 1 Leather + 2 Fine Silk Cloth
Clothing Proficiency Level 3 – 2 Cotton Cloth + 2 Leather + 3 Fine Silk Cloth
Clothing Proficiency Level 4 – 2 Cotton Cloth + 2 Leather + 4 Fine Silk Cloth
Clothing Proficiency Level 5 – 2 Hempen Cloth + 2 Cotton Cloth + 2 Leather + 1 Fine Silk Cloth Sword:
Sword Proficiency Level 2 – 1 Iron + 1 Tempered Iron + 2 Tamahagane
Sword Proficiency Level 3 – 2 Iron + 2 Tempered Iron + 3 Tamahagane
Sword Proficiency Level 4 – 2 Iron + 2 Tempered Iron + 4 Tamahagane
Sword Proficiency Level 5 – 2 Whetstone + 2 Iron + 2 Tempered Iron + 1 Tamahagane Gauntlet:
Gauntlet Proficiency Level 2 – 2 Malicite Mass
Gauntlet Proficiency Level 3 – 4 Malicite Mass
Gauntlet Proficiency Level 4 – 6 Malicite Mass
Gauntlet Proficiency Level 5 – 5 Malicite + 2 Byakue’s Talisman + 2 Dohatsu-ten’s Horn + 3 Malicite Mass |
||
 |
Oni Armory Acquire all Oni Armaments. |
|
| » Oni Armaments Locations | ||
 |
Health Is Wealth Enhance a Hozuki Pouch to the maximum level. |
|
| » Hozuki Pouches Locations & Upgrades | ||
 |
Medical Marvel Enhance all Hozuki Pouches to the maximum level. |
|
| » Hozuki Pouches Locations & Upgrades | ||
 |
A Real Charmer Enhance a charm to the maximum level. |
|
| » Charms Locations & Upgrades | ||
 |
Charmed Life Enhance all charms to the maximum level. |
|
| » Charms Locations & Upgrades | ||
 |
Burning Blade Defeat 50 foes while in the Blazing State. |
|
| Your Blazing State is a skill you will unlock early in the game through the Break Issen Combo skill tree. Parrying enemies will fill up the gauge to the left of your Oni Armament gauge on the bottom right of the screen. Parrying attacks will fill up this gauge and when it fills you will automatically go into your Blazing State. While in the Blazing State your attacks hit harder. Use this skill to defeat 50 enemies.
If by the end of the game you need to farm this it can be done in Emma’s Hall through the Practice Ground using the Blazing State Drill. However, this drill only supplies 1 enemy to fight each time. |
||
 |
Stop Motion Perform 50 Reflex Combos. |
|
| A Reflex Combo is when you evade at the right time and can activate a counterattack. The gauge to the right of your Oni Armament Gauge in the bottom right corner of the screen is your Reflex Gauge. The more you evade attacks the more that gauge will fill up. Once full the next time you Reflex Dodge you will have the option to unleash a Reflex Combo. Doing so will count toward this trophy regardless if it is used to defeat the enemies or not. Simply connecting with enemies 50 times using this skill will unlock this trophy.
If by the end of the game you need to farm this it can be done in Emma’s Hall through the Practice Ground using the Reflex Combos Drill. |
||
 |
Wielder of Oni Armaments Defeat 100 enemies with Oni Armaments. |
|
| For this trophy you will need to use any of the six Oni Armaments to defeat 100 enemies total. This won’t come quickly so be mindful of this when playing through the game as you have to wait until your Oni Armament Gauge is full before you can unleash an attack. It’s recommended to use the Wind-Whipper to rack up numerous kills in one shot.
If by the end of the game you need to farm this it can be done in Emma’s Hall through the Practice Ground using any of the Oni Armament’s Drills. |
||
 |
Oni’s Oni Defeat 50 enemies in the Oni Awakened state. |
|
For this trophy you need to defeat 50 enemies while in the Oni Awakened state. Doing so is easy as the Oni Awakened form not only is incredibly powerful against minor enemies but also allows for easier Issen attacks making most enemies a one hit kill. Activate your Oni Awakened skill using  + +  and easily kills mobs of enemies using and easily kills mobs of enemies using  . .
If by the end of the game you need to farm this it can be done in Emma’s Hall through the Practice Ground using the Oni Awakening Drill. |
||
|
Brutalist Land 50 Issen attacks. |
|
| An Issen attack is when you press either Light or Heavy attack at the moment your opponent is about to make impact with you, you sidestep and slice the enemy. Issen attacks are very strong and if you master these it will make the game much easier. If you are having trouble with Issen Attacks simply head to the Practice Grounds and do the “Issen” Drill over and over again until the trophy unlocks. When you get your 50th Issen attack you will obtain this trophy.
If by the end of the game you need to farm this it can be done in Emma’s Hall through the Practice Ground using the Issen Drill. |
||
 |
Flow State Defeat 50 enemies with Chain Issen attacks. |
|
| Chain Issen are not easy attacks but learning them and mastering them would make the game much easier when dealing with mobs of enemies. In order to perform a Chain Issen properly you must first perform an Issen attack. To do so you will need to attack at the moment that an opponent’s attack is about to connect with you. If done correctly you will sidestep and counterattack with a massive slash. This counterattack will animate a slashing animation with a bright light. While this light is on the screen you must press your attack again (pressing attack too early will cancel out the ability to Chain Issen even if pressed at the right time after). This will target the next enemy for you to strike.
A chain needs to be 2 or more to count once for this trophy. Once you have gotten your 50th chain you will receive this trophy. If by the end of the game you need to farm this it can be done in Emma’s Hall through the Practice Ground using the Chain Issen Drill. |
||
|
Silent Violence Assassinate 20 enemies. |
|
| For this trophy you need to sneak up behind enemies by walking from behind and using the prompt to assassinate the Genma:
This is a one hit kill and is an animated attack if done correctly. Once you get your 20th kill without being detected by the enemy you killed you will receive this trophy. Running will alert the enemies unless you unlock the sneak while running skill. |
||
 |
Pinch Hitter Deflect 50 projectiles. |
|
| For this trophy you will need to have the Basic Skill “Deflect” unlocked. Once unlocked, you simply need to send Genma projectiles back at enemies by holding forward and pressing Guard at the right moment (same timing as a parry). Once you deflected your 50th projectile whether it is arrows or magic attacks you will receive this trophy. | ||
 |
Deadeye Score 100 headshots with your bow. |
|
| For this trophy you need to obtain 100 headshots when using your bow. The easiest way to do this is to take out any archers or the floating heads with your bow. If you deflect an arrow back at an archer it will drain their stamina but leave them alive enough for you to get an easy headshot. To ensure a headshot simply aim slightly above the genma’s head so that it does not count as a body hit. | ||
 |
Winning Is What Matters Carry out 50 attacks with environmental objects. |
|
| There are several ways to achieve environmental attacks. You can use your skill to pick up kegs and throw them at enemies, there are planks of wood on floors of bigger battle areas you can flip up as a shield or kick at your enemies, there are carts you can drive at your enemies, and finally you can shoot barrels with your bow to explode. You need to carry out 50 attacks, not hit 50 enemies or defeat them. You just need to make contact with an enemy using an environmental object to count toward this trophy. Once you carry out your 50th attack you will obtain this trophy. | ||
 |
Untouchable Perform 50 Grab Reversals. |
|
| Grabs are heavily signaled in this game by a lightning effect that surrounds the enemy’s appendage they will be grabbing you with, usually followed by a run-up. Simply evade toward the enemy to reverse the grab. Doing so will do heavy stamina damage but the point here is to get 50 done, once 50 have been completed you will receive this trophy. | ||
 |
Coming Through! Break an enemy’s guard 50 times. |
|
| This is simply depleting your enemies stamina gauge before killing them. This will come naturally early on in the game. | ||
 |
Helm Splitter Break 100 shields or pieces of enemy armor. |
|
| For this trophy you will need to use your Oni Power on enemies to destroy their armor or shields. The genma that have the big concrete block that they block with can have their shields broken while enemies like the Kogashira, Hitotsume Sho and such all that have armor built into them are prime targets to use your Oni Power to break through their defenses.
Once you break through your 100th shield you will receive this trophy. If by the end of the game you need to farm this it can be done in Emma’s Hall through the Practice Ground using the Oni Strength Drill. |
||
 |
Get This Thing Off Me Absorb 30 or more souls at once. |
|
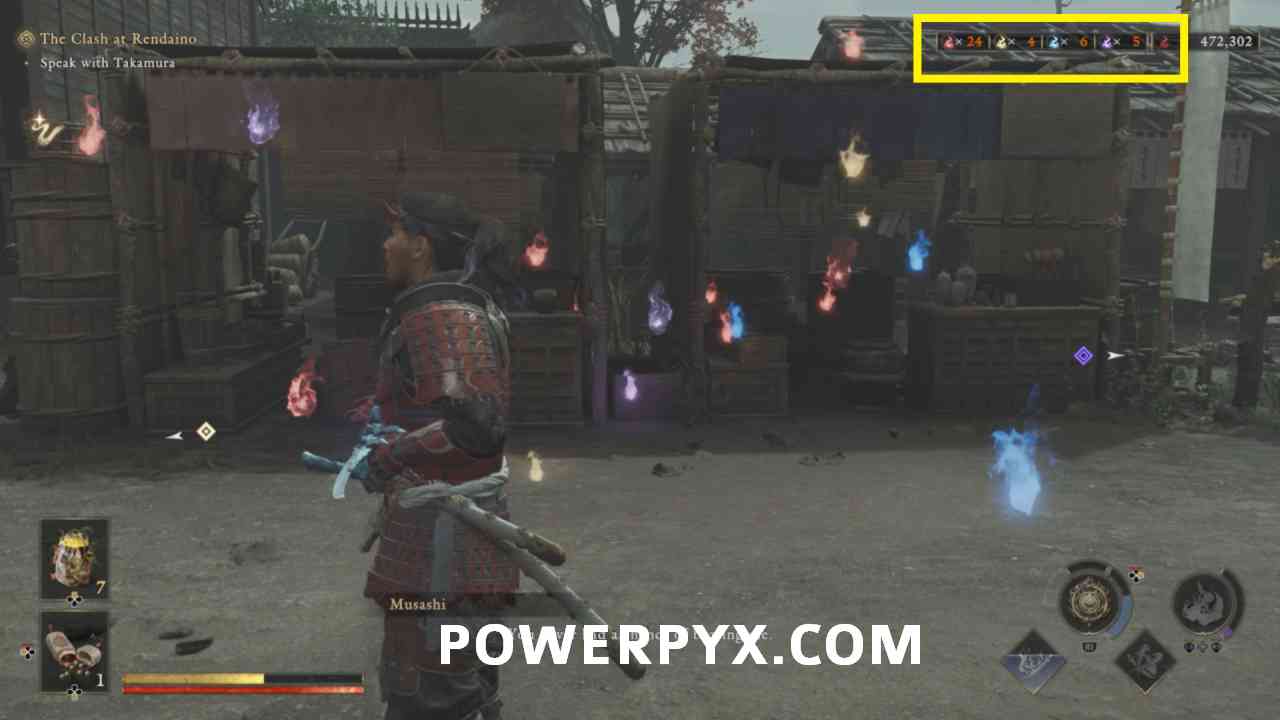
| This trophy will come naturally while playing. To obtain it you will need to use the Absorb function of your Oni Arm to collect 30 orbs in one go. This doesn’t mean 30 orbs worth of currency but 30 individual orbs regardless of their value. To do this you will need to defeat about 6 enemies as the average enemy drops about 5 orbs and then absorb the orbs. Do note though that orbs uncollected will disappear after a short time so make sure to defeat the required enemies in quick succession.
If you look at the top of your screen where your soul count is there is also a count of how many are floating around:
Once you have 30 total in those boxes absorb them to unlock this trophy. |
||
 |
Berserker Defeat 3 enemies with continuous Break Issen attacks. |
|
| You can get this trophy as early as the tutorial when you are ambushed outside by the group of enemies but can be gotten any other time. For this trophy you need to weaken 3 enemies in the same vicinity until they are ready to be finished off with an Issen Attack. Once you have 3 enemies with a red dot on them indicating the are ready to be finished off attack one and it will automatically point you toward another enemy ready to be finished off and you need to simply hit the Light Attack Button again to dash over to that enemy and Issen Attack them. Once again it will aim you at the 3rd enemy and you simply have to repeat the button press one more time to dash over and defeat the third in a row. | ||
 |
Genma Griller Set three enemies ablaze at once. |
|
| For this trophy you will need to unlock the skill Firebird Flute: Charged Shot. To obtain the trophy you need to use the Firebird Flute and charge it up and wait for 3 enemies to be crowded together. Once you have 3 or more targets in your sights launch the projectile at the middle of them. If at least 3 get set on fire using this technique you will receive this trophy. | ||
 at the right moment — if it connects, he siphons a large number of souls from you and shifts into an enhanced phase-one state, wreathing his katana in Malice. One attack that recurs across all three phases and is particularly dangerous here in phase one is his shoulder tap: the instant he taps his katana against his shoulder, he’ll dash-slash toward you with a lightning-fast thrust, so treat that tap as your cue to parry.
 and
and 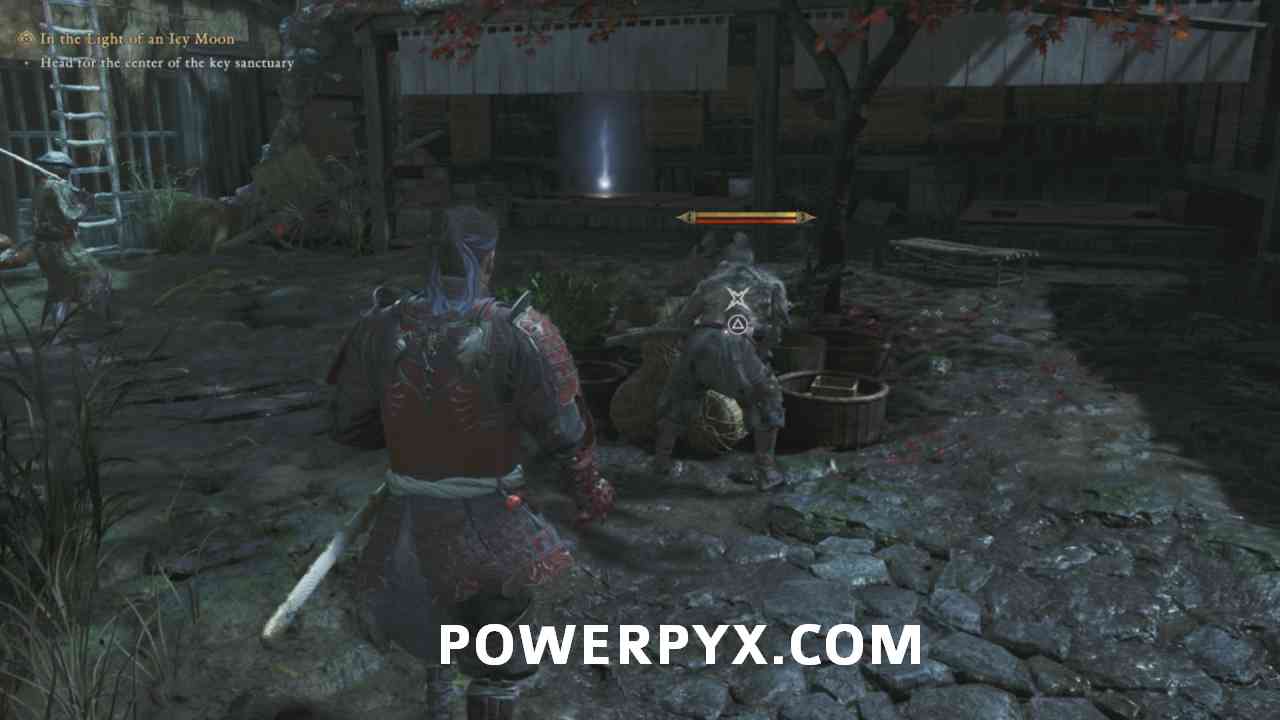
GregothTheDoth says
How much of a jump is Carnage from Action difficulty?
FranciRoosters says
Considerable. Enemies, especially bosses, take much longer to go down.
NL_the_Godfather says
Me personally have a much harder time with Onimusha on boss rematch carnage difficulty then with Sekiro. At least there you were allowed to use items other then your pouch. I’d say difficulty is 9/10 because of that
wanlskgsamgl says
Do you think the game has a similar battle difficulty level to that of which other game at the “carnage” difficulty setting? sekiro? yotei on highest diff?
FranciRoosters says
Sekiro, and Ghost of Yotei on its highest difficulty setting are harder.
niko228hunter says
Thank you for the guide. I been waiting for this one. Once again, wanna thank you for the guides because i use them often for my platinums. God bless you.
Jeff says
Bro this game just came out today. I realize some can get this game early, but my goodness y’all don’t mess around
irriducibile87 says
Great guide as always ! Thank you !
Just a couple of clarifications.
Regarding collectibles: is there any way to track the upgrade materials (i guess they don’t get “listed” anywhere) ? do they still remain on the map to show which one you collected ?
The Genma notes (which do not appear on the map) I guess they are easily trackable with the dedicated subsection in the menu where you can re-read them/check which one you have ?
I guess the same applies for the lions and the side quest in the curios cases submenu ?
Regarding the “Path to upgrading” section:
does that mean that I should NOT upgrade anything until I have the 150,000 favors and 130,000 red orbs in order to be able to do the save-scumming ?
imbroken963 says
you can upgrade as you go but I would save charms or pouches you aren’t using until the end. I chose 3 charms and 1 pouch to use the whole first playthrough but honestly still ended with more than enough to upgrade everything on the first playthrough. The save scumming was in case you didn’t have enough materials by not picking everything up along the way to have enough Favor and needing to use Souls to buy items to trade for favor late in the game.
irriducibile87 says
Great ! good to know !!
Thank you for the clarification !
Arkonite says
I’ve plated the game 10 days ago, i’m really surprised with the 6.5/10, essentially because in Boss rematch we can’t use any consummables.
GregothTheDoth says
I believe it’s because of the weapon you unlock for beating Carnage.
Snake2410 says
The guide writer also did Oni 1 and 2 guides and did rate those at least a point or two lower than most other guides have rated them.
NL_the_Godfather says
Yeah i’d say the difficulty is 9/10 especially with some bosses in boss rematch. The sword helps a bit but it’s not very easy with it still.
Greg says
After reading the platinum requirements for this game, now i’m not sure whether I would like to platinum this lol let’s see once the game release about how much I enjoy it. but for now, I don’t think I would go for platinum this time lol
Ronse says
I am missng 2 Byakues Talismen and 2 Sohatsu-ten horn for the last upgrade for my Gauntlet and i cant buy or find any more on the map.
Ronse says
lol i got them now by doing the bosses in the last mission.
Arkonite says
There are 2 spots in Kyoto east where Byakue and Dohatsu-ten respawn after you unlocked Shanaoh castle. One to the very south of the map (you have to crouch to reach the place) and one on the west island (Kabuki stage)
Max says
Stupid question but is the saving and reloading for upgrades necessary? or would you earn enough materials on carnage new game plus
Danto says
Thing is, in the Guide it says Gear Enhancements doesnt carry over but Items do. What i will do is stop Upgrading my Gear at lvl 3 and then just wait till the End of the Game and see if i have enough Materials to upgrade everything. Otherwise if i miss like a couple of Items and cant get to the max i would just waste a Ton of Materials since Upgrades doesnt carry over.
I dont know if there are more Upgrade Items then needed or if you have to find all of them since i dont use the Guide for all the Locations.
NL_the_Godfather says
It is easy to farm a bit of chests in the end that respawn and max out everything. With the charm also gives a bit higher chance to farm the rifts for Byakue and Daihatsu ten. I’ve had plenty of materials and in the west you can farm like 6.6K orbs in 30 seconds. So not that bad
Ale says
Wow, onimusha Platinum ist harder than nioh 3 platinum? Really ?
Bunkerbudy says
I’ve read a lot from people that have played carnage already that they find it way more difficult than Sekiro.
Ems says
Harder than Sekiro? Damn…that might be me out then. I loved Sekiro but I hit a difficulty wall (just couldn’t click with the parry mechanic) so I never got anywhere near to finishing it sadly. This looks amazing though…hope everyone has fun with it.
NL_the_Godfather says
Yeah boss rematch on carnage even with the bishomon sword is no joke. You basically have no items except your pouch. In sekiro at least you had the self revives.
Jadezt says
If upgrades material carries over, or even if it isnt, does it make sense to get all sidecontent trophies nad stuff done in the first playthrough?
If we’re gonna need to do lots of sidecontent to upgrade in carnage anyways, isnt it better to leave all that for the carnage run and just get/upgrade what actually carries over to carnage?
I’m a little lost since from the guide looks like you ask for 100% action run + ¿70%? repeated content to get strong enough in carnage…
imbroken963 says
We only recommend going for the 100% during the first playthrough for some players that may think that doing it during the second playthrough is better and may not make it fully through the second playthrough. On NG+ you don’t NEED everything fully upgraded to make it through the story but it helps. Players good enough at the game will be doing no upgrade runs for a fun challenge.
PyramidSlink98 says
Do any of the charms from the Premium Deluxe Kit add-ons make a difference? I see Capcom has already added Red Souls as a materials DLC pack, so I wonder if they’ll add more items as paid DLC that the game easier like with RE…
Snake2410 says
Most of the charms, including the preorder/deluxe ones, aren’t a major help from what I’ve seen so far.
I think the only thing they could potentially add aw a paid dlc to make the game easier would be the weapon that unlocks for beating Carnage. I doubt they’d do that, honestly, but there might be a miniscule chance they could. Only because they’ve done that with many of the Resident Evil games infinite ammo weapons. I don’t expect it to happen though. Maybe they could make some super powerful charms as a dlc, but I wouldn’t count on that either. They seem to want this game to be intentionally difficult.
GregothTheDoth says
Some tips for beginners:
Combat & Boss Fundamentals
The Blazing Combo: Parries build your blue meter. Once you go slow-mo and your sword glows blue, hold L1 (Block) and tap your layout’s attack button to spam deflects. It completely melts boss stamina bars for a massive Break Attack!
Parry vs. Dodge: Use L1 for anything with a physical edge/slashing animation (even beast claws). Use Cross (X) or Circle to dodge pounces, kicks, and lightning/tornadoes. Tip: Energy waves look like slashes but must be dodged, while physical projectiles can be deflected right back at enemies!
Stop Boss Power-Ups: Bosses get a massive buff if they hit you with a pink unblockable attack. Play defensively, don’t overextend into long combos, and focus on parrying/deflecting those pink moves to delay their transformation.
Hidden Skill Uses
Tower Takedowns: Grab the Oni Strength skill ASAP. Instead of just throwing pots, you can run right up to the base of those annoying Demon Archer Towers and press the Interact Button to rip out the supports. It collapses the tower and instantly kills everyone on top.
Infinite Range Arrow Counter: Buy the arrow counter upgrade. If you press Square right before an arrow hits you, Musashi executes an Issen counter. It automatically teleports you across any distance, even up to high, unreachable ledges—to delete the archer.
Awakening Issen Hunt: When you pop your Oni Awakening (L3 + R3), do not just mash Square. The timing window for an Issen (instant-kill counter) becomes incredibly forgiving in this mode. Just play reactively, bait basic attacks, and cash in on easy counters. Avoid trying to counter grabs/unblockables here though, as getting hit empties your meter!
Gear & Progression
Earth Shaker i-Frames: The Earth Shaker armament is a beast for breaking armor and shredding boss stamina. The trick is that you’re only vulnerable while charging. The exact frame the swing animation starts, you get full invincibility frames (i-frames). If a boss is about to hit you mid-charge, let go of the button early to tank safely through their attack and trade massive damage!
Skip the Material Grind: Falling behind the upgrade curve is brutal. Instead of grinding for hours around Eastern Kyoto, just buy your iron and materials from Yorimasa’s Monument using red souls. The shop restocks with essential crafting items after every major story milestone.
Exploration Secrets
Ignore “Souls” Instincts: Because there’s no jump button, muscle memory makes you think waist-high ledges are invisible walls. They aren’t! If you’re stuck (like trying to reach the malice plant early on), just push the Left Stick forward against the ledge to climb right up.
Missable Weapons: Don’t miss these two awesome optional armaments hidden off the main path:
Flashing Void Spear (Great boss damage): On Mount Oe, right past the elevator leading to the main castle.
Still Water Sword: Just past the Swamp 1 checkpoint at Arima.
Novaria says
If I purchase the premium deluxe, do I need to upgrade the dlc charms as well, or are the base game charms enough?
Novaria says
If the base game charms are enough, will I still have enough materials to upgrade all of them in one playthrough if I already maxed out two dlc charm?
imbroken963 says
The base game ones are the only ones required to be upgraded but I would recommend upgrading a couple from the deluxe pass just as a normal charm to use through your game though
Martin says
For example for the use 50 environmental attacks can i just keep reloading the auto save will it count?
GregothTheDoth says
can farm it in the practice arena too
Archer says
Is it even possible to upgrade everything on your first playthrough? Cause I’m on the last mission and still need several levels for equipment. It seems that only clearing the map one time is definitely not enough. I often see chests and items reappear even though I already cleared that spot. So i have to run around the map actively trying to find anything new reappear.
Archer says
Well. It seems I upgraded all the pouches so there might not be enough materials to upgrade all the equipment. But you said the cloth weapon enhancement will not carry over into NG+ does i get soft locked out of these trophies?
NicolasNexus- says
I was thinking, you could trade the red orbe from enemies for trading on materials. It could be expensive, i suggest that if you think to upgrade everything in one shot, you could make a save and pop the trophy. Im not sure 100%. I’m clearing the map after arriving on the last mission rn, 26h in
Emircan says
If, in carnage difficulty , you have to defeat all the bosses again in the boss rematch and it’s then automatically completed for lower difficulty levels as well, is there any point at all in defeating them all in the Boss rematch in Action difficulty first?
Bunkerbudy says
Nope, you gain nothing from it except personal experience..
GregothTheDoth says
it doesnt hurt to help learn the bosses honestly, their moves don’t change a lot
Archer says
For the power stones and oni stones. I somehow ended up with enough of both of them in one playthrough after finishing the final mission.
sadman says
Maybe it’s just me being dumb, and I know guides are written by different people, but imho a 6.5 is underselling Carnage Mode. It’s probably nothing like DMC5’s DMD, but it’s already kicking my ass this early on, and I can’t even fathom what Yoshitsune will be like. Compared to Khazan, Nightreign etc., it feels like it’d land somewhere around a 7.5–8 for the majority of players. The sheer amount of things you need to micromanage can be quite overwhelming.
irriducibile87 says
One quick question. You mentioned that in New Game+, Clothing, Sword, and Gauntlet enhancements do not carry over.
However, do the upgrade materials needed for those enhancements transfer to New Game+ if you do not use them ?
If they do, wouldn’t it make more sense not to spend those materials during the first playthrough and instead carry them over to New Game+? That way, I could immediately upgrade my Clothing, Sword, and Gauntlet as soon as I start New Game+, rather than having to gather the materials again.
Is the above actually doable ?
PawN says
Got the plat in 52 hours, thank you as always for the amazing guides. The Yoshitsune fight on carnage was really fun and the sword you get makes you feel like a god with the issens on the carnage boss replays.
TheNoMoreHero03 says
Regarding the Coming Through! trophy it did not pop up right away for me and then I realized you have to use your Oni power move (Triangle + Circle) on enemies that are blocking and you break their guard and then get an option to follow up with the move again. After doing this the trophy popped up. As I was always parrying, deflecting, reflex doding or using issin this was not popping up even after using the same oni attack to break enemies with shields (Helm Splitter). Anyways hope this helps someone, happy hunting!
GregothTheDoth says
Thank you! I was wondering why it hadn’t unlocked yet. Had broken guards many times, good to know its using the power move!
Little 3vil says
This makes more sense. I have pretty much all the combat achievements except this one. I was wondering what I was doing wrong.
So you need to do these power moves twice 50x, or do they count as 2? I hate they don’t have achievement/trophy tracking.
us_chrono says
When you beat Carnage difficulty, you unlock a skin, and that skin makes Issen way easier — it looks like you’re using Oni power mode, but way more powerful; if you land a hit, it deals a lot of damage.
When you finish Rematch mode, you unlock a clothes skin, and that skin makes the armor a bit harder, and the souls get sucked in automatically.
JuanFFG says
Is it enough to complete the rematch in any mode to get that armor? Or does it have to be in Carnage mode? Thanks in advance.
us_chrono says
You have to beat the carnage mode in rematch, but with the skin issen, its gonna be so much eaaaaaaaaaaaasy
zWerehog says
Hi!!
About the point of no return, the guide says to complete everything before the final mission. Is that just a suggestion? Can I finish the game and do all the collectibles, side missions, etc after the final mission?
Thank you for the guide!!!
Social_Discourse says
You can yeah
Peter says
Thank you for the complete guide. As reliable as always!!!
Motaz R. says
How to reach to hozukyo gorge once you finish that icy mission? I’m missing 2 dogs and I can’t find a way to access to hozukyo gorge.
amit says
hey everyone!
question can i upgrade all of the hozuki pouches and the clothing,sword,gauntlet in the same playthrough without the save scam?
iam worried i will be stuck withot materials to upgrade all of them
because they all pretty much use the same materials can any one clerify it please?
Class6ix says
any luck? I might have used my materials as well because the guide says no missable trophies when there obviously is
Marco says
If any kind soul would be willing to help me out, I’m stuck on a boss in my rampage run.
id: Lostwayn
JuanFFG says
I’ve got the last two bosses left in Carnage mode – is there anyone here who fancies having a go at them? My ID is JuanFFG_Zero
SAM says
Is the gemna-ologist trophy glitched, i got all notes exccept for endboss then finished the game and didn’t get it
gerlto919 says
Seems quite a few people are managing to get the platinum.
Sounds like much of the difficulty stems from people rushing Carnage mode and not doing the side content to level up gear.
If you level up the sword/cloak/gauntlet to max, you’ll have a much easier time in Carnage mode, and it starts to feel like an NG+ mode, which is probably Capcom’s intention lol.
4ipuxa says
Did the plat today. Probably the hardest platinum i ever did, and i did Sekiro and multiple Soulsborne whatever games etc, 6.5 difficulty may be a reach, probably if Bishamon was given after Action Difficulty and you play Carnage with it, last boss in story mode took like a lot of tries and hours and most of the videos does not help there are no easy ways to do him no cheese unless you learn move patterns timings and etc yourself, then in Rematch i did him ilke less than 10 tries with sword of course and moderate ammounts of Issen counters. If someone is strugling
Overall i feel like this platinum definetely took some health from my HP bar.
Also on Psnprofiles the platinum % is 22 which is rediculous, makes you feel like there was some glitch that let you complete the bosses on Carnage easier, but i dont think that is the case.