
007 First Light contains 36 Cards (Playing Cards) Collectibles. Finding all Card Locations unlocks the Casino Royale trophy & achievement.
There is no collectible tracker by chapter, only by type when pressing Touchpad. Nothing is missable, everything can be collected through Chapter Select. All collectibles are saved instantly when picking them up. If you grab them in Chapter Select you can quit out immediately without reaching the next checkpoint. You can jump to any Checkpoint directly which makes it fast to clean up anything you missed.
Collectibles Overview:
Chapter 1: Against the Odds
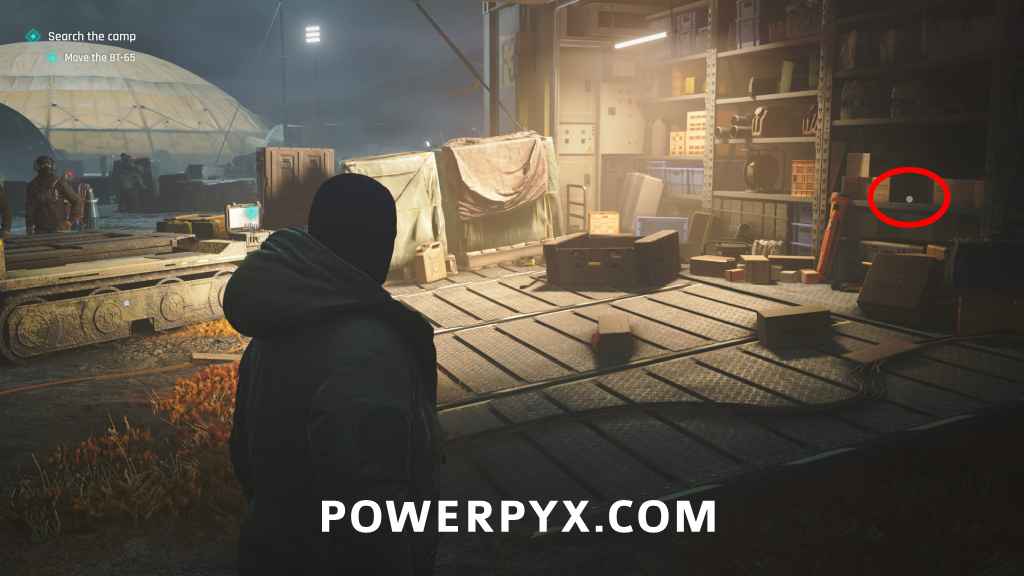
Card #1: 7 of Acorns
Checkpoint: 04 Deployment Camp
Objective: Move the BT-65
After watching the small scene of the 2 guys crashing the car and them asking you to move it, the collectible is on the shelves to the right of the remote.
Chapter 5: A New Home
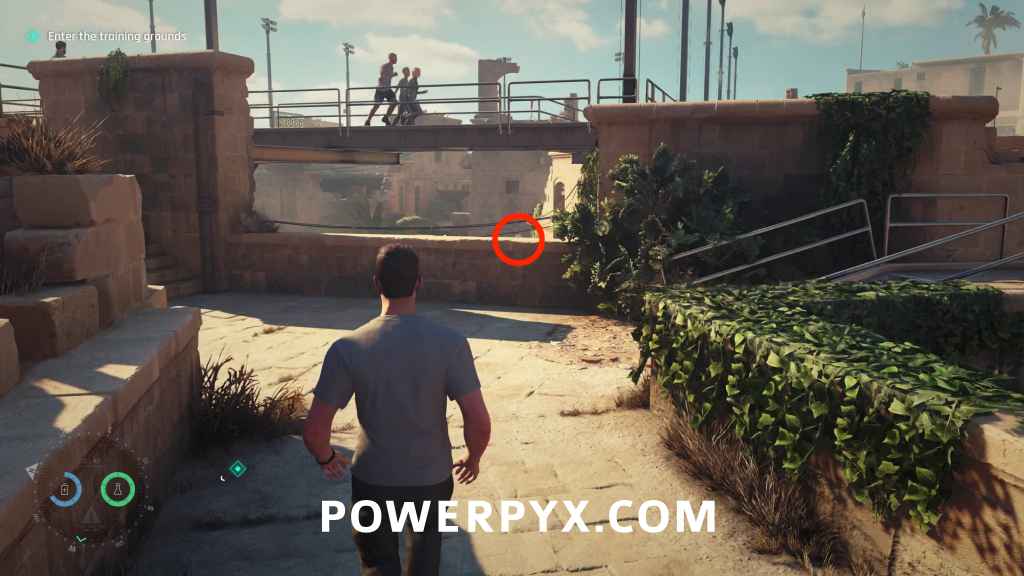
Card #2: Under of Acorns
Checkpoint: 02 Advanced Training
Objective: Enter the training grounds
At the start of the training area, proceed until the first gate you have to open by hacking it. Then turn around and backtrack to the start of the area, go up the stairs to the platform where Greenway explained the rules to you earlier. On the ledge straight ahead from the stairs you find the card. You can only reach it AFTER opening the first gate, before you can’t go up the stairs.
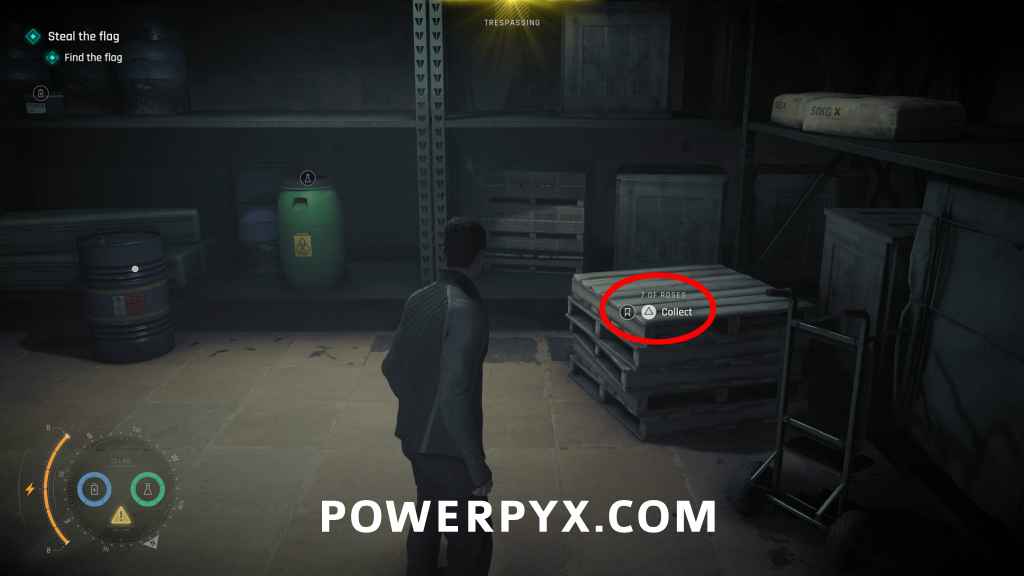
Card #3: 7 of Roses
Checkpoint: 10 Search the compound
Objective: Steal the flag
Go down to the pier area and there will be a giant double door by the stairs. You can either kick it in (alerting nearby enemies) or get the key from a nearby enemy on the stairs. After going through the door, the collectible is on a set of pallets in the room ahead with the 3 enemies.
Chapter 6: A Night Out
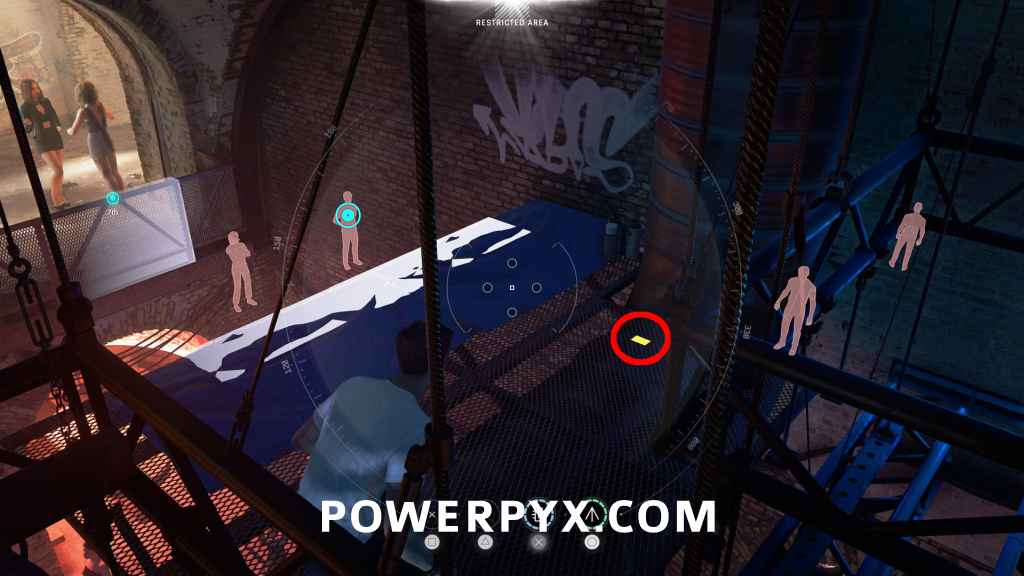
Card #4: Ober of Bells
Checkpoint: 05 Get upstairs
Objective: Get to the upstairs lounge
In the disco room go behind the stage and climb up the scaffolding backstage. Then climb across the pipes and the collectible will be on the ground right before jumping across to the second floor. You’ll go this way following the “Above and beyond” objective (you can press Touchpad to track specific objectives).
Chapter 8: All the Time in the World
Card #5: Ace of Acorns
Checkpoint: 02 In Position
Objective: Investigate the blond man
After you parked the car and continue on foot, go up the stairs, then on the left go down the next stairs to find this on the railing.
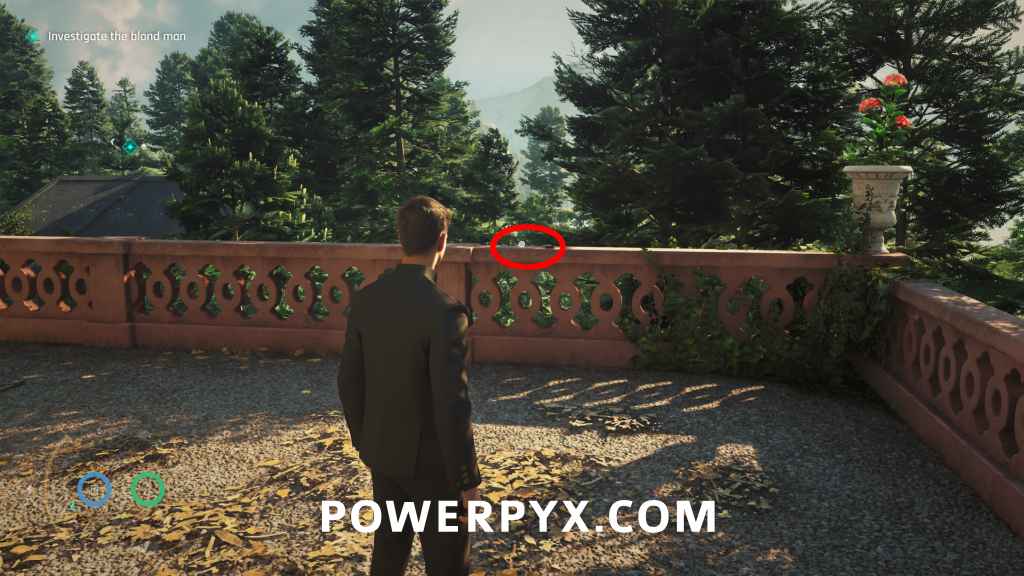
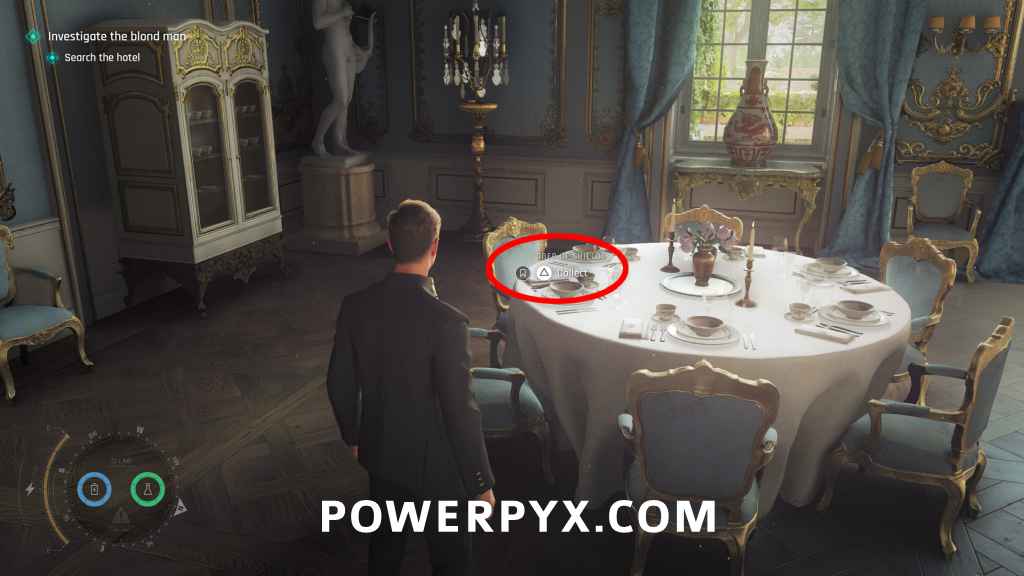
Card #6: Ober of Shields
Checkpoint: 03 The game is on
Objective: Search the hotel
When you enter the huge room with many guests, head left and go down the staircase. After exiting the staircase turn left again, walk down the corridor and on the left you will see a room labeled “Dining Room”. Go in and check the table in the back left corner from where you enter. It’s one of the dining tables with a white cloth on it, the card can be hard to see on it.
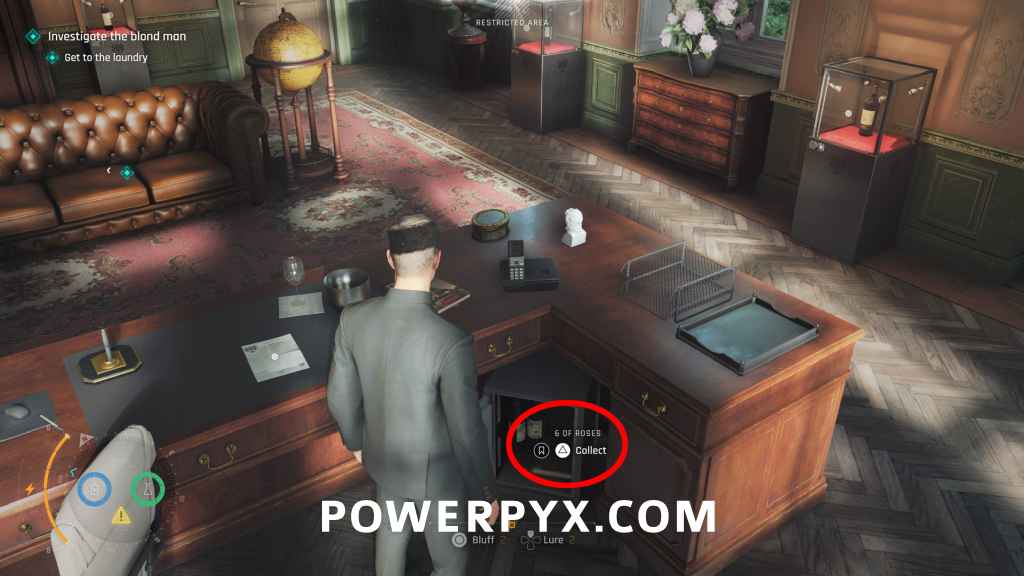
Card #7: 6 of Roses
Checkpoint: 03 The game is on
Objective: Search the hotel
Go downstairs to the reception. Directly behind the reception go through the white door. Then enter Manager’s Office in the back right corner of the restricted area, either by distracting the guard or going through the “Staff Only” room with 2 maids. In Manager’s Office check the safe under the desk and enter code 1952, collectible is in the safe (the code is the year of the middle wine bottle in the room).
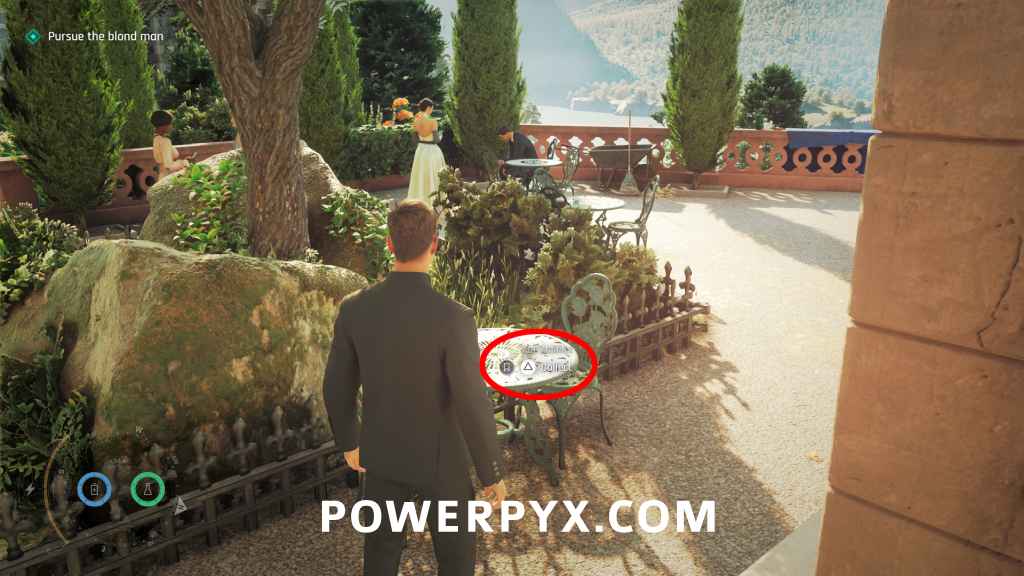
Card #8: 6 of Acorns
Checkpoint: 08 Delivery Area
Objective: Pursue the blond man
Later in the chapter after the story takes you through room 206, for the next objective you will enter a service corridor with a big blue power cable. At the end of the corridor go through the door and head left to the terrace, it’s on a table (the area is locked off until this objective).
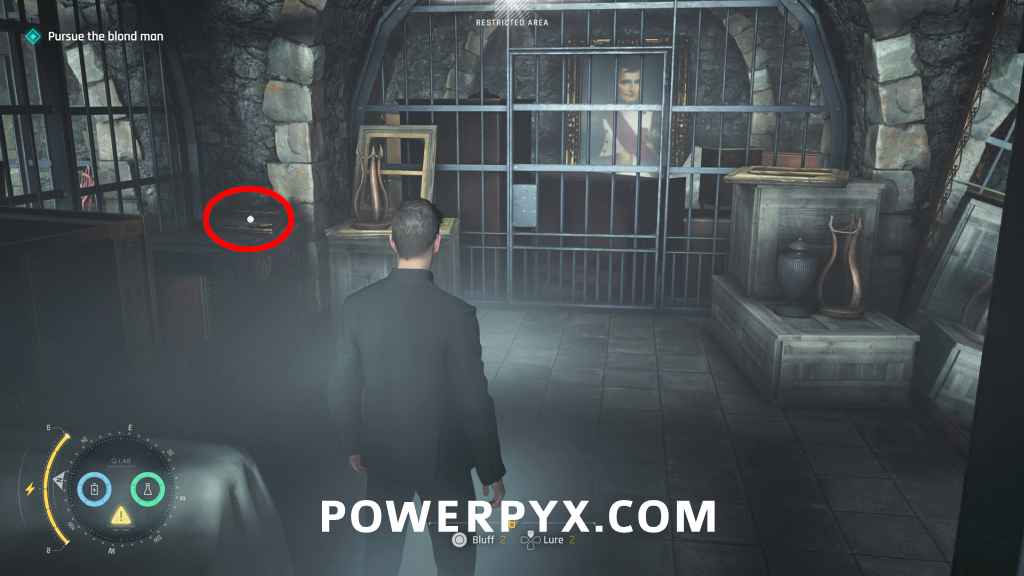
Card #9: 7 of Bells
Checkpoint: 10 The vanishing
Objective: Pursue the blond man
After solving the dining room puzzle (Lion > Snake > Goat), you enter a dark cellar. After vaulting over the first table, turn left to enter a room with prison bars to find it on the crate (before squeezing through a gap).
Chapter 9: Out of the Ashes
Important: When you reach the gadget table in Q-Lab (story objective), be sure to equip the new “Laser Strap”, it’s needed for two cards in Chapter 10!
Chapter 10: The Past Never Dies
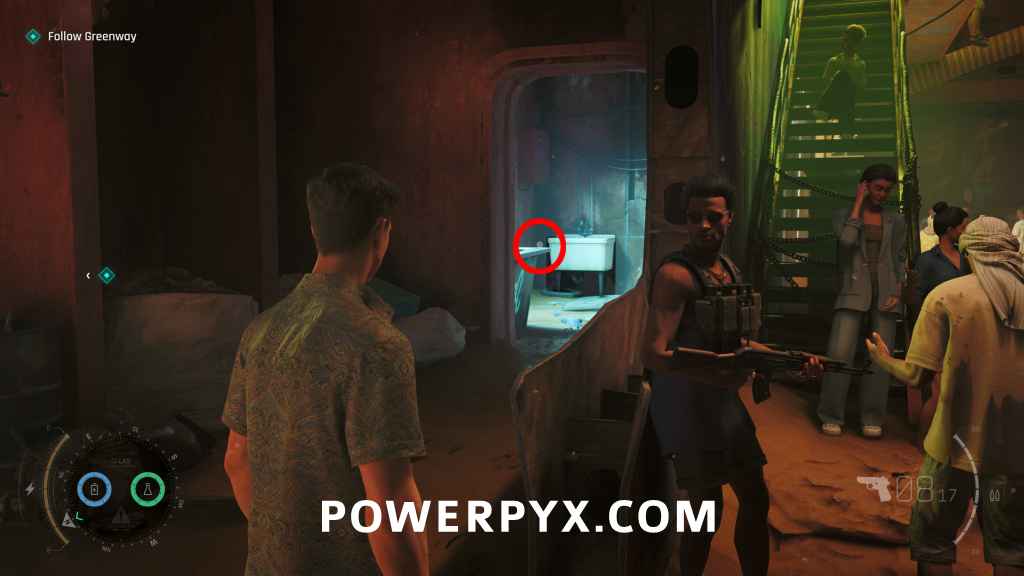
Card #10: 6 of Bells
Checkpoint: 02 Arriving at Aleph
Objective: Follow Greenway
After you exit the car you continue on foot into a shipwreck with a market inside. Take the left path to find this in the bathroom.
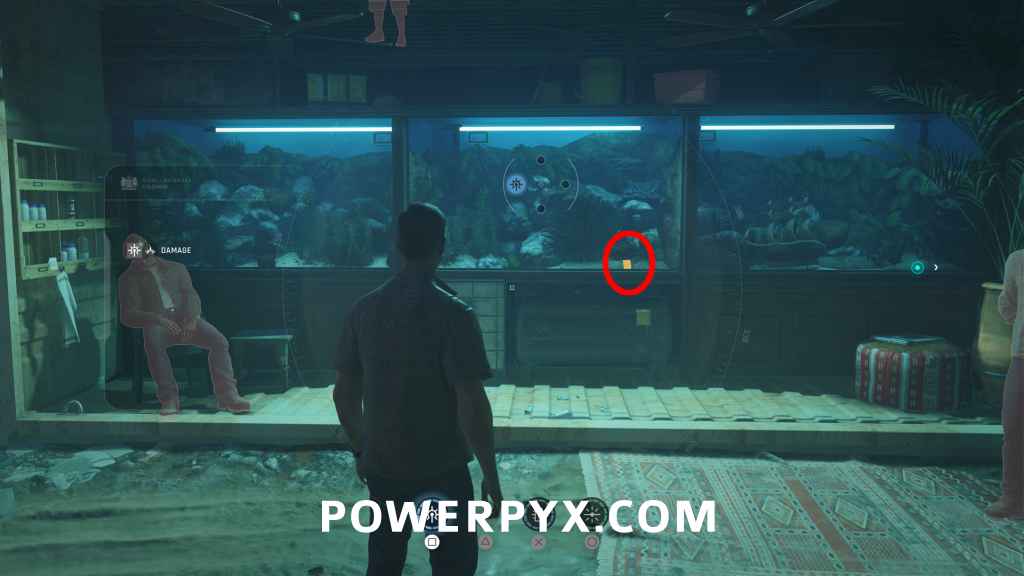
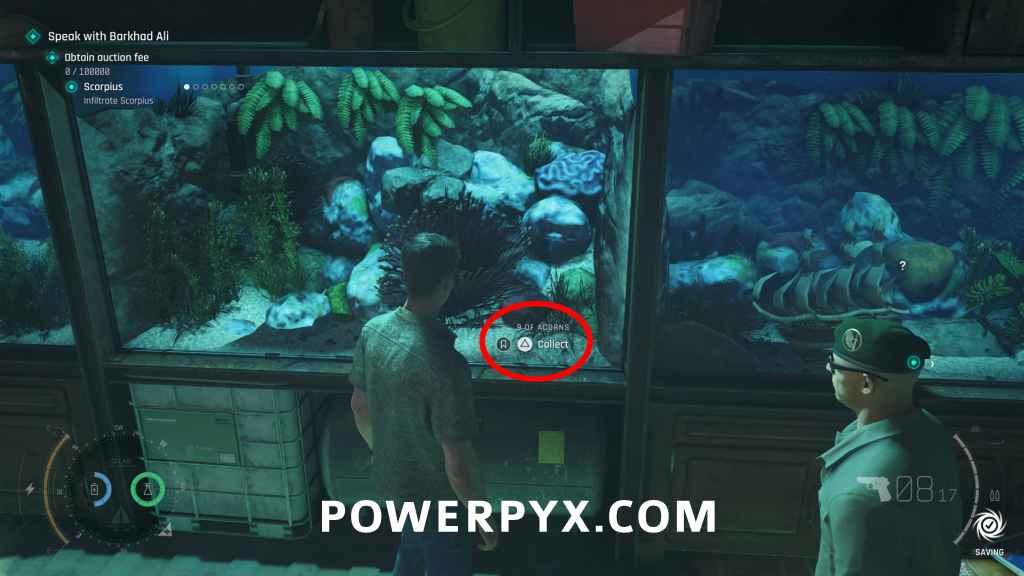
Card #11: 9 of Acorns
Checkpoint: 03 Black Market
Objective: Obtain auction fee
As soon as you get this objective, go downstairs to the market, then go right to an area with an eavesdrop opportunity on two guards. The card is inside the fish tank where the guards are. You must destroy the fish tank using the Laser gadget of your Q-Watch (must have equipped it in Chapter 9 in Q-Lab). If you use Chapter Select it will automatically equip you with different gadgets and you must replay from Chapter 9 onward.
Card #12: Ober of Acorns
Checkpoint: 03 Black Market
Objective: Obtain auction fee
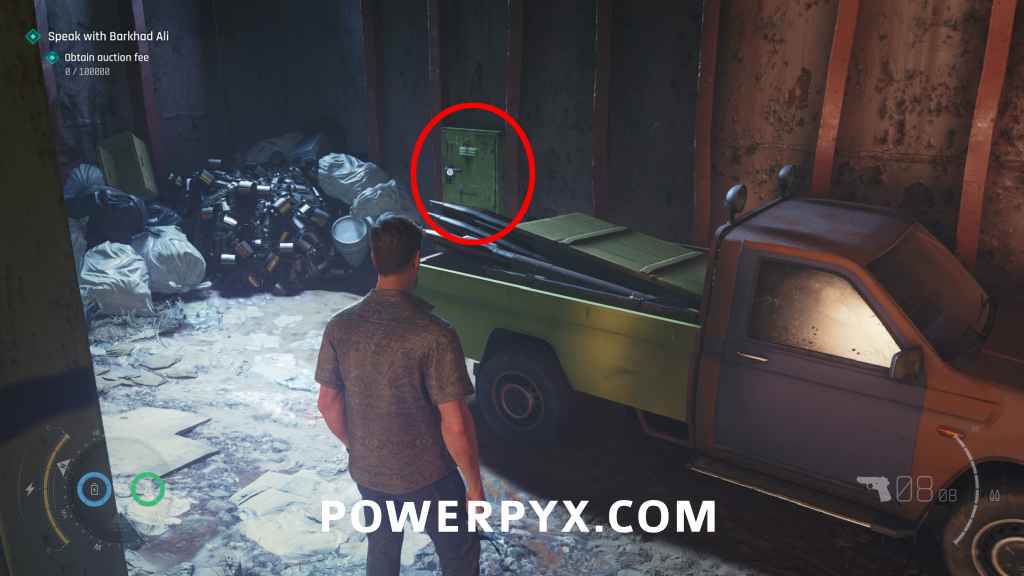
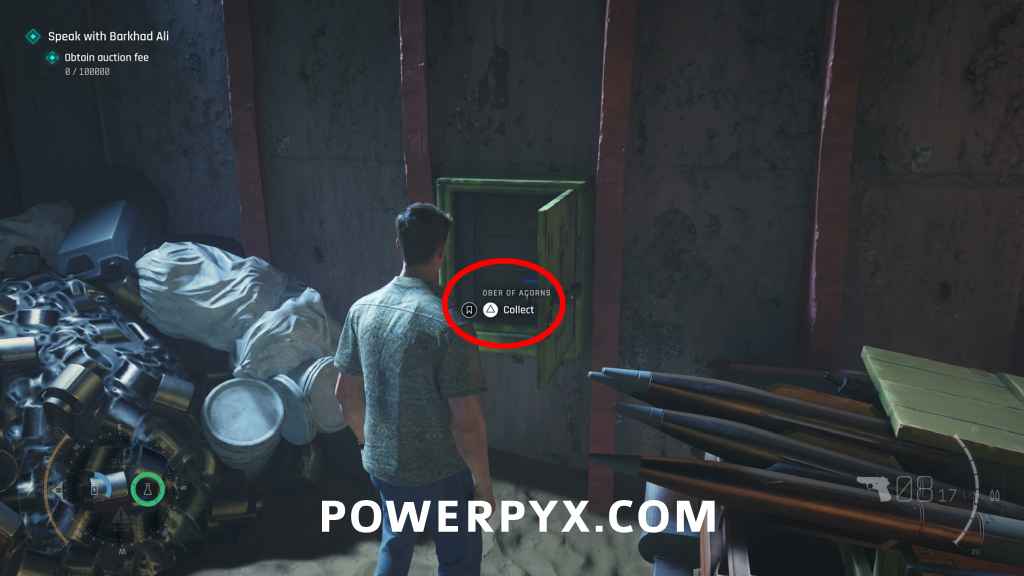
From the ramp where you first entered the market area, head to the left side with a big red anchor in the ground and a little fenced-in area. Past the fenced-in area is a parked truck. Behind the truck is a wall panel you can break open with the Laser gadget, the card is in it.
Card #13: Ace of Roses
Checkpoint: 03 Black Market
Objective: Obtain auction fee
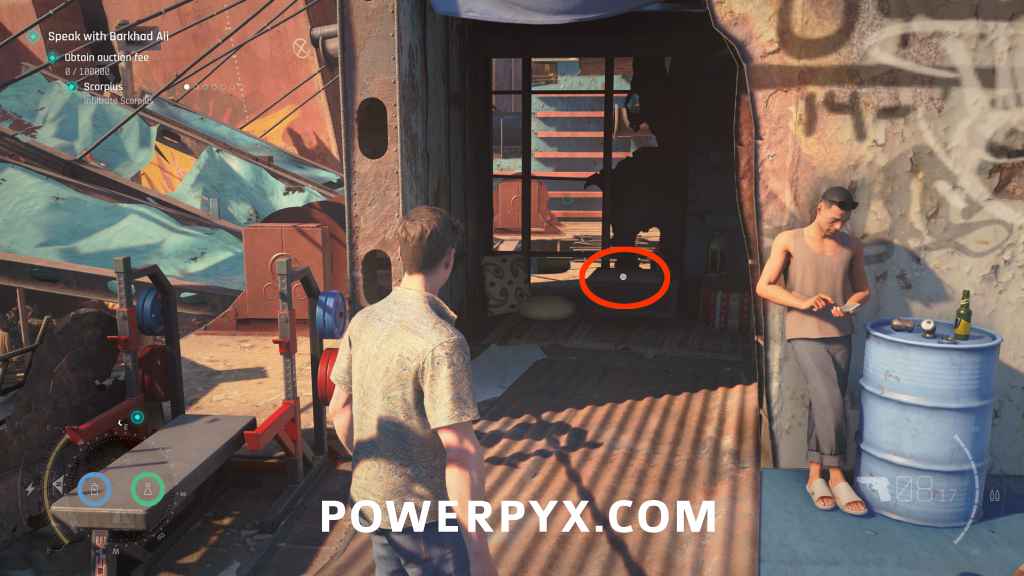
Backtrack to the ramp where you entered the market, then go in a straight line through the market and enter the tunnel to reach the Fight Club. On the upper floor of the Fight Club, take the exit left of the bar to reach a roof with training equipment. There in the small corner room you find it on the box.
Card #14: Banner of Shields
Checkpoint: 07 Find 009
Objective: Find 009
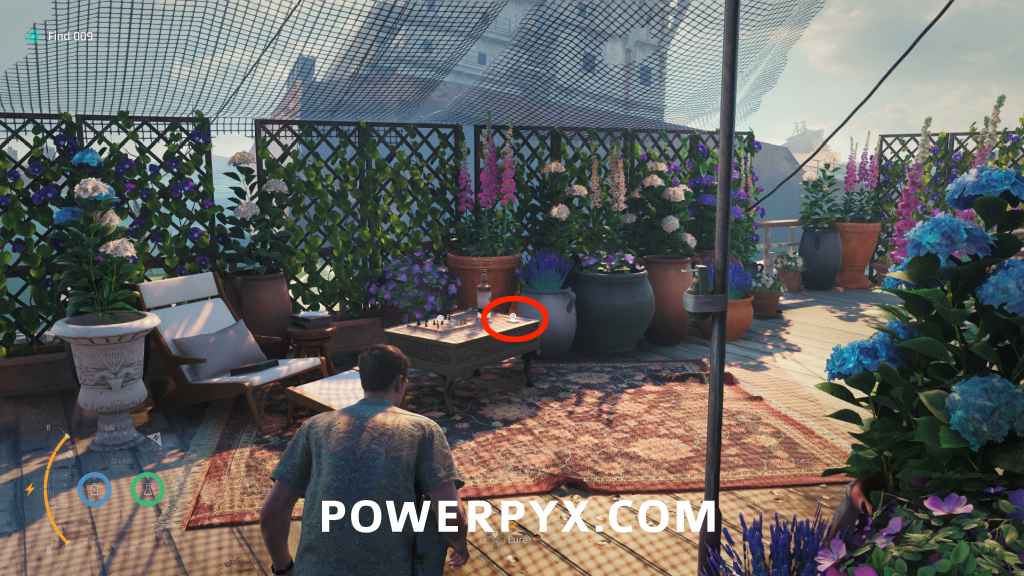
When the story makes you disarm tripwires on a ship, go up the right staircase, then turn around to find this at the front of the upper deck.
Card #15: 6 of Shields
Checkpoint: 10 Find a way inside the shipwreck
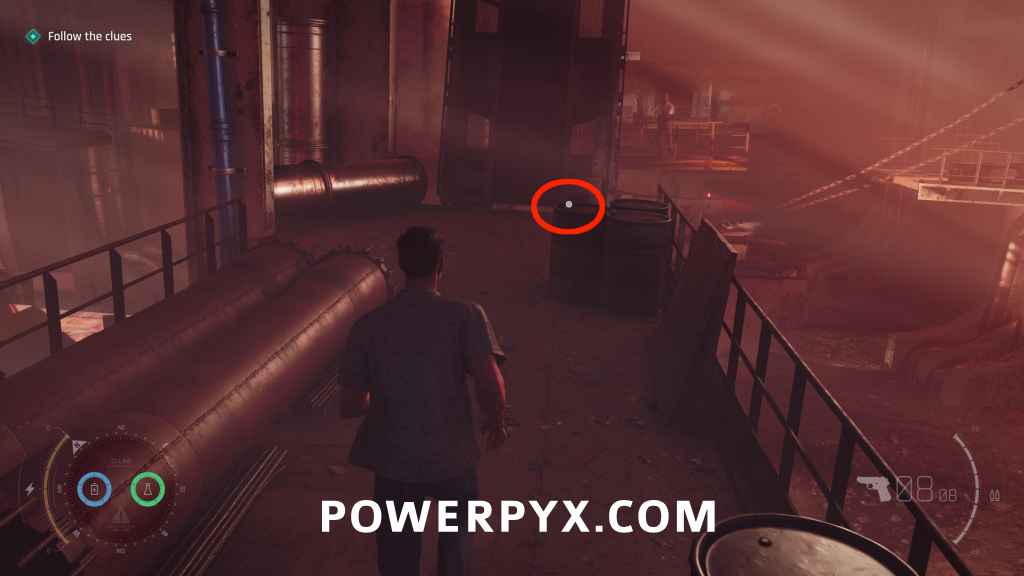
Objective: Follow the clues
Inside the shipwreck, after hoisting yourself up a chain and using a zipline to get to the other side, proceed forward and this will be on a barrel. In front of a blue pipe you need to climb to lower a drawbridge.
Chapter 11: Uninvited
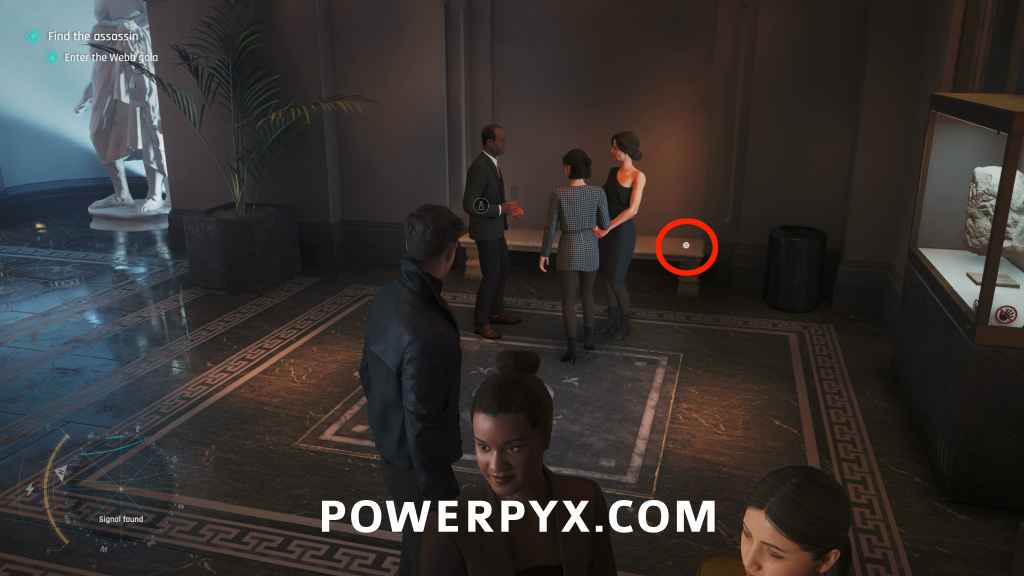
Card #16: 8 of Acorns
Checkpoint: 04 Gala Entrance
Objective: Enter the Webb gala
In the first hall of the Gala in the back right corner, to the right of the reception desk, on a stone bench.
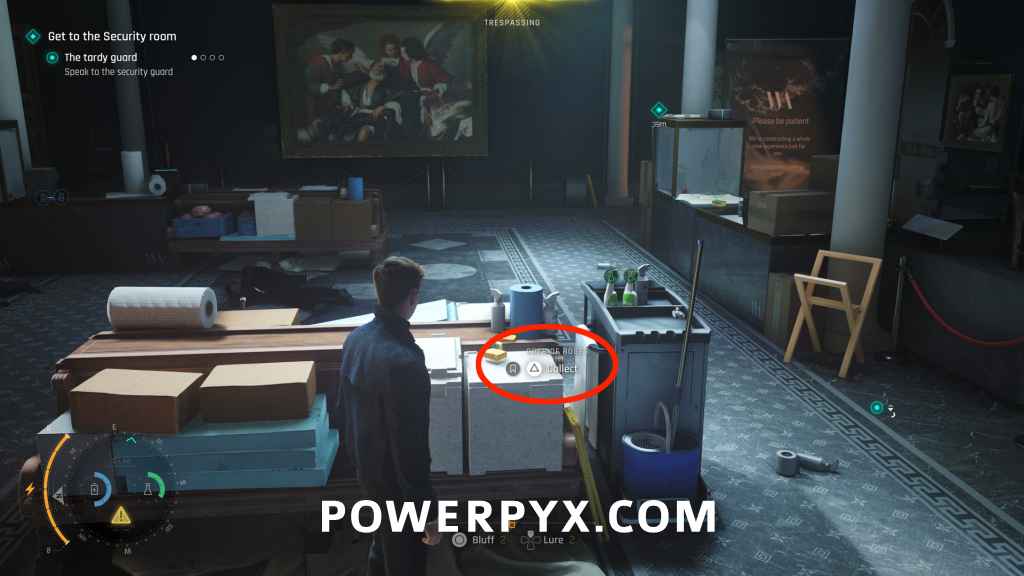
Card #17: Ober of Roses
Checkpoint: 05 Get upstairs
Objective: Find the assassin
After using the invitation to enter the Gala room, immediately turn left and enter the hallway on the side. In the hallway turn left again, at the end of the hallway is a single guard in white shirt and a restricted area to the Cloakroom. Distract the guard using gadgets such as Dartphone or Laser. Then you can sneak past him into the Cloakroom, turn right to pash through the gap and kick down the door. Then head upstairs to a room with enemies, defeat them. In the middle of the enemy room you find this on a white box.
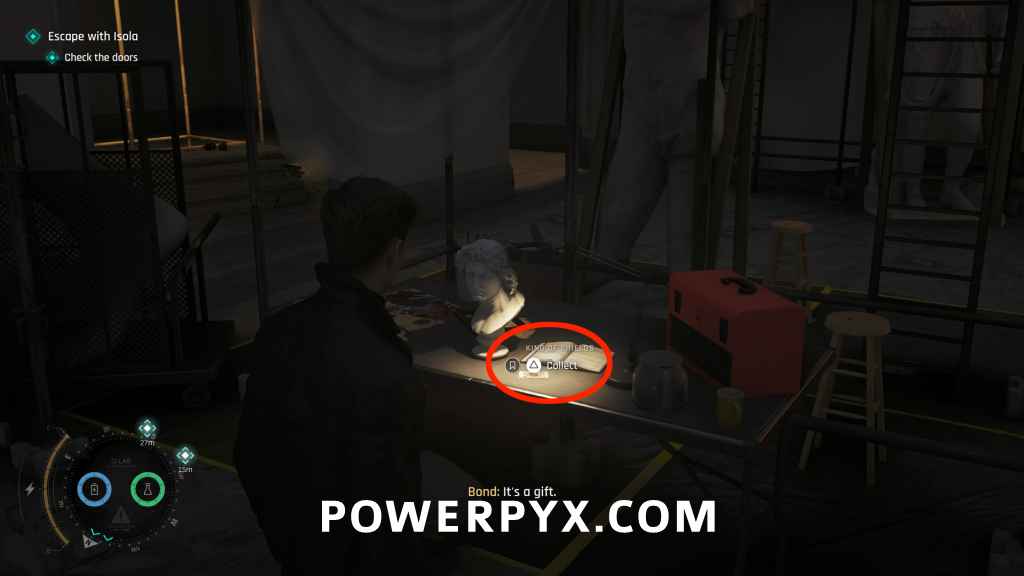
Card #18: King of Shields
Checkpoint: 09 Storage room
Objective: Escape with Isola (Check the doors)
After getting freed from the chair, turn around and the collectible is on top of the table.
Card #19: 8 of Roses
Checkpoint: 09 Storage room
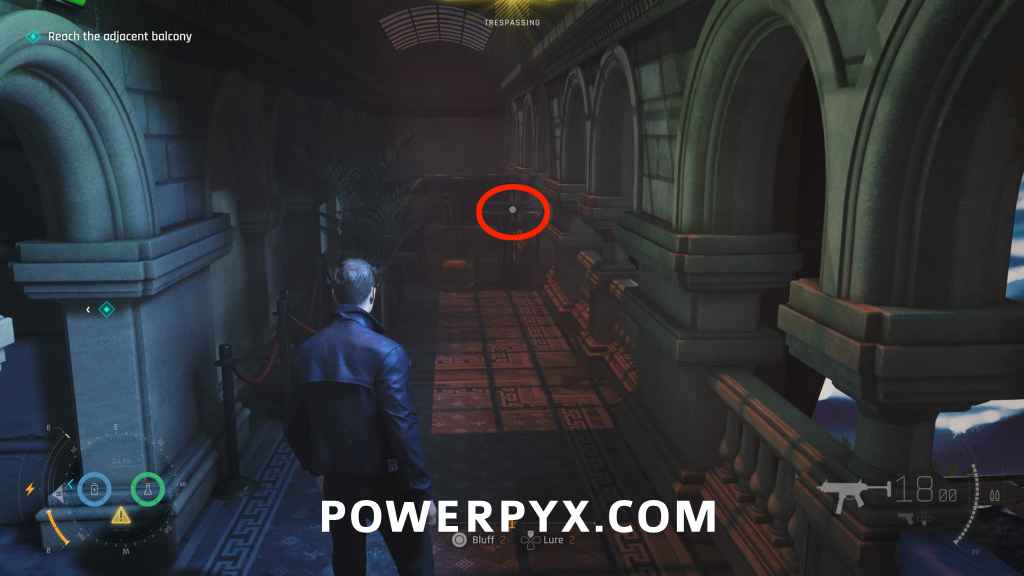
Objective: Reach the adjacent balcony
After jumping across the light rig to the other balcony, go to the right and the collectible is on a table.
Card #20: 9 of Shields
Checkpoint: 10 The courtyard
Objective: Escape the courtyard
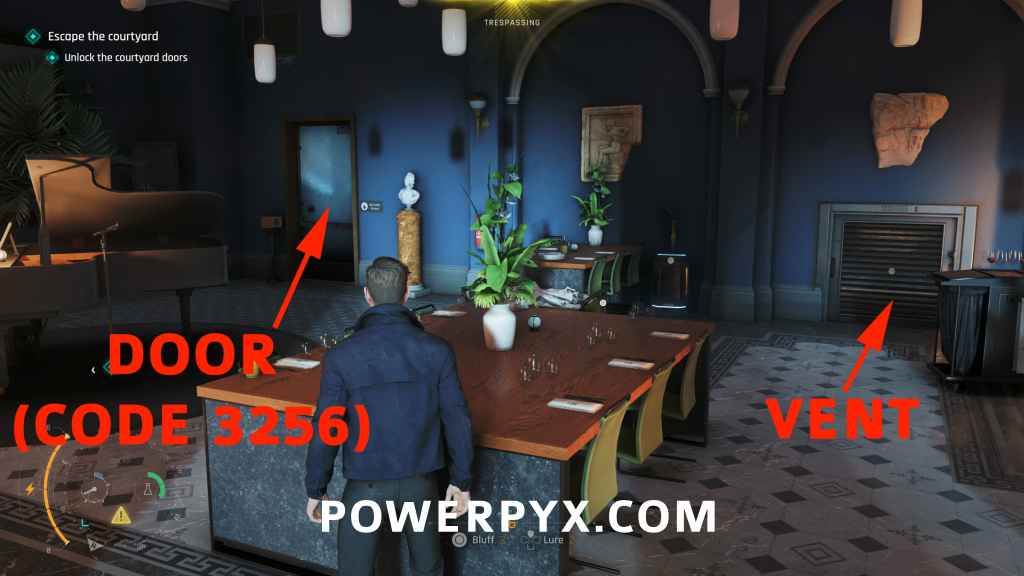
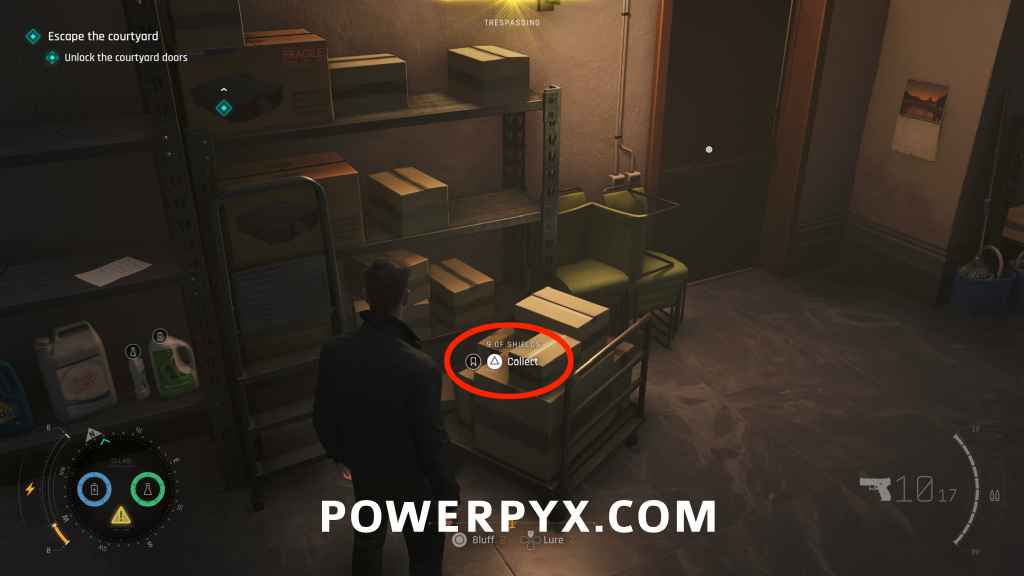
After dropping into the courtyard where many enemies are, go down to the ground floor to the dining hall (back right corner of where you started the area). There will be a vent near the piano where you can enter. Follow it and you can use the laser gadget to break the padlock to get into the maintenance room where the collectible is on a box. You can also put the code into the door to open it, which is 3256, which can be found on the laptop in the library.
Chapter 12: Knightfall
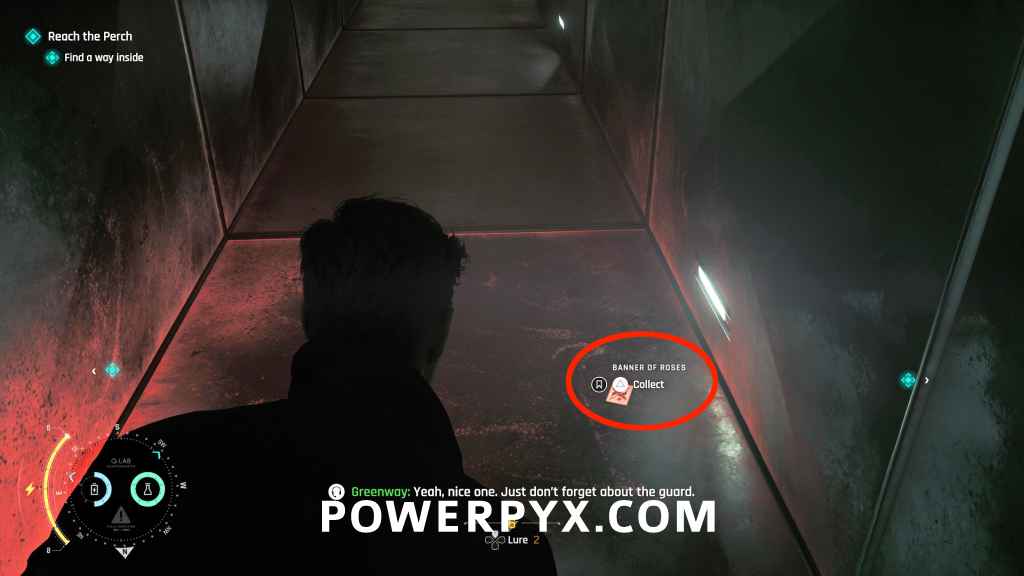
Card #21: Banner of Roses
Checkpoint: 02 Executive 1st Floor
Objective: Reach the Perch / Find a way inside
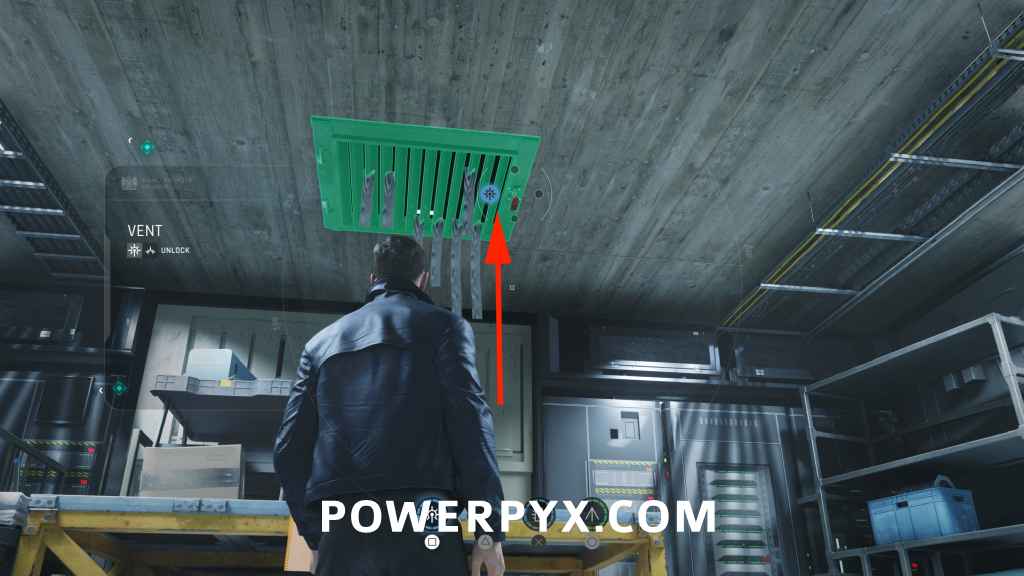
After you reach Level 2 (2nd floor), you’ll be in a hallway. At the end of the hallway on the right enter the “Maintenance” room. On the ceiling open the vent using the Laser Strap. Climb into the vent and the collectible will be on the ground.
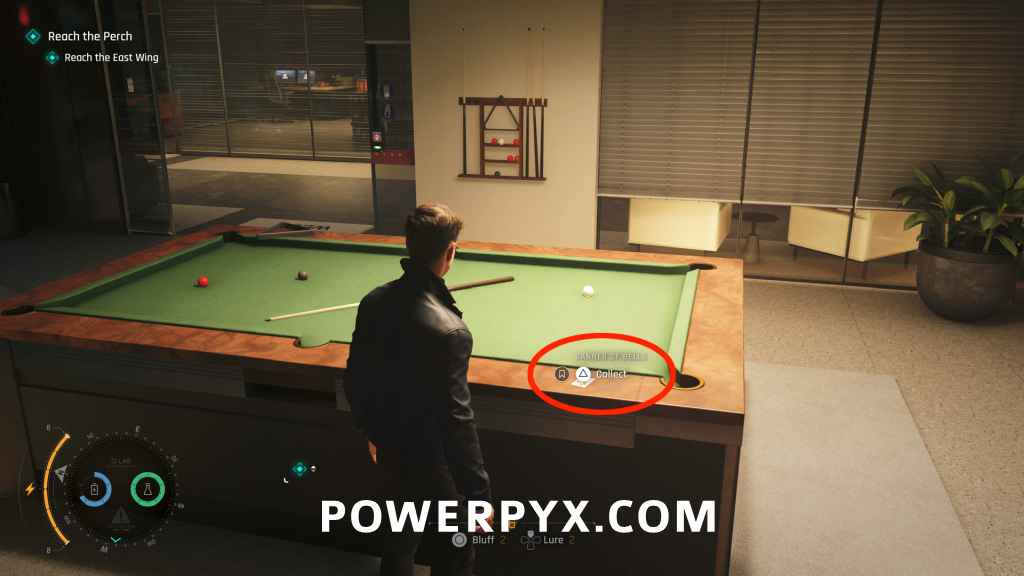
Card #22: Banner of Bells
Checkpoint: 02 Executive 1st Floor
Objective: Reach the east wing
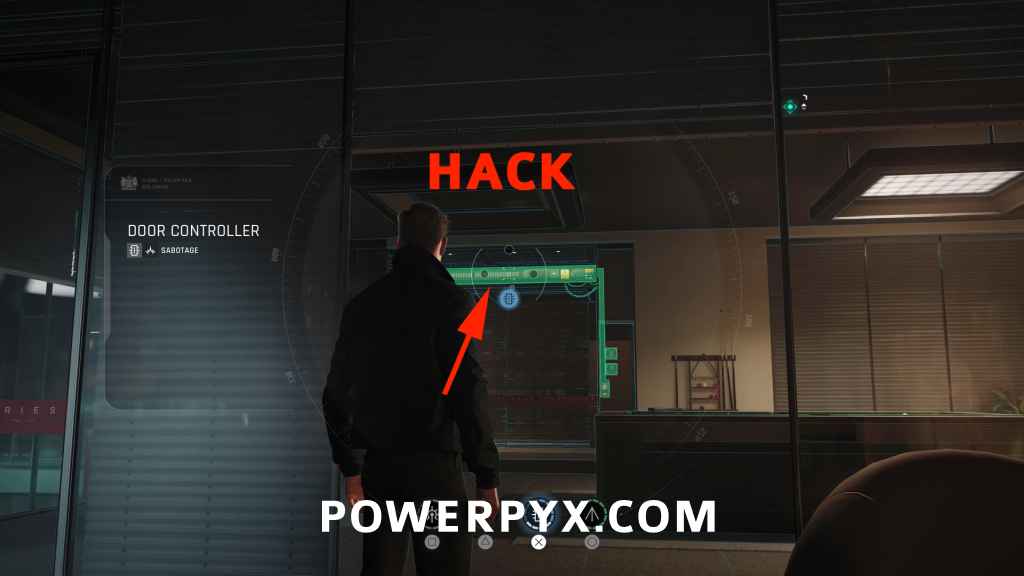
After talking to Greenway at the railing in front of the two waterfalls, climb over the railing and use the ledge between the waterfalls to shimmy across to the other side. Immediately after climbing up, turn left and hack the door sensor inside the locked room. Wait for Greenway to open the door from the other side. The card is on the billiard table.
Card #23: 7 of Shields
Checkpoint: 02 Executive 1st Floor
Objective: Get to the Penthouse
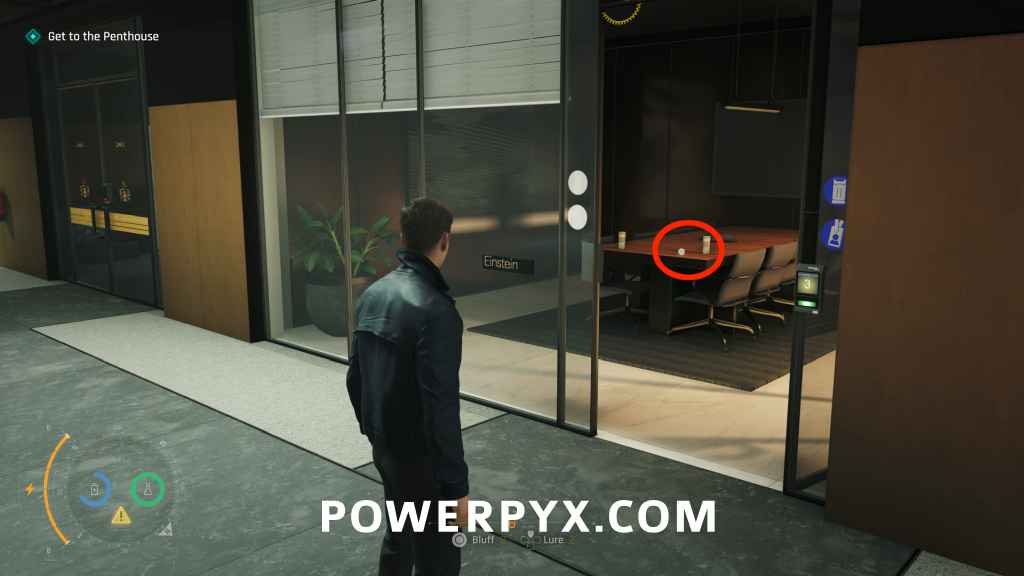
After going up to the next floor with Greenway (Level 3). Near the end of the hallway on the left go into the office labeled “Bohr”. Turn left and hack the door of the office labeled “Einstein”. Now you can enter the Einstein office to find it on the desk.
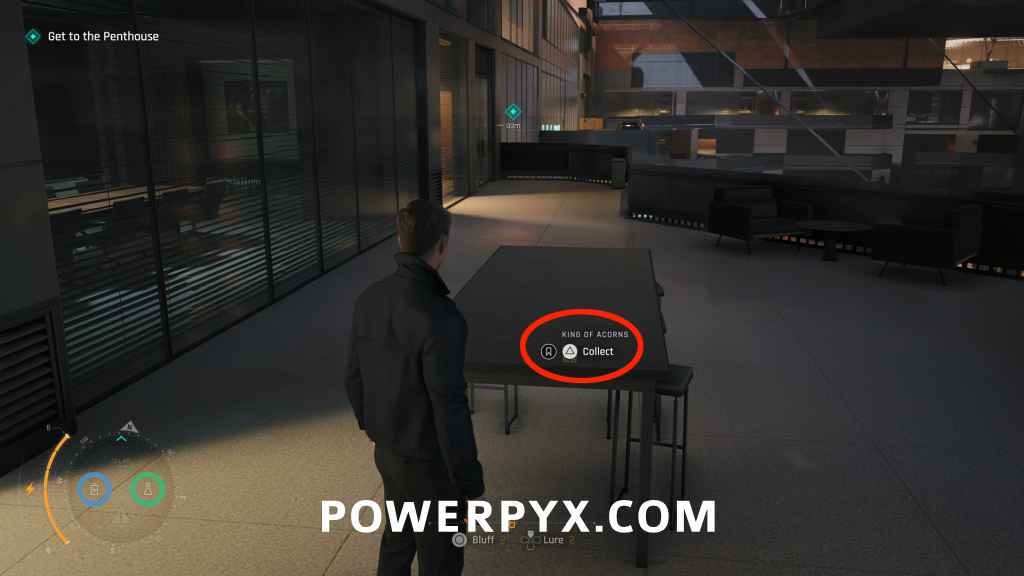
Card #24: King of Acorns
Checkpoint: 02 Executive 1st Floor
Objective: Get to the Penthouse
After getting the Security Access Key (main objective), go back to where you found the previous collectible in Einstein’s office. Instead of going into the office, backtrack toward the start of the hallway where you first entered Level 3. You can now open the side doors to the balcony using the Security Access Key. The card sits on the table there.
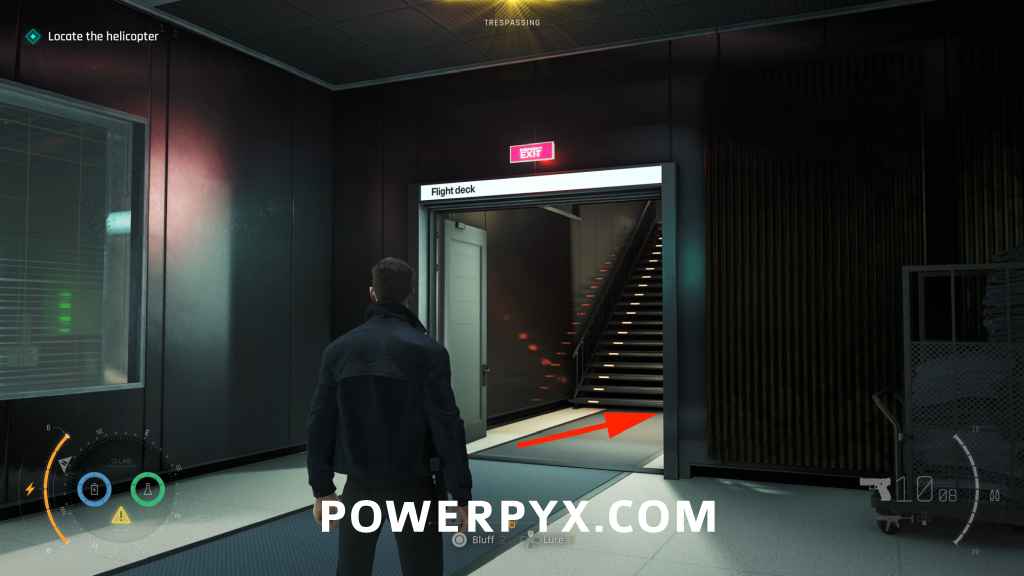
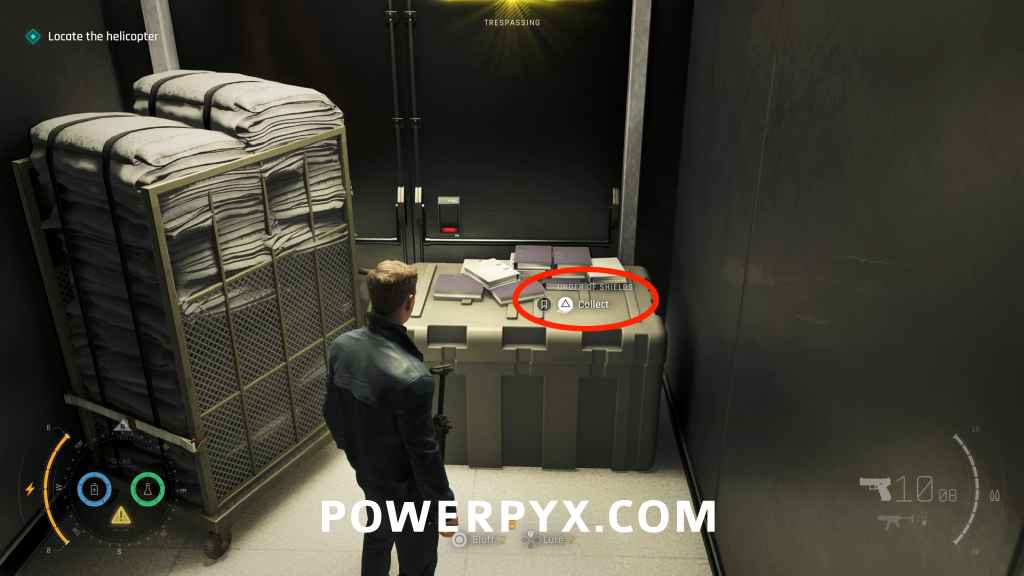
Card #25: Under of Shields
Checkpoint: 09 Cargo floor
Objective: Locate the helicopter
Once you reach the stairs leading to the flight deck, go down the stairs instead and the collectible will be on a crate.
Chapter 14: Time to Die
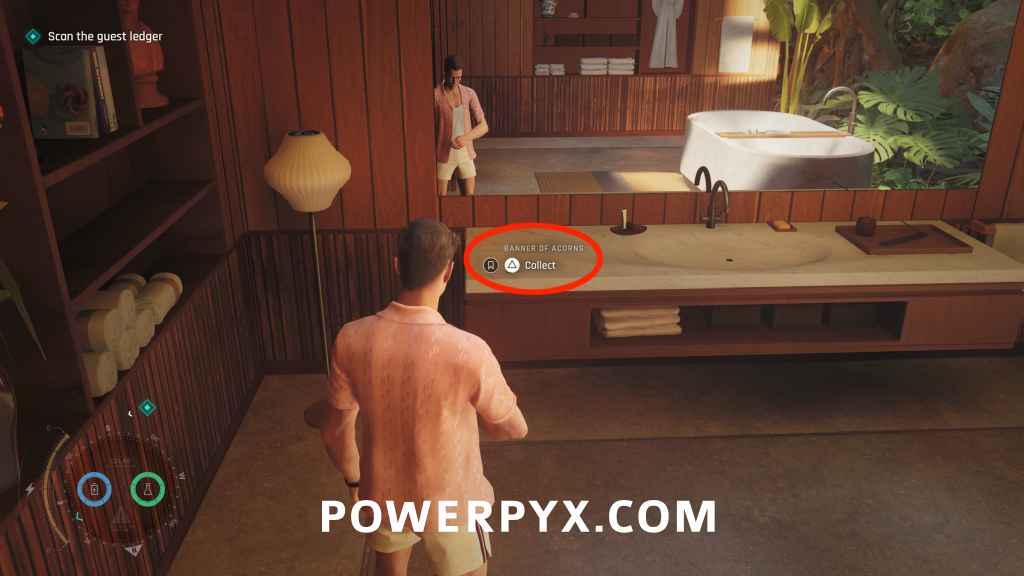
Card #26: Banner of Acorns
Checkpoint: 03 A Package from Q
Objective: Open package from Q
Once you get inside the villa, go up the stairs and go down the hallway on the right to enter the bathroom. The collectible will be on the sink counter.
Card #27: 8 of Shields
Checkpoint: 05 The three targets
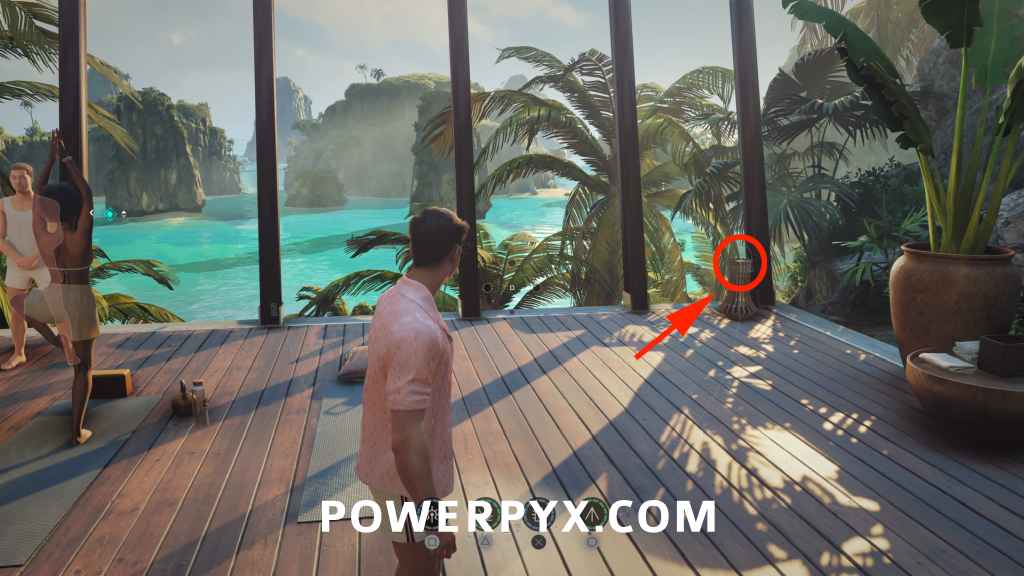
Objective: Plant Q-Traks
After visiting the reception, follow the signs until you reach the Tranquility platform (next to the Ocean View Bar), and the collectible will be on top of a lantern near the edge.
Card #28: 9 of Roses
Checkpoint: 05 The three targets
Objective: Plant Q-Traks
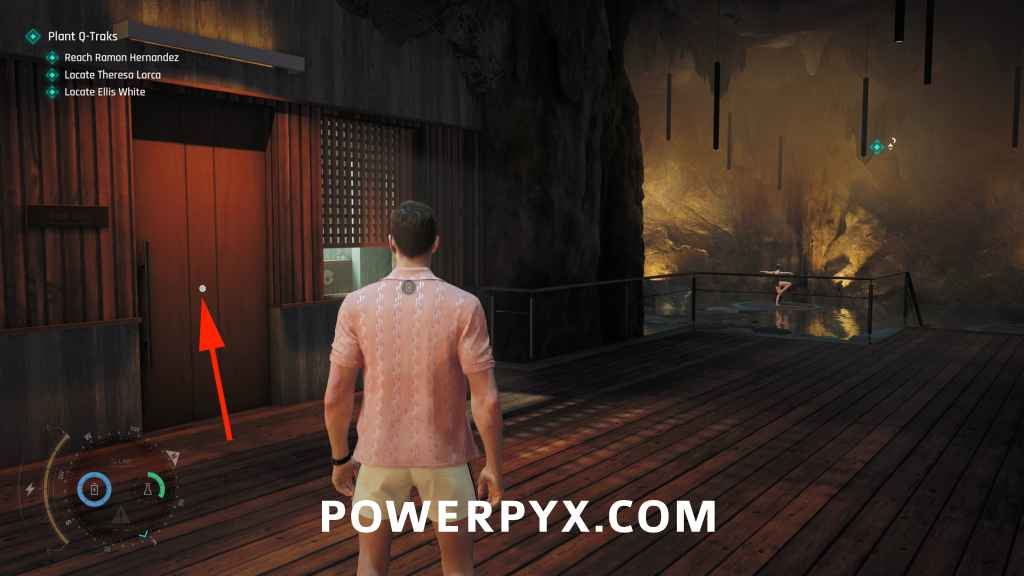
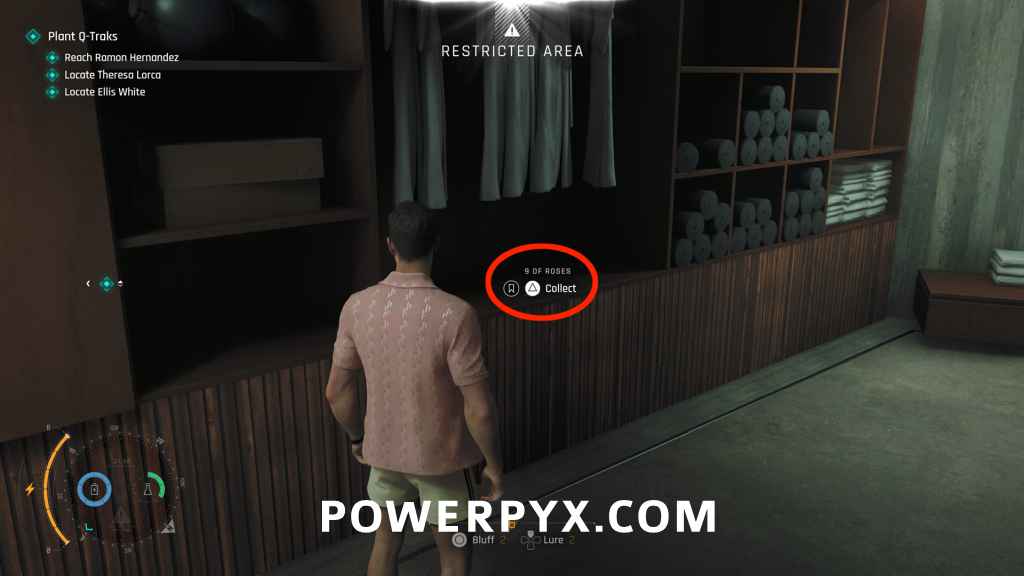
From the previous collectible, go down the stairs into the Tranquility Cave and towards the end you’ll see someone on the phone. After eavesdropping on his conversation, you can use the Dart Phone on him to pickpocket the Storage Key, and use it to unlock the nearby door. Go inside and the collectible will be on the shelf to the left.
Card #29: Under of Bells
Checkpoint: 05 The three targets
Objective: Reach Ramon Hernandez
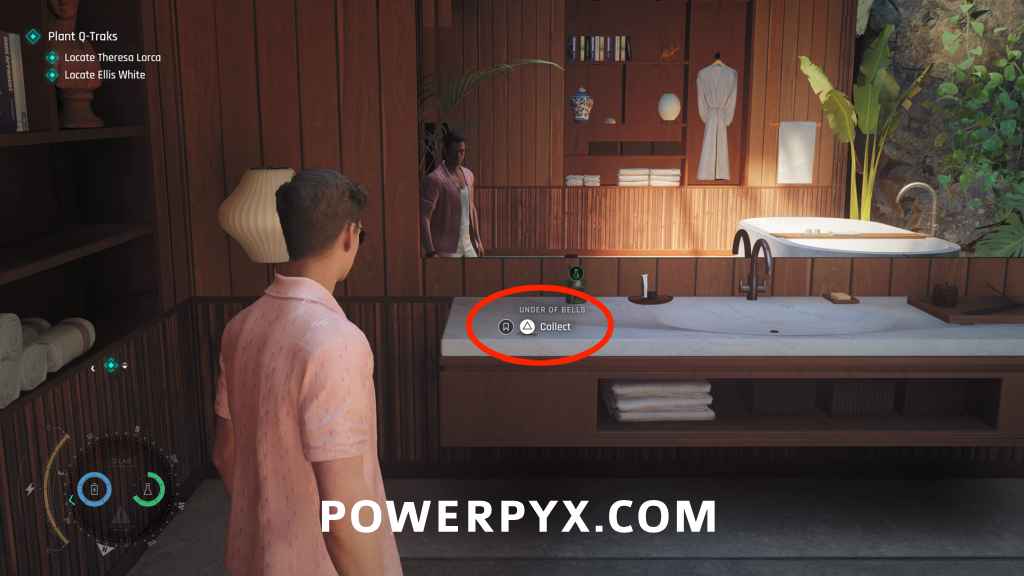
Once you get into the Hung Villa, go upstairs where you will talk to Ramon Hernandez (main objective). Then enter the bathroom to find the collectible on the sink counter (heavily recommended to use the Yoga disguise so you can walk around the area freely, which is found in room with previous collectible by reading the wall note and picking up the yoga mat).
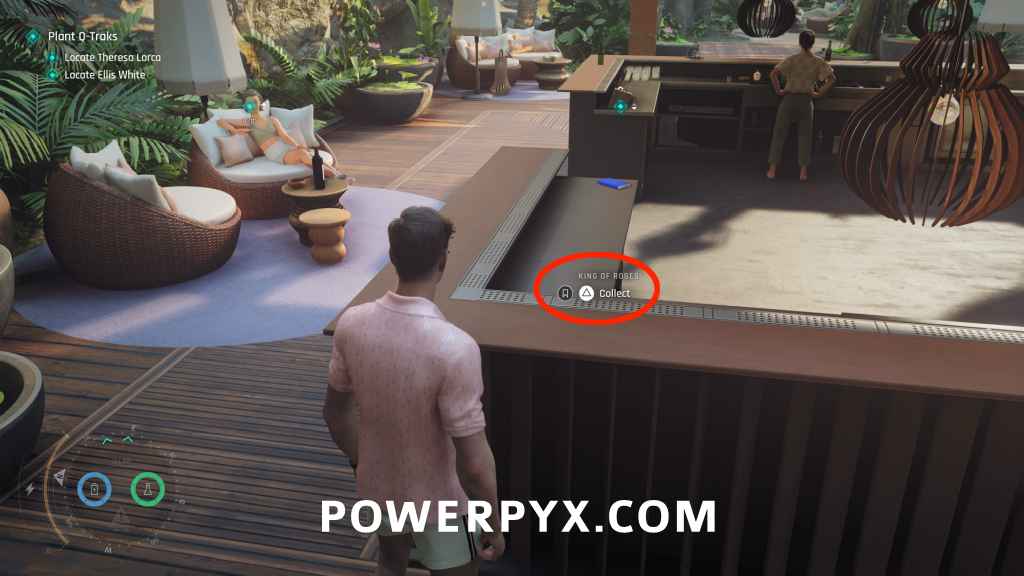
Card #30: King of Roses
Checkpoint: 05 The three targets
Objective: Plant Q-Traks
Follow the signs to Lotus Bar and this will be on the counter in the back of the bar. When you come out of Ramon’s villa go straight and take the next left.
Chapter 16: Wave of the Future
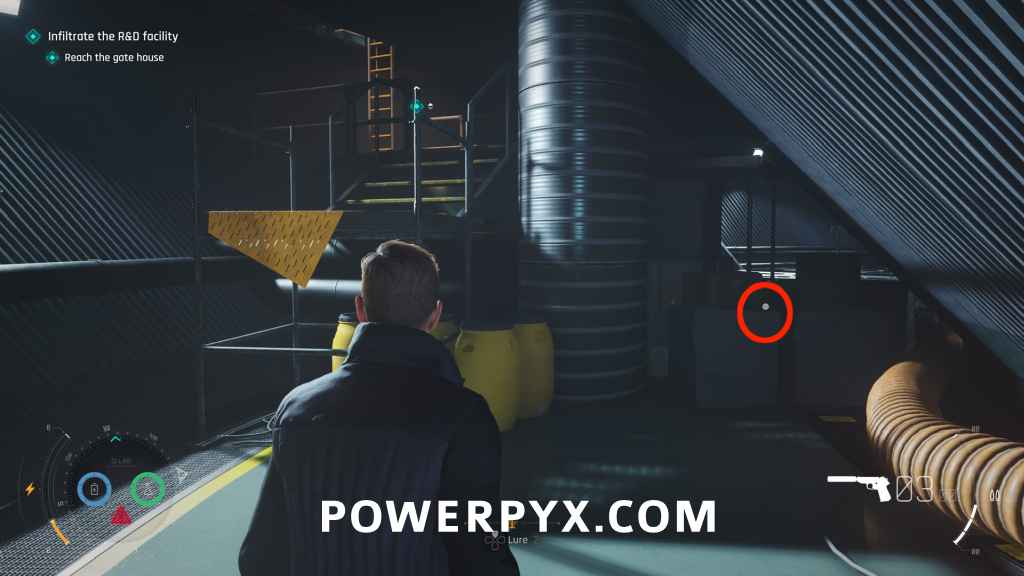
Card #31: Under of Roses
Checkpoint: 03 The gantries
Objective: Reach the gate house
After getting past the first set of enemies and entering the building, this will be at the end of the hallway, before climbing the yellow scaffolding.
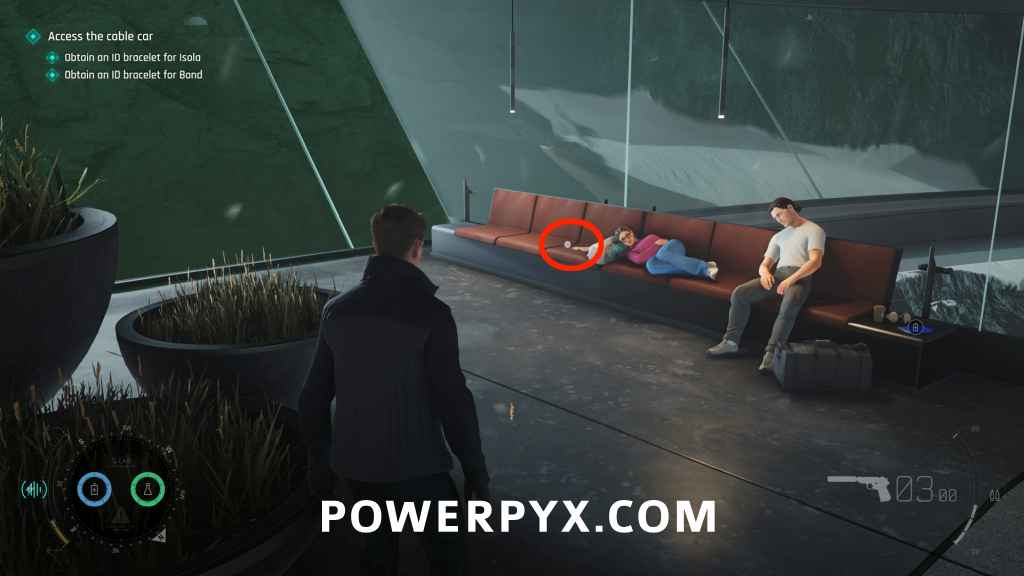
Card #32: Ace of Bells
Checkpoint: 04 The gate house
Objective: Access the cable car
After reaching the cable car, go up the stairs on the right side and then turn around at the top. The collectible will be on one of the couches on the left.
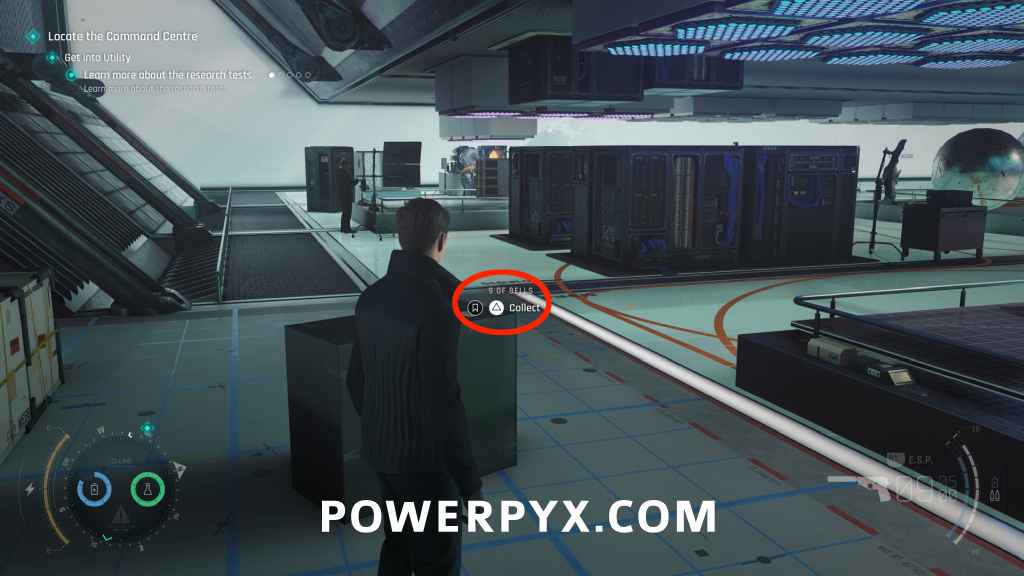
Card #33: 9 of Bells
Checkpoint: 08 Robotics Department
Objective: Get into Utility
From the entrance of Robotics, go straight ahead to the Utility door, then go to the right. The collectible will be on a box.
Chapter 17: For England
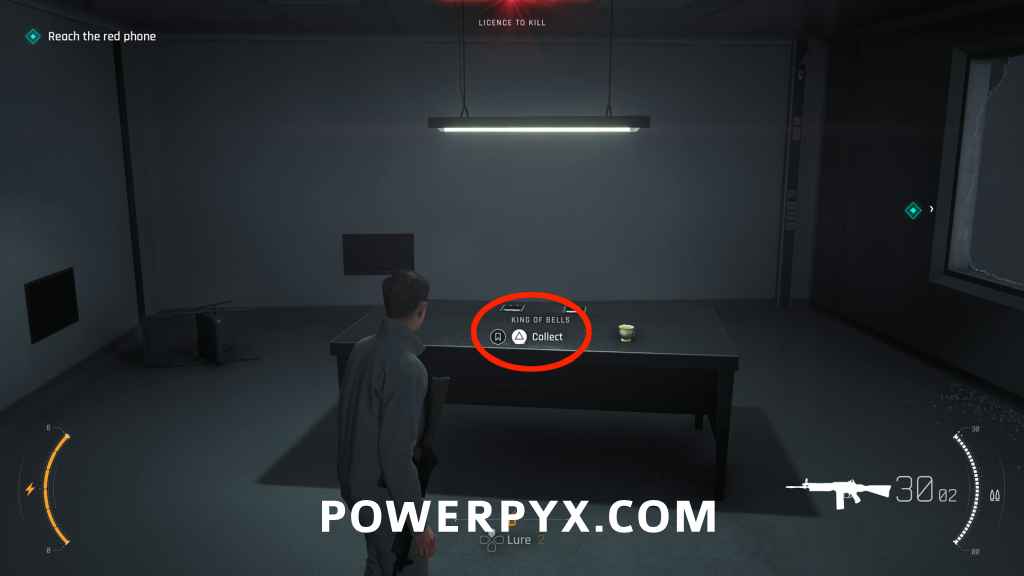
Card #34: King of Bells
Checkpoint: 03 Null Space
Objective: Reach the red phone
After speaking with the wounded lady, go through the door to the next area. Go into the room straight ahead and the collectible will be on the table.
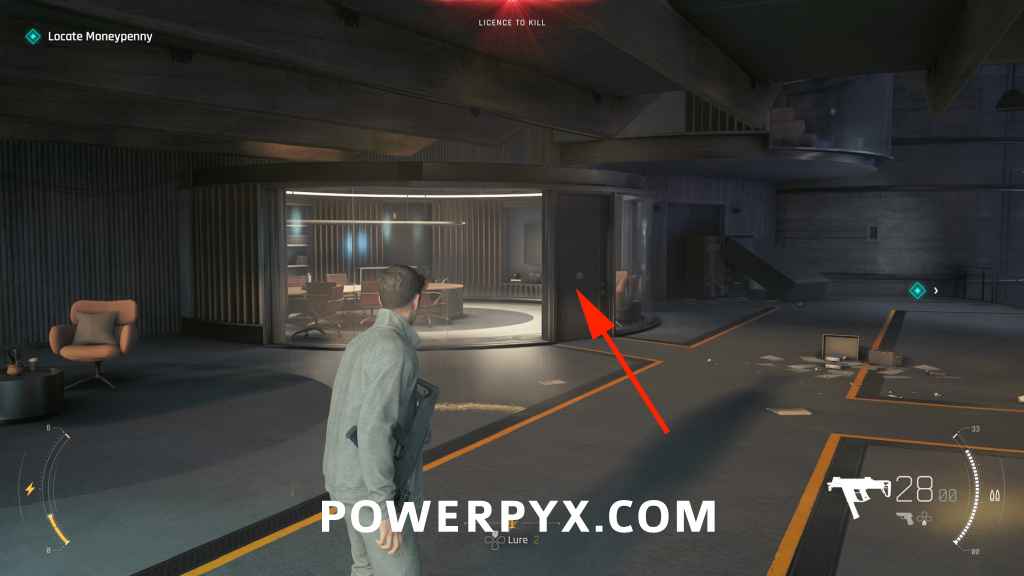
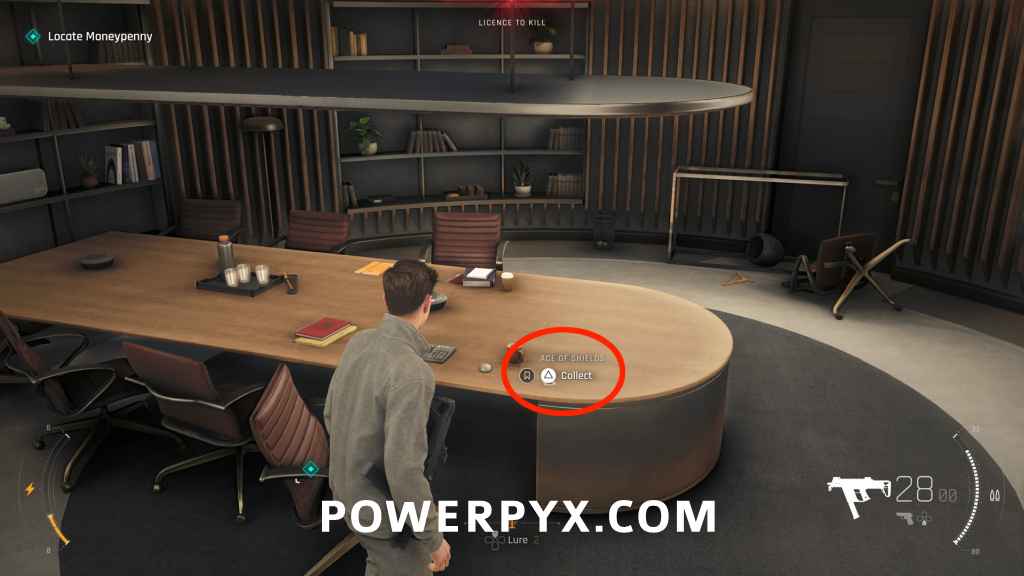
Card #35: Ace of Shields
Checkpoint: 08 Moneypenny’s pod
Objective: Locate Moneypenny
Once you get to where Moneypenny’s office is, kick down the door to the office on the left and the card is on the table.
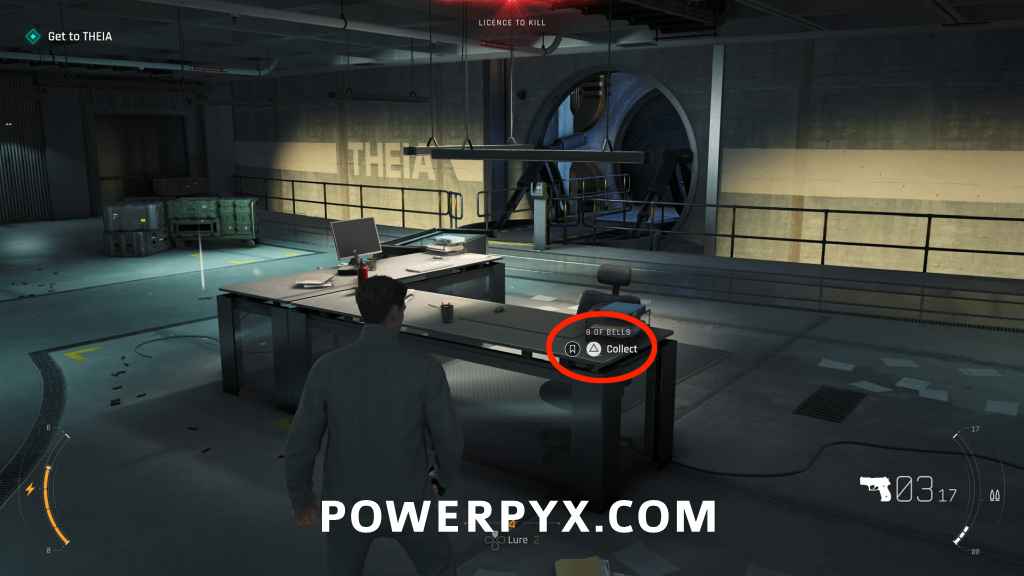
Card #36: 8 of Bells
Checkpoint: 12 THEIA
Objective: Get to THEIA
After dropping through an elevator and defeating the 3 enemies, the collectible will be on the desk to the right.
For all other collectible types refer to 007 First Light Collectible Guide.
PowerPyx says
Last card is found now.
It was in Chapter 5 – Under of Acorns.
zeDrake says
Slight issue with Card #11. When you chapter select in your don’t start with any gadgets that you need to break the fish tank. I think this needs to be gotten during an actual playthrough? unless im doing something wrong
PowerPyx says
As explained in the guide, you need to replay from Chapter 9 onward if doing it via chapter select to get the laser.
Isaac says
Trophy bugged for me says I collected 35/36 even though i collected all 36
Emily says
Me too!