
This guide shows all collectible locations in Life is Strange Reunion. There are 33 Chapters in total. There is Chapter Select as soon as you finish a chapter and it can be used to find anything you missed, except Evidence which must be found in a single playthrough. Collecting everything is required for the following trophies & achievements:
- Found all Collectibles –
 All These Memories
 - Listened to All Podcasts –
 Podcast Overload
 - Found all Collectibles for Max – Photo Wall
- Found all Collectibles for Chloe – Drugstore Makeup
- Find all Pieces of Optional Evidence in Game in a Single Playthrough – Major Gumshoe
Chapter 1: The Story So Far
No Collectibles
Chapter 2: Backstage Pas
No Collectibles
Chapter 3: Mountain State of Mind
Sunset
Obtained automatically from story, can’t be missed.
Chapter 4: Return to Selfie
No Collectibles
Chapter 5: Time Dojo
Gourd Day To You
As soon as you can move as Max, head to the left and take a photo of the pumpkins.

One Giant Leap
Follow the path to the left, past the globe, until you reach the astronaut display case. Take a photo of the astronaut.

Podcast #1
As Max, follow the path to the left from the globe. Loretta’s podcast is on the noticeboard.
Chapter 6: Class Act
A Friend? A Foe?
Obtained automatically from story, can’t be missed.
Trophy/Achievement:  Bucket Challenge – With Max, head to the right porta potty and examine the graffiti on the wall to the left of the potty. After the janitor wipes the graffiti, rewind time. Then interact with the bucket and choose “Move” to set it aside. Finally, inspect the graffiti.
Evidence #1 Reggie’s Notes
Next to the statue where Reggie is taking a photo, go to the table and inspect the notebooks. There you will find your first optional evidence.
What a cute critter!
As soon as you can move as Max, take a photo of any squirrel. There are several squirrels in the park.

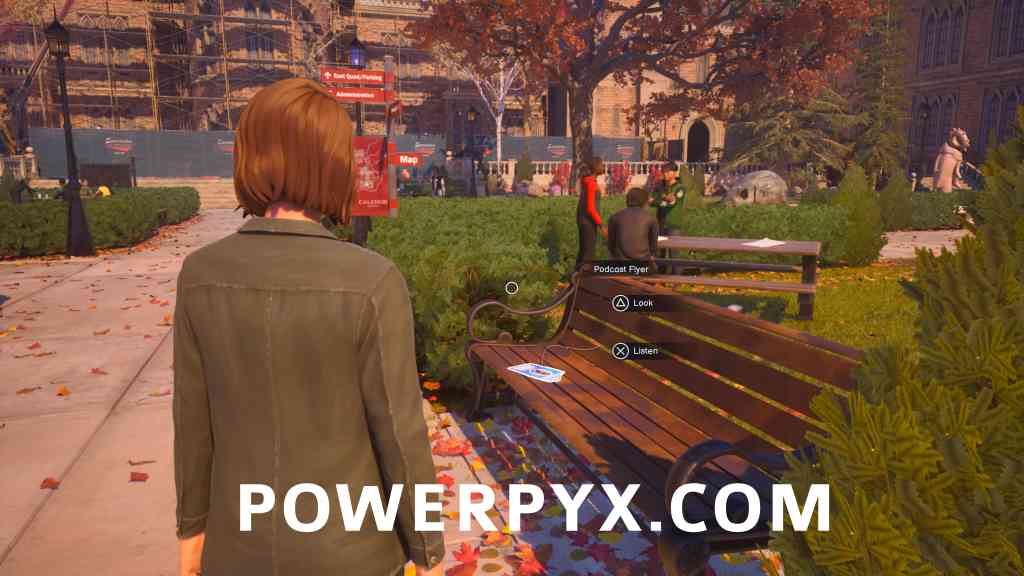
Podcast #2
As soon as you head toward the red signpost as Max, the podcast is lying on the bench in the middle.
Evidence #2+3 Fire Warning / Protest Sign
As Max, go to the Caldeon Bulletin Board on the path. Inspect it and flip through the notes to find the optional evidence.
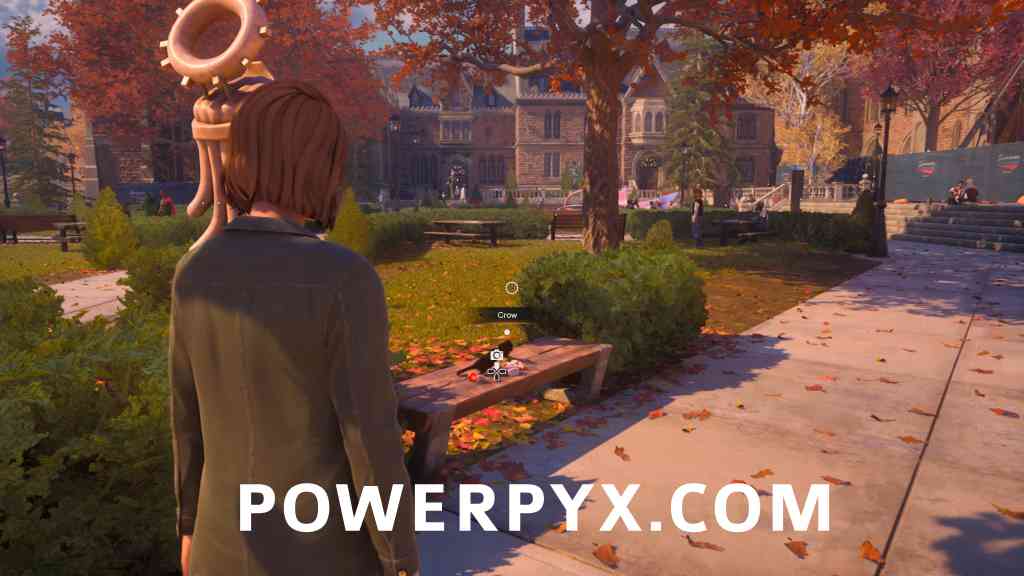
Not Quite Nevermore
Follow along the path toward the center until you reach the red signpost. Then go right until you reach the statue of the large face. On the bench next to the statue, you can photograph the crows.
End of School Week
Follow the path to the red-and-blue sculpture that looks like a roller coaster. Take a photo of the student wearing the blue jacket who is playing Frisbee there. (Photographing other students may also count)

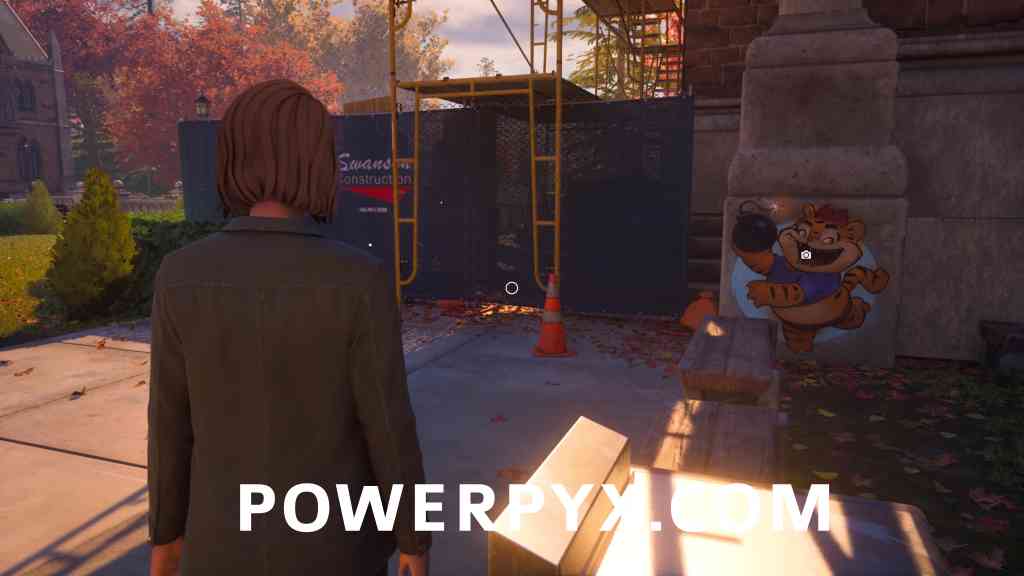
The Rebellion Lives in Art
From the student playing Frisbee, follow the path to the left until you reach the restricted area. Photograph the graffiti on the wall to the right.
Chapter 7: Open Mic Night
Trophy/Achievement: Soul of a Poet – When playing as Max, go to the stage and interact with the Poet. Choose “Listen” and keep listening until the trophy unlocks. Make sure to do this at the very beginning of the chapter, because once Amanda’s Stand‑Up Comedy performance starts, this trophy can no longer be obtained.
Trophy/Achievement: Going Once… Going Twice! – As Max, interact with the Silent Auction Bidding Sheet. Check the far right sheet and select “Bid”. Next, progress the story and watch Amanda’s Stand‑Up Comedy Show. After her performance, return to the Silent Auction and bid again. Max will have been outbid by Vinh. Continue with the story by talking to Lucas and gathering all necessary information. Then go back to the Silent Auction one more time and place another bid. A short cutscene will play where Max loses the auction. To win instead, rewind time, then choose “Bid and Steal
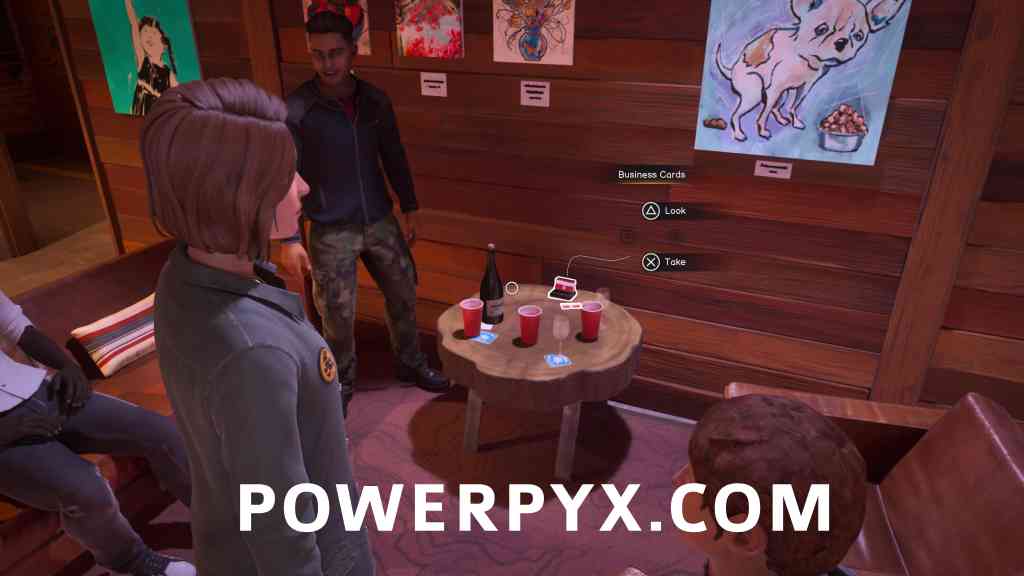
Podcast #3 + Evidence #4
After Amanda’s comedy show, talk to Lucas. Once you have gathered all the information from Lucas, you can listen to his podcast. His card is on the table to the right of the toilet, where the students are sitting.
Chapter 8: Bar Break In
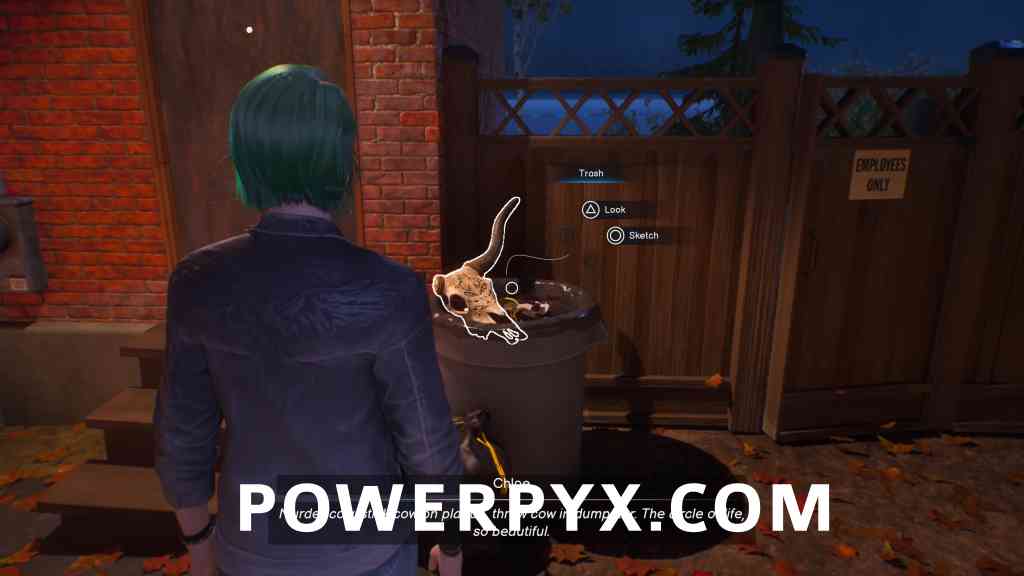
Circle of Life
As Chloe, go right from the main entrance into the alley. Look at the skull in the trash can and then sketch it.
Chapter 9: Fremont Street
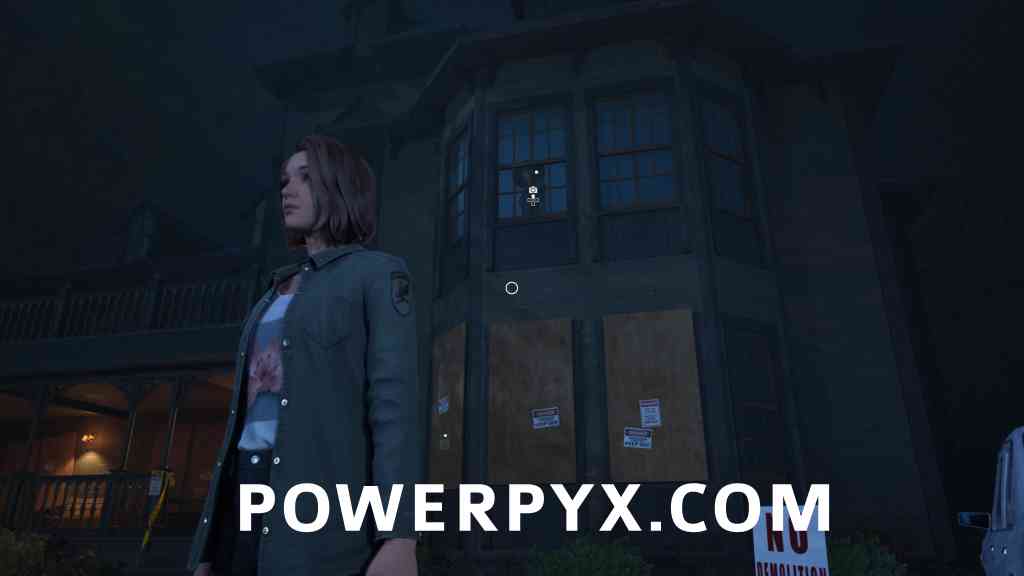
There’s a light over the Frankenstein Place
As Max, look at the window in the upper right side of the house. There is a mannequin there. Take a photo of it.
Evidence #5 Inspection Flyer
From the house where you took the photo, turn around and inspect the Abraxas flyer on the blue car.
Evidence #6 Fremont Map
From the Abraxas House, go left to the truck. You can see the open truck door, and on the seat you can find the evidence.
Chapter 10: Lying and Waiting
Tip from the Rogue Bar artist
As Chloe, look at the coaster. Inspect it and turn it until you see the bull. Look at it and wait until you can sketch it
Trophy/Achievement: Prospective Student,  Slick Rick (Step 1), Sass Queen (Step 1) – During the argument with Noelle pick: “Space” > “UVM”.
Chapter 11: More than Meets the Eye
No Collectibles
Chapter 12: Reunion
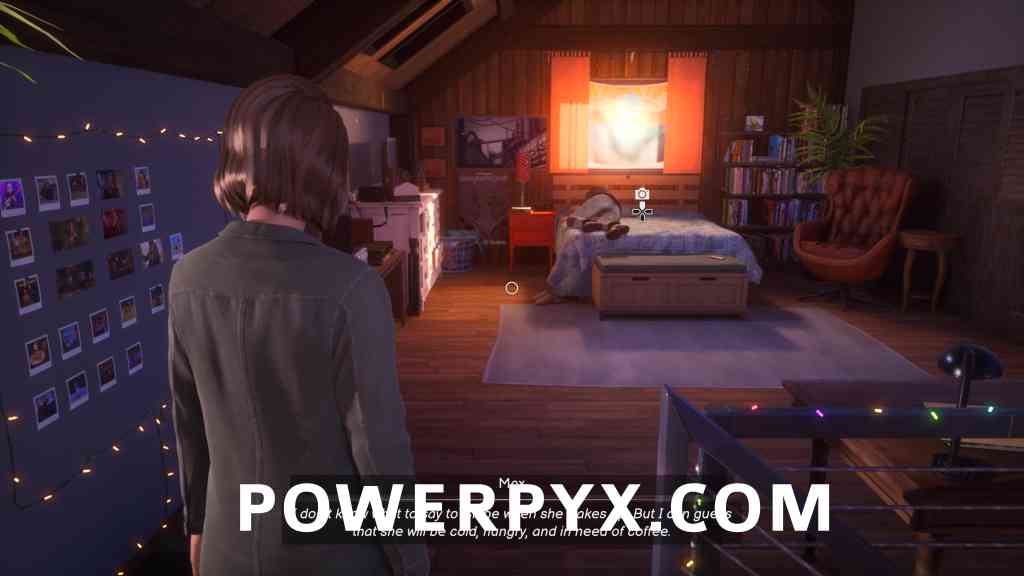
Trophy/Achievement: It’s, Uh, Kind of Fascinating to Me – As Max, go upstairs and watch Chloe while she’s sleeping. After you go back downstairs the trophy will unlock.
Shh! Don’t wake her
As soon as you can play as Max, go straight back up the stairs and watch Chloe sleeping. After that, you can take a photo of her.
Chapter 13: Divide and Investigate
No Collectibles
Chapter 14: Divide and Investigate
No Collectibles
Chapter 15: Admin Sleuth
Evidence #7 Newspaper Article
Once you need to find all the Abraxas information for Loretta, inspect the book “History of the Occult” in the library. Then talk to Loretta and choose the dialogue option “Jack Parsons.” This will give you the next clue.
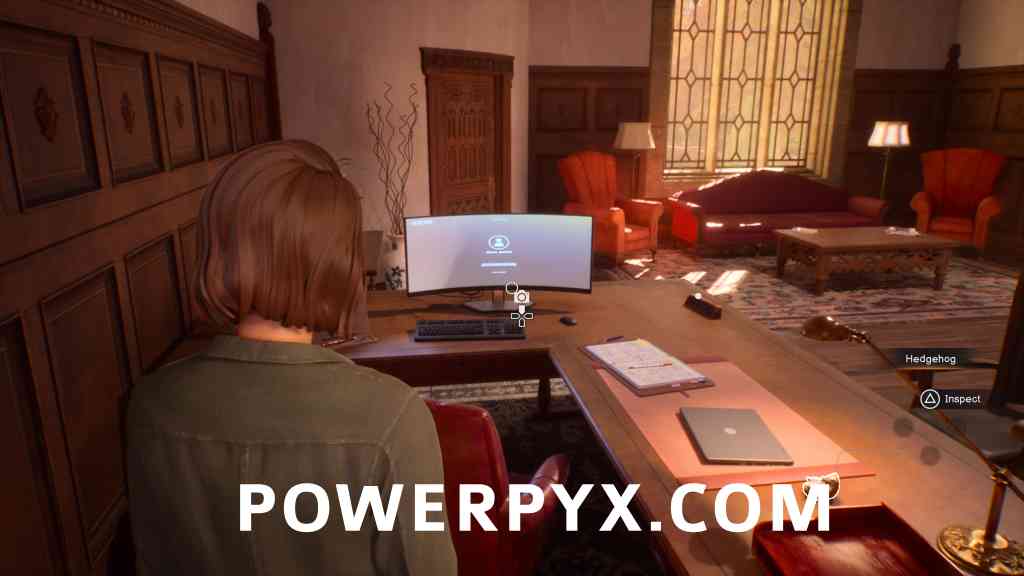
Deflection of Duty
After you have received all the Abraxas information from Loretta, talk to Vinh and choose “Owen will want to hear this.” Once Vinh has left, take a photo of the desk.
Evidence #8 Demolition Contract
As soon as you are in Owen’s office, inspect the desk drawer to obtain the evidence.
Chapter 16: Cat and Max
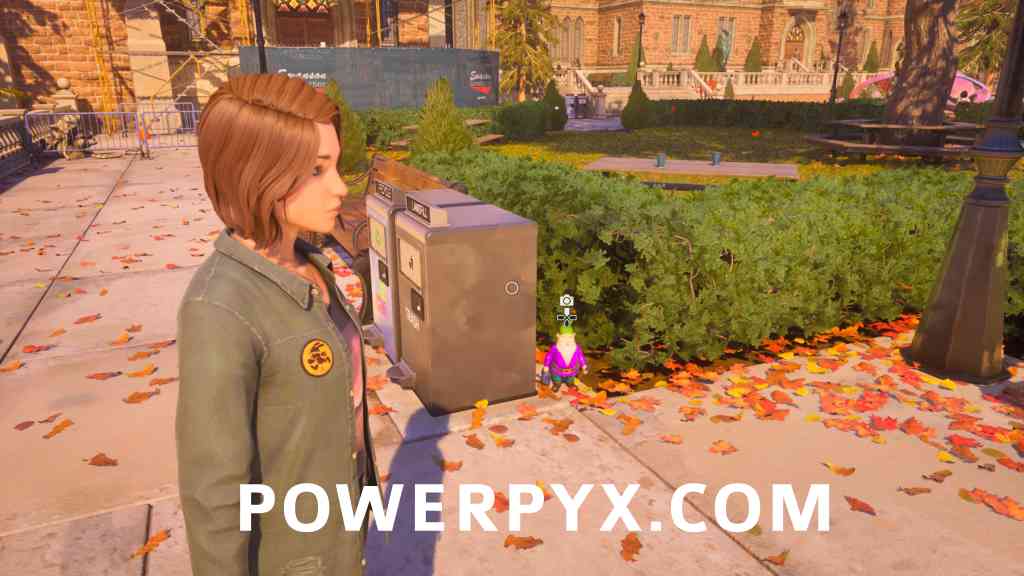
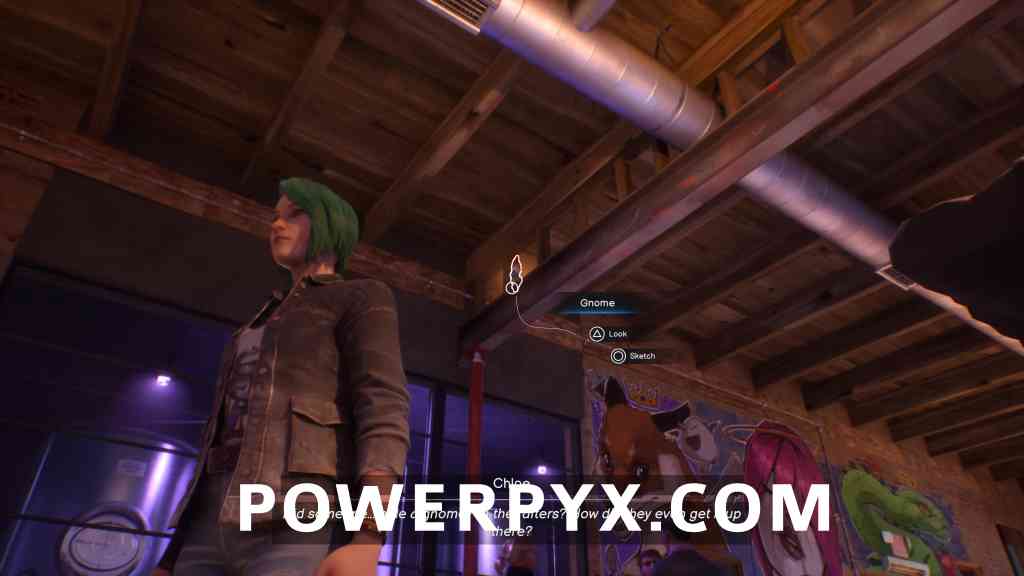
A Portly Fellow
As Max, follow the path toward the restricted area where you photographed the graffiti. Next to the bins, there is a gnome that you can photograph.
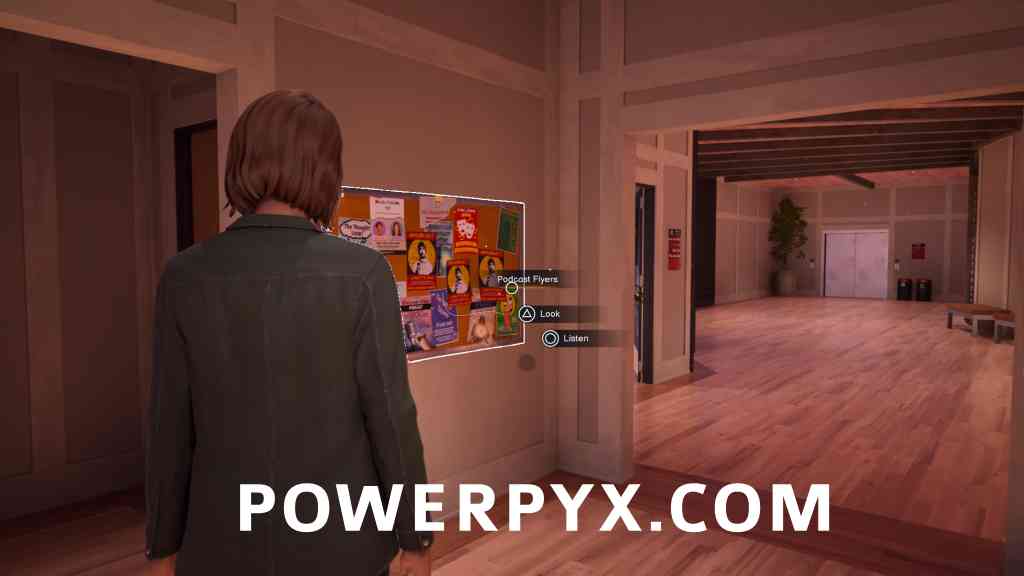
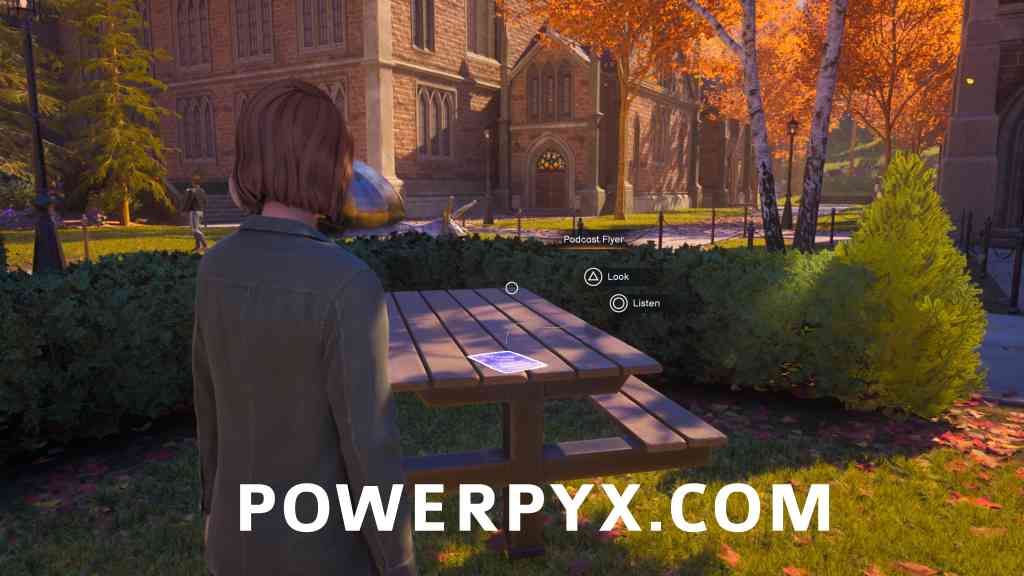
Podcast #4
As Max, head toward the water statue to the right of the janitor. The flyer for the podcast is on the table.
Which one is she?
Obtained automatically from story, can’t be missed.
Chapter 17: The Overlight
Trophy/Achievement: Happy Birthday! (Step 1) – As Chloe, look at the bulletin board on Moses’s desk. Examine the calendar to find out that today is Max’s birthday.
Next, inspect the 3D printer so that Chloe gets the idea to make a gift for Max. Then, talk to Moses and choose the dialogue option “3D Printer” to have him print a gift for Max.
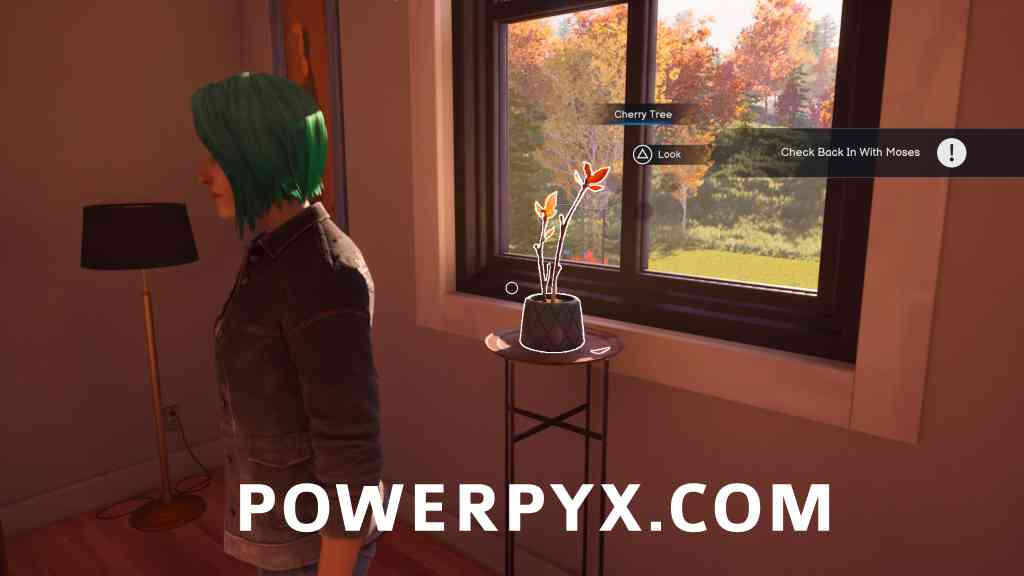
Young yet beautiful
Go up the stairs in Moses’ room and photograph the cherry blossoms. First look at the cherry blossoms, then sketch them
Trophy/Achievement: Uranus’s Long-Lost Cousin – As Chloe, go upstairs in Moses’s office. On the table in front of the couch, you’ll find a photo that you can examine. Interact with the photo and choose “Suggest a name.” Then select the name “URTITTIES”.
Chapter 18: Times in Turtle
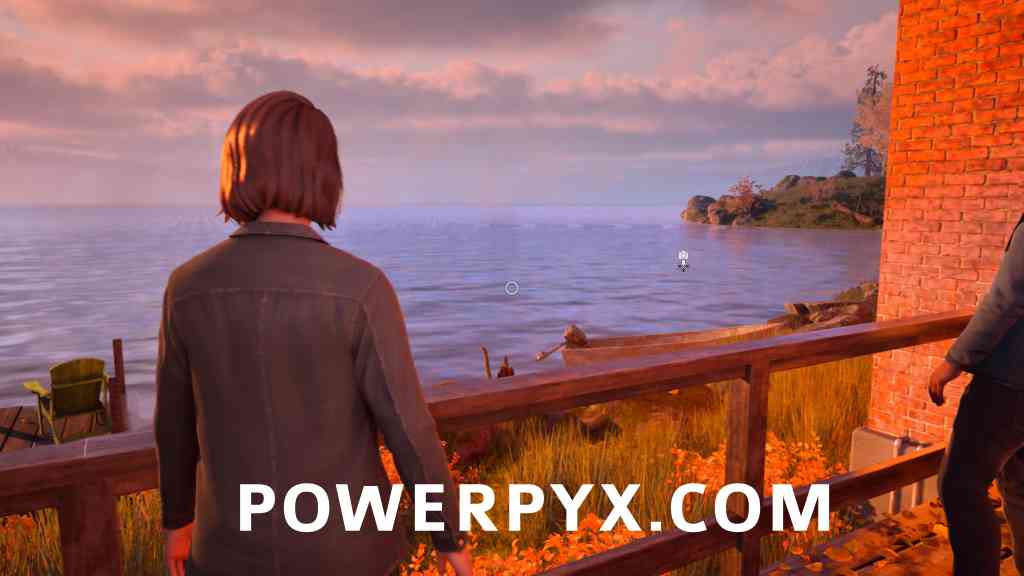
Where water meets land
As Max, before confronting Safi, look to the right of Safi at the water and take a photo of the beautiful view.
Too soon to be spooky
As Chloe, take a sketch of the pumpkins across from the bar.

Evidence #9 Fireworks
Now go to the end of the bar counter to the fireworks box and ask Amanda why it is there to get the next piece of evidence.
Trophy/Achievement: Not a Rat – As Chloe, progress the story and talk to Amanda to check the forum. After reading through the posts, speak with Joey to start an argument. During the conversation: “I’m CardinalSin.” > “Bowling league.” > “Sic semper tyrannis”.
Trophy/Achievement: Slick Rick (Step 2), Sass Queen (Step 2) – As Chloe, talk to Lucas and select the dialogue options “Protest” > “Not really considering”.
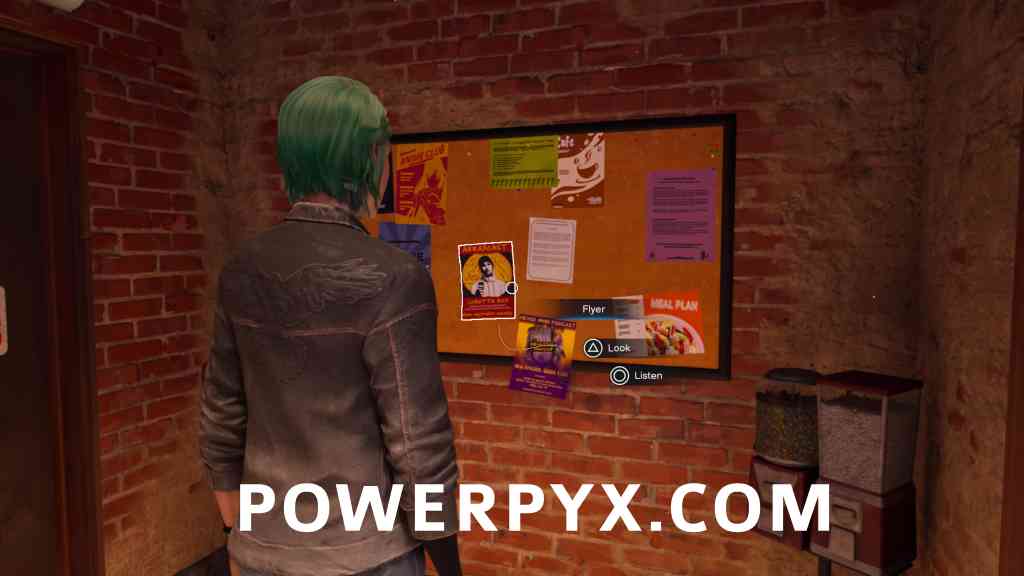
Podcast #5
As Chloe, head toward the entrance of the bar. The podcast is on the noticeboard.
Chapter 19: Champlain Problems
Trophy/Achievement: Happy Birthday! (Step 2) – When the dialogue option “Happy Birthday” appears, select it. Note that it only becomes available after a short while.
Chapter 20: Mabon
Get this bad man a drink
As soon as you’ve found the password with Max and are inside, go left and take a photo of the statue standing on the dresser.

Evidence #10 Blueprint
As Chloe, you must attack the intruder to obtain this evidence. You only get the blueprint by choosing “Attack”.
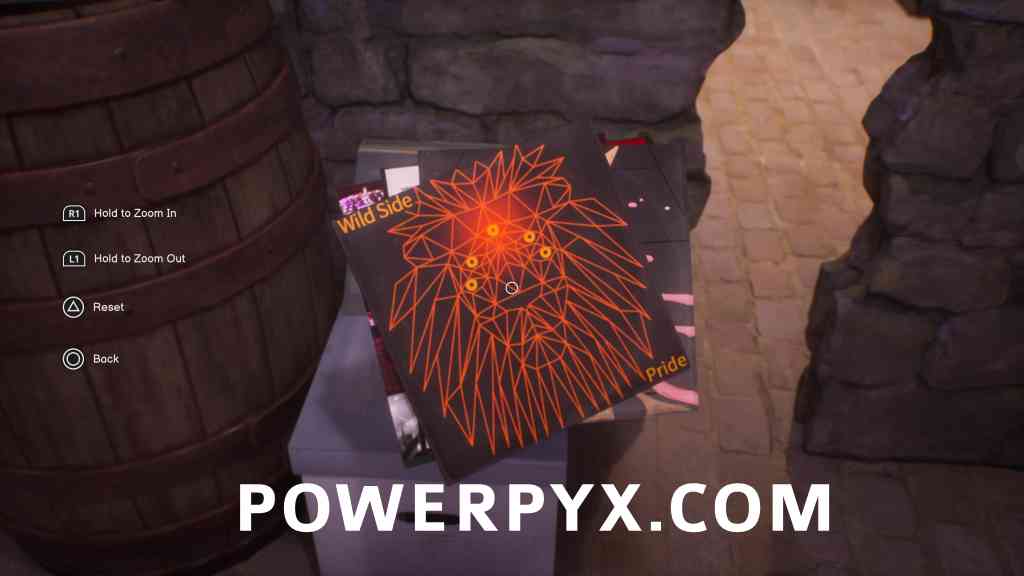
Taste of the psychedelic
As soon as you open the secret door with Chloe, inspect the box with the records at the lower left on the floor. Turn it until you can sketch the Wild Side Pride vinyl.
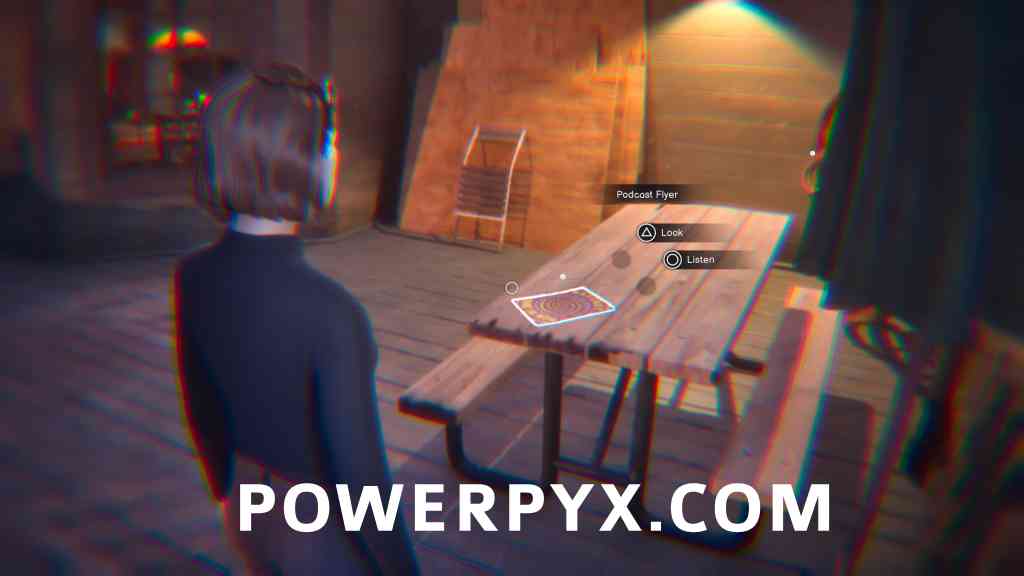
Podcast #6
As soon as Max is high, follow the path until you go up to the terrace. The podcast is on the table.
Chapter 21: The Majestic Tapestry
No Collectibles
Chapter 22: All Available Evidence
Trophy/Achievement: Daddy Issues (Step 1), Sass Queen (Step 3) – As Max, examine the Protest Evidence Whiteboard. Look specifically at Ren’s Research. This will unlock the “Daddy Issues” dialogue option later during the argument.
An empty home
As Max, go up the stairs and take a photo of the empty terrarium.

Podcast #7
From the terrarium, look at the table. The next podcast is there.

Chapter 23: Worth the Wait
No Collectibles
Chapter 24: Chloe’s Decision
Hiding in plain sight
As soon as you’re at the bar as Chloe, look up to be able to sketch the hidden gnome.
Podcast #8
As Chloe, head toward the entrance of the bar. The podcast is on the noticeboard again.

Trophy/Achievement: Daddy Issues (Step 2), Sass Queen (Step 4) – As Chloe, inspect Ren’s Bag before talking to him. This ensures you’ll have all the necessary information for the upcoming confrontation. Now, talk to Ren, then speak to him again to initiate the Pressure sequence. Choose the following dialogue options in order: “I’ll tell Noelle” > “Red paint can” > “Daddy Issues”.
Trophy/Achievement: Bottled It!,  Super Max – During this chapter, select Ren as the suspect. Making this choice will ensure that the trophy unlocks later in the story.
Chapter 25: Max’s Decision
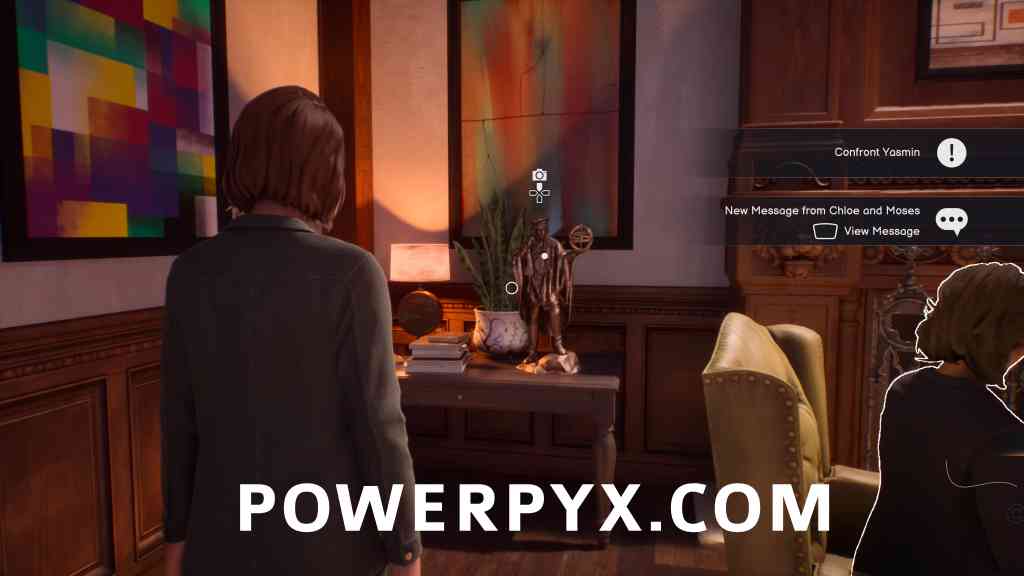
Not the center of the Universe
Before speaking to Yasmin, take a photo of the sculpture standing next to her on the cabinet.
Trophy/Achievement: Second Chance, Super Max (Step 1) – During this chapter, select Vinh as the suspect. Making this choice will ensure that the trophy unlocks later in the story.
Chapter 26: A Bold Plan
No Collectibles
Chapter 27: “Peaceful” Protest
No Collectibles
Chapter 28: Keeping Watch
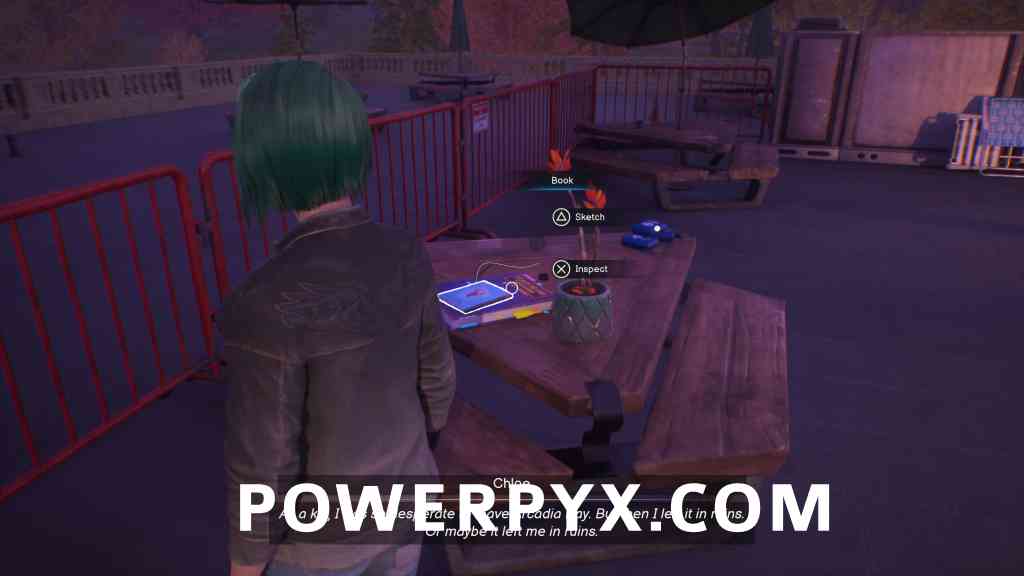
Cycles of tragedy
As Chloe, head toward the red fence. Inspect the book next to the plant and sketch it.
Chapter 29: In the Lighthouse
Trophy/Achievement: You’re Coming With Me, Super Max (Step 2) – Playing as Chloe pick these choices to save Safi: “Max loves you” > “She told you about the fire” > “You got lost in your powers” > “Mums can forgive a lot” > “She knows you can get better” > “We’re also alive”.
Chapter 30: The Line of Fire
Trophy/Achievement: Super Max (Step 3) – While playing as Max, examine the Caldeon Poster Board on your way upstairs. Reading it reveals that Jeanette is still inside the Observatory. Later in Janitor room after talking to Janitor: Pick up the mask and wrench on the right > Pull the valve lever to restore the water supply > Before leaving, activate the sprinkler system by turning on the Breaker Box!. Once you have the mask, talk to Noelle and select the option that says, “Take this mask.” and “Jeanette is in the classroom”. Turn on the final two valves to ensure full water flow. Before heading behind the building, go to the locked door. Select “Smash” to break the window in the door. This will alert the remaining students, allowing them to escape through the front door to save all students.
Chapter 31: Trust Fall
No Collectibles
Chapter 32: Memorial
The things we cannot escape
As Max, go outside to the terrace where Safi and Chloe are sitting. Take a photo of the memorial there.
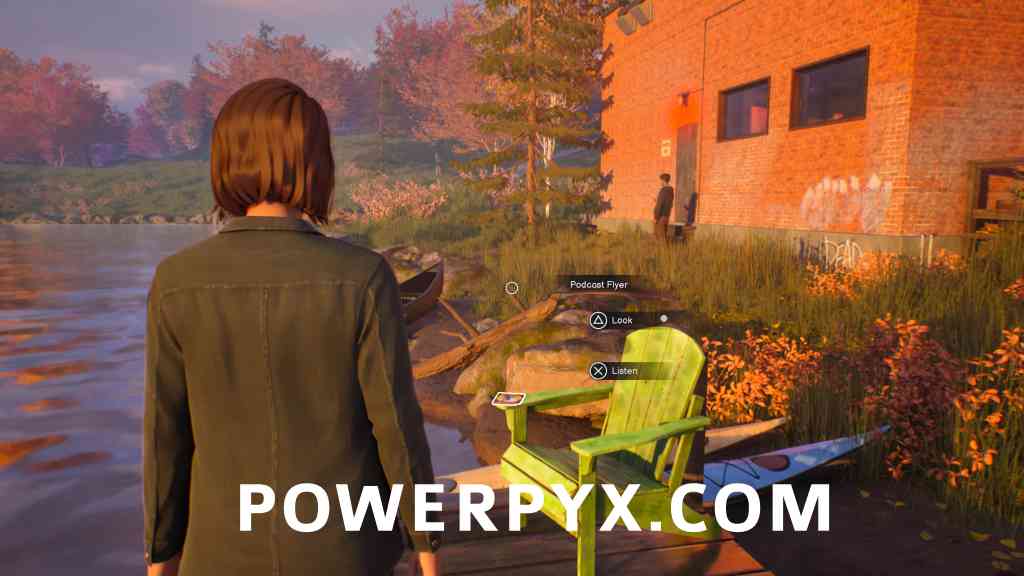
Podcast #9
As Max, go out to the bar terrace. Then head down to the dock and go to the right where the chair is. The last podcast is there.
Chapter 33: Partners In Time
Chloe
Obtained automatically from story, can’t be missed.
Baz says
The End of School Week prompt isn’t there for me.
xAsteQx says
It wasn’t there for me too, but i took a photo of two students playing chess a bit earlier in the same area, and it counted for me as “The end of school week”.
Ryu says
You can take a photo of the students playing chess in the starting area of the chapter instead. It’s random which photo spot you get, but both count towards that collectible.
Gen_Boredom says
Podcast #3 isn’t working for me. I talked to Lucas and gathered all of the information from him but I can’t interact with the business cards on the table.
xAsteQx says
I had same issue with this, but found out why.
It appears only if you ask Lucas about his new book in the beginning of the conversation.
Ryu says
In Chapter 10: Lying and Waiting you have to choose “One exception” when talking to Lucas. If you choose “Just bitter”, you get locked out of the subsequent dialogue options when talking to Lucas in Chapter 18: Times in Turtle for the “Slick Rick” trophy.
Andre says
Note missing
For the Slick Rick trophy, make sure in Chapter 10, MAKE SURE YOU PICK TO MAKE UP A NAME.
If you name Max, that also locks out Lucas in Chapter 18.
Megaflare says
For Super Max, you have to keep Safi’s secret and tell her about the fire or else it locks you out of dialogue to save Safi
RJ says
There’s no Chapter 13 listed?
PowerPyx says
There’s nothing to collect in Chapter 13.