
Assassin’s Creed 4 Black Flag Resynced Trophy Roadmap
- Estimated trophy difficulty: 3.5/10
- Approximate amount of time to platinum: 40-50 hours
- Offline Trophies: 50 (1
 , 1
, 1 , 11
, 11 , 37
, 37 )
) - Online Trophies: 0
- Number of missable trophies: 0
- Glitched trophies: 0
- Does difficulty affect trophies?: No, can do everything on the easiest difficulty
- Hardest Trophy: Devil Of The Caribbean
- Minimum Playthroughs: 1
- PS4/PS5 Autopop, Save Transfer, Crossbuy: No, game doesn’t have a PS4 version
- Free-Roam / Level Select after Story?: There is Free Roam after the story and you can still go everywhere, but no Mission Replay
- New Game+ Mode?: No
- Supports Manual Saves?: Yes, 20 Manual Save Slots (press Touchpad in Map Screen)
- Release Date: July 09, 2026
 , 1
, 1 , 37
, 37 )
)Introduction
Welcome to the Assassin’s Creed 4 Black Flag Resynced Trophy Guide! This is a full remake of Assassin’s Creed IV Black Flag, re-releasing in 2026. It comes with upgraded visuals, a new trophy list, new content, and changes to old content. Old guides from the original 2013 game are no longer applicable, as some item locations have changed and the map coordinates are different. The trophy list puts more focus on the new content. Overall, it’s easier than the original because you no longer need to complete the mission constraints, and Multiplayer has been removed. The collectibles you need for Platinum are all Art Collections, Officers, Forts, Underwater Shipwrecks, Portraits, Paintings, Ultimate Plans, Legendary Ships, Swords, Pistols.
General Note: The Resynced version no longer numbers the story Sequences and Memories in-game. For a full mission list refer to  Even a Splinter.
Step 1: Finish Story + Luck-Based Random Trophies [15-20 Hours]
Play through the story and work on any side content as you see fit. You can play on the lowest difficulty and enable helpful settings such as unlimited oxygen. Most of the collectibles aren’t needed for trophies, but it’s still worth cleaning out all locations 100% to get the rewards and reduce cleanup later. You can free-roam everywhere after Sequence 04 – Mission 01: This Old Cove, except for a few islands that are gated behind story progress. If you need help with collectible refer to the Collectible Guide.
It’s highly recommended to work on the luck-based random trophies from the start:
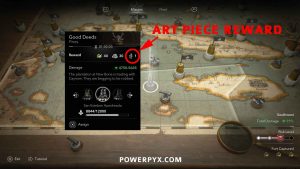
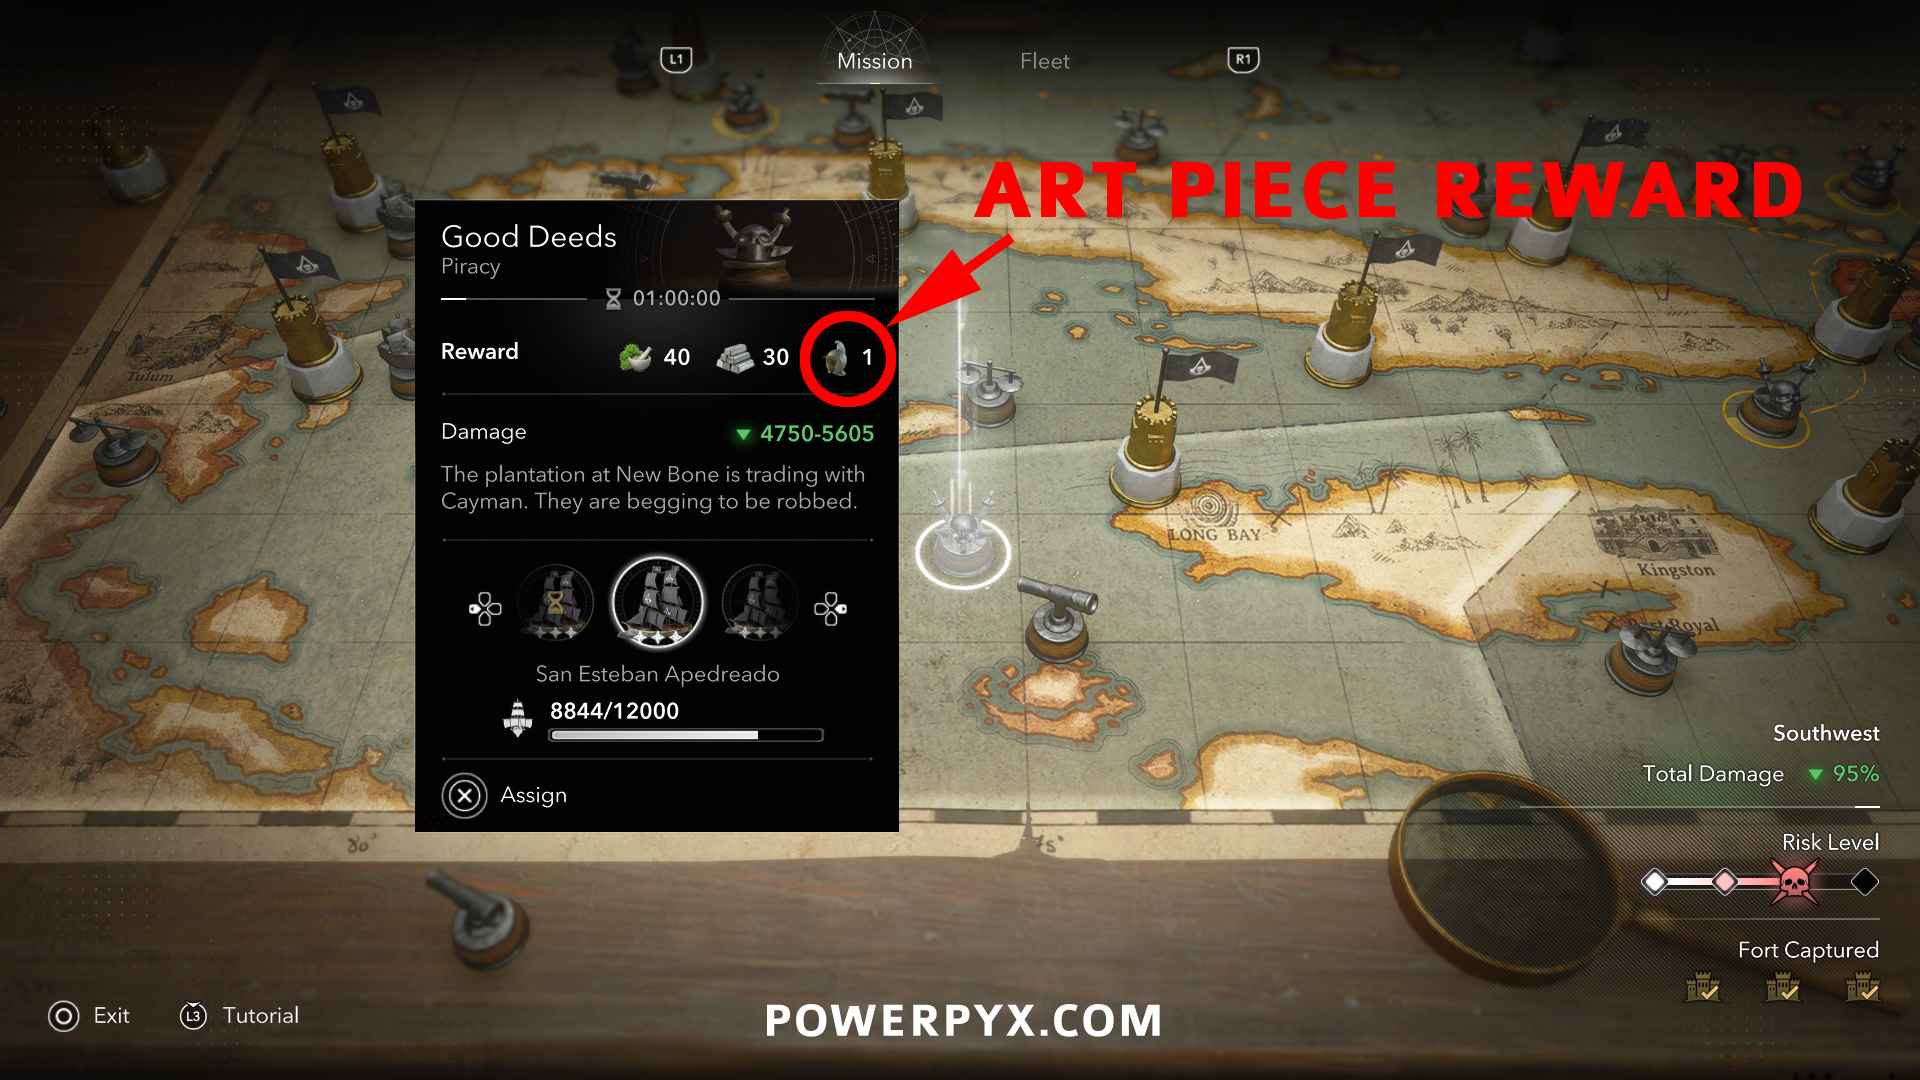
- Dilettante – 19 Art Pieces from Kenway’s Fleet (Send Brigs on Piracy Missions): In Sequence 04 you unlock Fleet Planning (Kenway’s Fleet) at Great Inagua manor. You can then add ships to your fleet by boarding them. 19 of the Art Pieces for Dilettante are random rewards from Brig Piracy missions. The other types of ships don’t give Art Pieces. So you’ll want to capture at least 5 Brigs (medium-sized ships with a Ram) and constantly send them on missions in all 5 regions. These complete passively in the background after 30-60 minutes. You need to conquer the Forts to make those missions available, and renovate the buildings in Great Inagua to get more ship slots. You should recruit your ships from the southern hard-difficulty regions for better stats. Always make a manual save before accepting the mission report! If you don’t get a Piracy mission with an Art Piece, reload the save, accept report again to roll new missions. After upgrading all buildings you should run 5 Brigs + 5 Schooners. The Schooners generate money and you need a lot to buy all Ship Upgrades and Weapons. Frigate and Man-o-War missions should be ignored. You can tell if a Piracy mission gives an Art Piece because it will be displayed in the rewards with a little icon and a value of “1”:
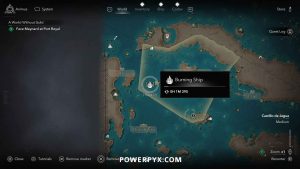
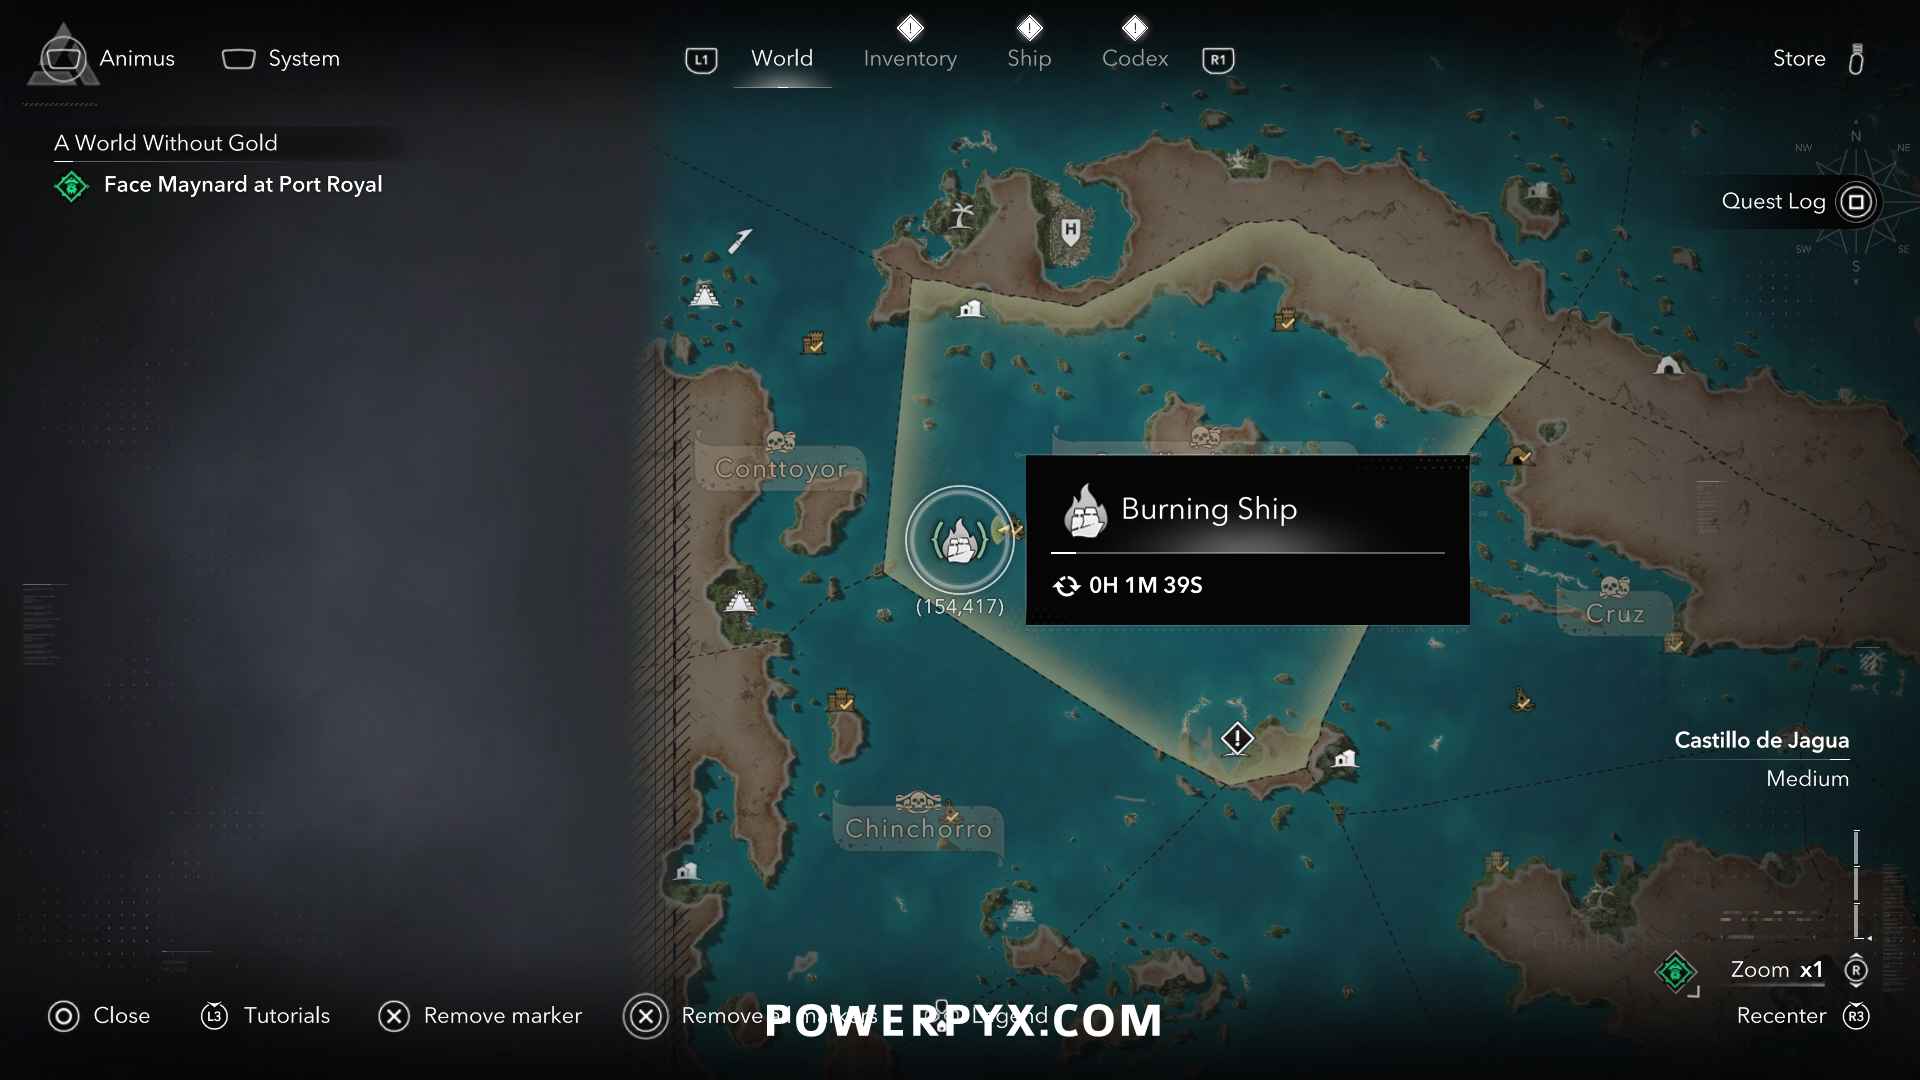
- Last to Leave – Burning Ship with Chair: Look for the random Burning Ship events at sea. They are completely random spawns and get marked by a white icon on the map when nearby. They are very rare, you might only see these every few hours. These are not the ships you defeat in battle, they are unique timed events with a bunch of lootable chests on board. What makes this trophy so random is that you need one with a chair specifically, which has extremely low odds. Most Burning Ships won’t have a chair so keep looking out for it as you play.
- The Hangman (10 Rope Kills): In Sequence 03 you unlock the rope. You can then hang enemies by pressing
 while sitting on a tree/wooden beam above them in stealth. You’ll want to work on this throughout the game. It can also be farmed but it takes a long time for enemies to respawn (see trophy description).
 - Glutton for Nourishment (Consume 20 Food Items): This trophy only counts food items you find in the environment such as berry bushes, not the healing charges you use with
 . Look out for them so you don’t have to farm it later. They can only be consumed when not at full health.
 - Unsinkable (Survive a rogue wave taken from the side): Rogue Waves are pretty random and only happen during stormy weather. They are tall waves that damage your ship. A guaranteed way to get this early is in Sequence 02 – Mission 06: The Treasure Fleet, there you sail through a storm with rogue waves.
To summarize: Always run 5 Brigs in Kenway’s Fleet (make save before accepting report, reload save until you get one with Art Piece), look for Burning Ship events with a chair, do stealth Rope Kills from trees/wooden beams, consume 20 Food Items found in the environment, have a Rogue Wave hit the side of your ship when the story makes you sail through a storm for the first time.
Step 2: Collectibles [20-30 Hours]
After the story you will have access to all areas and all Portraits (some are gated behind story progress). The collectibles needed for trophies are:
 11 Forts – King of the Castle
 7 Underwater Shipwrecks – Seven Deadly Seas
 5 Legendary Ships – Devil Of The Caribbean
 11 Portraits – The Memory of My Enemy, Dilettante
- 5 Officers – All Hands On Deck
- 8 Friendly Animals – Friend To All
- 12 Ultimate Plans – Ship This
- 57 Locations (“?” Icons) – Cartographer
- 41 Art Collection: Art Pieces (Collections) – Dilettante
- 9 of 12 Art Collection: Paintings (Collections) – Dilettante
- 20 Art Collection: Ship Models (Collections) – Dilettante
- Any 18 Swords – Dilettante
- Any 12 Pistols – Dilettante
It’s best to prioritize the Officers as they give passive abilities for your ship. Then do the Forts and Underwater Shipwrecks to get lots of money and upgrade your ship with it. Clean up the rest afterward. Continue to use Kenway’s Fleet to farm the random Art Pieces from Brig Piracy missions.
The main collectible trophy is to fill all decoration slots in Great Inagua Manor, which requires all Art Pieces, Paintings, Portraits, Ship Models, most of the Swords and Pistols. There are a few more Swords/Pistols and 2 more Furniture than needed, but of the rest you need everything. You can view the Art Pieces under Codex > Database.
Step 3: Miscellaneous Cleanup [1-2 Hours]
If you have any of the miscellaneous combat trophies left, you can quickly clean them up now. Depending on how lucky you got with the random trophies from Step 1, you might still need to farm more Art Pieces from Kenway’s Fleet or look for a Burning Ship with a chair.
Useful Tips, Tricks and Guides:
- Assassin’s Creed 4 Black Flag Resynced Wiki (100% Completion)
- Collectible Guide
- Treasure Maps & Solutions
- Ultimate Plans
- Officers
- Forts
- Viewpoints
- Underwater Shipwrecks
- Legendary Ships
- Portraits
- Art Collection: Art Pieces
- Art Collection: Paintings
- Art Collection: Ship Models
- Swords
- Pistols
- Friendly Animals
- “?” Locations (Cartographer)
- Shanties Song Sheets
- Mayan Stelae
- Secrets
- Chests
- Warehouses
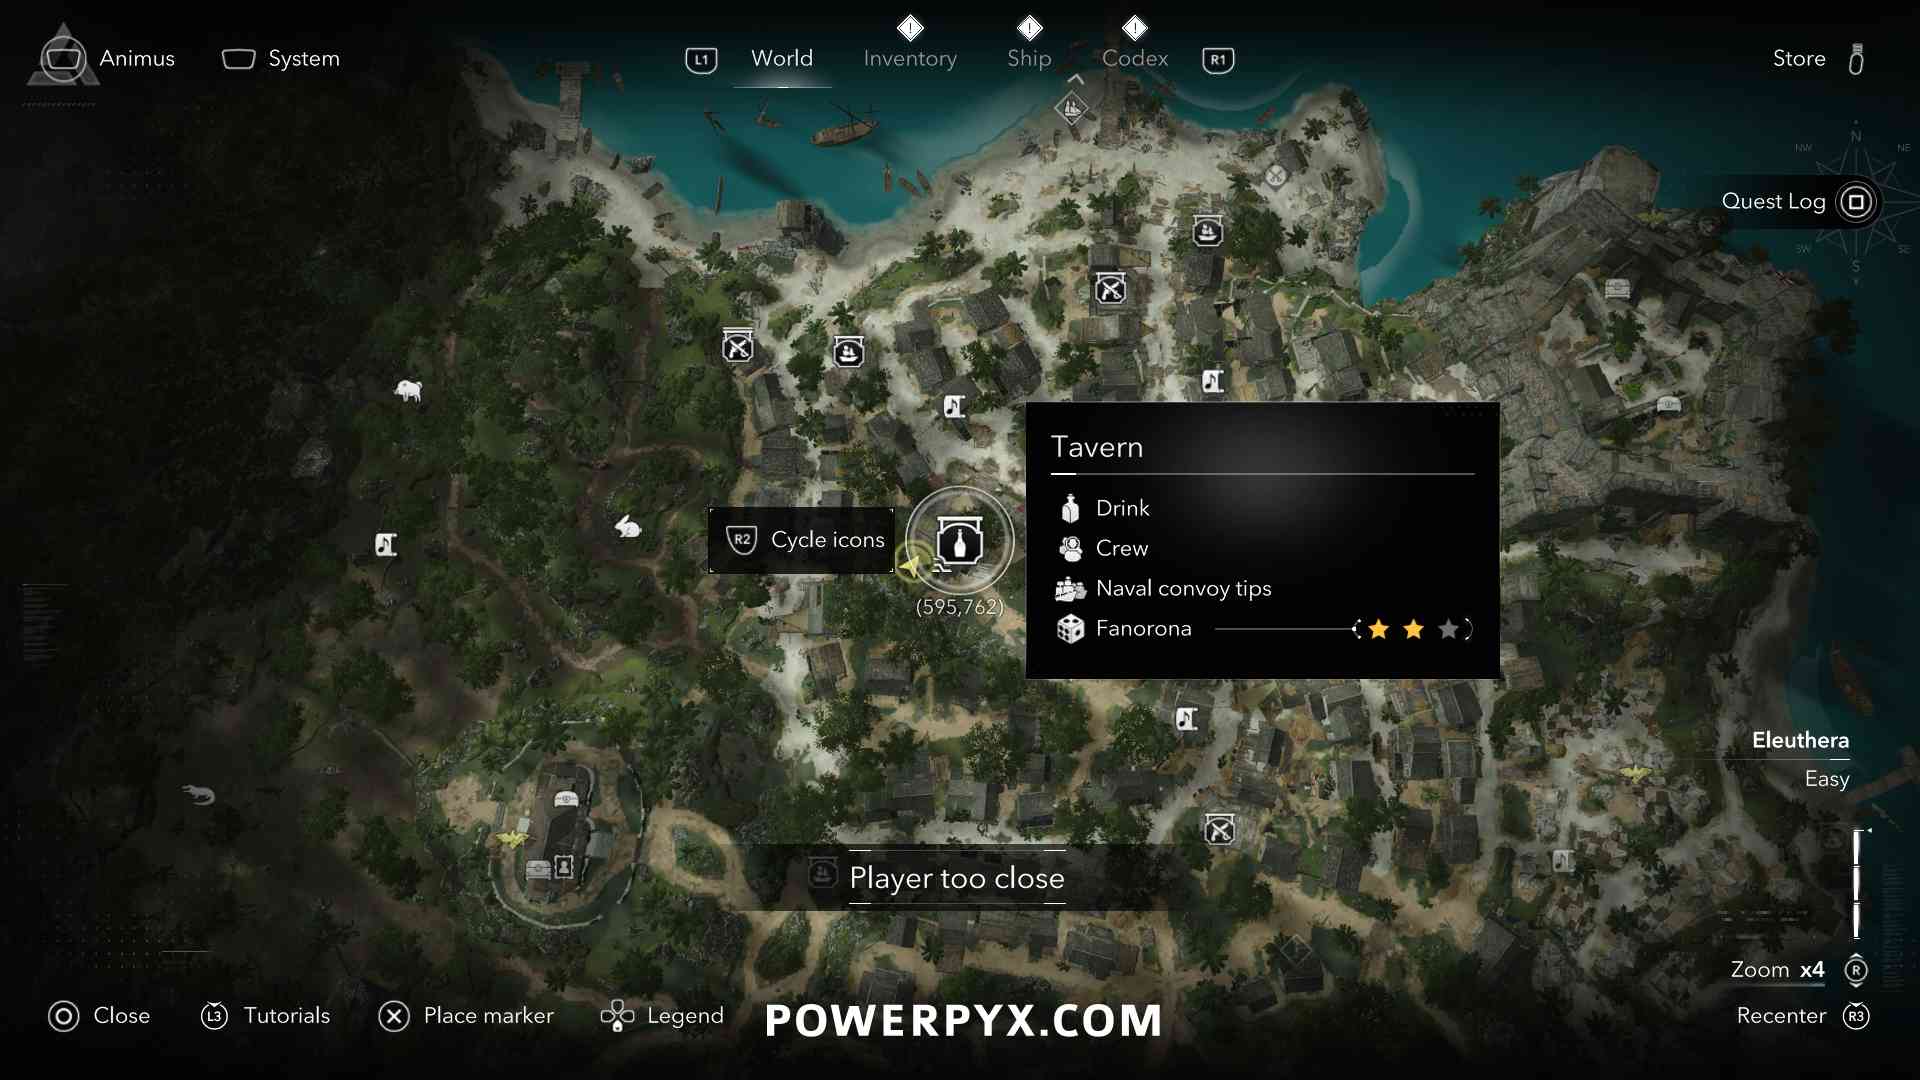
- Taverns
- Assassin Contracts
- Naval Contracts
- Inventory Crafting Upgrades
- Jackdaw Ship Upgrades
- Outfits
- Trinkets
- How to Skip Time
- World Map
Assassin’s Creed 4 Black Flag Resynced Trophy Guide
 |
Prizes, Plunder, and Adventure! Win every trophy |
 |
| Earn all other trophies in Assassin’s Creed IV: Black Flag Resynced to unlock Platinum (no DLC required). | ||
 |
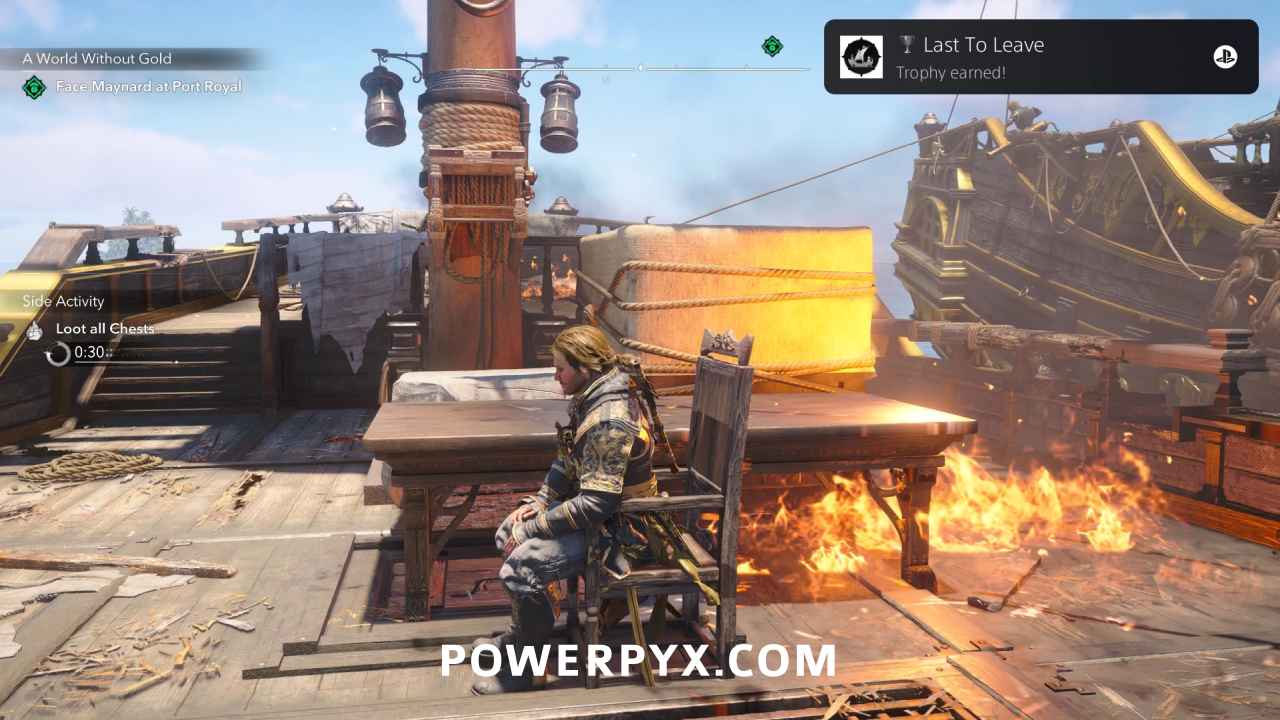
Last To Leave Take a seat on a burning ship |
 |

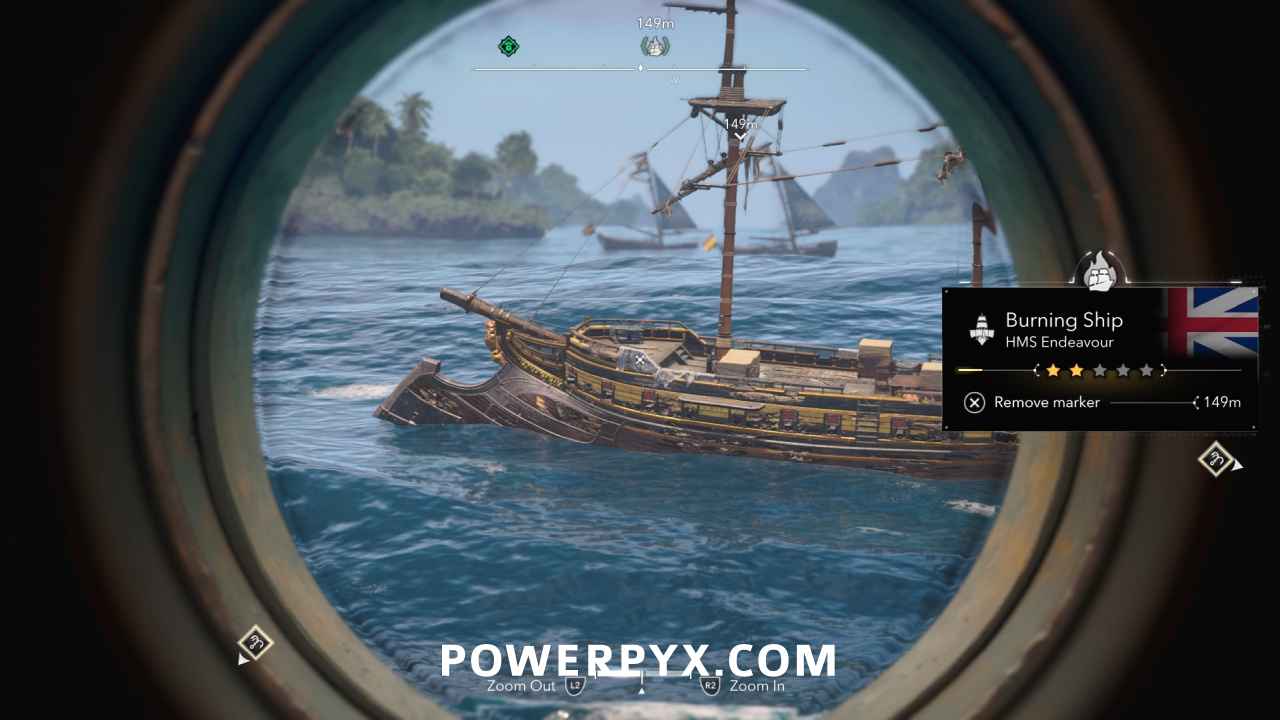
This is a completely luck-based random trophy. Sometimes you will see “Burning Ship” events at sea, they get marked by a white icon when nearby and have a 5-minute timer before disappearing, similar to Lead Convoys. These are NOT ships you defeat and board. They are separate random events and they are very rare. The Burning Ship Events have a bunch of lootable boxes on them that give money. The ships are already burning when you find them and you don’t need to fight them. They look like this on the map (completely randomized locations):
You need to get extremely lucky to find a Burning Ship event that also has a chair in the middle of the deck to sit on.
There’s an estimated 5% chance that a Burning Ship Event has a chair. So not only are the events themselves rare spawns, you need to get doubly lucky that one also has a chair. Some players might get one first try, others might not find a single one in 50 hours playtime, making this the most frustrating trophy overall. Burning Ship Events can spawn any type of ship (Schooner, Brig, Frigate, Man-o-War) and the chair can spawn on any type of ship, but it seems to be more common on Burning Brigs. Luckily, there is a way to farm it and get this in a couple minutes!
|
||
 |
King of the Castle Capture all forts |
|
| There are 11 Forts, they are marked by red tower icons on the map. You need to destroy their defensive towers with your ship, then storm the fort on foot, defeat all enemies and open the gate at the end.
» Assassin’s Creed 4 Black Flag Resynced – All Fort Locations |
||
 |
The Memory of My Enemy Display all character portraits in the Great Inagua manor |
 |
| There are 11 Character Portraits, they get marked by white portrait icons on the map when going near them, but aren’t automatically revealed from syncing viewpoints. They only spawn after reaching enough story progress, so it’s best to look for them after the story. After collecting them you can interact with the empty picture frames in Great Inagua manor to hang them.
» Assassin’s Creed 4 Black Flag Resynced – All Character Portrait Locations |
||
 |
Dilettante Fill all Art Collection and Equipment slots in the Great Inagua manor |
|
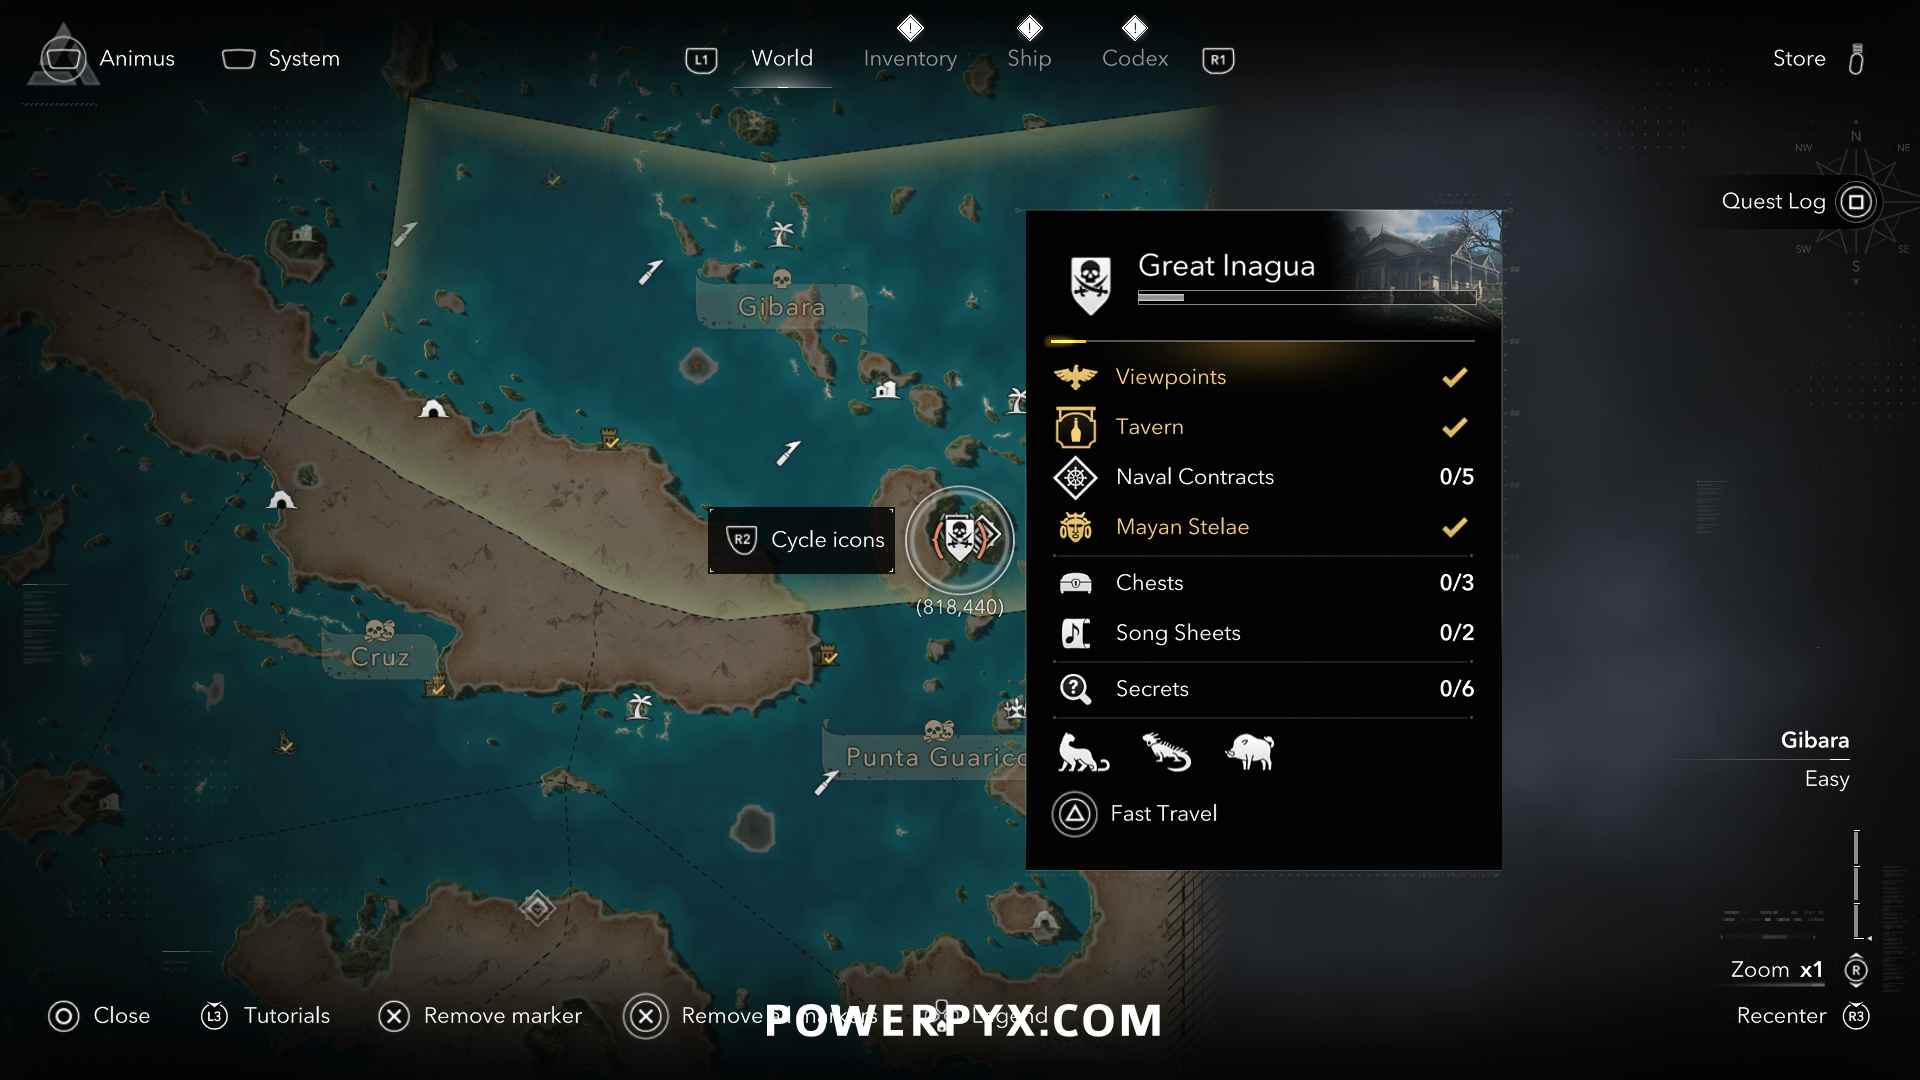
| Great Inagua manor is the house that you unlock in Sequence 04 – Mission 01: This Old Cove (Coordinates: 826, 444). Throughout the manor you must fill all decoration slots: Paintings, Portraits, Table Decorations, Furniture, Shelf Decorations, Ship Models, Swords, Pistols.
This requires finding all Art Collection Pieces and Portraits. You can view these under Codex > Database. There are 11 Portraits, 41 Art Collection: Art Pieces (contains 2 more Furniture than needed), 10 Art Collection: Paintings, 20 Art Collection: Ship Models. When you scroll over them it shows a hint on the right side how they are obtained. The weapons are viewed in your inventory and are bought, found in the world, obtained as quest rewards. There are a few more Swords and Pistols than needed. Totals needed: 9 Paintings, 7 Table Decorations, 2 Large Table Decorations, 3 Furniture, 27 Shelf Decorations, 1 Outfit, 18 Swords, 12 Pistols, 20 Ship Models
The most tedious part is getting the 19 random Art Pieces from Kenway’s Fleet. These are exclusively obtained from sending Brigs on piracy missions via the Fleet Planning Room. They don’t drop from Schooners, Frigates, Man-o-Wars. Only Brig Piracy can give them. Whether you get a mission that gives an Art Piece is entirely random and they take 30-60 minutes each time. When you only have a few pieces left the chances get extremely low. You should work on this from the start, get 5 Brigs from hard-difficulty regions (they have more health), conquer the Forts to open up the full sea map. Then run 5 Brig Piracy missions simultaneously and wait for them to finish. Before accepting the mission report, make a manual save. Then accept the report, check if you get a mission that gives an Art Piece, if not reload save and accept report again to roll new missions. Sometimes it can take 15+ save reloads to get a single mission with an Art Piece. You can tell if a mission gives an Art Piece because it will show a unique icon in the rewards with a value of “1”:
The other Art Pieces are bought at the General Store and found in the world (Chests, Treasures, Local Events). Paintings are from looting each Warehouse once. Portraits are found in the world and rewarded from Side Quests. Ships are from defeating each type of ship once (some from story, 4 from Legendary Ships, 1 called “Ipswich” from questline “A World Without Gold”). Location Guides: |
||
 |
Governor Restore all buildings in the Great Inagua village |
|
| For this you need to restore only the first level of all 7 buildings in Great Inagua village. Upgrading the Manor Facade isn’t needed.
You reach Great Inagua after Sequence 04 – Mission 01: This Old Cove. The shopkeepers will be marked on the map, talk to them at the harbor of Great Inagua to restore their buildings. Of General Store & Harbourmaster you only need the first level. The other buildings only have a single level. This costs a total of 23,100 Reals. The most reliable way to get money fast is to conquer Forts, open chests in Underwater Shipwrecks, board Man-o-Wars and take their Captain’s Lockbox in hard difficulty regions, and use Kenway’s Fleet to send Schooners on trade missions.
|
||
 |
Zero Waste Restore a map from map pieces |
|
|
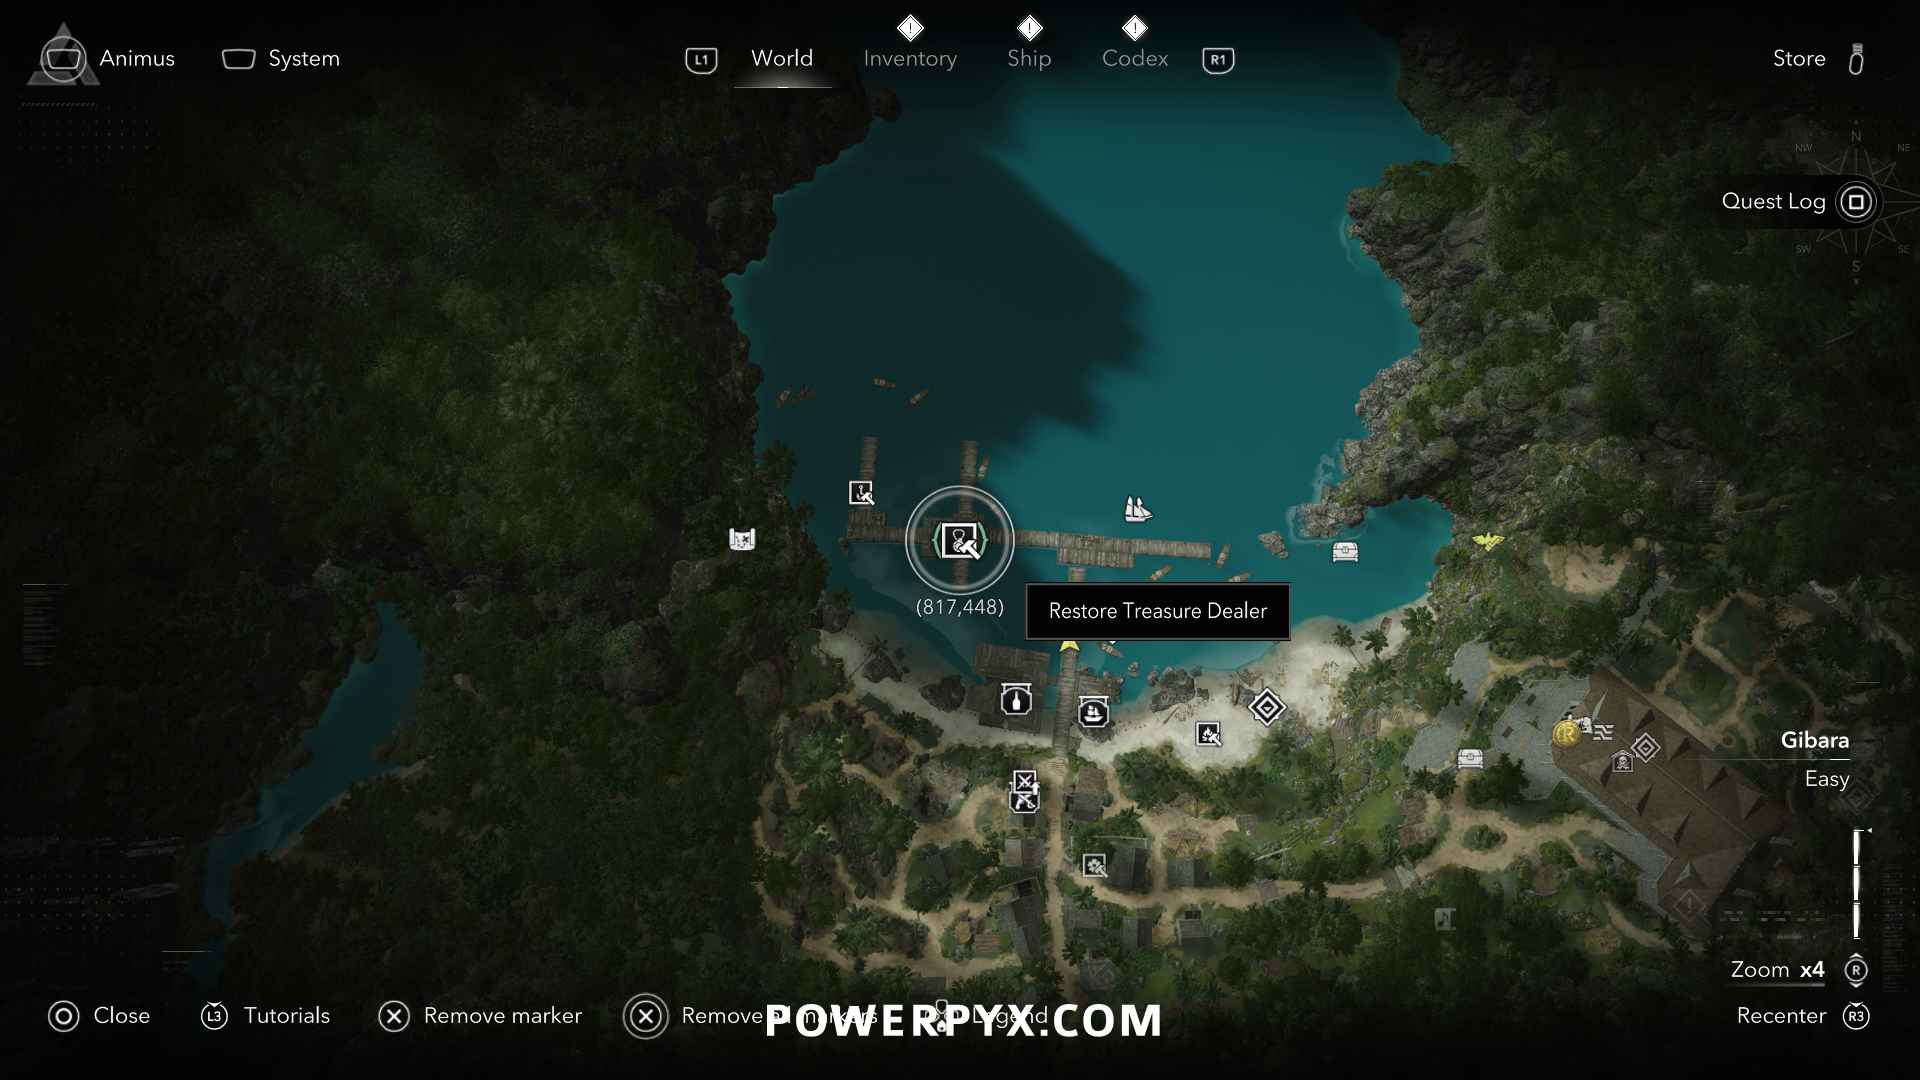
First you need to restore the building “Treasure Dealer” in Great Inagua (Coordinates: 817, 448). Talk to the treasure hunter at the docks to restore this building, he’s available after Sequence 04 – Mission 01: This Old Cove.
Then in his shop you can see 5 maps that can be restored after you find all their pieces. These also cost huge amounts of materials so you’ll want to use Kenway’s Fleet and send Brigs to piracy missions to farm the materials. You can also destroy ships to get the materials. Which map you restore doesn’t matter. The easiest are the “Restored Digested Map” and “Restored Tattered Map”. The Digested Map has only 2 pieces and Tattered Map 3 pieces. While farming all 19 Collection Pieces from Kenway’s Fleet for
|
||
 |
Grandmaster Win at each of the different tavern games |
|
|
There are 3 tavern games. Each of them comes in 3 difficulty levels from 1 star to 3 stars. Winning the easy 1 star version is enough, you don’t need to beat the 2-3 stars. There is a playing table at each tavern, if he’s not available buy a drink at the bar to spawn some enemies, beat them up and the minigame will unlock. There will be tutorials for each game when you sit down at the table. Below are the locations of the easy 1-star versions:
|
||
 |
Articles Of Agreement Ensure the survival of all pirates in a street fight |
|
|
Street Fights are RANDOM Side Activities that get marked with a chainlink symbol |
||
 |
Among Thieves Unlock a smuggler’s chest |
|
|
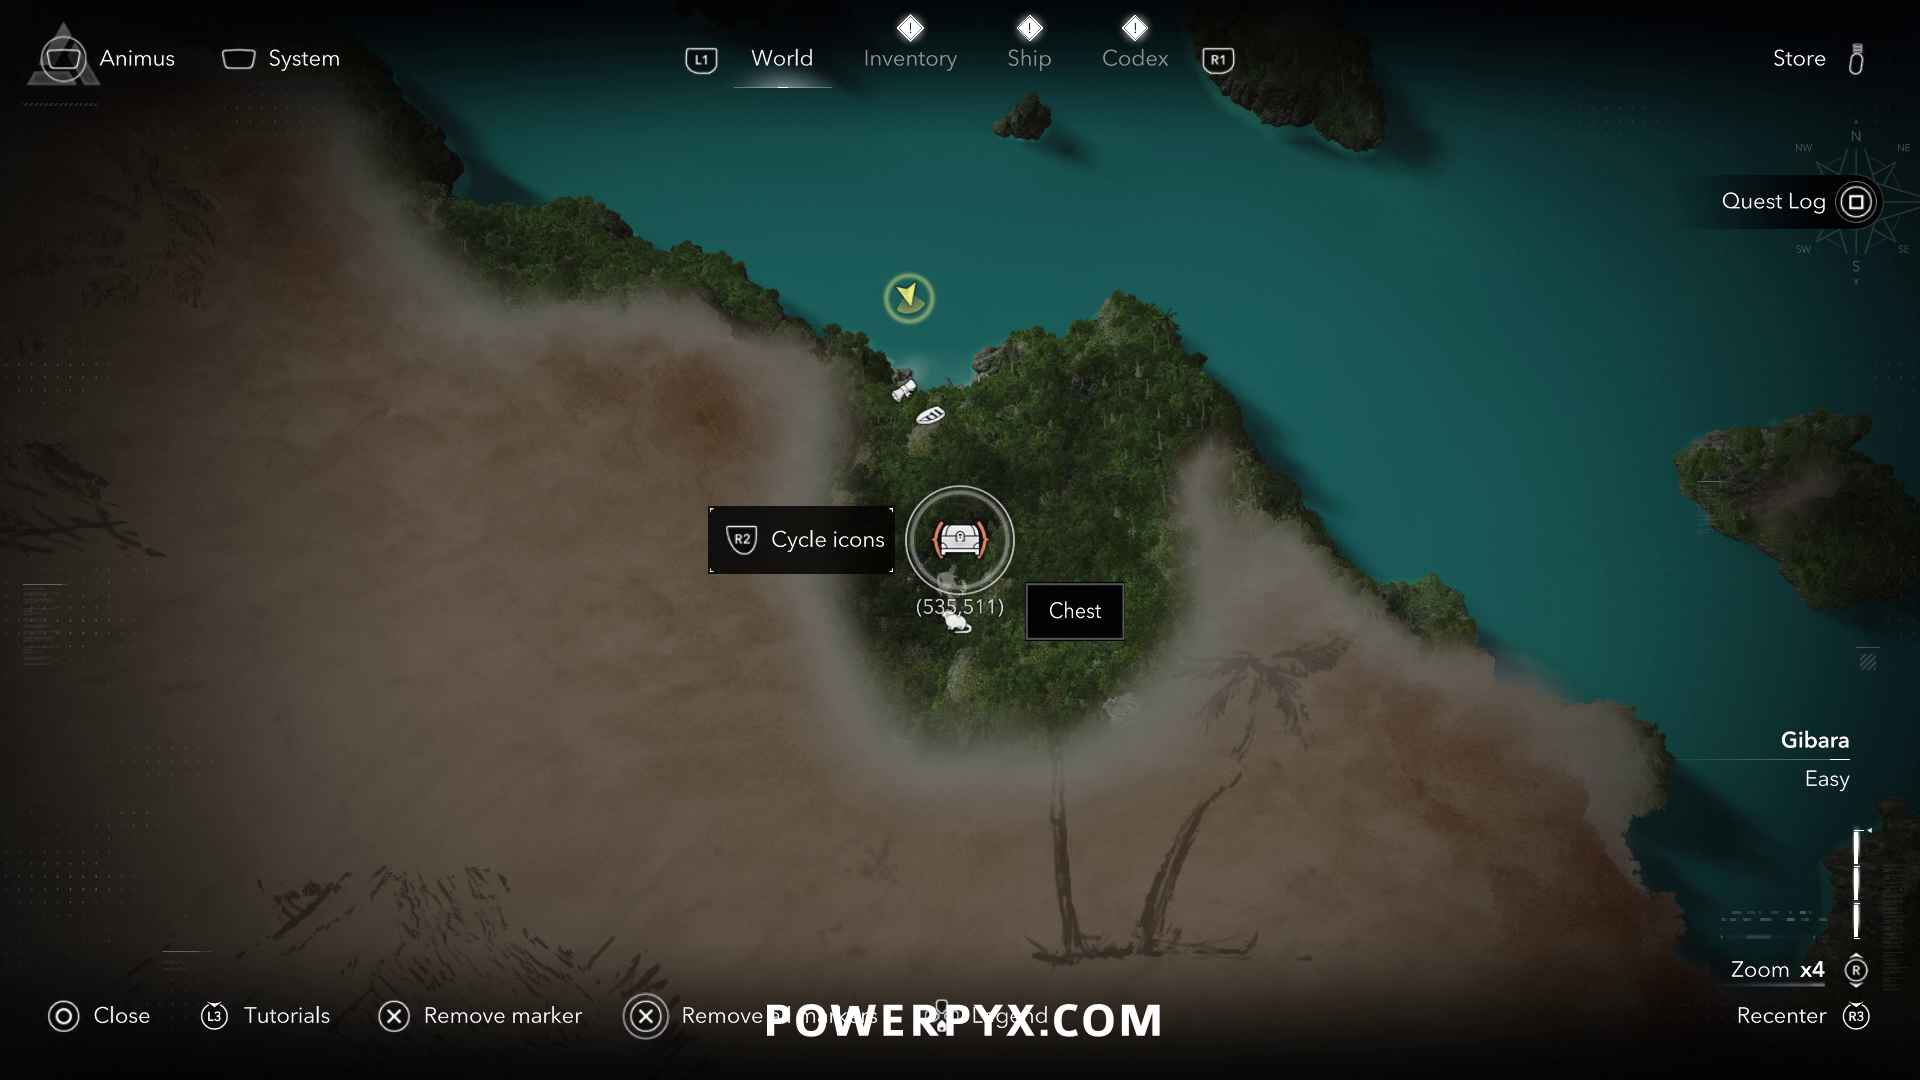
A Smuggler’s Chest can be found in Jiguey cave (Coordinates: 535, 511). It’s the locked underwater chest in the middle of the cave where enemies are. Defeat the enemies to loot the key from them, then open the chest with it. The enemy next to the big brute has the key.
You can also find Smuggler’s Chests in other caves, there are 5 total that you will reveal while unfogging all “?” icons on the map. |
||
 |
Help A Brother Out Complete a Templar Hunt sequence |
|
There are 4 Templar Hunt Sequences: Rhona Dinsmore, Antó, Upton Travers, Opía Apito. They are automatically unlocked from story progress after Sequence 04 – Mission 01: This Old Cove. On the world map you can press  to select the Templar Hunts, they will be marked by exclamation points (“!”). Each consists of 4 quests that leads to killing the templar. For the trophy you need to play all 4 quests of one templar. to select the Templar Hunts, they will be marked by exclamation points (“!”). Each consists of 4 quests that leads to killing the templar. For the trophy you need to play all 4 quests of one templar. |
||
 |
Seven Deadly Seas Find all treasure chests in underwater shipwrecks |
|
| There are 7 Underwater Shipwrecks containing a total of 68 chests (61 regular chests and 7 secret chests), they get marked by white diving bell icons on the map. You can only access them after story Sequence 06 – Mission 01: Diving for Medicines, then they all get marked on the map automatically. You then interact with the shipwrecks to use the diving bell and the treasure chests get marked when swimming near them.
» Assassin’s Creed 4 Black Flag Resynced – All Underwater Shipwreck Treasure Chests Locations |
||
 |
Silence, Fool! Kill a guard ringing a bell |
|
|
Go to a Warehouse, these always have a bell. Let the guards see you, wait for one to ring the bell and headshot him with the pistol for an instakill ( You can filter for Warehouses on the map by pressing
|
||
 |
Matador Dodge a total of three charge attacks by a Wild Pig |
|
|
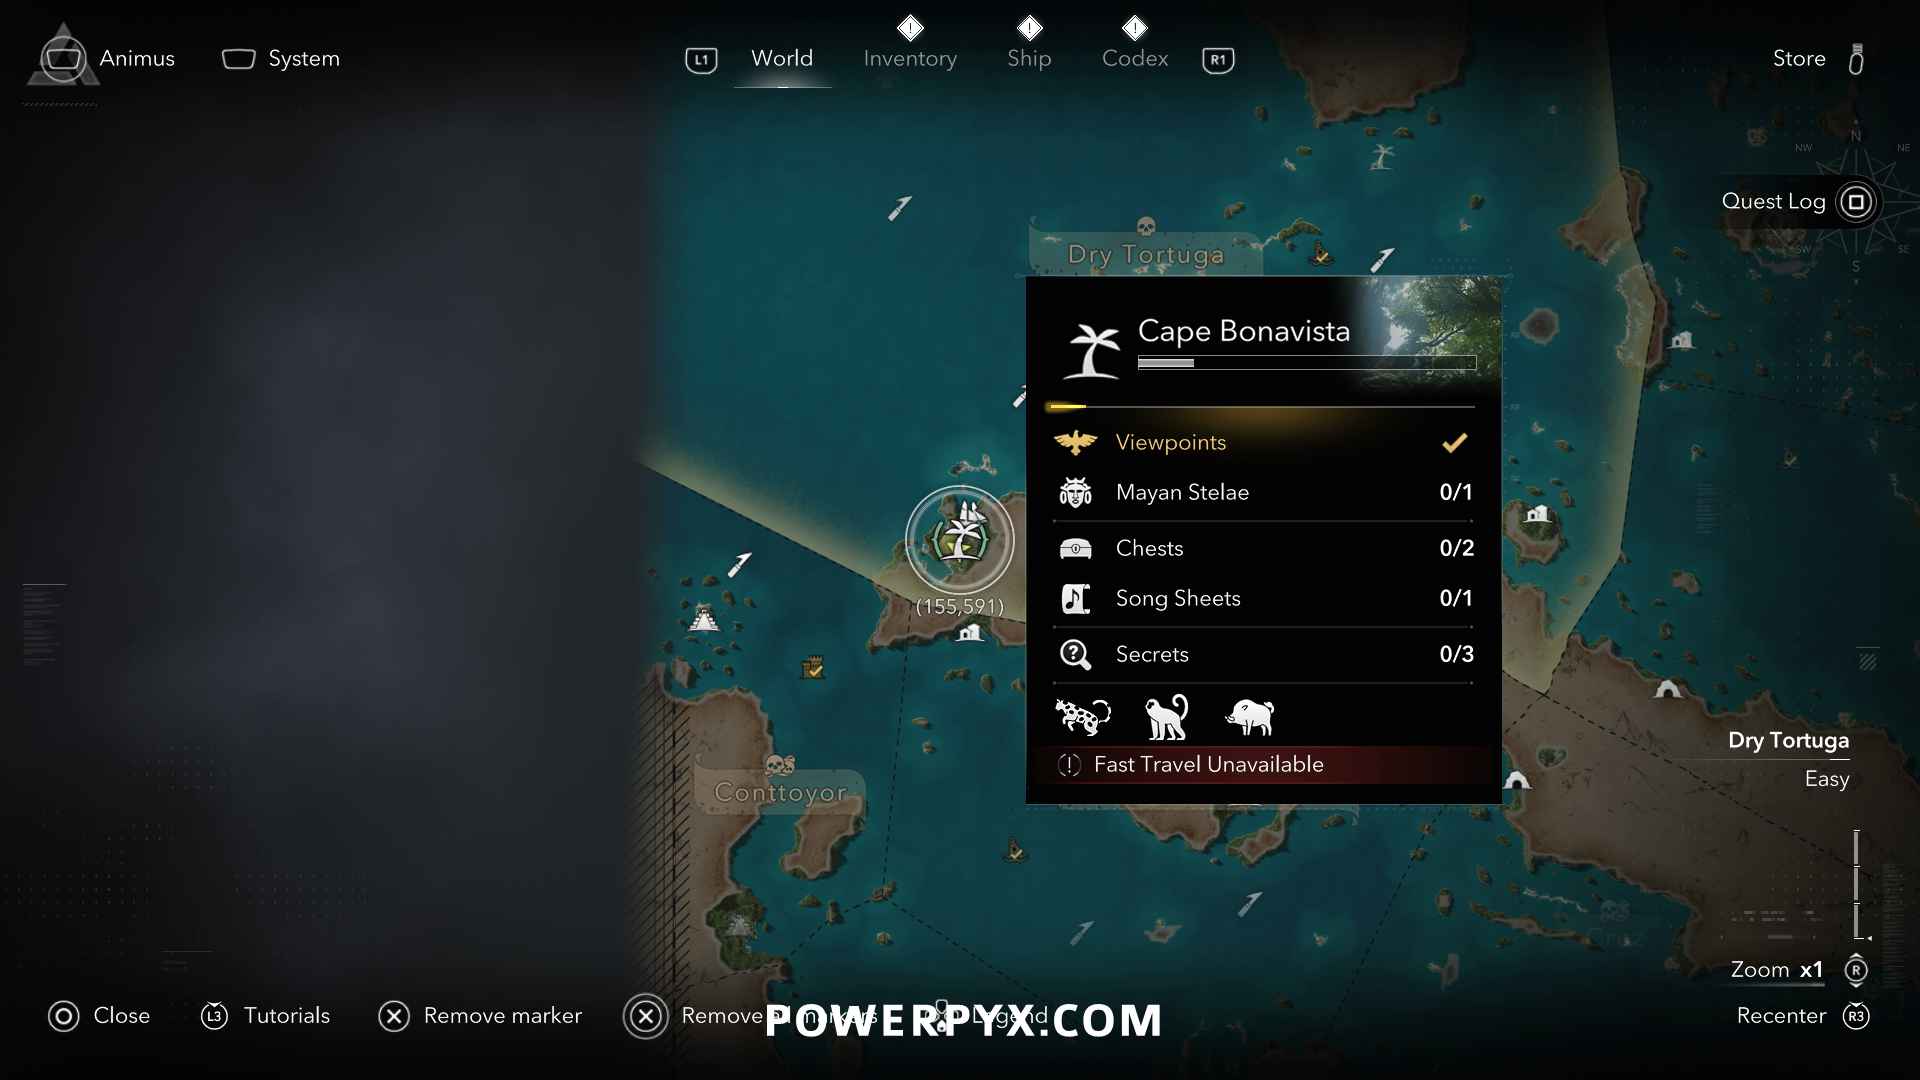
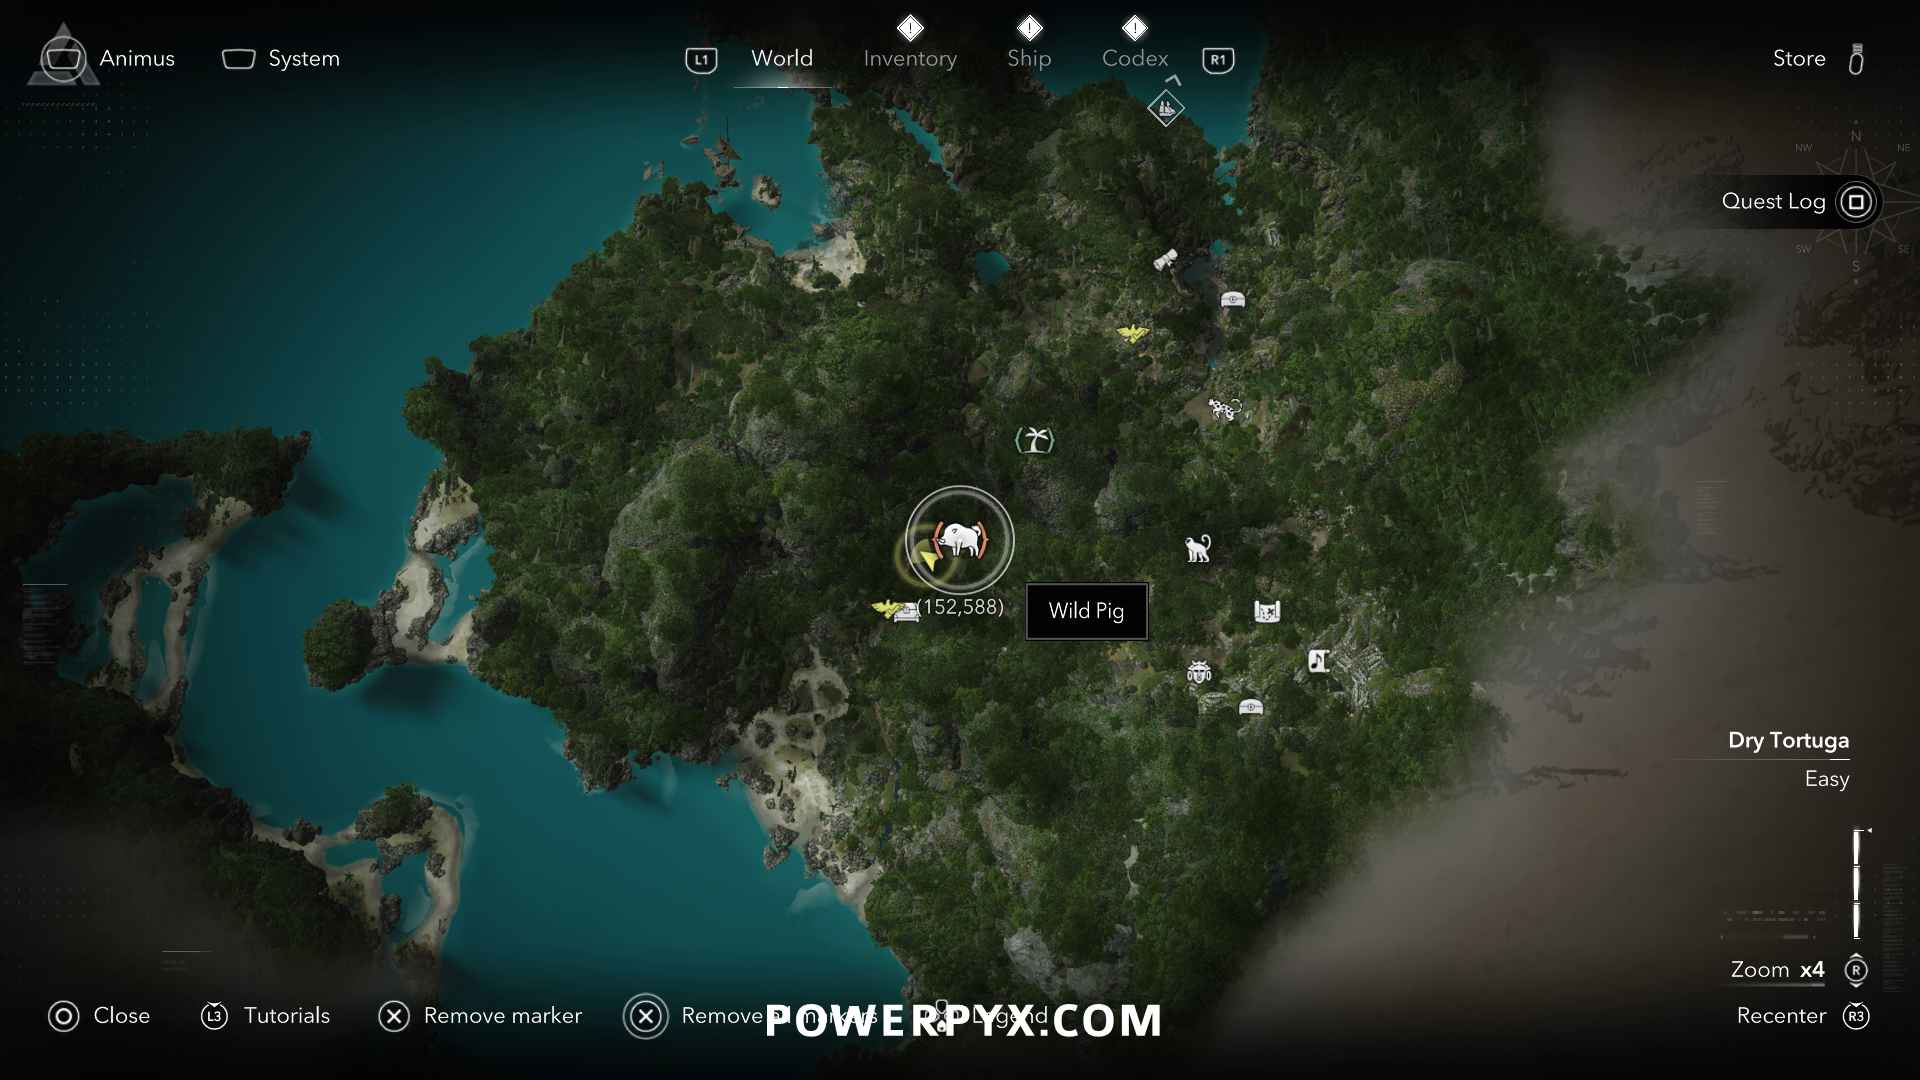
Wild Pigs are found on Cape Bonavista (Coordinates: 152, 588). They get marked on the map by a white pig icon. When a pig fights you, wait for it to do a red charge attack and dodge it so that time slows down. Repeat 3 times, can be the same pig and you are allowed to miss dodges in between. You don’t need 3 perfect dodges in a row.
|
||
 |
Perfect Predator Get a perfect harpoon shot on a Great White Shark |
|
|
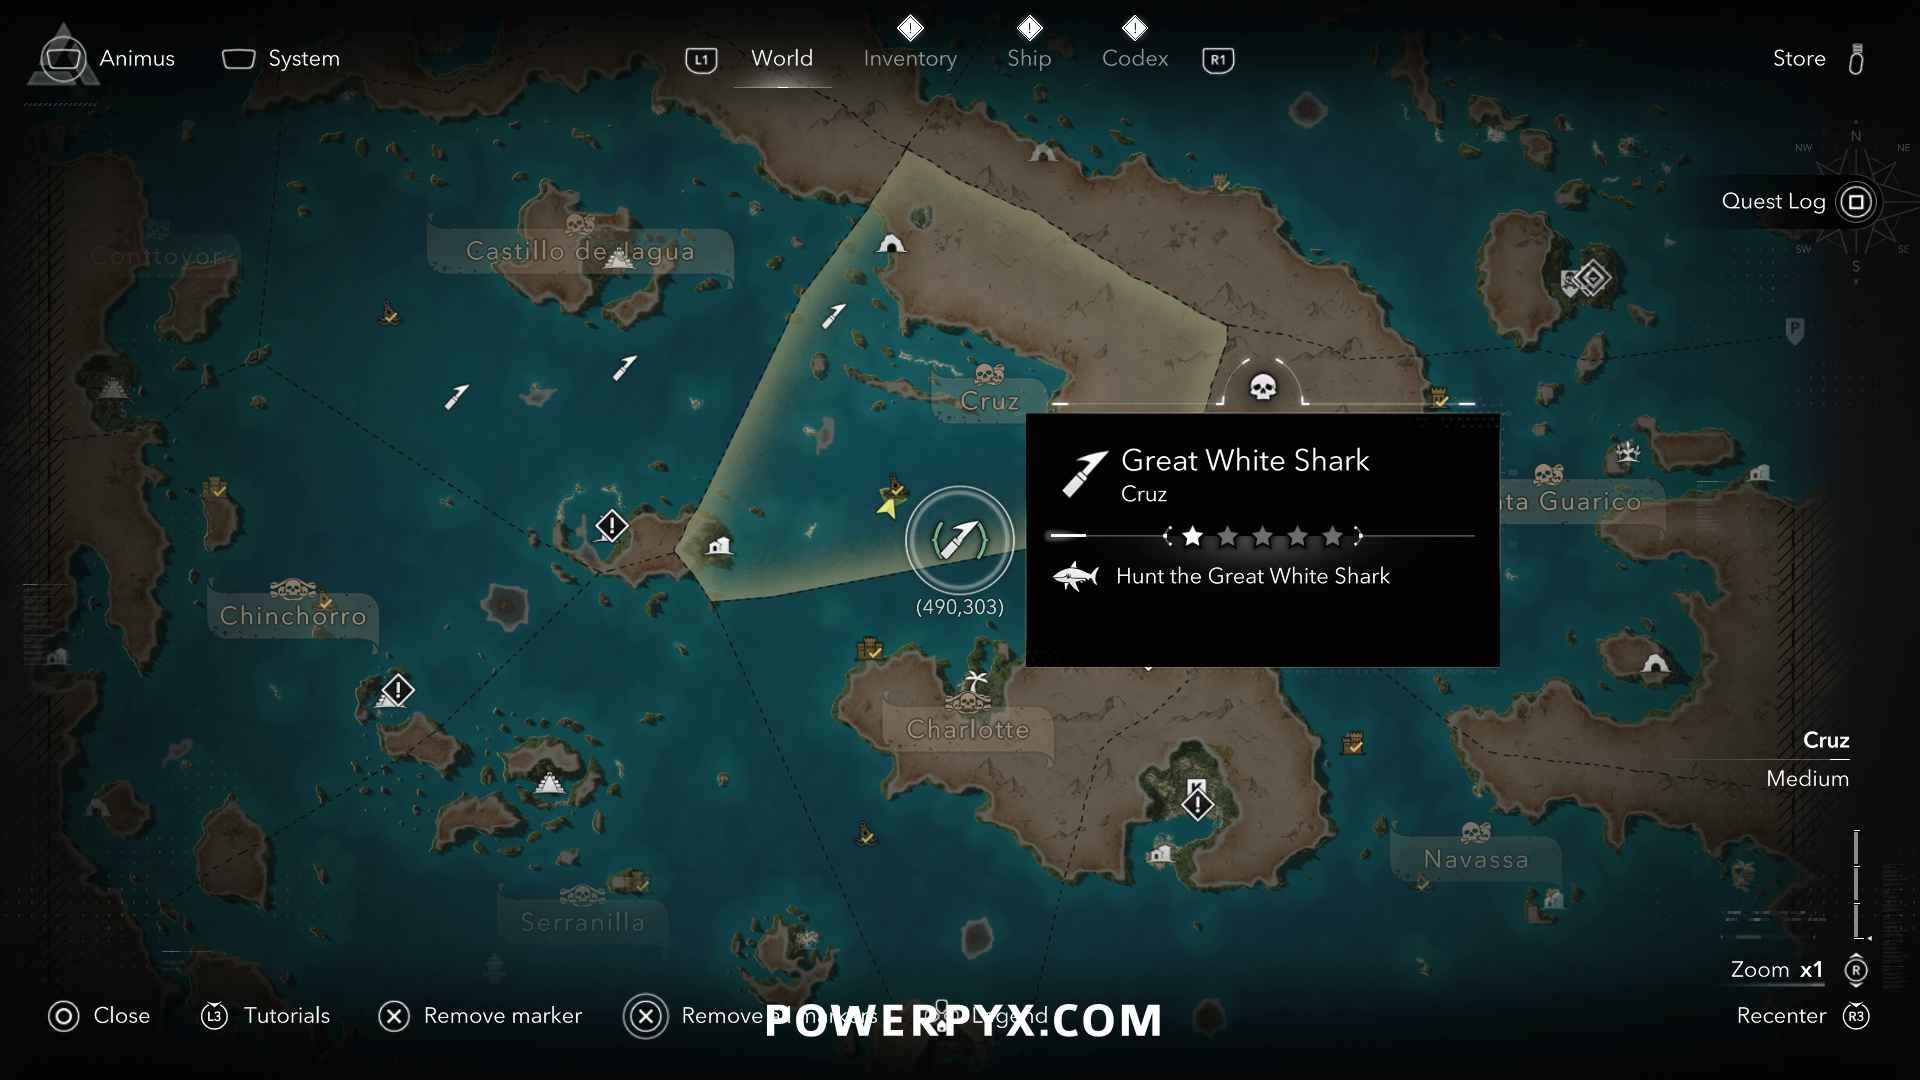
A Great White Shark harpooning spot can be found in Cruz region at Coordinates 490, 303. It will get marked by a white harpoon icon when going near it. Interact with the harpooning spot, then you will be on the rowboat holding a harpoon. To perform a “Perfect Shot” aim with
|
||
 |
Double Tap Parry two Ocelot attacks in rapid succession |
|
|
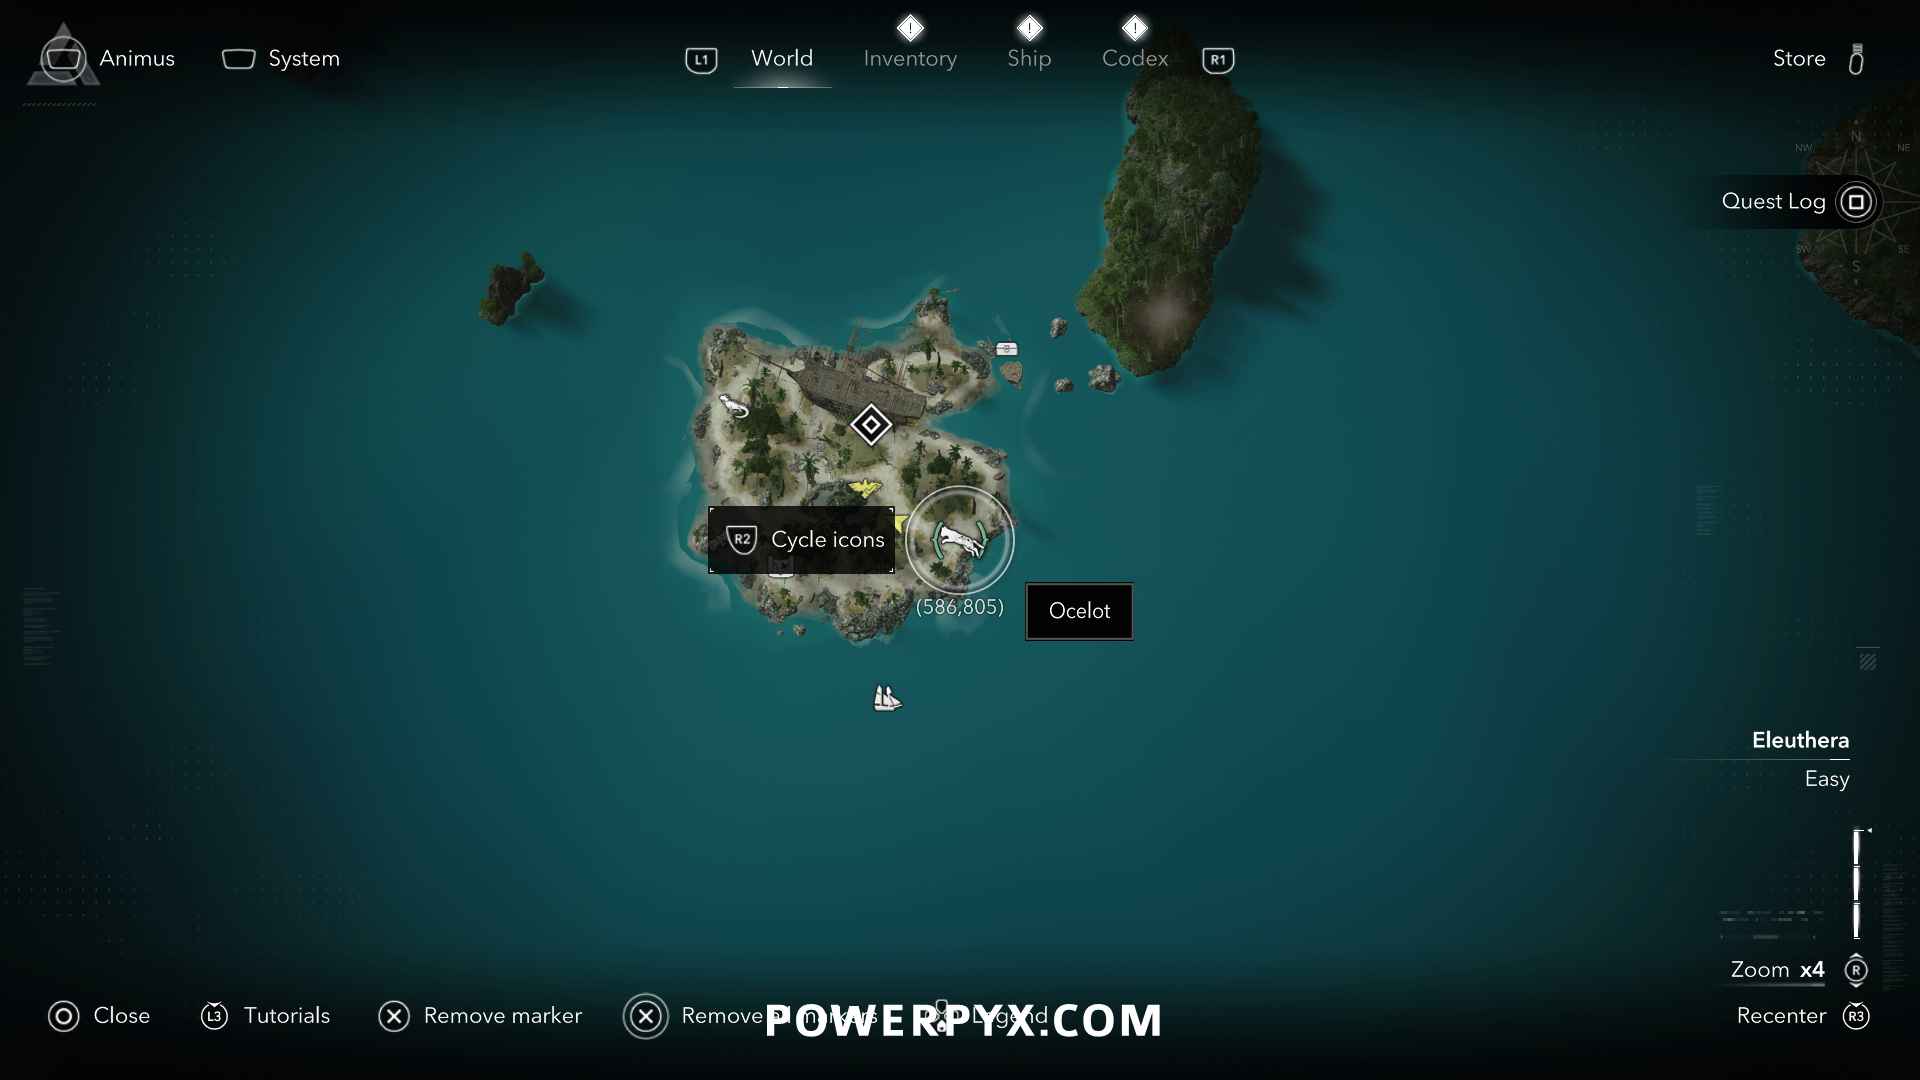
Ocelots are found on Abaco Island (Coordinates: 583, 807). The trophy is slightly misleading, you don’t need 2 Ocelots for it, you can parry one and the same Ocelot twice in a row. When the Ocelot attacks press
|
||
 |
Owned Complete every activity in a single location |
|
| For this you must find all collectibles (including viewpoints) on one island. Finding all treasure chests in sunken shipwrecks counts too, so you will get this automatically while going for all Shipwreck Treasure Chests. | ||
 |
The Hangman Kill 10 enemies by hanging them with the rope dart |
|
|
The rope dart is automatically unlocked in Sequence 03 of the story. To hang enemies you must be in stealth on a tree branch or a wooden beam. When an enemy is underneath the tree/beam, you will get the If an enemy is too far away you can pull them in with the rope dart ( Plantations with climbable trees work great for this. The best locations are:
Between these locations you should easily get 5 kills. Then wait for the enemies to respawn. It takes a long time for warehouse enemies to respawn so check back after a few hours to farm more kills. If you don’t want to wait you can lure more enemies by whistling or get detected and have them search the area. Note that kills can’t be farmed by reloading saves. |
||
 |
Caught ‘Em All Catch at least five enemies within a single smoke bomb |
|
|
Smoke Bomb is an automatic story unlock from Sequence 02 – Mission 01: Lively Havana. Afterward you can select it with This is best done when boarding ships, there are many enemies close together. Alternatively, you can attack enemies in cities or plantations and lure them close together. |
||
 |
Gun-kata Use pistols to kill four enemies in a row within five seconds |
|
|
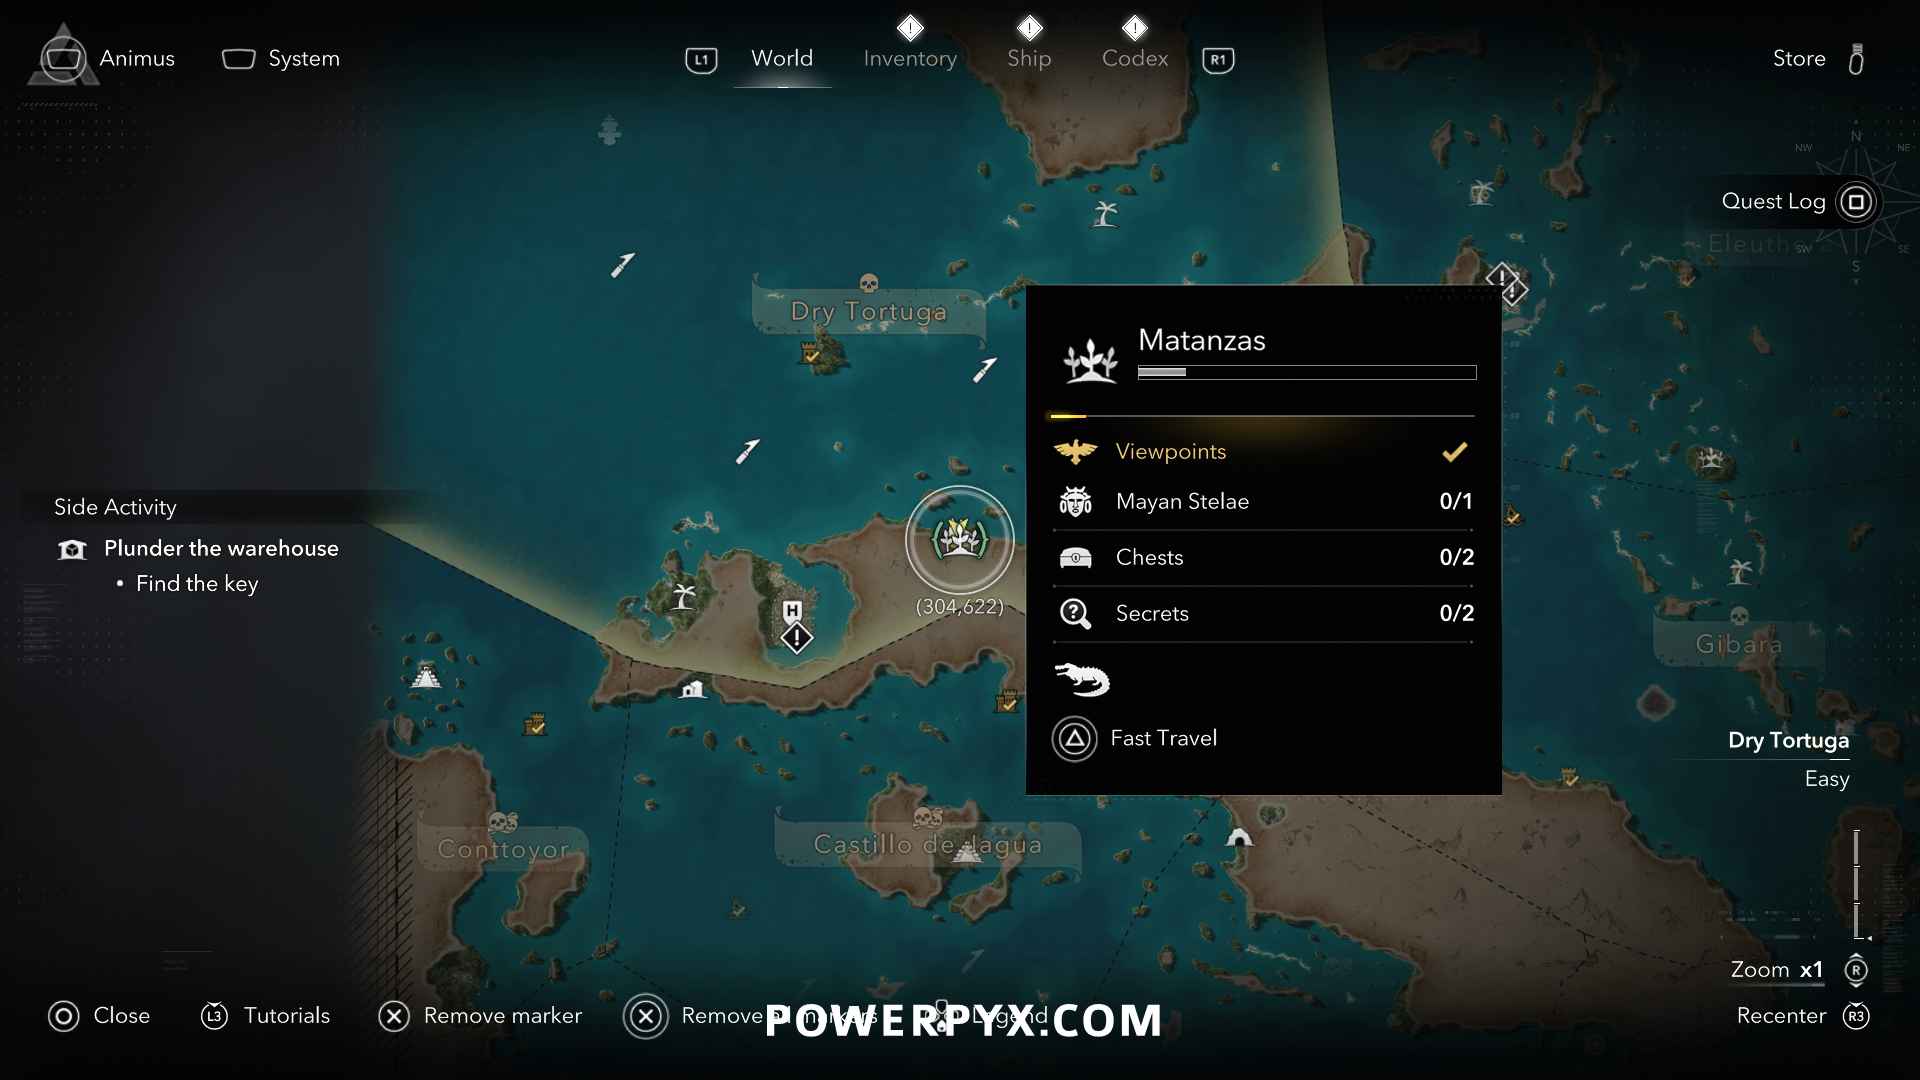
First, upgrade the Pistol Holster to the maximum (Level 4) to carry 4 Pistols. This allows you to shoot 4 times in quick succession. The Level 2 upgrade is story-related from Sequence 03 – Mission 01: This Tyro Captain. Level 3 requires 2 Rabbit Pelts which come from hunting Rabbits (e.g. in Nassau at 597, 760 in the Eleuthera Region). Level 4 requires 4 Bull Shark Skins which come from Harpooning Locations on the sea in Dry Tortuga and Gibara regions. You craft upgrades from the inventory by clicking the anvil icon in the bottom right. Now you have to kill 4 enemies using pistols within 5 seconds. This requires you to kill one enemy with each shot without missing. If you miss a shot the reload can make you take longer than 5 seconds. The easiest option is to go to a plantation (e.g. Matanzas at 304, 622) and get 4 enemies to low health so they will die in 1 hit. Lure them to you and put them to sleep using the Blowdart (story unlock from Sequence 04 – Mission 04: Overrun and Outnumbered). Now shoot the sleeping low-health enemies with the pistol, one shot each. Alternatively, you can also do it by headshotting 4 enemies quickly for instakills. Putting them to sleep first makes it easier as they won’t move. If you get them to low health first you can kill them by shooting the body instead of headshots. It also helps to upgrade the Sleep Dart and Dart Pouch so you can carry more ammo and they stay asleep longer. Another method is to board a ship, get multiple enemies to low health, throw a smoke bomb and use quickshot with |
||
 |
Backs To The Wall Kill an enemy with a wall takedown |
|
During combat, kick an enemy into a wall with  + then the “Takedown” prompt should appear on the enemy with + then the “Takedown” prompt should appear on the enemy with  which will perform a “Wall Takedown”. You can do this practically anywhere. which will perform a “Wall Takedown”. You can do this practically anywhere. |
||
 |
Let Me Explain After a perfect parry, perform a total of four takedowns |
|
|
First, you need a sword that has 4 “Maximum Takedowns”. You can check this in the inventory when scrolling over the sword. You can buy “Officer’s Rapiers” from the General Store in Great Inagua after upgrading it to Level 2 (available after Sequence 04 – Mission 01: This Old Cove). Now perform a parry on a blue glowing attack with |
||
 |
Overdesign IV Kick a berserk enemy caught in smoke off a ship |
|
|
First, you need to advance the story to unlock the Smoke Bomb and Berserk Dart. Both are automatic story unlocks. Smoke Bomb is unlocked in Sequence 02 – Mission 01: Lively Havana. Berserk Dart is unlocked in Sequence 04 – Mission 04: Overrun and Outnumbered. Now damage a ship and board it (preferably a Brig). Shoot an enemy with Berserk Dart so he has a purple icon over his head ( You should get the Takedown animation that performs a kick to push the enemy over the railing. It won’t work every time. Sometimes the Takedown won’t kick him all the way over the railing or it uses the hidden blades to kill him. The enemy needs to fall over and into the water. You’ll want to kick the enemy against one of the shorter railings. It works well on Brigs (the medium-sized ships with a ram at the front), there are parts of the railing that are lower and enemies fall over more reliably. Running toward the enemy before kicking him also helps, this ensures you will face him head-on for has a better chance to trigger the Kicking Takedown. Avoid takedowns from the side as these trigger the hidden blade. |
||
 |
Lively Havana Get a tour of Havana (complete Sequence 2, Memory 1) |
|
| Automatic story-related trophy, cannot be missed. | ||
 |
A Poxy Bird Captain your own ship (complete Sequence 2, Memory 6) |
|
| Automatic story-related trophy, cannot be missed. | ||
 |
Walls That Hold Back The Wind Settle in a new home (complete Sequence 4, Memory 1) |
|
| Automatic story-related trophy, cannot be missed. | ||
 |
In A World Without Gold Witness the end of a legend (complete Sequence 8, Memory 1) |
|
| Automatic story-related trophy, cannot be missed. | ||
 |
Ever A Splinter Stop a Templar plot (complete Sequence 12, Memory 5) |
 |
| Automatic story-related trophy, cannot be missed.
Full Quest List: Sequence 1: Prologue
Sequence 2: The Spanish Main
Sequence 3: The Republic of Pirates
Sequence 4: Nothing Is True…
Sequence 5: The Forts
Sequence 6: The Siege of Charles-Towne
Sequence 7: The Hammer Falls
Sequence 8: Marooned
Sequence 9: Trust
Sequence 10: The Observatory
Sequence 11: Everything Is Permitted
Sequence 12: The End of the Journey
Epilogue
|
||
 |
All Hands On Deck Recruit all Officers |
|
| » Assassin’s Creed 4 Black Flag Resynced – All Officer Locations | ||
 |
Hungover Wake up in a haystack |
|
|
Go to a tavern and keep buying drinks until you pass out. A tavern can be found in Nassau. It’s one of the first locations you will visit during the main story. Walk up to the bar and interact with the bottle on the counter to start drinking. You have to drink at least 5 times to pass out.
|
||
 |
Collective Madness Add one of each ship class to Kenway’s fleet |
|
Kenway’s Fleet is unlocked during Sequence 04, you can then interact with the table in Great Inagua Manor to send your ships on missions. There are 4 types of ships, defeat one of each, then board it and choose to send it to Kenway’s Fleet. You can add more Ship Berths by buying and upgrading buildings at Great Inagua. While sailing press  to zoom in on ships and reveal what type they are. You don’t need all 4 at the same time, just adding them to your fleet once in general is enough. to zoom in on ships and reveal what type they are. You don’t need all 4 at the same time, just adding them to your fleet once in general is enough.
|
||
 |
Strike The Colors Board a Lead Convoy ship |
|
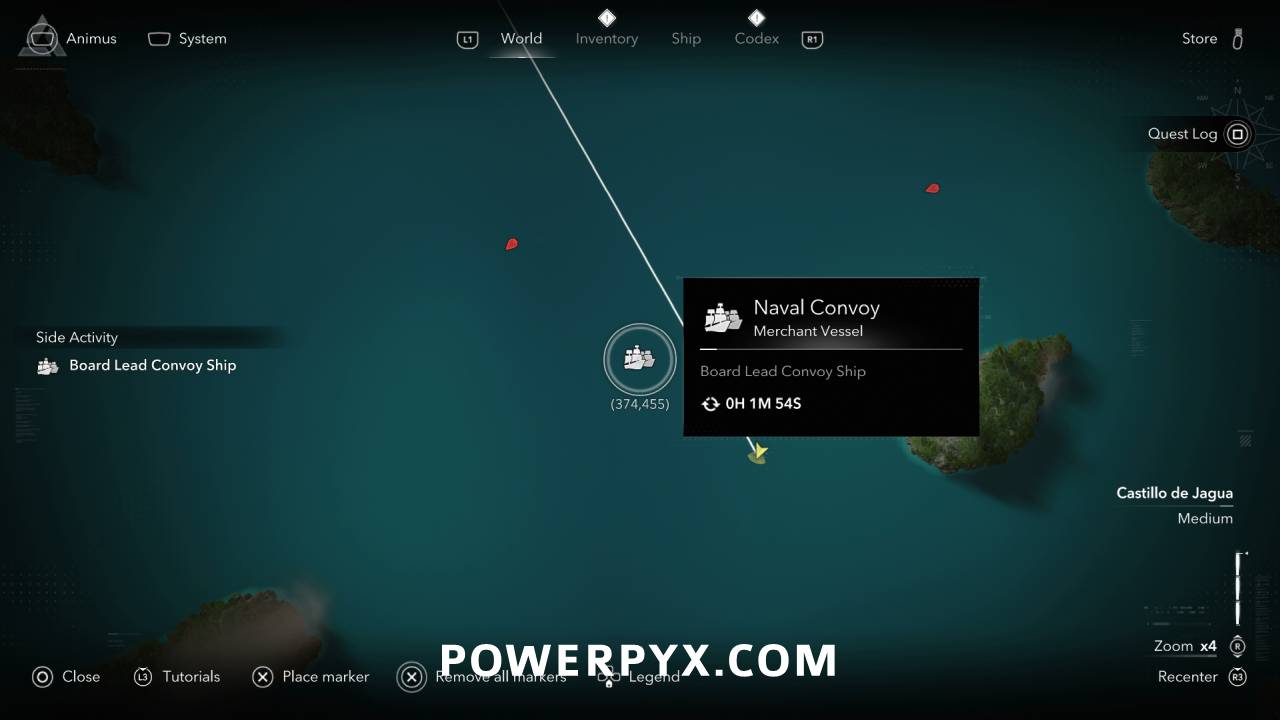
| At sea you will frequently get white ship icons labeled as “Lead Convoy”. These are timed events and only stay for a few minutes before respawning elsewhere. When scrolling over the icon it says “Naval Convoy – Merchant Vessel – Board Lead Convoy Ship”. Reduce the health of the ship, sail next to it and board it, complete the boarding objective to conquer the ship. The trophy unlocks after you conquered the ship, not immediately when boarding it.
Here’s what the map icon looks like:
|
||
 |
Unsinkable Survive a rogue wave taken from the side |
|
| “Rogue Waves” are the tall waves during storms that cause damage to your ship. Have a big wave hit the side of your ship and survive the impact. You can brace with to reduce the damage taken. You will probably unlock this naturally throughout the game. If you still don’t have it by the time you’re done with the other trophies, a guaranteed spots is near the start of the game in Sequence 02 – Mission 06: The Treasure Fleet. At the end of the mission you will have to escape from a storm, there are always Rogue waves here. In the open world the weather is pretty random but in this story section it’s guaranteed. If this is one of your last trophies, you could start a New Game to replay the first two sequences. |
||
 |
Yo Ho… Learn a new shanty |
|
Shanties are learned from collecting Shanty collectibles. When syncing viewpoints they get marked by white music icons  on the map. on the map.
You also automatically learn a new shanty after Sequence 08 – Mission 01: Do Not Go Gently, so technically this is an unmissable story-related trophy. Even if you never collected one you earn the trophy at that point. |
||
 |
Return The Favor Dash ram a ramming Brig |
|
|
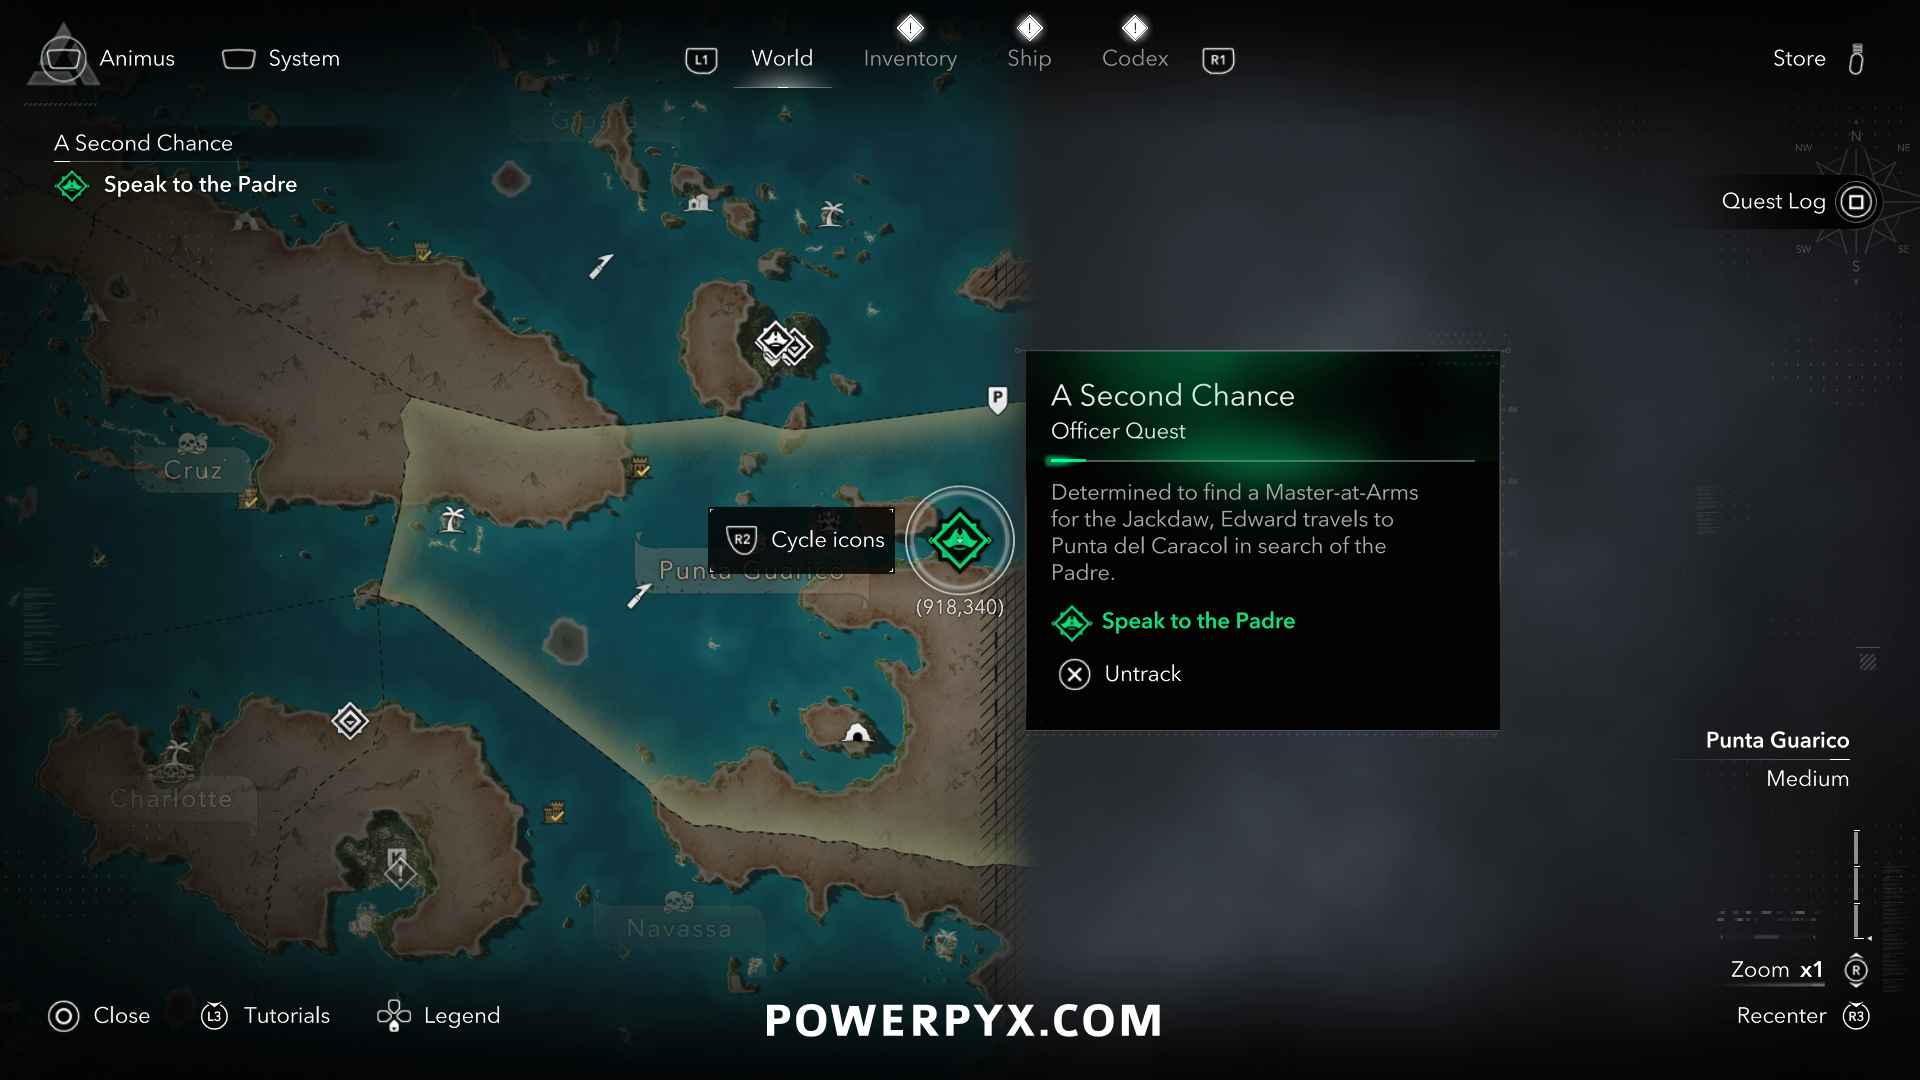
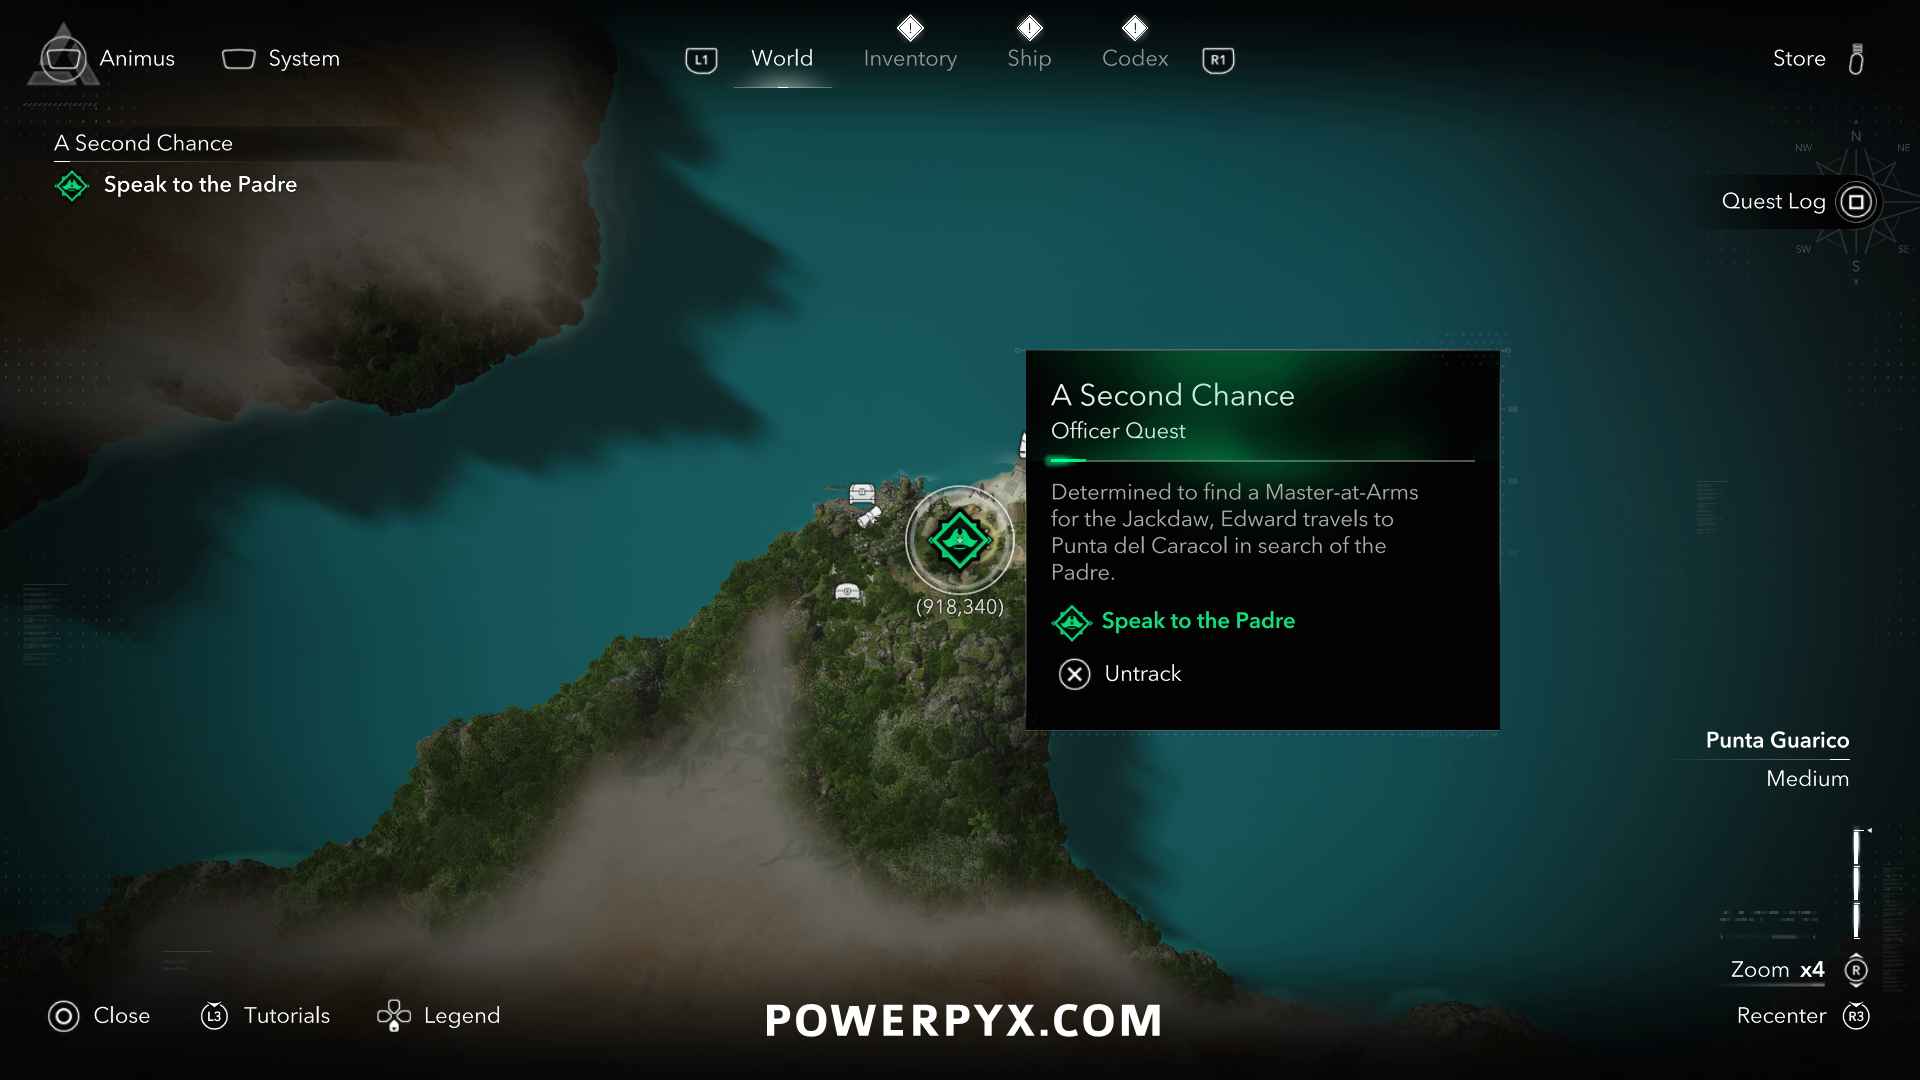
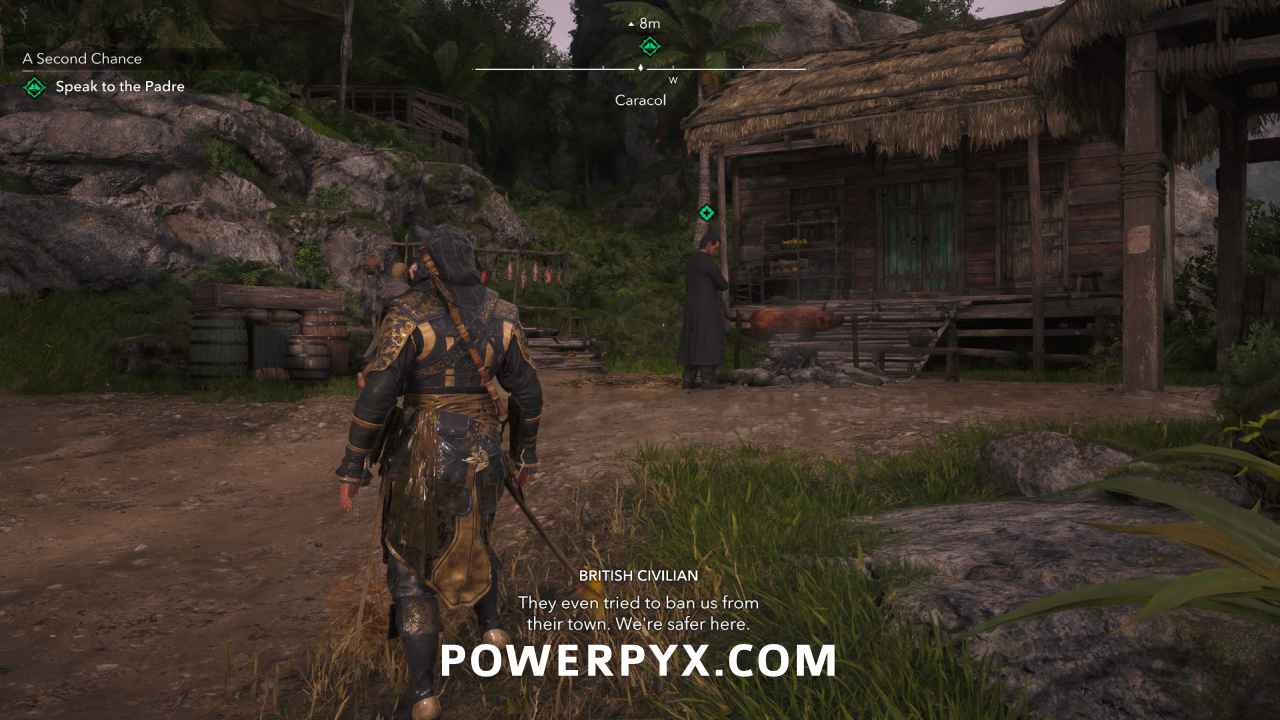
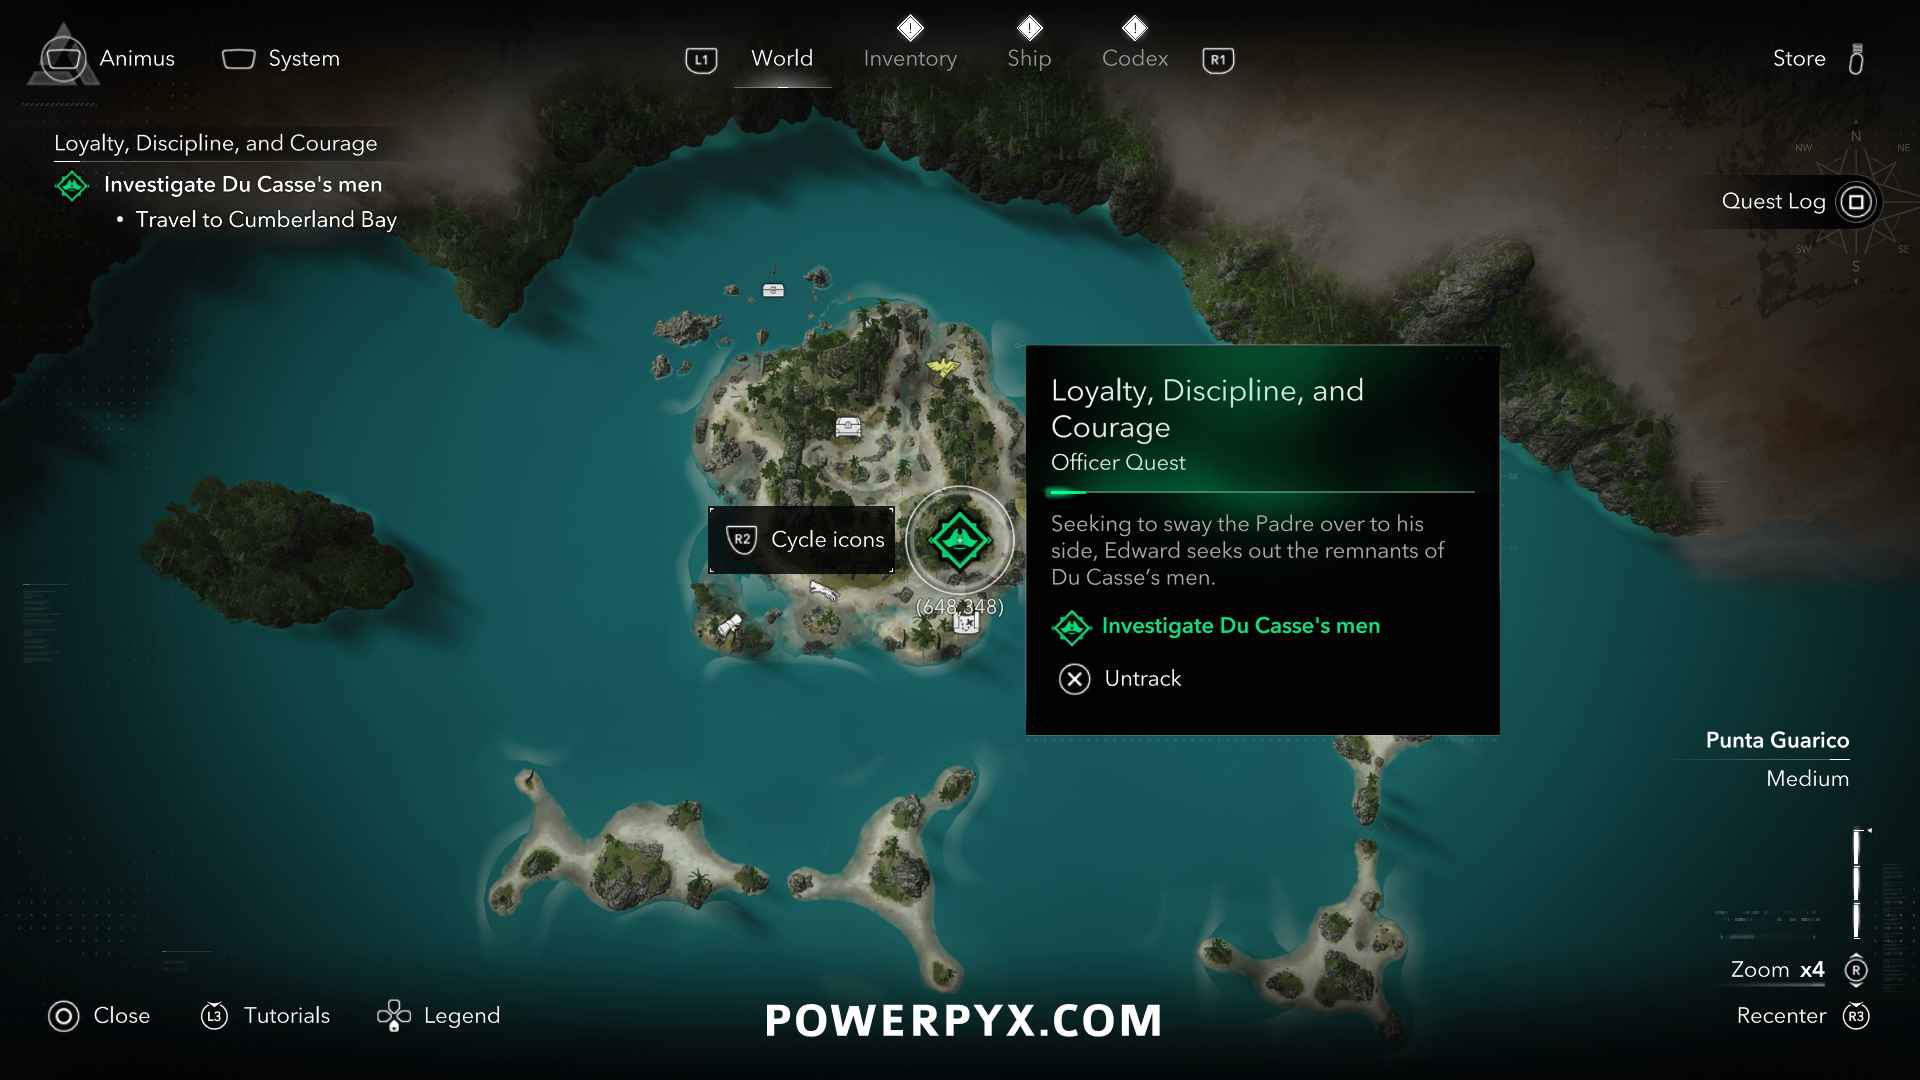
First, you need to recruit officer “The Padre” to unlock the “Ram-Dash” ability. You also need at least the first ram upgrade for your ship, purchasable from any harbourmaster. Then while sailing your ship you can use ram dash ability with To recruit The Padre, finish his first two Officer Quests “A Second Chance” & “Loyalty, Discipline, and Courage”. Officer Quest: A Second Chance – available after Sequence 04 – Mission 01: This Old Cove, then press
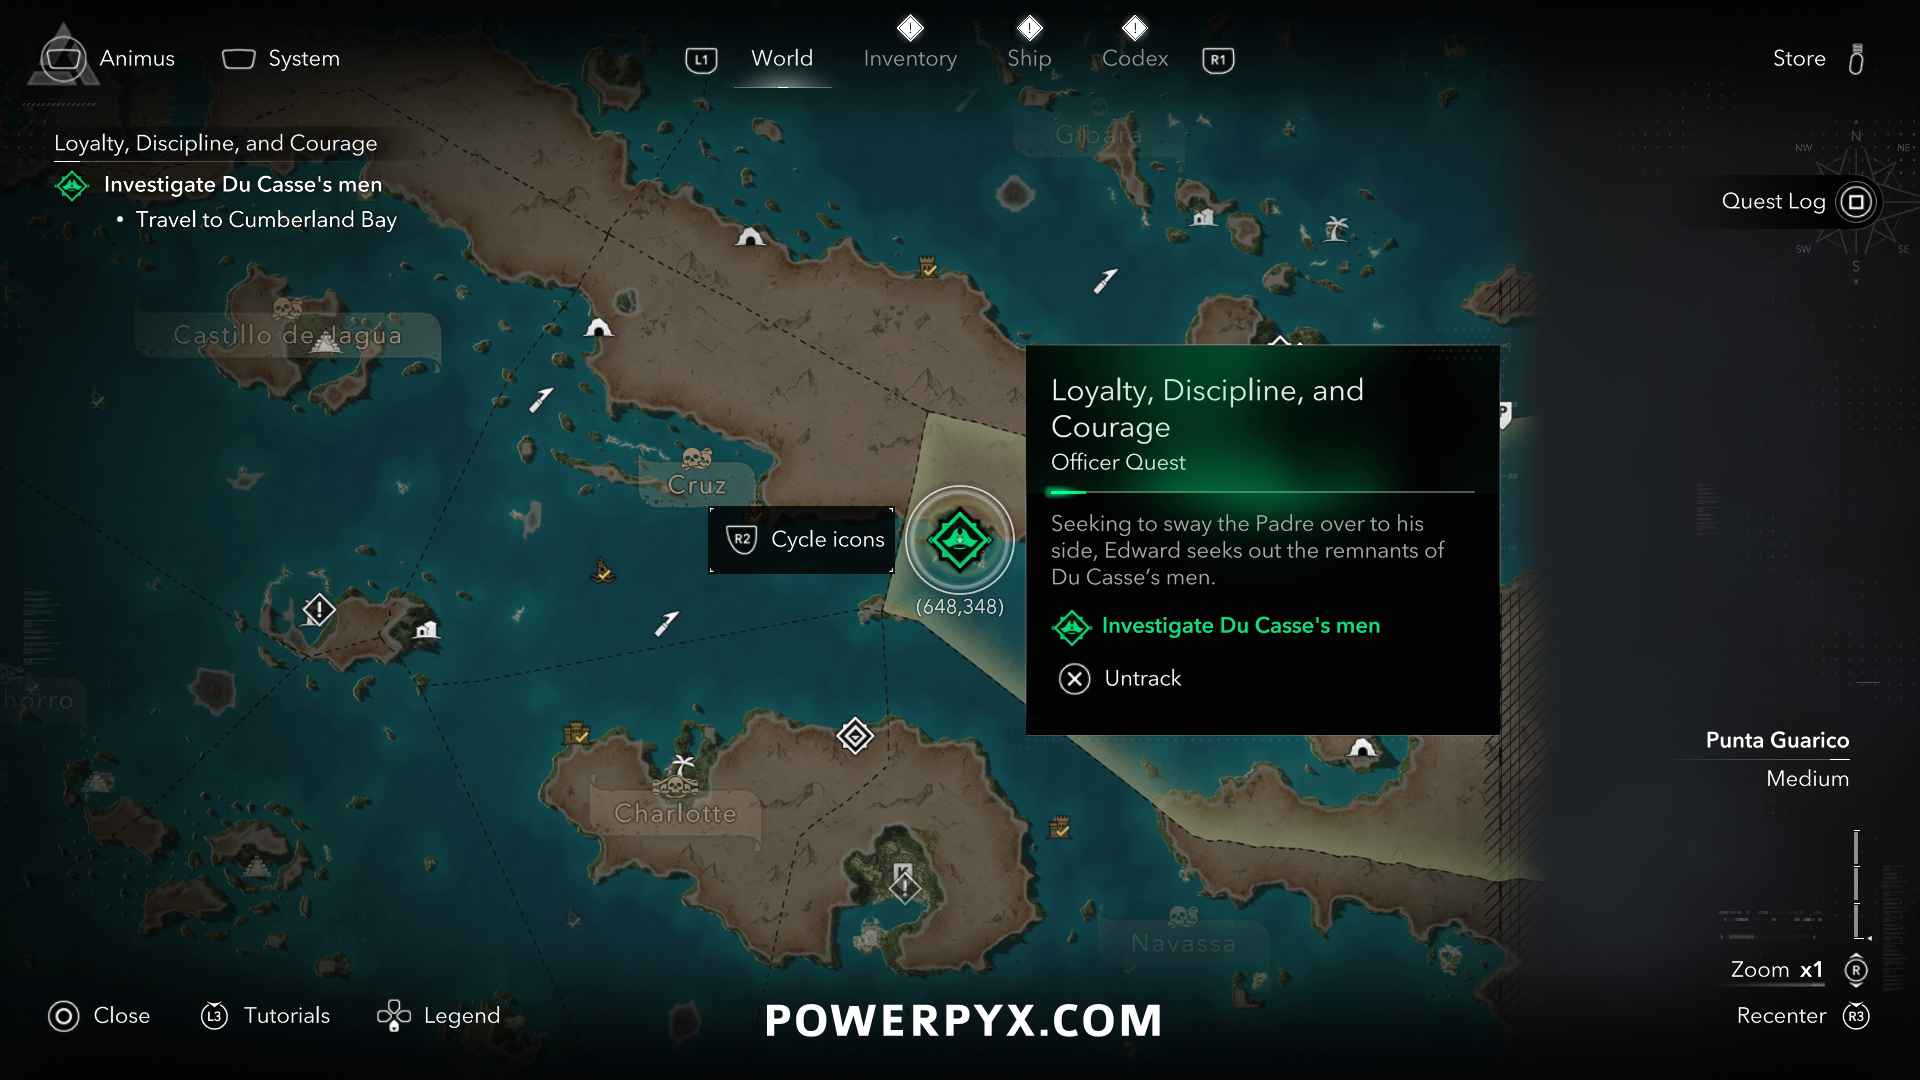
Officer Quest: Loyalty, Discipline, and Courage – available after “Officer Quest: A Second Chance” – Location: 648, 348 at “Cumberland Bay” –> Padre is recruited after completing this quest.
Once Padre is recruited you can scroll over his officer icon under Ship Menu > Arsenal, there it shows his ability is the Ram-Dash. This ability has a cooldown before it can be used again. |
||
 |
Hunter Hunted Defeat a Pirate Hunter while at maximum Wanted Level |
|
| Defeat ships to raise your Wanted Level to the maximum (Level 4). You will automatically be chased by Pirate Hunters while sailing, defeat one of them at Wanted Level 4. You should upgrade your ship to improve survivability. Board ships regularly to repair your own ship. After fully upgrading the ship it will be much easier. | ||
 |
Devil of the Caribbean Defeat all legendary ships |
|
| There are 5 Legendary Ships, they get marked in the corners of the map by white ship icons after conquering the Forts. They are the hardest battles in the game and you should fully upgrade your ship first with Ultimate Plans and recruit all Officers for their passive bonuses.
» Assassin’s Creed 4 Black Flag Resynced – All Legendary Ships Guide |
||
 |
Old Ironsides Perform 3 perfect braces |
|
| First, you need to recruit the Officer “Lucy Baldwin” to unlock the Perfect Brace ability. You need to do her first two Officer Quests “A Proper Shipwright” & “The One With the Gun”. Both are available after Sequence 04 – Mission 01: This Old Cove, then press on map to select it from Officer Quests (Location: 446, 620 at Salt Key Bank).
Then during naval combat hold |
||
 |
Not So Little Friend Unlock the secondary firing mode on a Jackdaw weapon |
|
Automatic story-related trophy, cannot be missed. Unlocks after Sequence 3 – Mission 6: Proper Defenses. You unlock the burning cannon shot during this mission for story progression, but the trophy only unlocks after the mission. You can then use secondary fire mode while aiming the ship cannons with  and pressing to change munitions. and pressing to change munitions. |
||
 |
Dressing Overall Equip new cosmetics in each of the Jackdaw’s vanity slots |
|
| Go to the harbourmaster in Great Inagua (unlocked in Sequence 04 – Mission 01: This Old Cove – Location: 818, 440). Rebuild his shop for 500 Reales. Then talk to the Harbourmaster and press to switch to the “Appearance” menu. Change the design for each of the 5 slots: Sails, Figurehead, Hull, Wheel, Crew. You can buy these from the Harbourmaster too, click on “See Shop” when you talk to him. You will also get cosmetics for free from conquering the 11 Forts, from defeating all 5 Legendary Ships, and from some Chests.
If you own the Deluxe Edition you automatically start out with a legendary cosmetic for each slot which also counts for the trophy. |
||
 |
Smooth Operator Craft an item |
|
| Automatic story-related trophy, cannot be missed. Unlocks during the crafting tutorial in Sequence 3 – Mission 1: This Tyro Captain. There the game teaches you how to craft a Pistol Holster for story progression. Afterward you can access the Crafting Section in the Inventory if you want to make more items. | ||
 |
Business And Pleasure Spend 50,000 Reales |
|
| Spend a total of 50,000 money (Reales) throughout the game. This should happen naturally while working towards other trophies. Upgrade your ship, buy buildings in Great Inagua, buy items from merchants. After finishing the story and conquering all Forts you will have enough money. The most reliable way to get money fast is to conquer Forts, open chests in Underwater Shipwrecks, board Man-o-Wars and take their Captain’s Lockbox in hard difficulty regions, and use Kenway’s Fleet to send Schooners on trade missions. | ||
 |
Ship This Fully upgrade the Jackdaw |
|
| For this you need to fully upgrade your ship, called “Jackdaw”. First, you’ll need to upgrade the Harbourmaster at Great Inagua to access higher level upgrades (Coordinates: 818, 445 – unlocks after Sequence 04 – Mission 01: This Old Cove).
You will also need all 12 Ultimate Plans for the final upgrades. Each upgrade costs money and materials. Materials are quickly obtained by conquering Forts and money is quickly obtained from chests in Underwater Shipwrecks. Also run 5 Schooners via the Fleet Planning room in Great Inagua manor, they passively collect money. Boarding Man-o-Wars and taking their Captain’s Lockbox in hard difficulty regions also gives around 5500 Reales each time. The Diving Bell is automatically unlocked in Sequence 06 – Mission 01: Diving for Medicines. Total Cost:
» Assassin’s Creed 4 Black Flag Resynced – All Ultimate Upgrade Plan Locations |
||
 |
Glutton for Nourishment Consume 20 food items |
|
| Food items are things like berry bushes and soup bowls that restore your health. These are found all over the world, press to interact with them. You can only consume food while your health isn’t full. if you don’t have this by the time you finish the story, the quickest method is to raid storehouses and let the enemies hit you. There are usually a couple of food items in the storehouse areas. The health flasks you consume with don’t seem to count for this. |
||
 |
Friend To All Interact with all seven friendly animals |
|
| » Assassin’s Creed 4 Black Flag Resynced – All Friendly Animal Locations | ||
 |
Blow The Man Down Shoot down all the hanging bodies in Long Bay |
|
|
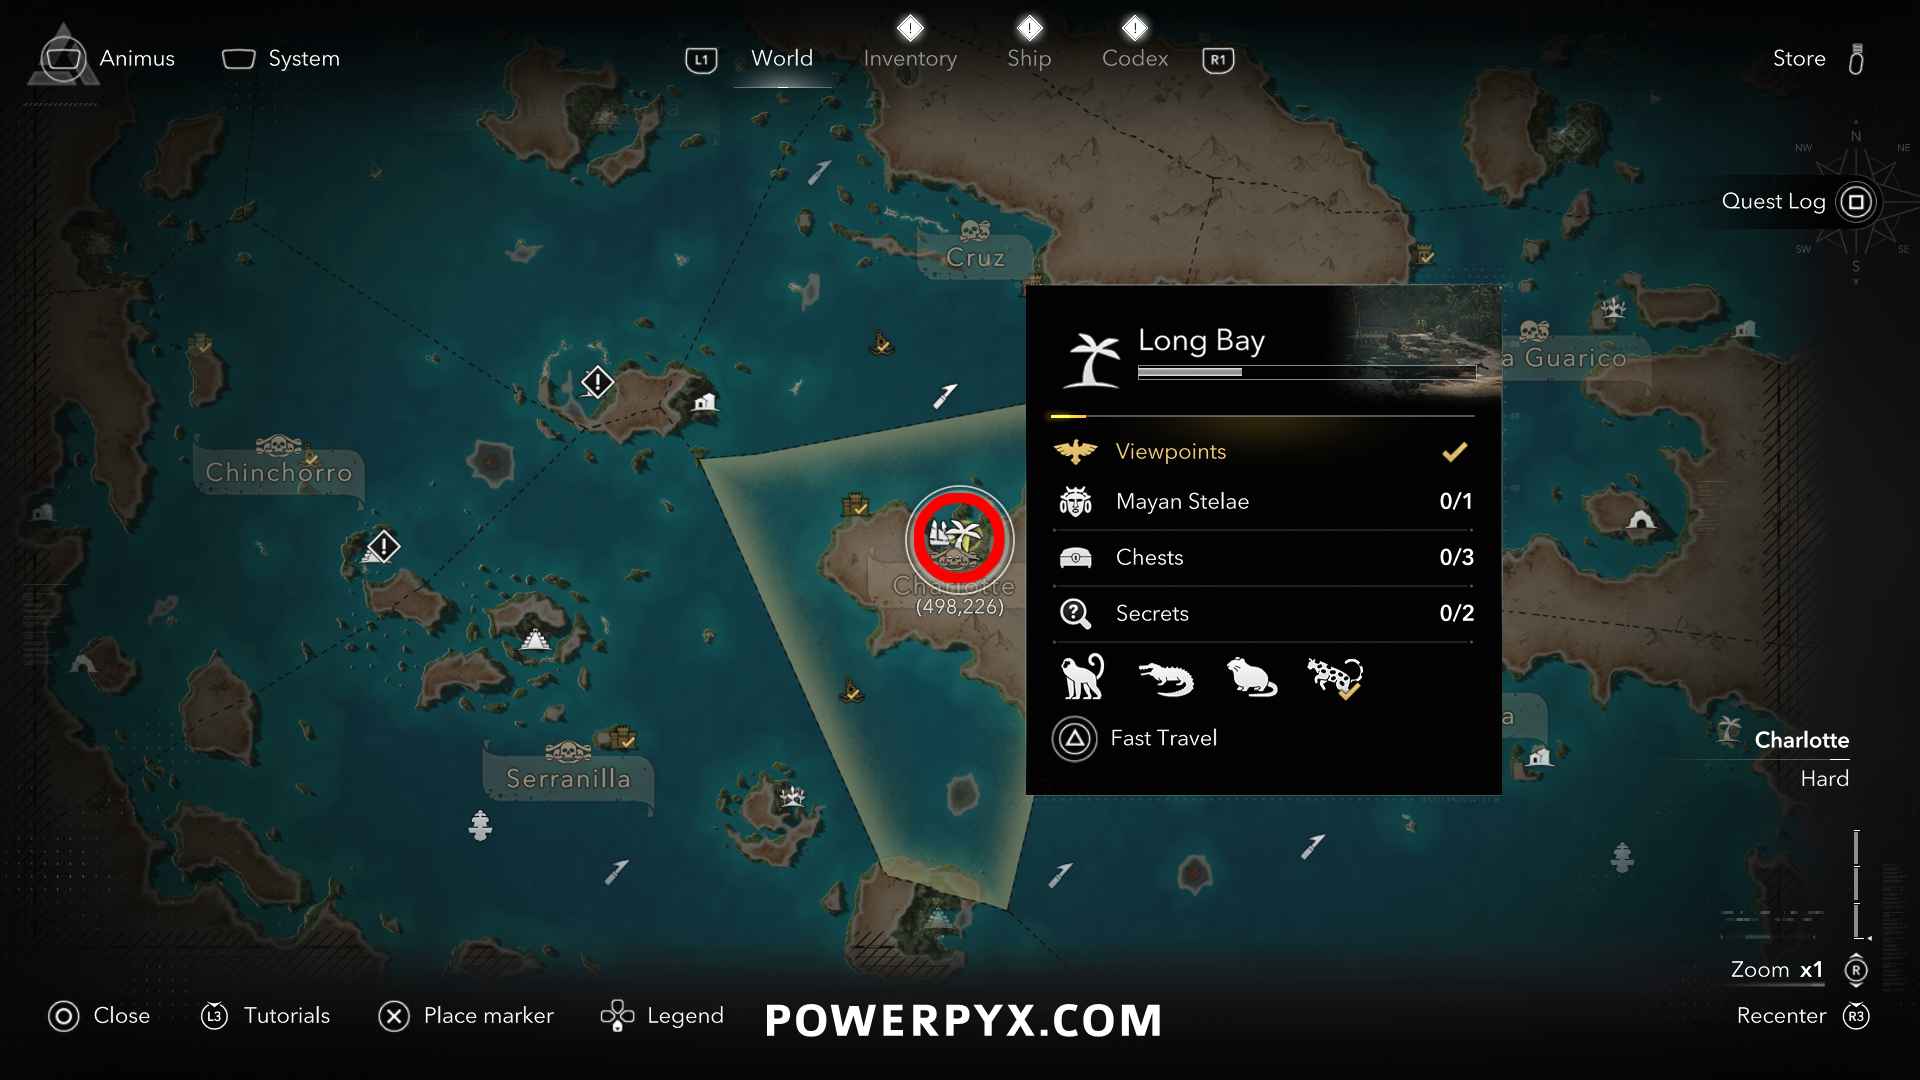
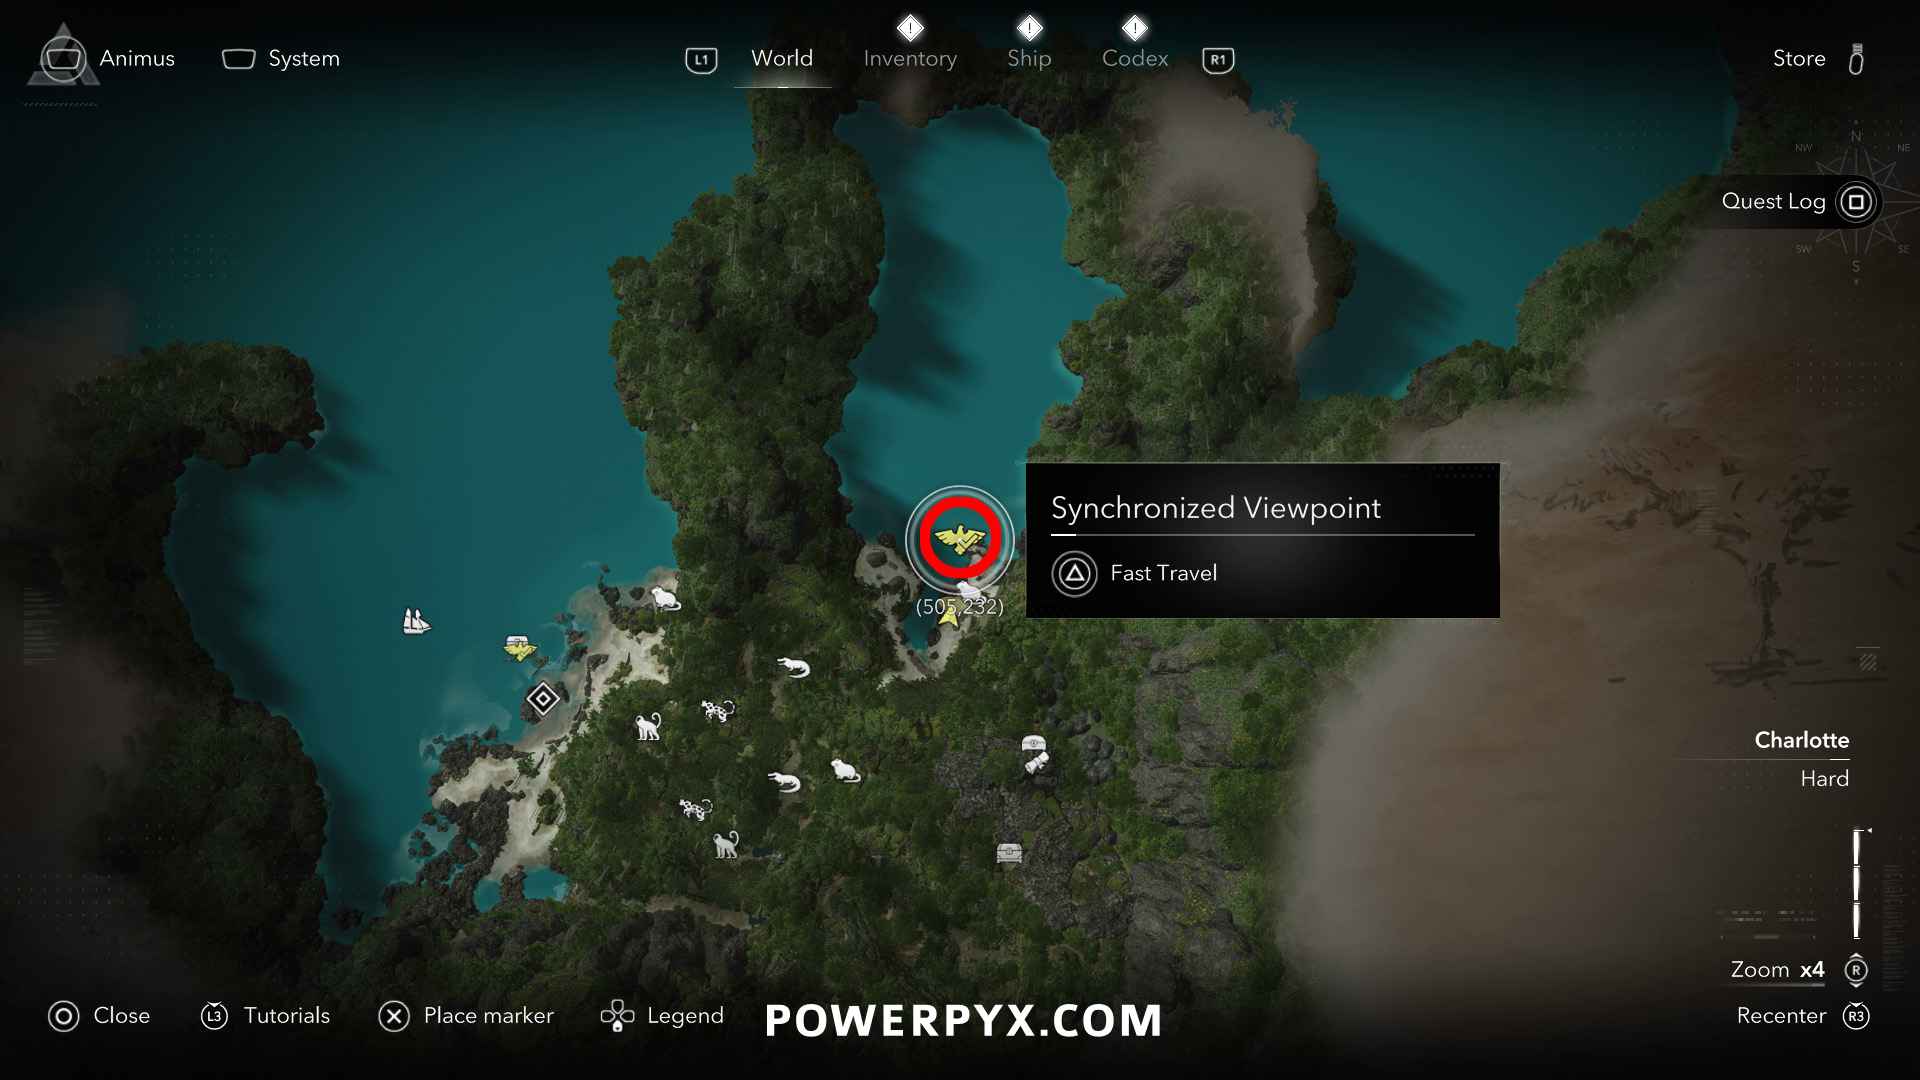
First, you must advance the story to reach Long Bay island during Sequence 10 – Mission 03: The Observatory (Coordinates: 498, 226). It will then stay marked on the map and you can still fast travel to it after the story. You can’t enter the island before this point. Long Bay Location:
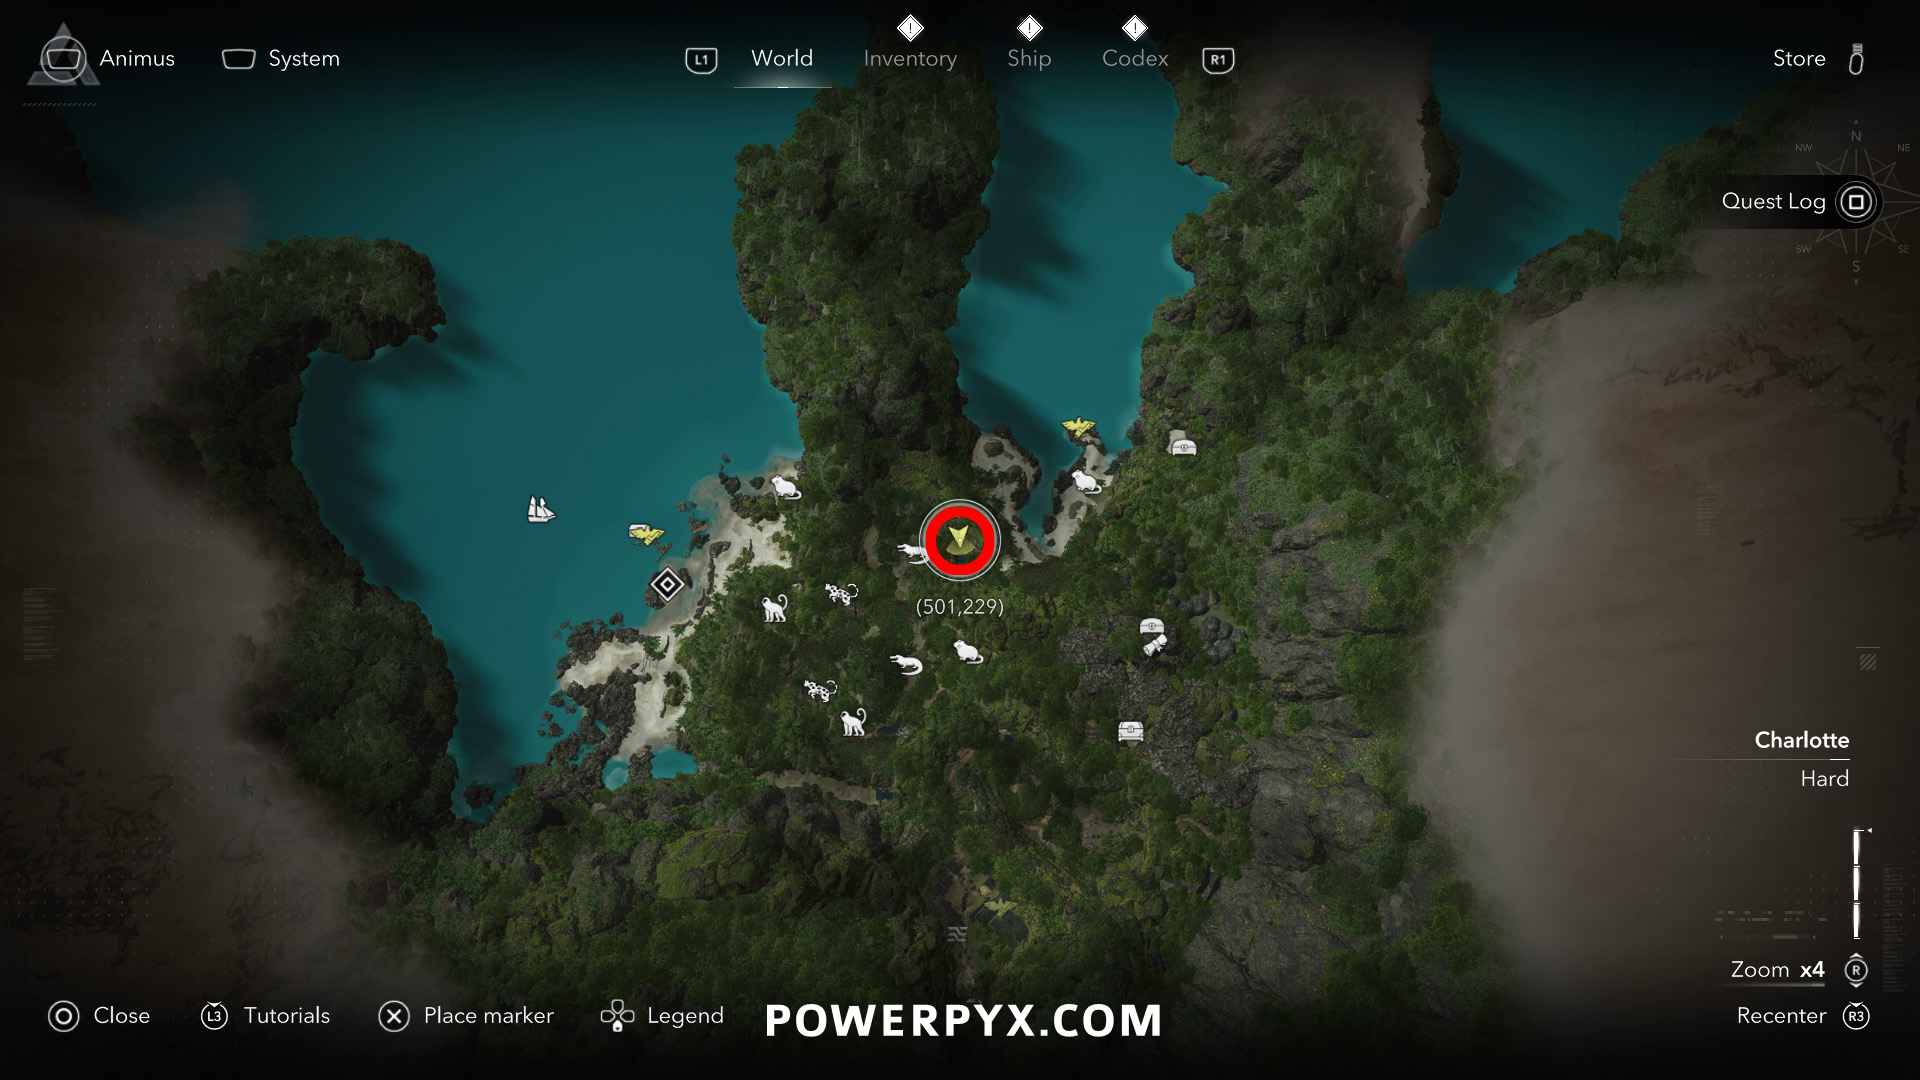
There are 3 bodies hanging off ropes on this island. You need to shoot them in the head from close range with the pistols. Hold Body #1 – hanging off the northern viewpoint. Climb to the very top of the viewpoint to get close enough to shoot it:
Bodies #2 & #3 – jump off the viewpoint from the first body, go forward to the start of the beach and enter the right path, look up to see two bodies hanging off the roots above the path. It’s the path that leads from the northern viewpoint back to your ship. Both bodies are hanging very close to each other. Very close to the beach with the viewpoint.
|
||
 |
Davy Jones’ Locker Swim to the lowest point on the map |
|
|
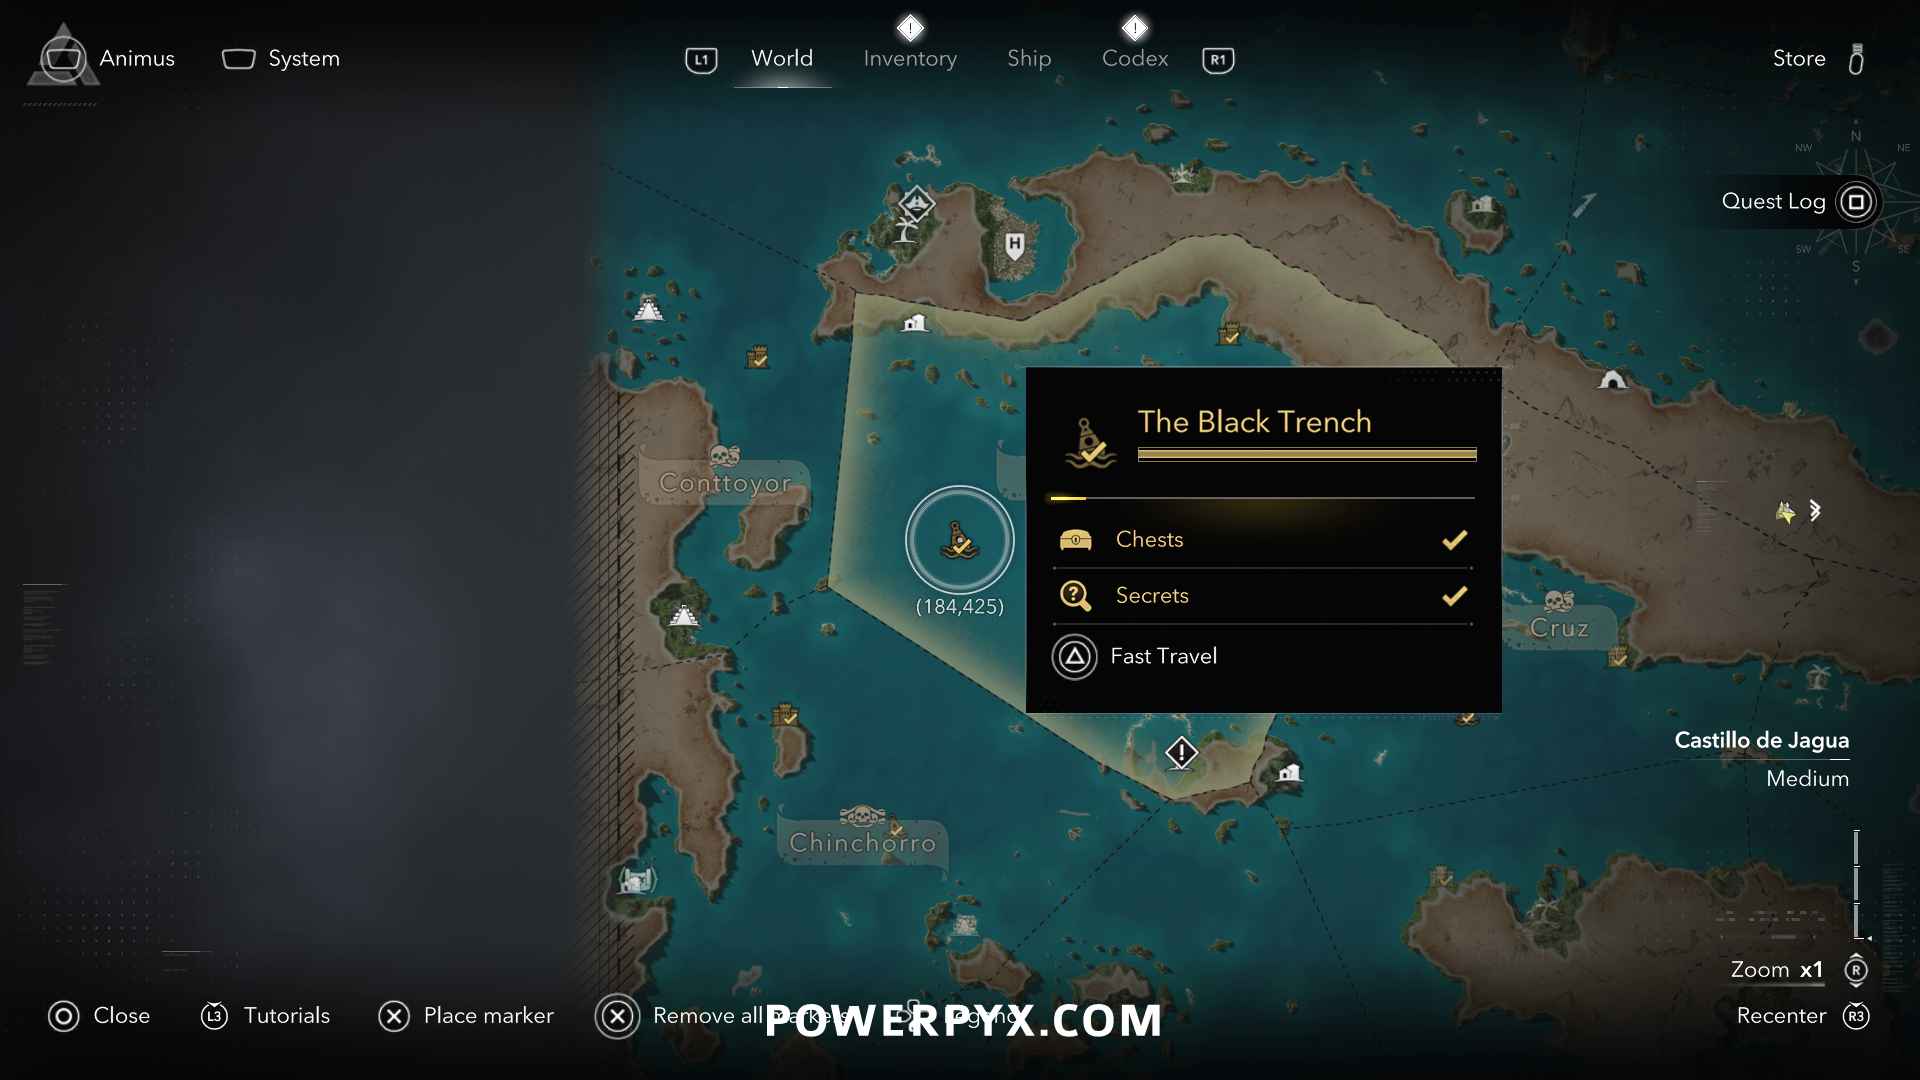
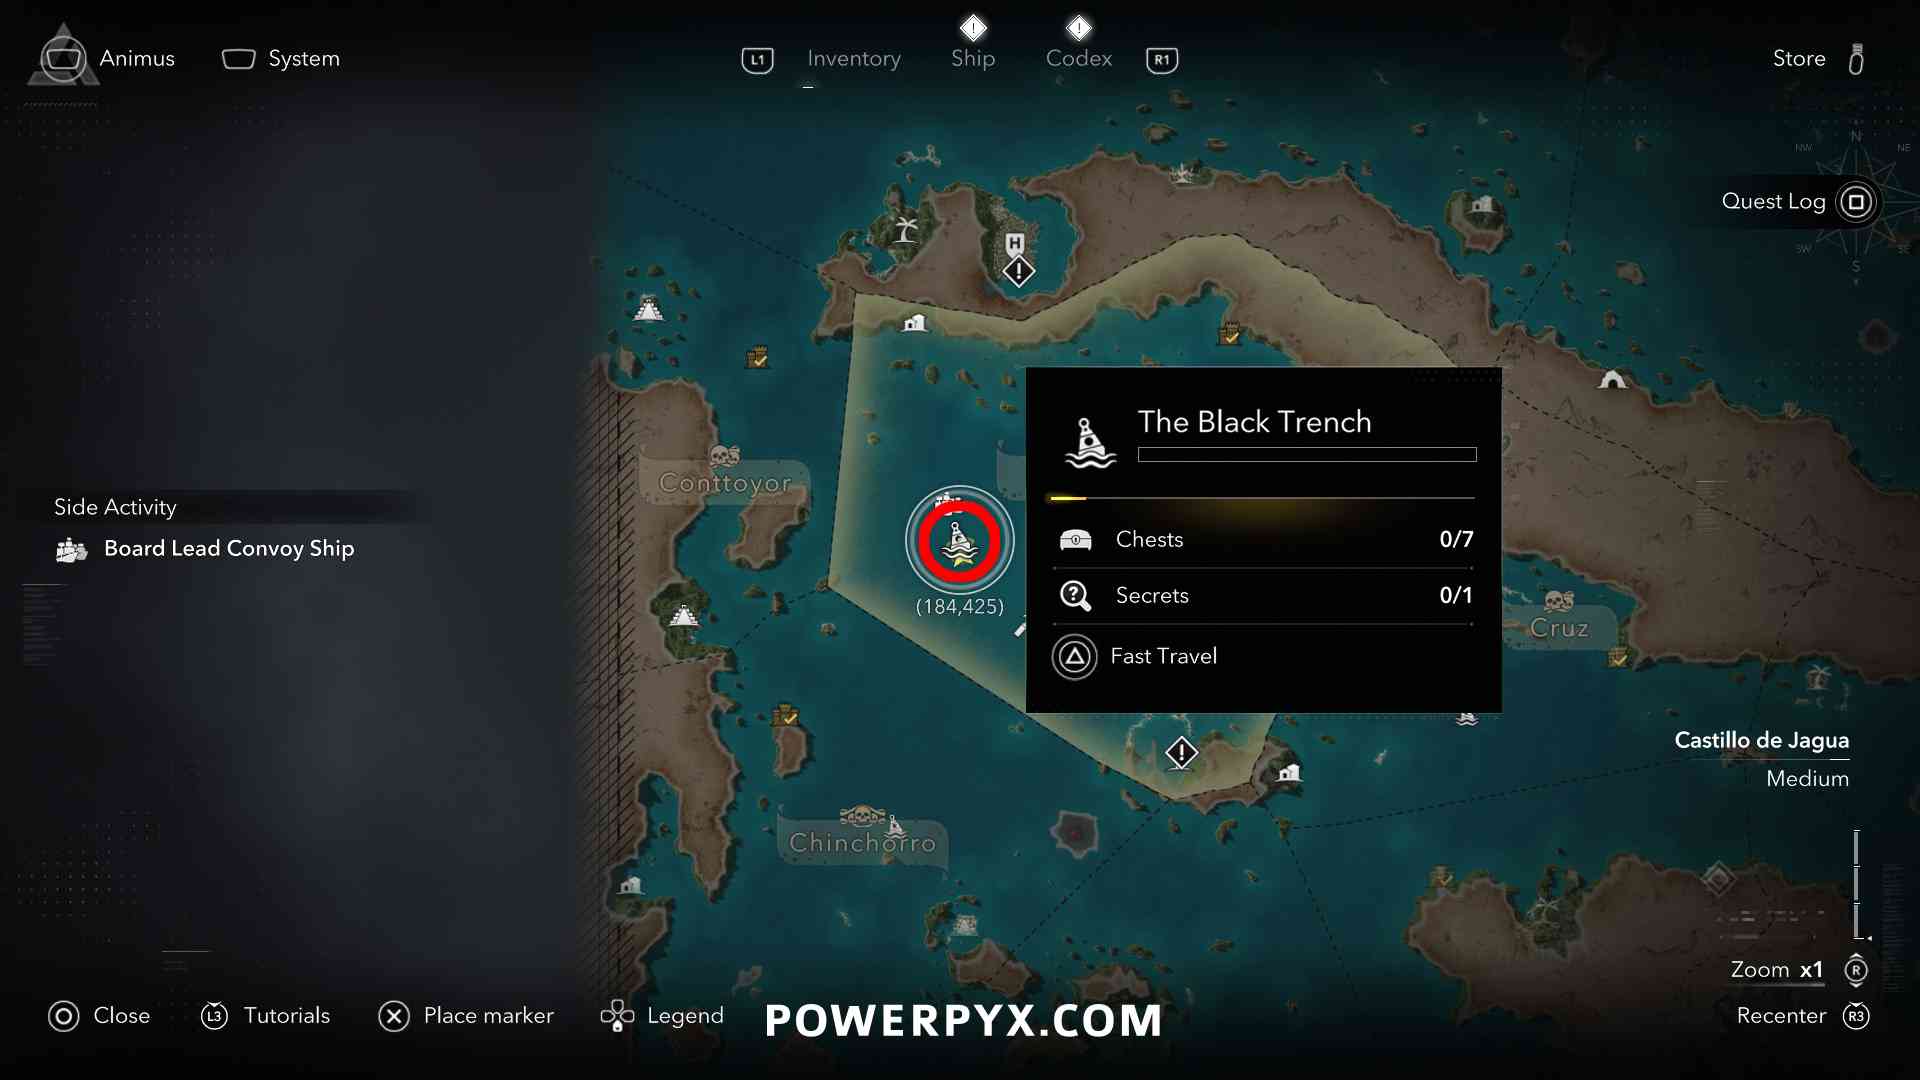
The lowest point is found at the Underwater Shipwreck “The Black Trench”. It’s unlocked after Sequence 06 – Mission 01: Diving for Medicines and will get marked automatically in region “Castillo de Jagua” (Coordinates: 184, 425). You also get the Diving Bell at this point in the story, which lets you visit the Underwater Shipwrecks.
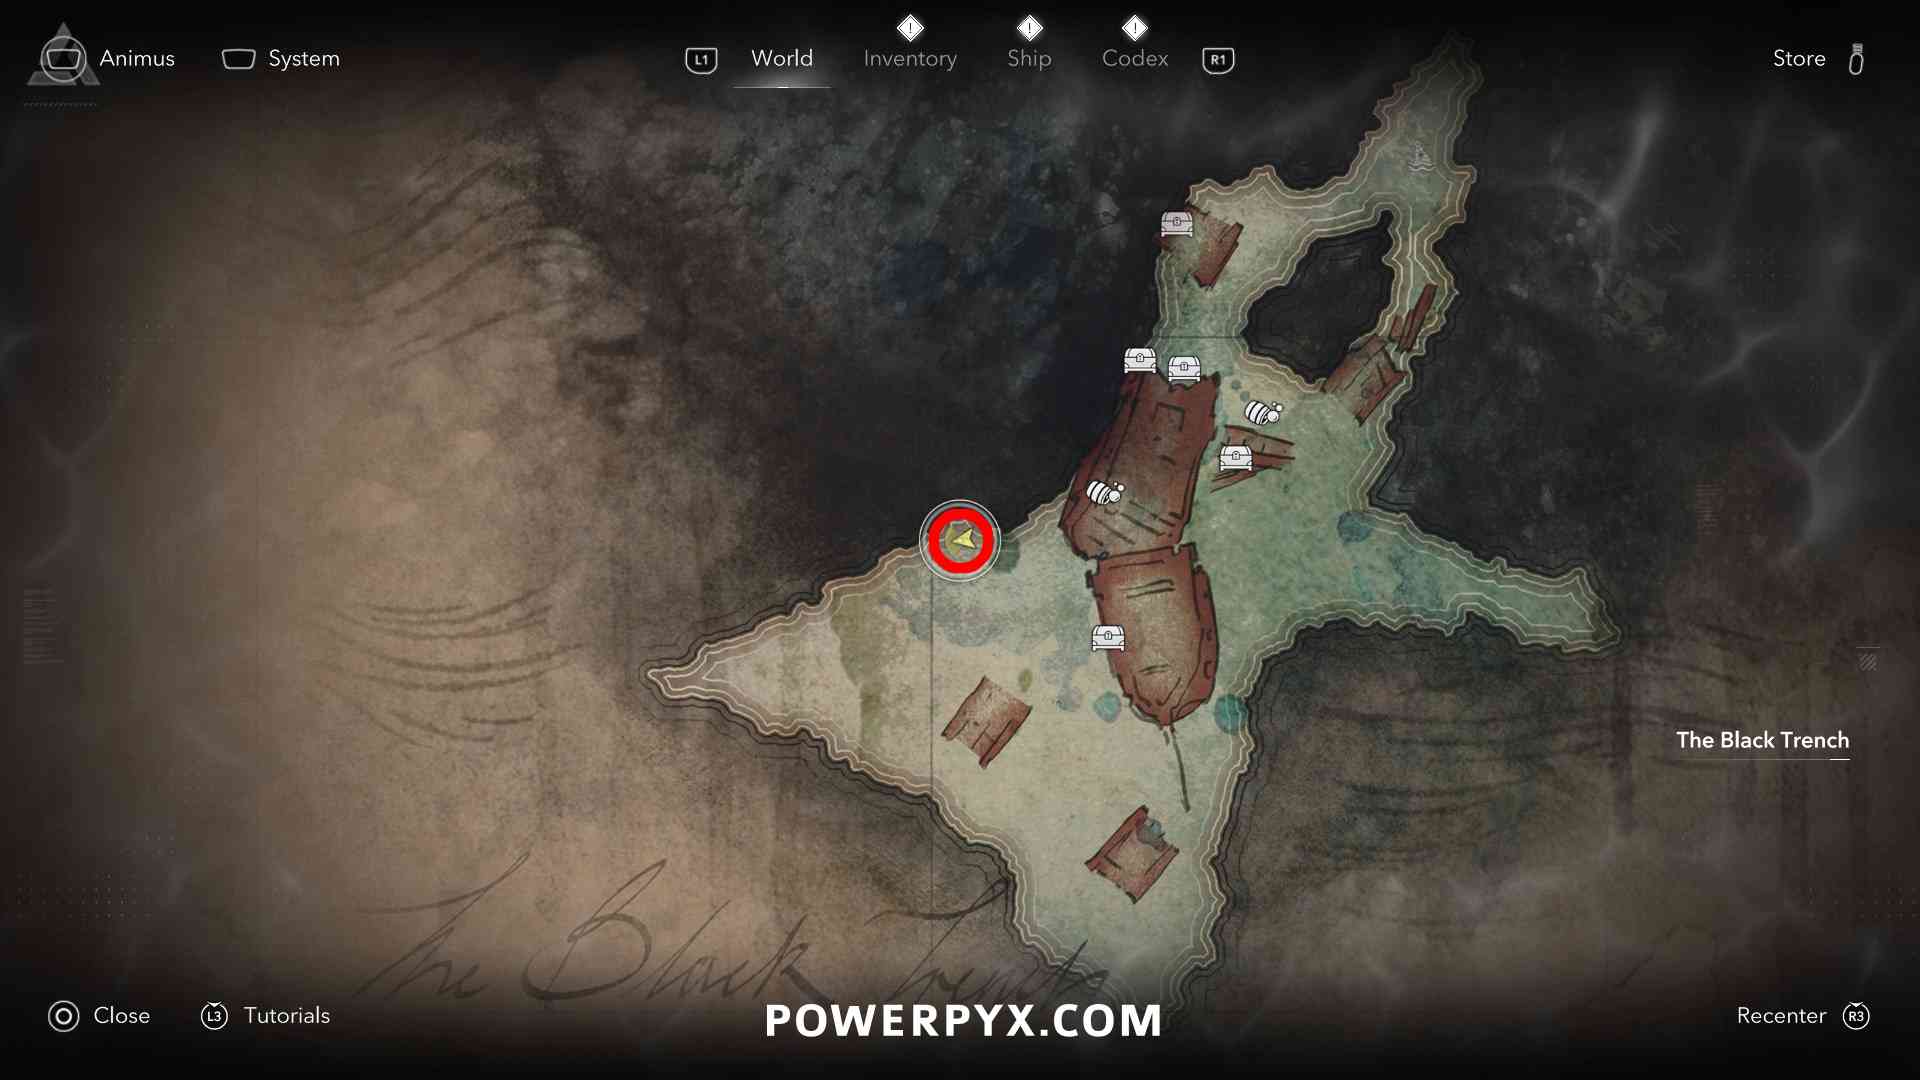
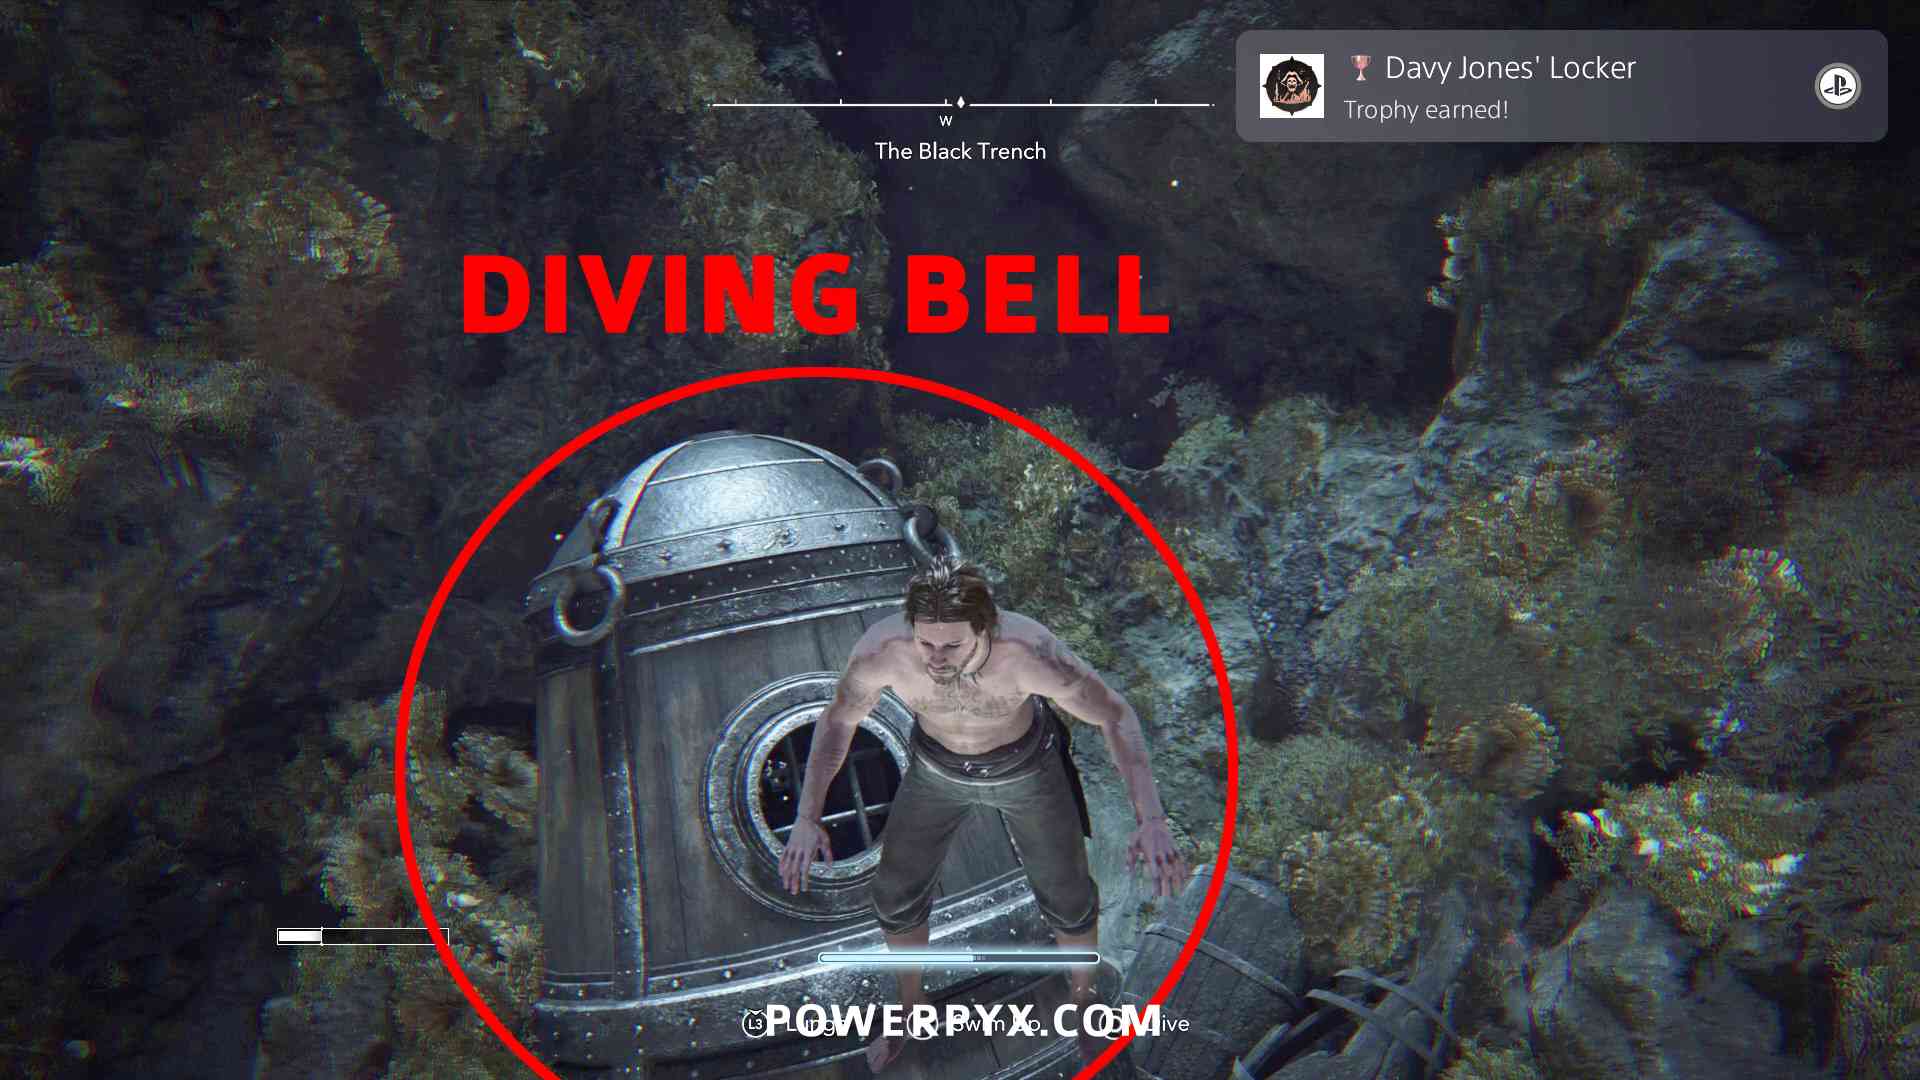
After using the Diving Bell and arriving in the Black Trench, swim forward and to the right until you reach a big shipwreck with an Air Barrel on it. From the air barrel at the middle of the shipwreck, swim straight down into the dark trench. At the bottom of the trench you find a broken diving bell, swim near it to unlock the trophy. If the trophy doesn’t unlock immediately, swim around the diving bell a few times from different angles.
|
||
 |
Cartographer Visit every location in the game |
|
| For this trophy you need to play through the story to unlock all story-exclusive locations, sail to all white question marks (“?” icons) on the map, go near all Forts (so it shows their number of defenses), enter all Underwater Shipwrecks (automatically marked after Sequence 06 – Mission 01: Diving for Medicines). Conquering the Forts isn’t required, just going near them.
» Assassin’s Creed 4 Black Flag Resynced – All Cartographer Locations |
||
 |
Edward Catway Break 50 potted plants |
|
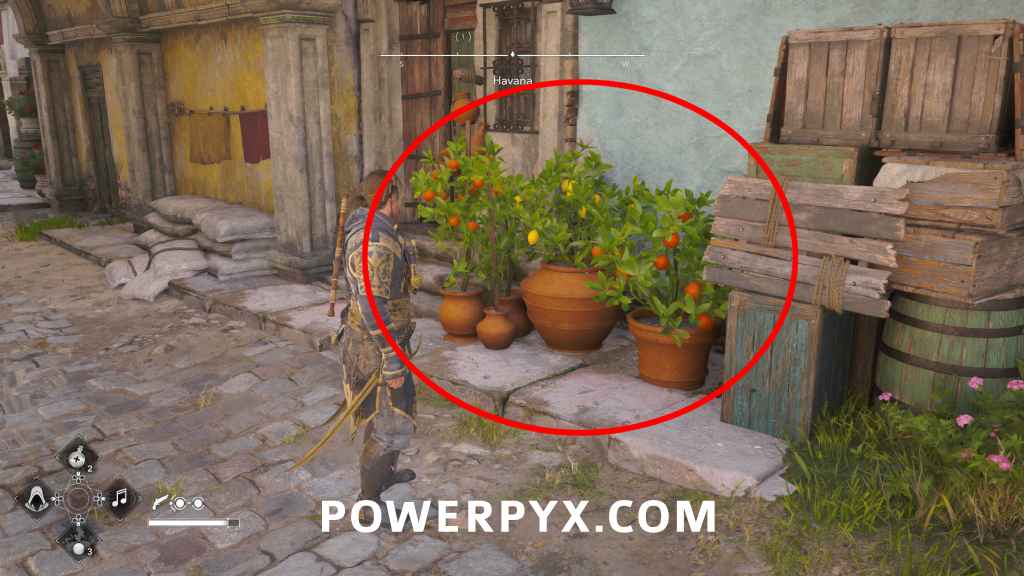
| Potted Plants are most frequently found in Havana in front of buildings and on balconies. Destroy 50 of them with melee attacks. Just run around Havana for 10 minutes and you should find enough of them. There are also several on the veranda of Great Inagua manor and throughout other towns. Repeatedly destroying the same pots doesn’t seem to count, destroy 50 individual ones at different spots.
|
||
 |
Ed the Diver Swim a total of 1000m underwater, excluding underwater shipwrecks |
|
Jump into water and press  to dive. Swim underwater for a combined total of 1000 meters. You don’t have to do this in one go, it adds up throughout the game. You will likely get this naturally throughout the story. to dive. Swim underwater for a combined total of 1000 meters. You don’t have to do this in one go, it adds up throughout the game. You will likely get this naturally throughout the story. |
||
 on the map to filter for the caves. In each cave you must kill the pirate leader and loot the key from his body to open the chest. The 5 caves are: Jiguey (535, 511), San Juan (454, 462), Anotto Bay (590, 245), Petite Caverne (864, 237), Ambergris Key (28, 159). The key in Anotto Bay might not spawn on the first visit, if no enemy drops it then come back after 2 hours when the enemies have respawned.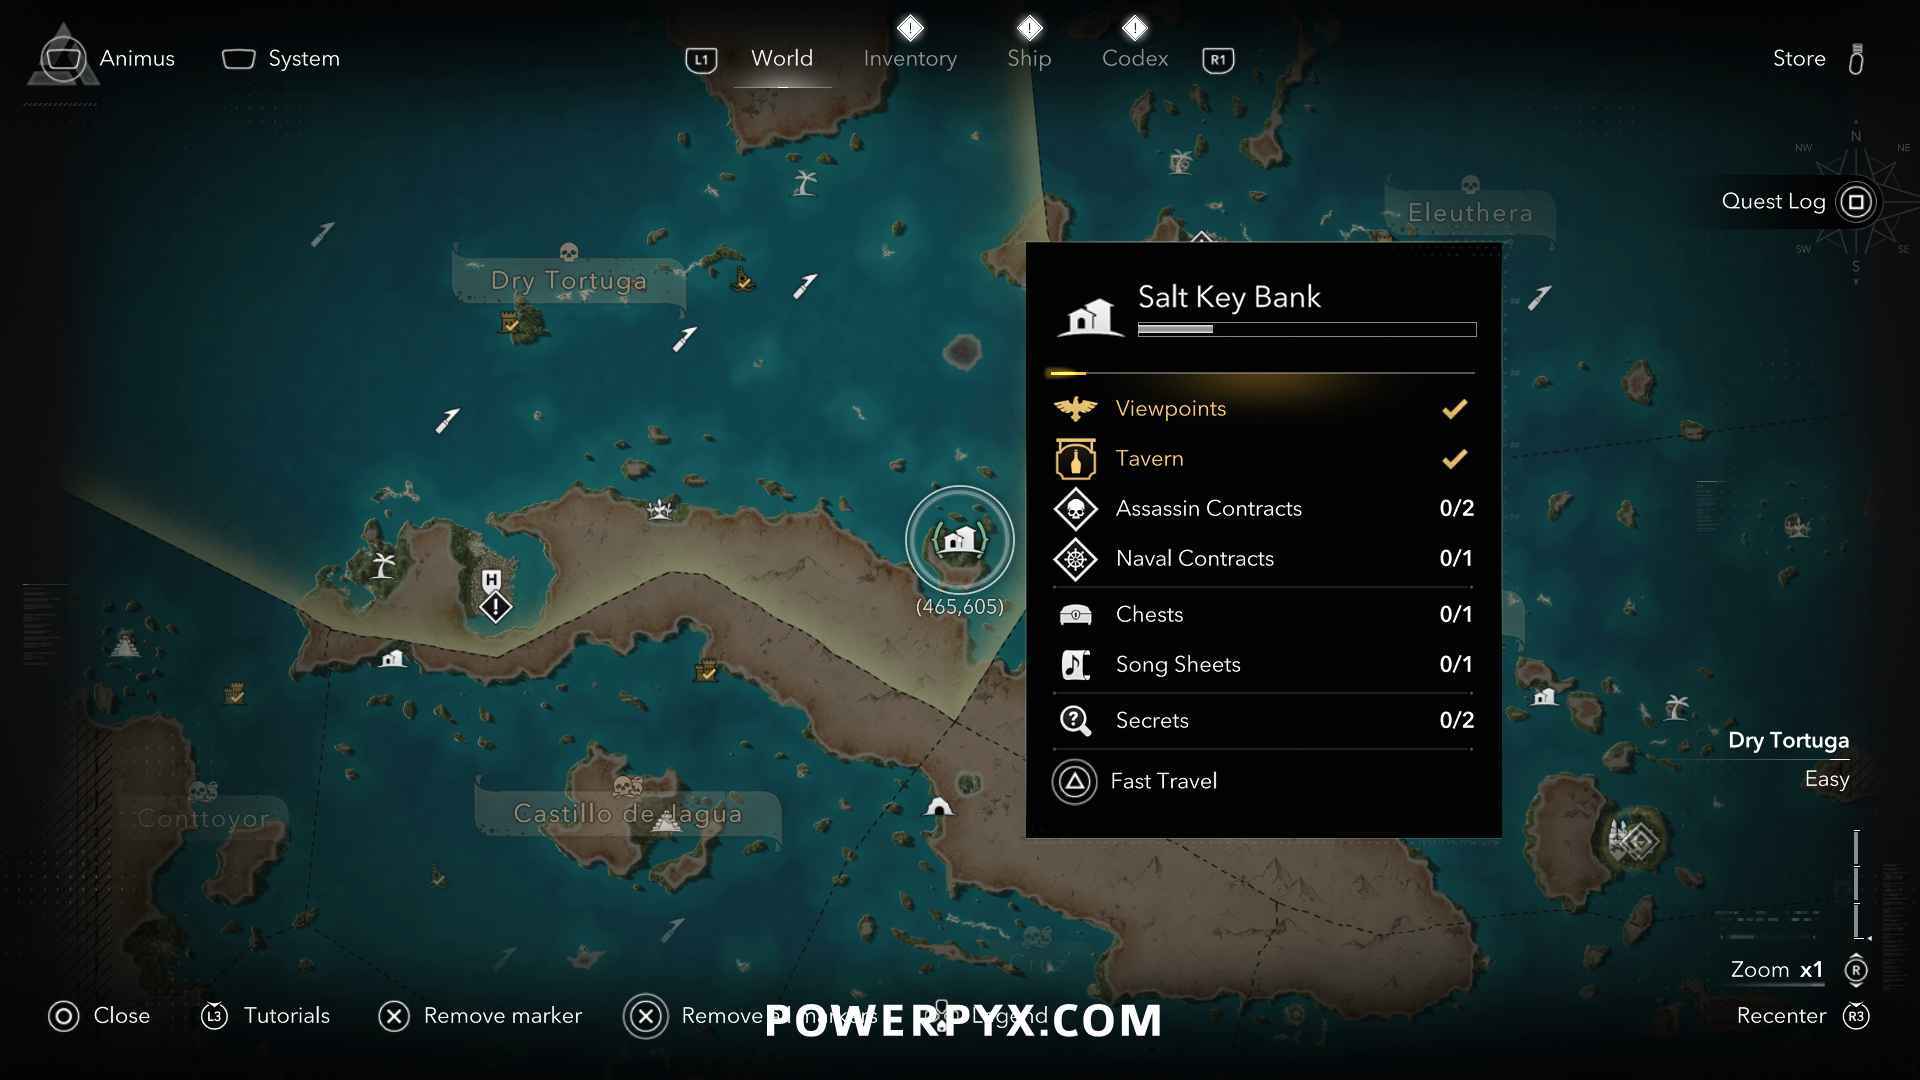
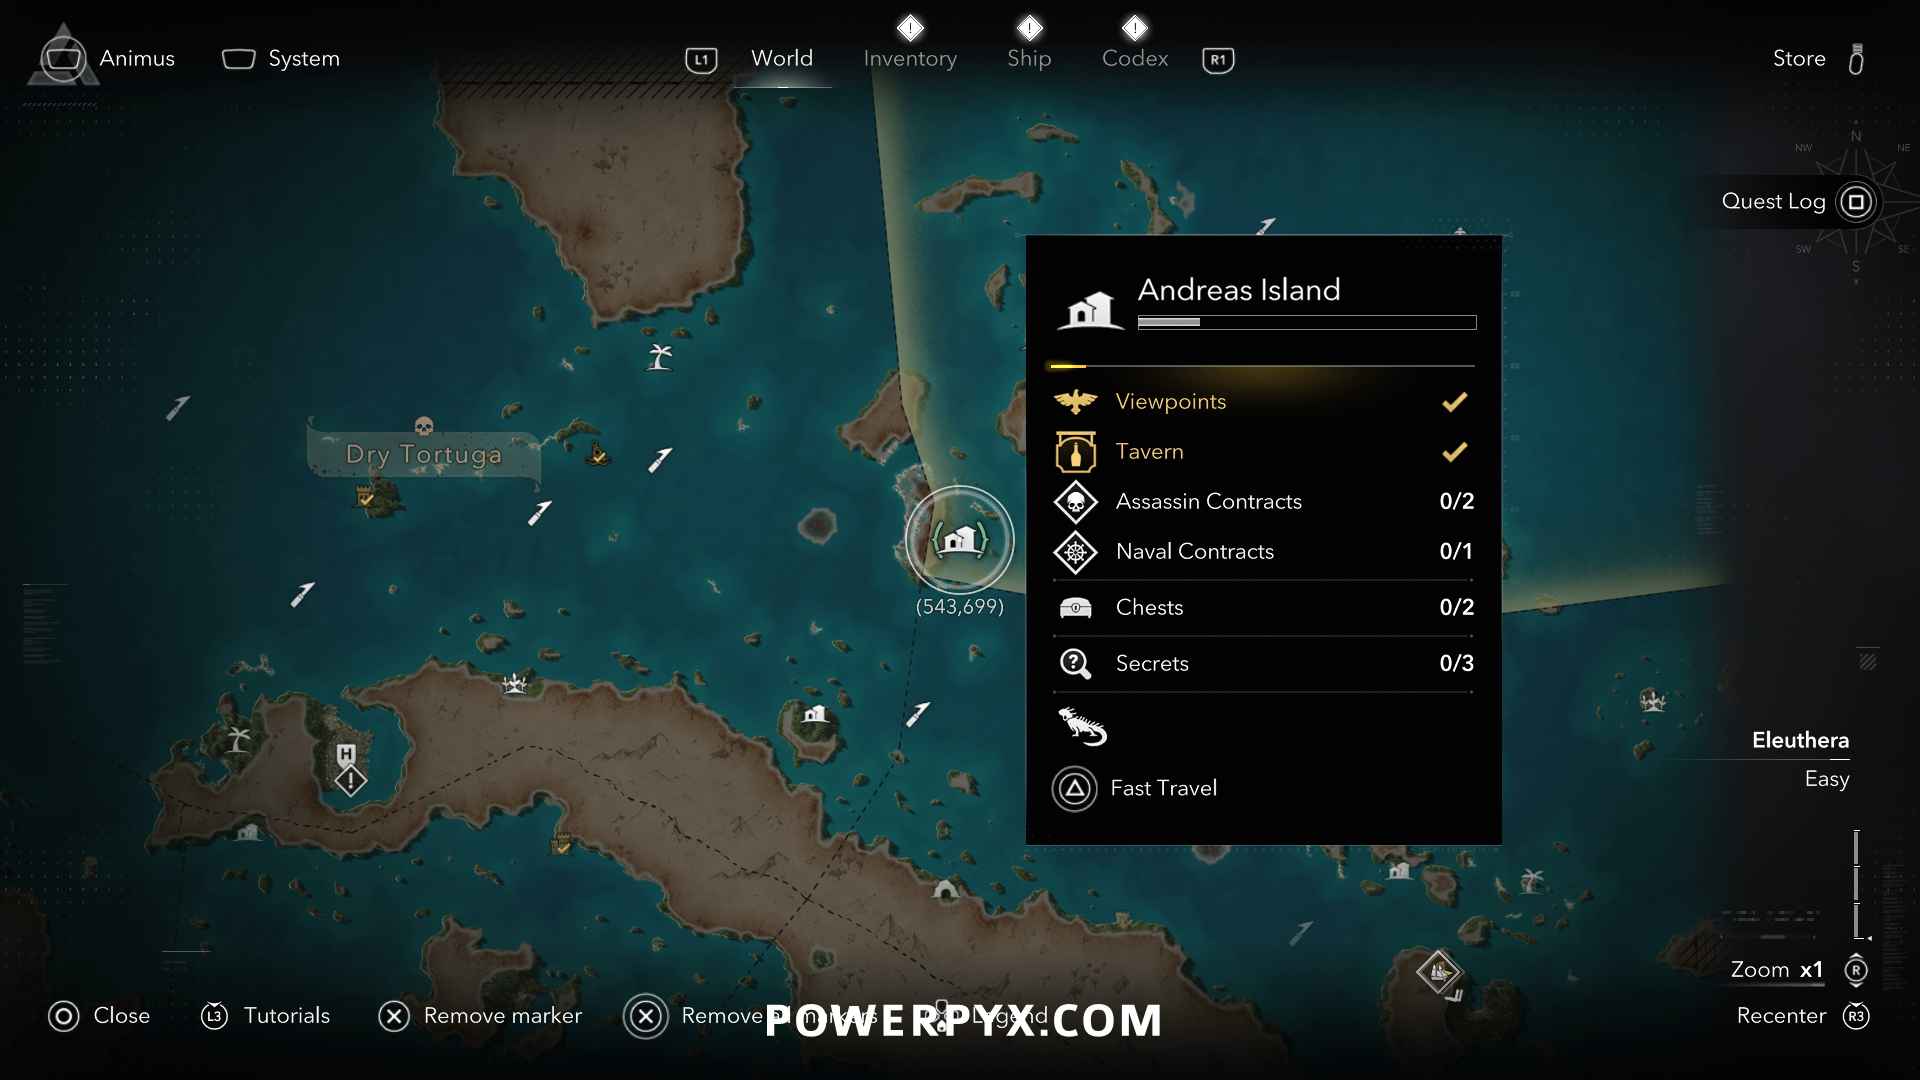
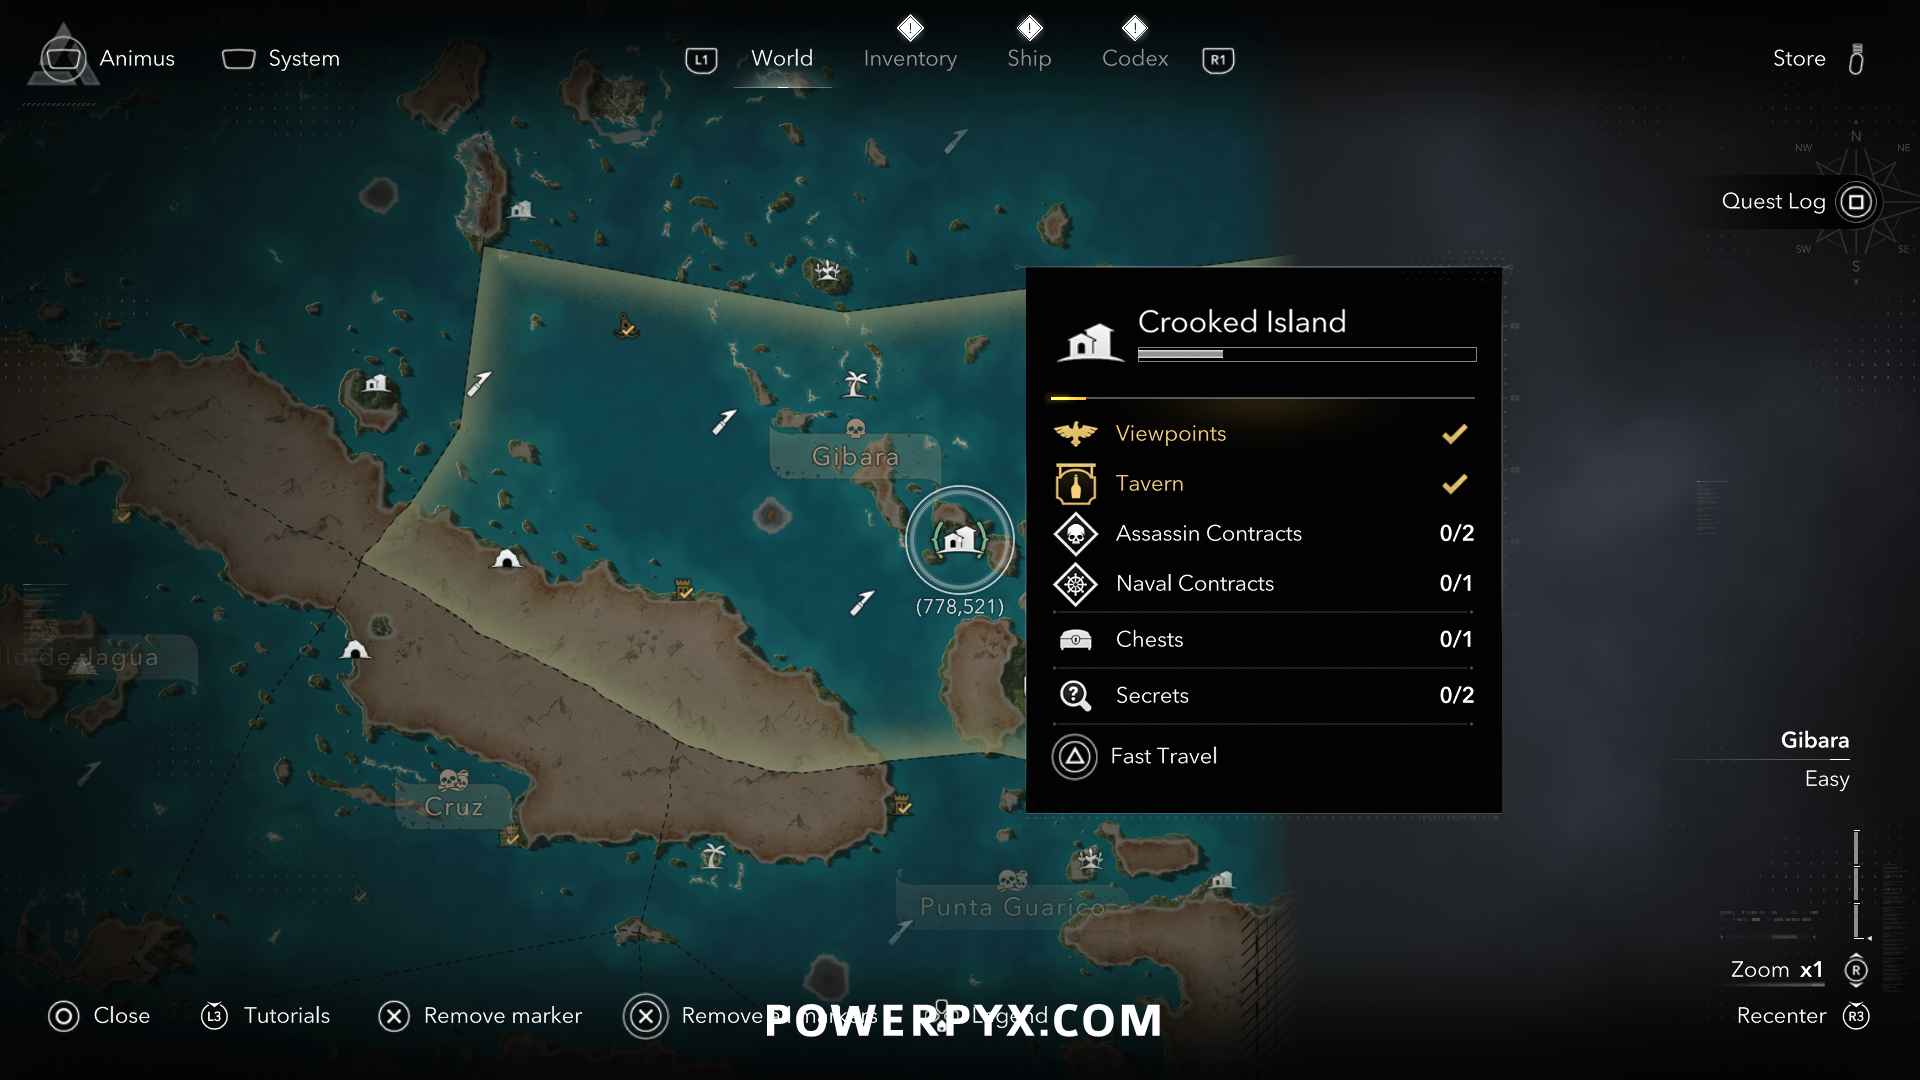
 when nearby. There will be some enemies guarding a group of pirates. Kill the enemies and free the pirates without any of them dying. These side activities spawn randomly on almost any inhabited island. You find them most frequently in the large cities: Havana, Nassau, Kingston. Simply run around Havana for 2 minutes and you should get one of these to appear.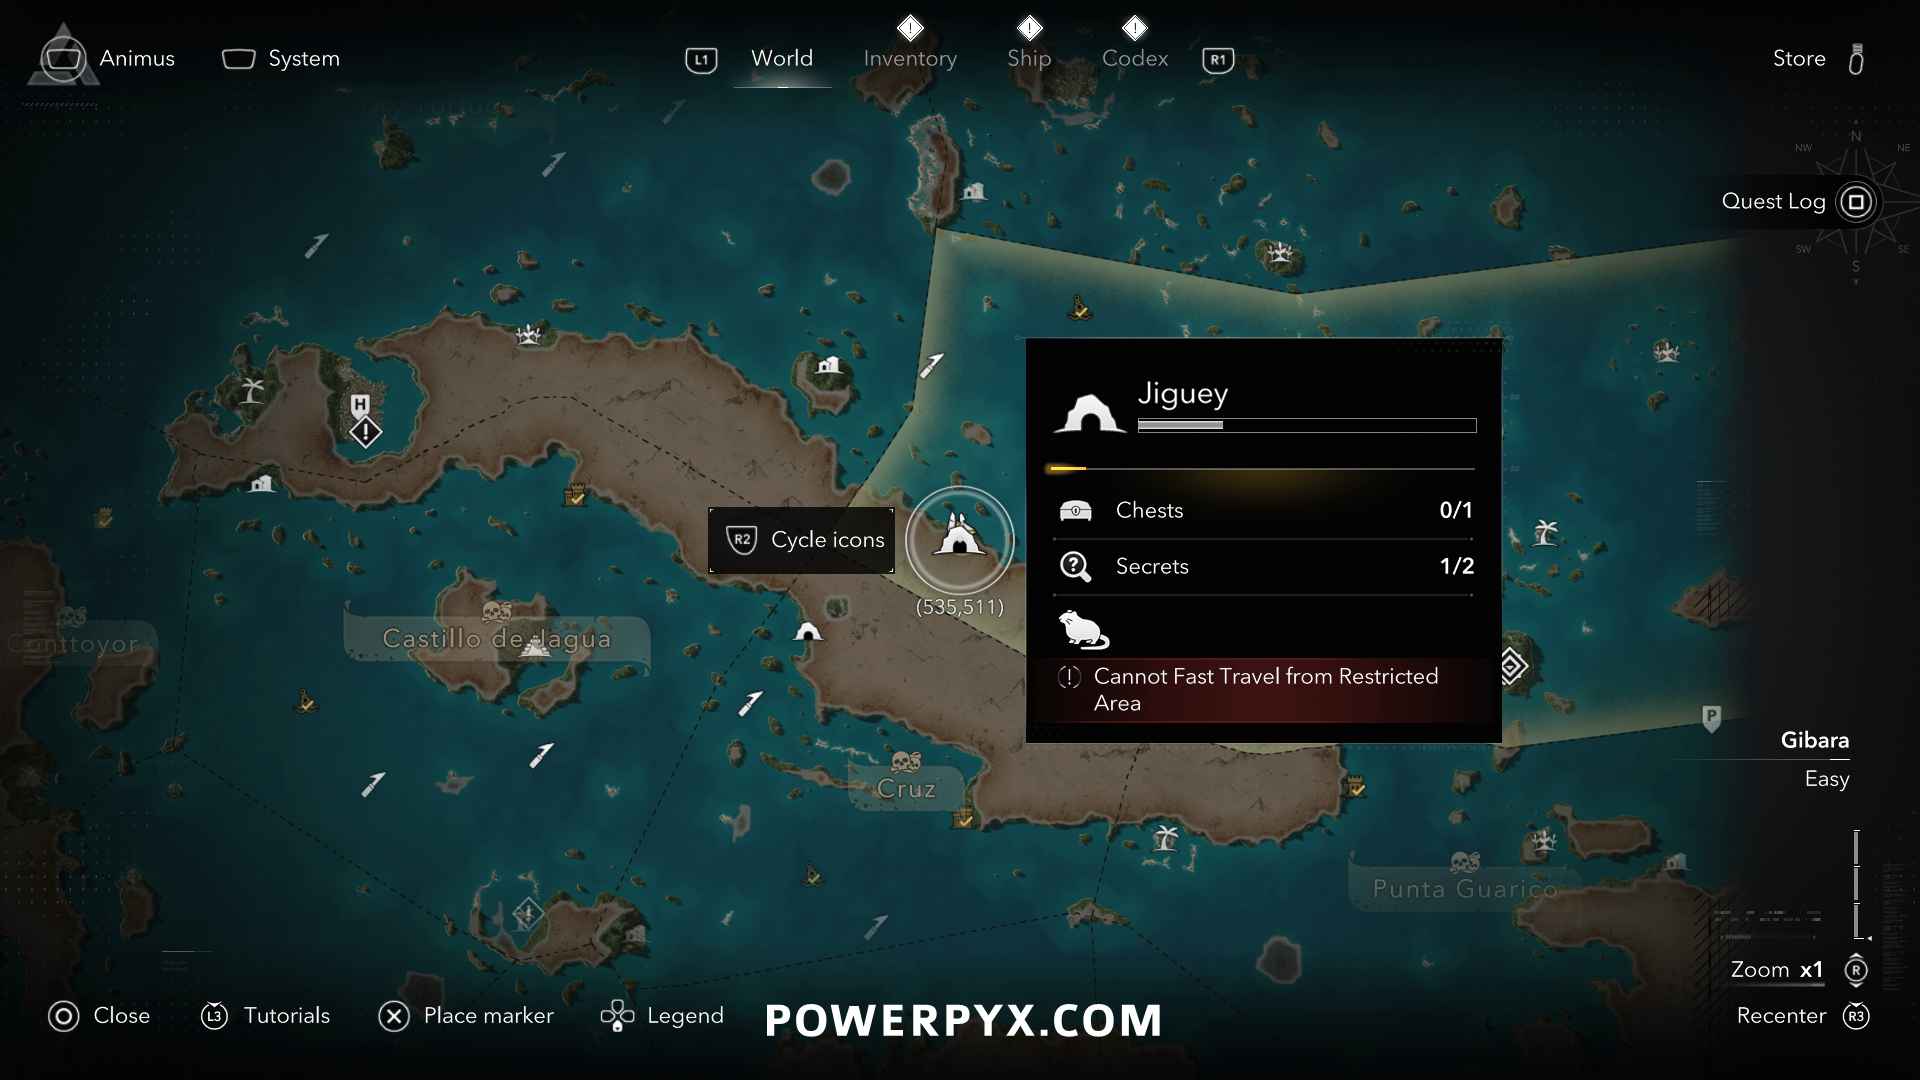
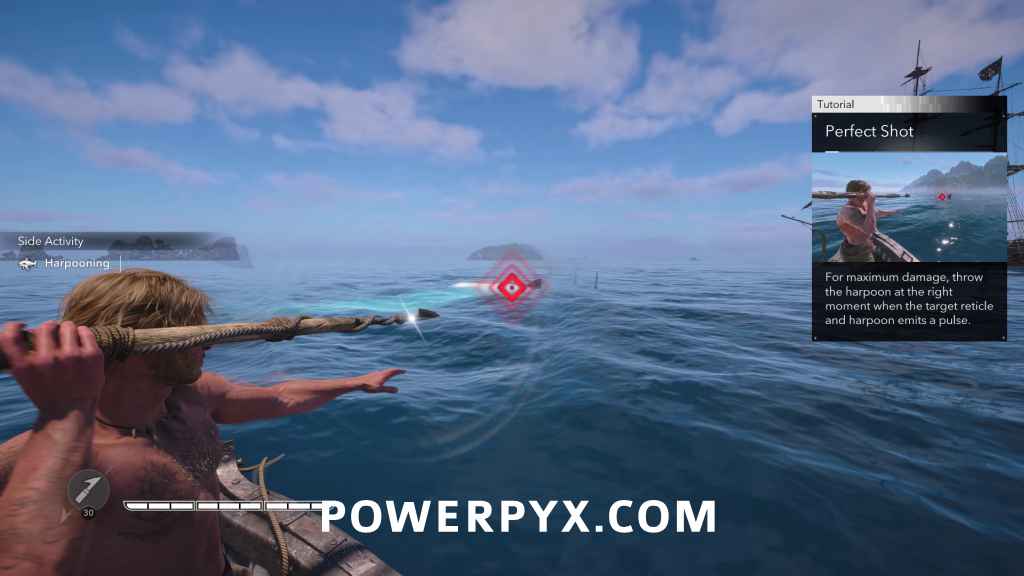
 to parry. When done correctly it will knock the Ocelot back and you won’t take damage. Walk toward the Ocelot to bait it into attacking again.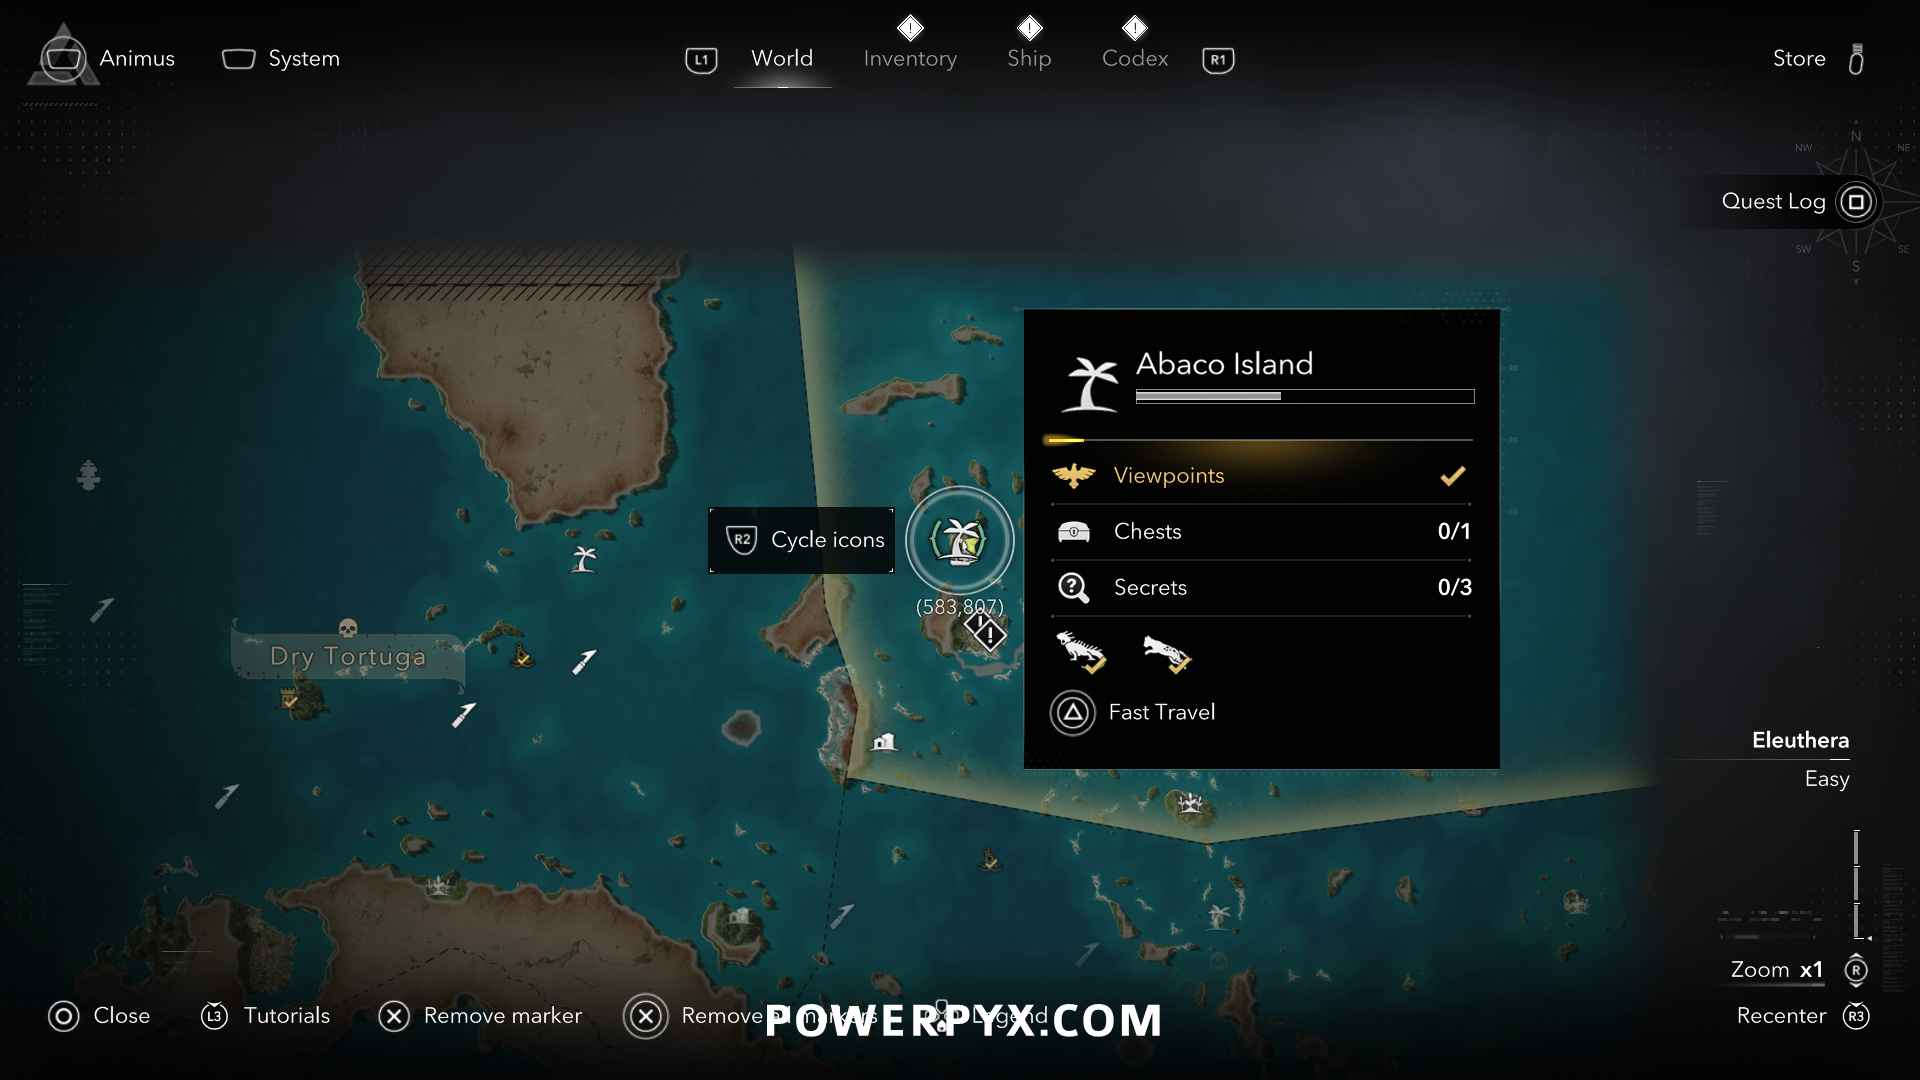
 >
>  to switch between Sleep Dart & Berserk Dart >
  to run >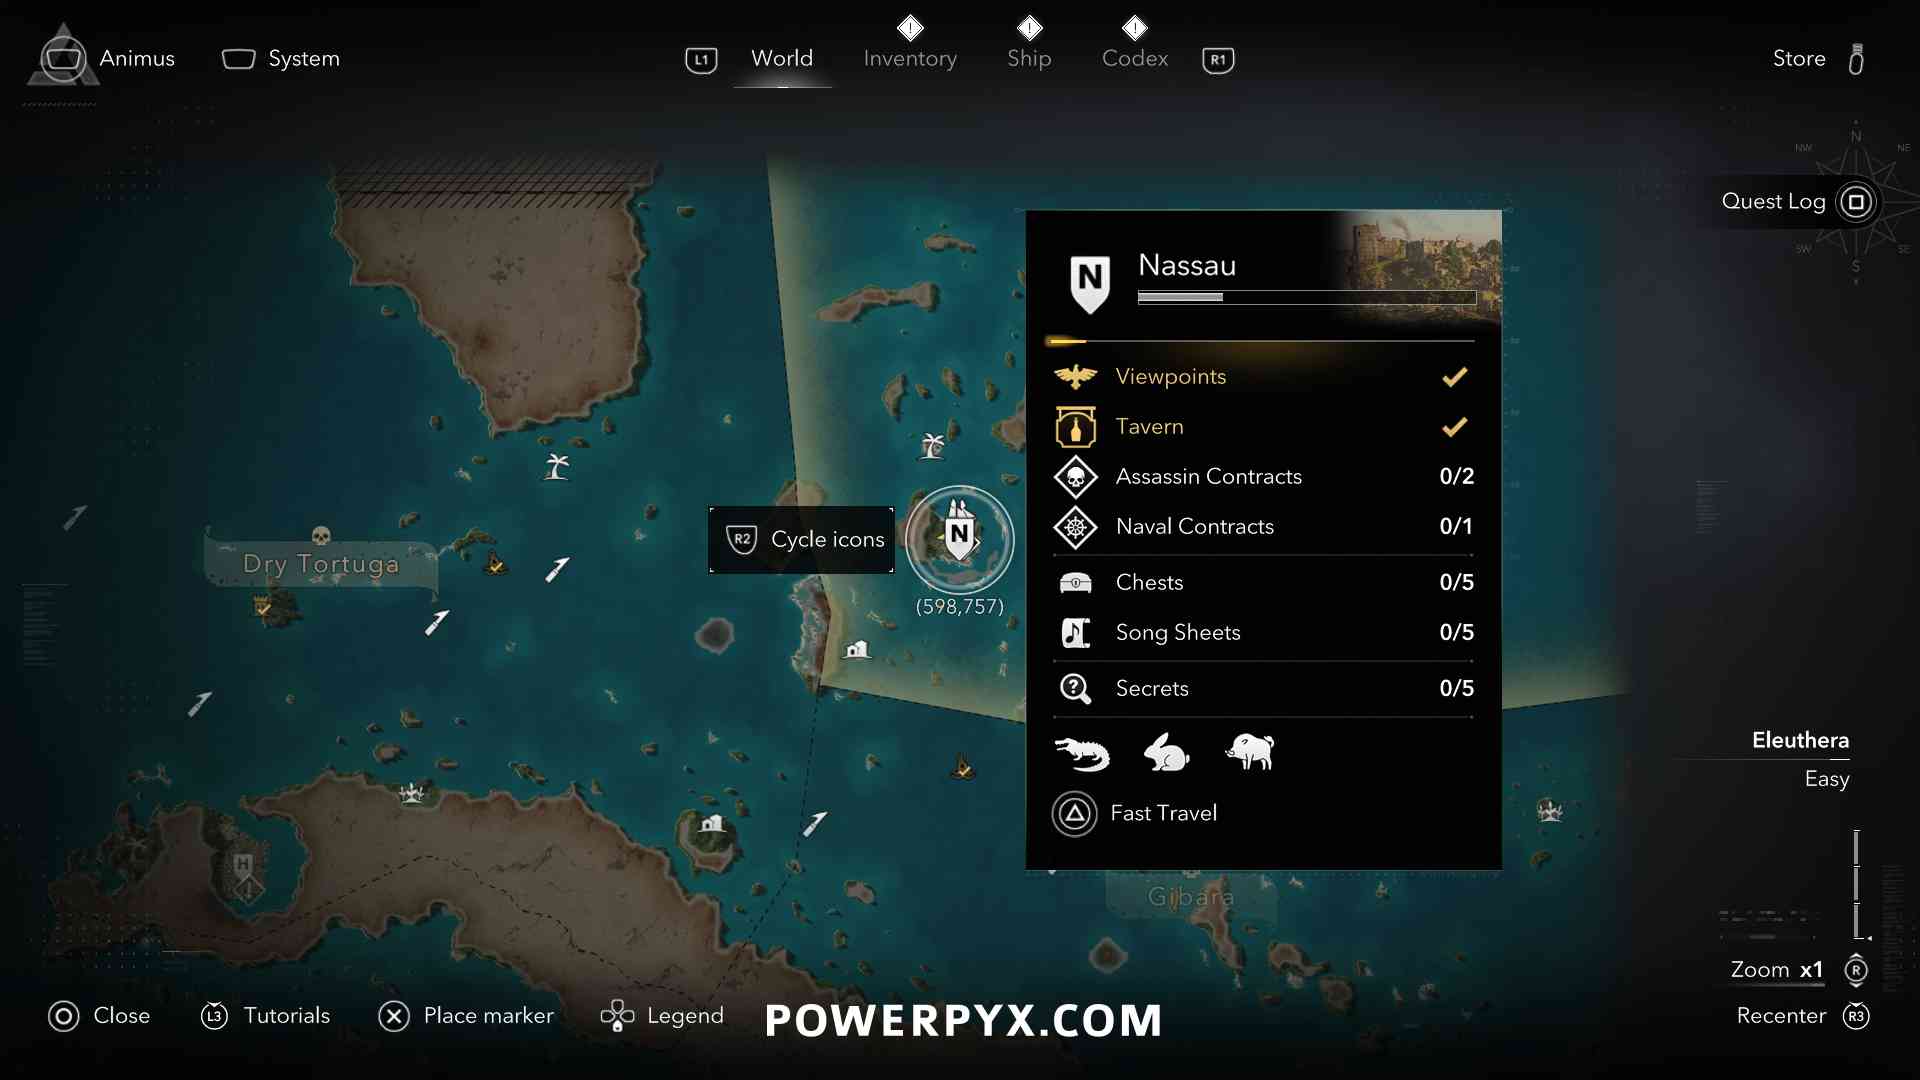
 Special Thanks / Credits
HardyBoy, ObsiEez, imbroken963 = Co-Authors on Assassin’s Creed Black Flag Resynced Wiki
Nick says
Thanks for the guide, how hard are the minigames to a complete novice?
PowerPyx says
Not that bad, Fanorona will probably be the one people struggle with the most, just like the original. But on Novice it’s doable with a few minutes of practice and some luck.
Fallout says
Can we replay the legendary ship battles, or is it a one-and-done like in the original black flag?
PowerPyx says
They respawn and are replayable.
Drew says
Does lowering the difficulty make the Devil of the Caribbean trophy easier?
TheBob says
Great question, would like to know the same 🙂
castlecrasher317 says
Yes it does make it significantly easier i’d say a 4/10 difficulty on the casual setting. Currently running through them on normal just to see what the devs “intended” difficulty was and they clearly did not test HMS Prince and el Impoluto on it as they are easily and 8 or 9/10 difficulty just on normal with a maxed ship. They went overboard with the changes to their attack patterns when compared to the original.
Ali says
Yes it would make it so easy. Fully upgrade your ship and tune the naval difficulty on the lowest.
BOOM! You will defeat legendary ships on the first try.
Lars says
So there are not any collectibles needed for trophies in the islands gated behind story progress?
PowerPyx says
You do need collectibles from story gated areas. This is why Collectibles are Step 2 in post-story cleanup. A bunch of islands are entirely inaccessible and have trophy-relevant items, and each Portrait is gated behind story progress. You can already grab what you can during the story and clean up the rest afterward.
Mr.T says
Thanks guys, hate minigames trophies oh well…
Ali says
Well, search for one star mini games. They are so easier to beat.
EarthBear says
If you still have trouble with the 1 star mini games, there are solvers available online for the games.
jubilee64 says
Some of these look really tedious.
ShaoKahn says
Can all trophies be unlocked if you play 100% offline?
PowerPyx says
Yes, everything unlocks completely offline without internet connection. They ditched the need for always-online that AC Shadows had.
Alon says
I wan’t to enjoy this game fully and don’t look at trophies, even if i do everything in the game i can still get all the miscellaneous trophies right?
PowerPyx says
Correct, nothing is missable.
Dave says
Hi abaco island and andras island have the same treasure map location as salt lagoon 719,607 so one if wrong hope this helps
PowerPyx says
They don’t.
See Treasure Map Locations & Solutions Guide.
When you open the maps from the in-game inventory it sometimes opens the wrong map in the codex which is probably where the confusion is coming from. They have separate solutions though.
djn says
so i don’t need to worry about 100%ing every island and getting all the synchronize points and chests? That’s what i was doing up until reading this.
PowerPyx says
You don’t need to 100% every island, as explained in the Roadmap 🙂
Only the specific collectibles outlined in the Roadmap (Step 2) are needed. The rest isn’t relevant for platinum. Opening chests is good to get money though for upgrading your ship, and some of them give art pieces and weapons for Dilettate.
Ali says
Although you don’t need to complete every location on the map, it will help you earn money and find many items that make the game easier.
Ronse says
I don’t understand the Dilettante trophy involving getting the art through Edward’s fleet. How do I lower the risk and damage?
After completing a few missions, the risk meter is at its maximum. If I only use brigs and schooners, they get completely decimated during the mission.
PowerPyx says
You need to recruit Brigs from the hard difficulty regions so they have more health (this is explained in Step 1).
The risk level can be lowered by sending Man-o-Wars on missions. But generally it’s better to run Schooners for money to repair your ships, as the few % lower risk level doesn’t make that big of a difference in damage and the risk immediately goes back up from your Brigs anyway.
Wynachtsmann says
In German there is a Translation fail and it says you need 1000km under water and i was Like what is this. Thanks for claryfing its Not that bad :D
MidnightDragonDX says
With the friendly animals, are they in specific locations or can you just interact with them wherever you find them?
PowerPyx says
They spawn in specific predetermined locations, but each animal appears multiple times throughout the world. Where you interact with it doesn’t matter. For example, you can pet a dog in Havana or in Kingston but where you pet it doesn’t matter, just that you did so anywhere once.
Tom Hughes says
Great guide as always.
Do the art reward missions only spawn in the southern areas of the map when choosing a mission from the Fleet Planning?
I’ve been saving and resetting to get the correct missions, but I’ve only ever seen them spawn in the lower areas of the map, and I’ve only seen 1 spawn with over 15 hours of play so far.
Thanks for the hard work.
PowerPyx says
The art rewards can spawn in any region. They’re not exclusive to the southern regions.
In the Art Pieces guide I listed in what regions they spawned for me personally, but I think it’s just RNG. -> Art Pieces Guide
mati11120 says
In on sequence 7 and still don’t see any art pieces missions on entire map of fleet? Do I need more story to those?
Lazarus says
Found a easy way to get the 10 hang from rope kills early for the trophy. It’s the first templar hunt mission in Havana where you are to defend a friend and enemy comes in waves. There is a roof and you climb that and jump on a tree and sit there when they rush it and get them one by one
Assassin's Creed Raiders says
Love your guide usual!! Fantastic. Can’t wait to continue tonight after watch England football World Cup plus can’t wait for Splatoon Raiders too.
Confused Jedi says
Hello there,
Great guide as always
Gun kata is bugged, hope they fix it soon.
Louise says
Did you have any luck unlocking this yet? A friend of a friend i know got it but i cannot for the life of me get any method to work at all. Spent hours to simply failing to nothing.
Confused Jedi says
Sadly couldnt found any way, tried everything. What i dont understand is if it is bugged how the 10% people got this trophy. It is the only one left. Some people really struggle and some dont, cant figure it out yet.
PowerPyx says
Try reinstalling the game. It unlocks fine for most people. Sometimes individual trophies don’t pop if something went wrong with trophy set install. Reinstalling the game typically fixes this.
Dean says
Do this on a ship, that’s how got it, I might of got lucky with 4 enemies bunching together, tried powerpyx way but didn’t work for me.
Heaven says
The fleet missions (kenway fleet) can we run missions and leave the game and ocme back 1h later real time?
PowerPyx says
Yes you can stand idle and it will progress the missions. Only important thing is you’re not in any menu (not in map, inventory etc) because those stop time. When you stand still in front of the fleet planning table it will work.
Kefman says
I think i got a bug none of my trophys are unlocking? I just completed all the forts and nothing… And collected all templar keys got the armor and no trophy… Can someone help me please
Kefman says
Sorry didnt know there was a story mission for a fort so thats fixed???? and i see now the templar keys are not a trophy
PowerPyx says
Correct, no trophy for all templar keys and one fort is gated behind story progress. Not bugged.
mxrich says
i hear that if you completed all templar hunters before one story mission in Kingston area in map, you cant get the one main quest in Kingston for continue in story? im so nerves i complete all templar hunters two days ago i must reload my save or just continue?
SirMartian says
I heard it’s only bugged if you start the Kingston one and DON’T finish it.
I finished all 4 of them ahead and no problem, afterwards when I went on several missions later in Kingston.
Jetli says
I quote “Then accept the report, check if you get a mission that gives an Art Piece, if not reload save” referred about the Dilettante trophy if you should not get a mission with an Art Piece and I will reload now a previous save, how is it still saving your current progress?
HK says
What do you mean when you say to make a save before accepting mission report? I go to the fleet planning table in the cabin, and I don’t see anything about accepting a mission report. The available missions are just set and don’t change. None of which reward art pieces. Do you mean to make a save before even going into the cabin? I tried that and I still get the same available Brig missions
XxC47 says
Same here, theyre not refreshing for me
PowerPyx says
You accept the report after the missions finish.
dj says
Are the Fleet pieces real time or in-game time to get them?
PowerPyx says
real time 30-60 minutes per mission
Otacon85 says
I have cleared over half the map from the forts, I am missing the “difficult” areas, but the missions with the artwork icon do not appear in the ship missions. Do they come out later?
Ali says
Yes they will come more frequently when you beat all of the forts. Add five brig from hard map section (3 star brig) to your fleet and keep sending them on missions.
Sunny says
For The Last to Leave trophy, a burning ship appears pretty consistently in (755, 145) 2 seconds away from Kabah Ruins.
Got a burning ship on every reload, and one with a chair at the 5th or 6th try.
Ali says
Thank you powerpyx for your excellent guide. I completed and ploted the game in 57 hours.
Your strategy for fleet pieces was very effective.
fox says
Overdesign IV trophy possibly bugged after latest update?
It’s the only trophy I’m missing and I just can’t seem to get it even after several attempts. Tried different methods such as knocking sniper enemies off their platforms and having them fall into the ocean. I even got it once normally and it just didn’t unlock for me. Anyone having the same issue?
EarthBear says
If you are reading this and don’t have unsinkable yet, do yourself a favor and completely ignore any tips you read and avoid wasting hours for no reason. Start a new game, and just get it with the story mission, it takes less than an hour with skipping cutscenes. You will waste many more hours trying anything else, I promise.
Greg says
On the latest update (I think version 1.4xx.xxx) beware of potential bug on the Memory of my Enemy trophy. If you try to visit Principe for the Bartholomew Roberts photo after finishing the main story, you’ll get drowning bug loop when fast travelling to principe. Even if you try to sail manually to Principe. It would lock you from the Memory of my Enemy trophy
For now, there’s no known solution for this except hoping for future patch to fix this
Ben says
Same Issue, for me it was after killing roberts. Progressing further didn’t fix the issue.
Looks like an update is coming out today 1.06. But the bug is still open. Very annoying, only need to pick up the portrait.
Assassin_991_ says
I looted the chest for the Art piece: Pedestal Bowel and it did not registered. The chest is looted and I don’t have the Pedestal Bowel in my codex.
Any one encountered similar bug?
Can you obtain Pedestal Bowel from somewhere else?
Thanks,
PowerPyx says
I rechecked on latest patch and that same chest still gives me Pedestal Bowl (Cumberland Bay, chest at 644, 352 in tent in enemy camp).
Others also getting it fine, but also several reports of people not getting it. Seems like it has a chance to bug out. Only workaround might be to recollect everything from an older save or wait for a patch.
Dean says
I think the barrel ultimate plan has bugged out on me I 100% collected it and had the treasure map and then went to the location where the ultimate plan is picked it up but when I went to upgrade it at the quarter Master it isn’t there, any help powerpyx?
Dean says
Ignore this, i was confused, didn’t even realise there was different types of barrel upgrades, got it now ????
Toby says
I’ve got a bug. All 5 caves are 100% complete and I bought one map, but it’s only showing 5/6 for the legendary sword. Any ideas?
PowerPyx says
Not a bug, you buy the last map piece from the treasure dealer at Great Inagua.
It’s explained in the guide, quote: “5 pieces are obtained from the locked chests in the 5 Caves, 1 piece is bought from the treasure dealer in Great Inagua.”
Max says
FYI there is currently a game breaking bug for everyone, once you beat the game you CANNOT return to principa, you get stuck in an endless desych loop whether you sail or fast travel there. report it on the ubisoft bug reporter because theres already a lot of info on there
Schlyter84 says
A very important note! There´s a current glitch that I´ve encountered. If you don´t finish Lucy’s “The one with the gun” and then complete all the main missions you wont be able to recruit Deadman during “A World Without Gold”. The reason is that The one with the gun restarts and you are asked to pick up a box/crate of plantains that doesn´t exist since it has already been completed. There´s no solution to this beside reloading a previous save. In my case, all of my auto saves were from the last story mission, which cannot be aborted so I don´t have the option to complete the officer quest before finishing the story.
Max says
stupid question but you started “the one with the gun” but didnt finish it?? i didnt know that was even an option. so basically finish the quest asap and you are good?