
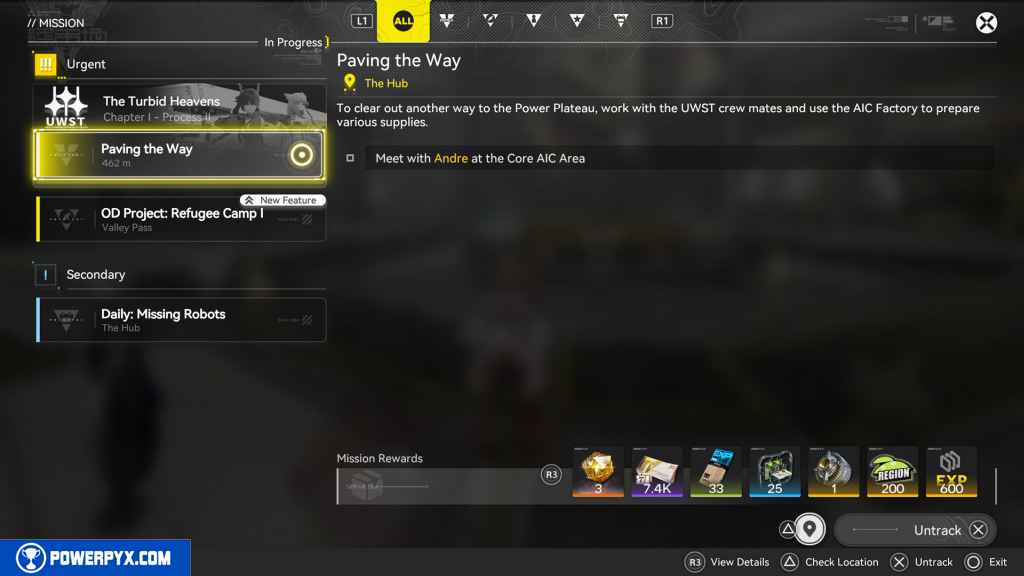
Paving the Way is the 11th main mission in Arknights Endfield. This walkthrough will guide you through all objectives of the Paving the Way main quest.
- Starting Location: Hub Base
- Quest Giver: Automatically begins after completing “Fort Showdown“
- Chapter: Chapter 1 – Process 1
- Requirement: Complete “Fort Showdown“
- Reward: Origeometry x3, Valley Stock Bill x100, T-Creds x7,400, Intermediate Combat Record x33, Arms INSP Kit x25, Basic Expansion Core X1, Valley Region Development Metric x200, EXP x600
- Quest Description: To clear out another way to the Power Plateau, work with the UWST crew mates and use the AIC Factory to prepare various supplies.
Before starting this quest, it is highly recommended to complete all of the simulation training for base building. You can find these by holding L2, pressing Left on the D-Pad, then pressing Square to open the Simulation menu.
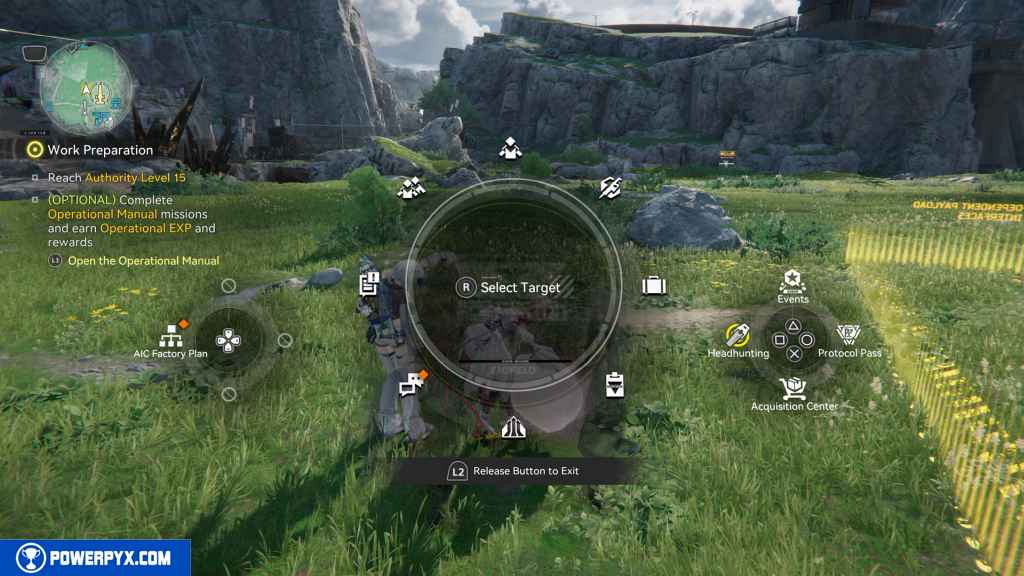
These will help you better understand how to run your base, but several of them are mandatory to do before this quest can be completed.
Otherwise, you will be presented with each of the mandatory Simulations as you progress this quest. Choose whichever tactic you prefer.
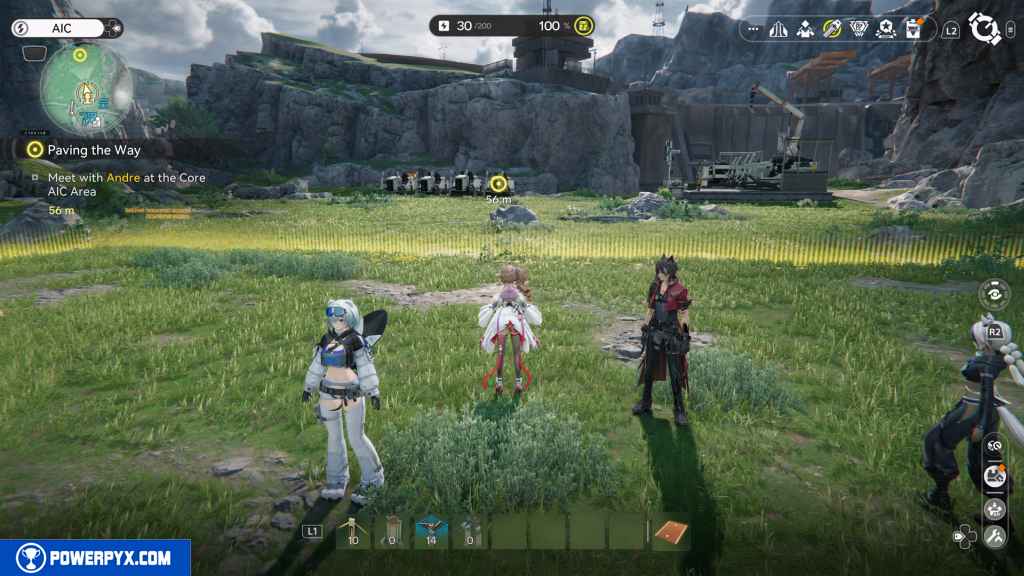
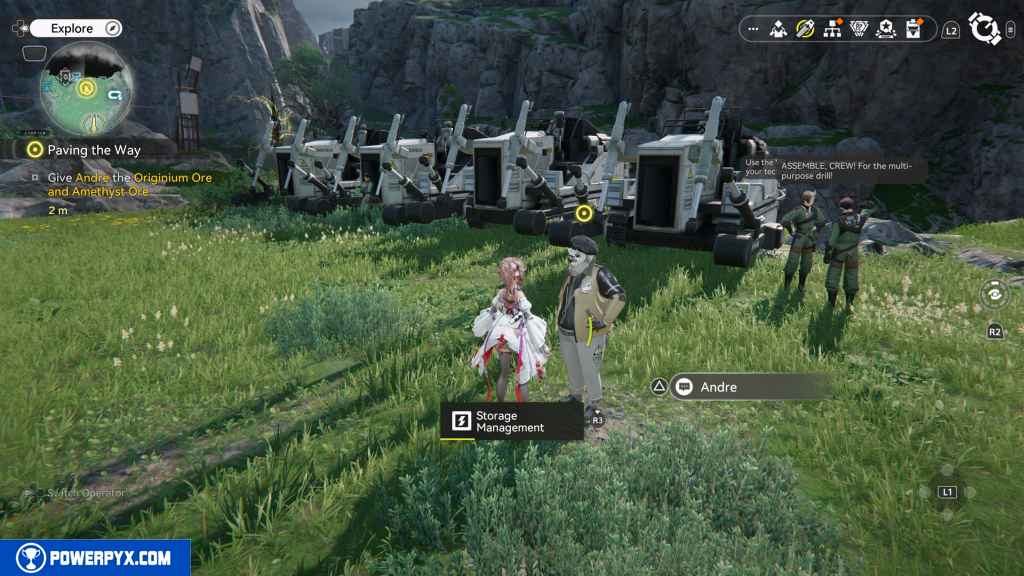
Meet with Andrew at the Core AIC Area
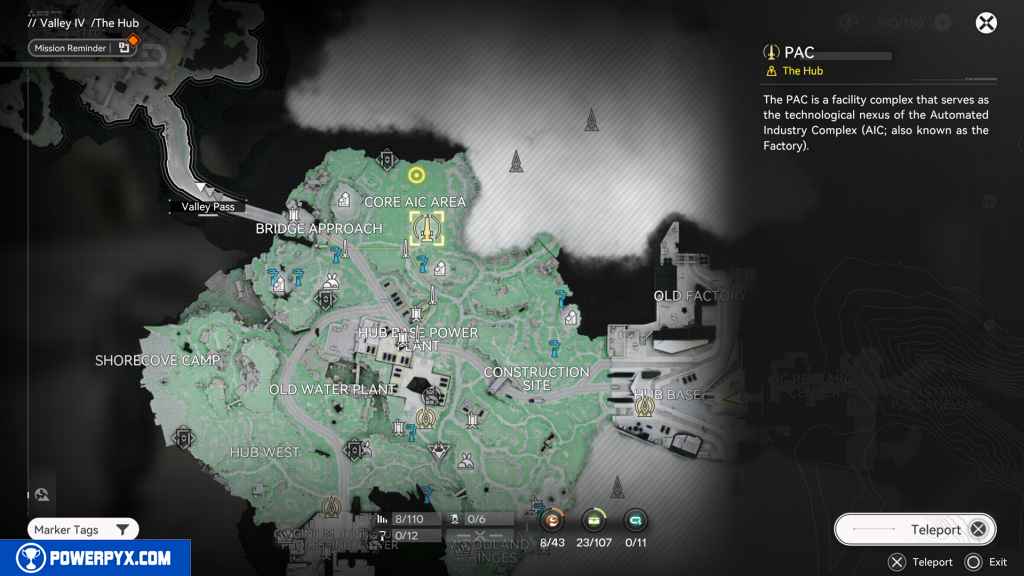
This quest begins north of the Core AIC Area. Press the Touchpad to open the map. Select the PAC at the north end of the area to teleport there.
Once there, head north to the equipment lined up by the cliff face. Approach Andre to trigger a cutscene.
When you regain control, hold L2 to open the System Feature Wheel.

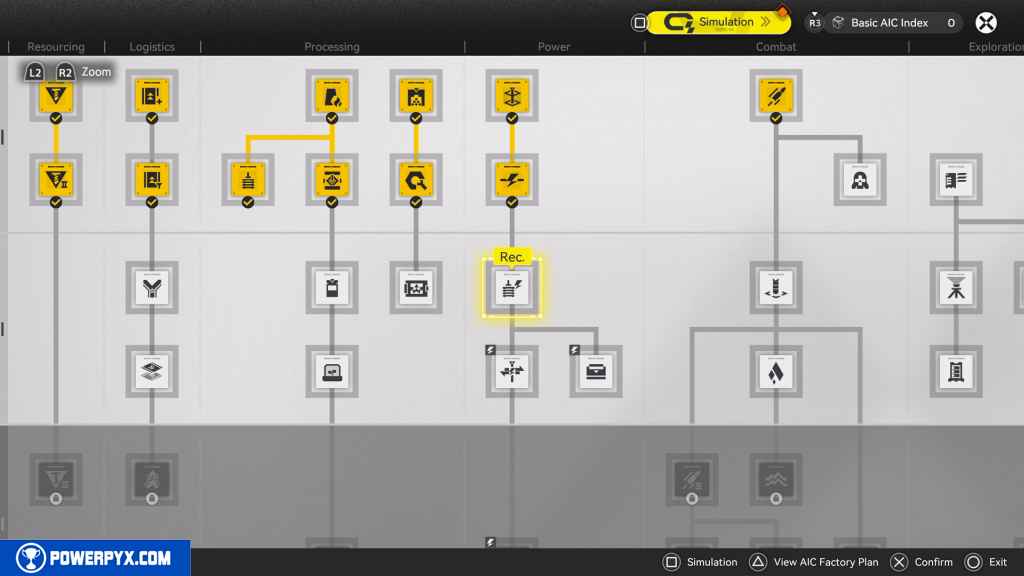
Within that menu, press Left on the D-Pad to open the AIC Factory Plan menu. This takes you through a tutorial for researching new technologies.
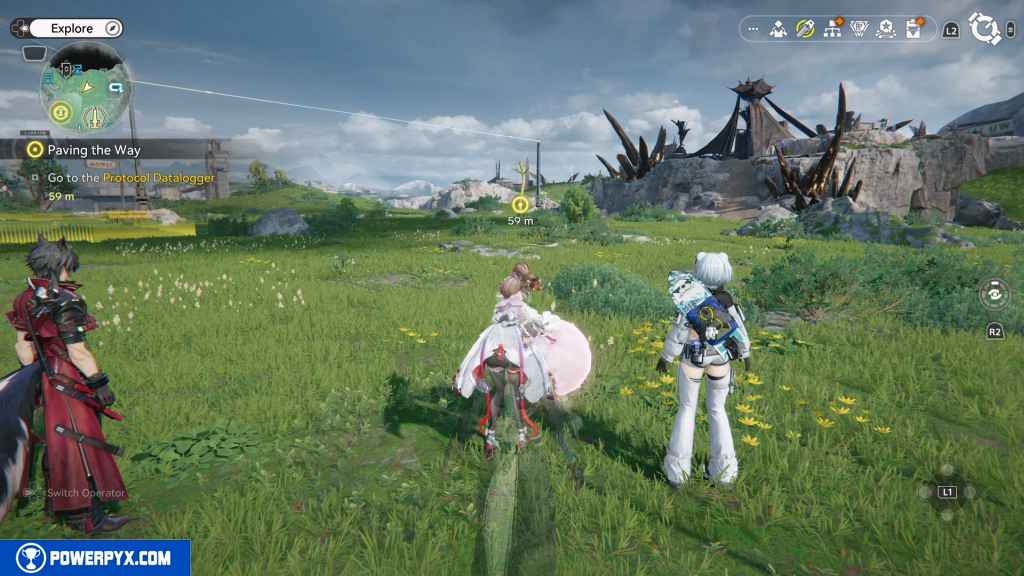
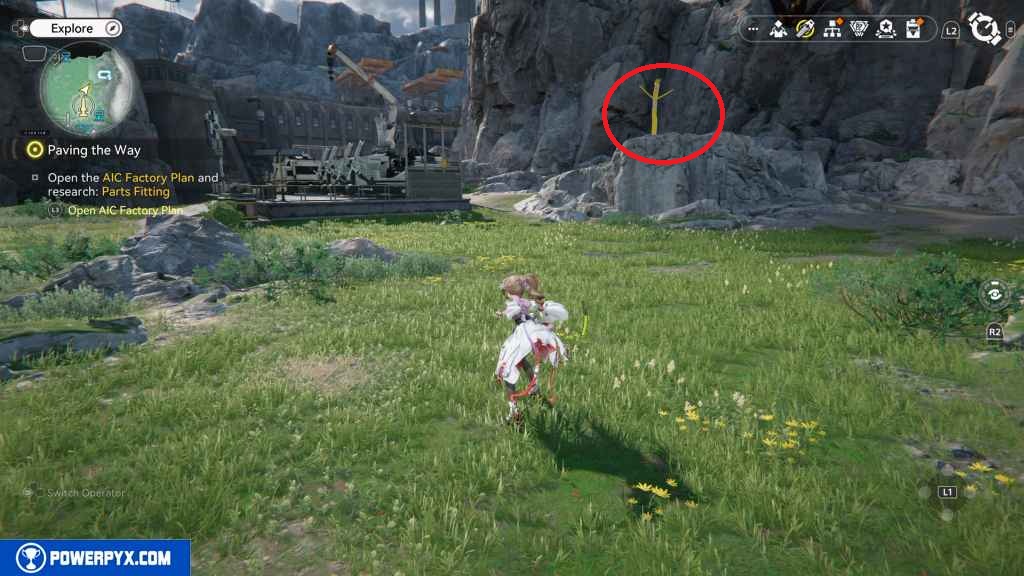
Go to the Protocol Datalogger
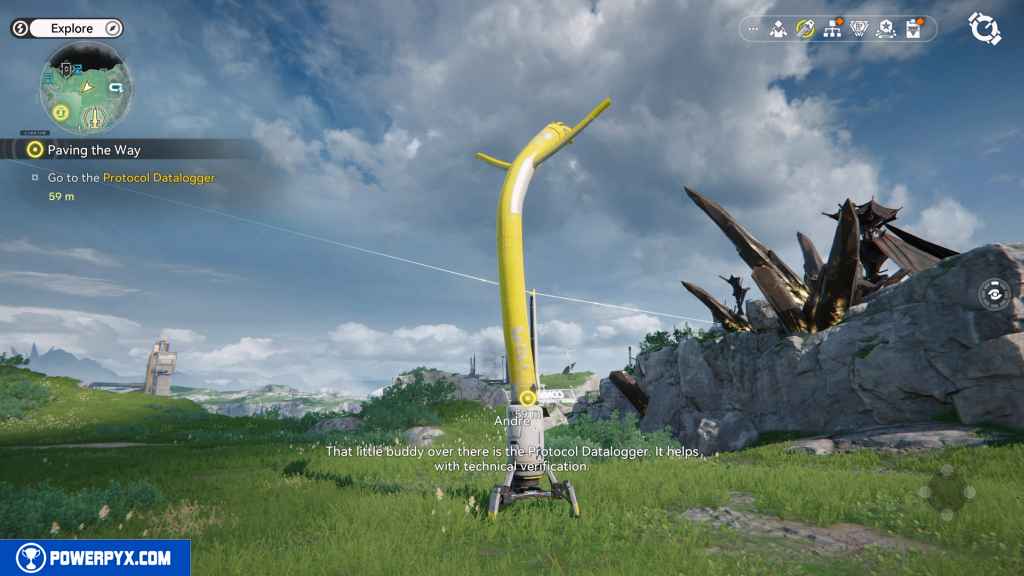
When you regain control, head southwest to the Protocol Datalogger. Look for the Wacky, Waving, Inflatable, Arm-flailing Tubeman. Approach it to trigger a cutscene.
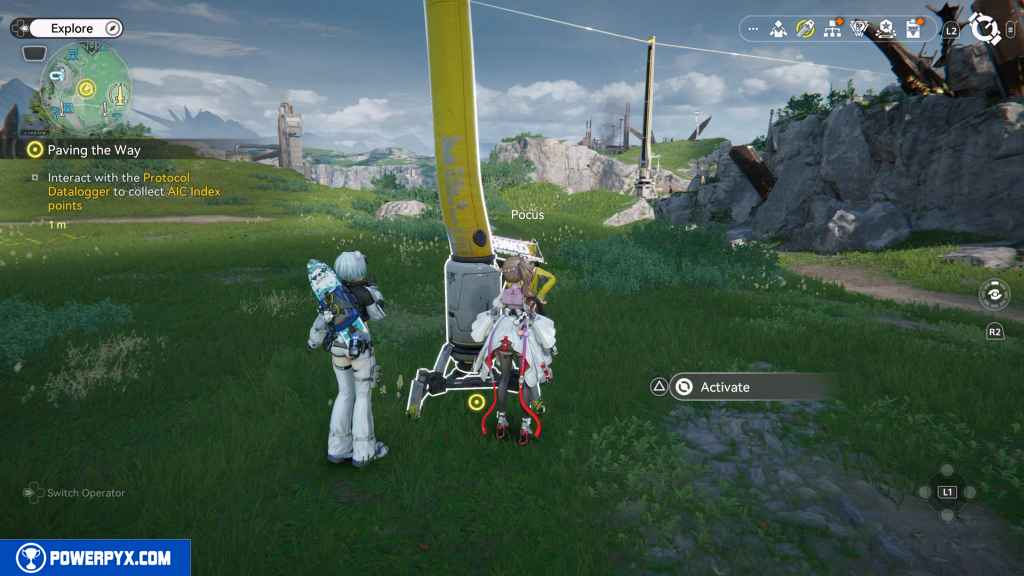
Interact with the Protocol Datalogger to collect AIC Index points
Reach the Protocol Datalogger and interact with it.
Open the AIC Factory Plan and research: Mining II
Hold L2 then press Left on the D-Pad to reach the AIC Factory Plan menu once again.
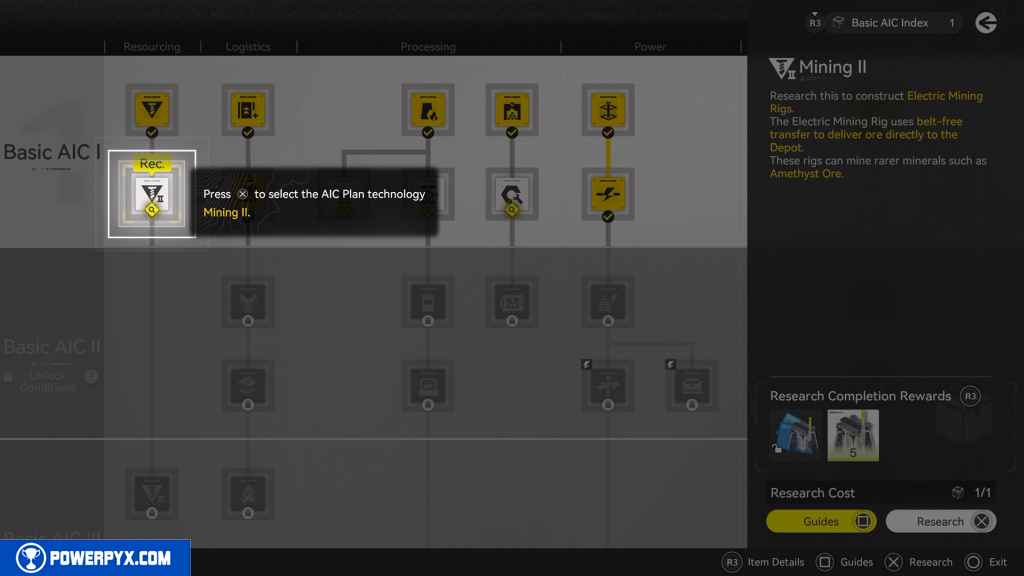
This time around, the game automatically has you select the correct research node. Press X to complete the research for the Electric Mining Rigs.
The game then leads you to a simulation tutorial. The simulation tutorial does reward you with 25 Oroberyl and 200 EXP if you do it, so it’s worth doing. If you feel confident in your ability to do the building that you did in previous main quests, feel free to just press Circle to continue on. Otherwise, this tutorial makes for good practice.
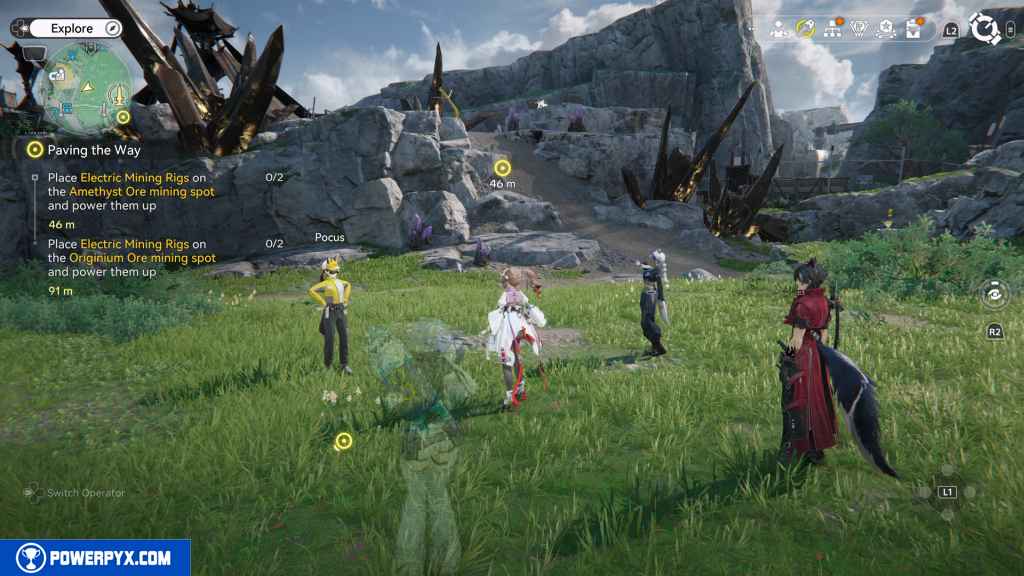
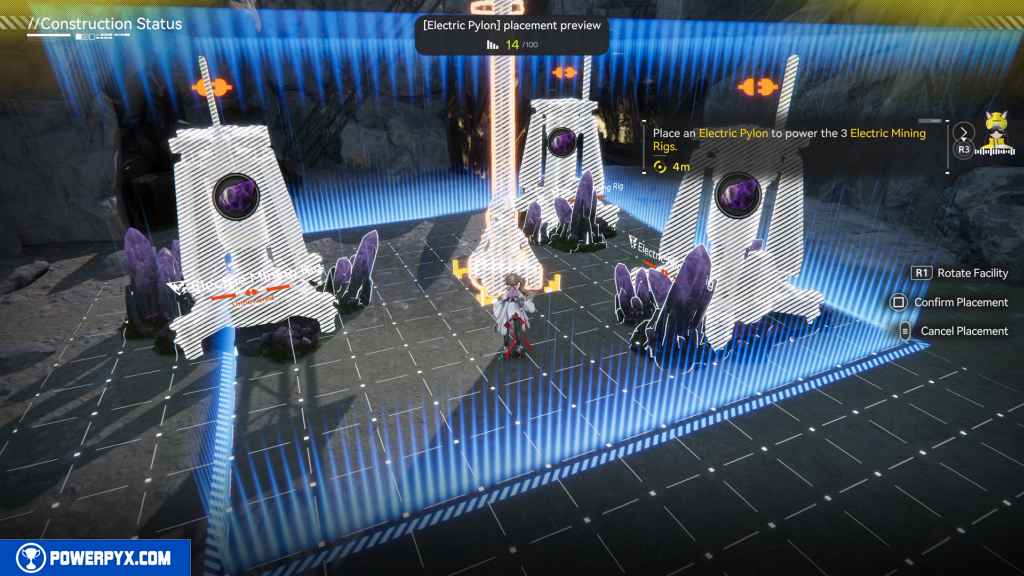
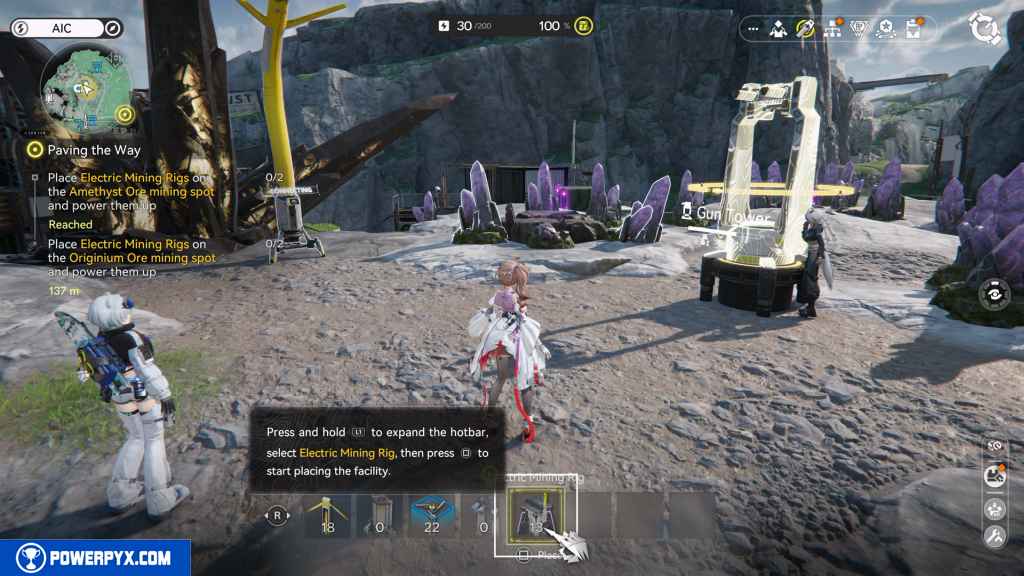
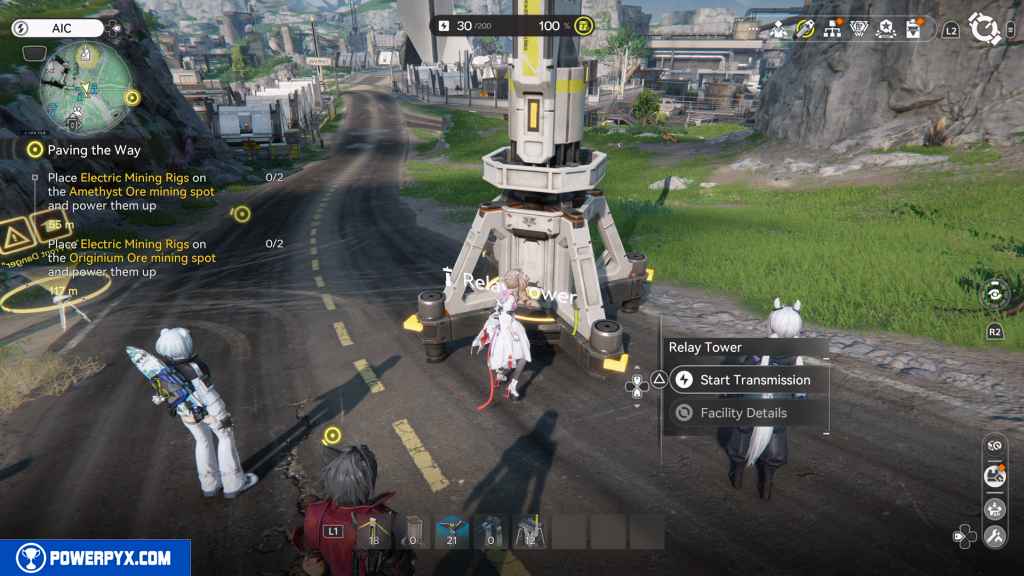
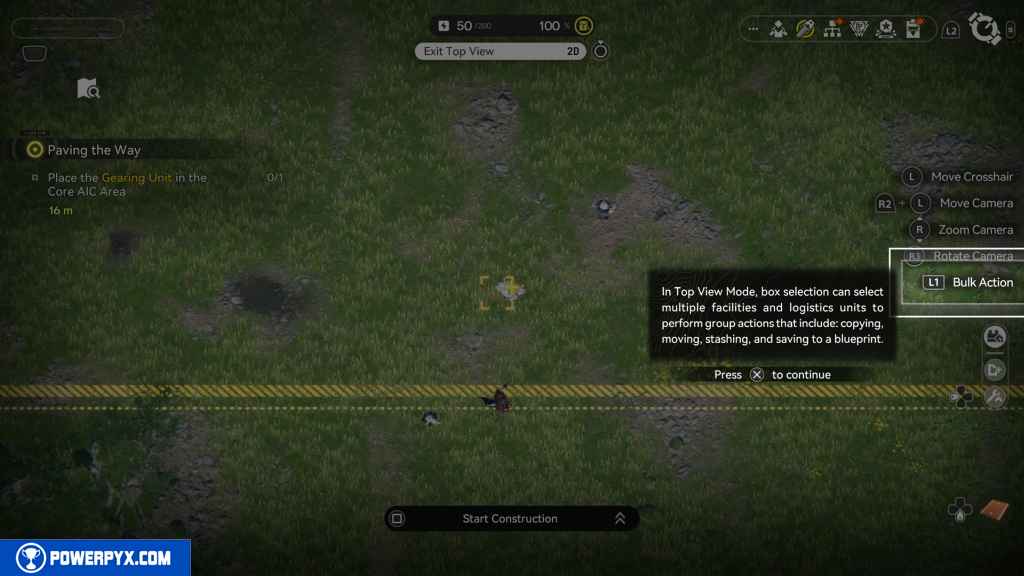
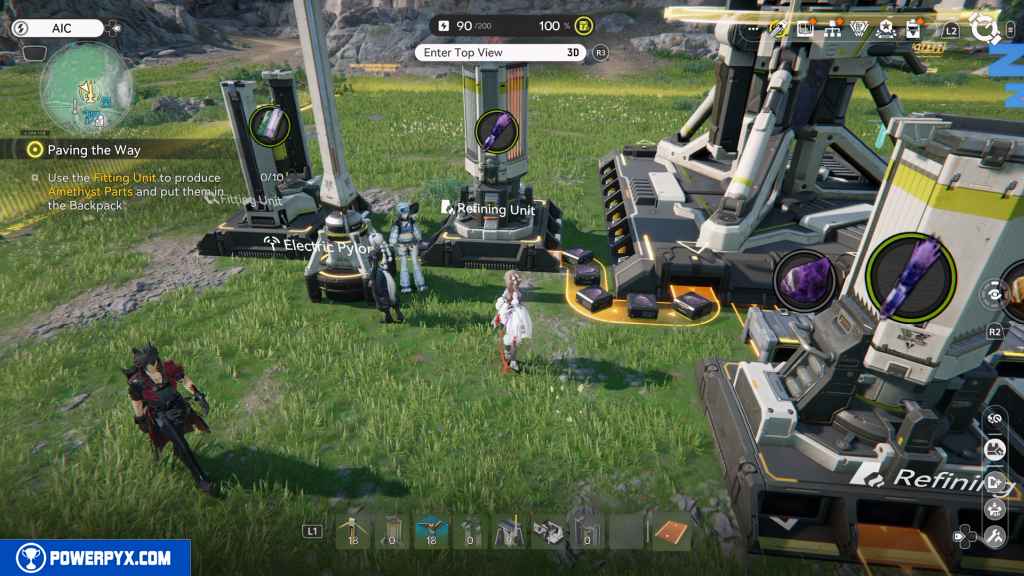
Place Electric Mining Rigs on the Amethyst Ore mining spot and power them up (2)
For Amethyst Ore, head west up the hill. When surrounded by the Amethyst nodes, press Right on the D-Pad to open AIC Mode.
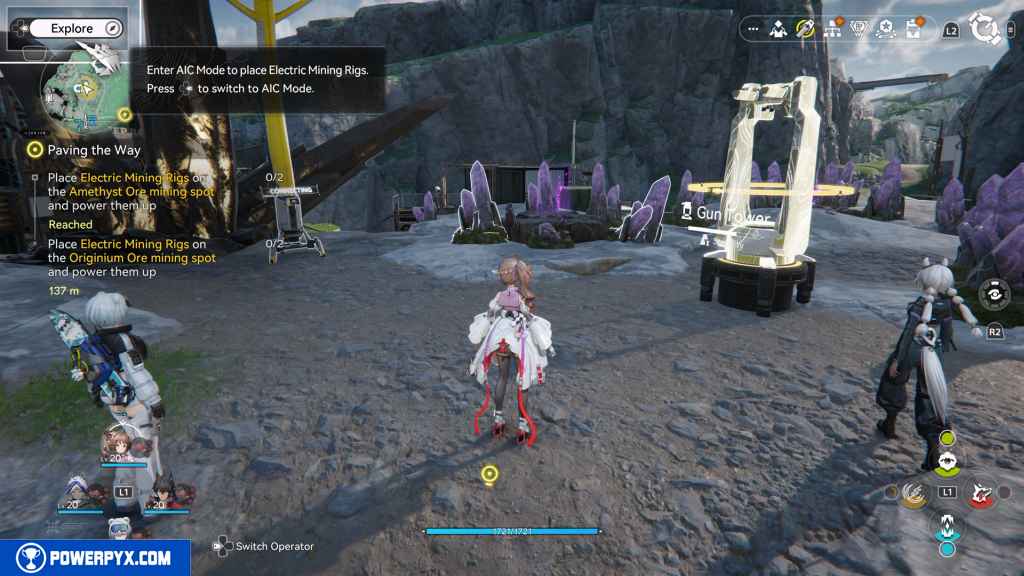
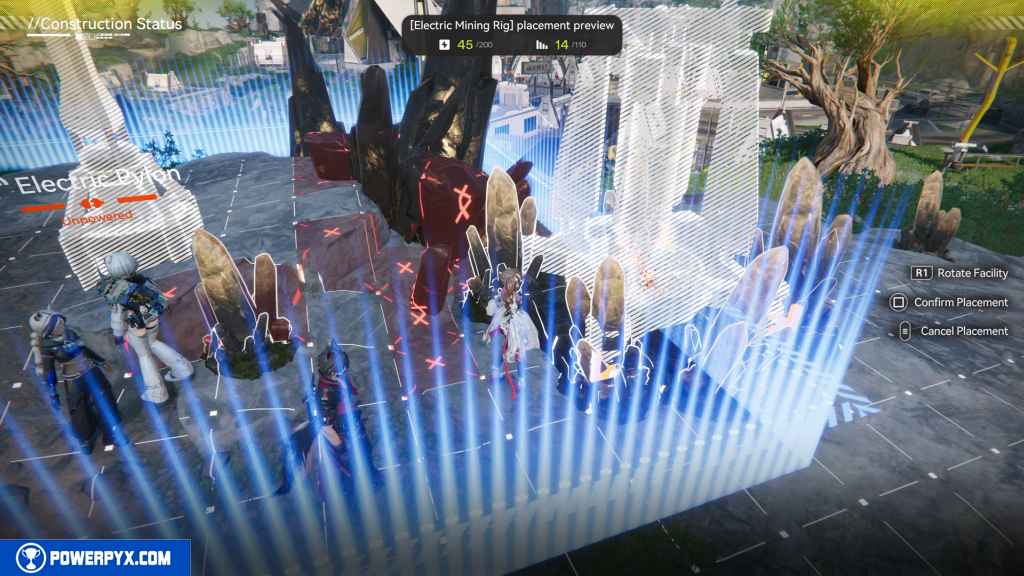
Hold L1 to bring up the Hotbar to select your Electric Mining Rigs and Electric Pylon. If you do not have these items on your Hotbar, hold L2 and point the Right Joystick to the right to open your Inventory. Then, move down to these items and press Cross to bring up a submenu. Highlight and click “Place in Hotbar” for each of these items. This makes your life much easier later on.
Place the two Electric Mining Rigs on Amethyst blocks and then place an Electric Pylon between them.
Interact with the Protocol Datalogger nearby while you’re here. You’ll need the Gearing Unit later in this quest.
Look south to see one of the Electric Pylons you placed earlier in the quest line. Go to it and press “Begin Transmission”. Then run back to the Electric Pylon you just placed and activate it. This will automatically begin mining of Amethyst from this location.
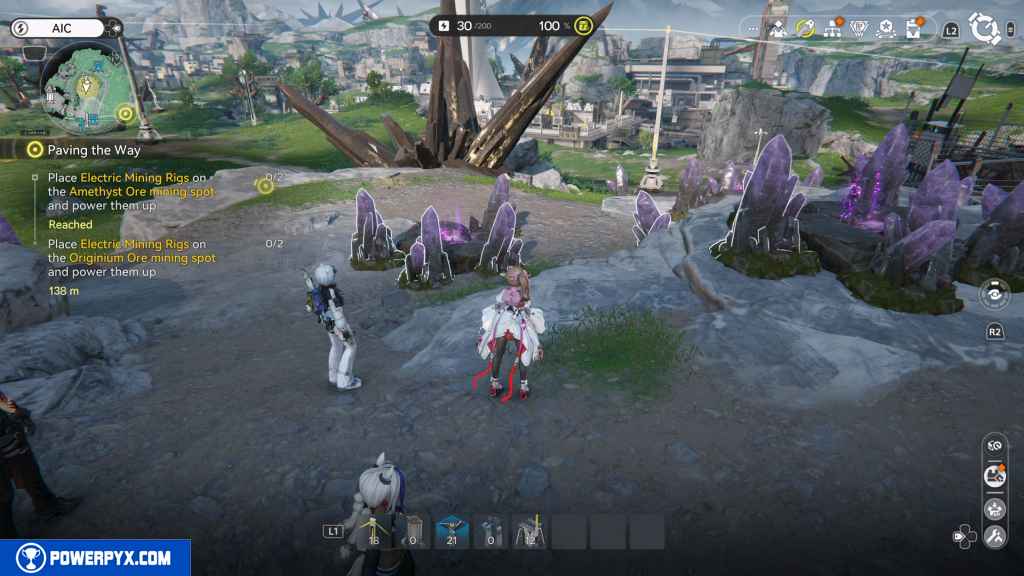
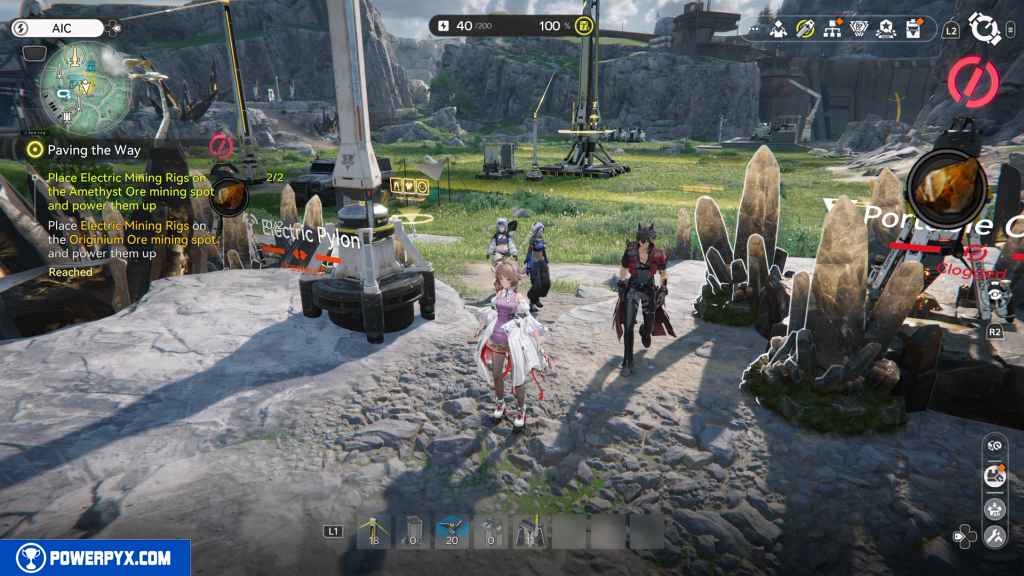
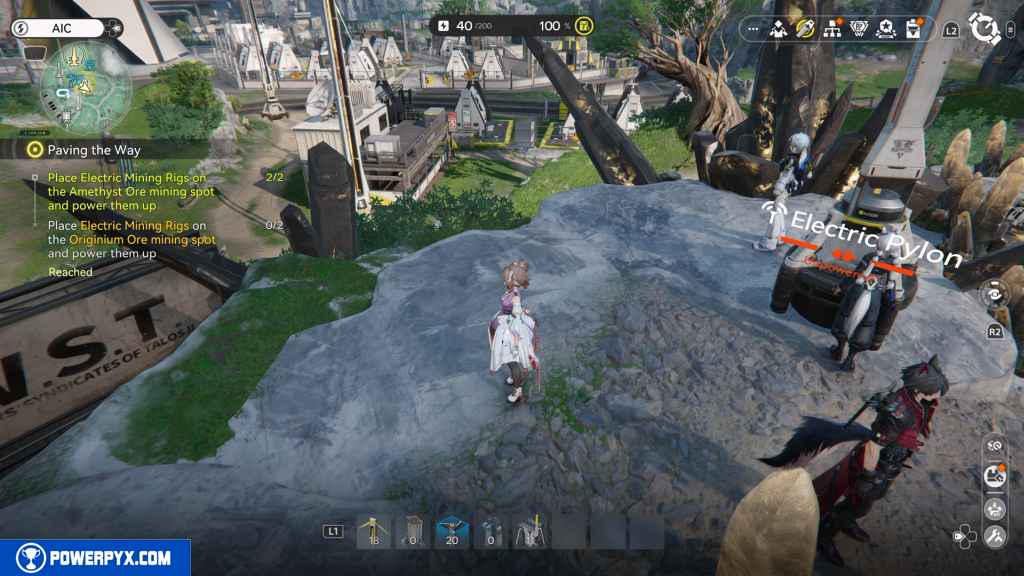
Place Electric Mining Rigs on the Originium Ore mining spot and power them up (2)
Next, head southeasterly toward the Originium Ore mining spot. In this case, the mining rigs are already in place from a previous main quest.


Unfortunately, these won’t count for this quest simply because the game does not register these existing rigs as rigs that have been placed while doing the quest. So, interact with each one, press Options, then select “Stash” to put them away. Then press Right on the D-Pad to activate AIC mode, hold L1, then navigate to the Electric Mining Rig to place one in each mining node.

After that, all you need to do now is place an electric line and transmit power to it. You can use either the nearby Electric Pylon you placed in an earlier main quest or you can transmit power directly from your PAC.
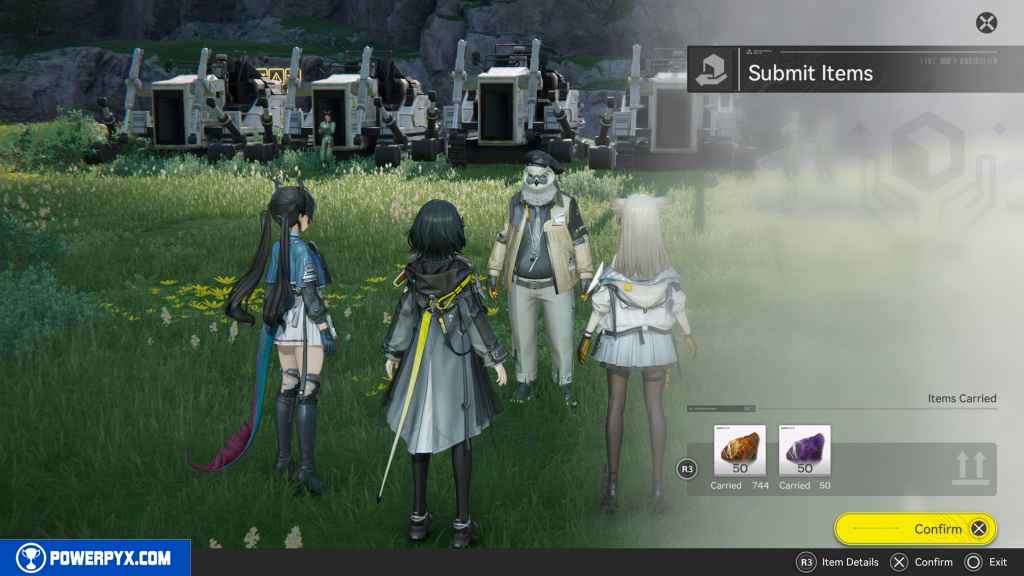
Give Andrew the Originium Ore and Amethyst Ore
Head back to the mining equipment by the rock face to the northwest of you. Interact with Andre to trigger a conversation.
This prompts a dialogue option:
- [Take these mineral ores.] – You must select this option in order to progress the quest.
- [I need to take care of something else.]
Then just hit Confirm when the menu appears with the Originium and Amethyst Ores.
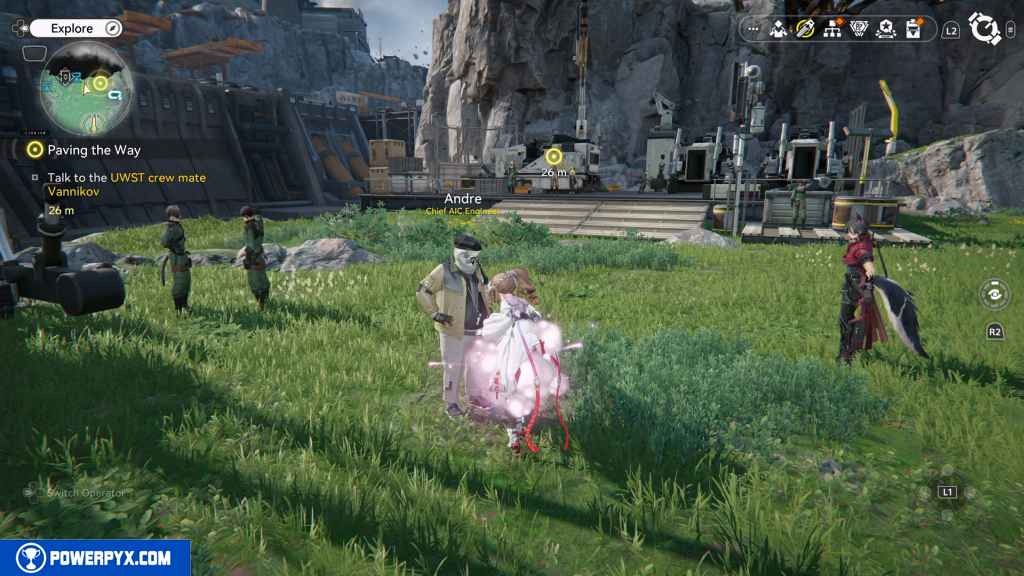
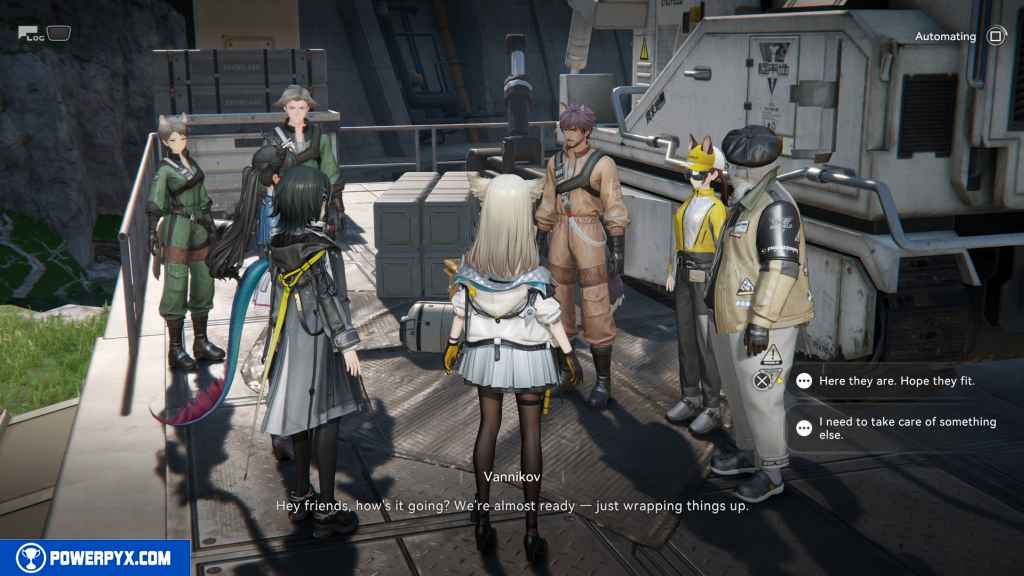
Talk to the UWST crew mate Vannikov
Go due east a short jaunt to Vannikov, who stands next to another set of mining equipment. Interact with him.

When you regain control, press Left on the D-Pad then press Cross to open the gear assembly screen.
This part takes you through crafting some new equipment for your characters. If you don’t want to waste resources on these, you don’t need to. Just back out of the menu.
Once in control again, press R3 to open the Gearing Tech menu. It tells you to go find another Protocol Datalogger in order to get another Gearing Unit. Since you grabbed the one by the Amethyst mine, you don’t need to go find another one.
Research Gearing Units in the AIC menu.
The game also leads you to a simulation of using the Gearing Units. If you haven’t done all of the simulations yet, do it now. Finishing it rewards you with 25 Origeometry, the Amethyst Component Blueprint, and 100 EXP. You need this blueprint to progress the story. Back out of the menu when you finish.
Go to the Core AIC Area
Head south back to the PAC.
Place the Gearing Unit in the Core AIC Area
Press R3 to “Start Construction,” which activates a top-down camera.
Press Left on the D-Pad to open Blueprints. Then select Amethyst Component Blueprint to make one.
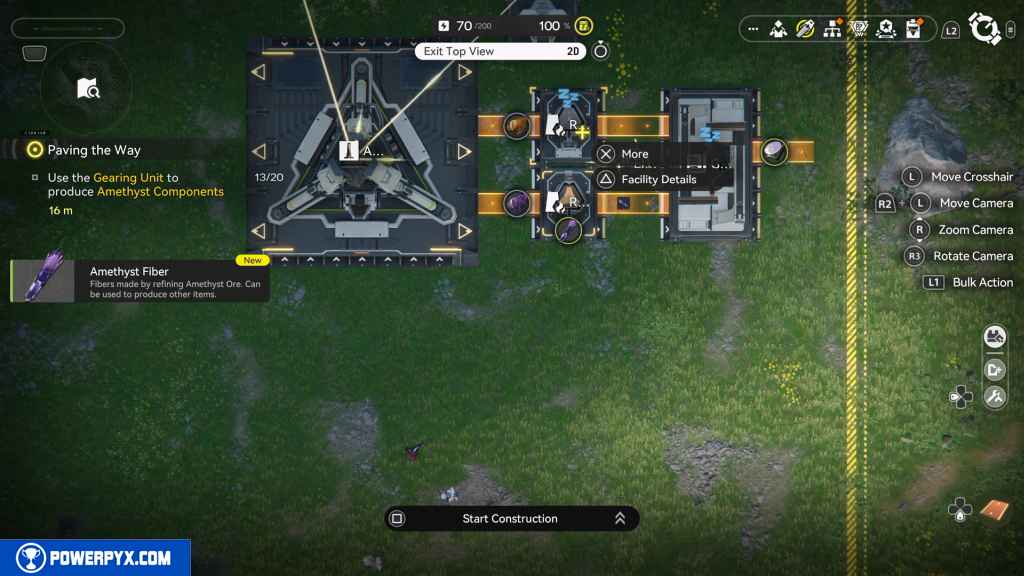
Back out of that menu. While in this top-down construction mode, you can just move your cursor to each component and make selections instead of running your character around the PAC.
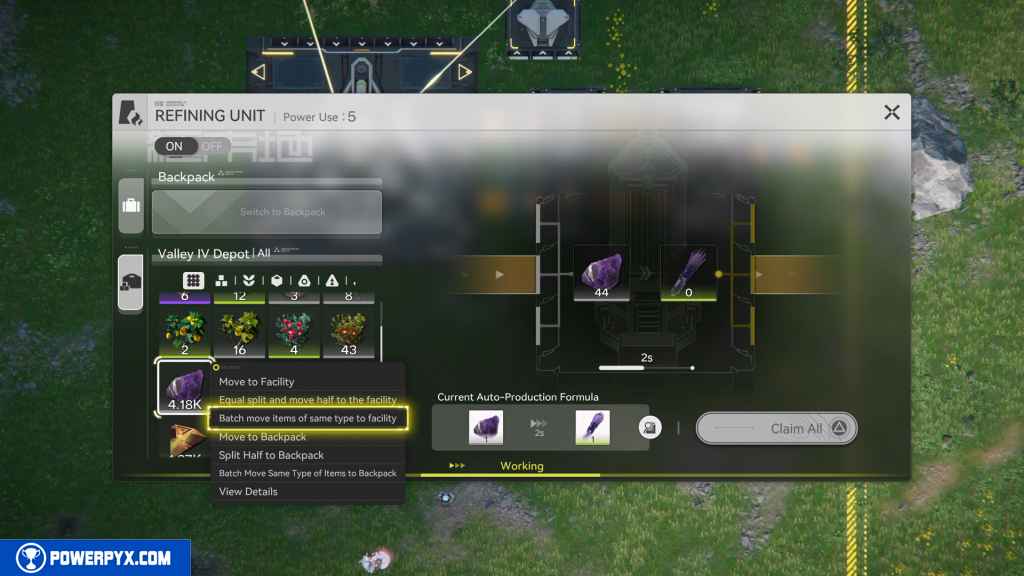
Interact with the south refining unit. Just to make your life easier, go into your backpack and press Cross on any Amethyst you may have. Then select “Batch move items of same type to Stash”. Then press L3 to open the Stash. Interact with the Amethyst Ore and then press “Batch move items of same type to facility.” This way, all of your Amethyst is in your Stash, and you won’t need to keep refilling the facility over and over.

Go to the north refining unit and follow the same process but for Originium Ore this time.
Once one Gearing Unit is craft, this objective completes.
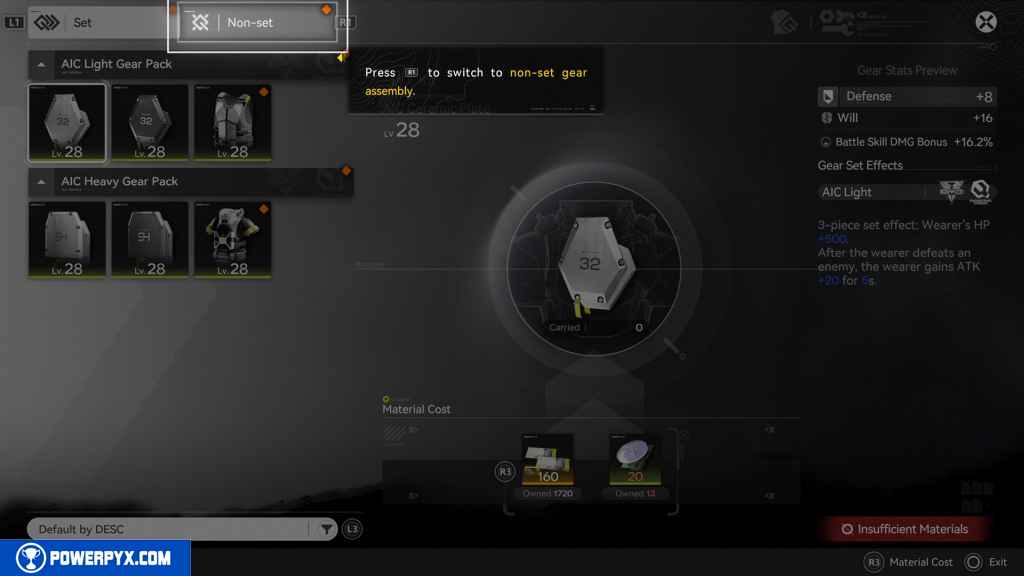
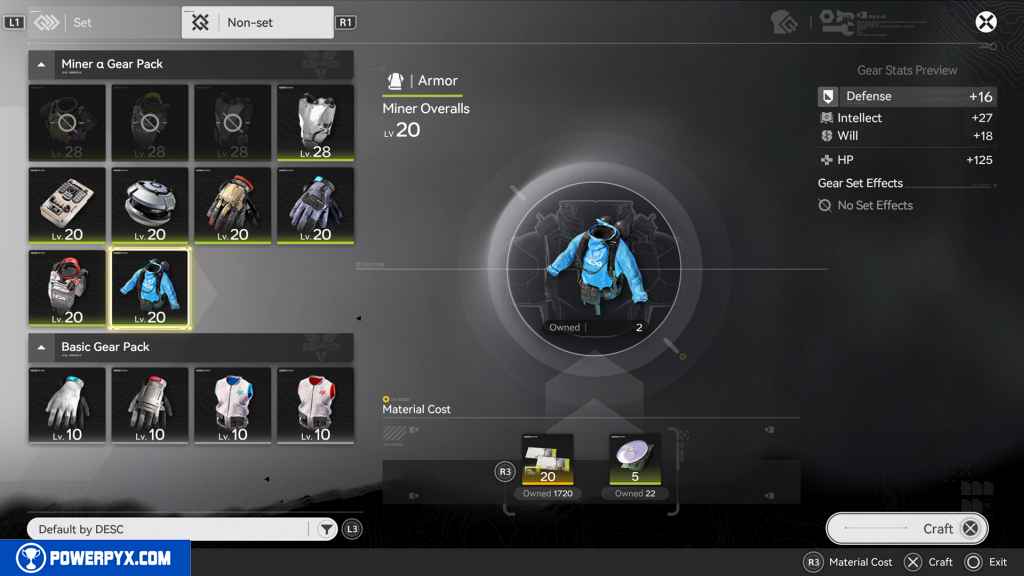
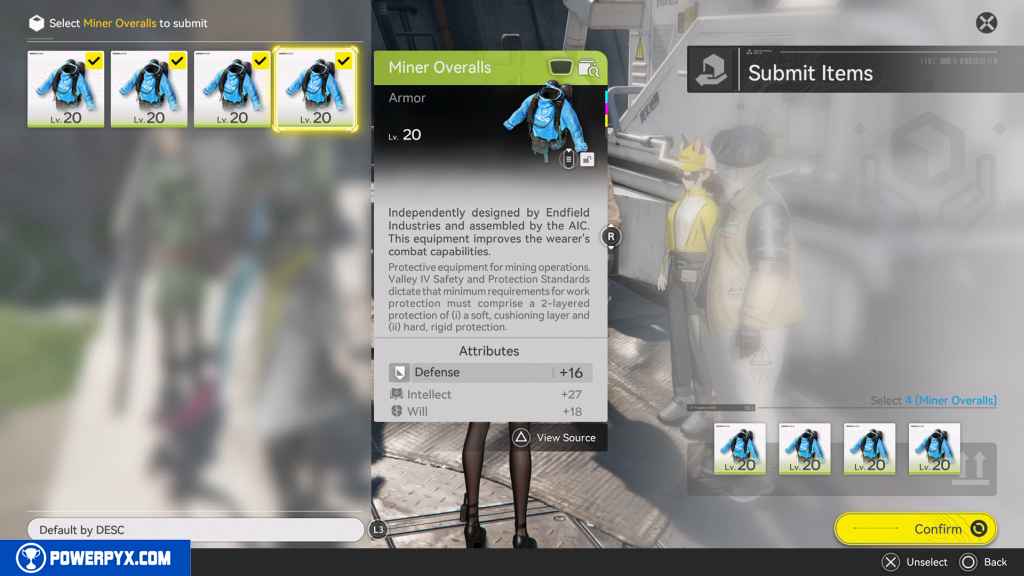
Make the gear: Miner Overalls
Hold Left on the D-Pad and then use the Right Joystick to interact with “Gear Assembly.” Press R1 to switch to the “Non-set” armor menu.
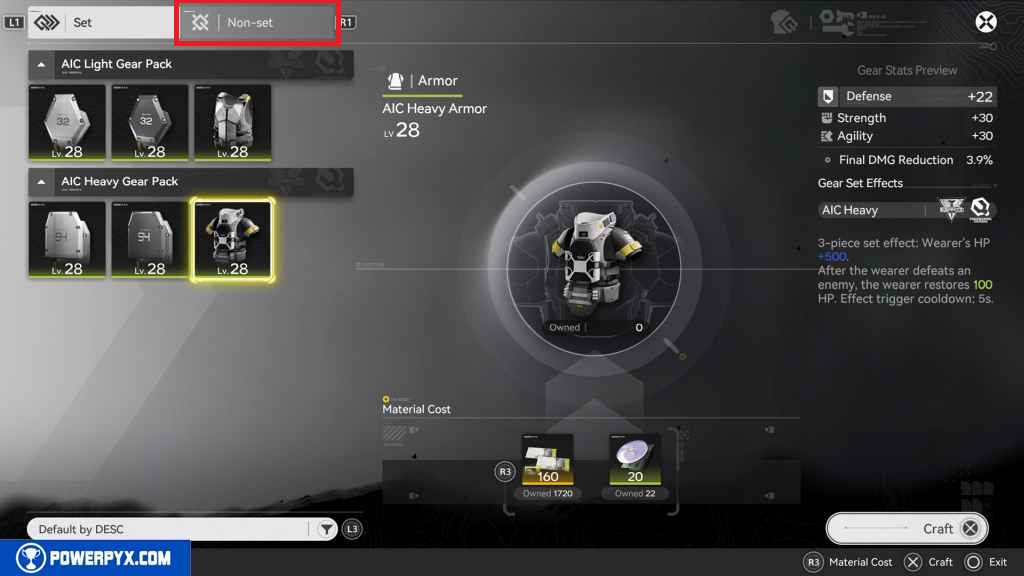
Craft 4 Miner Overalls. It doesn’t tell you to craft four until you back out of the menu and it gives you a count. So, make all 4 of them while you are in the menu instead of needing to go back into the menu to do it again. Be warned that if you only make 2 Miner Overalls and you already have 2, the quest will still complete. However, you will still need to turn in 4 Miner Overalls. So, if you have the already-made Miner Overalls on your characters, those cannot be given to Vannikov.
Give Vannikov the Miner Overalls
Hold Circle to exit construction mode.
Before leaving, interact with the Gearing Unit on the end and pick up any Amethyst Components you have made.
Then head back north. Before talking to Vannikov, grab the Protocol Datalogger just east of Vannikov.

Finally, interact with Vannikov by the mining equipment.
This gives you a dialogue option:
- [Here they are. Hope they fit.] – You must select this option in order to progress the quest.
- [I need to take care of something else.]
Press Triangle to bring up the menu. Then place the Miner Overalls in each one.
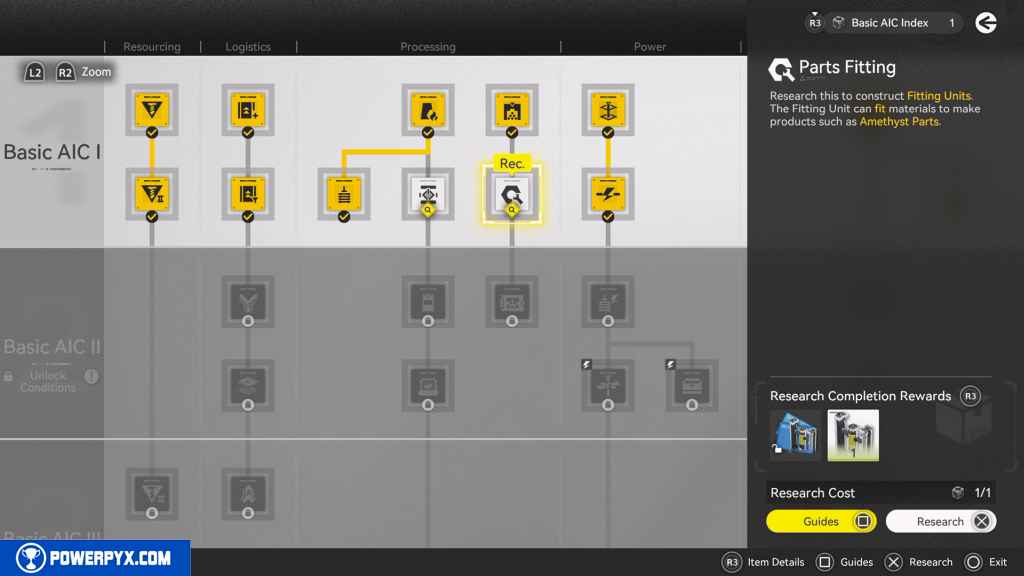
Open the AIC Factory Plan and research: Parts Fitting
Press L3 to open the AIC Factory Plan.
Interact with “Parts Fitting.” It has a “Rec.” text bubble over it. Research it.
Give Vannikov the Miner Overalls
Go back to PAC and place a Fitting Unit nearby.
If you haven’t already done all of the simulations, interact with the Fitting Unit and then press the Touchpad. Press R3 and then move to the right to interact with the Amethyst Part. Press Triangle to View Source. This menu opens the full formula to make the Amethyst Part.
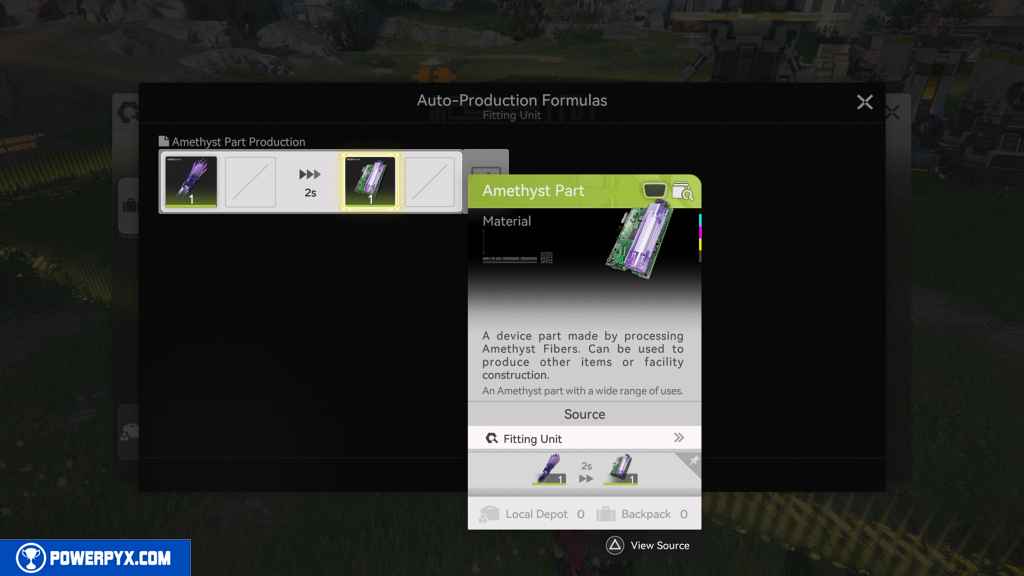
Press Triangle to open System Blueprints. This takes you to the Simulation that rewards you with the Amethyst Part Blueprint.
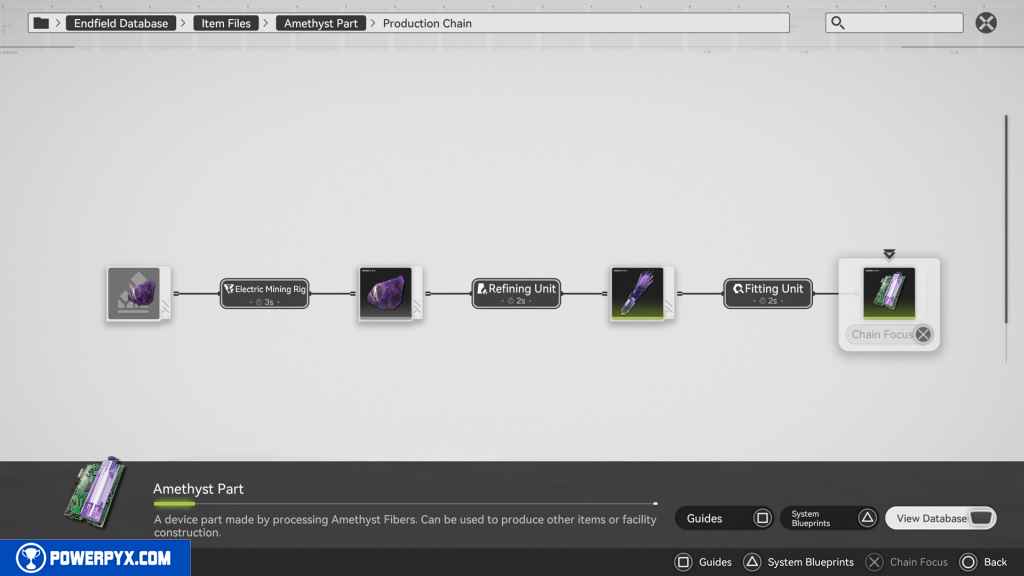
Now, you can choose to make an entirely new setup just for Amethyst Parts. This consists of connecting a Transport Belt with Amethyst Ore to a Refining Unit that makes Amethyst Fiber that then connects a Transport Belt to a Fitting Unit.
Give Andrew the completed parts
Head back north and interact with Andre. This prompts a dialogue choice:
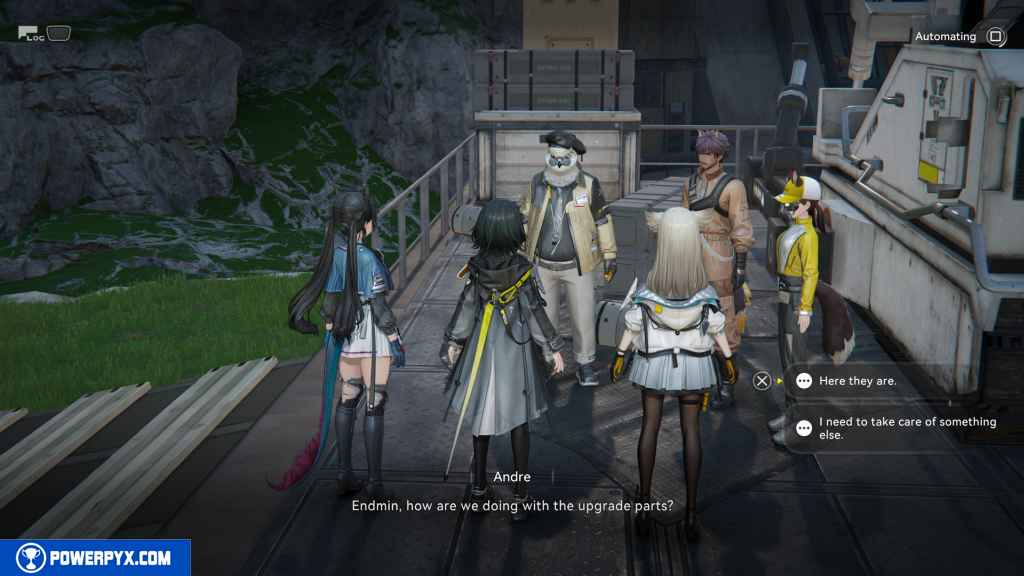
- [Here they are.] – You must select this option in order to progress the quest.
- [I need to take care of something else.]
This finishes Paving the Way main quest in Arknights Endfield.
NEXT: Work Preparation
For all other Quests refer to Arknights Endfield Walkthrough.
Leave a Reply