
This guide shows how to unlock the Pack a Punch Machine (PaP) in Classified DLC in Call of Duty Black Ops 4 Zombies. The Pack-a-Punch machine lets you upgrade your weapons for more damage. You must turn on the power, find the 3 Pack-a-Punch machine parts, and activate Defcon level 5 by hitting the switches in the War Room.
Turn on the Power
To start things off, you have to turn on the power. To do this, simply take the first lift down to the War Room and from here the next lift down to the Laboratories. The switch can be found in the second room on the left. It’s already open so you don’t have to spend any points to get get to it. Now all of the teleporters have been turned on and you can freely travel between the 3 different floors of the Pentagon.
In order to teleport to Groom Lake (Area 51 in previous games) where the Pack-A-Punch machine is located at, you have to find 3 different parts first. These parts and their locations are:
Lid
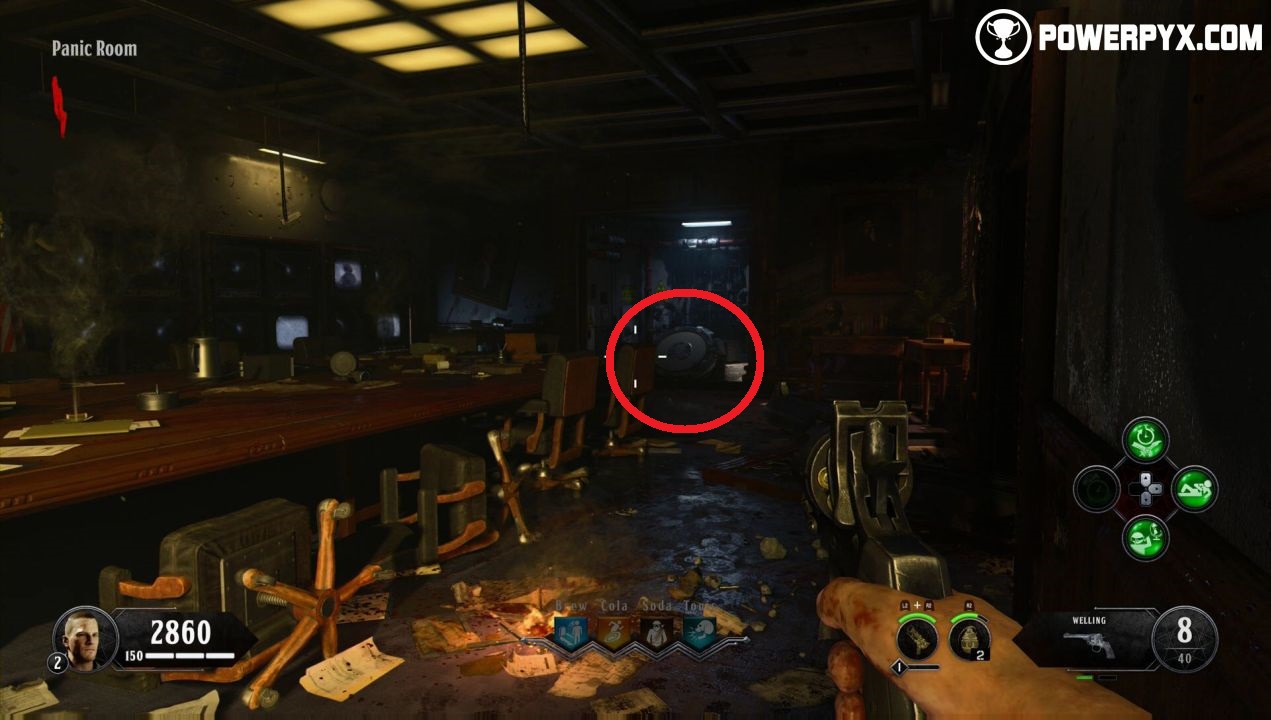
The Lid can be only be found in the Panic Room. You have to activate Defcon 5 in order to reprogram the teleporter to take you there. To do this you have to flip all 4 Defcon switches:
- War Room: Upper Level – By the Spitfire wall-buy.
- War Room: Upper Level – On the left side right after exiting the lift that took you down to the War Room from the Offices.
- War Room: Lower Level – After coming down the left set of stairs right in front of you.
- Server Room (on the Lower Level of the War Room) – Just keep walking straight ahead and it will be right in front of you.
Once all of them have been activated, you can use the teleporter in the middle to get to the Panic Room. Once inside, you will notice a wall in front of you suddenly opening up. This will reveal a small room with the Lid just sitting on the floor.
Wiring
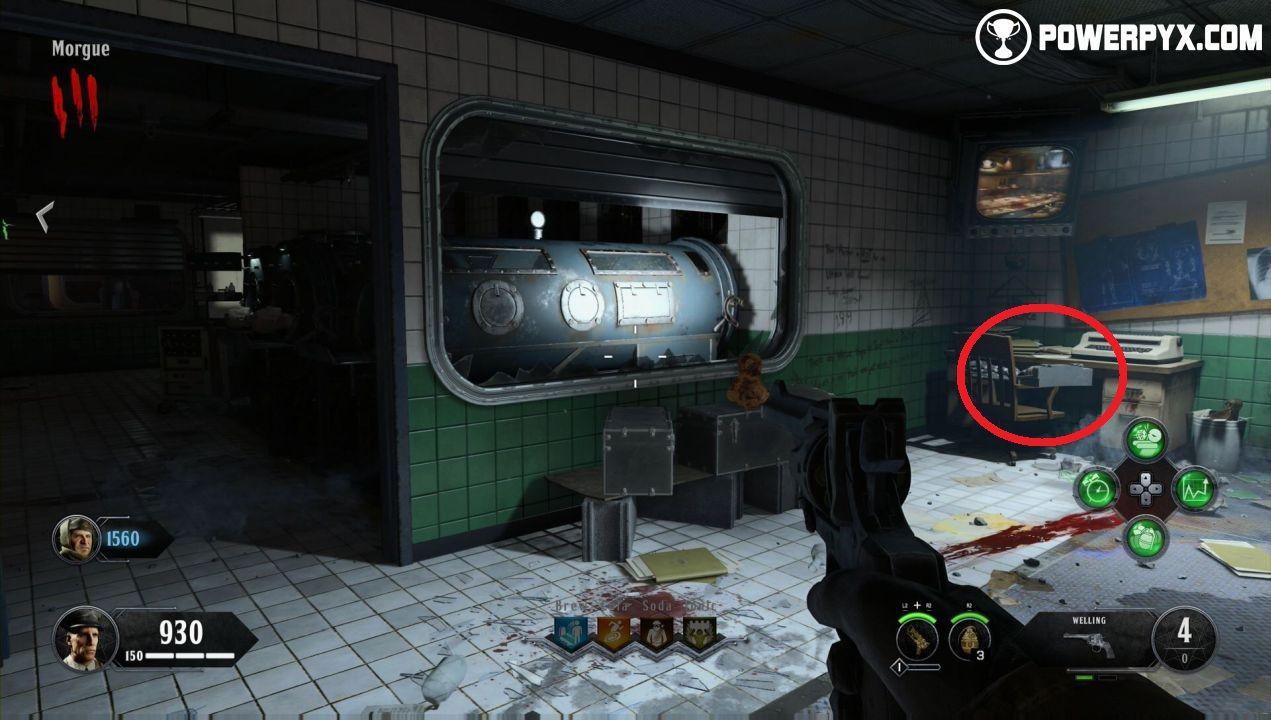
The Wiring can be found in the Morgue, down in the Laboratories. Just like most other parts, there are 3 possible spawn locations:
Location #1: Inside the first of the 3 massive cylinder shaped chambers.

Location #2: On the office desk in the back of the room. Right behind the prep table.

Location #3: Inside the smaller room of the Morgue, sitting on the wooden office chair, right next to the Mystery Box location.
Cover
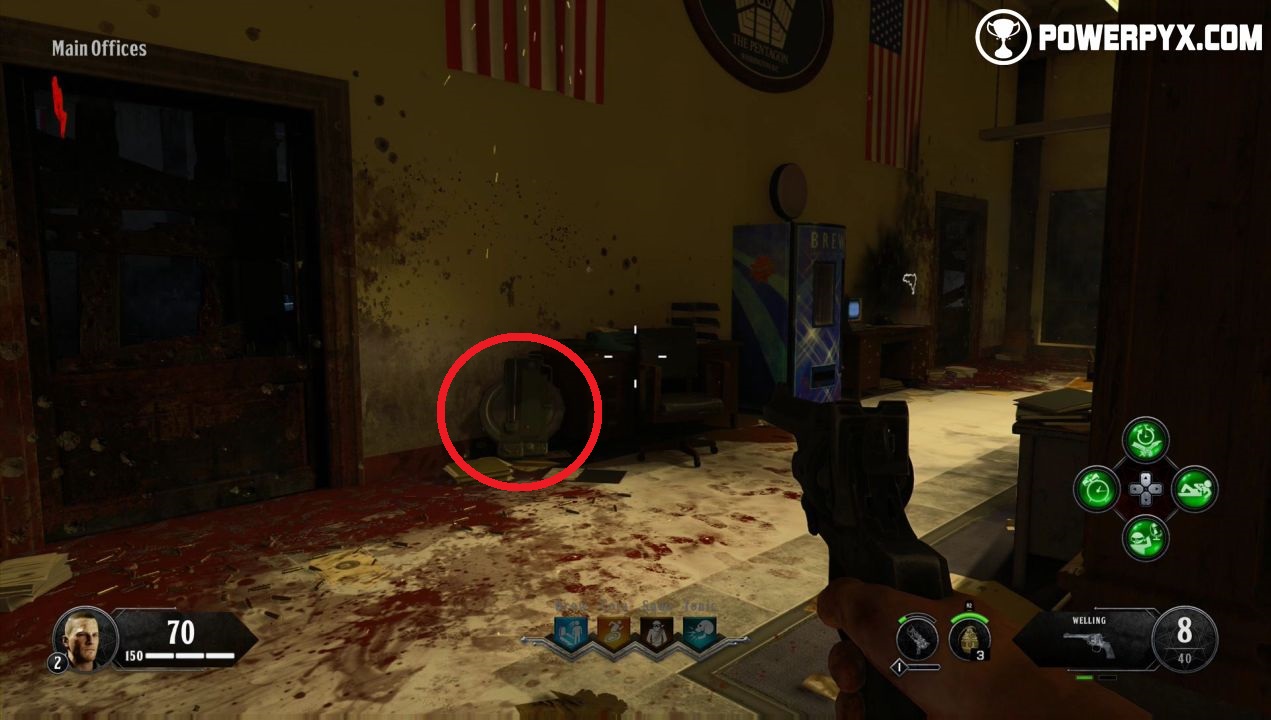
The Cover can be found in the Main Offices area. There are 3 spawns in here as well:
Location #1: Sitting on the left side of the desk right next to the Soda perk machine.
Location #2: Right in the middle of the room on a desk that has been knocked over.

Location #3: In the smaller area of the Main Offices sitting behind a table.

Workbenches
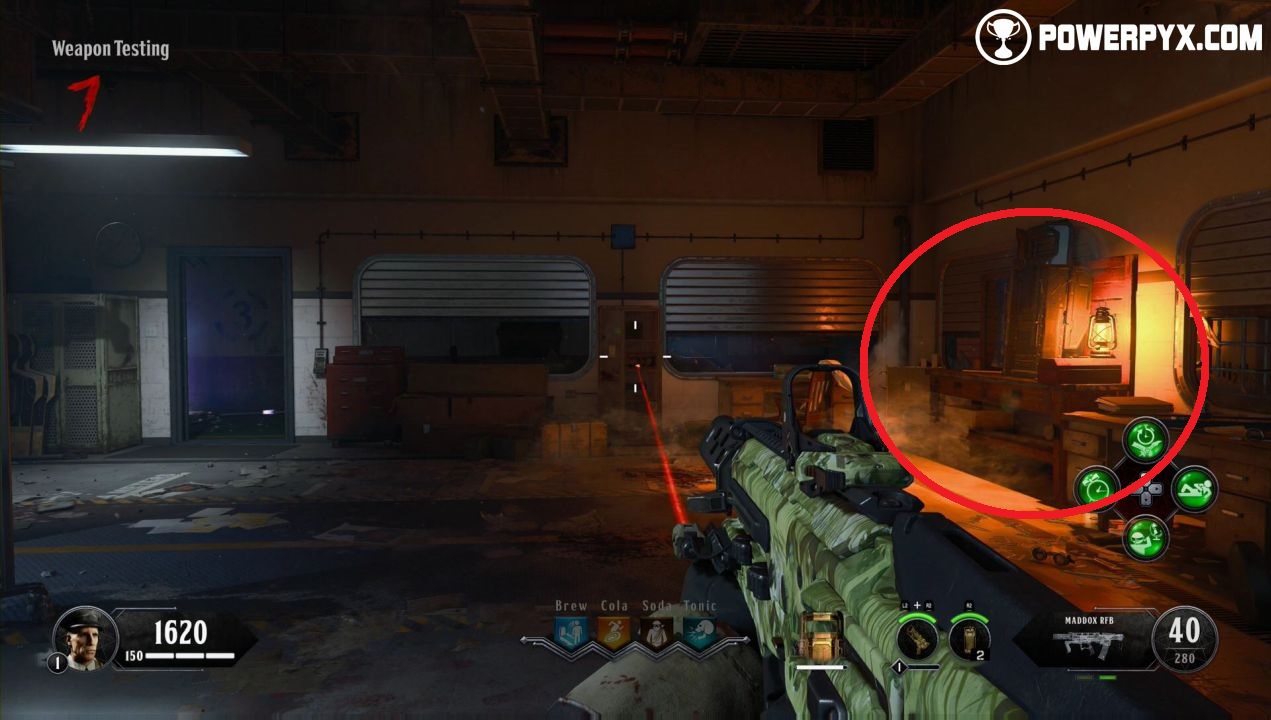
Head over to one of the 2 workbenches to assemble the Teleporter Signal Amplifier.
Location #1: In the Central Filing area where you already picked up the shield handle. On the right side of the door leading into the Main Offices.

Location #2: In the Weapon Testing room next to teleporter 3.
Now you simply have to head over to the main teleporter in the middle of the War Room and attach the Teleporter Signal Amplifier to it. Every time you want to teleport to the Groom Lake you will have to initiate Defcon 5 first by activating the Defcon switches around the War Room.
To get back from Groom Lake to the Pentagon, simply use the teleporter up the stairs in the area.
Ryano says
Thanks! Couldn’t find the wiring.
OmegaRejectz says
Just experienced a glitch where my teammates (bots) left Groom Lake and then it stopped me from being able to leave. Completely trapped here…