
Speedrunning Silent Hill Townfall in under 4 hours will unlock the Fleeting Visit trophy/achievement. This walkthrough will help you do that. Included here are all puzzles in Silent Hill Townfall with their locations and solutions. All puzzles and associated Clue collectibles are required to advance the main story. The game generally does not allow you to skip puzzle steps even if you know solutions beforehand, you must obtain all puzzle specific collectibles to be able to complete puzzles.
For a 100% walkthrough containing all collectibles, instead refer to the Silent Hill Townfall Collectible Guide. The Speedrun Walkthrough here only focuses on what’s necessary to advance the story as fast as possible (mandatory key items and puzzles only).
This guide lists all puzzles and solutions in chronological order:
Walkthrough Overview
Part 1 – Arrival
1. Cold Open
Shorefront District – South
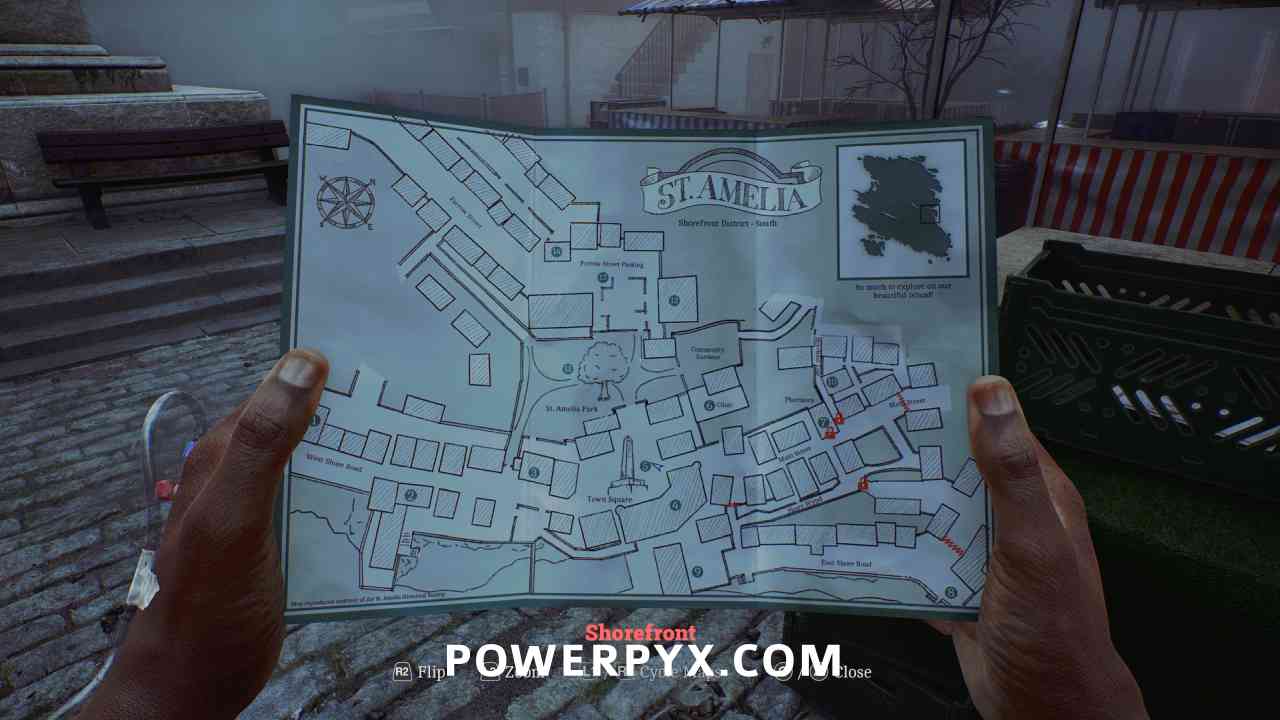
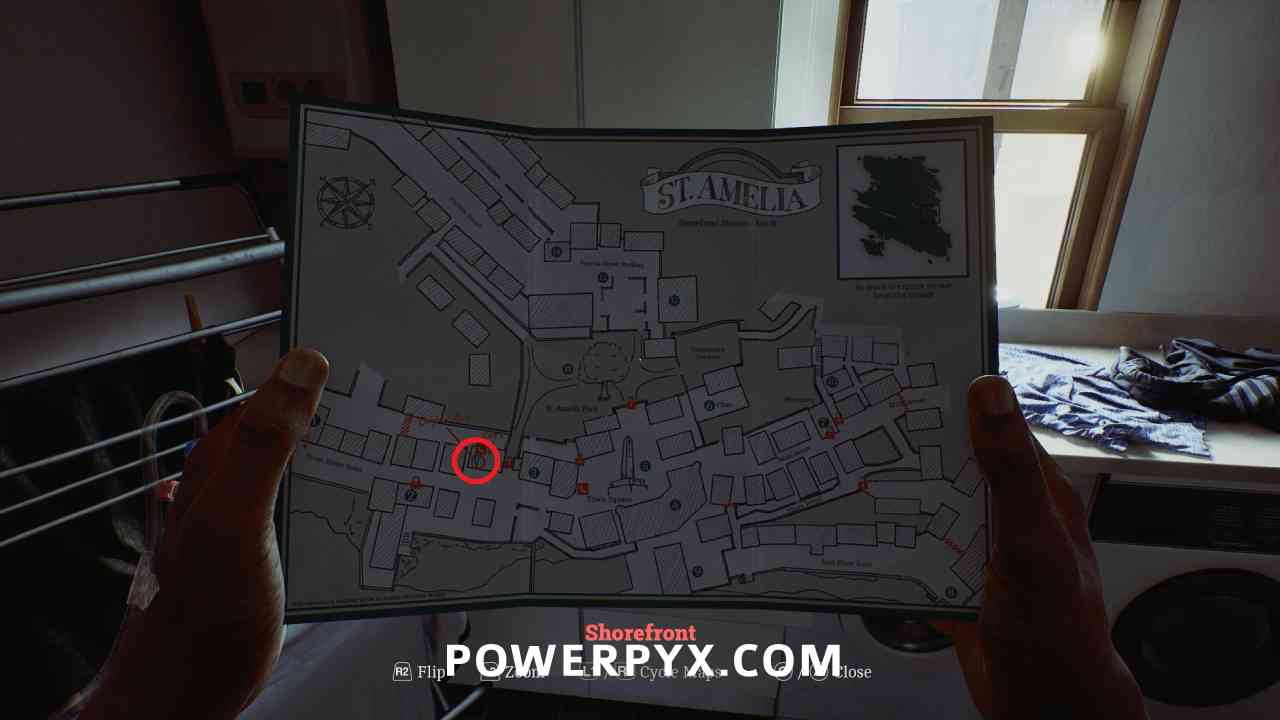
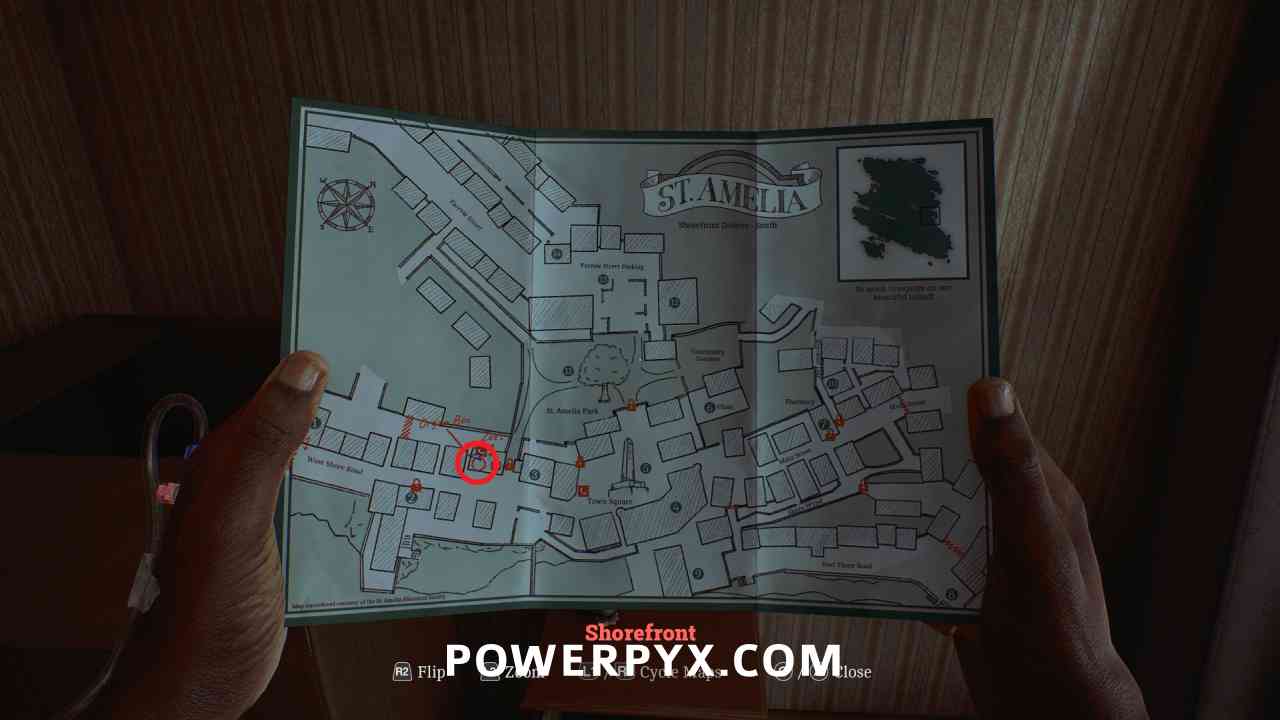
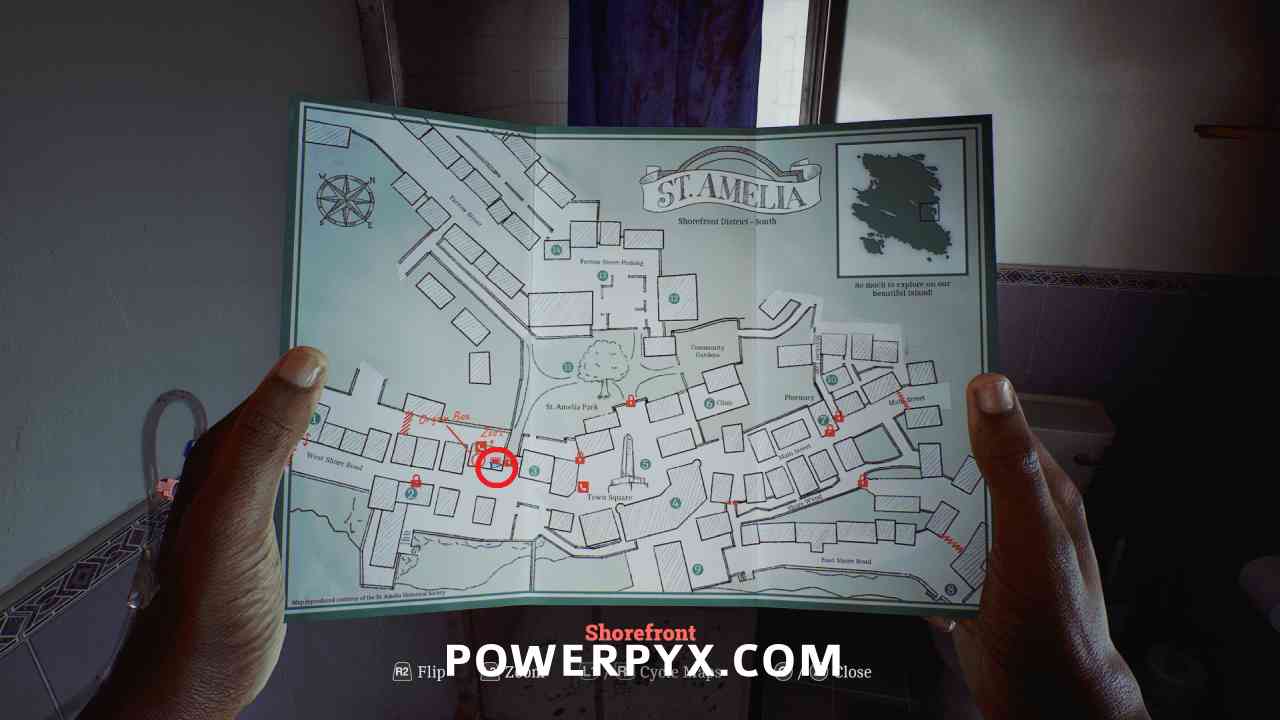
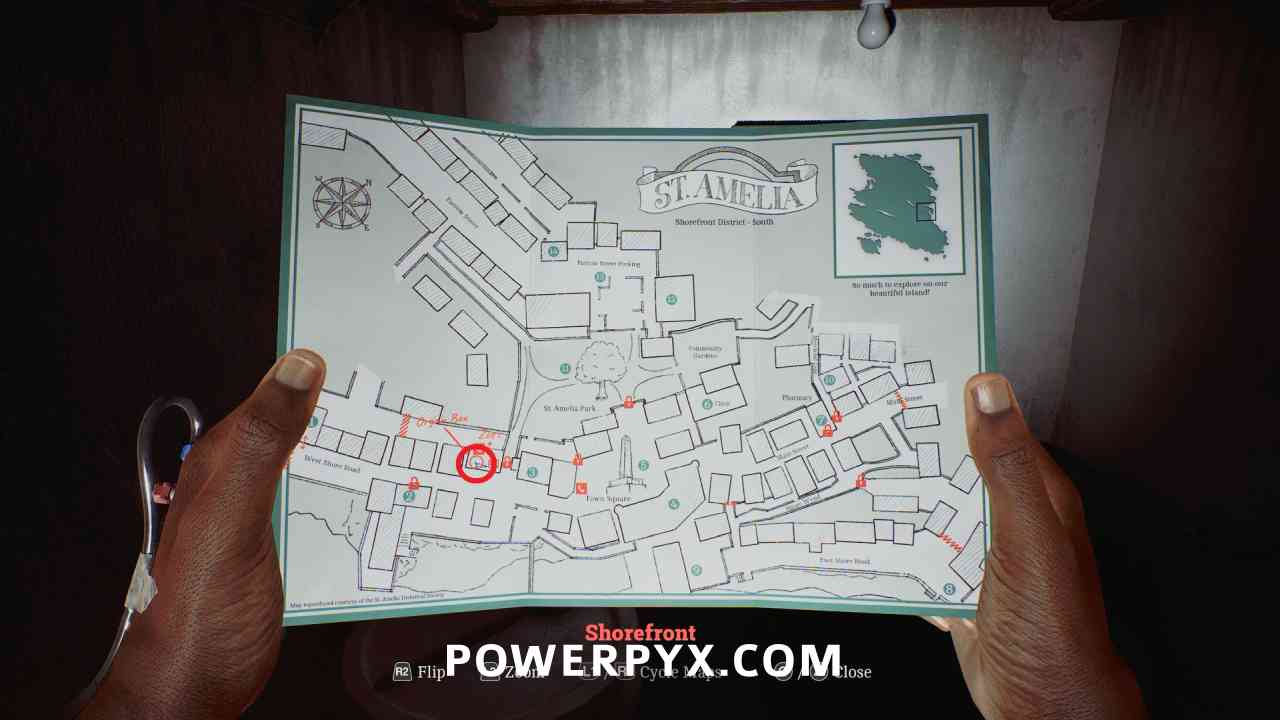
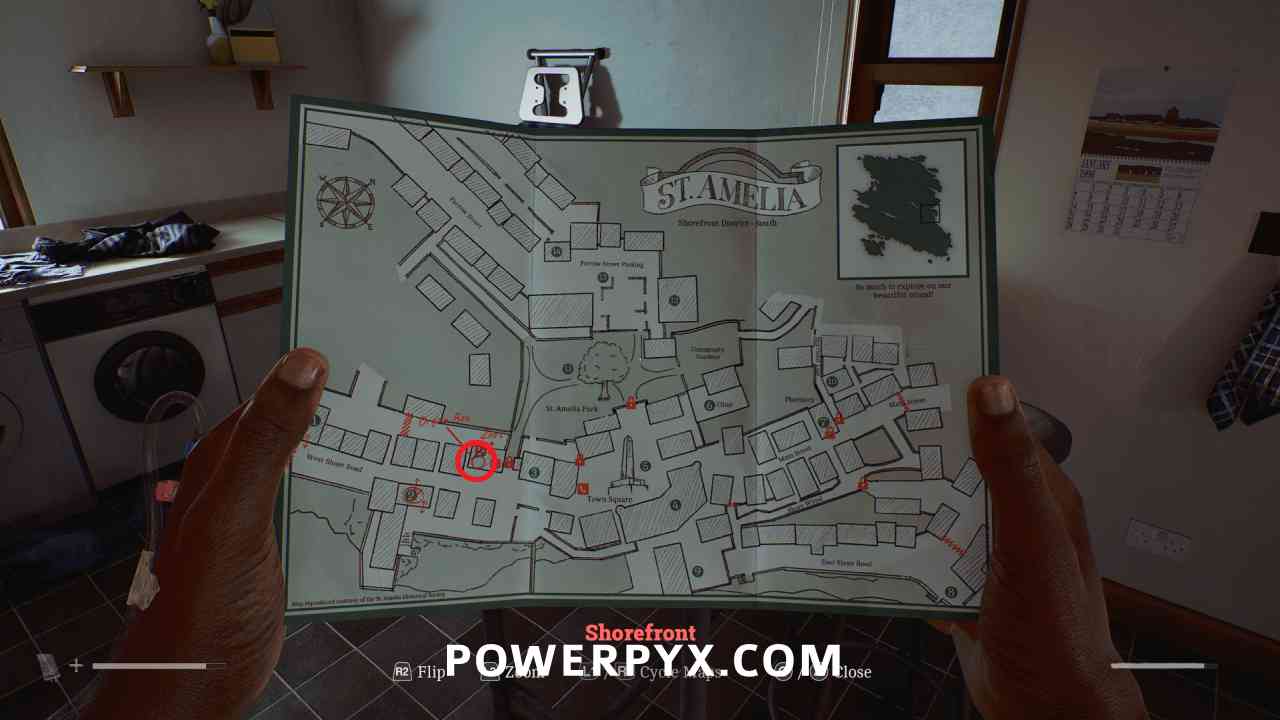
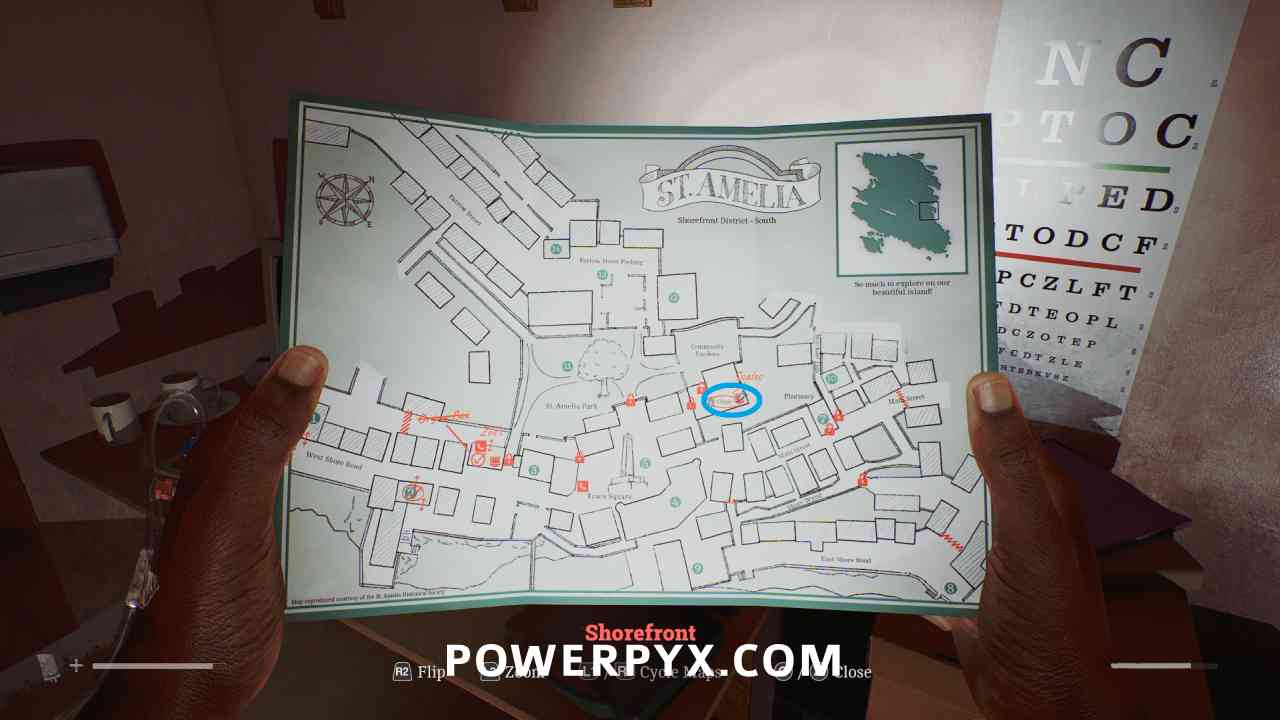
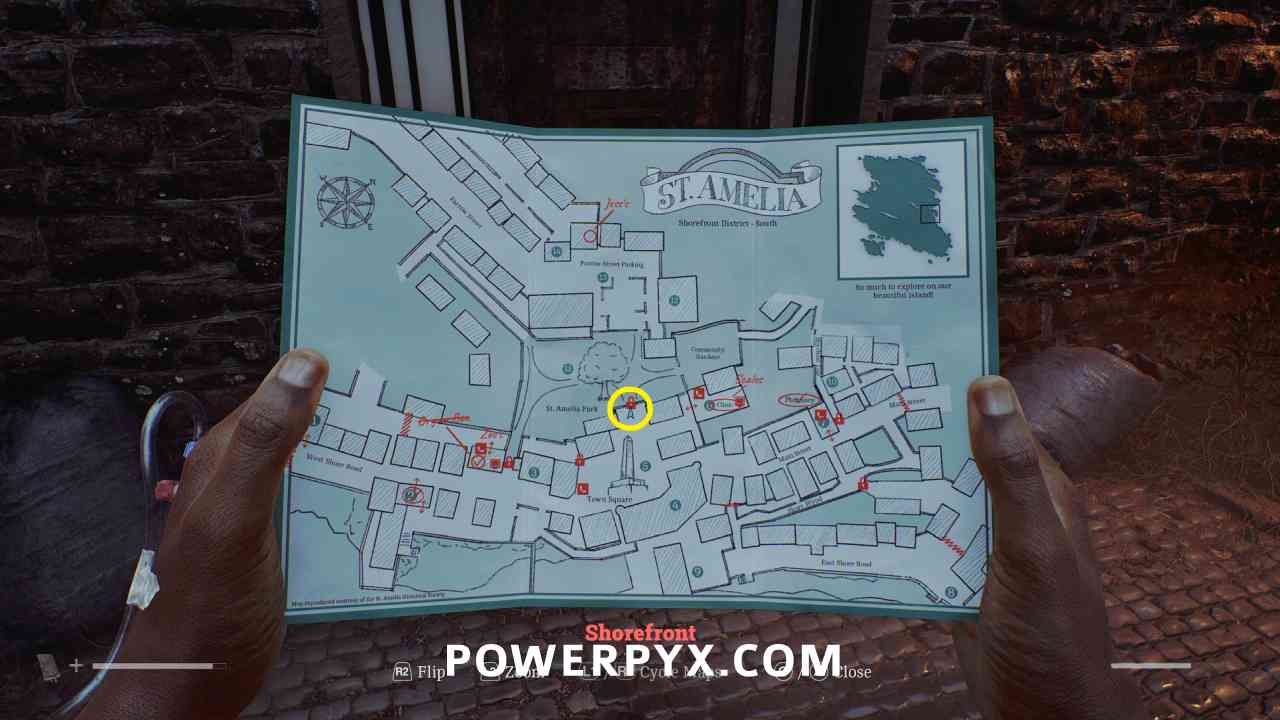
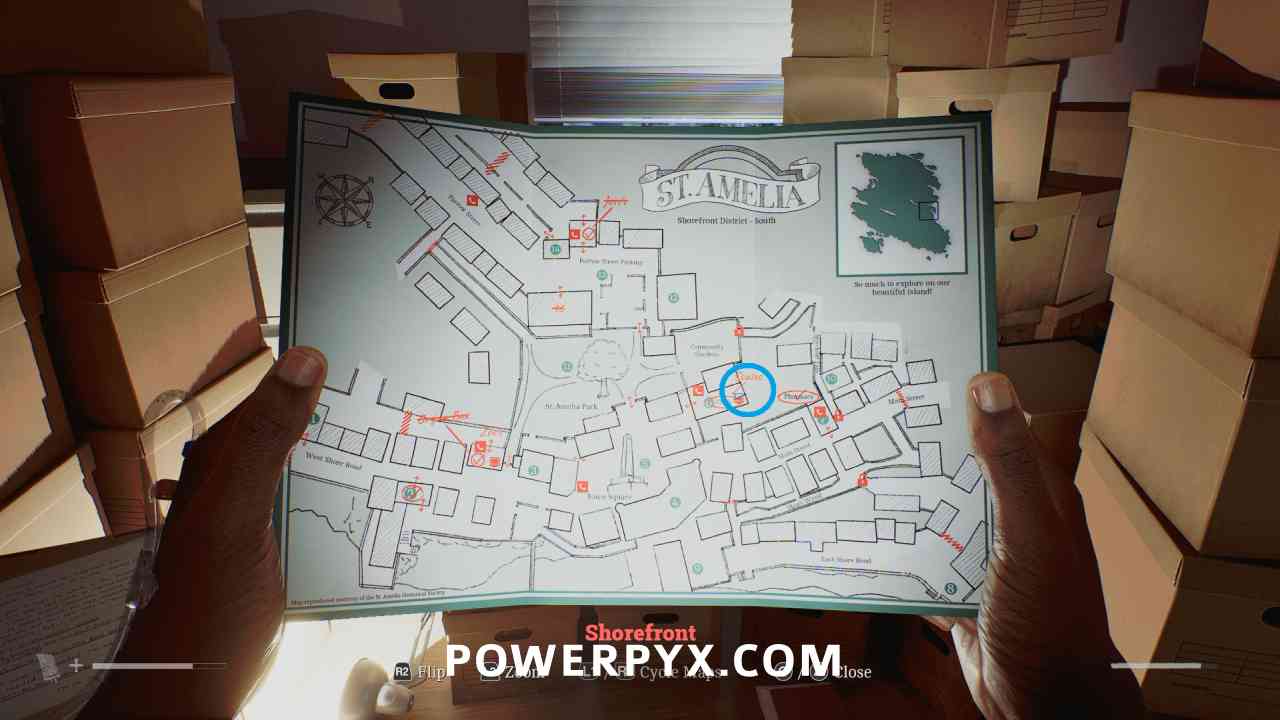
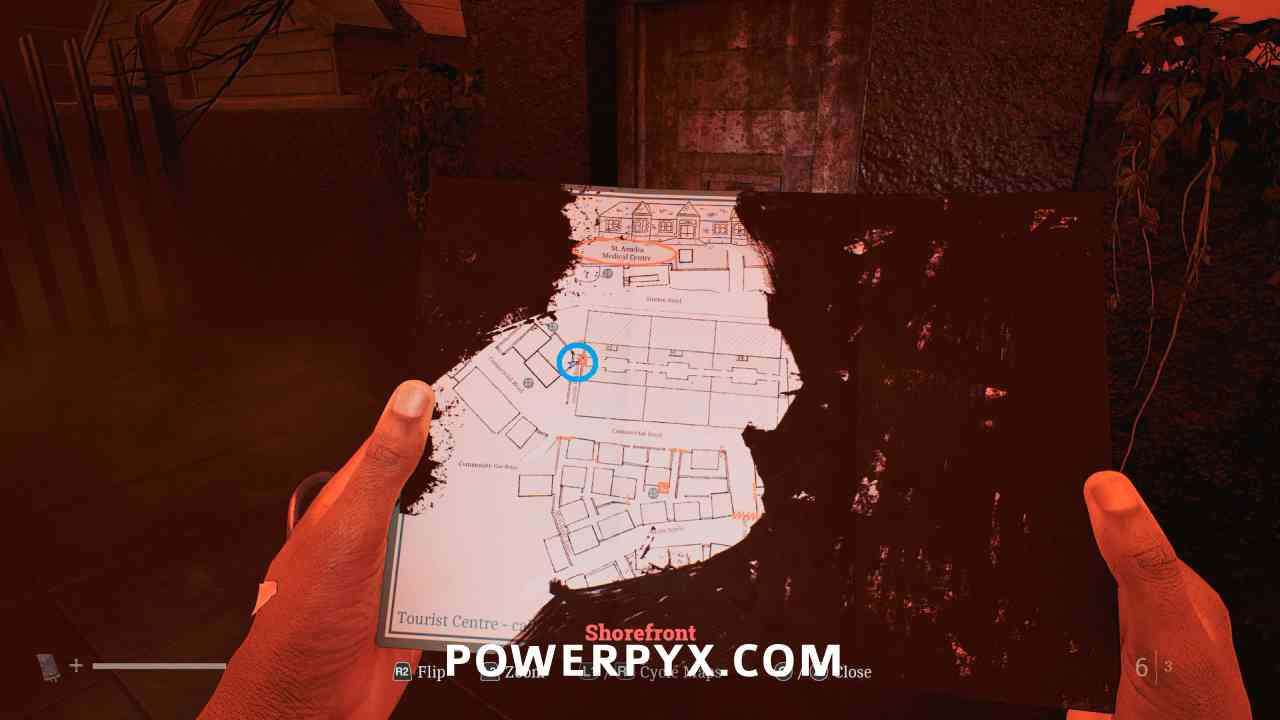
Shorefront Map
Area: Shorefront District – South
Automatically obtained after going through the red fog and reaching the town square.
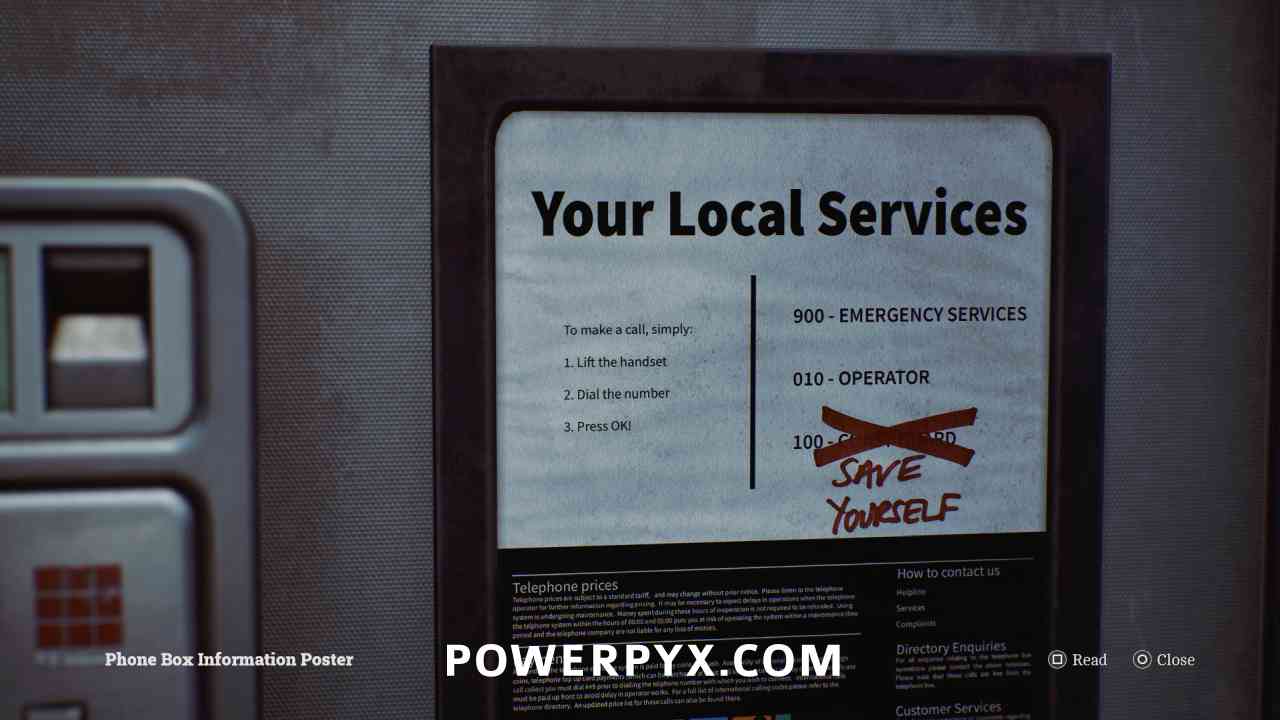
Phone Numbers: 900 – Emergency Services, 010 – Operator, 100 – Save Yourself (Save game)
Area: Shorefront District – South
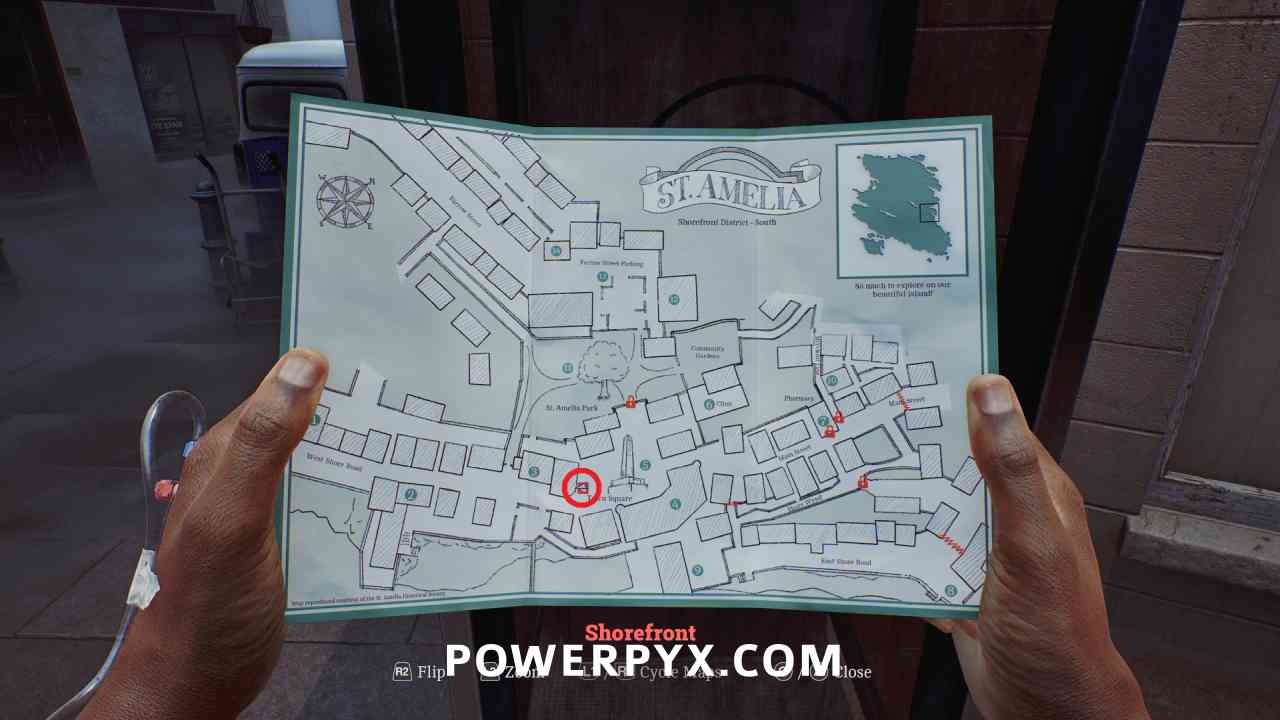
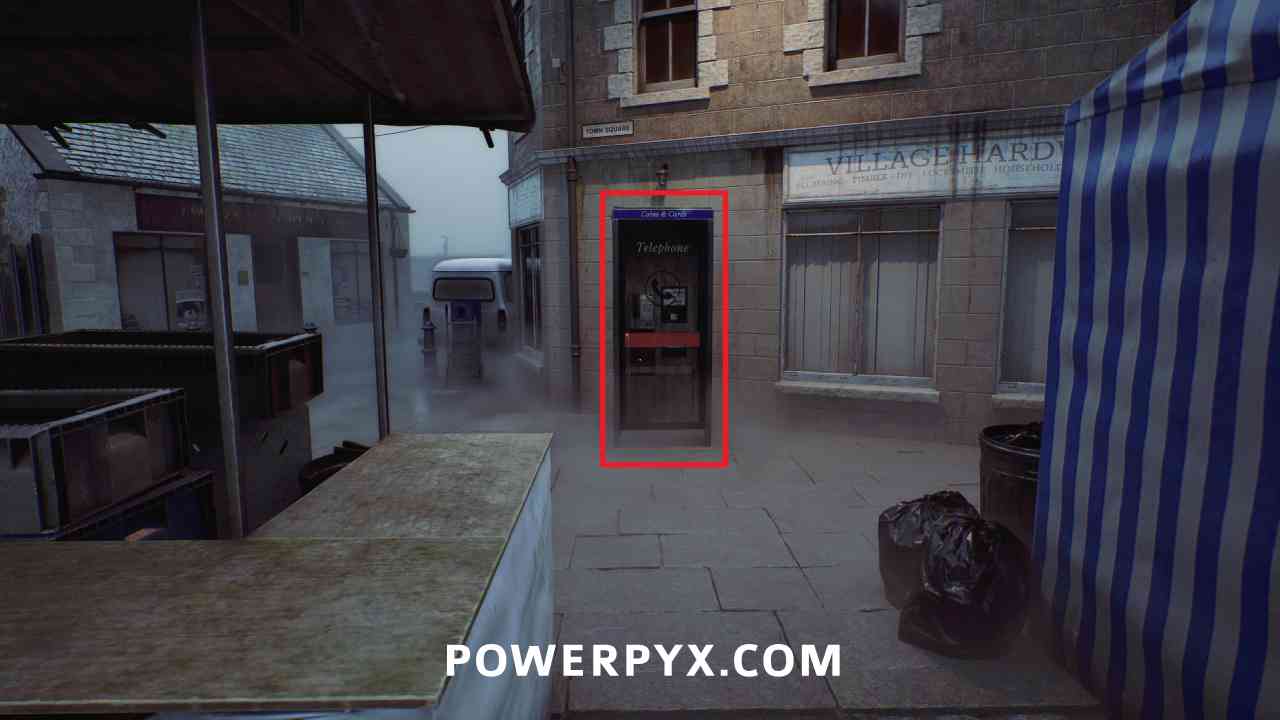
At the first phone booth in the Town Square (5) inspect the “Your Local Services” flyer to the right of the phone. Call all phone numbers immediately. Phone number 100 is used to save from any phone.
2. Escape
A Different Place
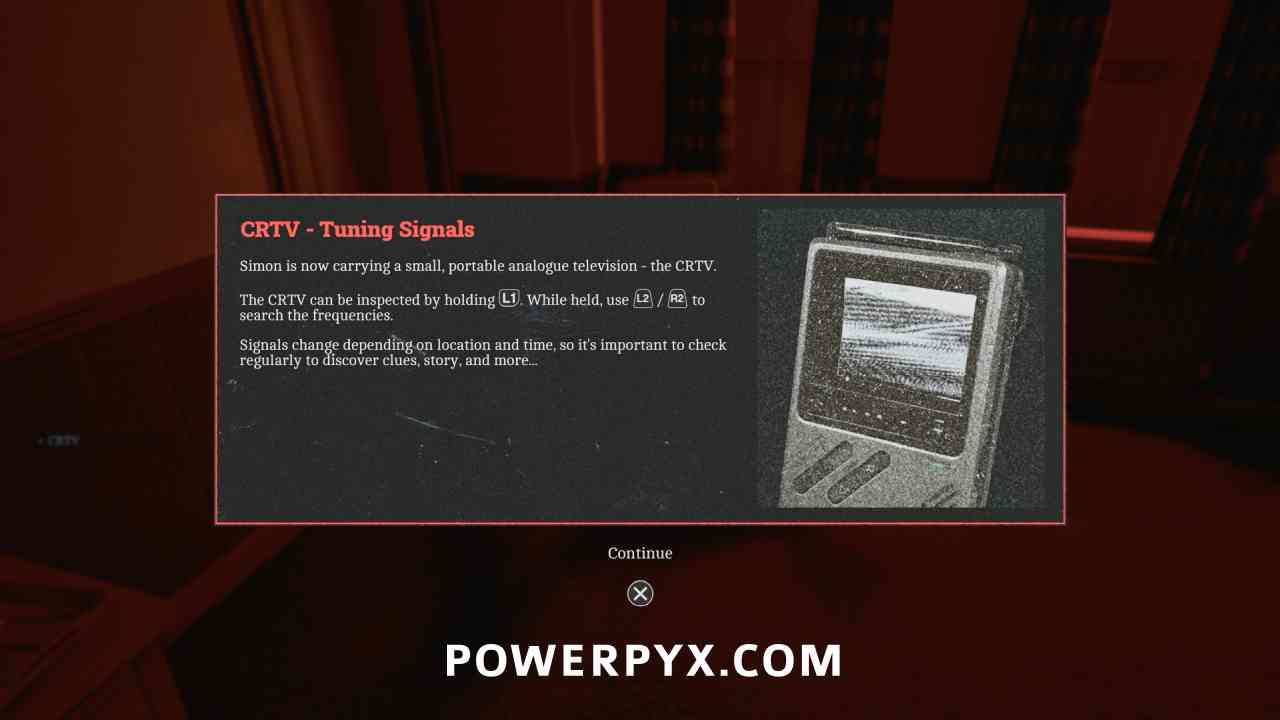
Equipment: CRTV
Area: A Different Place
Automatically obtained after passing through the otherworld area after interacting with the first phone.
Puzzle #1
Area: A Different Place
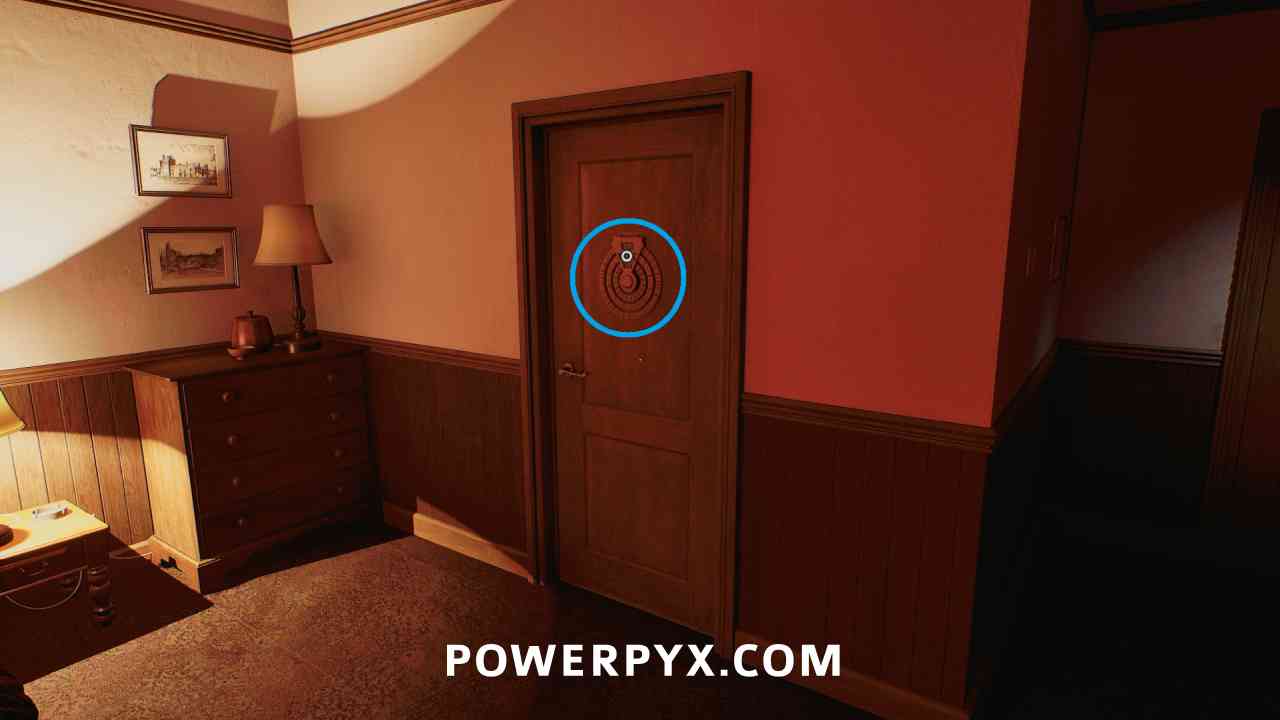
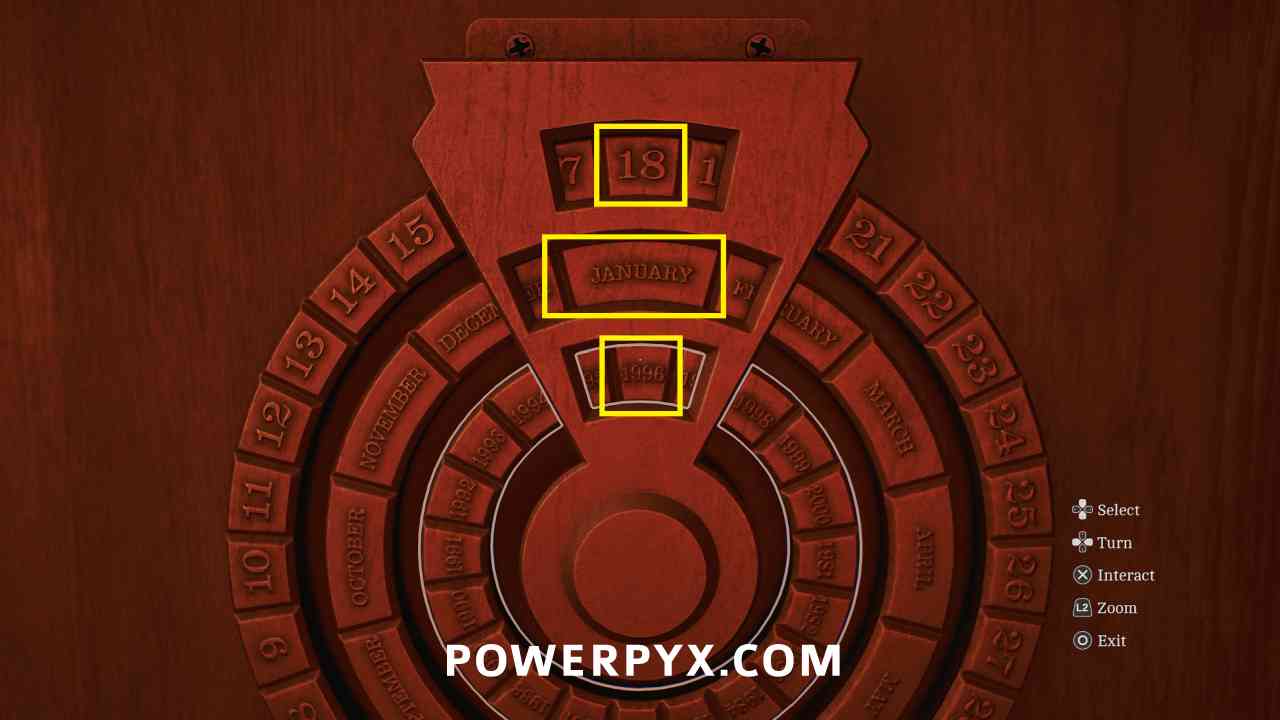
Interact with the wheel on the door, spin the wheels to 18 on the top, January in the middle, 1996 on the bottom. (Clues from the Room Service Card and CRTV Channel 60).
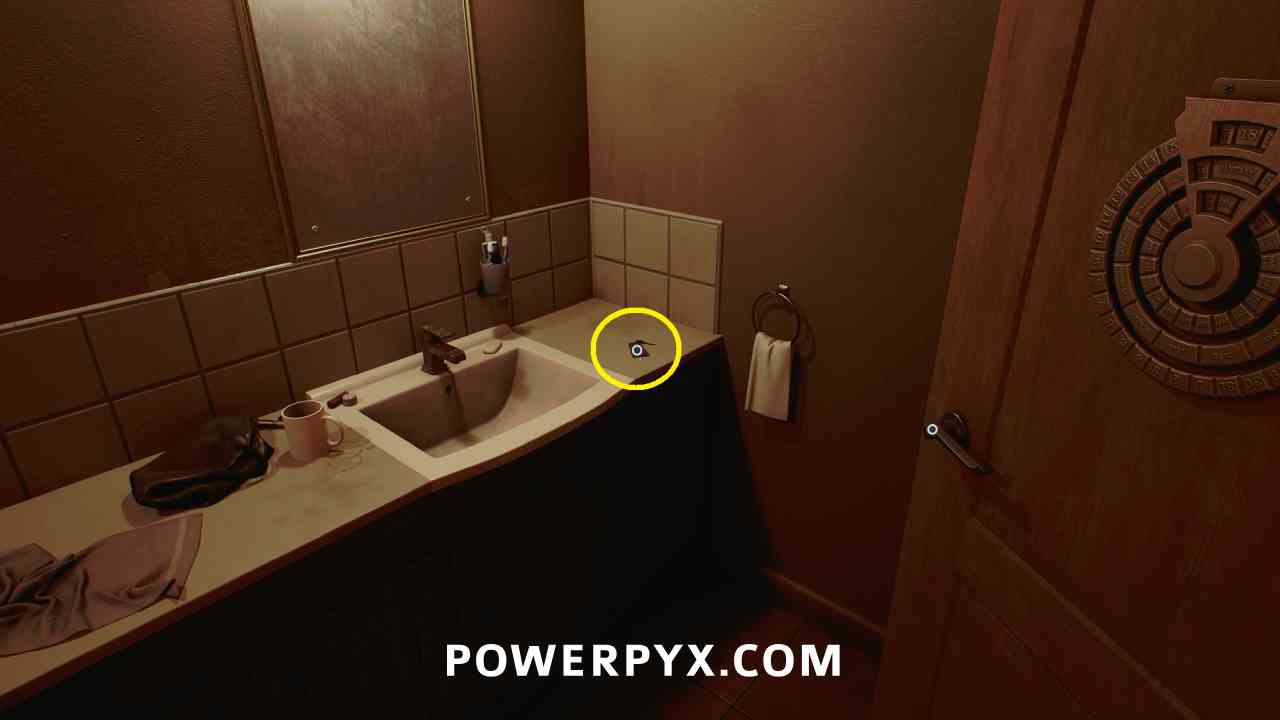
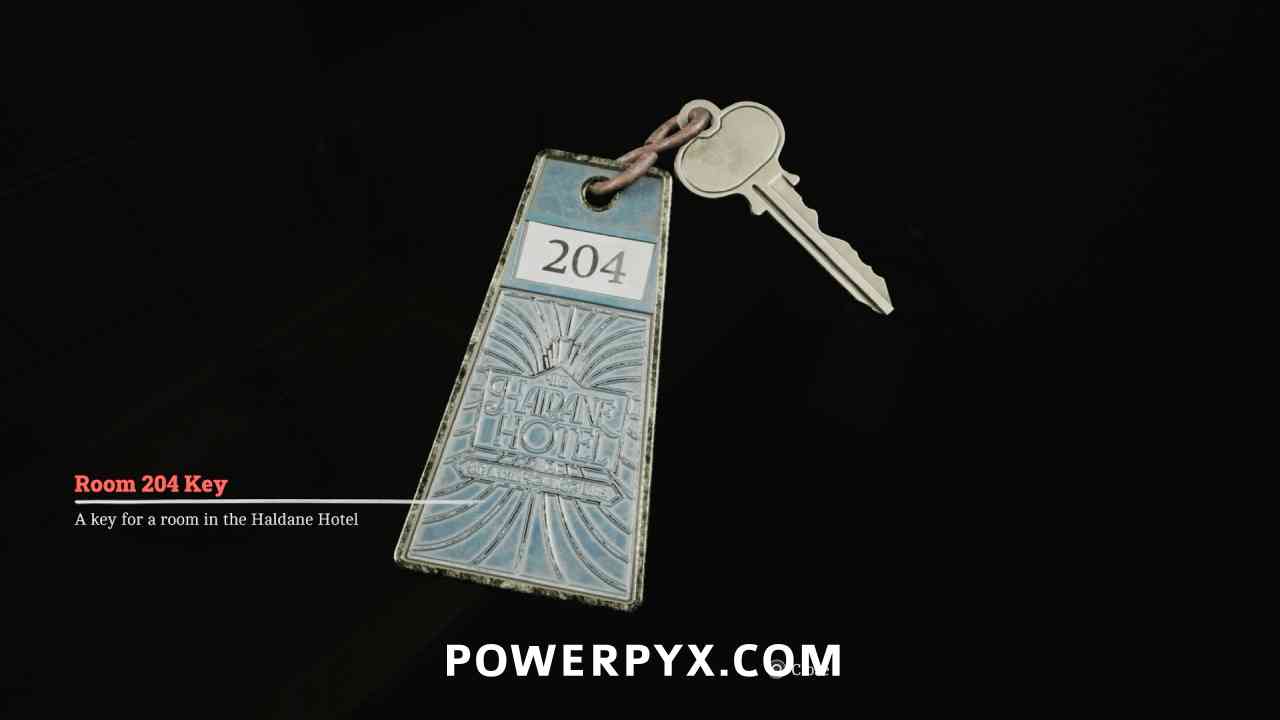
Key Item: Room 204 Key
Area: A Different Place
On the counter in the bathroom after opening the door puzzle. Use to open the door to the hotel room.
3. A Connection
Shorefront District – South > Zoe’s House
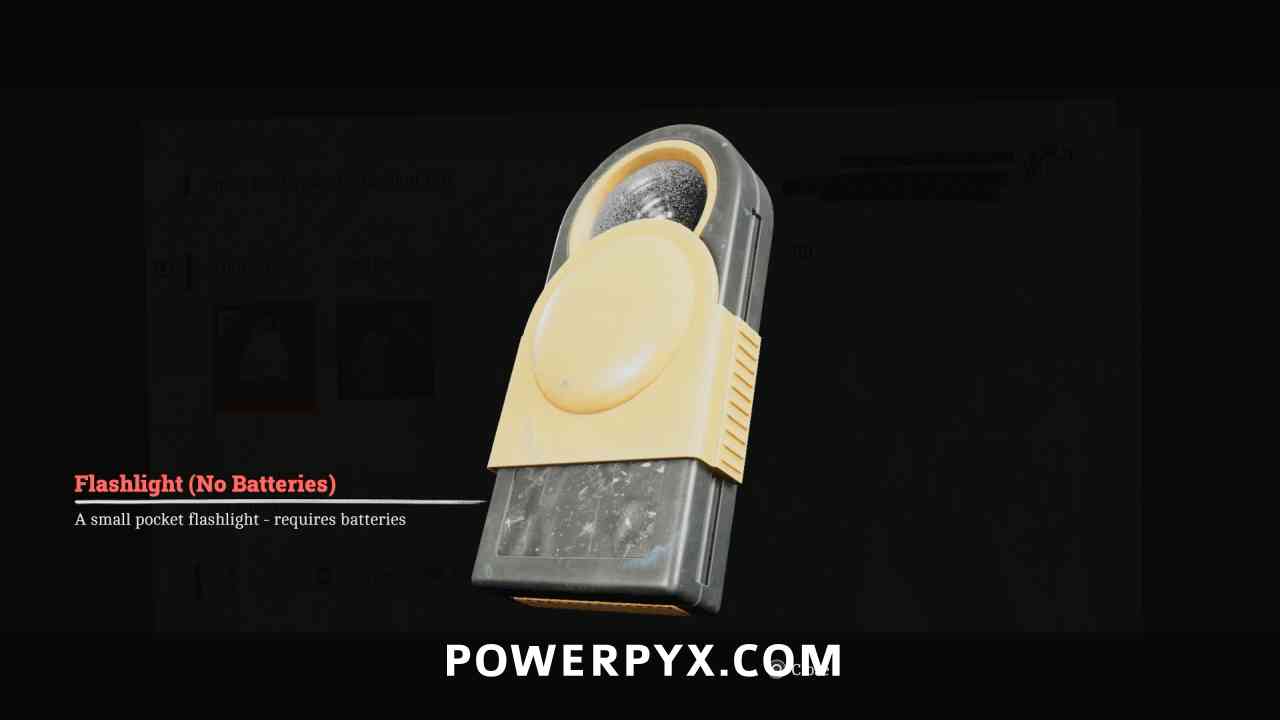
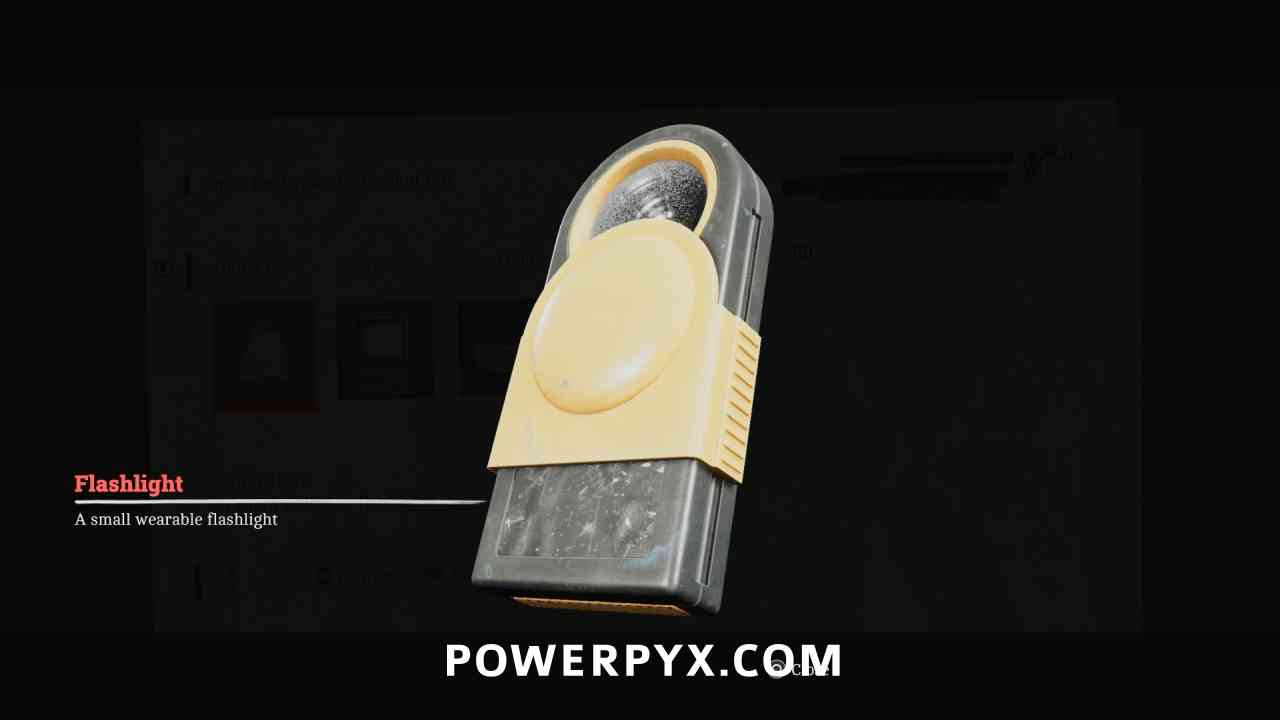
Key Item: Flashlight (No Batteries)
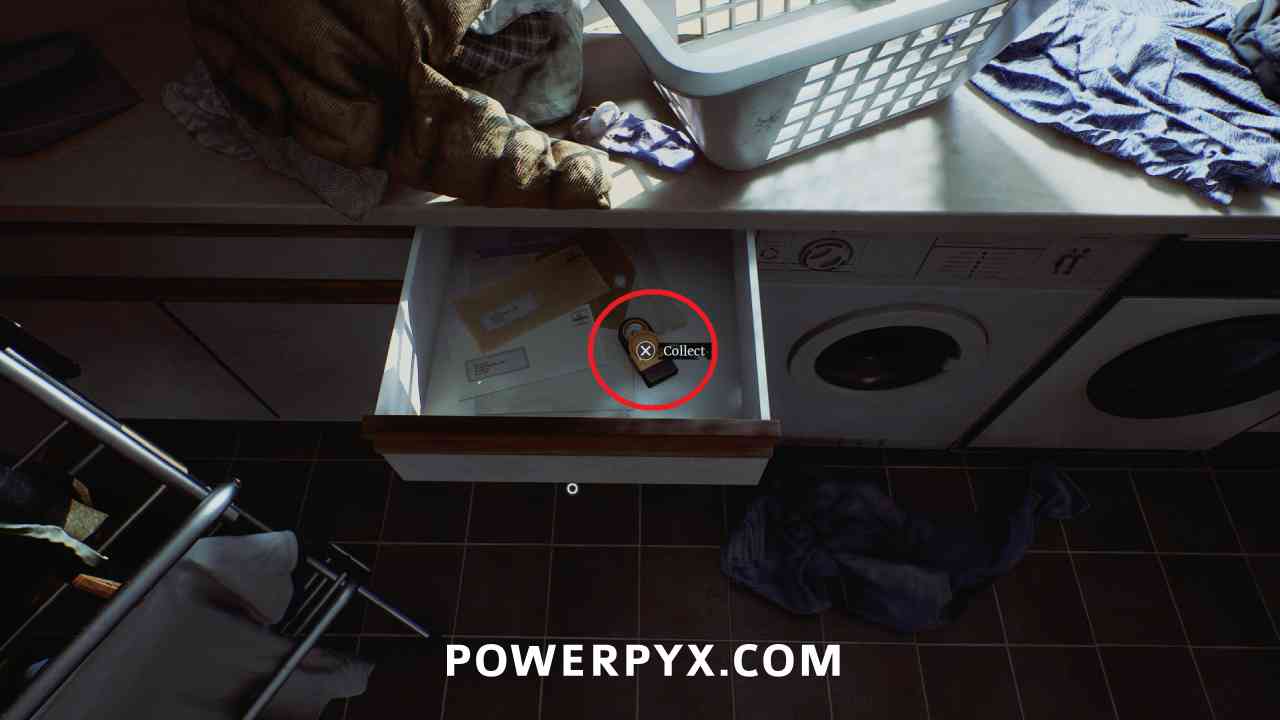
Area: Shorefront District – South > Zoe’s House
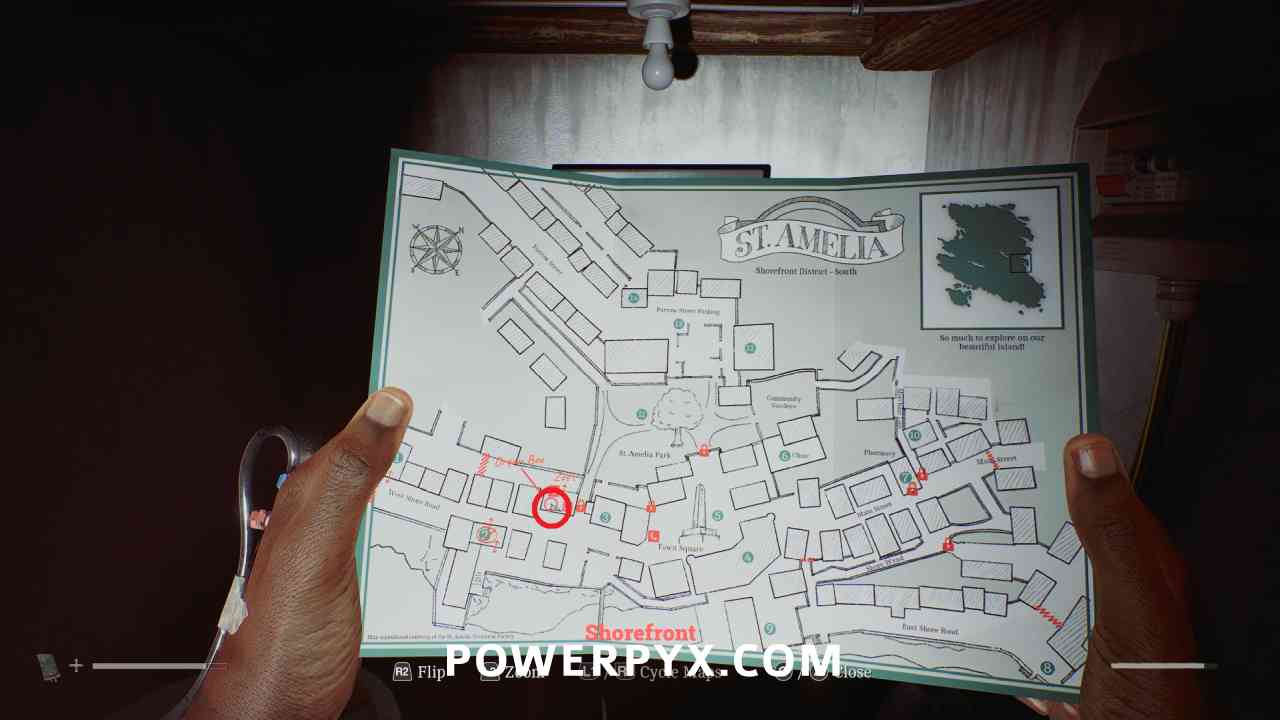
Inside Zoe’s house (west of Town Square (5)) in the drawer to the left of the organ box.
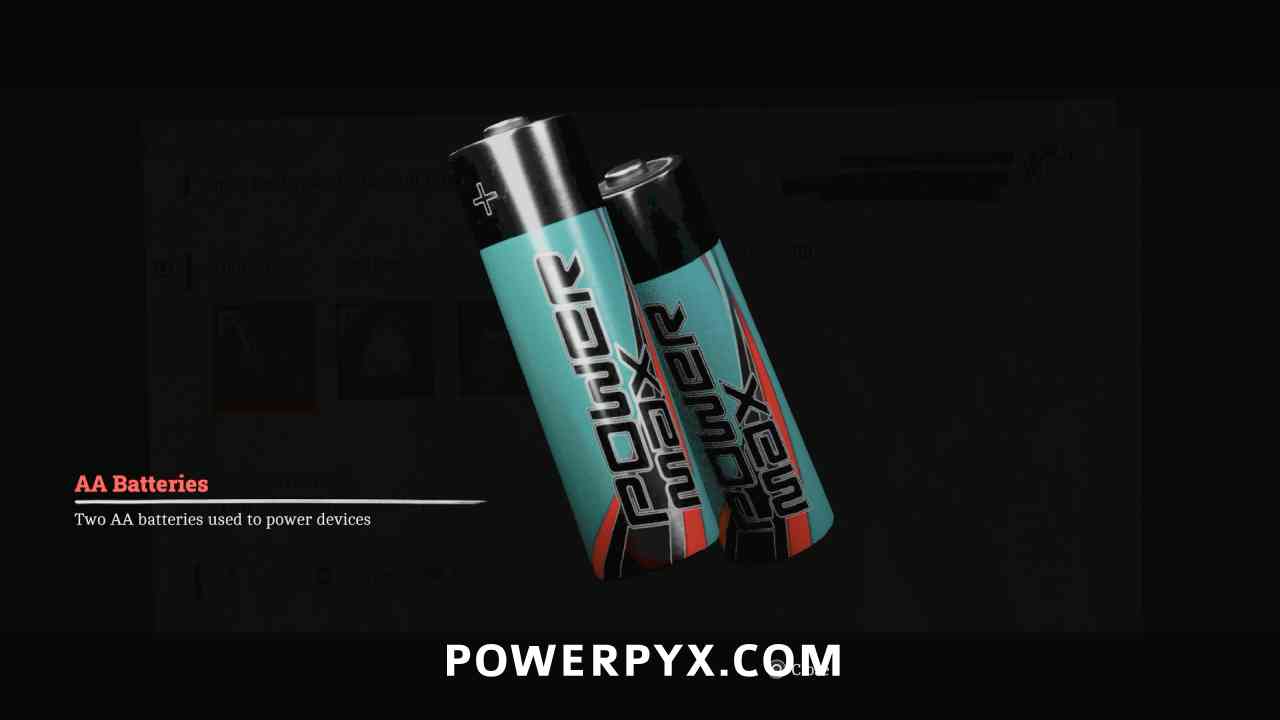
Key Item: AA Batteries
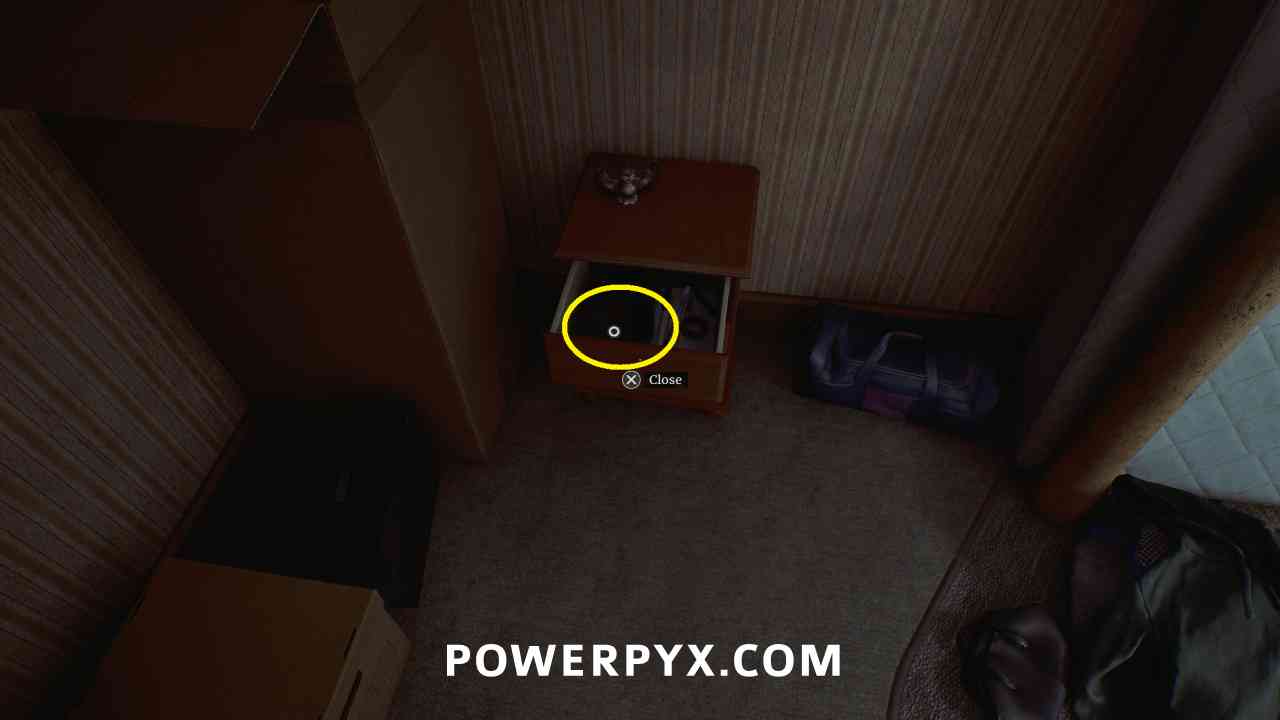
Area: Shorefront District – South > Zoe’s House
Inside Zoe’s house (west of Town Square (5)) upstairs in the second room on the left, in the drawer of the small cabinet.
Equipment: Flashlight
Area: Shorefront District – South > Zoe’s House
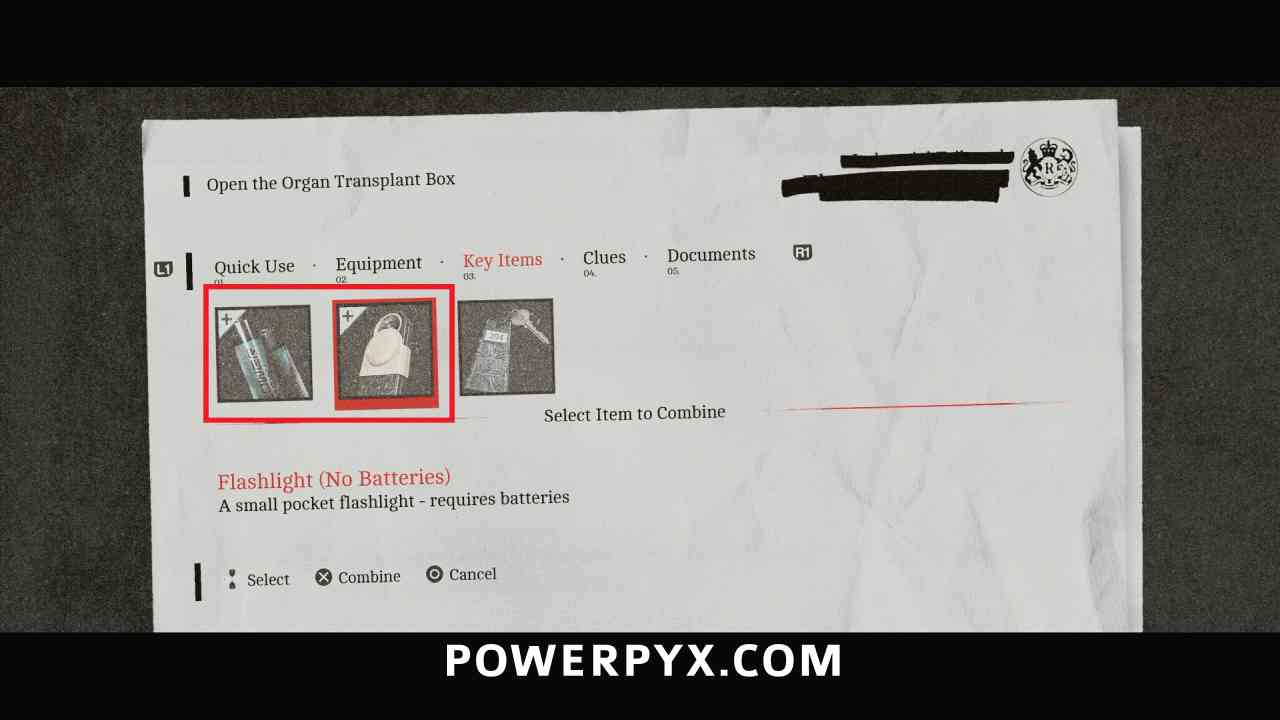
Combine the AA Batteries and Flashlight (No Batteries) in your inventory.
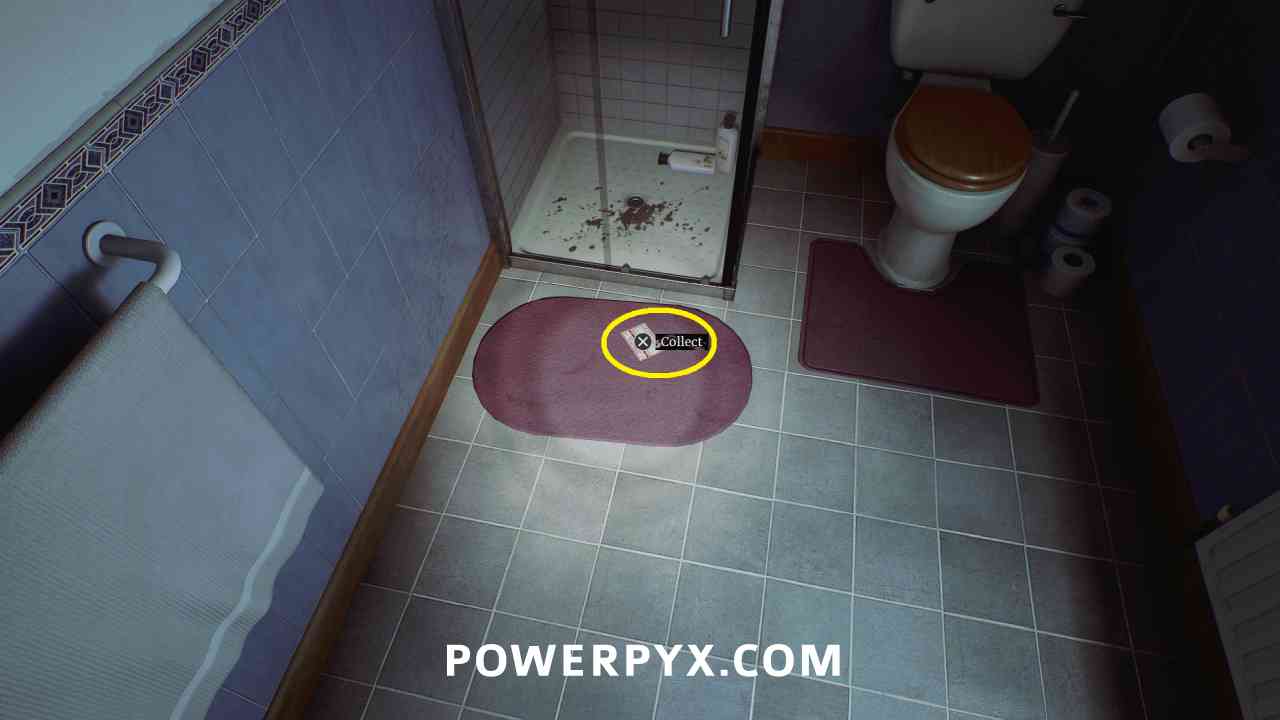
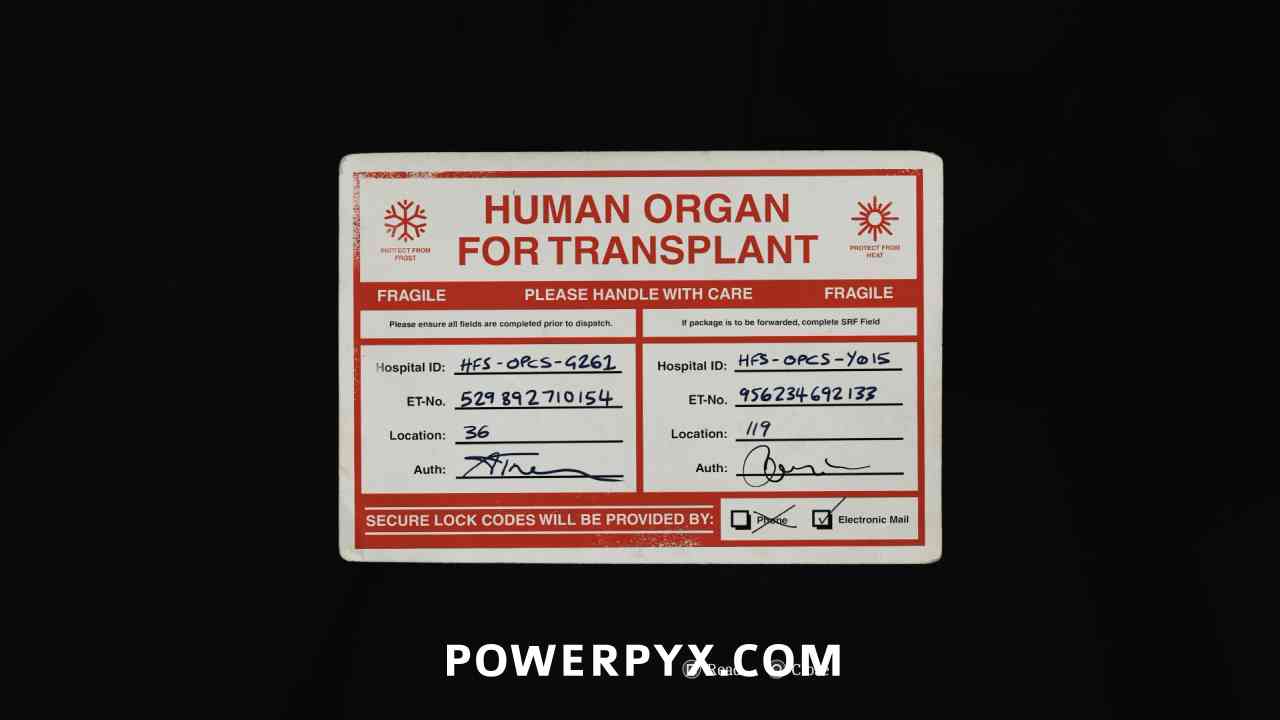
Clue: Organ Transplant Card
Area: Shorefront District – South > Zoe’s House
Inside Zoe’s house (west of Town Square (5)) upstairs through the room on the right, on the floor of the bathroom.
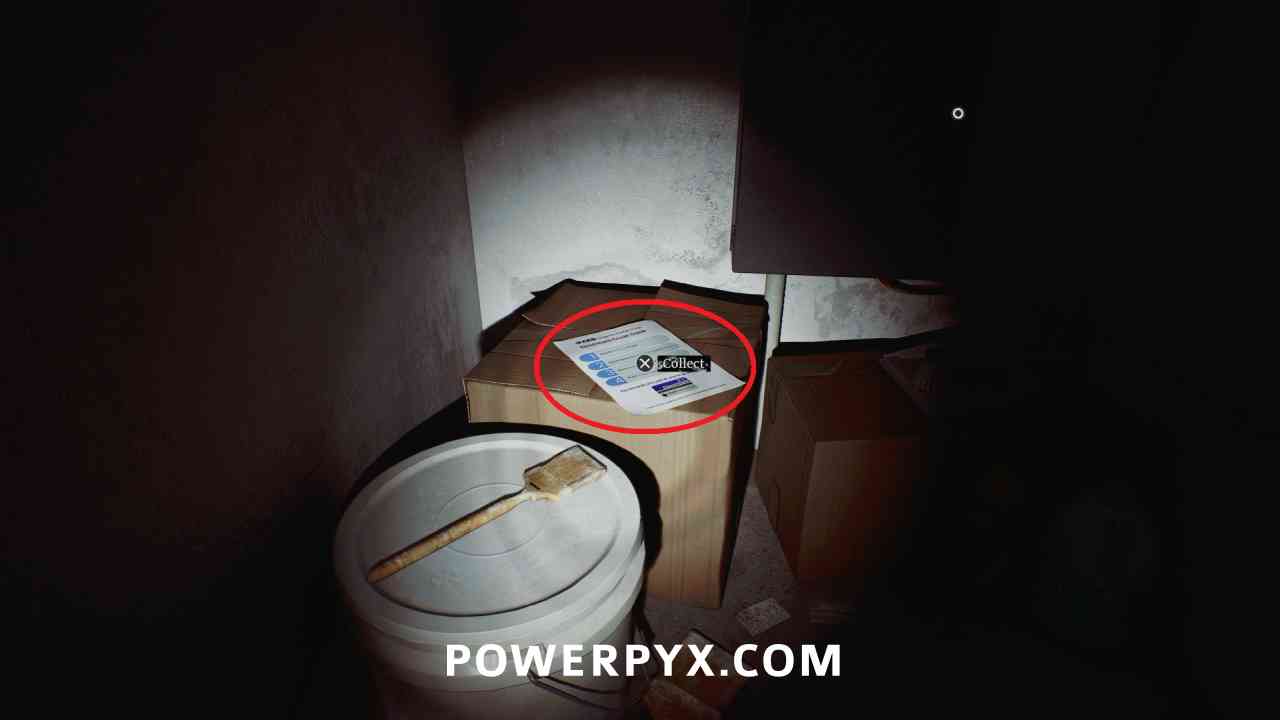
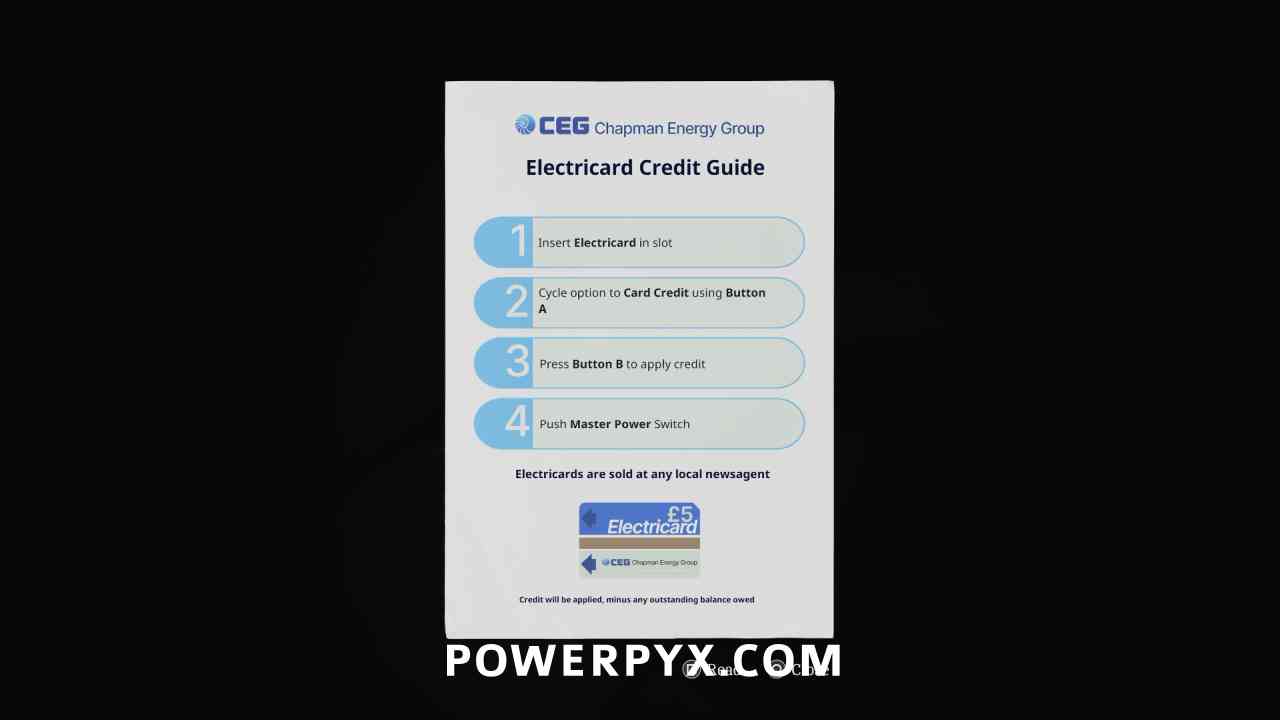
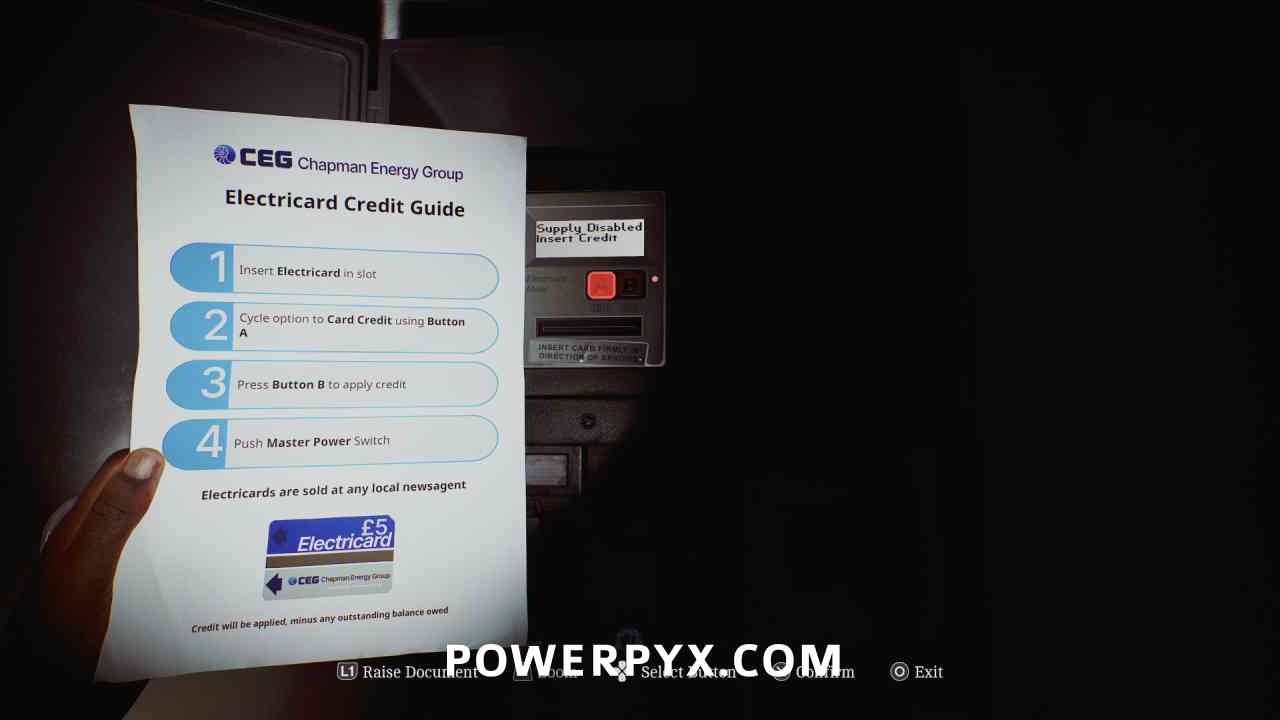
Clue: Power Card Credit Guide
Area: Shorefront District – South > Zoe’s House
Inside Zoe’s house (west of Town Square (5)) crouch and enter the crawlspace beside the stairs, using the flashlight to see this.
Shorefront District – South > Peters Newsagent (2)
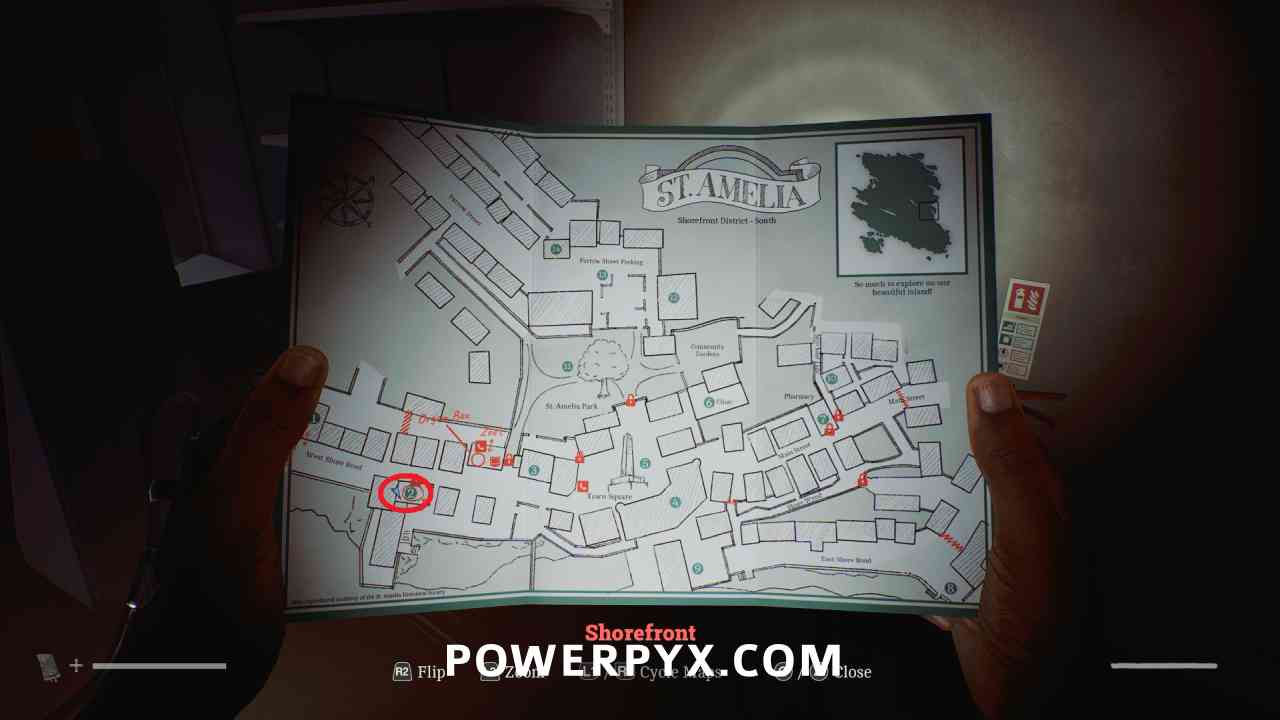
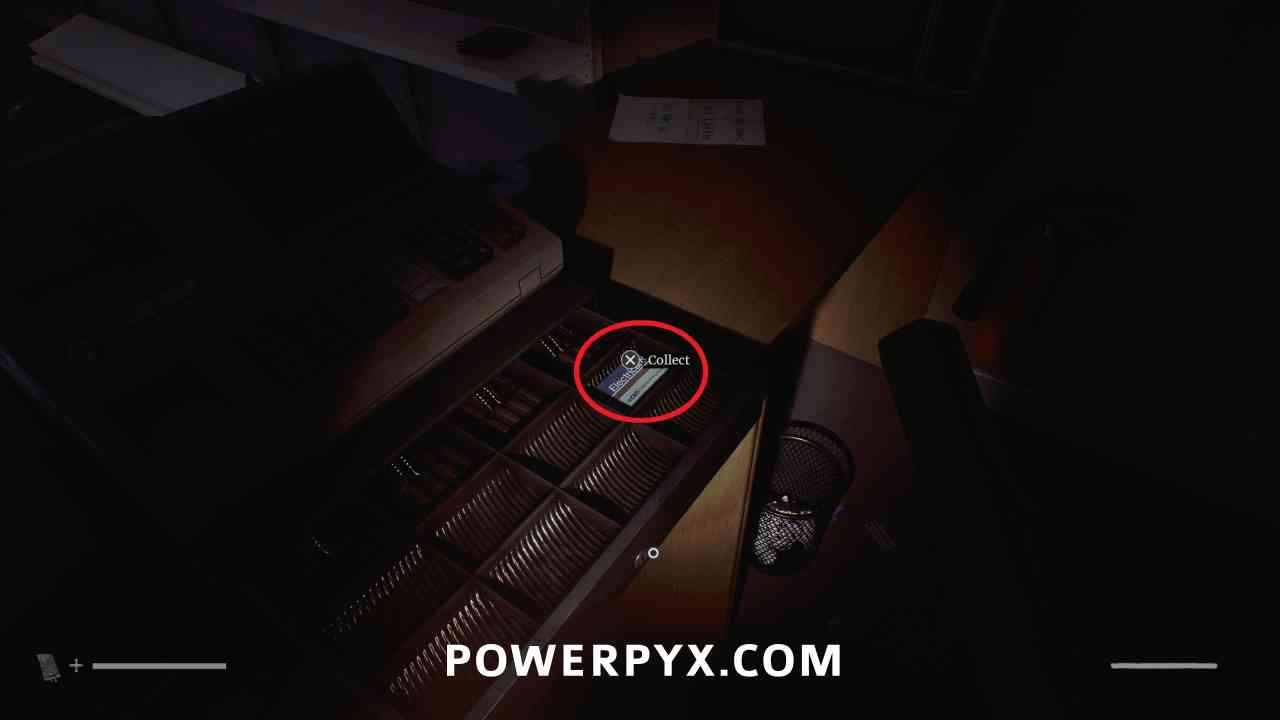
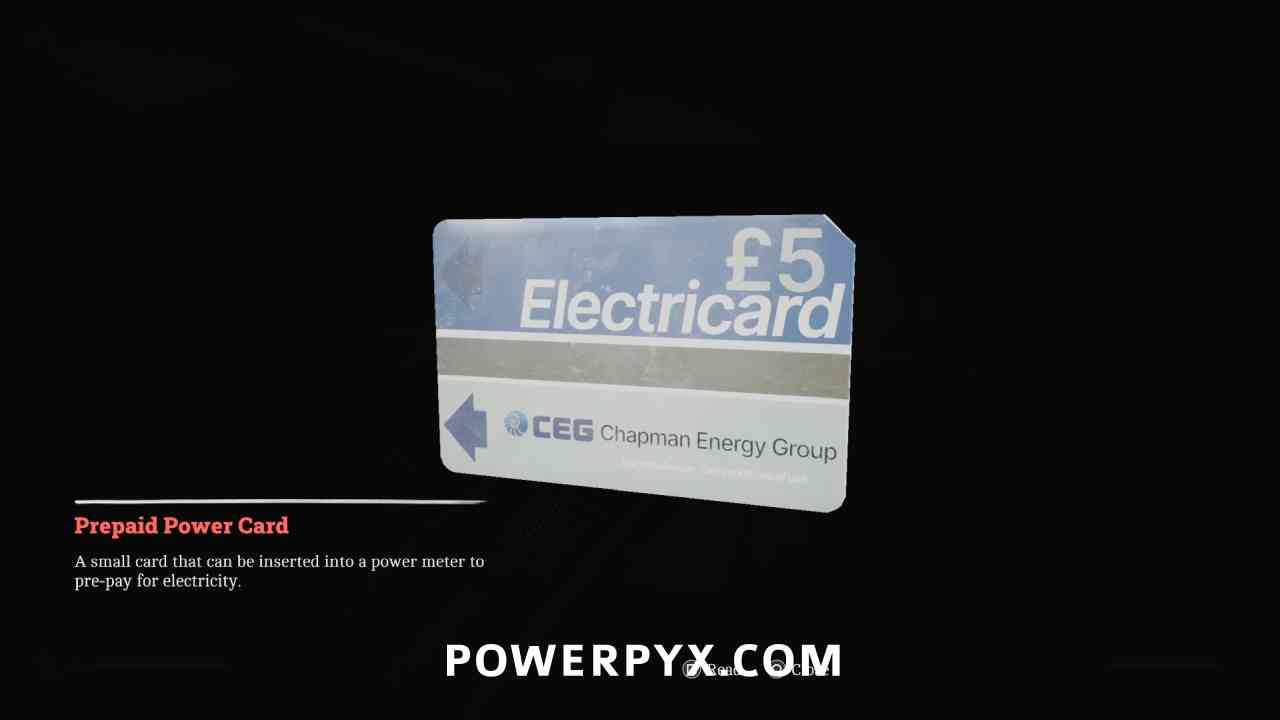
Key Item: Prepaid Power Card
Area: Shorefront District – South > Peters Newsagent (2)
Inside Newsagents shop, in the cash register.
Shorefront District – South > Zoe’s House
Puzzle #2
Area: Shorefront District – South > Zoe’s House
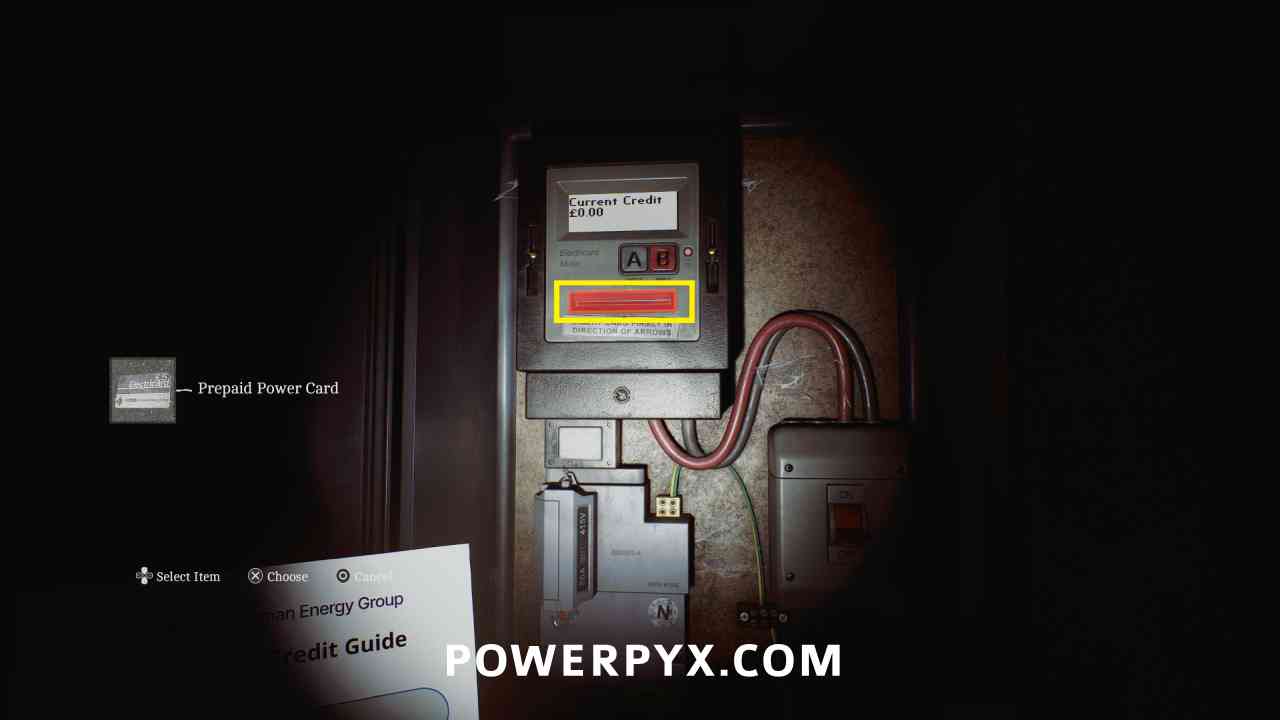
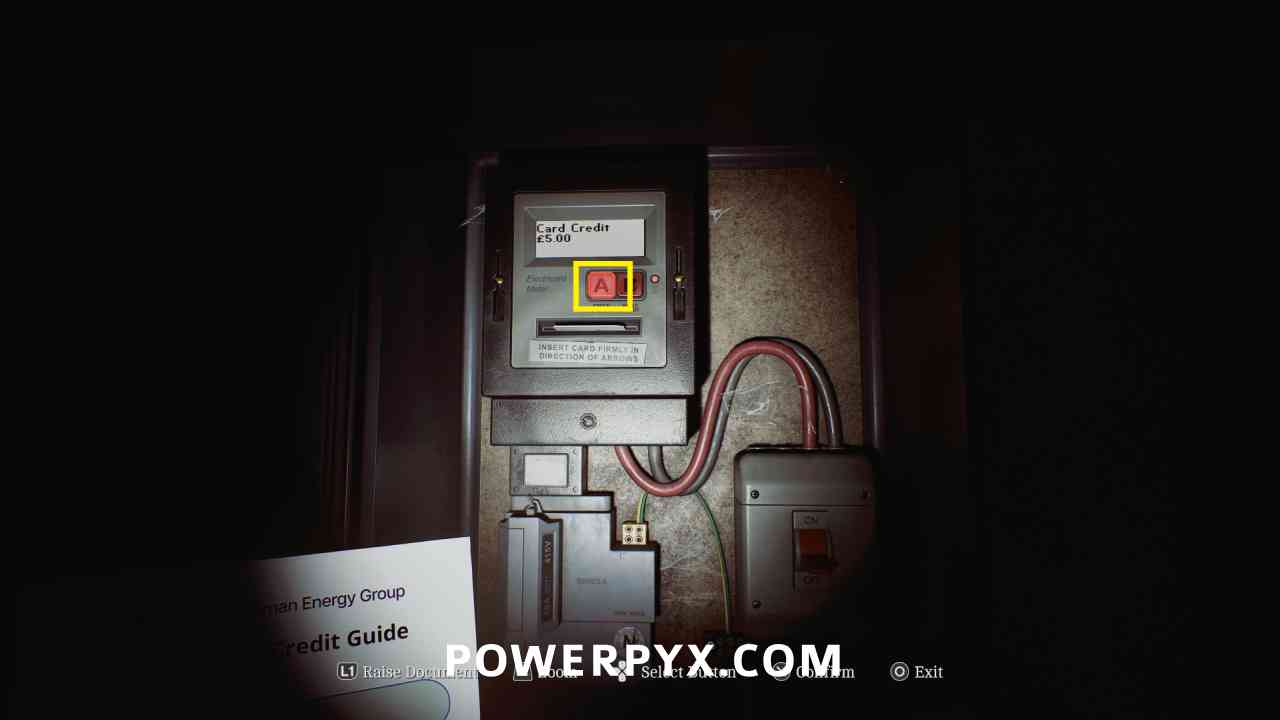
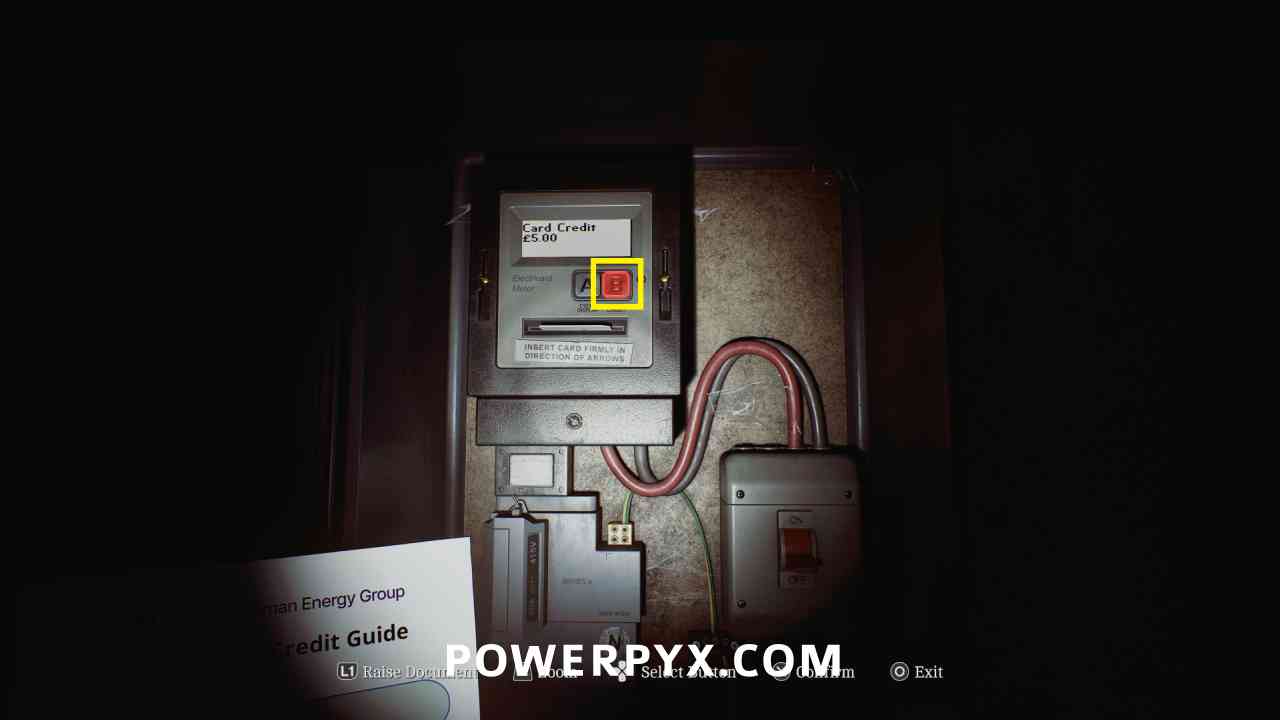
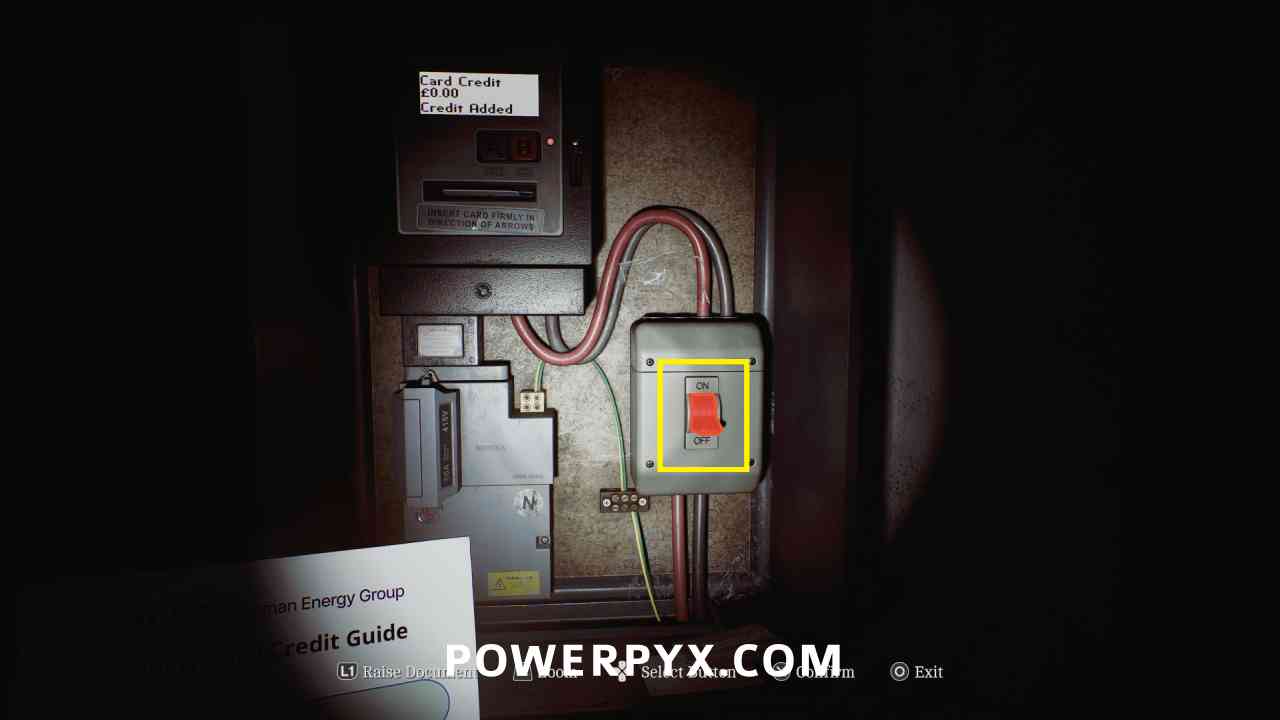
Inside Zoe’s house (west of Town Square (5)) crouch and enter the crawlspace beside the stairs. Interact with the panel on the wall. Insert Prepaid Power Card in slot on the bottom of the display. Hit button A to cycle screen to say “Card Credit”. Hit button B. Hit main switch on the bottom right.
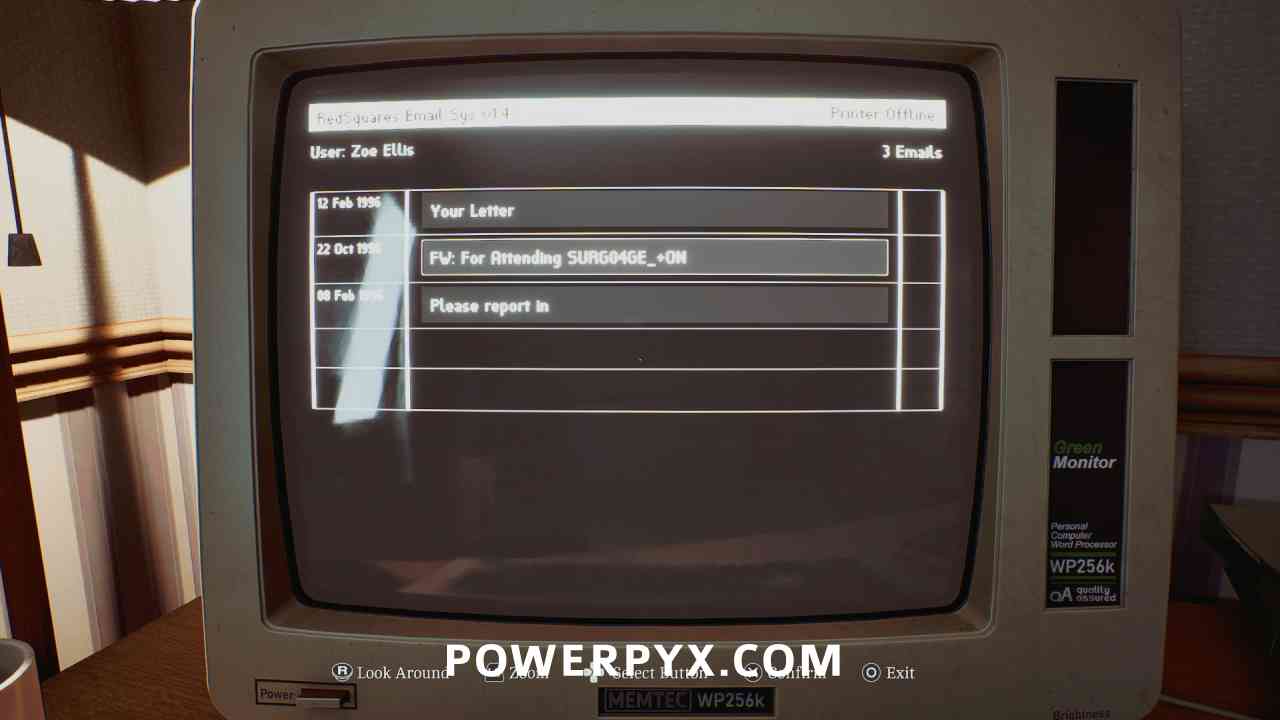
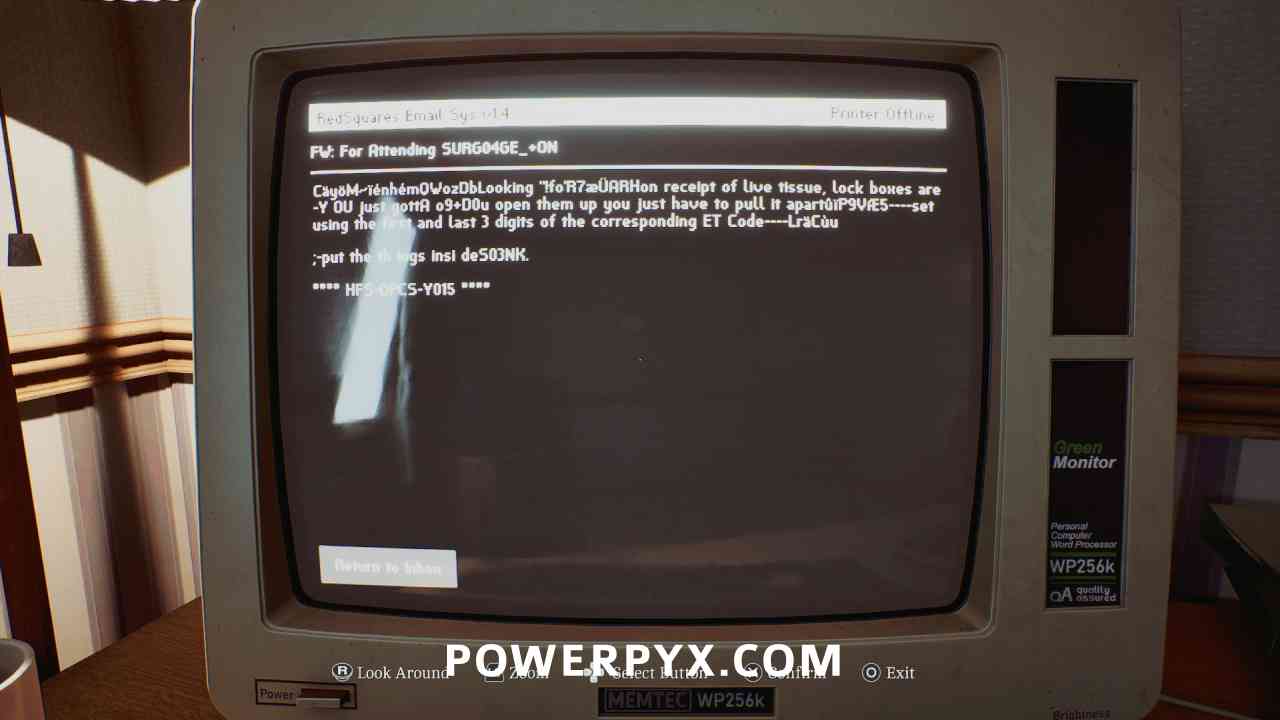
Clue: Zoe’s Email: “For Attending…”
Area: Shorefront District – South > Zoe’s House
Inside Zoe’s house (west of Town Square (5)) after turning on the power, interact with the computer and turn it on, then refresh inbox. Read the middle email.
Puzzle #3
Area: Shorefront District – South > Zoe’s House
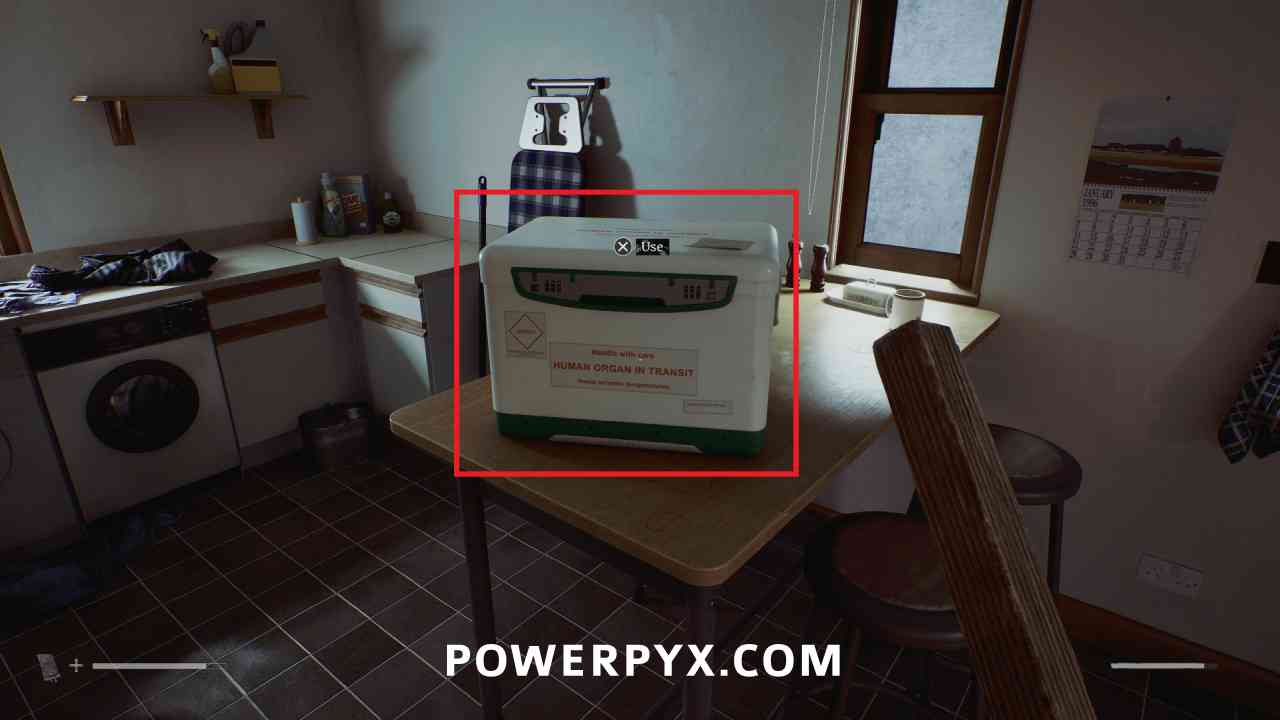
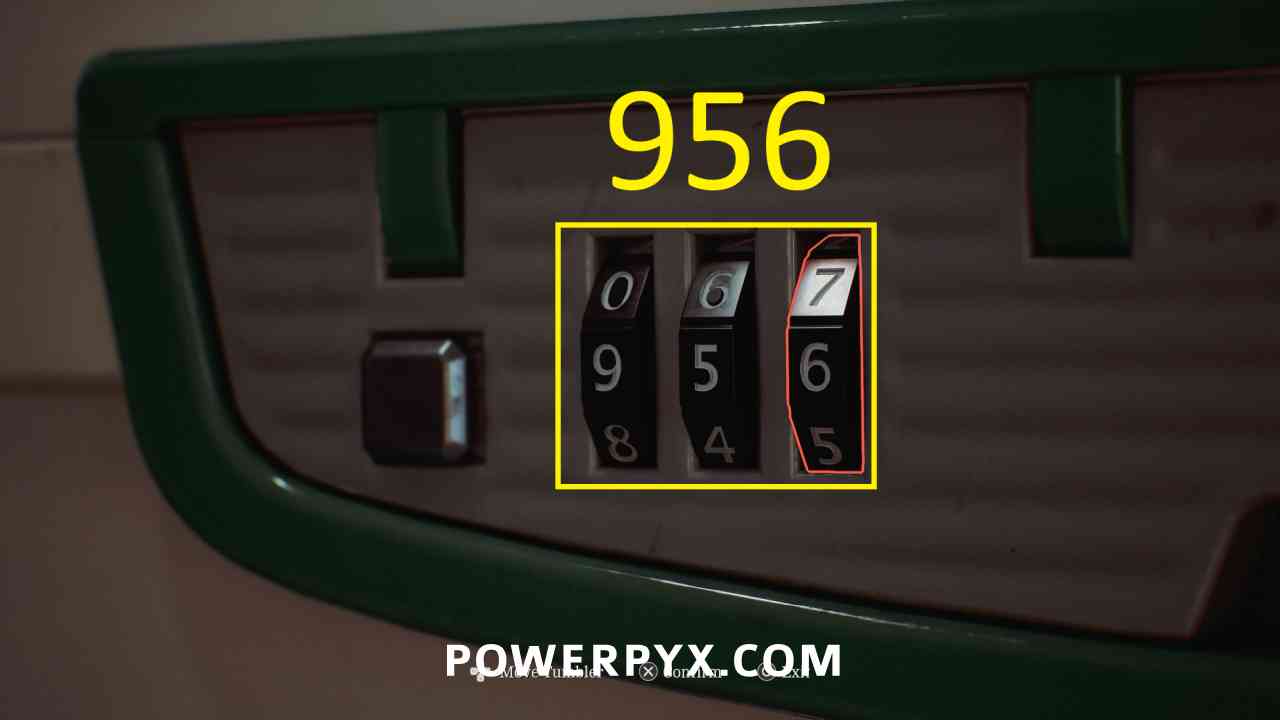
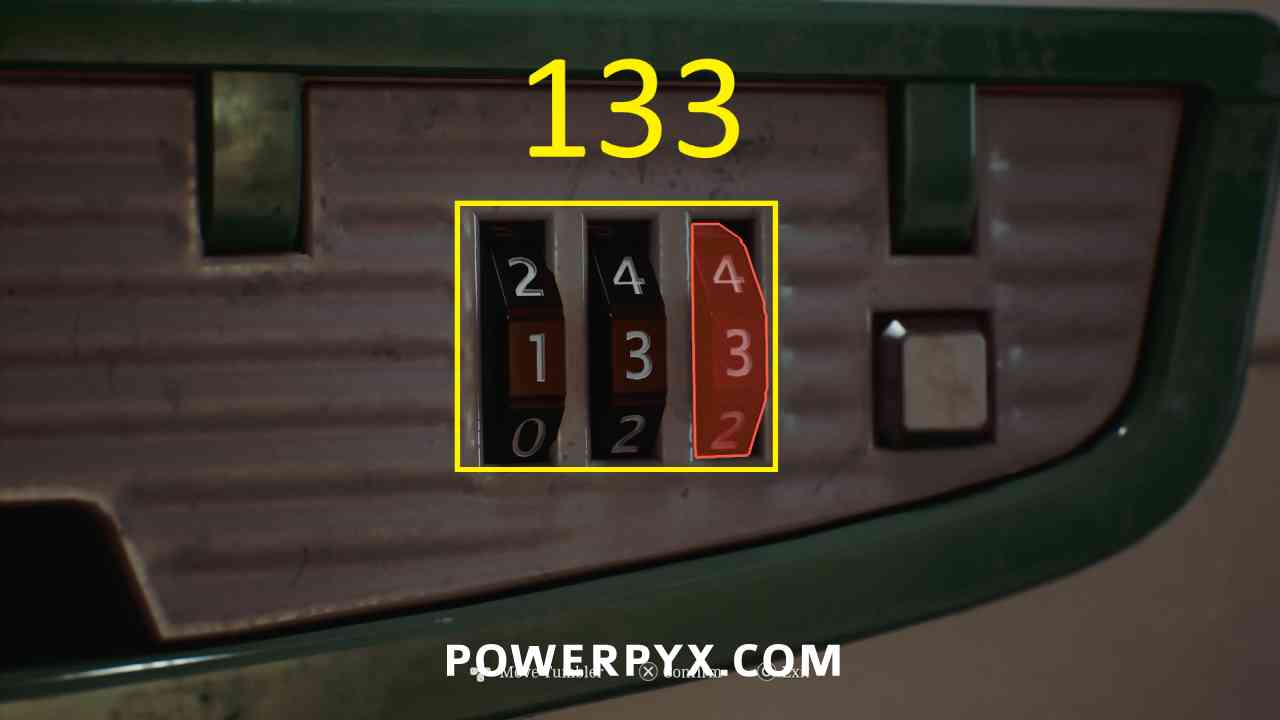
Inside Zoe’s house (west of Town Square (5)) go into the kitchen and interact with the organ transport box. Enter 956 on the left and 133 on the right. (From the email and Organ Transplant Card).
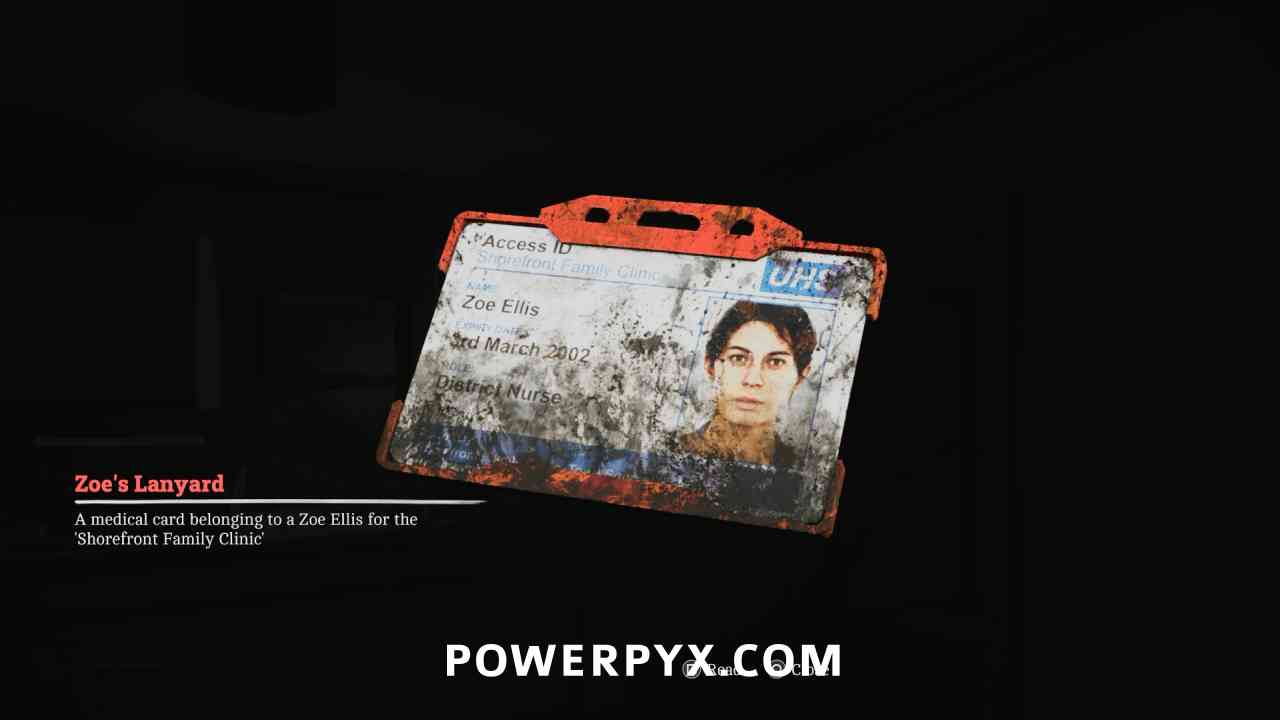
Key Item: Zoe’s Lanyard
Area: Shorefront District – South > Zoe’s House
Automatically obtained after opening the organ transport box.
4. Searching for Zoe
Shorefront District – South
Puzzle #4 – Locked Door: Clinic
Area: Shorefront District – South > Clinic (6)
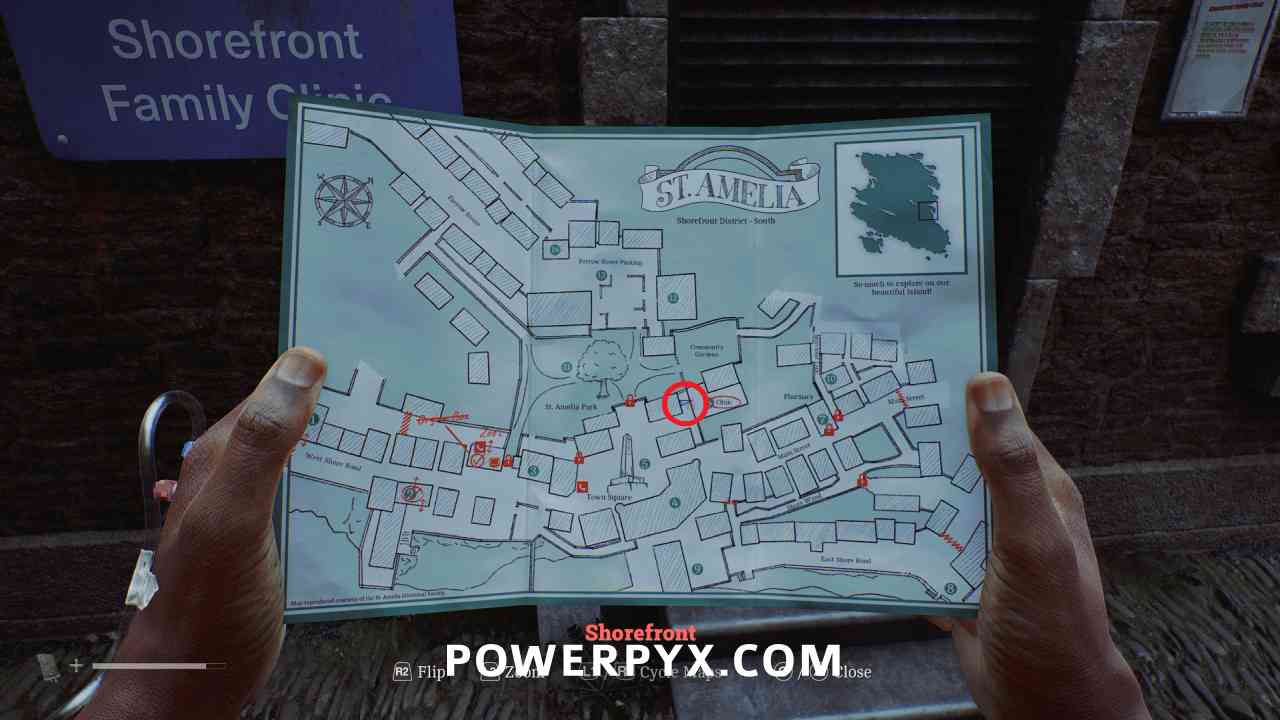
Outside the Clinic interact with the pad to the left of the door and use Zoe’s Lanyard to open it.
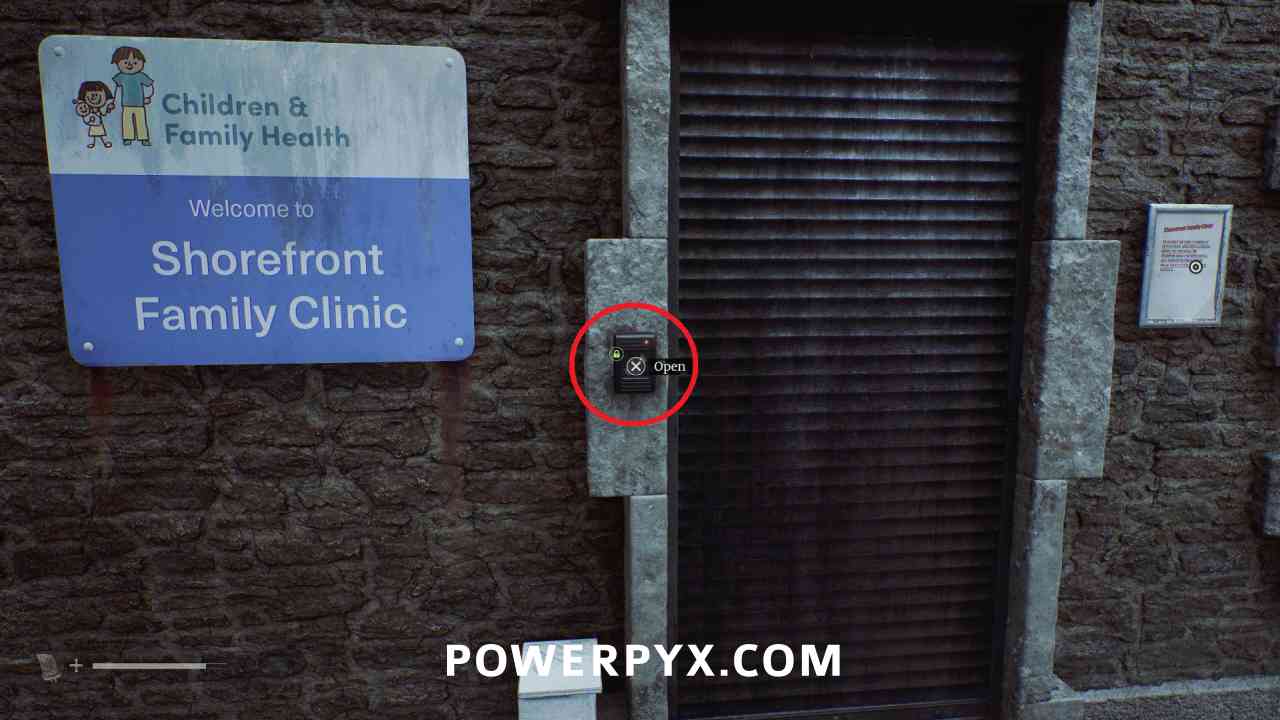
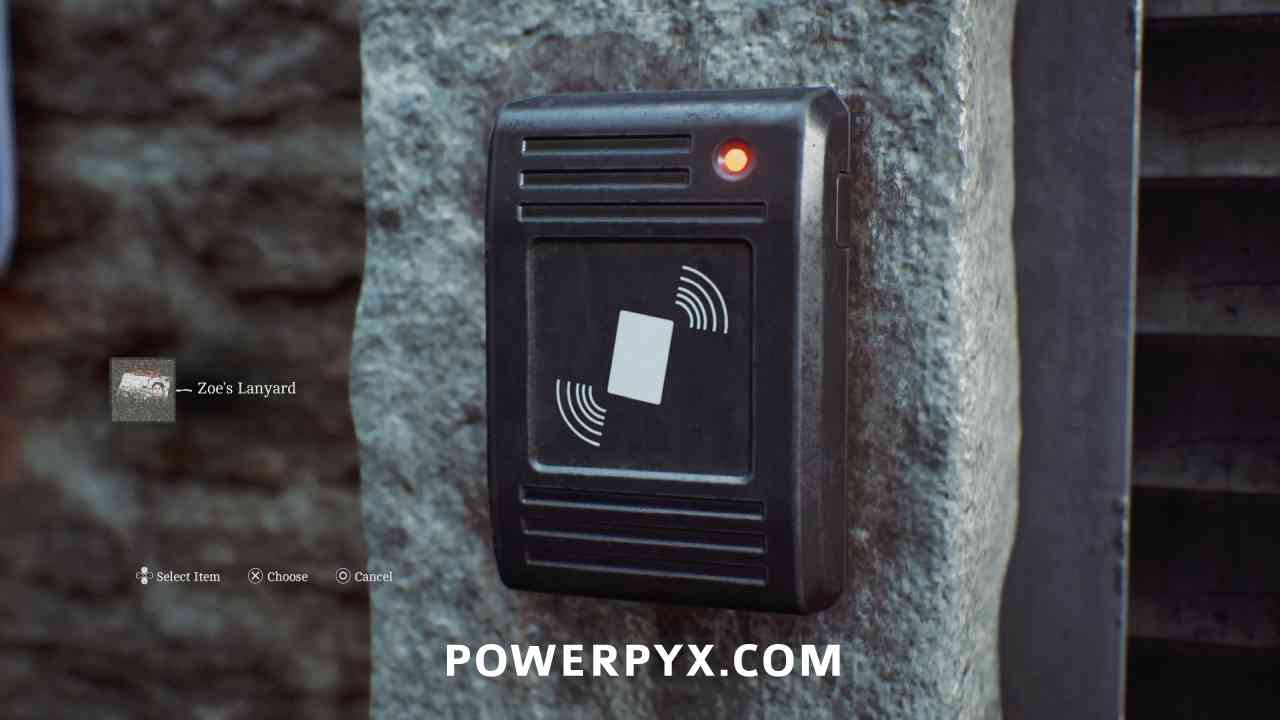
Shorefront District – South > Clinic (6)
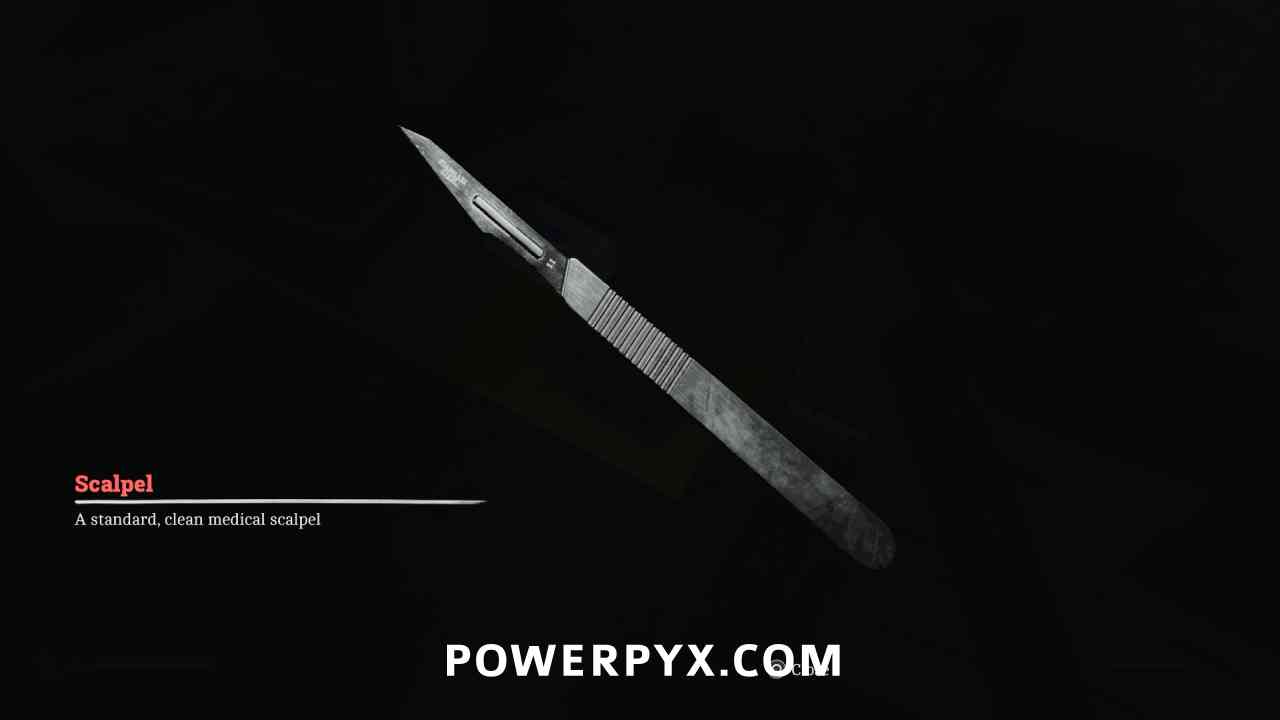
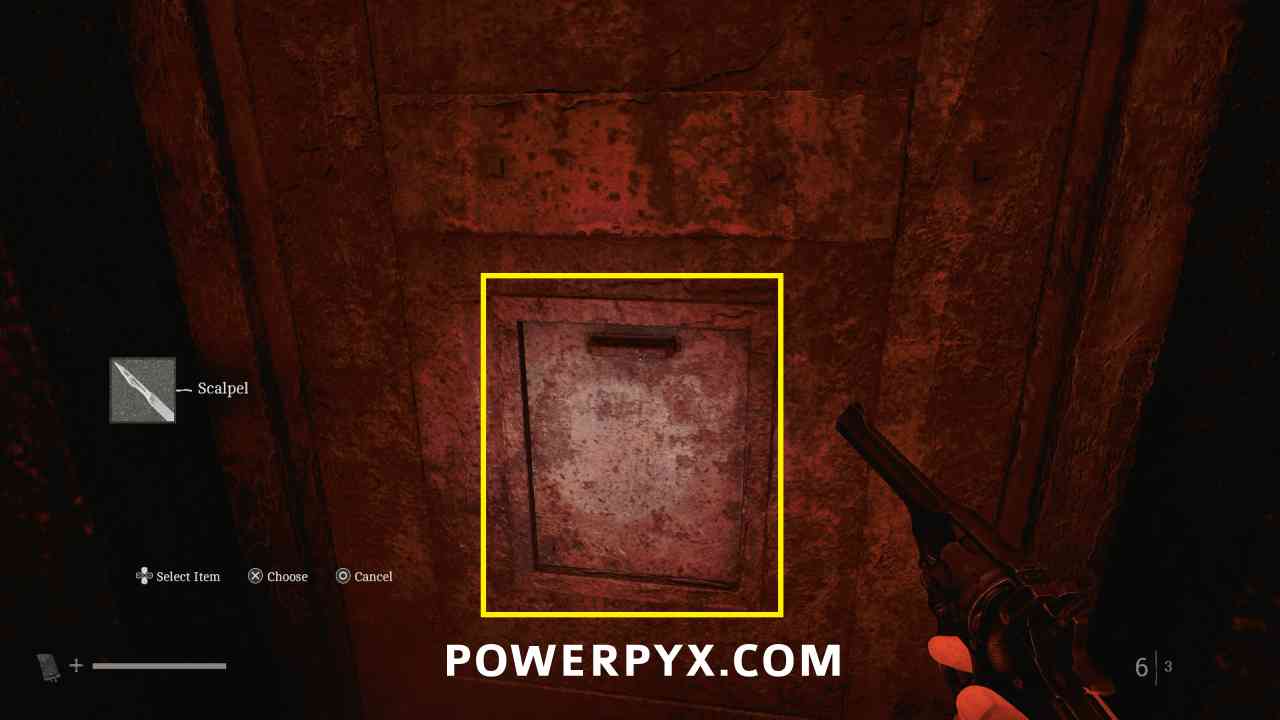
Equipment: Scalpel
Area: Shorefront District – South > Clinic (6)
Inside the Clinic, go in the second door at the end of the hallway (Z Ellis) and pick this up from the green box on the table beside the computer. This is used to open the rusty doors with the hatch in the middle.
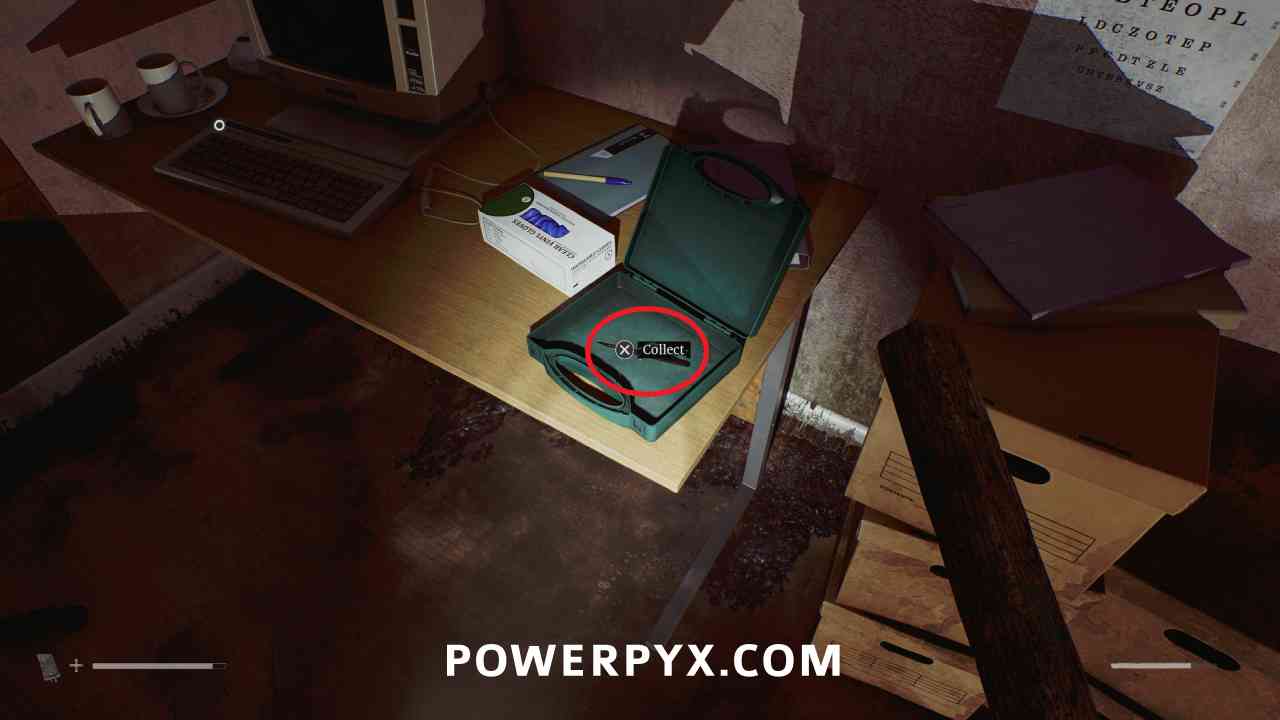
Shorefront District – South
Locked Door – Pharmacy
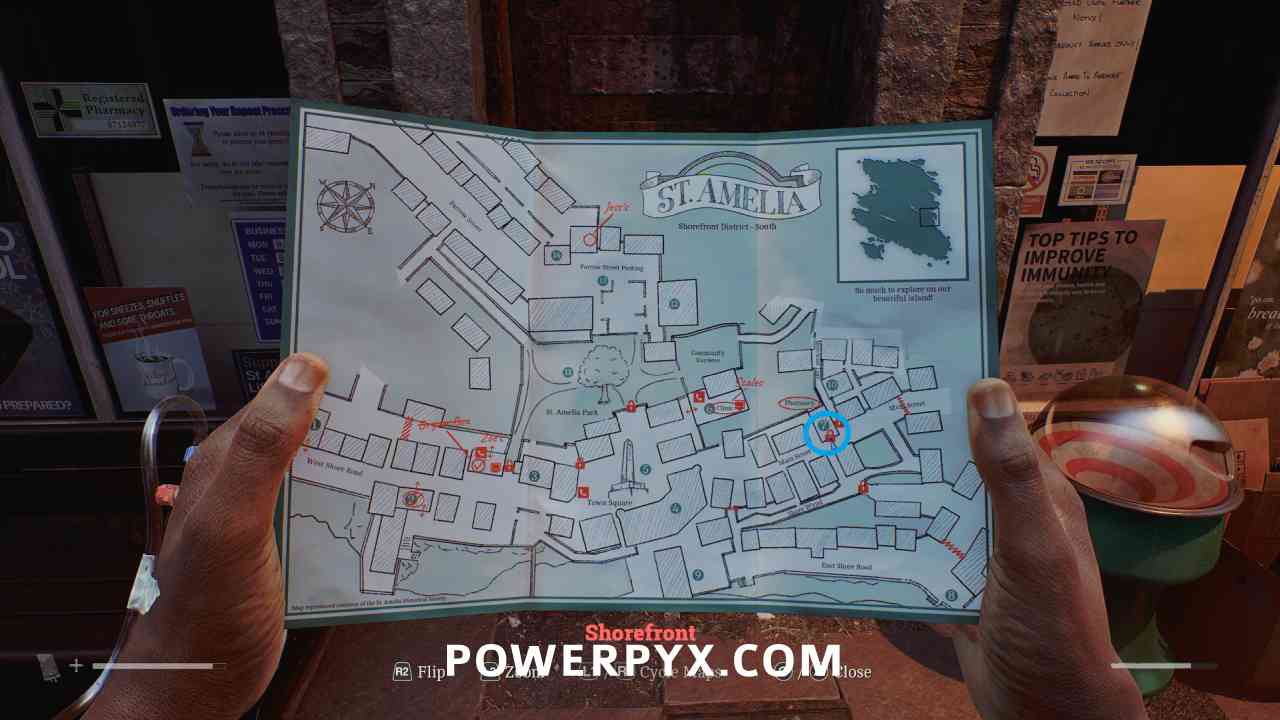
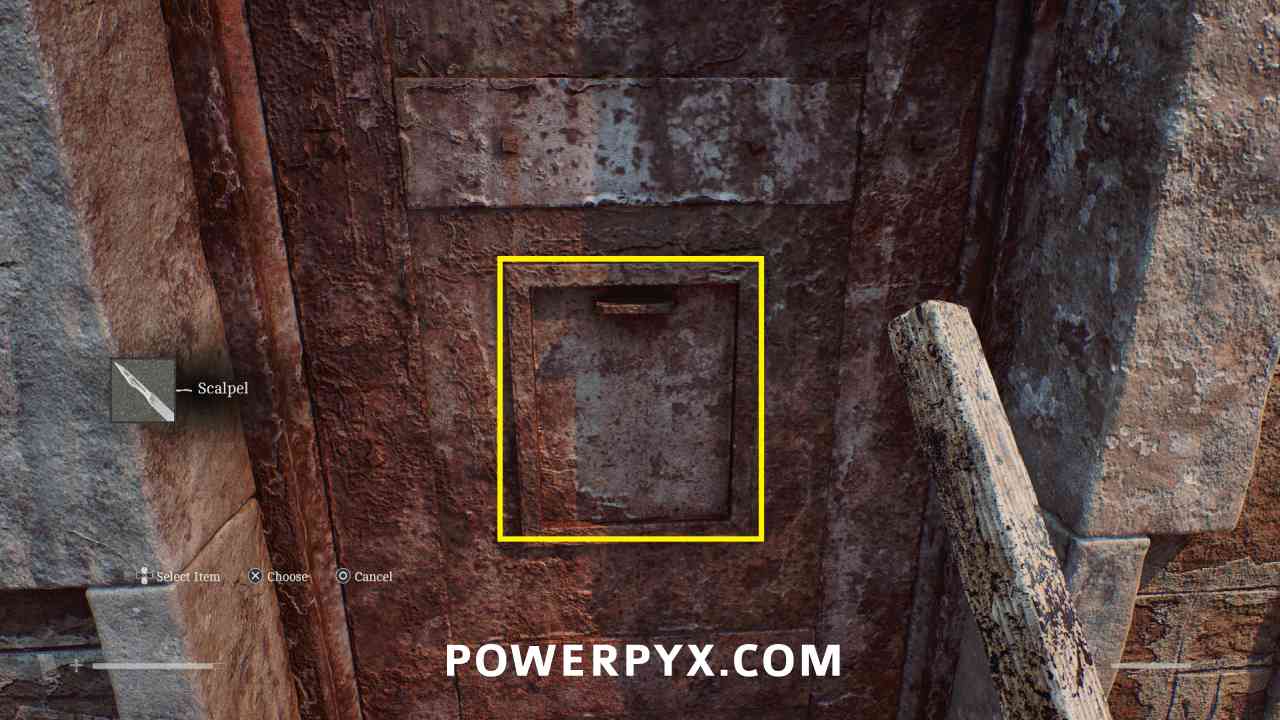
Area: Shorefront District – South > Outside Pharmacy (7)
Outside the Pharmacy, interact with the door and choose to use the Scalpel.
Shorefront District – South > Pharmacy (7)
Puzzle #6
Area: Shorefront District – South > Pharmacy (7)
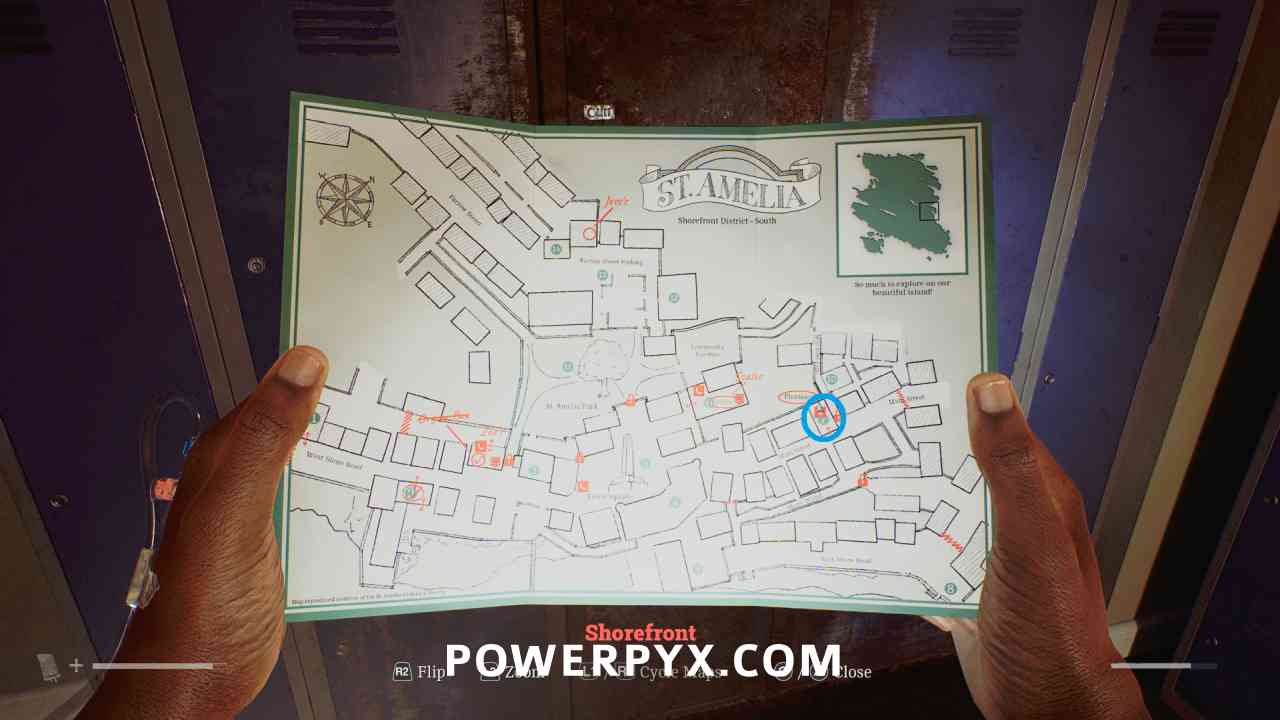
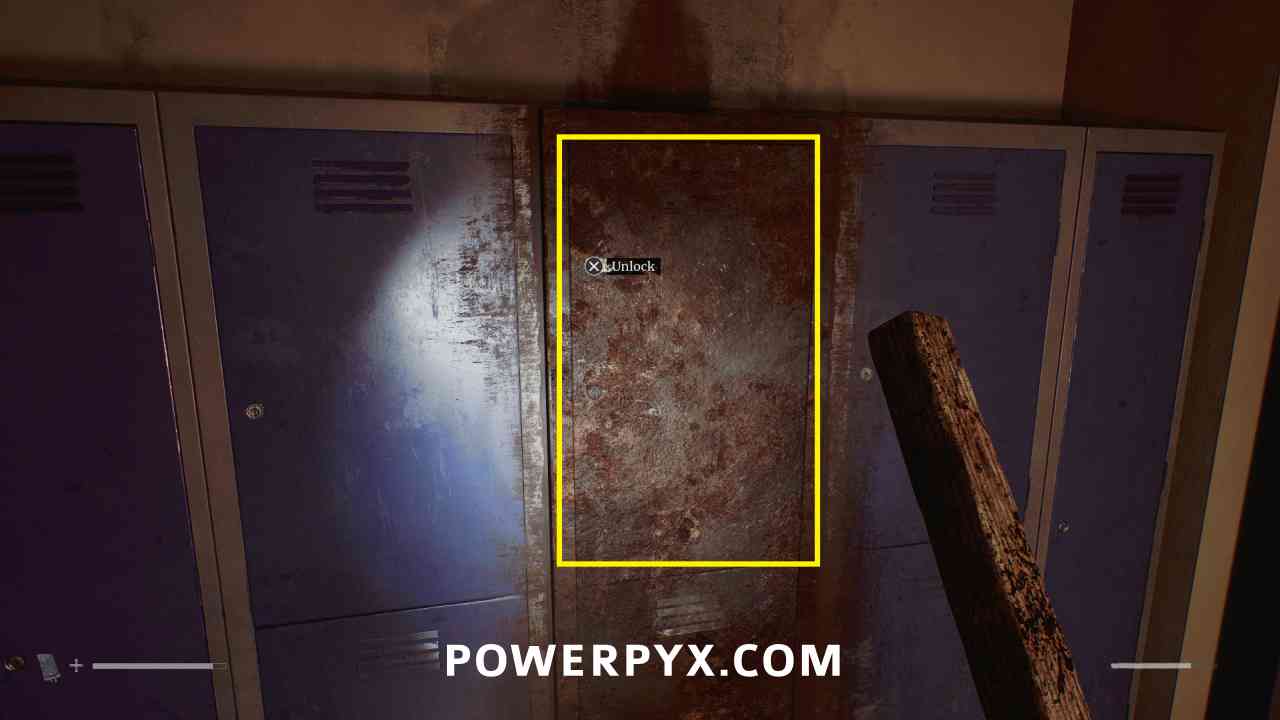
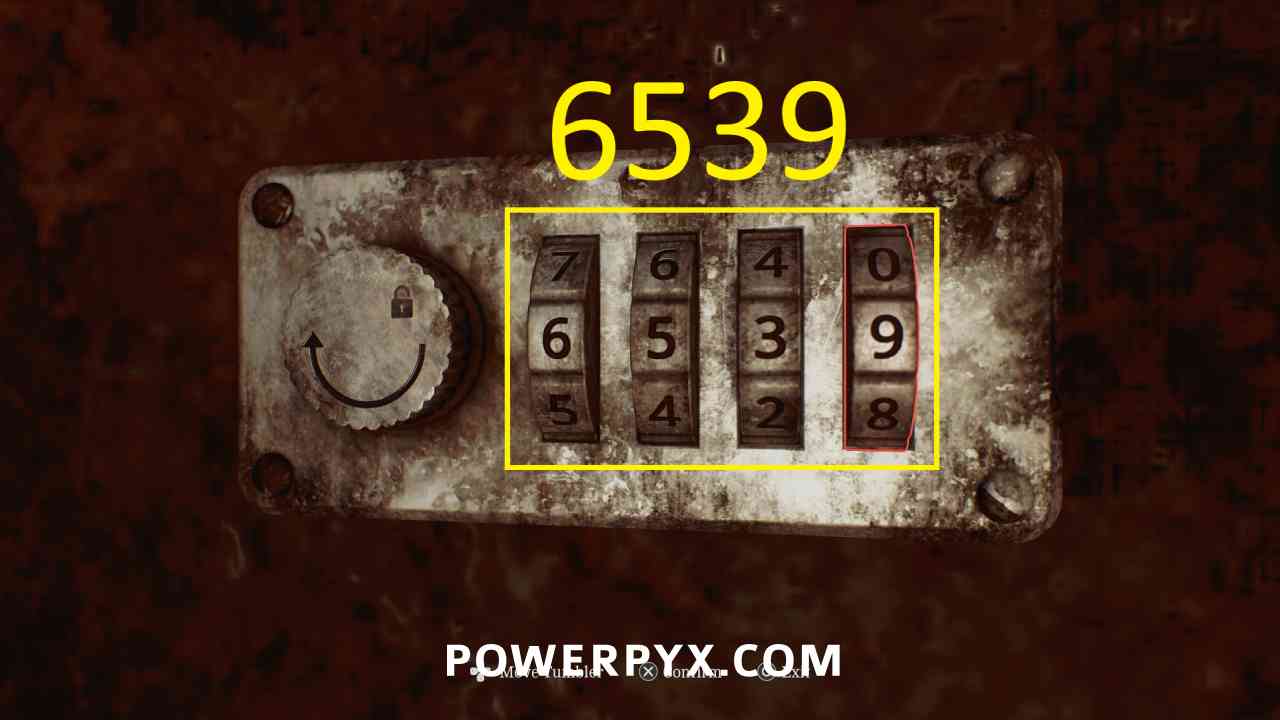
Inside the Pharmacy, in the back room interact with the rusty locker and enter 6539 (the posters in the Pharmacy have numbers on them, entered in the order they are shown in the CRTV broadcast).
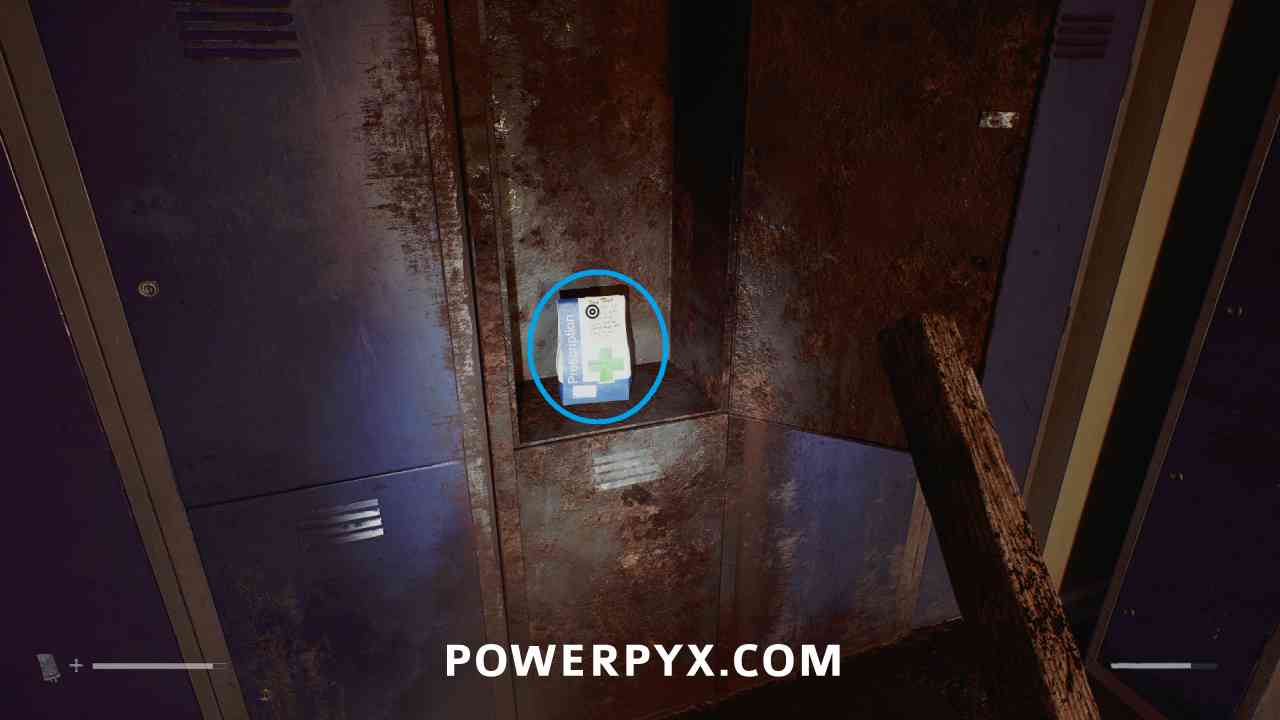
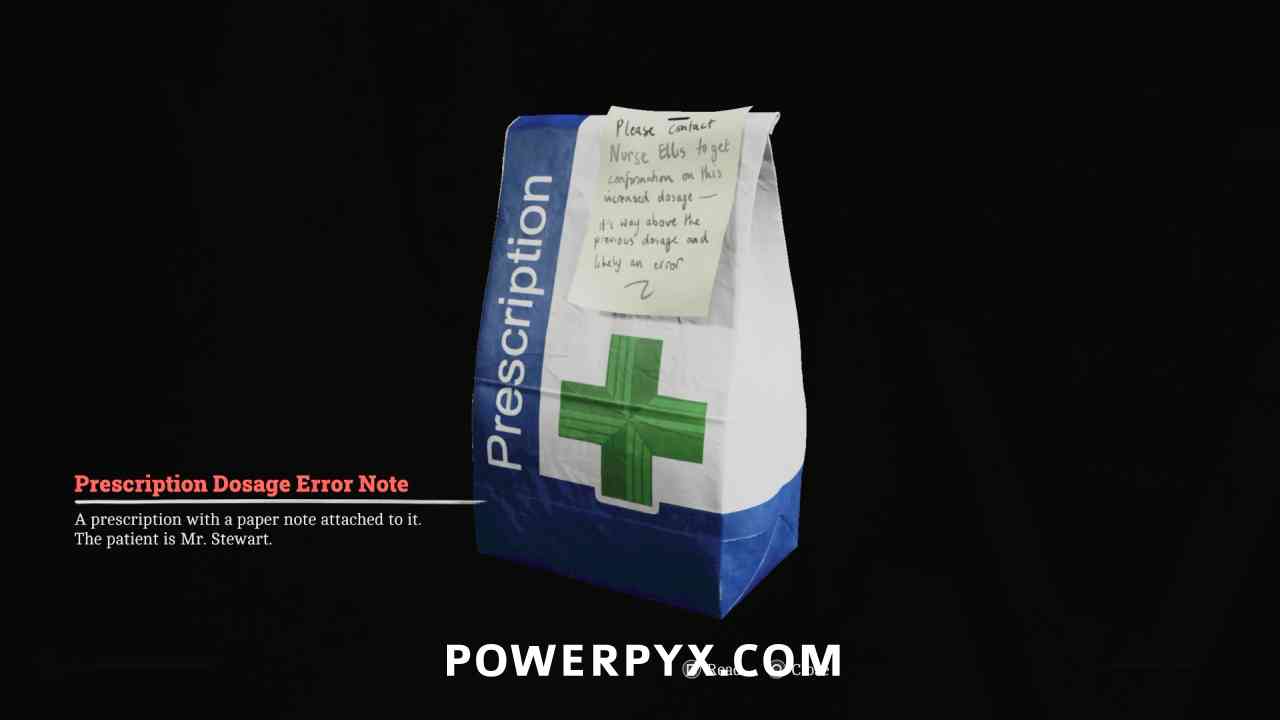
Key Item: Prescription Dosage Error
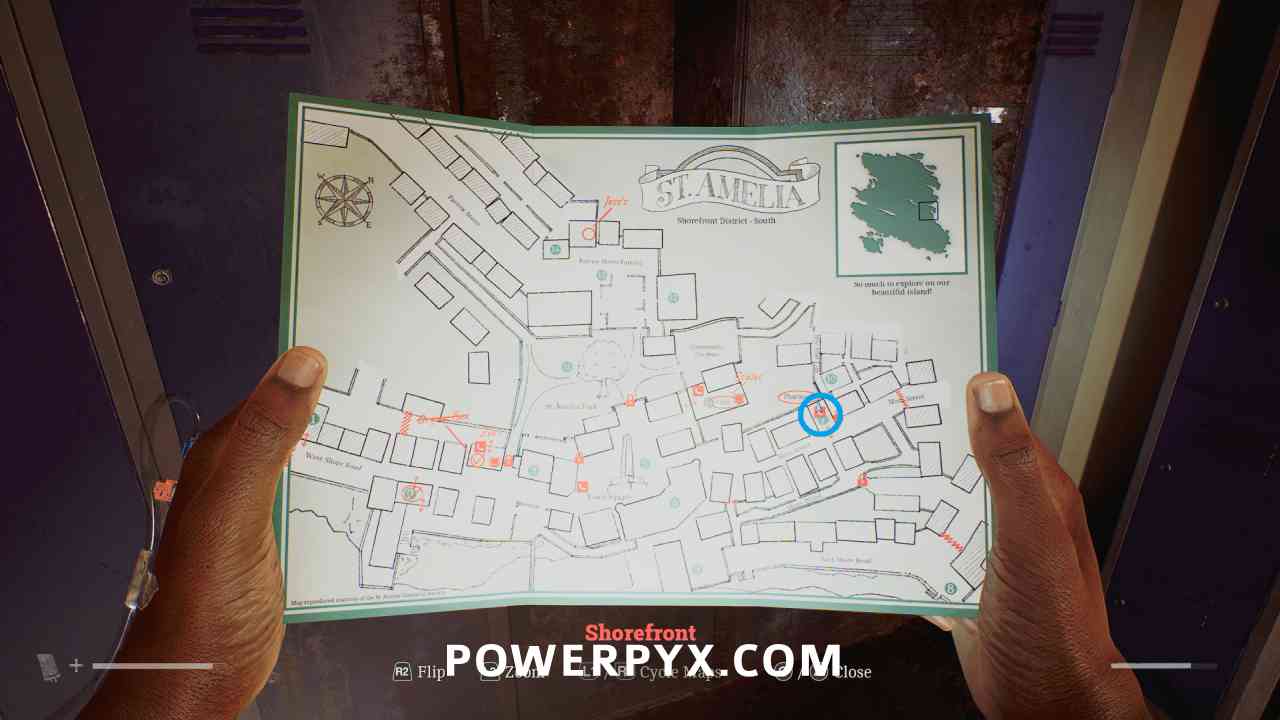
Area: Shorefront District – South > Pharmacy (7)
Pick up from the locker after opening it.
Shorefront District – South
Locked Door – St. Amelia Park
Area: Shorefront District – South > Outside St. Amelia Park (11)
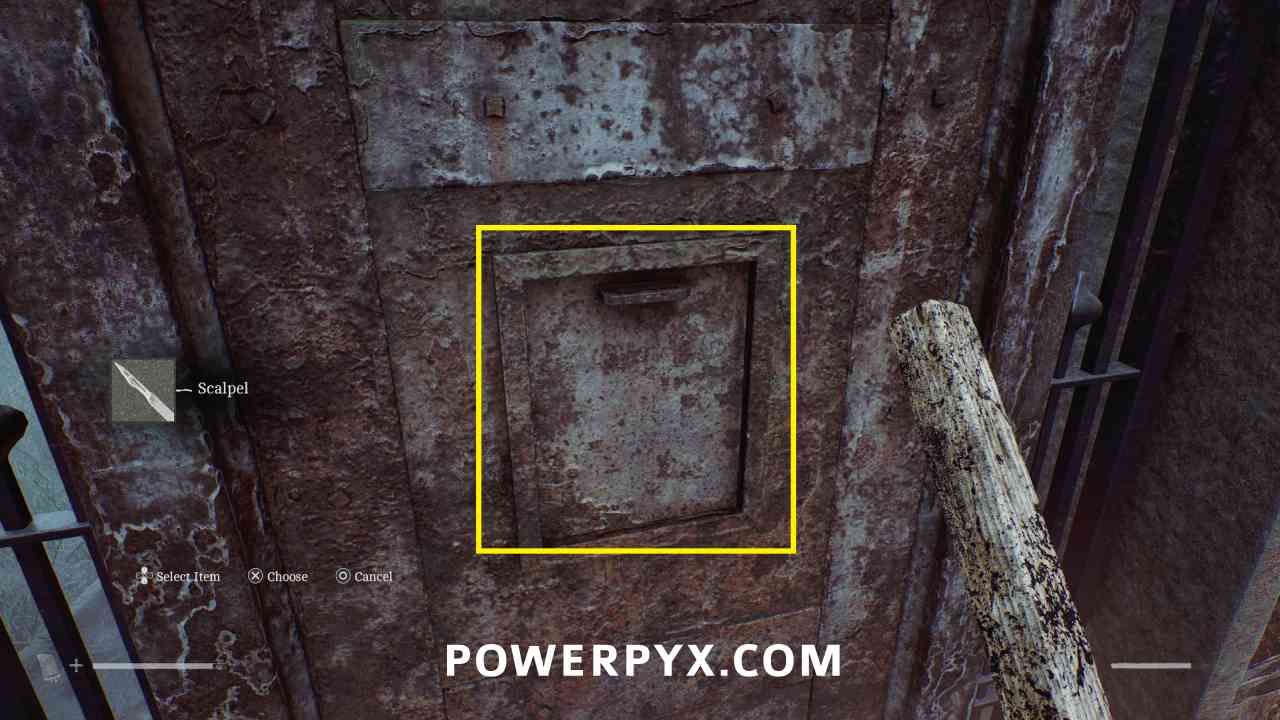
At the south side of St. Amelia Park (11), interact with the door and choose to use the Scalpel.
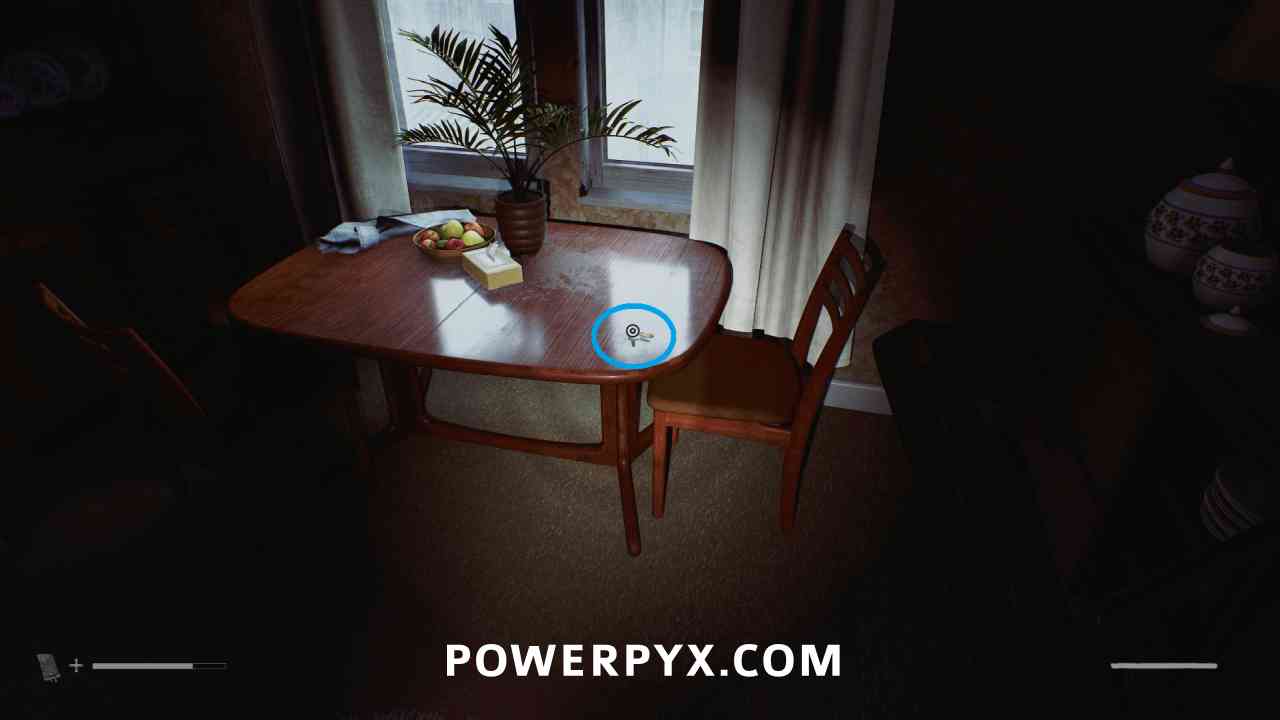
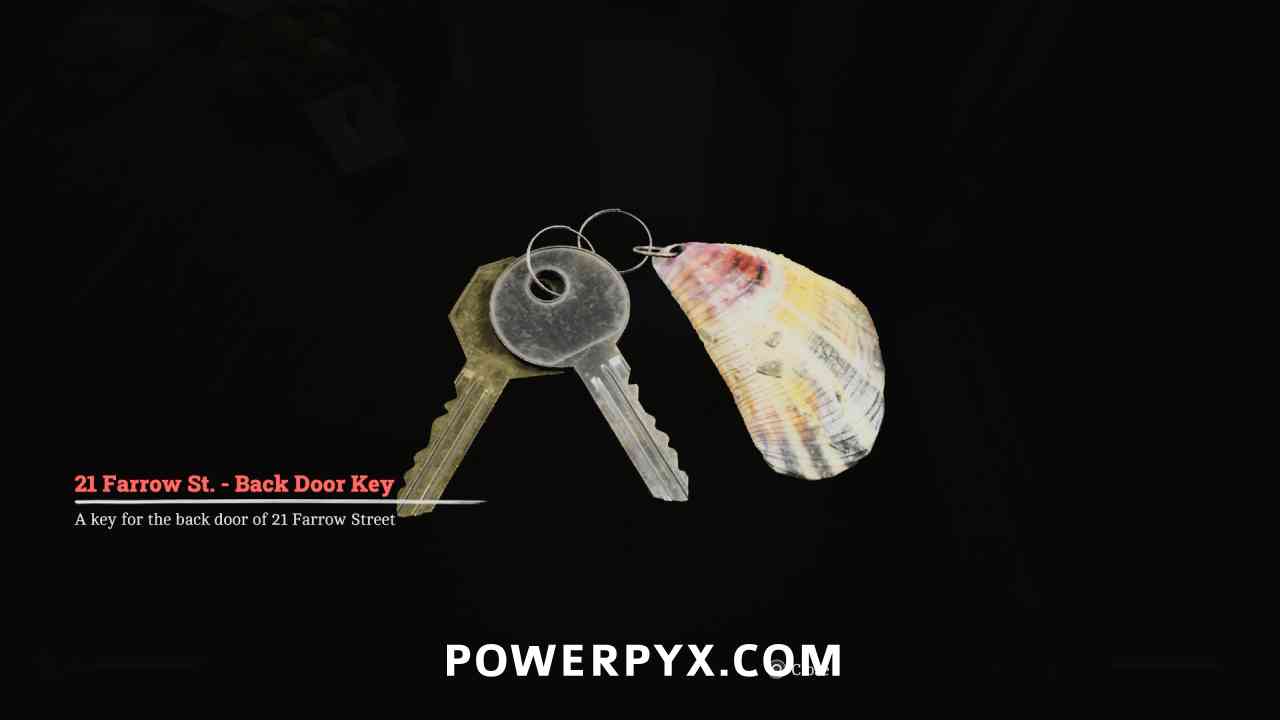
Key Item: 21 Farrow St. – Back Door Key
Area: Shorefront District – South
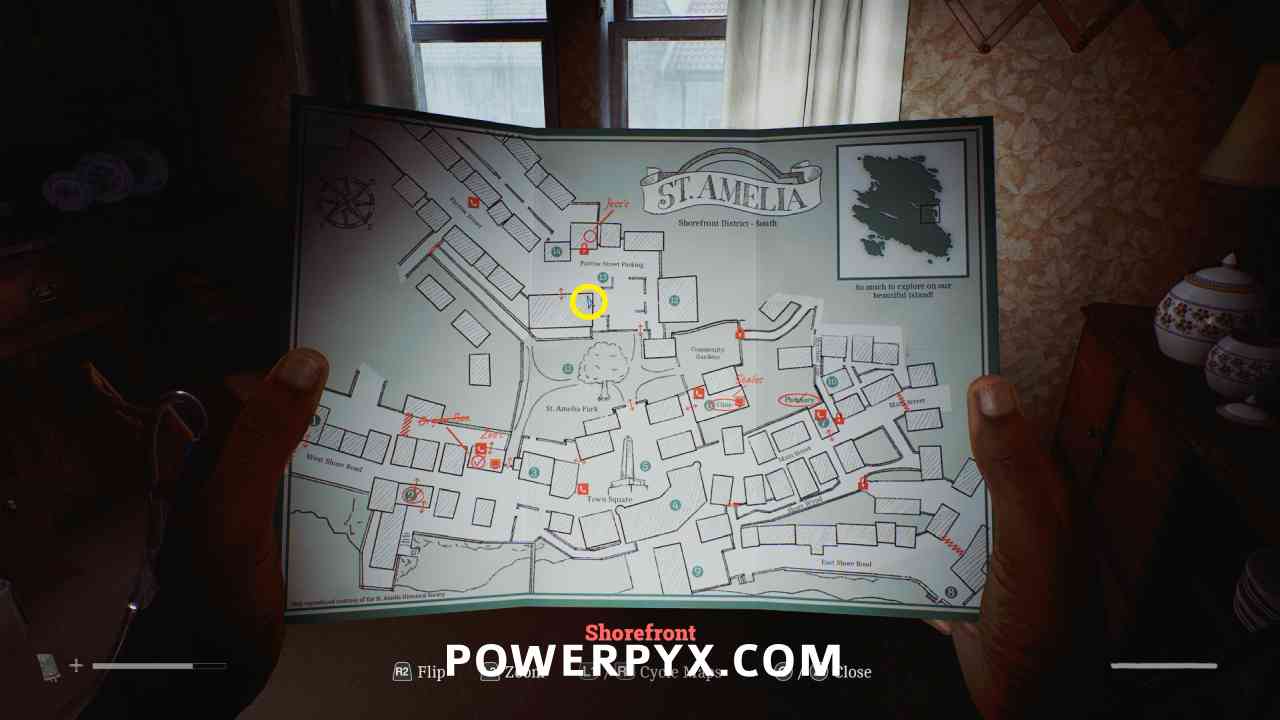
Inside the apartment building south of the building numbered (14), go up to the second floor into apartment 1/2, then on the table in the living room.
Locked Door – Jess’s
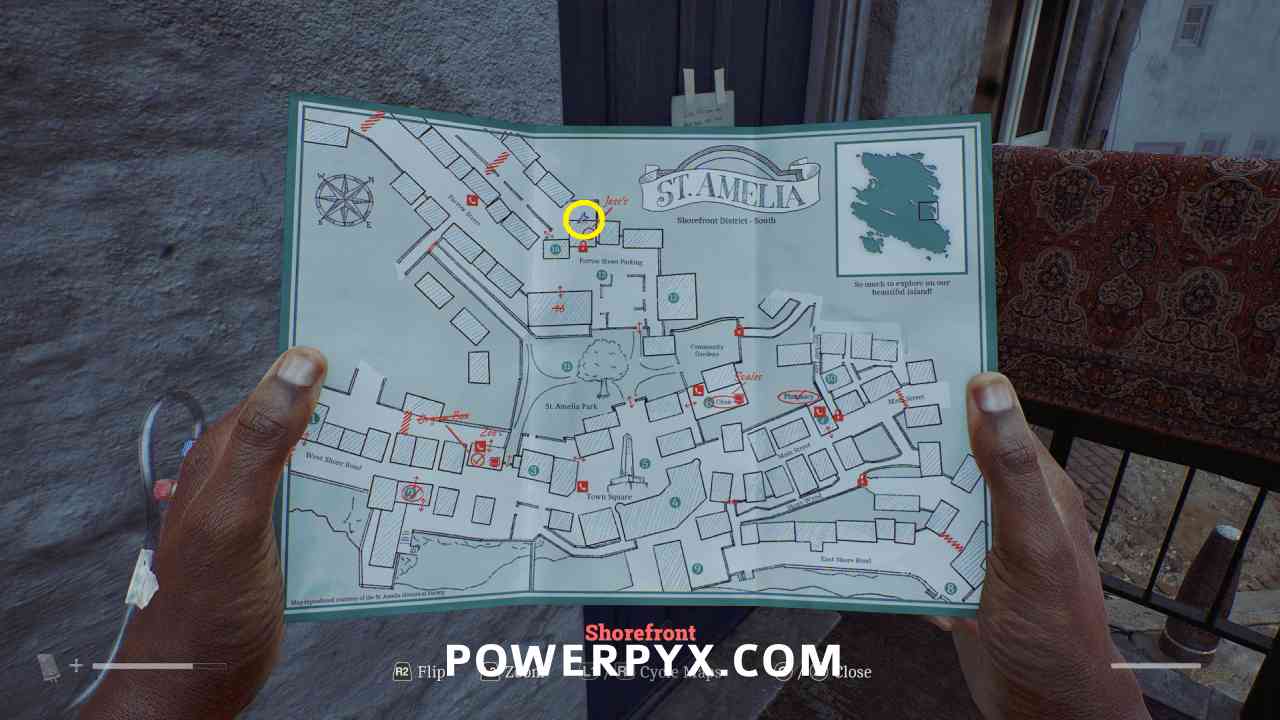
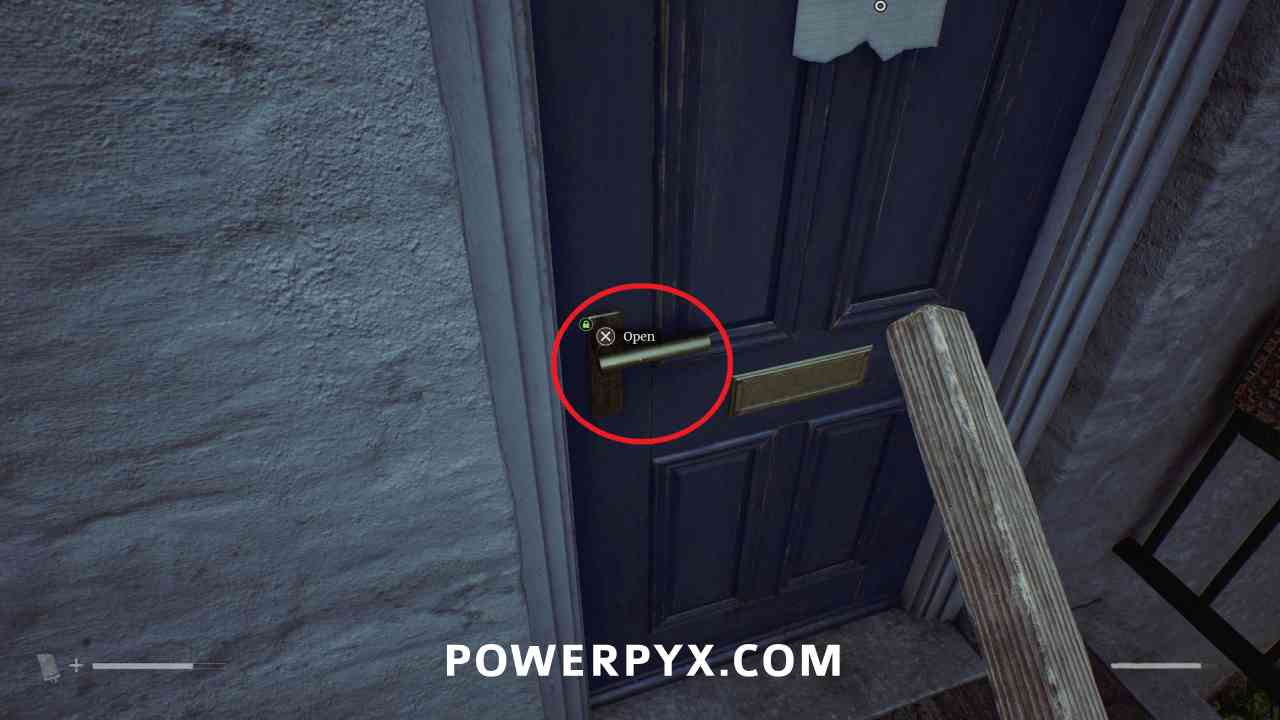
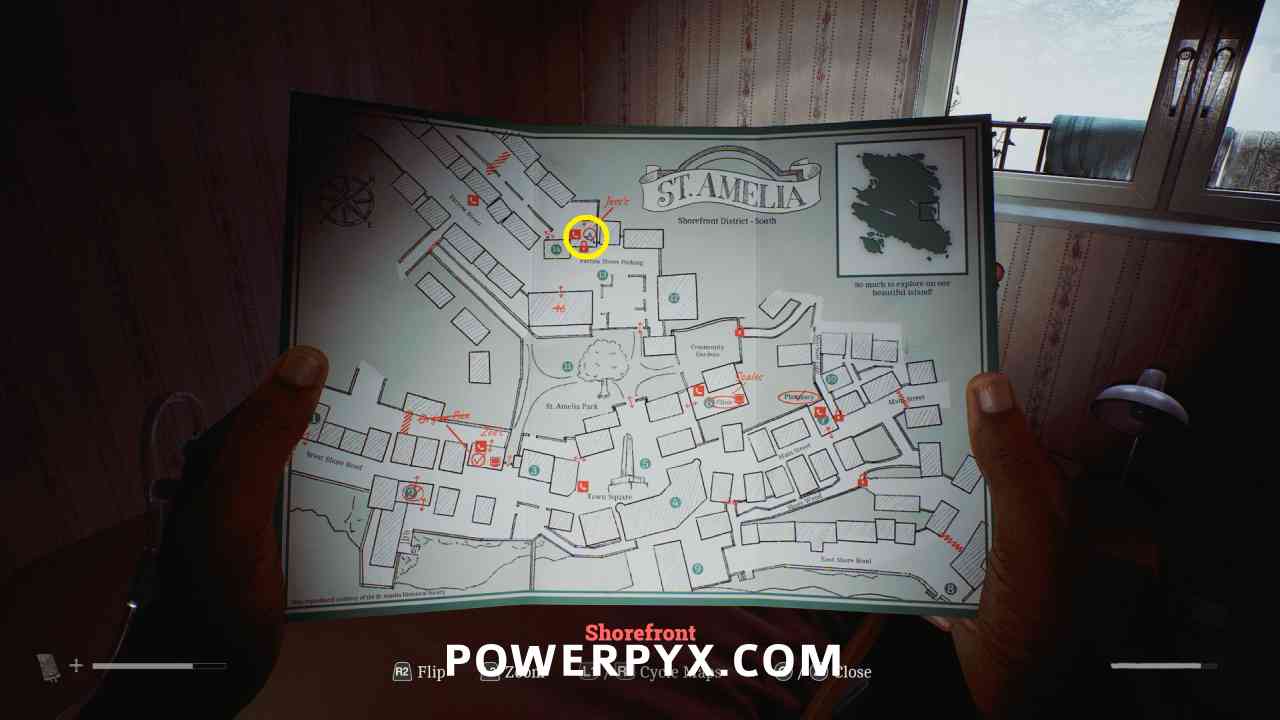
Area: Shorefront District – South > Outside Jess’s
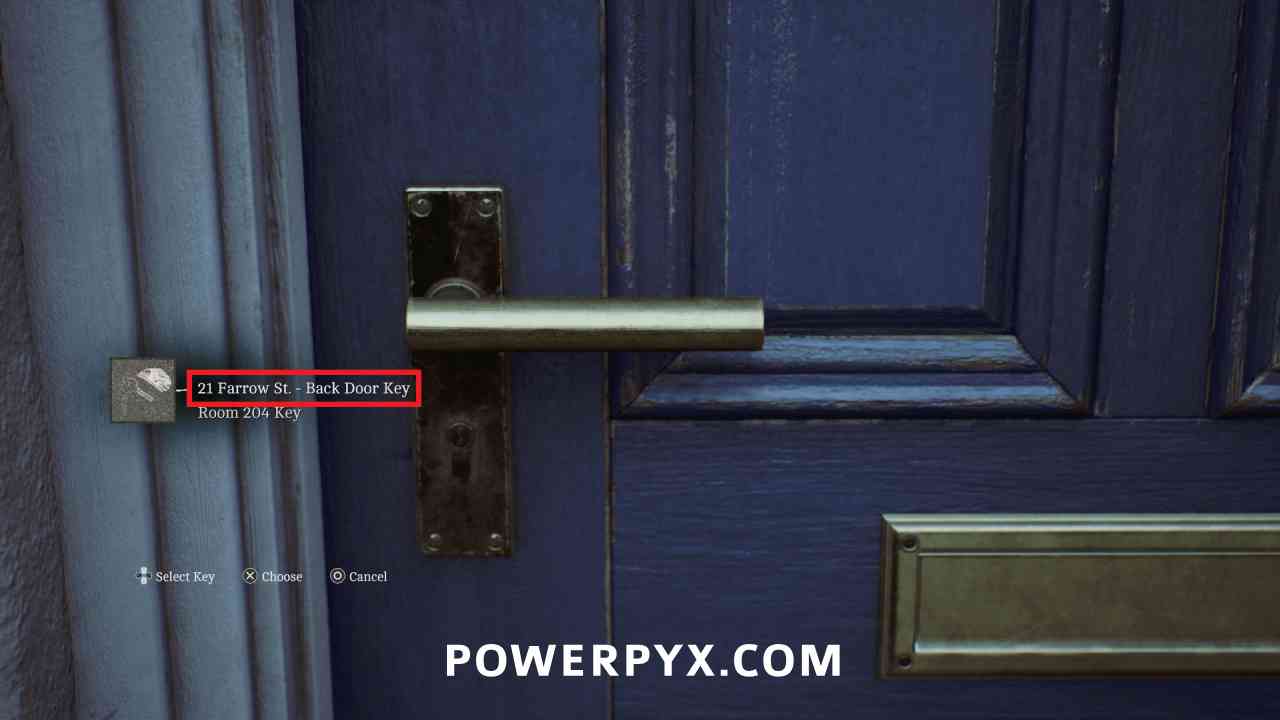
At the back door of Jess’s house (beside (14)) interact with the lock and use 21 Farrow St. – Back Door Key.
Shorefront District – South > Jess’s House
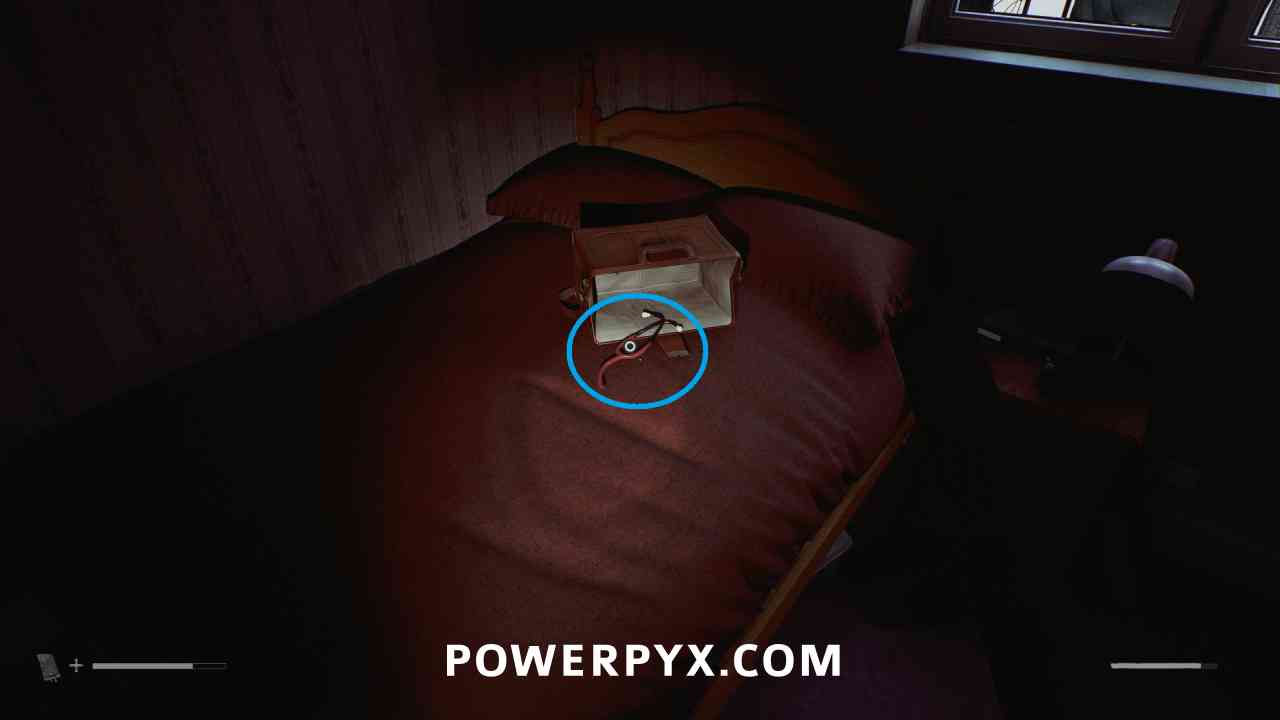
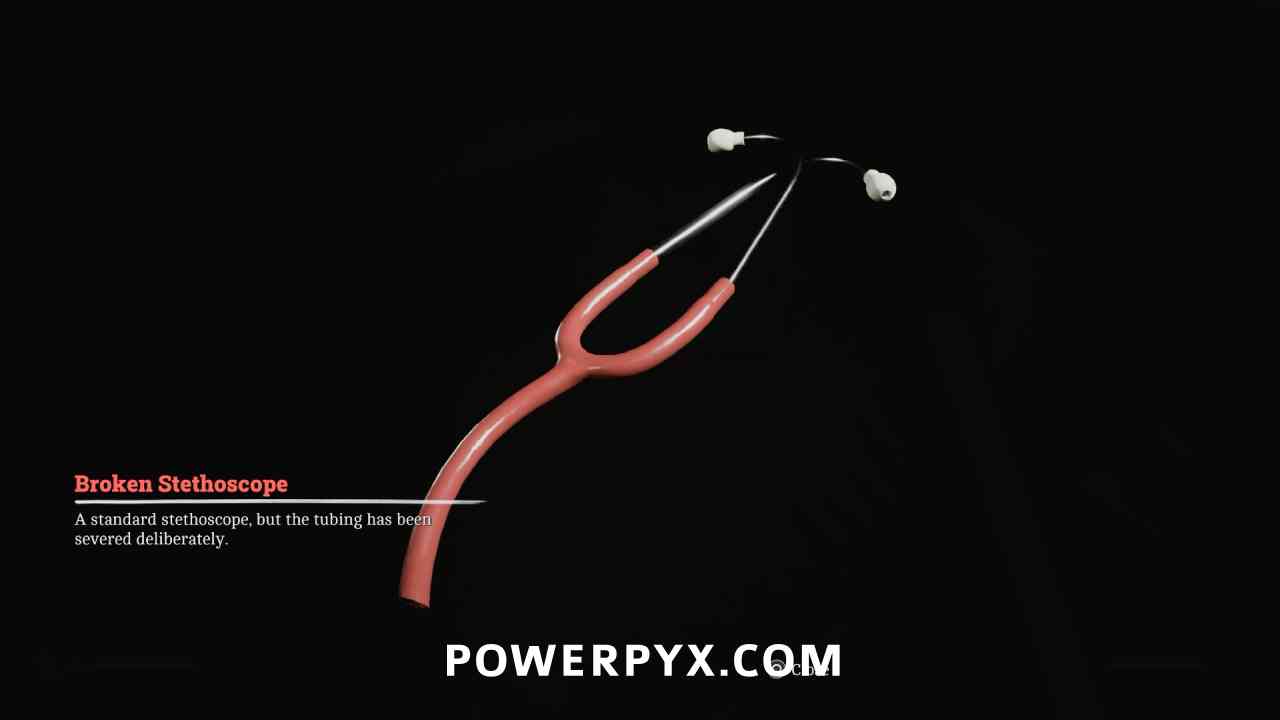
Key Item: Broken Stethoscope
Area: Shorefront District – South > Jess’s House
Inside Jess’s, on the bed in the bedroom.
Shorefront District – South > Clinic (6)
Puzzle #7
Area: Shorefront District – South > Clinic (6)
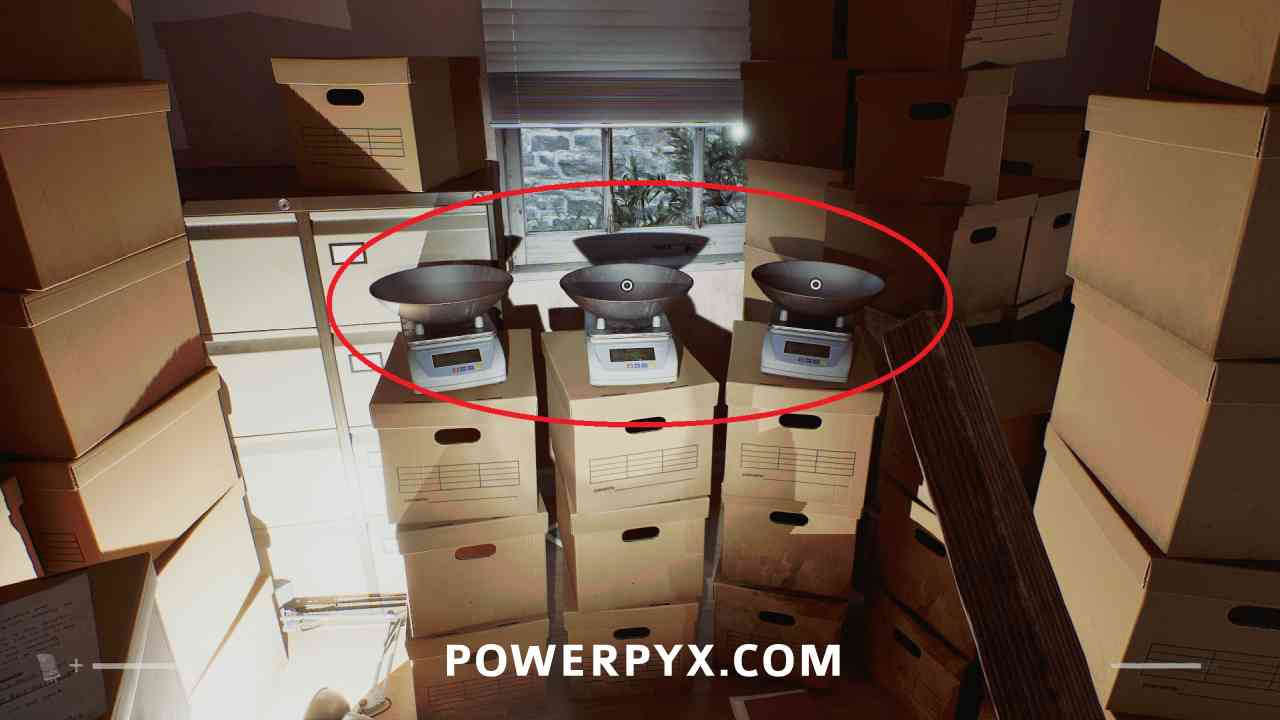
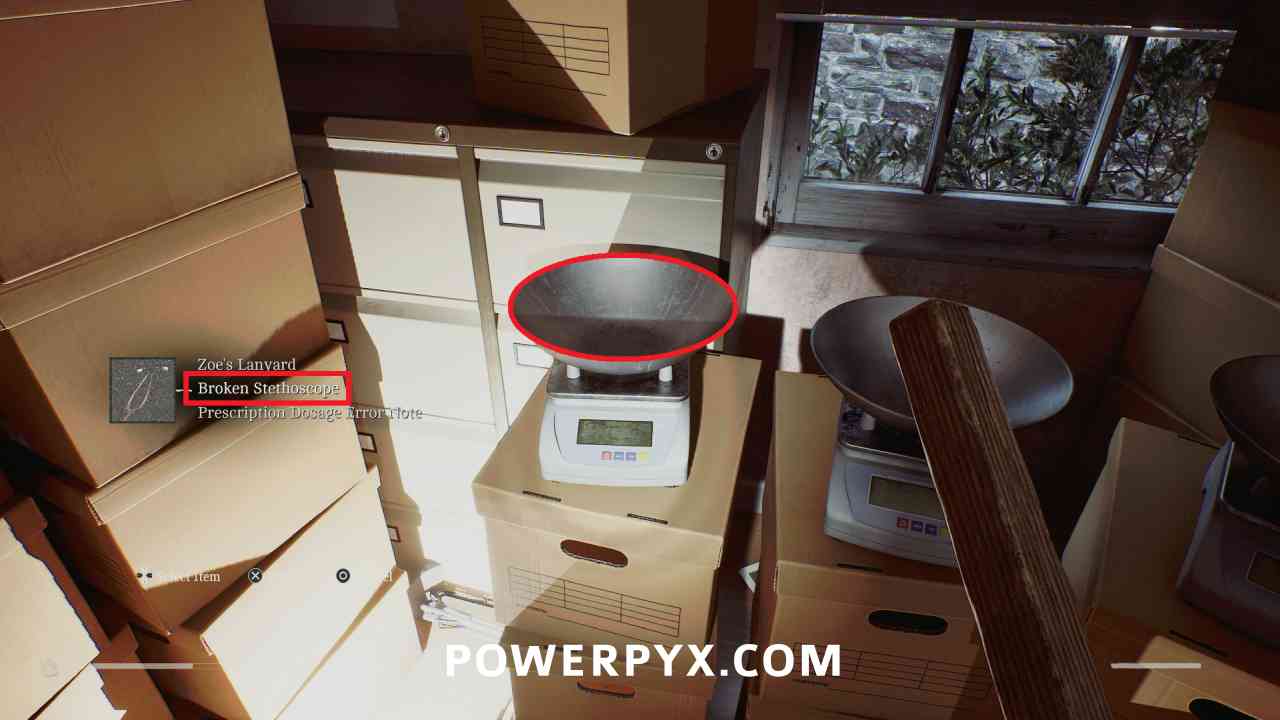
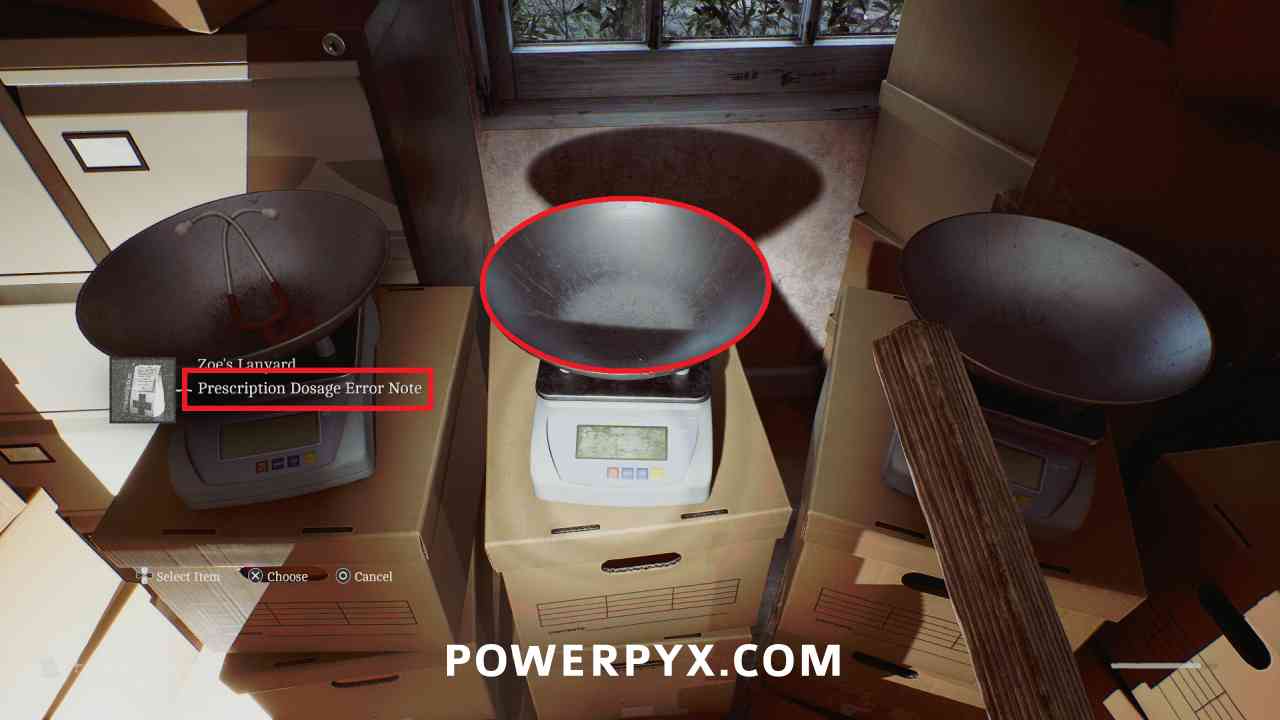
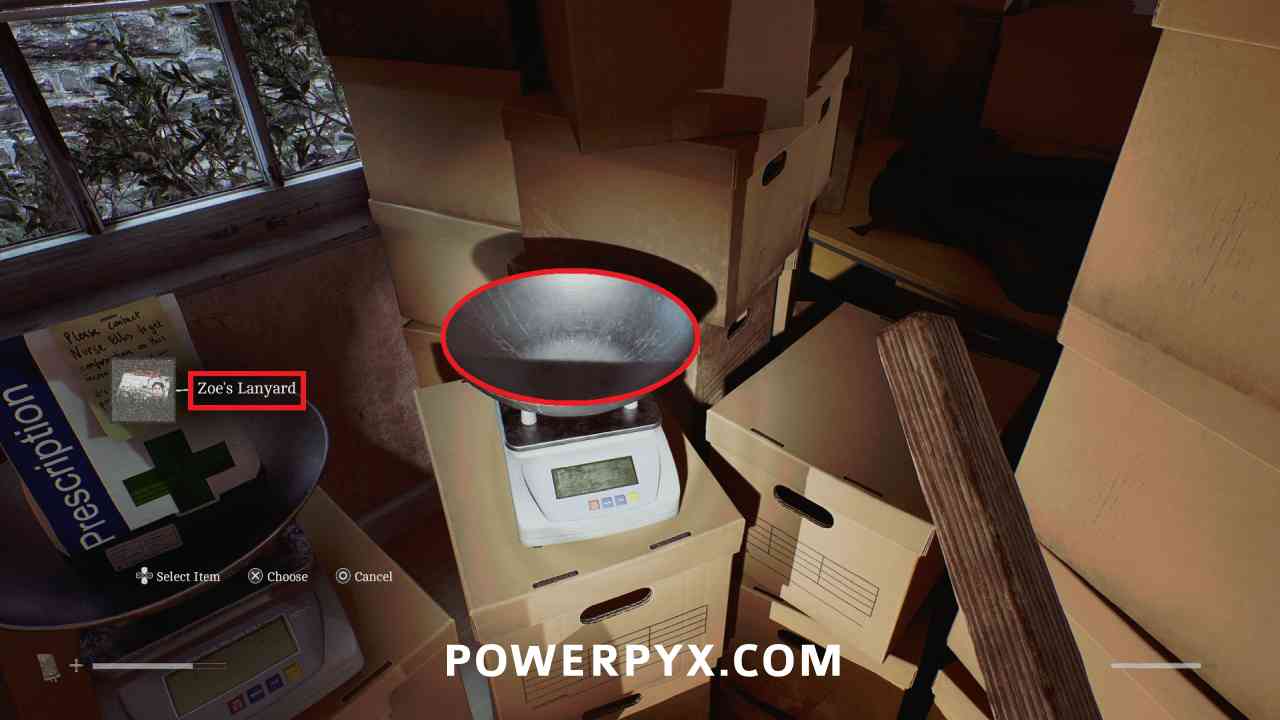
Return to the Clinic, and go to the back room in the hallway (Z Ellis). Interact with the scales and place the Broken Stethoscope on the left, the Prescription Dosage Error Note in the middle, and Zoe’s Lanyard on the right.
Part 2 – Zoe
5. Zoe: Rounds
Shorefront District – South
Puzzle #8
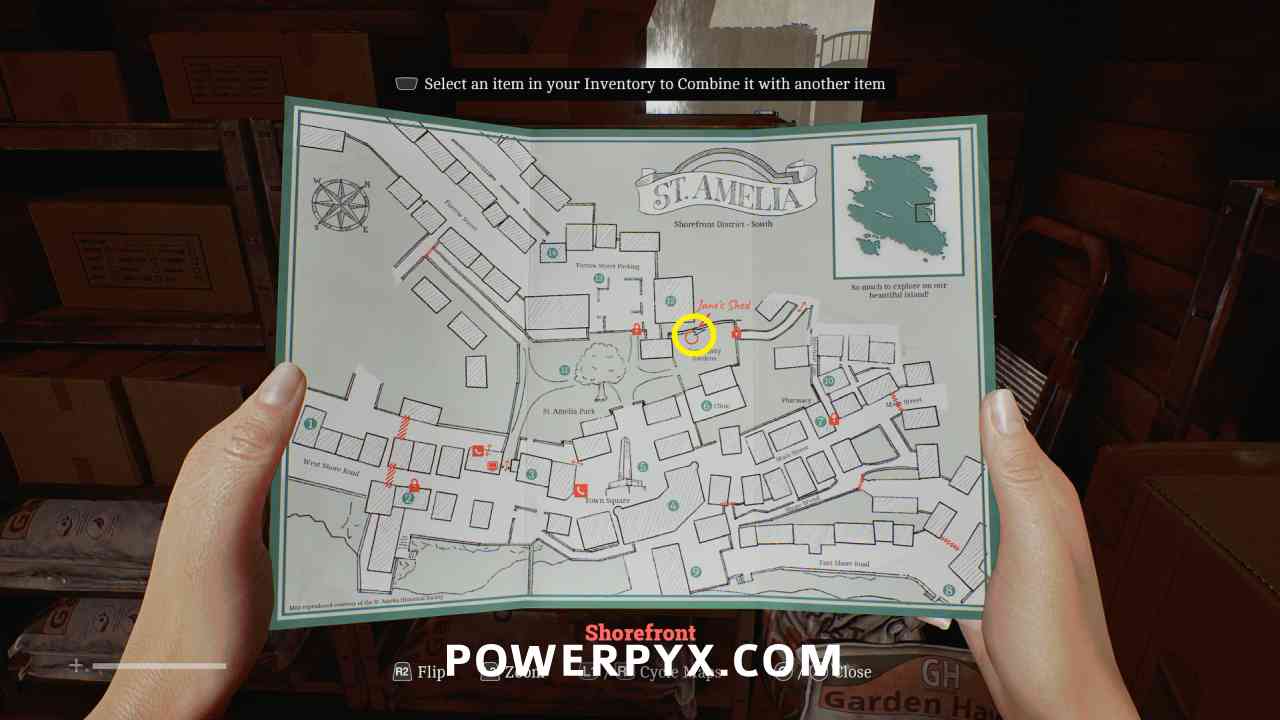
Area: Shorefront District – South > Community Gardens
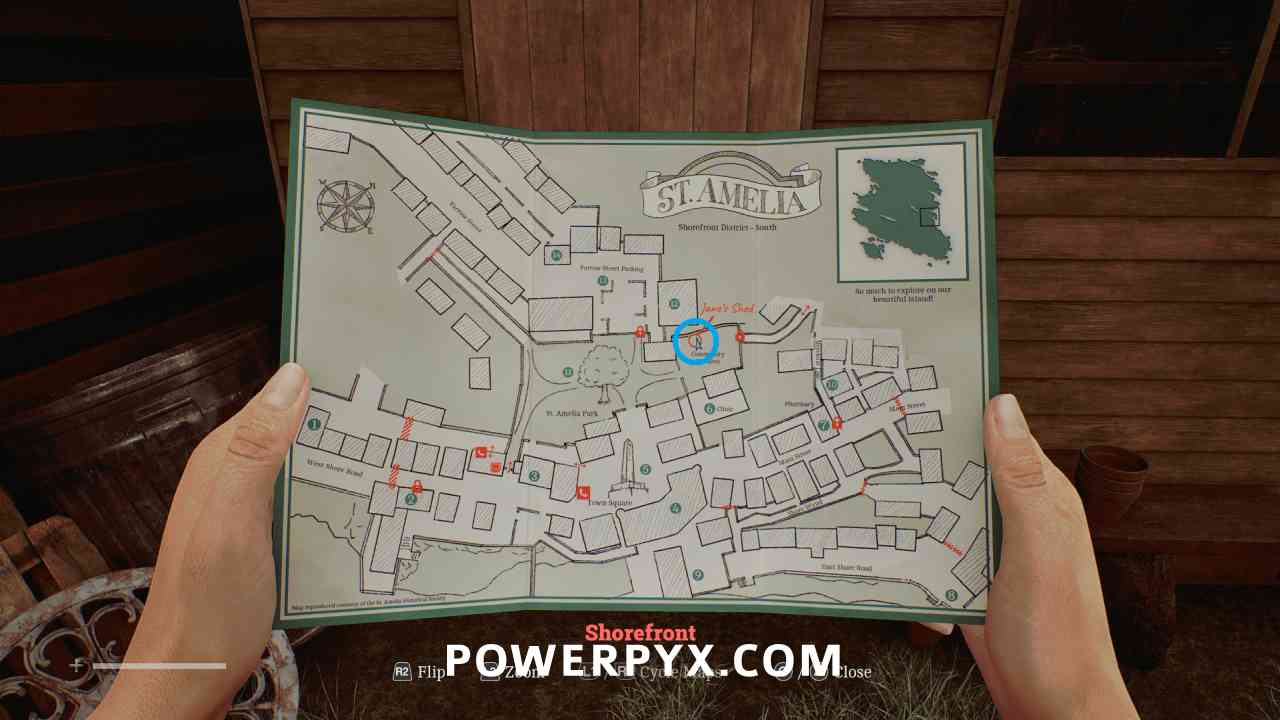
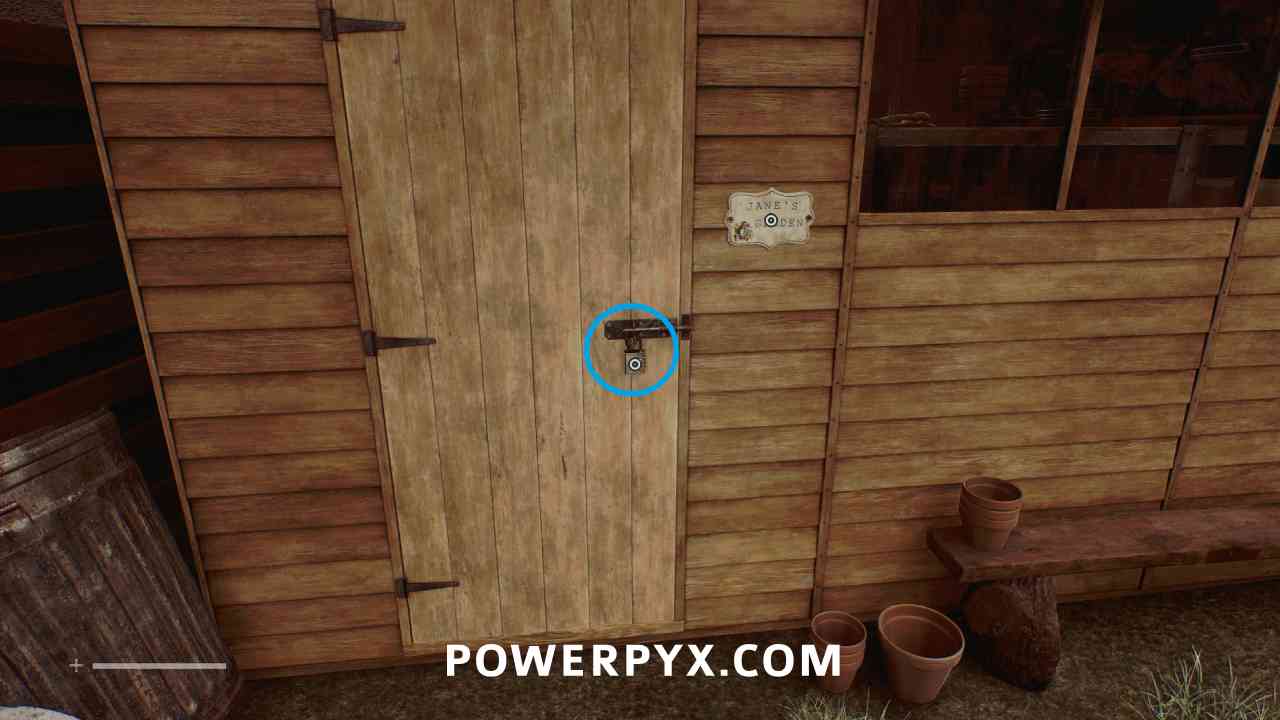
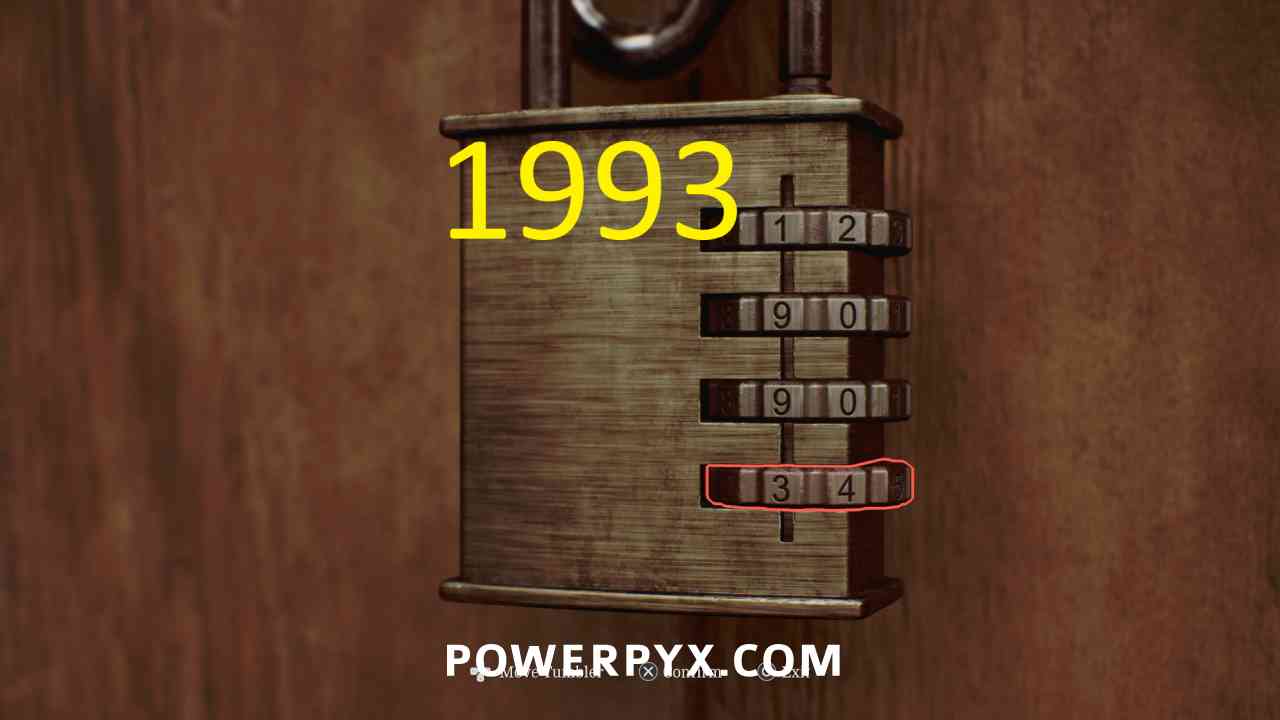
In the community garden, interact with the lock on the shed and enter 1993 (the same year on the flower bed with the name Jane Chalmers on it).

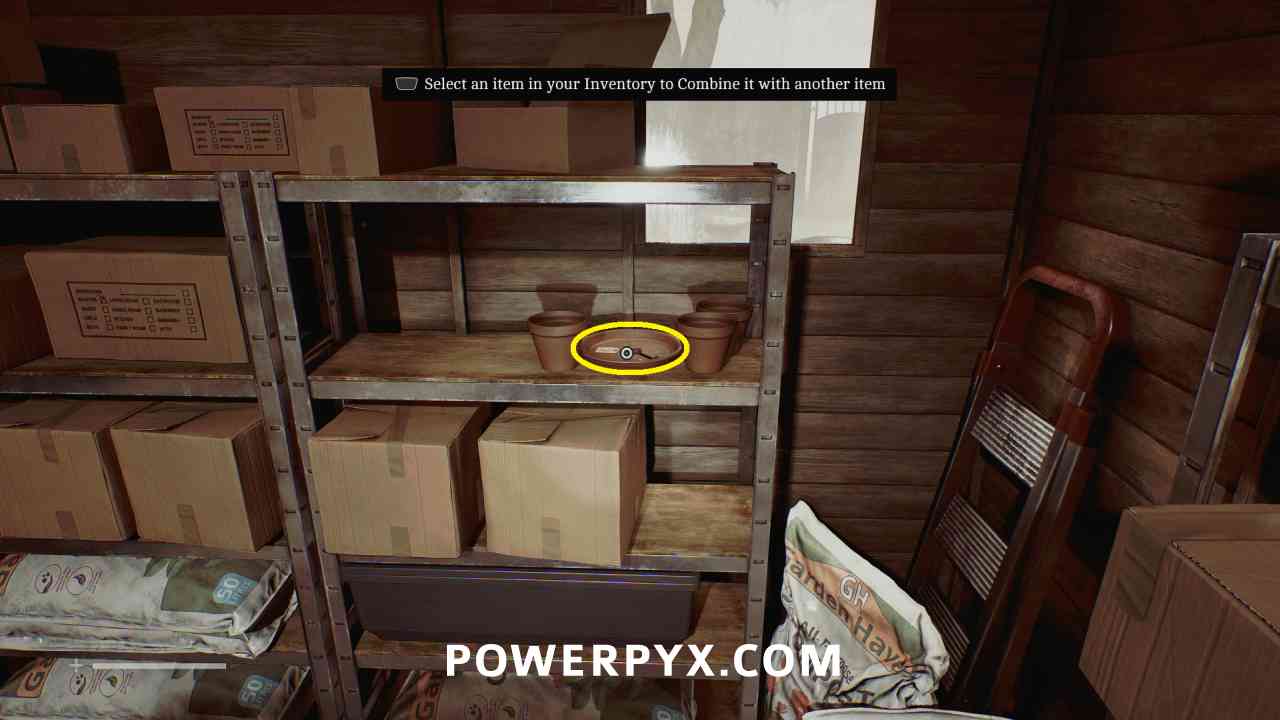
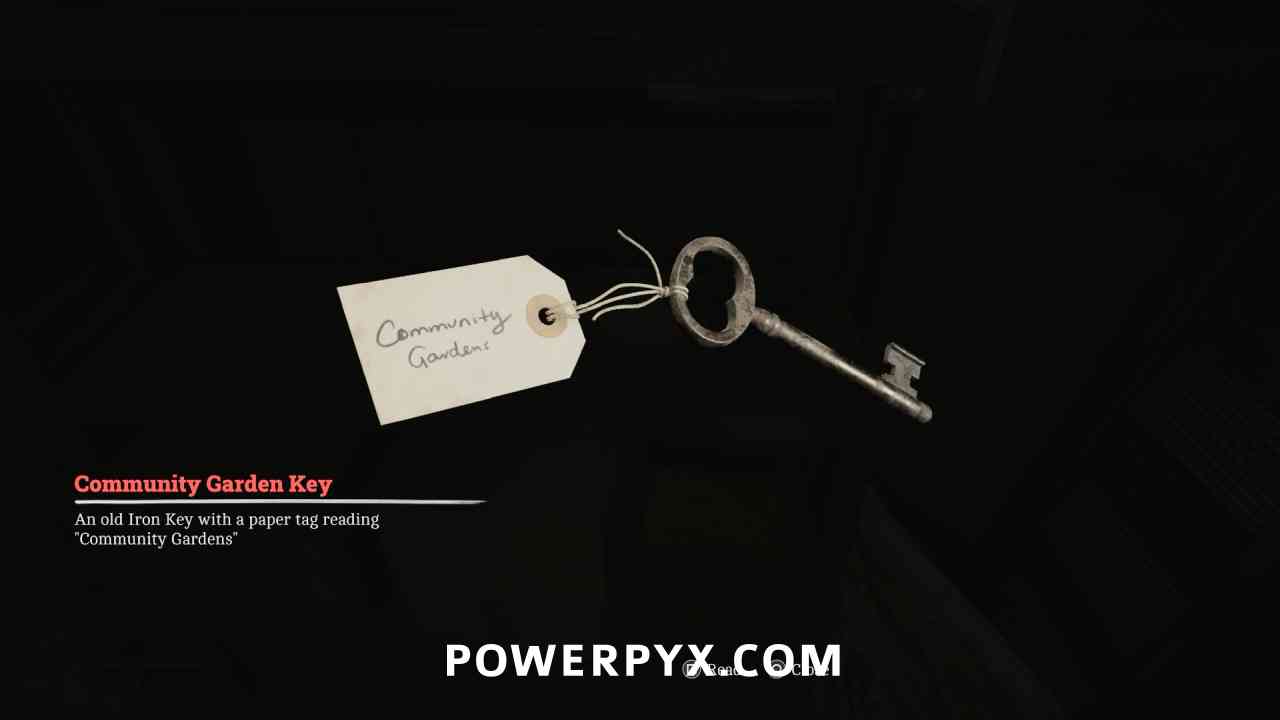
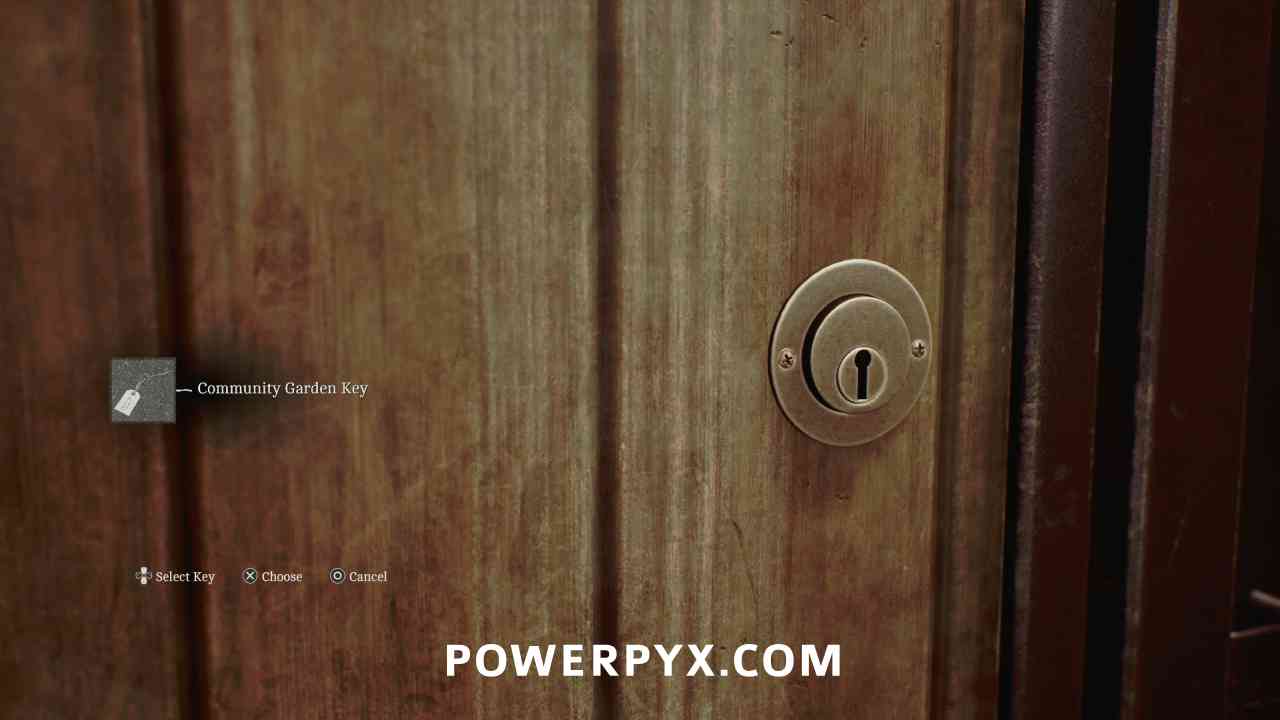
Key Item: Community Garden Key
Area: Shorefront District – South > Community Gardens
In the shed, on a shelf to the right.
Locked Door: Community Gardens
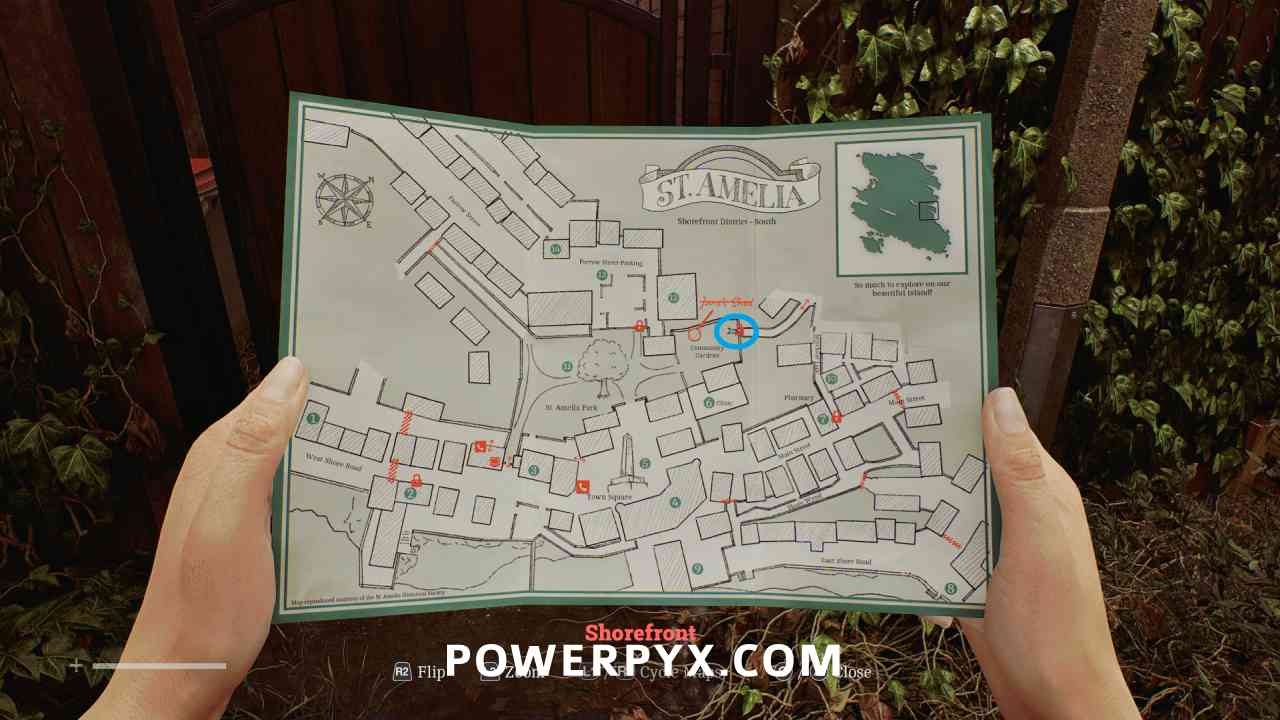
Area: Shorefront District – South > Community Gardens
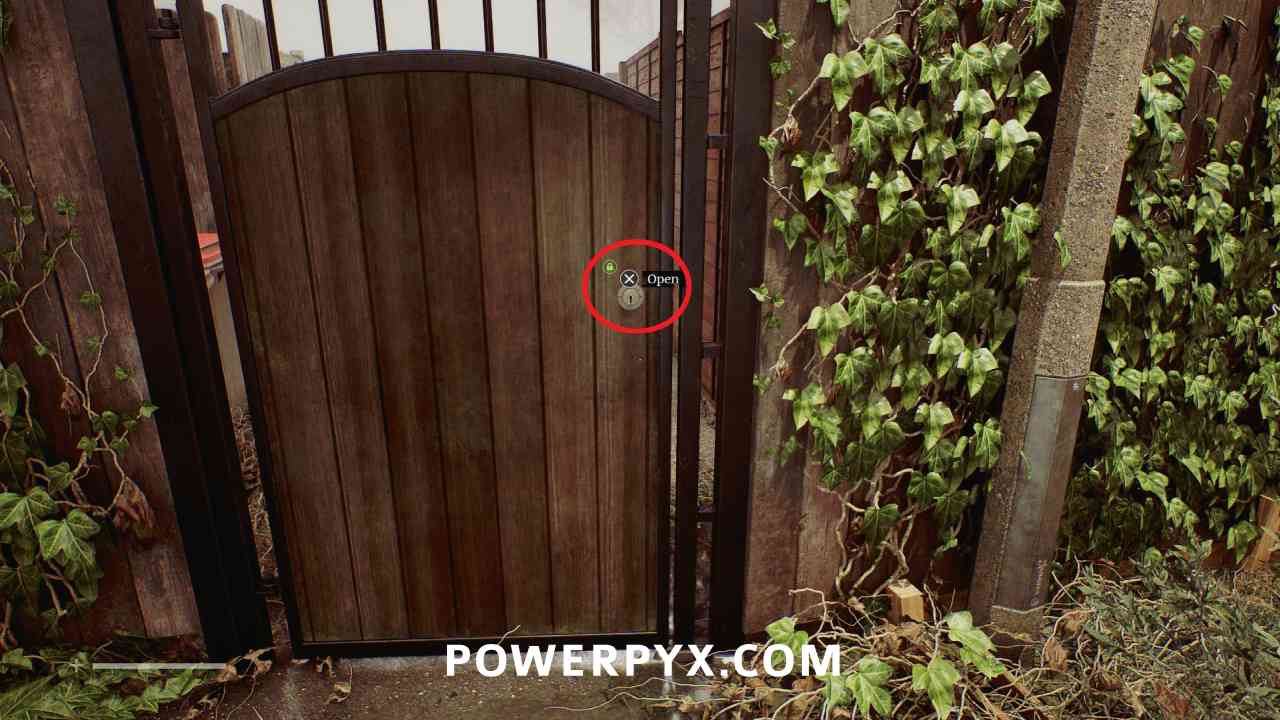
Interact with the gate in the gardens and use the Community Garden Key to open it.
Shorefront District – North > Mr. Stewart’s House
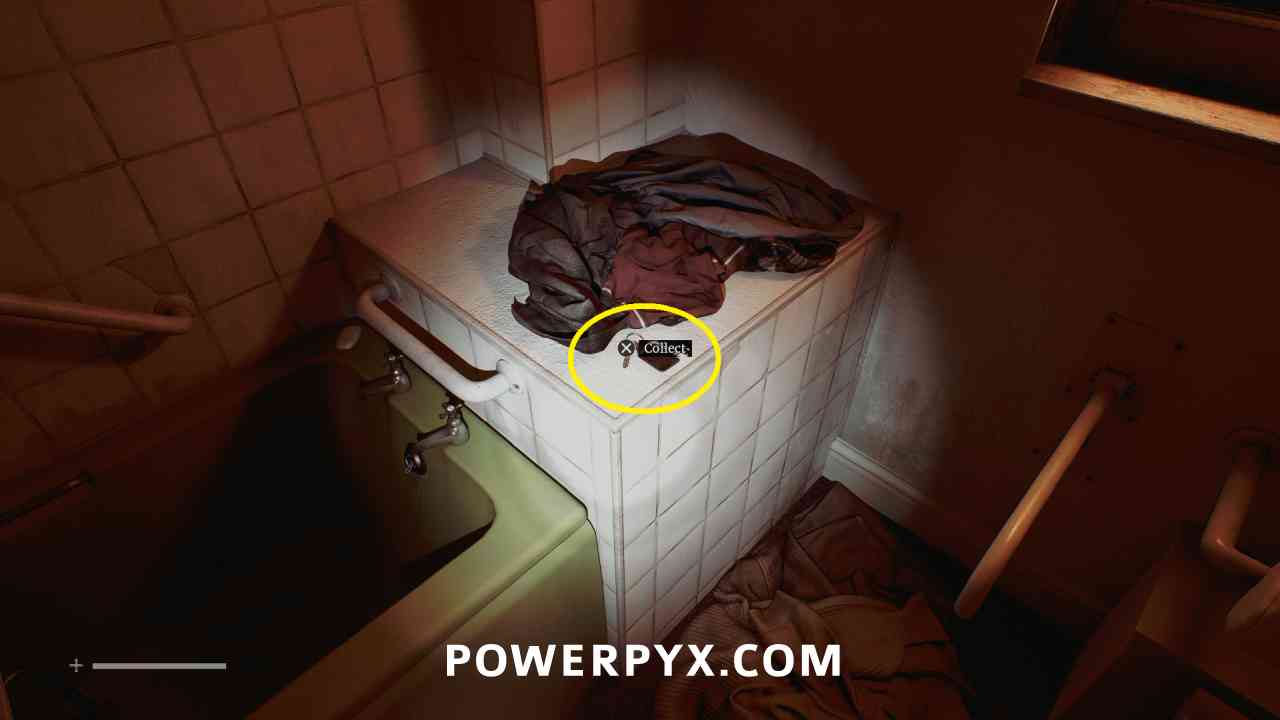
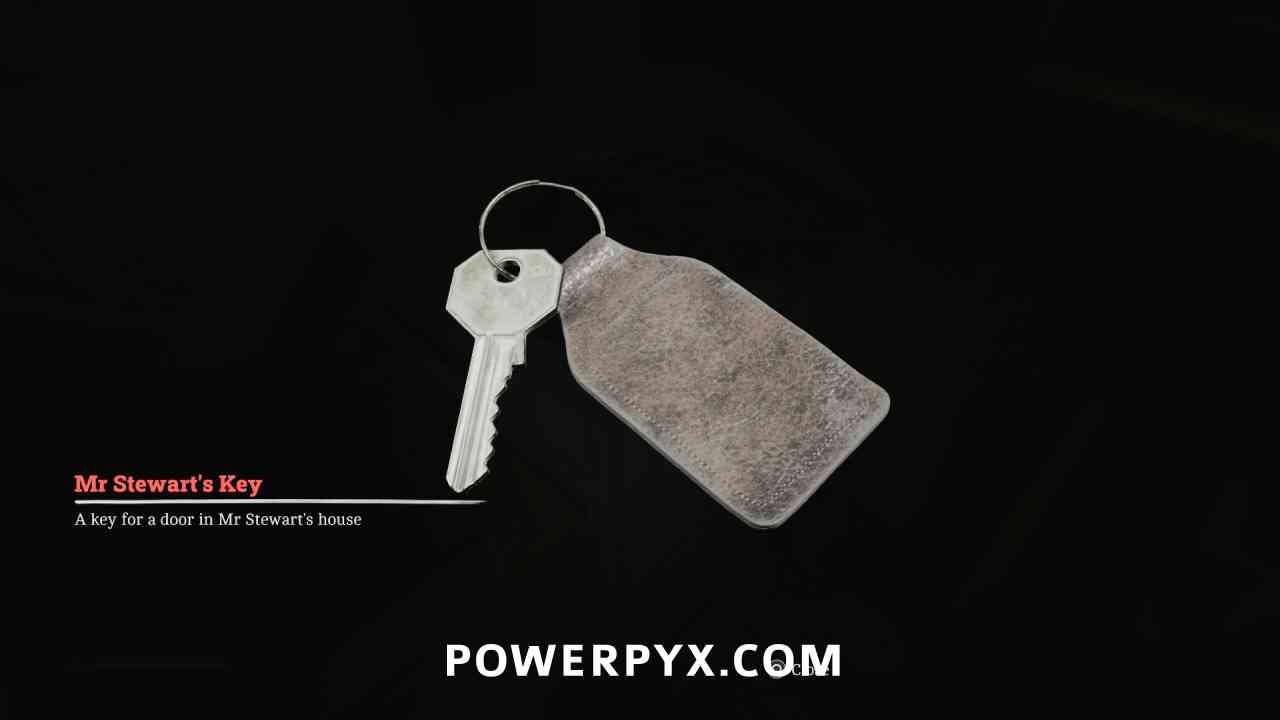
Key Item: Mr. Stewart’s Key
Area: Shorefront District – North > Mr. Stewart’s House
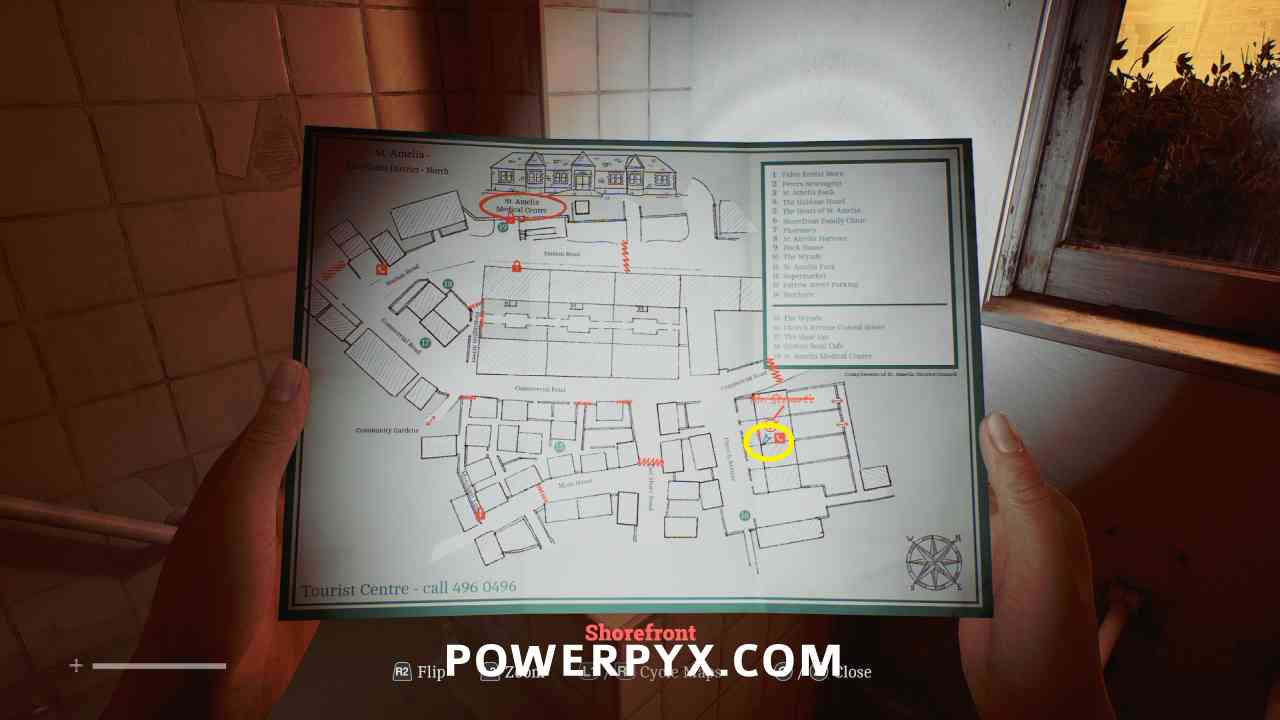
Inside Mr. Stewart’s House, after seeing the monster for the first time, go back in the bathroom and this is to the right of the tub.
Locked Door – Mr. Stewart’s House
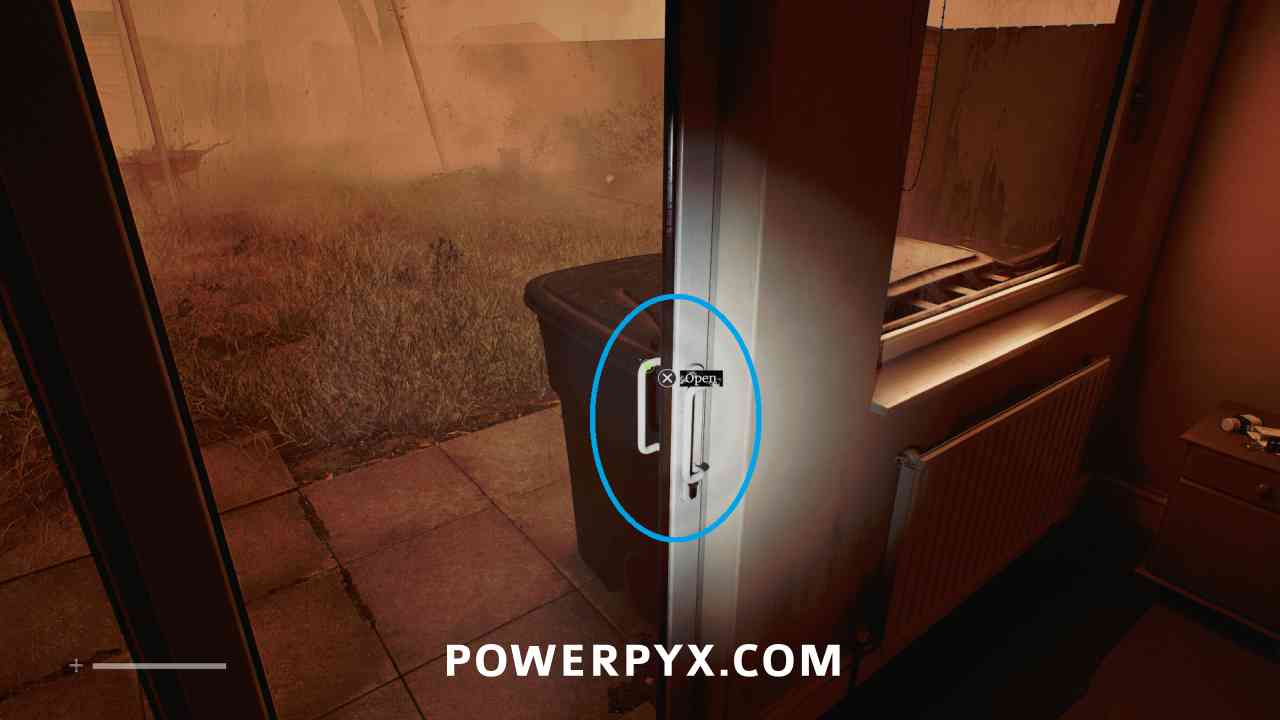
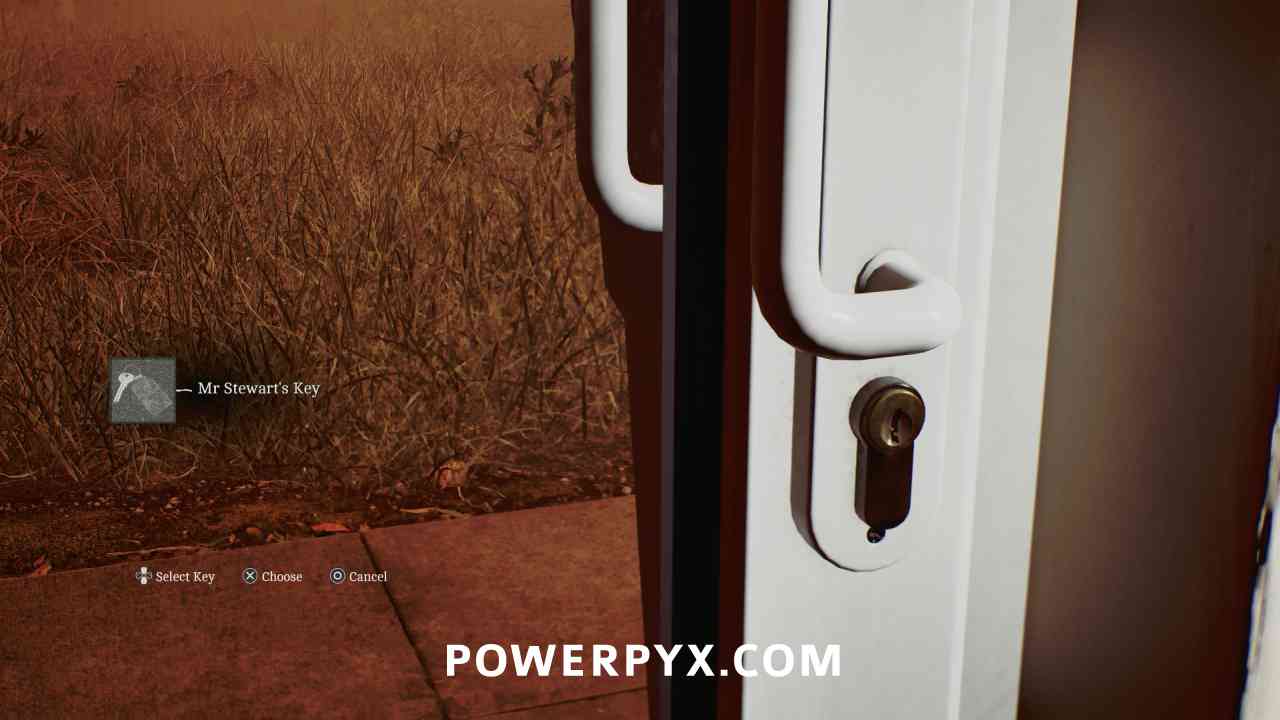
Area: Shorefront District – North > Mr. Stewart’s House
Inside Mr. Stewart’s House, use the key on the back door where you entered to exit the house.
Shorefront District – North
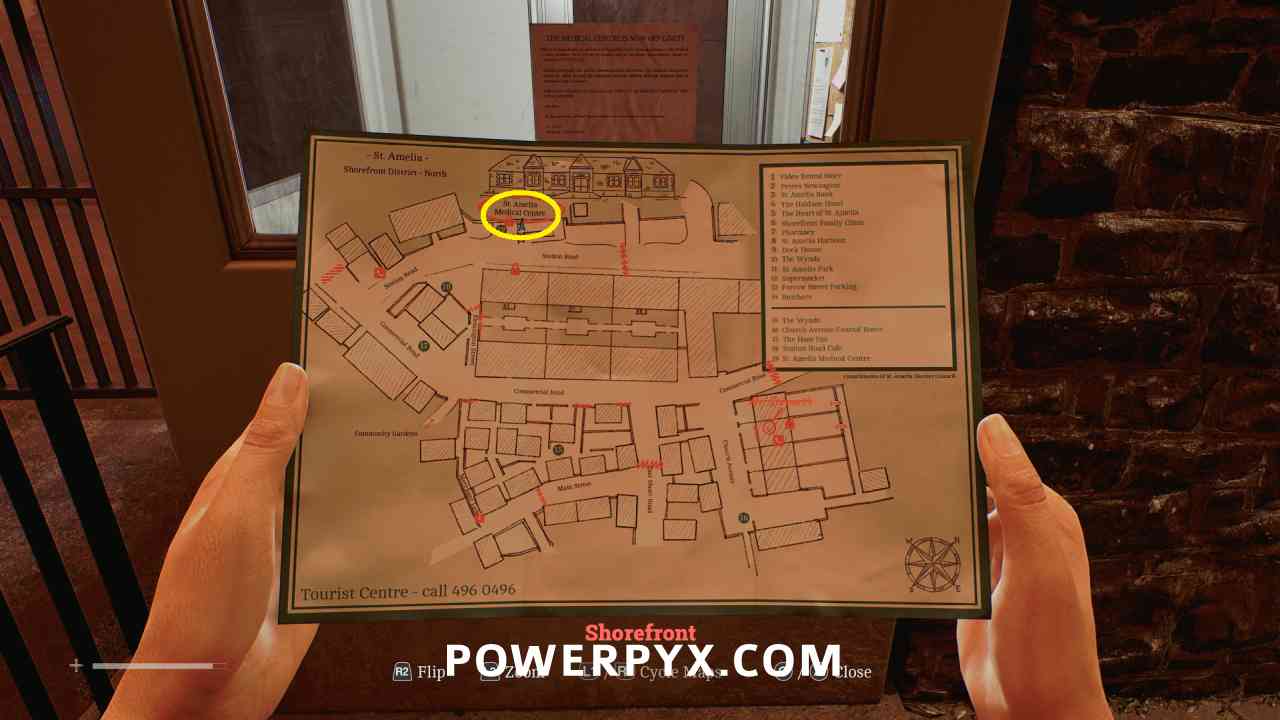
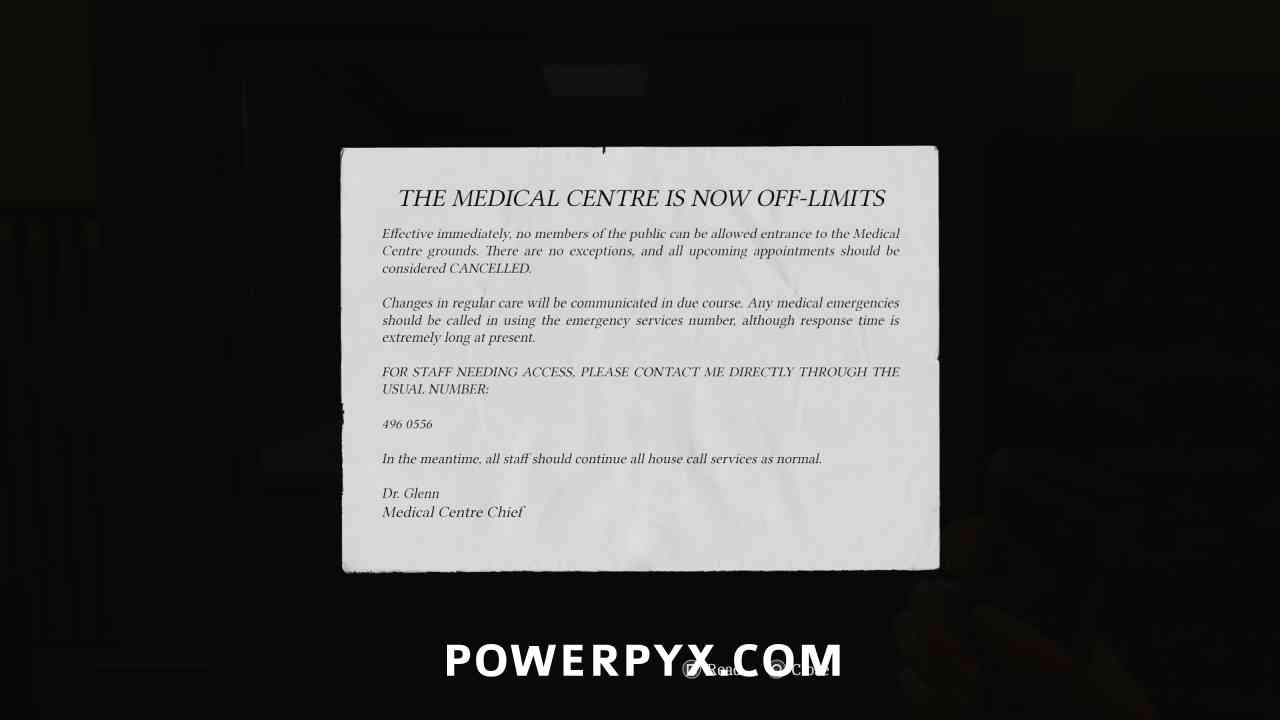
Clue: Medical Security Note
Area: Shorefront District – North > Outside Medical Centre
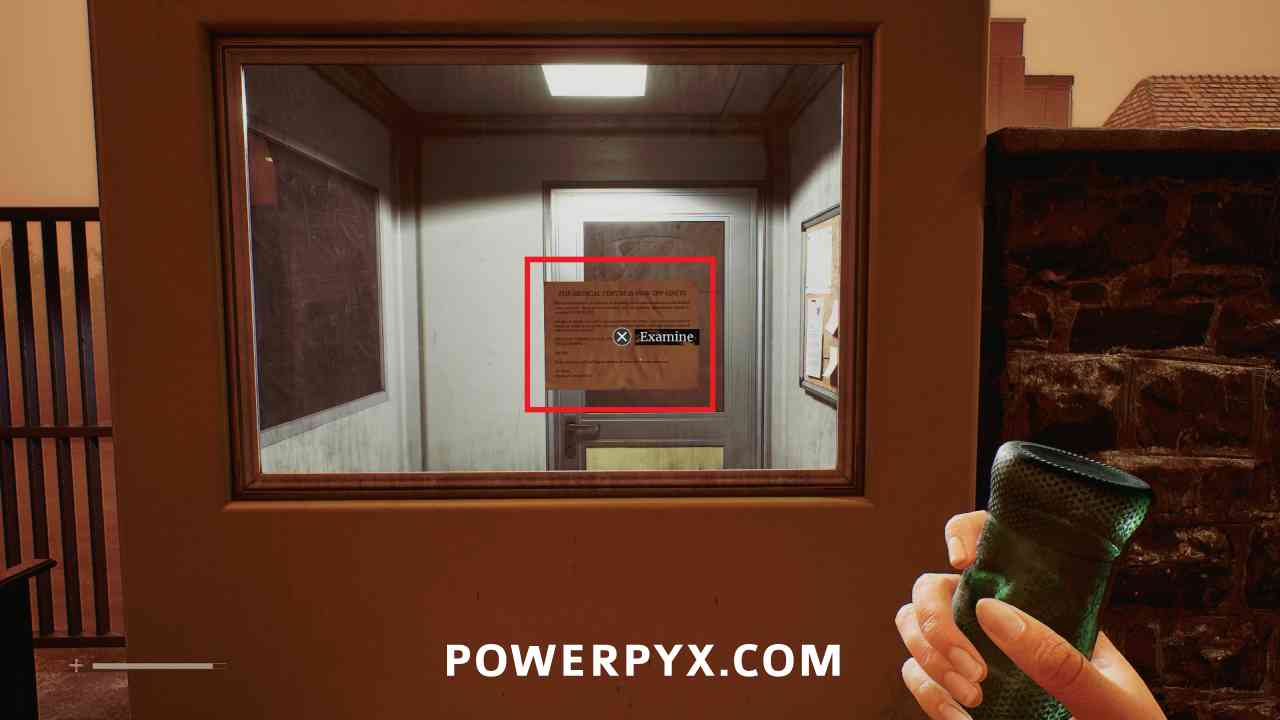
Outside the Medical Centre, inspect the paper on the window of the security booth.
Puzzle #9
Area: Shorefront District – North
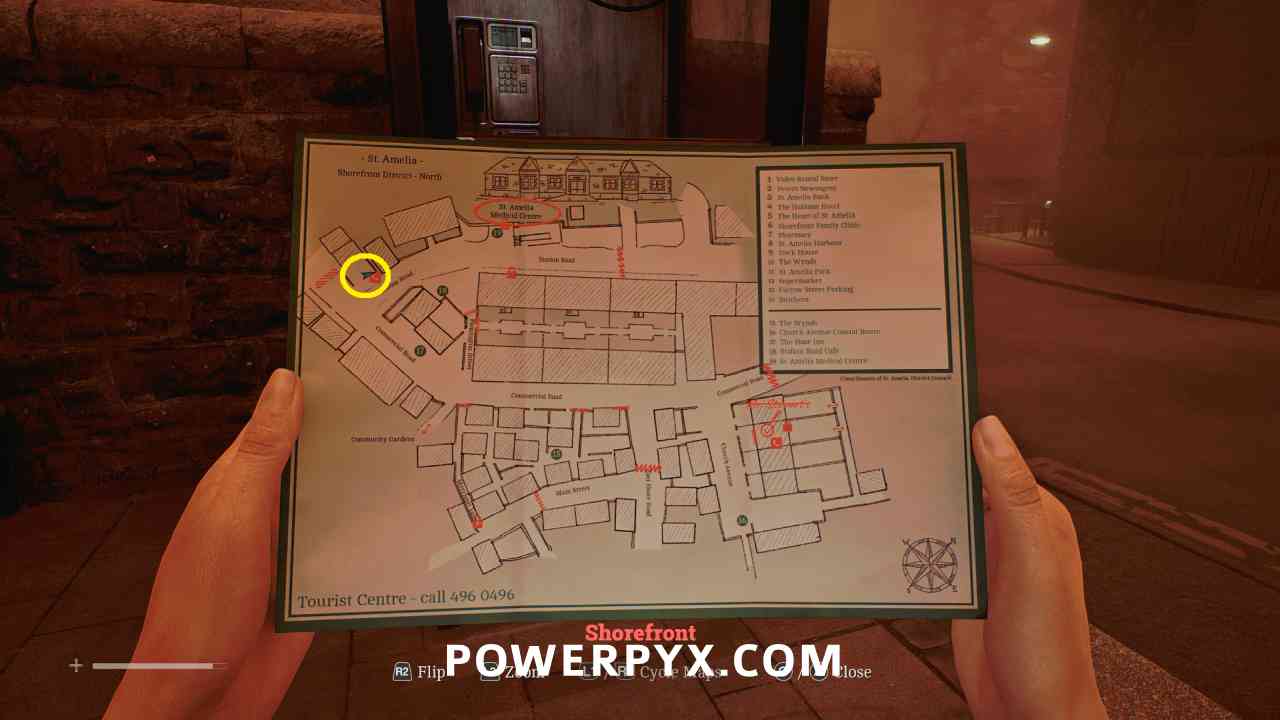
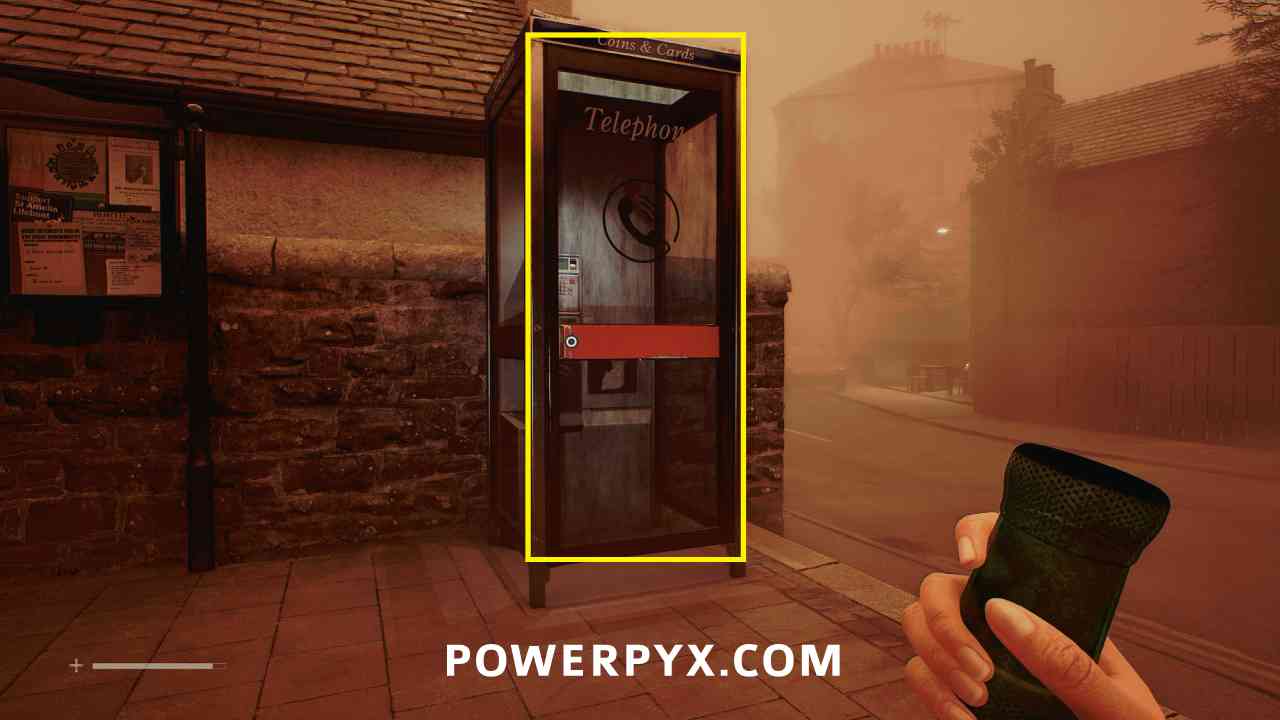
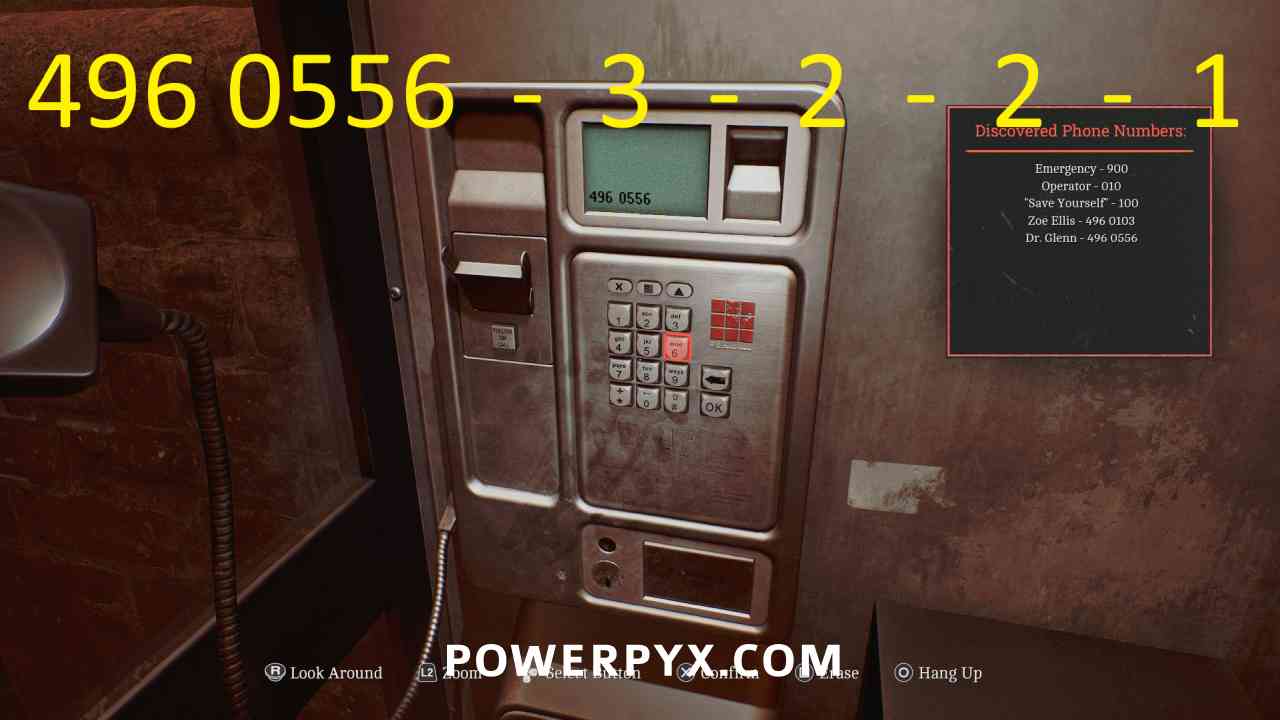
Go back down the street to the phone booth, use number 496 0556 (from the Medical Security Note). Press 3 when prompted, then press 2, then press 2 again, then press 1.
Shorefront District – North > Medical Centre
Locked Door
Area: Shorefront District – North > Outside Medical Centre
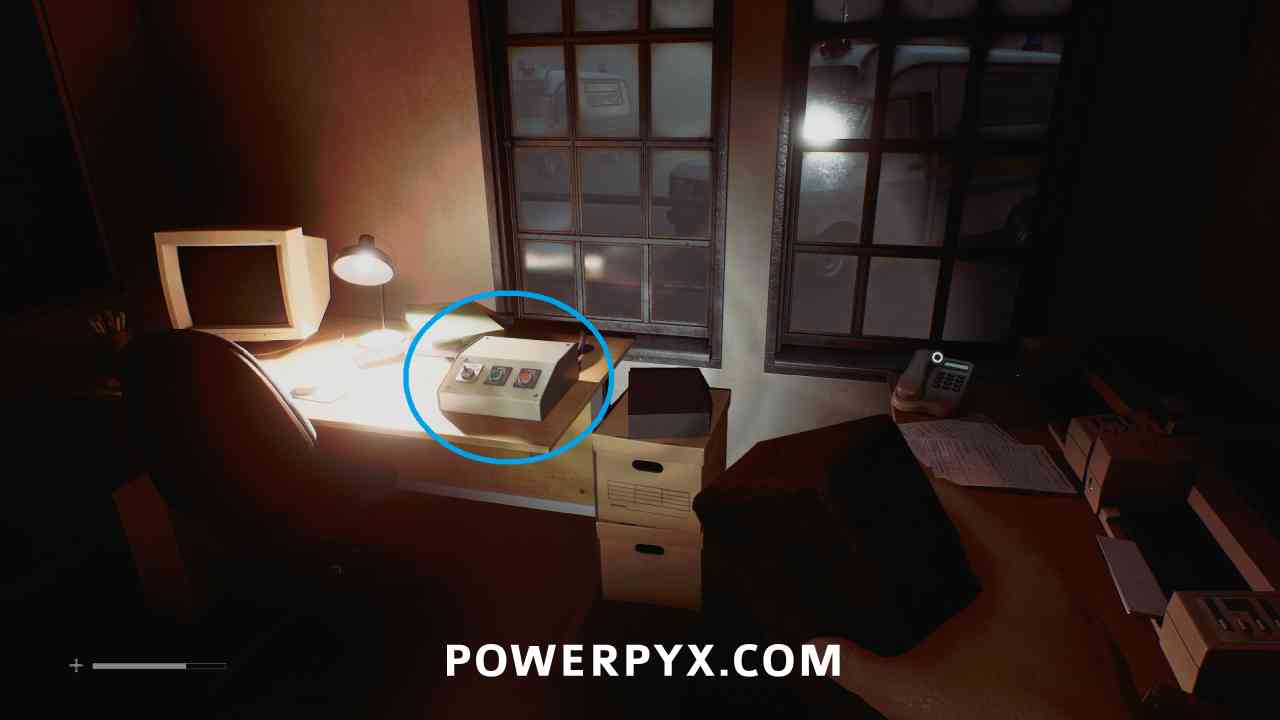
In the back parking lot of the Medical Centre, interact with the garage door to enter it, then go into the office and interact with the button beside the phone to open the gates beside the building.
6. Journey to Medical
Shorefront District – South
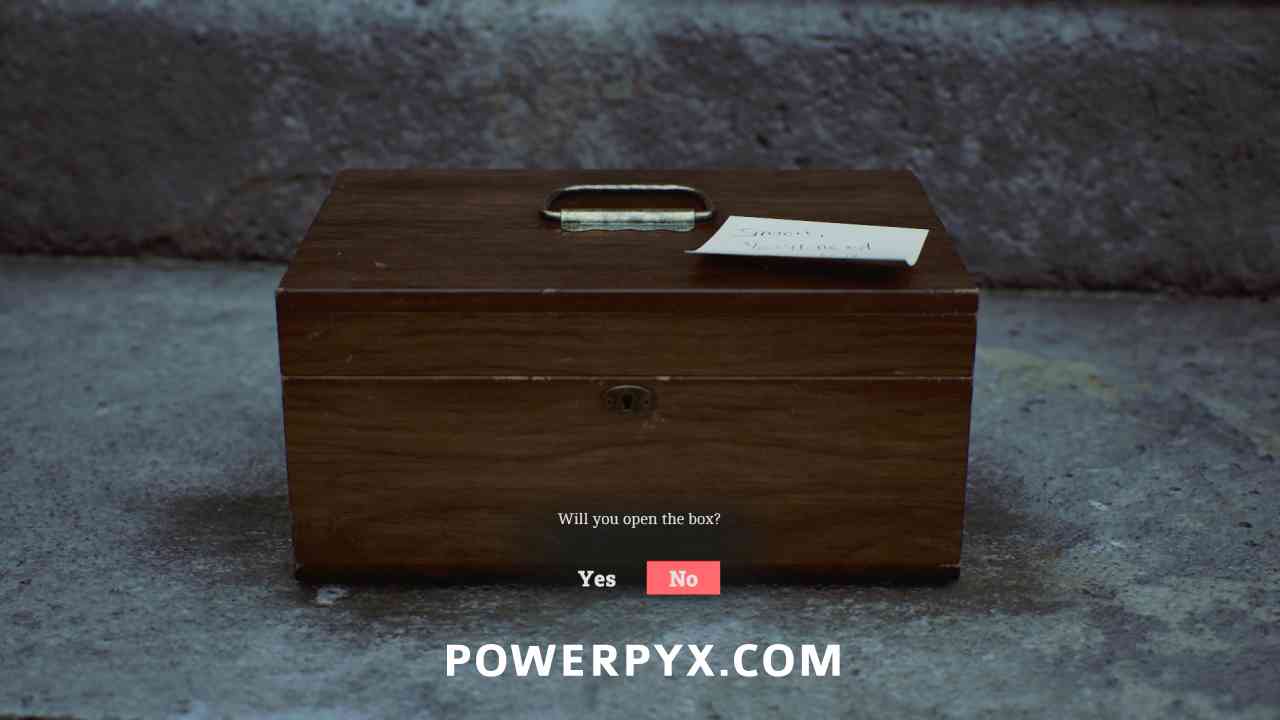
Equipment: Pistol
Area: Shorefront District – South
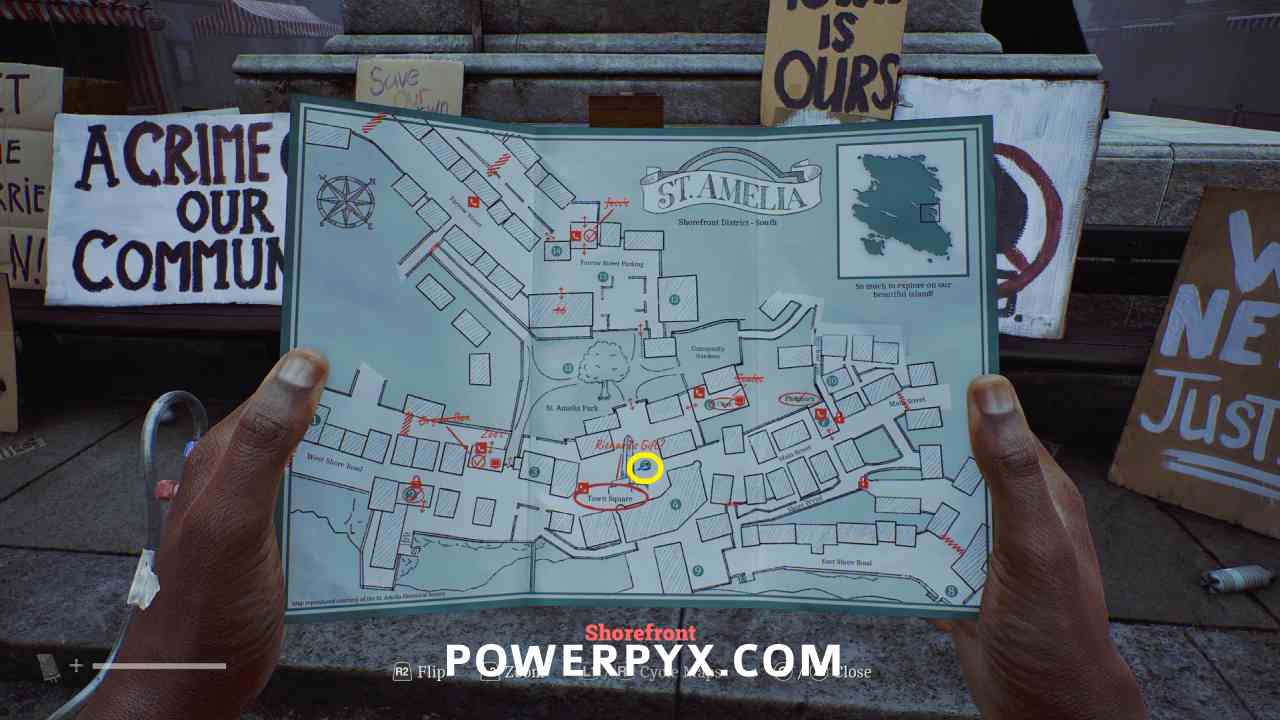
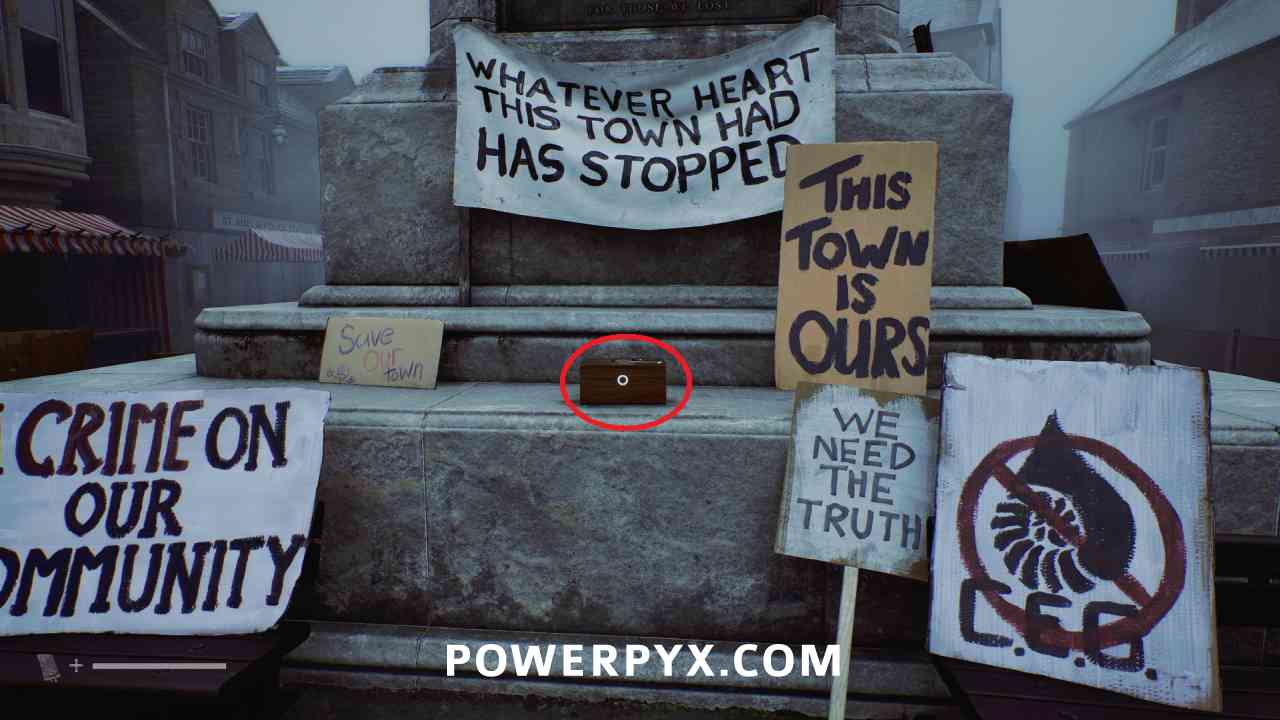
In the Town Square (5) in a box. You must choose “Yes” to this option to trigger the Otherworld shift in the town to allow you to progress.
Shorefront District – North
Locked Door – Flemington Street
Area: Shorefront District – North
On Flemington Street, interact with the door and choose to use the Scalpel.
Part 3 – The Patient
7. Zoe: The Patient
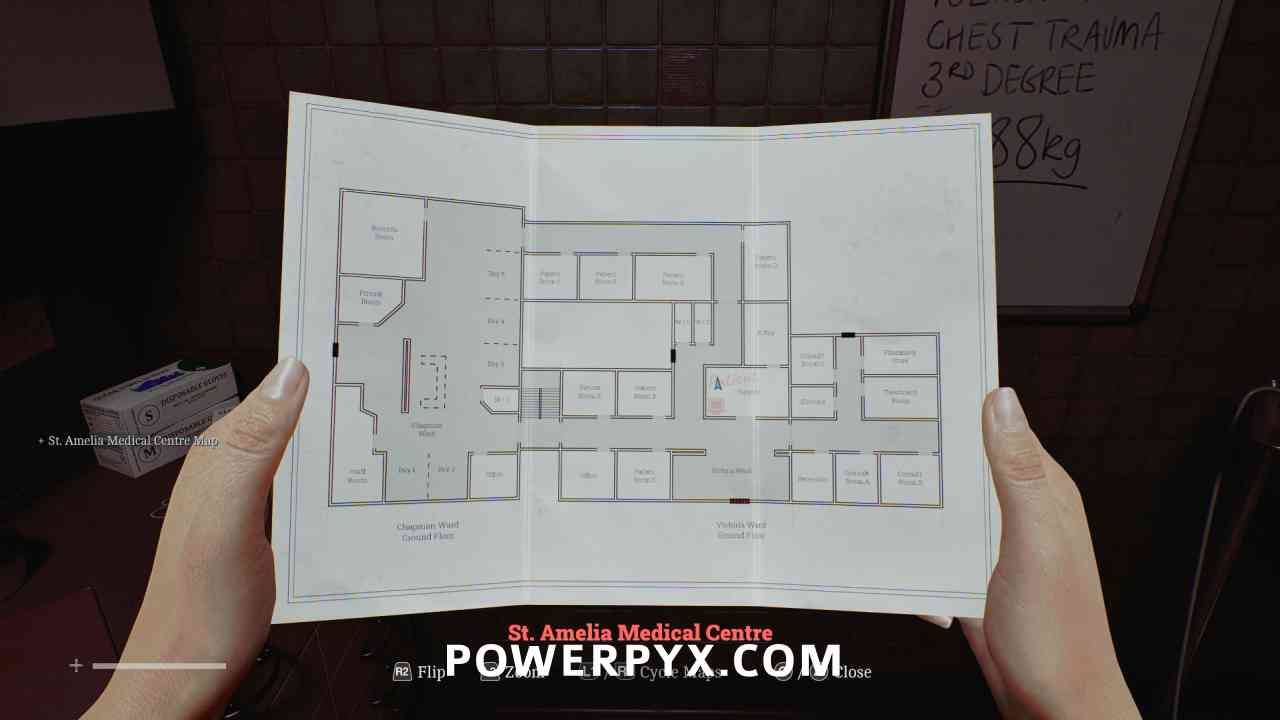
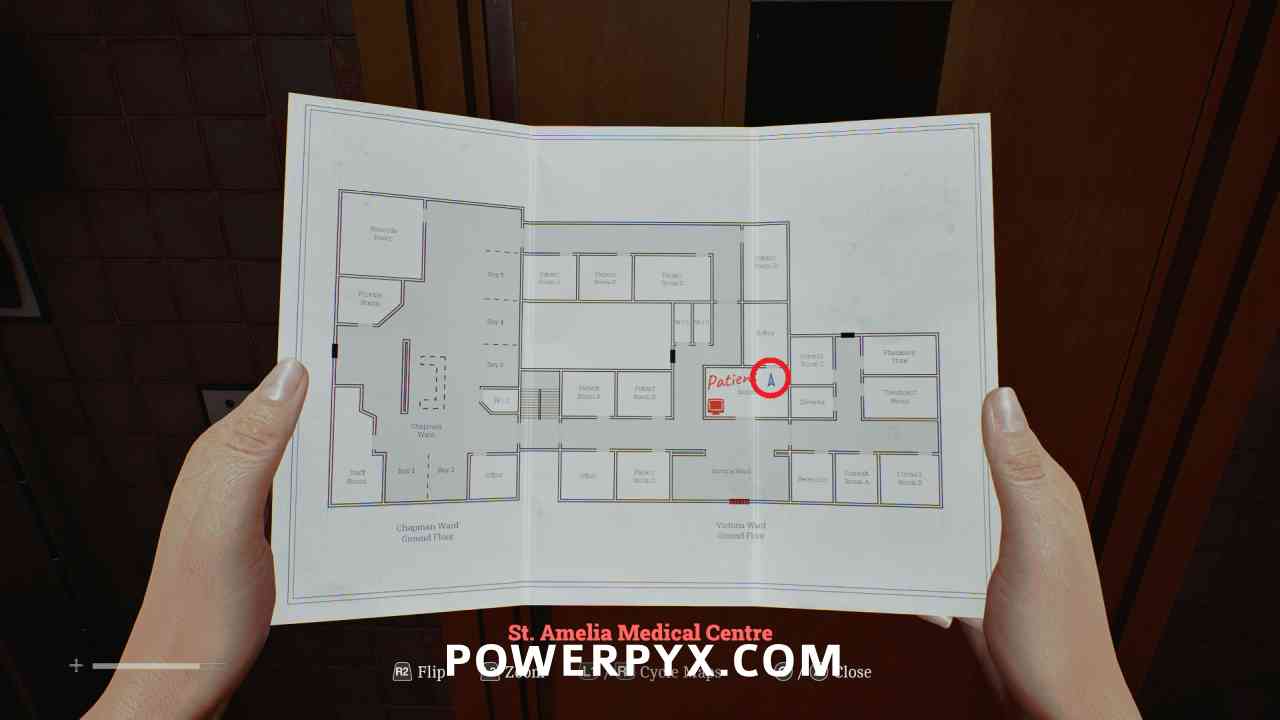
St. Amelia Medical Center
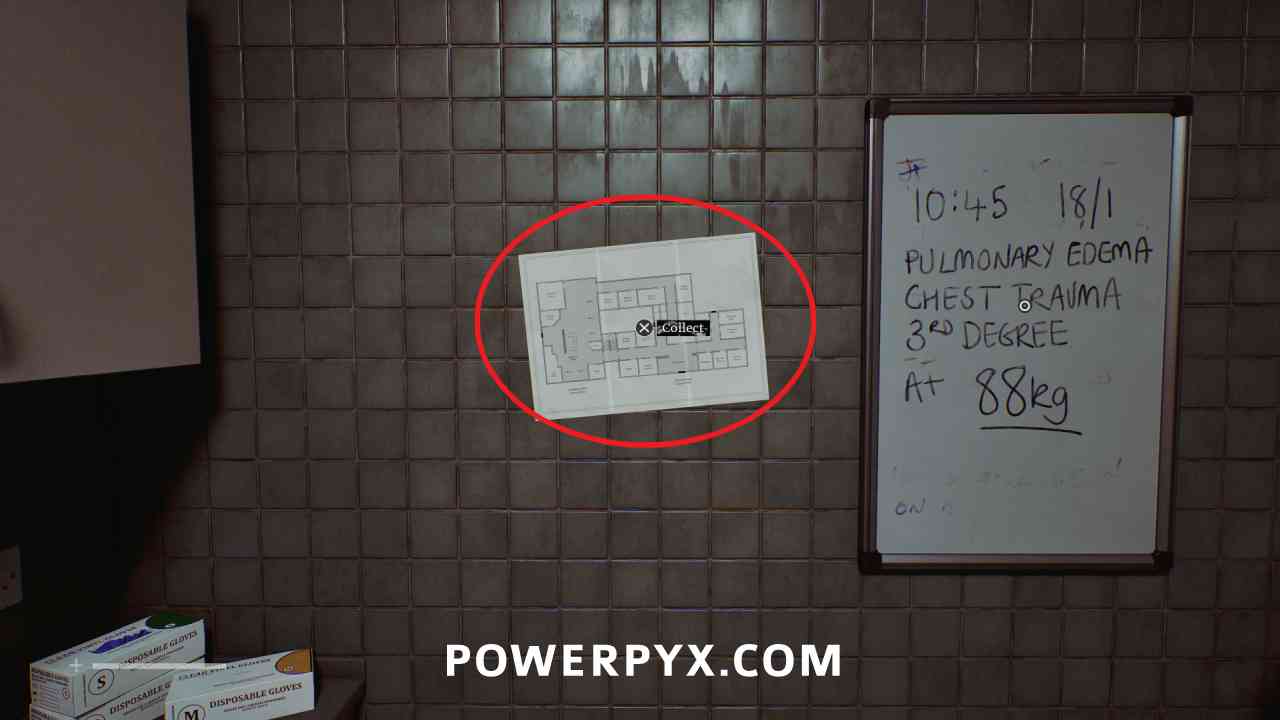
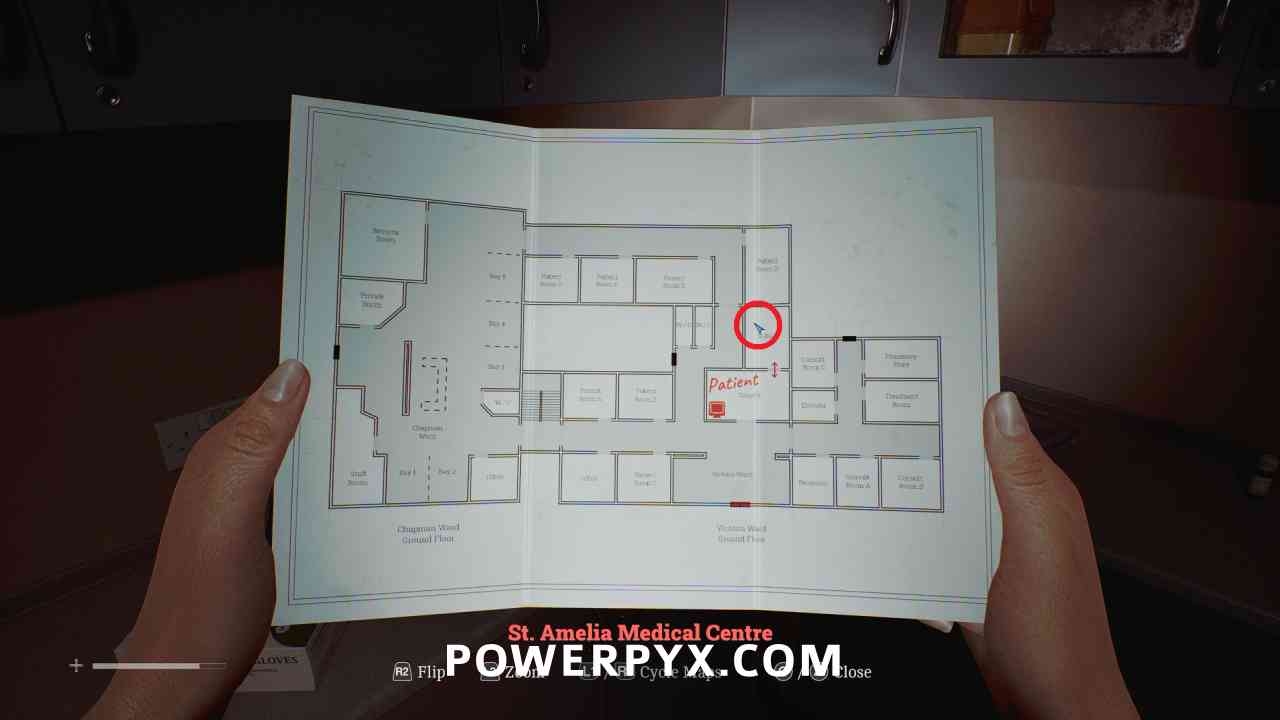
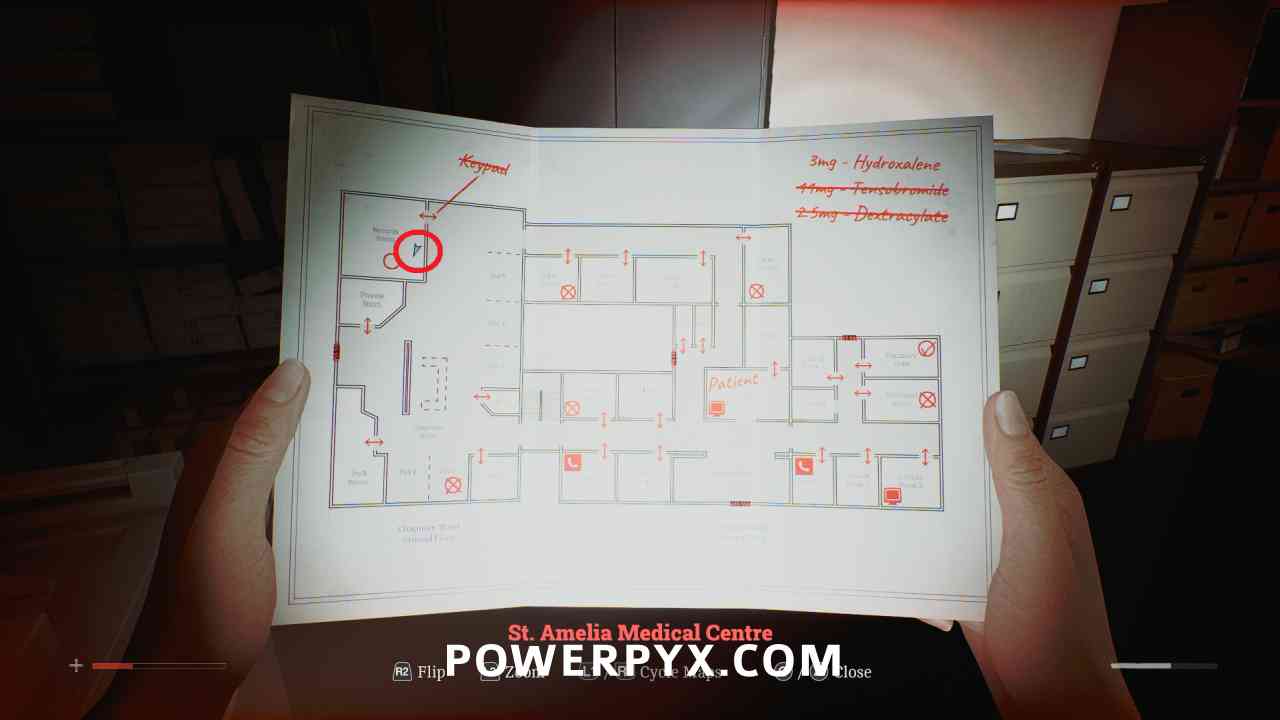
St. Amelia Medical Center Map
Area: St. Amelia Medical Center > Surgery
On the wall to the left at the start of the chapter.
Puzzle #10
Area: St. Amelia Medical Center > Surgery
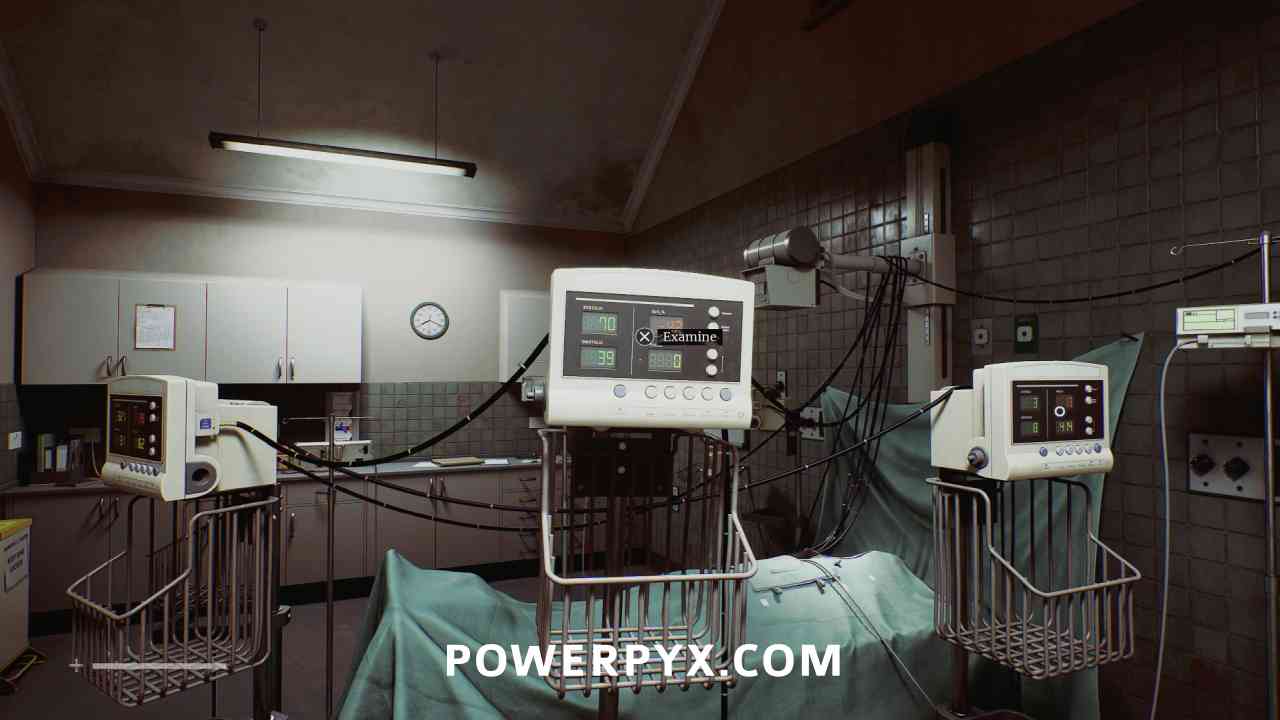
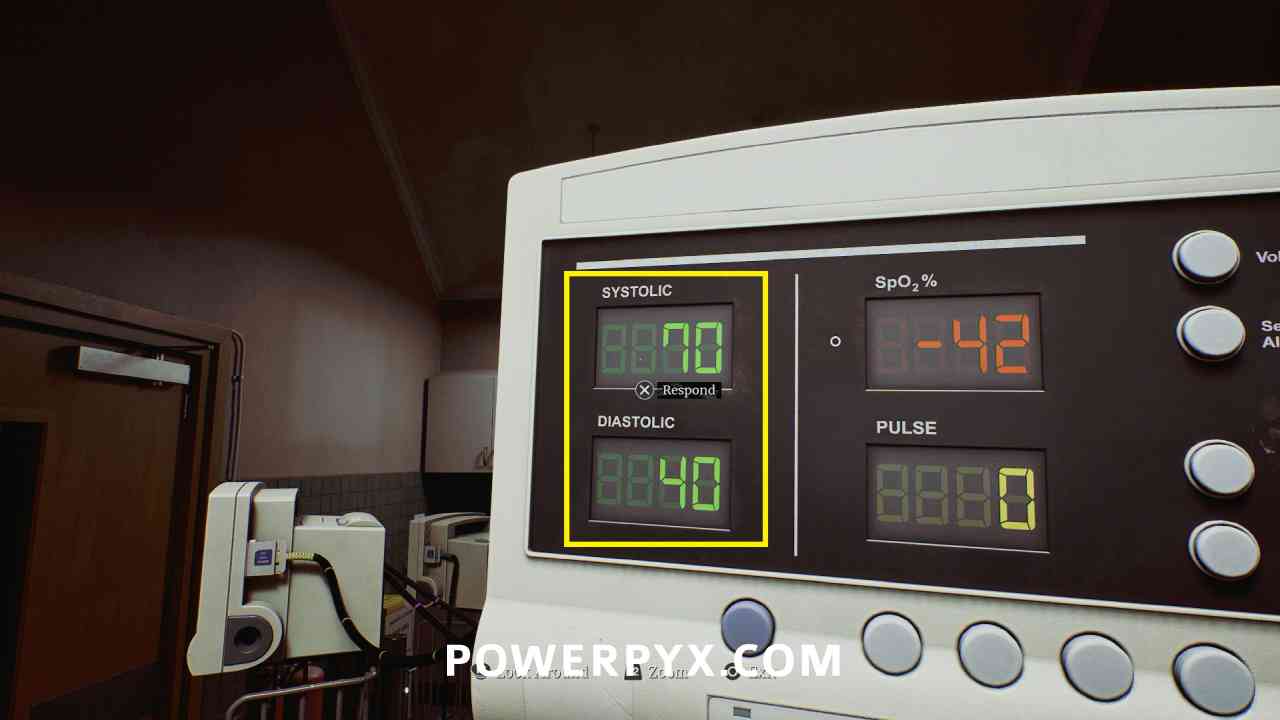
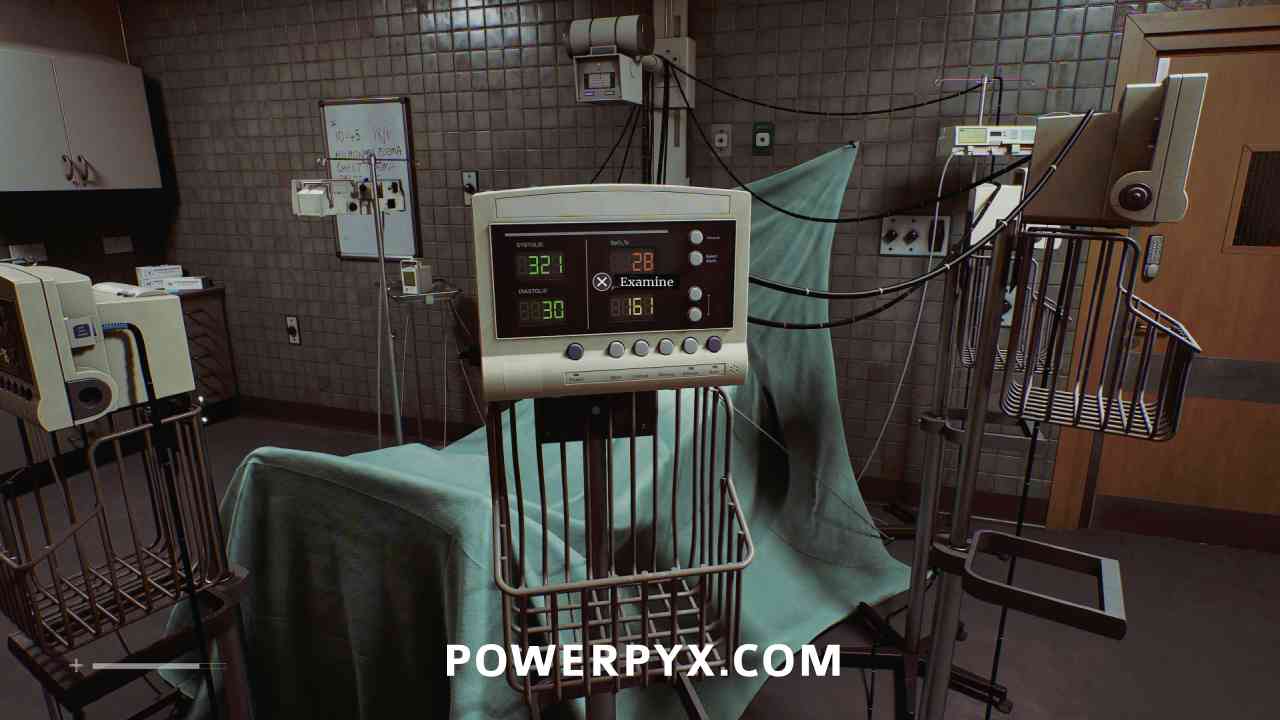
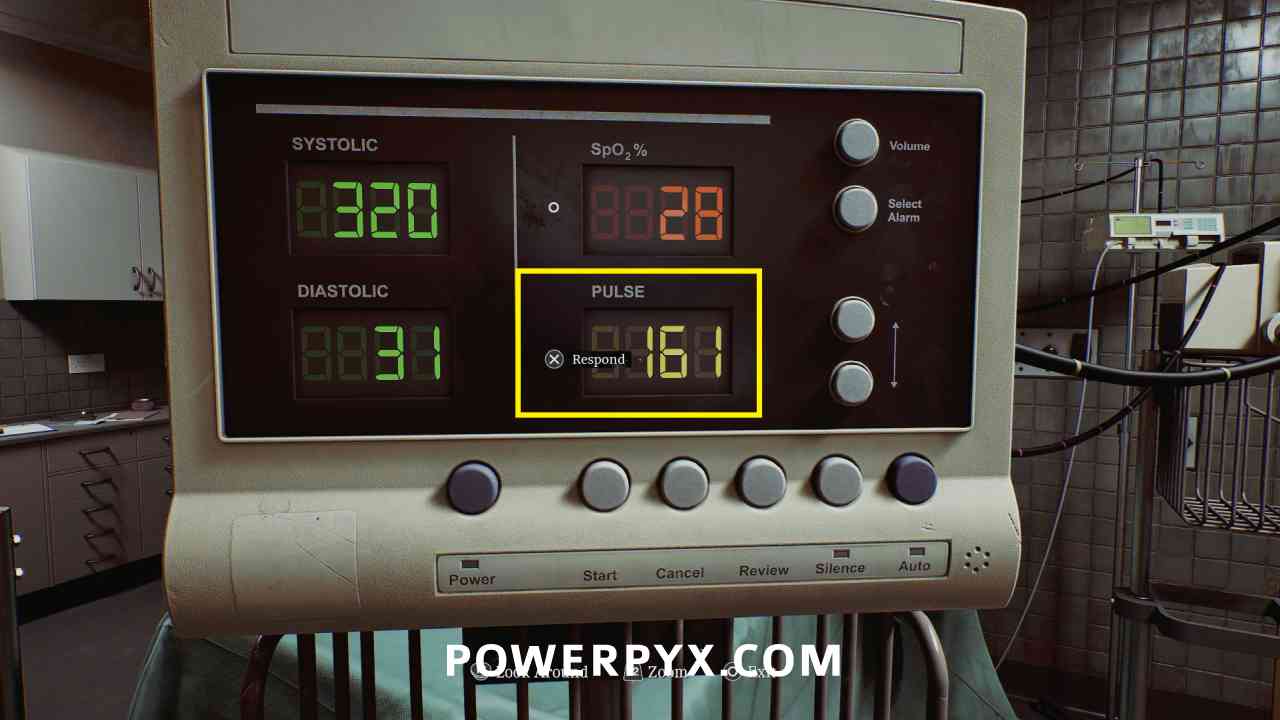
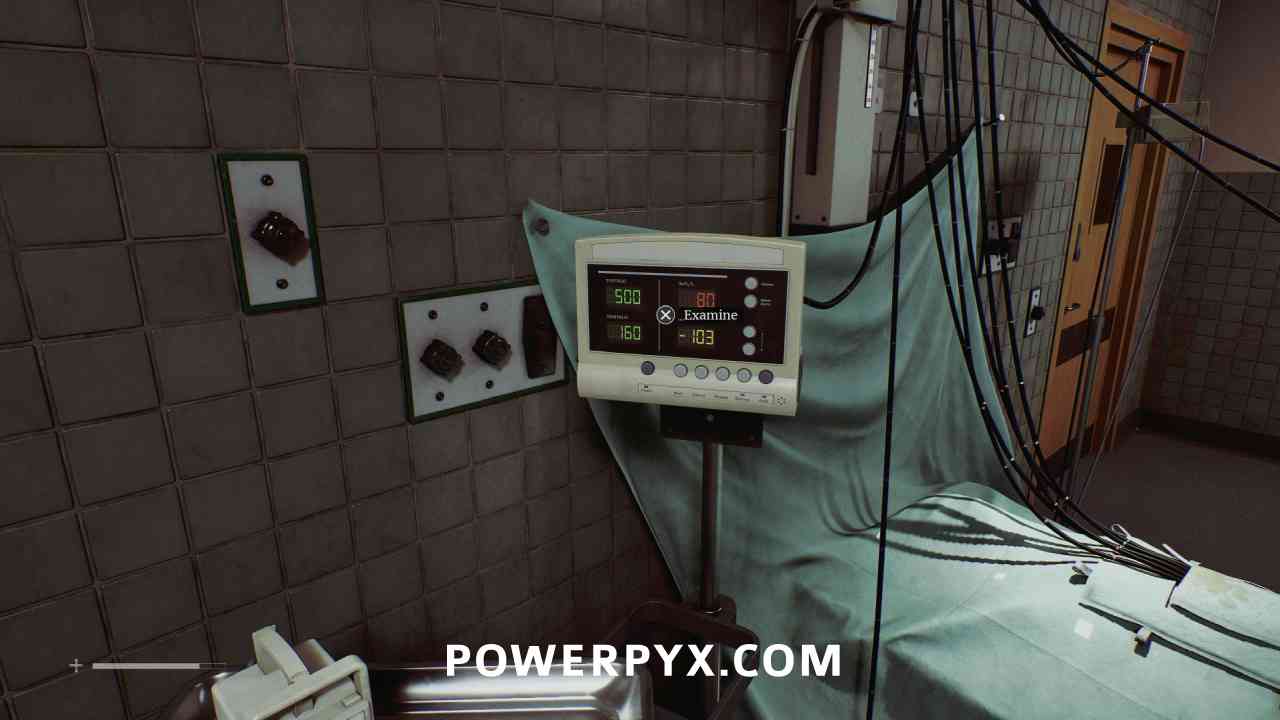
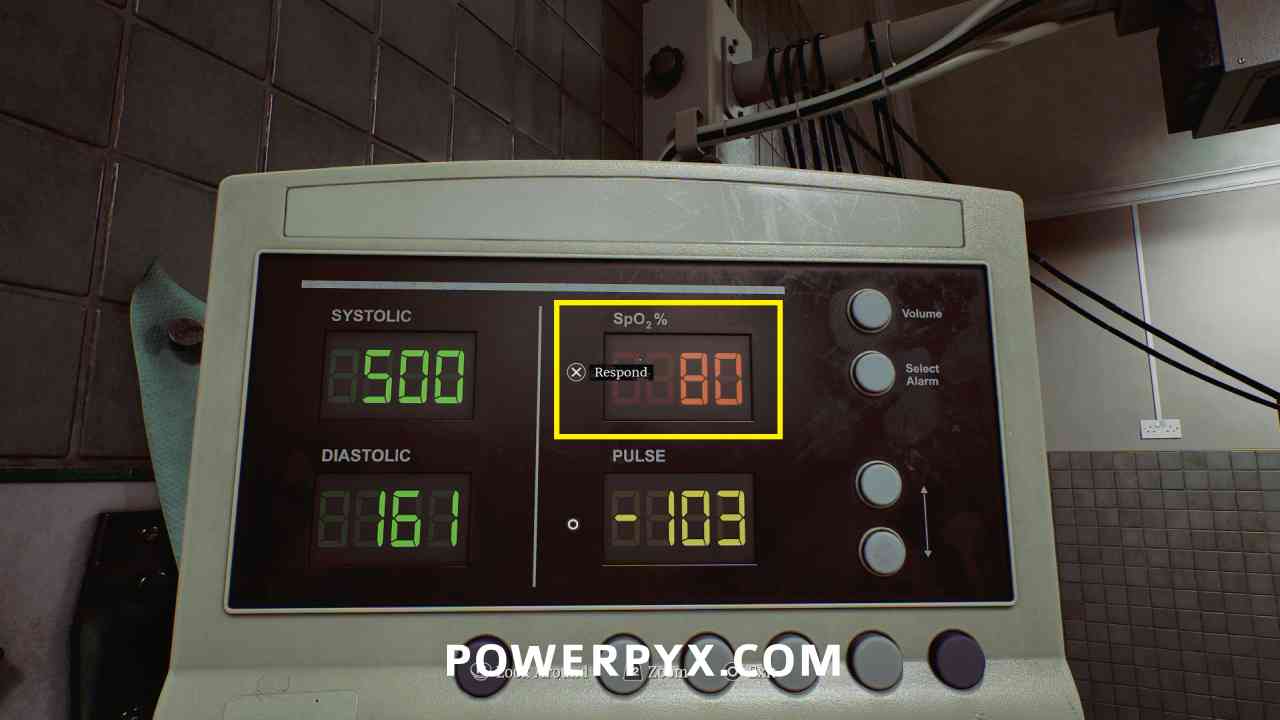
After talking on the intercomm, you must respond with the correct readings from the machines in the room. If you select the wrong one you take damage. Hints toward this are on the laptop left of the bed.
First look at the middle monitor on the right (from the foot of the bed), respond with the Systolic (70) and Diastolic (40) numbers for blood pressure. Note the numbers on these displays shift around slightly over time so you are just looking for the closest one.
Second look at the bottom monitor on the right, respond with Pulse (160).
Third look at the upper monitor on the left, respond with SpO2% (80).
Locked Door – Surgery
Area: St. Amelia Medical Center > Surgery
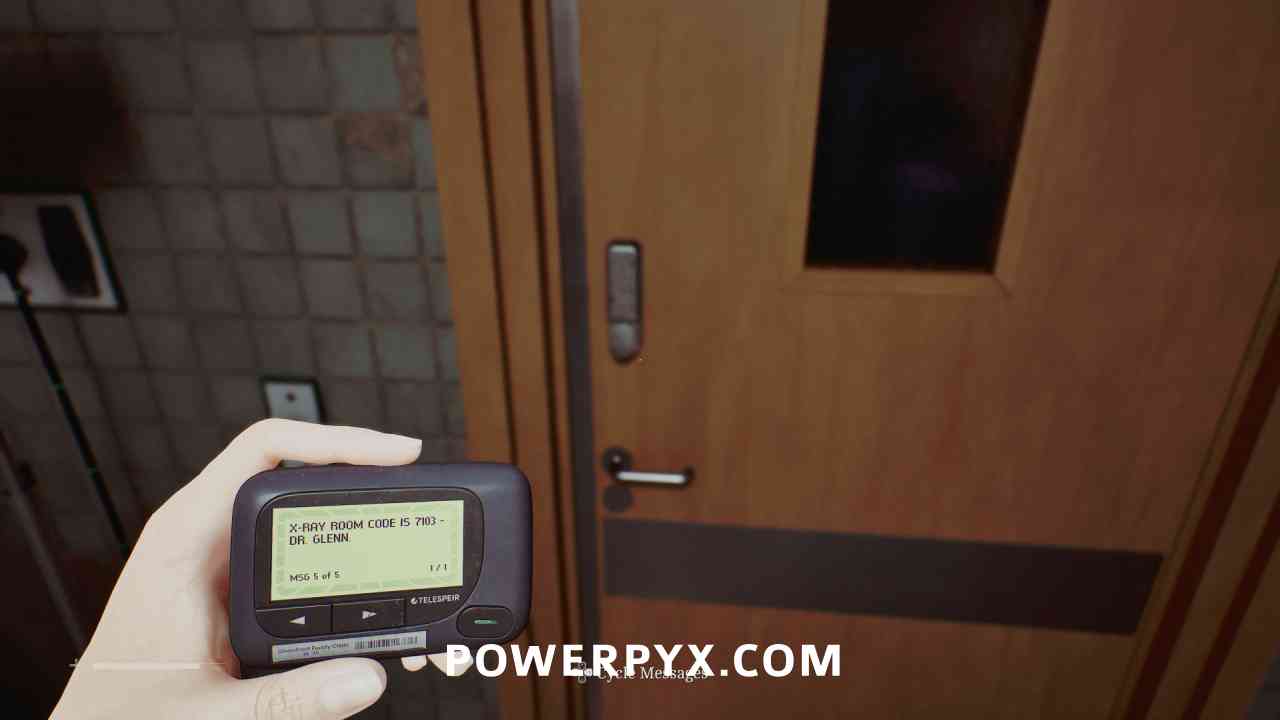
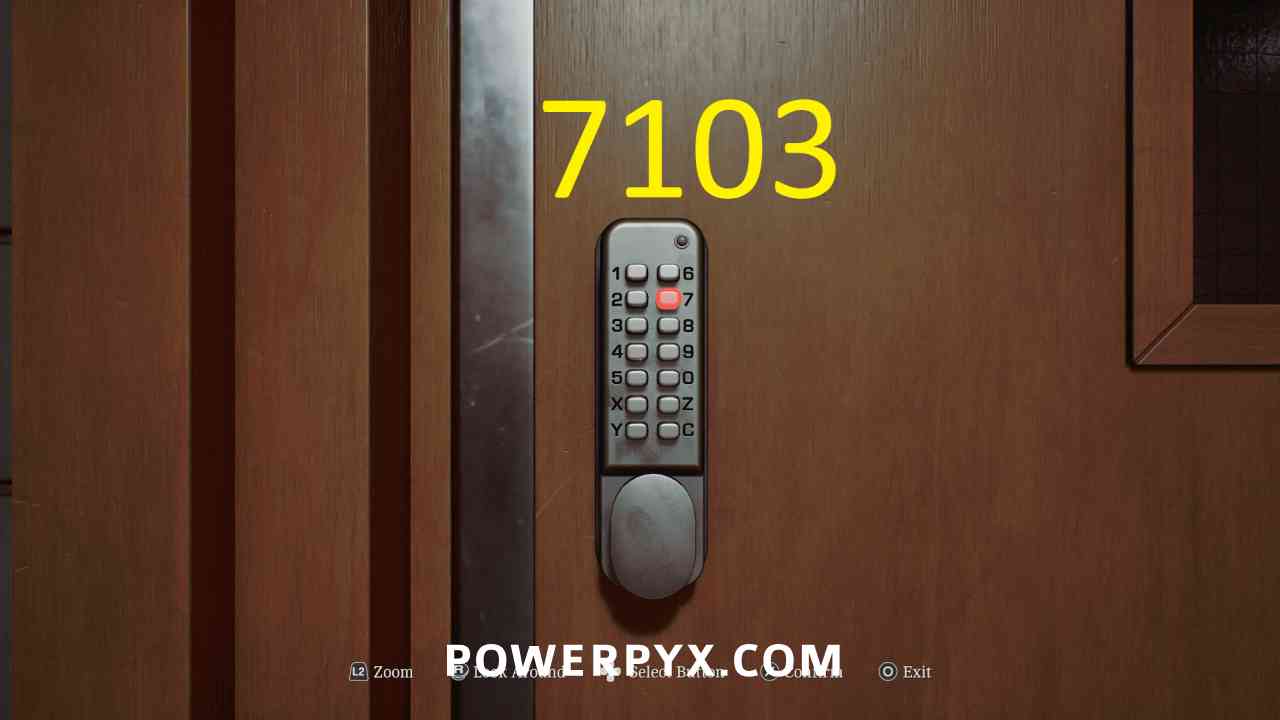
Go to the door on the right of the room, enter 7103 (the number you receive on the pager).
Puzzle #11
Area: St. Amelia Medical Center > X-Ray
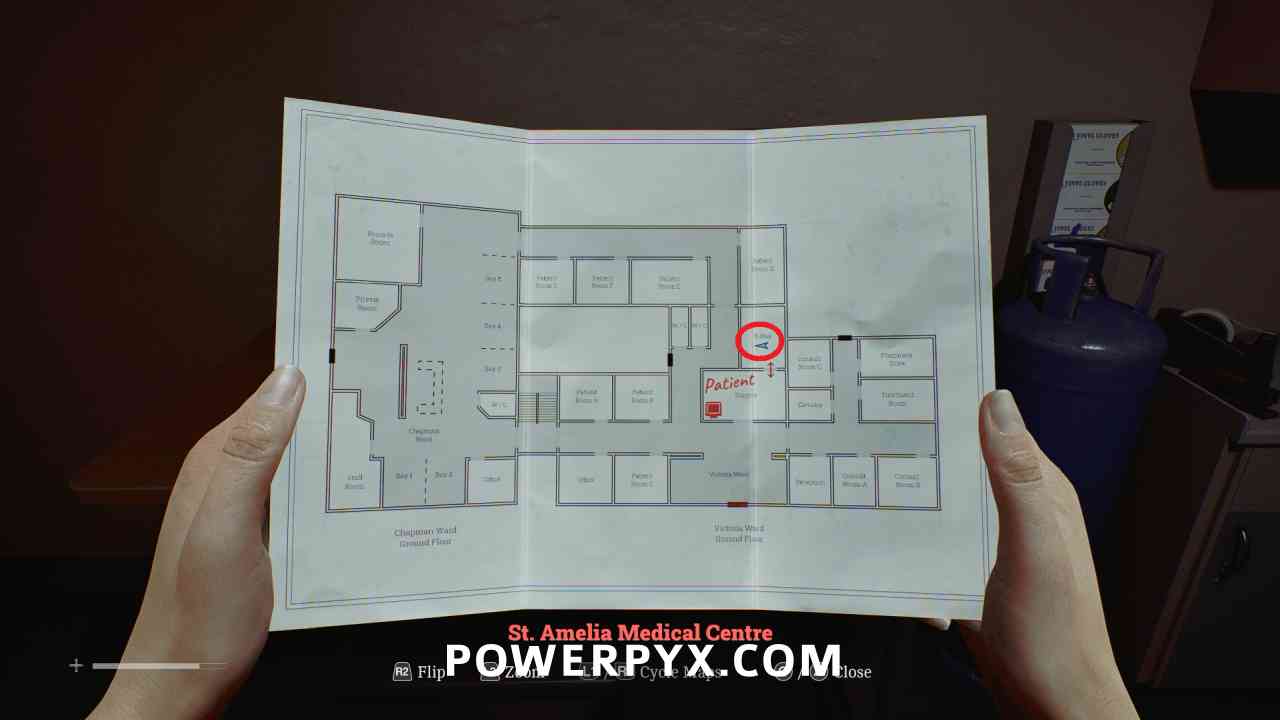
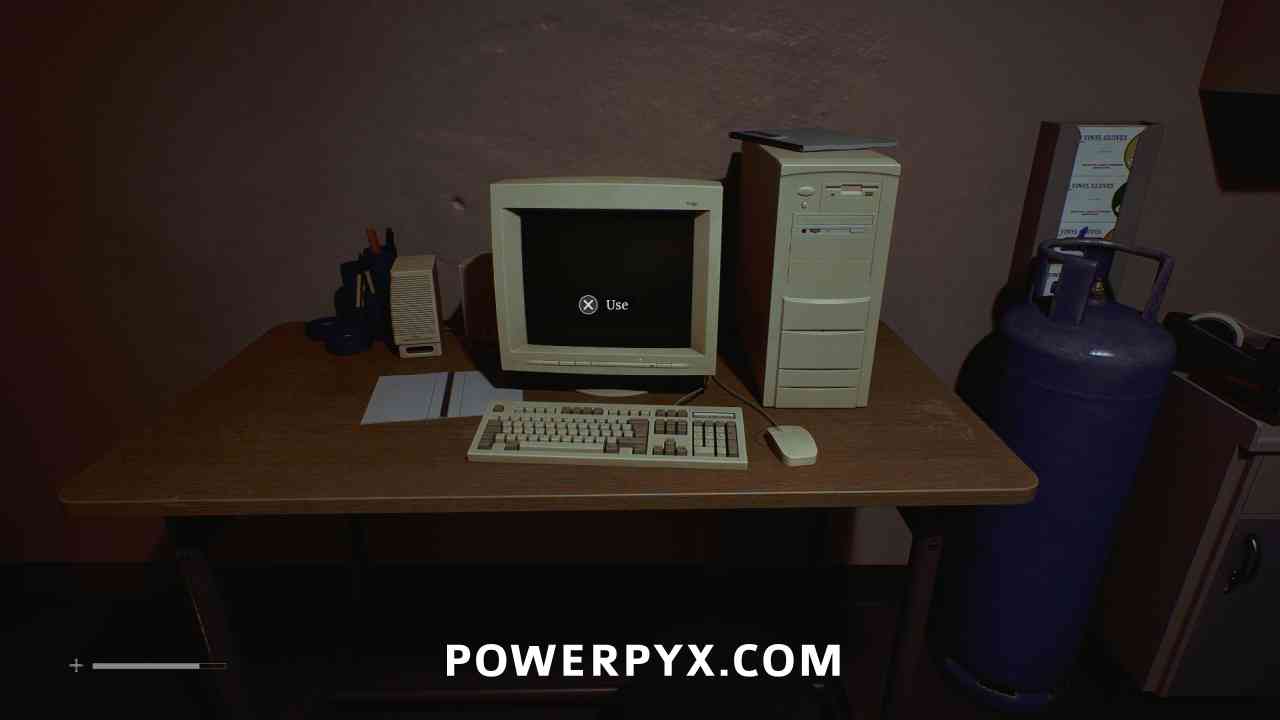
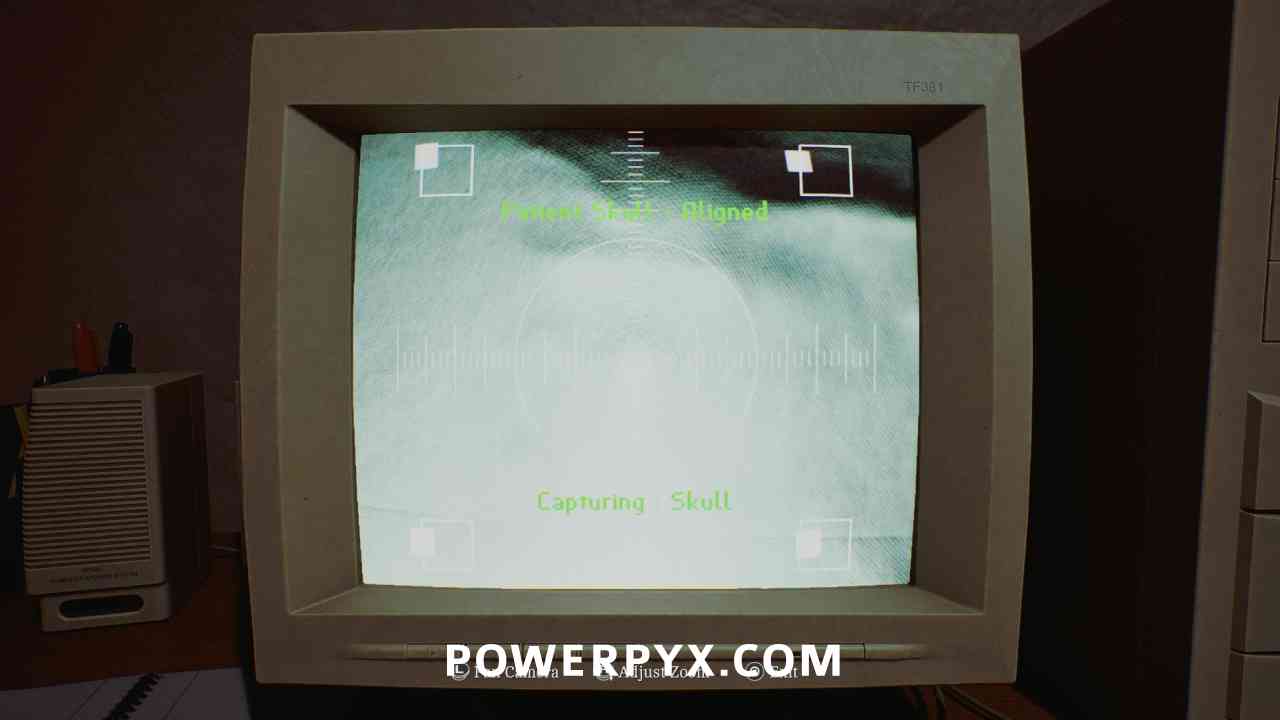
Interact with the computer to turn it on. Zoom in and move the camera up until the “Patient Skull – Aligned” text is at the top of the screen.
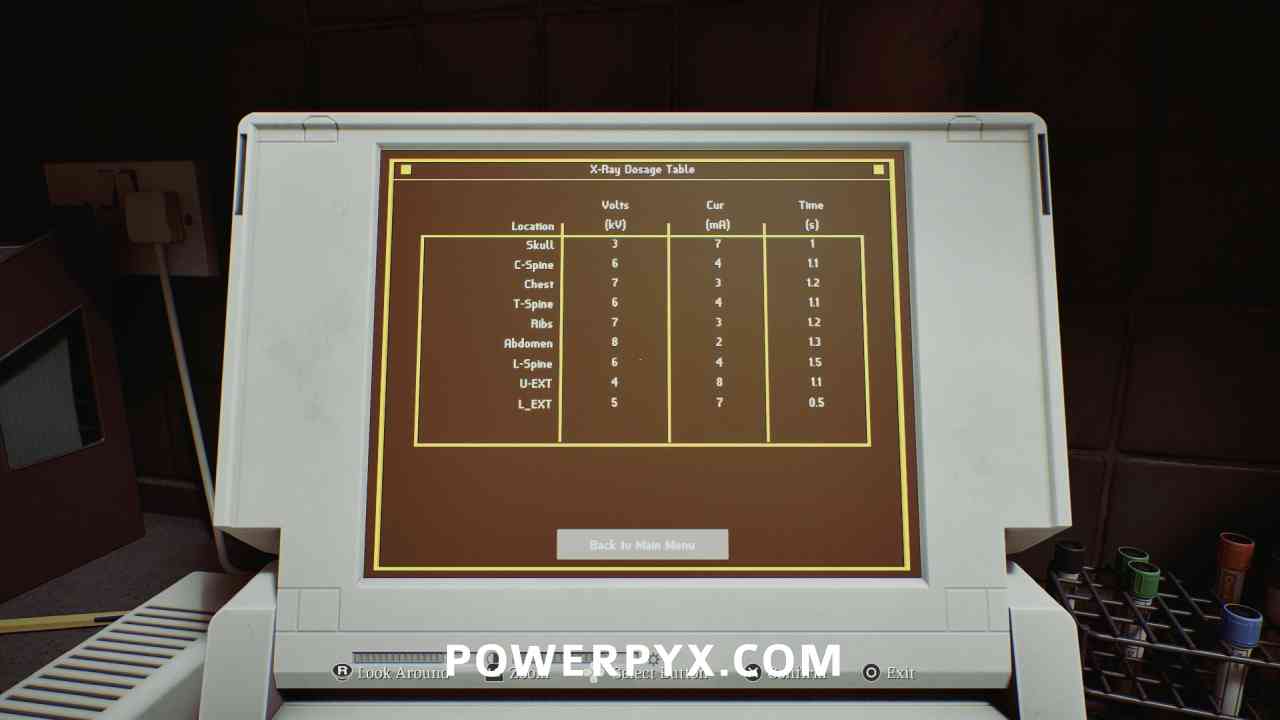
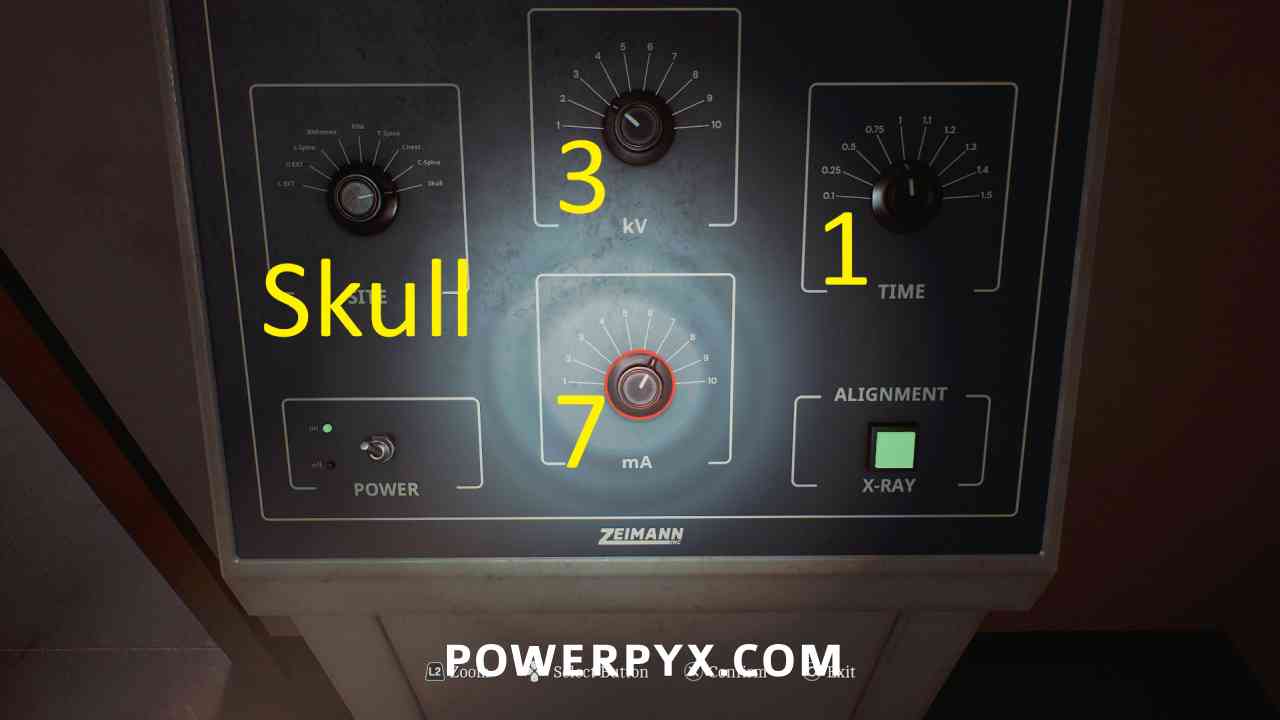
Then interact with the panel on the left, flip POWER to on, turn SITE to Skull, kV to 3, mA to 7, Time to 1. Numbers are from the “X-Ray Dosage Table” on the laptop left of the bed.
When numbers are correct hit the green button on the bottom right.
Puzzle #12
Area: St. Amelia Medical Center > X-Ray
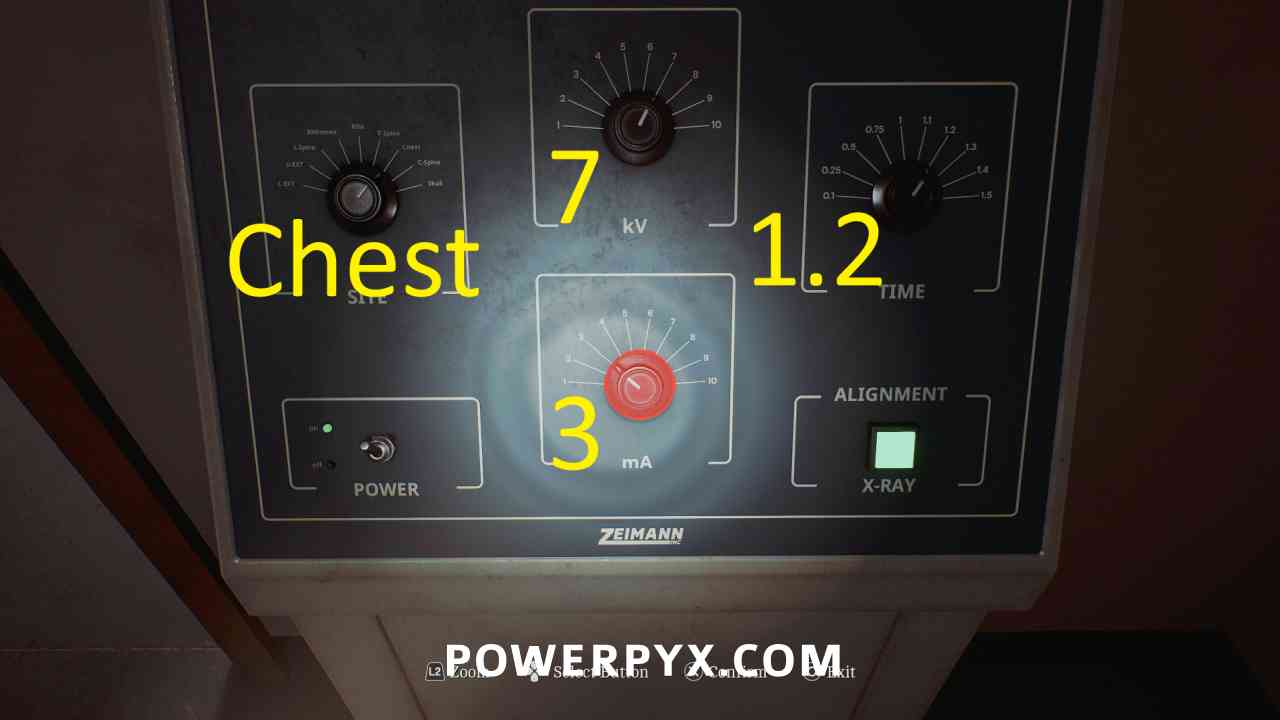
Now repeat the same steps with the chest.
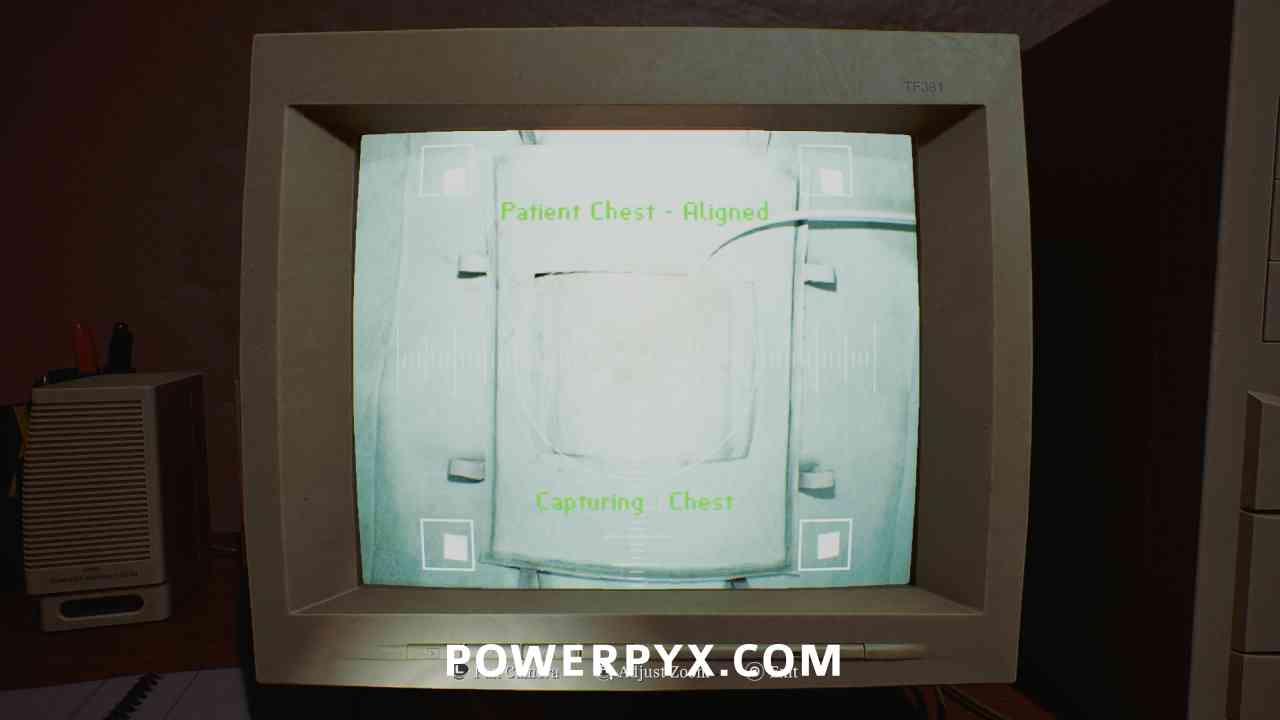
Interact with the computer, zoom and move the camera down until the “Patient Chest – Aligned” text is at the top of the screen.
Then interact with the panel on the left, turn SITE to Chest, kV to 7, mA to 3, Time to 1.2.
When numbers are correct hit the green button on the bottom right.
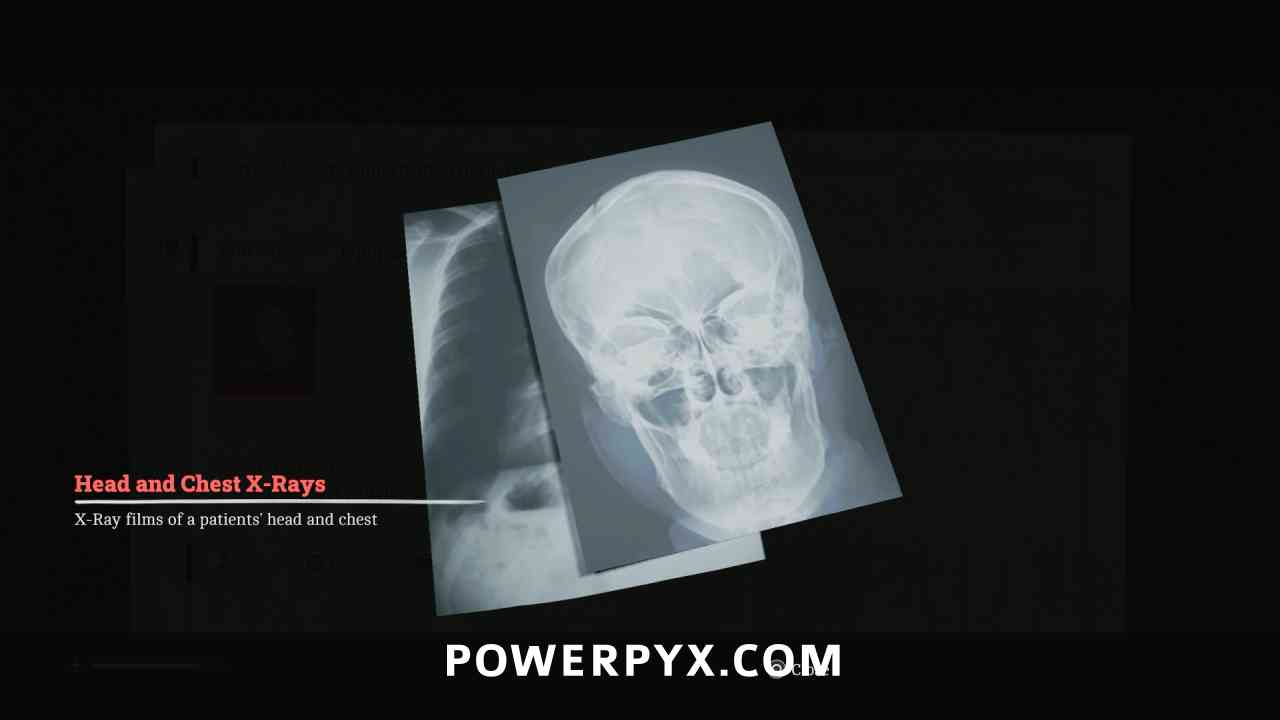
Key Item: Head and Chest X-Rays
Area: St. Amelia Medical Center > X-Ray
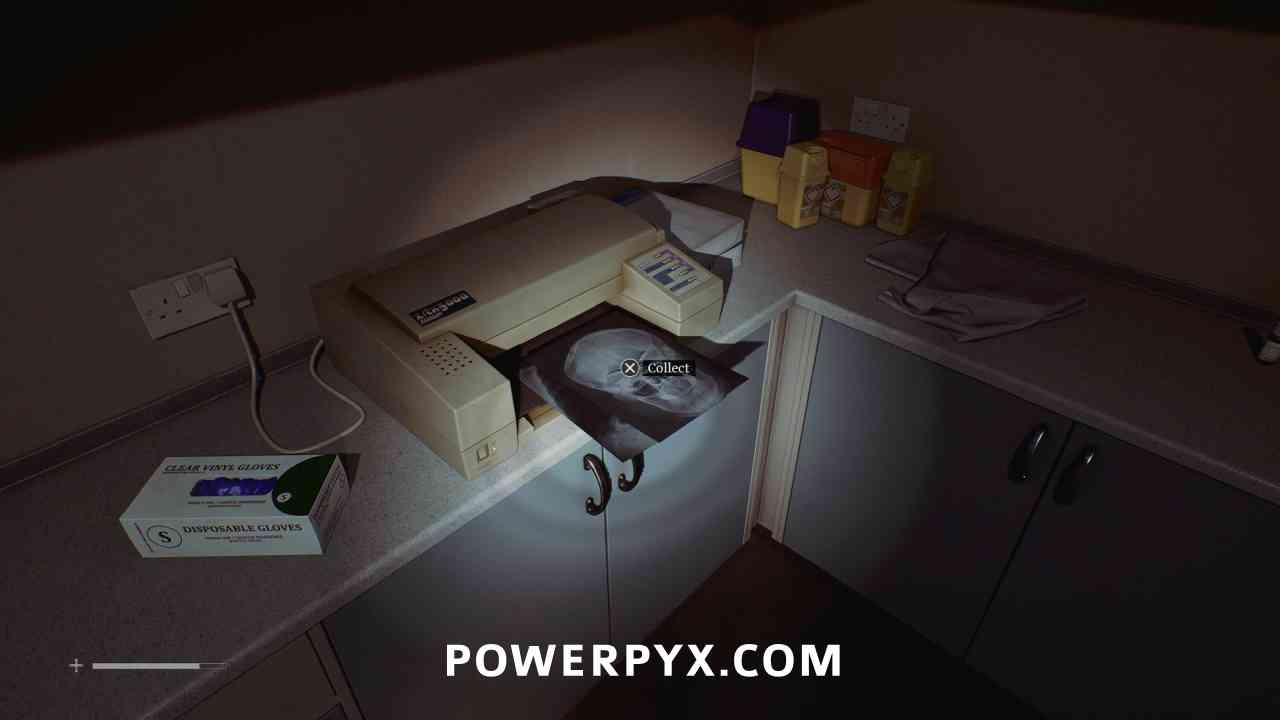
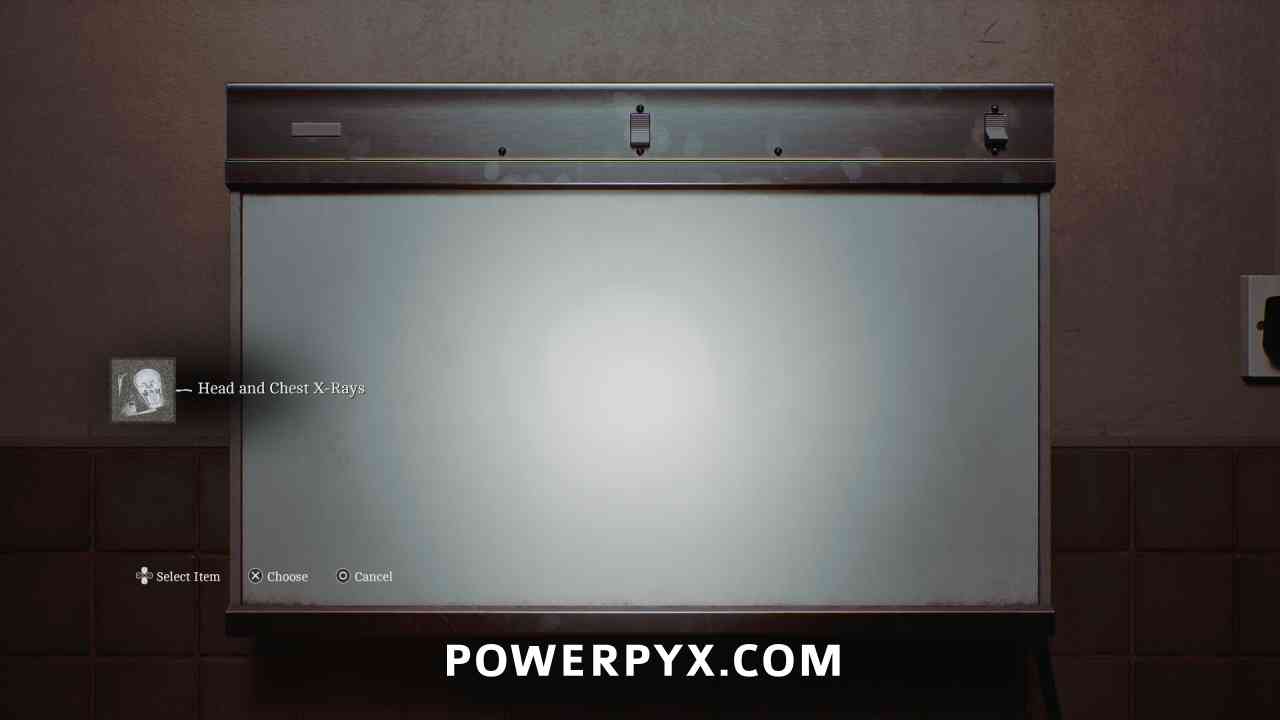
Pick up the printed X-Rays from the printer to the right of the computer. Place them on the board to the left of the intercom, then interact with the head and chest when prompted.
Key Item: Tensobromide
Area: St. Amelia Medical Center > Victoria Ward Ground Floor – Pharmacy Store
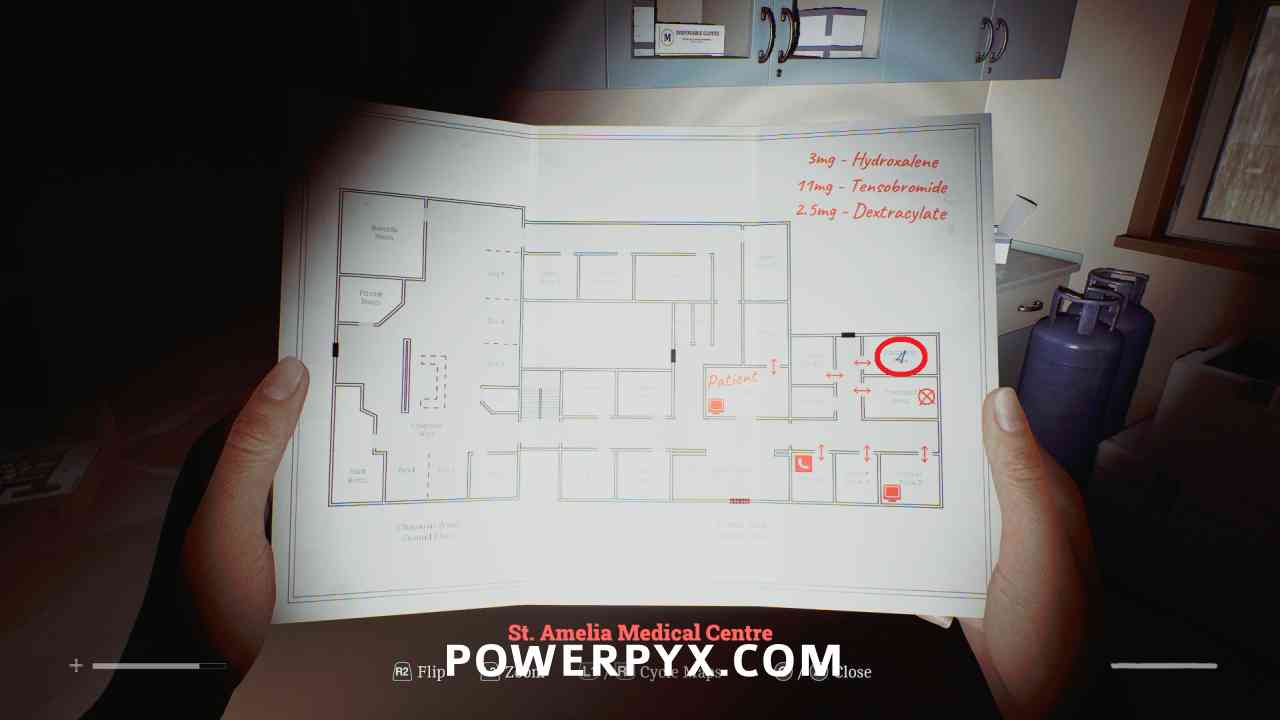
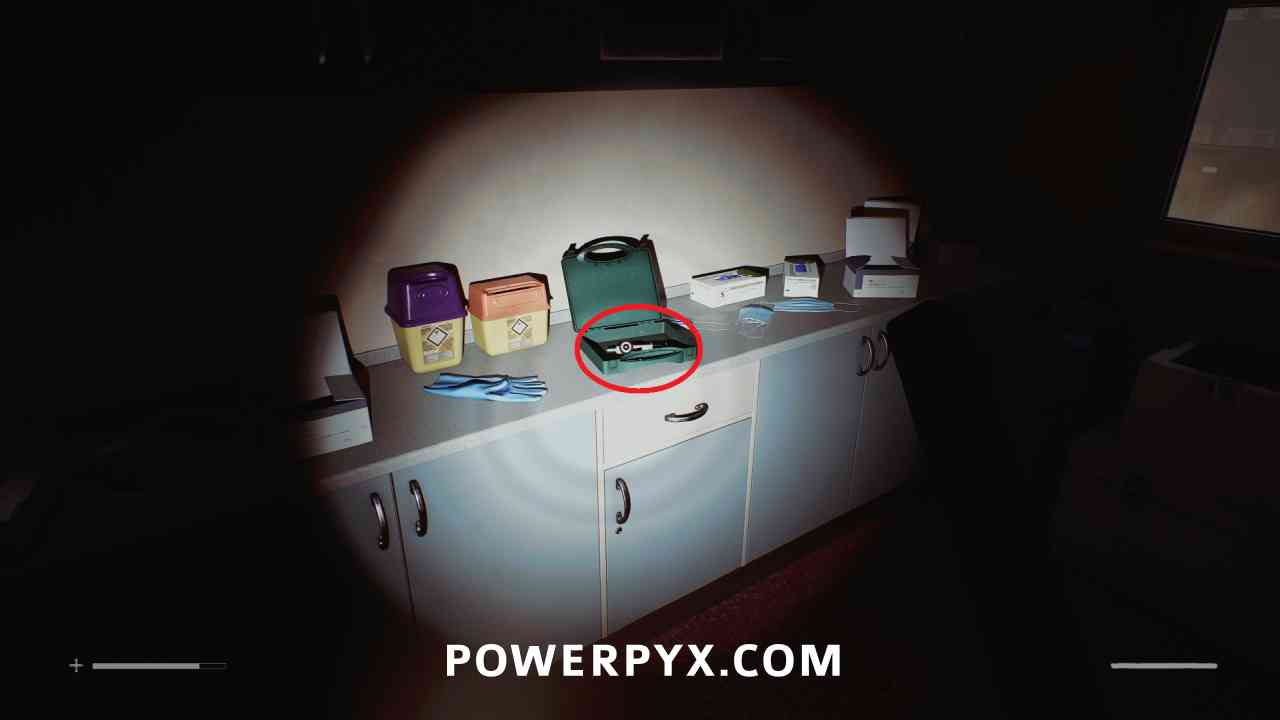
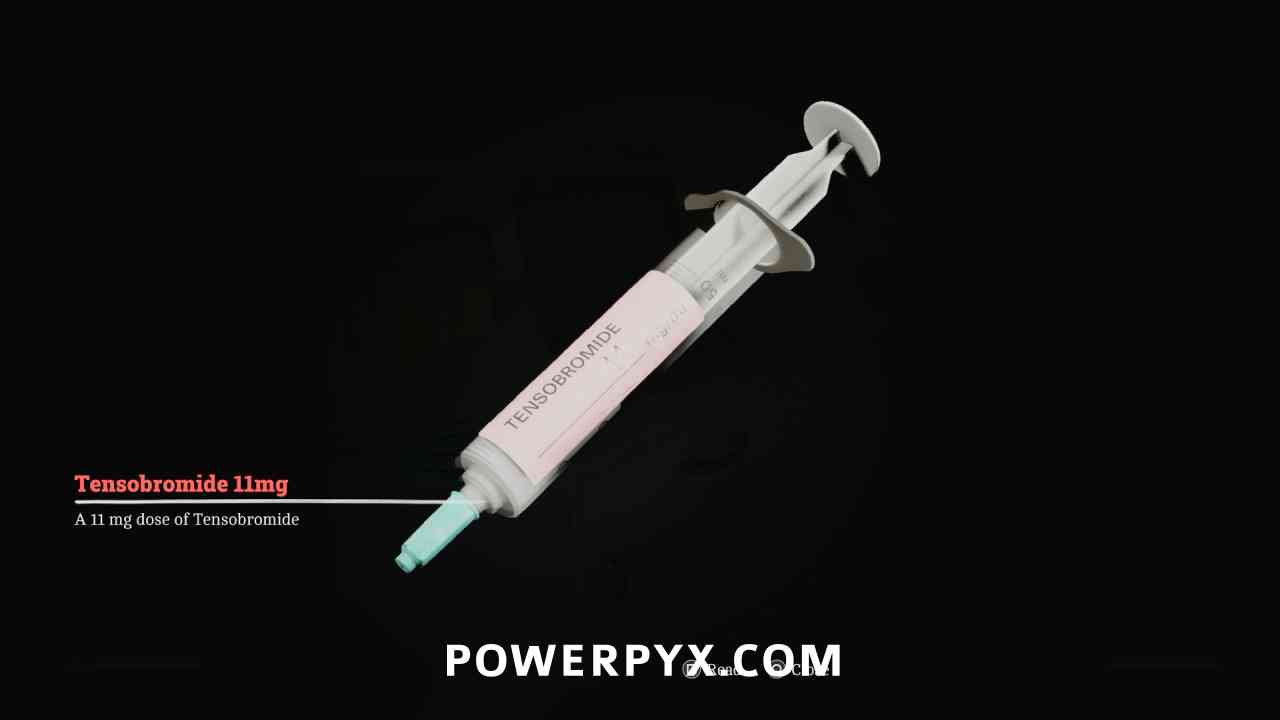
Go to the end of the hallway and into the Pharmacy Store room, open the green medical box to find this drug.
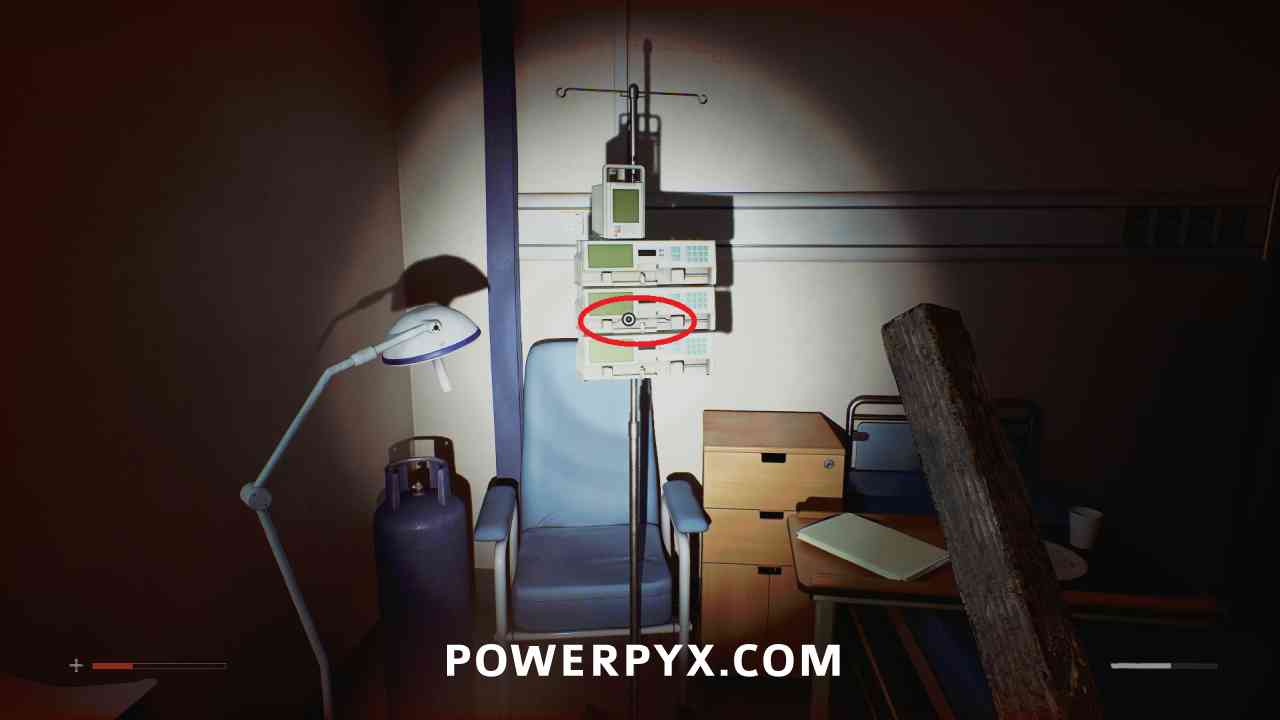
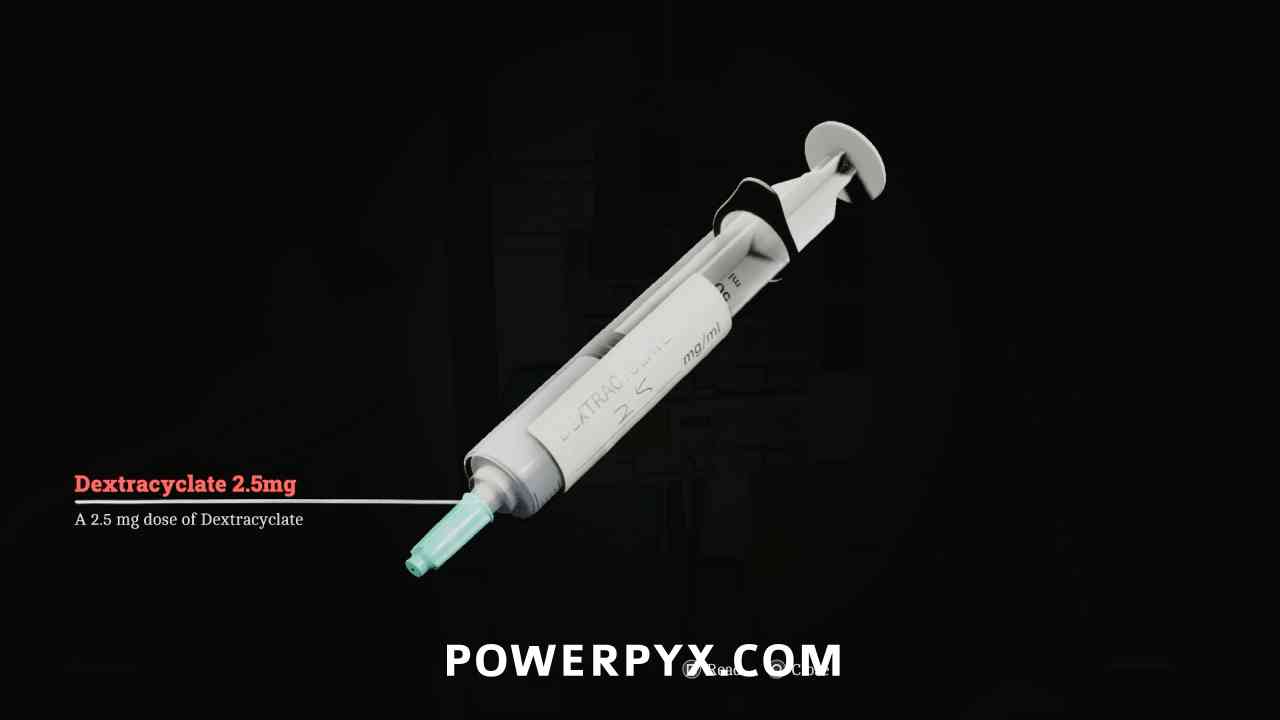
Key Item: Dextracyclate
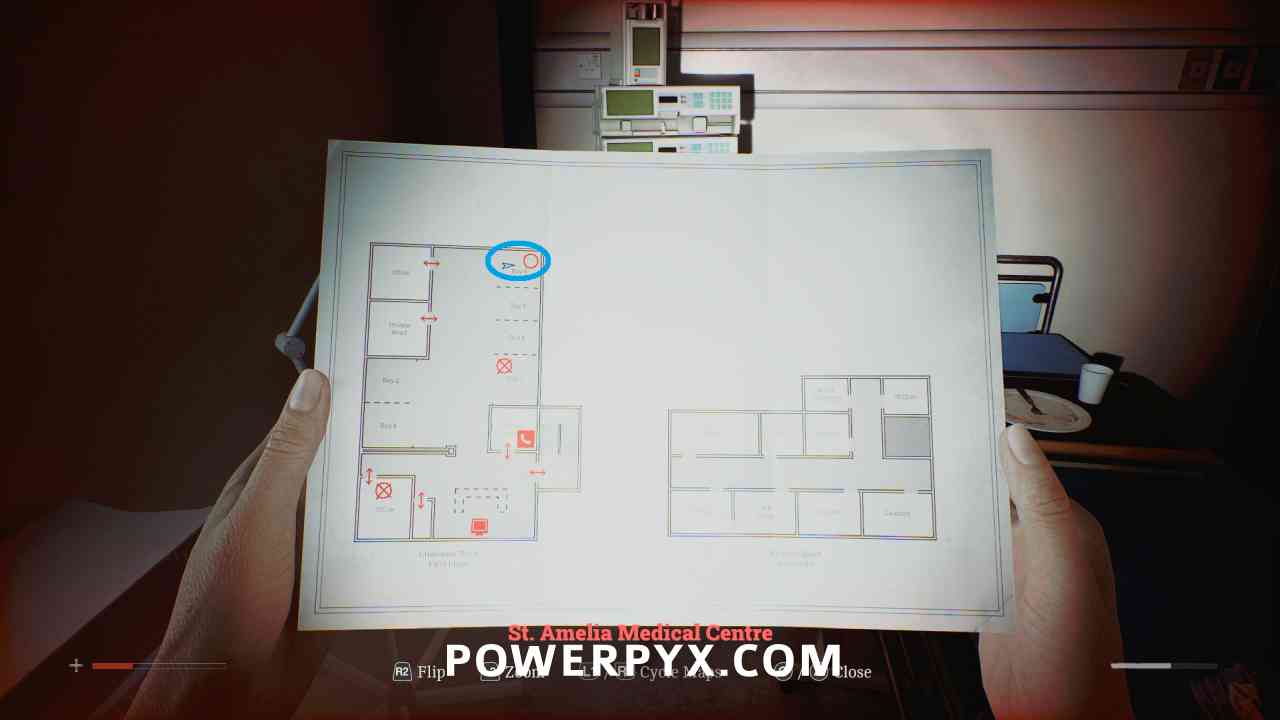
Area: St. Amelia Medical Center > Chapman Ward First Floor – Bay 6
In Chapman Ward First Floor – Bay 6, in the infusion machine.
Locked Door – Records Room
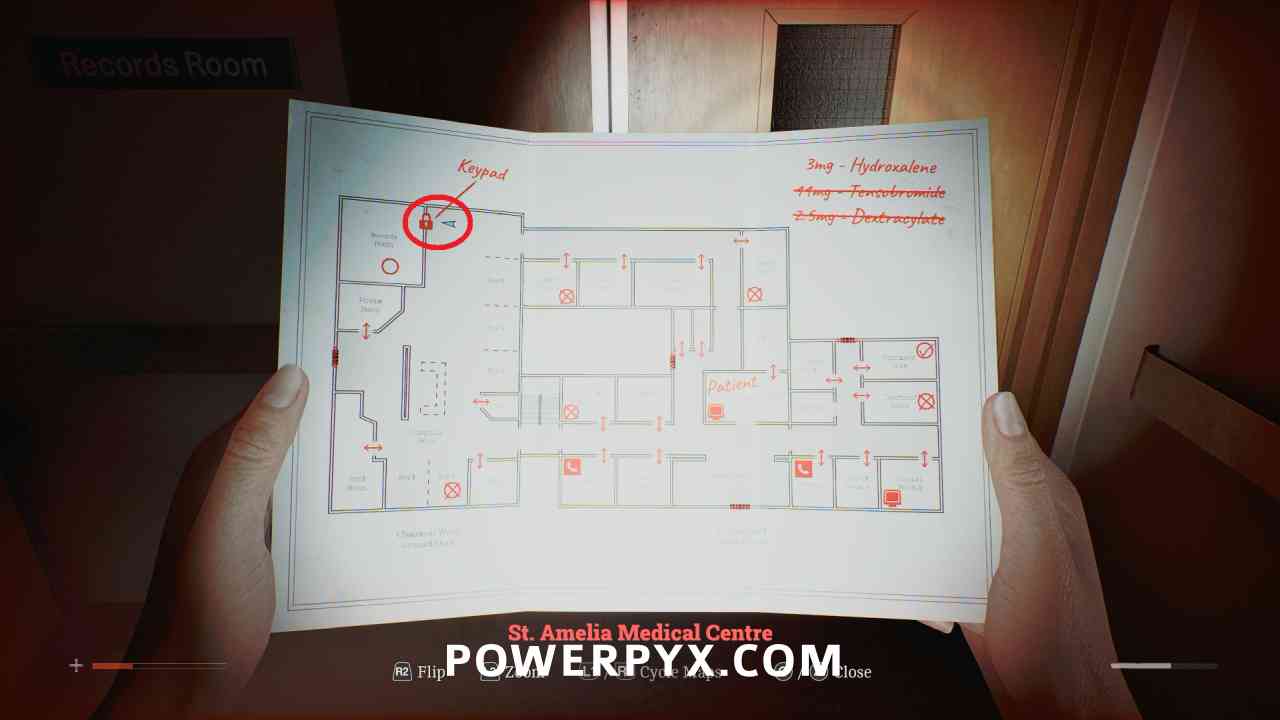
Area: St. Amelia Medical Center > Chapman Ward Ground Floor – Records Room
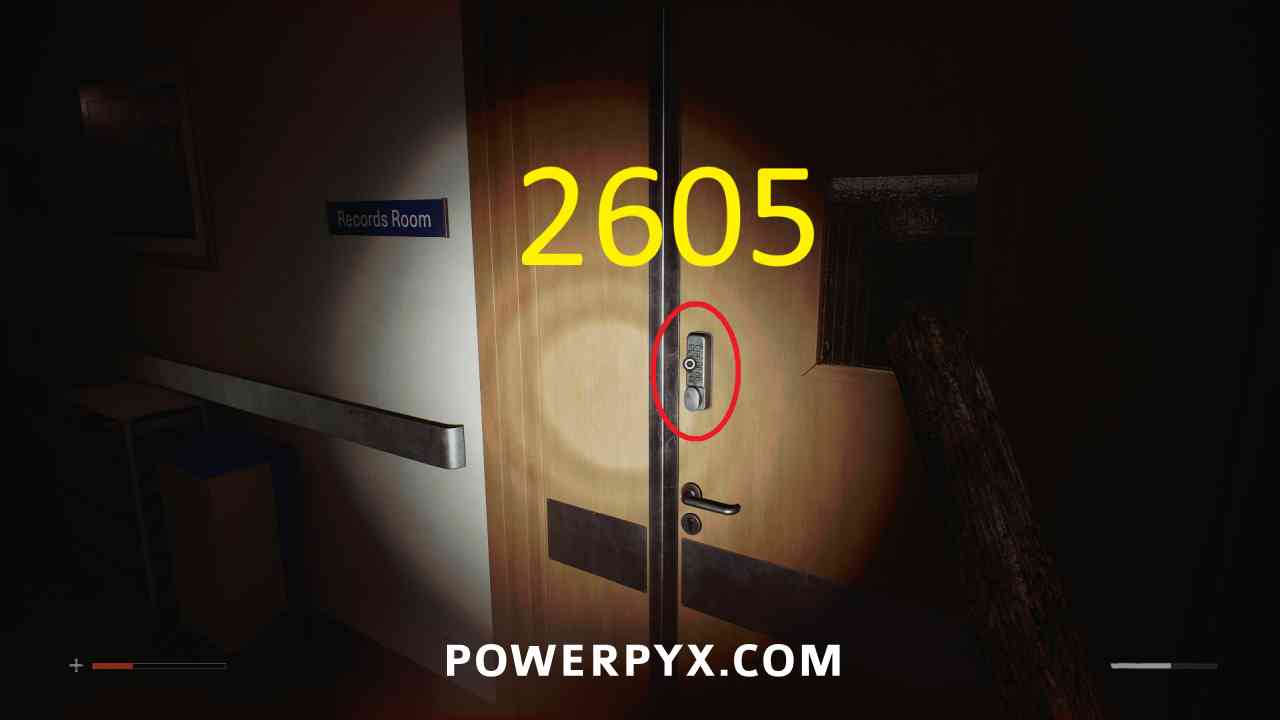
In the top left corner of Chapman Ward Ground Floor, interact with the door to records room and enter 2605 (the clue from upstairs).
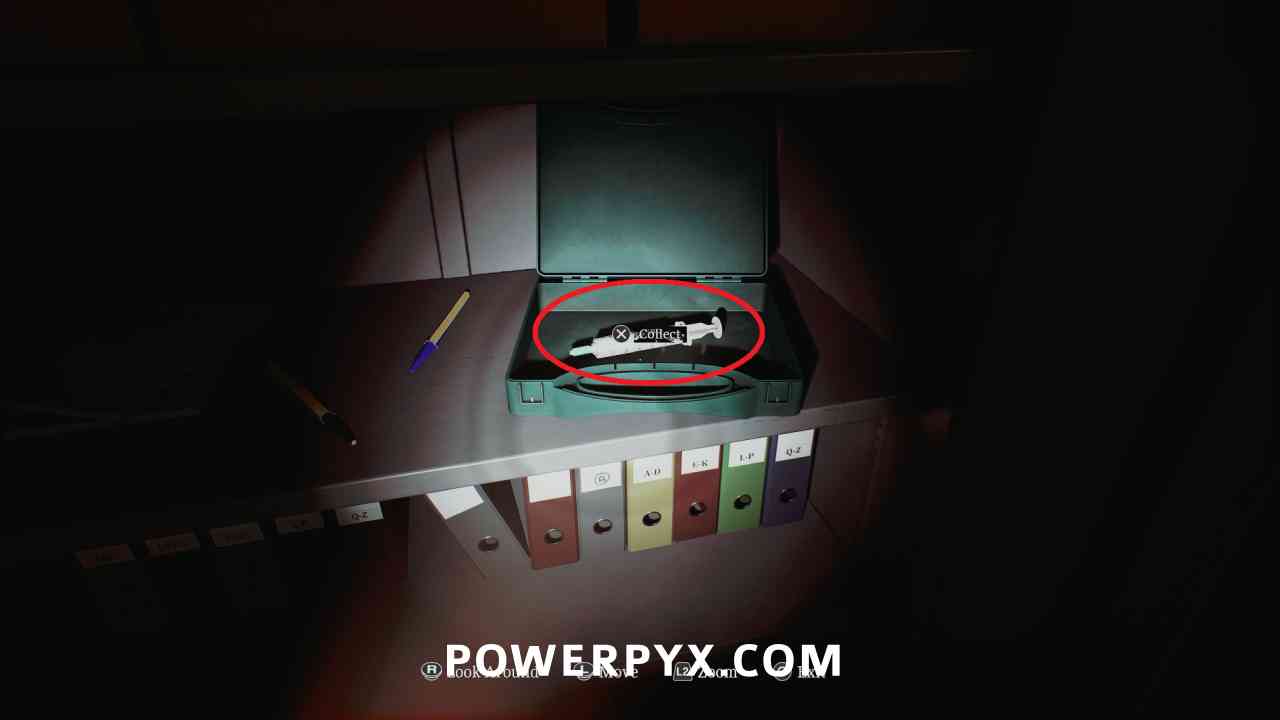
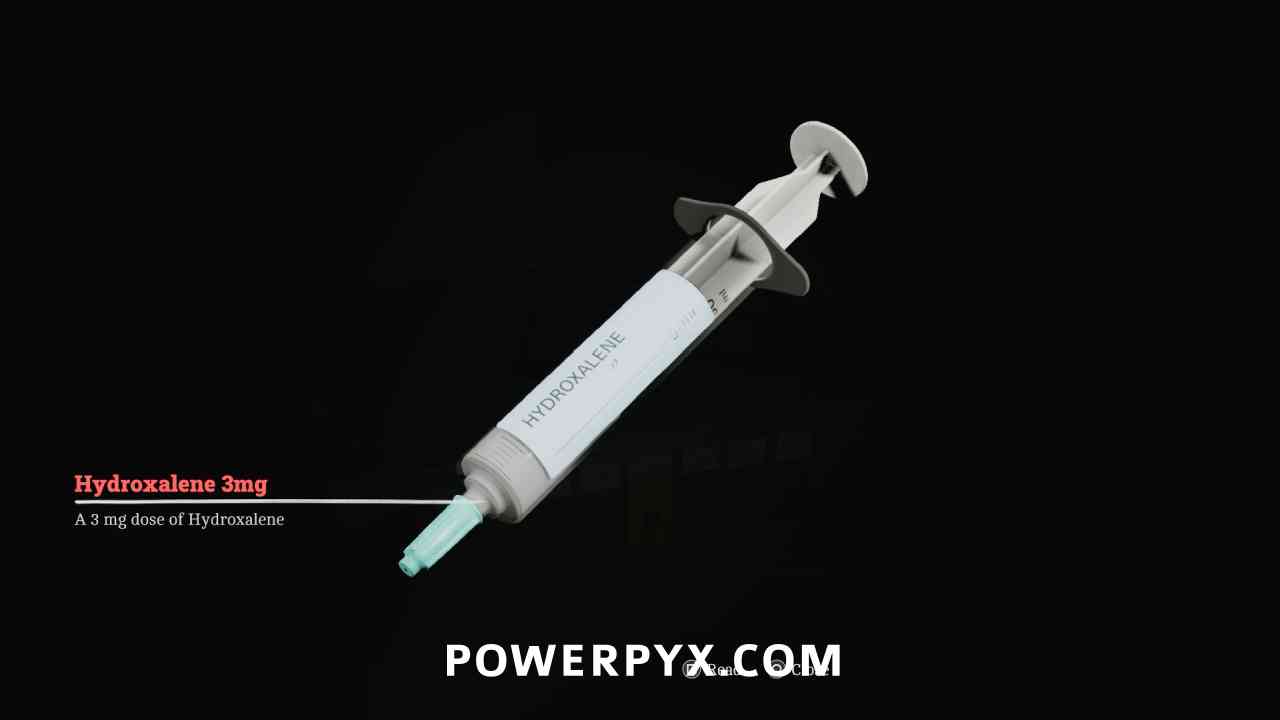
Key Item: Hydroxalene
Area: St. Amelia Medical Center > Chapman Ward Ground Floor – Records Room
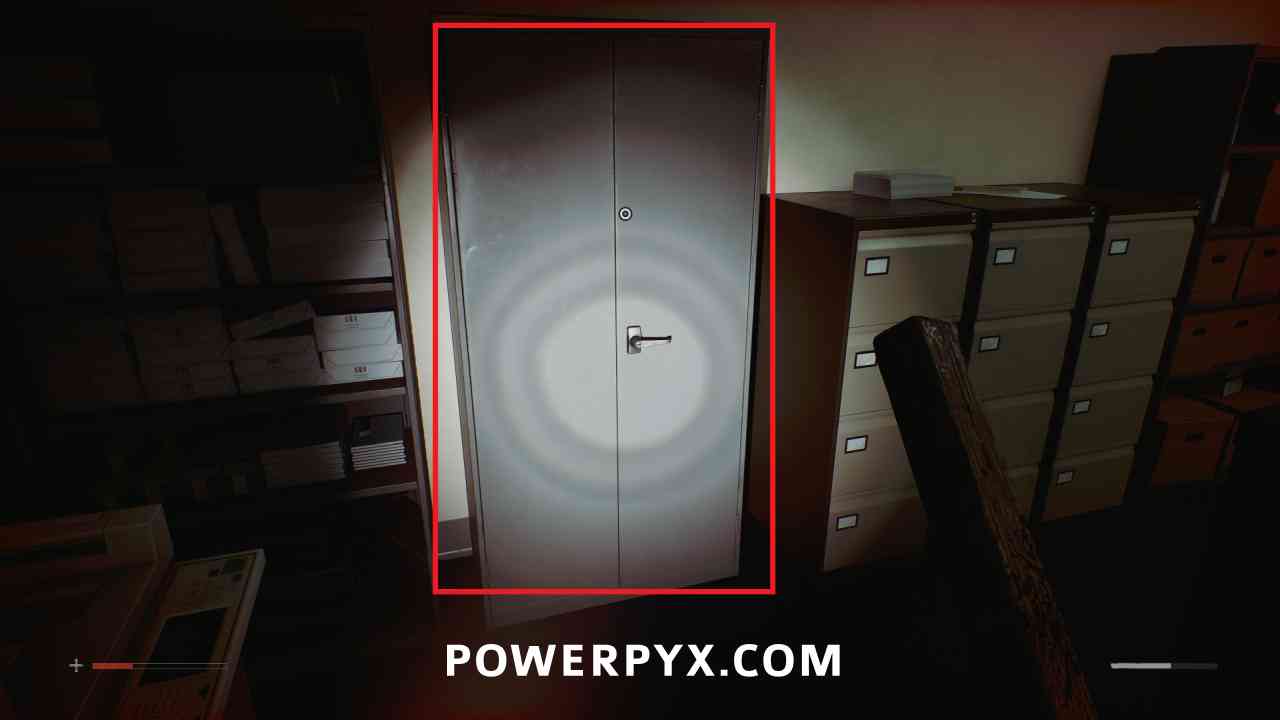
In the records room, search the cabinet and pick up from the green medical box.
Puzzle #13
Area: St. Amelia Medical Center > Surgery
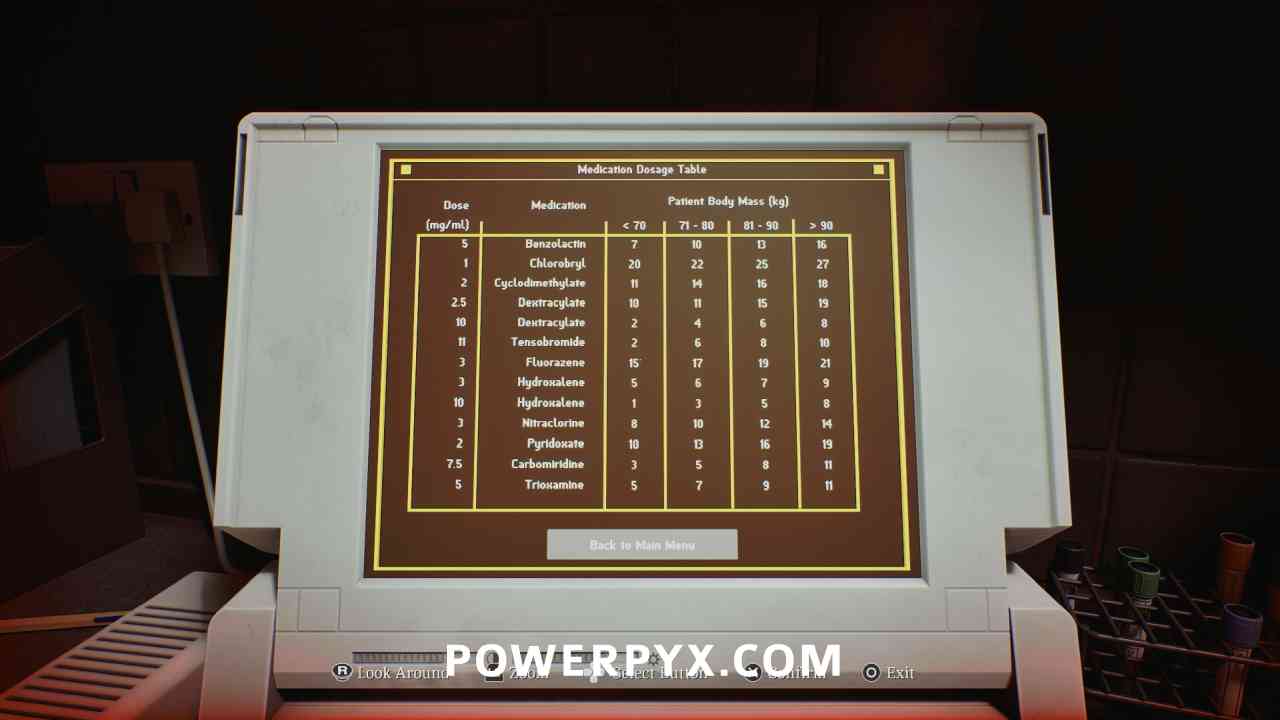
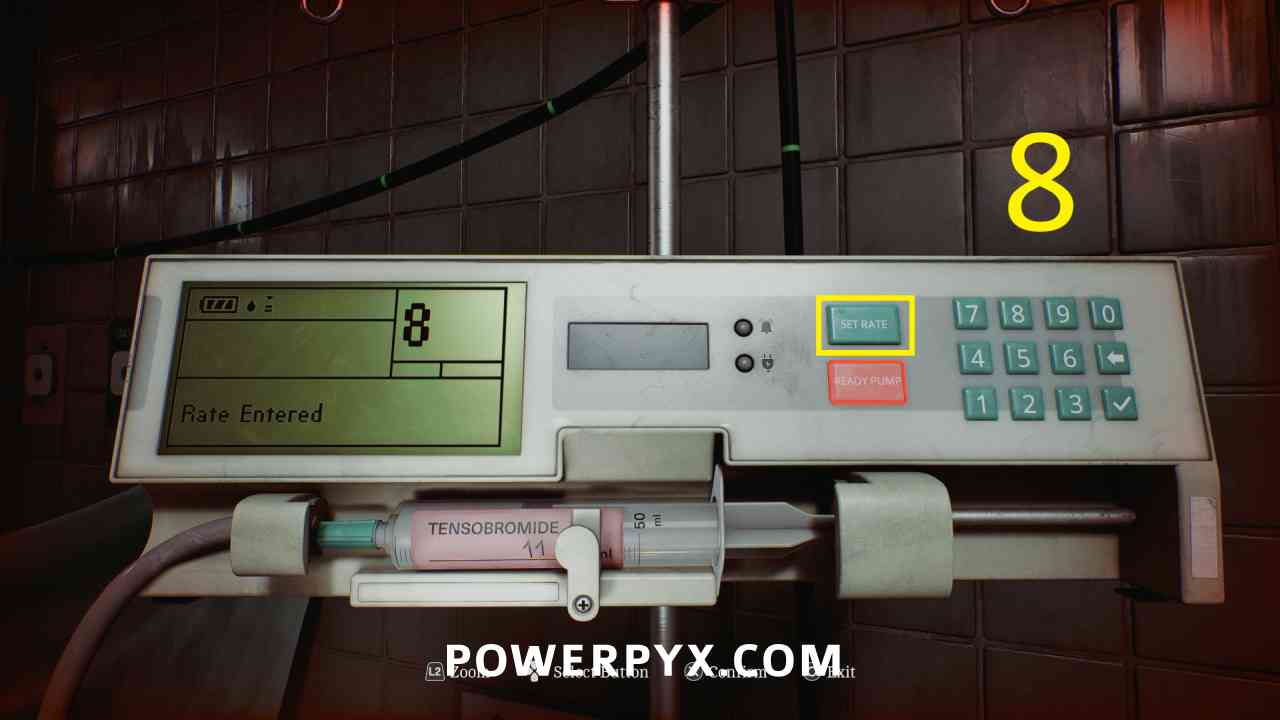
You now return to Surgery and must set up the infusions with the correct dosage rate. You use the Medication Dosage Table on the laptop with the weight from the white board (88 KG, third column).
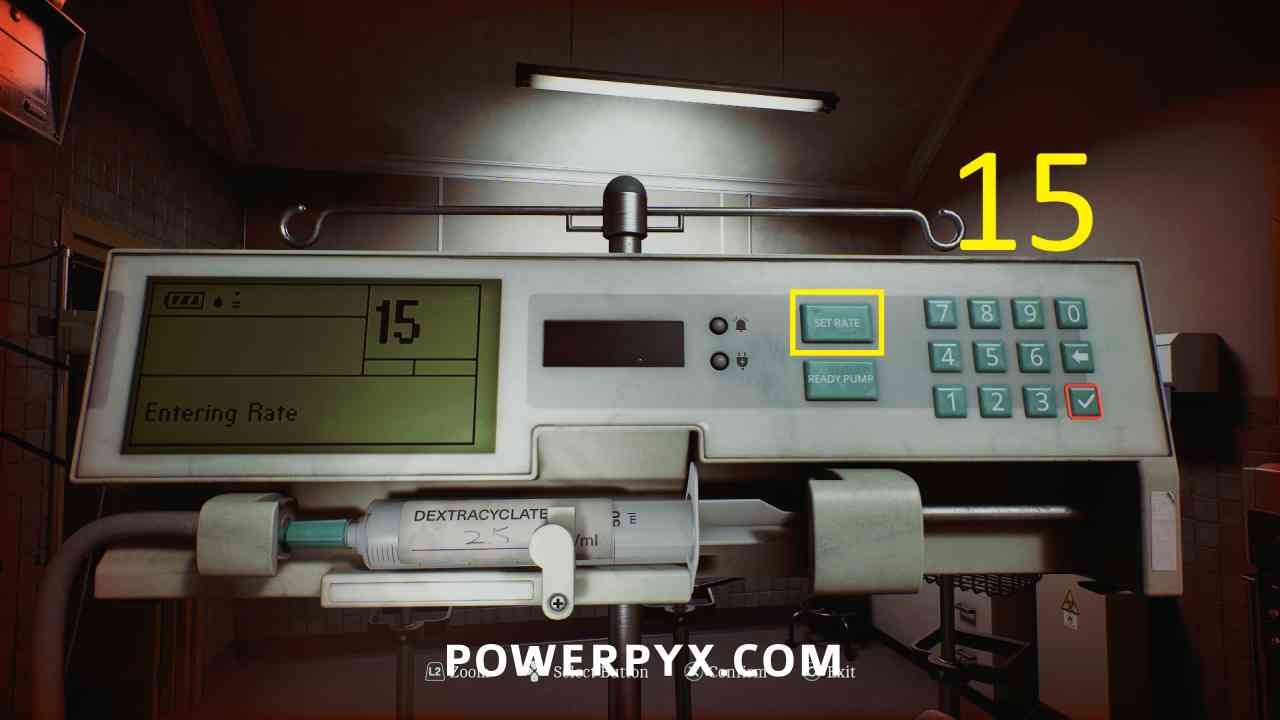
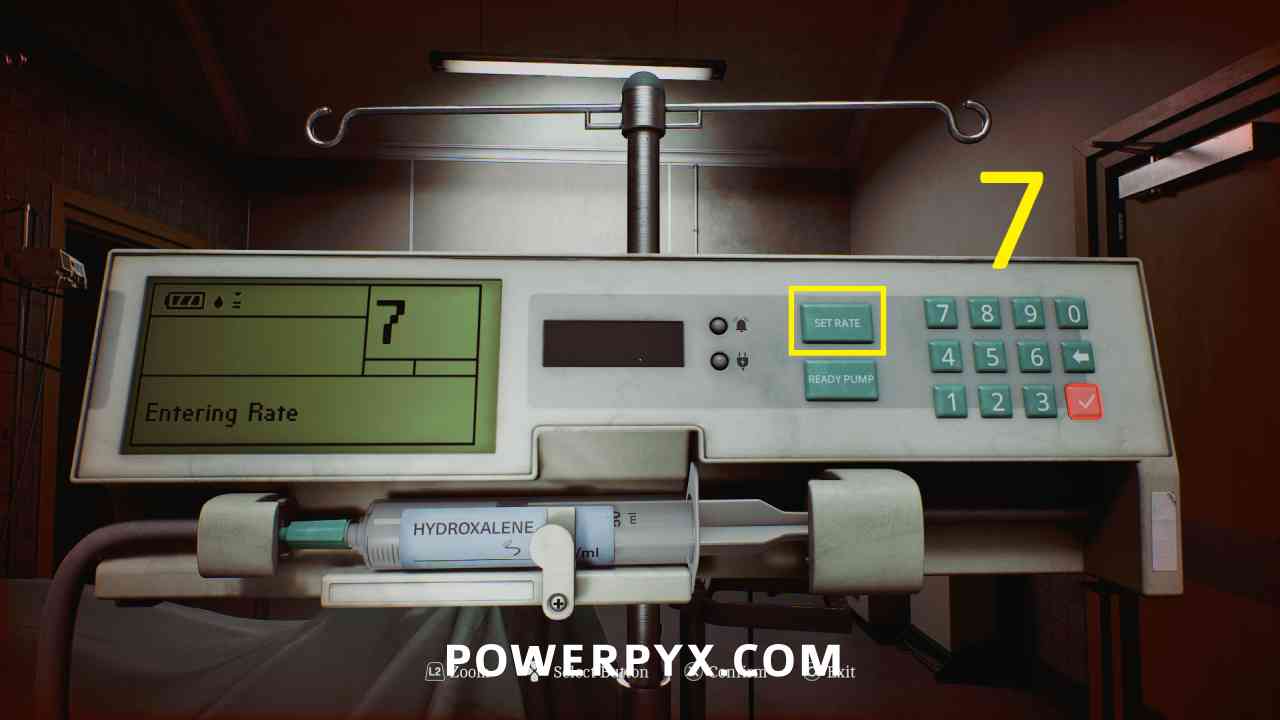
First hit the SET RATE button, then enter the number, then press the check mark, then READY PUMP.
Dextracyclate set the rate to 15.
Hydroxaline set the rate to 7.
Tensobromide set the rate to 8.
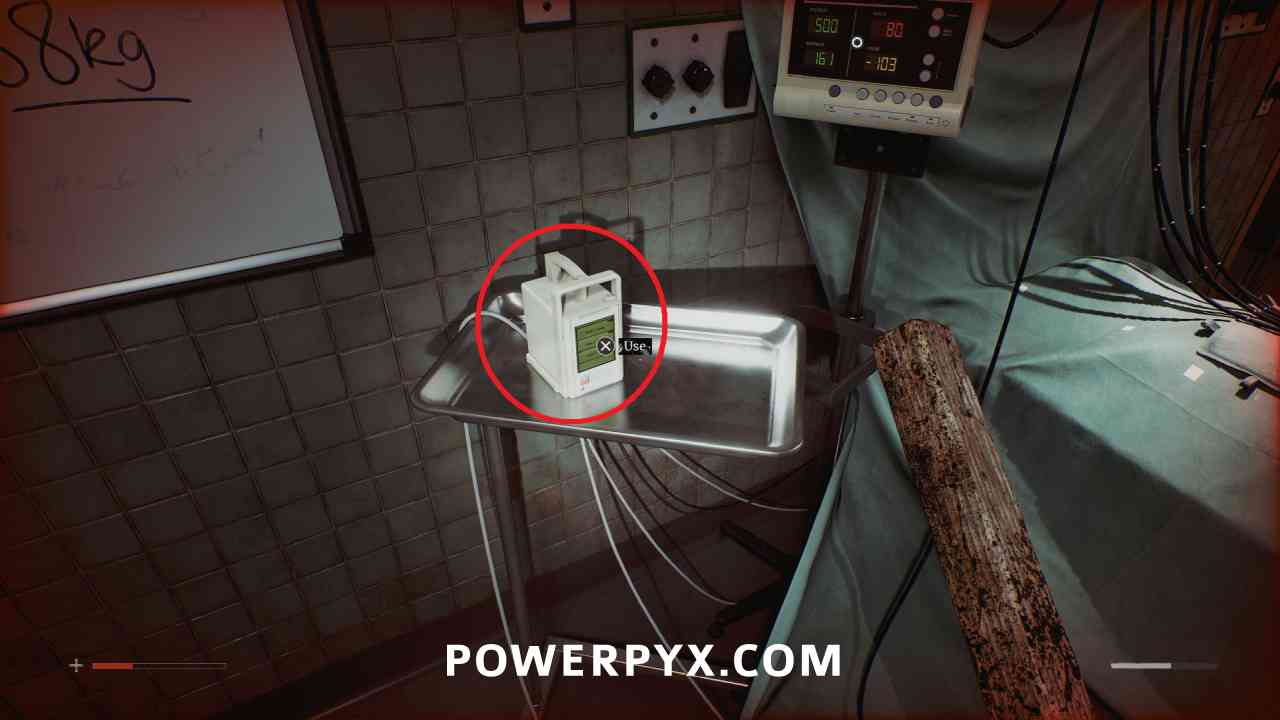
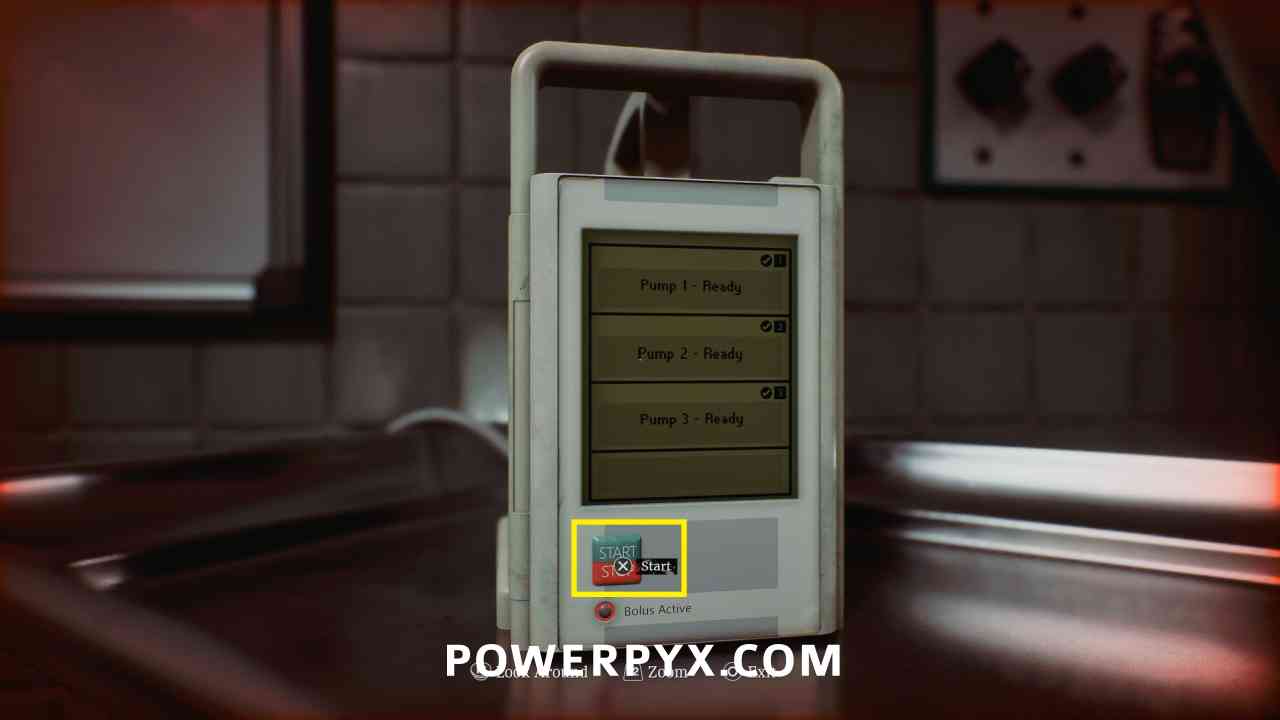
Then interact with the small console on the left of the bed to start.
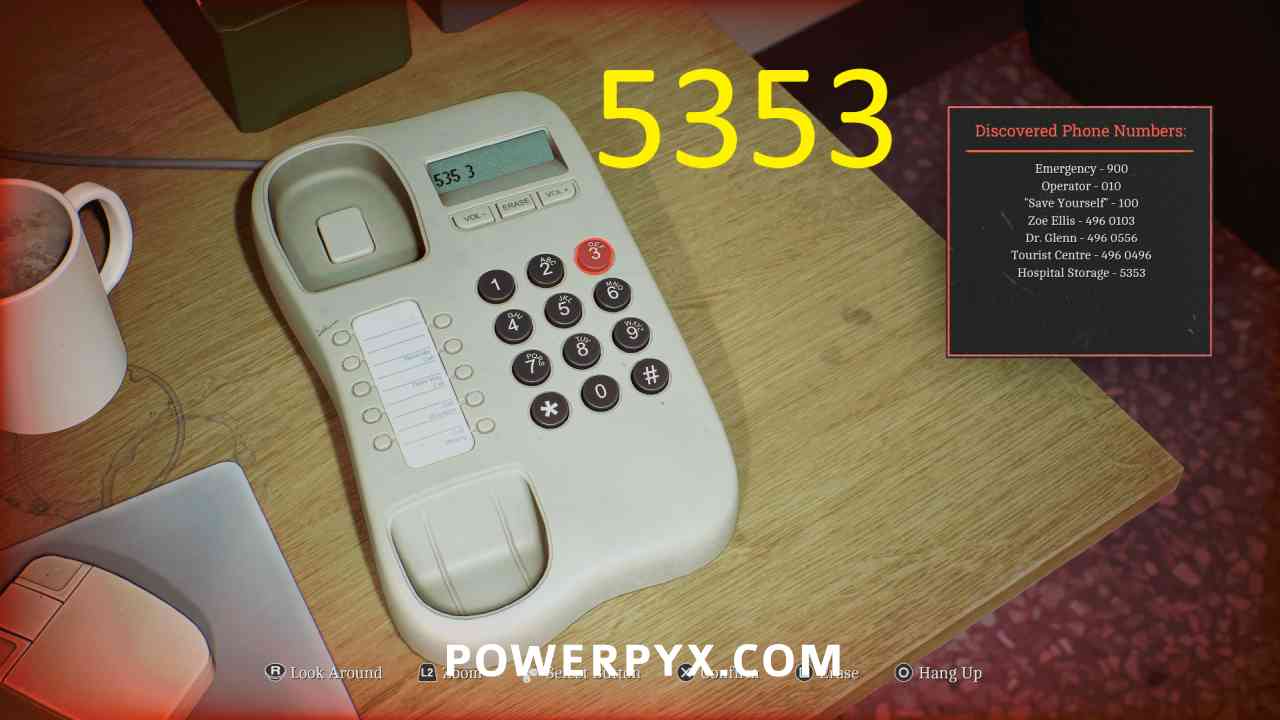
Phone Number: 5353 – Hospital Storage
Area: St. Amelia Medical Center > Surgery
Automatically given to you by Dr. Glenn, use on the phone in reception.
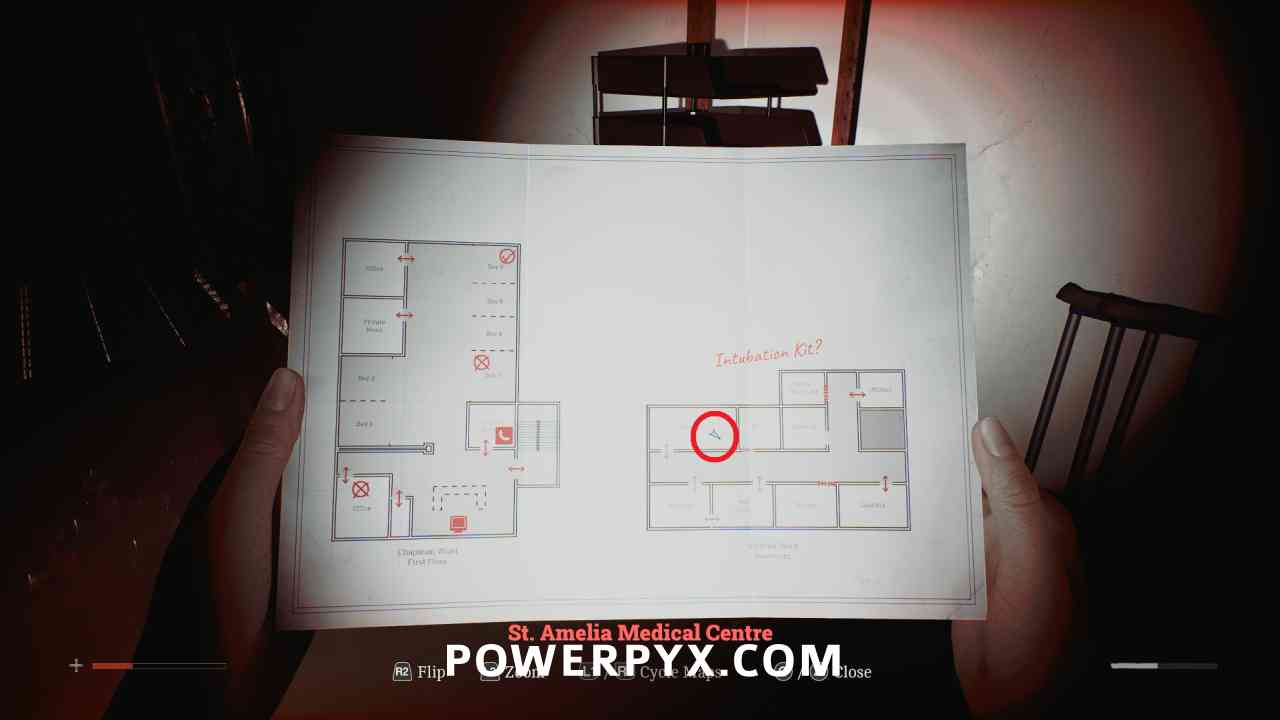
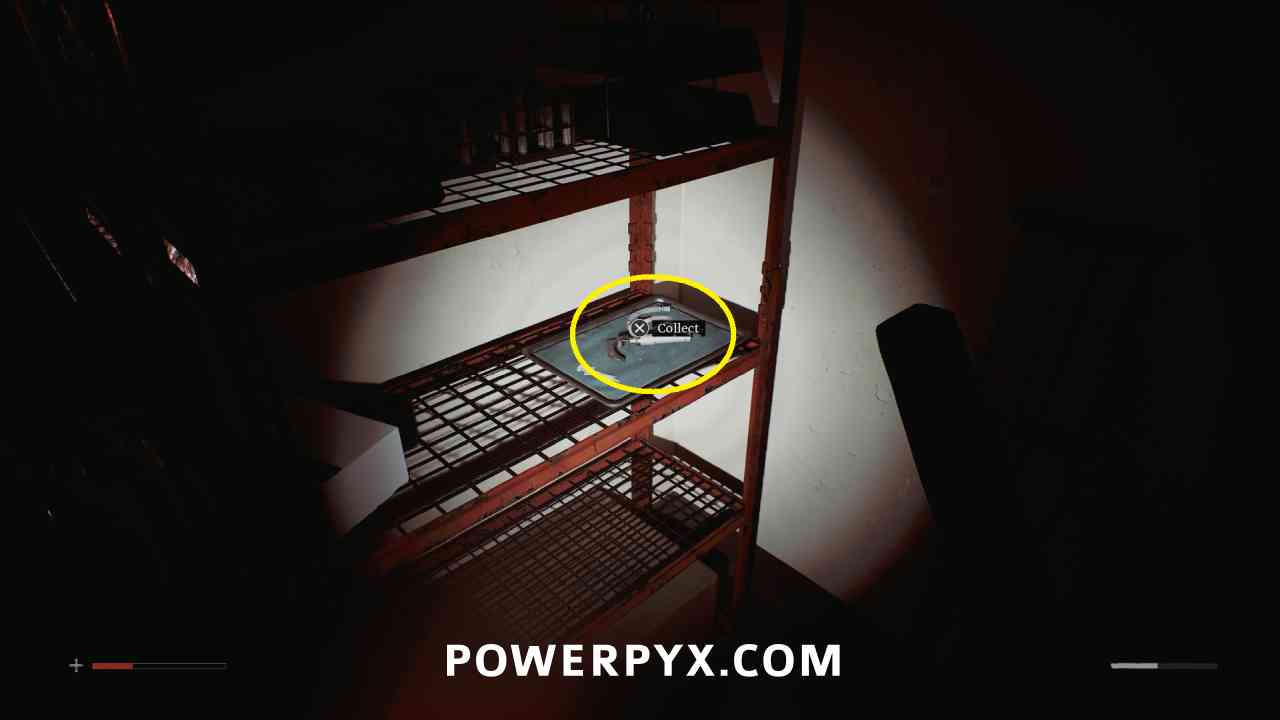
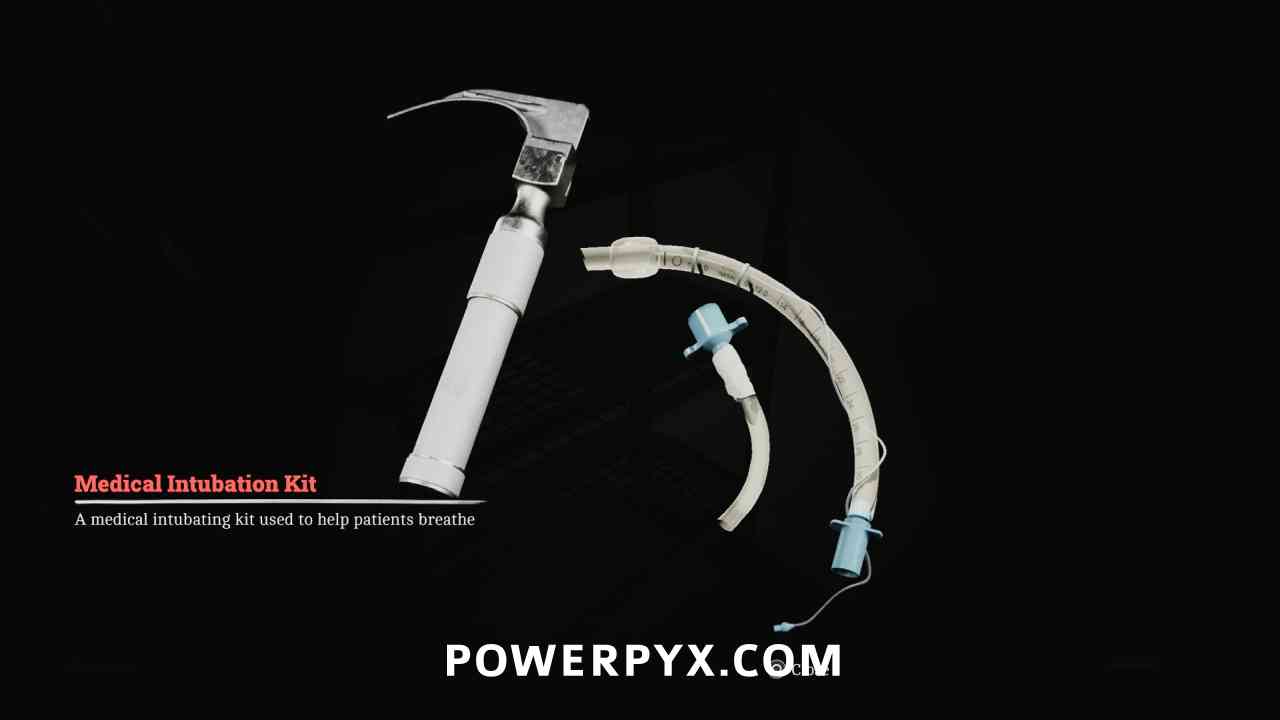
Key Item: Medical Intubation Kit
Area: St. Amelia Medical Center > Victoria Ward Basement – Storage
In the storage room through the gap in the lockers, on a shelf.
Puzzle #14
Area: St. Amelia Medical Center > Surgery
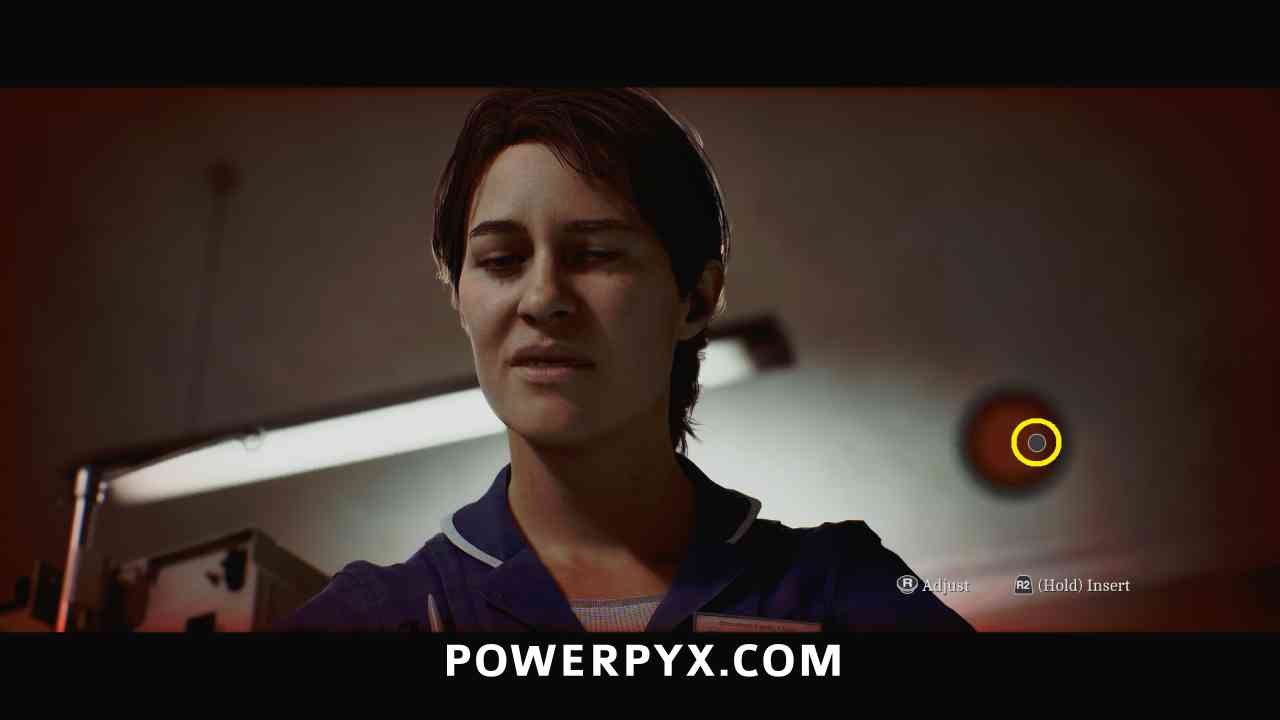
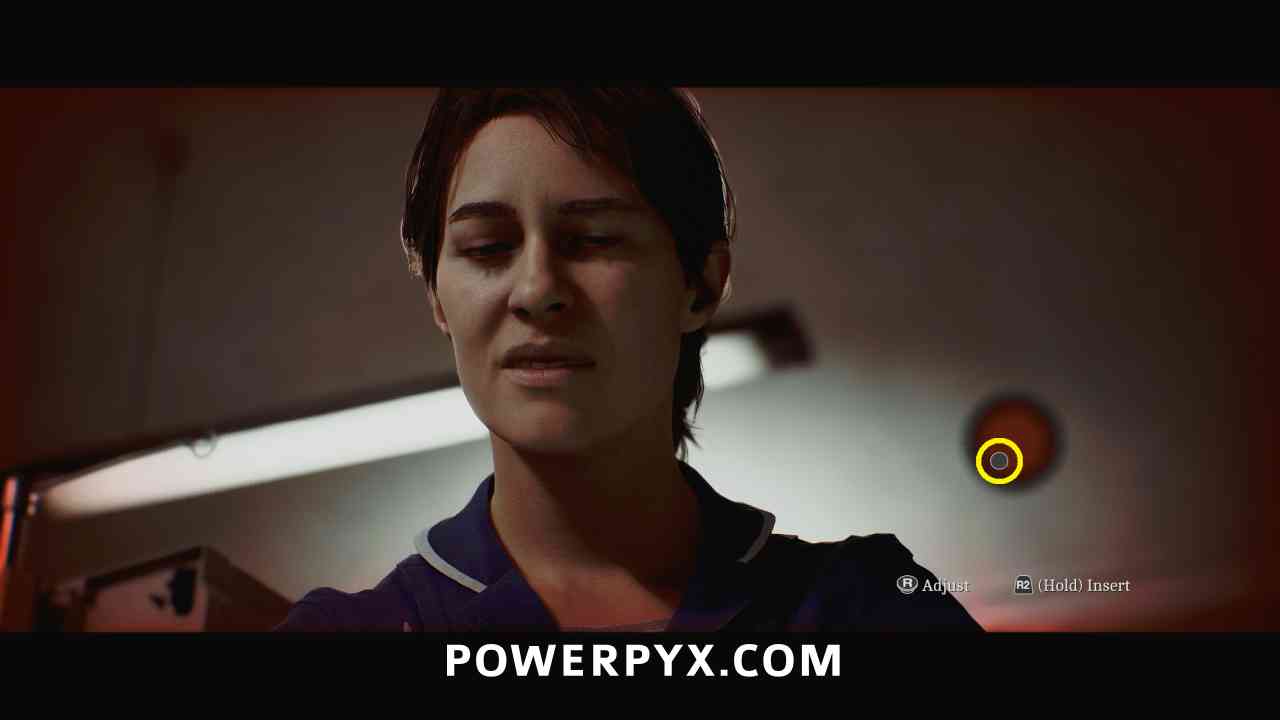
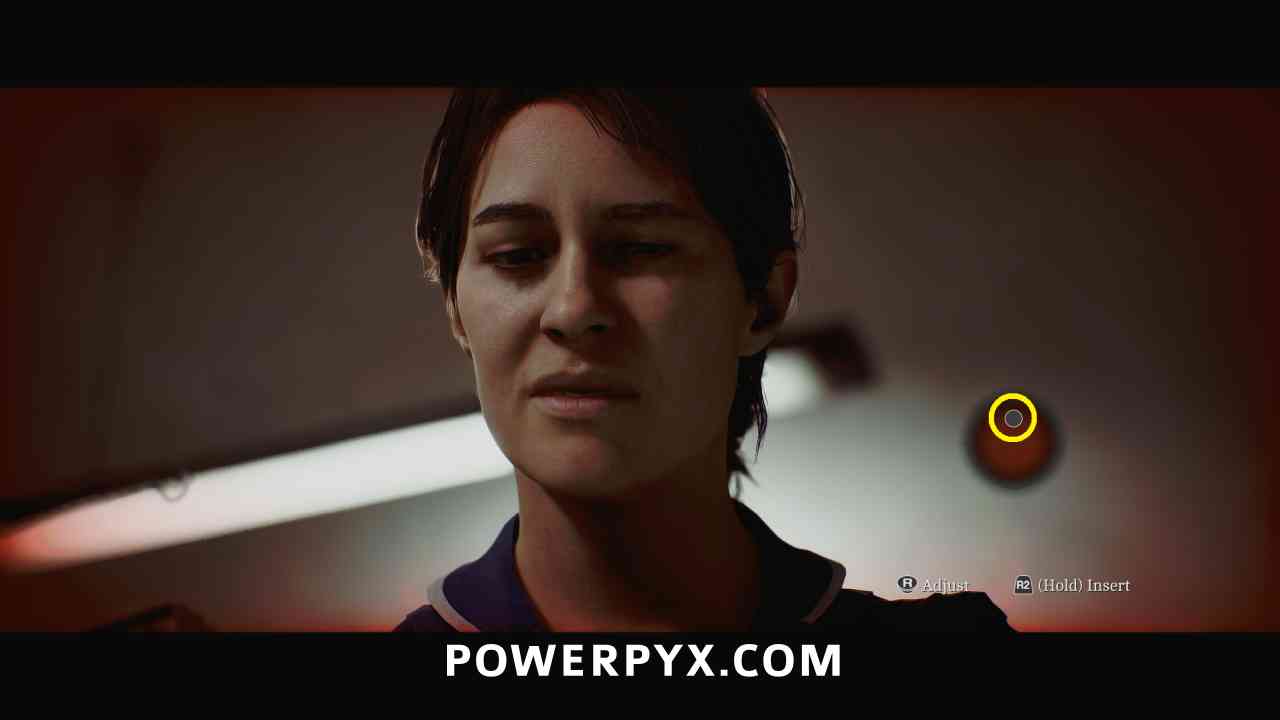
You now must intubate the patient.
When positioning, you need to find the locations where the visual is flashing red, then hold R2/RT to insert. The order is always to the right side, then the lower left, then the top.
8. Many Into One
Medical Center – Different
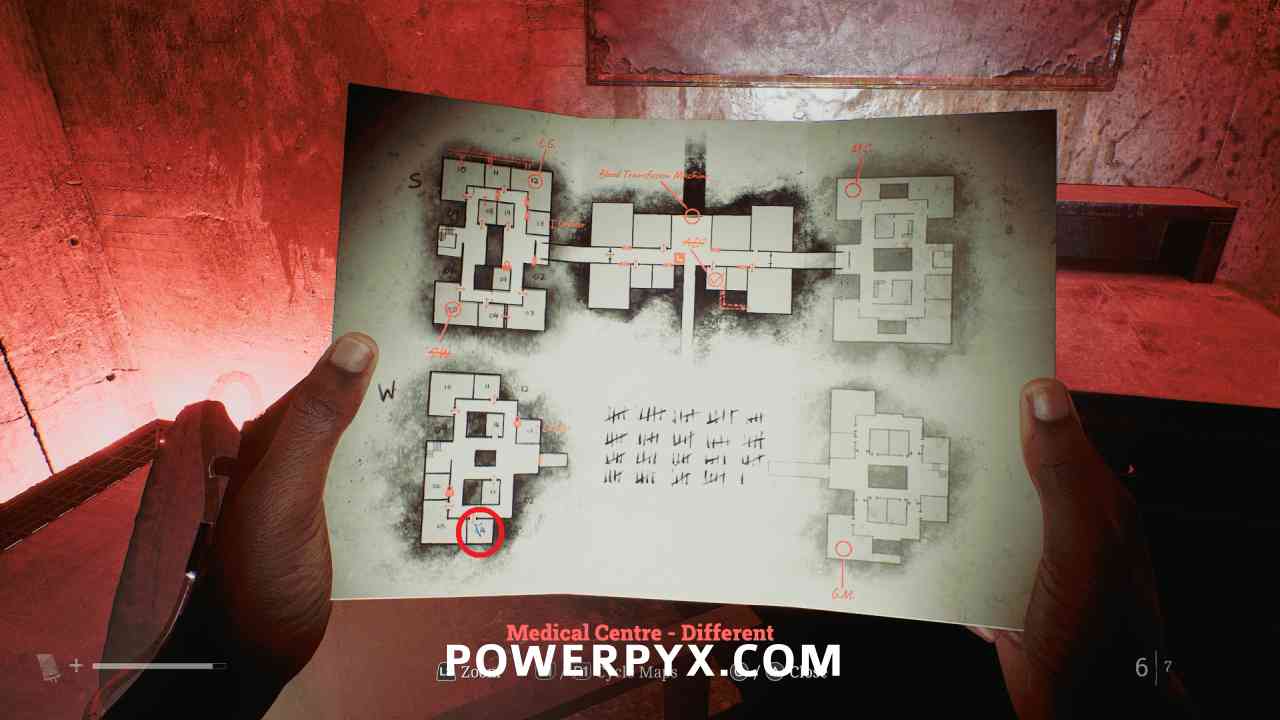
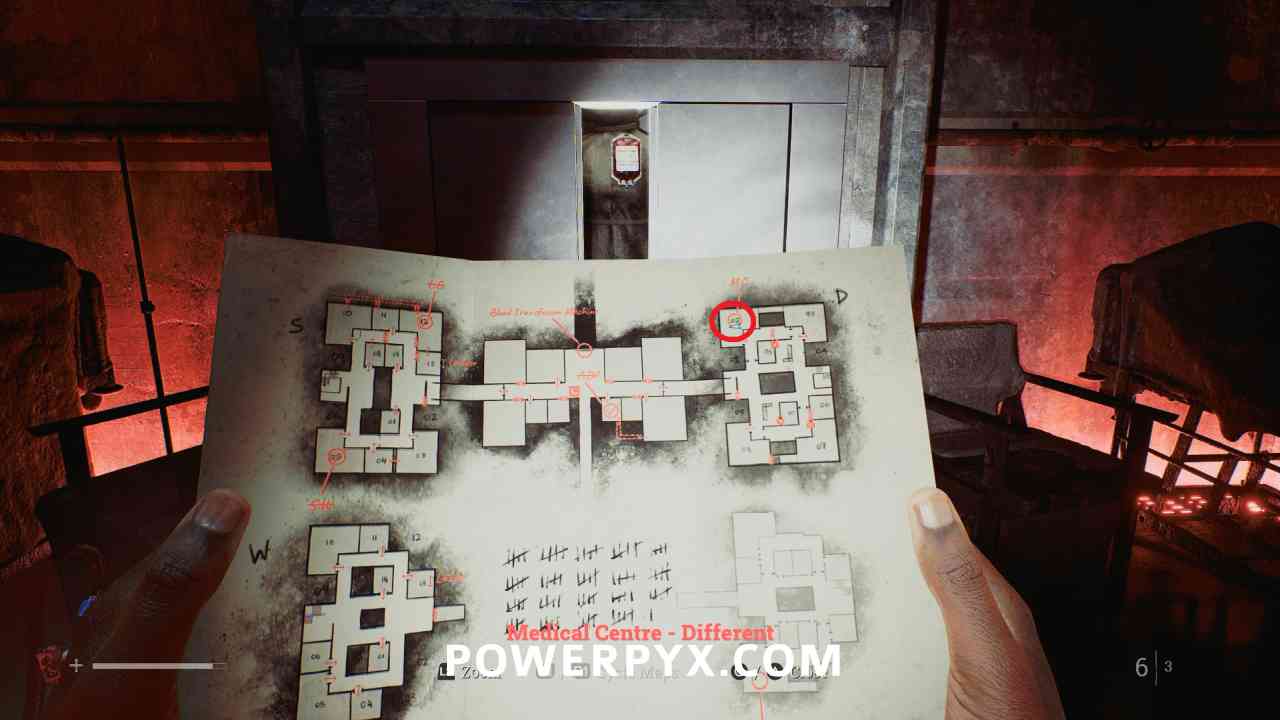
Medical Center – Different Map
Area: Medical Center – Different
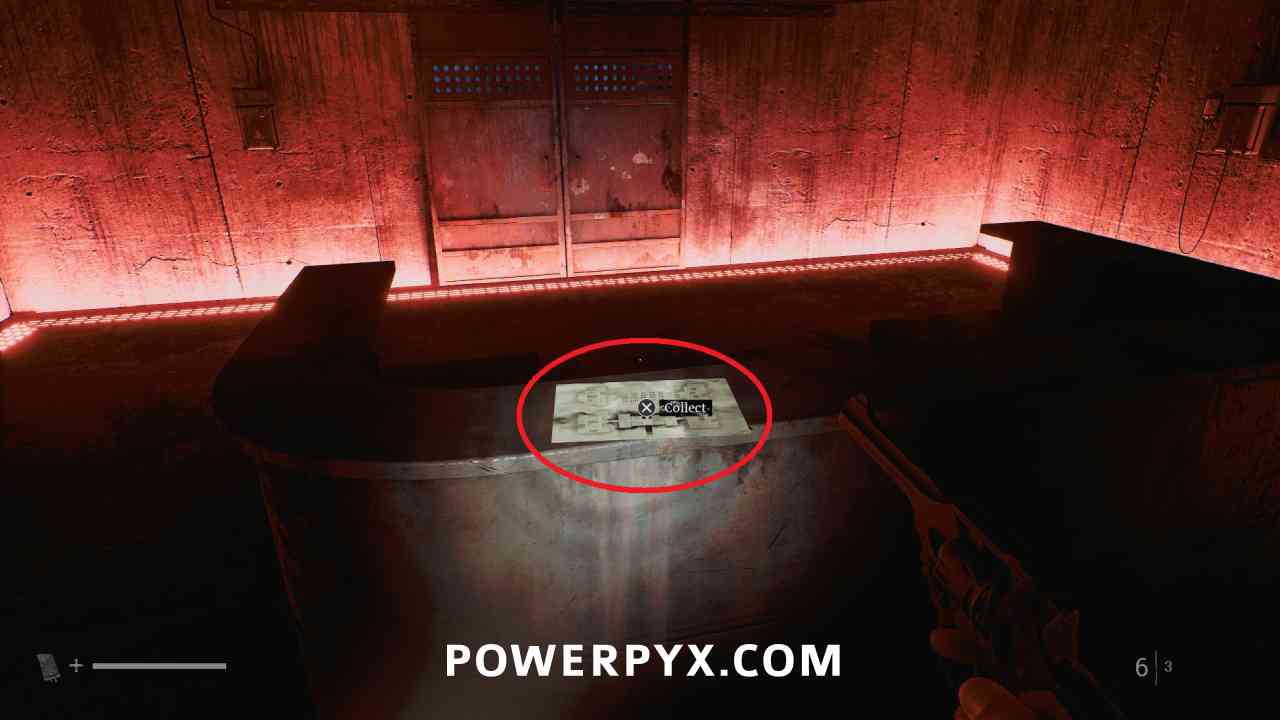
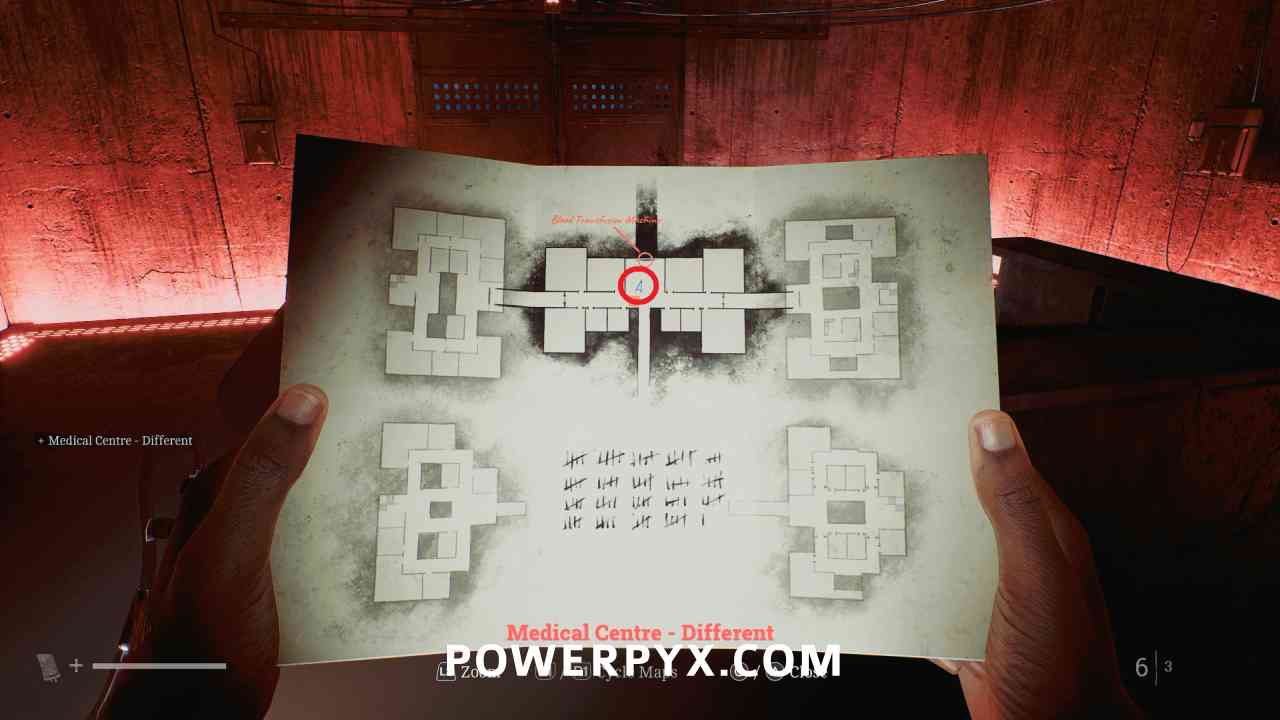
Go down the hallway on the upper floor and pick this up from the counter by the metal door.
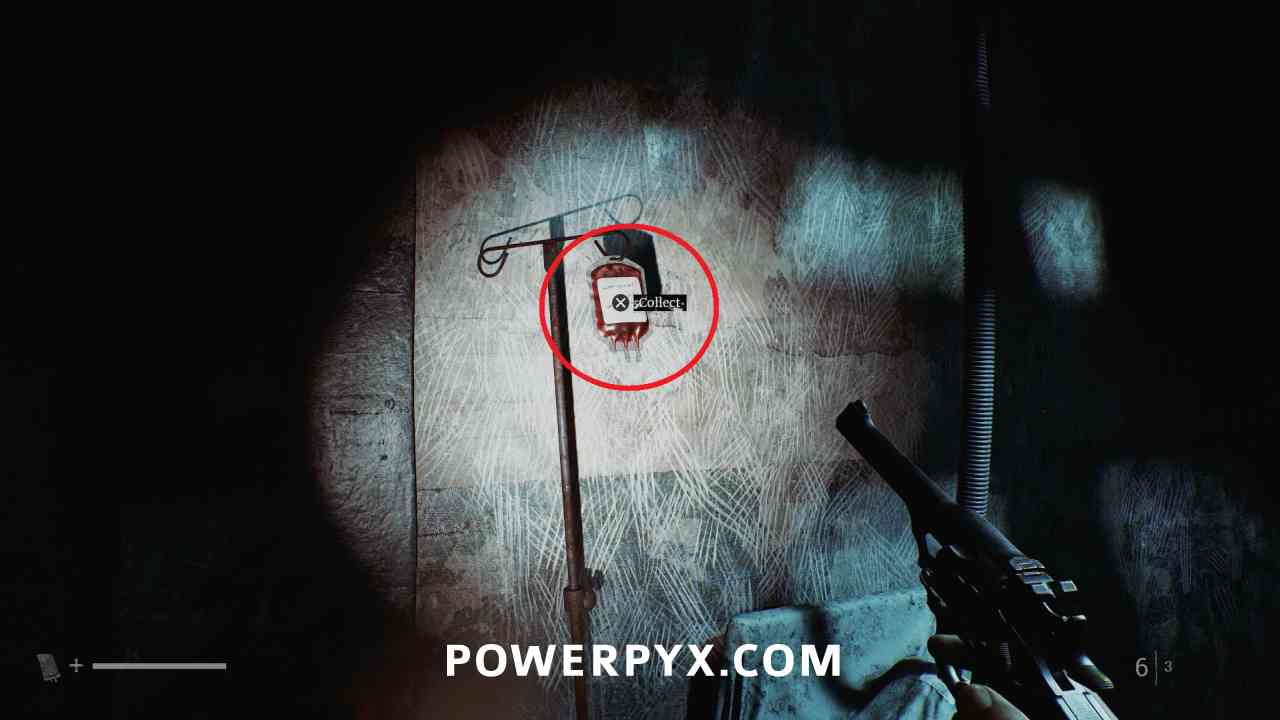
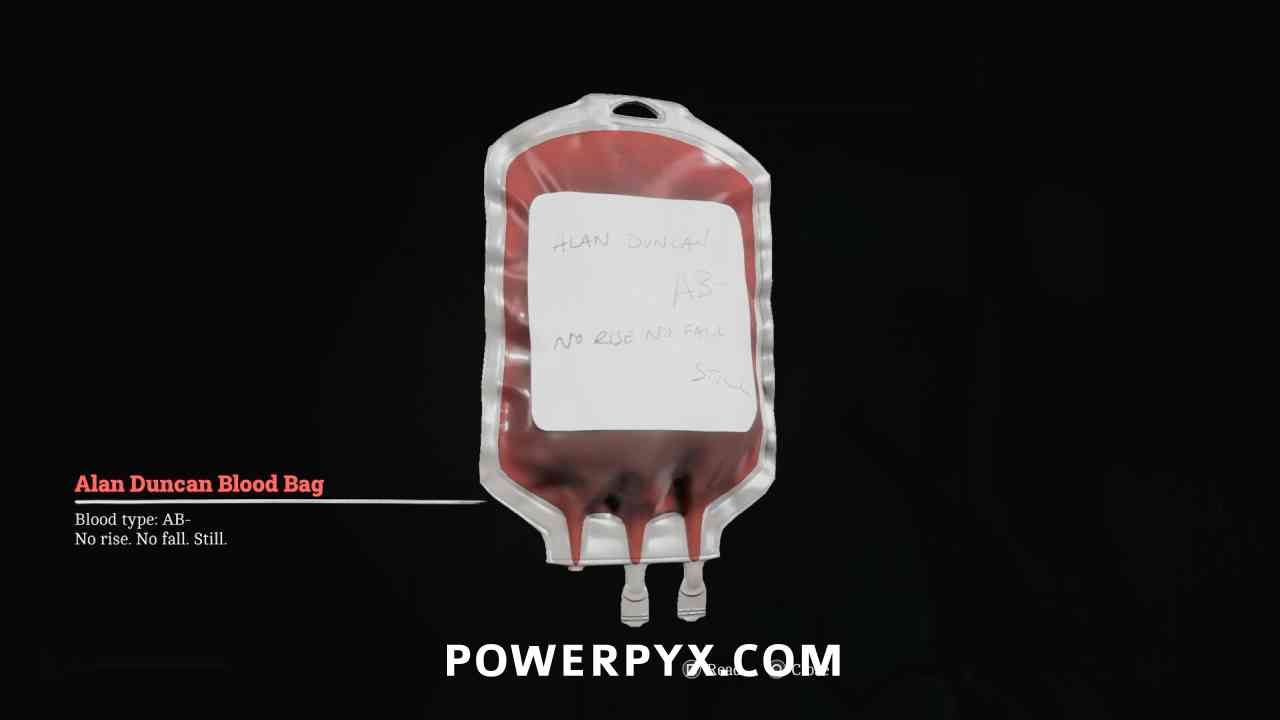
Key Item: Alan Duncan Blood Bag
Area: Medical Center – Different
Go down the right hallway and the bottom door at the end, crouch through the vent and pick this up left of the bed.
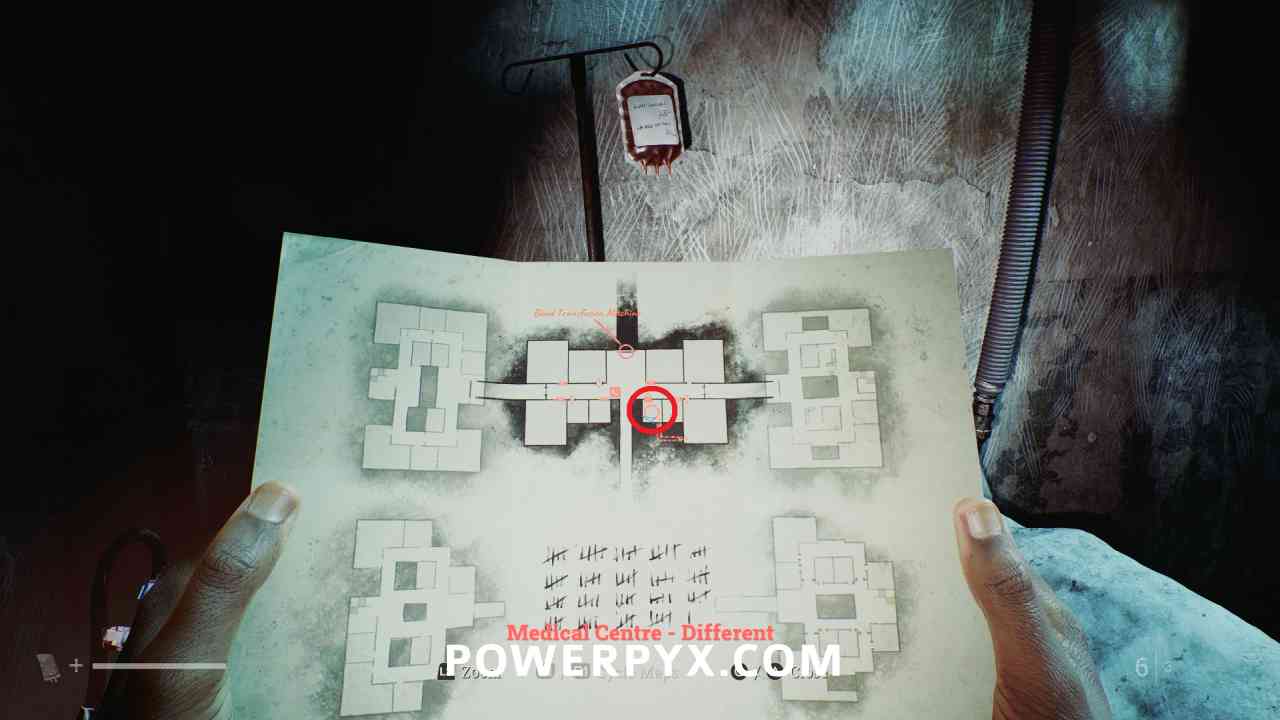
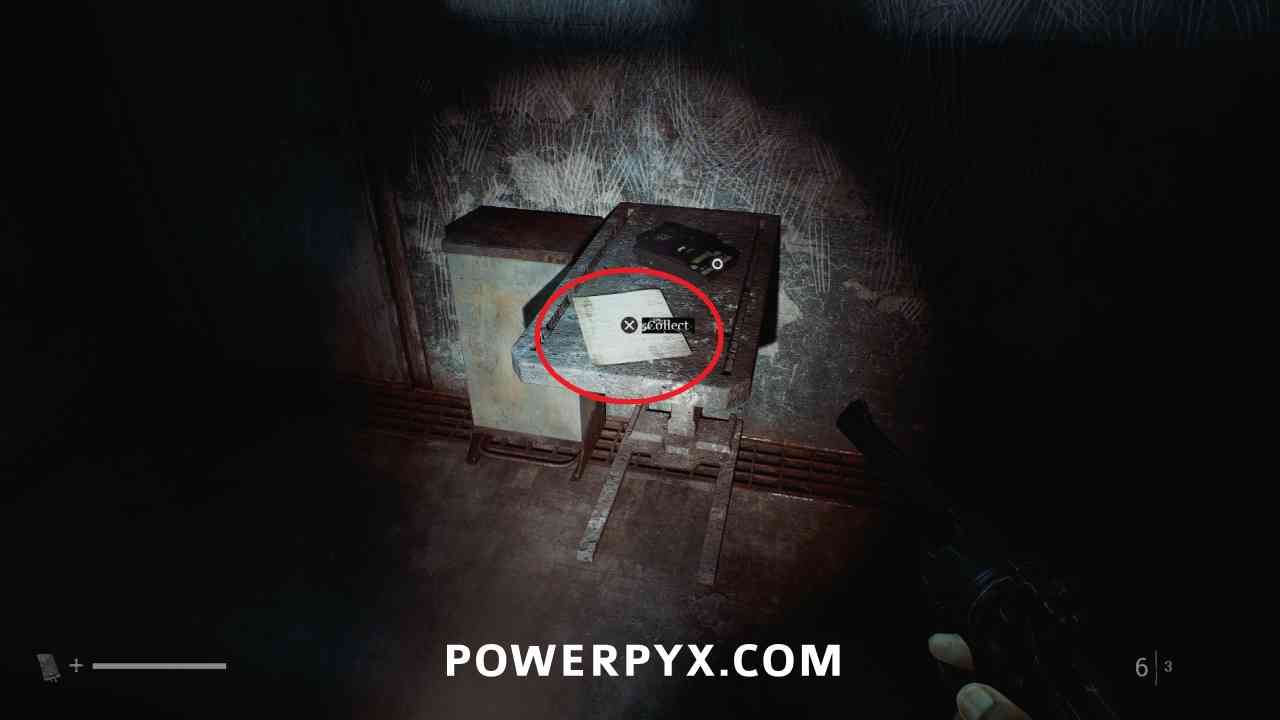
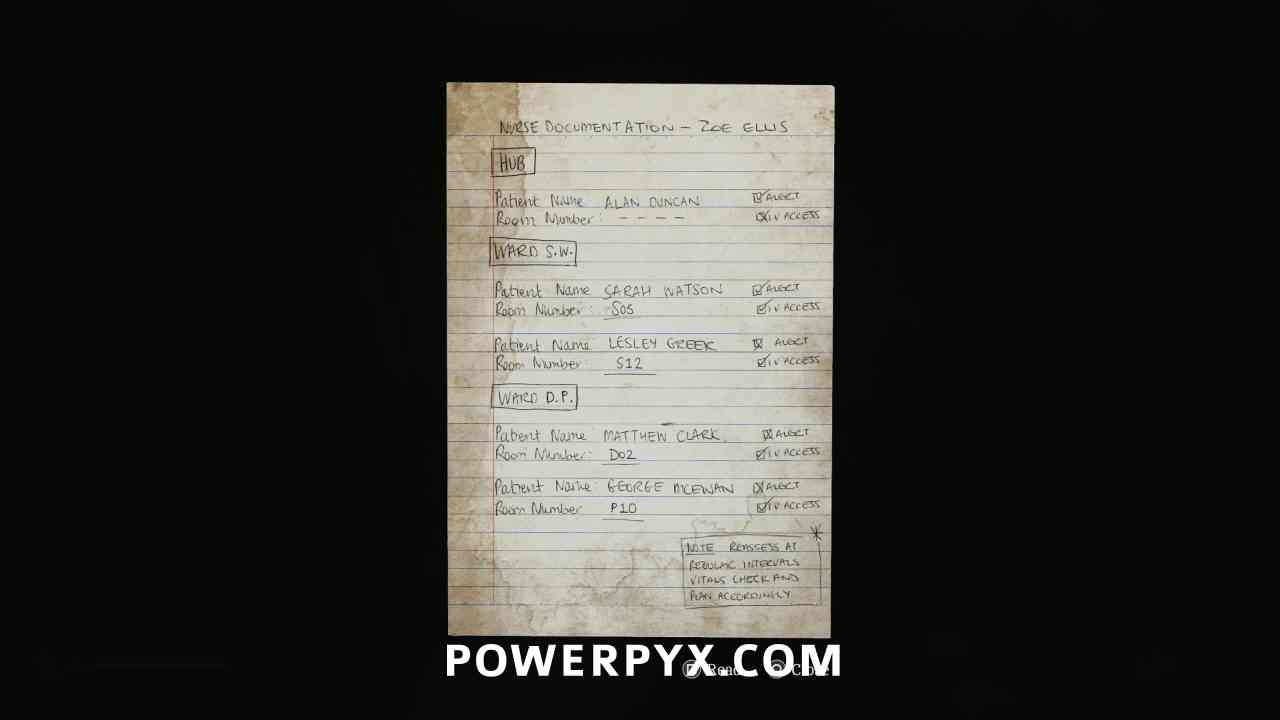
Clue: Zoe’s Patient List
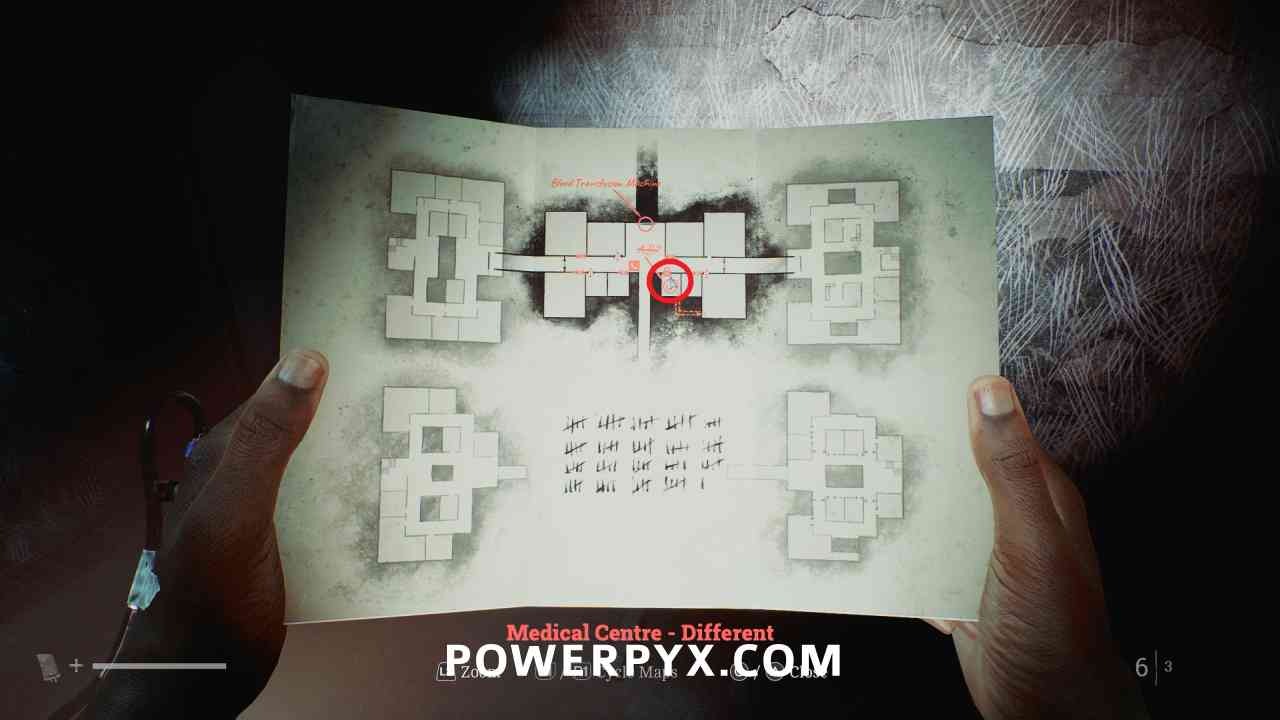
Area: Medical Center – Different
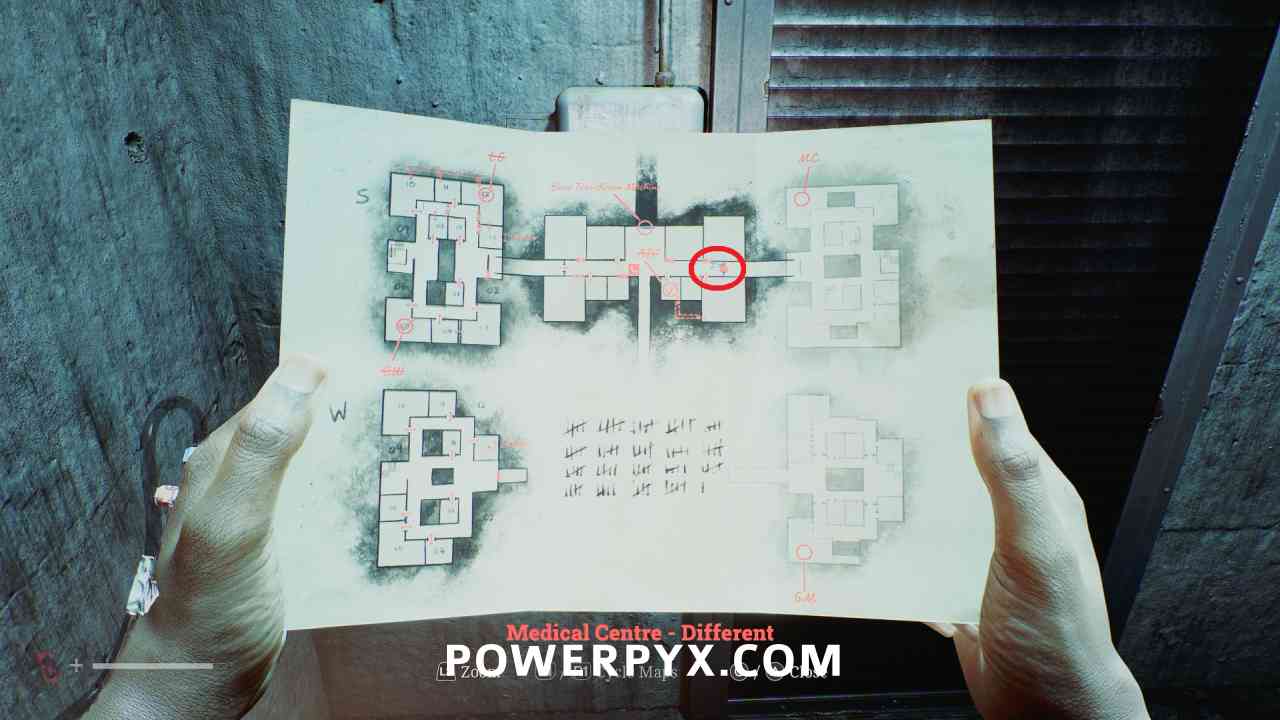
In the same room, on the table beside the tape player. Marks the location of blood bags on the map.
Locked Door – S.W.
Area: Medical Center – Different
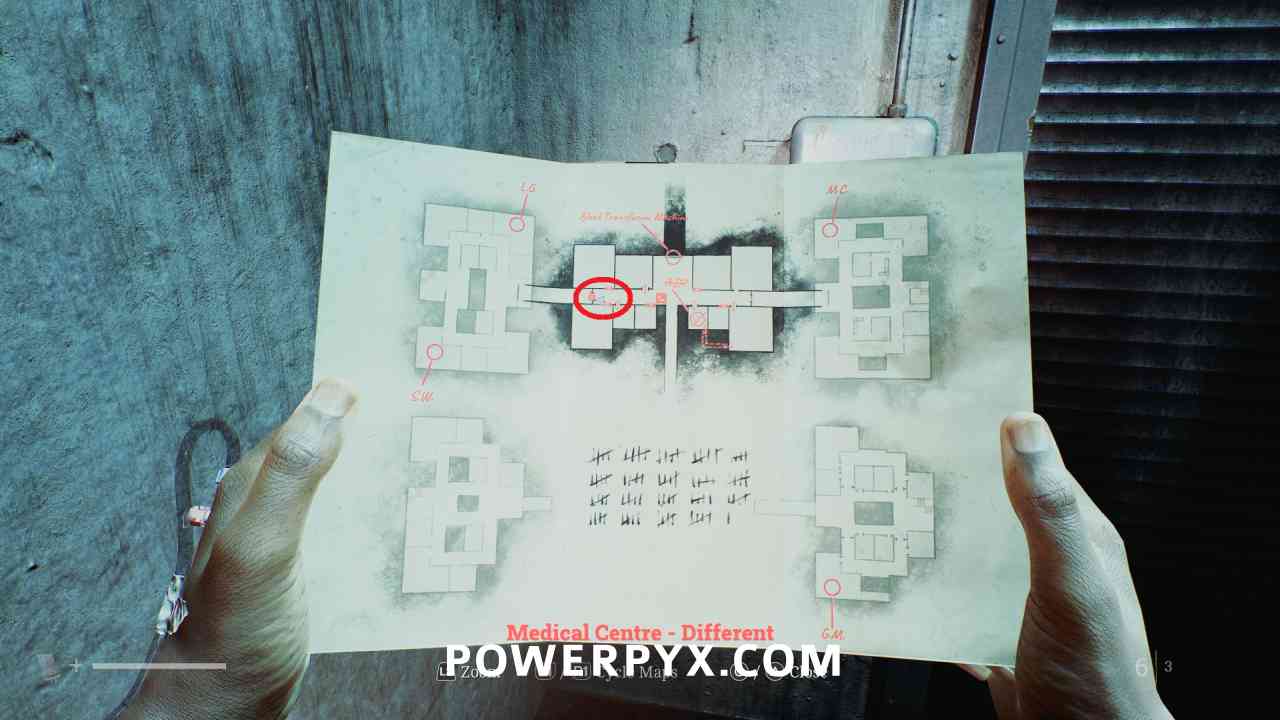
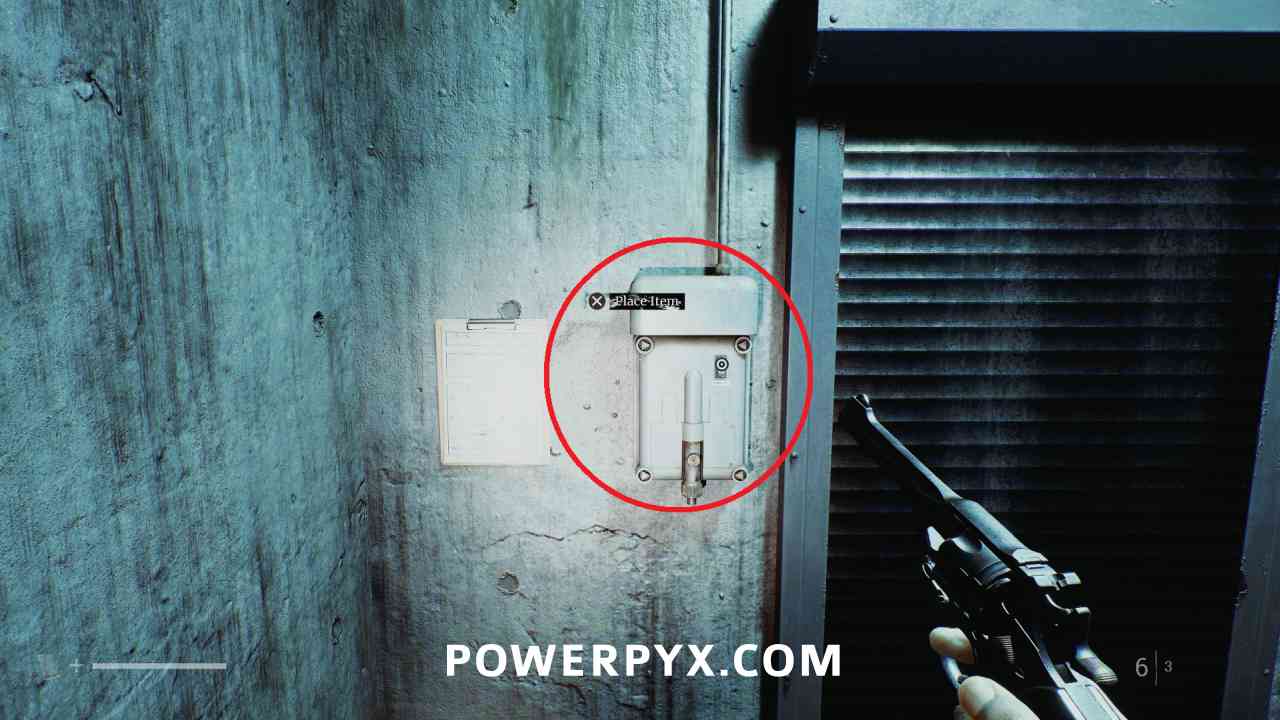
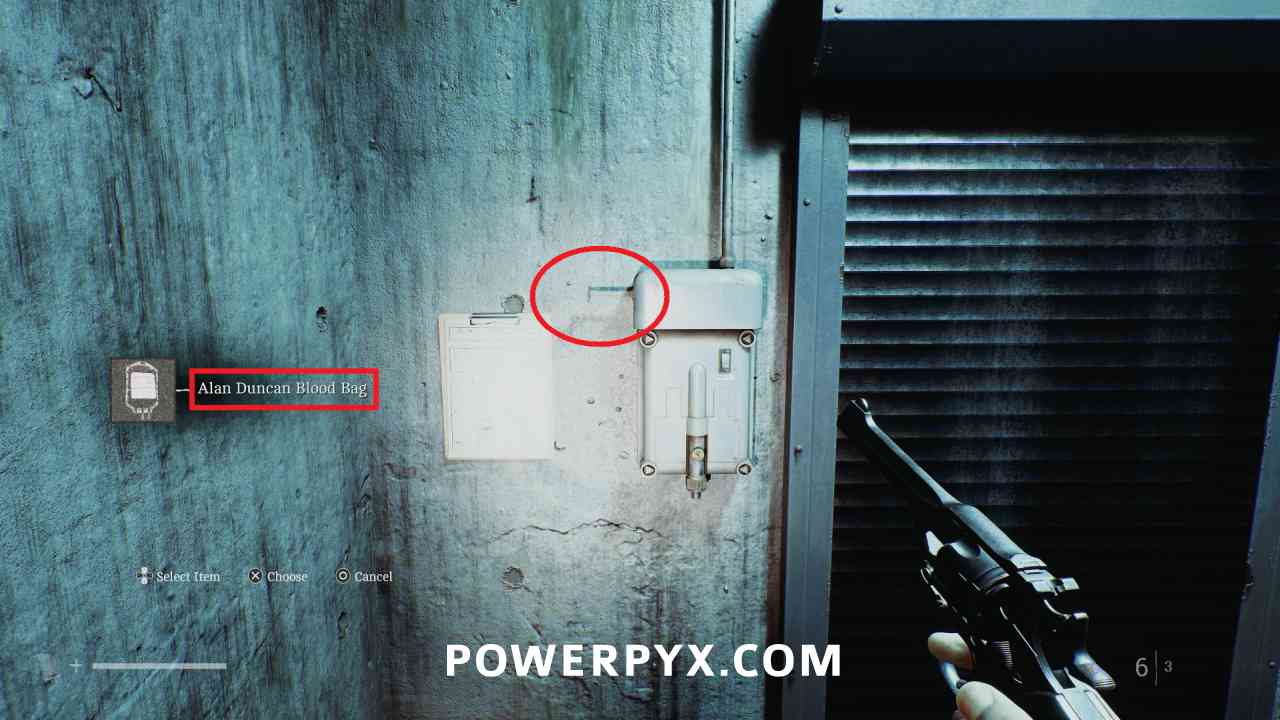
Go to the end of the left hallway (S.W. above door) interact with the transfusion machine and place the Alan Duncan Blood Bag, then use the transfusion switch.
Medical Center – Different – Ward S
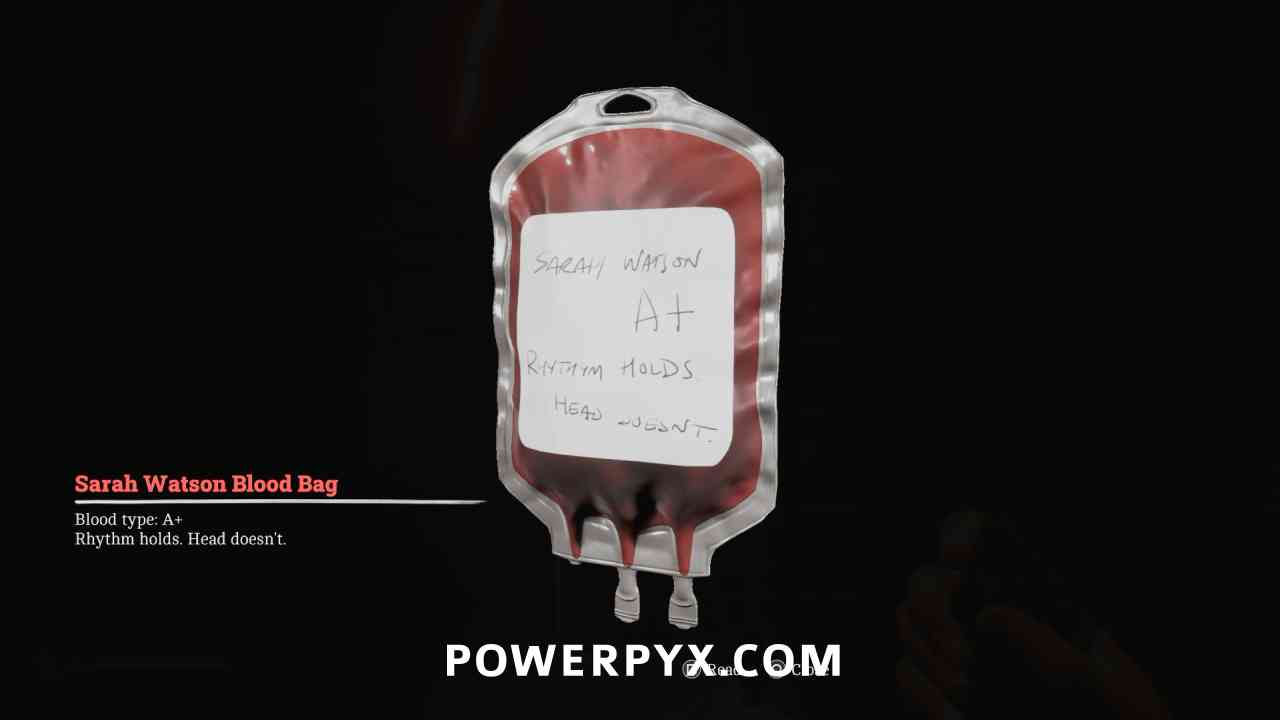
Key Item: Sarah Watson Blood Bag
Area: Medical Center – Different > Ward S
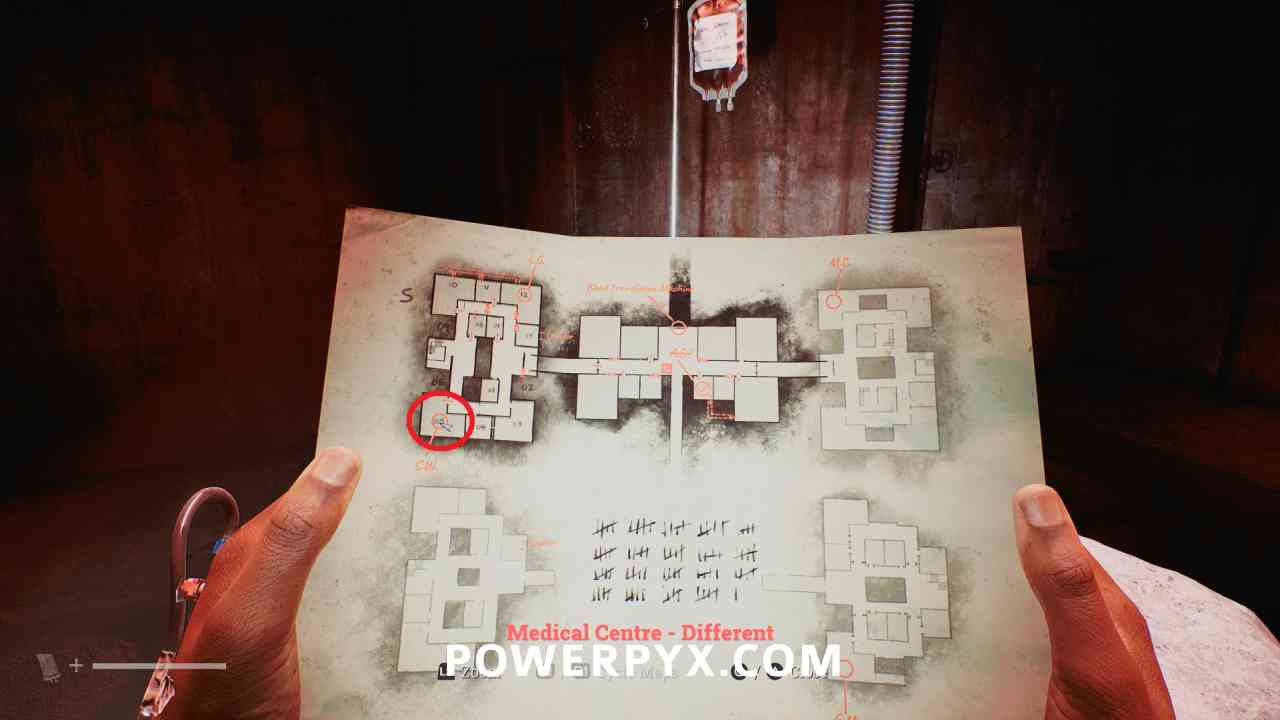
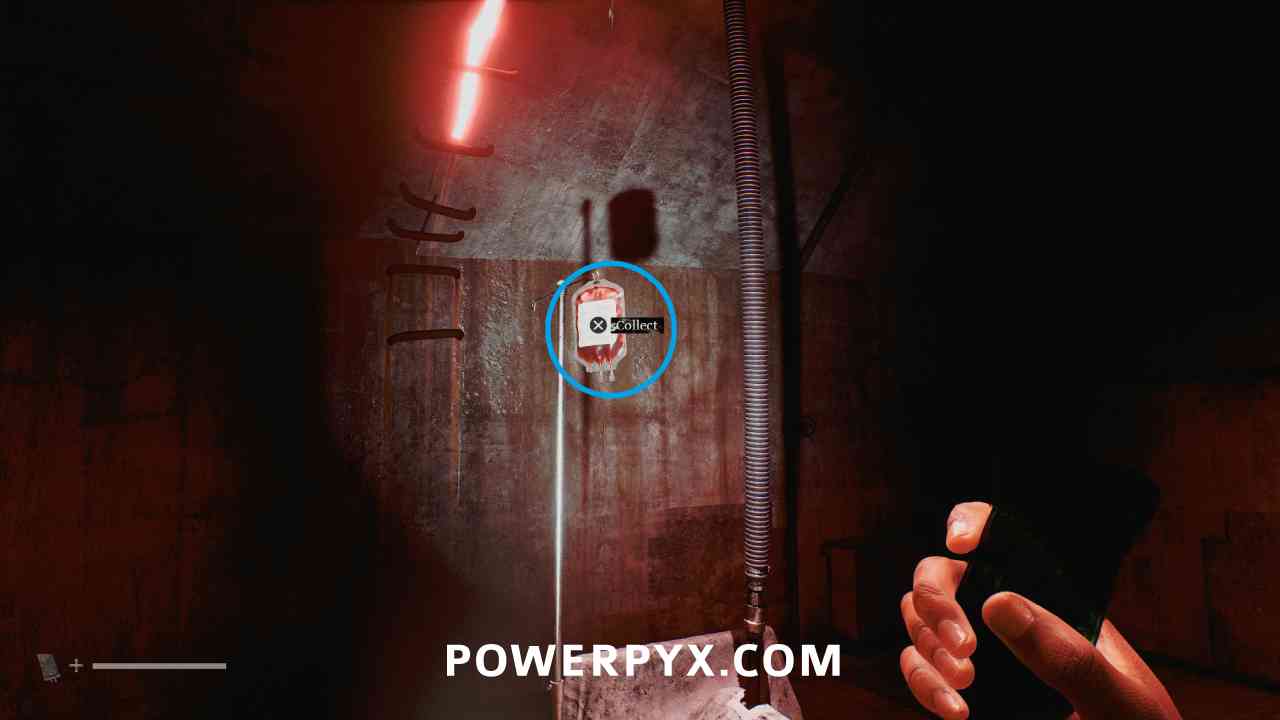
In the left area of the map, follow the path around to room 05 at the bottom left, and pick this up from beside the bed.
Medical Center – Different – Ward W
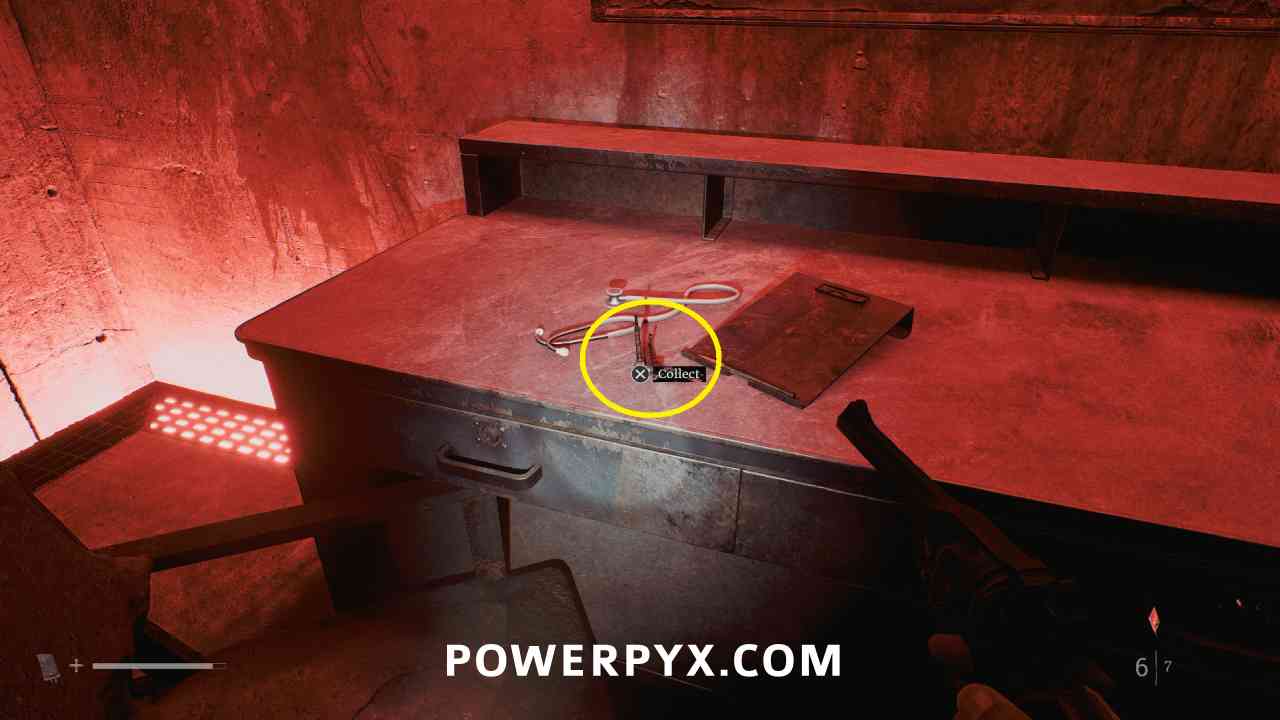
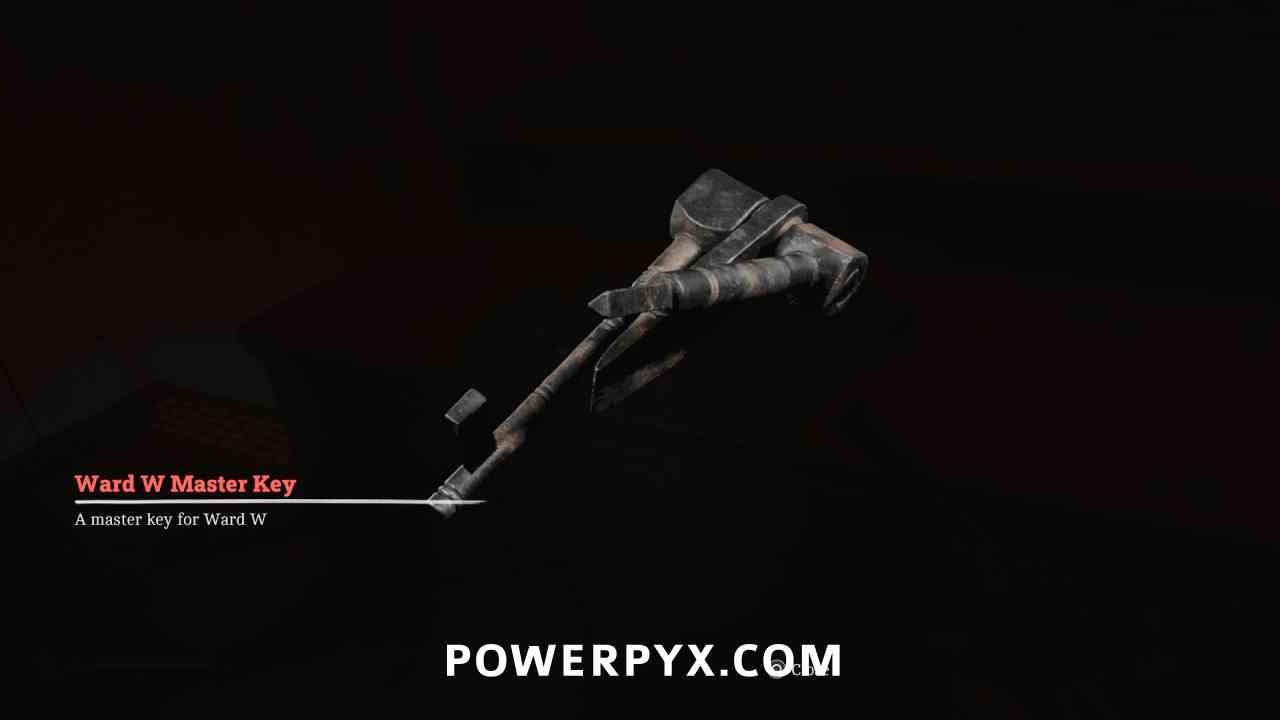
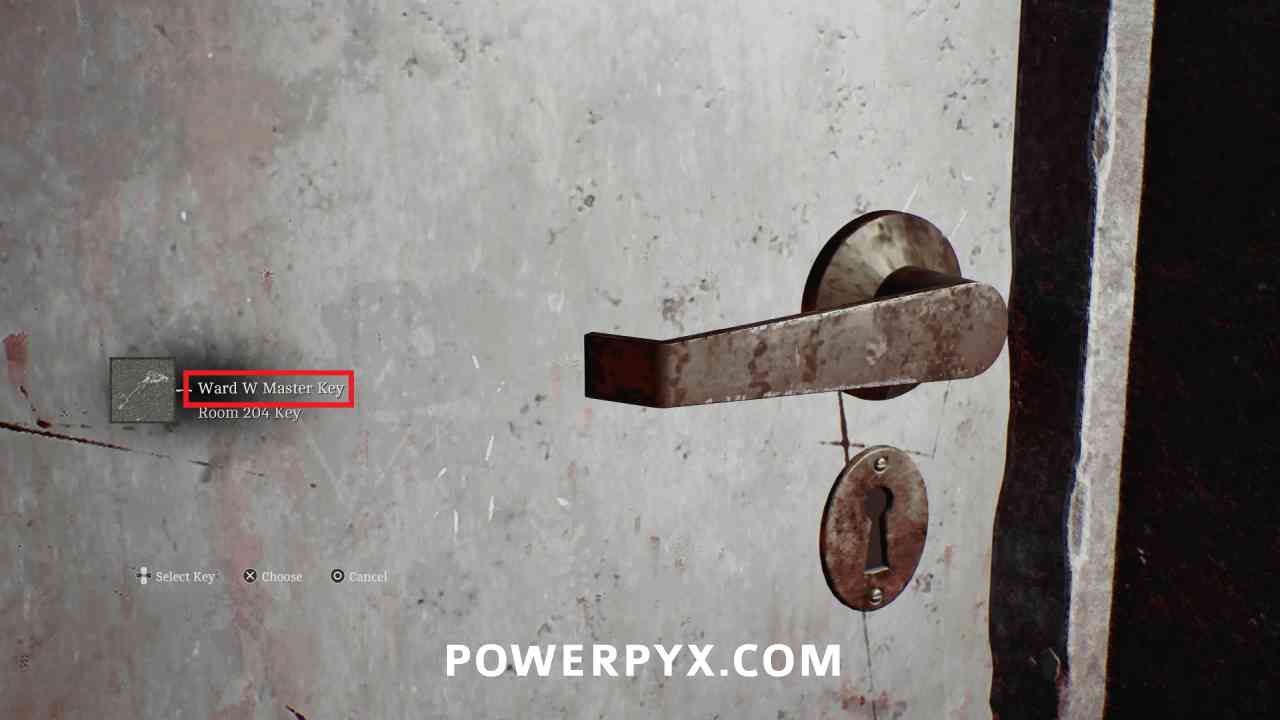
Key Item: Ward W Master Key
Area: Medical Center – Different > Ward W
On the bottom floor on the left area of the map, in room 04 on a table.
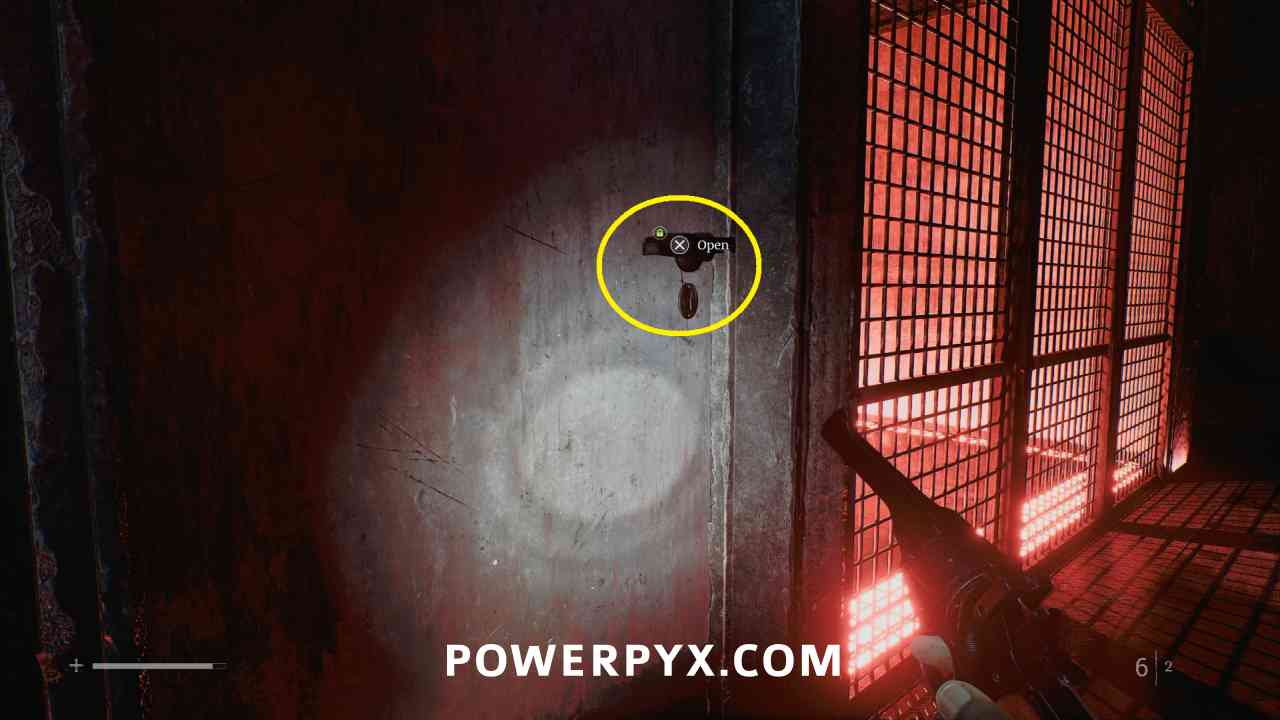
Locked Door – 13
Area: Medical Center – Different > Ward W
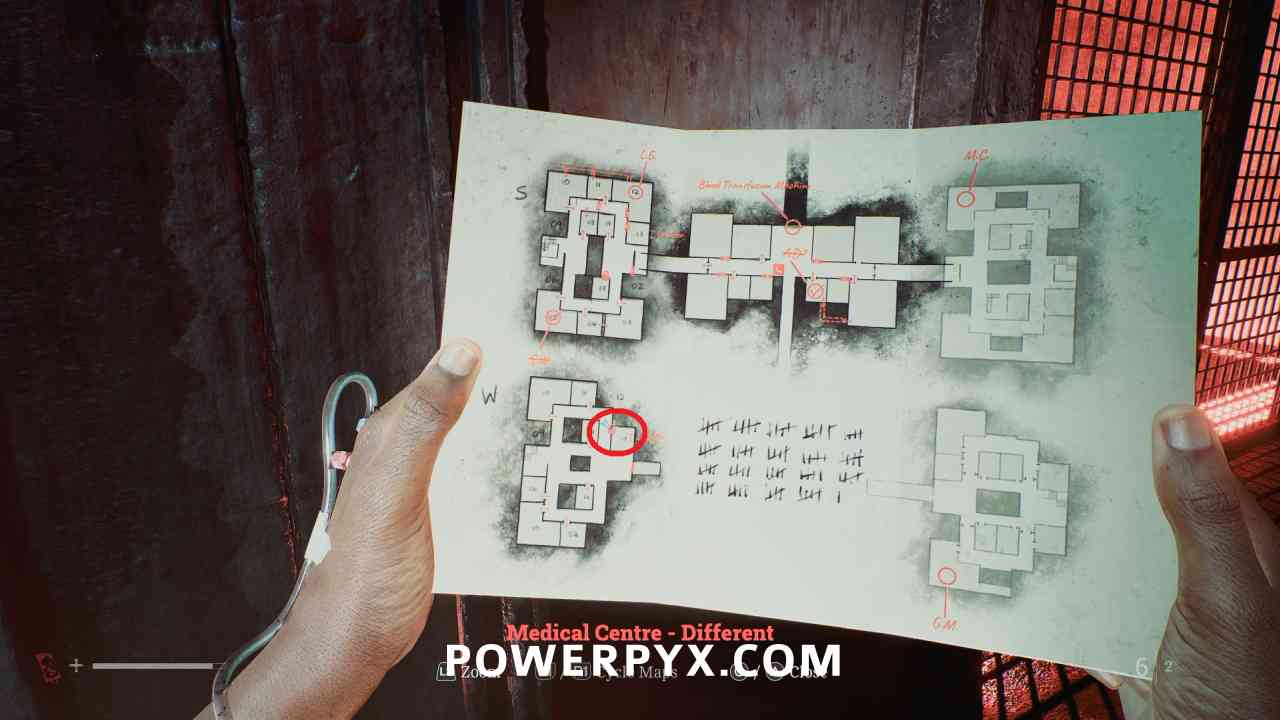
Go to room 13 and use the Ward W Mastery Key to open the door.
Medical Center – Different – Ward S
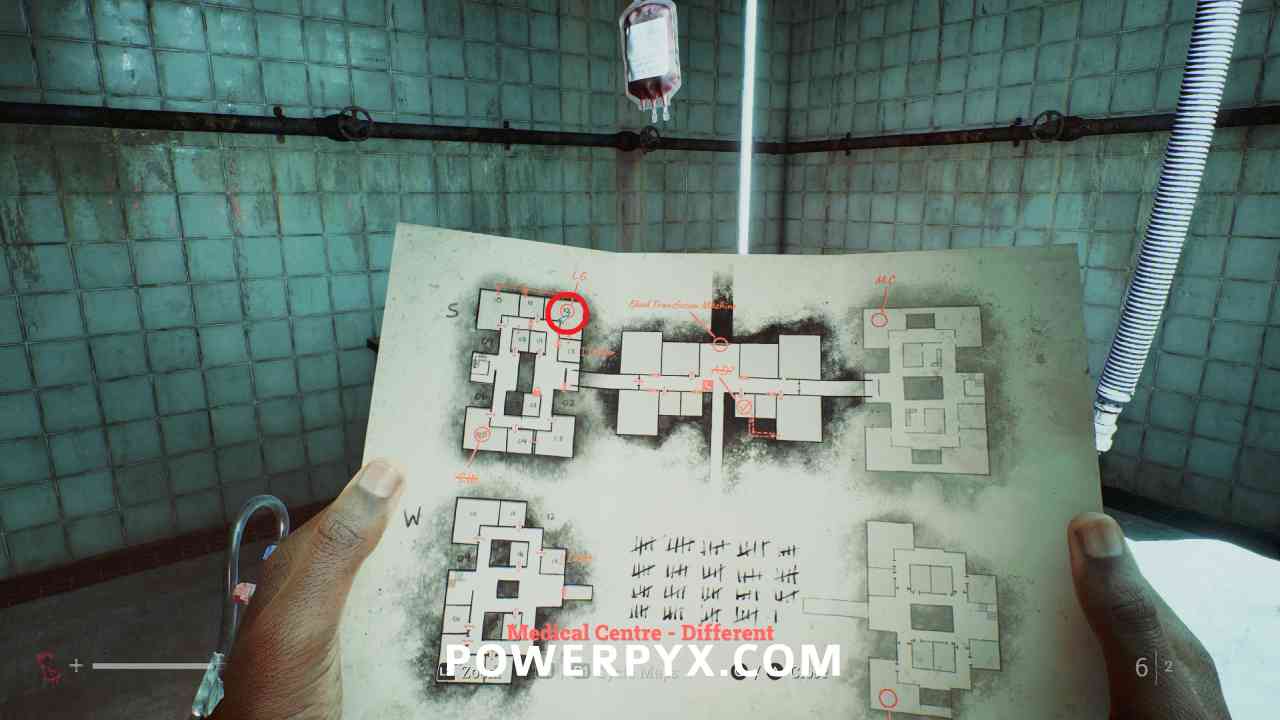
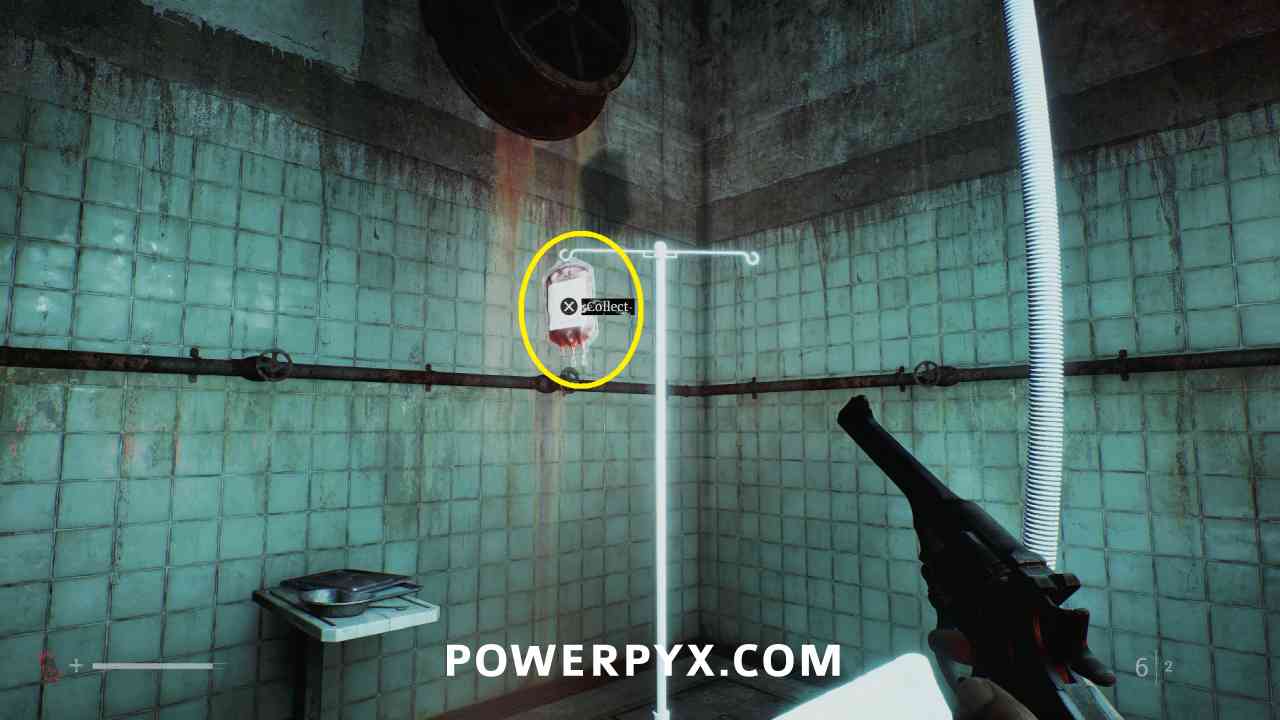
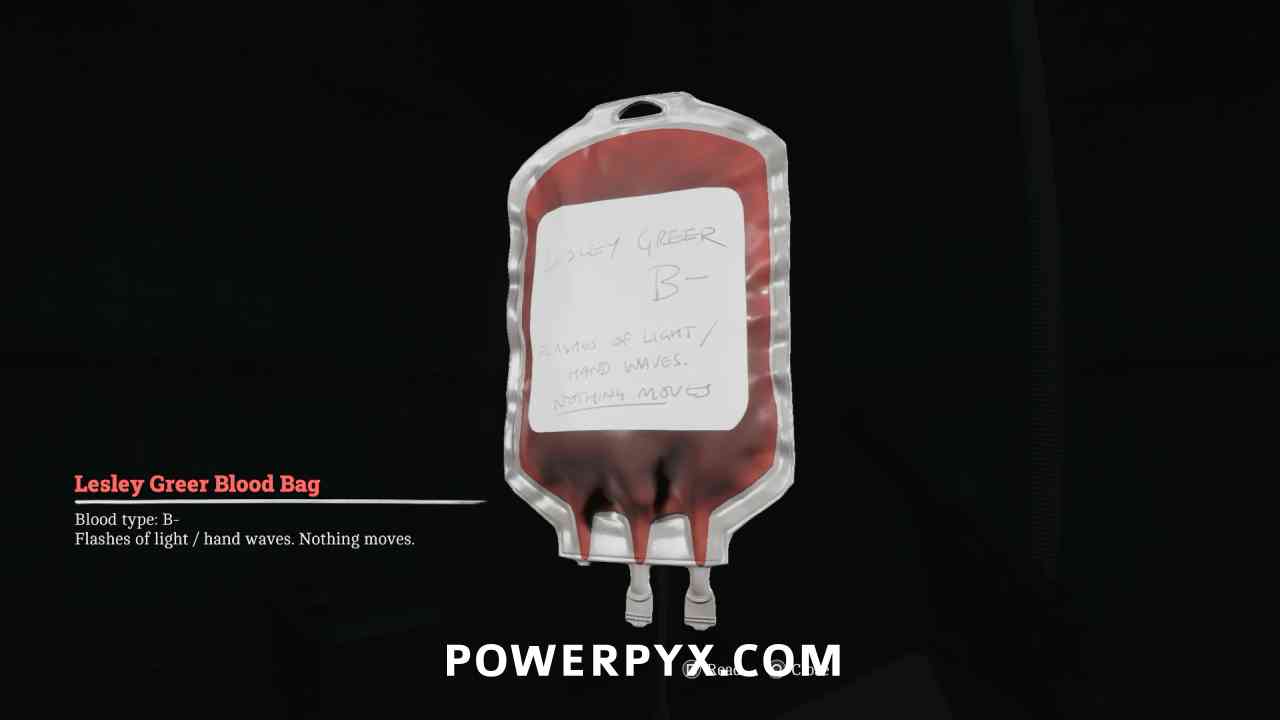
Key Item: Lesley Greer Blood Bag
Area: Medical Center – Different > Ward S
Go up the ladder in lower floor room 13 to reach the upper floor room 12 where this is located.
Medical Center – Different
Locked Door – D.P.
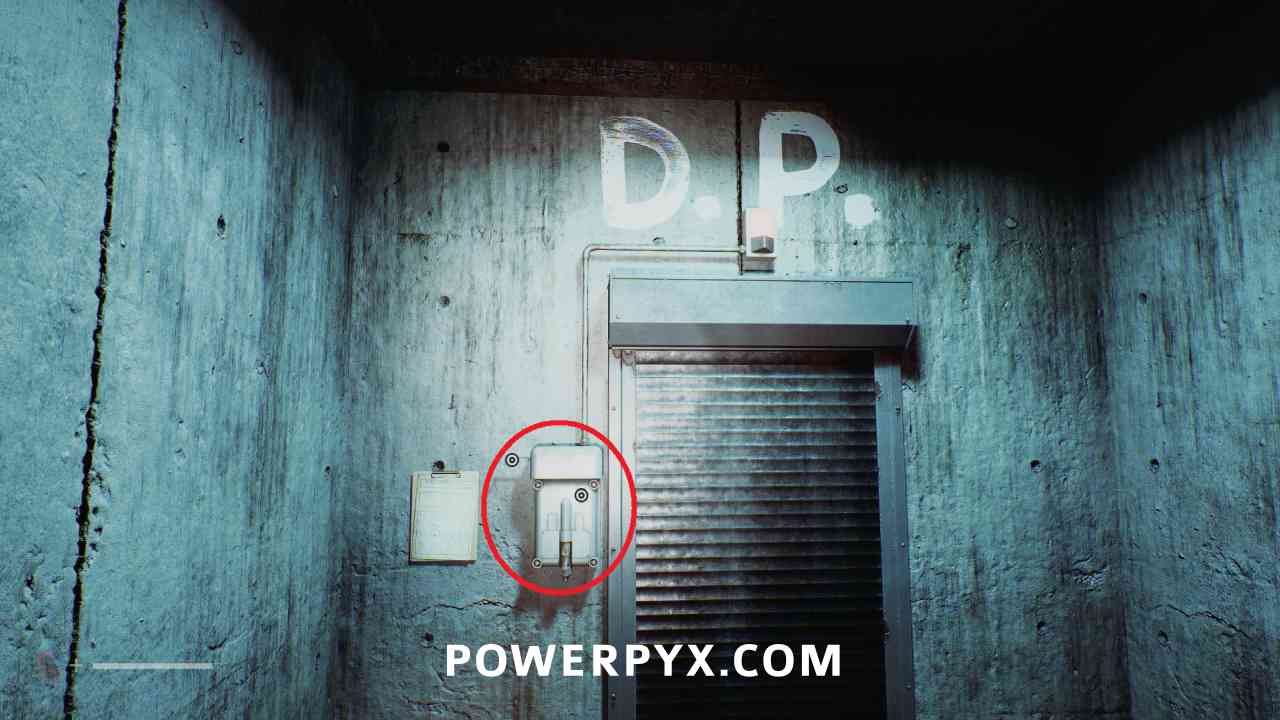
Area: Medical Center – Different
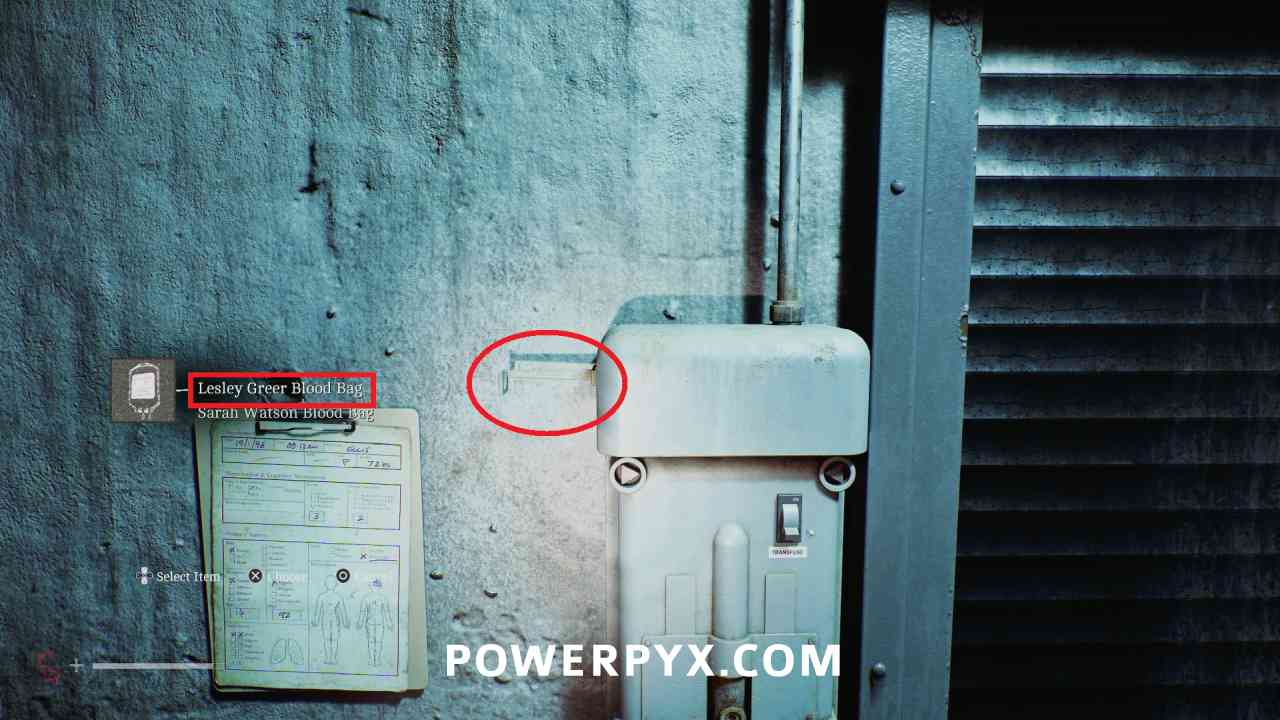
Go to the end of the right hallway (D.P. above door) interact with the transfusion machine and place the Lesley Greer Blood Bag, then use the transfusion switch.
Medical Center – Different – Ward D
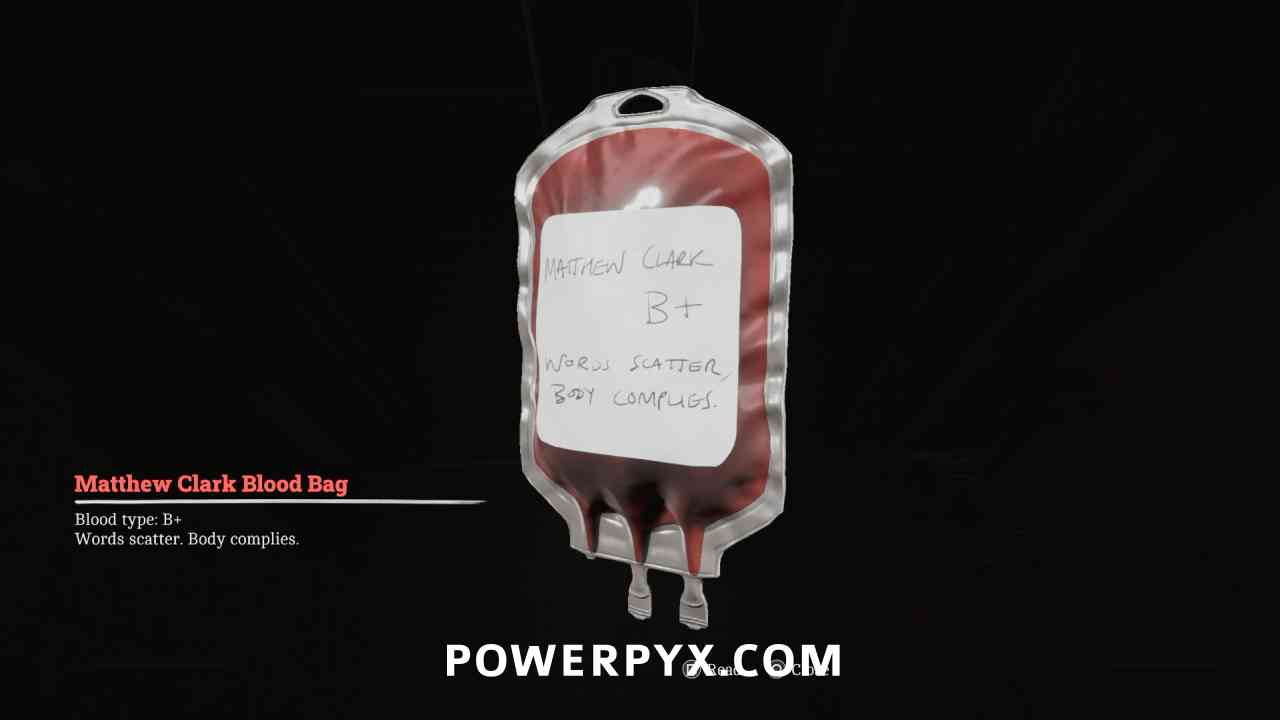
Key Item: Matthew Clark Blood Bag
Area: Medical Center – Different > Ward D
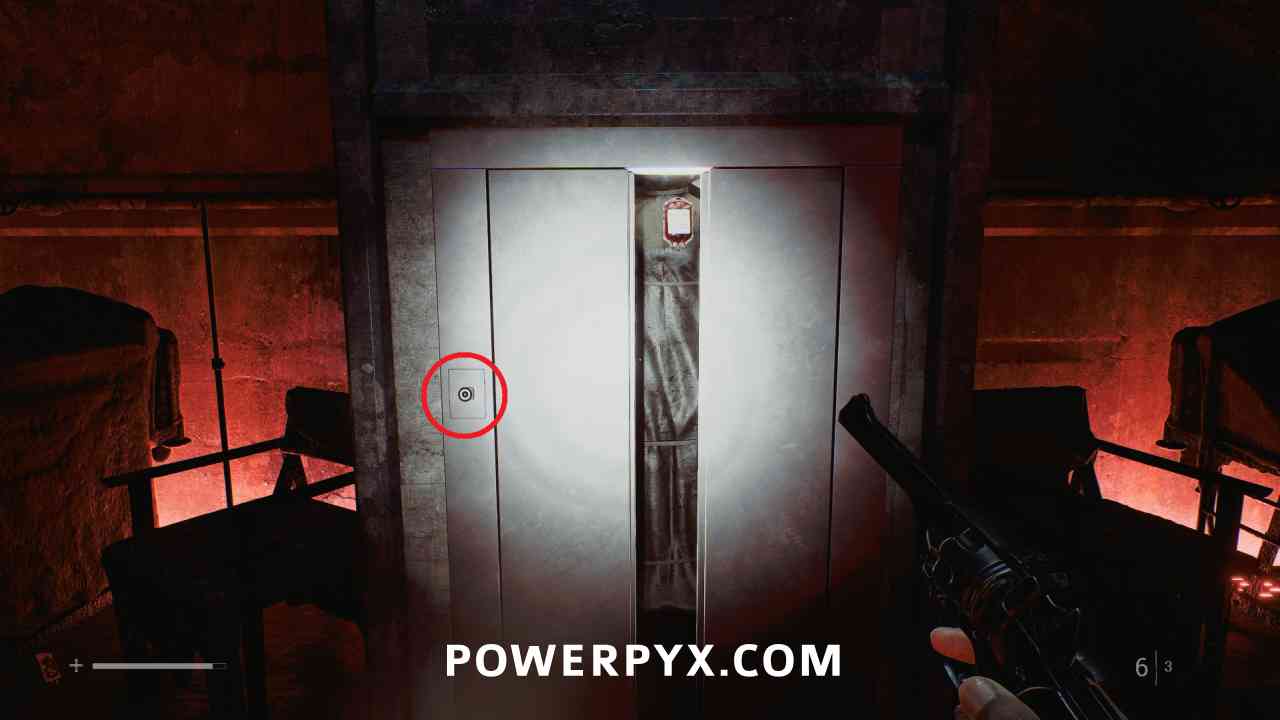
Go to room 03, then through the hallway to room 02. Interact with the elevator button to drop the blood bag to the lower floor.
Medical Center – Different – Ward P
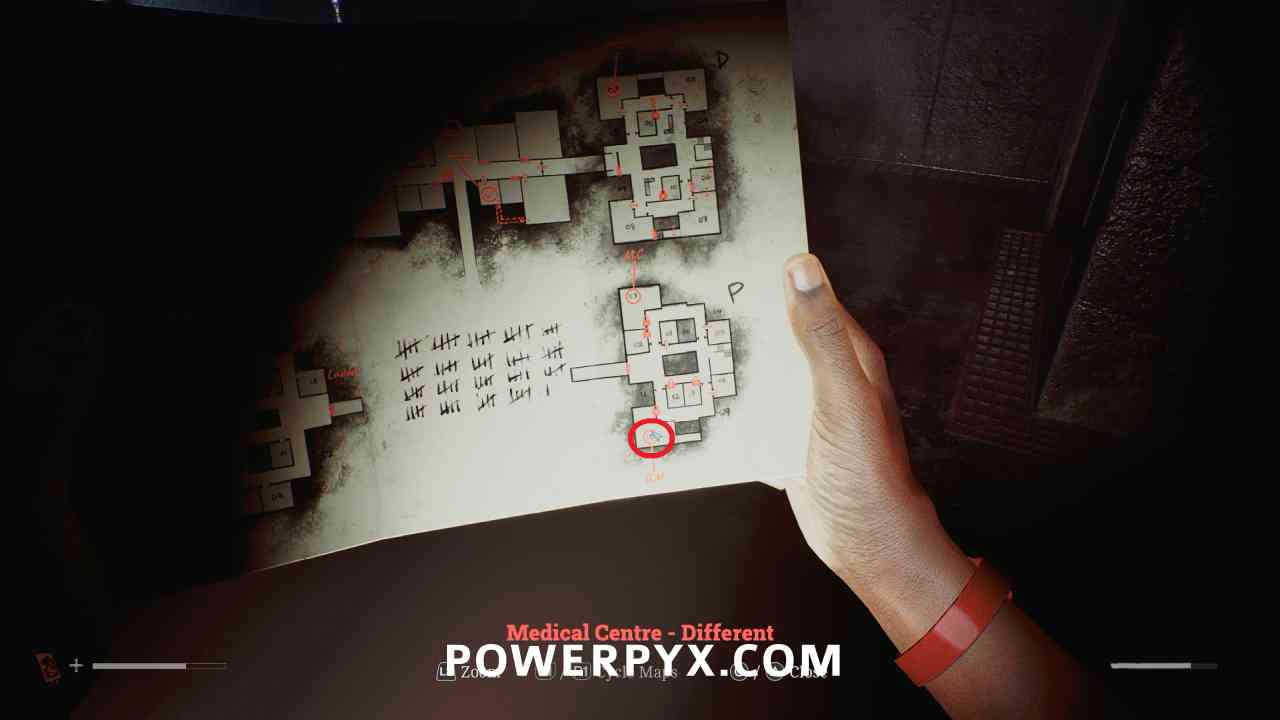
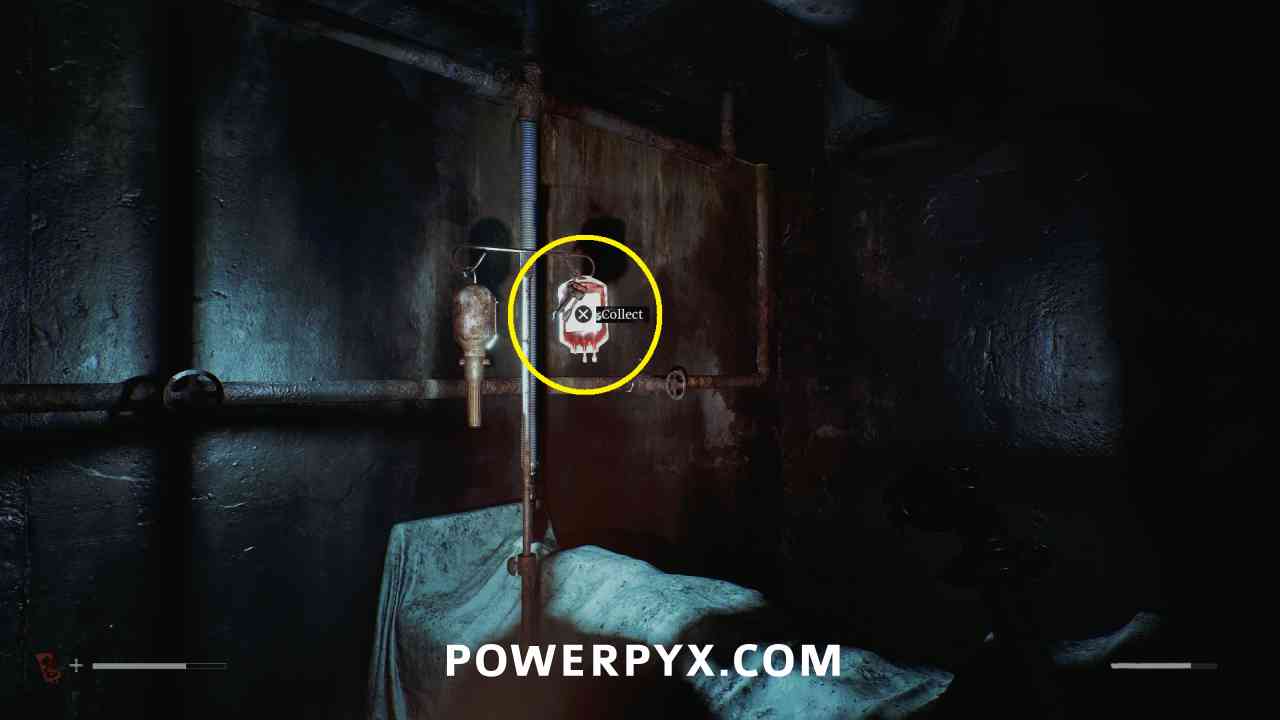
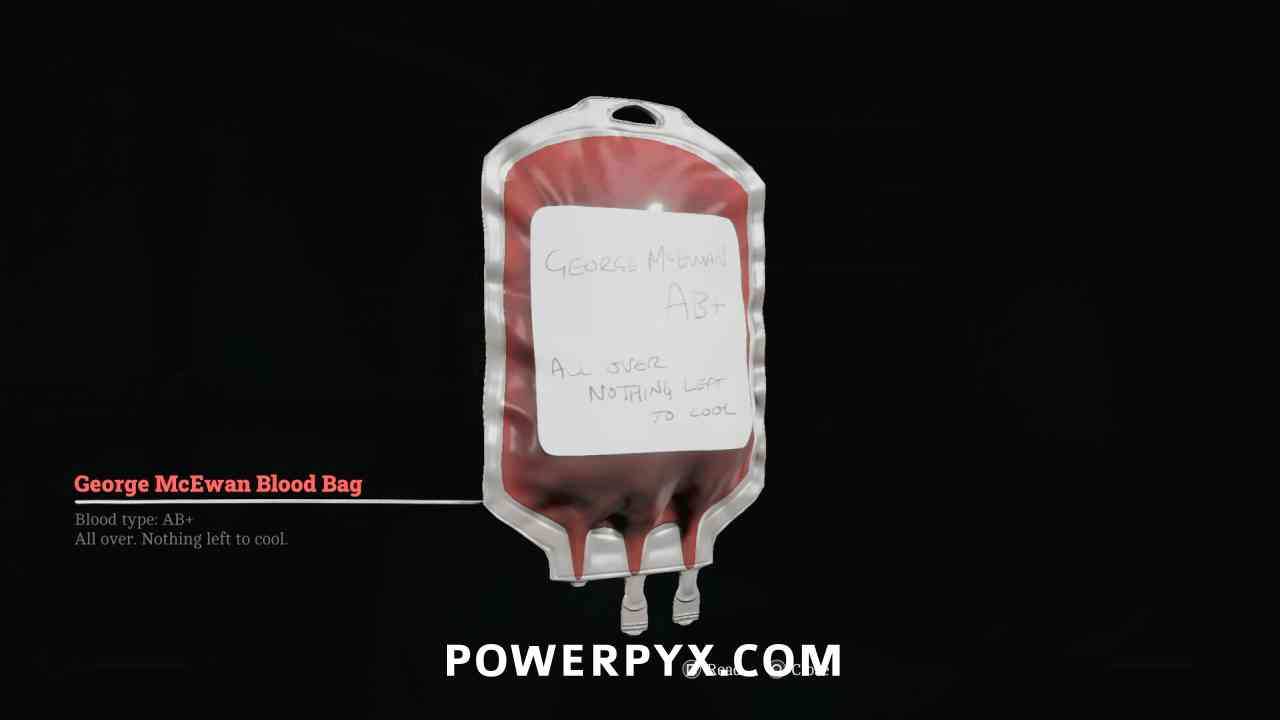
Key Item: George McEwan Blood Bag
Area: Medical Center – Different > Ward P
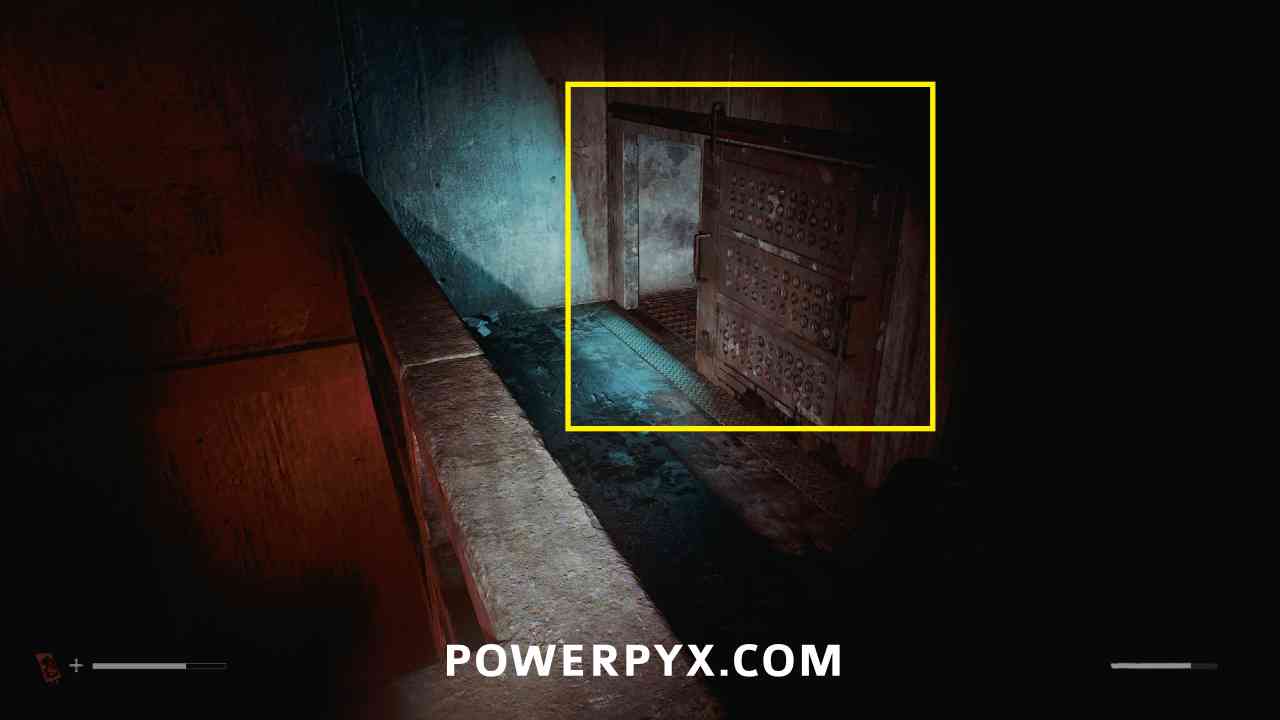
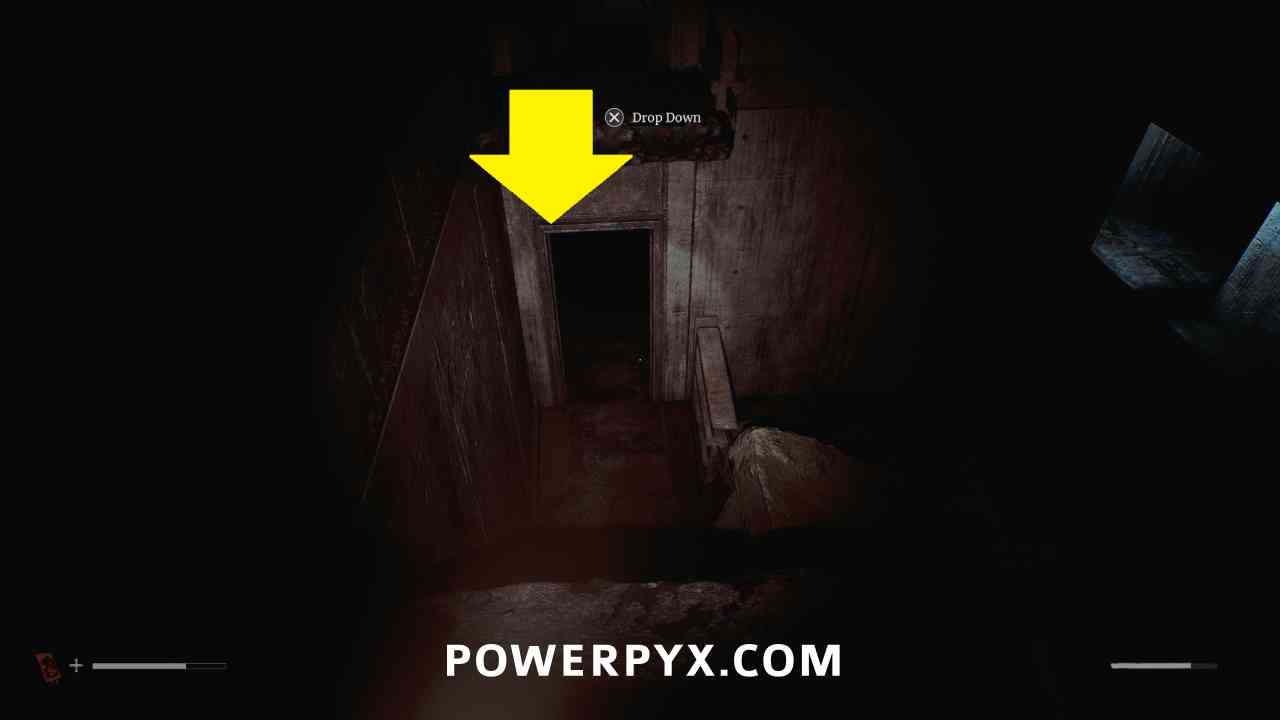
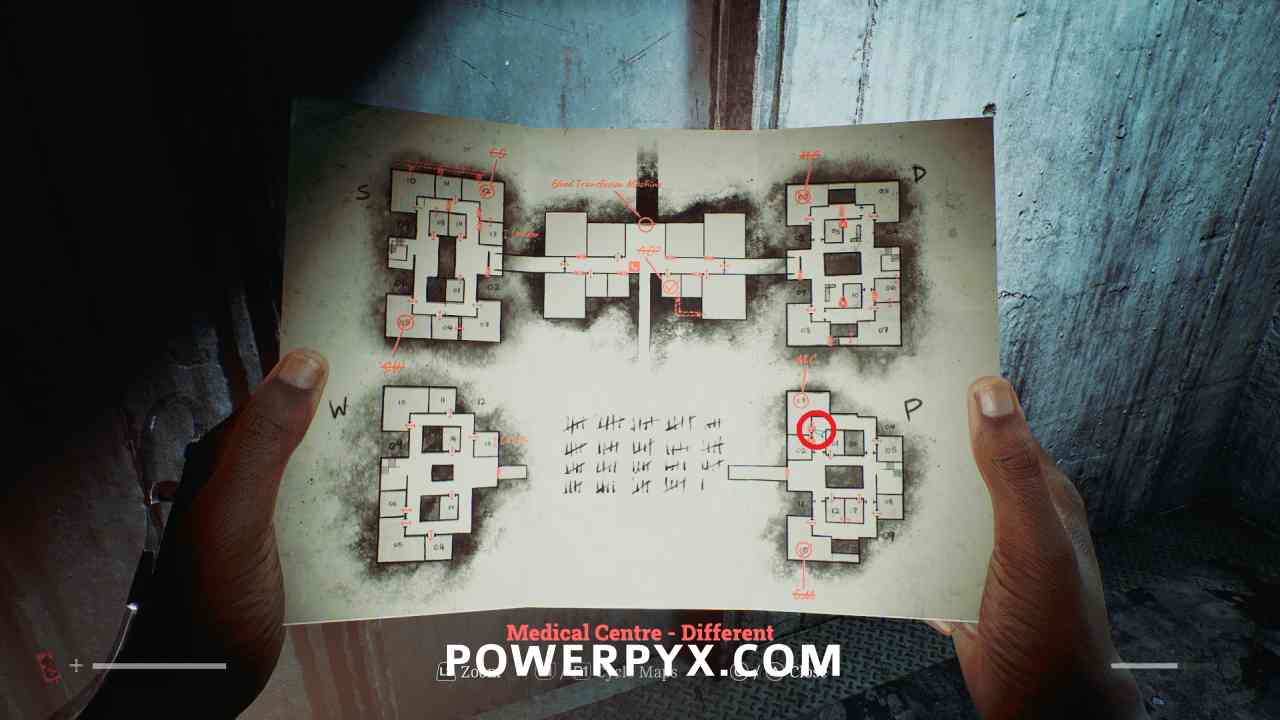
Go back upstairs and on the north wall of room 06 there is a vent you can crawl through. Go through the room to the end and drop down to the lower area, then this is in room 10 on the lower floor.
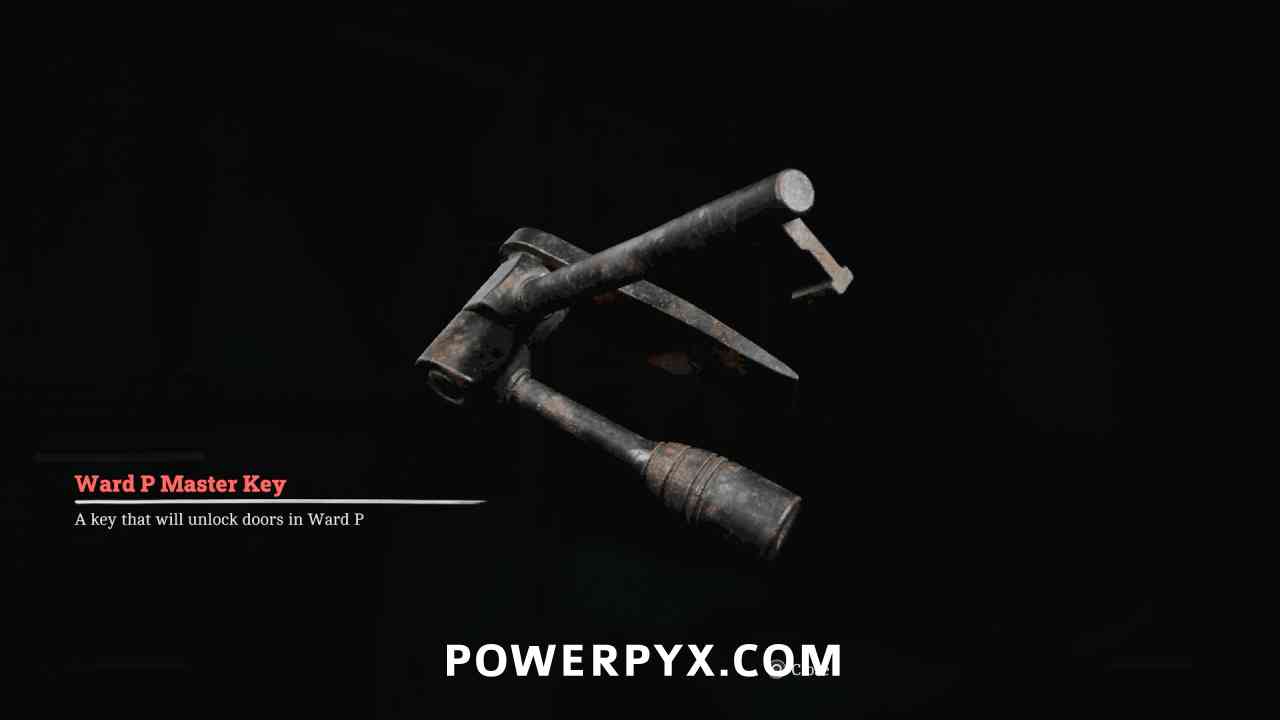
Key Item: Ward P Master Key
Area: Medical Center – Different > Ward P
Obtained automatically at the same time as George McEwan Blood Bag
Locked Door – 03
Area: Medical Center – Different > Ward P
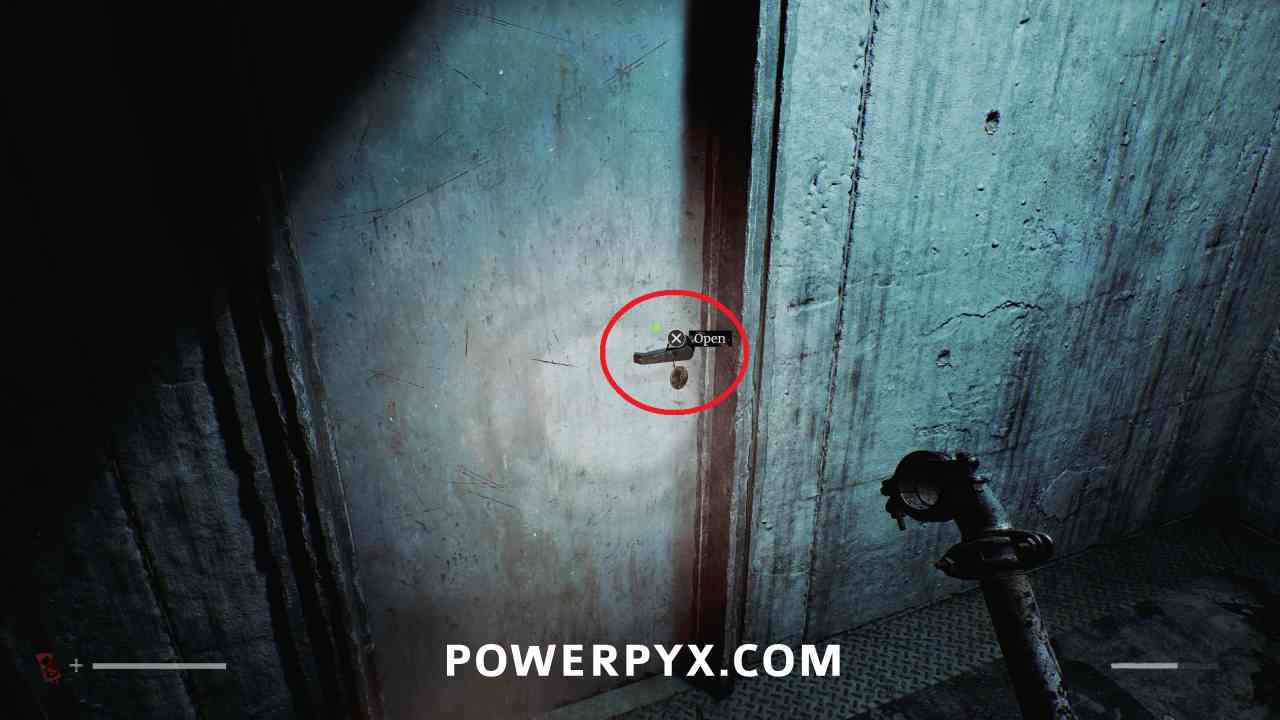
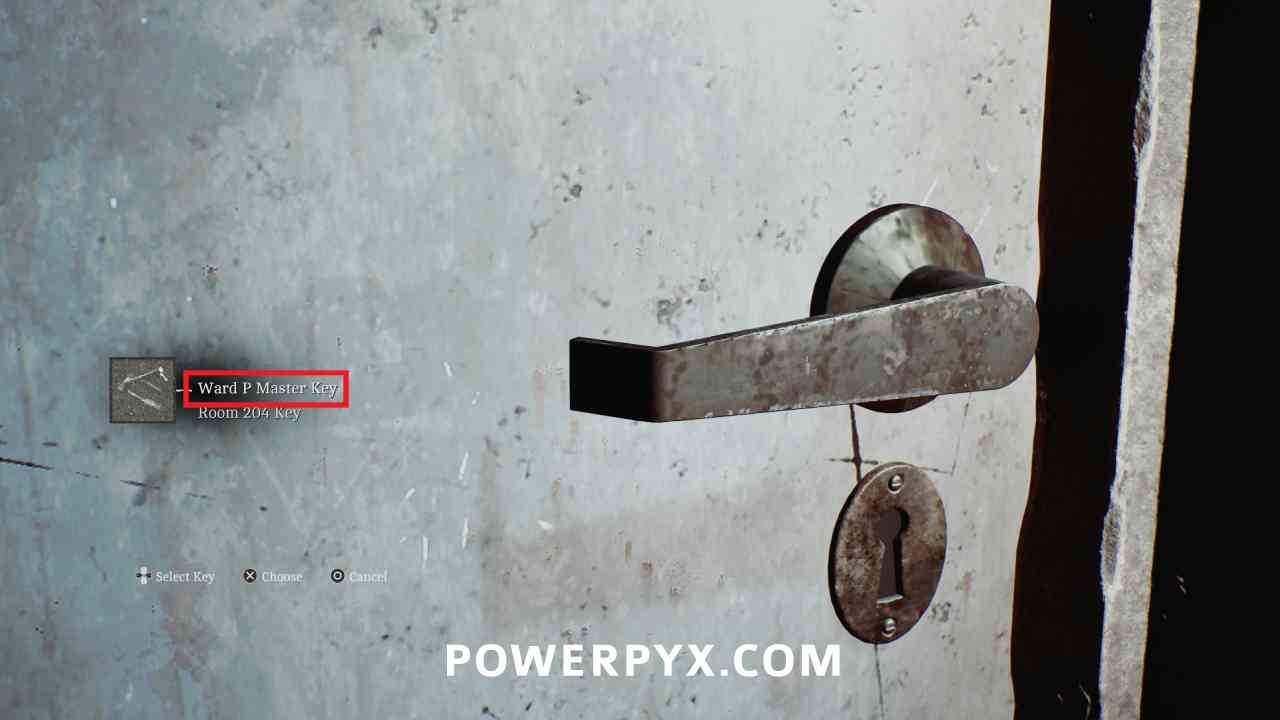
Door of room 03, unlocked with Ward P Master Key.
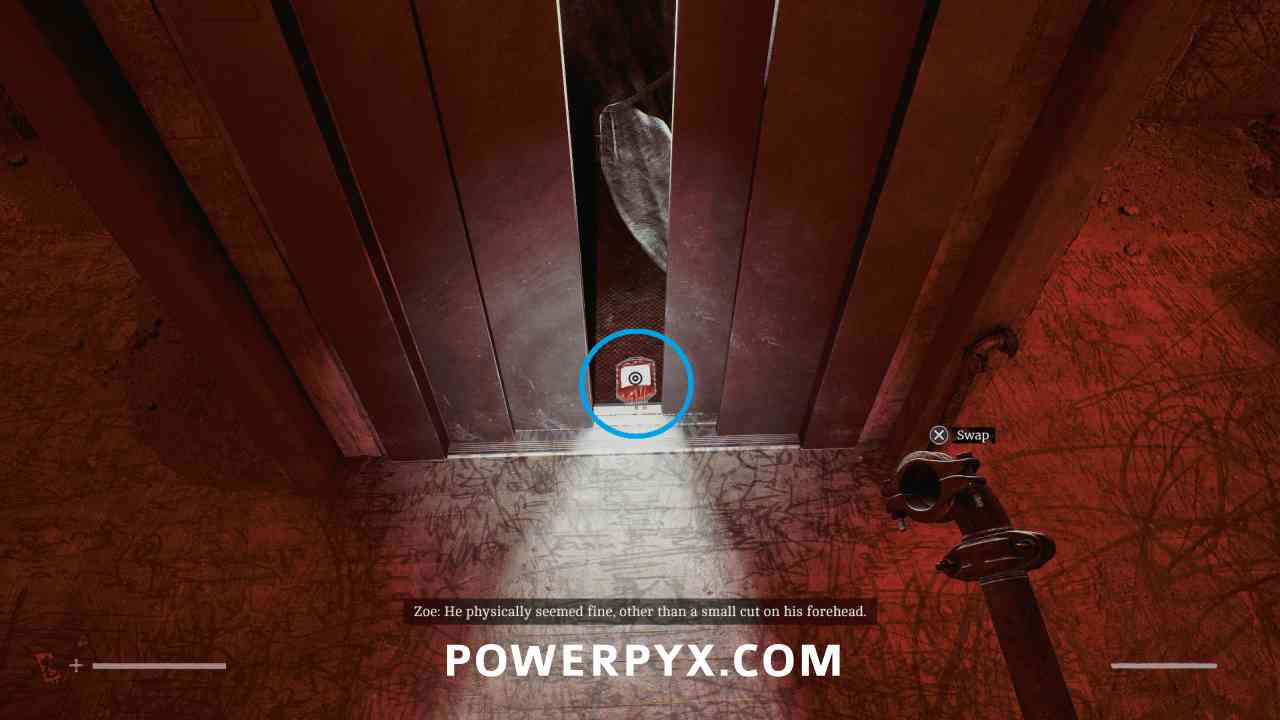
Key Item: Matthew Clark Blood Bag
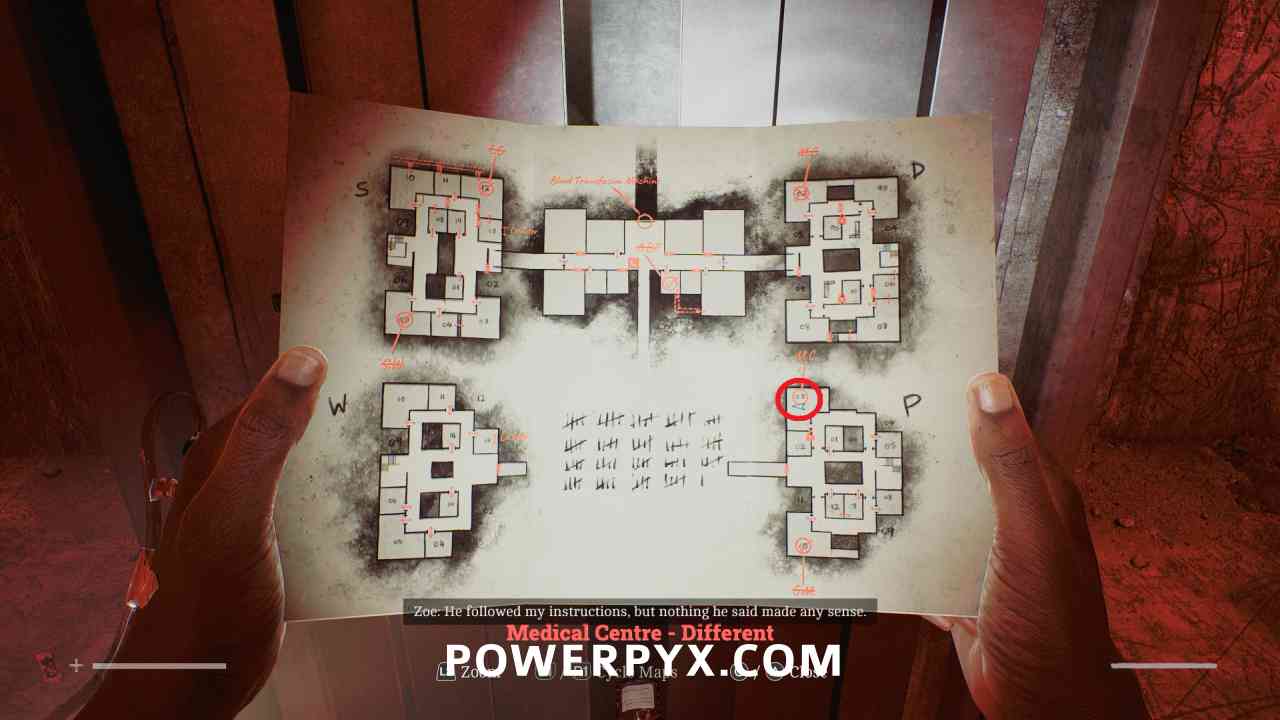
Area: Medical Center – Different > Ward P
Inside room 03, you can pick this up from between the elevator doors.
Medical Center – Different – Ward D
Locked Door – Ward D
Area: Medical Center – Different > Ward D
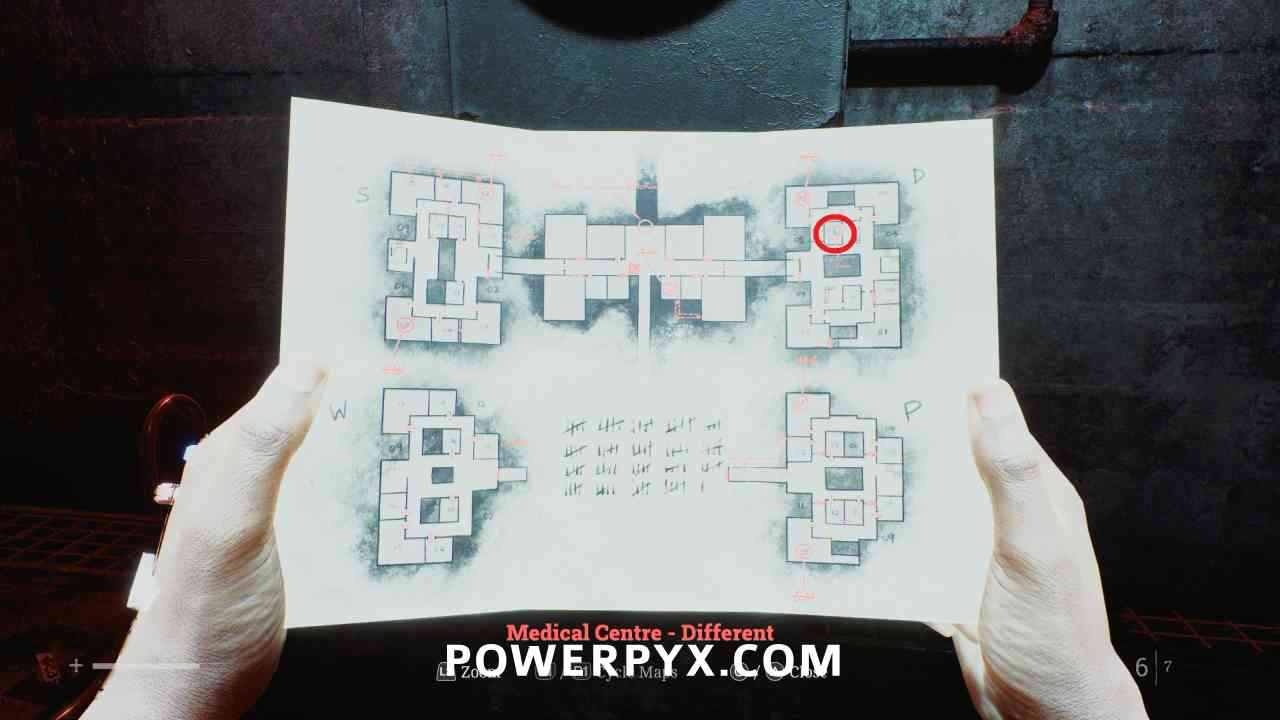
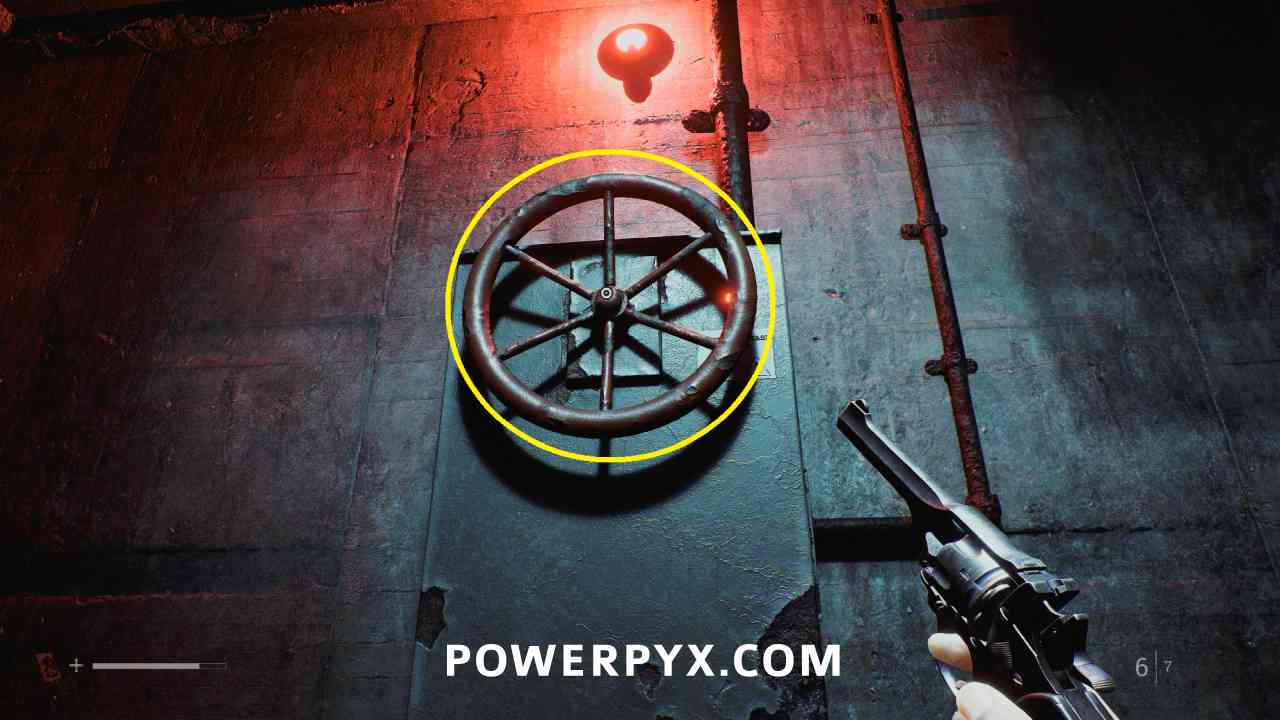
To get back out of the area, you need to turn the valves in rooms 05 and 10 on the upper floor. Wait for the big enemy to be on the other side of the room before turning it. You can hide in the nearby closets if they get too close and start trying to enter the rooms.
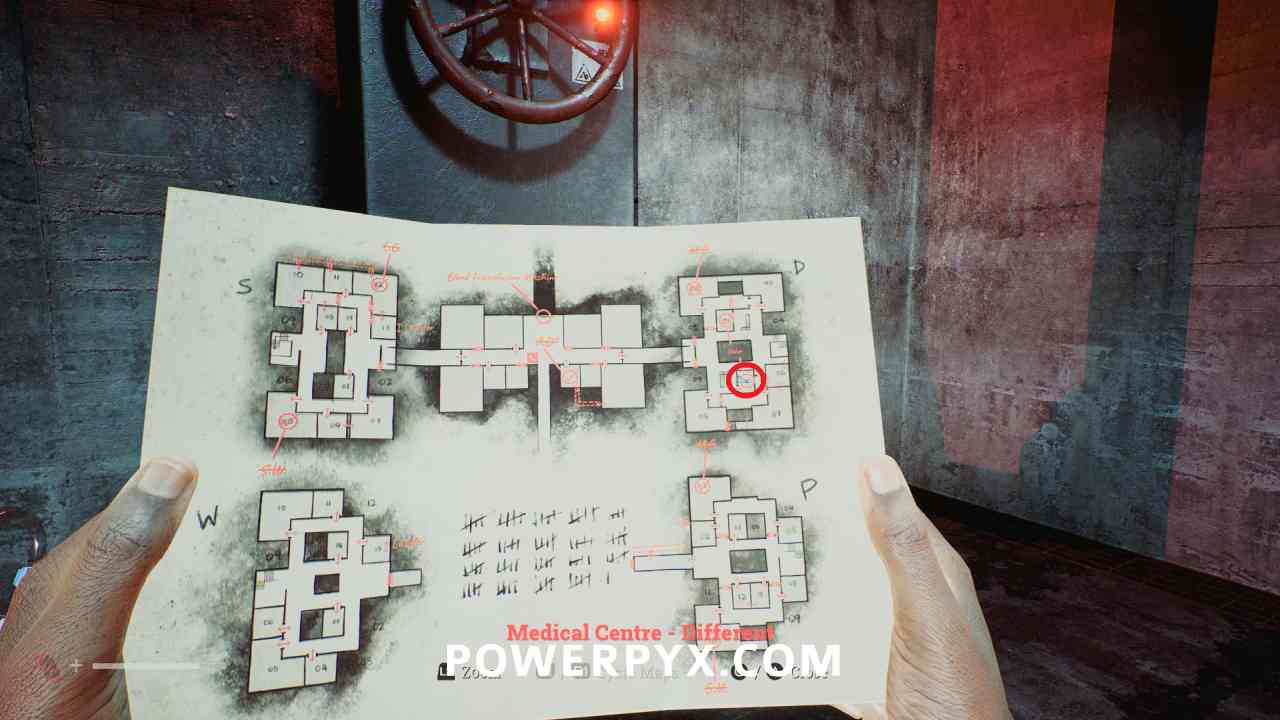
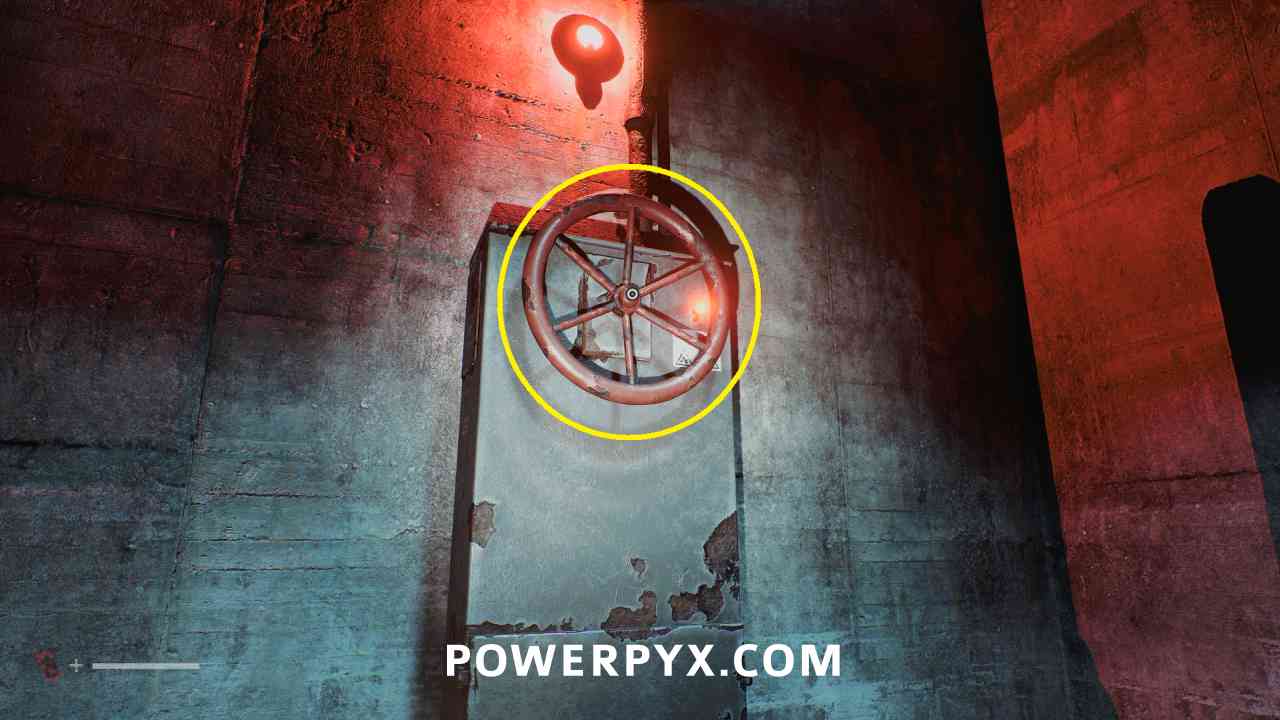
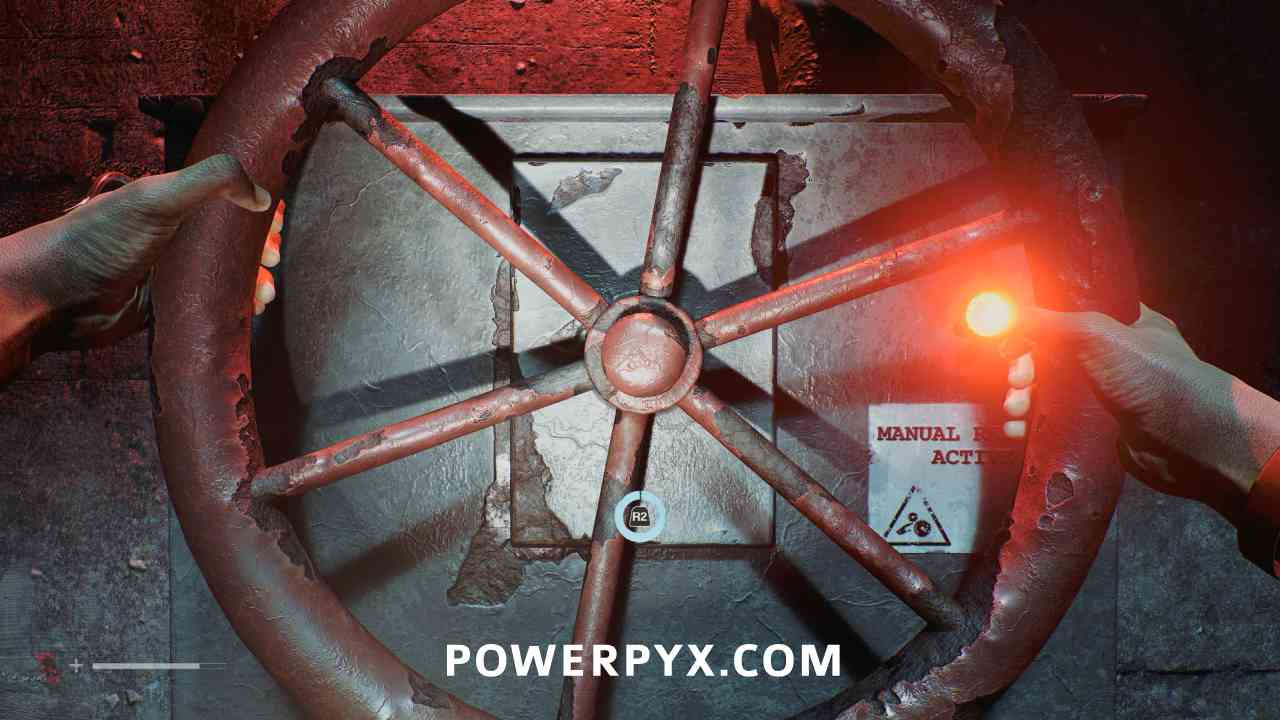
Medical Center – Different
Puzzle #15
Area: Medical Center – Different
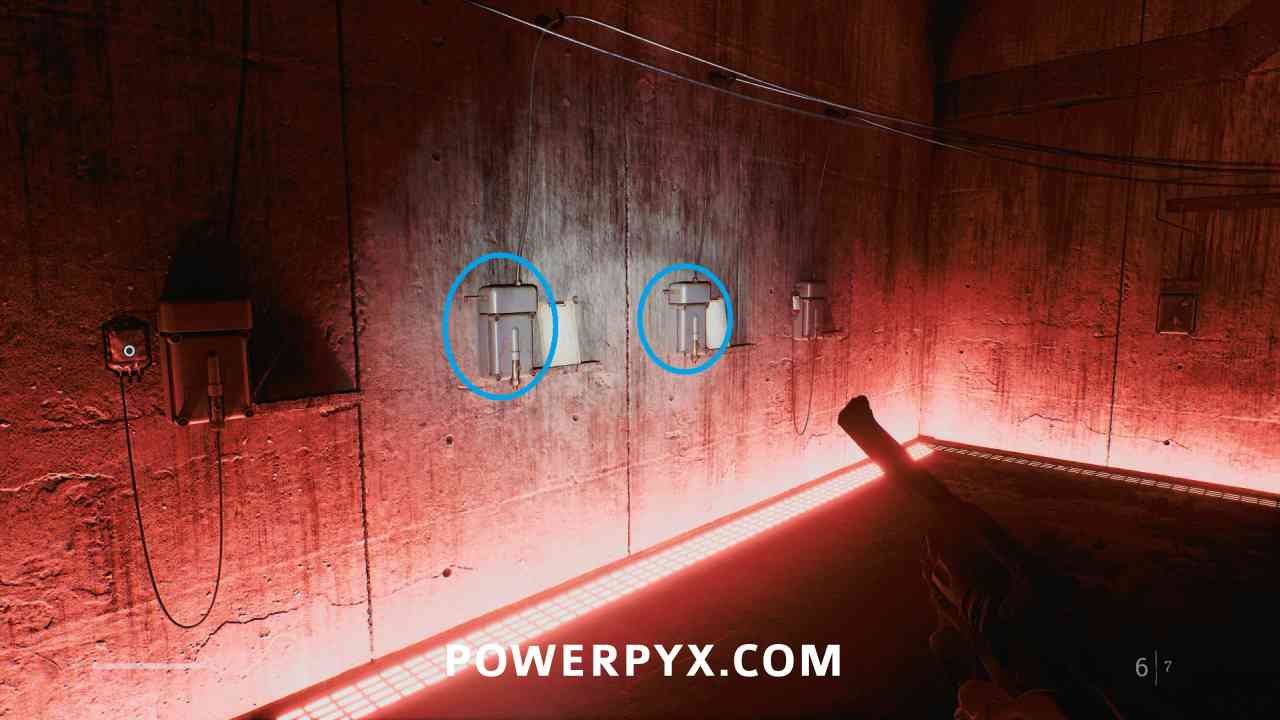
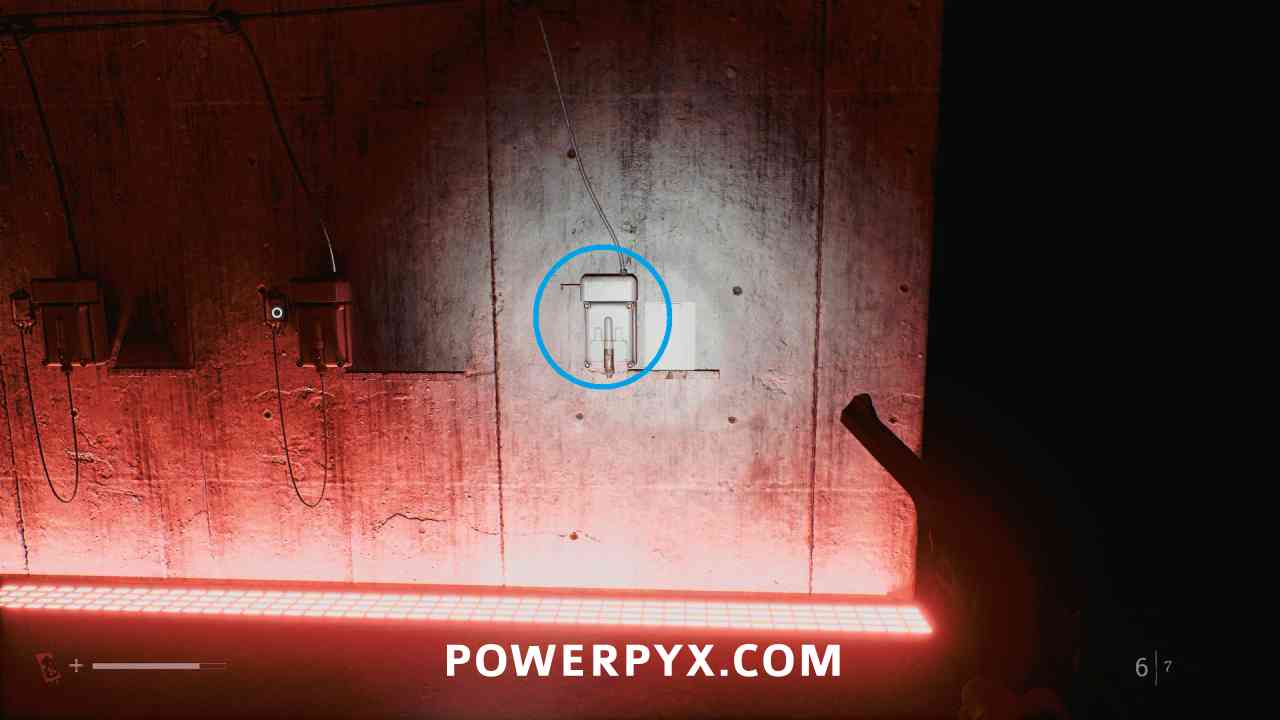
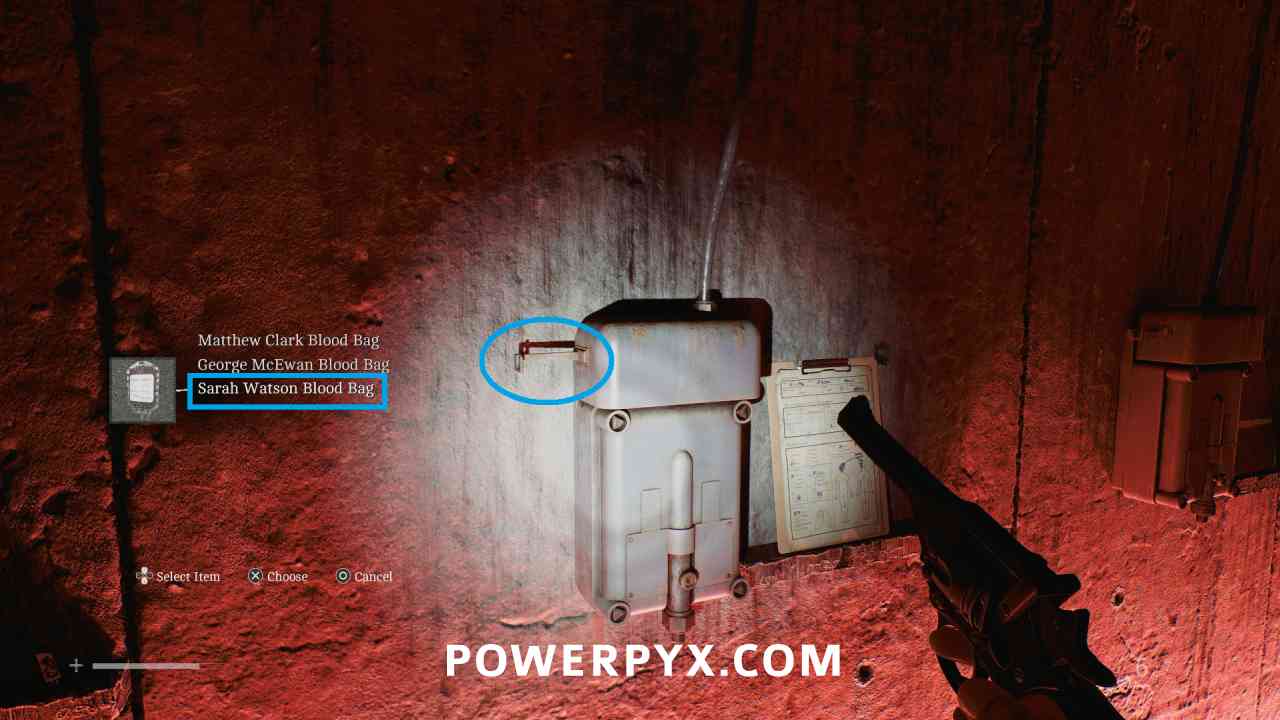
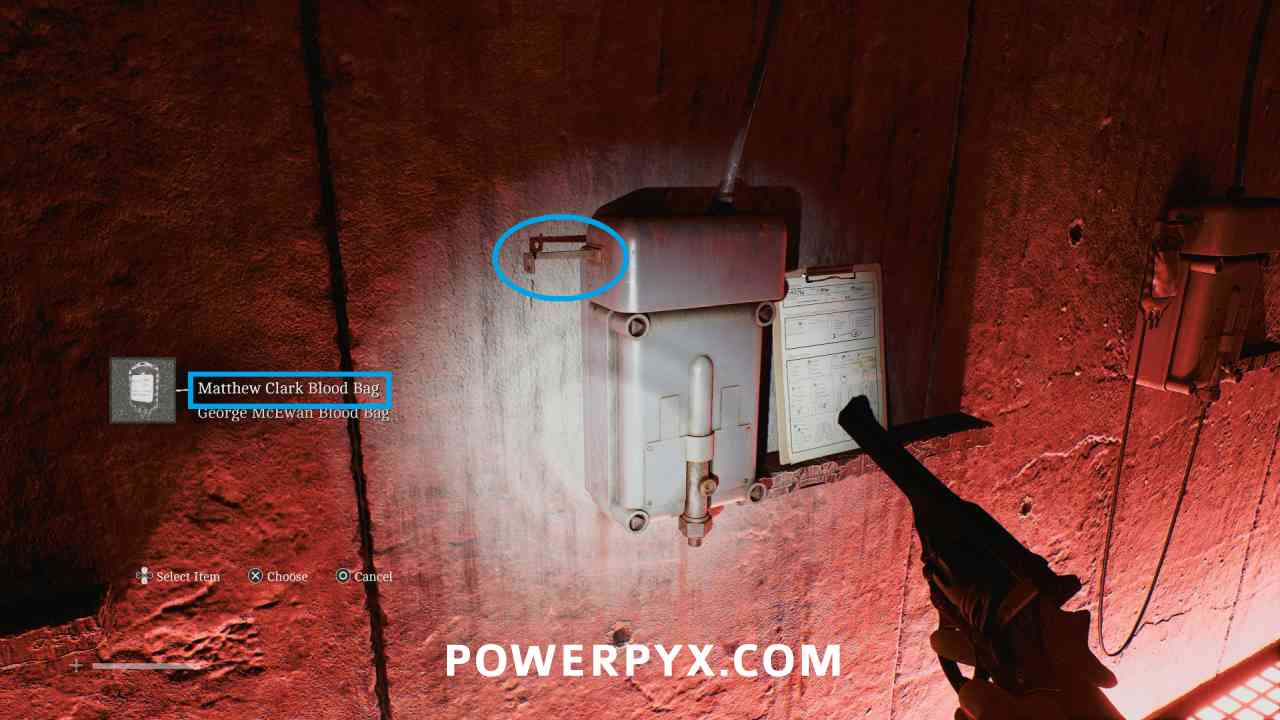
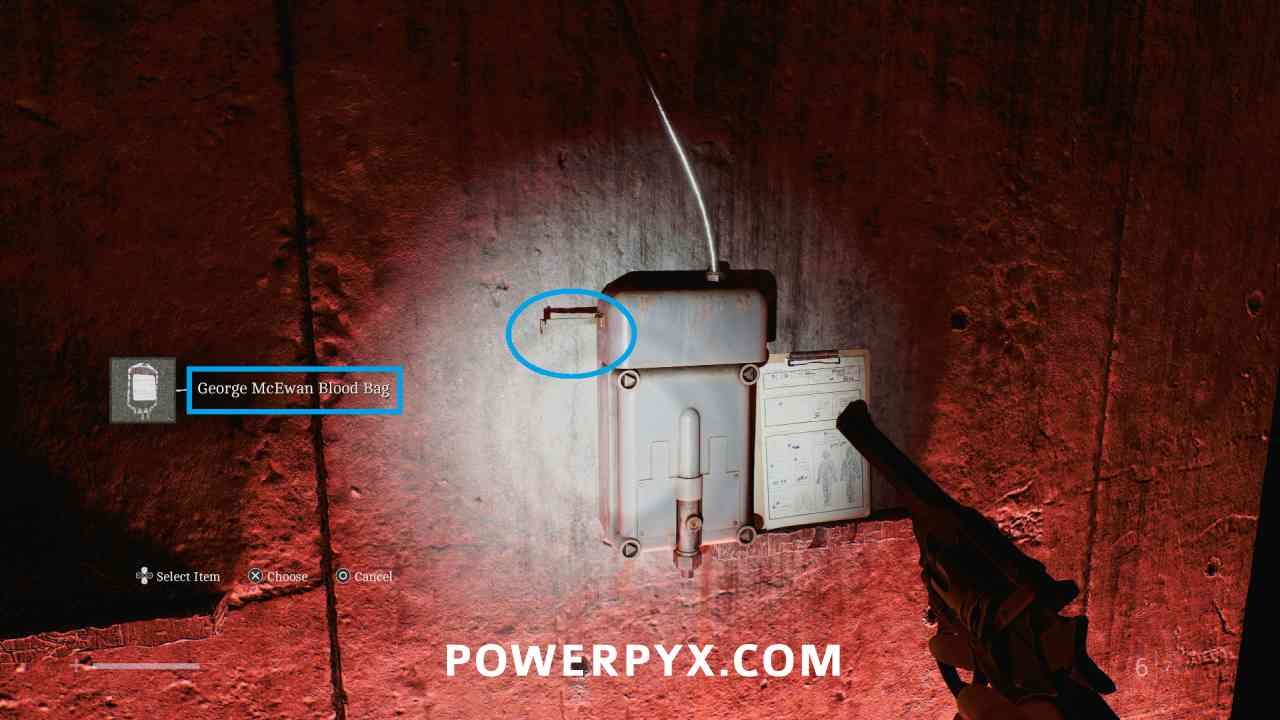
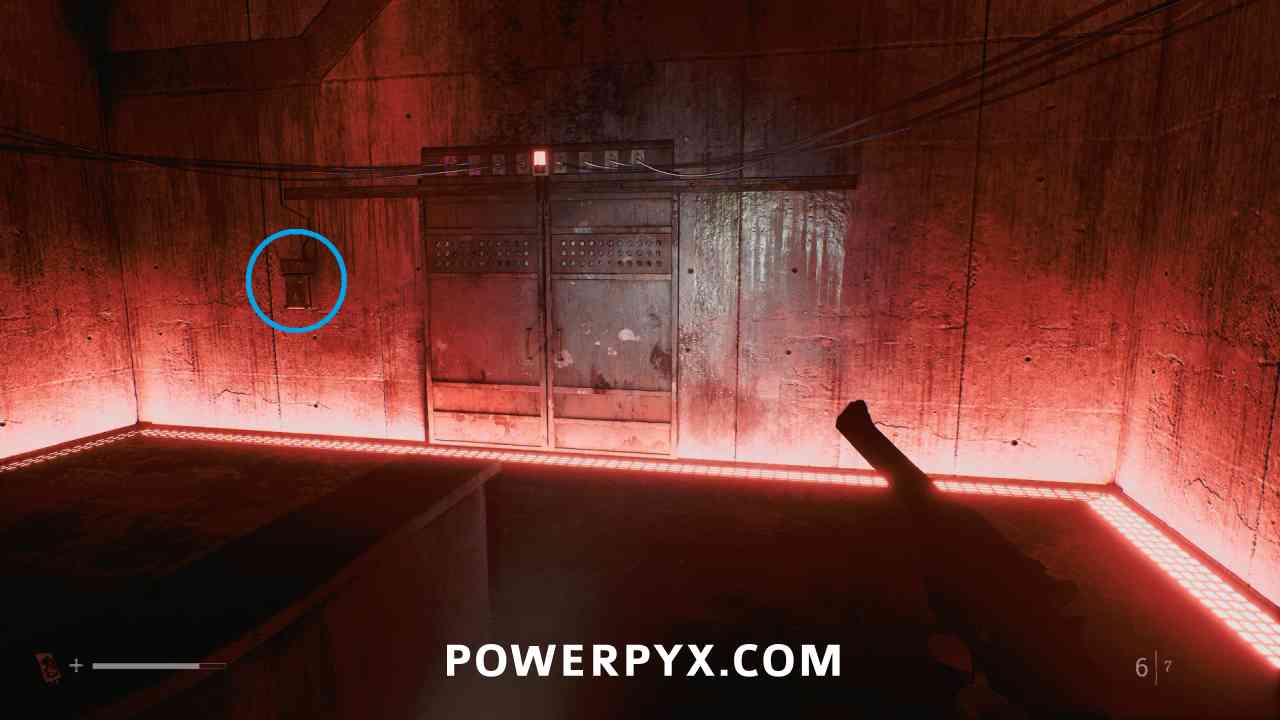
Back in the central area, you must now place the blood bags in the correct spots on the walls.
First spot on the left, place Sarah Watson Blood Bag.
Second spot on the left, place Matthew Clark Blood Bag.
Spot on the right, place George McEwan Blood Bag.
Then interact with the switch to the left of the double doors at the back of the room.
Puzzle #16
Area: Medical Center – Different
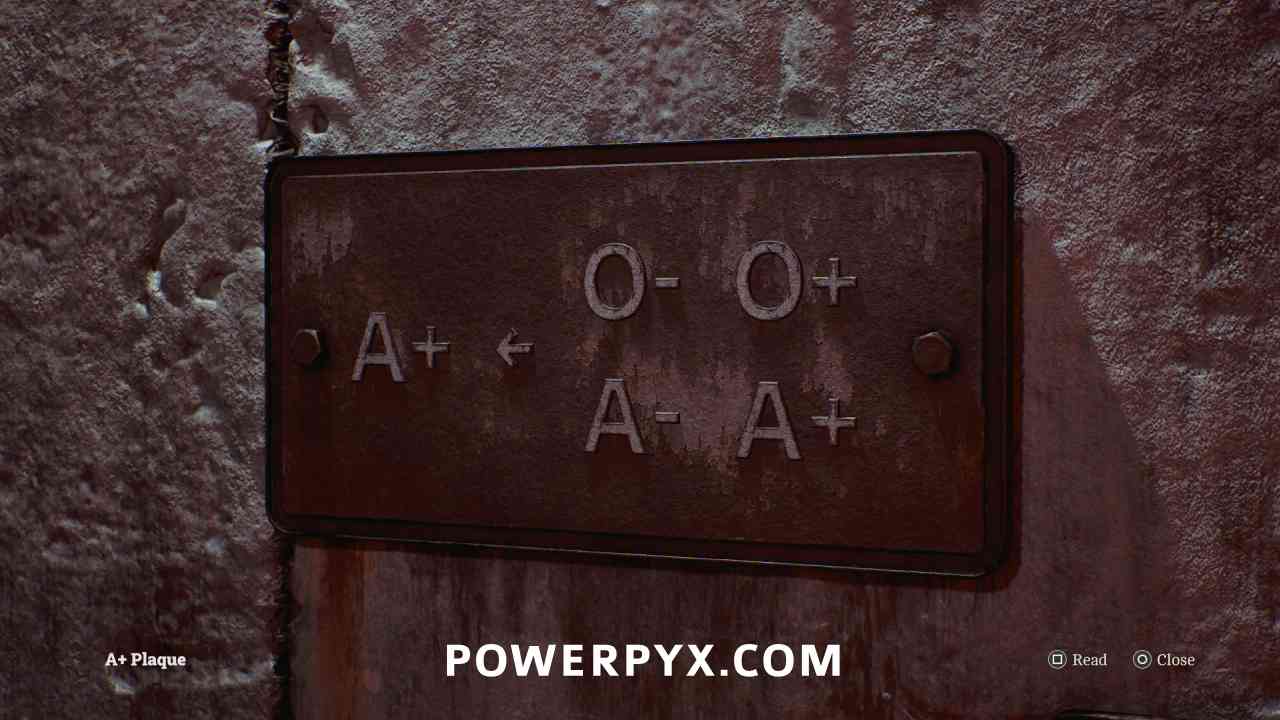
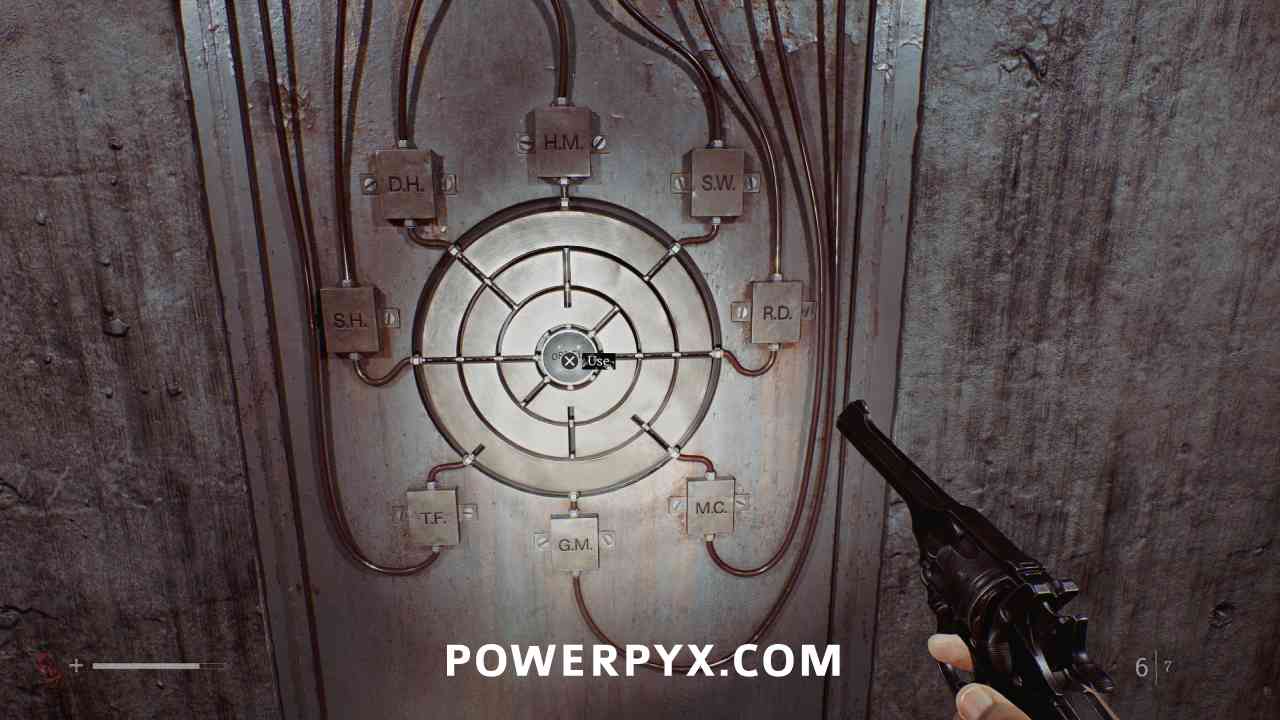
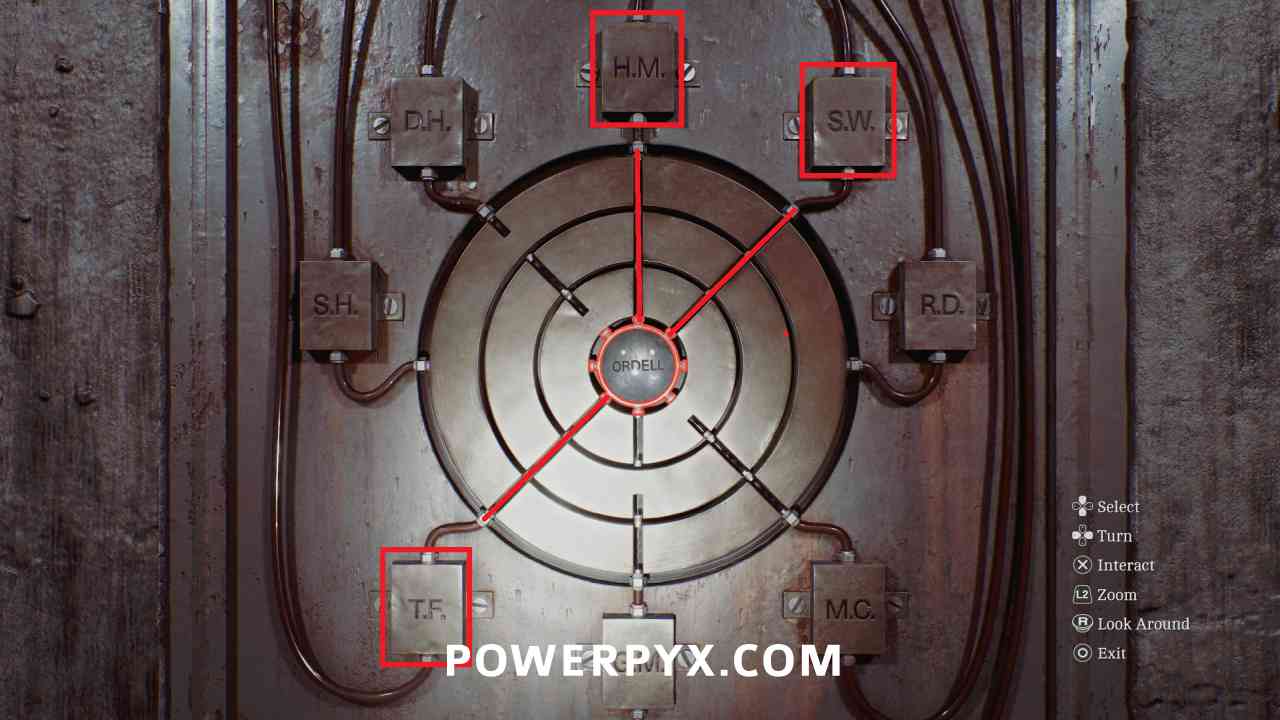
Now you have to correctly have the blood from the outside, go to the interior.
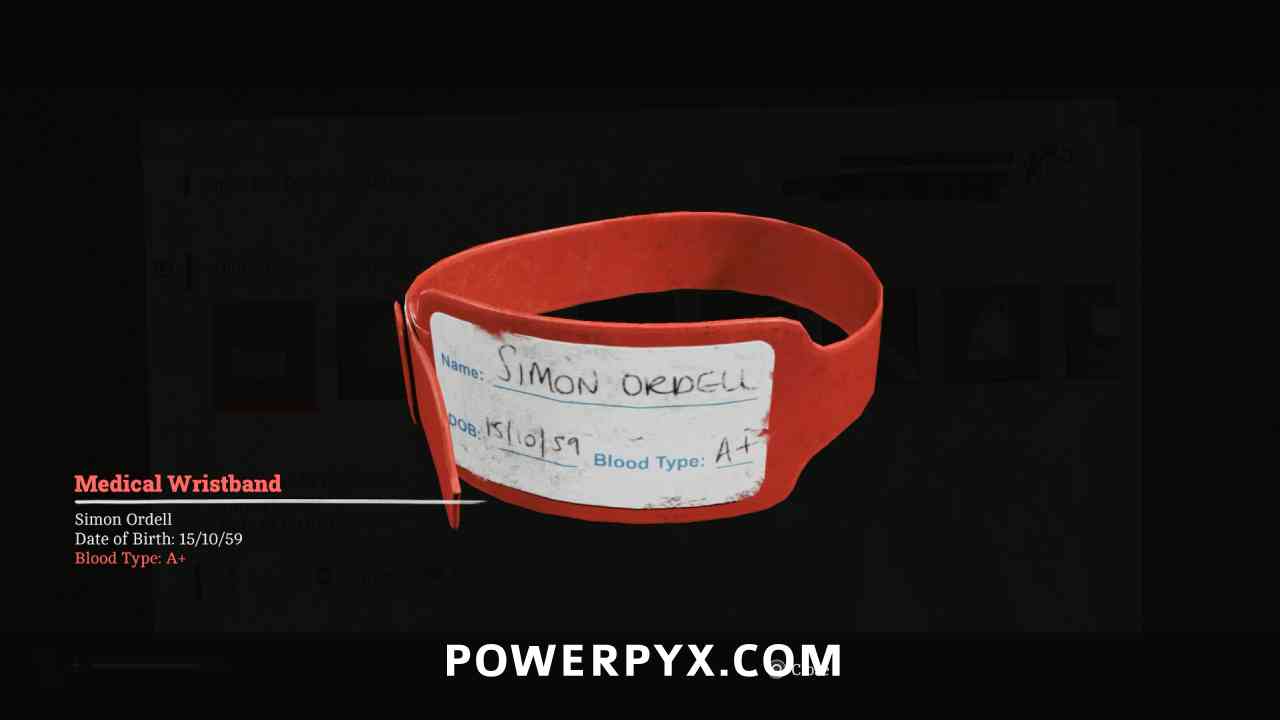
Ordell is Simon’s last name, and you can see his blood type from the Medical Wristband in Equipment.
You need to have only O-, O+, A-, and A+ going to the center. This means T.F., H.M., and S.W.
Spin the circles so there are straight lines connecting those three initials, then confirm by interacting with the ORDELL button in the middle.
Locked Door
Area: Medical Center – Different
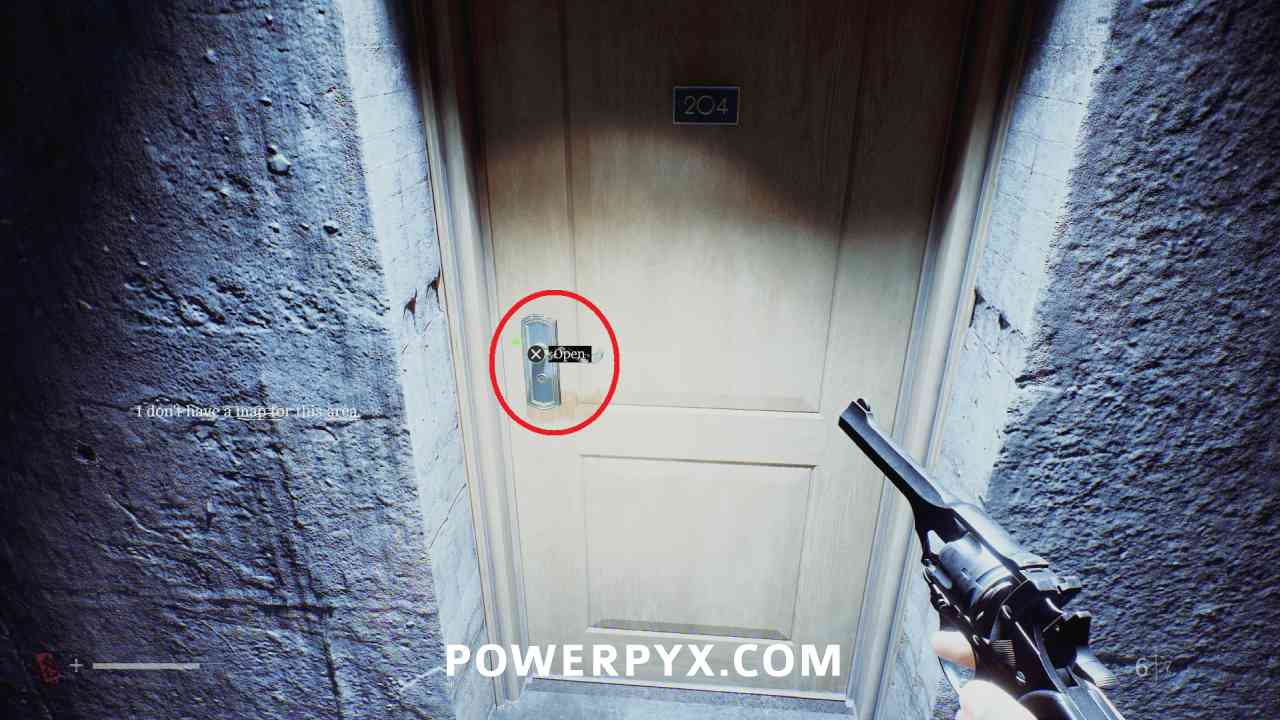
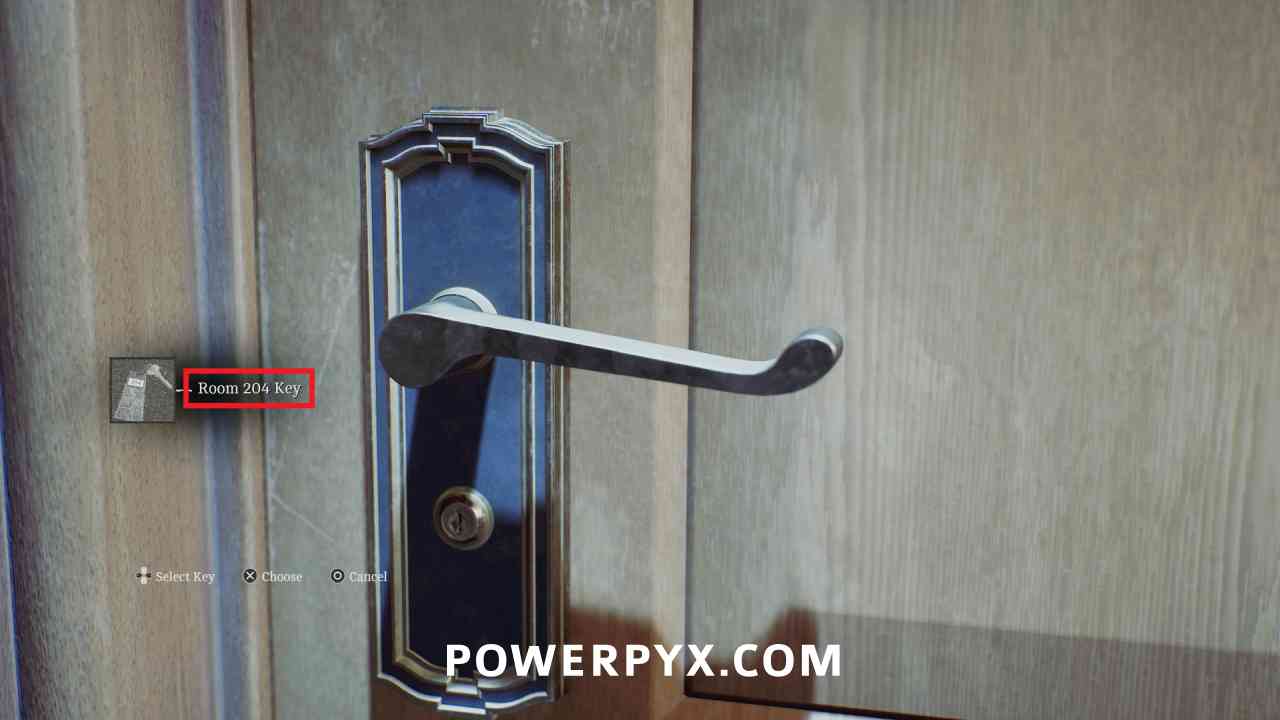
Interact with the door at the end of the hallway and use the Room 204 Key. Note the next Chapter starts immediately after the next cutscene.
Part 4 – Clara Woods
9. Begin Again
Clara Woods
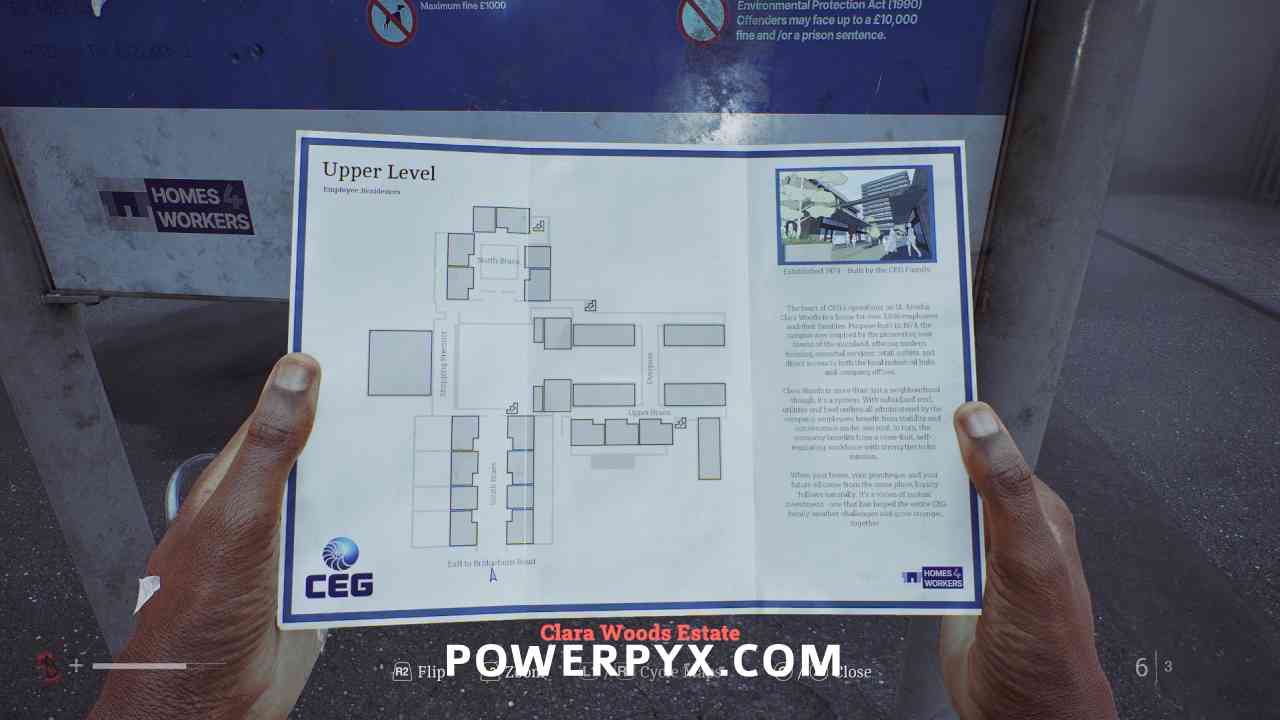
Clara Woods Estate Map
Area: Clara Woods
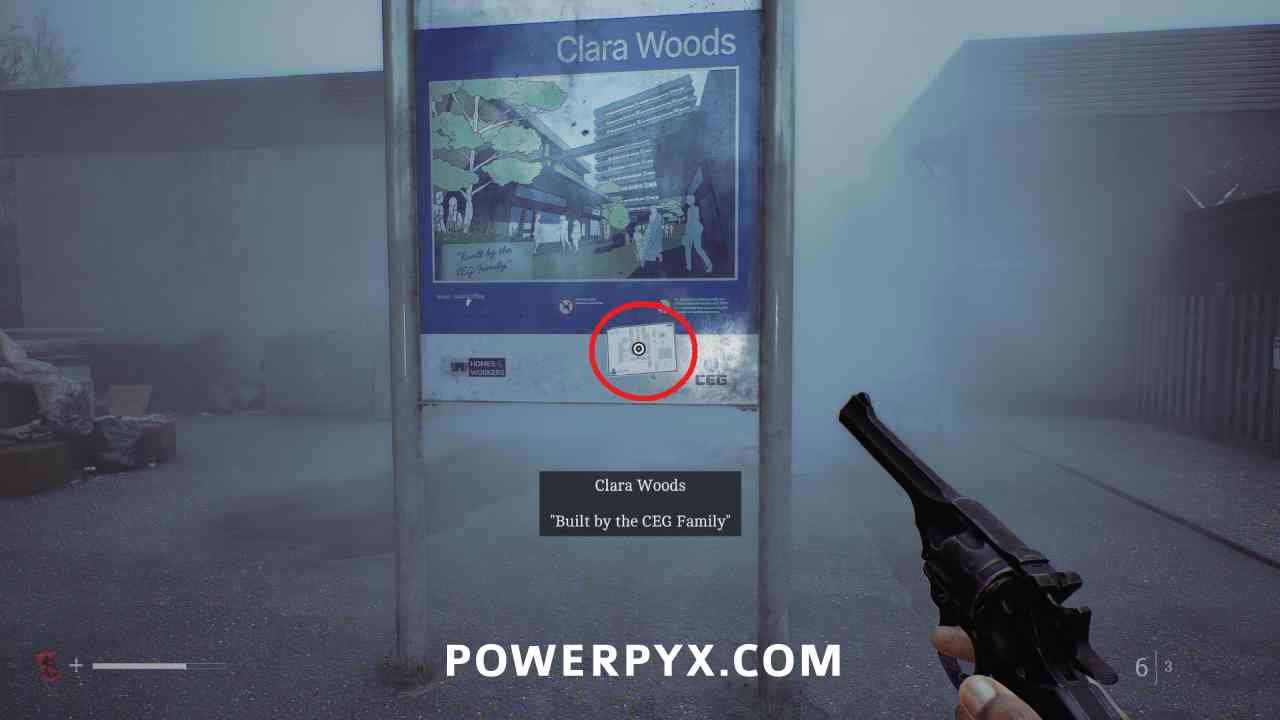
Go up the road to the split in the road and continue left, and this is stuck to the Clara Woods sign.
10. Missing Parts
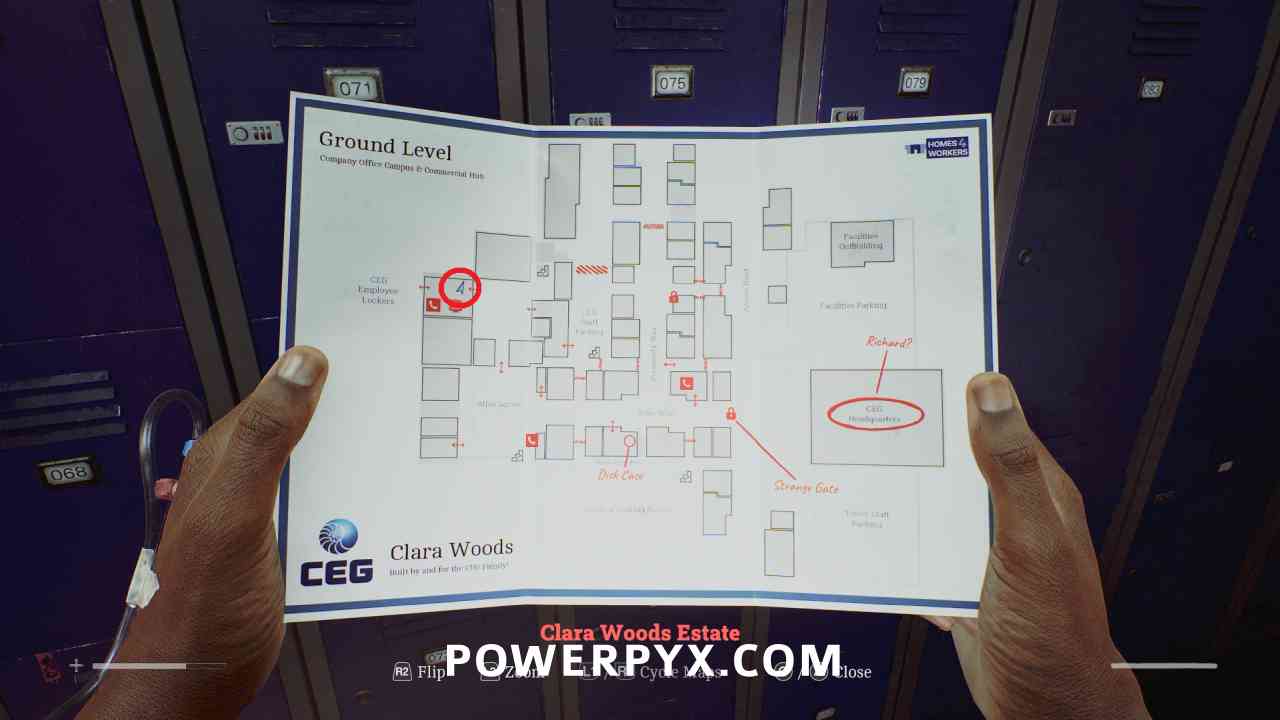
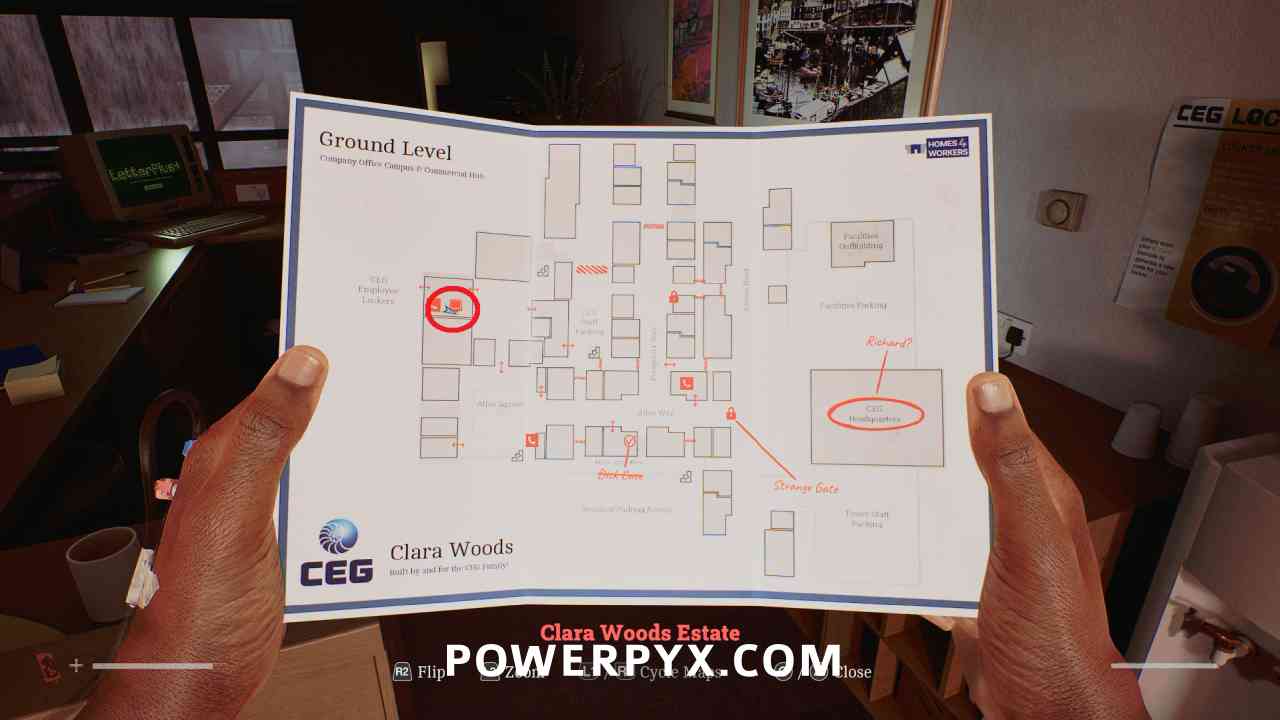
Clara Woods Estate > Ground Level
Puzzle #17
Area: Clara Woods Estate > Ground Level
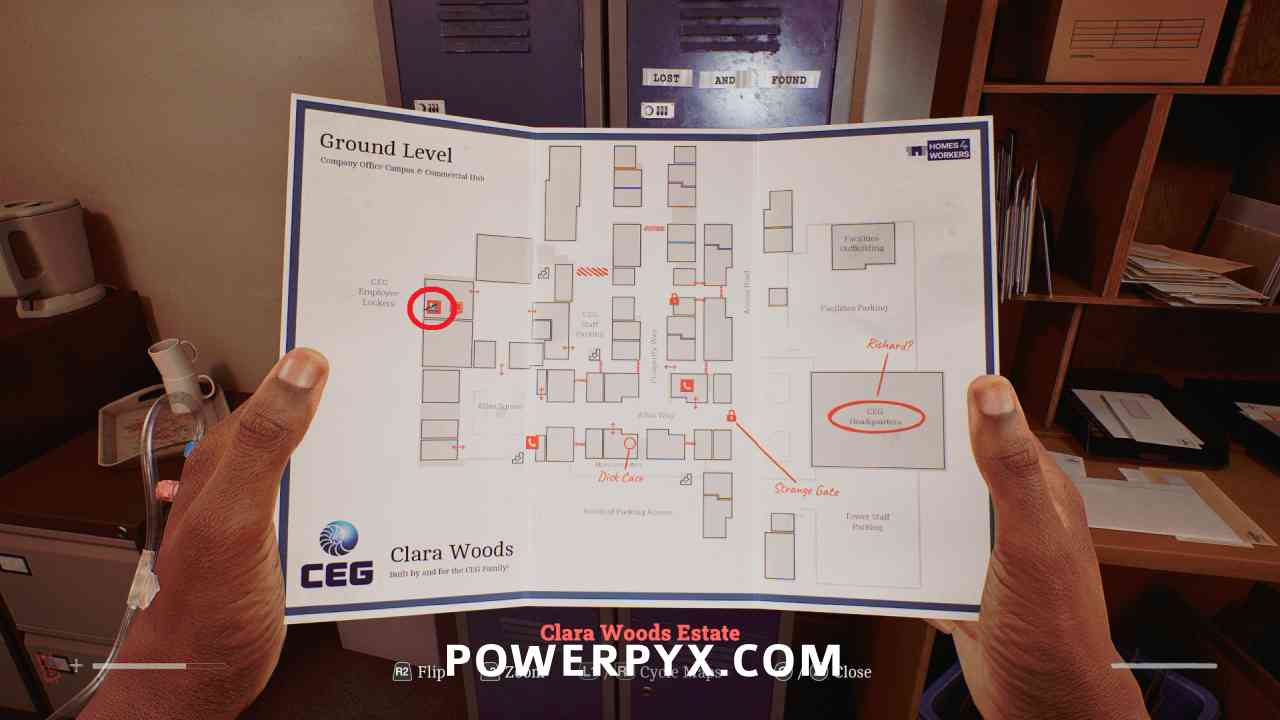
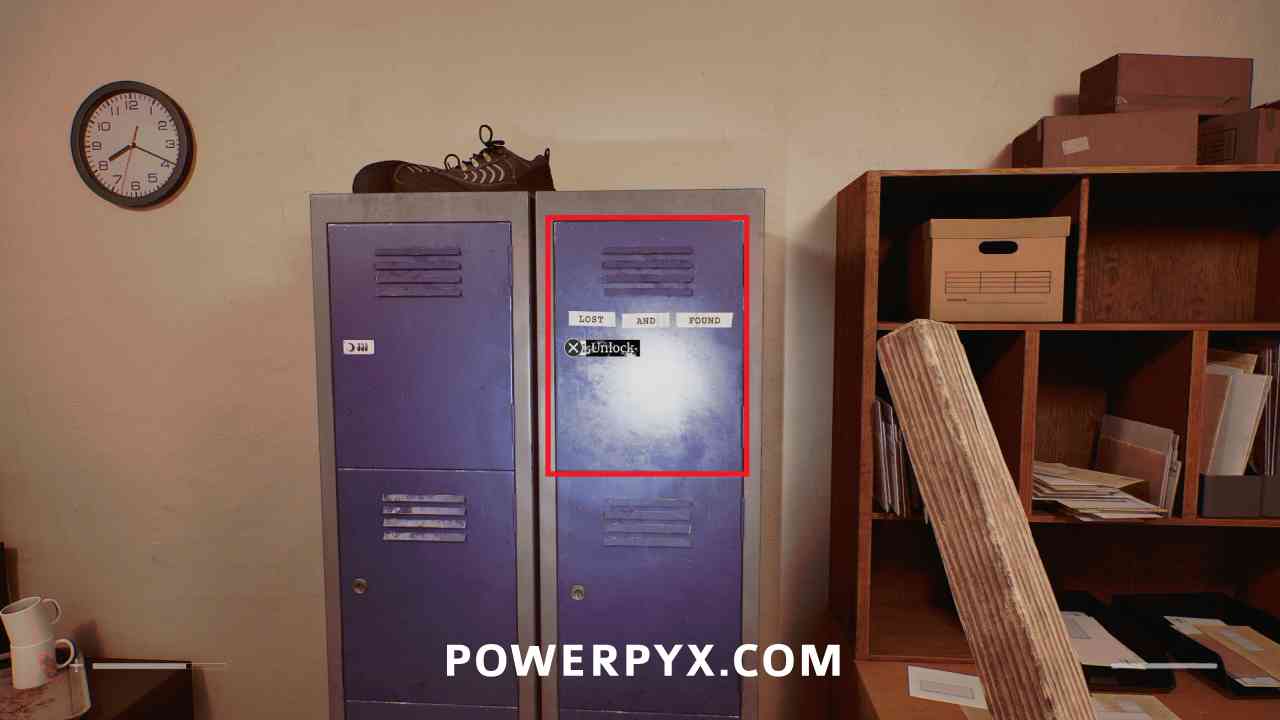
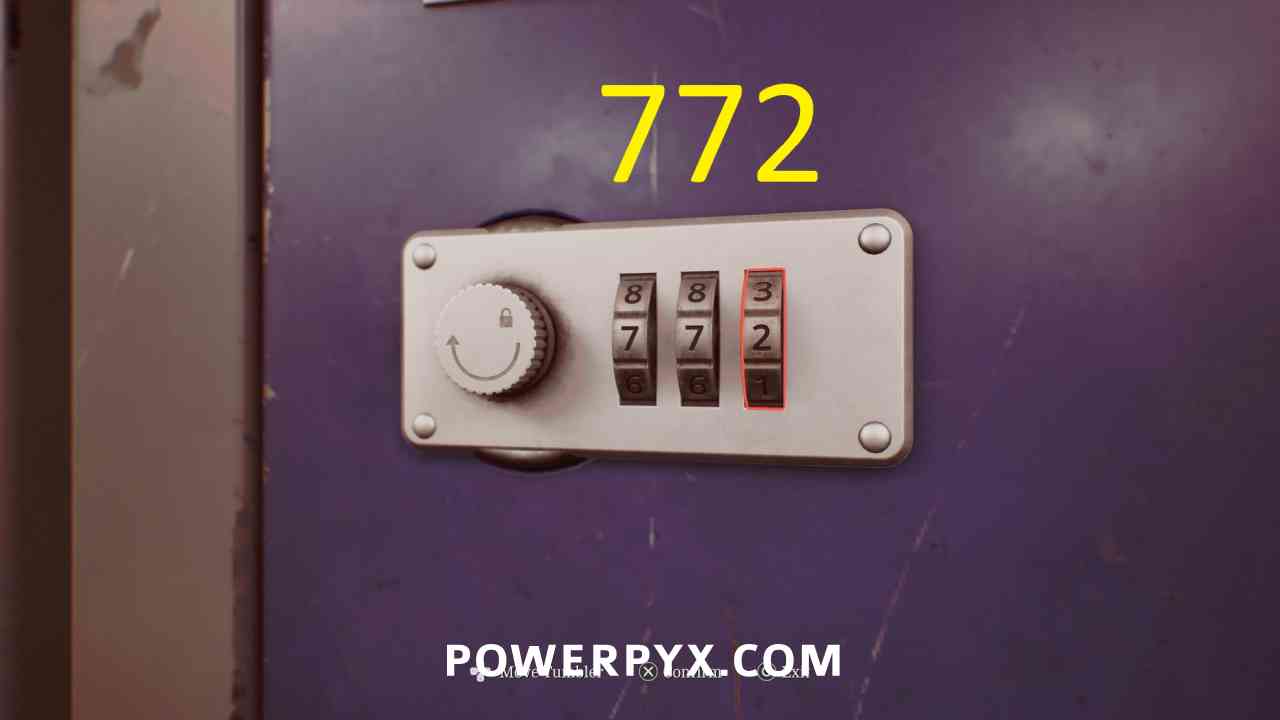
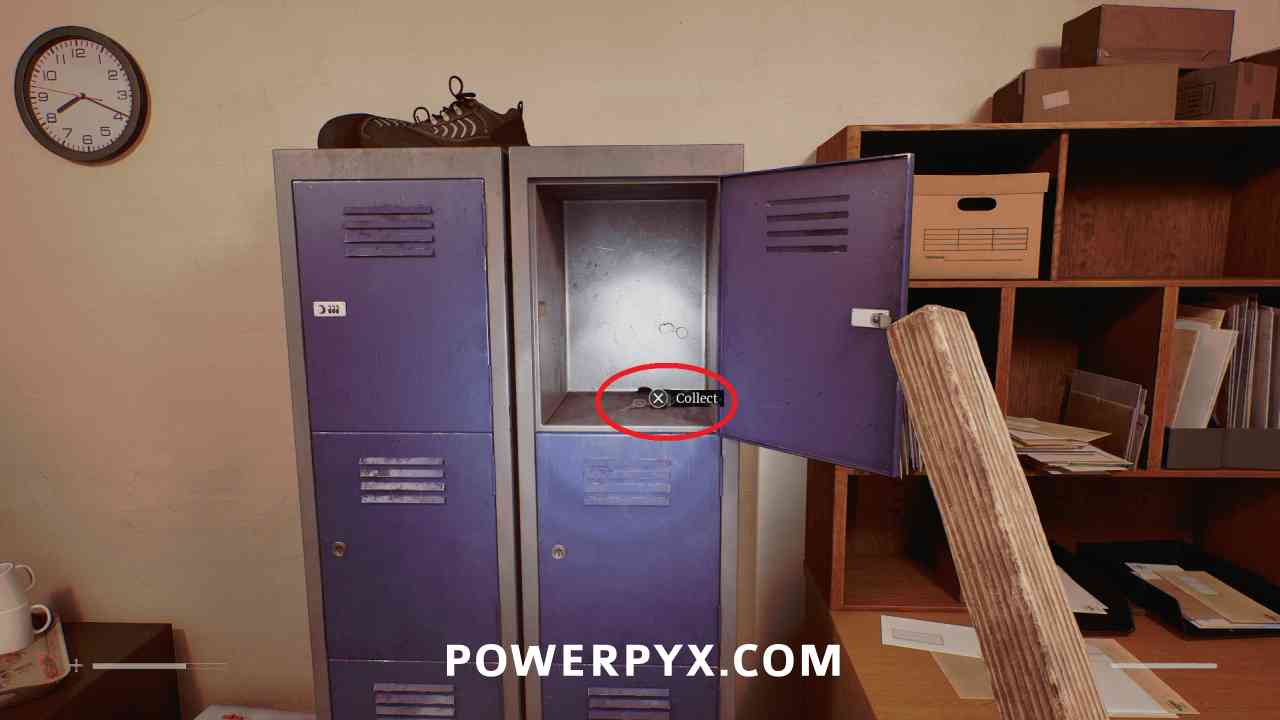
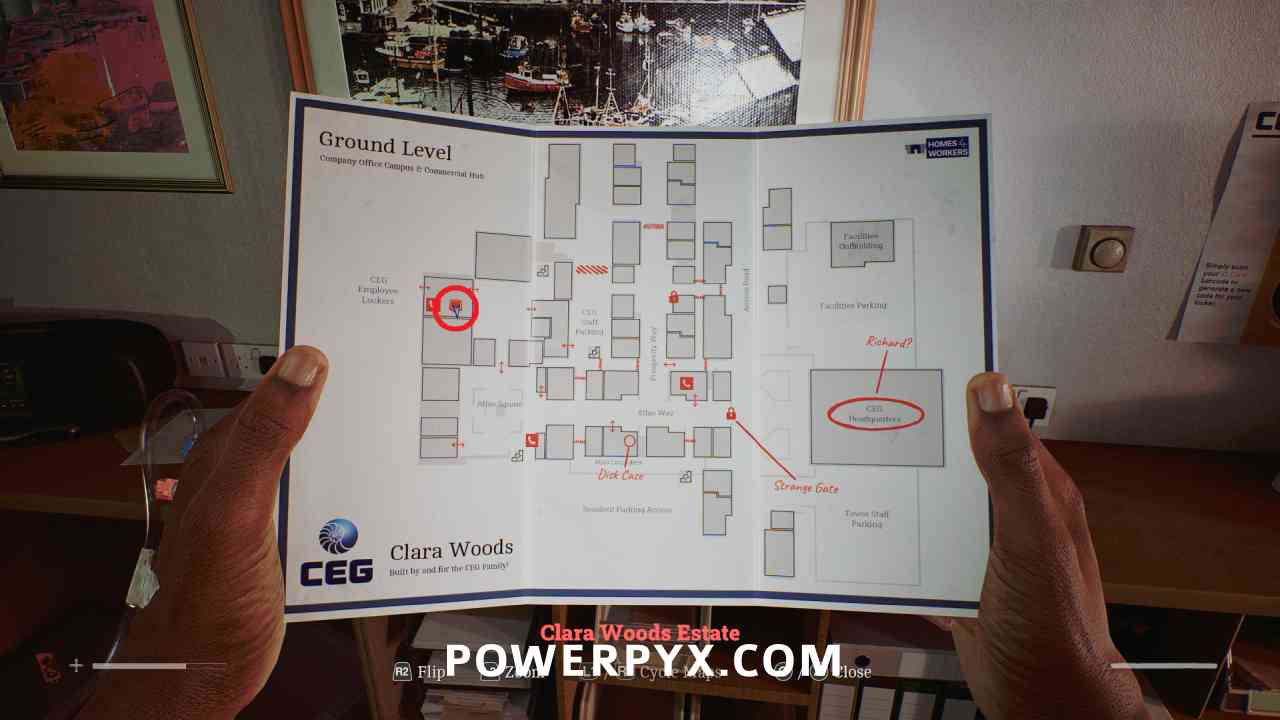
In the back office of the CEG Employee Lockers building, interact with the LOST AND FOUND locker and enter 772 (from the note on the computer).
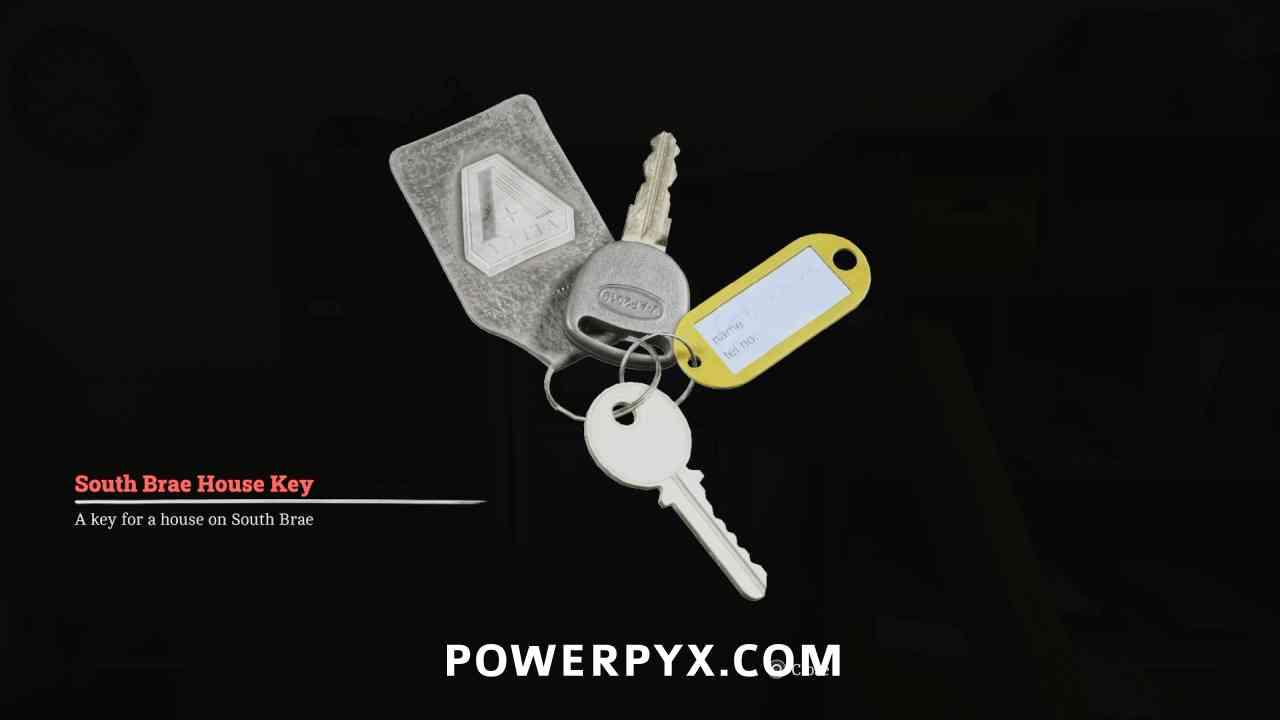
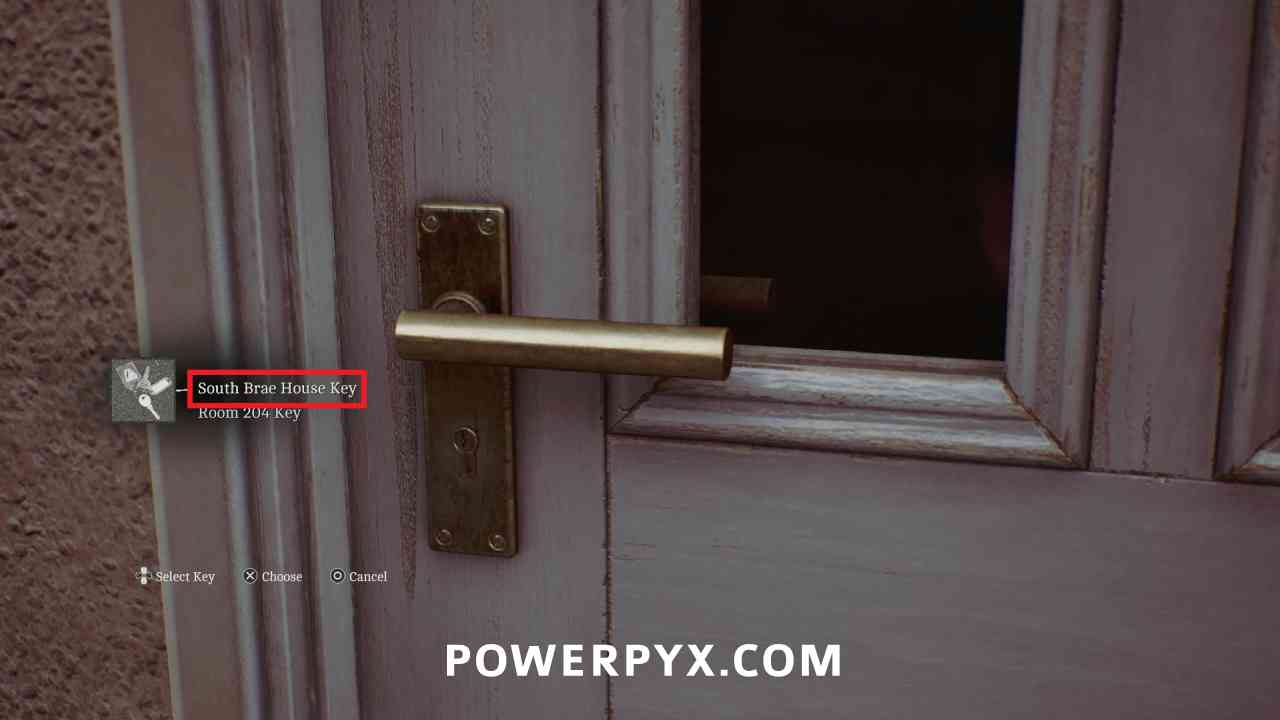
Key Item: South Brae House Key
Area: Clara Woods Estate > Ground Level
Pick up the key from the locker.
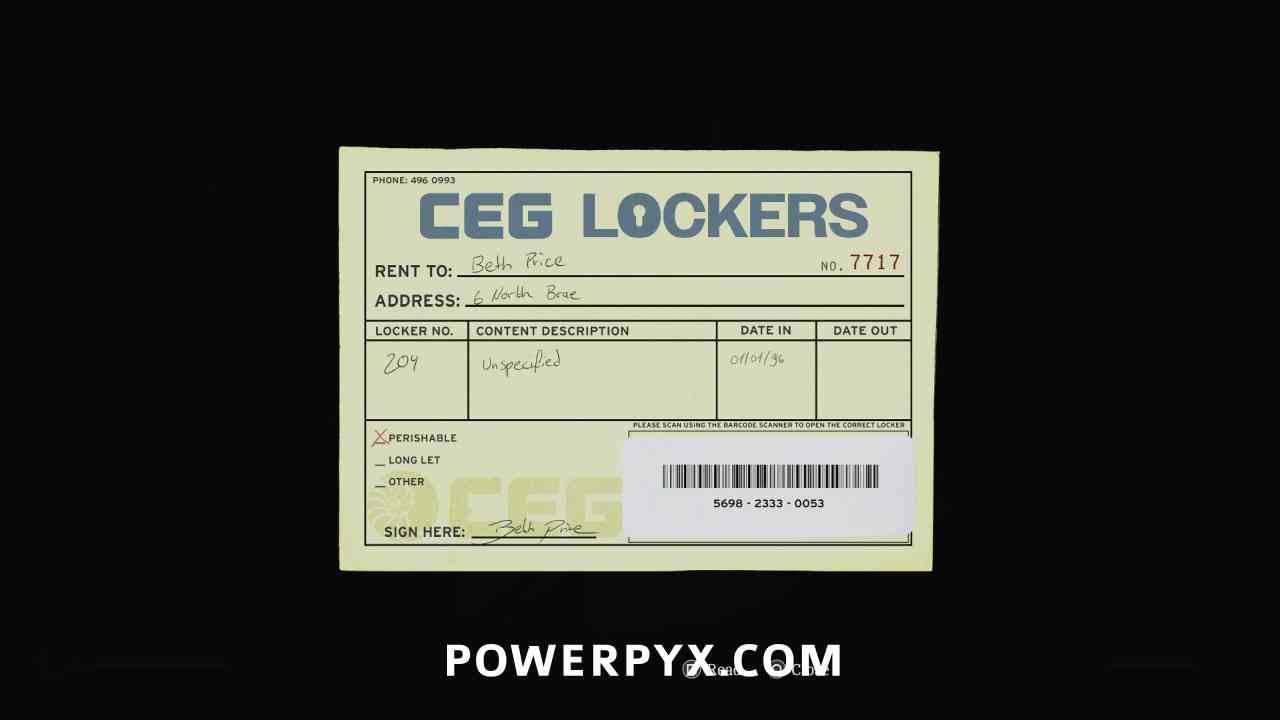
Key Item: Barcode (CEG Lockers) – Locker 75
Area: Clara Woods Estate > Ground Level
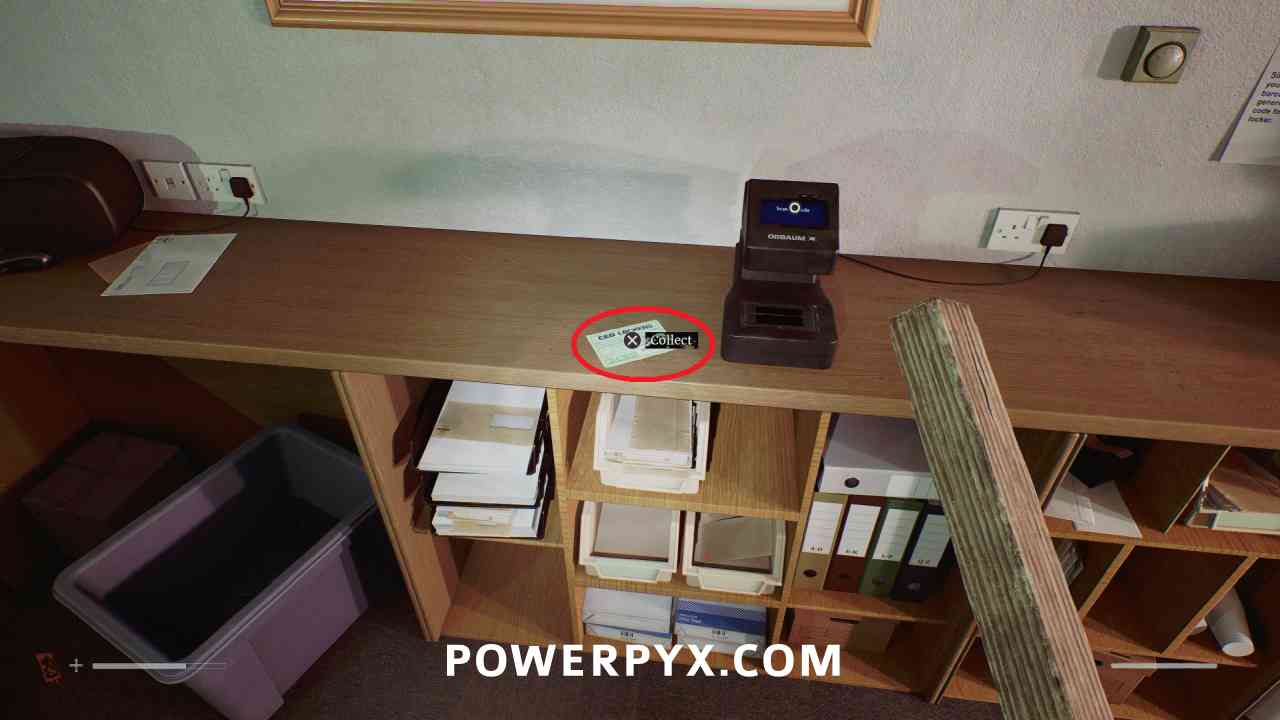
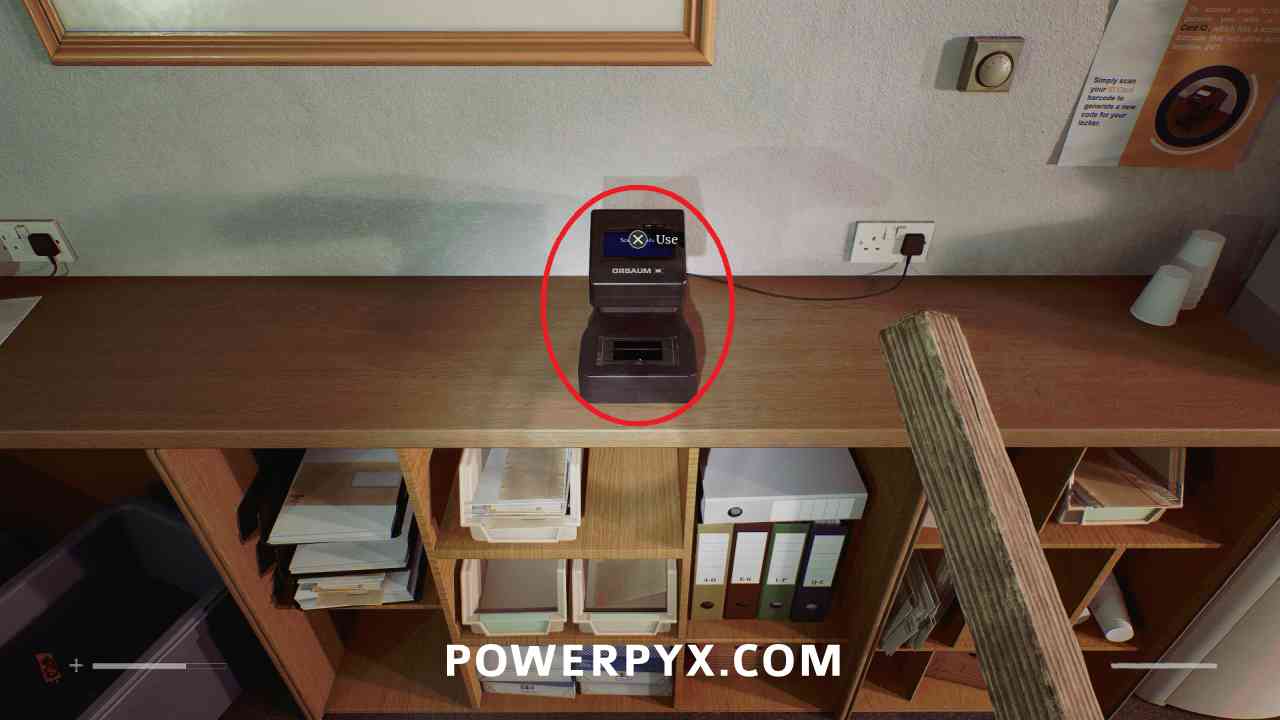
On the counter opposite the computer, by the barcode scanner.
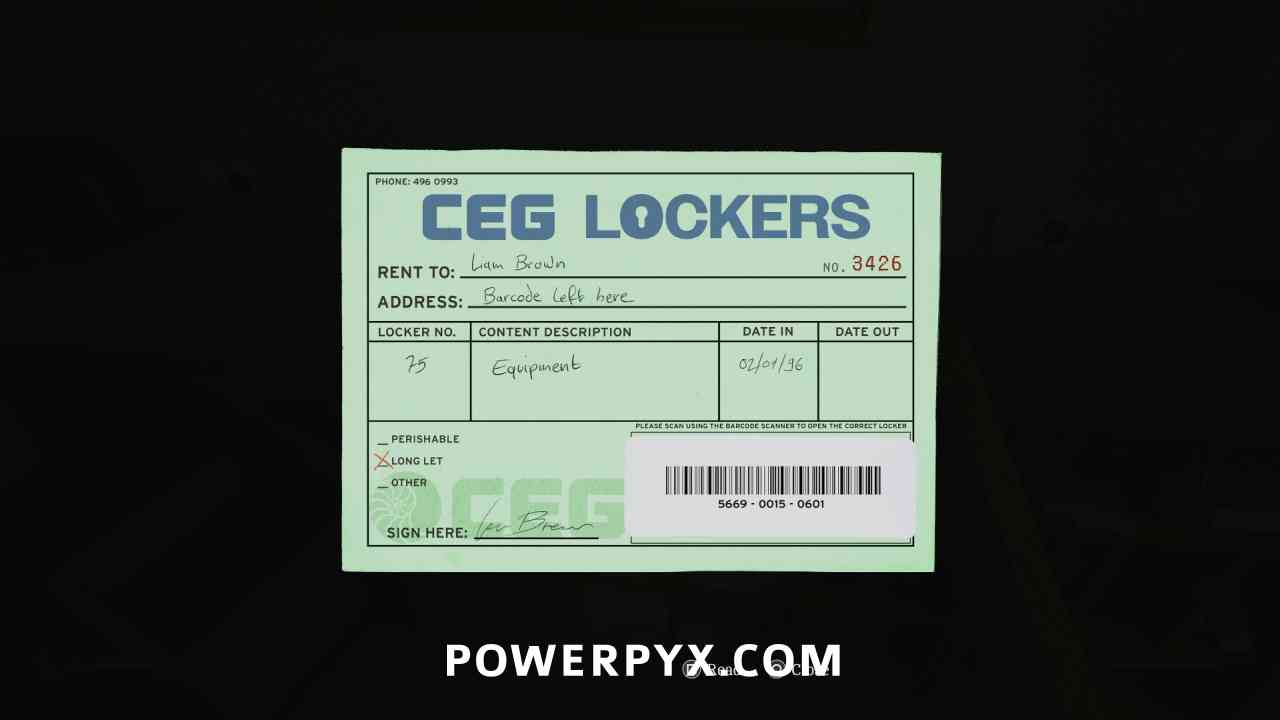
Puzzle #18
Area: Clara Woods Estate > Ground Level
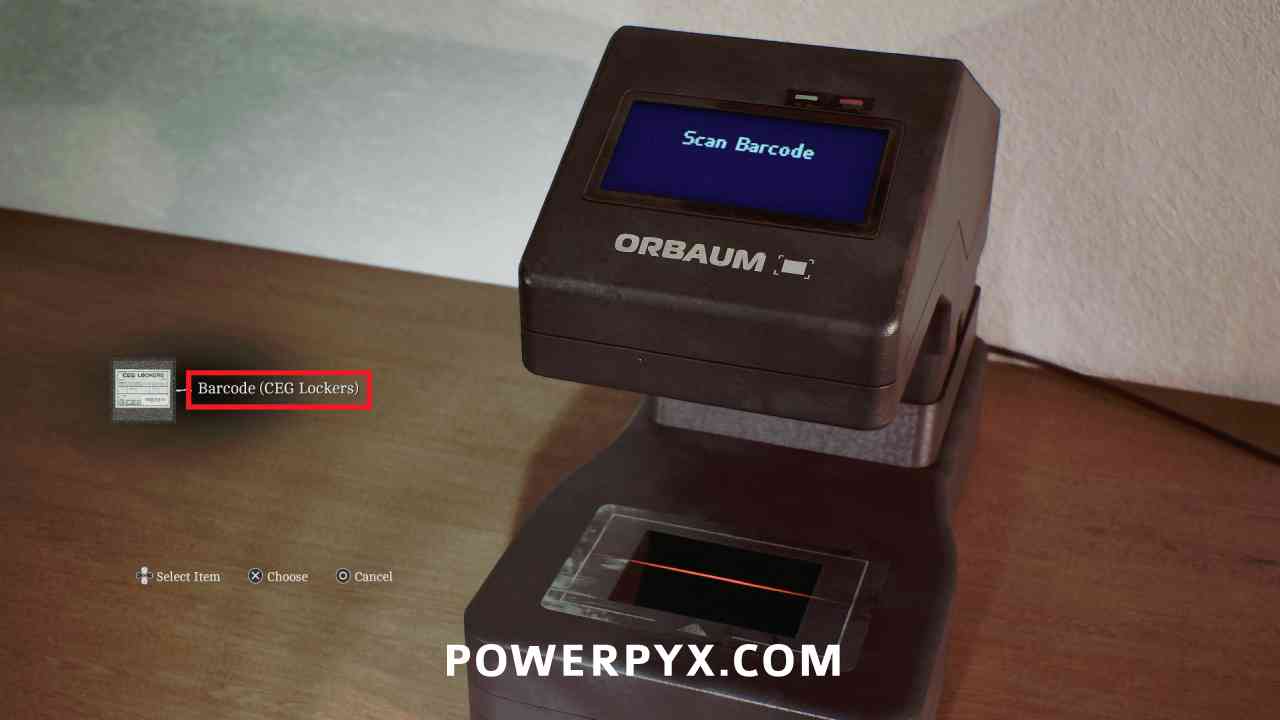
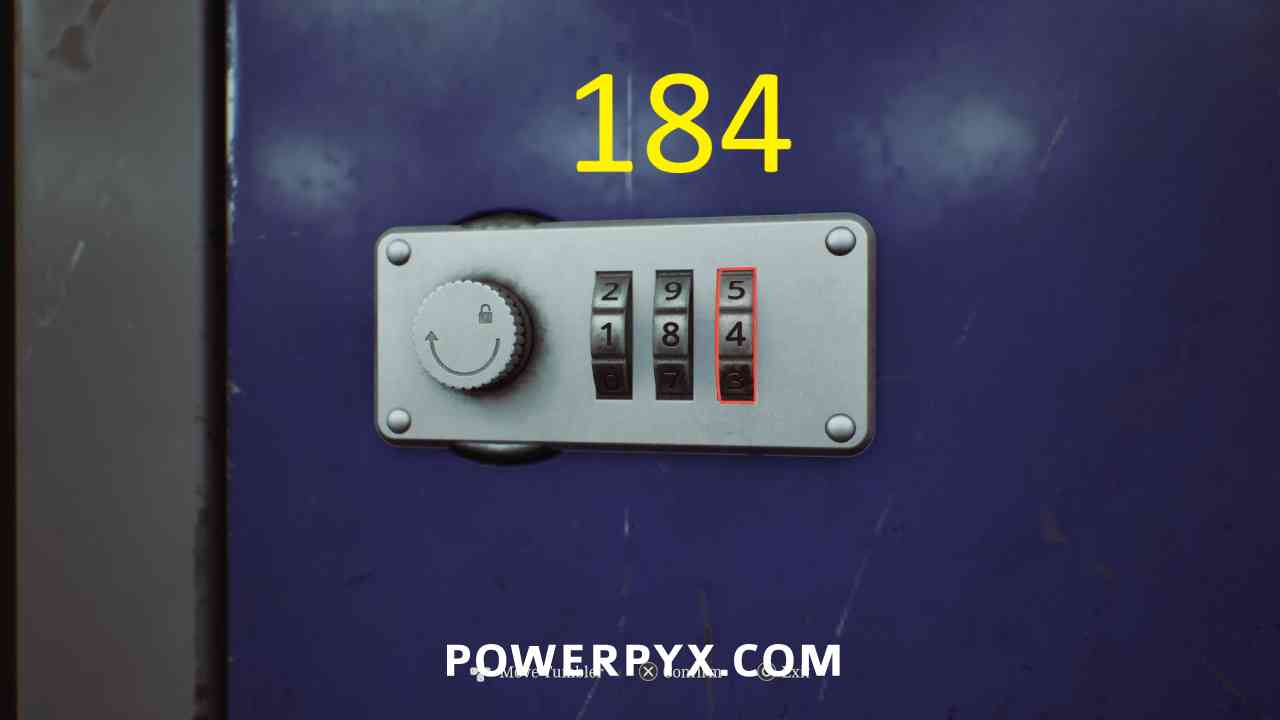
Interact with the barcode scanner and use Barcode (CEG Lockers) – Locker 75 to obtain the pin for locker 75 (184). Input this at locker 75 to open it.
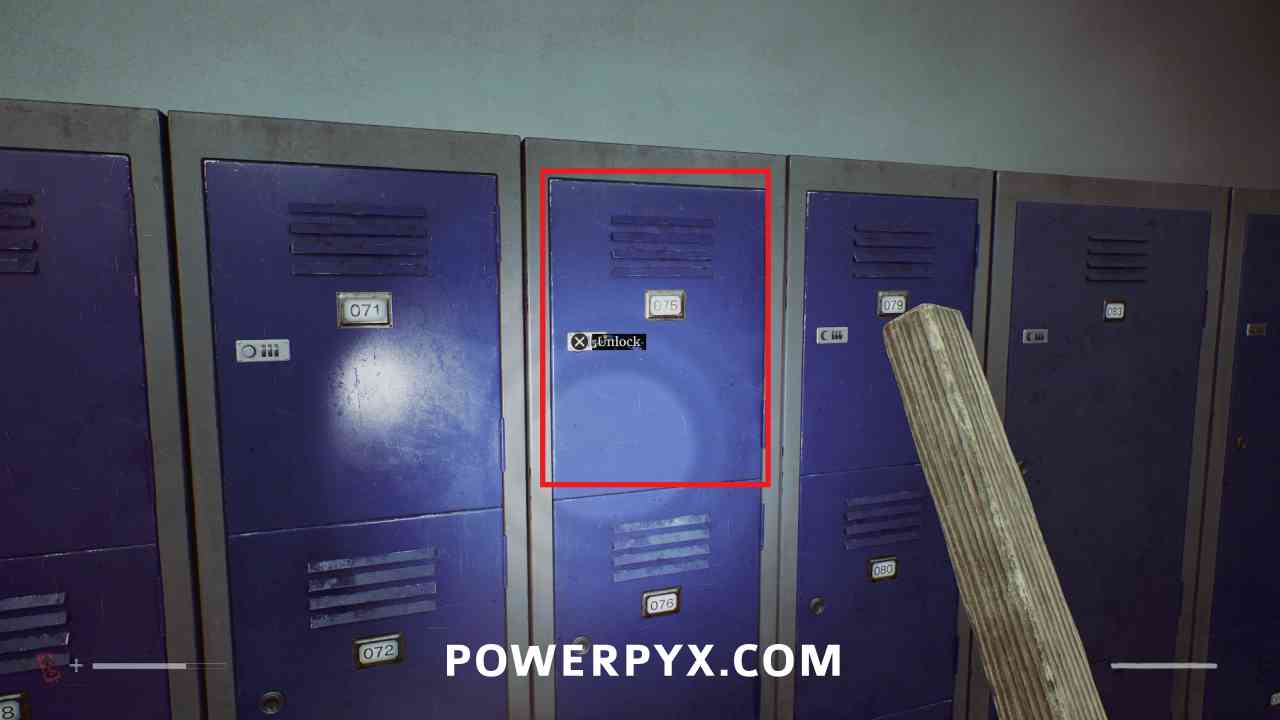
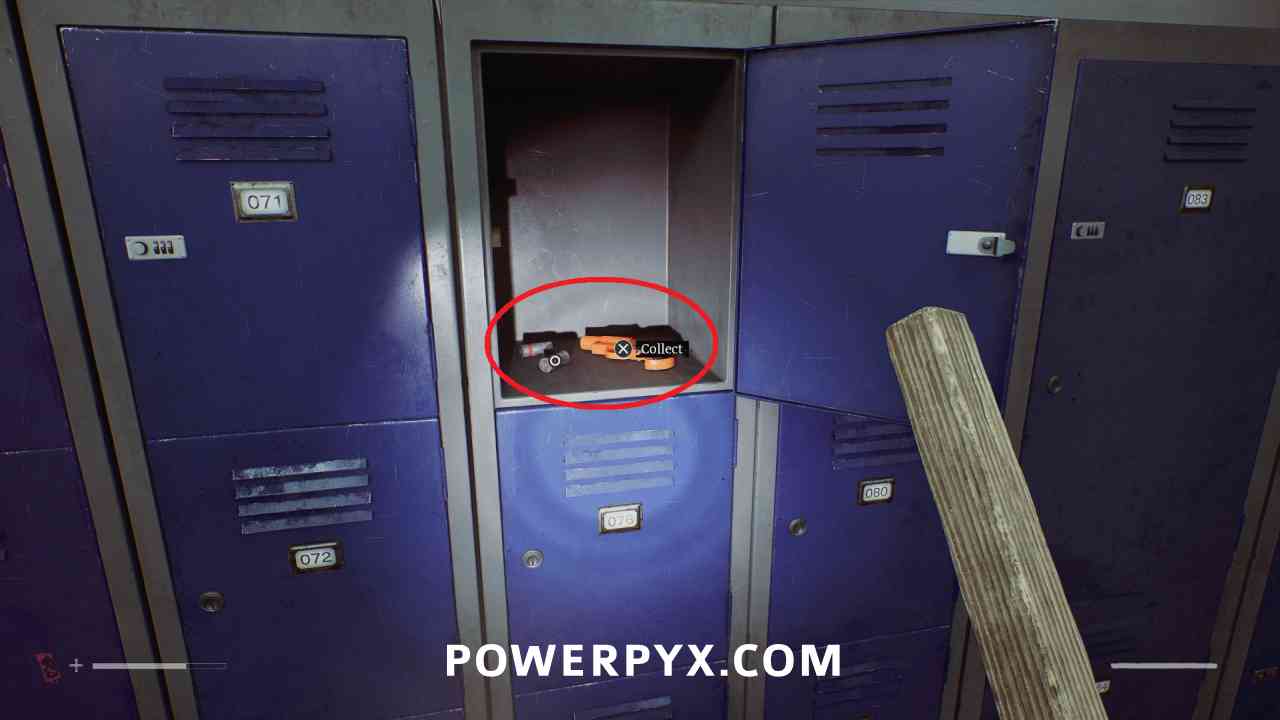
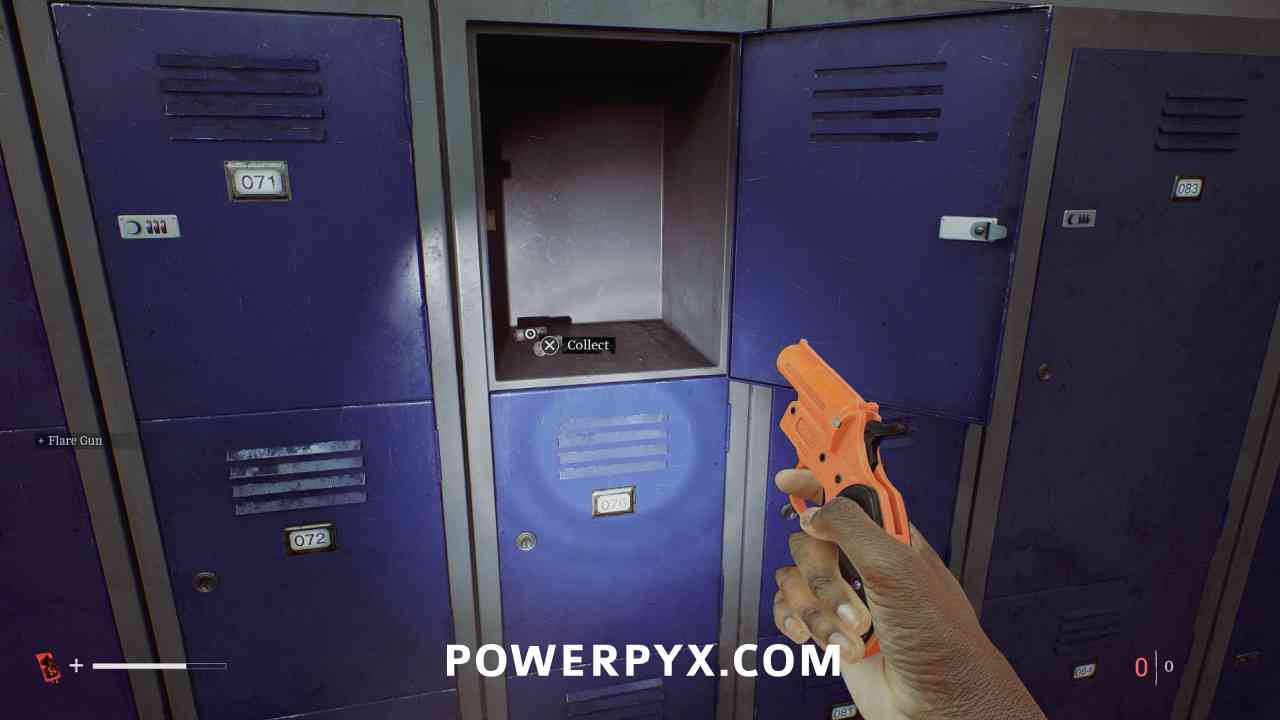
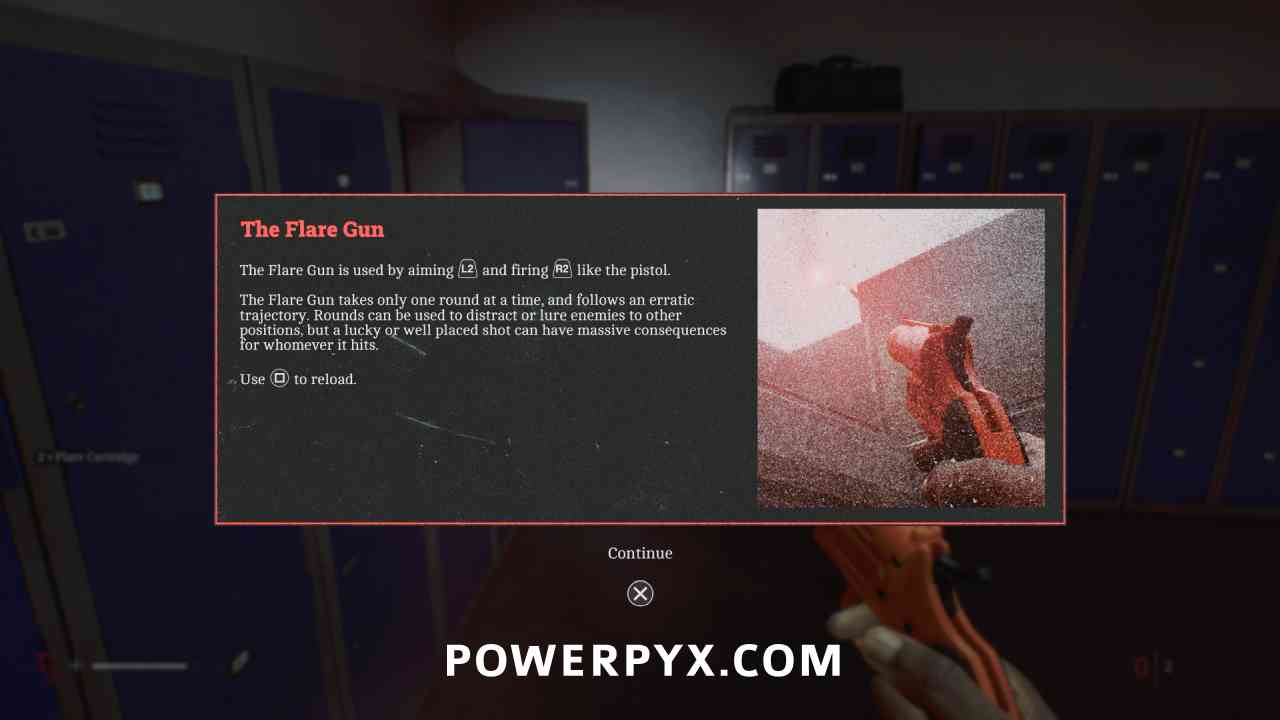
Weapon: Flare Gun
Area: Clara Woods Estate > Ground Level
Inside locker 75.
Clara Woods Estate > Upper Level
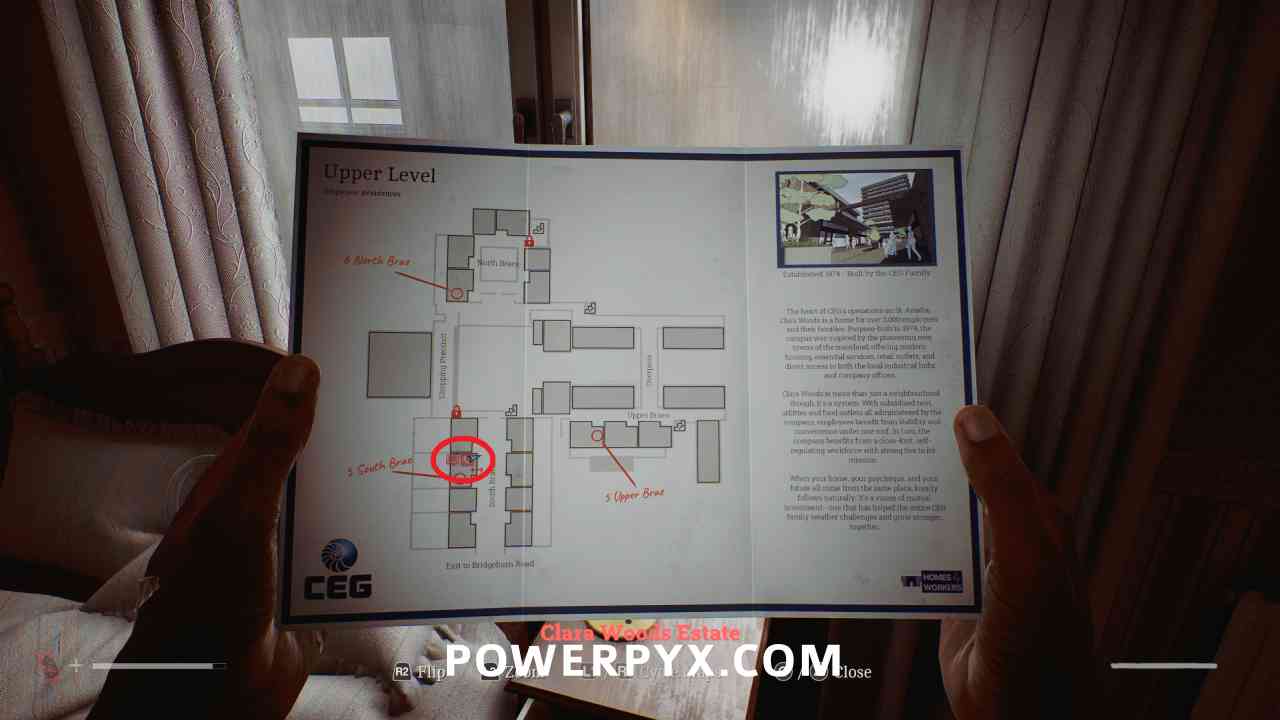
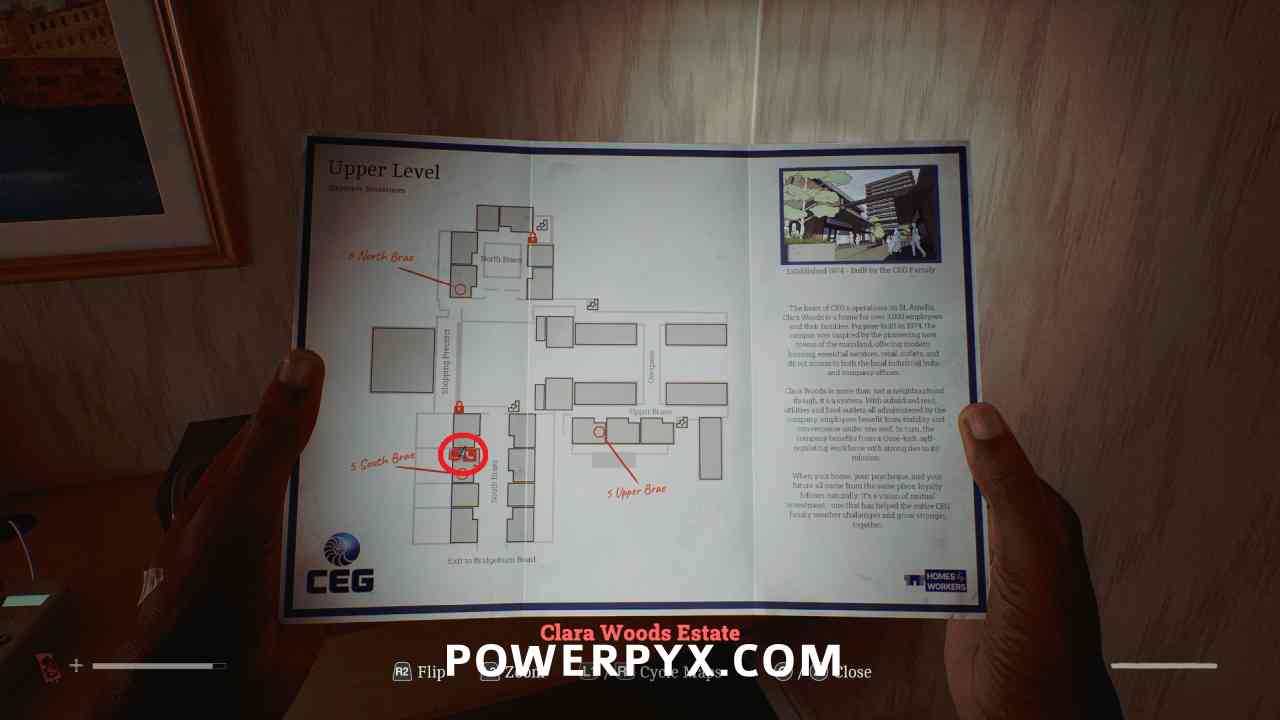
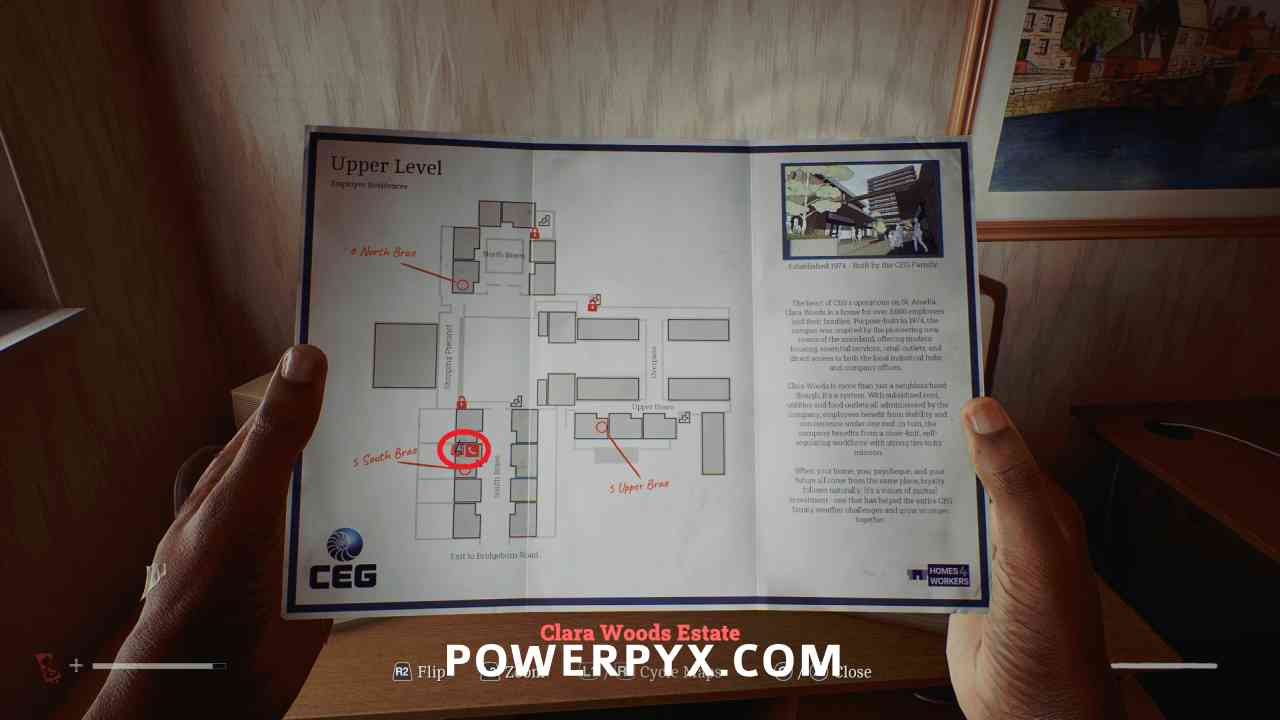
Locked Door – 5 South Brae
Area: Clara Woods Estate > Upper Level
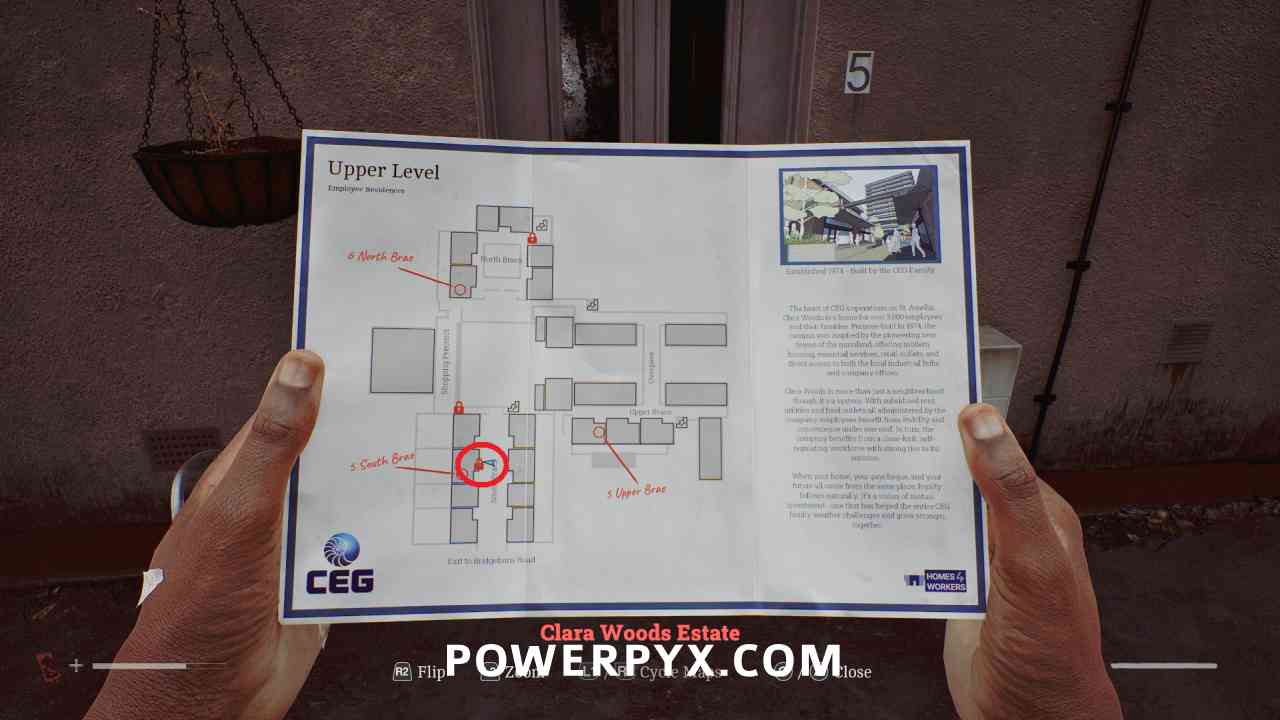
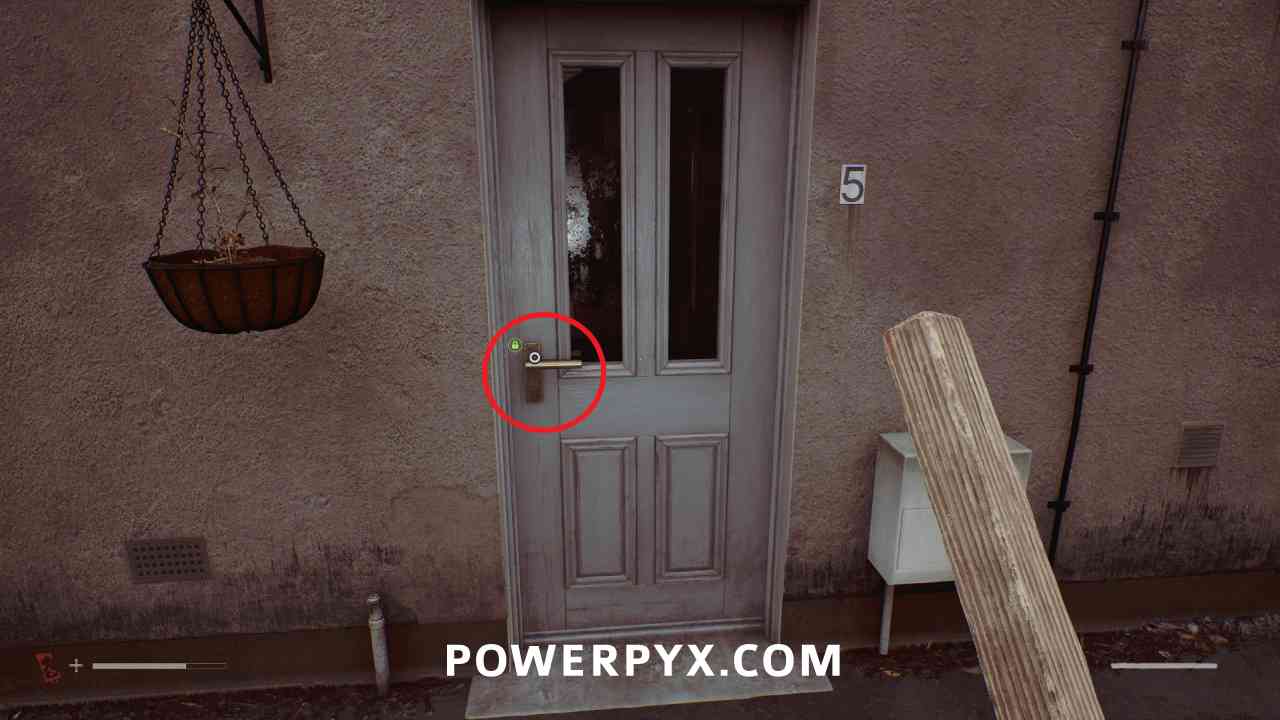
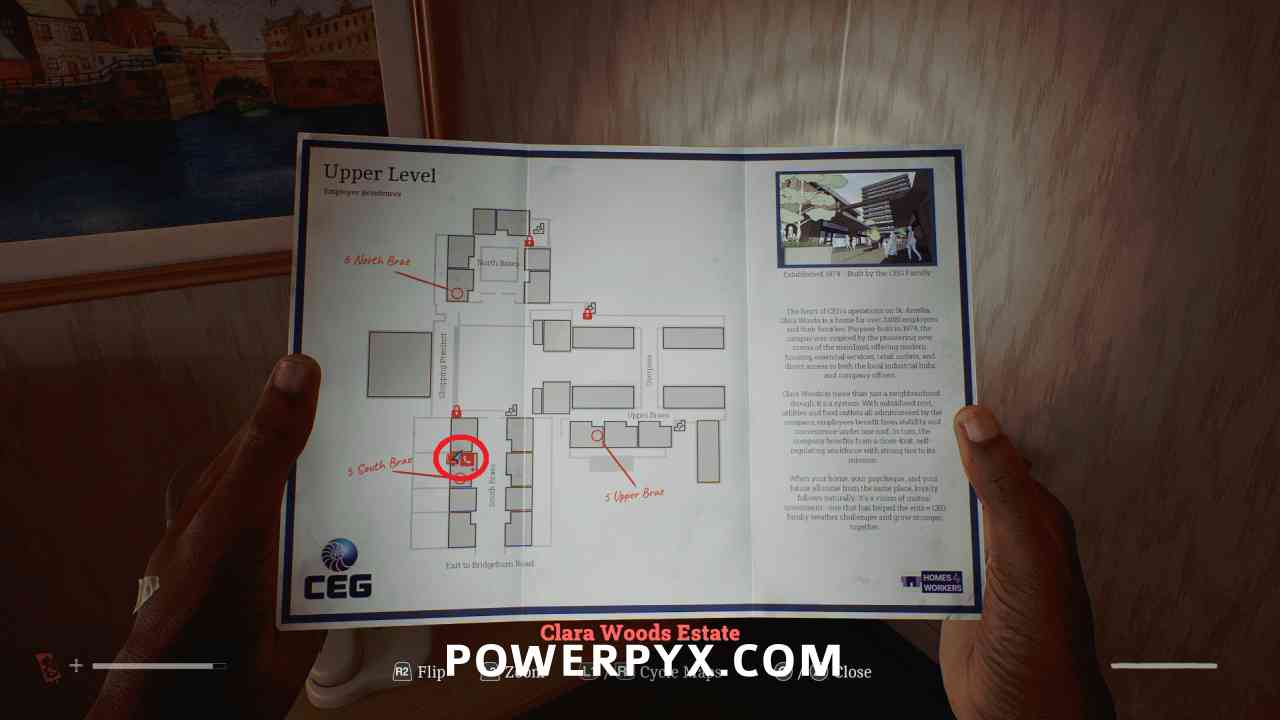
Go south back to the entrance of the area, and you can now open the locked door at 5 South Brae by using the South Brae House Key.
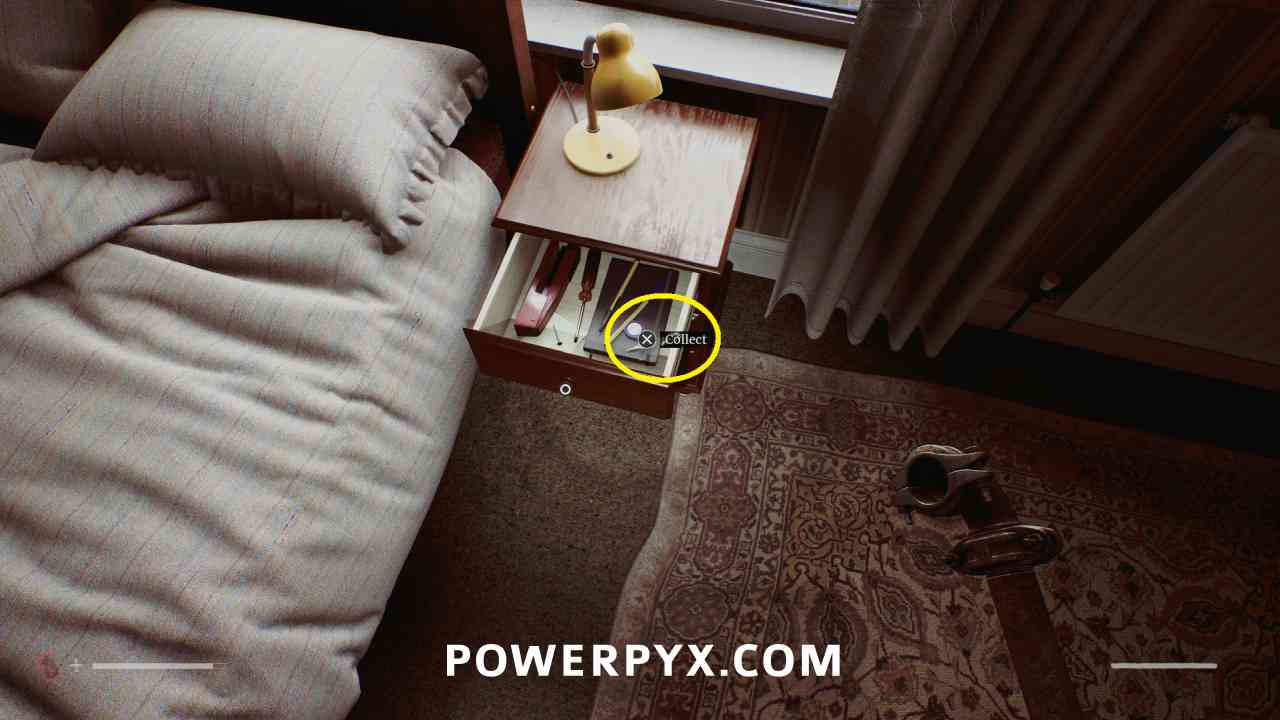
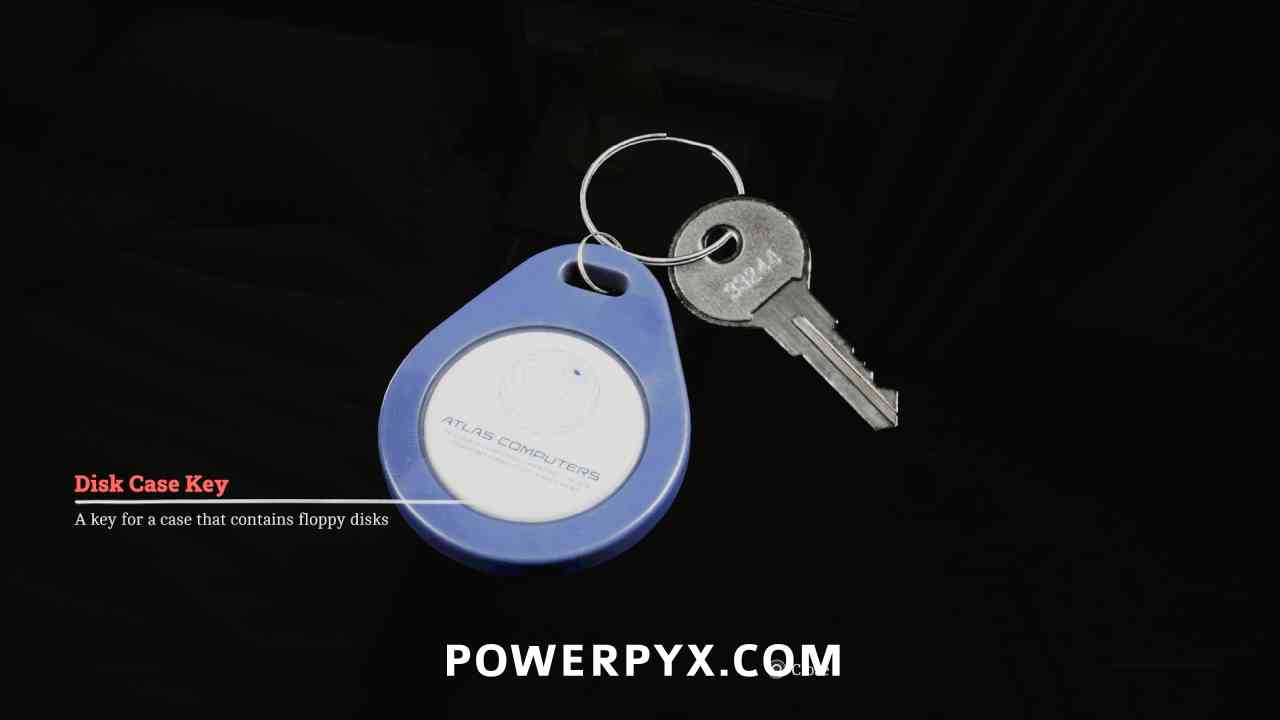
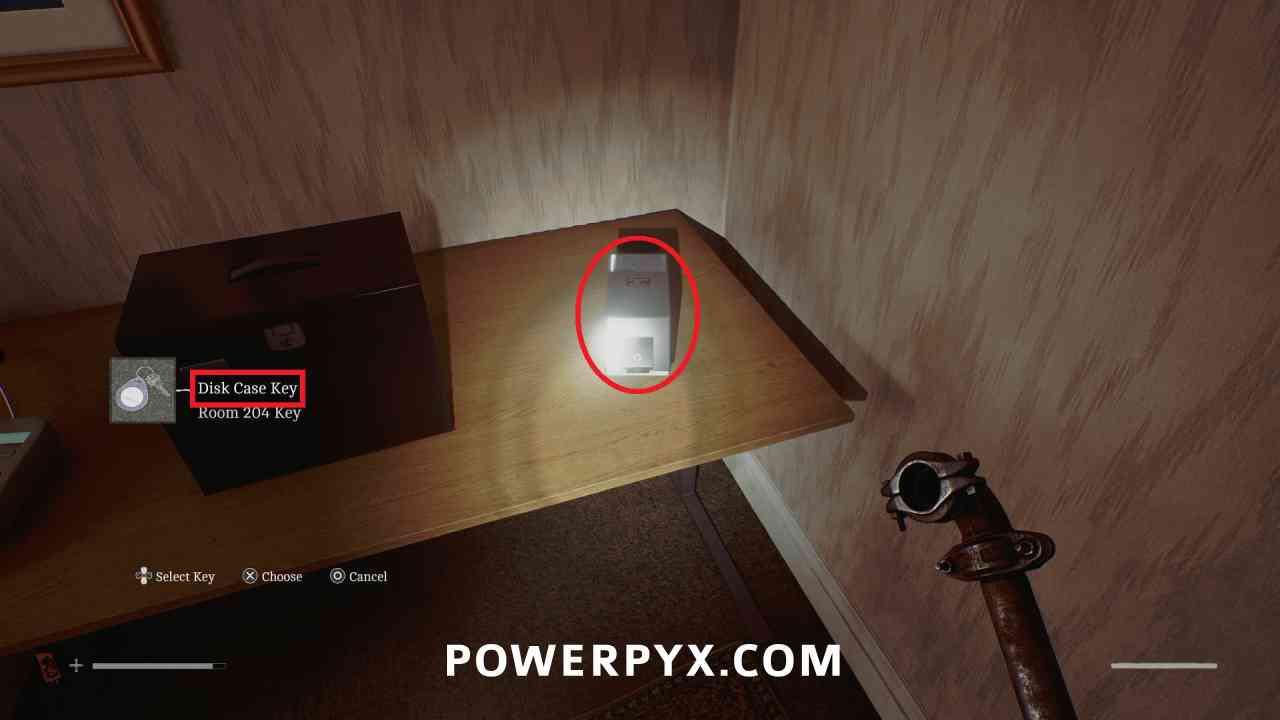
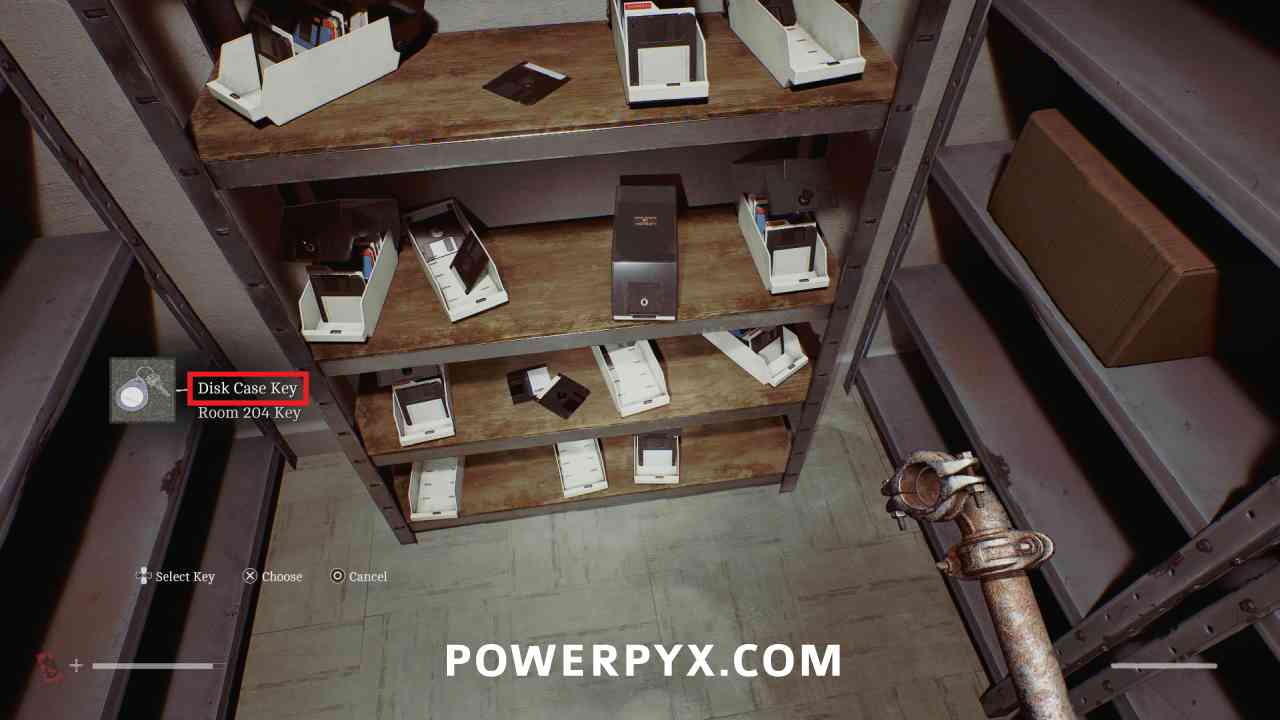
Key Item: Disk Case Key
Area: Clara Woods Estate > Upper Level
In 5 South Brae, on the upper floor in the bedroom at the end of the upstairs hallway, in the drawer beside the bed.
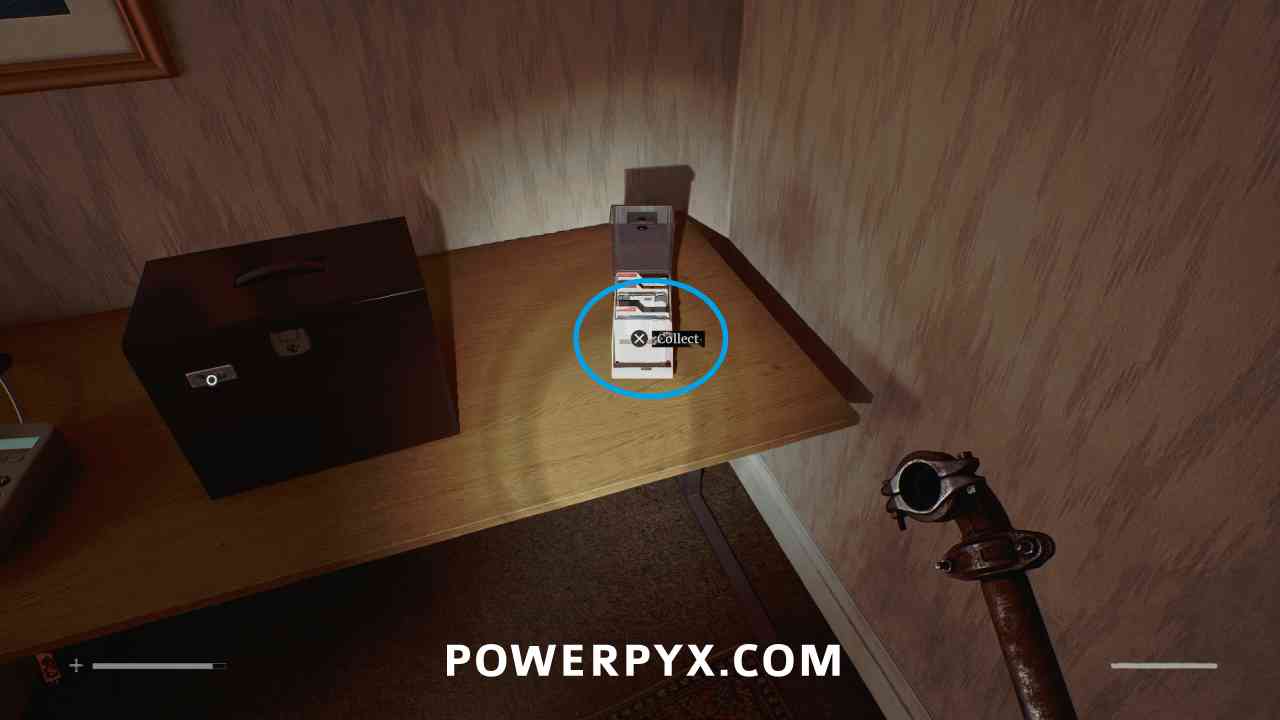
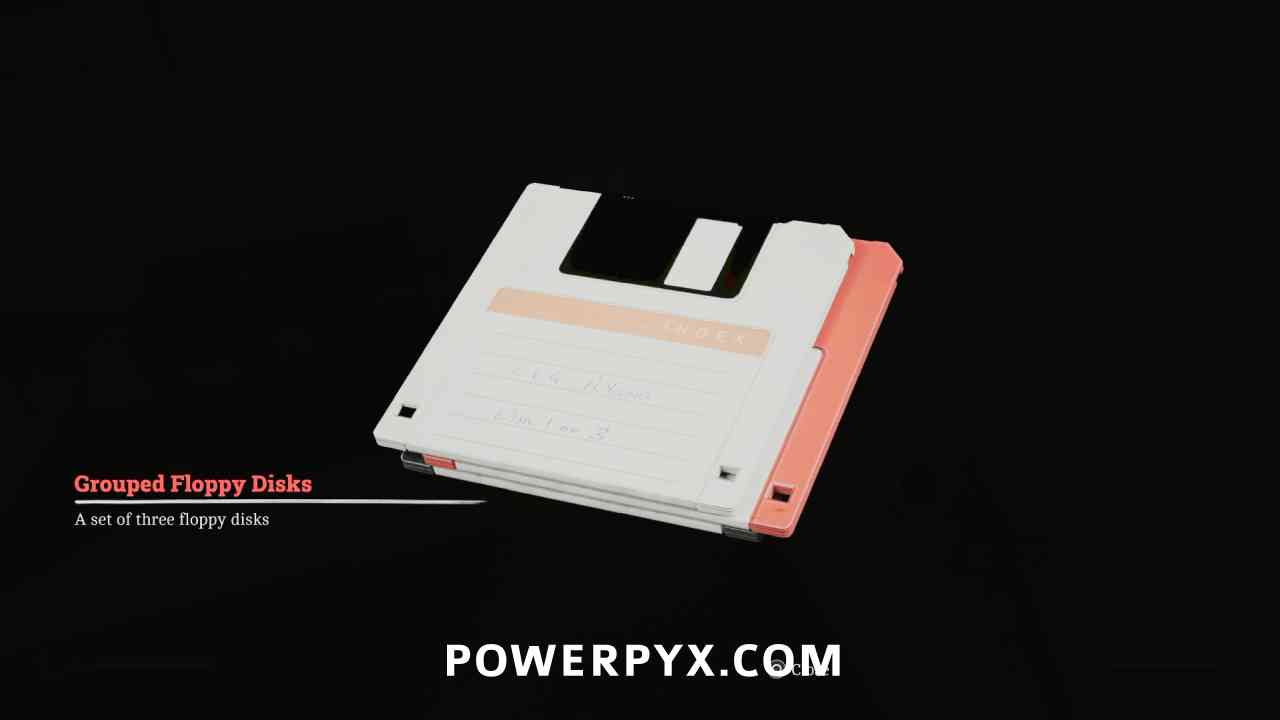
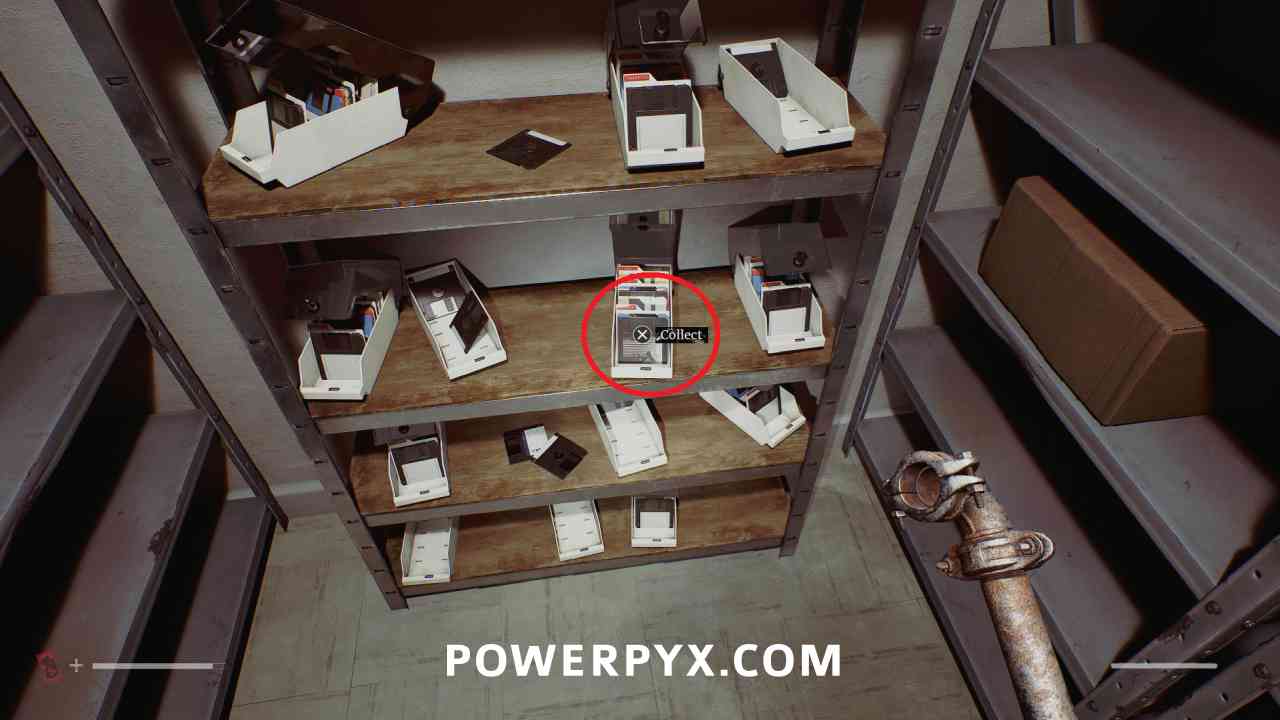
Key Item: Grouped Floppy Disks
Area: Clara Woods Estate > Upper Level
In 5 South Brae, go into the room with the computer and use the Disk Case Key on the container to the right of the safe to obtain these floppy disks.
Clara Woods Estate > Ground Level
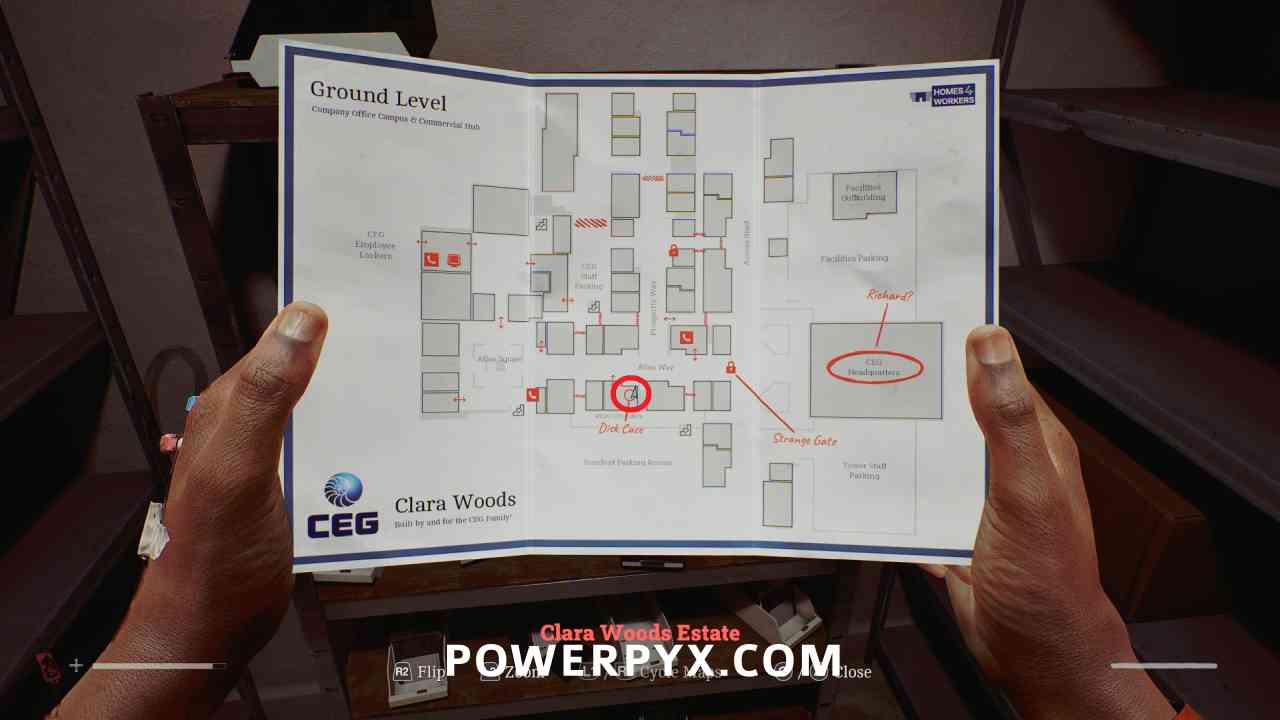
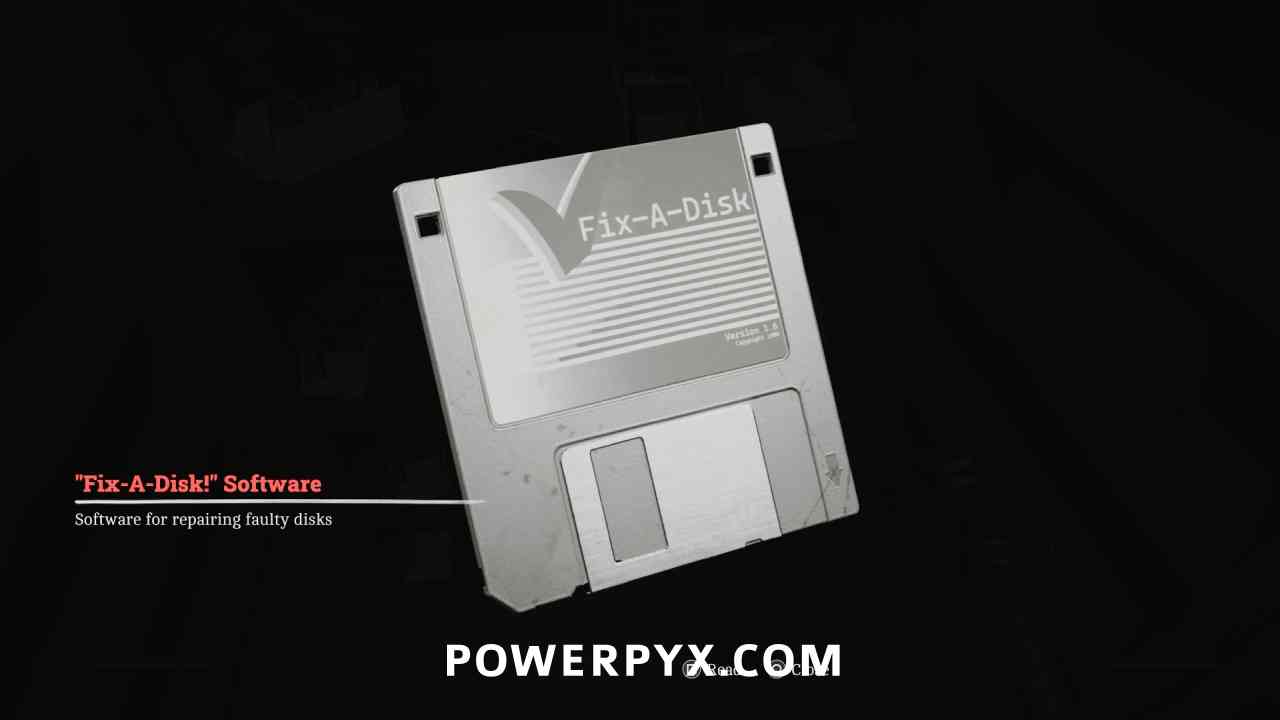
Key Item: “Fix-A-Disk!” Software
Area: Clara Woods Estate > Ground Level
Go back to Atlas Computers, and go into the side room where there is another container that you can open with the Disk Case Key, obtaining this floppy disk.
Clara Woods Estate > Upper Level
Puzzle #19
Area: Clara Woods Estate > Upper Level
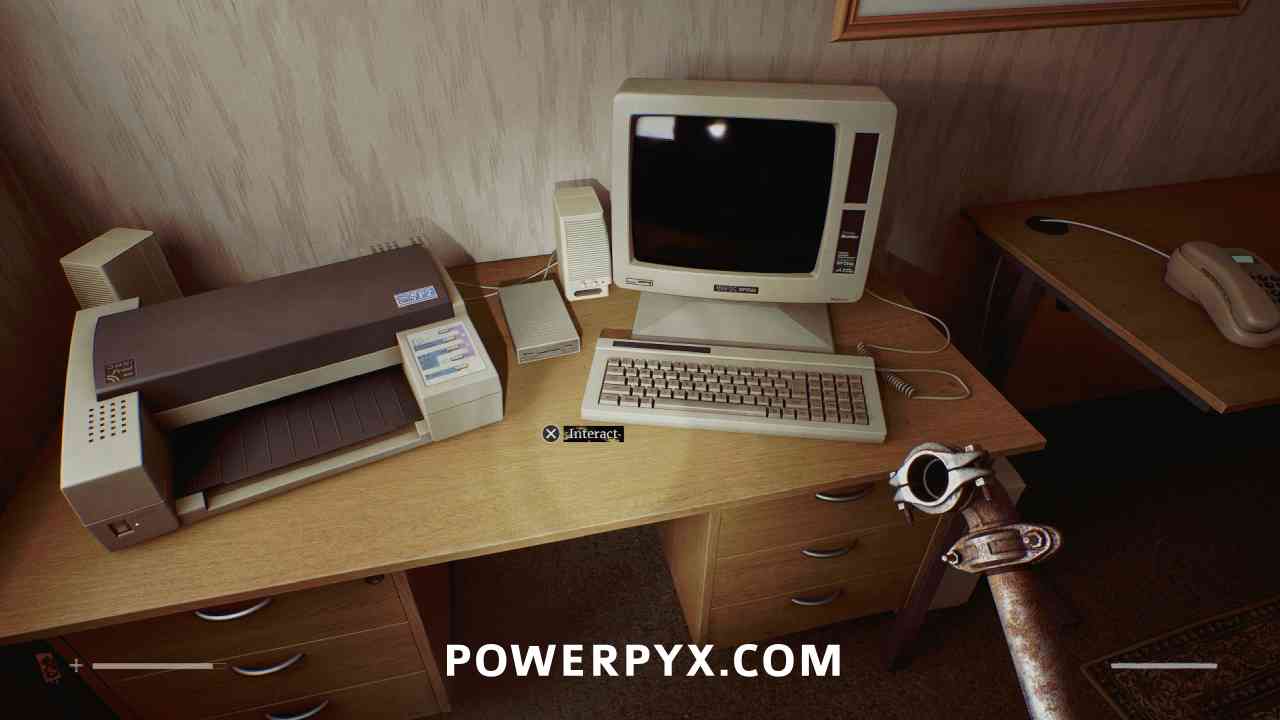
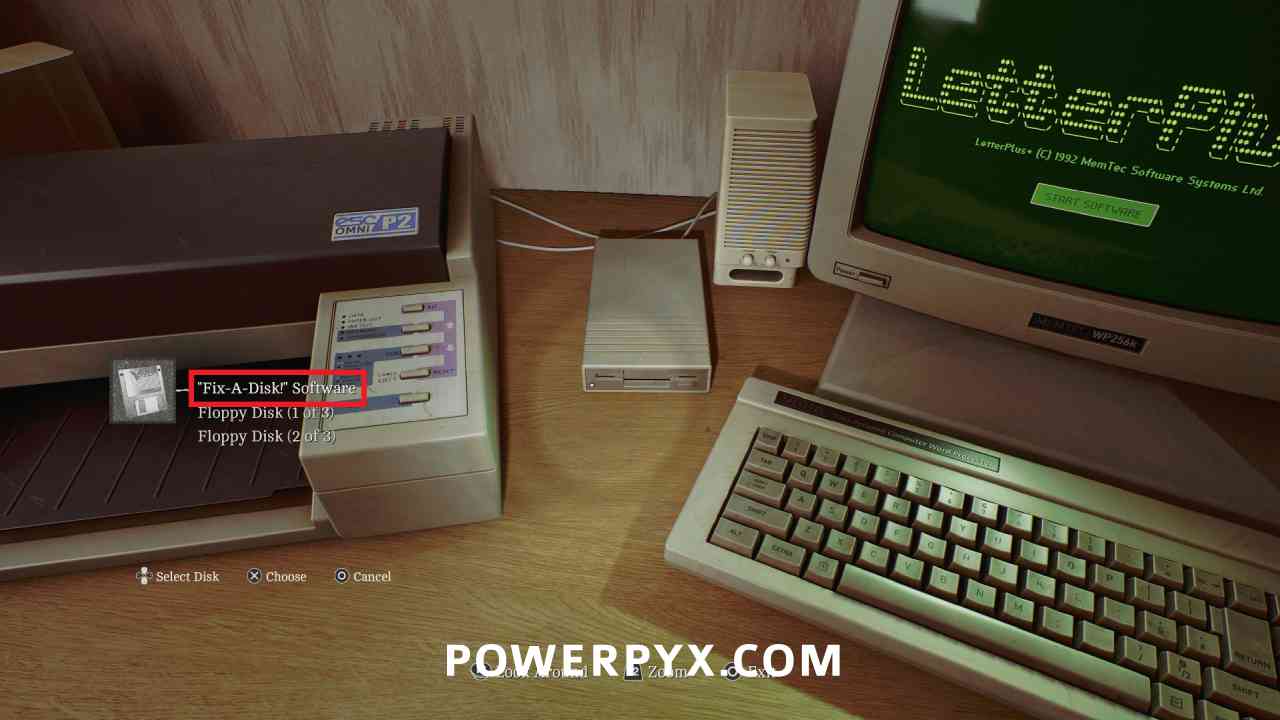
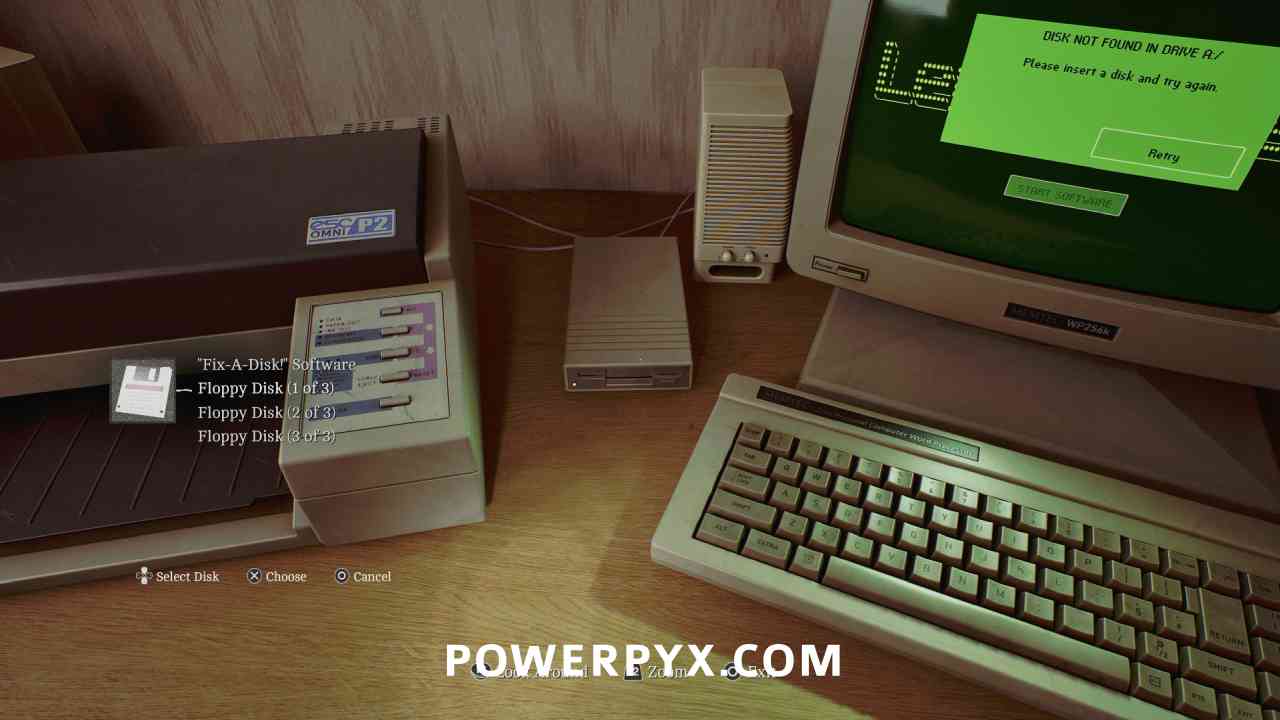
Return to 5 Brae Street and to the upper floor with the computer. Interact with the computer to turn it on, then put the “Fix-A-Disk!” Software floppy in the drive in the middle.
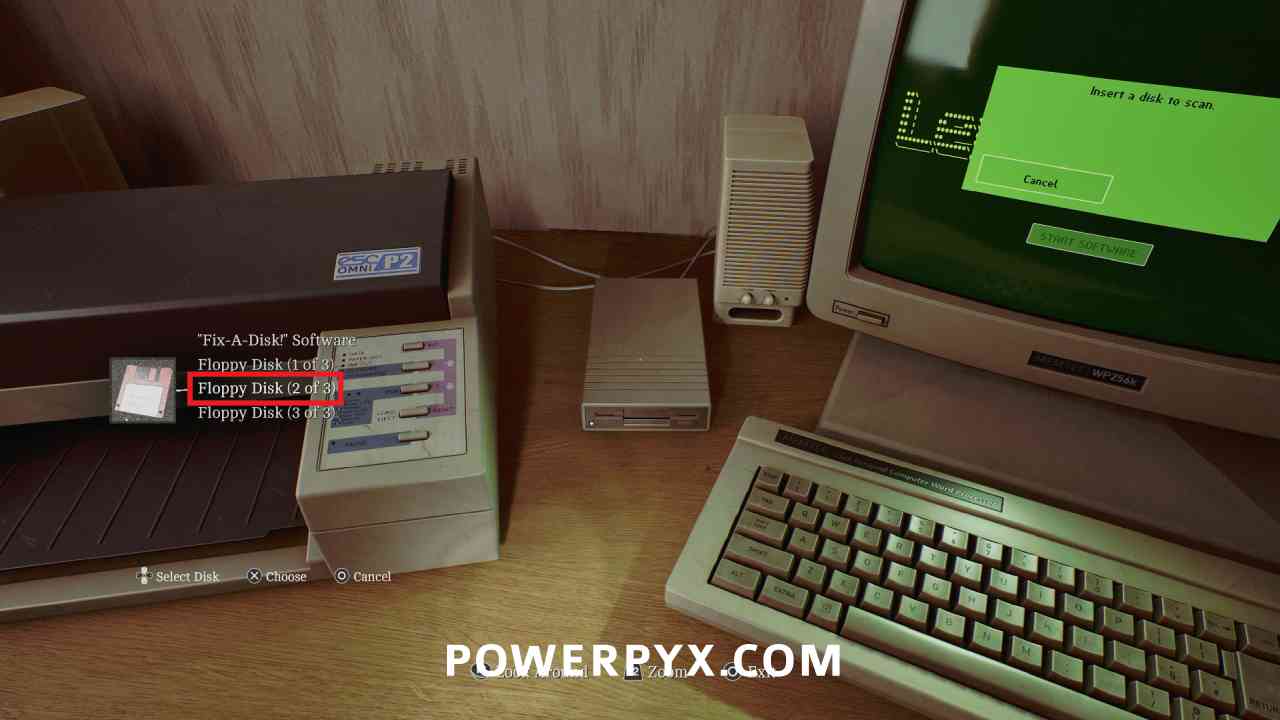
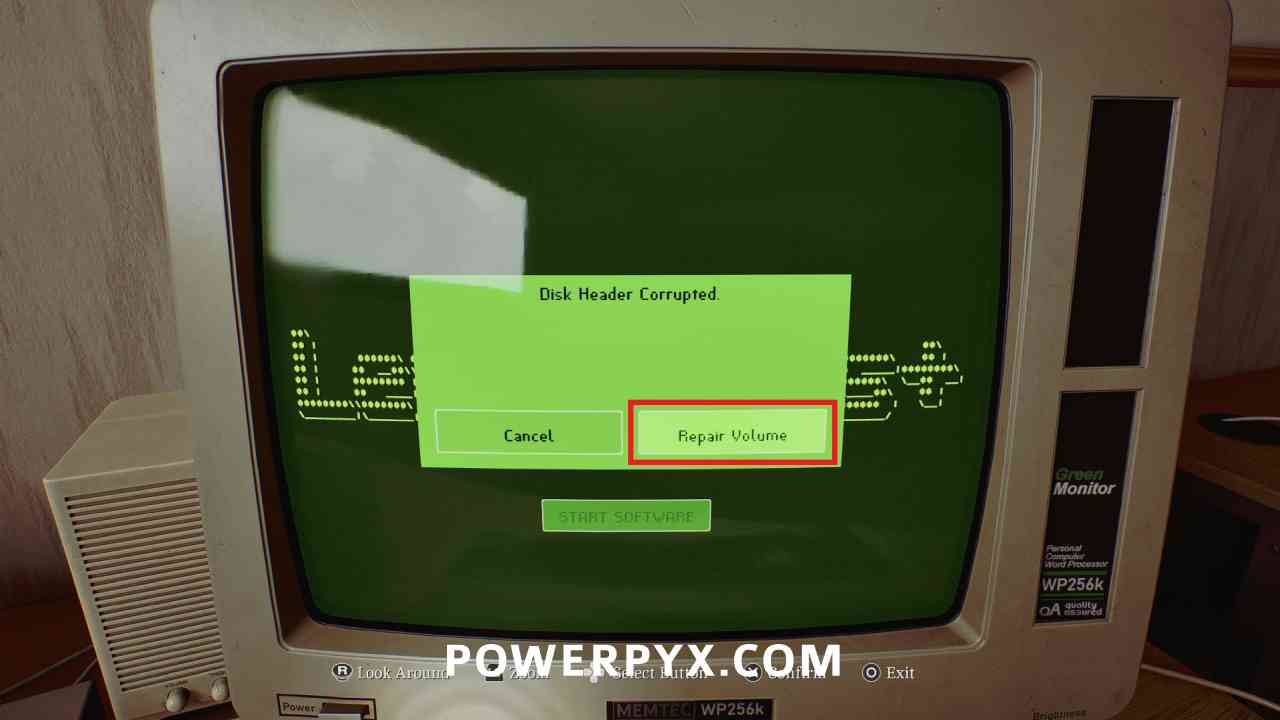
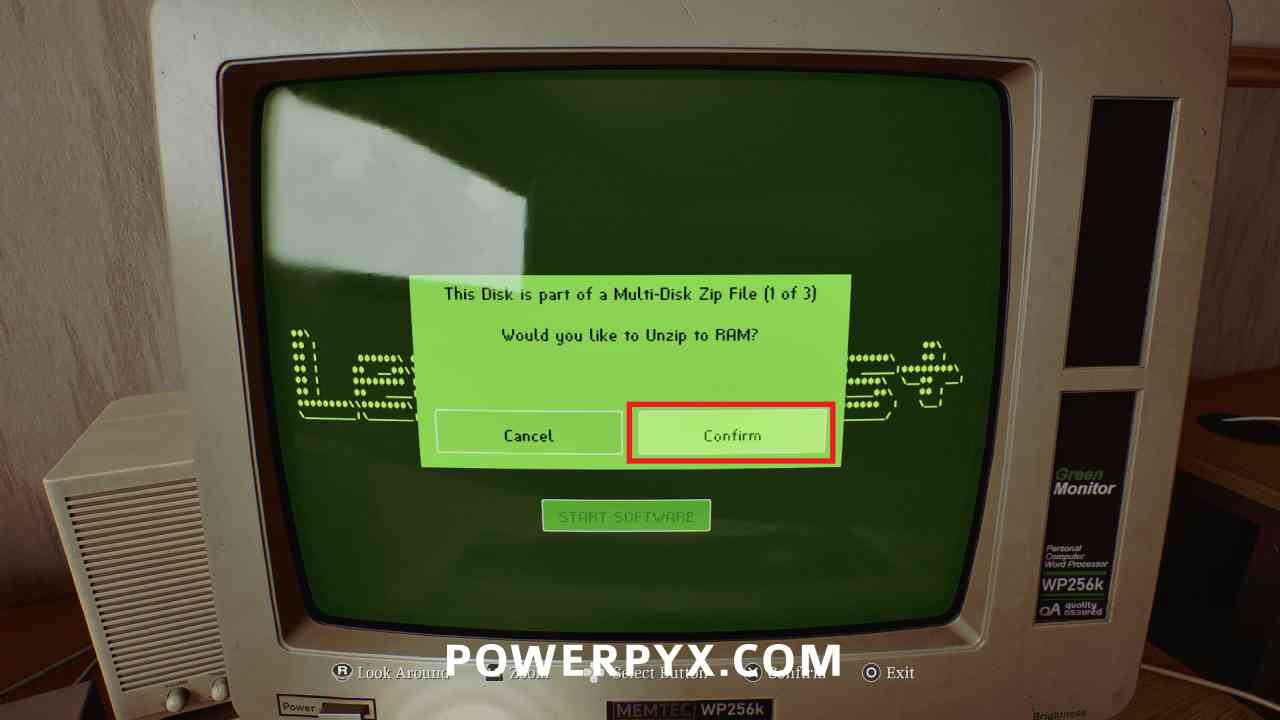
Interact with the computer screen so that it says “Insert a disk to scan.”, then back out (without selecting Cancel) and interact with the drive again to retrieve the disk. Insert Floppy Disk (2 of 3) then interact with the computer and select Repair Volume to fix the disk.
Retrieve the disk again, then in order insert Floppy Disk (1 of 3), confirm on screen you want to Unzip to RAM, then insert (2 of 3), then (3 of 3).
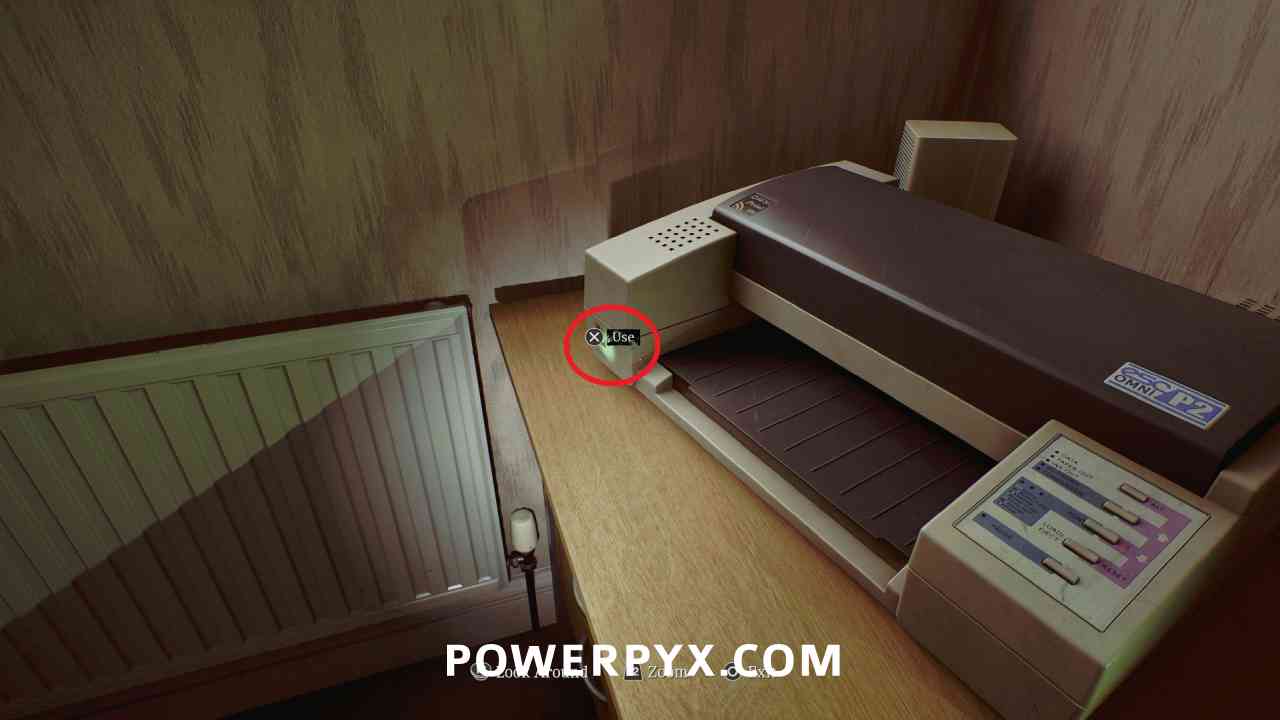
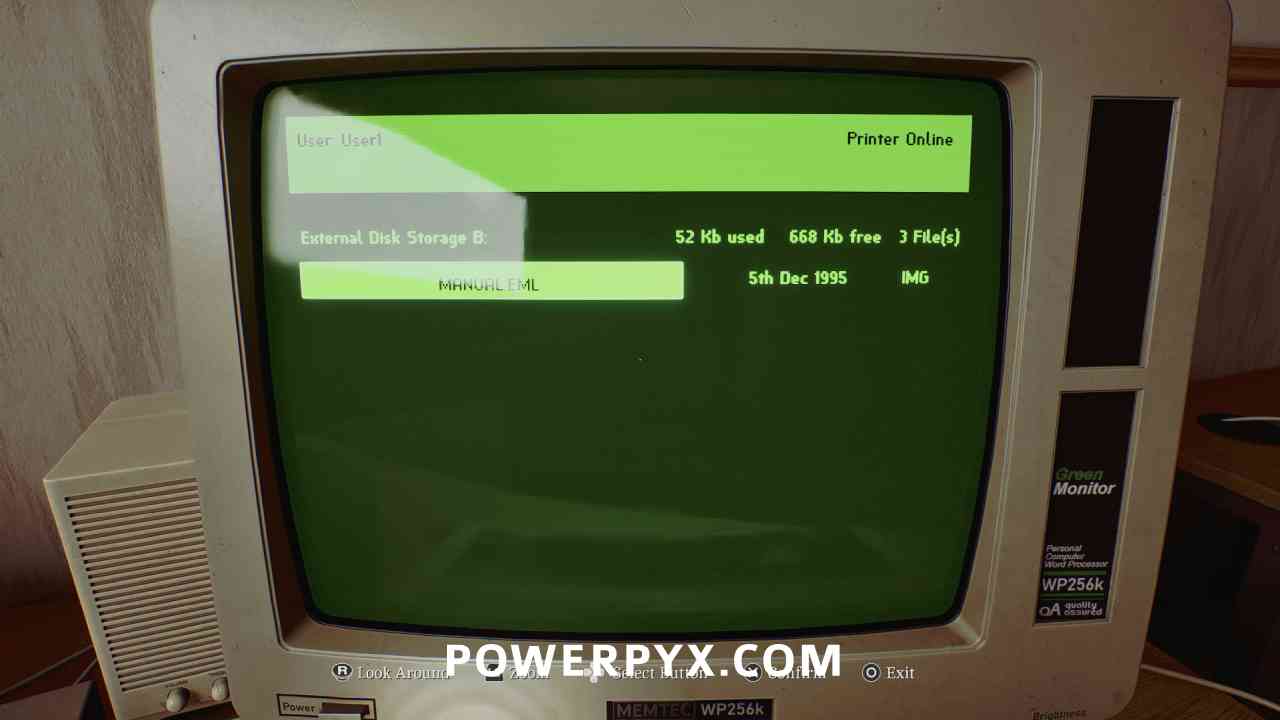
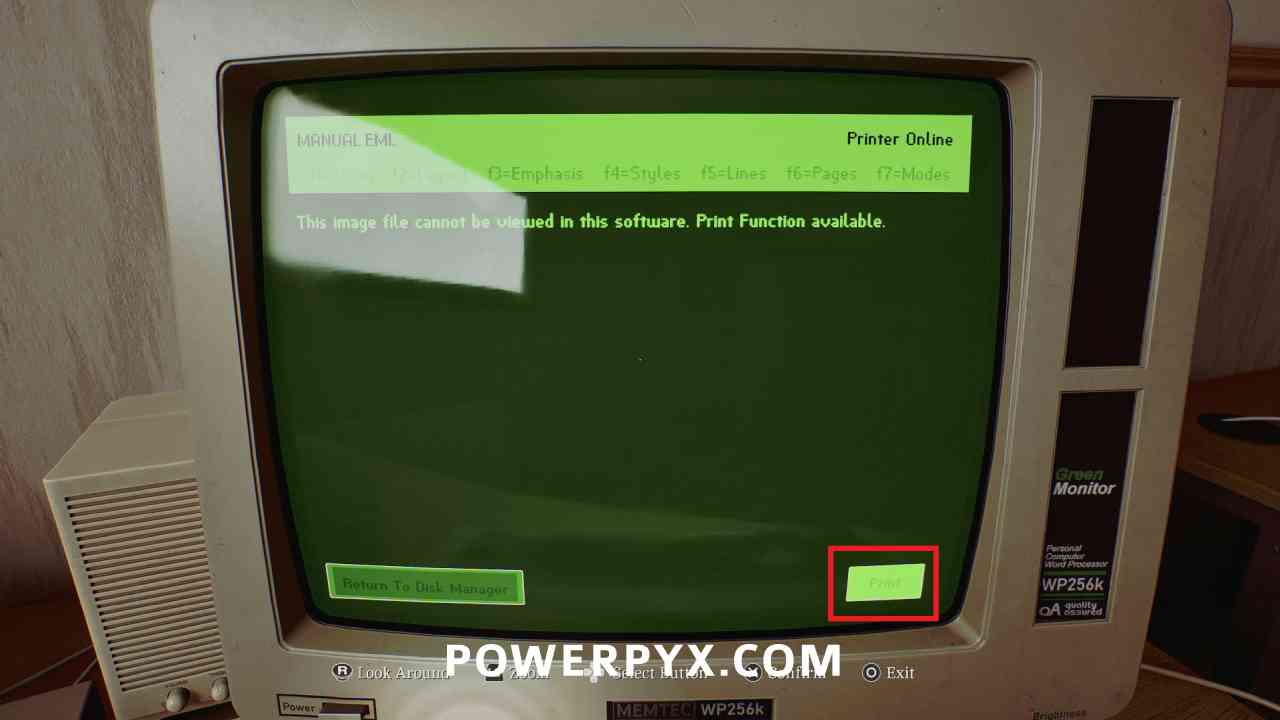
Interact with the printer on the left of the table to turn it on, then interact with the computer to print out MANUAL.EML.
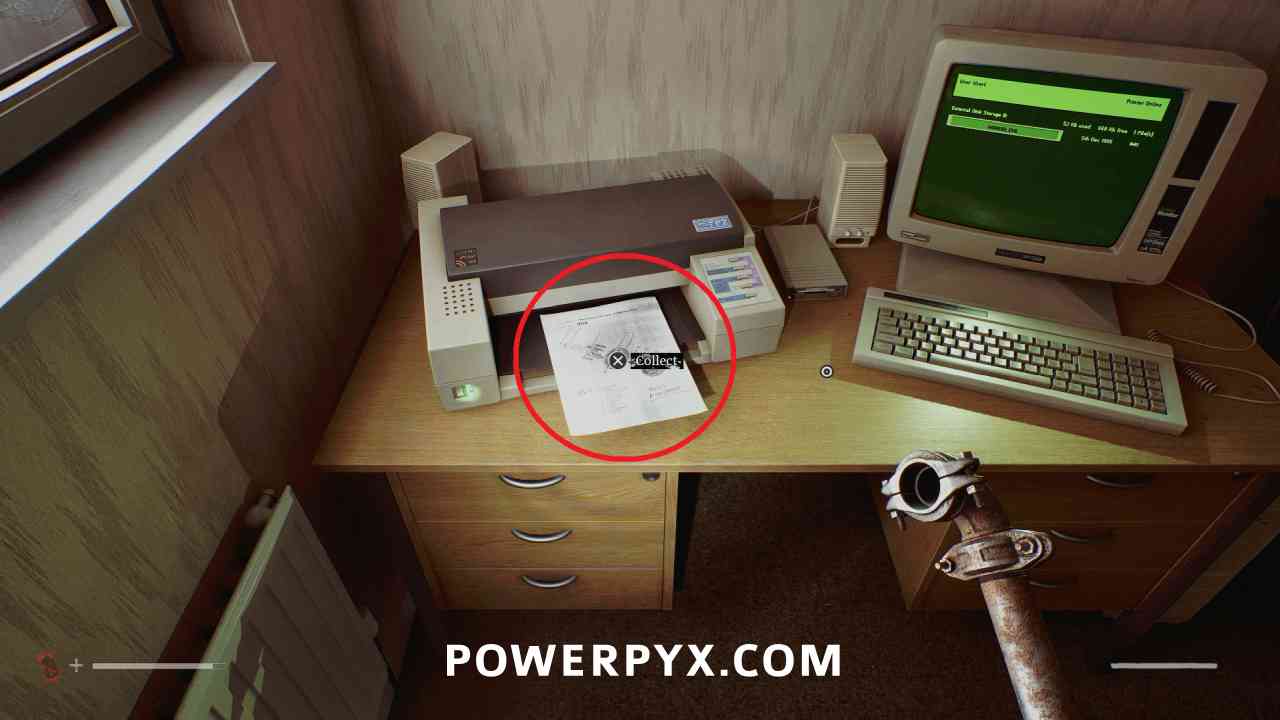
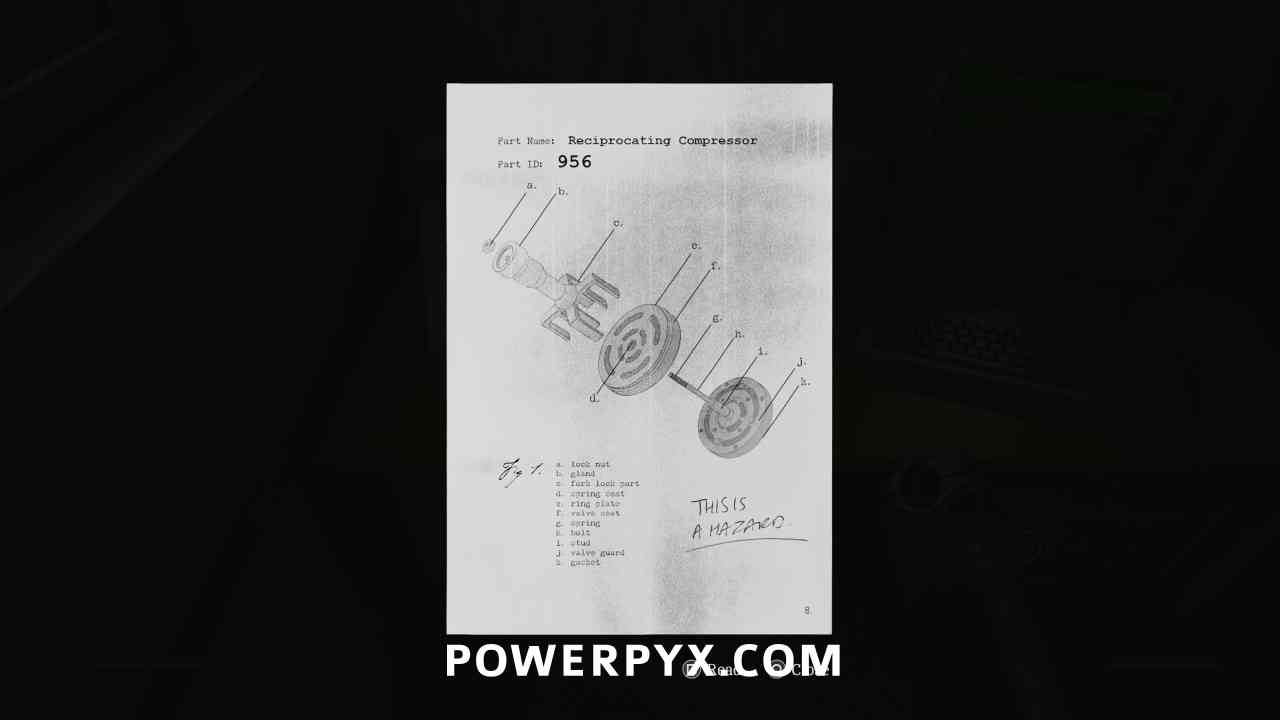
Clue: Reciprocating Compressor
Area: Clara Woods Estate > Upper Level
Pick the printout up from the printer to obtain this clue.
Puzzle #20
Area: Clara Woods Estate > Upper Level
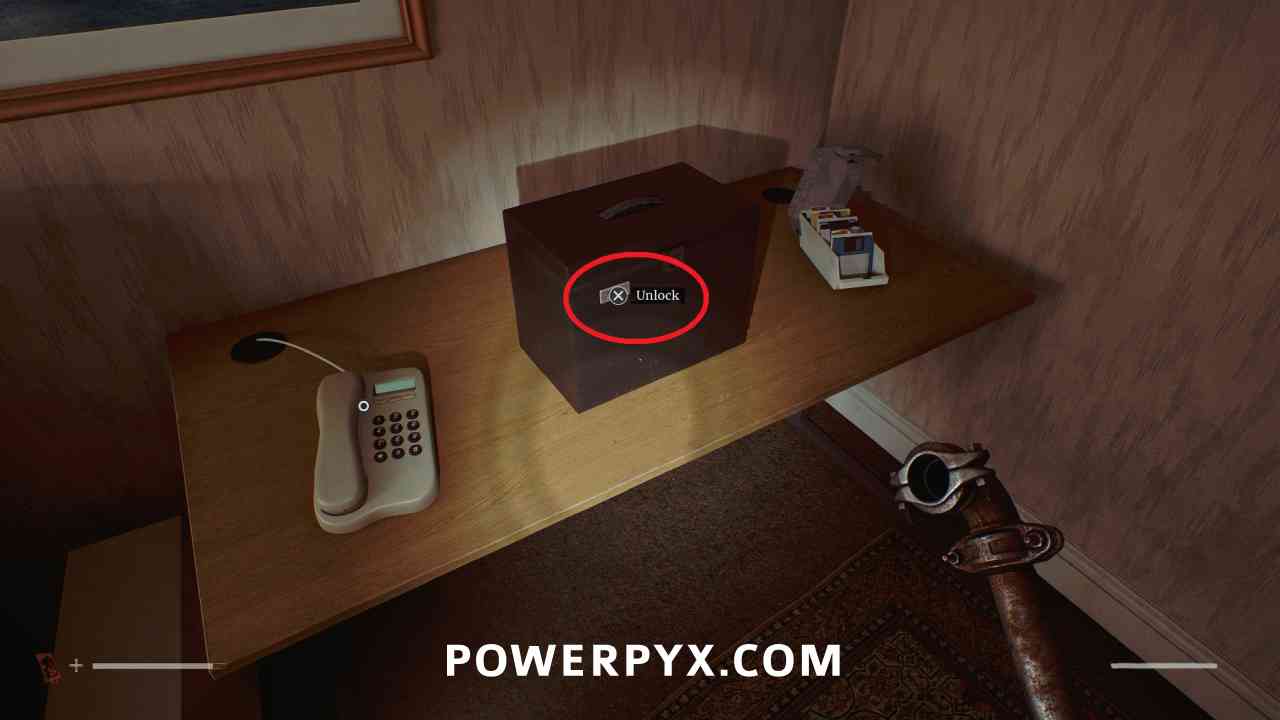
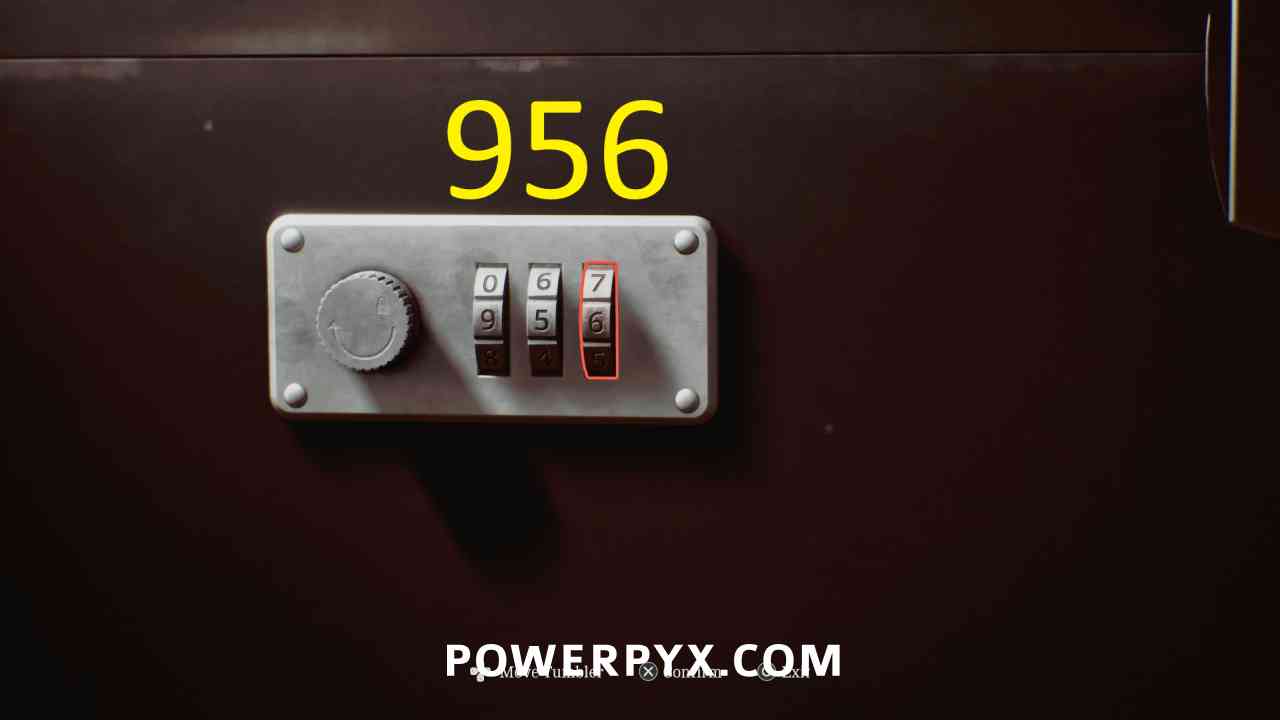
Interact with the safe to the right of the computer, and enter the code 956 (the part number from the printout).
Key Item: Barcode (South Brae) – Locker 17
Area: Clara Woods Estate > Upper Level
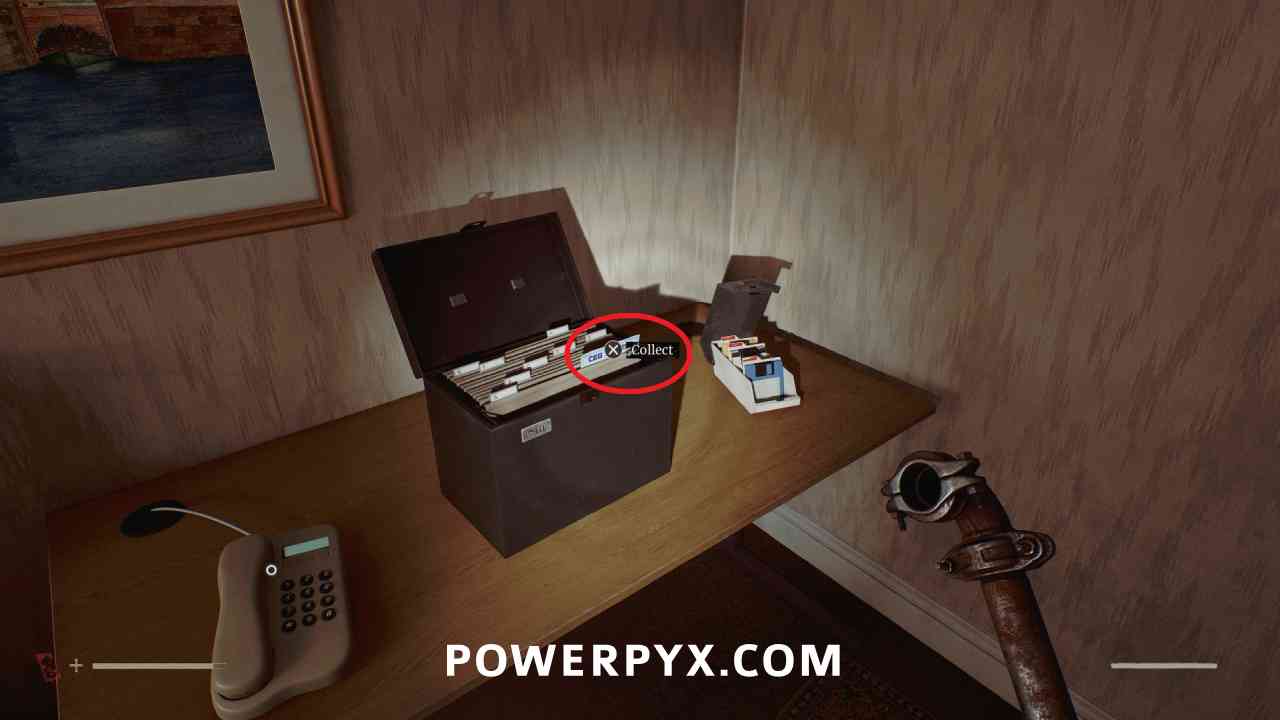
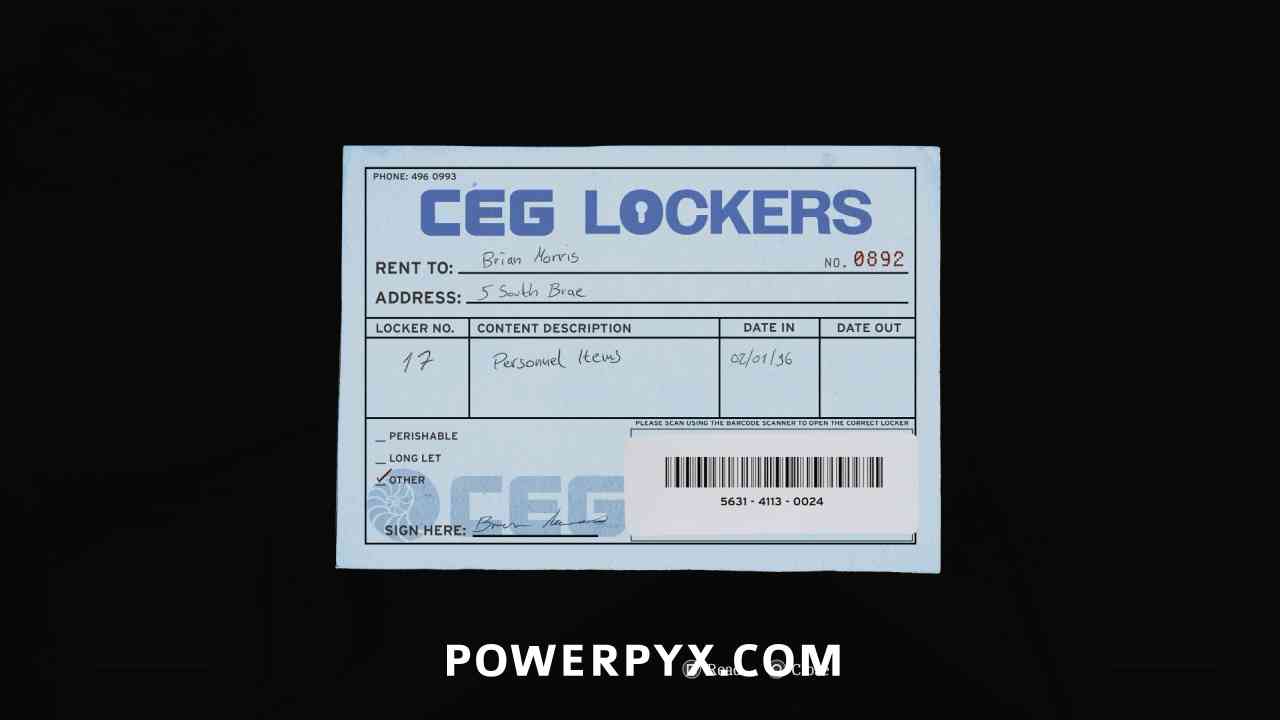
Pick this up from the opened safe container.
Clara Woods Estate > Ground Level
Puzzle #21
Area: Clara Woods Estate > Ground Level
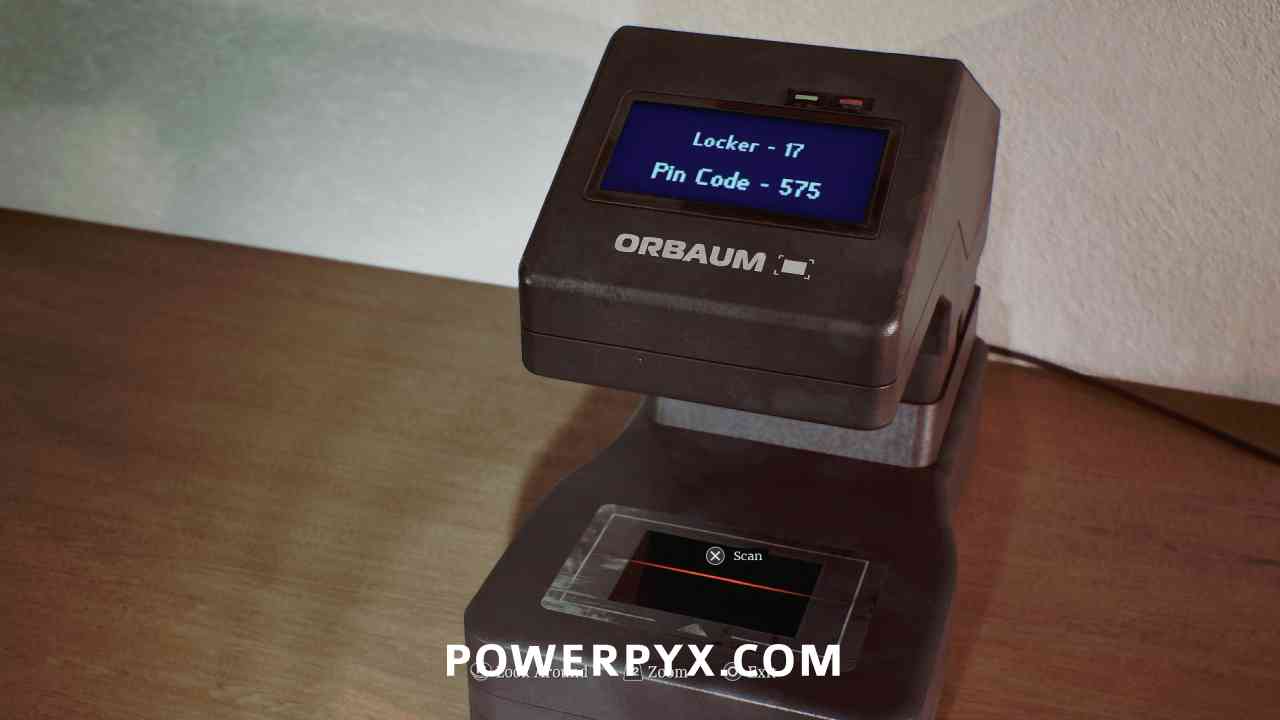
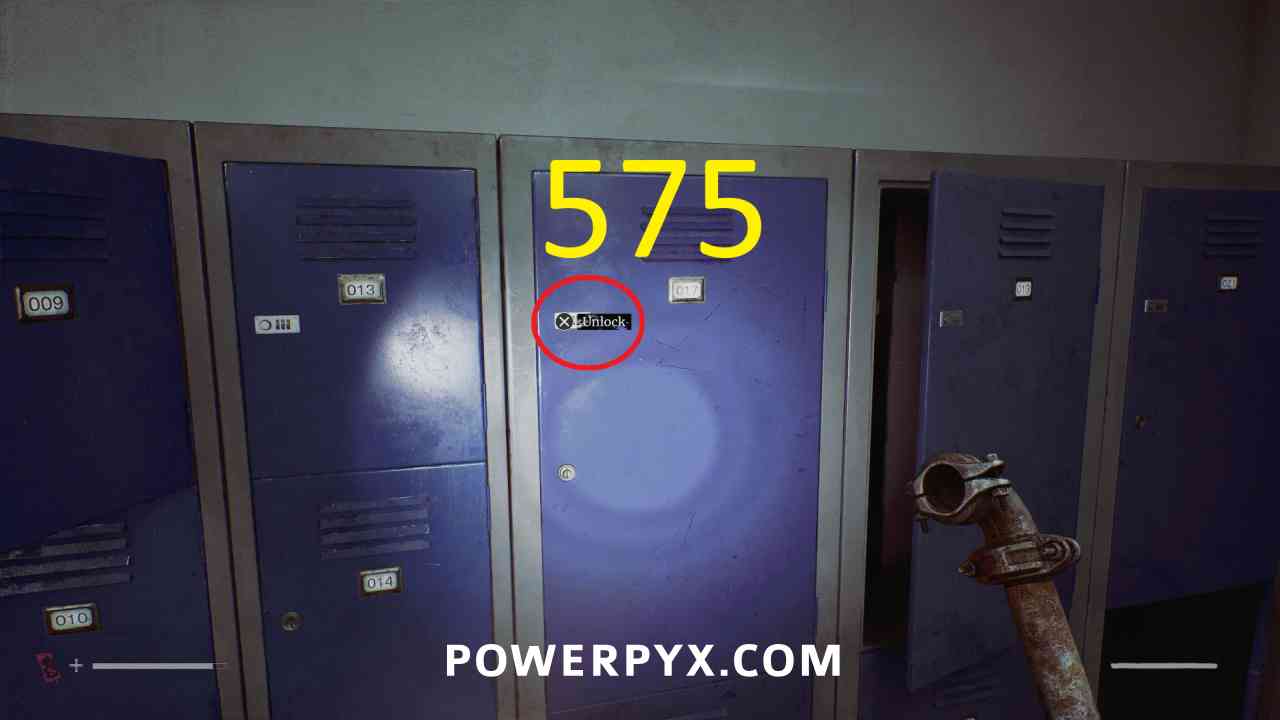
Return to the CEG Employee Lockers building, interact with the barcode scanner and use Barcode (South Brae) to obtain the pin for locker 17 (575). Input this at locker 17 to open it.
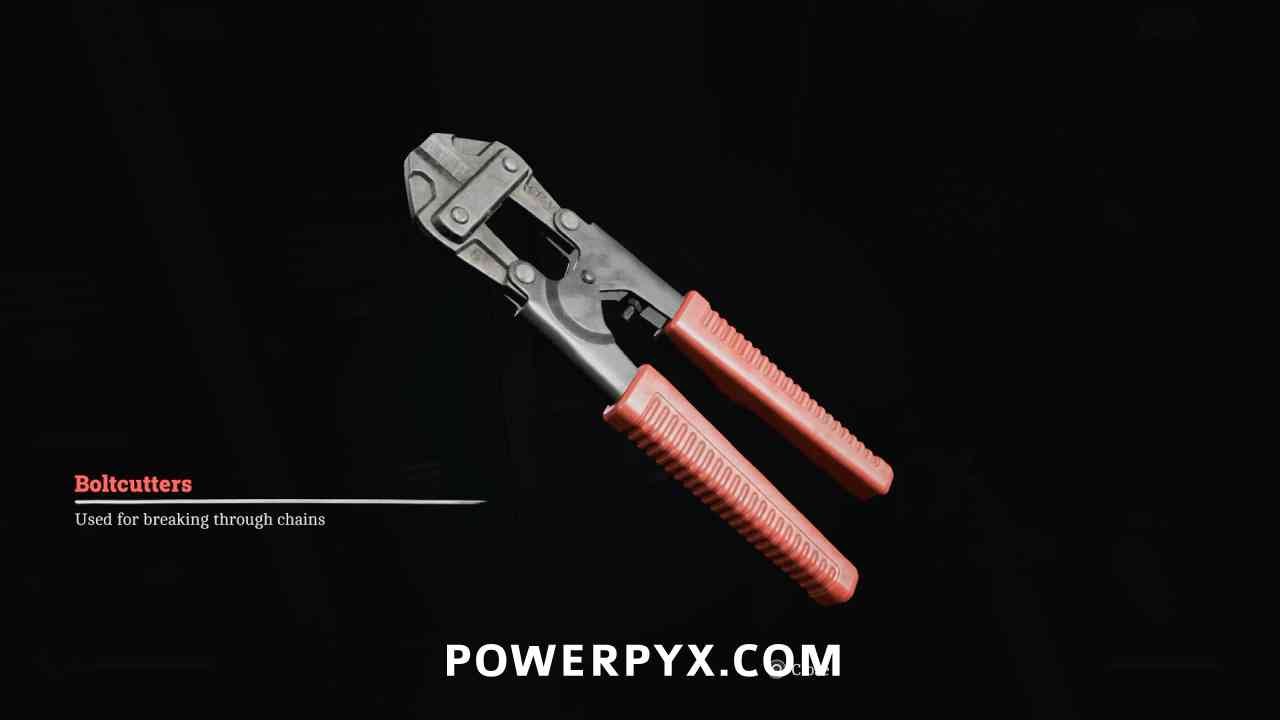
Equipment: Boltcutters
Area: Clara Woods Estate > Ground Level
Inside locker 17.
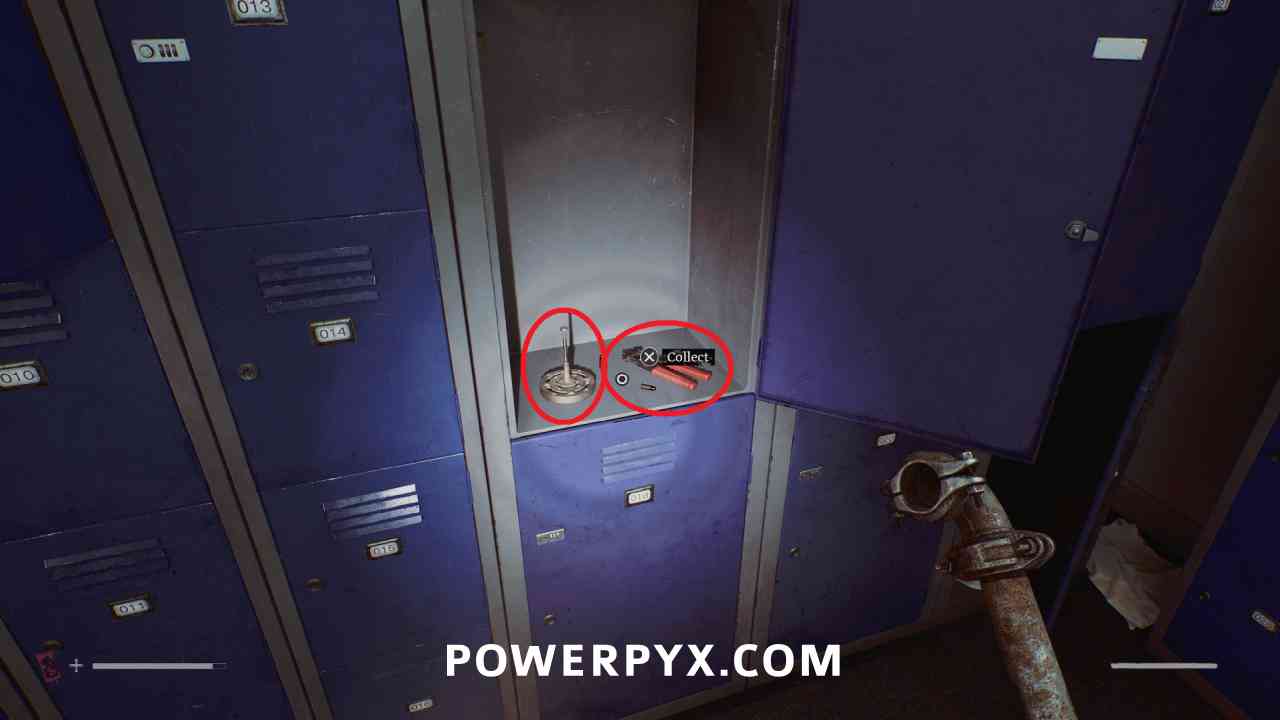
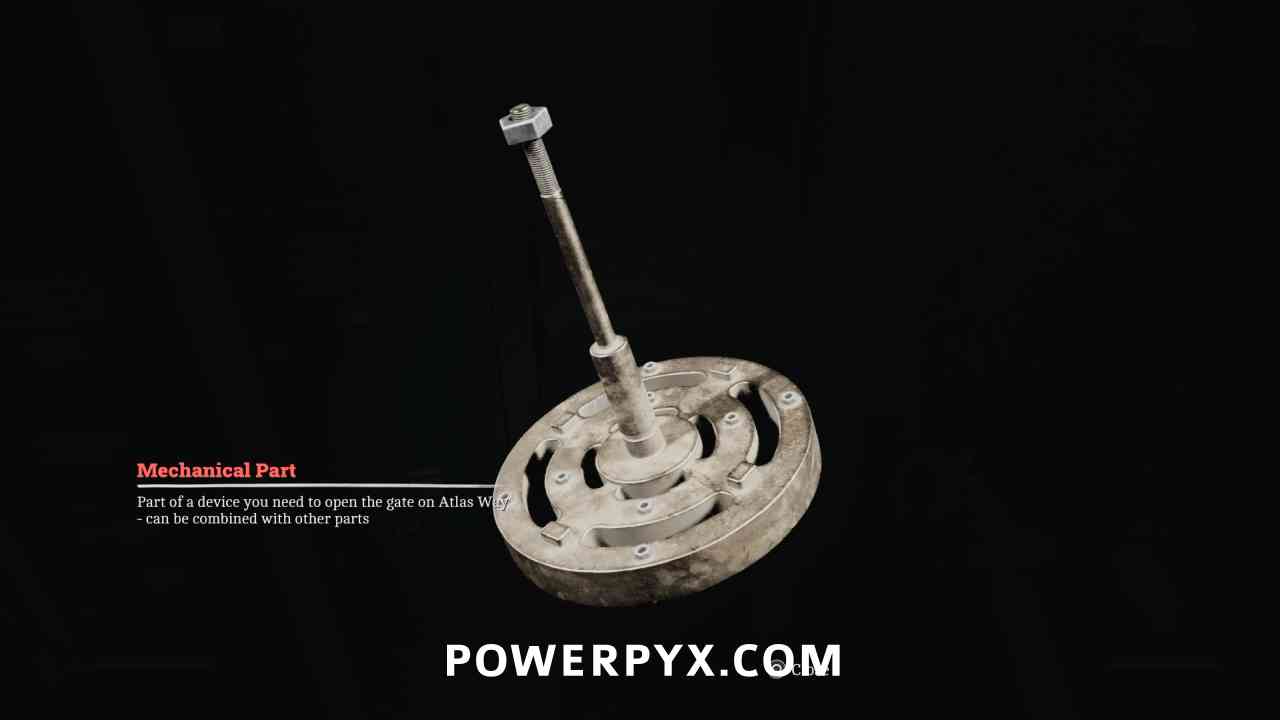
Key Item: Mechanical Part
Area: Clara Woods Estate > Ground Level
Inside locker 17.
Clara Woods Estate > Upper Level
Locked Door
Area: Clara Woods Estate > Upper Level
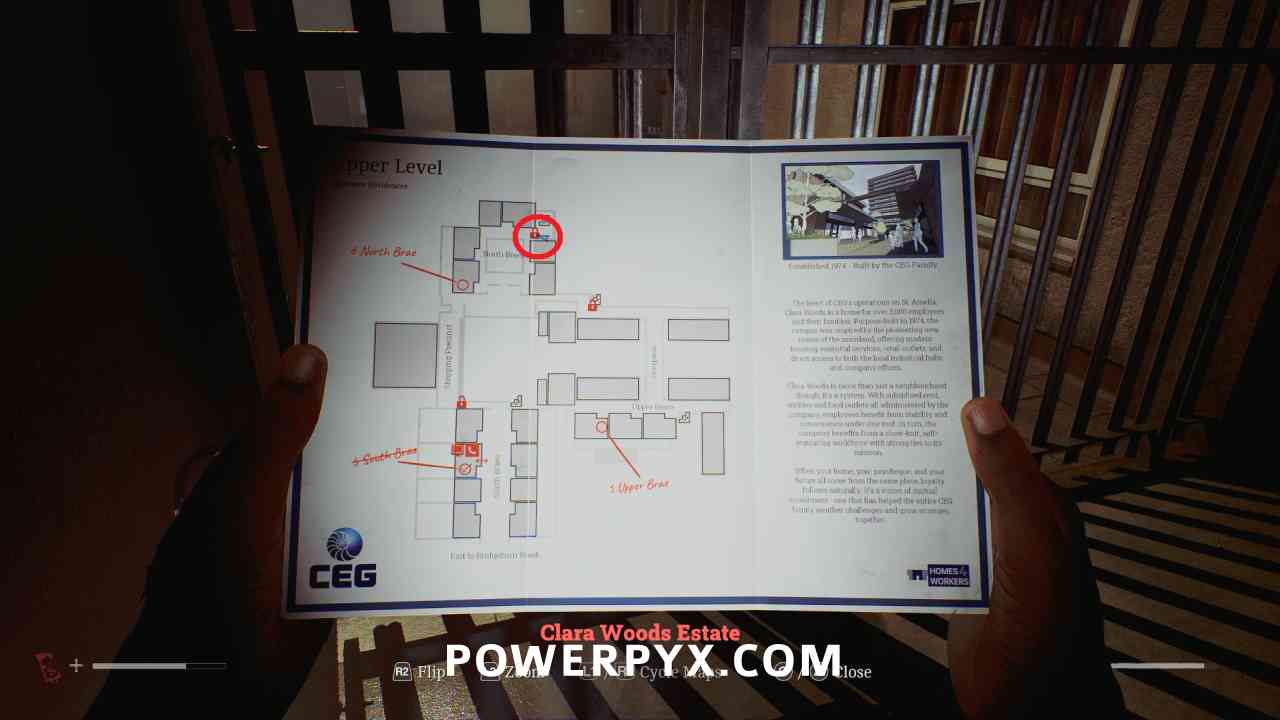
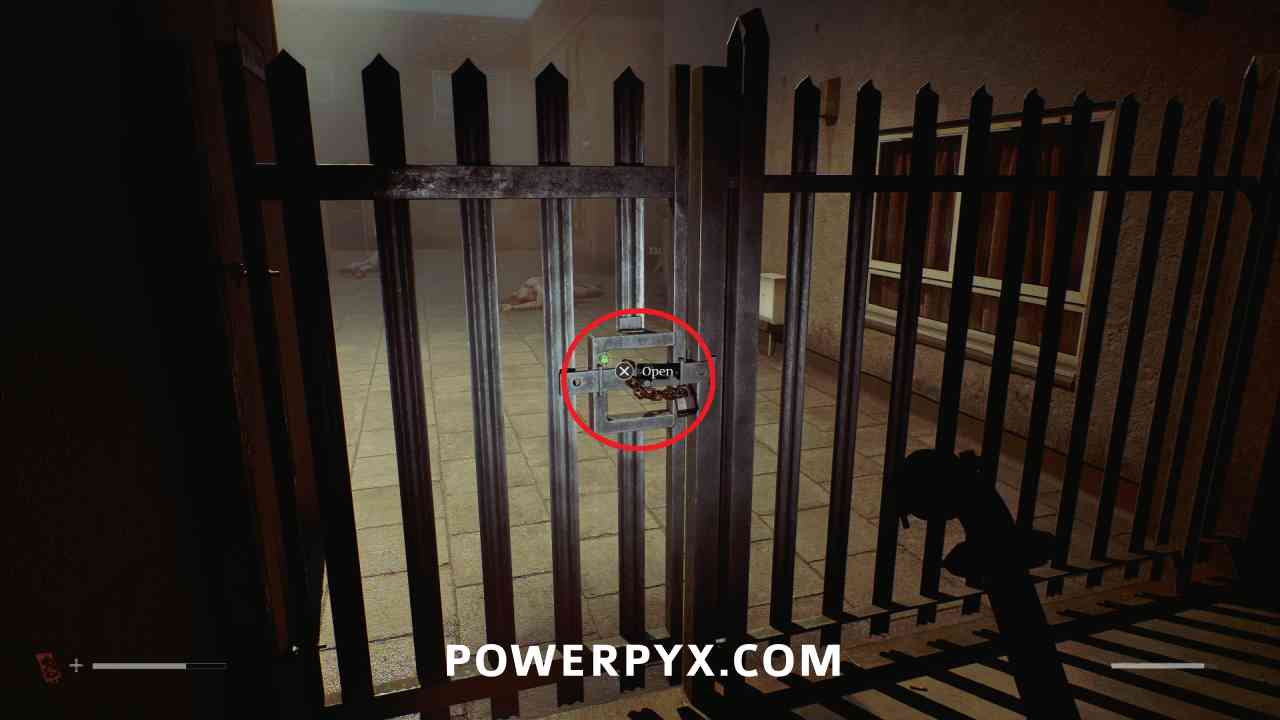
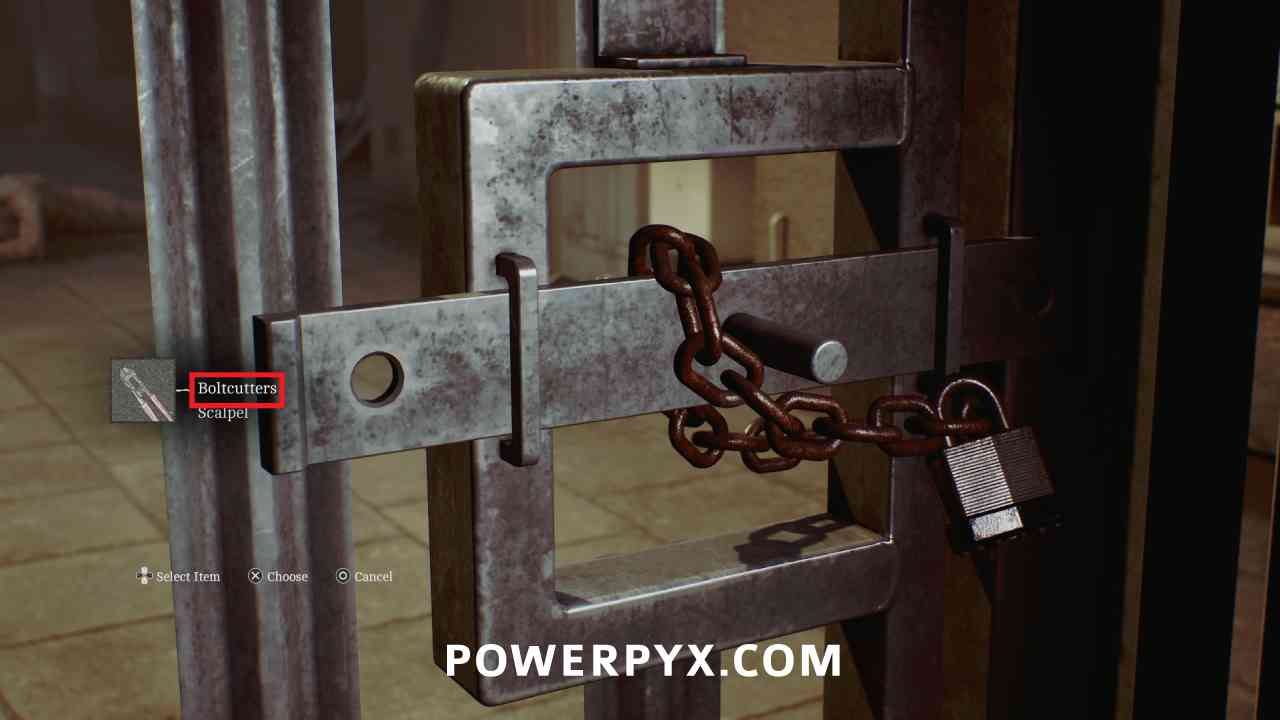
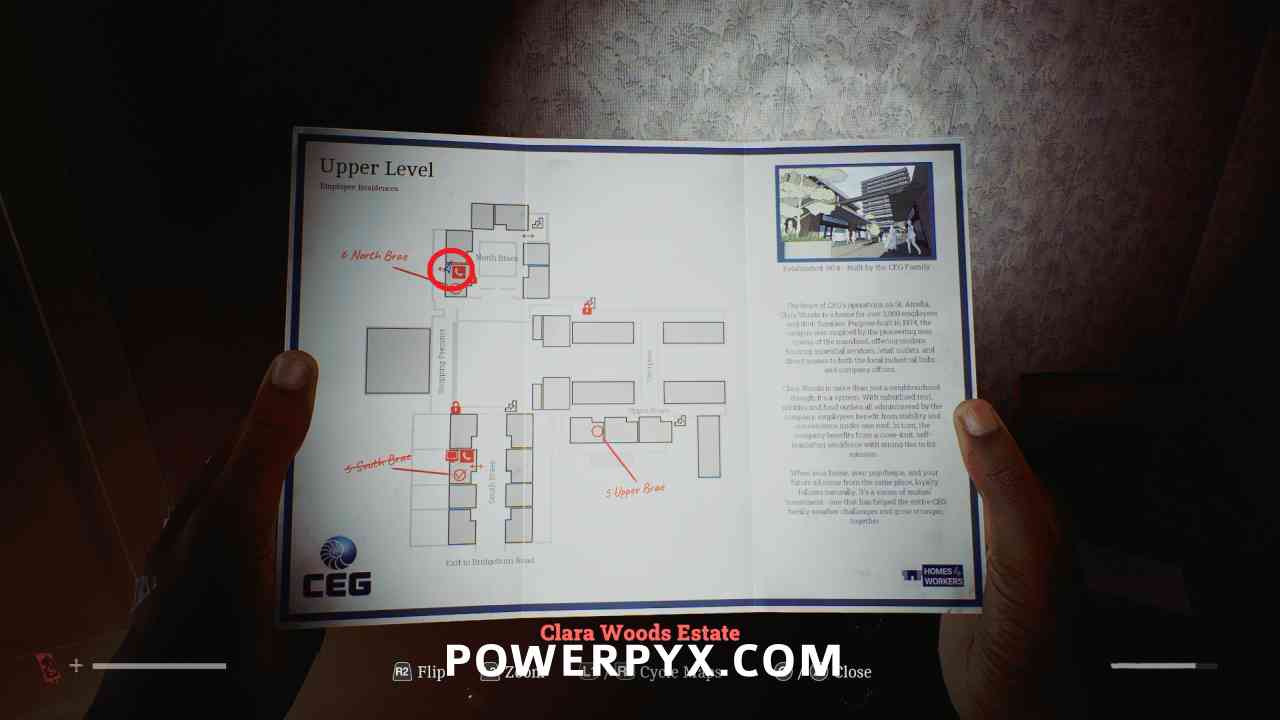
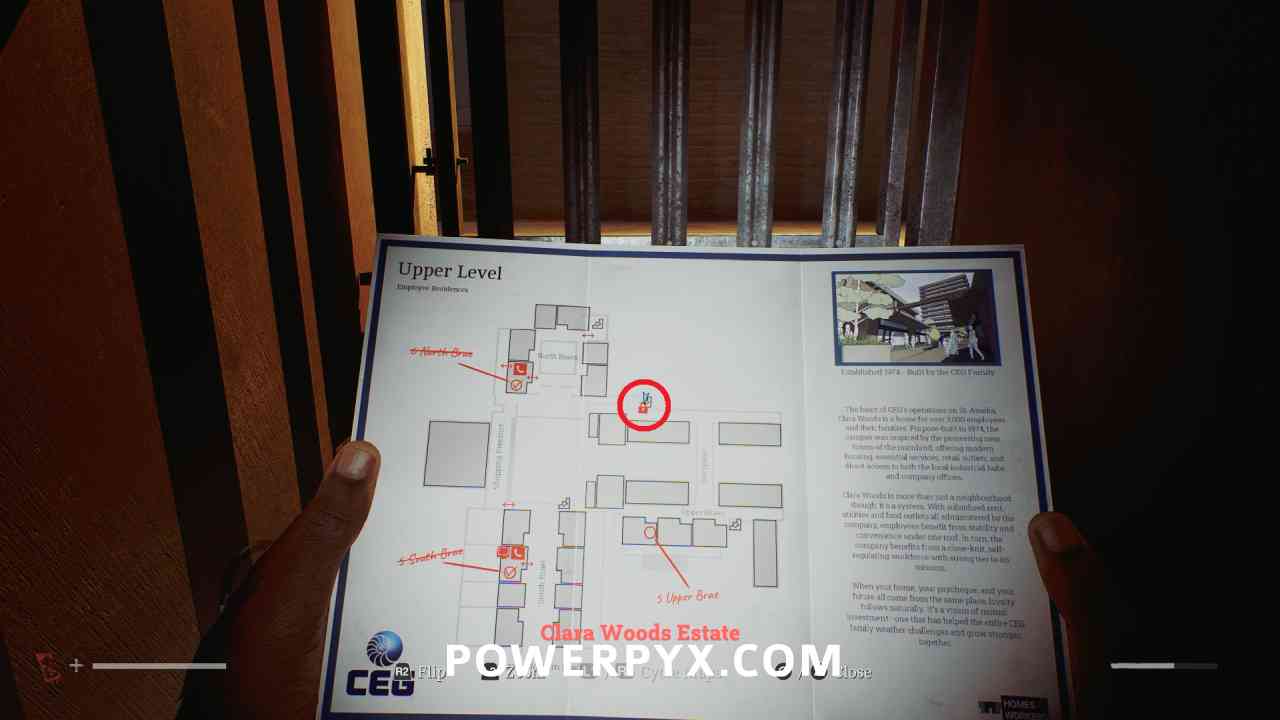
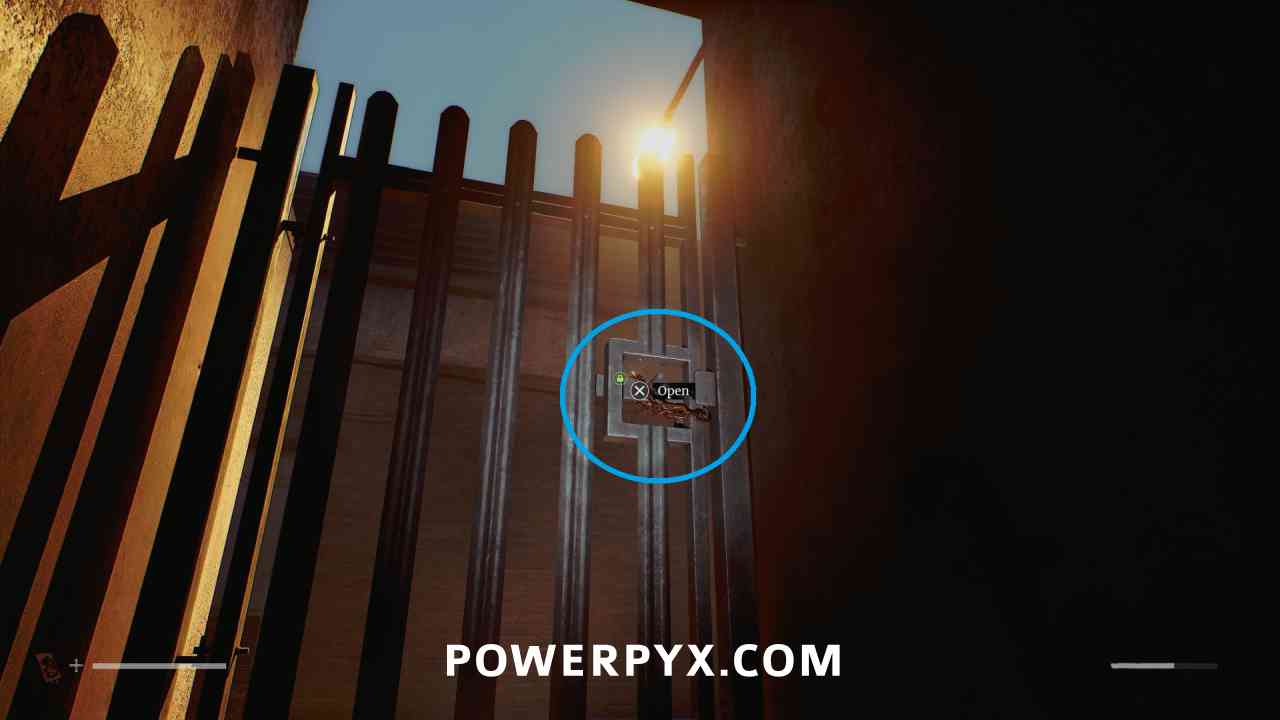
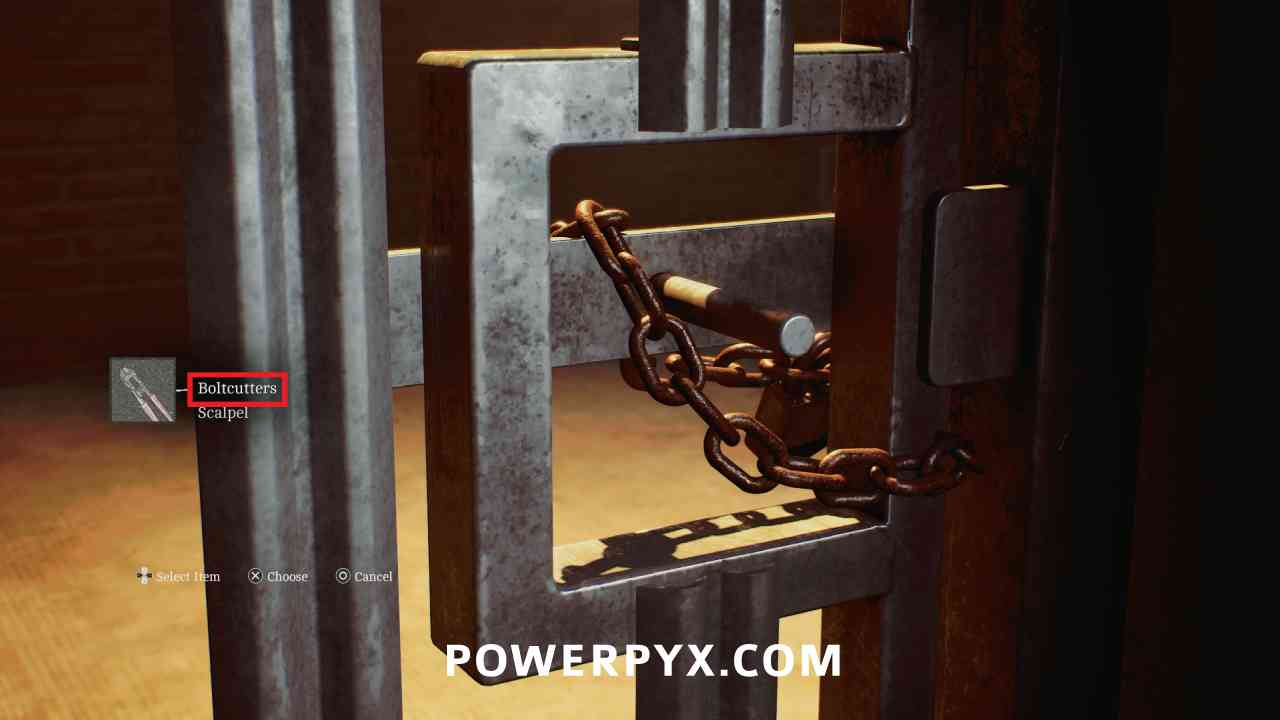
Go to the northeast corner of the area where the locker building is an up the stairs, at the top use the Boltcutters to cut open the gate.
Clue: Lamenting Poem
Area: Clara Woods Estate > Upper Level
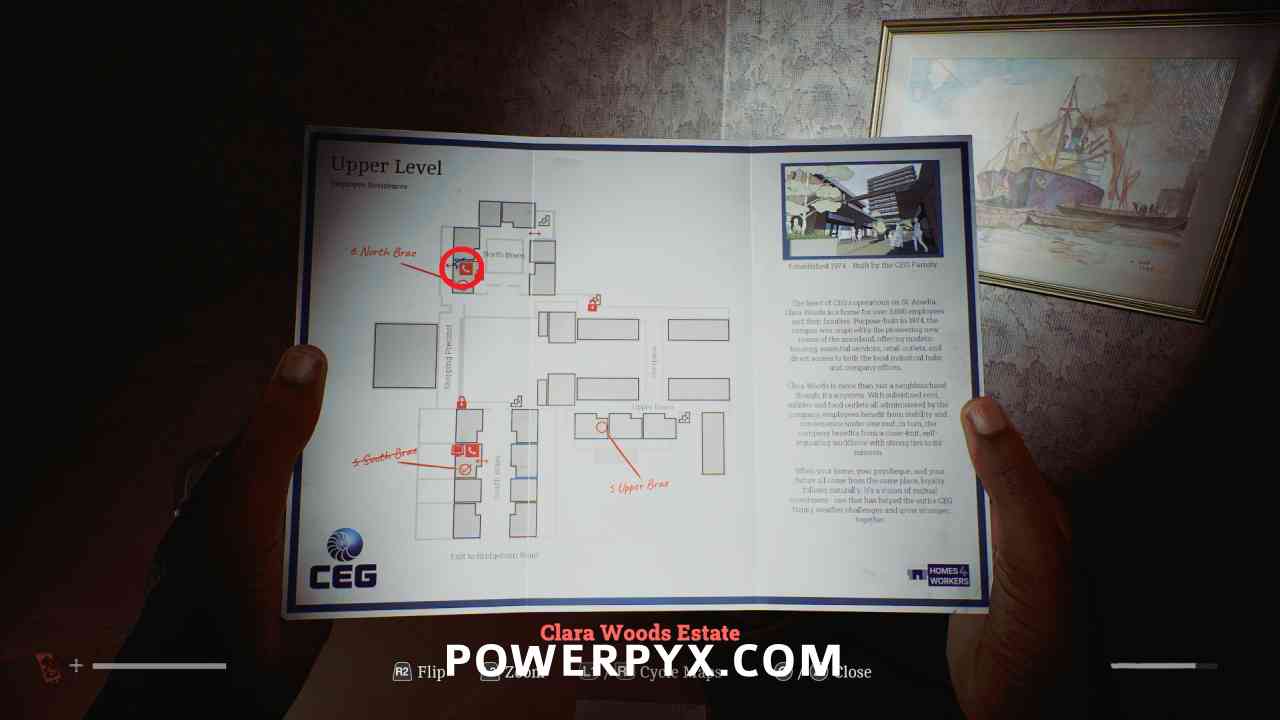
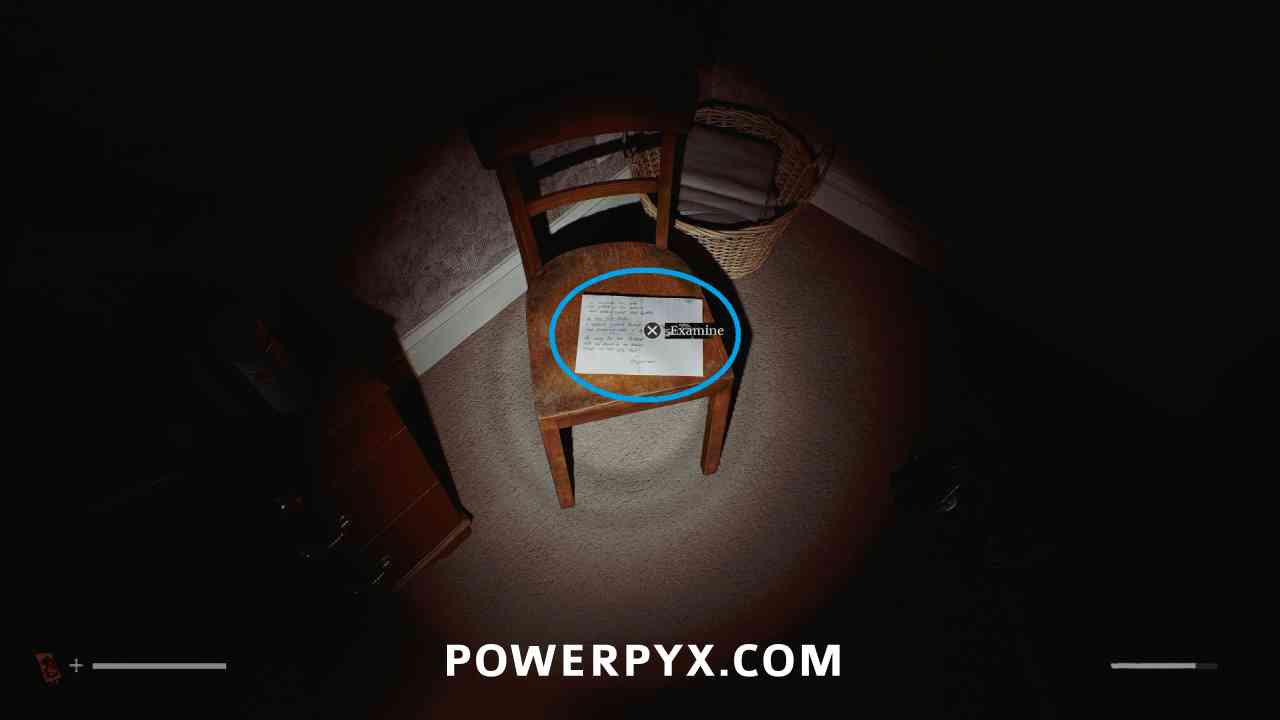
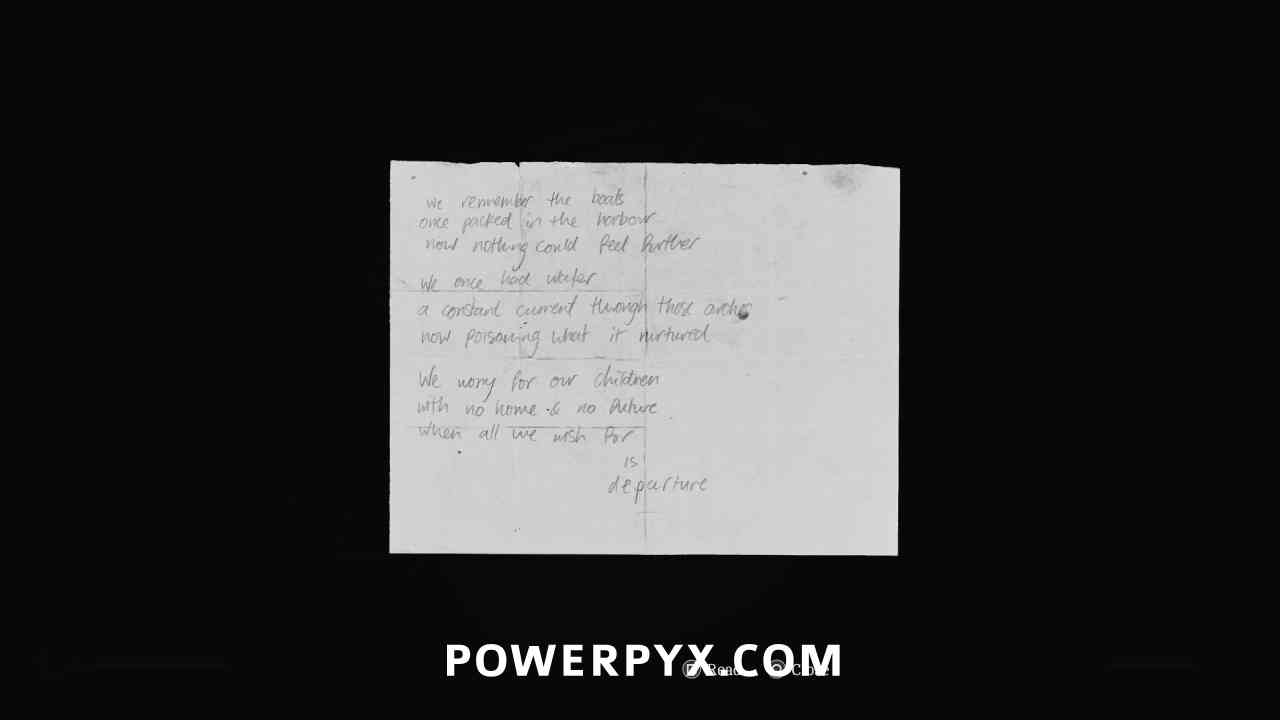
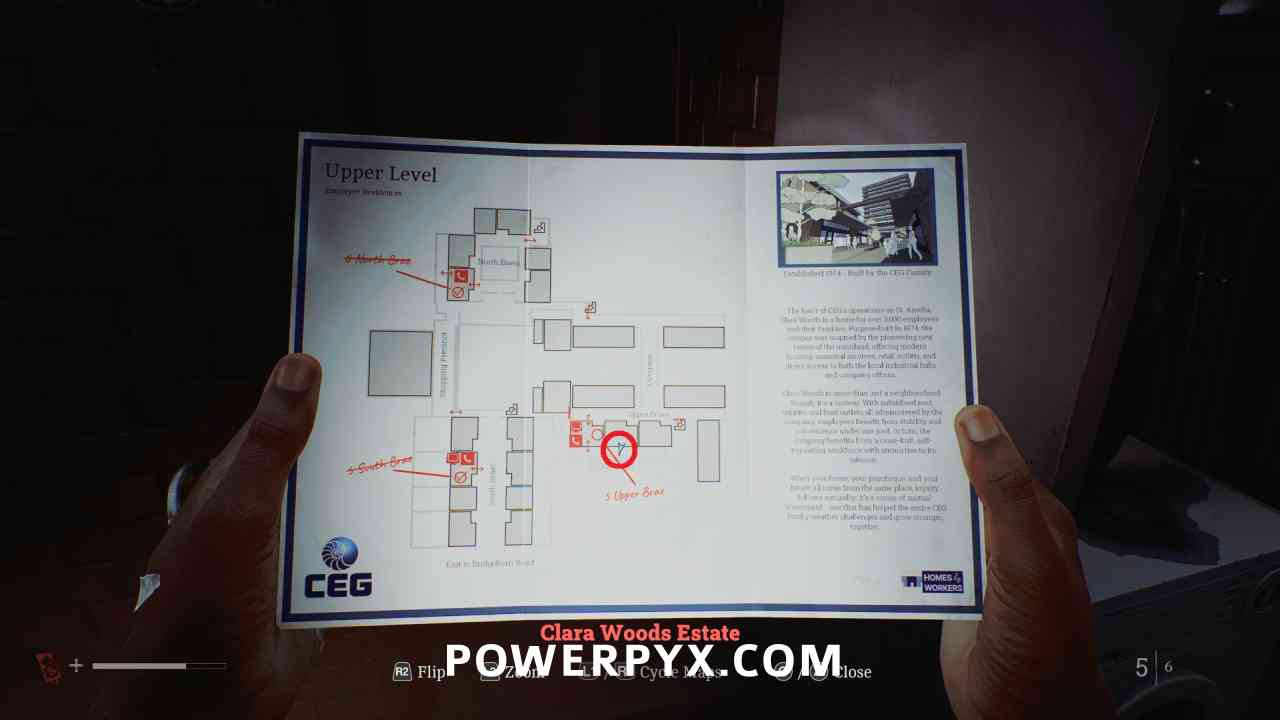
Enter 6 North Brae through the back door, then go upstairs to and in the second bedroom where this is on a chair.
Puzzle #22
Area: Clara Woods Estate > Upper Level
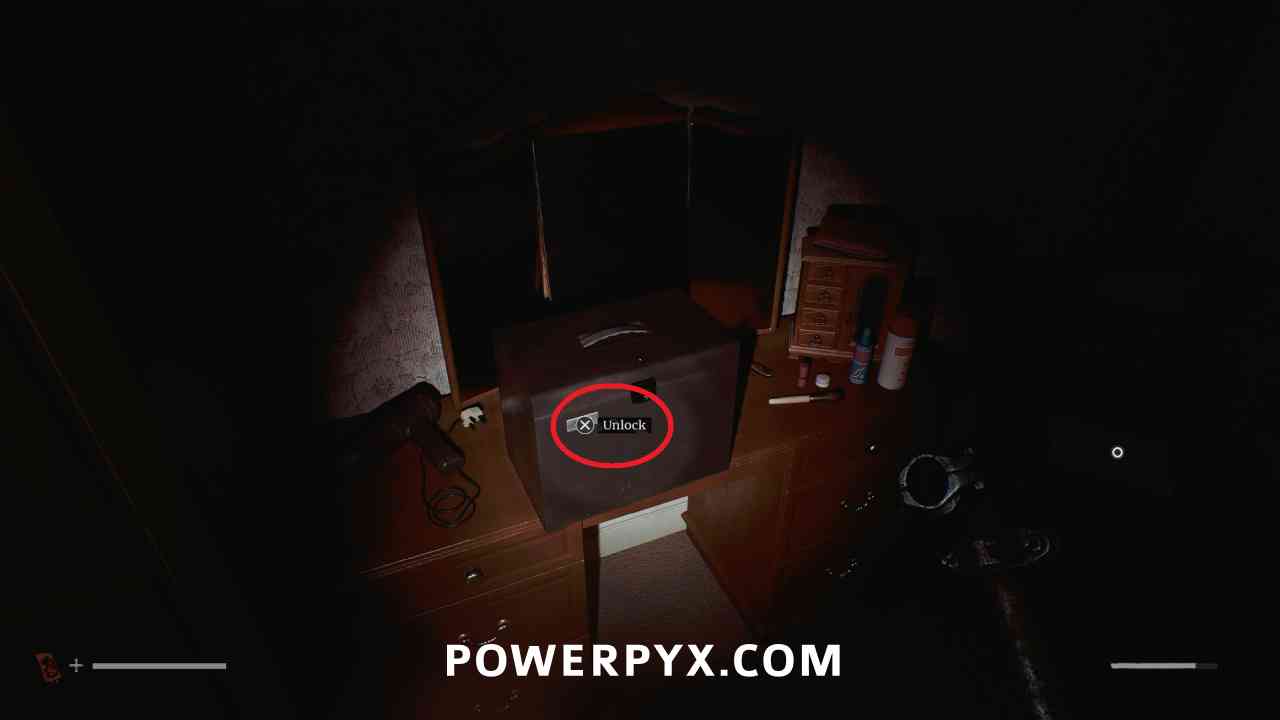
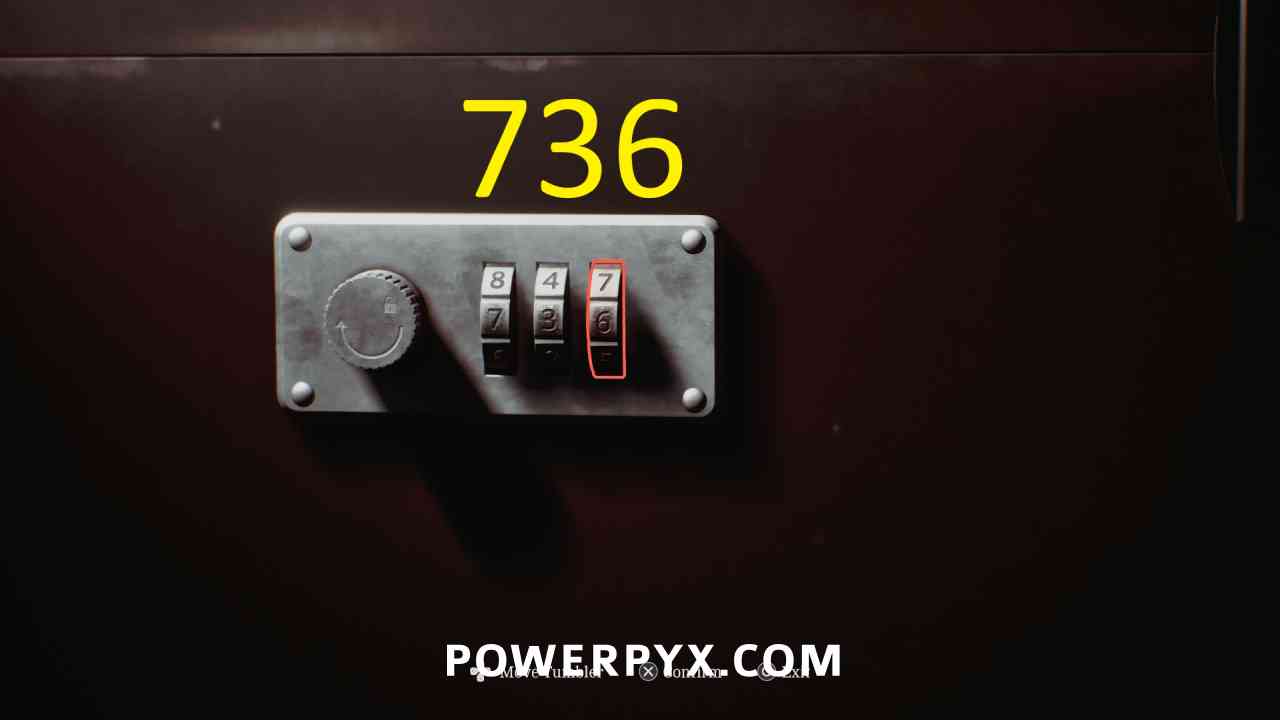
Interact with the safe on the table, and enter 736 (the number hinted at by the note, corresponding to the number of each item in the paintings around the house).
Key Item: Barcode (North Brae) – Locker 204
Area: Clara Woods Estate > Upper Level
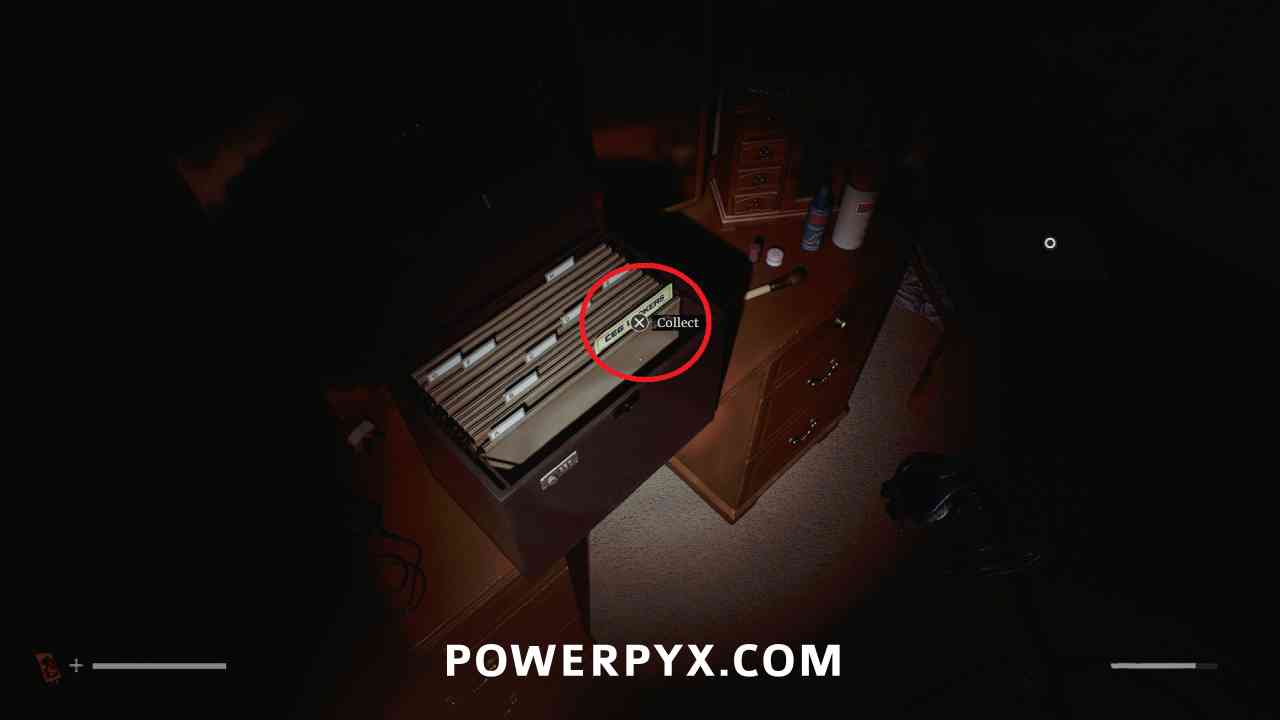
Pick this up from the opened safe container.
Locked Door
Area: Clara Woods Estate > Upper Level
At the top of the stairs in CEG Staff Parking (Ground Level) you can use the Boltcutters to open a gate leading to the Overpass area.
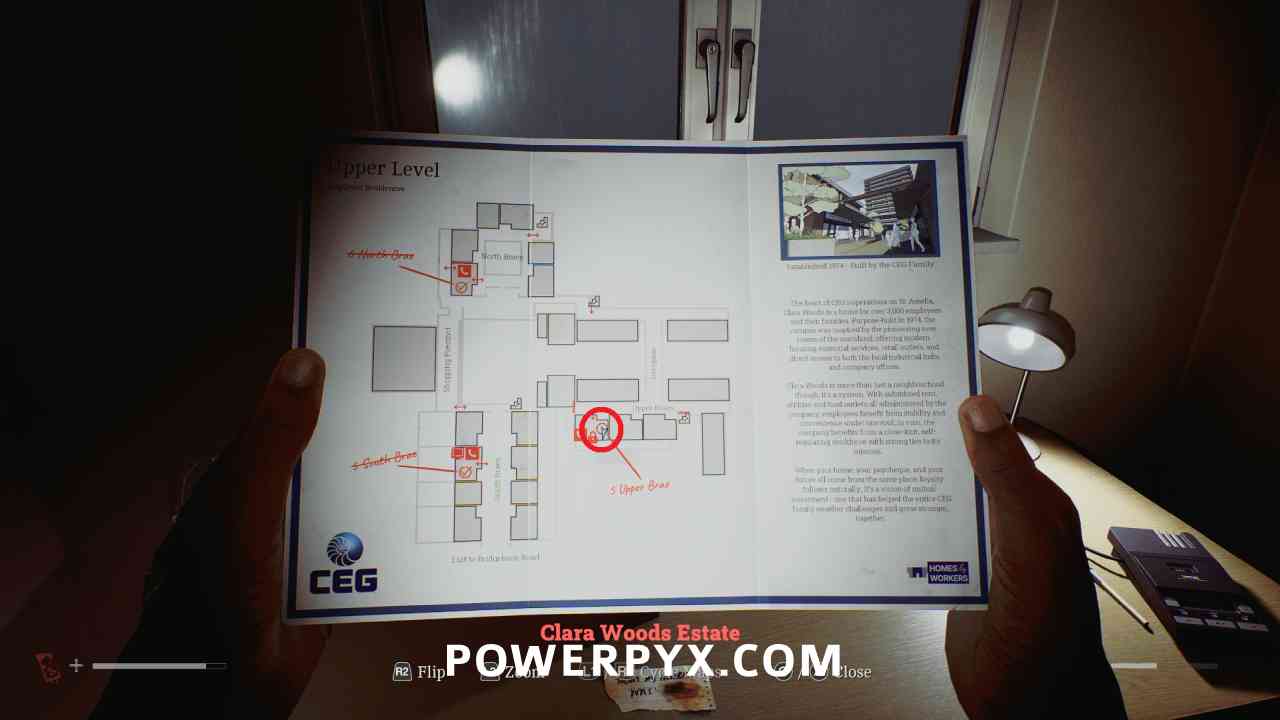
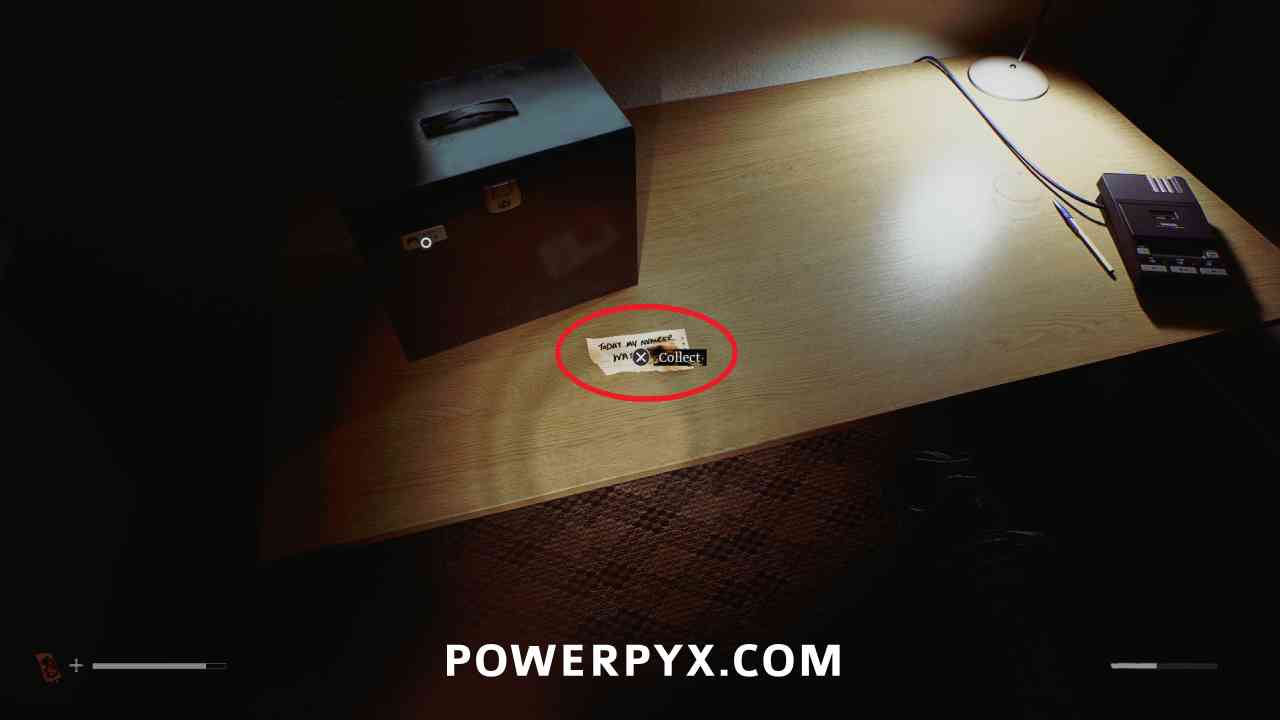
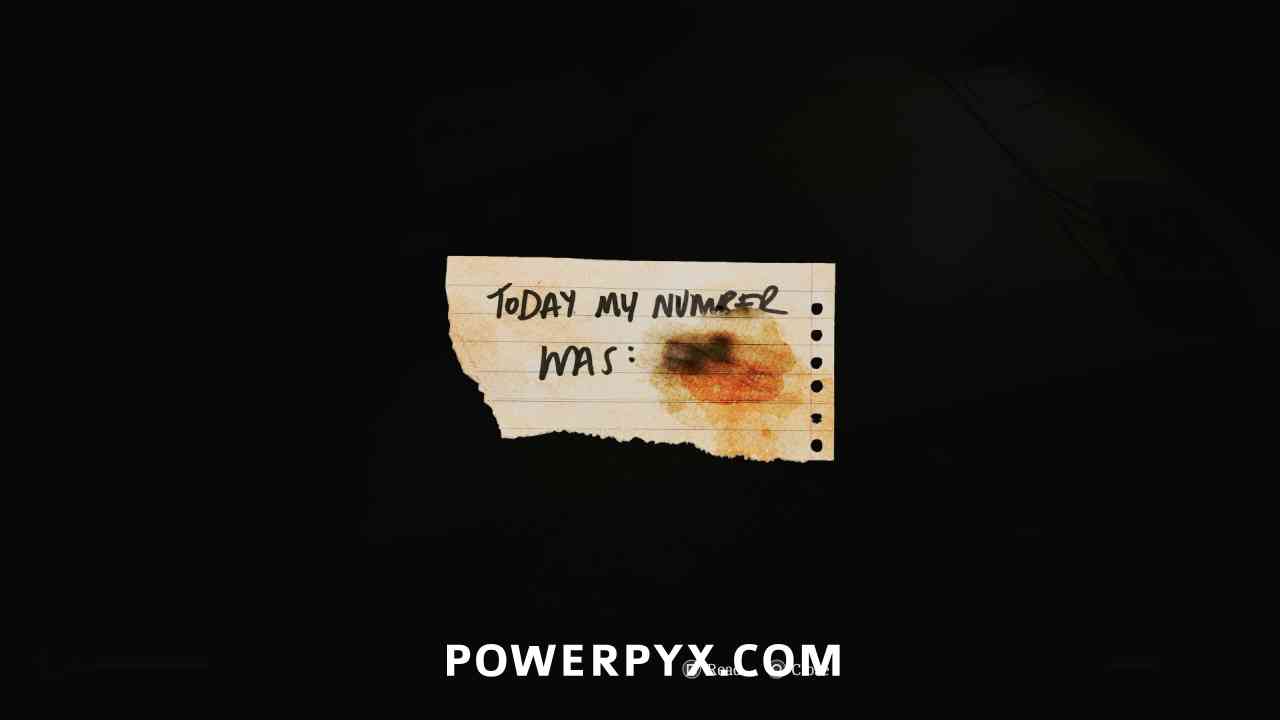
Clue: The Code Today
Area: Clara Woods Estate > Upper Level
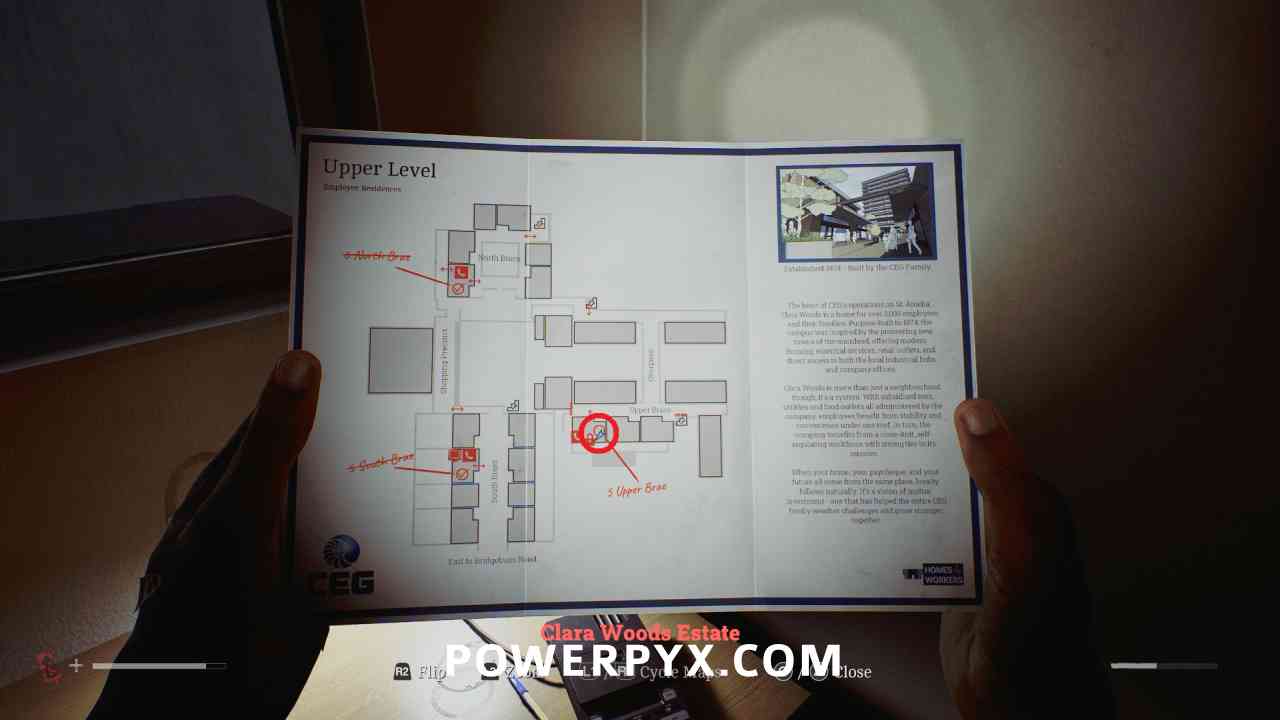
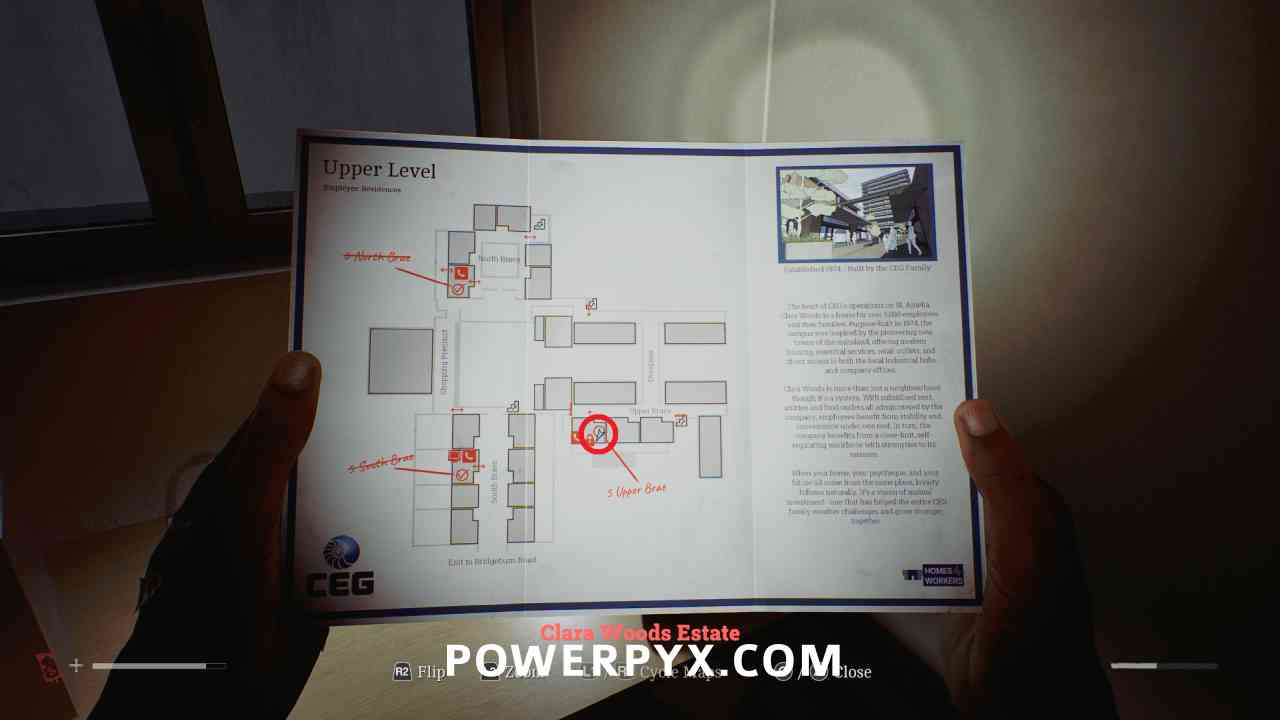
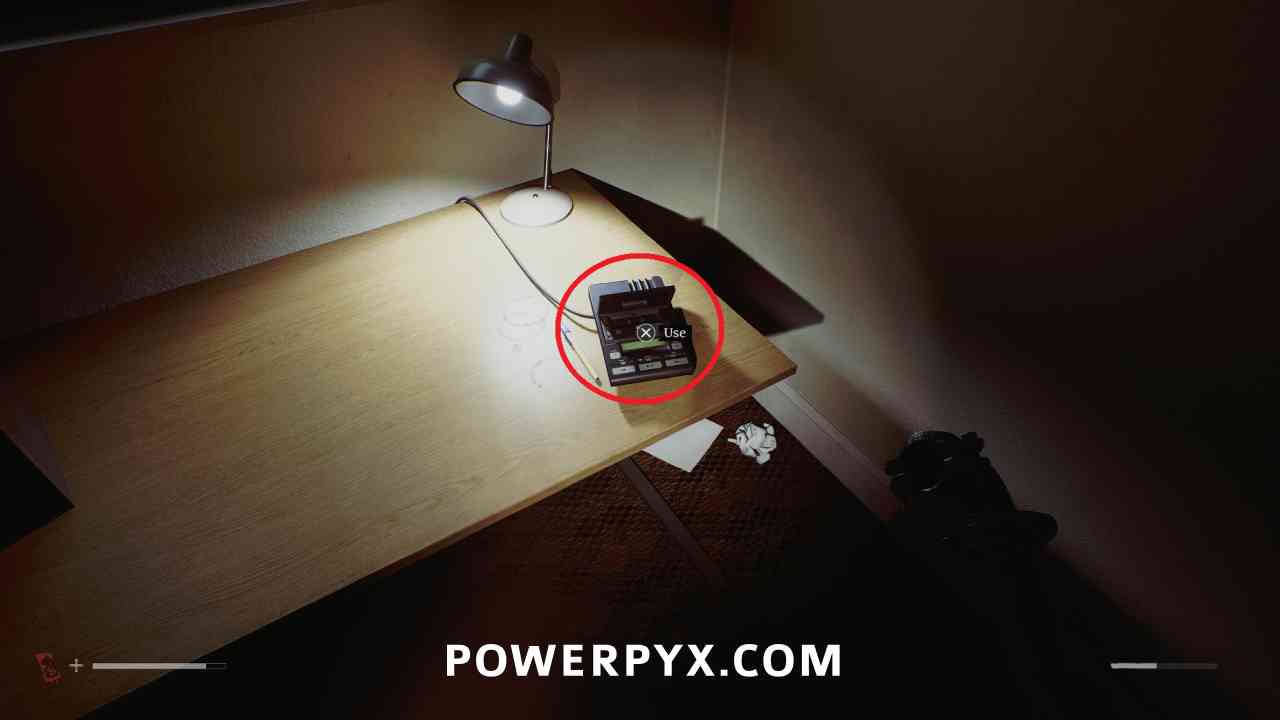
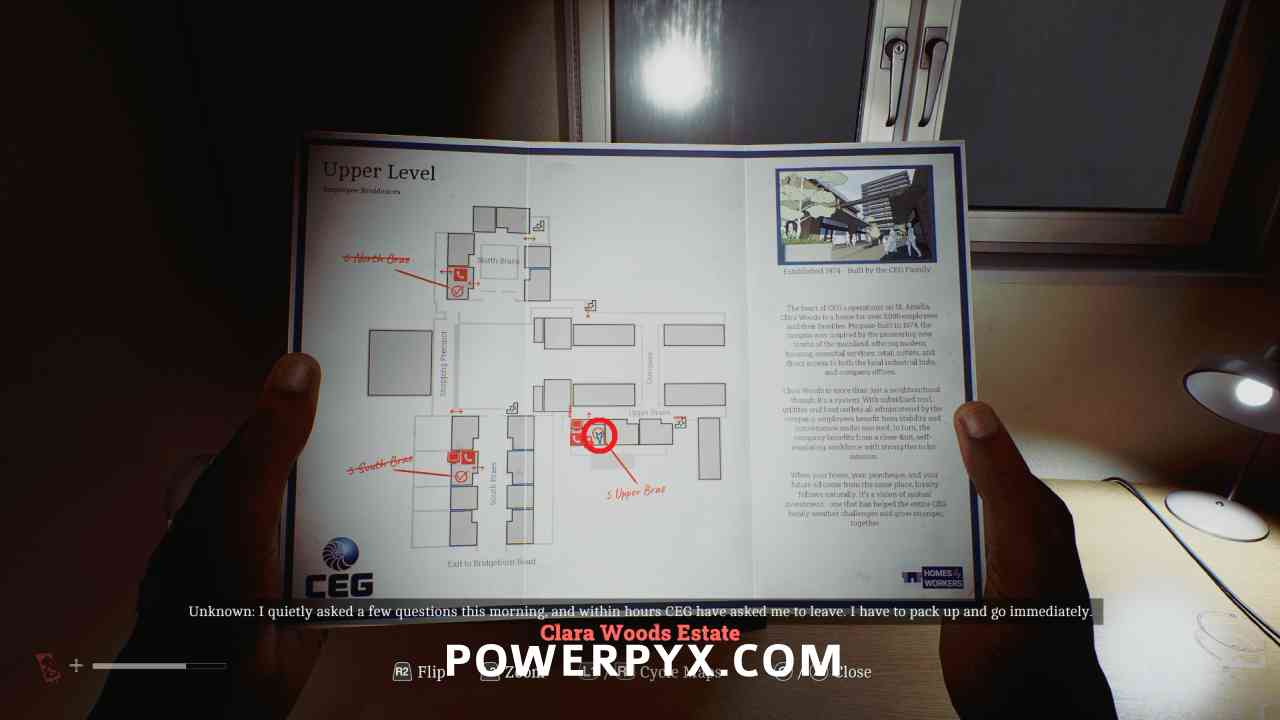
Enter 5 Upper Brae and go upstairs, in the first room on the left you can pick this up from the table.
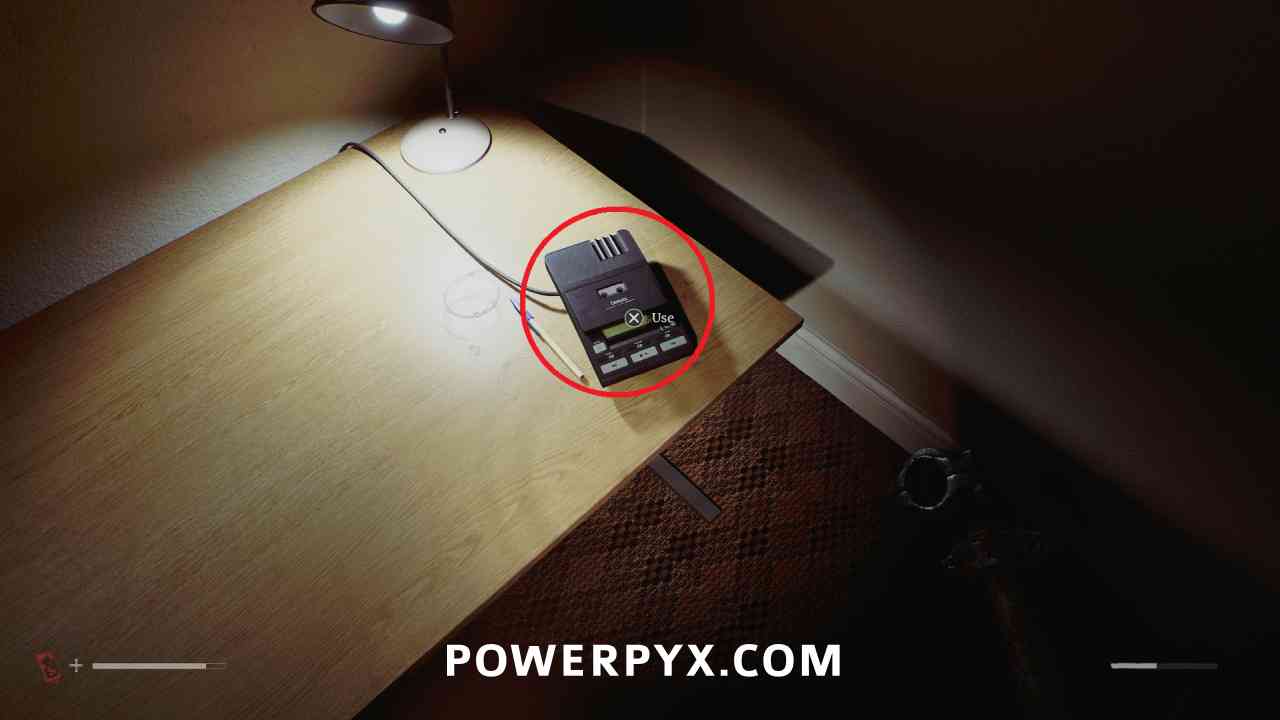
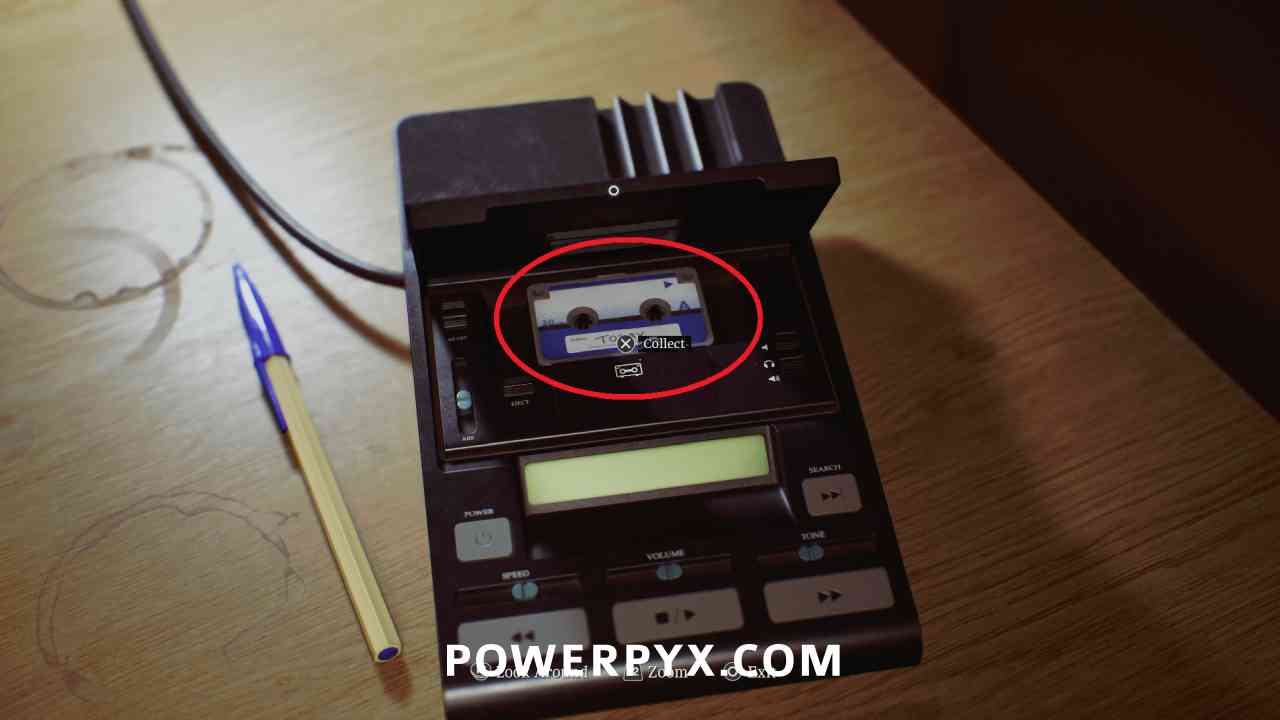
Key Item: Tape: Today
Area: Clara Woods Estate > Upper Level
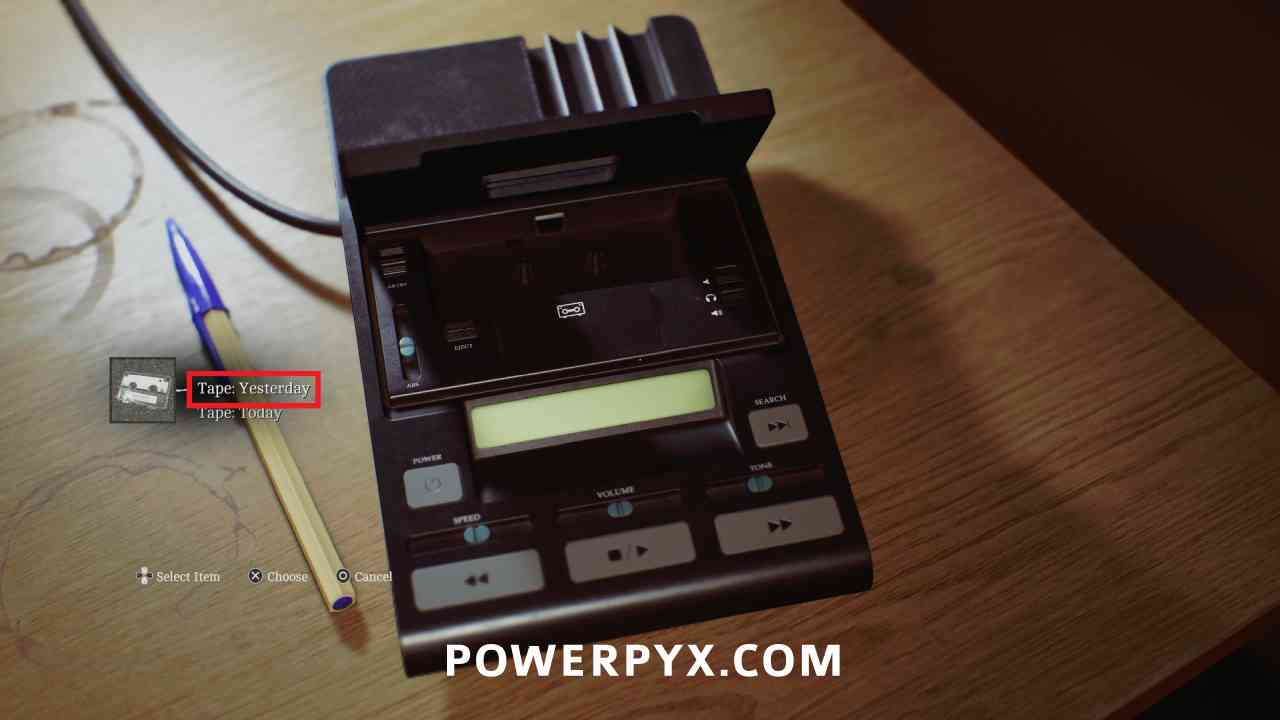
On the same table, interact with the tape player, play the tape, then interact with the middle to open it and remove the tape.
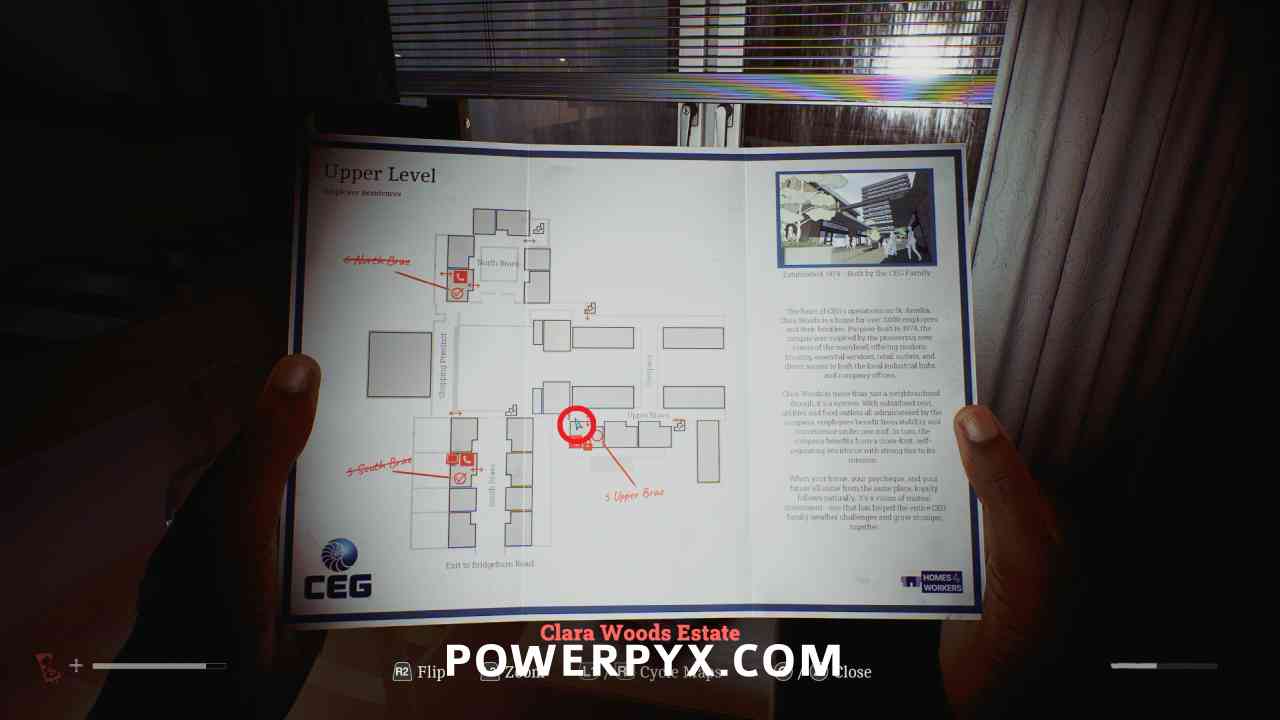
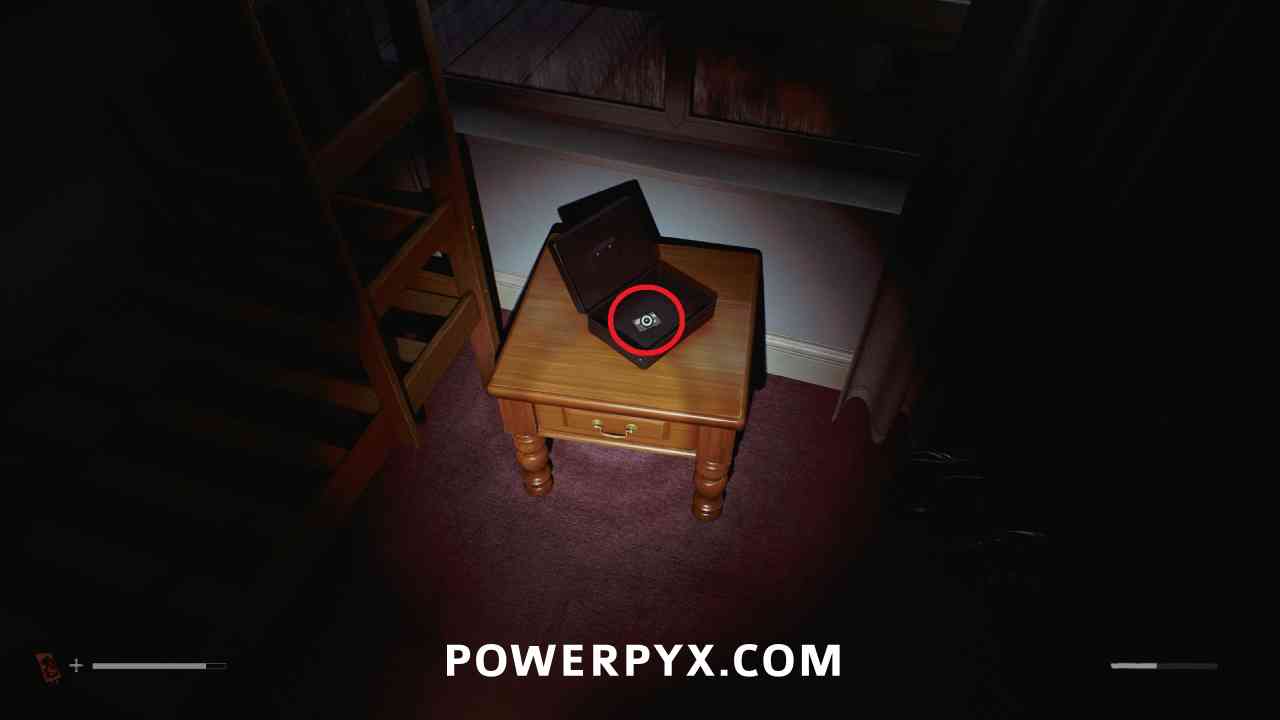
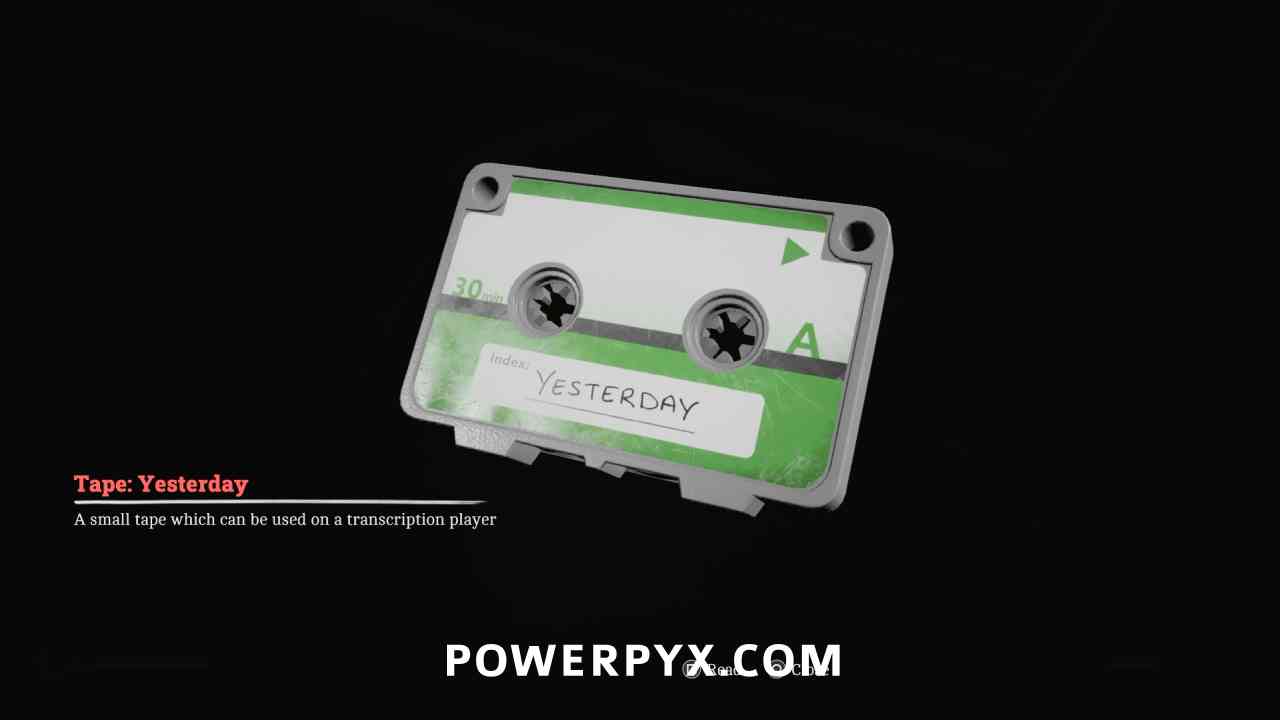
Key Item: Tape: Yesterday
Area: Clara Woods Estate > Upper Level
Go into the bedroom at the end of the hallway upstairs, open the black container and pick up this tape.
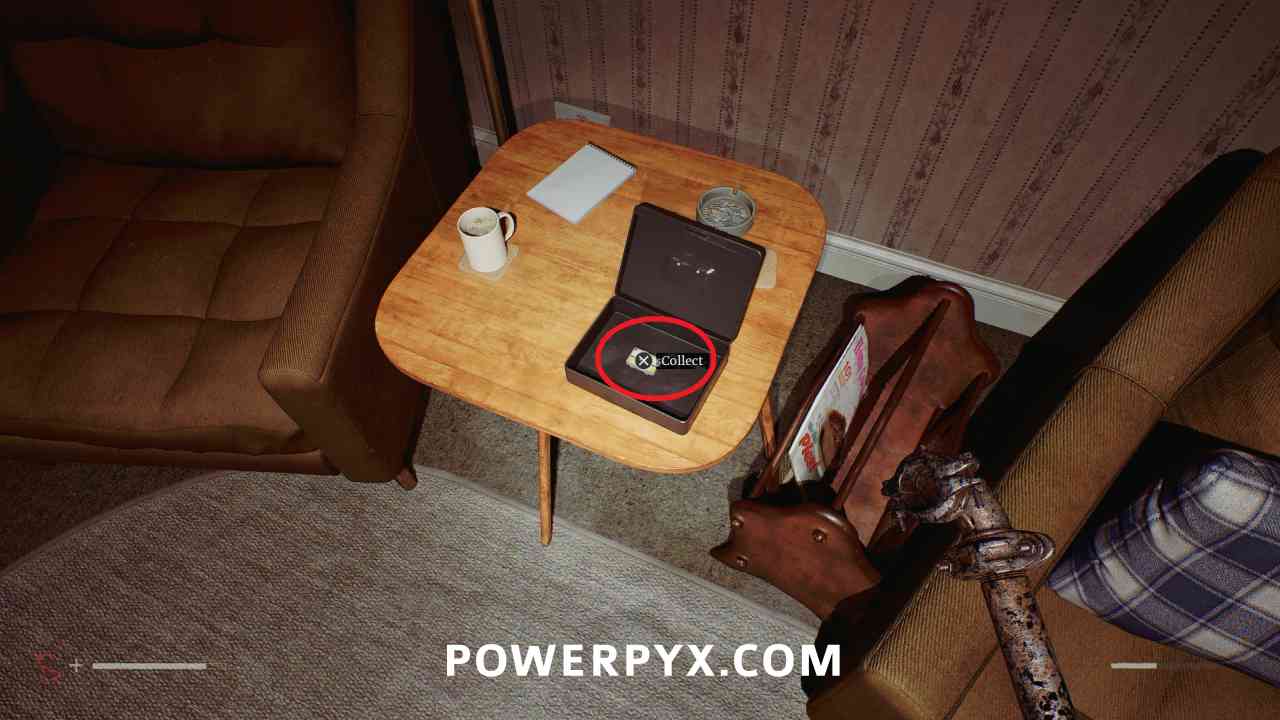
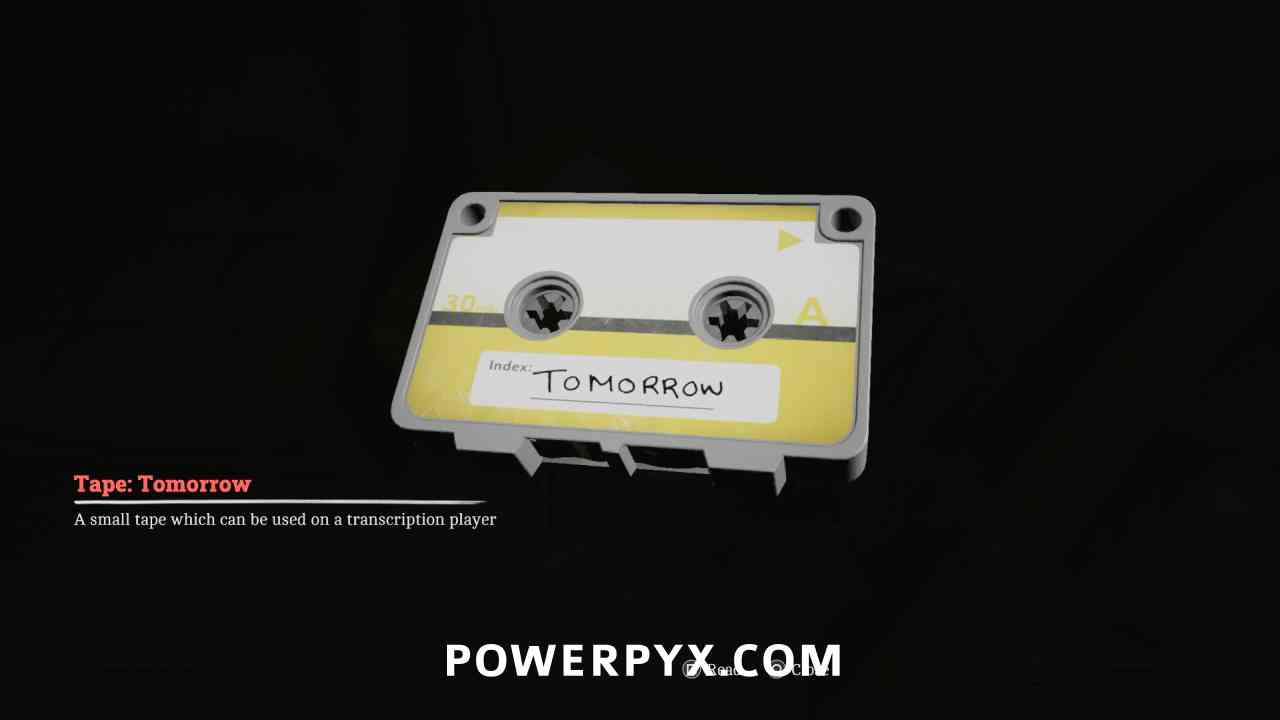
Key Item: Tape: Tomorrow
Area: Clara Woods Estate > Upper Level
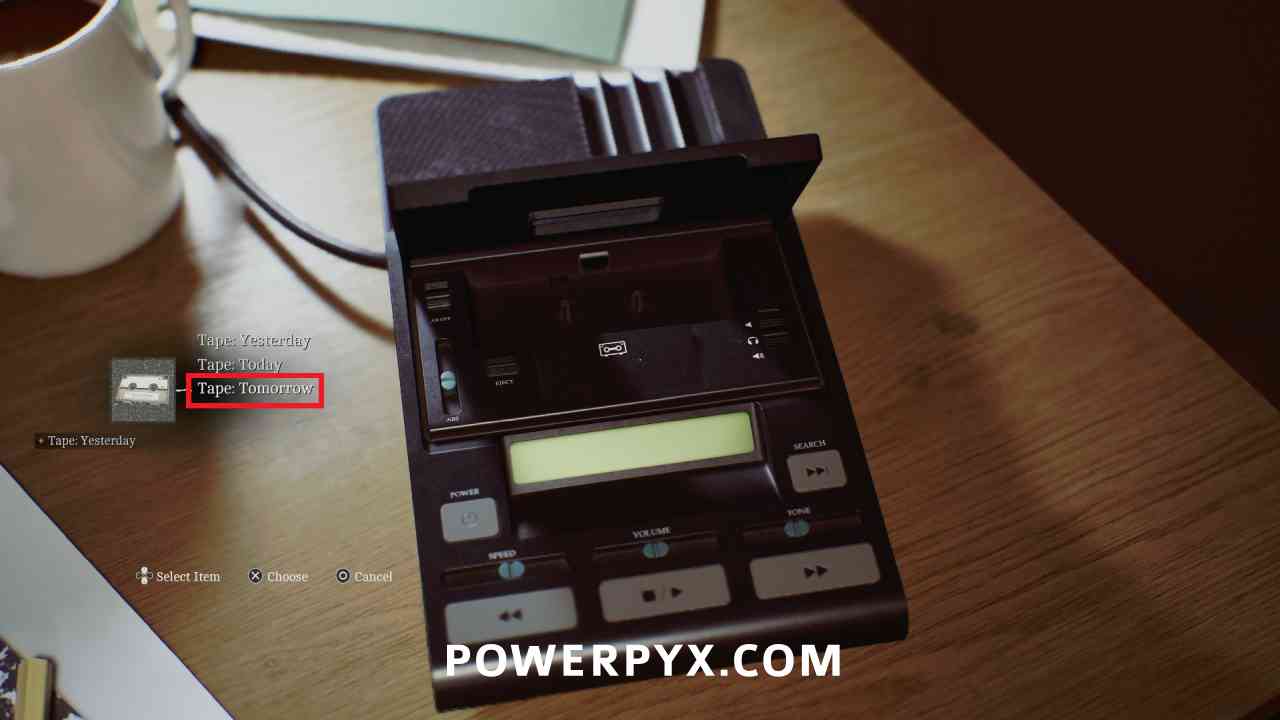
Go back to the room with the tape player and insert Tape: Yesterday. This changes time back to the day before in the house. Go downstairs to the living room and open the black box to obtain Tape: Tomorrow.
Clue: The Code Before
Area: Clara Woods Estate > Upper Level
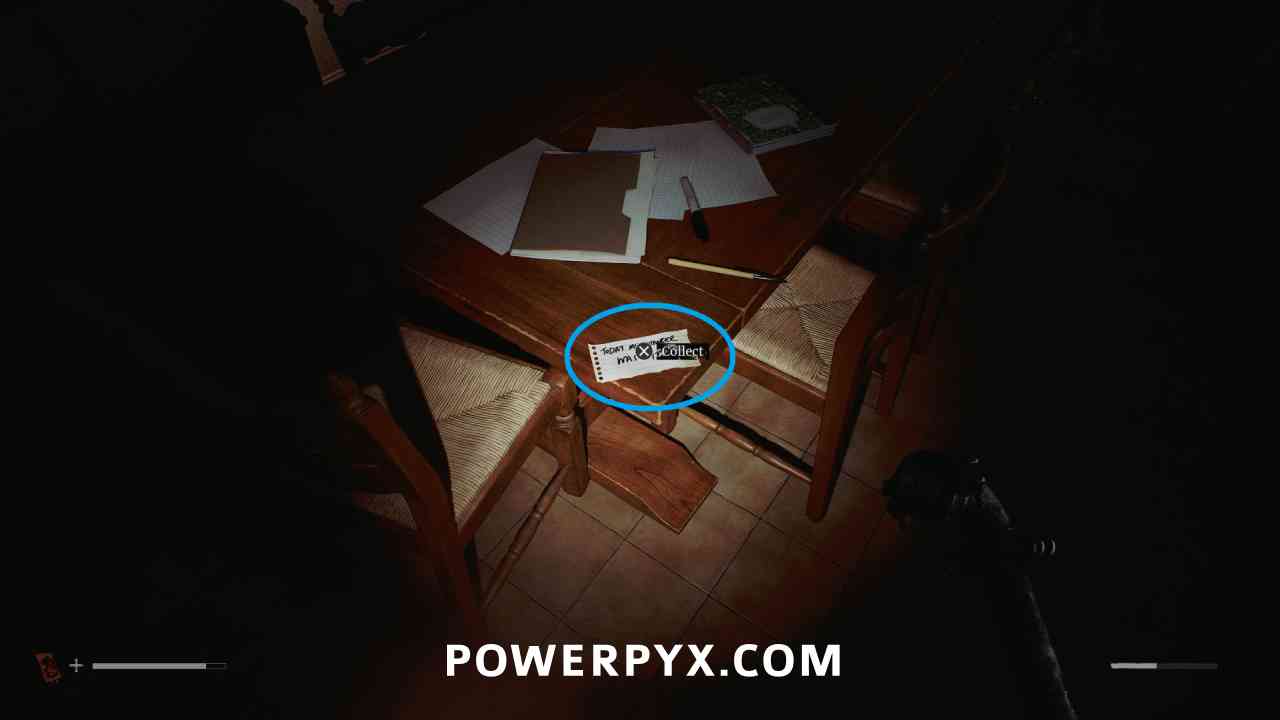
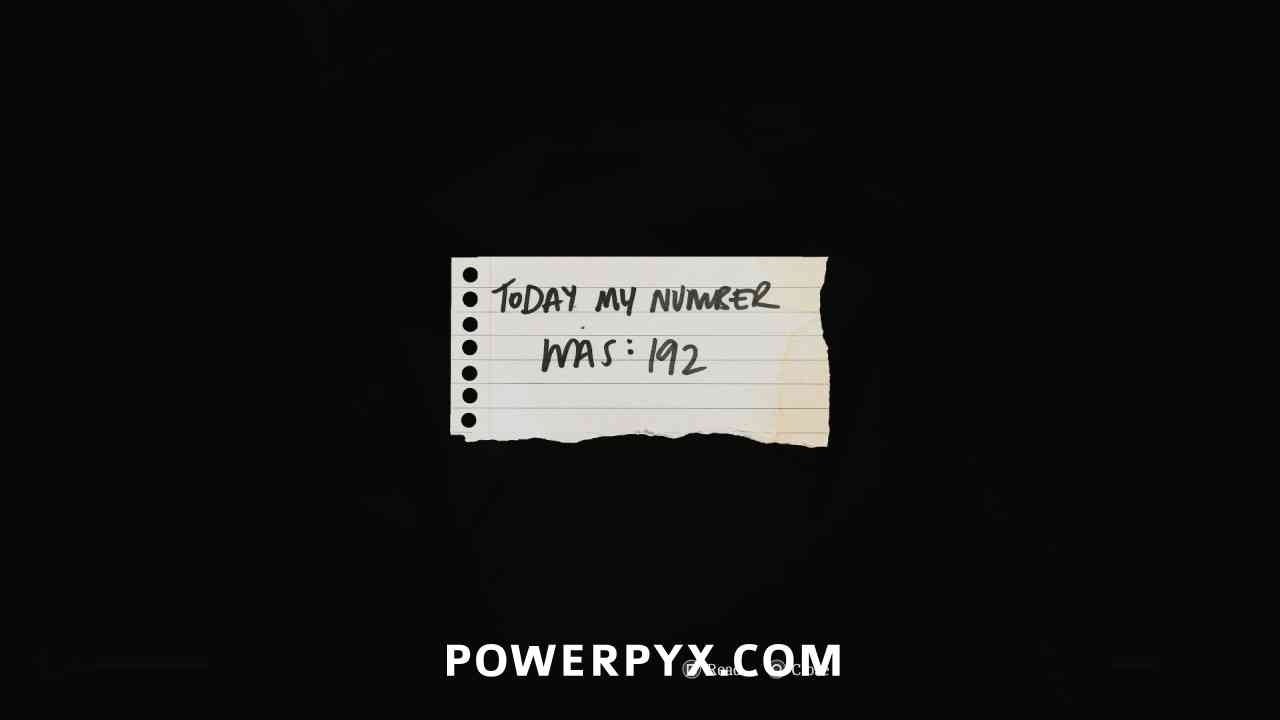
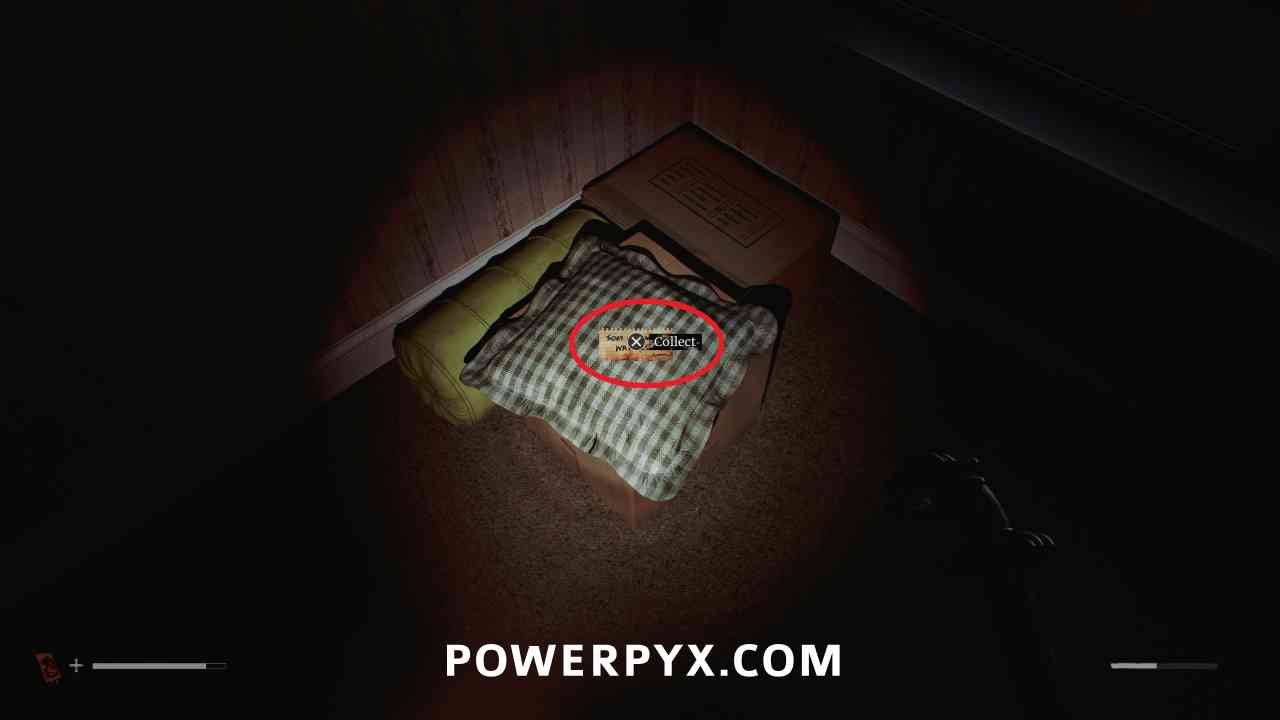
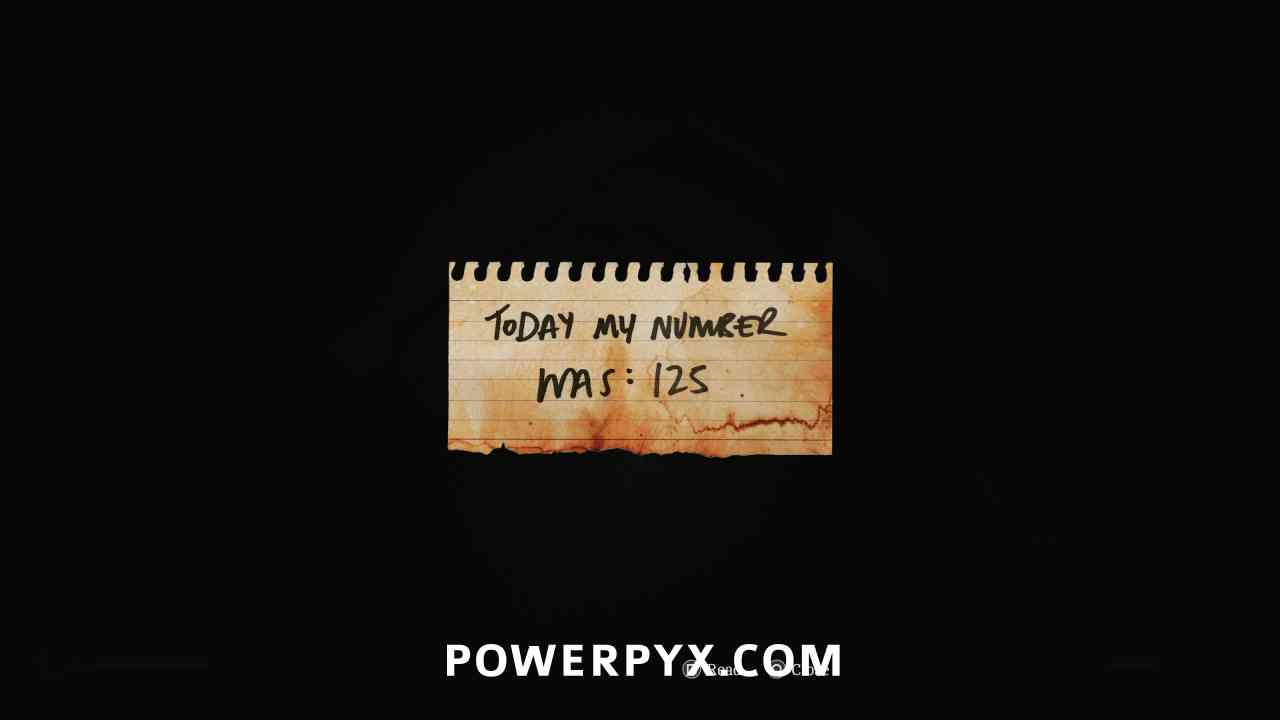
Go into the kitchen where this paper is sitting on the corner of the table.
Clue: The Code After
Area: Clara Woods Estate > Upper Level
Go back upstairs and switch the tape in the machine to Tape: Tomorrow. Go downstairs and pick this up from in the living room.
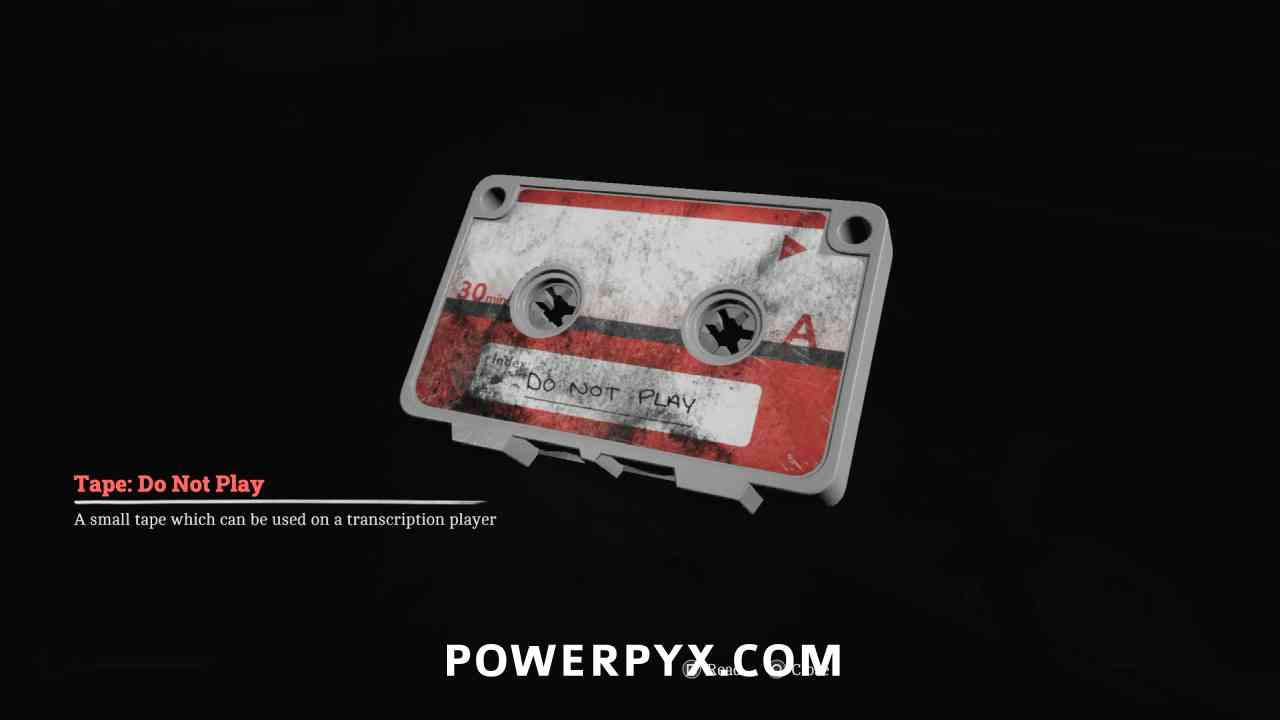
Key Item: Tape: Do Not Play
Area: Clara Woods Estate > Upper Level
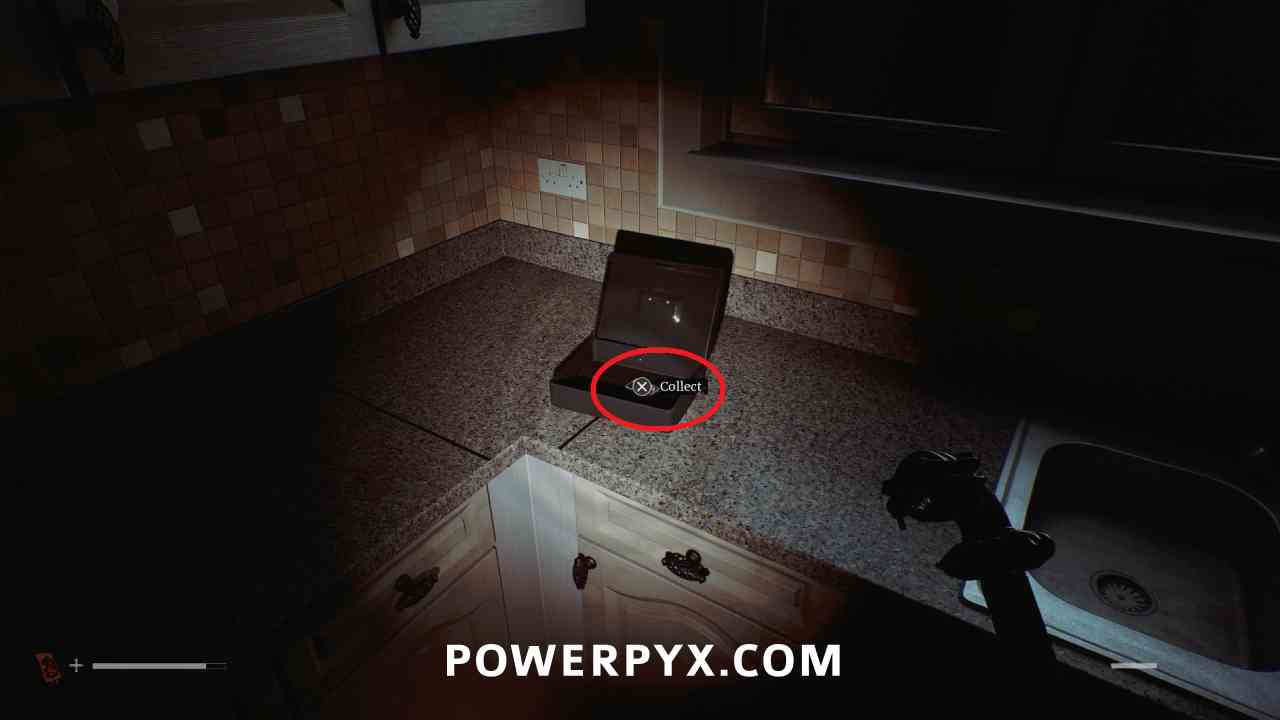
Go into the kitchen where there is another black box, open it to obtain this tape.
Key Item: Back Door Key
Area: Clara Woods Estate > Upper Level
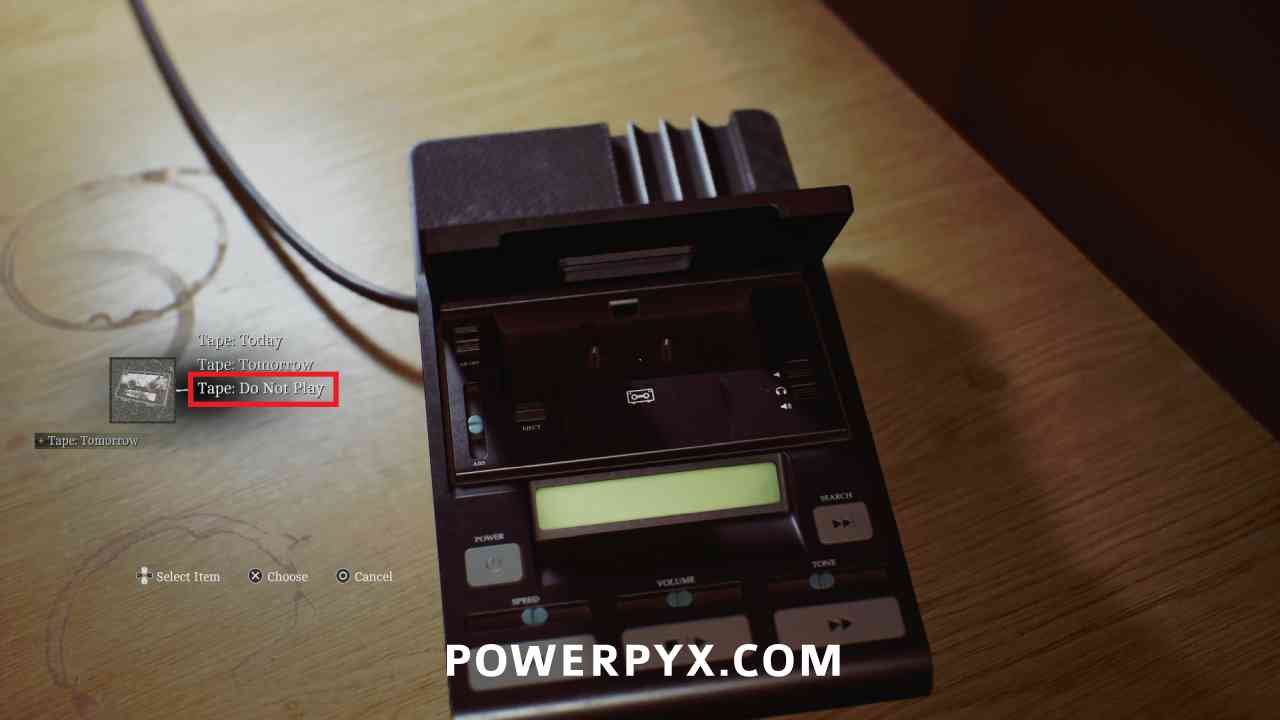
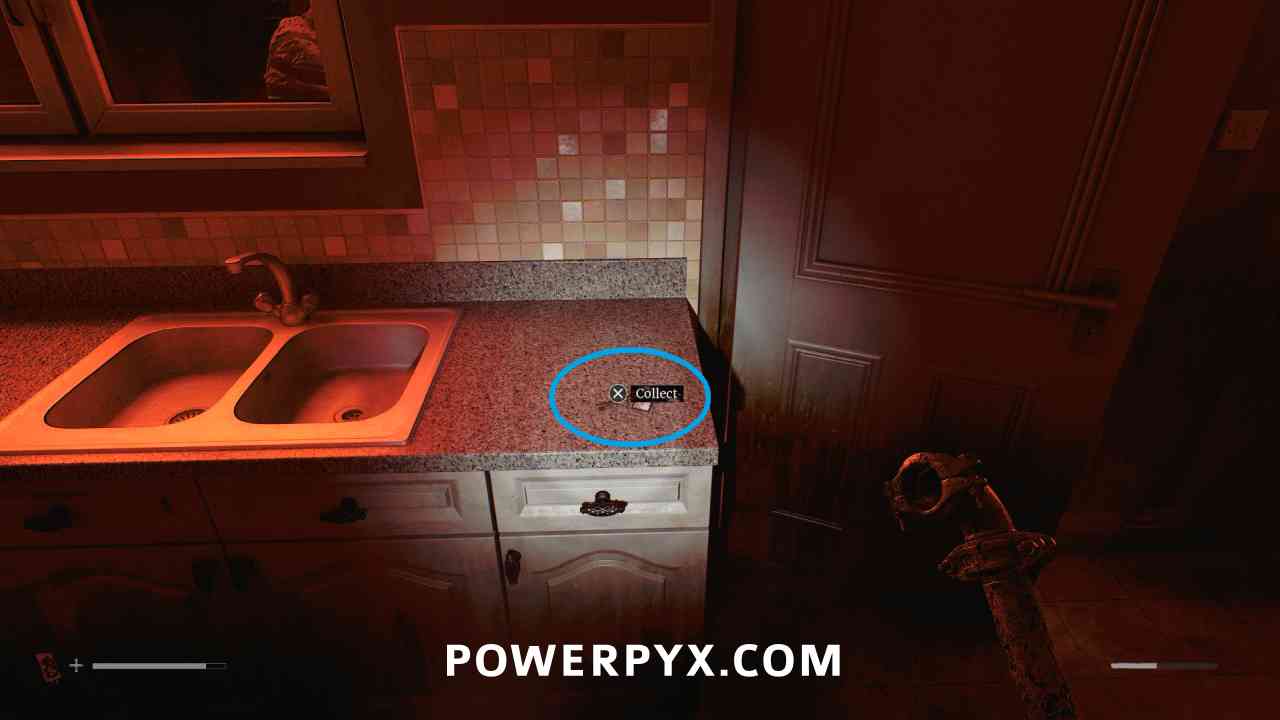
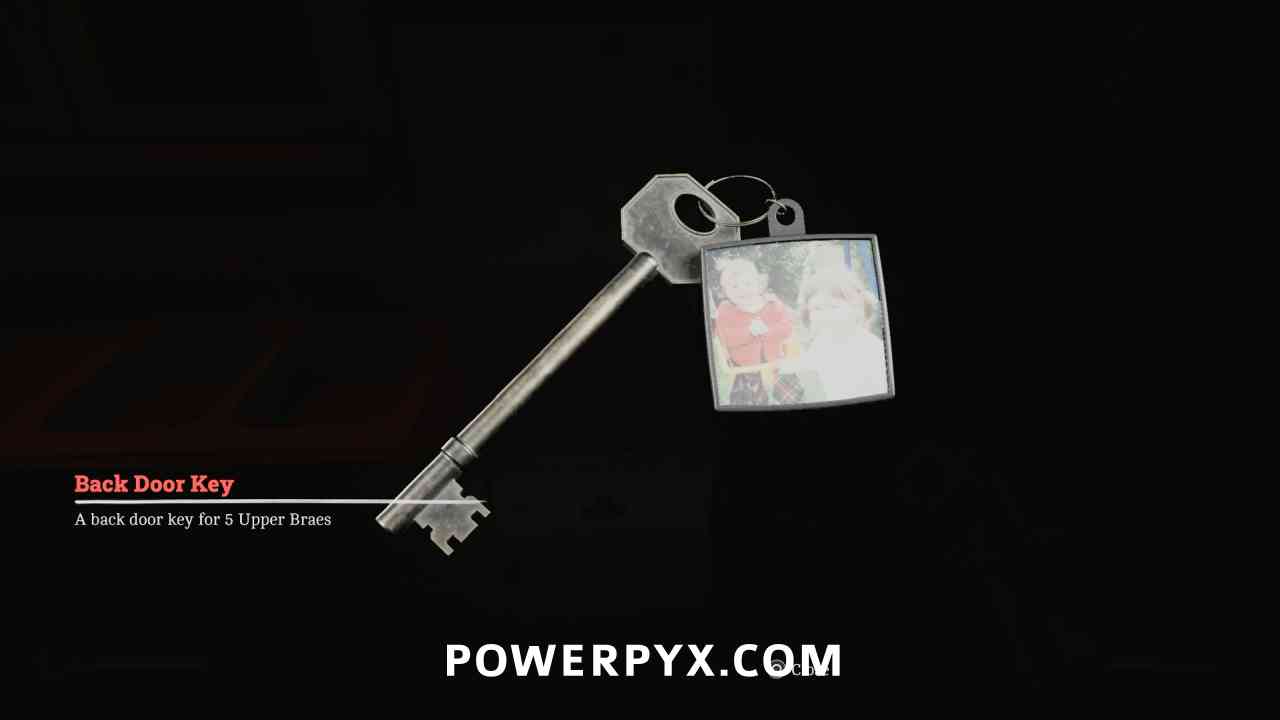
Go back upstairs and switch the tape in the machine to Tape: Do Not Play. Go into the kitchen and this is on the counter beside the door.
Key Item: Ammonite Disk
Area: Clara Woods Estate > Upper Level
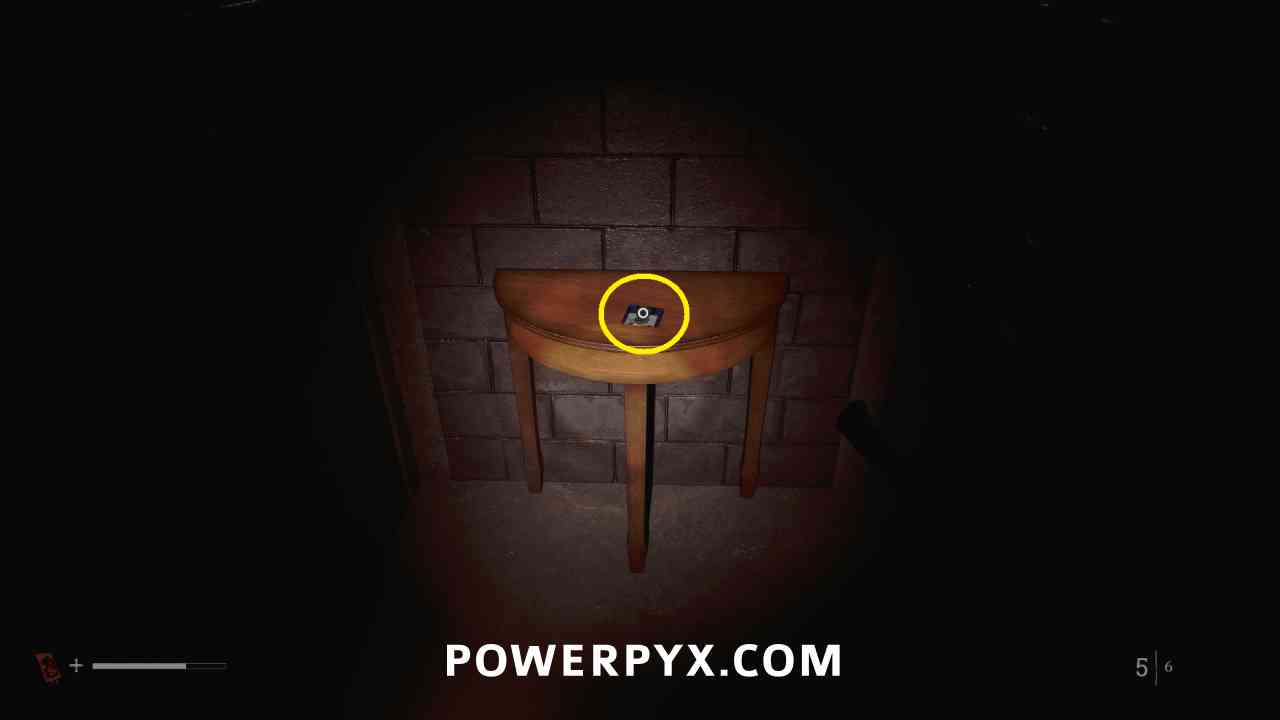
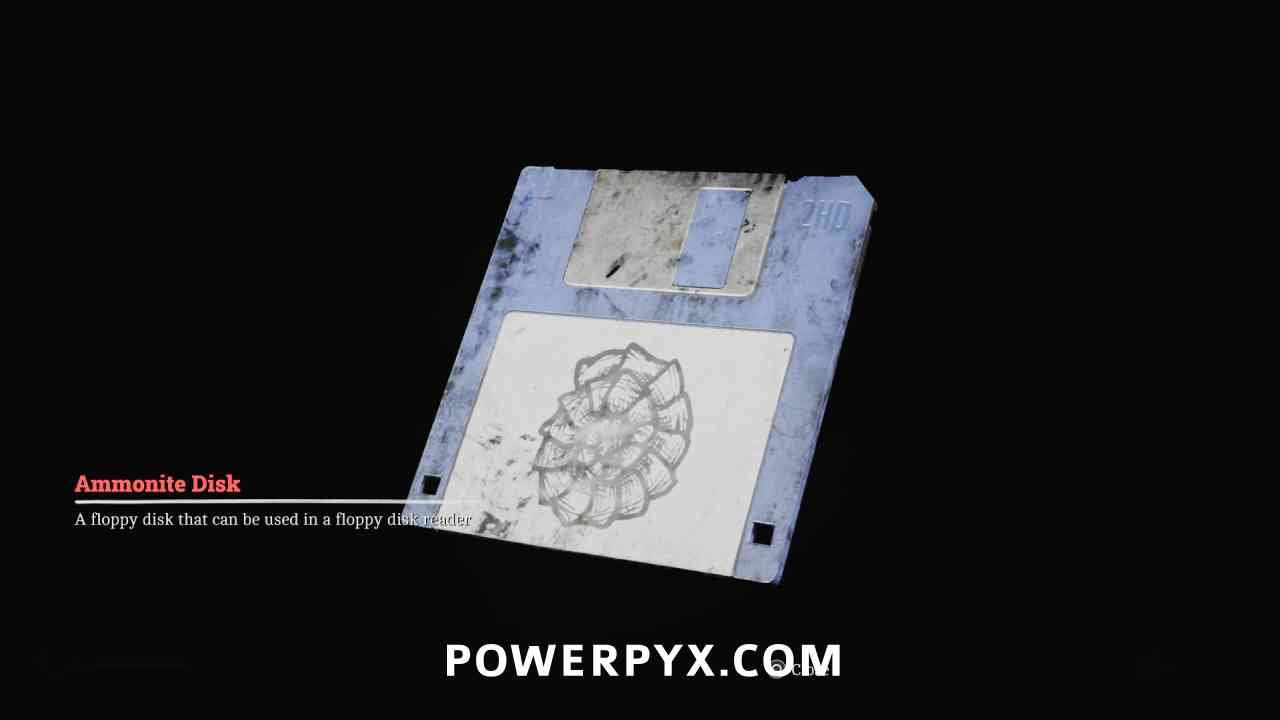
Go back upstairs and switch the tape to Tape: Today. Go downstairs and out the back door using the Back Door Key. Walk down the alley and in a door that is only open in this time you can pick up this disk on the table.
Clue: Current Count
Area: Clara Woods Estate > Upper Level
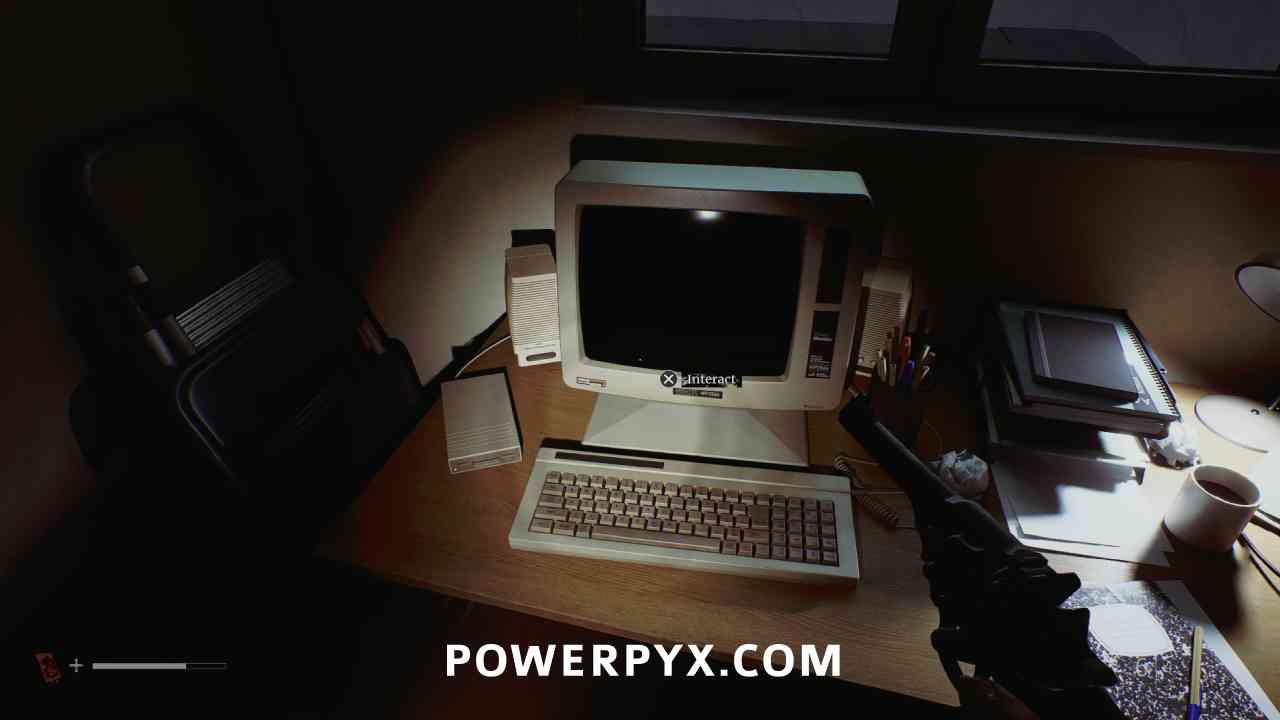
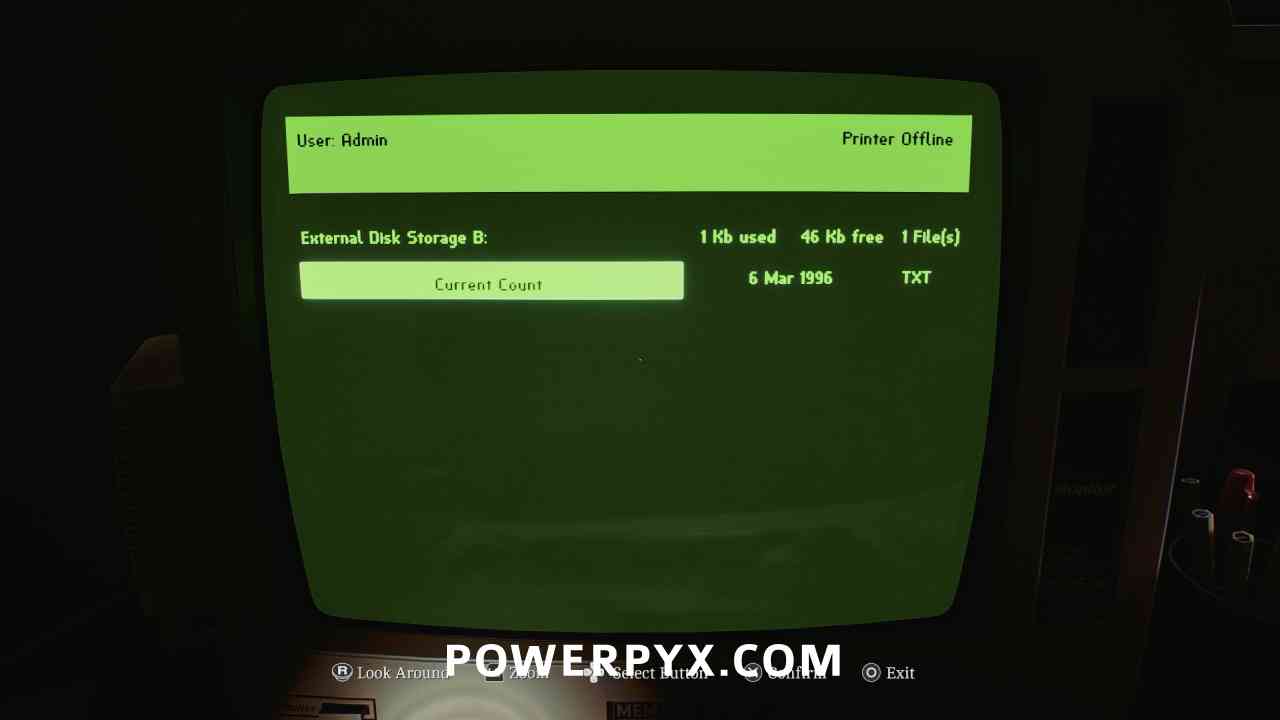
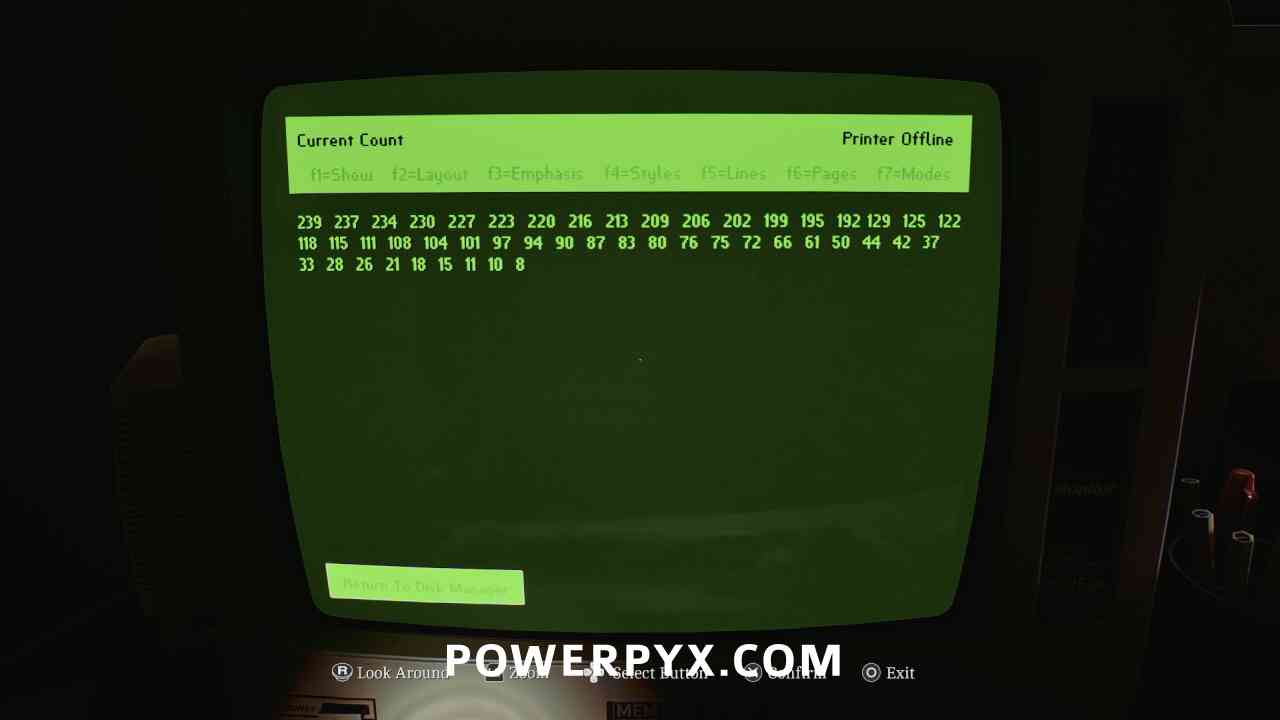
Go back upstairs and switch the tape to Tape: Yesterday. Interact with the computer and insert the Ammonite Disk in the reader to the left of the computer. Read the Current Count file.
Puzzle #23
Area: Clara Woods Estate > Upper Level
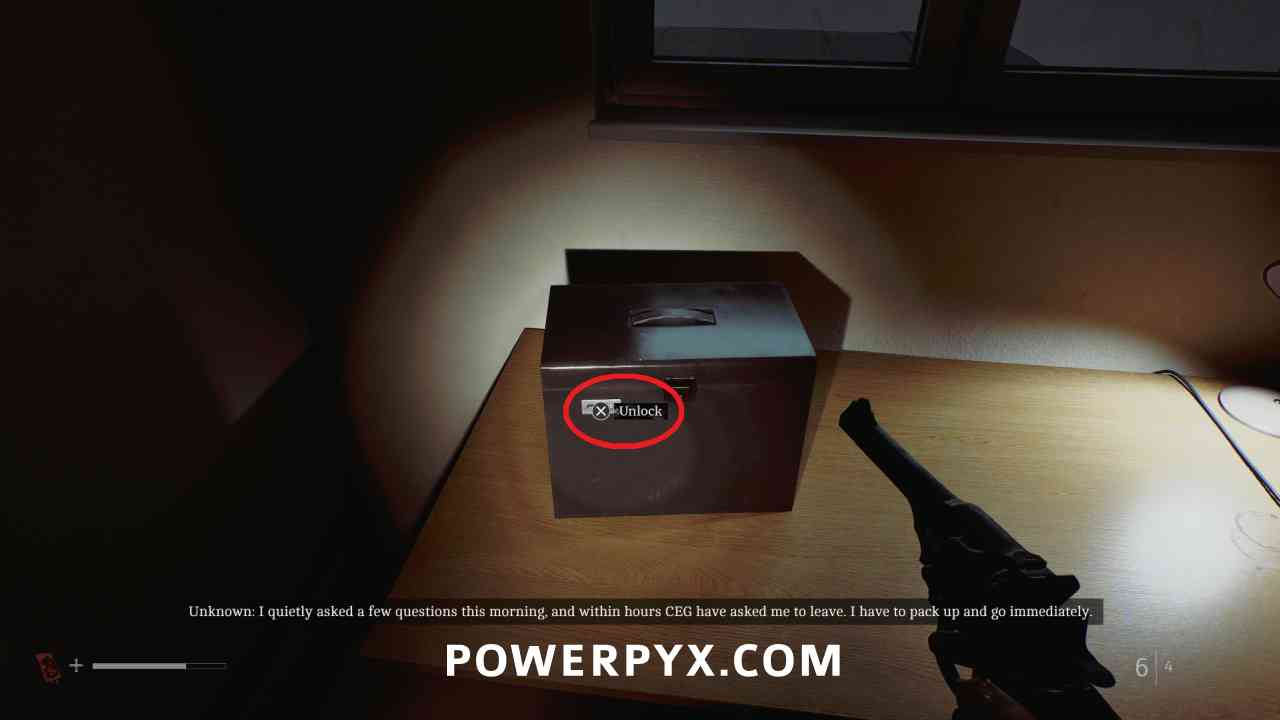
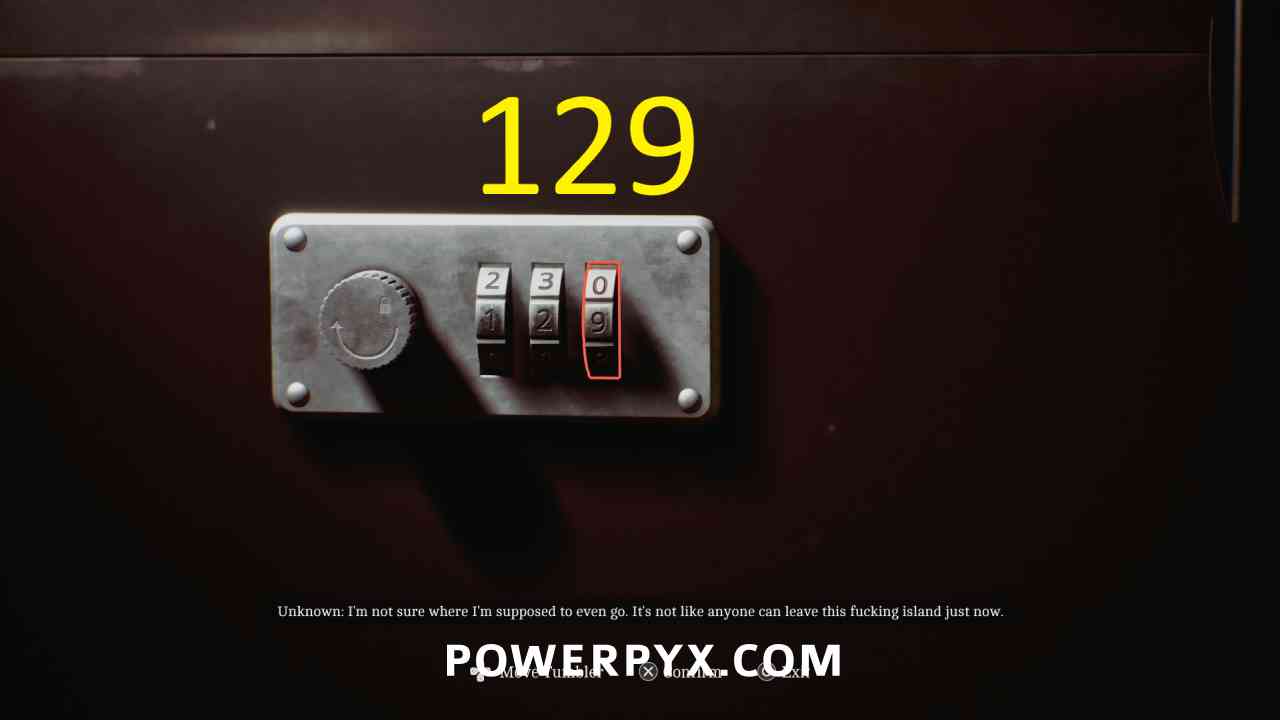
Switch the tape to Tape: Today. Interact with the safe on the table, and enter 129 (the number in between the two from the other notes in the Current Count file).
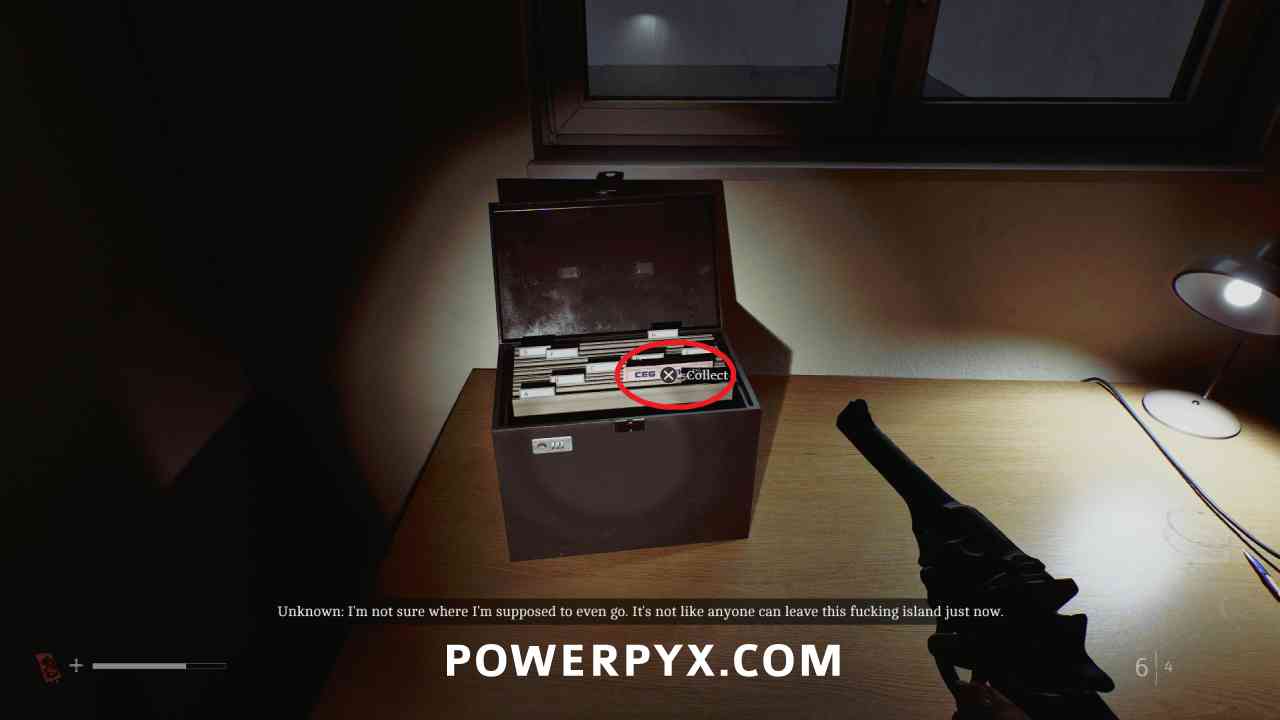
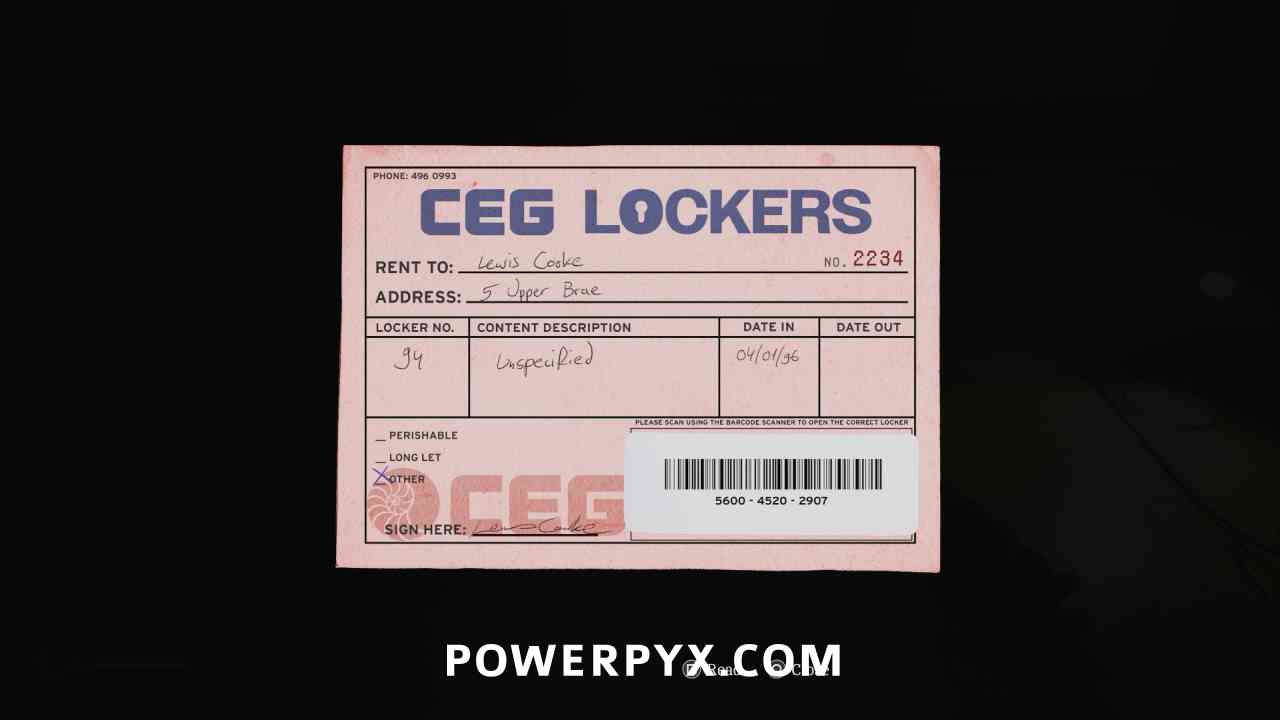
Key Item: Barcode (Upper Brae) – Locker 94
Area: Clara Woods Estate > Upper Level
Pick this up from the opened safe container.
Clara Woods Estate > Ground Level
Puzzle #24
Area: Clara Woods Estate > Ground Level
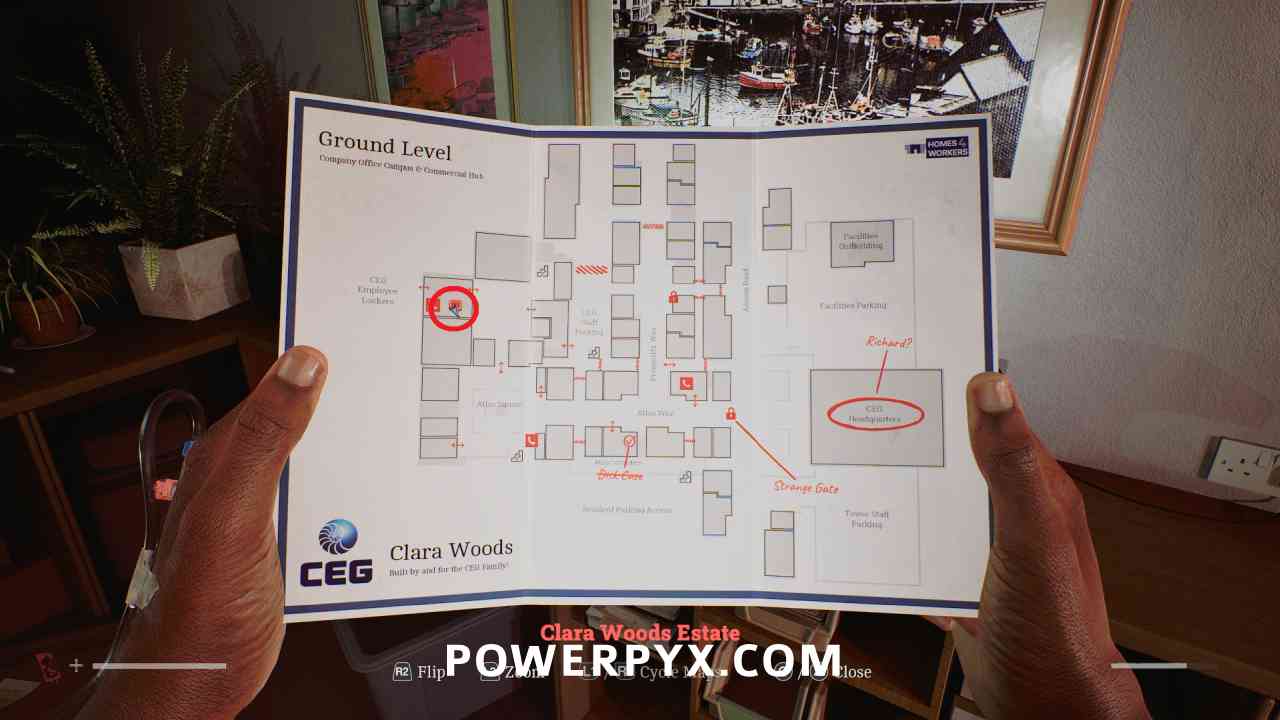
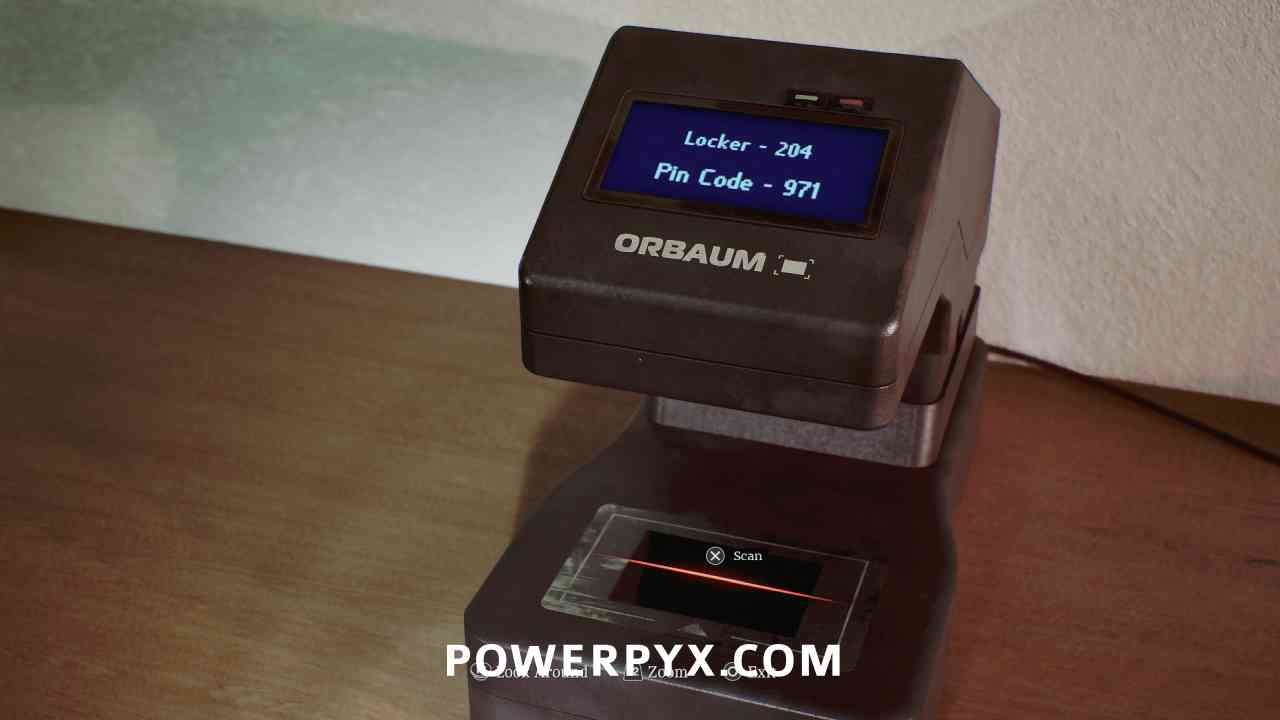
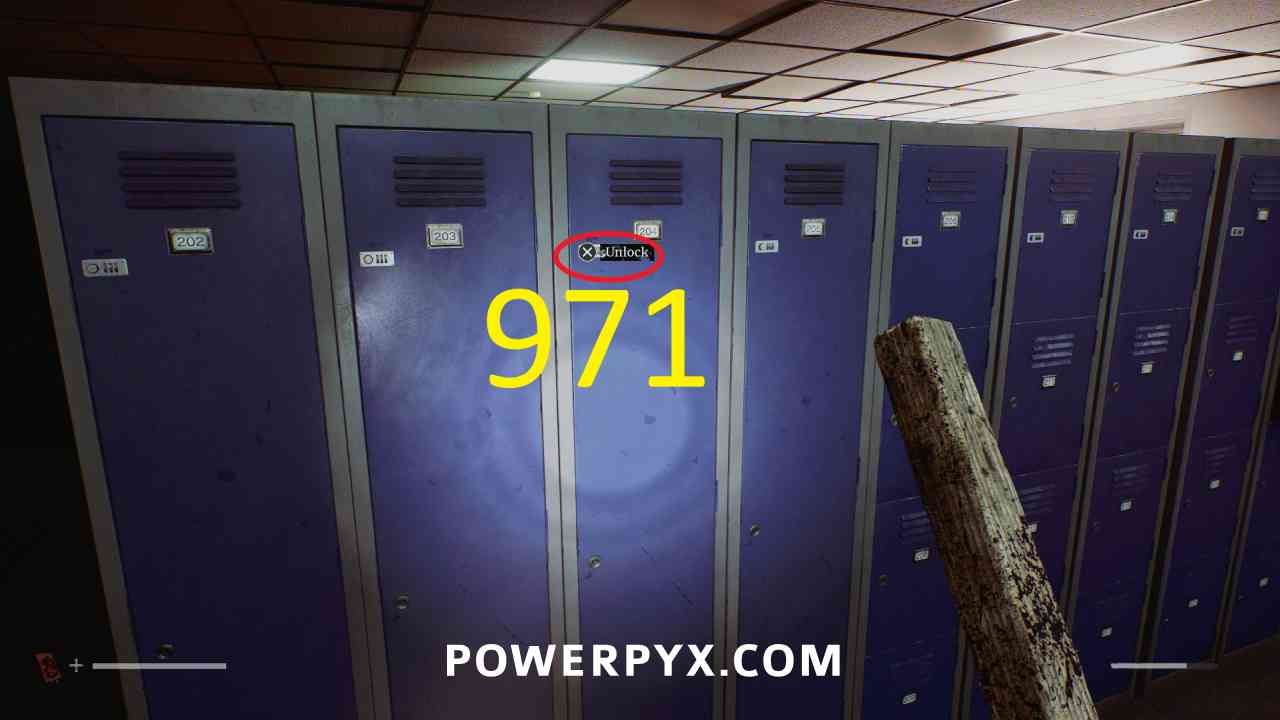
Return to the CEG Employee Lockers building, interact with the barcode scanner and use Barcode (North Brae) to obtain the pin for locker 204 (971). Input this at locker 204 to open it.
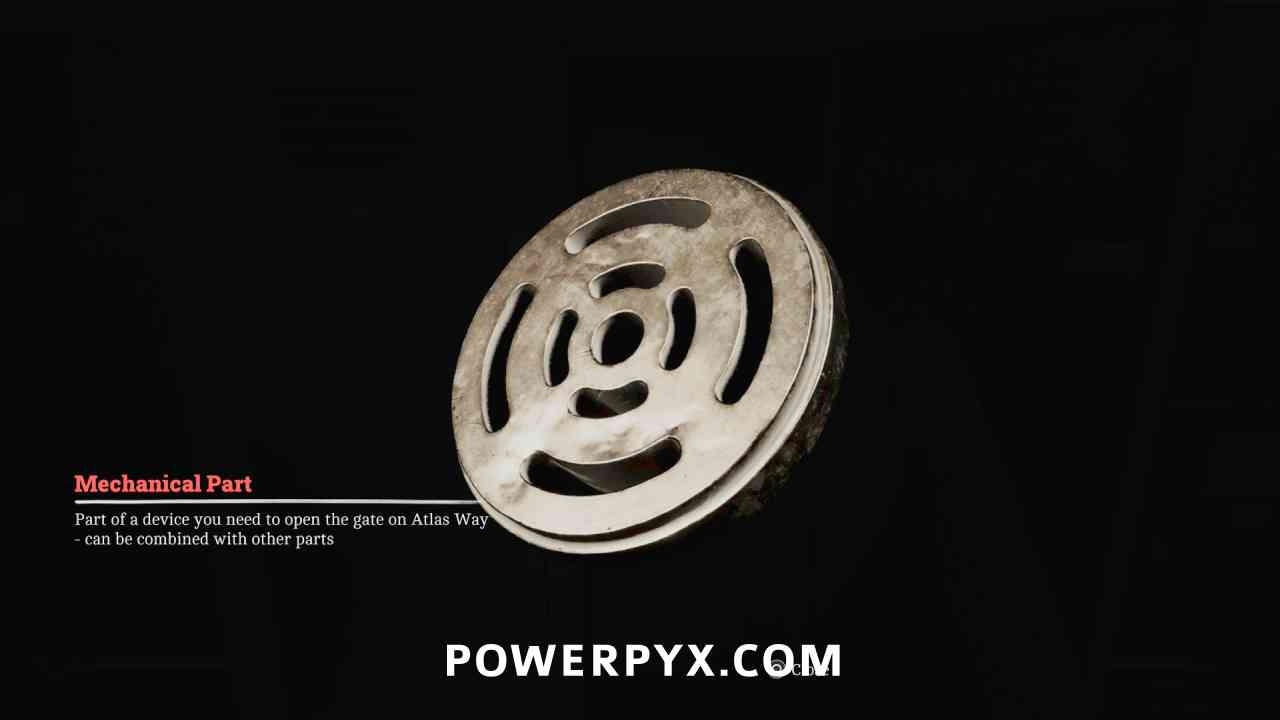
Key Item: Mechanical Part
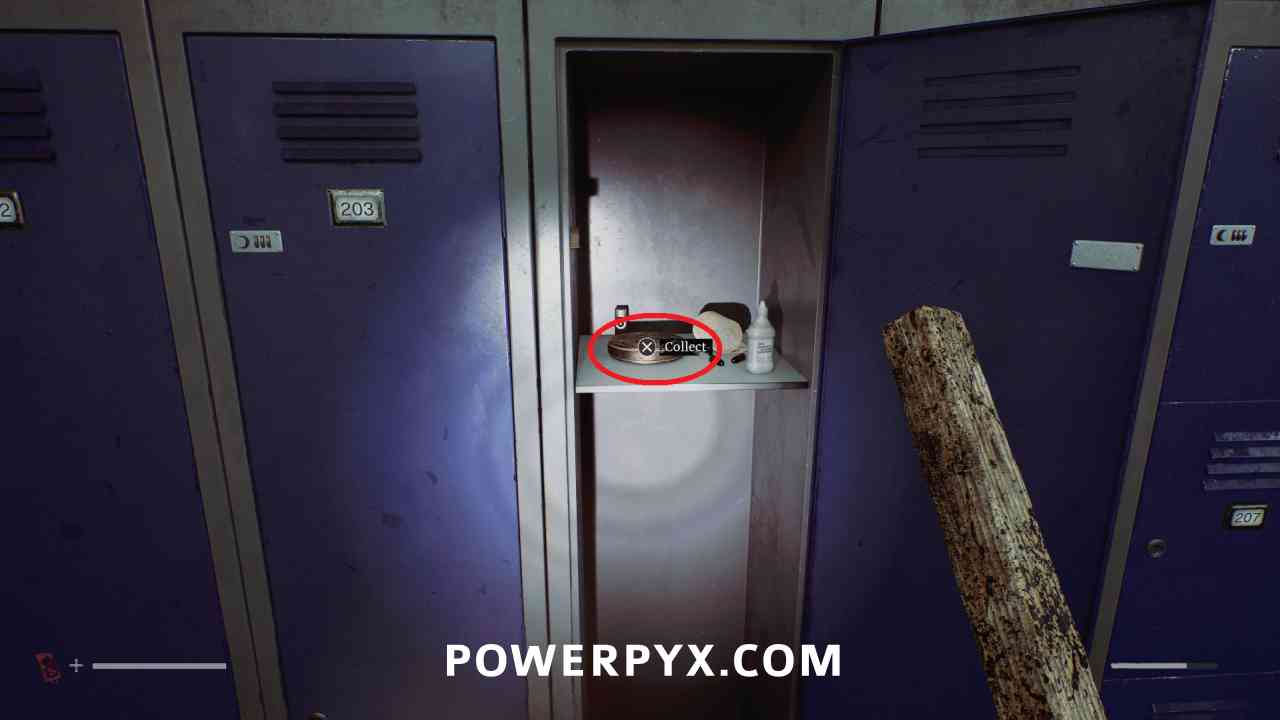
Area: Clara Woods Estate > Ground Level
Inside locker 204.
Puzzle #25
Area: Clara Woods Estate > Ground Level
Interact with the barcode scanner and use Barcode (Upper Brae) to obtain the pin for locker 94 (490). Input this at locker 94 to open it.
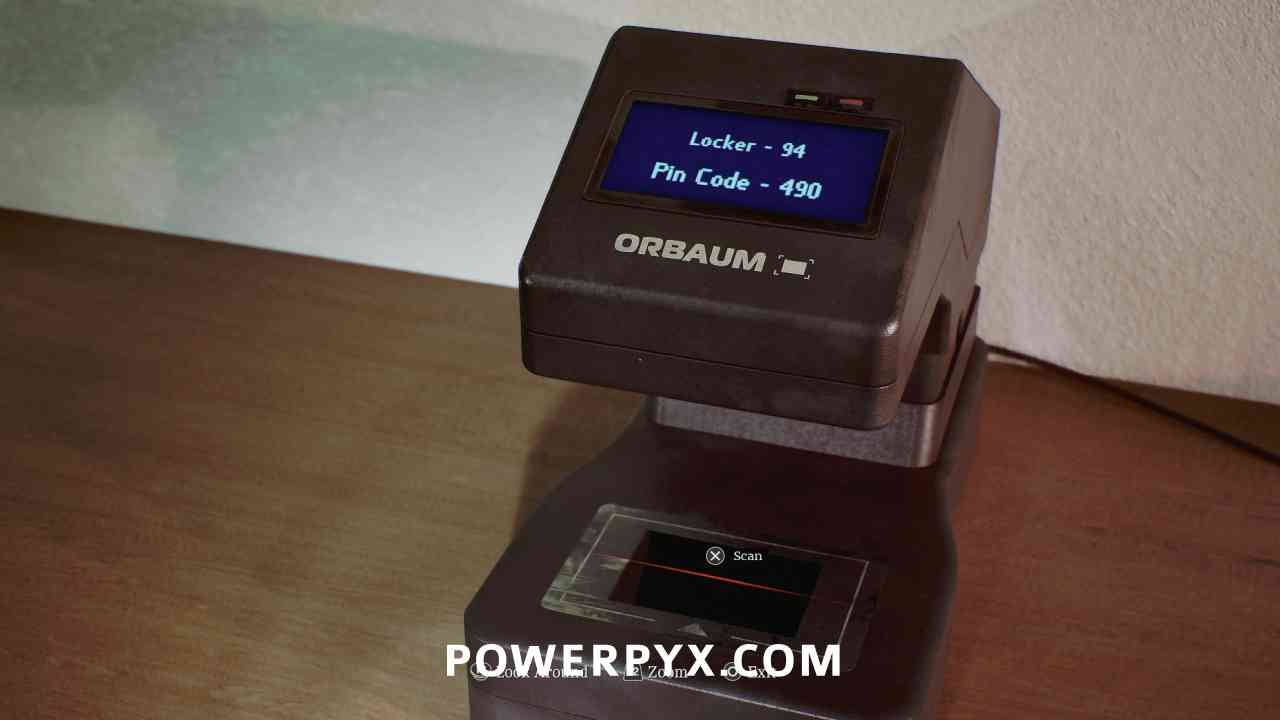
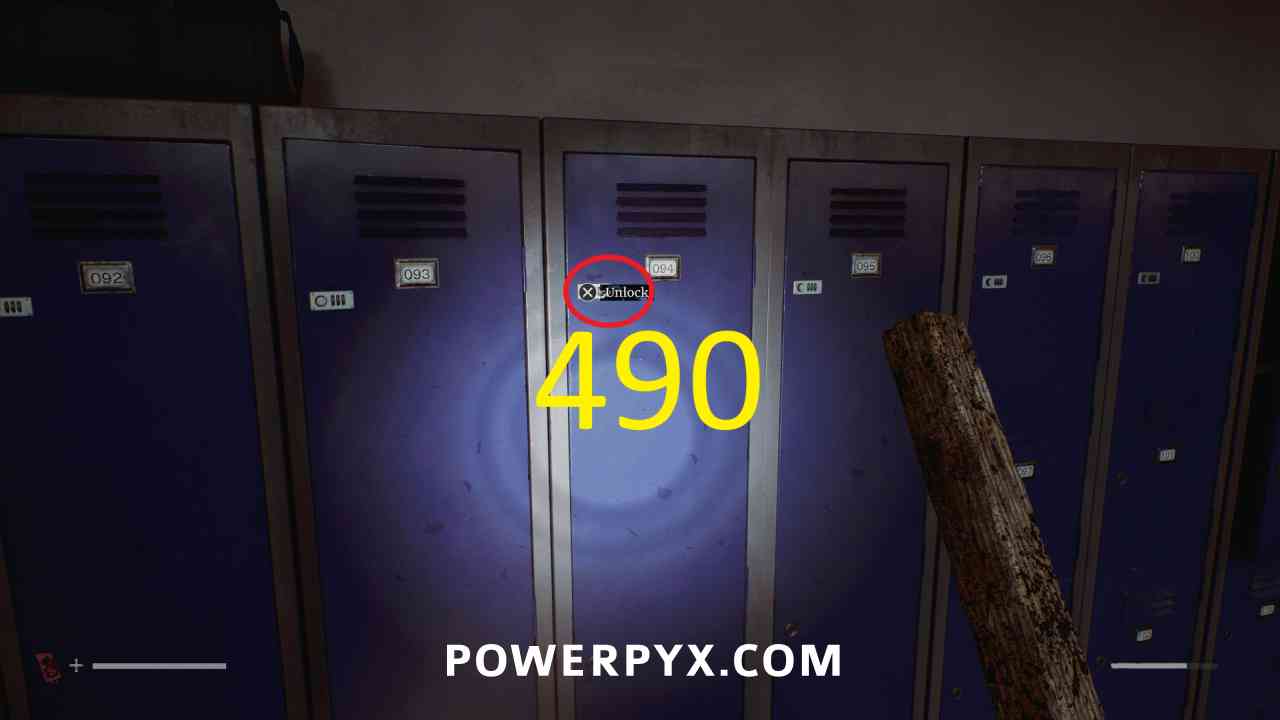
Key Item: Mechanical Part
Area: Clara Woods Estate > Ground Level
Inside locker 94.
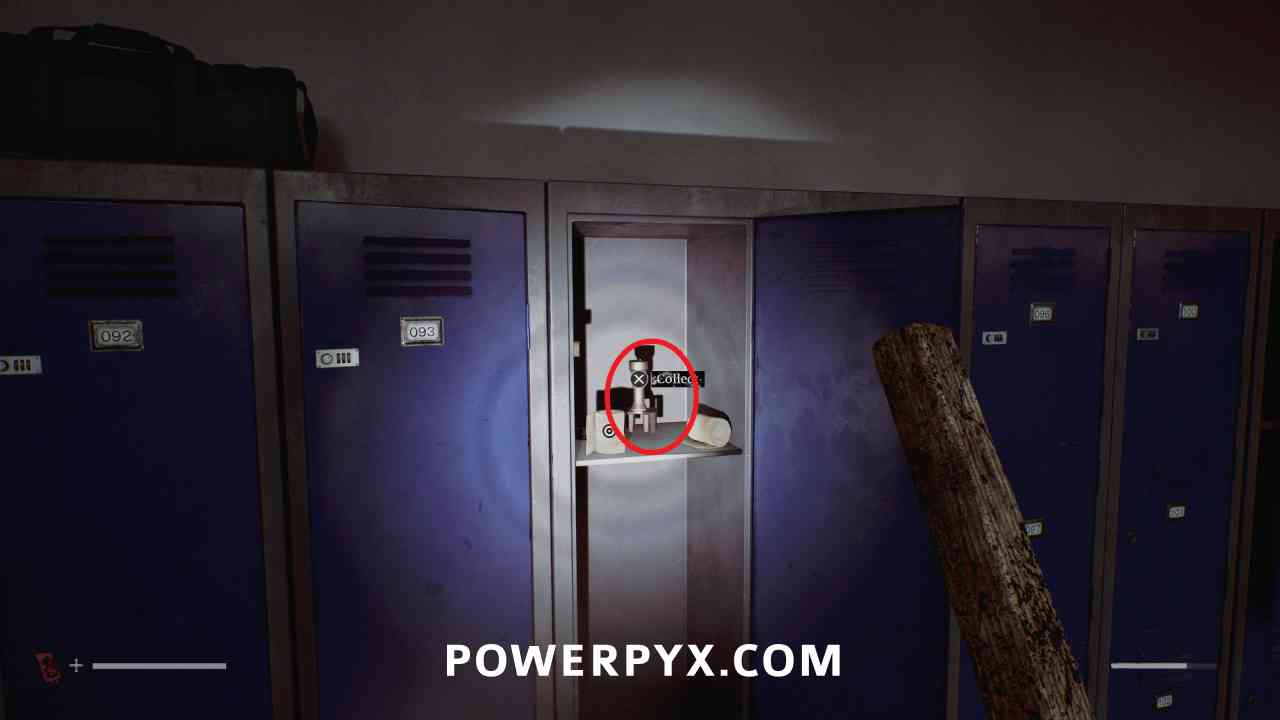
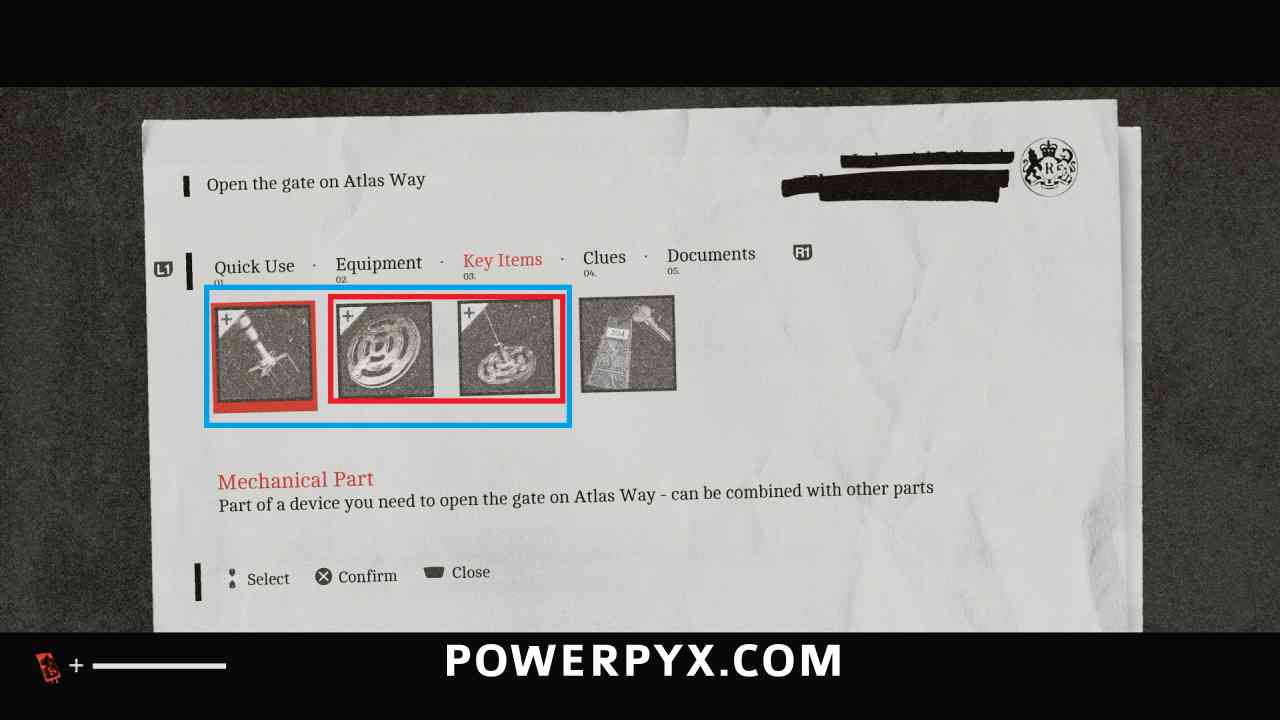
Key Item: Constructed Mechanical Device
Area: Clara Woods Estate > Ground Level
In your inventory, combine all 3 mechanical parts. Put the two discs together first, followed by the cylindrical piece.
Locked Door – Strange Gate
Area: Clara Woods Estate > Ground Level
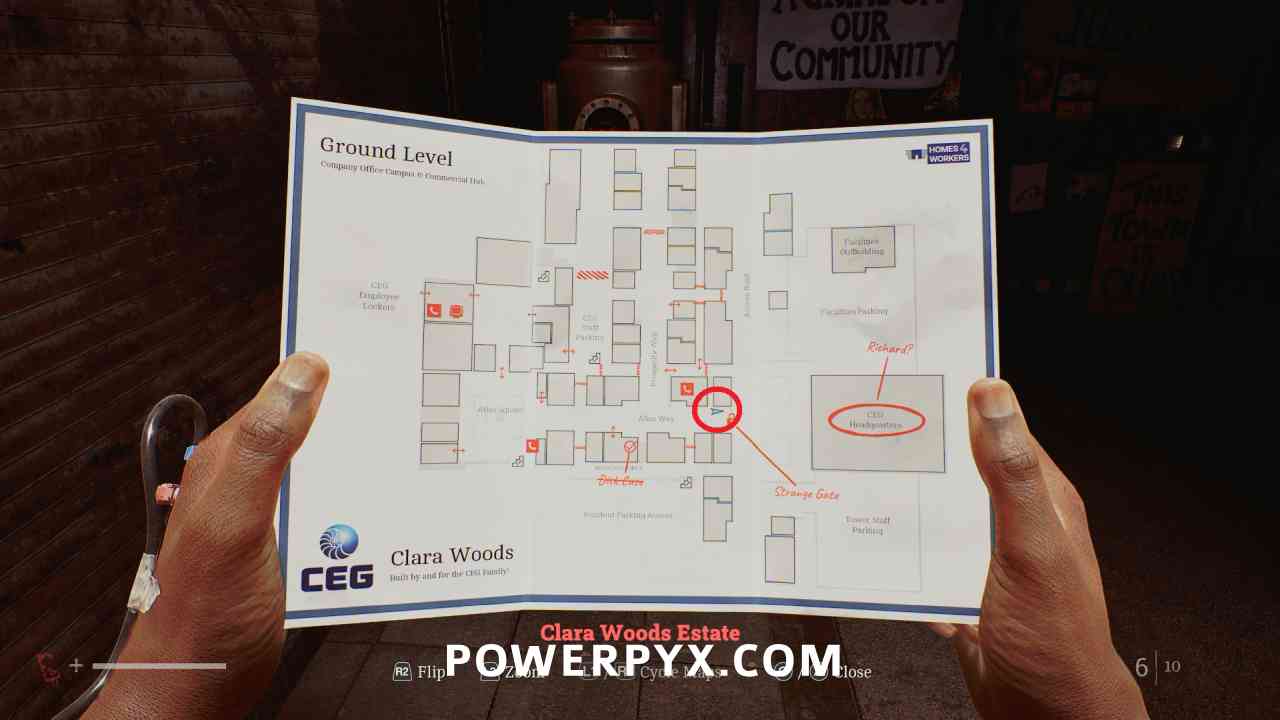
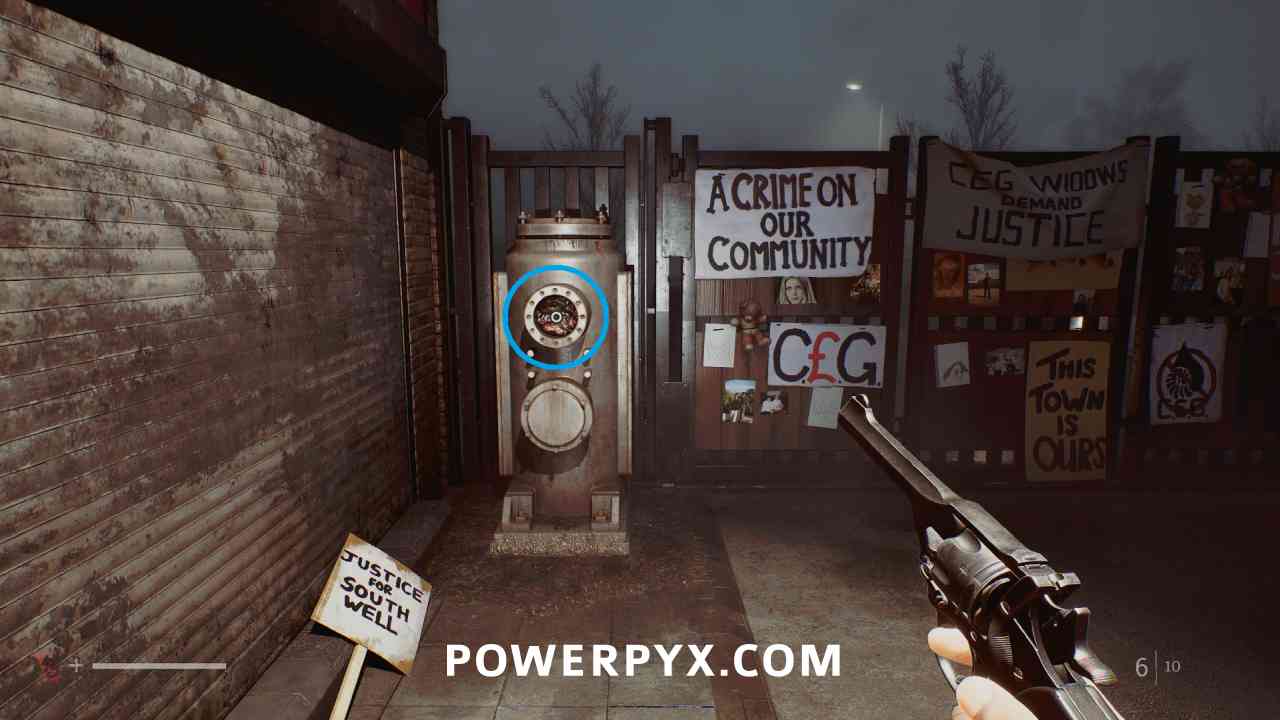
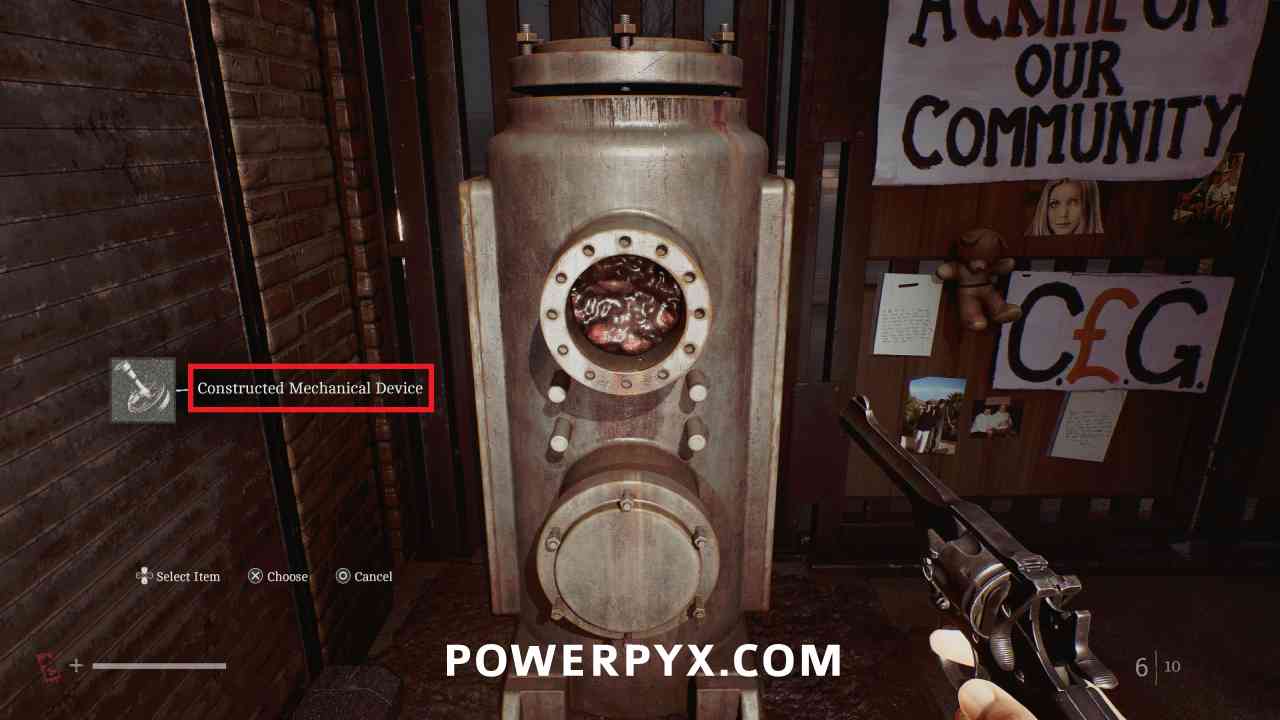
Go to the Strange Gate and interact with the pipe structure, inserting the Constructed Mechanical Device to open it.
11. Inside CEG HQ
CEG HQ > Ground Floor
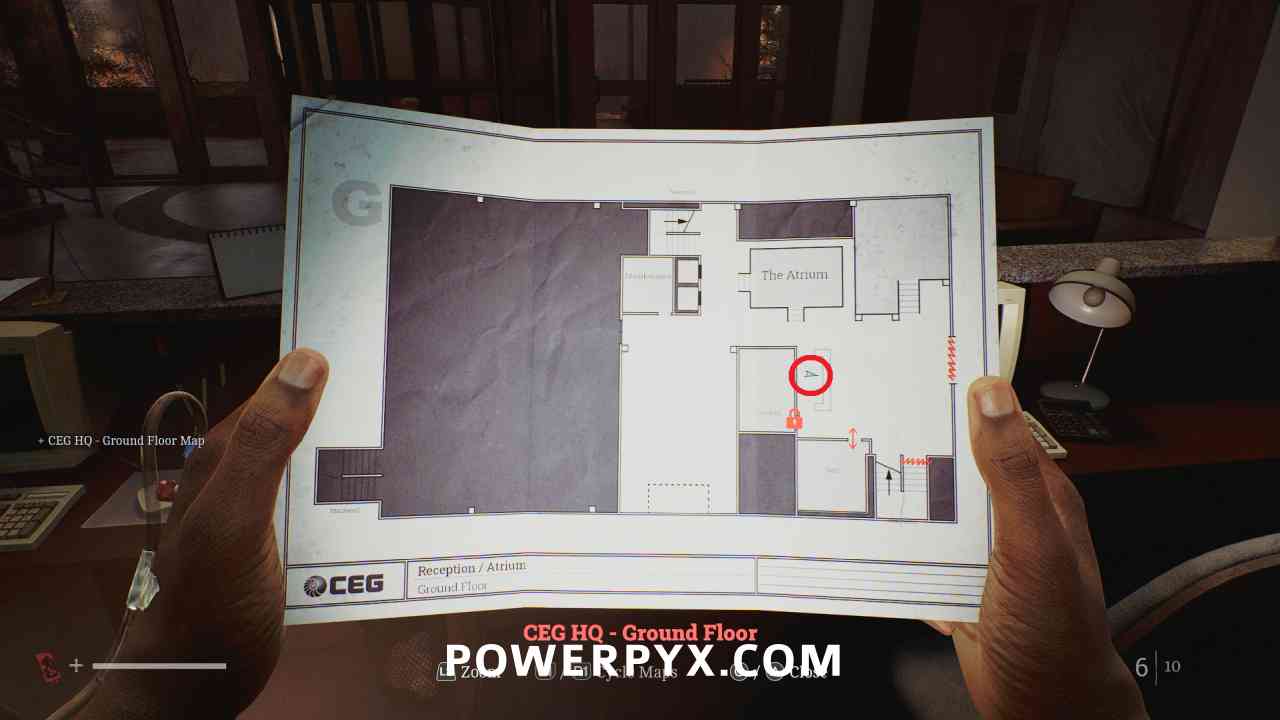
CEG HQ – Ground Floor Map
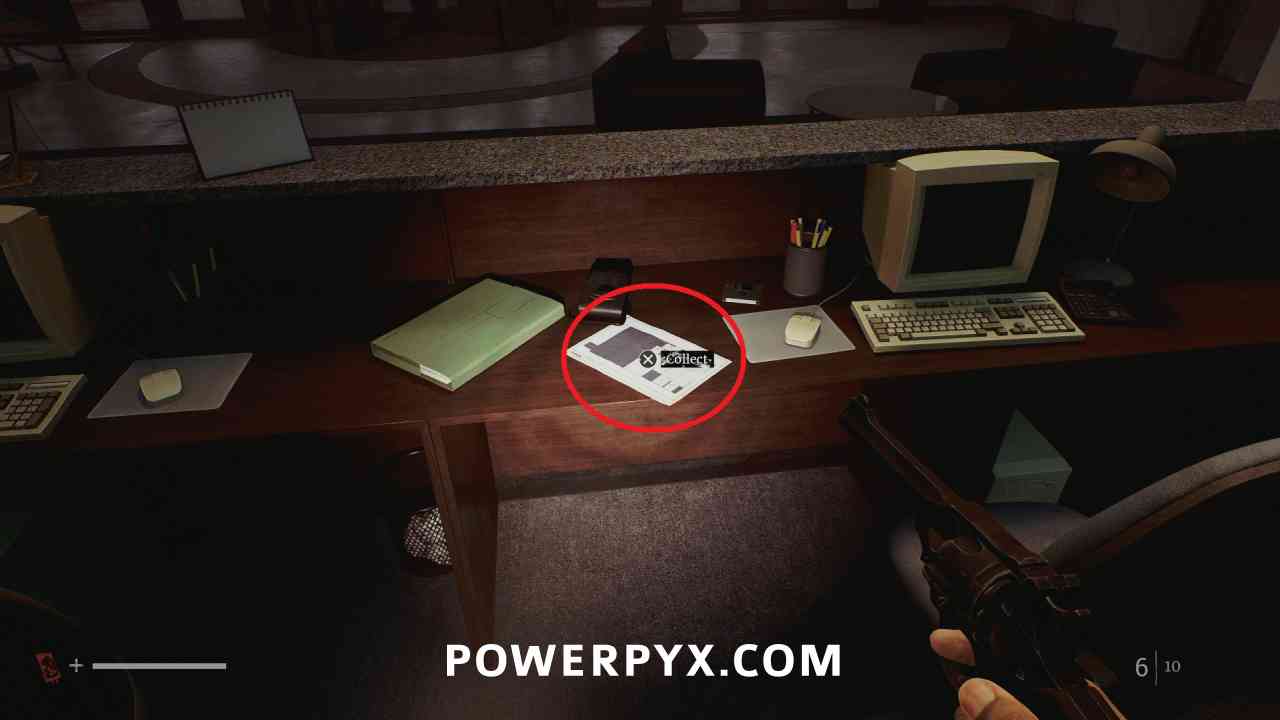
Area: CEG HQ > Ground Floor
In the lobby of the building, behind the reception desk.
Locked Door – Security
Area: CEG HQ > Ground Floor
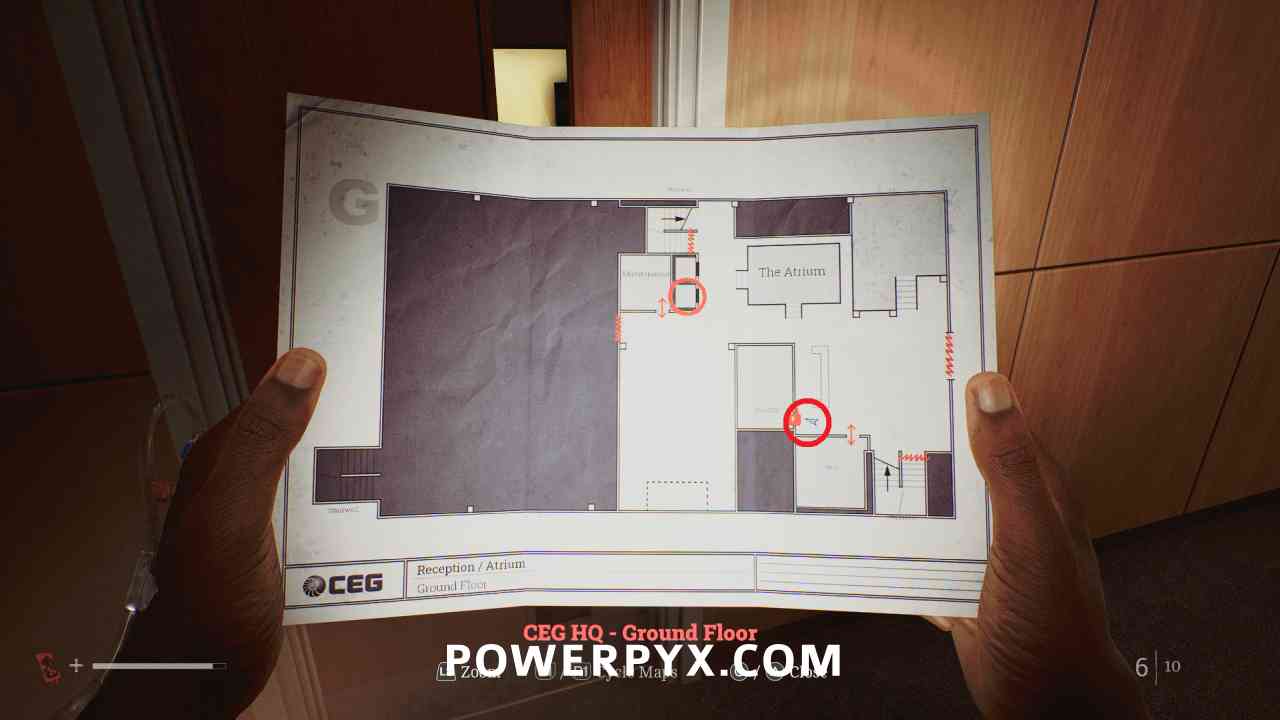
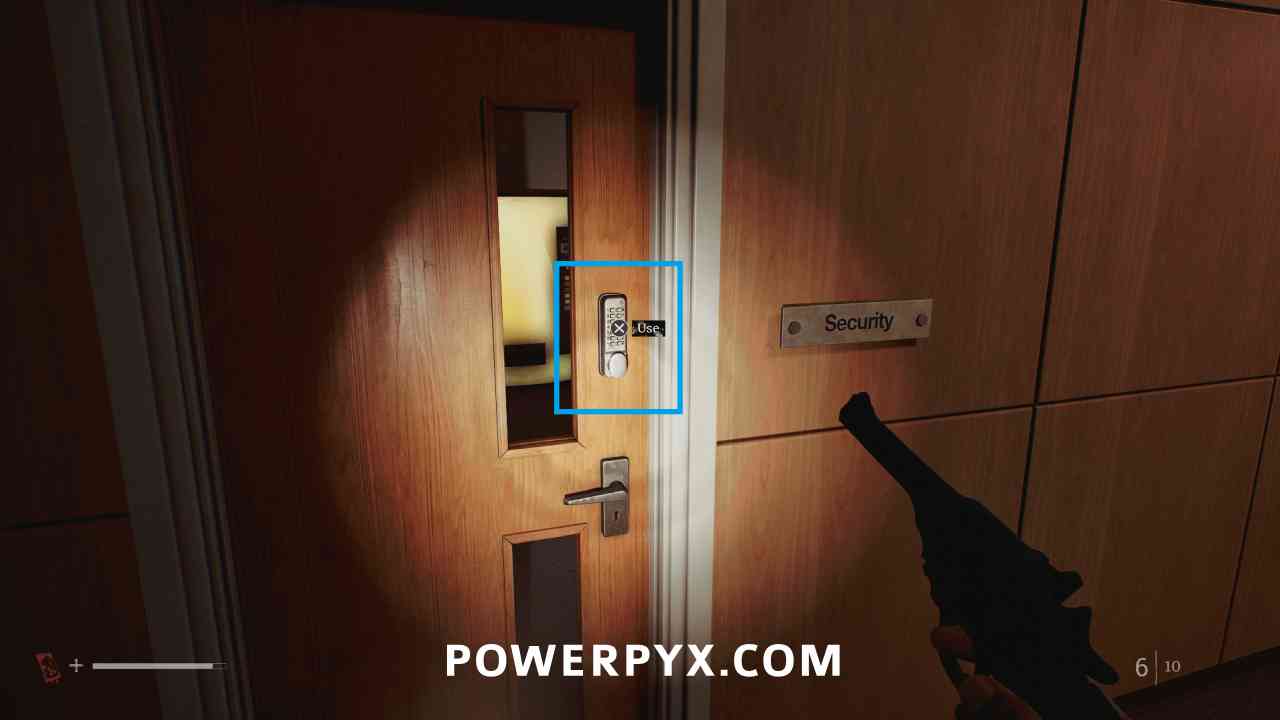
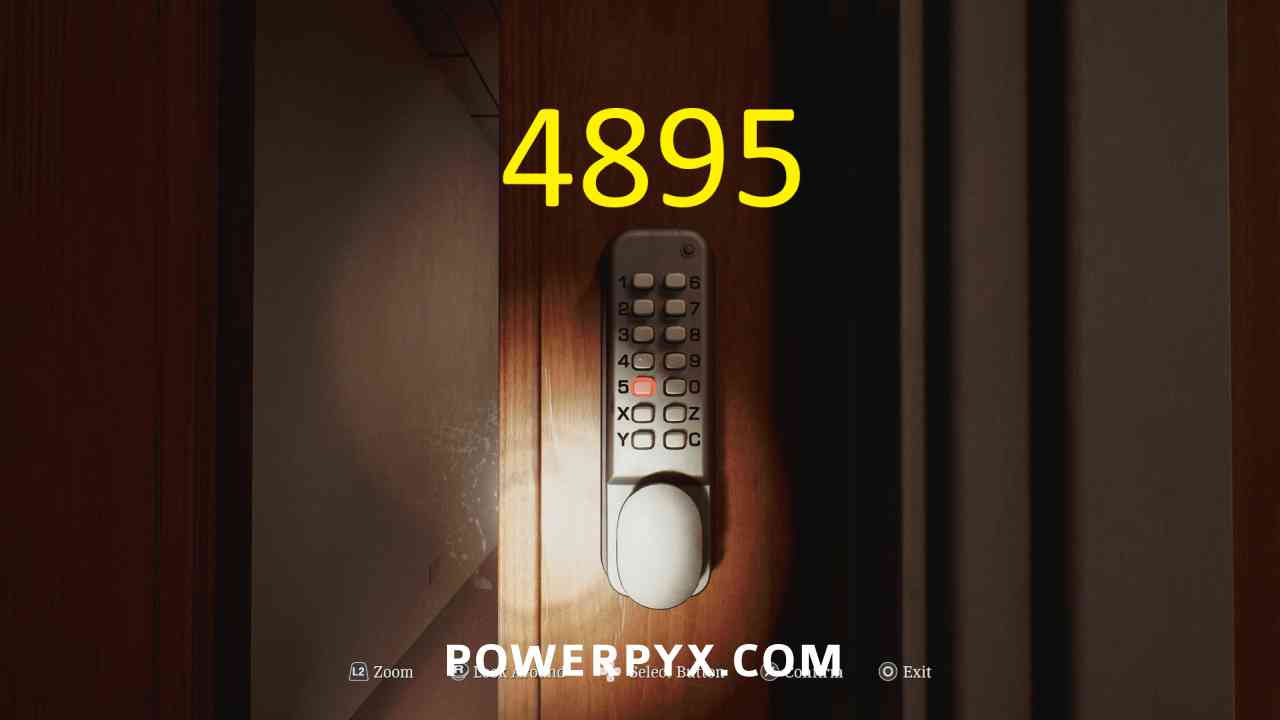
At the security room near the front entrance, interact with the door and enter 4895 (hinted at by the white board in Maintenance).
Puzzle #27
Area: CEG HQ > Ground Floor
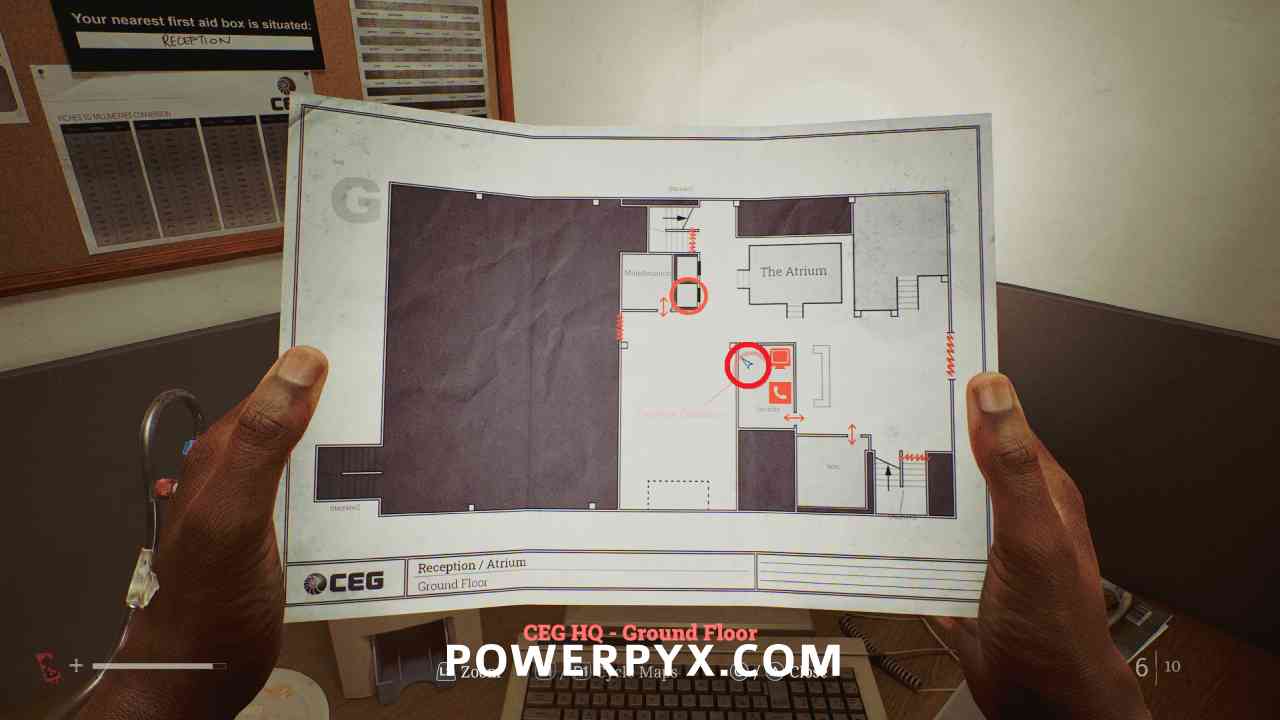
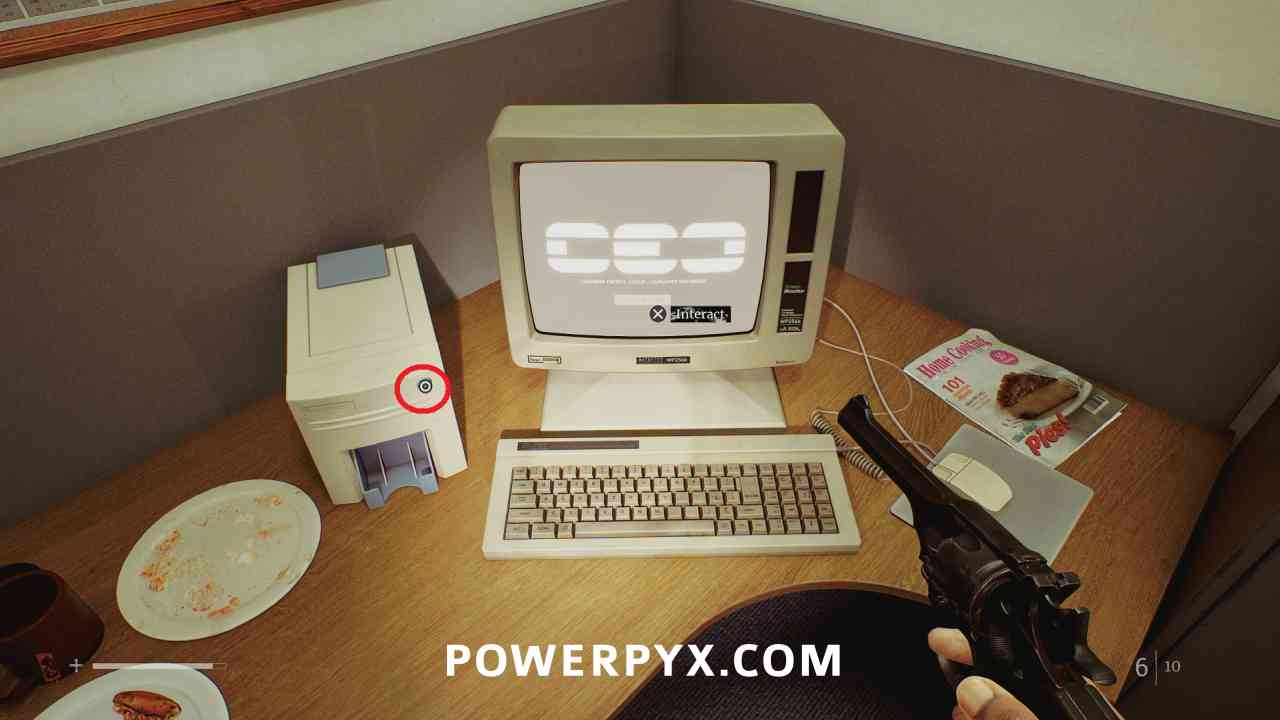
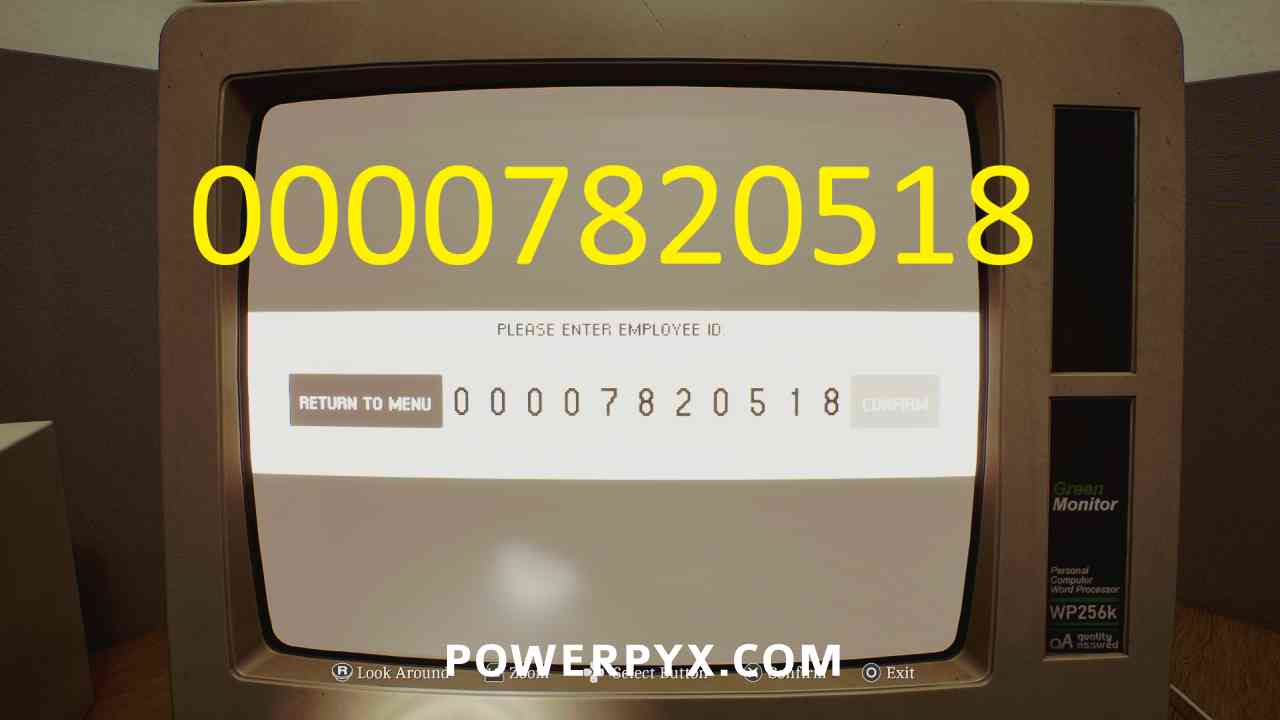
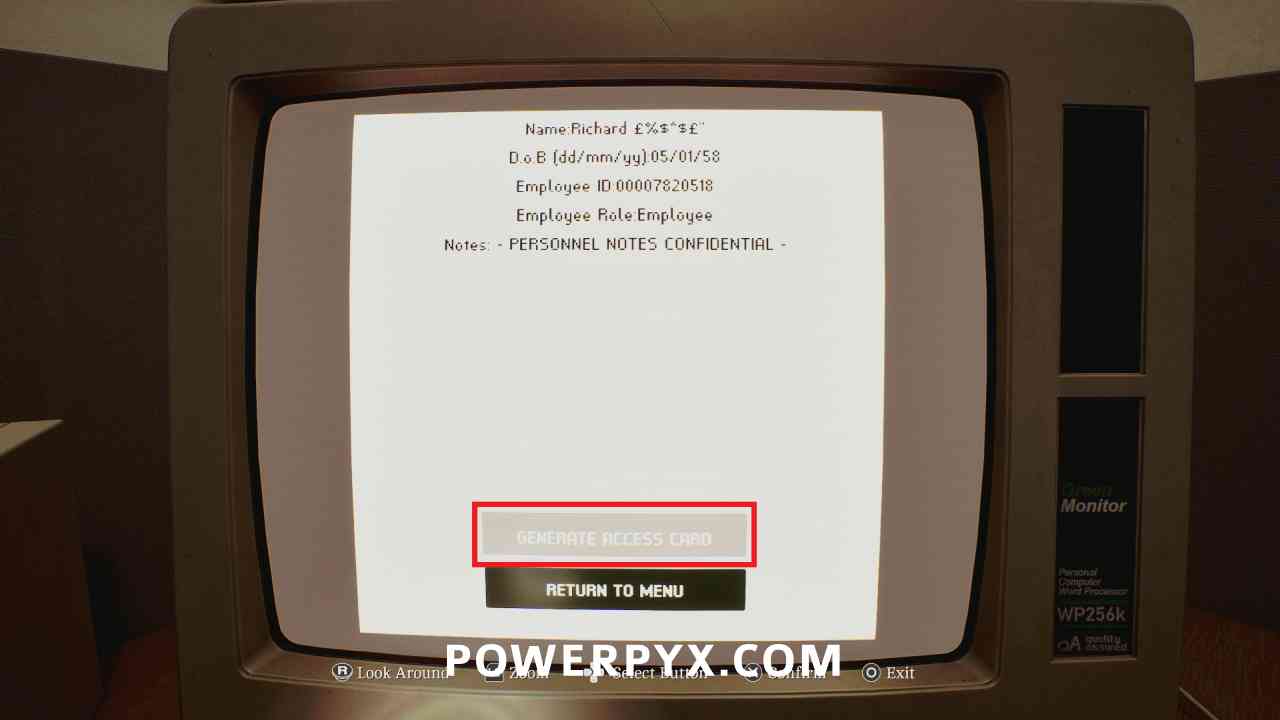
Interact with the Employee Database computer. In the Employee ID field enter 00007820518 (from the file in the box). Turn on the printer to the left, then print an access card.
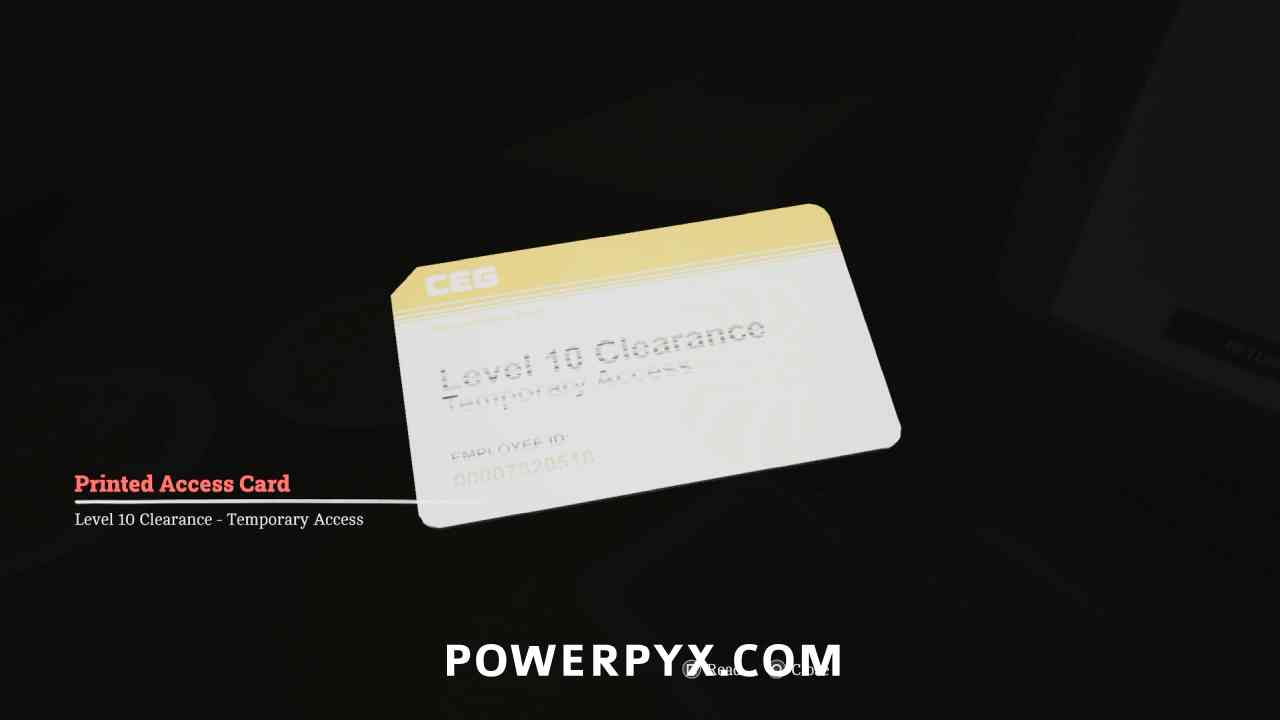
Key Item: Printed Access Card
Area: CEG HQ > Ground Floor
Pick up from the printer after printing it on the computer, use it to go up the elevator.
Part 5 – Richard
12. Richard: Getting Inside
CEG HQ > Exterior
Locked Door – CEG HQ Exterior
Area: CEG HQ > Exterior
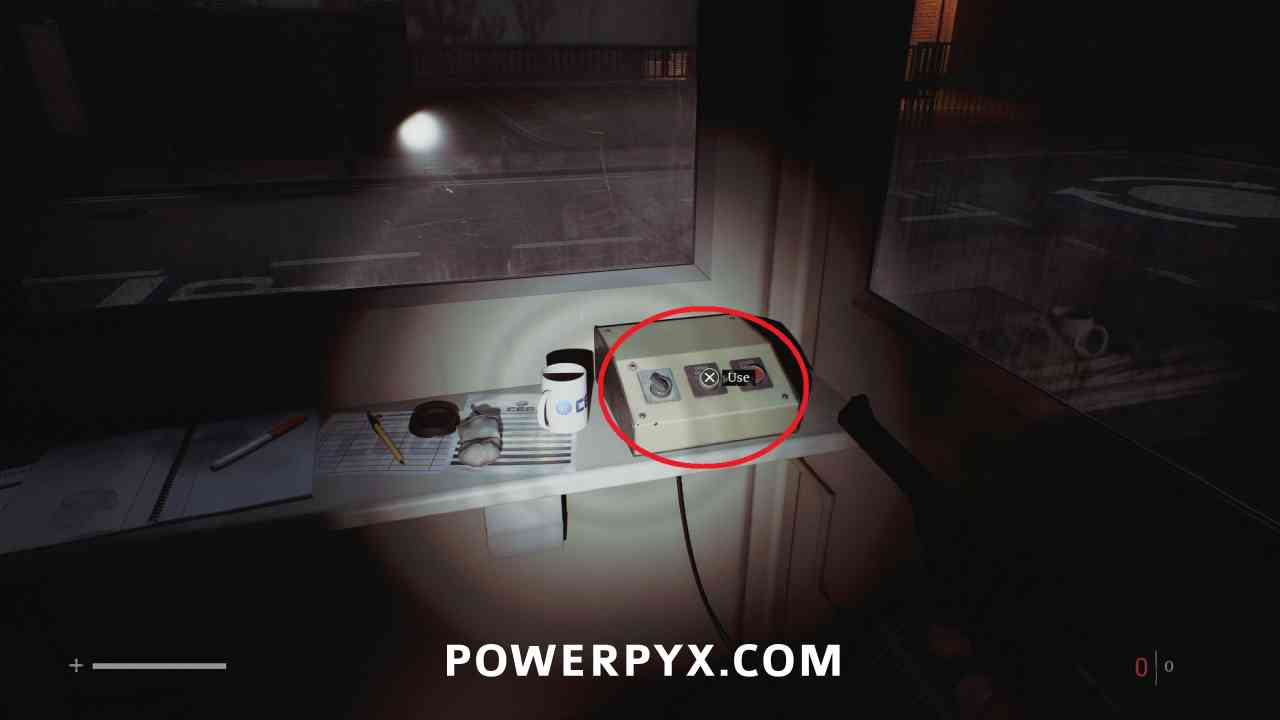
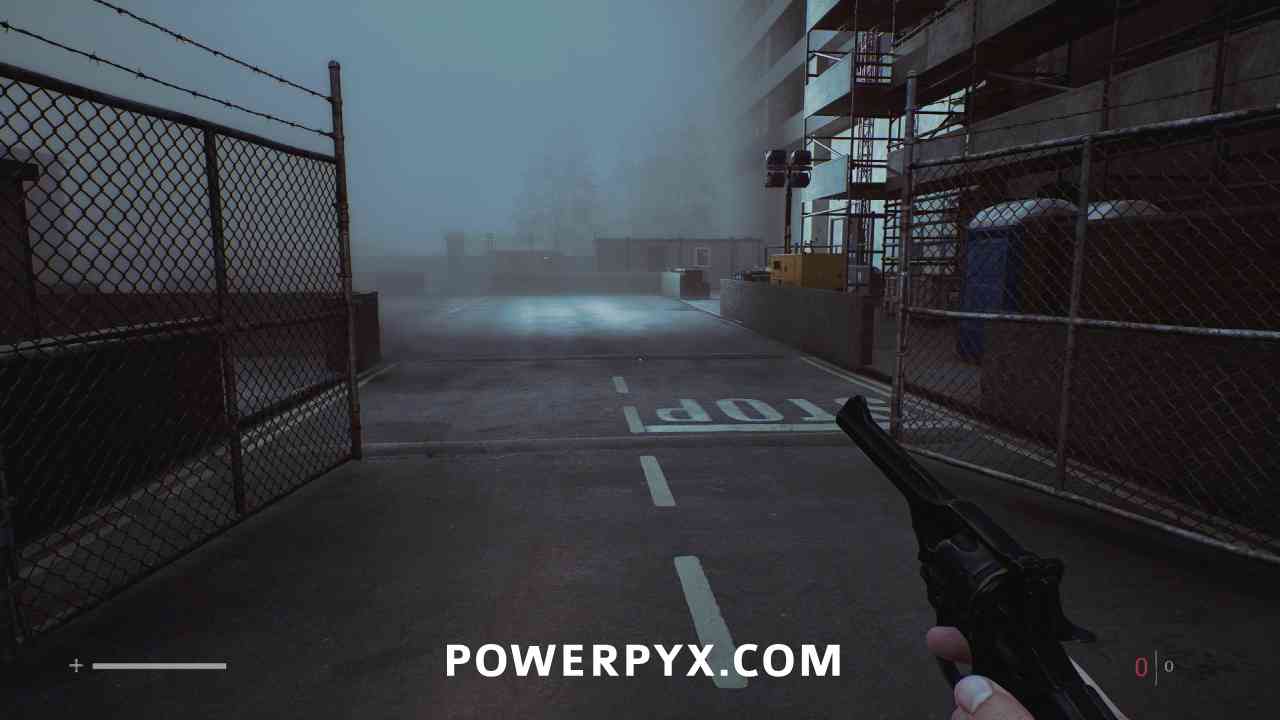
Go left of the front entrance and enter the small security booth, interact with the button to open the gate.
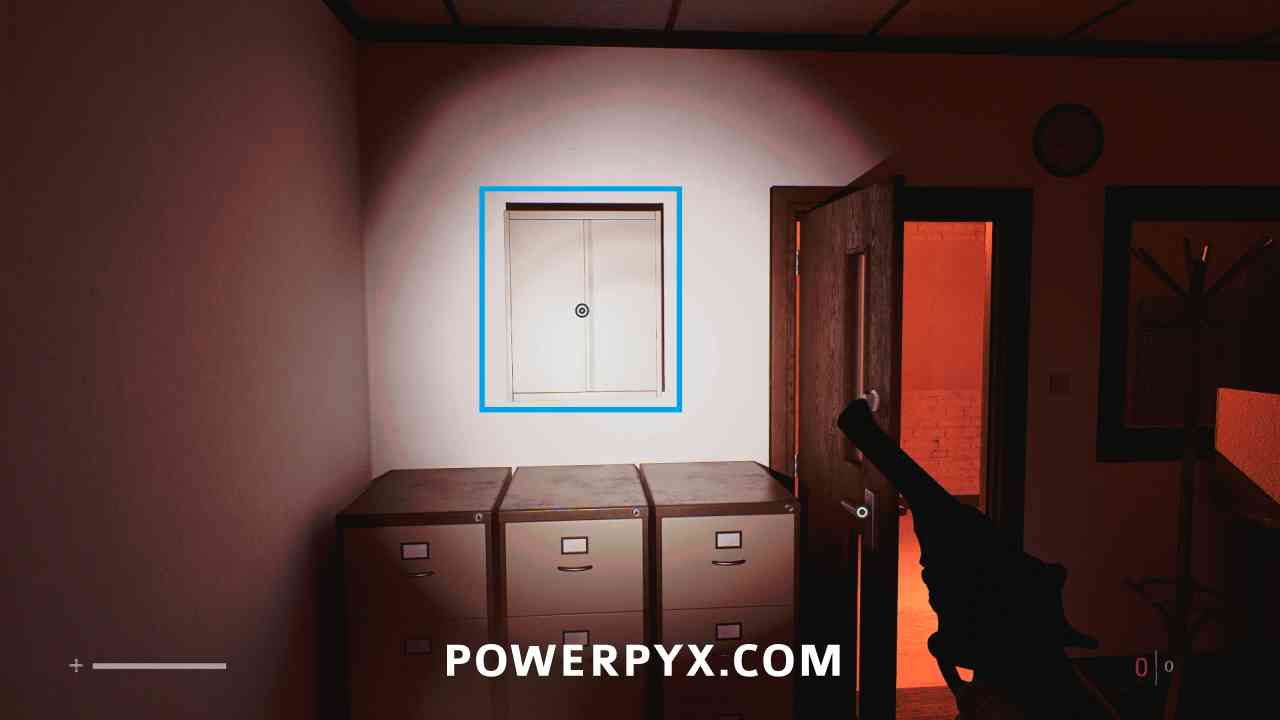
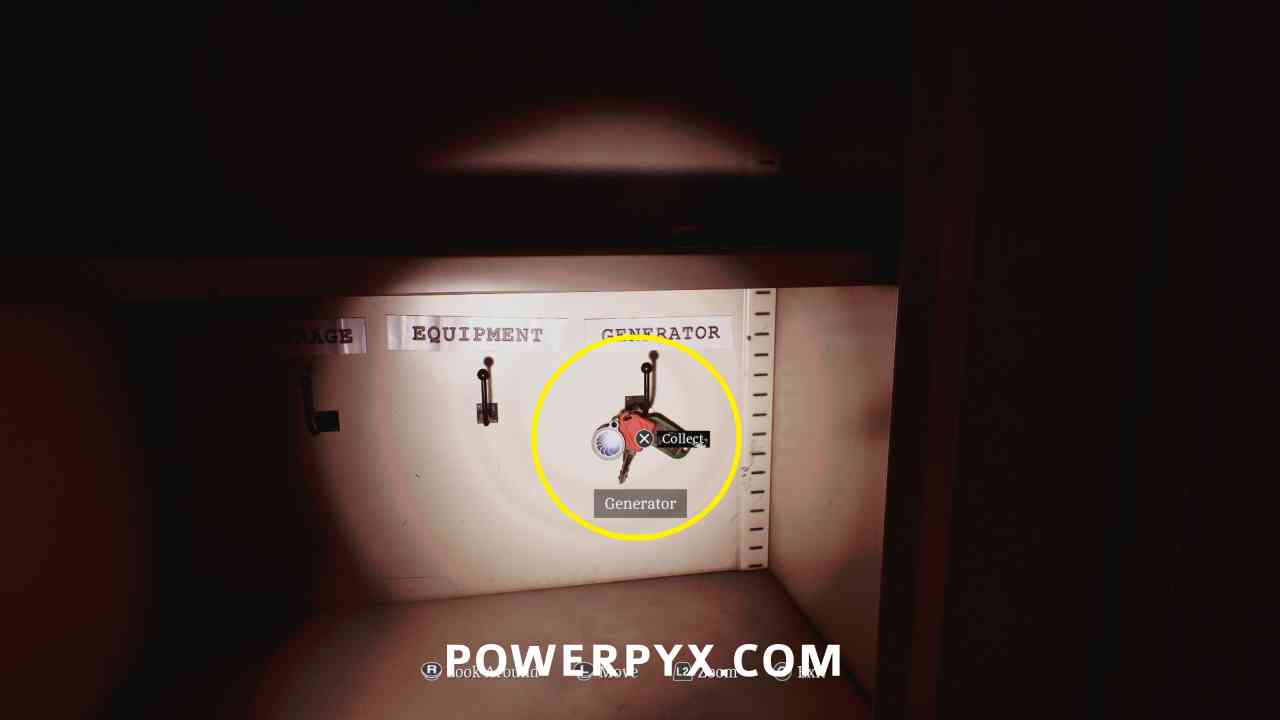
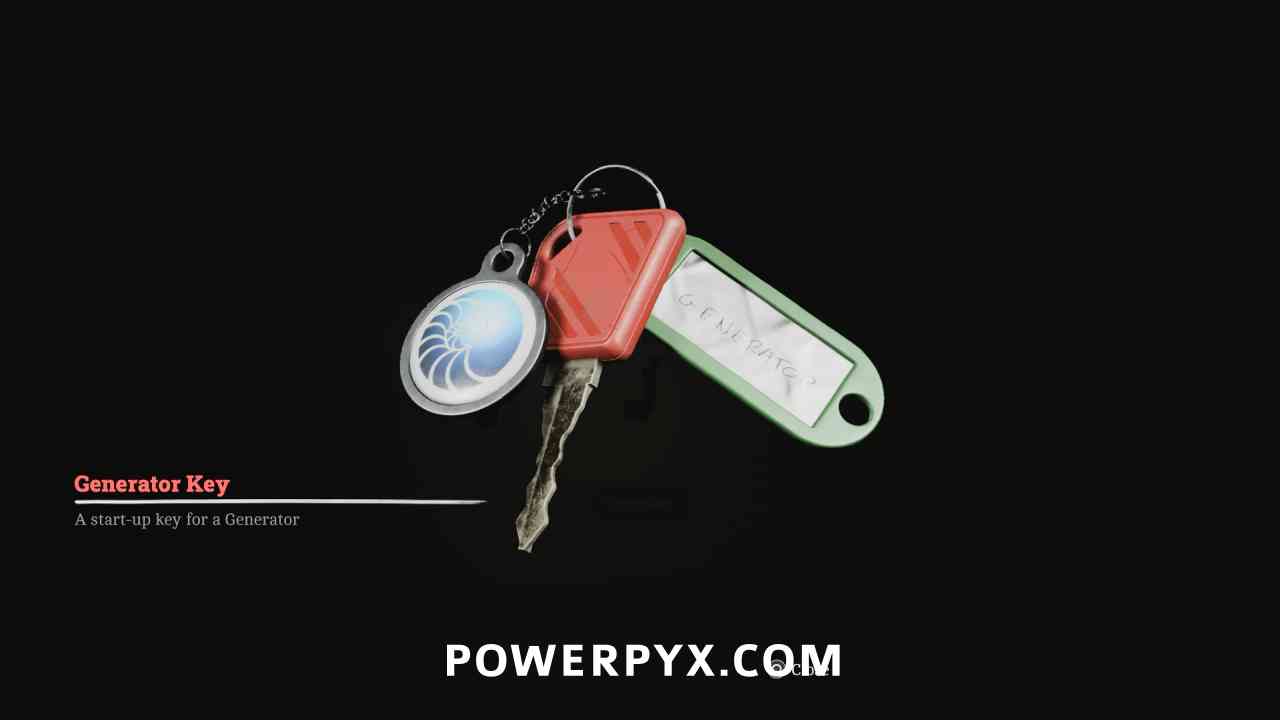
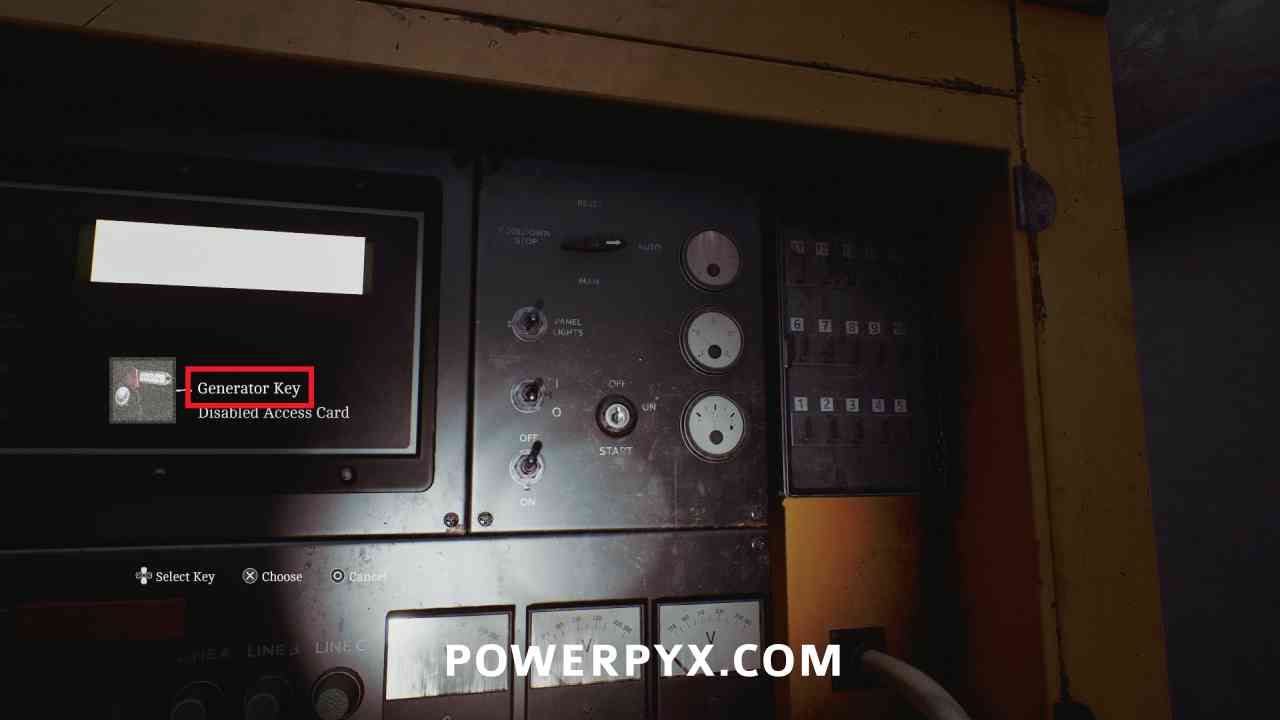
Key Item: Generator Key
Area: CEG HQ > Exterior
In the Managers Office behind the door, in a cabinet.
Puzzle #27
Area: CEG HQ > Exterior
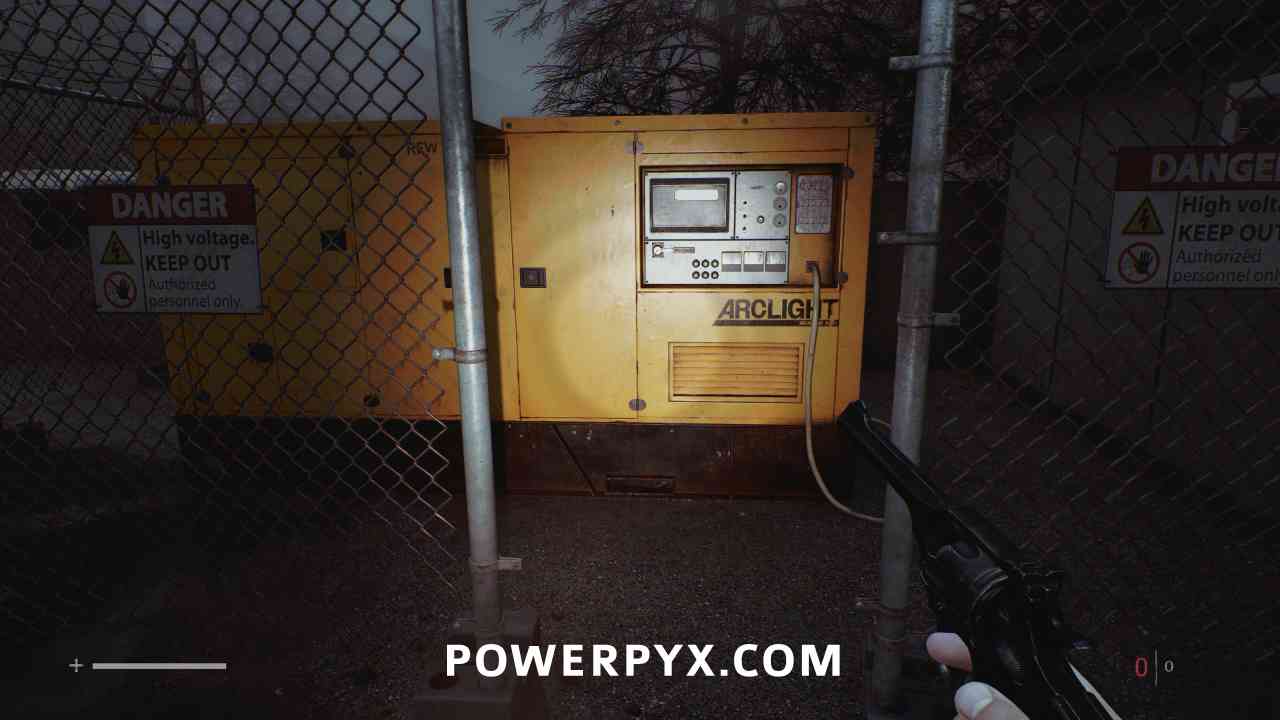
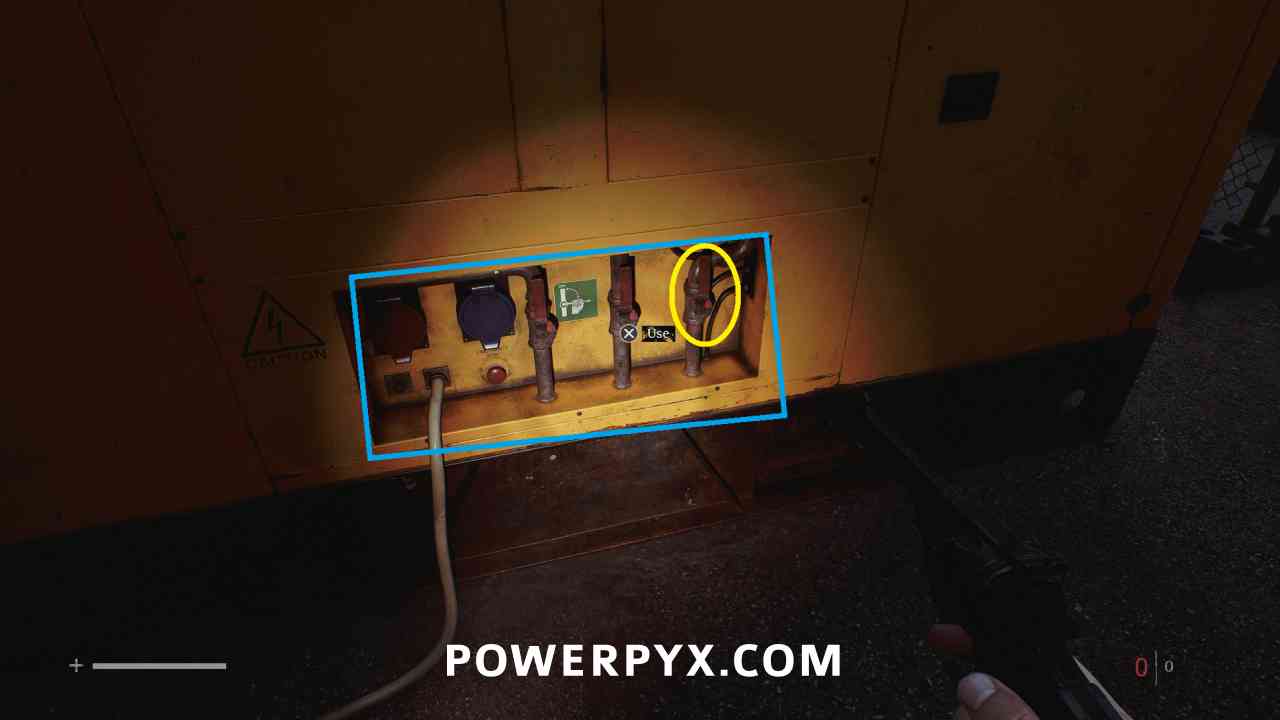
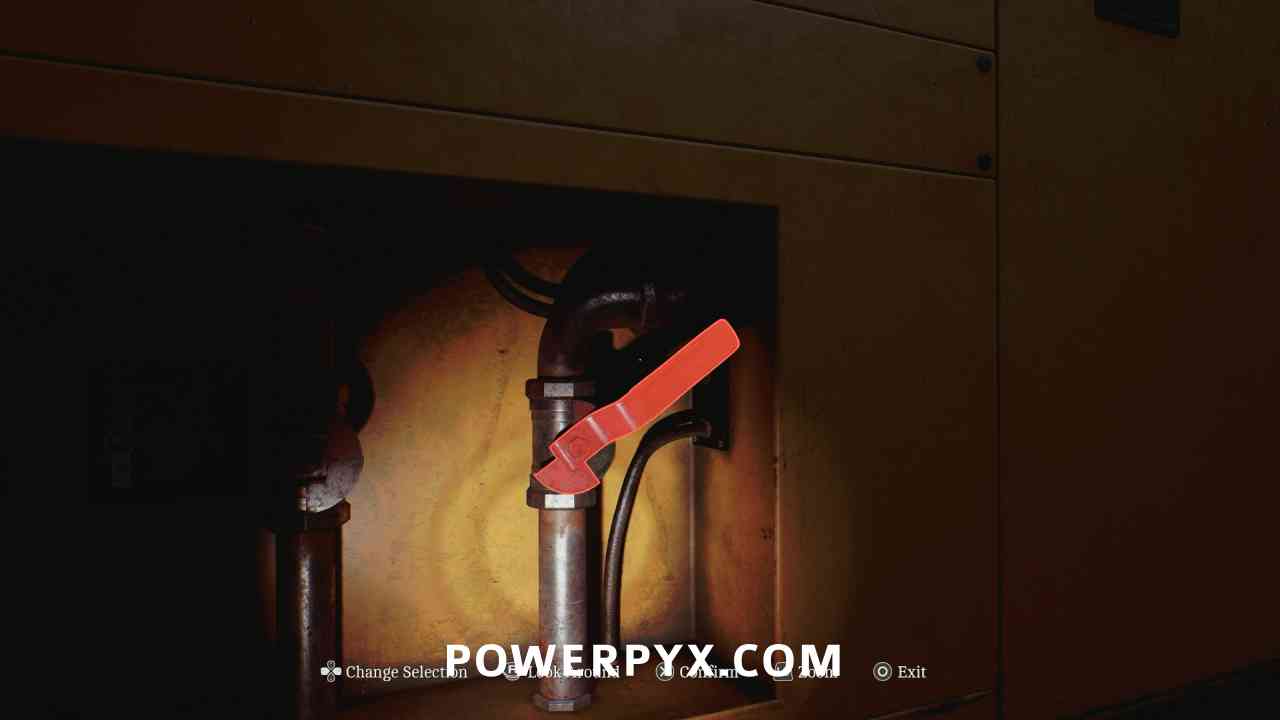
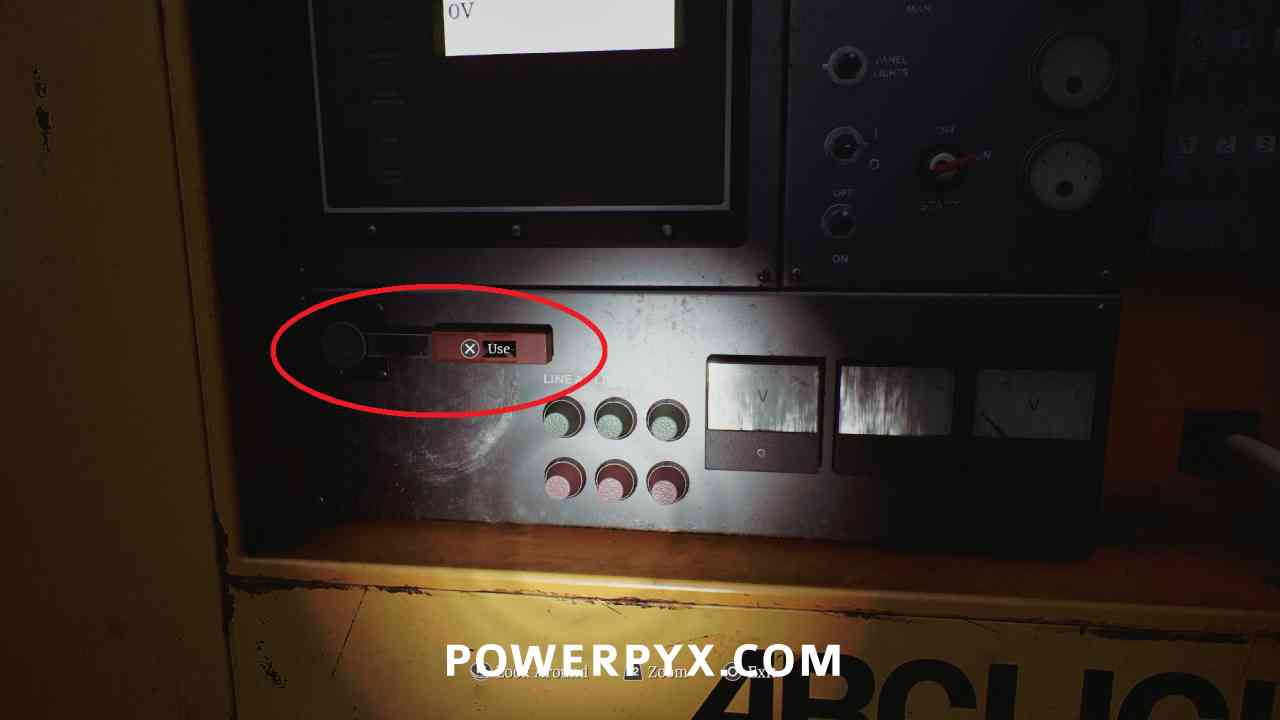
Go over to the generator outside. Walk around the back and turn the right lever so that it is diagonal, leave the left and middle vertical (off). Go to the front and interact with the panel, placing the key on the right. Then pull the red lever on the left. This turns on the generator and allows you to use the elevator to enter the building.
13. Richard: Another Attempt
CEG HQ > 2nd Floor
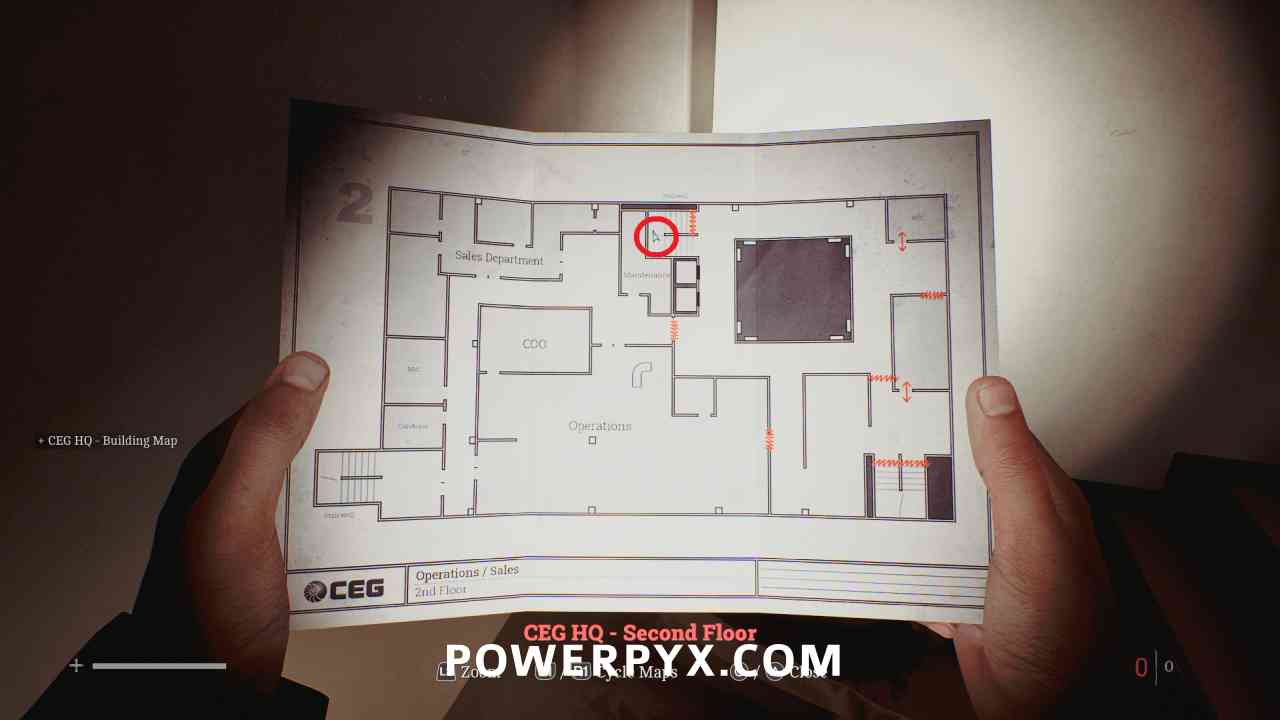
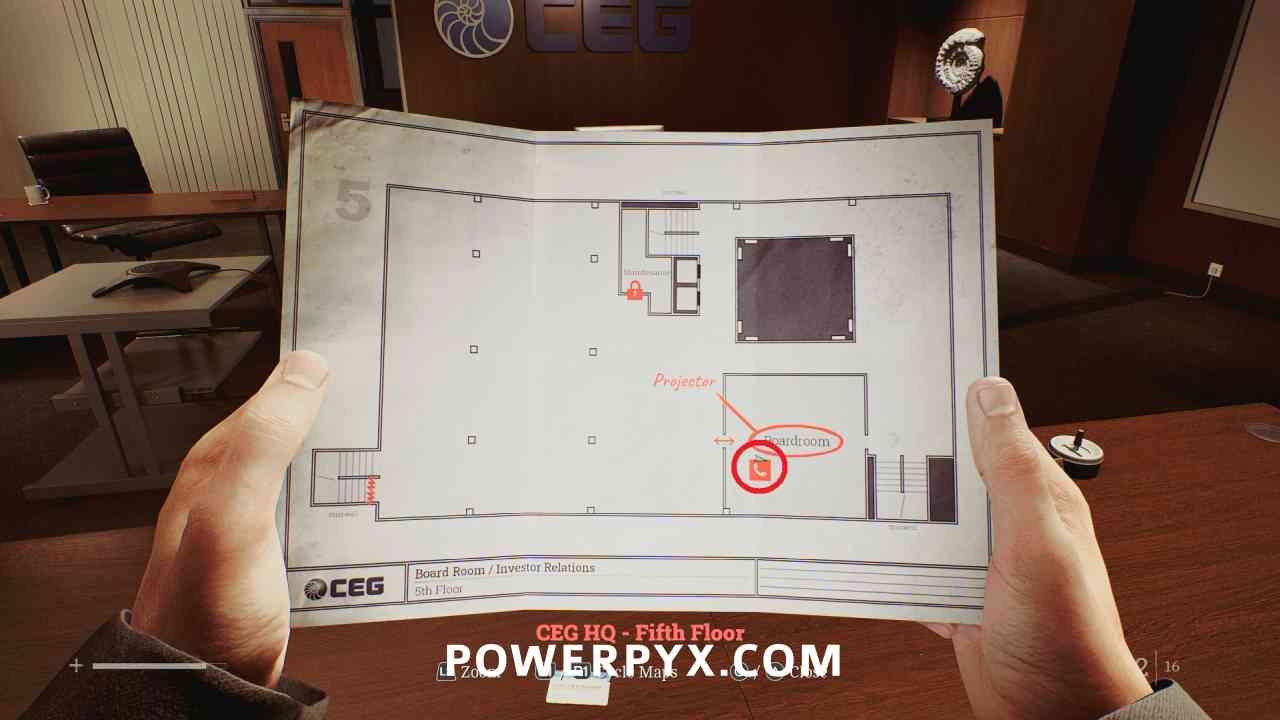
CEG HQ – Mezzanine > Fifth Floor Map
Area: CEG HQ > 2nd Floor
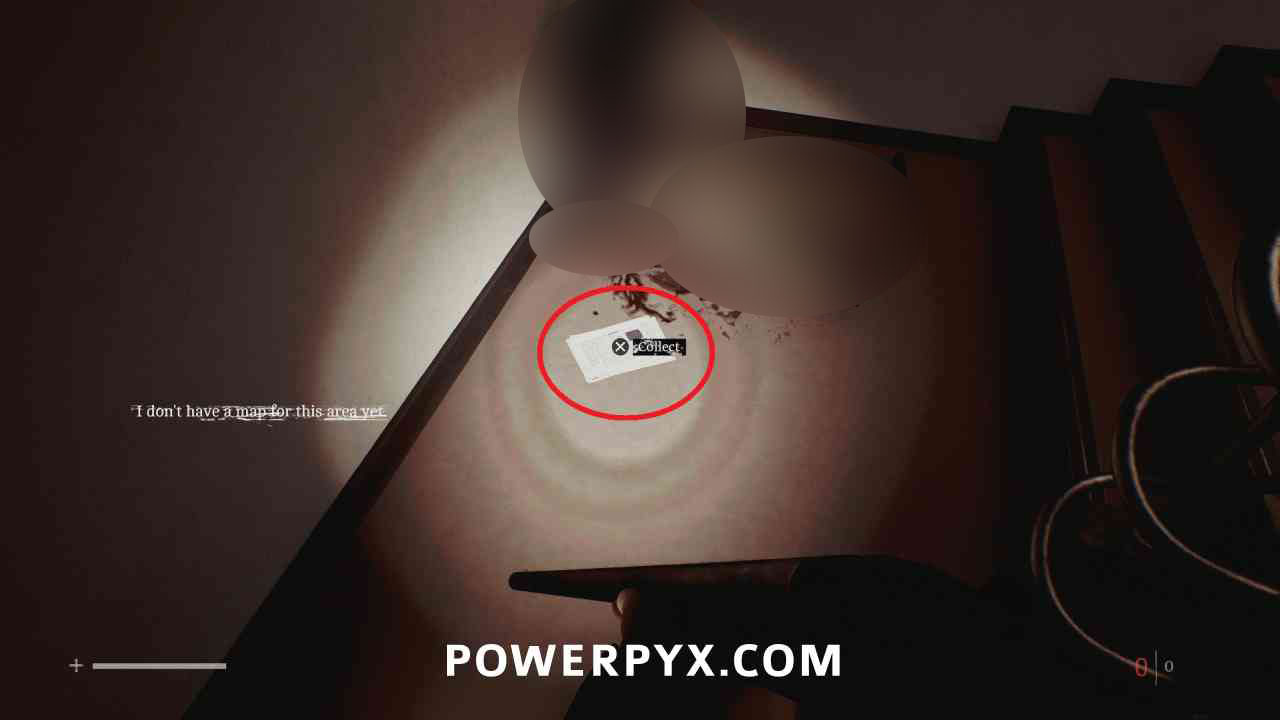
On the stairs going from the 2nd Floor to the 3rd floor, beside a body.
CEG HQ > 5th Floor
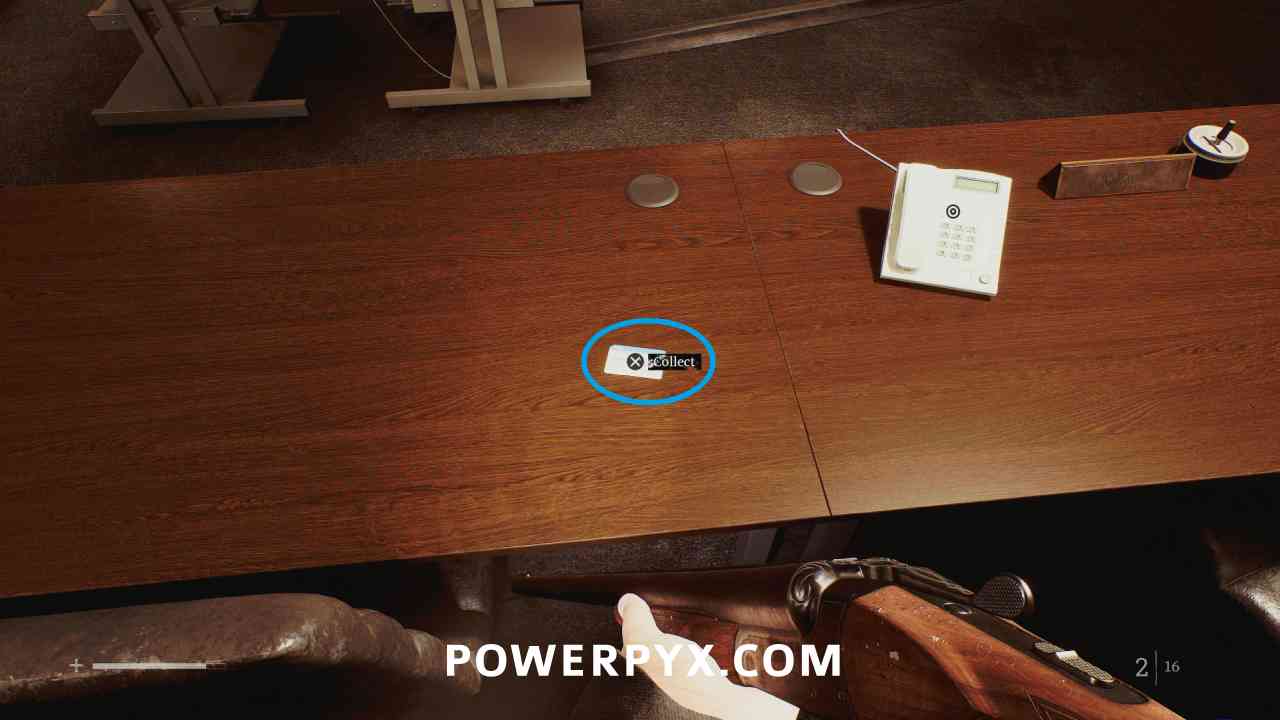
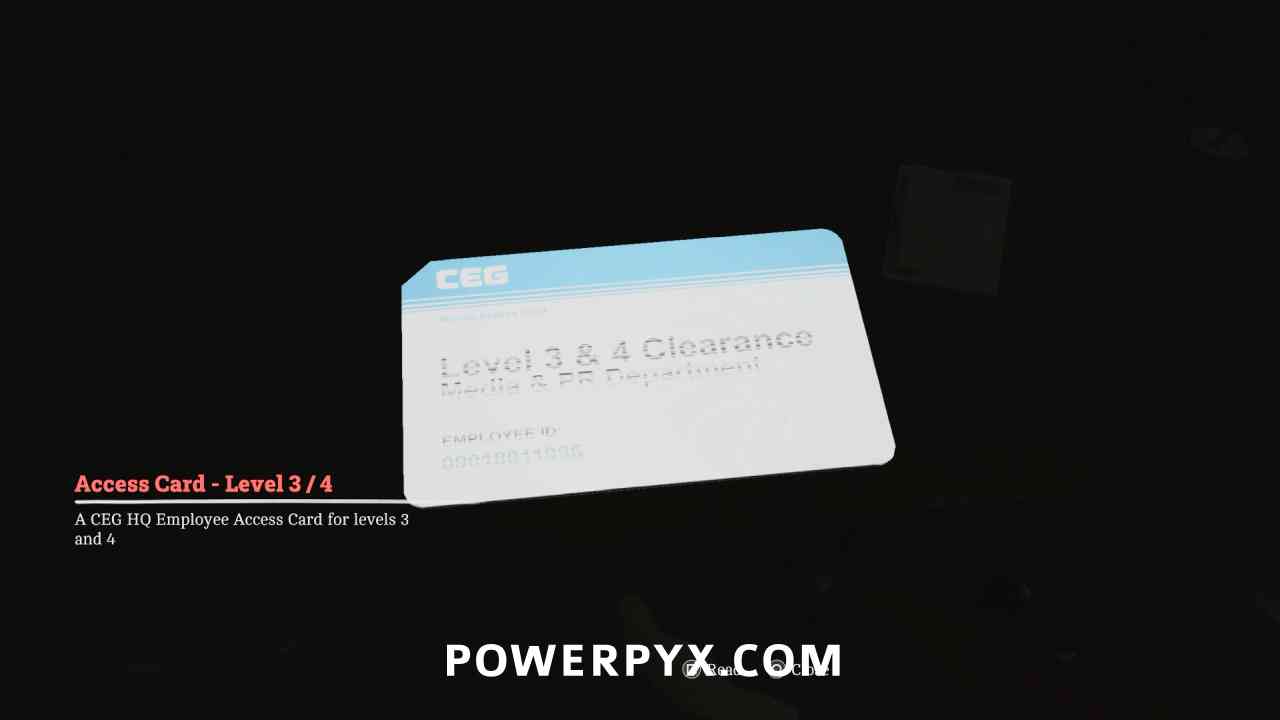
Key Item: Access Card – Level 3/4
Area: CEG HQ > 5th Floor
In the Boardroom after the cutscene, on the table. Allows you to use door pads on the 3rd and 4th floors.
CEG HQ > 3rd Floor
Locked Door – Finance and Public Relations
Area: CEG HQ > 3rd Floor
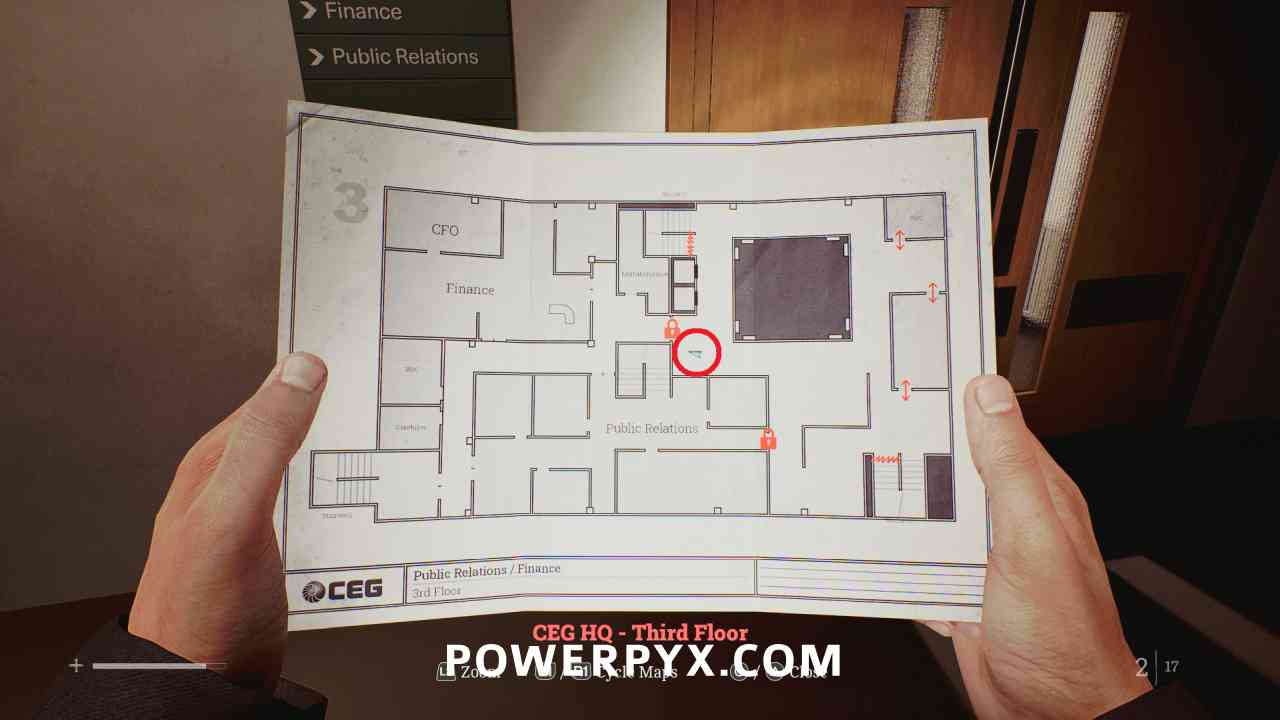
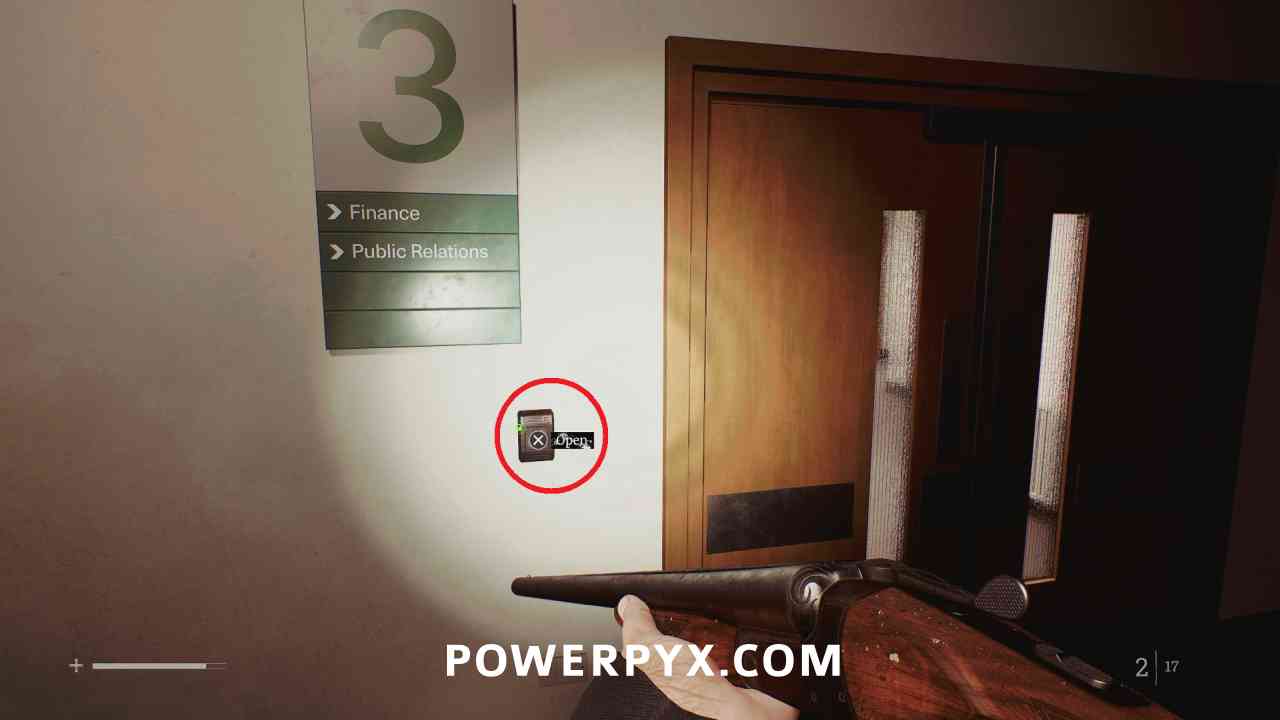
On the third floor, use the Access Card to open the door leading to the west side of the area (Finance and Public Relations).
Locked Door: Public Relations
Area: CEG HQ > 3rd Floor
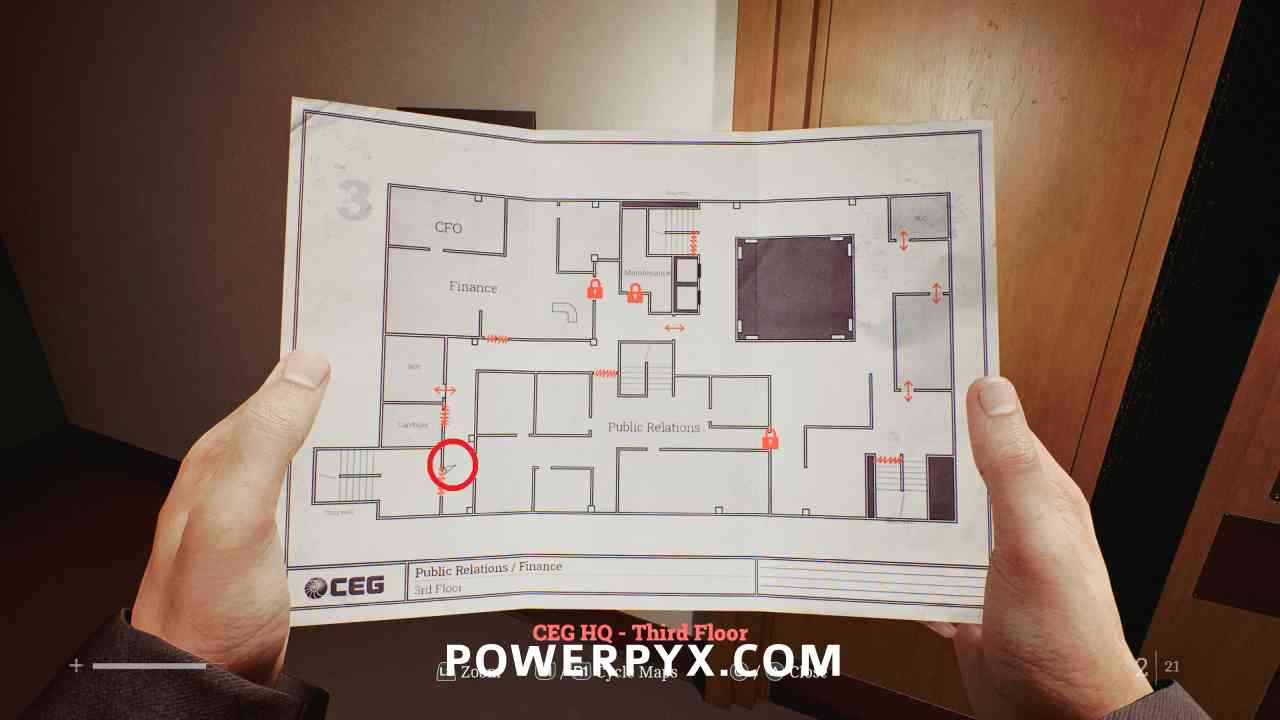
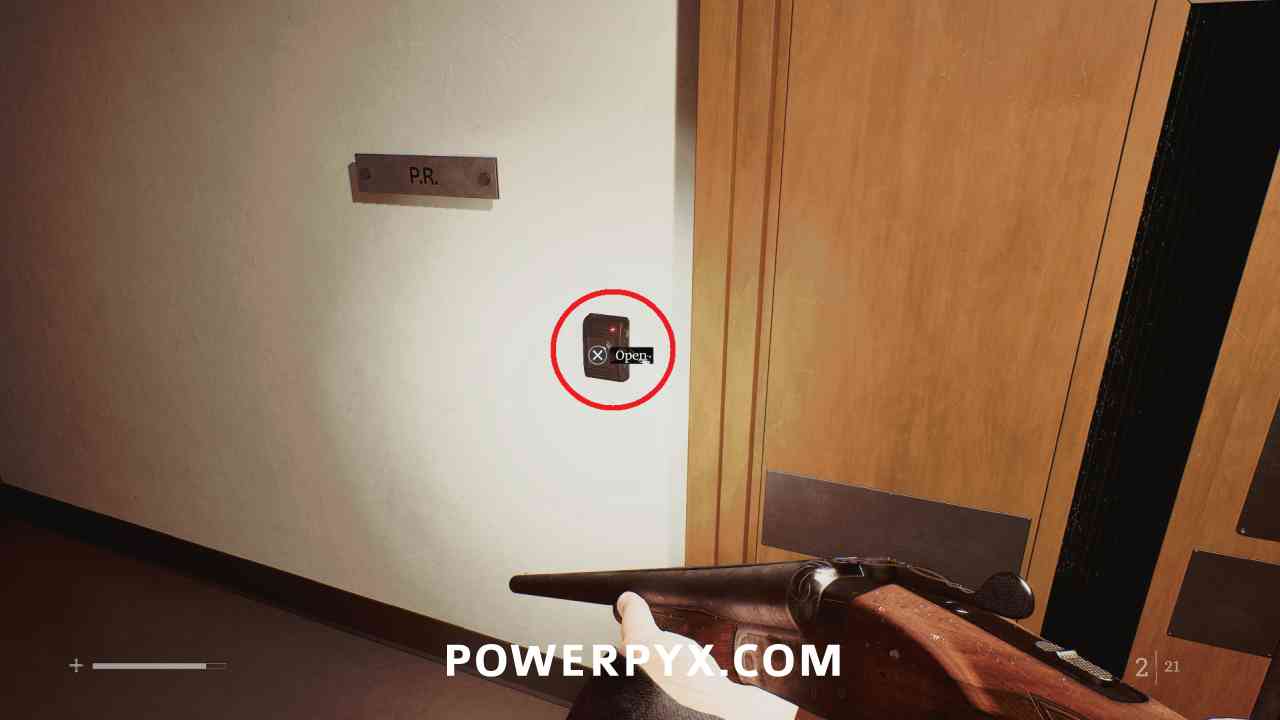
Go to the southwest corner and use the Access Card to enter the Public Relations area.
CEG HQ > 4th Floor
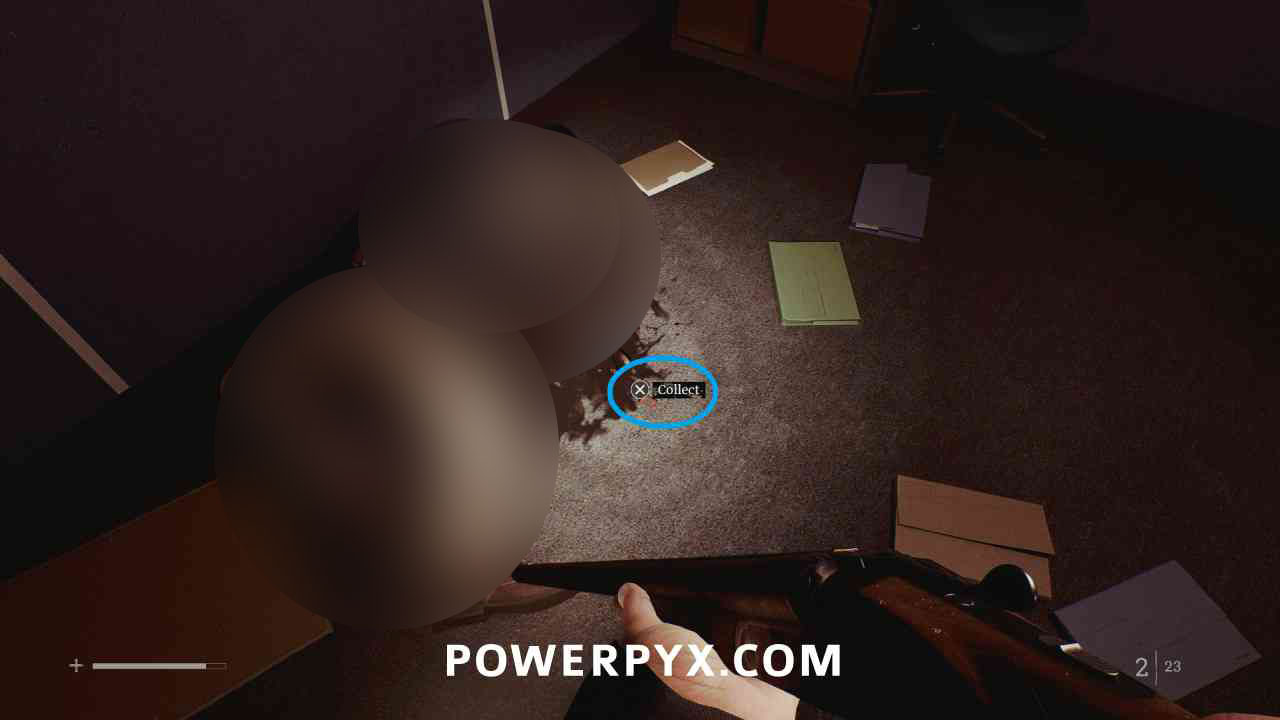
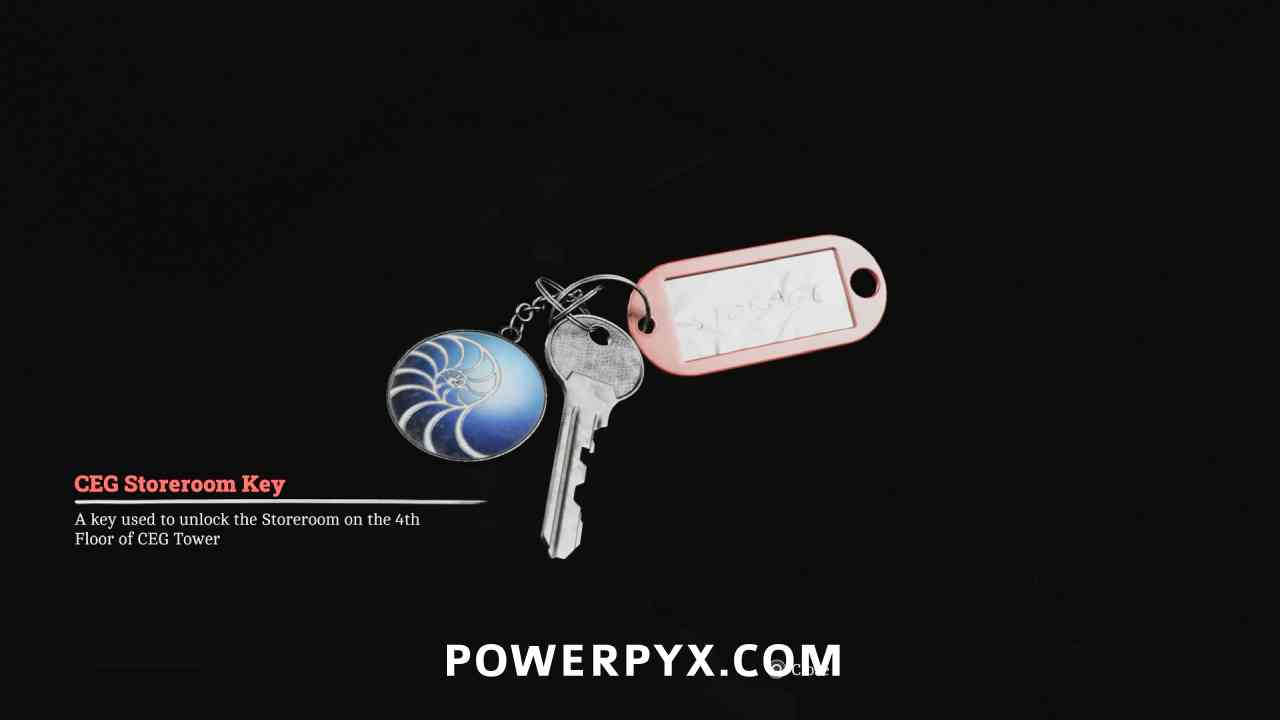
Key Item: CEG Storeroom Key
Area: CEG HQ > 4th Floor
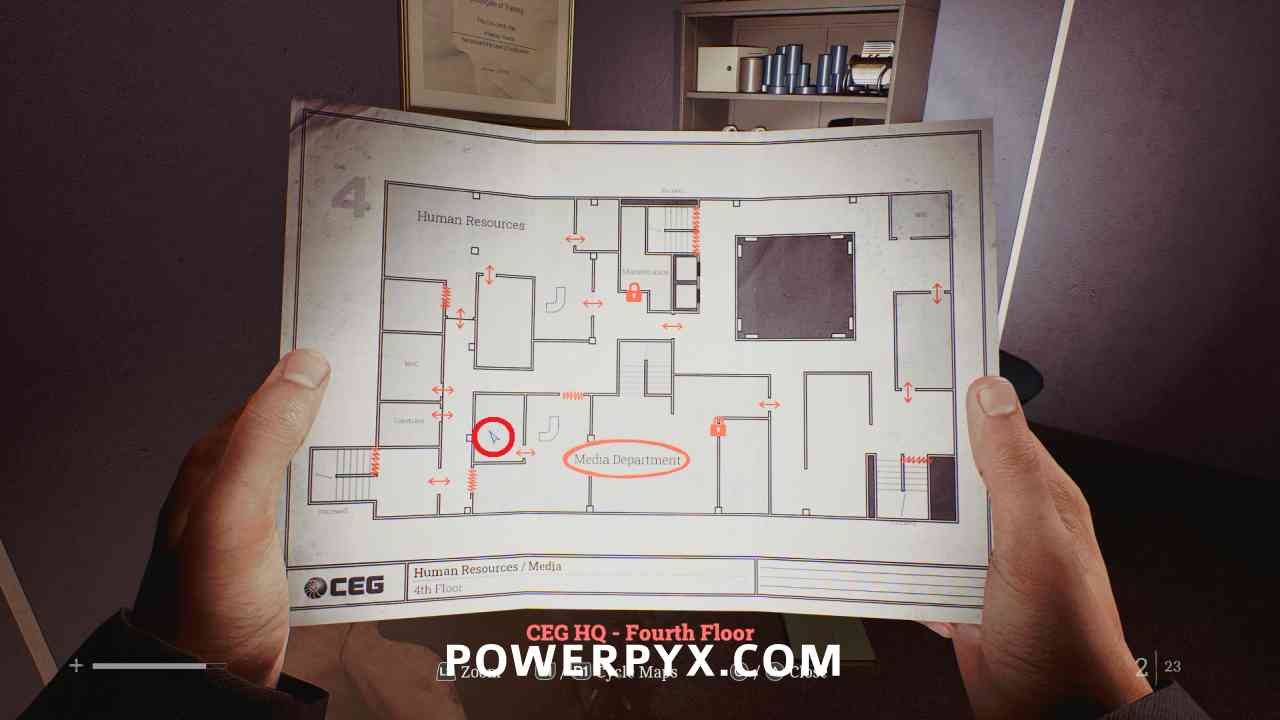
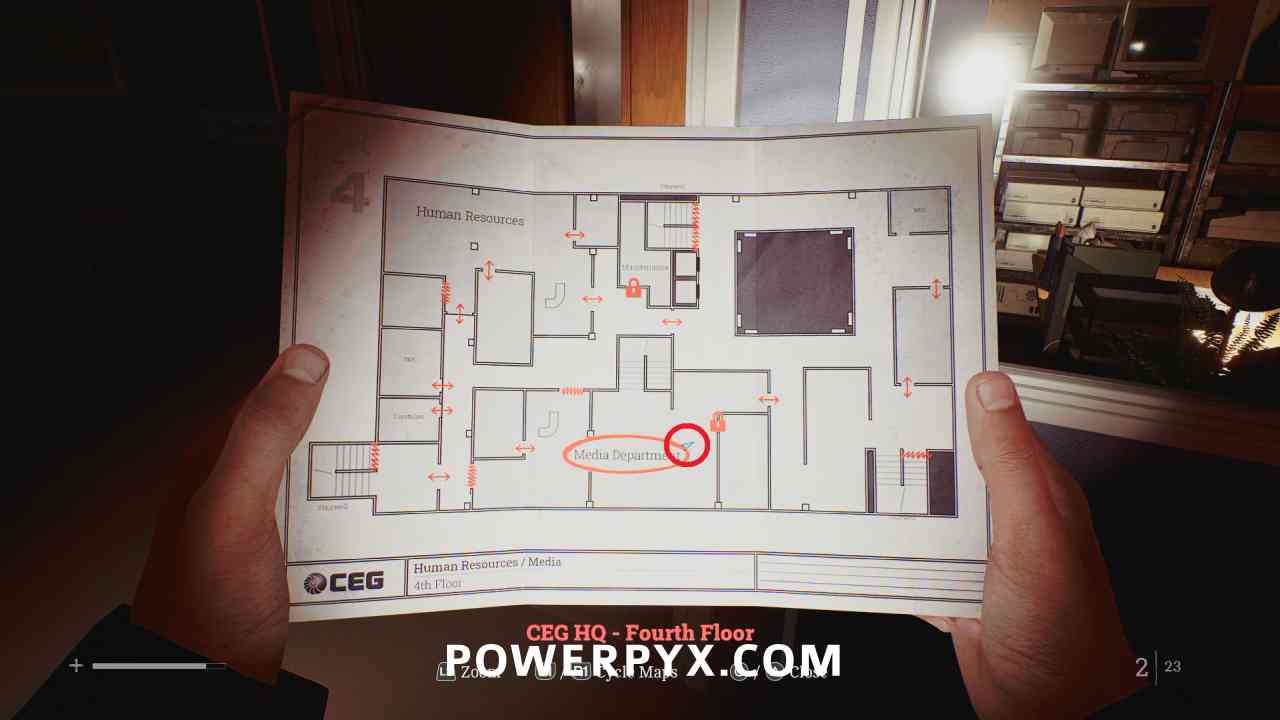
Go up the stairs in PR to the Media Department, then into the room on the west side where this is on the ground by a body.
Locked Door: Media Department Storeroom
Area: CEG HQ > 4th Floor
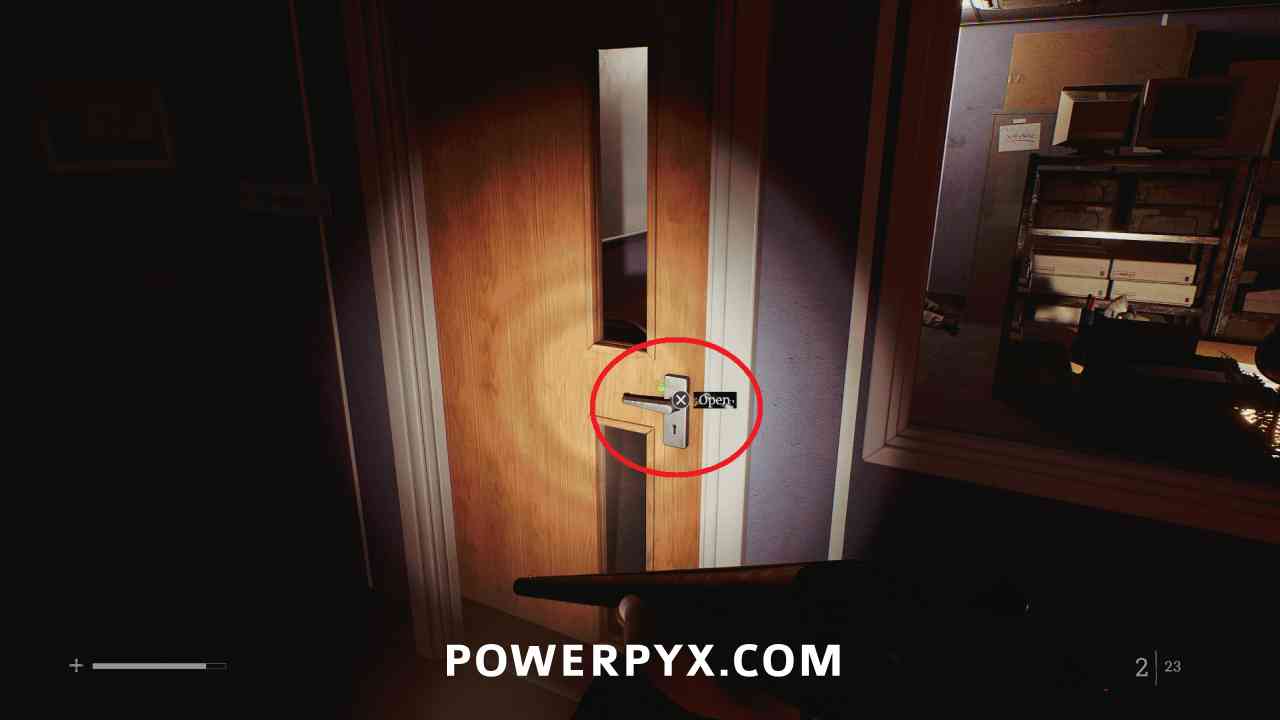
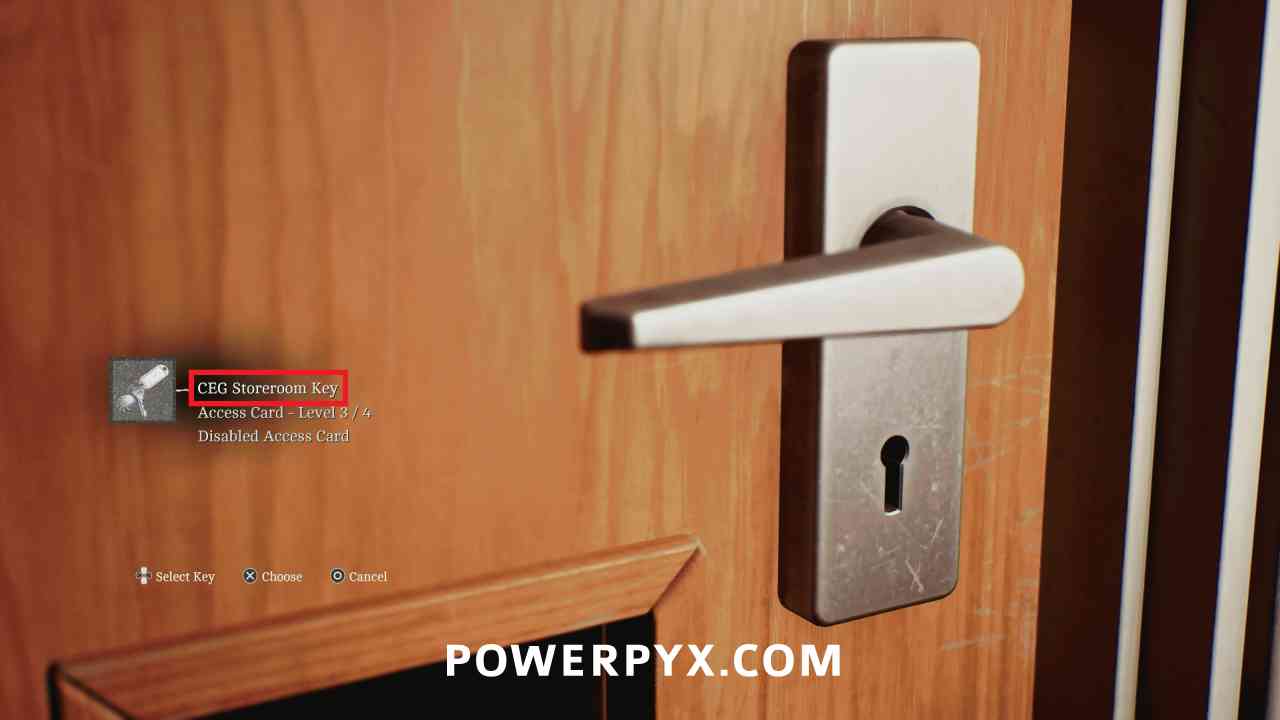
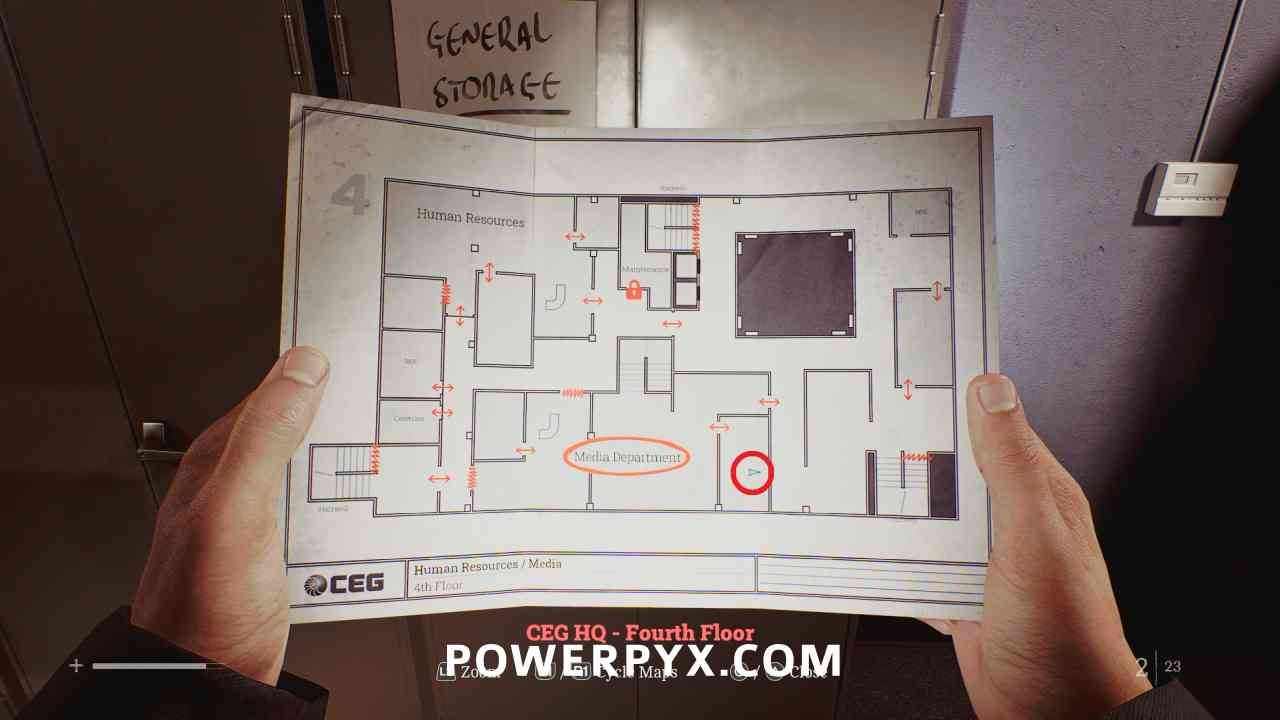
Go to the other side of the Media Department and use the CEG Storeroom Key to open the door.
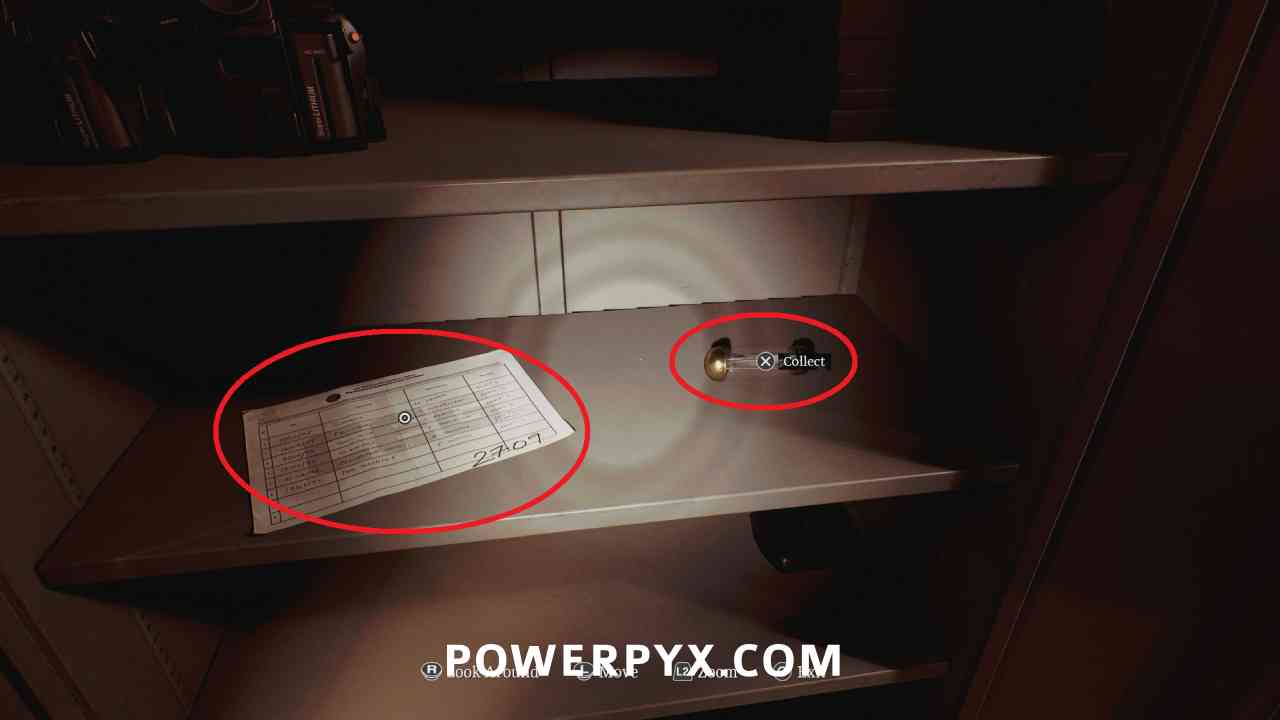
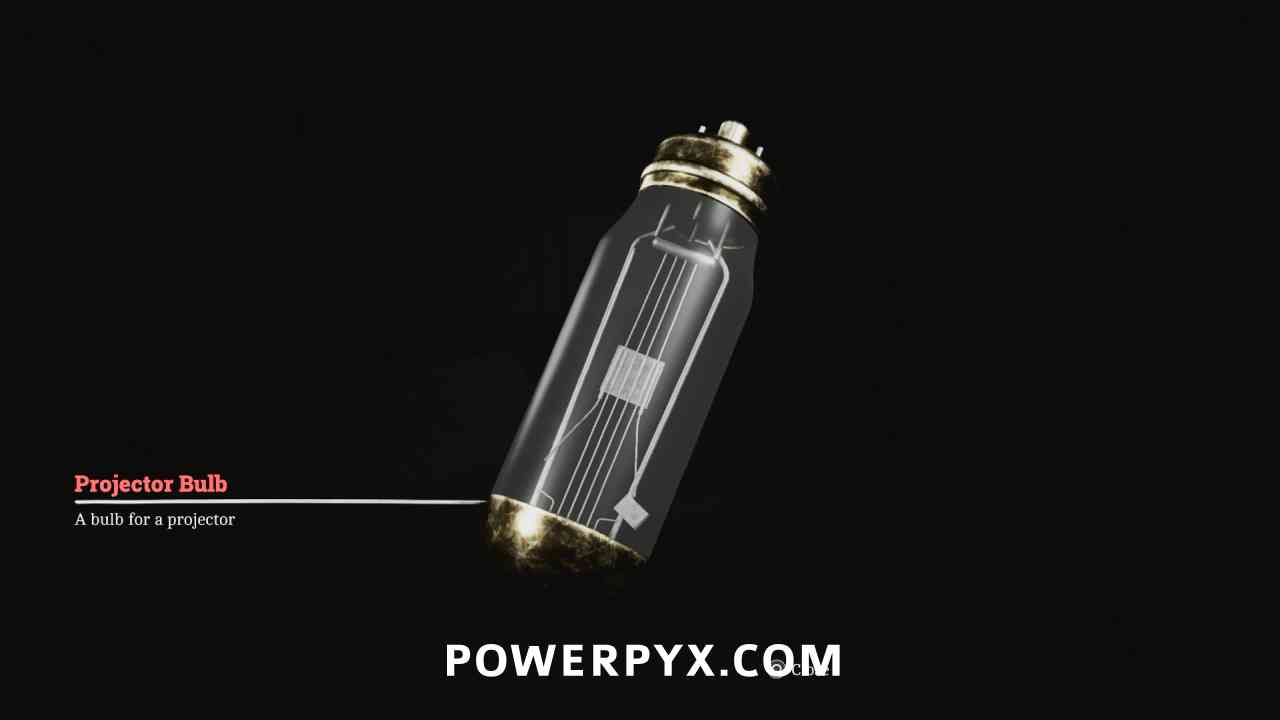
Key Item: Projector Bulb
Area: CEG HQ > 4th Floor
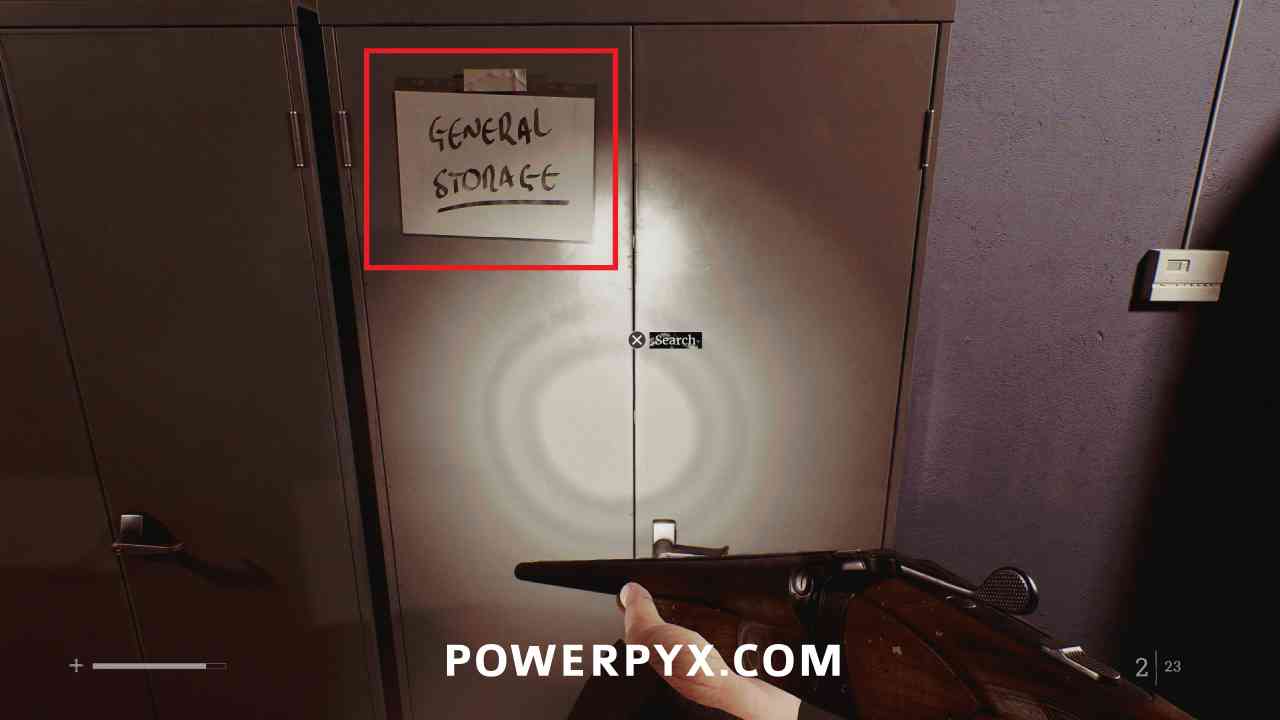
In the storeroom, in the GENERAL STORAGE cabinet.
CEG HQ > 3rd Floor
Locked Door: Finance
Area: CEG HQ > 3rd Floor
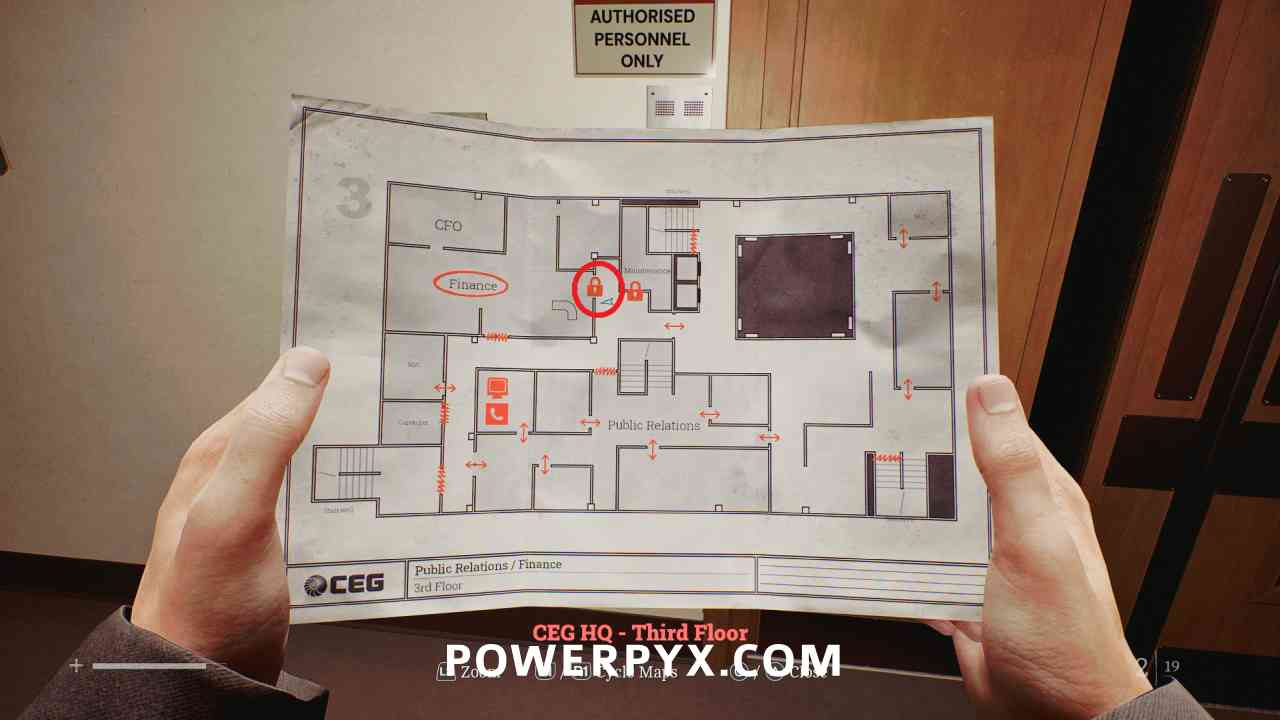
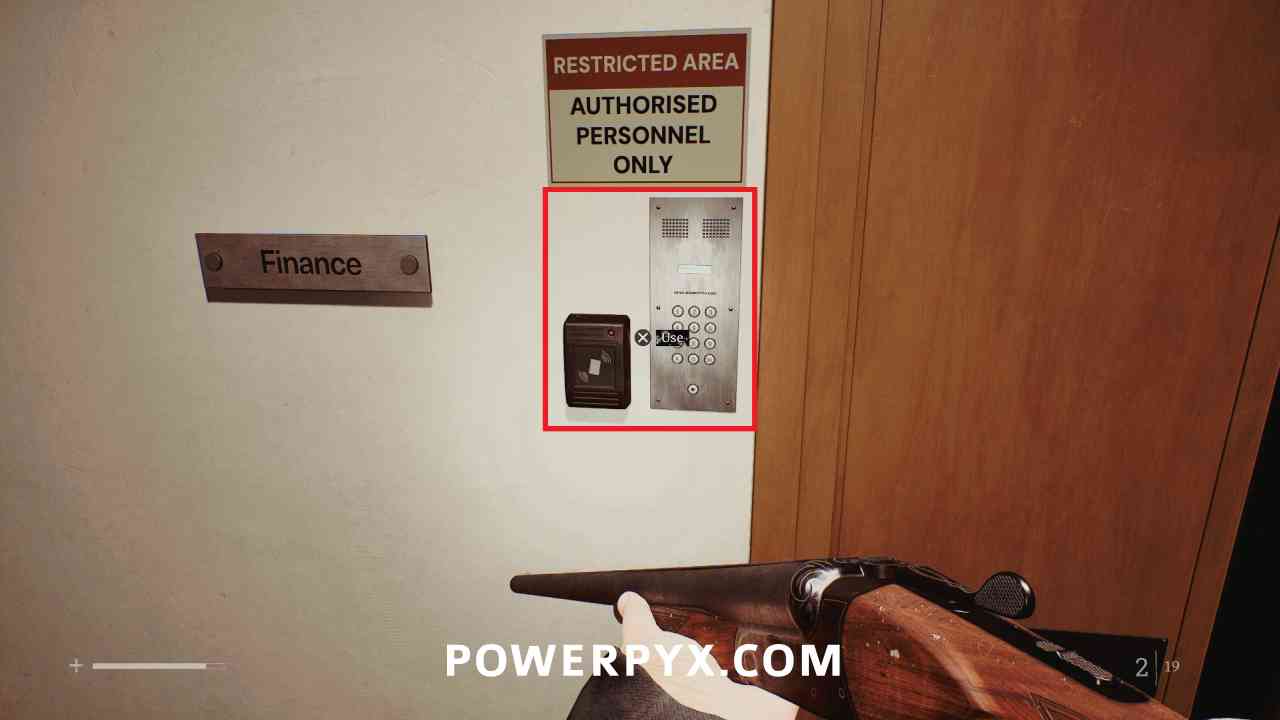
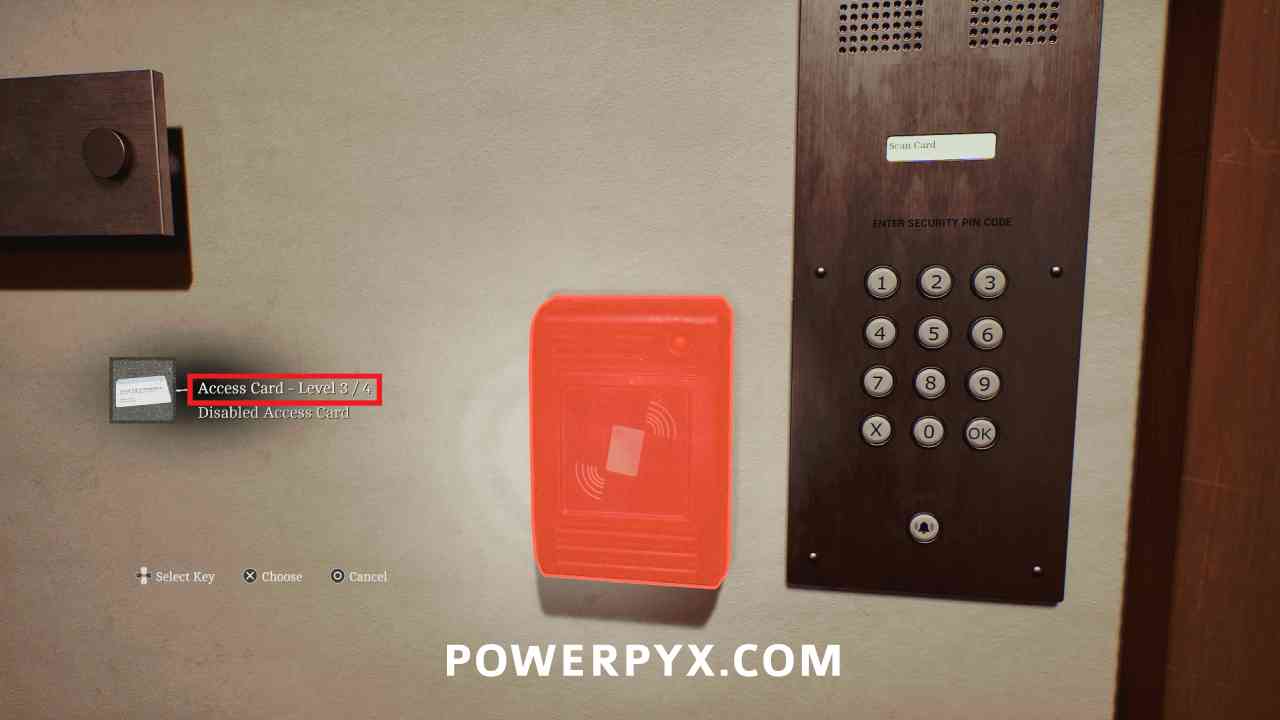
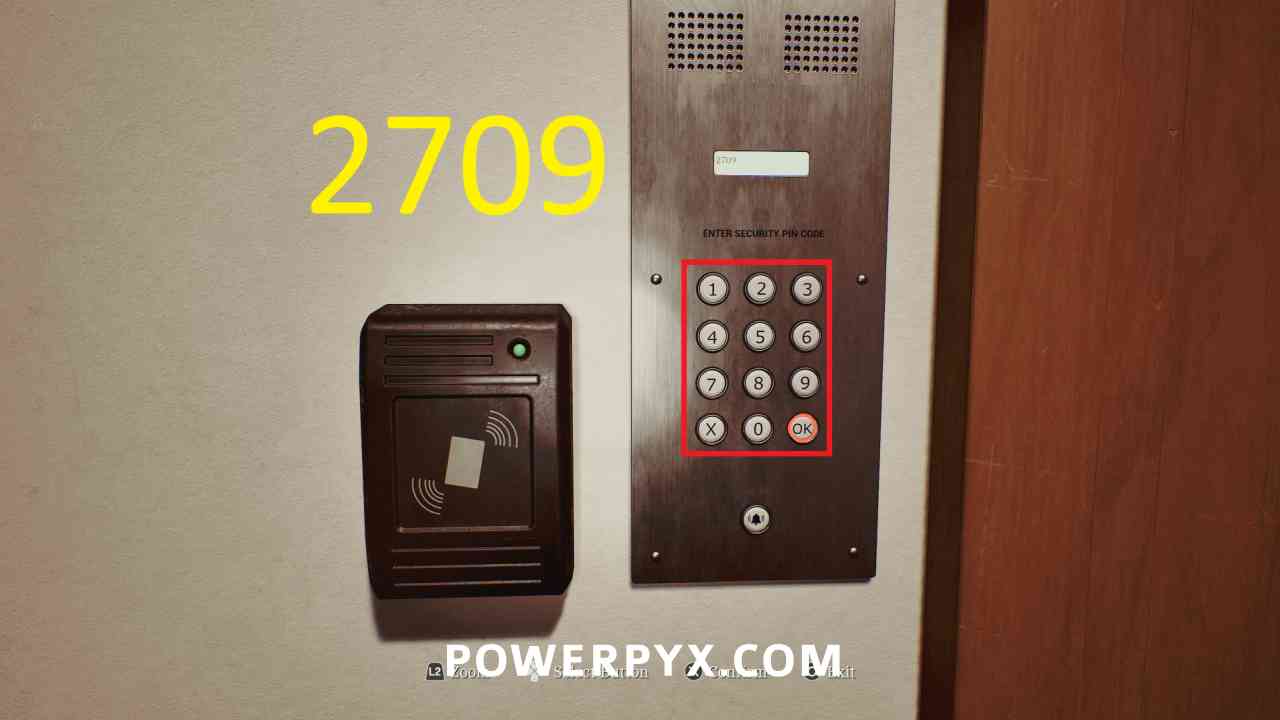
Go back to the 3rd Floor and to the locked door to the Finance area. Use the Access Card on the scanner, then enter 2709 (from the CEG Checkout Sheet) to open the door.
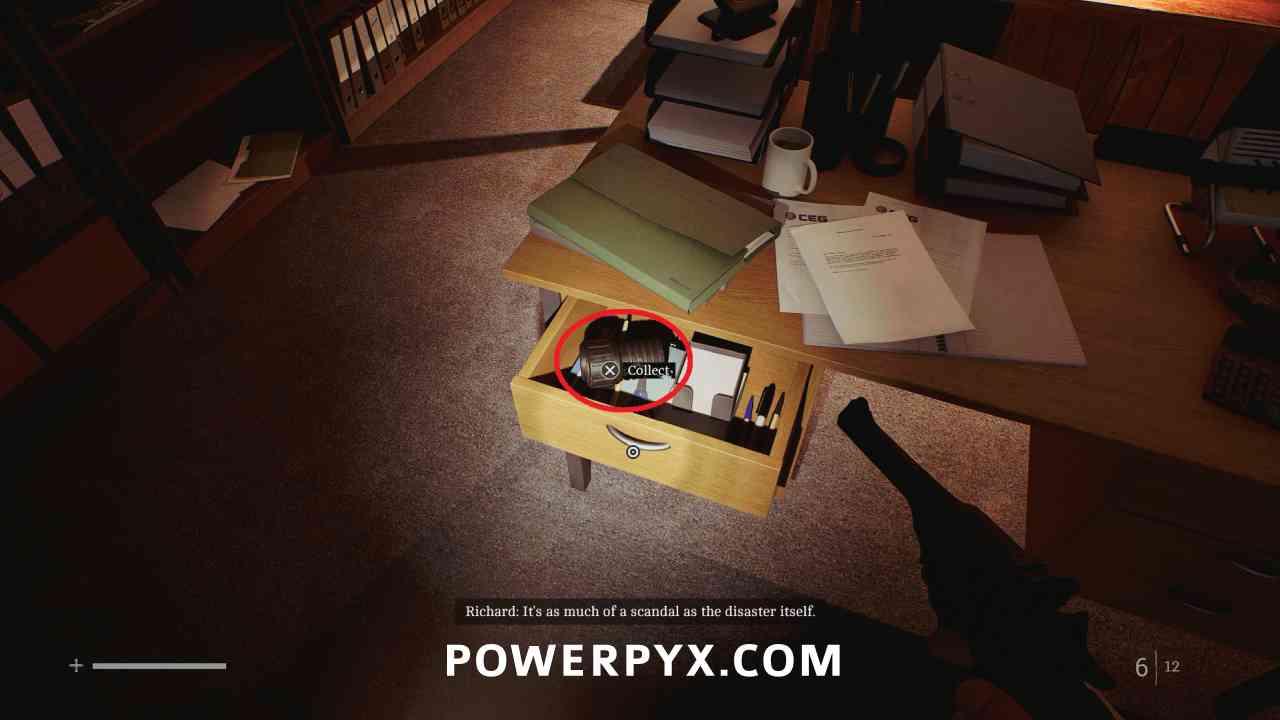
Key Item: Projector Lens
Area: CEG HQ > 3rd Floor
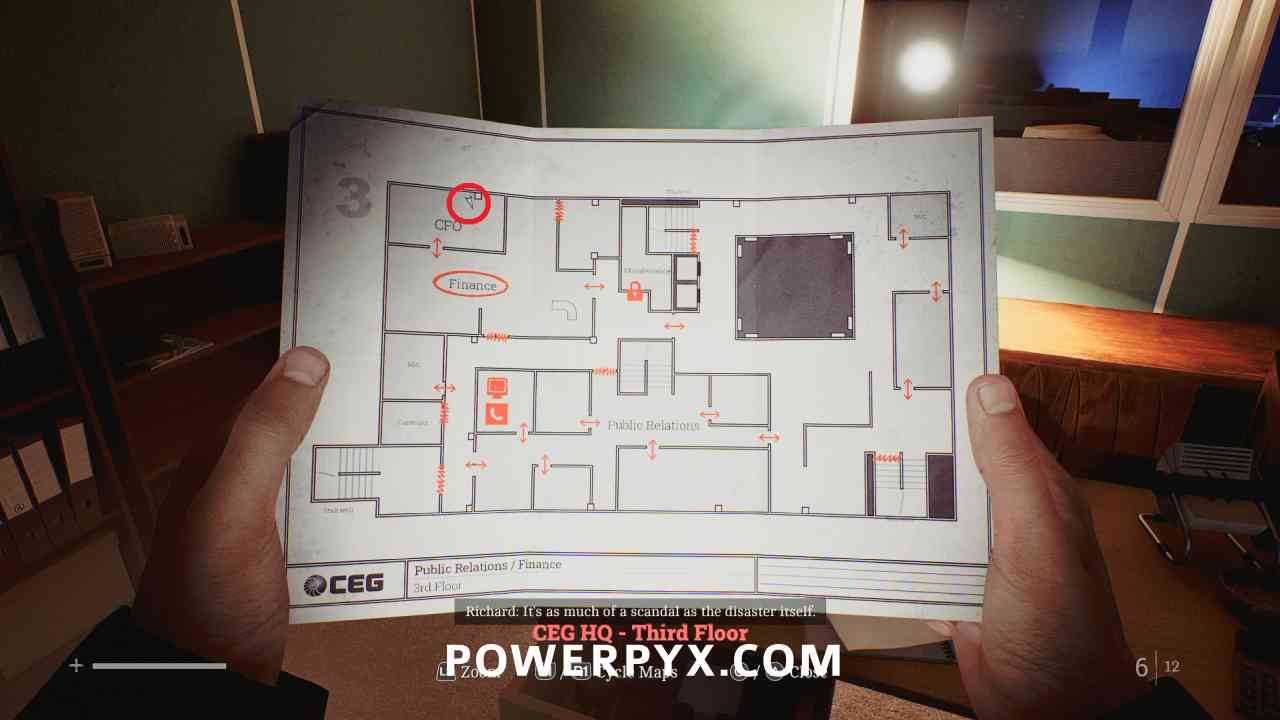
In the Finance area, go to the CFO room and this is in a desk drawer.

CEG HQ > 5th Floor
Puzzle #28
Area: CEG HQ > 5th Floor
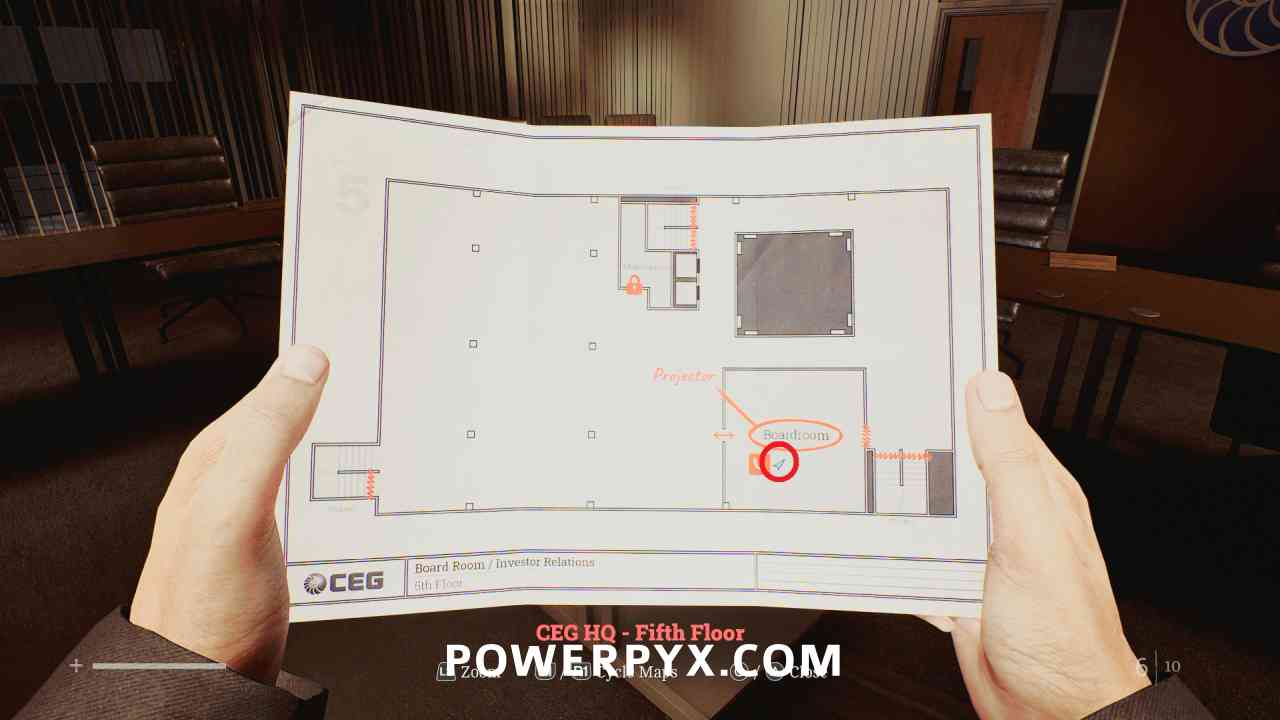
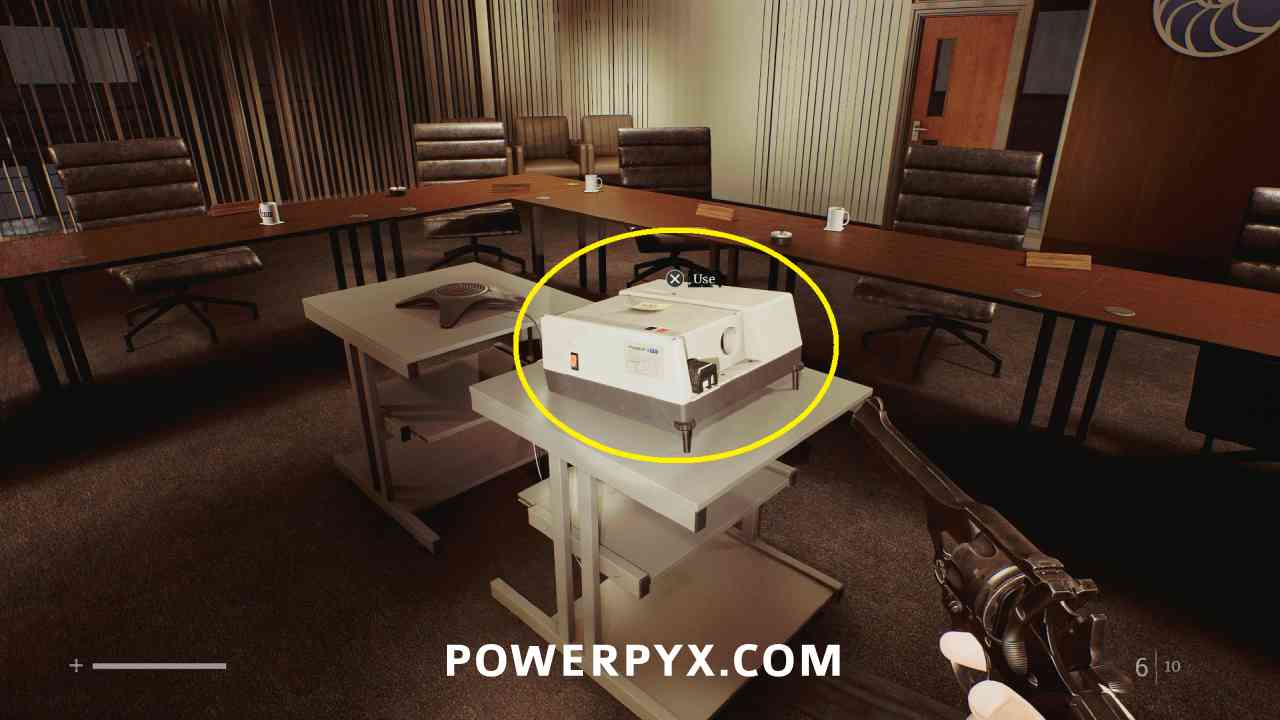
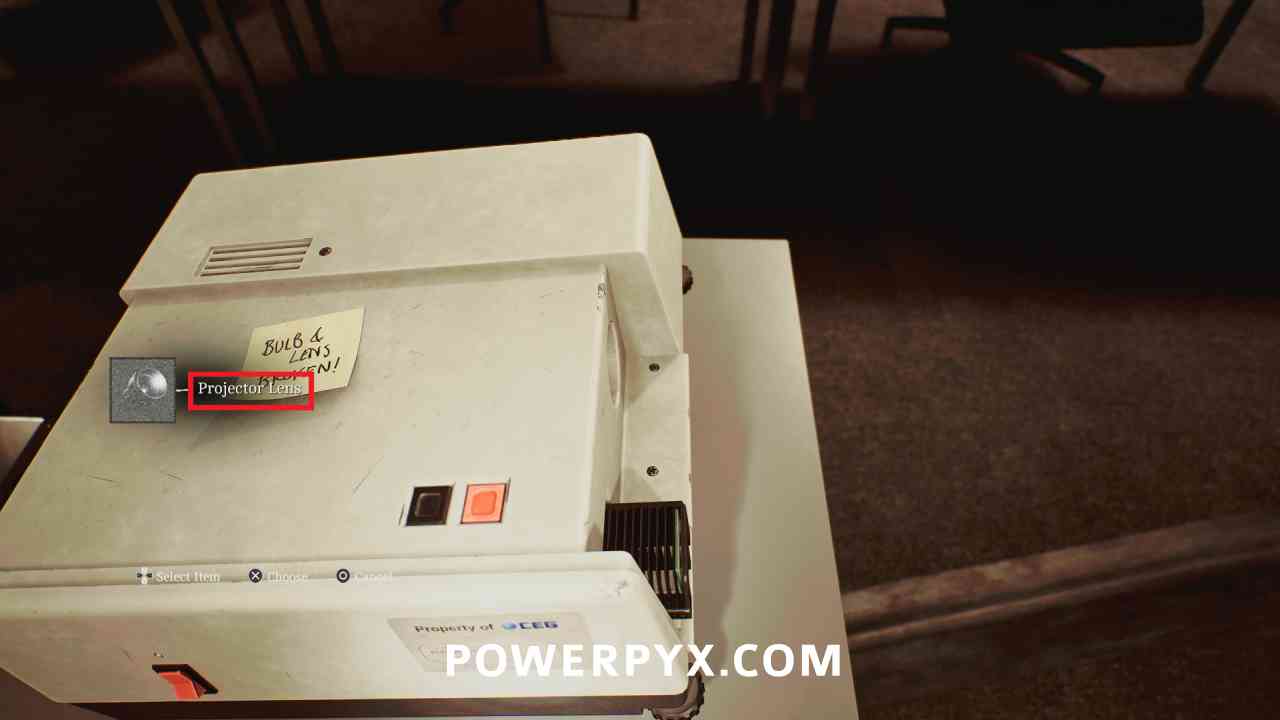
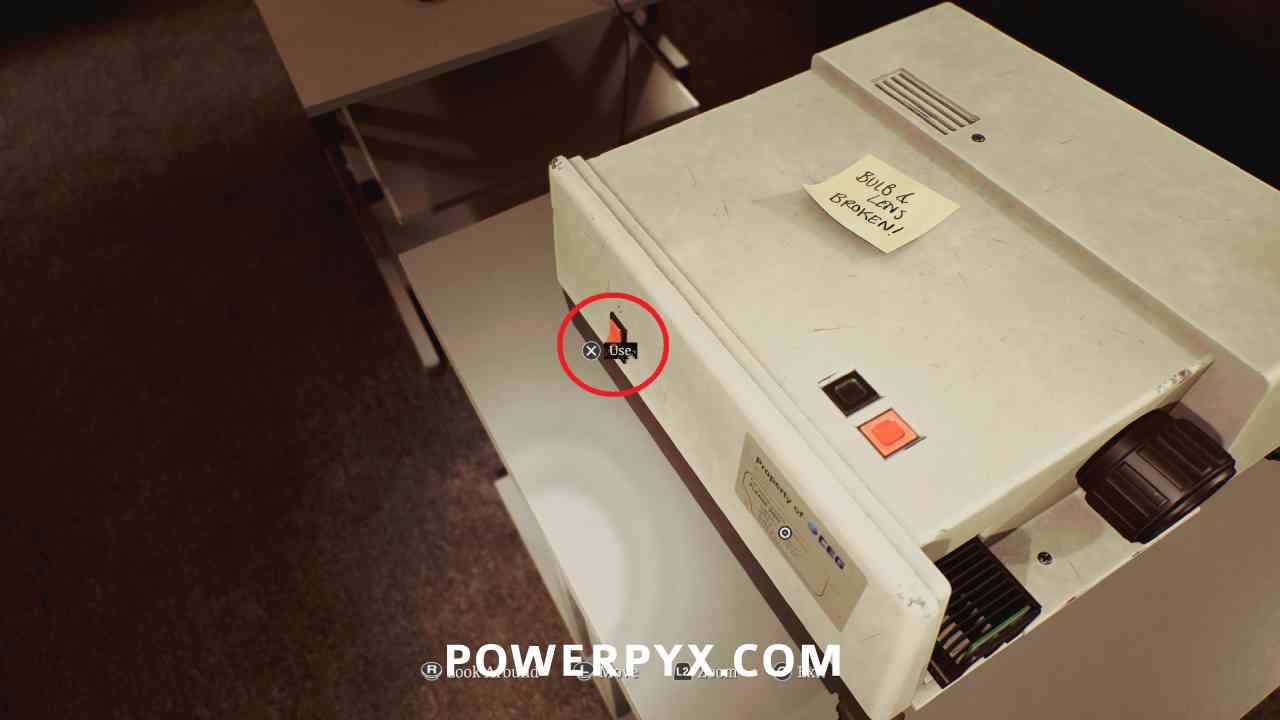
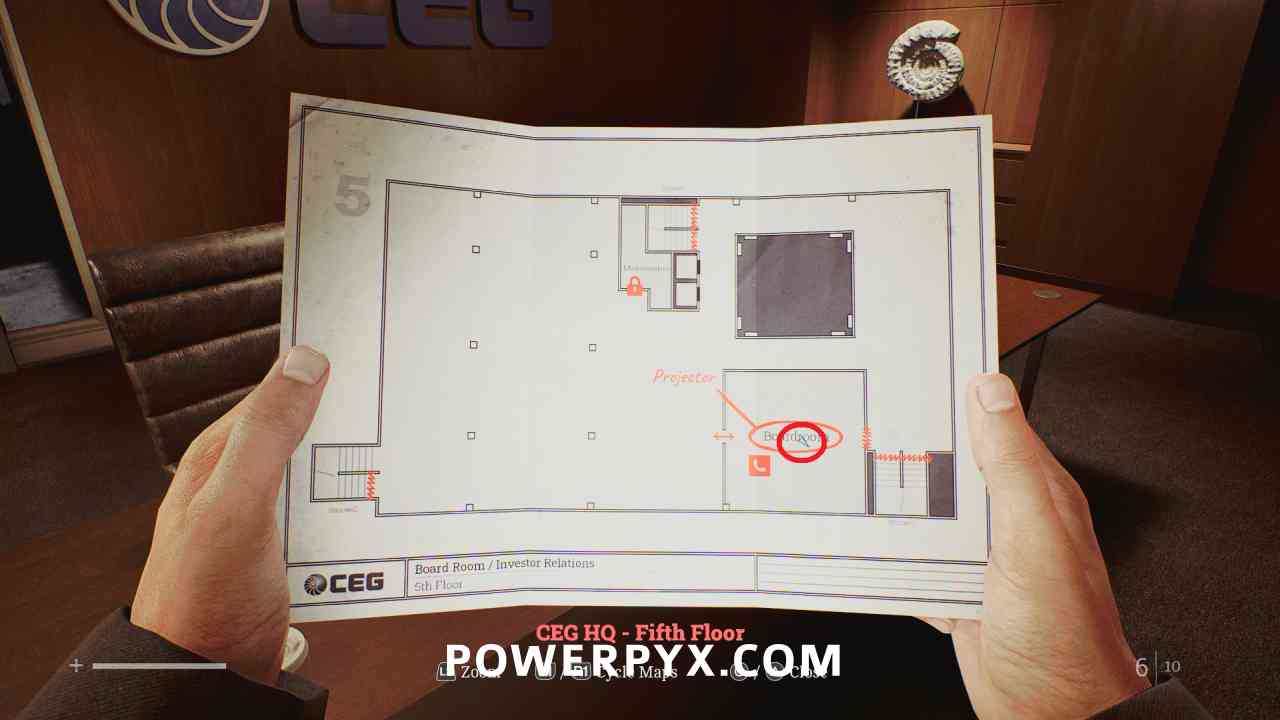
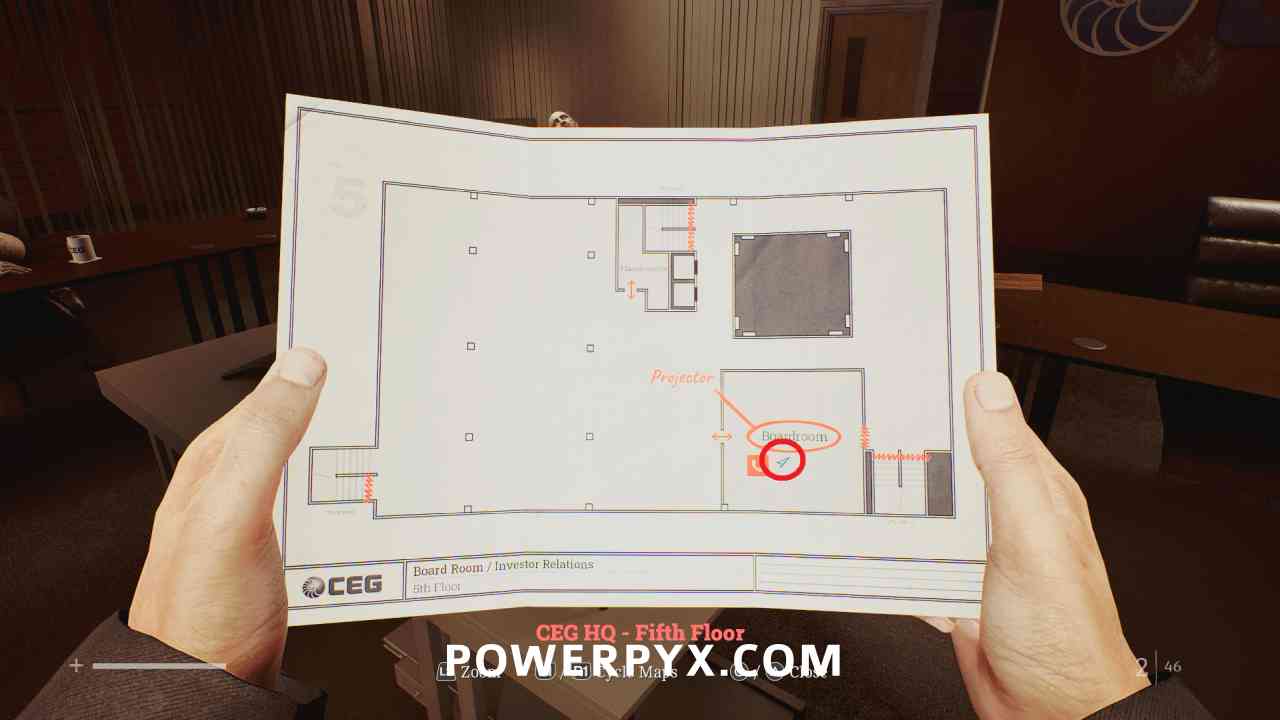
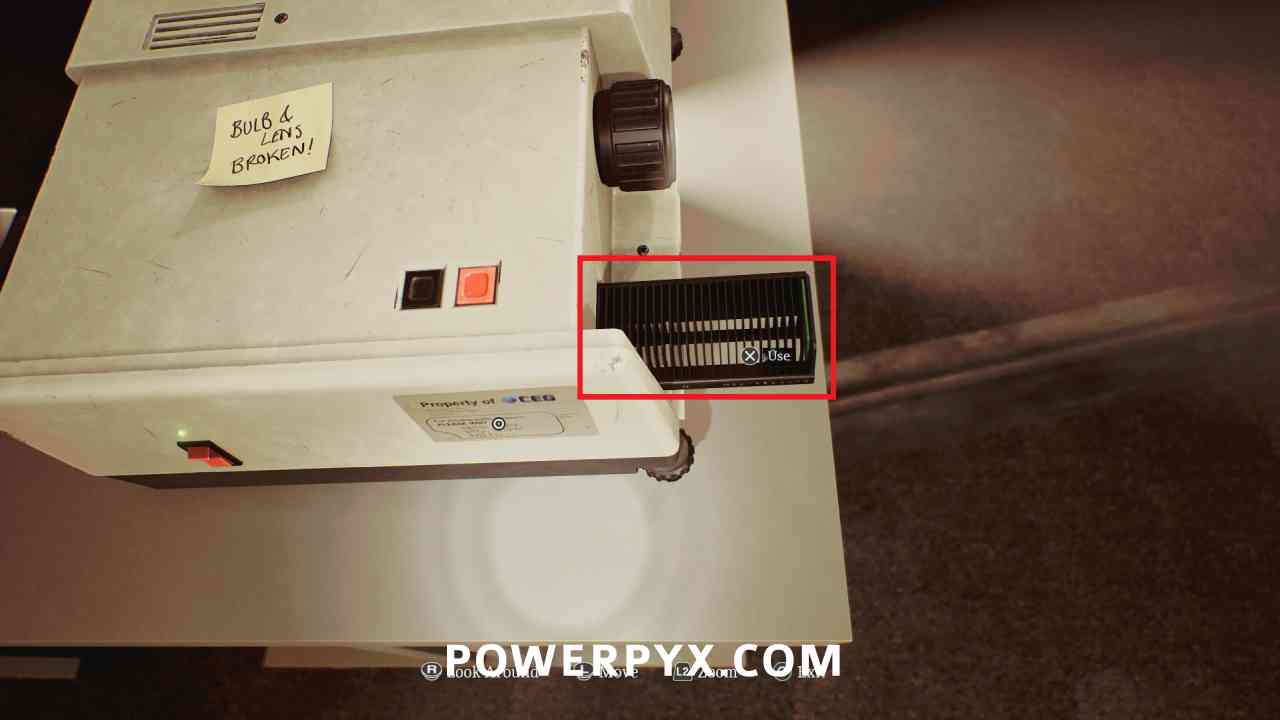
Go back up to the Boardroom on the 5th floor. Interact with the projector in the middle of the room.
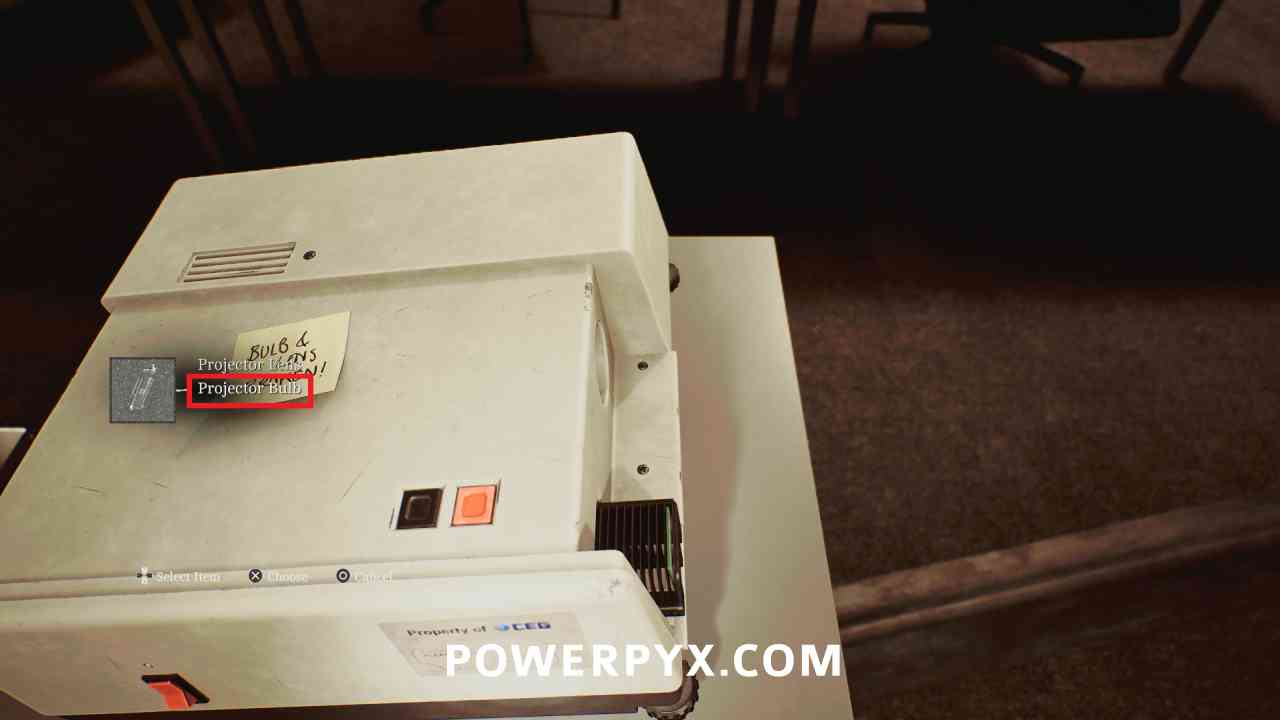
Interact with the front and place the Projector Bulb, then the Projector Lens.
Then press the red switch on the left side.
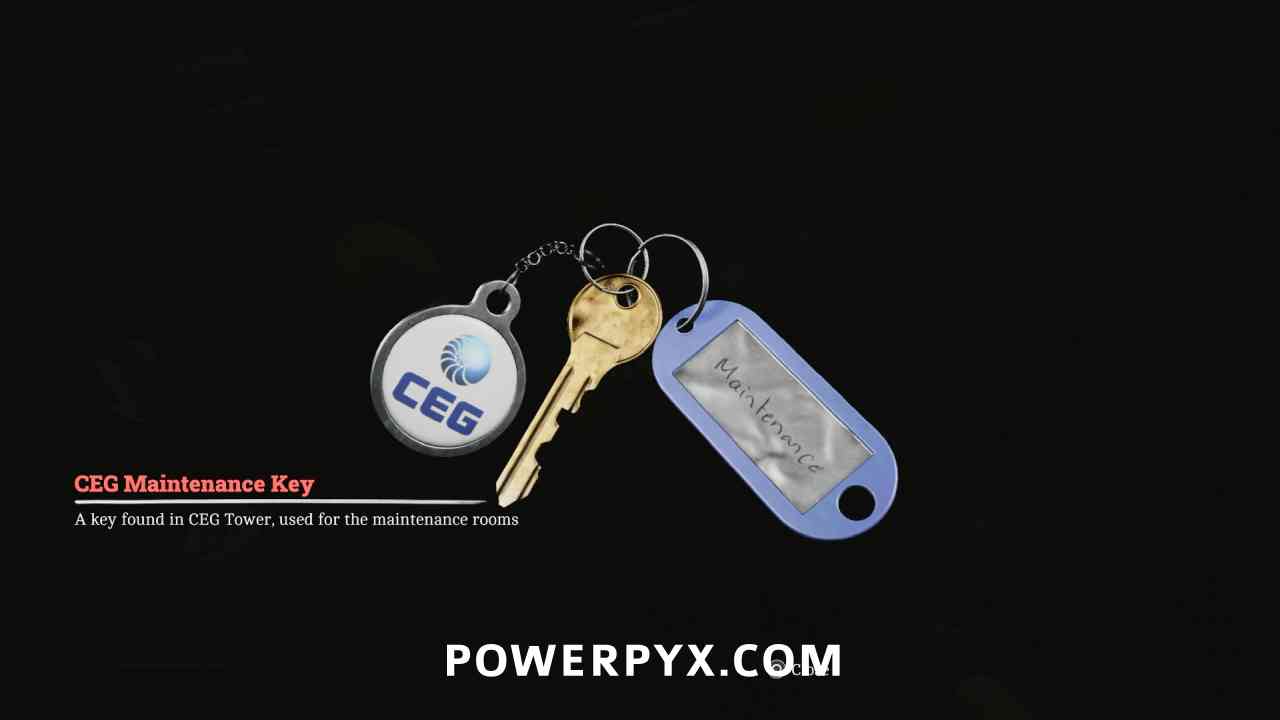
Key Item: CEG Maintenance Key
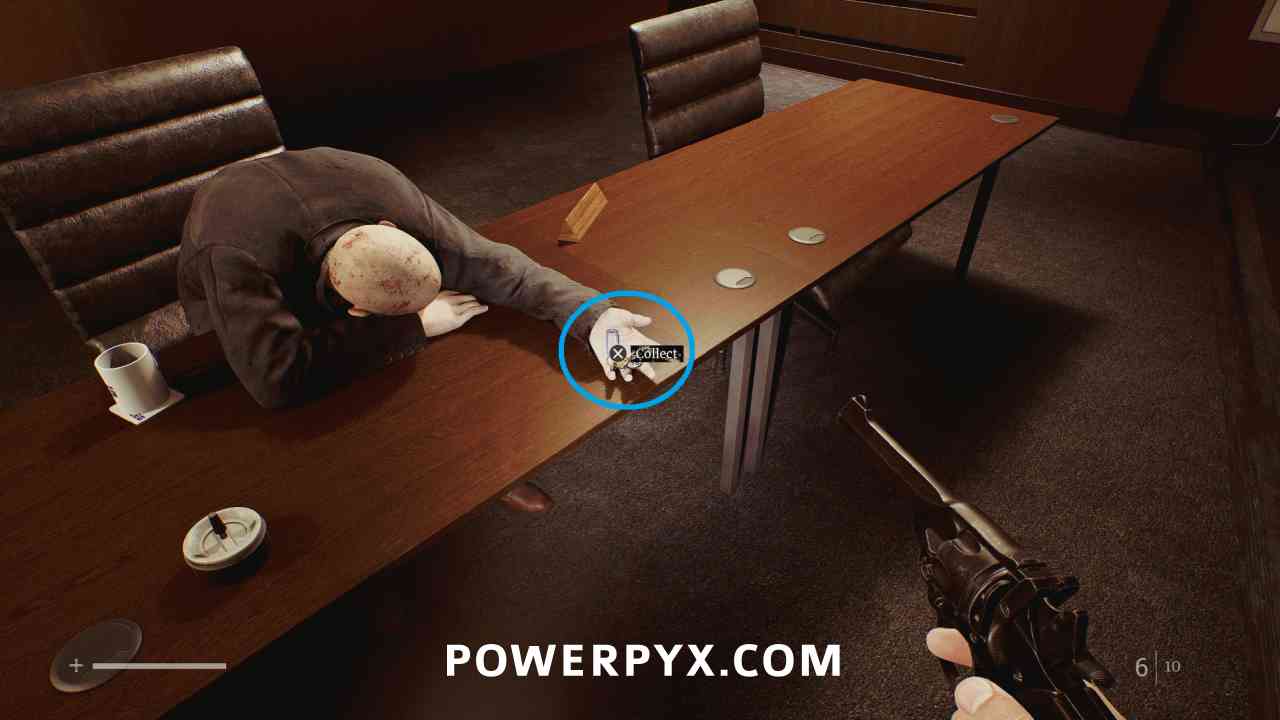
Area: CEG HQ > 5th Floor
After turning on the projector, can be picked up from the hand of a body at the table.
Locked Door: Maintenance
Area: CEG HQ > 5th Floor
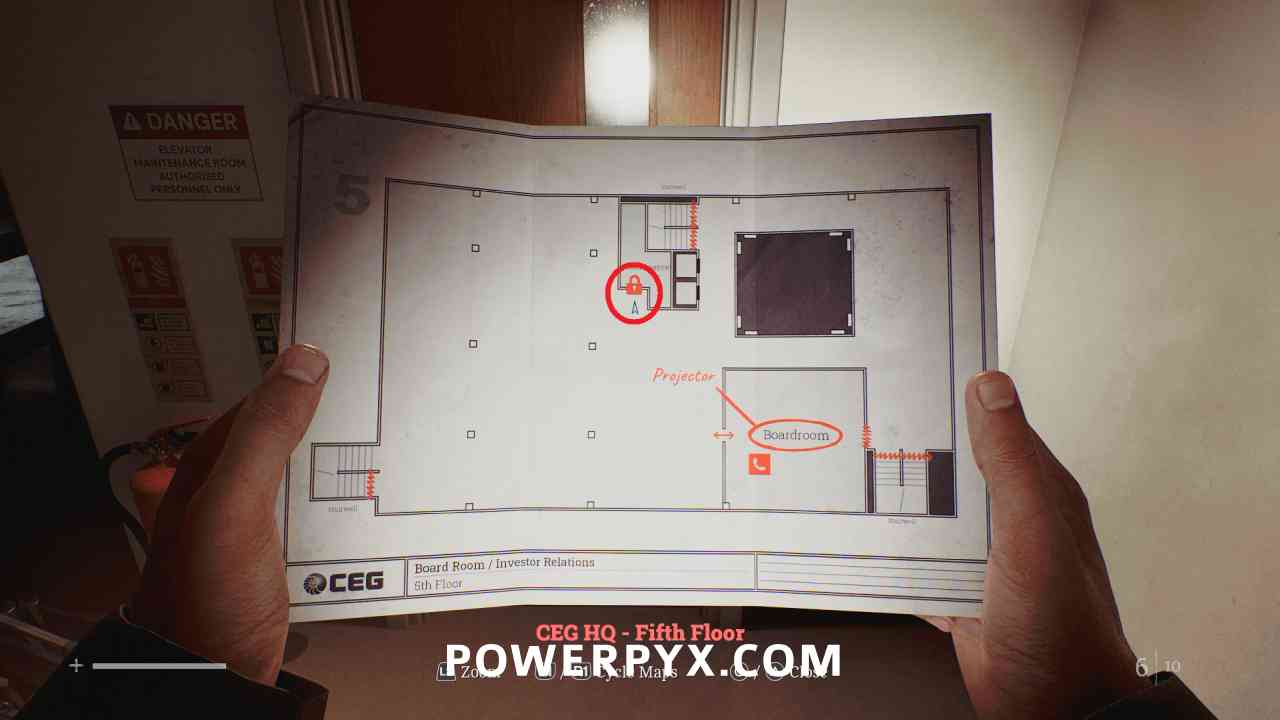
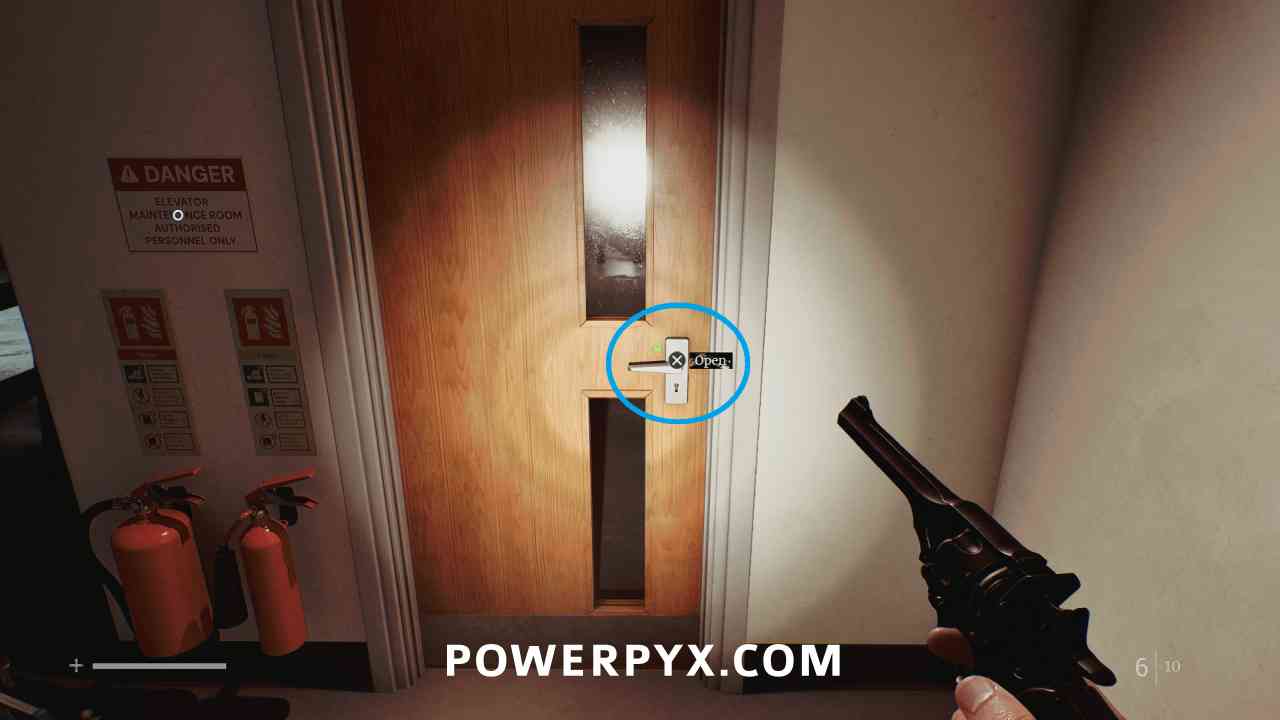
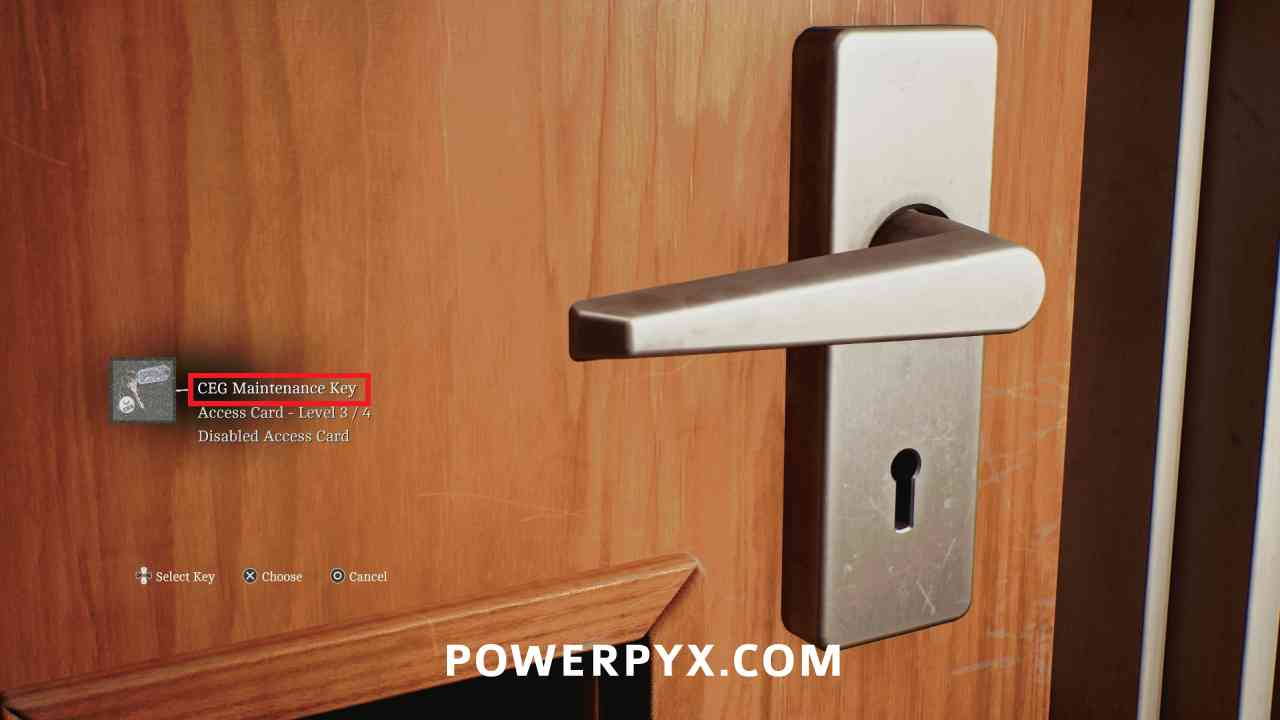
You can now go to the Maintenance room on the floor and open it with the CEG Maintenance Key. This opens the Maintenance door on all floors.
CEG HQ > Mezzanine
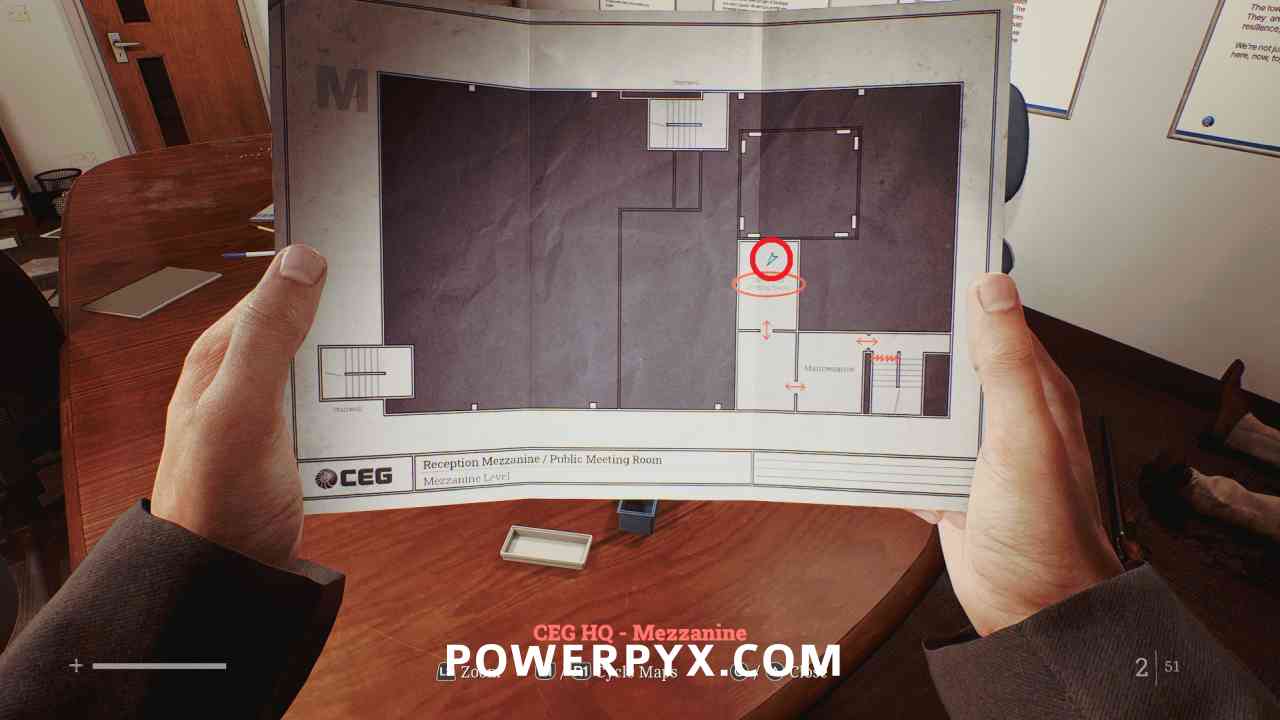
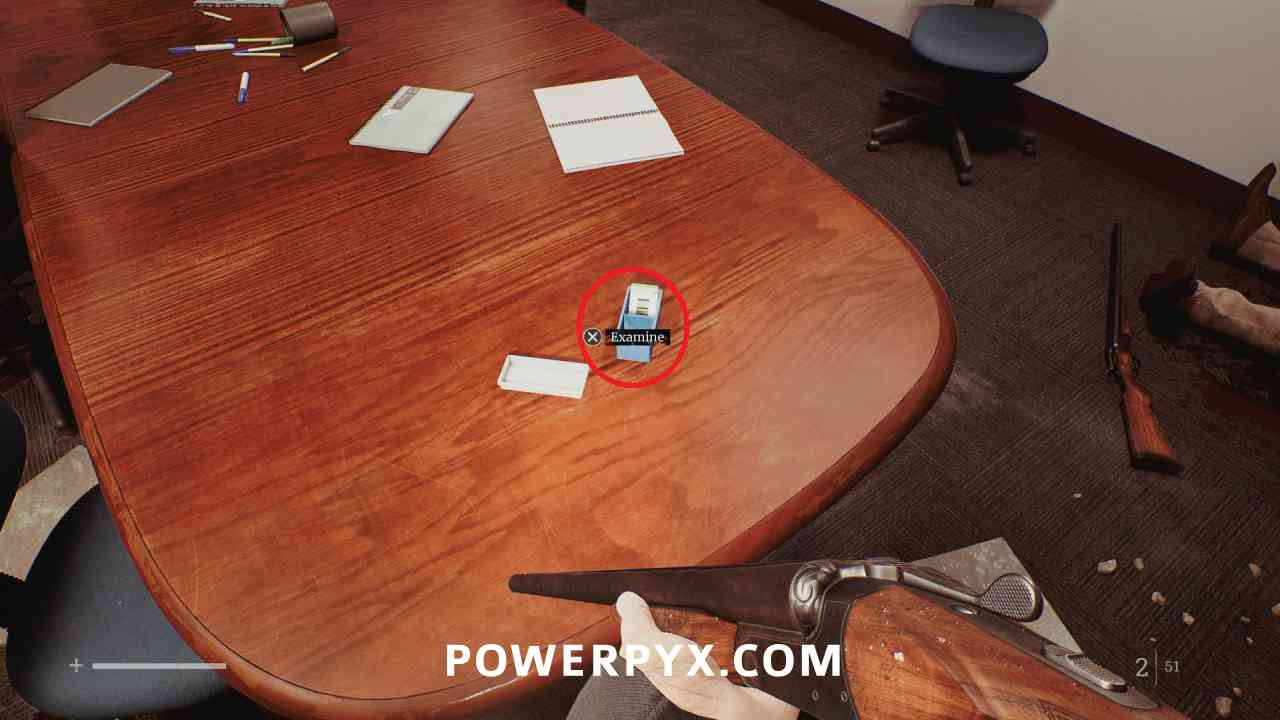
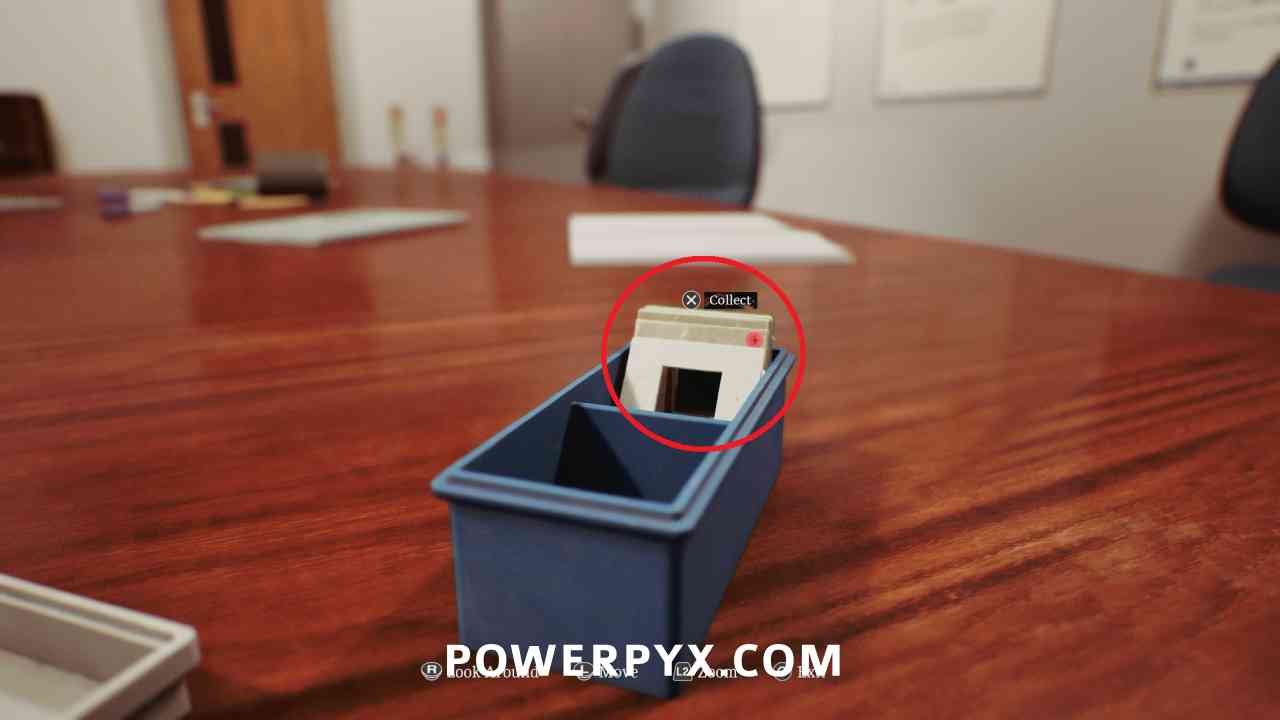
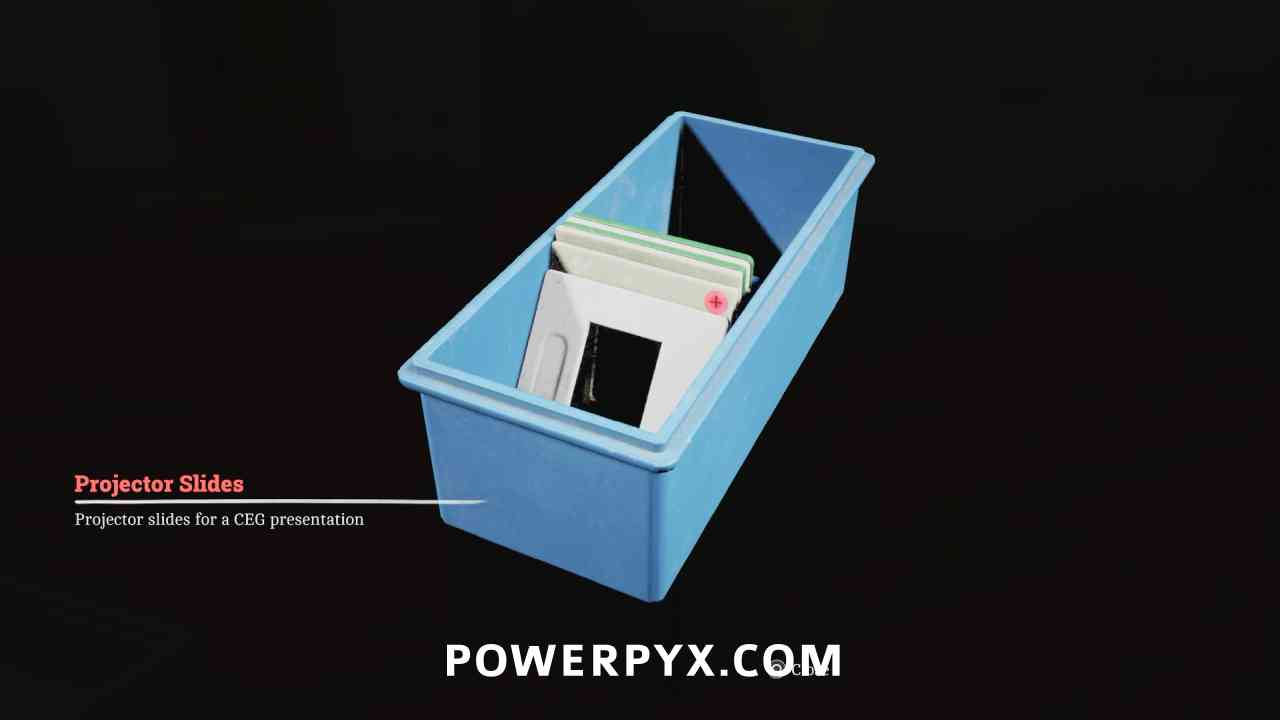
Key Item: Projector Sliders
Area: CEG HQ > Mezzanine
In the Mezzanine Meeting Room, on the table.
CEG HQ > 5th Floor
Puzzle #29
Area: CEG HQ > 5th Floor
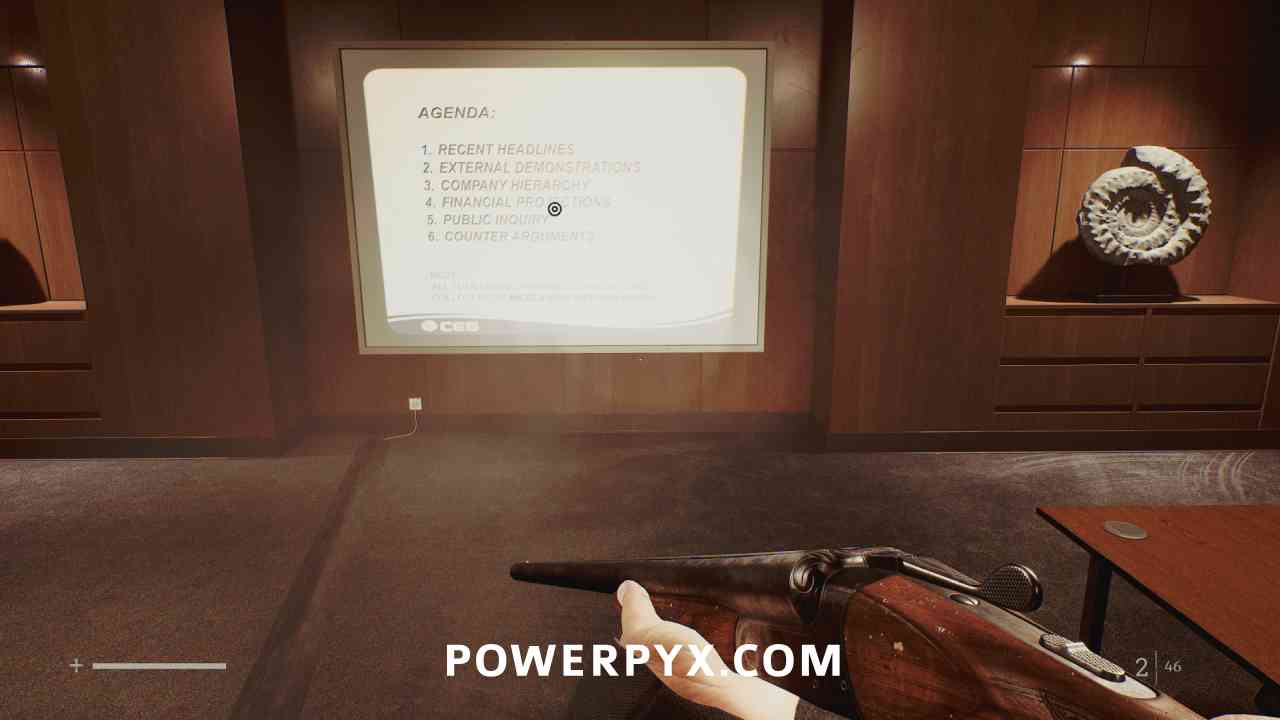
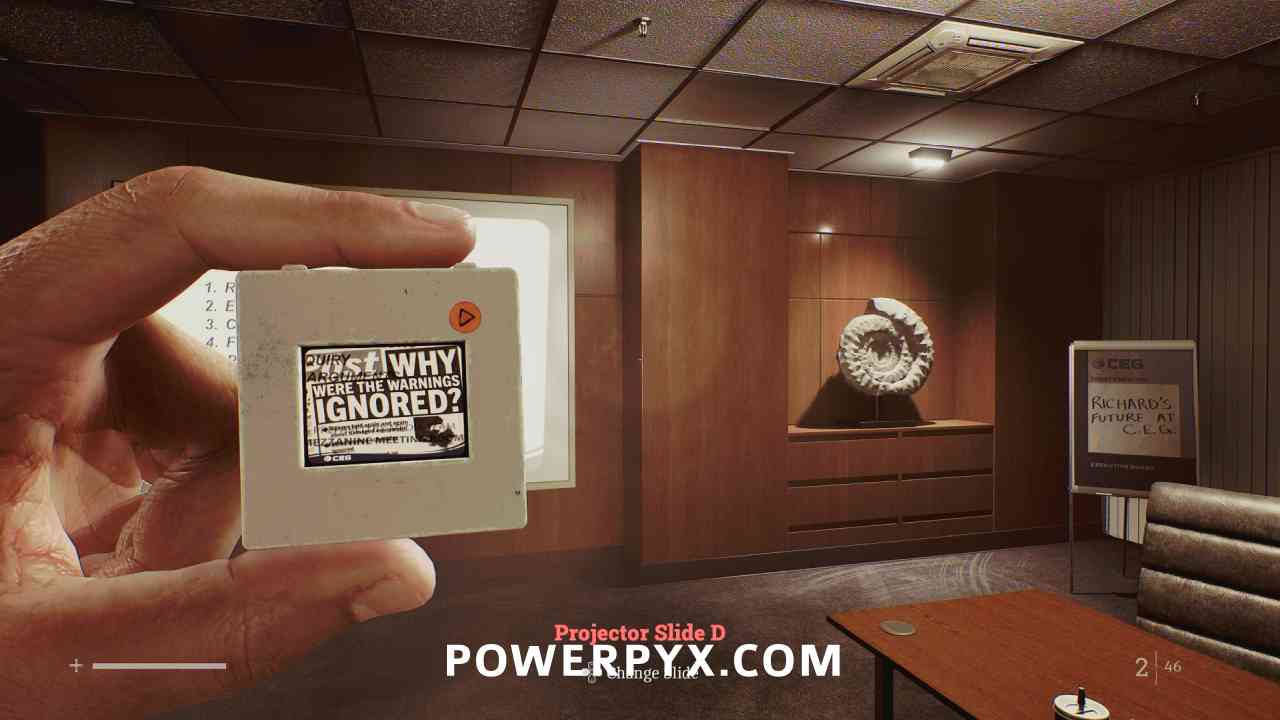
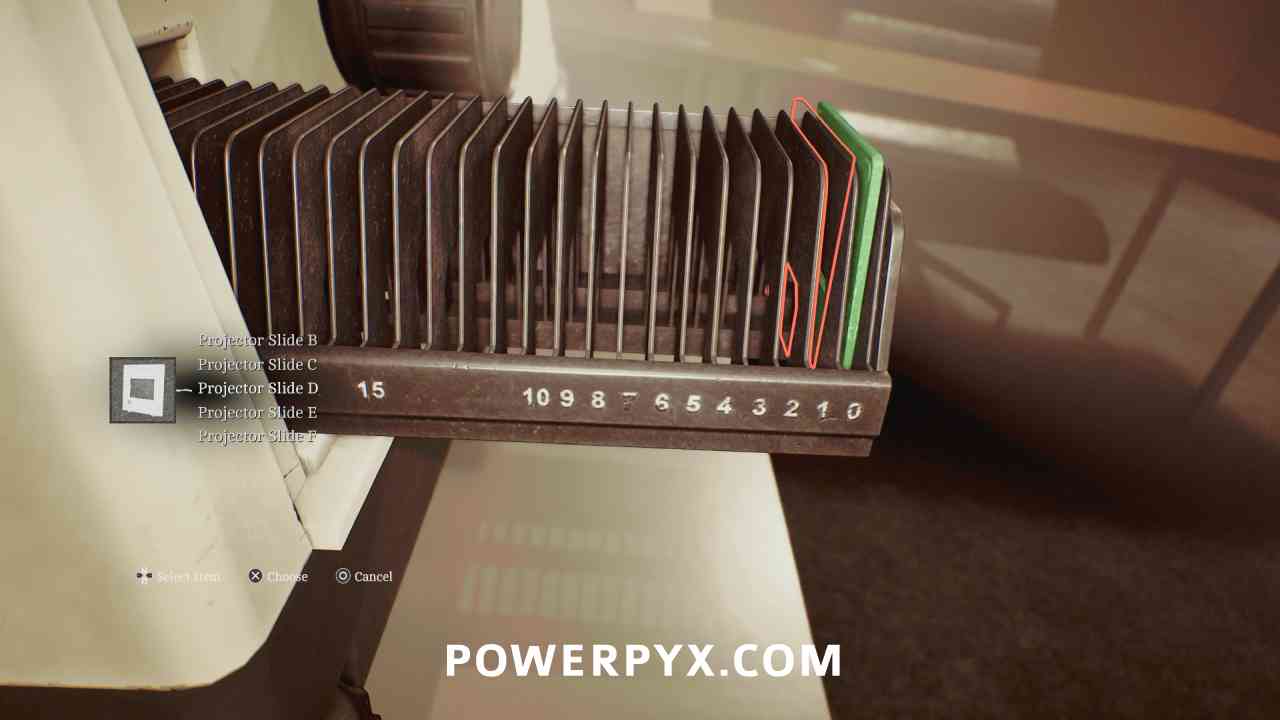
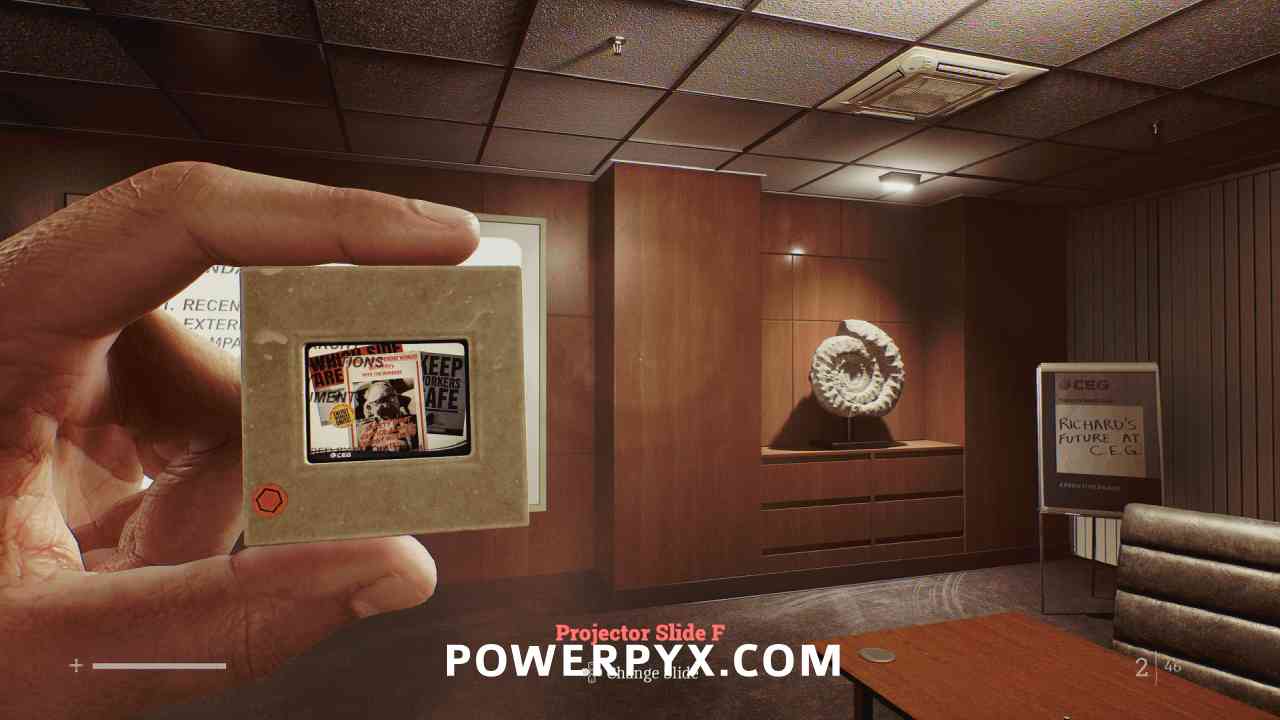
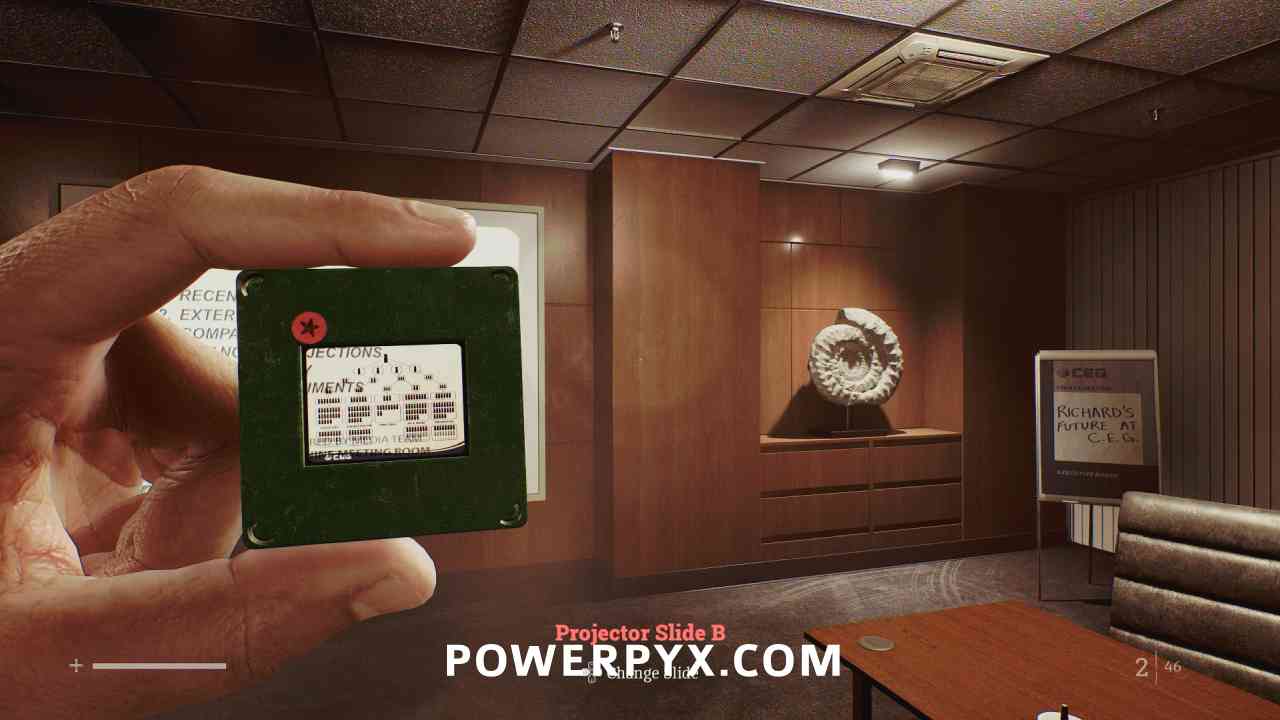
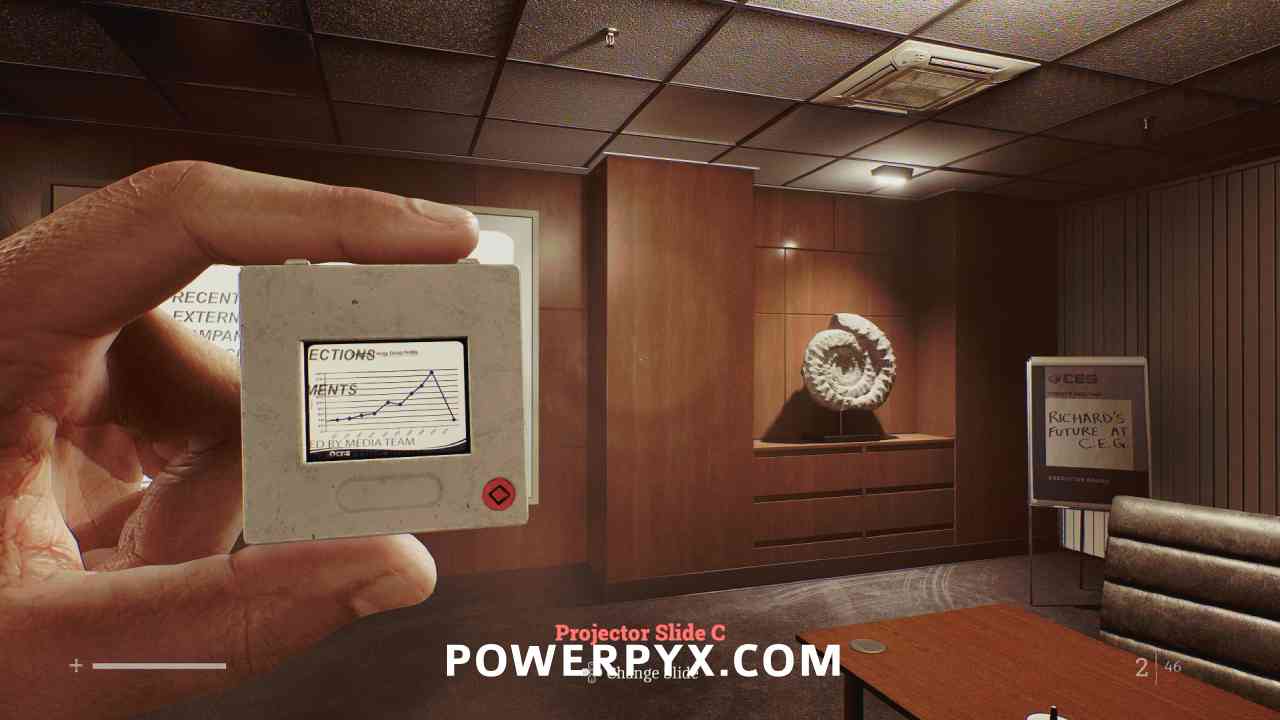
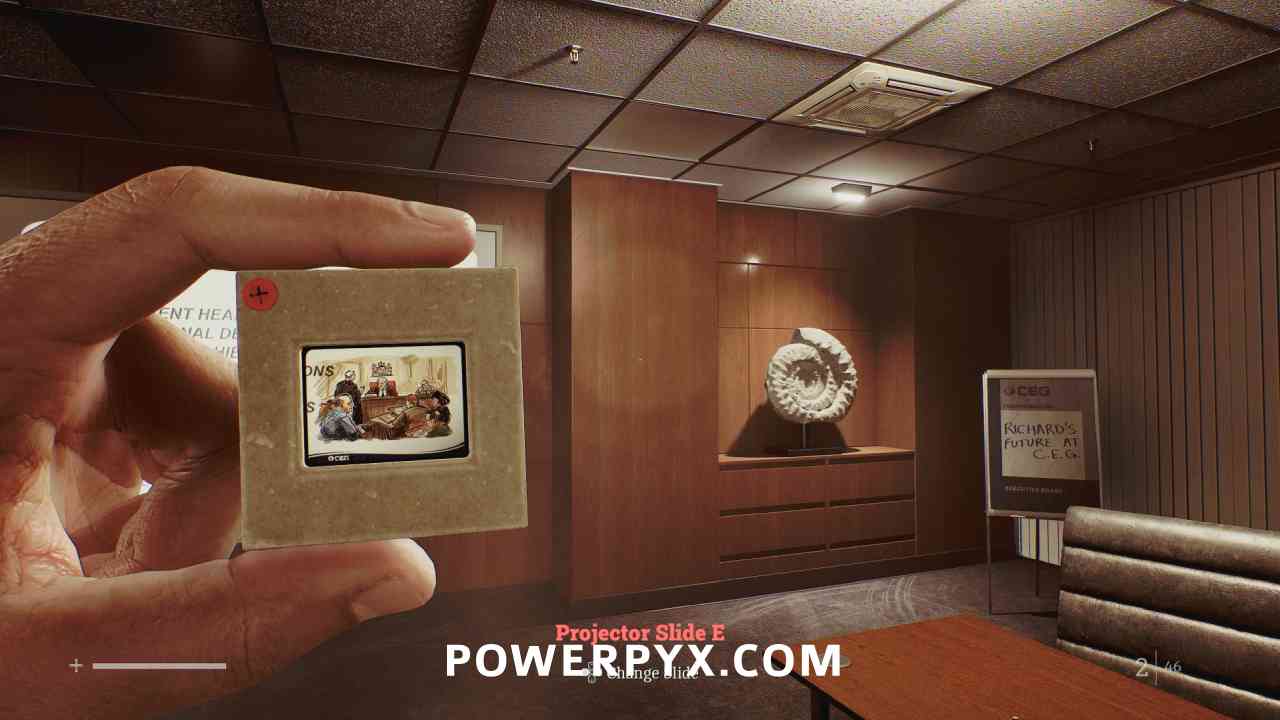
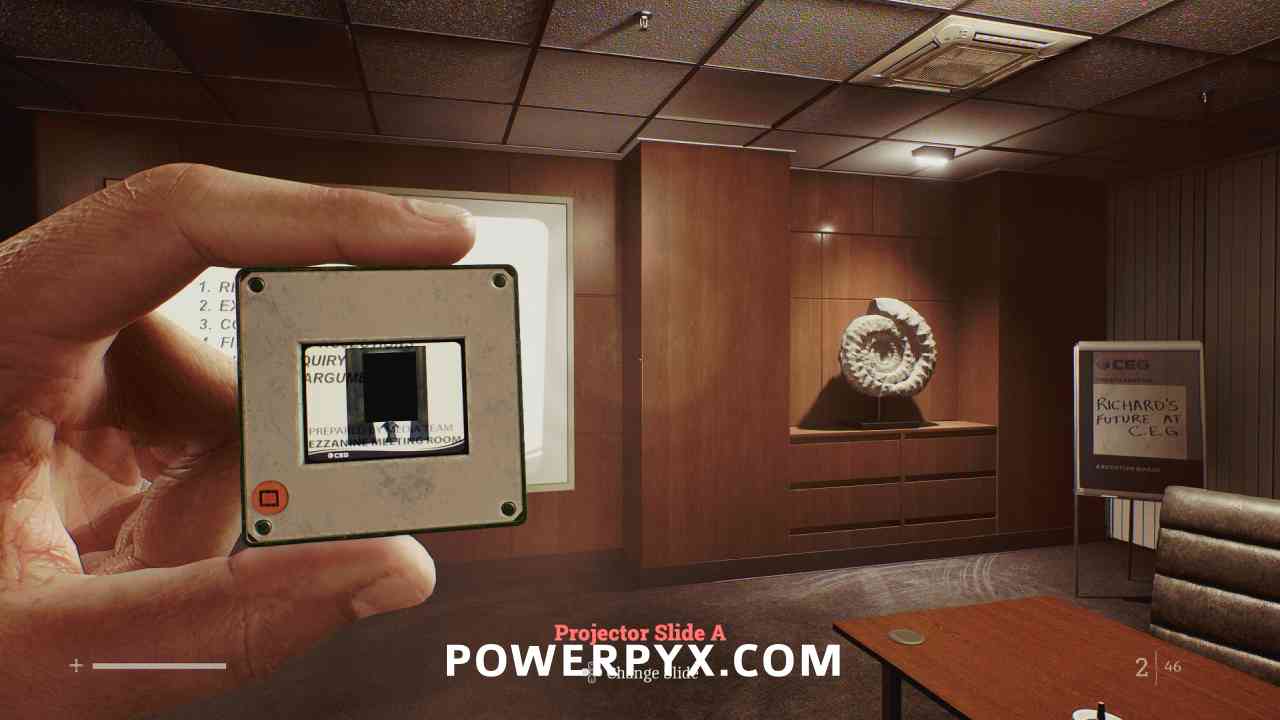
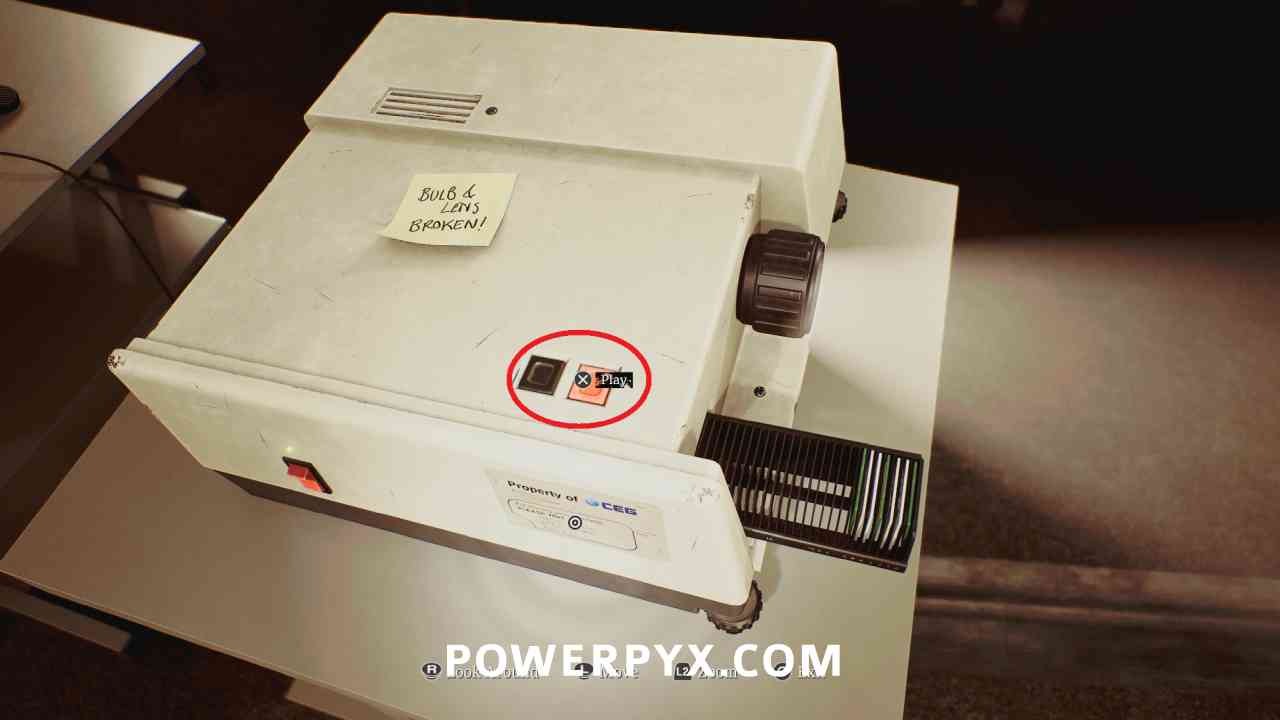
Go back up to the Boardroom on the 5th floor. You can now view the Projector Slides by holding L1. You need to place them in the projector in the correct order, as shown by the Agenda being displayed by the projector. After you have placed all slides in the projector, press the red Play button on top.
The order is:
- Recent Headlines > Slide D – Triangle / Newspaper
- External Demonstrations > Slide F – Hexagon / Protest Signs
- Company Hierarchy > Slide B – Star / Hierarchy Chart
- Financial Projects > Slide C – Diamond / Profits Chart
- Public Inquiry > Slide E – Plus / Courtroom Sketch
- Counter Arguments > Slide A – Square / Censored Photograph
Key Item: CEO Access Card
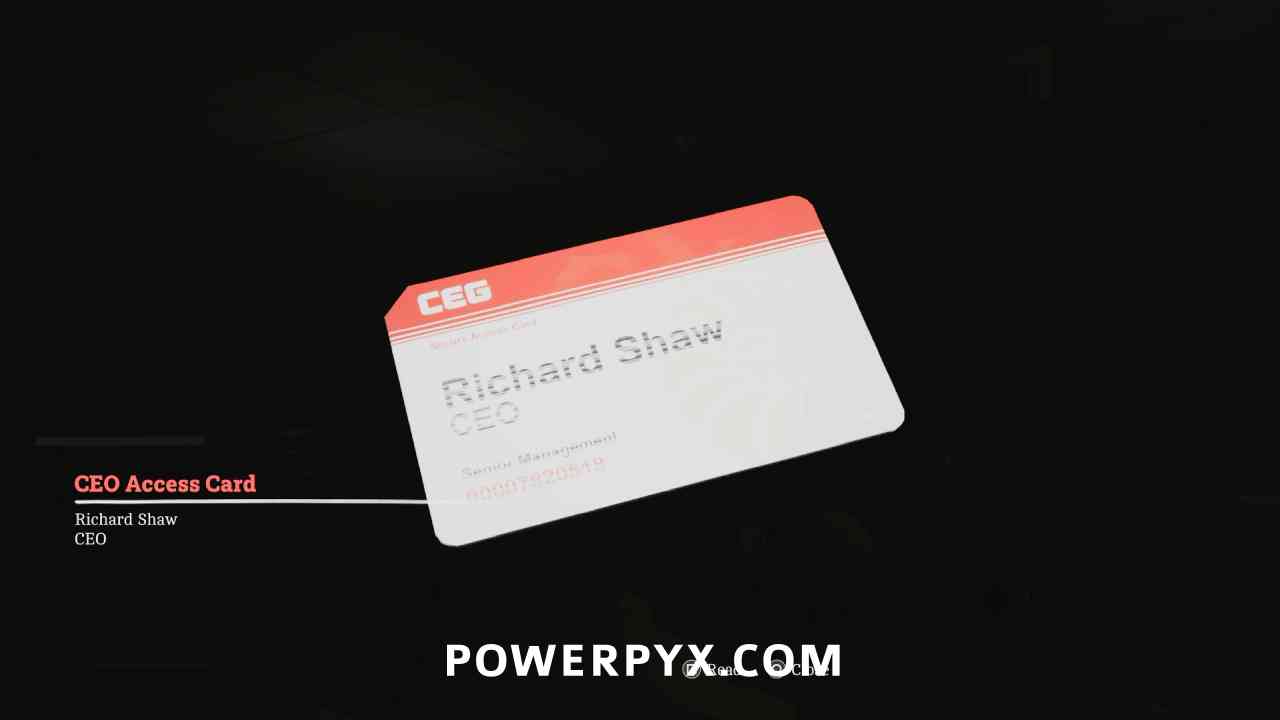
Area: CEG HQ > 5th Floor
Automatically obtained after the cutscene following the slide puzzle.
Part 6 – Simon
14. Fix This
CEG HQ (Different)
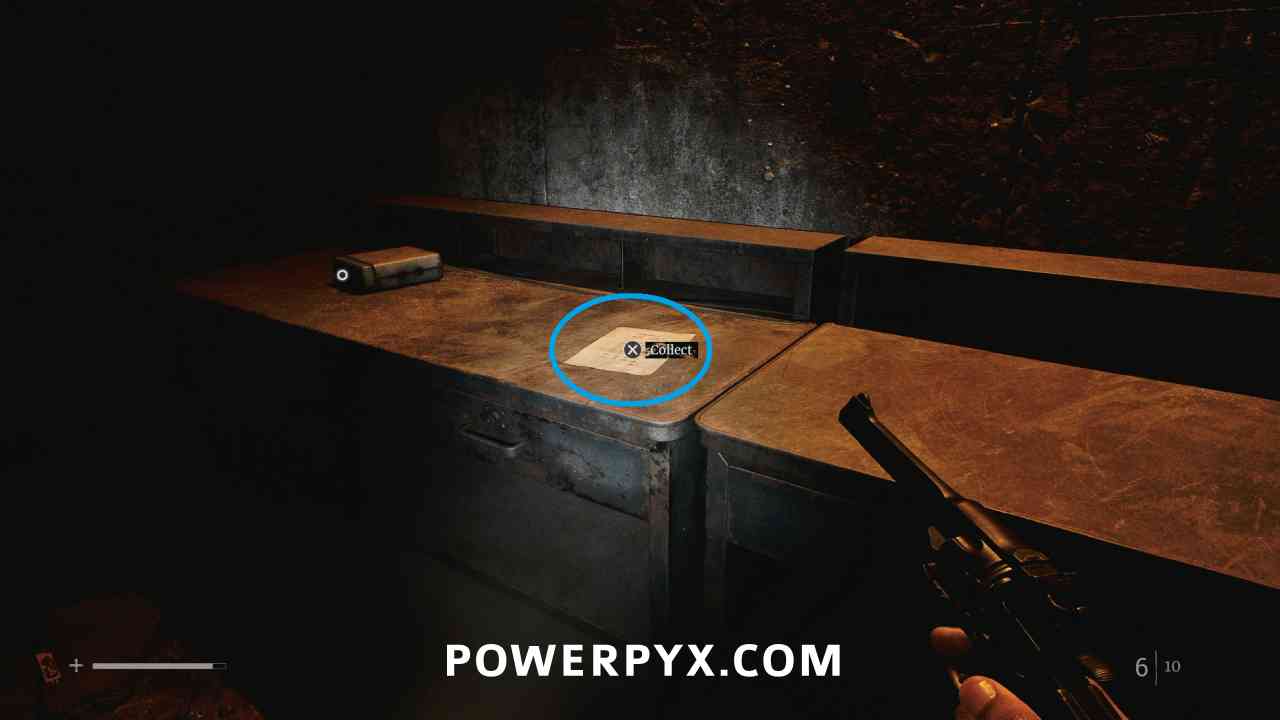
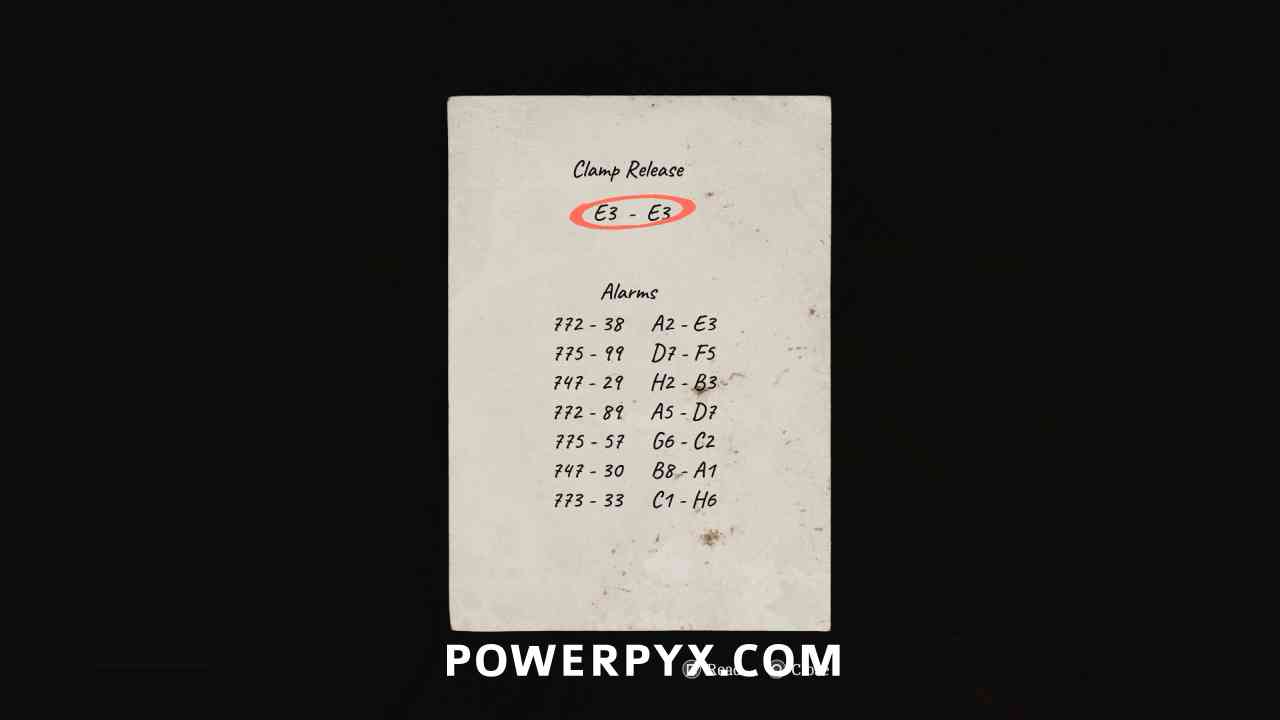
Clue: Reference Sheet
Area: CEG HQ (Different)
As soon as you enter the main room in the new area, on a desk to the right.
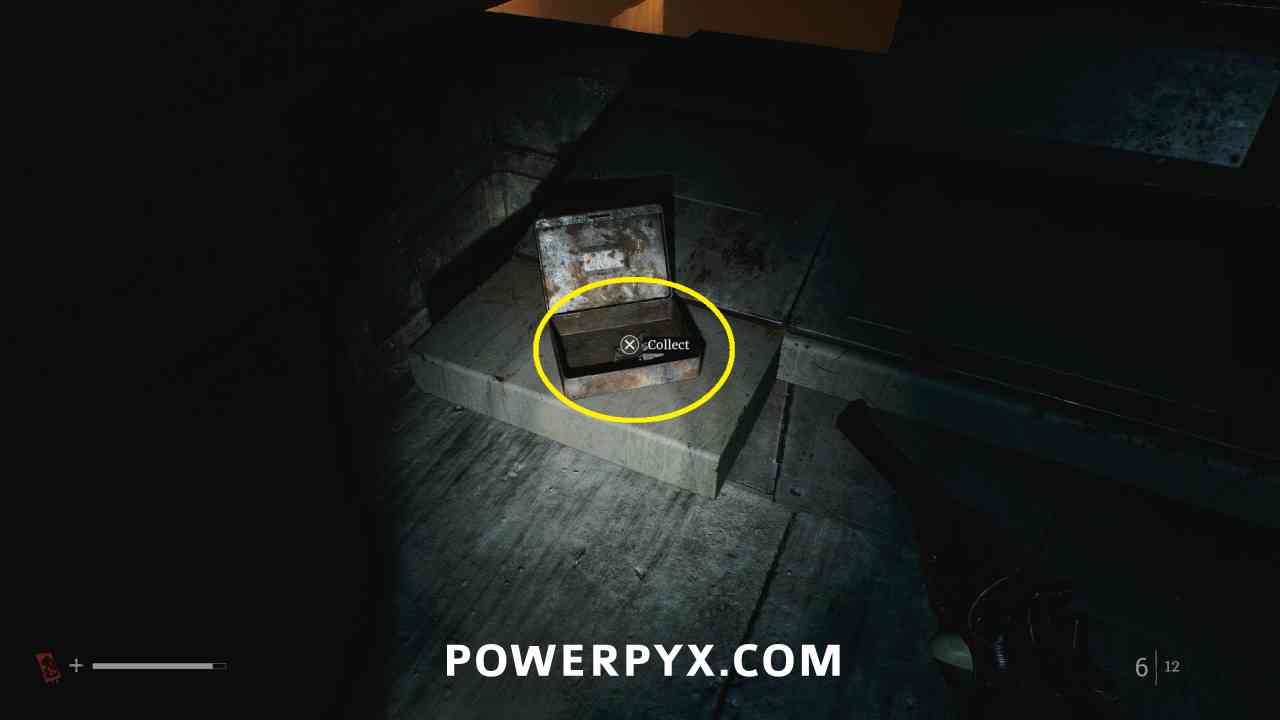
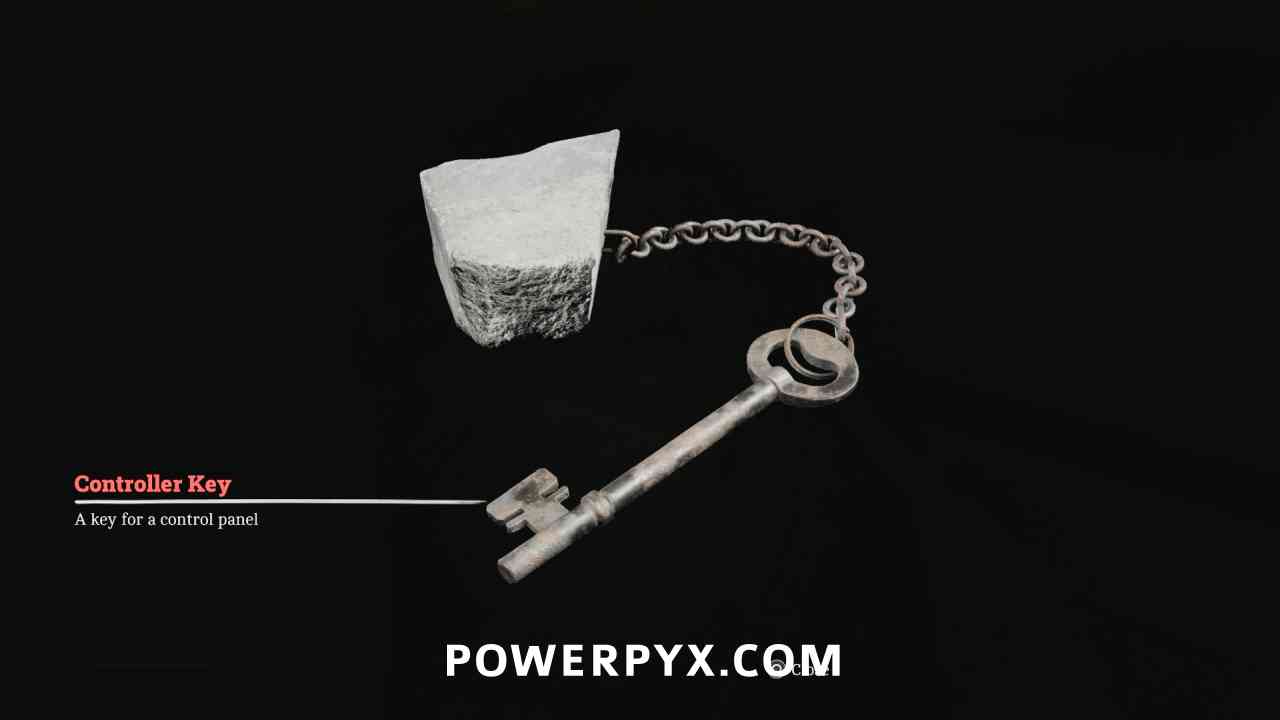
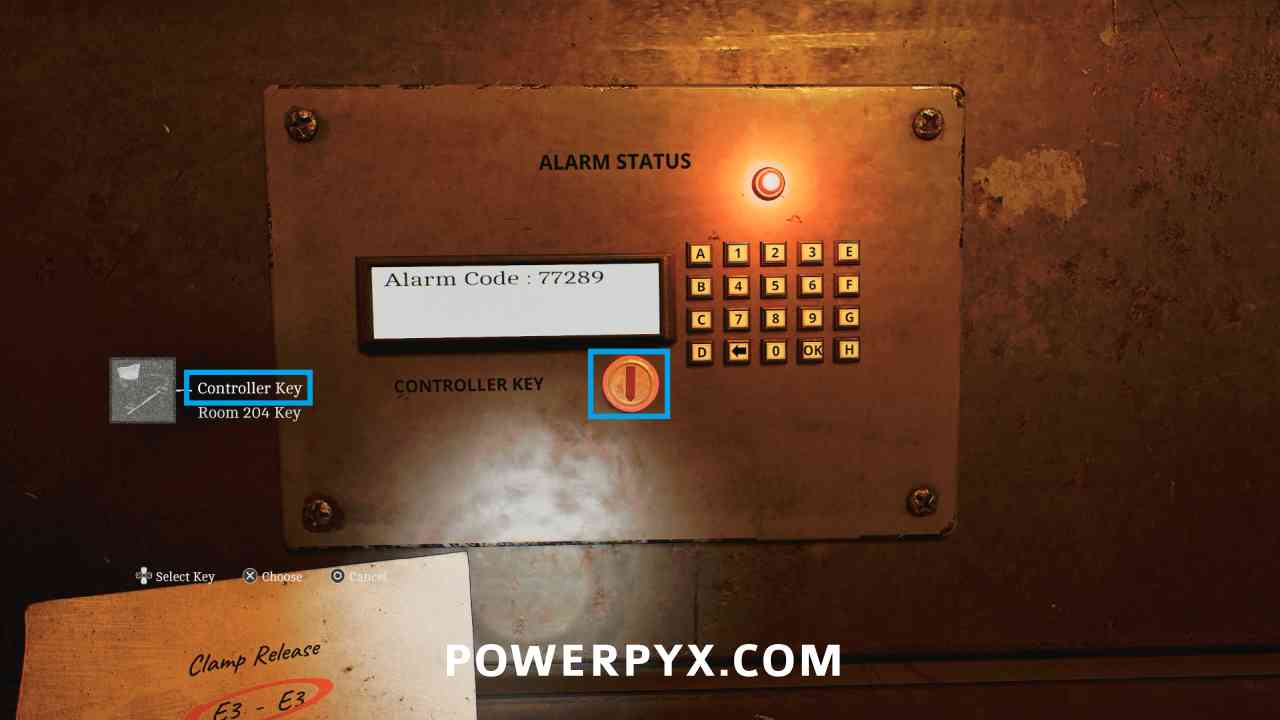
Key Item: Controller Key
Area: CEG HQ (Different)
Use the elevator to go up to the second floor, and his is in a box on the console to the left of the red clamp wheel.
Puzzle #30
Area: CEG HQ (Different)
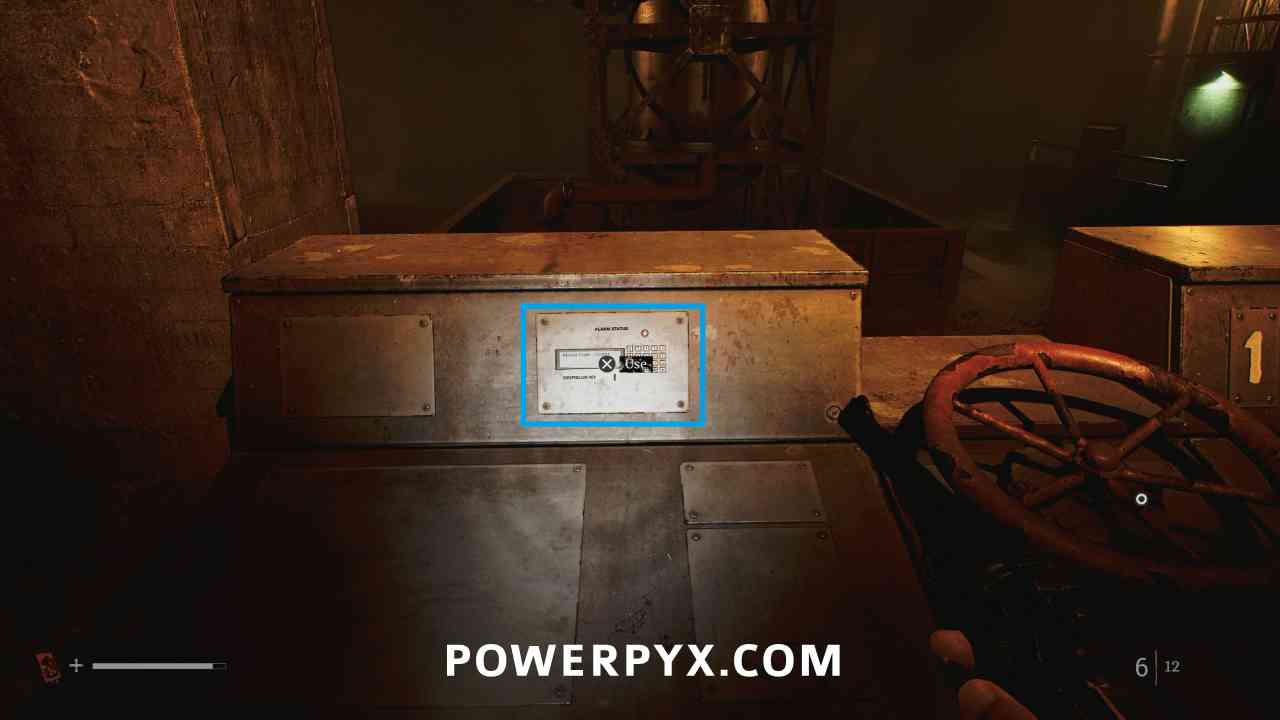
Go back to ground level and interact with the alarm panel beside the red clamp wheel.
First interact with the key hole and use the Controller Key to unlock the buttons.
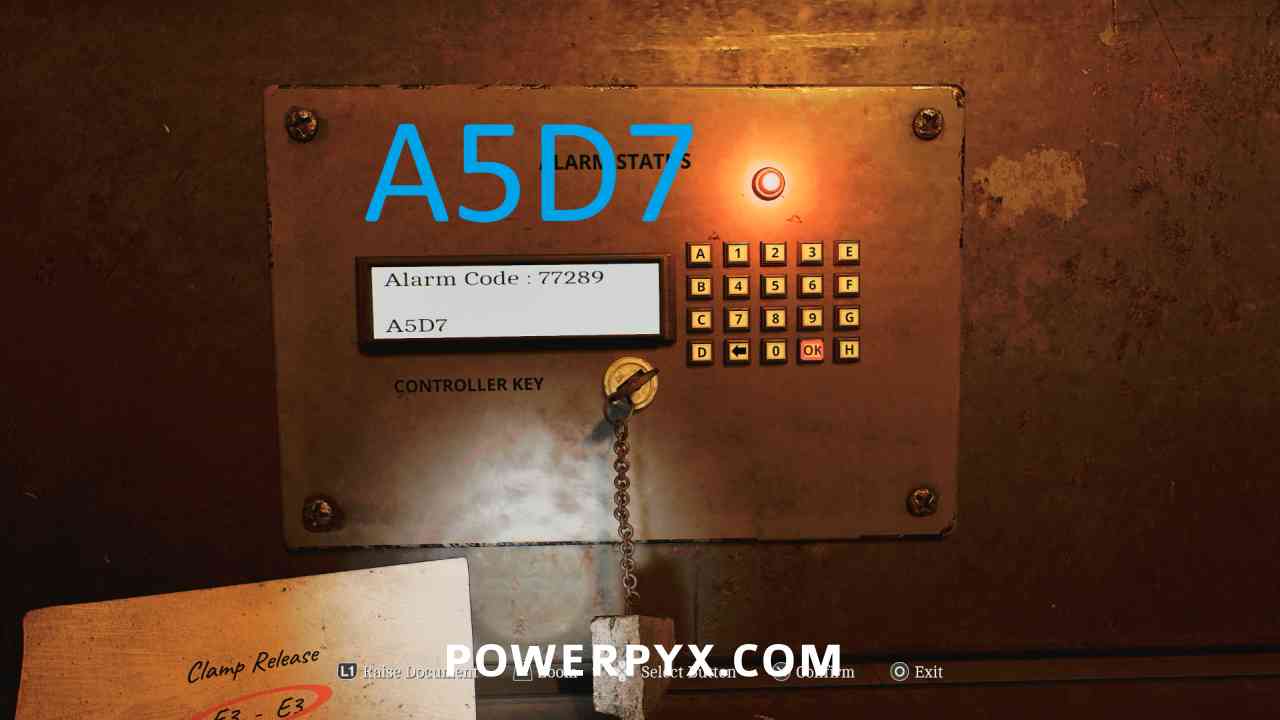
Then enter A5D7 (corresponding to the Alarm Code from the Reference Sheet) and hit OK.
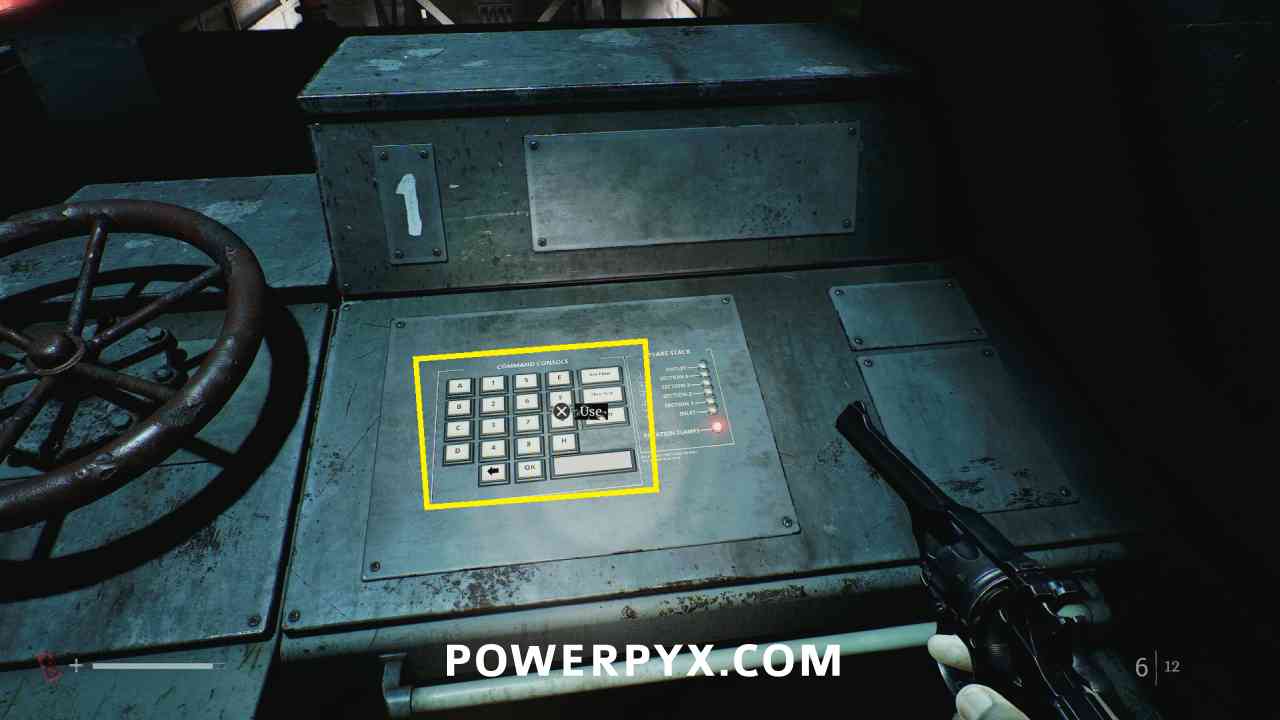
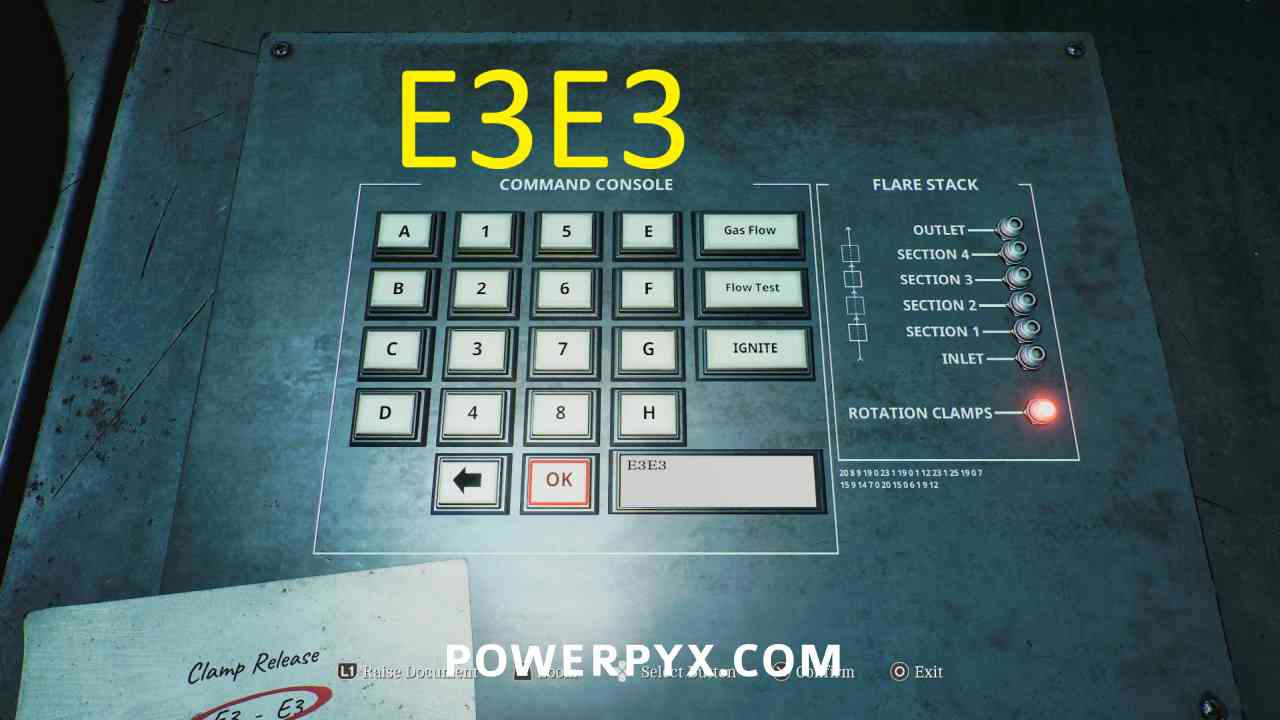
Interact with the panel on the right side and enter E3E3 (from the top of the Reference Sheet) and hit OK.
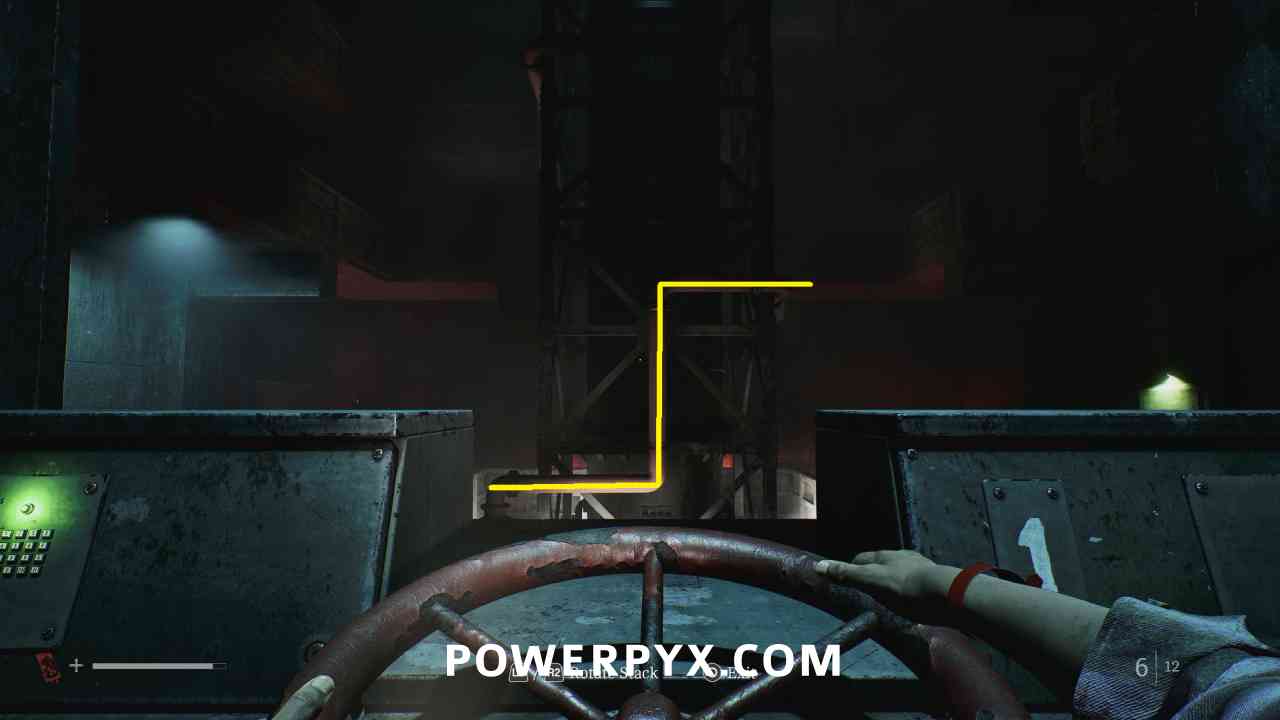
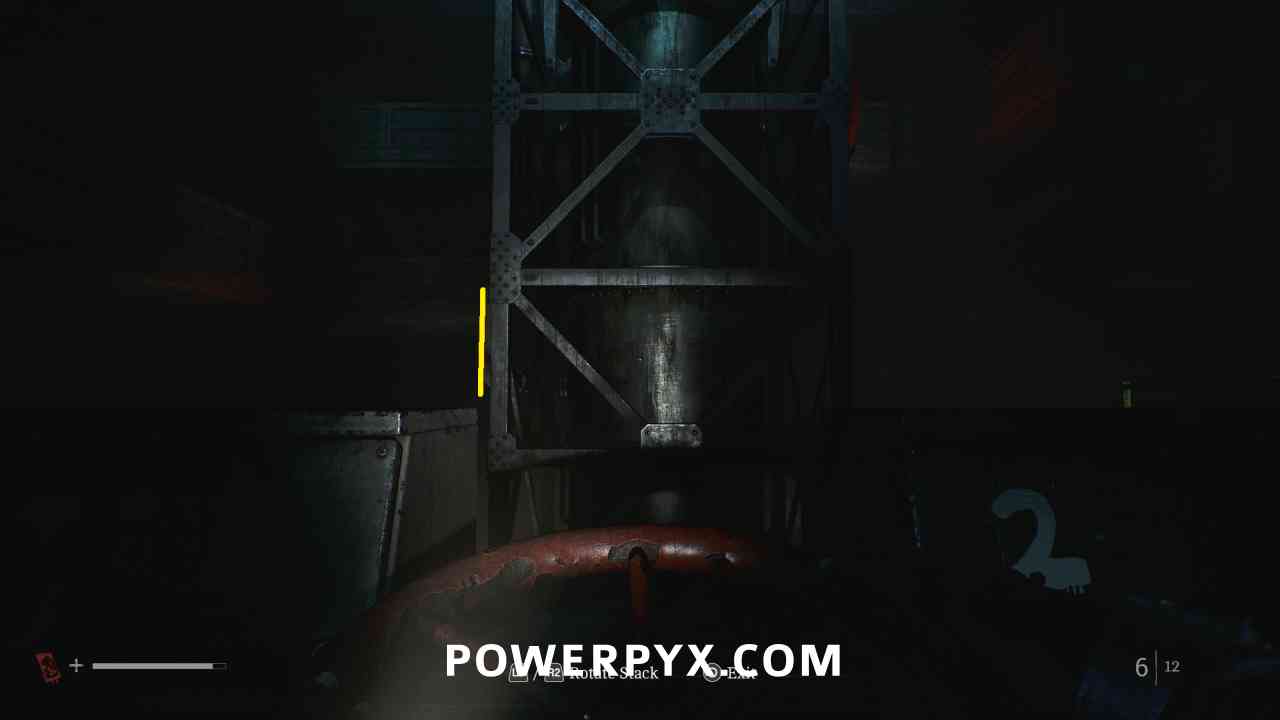
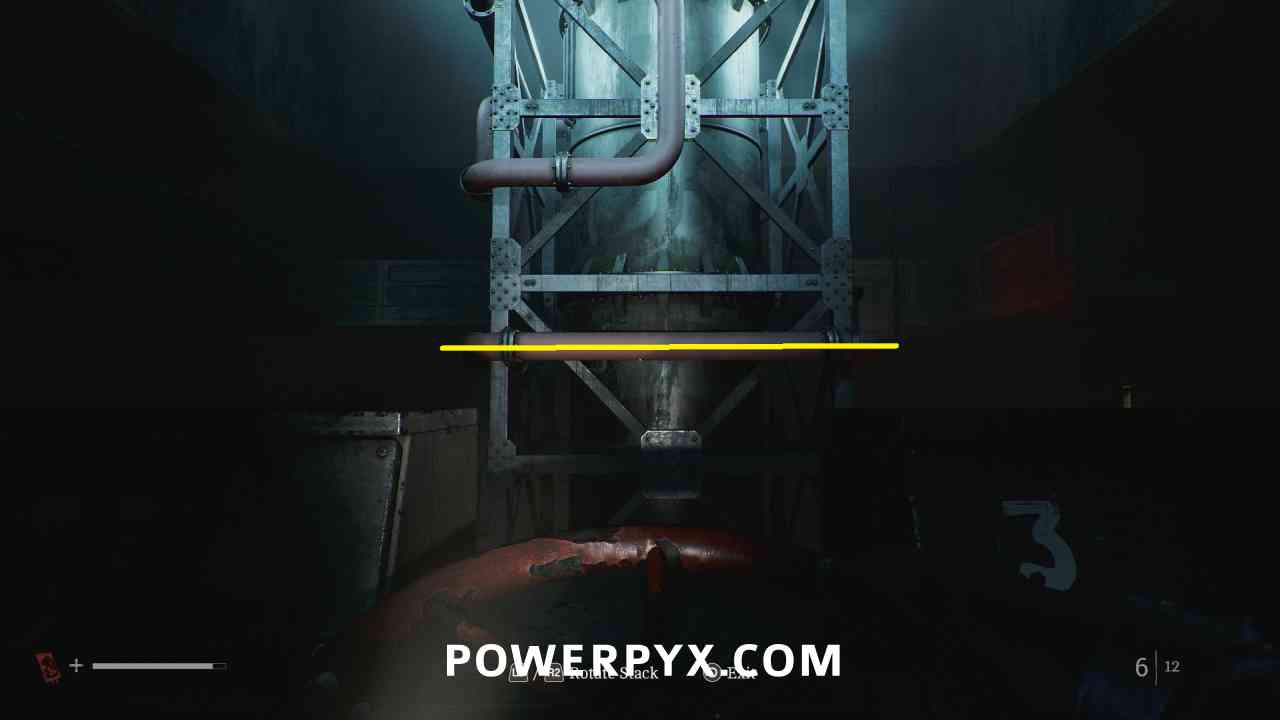
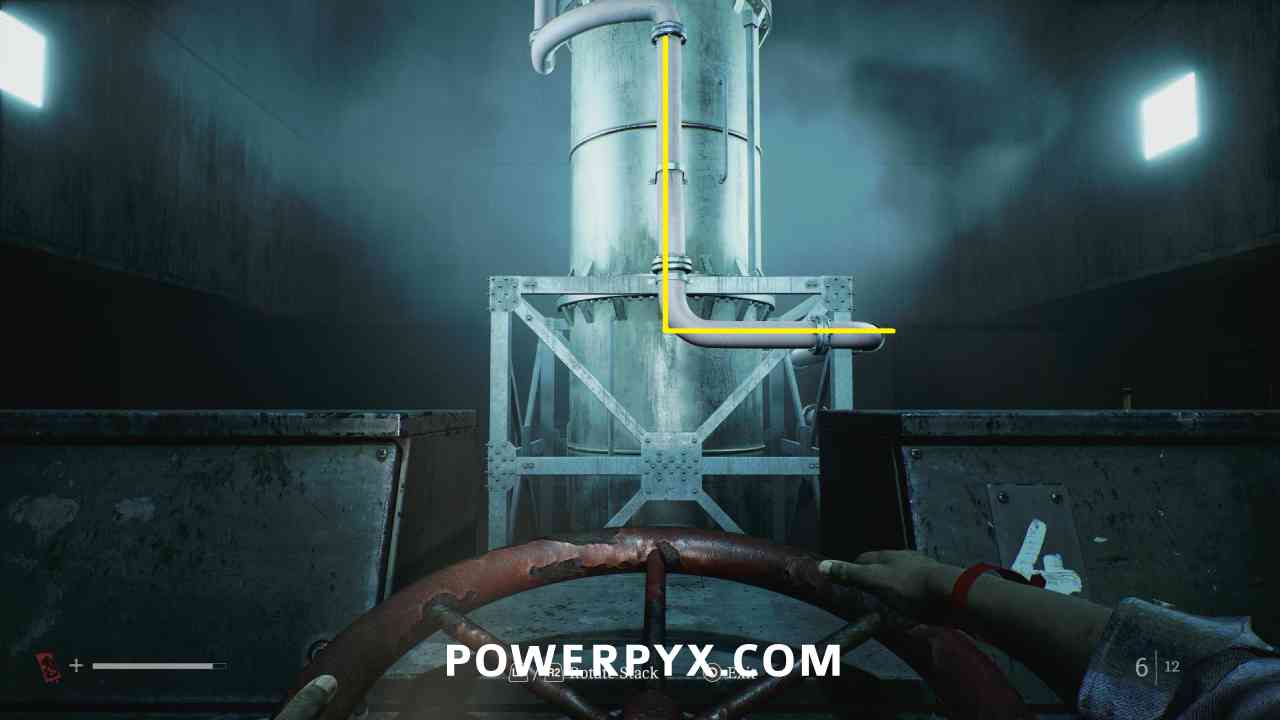
You now need to go through each floor and use the crank to rotate the middle tower, so the red pipe goes all the way to the top.
On floor 1, rotate left or right twice, the pipe is going up and then to the right.
On floor 2, rotate left once, you can see the pipe going up on the left side, and it will be connected on the side near the elevator.
On floor 3, rotate left or right twice, the pipe is connected on the left, and going straight across in front of you.
On floor 4, rotate left or right twice, the pipe is now connected to the top in front of you.
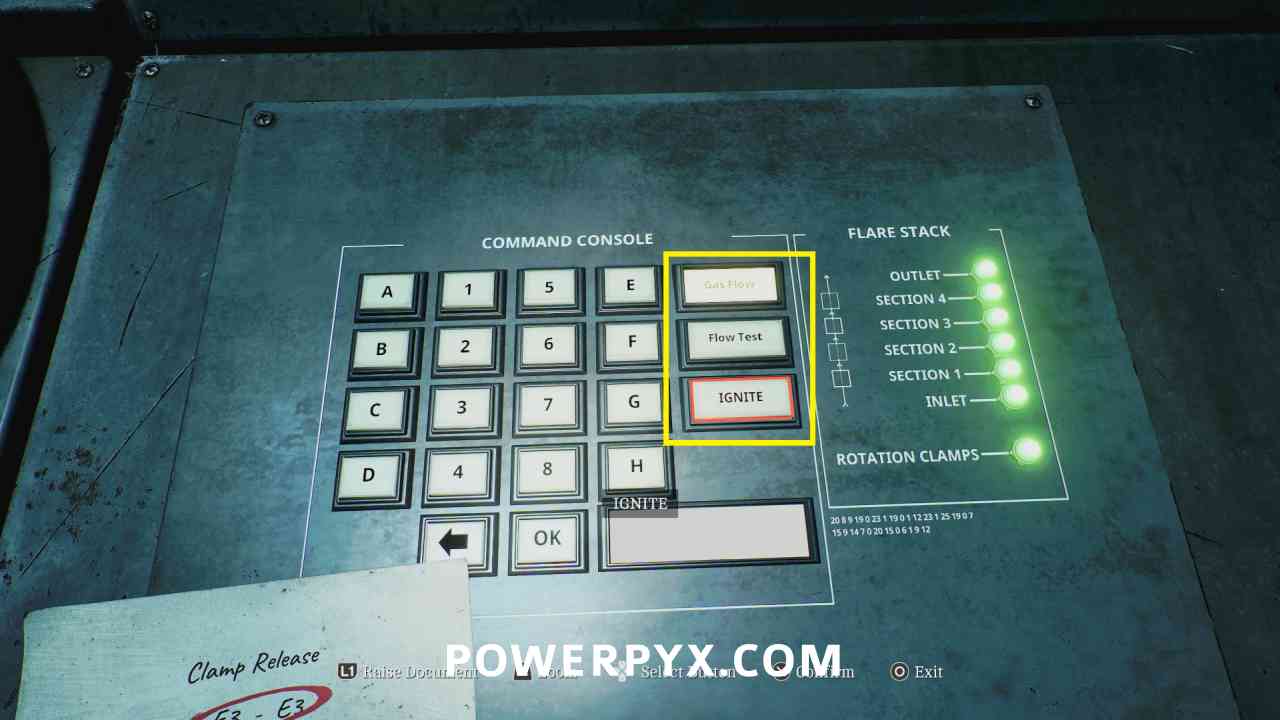
Go back to ground level again and interact with the right side panel. You press the button Gas Flow, followed by Flow Test which should light up all lights green on the panel, then finally IGNITE.
15. Trying Again
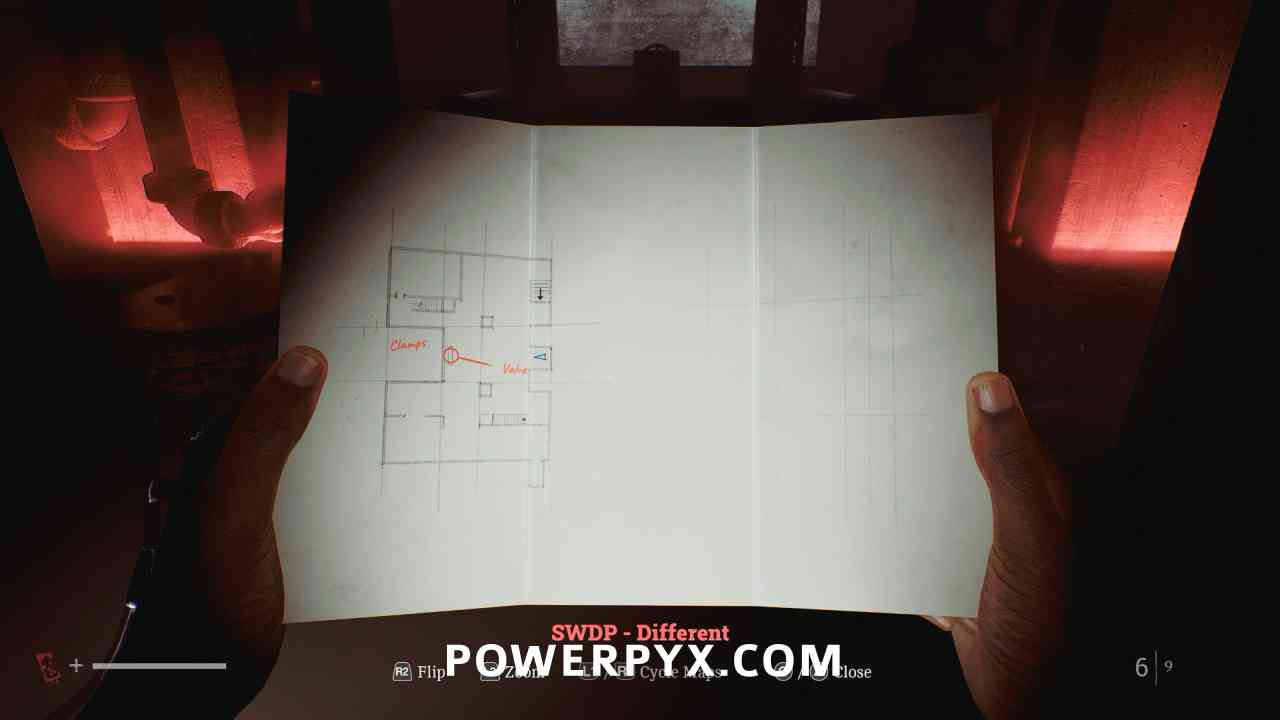
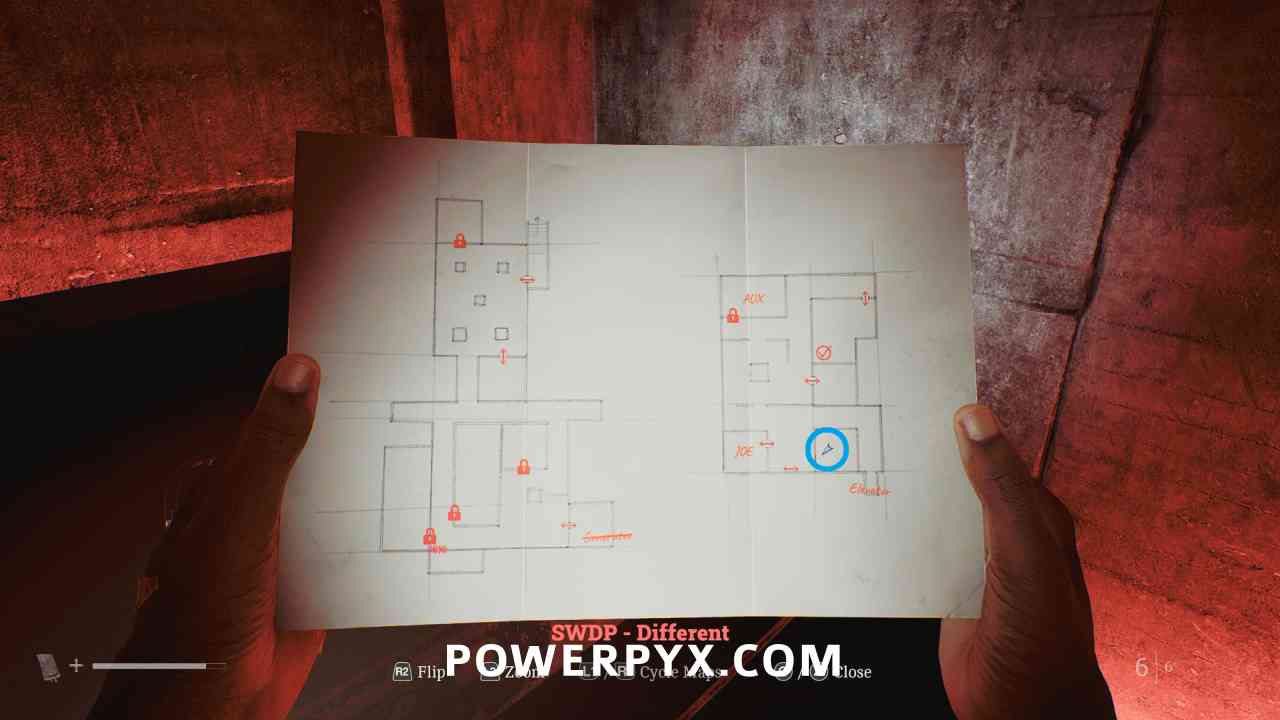
SWDP – Different
SWDP – Different Map
Area: SWDP – Different
Automatically obtained when you enter the SWDP – Different area.
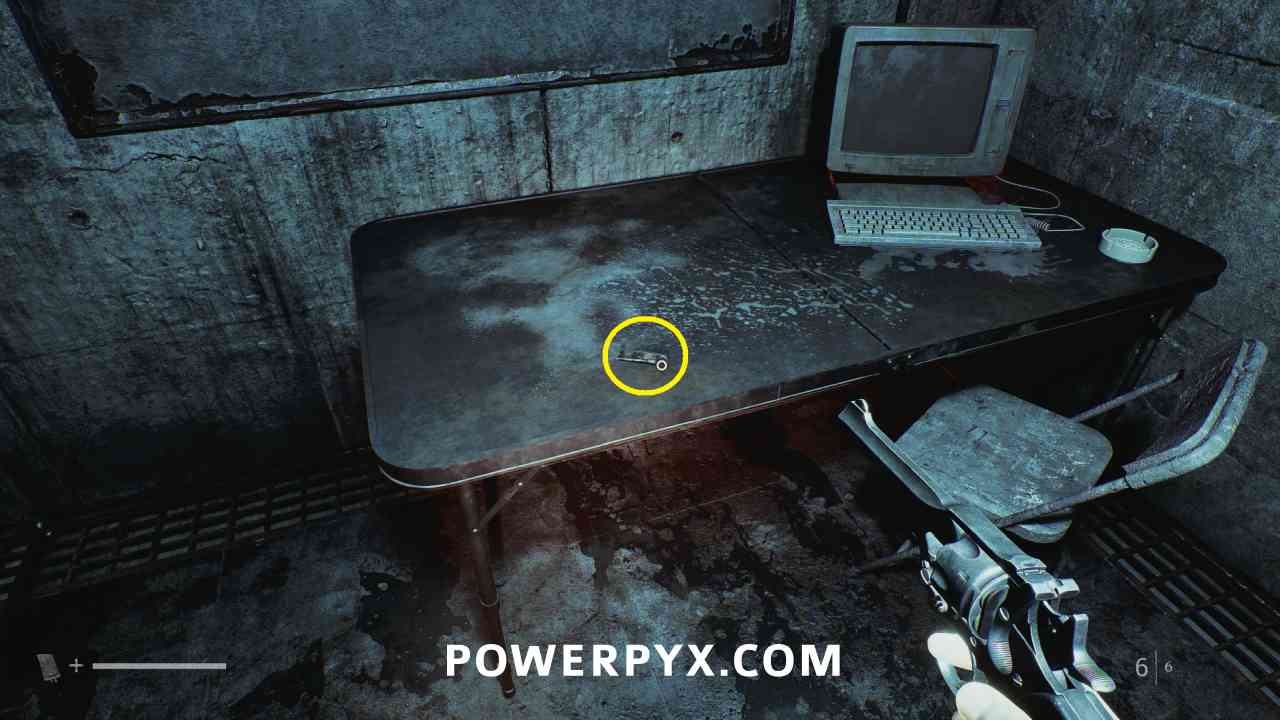
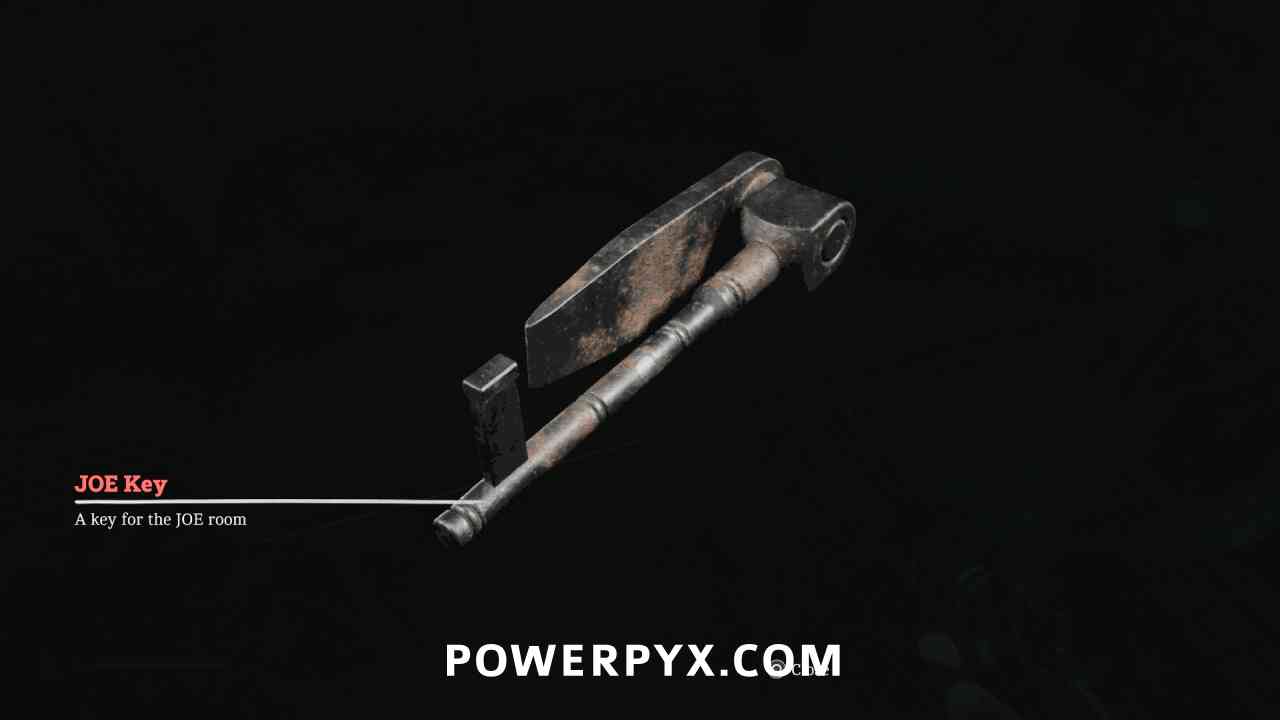
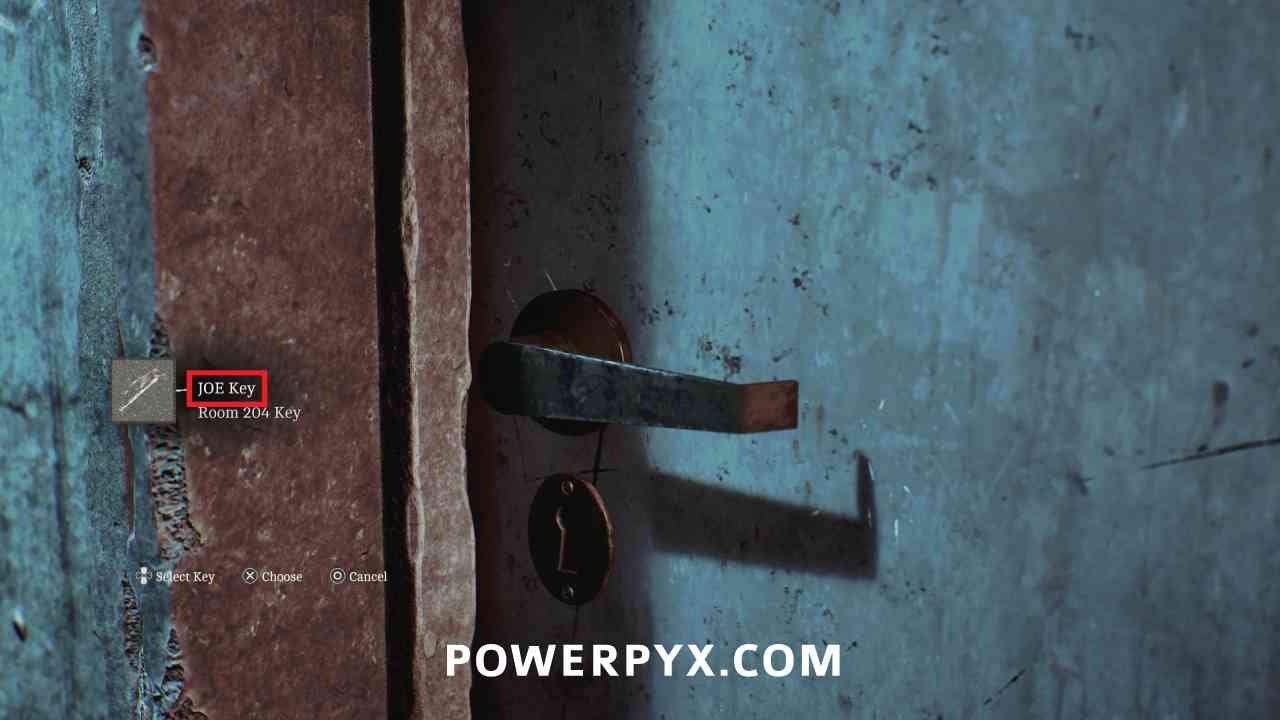
Key Item: JOE Key
Area: SWDP – Different
In the room with the computer, on a table in the corner.
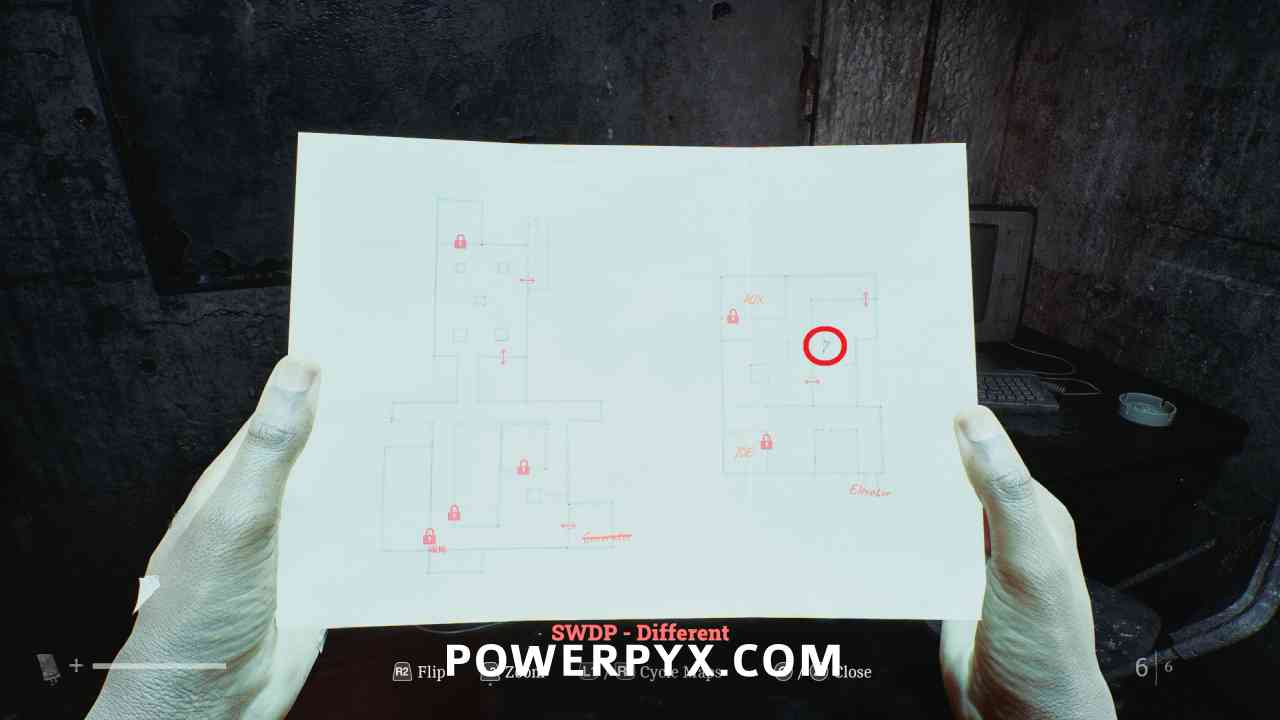
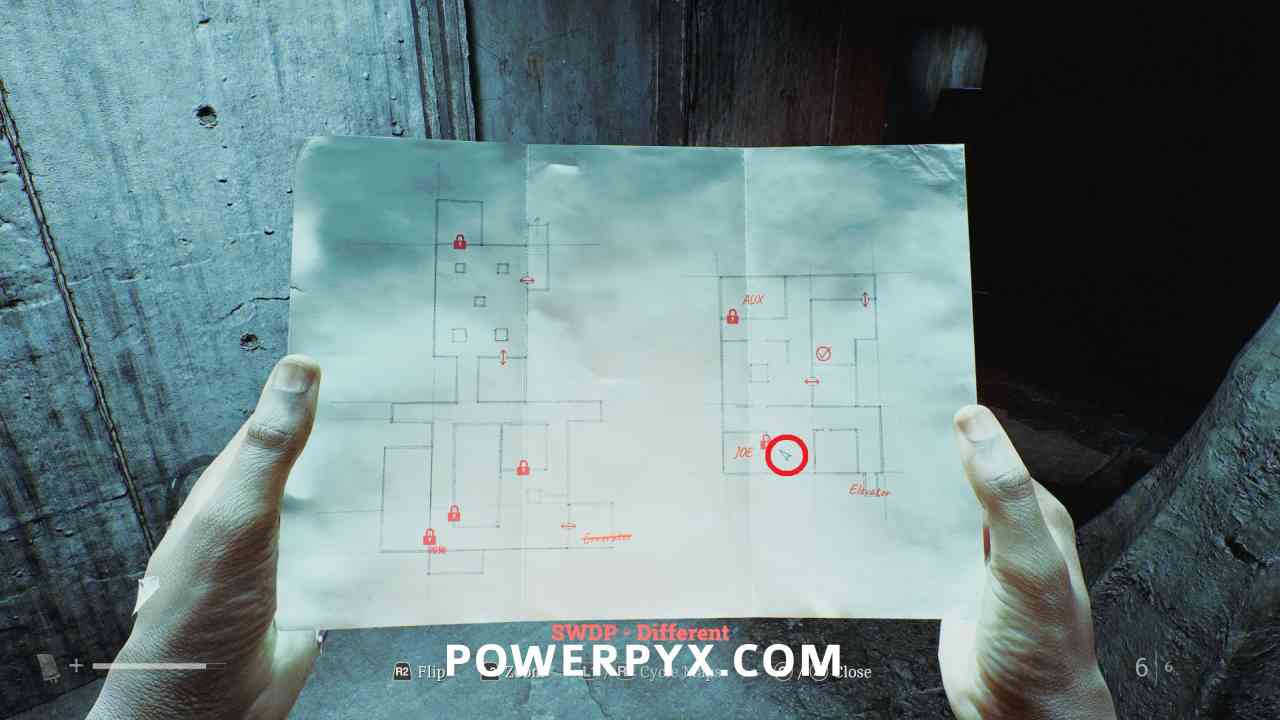
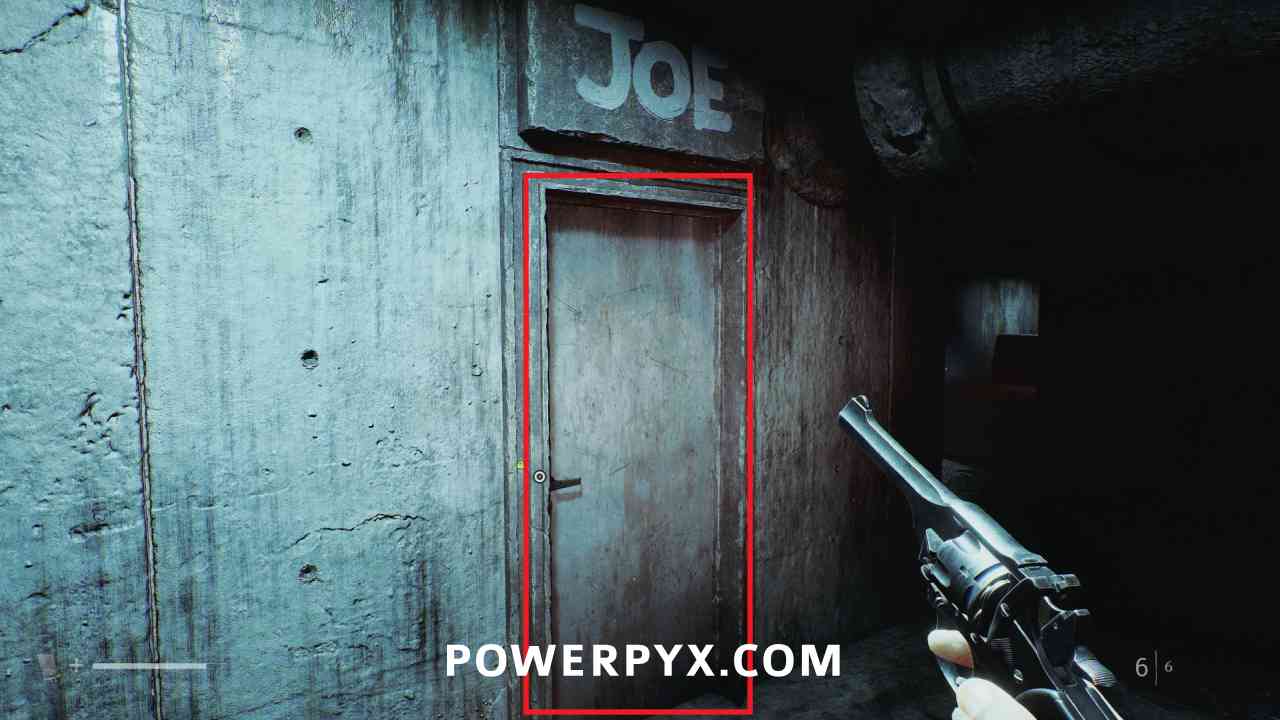
Locked Door – JOE Door
Area: SWDP – Different
Go to the room in the southwest corner with JOE above the door, and use the JOE Key.
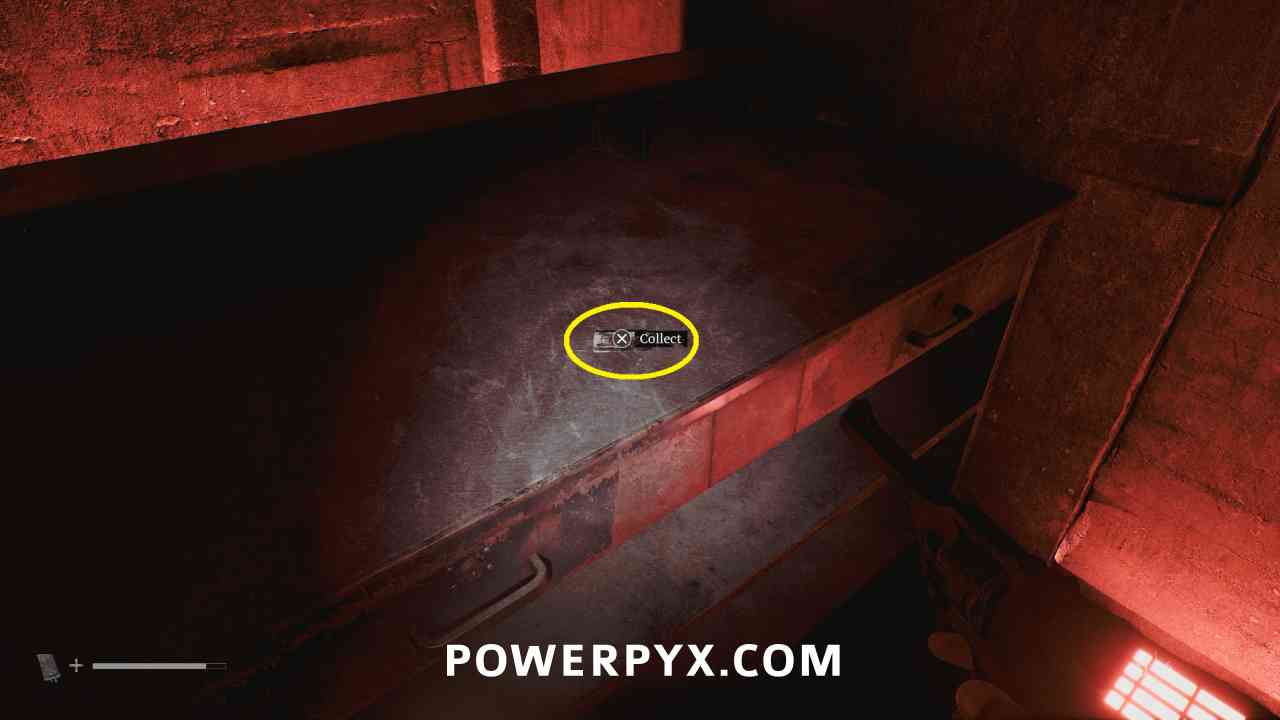
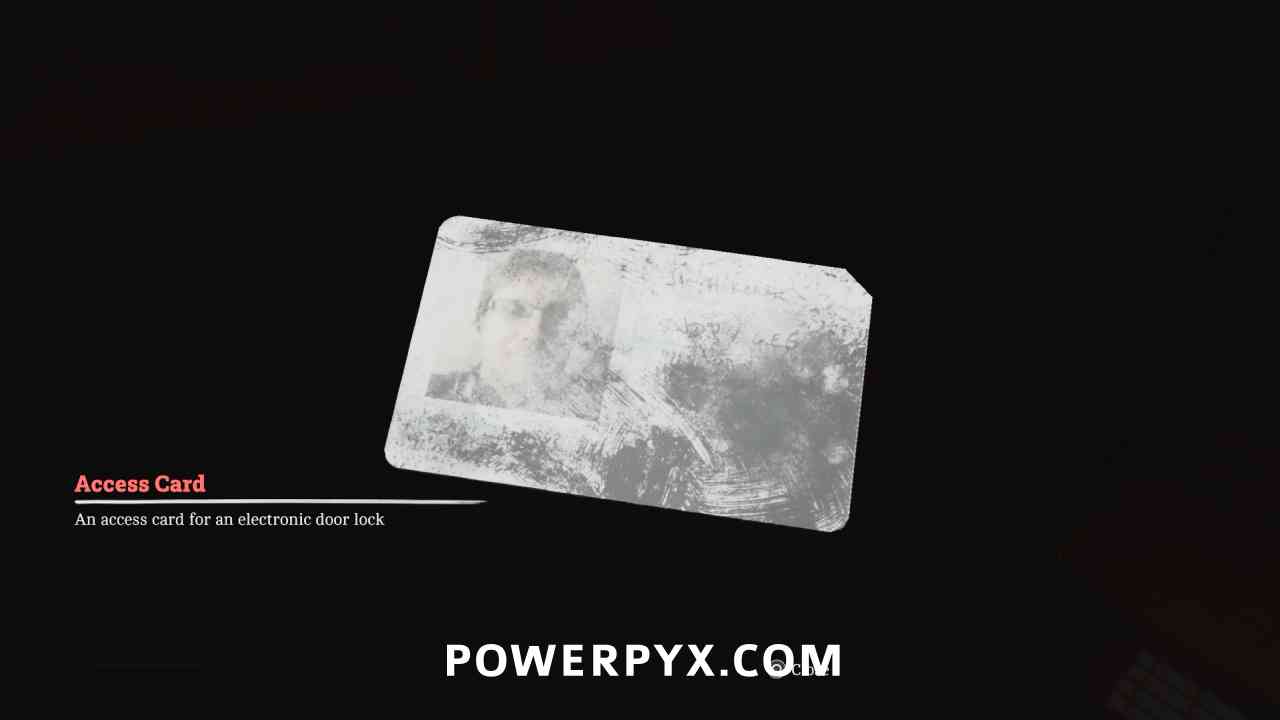
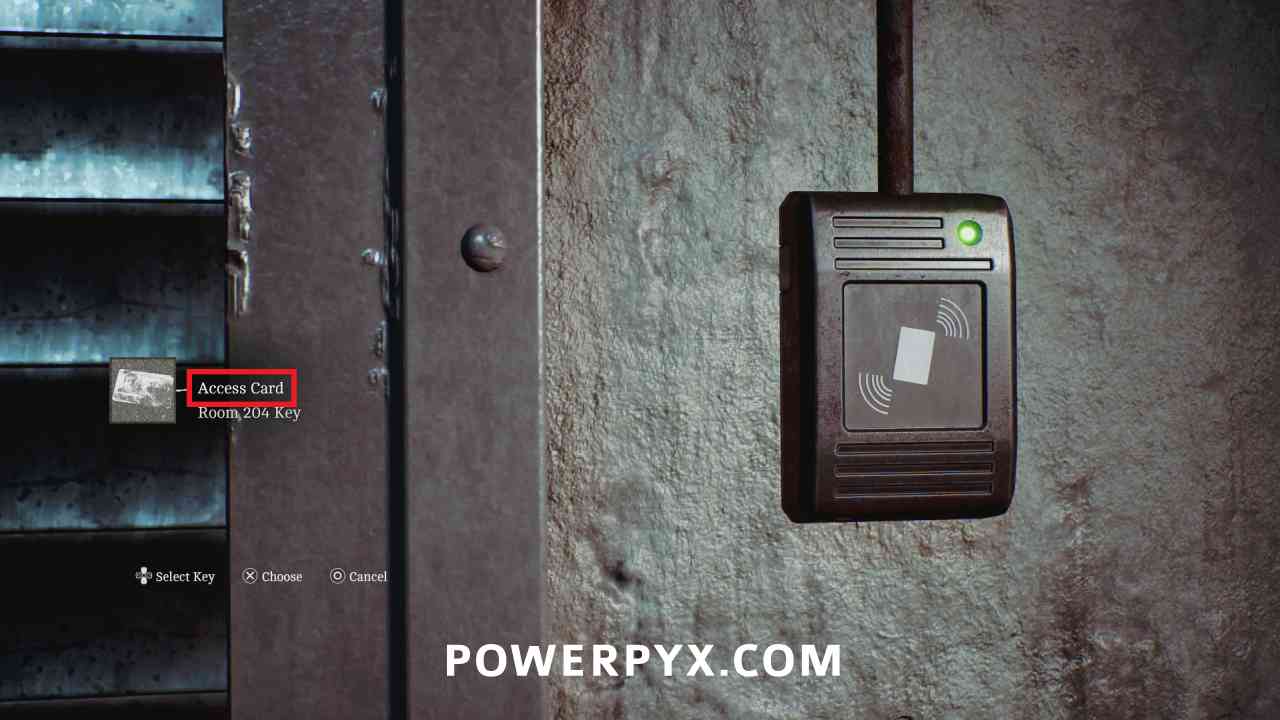
Key Item: Access Card
Area: SWDP – Different
After squeezing through the gap in the wall, on the counter beside the bed.
Locked Door – Control Room
Area: SWDP – Different
Go back up to the main area and up to the upper floor where you can use the Access Card to open the door on the east side of the area.
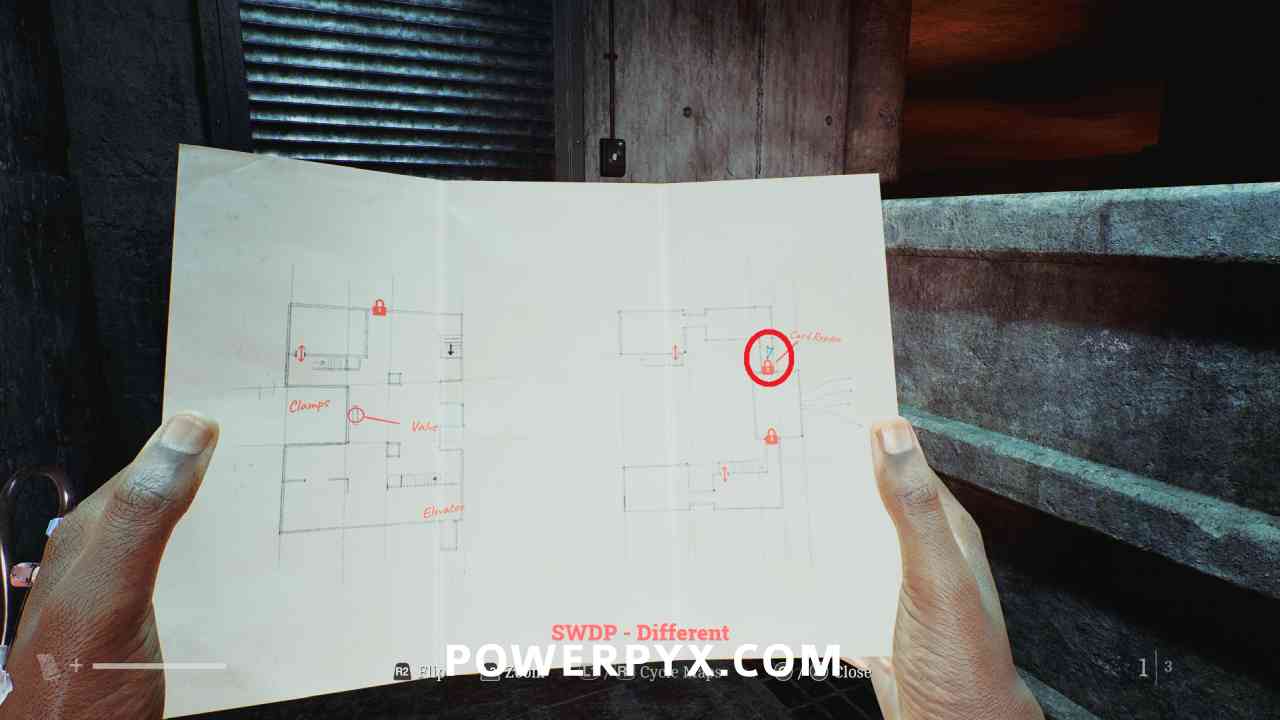
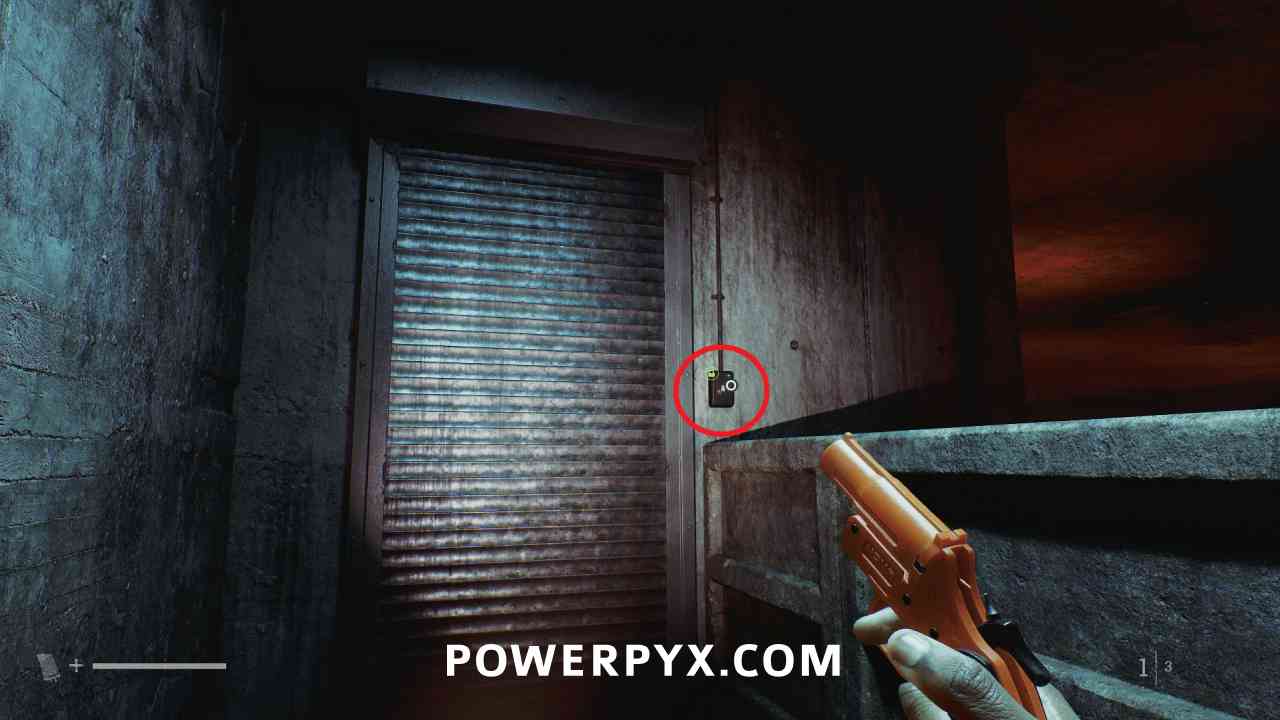
Puzzle #31
Area: SWDP – Different
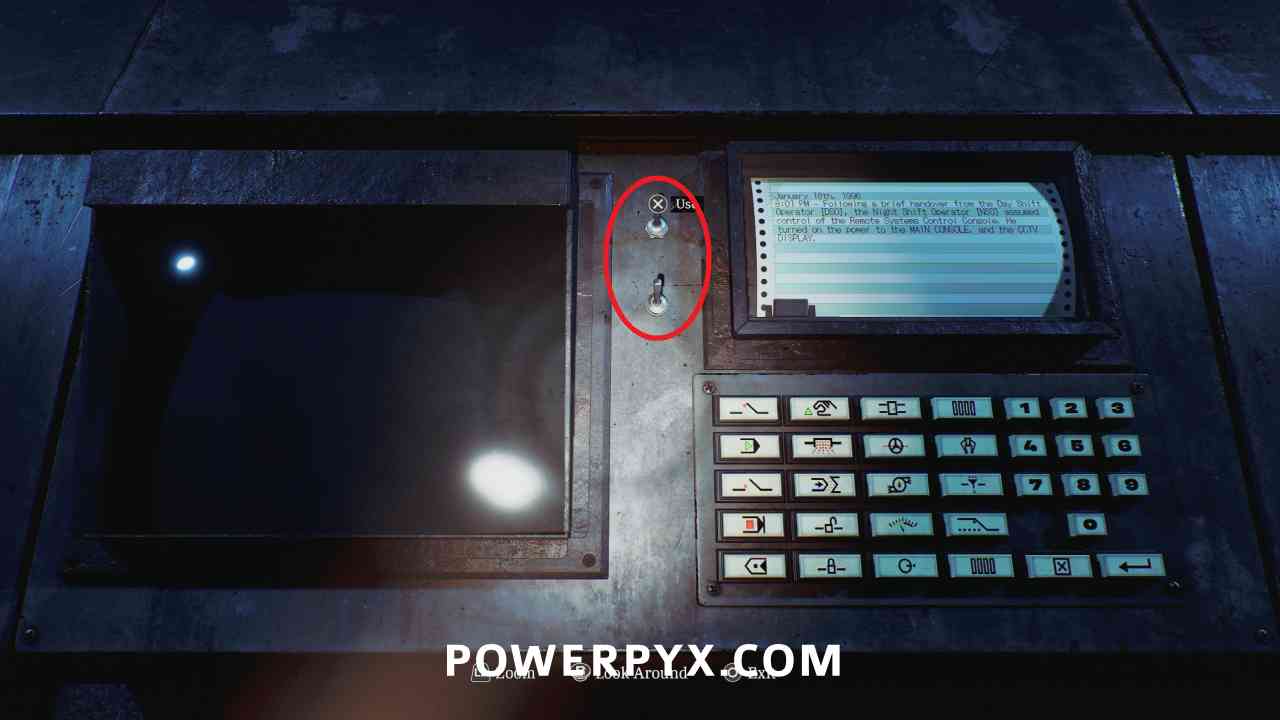
First, interact with the panel with the printer above it, and use the two switches to turn it on.
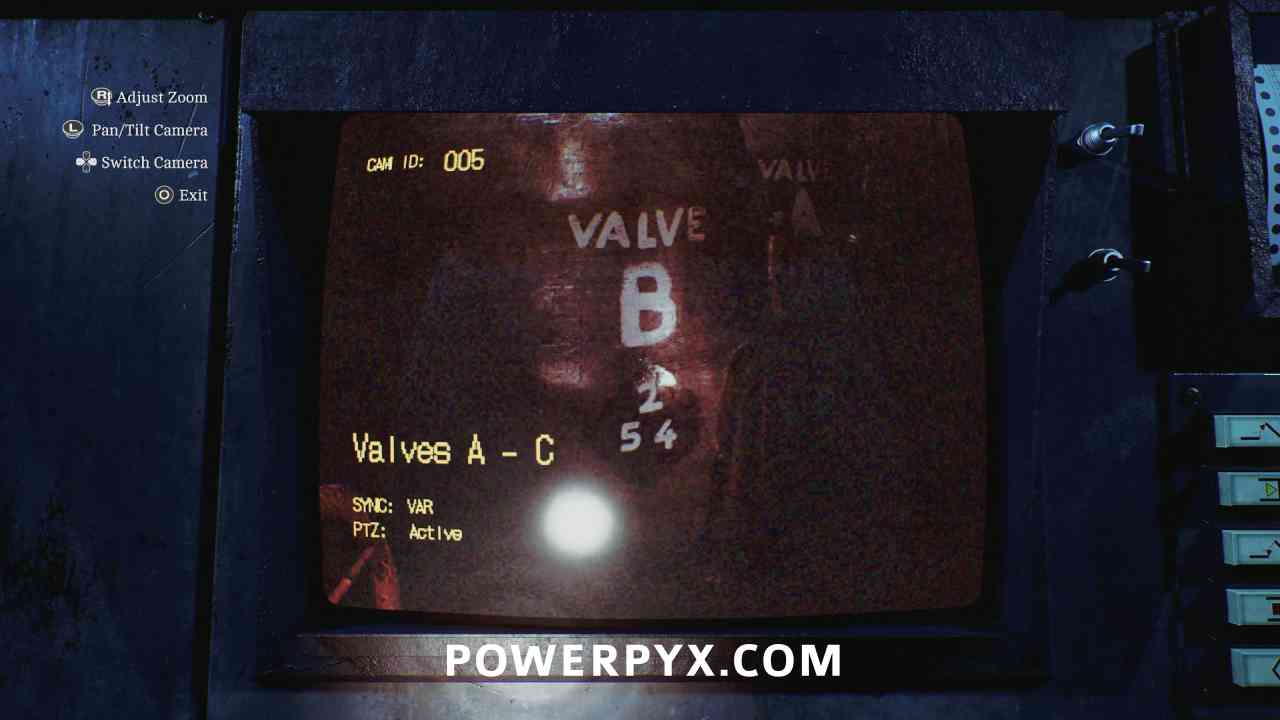
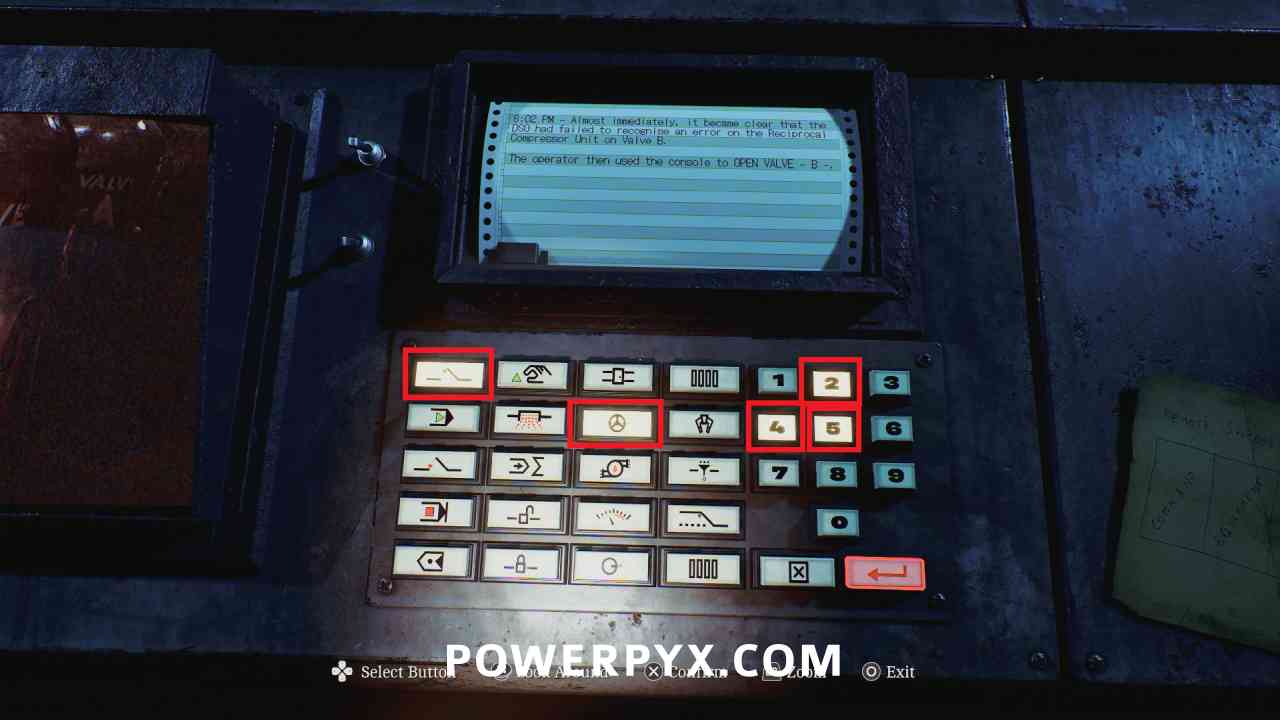
Next, interact with the buttons and select the open switch (top left corner), the valve switch (circle with a red line through it) and the numbers 245 (the numbers visible on VALVE B when using the camera) and then ENTER button on the bottom right.
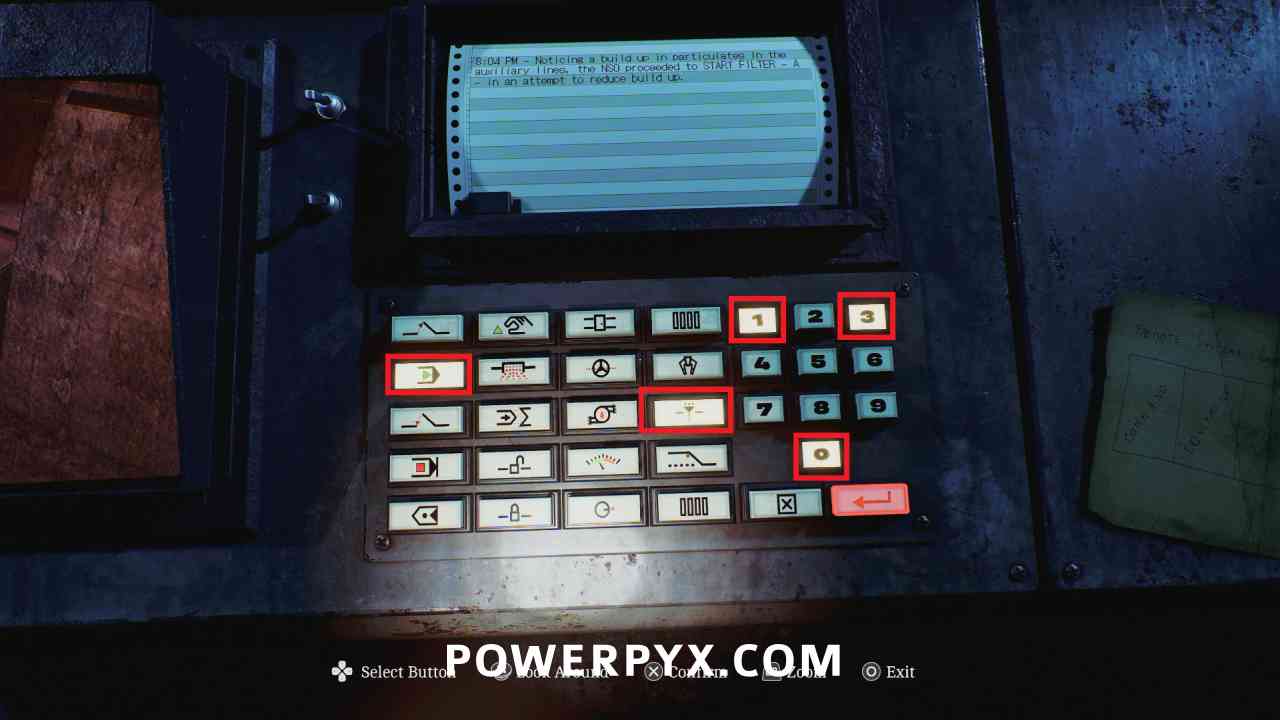
Then select the start switch (green arrow first column) the filter switch (middle button right column) and the numbers 130 (visible in the filter unit camera).
Key Item: AUX Key
Area: SWDP – Different
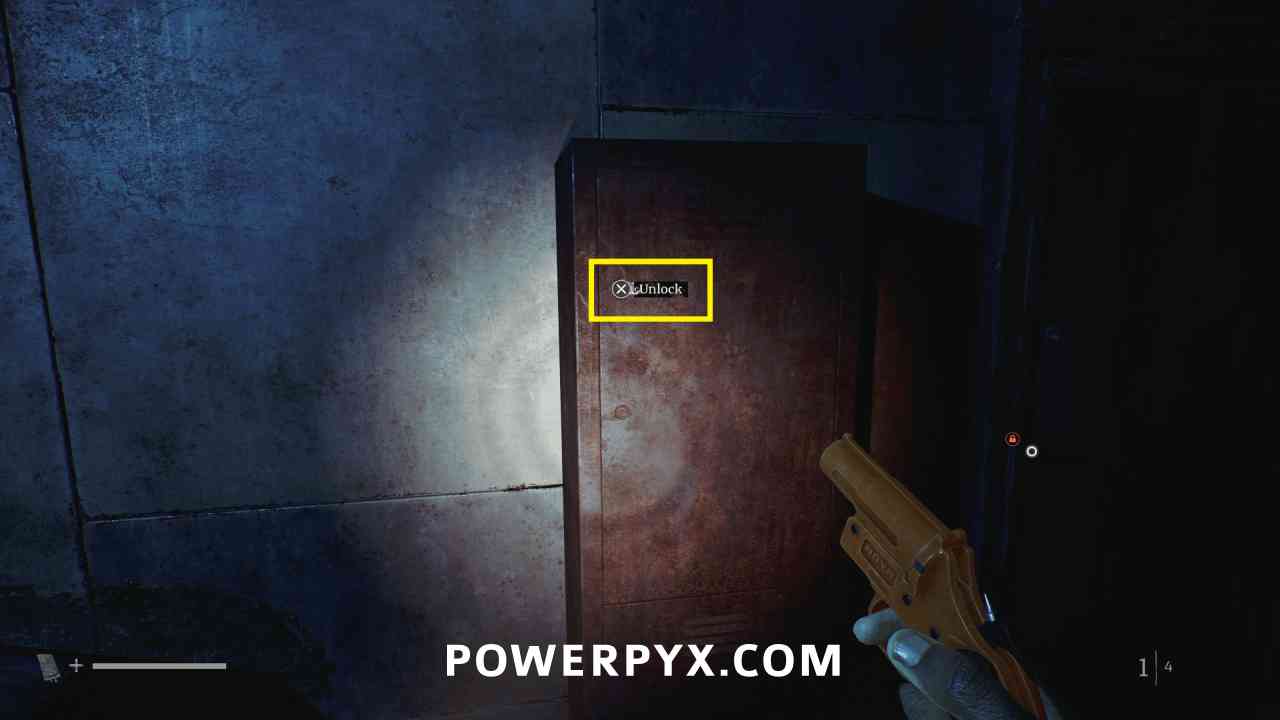
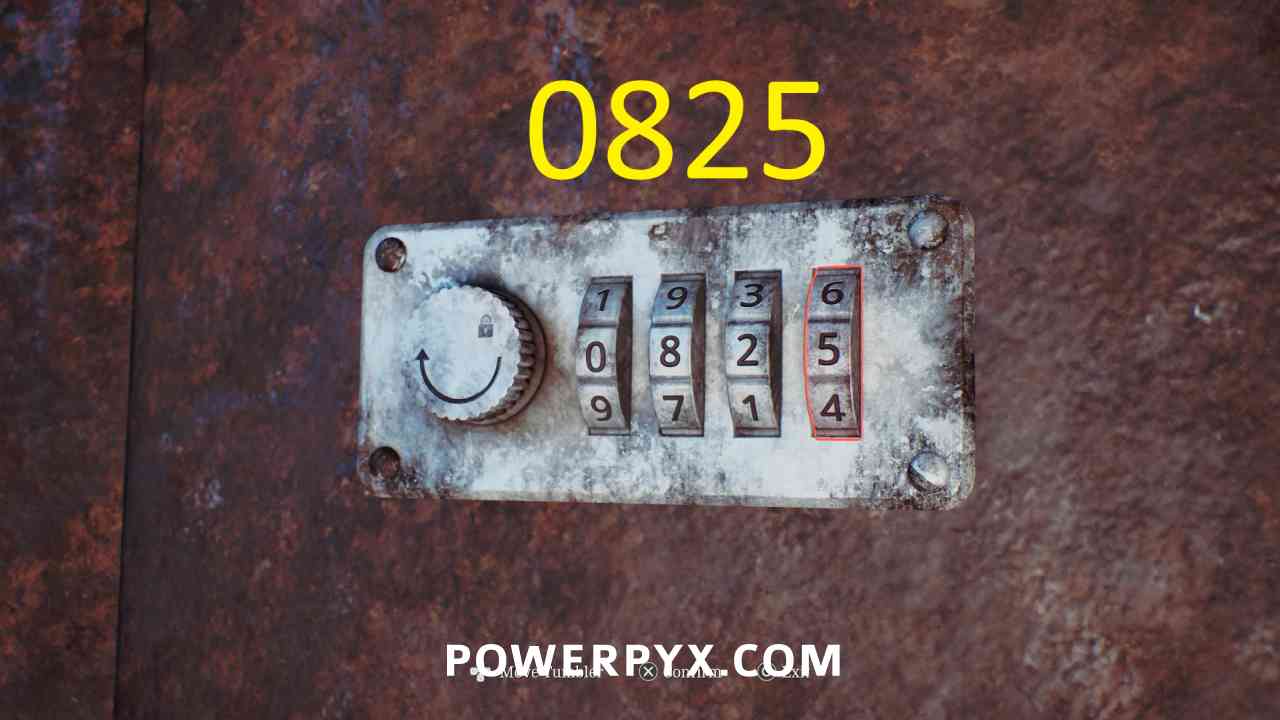
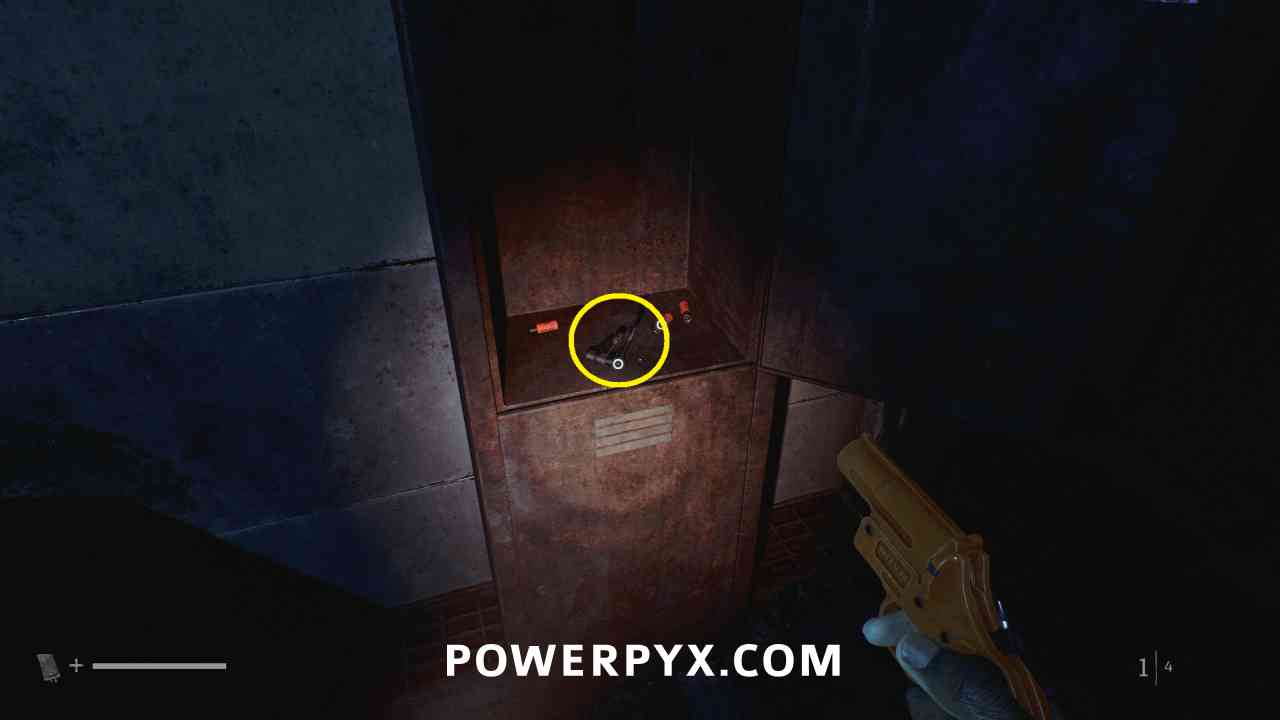
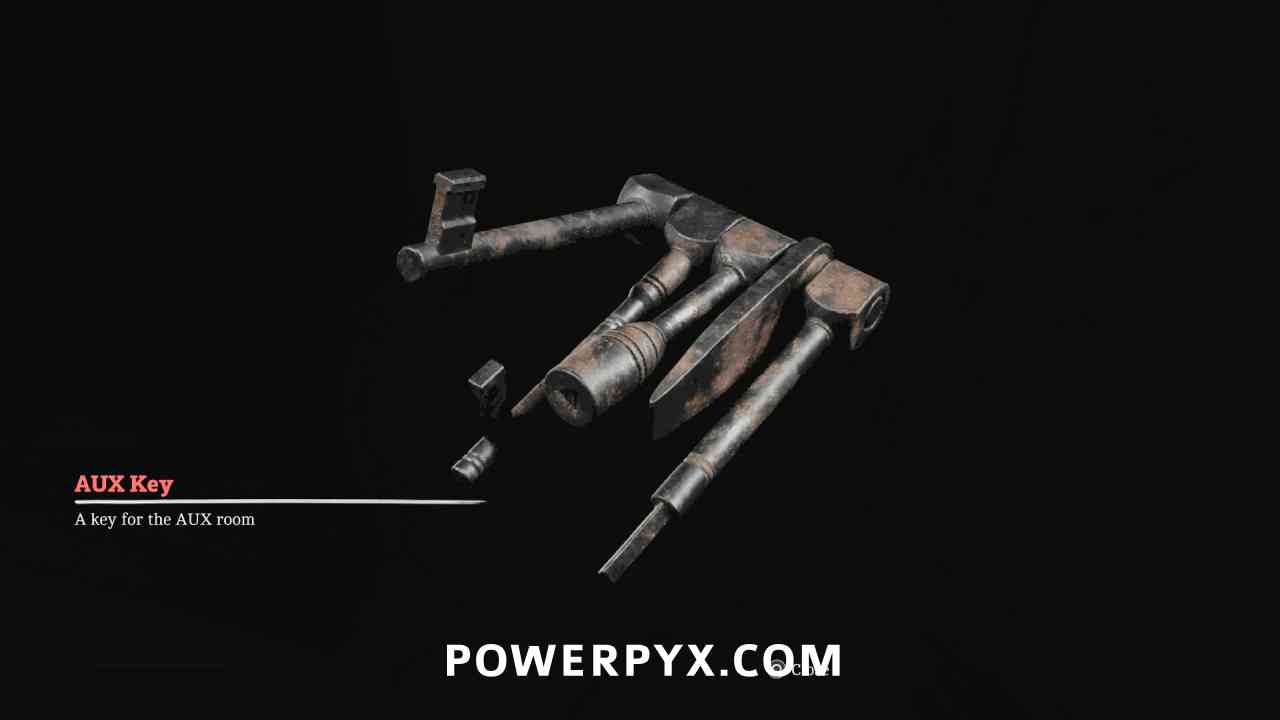
Use the code provided by the panel (0825) to open the locker to the right and pick up this key.
Locked Door – AUX Door
Area: SWDP – Different
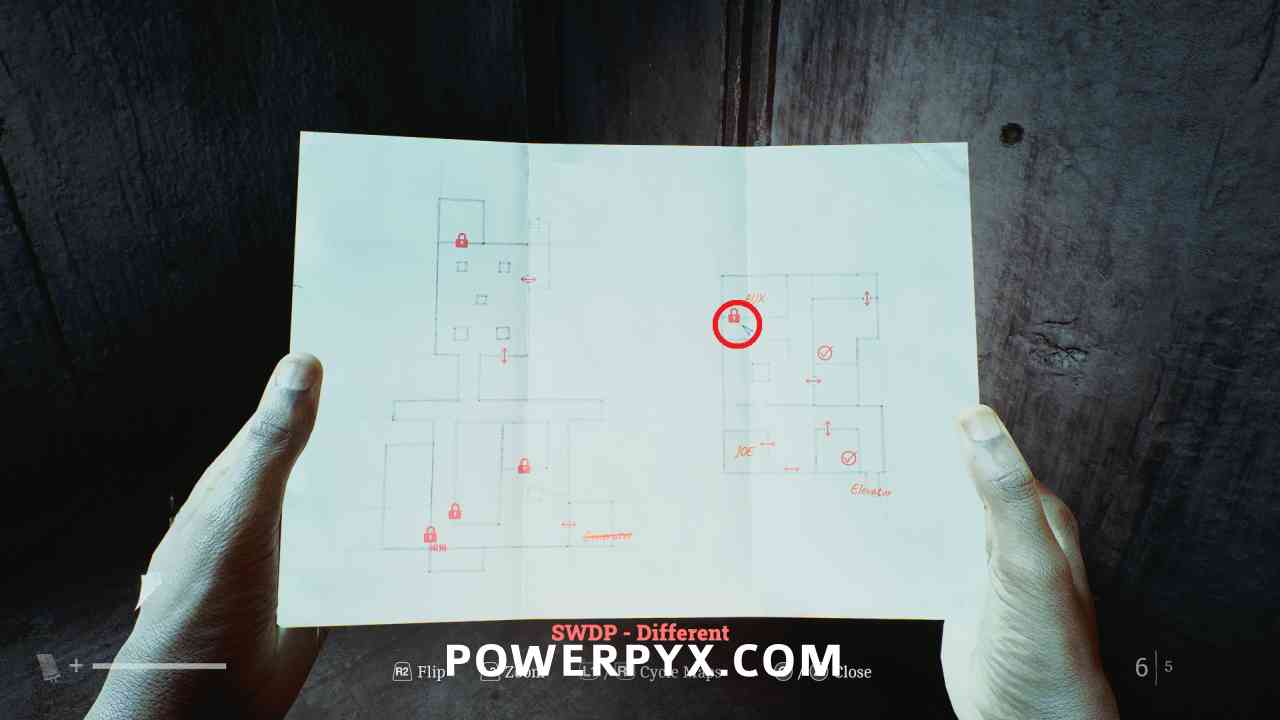
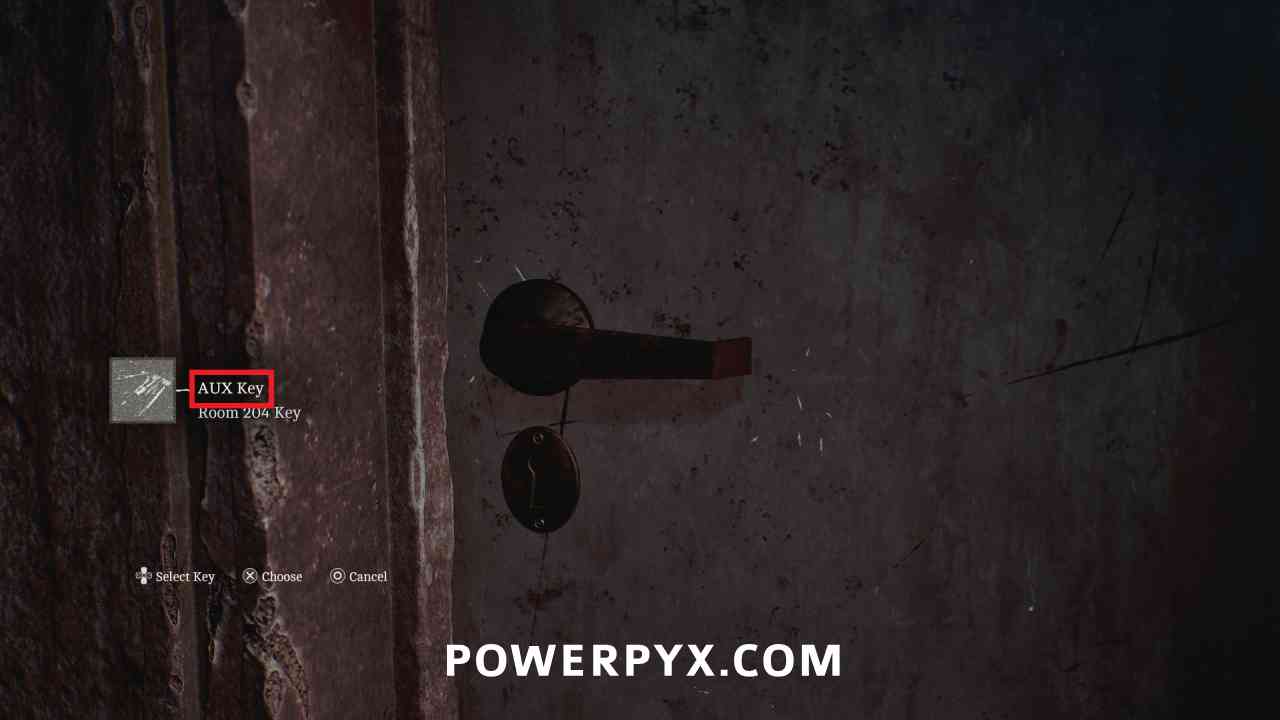
Go back down the elevator, and you can now use the AUX Key to enter the room on the northwest corner of that floor.
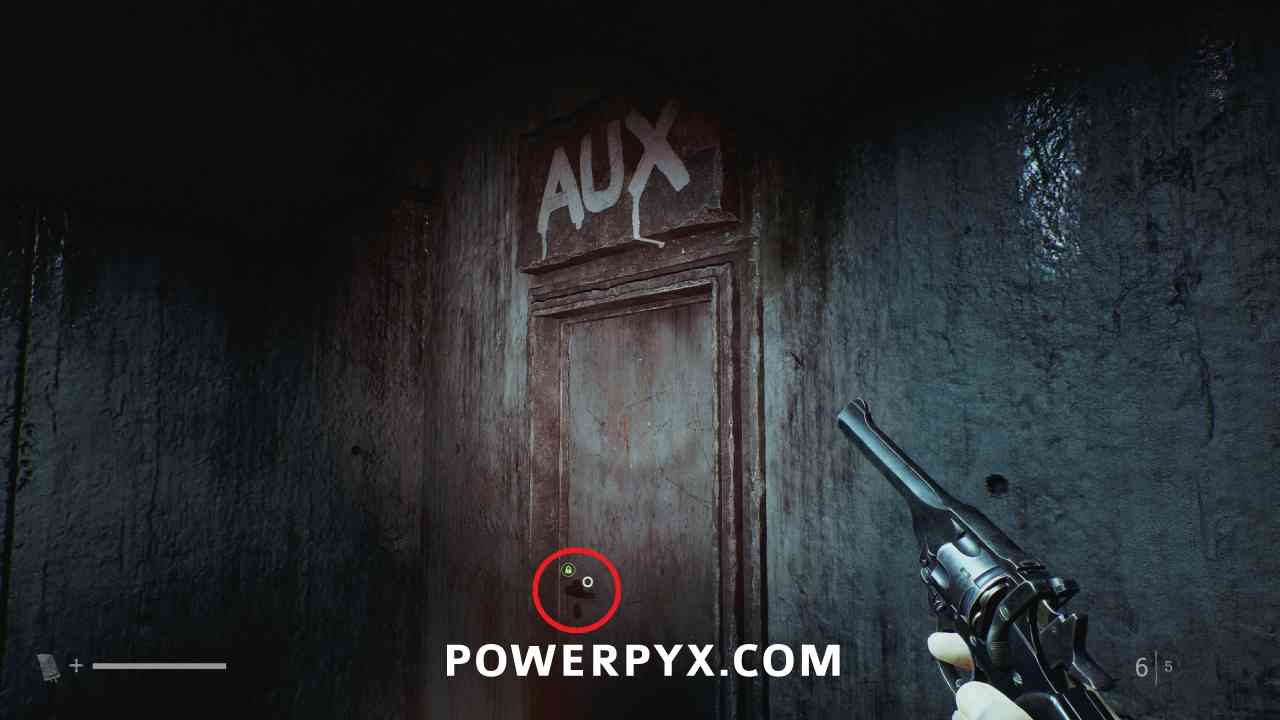
Puzzle #32
Area: SWDP – Different
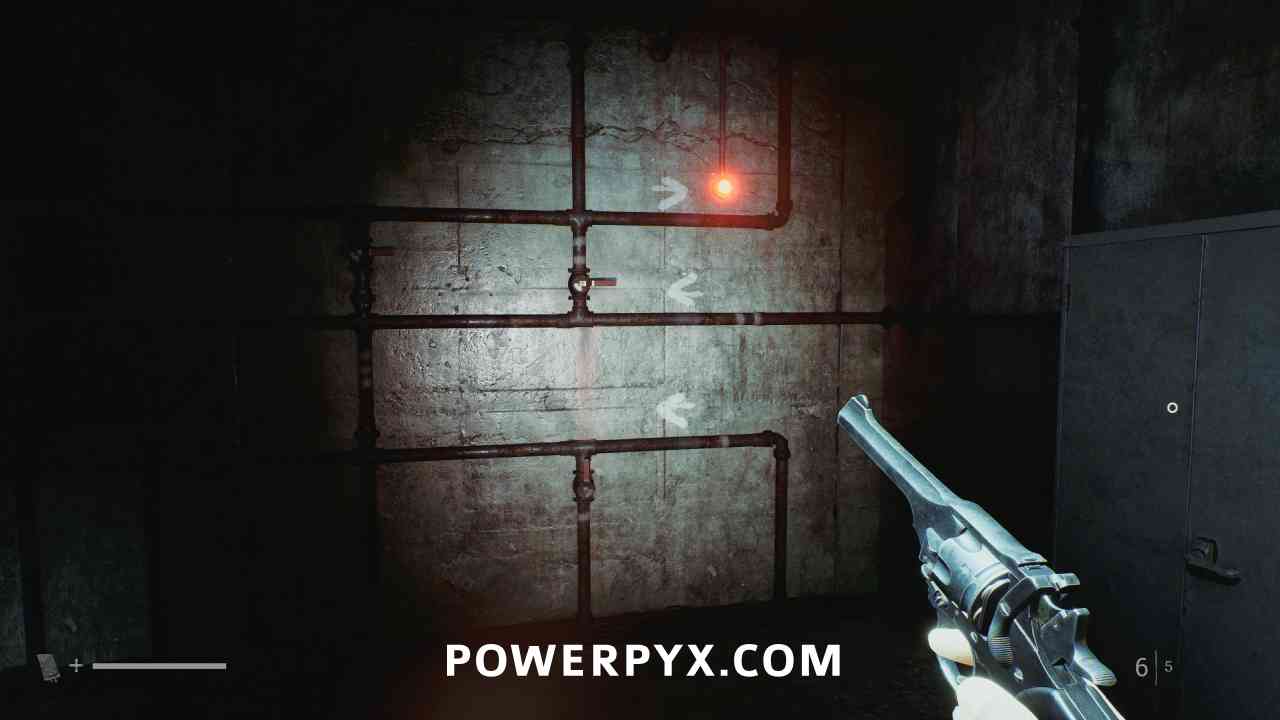
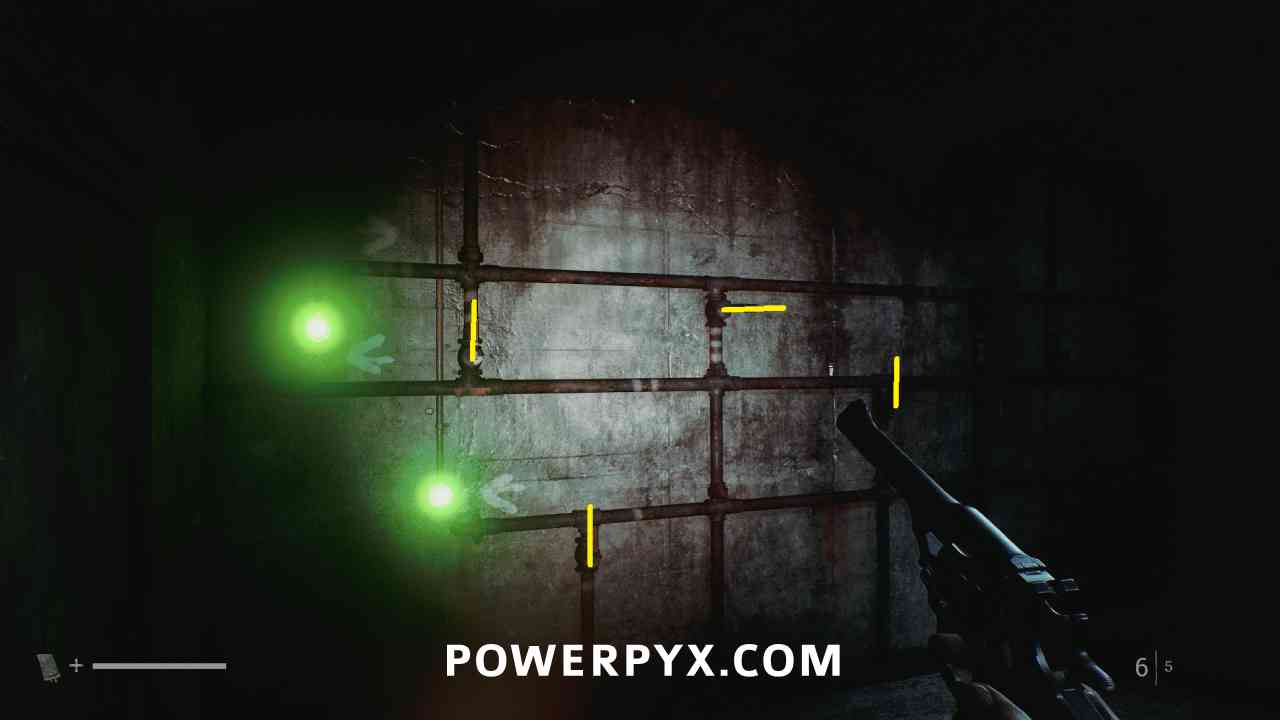
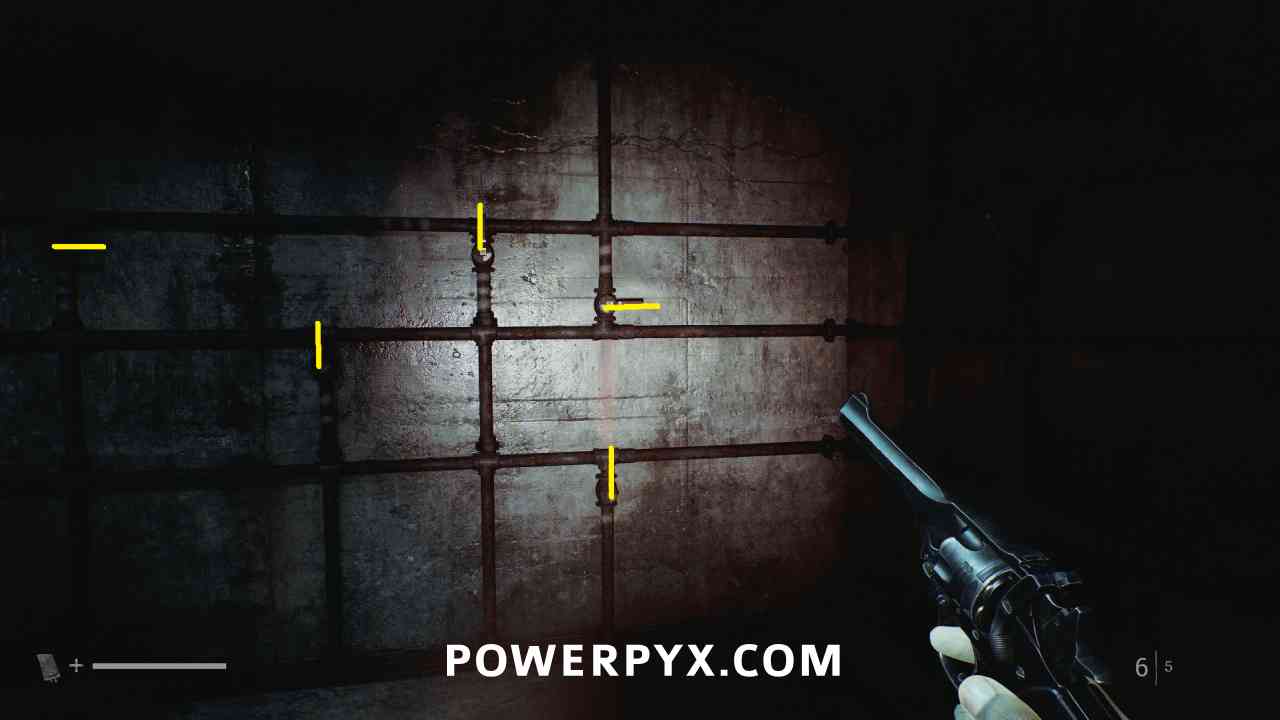
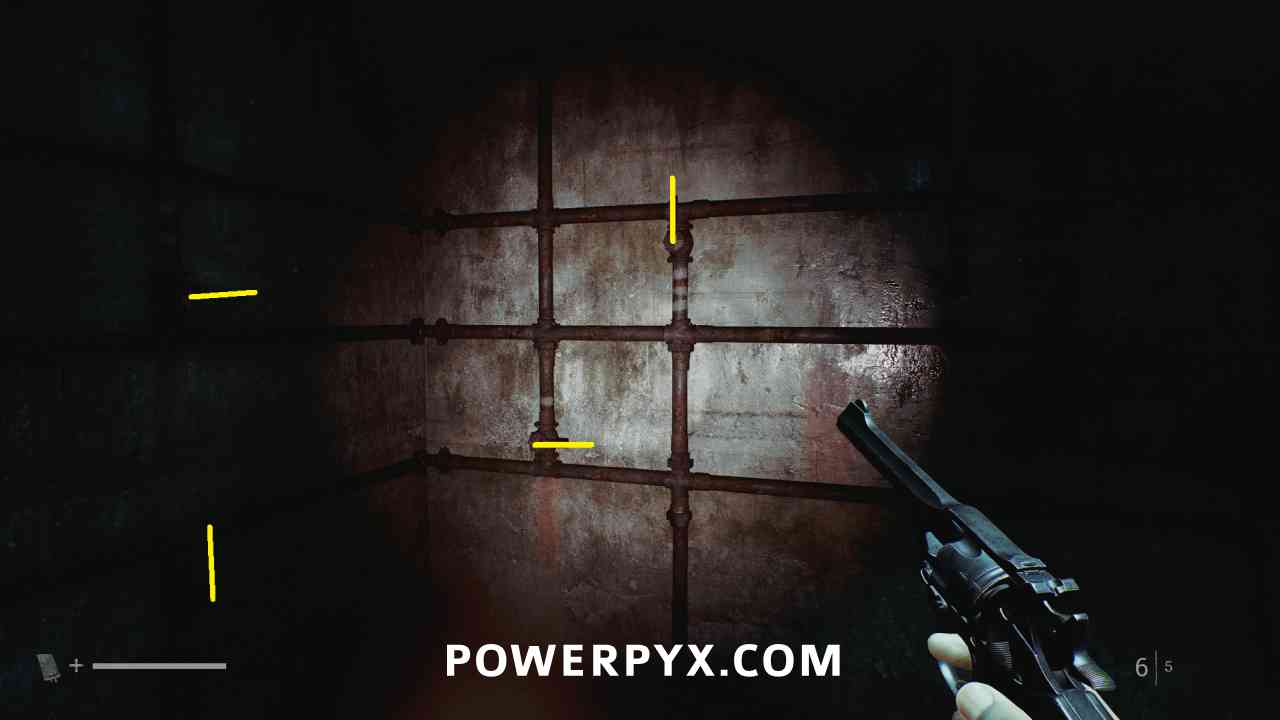
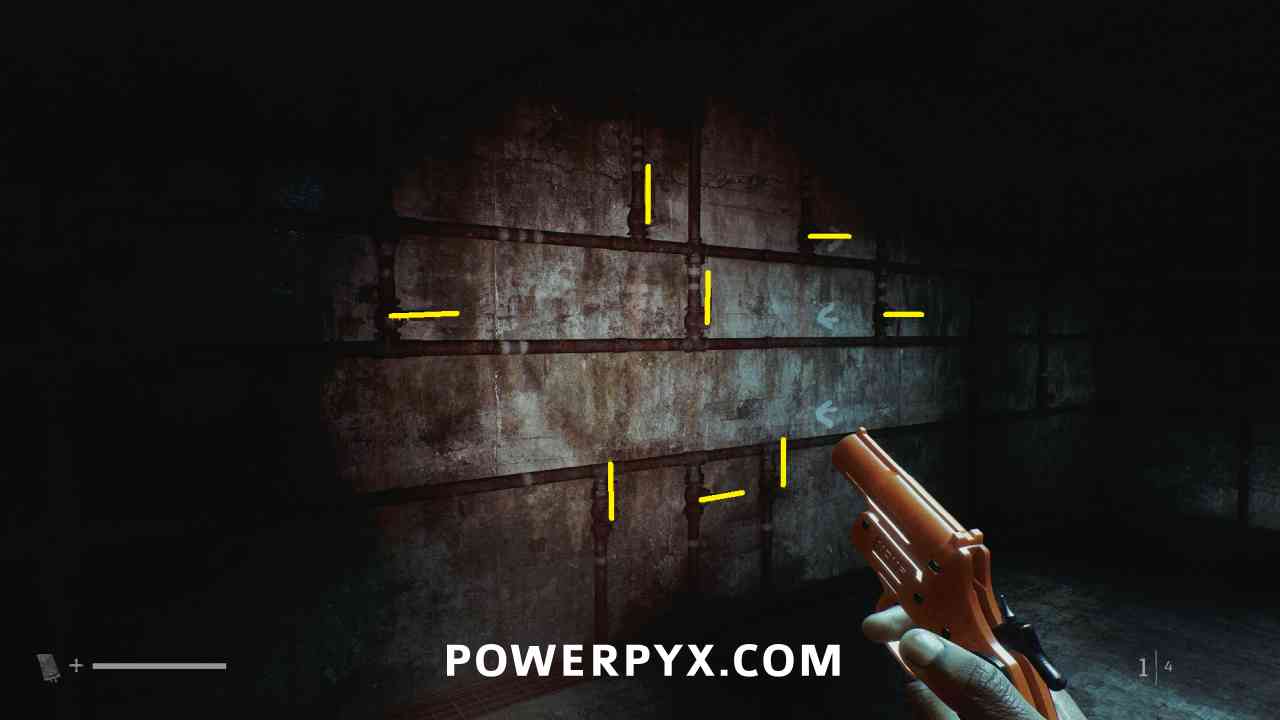
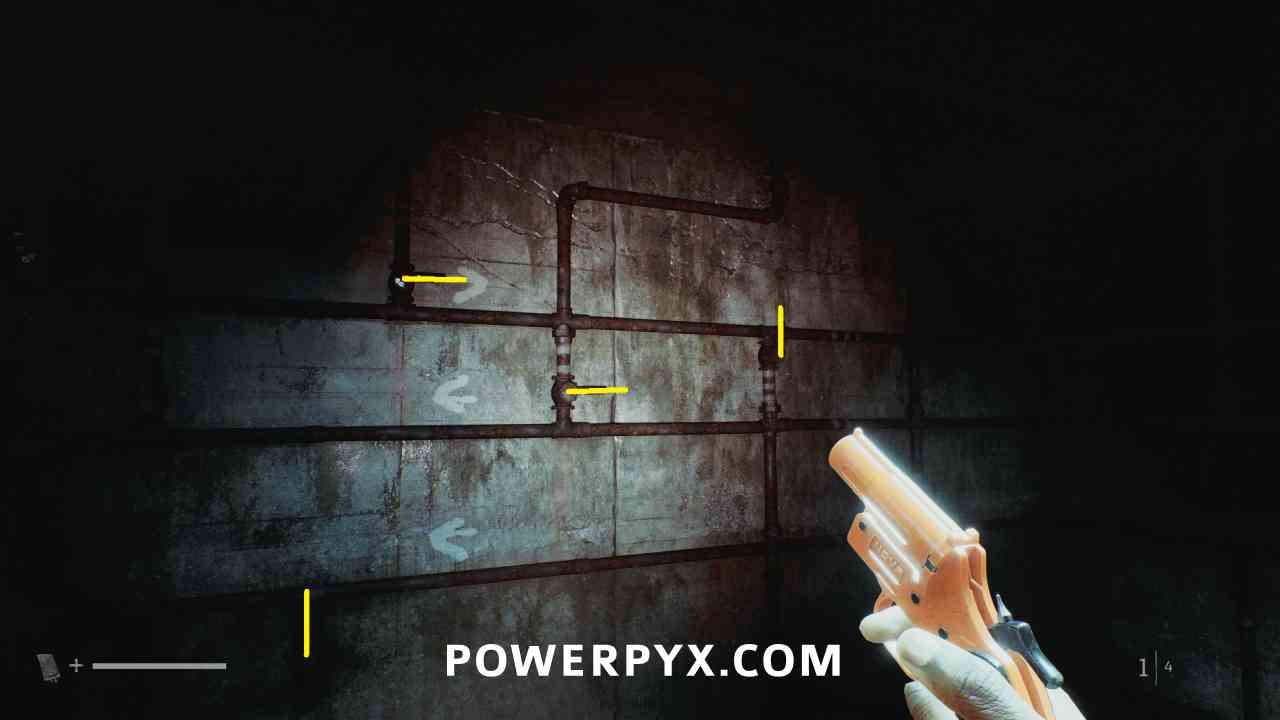
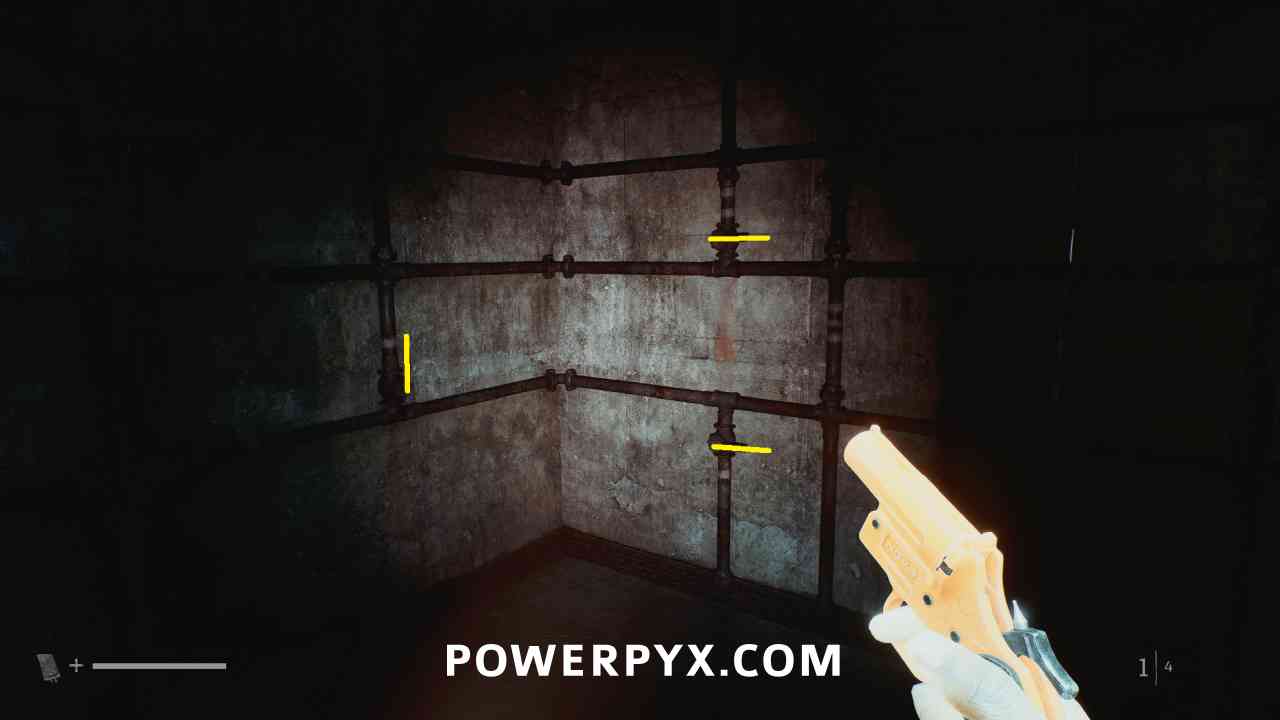
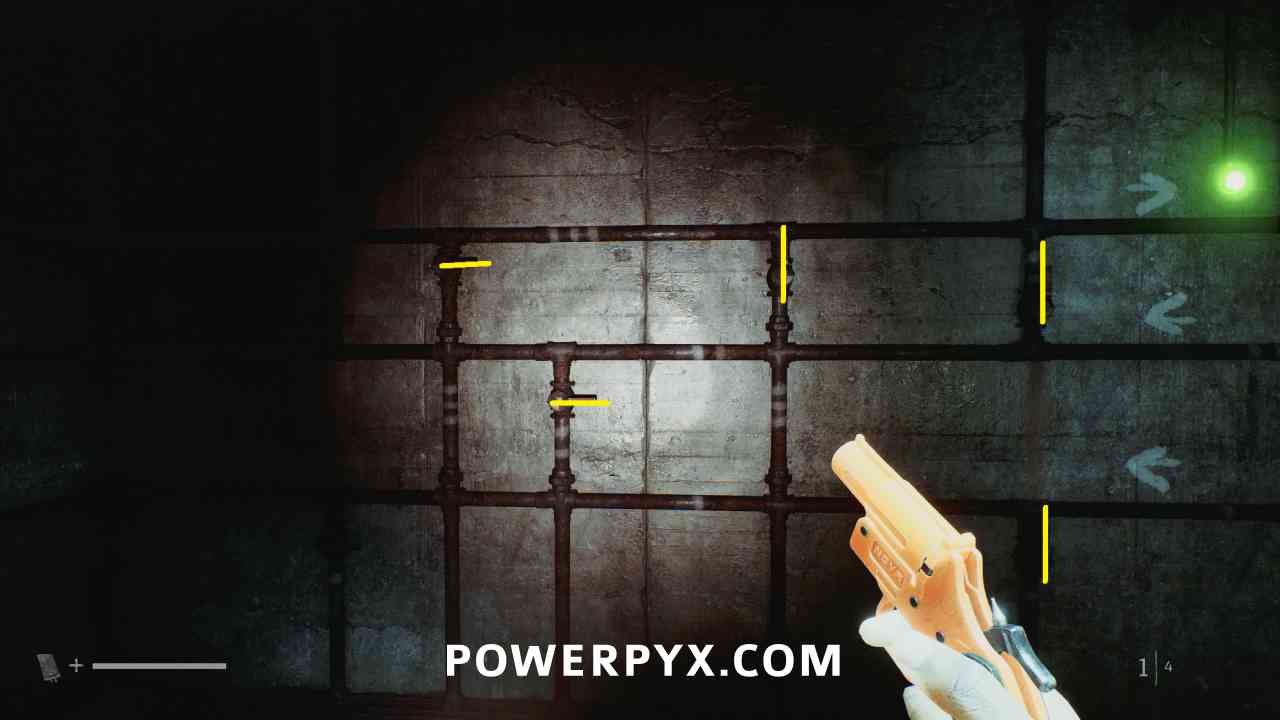
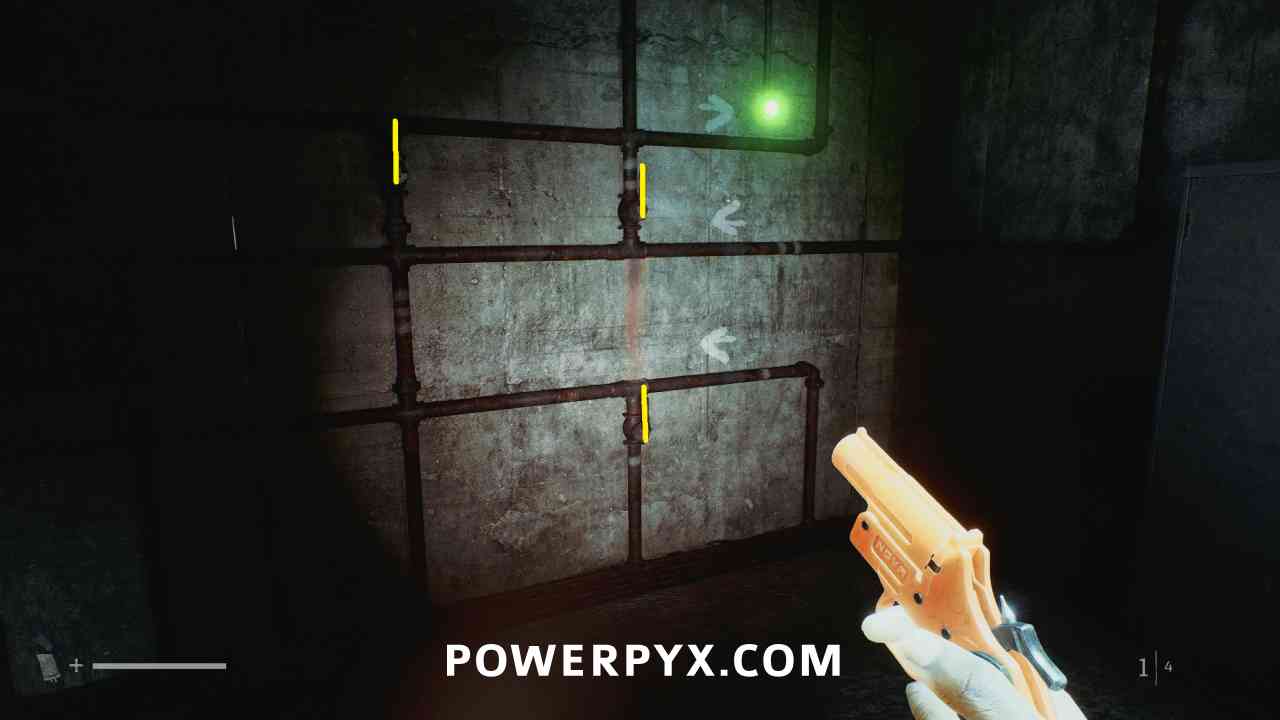
You need to interact with the switches on the wall, so that they match the same directions as shown in the Auxiliary Lines clue for each line. Note that line 1 and 2 start from the wall facing away from the computer, and you look at the switches based on how many lines are painted beside them go in the direction that the arrow points. When you have the switches correct, the light for that line turns green.
Puzzle #33
Area: SWDP – Different
Go back upstairs to the control room, and interact with the panel again.
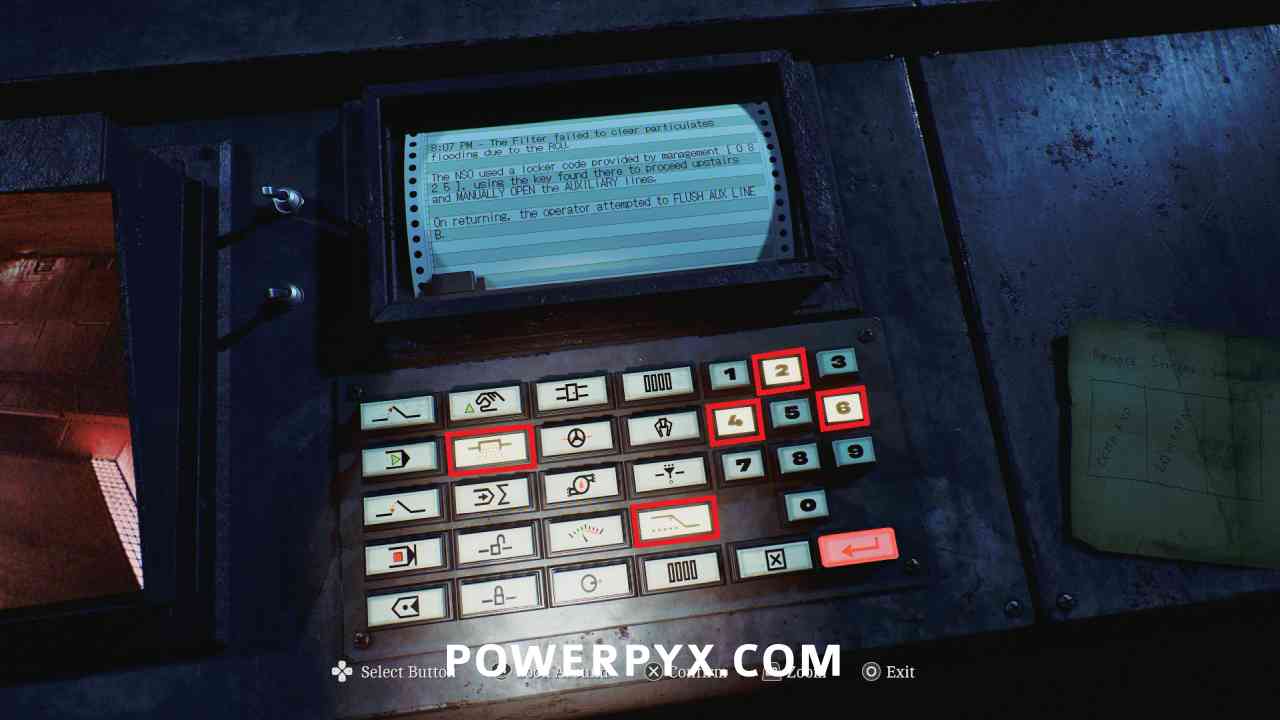
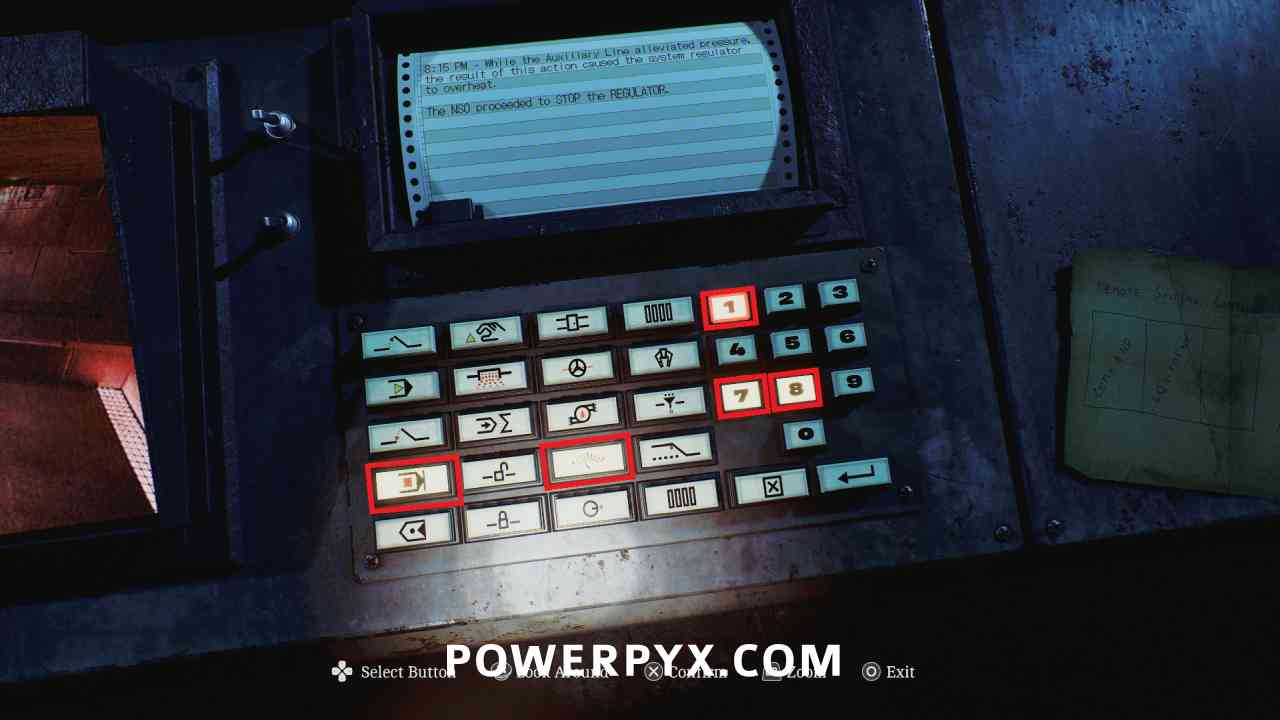
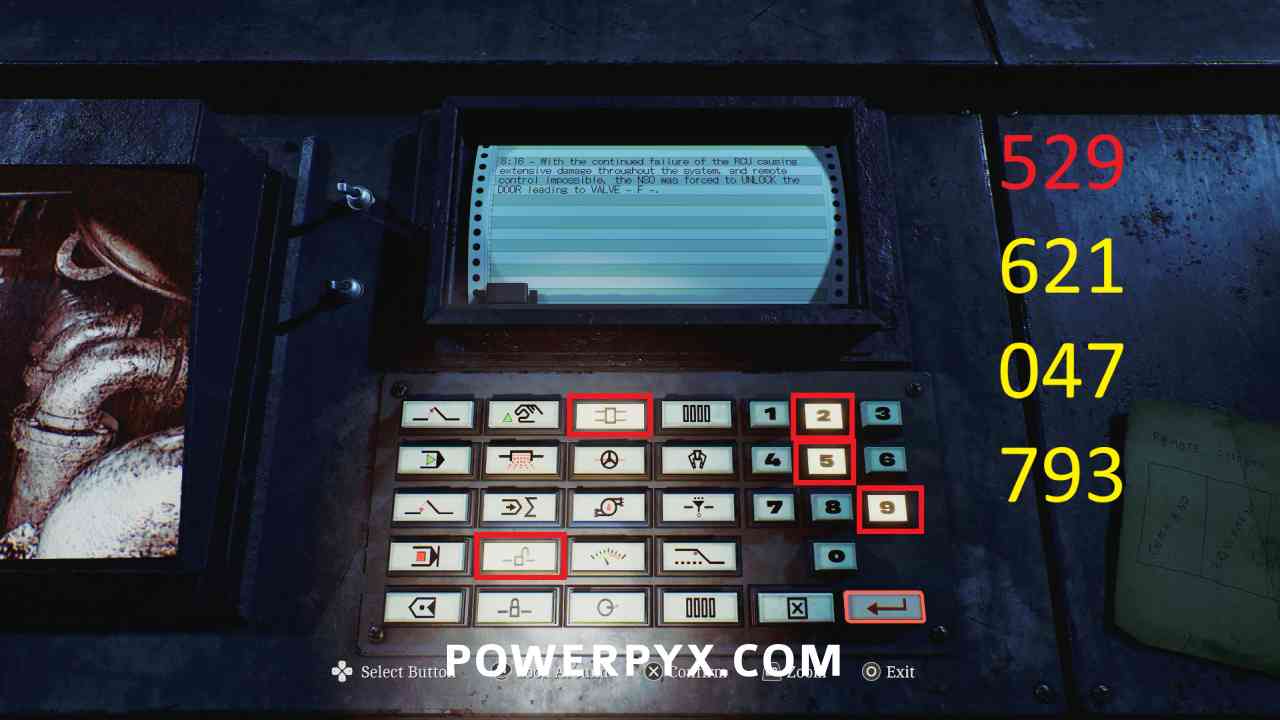
Select the flush switch (second row second column) the auxiliary switch (one up from bottom right) and the numbers 246 (from the paper to the right).
Then select the stop switch (red square) the regulator switch (green and red dial) and the numbers 781 (visible in the Regulator Systems camera).
Then select the unlock switch (open padlock) the door switch (top row has a door on it) and the numbers 592 (visible in the Valves D-F camera).
Puzzle #34
Area: SWDP – Different
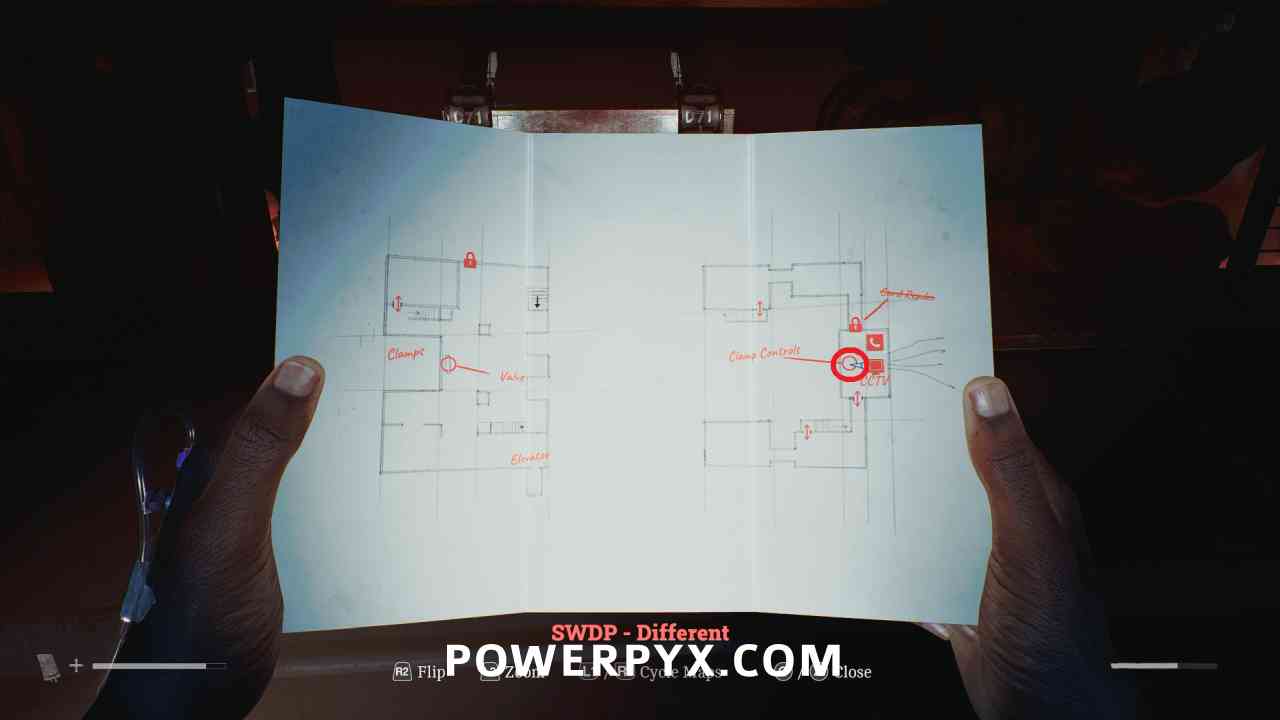
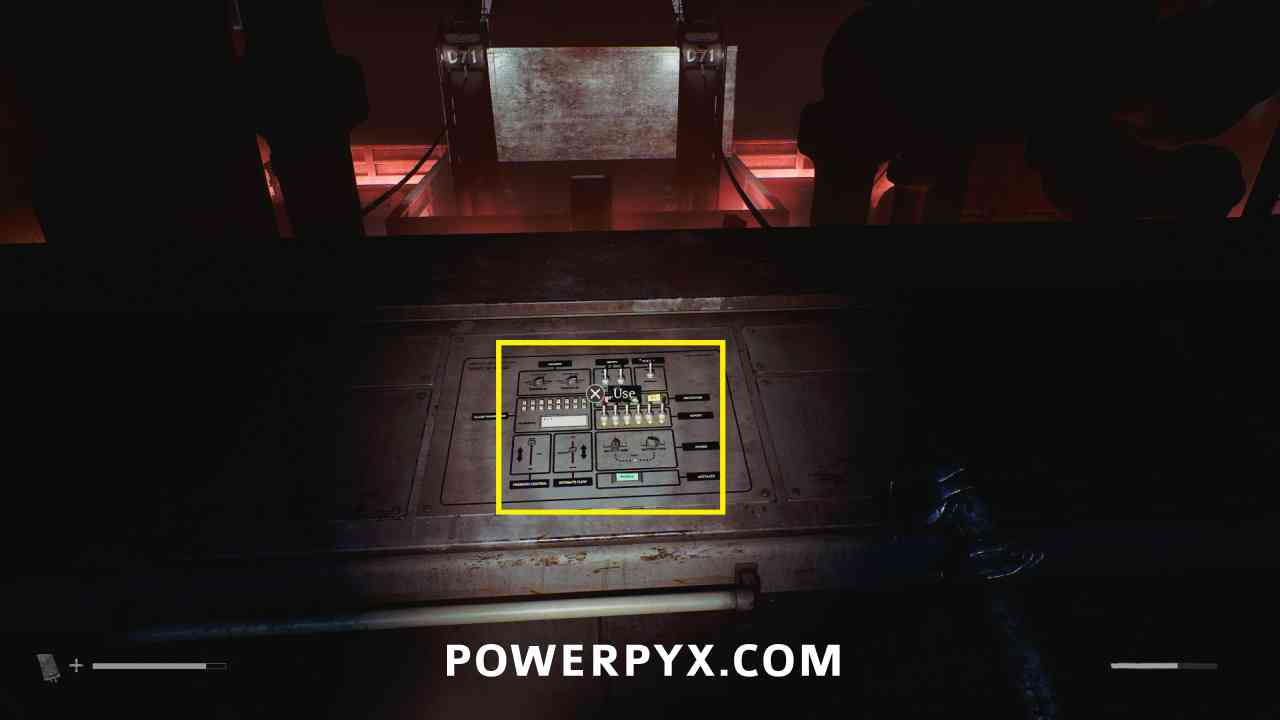
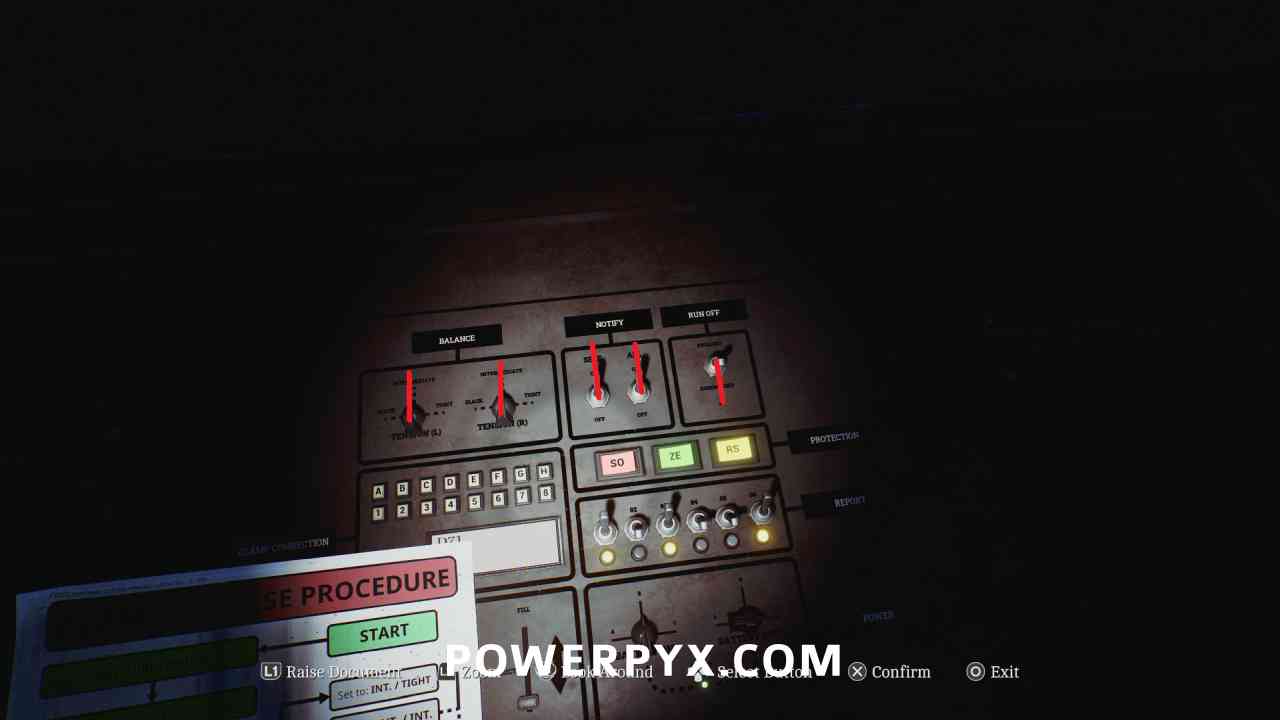
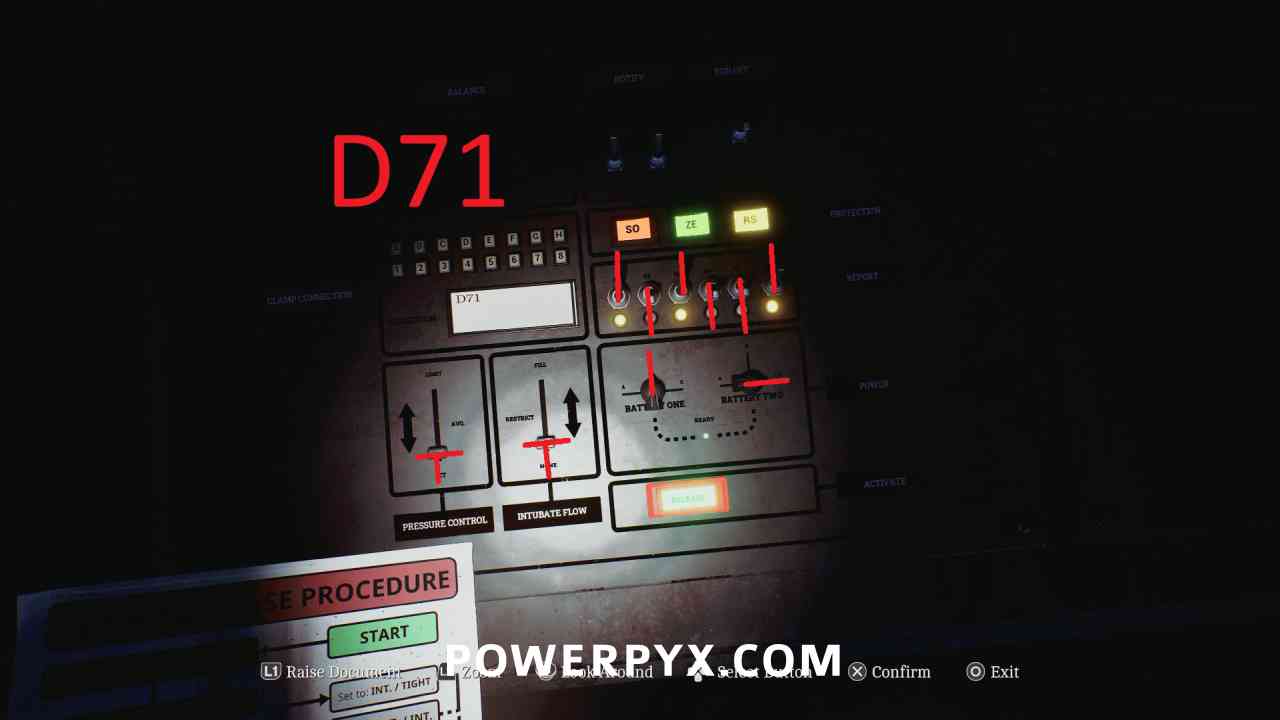
Interact with the panel opposite the previous one, you have to set the controls as is specified in the Clamp Release Procedure document. The actual order you complete everything doesn’t matter, just that you set everything the correct way.
- Set BALANCE to Intermediate on both.
- Turn On both NOTIFY switches.
- Set RUN OFF to Disengaged.
- Enter D71 on the Clamp Connection pad (the number visible in front of you).
- Set REPORT switches so that the 1st, 3rd, and 6th are on (yellow light).
- Set PRESSURE CONTROL to SET (bottom).
- Set INTUBATE FLOW to NONE (bottom).
- Turn the BATTERY ONE switch to B (up) and the BATTERY TWO switch to C (right).
- When everything is set correctly the green RELEASE button will flash and you can press it.
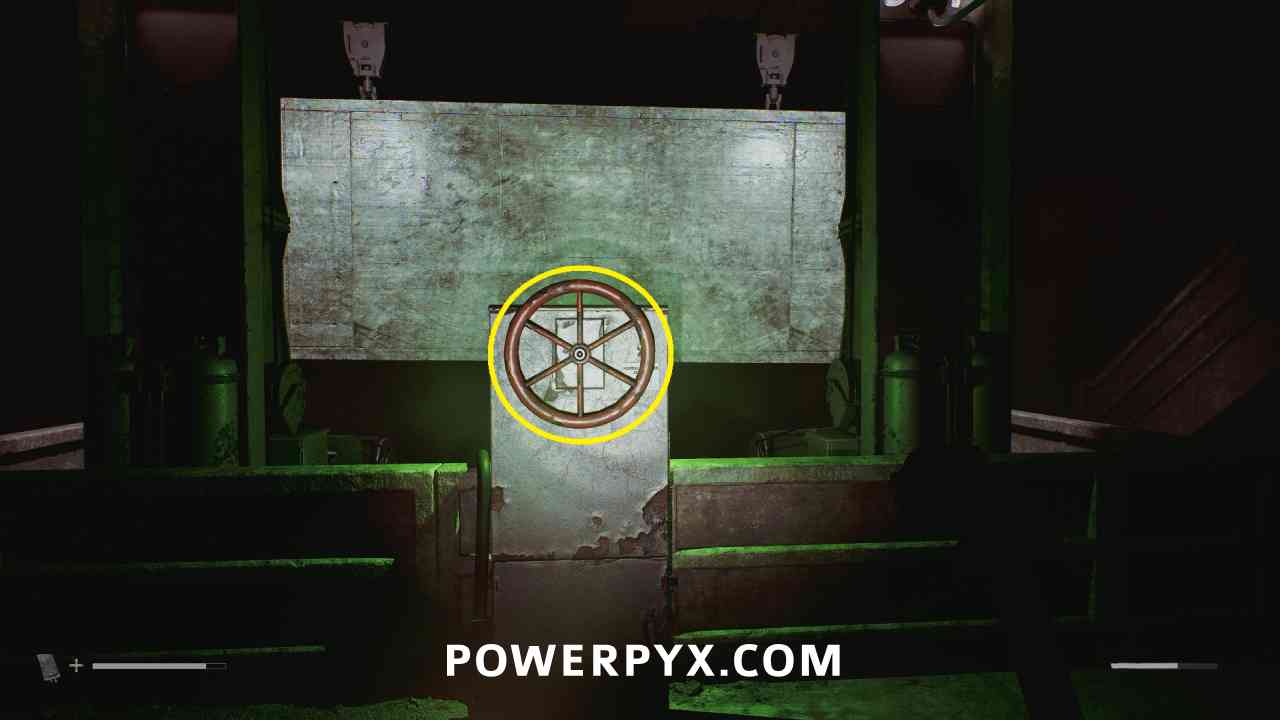
- You can then go down and turn the red crank to complete the puzzle.
16. Eraser
All that remains is to defeat the final boss, after which you reach the ending.
Leave a Reply