
Control Resonant has 14 Freeze Frame Camera Locations (Instant Photos). Finding all Cameras is needed to finish the Freeze Frame side quest, which is also one requirement for the Panopticon Intern trophy & achievement to contain all Altered Items.
There are 2 Freeze Frame Cameras per zone and 7 zones total = 14 cameras. They get marked on the map with a camera icon when you go near them.
What you have to do is get behind the camera without it spotting you (without time freezing). This usually involves finding alternate hidden routes, for example by platforming behind them or using electric charges to open doors, smashing through rooftops with the “Ground Slam” ability, or open a locked door behind the camera and then backtrack to it.
If the camera spots you, it will disappear. You can then walk away in the vicinity of the camera until you hear a “click sound” that makes the camera respawn. Then you can attempt it again immediately until you find the right path that leads behind the camera unseen. Then you can interact with the camera from behind. Do this to all 14 cameras to finish the Freeze Frame quest. Once you’ve found the path behind the camera you can simply backtrack on that path and run away until you hear the click sound and retrace your steps to deactivate the camera.
Many of the cameras are in hard to reach places. To reach all of them you should first complete all Jesse Sightings quests to unlock the necessary traversal abilities: Jesse Sightings: The Incursion Fault > Jesse Sightings: The Subway Fault > Jesse Sightings: The Underpass Fault. You will also need to equip the “Ground Slam” ability to slam through some Ability Barriers on rooftops – you get it from defeating The West Incursion Zone Resonant and equip it by interacting with the Mural in The Gap. You also need the Ignite or Inferno ability from The Central Zone Resonant.
Nothing is missable, you can still do everything after the story in free-roam.
Video Guide
Downtown
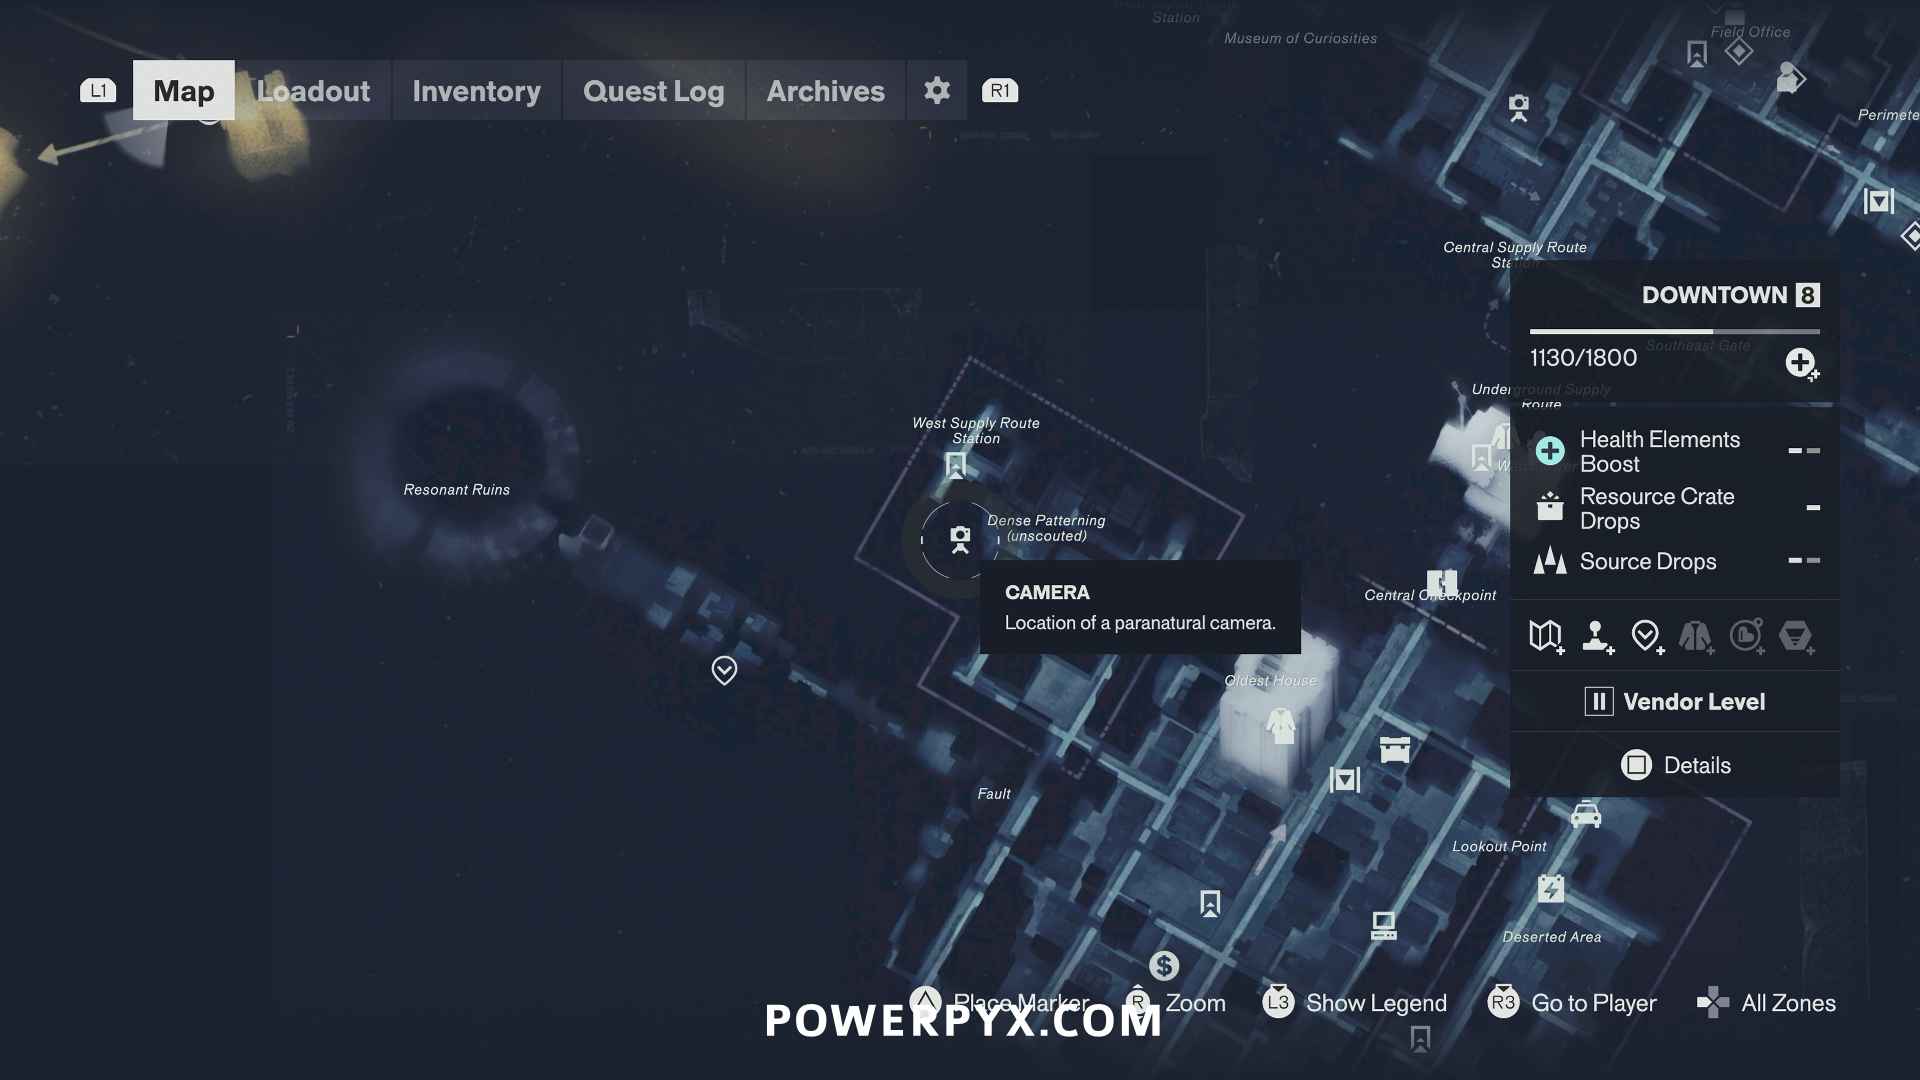
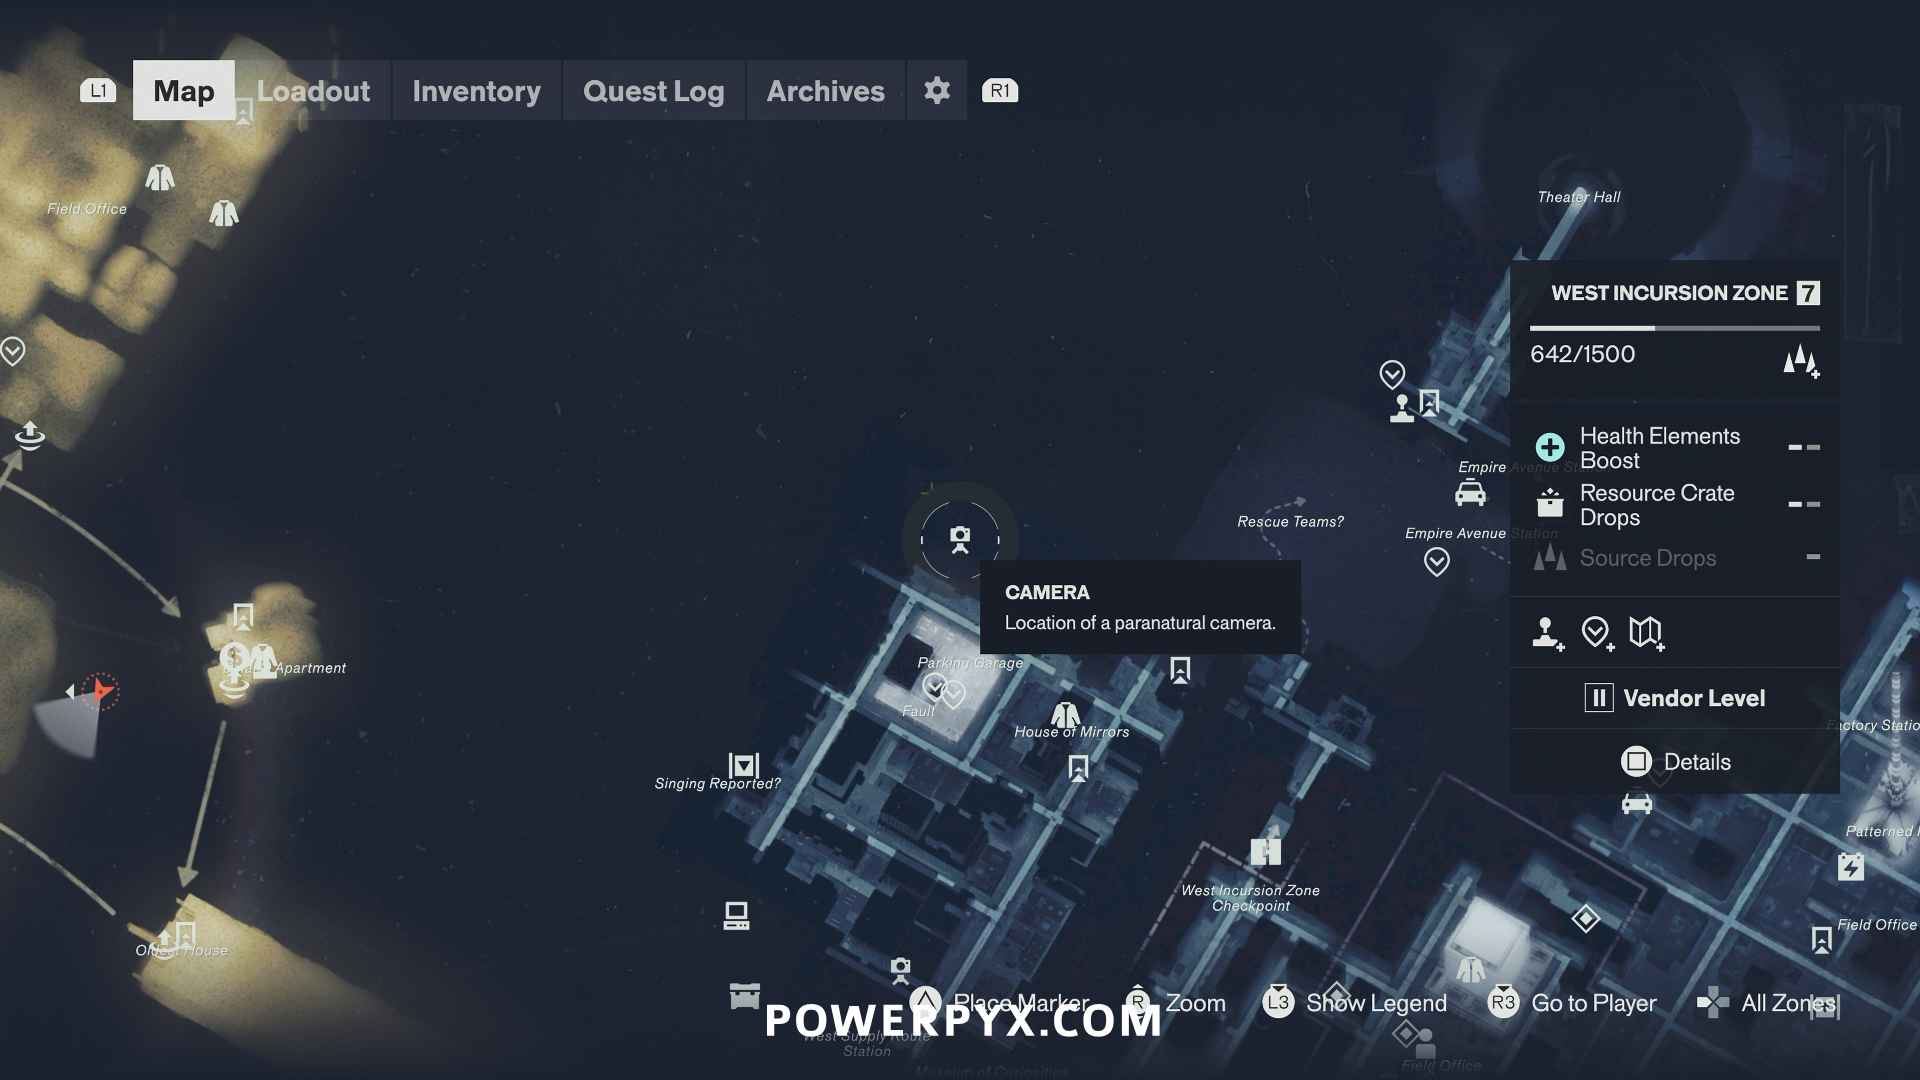
Camera #1
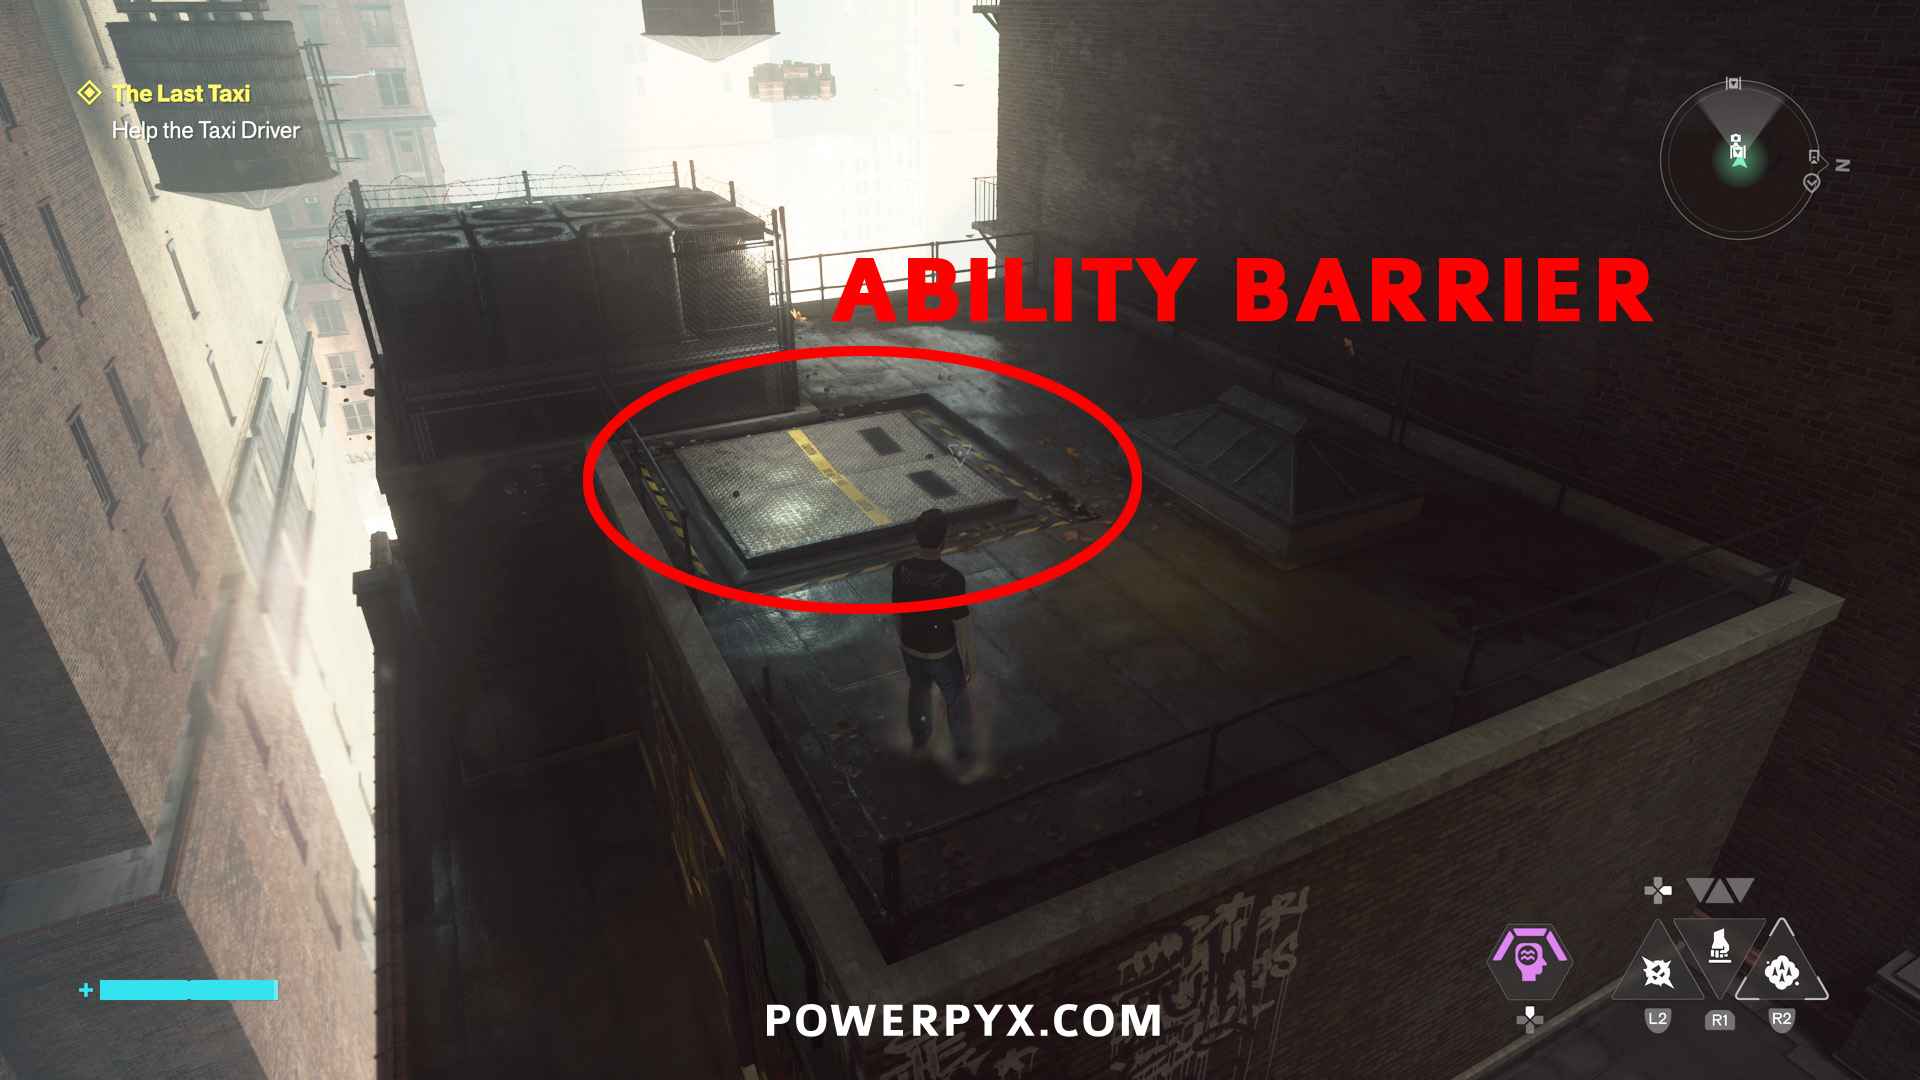
Smash through the ability barrier on the roof above the camera (use Ground Slam ability), it will be marked with a map icon. To reach the roof without the camera spotting you, approach from the street slightly north-west of the camera and use the Shift Gravity ability to walk up the side of the roof.
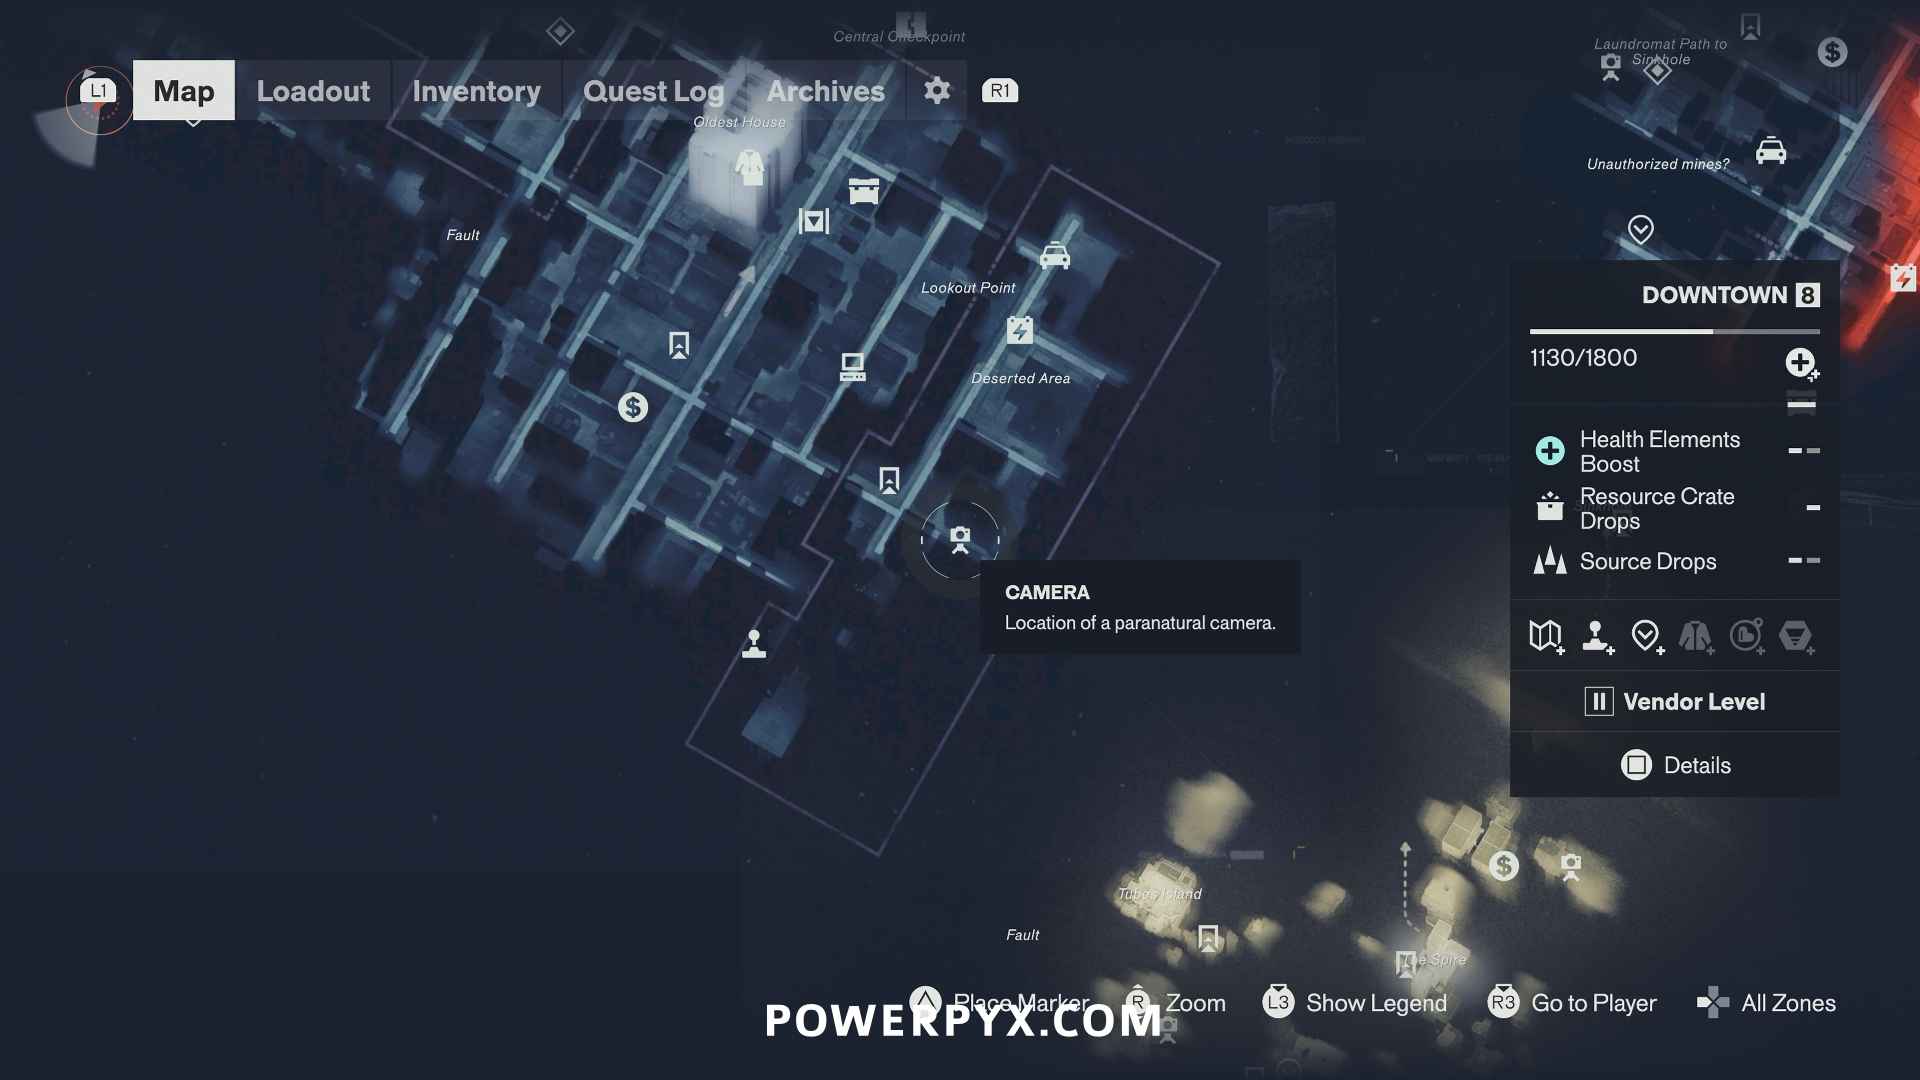
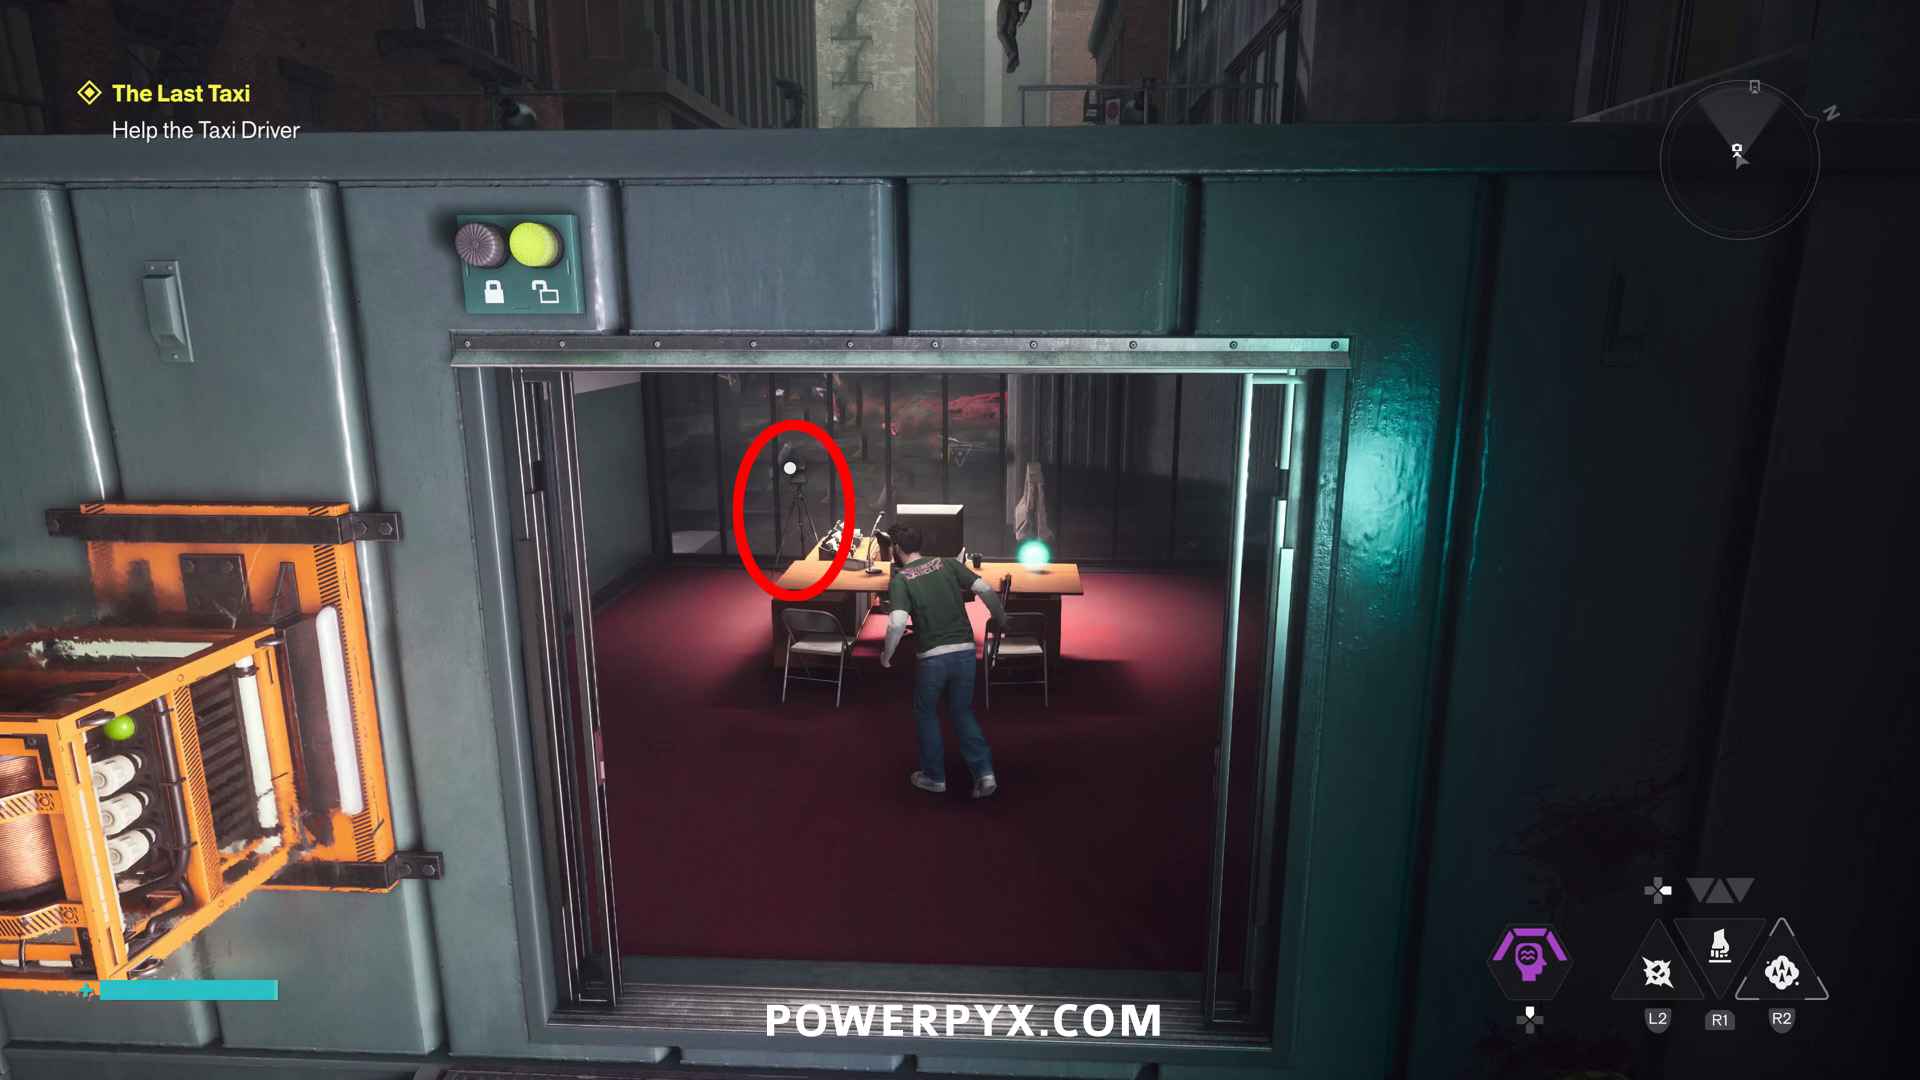
Camera #2
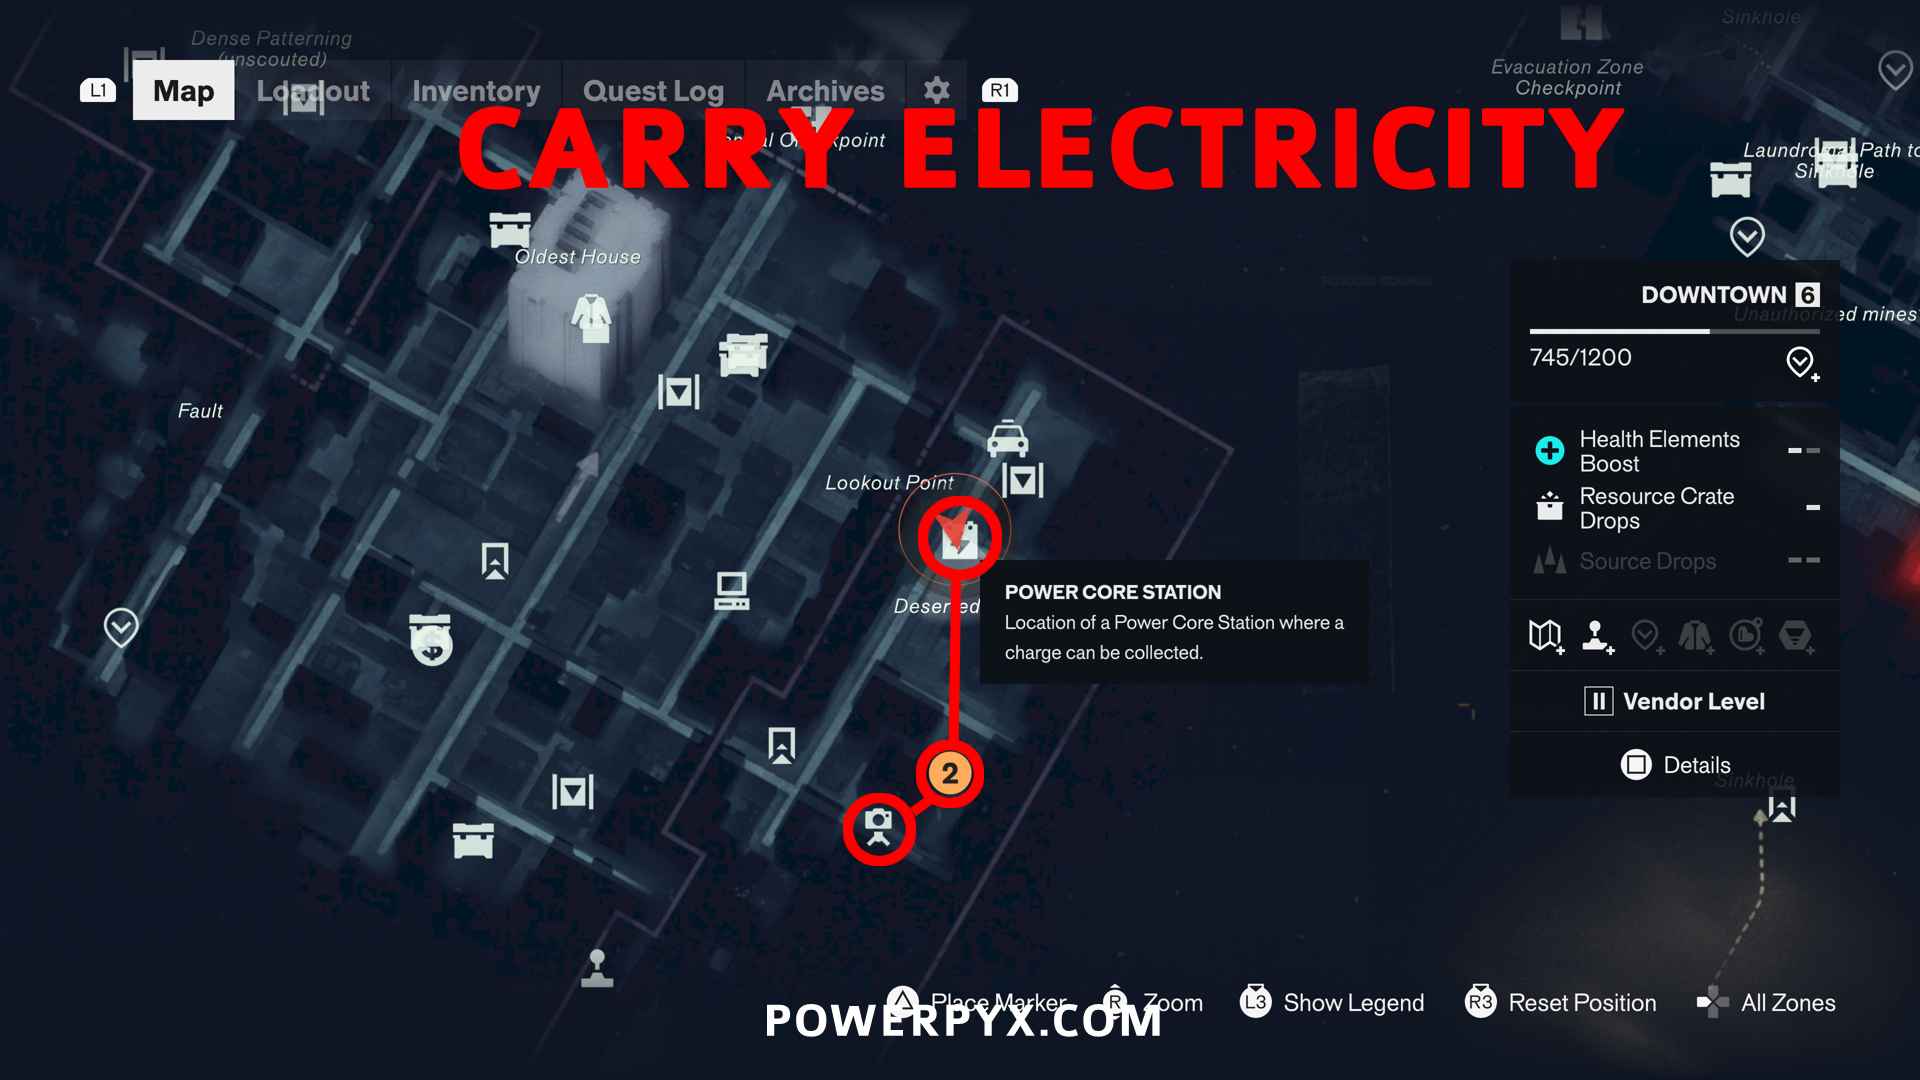
You must open the door behind the camera by bringing electricity to it. Go to the Power Core Station north of the camera, carry the electricity to the roof slightly north-east of the camera. From there you can carry it to the camera door. The pathing is outlined in red in the 2nd image below.
Central
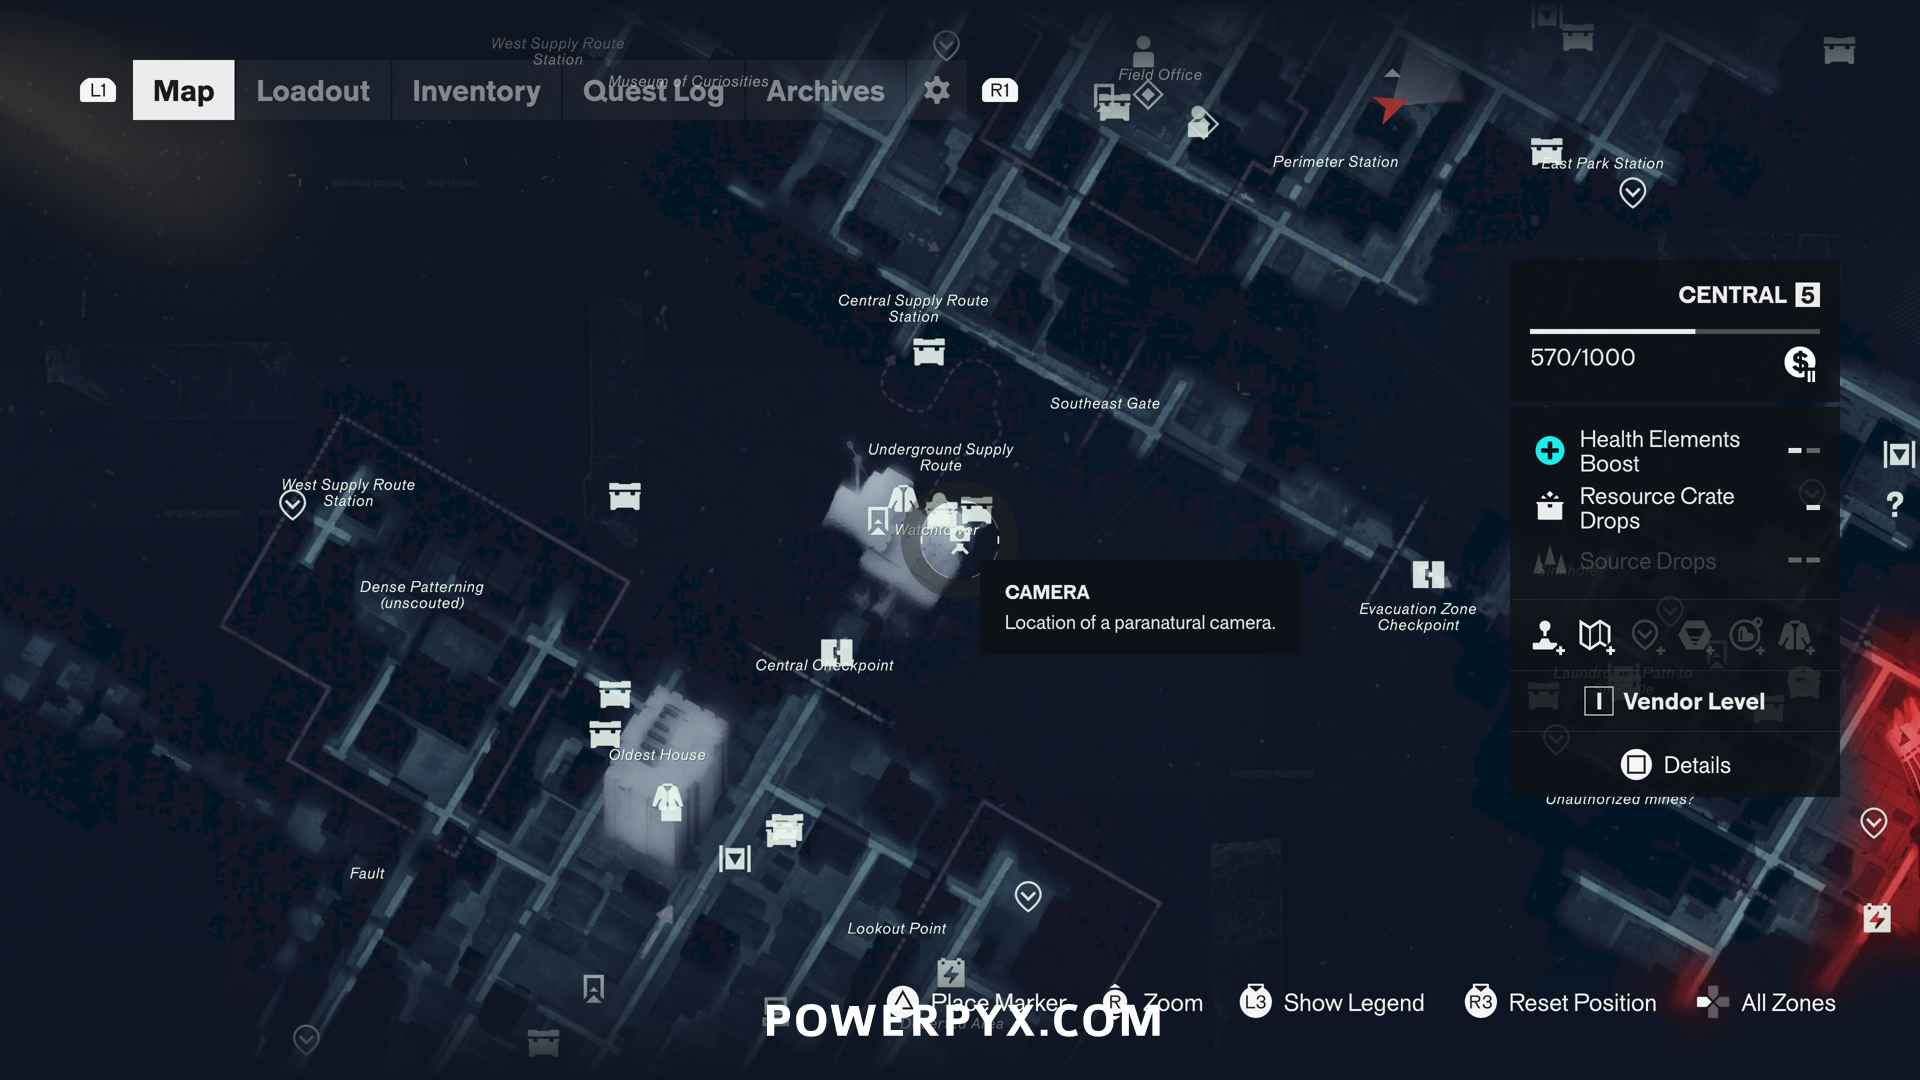
Camera #3
From the Watchtower fast travel door, go all the way downstairs, then enter the open storage room on the side. There you find some scaffolds you can jump up. Where you climb up, there is another hole in the ceiling (just before the camera where you pull yourself up the ledge). Climb through the open ceiling to drop down behind the camera.
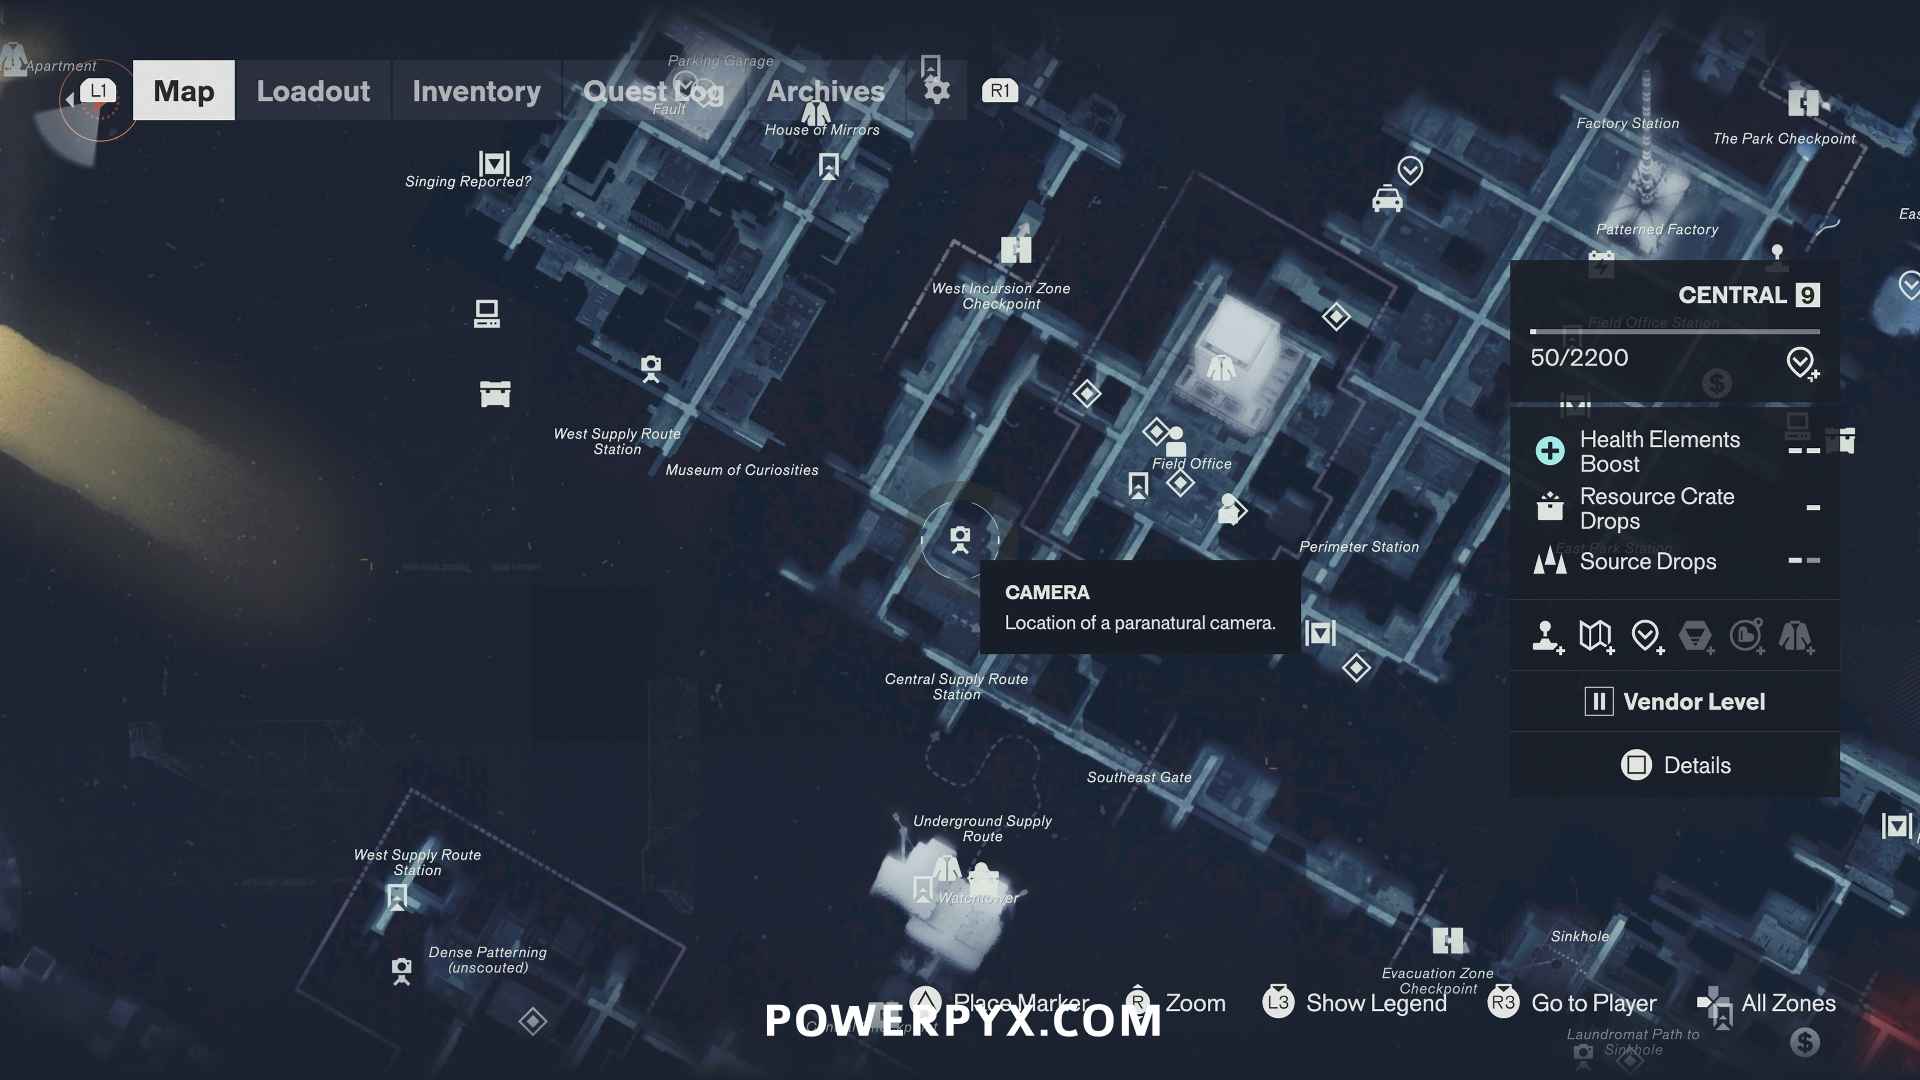
Camera #4
Found on a rooftop behind an open door. To reach it you must first have unlocked the Reach ability from Jesse Sightings: The Subway Fault. Go through the door where the camera is, let it spot you. Then go down inside the building and open the door on the bottom floor. Step outside to the street until you hear the “click” sound that indicates the camera has respawned. Then backtrack through the door you just opened and walk upstairs in the building to get behind the camera.
West Incursion Zone
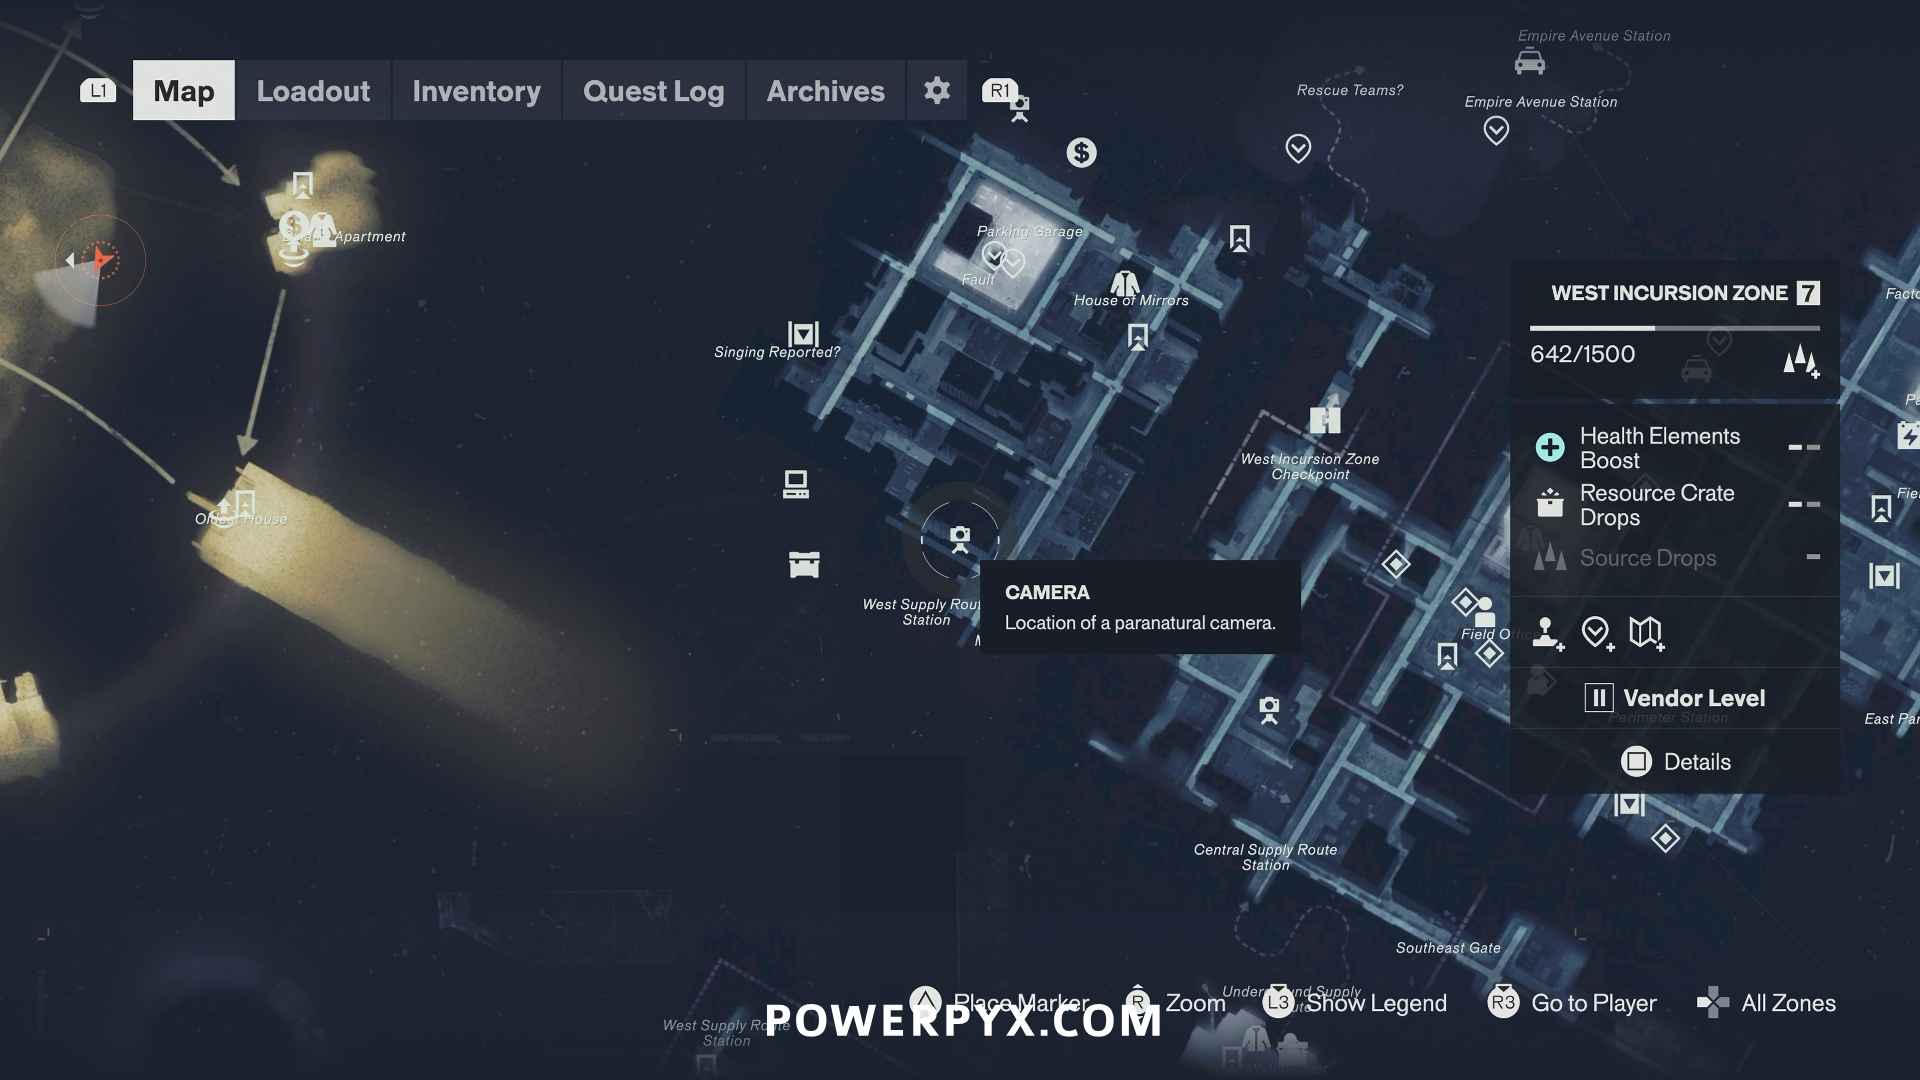
Camera #5
This camera is on a platform on the side of a building. Jump the flying platforms behind it to reach it unseen. You must use the Shift Gravity ability at the end of the street (slightly west of camera). Then jump toward the flying platform near the camera while in 180° inversed gravity – when you jump off, gravity will turn around again and you will fall down to the flying platform. Then a second platform spawns that leads to the camera.
Camera #6
This is in the far north-west corner of the West Incursion Zone, on one of the buildings that’s flipped sideways and you must use the Shift Gravity ability to walk on it. The camera is a bit hidden in the corner of the building, look for the red light on it. To reach it unseen, you must drop onto the camera from the roof above it. This requires using the Reach ability to climb that second roof.
Evacuation Zone
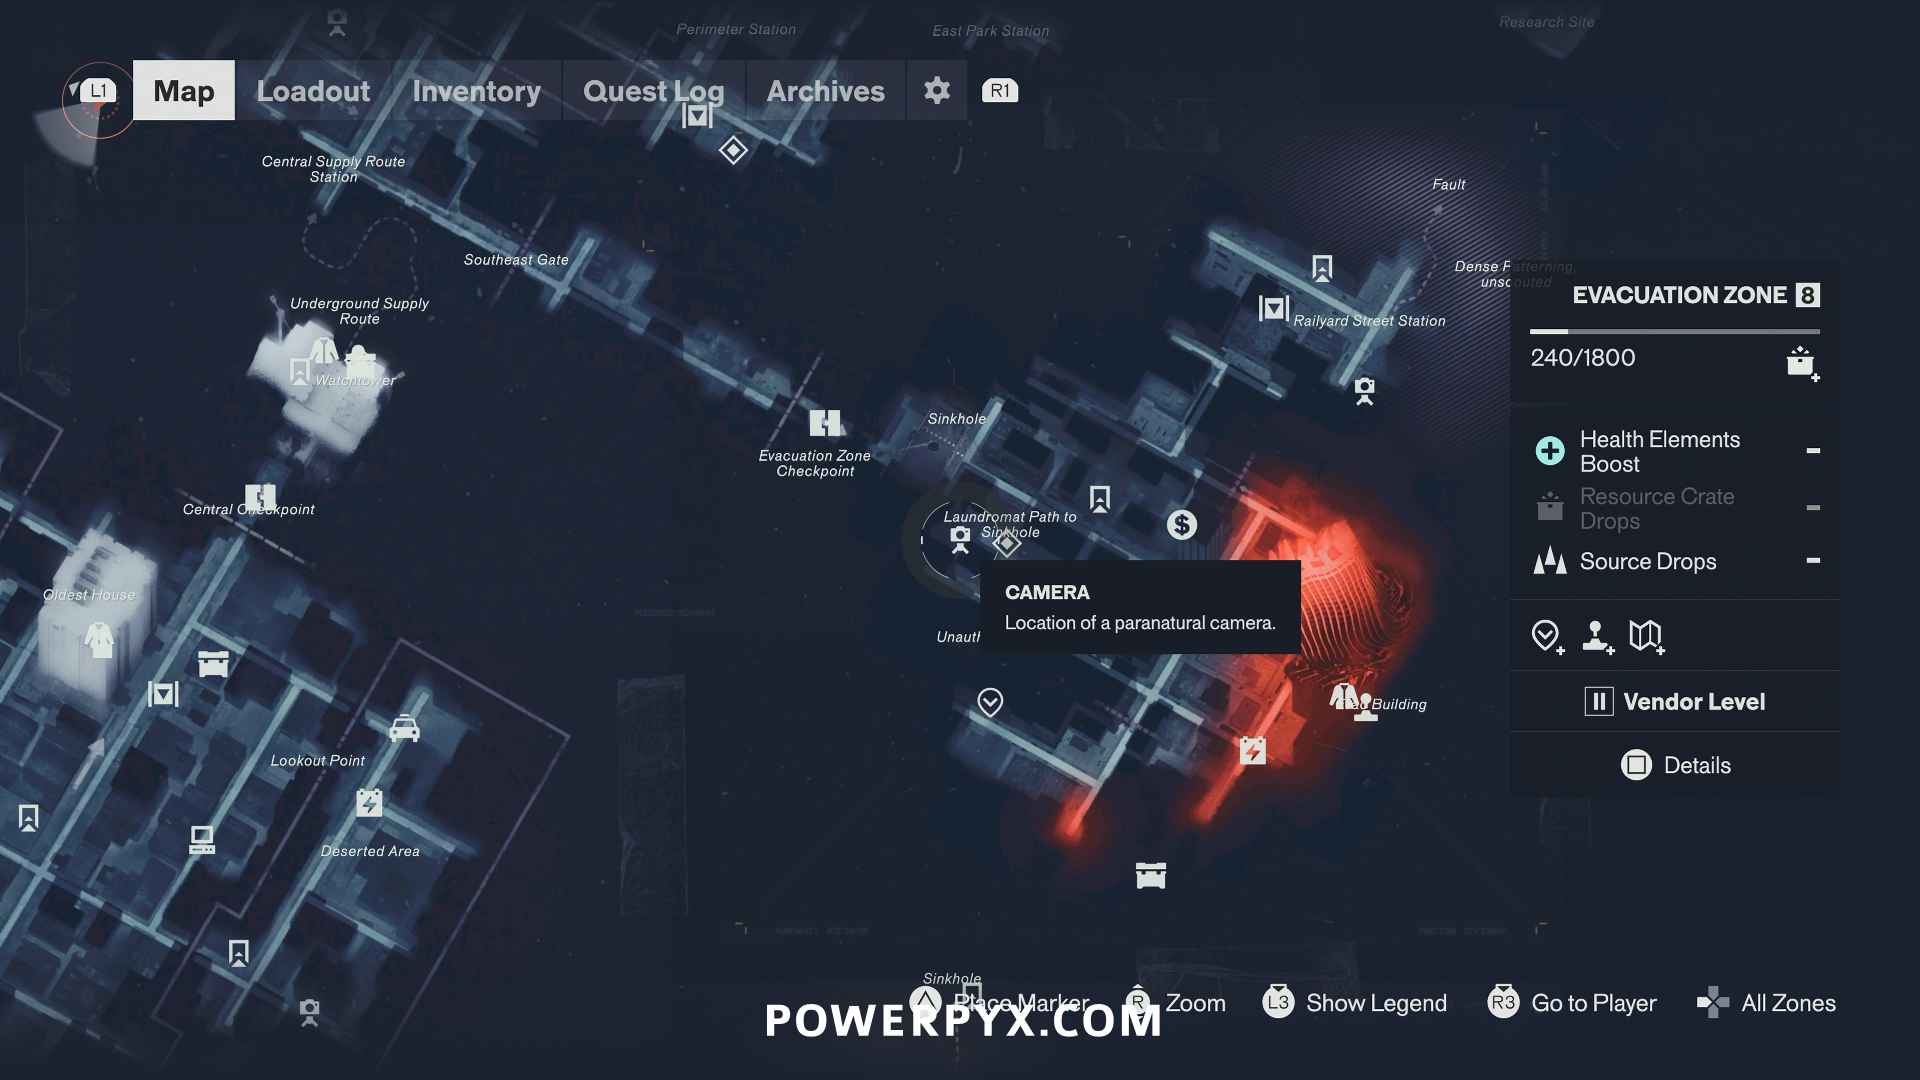
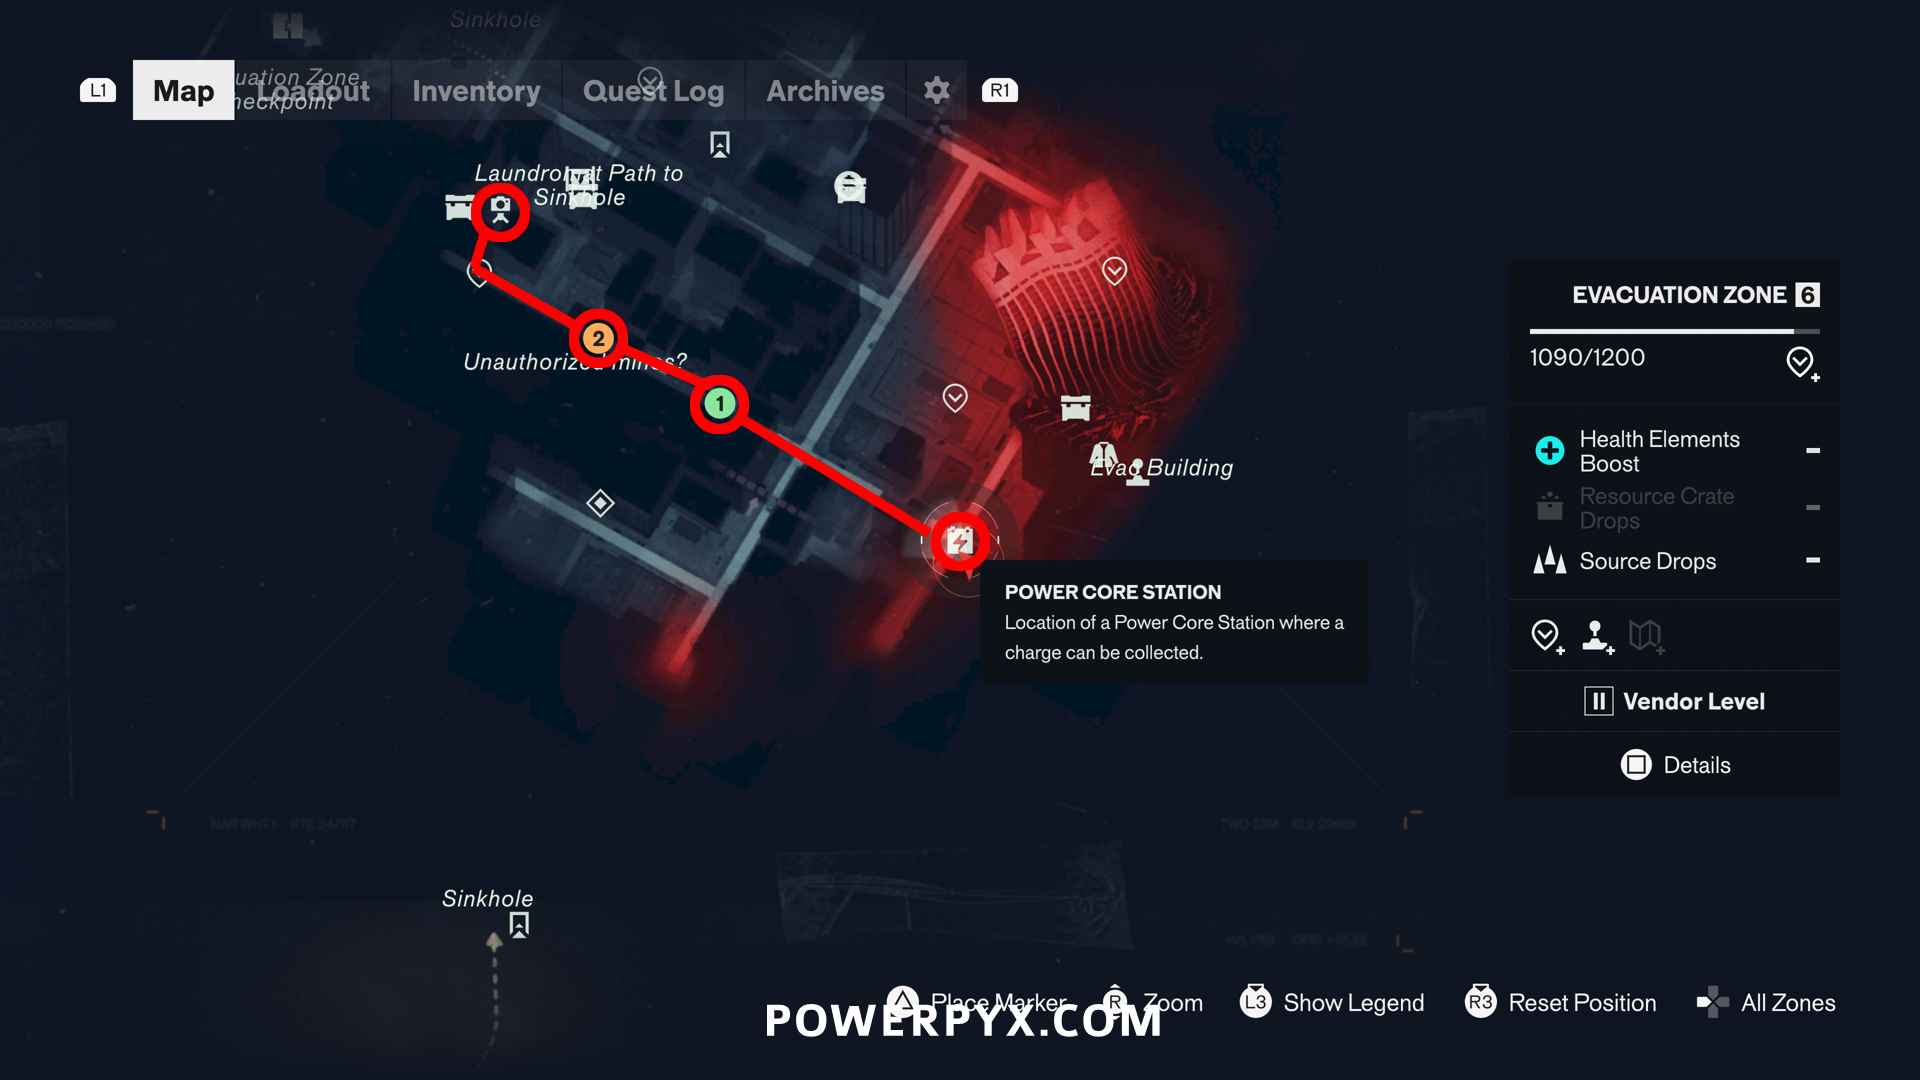
Camera #7
Found on a rooftop. To reach it unseen you must bring electricity to the door behind the camera. Go to the Power Core Station in the south-east corner of Evacuation Zone. Then follow the street west toward the camera, where you see the white map text “Unauthorized mines?”. There are 2 electrical boxes along the street, put the electricity there and carry it further from there (first directly on street, second below elevator). The use Reach ability to get up to the roof where the camera is and use the electricity on the cube there. The exact pathing is outlined on the 2nd image below with the numbers “1” and “2” indicating the electrical box locations along the street.
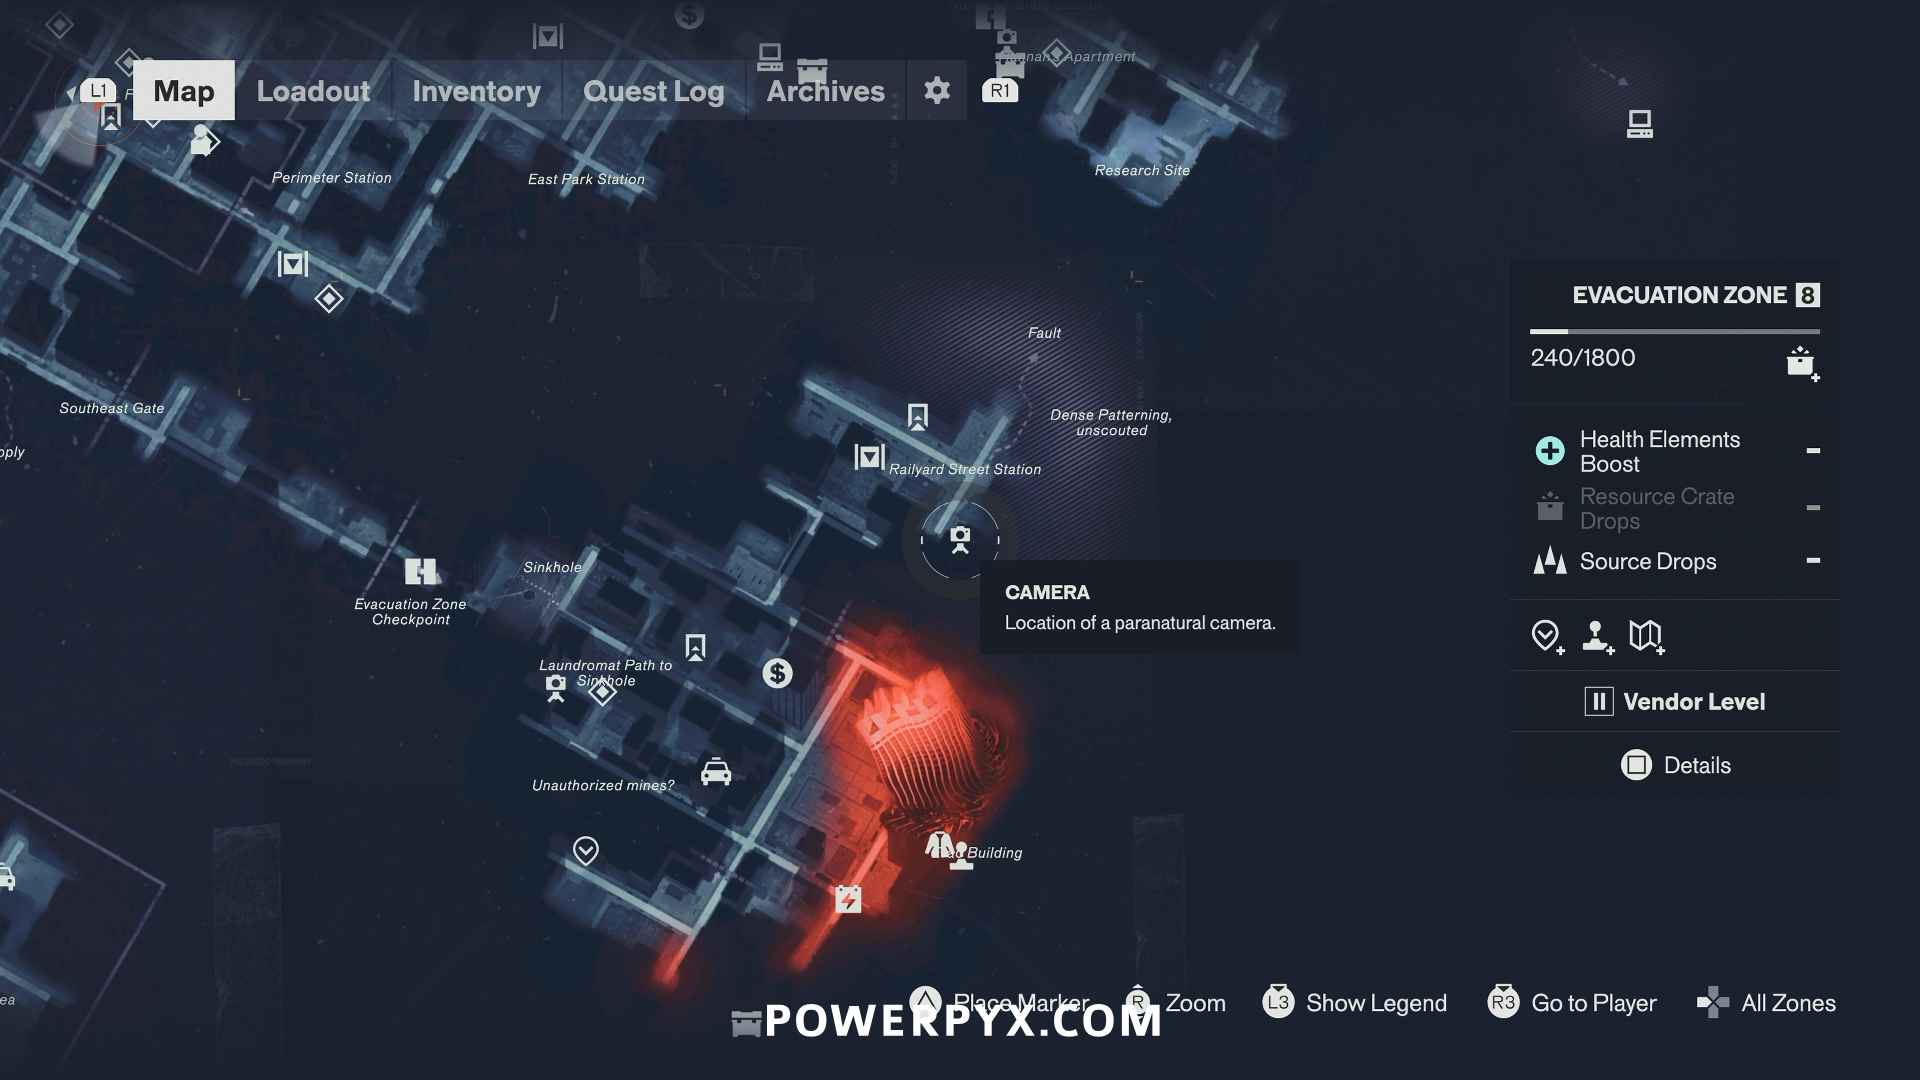
Camera #8
Found on a roof. Let the camera spot you and walk past it into the building, go downstairs and press the elevator button. Take the elevator down and exit through the front door at the street level. Walk forward until you hear the “click” sound that makes the camera respawn. Now backtrack by using the elevator inside the building to get behind the camera.
The Park
Camera #9
Found in the underground station (subway station). Enter the subway station from the street slightly north of the camera icon, at the white map text “Nomand Avenue Station”. The camera will automatically spot you when you enter. Take the left path, when you reach a blocked wall with webs on it, use a fire ability to burn it away (Ignite or Inferno, obtained from Central Zone Resonant). This leads you behind the camera.
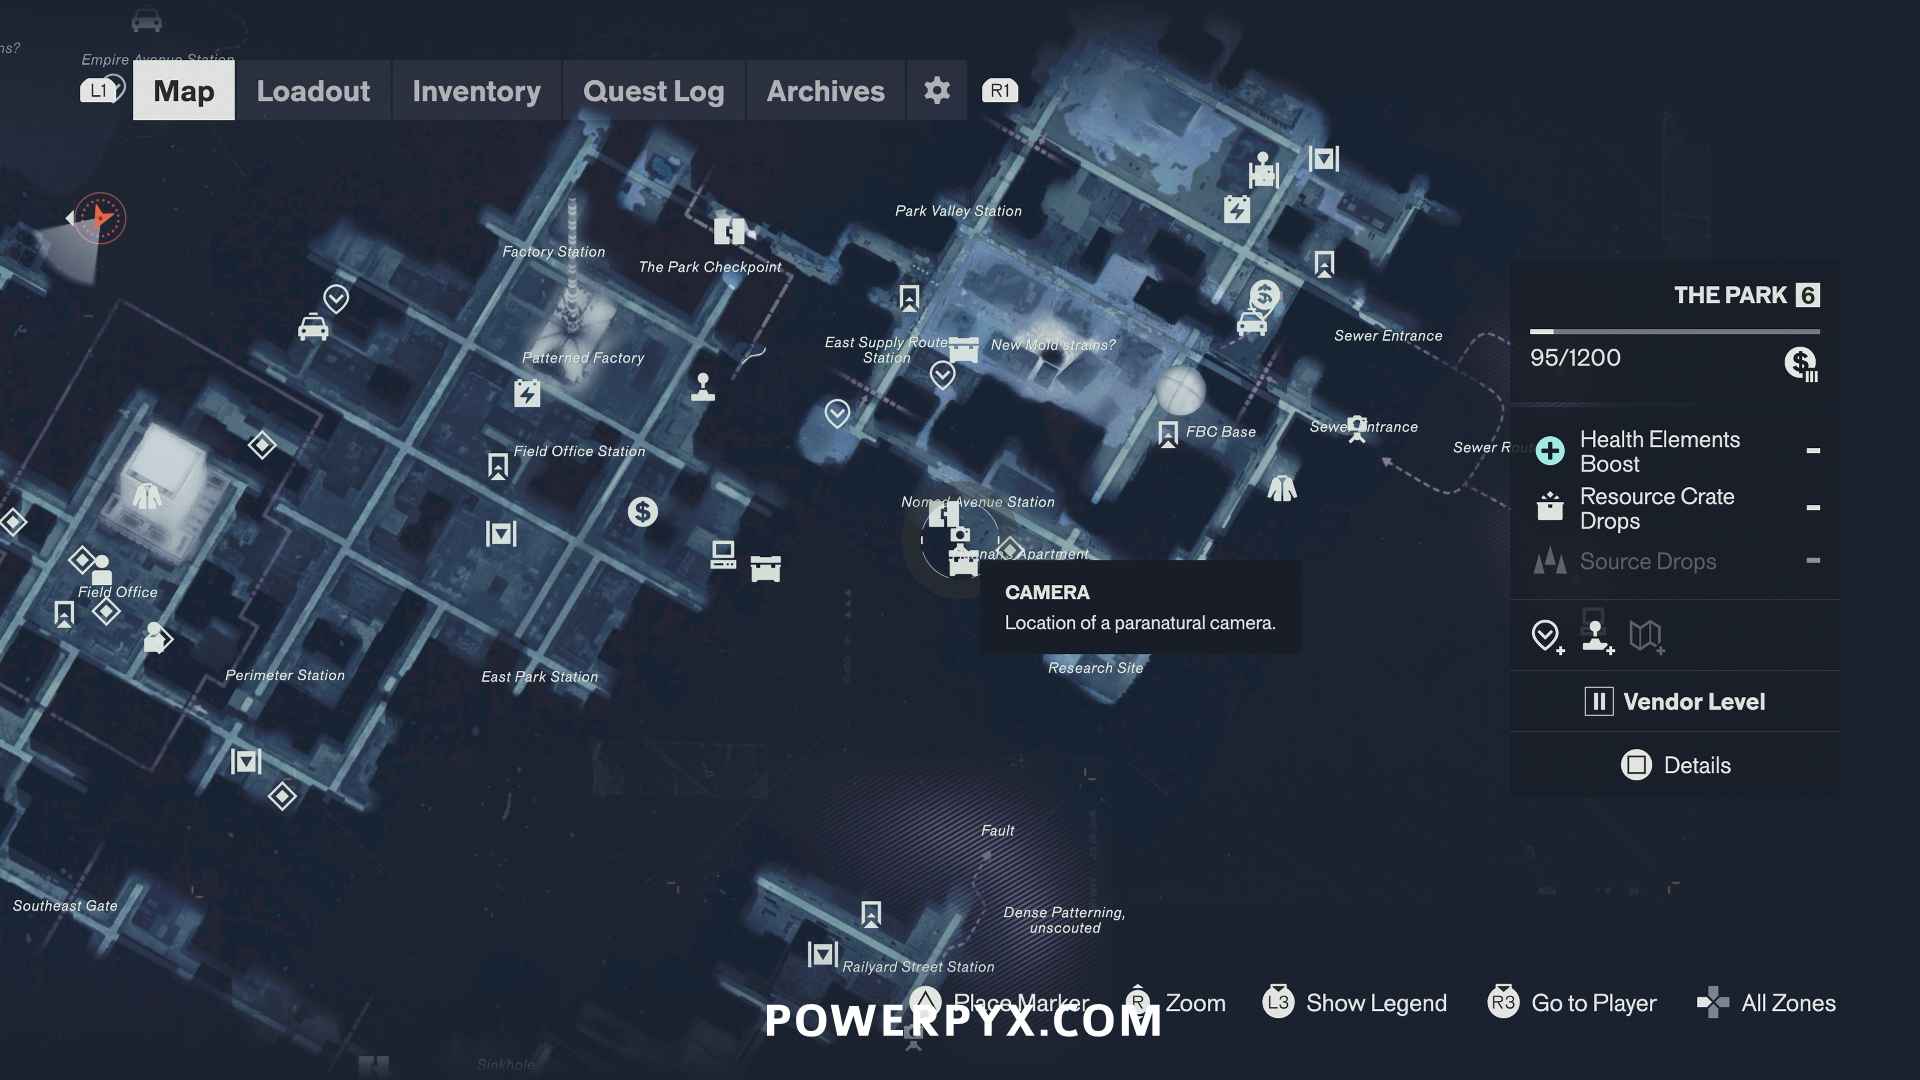
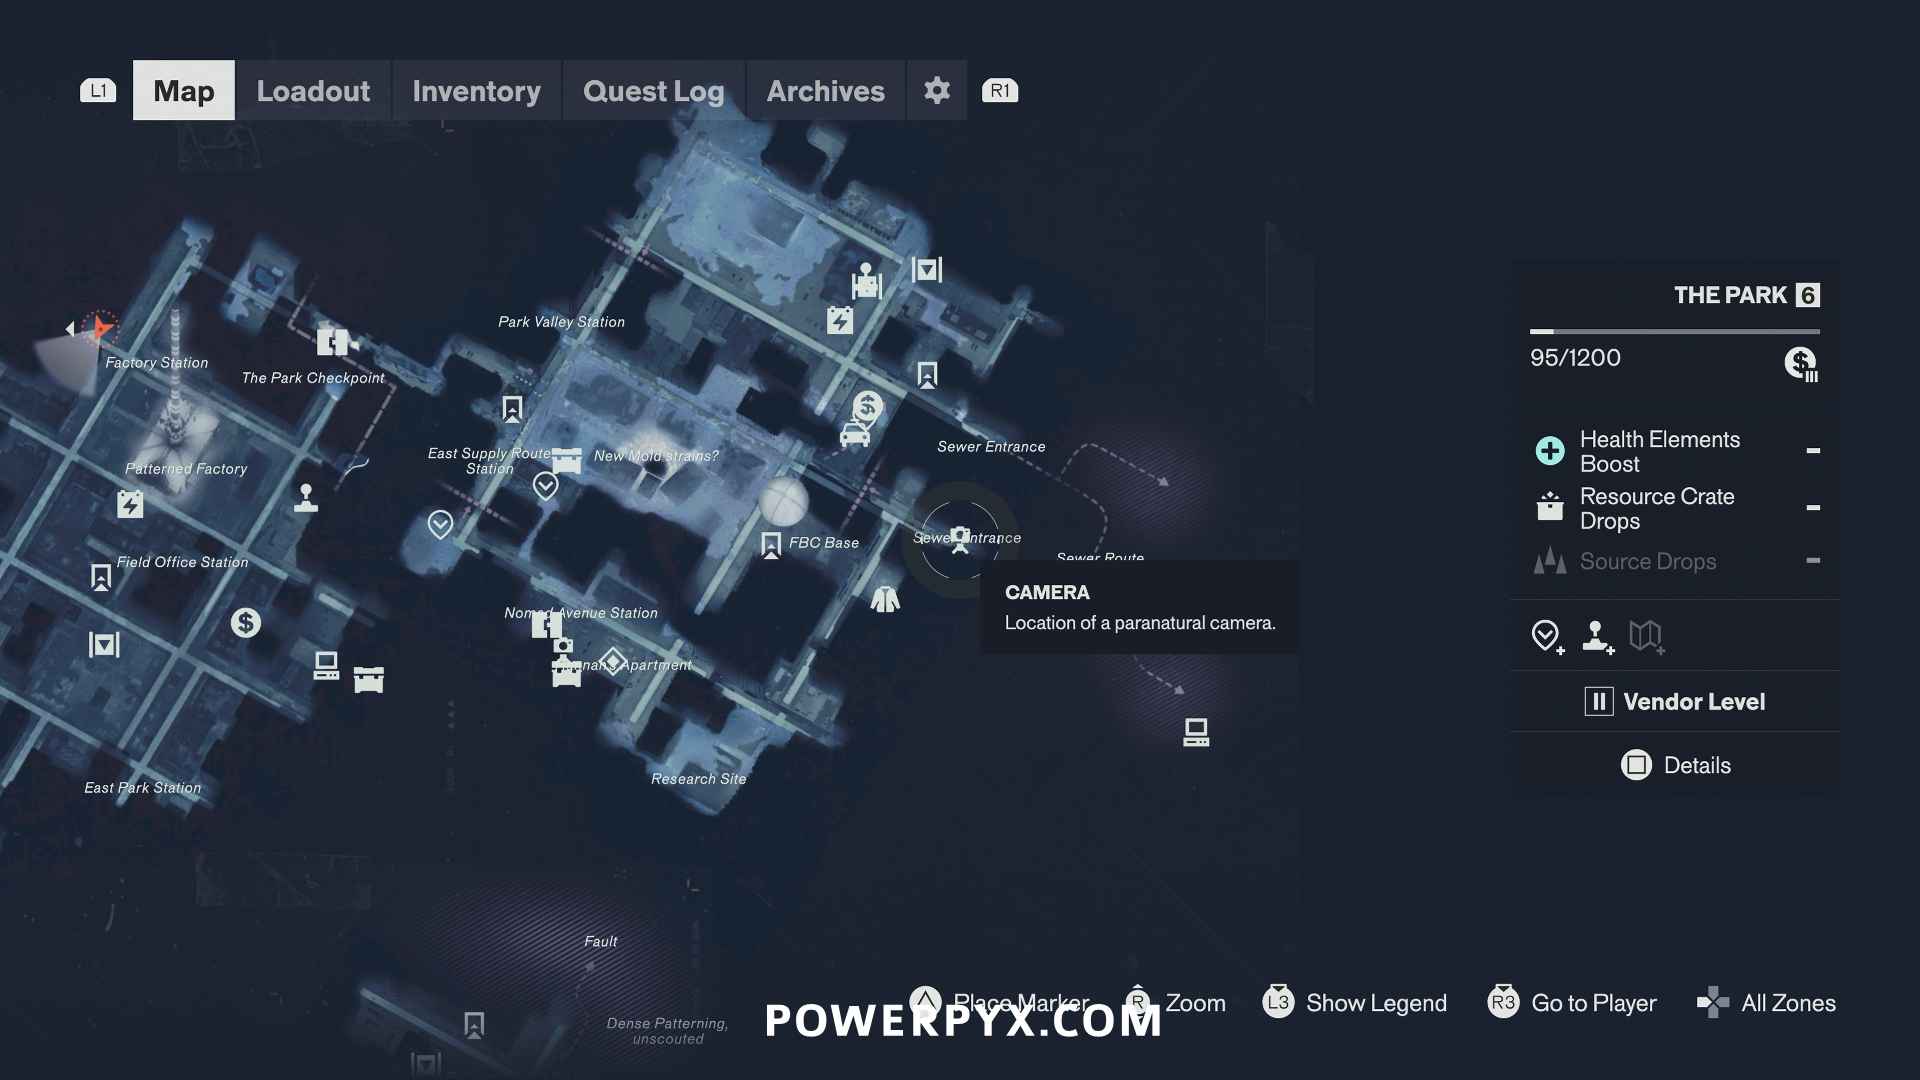
Camera #10
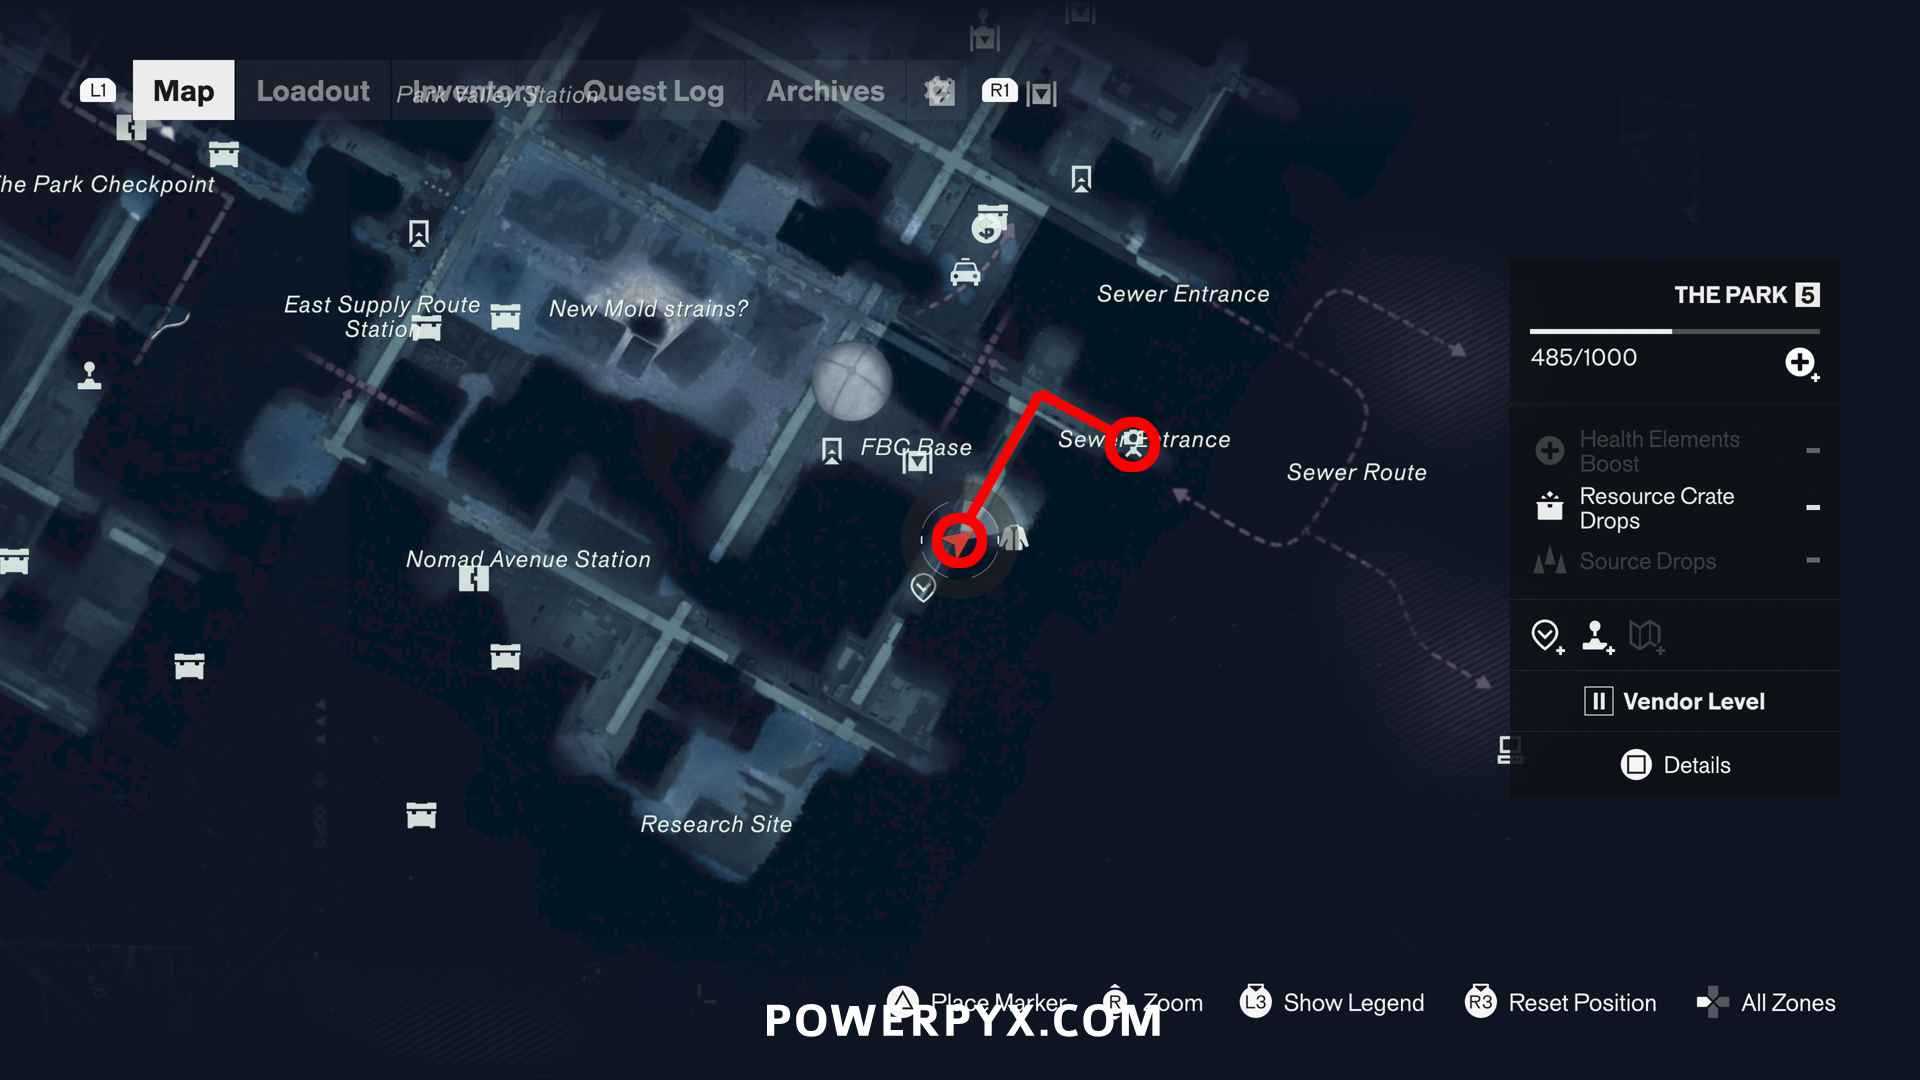
Found on a platform on the side of a building, above the sewer entrance. To reach it you must bring electricity to the elevator. The elevator is slightly west of the camera icon (same street). The electricity is found on the street going south, from an electric cube (near the jacket icon on map). After bringing electricity to the elevator, you can ride it to the top and jump over to the camera. The exact pathing is outlined in the 2nd image below, with the electricity circled red.
The Underpass
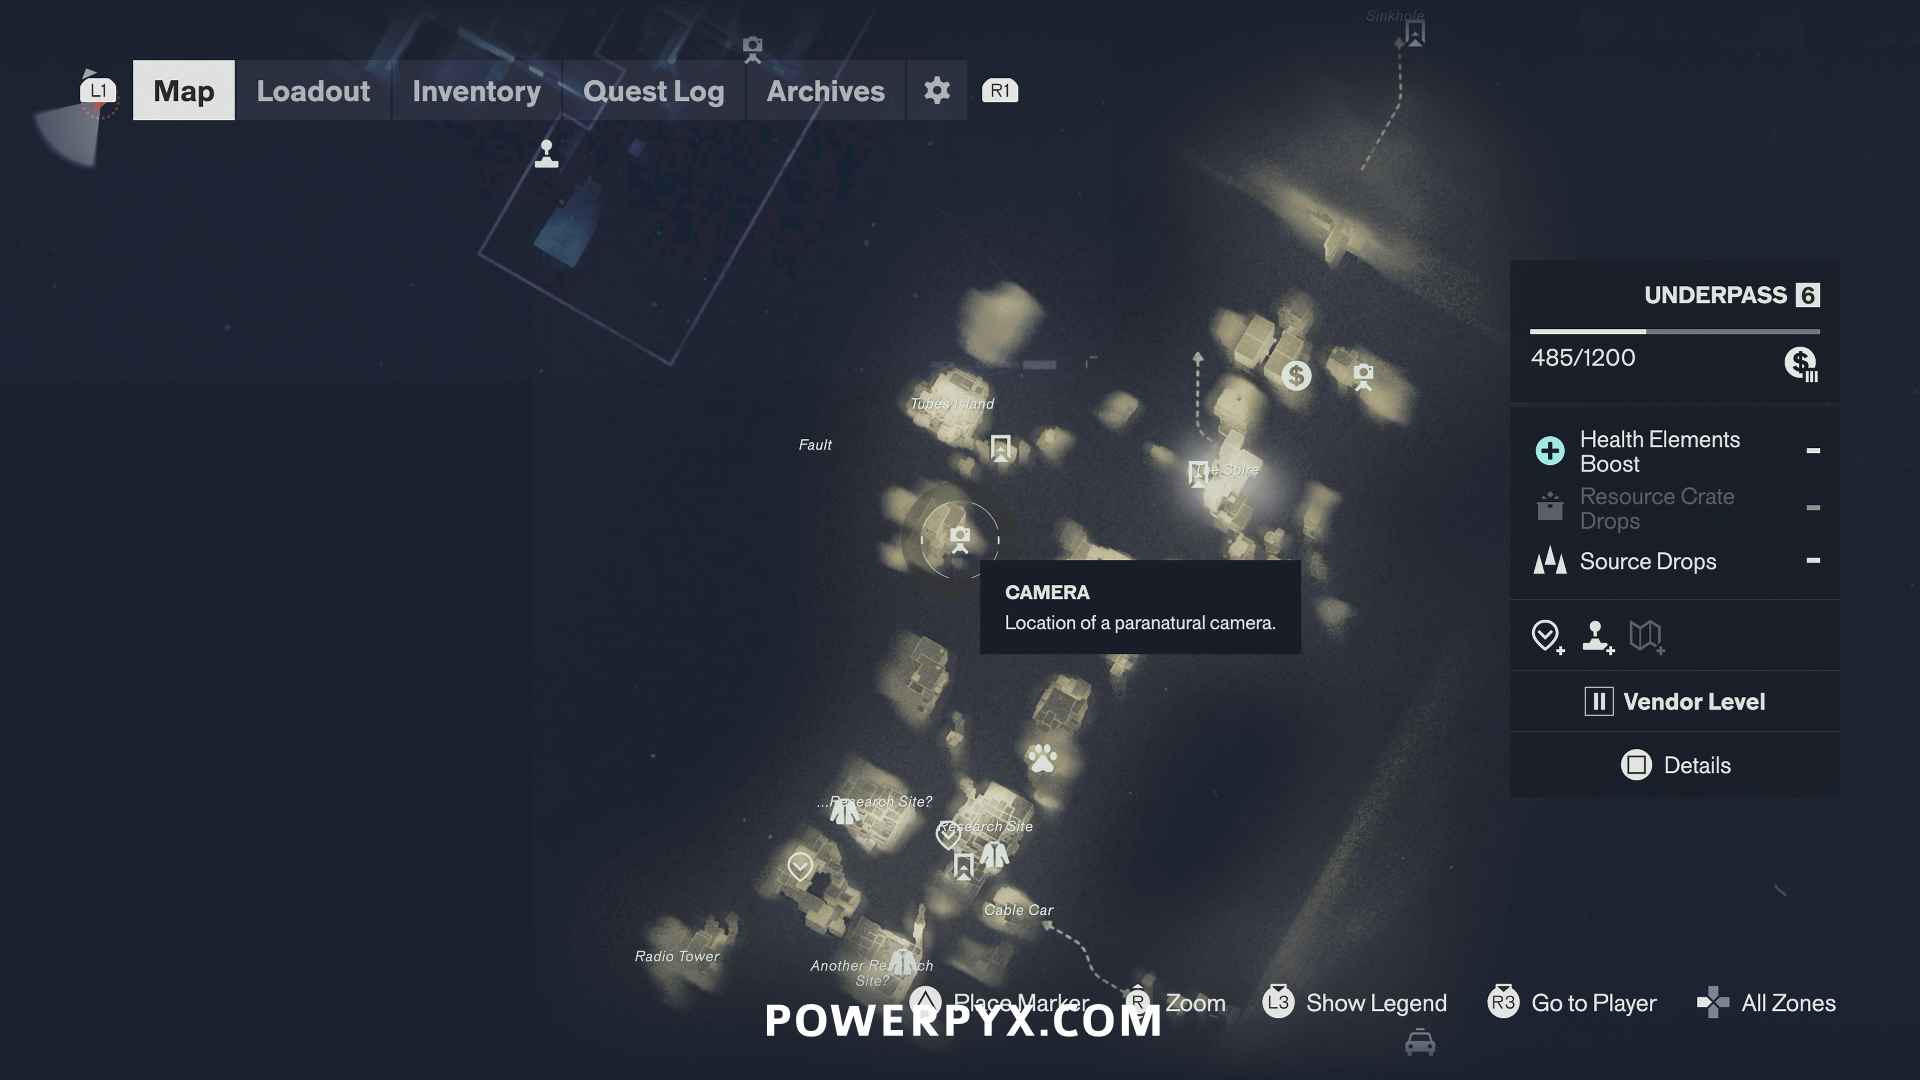
Camera #11
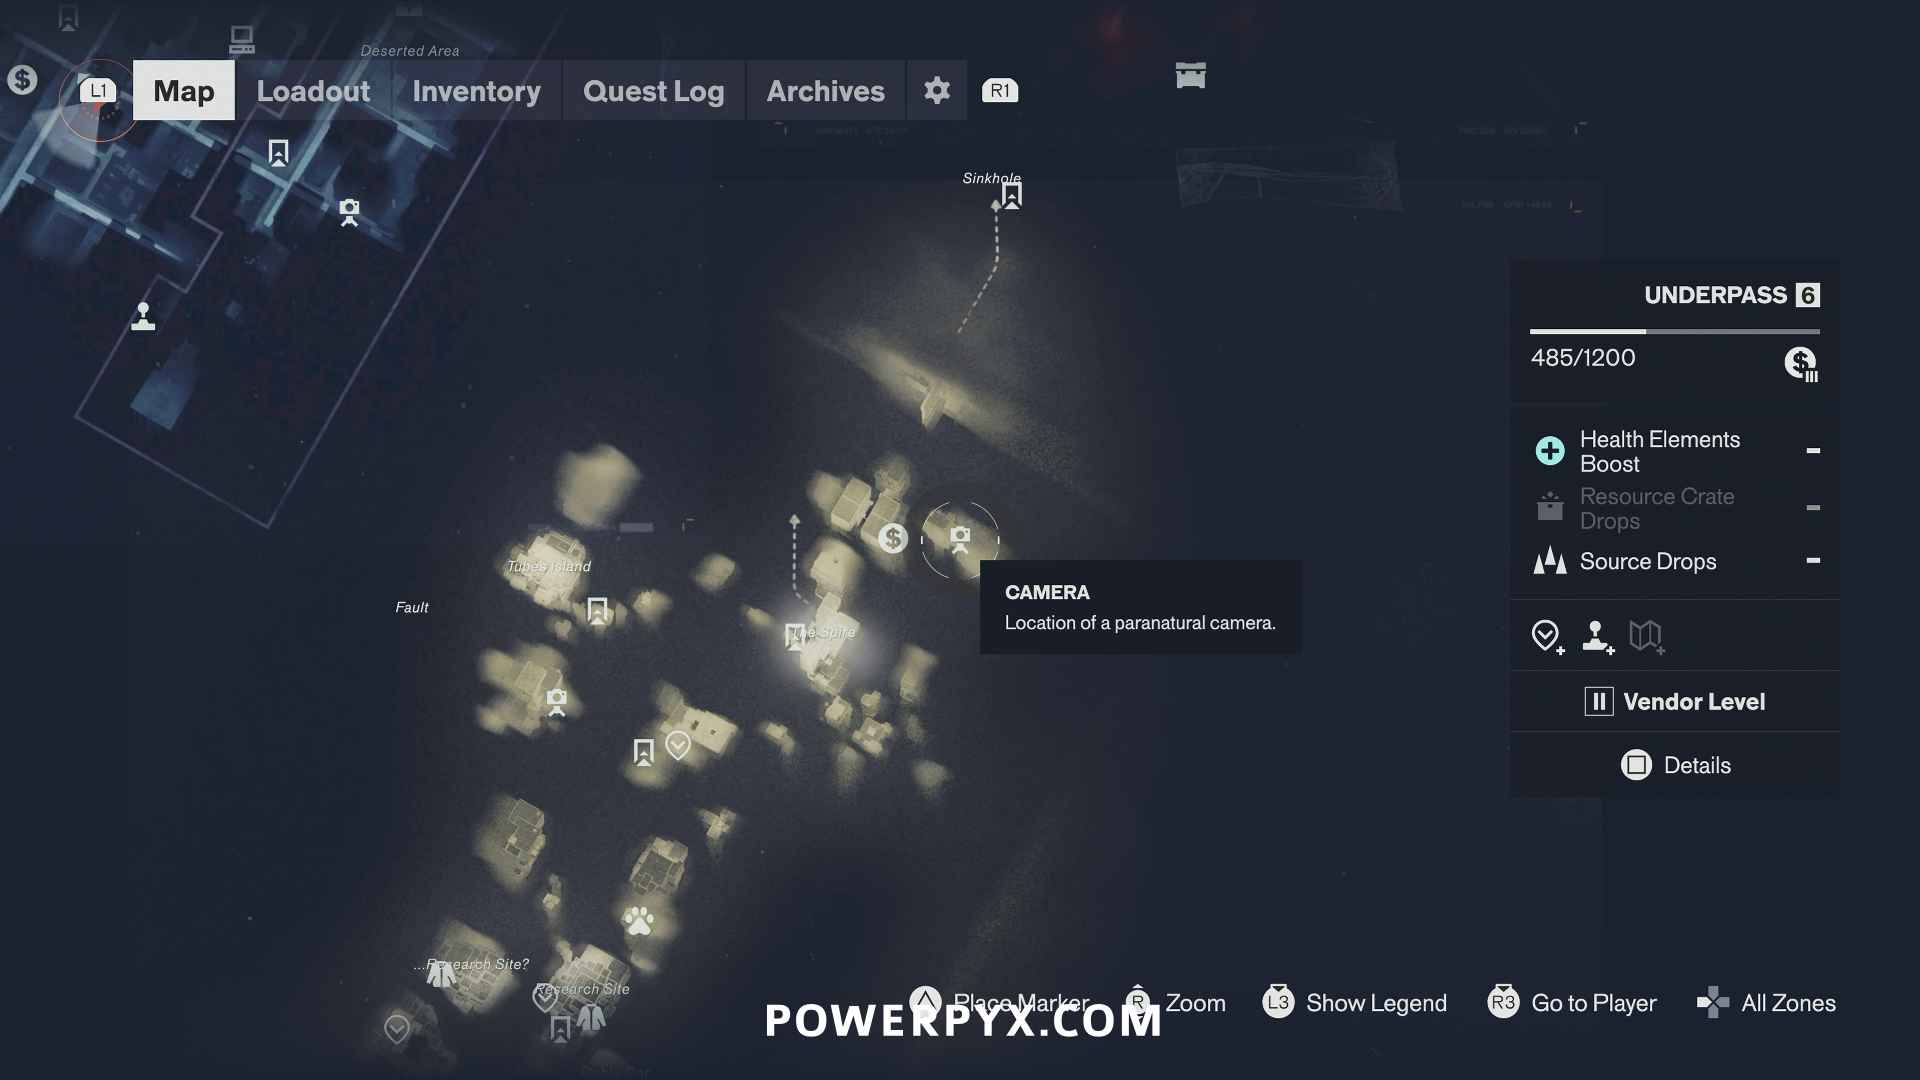
The camera is looking out of a yellow-lit corridor on the north-east island. Stick to the left edge of the platform so it doesn’t spot you and look down for an  grapple point (use Reach ability). There you find a hole in the floor you can drop down, it leads behind the camera.
Camera #12
This camera is on the island south of Tubes Island, up in a wall, in an area with mold. Across from the wall with the camera is another wall opening. You must use Shift Gravity ability and follow the red floor until you can drop through the upper opening, then fall into the opening with the camera. (You can also jump dash toward it from a nearby pillar and do  quick attacks midair to cover more distance in midair).
The Unknown
To reach all locations in The Unknown zone, you must first do Side Quest: Pope’s Research.
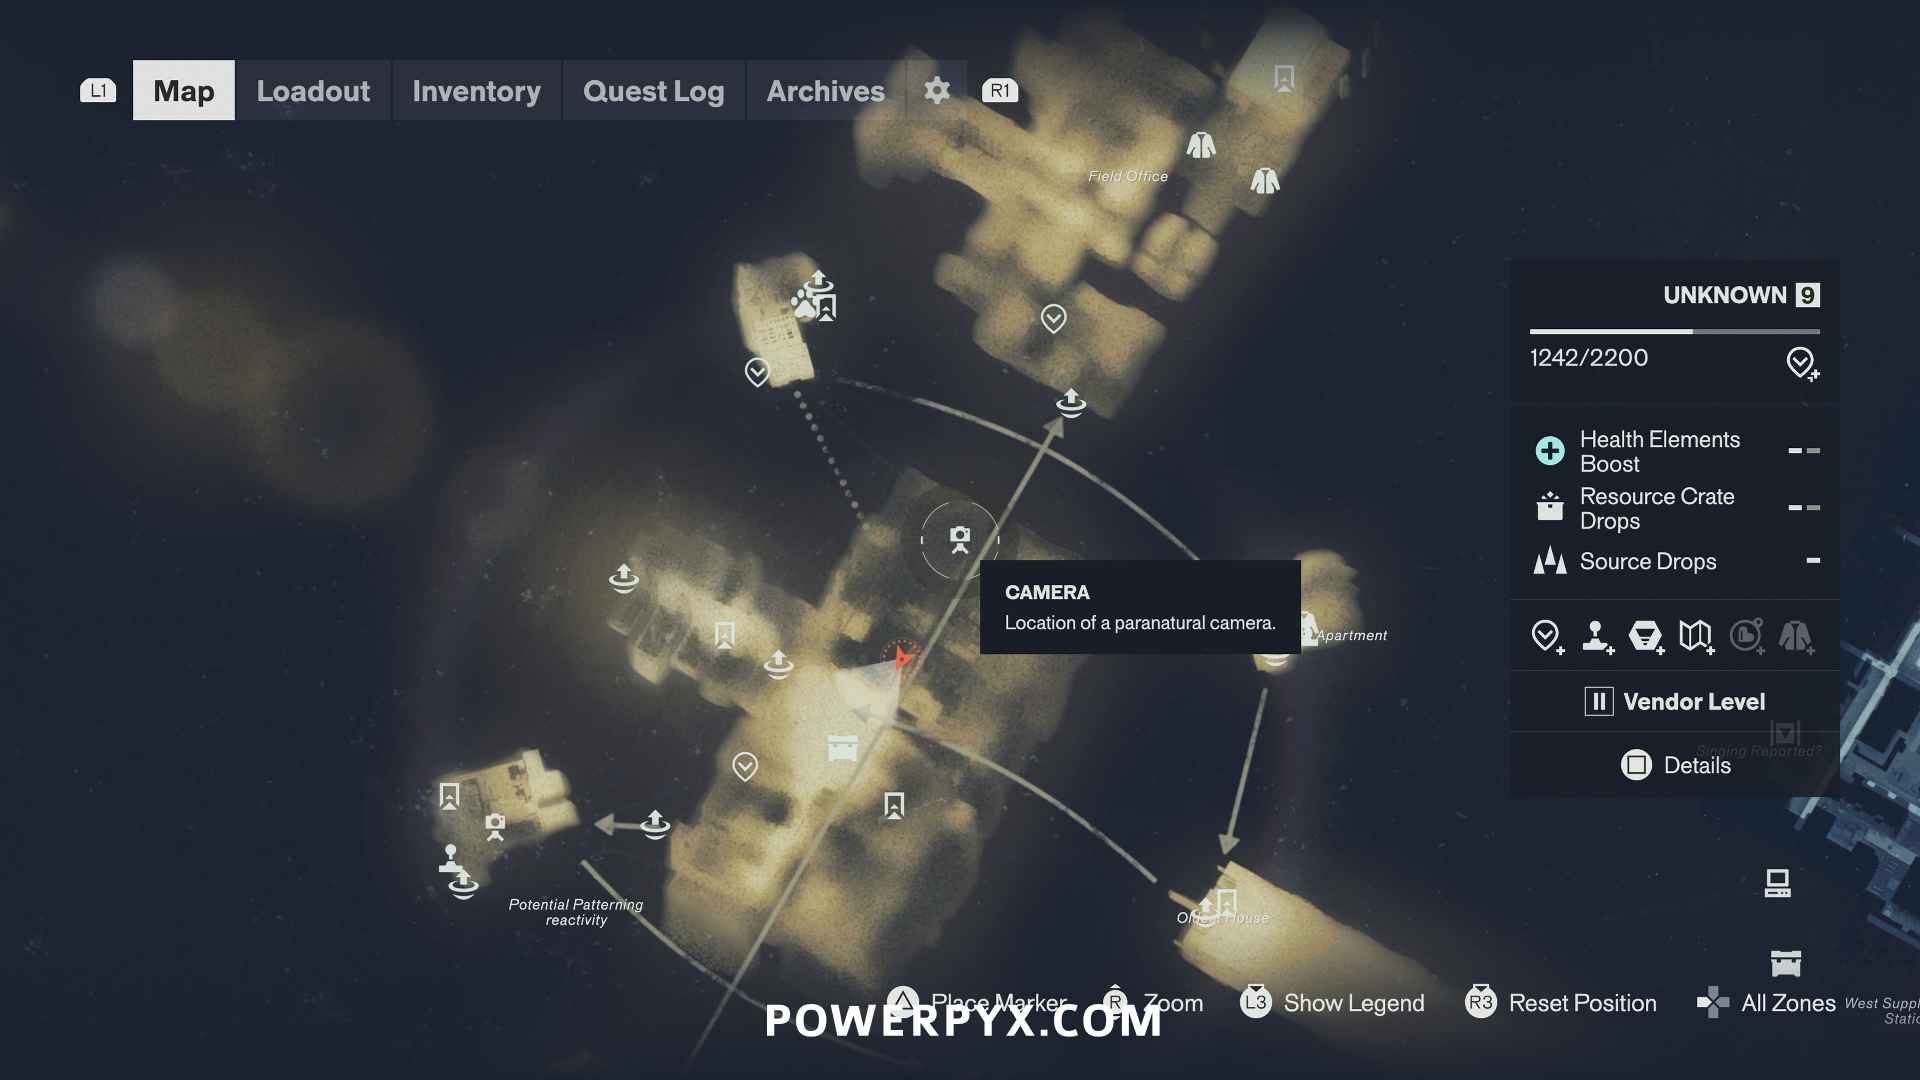
Camera #13
This camera is found at a construction site, behind a little hole in the blue mold. To reach it, enter the main construction site building and go down the stairs inside. On the lower floor you will get ambushed by mold enemies, defeat them and in the same room as the ambush you can access the camera from behind. The Unknown has an upside down gravity version, so if you go to the camera location and there’s no construction site, you must flip gravity 180° to reach the opposite level of the map where the construction site is.
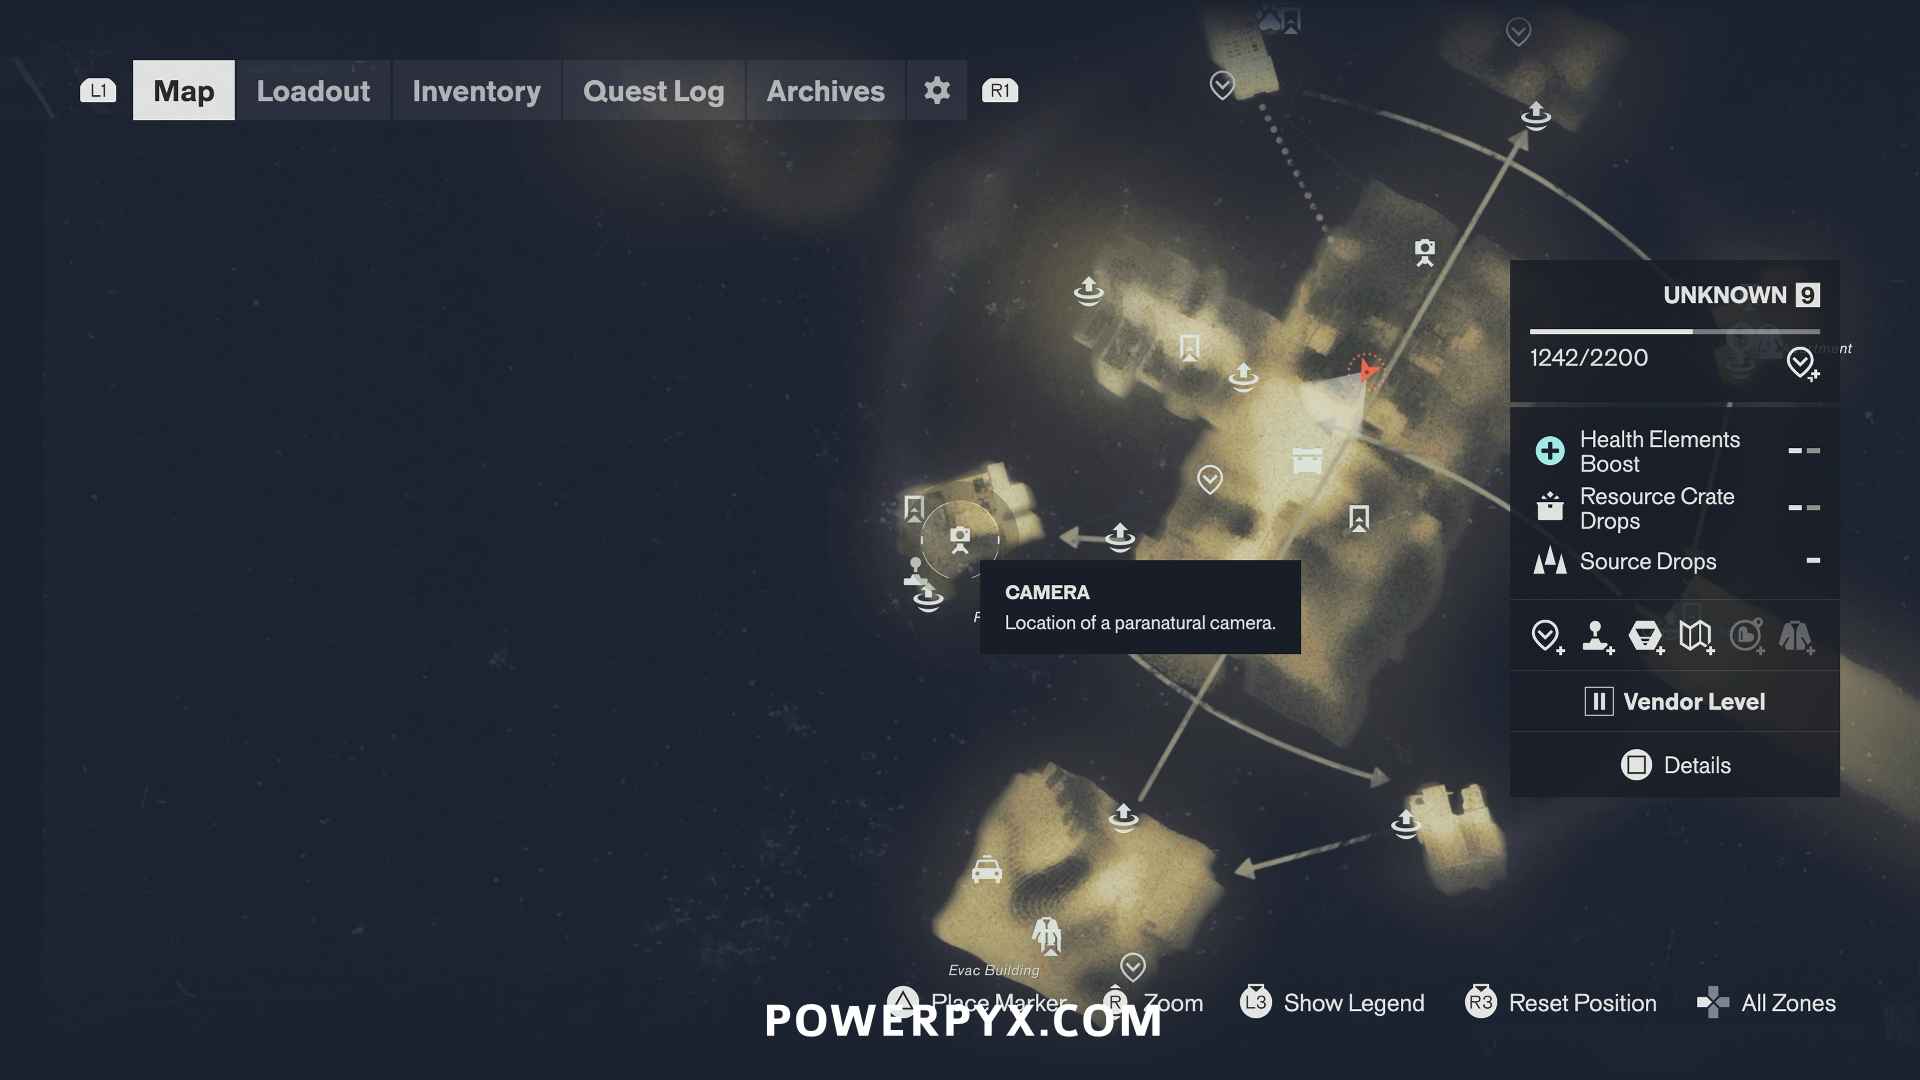
Camera #14
This camera is inside one of the shops. Let the camera spot you and enter the shop behind it. Go through the door to the garage and hit the red garage door button on the wall. Now walk away to make the camera respawn and enter back through the garage you just opened to get behind the camera.
Contain All Cameras in Downtown
After finding all 14 Cameras, you get a call and must go to Downtown and turn off all cameras in the marked quest area. Just like before you must approach the cameras from behind to shut them off. If you are seen by the cameras, they will reset and you must turn off all of them again. They keep spawning in different spots throughout the marked objective area. After turning them all off it will finish the quest.
That’s all of the Freeze Frame Cameras in Control Resonant.
For all other quests refer to the Control Resonant Walkthrough.
Matthew says
You do not need Ground Slam. Crush will also work.