
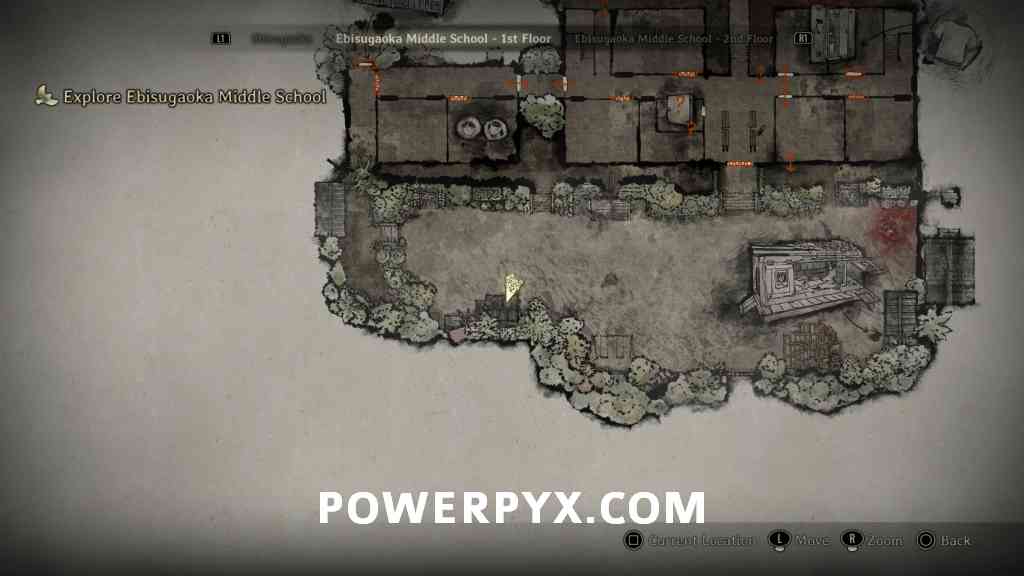
Ebisugaoka Middle School is the 6th area in Silent Hill f. This 100% walkthrough will guide you to all collectibles in chronological order. Everything that’s needed for trophies, achievements and 100% completion is included: Documents, Hidden Omamoris, Character Upgrades, Inventory Upgrades, Trophy-Relevant Documents, Puzzle Solutions, Trophies & Achievements.
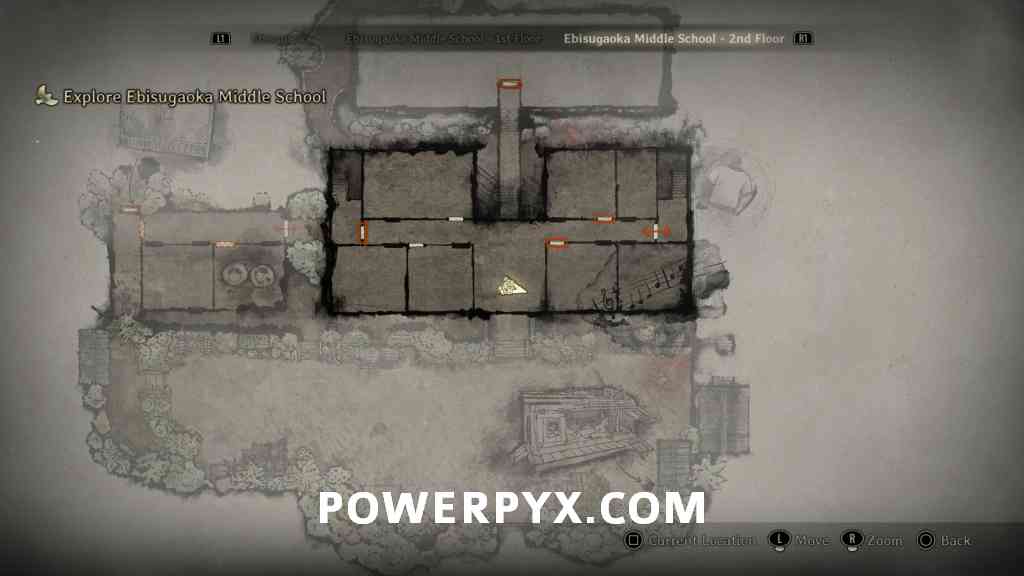
Ebisugaoka Middle School
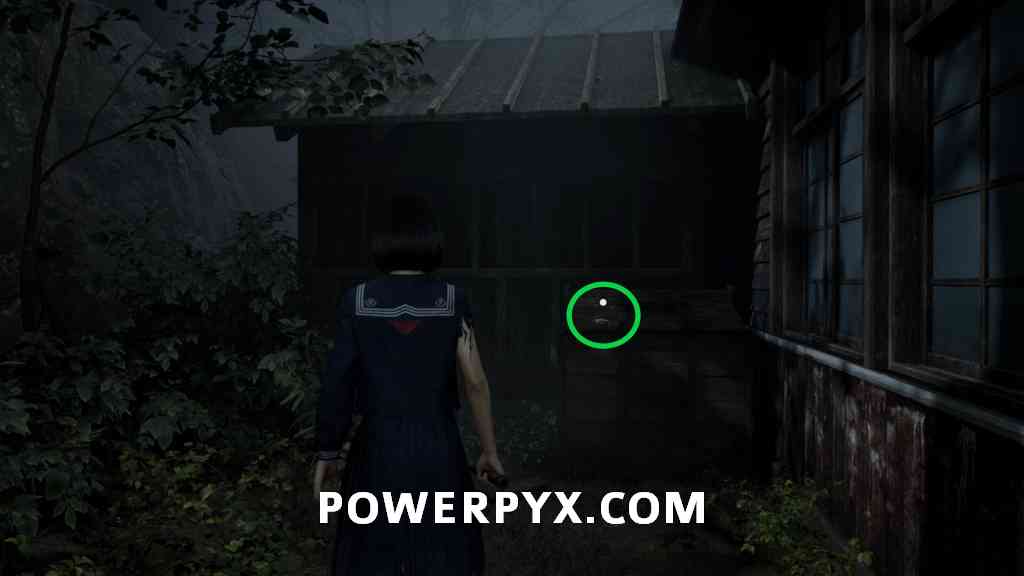
Offering: Dried Carcass (200 Faith)
Go outside and up the stairs, past the Hokora Shrine. Sitting on a crate in the corner will be this offering.

Stairwell Puzzle
Story Difficulty – In order to open the locked drawer in the teachers’ storage room, you must first go into the one open classroom and pick up the scrunched-up paper. This will tell you that you can open it with a hairpin. Climb out the window and crawl into the rabbit hutch in the corner to find the hairpin in the basket. With this, you can open the drawer and obtain the key for the Second Floor.


Hard Difficulty – Go outside via the window in the classroom. Head to the west section of the outside area to find a patch of blue flowers, where you will find the key for the Second Floor.


Lost in the Fog Difficulty – Go outside via the window in the classroom. Head to the west section of the outside area, then go up the stairs and back east to find some potted blue flowers, where you will find the key for the Second Floor.


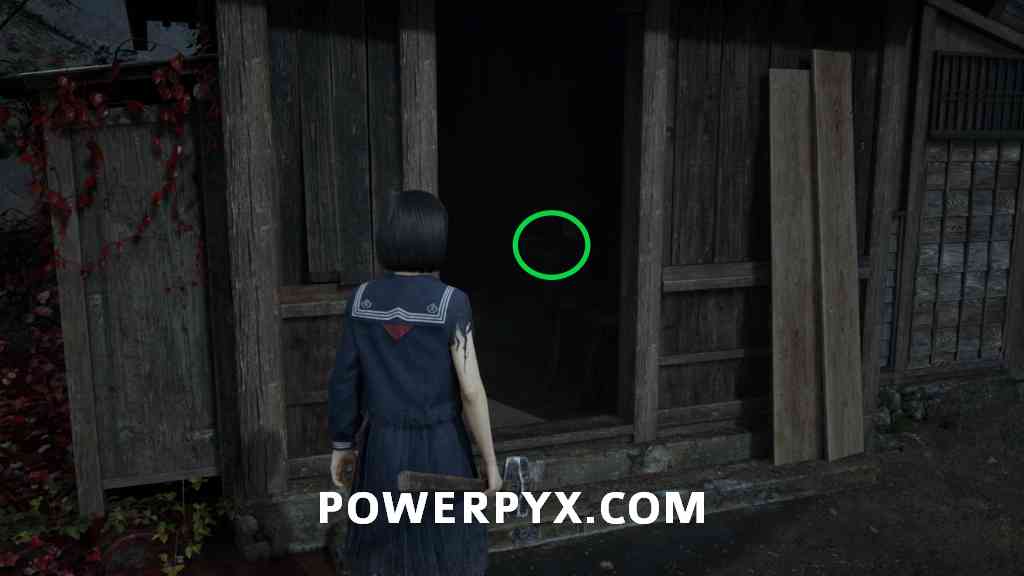
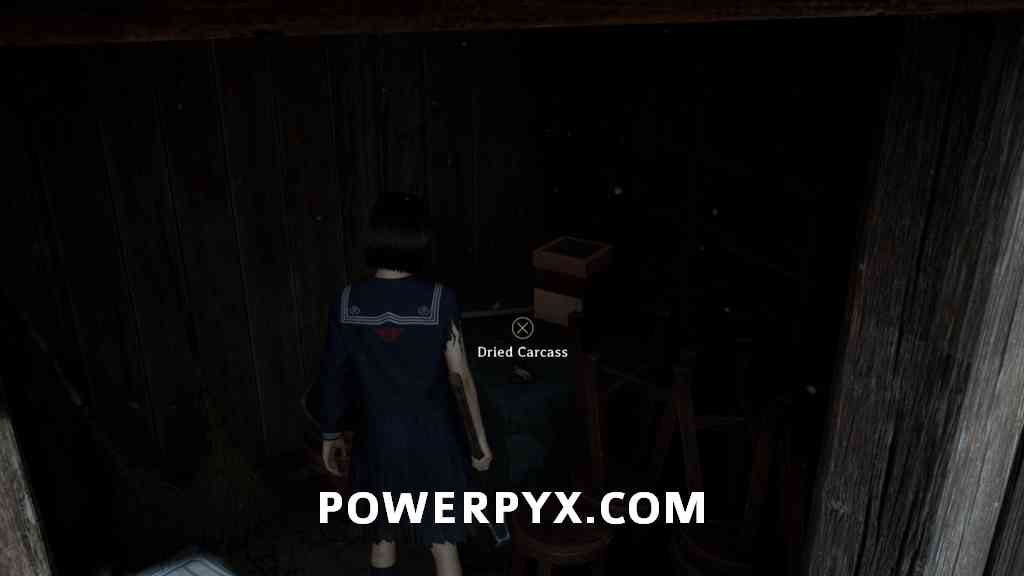
Offering: Dried Carcass (200 Faith)
While still outside, enter the small shed on the other side of the area to find this.
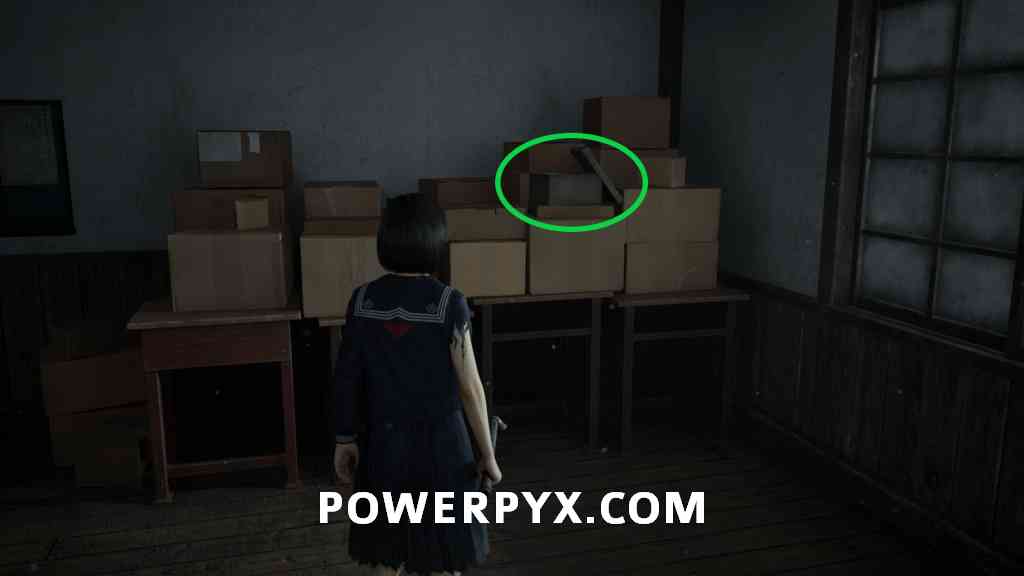
Offering: Antique Comb (300 Faith)
Once you unlock the door upstairs, go into the central room to find this on a cardboard box on a table in the corner.
Secret Box Puzzle
Story Difficulty – For this puzzle, you will need to use the hints provided in the letters to unlock three tiers of the Secret Puzzle Box. Each tier will give you a new letter with a new hint. For reference, Side 1 is the side the puzzle starts on.
- Puzzle 1: You will need to slide one panel on each side of the box to open it, with the sweet and tart fruits exposed.
- Side 1: Bottom Row
- Side 2: Top Row
- Puzzle 2: Now you will need to show all of the journals to open the next part.
- Side 1: Second and Third Row
- Side 2: Second Row
- Puzzle 3: For this you will need to show the Sakura in Full Bloom, of which there is only one.
- Side 1: No Change
- Side 2: Third Row
Hard Difficulty – For this puzzle, you will need to use the hints provided in the letters to unlock three tiers of the Secret Puzzle Box. Each tier will give you a new letter with a new hint. For reference, Side 1 is the side the puzzle starts on.
- Puzzle 1: You will need to slide one panel on each side of the box to open it, with the sweet and tart fruits exposed.
- Side 1: Top Right, Middle Left, Bottom Right
- Side 2: Top Right, Bottom Left, Bottom Right
- Puzzle 2: Now you will need to show all of the journals to open the next part.
- Side 1: Top Right, Middle Left, Bottom Left
- Side 2: Middle Right, Bottom Right
- Puzzle 3: For this you will need to show the Sakura in Full Bloom.
- Side 1: Middle Right
- Side 2: Top Right, Bottom Right
Lost in the Fog Difficulty – For this puzzle, you will need to use the hints provided in the letters to unlock three tiers of the Secret Puzzle Box. Each tier will give you a new letter with a new hint. For reference, Side 1 is the side the puzzle starts on. White Row will refer to the lighter wooden pieces that can be moved, while Brown Row will refer to the darker pieces.
- Puzzle 1: You will need to slide one panel on each side of the box to open it, with the sweet and tart fruits exposed.
- Side 1: First White Row (Orange), Third Left Brown Row (Apple)
- Side 2: First Left Brown Row (Cherries), Second Right Brown Row (Strawberry), Third Right Brown Row (Grapes), Fourth White Row (Pineapple)
- Puzzle 2: Now you will need to show all of the journals to open the next part.
- Side 1: First White Row, Second White Row, Second Left Brown Row, Fourth White Row
- Side 2: Third Left Brown Row
- Puzzle 3: For this you will need to show the Sakura in Full Bloom.
- Side 1: First Left Brown Row, Third White Row, Third Right Brown Row
- Side 2: First Left Brown Row
Completing this will get you the Second Floor Classroom Generic Key.
Locker Puzzle
The secret code for figuring out the lockers codes can be found by reading various notes throughout the Annex. Letters will translate directly to numbers, ie A = 4, I = 1. The codes will be same on all difficulties (except Asakura Ayumi), the main difference are the hints you are provided.
- Aoi Takeshi: AOI – 401
- Asakura Ayumi:
- Story: SEA – 534
- Hard: BUS – 865
- Lost in the Fog: EGG – 399
- Suga Yosie: SOS – 505
- Tsuchiya Taiko: 377
Omamori: Wolf
Inside Tsuchiya Taiko’s Locker, which can be unlocked with the code 377.


Inventory Upgrade: School Bag
Inside Suga Yosie’s Locker, which can be unlocked with the code 505.


Next Area: Worship Hall
Max says
Your guide is very helpful. But may i give you an advice? If i left click an image it open in a same window. I wish i can switch to next image by clicking the → like IGN does.
Opening an image then go back to endure so many ads again, open another image its just inconvenience.
Rising says
School class box puzzle on hard, part 2 the journal part, there is no botton section to be chosen at side 2, only the middle part.
angelbless says
For the Secret Box Puzzle, Side 2 is only Middle Right
xeixa says
Hi, thanks a lot for this guide! I noticed one collectible that isn’t listed: there’s an EMA for a character upgrade in the schoolyard, on the west side of the yard. It would be great if you could add it to the guide for completeness.
Thanks again for all your hard work!
Ed says
Can’t find this.
MJ says
Didn’t find this either…