
The Tomb of Gibborim puzzle is the third major puzzle challenge in Indiana Jones and the Great Circle: The Order of Giants DLC. This walkthrough will guide you through all the steps needed to solve the puzzle.
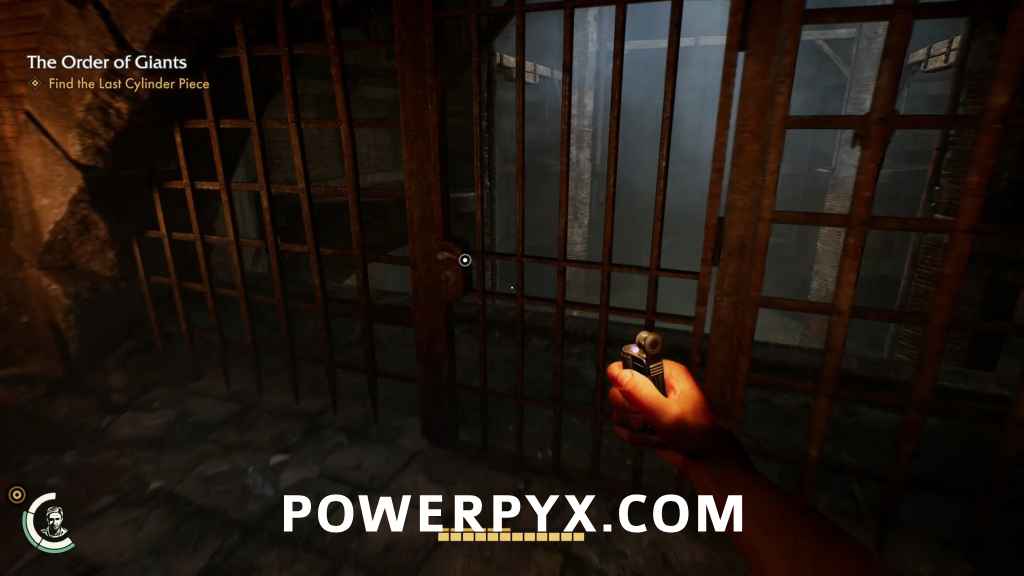
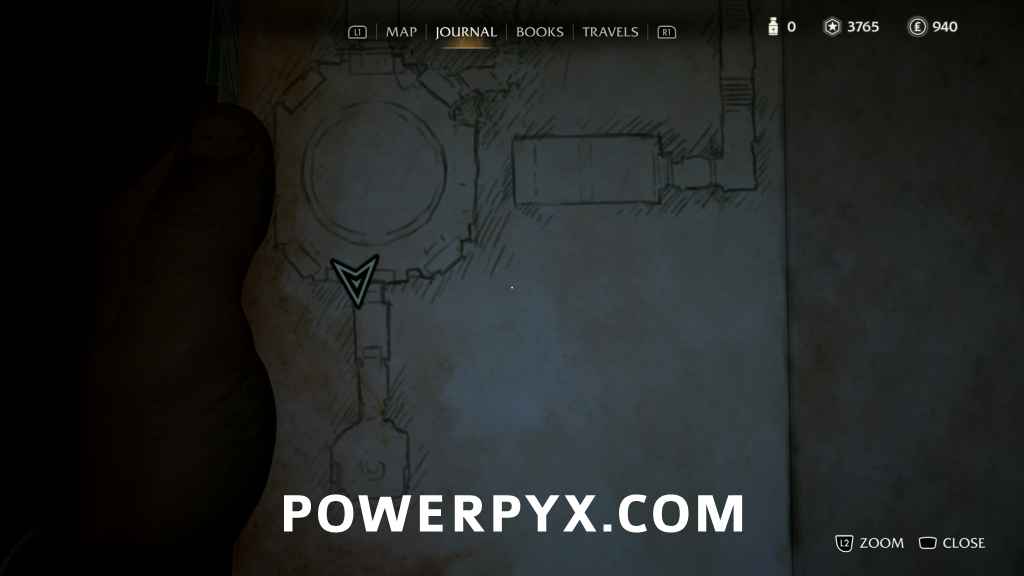
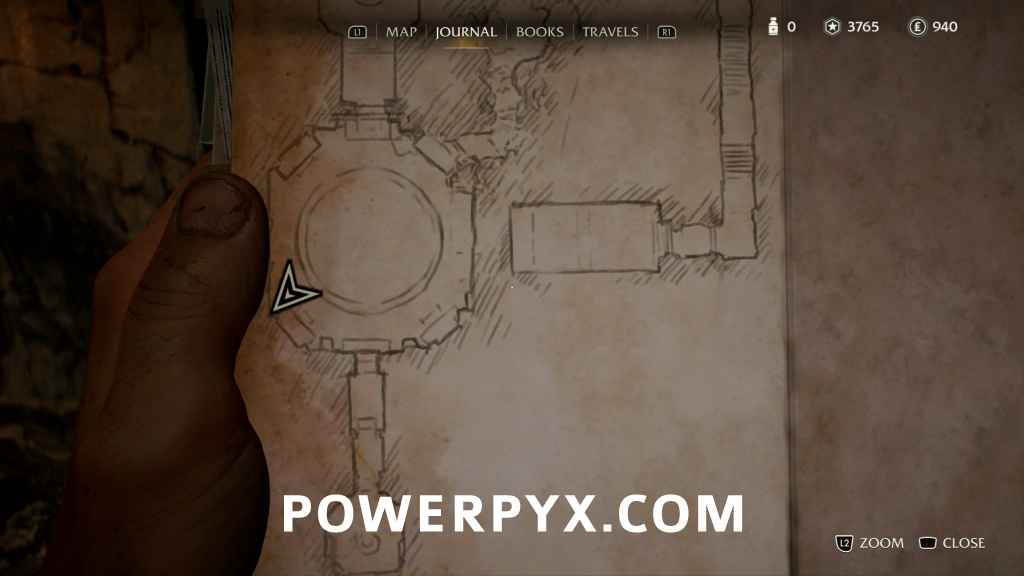
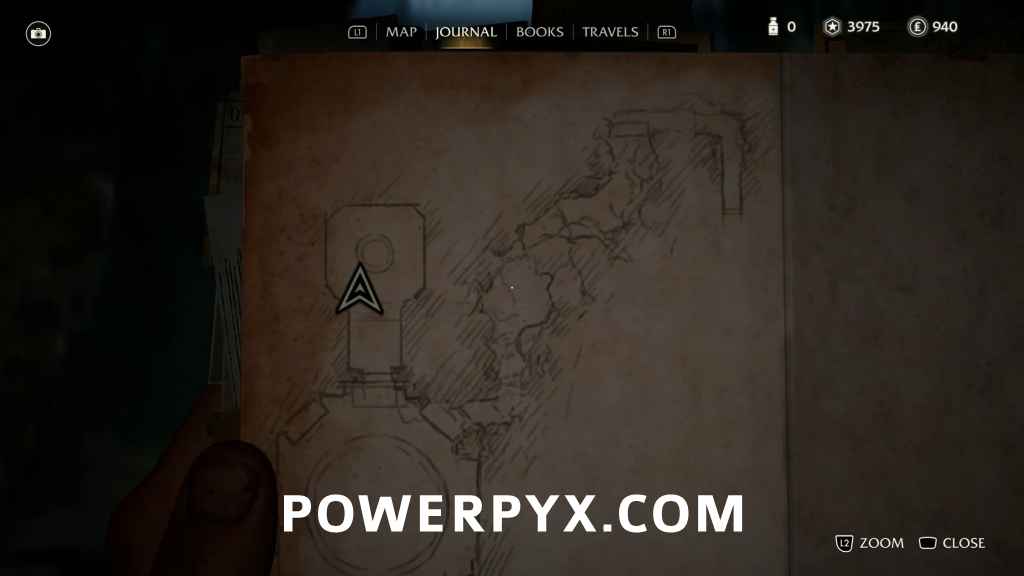
When on the way to retrieve the third Cylinder piece, you’ll eventually find yourself on the upper level of the octagonal room in the north portion of Cloaca Maxima. Head down the tunnel to the west, until it branches off into a locked door to the west, and the path that you’ll follow north into a cave.
 Swing across a chasm, and you’ll find a photo opportunity on the other side.
Discovery Note #32: A Tree (10 AP)

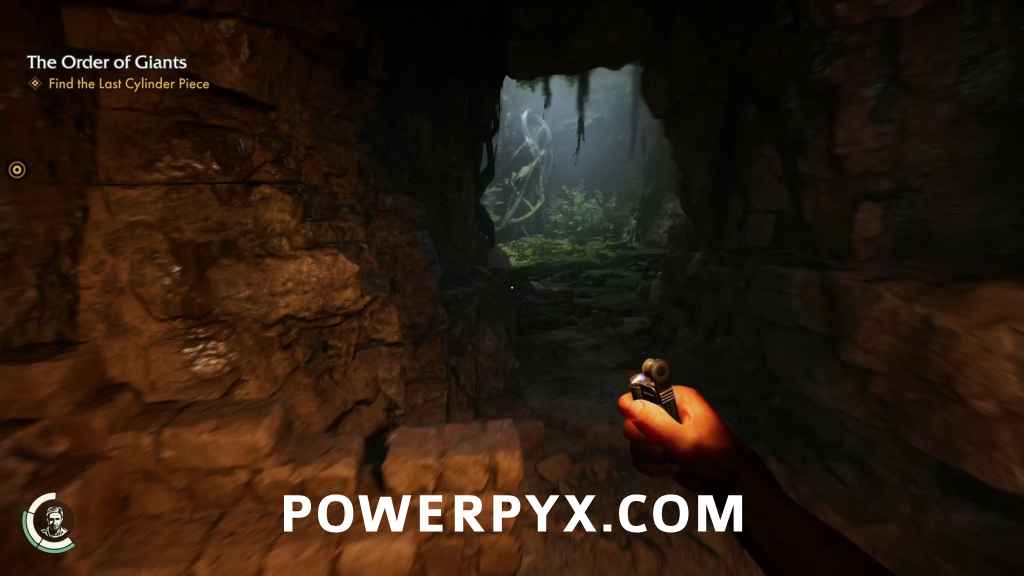
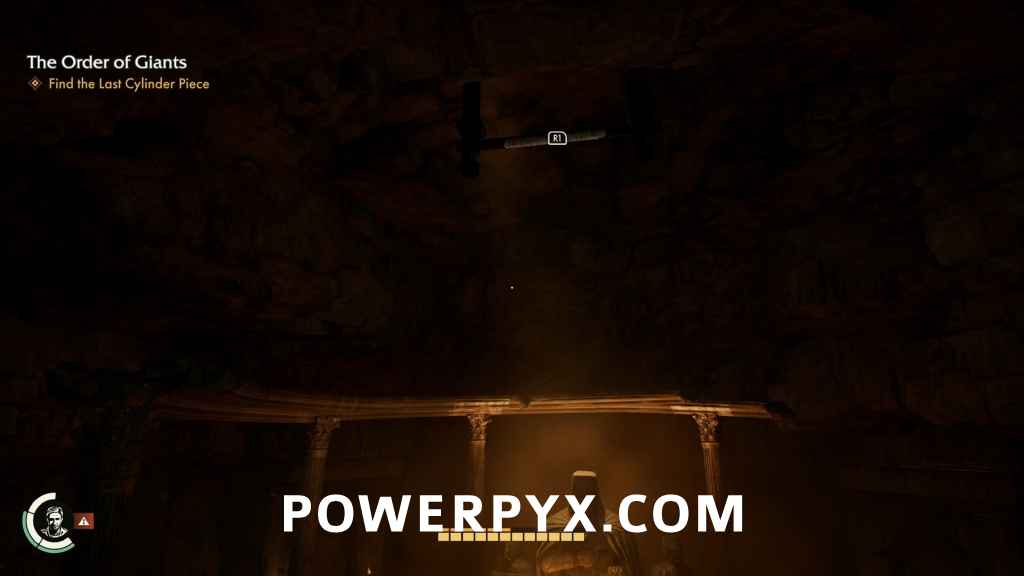
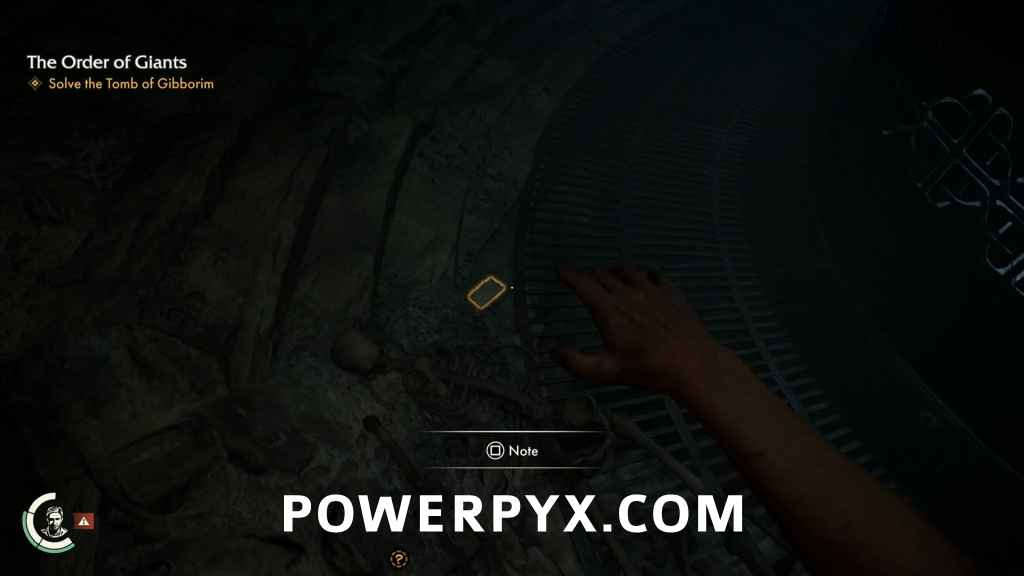
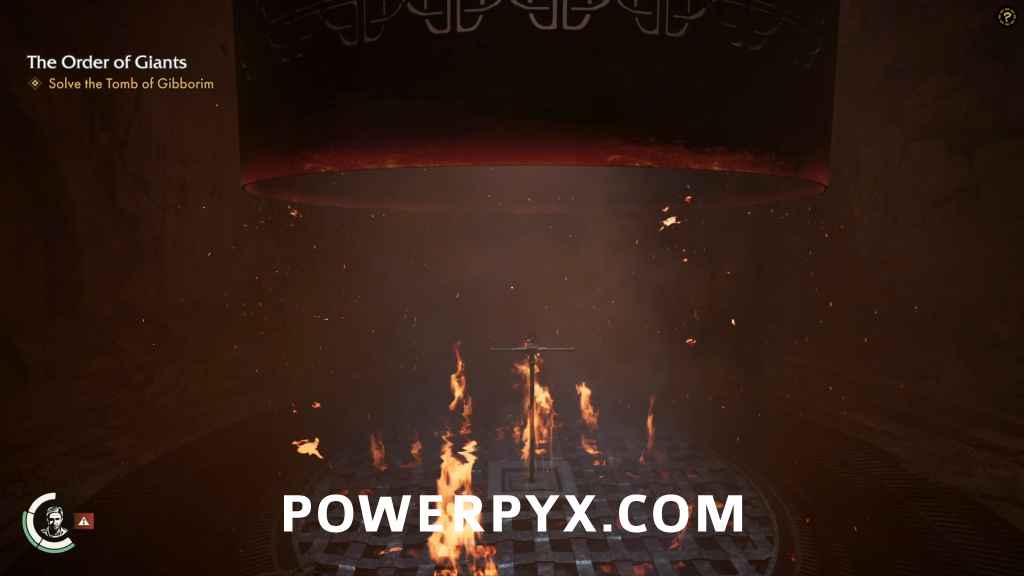
Keep going past the tree to find an alcove that has a narrow passage you can squeeze through, and on the other side you’ll find the Tomb of Gibborim. You’ll enter along a balcony high above the room below, so go to the left until you’re right in front of the tall statue then look up to find a bar that you can whip to lower yourself down safely.
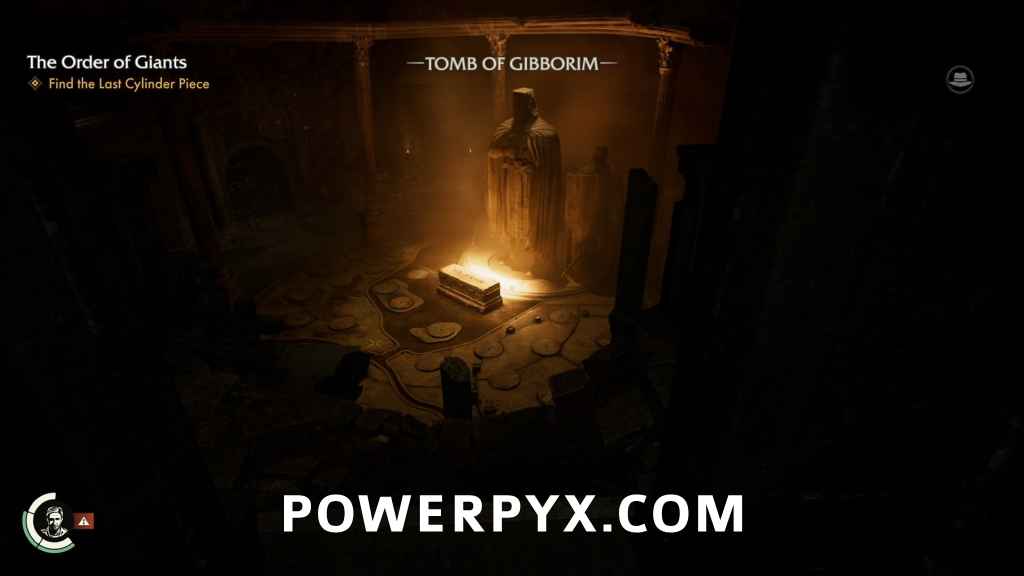
Explore the Tomb
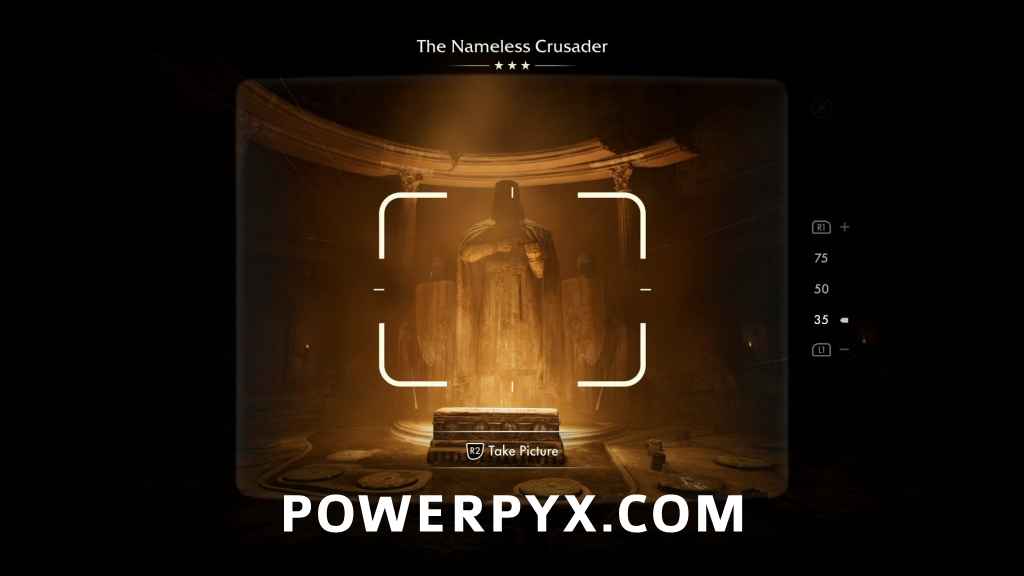
First thing to do is to take this photo opportunity to snap a shot of the Nameless Crusader, the giant statue to the west.
Adventure Note #42: The Nameless Crusader (10 AP)
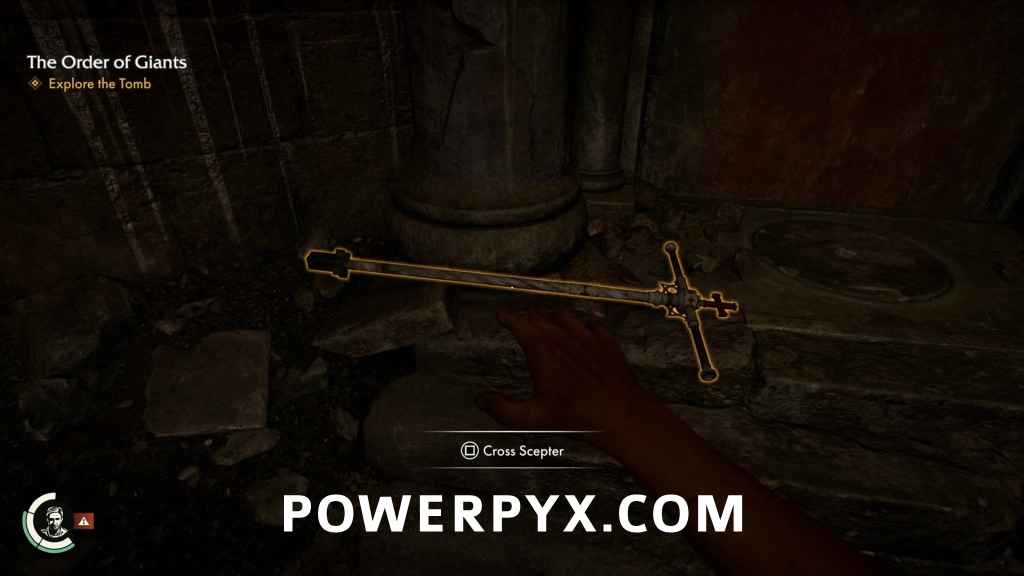
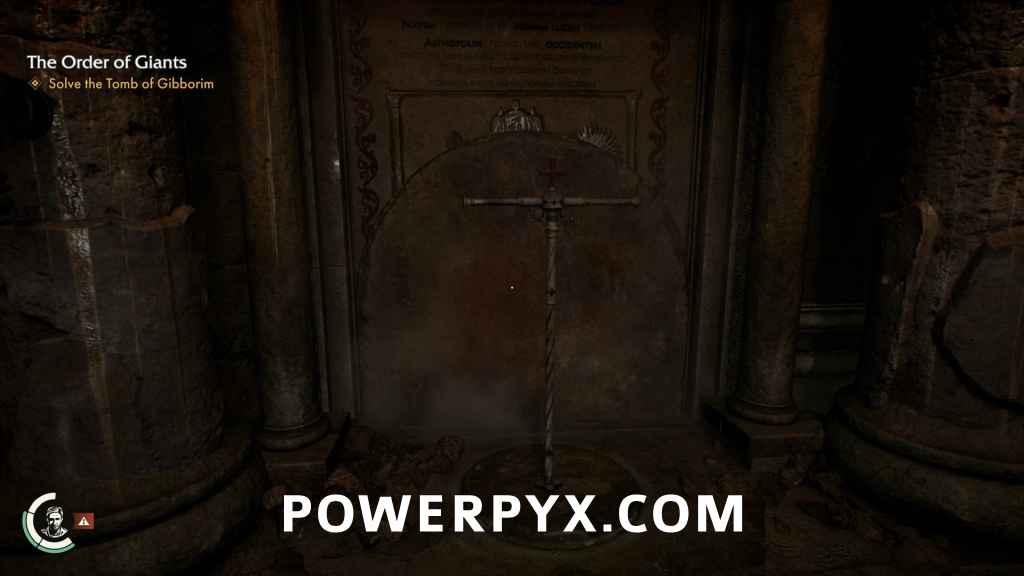
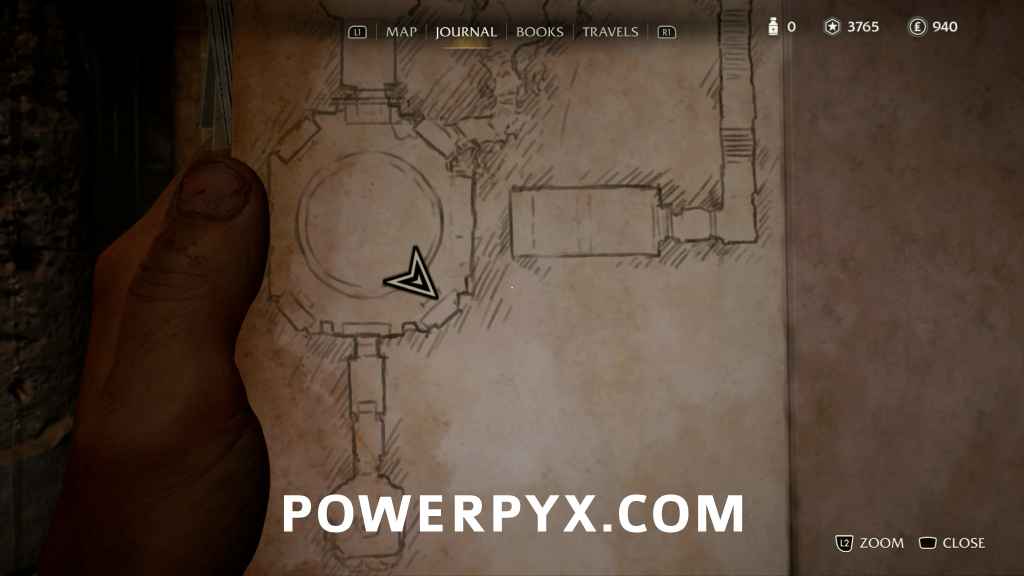
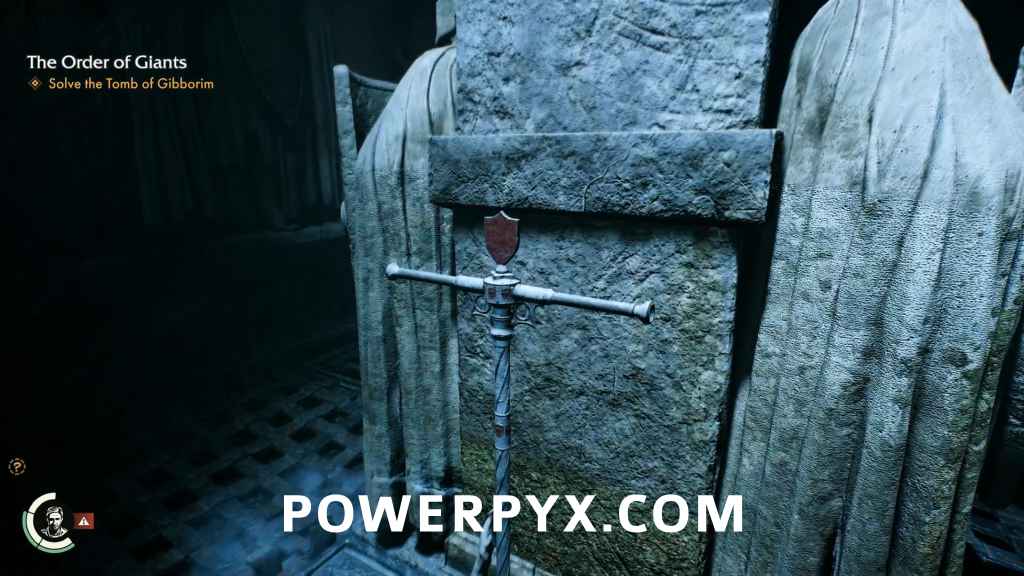
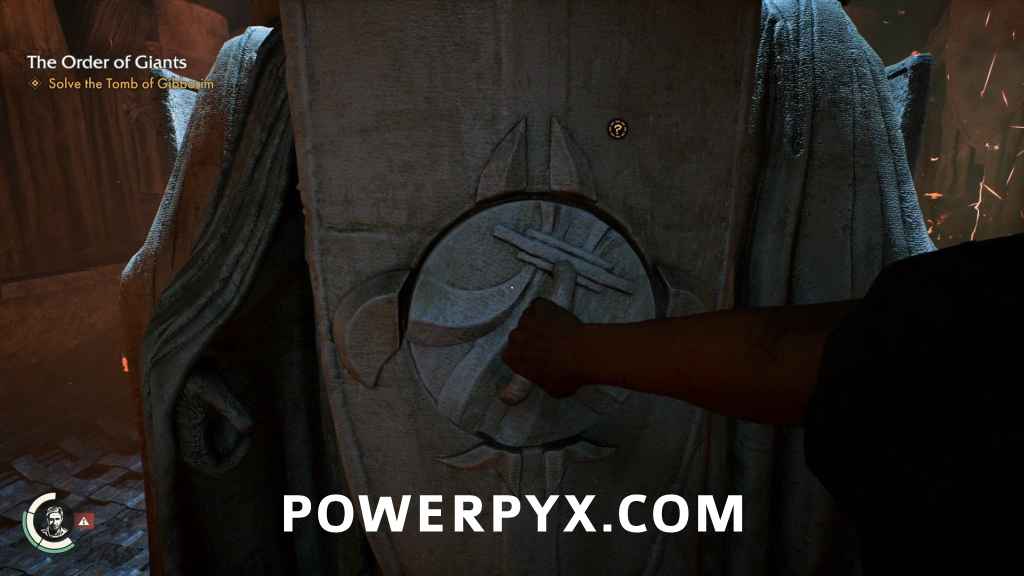
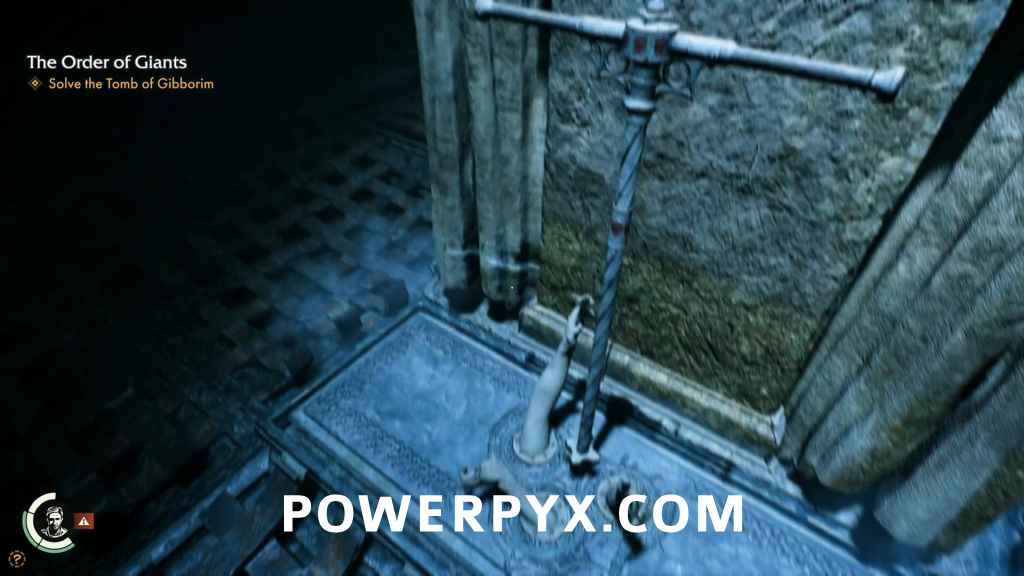
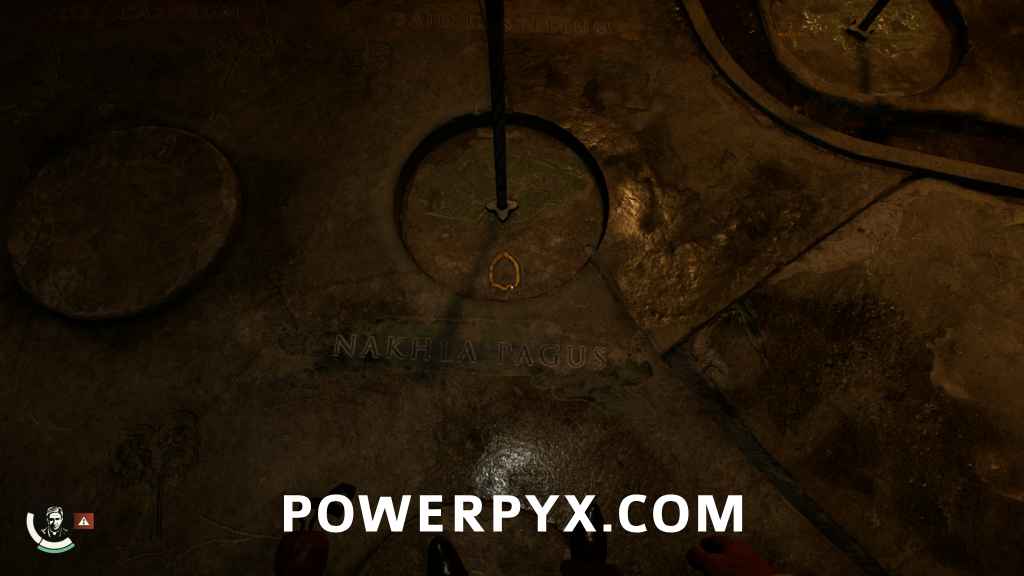
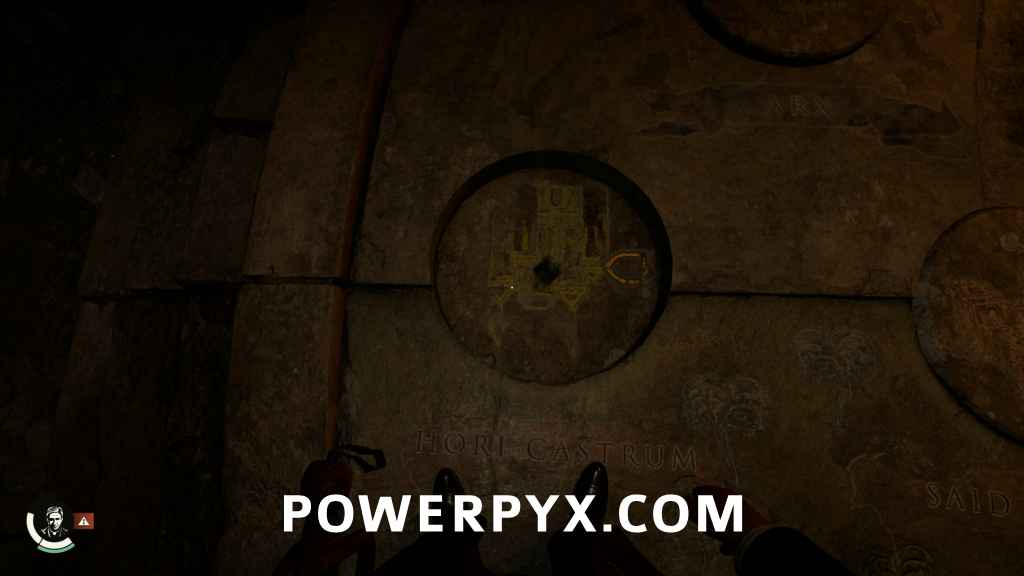
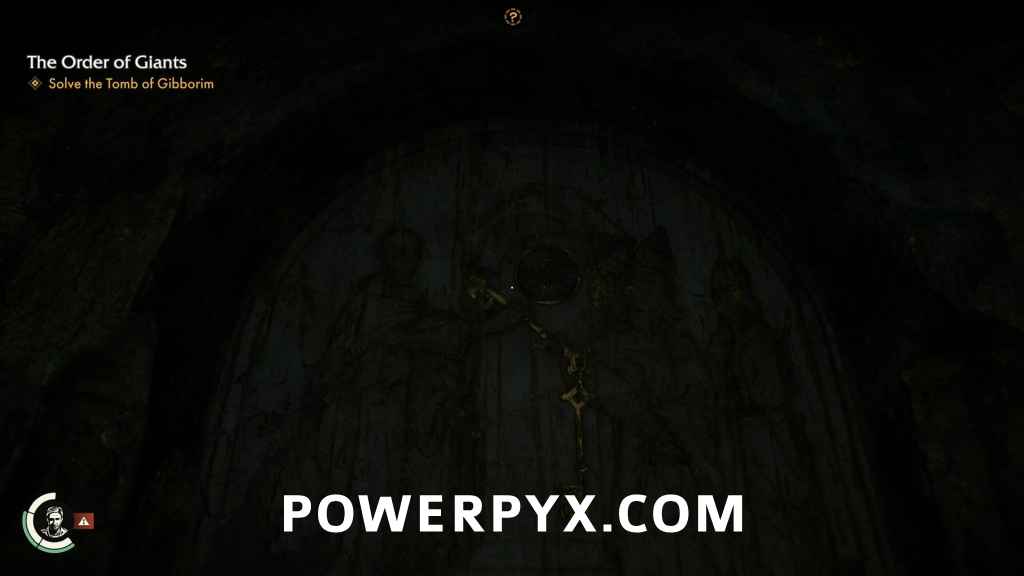
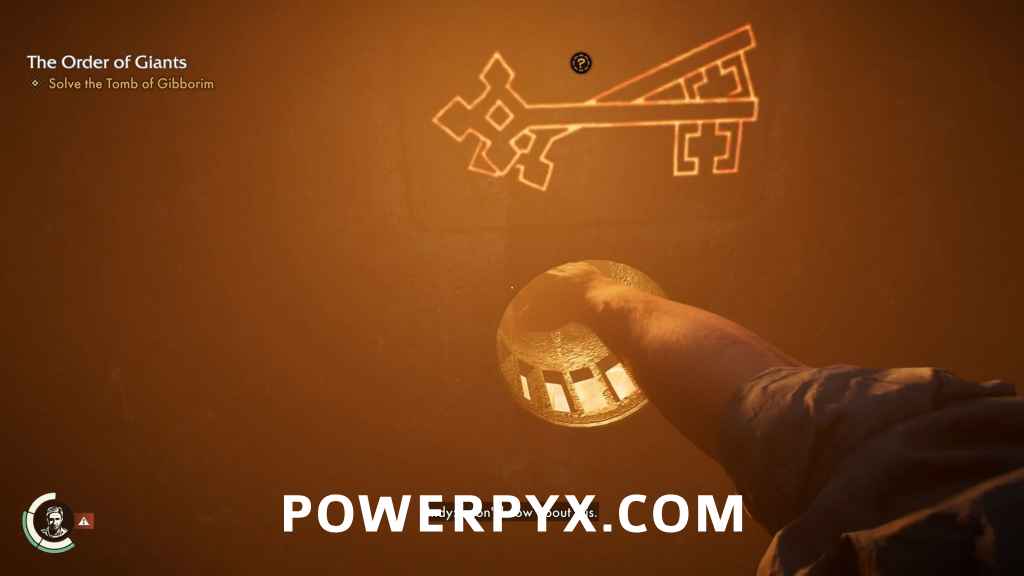
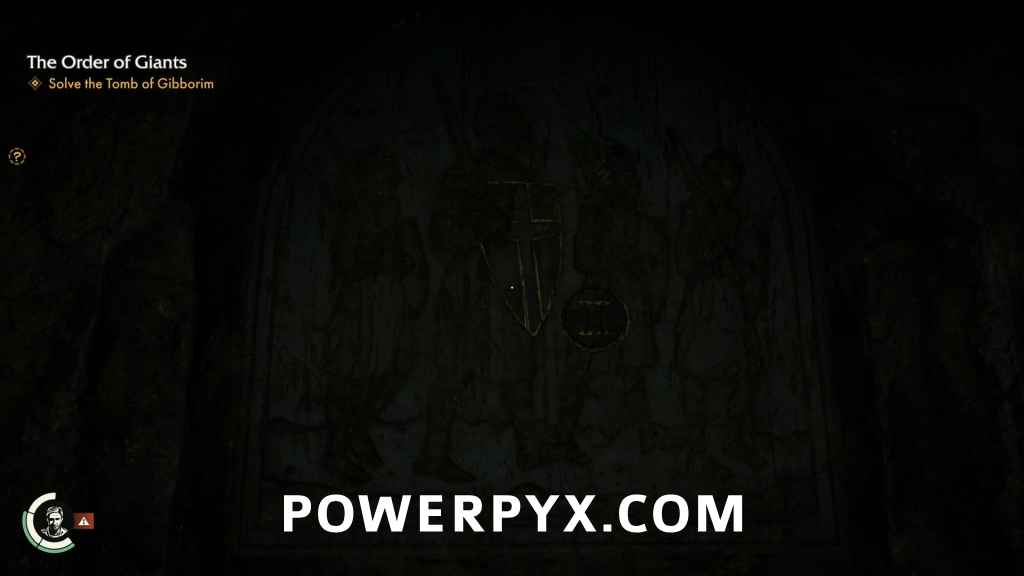
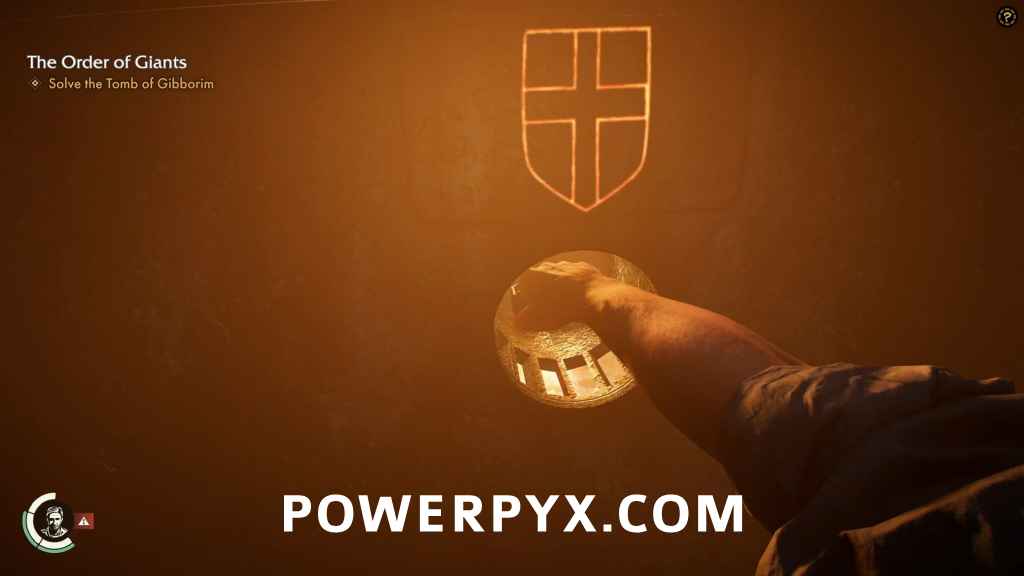
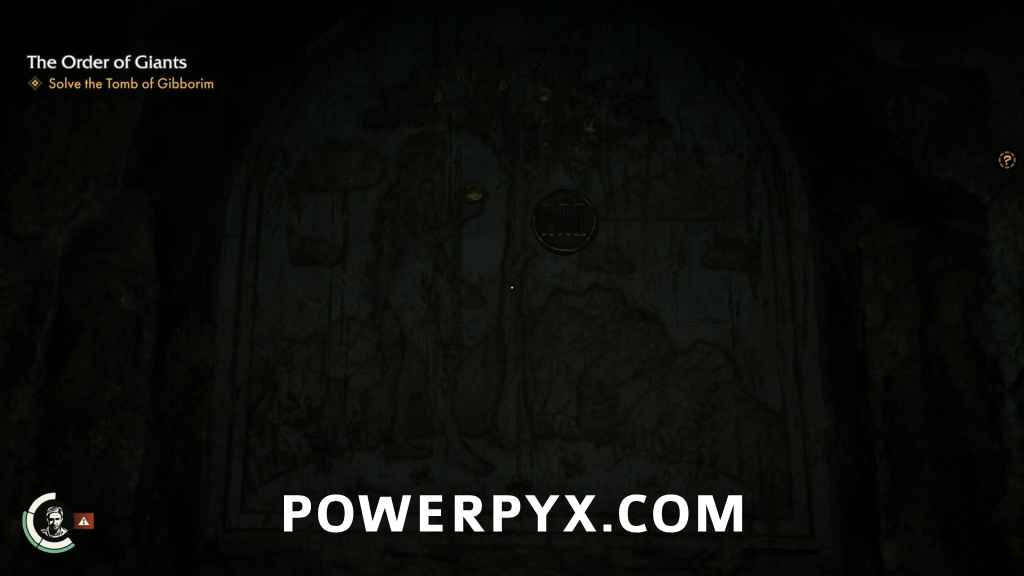
Looking at the ground, you will see that the entire platform is a map, each circle representing a different place and marked with its name. Each also has one of four symbols: a cross, a shield, a sword, and a trinity symbol. All four symbols appear on the altar in the center of the room, and also on four murals that are around the edges of the room. In the southeast corner, you’ll find a Cross Scepter, which looks and performs much like the Serpent Wrench seen earlier. Pick it up, and plant it in the hole next to the cross mural and a panel will slide away to reveal a latin inscription.
Solve the Tomb of Gibborim
The inscription is a photo opportunity, so take a picture of it for the note and as well for the translation of the inscription.
Adventure Note #43: Crusader Cross Mural (10 AP)
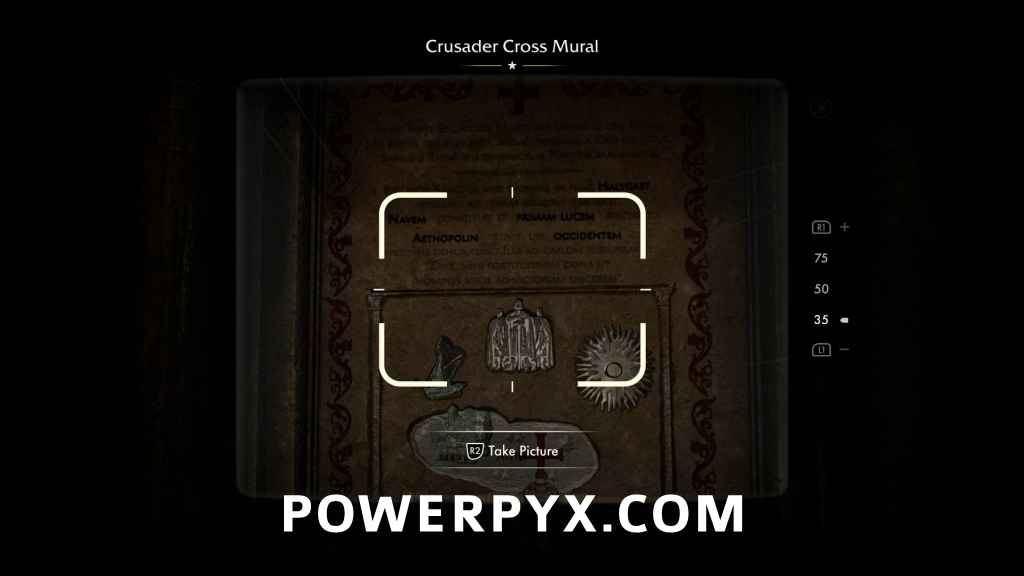
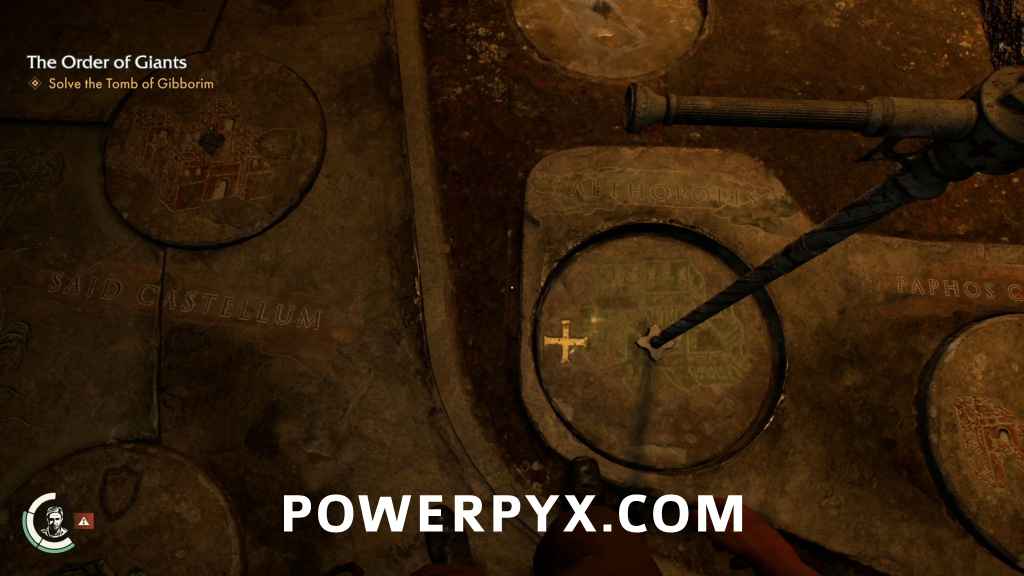
Inscriptions that you read will have certain words underlined. These will be the important directions that you will have to follow when solving this puzzle. The inscription reads “These are the deeds and fate of the Nameless Crusader. A mighty warrior. Pure of heart, chosen by God, true to the Holy Trinity, and loved by Pontiffs. The Nameless Crusader sailed on Halygast to distant lands. The ship anchored and he watched the morning light. He reached Aethopolis where he knelt facing west. He whispered to the heavens “Lord, grant me strength to lead my men to victory.”
When holding the Cross Scepter, you’ll be able to hit  /
/  to bring up the inscription so you don’t have to go looking in your journal for it. Also, all the circles that also have a cross symbol will now show an interaction prompt when you are close, allowing you to plant the scepter and use it to turn the circle to the direction indicated by the cross symbol. At first glance this seems like a simple puzzle, just turn the circles representing Halygast and Aethopolis to the right directions. The problem is that there’s a key piece of missing information you’ll need to solve these puzzles.
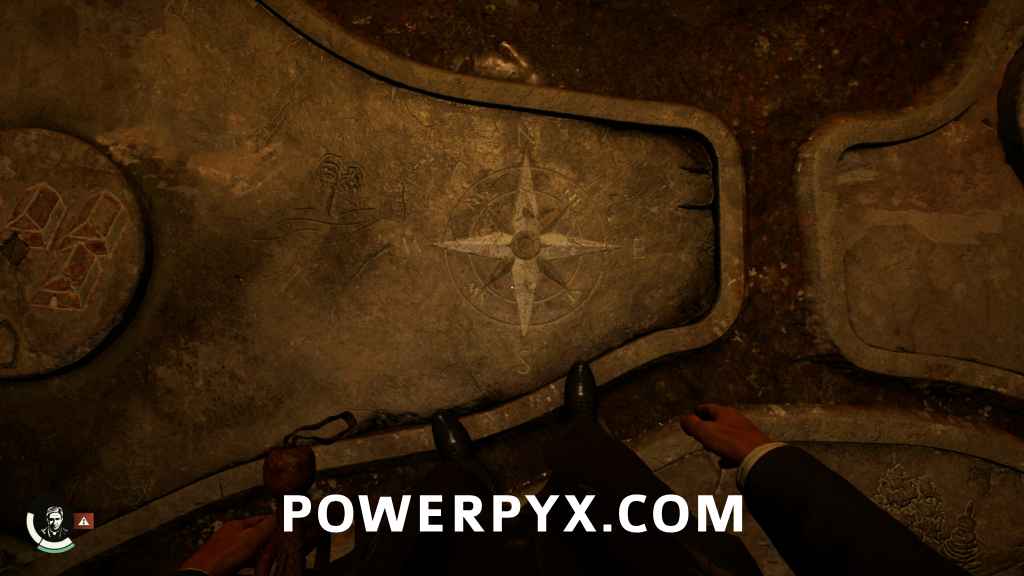
The map in the Tomb of Gibborim does not use actual compass directions.
Look at the map near where the river joins with the lake. Look closely and you’ll see a very faint compass rose that gives you the map’s orientation. North on the map is towards the Nameless Crusader statue, but when facing that direction Indy is actually facing west. So all directions given in the inscriptions are relative to the map, not the compass, and the circular panels should be rotated so that the symbol matching the scepter is facing in the direction given (again, relative to the map).
Cross Mural Solution:
Halygast – East
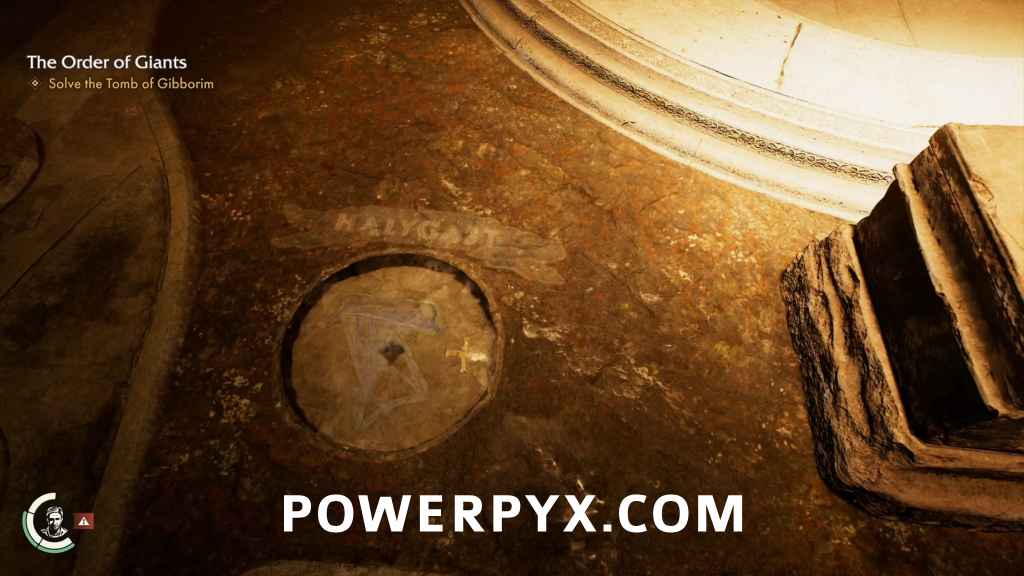
Aethoplis – West
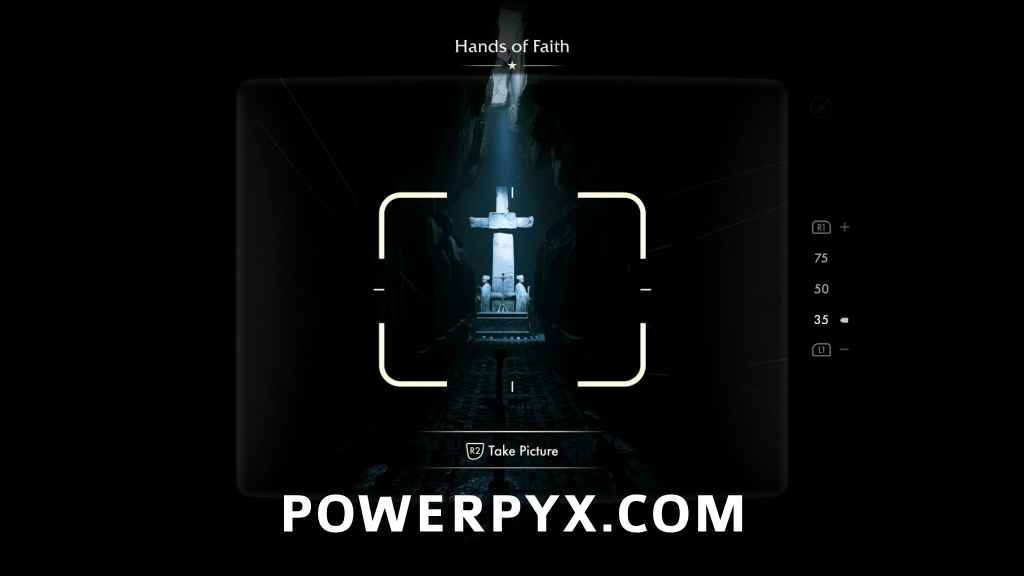
Once you’ve rotated these circular panels correctly, you will hear the sound of gears turning, the circles that you’ve adjusted will drop a few inches and lock the Cross Scepter into place, and the gate blocking the door to the south will lift allowing you access to the next puzzle. Just inside the gate you’ll find a lever and be presented with a photo opportunity.
Adventure Note #44: Hands of Faith (10 AP)
Before you pull the lever, head south into the room to examine the next puzzle. Straight ahead of you is a giant stone cross, and in front of it will be the Shield Scepter being held in place by three stone hands. Around the other sides of the cross are statues of three knights, each of which will have a fleur-de-lis device on their shield that has a circular section with a handle. These sections, when rotated, will cause the hands to release the Shield Scepter, but you won’t be able to turn them yet. Not until you go back to the lever and pull it to activate the puzzle. When you do, fire will shoot up out of the conveniently grill-like floor in a looping pattern which you have to avoid.
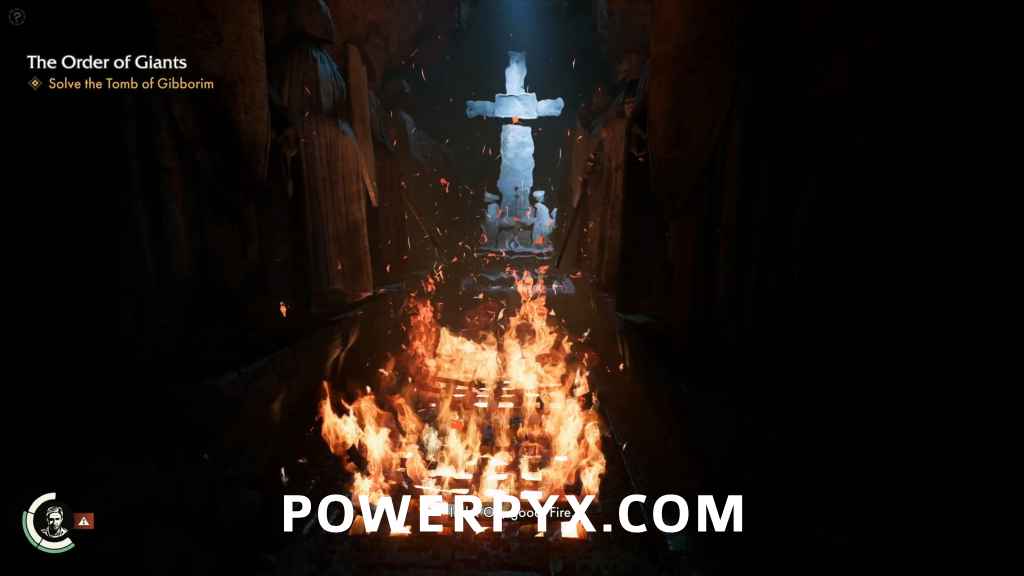
In reality the amount of damage isn’t large, so you don’t have to be too concerned if you get burned a little while solving the puzzle, but it’s always worth avoiding. The fire will go south towards the cross, circle it once counterclockwise, then head back to the north, and the pattern will reverse with the fire circling around the cross clockwise once before heading back to the south until it repeats from the beginning of the pattern. You have to follow the fire to the south, go right around the cross and activate the three switches while avoiding the fire. Each switch takes about two seconds to rotate all the way around though, so you’ll probably only be able to activate one switch per circle the fire makes of the cross.
On story difficulty however, you can just take the fire damage and get all three done at once. If you’ve already unlocked all the Adventure Books, you probably won’t take more than a single double-segment worth of damage, particularly if you’ve already eaten bread items for the extra layer of protection. In any case, once you’ve turned all three of the circular switches to make the correct fleur-de-lis symbol, all three hands will release the scepter allowing you to take it.
Head back to the Tomb and plug the Shield Scepter into the hole in front of the Shield Mural. The mural will slide away to reveal the second inscription, and another photo opportunity.
Adventure Note #45: Shield Mural (10 AP)
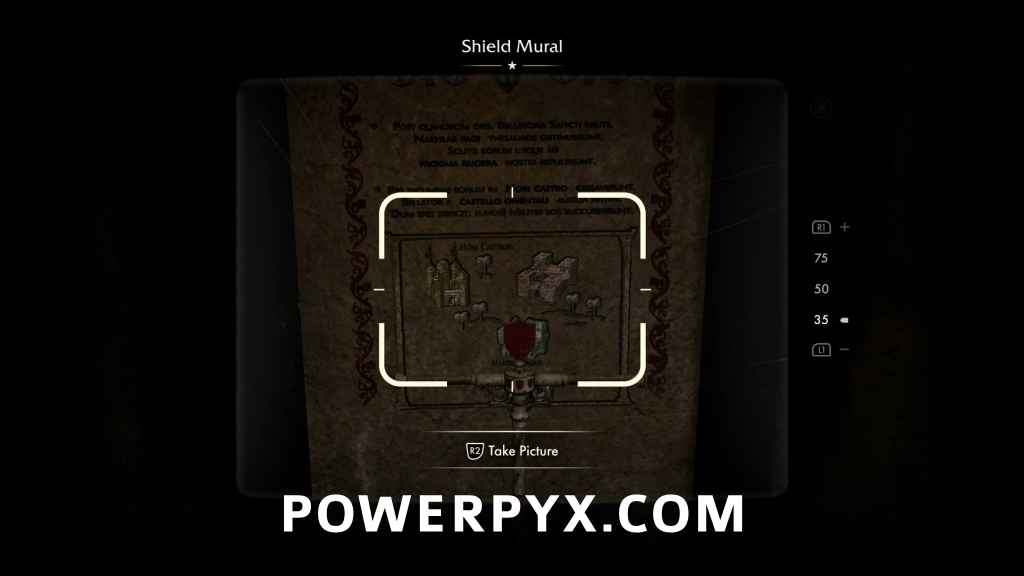
The second inscription reads, “A fortnight later, the Nameless Crusader’s men seized the treasures of Nakhla. Clashing against their shields, the enemy was driven to the nearby ruins. At The Castle of Horus their fortune turned dire. The Crusader sent word to the eastern fort and lo, as hoped dimmed, soldiers came to their aid.” For your reference, some of the untranslated locations on the map aren’t an exact match for the translations. If you ever have any question about the actual names you’re looking for on the map, you can look at the original inscription on the wall and they will have the original names written there for you to see. Still that’s what you read guides for, right?
Shield Mural Solution:
Nakla Pagus (Nakhla) – South
Hori Castrum (The Castle of Horus) – East
Again, the circular panels will sink and lock the Shield Scepter in place, opening the gate to the north but only halfway for some reason. Crawl under the gate and head north to the switch for another photo opportunity.
Adventure Note #46: Ring of Sigils (10 AP)
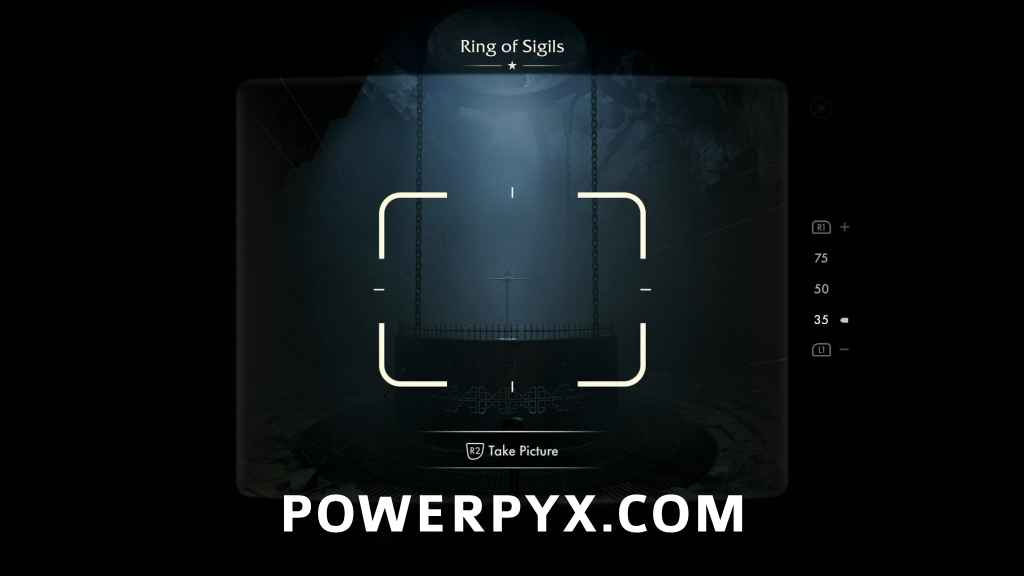
Again, don’t pull the lever yet. Straight ahead of you is a metal ring with the Trinity Scepter at it’s center. Before you start working out how to retrieve that, have a look on the ground on the southwest side of the room. Strangely enough there’s a second scepter in this room, the Sword Scepter, just lying on the ground for you to take. But let’s finish this puzzle first.
Close the Sword Scepter there’s a skeleton on the ground with a note.
Adventure Note #47: Skeleton’s Note (15 AP)
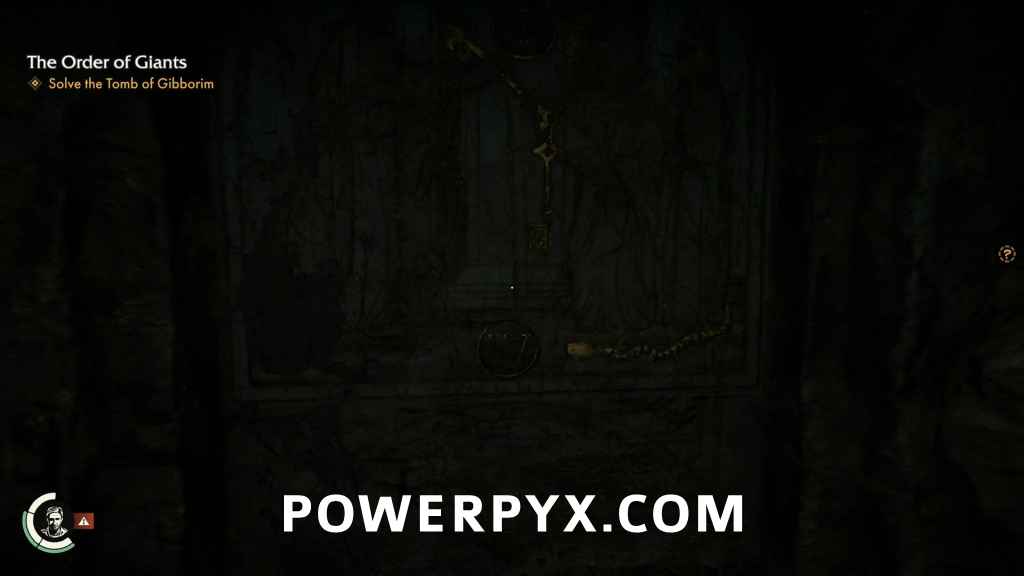
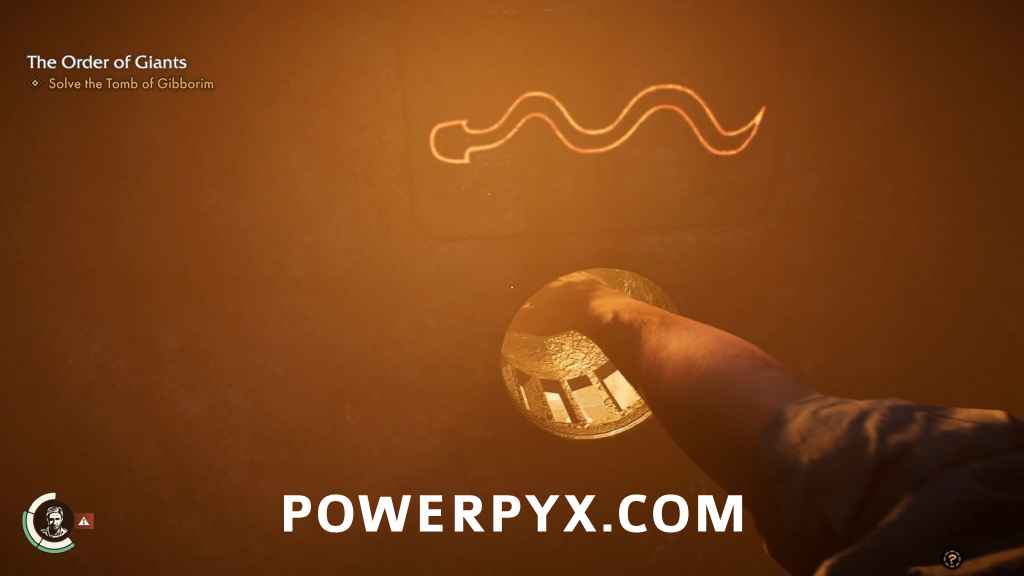
On the walls there are three murals, each of which has a roman numeral inlaid with gold, as well as a gold object in the mural that matches four of the sigils inscribed on the outside of the ring. The numbers give the order of the sigils: Key, Shield, Apple, and Snake. Just under each sigil is a recessed handle to turn, but of course nothing will happen until you go back to the north and pull the lever to start up the fire. Luckily with the images from the murals, this is an easy solve.
1. Key
2. Shield
3. Apple

4. Snake
Turn each handle in sequence and the ring will extinguish itself then rise out of the way so that you may retrieve the Trinity Scepter.
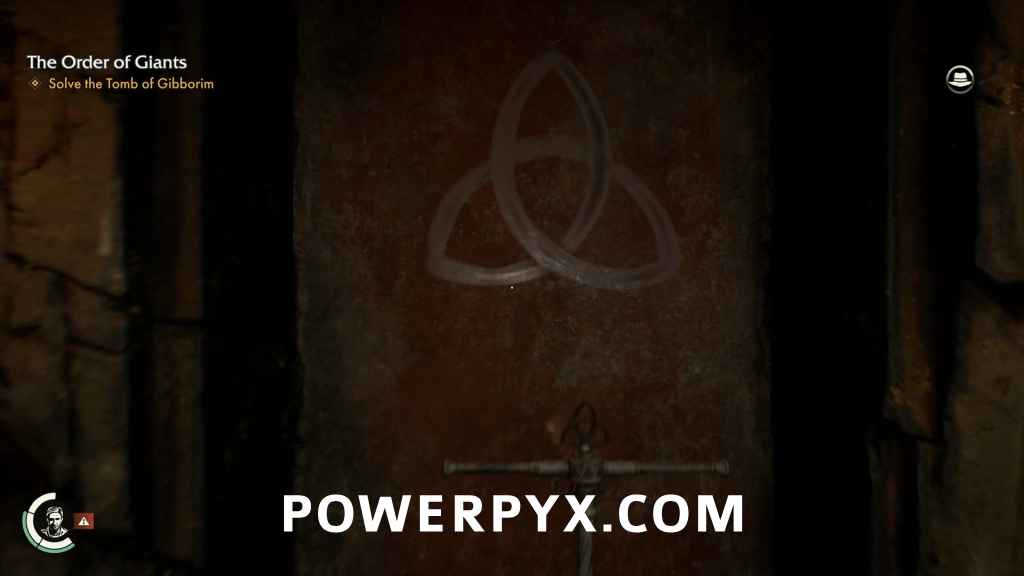
Take it and head back to the tomb, planting it in the hole in front of the trinity mural. That’s the mural with the symbol that looks like a celtic knot but with only three arcs (technically the shape is called a Triquetra). The cover will slide away to reveal the third inscription and another photo opportunity.
Adventure Note #48: Trinity Mural (10 AP)
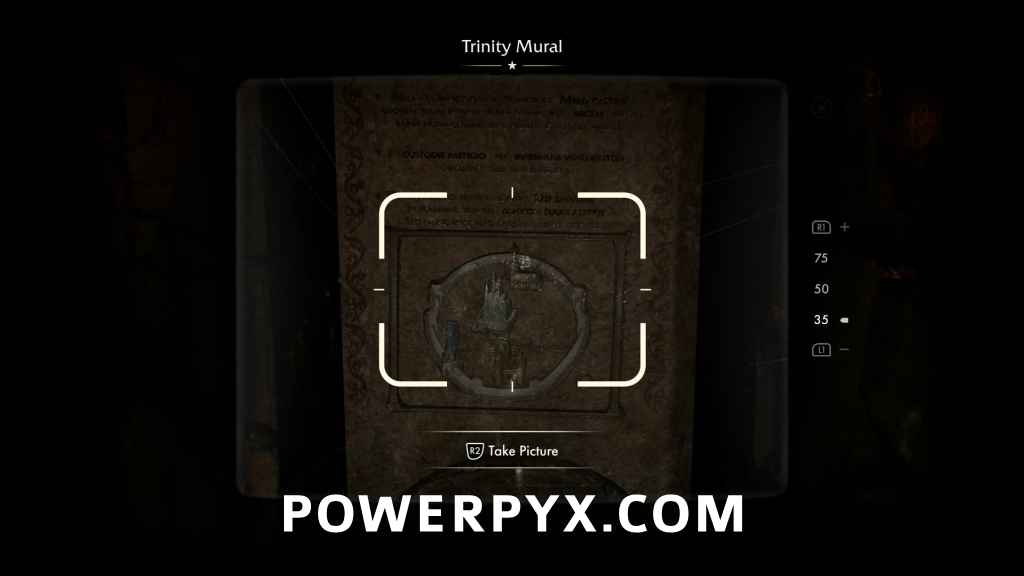
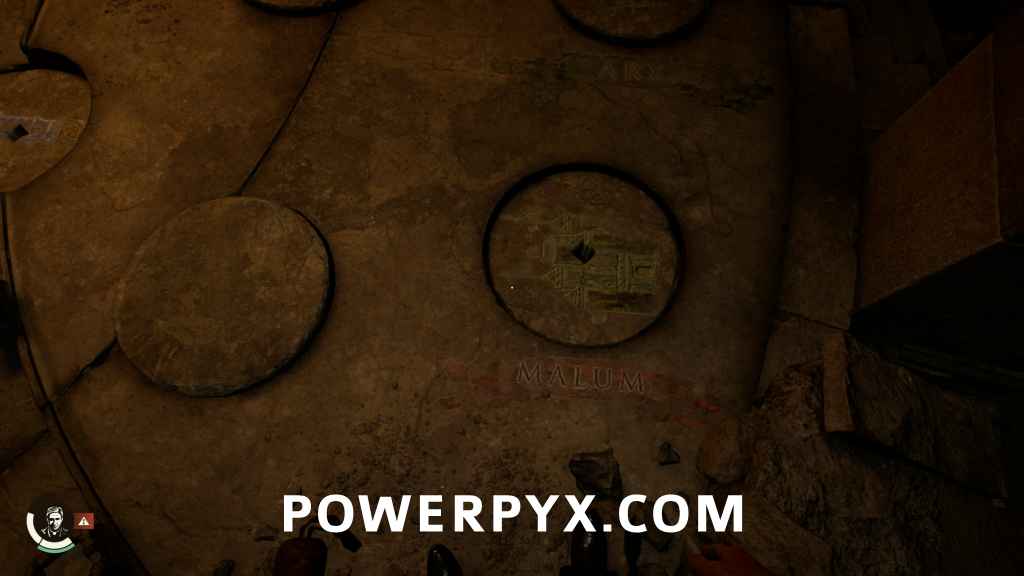
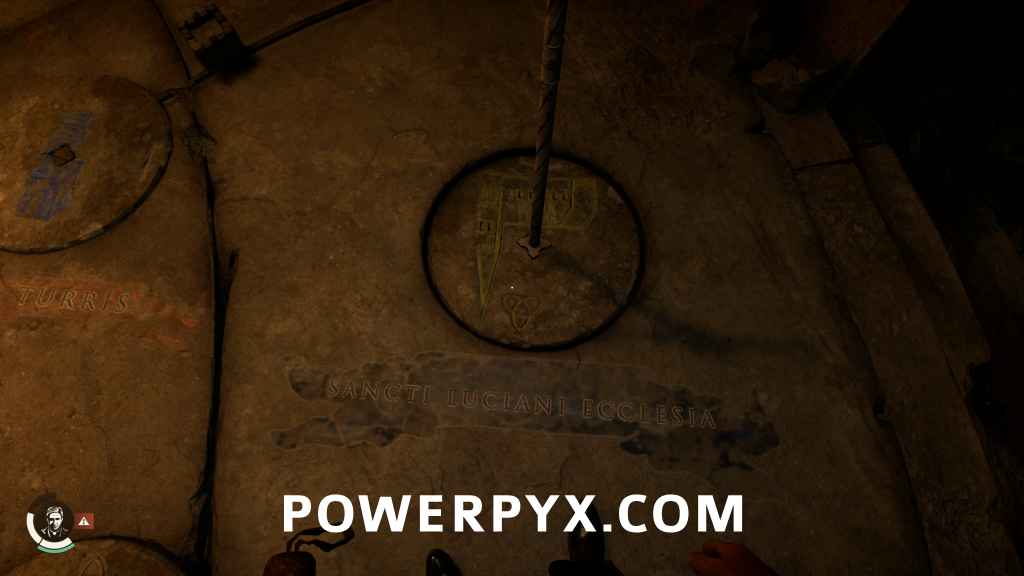
The third inscription reads: “At Castle Malum, the Nameless Crusader found his love. With Marie besides him, he gazed (sic) upon the citadel. The next moon, cries arose: ‘The Castle burns!’ From the guardian spire, he ran towards the fierce inferno but he was too late. Hopeless he seeked (sic) God’s salvation to the north. Beyond the flames he faced his love once more. Now turned to ash, like his heart.”
Trinity Mural Solution:
Malum – North
Custodis Fastigium (Guardian Spire) – East

Sancti Luciani Ecclesia (“God’s Salvation” as shown on the mural) – South
When this is complete, there will be the sound of gears but there aren’t any more doors to open. You’ll know it worked though, as you can see on the altar that the trinity symbol has slid aside to reveal the roman numeral III. Head back to the room with the Ring of Sigils and grab the Sword Scepter. Head back to the tomb, planting it in the hole in front of the sword mural to reveal the last inscription, and of course one more photo opportunity.
Adventure Note #49: Sword Mural (10 AP)
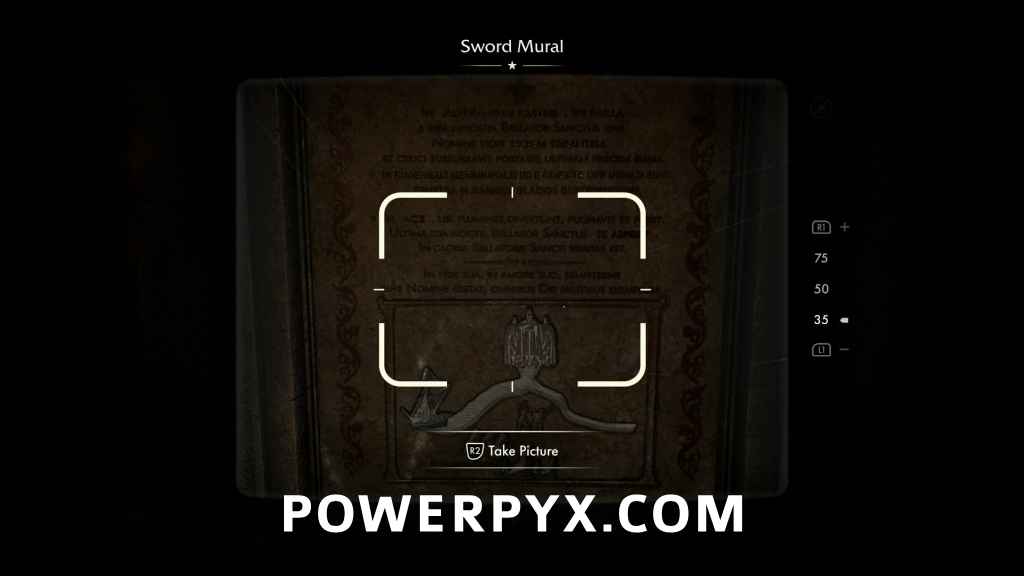
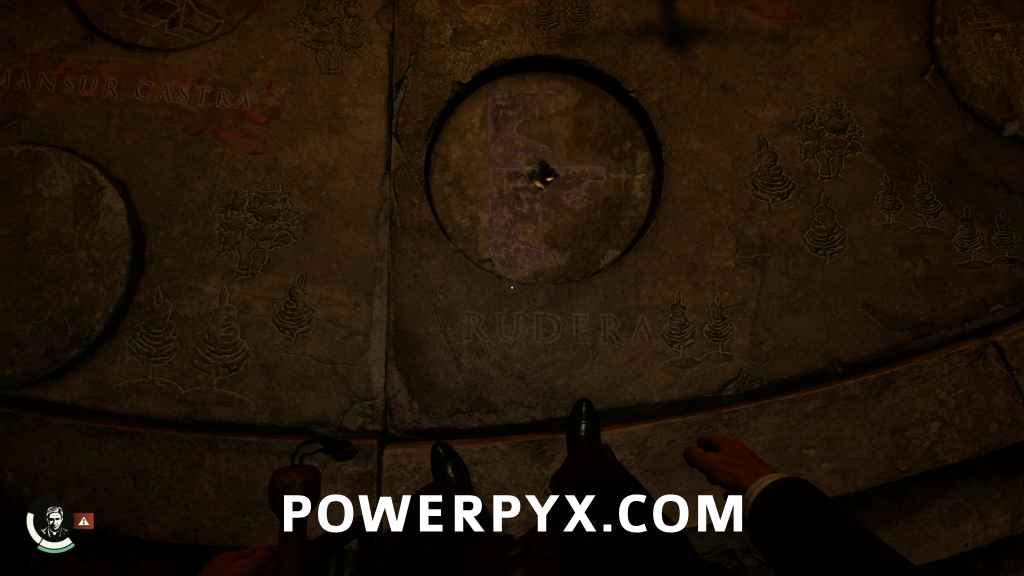
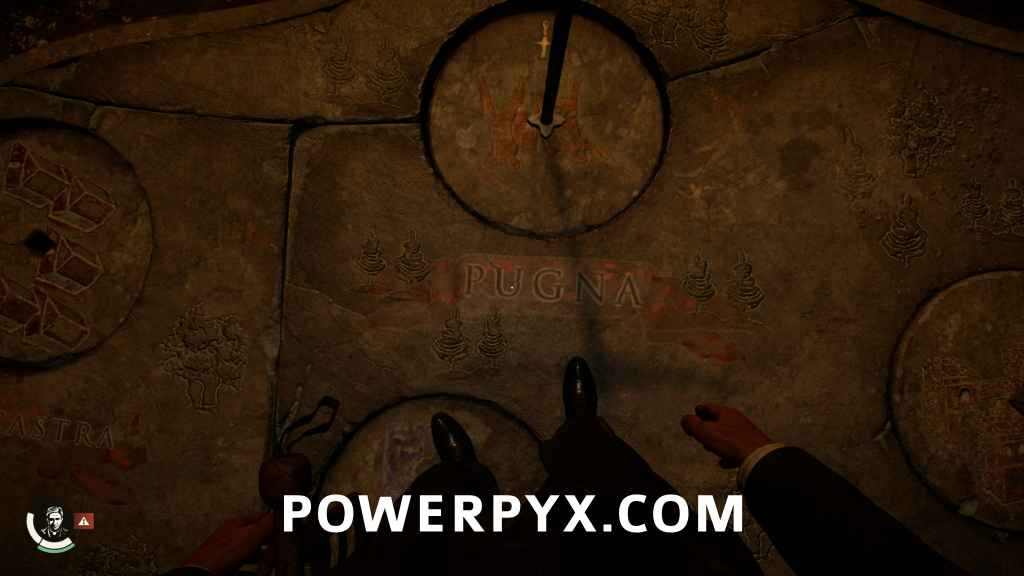
The fourth inscription reads: “At Camp Al-Mansur, with all hope gone, on the river far away, the Nameless Crusader watched a ship drift by, and whispered to the cross what might be his last prayer. In ruins south, they were attacked from the east. They drew their swords in vain. On the battlefield where rivers divided, he fought and fell. And on his final night, the Crusader faced himself. In glory lies the Crusader’s truth. His faith that carried, his love that burned. Nameless he remains, an example for all God’s warriors.”
Sword Mural Solution:
Al-Mansur Castra (Camp Al-Mansur) – West
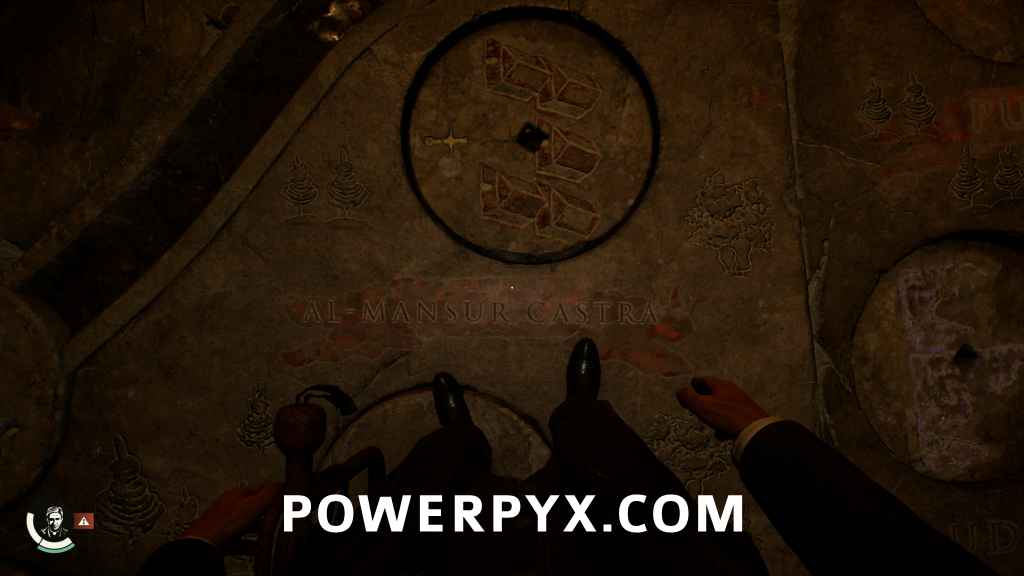
Rudera (Ruins) – East
Pugna (Battlefield) – North
The answer to the third clue might be cryptic until you look up and see the massive stone statue of Gibborim looming over you to the “north”.
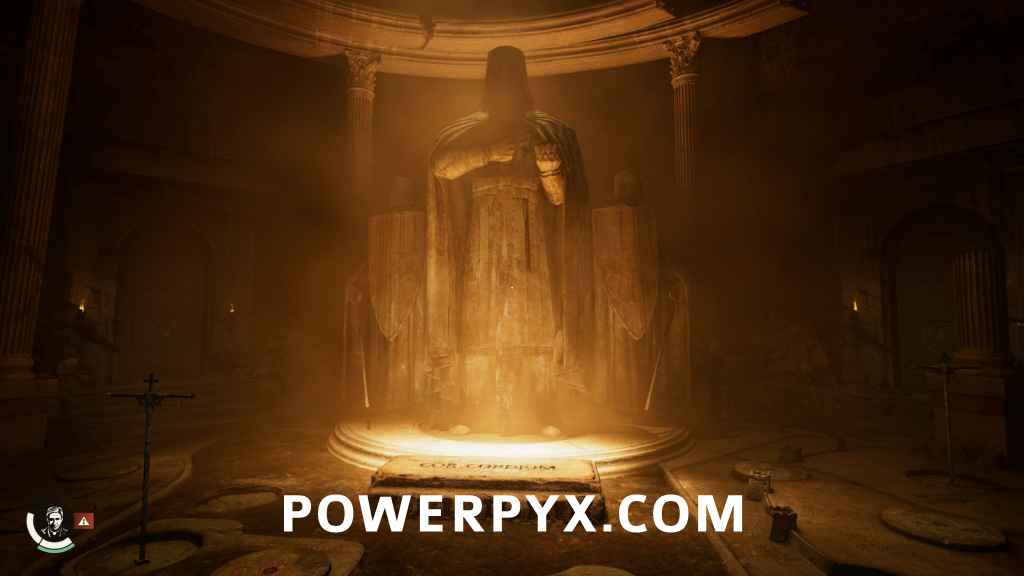
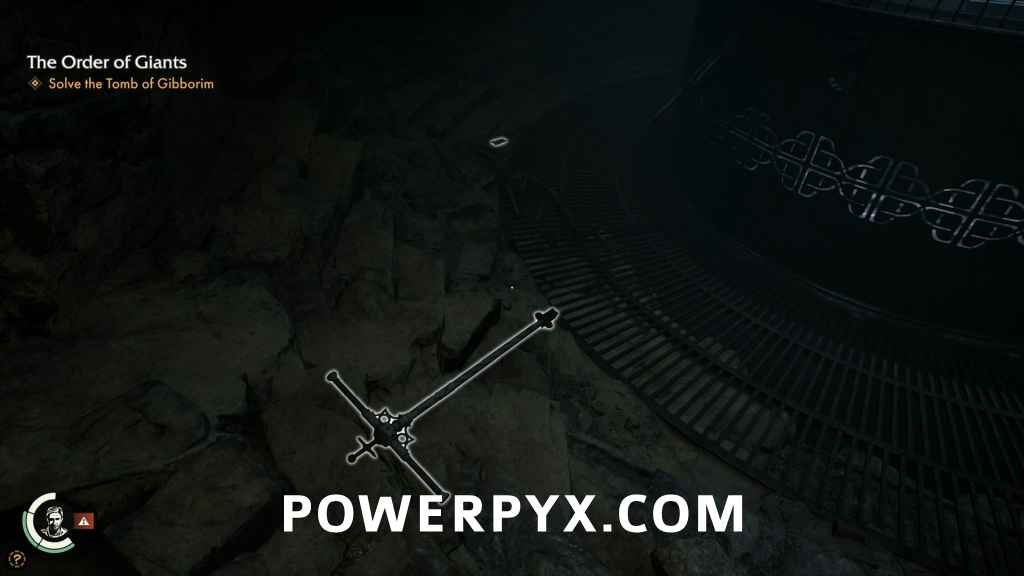
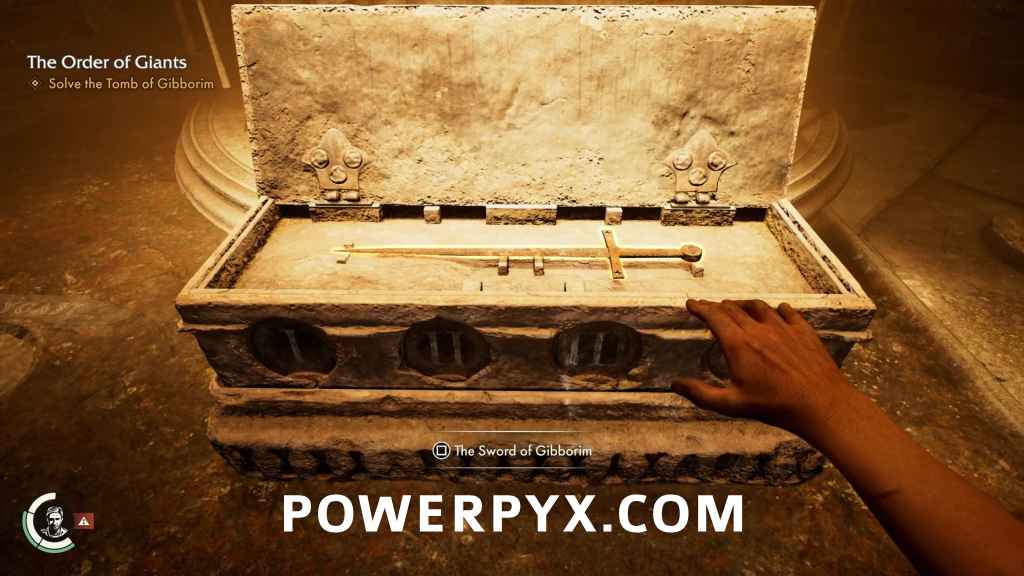
After completing the fourth mural puzzle, the top of the altar will open to reveal the Sword of Gibborim. Pick it up, and the statue will start to sink into the ground.
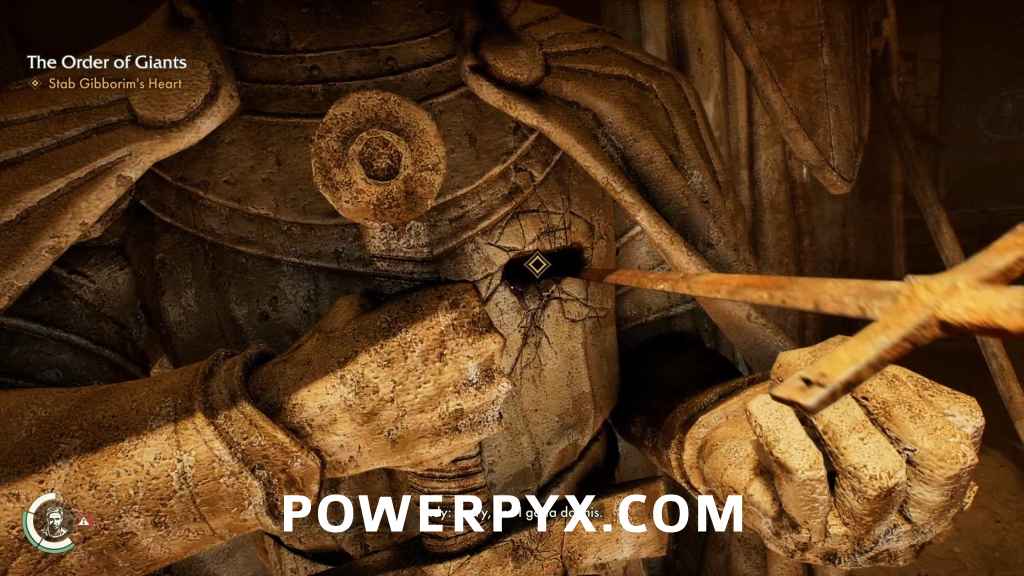
Stab Gibborim’s Heart
Once the statue as at your level, approach it and you’ll see an interaction prompt at a hole in its chest. Use the sword to stab Gibborim’s statue and his hand will open to reveal the third and final cylinder piece.
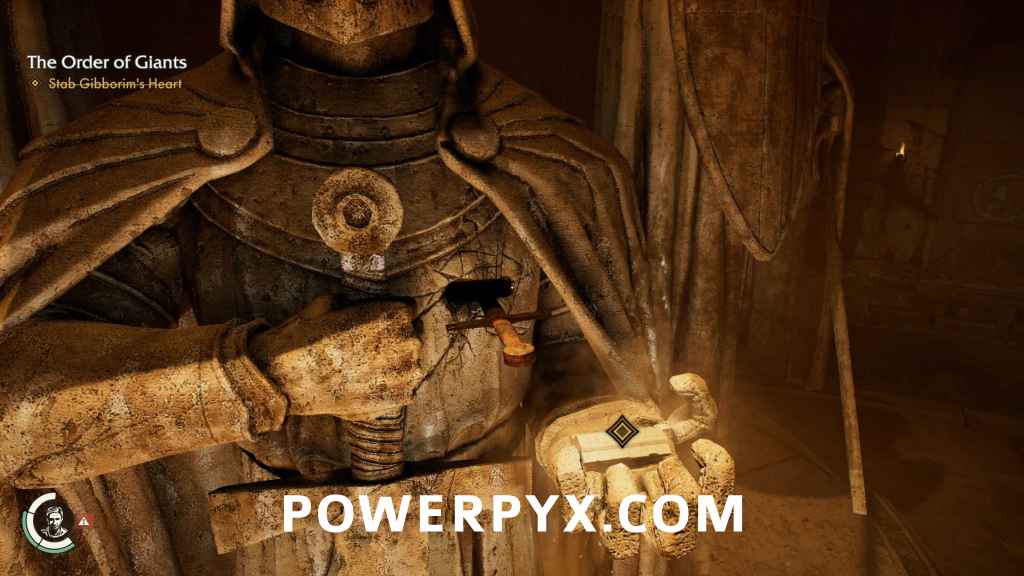
Take the Cylinder Piece
Take it and the statue will begin to rise. Don’t hesitate though, because there will be cultists that come to investigate the sound of stones grinding.
Adventure Note #50: The Tomb of Gibborim Solution (15 AP)
For more information, including a walkthrough, solutions to all puzzles and the location of all collectibles, see The Order of Giants Collectible Walkthrough.
Leave a Reply