
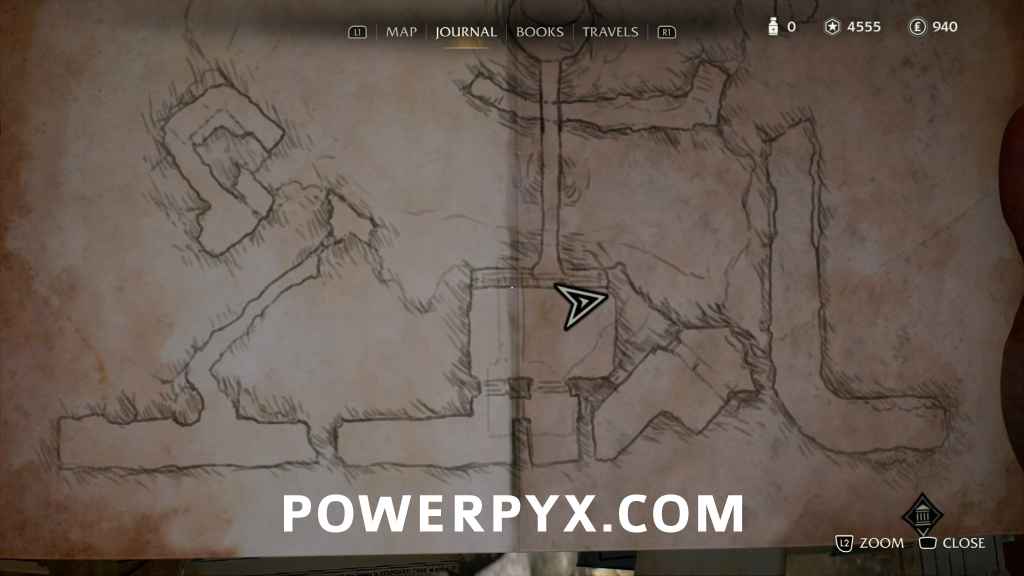
Here you can find a full Indiana Jones: The Order of Giants DLC Walkthrough for 100% Completion that includes all Collectible Locations. By following this you will earn all trophies & achievements. Indiana Jones and the Great Circle: The Order of Giants DLC has 118 Journal Notes, 7 Mithraic Artifacts, and 3 Mysteries. Unlike the base game, there are no individual missions but a single story mission that encompasses the entire DLC from start to finish. Difficulty is on par with the base game but puzzles can be significantly more difficult, particularly if you haven’t made a point of collecting every Journal Note along the way.
A Mystery Begins
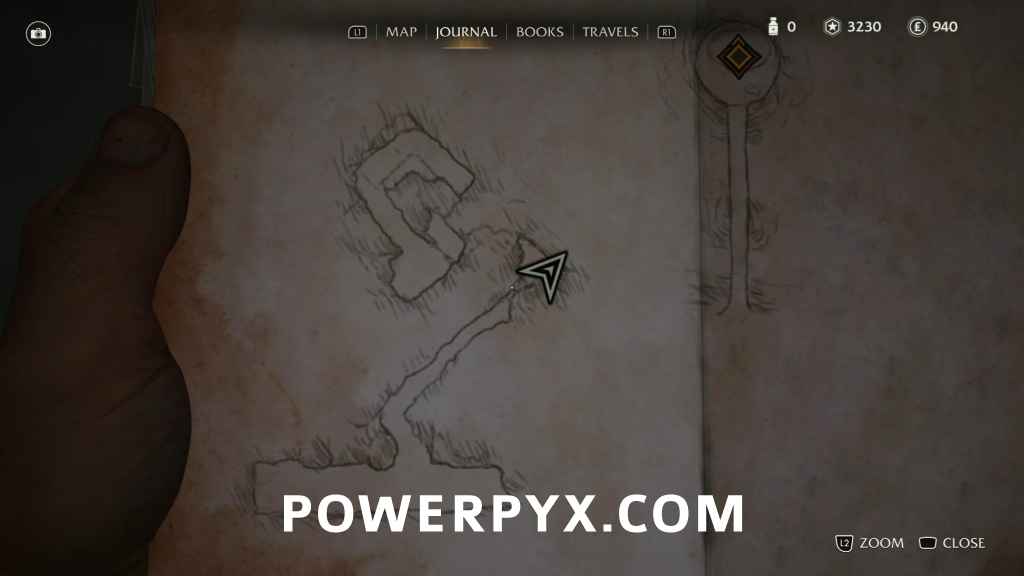
After loading your game, you’ll receive a pop-up directing you to go back to the Vatican to embark on a new journey. Just outside the Fountain of Confession you’ll find Father Ricci seemingly arguing with a parrot named Pio.
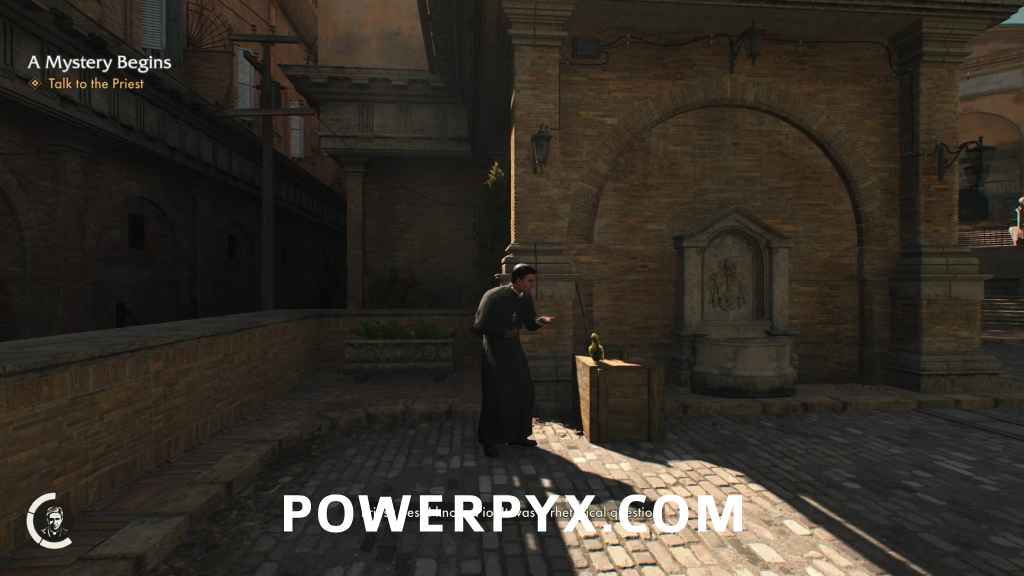
Recognizing you as a friend of Father Antonio, he asks for your help to investigate the legend of the Nameless Crusader, and tells you about a hidden chamber beneath the Casina where Pope Paul IV had proof of the crusader’s existence, the Nameless Crusader’s helmet. Before he could find the entrance, he was kicked out by Father Ventura and now he is being forced out of the Vatican. He tells you that his parrot Pio will fly in and unlock a window to his office, where you’ll find a key to the Casina. When you’ve found the chamber, he tells you to not disturb the site and to meet him at his house across the river.
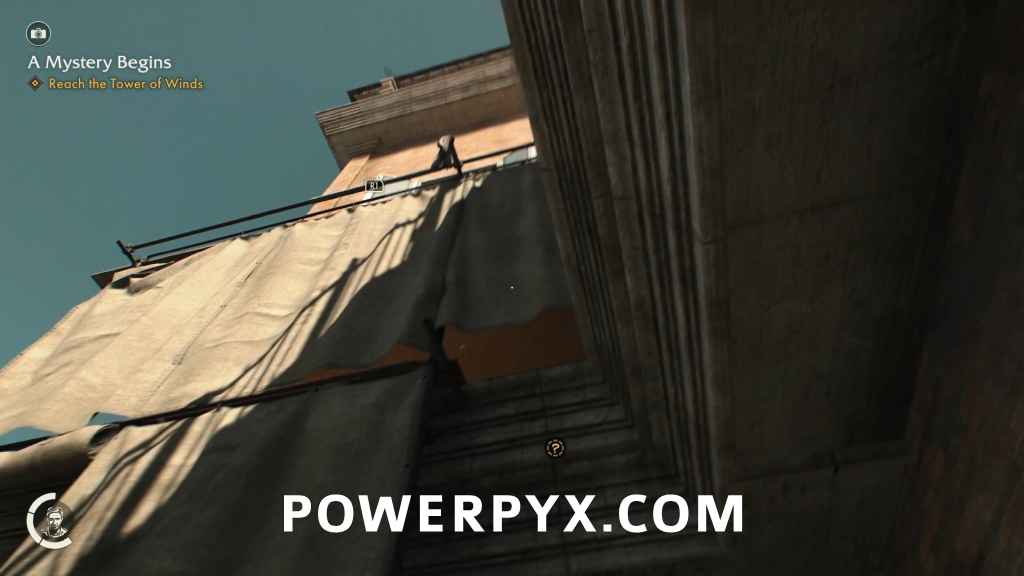
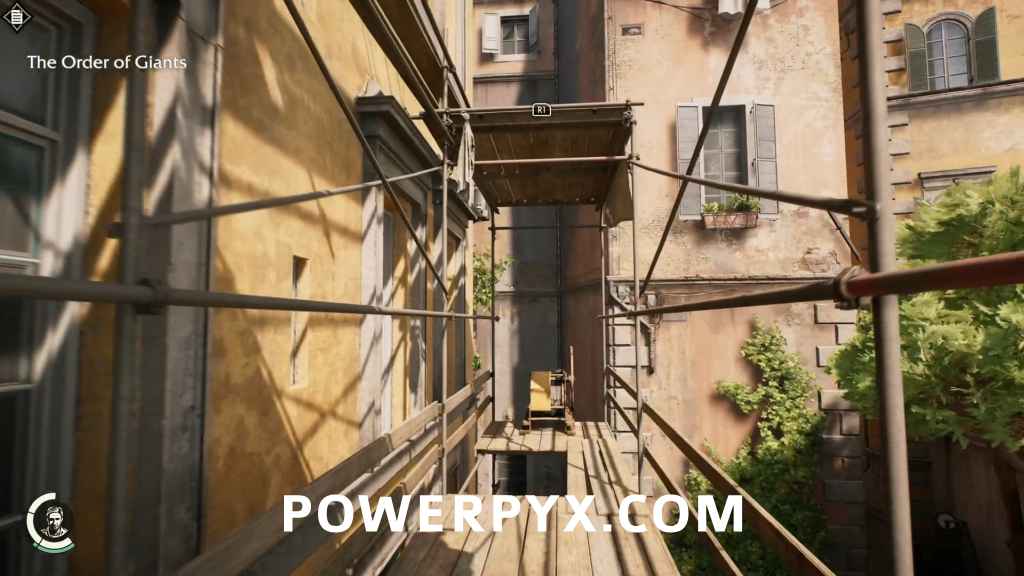
Reach the Tower of Winds
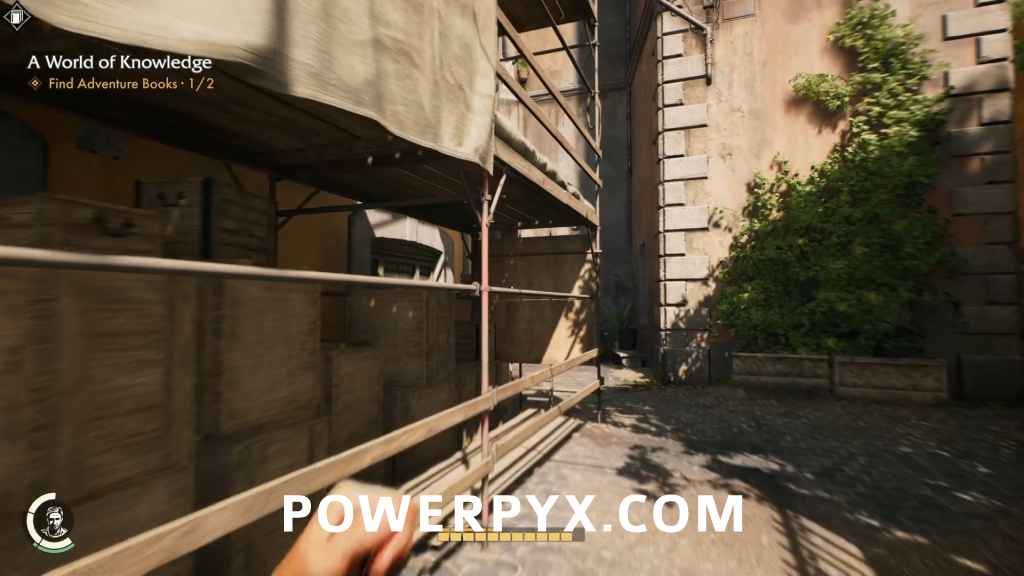
Head east to the Security Barracks and climb up the scaffolding against the south wall. Pio will follow you as you climb, letting you know you’re going in the right direction. Grab the edge and climb up, then go up the ladder.
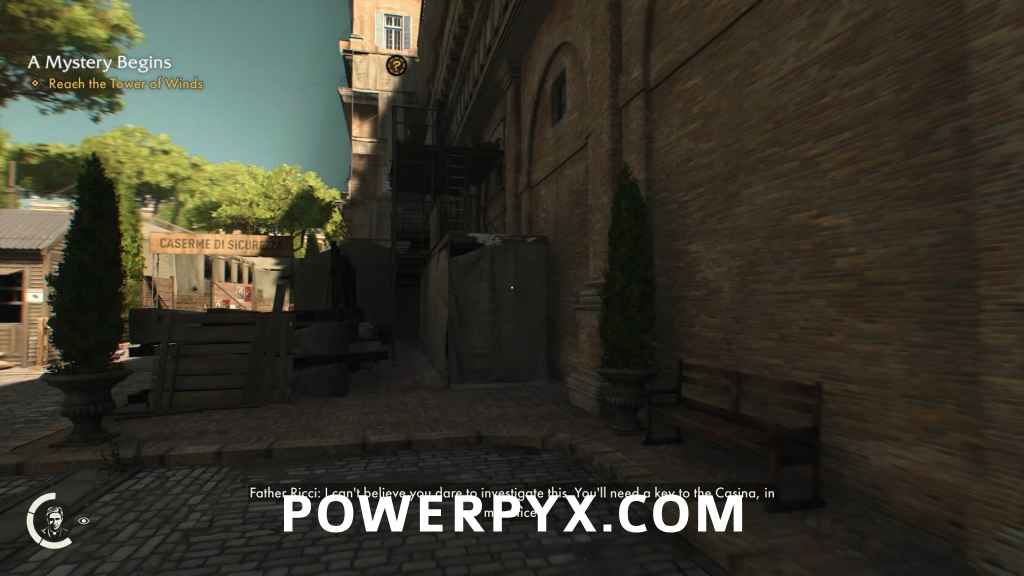
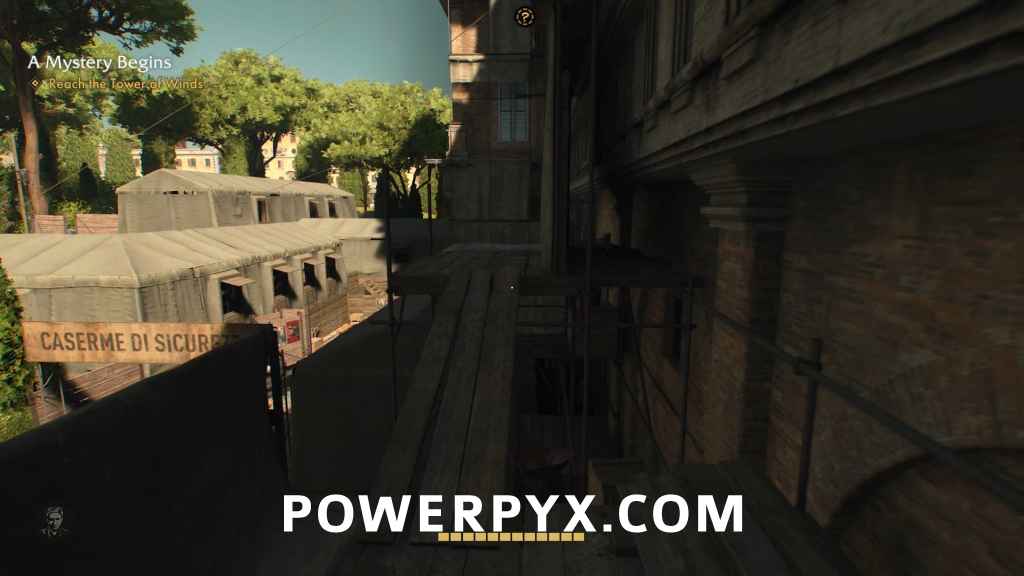
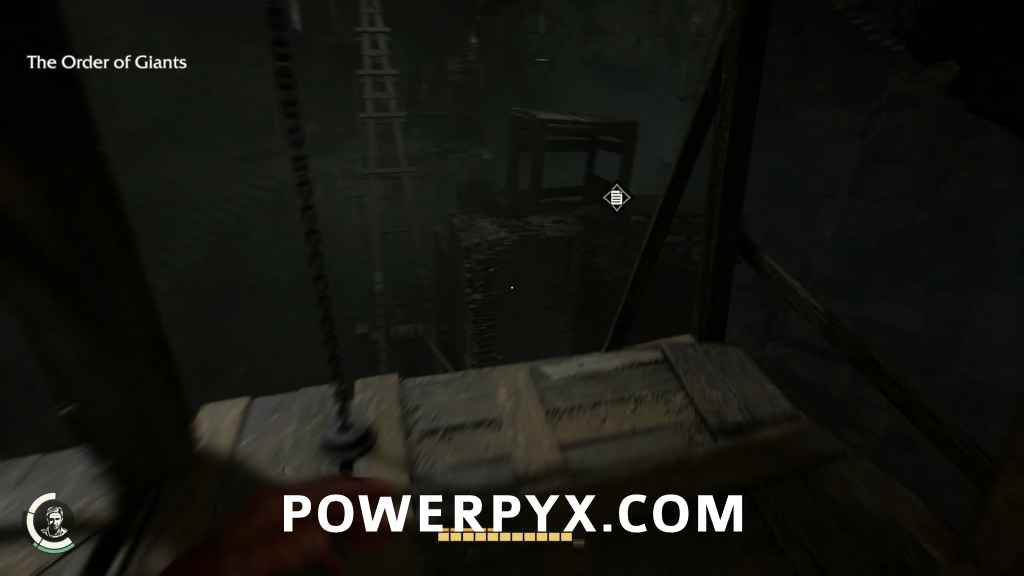
Walk across the planks to another platform, then turn right and climb up to the ledge above you. Turn left and continue to the east until you see a bar you can whip to above your head.

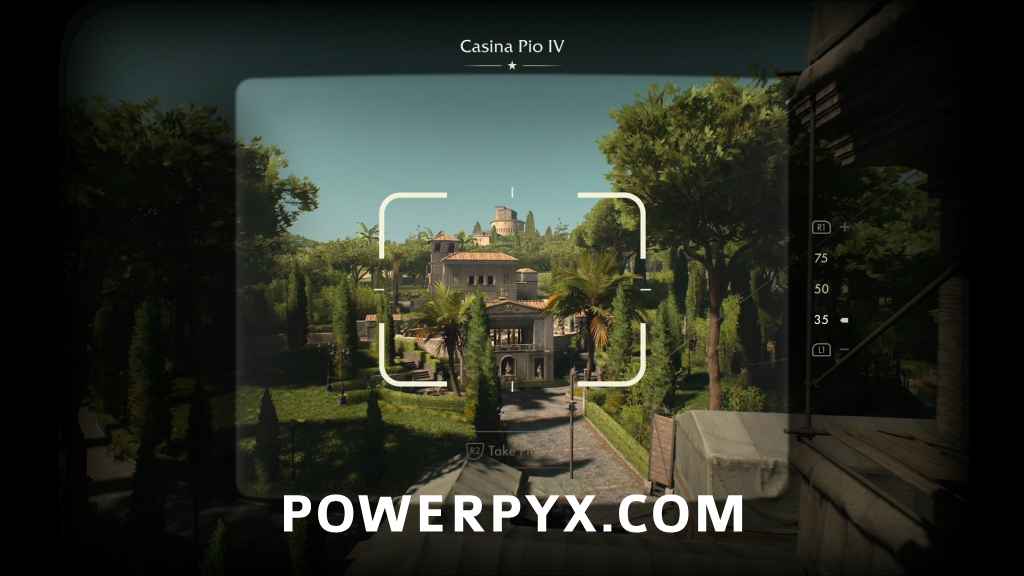
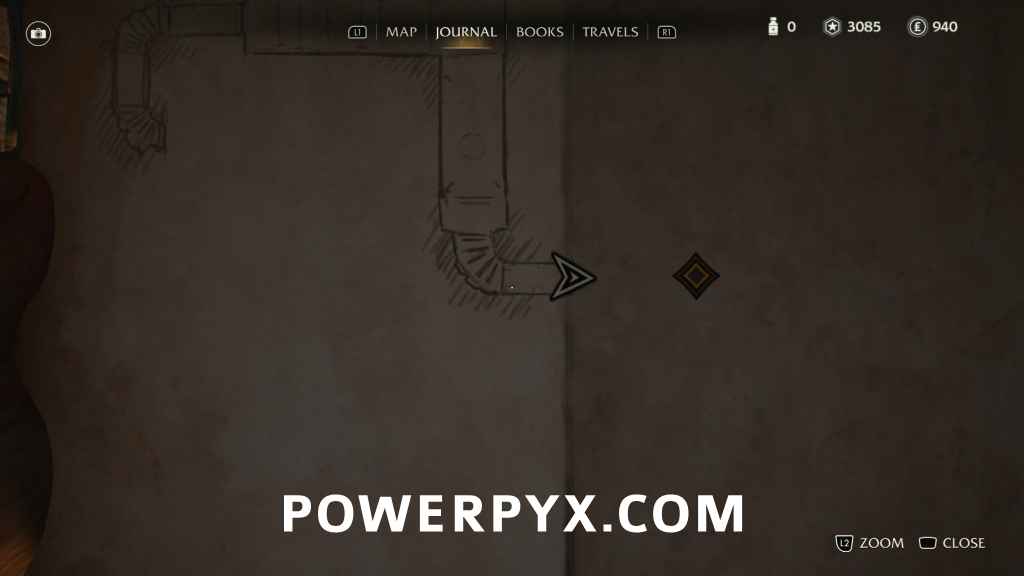
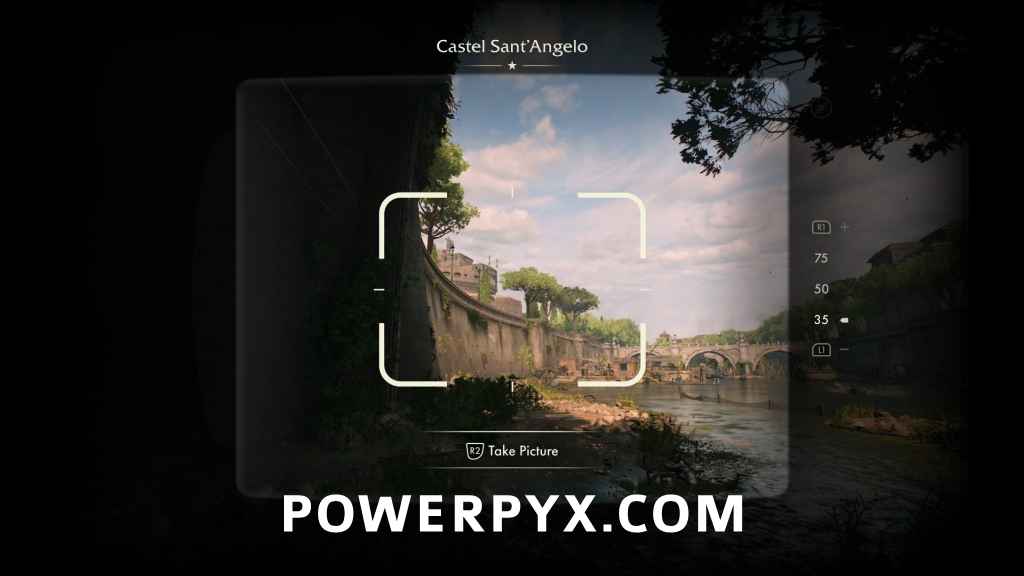
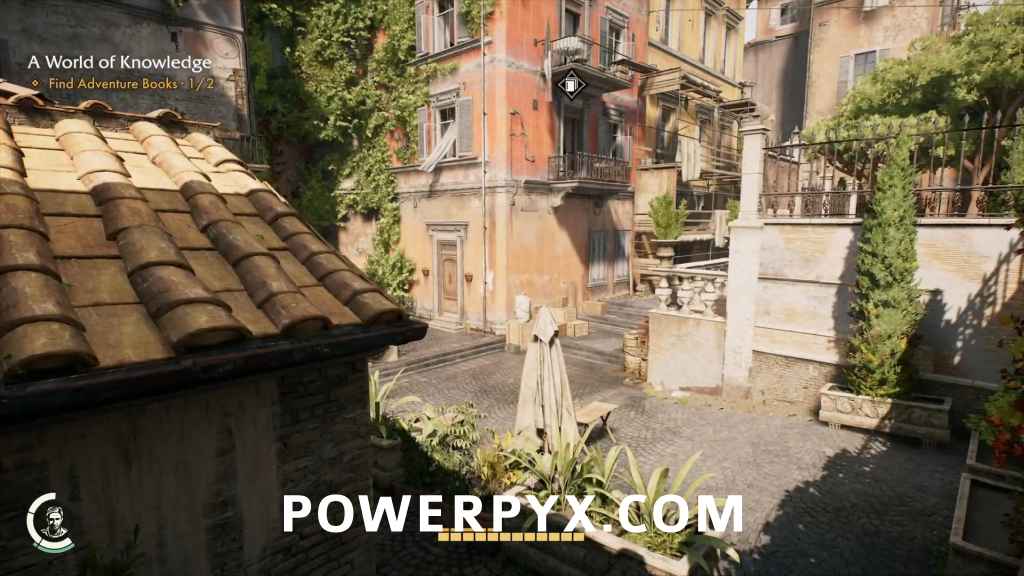
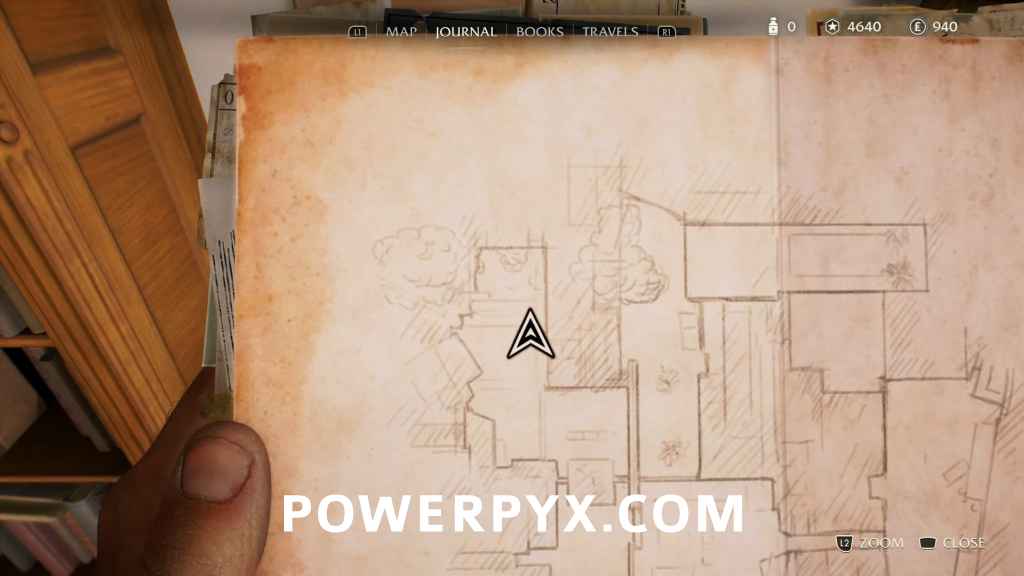
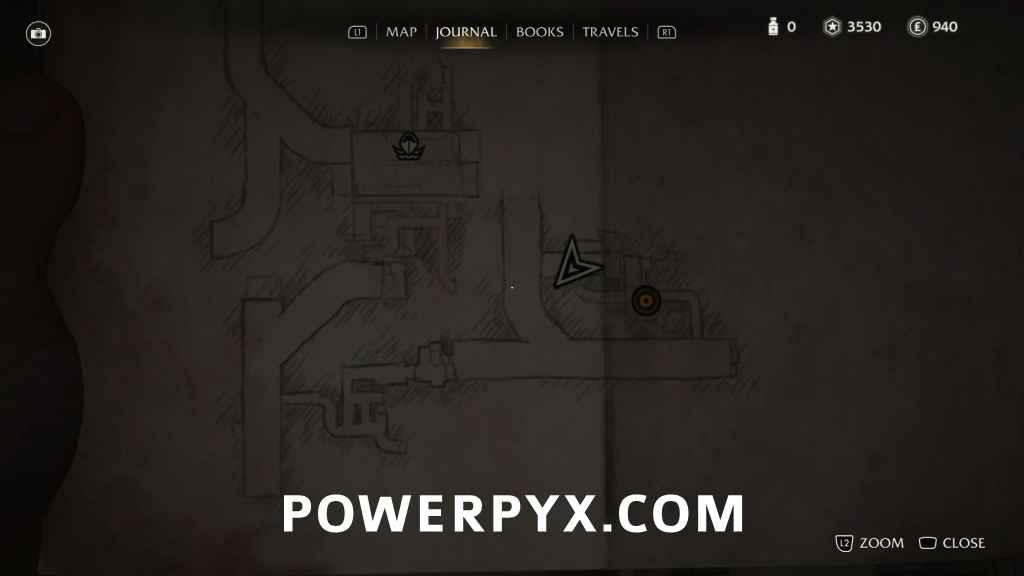
Climb up and look to the north towards the Casina to have a photo opportunity.
Adventure Note #1: Casina Pio IV (10 AP)
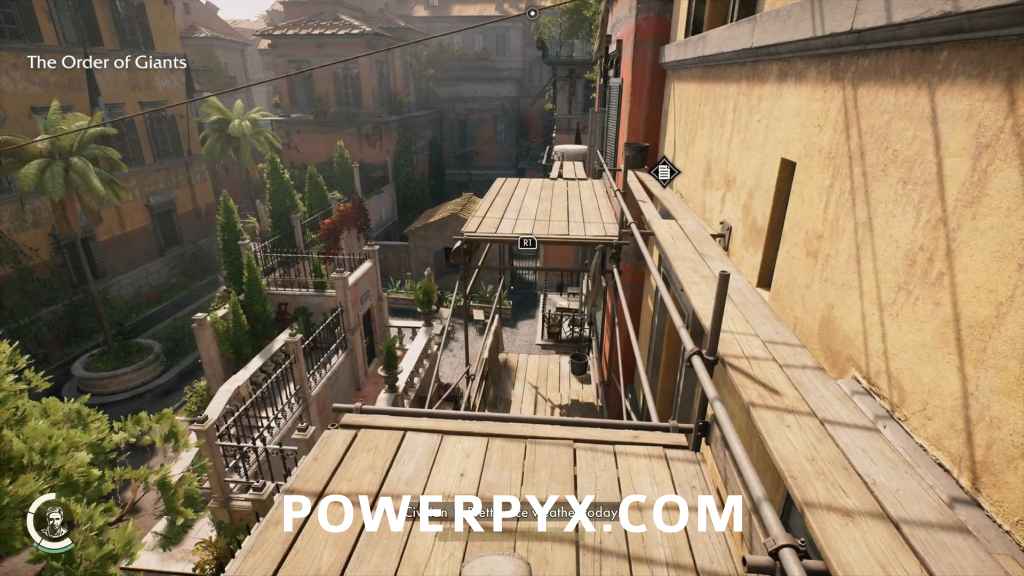
look up and to the east to find another bar that you can whip and climb up to.
Once at the top, enter the window in front of you to enter Father Ricci’s office.
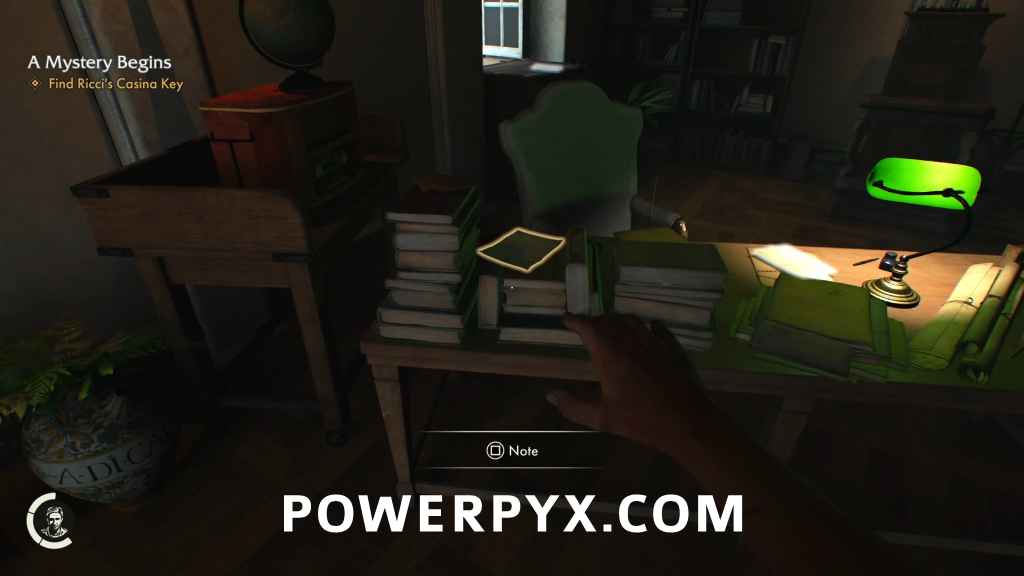
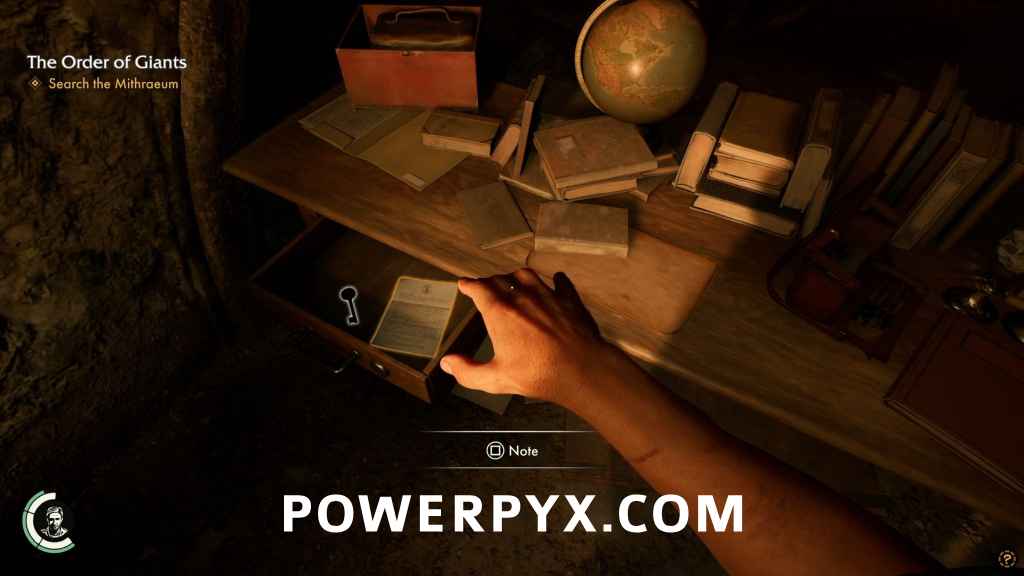
Find Ricci’s Casina Key
Turn left and look the pile of books beneath a window.
Adventure Note #2: Pasquinata (15 AP)

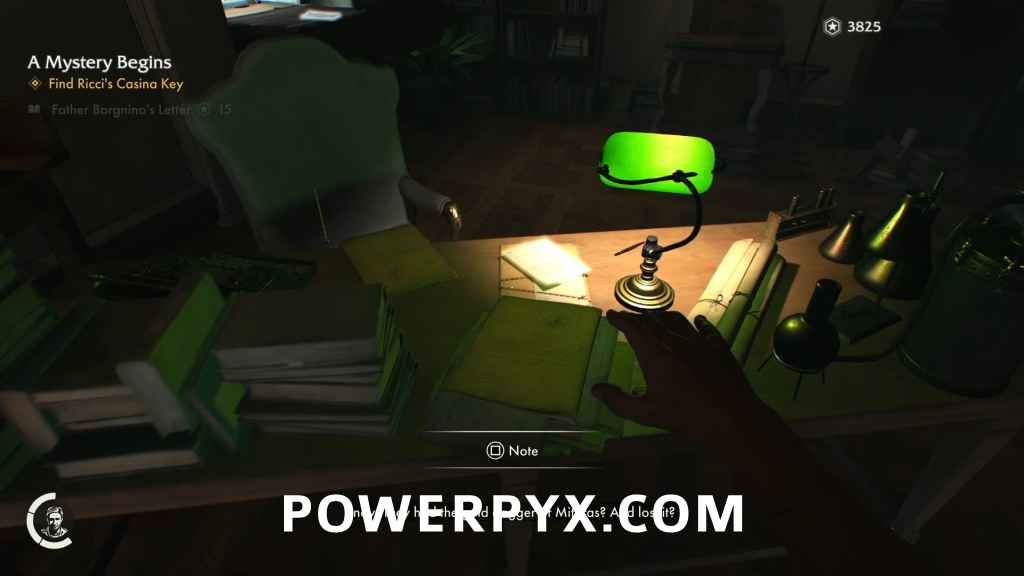
In the center of the room will also be a desk with a few more collectibles.
Adventure Note #3: Father Borgnino’s Letter (15 AP)
Adventure Note #4: A Letter of Warning (15 AP)

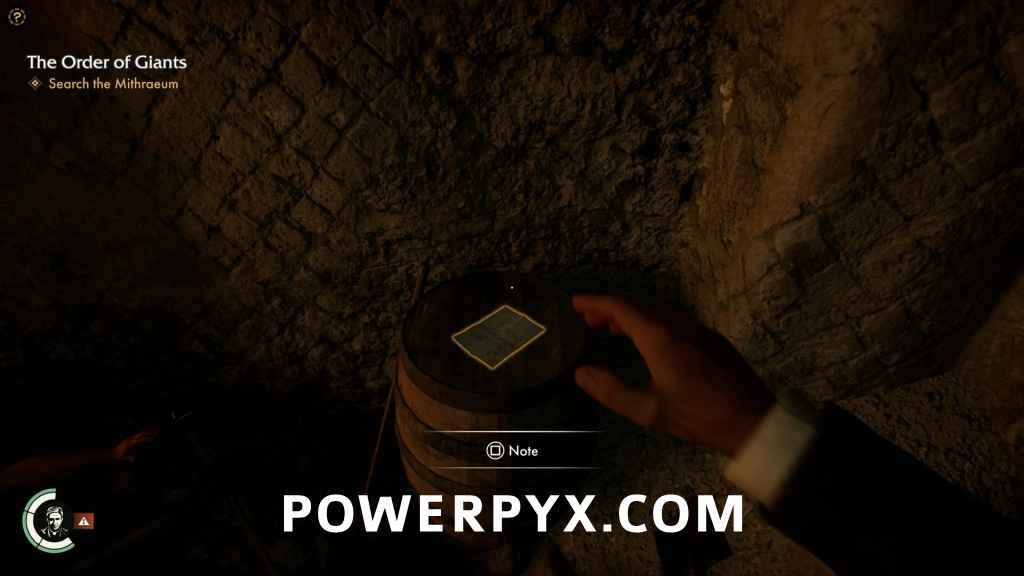
Look to the north near the window you’ll be exiting from to see another note on a chest.
Adventure Note #5: Research Note (15 AP)

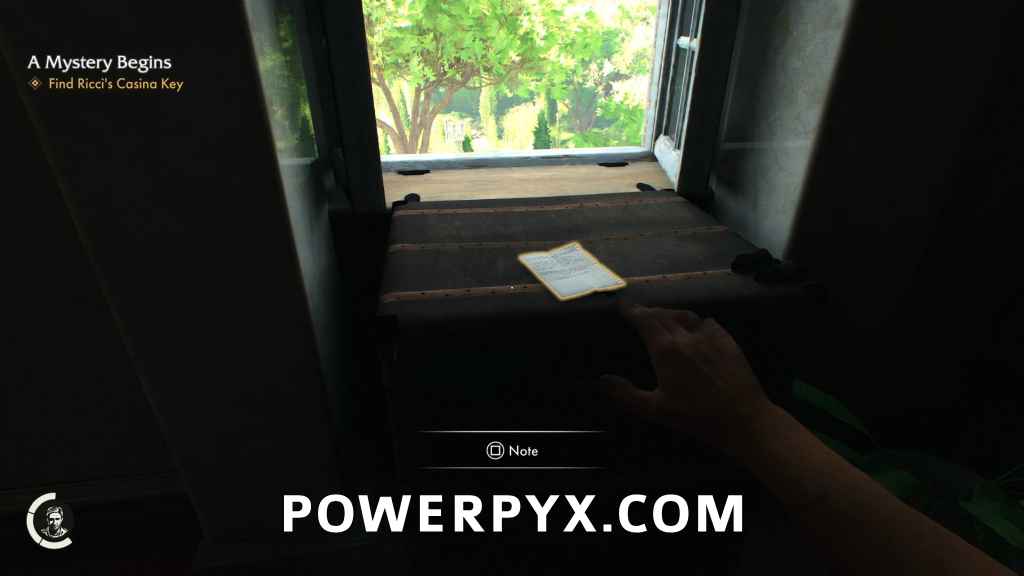
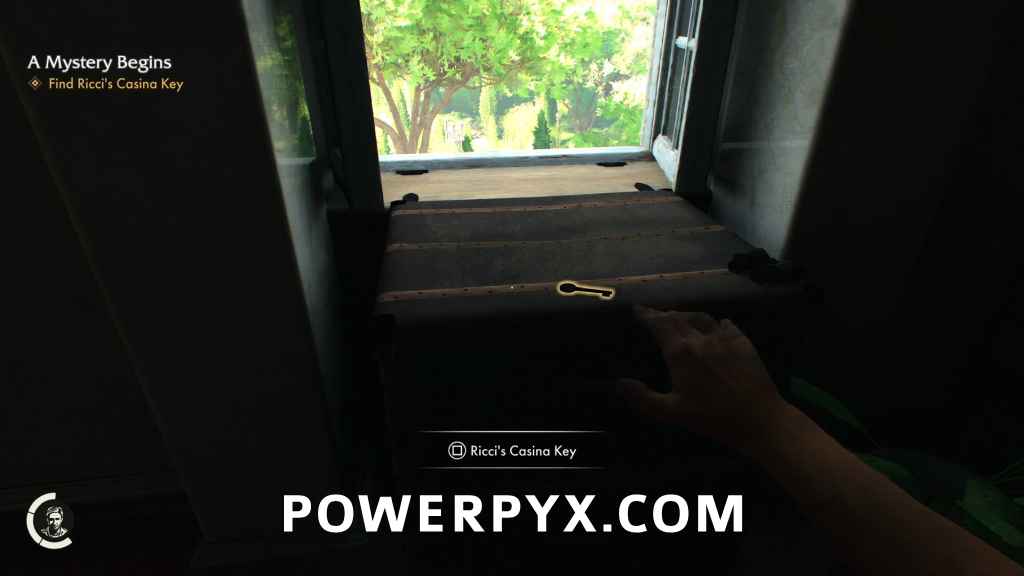
Beneath that note will be the key to the Casina.
KEY: Ricci’s Casina Key

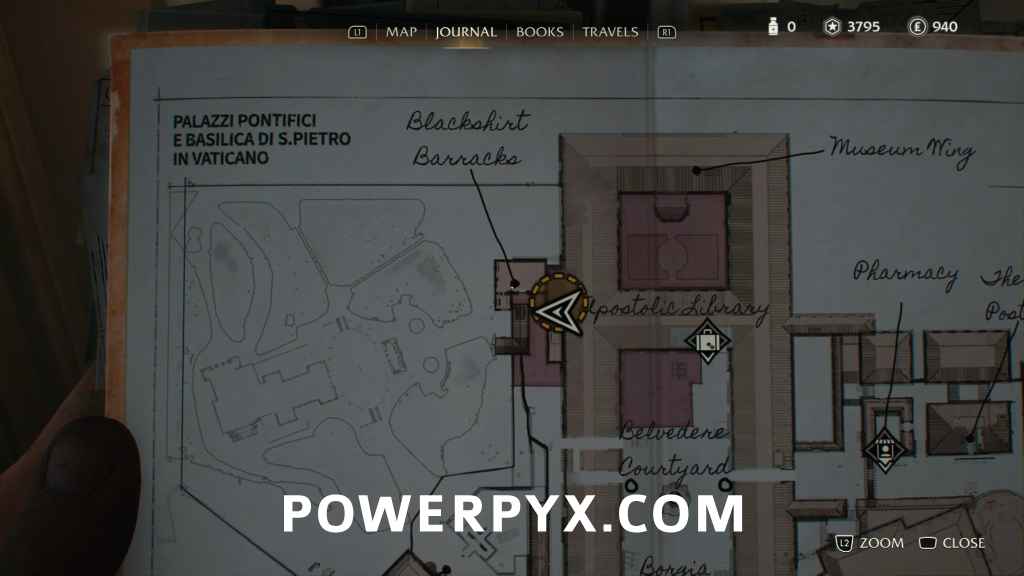
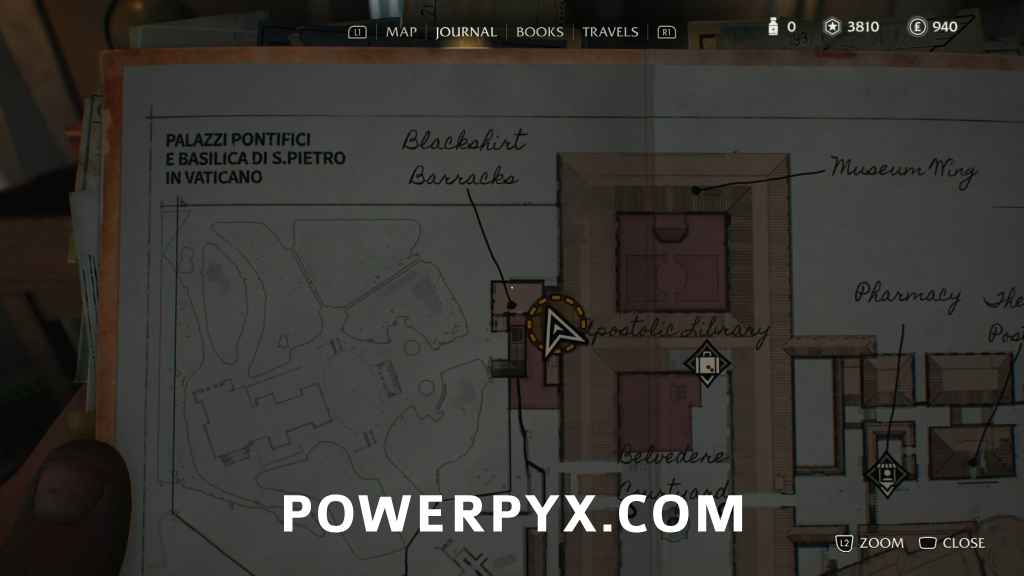
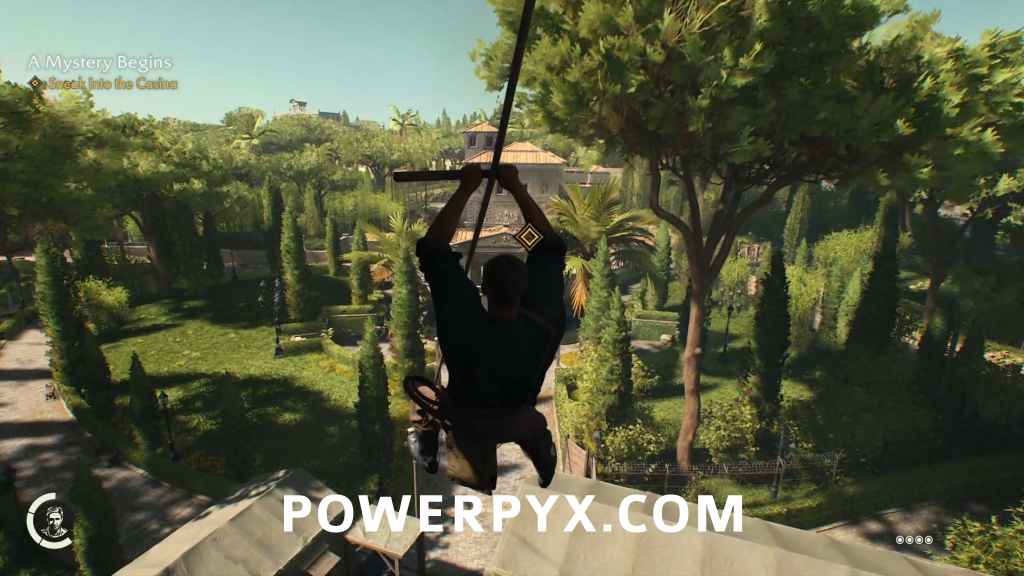
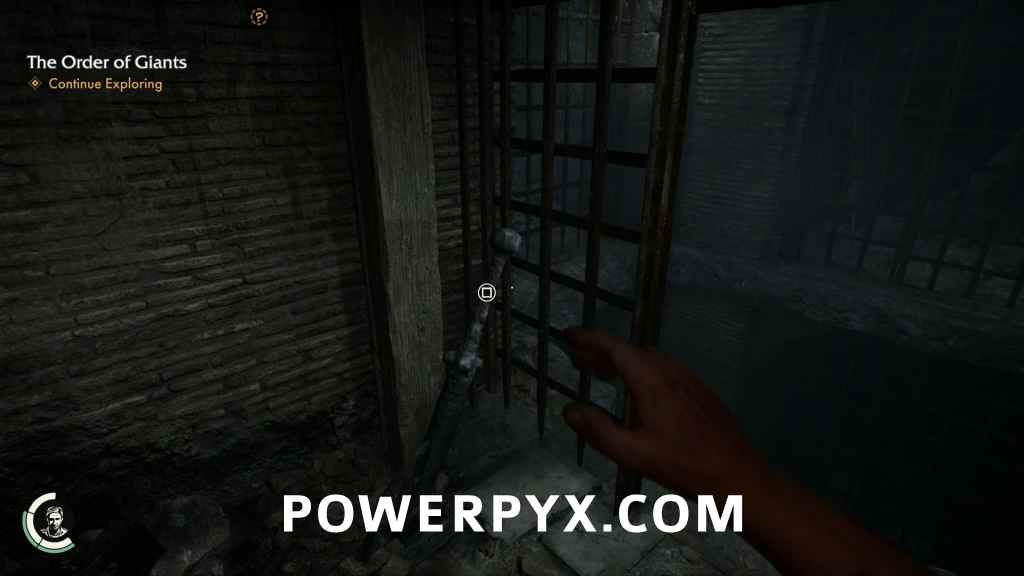
Sneak into the Casina
Go out the window and take the zipline down into the Casina grounds.
Before you progress, turn around and find the Barracks key hanging on a nearby post. Unlock the door to your east to save you trouble if you have to backtrack here during cleanup.
KEY: Barracks Key

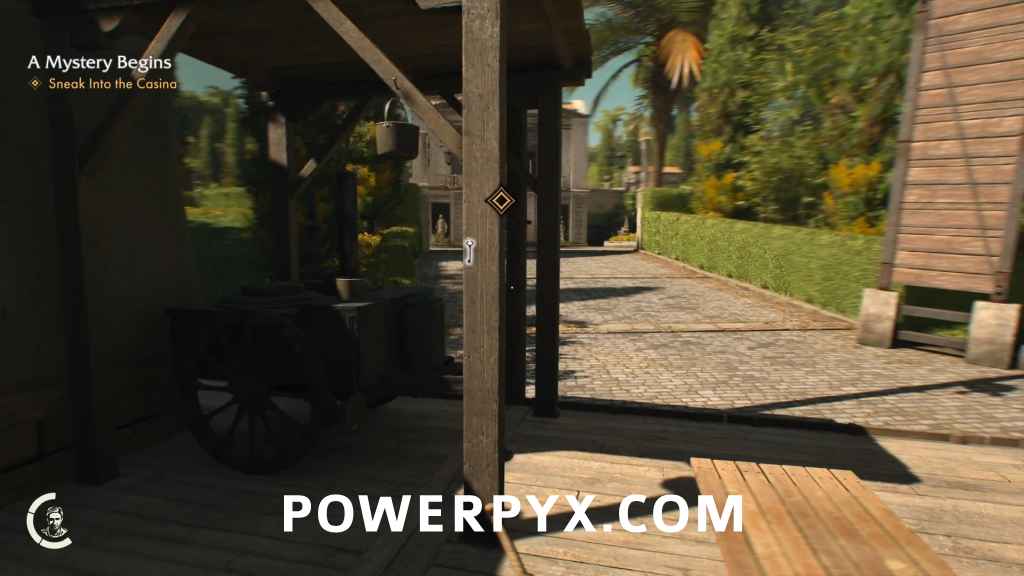
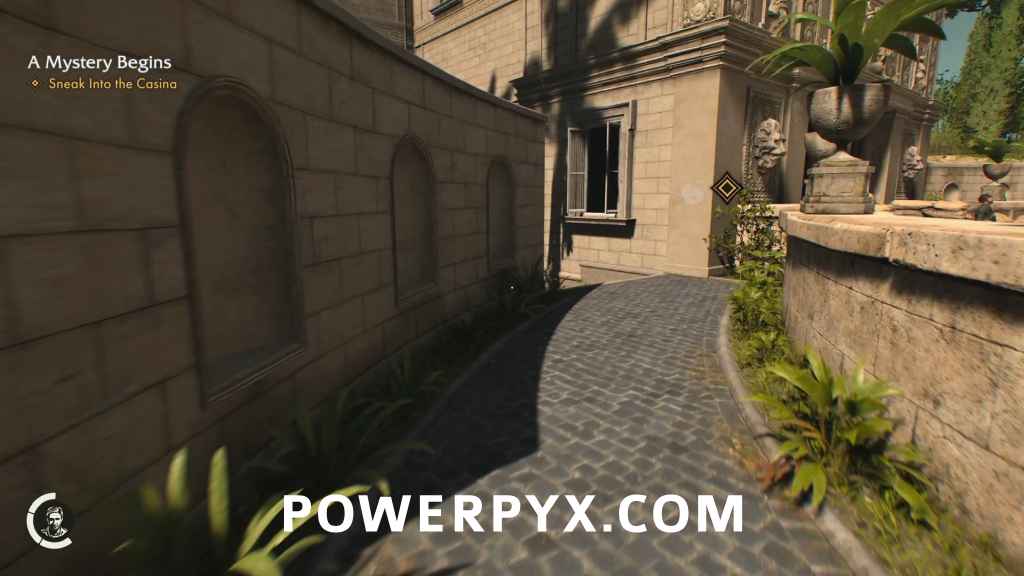
Wear your Blackshirt disguise to save yourself some difficulty, and head towards the door to the Casina. Watch out for the captain that is patrolling the courtyard. Either avoid his attention, or go through the side window to the portico and quickly use Ricci’s Casina Key to unlock the door and slip inside before he sees you. Once inside, you’ll get the  Locked Doors Hide Secrets trophy.
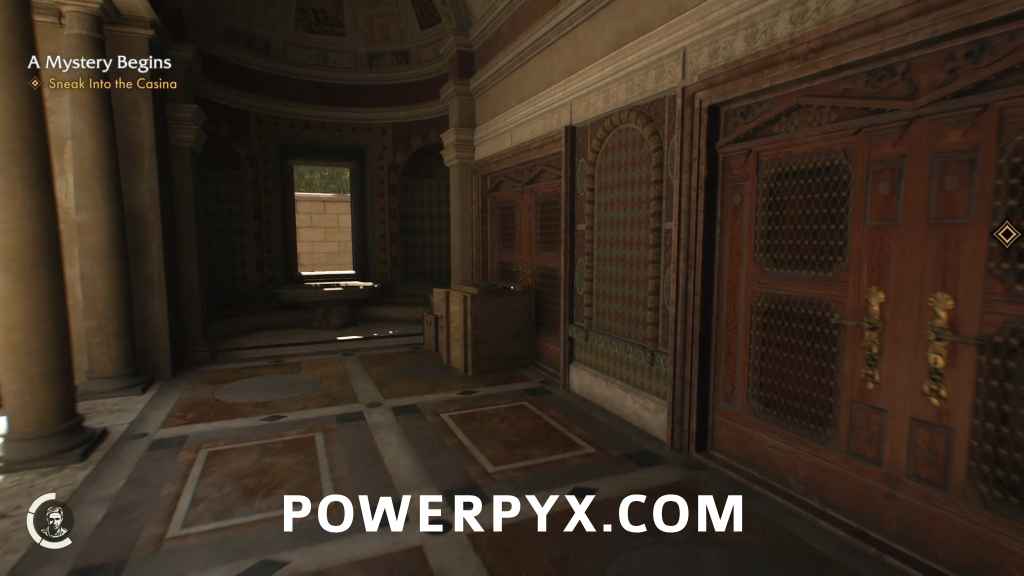
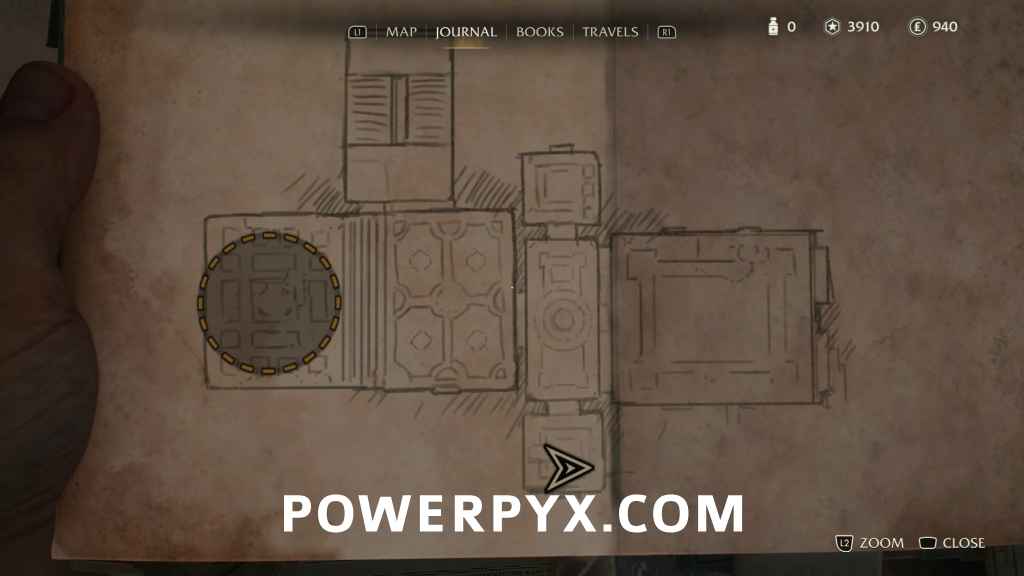
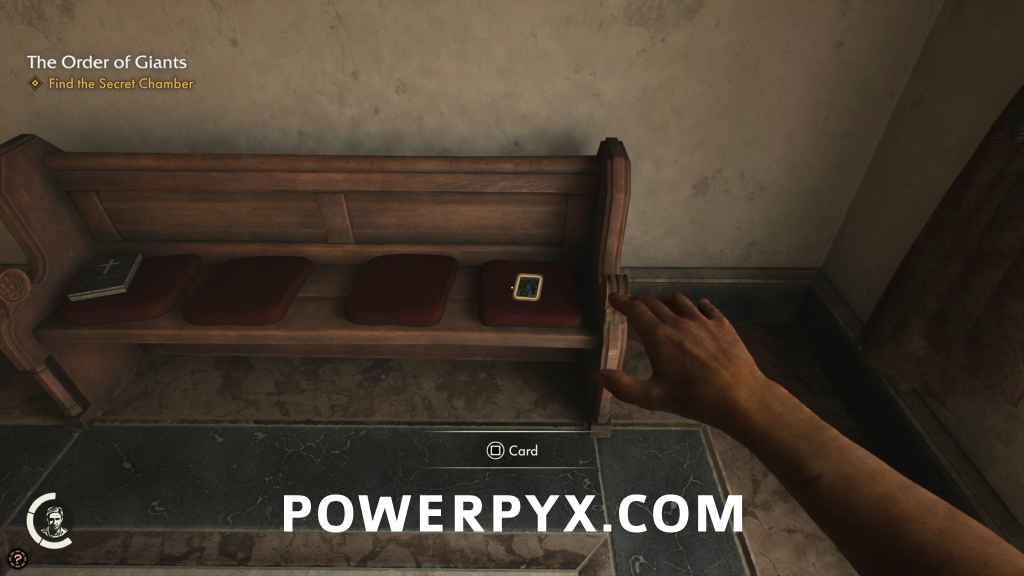
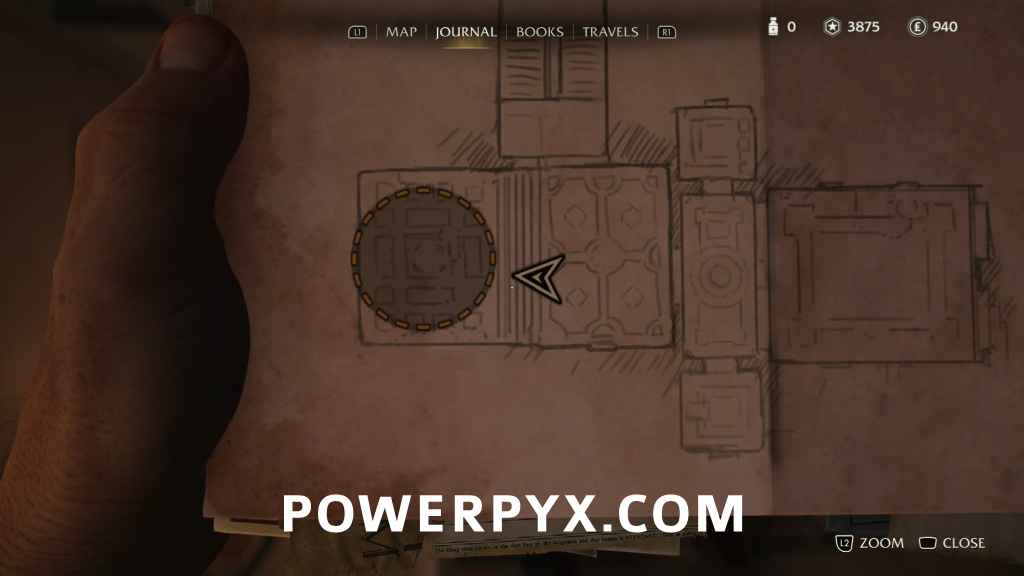
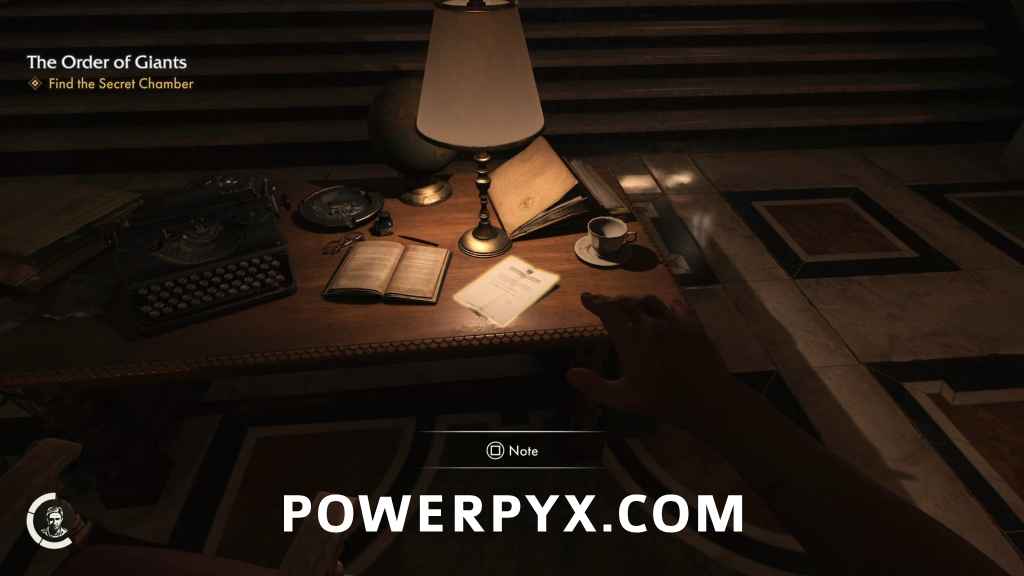
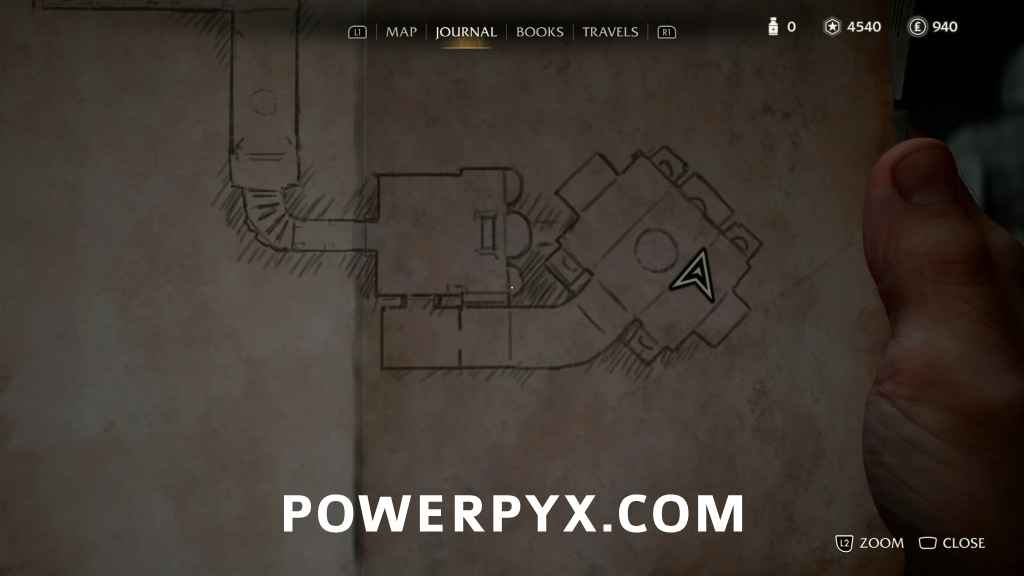
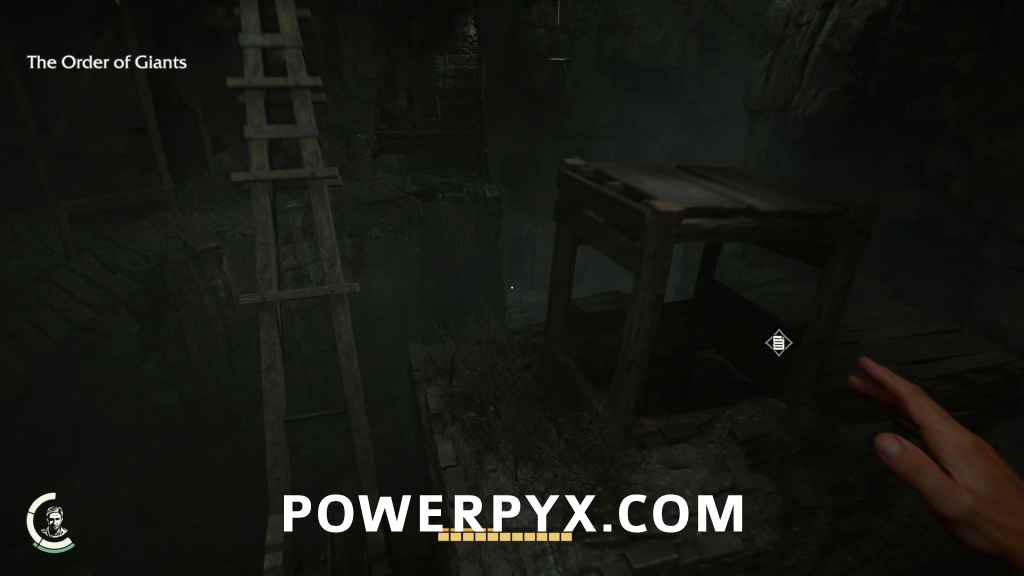
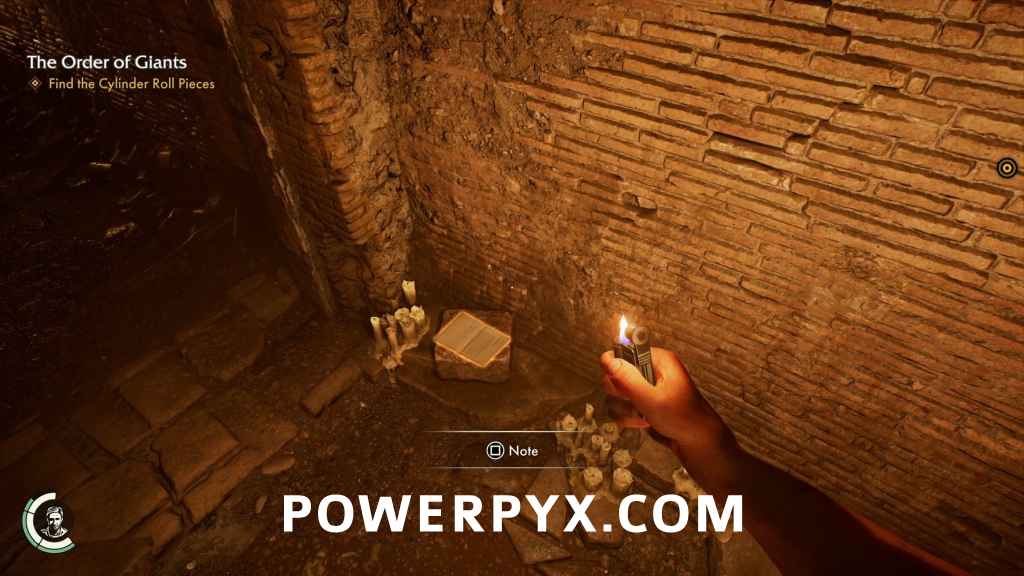
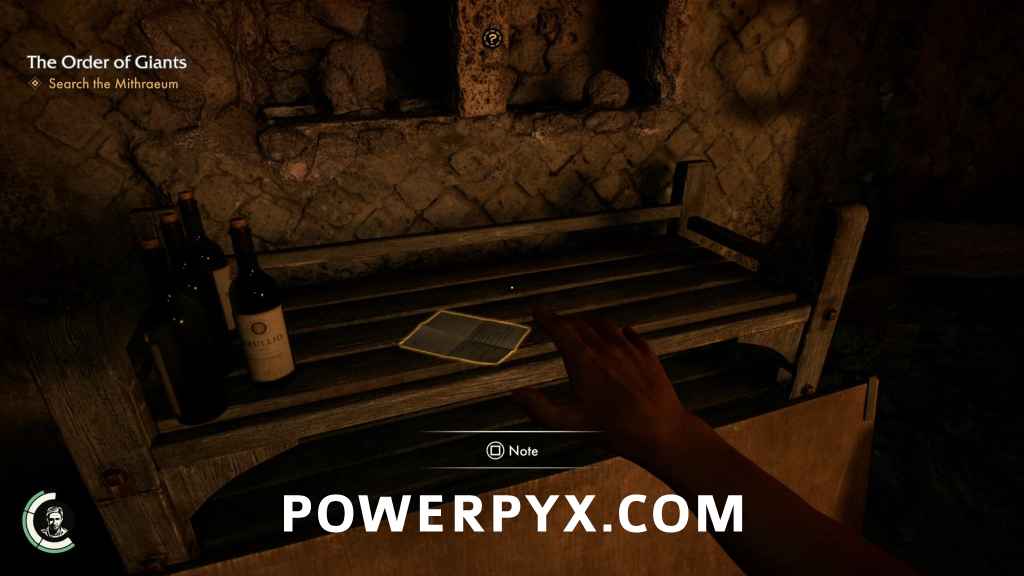
Find the Secret Chamber
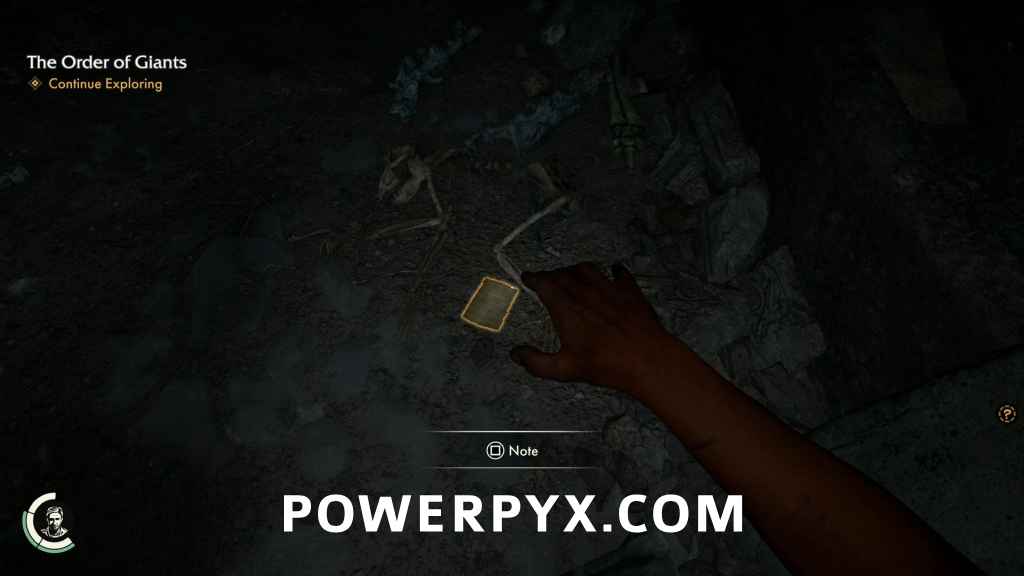
Along the south wall, you’ll find a small writing desk with a bench along the opposite wall. Look on the bench to find a card.
Discovery Note #1: Death Card (15 AP)
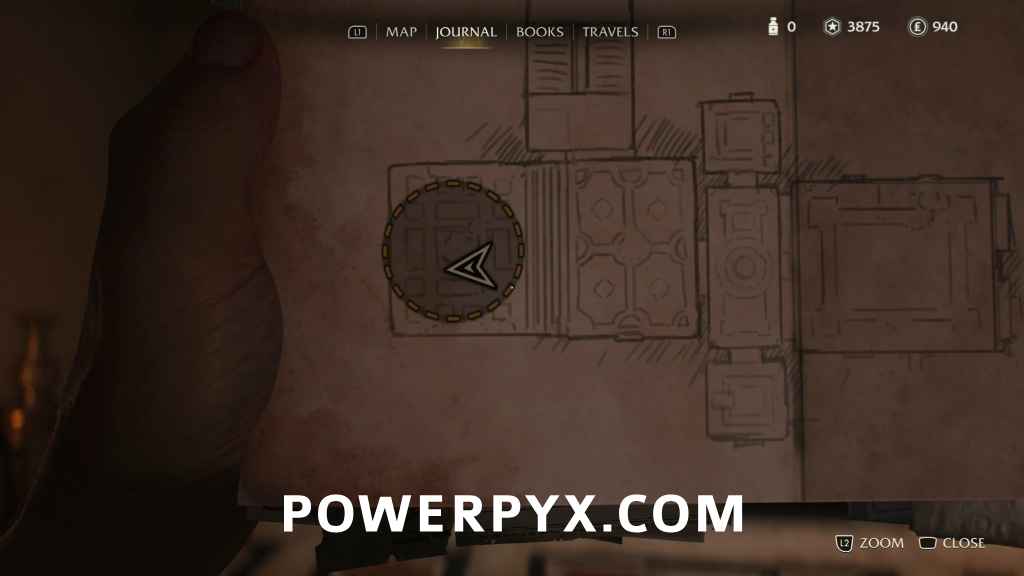
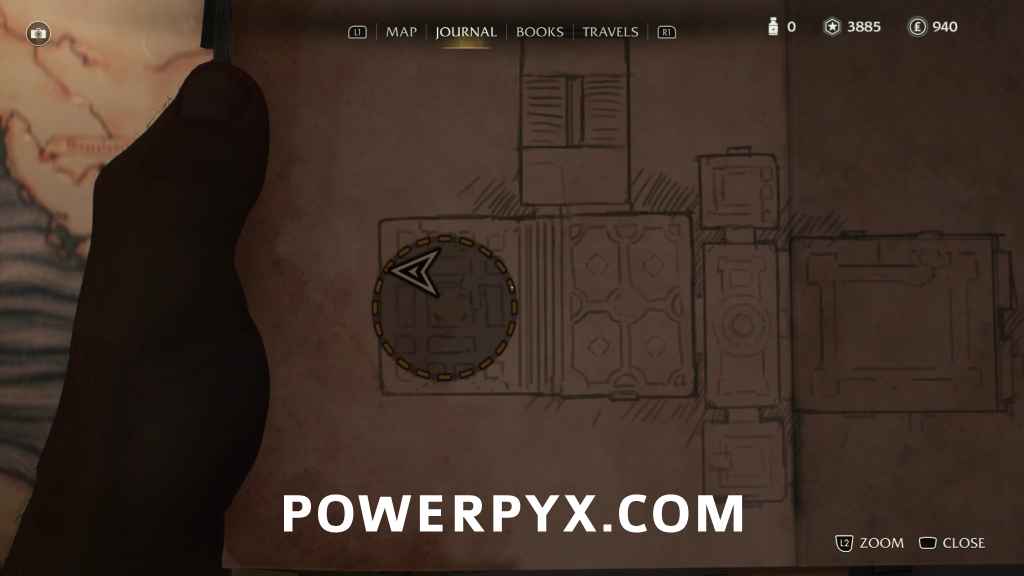
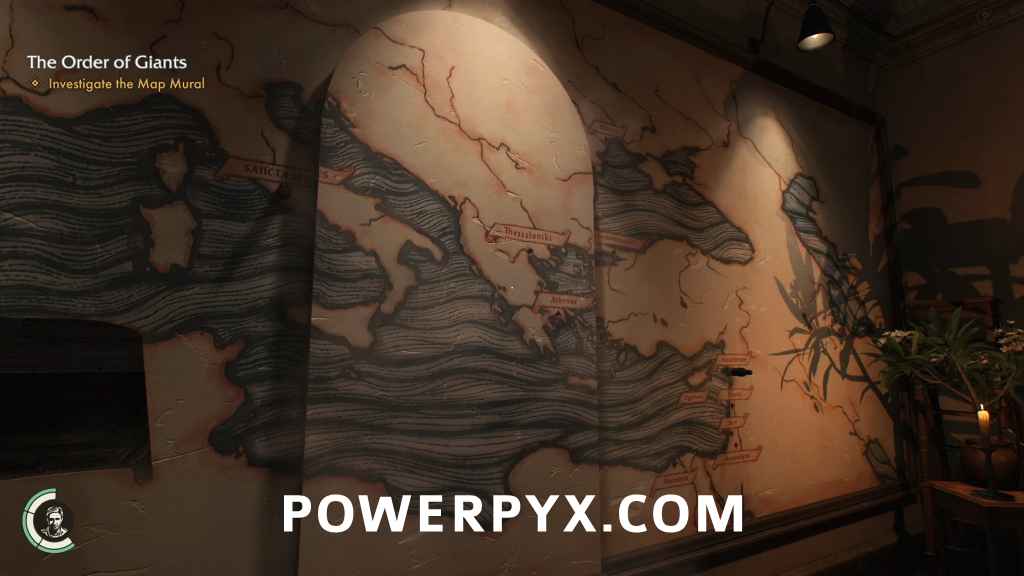
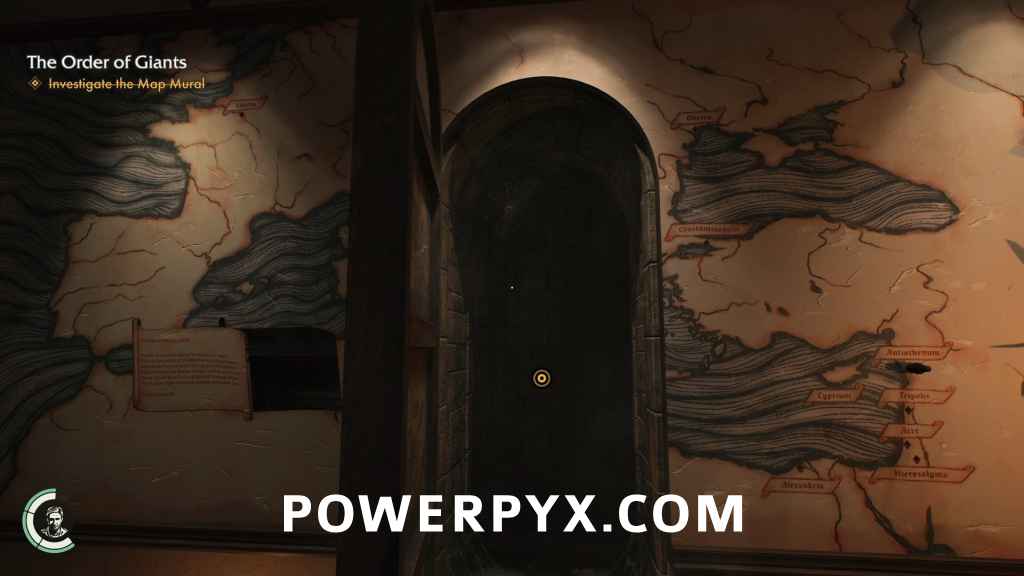
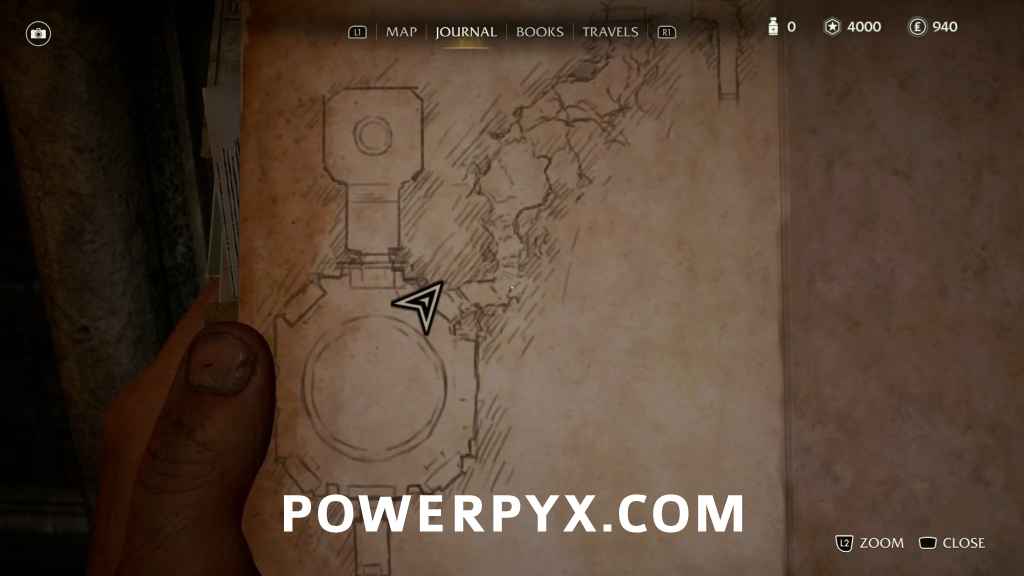
Follow the waypoint to the west to find a room with a large map of the Mediterranean on the wall. Just as you enter this room there will be a photo opportunity.
Adventure Note #6: Mediterranean Map Mural (10AP)
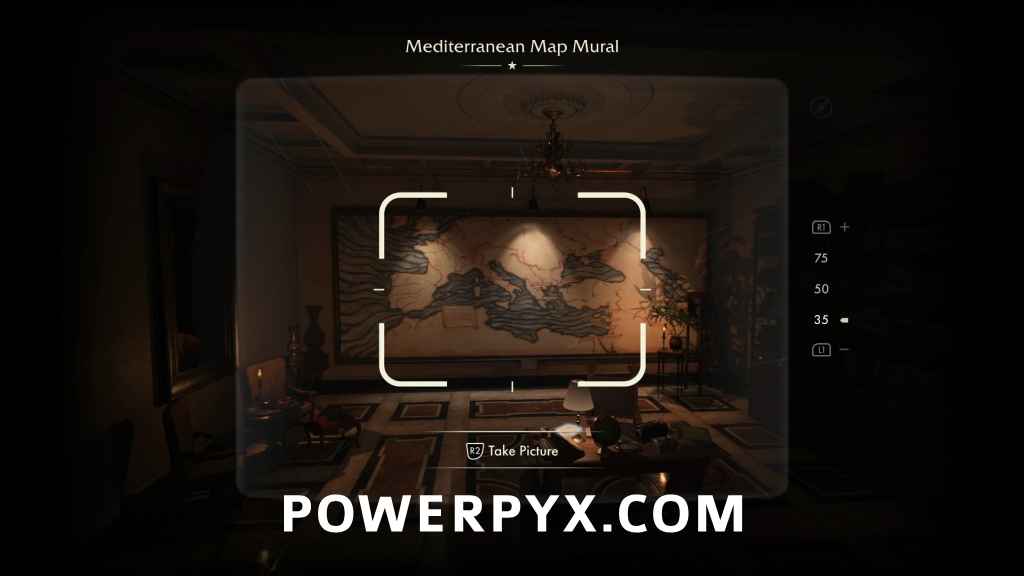
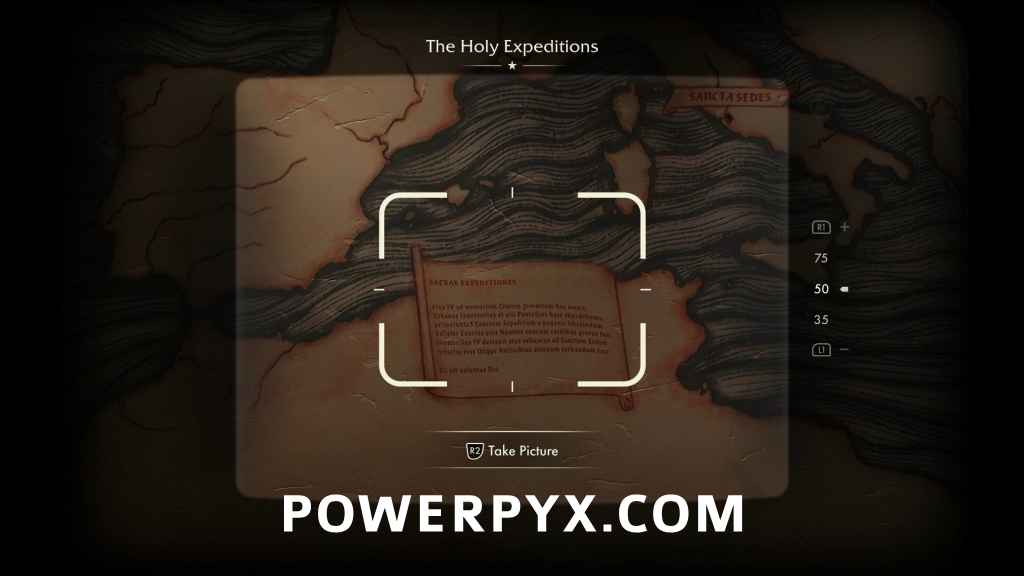
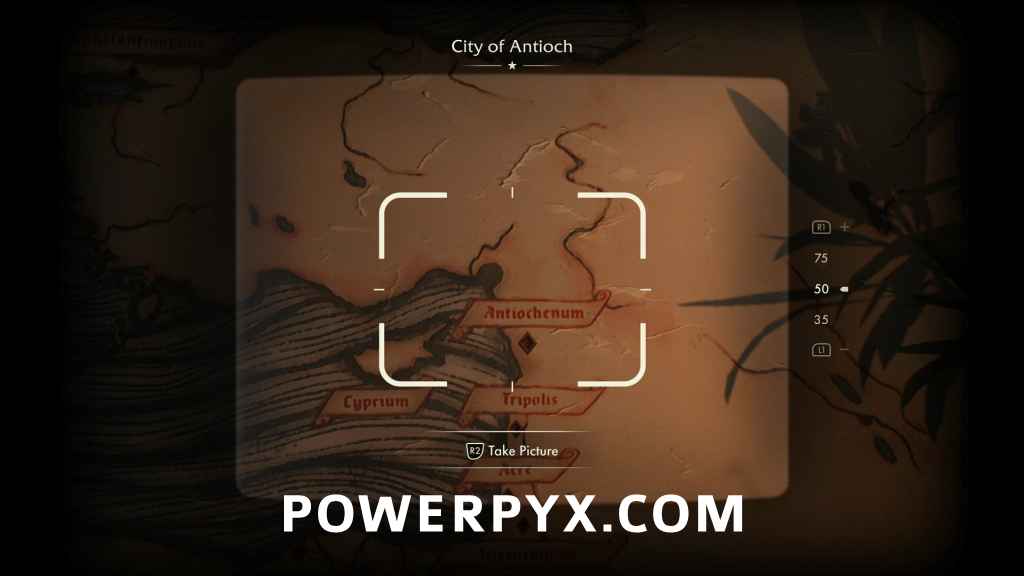
Get a bit closer to the map and you’ll find two more photo opportunities. After you take the first photo, Indy will translate the text to let you know that your second photo target is Antioch (note that it will use the untranslated spelling, “Antiochenum”)
Adventure Note #7: The Holy Expeditions (10AP)
Adventure Note #8: The City of Antioch (10AP)
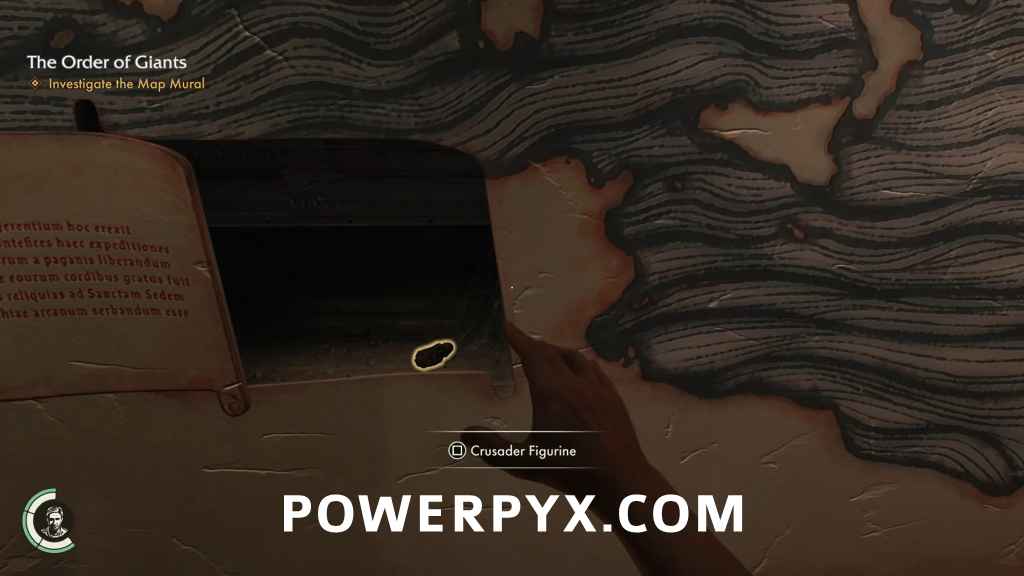
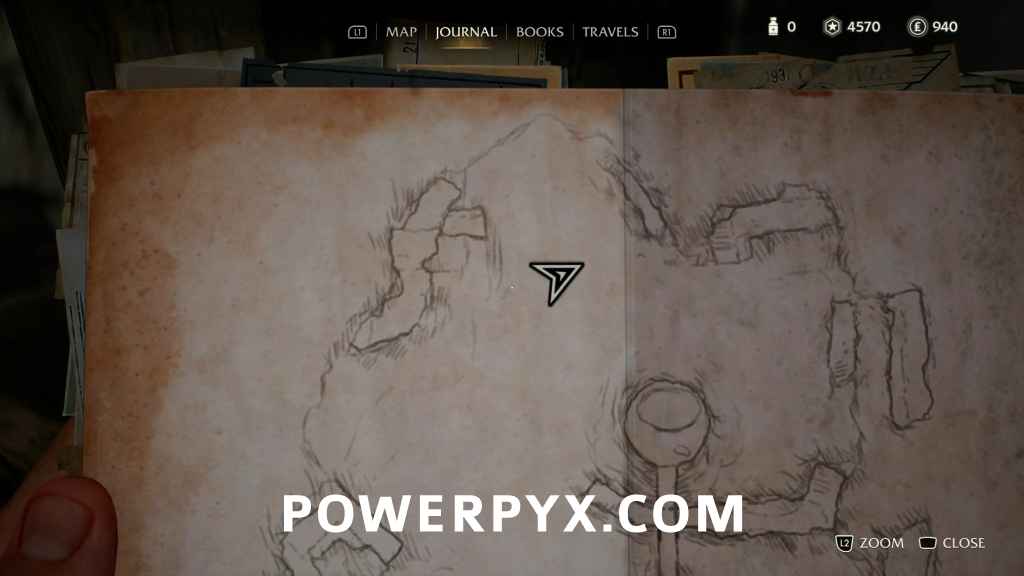
Indy will notice that the diamond shaped map markers are actually indented as though something could be inserted into them. Move closer to the mural and move towards the “Sacrae Expeditiones” (Sacred Expeditions) scroll that you just photographed. When close, you’re given an interact prompt that causes a hidden panel to open revealing two figurines: A Pope figurine, and a Crusader figurine.

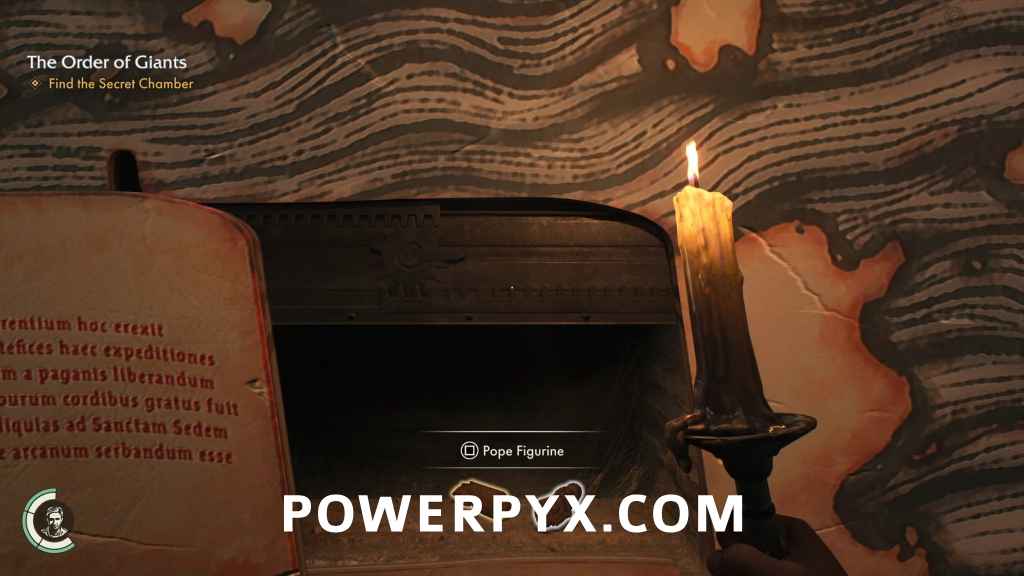
Investigate the Map Mural
Obviously the Pope will be in Rome, so pick up the Pope figurine and plug him into the location in Italy labeled “Sancta Sedes”. This translates to “Holy See”, the jurisdiction of the Pope in Rome.


Reading the note again, you’ll see that they sent the Nameless Crusader to Antioch, so pick up the Crusader figurine and plug him into the slot labeled “Antiochenum”.
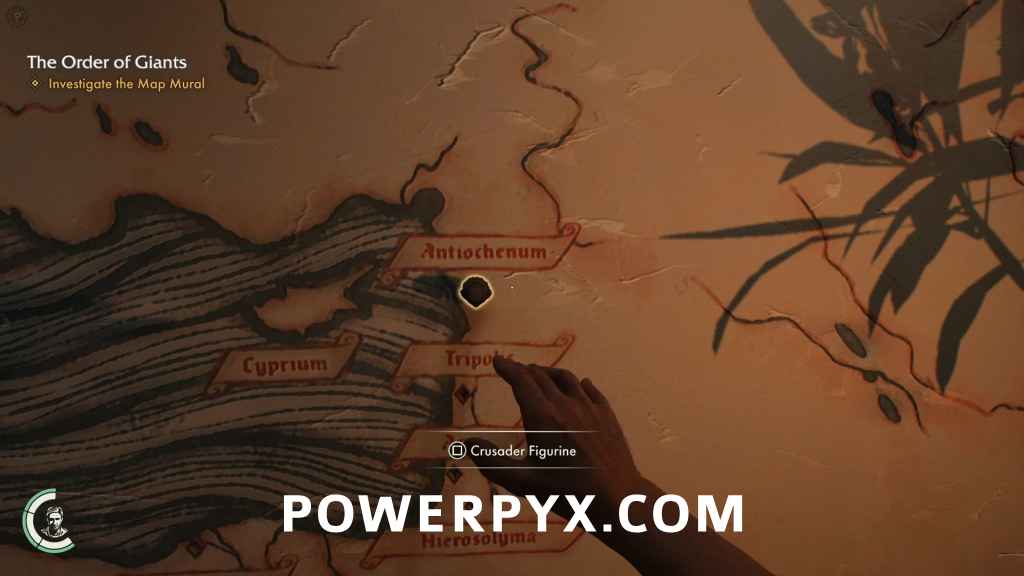
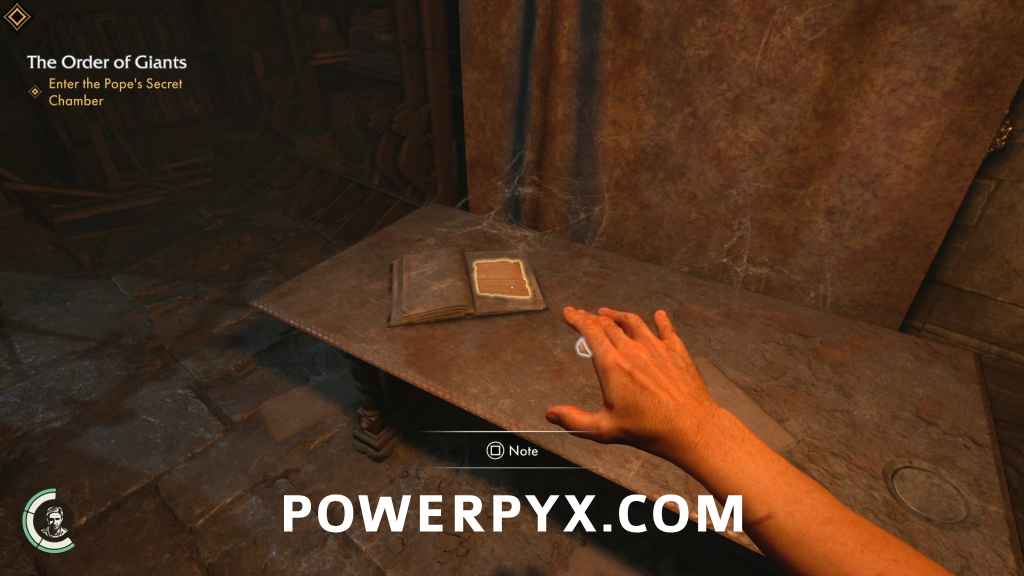
Once both figurines are in the correct location, a secret door will open in the mural leading to a hidden chamber.
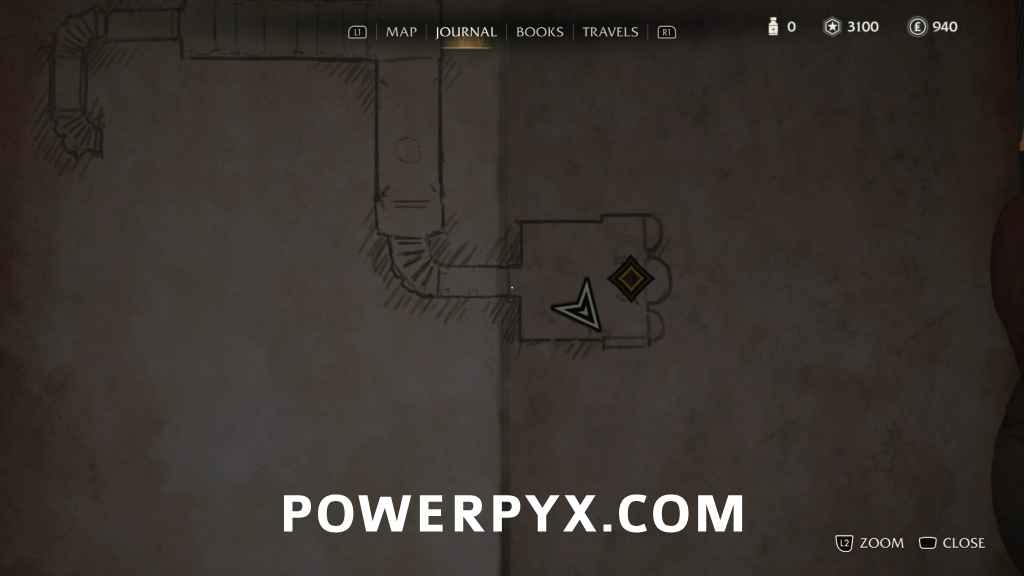
Before you head downstairs, there’s still a lot of the Casina left to search, starting with grabbing the note on the desk.
Adventure Note #9: Blackshirt Orders (10AP)

Now head into the stairwell to the north and go upstairs. At the top is some sort of council chamber, and the site of the first mystery of the DLC!
| Suggested Detour: A Collegial Mystery
Link to A Collegial Mystery Walkthrough. Gained in A Collegial Mystery:
|
With A Collegial Mystery taken care of, head back down to the secret passage in the mural and go down the stairs.
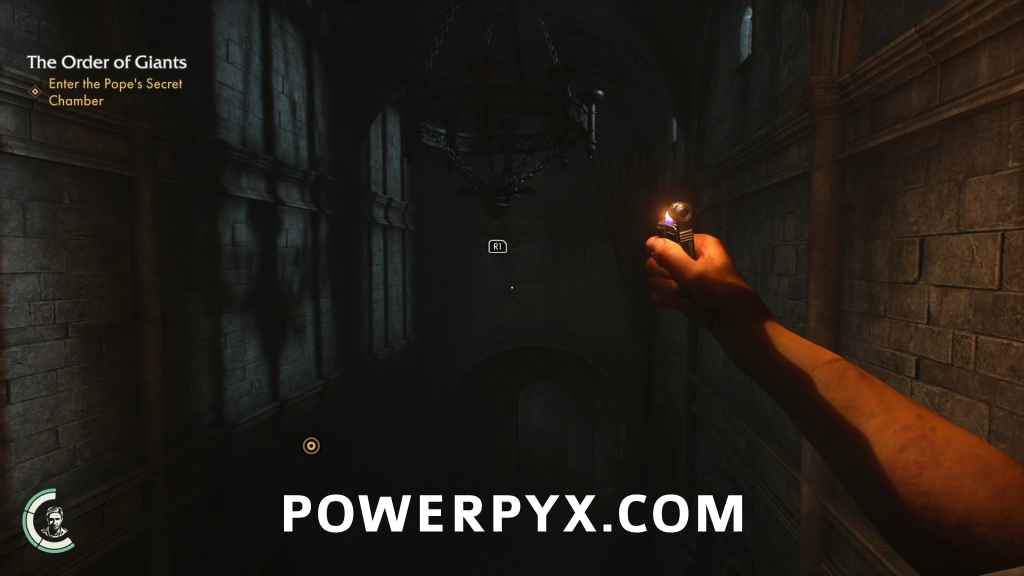
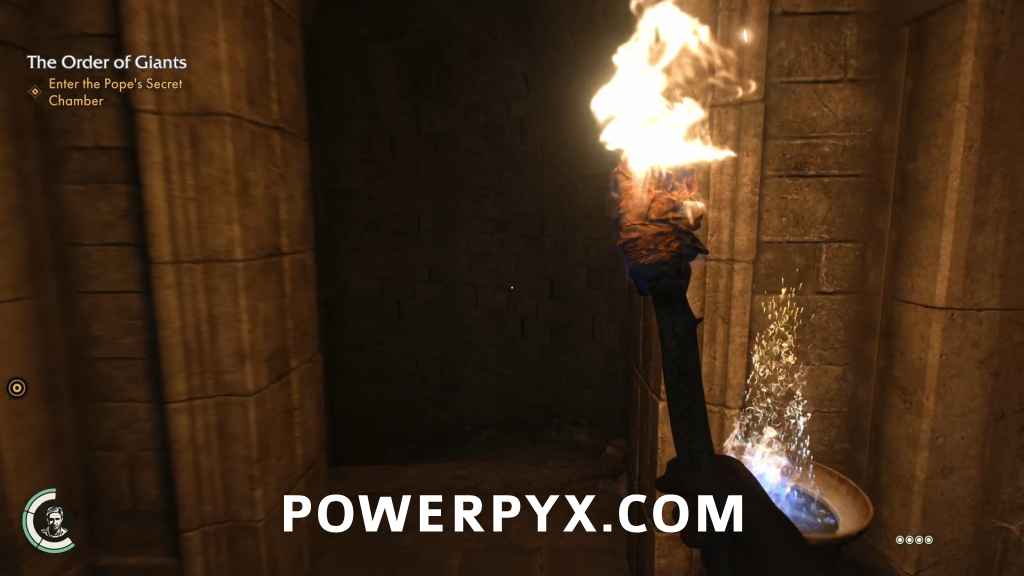
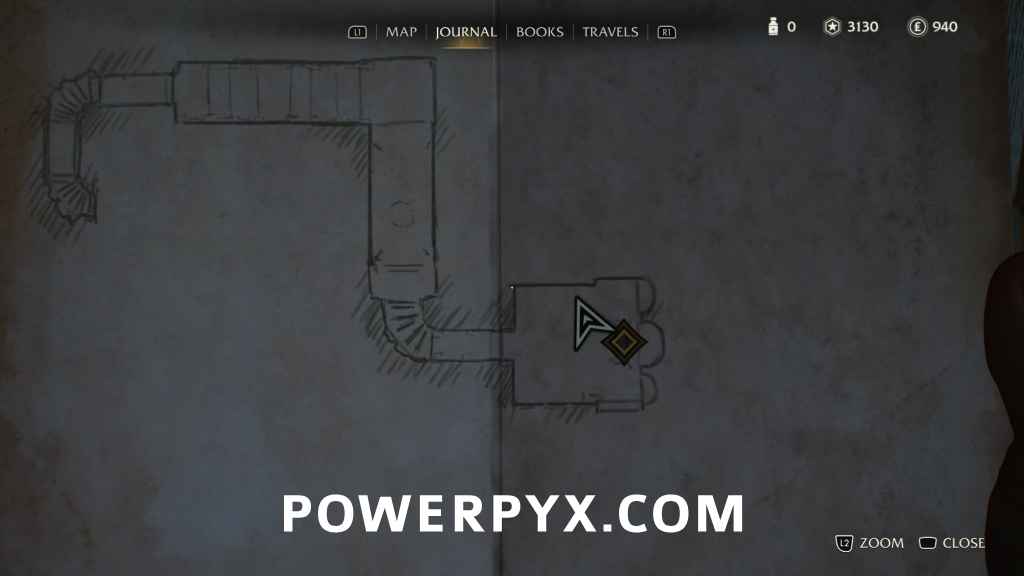
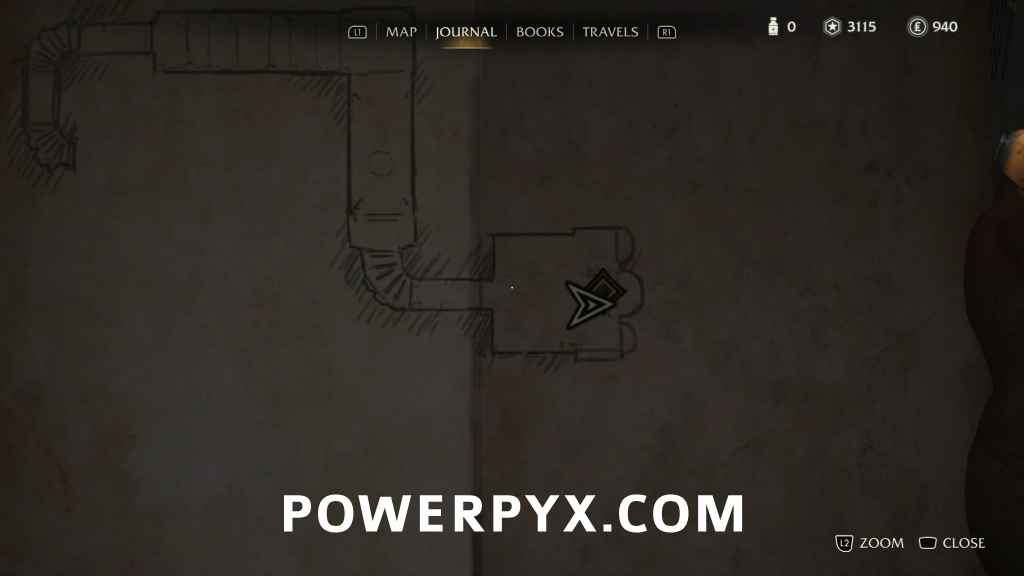
Enter the Pope’s Secret Chamber
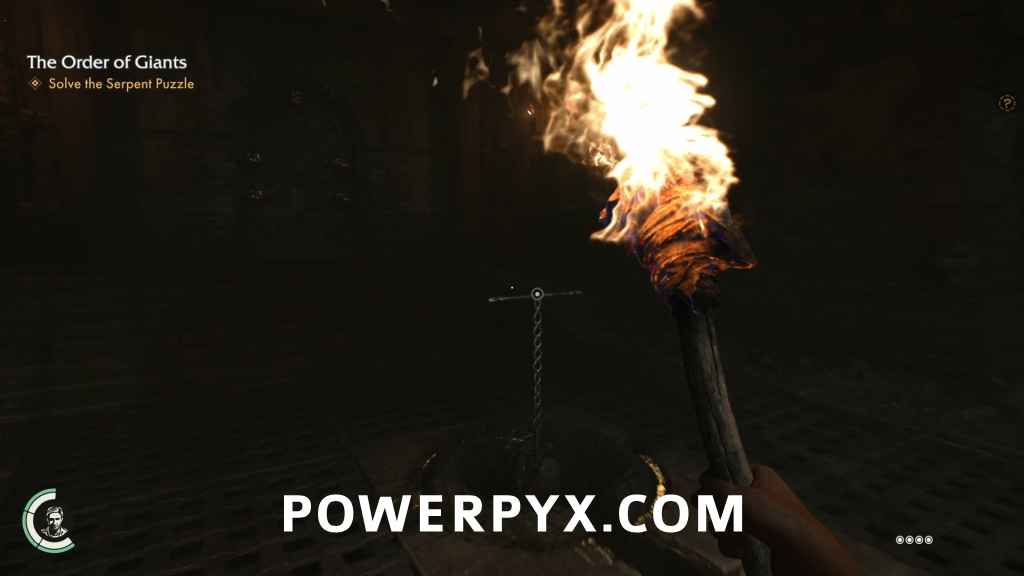
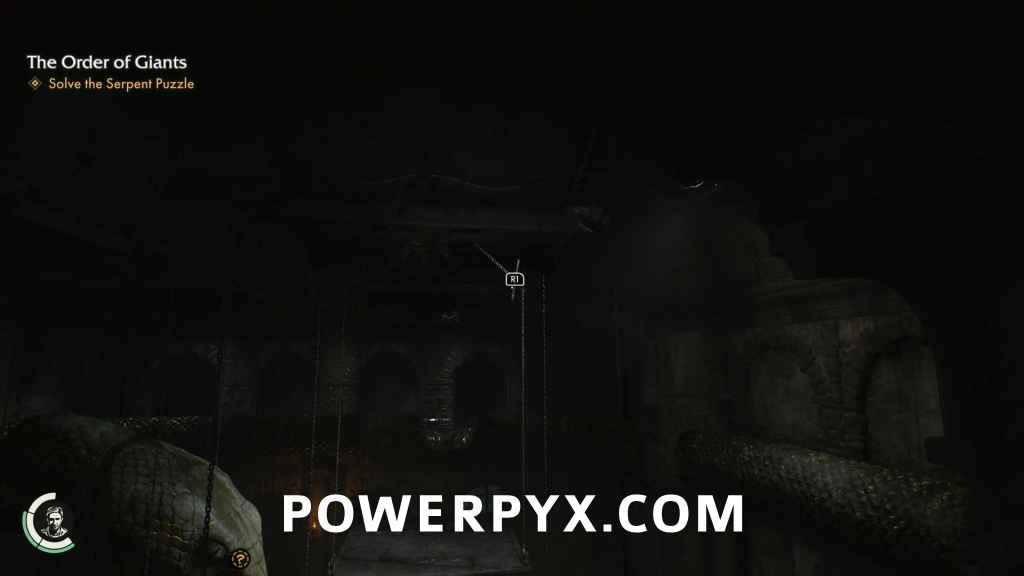
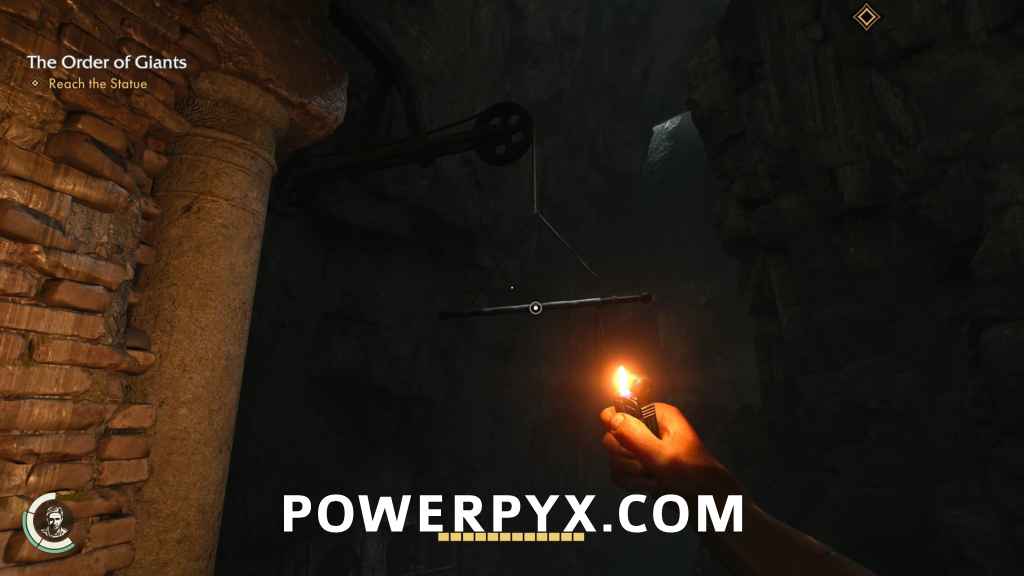
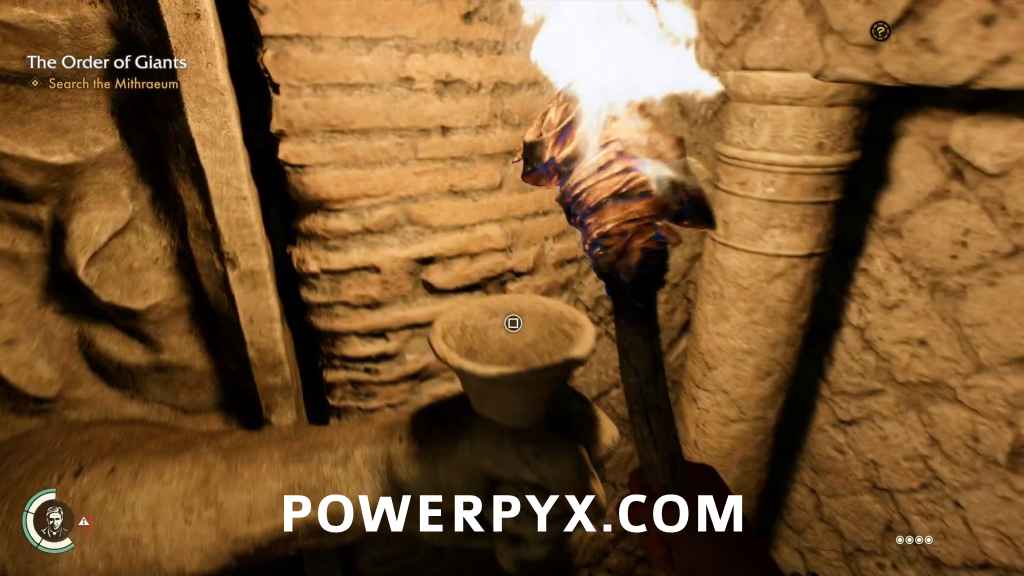
Follow the dark and winding path, until you get to a chandelier that you can attach your whip to and lower yourself down to the extremely dark floor below. There is a pot with torches near the next staircase down if you want more light.
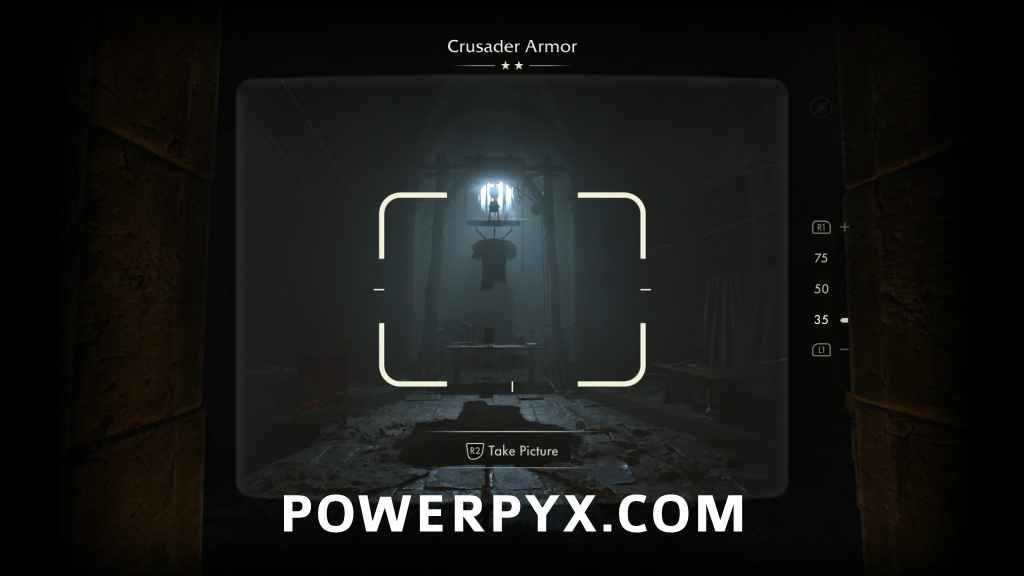
At the bottom of the stairs, you’ll enter the Secret Study and immediately be presented with a photo opportunity.
Adventure Note #10: Crusader Armor (15 AP)
At the sides of the room are two tables with notes as well as tablets that aren’t used for anything.
Adventure Note #11: Thodorus’ Confession (15 AP)
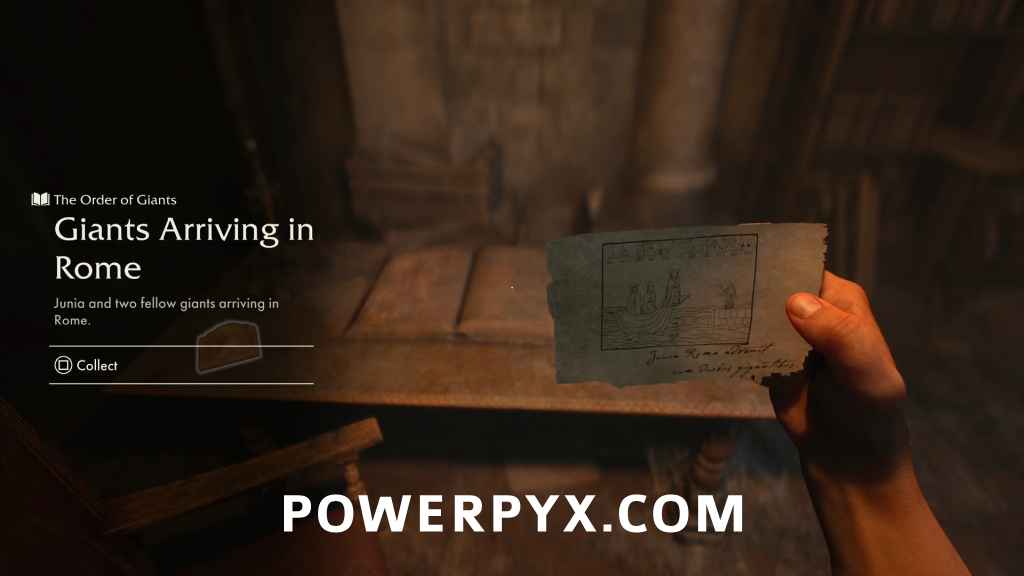
Adventure Note #12: Giants Arriving in Rome (15 AP)
Next to the helmet is another note, as well.
Adventure Note #13: Crusader’s Diary (15 AP)
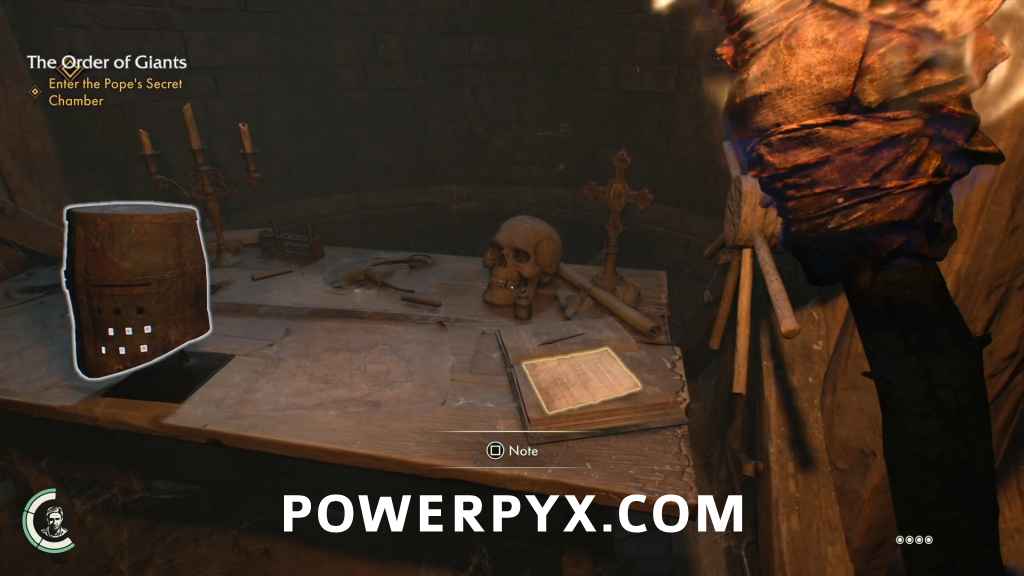
Now that the room is clear, pick up the Crusader’s Helmet and you’ll find a key and a parchment inside.
Adventure Note #14: Nephilim Orders (15 AP)
KEY: Crusader Helmet Key

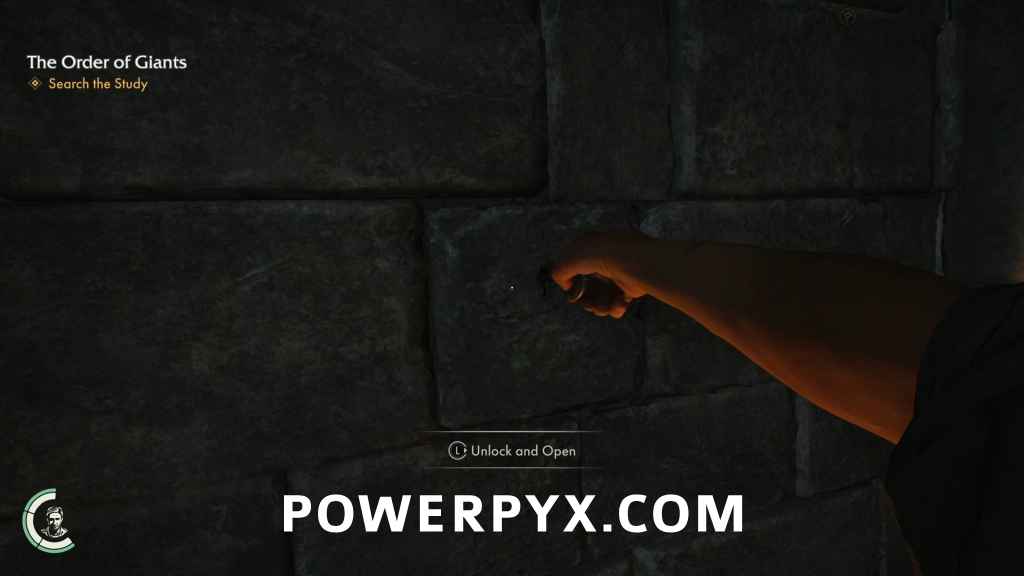
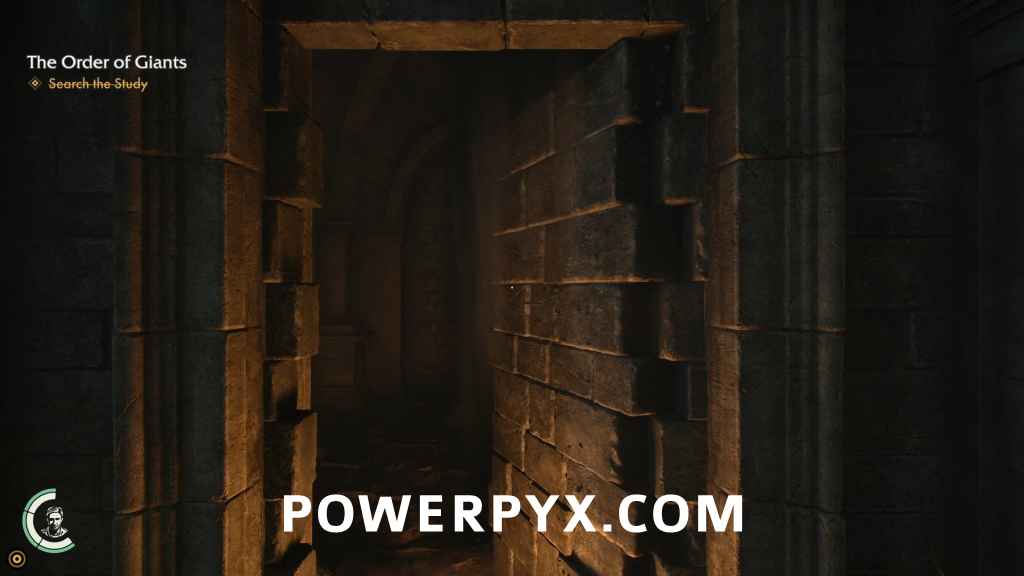
Search the Study
Looking at the wall to the south, you’ll find a photo opportunity.
Adventure Note #15: Peculiar Wall (10AP)
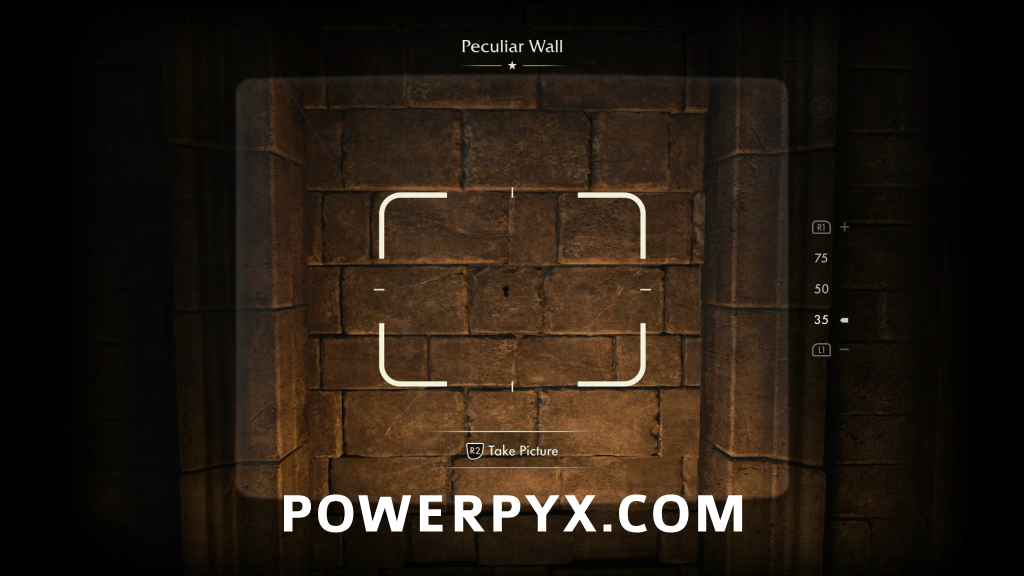
Go into your inventory and bring out the Crusader’s Helmet Key and slot it into the strangely key shaped hole in the wall to open up another secret door.
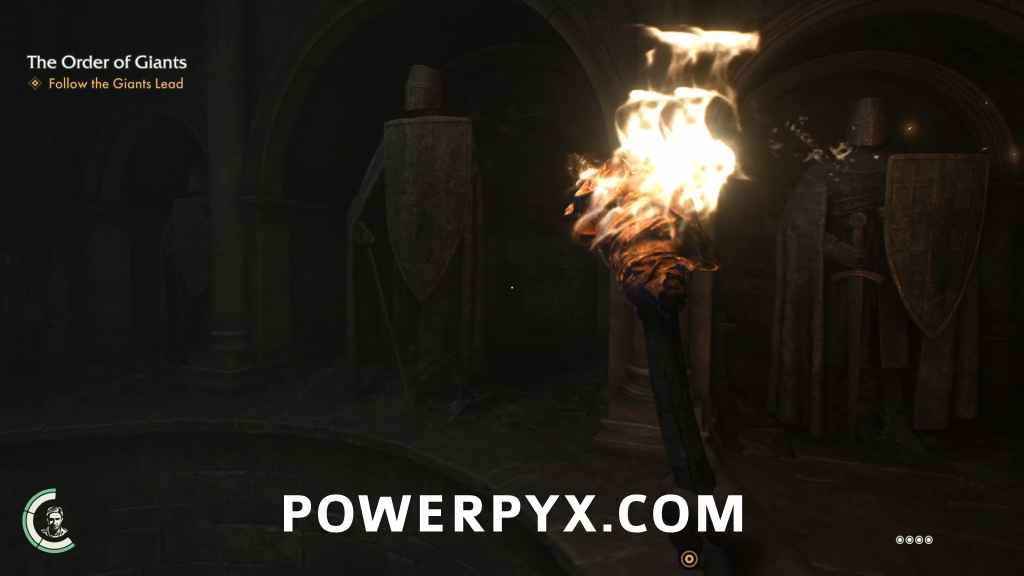
Follow the Giant’s Lead
In the next room, you’ll see a circular staircase leading down into the floor with a number of statues of knights all around the room. The tallest one stands right next to the stairwell. Have a look behind his cape to find a note.
Discovery Note #2: Herbal Cure (15 AP)
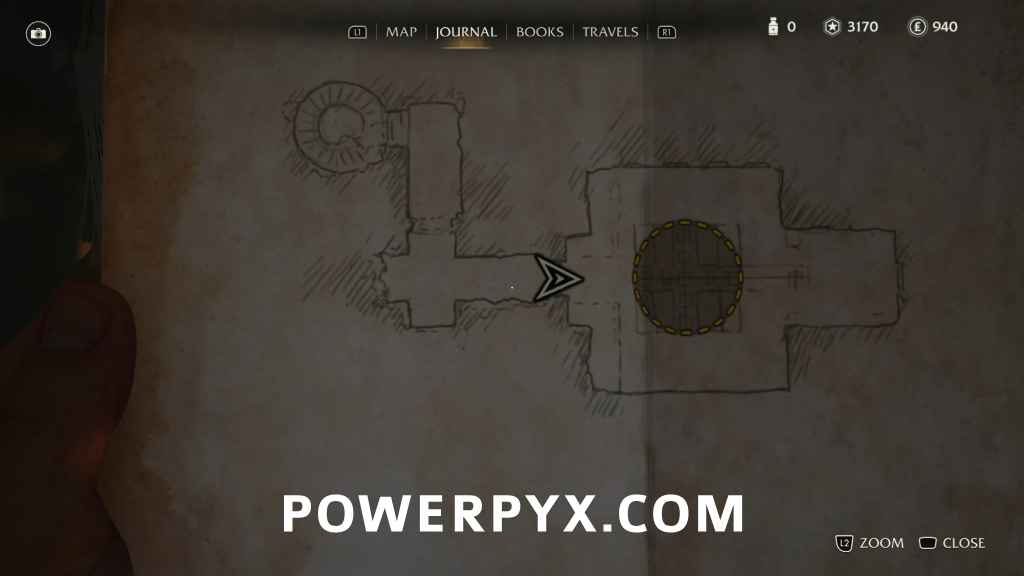
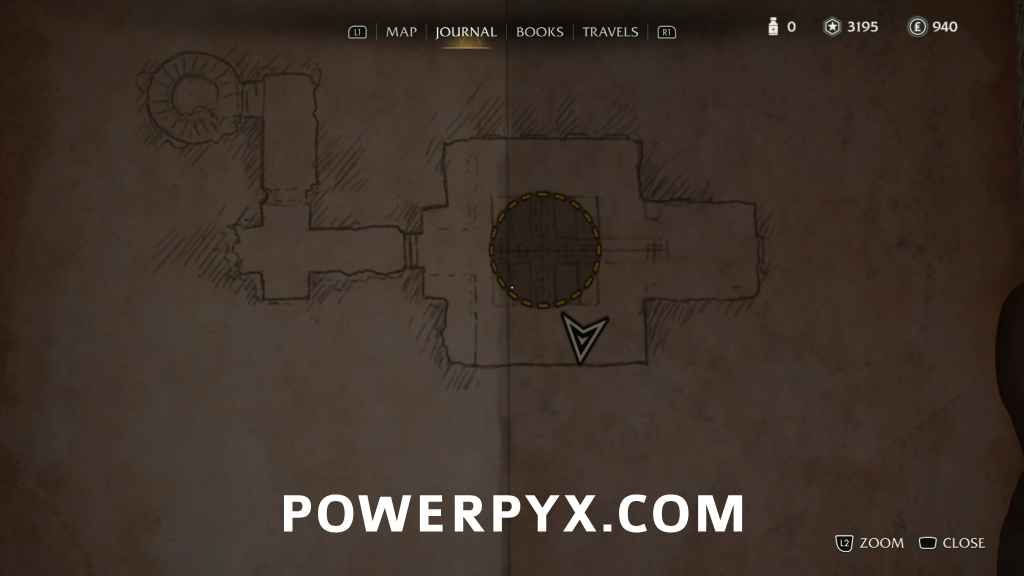
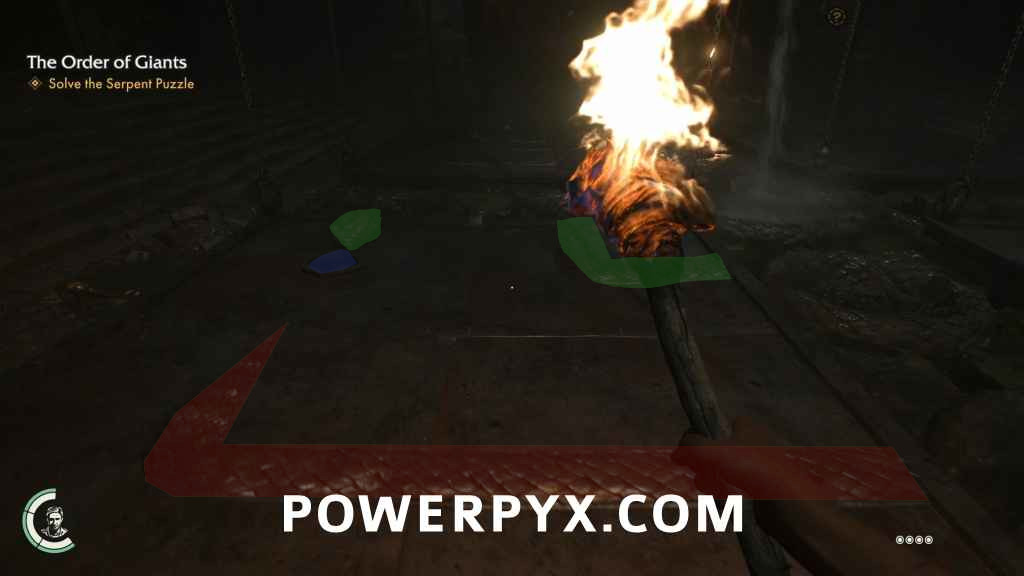
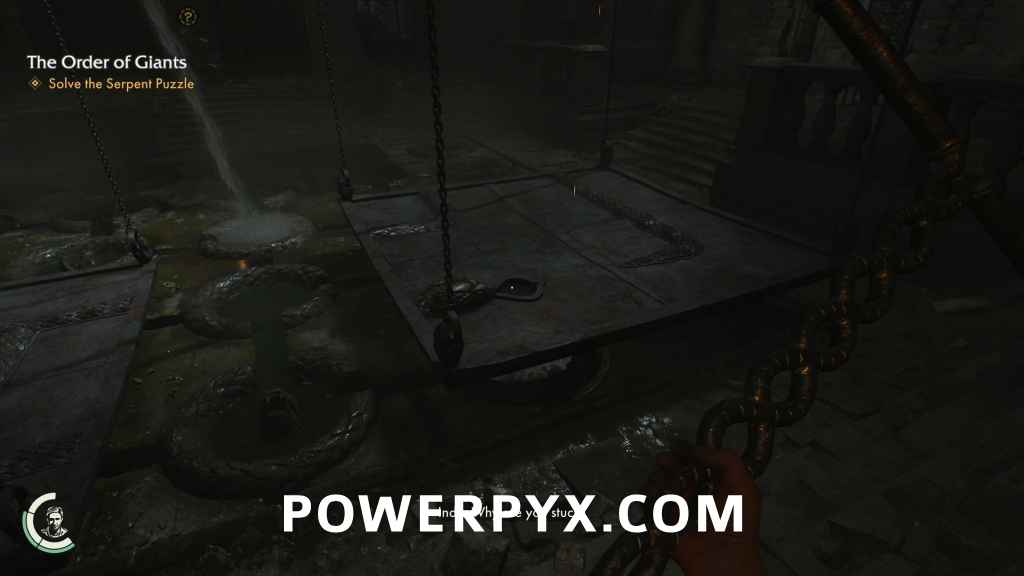
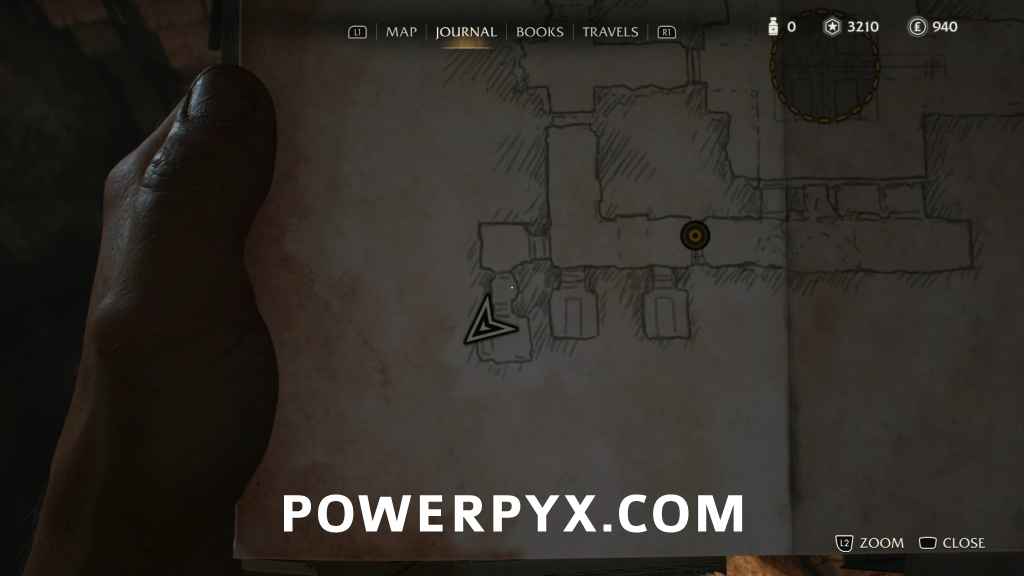
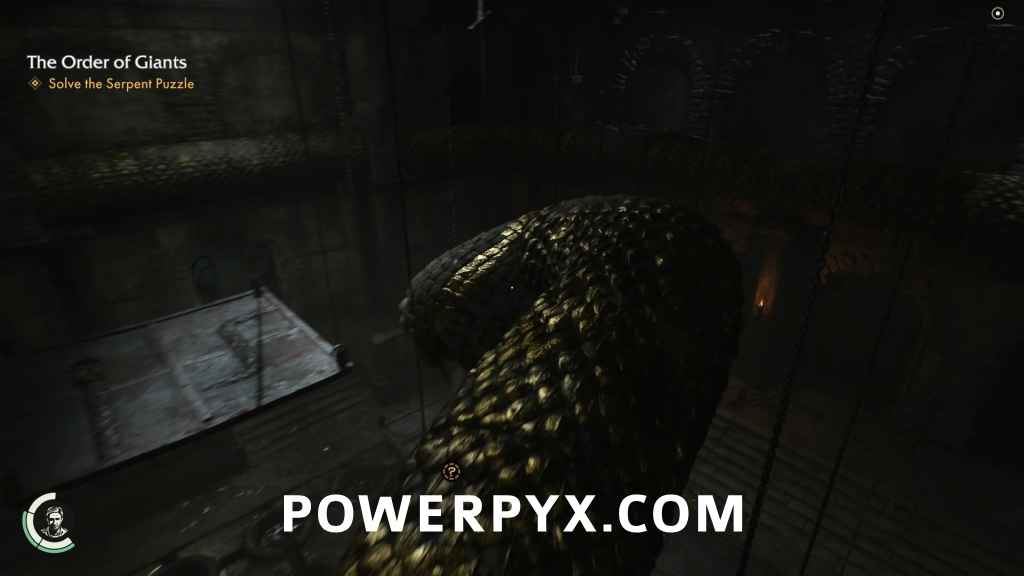
Head down the stairs and follow the path until you reach the room of the Serpent Puzzle.
Solve the Serpent Puzzle
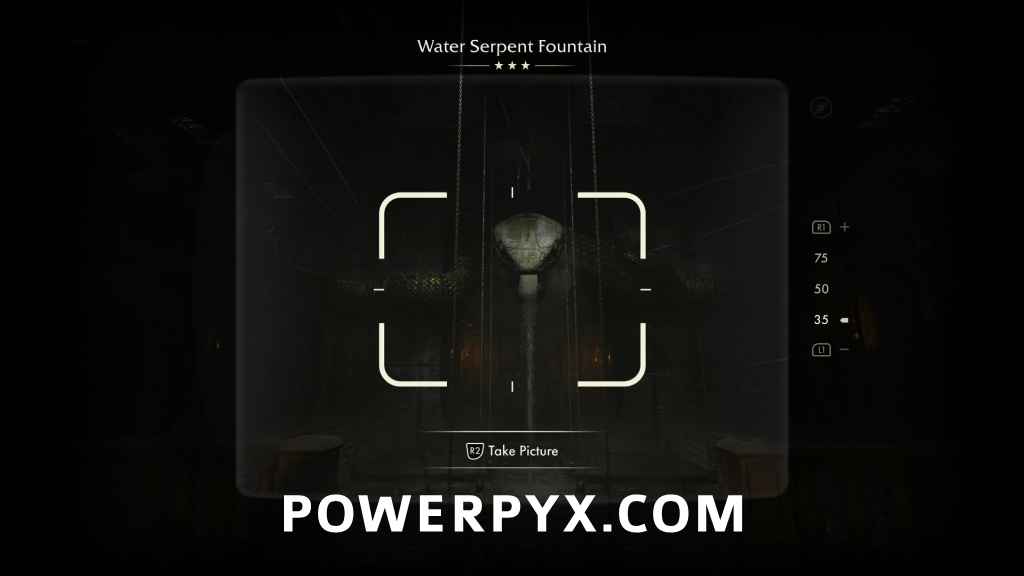
Right inside the door is a photo opportunity.
Adventure Note #16: Water Serpent Fountain (10AP)
On the south side of the room, you’ll find a note that barely scratches the surface of serpent puzzle.
Adventure Note #17: Water Serpent Blueprints(10 AP)
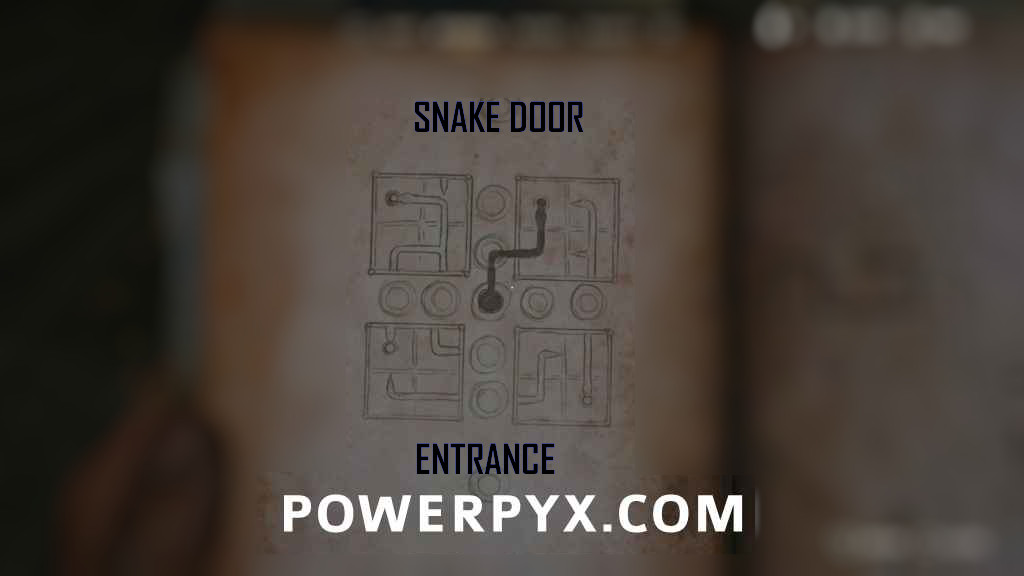
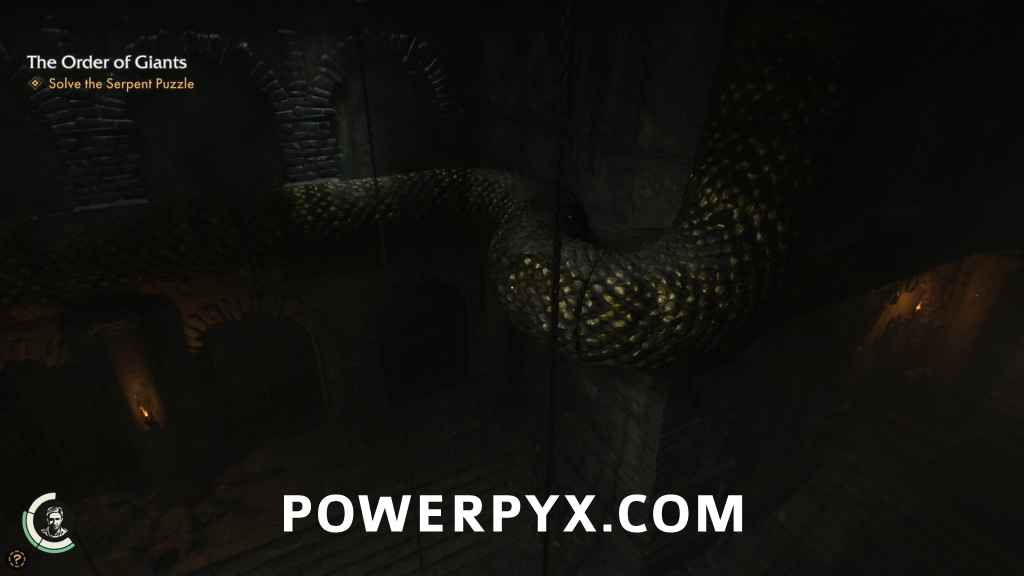
As hard as this looks initially it is actually fairly straightforward once you understand the mechanics of the puzzle, but it still takes some keen observational skills. The giant serpent head above you is the source of all the water, and it pools in a small ring in the center of the floor, where it flows into other rings. Some of the rings have the image of a snake head with an open mouth in them, while others are just empty rings. All the rings have gaps in them however, which allows water directed into them to flow in different directions.
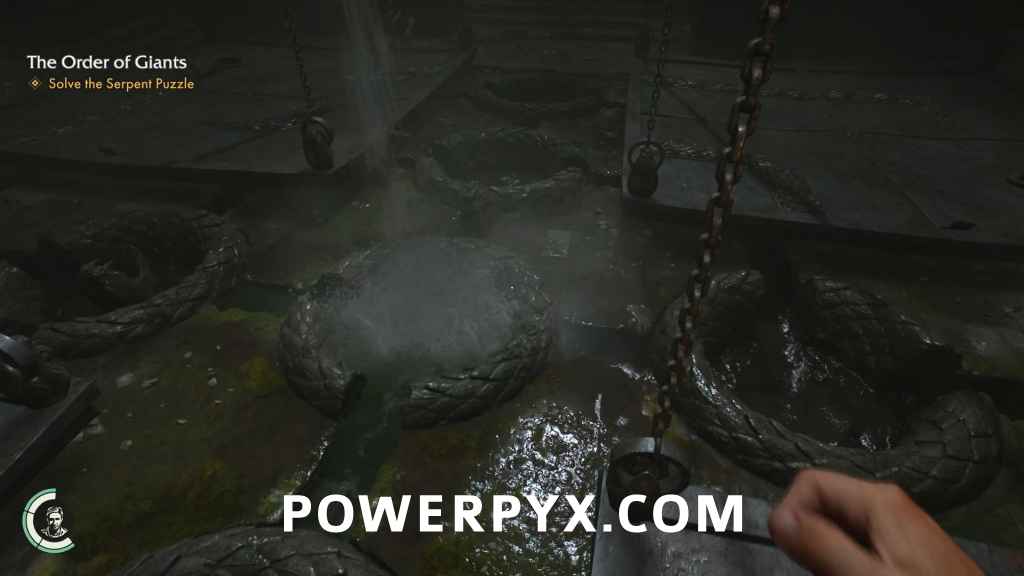
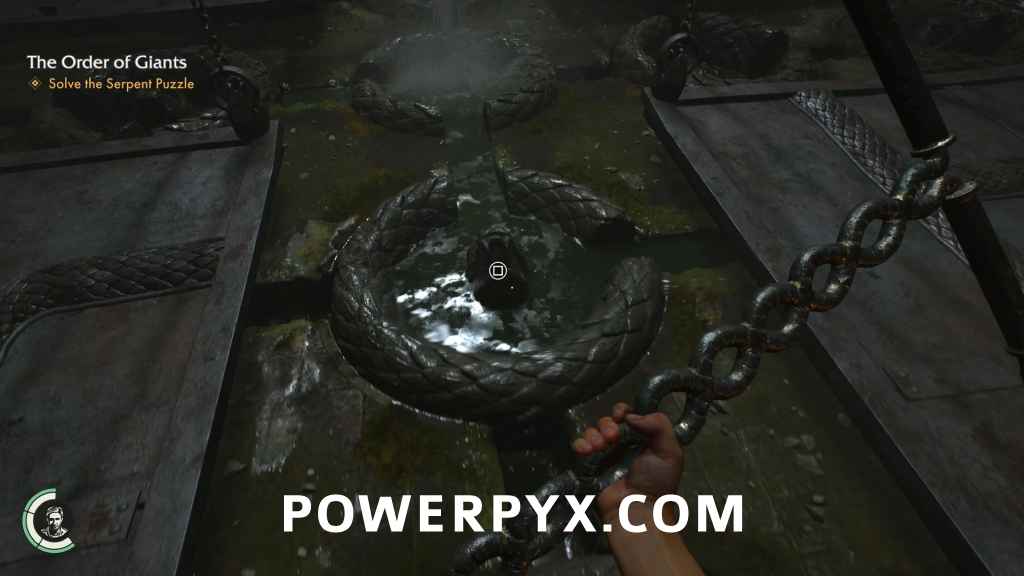
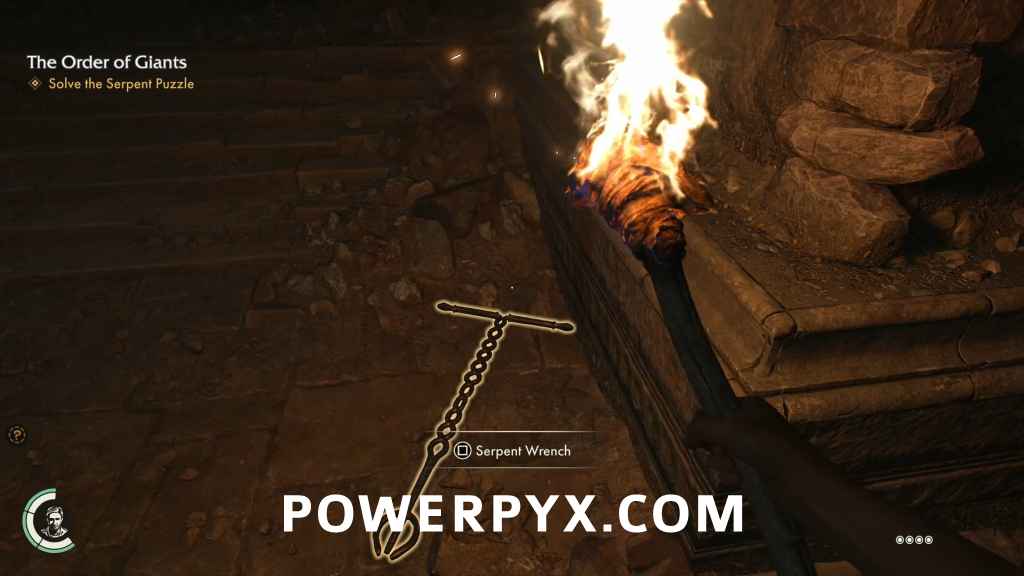
On the east side of the room is a tool called a Serpent Wrench that you can see inserted into one of the snake heads on the floor. There’s a spare Serpent Wrench on the floor, and you’ll get a third part way through your puzzle solution but you’ll only ever need the one. By inserting a Serpent Wrench into the mouth of one of the snakes on the floor, you can turn its ring, causing the gaps in each ring to move and change the flow of water how you see fit.
Also on the floor are four large metal platforms resting on the ground, but connected to chains that stretch up to the ceiling. While on the ground, they block your access to the rings beneath them. The only way to raise the platforms is to direct the water to flow under them in the correct way. How can you do this without being able to see the positions of the rings under the platforms you ask? Well its easier than you think, because the paths are marked by the snake patterns that are embossed into the surface of the platforms (See crude diagram below). The snake’s head on each platform shows where you need to direct the water’s flow to cause that platform to rise (shown in green highlighting with blue showing the target drain). There can also be a portion of the snake’s body, which will mark channels that you can pass water through from one side of the platform to the other (highlighted in green in upper right). If the snake’s body ends in a tail however, that marks a dead end (highlighted in red at bottom).
At the back of the room to the east is a giant door which is secured by five golden snake heads. That’s going to be important after we get all four platforms lifted, but we can ignore it for now. Grab a Serpent Wrench and head to the middle of the room. The first part of the puzzle only needs you to turn one ring.
NOTE: The diagrams of the solution that appear in your journal are oriented as though the Five Snake Headed Door is at the TOP of the diagram. The door that you entered from is at the BOTTOM of the diagram.
First Platform:
Second Platform:
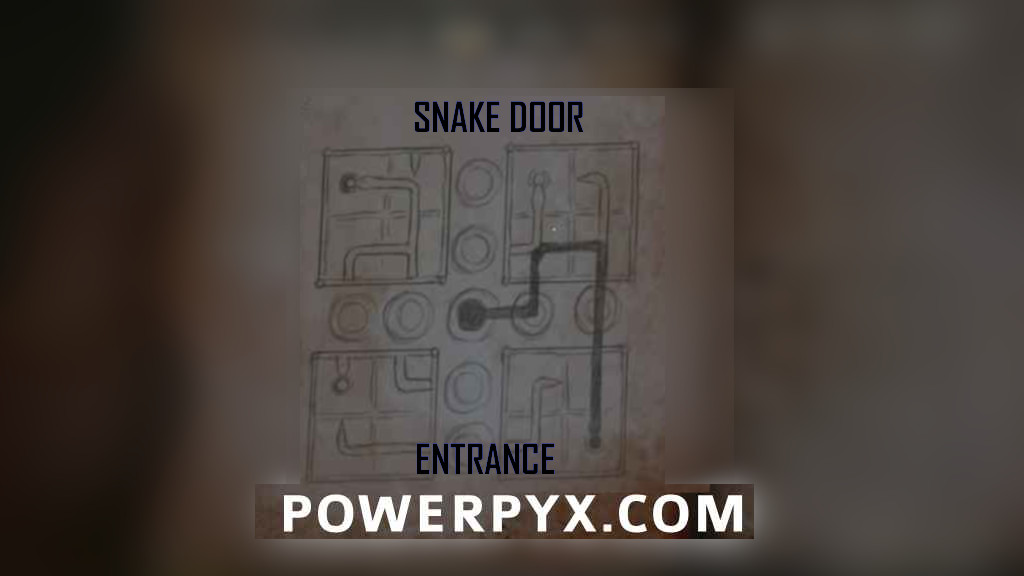
Third Platform:
After the third platform starts to rise, you’ll notice it screeches to a halt and is just juddering there. Look up and you’ll see the reason why.
Remember that third Serpent Wrench I mentioned? Yep, that’s where it is. Look at the south side of the room, and you’ll see two short flights of stairs and a walkway in the middle that gives you a little extra height. Get on that walkway and jump up to the first platform right in front of you.
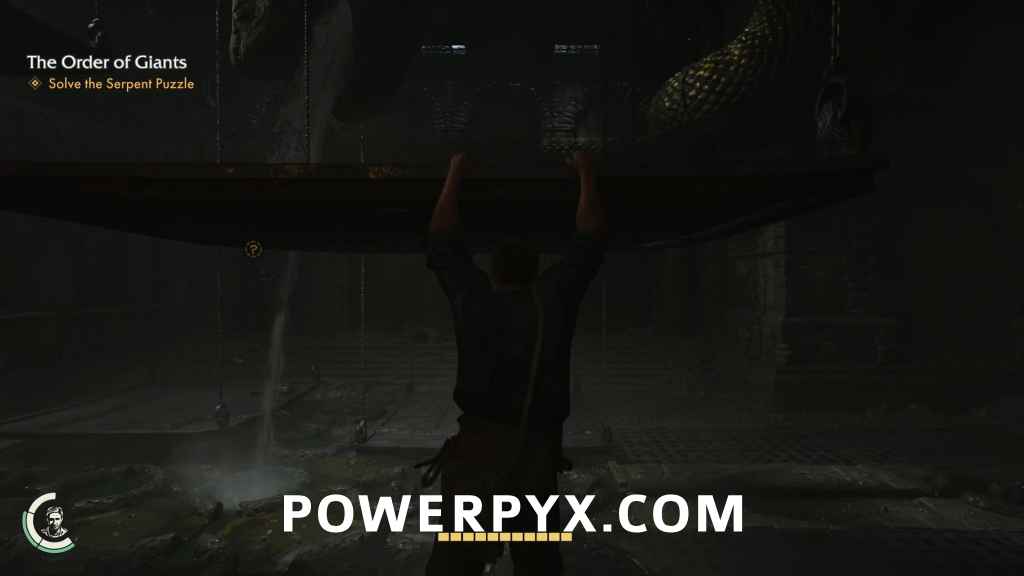
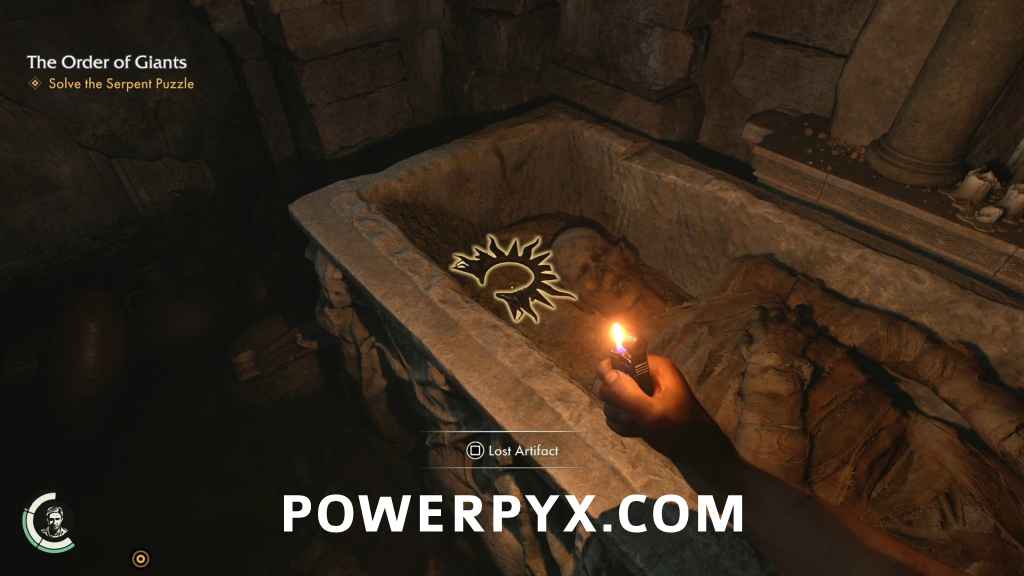
From the first platform, jump up to the second platform then turn to the south and you’ll see a section of the snake’s body is broken away, forming a convenient platform that you can jump across to. While we’re up here, we’re going to take a quick detour and go south through the archways to find a tunnel that slopes down and to the west. At the bottom, ignore the first two archways to the south, as you can’t open the sarcophagi and there’s nothing else worthwhile in them. Go straight ahead and through the archway to the west.
Follow the passage to the south and you’ll find yourself in a tomb with one open sarcophagus along the west wall. Inside near the body will be a Mithraic Artifact.
Mithraic Artifact #1: Heliodromus Artifact (20 AP)
This will also earn you Symbol of Initiation for finding your first artifact. Go all the way back to the giant snake statue. Climb on its back and walk along the top of it until you reach it’s head. From there, look to the north and you’ll see a small jump to where the rest of the snake winds its way around the room.
Jump across, and follow the snake west until you see a small platform jutting out to the south, conveniently close to where the mechanism of the third platform is jammed. Walk out to the edge and you’ll be able to whip yank the stuck Serpent Wrench out of the gears, allowing the platform below to rise.
Head back to ground level, using the platforms to descend safely. Only one more platform left to lift.
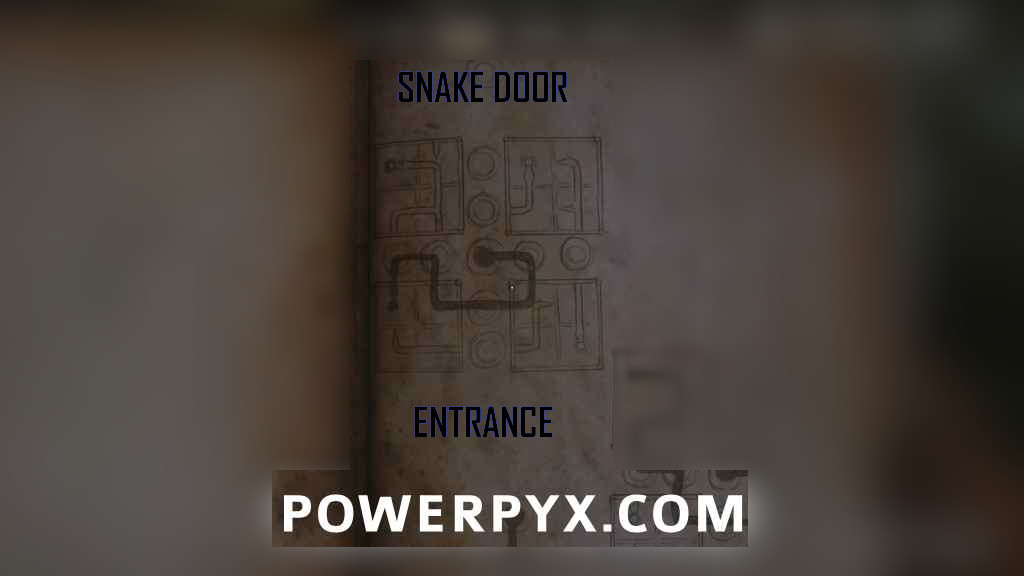
Fourth Platform:
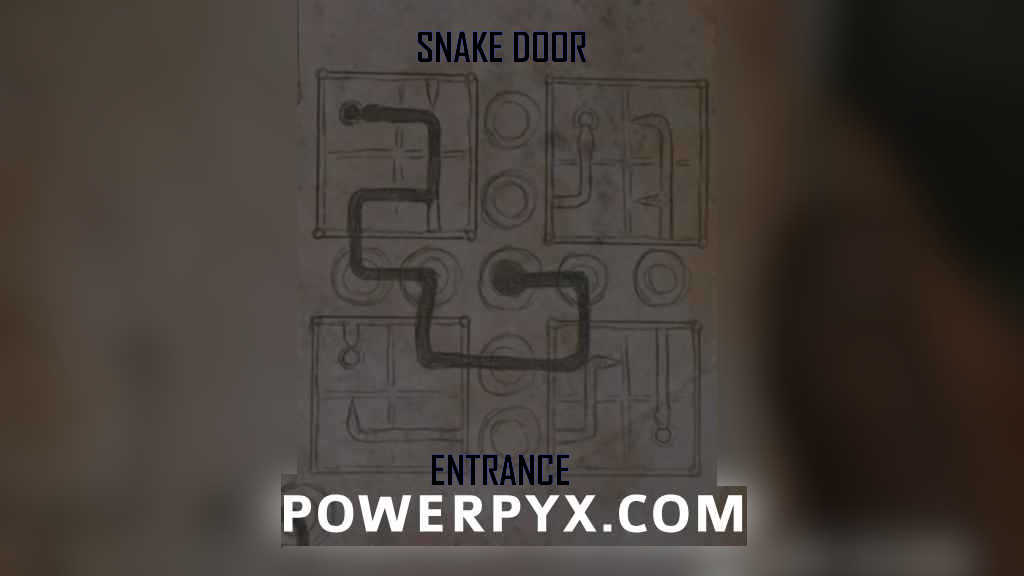
Now with all four platforms raised, you will be able to access every ring. By now you might have noticed that some rings will bubble when you direct water into them, and the first time it happens it will be accompanied by the sound of creaking metal. That’s because at the bottom of all those bubbling rings are drains that direct the flow of water into a mechanism that causes one of the five snake heads on the door to the east to disengage. Cut off the flow, and the head will creak back into place. Only by getting water into all five drains simultaneously will allow you to open the door and solve the puzzle. This took a lot of trial and error to solve, but now you can reap the benefit of my suffering.
Water Flow to Reach All Five Drains:
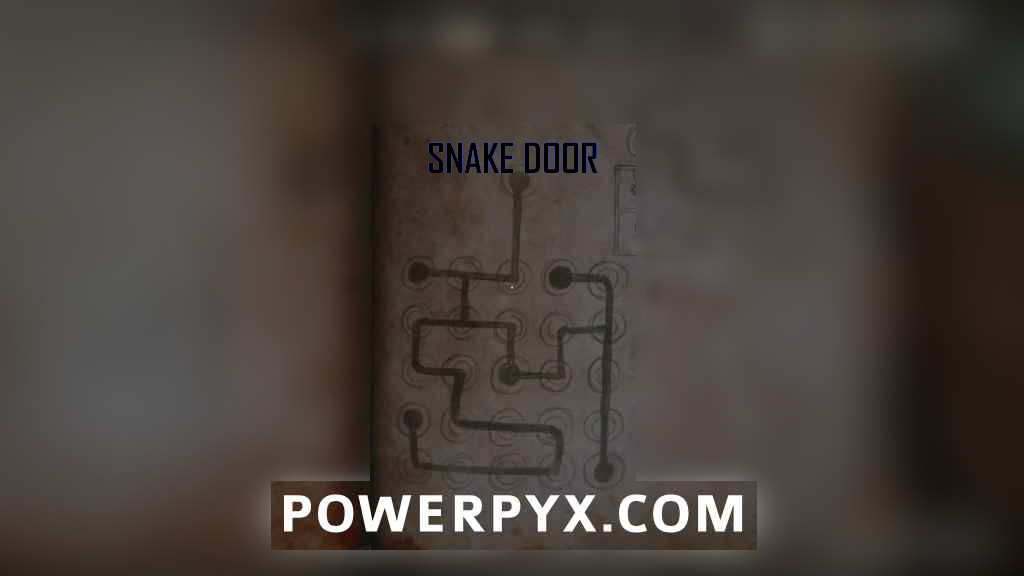
This will cause the door to the east to open, and the solution to the puzzle will be diagrammed and added to your Journal. Right around here you should also get your Chronicler.
Adventure Note #18: The Water Serpent Solution (15 AP)
Search the Underground
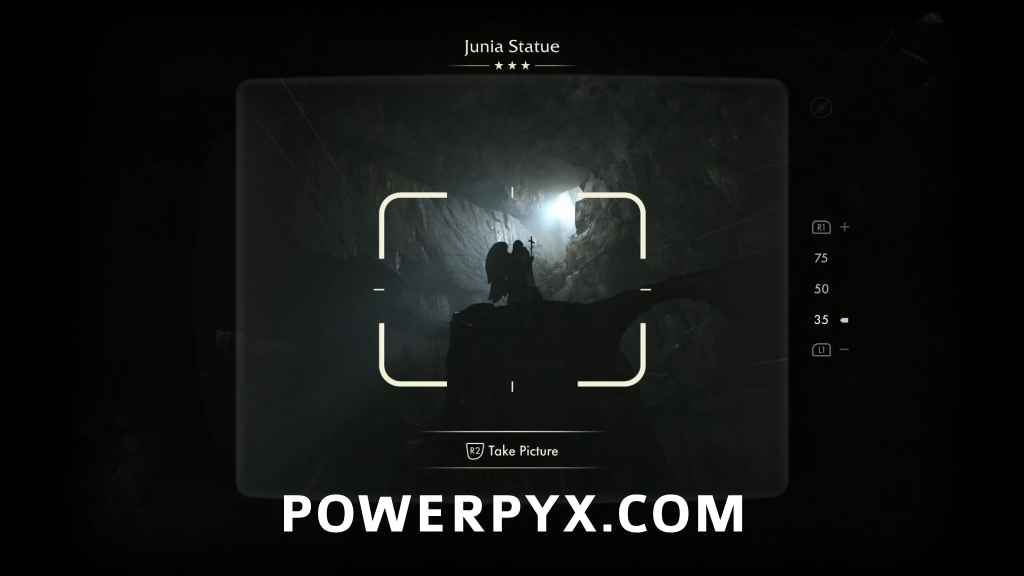
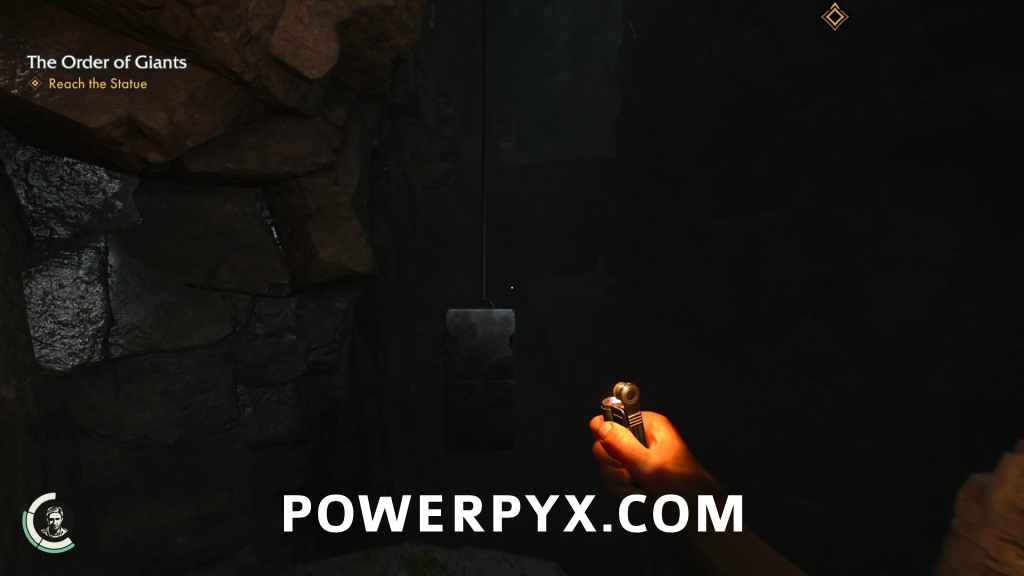
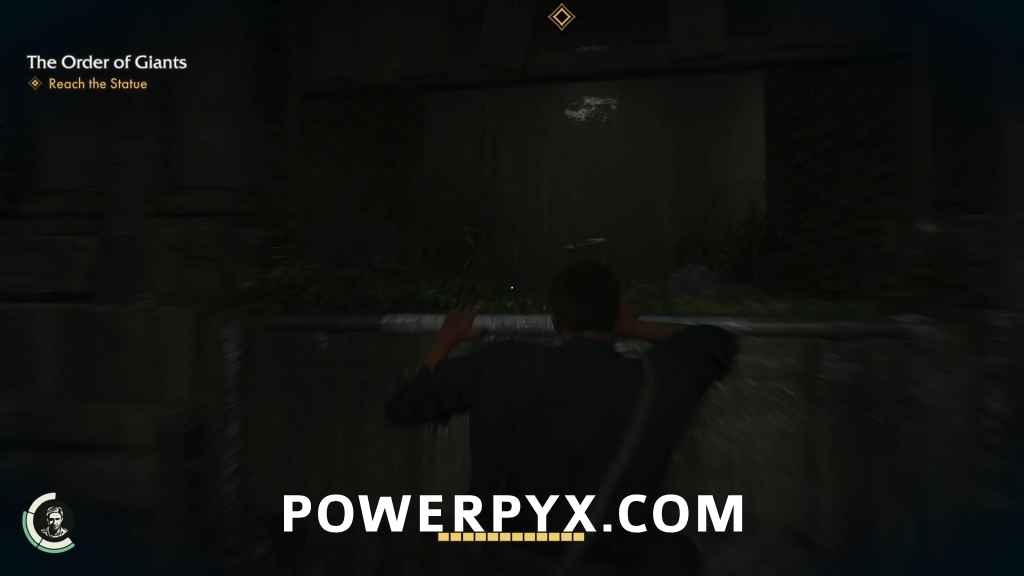
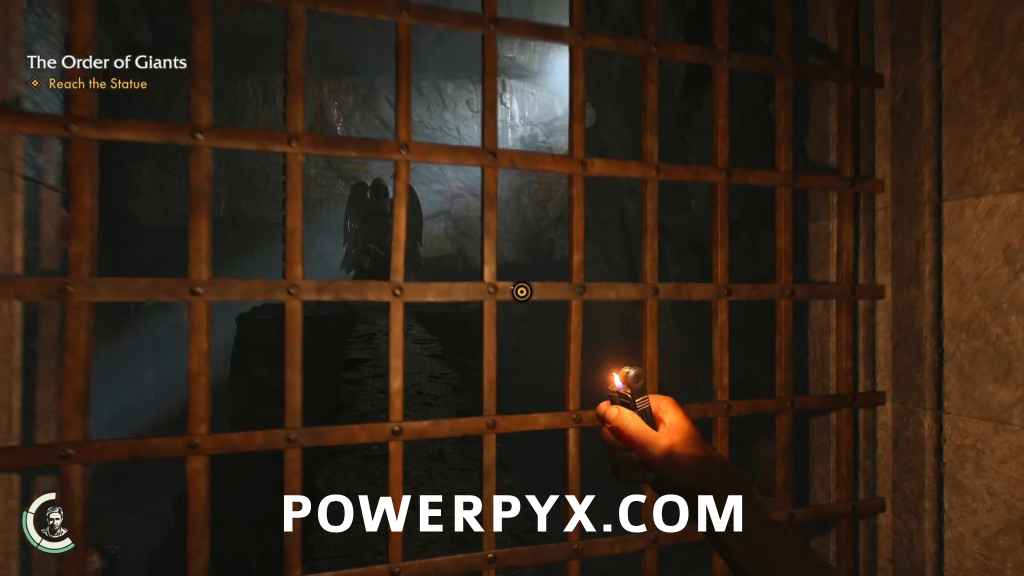
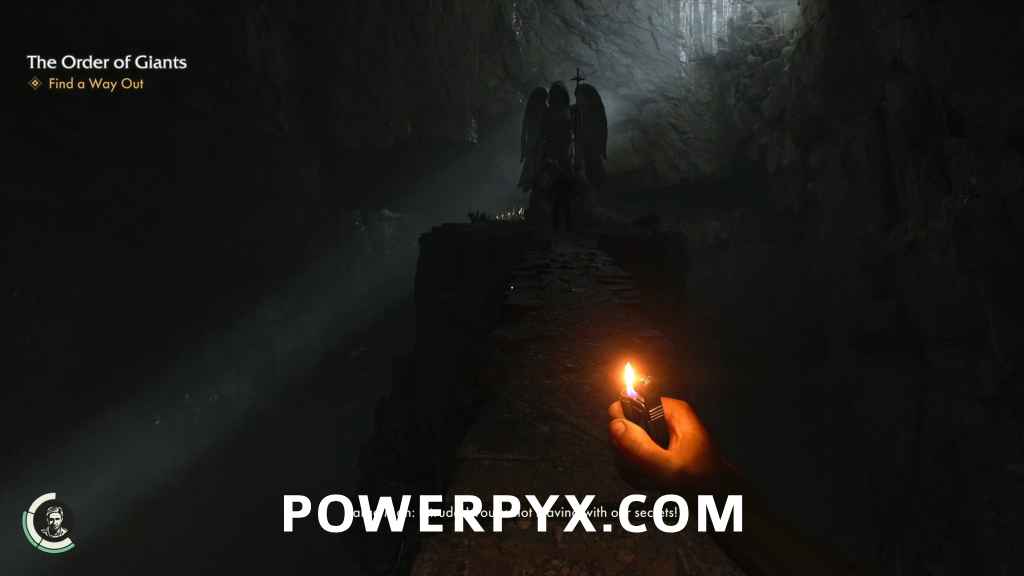
Go through the snake door and down the passage to the east until you find a jagged hole in the wall to the north. Go through that hole, then drop down to the cavern below and follow it until you emerge in a large chamber underground, with a statue of an angel on top of a far off outcropping. This is Junia’s Tomb.
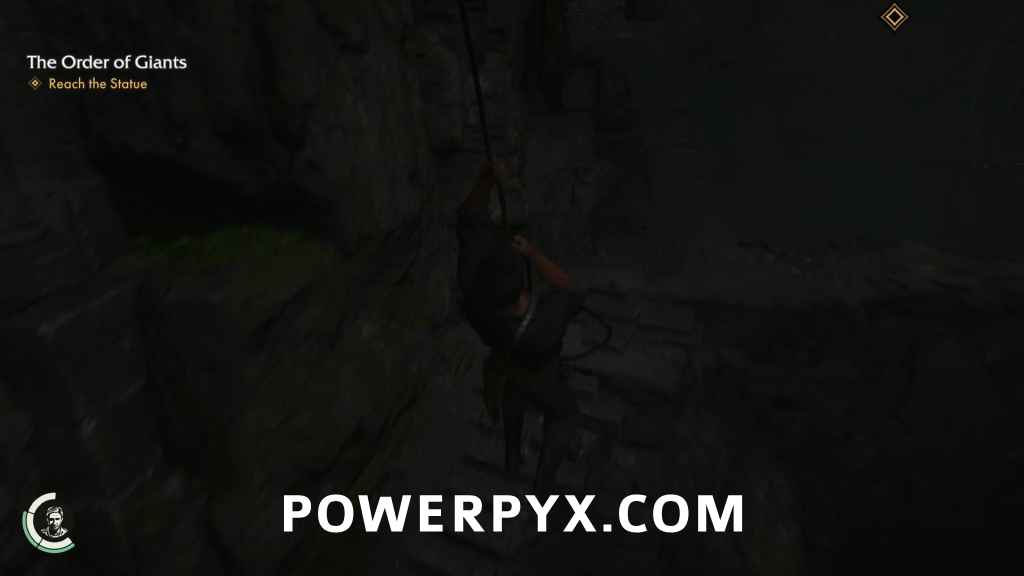
Reach the Statue
Right away you’ll get a photo opportunity.
Adventure Note #19: Junia’s Statue (10 AP)
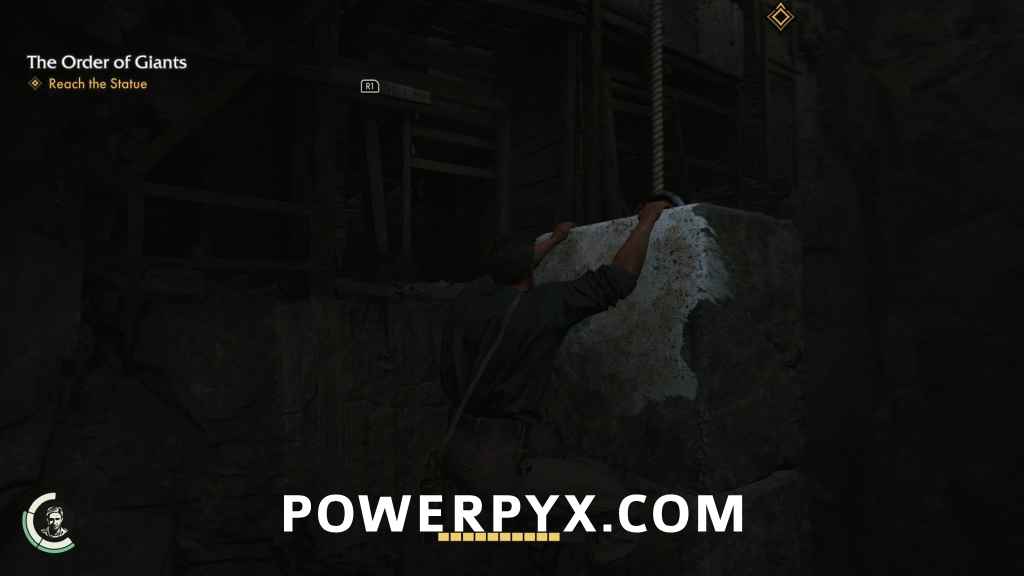
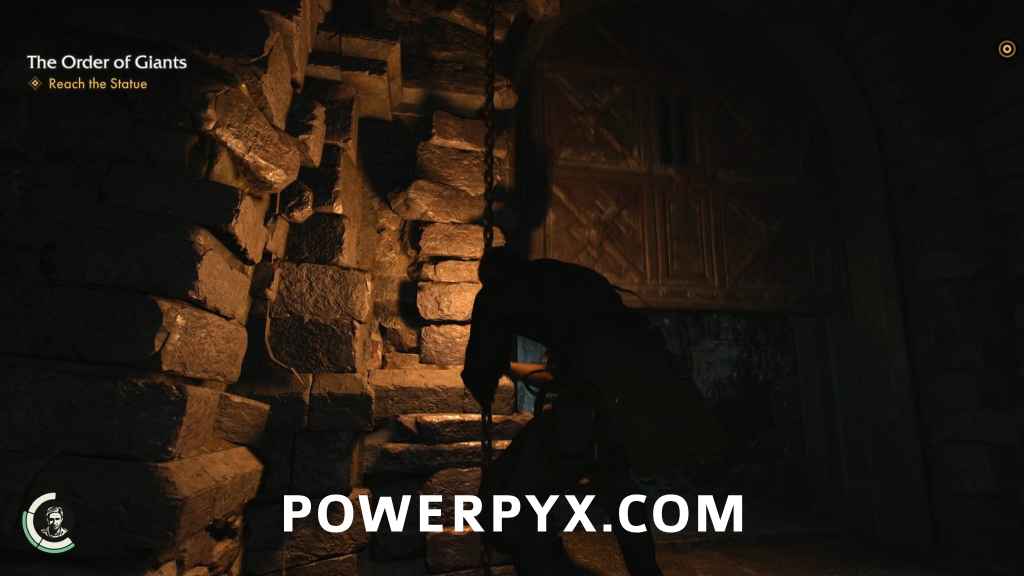
Follow the path to the northwest until it ends, then look up to see a whip point you can use to swing across the gap. Once on the other side, go south to find a staircase that ends in a wall you can climb up. Once at the top, turn south and you’ll see a white streaked wall next to a beam you can jump across to and shimmy hand-over-hand to the west until you are in range of a whip point to swing across to the other side.
Go straight ahead on this platform to find a zip-line that will take you across to the other side of Junia’s Tomb. Once on the other side, go around the corner of the passage to find a wall to climb up.
Now, here’s a bit of fun. This platform has a chain that will winch the tower in the distance towards you, swinging on a pivot point attached to the rocky pillar in the center of the cavern. Once winched all the way towards you, once you let go of the chain, counterweights will work to swing the tower in the opposite direction until its back at its starting position. What the game would like you to do is winch the tower over to you, you’ll let go and quickly try to whip to the tower so it will yank you off your feet and send you careening around until you let go, flinging yourself to the other side like the world’s worst trebuchet. Instead of doing that, we’re going to do something much stupider.
You see, there’s a note out there on that platform that’s way out in the middle of open space. And while you could try to maneuver yourself while swinging on the tower to be going in roughly the same direction, let go, and hope for the best, in fact the safest and most consistent way to reach the platform is to just jump. You need to jump from this side of the cavern too. If you use the tower to cross then turn around to look, the rocky wall in the center looks much closer, but on that side the rocks are uneven and I’ve never been able to stick the landing from that side. From the side with the chain though, its a long jump but its absolutely doable. Try to aim for the corner for safety.
Adventure Note #20: Building Instructions (15 AP)

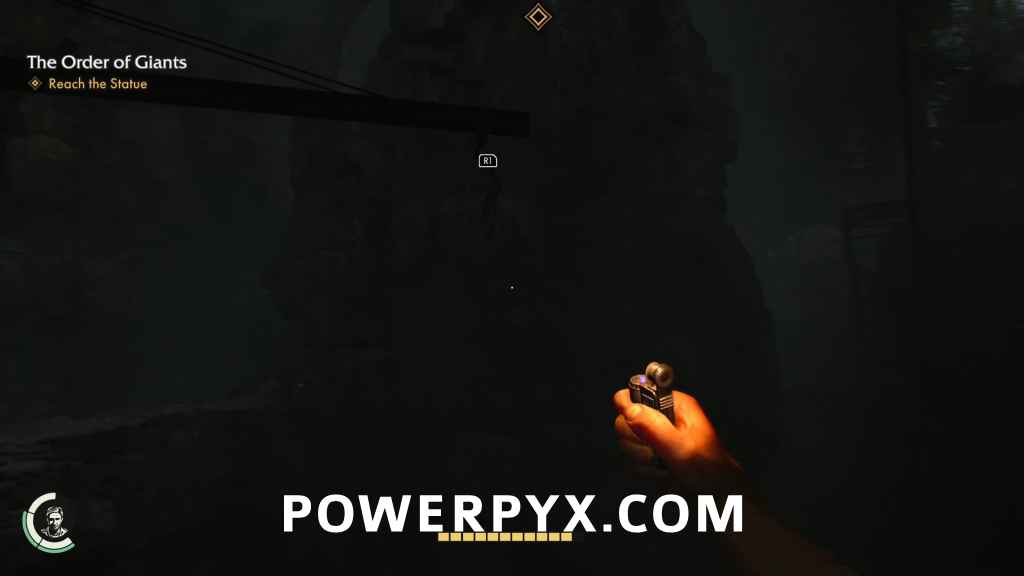
Once you have the note, jump up to the top of the platform and whip the tower in its resting position to swing across the other side. You might bump off the tower a little but you won’t be knocked free. Land on the other side and continue onward. Go up the stairs and follow the cliff till you have to jump up and shimmy around to the right until you can drop down again. Face the cavern and there will be a bar on a rope. Whip to it and your weight will pull it down until you reach the bottom where you can swing to an opening in the wall. Once released, the counterweight will pull the bar up and out of your reach but when it comes to a stop you’ll see the counterweight has the familiar white paint that marks it as a climbable surface.
Jump across to the weight, then look to your left to see a beam that you can whip and climb up to. Once on the platform, there’s a passage in the wall ahead of you to follow till you reach the end. Turn around and look up, and you’ll see you’ve been under a wooden platform that you can climb to.
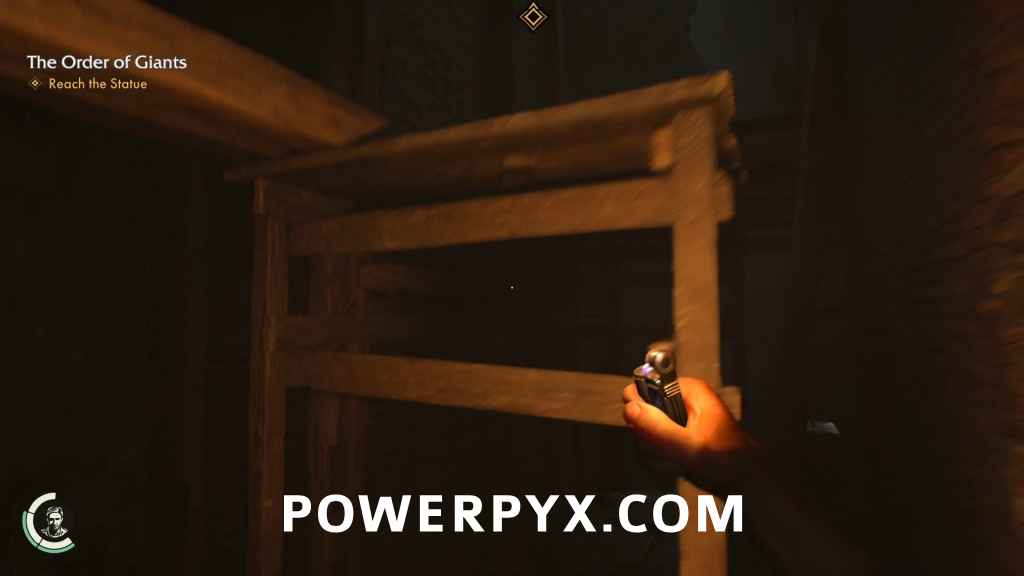
On the platform, go back towards the cavern and then turn left to follow the short ledge to the end, then look up to see a bar above you to whip climb to, then pull yourself into the room beyond.
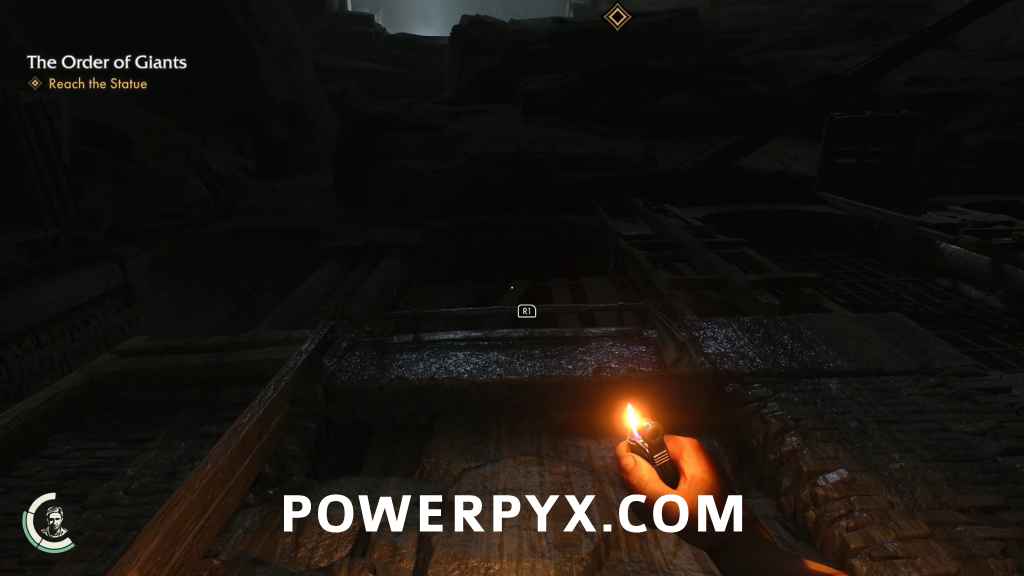
Right around the corner from the entrance you’ll find a large opening covered in an iron grate, and next to it by the wall is a chain for you to pull. Pull it all the way down and you’ll see a crane swinging to the right until you’ve pulled the chain all the way down.
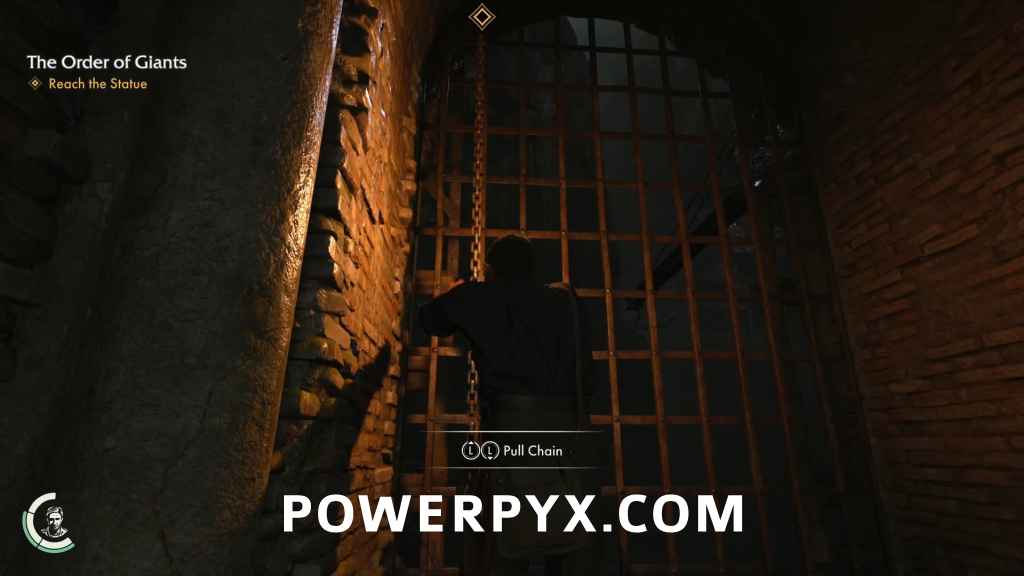
Quickly let go of the chain and run back the way you came, past the entrance you used with the wood planks blocking it, to the open archway on the other side. Quickly whip to the crane before it swings back and out of reach, then dangle from it until you can swing over to a broken staircase on the other side.
Follow the stone bridge across the gap and go up the stair to find a zip-line at the top that takes you to the other side of the cavern again, but higher this time. When you land, head up the path in front of you, and keep going up stairs until you come to the end of the passageway. There you’ll see another counterweight to jump to, then look right to find another whip point to swing from into the archway on the other side.

Left around the corner and you’ll find another chain to pull all the way down until it stops. This time a wooden wall is hanging from the chain. Let go and quickly jump across to grab the top of the wall before it rises out of your reach. Hang from the wall until it stops, then turn to your right to see a bar that you can whip top and climb up, then shimmy right along the bar until you can pull yourself up.
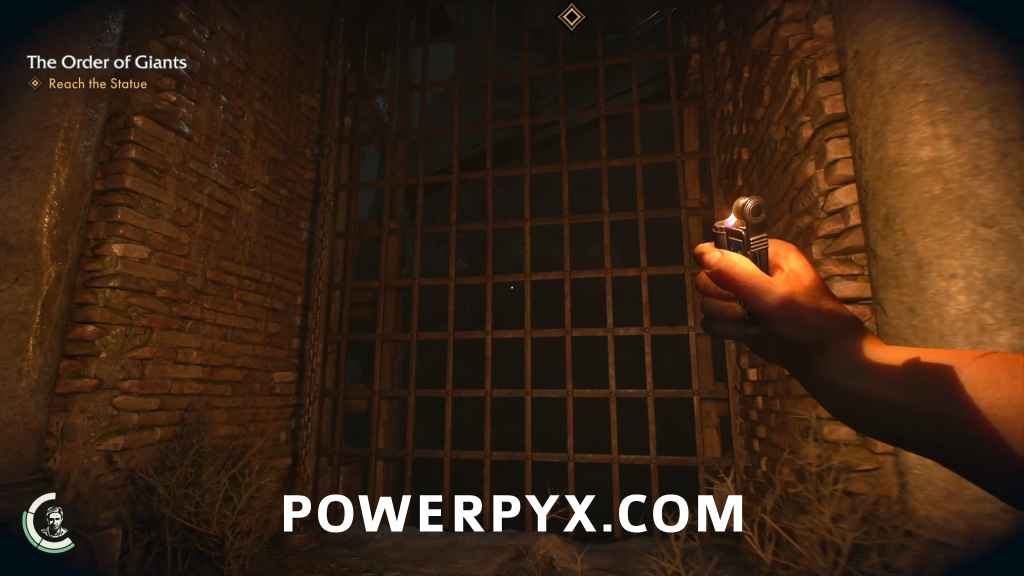
Go through the archway and follow the passage until you reach a gate leading to the statue of Junia, with a chain you can pull to raise it. Before you go and do that though, keep following the passage around until you find a door you can open to shortcut going back the way you came. Back in the room with the gate to the statue, there is also a note lying on the nearby rubble.
Adventure Note #21: Protection Instructions (15 AP)
Now that’s done, go ahead and raise the gate to the Junia statue, then once you let go hurry onto the bridge before the gate automatically closes.
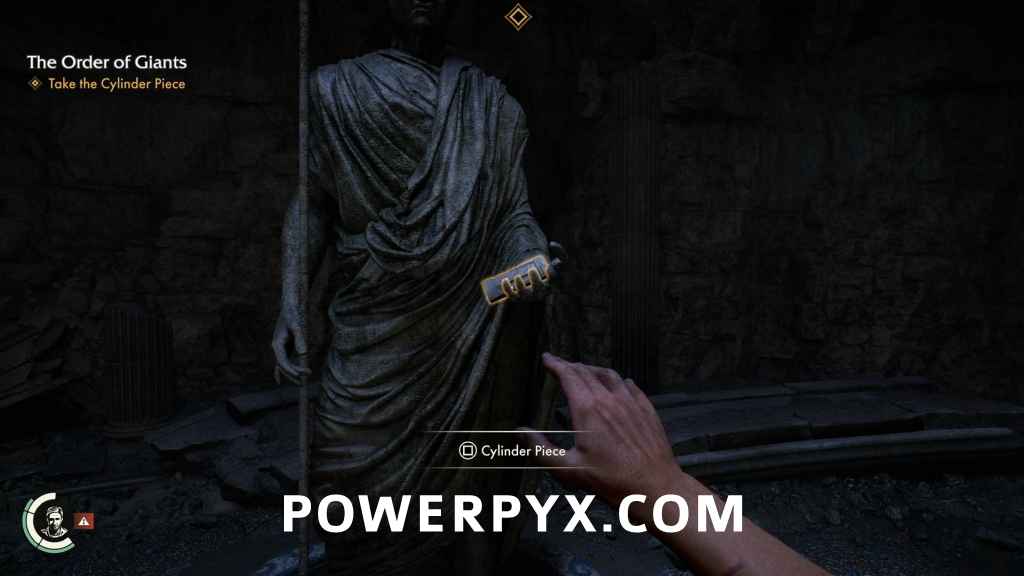
Investigate the Statue
At the feet of the statue is a stone chest. Lifting the lid you find a intricately carved piece of a marble cylinder, one third of a whole object.
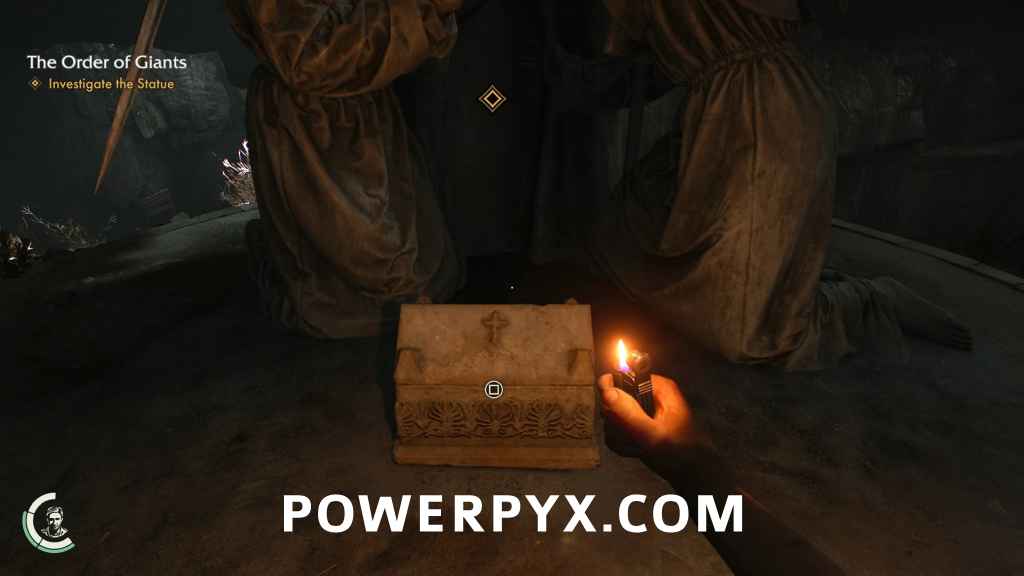
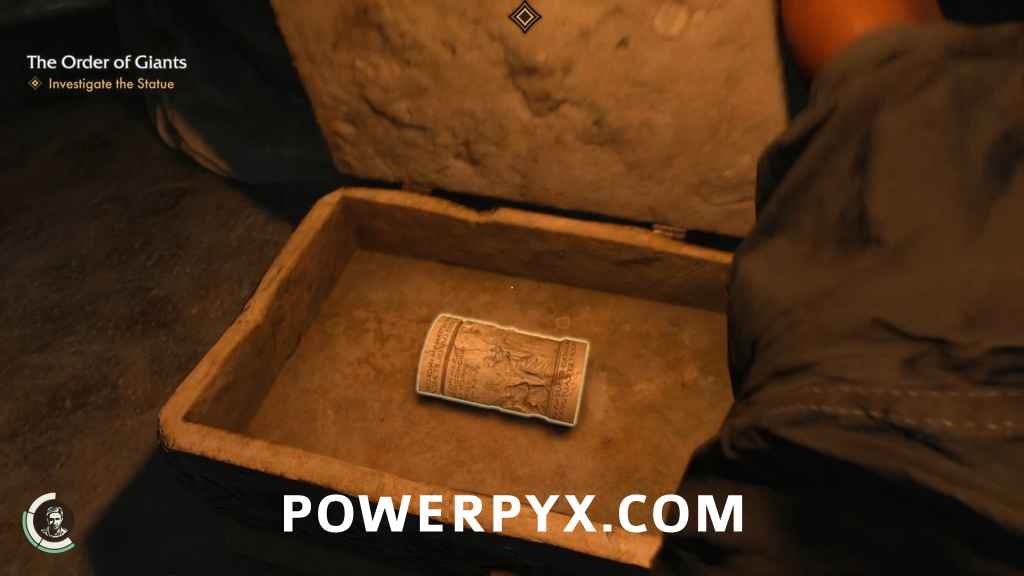
Pick it up and head back across the bridge.
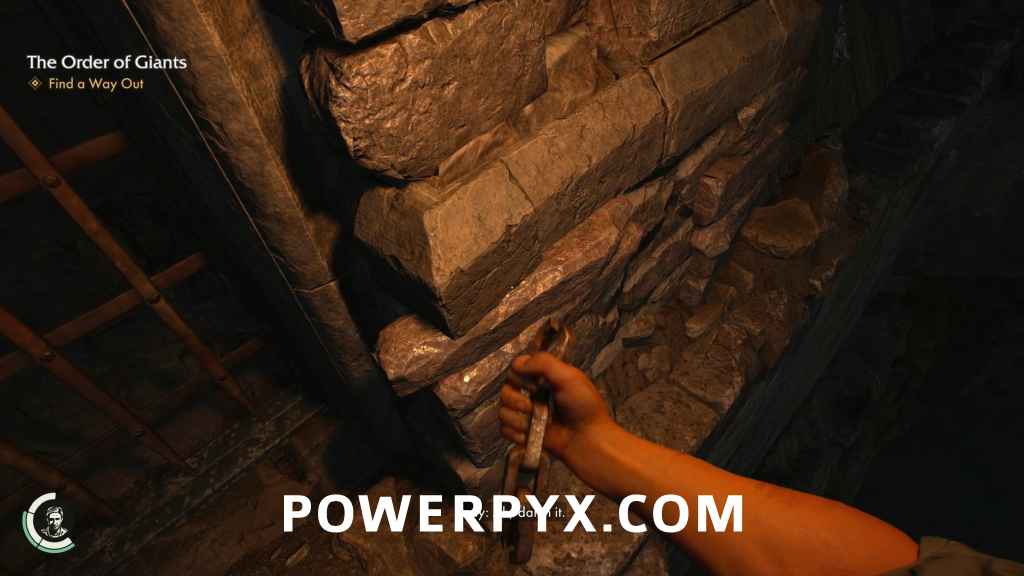
Find a Way Out
Just as you start pulling the chain to open the gate, it snaps off in your hand and causing the counterweight to fall. Suddenly things go from bad to worse as a voice starts shouting at you in Adamic, and a Nephilim comes from out of nowhere to ruin your day.
You can try to fight the Nephilim, but there’s just no room to maneuver out of his reach. Eventually he grabs you and throws you to the ground, triggering a cutscene that is better left unspoiled.
Exit the Underground
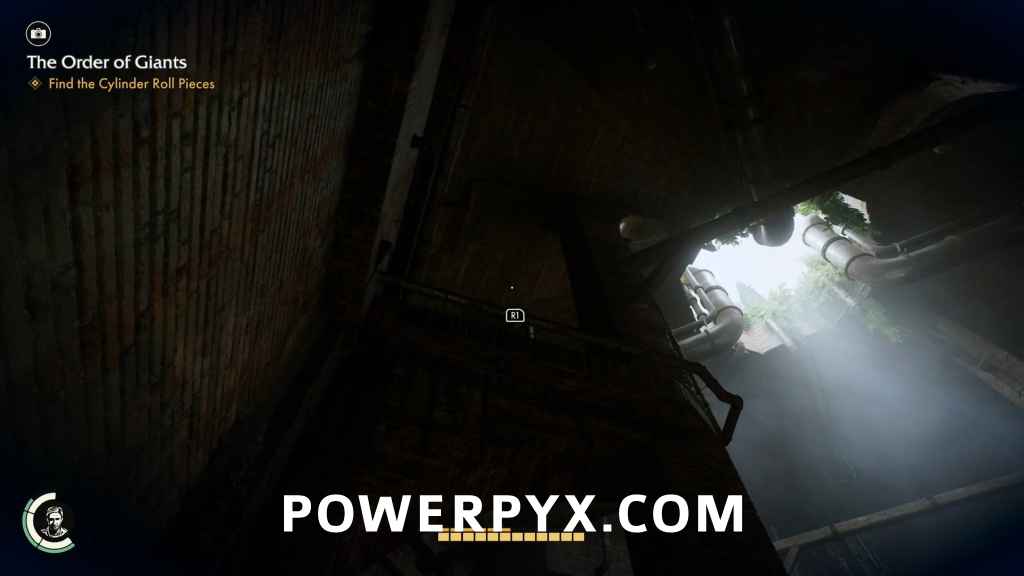
Once you have control again, follow the pipes in this relatively new passage to find a ladder to climb up, and reach the iron gate leading to the sewers.
Exit the Sewers
Once through the gate, follow the tunnel to find a door that leads outside. As soon as you reach the door there will be a photo opportunity.
Discovery Note #3: Castel Sant’Angelo (10 AP)

You will also earn Out of the Vatican.
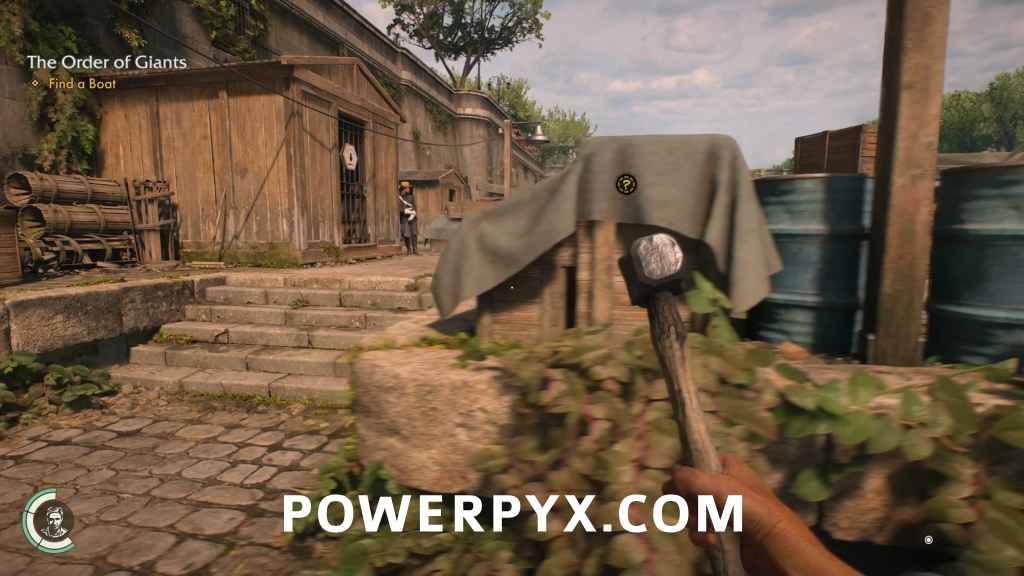
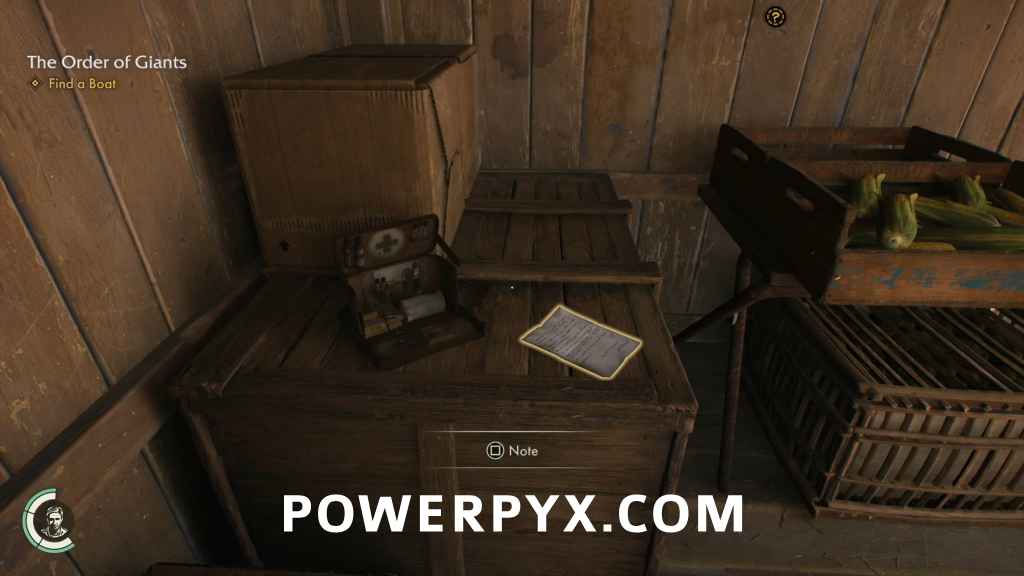
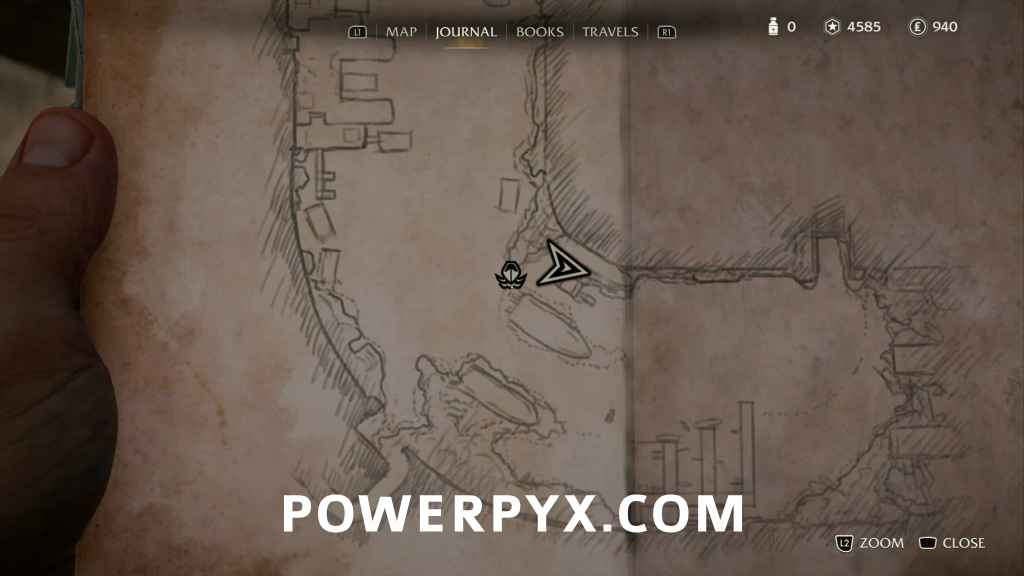
Find a Boat
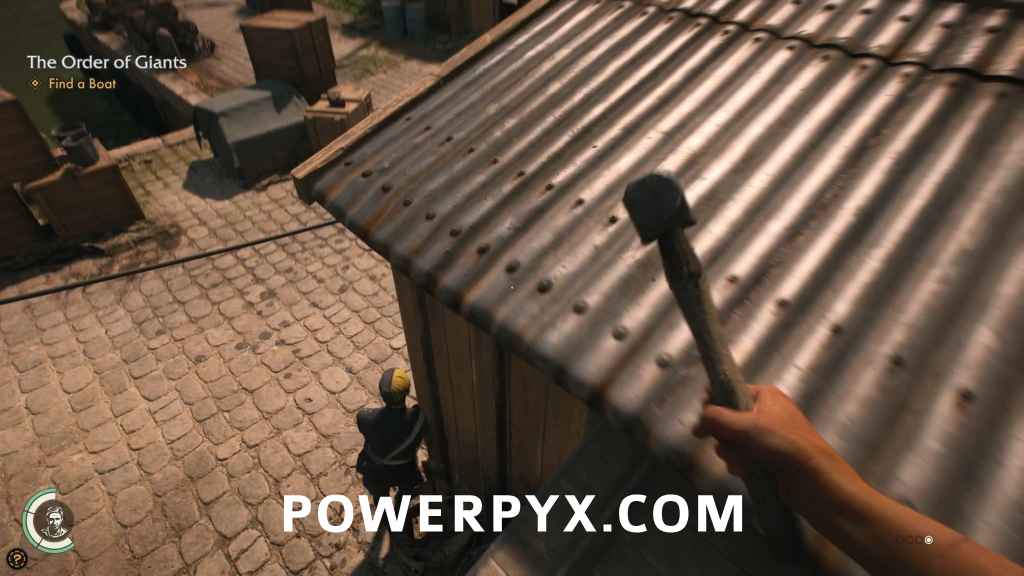
You’ll emerge onto the shores of the Tiber, near the foot of a bridge that stretches across the river to the northeast. If you look directly across the river from this point, you’ll see a tiny shelter with a tin roof on the opposite shore. Remember this location, we’ll be back here in a minute. Head up the shore to the north and you’ll find some Blackshirts guarding the docks. Wear your Blackshirt disguise to minimize detection. Along the way you’ll find a small shack with a locked safe. Go past that area and head for the next shack, which has a Captain nearby watching the area. Ignore him or deal with him however you want, but personally I went over the shack and hit him from behind then dumped his body in the nearby locked shack.
The third shack has a note in it that will give you the combination of the safe that you’d passed in the first shack. You can backtrack if you want the dynamite inside, but it isn’t neccessary.
Adventure Note #22: DiMaggio’s Note (15 AP)
At the end of the docks you’ll see a boat, but just before that on top of an empty wooden spool and near a boat that is on a table for repair, there is another note.
Adventure Note #23: Boat Request (15 AP)

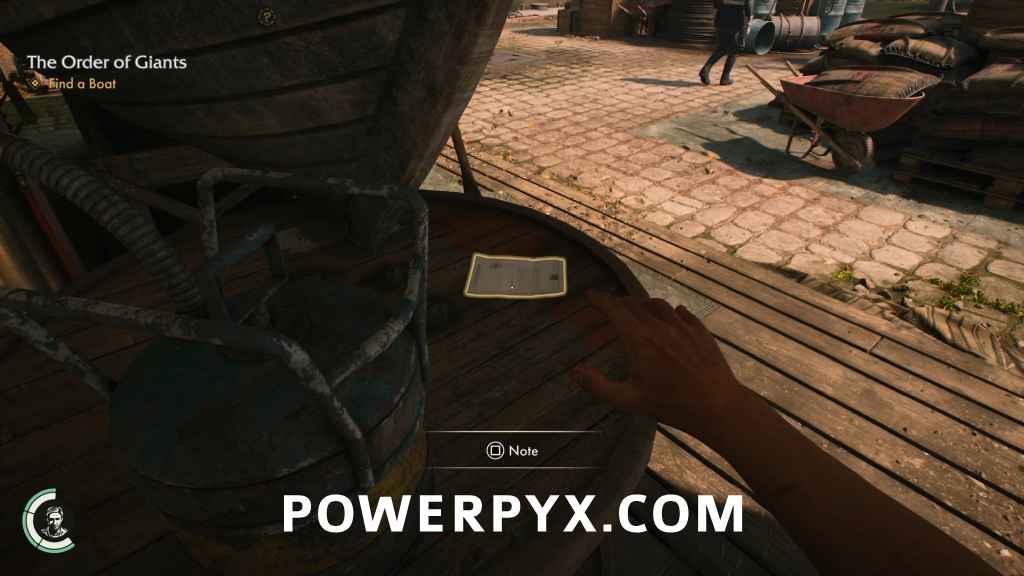
With that taken care of, hop in the boat and go for a ride.
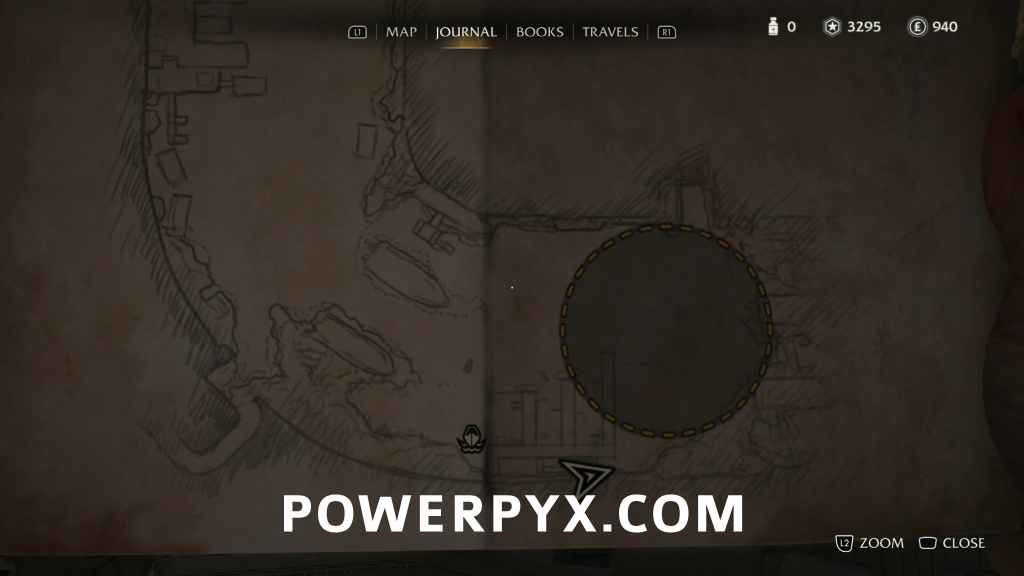
Go Up the River
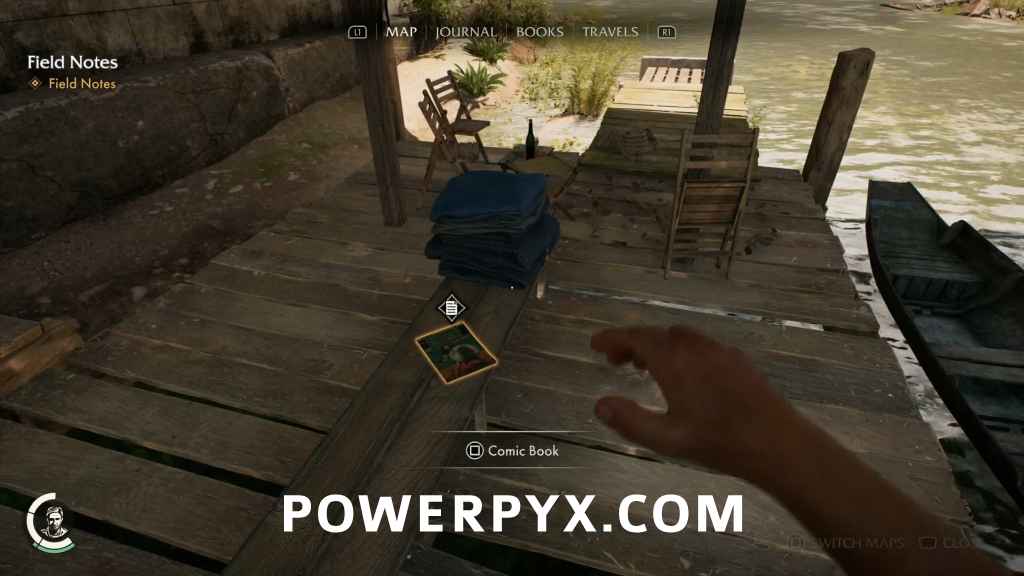
Now that you have a boat, head to the tiny tin-roofed shelter on the other shore by the bridge. On a bench out in the open will be a comic book collectible.
Discovery Note #4: Titans of the Arena (15 AP)
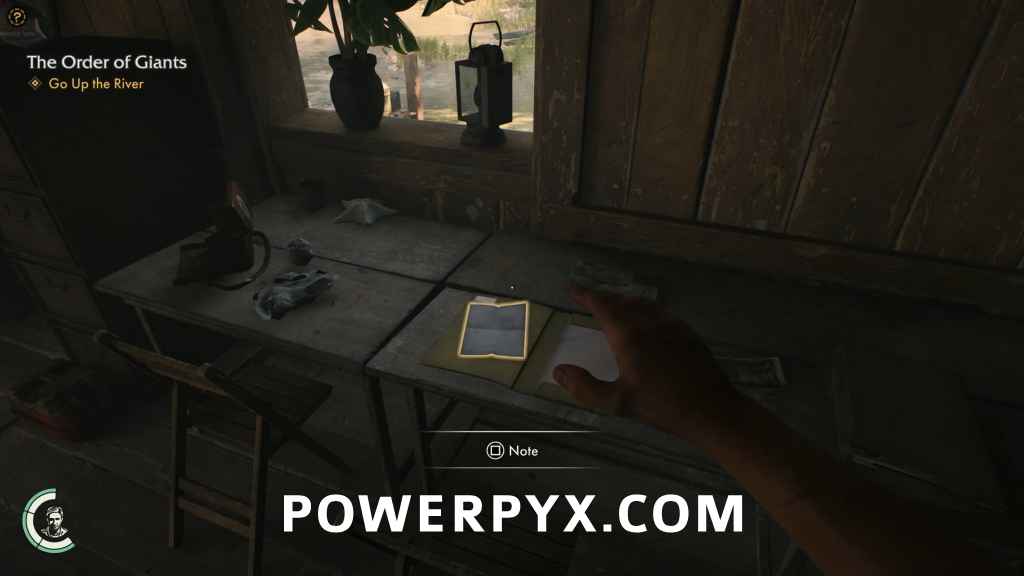
Continue up the river until you see a bridge across the water in front of you, and the way beneath it to the east is blocked. You’ll see a tunnel in the north wall leading into the sewers, and another set of docks along the south wall. Had to the docks and head into the structure on stilts there. Inside you’ll find another note.
Discovery Note #5: Leonardo’s Letter (15 AP)
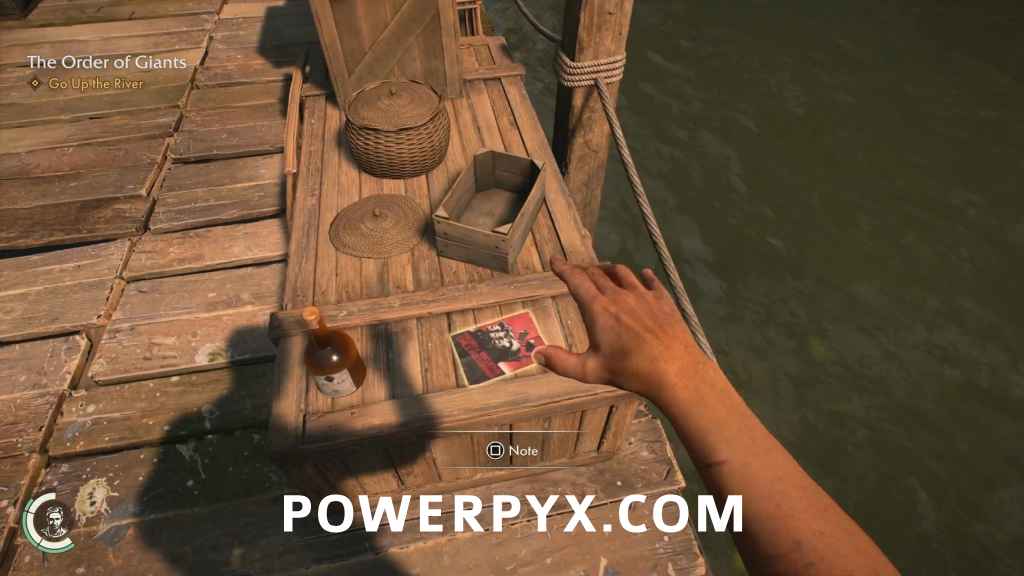
On the docks to the north of the structure, look for a propaganda flyer on one of the crates on the west edge of the dock.
Discovery Note #6: Fascist Propaganda (15 AP)
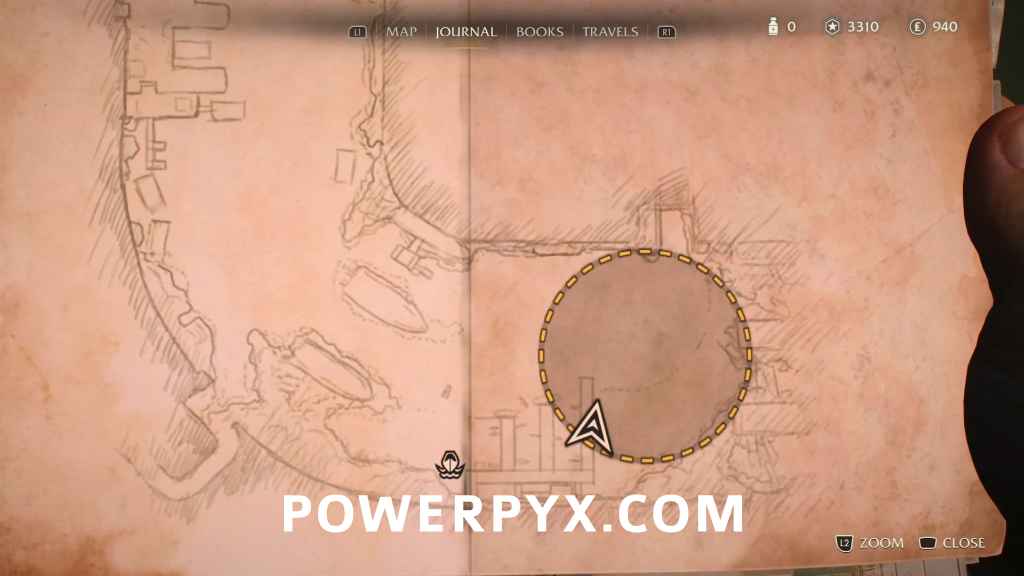
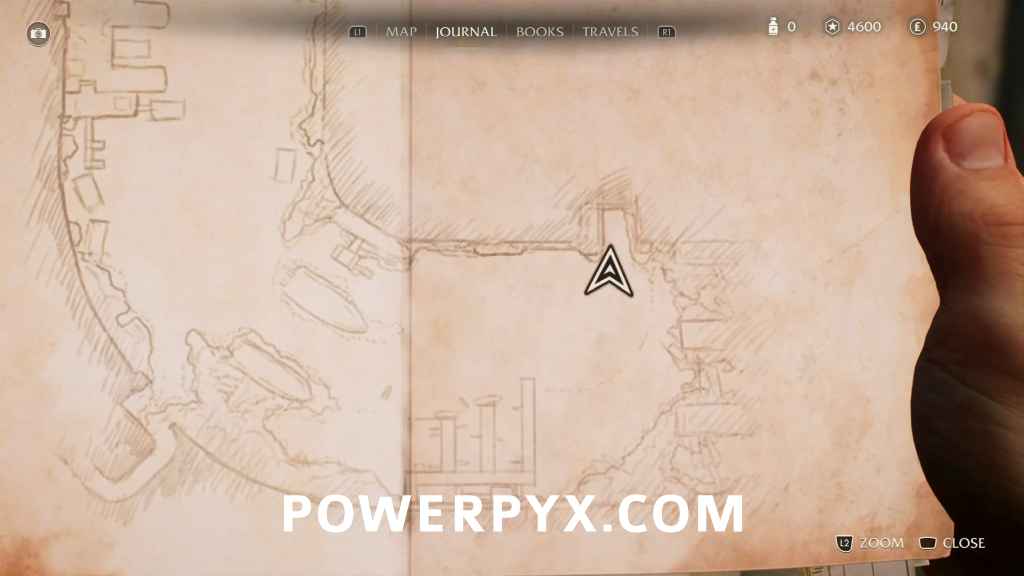
Head back to the boat and head towards the tunnel. When you’re just about to enter the tunnel, you’ll have a photo opportunity.
Discovery Note #7: Sewer Entrance (10 AP)
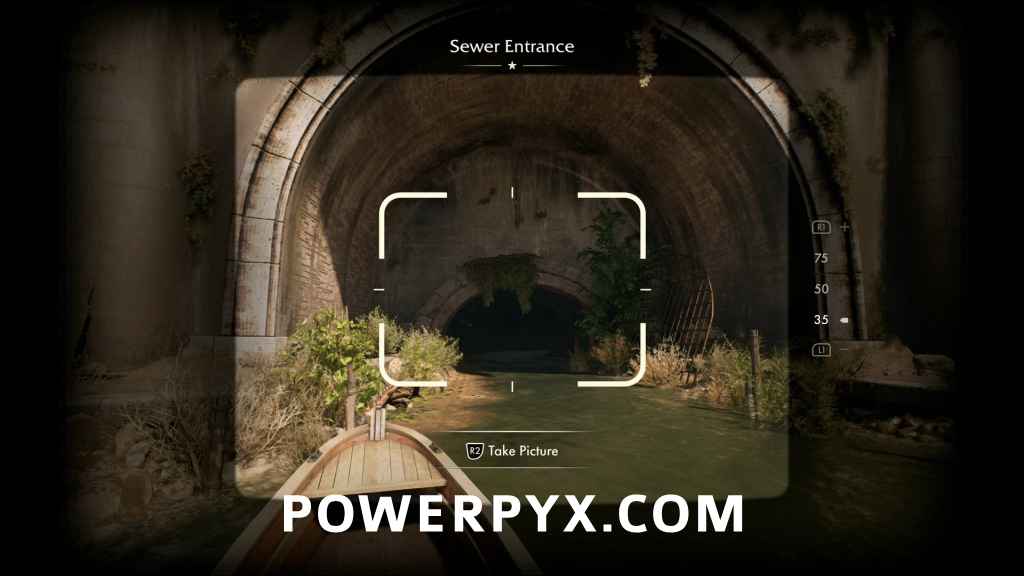
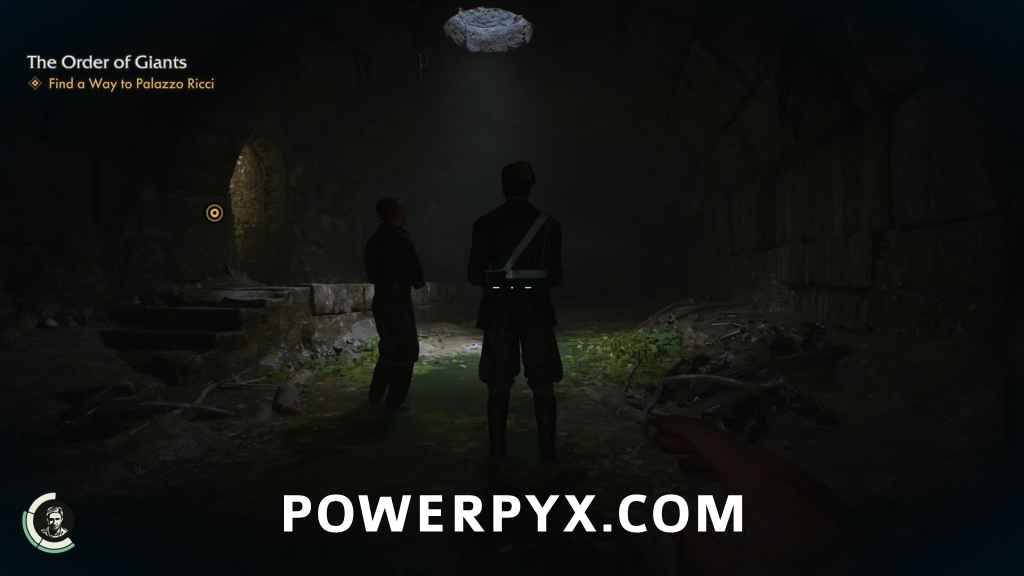
go into the tunnel until you reach Cloaca Maxima.
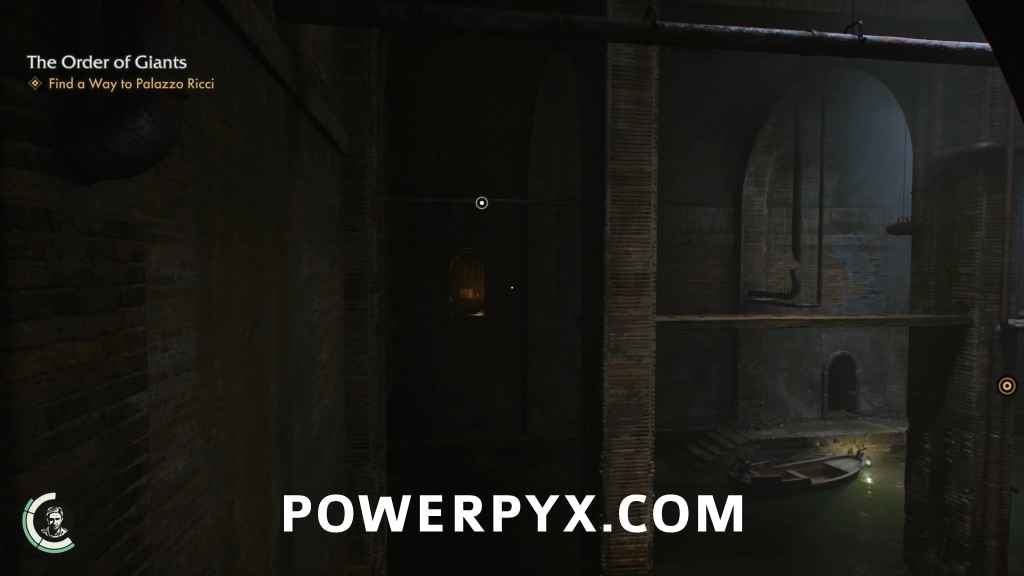
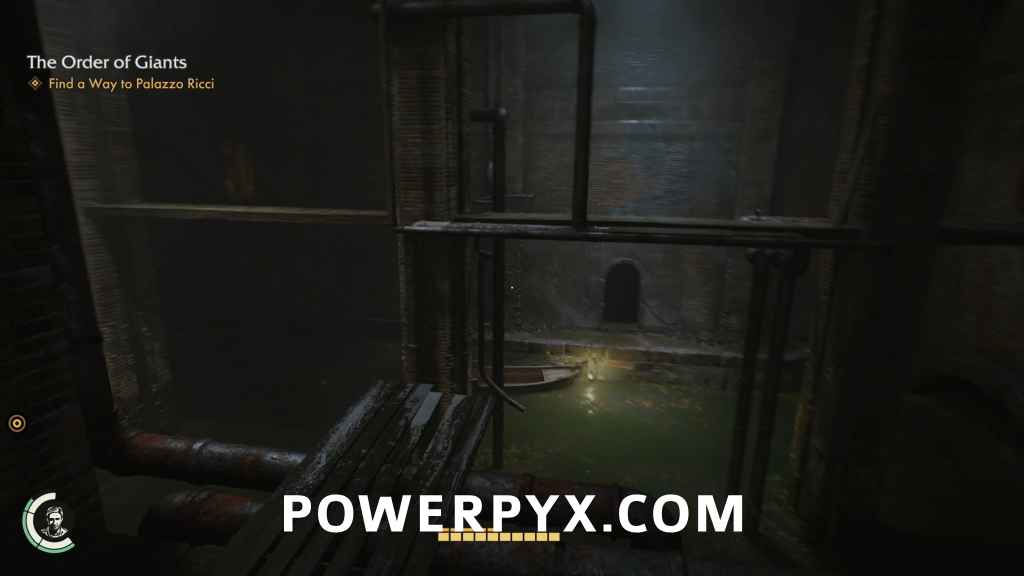
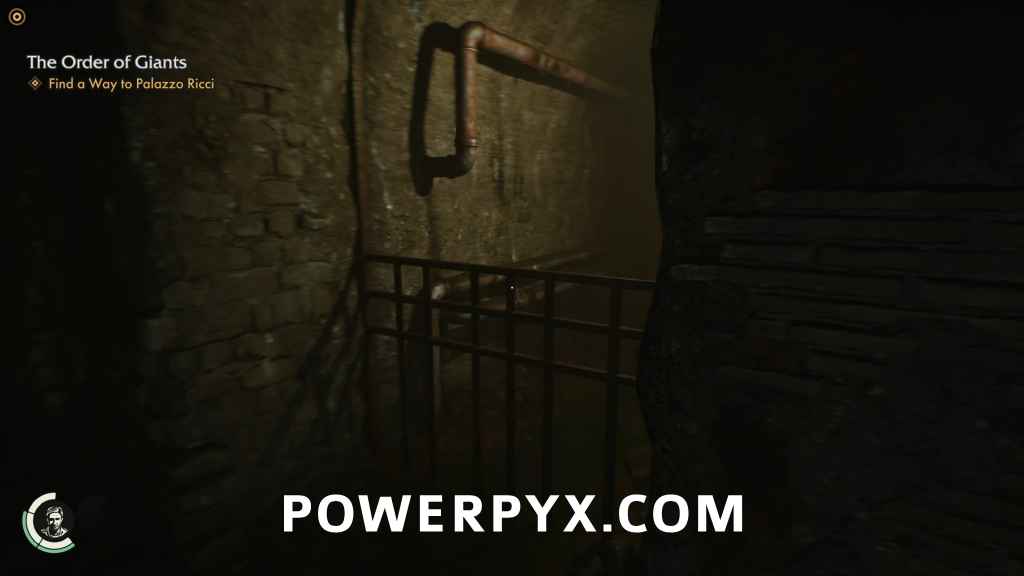
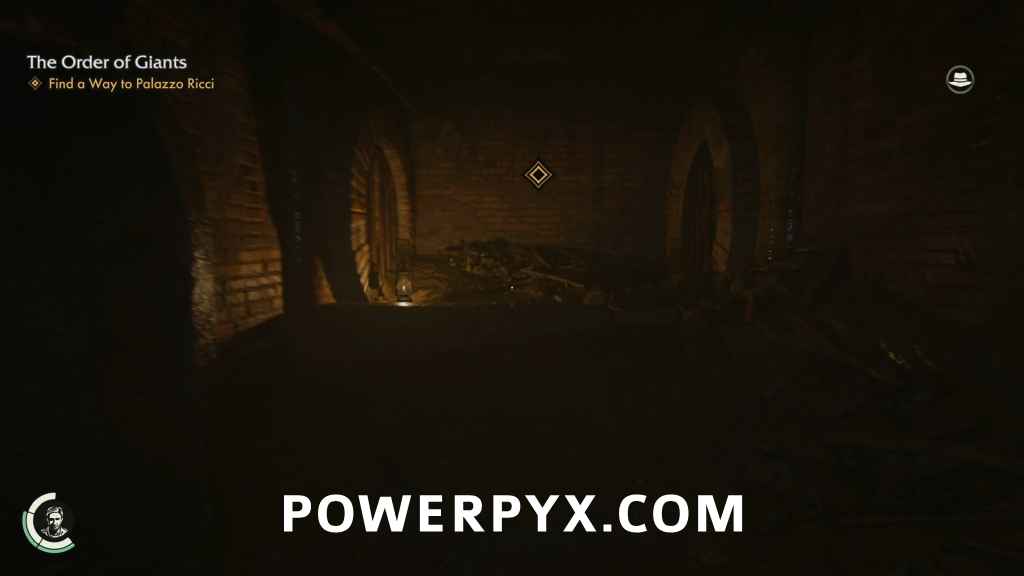
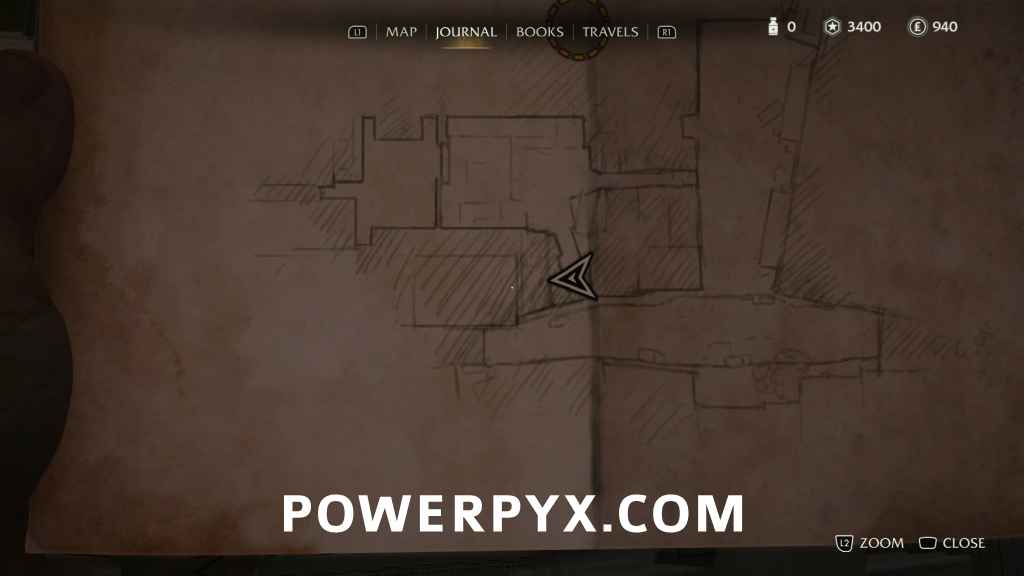
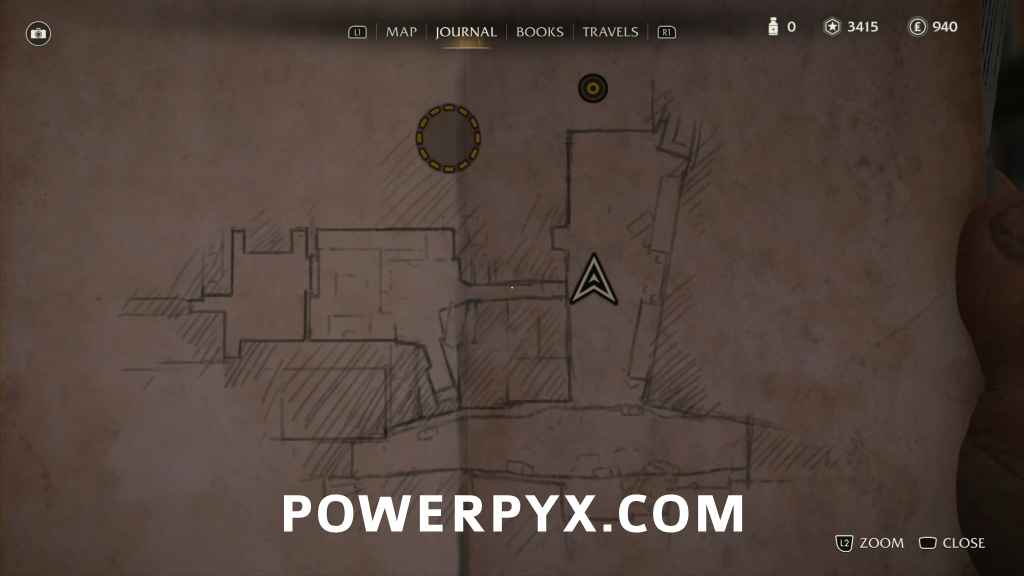
Find a Way to Palazzo Ricci
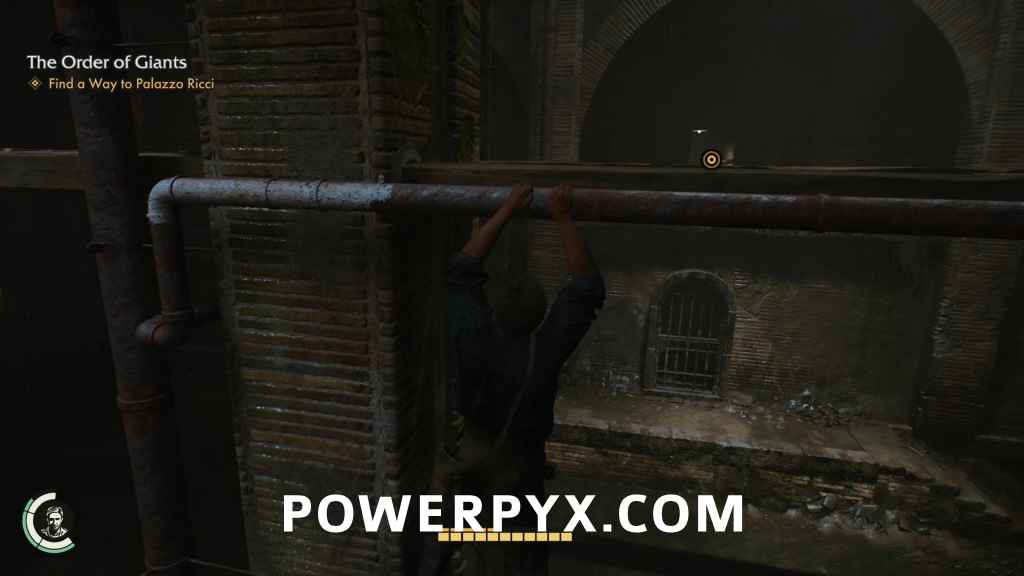
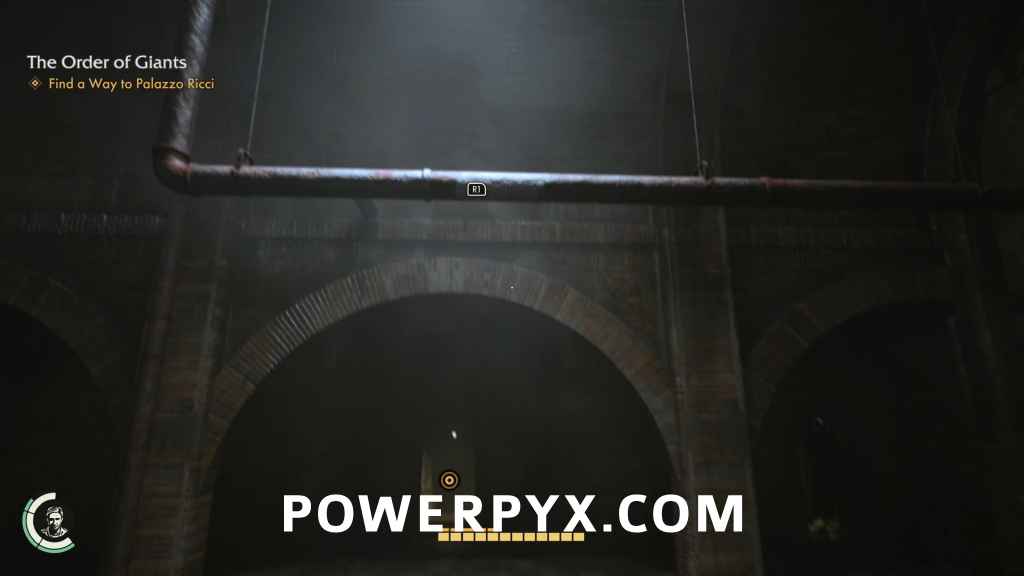
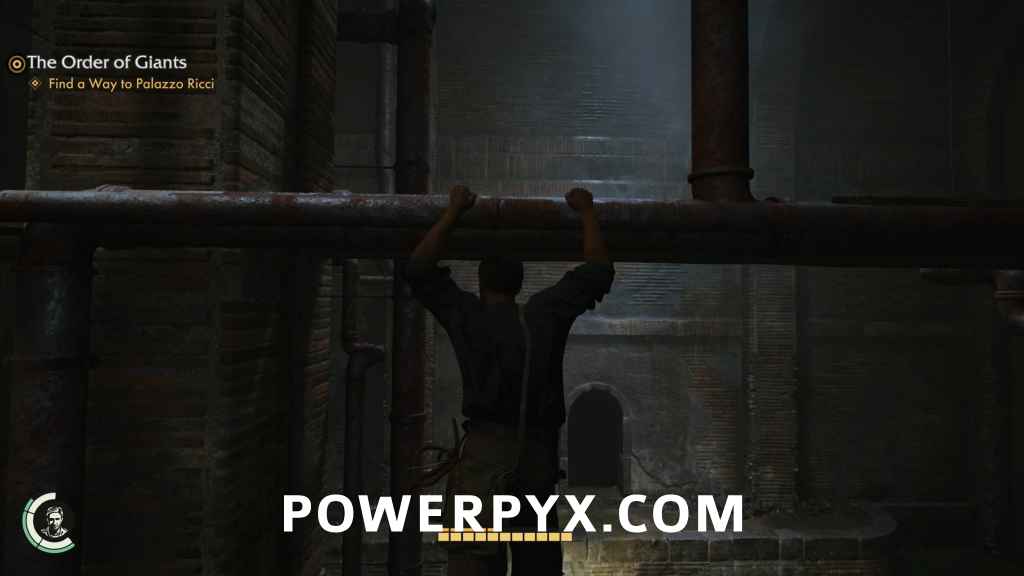
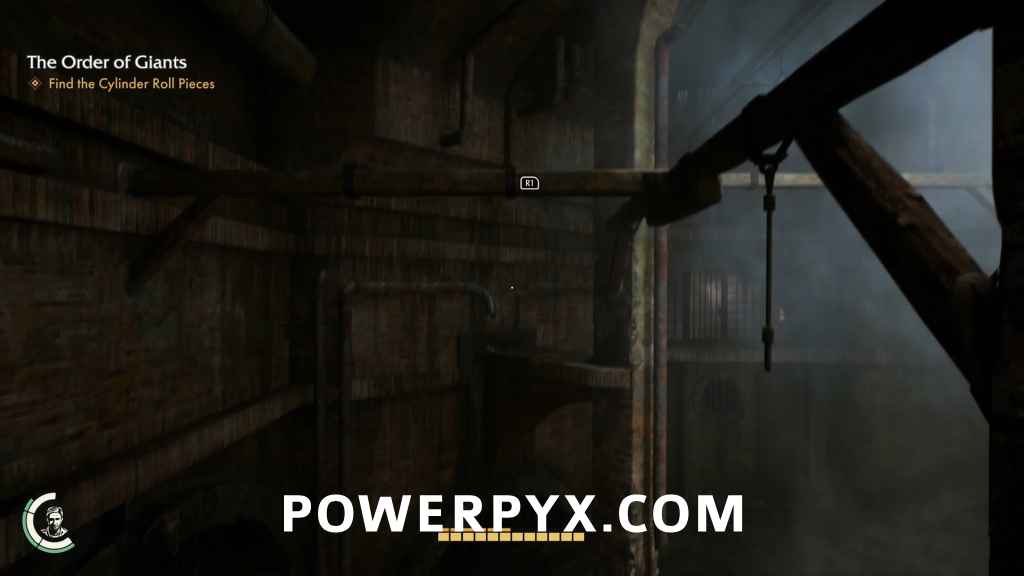
Indy will comment that he isn’t far from Palazzo Ricci now as you enter this larger room. As you move through the room, you’ll start to hear some fascists being attacked by someone in the adjoining chambers. Dock at the north side of the room, and you’ll see a pipe above your head that you can whip and climb up to. Once one the pipe, shimmy to the south till you can whip to another pipe in the middle of the room.
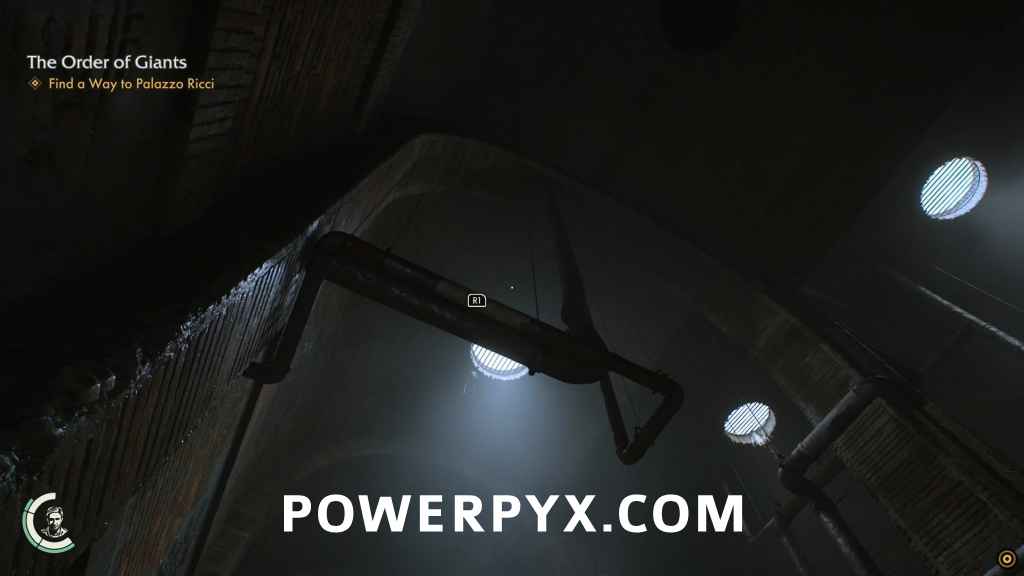

Again climb up until you reach that pipe then shimmy to the right until you reach a platform you can climb up to. Look ahead of you and you’ll see a pipe above you that you can whip and use to swing across to the south side of the room on the upper floor.
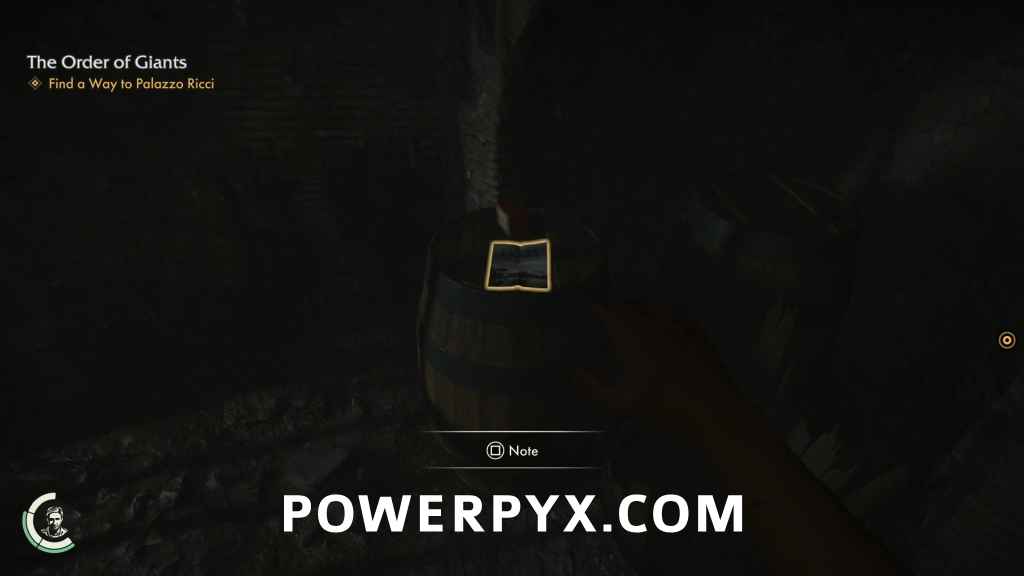
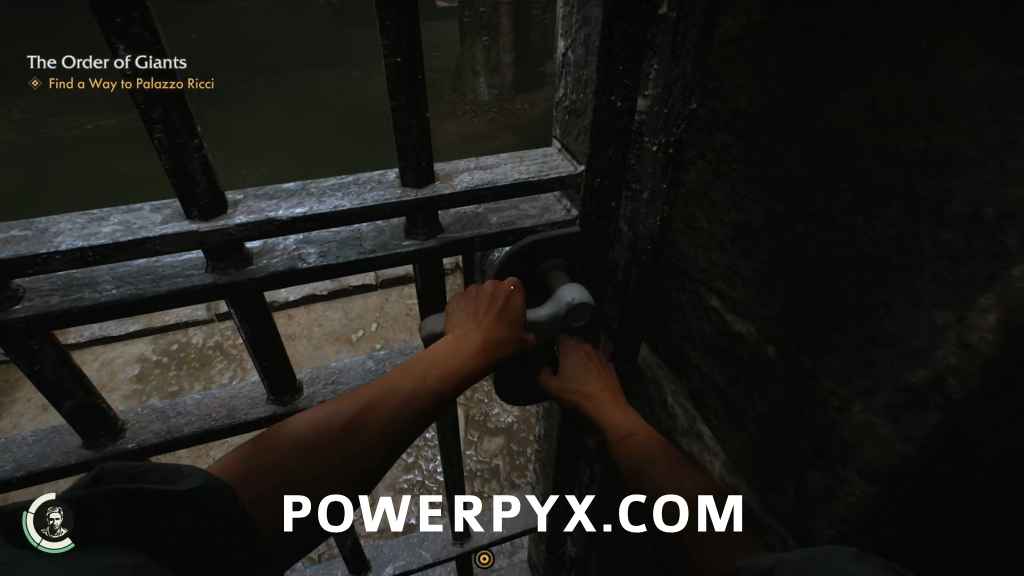
Before you do anything else, go through the west doorway here, and go down the stairs. At the bottom you’ll find a note on a barrel and a locked gate. First grab the note.
Discovery Note #8: Sewer Tours (15 AP)
Then unlock the door that leads back to the first level where there’s a convenient place to dock your boat. You can move it if you want, but the important thing is that now you’ll have a convenient staircase to reach the other floor if you fall while doing something stupid, like what I’m about to tell you to do.
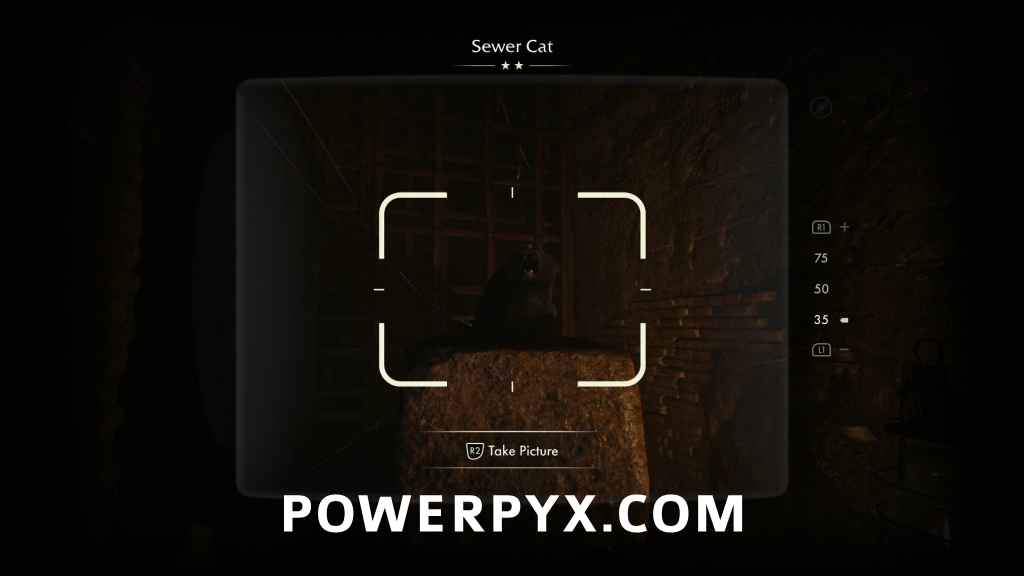
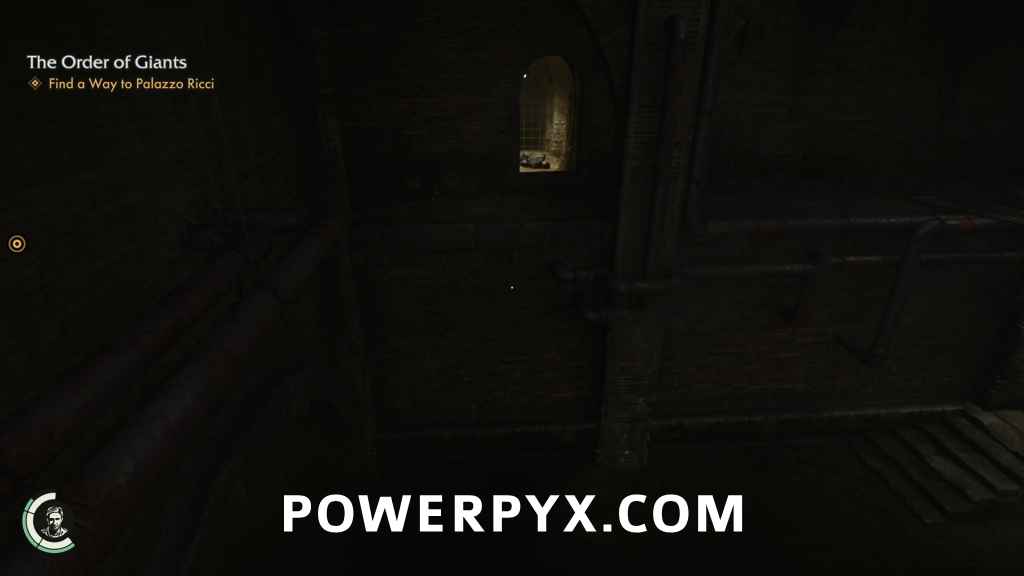
Go back upstairs to the upper level, and go all the way to the west of this platform. In the distance, you’ll see a single bar that’s out of range of your whip, and on the far side a door high in the wall that has a light on inside. In order to reach this alcove, you will have to run towards the edge and jump at the very last second. Knowing how close you are to the edge in this game is deceptive because of the first person view, but it’s usually about two steps closer to the edge than you think it is visually. After jumping at the very last second, you will have to hit the whip button the moment you see the prompt in order to catch the bar with your whip before you drop out of range.
If you’re finding the timing difficult and you’re whipping too late, you might try hitting the button before the prompt is visible, and hope that the length of the whip animation works in your favor. Truly you will be glad you opened the door back to the first floor before trying this. Anyhow, after you manage to whip the center beam, be very sure you have enough momentum to reach the other side before you release. It never hurts to build up your swing a couple times before attempting the dismount. Once you reach the other side, your only reward is a sleepy sewer cat that you can take a picture of. You don’t even get to pet it.
Discovery Note #9: Sewer Cat (15 AP)
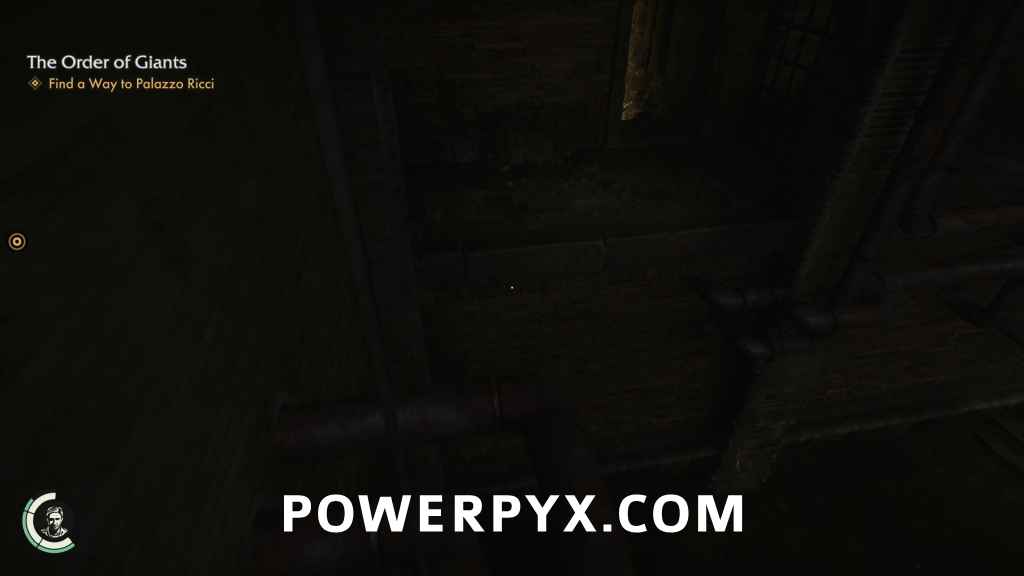
Swing back to the other side (or dive/fall in the water, swim back to the other side and climb the stairs to the second floor again. This time go all the way to the east side of the platform. You’ll see there’s a section on the east side that you can’t access behind a metal grate, and right next to it there’s a convenient group of planks that stick out from the platform, giving you just enough distance to be able to jump and grab the pipe in the middle of the room.
Pull yourself up onto the pipes and head east to the end of the platform. There, along the east wall you’ll find two pipes that run almost all the way back to the south platform, allowing you to jump back into the area behind the grating.
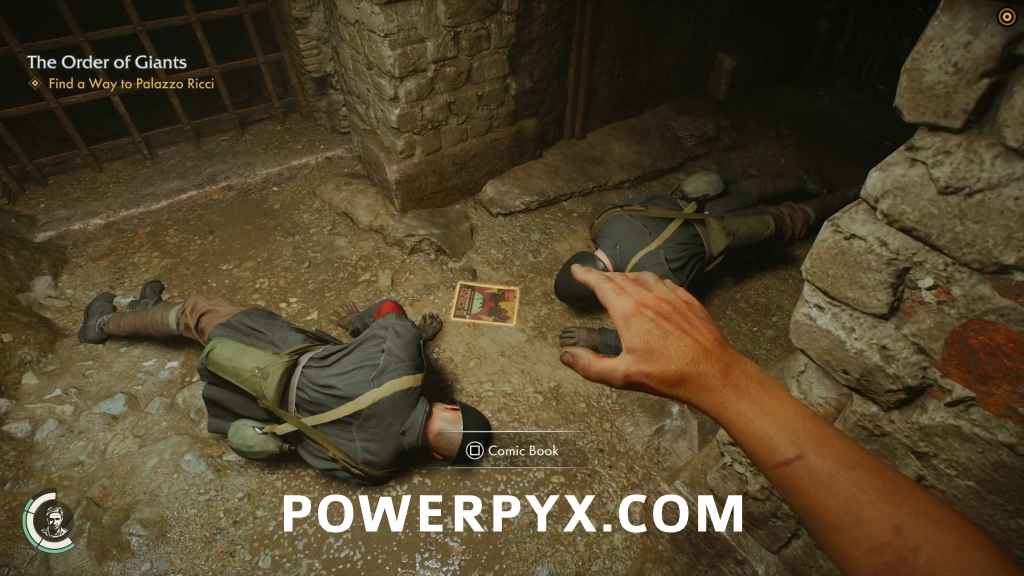
Head into the tunnel in the south wall and right away you’ll see two bodies on the ground, right next to a comic book collectible.
Discovery Note #10: Cult of the Eternal Serpent (15 AP)
Around the corner is a door you can unlock to join the main path heading south, down to the next area. Follow the tunnel until you hear two fascists talking. They will come to a stop in the middle of the tunnel with their backs facing you. Perform a takedown on the Captain so that he doesn’t call for reinforcements, then quickly punch the other Blackshirt into submission. Head down the lit tunnel from here and follow it until the tunnel splits into a tunnel to the north, and one to the east blocked by a metal grate.

Head north for a bit where you’ll see the tunnel is lit up and start to slope upwards, but instead of heading up, take the dark passage to the east. It leads to another lit path to the south with a low metal grate that you can jump over.
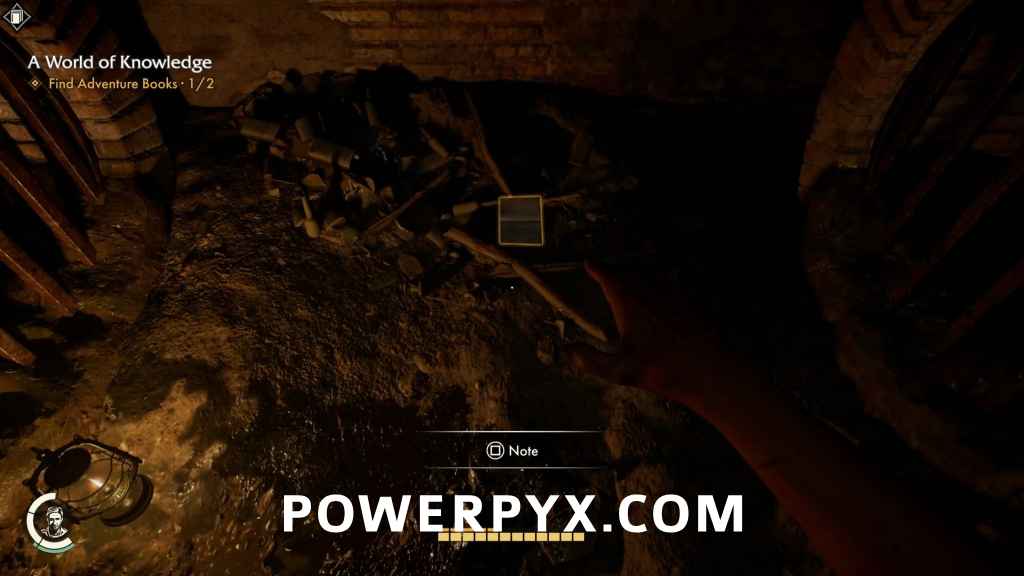
Follow the path around the corner until you reach another note.
Discovery Note #11: Disappearances Article (15 AP)
Go back the way you came, and this time continue up the slope to the north. Follow the tunnel to the very end, you’ll see a lantern, two sewer pipes with metal gratings covering them, and in the roof some rungs leading to a manhole cover. Don’t climb up yet, because there’s one more thing to do in this area. Look around near the lantern.
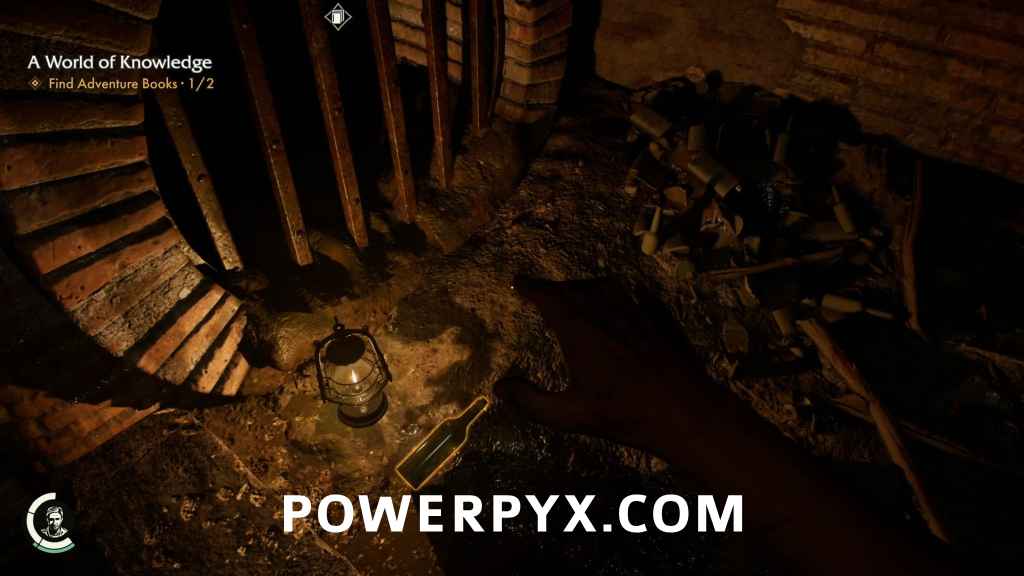
There’s a message in that bottle, so pick it up and toss it at the wall to get the note.
Discovery Note #12: Message in a Bottle (15 AP)
Now climb up the rungs and enjoy the next cutscene. When you have control again, you’ll be in Rome near Palazzo Ricci, but there are a number of collectibles to pick up before you head there. First go east down the street. On the south side, there will be a note attached to a easel on a table.
Discovery Note #13: Book Presentation Leaflet (15 AP)

Next head west up the street past your starting point, until you can go north up an alleyway. On the west side of the alley will be a bulletin board with a note beside it.
Discovery Note #14: Trattoria Ad (15 AP)
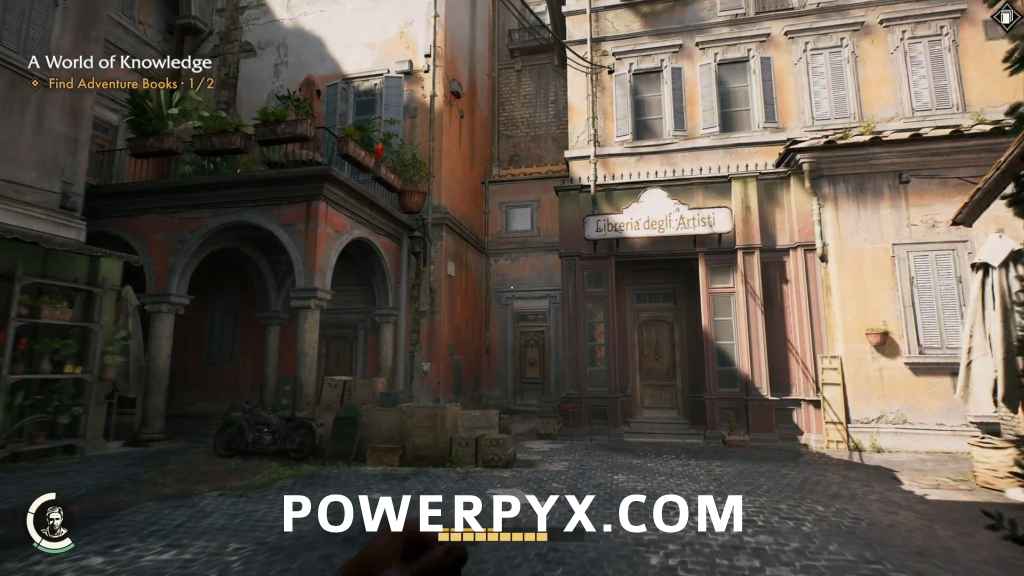
From there head west until you see a sign that says “Libreria degli Artisti” (Artists’ Library) then turn to the north, where you’ll see a small house next to a small alcove. In the alcove are a couple of boxes near the wall that you can jump on to be able to reach the other side of the wall.
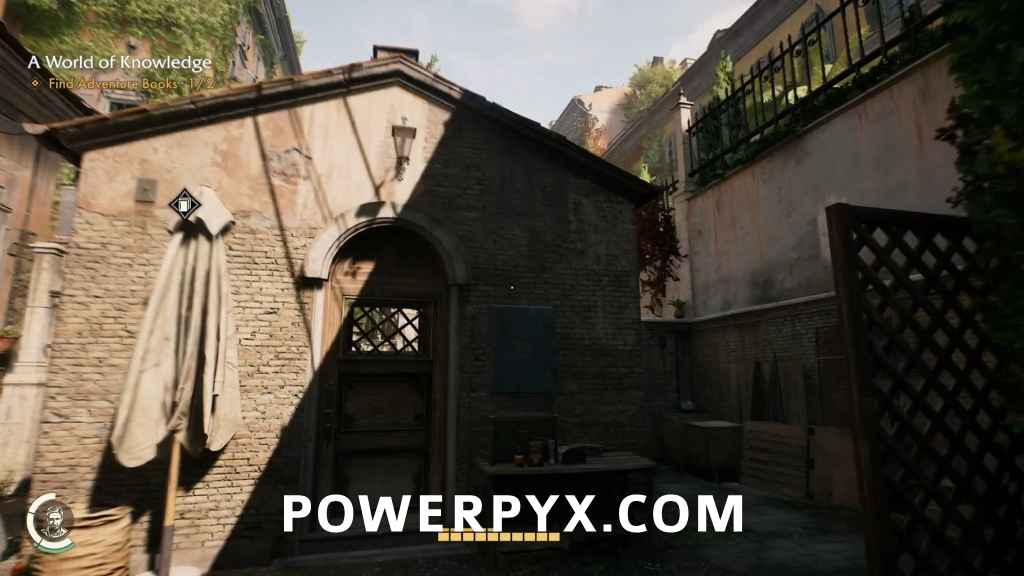
Once you reach the other side, you’ll see a building to the north with scaffolding next to it. First go to the west and look behind a grating with a cloth draped over it, to find a note on a bench on the other side.
Discovery Note #15: Colosseum Tours (15 AP)
Now head north and run to the end of the scaffolding to find a ladder to climb.

At the top of the ladder, you’ll see a gap in the platform above next some boxes. Climb up to the next level then go straight ahead where you can jump onto a balcony.

In this room, you’ll find a note on the table.
Discovery Note #16: Oenogarum Recipe (15 AP)
Jump back to the scaffolding and look up to find a bar to whip to and climb to the upper level, then turn around and jump across the gap to the south. There will be some planks forming a walkway to another balcony. Go across and enter the building.
Inside you’ll find a note and an Adventure Book for your trouble!
Adventure Note #24: Blackshirt Note (15 AP)
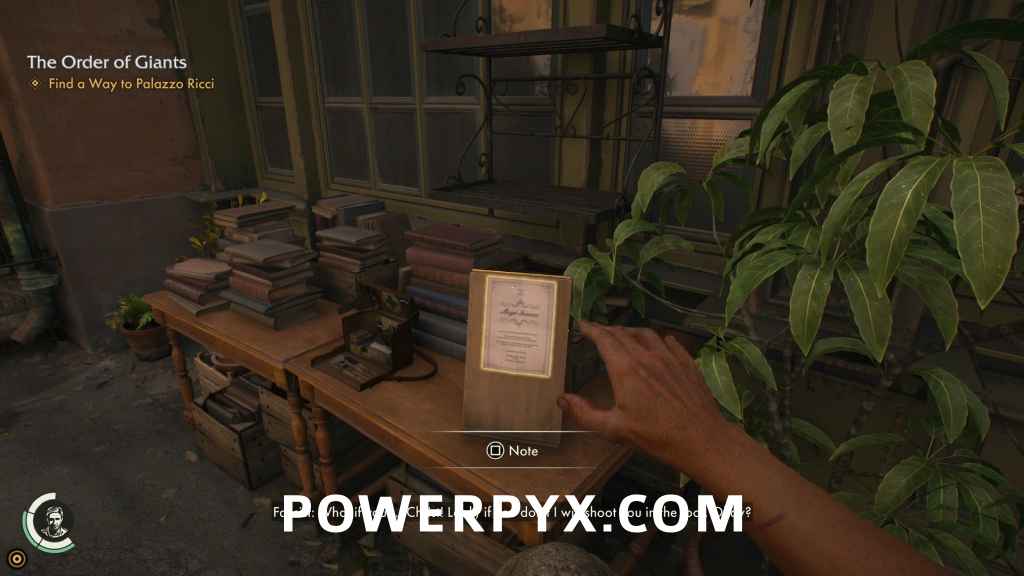
Adventure Book #2: Vitamins (Requires 1000 AP)
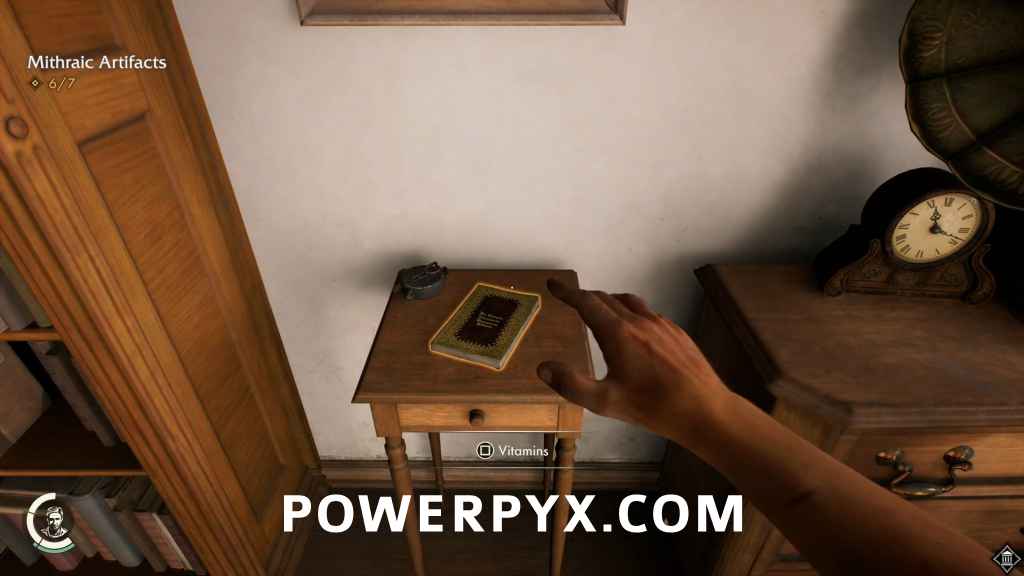
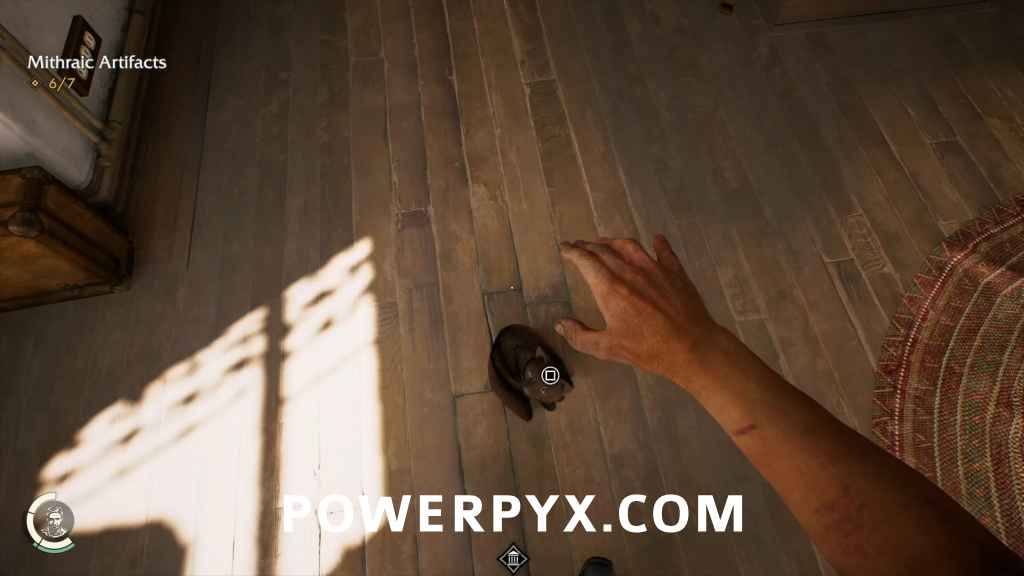
Read this to unlock  Books of Power. Also in this room is a cat that you can pet for the Pet the Cat trophy.

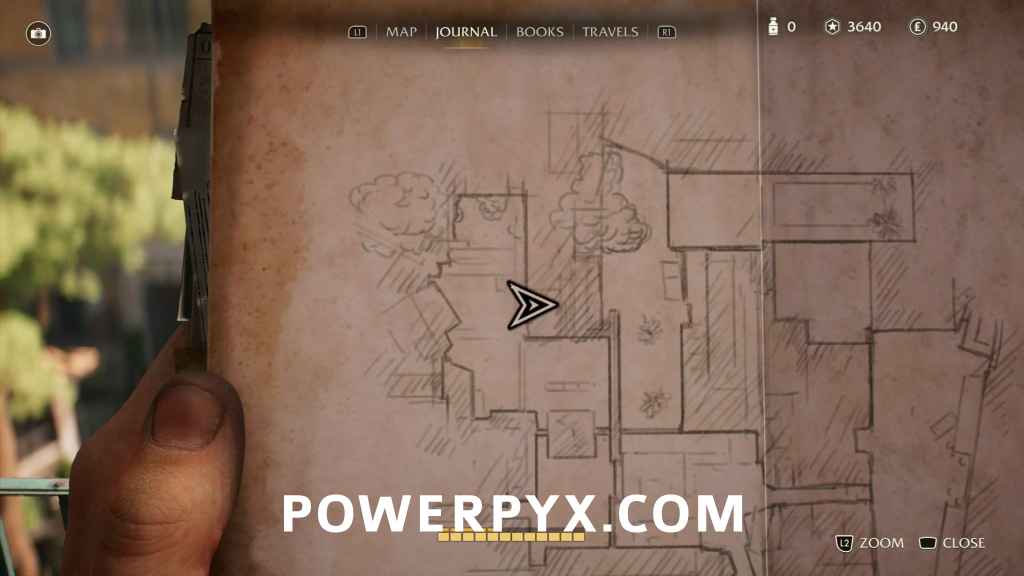
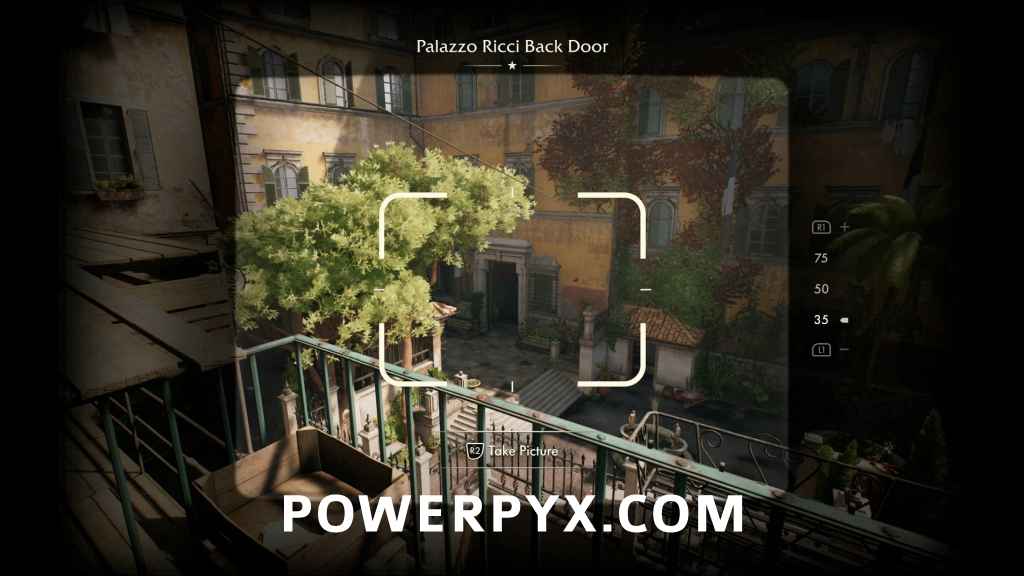
From the balcony, look down at the Palazzo Ricci Back Door for a photo opportunity.
Discovery Note #17: Palazzo Ricci Back Door (10 AP)
Now you can head back to your starting point, and you’ll find the way to Palazzo Ricci to the north. As you approach, look at the cafe tables to the east. On one of them will be a postcard.
Discovery Note #18: Vadstena Postcard (10 AP)
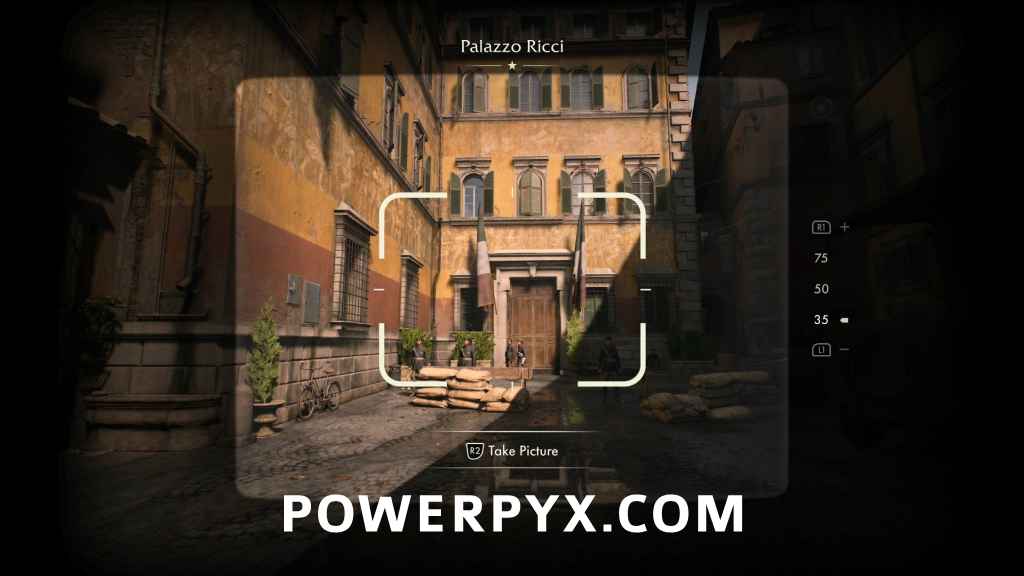
Continue to the north, and as you approach the entrance you’ll get a photo opportunity.
Discovery Note #19: Palazzo Ricci (10 AP)
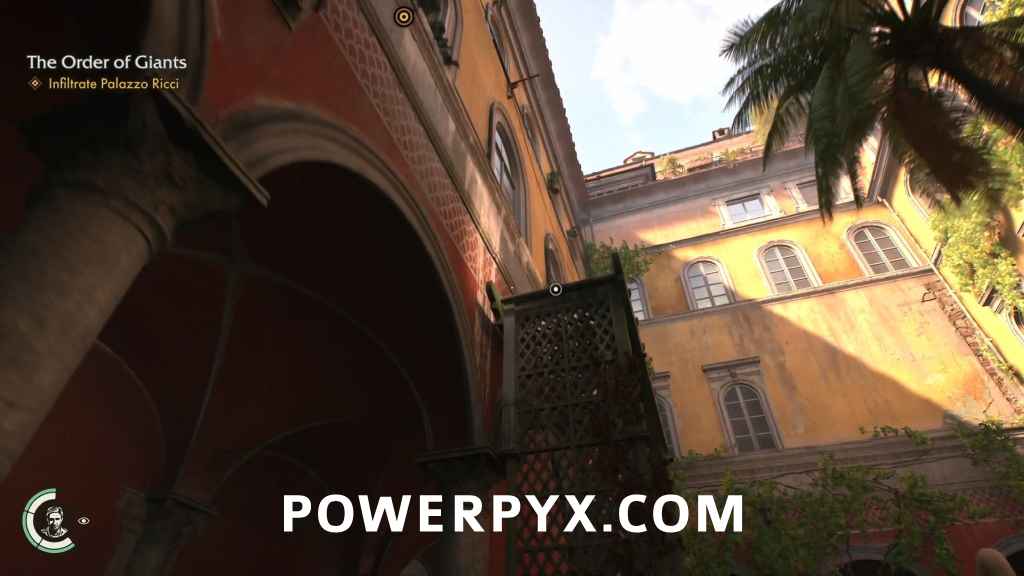
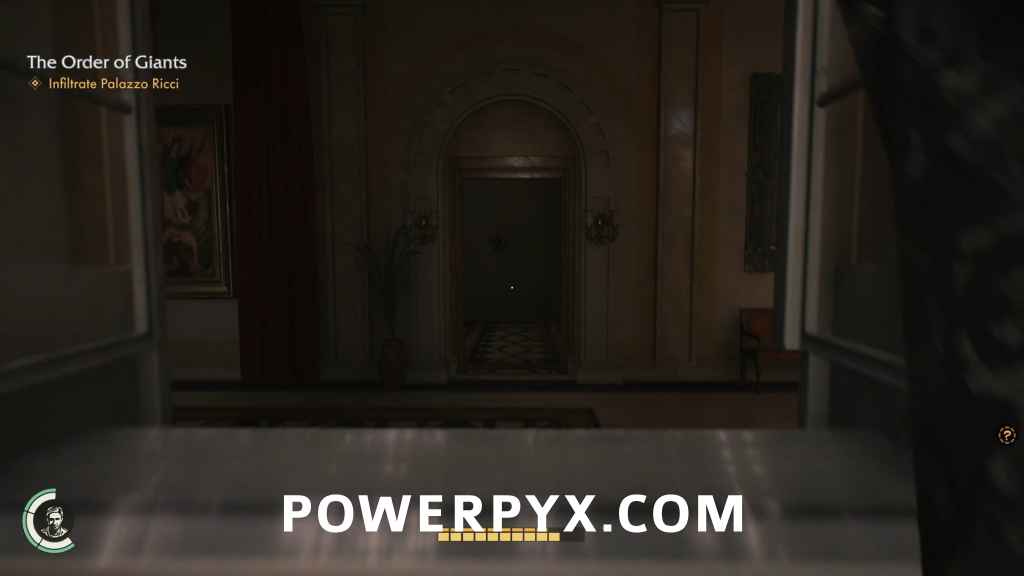
Infiltrate Palazzo Ricci
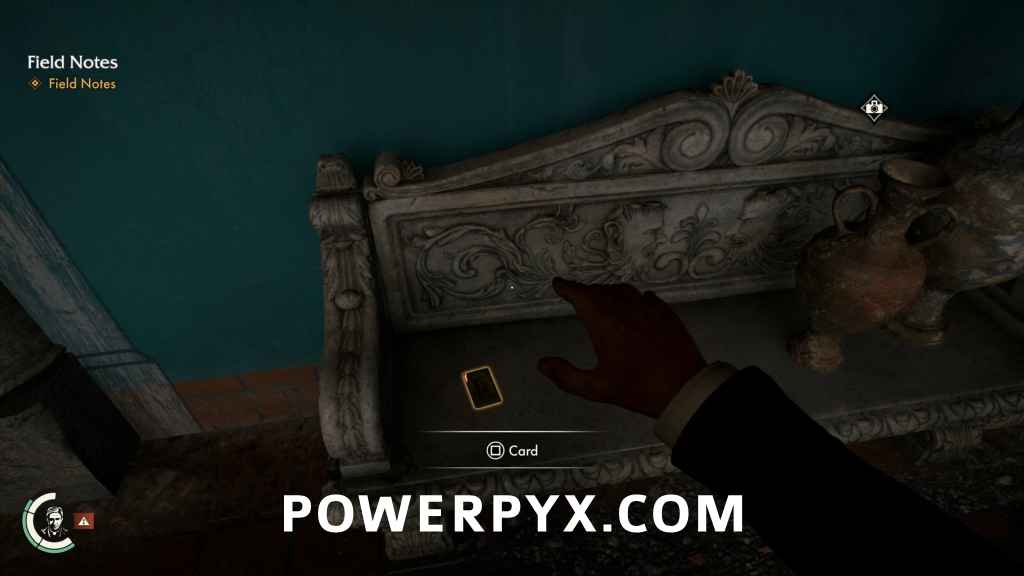
Inside the doors, you’ll be in a hallway with a Captain ahead of you looking your way. If you back up, you’ll find there’s a Captain who can see you outside the entrance (assuming you haven’t already killed him). Depending on the timing of your entrance, you may be able to hide behind a small wall that juts out near the entrance to the courtyard, or you may have to just barge your way in and hope that you can get out of sight before their notice meter fills up. Its very close quarters in here, so try to avoid a fight if you can. In the northwest corner of the courtyard, there is a card on one of the marble benches here.
Adventure Note #25: Magician Card (15 AP)
Also just east of the last collectible, there’s a photo opportunity while you’re facing the east.
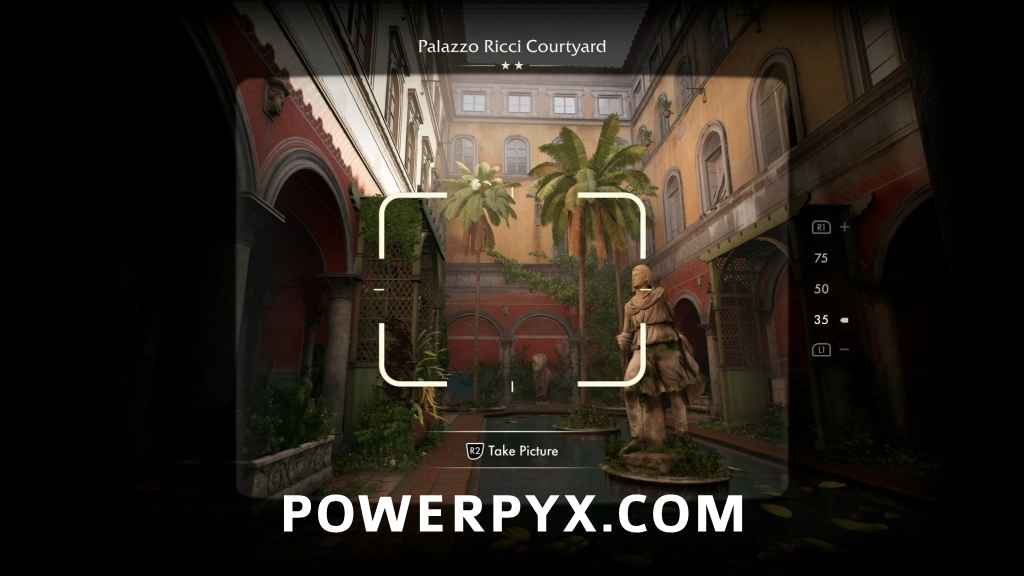
Discovery Note #20: Palazzo Ricci Courtyard (15 AP)
The doors to the inside of the house are locked, so you will have to find another way in. On one side of the courtyard is an arch trellis that you can whip climb.
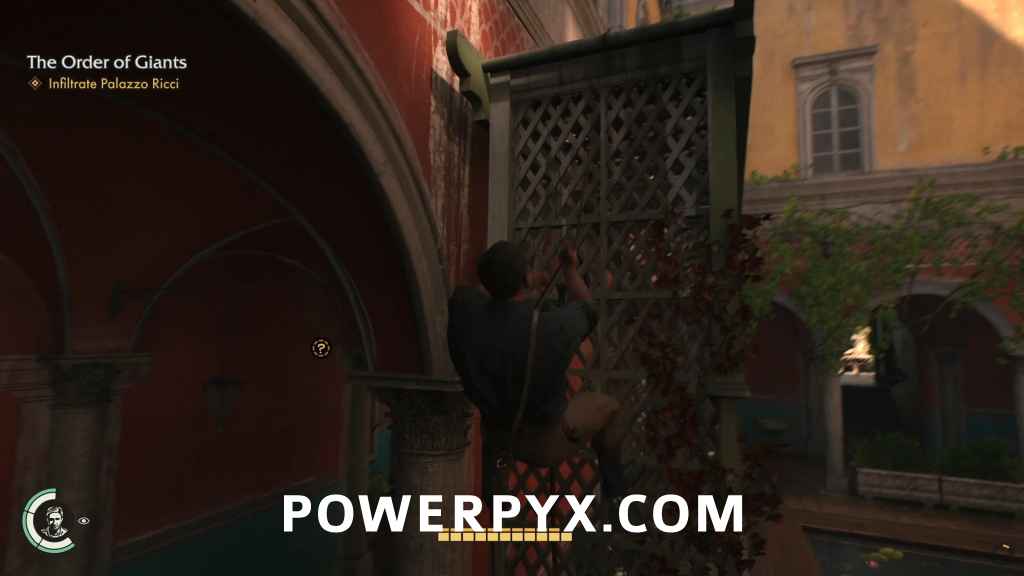
Once at the top, jump up and grab the ledge above you and shimmy to the left or right to reach an open window.
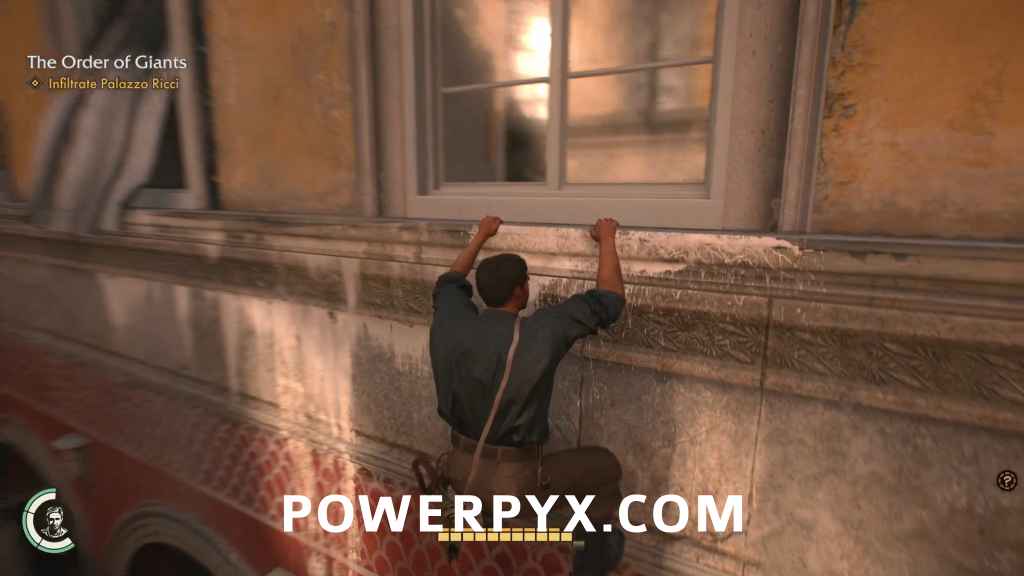
Go through this hallway to reach a staircase, and head downstairs.
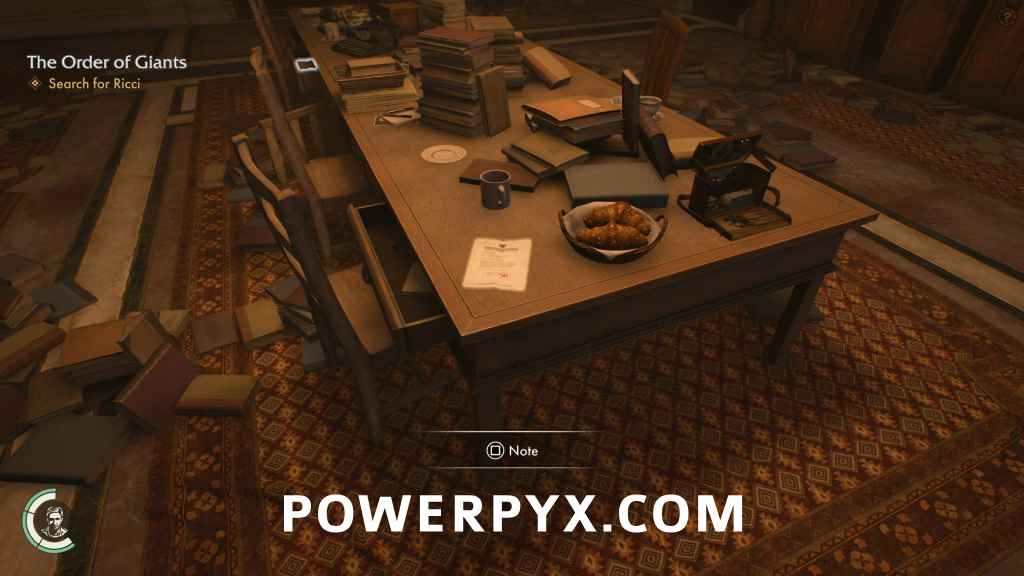
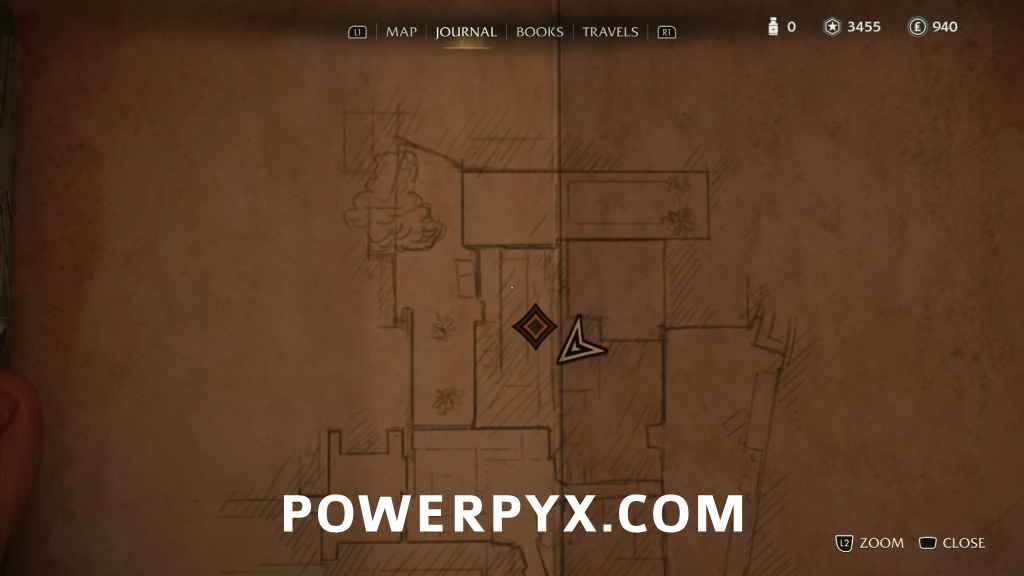
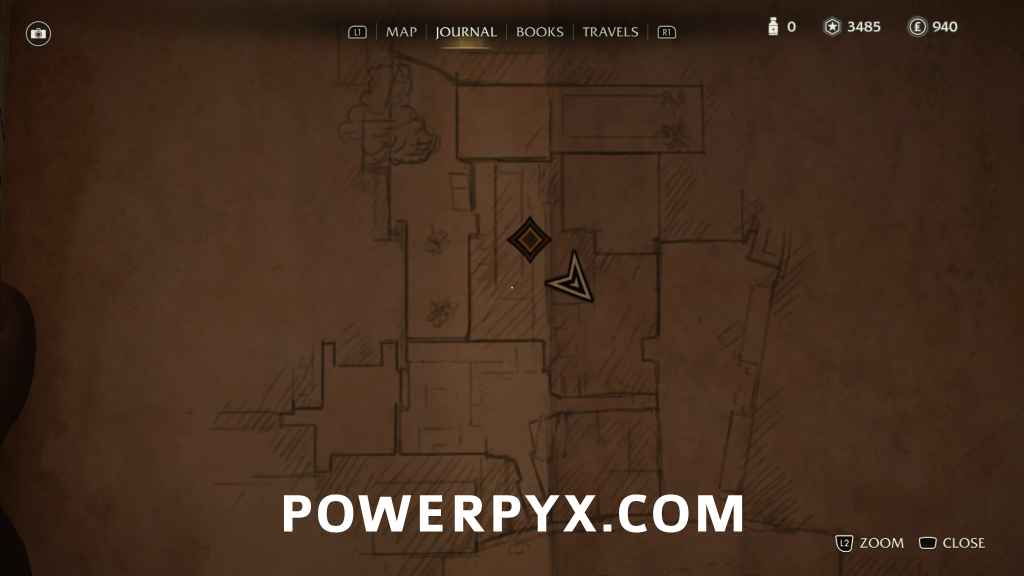
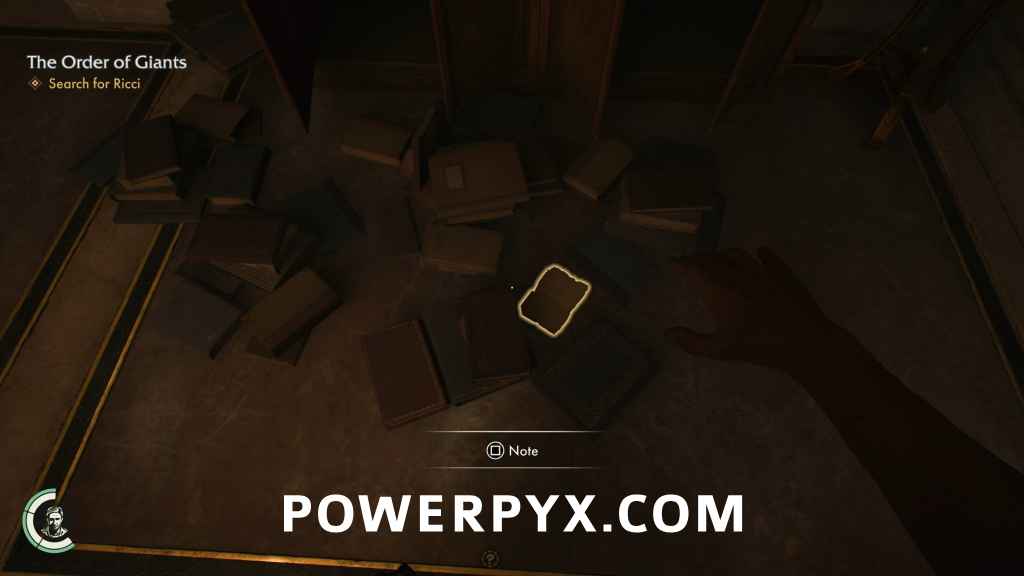
Search For Ricci
As soon as you reach the library, you will get a photo opportunity.
Discovery Note #21: Father Ricci’s Library (15 AP)

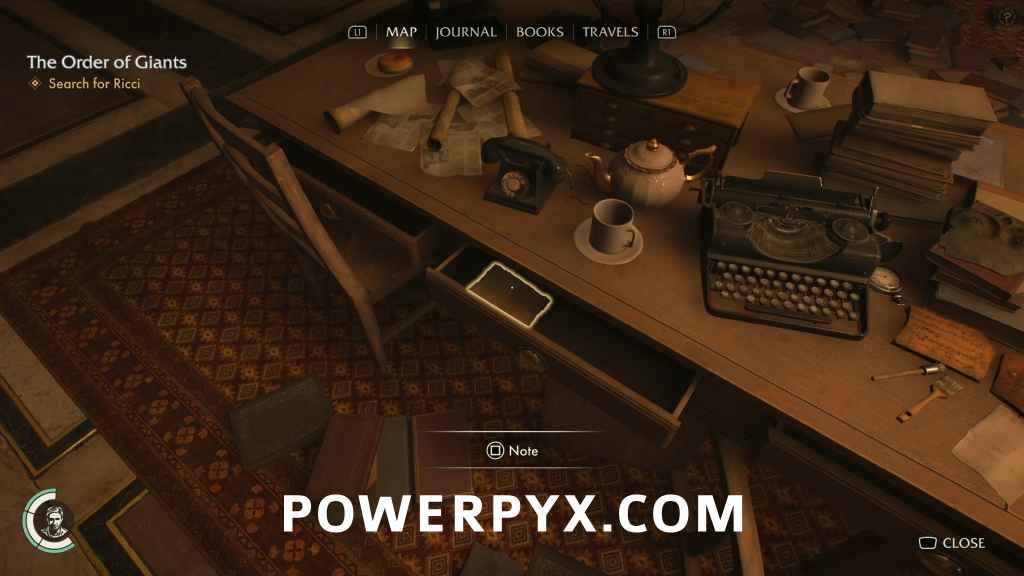
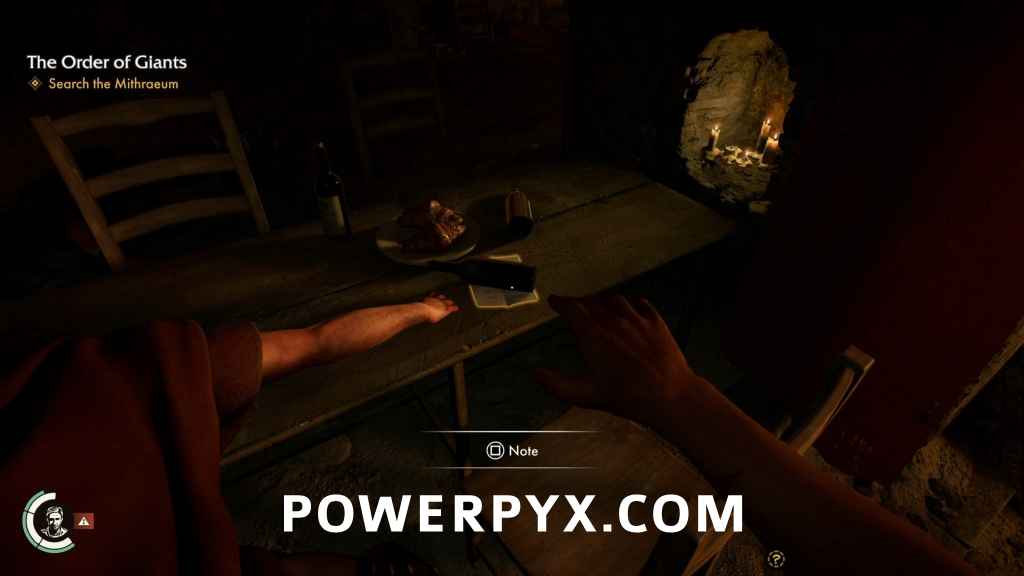
On the table in the library is a note.
Adventure Note #26: Blackshirt Search Order (15 AP)
There is also a drawer in the table that hides another note.
Adventure Note #27: Battle of La Forbie (15 AP)
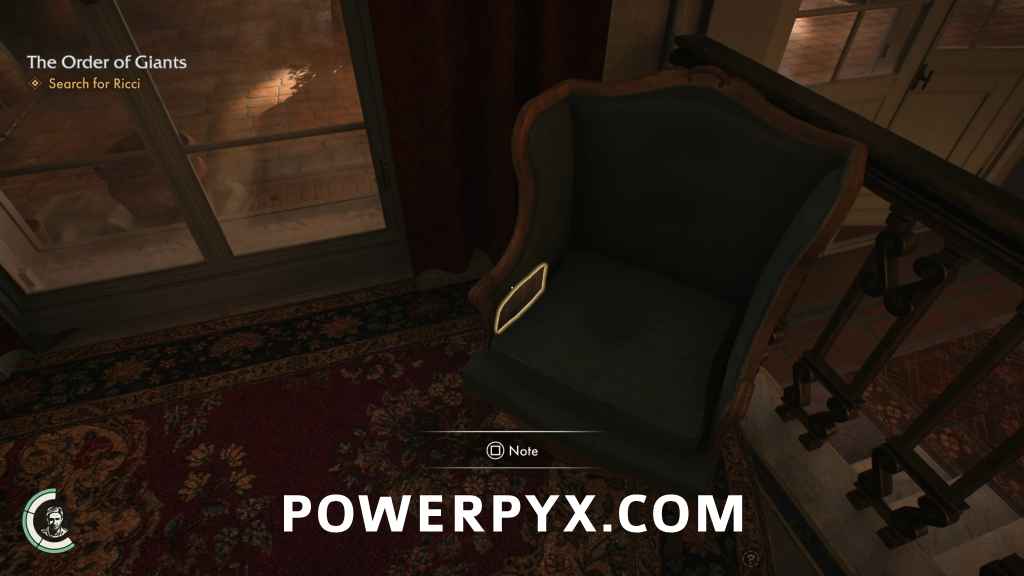
Tucked into the cushion of the wingback chair by the window, you’ll find yet another note.
Adventure Note #28: Dr. Barbieri’s Research (15 AP)

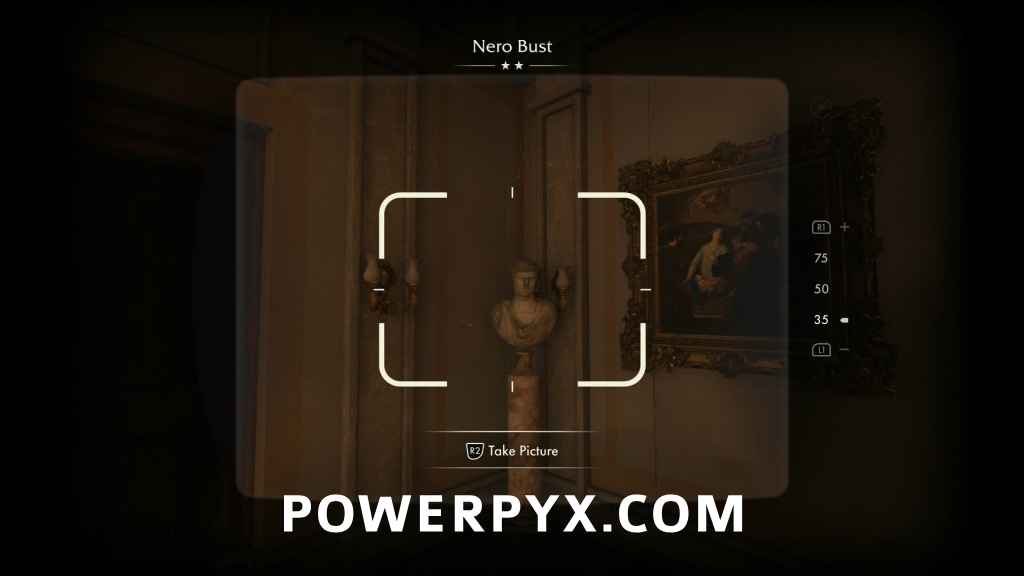
In the southeast corner of the room is a bust that presents a photo opportunity.
Adventure Note #29: Nero Bust (15 AP)
In the southwest corner of the room, there’s a note on the floor amidst a number of books.
Adventure Note #30: Nero’s Favorite (15 AP)
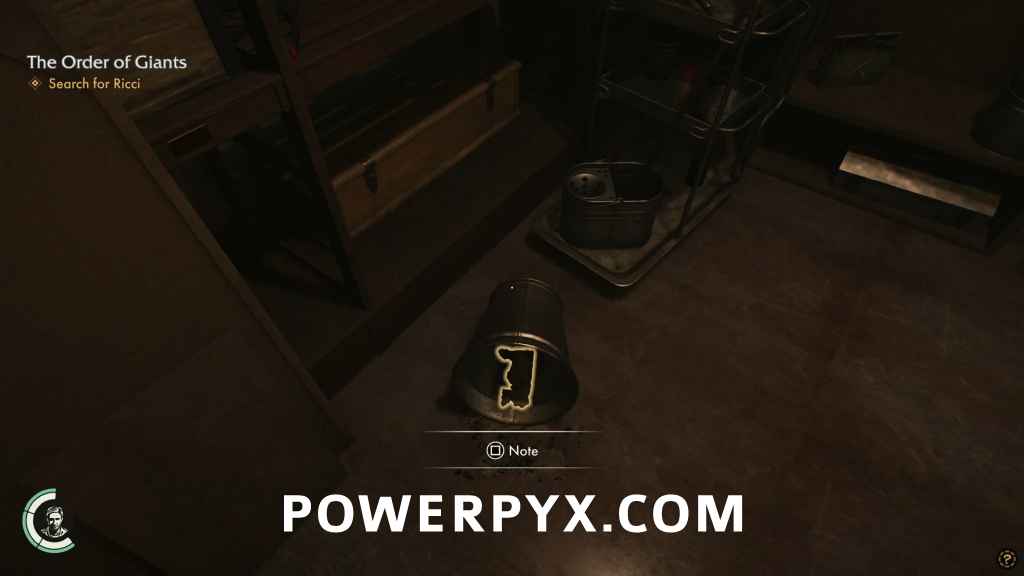
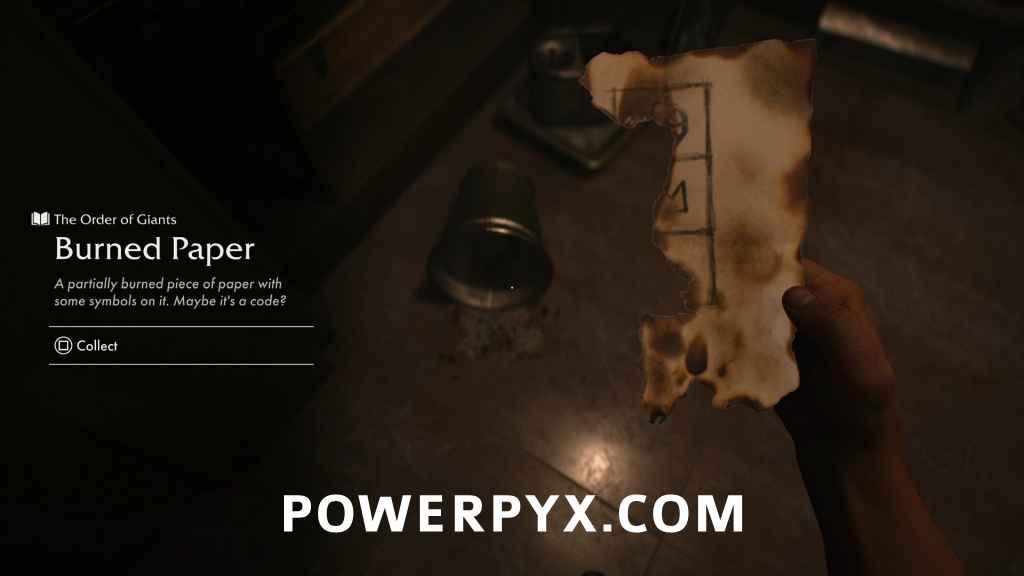
Out the door to the south is a small anteroom with a lit up closet. On the floor in an overturned bucket, is a partially burnt note.
Adventure Note #31: Burned Paper (15 AP)
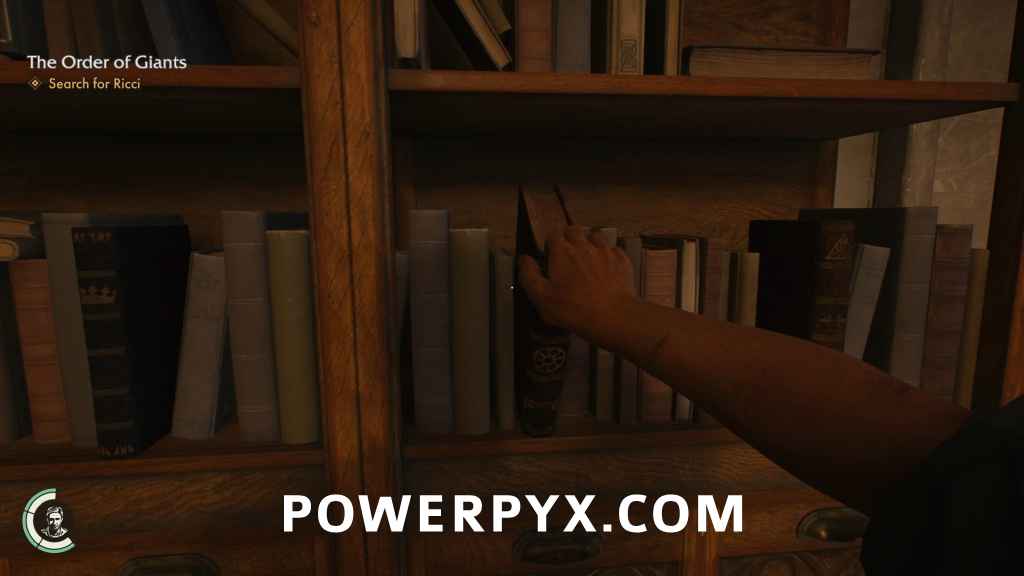
The burned paper has three boxes on it, but most of it has burned away. It doesn’t make much sense out of context, but if you look at the bookcase in the library, its meaning becomes clear. On the west bookcase, there are three books that you can interact with. The burned paper is mostly destroyed, but there’s enough to see that the first symbol is a wheel, the second symbol is a crown, and the third symbol is missing but by process of elimination it has to be the pyramid.
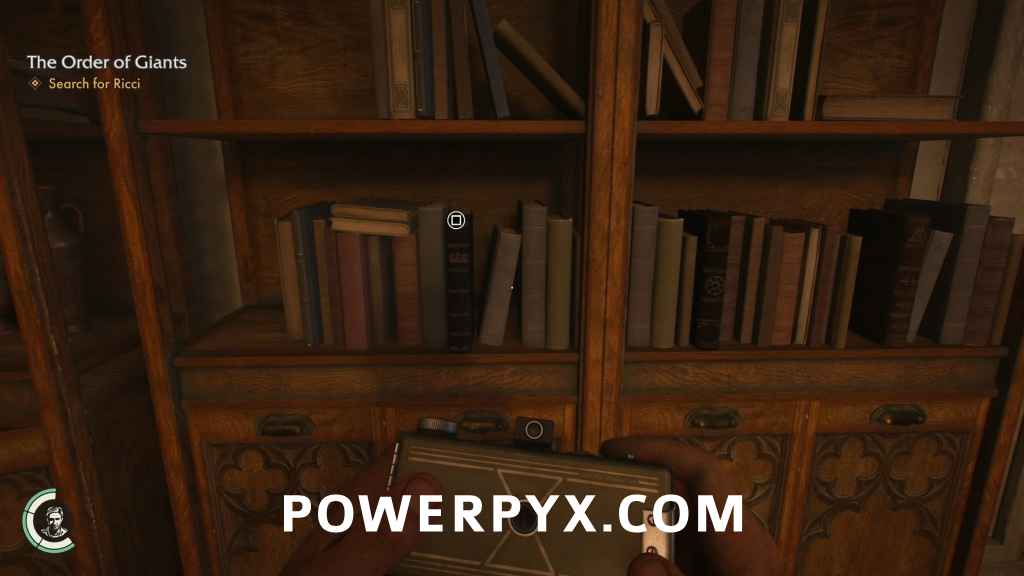
Pull the books in that order (Wheel, Crown, Pyramid) and a secret door will open behind the bookcase. Use the Clerical Key to open the door and you’ll watch another cutscene with Father Ricci and Pio.

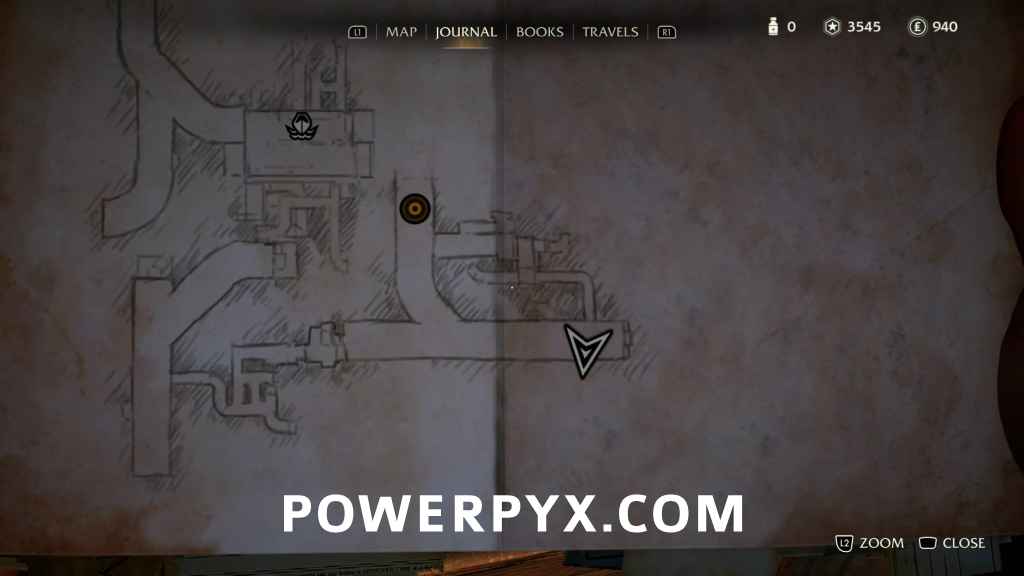
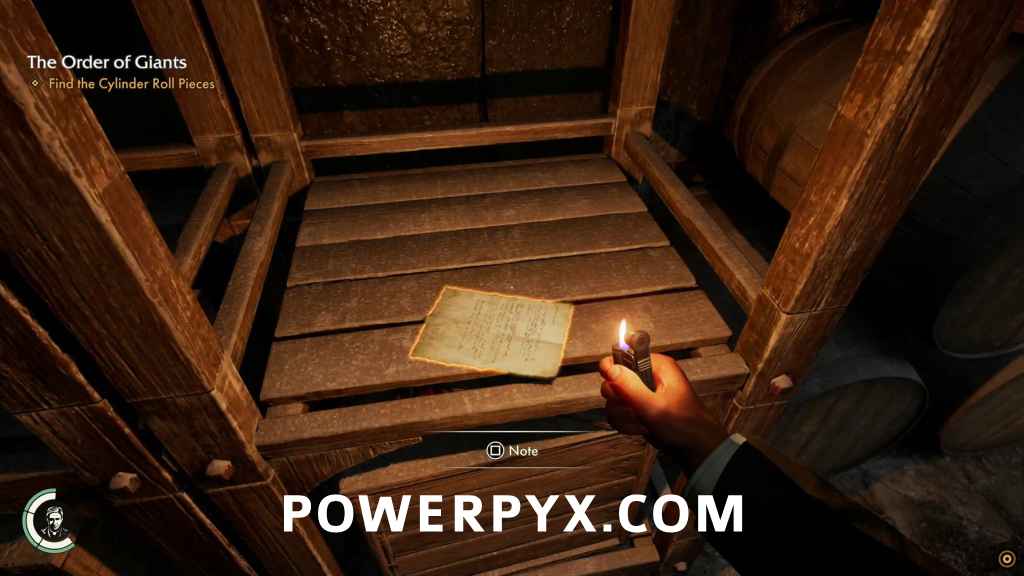
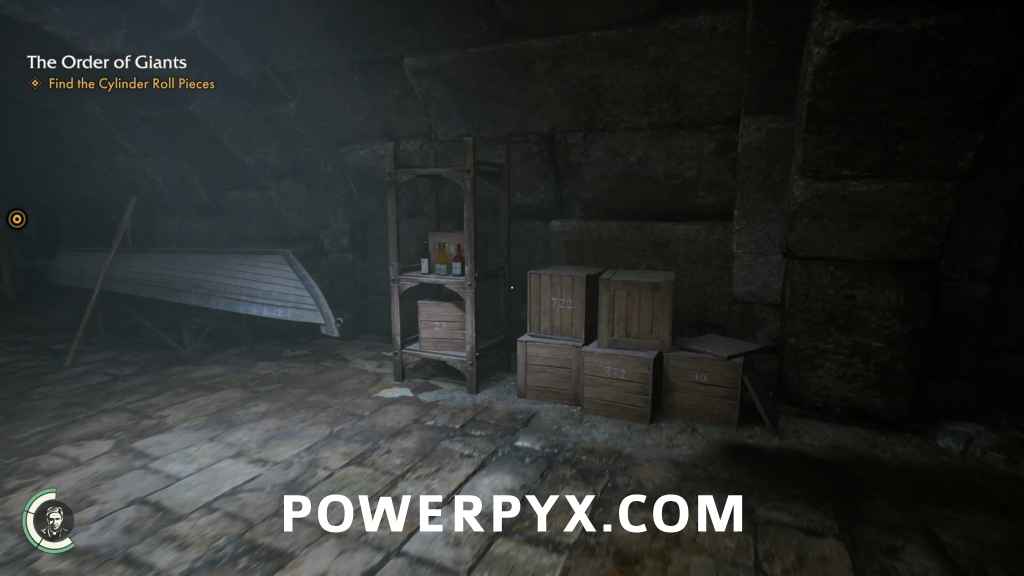
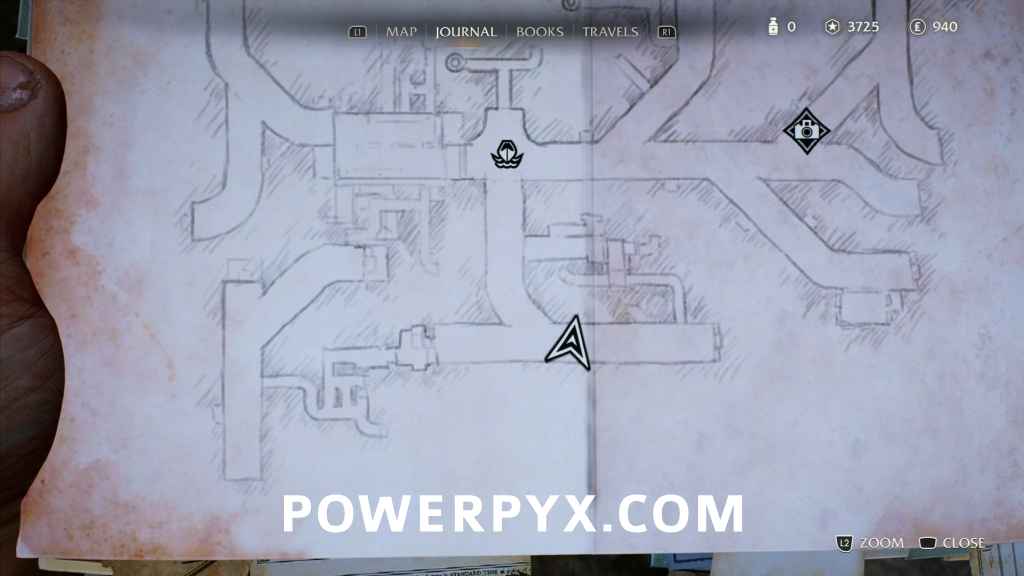
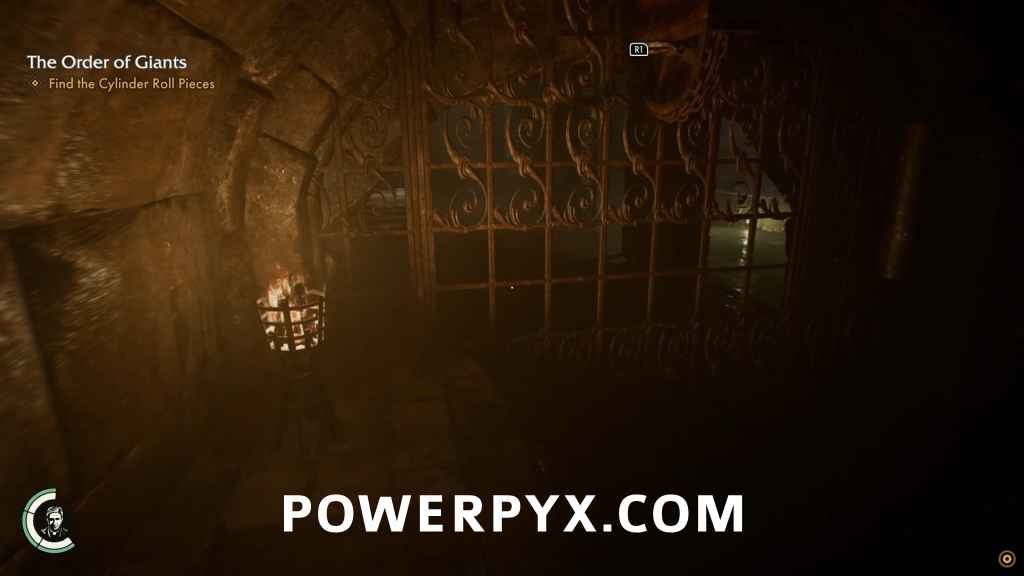
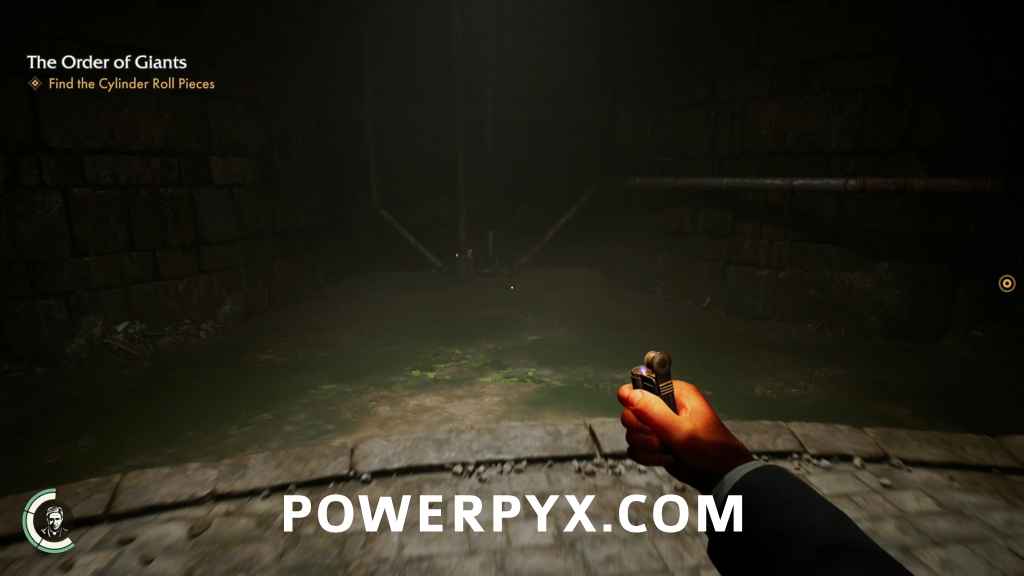
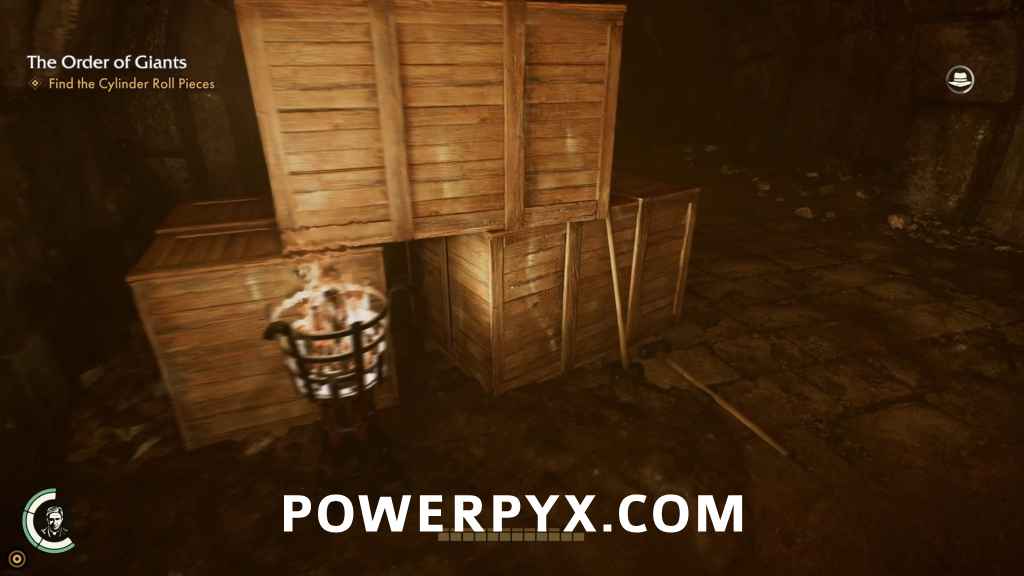
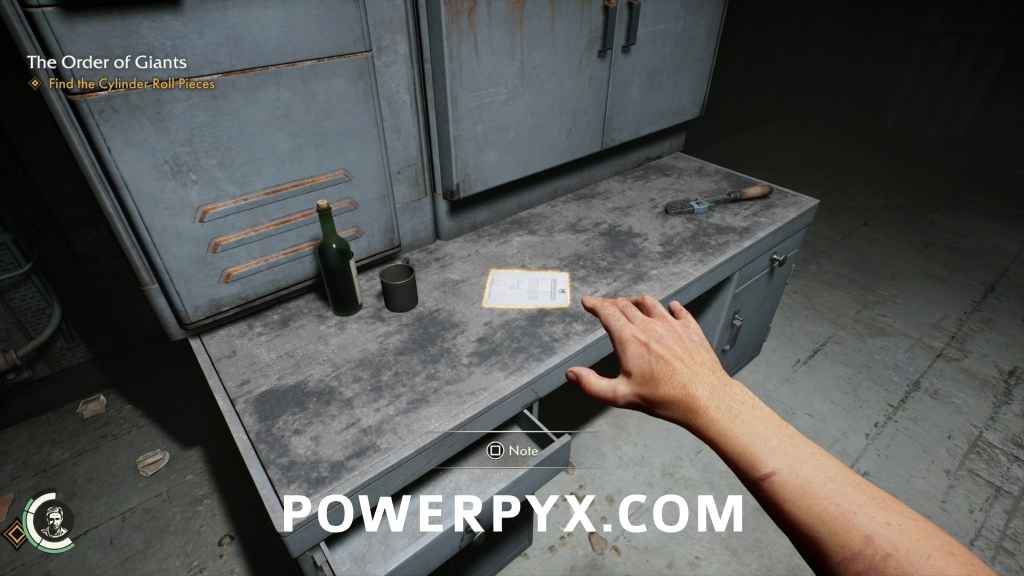
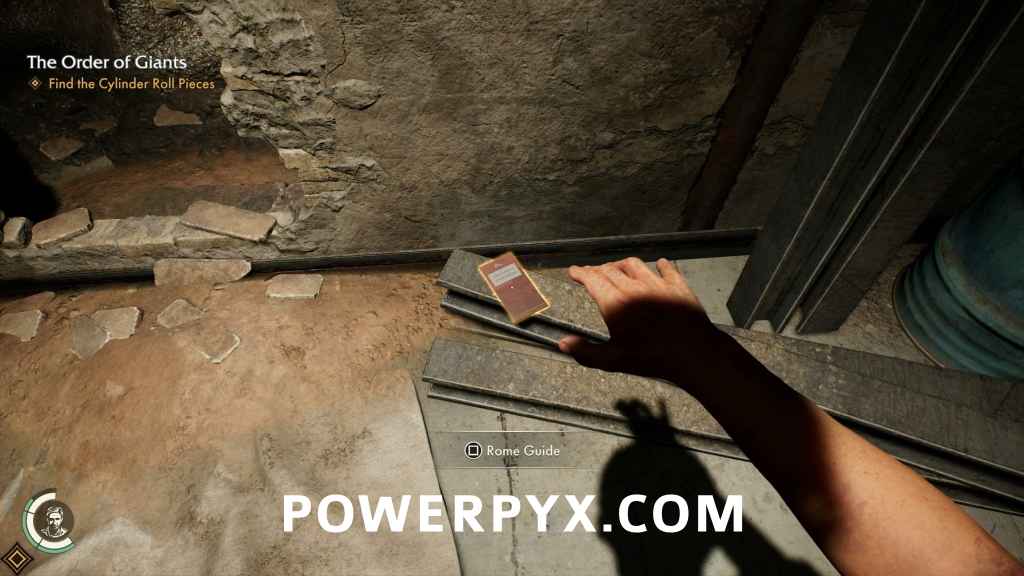
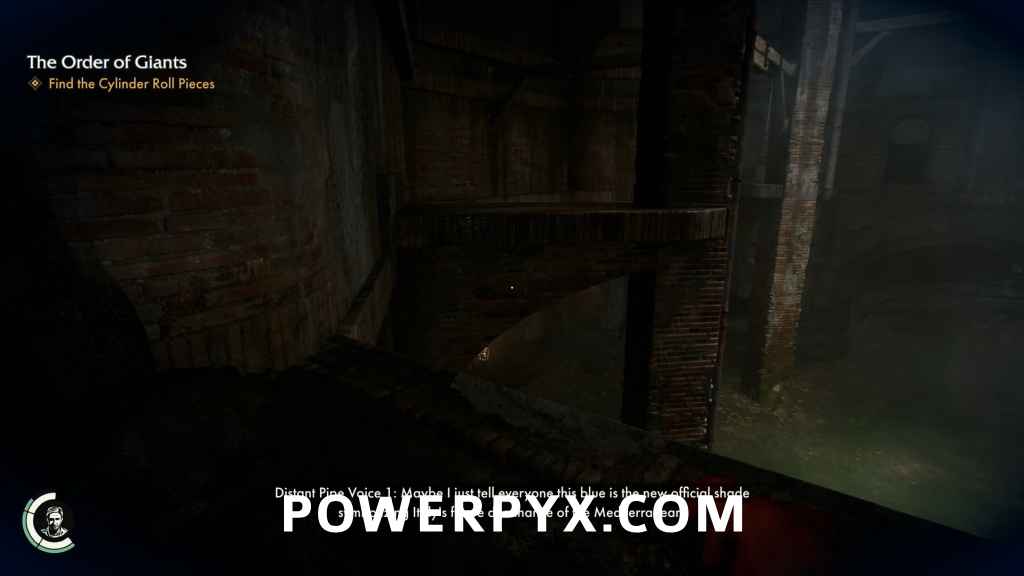
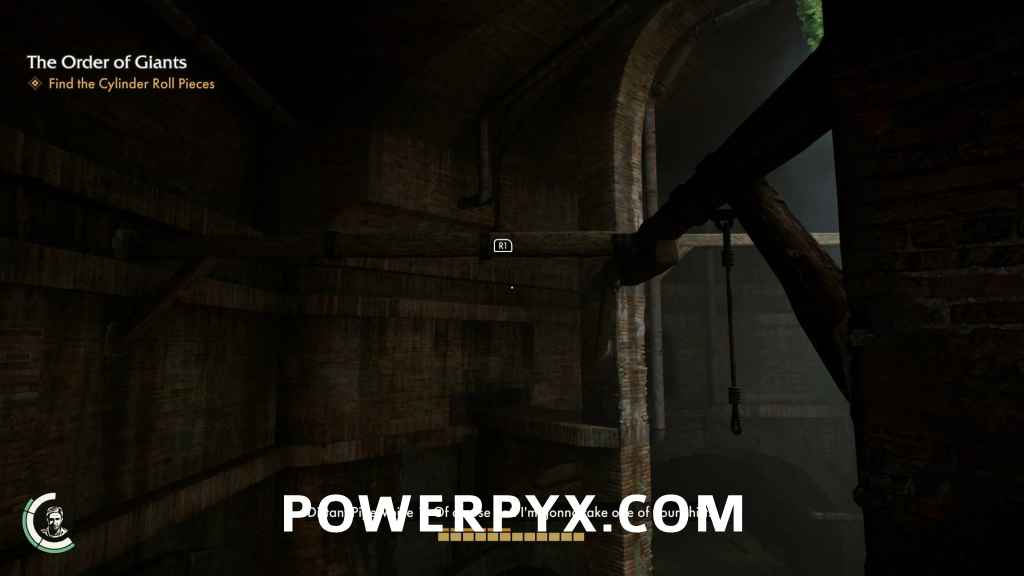
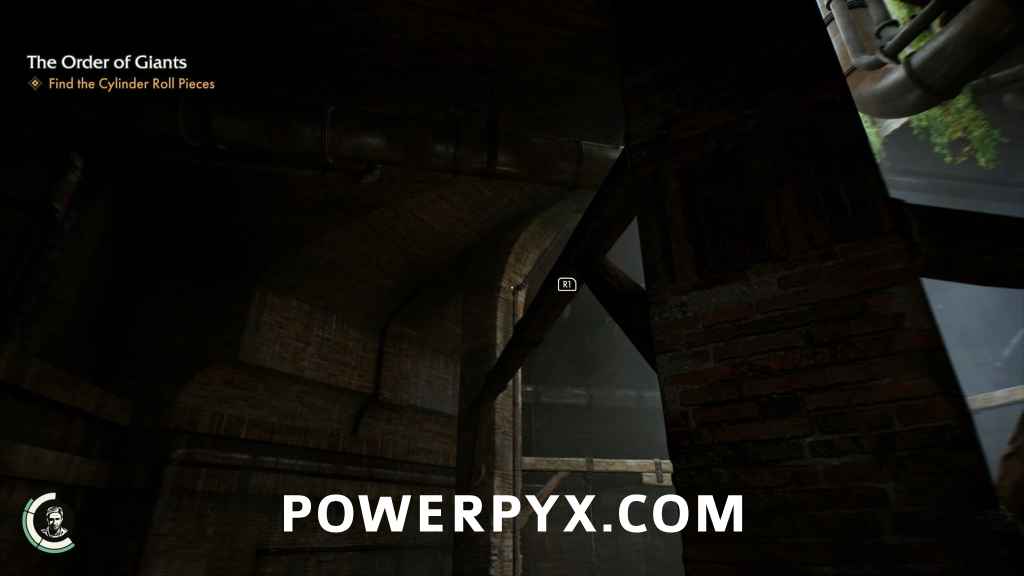
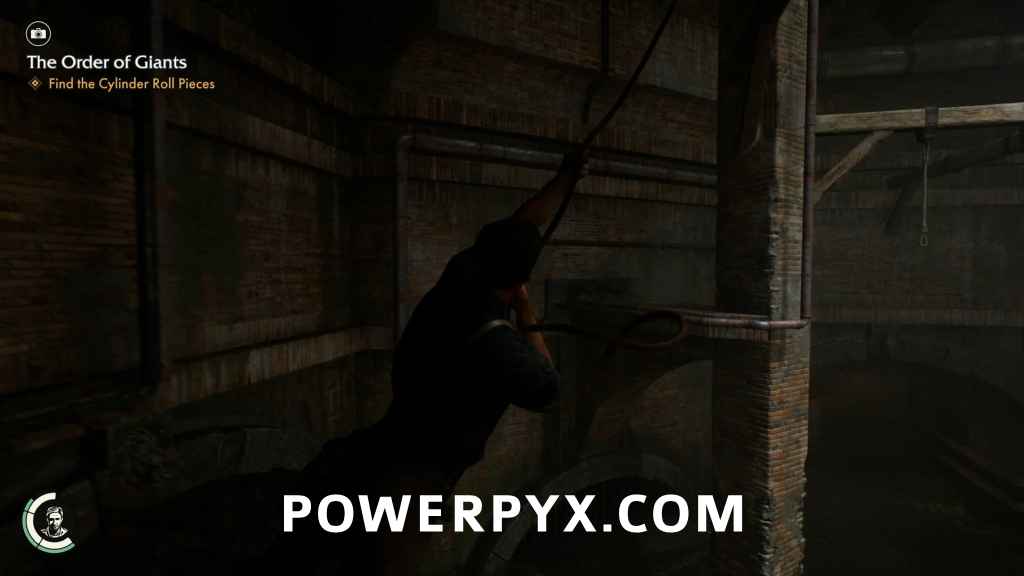
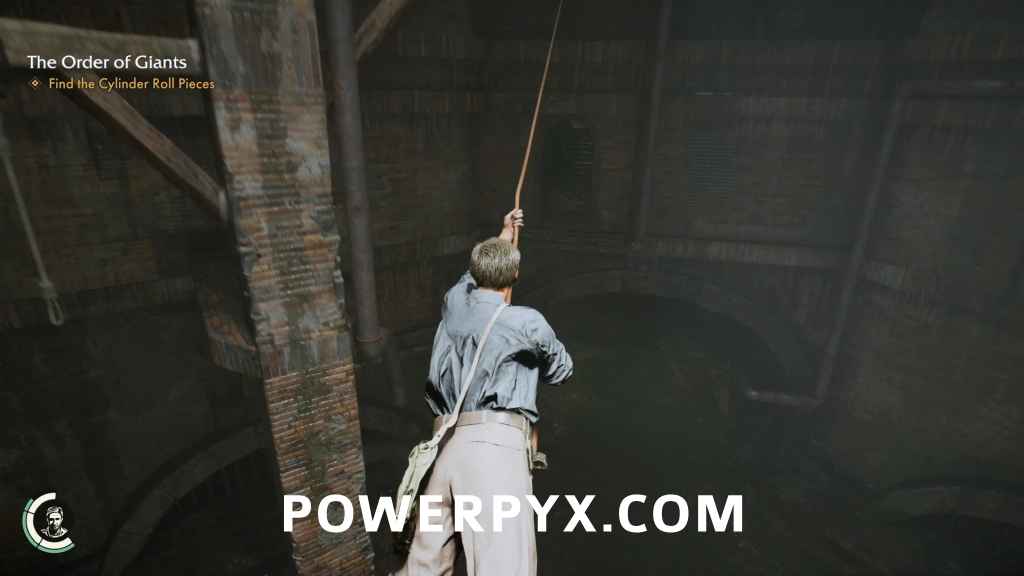
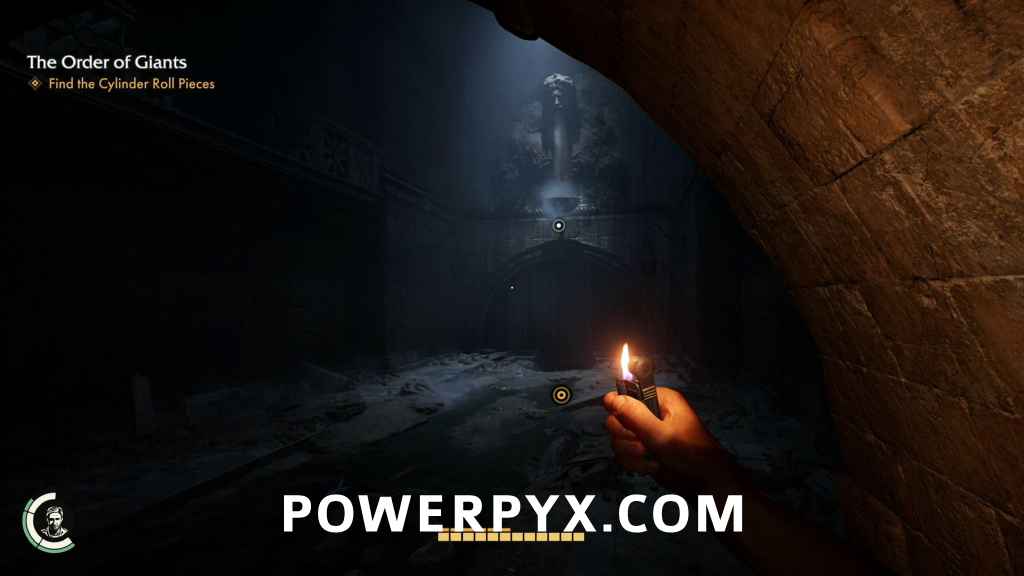
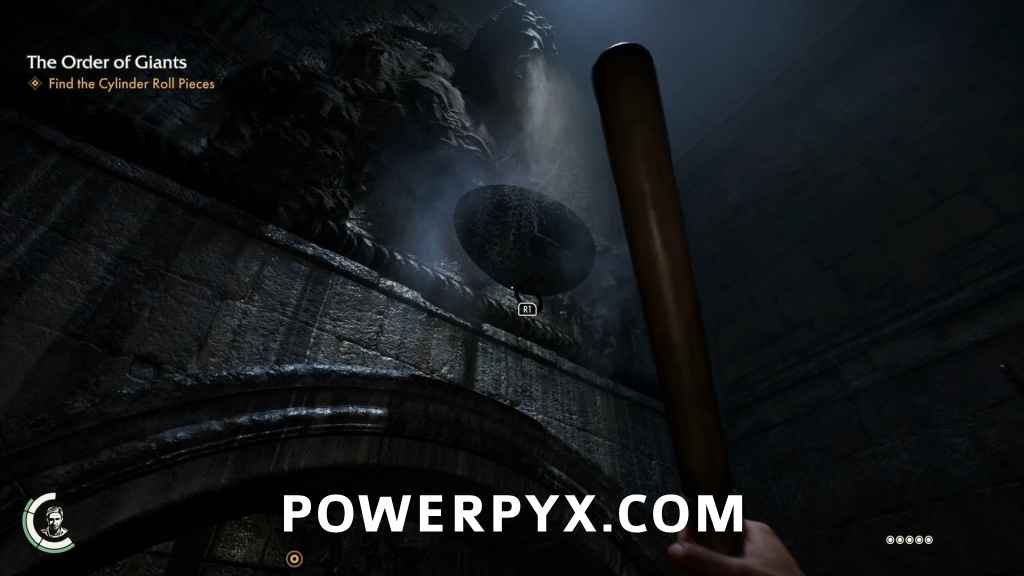
Find the Cylinder Roll Pieces
Your next task will be to head into the Cloaca Maxima to find the other two pieces of the cylinder. Father Ricci will direct you to a door to the east that will access the other side of the sewer map, but before you go there’s a photo opportunity in this room you can’t pass up.
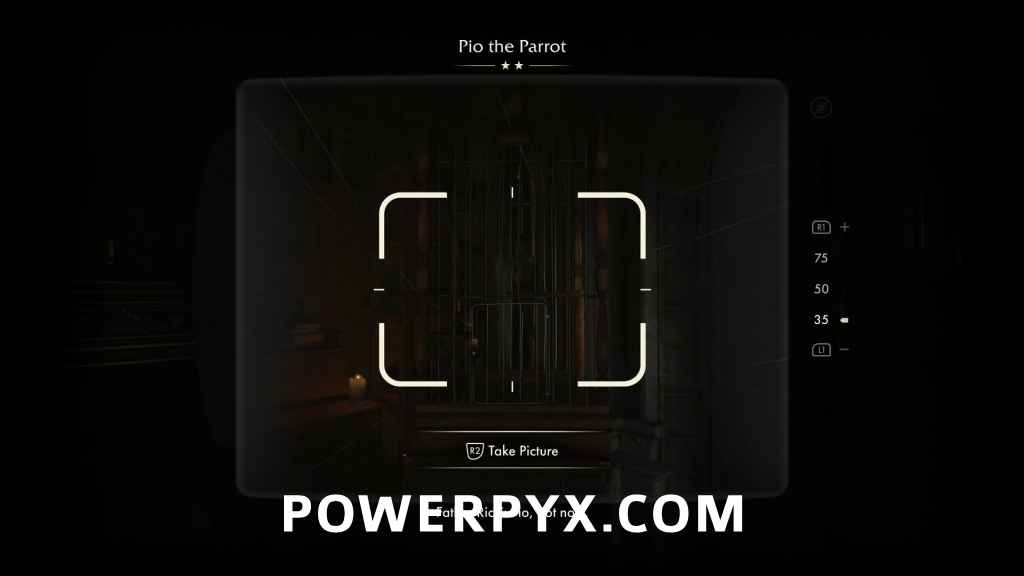
Discovery Note #22: Pio the Parrot (15 AP)
Adorable. Now head out the door to the west, and follow the path, using the Clerical Key to open the door back into the sewers (kind of odd that a priest has an entrance into the sewers in his basement though). Follow the stairs to the bottom, and when you enter the sewer, directly across from you will be a note on a shelf.
Discovery Note #23: Garum Recipe (15 AP)
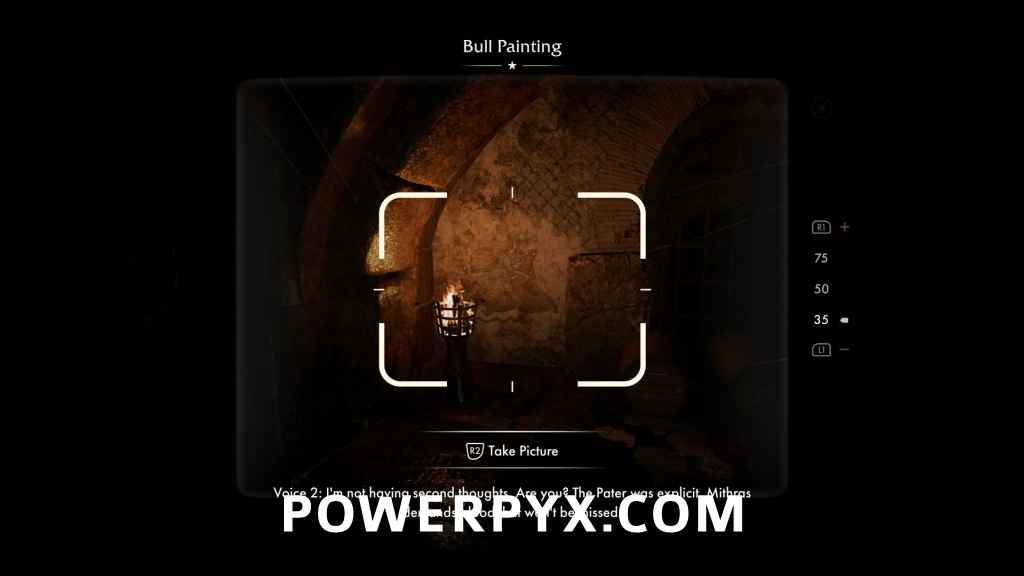
Just before the tunnel splits, there will be a safe on a shelf against the north wall. The code is nearby, but we’ll come back to that. Keep heading west when the tunnel splits. Against the west wall there is a photo opportunity of a painting. Light up the nearby brazier and take a picture.
Discovery Note #24: Bull Painting (10 AP)
Head back to the split and go north. You’ll start to see boxes with numbers on them. One of them is behind some bottles on a shelf, and if you smash them you’ll see that its the only box that has four numbers on it.
Try the code on the safe, and bingo: an artifact, and a gun!
Mithraic Artifact #2: Leo Artifact (20 AP)
When you reach the water, go west and you can use your whip to open the grate that blocks the rest of the sewer from accessing it by boat.
After that, dive in the water and head north to find a beam you can shift underwater. Put on your rebreather, move the beam out of the way and follow the tunnel to the end to find a note.

Discovery Note #25: Love Letter Draft (15 AP)


Head back to the sewer and go east, ignoring the first split which is blocked by a grate. Continue east until it splits again, and then go down the tunnel that leads to the southeast. It leads to a dock that is lit up. Leaning against some crates are a few sledgehammers, just what you’ll need to bust down the nearby breakable wall at the map location below.

You’ll find two very surprised Blackshirts inside, desperately in need of a sledgehammering. It turns out they were guarding your next mystery!
| Suggested Detour: A Tale of Wine Making
Link to A Tale of Wine Making Walkthrough. Gained in A Tale of Wine Making:
|
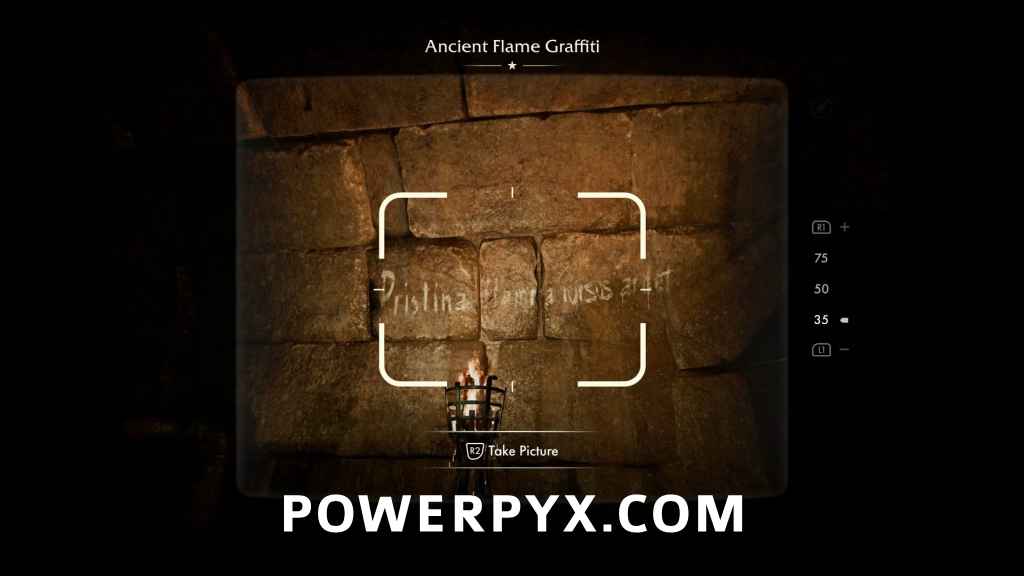
After A Tale of Wine Making, head back to the sewer and continue east until the tunnel splits yet again. Right at the split where the tunnel that goes northeast, watch out for a photo opportunity on some graffiti that is lit up by a brazier.
Discovery Note #26: Ancient Flame Graffiti (10 AP)
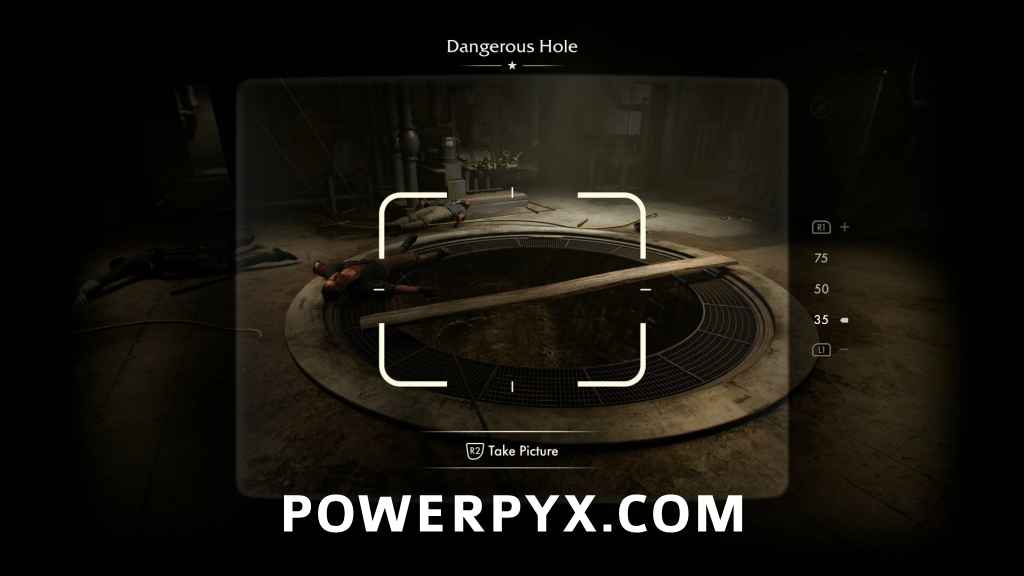
Now follow this tunnel as it curves to the north, and at the end the sewer will be blocked by another large grate, but you can dock your boat there and follow a passage to the east to continue. Heat up the stairs and follow the passage until you reach the Pump House. Whip a bar above you and climb up. If you haven’t already done so, change back into your Blackshirt disguise before you start exploring. There will be a Captain in the room with the dangerous hole, but feel free to push him in it, then take a picture of it.
Discovery Note #27: Dangerous Hole (10 AP)
If you can dispense with the Captain and the other Blackshirt in this room without raising an alarm, you should be able to proceed through this area without any difficulty. In the room to the north will be another note on a desk.
Adventure Note #32: Pump Room Request (15 AP)
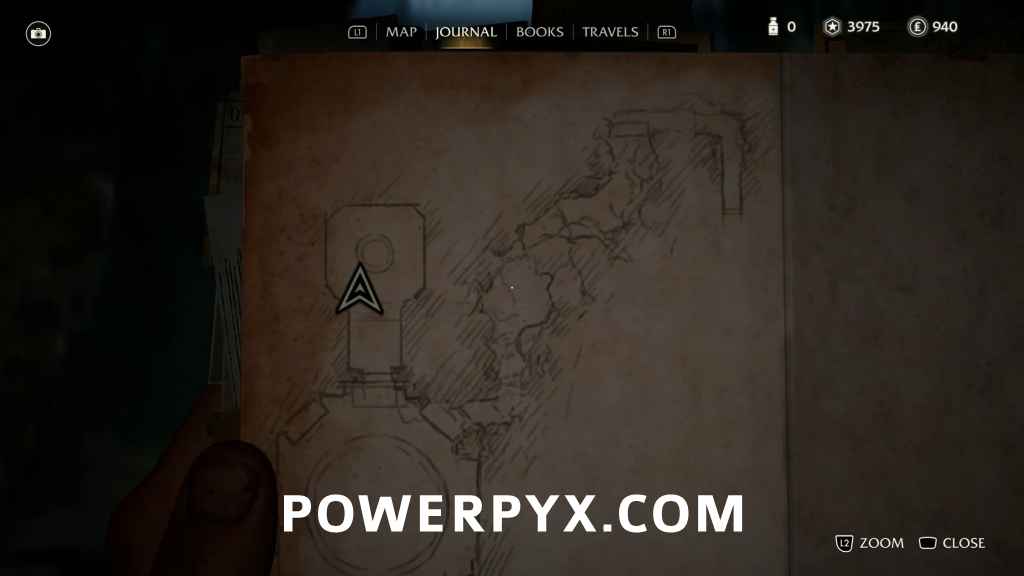
Back in the room with the dangerous hole, head through the other door in the east wall and you’ll be able to grab that map guide you might have seen through a hole in the wall. This will make finding any remaining collectibles much easier.
Head through the nearby hole in the wall, and you’ll find yourself inside a pipe with two fascists using it like a slide. Push the guy in front of you down the pipe, and bonus points if you hit the guy below with him and kill them both. When you’re ready, slide down to the bottom and you’ll be back in the sewer. Go west a little ways to find a lit passage to the south, which you’ll follow till you reach the room beneath the dangerous hole. Unlock the door here to start another cinematic, and your first encounter with the Mithraic Cult. When you have control again, follow them through the tunnel, unlocking the door as well as the grate blocking boat access as you go by.
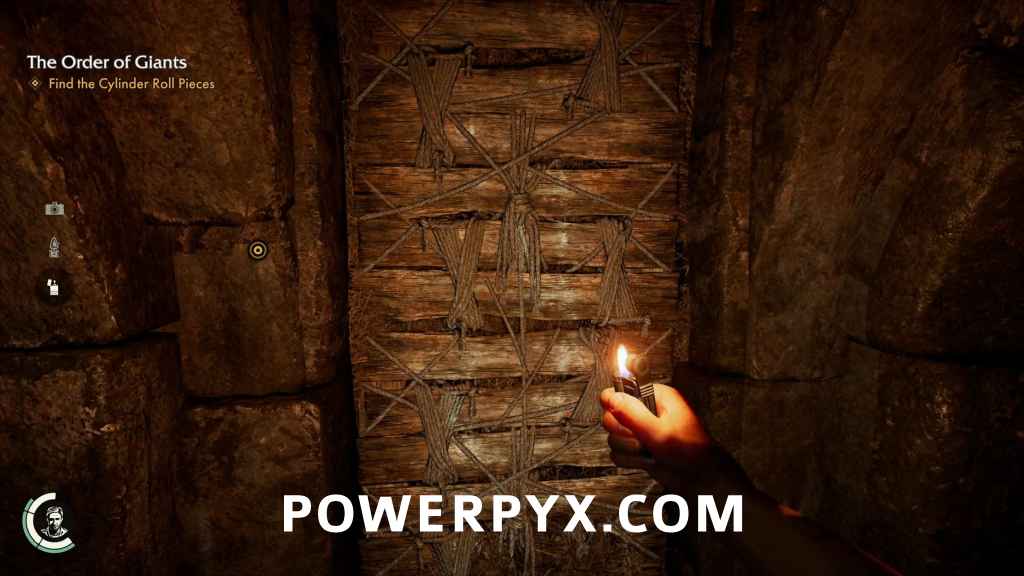
Once again, you’re in the Cloaca Maxima. Follow the water north, continuing north when it splits. Dock your boat here, and bring out your lighter since its very dark… and to deal with this burnable barrier.
Head east into the dark tunnel, and you’ll see a locked gate ahead of you with a note on the other side. Look to the north, and crouch down to enter a hole in the wall. Crawl through and follow the tunnel till you find the note. Then unlock the gate and head back the way you came.
Discovery Note #28: Miles’ Letter (15 AP)
Back in the main sewer path, take the fork to the northeast. It will curve to the east, then end at a large octagonal room. Look to your left, and on the southeast wall of the room there’s a platform you can stand on, and a pipe above your head that you can whip climb up to. Once on the platform at the top, whip to the beam to the west and swing across.
From here, stay close to the south wall, and jump across to the platform by a metal gate. You’ll hear distant voices talking about their plans. On the other side of the platform do the same thing and jump across to the next platform.
You’ve almost circled the entire room now. Whip to the beam ahead of you and swing to the next platform. From here, there’ll be a door straight ahead of you high in the wall. You might be tempted to try and make that jump, but instead, you should turn right and look at the beam above you.
Whip to it, swing yourself back and forth until you have enough momentum to reach the door.
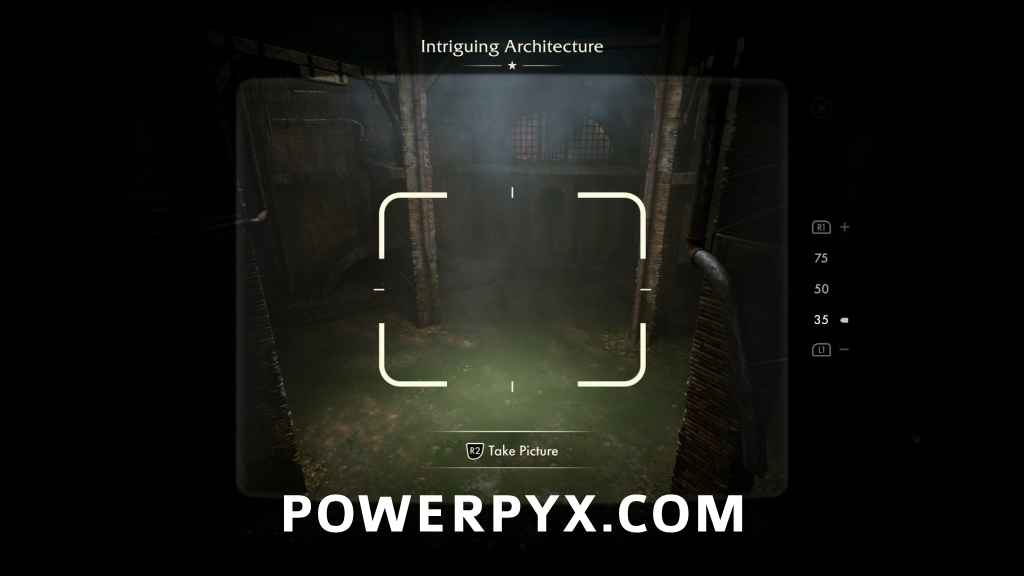
When you land, take a moment and turn around to look back into the octagonal room and take a picture of it for the photo opportunity.
Discovery Note #29: Intriguing Architecture (10AP)
Now climb the stairs and pick up… a Nasty Croissant?
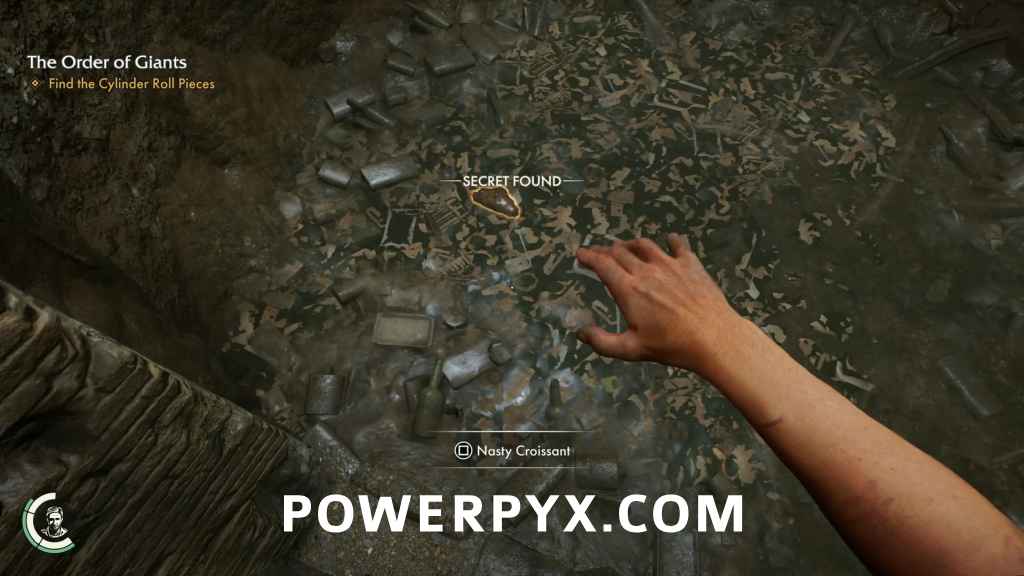
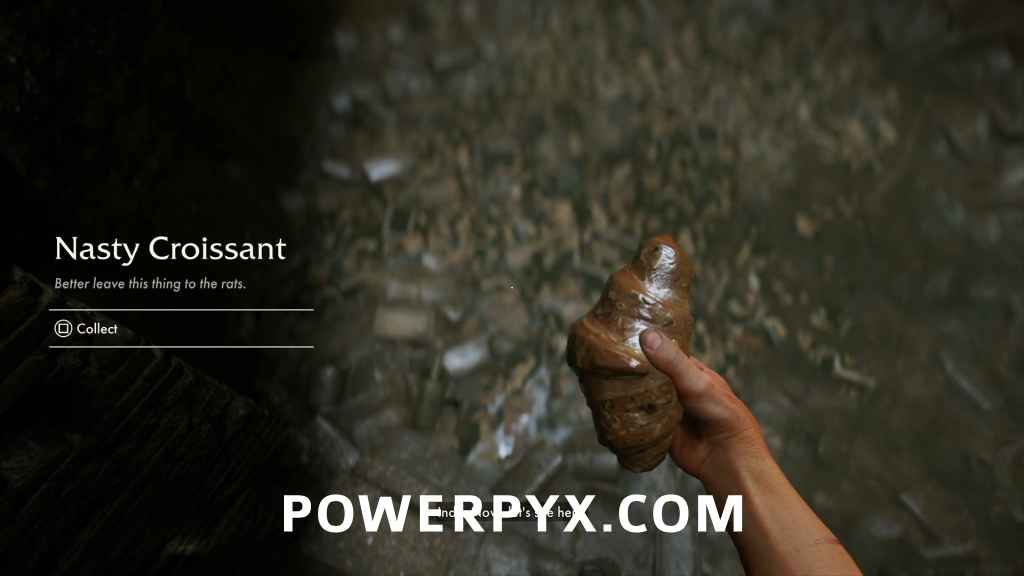
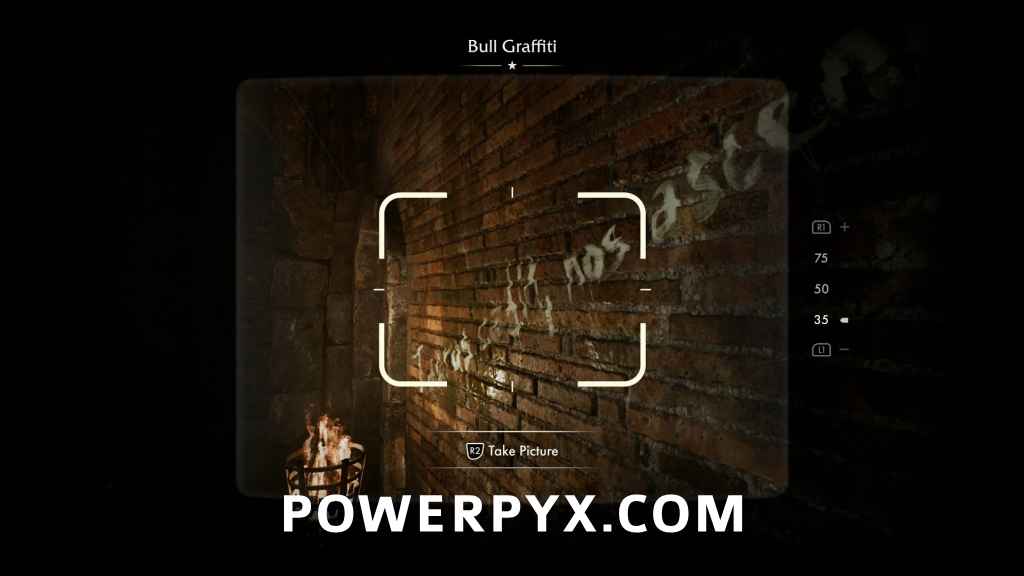
Turns out it was the Cloaca Maxima map those two Blackshirts in the sewer were mentioning they dropped all the way back by Father Ricci’s basement. There’s absolutely no feedback to tell you that’s what this is, and I’m still not sure it was worth that much effort, but you’ll still get the map. Head back to the octagonal room, drop down into the water and head for the north wall. There’s another photo opportunity for some graffiti.
Discovery Note #30: Bull Graffiti (10 AP)
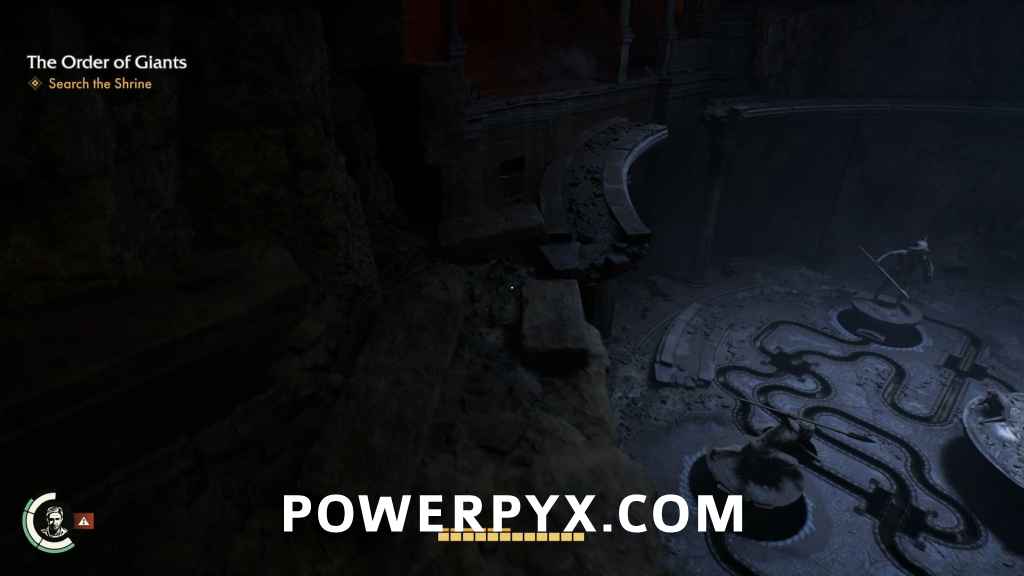
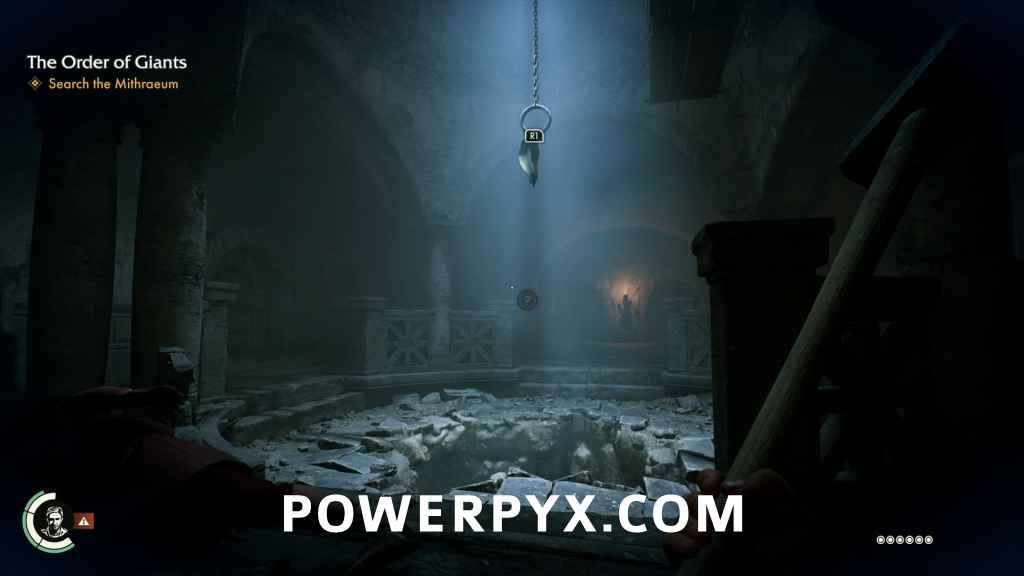
Head through the door in the north wall and go down the stairs. When you reach the bottom, there will be a metal grate blocking the archway, and a small hole in the wall to its right. Go through the hole and follow it to a lower level. Keep following the path until you emerge at the bottom of a canal. Follow it, and narrowly miss being crushed by a falling body. Keep going to the end until you can see a hole in the floor. Right above it, there’s a ring on the underside of a bowl that you can attach your whip to in order to lower yourself down safely.
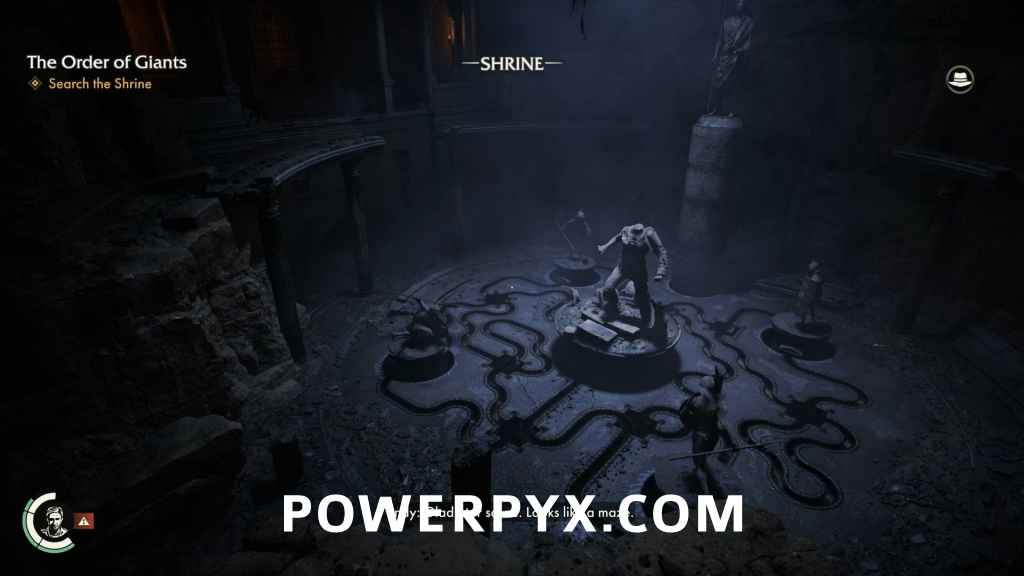
At the bottom you’ll emerge into the Shrine, and another puzzle to solve. This one takes a bit more planning if you want to do it easily, or you can just rely on your reflexes and hope for the best.
Search the Shrine
Before you can start the puzzle, search the Shrine of the Gladiator for a couple of pieces of critical information. First go to your left along the top of the ruined colonnades.
The balconies are lit up by torchlight, and there are two photo opportunities on each one.
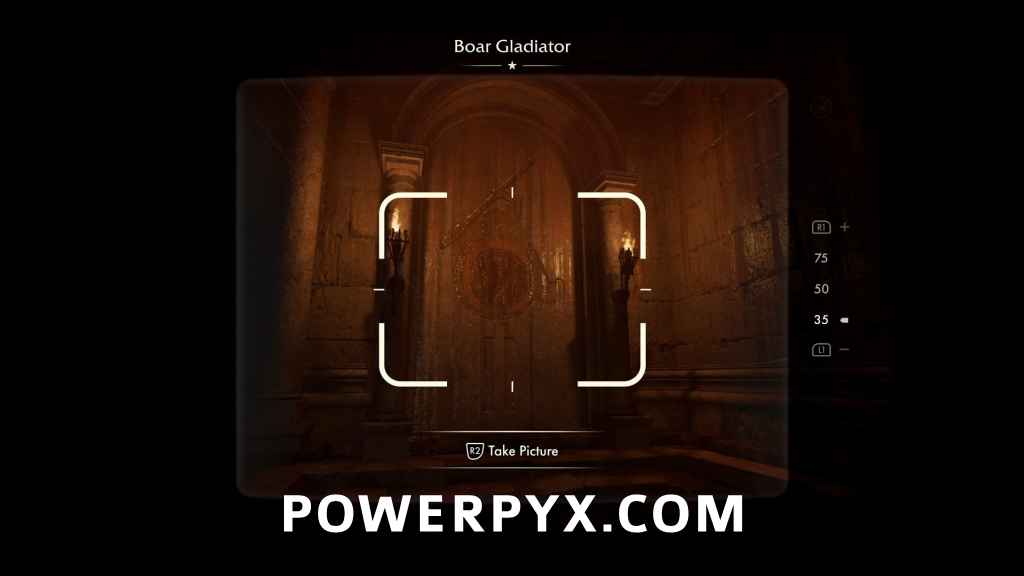
Adventure Note #33: Boar Gladiator (10 AP)

Adventure Note #34: Lion Gladiator (10 AP)

To reach the other balcony, just drop down to the ground floor head to the south side of the room. When you are beneath the balcony, you’ll be able to whip up to the ledge and climb up.
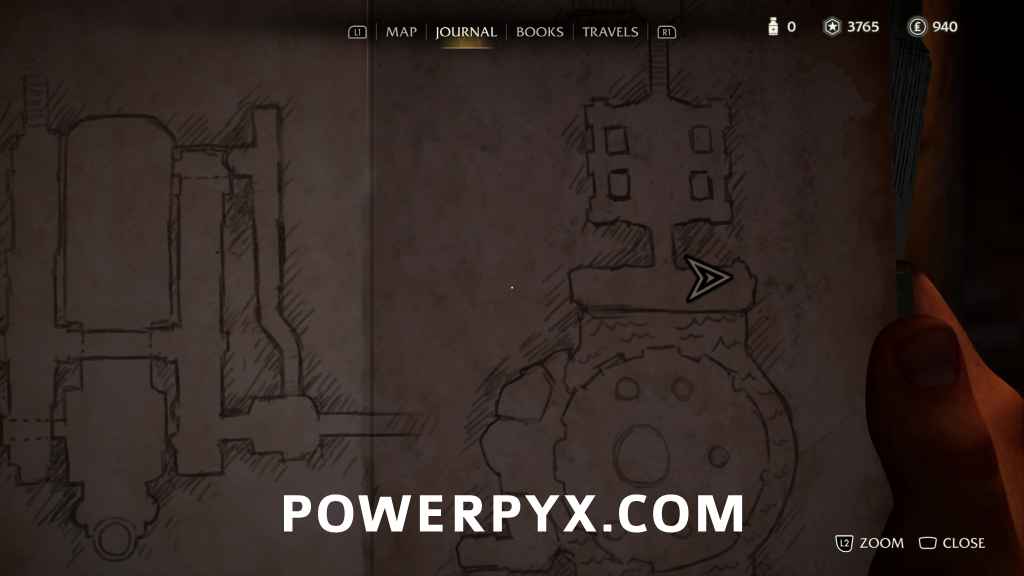
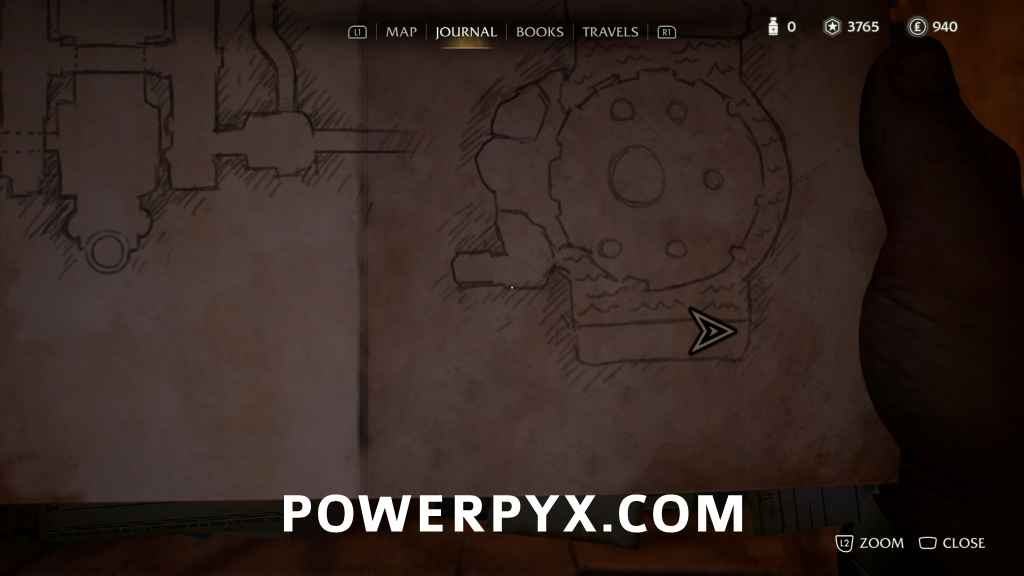
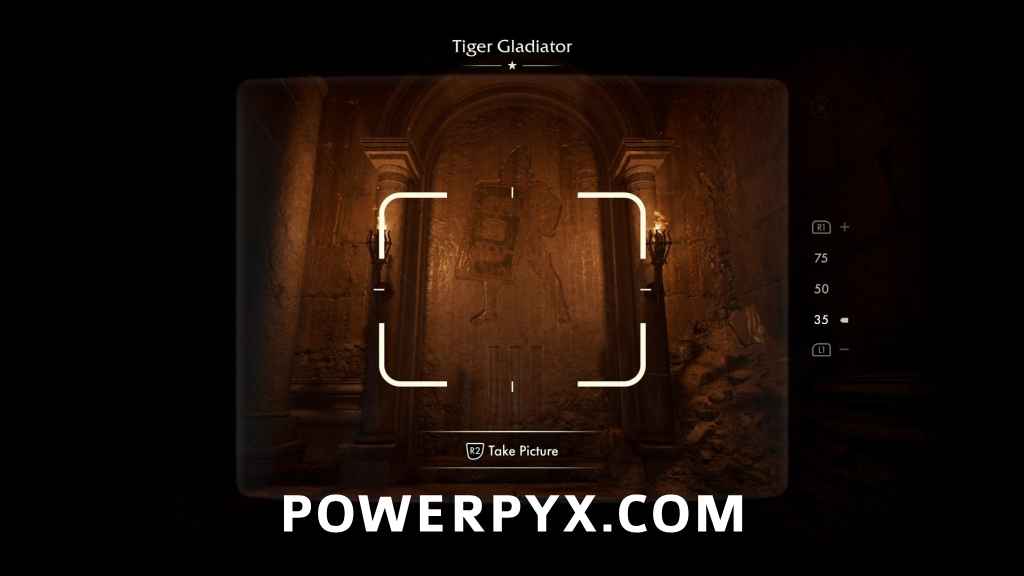
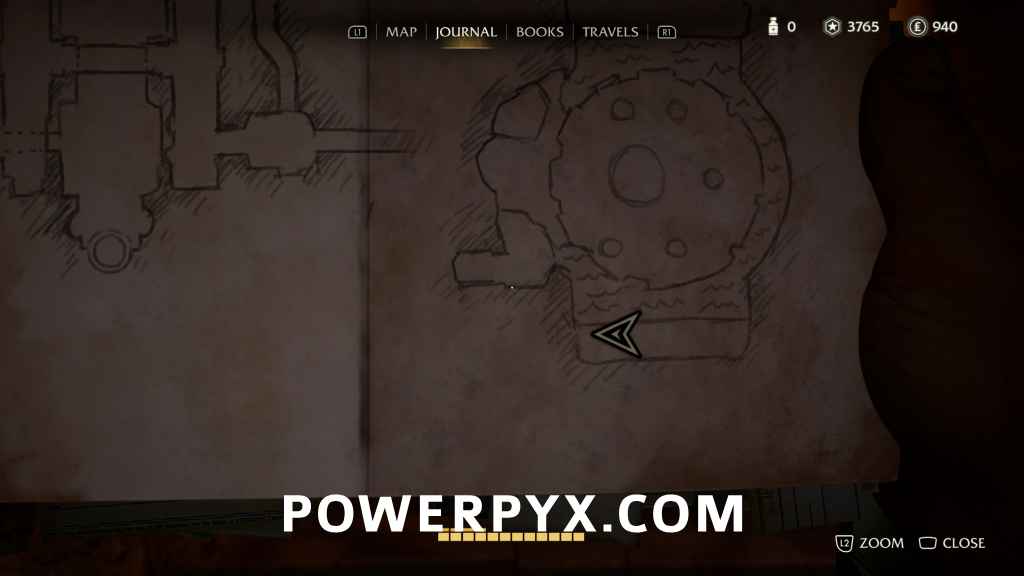
Adventure Note #35: Tiger Gladiator (10 AP)
Adventure Note #36: Bear Gladiator (10 AP)
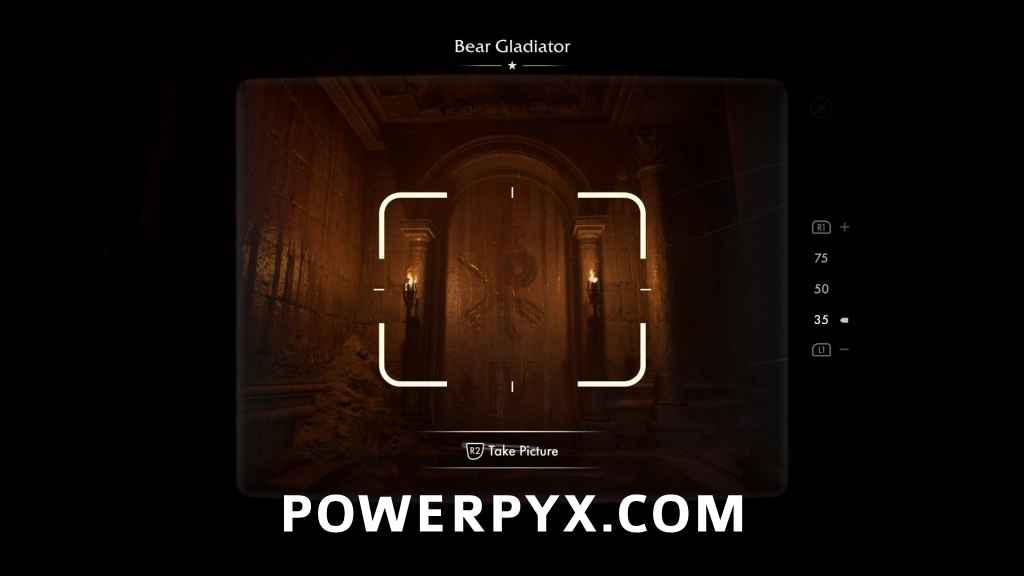
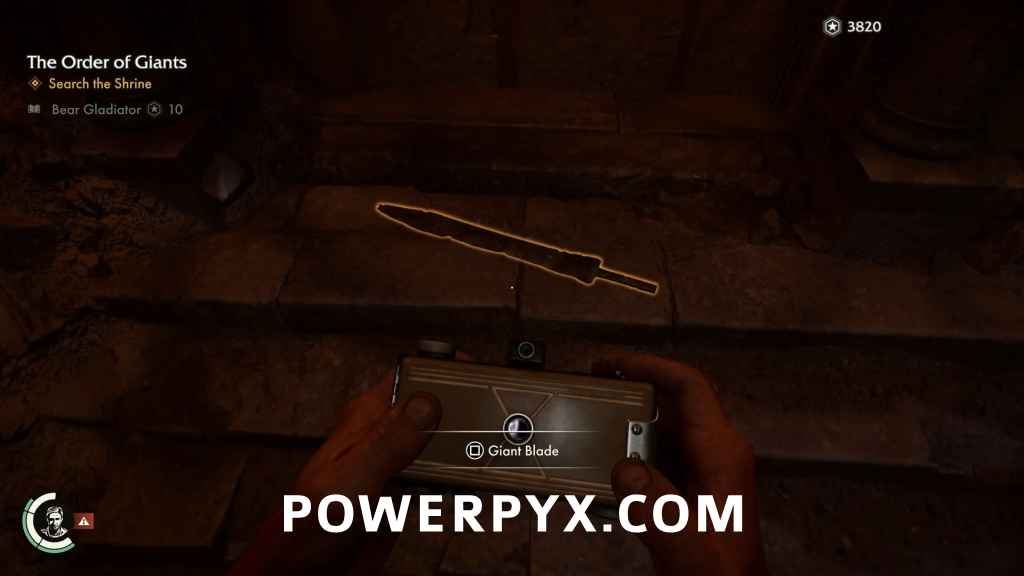
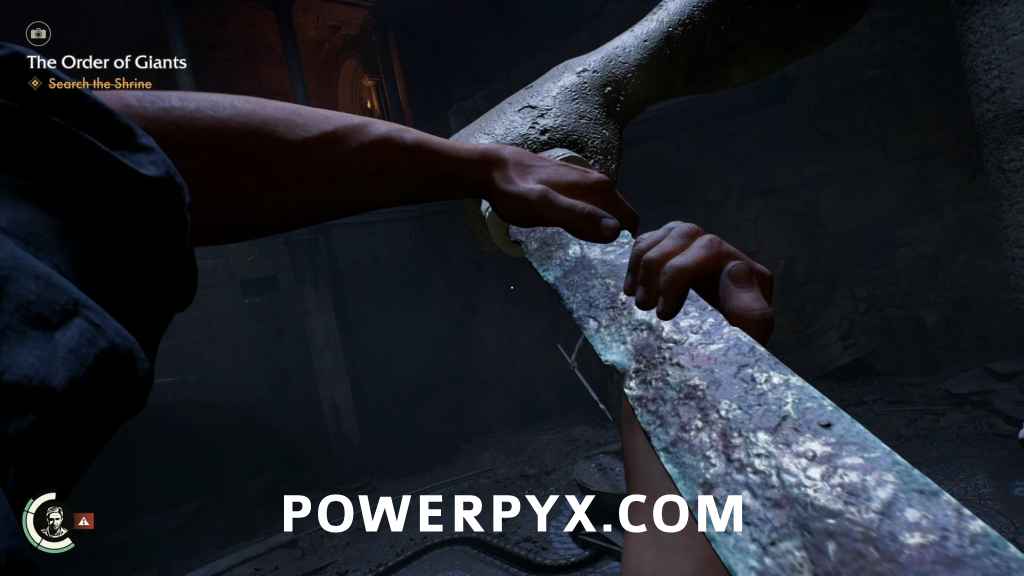
Right in front of the image of the Bear Gladiator, you’ll see the blade of a sword lying on the ground. Grab it, you’ll need it in a minute.
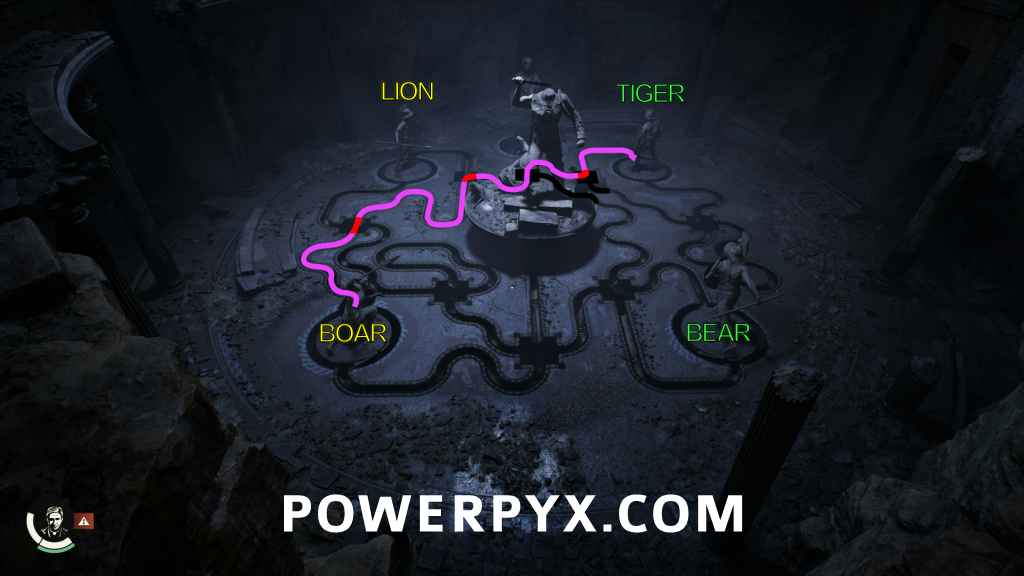
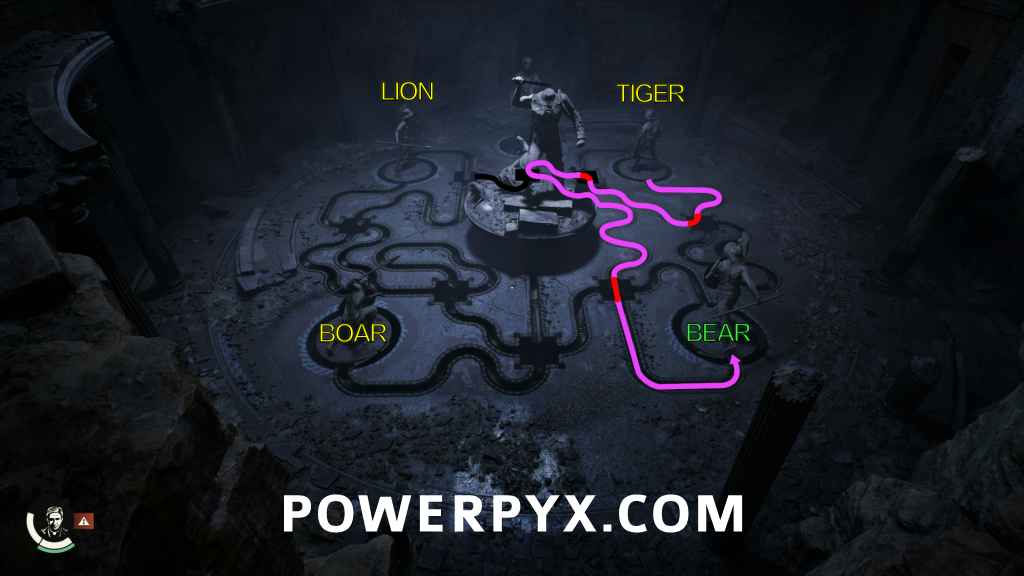
So there are four gladiator images, each one having a roman numeral beneath them. The gladiators are (in order):
- Lion Gladiator
- Boar Gladiator
- Tiger Gladiator
- Bear Gladiator
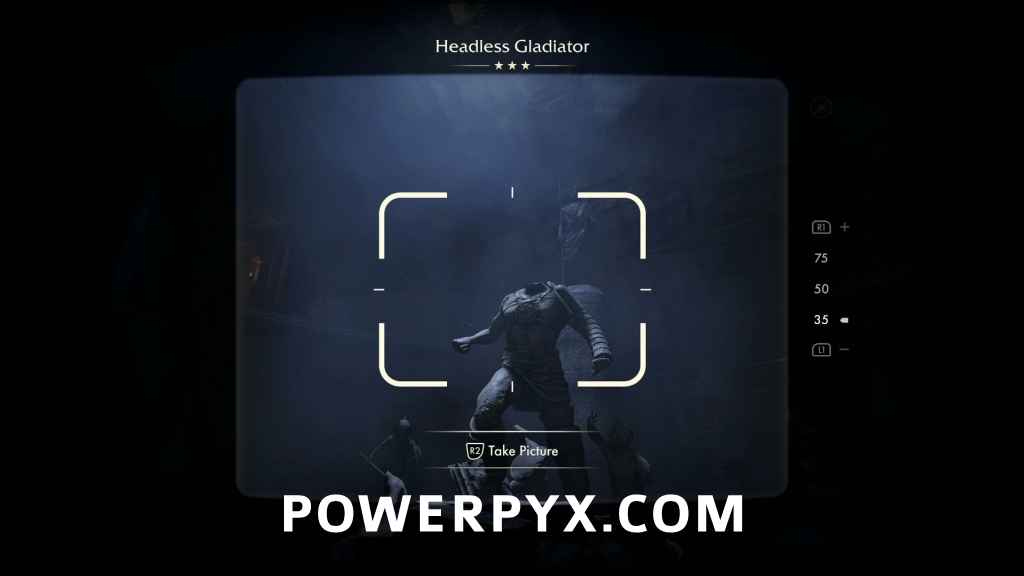
Now that you know that, what does it mean? Well if you look at the statues in the room, their shields all correspond to one of the statues. There are channels on the floor leading in and out of the four gladiator statues around the room, but there is only one channel leading out of the Headless Gladiator Statue in the center. Let’s get a closer look at it, but first take a second to take a picture of it.
Adventure Note #37: Headless Gladiator (25 AP)
Having a look at the statue, you’ll see that it has a sword hilt in its hand, but the sword has no blade. Jump up on the statue’s base and slot the blade into the hilt. Suddenly you’ll hear a mechanism in the statue turning, and its sword arm will raise up as if it were claiming victory. When the arm comes to a stop, you’ll see a prompt to perform a whip yank on it.
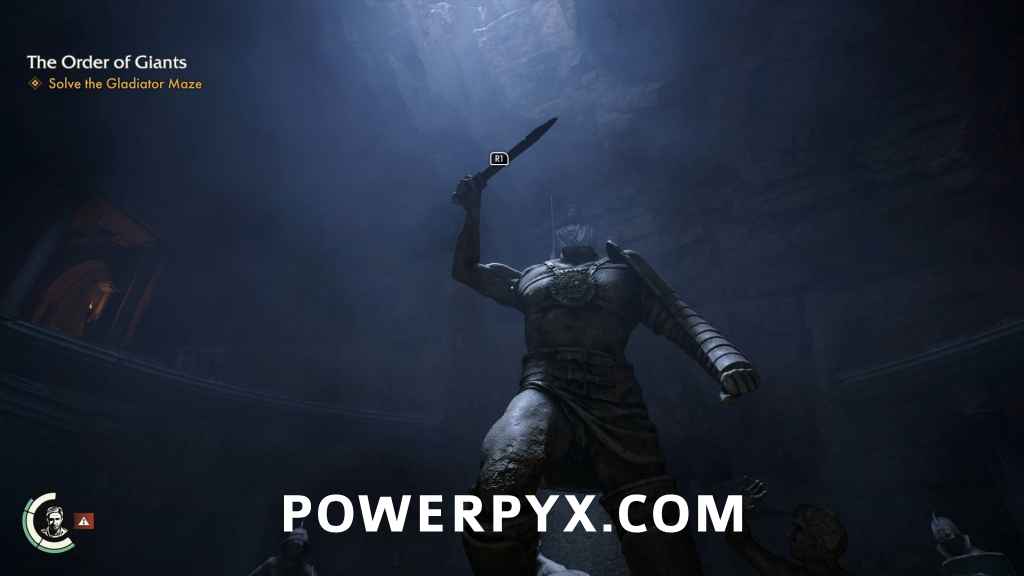
Yank the arm down with your whip, and a firey metal ball will roll out of the statue’s base and start rolling along a channel towards an empty hole. A quick survey of the area will net you three pipe segments that you can use to redirect the path of the ball by slotting them into the empty holes in the correct position. You only have three though, and you’ll have to be quick and decisive about moving them while the ball is in motion. While the ball is travelling along a pipe segment you won’t be able to move it, so the second you see the interact prompt it will be safe to grab. Feel free to hammer on the interact button before it appears, if you think it will help you.
Placement can be finicky sometimes, especially with the elbow pipes. When you are in position at a junction with a pipe segment in hand, you’ll know how it will be oriented when placed because the ends of the pipes you will be connecting to will glow. If the wrong pipes are glowing, try moving your camera or circle around to a different angle. If you happen to do it wrong, just pick it up and try again.
If you don’t have the right pipe in the right spot when the ball reaches a hole, or you direct it to a statue in the wrong order, or accidentally direct it to a statue you’ve already activated, or accidentally lead the ball into an elbow pipe segment that ends against a wall (yes, I’ve done it), you’ll have to start again from the beginning. Having attempted this puzzle numerous times, and seeing after I’d finished that unlike every other puzzle that there is no definitive solution given to you in your journal, I was irritated. So I’ve put together precise instructions to what I’ve found to be the least stressful sequence of pipe moves to complete this puzzle with maximum efficiency and minimum risk.
If you are still having trouble, or find yourself falling behind, make use of the two loops that can be closed with an elbow pipe. One is just west of the Tiger Gladiator, between it and the Bear Gladiator. The other is just southeast of the Boar Gladiator. If you use an elbow pipe to close the loop, the ball will roll around in that loop forever while you move the other pipes to the correct position, or just take a break for a minute to catch your breath. Then when you’re ready you can move or replace the pipe to dump the ball out in the direction you want to go. The sequence below is fairly straight forward though, and doesn’t require a lot of quick reflexes.
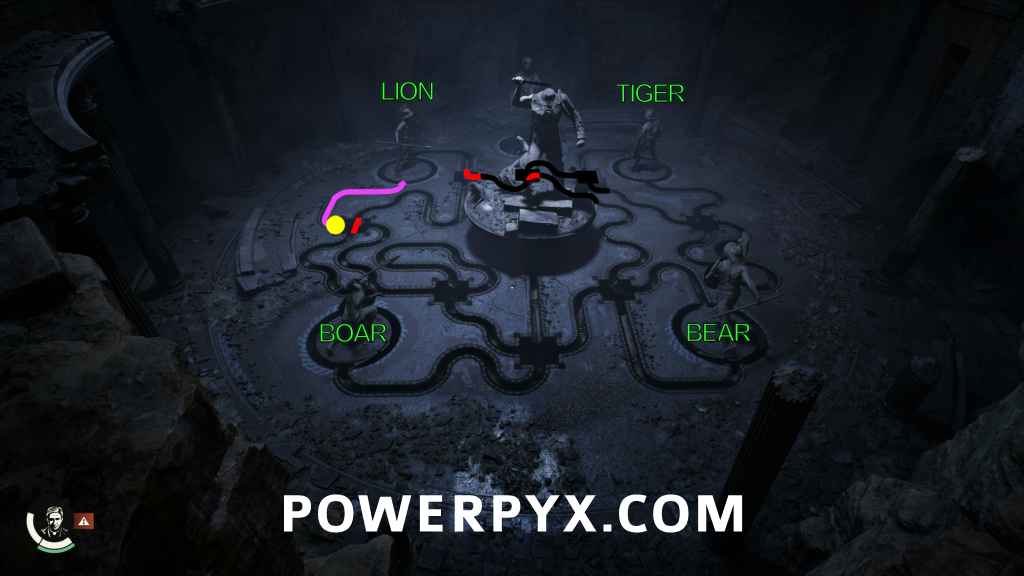
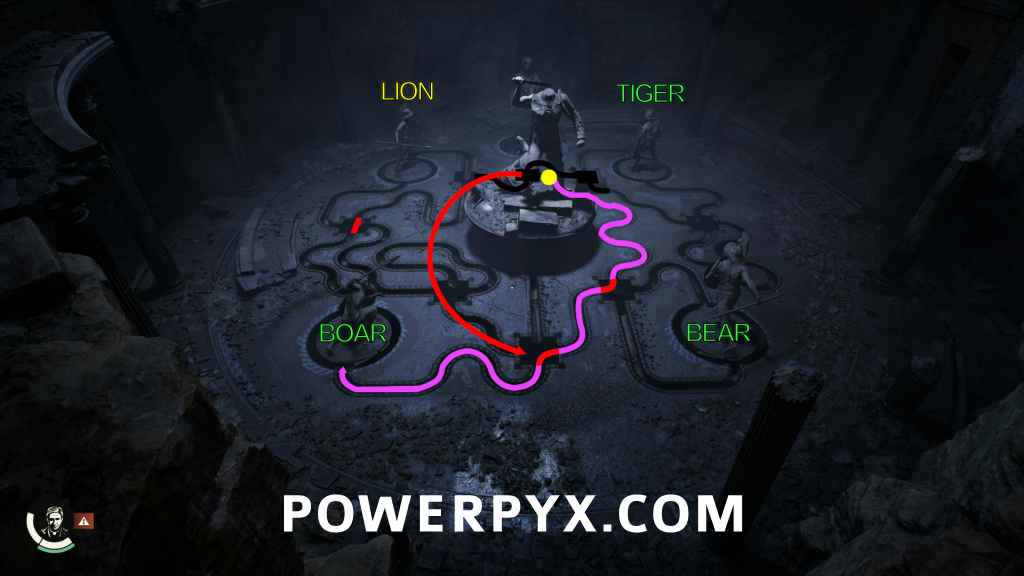
Step 1: Lay out the three pipe segments as shown in red, and then pull the gladiator’s arm to release the ball. The path we want to take the ball to take is in pink, to direct it first to the Lion Gladiator. I’ve superimposed in black the paths of the channels that run behind the Headless Gladiator in the middle, for ease of understanding.
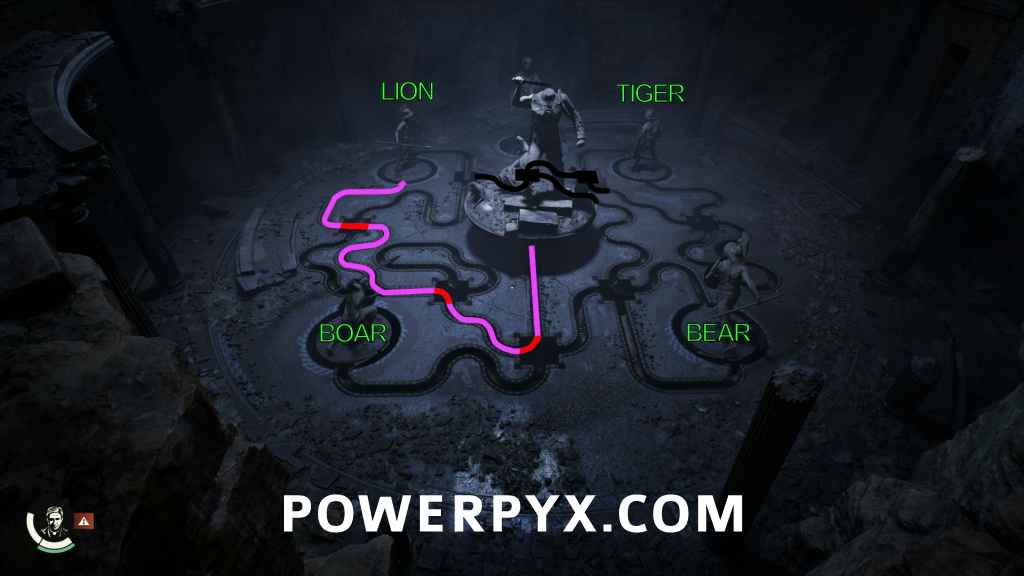
Step 2: When the ball is moving, you always want to be standing by one of the pipe segments and be ready to grab it and move it to a different location the moment the ball has cleared the pipe and you can interact with it. The first move is to take the elbow pipe and move it to the other side of the Lion Gladiator to direct it to the South. While heading west is the more direct route, to accomplish that, you’ll have to move the straight pipe and place it correctly multiple times in quick succession.
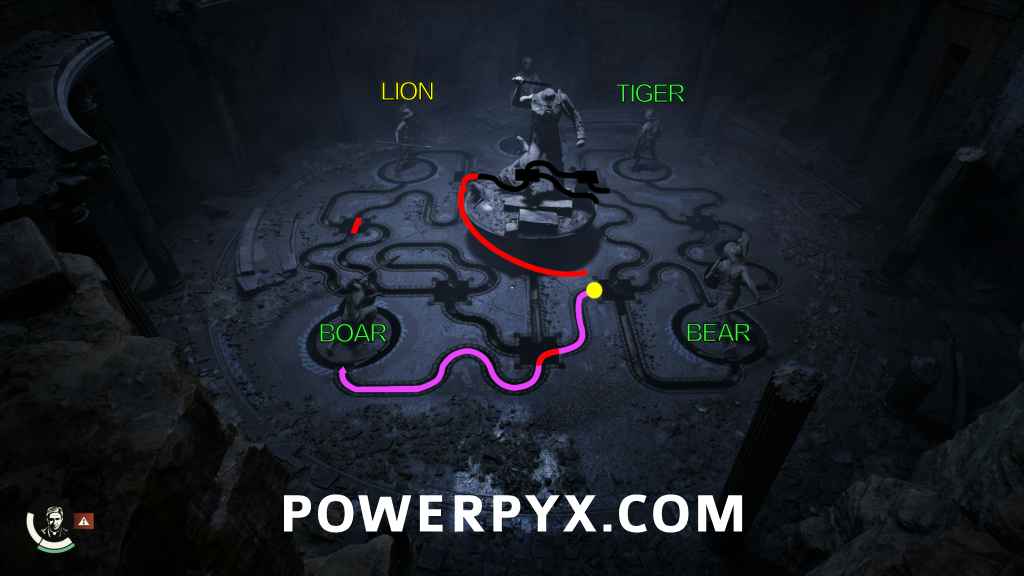
Step 3: As soon as the ball is past the second pipe, move it to the junction next to the last pipe, this time directing the ball to the west.
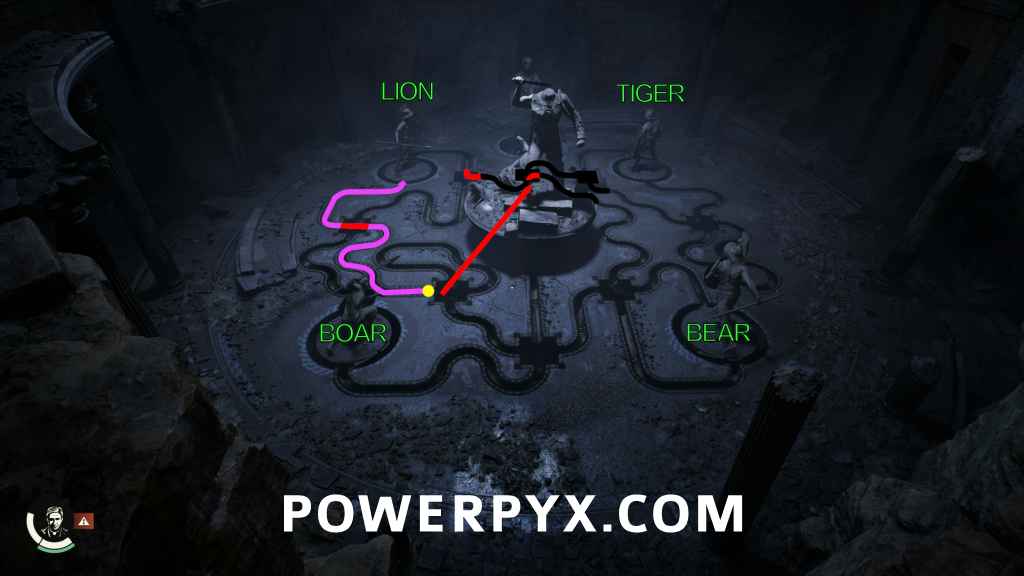
Step 4: An easy one, just rotate the straight pipe 90 degrees.
Step 5: The Lion Statue has been activated. So far so good. This next section has you placing two elbow pipes one after another, but the pipes wind back and forth to give you some extra time. Keep cool and be sure your placement is right before you hit the interact button. Its very easy to drop an elbow pipe into the wrong position under pressure. Stand by the elbow immediately to the south of the Lion Gladiator and wait for your moment.
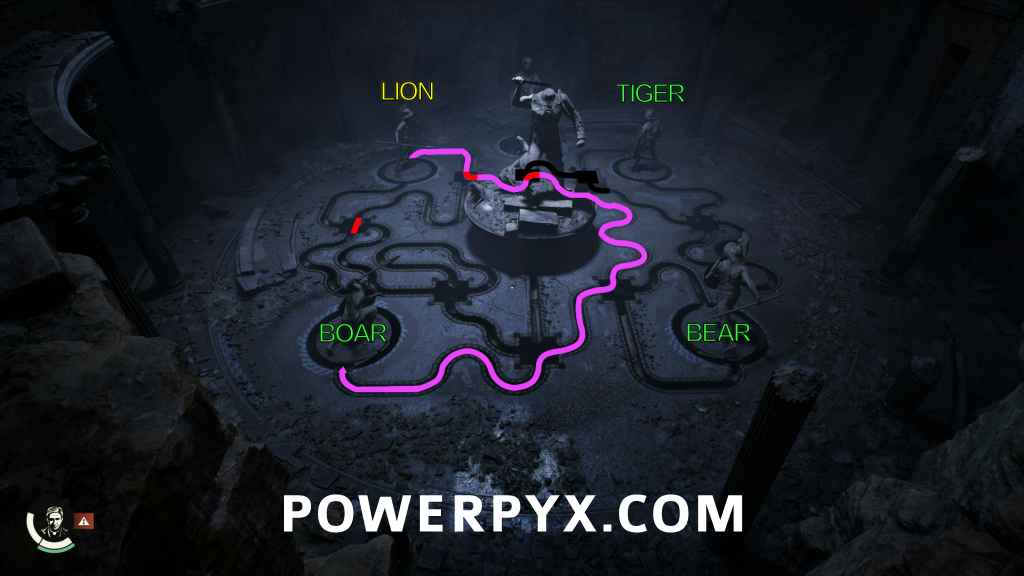
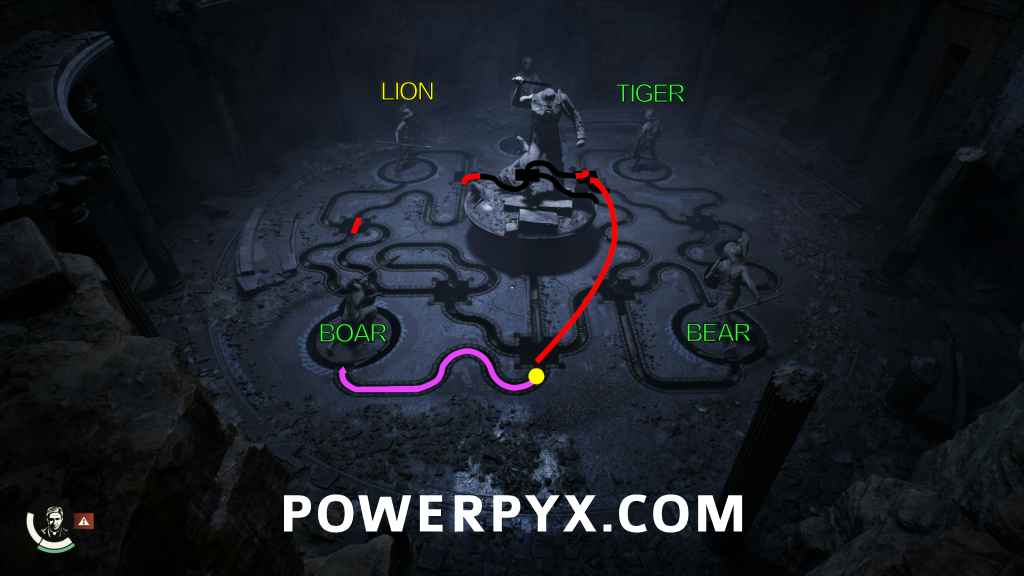
Step 6: As soon as you can grab it, move the first elbow to the junction by the Bear statue, sending the ball back to the north.
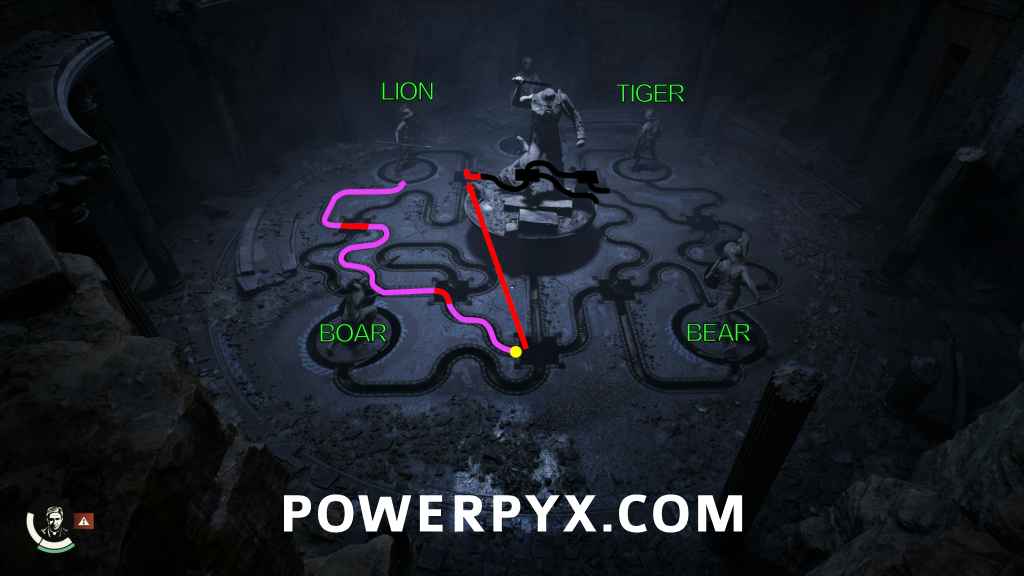
Step 7: By the time you get back to the next elbow, the ball will probably already be past so grab it right away and move it to the junction due west of the Headless Gladiator.
Step 8: The rest of the puzzle should be less hectic from this point on, as you’re building well in advance. As soon as you can, move the elbow pipe to the south of the Lion Gladiator.
Step 9: Move the pipe segment south of the Headless Gladiator to the junction just north of the Tiger Gladiator.
Step 10: Two down, two to go. Stand by the straight pipe and be ready to move it.
Step 11: Move the straight pipe to the to the only empty junction between you and your next Gladiator.
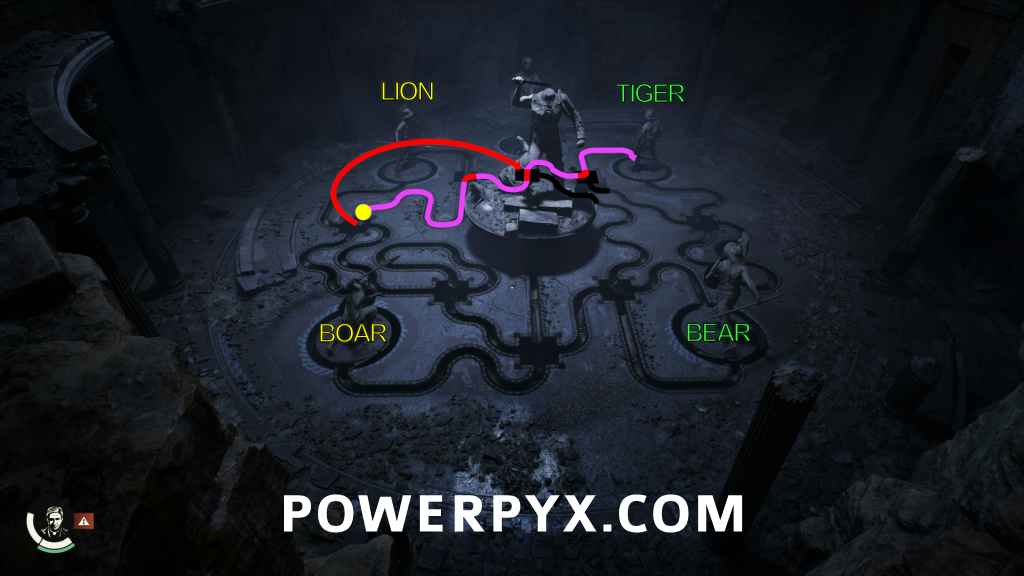
Step 12: As soon as the ball has passed the elbow pipe, move it to the junction just west of the Tiger Gladiator.
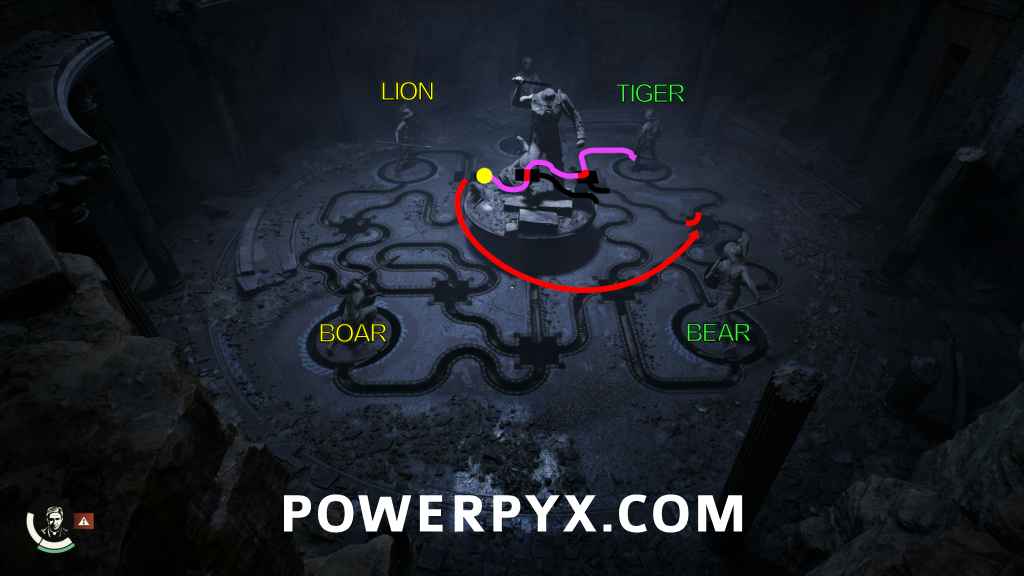
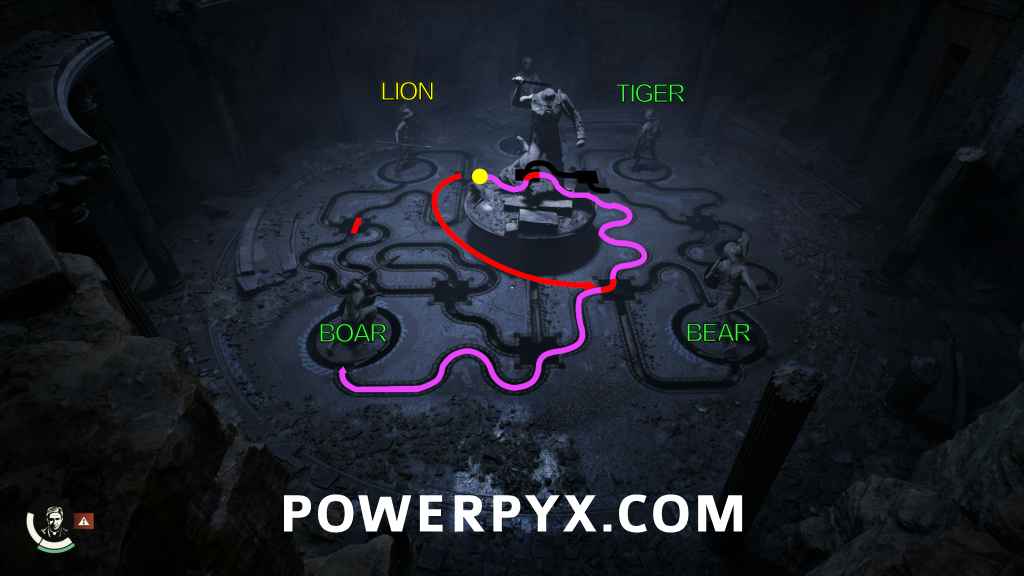
Step 13: Move the straight pipe to the junction between the Headless Gladiator and the Bear Gladiator.
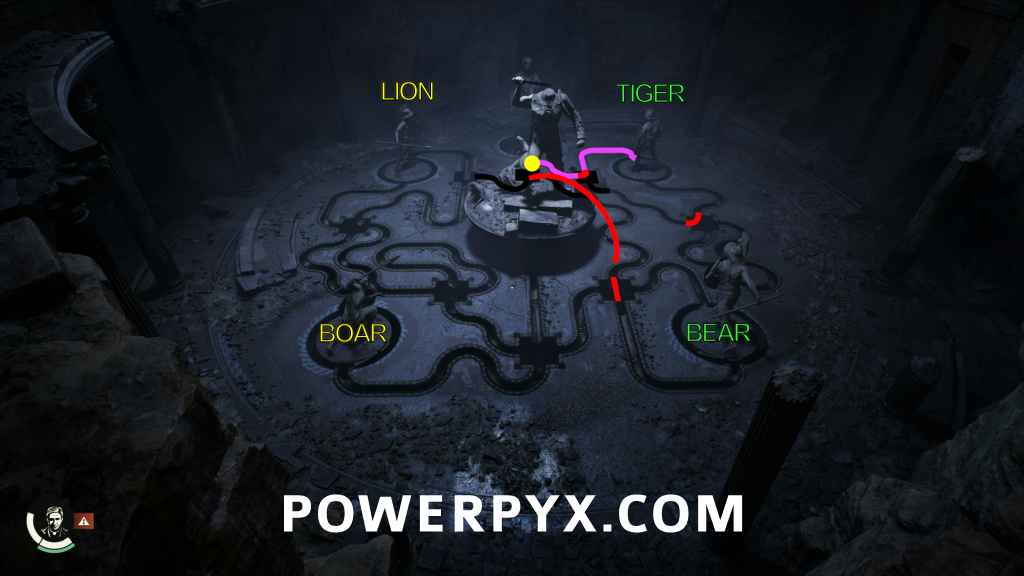
Step 14: As soon as the ball has passed, rotate the elbow pipe 90 degrees so that it will direct the ball to the north after activating the Tiger Gladiator.
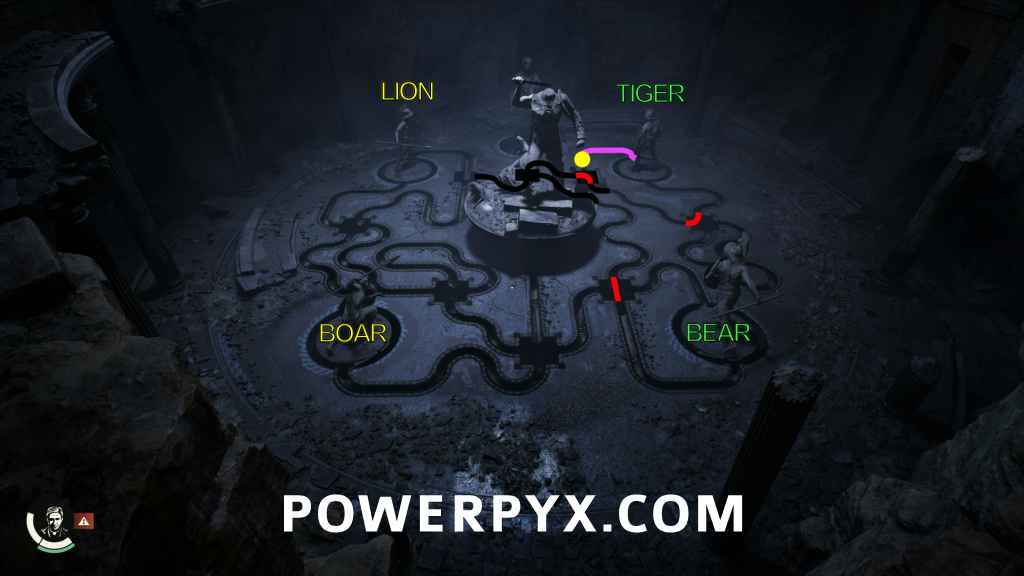
Step 15: Just one more to go. One more statue, and actually only one pipe move too. Stand by the elbow pipe just west of the Tiger Gladiator.
Step 16: Move the elbow pipe to the junction due east of the Headless Gladiator, oriented so that the ball will be turned back to the south. At this point the only way you can fail is to start pulling out pipe segments, so just chill and wait for the ball to do its thing.
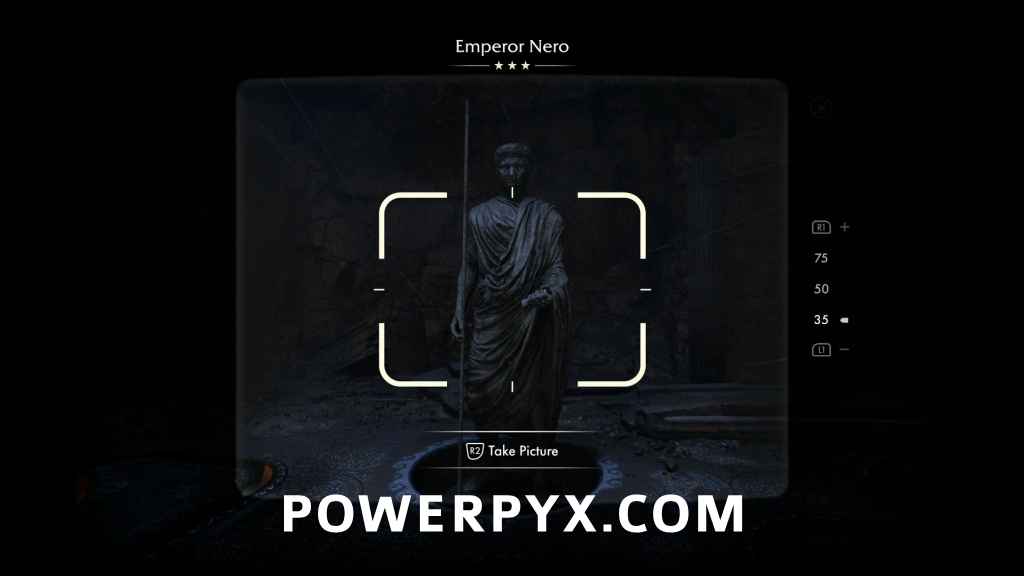
When you’ve activated all four statues, the statue of Nero that was on a high platform at the east side of the room will drop down to ground level and give you a photo opportunity.
Adventure Note #38: Emperor Nero (25 AP)
Take the Cylinder Piece
…And in its hand is the second Cylinder Piece.
Adventure Note #39: The Gladiator Shrine Solution (15 AP)
Leave the Shrine
Don’t stop to congratulate yourself, you’ve got Cultists incoming! Climb up to the balcony they appeared on and you’ll see they’ve graciously left the door open for you. Deal with them how you’d like, then slip through the door to the door to the north into the next area. There will be two cultists patrolling the next room, but there will also be plenty of clubs and cudgels on benches at the sides of the room so feel free to knock them out.
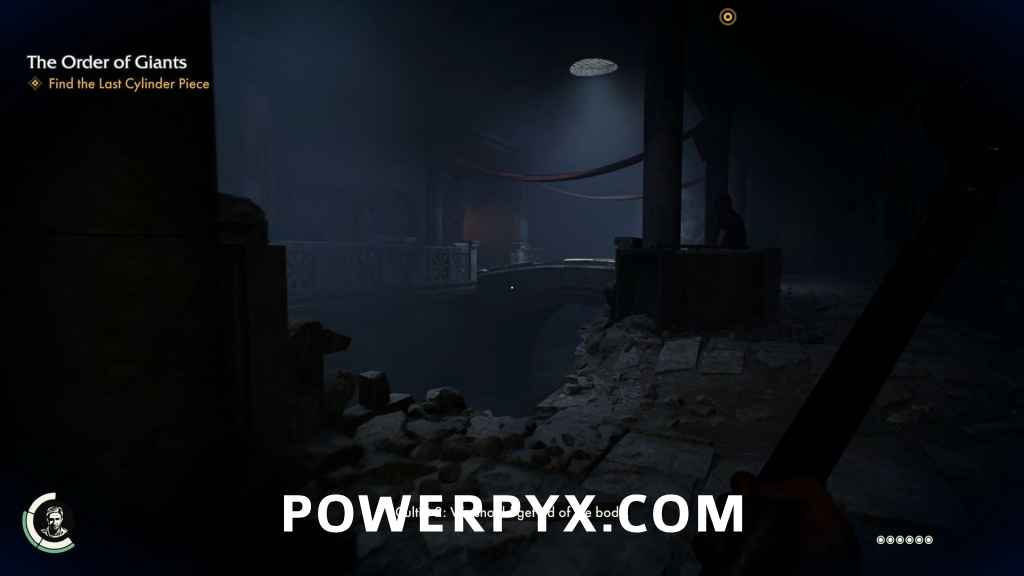
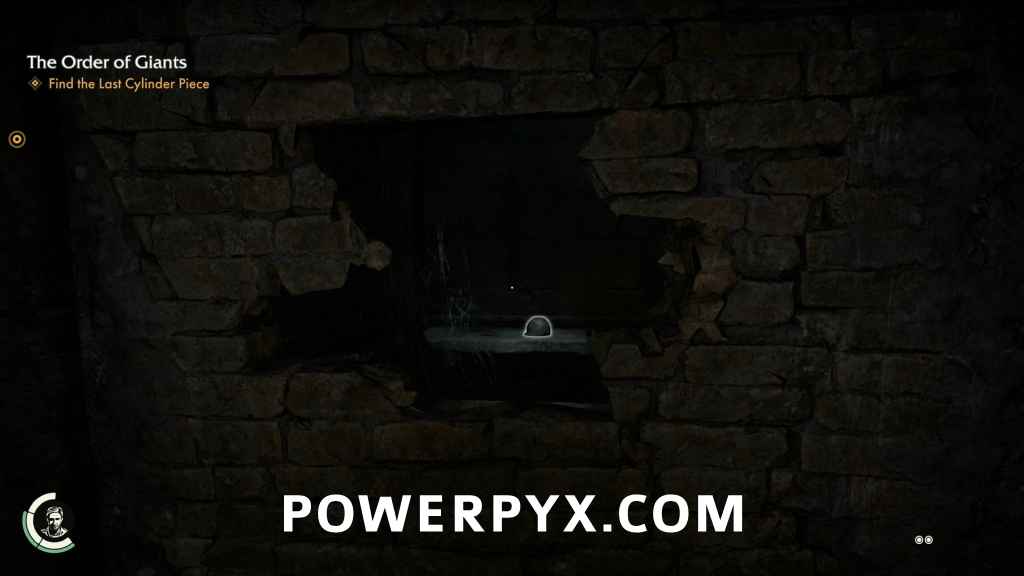
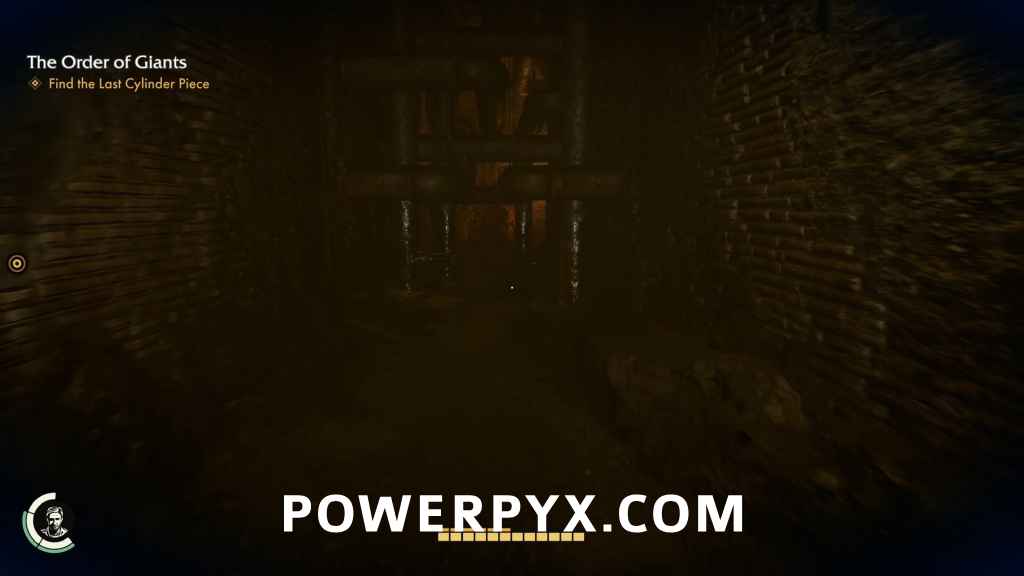
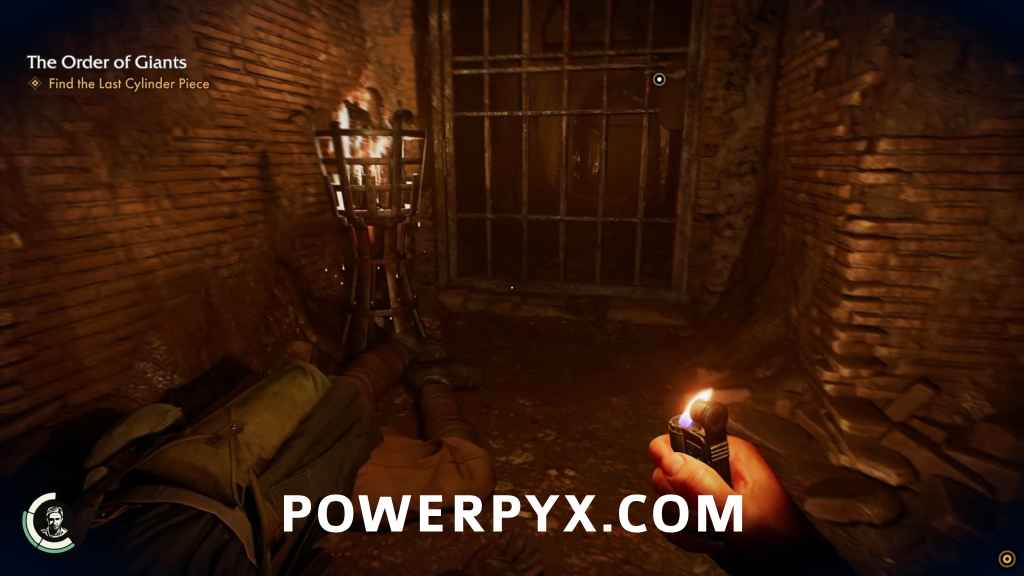
Find the Last Cylinder Piece
Keep following the path and you’ll come out on the level above the canal you’d walked through earlier, with more cultists hanging around. Might as well knock them out too because you’re about to make a lot of noise. Luckily there are still lots of improvised weapons available to you here as well.
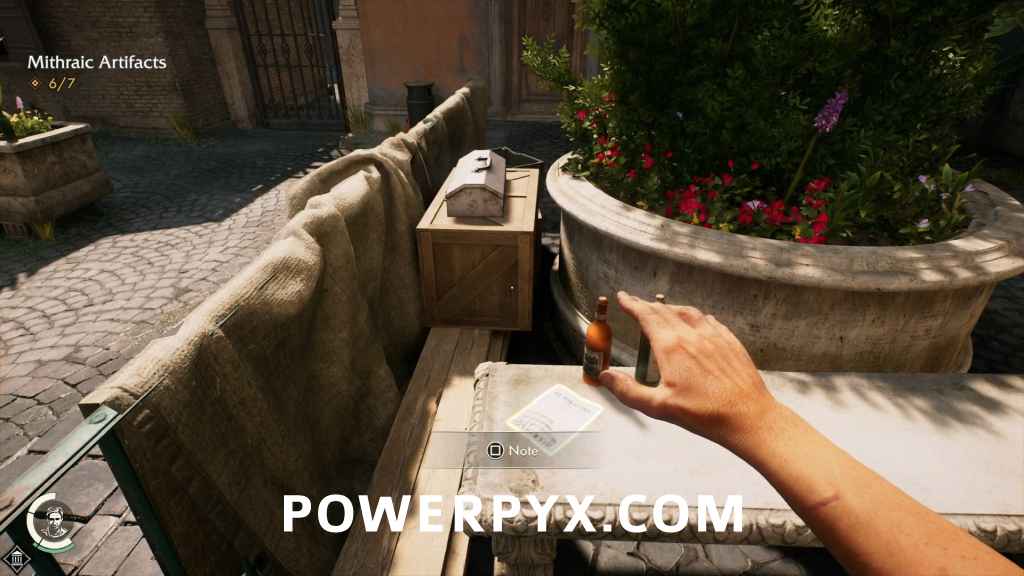
When they’ve all been taken out and before you cross the bridge, head south along the upper level to find a breakable wall right at the end of the walkway. Use one of the clubs, or some other heavy object to knock down the wall to find an artifact.
Mithraic Artifact #4: Miles Artifact (20 AP)
Then go down the stairs to the west to find a note next to a downed Blackshirt.
Adventure Note #40: Dead Blackshirt’s Letter (15 AP)
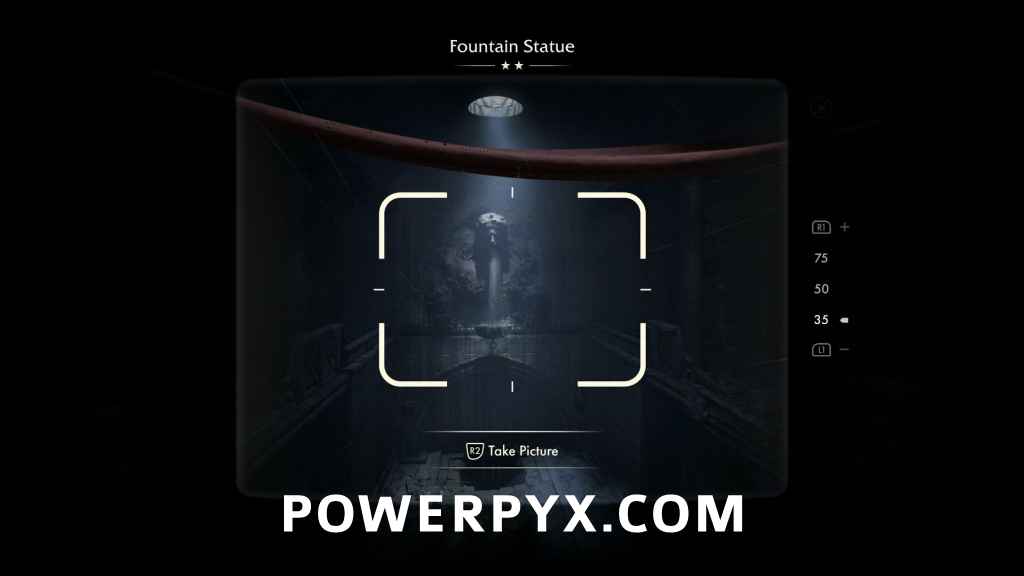
Go back up to the bridge over the canal and look towards the fountain for a photo opportunity.
Adventure Note #41: Fountain Statue (15 AP)
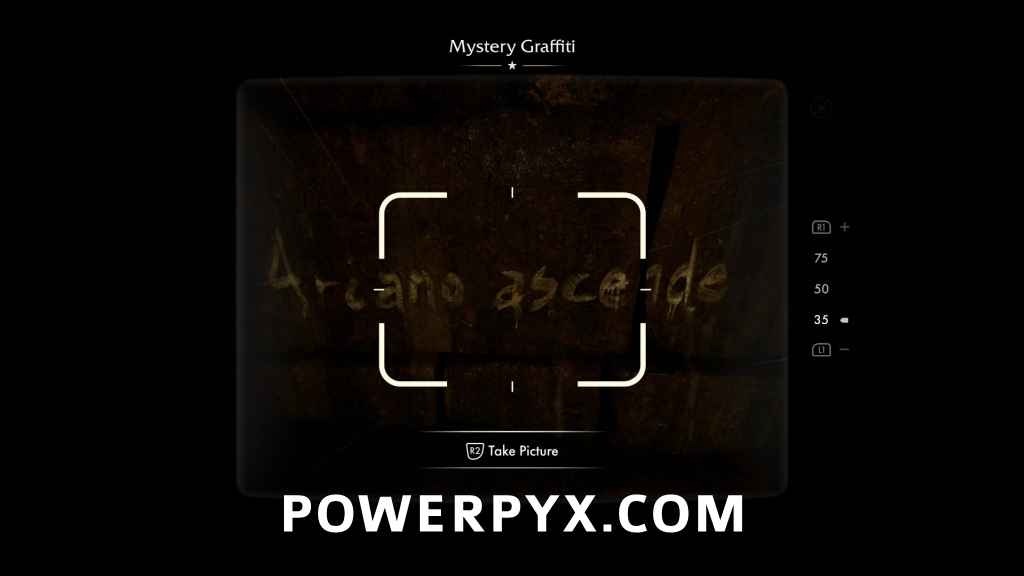
Now go over the bridge and the gate has now been lifted, allowing you to go back up the stairs to the octagonal room in the Cloaca Maxima. Once there, take your boat to the south down the tunnel, until you reach another gate. Dock your boat here, and you’ll see on the southeast side of the tunnel in the firelight is another string of graffiti.
Discovery Note #31: Mystery Graffiti (10 AP)
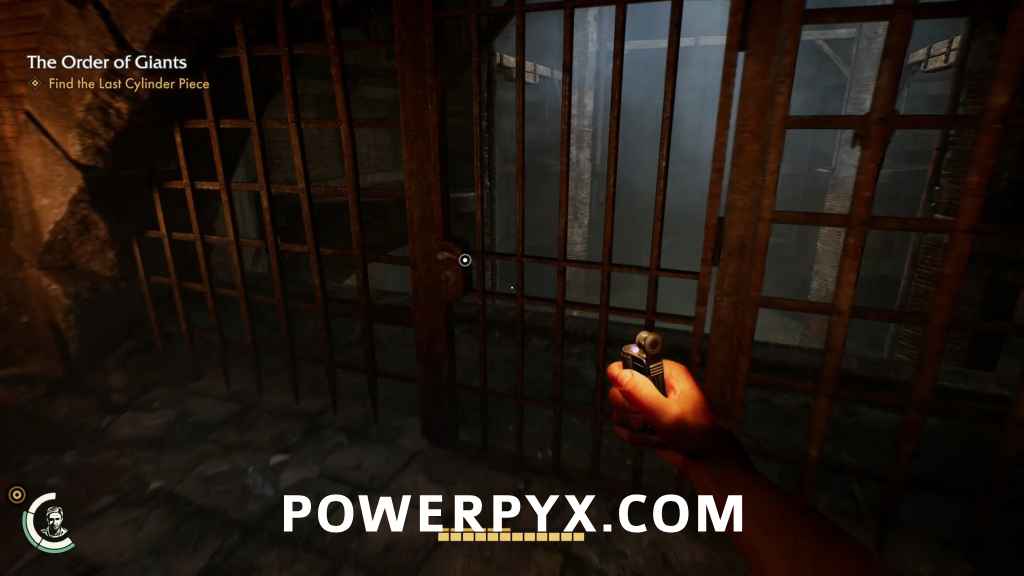
Be sure to open the grate that’s blocking the waterway for your boat, then head down the tunnel to the northwest. Eventually the path will be blocked by a metal gate, but also split into a stairway down to the west. Back in the water. keep following the tunnel as it turns to the east. Here you have to crawl beneath a tangle of pipes, and on the opposite side you’ll see another dead Blackshirt and the other side of the metal gate you just saw. Unlock it before you continue.
Keep going east and follow the tunnel up a few flights of stairs, and you’ll be back at the upper level of the octagonal room behind the metal gate that you passed earlier. Unlock this before you move on, then head down the tunnel to the west. The tunnel will split, ending at a locked door to the west, so head north into a cave.
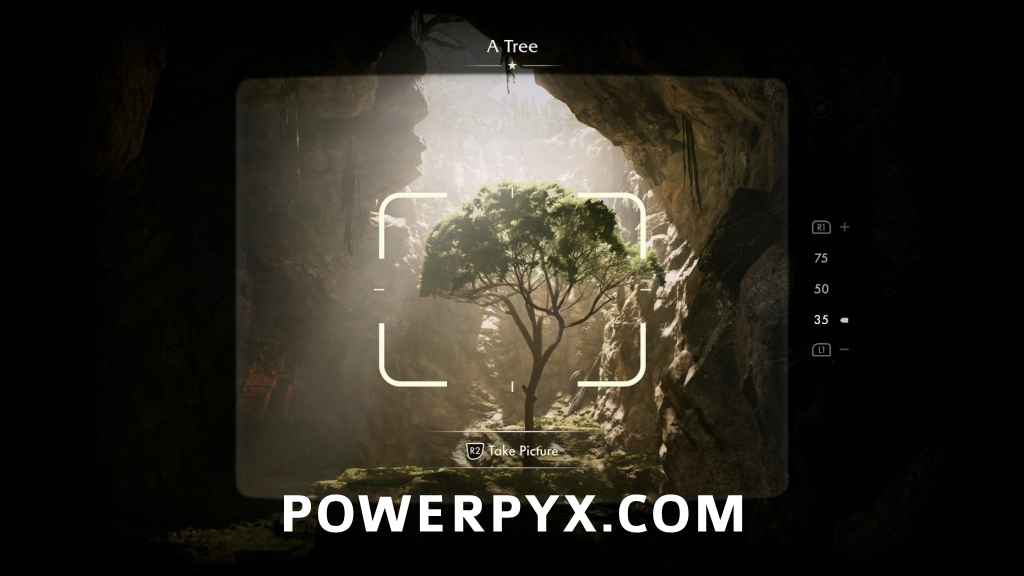
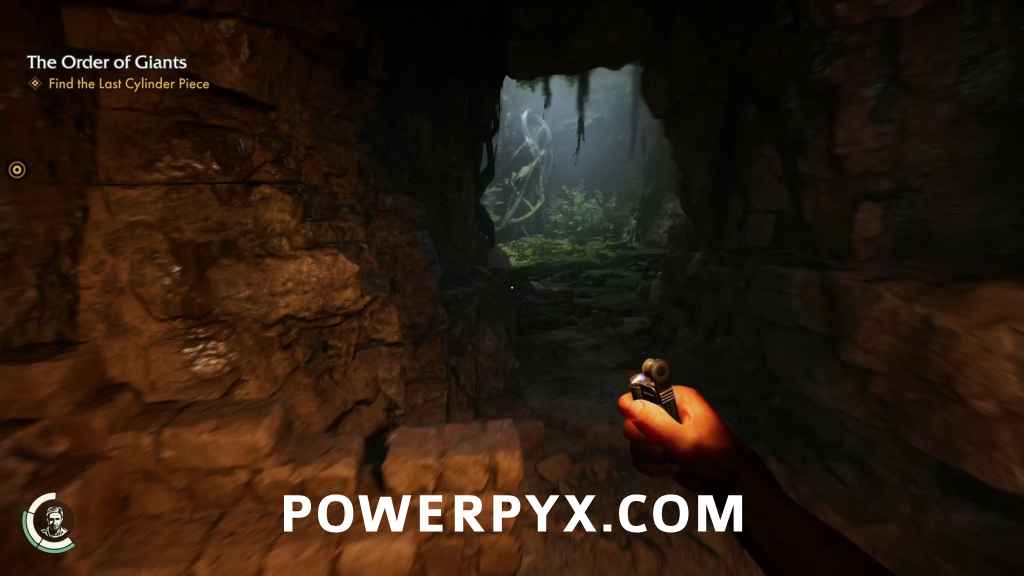 Swing across a chasm, and you’ll find a photo opportunity on the other side.
Discovery Note #32: A Tree (10 AP)
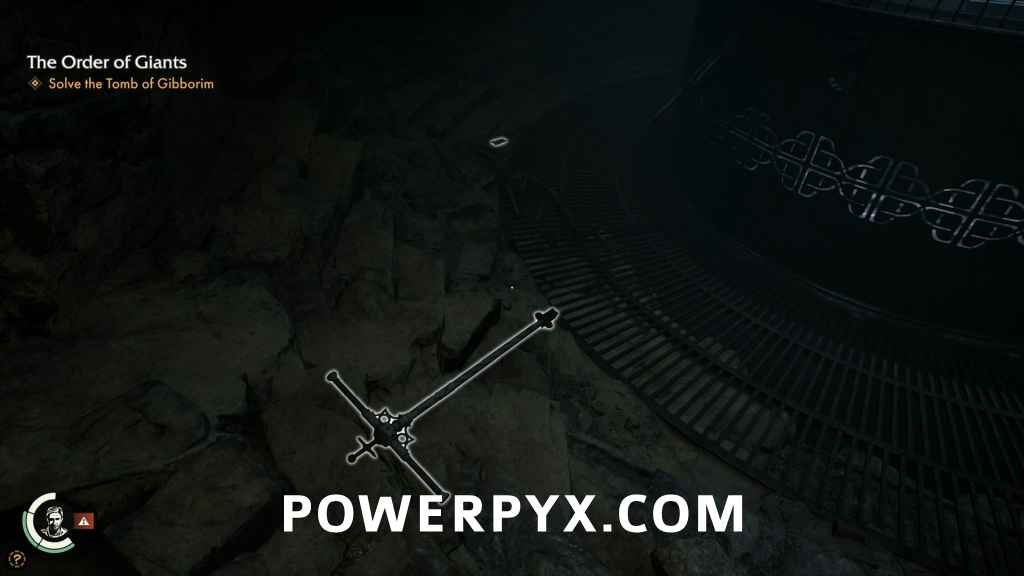
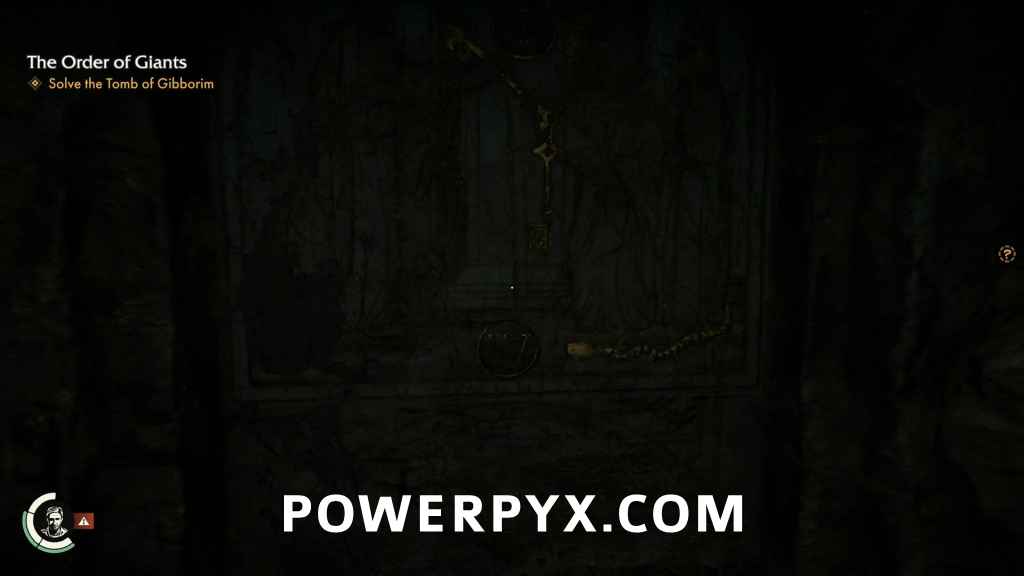
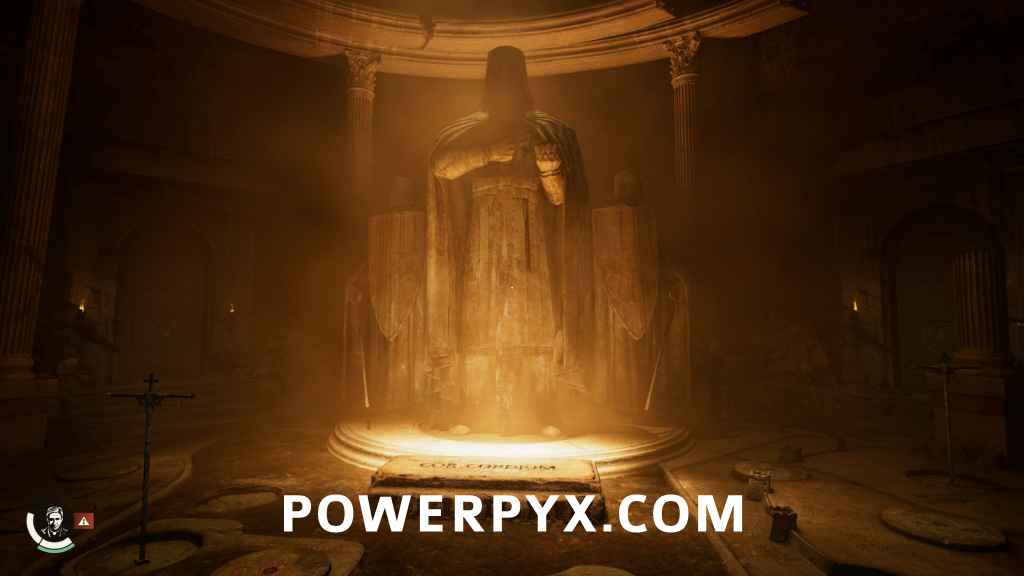
Keep going past the tree to find an alcove that has a narrow passage you can squeeze through, and on the other side you’ll find the Tomb of Gibborim. You’ll enter along a balcony high above the room below, so go to the left until you’re right in front of the tall statue then look up to find a bar that you can whip to lower yourself down safely.
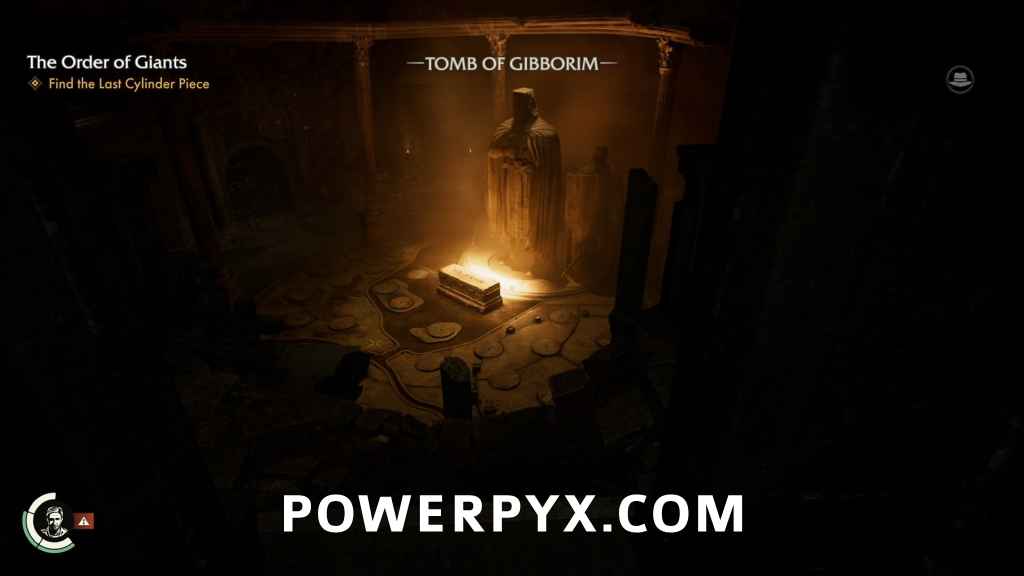
Explore the Tomb
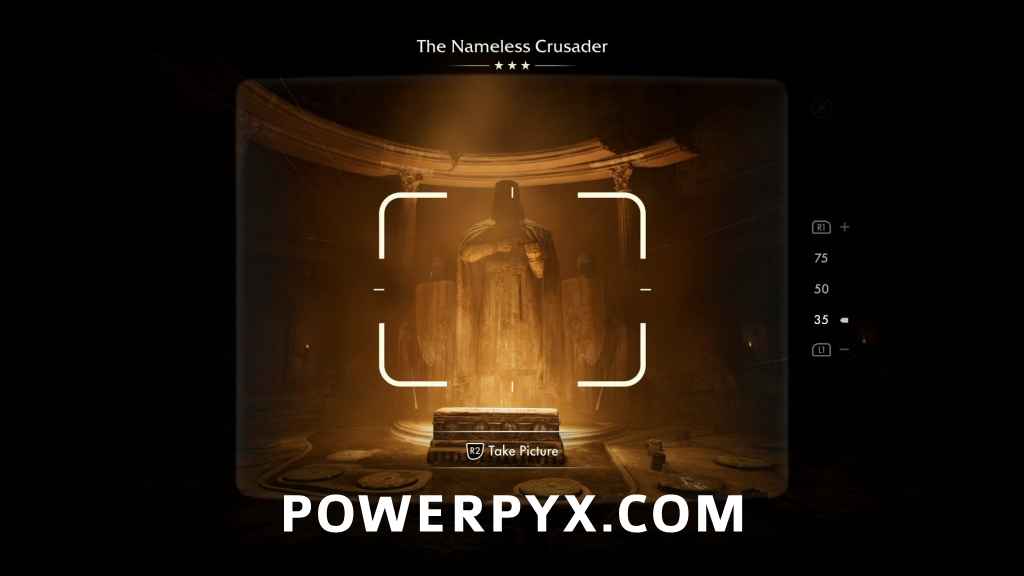
First thing to do is to take this photo opportunity to snap a shot of the Nameless Crusader, the giant statue to the west.
Adventure Note #42: The Nameless Crusader (10 AP)
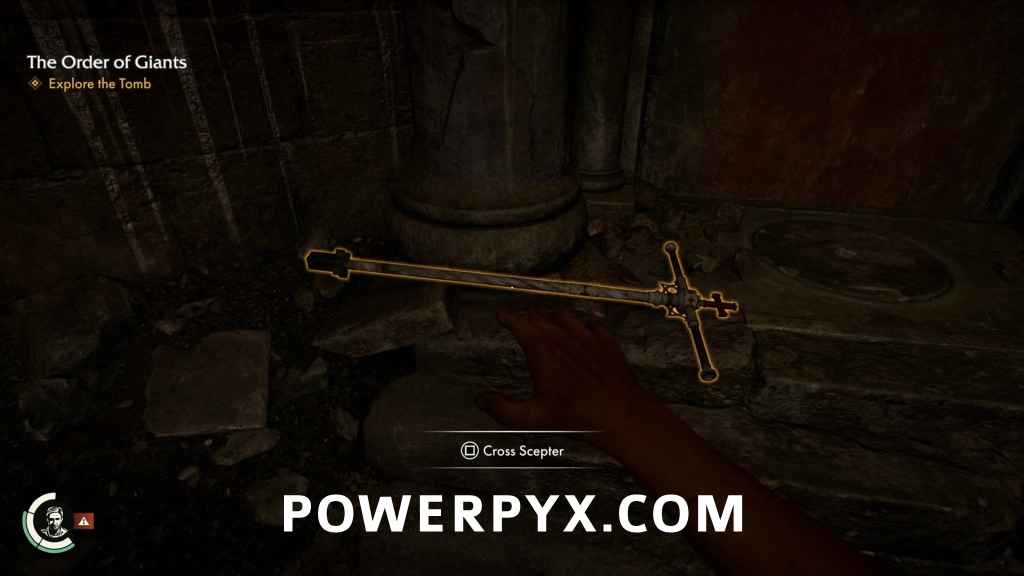
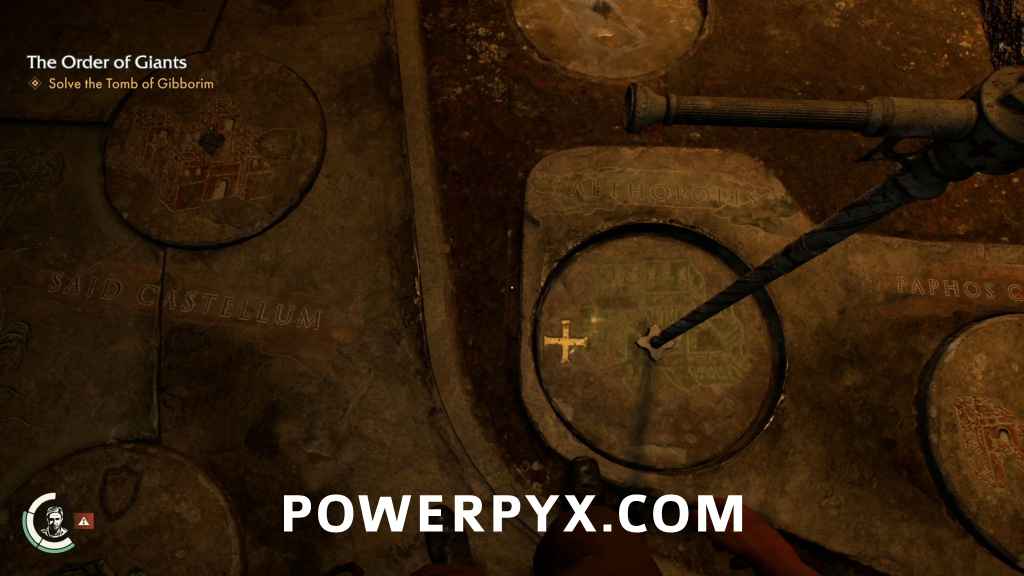
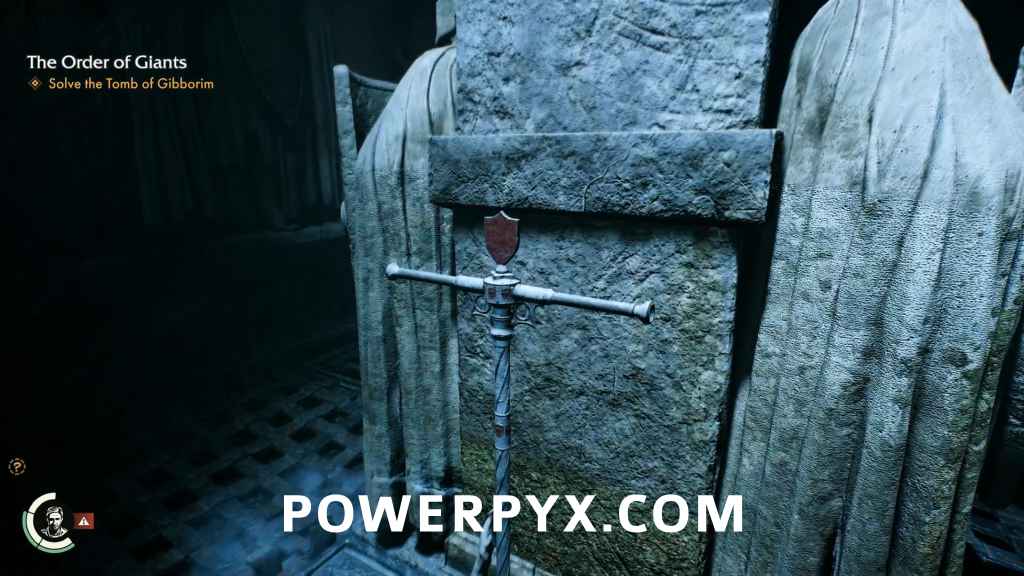
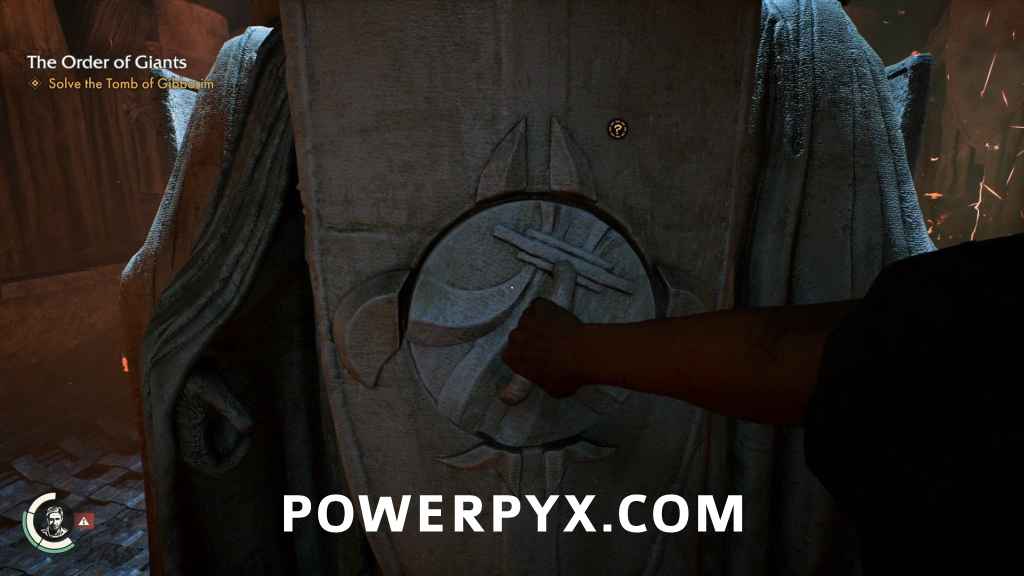
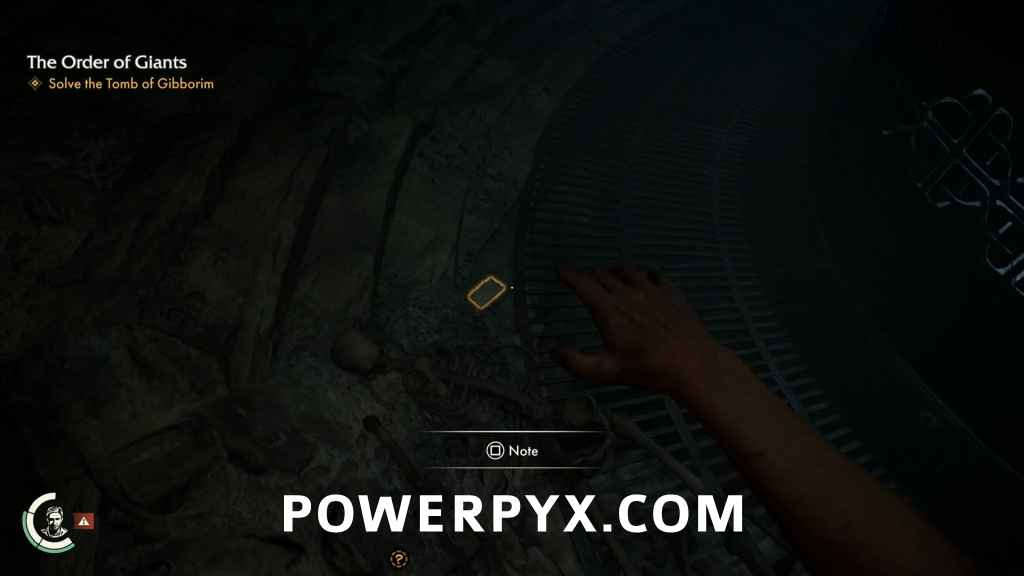
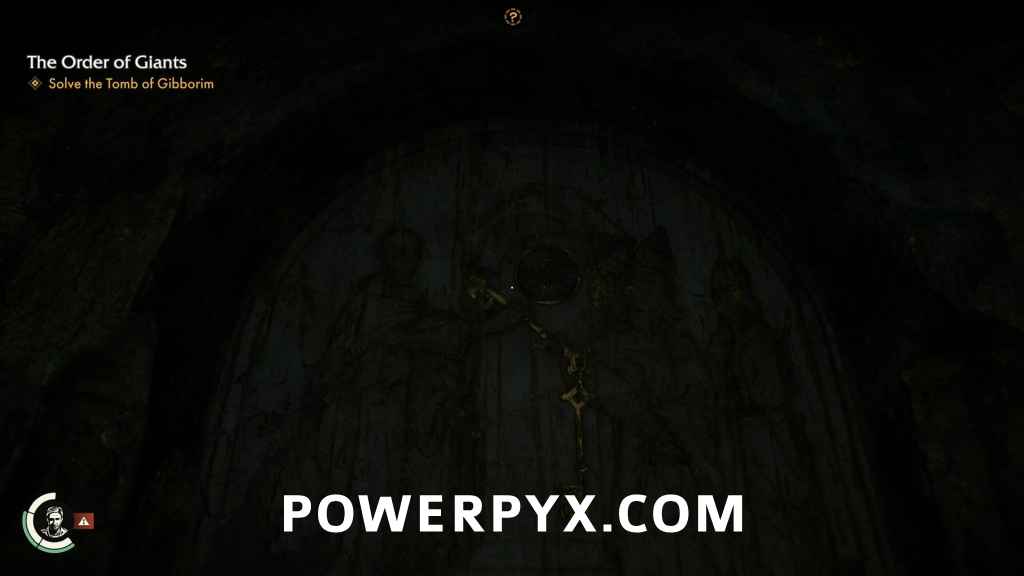
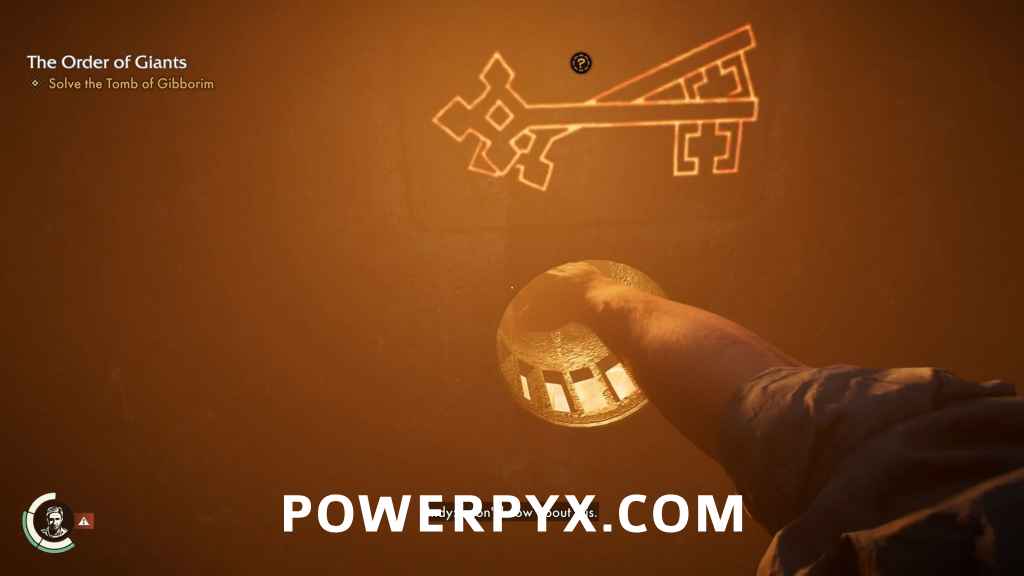
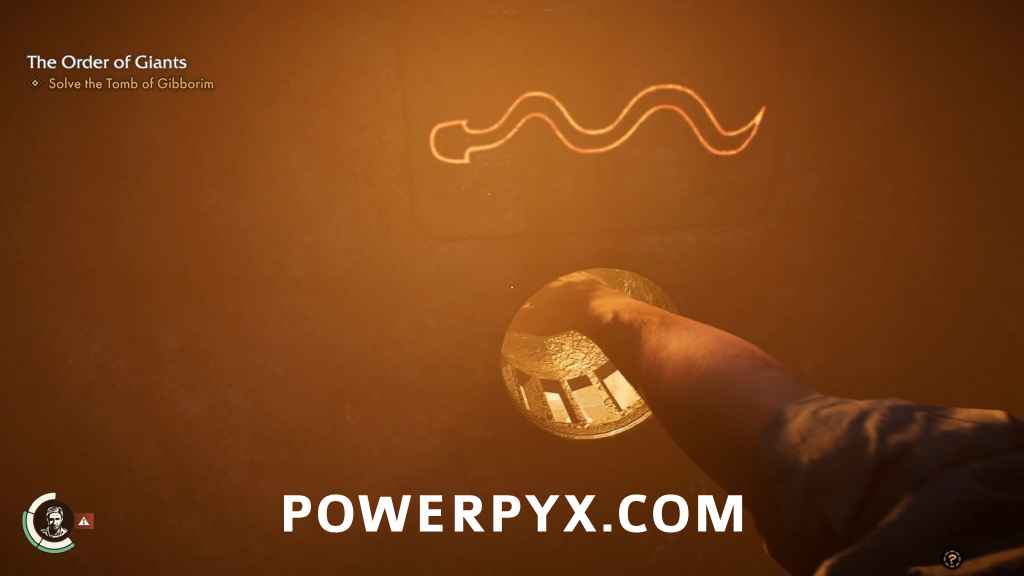
Looking at the ground, you will see that the entire platform is a map, each circle representing a different place and marked with its name. Each also has one of four symbols: a cross, a shield, a sword, and a trinity symbol. All four symbols appear on the altar in the center of the room, and also on four murals that are around the edges of the room. In the southeast corner, you’ll find a Cross Scepter, which looks and performs much like the Serpent Wrench seen earlier. Pick it up, and plant it in the hole next to the cross mural and a panel will slide away to reveal a latin inscription.
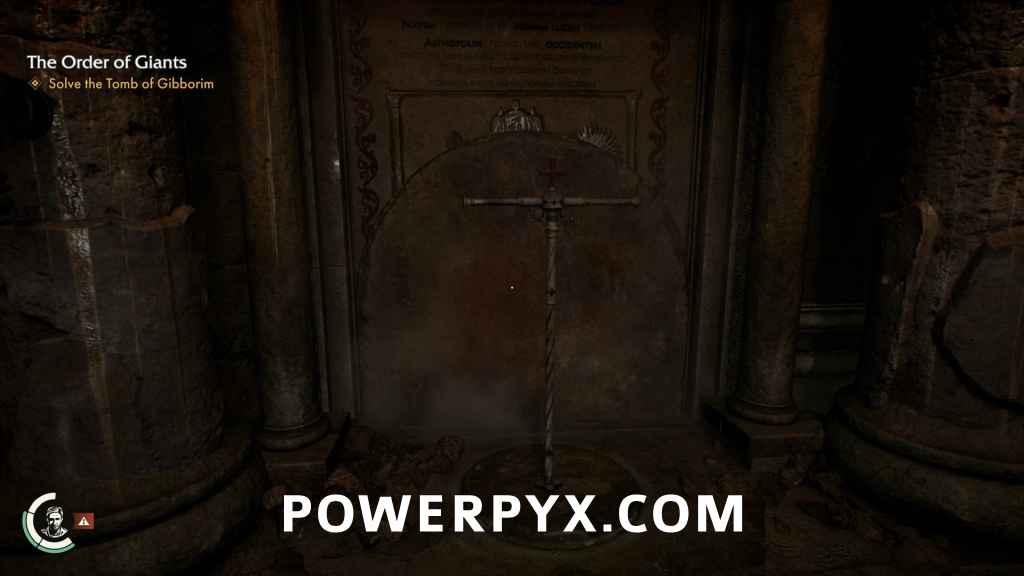
Solve the Tomb of Gibborim
The inscription is a photo opportunity, so take a picture of it for the note and as well for the translation of the inscription.
Adventure Note #43: Crusader Cross Mural (10 AP)
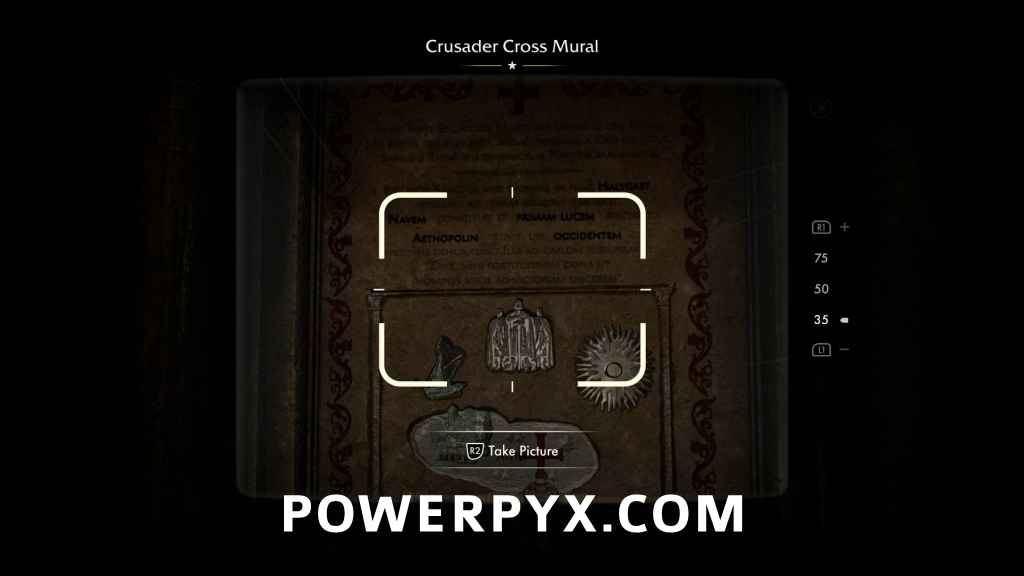
Inscriptions that you read will have certain words underlined. These will be the important directions that you will have to follow when solving this puzzle. The inscription reads “These are the deeds and fate of the Nameless Crusader. A mighty warrior. Pure of heart, chosen by God, true to the Holy Trinity, and loved by Pontiffs. The Nameless Crusader sailed on Halygast to distant lands. The ship anchored and he watched the morning light. He reached Aethopolis where he knelt facing west. He whispered to the heavens “Lord, grant me strength to lead my men to victory.”
When holding the Cross Scepter, you’ll be able to hit  /
/  to bring up the inscription so you don’t have to go looking in your journal for it. Also, all the circles that also have a cross symbol will now show an interaction prompt when you are close, allowing you to plant the scepter and use it to turn the circle to the direction indicated by the cross symbol. At first glance this seems like a simple puzzle, just turn the circles representing Halygast and Aethopolis to the right directions. The problem is that there’s a key piece of missing information you’ll need to solve these puzzles.
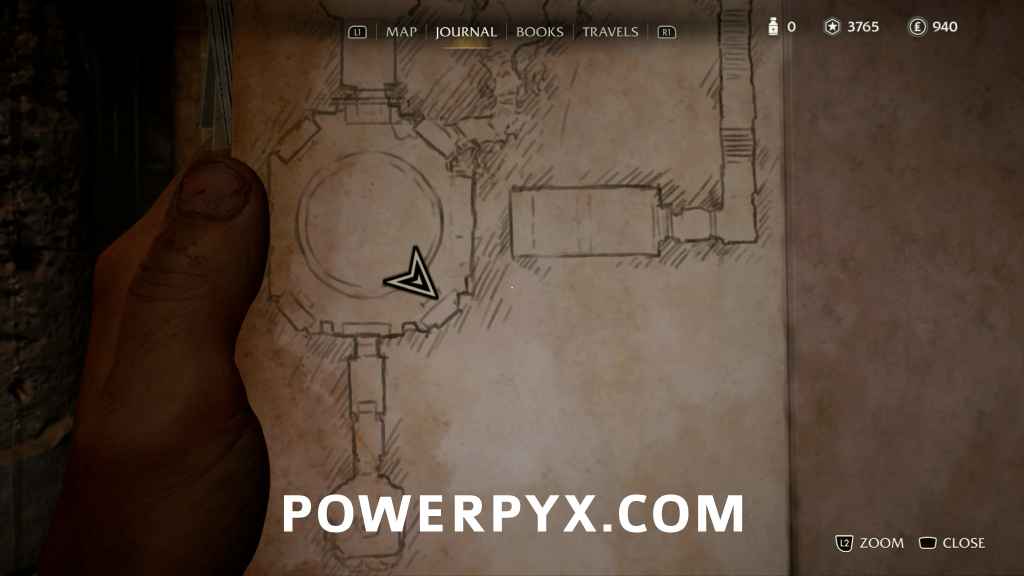
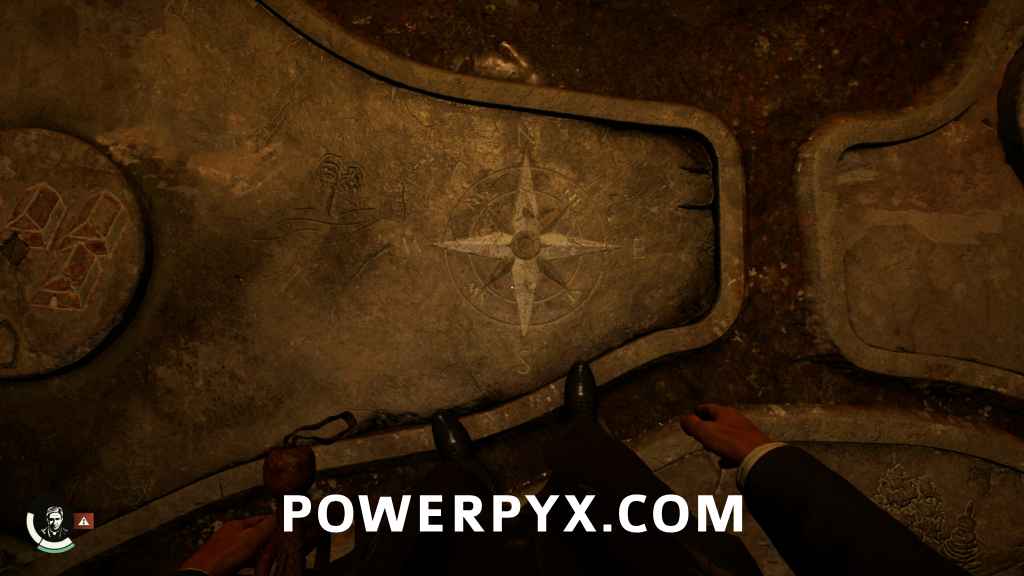
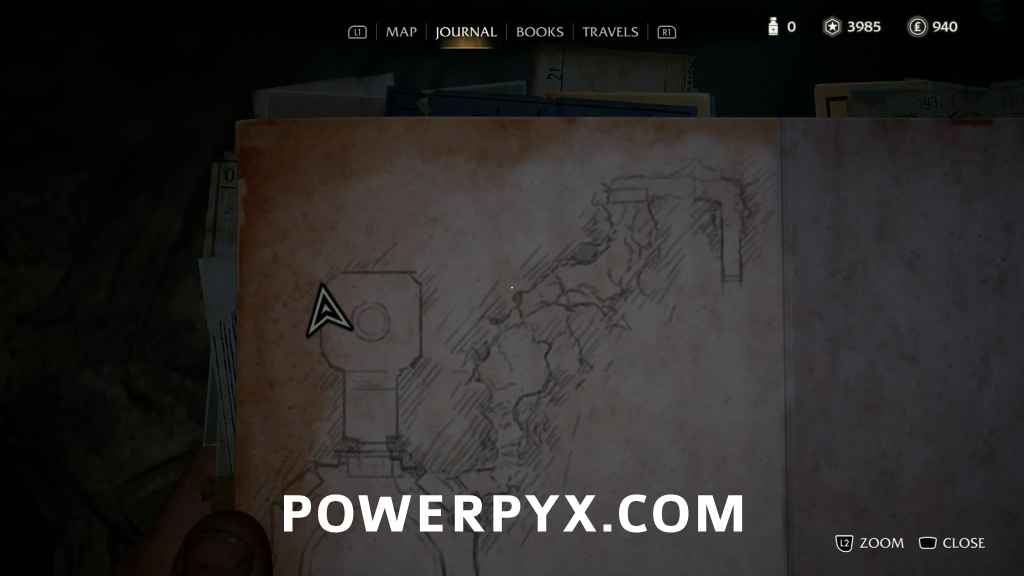
The map in the Tomb of Gibborim does not use actual compass directions.
Look at the map near where the river joins with the lake. Look closely and you’ll see a very faint compass rose that gives you the map’s orientation. North on the map is towards the Nameless Crusader statue, but when facing that direction Indy is actually facing west. So all directions given in the inscriptions are relative to the map, not the compass, and the circular panels should be rotated so that the symbol matching the scepter is facing in the direction given (again, relative to the map).
Cross Mural Solution:
Halygast – East
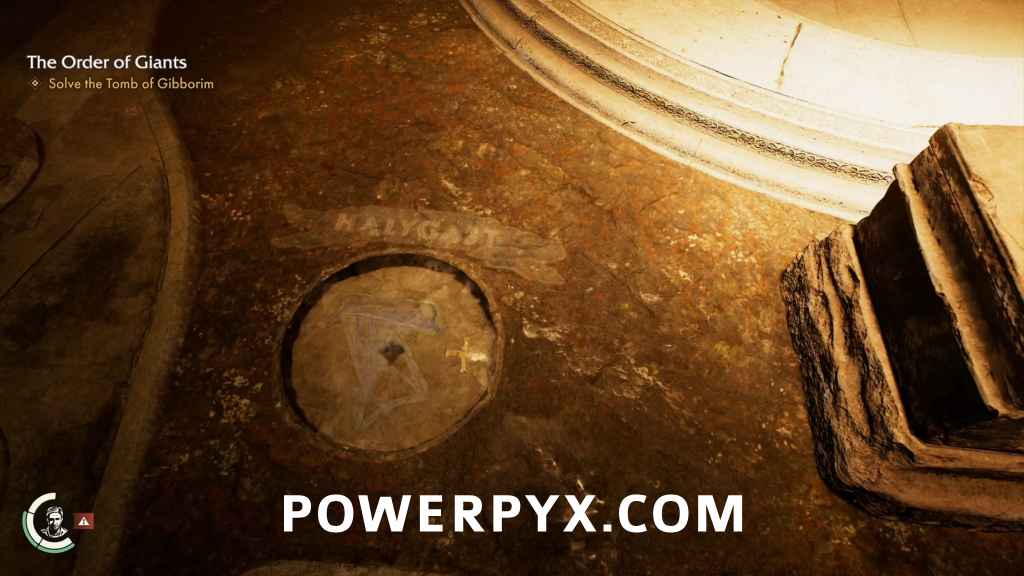
Aethoplis – West
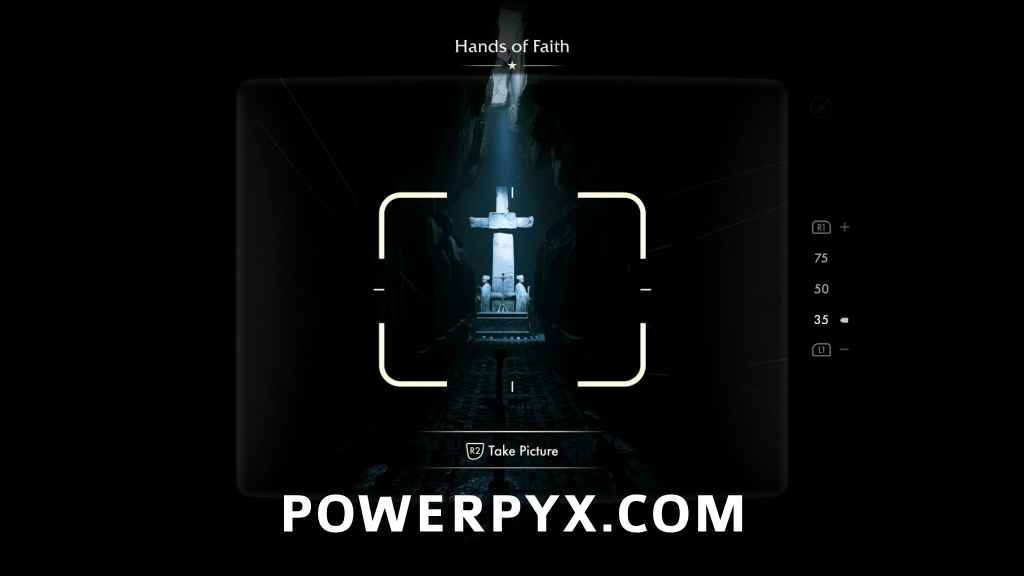
Once you’ve rotated these circular panels correctly, you will hear the sound of gears turning, the circles that you’ve adjusted will drop a few inches and lock the Cross Scepter into place, and the gate blocking the door to the south will lift allowing you access to the next puzzle. Just inside the gate you’ll find a lever and be presented with a photo opportunity.
Adventure Note #44: Hands of Faith (10 AP)
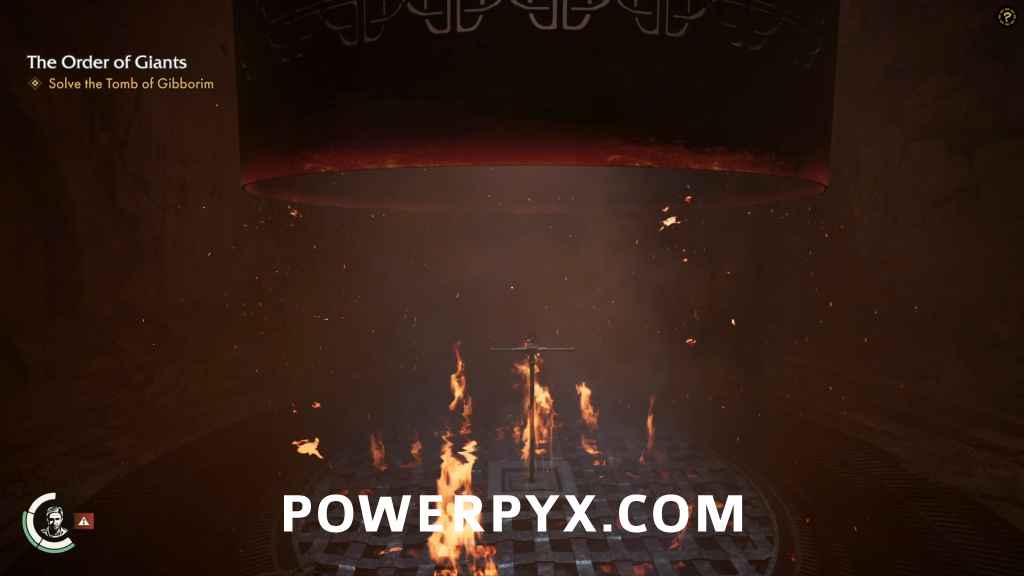
Before you pull the lever, head south into the room to examine the next puzzle. Straight ahead of you is a giant stone cross, and in front of it will be the Shield Scepter being held in place by three stone hands. Around the other sides of the cross are statues of three knights, each of which will have a fleur-de-lis device on their shield that has a circular section with a handle. These sections, when rotated, will cause the hands to release the Shield Scepter, but you won’t be able to turn them yet. Not until you go back to the lever and pull it to activate the puzzle. When you do, fire will shoot up out of the conveniently grill-like floor in a looping pattern which you have to avoid.
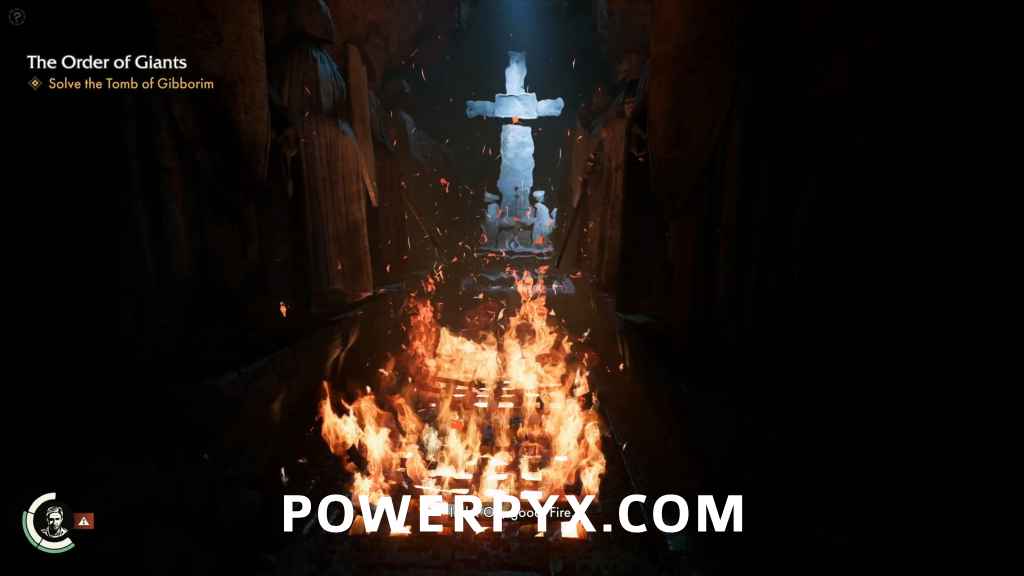
In reality the amount of damage isn’t large, so you don’t have to be too concerned if you get burned a little while solving the puzzle, but it’s always worth avoiding. The fire will go south towards the cross, circle it once counterclockwise, then head back to the north, and the pattern will reverse with the fire circling around the cross clockwise once before heading back to the south until it repeats from the beginning of the pattern. You have to follow the fire to the south, go right around the cross and activate the three switches while avoiding the fire. Each switch takes about two seconds to rotate all the way around though, so you’ll probably only be able to activate one switch per circle the fire makes of the cross.
On story difficulty however, you can just take the fire damage and get all three done at once. If you’ve already unlocked all the Adventure Books, you probably won’t take more than a single double-segment worth of damage, particularly if you’ve already eaten bread items for the extra layer of protection. In any case, once you’ve turned all three of the circular switches to make the correct fleur-de-lis symbol, all three hands will release the scepter allowing you to take it.
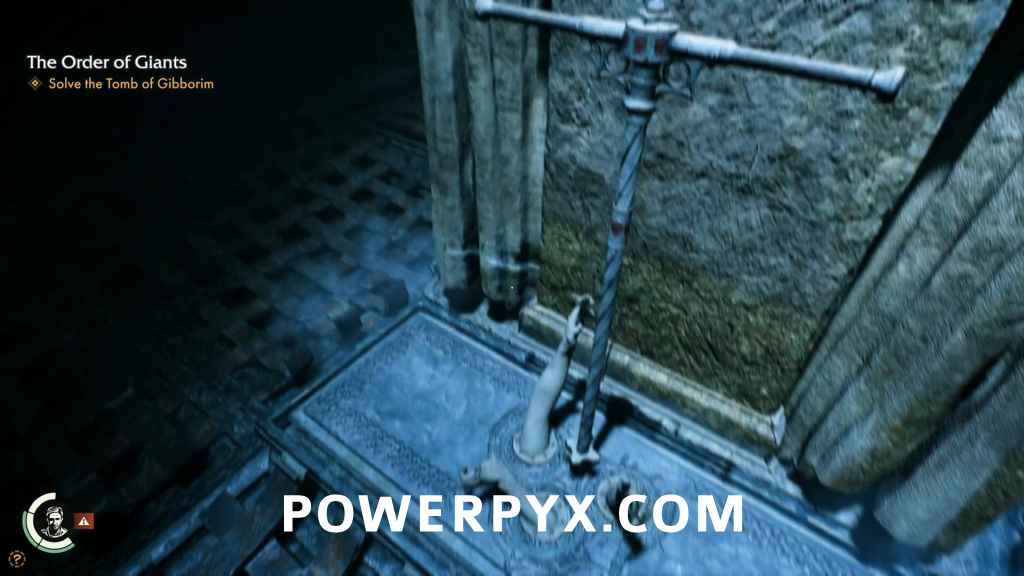
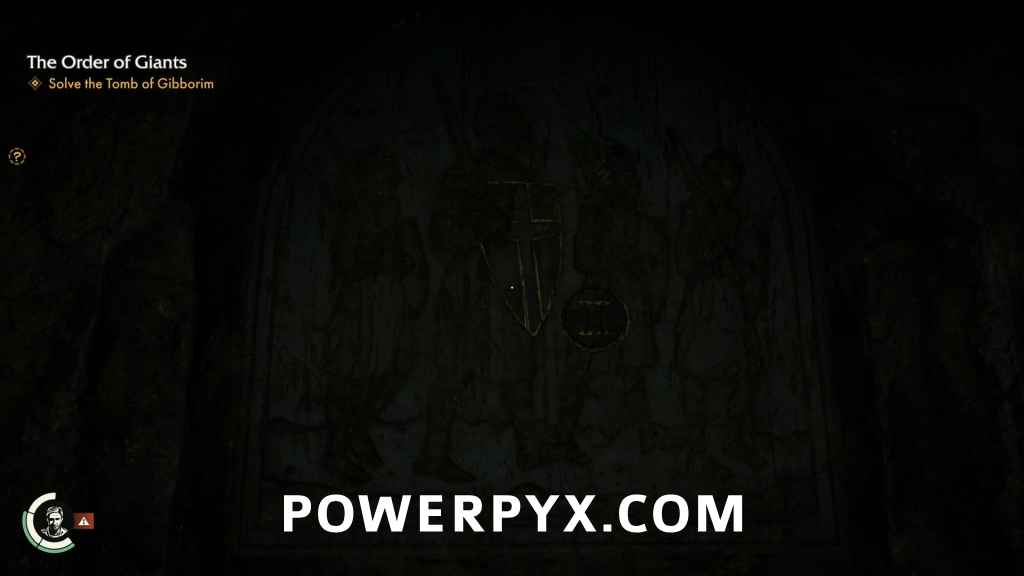
Head back to the Tomb and plug the Shield Scepter into the hole in front of the Shield Mural. The mural will slide away to reveal the second inscription, and another photo opportunity.
Adventure Note #45: Shield Mural (10 AP)
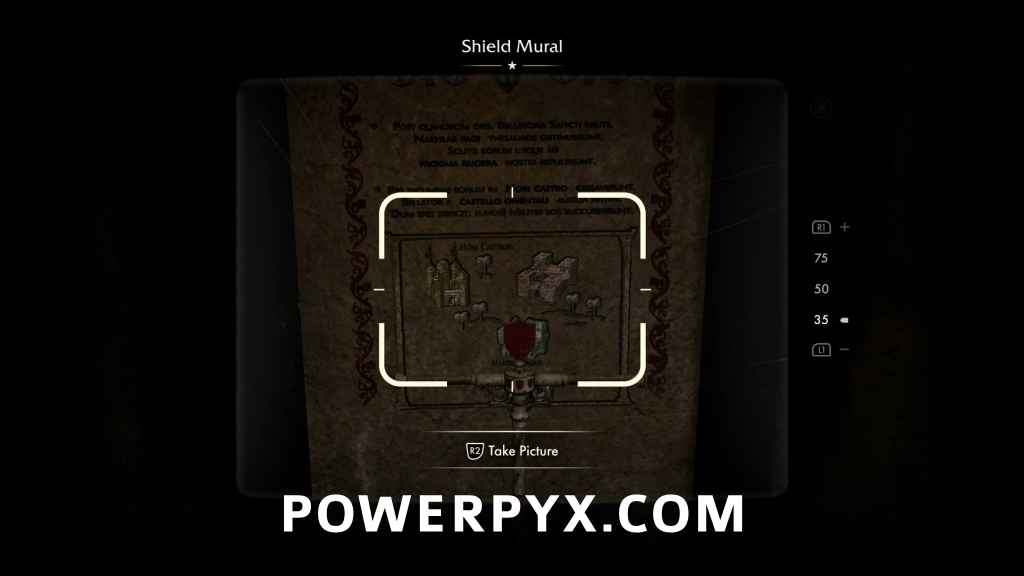
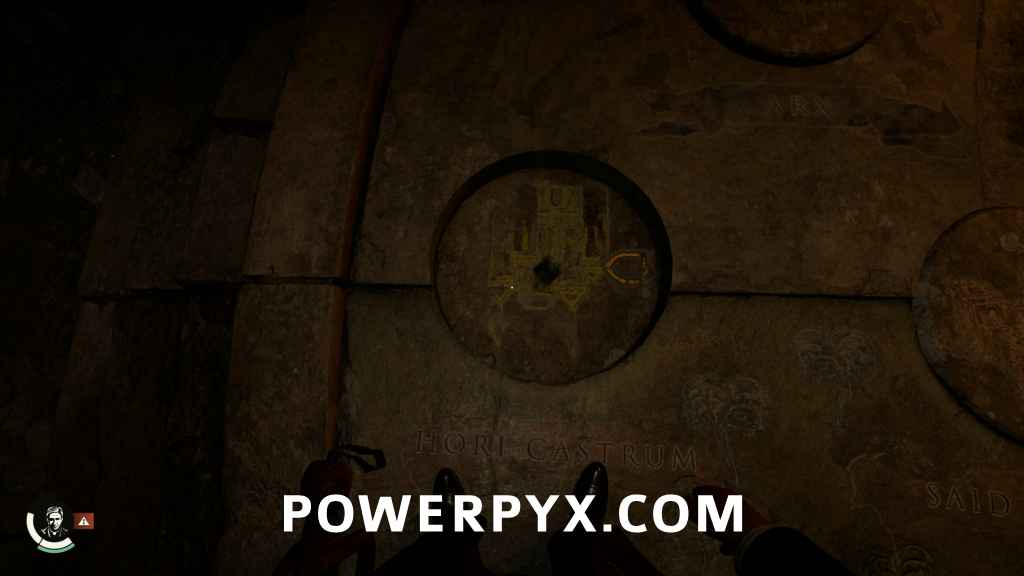
The second inscription reads, “A fortnight later, the Nameless Crusader’s men seized the treasures of Nakhla. Clashing against their shields, the enemy was driven to the nearby ruins. At The Castle of Horus their fortune turned dire. The Crusader sent word to the eastern fort and lo, as hoped dimmed, soldiers came to their aid.” For your reference, some of the untranslated locations on the map aren’t an exact match for the translations. If you ever have any question about the actual names you’re looking for on the map, you can look at the original inscription on the wall and they will have the original names written there for you to see. Still that’s what you read guides for, right?
Shield Mural Solution:
Nakla Pagus (Nakhla) – South
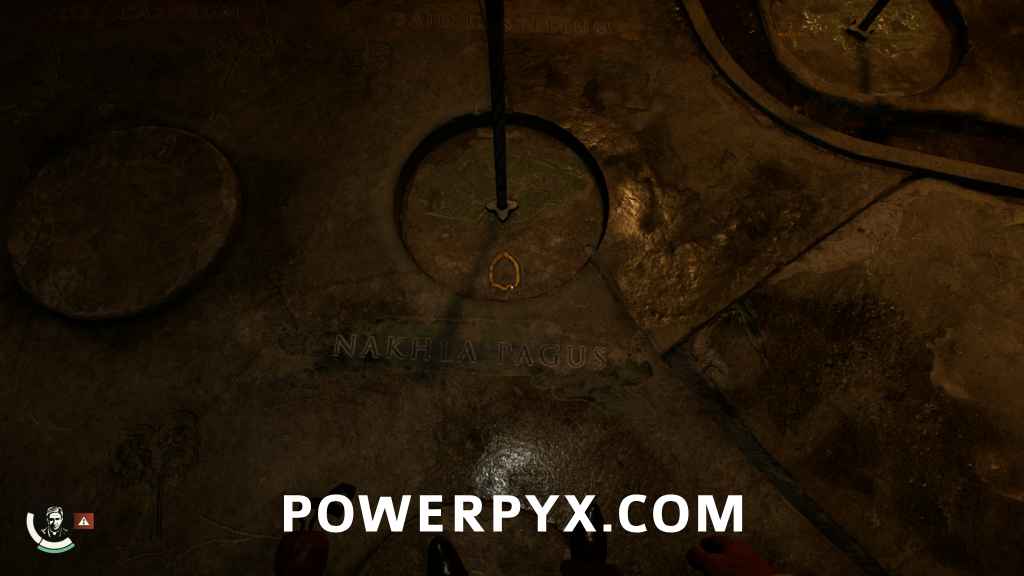
Hori Castrum (The Castle of Horus) – East
Again, the circular panels will sink and lock the Shield Scepter in place, opening the gate to the north but only halfway for some reason. Crawl under the gate and head north to the switch for another photo opportunity.
Adventure Note #46: Ring of Sigils (10 AP)
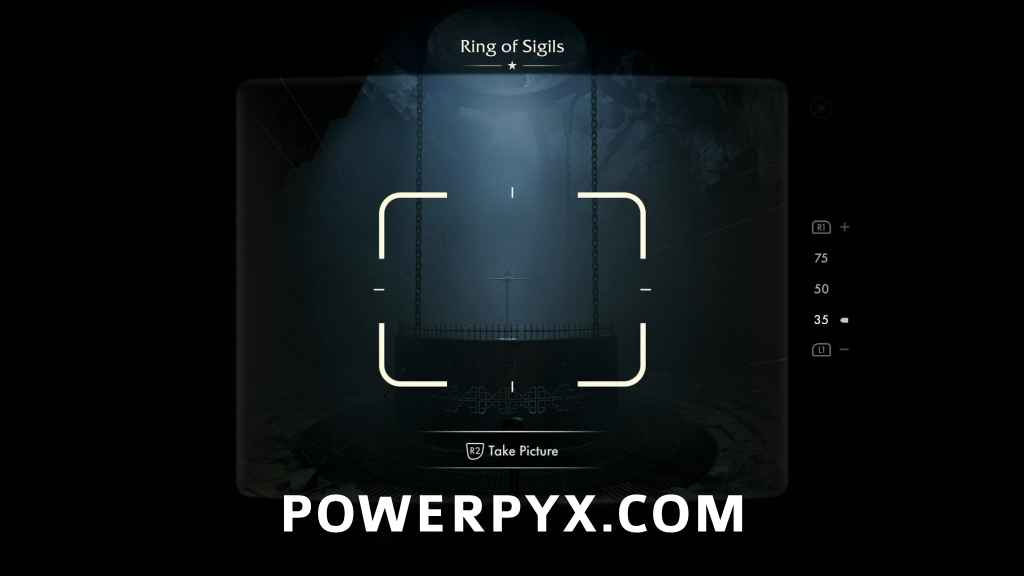
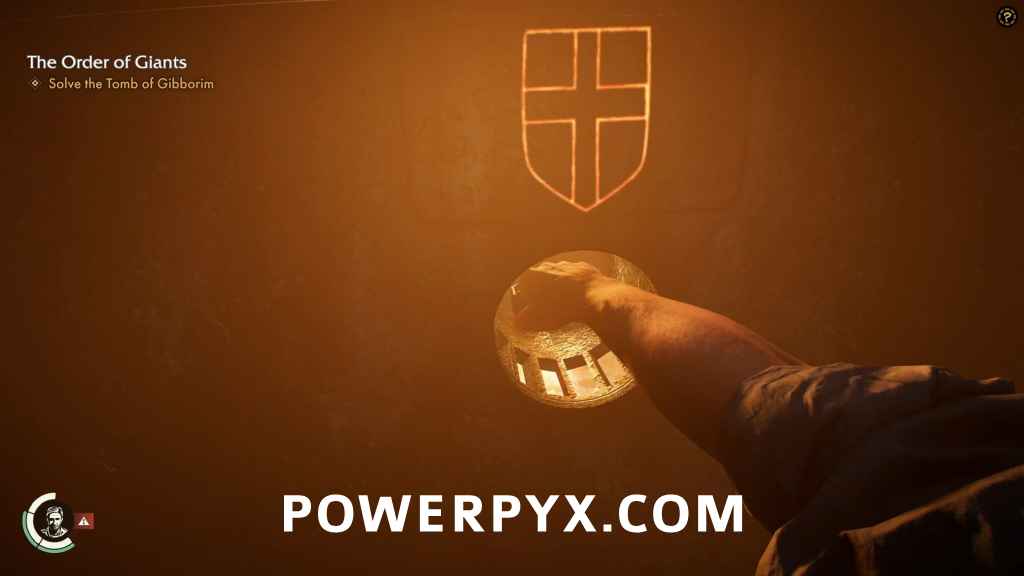
Again, don’t pull the lever yet. Straight ahead of you is a metal ring with the Trinity Scepter at it’s center. Before you start working out how to retrieve that, have a look on the ground on the southwest side of the room. Strangely enough there’s a second scepter in this room, the Sword Scepter, just lying on the ground for you to take. But let’s finish this puzzle first.
Close the Sword Scepter there’s a skeleton on the ground with a note.
Adventure Note #47: Skeleton’s Note (15 AP)
On the walls there are three murals, each of which has a roman numeral inlaid with gold, as well as a gold object in the mural that matches four of the sigils inscribed on the outside of the ring. The numbers give the order of the sigils: Key, Shield, Apple, and Snake. Just under each sigil is a recessed handle to turn, but of course nothing will happen until you go back to the north and pull the lever to start up the fire. Luckily with the images from the murals, this is an easy solve.
1. Key
2. Shield
3. Apple

4. Snake
Turn each handle in sequence and the ring will extinguish itself then rise out of the way so that you may retrieve the Trinity Scepter.
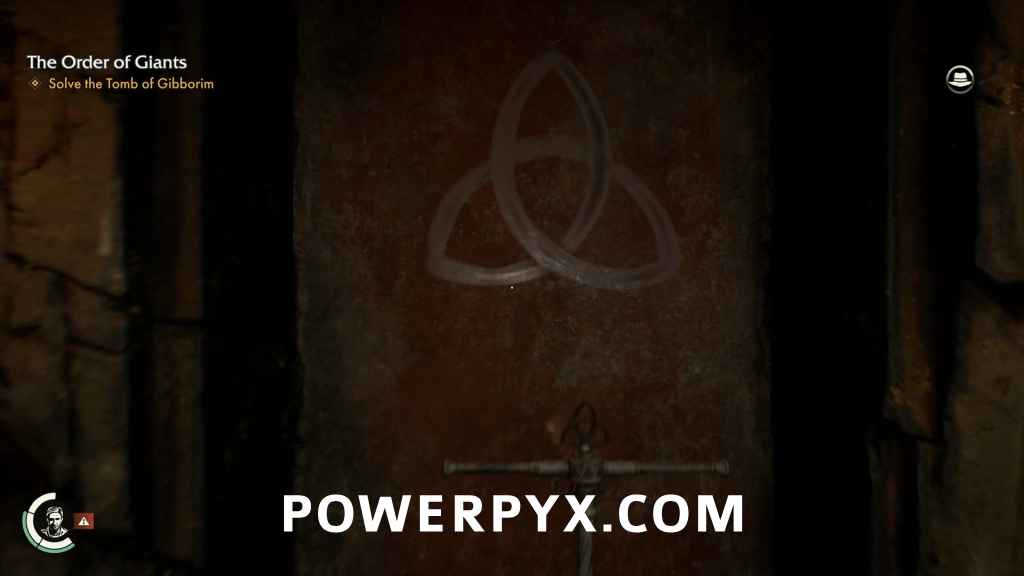
Take it and head back to the tomb, planting it in the hole in front of the trinity mural. That’s the mural with the symbol that looks like a celtic knot but with only three arcs (technically the shape is called a Triquetra). The cover will slide away to reveal the third inscription and another photo opportunity.
Adventure Note #48: Trinity Mural (10 AP)
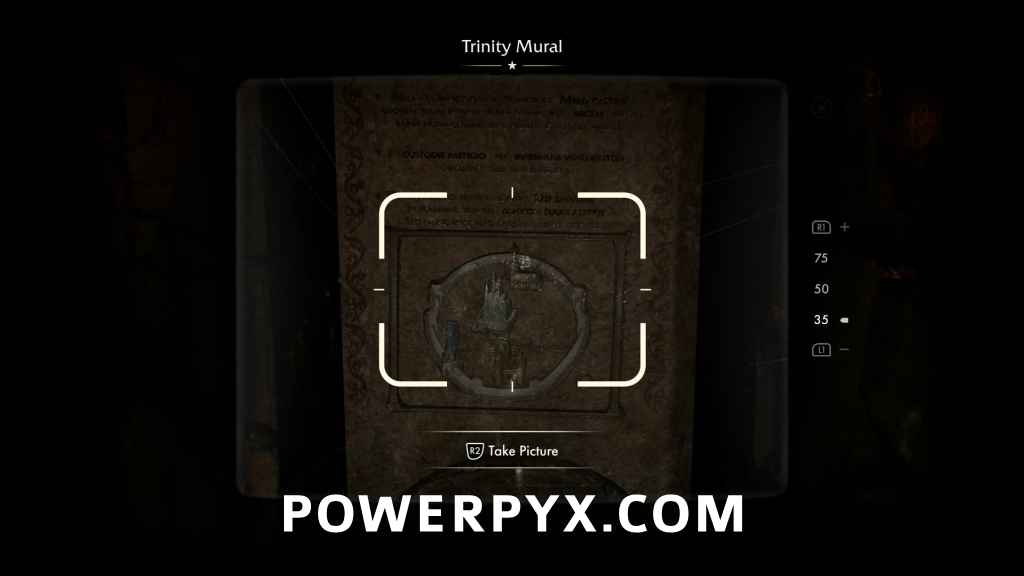
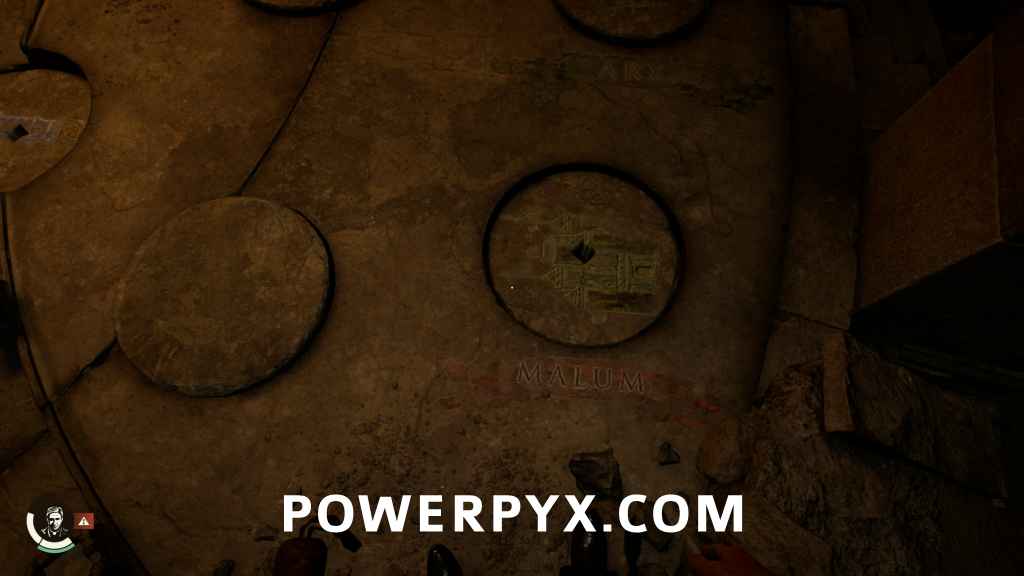
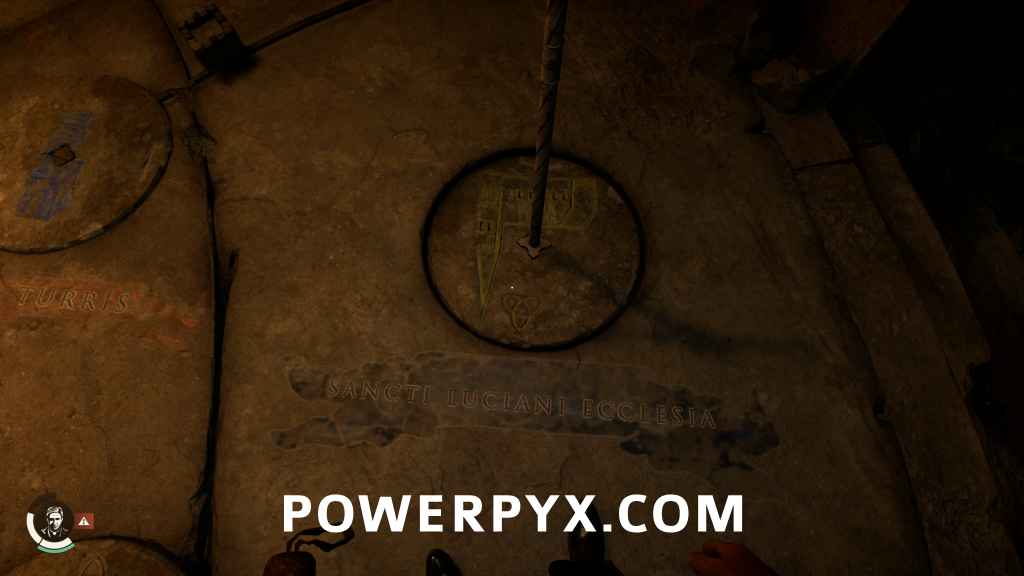
The third inscription reads: “At Castle Malum, the Nameless Crusader found his love. With Marie besides him, he gazed (sic) upon the citadel. The next moon, cries arose: ‘The Castle burns!’ From the guardian spire, he ran towards the fierce inferno but he was too late. Hopeless he seeked (sic) God’s salvation to the north. Beyond the flames he faced his love once more. Now turned to ash, like his heart.”
Trinity Mural Solution:
Malum – North
Custodis Fastigium (Guardian Spire) – East

Sancti Luciani Ecclesia (“God’s Salvation” as shown on the mural) – South
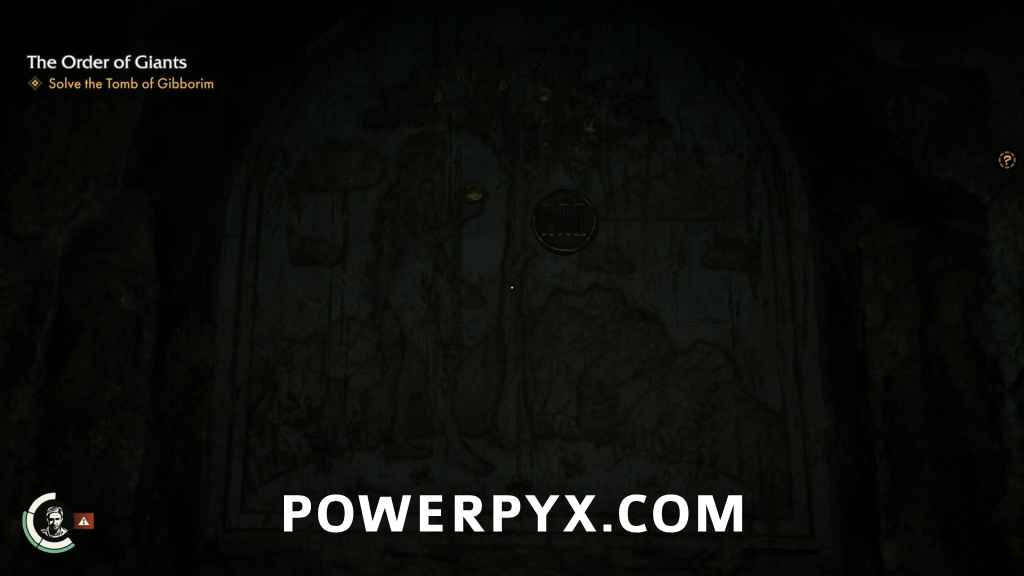
When this is complete, there will be the sound of gears but there aren’t any more doors to open. You’ll know it worked though, as you can see on the altar that the trinity symbol has slid aside to reveal the roman numeral III. Head back to the room with the Ring of Sigils and grab the Sword Scepter. Head back to the tomb, planting it in the hole in front of the sword mural to reveal the last inscription, and of course one more photo opportunity.
Adventure Note #49: Sword Mural (10 AP)
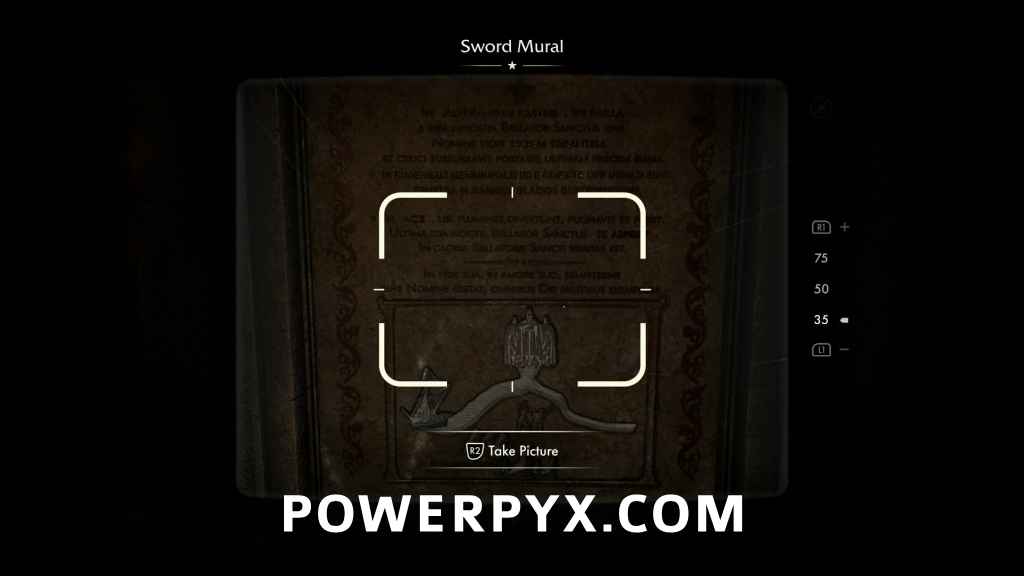
The fourth inscription reads: “At Camp Al-Mansur, with all hope gone, on the river far away, the Nameless Crusader watched a ship drift by, and whispered to the cross what might be his last prayer. In ruins south, they were attacked from the east. They drew their swords in vain. On the battlefield where rivers divided, he fought and fell. And on his final night, the Crusader faced himself. In glory lies the Crusader’s truth. His faith that carried, his love that burned. Nameless he remains, an example for all God’s warriors.”
Sword Mural Solution:
Al-Mansur Castra (Camp Al-Mansur) – West
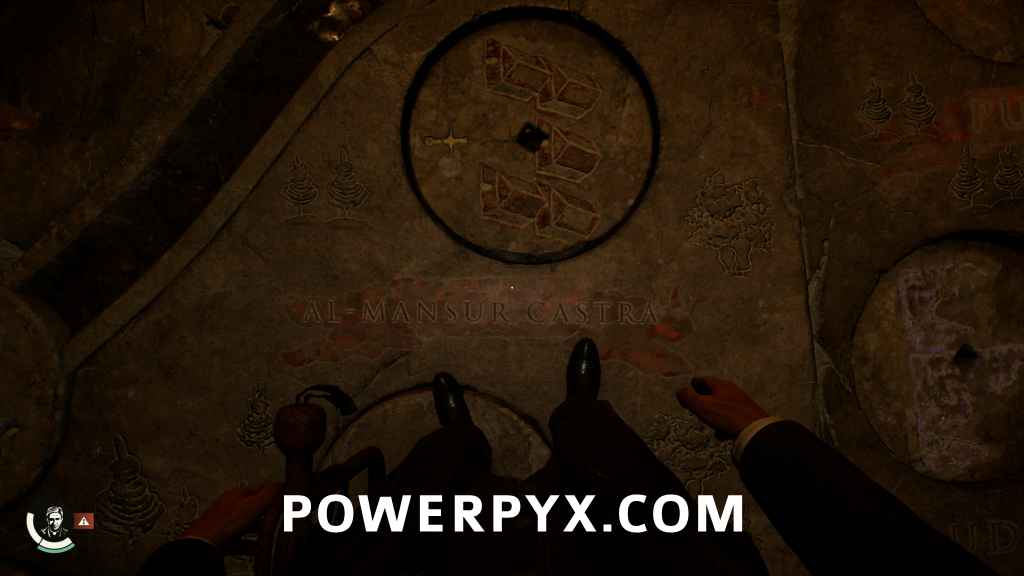
Rudera (Ruins) – East
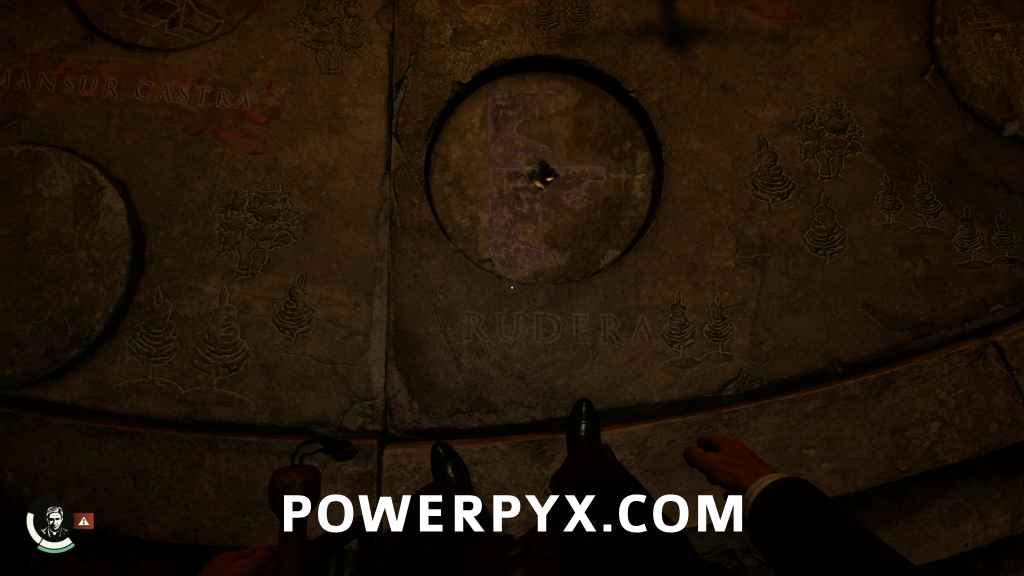
Pugna (Battlefield) – North
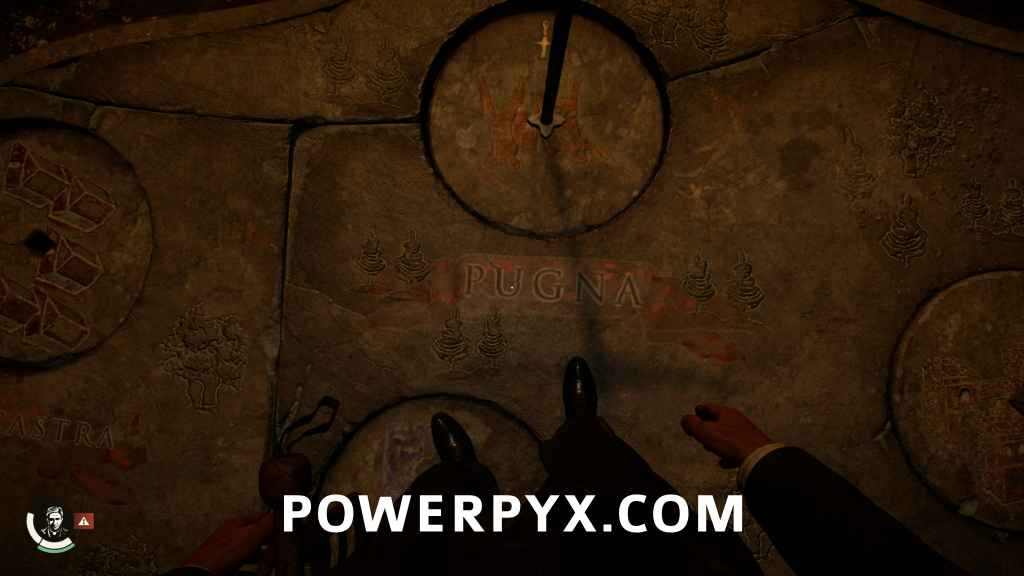
The answer to the third clue might be cryptic until you look up and see the massive stone statue of Gibborim looming over you to the “north”.
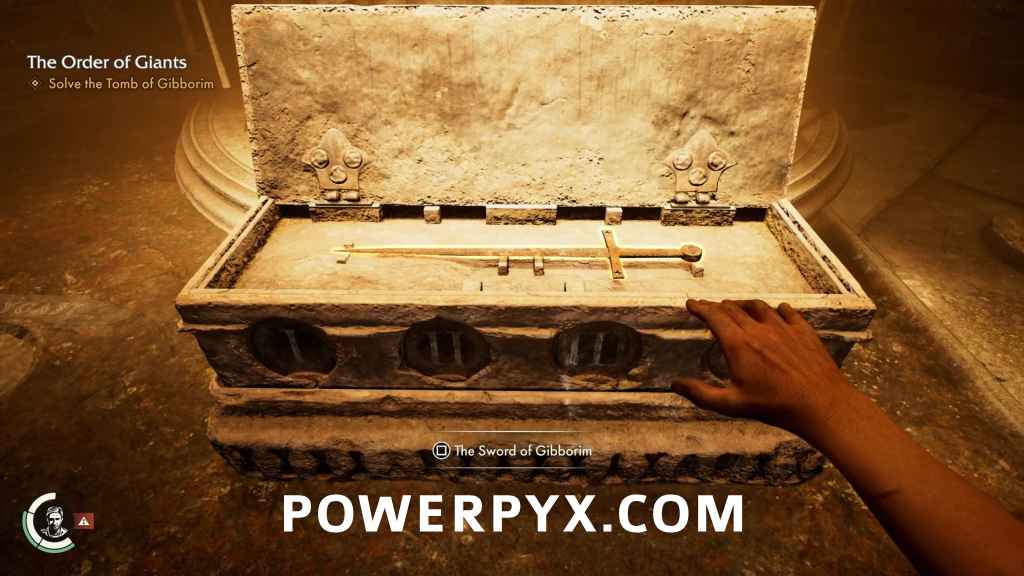
After completing the fourth mural puzzle, the top of the altar will open to reveal the Sword of Gibborim. Pick it up, and the statue will start to sink into the ground.
Stab Gibborim’s Heart
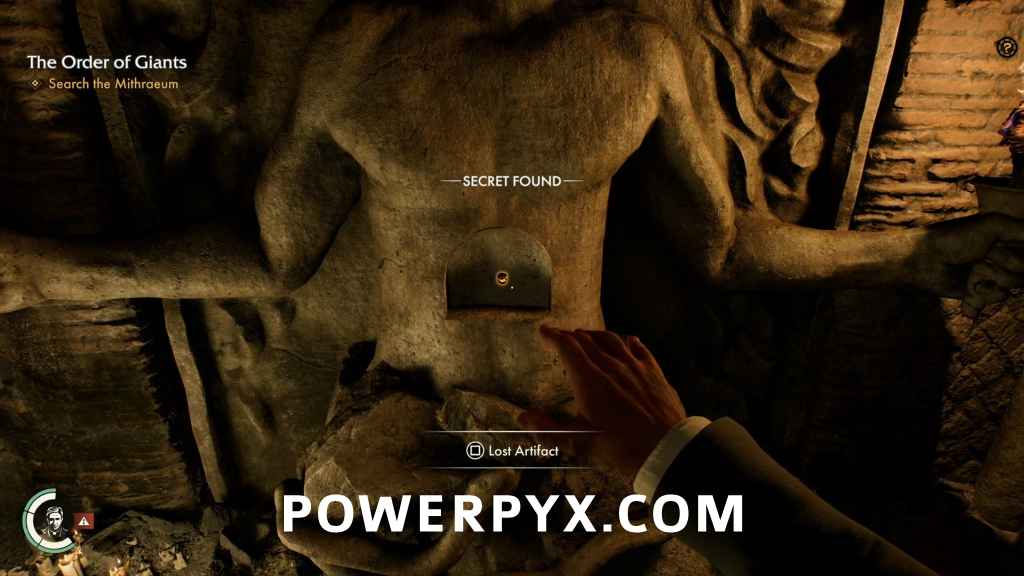
Once the statue as at your level, approach it and you’ll see an interaction prompt at a hole in its chest. Use the sword to stab Gibborim’s statue and his hand will open to reveal the third and final cylinder piece.
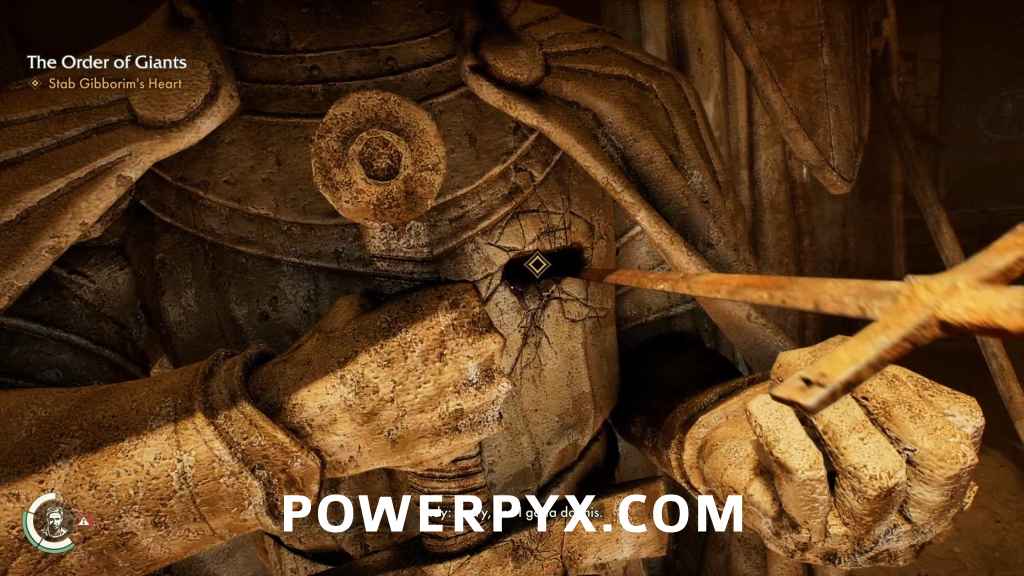
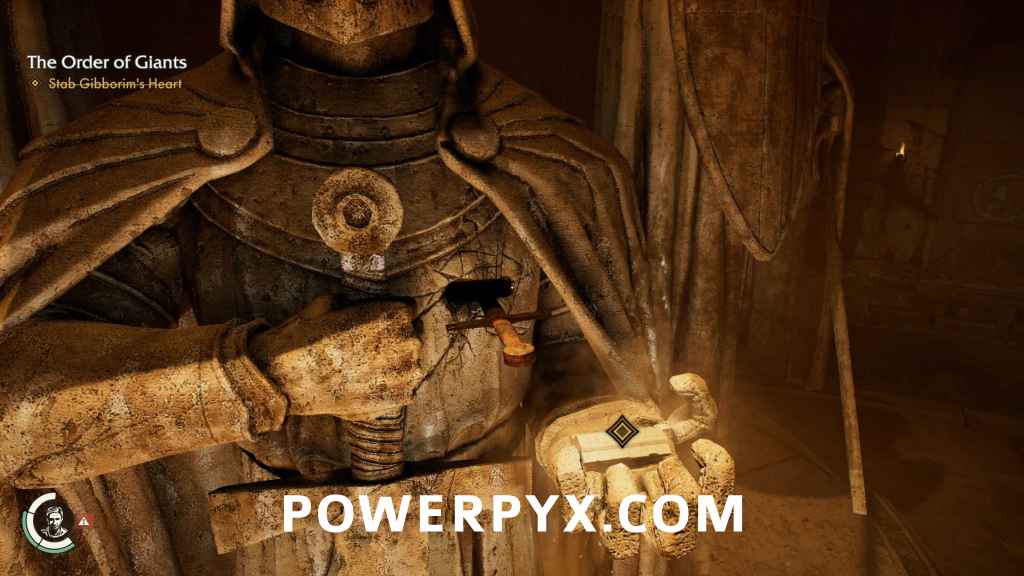
Take the Cylinder Piece
Take it and the statue will begin to rise. Don’t hesitate though, because there will be cultists that come to investigate the sound of stones grinding.
Adventure Note #50: The Tomb of Gibborim Solution (15 AP)
Leave the Tomb
Get past the cultists and follow your path back the way you came. When you reach the door above the octagonal room, your objective will update.
Return to Father Ricci
Head back to your boat, and drive all the way back to the Father’s hideout where you’ll watch another cutscene.
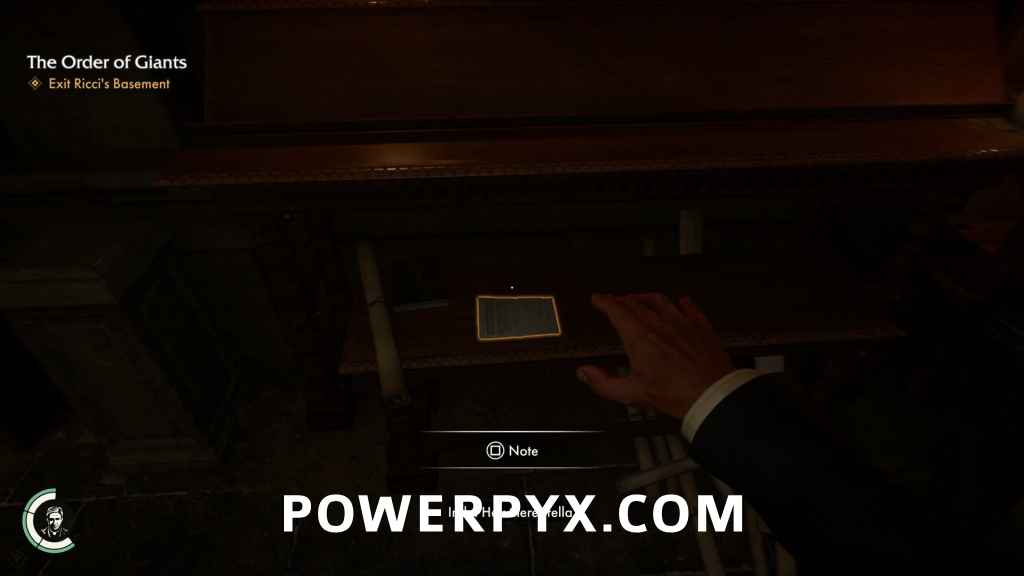
Exit Ricci’s Basement
There will be a few new notes here in the basement. And you’ll have access to Ricci’s sleeping quarters in the basement where he has apparently installed a new safe.
Adventure Note #51: Safe Invoice (15 AP)
In the basement bedroom there will be a card on some boxes at the foot of the bed.
Adventure Note #52: Costume Shop Receipt (15 AP)

Near the doorway is a bronze bust that can be moved. Behind it you’ll find a note tucked between some books on a shelf.
Adventure Note #53: Code to Safe (15 AP)
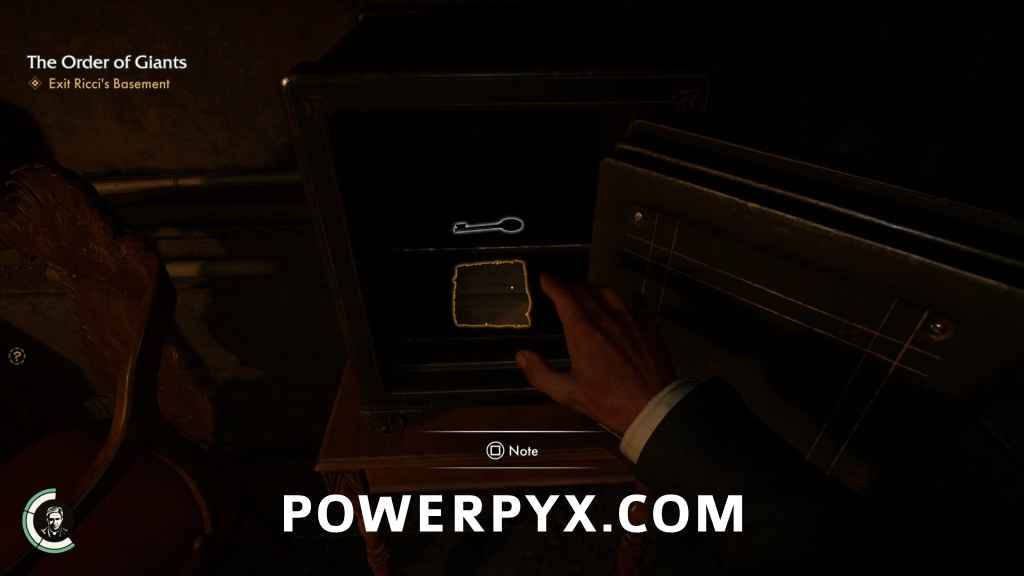
Enter 4768 into the safe’s lock to open it. You’ll find a basement key and another note.
Discovery Note #33: Nero’s Letter (15 AP)
KEY: Ricci’s Basment Key
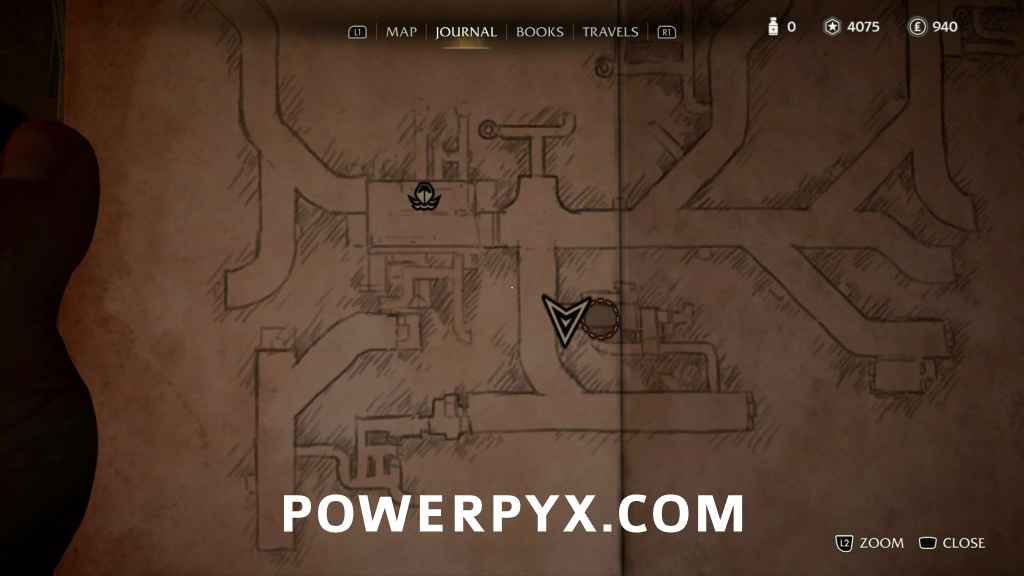
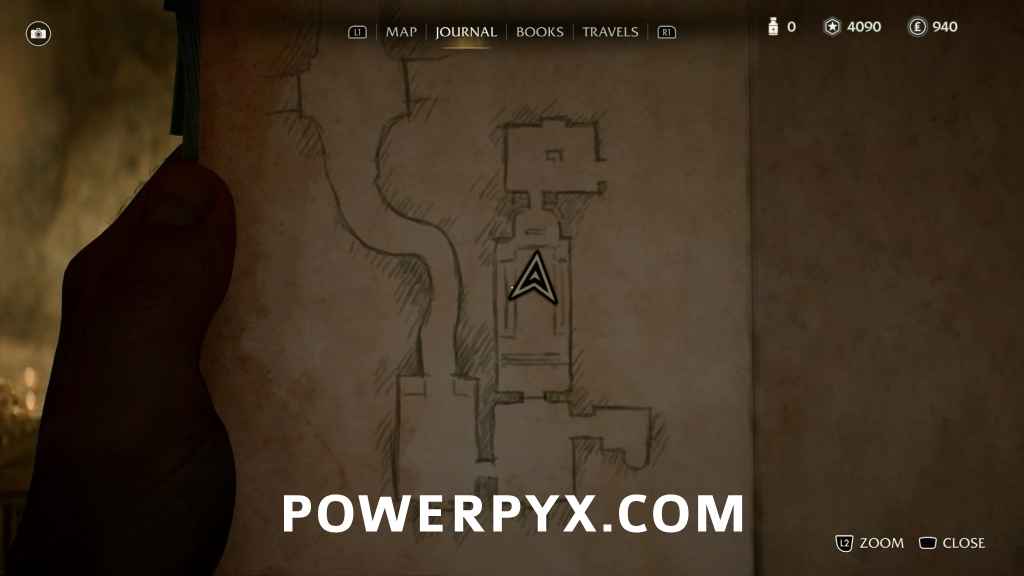
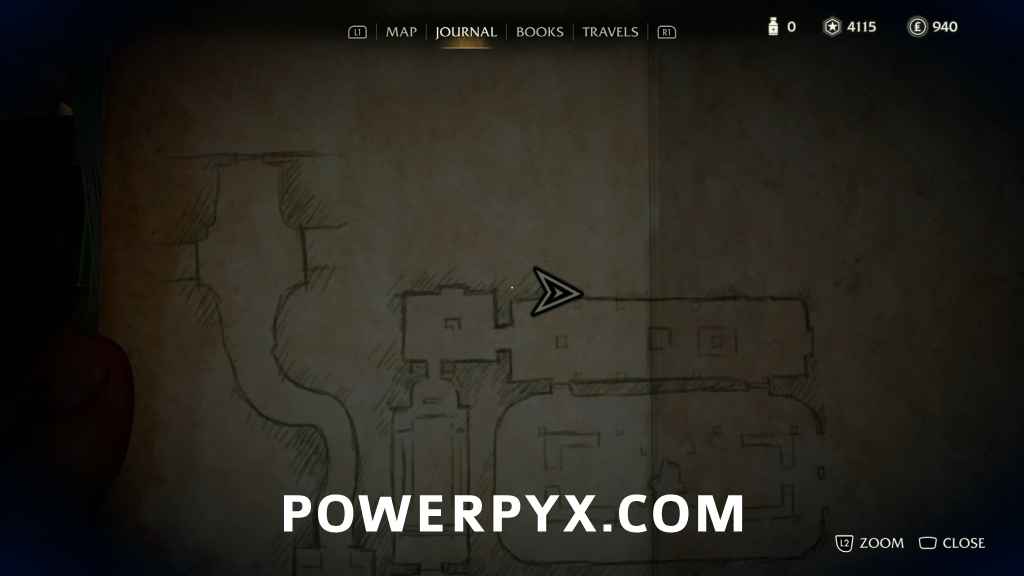
Find the Mithraeum
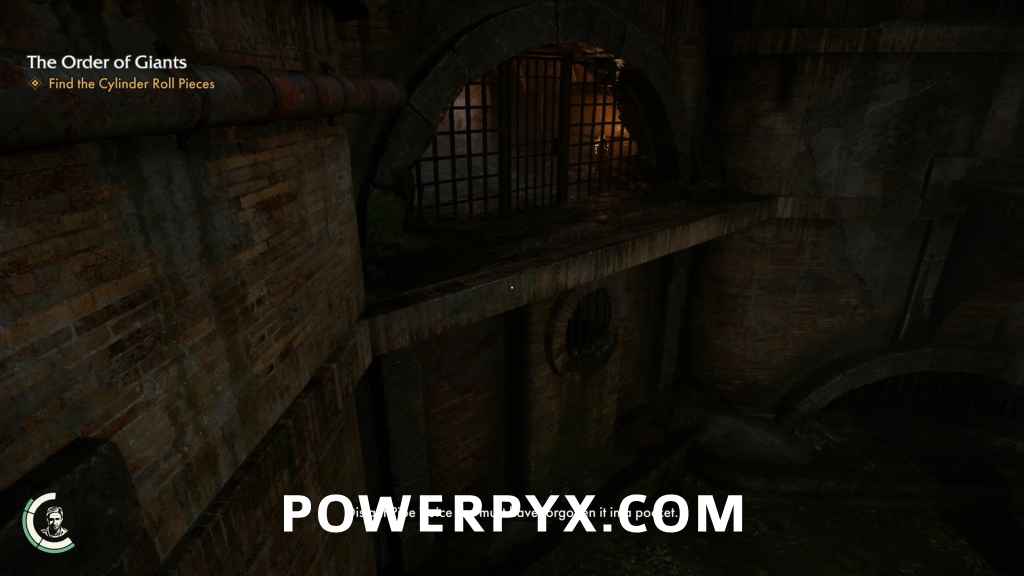
Head back down to the Cloaca Maxima, and head west. There will be new cultists in the hallways here, so be on your guard. When you reach the end of the tunnel to the west, you’ll see that a previously closed gate to the south is now open. Follow this tunnel until you reach the Mithraeum.
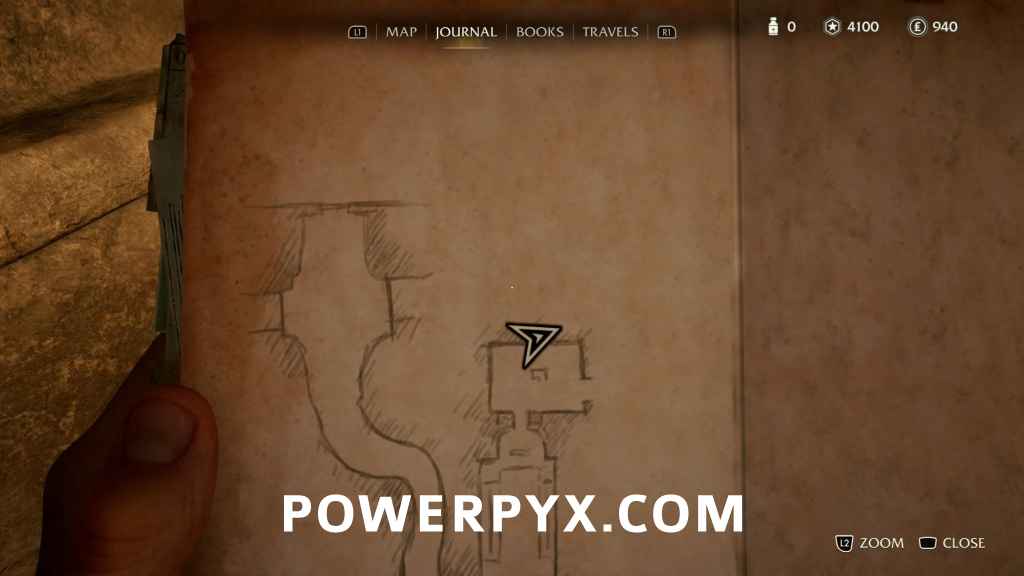
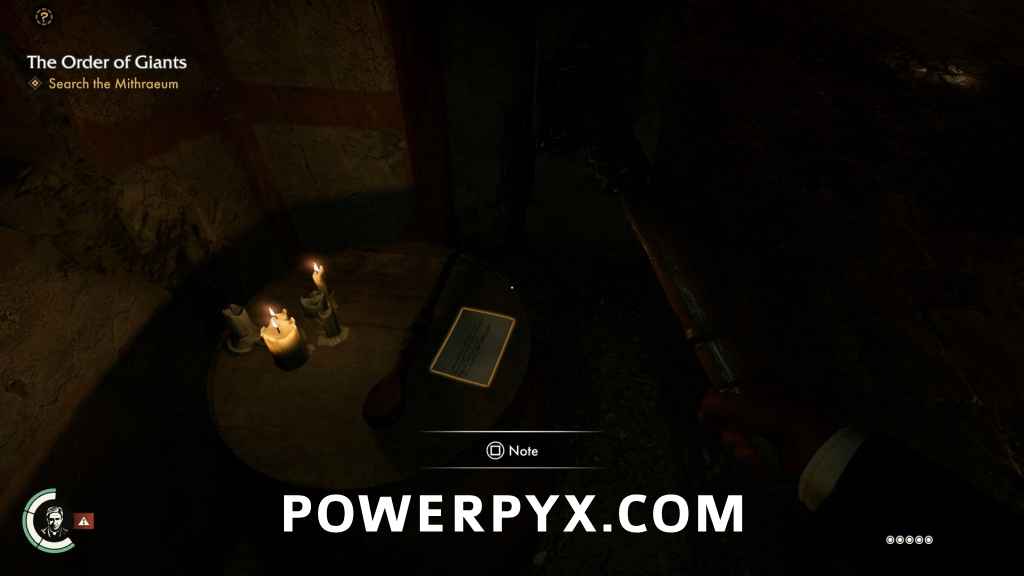
Search the Mithraeum
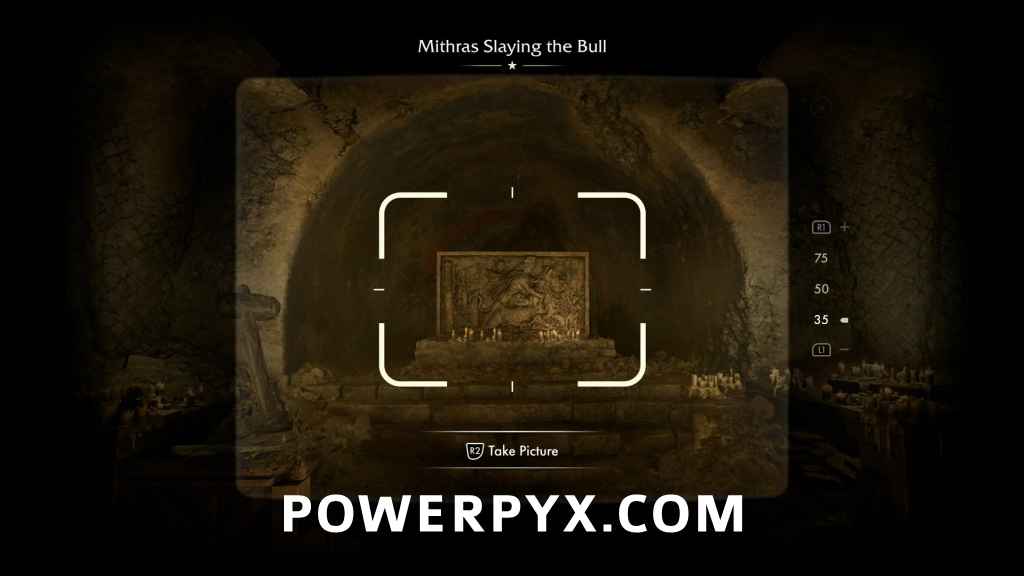
You’ll hear cultists talking about who has the cylinder wand what’s being done with it. Looks like you’ll still have a chance to get it back. As you get close to the relief at the back of the room, you’ll have a chance to take a photo of it.
Discovery Note #34: Mithras Slaying the Bull (10 AP)
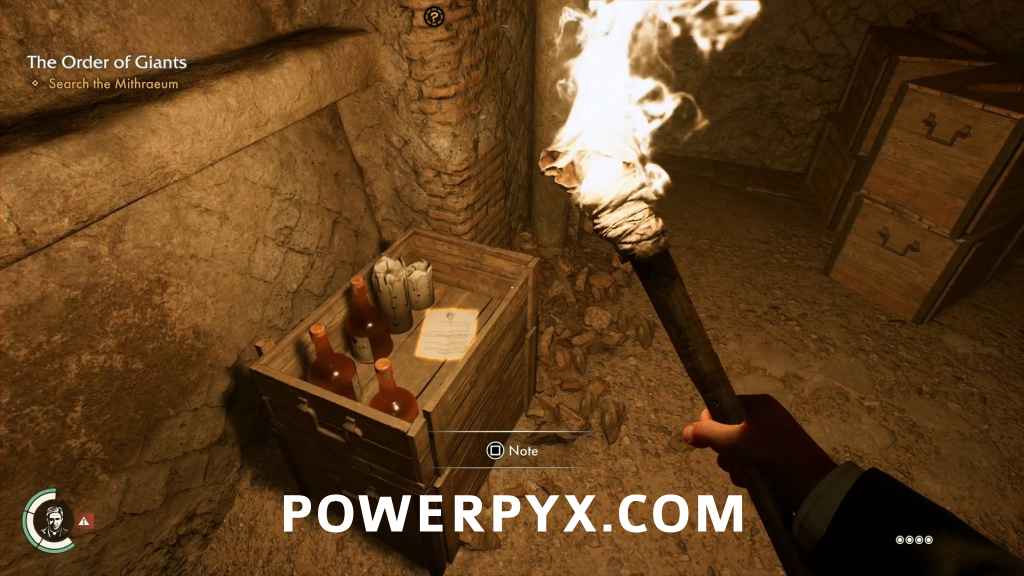
Behind the relief, go through the hole in the wall into the next room. Just north of the hole, on the other side of a pillar will be some wooden crates on the ground that will have a note inside.
Discovery Note #35: October Feast (15 AP)
Be careful when entering the next room not to alert the patrolling cultists. Its fairly dark in the tunnel though, so feel free to take them down quietly. There is also a note on a barrel on the north side of the room.
Adventure Note #54: Mithras Born from a Rock (15 AP)
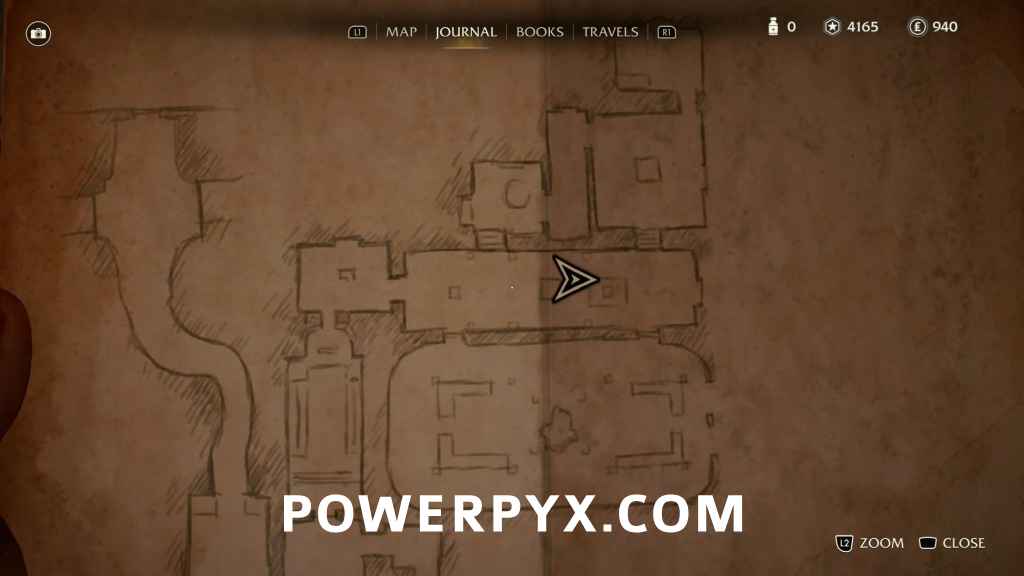
Further into this room will be a statue of Mithras in the middle of the room.
Discovery Note #36: Mithras Born from a Rock (15 AP)
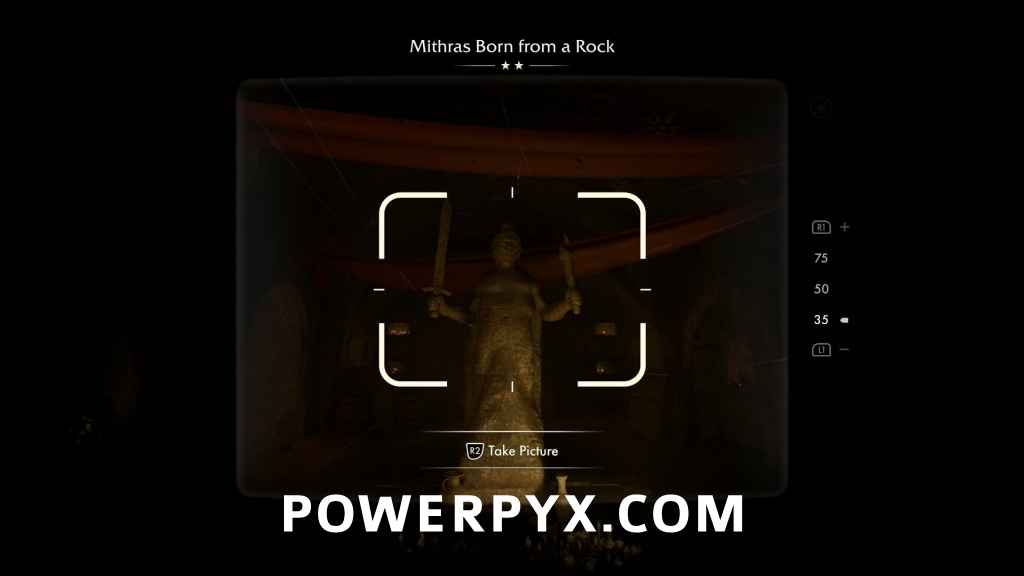
Confusingly that makes two notes with the same title, but take note (pun intended) that one is an Adventure Note and the other is a Discovery Note, so there will be separate entries in your journal. Along the north side of the room, there are two passages. Go through the one on the west side to find a room where you’ll find a cultist praying to an image of Mithras, who you can surprise if you’ve not already alerted the guards. After you take him out, light Mithras’s torch to reveal a secret panel in the statue.

Inside will be an artifact .
Mithraic Artifact #5: Pater Artifact (15 AP) (The Seven Grades 5/7)
In the next room east from the torch-holding statue there’s a note on another barrel.
Discovery Note #37: Digger’s Letter (15 AP)
Continue to the east, and you’ll be in some kind of mess hall for the Mithraic Cultists. On one of the tables will be a note.
Discovery Note #38: Mithraic Degrees (15 AP)
Proceed into the room to the north, and you’ll find even more notes.
Adventure Note #55: Note About Relief (15 AP)
Adventure Note #56: On the Tauroctony (15 AP)
Go to the desk, and open its top drawer to find a third note and a key.
Adventure Note #57: Ventura’s Letter (15 AP)
KEY: Mithraeum Key
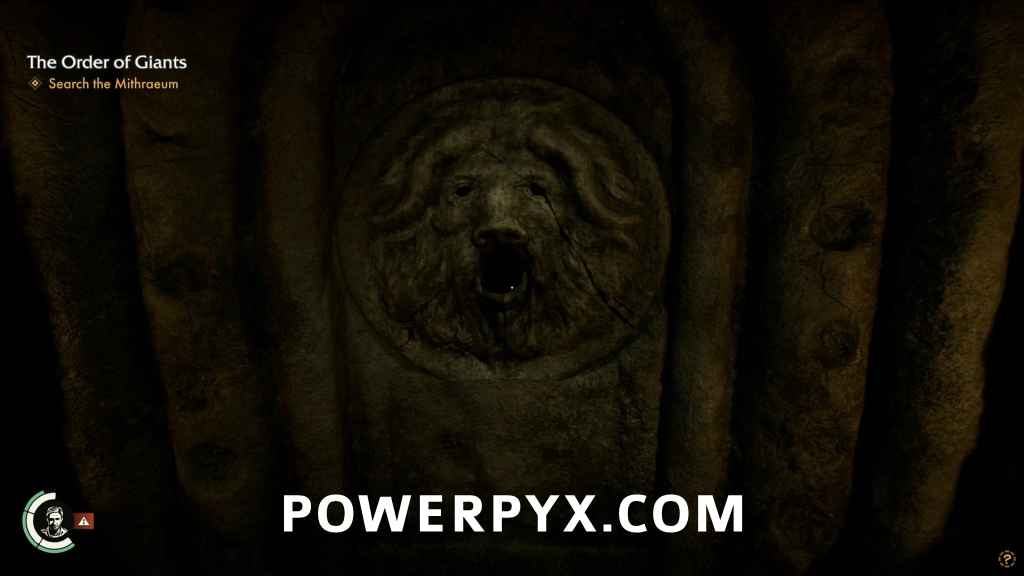
Use the mithraeum key to open the door in the east wall of the mess hall area. You will exit in a long hallway heading south, and there will be a passage into another temple area where there’s a carved face in the center of the wall. Like Bocca della Verità, you’ll have to stick your hand into its mouth to find a lever to open a secret door into the room to the east, and you will begin the third and final mystery in The Order of the Giants.
| Suggested Detour: A Bull in the Sky
Link to A Bull in the Sky Walkthrough. Gained in A Bull in the Sky:
|
After A Bull in the Sky, head back to the hallway and continue going south, until you see an archway leading to a large room to the west. There will be a large number of cultists here to deal with. When you’ve avoided or defeated them all, head to the large hole in the floor. Before you do that though, look through the area to find a sledgehammer or other similarly heavy weapon which you’ll need in a moment. Above the hole is a chain that you can attach your whip to and lower yourself down to the Lower Mithraeum.
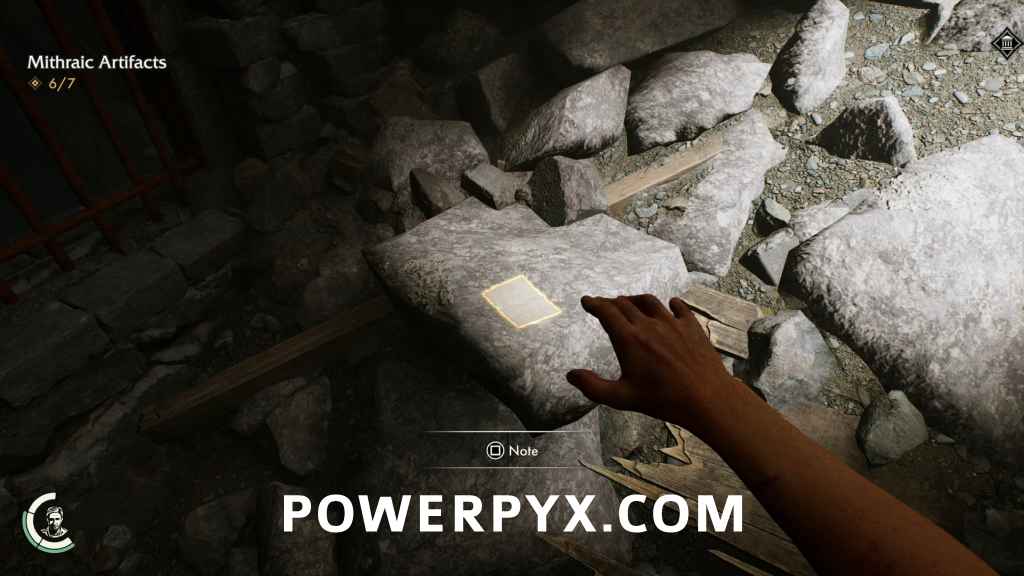
Immediately on hitting bottom, head west down the tunnel. At the end, you’ll find a breakable wall to smash with your heavy weapon. Inside there will be a dark hole that you can lower yourself down into. At the bottom you’ll find the last Mithraic Artifact, and unlock The Seven Grades.
Mithraic Artifact #7: Corax Artifact (20 AP)

Climb back up and head to the east down the tunnel. Follow the path and eventually you will find a large room full of chanting monks. Depending on how stealthy your approach was and what direction you approach from, you’ll have a few options on how to proceed, but ultimately there are enough cultists there that you’re not going to be able to takedown more than a couple before alerting everyone in the room. And you can’t just grab the cylinder and run because you need to be in this room to solve the next puzzle. Personally I waded in and started punching, but you do you. Playing on Story difficulty means never having to consider the odds.
Solve the Monster’s Gate
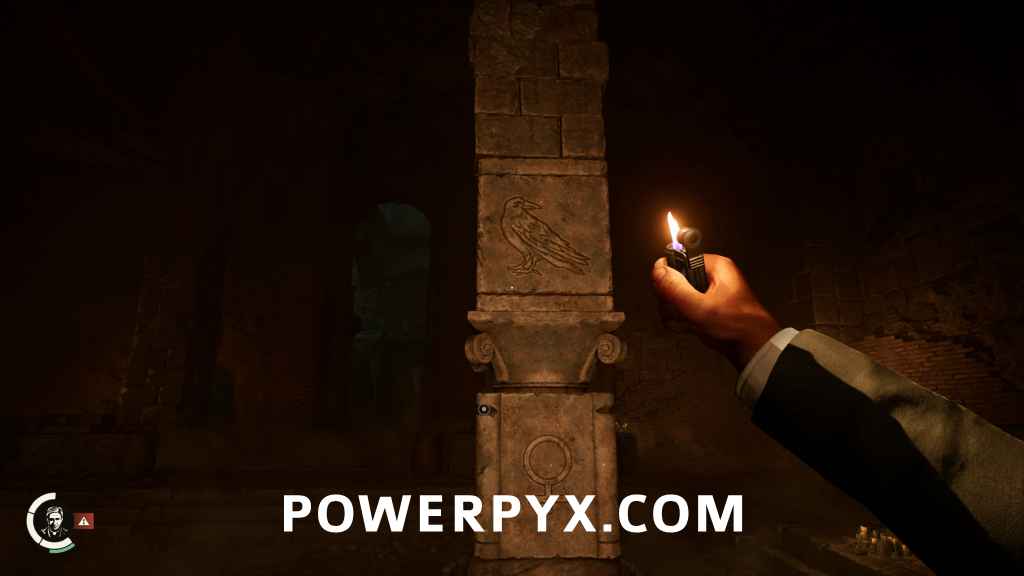
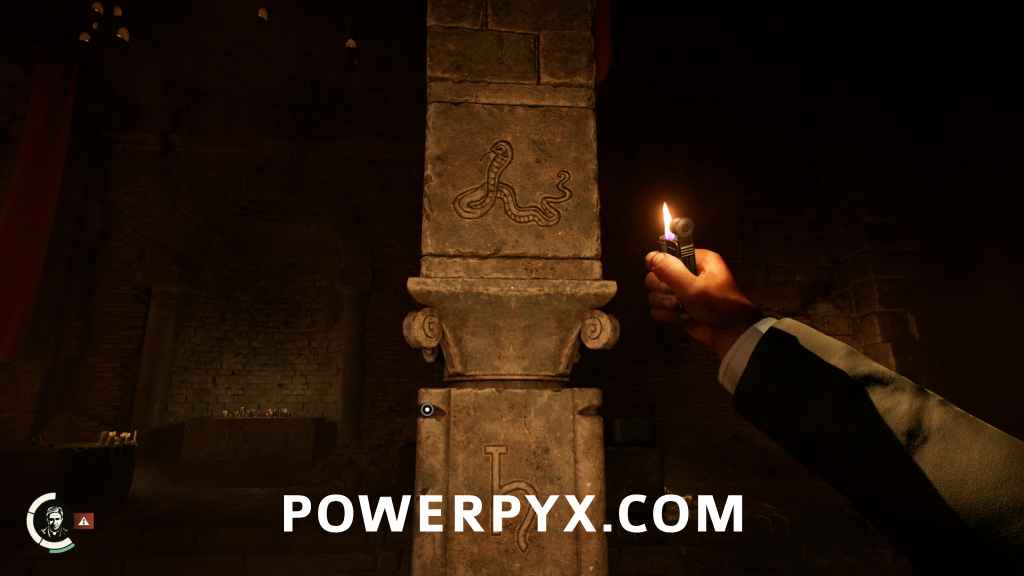
When you’ve cleared the room and recovered the cylinder, the Monster’s Gate itself is a photo opportunity.
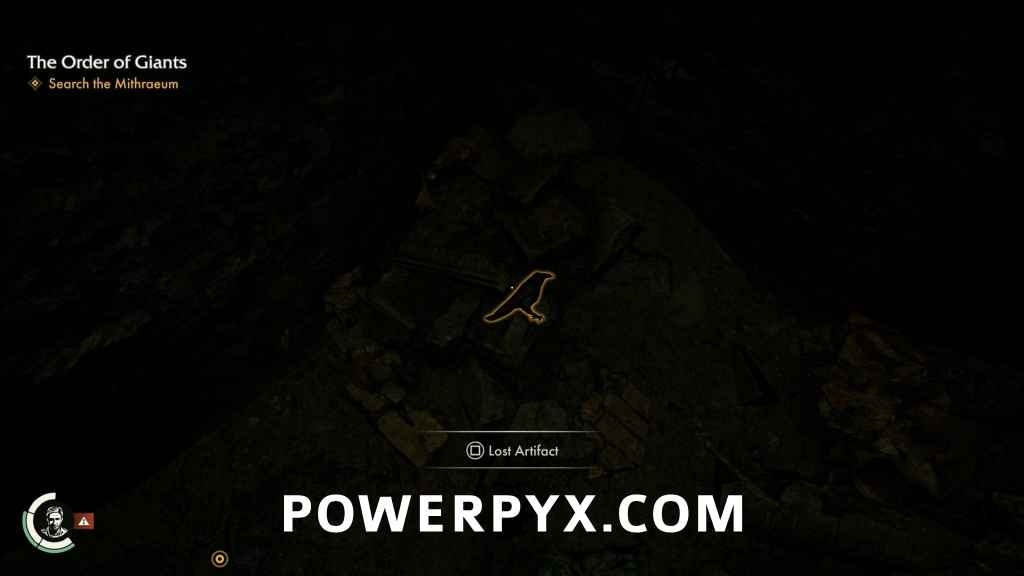
Adventure Note #58: Monster’s Gate (15 AP)

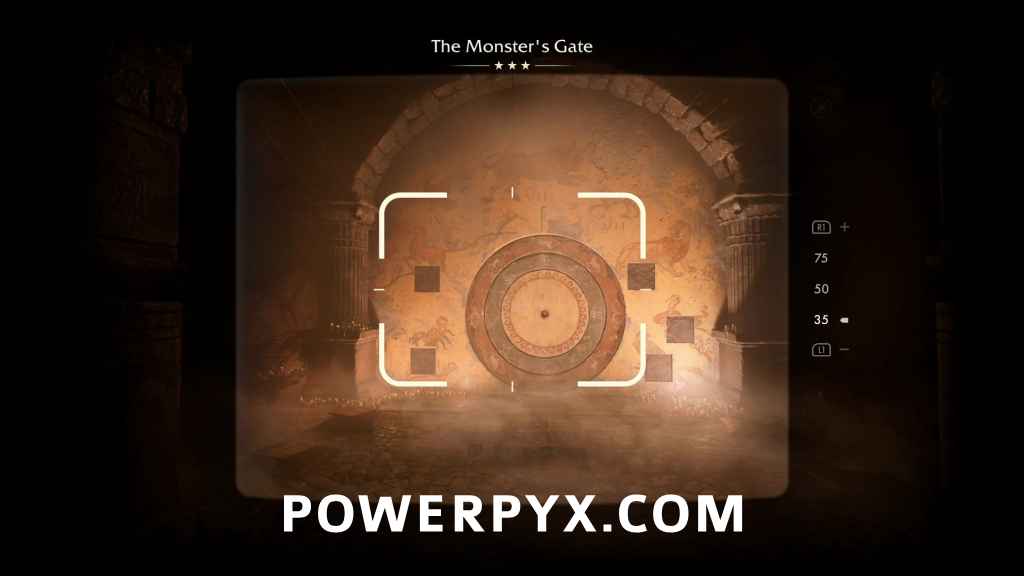
To solve the Monster’s Gate, first you have to replace the five tiles that are missing from around the gate. You won’t have to look far, they’re all basically on the ground at your feet. Also present is a note.
Adventure Note #59: Notes on Mural (15 AP)


The tiles all have numbers, or a partial number on them so by matching up the animal shapes, you’ll now which animal goes with which number.
Lion – I
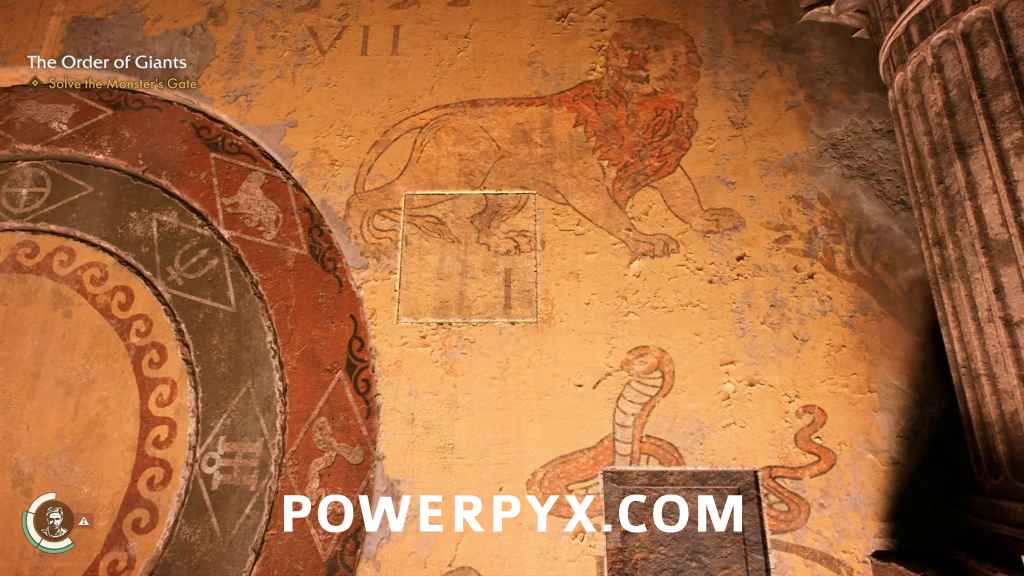
Snake – II

Horse – III

Crow – V
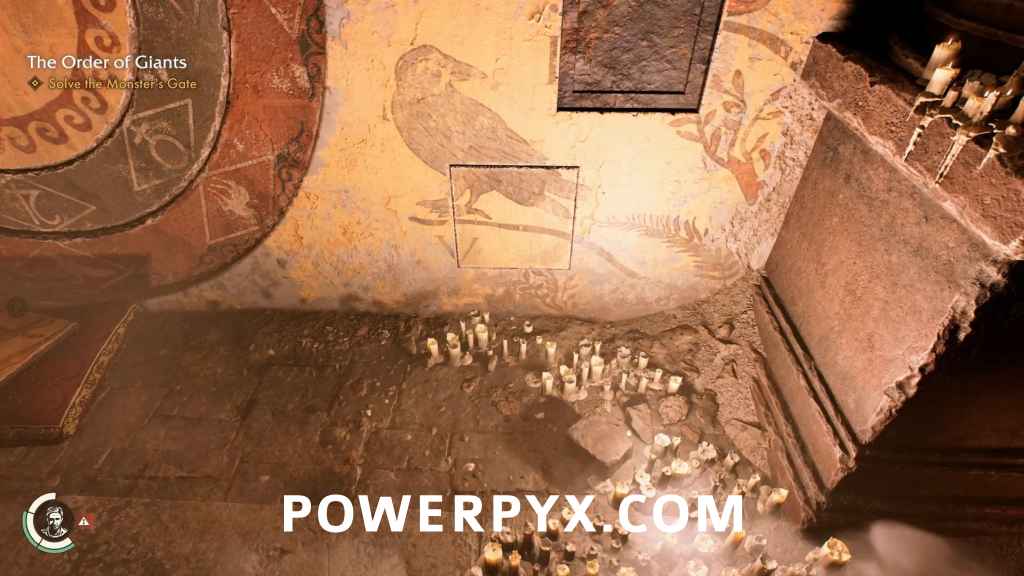
Scorpion – VI
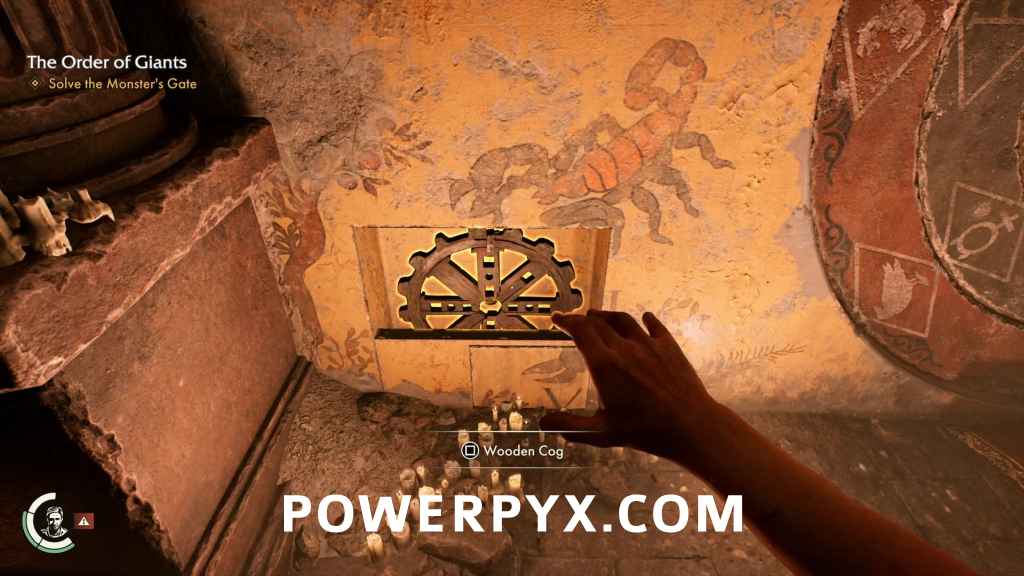
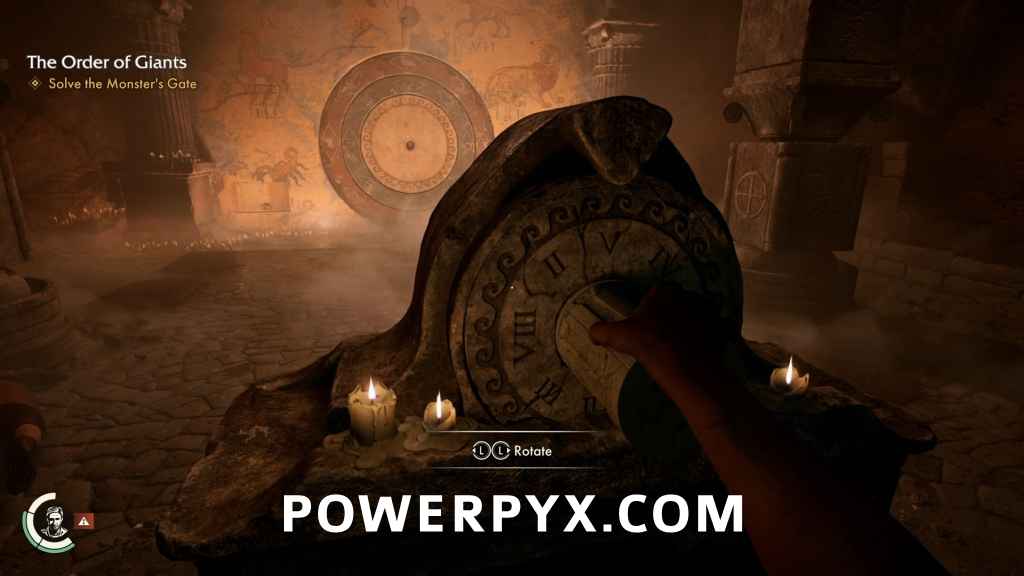
The first part complete, a panel will slide open to reveal a gear. Grab the gear and take it back to the console where the cylinder was before you picked it up, and interact with it while carrying the gear to mount it in the mechanism.

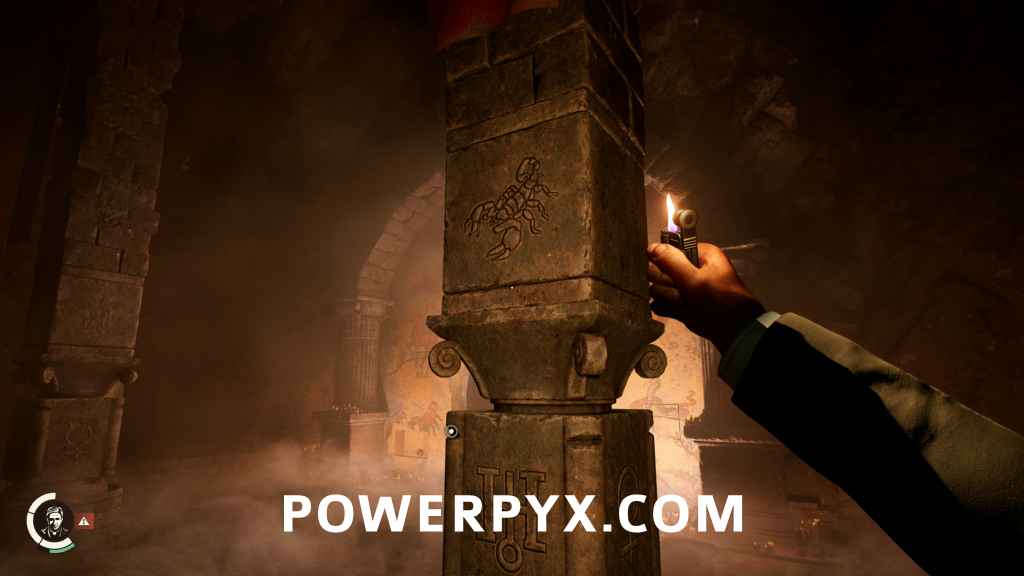
All around the room you’ll hear machinery and stone grinding as the four pillars around the room slide open to reveal a part of it that spins with symbols carved into each face. Above this on one side is an animal. You will need to choose the correct symbol for each animal: Scorpion, Crow, Horse, and Snake. Also keep in mind that occasionally cultists are going to wander in and try to murder you. To figure out which symbol goes with which animal, we’ll use the Cylinder Roll. Approach the console, and you’ll now be prompted to insert the Cylinder Roll. Press left or right on the  and you will rotate it to start the mechanism running, and the wheel of roman numerals will start turning. When you release it, the two outer rings of the Monster’s Gate will spin as well to reveal the symbol that goes with the animal who’s number matches the number of one of the animals.
Scorpion (VI) – Uranus (♅)
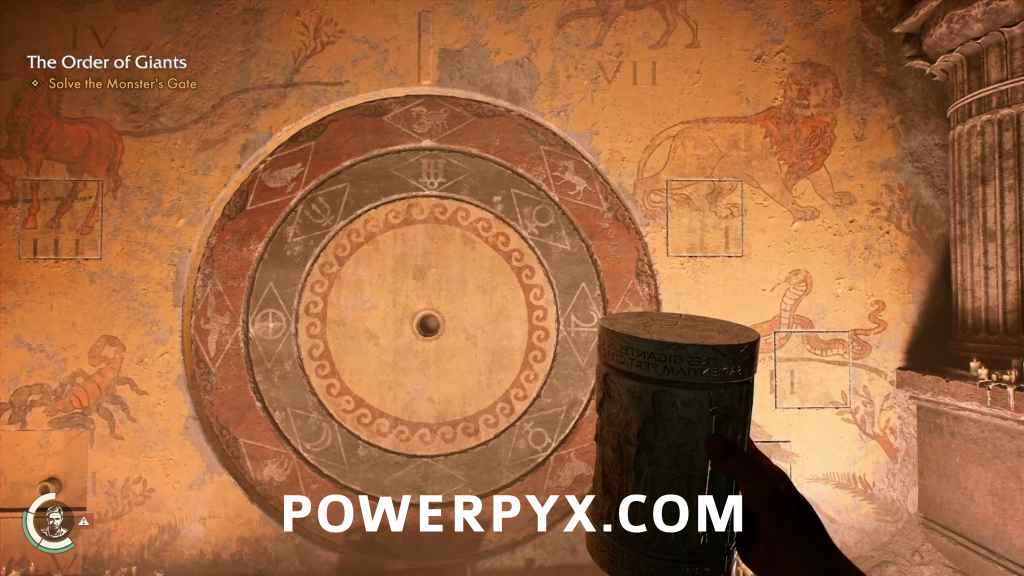
Crow (V) – Venus (♀)
Horse (III) – Mercury (☿)
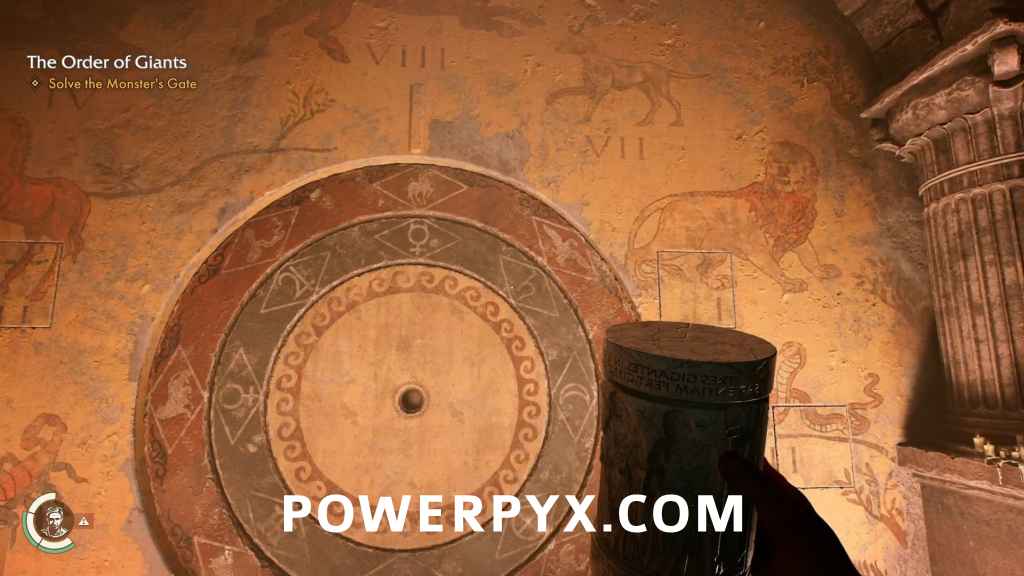

Snake (II) – Saturn (♄)
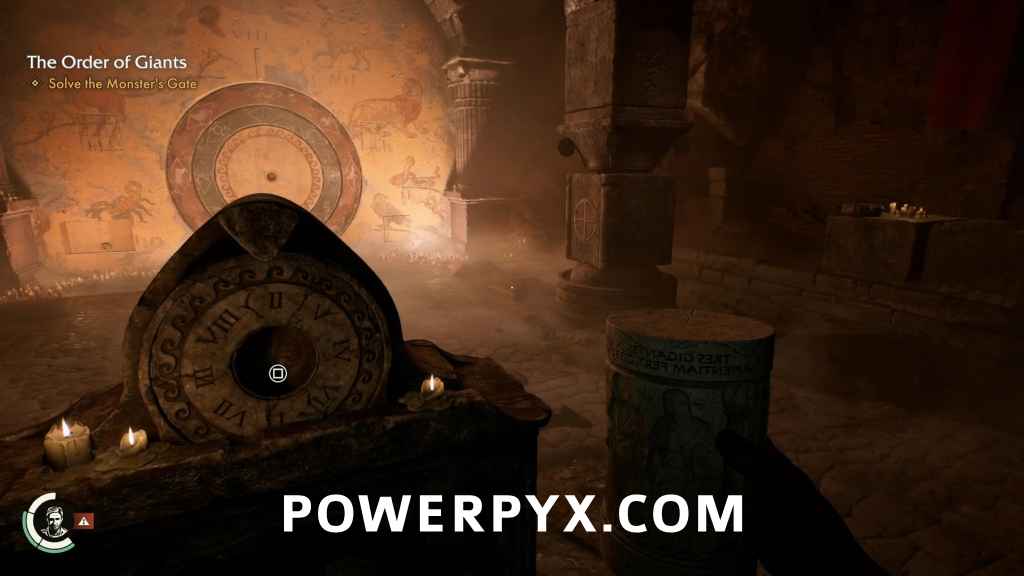
Once all four symbols are correct, go to the Monster’s Gate and put the Cylinder Roll in the center hole. Turn it, and the gate will open.
Adventure Note #60: Monster’s Gate Solution (15 AP)
Continue Exploring
Head north through the gate, and very quickly you will see a note on the ground ahead of you.
Discovery Note #40: Gladiator Earnings (15 AP)
Head east form there to find a gate that leads to a Secret Chamber. In the next area head north, but look for an alcove on the east side that will have a note in it.
Discovery Note #41: Mithras Guard Rotation (15 AP)
Keep following the path into what is increasingly looking like an abandoned dungeon. Eventually you will be blocked by a metal grate. Right next to that is a metal grate that is halfway raised so you can crawl under it. On the other side, there’s a narrow gap you can squeeze though back into the cell that you’d walked around on the way in. One of the skeletons on the ground will have a note.
Discovery Note #42: Ode to Nero (15 AP)
Go back through the narrow passage, then look to find a beam you can whip can climb. Once you’ve climbed up, follow the only open path and you’ll come to a drop back the the first floor and a closed cell door on the opposite wall. Use your whip to yank the door off its hinges then jump across.
Go through the door and go left. On a stone platform is a note, and there is a second in the nearby rubble.
Discovery Note #43: Gladiator Puls Recipe (15 AP)
Discovery Note #44: Gladiator Mediacal Status (15 AP)
Head across the hall now and go into the next room. Carefully drop down through the hole to the floor below. In this room will be a lever to pull which will lower an elevator that forms a platform for you to stand on.
Get on the platform then turn around and jump across the gap to the south. On the west side of the hall, you’ll see a cage with its door half raised. Go inside and you’ll find a note on the ground near a skeleton.
Discovery Note #45: Food for Beasts (15 AP)
Go north towards the big door and you’ll see a prompt to change back into Indy’s normal clothes. Do so for the extra damage reduction, because you’re about to have a cinematic.
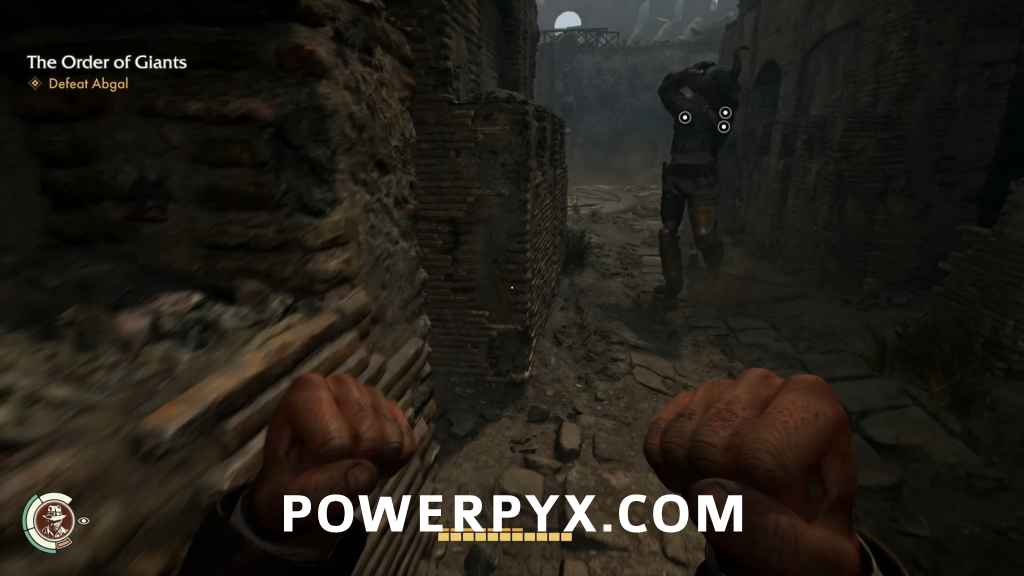
Defeat Abgal
Final boss time. Don’t bother trying to punch Abgal, because you will just end up grabbed and choked, then thrown. Instead, look around the outside of the arena for various polearms that you can throw at him. Tridents, spears, whatever you can grab. Abgal has heavy armor though, so don’t bother trying to hit him in the chest or legs because the hurled weapon will just shatter on his armor, and he’ll keep coming. Instead hit him in the helmet, where the impact will cause his ears to ring and stunning him momentarily. Mask of Vulcan, anyone?
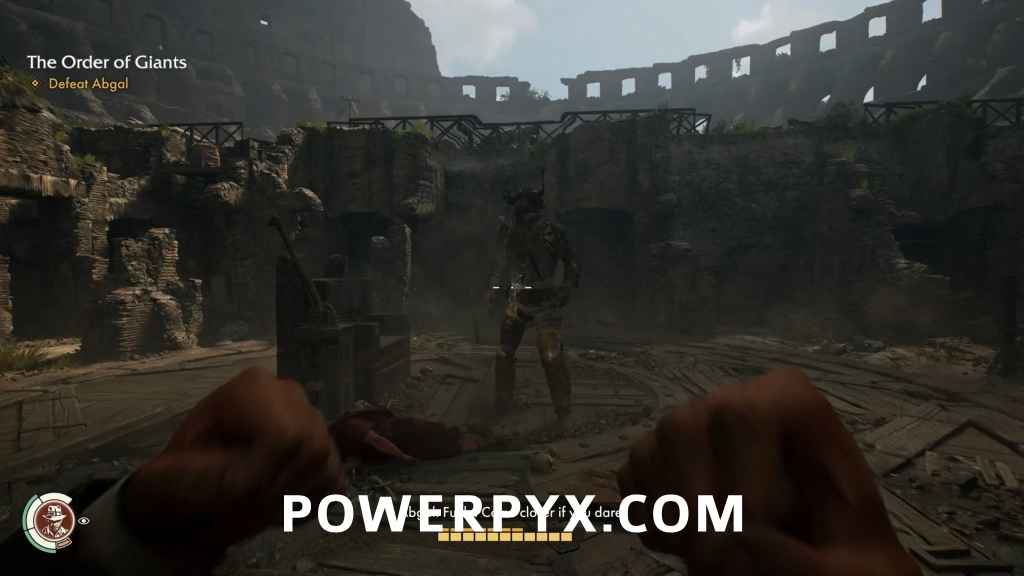
Once he is stunned, he’ll fall to one knee. You’ll have a very narrow window of opportunity during this moment to whip a section of his armor then whip yank it to break it. Each time you do this, run away and look quickly for a new weapon. Abgal is fast and relentless. He’ll follow you everywhere, and you just have to keep moving. Once you break three pieces of his armor, you’ll be able to pull off his breastplate. Once this happens, you’ll be able to begin doing damage to him. Keep sticking him with spears in his midsection. He’ll get angry and pull them out and keep coming. Eventually you’ll wear him down, and he’ll go down on one knee and stay there until you run up and interact with him to take off his helmet. Do that, and all that’s left is the ending cinematic. The Order of Giants unlocked.
For all base game walkthroughs refer back to Indiana Jones and the Great Circle Walkthrough.
Asturgis says
FYI there’s a Golden Apple secret at the foot of the tree you have to take a picture of in the Cloaca Maxima section, in the little cave. It’s in the grass and gives 20 Adventure Points like the Nasty Croissant. Right before the Tomb of Gibborim. It’s a reference to Lady Marie, the Nameless Crusader’s French lover.
LJ says
Thank you so much for all of this, splendid guide!