
Chapter 2: Intensive Care contains 32 Collectible Locations in Dead Space Remake. This walkthrough is updated for the PS5 Remake version and will guide you to all collectibles in Chapter 2: Intensive Care in chronological order. Everything that’s needed for trophies and 100% completion is included: Logs, Schematics, Weapons, Weapon Upgrades, Suit Upgrades, Nodes, Side Missions, Chapter-Specific Trophies, Marker Fragments.
Everything located on the USG Ishimura is unmissable until the Point of No Return at the end of Chapter 11: Alternate Solutions, except for a small number of action-dependent logs that only trigger when doing certain actions at specific story points. The guide will list everything when it first becomes available in an efficient order, but if you miss anything you can go through the Ishimura when you have full access in Chapter 11. Everything in Chapter 9: Dead On Arrival is missable, so be sure to collect everything during this chapter. Marker Fragments are only available in New Game+. You can still grab missing Collectibles in New Game Plus, all progress carries over.
Collectibles Overview:
Chapter 2: Intensive Care Collectibles
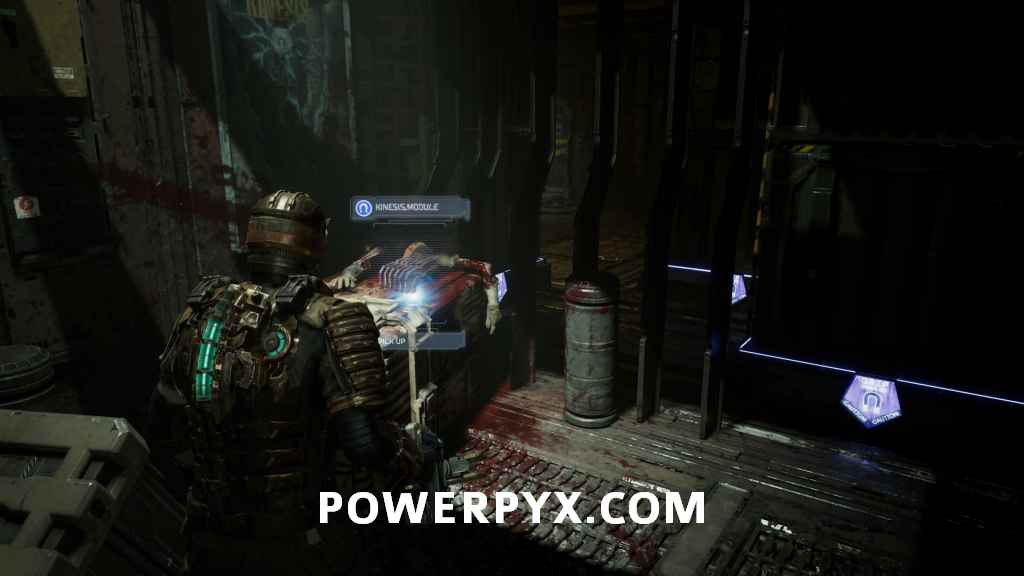
Weapon 3 – Kinesis Module
Immediately in front of you at the beginning of the chapter.
Weapon 4 – Pulse Rifle
After using Kinesis to move some obstacles, head upstairs to the Medical Tram Station. The weapon will be dropped by a dying security officer.


Log 17 – Destroy the Barricade
Story-related. Automatically after entering Security Station.
Node 5
After going through Imaging Diagnostics this is inside Diagnostic Technician, on a wall.


Log 18 – Patient Harris
In Imaging Diagnostic, open the doors by enabling the left circuit breaker (“Doors”). Head back to the other side of the room into Consultation Room to find it on a desk.


Log 19 – Calculated Risks
In Imaging Diagnostics, use the same circuit breaker from before and enable the right breaker for “Elevators”. Then use the small elevator left of the circuit breaker, upstairs go into the hallway and enter Observation Room. The log will be on a medical bed.


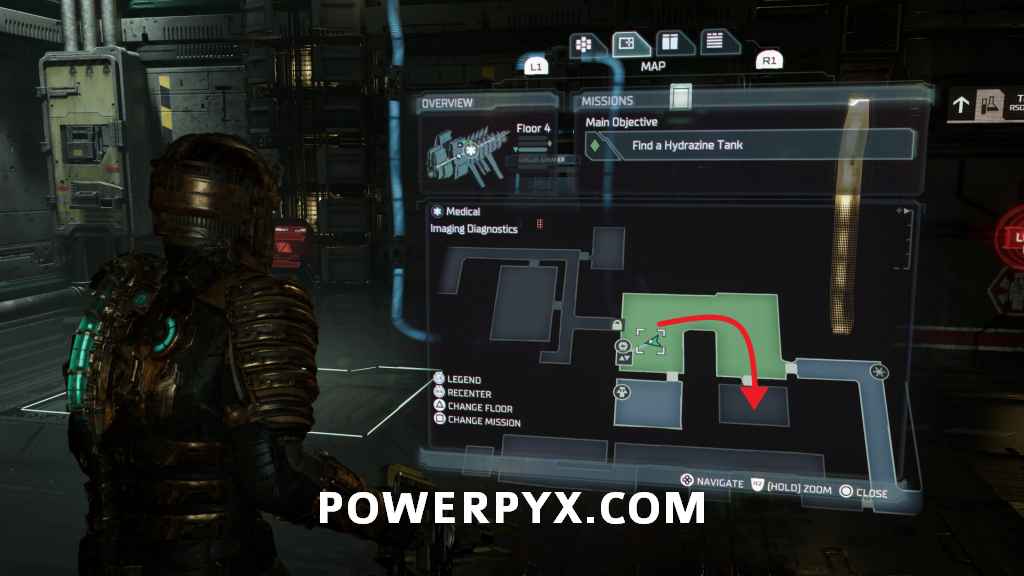
Log 20 – Found a Hydrazine Tank
Story-related. Automatically after collecting Hydrazine Tank.
Log 21 – Shook the Whole Ship
Story-related. Automatically after re-entering the vacuum.
Log 22 – Almost Got Me
Story-related. Automatically after descending down an elevator shaft.
Schematics 1 – Pulse Rounds
Directly on your left after entering Coolant Pipelines.

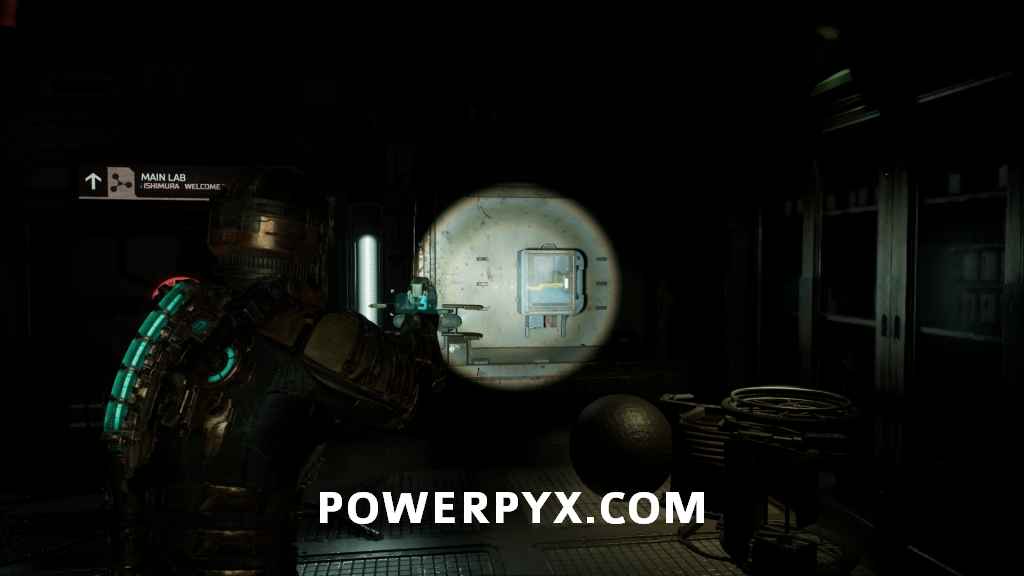
Log 23 – Nicole’s Log / Side Mission 1 – Scientific Methods
After clearing the quarantine in Main Lab, head inside Dr. N. Brennan’s office downstairs to find this on her desk.


Log 24 – Anonymized Transcript
On a shelf in the same office.

Log 25 – Marker Discovery
Inside Dr. T. Kyne’s office (across from Dr. N. Brennan’s office), on a bench by the door.


Log 26 – They Defy Death Itself
In the bathroom behind Dr. T. Kyne’s office, on the floor in a cubicle.


Schematics 2 – Stasis Pack
Enter Main Lab Changing Room to the left of Dr. N: Brennan’s office, on a bench on the right.


Log 27 – Vital Personnel
On a desk in the corner of Biological Prosthetics Center, where you’re introduced to the Lurker Necromorph.


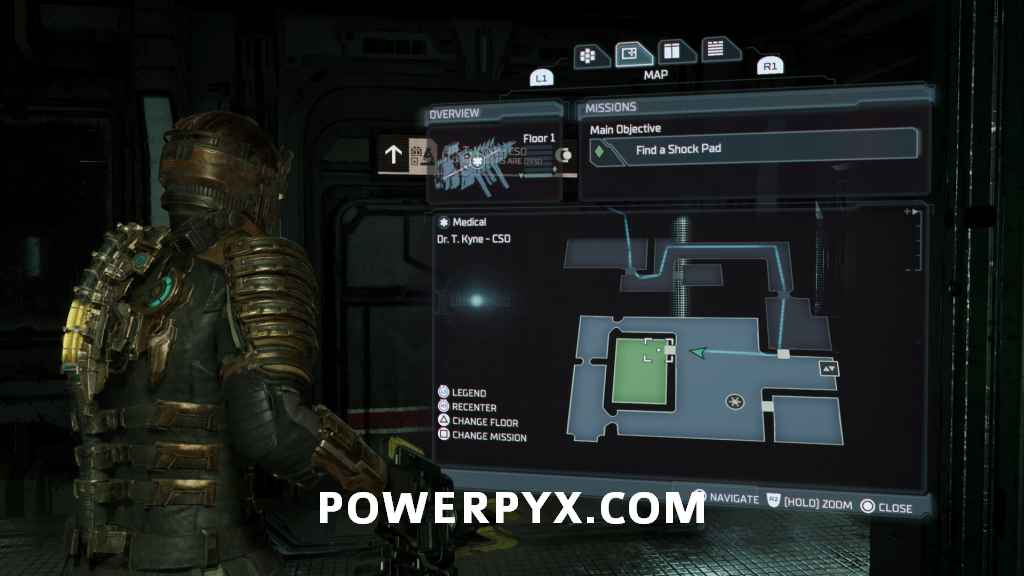
Node 6
Take the elevator upstairs and go through the two doors inside Limb Stimulation Therapy, on wall in right corner.

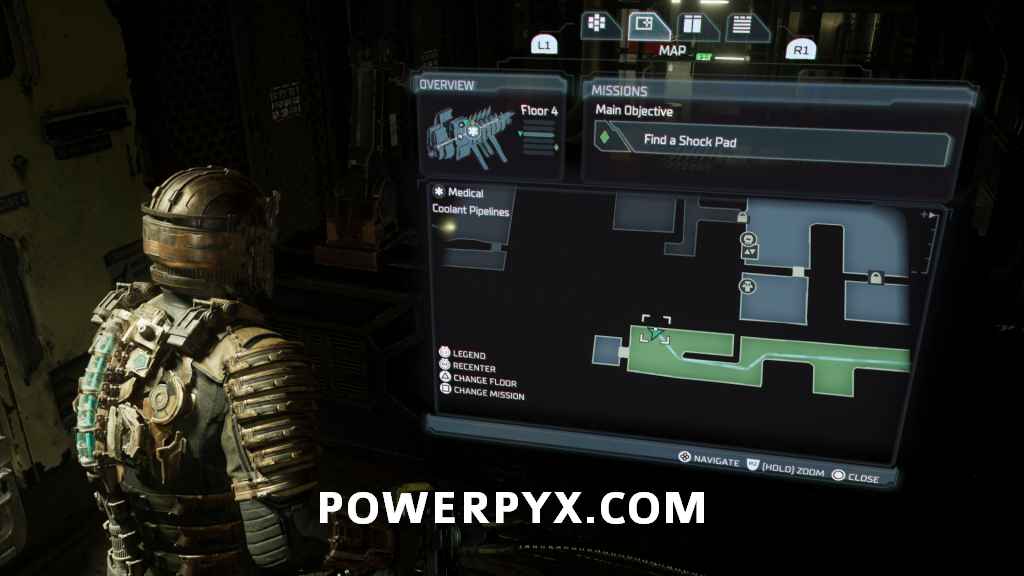
Log 28 – Found a Shock Pad
Story-related. Automatically after collecting Shock Pad in Limb Simulation Therapy.
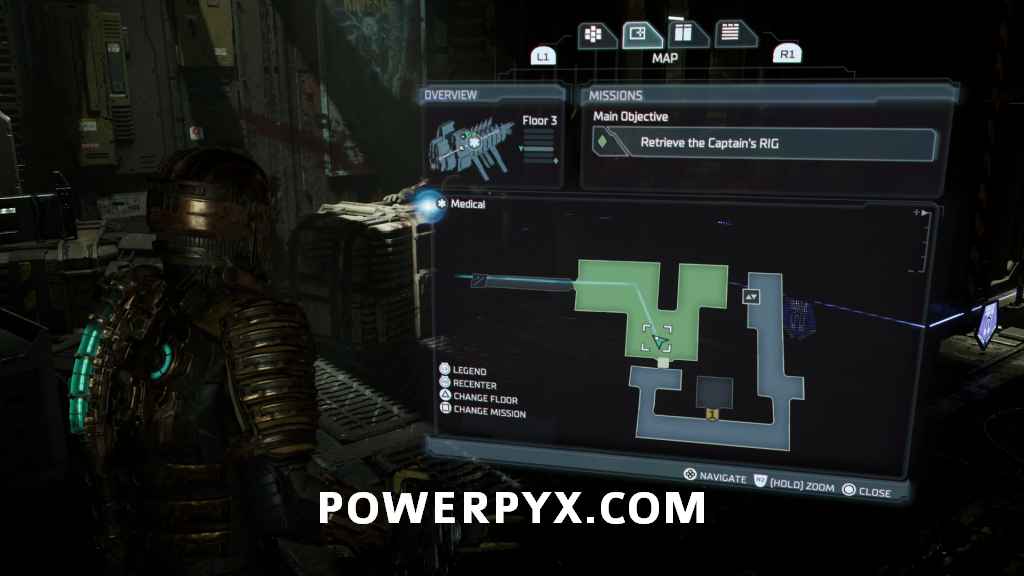
Log 29 – Find the Captain’s Rig
Story-related. Automatically after blowing up the barricade.
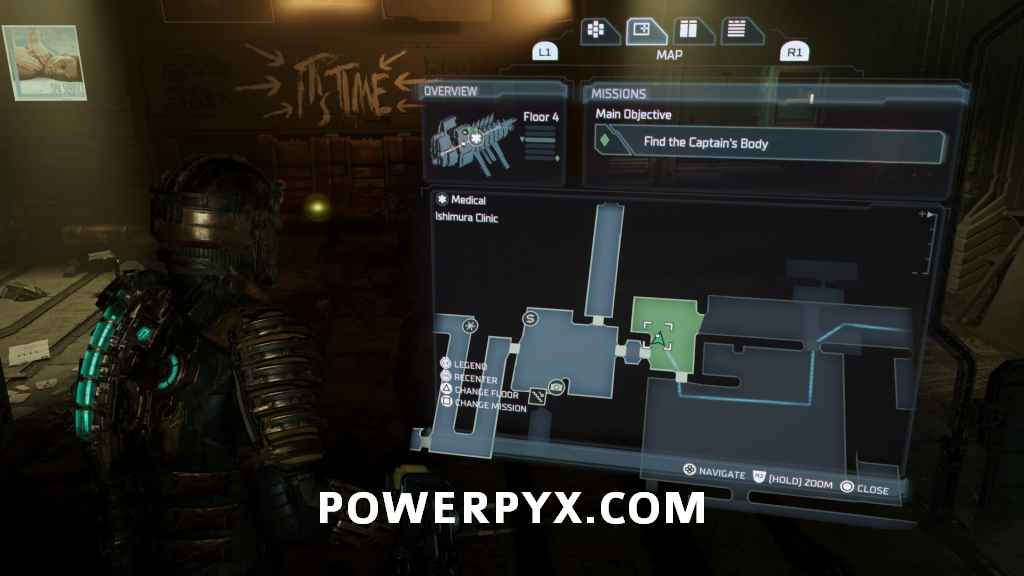
Weapon Upgrade 1 – Cartridge Rack (Plasma Cutter)
After blowing up the barricade, enter Ishimura Clinic. Sitting on a bench.

Log 30 – Patient Observations
Inside Emergency Room, sitting on a medical bed.


Side Mission 1 – Scientific Methods Step 1
After picking up the previous log, watch the hologram at the end of the room. Make sure to watch the full sequence until the hologram disappears, this is important. After the hologram disappears, also hit the blue “Activate?  Play” button where the hologram was on the bed – this is just to be 100% safe it updates the objective, in rare cases the objective can glitch but pressing the button to replay the hologram fixes it.


Log 31 – Nicole’s Study (Side Missions) / Side Mission 1 – Scientific Methods Step 2
At the circuit breaker enable the left breaker for the showers. Then use kinesis to move the wall revealing a hidden room with this log inside. Part of Side Mission 1 – Scientific Methods. (Note: if you do this step before the above Step 1, be sure to watch the hologram again in full, otherwise the objectives can bug out when they are done in wrong order).


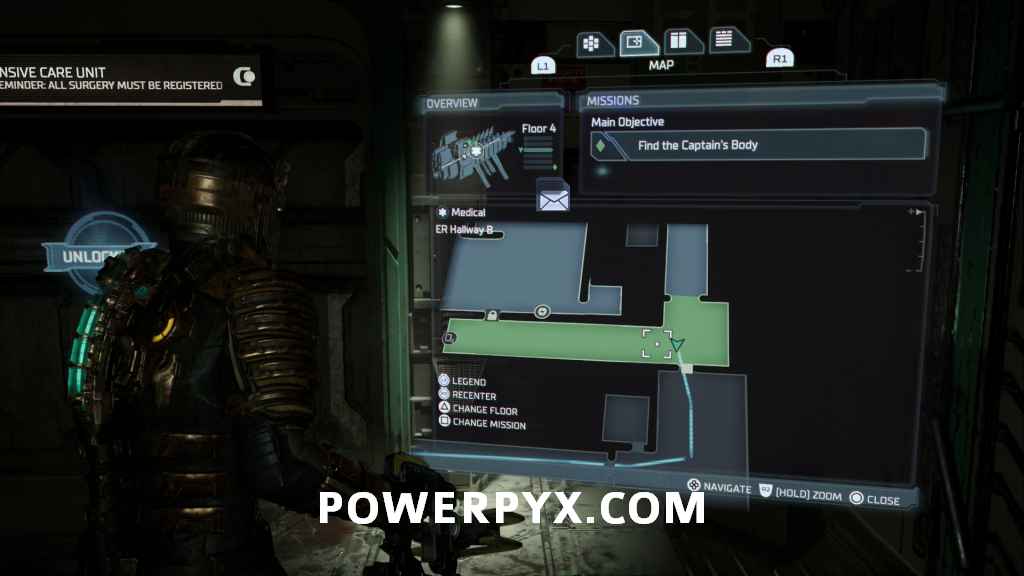
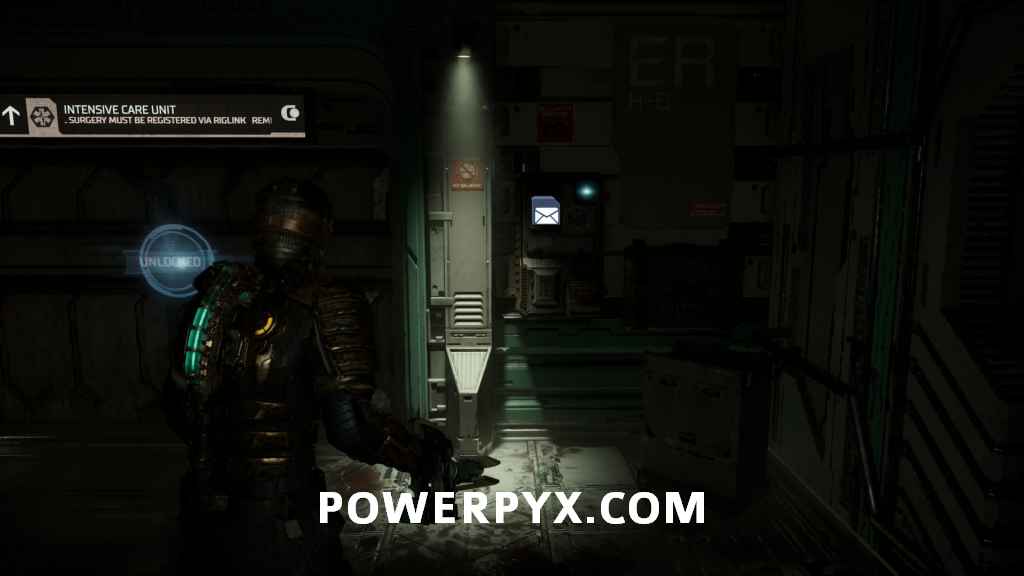
Log 32 – Rats in the Walls
Go back to the circuit breaker, disable both fuses to reveal the battery to the right, take out the battery with kinesis, place it at the door to ER Hallway A and defeat the enemies. Go through ER Hallway A, halfway through it transitions into ER Hallway B, log is on a wall next to the entrance to Intensive Care Unit (blinking mail icon). Before entering Intensive Care Unit pick up the next 2 collectibles in the same hallway.
Log 33 – Colony’s Problems
On the floor at the end of the same hallway.


Node 7
On the wall next to the log.

Log 34 – Autopsy Report
After using elevator and entering Morgue, found alongside the right wall.


Log 35 – Transmitting Codes / Security Clearance Level 1
Story-related. Automatically after collecting Captain’s Rig.
Log 36 – Go to Engineering
Story-related. Automatically after ascending the elevator.
Node 8
Back inside Ishimura Clinic where you got the weapon upgrade. Requires Security Clearance Level 1. Grab the next collectible before going to Medical Tram Station (don’t use Tram yet).


Node 9
Before using the Tram, backtrack through Imaging Diagnostics Wing > Coolant Pipelines > Zero-G Therapy Access Corridor (  +
+  to fly up) > there’ll be Patient Locker Room on left with a node inside. Requires Security Clearance Level 1.


That’s 100% of the collectibles in Chapter 2: Intensive Care of Dead Space PS5 / PC Remake.
Next Up: Chapter 3: Course Correction Collectibles
For all other Chapters, refer to Dead Space Remake Collectibles Guide.
Leave a Reply