
Resonance: A Plague Tale Legacy contains 37 Artefact Locations, also called Relics of the Present and Relics of the Past. Finding all Artefacts/Relics unlocks the Hoarder trophy & achievement.
None of them are missable, you can still find them after the story in Chapter Select. It also shows trackers in Chapter Select how many you found. You can also view them in the Artefacts menu, there they are listed by name and in the order they appear in the game. This lets you quickly narrow down which ones you’re missing.
For an All-in-One guide by Chapter that includes all Collectible Types, refer to Resonance: A Plague Tale Legacy Collectible Guide.
Chapter 1: Blood ties (1 Artefact)
Artefact #1 – Relic of the Present: Handled Cross
Sub-Chapter: 3 – The search for the key
Objective: Loot the bodies
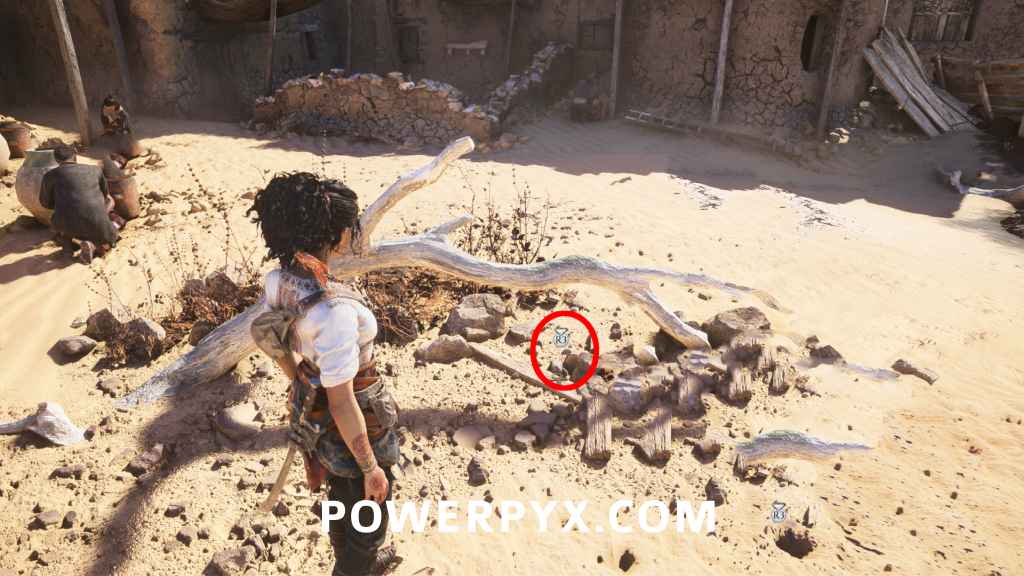
When this sub-chapter starts, you’ll be in a desert. Go forward to the courtyard where you find bodies on the floor. The artefact is in the middle of the area under the white tree branch.
Chapter 2: Felons (2 Artefacts)
Artefact #2 – Relic of the Present: Serenissima Banner
Sub-Chapter: 2 – The carnival
Objective: Follow the pieces of cloth to the church
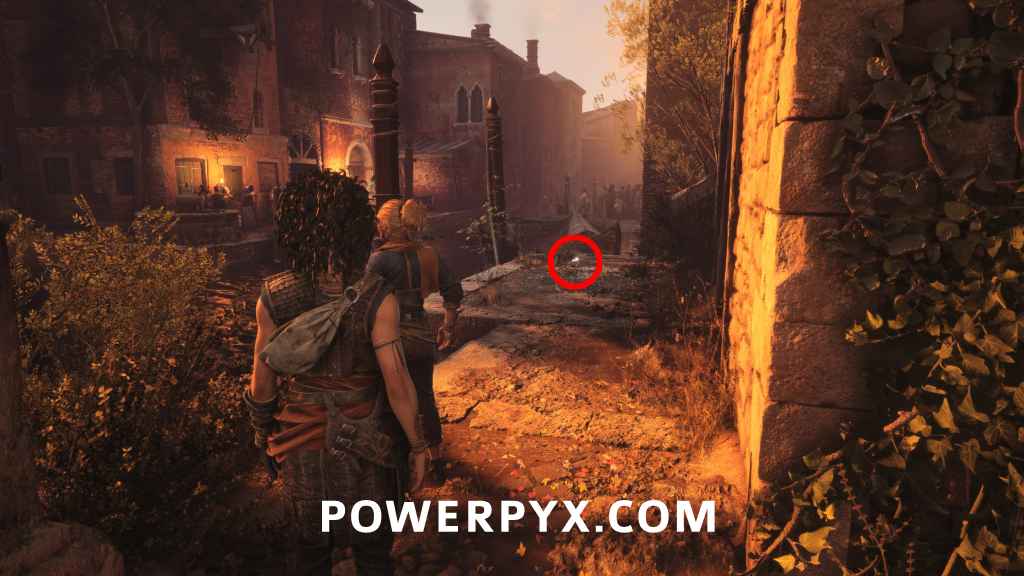
After two guards search you and Leni to enter the carnival, go through the first market square area and proceed forward until you reach a bridge with 2 guards. Before going over the bridge turn right to find this at the docks.
Artefact #3 – Relic of the Present: Bombasin Mask
Sub-Chapter: 2 – The carnival
Objective: Follow the pieces of cloth to the church
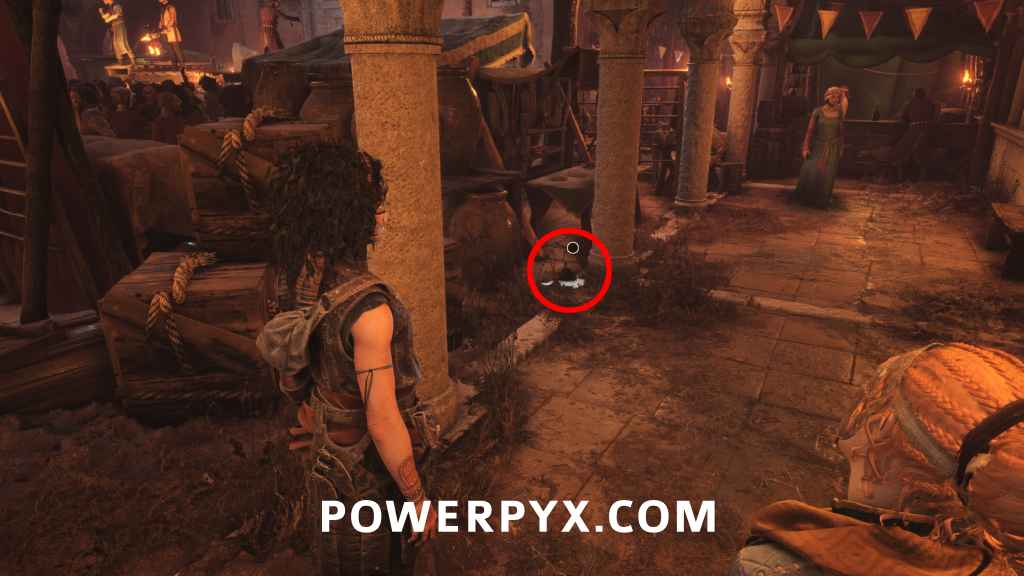
After Leni lockpicks a door, you go through a backyard with 2 pigs, then you reach the big carnival square with torch jugglers on the stage. Go to the right corner of this area to find a mask on the floor.
Chapter 3: Those before us (6 Artefacts)
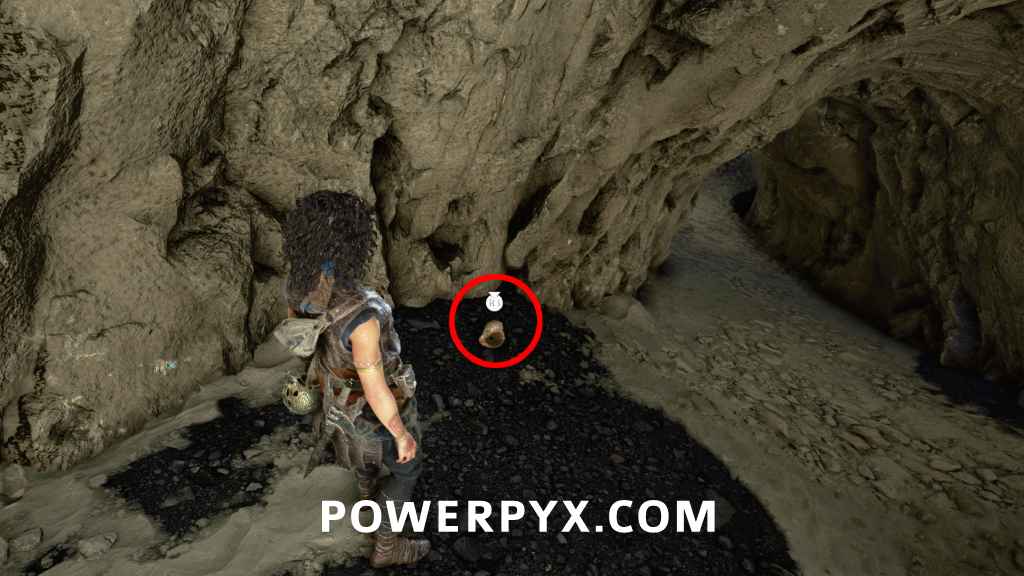
Artefact #4 – Relic of the Present: Conch Shell
Sub-Chapter: 1 – Paradise
Objective: Follow the plunderers’ tracks
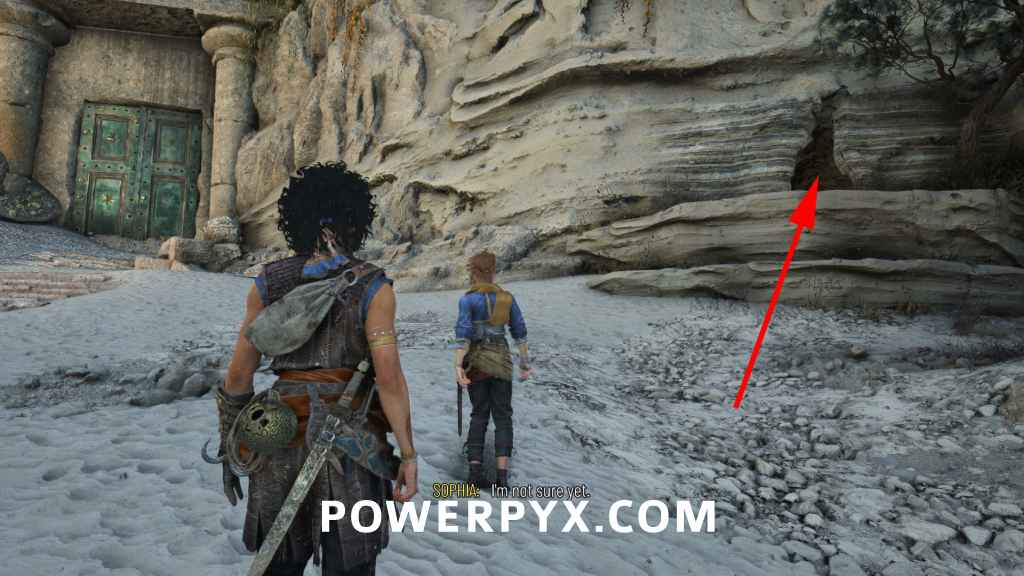
At the beach where the chapter starts, to the right of the big green gate, climb into the cave to find it.
Artefact #5 – Relic of the Past: Play Onyx
Sub-Chapter: 1 – Paradise
Objective: Follow the plunderers’ tracks
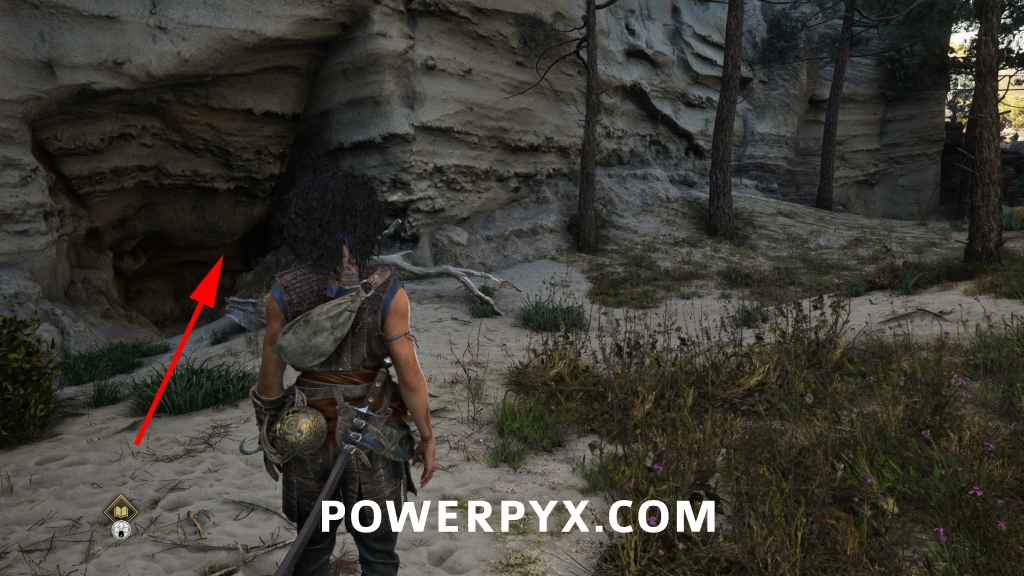
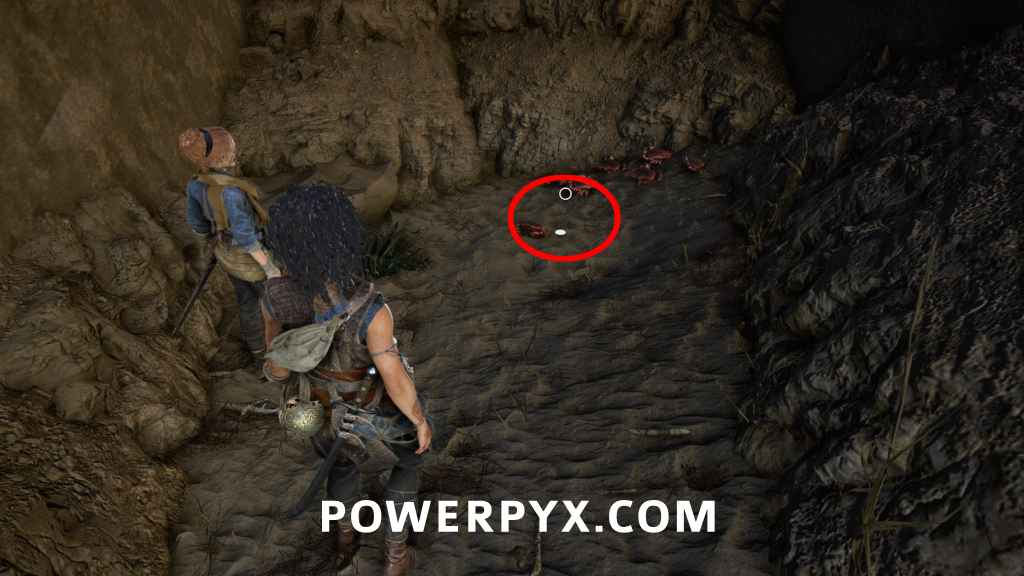
Still at the beach, go past the big green gate, then climb the rocks above the alcove with brown coloring and shimmy across the gap to reach a forest area. In the forest area enter the big alcove on the left side to find a shimmering coin on the ground.
Artefact #6 – Relic of the Past: Golden Cup
Sub-Chapter: 1 – Paradise
Objective: Follow the plunderers’ tracks
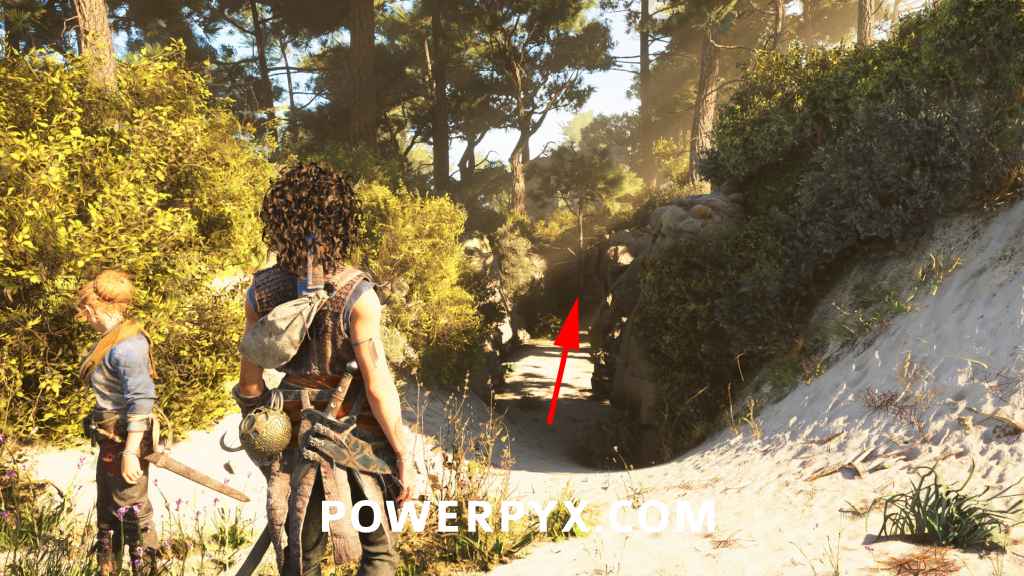
After pushing down the log for Leni, squeeze through the next gap to reach another beach area. Go uphill to the very end of the woods area, there is slope leading down to a dead-end path with this item at the end. This is to the left BEFORE jumping over a gap to the ruins.
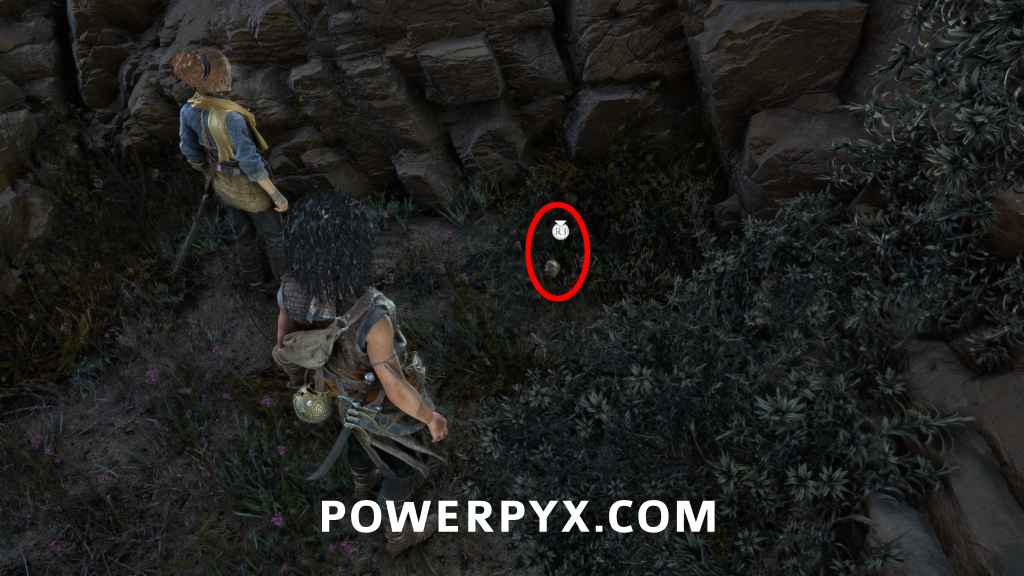
Artefact #7 – Relic of the Past: Heroic Plaque
Sub-Chapter: 1 – Paradise
Objective: Follow the plunderers’ tracks
From the previous Artefact, jump over the gap in the ruins now. You’ll reach an area with the ruined remains of old buildings. Head toward the cliffside overlooking the sea. Check the ruin closest to the cliffside, the relic is on the floor.
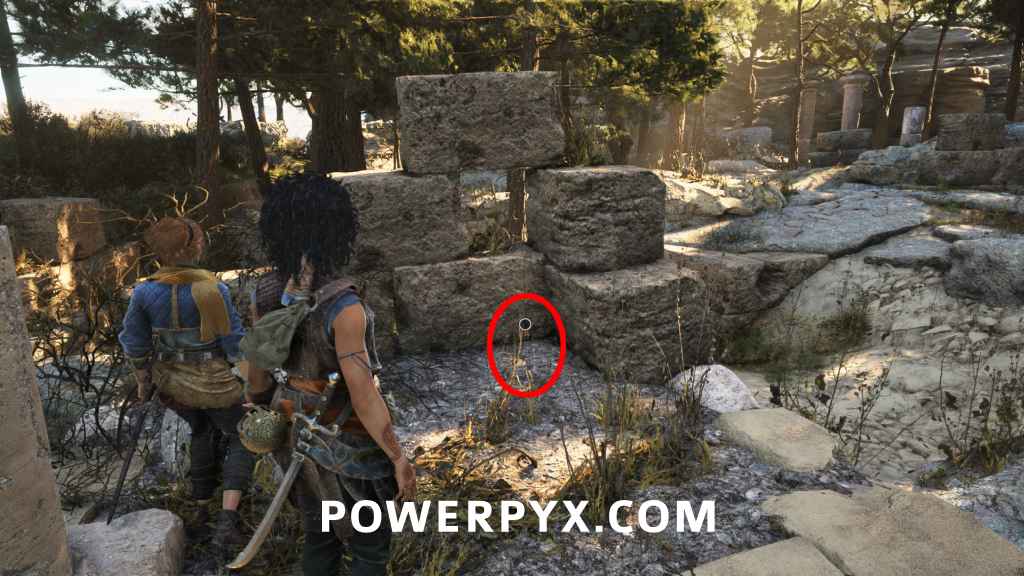
Artefact #8 – Relic of the Past: Strategy Game
Sub-Chapter: 2 – Vestiges
Objective: Find a way to get above the city’s ruins
After you use the grappling hook to pull down a wooden barricade, you reach the area with the big statue. Go up the stairs on the right, at the top jump left to the ruins. There you can interact with a stone on the floor to find the relic.
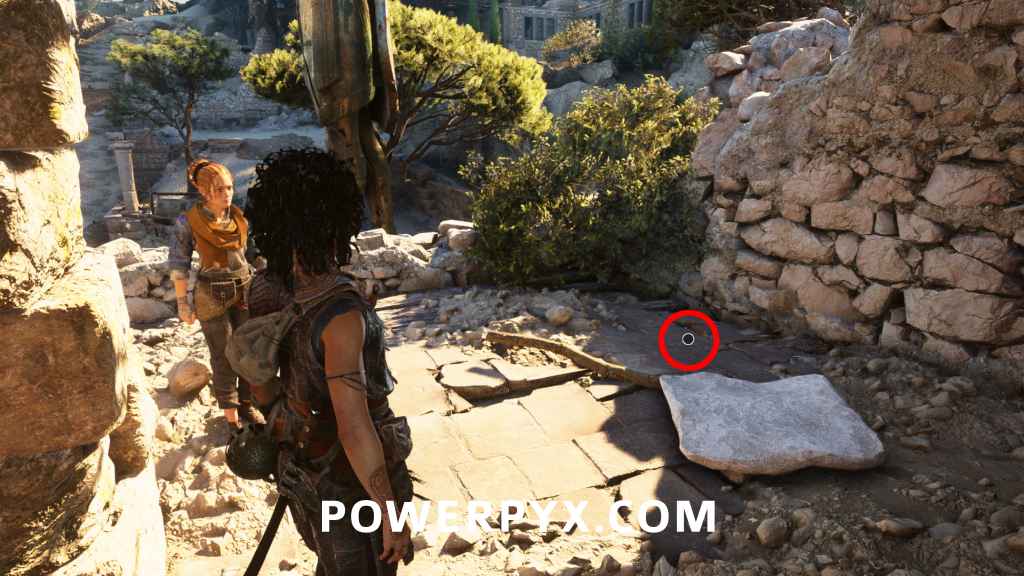
Artefact #9 – Relic of the Past: Minoan King
Sub-Chapter: 2 – Vestiges
Objective: Find a way to get above the city’s ruins
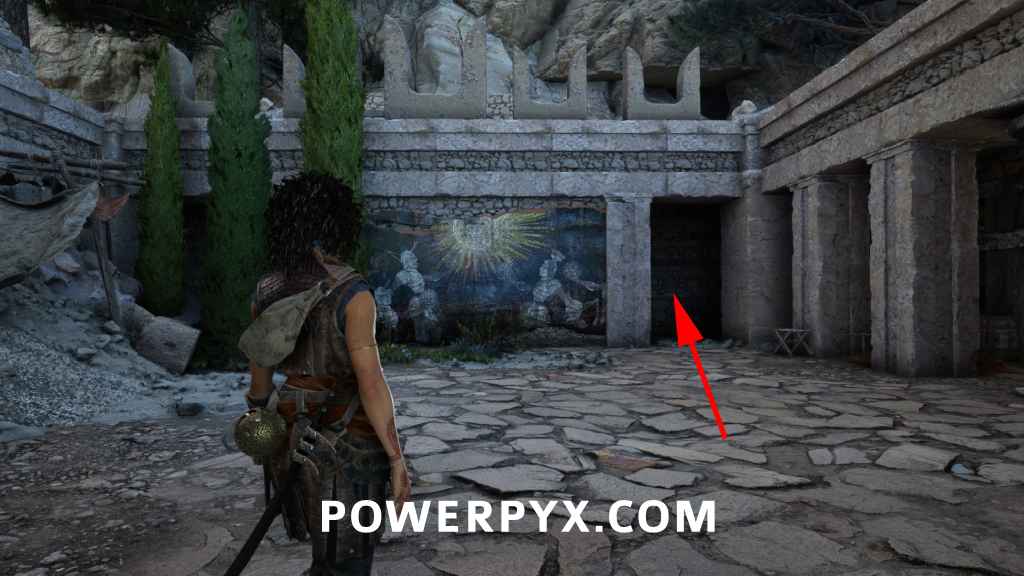
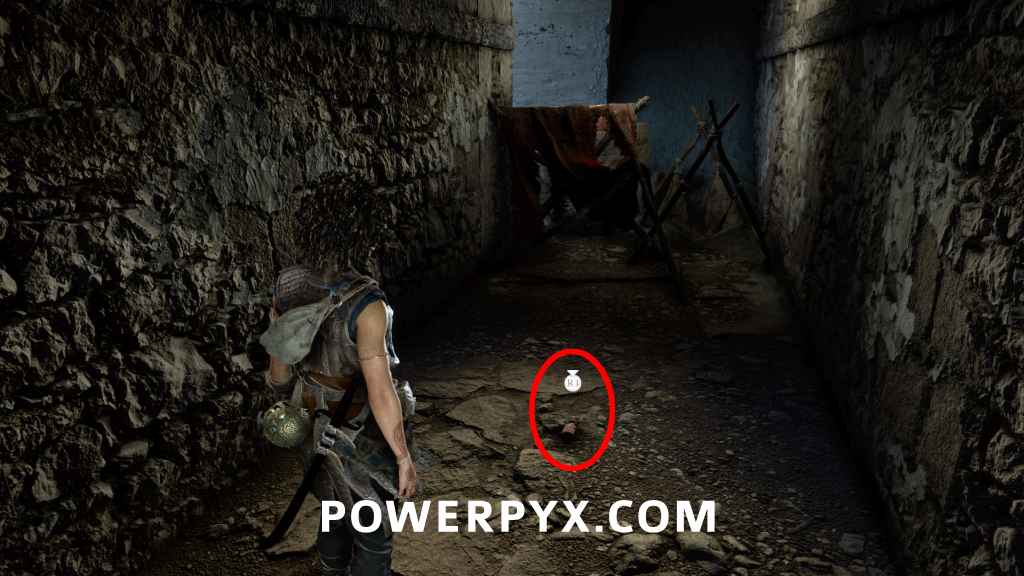
After Leni lifts up a log for you to crawl through a tunnel, when you exit the tunnel there will be a painting on the wall. In the ruin behind the painting is the Artefact.
Chapter 4: From Hell It rose (3 Artefacts)
Artefact #10 – Relic of the Present: Polished Cornicello
Sub-Chapter: 2 – Down the abyss
Objective: Progress through the Trial
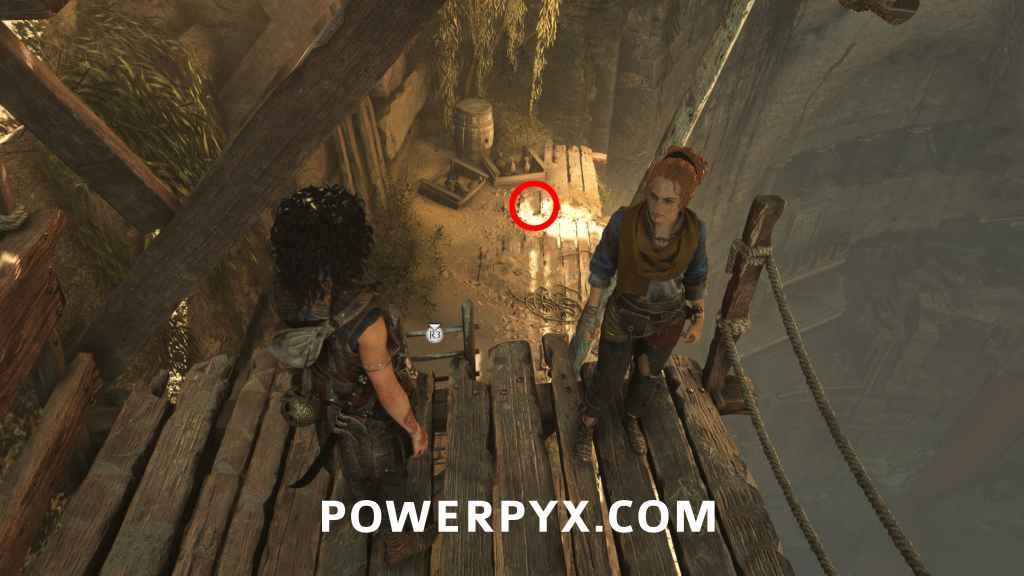
After solving a puzzle with the sphere to open a door, you reach an open area with a huge statue in front of you. Go right, drop down the ledge, immediately turn around and climb down the ladder.
Artefact #11 – Relic of the Past: Horned Rhyton
Sub-Chapter: 3 – Puzzles and traps
Objective: Progress through the Trial
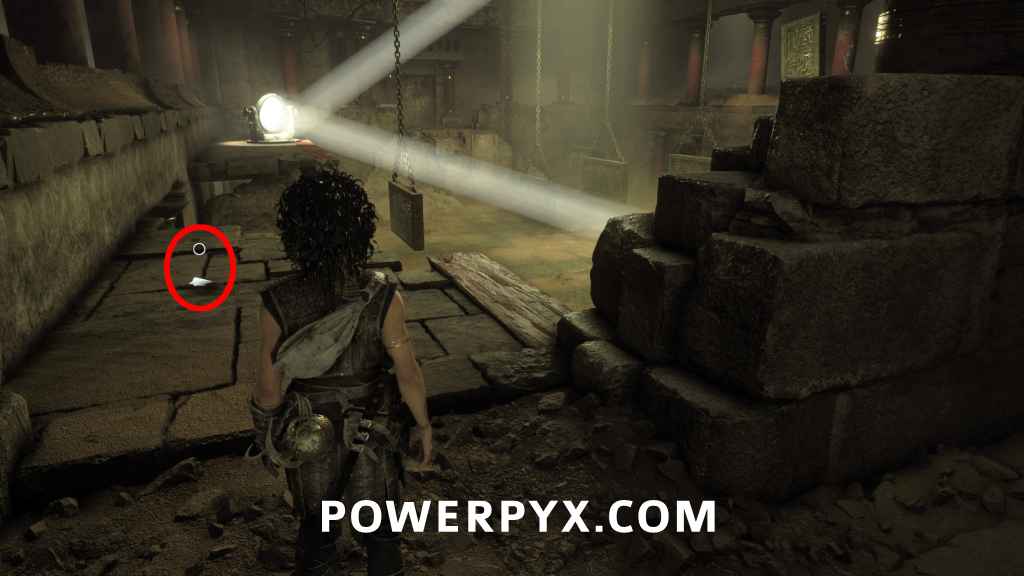
After passing a corridor full of traps (after the spike walls), you will reach another big puzzle room. Immediately turn left and go around the corner to find it.
Artefact #12 – Relic of the Past: Grand Mosaic
Sub-Chapter: 4 – At the bottom
Objective: Progress through the Trial
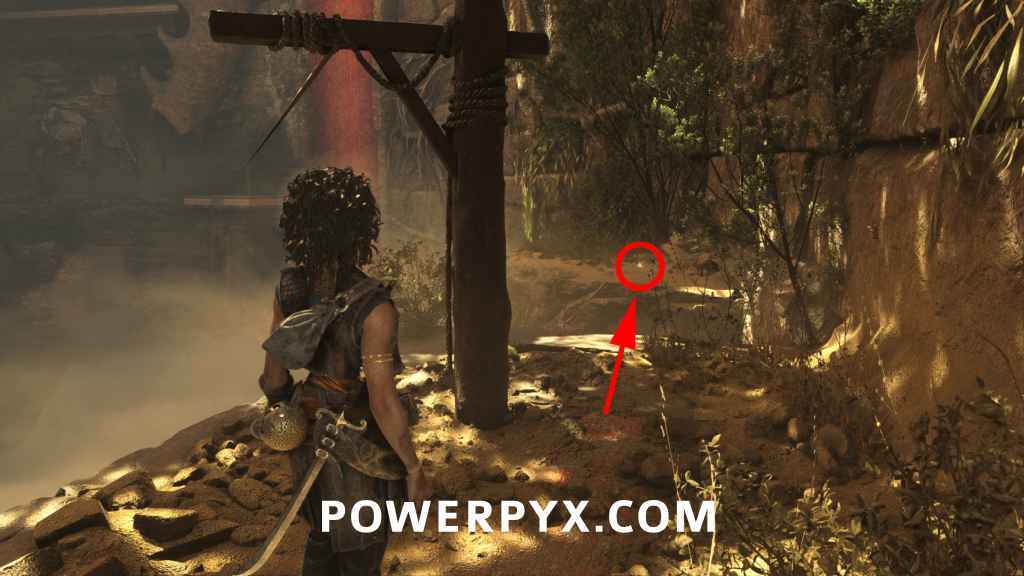
After sliding down a long zipline, immediately turn left and jump over the gap. (Opposite the story path).
Chapter 5: Desolation it wrought (5 Artefacts)
Artefact #13 – Relics of the Past: Griffin Figurine
Sub-Chapter: 2 – Battle grounds
Objective: Reach the central temple
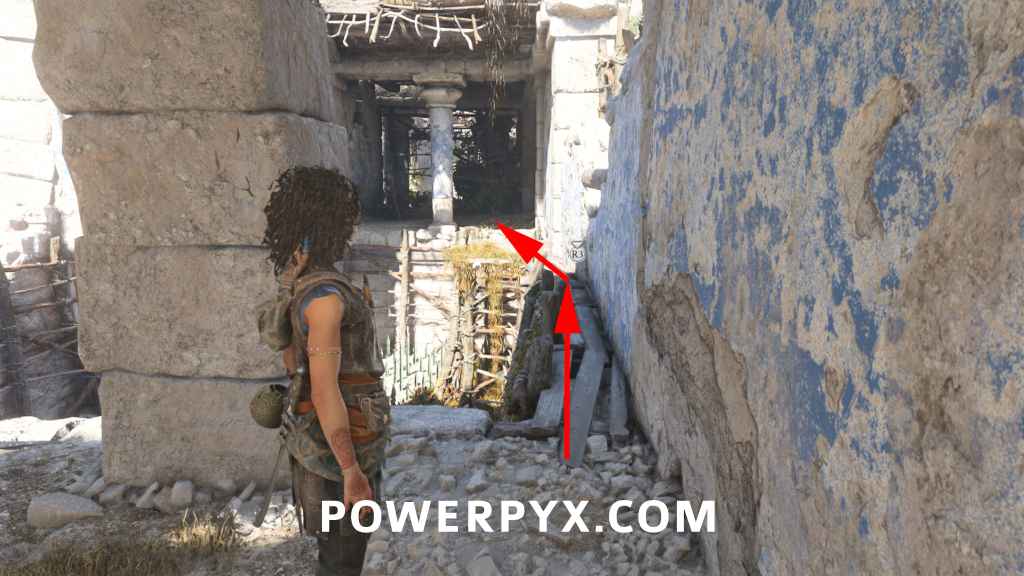
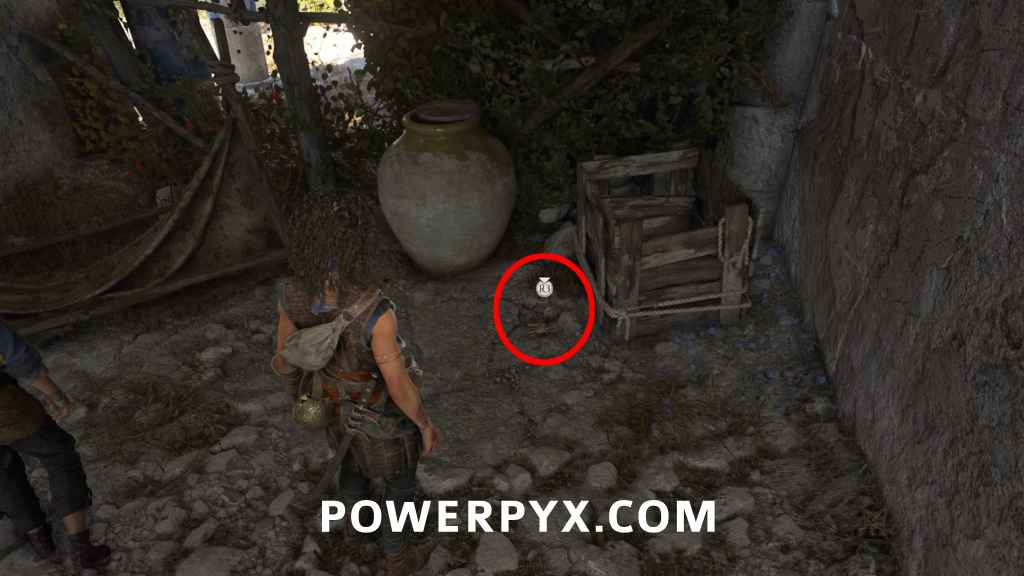
After defeating the first group of enemies in this chapter, go up to the right of the ruins, defeat the 3 enemies there. It’s the ruin with a large pit of spikes in the floor. In the corner are wooden boards you can shimmy across to reach the relic.
Artefact #14 – Relic of the Present: Dante’s Inferno – Canto XII
Sub-Chapter: 2 – Battle grounds
Objective: Reach the central temple
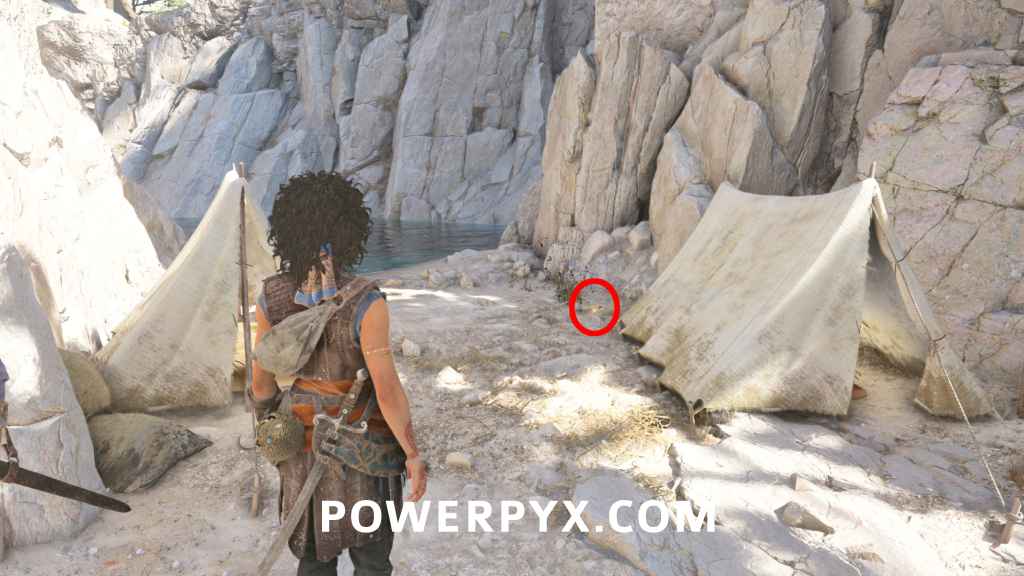
Proceed through the ruins until you reach a big green gate, but DON’T enter the gate. When facing the big green gate, turn left and go down the ladder to an enemy camp. Defeat them, then find this between the 2 white tents in the back.
Artefact #15 – Relic of the Past: Scarab Amulet + Floor Symbols Puzzle
Sub-Chapter: 3 – The four symbols
Objective: Find the first symbol
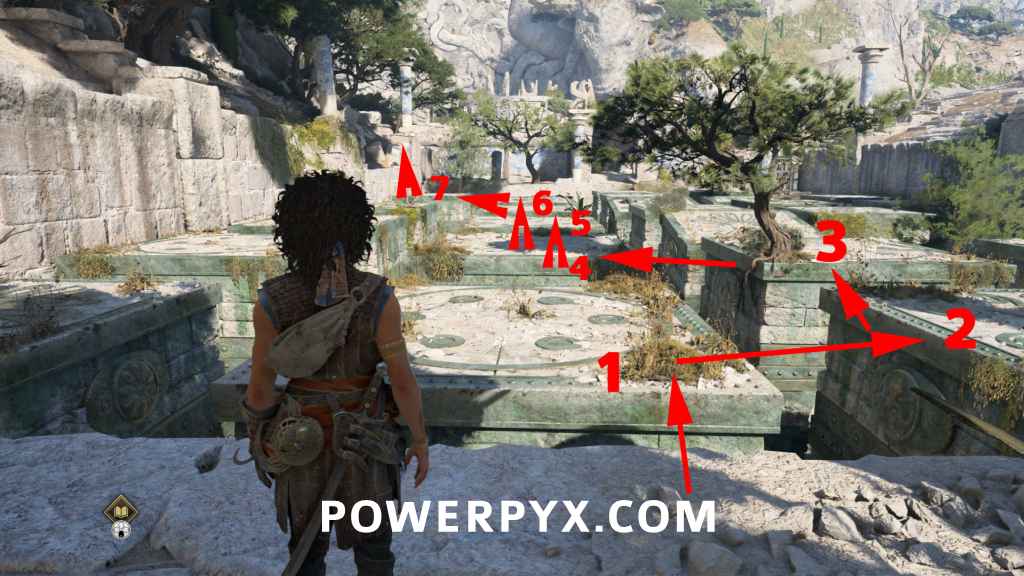
On your way to one of the four symbols, you will need to pass a puzzle where you jump over platforms with spikes. On the floor in front of the middle platform you see 5 symbols. This shows the order of symbols you need to jump to stay safe (Dots – Kraken – Dots – Flower – Kraken). There are 4 columns of platforms, if you jump on a wrong one you die. We’ll label these as columns 1, 2, 3, 4: 1 being the leftmost, 2 being left, 3 being right, 4 being rightmost. The artefact is in the back left corner of the spike platforms you jump across. Jump in this order: Dots (2) – Kraken (3) – Dots (3) – Flower (2) – Kraken (2) – Dots (2) – Kraken (1 *jump left). Then climb up the rocks on the left side and shimmy over the gap.
Artefact #16 – Relic of the Present: Condottiero Stamp
Sub-Chapter: 3 – The four symbols
Objective: Find the second symbol
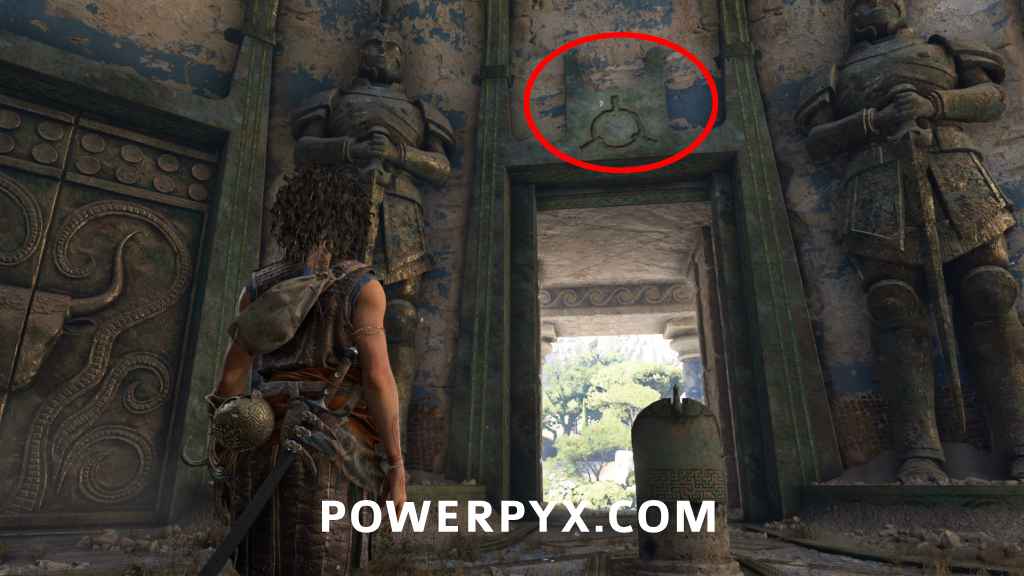
In the room with the 4 pedestals/symbols, look above the doors and go through the one that has the “O with 3 lines” icon.
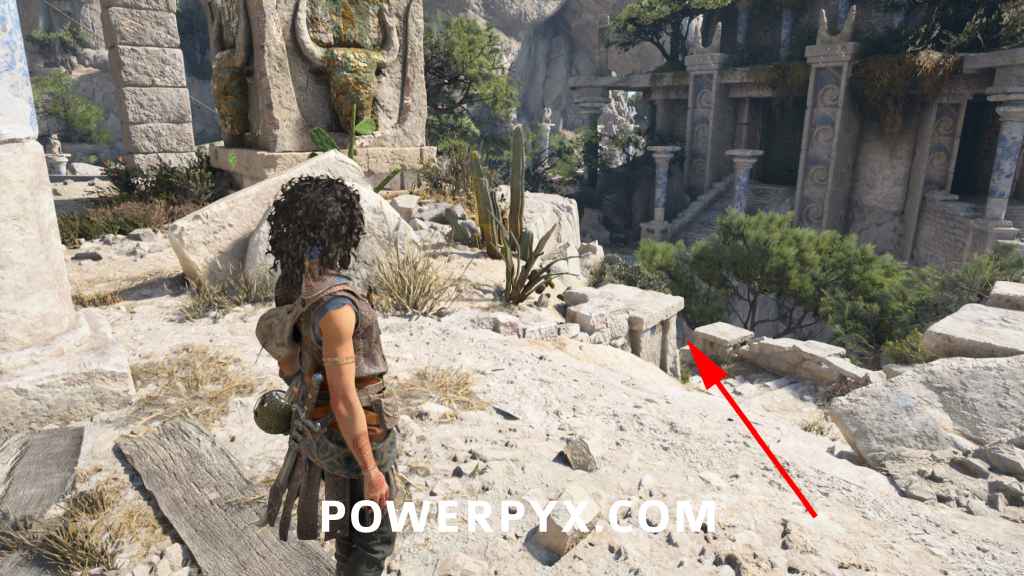
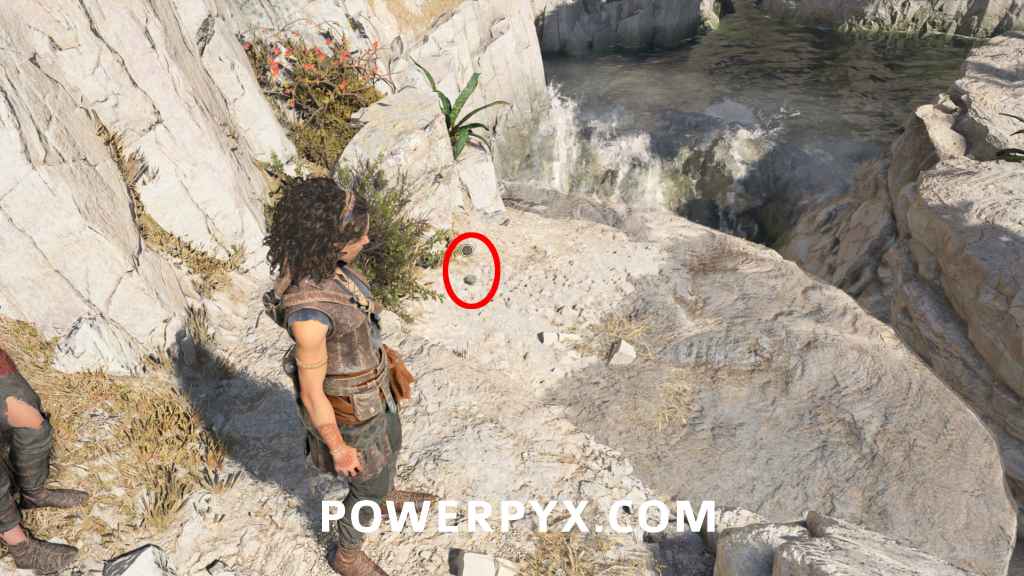
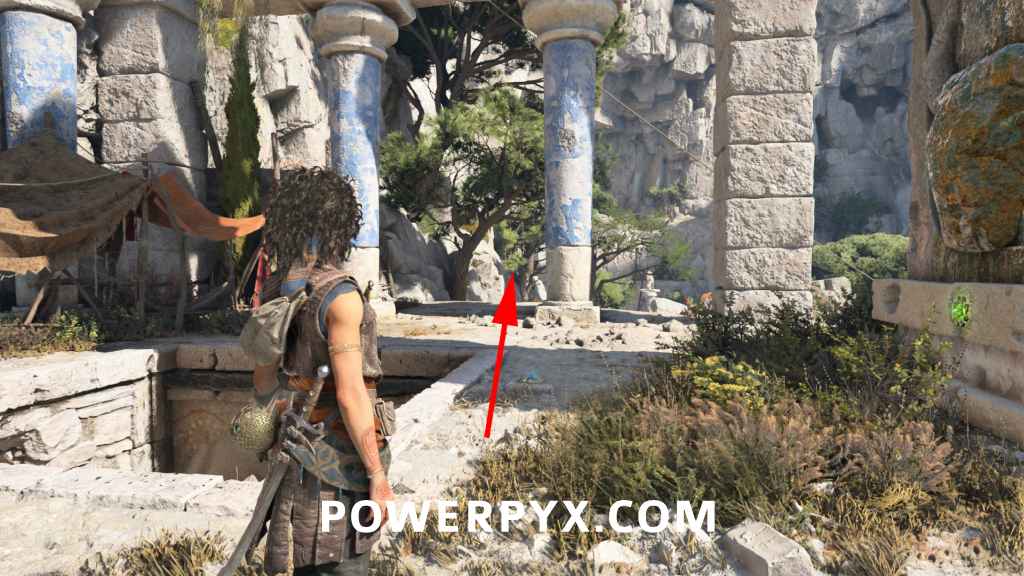
Go over the bridge, go left and then drop down the right cliff to some enemies. Defeat them, then you’ll see a big green gate upstairs. DON’T go through the green gate, instead go in the opposite direction and you’ll reach an abandoned camp with a big bull pillar. To the right of the bull pillar go down the path to find it before a gap.
Artefact #17 – Relic of the Past: Ceremonial Blade
Sub-Chapter: 3 – The four symbols
Objective: Find the second symbol
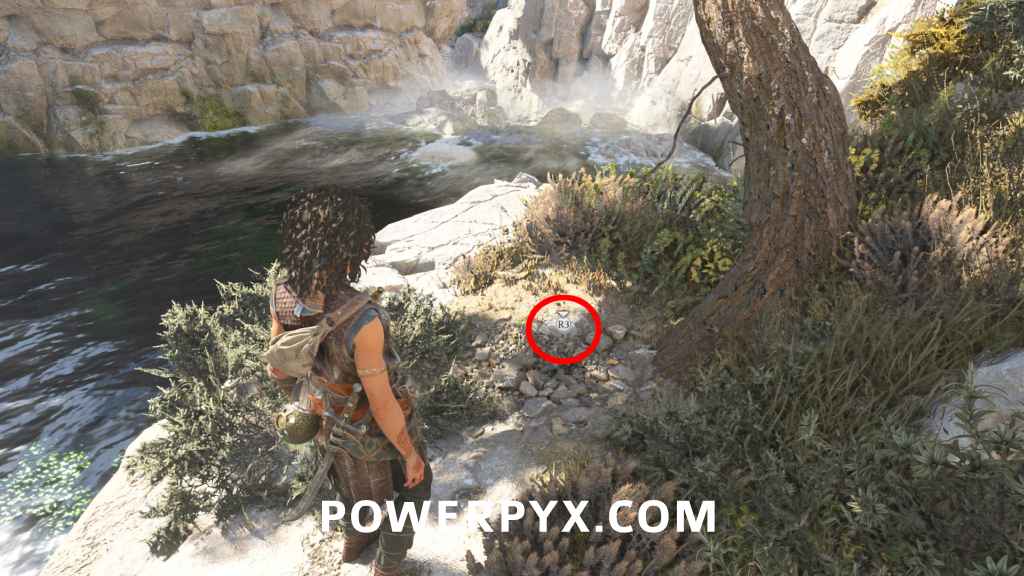
Backtrack upstairs to the bull pillar. This time, take the path left of the bull pillar through the camp. Jump the gap at a small waterfall and go down the path until you can go right. This path leads to the relic near the water.
Chapter 6: What lies beneath (2 Artefacts)
Artefact #18 – Relic of the Past: Minoan Queen
Sub-Chapter: 3 – False hope
Objective: Find a way to the surface
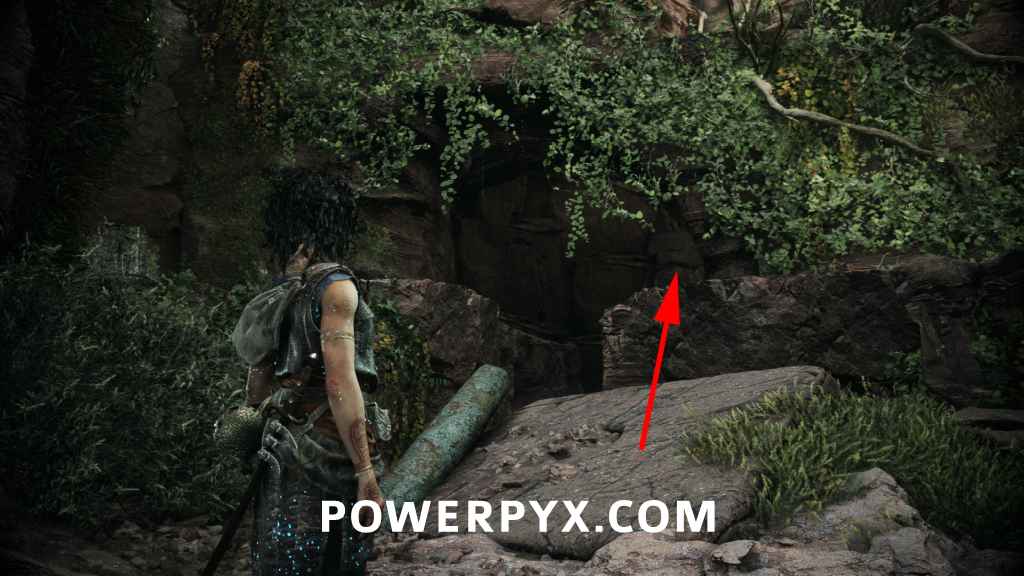
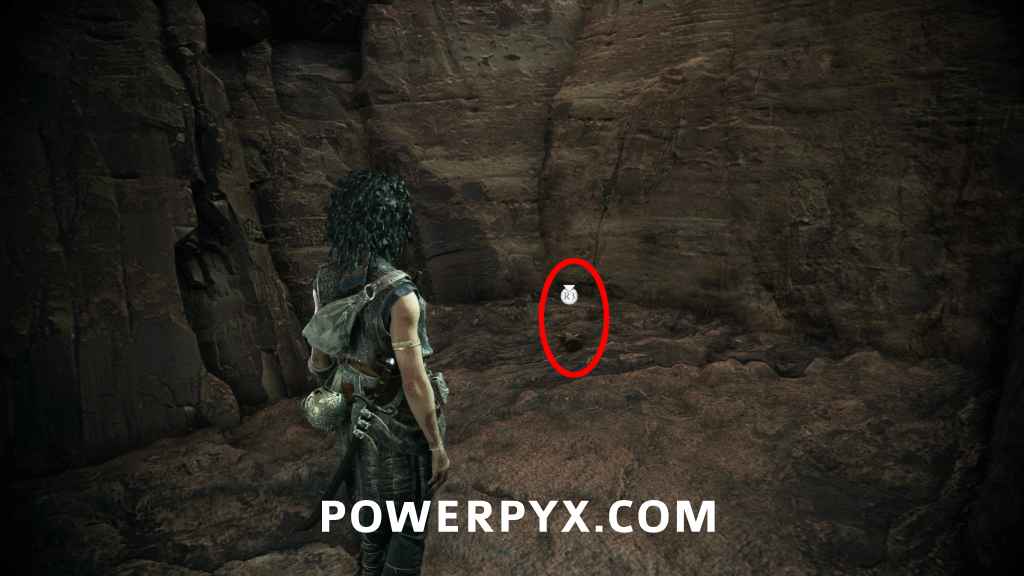
From the start of this Sub-Chapter, go forward past the broken water wheel. You’ll find this in the cave on the right. BEFORE climbing up with the grappling hook.
Artefact #19 – Relics of the Past: Corrupted Mosaic
Sub-Chapter: 5 – The Architect
Objective: Follow Daedalus’ shortcut
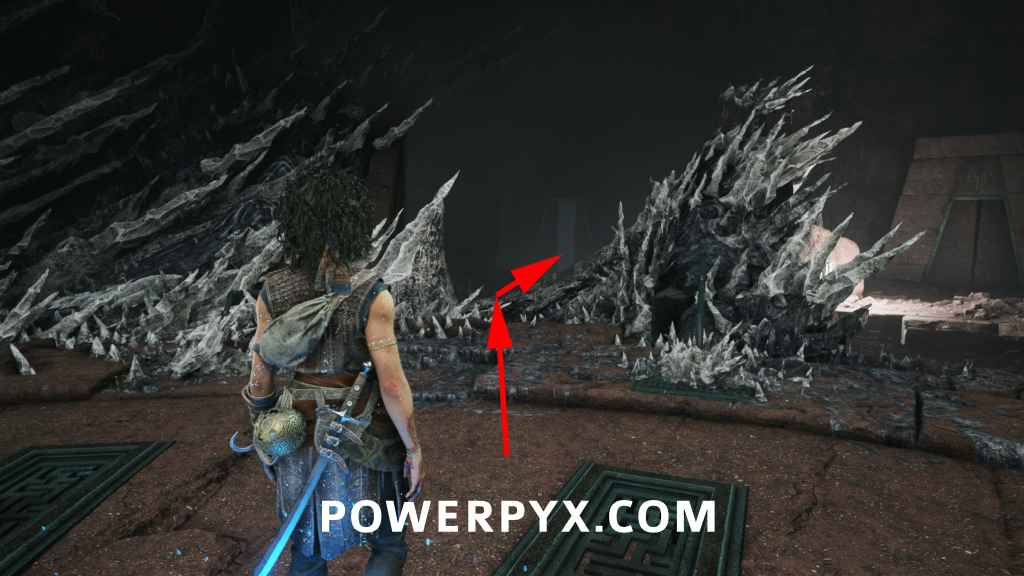
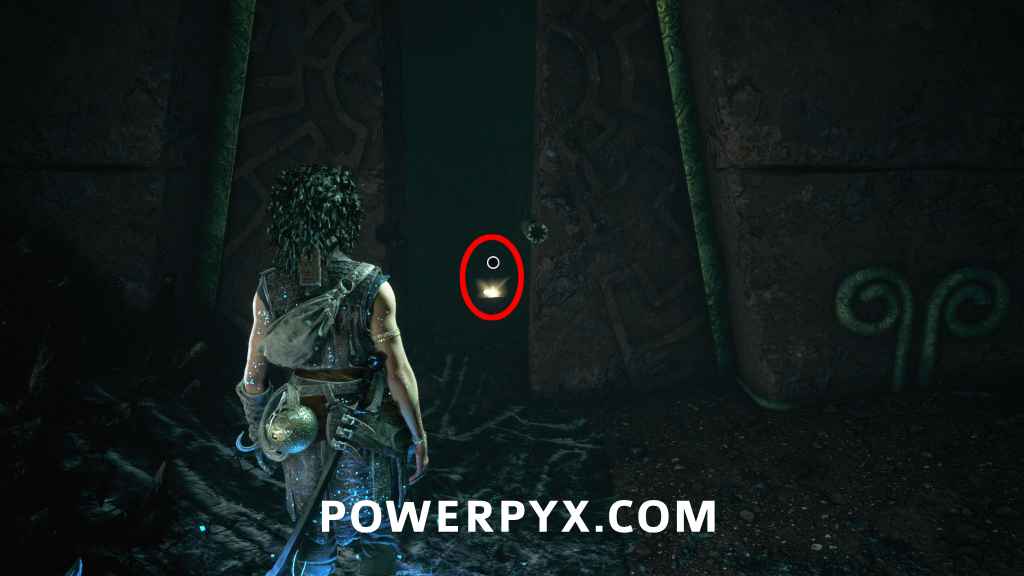
After a cutscene in a round room where you approach a petrified person at a cliff, face the staircase where you came from and go left of the staircase on the dark path. You’ll see this glimmering in the doorway.
Chapter 7: Death It sowed (4 Artefacts)
Artefact #20 – Relic of the Present: Tarot Card
Sub-Chapter: 2 – The whole damn army
Objective: Reach the black temple
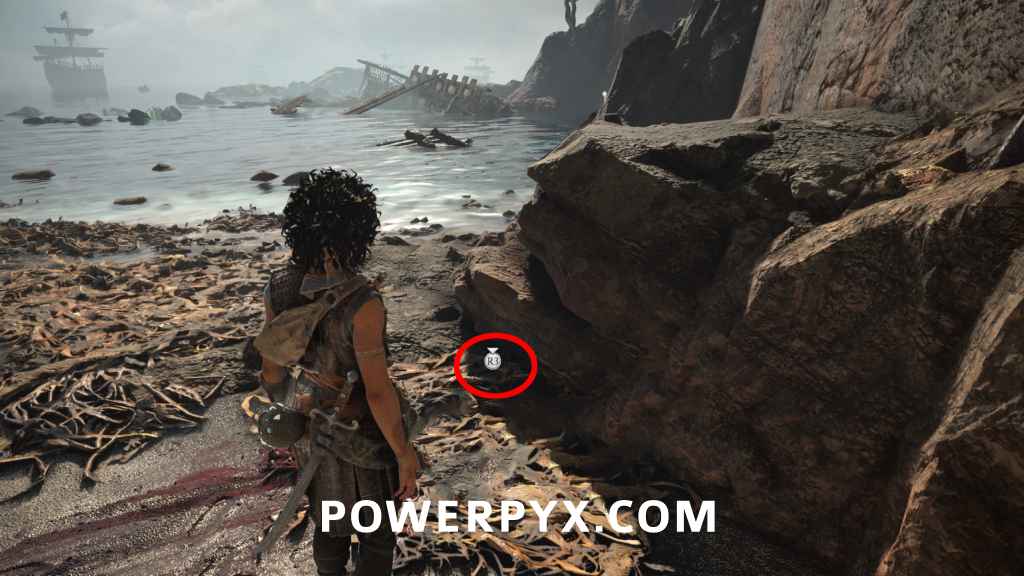
On the upper right corner of the beach, interact with the body.
Artefact #21 – Relic of the Past: Kill Onyx
Sub-Chapter: 2 – The whole damn army
Objective: Reach the black temple
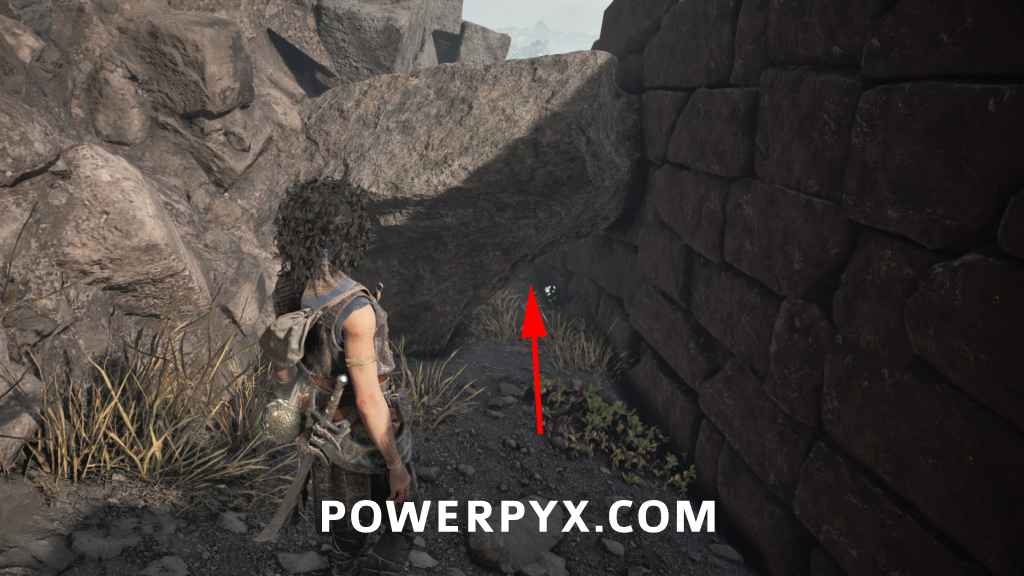
After you leave the underground section, go right and around the corner. There you can crouch under a rock to reach the back of the ruins. You find this in front of the grate.
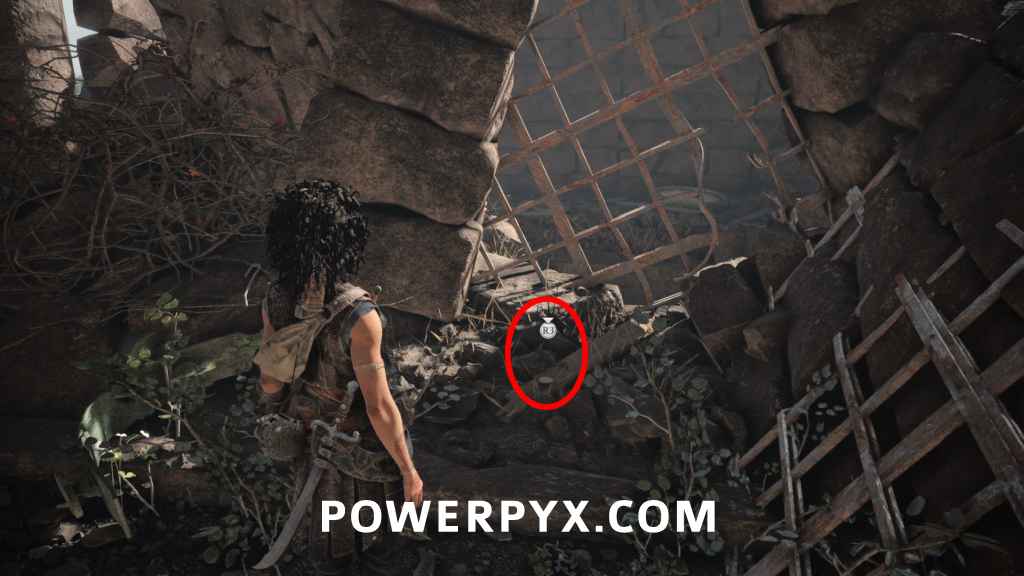
Artefact #22 – Relics of the Past: Stained Mosaic
Sub-Chapter: 3 – A stage of skulls
Objective: Find a way to open the black temple’s door
At the top of the mountain, after you defeat the enemies at the temple entrance, go right past the door to find the relic.
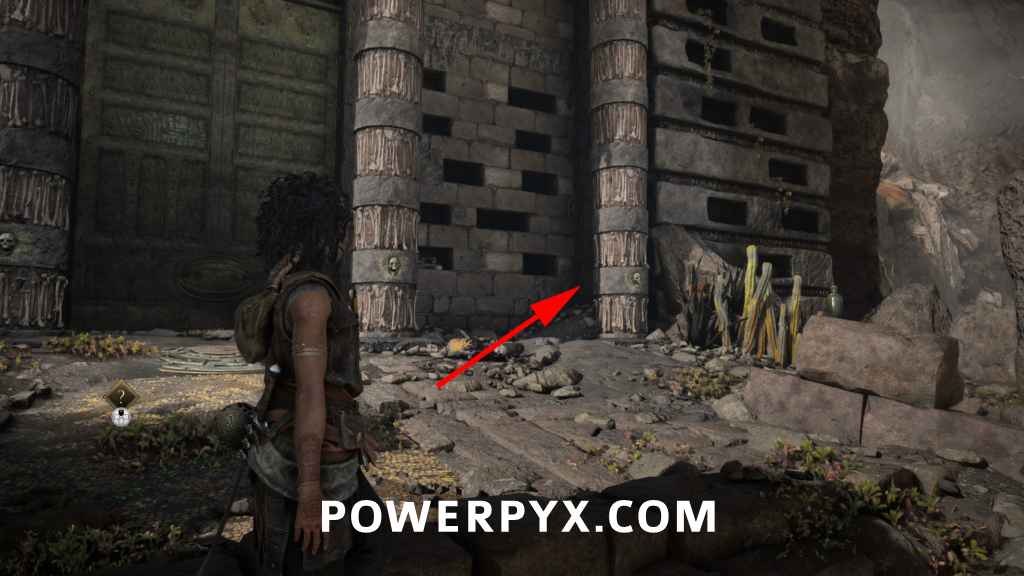
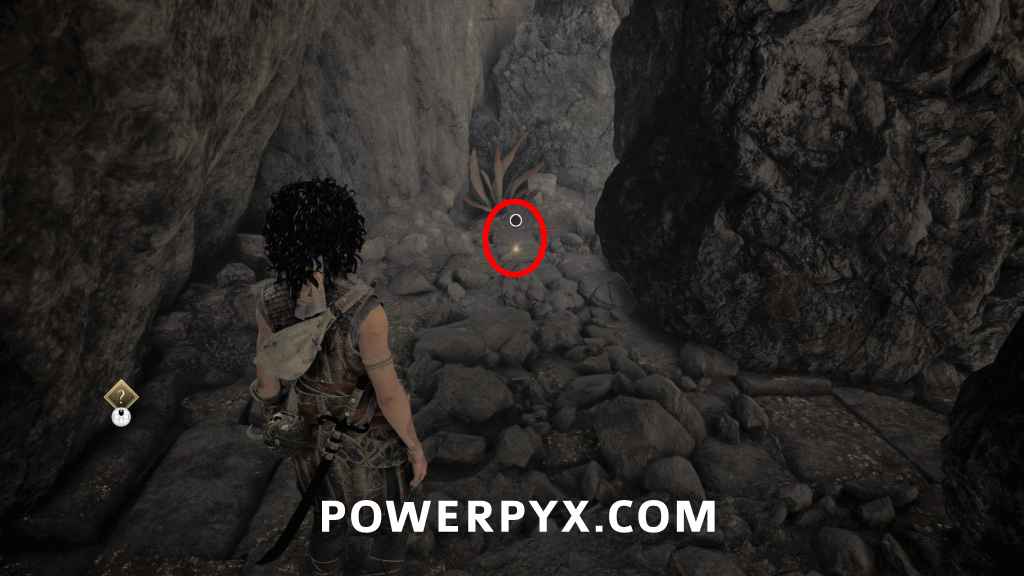
Artefact #23 – Relic of the Past: Kouros Puppet
Sub-Chapter: 5 – Its ruins
Objective: Reach the end of the trial
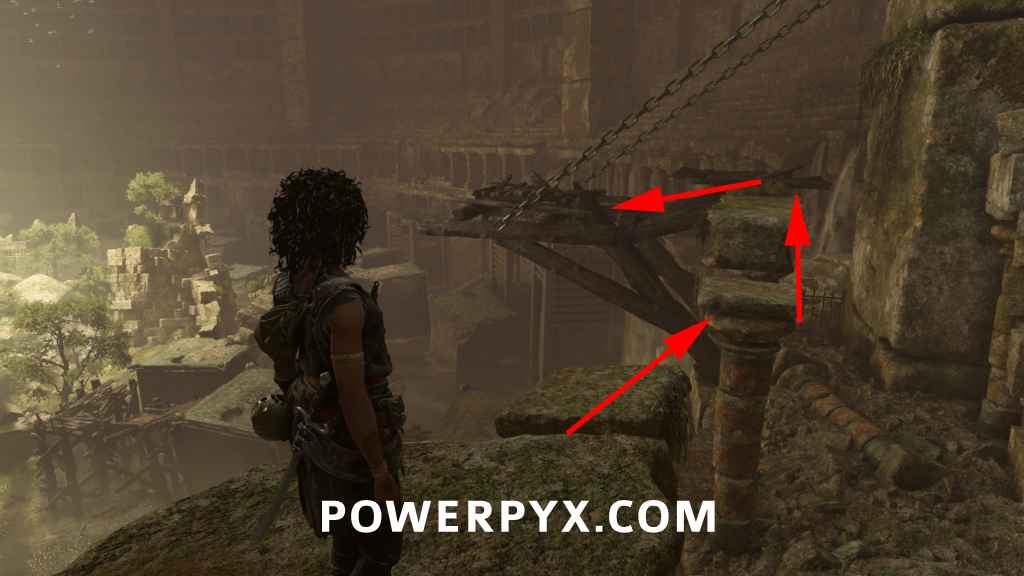
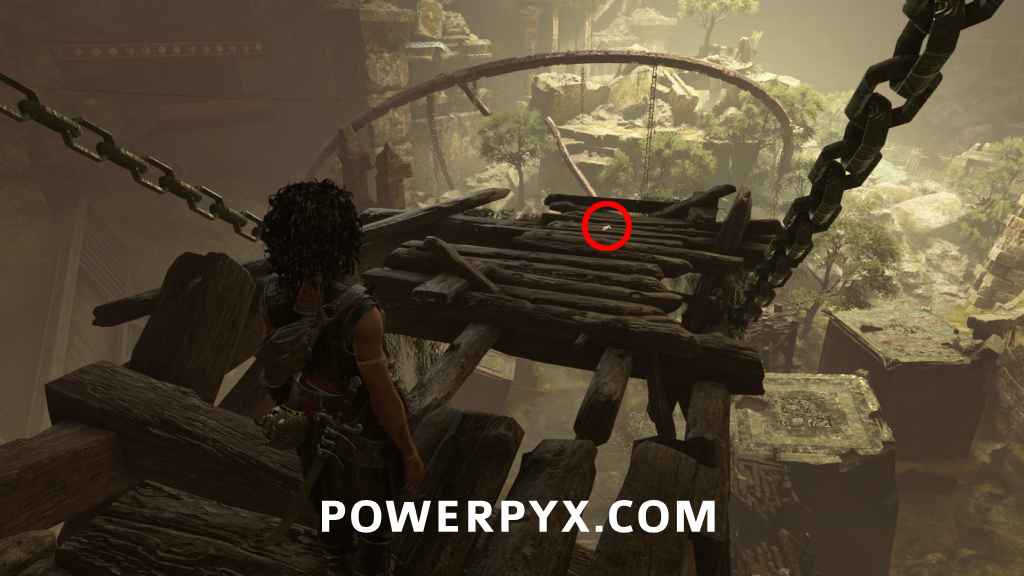
After you climb up a wall with the grappling hook, you slide down a slope and land on an aqueduct. You’re supposed to go left and use a zipline. Instead of doing that, take the right path first to find the relic on a wooden platform.
Chapter 8: Resonance
No Artefacts in this chapter.
Chapter 9: Light will save us (3 Artefacts)
Artefact #24 – Relic of the Present: Dante’s Inferno – Canto V
Sub-Chapter: 3 – No respite
Objective: Follow the lights to the palace
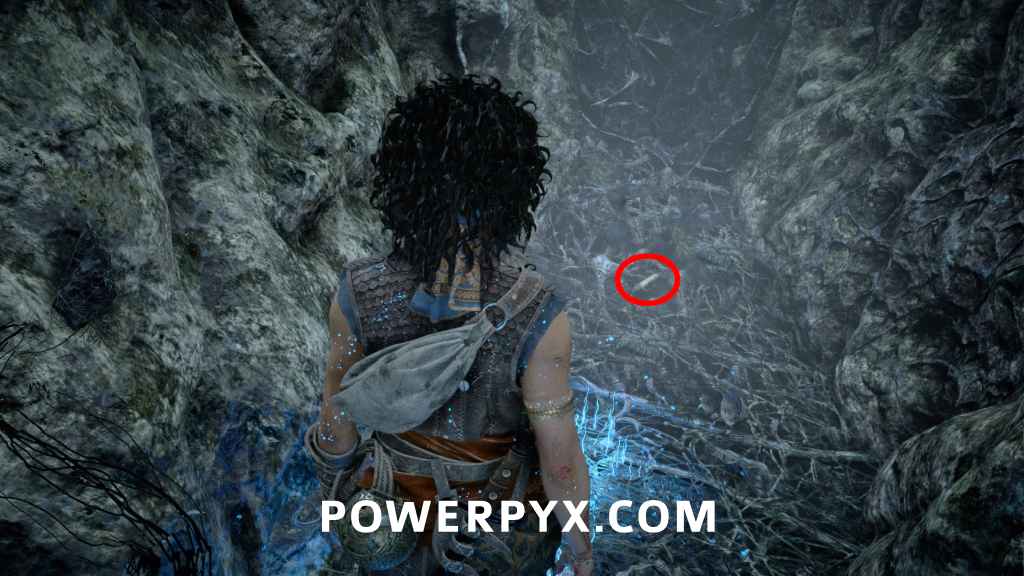
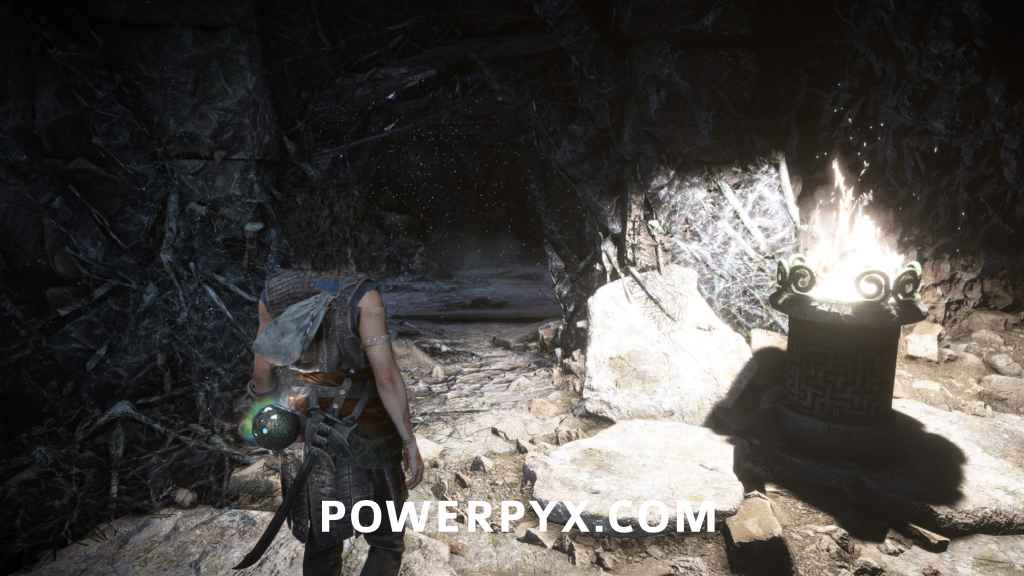
After escaping the monster again, you enter a cave. Go forward until you get a short cutscene where Sophia rests for a moment. There will be 3 paths. Take the right path to find this.
Artefact #25 – Relic of the Past: Phosphate Ring
Sub-Chapter: 4 – Hunted
Objective: Follow the lights to the palace
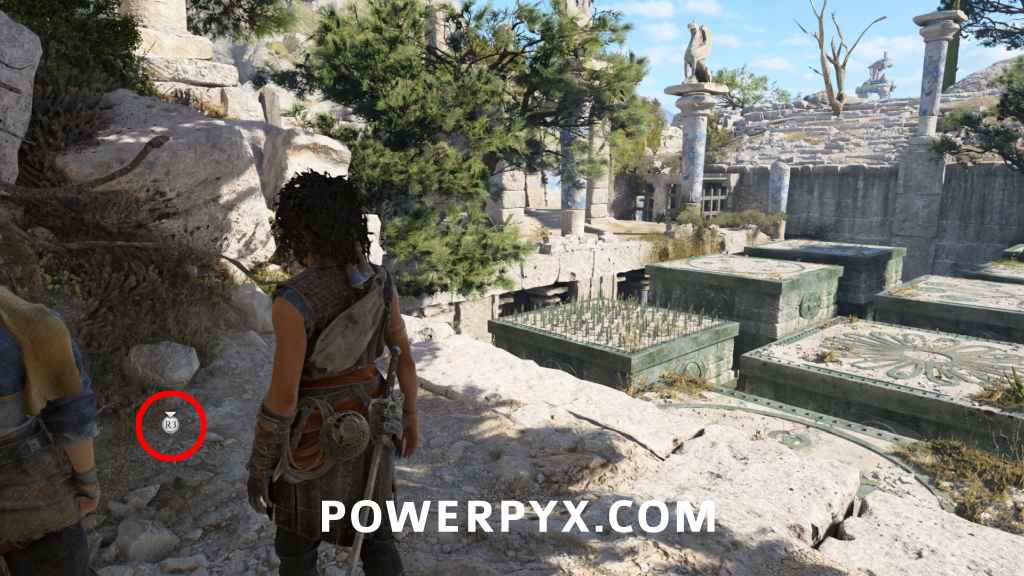
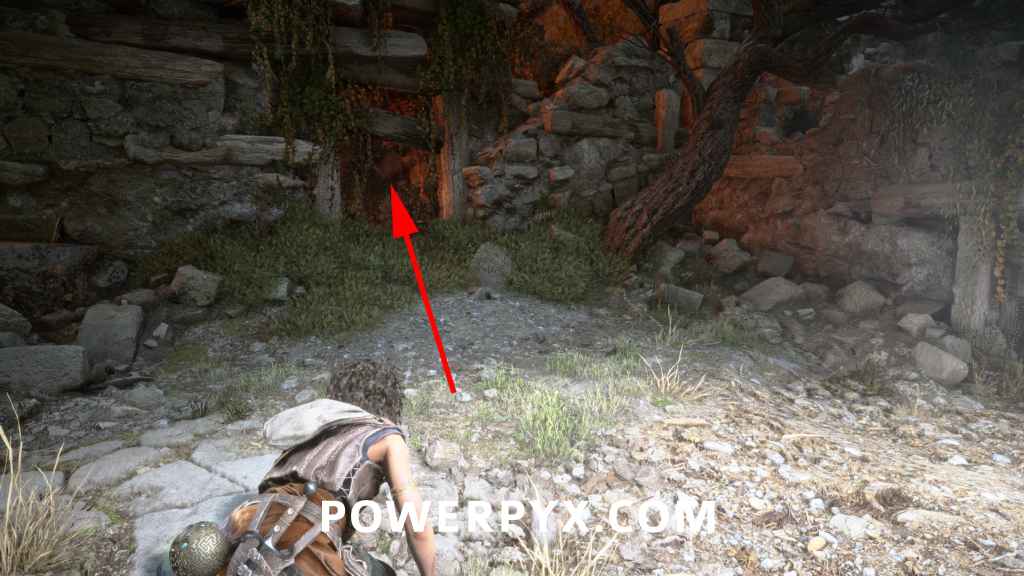
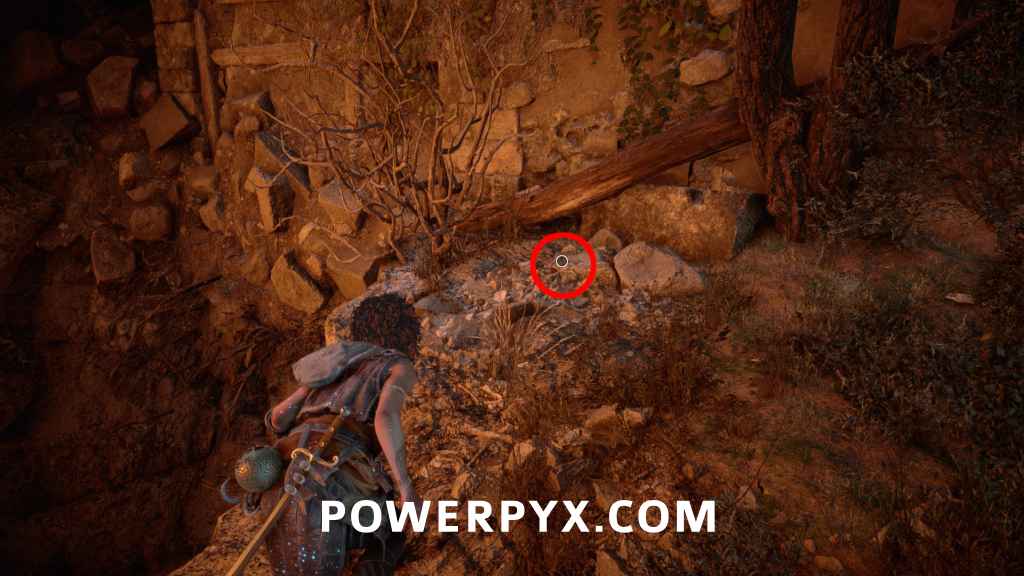
In the ruins where the monster chases you. Go up the stairs at the end of the ruins and you’ll reach a light. Straight ahead crouch under the door (the one with grass in front of it and orange light shining through, NOT the one with the R3 prompt).
Artefact #26 – Relics of the past: Bronze Mirror
Sub-Chapter: 6 – Echoes of the past
Objective: Cross through the petrified
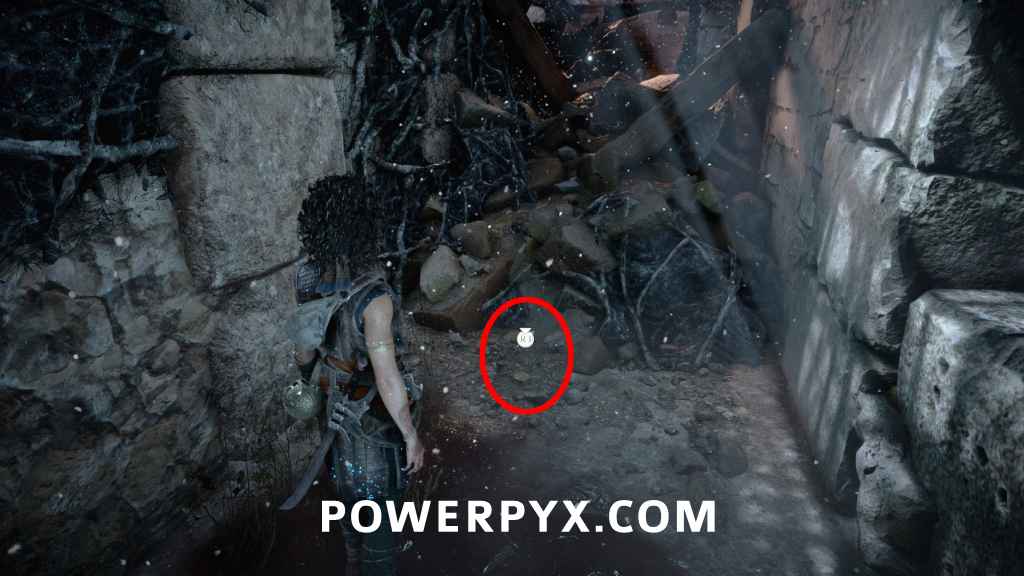
After the next cutscene, drop down the next ledge and turn on the light. From the light turn right and move forward. Turn right again and get up the ledge. Here you will find the relic.
Chapter 10: Parallel paths (4 Artefacts)
Artefact #27 – Relic of the Past: Sun Dial
Sub-Chapter: 1 – The bridge
Objective: Reach the door to get to the beam
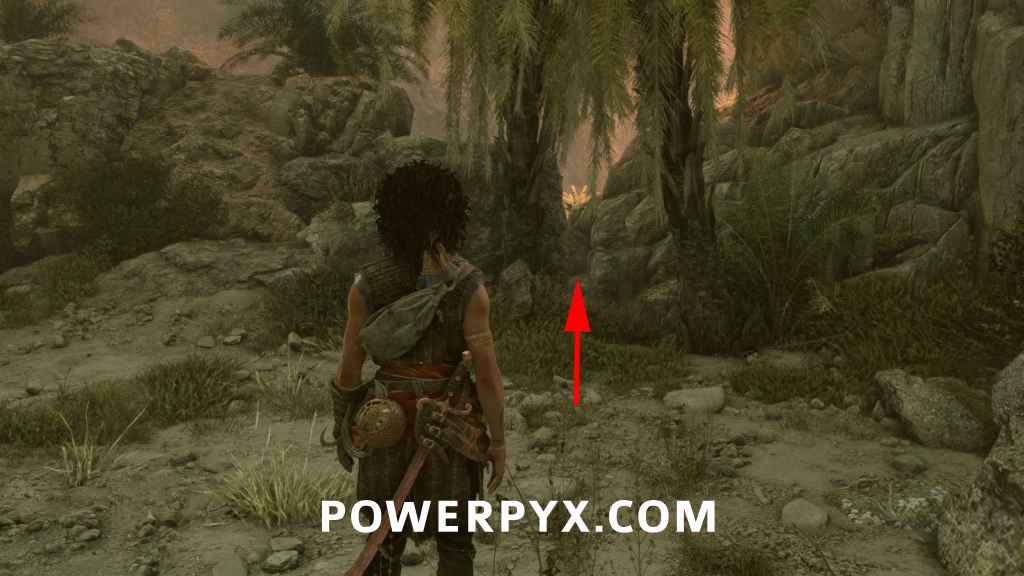
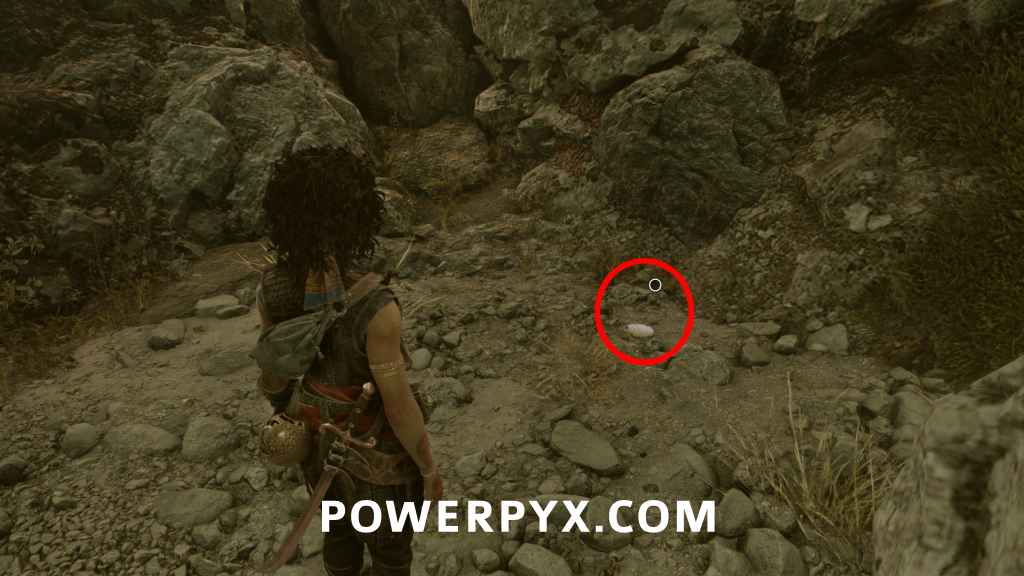
From the start of the chapter, follow the linear path forward until you squeeze through a gap. Then follow the cliffside until you reach a ladder. To the right of the ladder squeeze through the gap.
Artefact #28 – Relic of the Present: Terra Incognita
Sub-Chapter: 1 – The bridge
Objective: Find a way inside the mountain
After a combat encounter, you slide down a slope to a big open woods area. Stick to the far right edge of the area and you’ll find it between two broken vases. Approximately 30 meters forward and to the right from the prior location, at the right edge of the area.
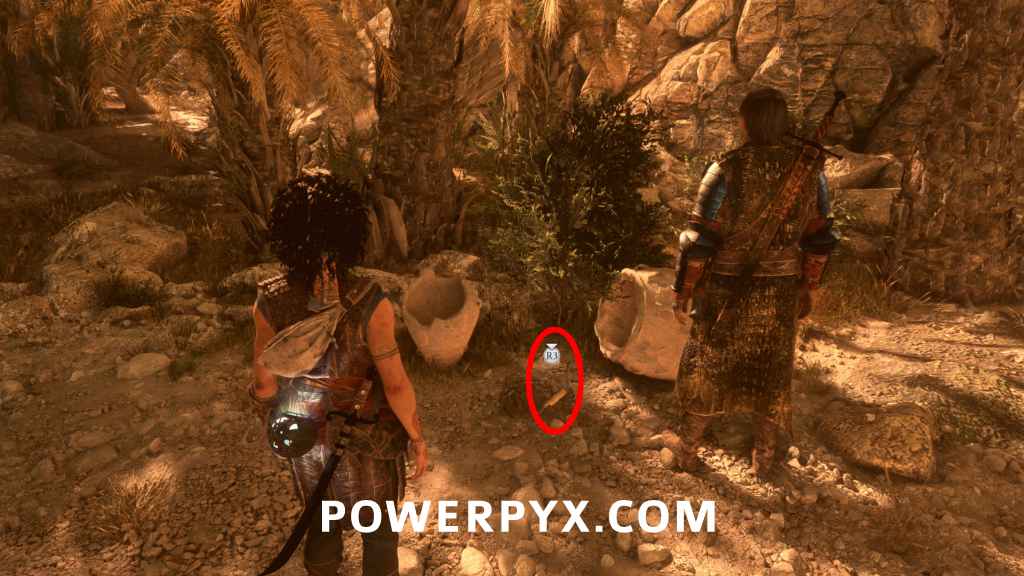
Artefact #29 – Relics from the Present: Thakourth Ball
Sub-Chapter: 2 – In the plunderers’ wake
Objective: Find a way inside the mountain
From the start of the 2nd Sub-Chapter (after escaping the cave labyrinth and going outside), go to the far right edge of the area to find it near the water.
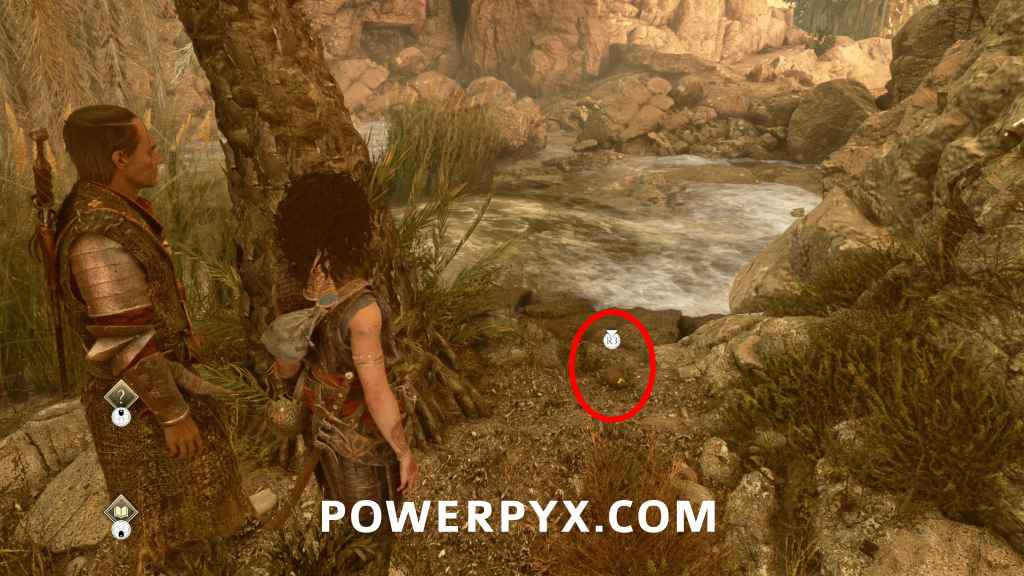
Artefact #30 – Relics of the Past: Impossible Mechanism
Sub-Chapter: 3 – Daedalus’ workshop
Objective: Explore Daedalus’ workshop
Inside Daedalus’ workshop. Go downstairs, then go right over the bridge to find it in the right corner.
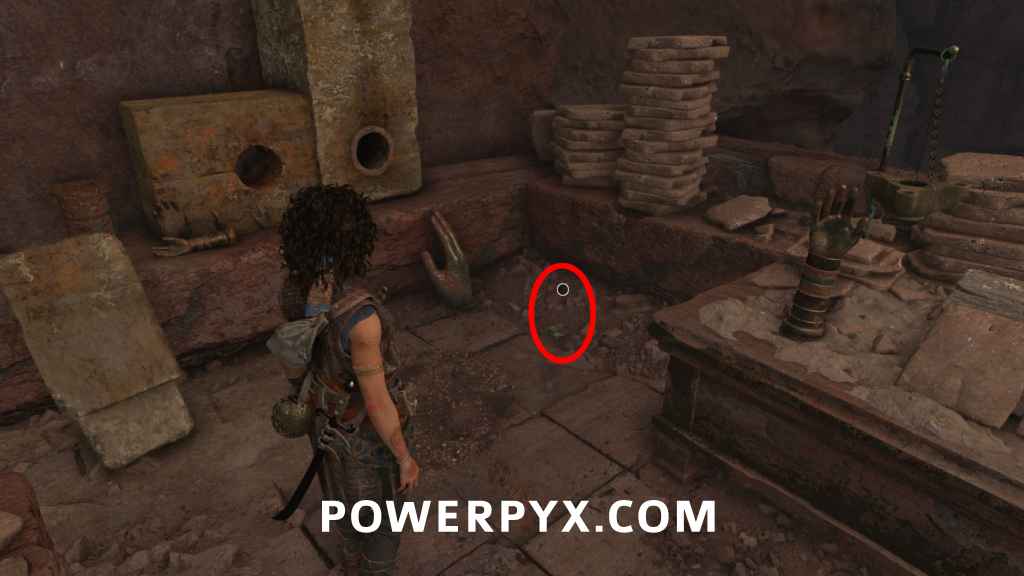
Chapter 11: Patera (3 Artefacts)
Artefact #31 – Relics of the Past: Olden Abacus
Sub-Chapter: 2 – Prisoners of the factory
Objective: Follow the beam
After the petrified crank puzzle, and immediately after the next enemy encounter, you’ll squeeze through a hole (story path), then drop down the next ledge. To your left will be a ladder you’re supposed to go down for story progress, but instead you’ll need to jump to the cliff on the right.
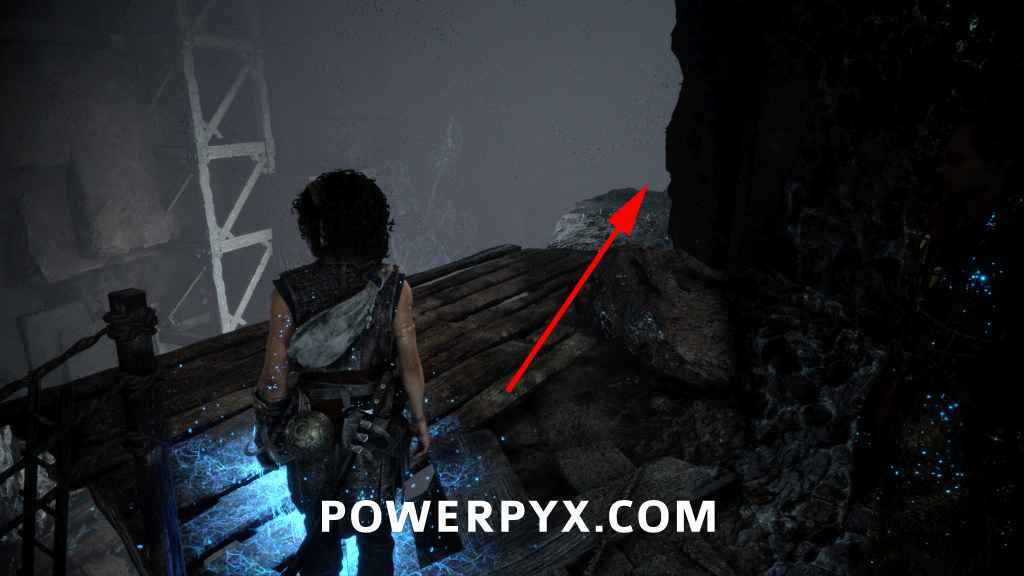
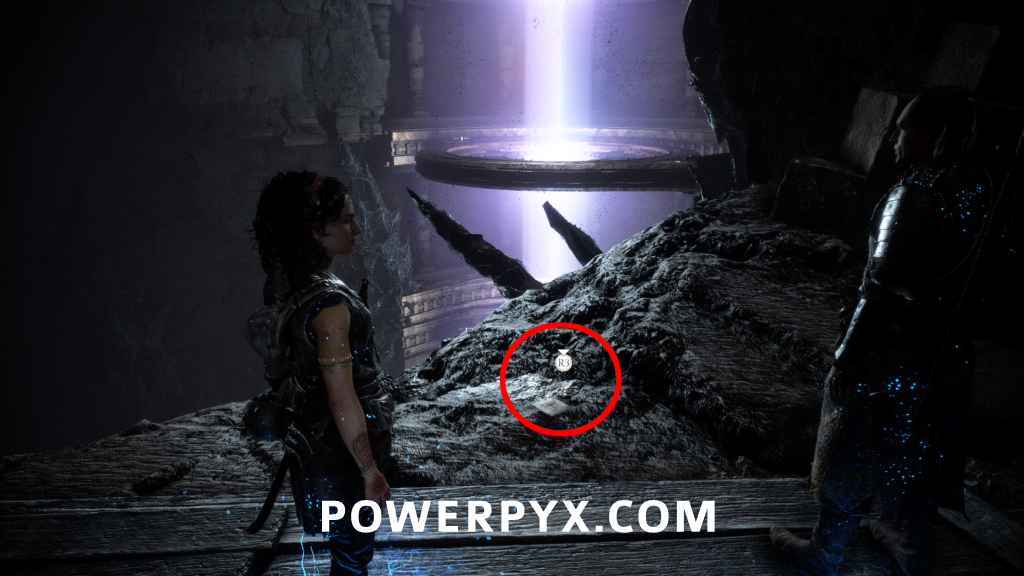
Artefact #32 – Relic of the Past: Burnt Mosaic
Sub-Chapter: 4 – The last lens
Objective: Follow the beam
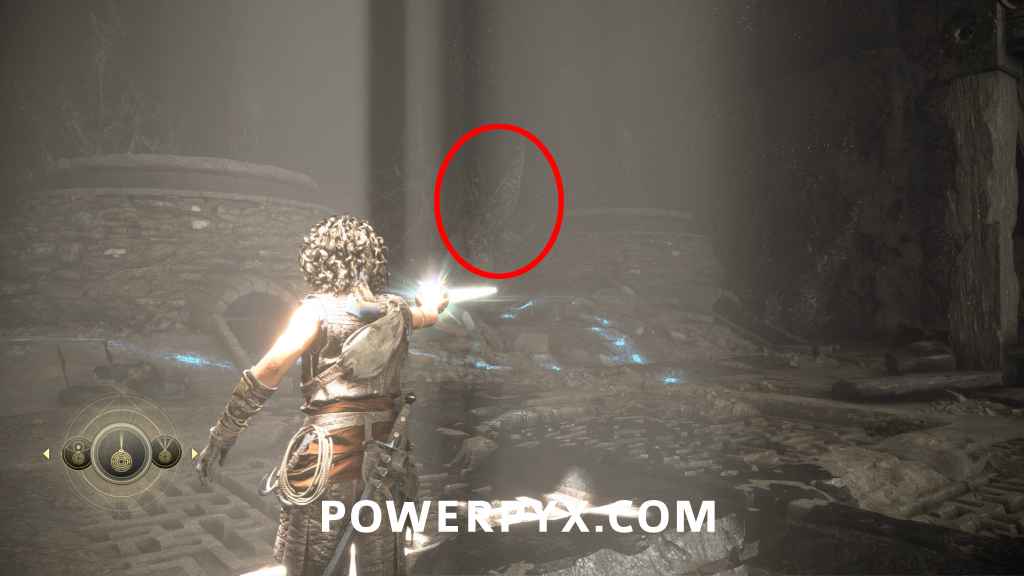
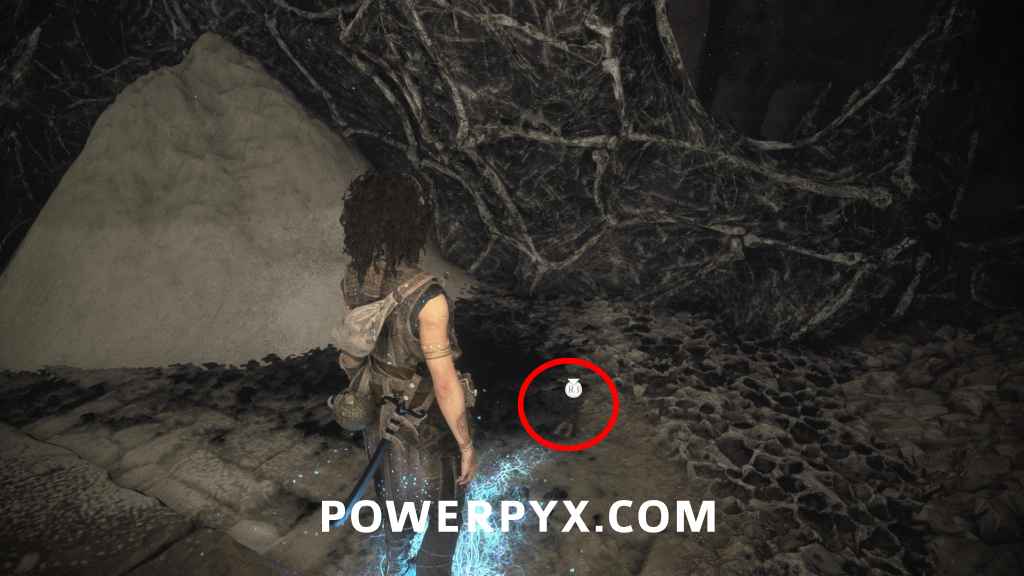
After the next petrified crank puzzle, you use a rope to climb down and have an enemy encounter. Defeat the enemies using the light that’s shining on the floor, then stand in the light and burn away the white dusty spikes in the right corner between two kilns. This reveals the path to the relic.
Artefact #33 – Relics of the Present: Weasel Foot + 1 Resonance Point
Sub-Chapter: 6 – The mines
Objective: Find your way through the mines
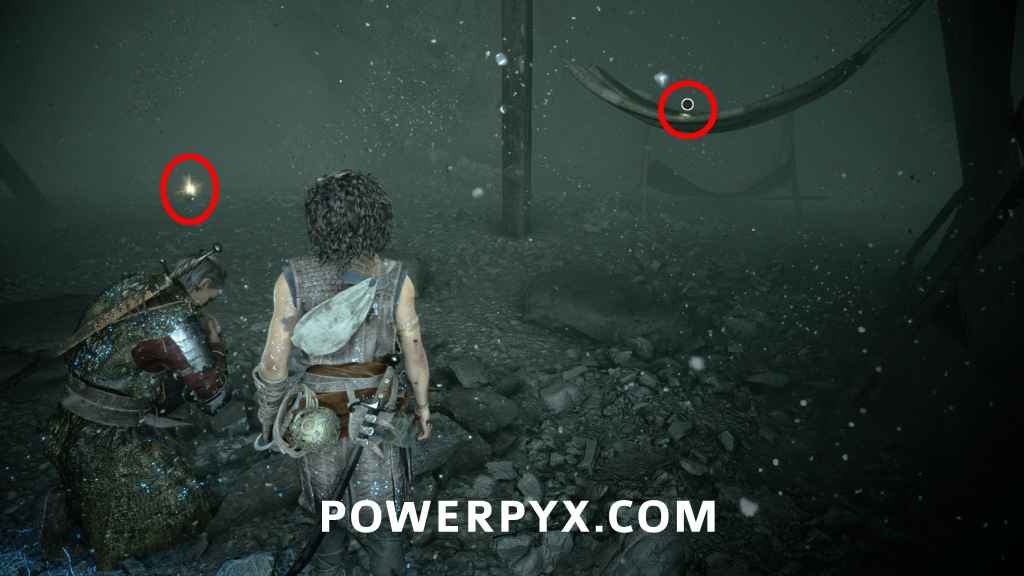
When you reunite with Faro, you will enter the mines right after. Follow the story path until you enter a little camp. Here you can see a Resonance Point to the right on a hammock, and the relic is on the left on the ground next to the wall.
Chapter 12: Fading light (2 Artefacts)
Artefact #34 – Relics of the Present: Loving Memento
Sub-Chapter: 1 – The beam
Objective: Follow the beam
After a cave room filled with enemies, you will reach a big open area. Here, turn right to find the relic next to a dead body.
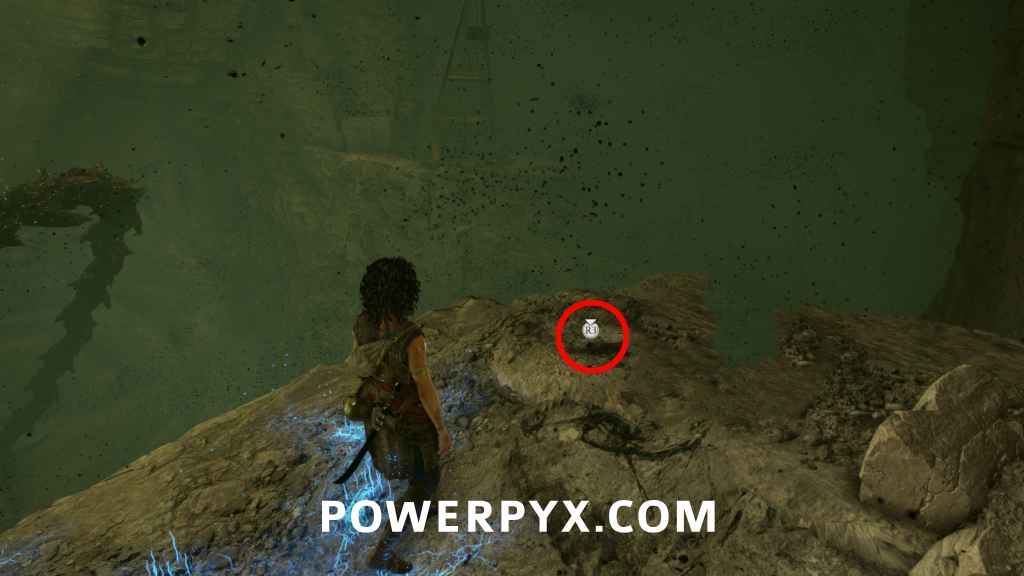
Artefact #35 – Relics of the Past: Blank Mosaic
Sub-Chapter: 4 – A few more steps
Objective: Cross the third trial
When you enter the trial, you will have to use your grappling hook to swing over gap. Right after that, instead of moving forward, turn right and jump over a gap to find the relic.
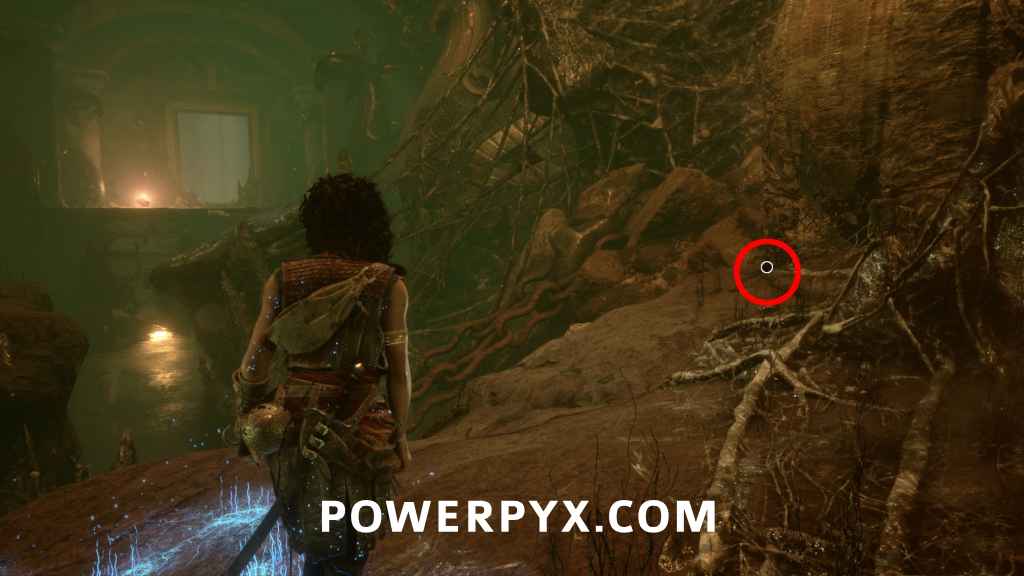
Chapter 13: As One (2 Artefacts)
Artefact #36 – Relics of the Past: Labyrinth Plan
Sub-Chapter: 1 – The Labyrinth
Objective: Follow the beam
In the labyrinth, after you swing over a grappling hook to escape the monster a 3rd time, you will be in front of a lamp. Here, turn left to find the relic on a dead end. Another method to recognize this location is when you get a short interruption where the screen flashes red and Sophia walks slowly for a few seconds as if she’s getting weaker.
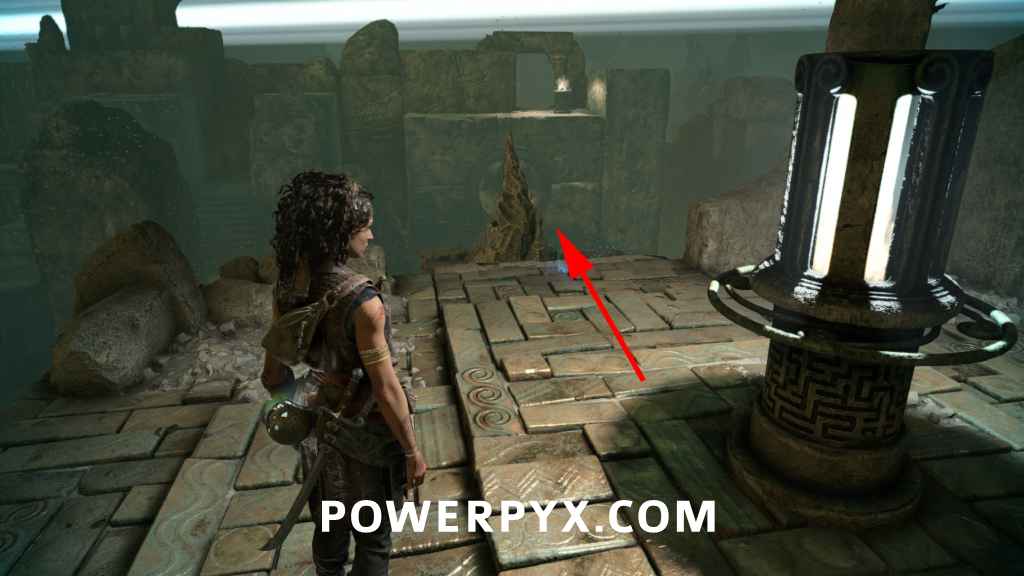
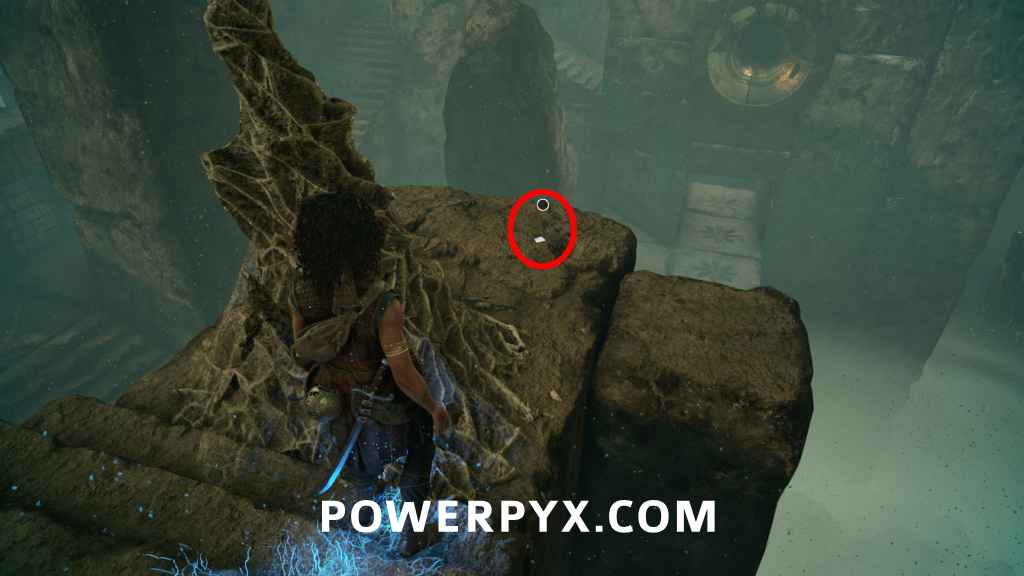
Artefact #37 – Relics of the Present: Poisoned Syringe
Sub-Chapter: 4 – One last Trial
Objective: Unlock the exit despite the Petrified
After you left the area with the petrified enemies, squeeze through the gap. Then immediately turn left and go around the corner to find the relic on a dead end.
That’s all of the Artefacts.
For all other collectible types, check out the complete Resonance: A Plague Tale Legacy Collectibles Guide.
Leave a Reply