
Resonance: A Plague Tale Legacy contains 30 Charm Locations. Finding all Charms unlocks the Superstitious trophy & achievement.
None of them are missable, you can still find them after the story in Chapter Select. It also shows trackers in Chapter Select how many you found. You can view them in the “Sophia” menu below the skills. They are all found in small chests and give you permanent buffs to make combat easier.
For an All-in-One guide by Chapter that includes all Collectible Types, refer to Resonance: A Plague Tale Legacy Collectible Guide.
Chapter 1: Blood ties
No Charms in Chapter 1.
Chapter 2: Felons (2 Charms)
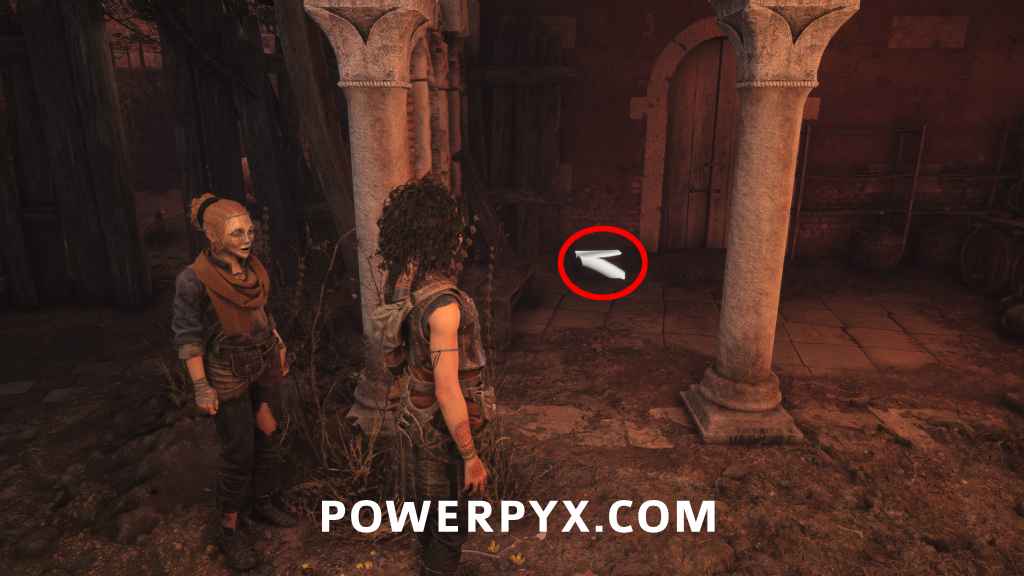
Charm #1 – Beads 1
Sub-Chapter: 2 – The carnival
Objective: Follow the pieces of cloth to the church
After Leni lockpicks a door you reach 2 pigs in a backyard. Then squeeze through a gap and immediately turn left to find a small wooden box in a building.
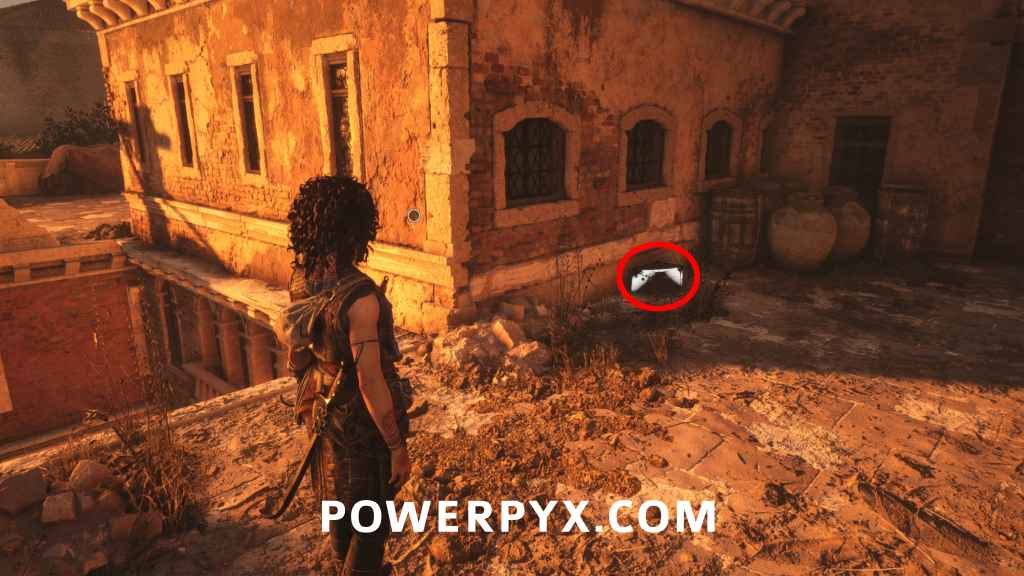
Charm #2 – Bracelet 1
Sub-Chapter: 3 – Rats in a barrel
Objective: Go help your crew at the arsenal
When you reach the tutorial on how to pull down an archer with your grappling hook, shimmy across the gap where the archer was and immediately turn left to find this in a small box.
Chapter 3: Those before us (4 Charms)
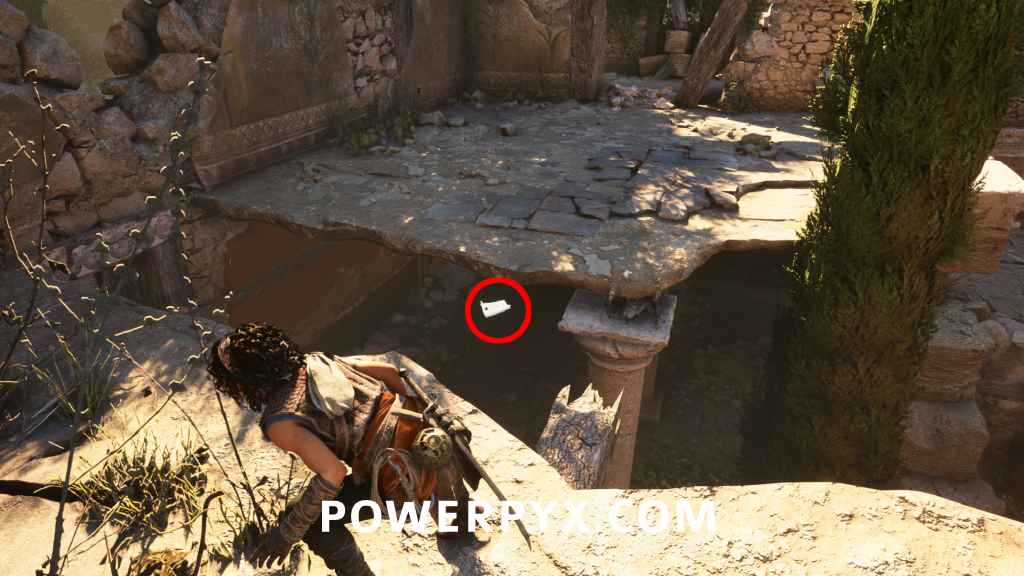
Charm #3 – Beads 2
Sub-Chapter: 2 – Vestiges
Objective: Reach the statue
At the start of the Sub-Chapter you’ll be on a wooden platform. Proceed until you slide down the slope into the ruins. Then drop down to the bottom floor to find this in a chest on the left.
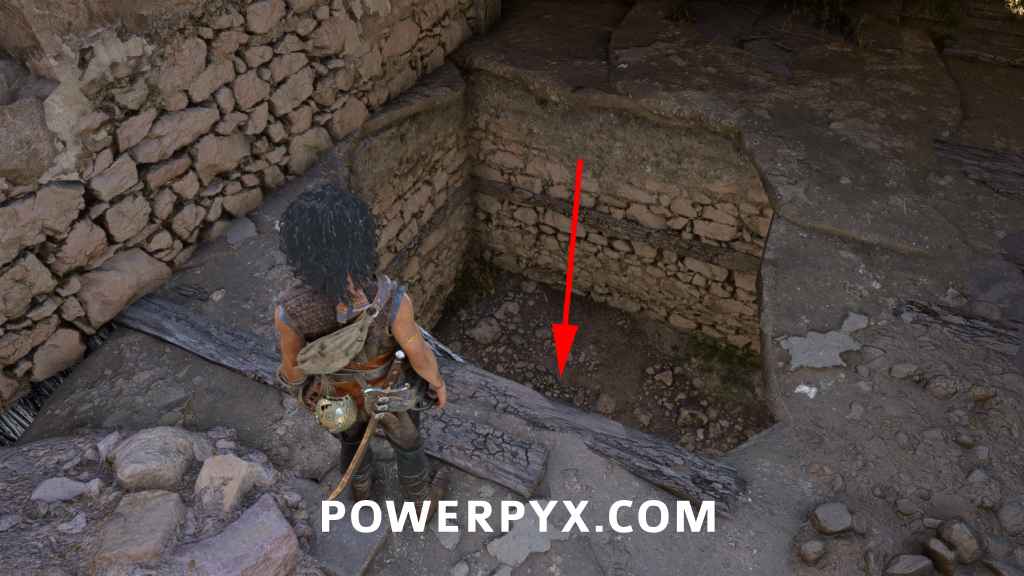
Charm #4 – Arm Band 1
Sub-Chapter: 2 – Vestiges
Objective: Find a way to get above the city’s ruins
After you use the grappling hook to pull down a wooden barricade you reach the area with the big statue. Enter the ruins on the right and drop through the hole in the floor.
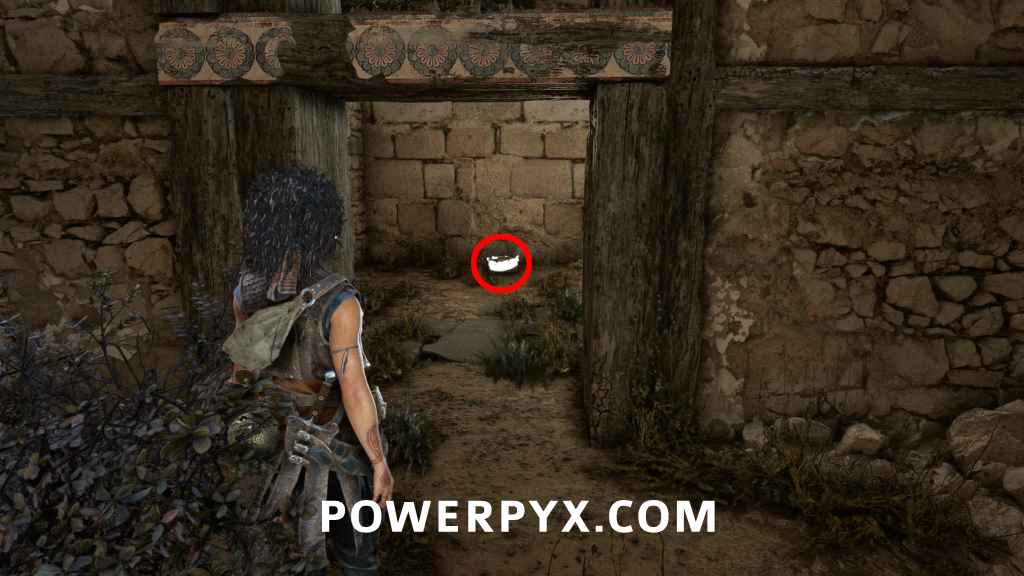
Charm #5 – Bracelet 2
Sub-Chapter: 2 – Vestiges
Objective: Find a way to get above the city’s ruins
From the previous Charm, go up the mountain on the opposite side of the area. For story progress you’ll enter a building on top the mountain, and Leni will ask for your help to open a door. To the left of the door is a side room with a chest. (Can grab it before or after interacting with the door)
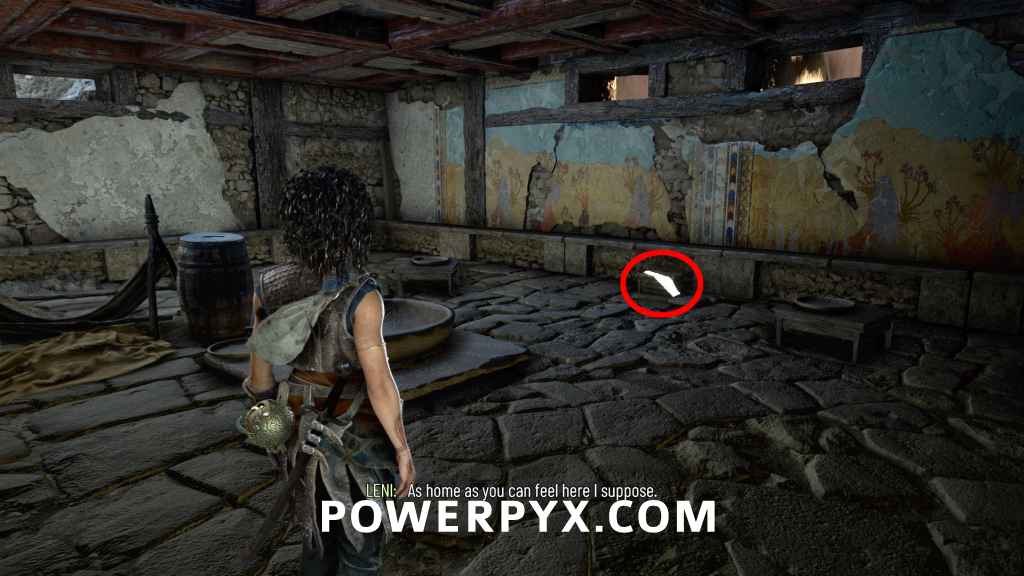
Charm #6 – Seal 1
Sub-Chapter: 2 – Vestiges
Objective: Find a way to get above the city’s ruins
After Leni lifts up a log for you to crawl through a tunnel, when you exit the tunnel there will be a painting on the wall. Shortly after you will slide down a slope to reunite with Leni, then pull down a barricade with the grappling hook. Immediately after, take the next left to find a small chest.
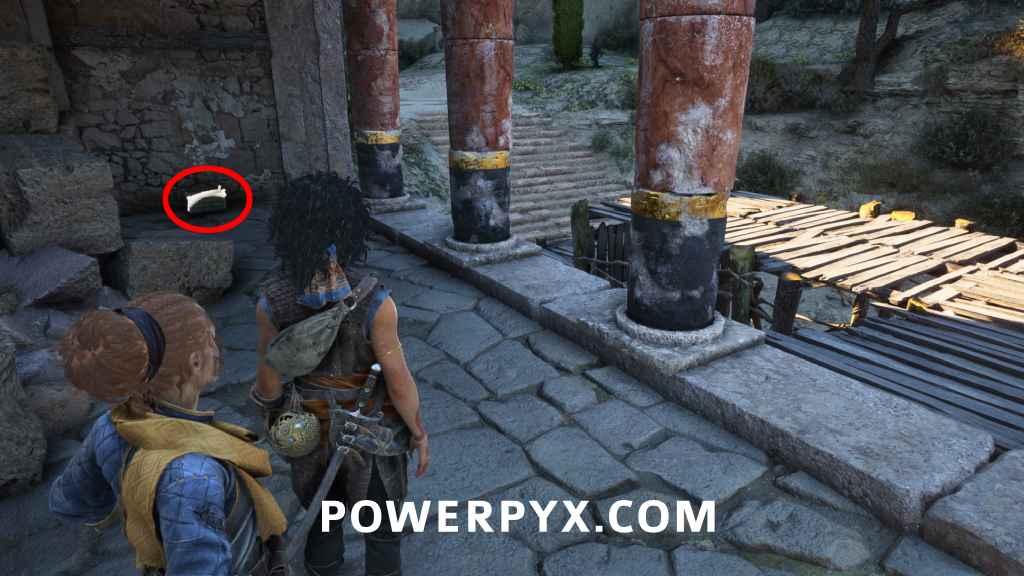
Chapter 4: From Hell It rose (2 Charms)
Charm #7 – Arm Band 2
Sub-Chapter: 2 – Down the abyss
Objective: Progress through the Trial
After a puzzle where you rotate 3 pedestals to show the correct symbols (Y-C-↑) to open a door, you will reach an open area with a big statue. Go right, and click up the first rock on the right BEFORE dropping down the ledge. This leads to a hidden camp with a small chest.
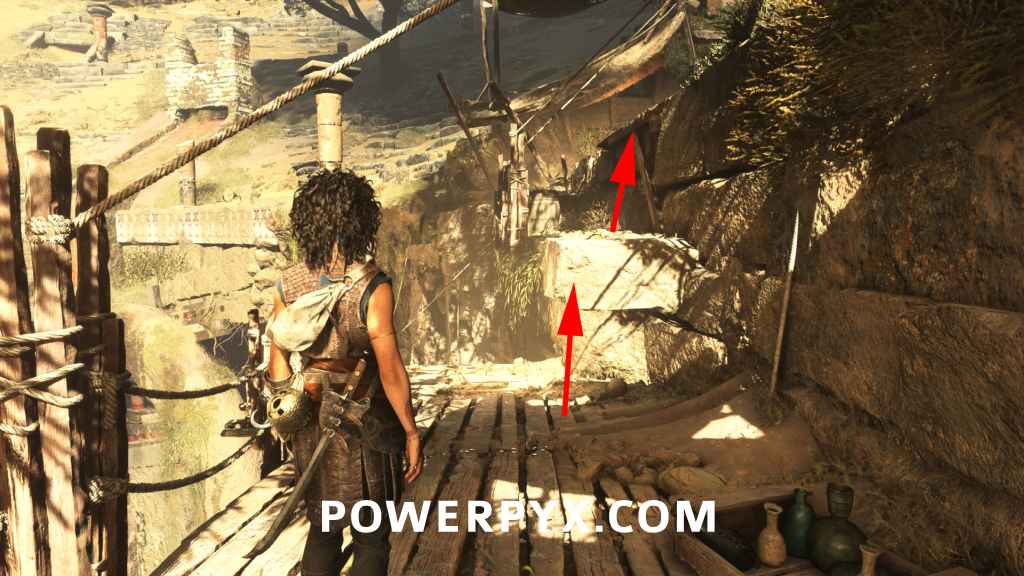
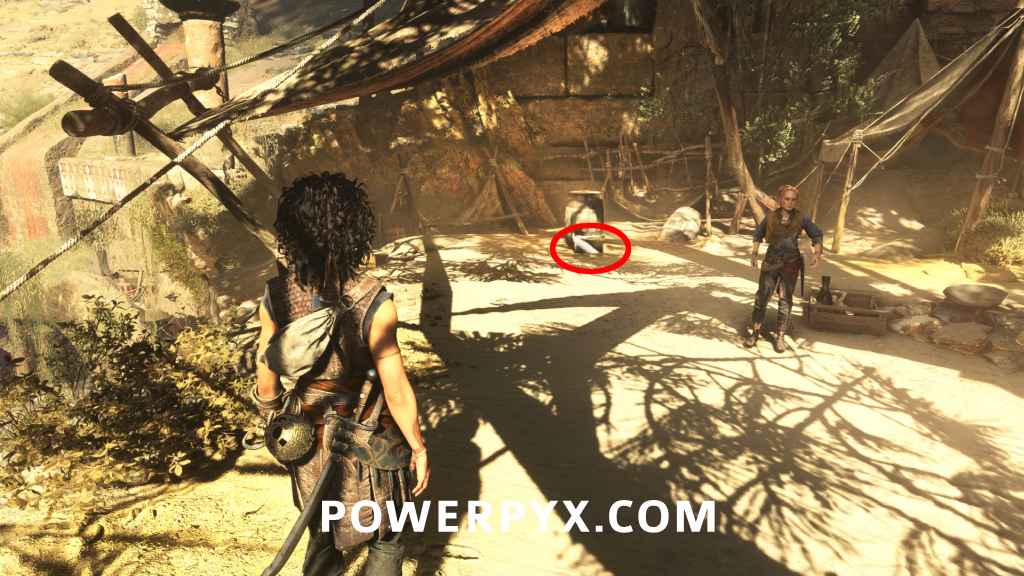
Charm #8 – Trinket 1
Sub-Chapter: 4 – At the bottom
Objective: Progress through the Trial
In a room where Leni uses a lever on the other side of the room from you, there will be an enemy ambush. After defeating the enemies, squeeze through the gap into the next room and drop down. There’s a chest under the ledge where you drop down.
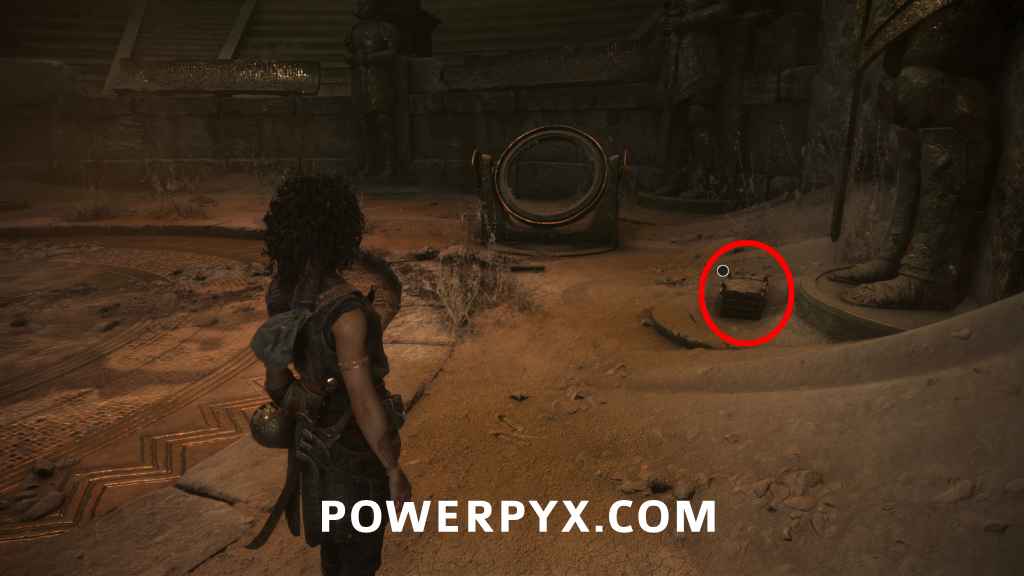
Chapter 5: Desolation it wrought (5 Charms)
Charm #9 – Trinket 2
Sub-Chapter: 2 – Battle grounds
Objective: Reach the central temple
Defeat the 1st group of enemies in this chapter, then take the left path and pull down the wooden barricade. Go through the ruins (stay on the lower floor, not upstairs) and you’ll reach an abandoned enemy camp in the corner of the area. Climb the rocks on the left to find this at the upper tent.
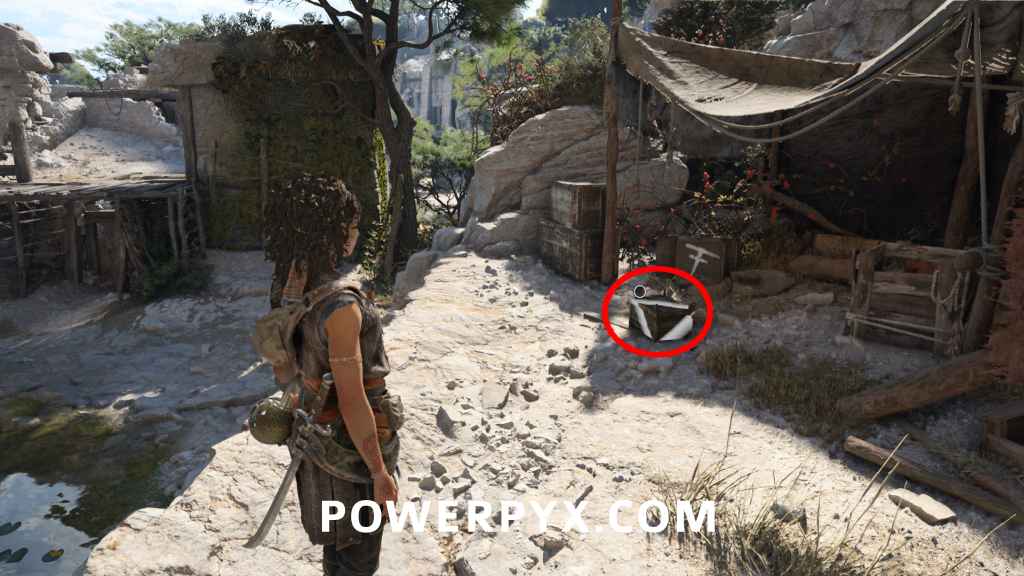
Charm #10 – Seal 2
Sub-Chapter: 2 – Battle grounds
Objective: Reach the central temple
From the previous charm, proceed up into the ruins. Roughly in the middle of the ruins there’s an archer on top the pillars. Defeat the archer, go around the left corner below where the archer was to find it in the ruins.
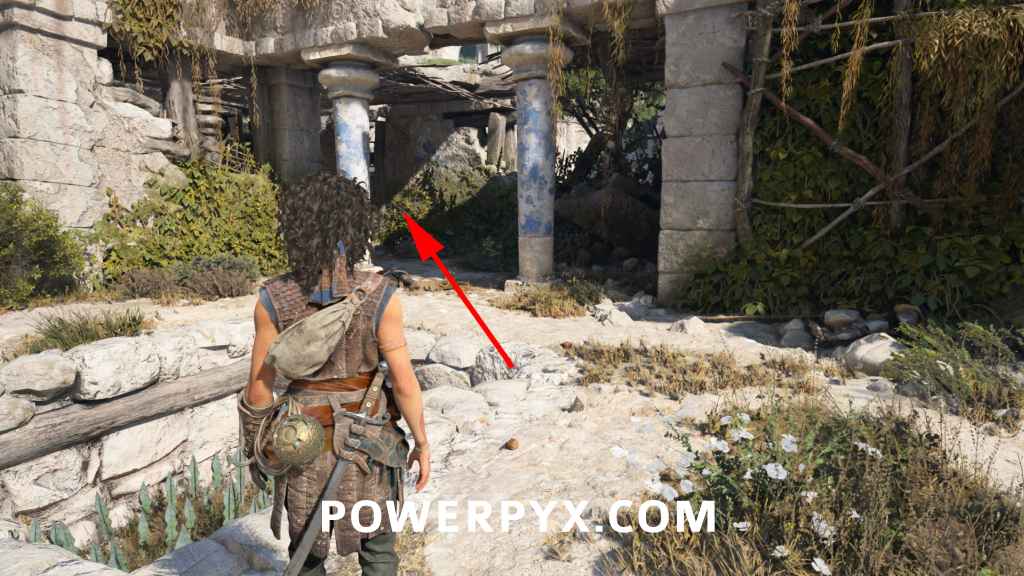
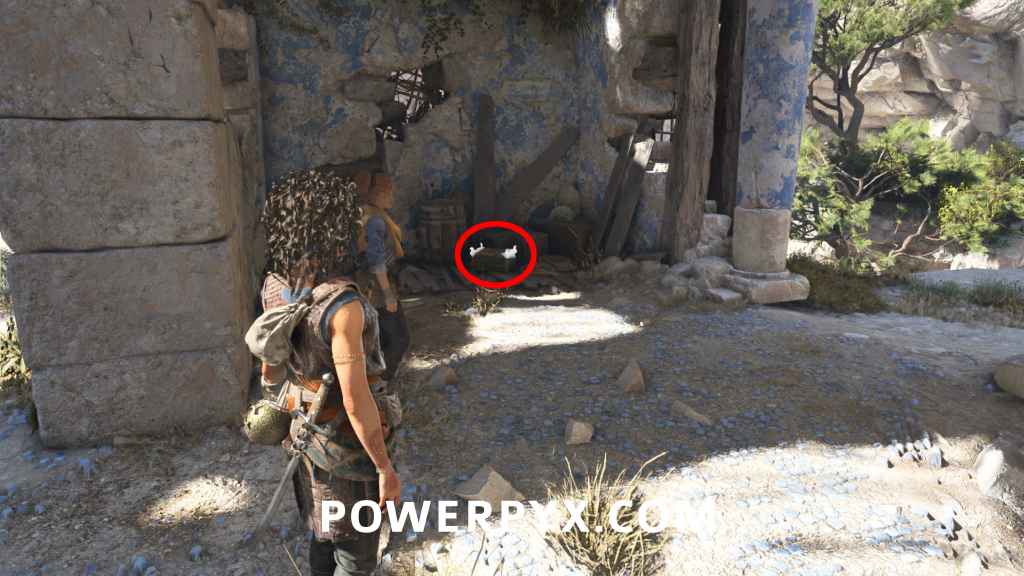
Charm #11 – Bracelet 3
Sub-Chapter: 3 – The four symbols
Objective: Find the first symbol
When you have to find the 4 symbols you can go 4 separate paths. In the room with the 4 pedestals, look above the gates to see different symbols. Take the path with the “Dice” icon.
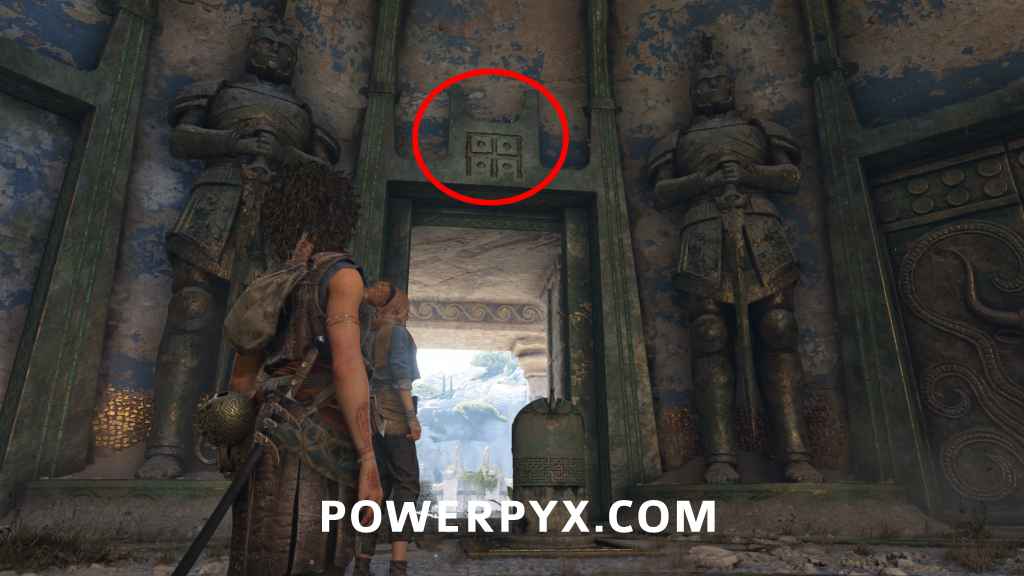
Continue on this path until you get separated from Leni. Proceed jumping down the platforms (one has spike trap, jump over it), when you reach the bottom of the area immediately turn left to climb up a ruin that has a chest at the end of the path.
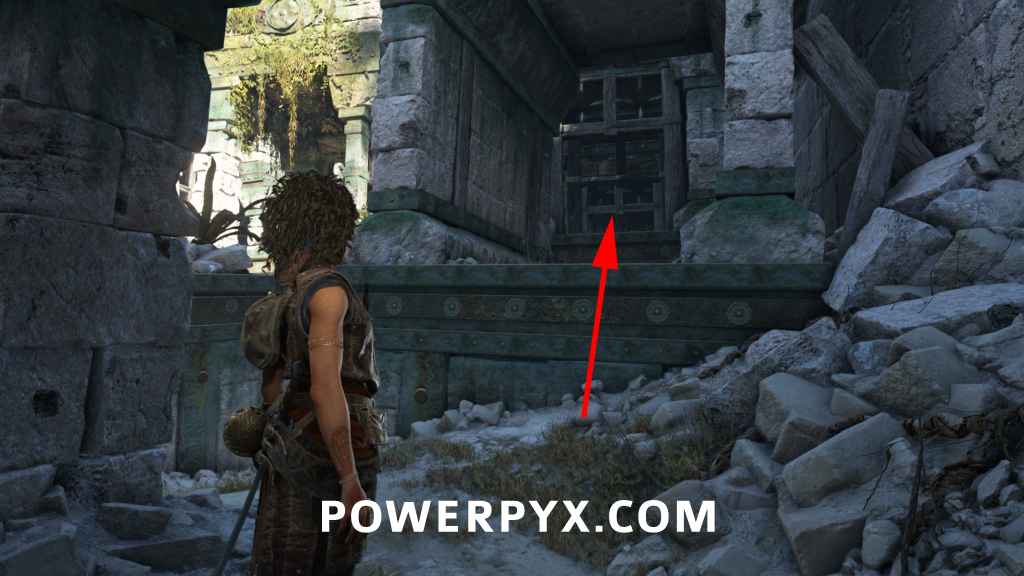
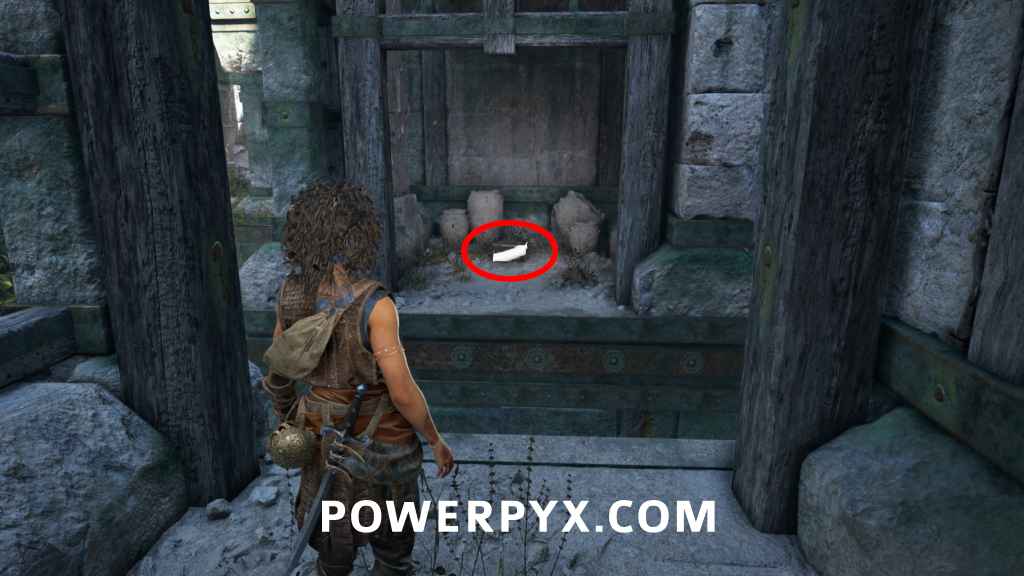
Charm #12 – Armband 3
Sub-Chapter: 3 – The four symbols
Objective: Find the second symbol
From the previous Charm, continue on this path until you solved the puzzle where you jump over the platforms with spikes, then grab the symbol. After obtaining the symbol, you’ll come to a beach with enemies. Go to the right corner of the beach to find it near the water and a boat.
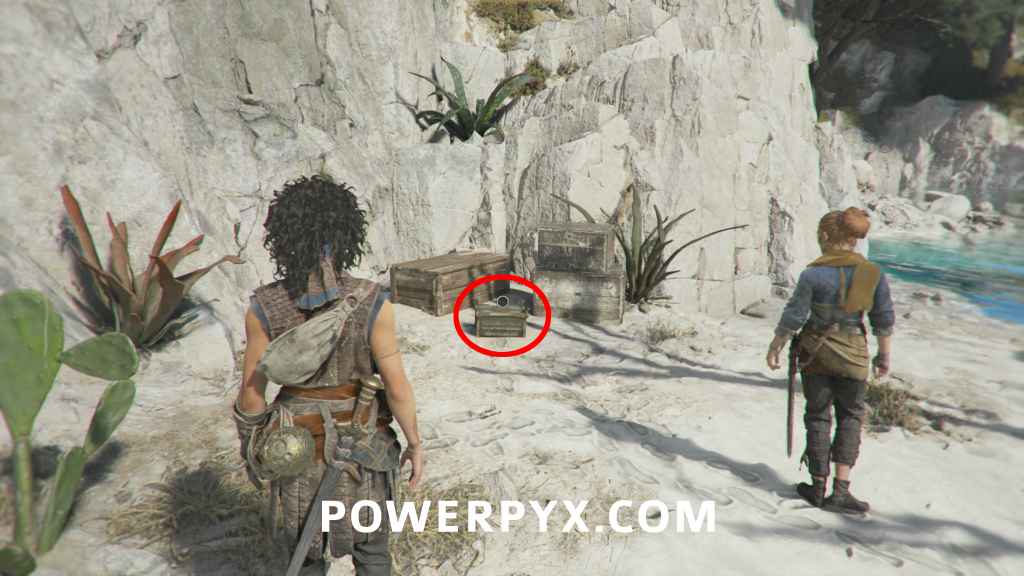
Charm #13 – Pierced Coin 1
Sub-Chapter: 3 – The four symbols
Objective: Find the second symbol
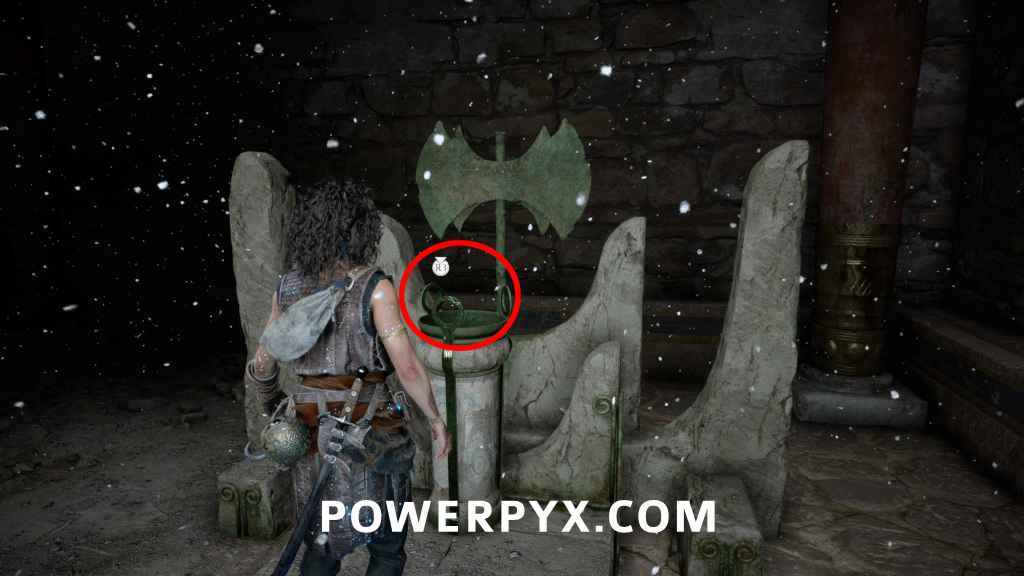
From the room with the 4 pedestals (4 symbols), take the path with the “O with 3 lines” above the gate.
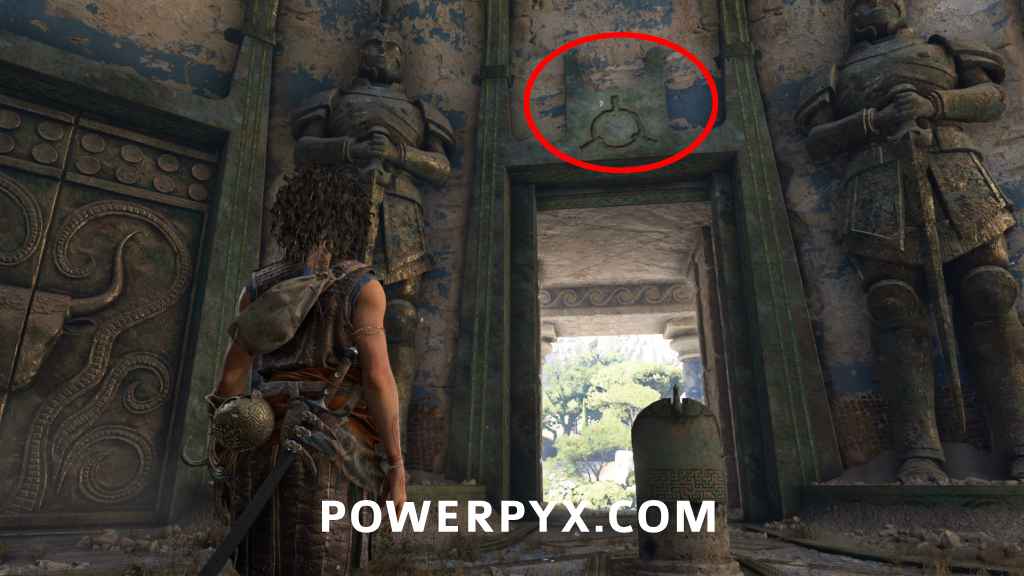
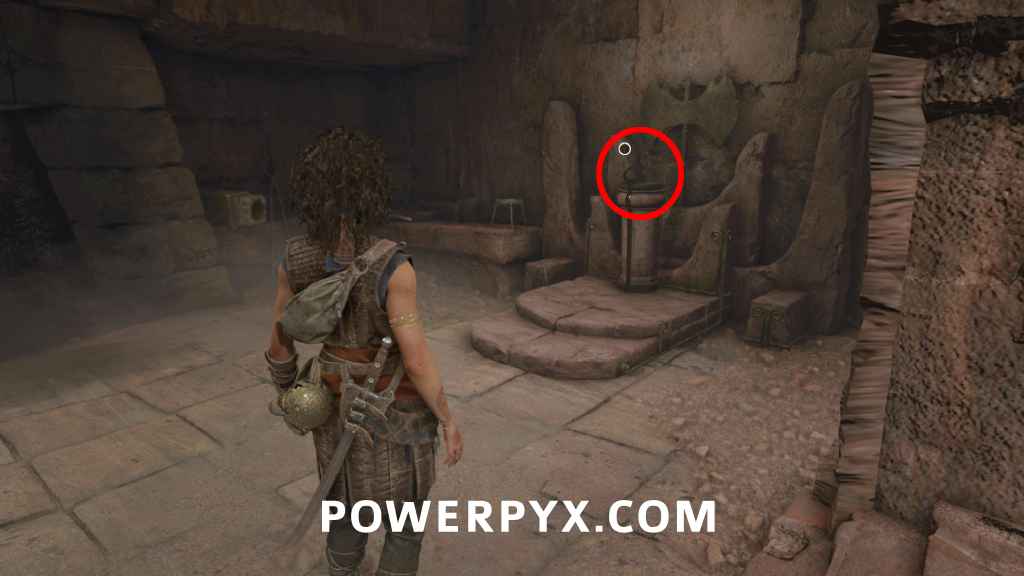
Go over the bridge. Then keep following the leftmost path until you climb a ladder to the top of the area. Defeat the enemies, then interact with the Axe statue.
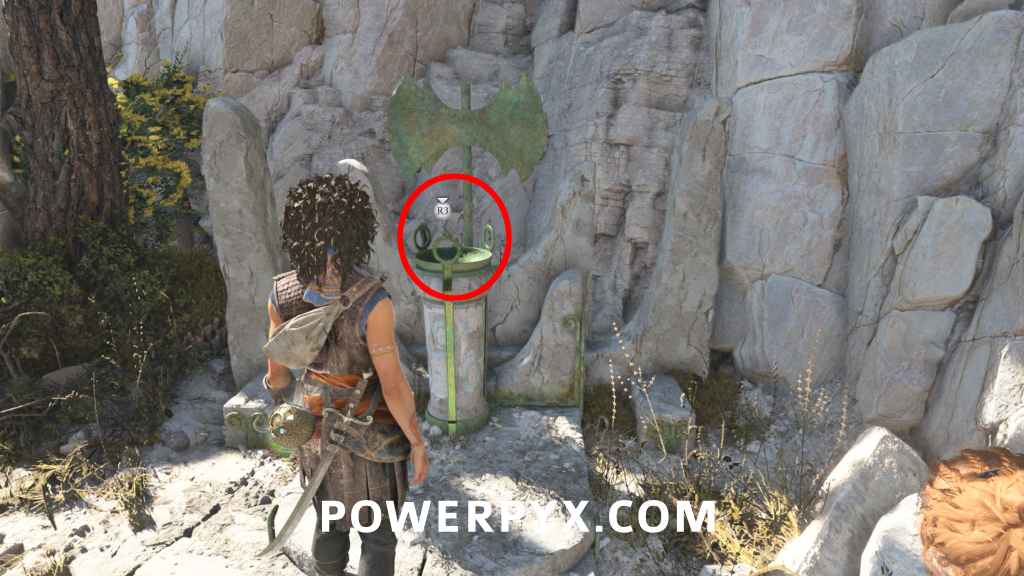
Chapter 6: What lies beneath (3 Charms)
Charm #14 – Seal 3
Sub-Chapter: 4 – Minoan machinery
Objective: Find a way out
After escaping from the monster again, you come to a room with some lanterns on the side. Go to the end of the hallway. You will find a mirror to your left (break the boxes) and some more boxes to the right. Destroy the boxes on the right to find the charm. It’s where the story makes you use the mirror to burn away the dust blocking the path.
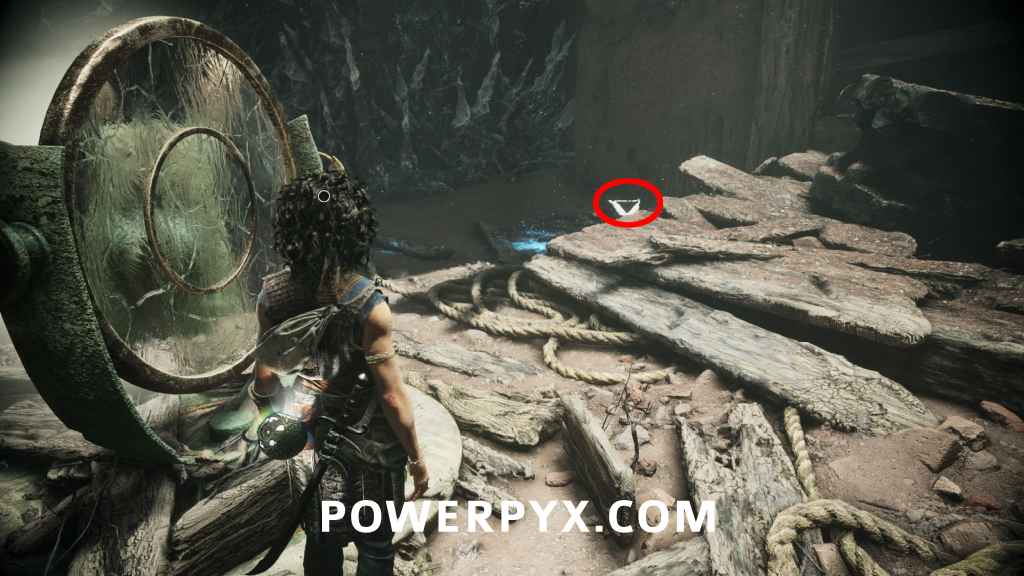
Charm #15 – Bead 3
Sub-Chapter: 5 – The Architect
Objective: Follow Daedalus’ shortcut
After you get a cutscene where you approach a petrified person near a cliff, go right to find this chest on the dark path.
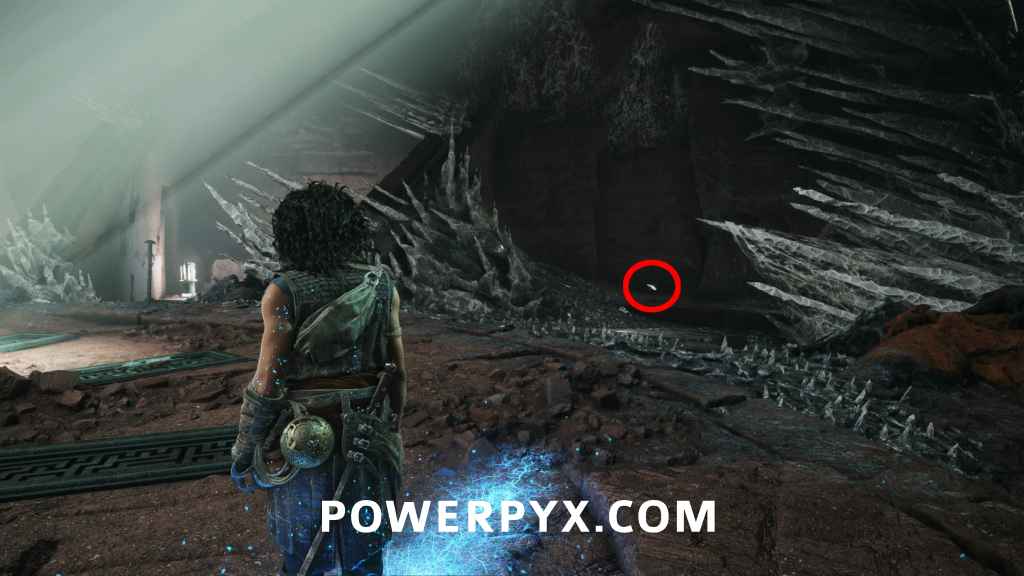
Charm #16 – Pierced Coin 2
Sub-Chapter: 5 – The Architect
Objective: Follow Daedalus’ shortcut
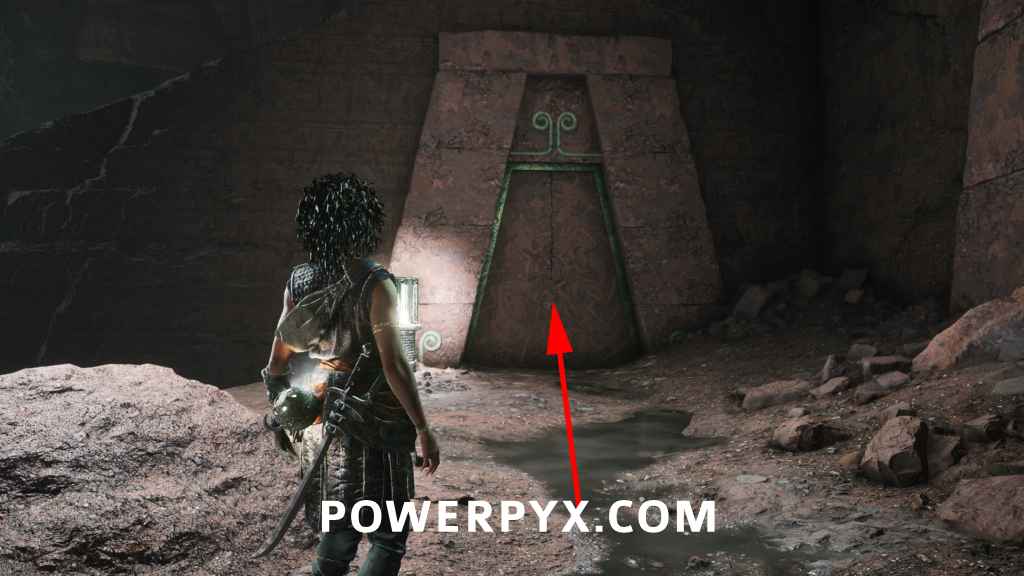
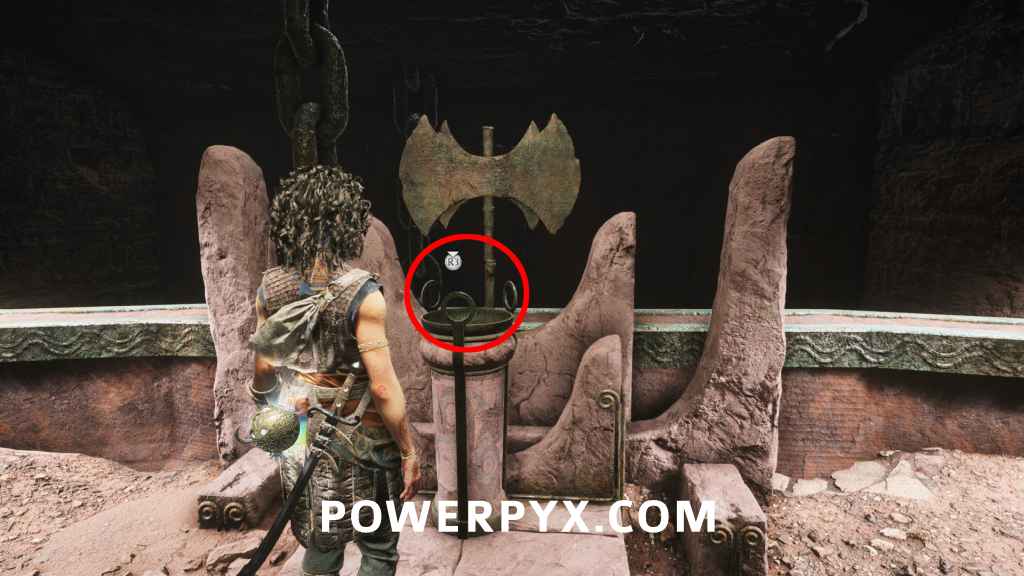
To the left of the previous Charm, drop down the cliff. DON’T go through the door on the right yet! Instead, head straight and go through the door at the end. Interact with the Axe chalice.
Chapter 7: Death It sowed (5 Charms)
Charm #17 – Bead 4
Sub-Chapter: 2 – The whole damn army
Objective: Reach the black temple
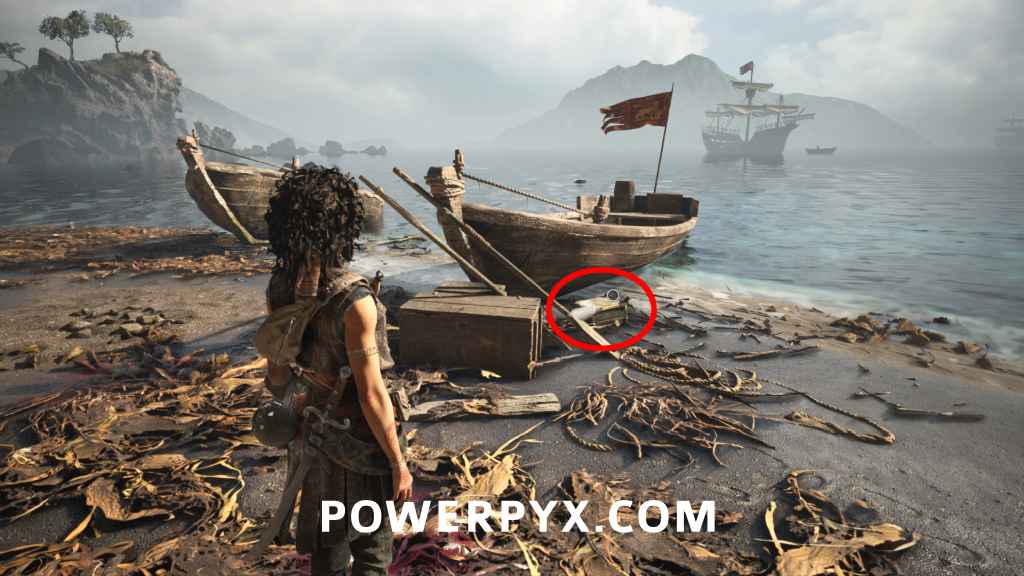
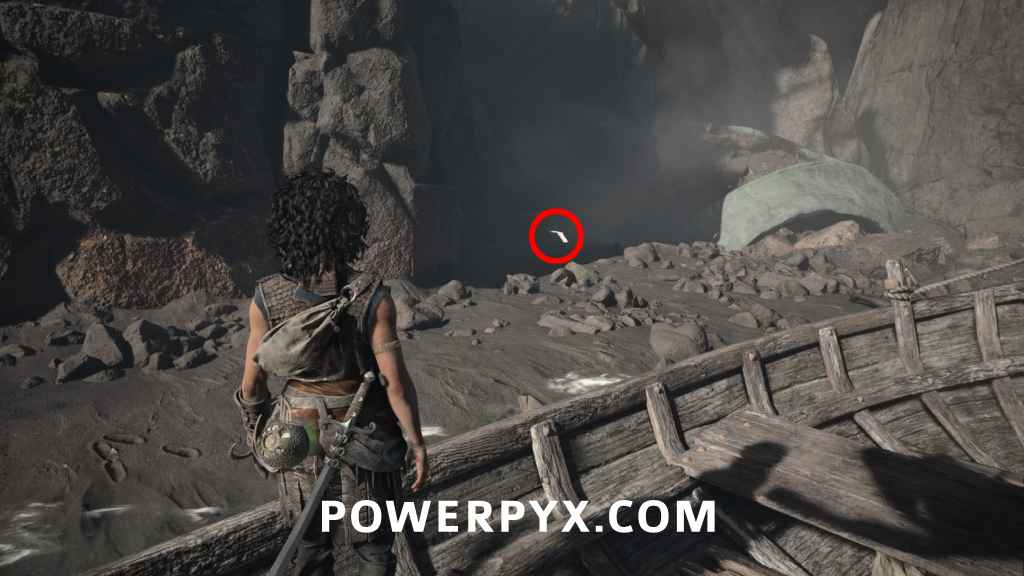
At the beach, at the shoreline where the boats are.
Charm #18 – Arm Band 4
Sub-Chapter: 2 – The whole damn army
Objective: Reach the black temple
After using the grappling hook to double-swing over a gap, take the right path down to the beach. Kill the enemies at the beach to find this chest in the corner.
Charm #19 – Pierced Coin 3
Sub-Chapter: 3 – A stage of skulls
Objective: Open one of the doors
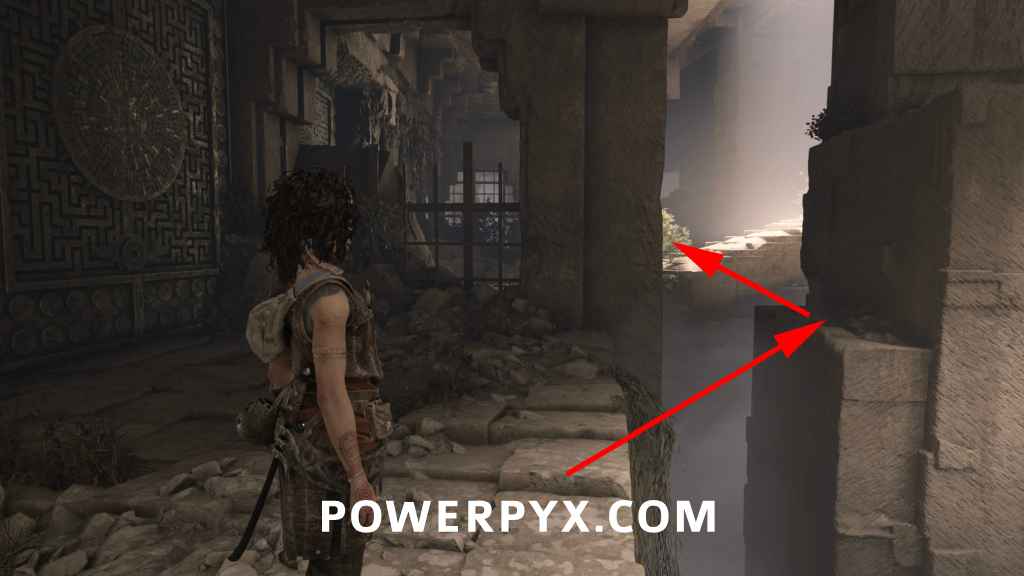
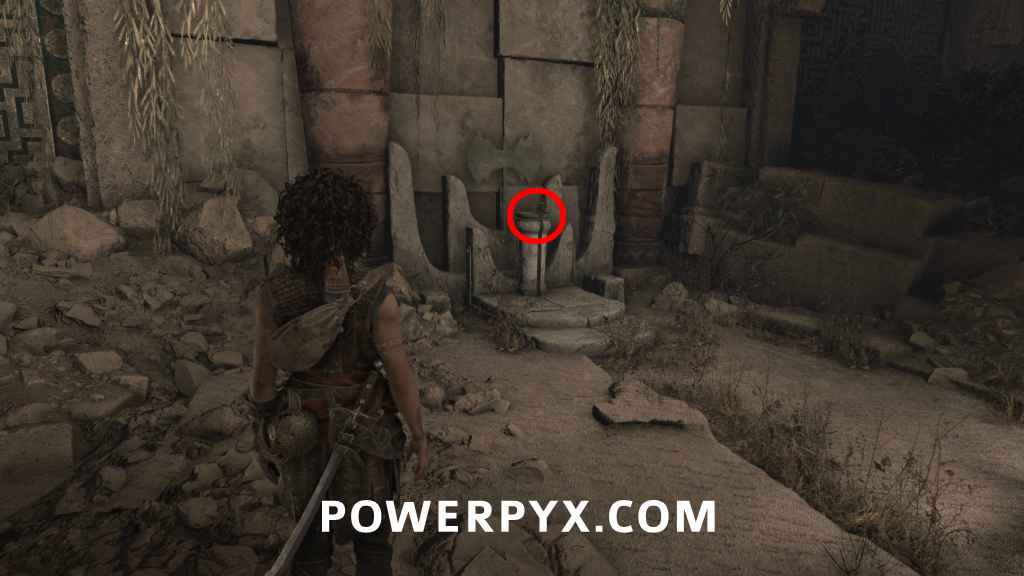
After solving a puzzle and going down a hole, slide under the gate, swing over the next 2 grappling hooks. Then jump right to find this. (To the right of a big locked green gate)
Charm #20 – Bracelet 4
Sub-Chapter: 3 – A stage of skulls
Objective: Open one of the doors
In the same general area as the previous Charm. From the last charm go back to the previous room and jump over the platforms. After the platforms there’s a broken staircase on the left, you find the chest there. Before squeeze through a gap.
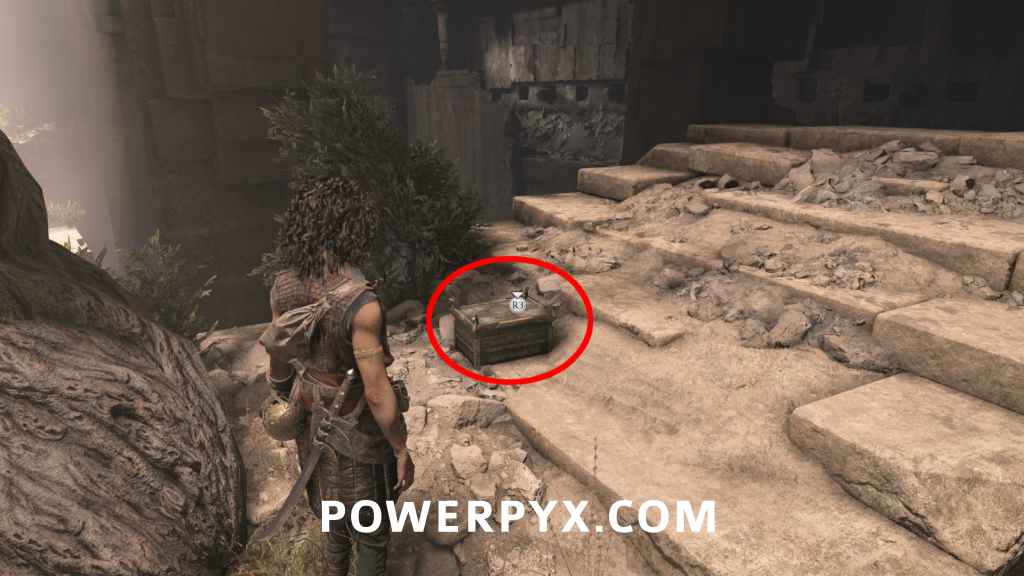
Charm #21 – Trinket 3
Sub-Chapter: 5 – Its ruins
Objective: Reach the end of the trial
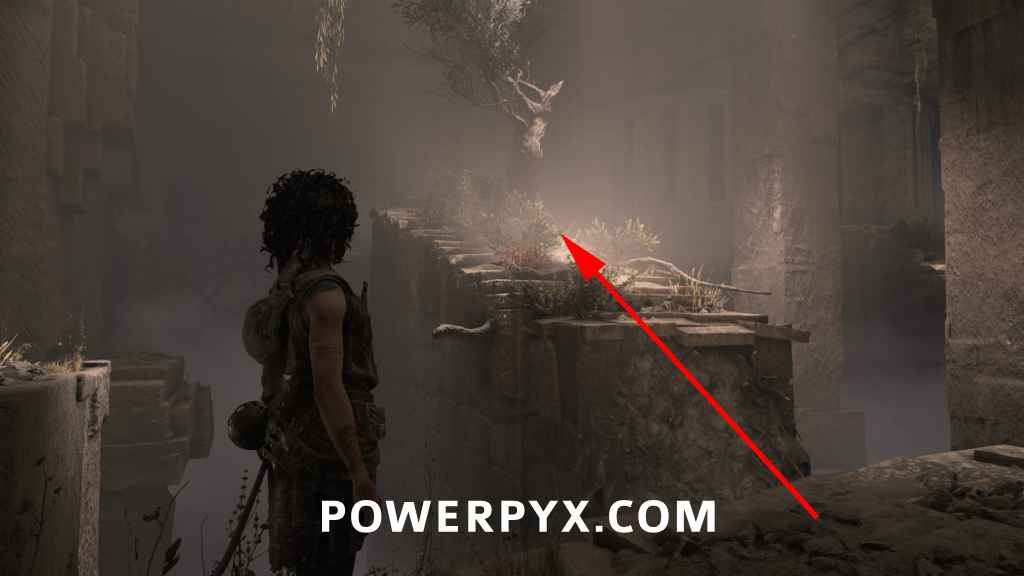
You will walk over what looks like an aqueduct and use a zipline. After the zipline you climb up a platform, then you can either walk through the opening in front or squeeze through a gap to your right. It does not matter what you choose. After that, get up the platform, go left to find it in a chest.
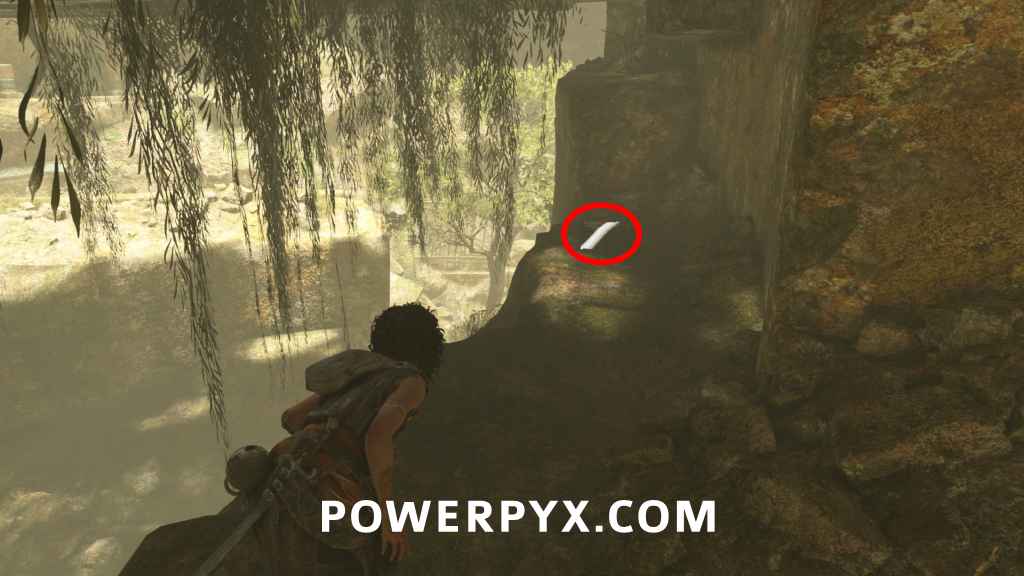
Chapter 8: Resonance
No Charms in this Chapter.
Chapter 9: Light will save us (2 Charms)
Charm #22 – Seal 4
Sub-Chapter: 3 – No respite
Objective: Follow the lights to the palace
After escaping the monster again, you enter a cave. Go forward until you get a short cutscene where Sophia rests for a moment. There will be 3 paths. Take the left path (squeeze through gap) to find this in a chest.
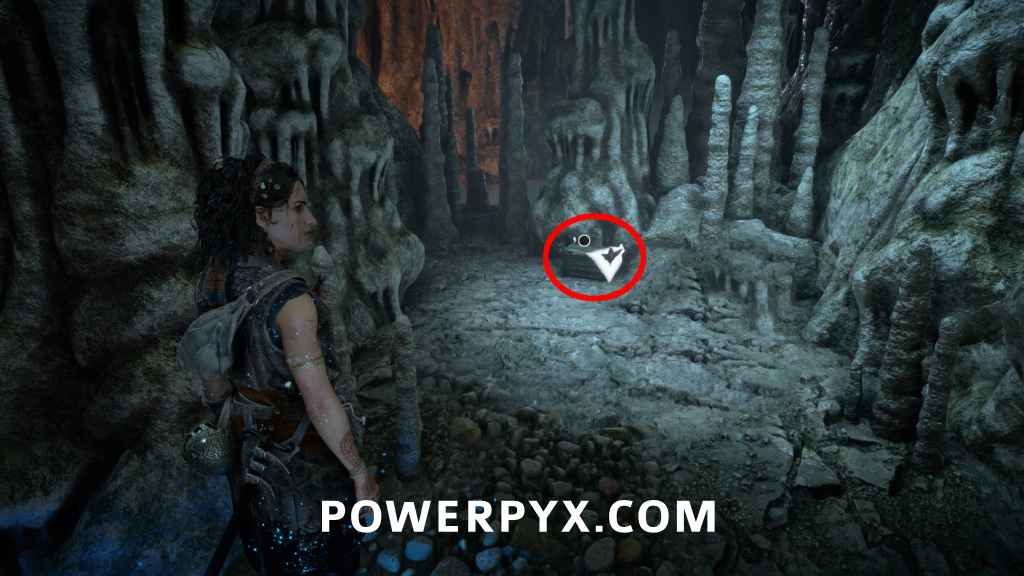
Charm #23 – Pierced Coin 4
Sub-Chapter: 6 – Echoes of the past
Objective: Explore Minos’ palace
For story progress you will destroy a pedestal to reveal light, and shortly after, you squeeze through a gap. You will reach a balcony. Here, turn left and crawl through the wall to find the charm.
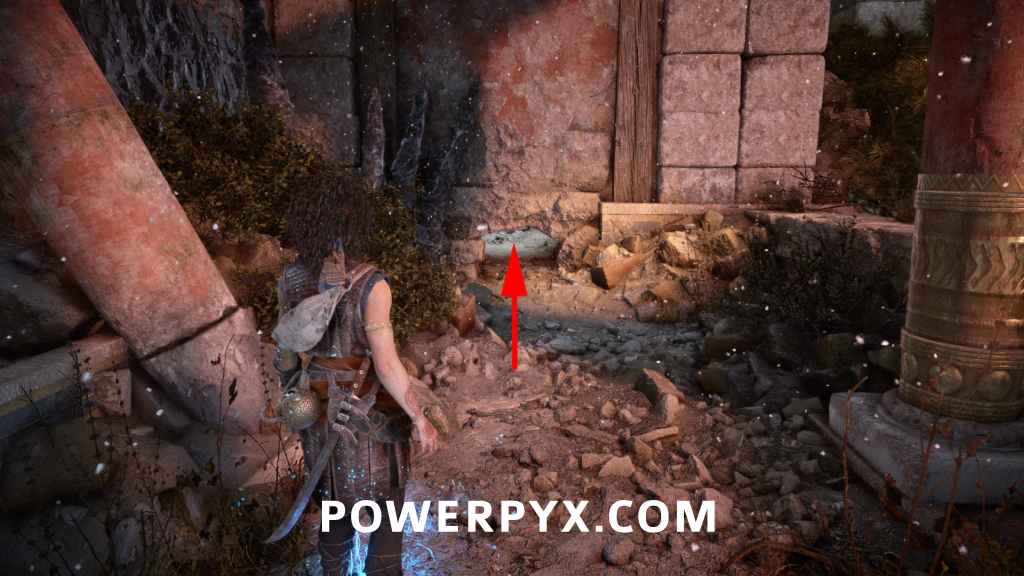
Chapter 10: Parallel paths (3 Charms)
Charm #24 – Beads 5
Sub-Chapter: 1 – The bridge
Objective: Find a way inside the mountain
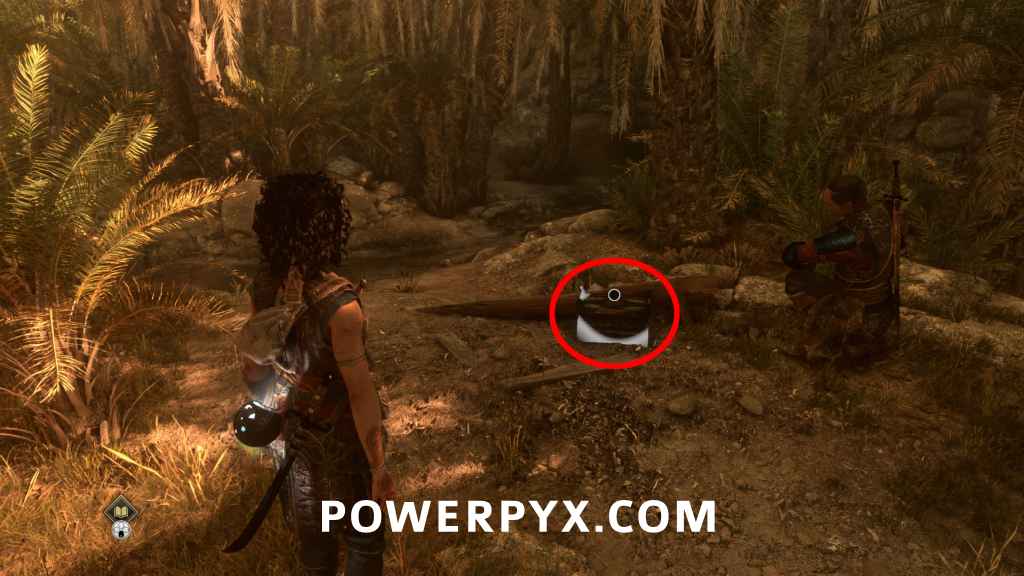
In the jungle area, it’s in the jungle to the right of the river. You’ll see it glimmering white from afar. Next to a small river that flows into the bigger river.
Charm #25 – Trinket 4
Sub-Chapter: 1 – The bridge
Objective: Find a way inside the mountain
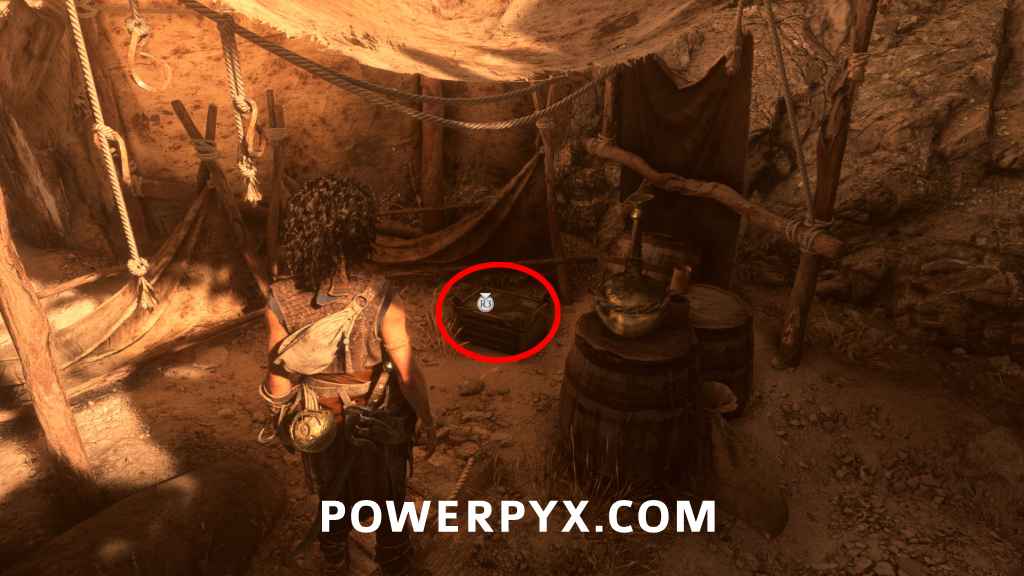
From the previous charm, othe right side of the woods area follow the cable on the ground to reach a cave with a ladder. Climb up and proceed to use the zipline. Then you enter a camp and this will be in the second tent on the right.
Charm #26 – Pierced Coin 5
Sub-Chapter: 3 – Daedalus’ workshop
Objective: Explore Daedalus’ workshop
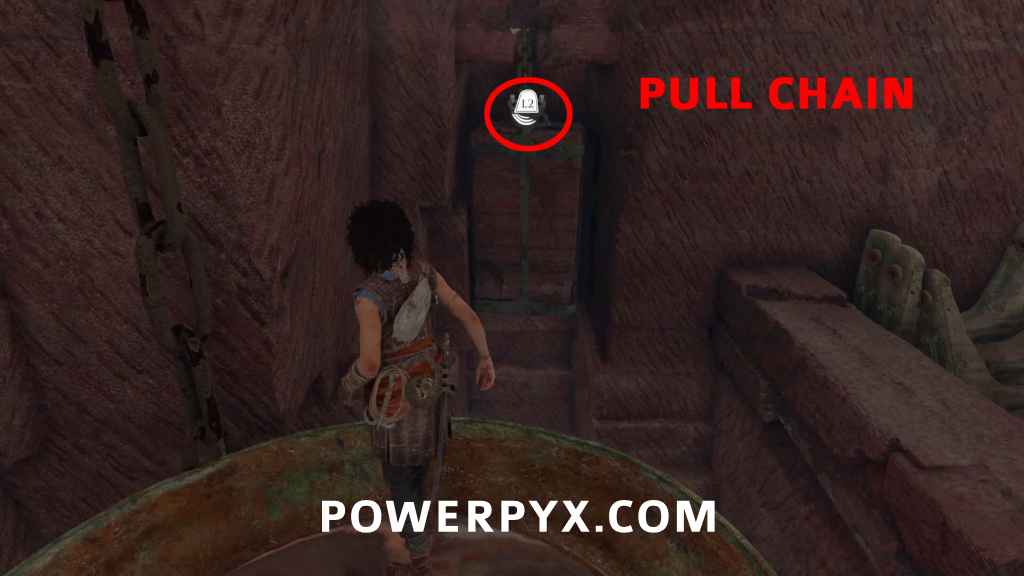
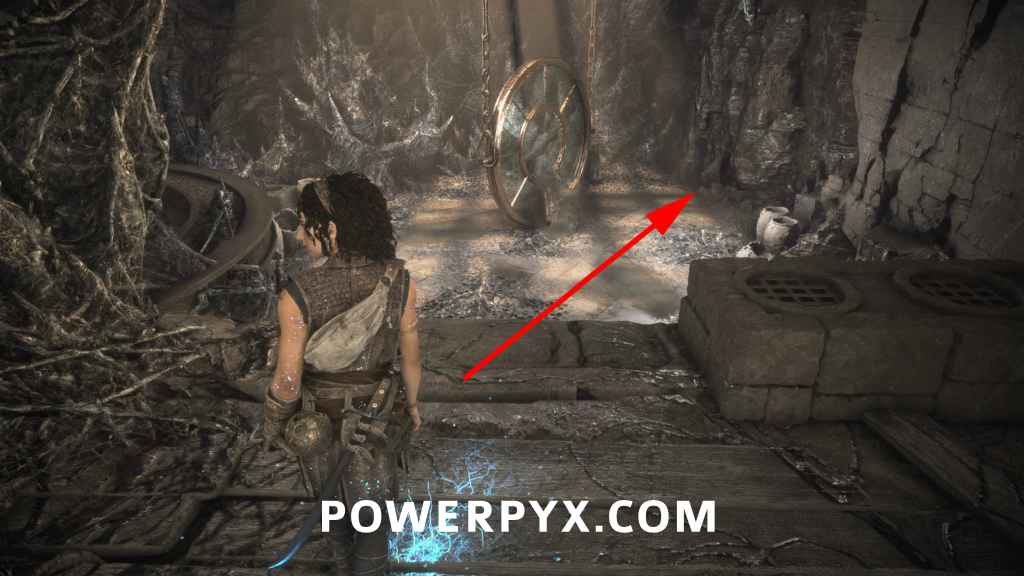
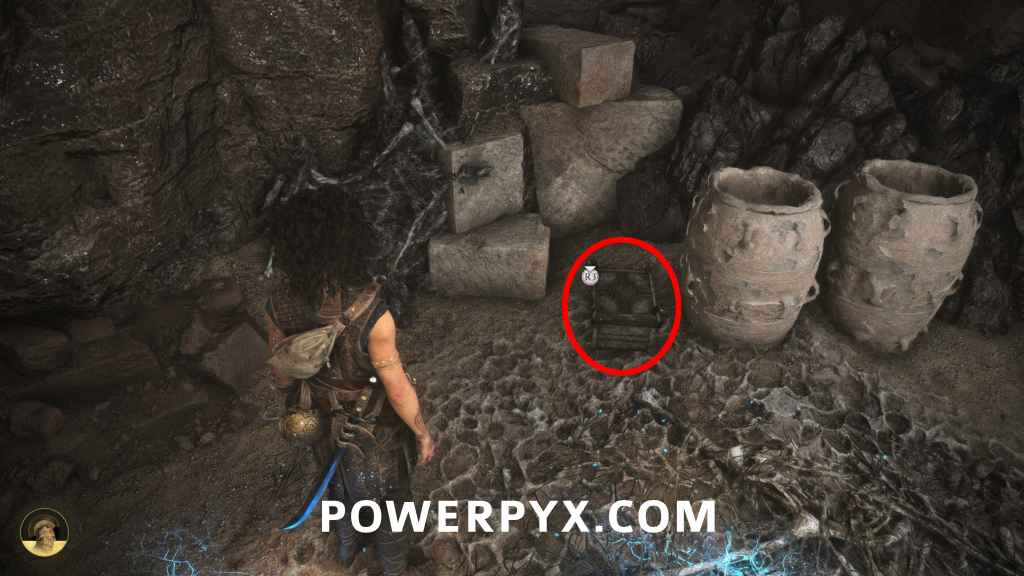
When you enter Daedalus’ workshop, go forward to the other side of the room and you’ll find a glimmering Resonance Point on the floor. From the Resonance Point turn right and you’ll see a mirror hanging from chains. Jump on it and look at the wall, there is a grappling point with L2/LT prompt. Pull on it to drop down a weight, it will open a tomb upstairs. Go back up and head downstairs into the tomb. This is just before interacting with a mirror for story progress.
Chapter 11: Patera (2 Charms)
Charm #27 – Arm Band 5
Sub-Chapter: 3 – Puppets
Objective: Follow the beam
At the start of the chapter you encounter the first “puppet” type enemies. After defeating them you go down an elevator, then have another puppet encounter, then you push Faro up a ledge and he pulls you up too. You will then reach a big lense. Continue on the story path until you passed the light. You will soon see a door to your left and a mirror to your right. Go to the mirror on the right and kill both enemies, then you can find the chest near the mirror.
Charm #28 – Bracelet 5
Sub-Chapter: 4 – The last lens
Objective: Realign the lens
After an enemy encounter, boost Faro up the ledge and cross to the other side of the room. In the back of the room open the chest, to the right of the elevator lever.
Chapter 12: Fading light (1 Charm)
Charm #29 – Seal 5
Sub-Chapter: 1 – The beam
Objective: Follow the beam
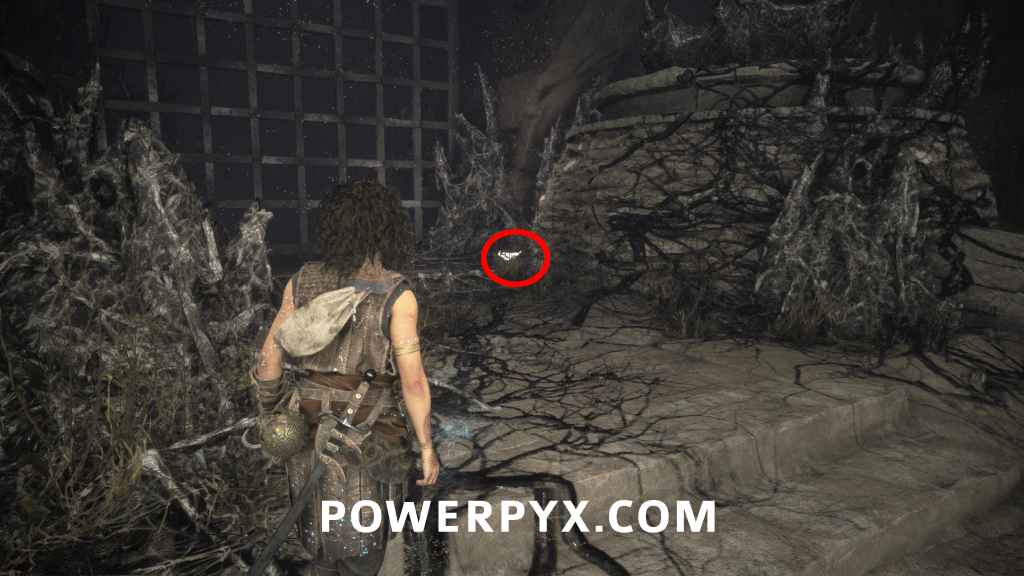
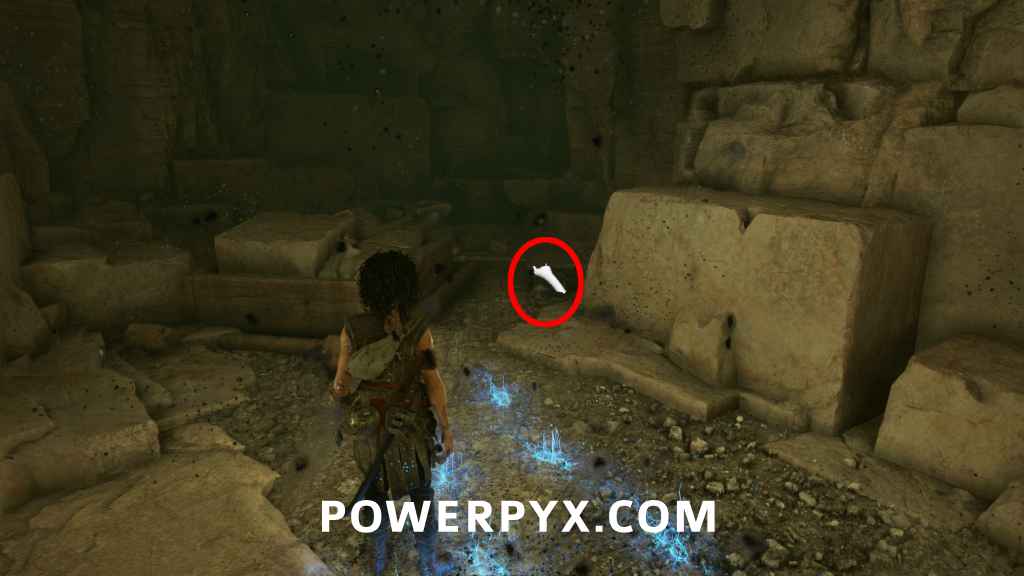
After using the light to lower a bridge, defeat the next enemies past the bridge. Afterward you will soon slide down a slope. Go right to find the chest in the corner.
Chapter 13: As One (1 Charm)
Charm #30 – Trinket 5
Sub-Chapter: 5 – By your side
Objective: Follow the beam
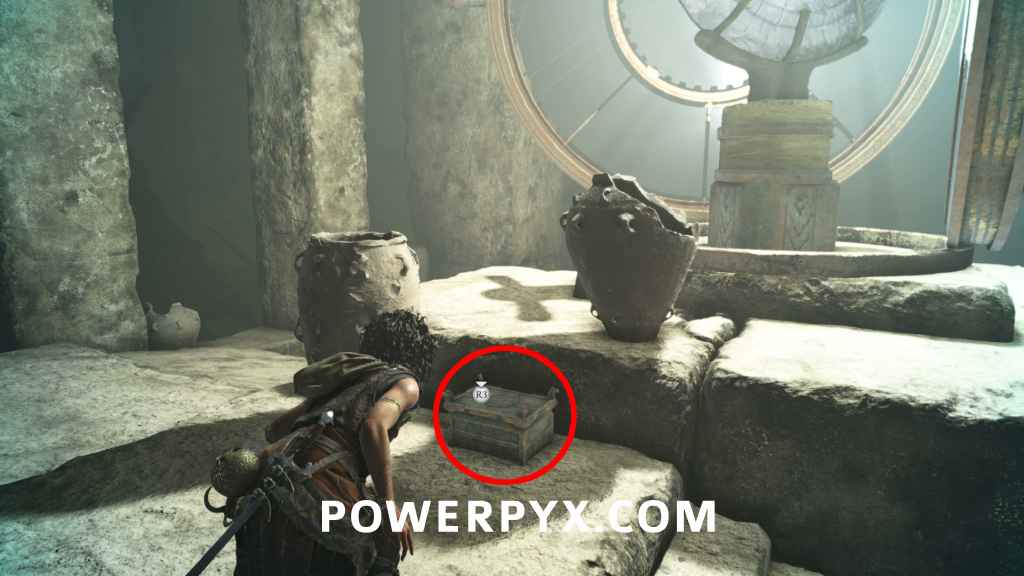
After you go completely upstairs until you reach the big light, the chest is next to the light.
That’s all of the Charms.
For all other collectible types, check out the complete Resonance: A Plague Tale Legacy Collectibles Guide.
Leave a Reply