
First F#@!ing Day is a Main Mission in Saints Row (2022 Reboot). This walkthrough will guide you through all objectives of the First F#@!ing Day story mission.
Quest Giver: N/A
Requirement: N/A
Reward: 3,000 XP, Style App
Mission Info: (Post mission): You captured the Nahualli but didn’t follow orders. No bonus for you.
Objectives:
- Create your Boss
- Advance to your squad
- Rendezvous with Bravo Team
- Regroup with the squad
- Protect the APC
- Get in the turret
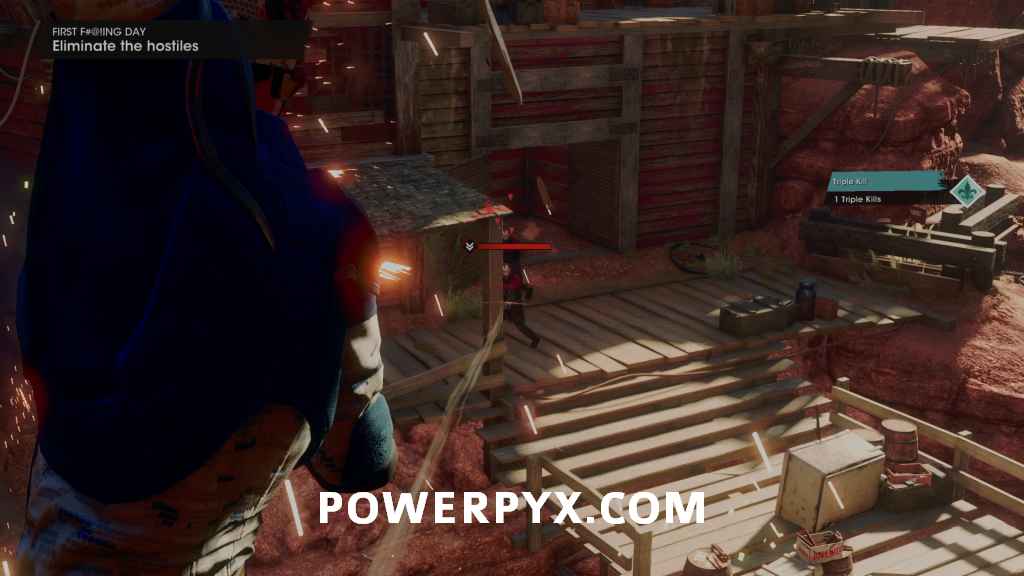
- Eliminate the hostiles
- Hold on!
- Advance on your own
- Rendezvous with Gwen
- Eliminate the hostiles
- Advance and report
- Get a C4 satchel charge
- Destroy barricade with C4
- Regroup with Gwen
- Advance to the saloon
- Take the saloon
- Enter the saloon
- Chase the Nahualli
- Return to Gwen
- Eliminate the hostiles
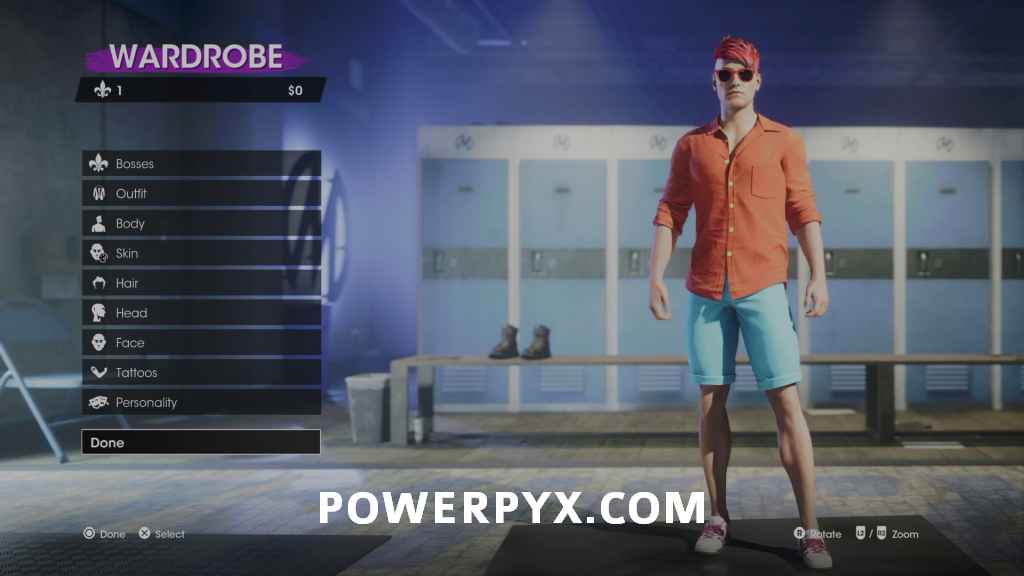
- Change your clothes
Create your Boss
At the start of the game, you’ll have a short intro cutscene then be able to start creating your Boss.

In this first bit, you only change things like your build and hairstyle, clothing choices come later. You don’t need to stress too much about character creation right away if you don’t want to, you can change all aspects of your character at any time once you’re past the initial mission, and you’re not locked into any character creation choices.
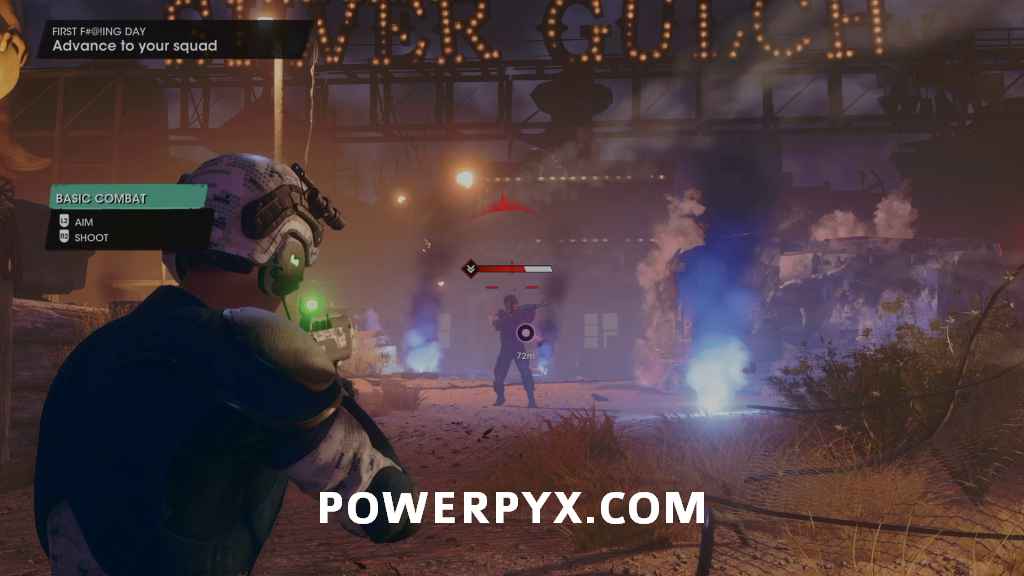
Advance to your squad
After another short cutscene, you’ll have a flashback to the actual start of the game, where you’re working for a private military contractor assaulting an old-west amusement park. Follow the objective forward, dealing with a couple of enemies in your way while you watch out for the gunfire coming from ahead.
Rendezvous with Bravo Team
After advancing through the hole blown in the wall ahead, continue to the burning wreckage and follow the right path between the buildings.

Regroup with the squad
After hopping over a wall, you’ll meet back up with the leading Marshall squad.
Protect the APC
Gwen tasks you with following behind the APC as it pushes through the area ahead. There are enemy groups that will appear on either side of the path and shoot at the APC. The APC does shoot back, but you’ll need to also take out as many enemies as you can to protect the APC.
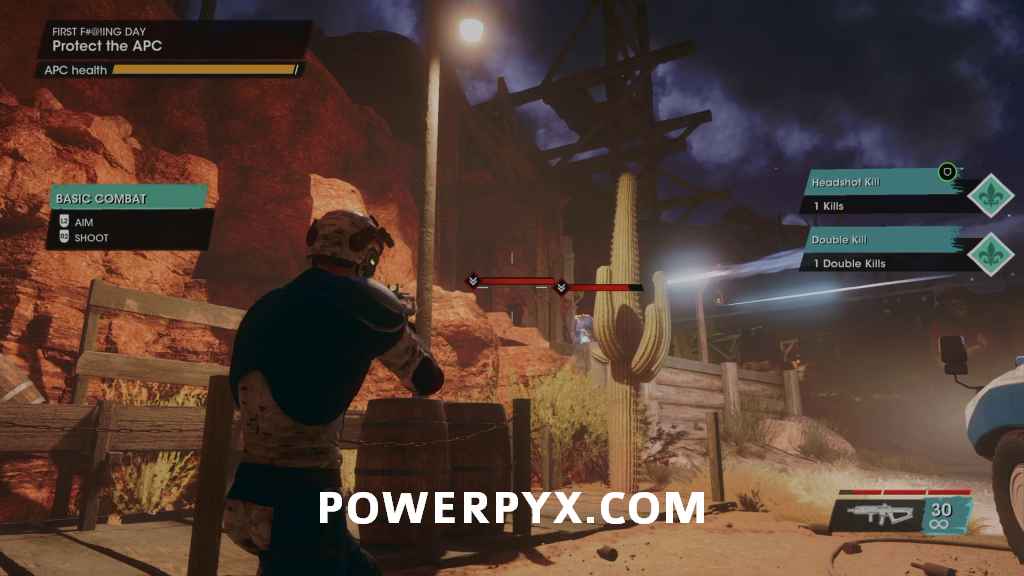
If you’re on the medium difficulty level or above (Entrepreneur) then the APC does feel quite weak from just normal enemies shooting at it. If you’re struggling you can specifically drop Vehicle Combat Difficulty, which causes the enemies to deal less damage to the APC. If you don’t want to do that, you’re going to need to be extremely quick about shooting the groups of enemies as they appear, because they shred it pretty quick just shooting normal guns. Keep a look out for when a  prompt pops up highlighting an explosive item, because you can instantly shoot them to take out nearby enemies.

Get in the turret
Once you reach the next open area, the turret gunner will be shot and you’ll need to run up and interact with the APC to take control of the turret.
Eliminate the hostiles
In the turret, start taking out the enemies around the area. You’ll want to immediately check for the enemy with an RPG on the right side of the bridge ahead and take them out. Important enemies will generally always have a target icon above them. On higher difficulties this can be significantly more challenging. An easy trick is to make use of the auto-aim feature, which can be enabled under gameplay settings > challenge options. Hold down  /
/  to shoot at all times non-stops while quickly tapping (not holding)
  /
/  for auto-aim.
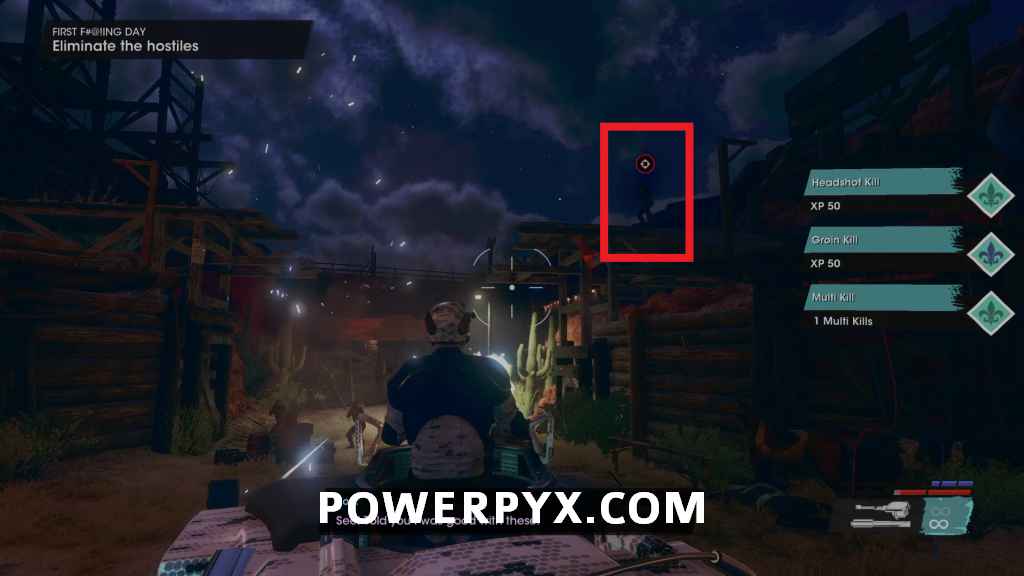
After a short period, a helicopter will appear in front which you also need to take out.

Hold on!
Once the helicopter is destroyed, the APC driver gets shot and it starts driving away down the path. You can’t do anything here, just wait for it to stop moving.
Advance on your own
After crashing into a mine tunnel, you’ll be by yourself and need to keep making your way forward. The game now prompts you on using Takedowns, which are available when your meter in the bottom middle of the screen is full, and activated by pressing near unarmoured enemies.

Continue down the linear tunnel, taking out enemies as you go.
Rendezvous with Gren
After exiting the tunnel, you’ll need to meet back up with the rest of the squad. Take note that you can bring up your weapon wheel with  to switch your guns if you didn’t already work that out and don’t want to try and defeat everyone with a pistol.
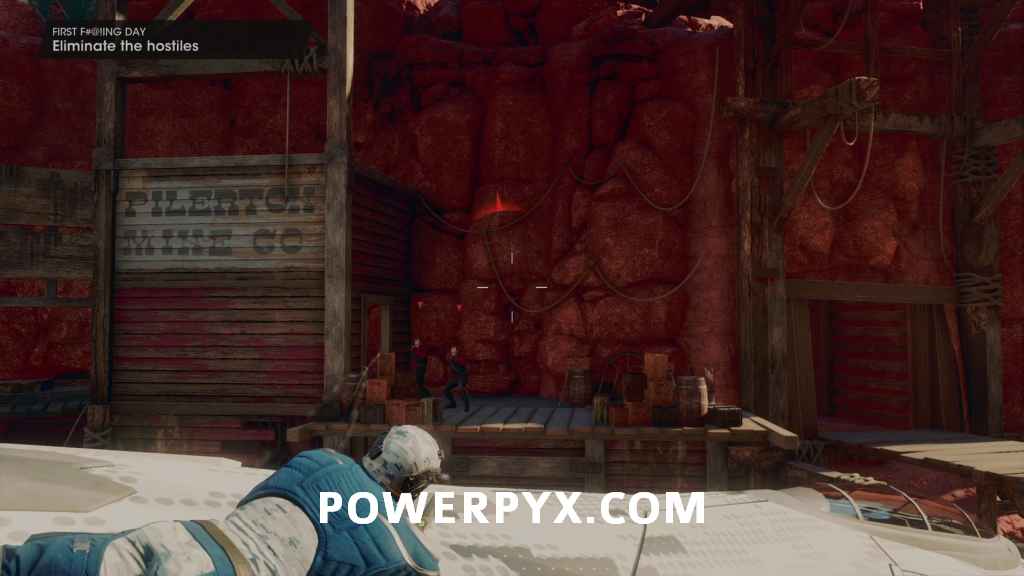
Eliminate the hostiles
There is another group of enemies to defeat in the town area ahead. Try to stick to the sides to avoid the fire from the sniper at the far end.

Advance and report
After the enemies are defeated, continue ahead to the objective by the wall.

Get a C4 satchel charge
You’ll need to blow up the barrier to get through. Turn directly around where you are pointed to some C4 on a table that you can grab.

Destroy barricade with C4
Toss C4 at the barrier with :r2:, then press  to set it off and blow up the barrier.

Regroup with Gwen
Continue past the barrier, and you’ll meet up with Gwen and the Marshall squad again ahead.
Advance to the saloon
Gwen wants to you flank to the left of the area, though you can just ignore that if you want and just run down the path ahead.
Take the saloon
At the saloon, you’ll need to continue taking out the enemies while waiting for more Marshall backup. There are a couple on the top level you can watch out for when you’re farther away, then mostly just focus on the enemies that will be running out the front door.

Enter the saloon
After every enemy is defeated, you can enter the front door of the saloon for a short cutscene.
Chase the Nahualli
After the cutscene, you’ll need to chase the enemy upstairs. Take out all the enemies in your way.
Return to Gwen
When all the enemies are defeated the Nahualli will have escaped, and you can run out the top door on the balcony to return to Gwen.
Eliminate the hostiles
After another cutscene, you’ll now be on top of a plane, with enemies shooting at you from platforms around you. They generally appear in groups of two or three, and your best bet is to focus one group at a time instead of getting distracted and swapping between without clearing out each group.
There are also explosives littered around the area you can use to take out the groups more quickly.

After another cutscene you’ll be hanging below the plane, shooting at enemies on lower platforms. There are more explosives down here you can use since it’s a new area, so don’t be stingy.
Change your clothes
Once all the enemies are defeated, you’ll earn the trophy/achievement  First F#@!ing Day. You’ll now also have the opportunity to dress your Boss in your normal clothes (and redo your prior customizations if you’d like.
After confirming your customization choices, you’ll automatically start the second story mission.
This finishes First F#@!ing Day main quest in Saints Row. Next is Morning Commute.
For all other Main Missions, check out the complete Saints Row Walkthrough.
Leave a Reply