
Ghosts of the Past is a Main Case in Sherlock Holmes Chapter One. This walkthrough will guide you through all objectives of the Ghosts of the Past main quest.
Starting Borough: Grand Saray
Starting Location: Hotel
Quest Giver: None, automatically started during “A Mother’s Love”
Requirement: Having entered the Seance-Room in the Hotel
Reward: 80 Money
Trophy:  Diamond in the Rough
Objectives:
- Character Portrait
- Clues in the Room
- Clues outside of the Room
- Imagination Sequence
- Talk to the Cravens
- Talk to Ghalichi
- Closing the Case
Starting Location: Ghosts of the Past
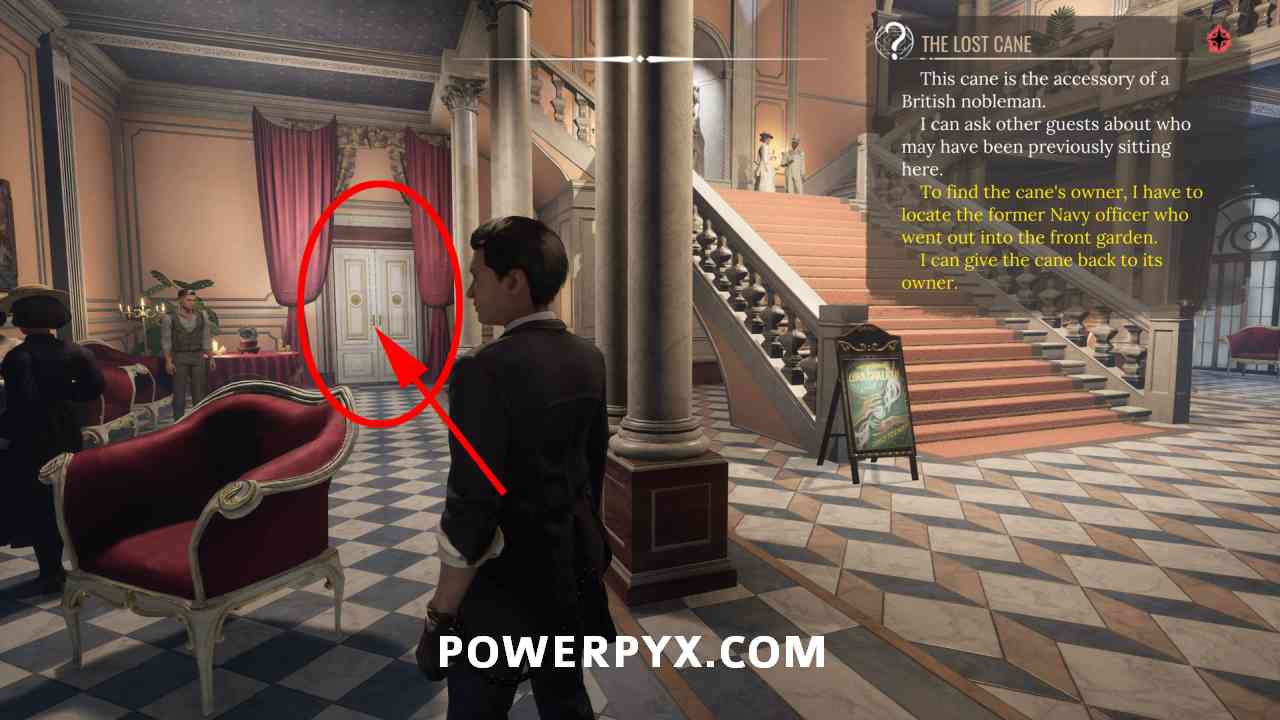
Ghosts of the Past Case starts automatically during “A Mother’s Love“, upon entering the Seance-Room of the Hotel, after finding out about the owner of the walking cane.
Character Portrait
After entering the room, we should draw our first character portrait. Watch out for the sections indicated by yellow sparkles and hold  /
/  to inspect them closer (face, ring, knuckles, clothes).


Whenever you observe someone, you get two portraits to choose from. One is wrong and one is correct. The correct one here is that Lord Craven is a “Bored British nobleman”. Afterward, go through all dialogues with him, it doesn’t matter in which order you pick them.

Clues in the Room
In the seance room, you can talk to the hotel staff as well as the Medium “Luka Ghalichi”, inspect the mirror and the skulls in the corner, and the broken chair by the door. You can highlight every point of interest by pressing  /
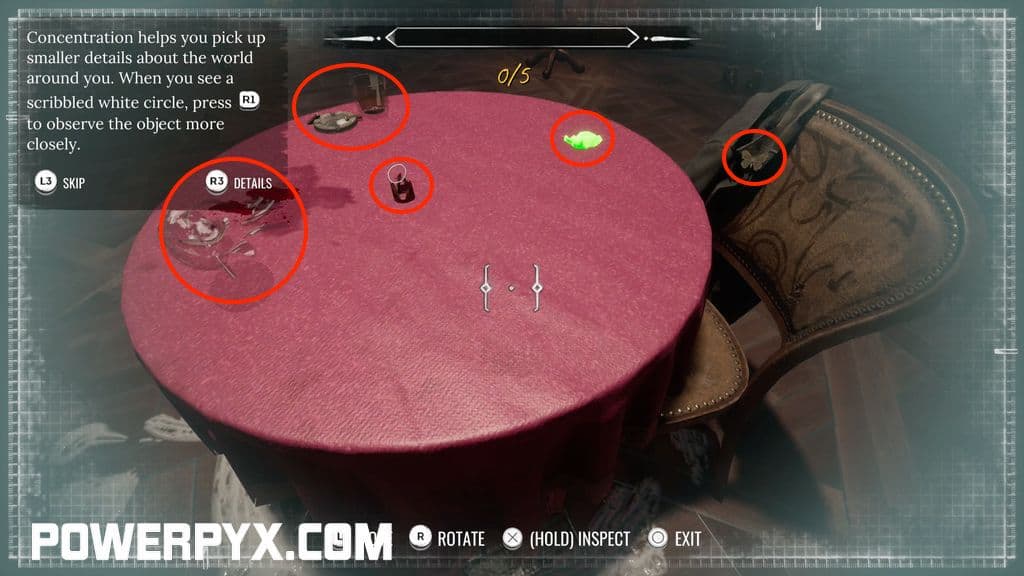
/  . Additionally, there are five clues found at the table in the middle (use
  /
/  on the diamond in middle of table, inspect wine glass, ash tray, green ‘ectoplasm’, butterfly brooch on jacket). The butterfly brooch on the jacket over the chair is the tricky one to see, you must place the cursor over it precisely so it turns yellow, then rotate it to inspect its wings. The clues are all circled red in the image below.
After finding all clues you can make your first deduction. Open the menu, go to “Mind Palace”, click “Ghosts of the Past”, combine “The Lady pointed across the table” and “Lady Craven faced the window”. This reveals there was a courtyard witness outside the window.
Clues outside of the Room
Head through the door next to the hotel staffer to enter a yard with a pool. By the window, you can find a broken heel on the floor. Use concentration mode / to inspect it, pick it up, rotate it to collect it.


Open your casebook and pin the objective “Someone in the Courtyard”, only then you can follow the tracks.

Now go into Concentration Mode / and follow the trail of where the person went, past the pool of water and through the door at the end of the courtyard. Go through the next door on the left. Inside, interact with the shoe on the ground. It should be colored blue when you go near it.


Inspect the lace on top of the shoe as well as the heel by rotating it.


We found out this shoe is being worn by the hotel maids. Make sure the objective “Someone in the Courtyard” is still pinned, then go talk to the maid at the lobby entrance who’s scrubbing the floor (should she not give you any info, talk to other maids around the hotel).

By talking to the maids you will learn that Lucia is the name of the maid we are looking for. She’s on the upper floor, by the paintings next to room 225. Talk to her and tell her you’re solving a crime.

Imagination Sequence
After talking to her, head back to the Seance Room downstairs. Interact with the white bubble to start reconstructing what must have happened in the room.

The correct positions of the persons in the room are shown below (medium using ectoplasm on the side nearest mirror, woman in chair nearest couch pointing at window, Lord Craven lifting chair on side nearest entry door). After all is done, hold / to validate:


Talk to the Cravens
When the sequence above has played out correctly, open your casebook and pin objective “The Probable Thief”.

Now we can proceed to the Cravens Suite 226, which is situated on the upper floor.
In front of the door, we are presented the first opportunity to eavesdrop for intel. Stand near the two maids with the “ear icon” between them, then hold / to start. You must swipe up the left stick to filter out the following words: Made her husband drunk, Was on the lookout, Cannot use a fish knife. If time runs out, walk away a few meters and come back to retry.


Now enter the room. A short sequence will play and you will talk to Lord Craven and address the elephant, or rather the corpse, in the room.
Interact with the corpse, it has 3 clues (bruised throat, red handbag, diamond on bed must be rotated and viewed from the top). In the same room, inspect the door in concentration mode. Also inspect jewelry box on the cabinet for 5 clues (use concentration mode on box to reveal secret compartment, ring with butterfly, ring with engraving, cheques, vanity case next to it).


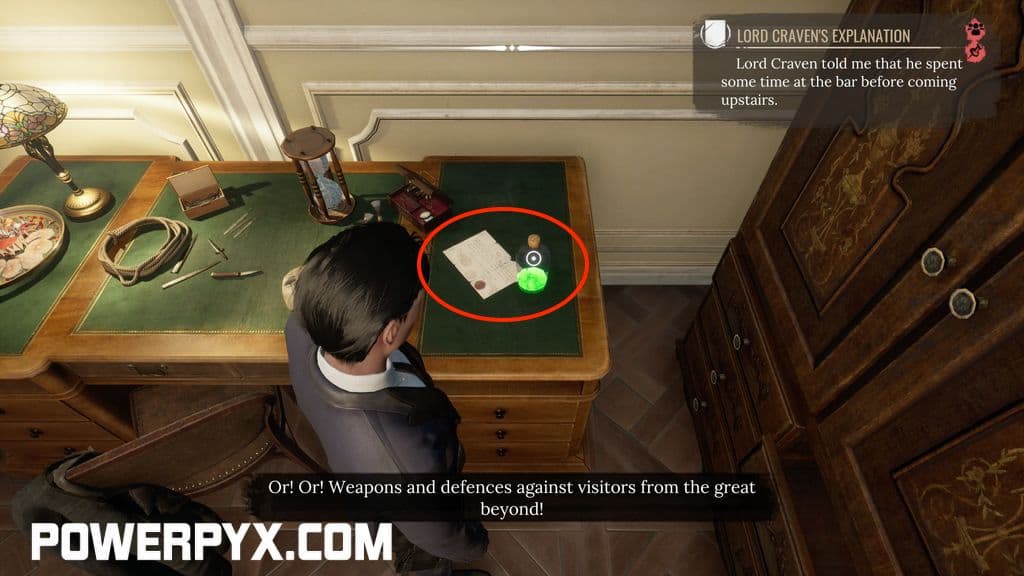
The other room of the suite has a letter and ripped papers on the desk, and a letter on the small table on the opposite side.


After collecting everything, present the evidence to Lord Craven and exhaust all available dialogues with him.
Then pin objective “Lord Craven’s Explanation”, head downstairs and talk to the receptionist to get the key to Ghalichi’s room. He’s in room 225, next door to Craven’s room.
Talk to Ghalichi
Head back upstairs and enter room 225.
First, look at the evidence on the left table (tools in middle of table, green ectoplasm bottle on right side of table, letter on right side of table).
After picking it up, go to casebook > Ectoplasm Sample > press / to start a Chemical Analysis. The easy method is to press  to skip it and get the solution immediately. The way to do it manually is to move ( / ) the chemical operation icon from the top row to the center. Move the reagents “red 3” and “green 2” from the bottom row into the left box, link them to the chemical operation icon in the middle ( hold
  /
/  ). Then link the chemical operation icon to the target formula on the right side and press the confirmation button when done. See solution image below.

Now make a portrait of him (bleeding nose, neck discoloration, belly. left hand, right hand).


The correct conclusion is “Former thief became a medium”. Talk to him and present him with all the evidence.

Closing the Case
We have all the evidence we need. Open the menu and go to the Mind Palace, combine all the different pieces of intel that you have gathered. There’s no way to combine wrong evidence, so you can’t mess this up. Do this until no evidence is left to be combined. From the mind palace screen you can press  /
/  to enter the deductions screen where all clues are connected. Make sure you click on all that show “???” to form the full picture. The correct choices are “Emma scratched Luka”, “The murderer left the diamond”. Eventually, it will form a chart like this and you have to choose the outcome you prefer:

This case only has one viable suspect and the outcome you choose is not relevant for any trophies or achievements, nor does it impact the rest of the story. You can either choose to “Bring Luka Ghalichi to justice” or “Help Luka Ghalichi escape”. Pick whichever you like better, it doesn’t matter. Once you made your choice, press  /
/  to quit out of this menu, talk to Ghalichi again and pick the “Accuse” dialogue. It doesn’t matter in what order you pick the remaining dialogues. At the end you can choose “you must be punished” to have police arrest him, or “I’ll give you a chance” to help him escape. But again, this doesn’t matter and doesn’t impact anything else in the game. Either way Ghalichi will never be heard of again.
This finishes Ghosts of the Past case in Sherlock Holmes Chapter One.
Now you come to the outer courtyard, interact with the carriage to skip to the Cemetery. Continue with Main Case “A Mother’s Love” – Objective: At the Cemetery.
Up Next: A Mother’s Love
For all other Cases, view the full Sherlock Holmes Chapter One Walkthrough.
PhantomFear94 says
It won’t let me pick up the shoe heel, and thus won’t let me pin it and enter concentration mode w/ a trail… keeps asking me to make a deduction?
Abc628633 says
Make sure you have 5/5 things on the table and got all the other clues then it will let you progress. Holmes will make a comment like “looks like someone was at the window” once you have found everything and then it will let you interact with the heel
Tan says
Actually, there is a way to accuse Lord Craven of killing the wife as well. If you talk with the bartender, he will reveal that Craven only spent a short time at the foyer. Talking to other witnesses at the bar confirms that. Then you can go back and talk to Lord Craven to accuse him. So you can choose either to Arrest or Mercy for either Craven or Luke (4 choices)
Vince says
When I talked to the bartender he said he doesn’t know, that maybe one of the guests noticed. Only three guest near the car gave me any information.
z says
yeah but you will get less money (only 30)
B says
You need to talk to the maid under the stairs for the information that Craven was only at the bar a short time.
Josh says
I accused Craven. The starving huckster wouldn’t have left the diamond.
Harry says
Luka literally confesses though?
Jerry says
I also don’t understand why the game frames Luka as the true culprit. As Josh said, he wouldn’t have left the diamond unless there was something more important he needed to find/conceal. The game lists Emma’s bag as a clue saying someone had gone through her belongings. It would have made sense for Craven to do so if he caught Emma with the diamond and figured out she had the rest of his things. Luka, on the other hand, had no reason unless he was looking for the moth ring to prove she was a thief as well. Even then, what was the point if he had already killed her? There’s also no way Luke lock picked his way into the room, had an argument with Emma where she realized she knew him from before, she somehow blurted out that she was going to frame him, he strangled her, went through her things, left the room, all in 15 minutes!
coolsomeXD says
He left the diamond to frame Craven.
Billie says
I followed this walkthrough to the letter for the second time now, found all clues but the game doesnt give me the clue that Emma has a history of deceit in the mind palace so i can’t finish this case with the right culprit. Did I do smth wrong or is my game bugged? The first time i played it for the plat it worked fine.
SL says
I also struggled with this last part because I thought I had all the evidence—nope! I finally figured out that I missed correspondence. Go back to Room 226 (Craven) and interact with the correspondence on the office desk, left-most letter. The letter is from the police saying they had to let the servant (that Craven accused of the earlier thefts) go free for lack of evidence. I combined this new clue with the clue about Emma’s theft of the diamond.