
Love, Death, and Cordona is a Mycroft Case in Sherlock Holmes Chapter One. This walkthrough will guide you through all objectives of the Love, Death, and Cordona side quest.
Starting Borough: Grand Sary
Starting Location: Stonewood Manor
Quest Giver: Emilio Estevo (Mycroft’s Agent)
Requirement: Started Main Case “The Muse From Abroad” & Finished Side Case “The Missing Shopkeeper”
Reward:  Not Now (missable), Not His Toy (missable), one of the three accusation sequences for
  Guilty! (missable) – also unlocks Jon’s Mariner outfit (regardless of the outcome), 70 Money (only if you let the murderer go unpunished, which would make you miss a trophy and isn’t recommended)
Case Info: Mycroft’s agent, Mr. Estevo, requested my help with a very sensitive matter.
Starting Location: Love, Death, and Cordona
Love, Death, and Cordona case starts in Borough: Grand Saray, Place: Stonewood Manor.
It only becomes available after having started Main Case “The Muse From Abroad” and finished Side Case “The Missing Shopkeeper“.
Missable Trophy: Not Now – When talking to the quest giver, be sure to pick the dialogue “I’m busy” to NOT accept the quest. This will unlock the trophy right here. Afterward, you can talk to him again and this time pick the other option to accept the quest.


Primrose Cafe
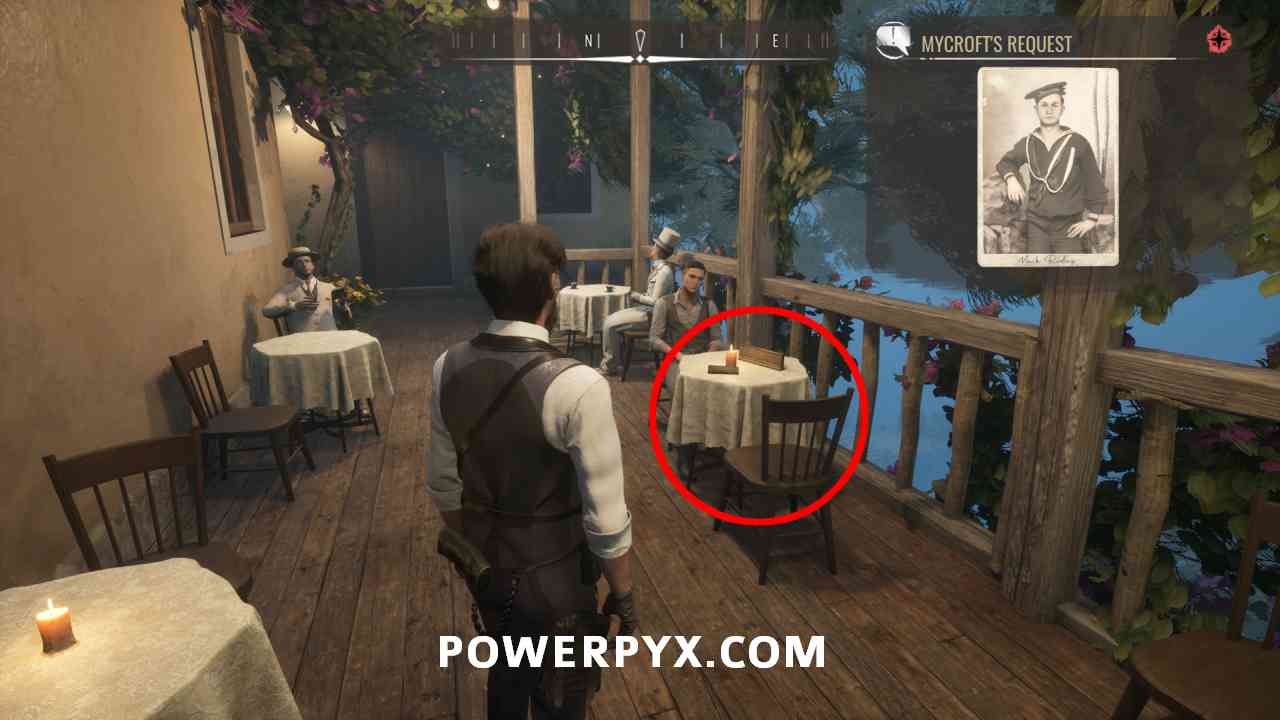
Pin objective “Mycroft’s Request” and head to the Primrose Cafe, located west of the Old City Bridge. Sit down at the table with Jon. While sitting there, you will see a man falling to his death from the Bridge Tower.

Bridge Tower
Head over to the Bridge Tower and inspect the dead body. It holds 6 clues: head, silk scarf around neck, stab wounds on stomach, brown knife sheathe on right leg, broken left leg, golden key on ground (rotate to see number 4 on it).


Now go talk to the man in blue uniform at the door under the bridge tower, near the corpse. Pick “Provide Evidence” and “Victim Profile”. Afterward, you can enter the “No Trespassing” Door next to him to inspect the upstairs of the tower.


Now in the tower there are several points to inspect: Knife on floor on the right (rotate to view both sides), the window next to the knife on the right, broken table on the left (use concentration mode), the papers on the floor in the center of the room (view letter and money clues), table at end of room with cigarettes on it, big open chest at end of room (use concentration mode). Everything is circled red in the image below:

After collecting these clues, a white orb should appear in the room. Interact with it to reconstruct what happened here. See the images below (unknown attacker with knife coming out of chest, our victim kicking him into table, attacker stabbing the victim at window).


After this, pin objective “Meeting Gone Wrong” and use concentration mode on the rope at the end of the room. Also interact with it to see the attacker escaped by sliding down the rope.

Now leave the tower through the door. The guy outside will talk to you again, he’ll tell you that someone at the barracks may be able to tell you more about the victim.
Attacker’s Escape Route – Pillar of Knives
Keep “Meeting Gone Wrong” pinned. First, let’s check the end of the rope slide where the attacker escaped. Cross the bridge to Old City, then turn to the right into a yard. At the end of the rope there’s a broken bench with blood on it, inspect this.


In that same yard is a big wooden pillar with knives sticking out of it. Inspect the blood splatter on the side of the pillar, can be highlighted with  /
/  . This also starts the Cordona Story “Pillar of Knives“. But ignore this for now, we’ll finish our current case first and come back to this later.


The other side of that pillar has a curved knife you can interact with, our supposed murder weapon. Rotate it to view both sides. However, the crowd will get angry that you’re trying to “steal” a knife from their scared pillar. So instead of taking it with you, take a photo of it  +
+  . You should get the prompt “All Evidence Collected”.


Barracks
Time to pin the objective “Victim Profile”. We must now head to the sailor barracks across the street. After coming from Old City Bridge it’s the first building on the left (has a red banner with yellow crossed swords on it). To enter it, you have to be wearing the “Marine Uniform”. Luckily, there’s a clothing vendor directly across from the barracks just a few steps away, so buy or rent it from there if you don’t have it already. You don’t need a Sailor Cap, only the “Marine Uniform” is needed, other wardrobe items don’t matter.
With the outfit equipped you can go through the barracks door. This is the correct outfit and the barrack entrance door:


Inside, talk to all the sailors until one of them tells you more about the victim. Must have “Victim Profile” objective pinned for this.


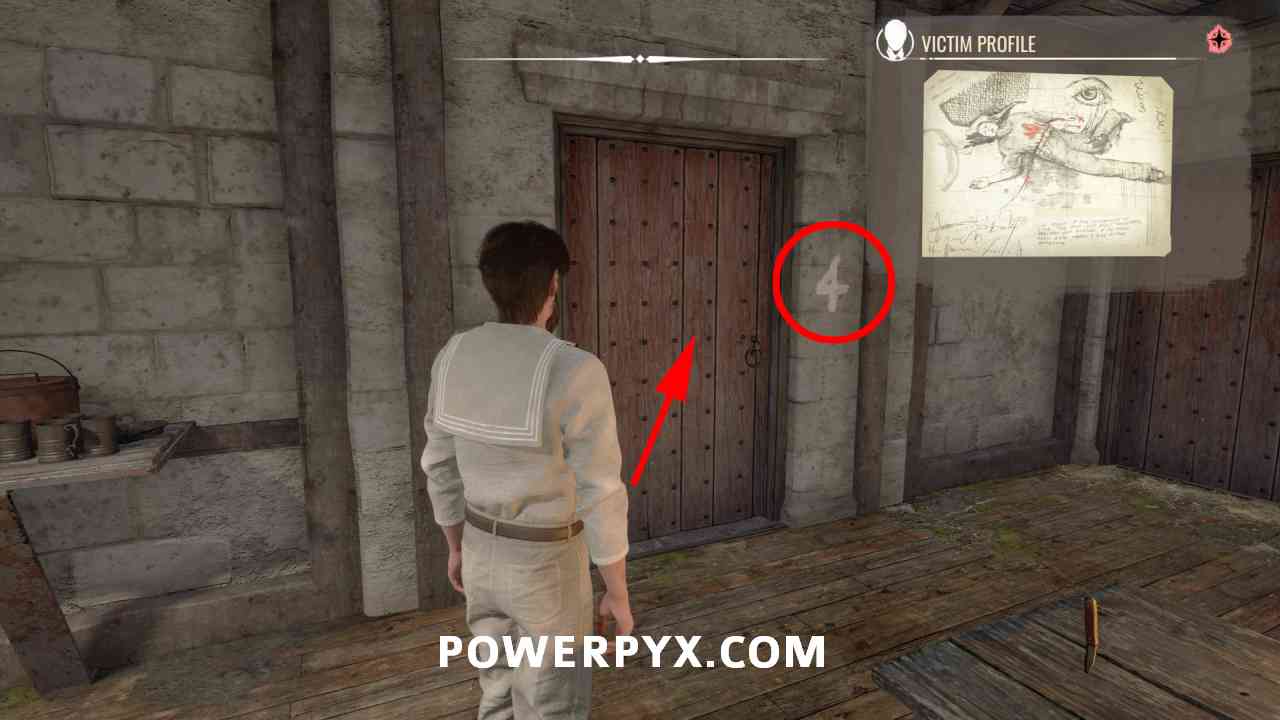
Inside the barracks we must also search the victim’s room. Head through the wooden door at the end of the barracks (same floor where you entered). Then enter room number 4. That’s the room for which we found the key on the corpse earlier that had the number 4 on it.

Inside, use concentration mode on the floor to see scratch marks. Then move the locker to reveal a hidden stash behind it. Inspect the stash for 3 clues: Jailan’s Letter (middle), Money (right), Travel Tickets (left).


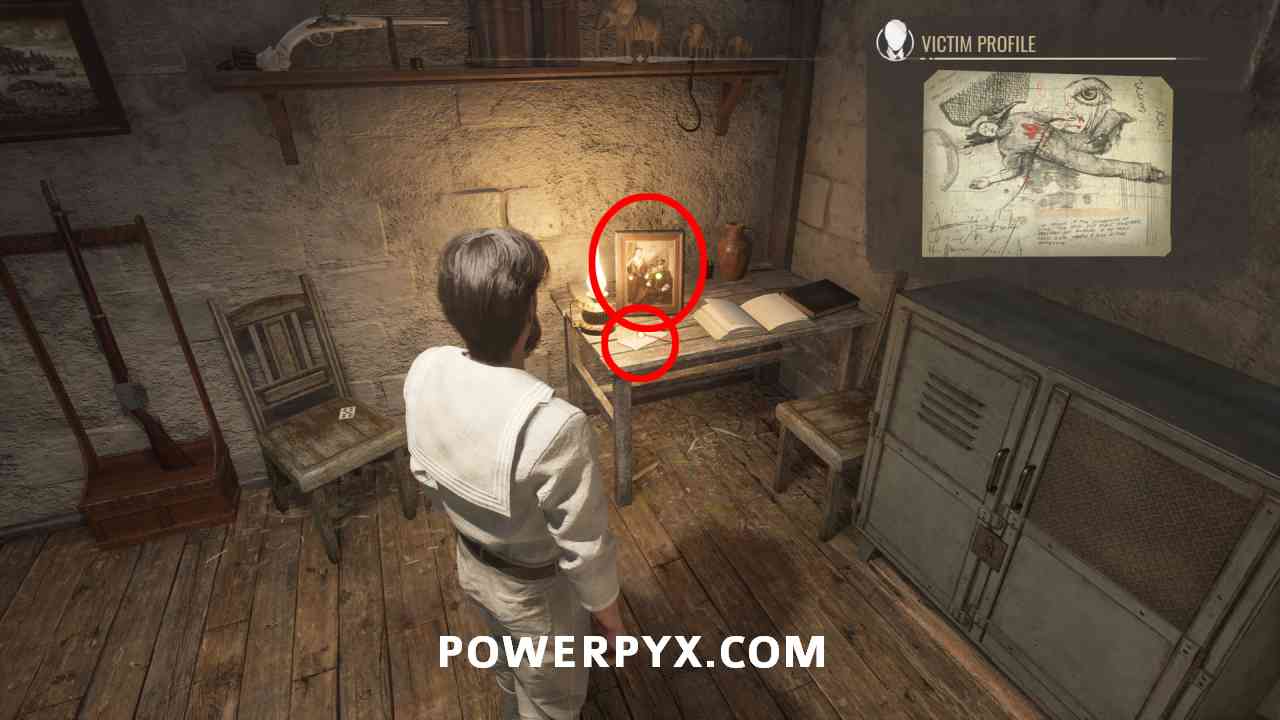
Also inspect the letter and portrait on the desk (rotate portrait to view front and back).
Open the casebook and do a chemical analysis on “Silk Scarf”. Solution below:


Lastly, we can head downstairs in the barracks to eavesdrop on two sailors. The correct words are: Take Revenge, General Will Speak, Disobedience. After thsi you should get the “All Evidence Collected” badge. That’s all we can do in the barracks.


House of the Eagle
Pin objective “Sign of the Eagle”. For this we must talk to random people in the streets of Old City, around Old City Market. It’s random luck who will give you info, just talk to everyone. Remember that people will only give you info when they are sympathetic to your outfit. Most people in the area have simple clothes, wearing a Worker’s Apron should get you some quick success. Just make sure you are asking people near Old City Market fast travel point, that has the best chances. Below is an example of where someone gave me the needed info. From this you’ll get an update on the objective that says the House of the Eagle is in the west corner of Old City Market.


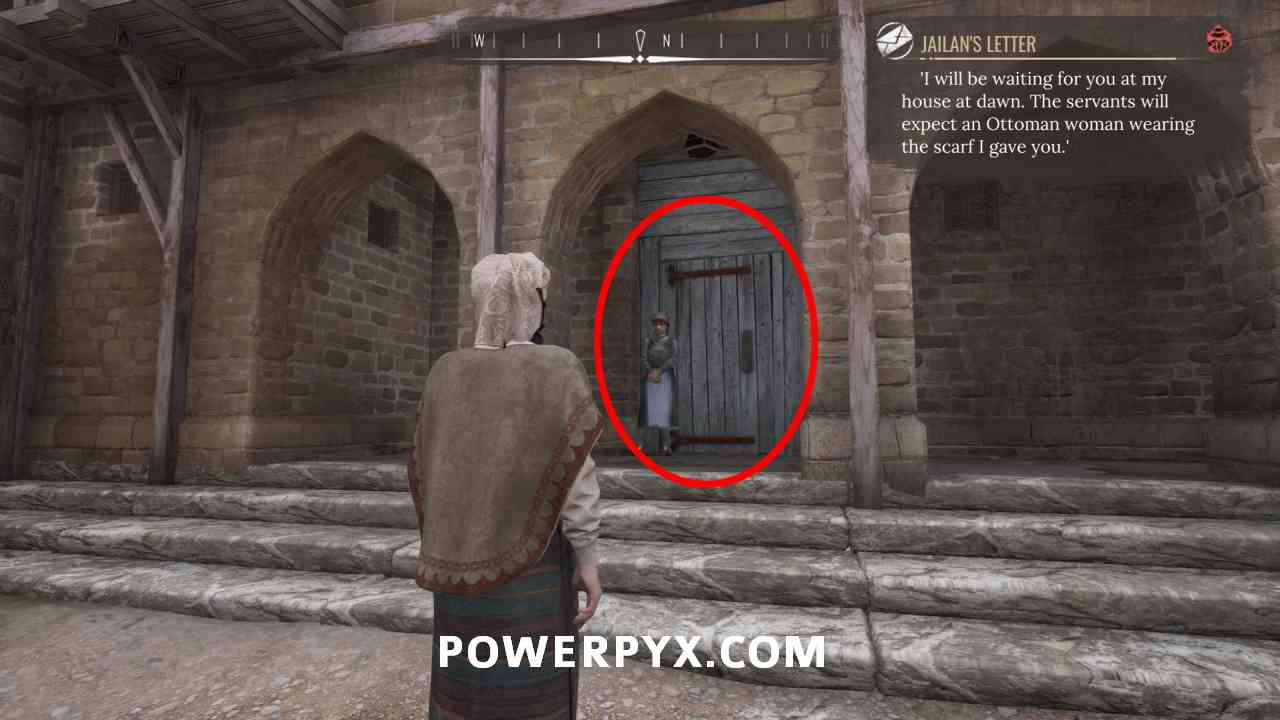
Before we can enter the House of the Eagle, we must get the correct disguise. Pin objective “Julian’s Letter”, which tells us to wear the Outfit of an Ottomanwoman wearing the silk scarf we found earlier.
Buy or rent the following clothing items from the merchant in Old City Market:

- Clothes = Female Ottoman Outfit

- Head = Ottoman Headscarf


Also equip the Silk Scarf from Wardrobe (was found on the corpse earlier and then we used chemical analysis on it, not bought):
- Accessory = Silk Scarf


With this outfit we can now enter the House of the Eagle via the south entrance. Talk to the female servant outside and head through the door:

Once inside, pin objective “Bloody Trail”. Turn to the right and use concentration mode  /
/  at the main gate for some blood on the floor.


Now follow the blood trail in concentration mode, it leads to the opposite side of the courtyard into a washing room. In there inspect the basket with the pink blanket and bloody clothes.


Now we must identify the killer. There’s a Jon challenge here “No Room For Error” for identifying him on the first try. The correct killer is the man standing at the main gate. Interact with him and observe – the correct character portrait is “On Edge”:

Two Missable Trophies take place during the conversation with him!: Not His Toy & Guilty!.
Pick the following dialogues: Confront Him > Accuse > MUST PICK THE 3 CORRECT ACCUSATIONS: Victim Profile, Meeting Gone Wrong, Jailan’s Letter. Then pick “I have to arrest you”.
Arresting him unlocks Not His Toy. Picking the 3 correct accusations here counts towards Guilty!. For that trophy you must also pick the correct Accusations in Side Cases “Blindsided” & “Iron Coffin“, so if you haven’t done those it won’t unlock the trophy yet.
After picking the arrest option there will be a short gunfight with his guards. After that he’ll get locked up and the case will be finished. Mycroft’s agent won’t like that you took matters into your own hand, but this is the needed outcome for trophy / achievement purposes. If you were to go with the other choice and “keep the peace”, the killer wouldn’t be punished and you’d have to return to the quest giver at Stonewood Manor and report back to him. Do note that the mission reward varies depending on whether you arrest him or let him go. You always get the “Mariner Jon” outfit, but if you “keep the peace” you get an additional 70 Money (but you’d miss out on the trophy), if you arrest him you do not get the money reward (must pick this for trophy).

This finishes the Love, Death, and Cordona side case in Sherlock Holmes Chapter One.
For all other Cases, view the full Sherlock Holmes Chapter One Walkthrough.
Tenreth says
The case (and trophy/achievement for denial) is available right after you recieve the invitation for “The Muse From Abroad”. No need to finish the case. You might want to update the missable trophy description. 🙂
PowerPyx says
Thanks, updated.
Sabs says
I cannot get the trophy for “Not Now”. I’ve tried reloading a previous save and select “I’m Busy” and no trophy / achievement notification pops up.
Caylen says
I arrested him with the correct steps and still recieved the money. I reloaded a manual save and did it again and still recieved the money. Not sure if it’s a glitch or if it will affect the trophy ir not later on.
Floyd says
Finishing the side case “The Missing Shopkeeper” isn’t required to unlock this mission. I completed the Mycroft cases in this order : “Love, Death and Cordona”, “Eel Hunting” and “The Missing Shopkeeper”.
Allie says
Merely picking “Confront Him” instead of silently leaving unlocked “Not His Toy” for me about five minutes ago. Not sure if the requirements have changed since the game released?
Mythic says
You can ask some sailors about The Sign Of The Eagle while you’re at the barracks instead of wandering around the marketplace for several minutes, looking for the right person to question (like i unfortunately did). Just wear the sailor or the marine outfit and cap and ask away. (Btw the sailor outfit seems to work just as well as the marine outfit)
Tay says
So annoying. I chose to go back and speak with Mycroft agent because I wanted the money. Mission done but no money. Irritated
SoulHunter21 says
For me the accusation went wrong the first try because the killer profil was wrong. Instead of this the missing knife worked just fine.
Rebekka says
When I was in the tower there was a jacket I picked up. It’s the “Navy Officer Uniform” and it got me into the barracks and the guys talked to me no problem.
When I was in the market looking for people I just happened to walk past the right building and it updated the location for me. So I didn’t have to ask anybody.
Also, I think that was an average fight, not a “short” one.