
Mortal Shell 2 contains 36 Dungeons. Dungeons are side areas in the overworld map accessed through elevators, typically containing extra rewards including Weapons, Sidearms, Tarstones, and Healing Upgrades.
None of the Dungeons are missable, you can enter and complete all dungeons after the final boss in free-roam before choosing to enter New Game+.
They are marked on the map once you go through the fog gate for the first time. You can then mark dungeons as complete by moving the cursor over them on the map using  which changes the icon, and allows you to manually track which ones you have completed. The game does not do this automatically, if you want to keep track this way you need to do it yourself.
Dungeons are listed in the order they appear near Beacons that they are most easily accessed from, in the same order as the Beacons appear in the Mether’s Breath (fast travel) menu when at any Beacon. They are only present in the overworld map, along with a single dungeon in the tutorial area that is considered outside the overworld map. There are no dungeons in the 6 areas accessed through the Corrupt Gates, or in the final area of the game.
Marrow Keep
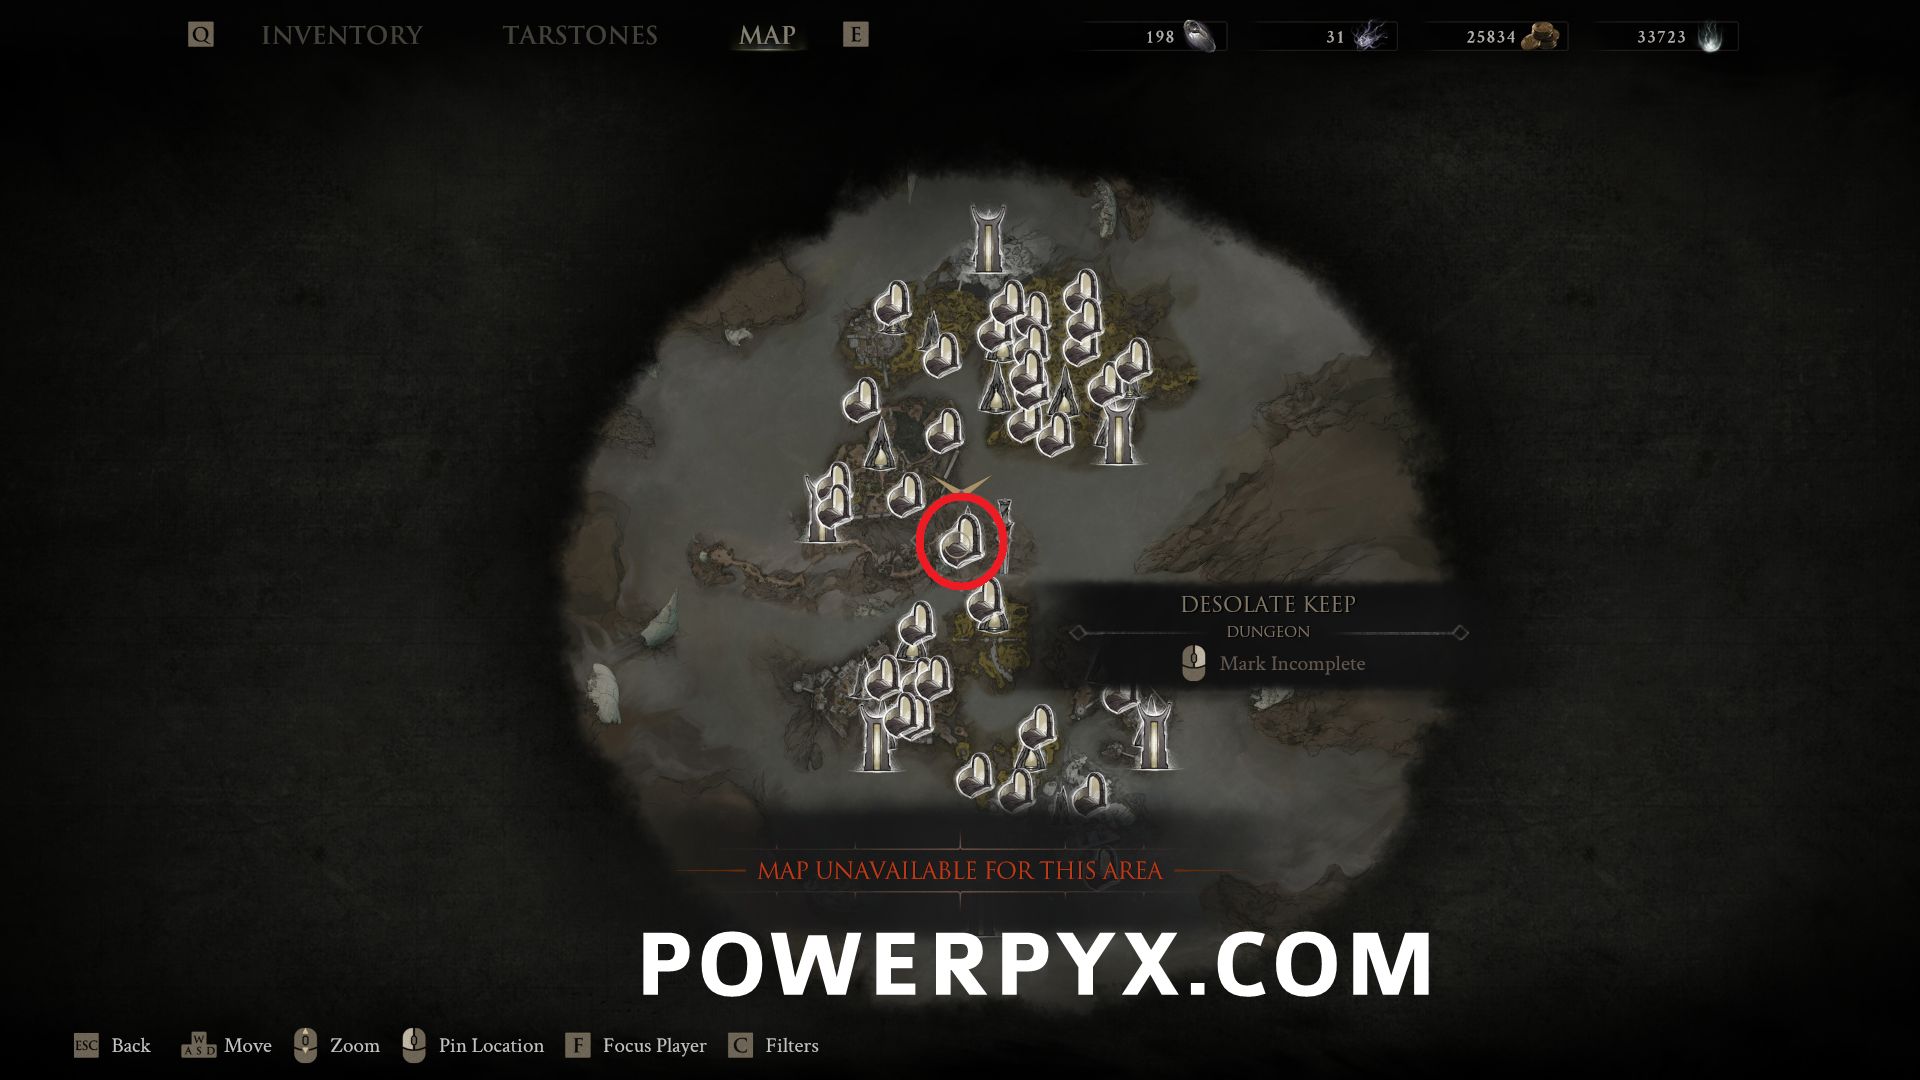
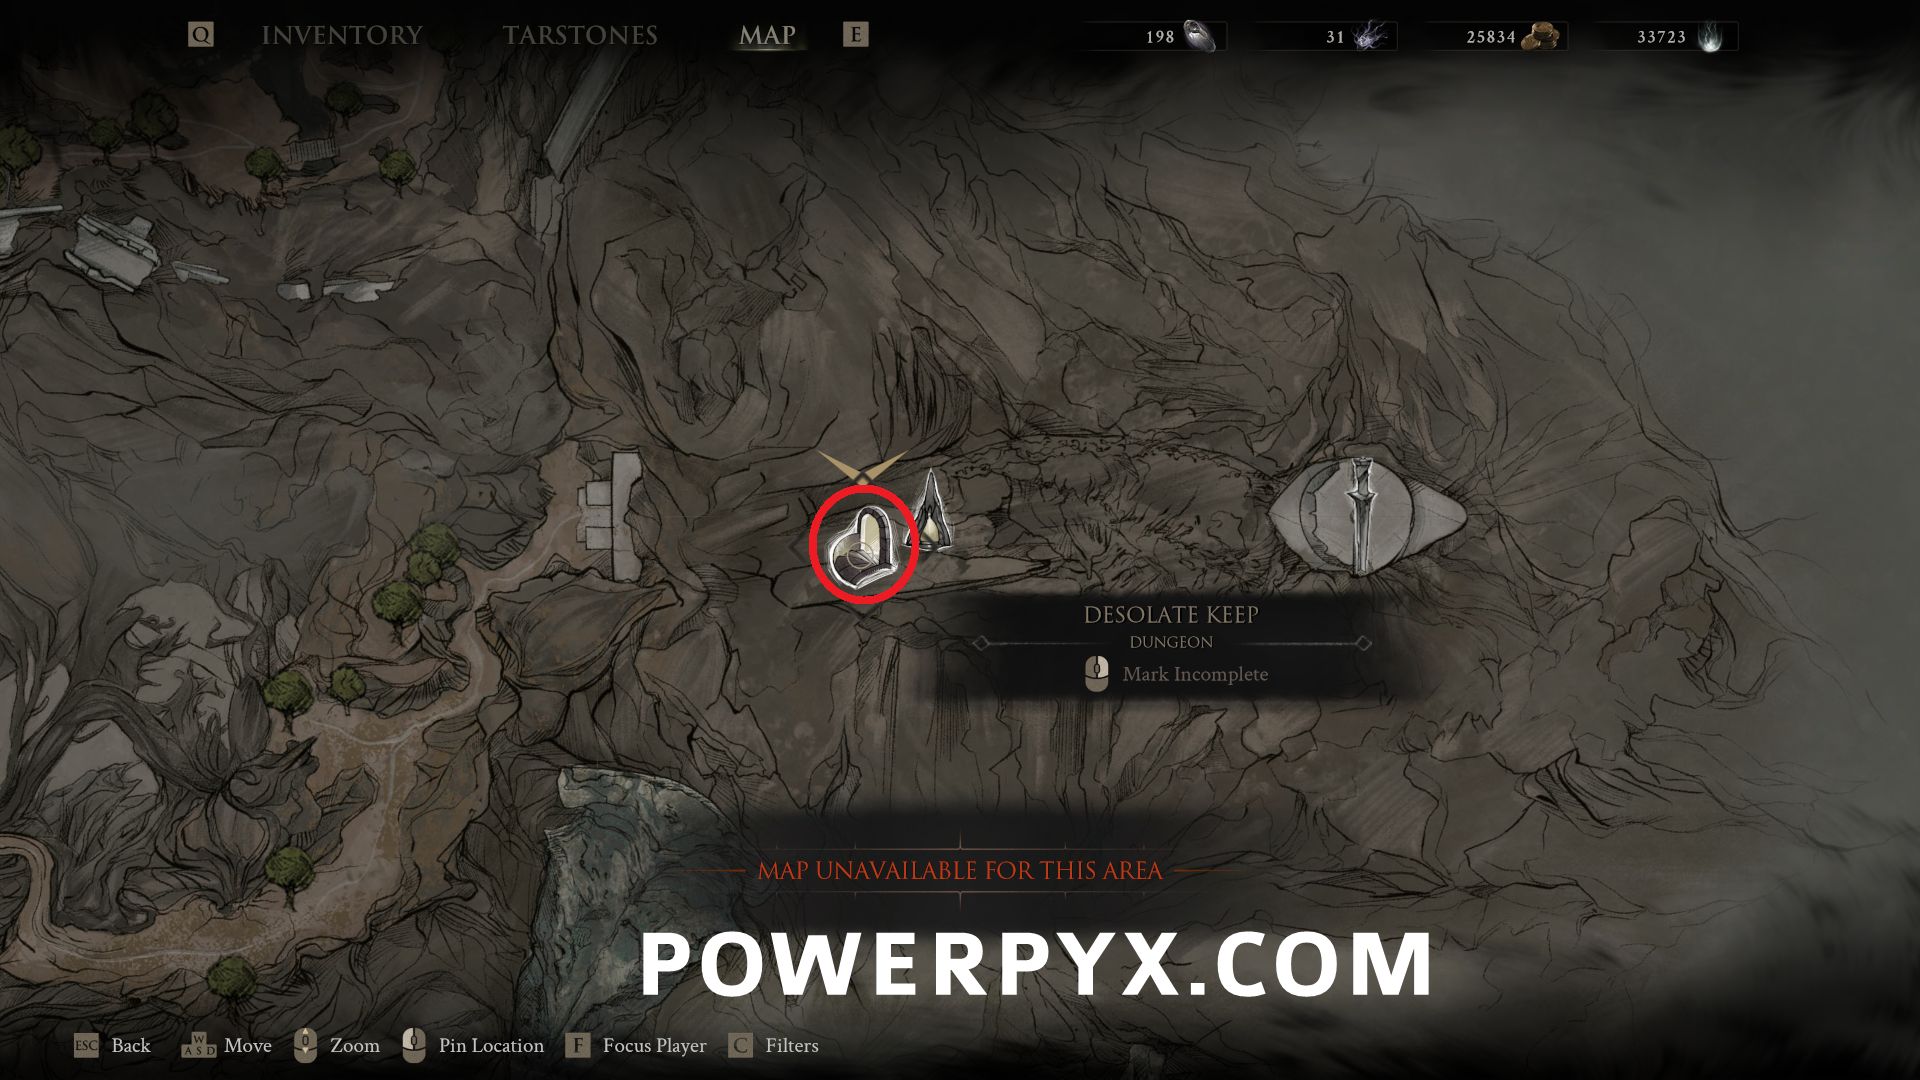
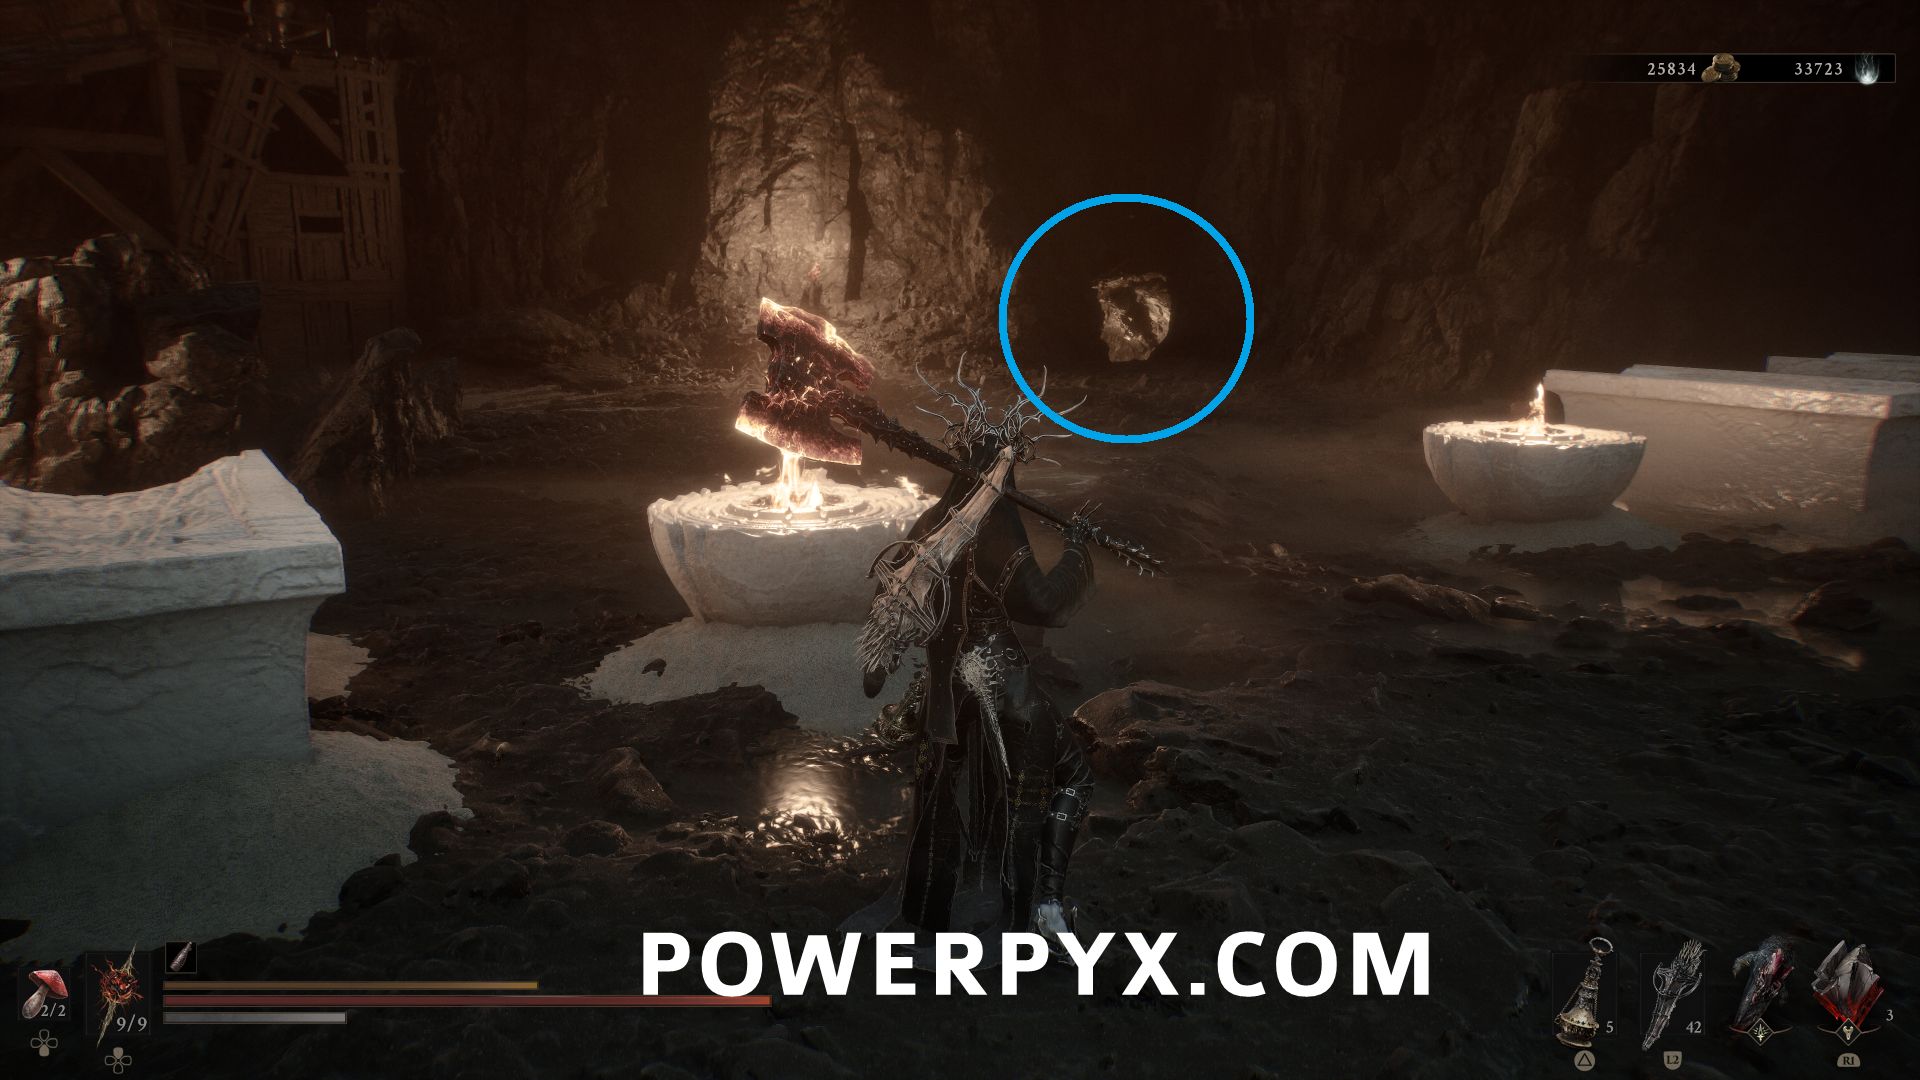
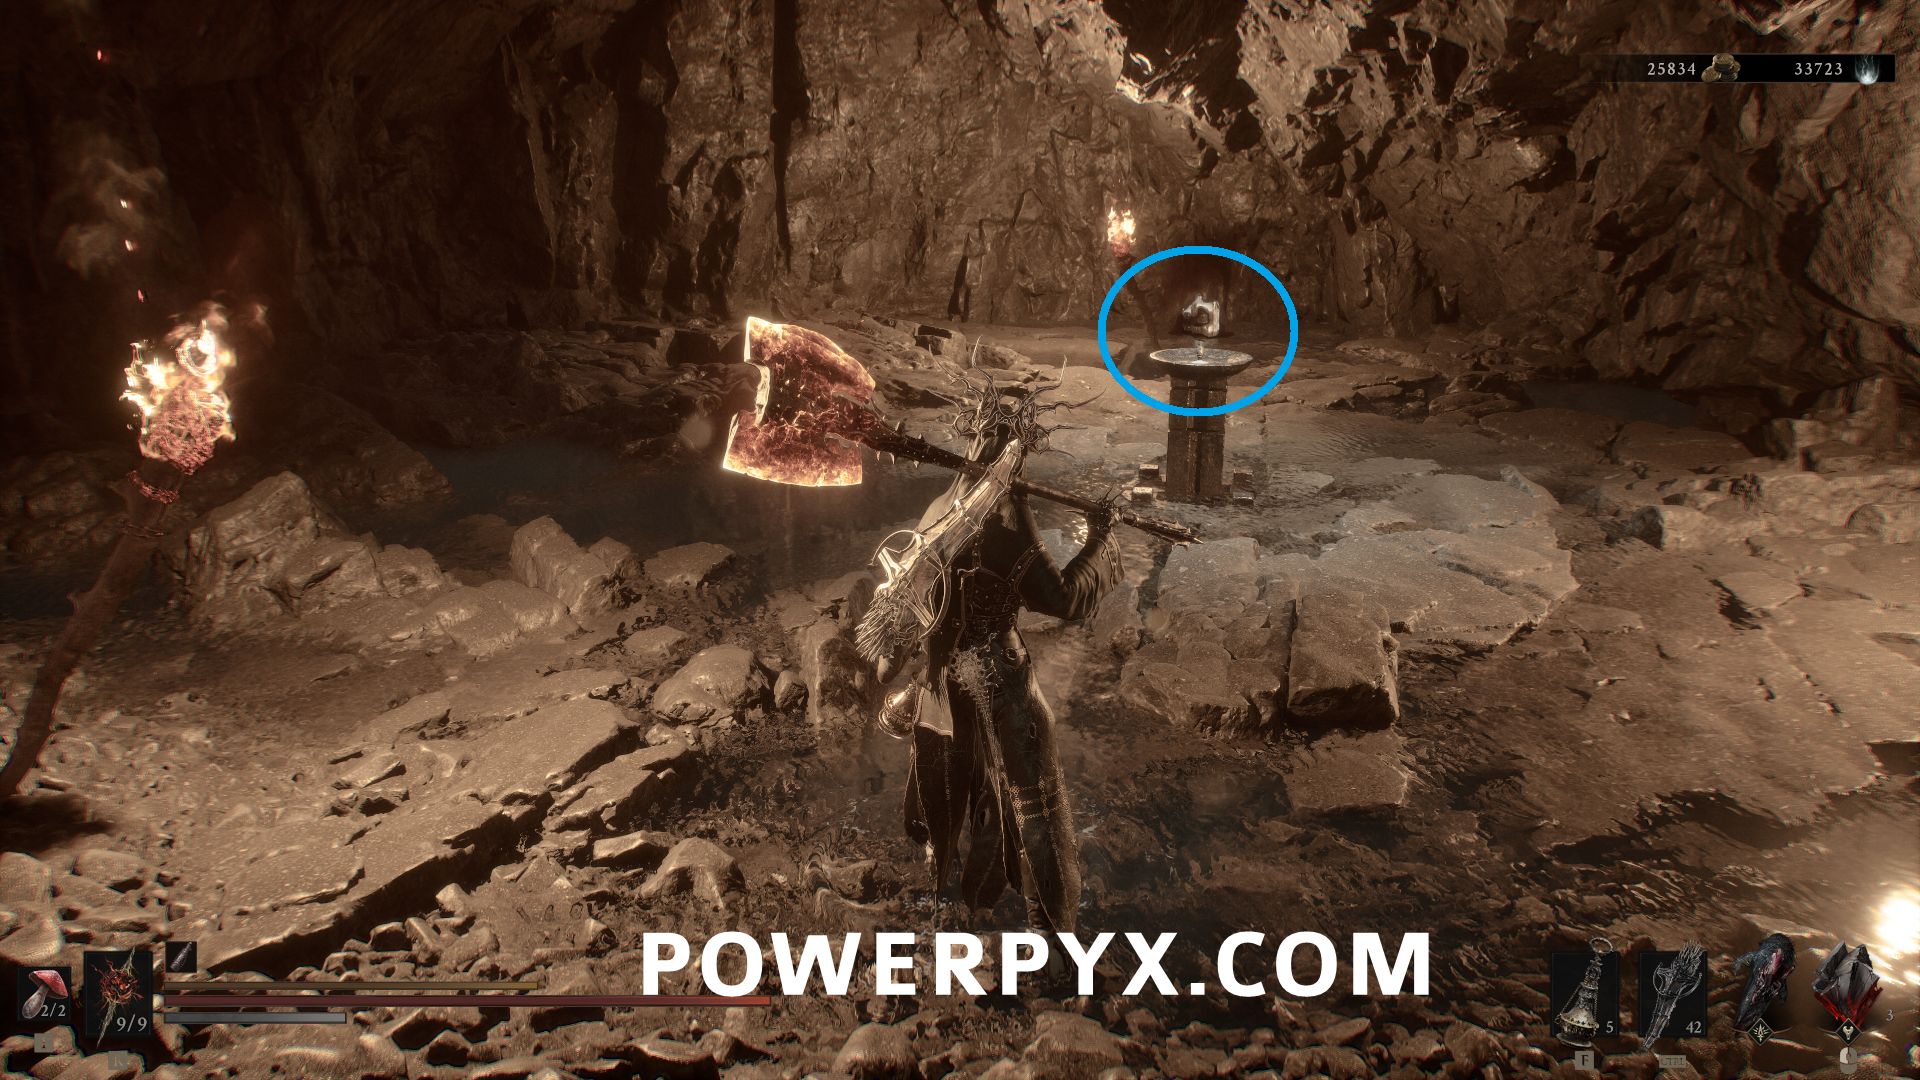
#1 – Desolate Keep – In the room with Sester Genessa, facing away from her on the right side is a wall with a white symbol. Attack it to reveal a hidden room with 4 chains. Attack all 4 chains and you’ll be able to interact with goblet in the center to “commune with chaos”. After having progressed a certain amount in-game (possibly beating at least one main boss), you will be taken to the hidden Desolate Keep Dungeon.
Fainweald
Nochtean Gate
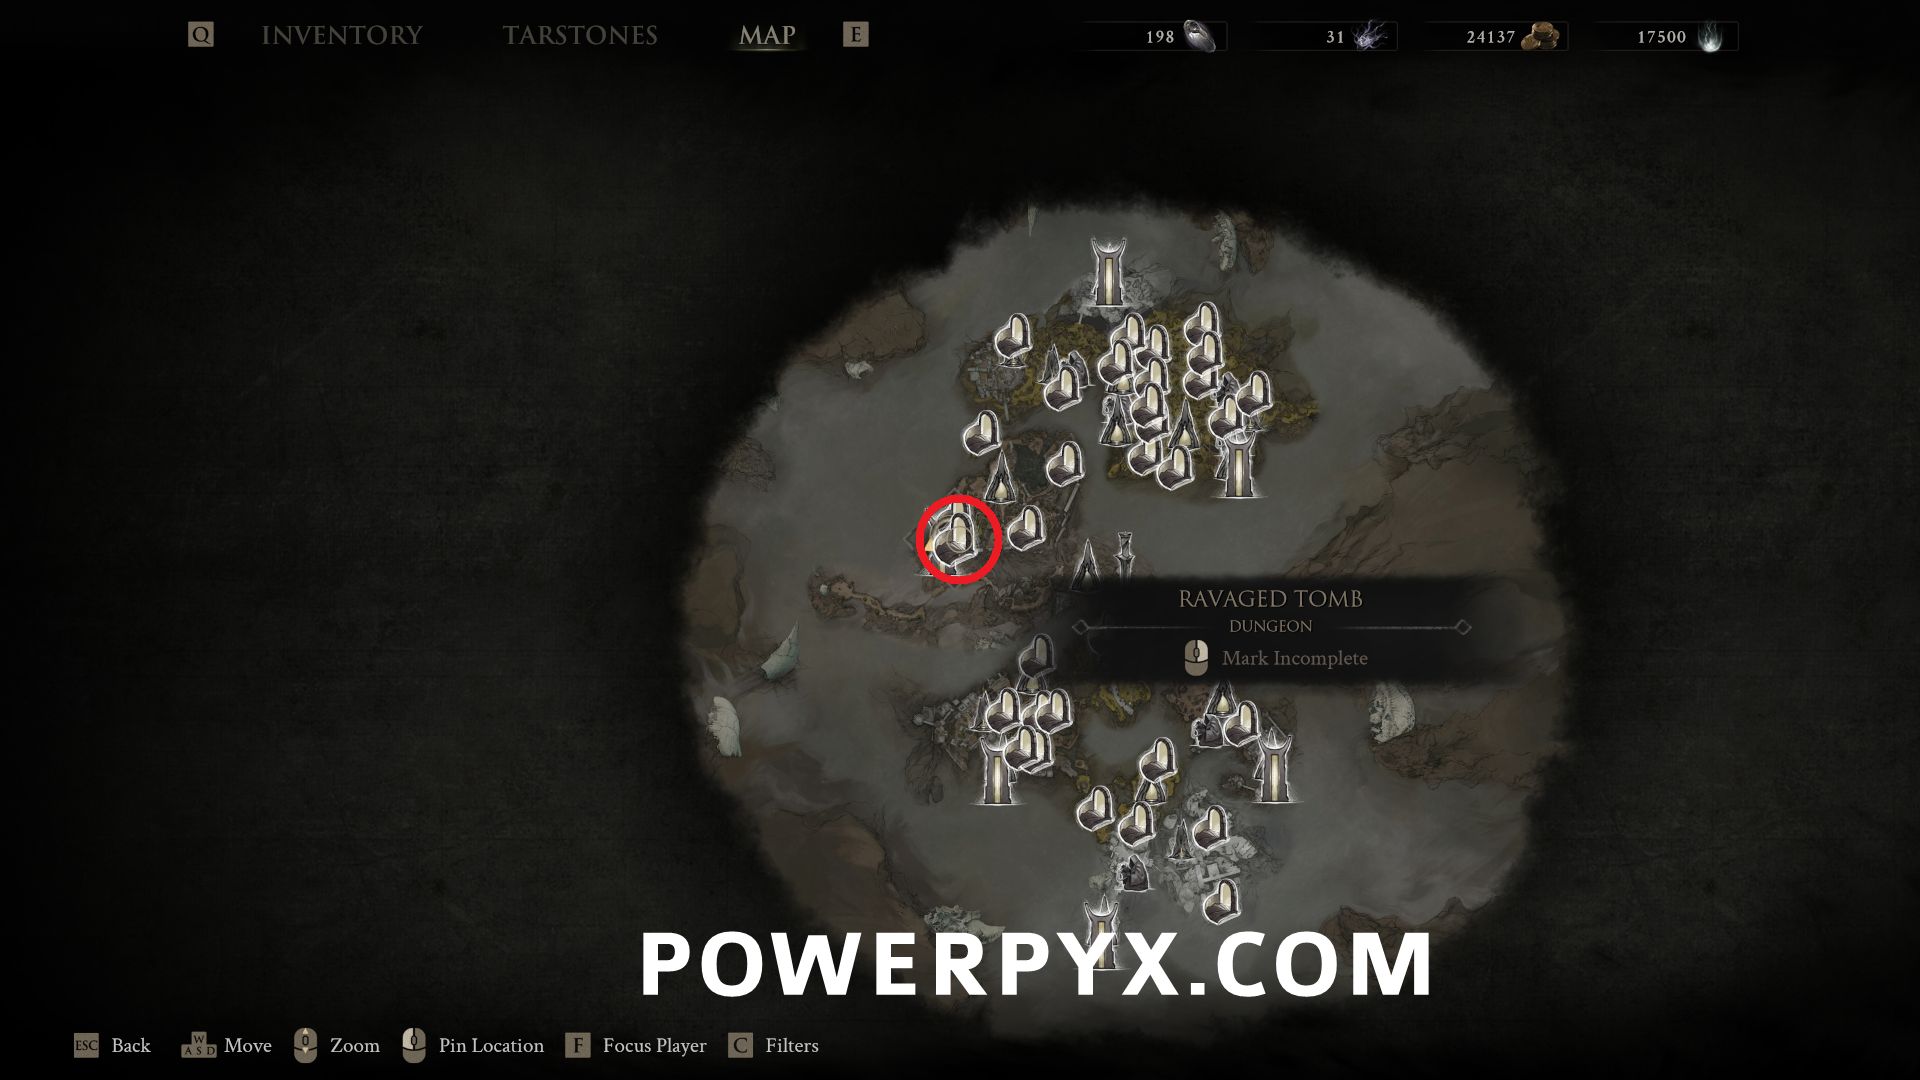
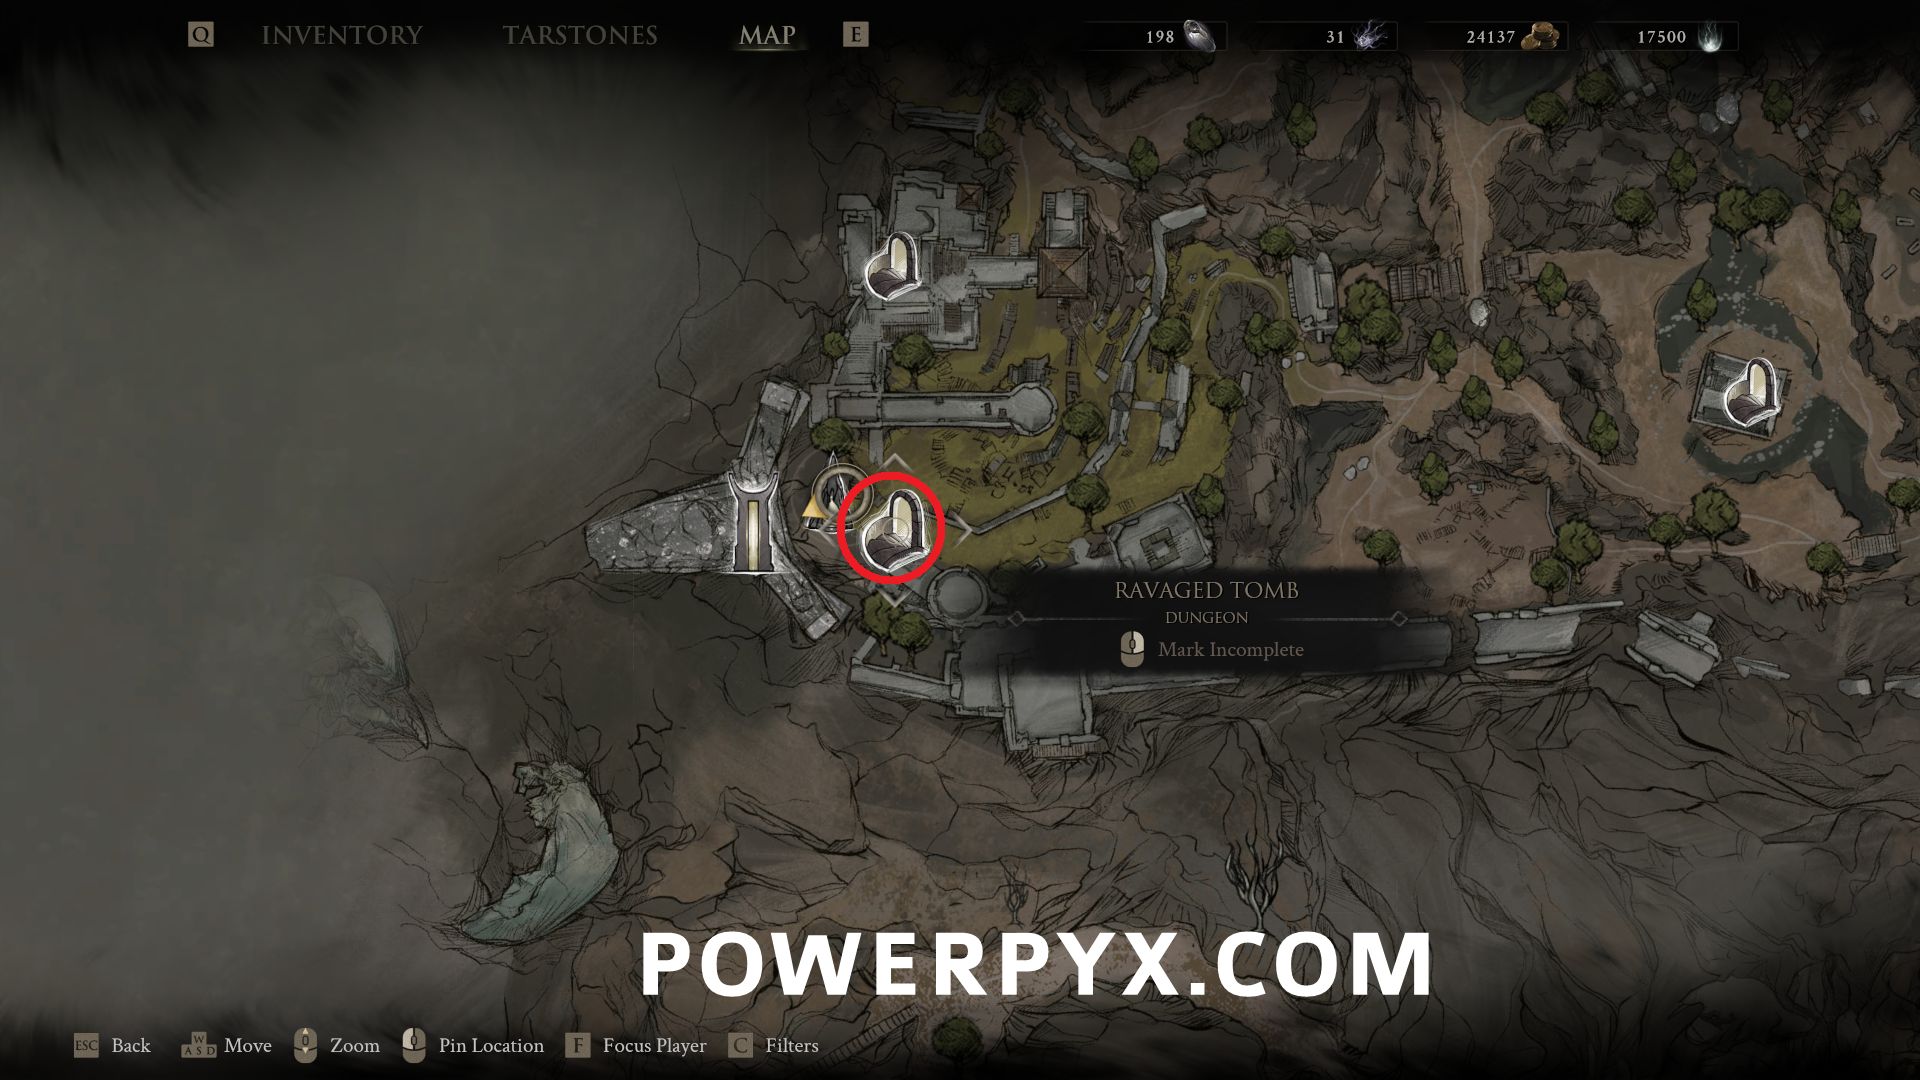
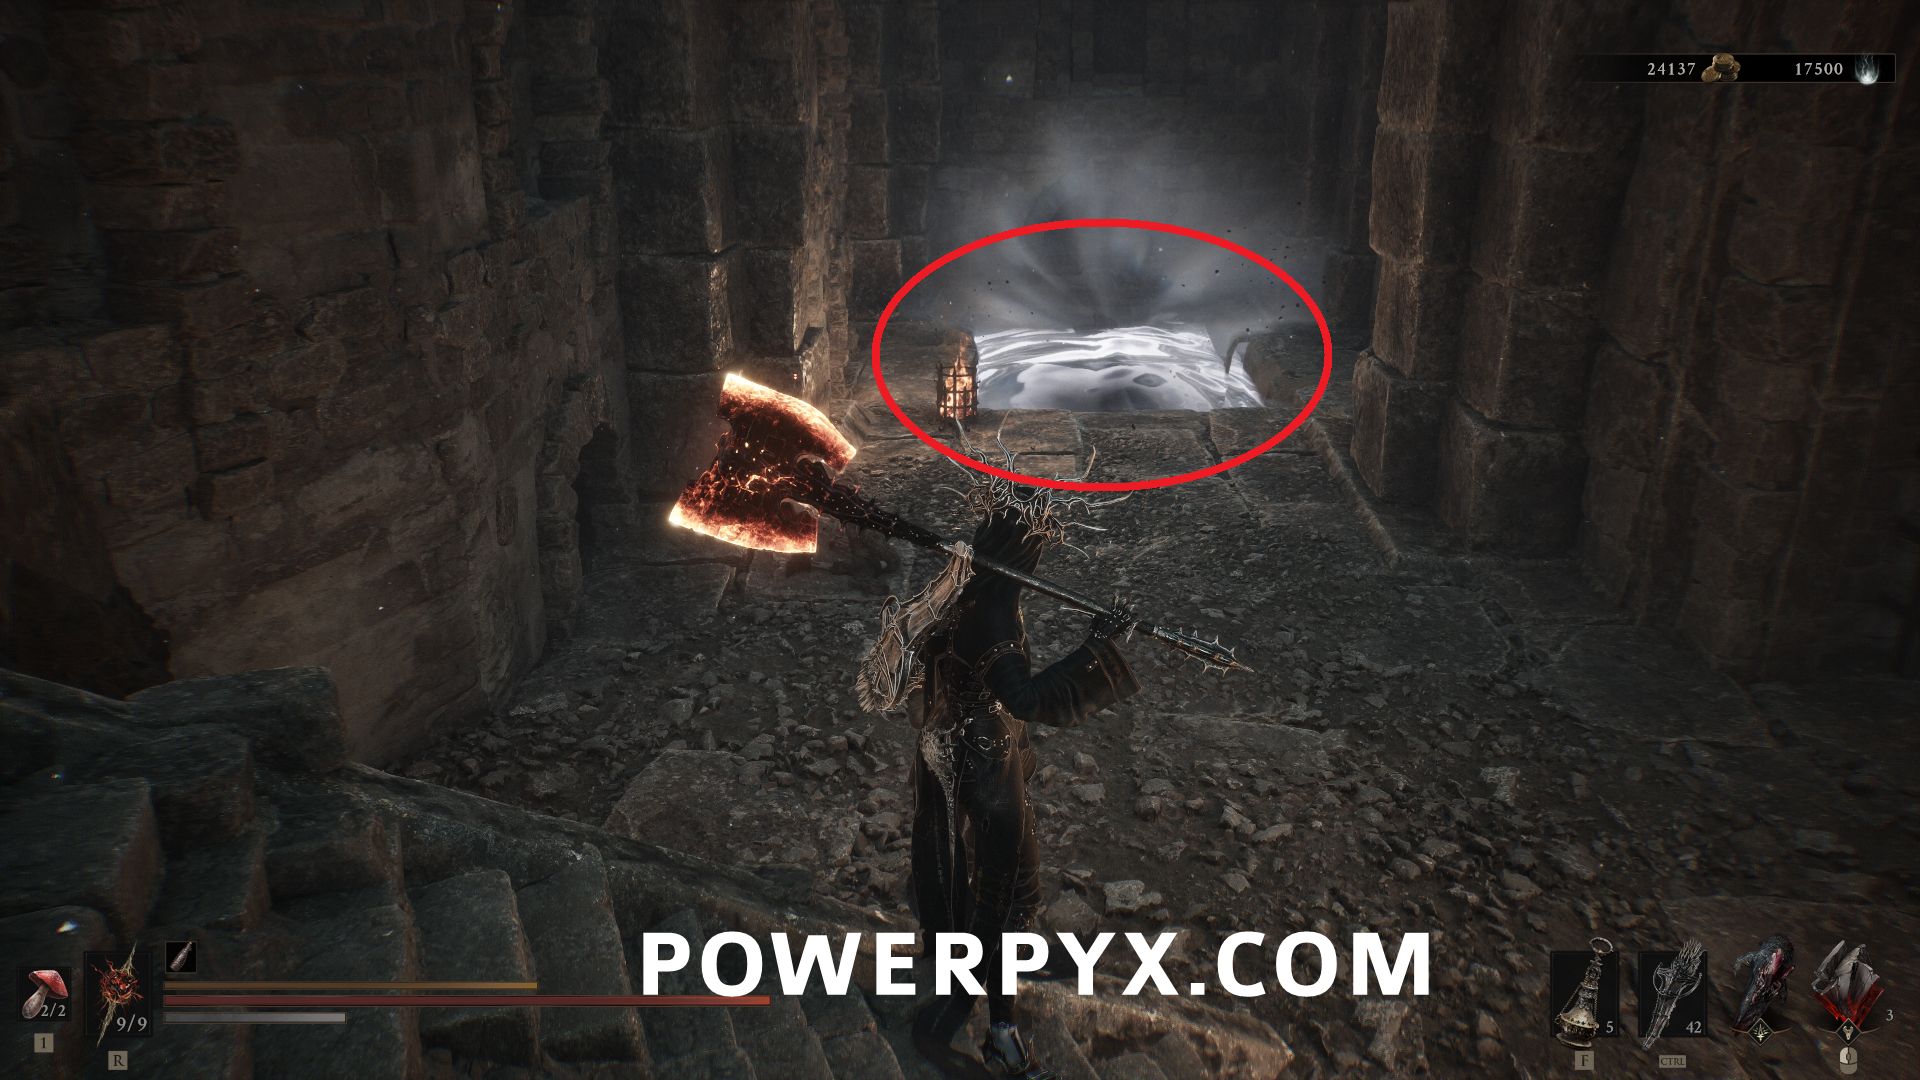
#2 – Ravaged Tomb – From Nocthean Gate Beacon, go southeast down the elevator, and the entrance is in the room at the bottom.
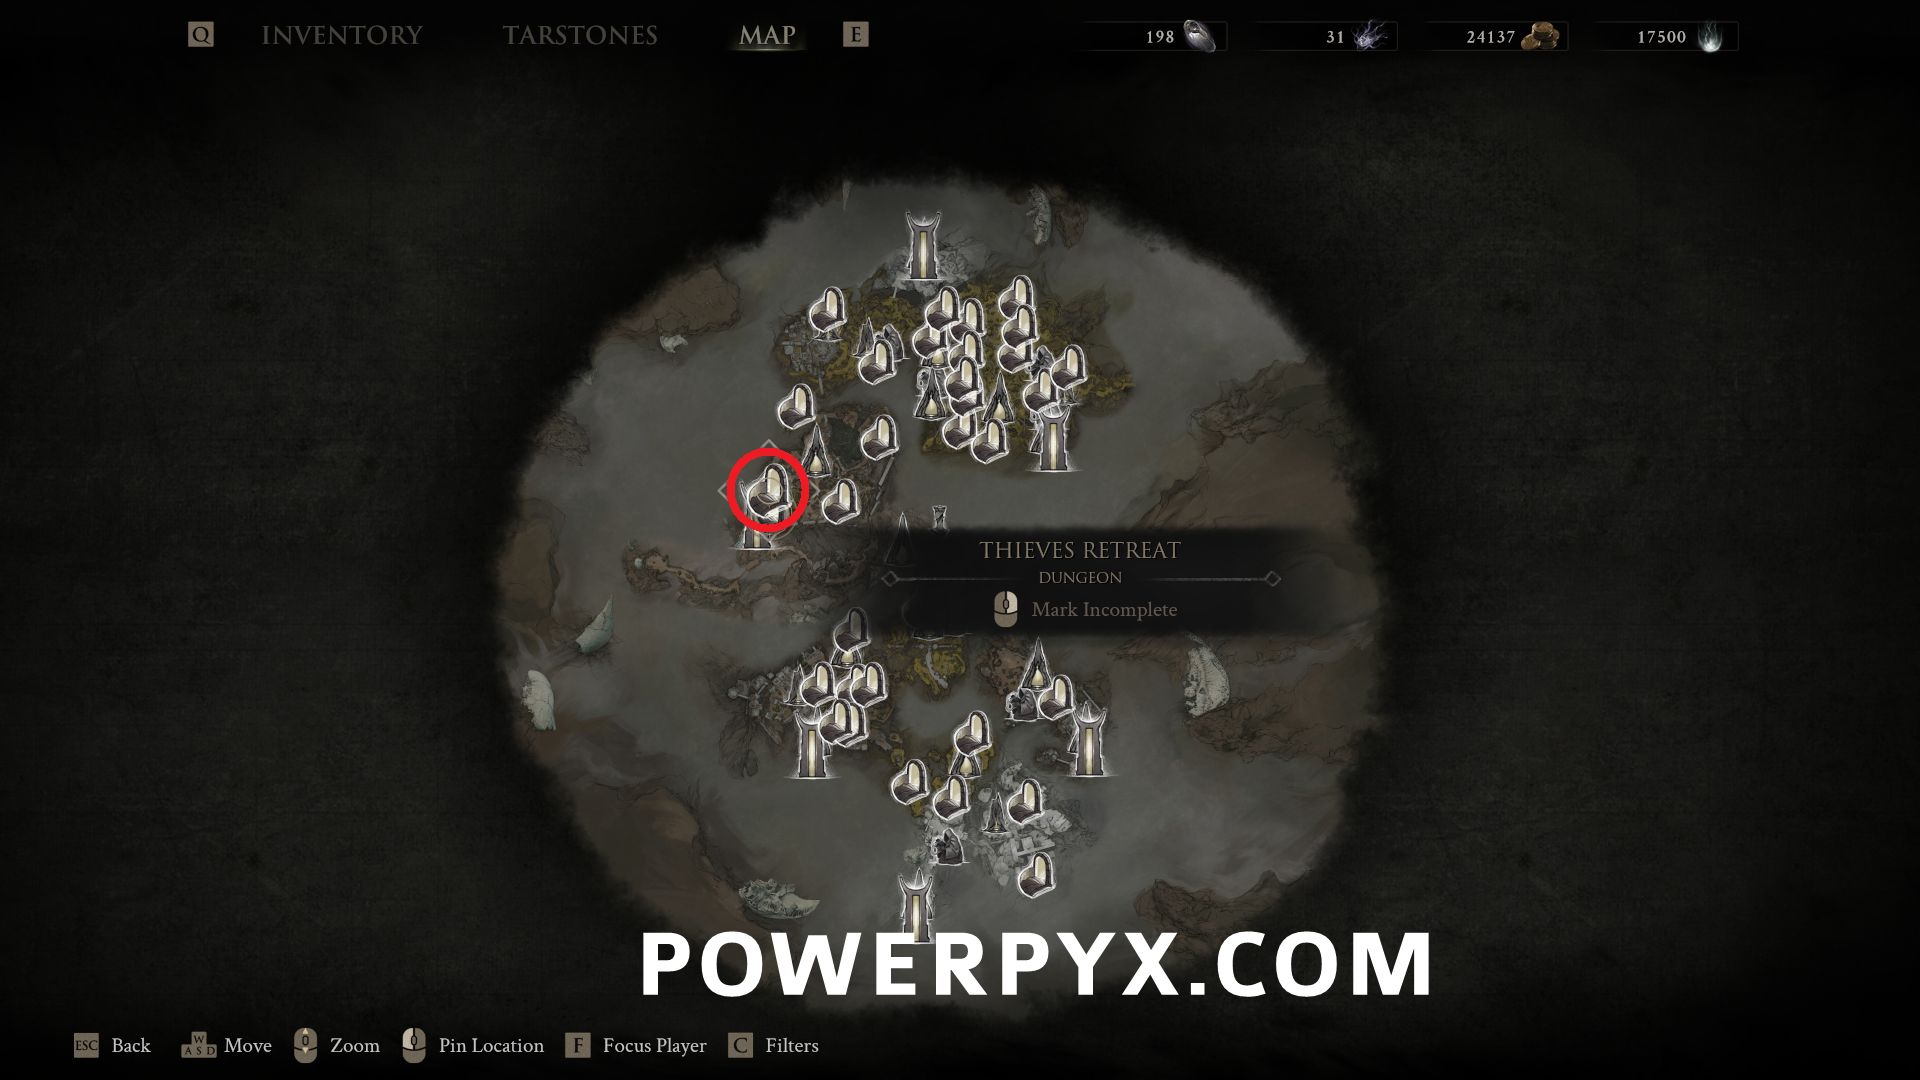
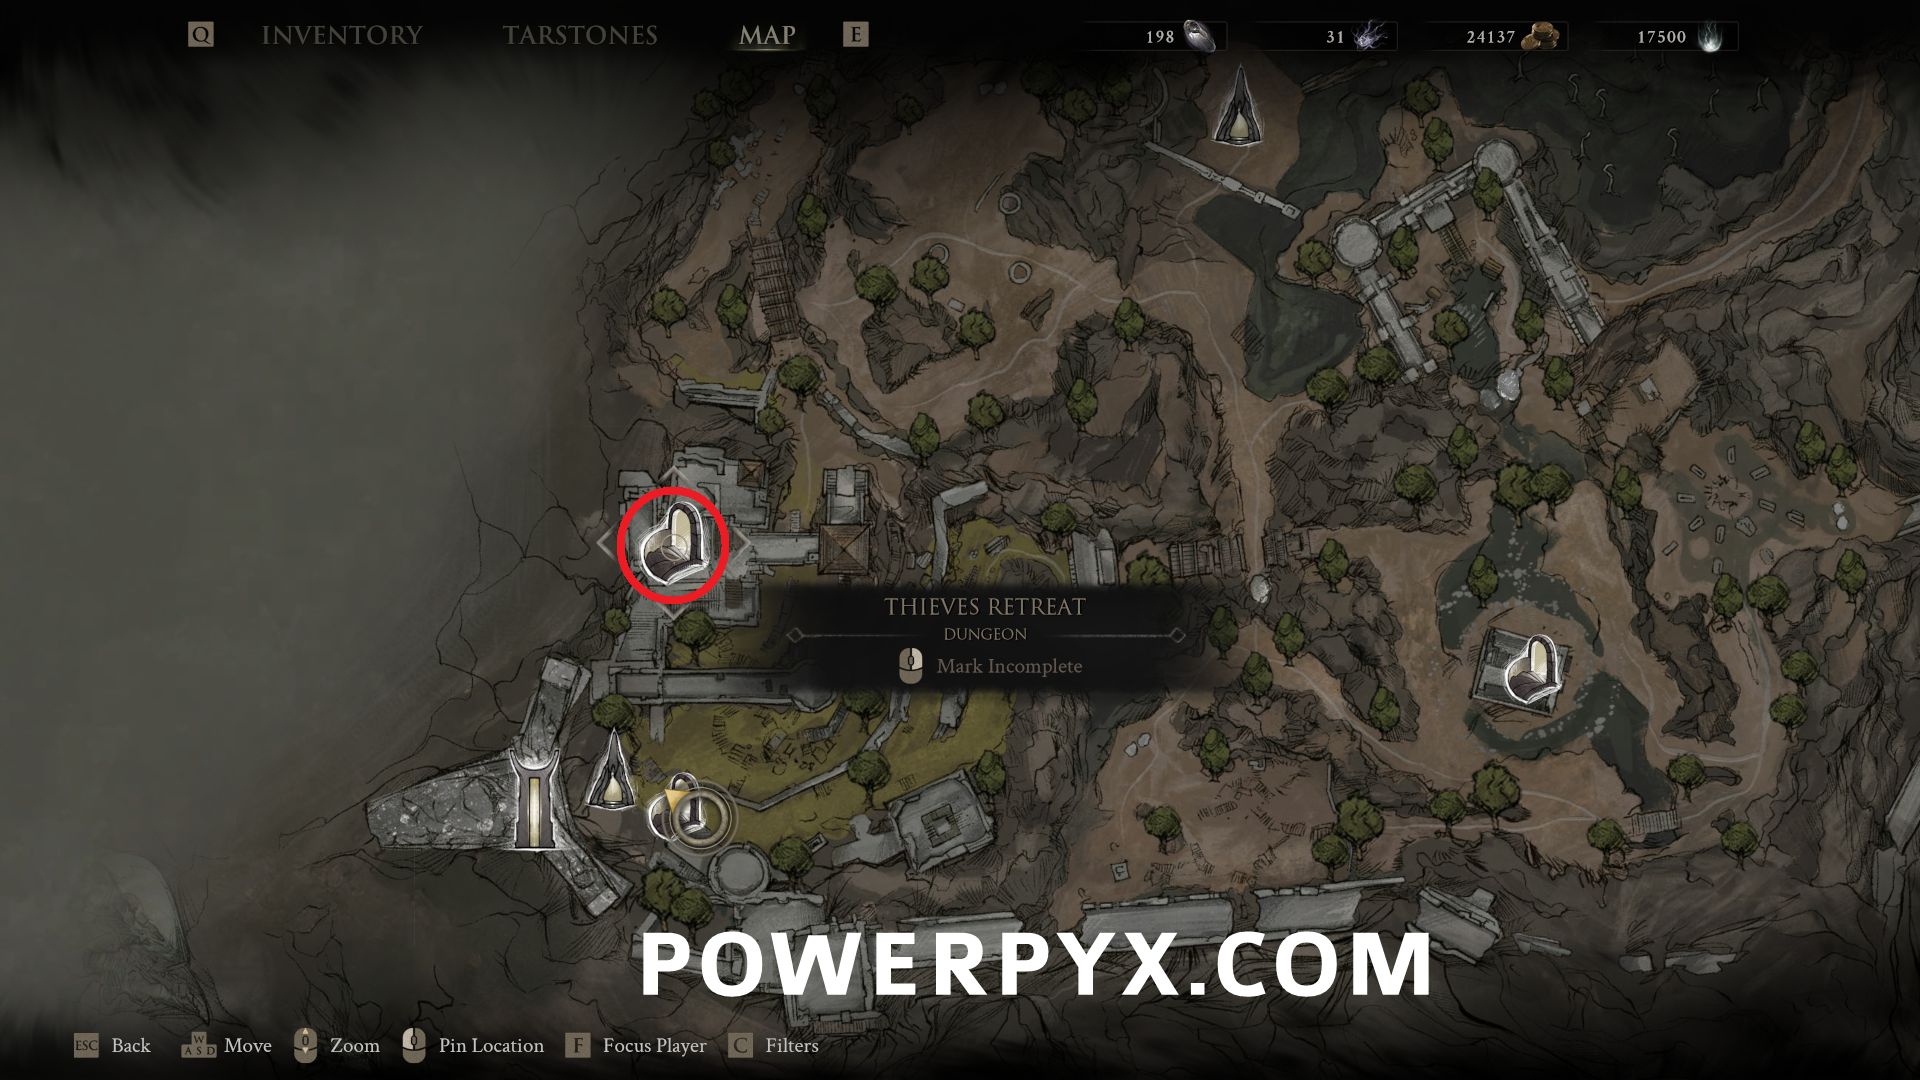
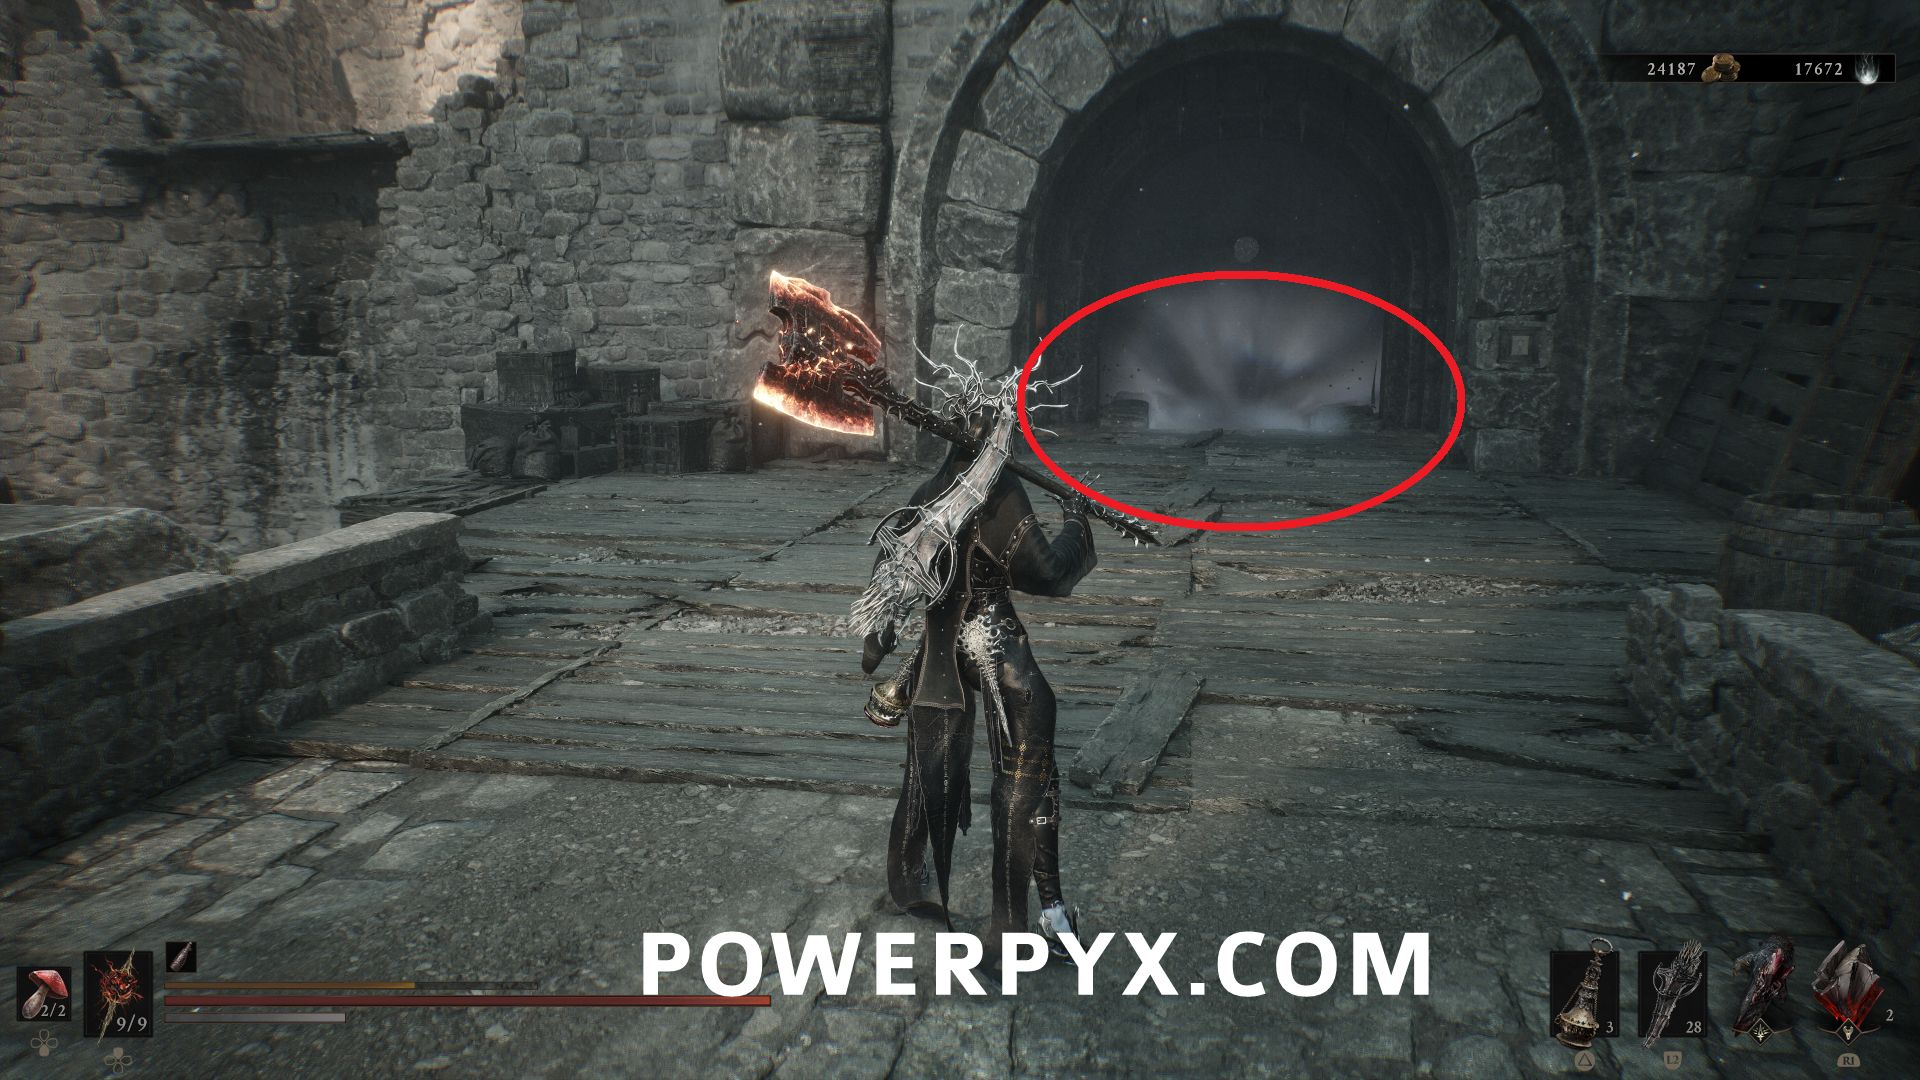
#3 – Thieves Retreat – From Nocthean Gate Beacon, go north and drop one level below, where you can press a switch to open a metal gate leading to the entrance of this dungeon.
Mushroom Village
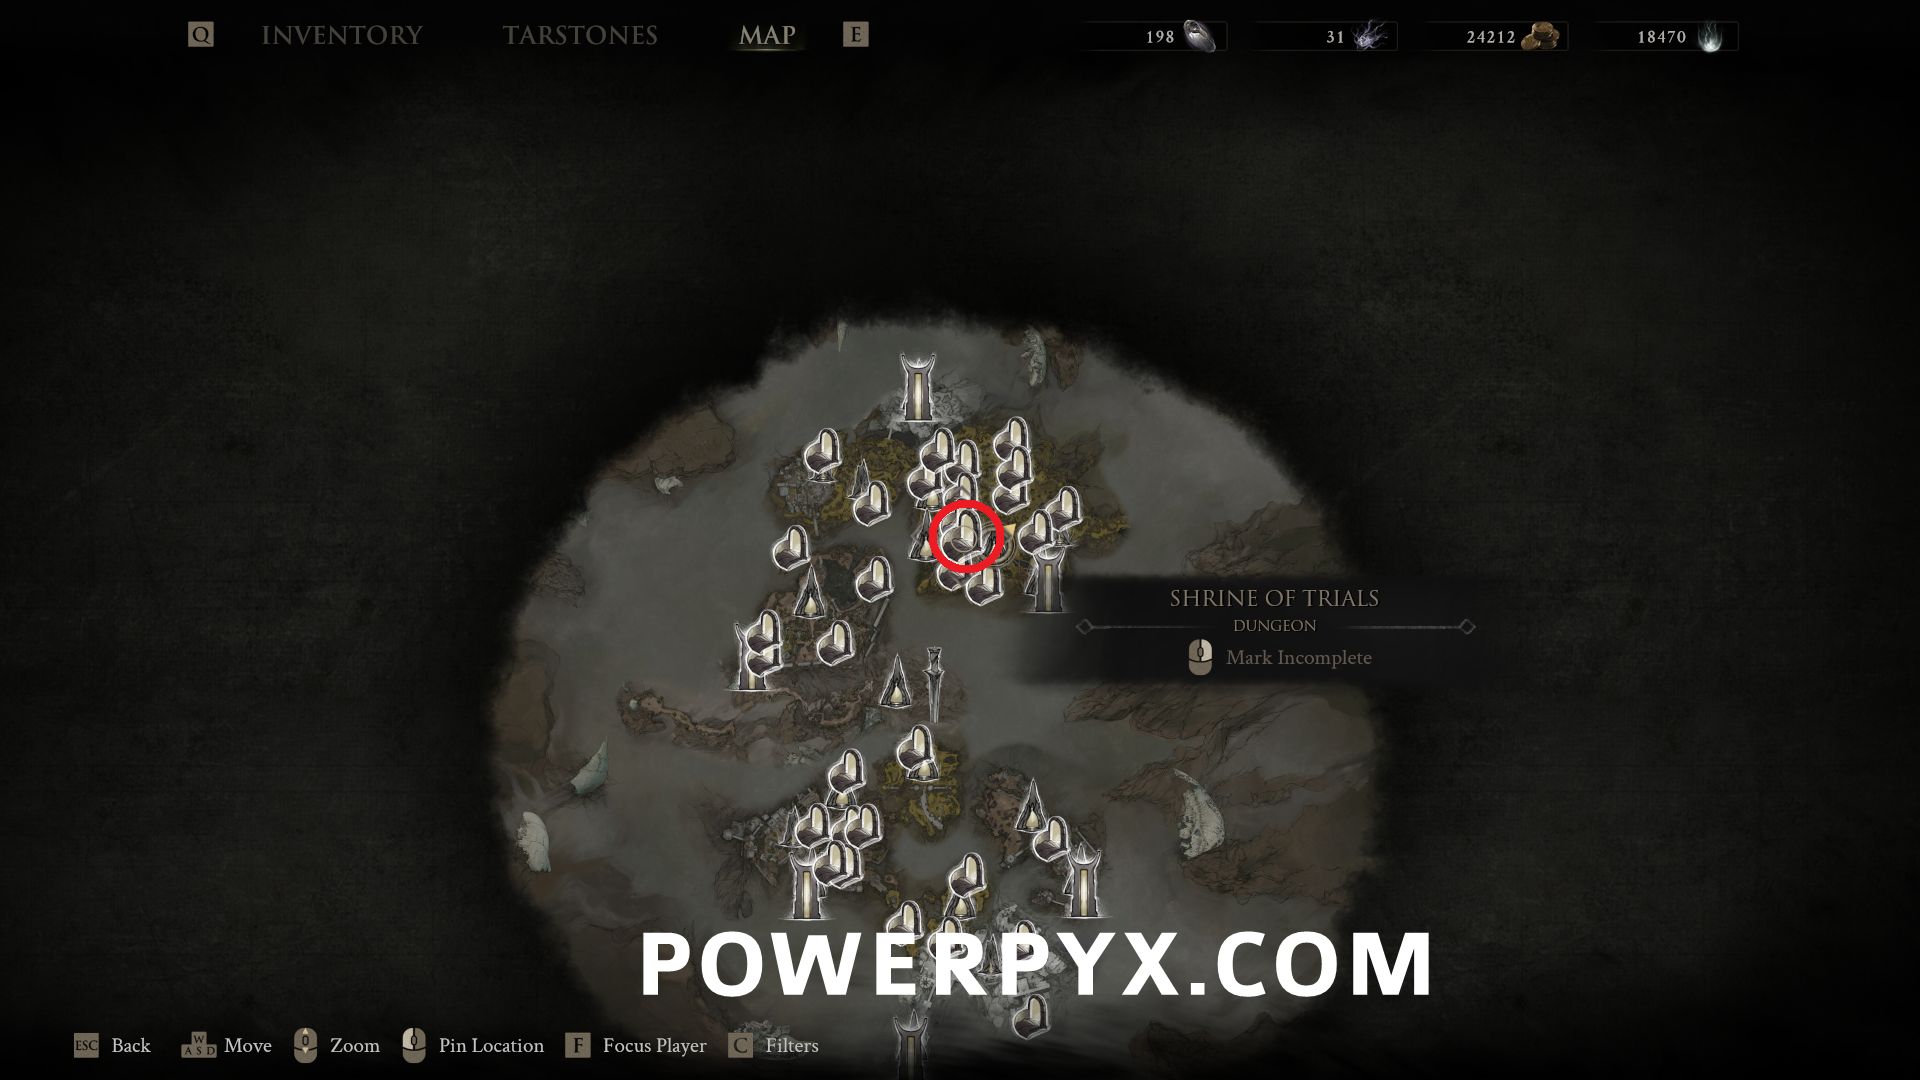
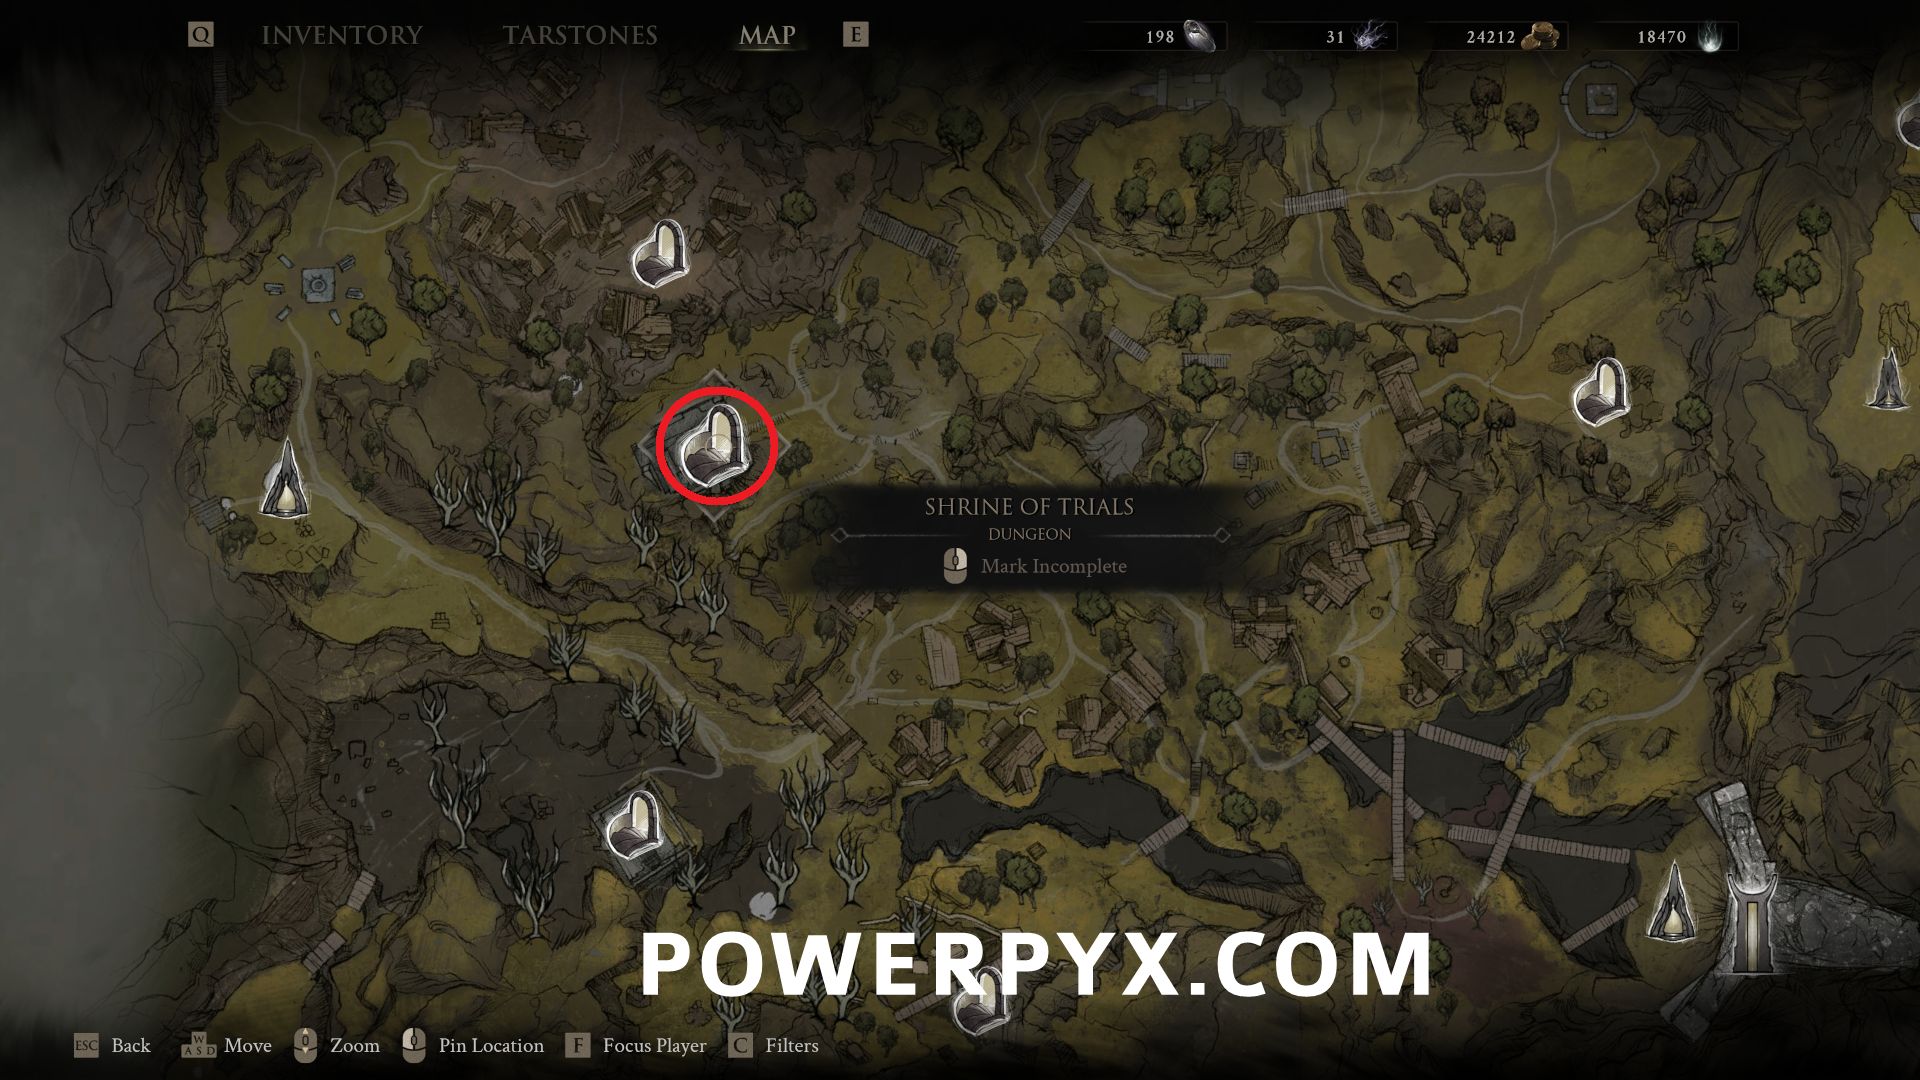
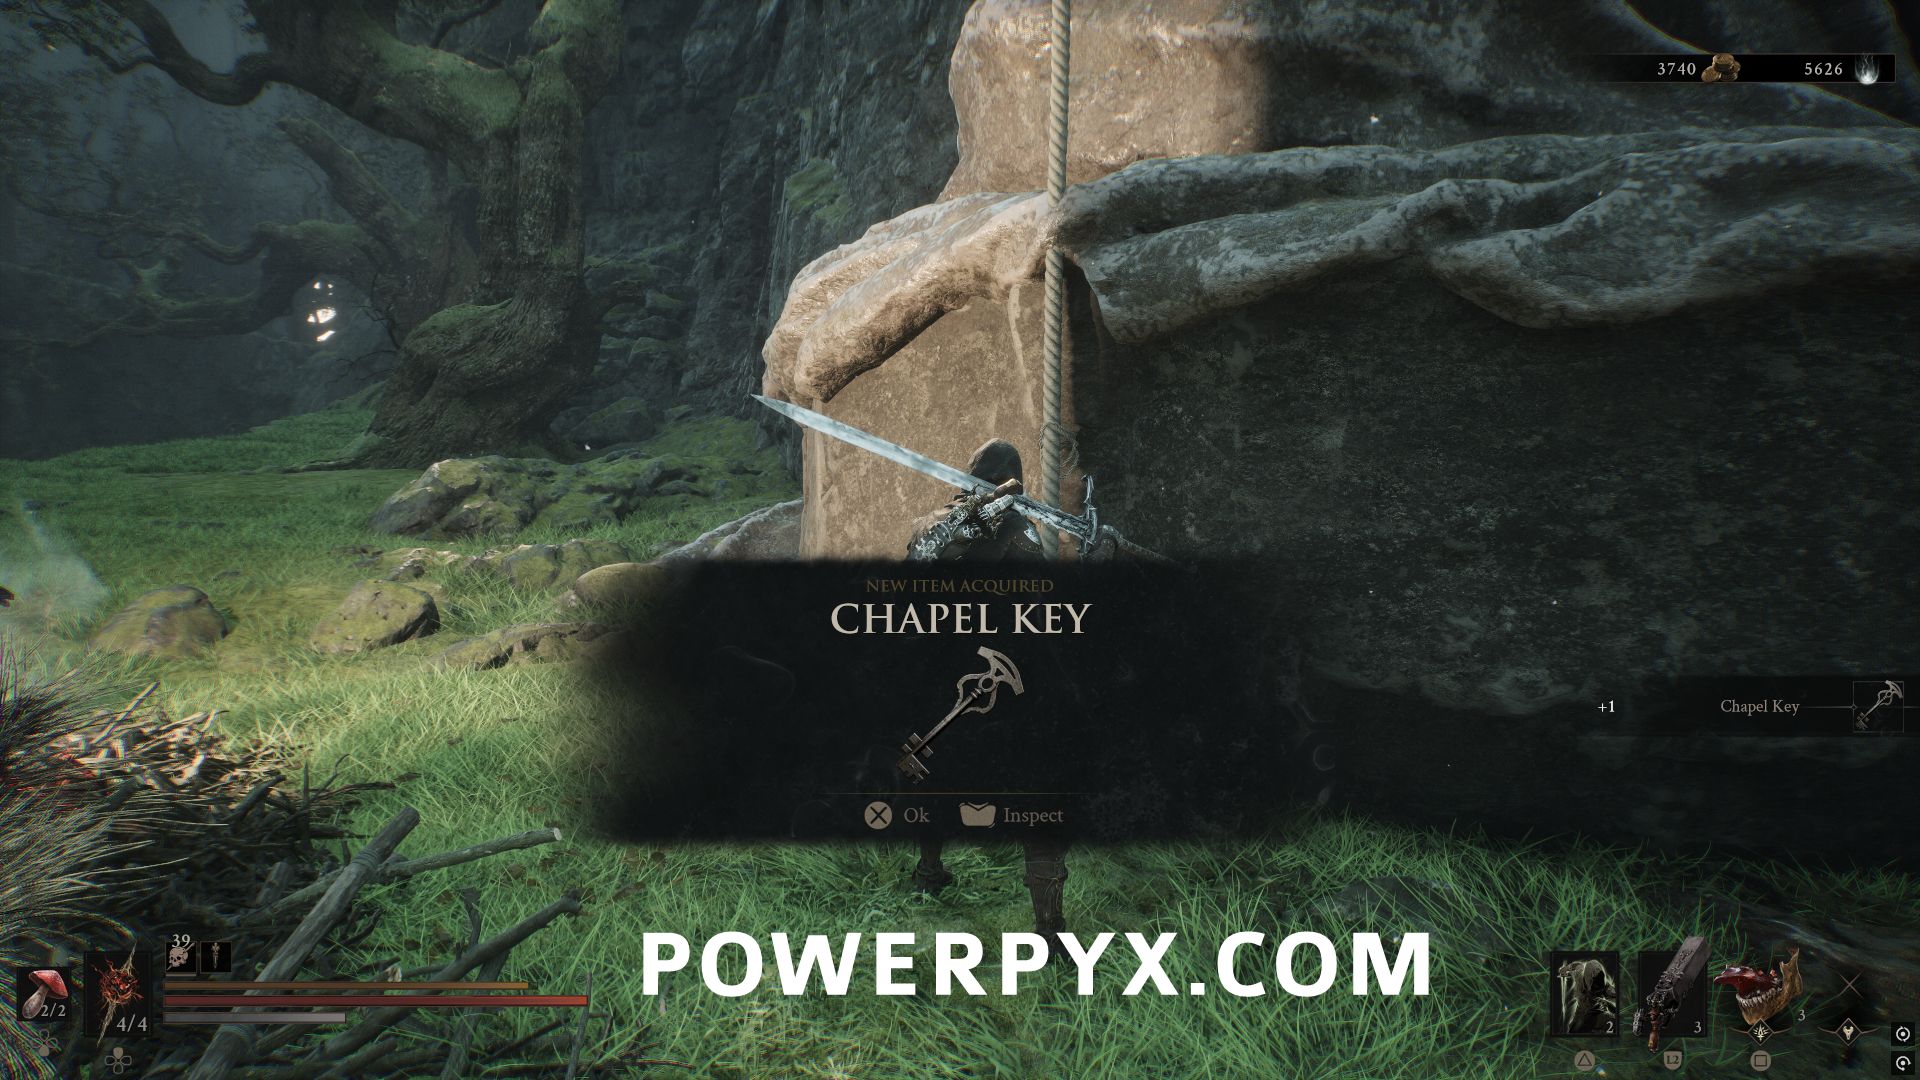
#4 – Shrine of Trials – Northwest of Mushroom Village Beacon, use the Chapel key to open the doorway and enter the Shrine of Trials dungeon.
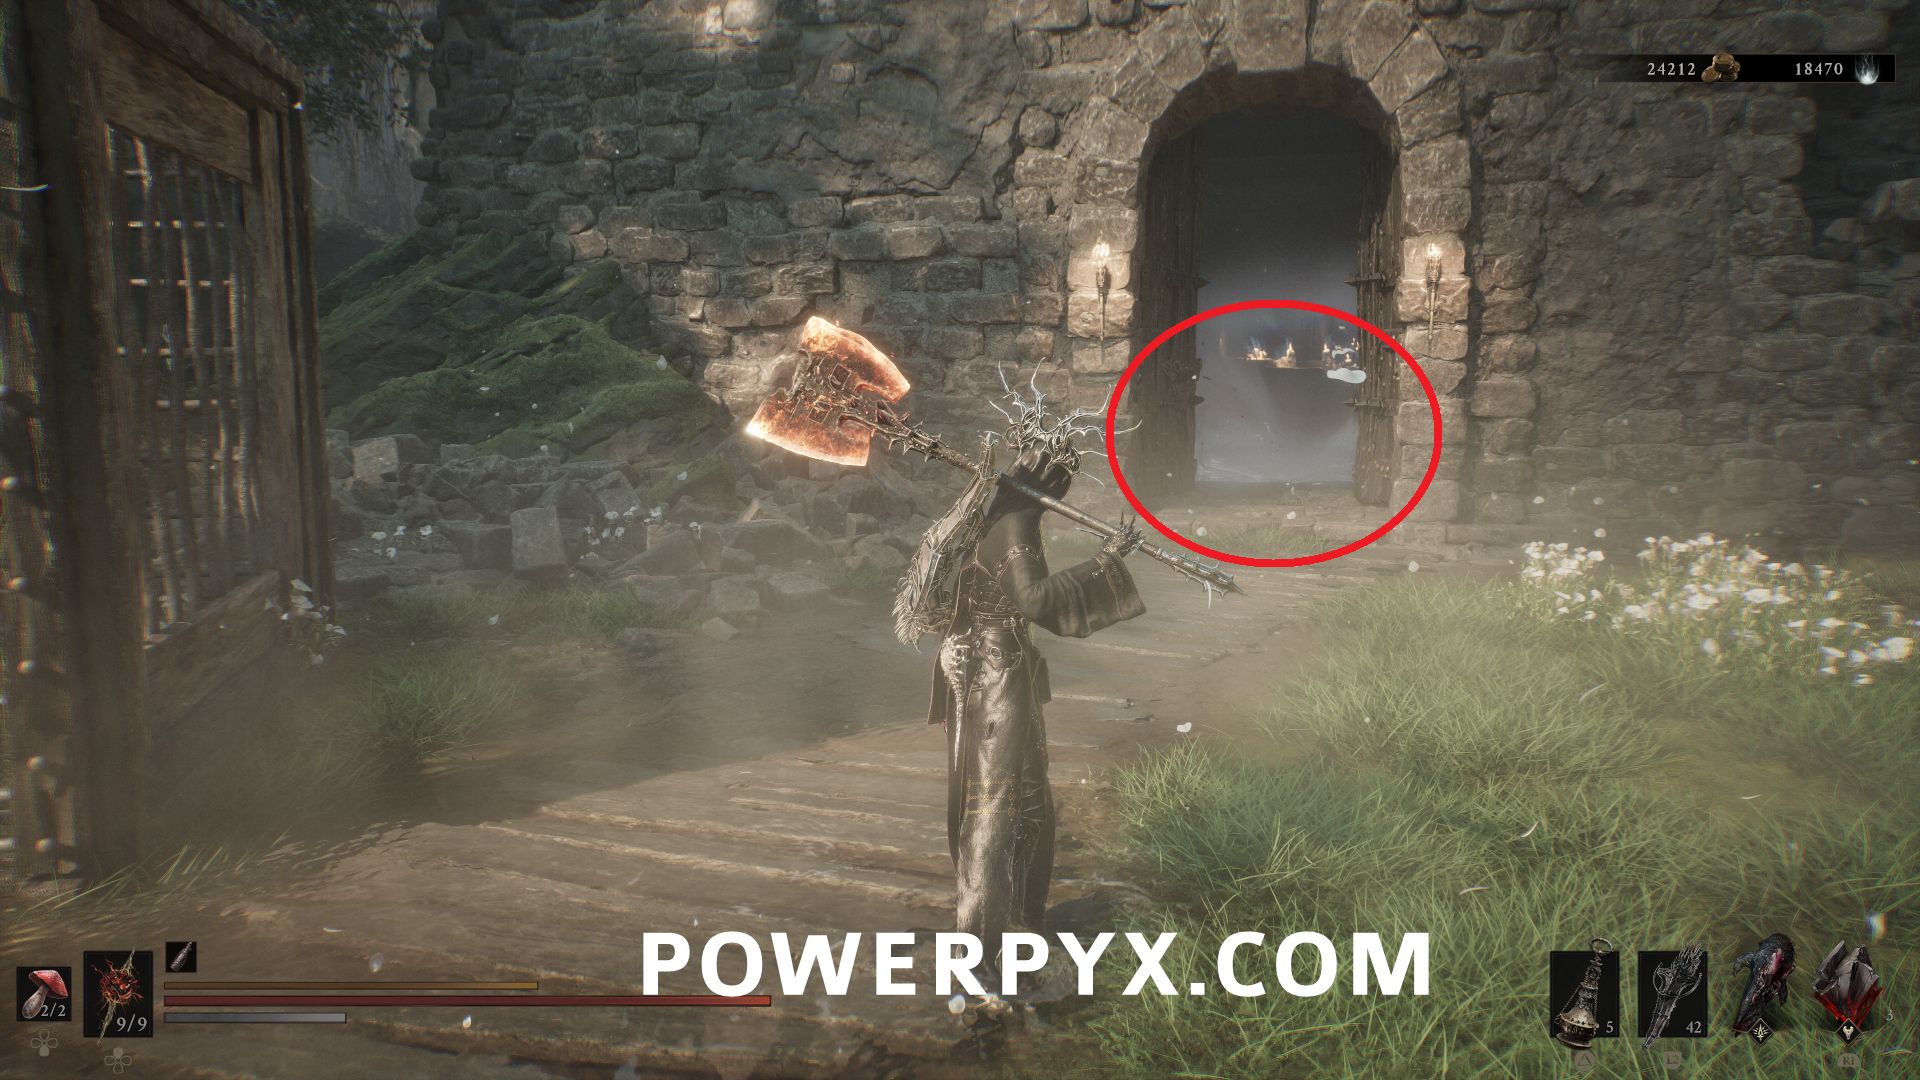
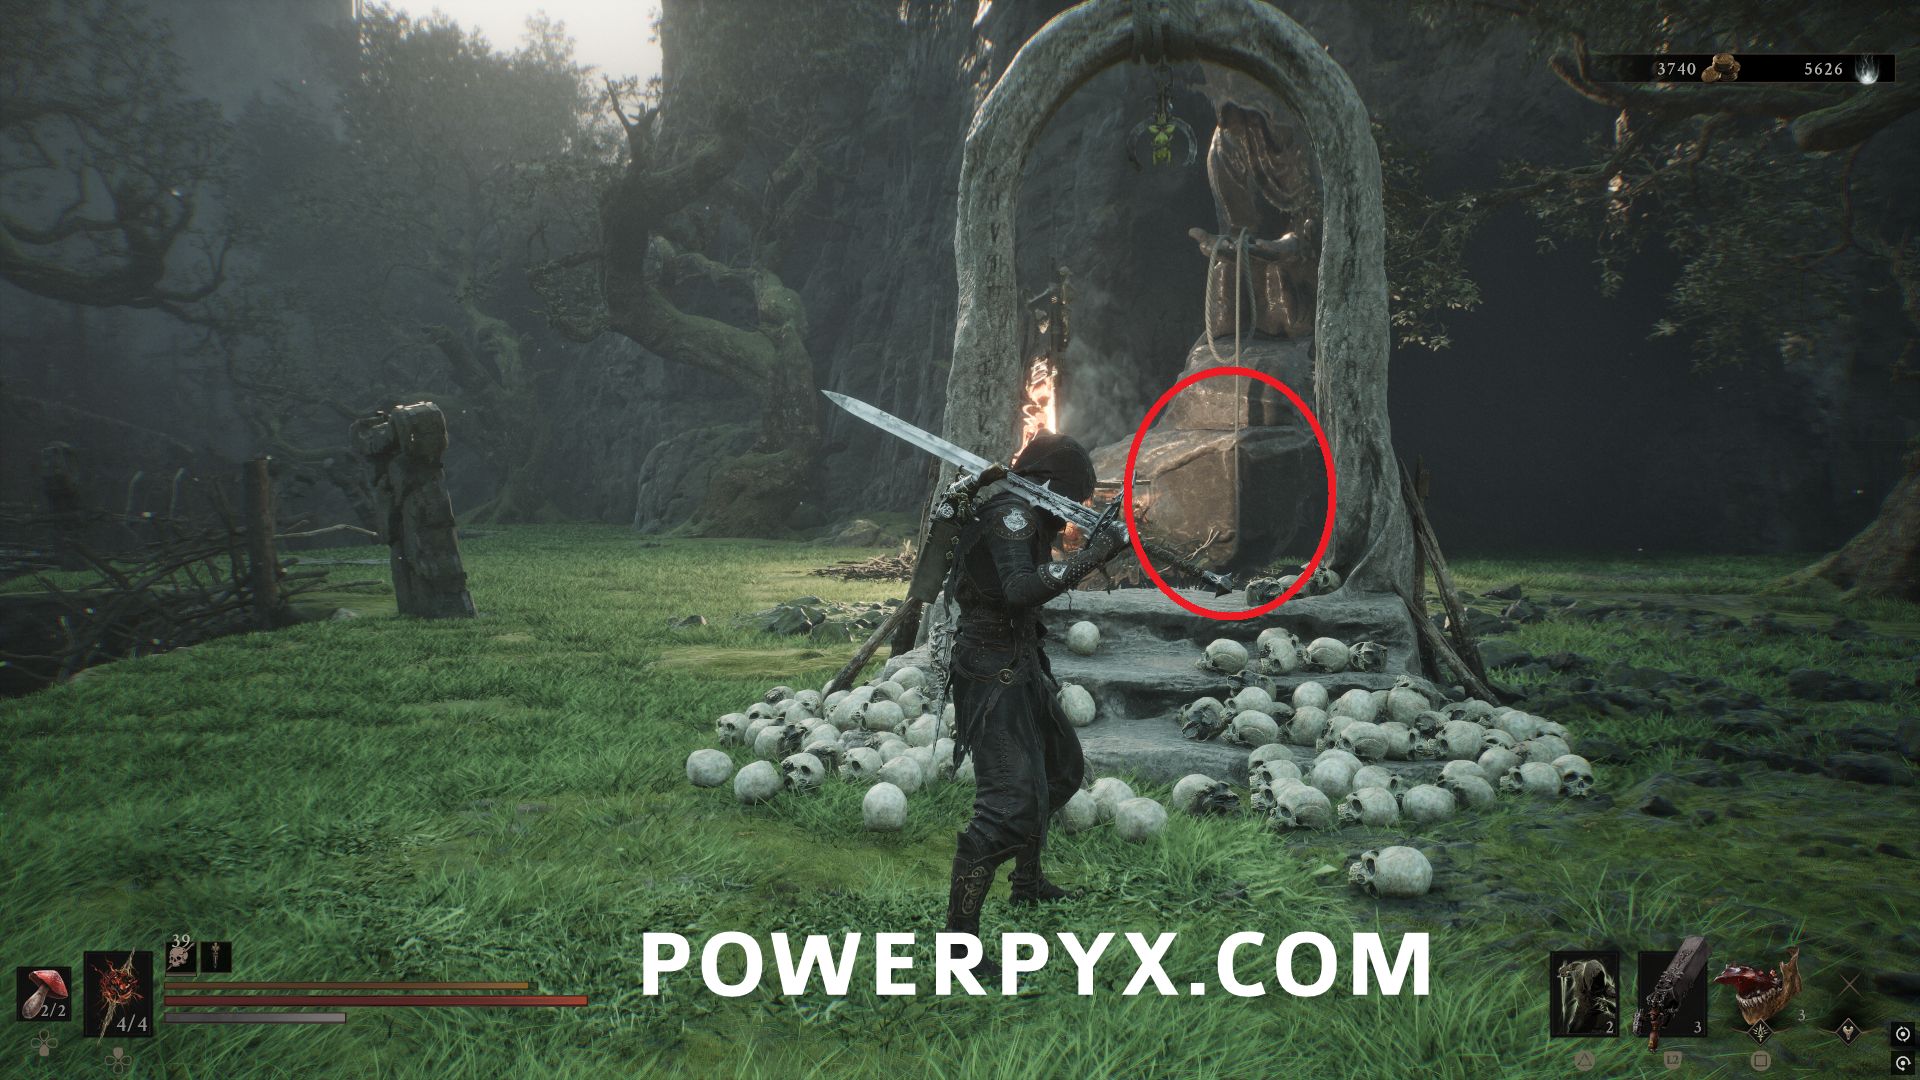
To obtain the Chapel Key, go south of Mushroom Village Beacon to the area with the large burning pyre and the enemies nearby. On the north edge of the platform is an arch that when you walk through while facing the fire will cause a statue to appear. On the rope hanging from the statue is the Chapel Key.
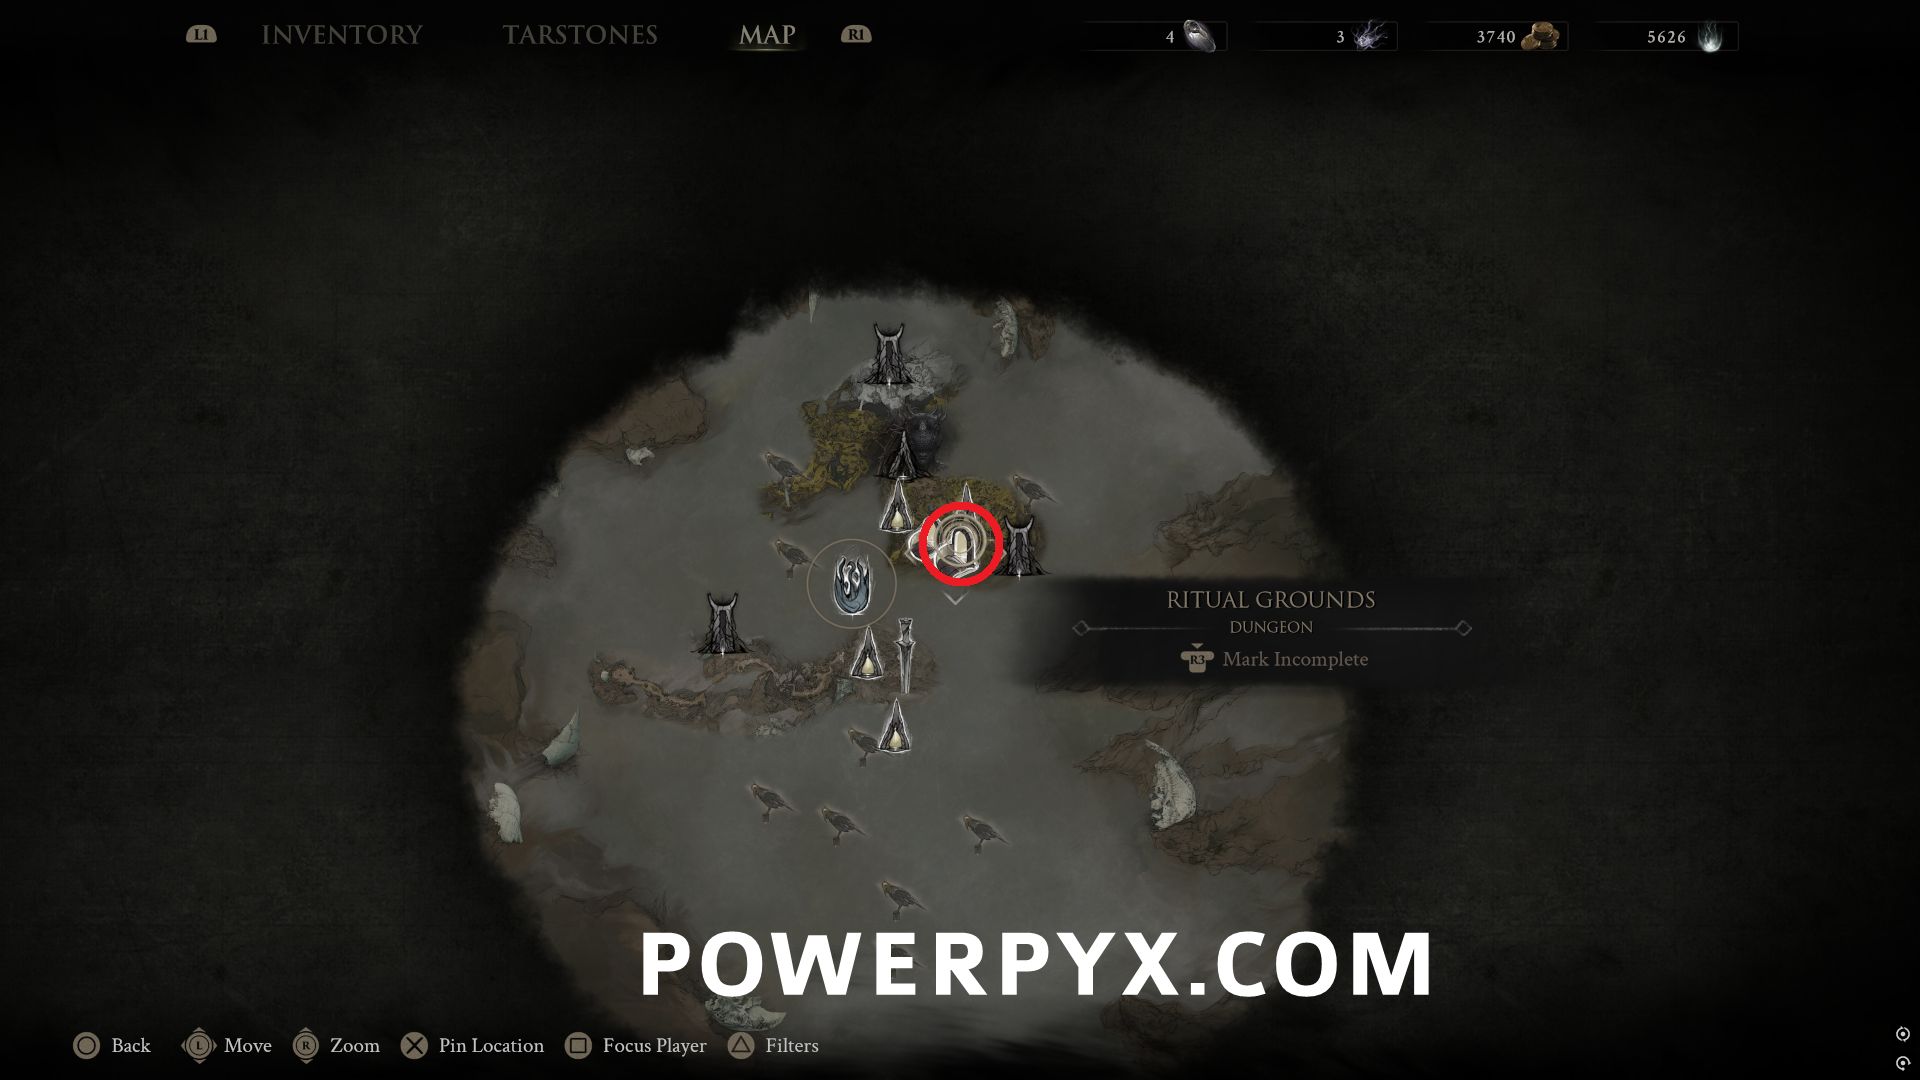
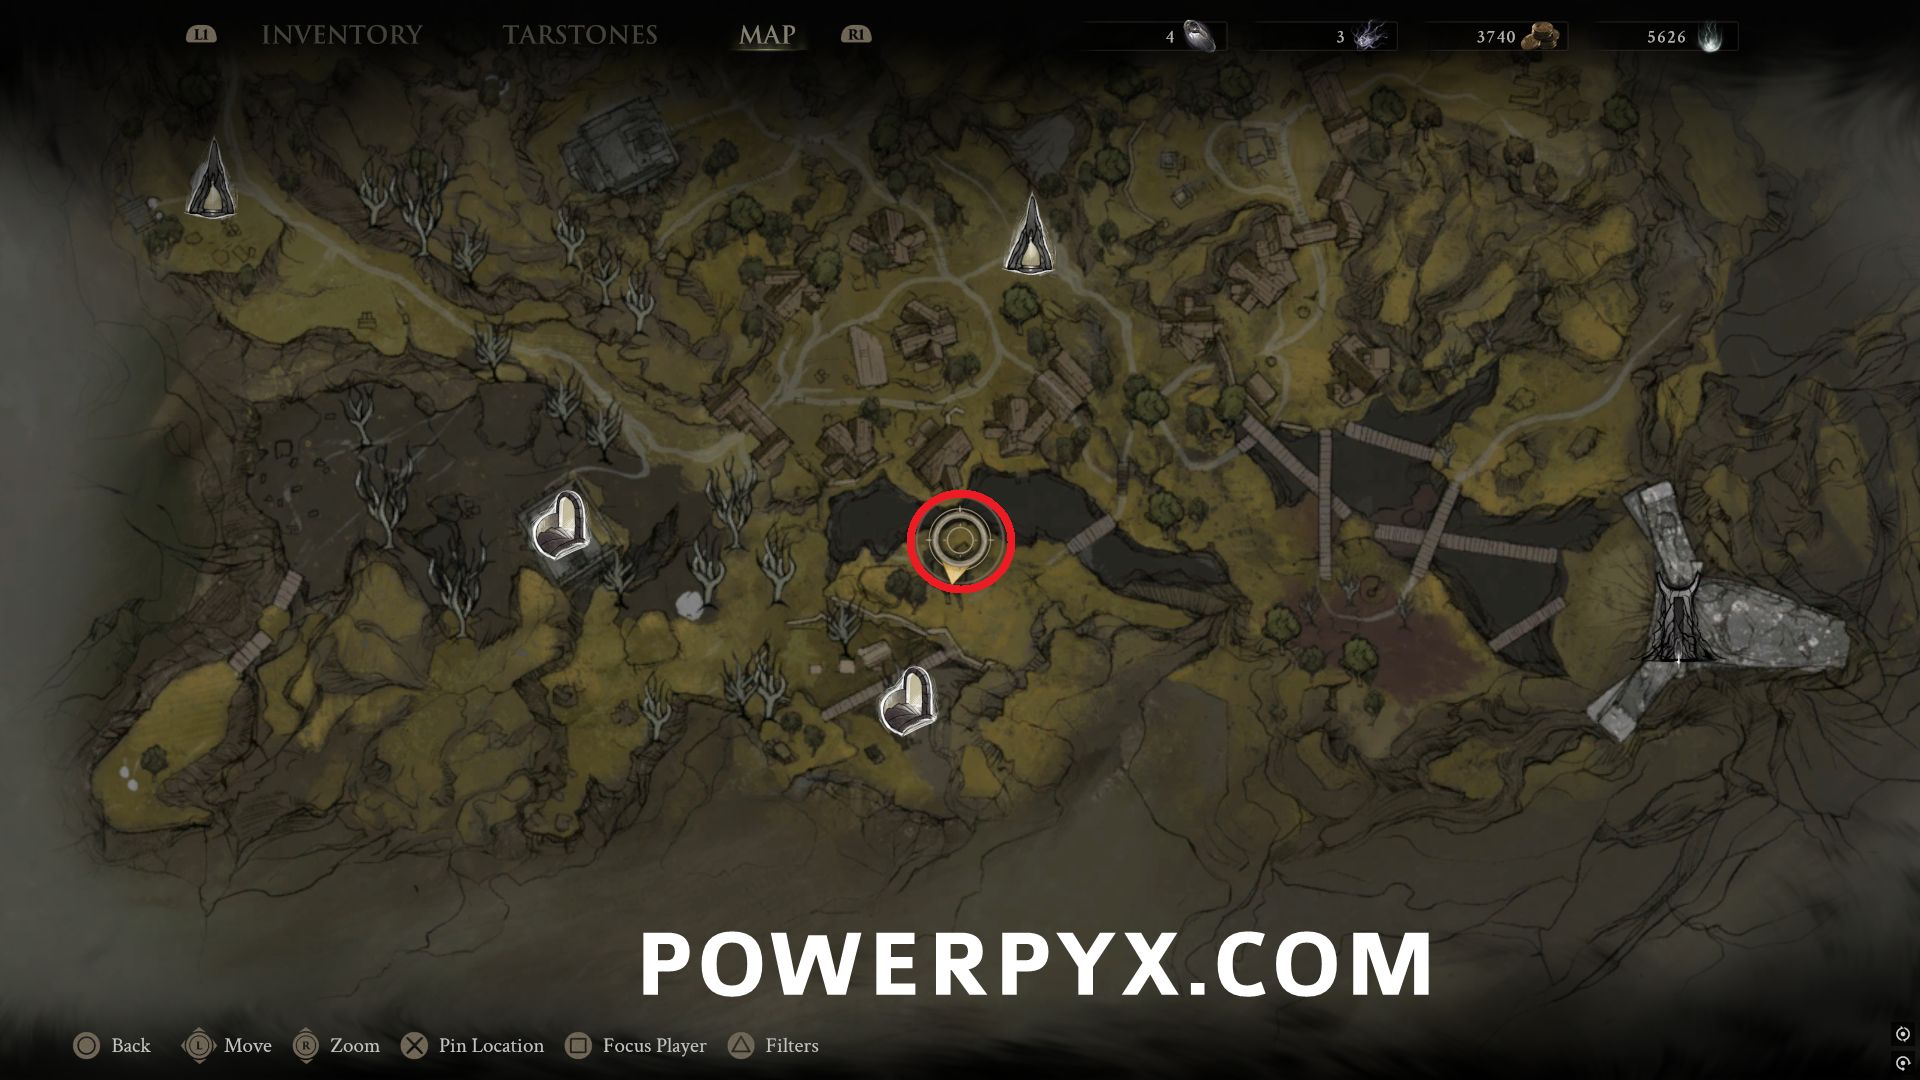
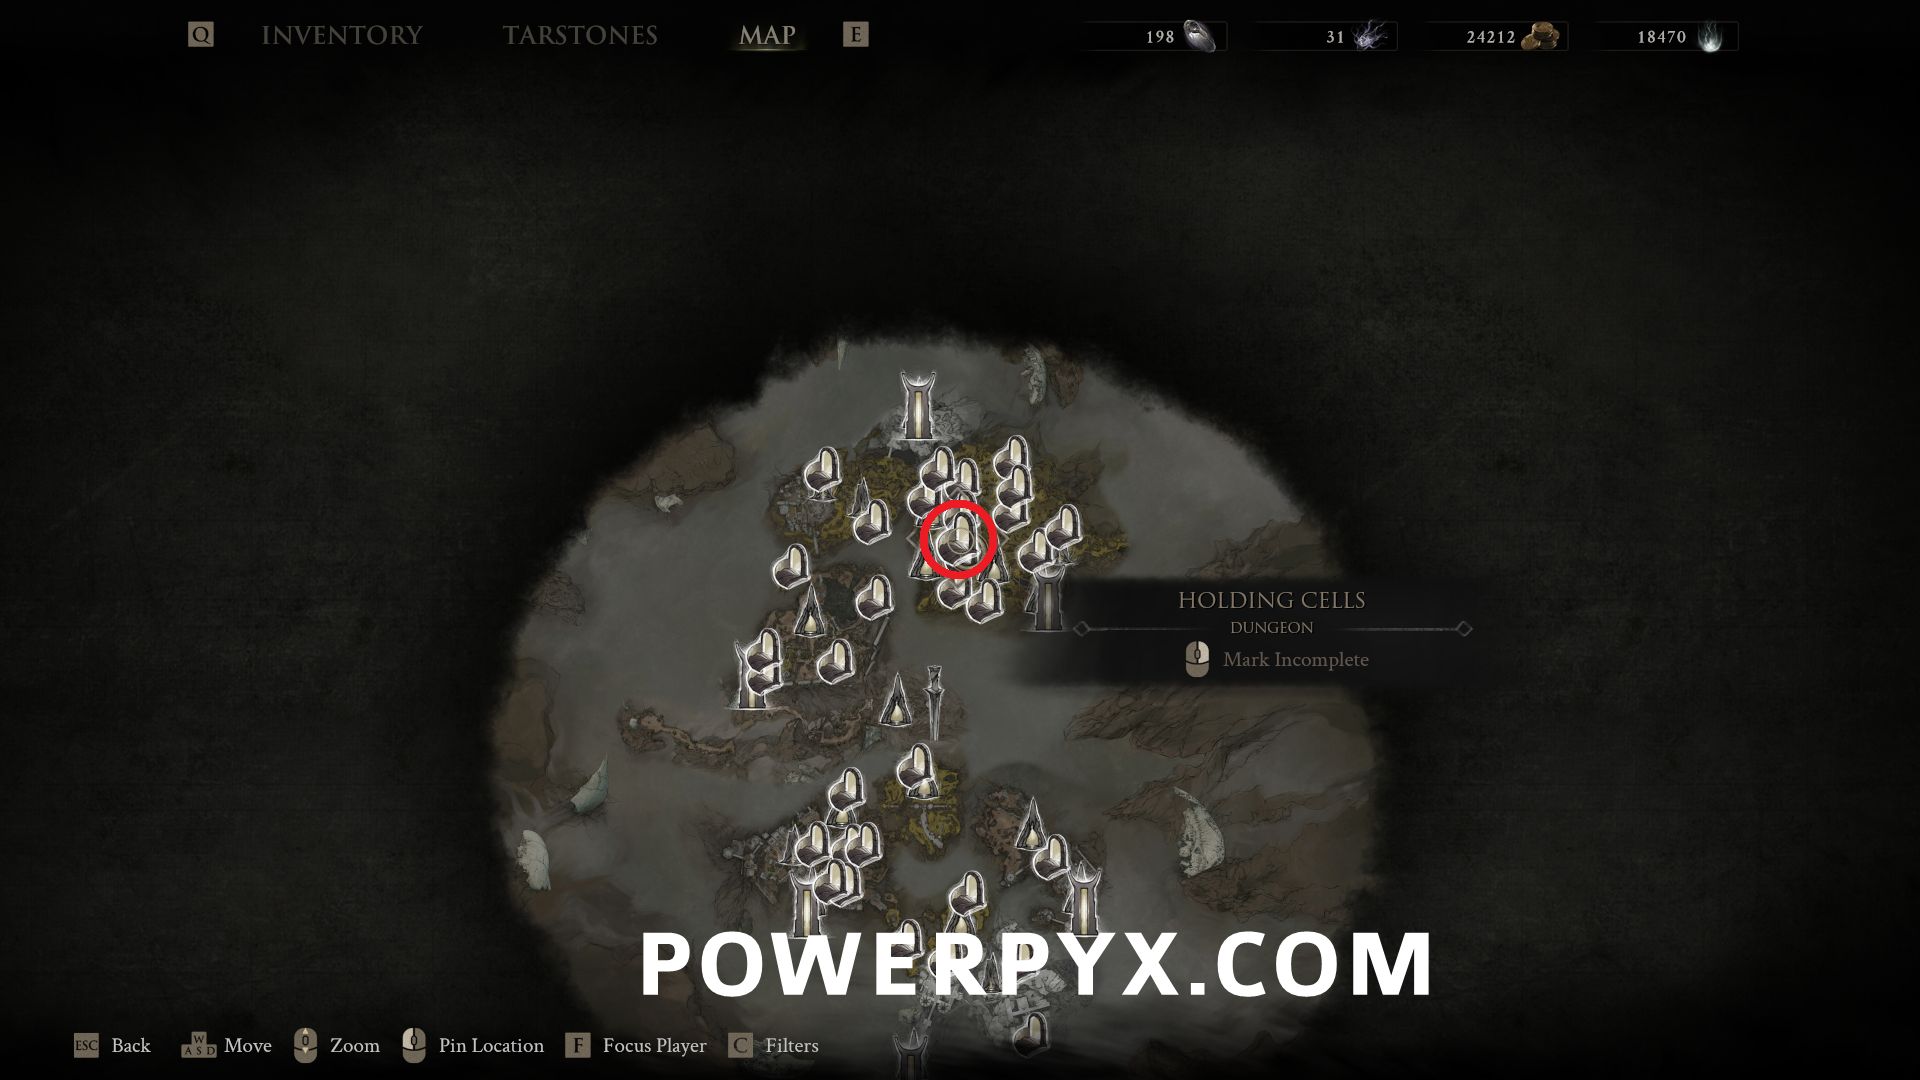
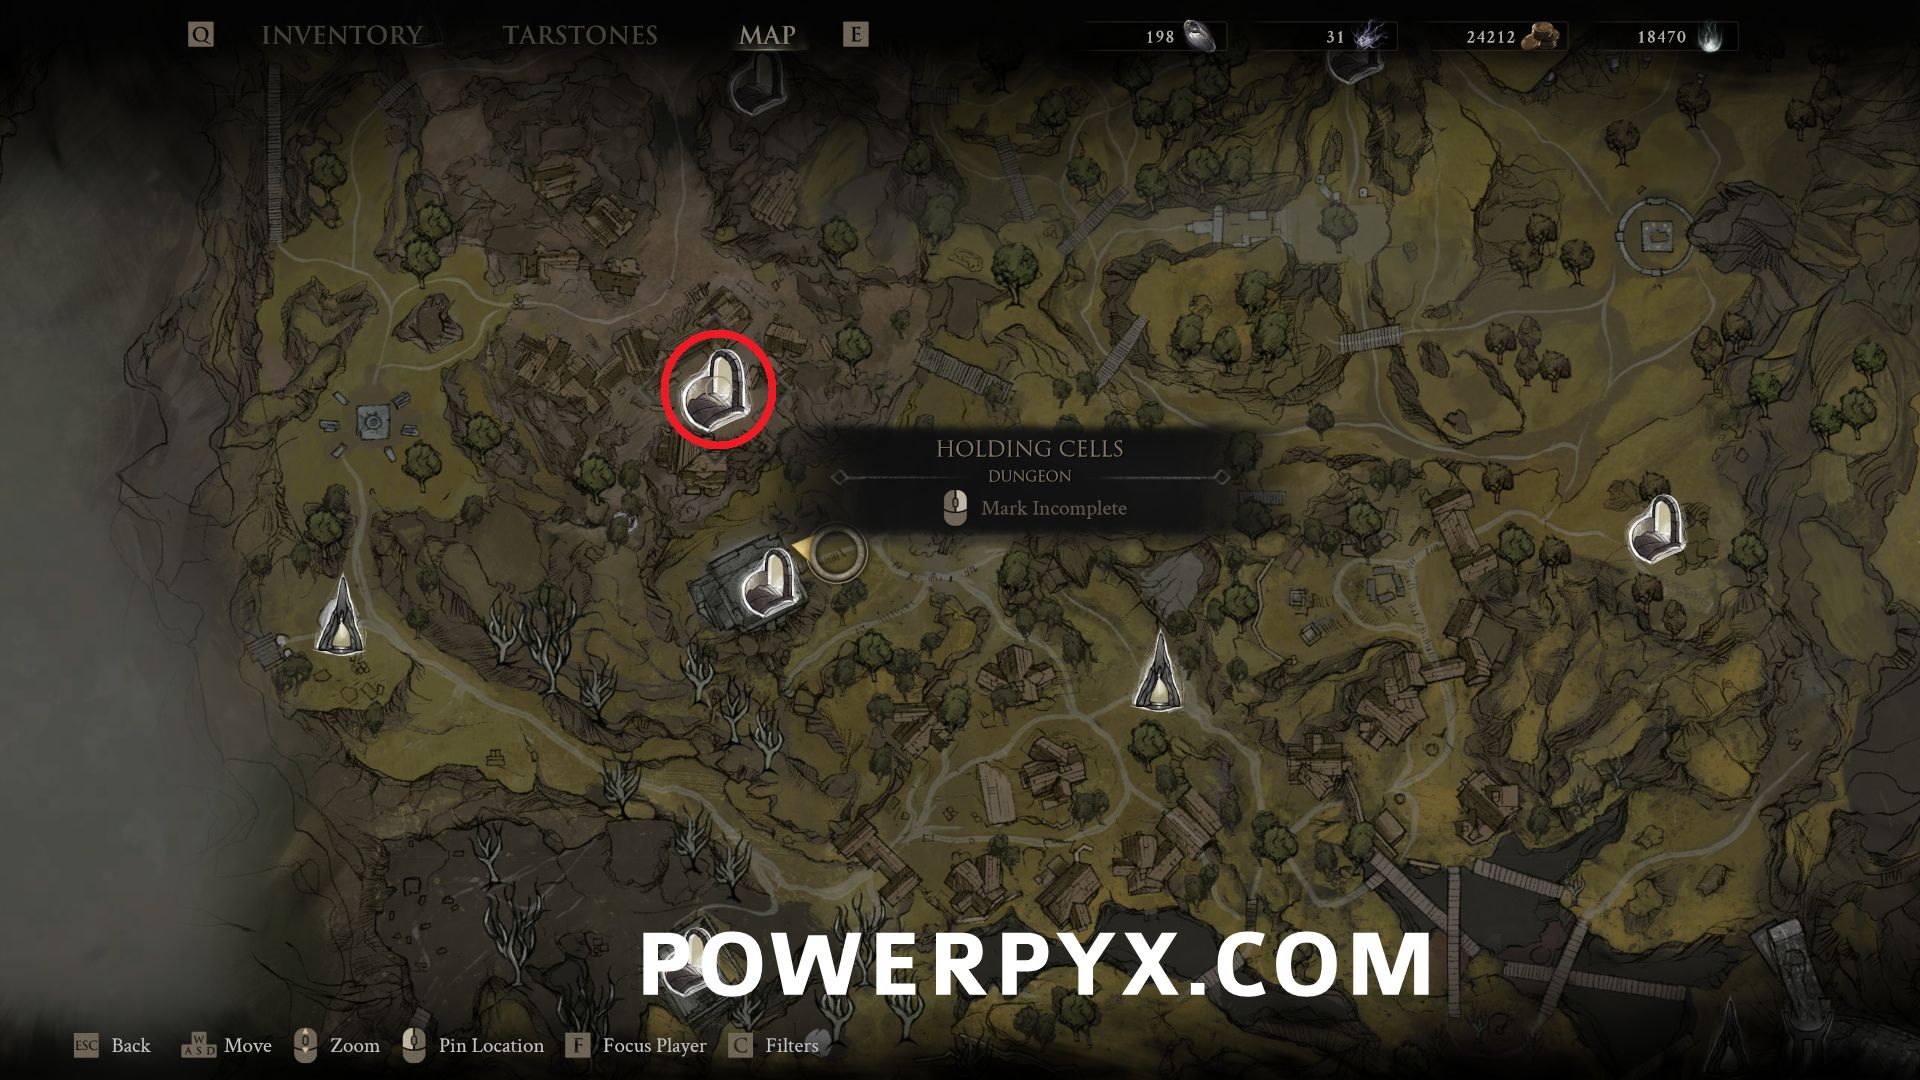
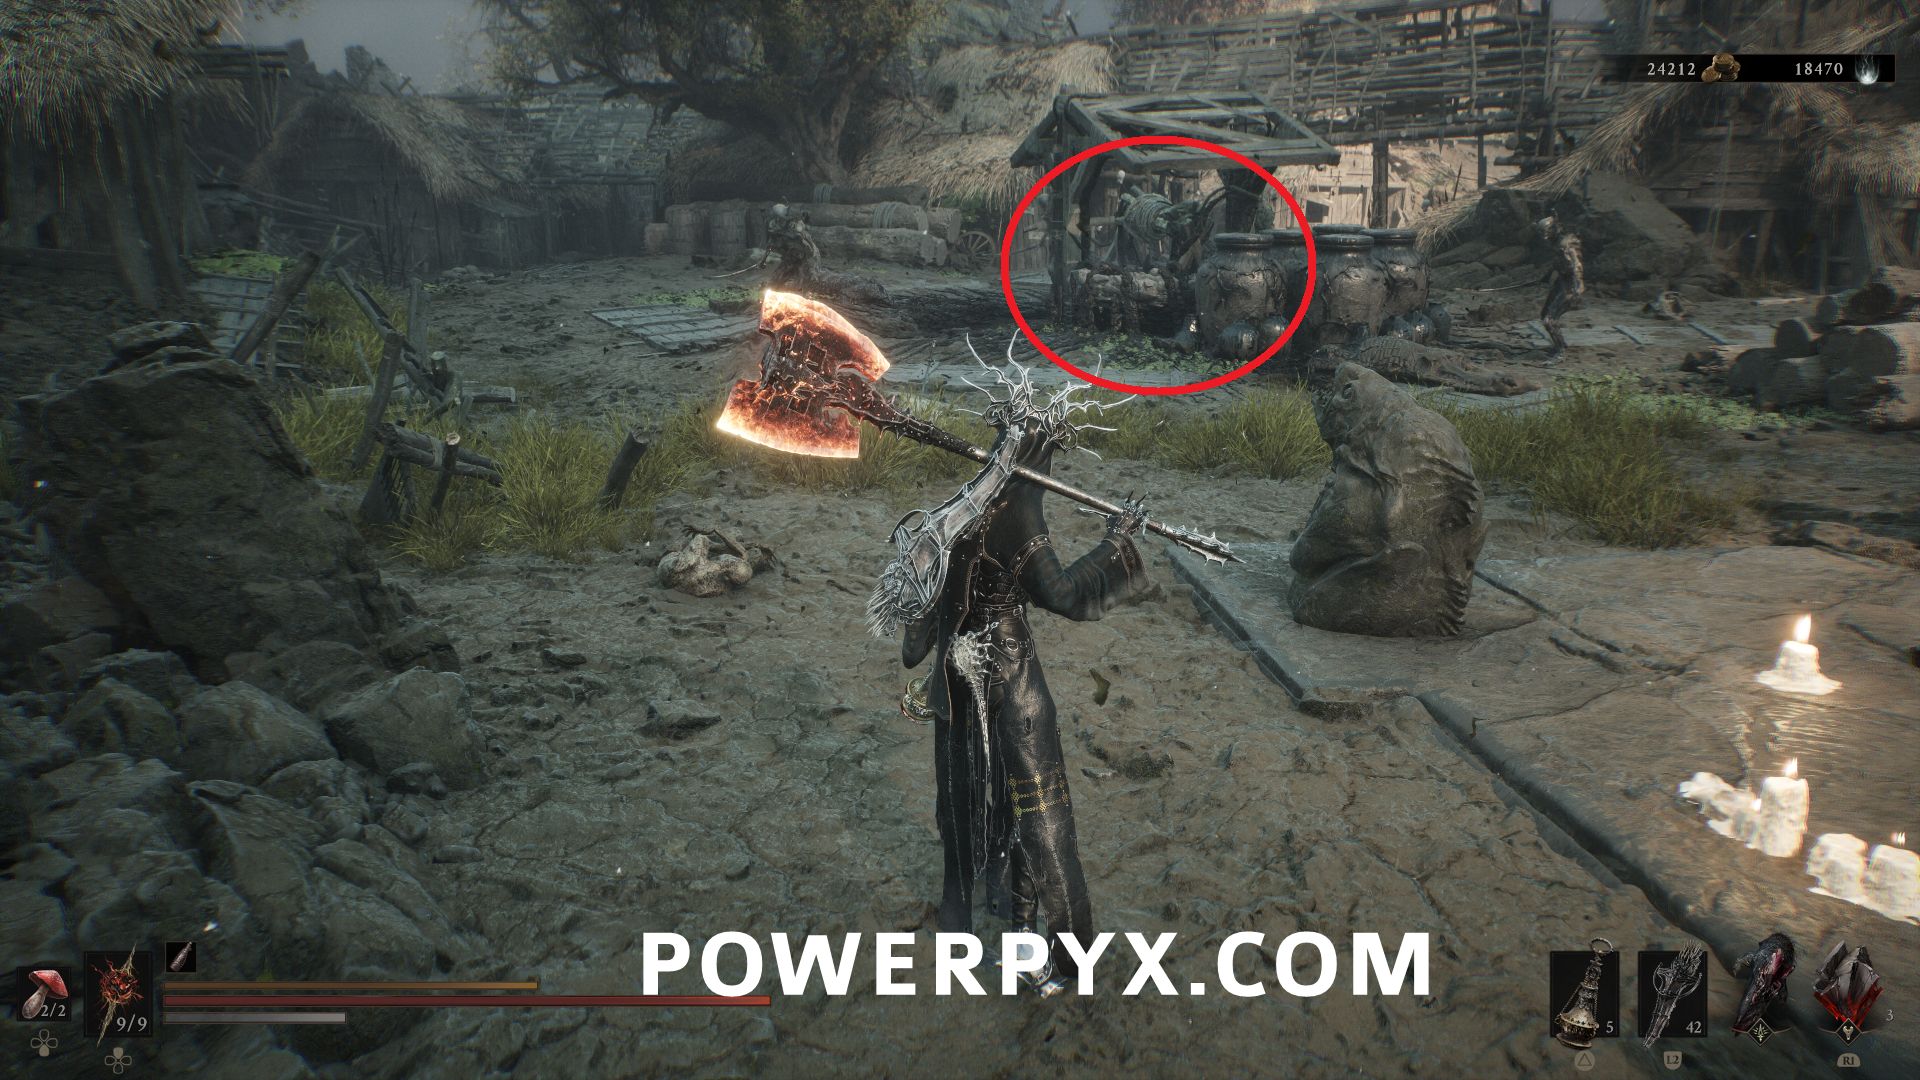
#5 – Holding Cells – Northwest of Mushroom Village beacon, north of Shrine of Trials dungeon entrance, use Mether’s Breath to clear the corruption blocking the jump pad. On the upper level you can enter this dungeon by interacting with the well.
Outskirts of Nochte
#6 – Waterfall Camp – South of Outskirts of Nochte Beacon in the southeast part of this area, press the button on the northern wall of the building to move the wall to reach the dungeon entrance.
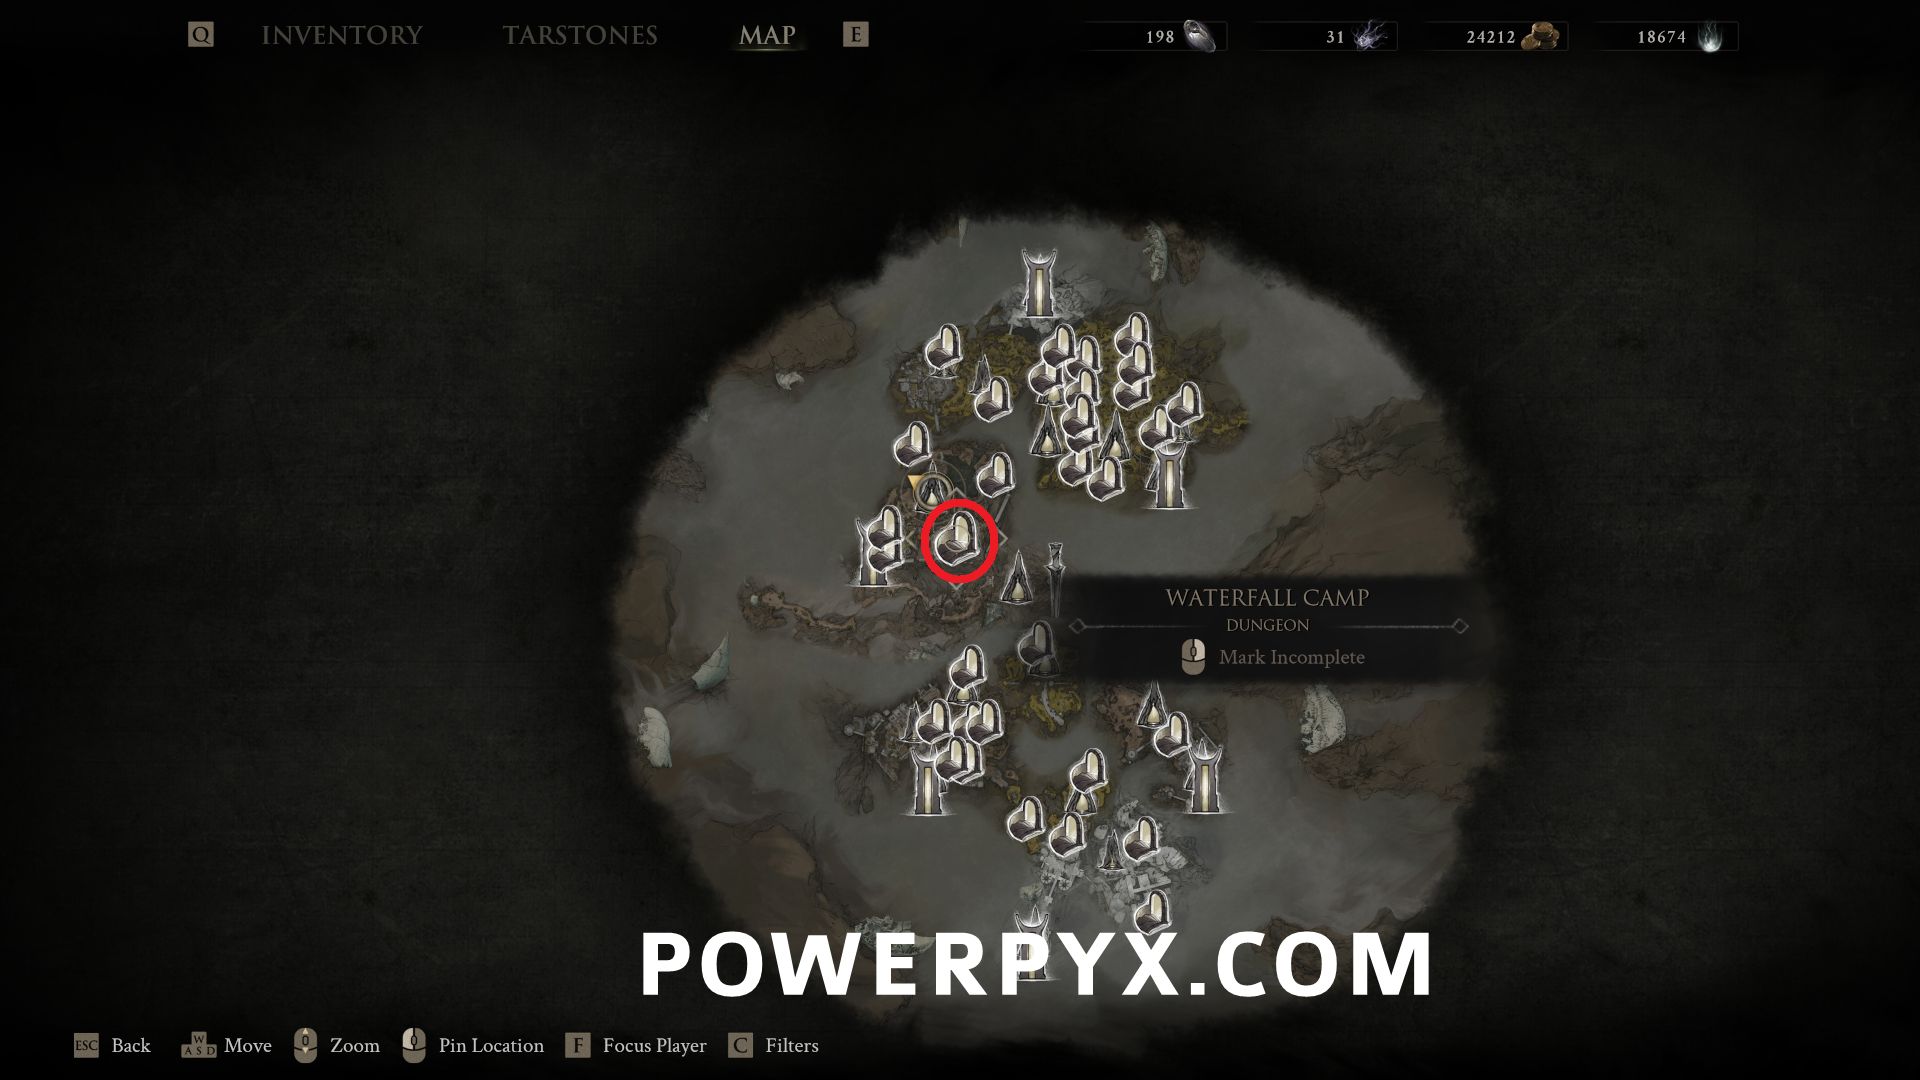
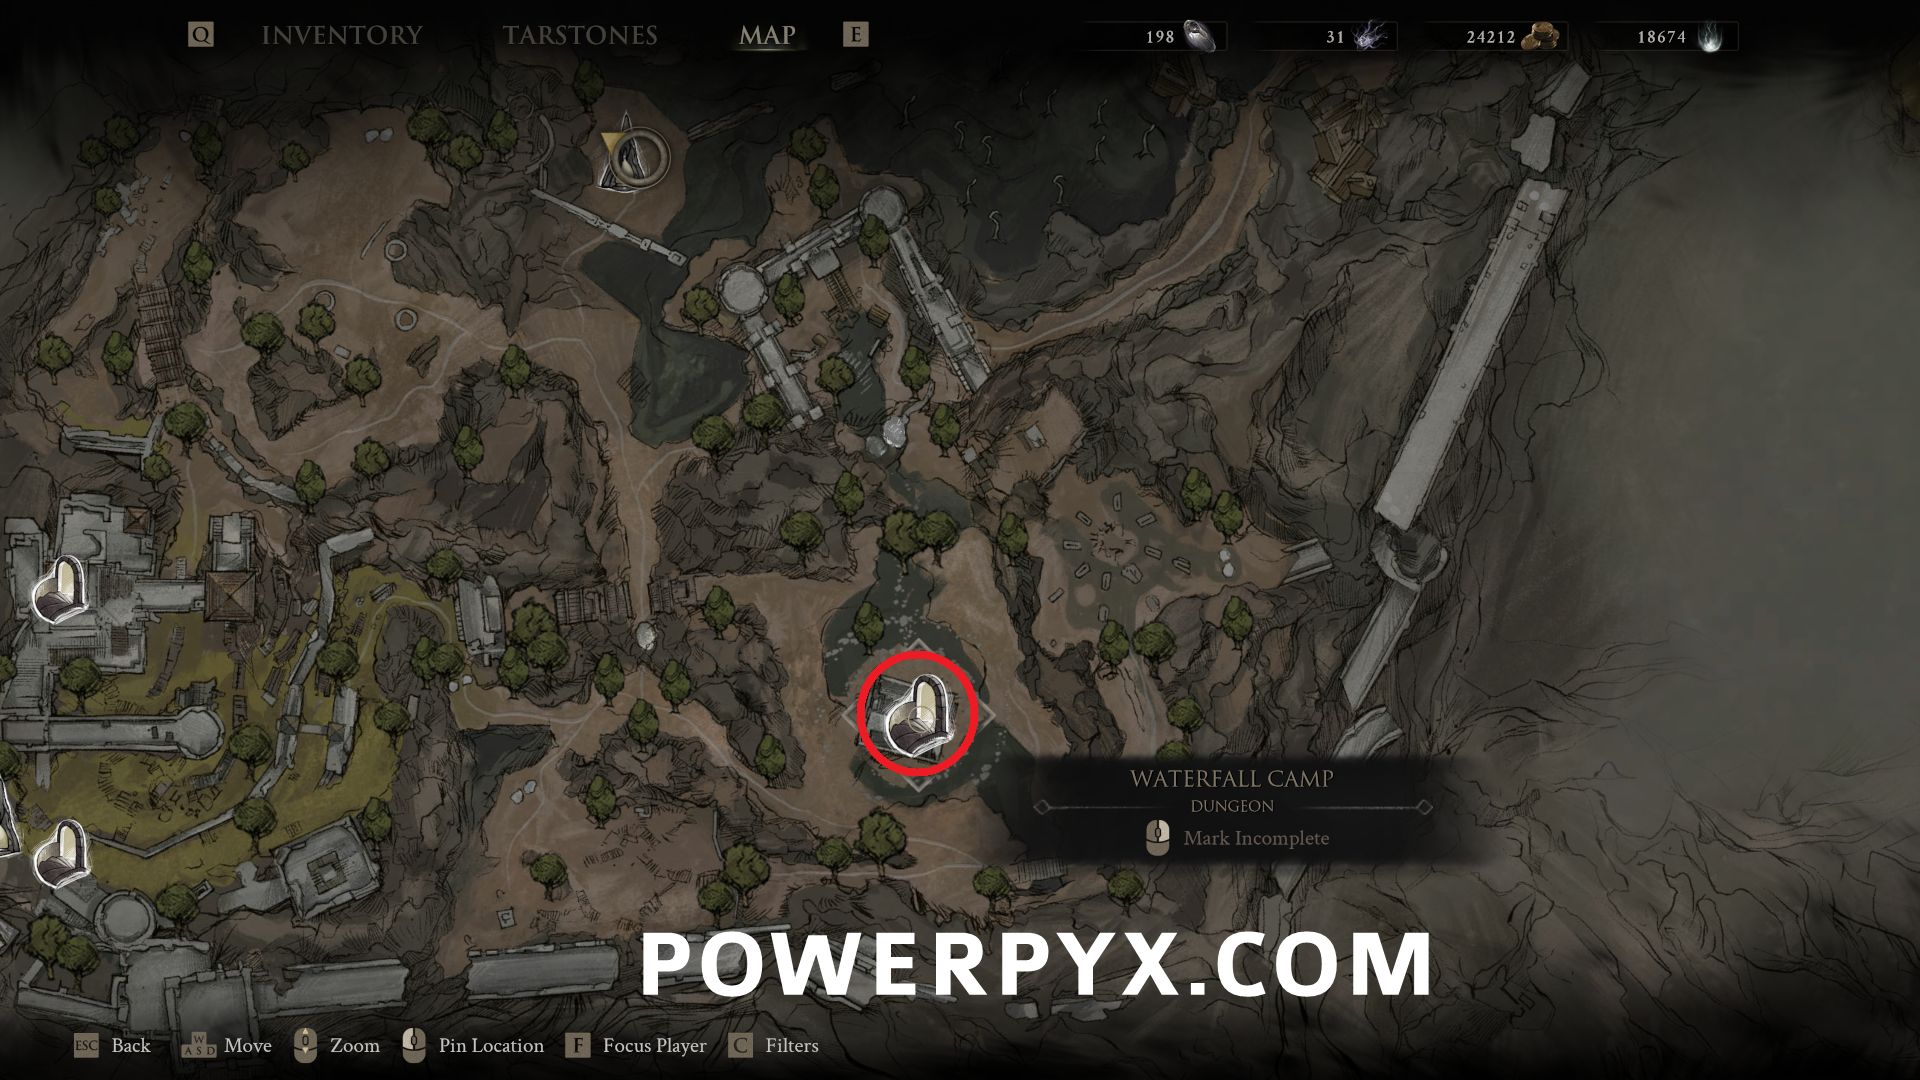
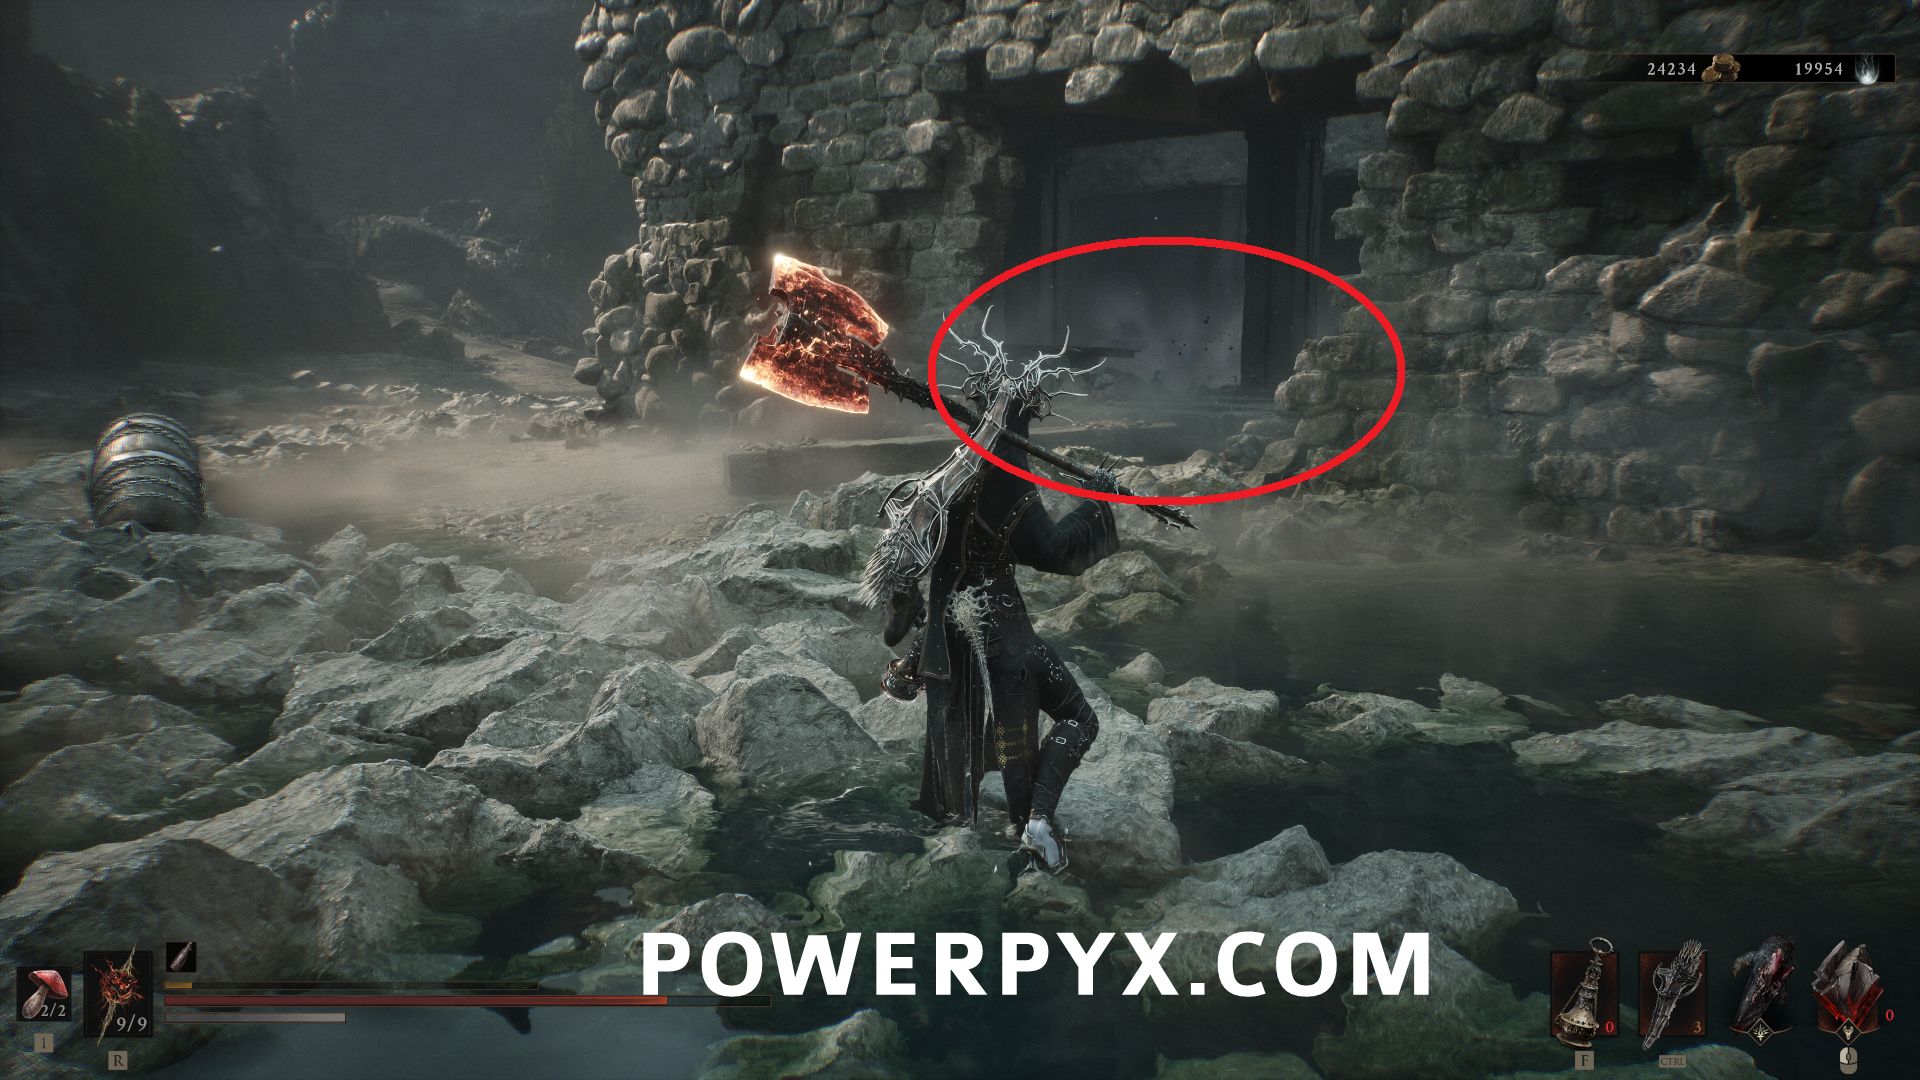
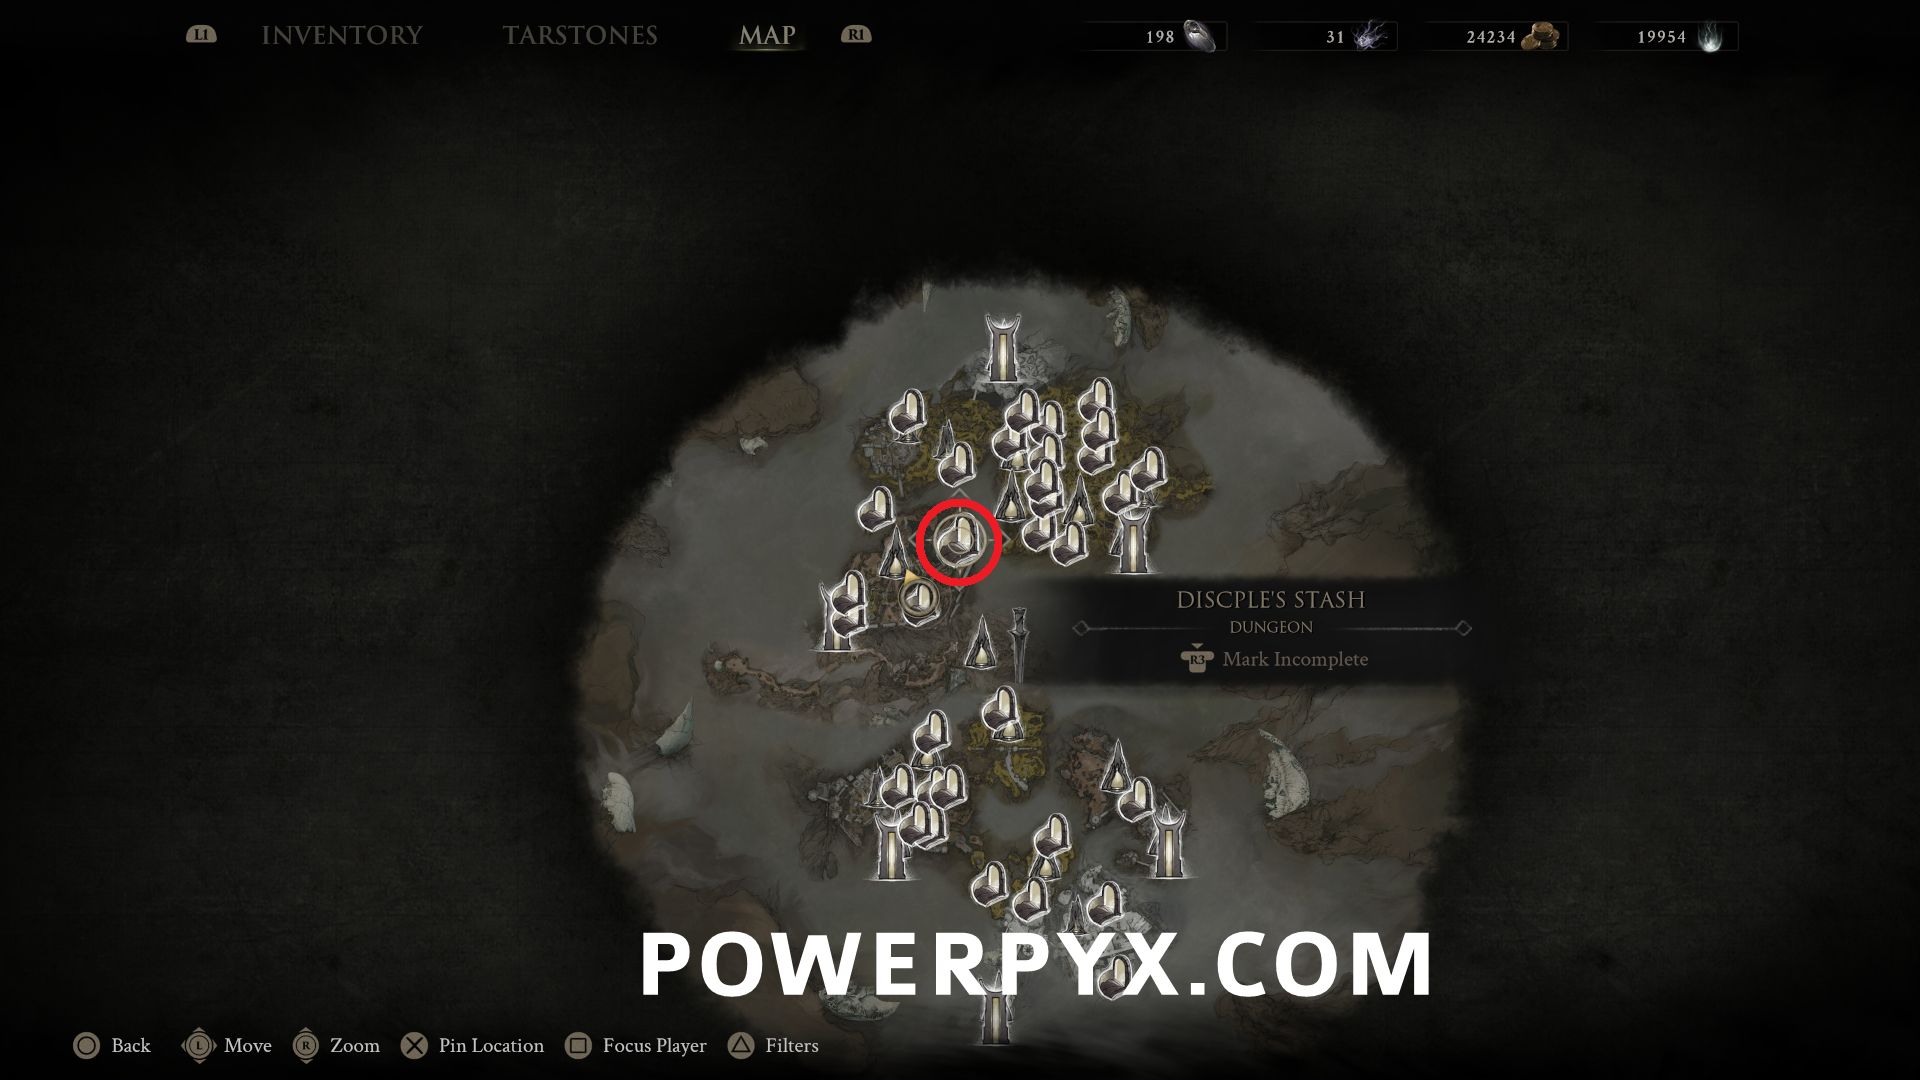
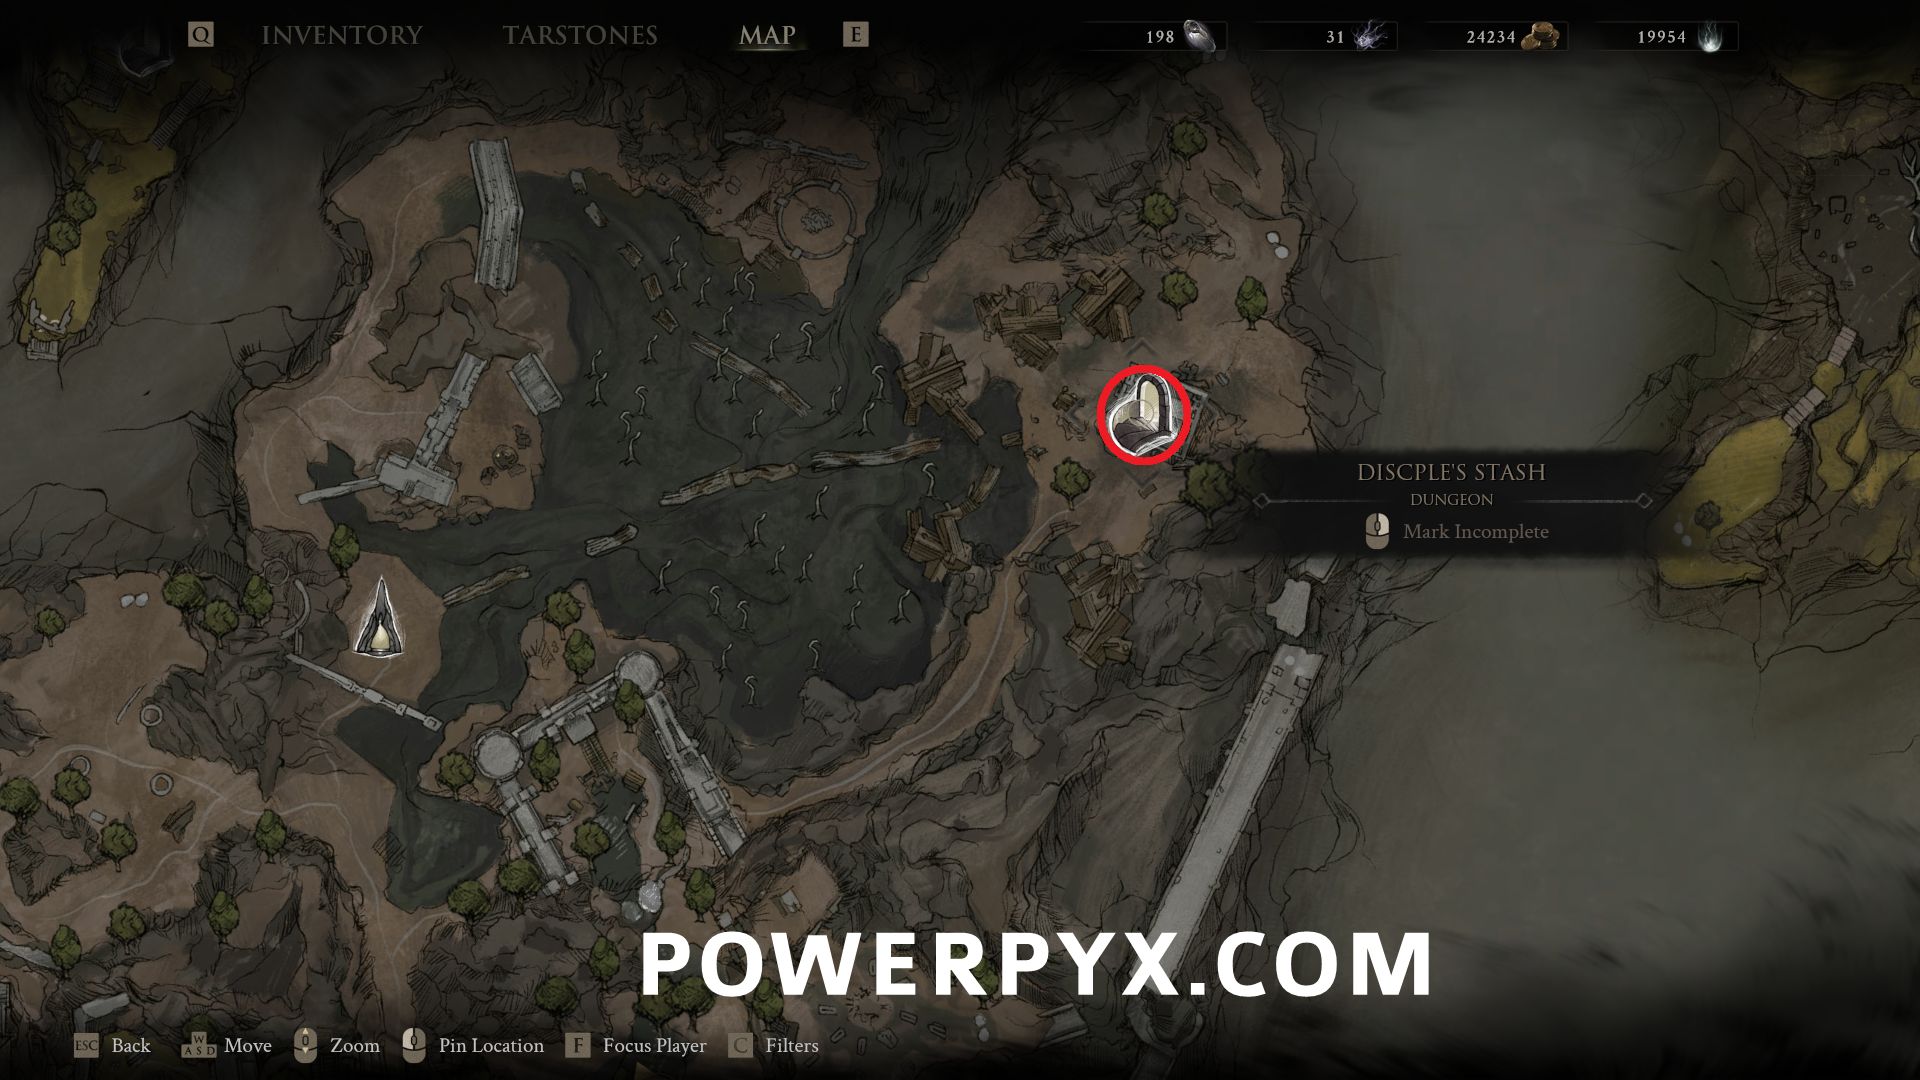
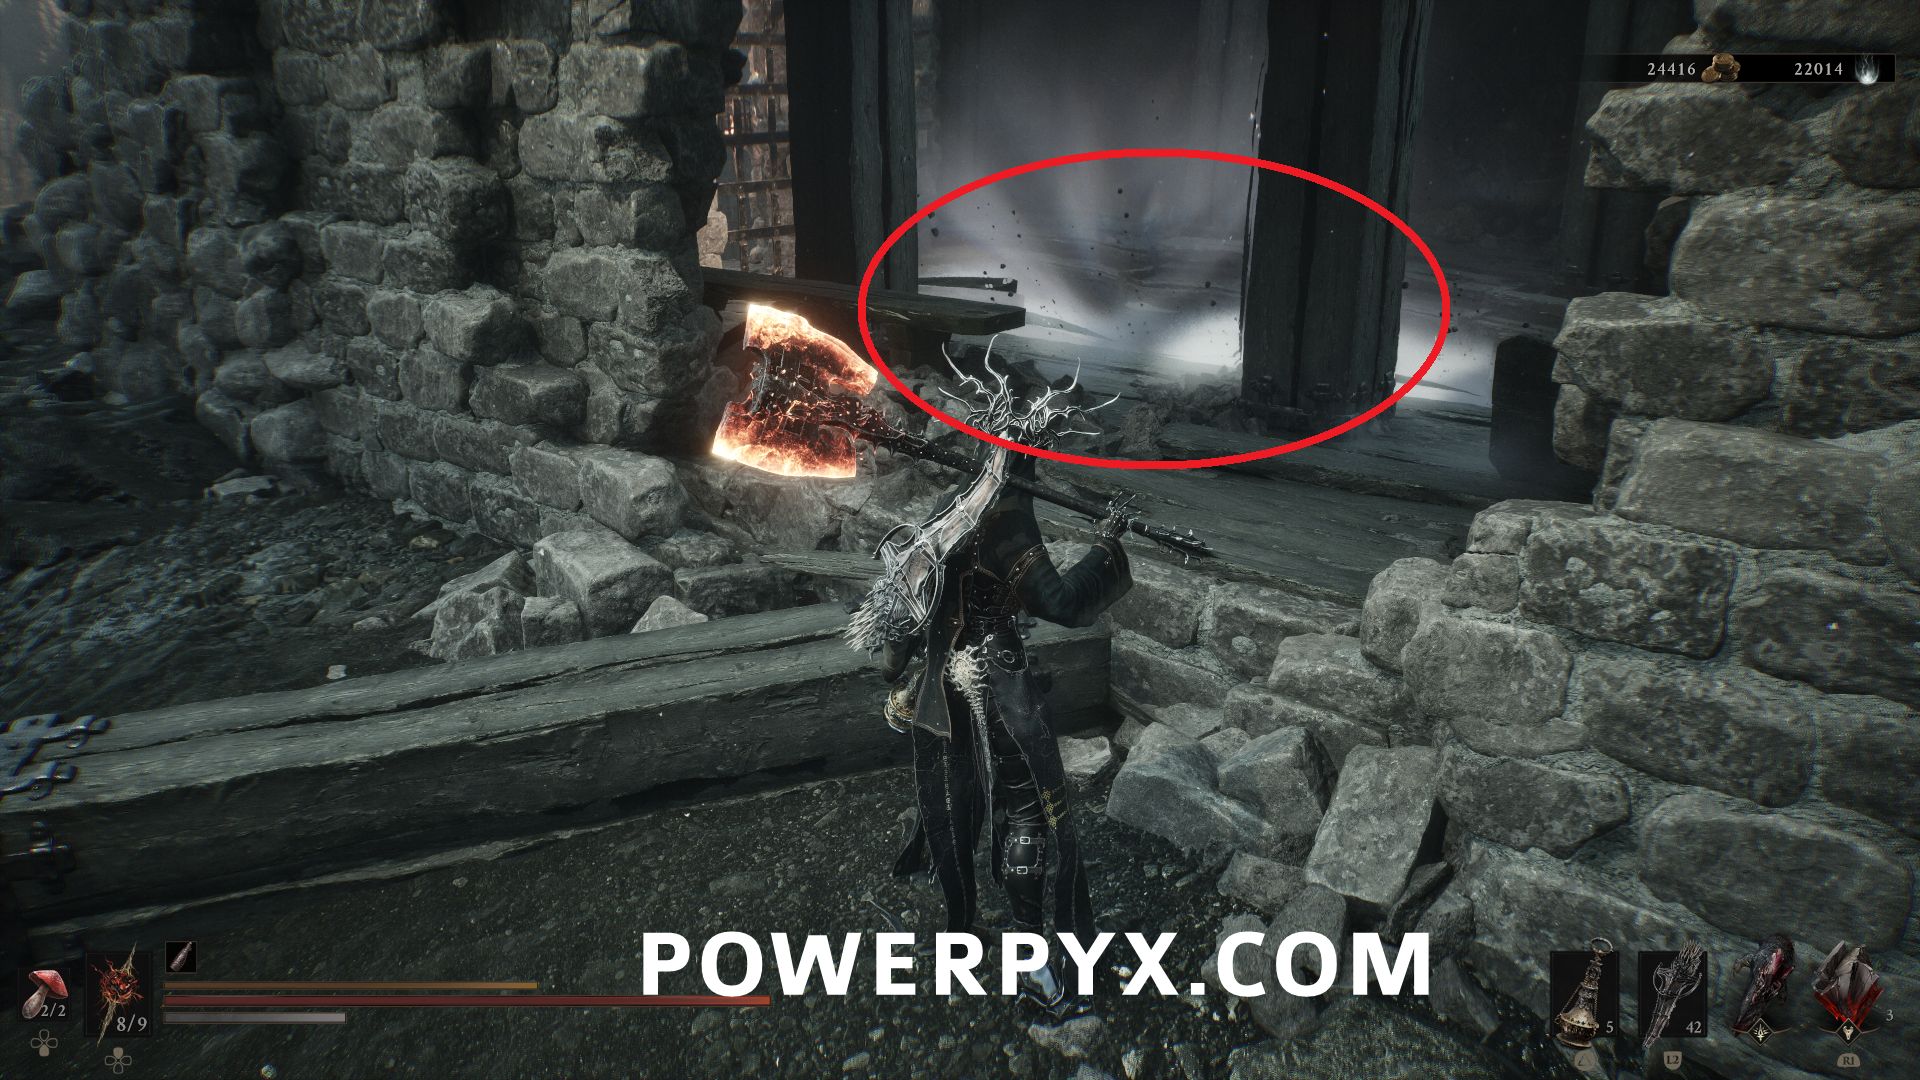
#7 – Disciple’s Stash – East of Outskirts of Nochte Beacon, in the town area break the wall on the large building to reach the entrance to the dungeon.
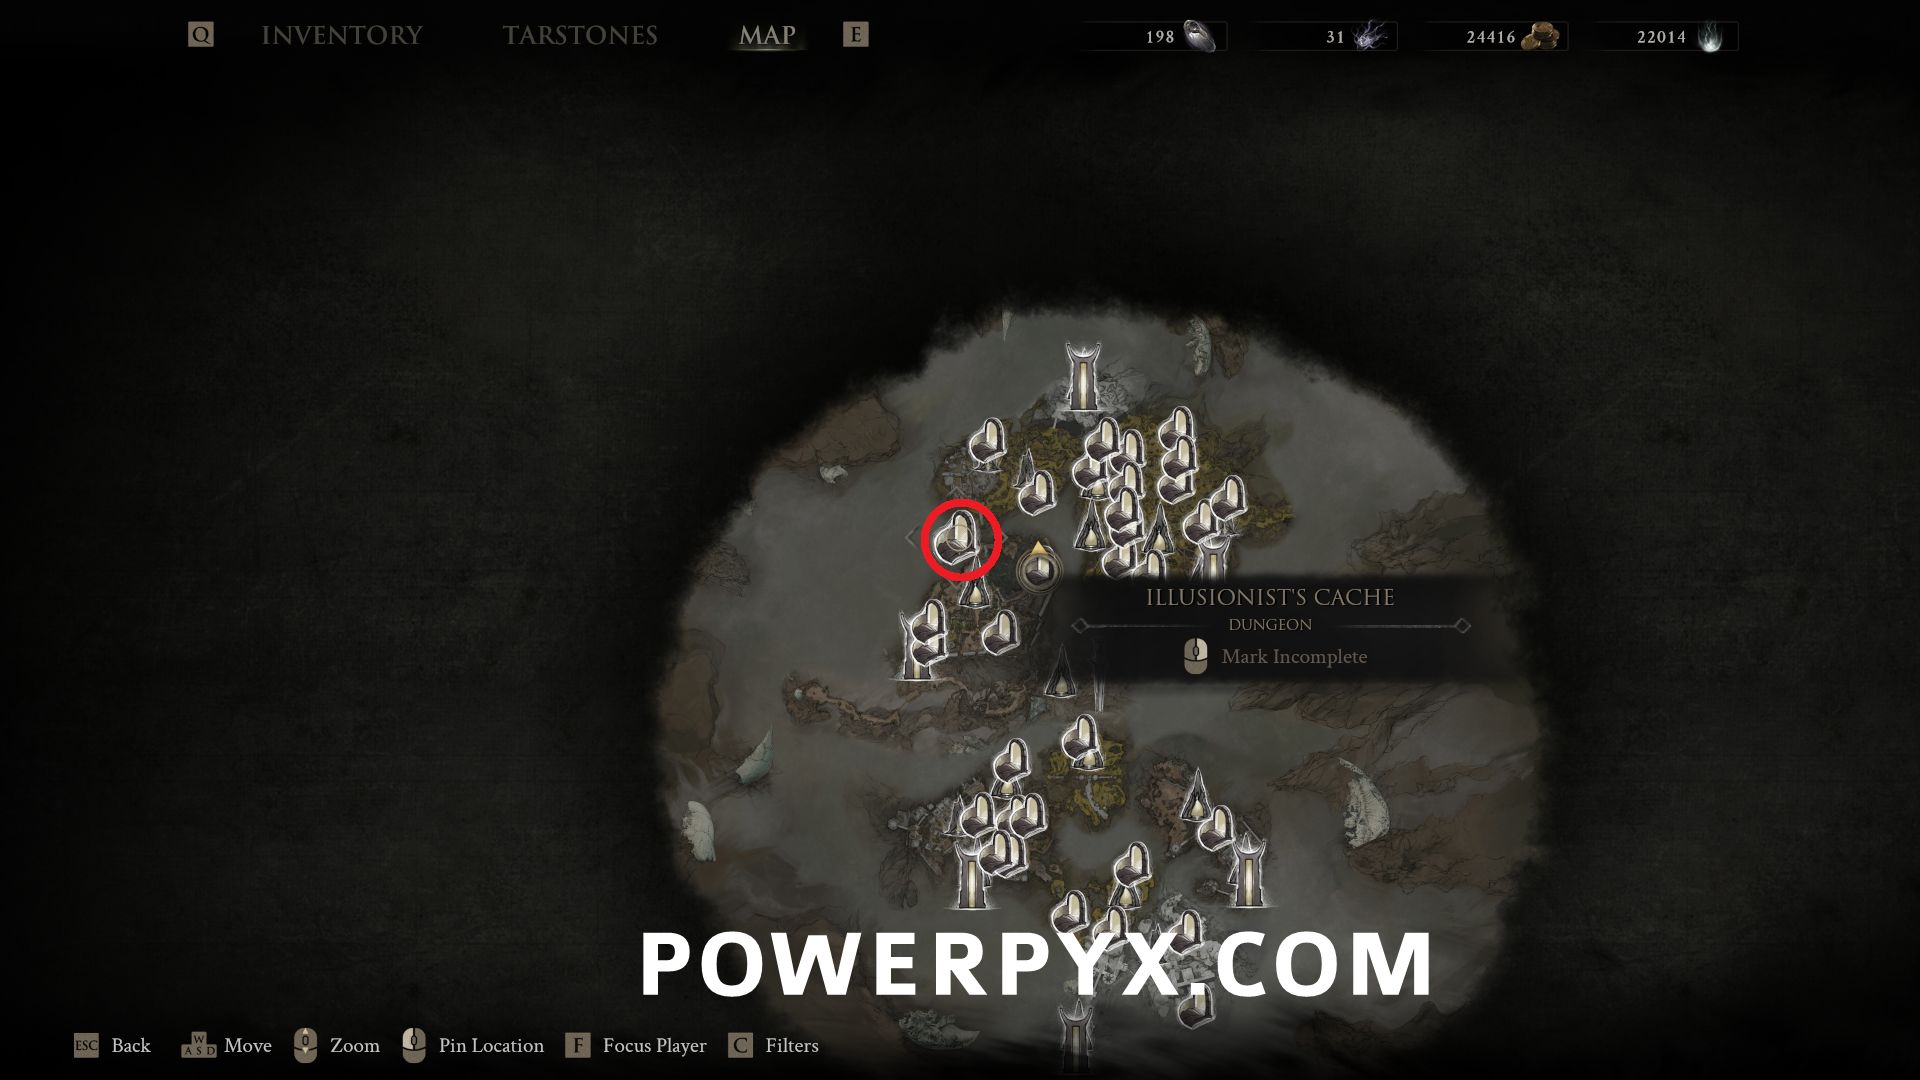
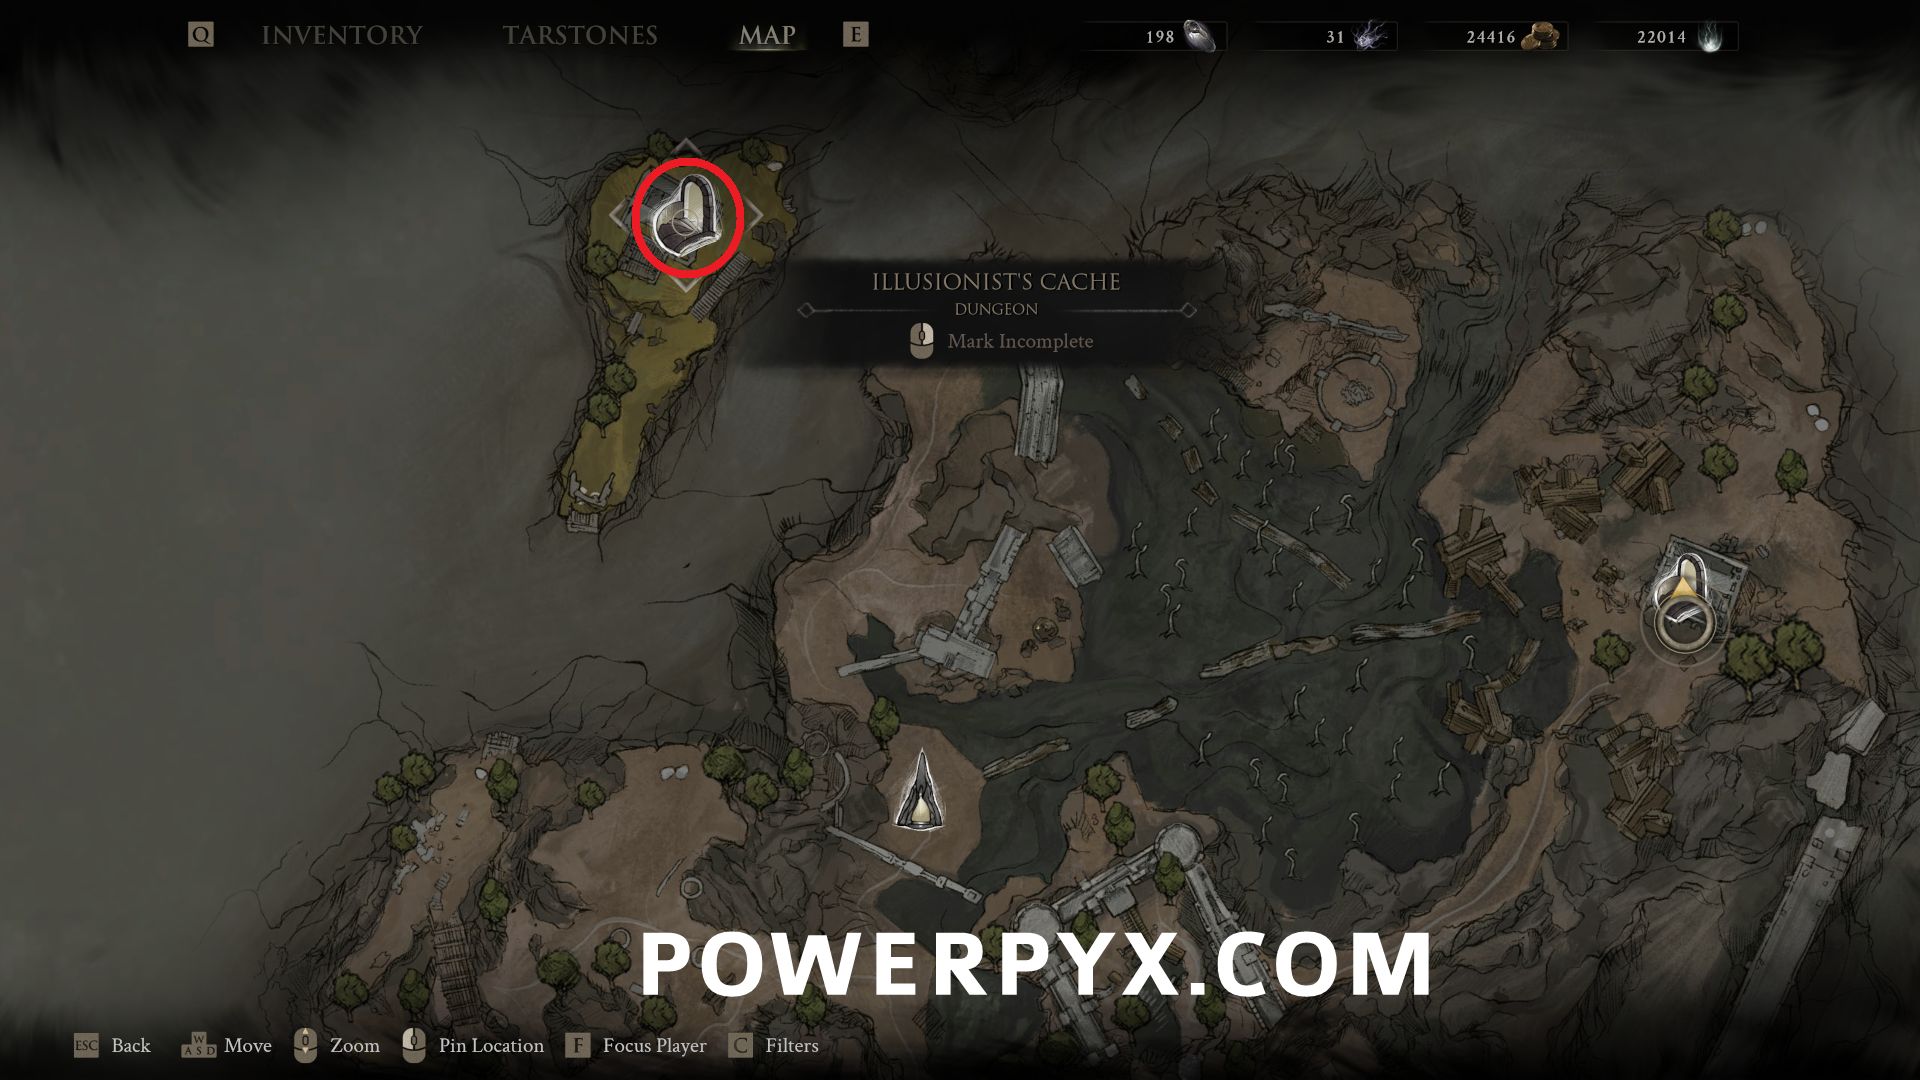
#8 – Illusionist’s Cache – North of Outskirts of Nochte Beacon, use one of the Bone Gates to reach the Desolate Peak location, where the dungeon entrance is inside the building.
Blackridge Pass
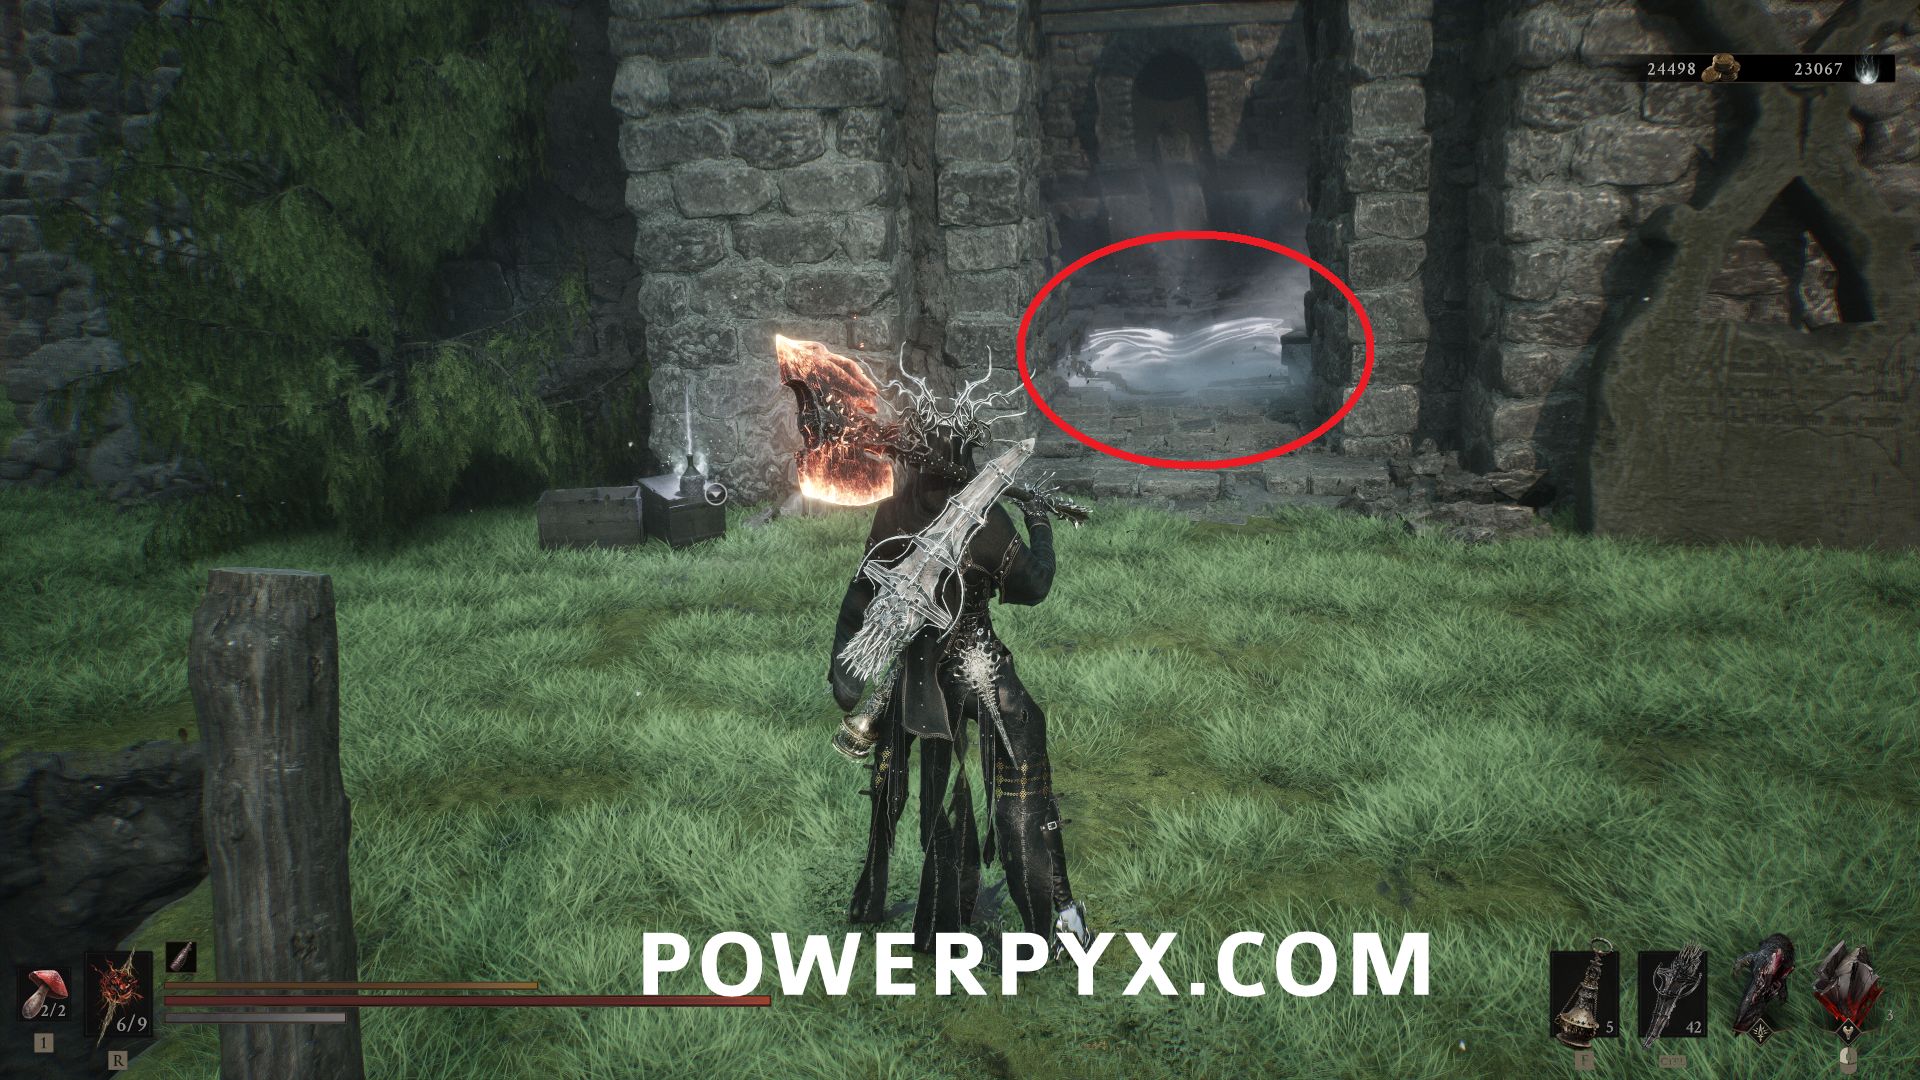
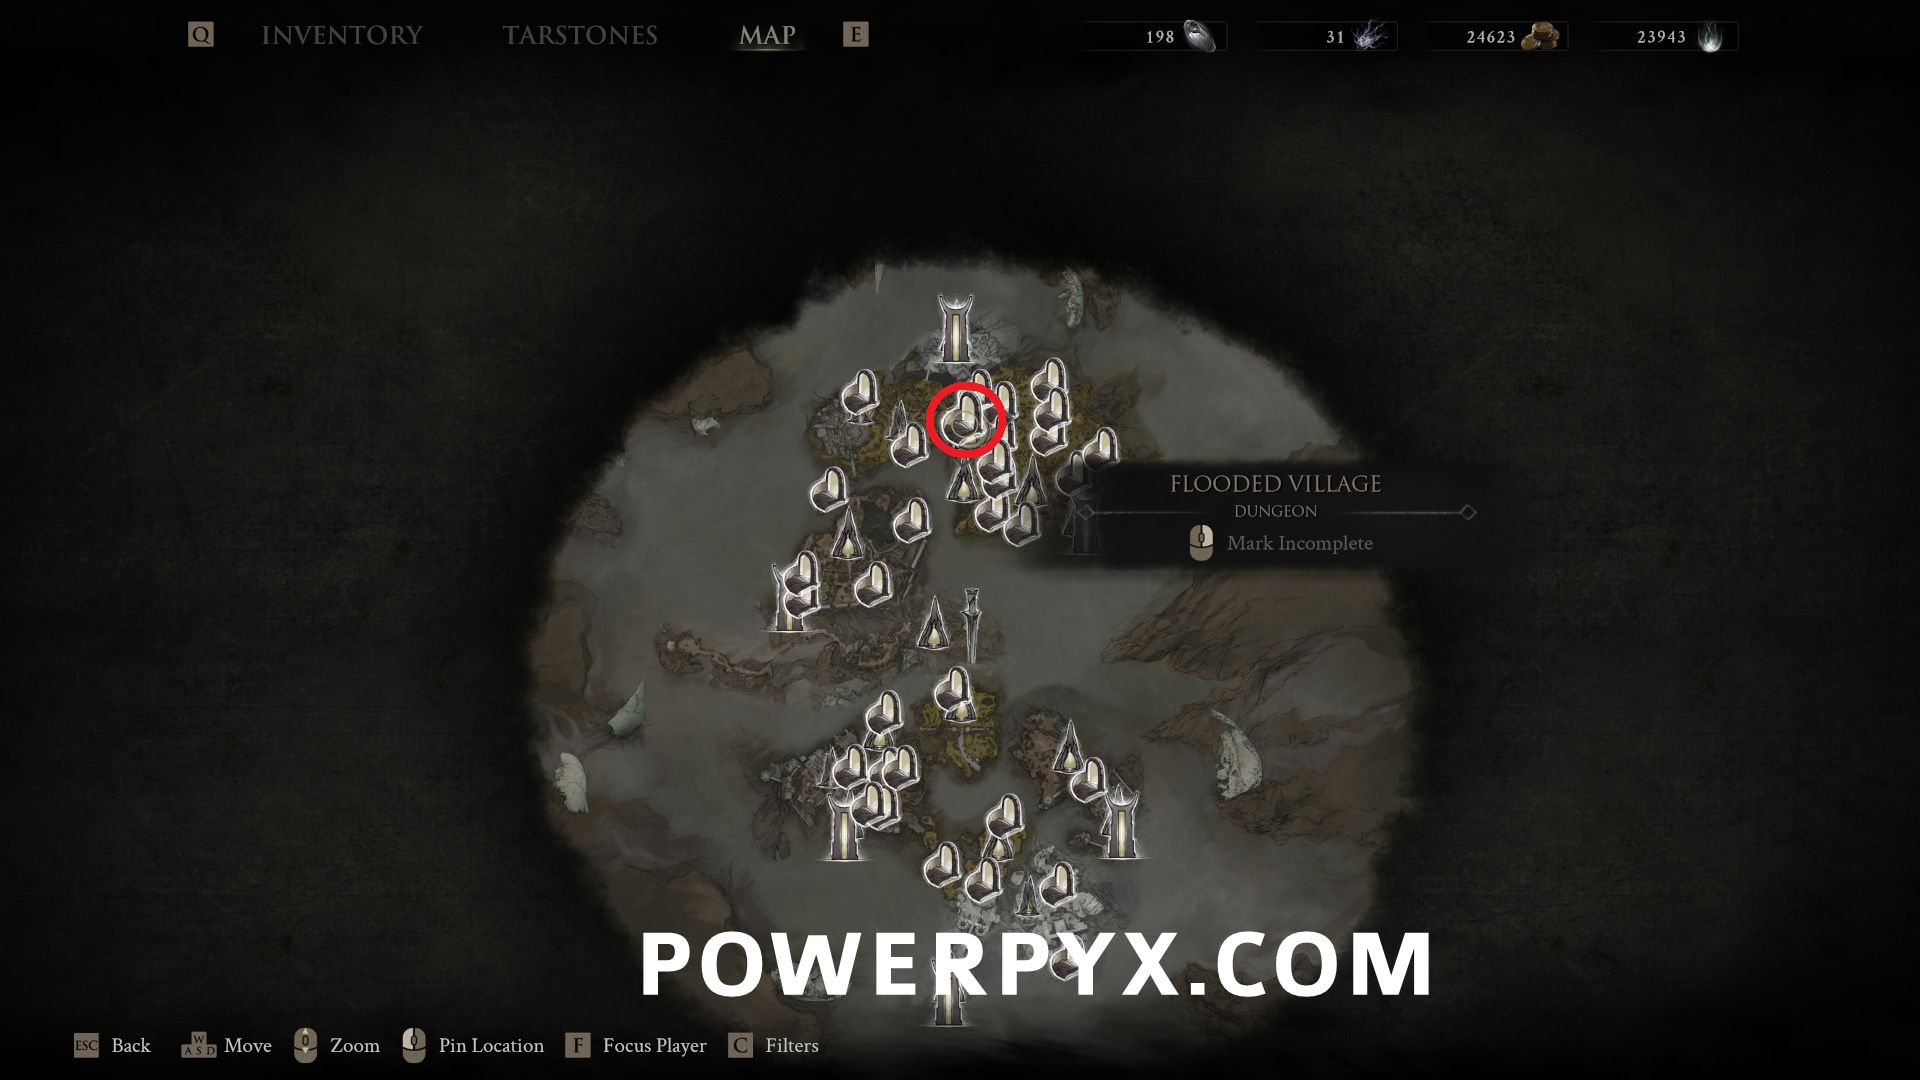
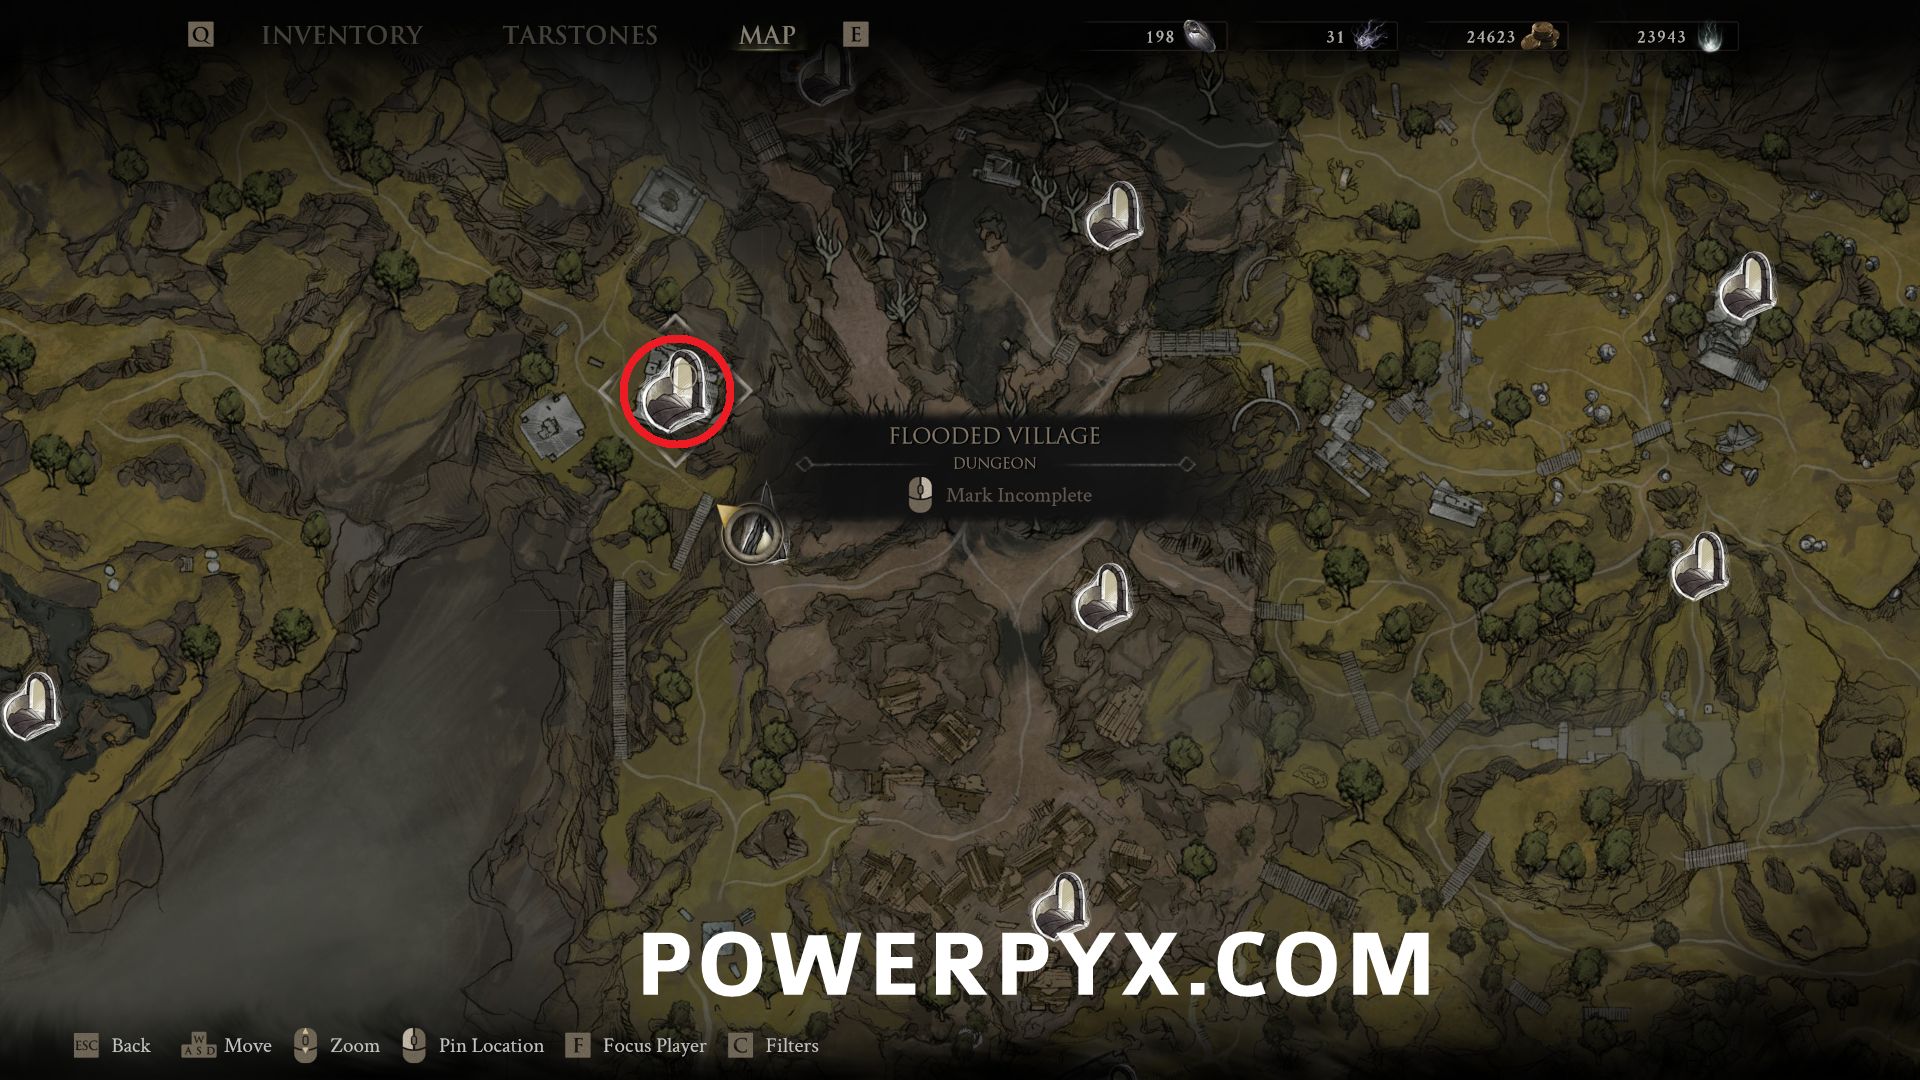
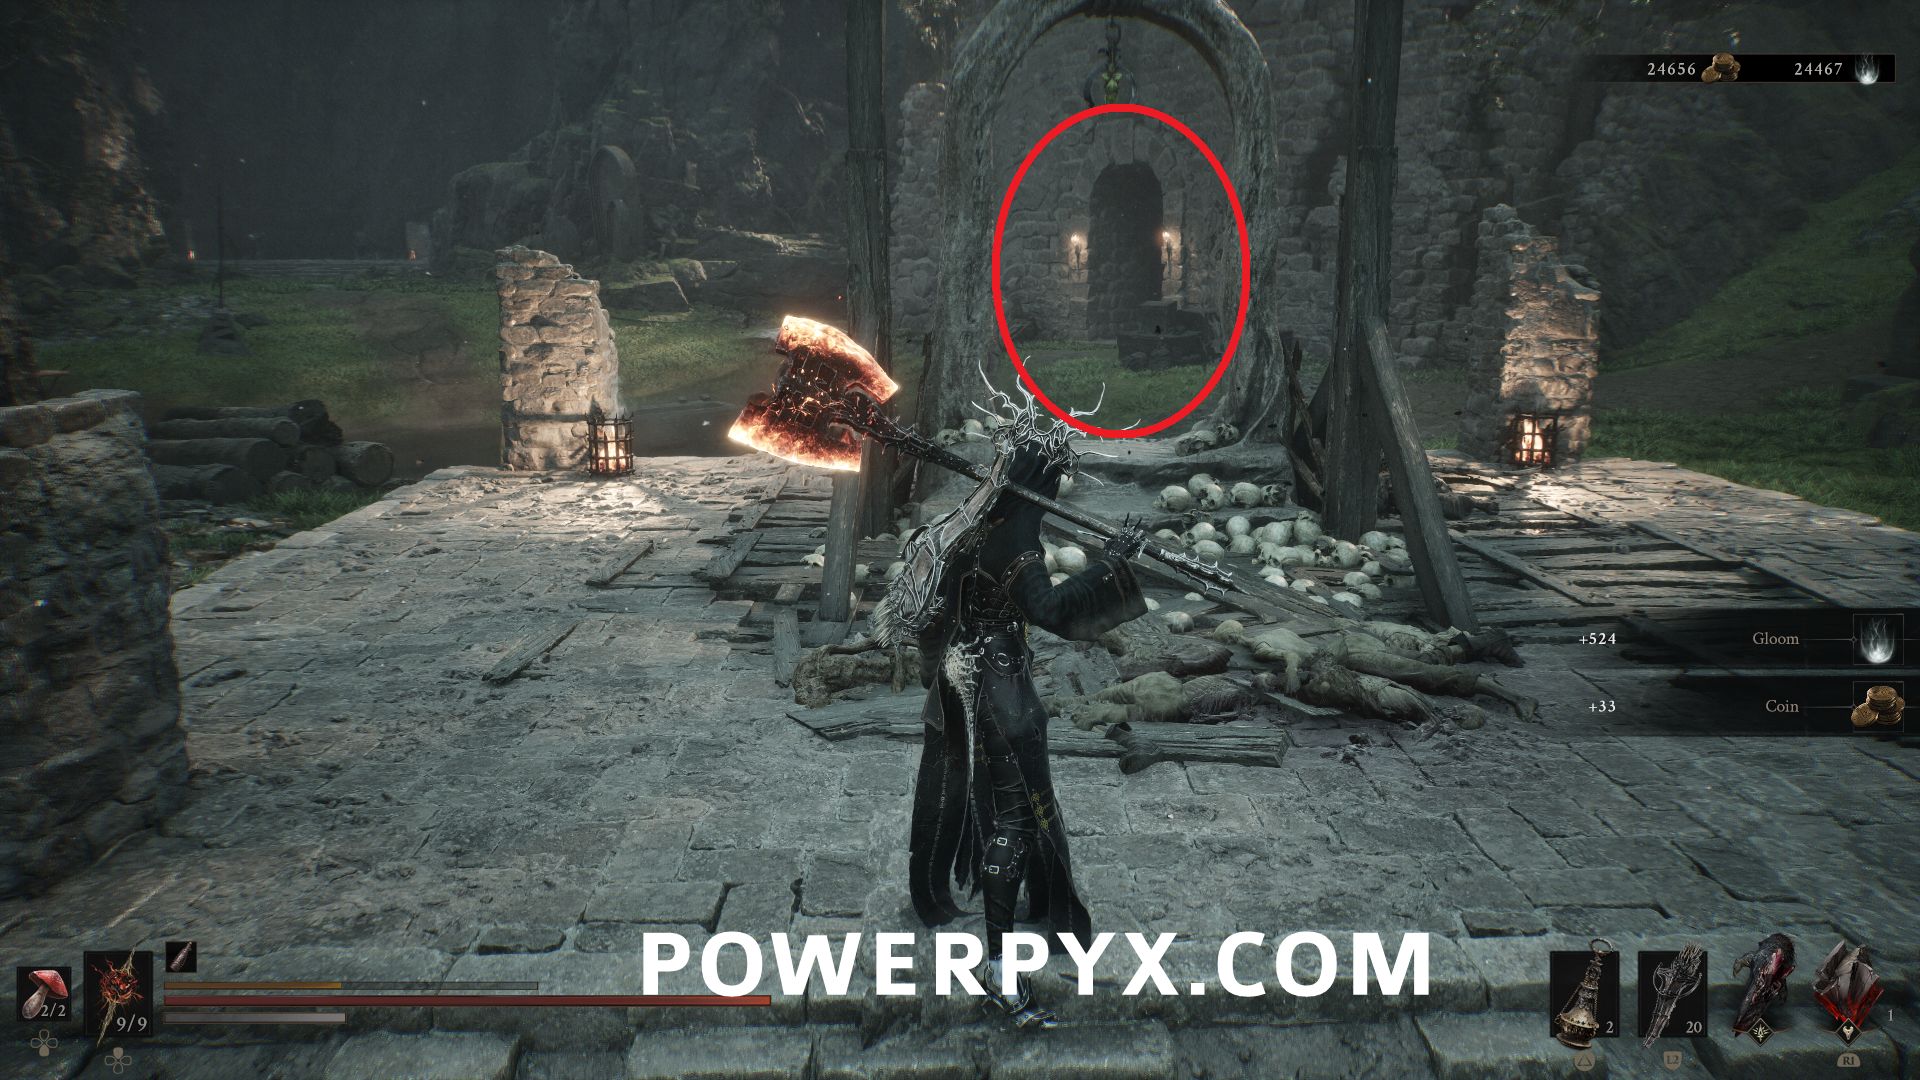
#9 – Flooded Village – Northwest of Blackridge Pass Beacon, use the archway to open the doorway on the building to reveal this dungeon entrance.
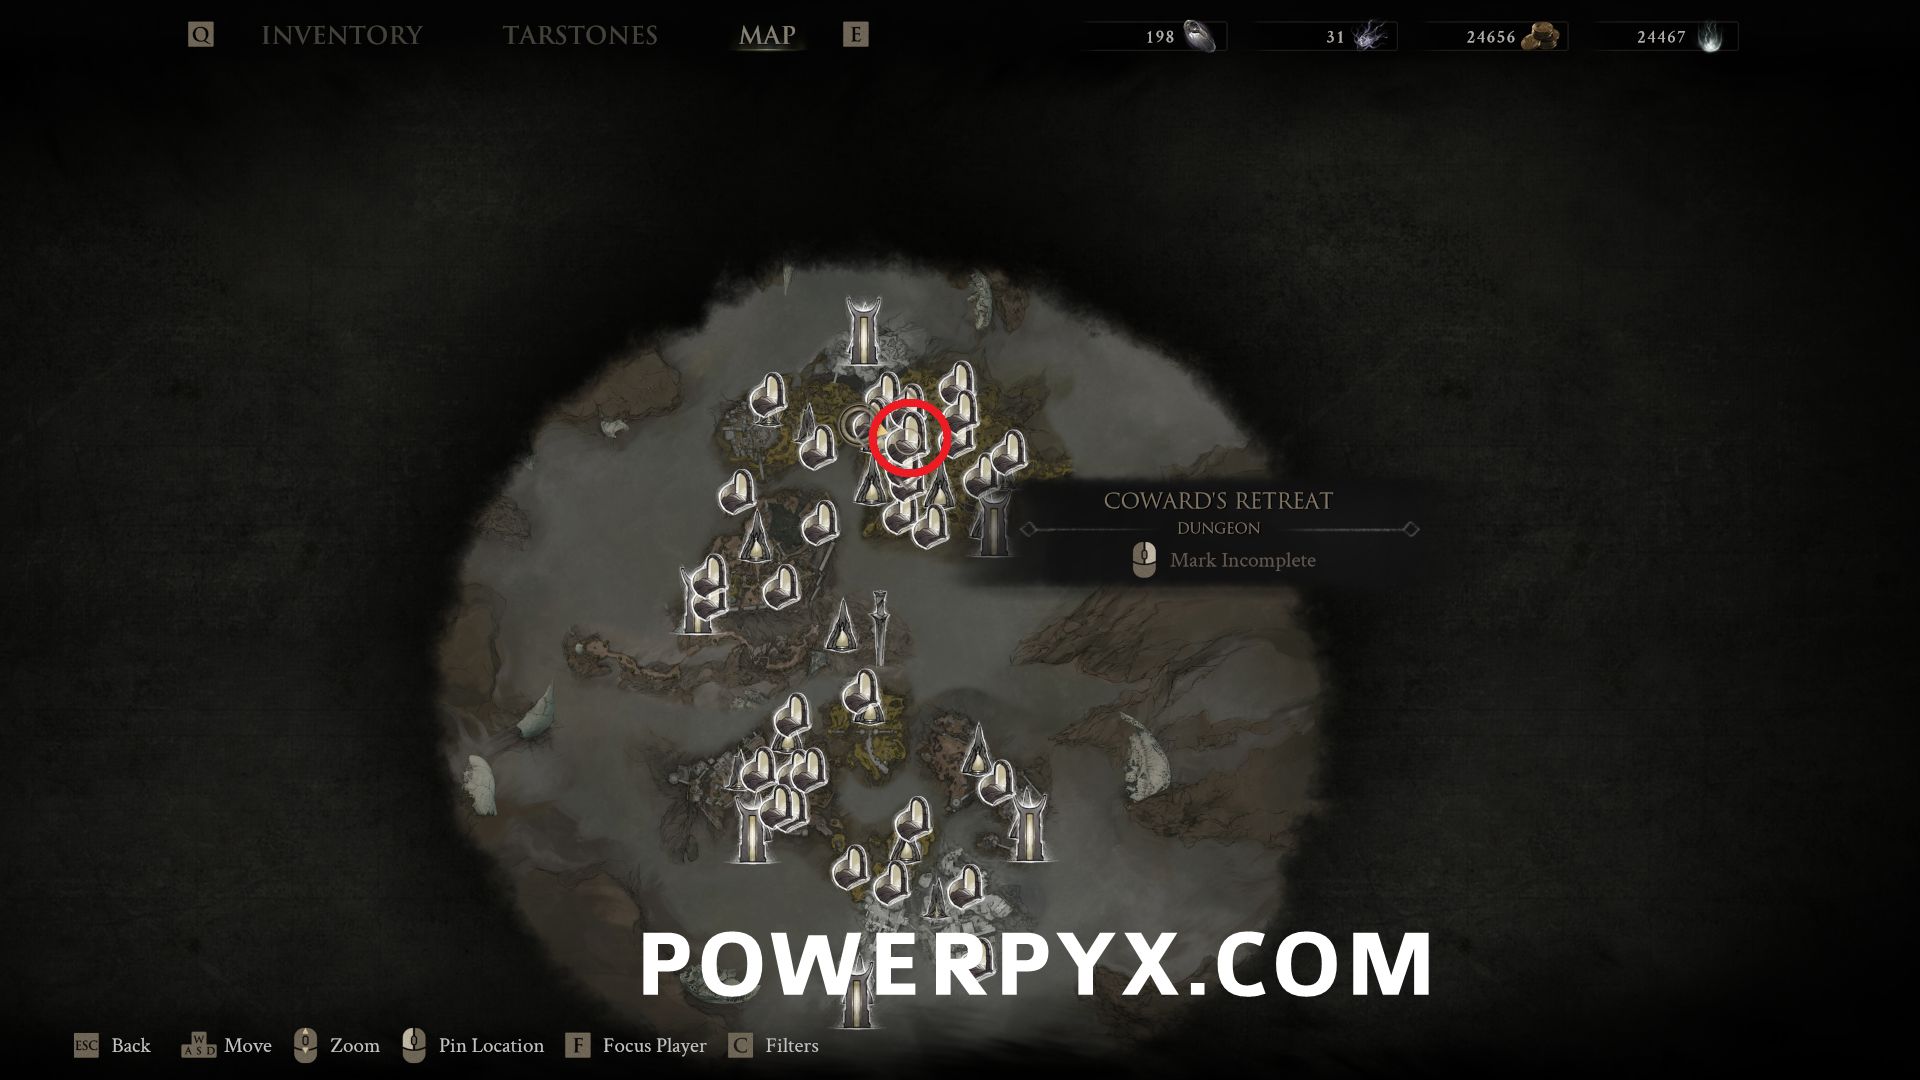
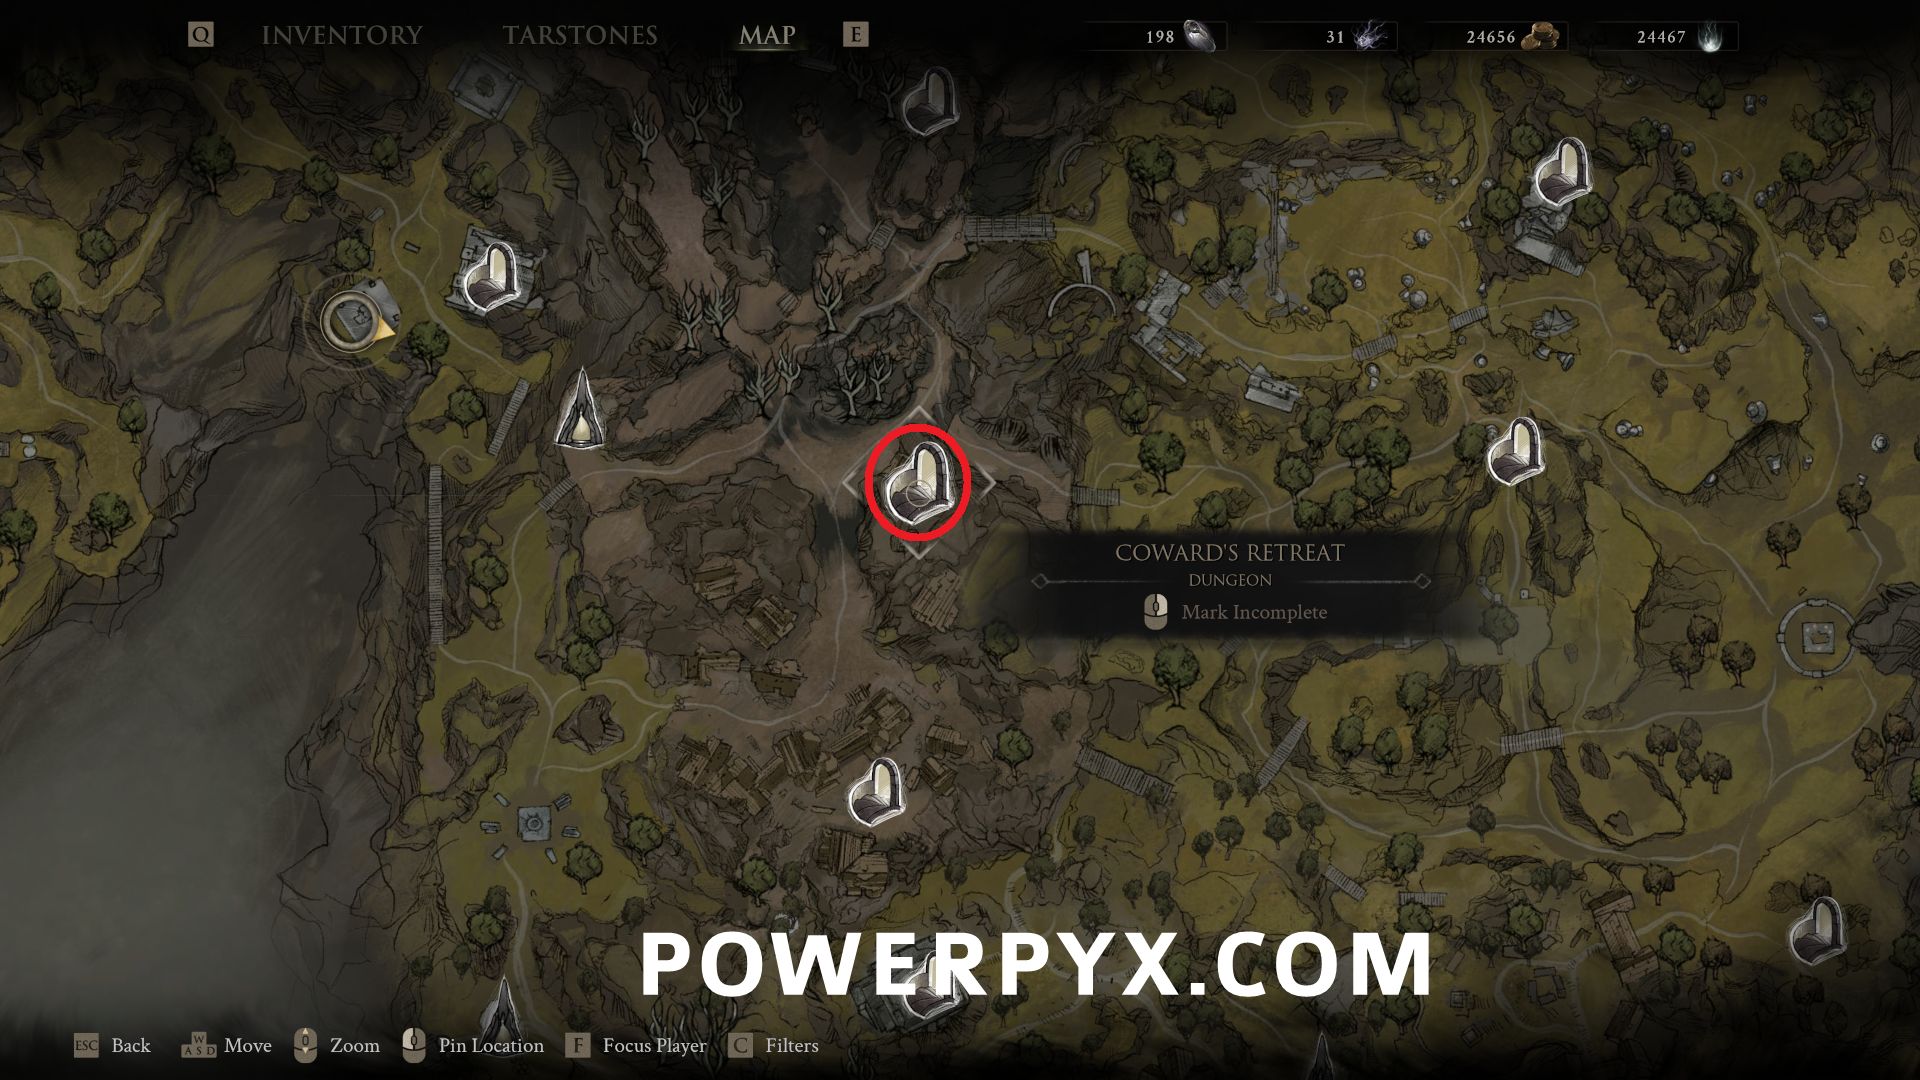
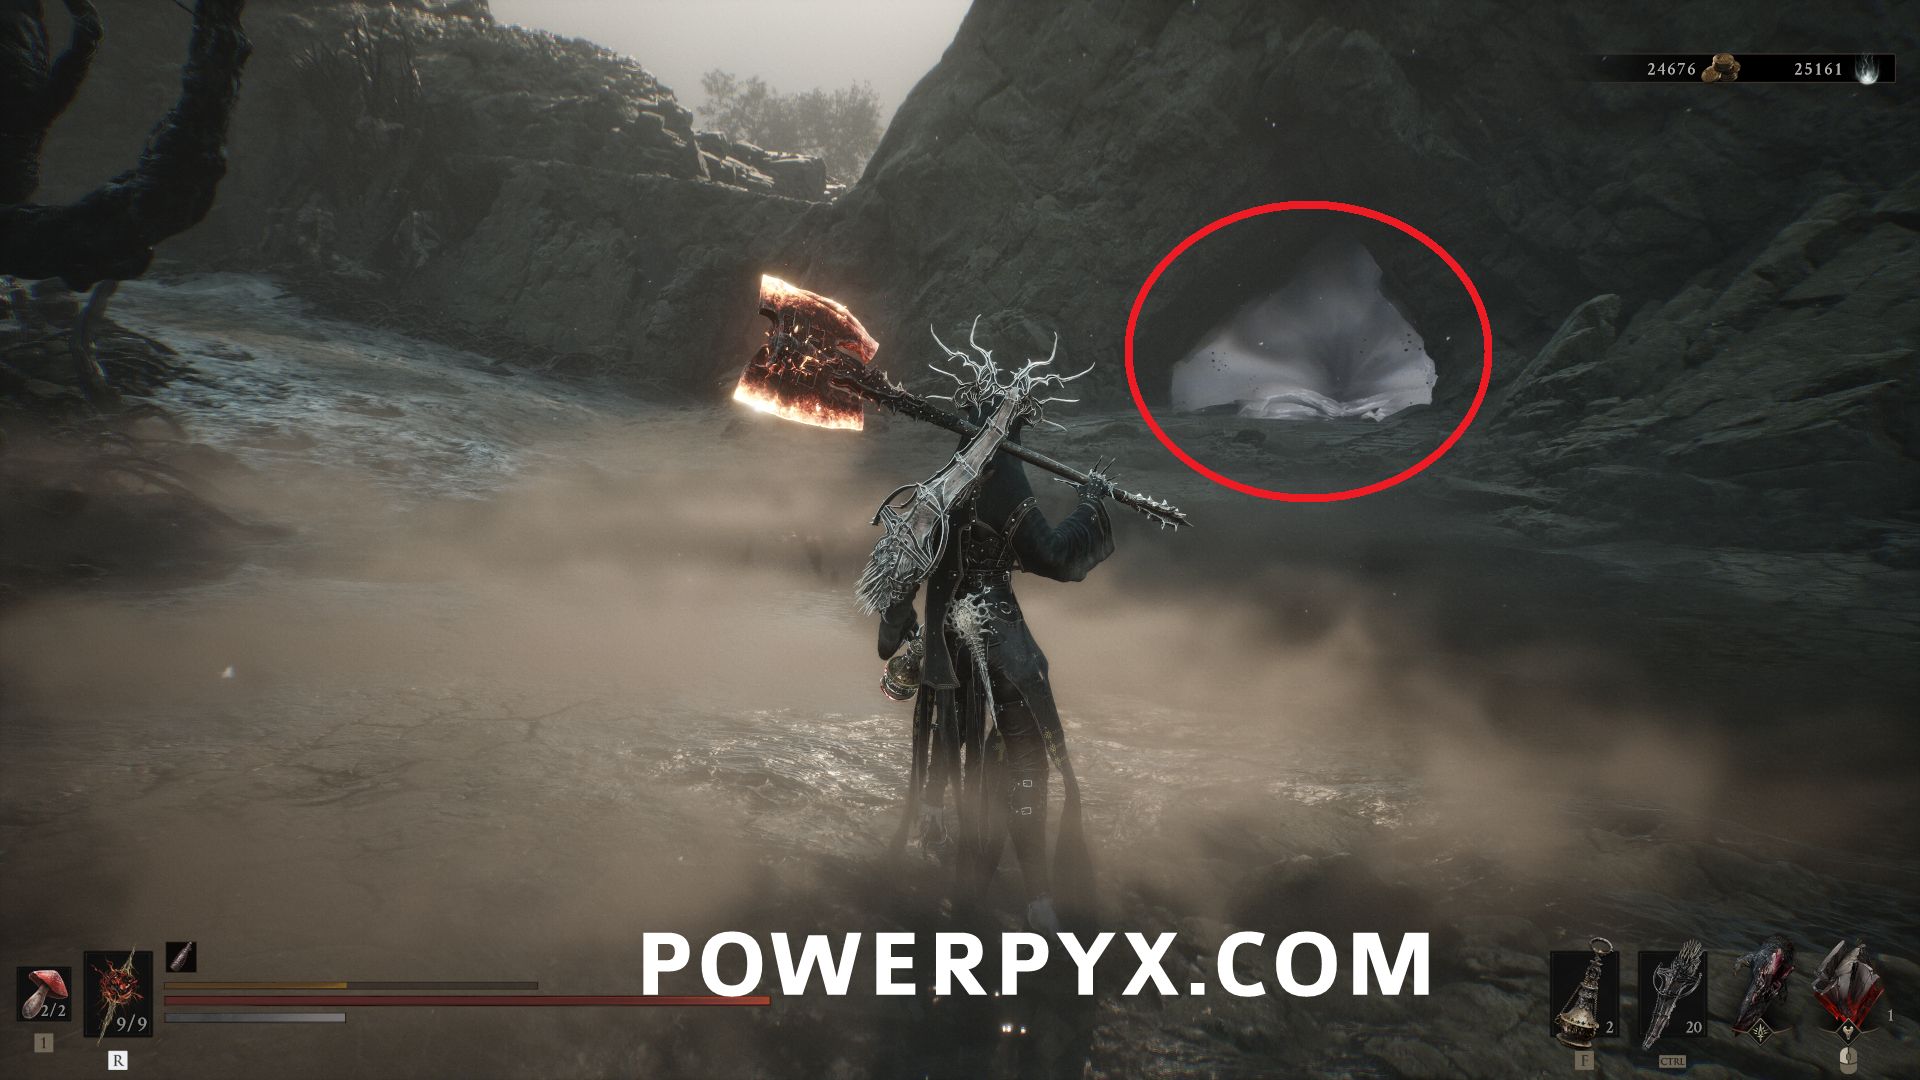
#10 – Coward’s Retreat – East of Blackridge Pass Beacon, in a cave.
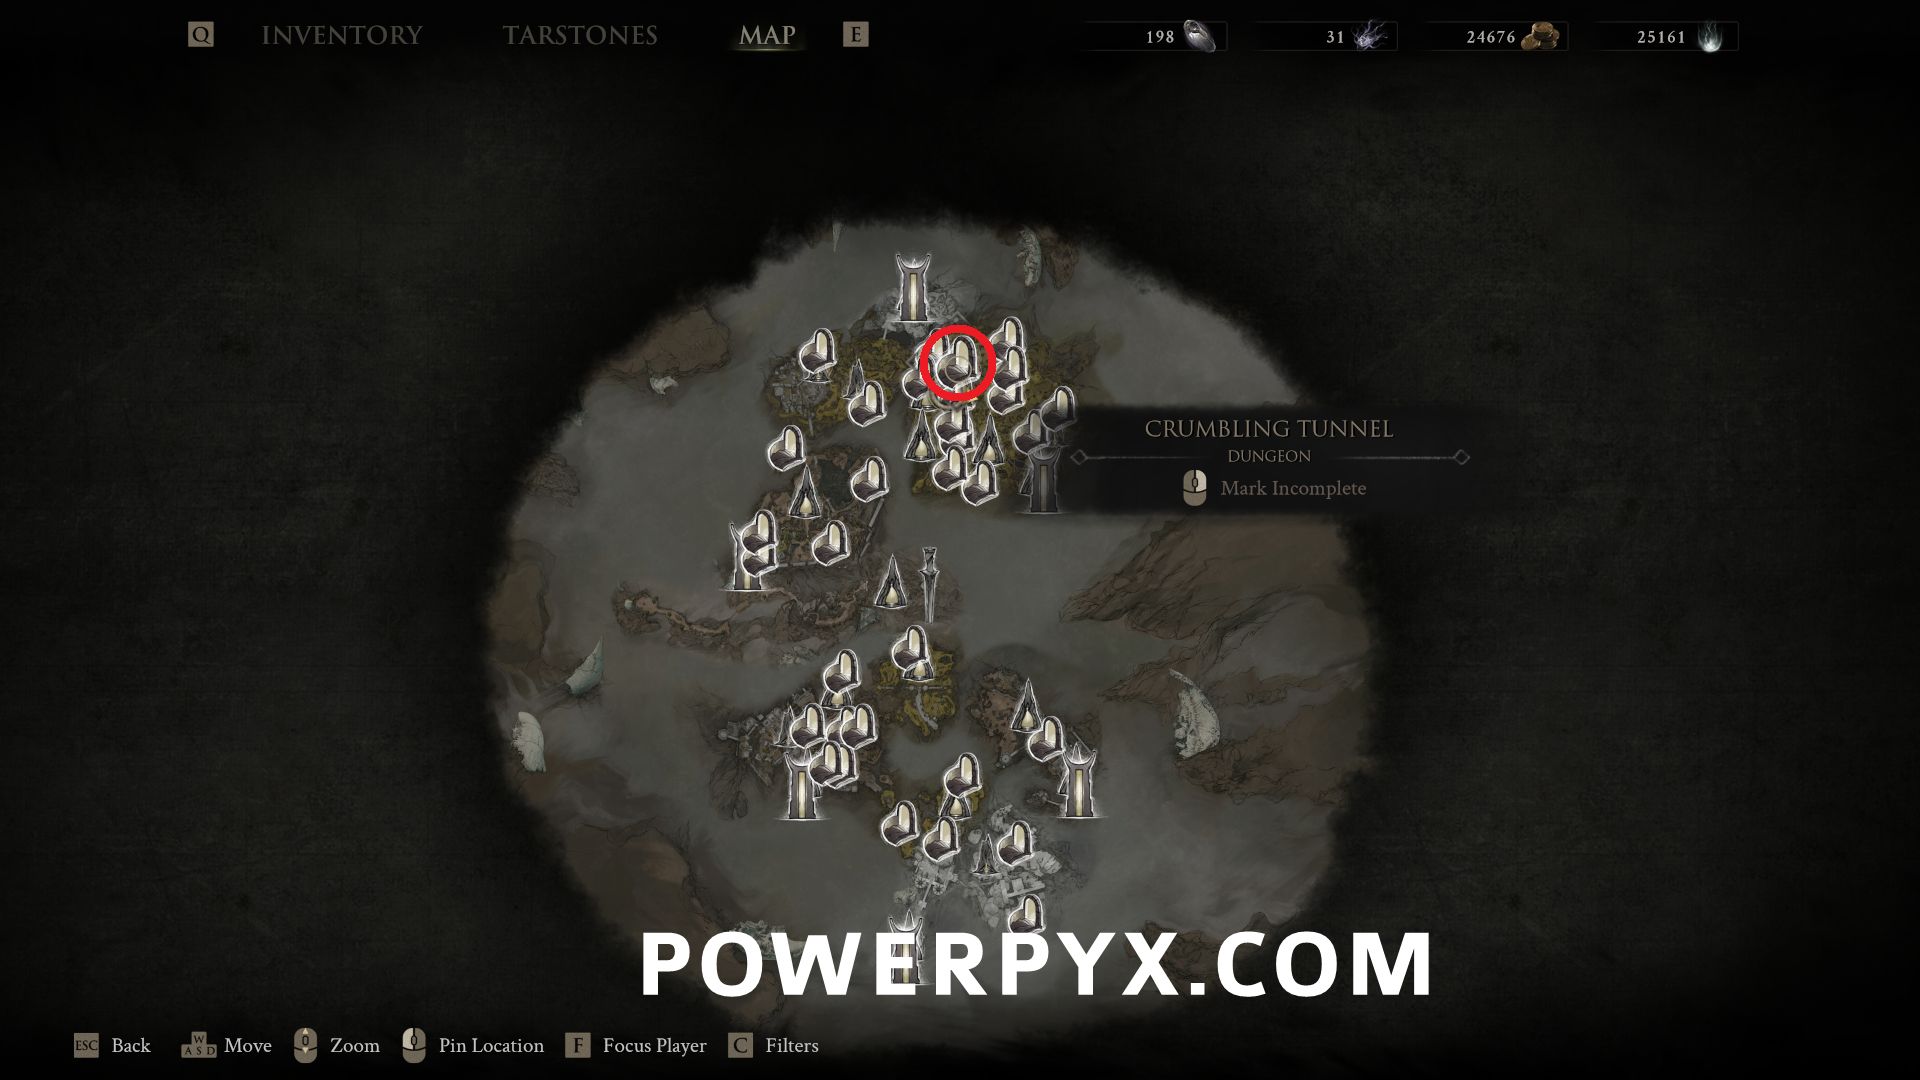
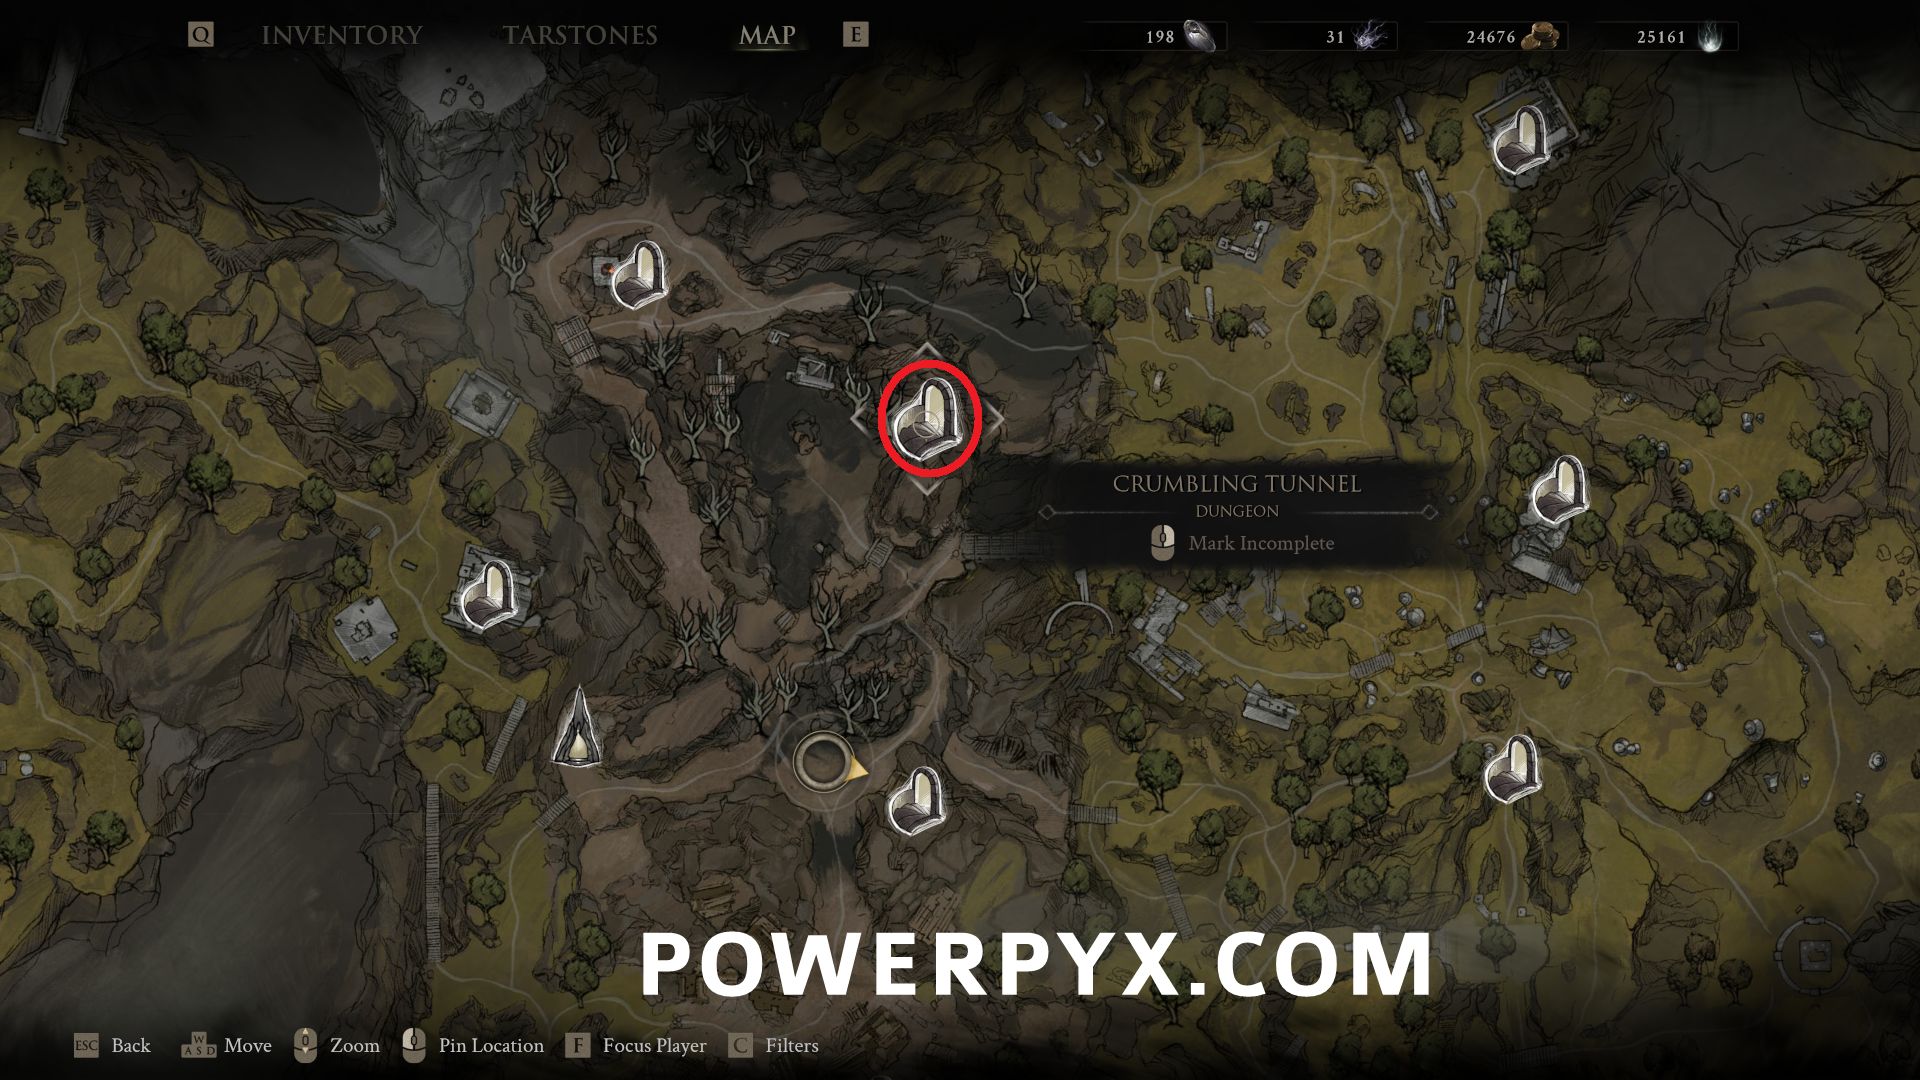
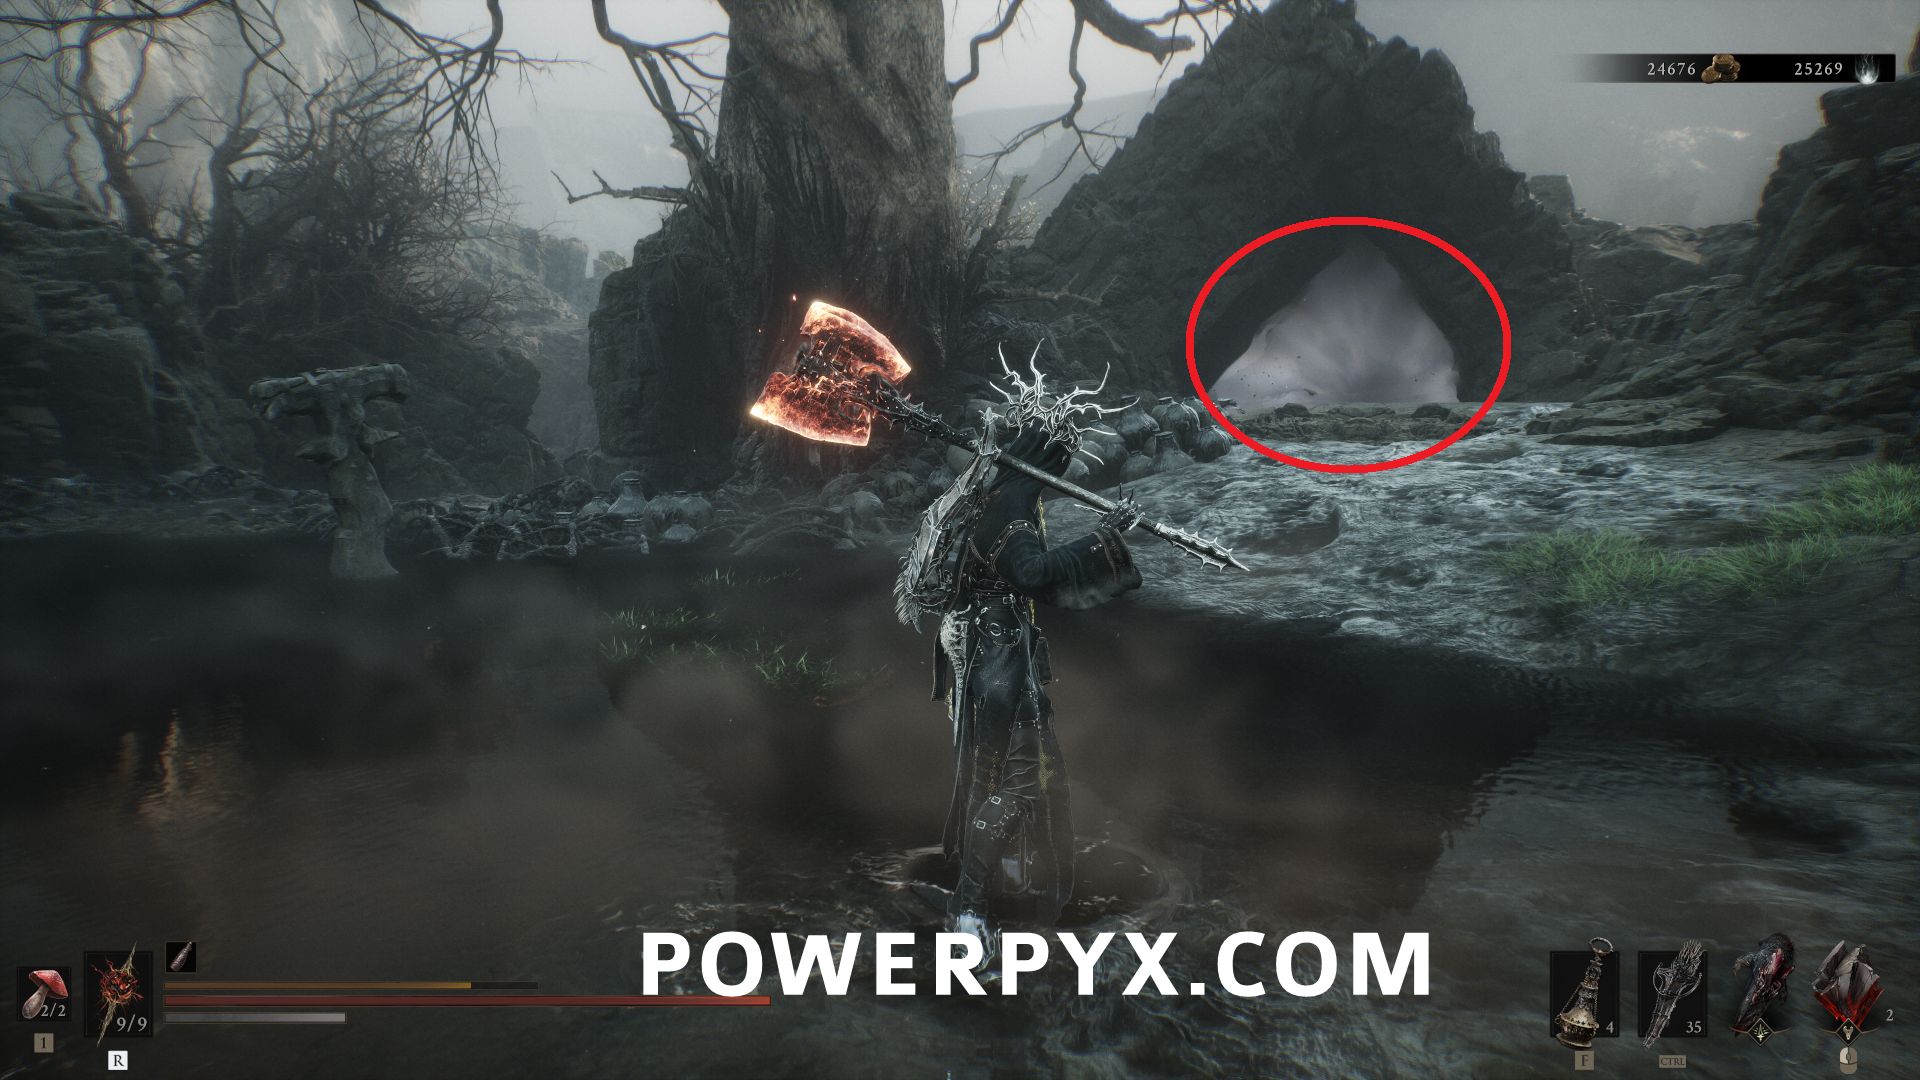
#11 – Crumbling Tunnel – Northeast of Blackridge Pass beacon, directly east of Shattered Beacon entrance.
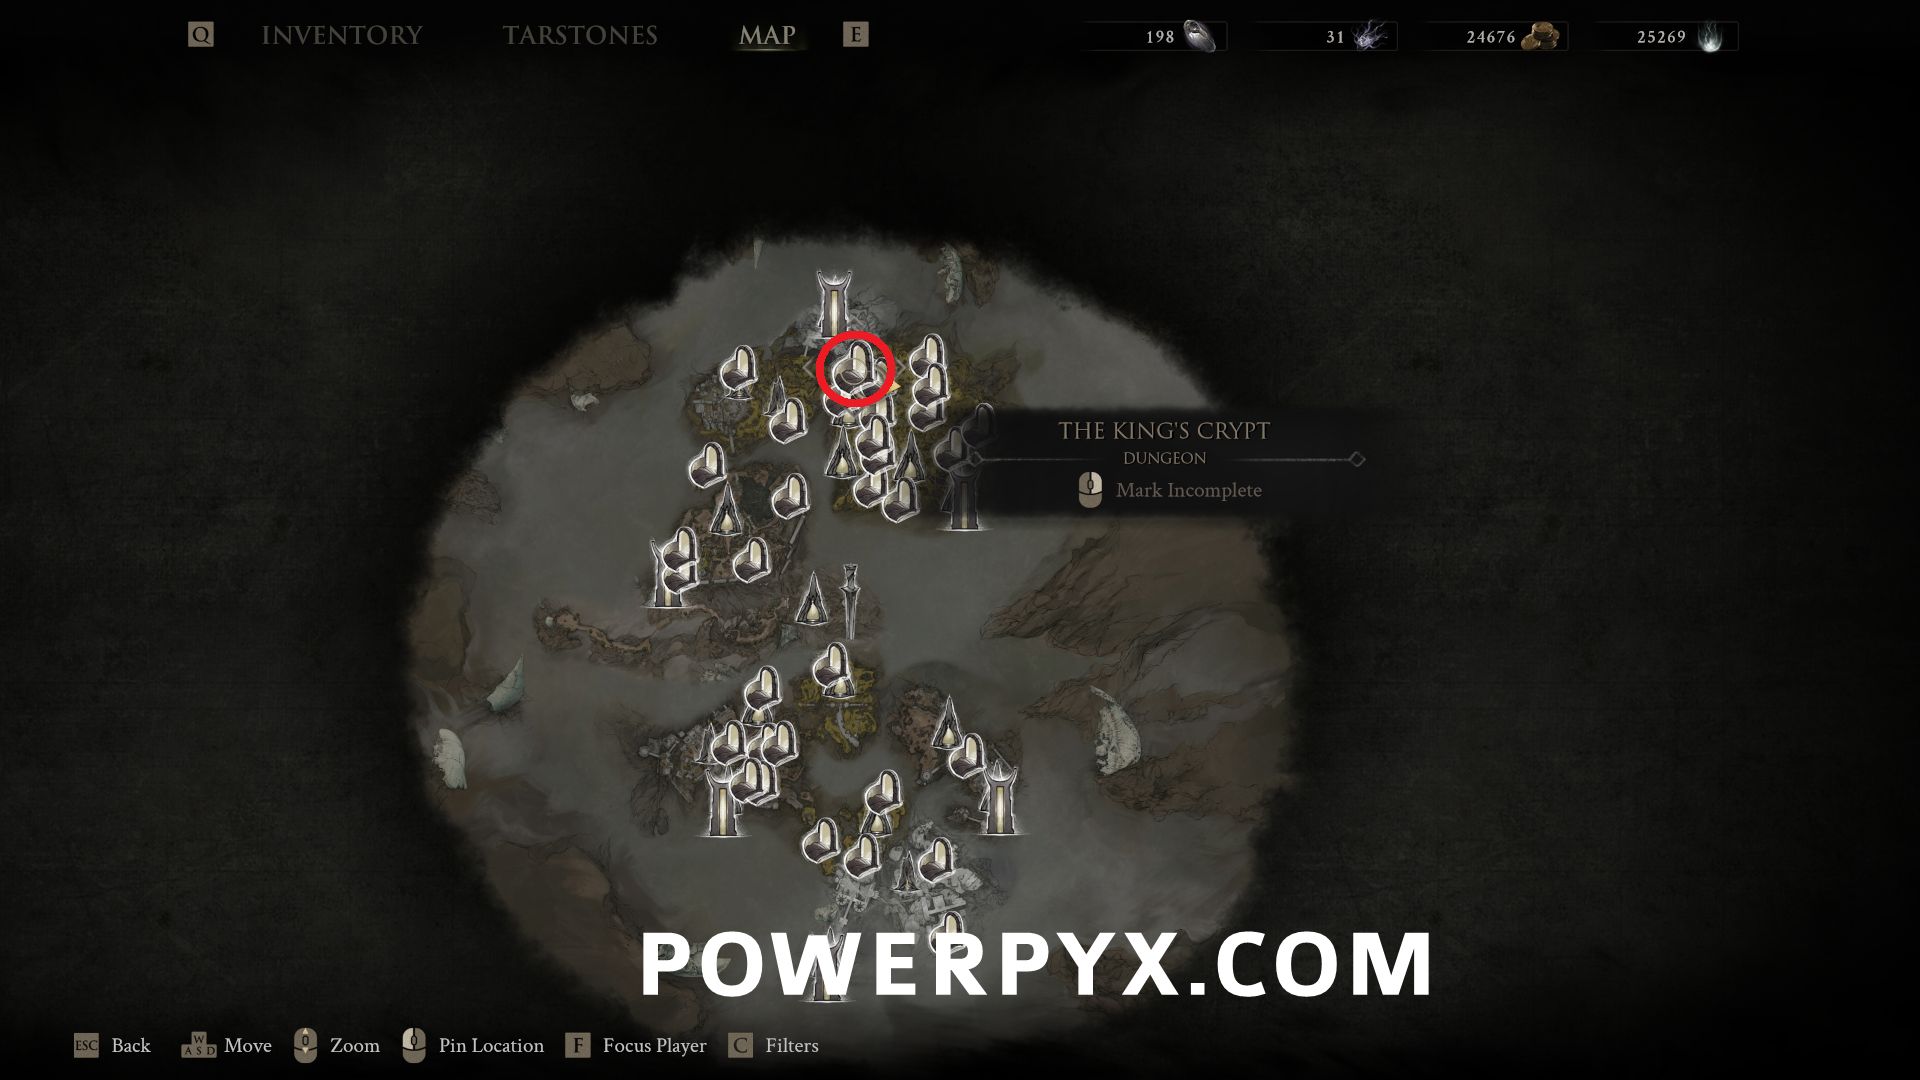
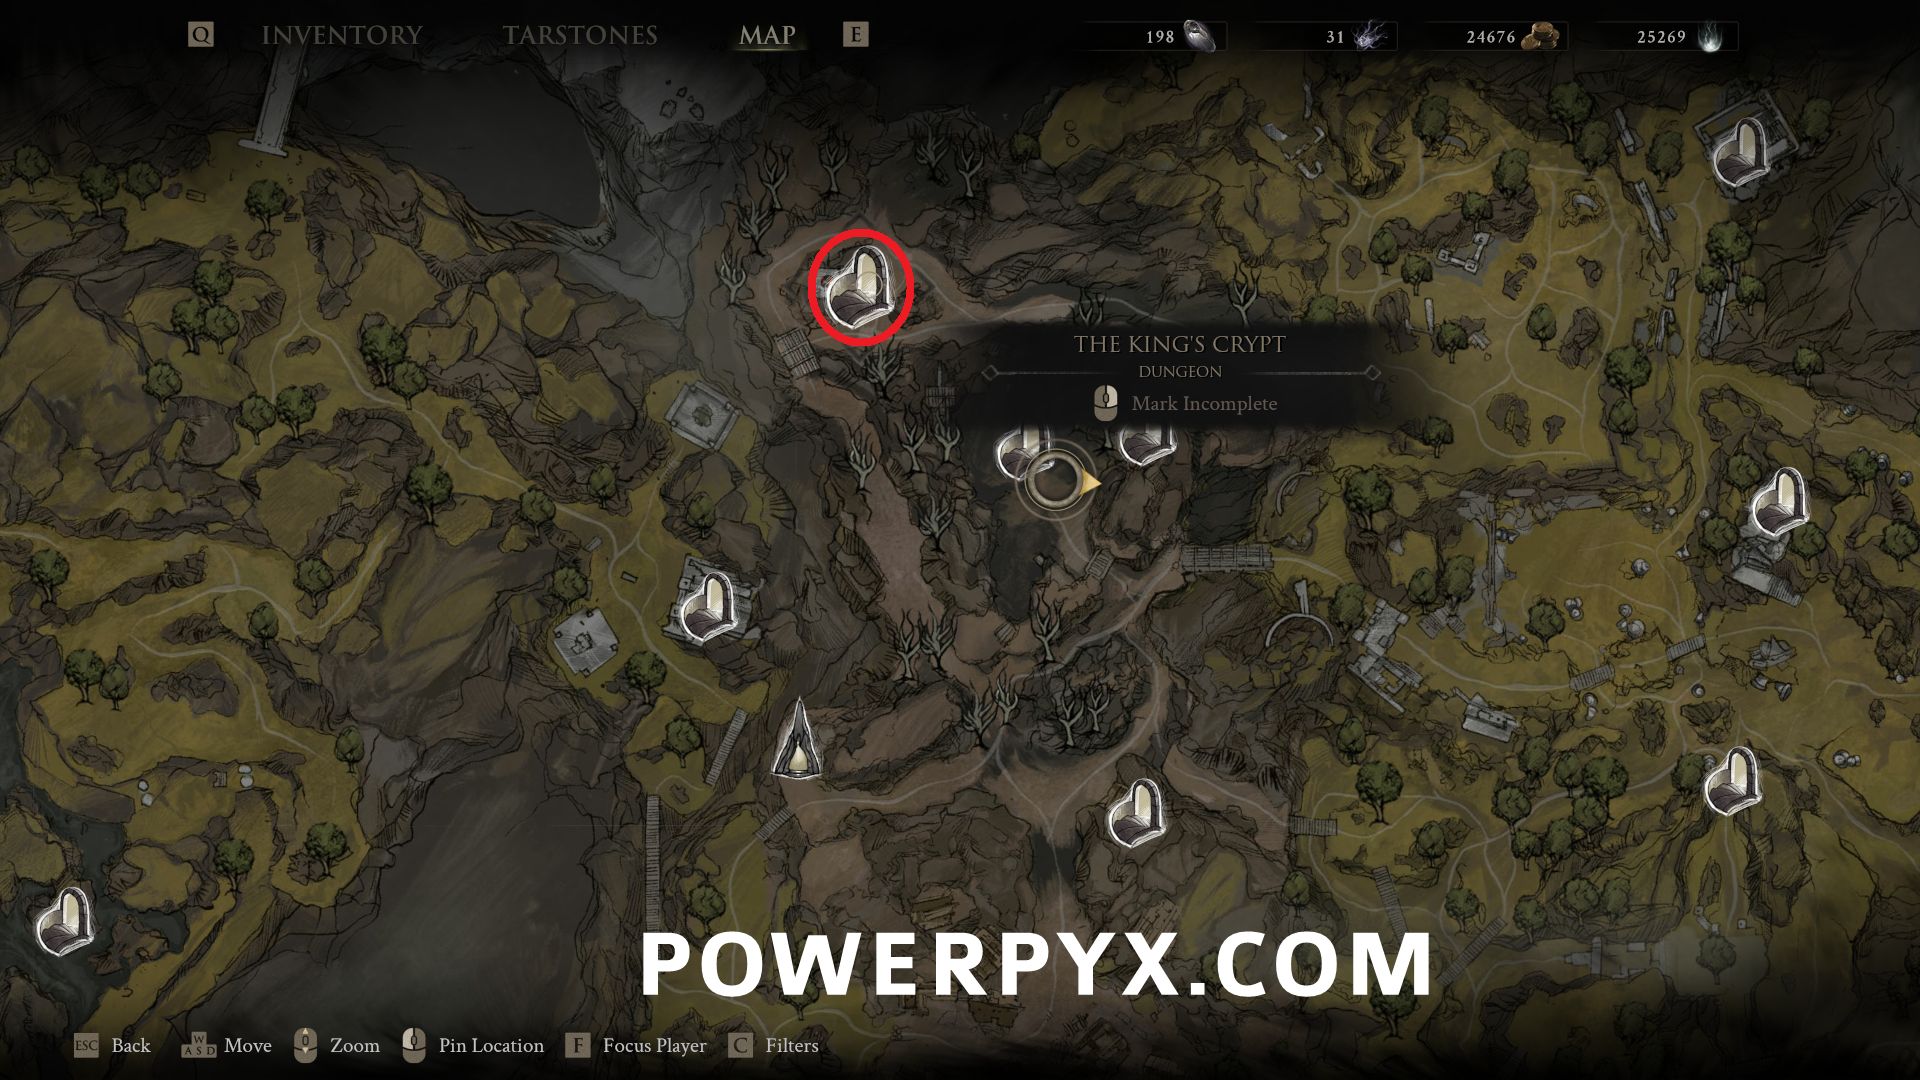
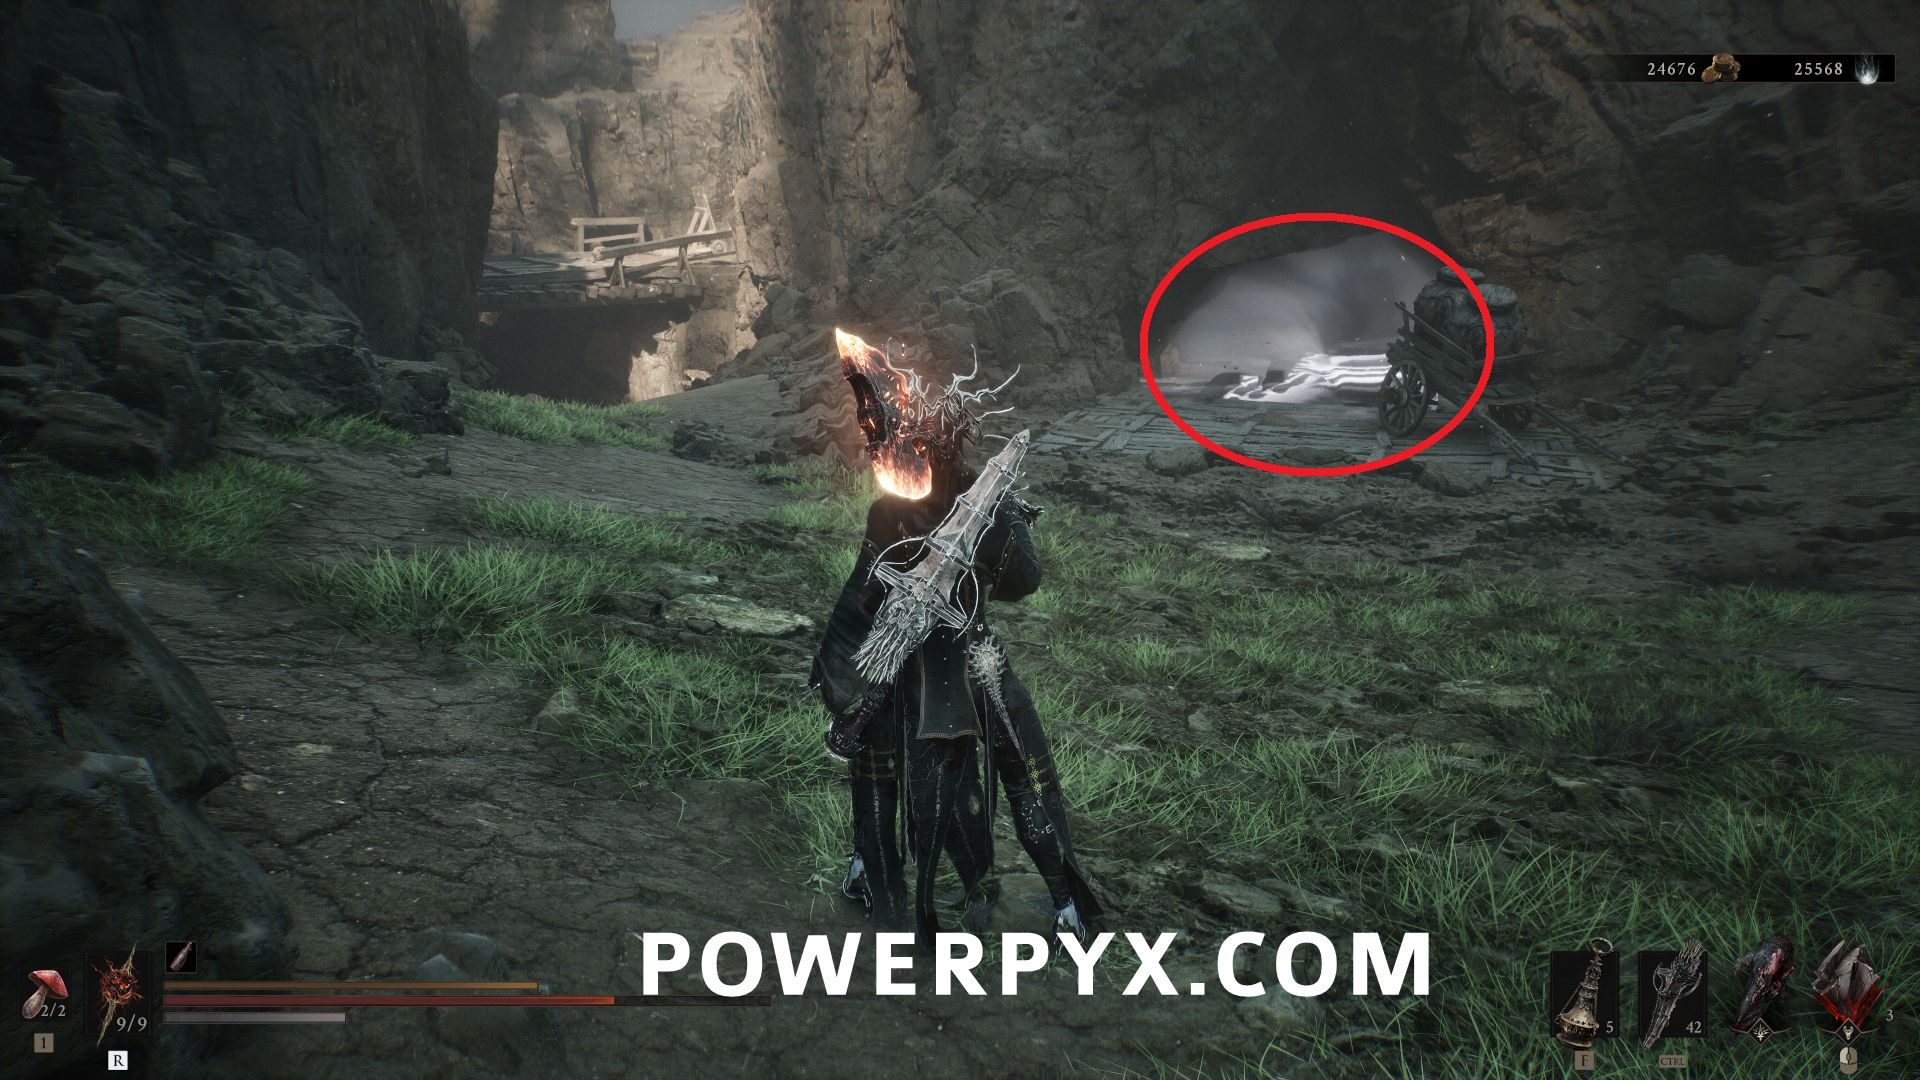
#12 – The King’s Crypt – North of Shattered Beacon dungeon, in a cave near a bunch of explosive jars.
Widow’s Overlook
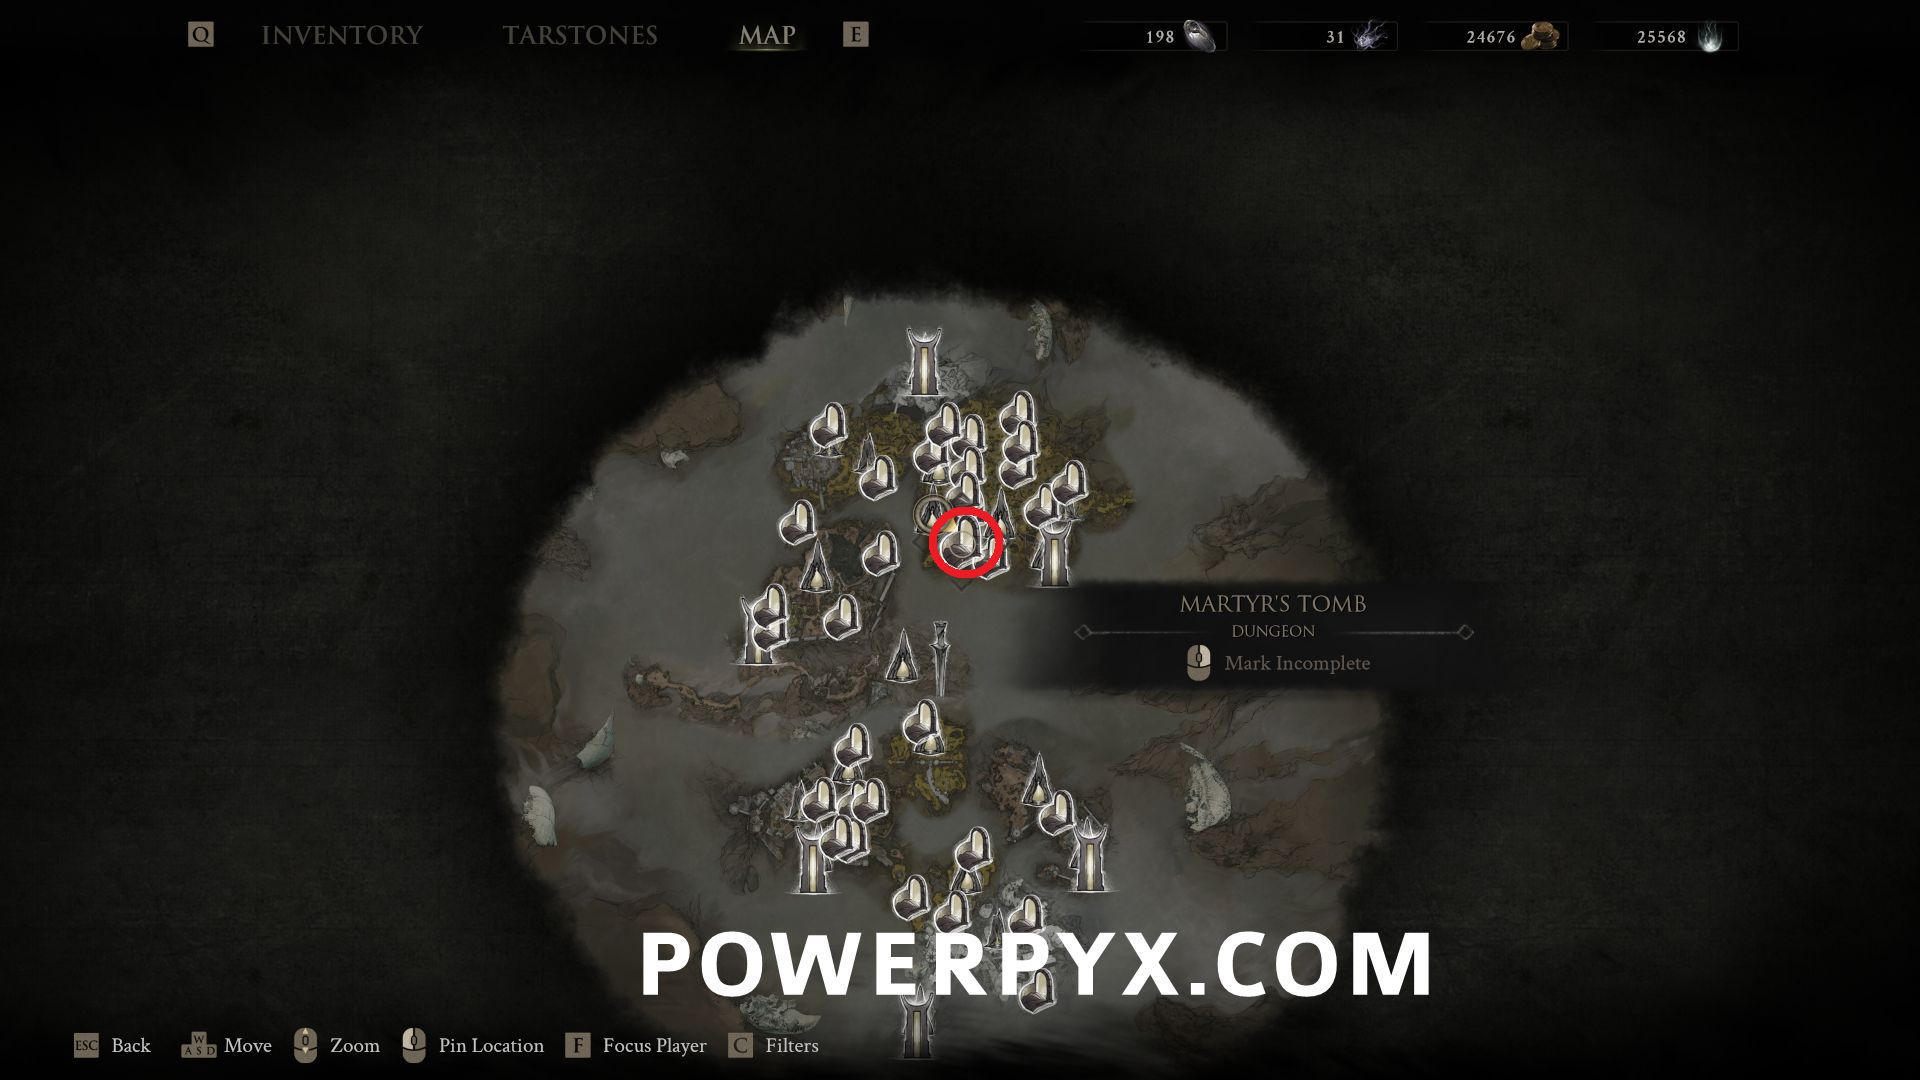
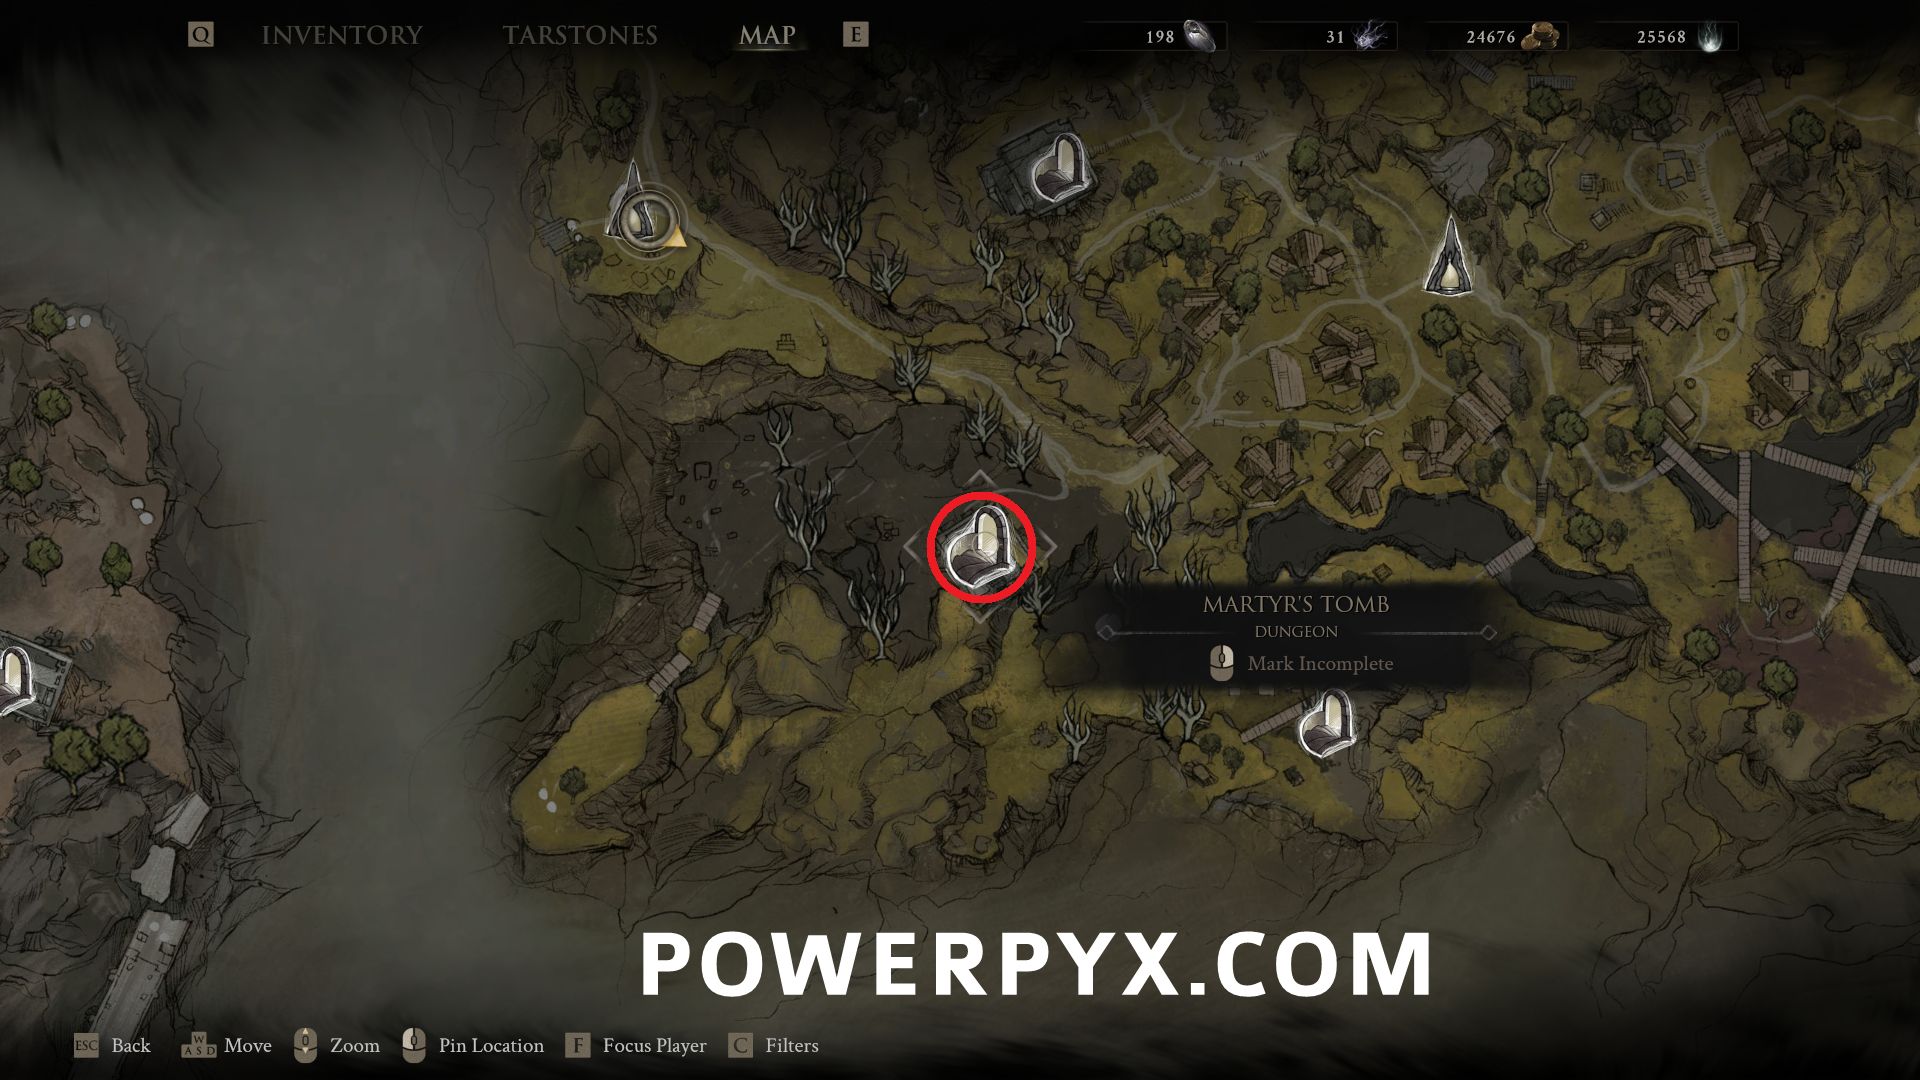
#13 – Martyr’s Tomb – Southeast of Widow’s Overlook Beacon, in the building.
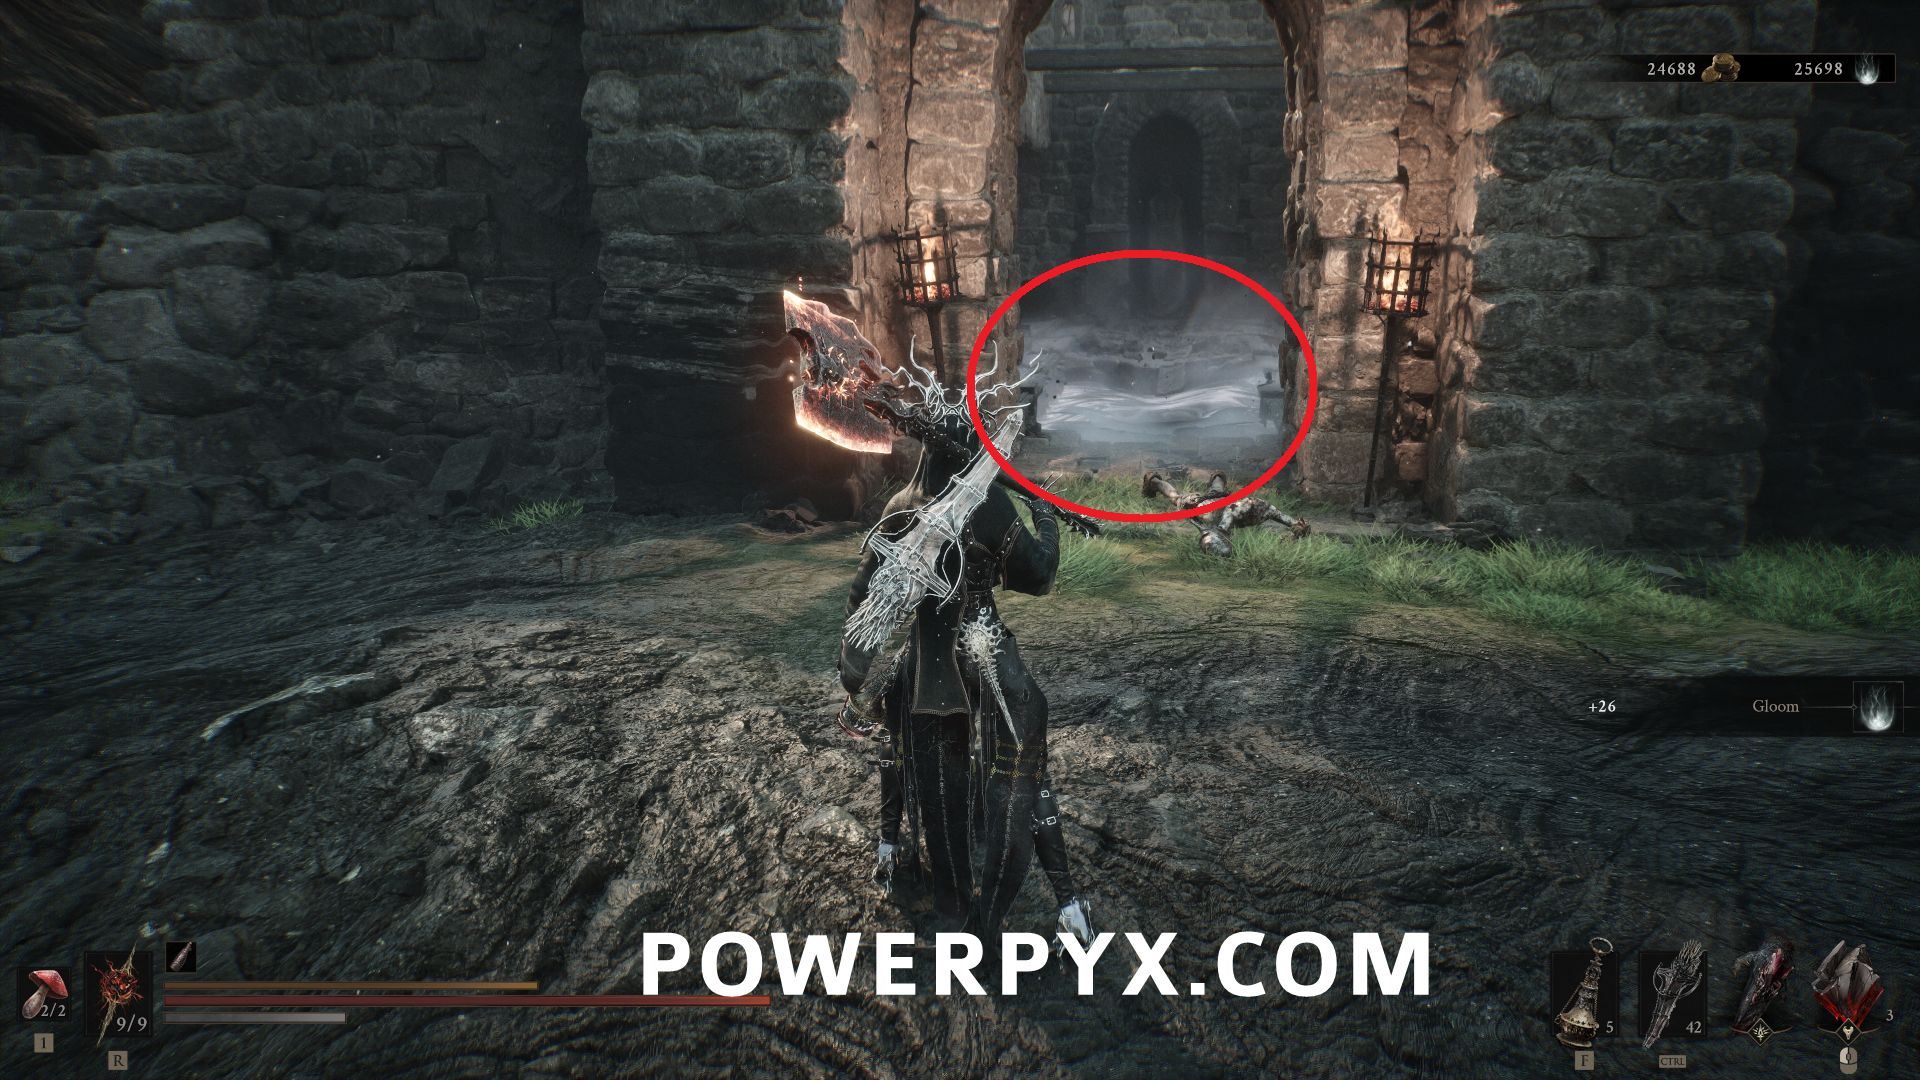
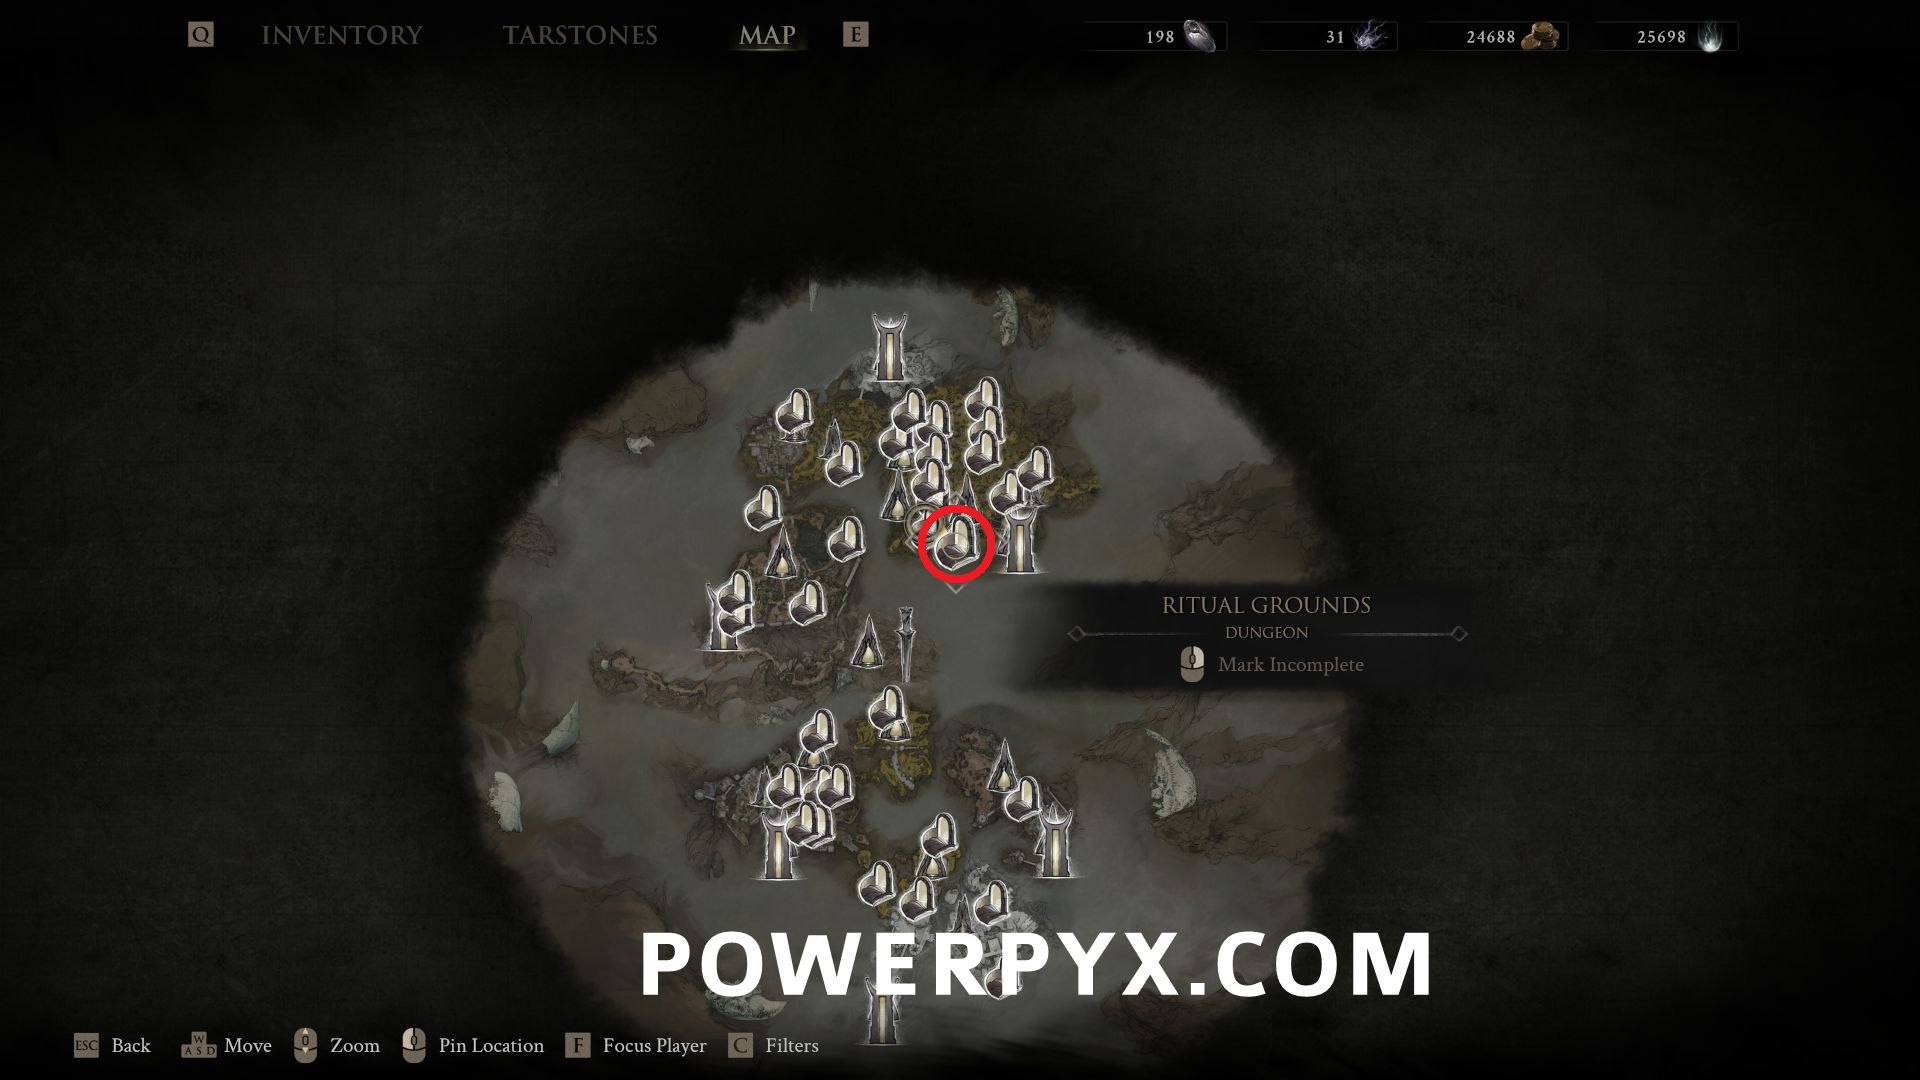
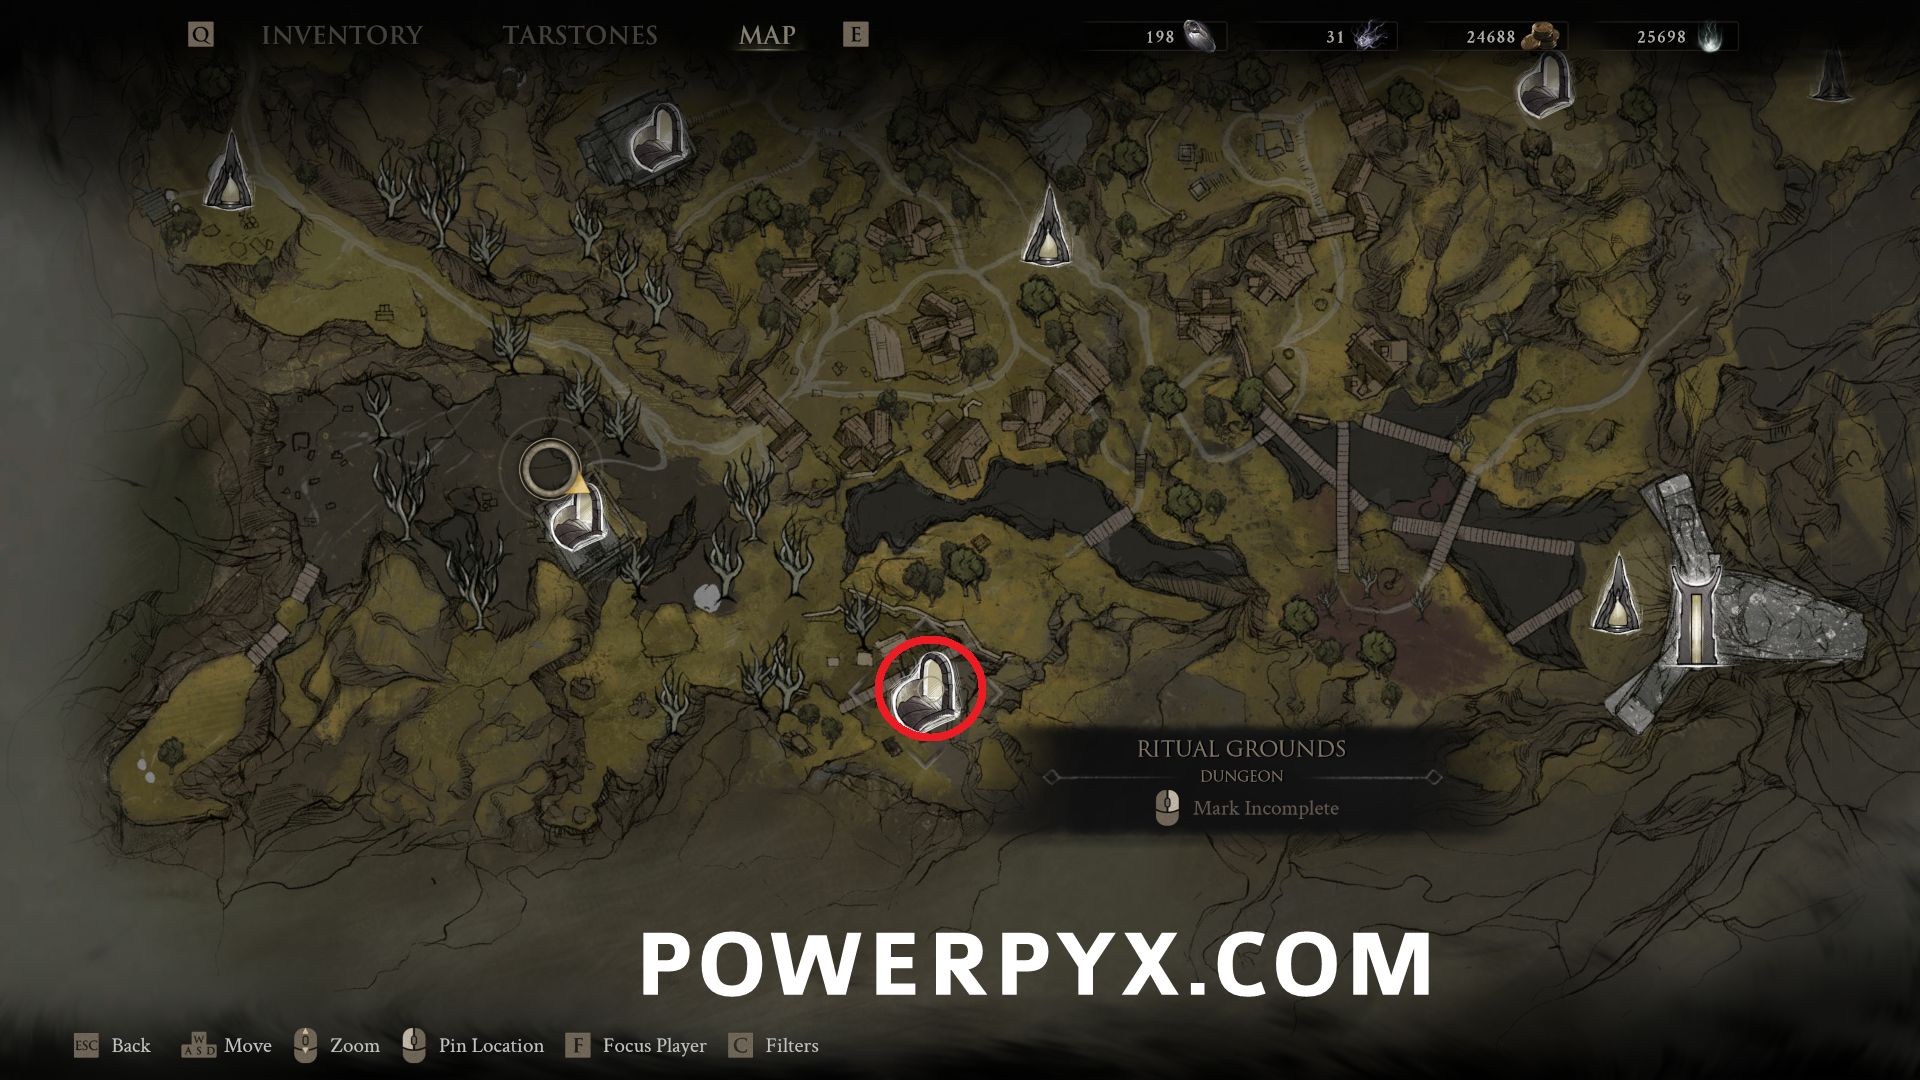
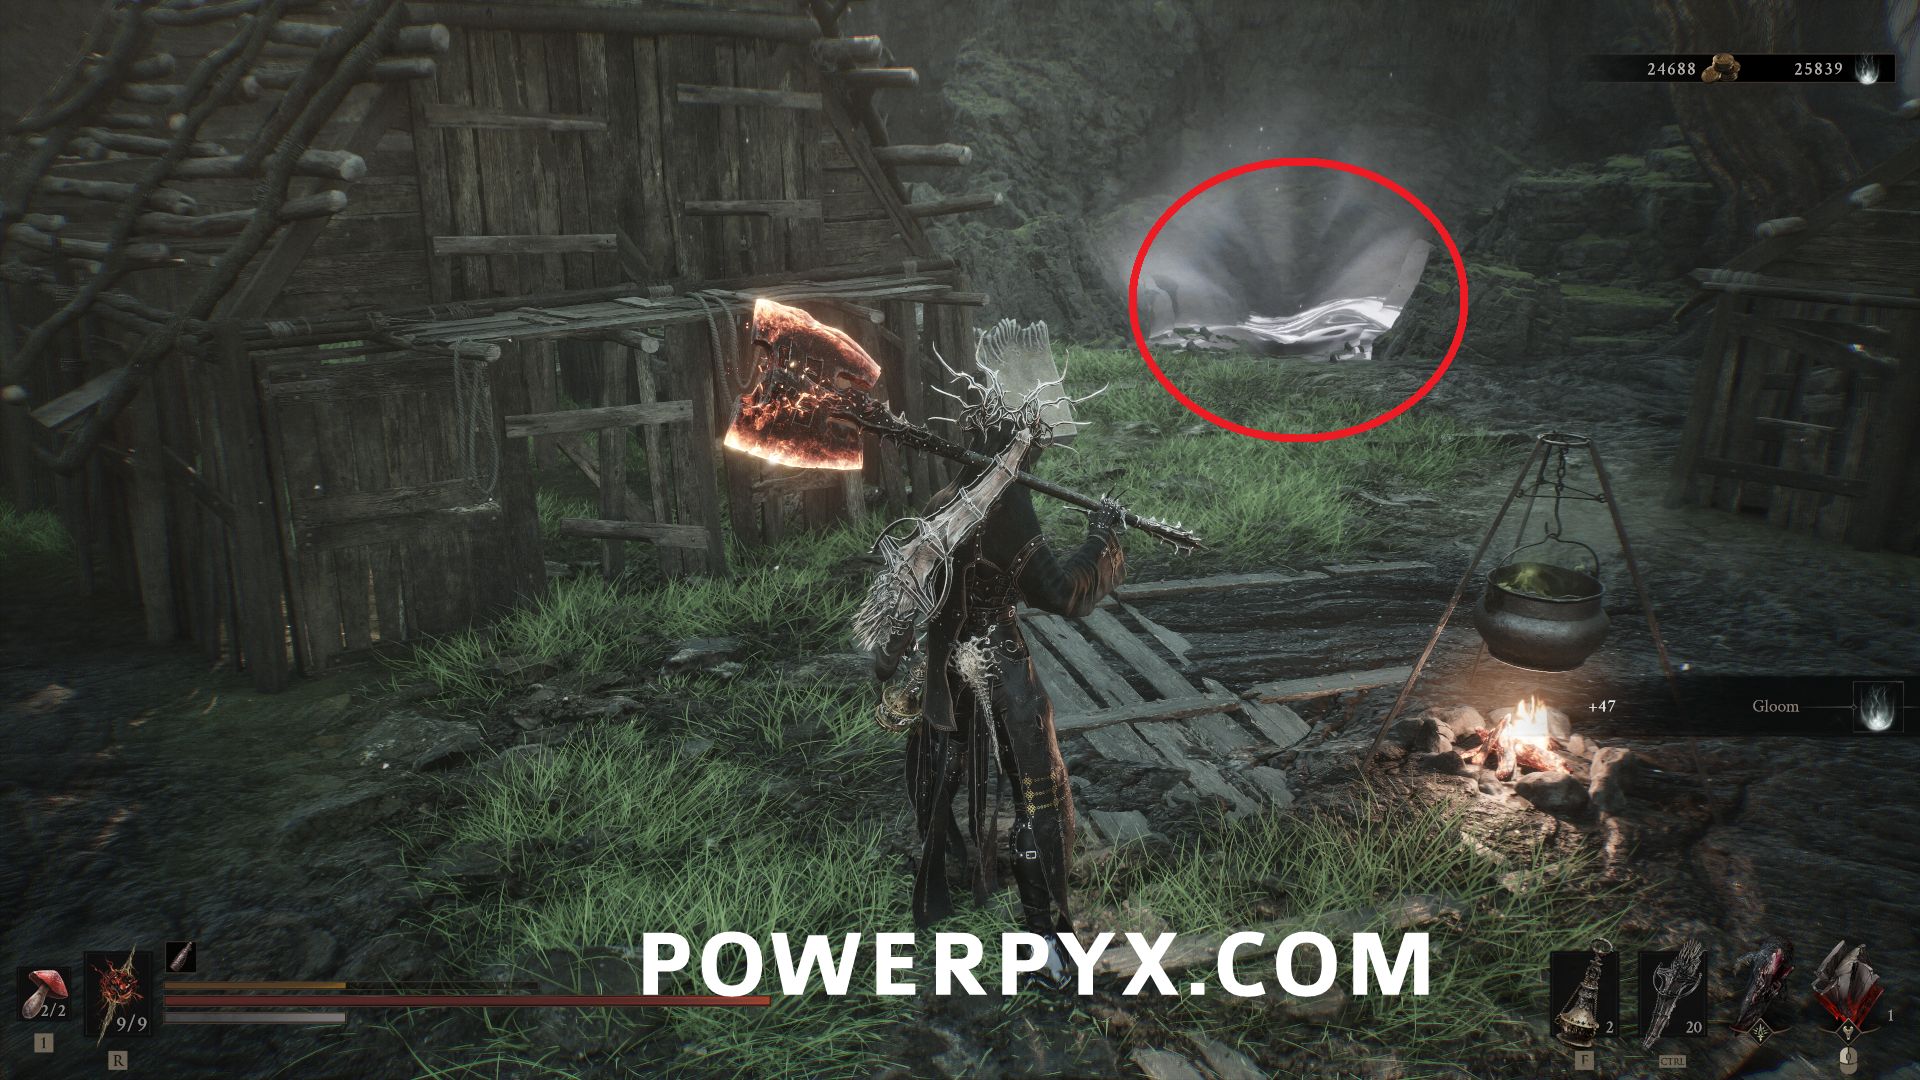
#14 – Ritual Grounds – Southeast of Widow’s Overlook Beacon, in the back of the small village area where Tiel is located.
Gloomshade Grove
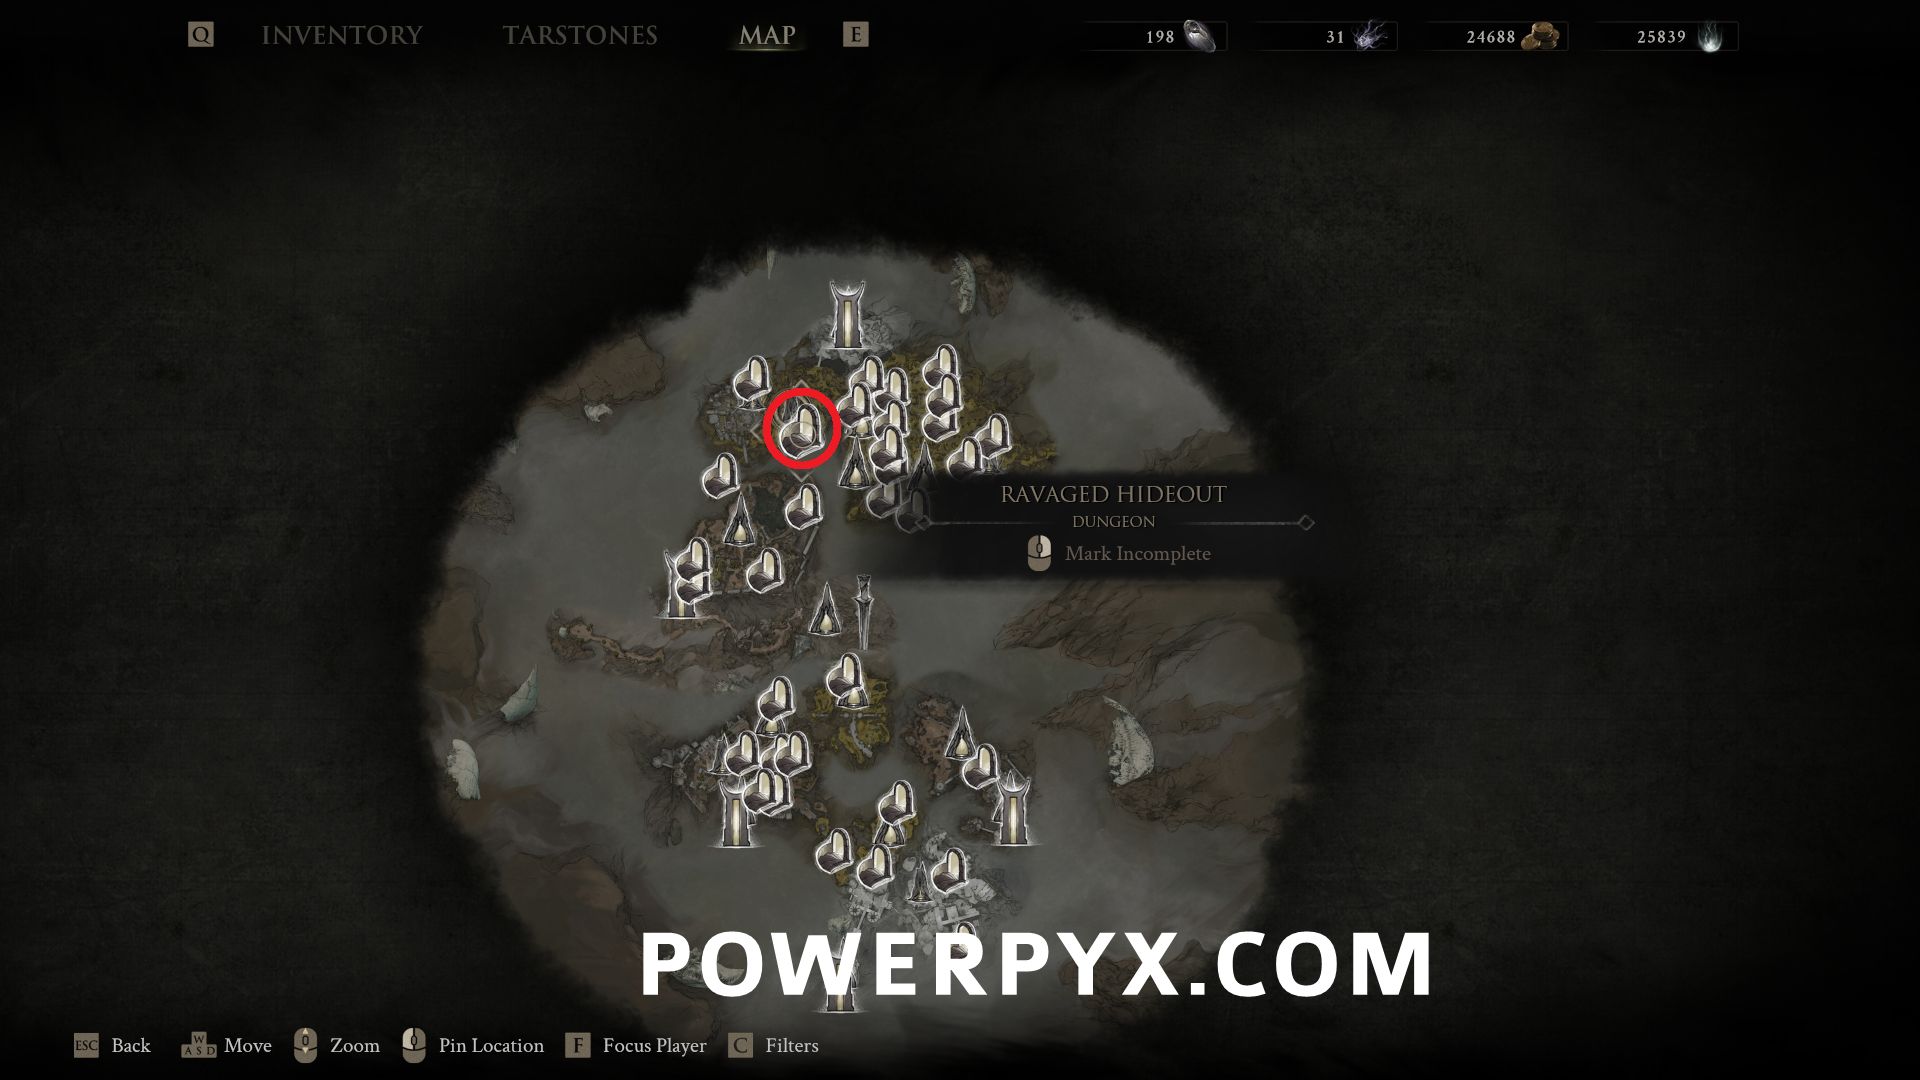
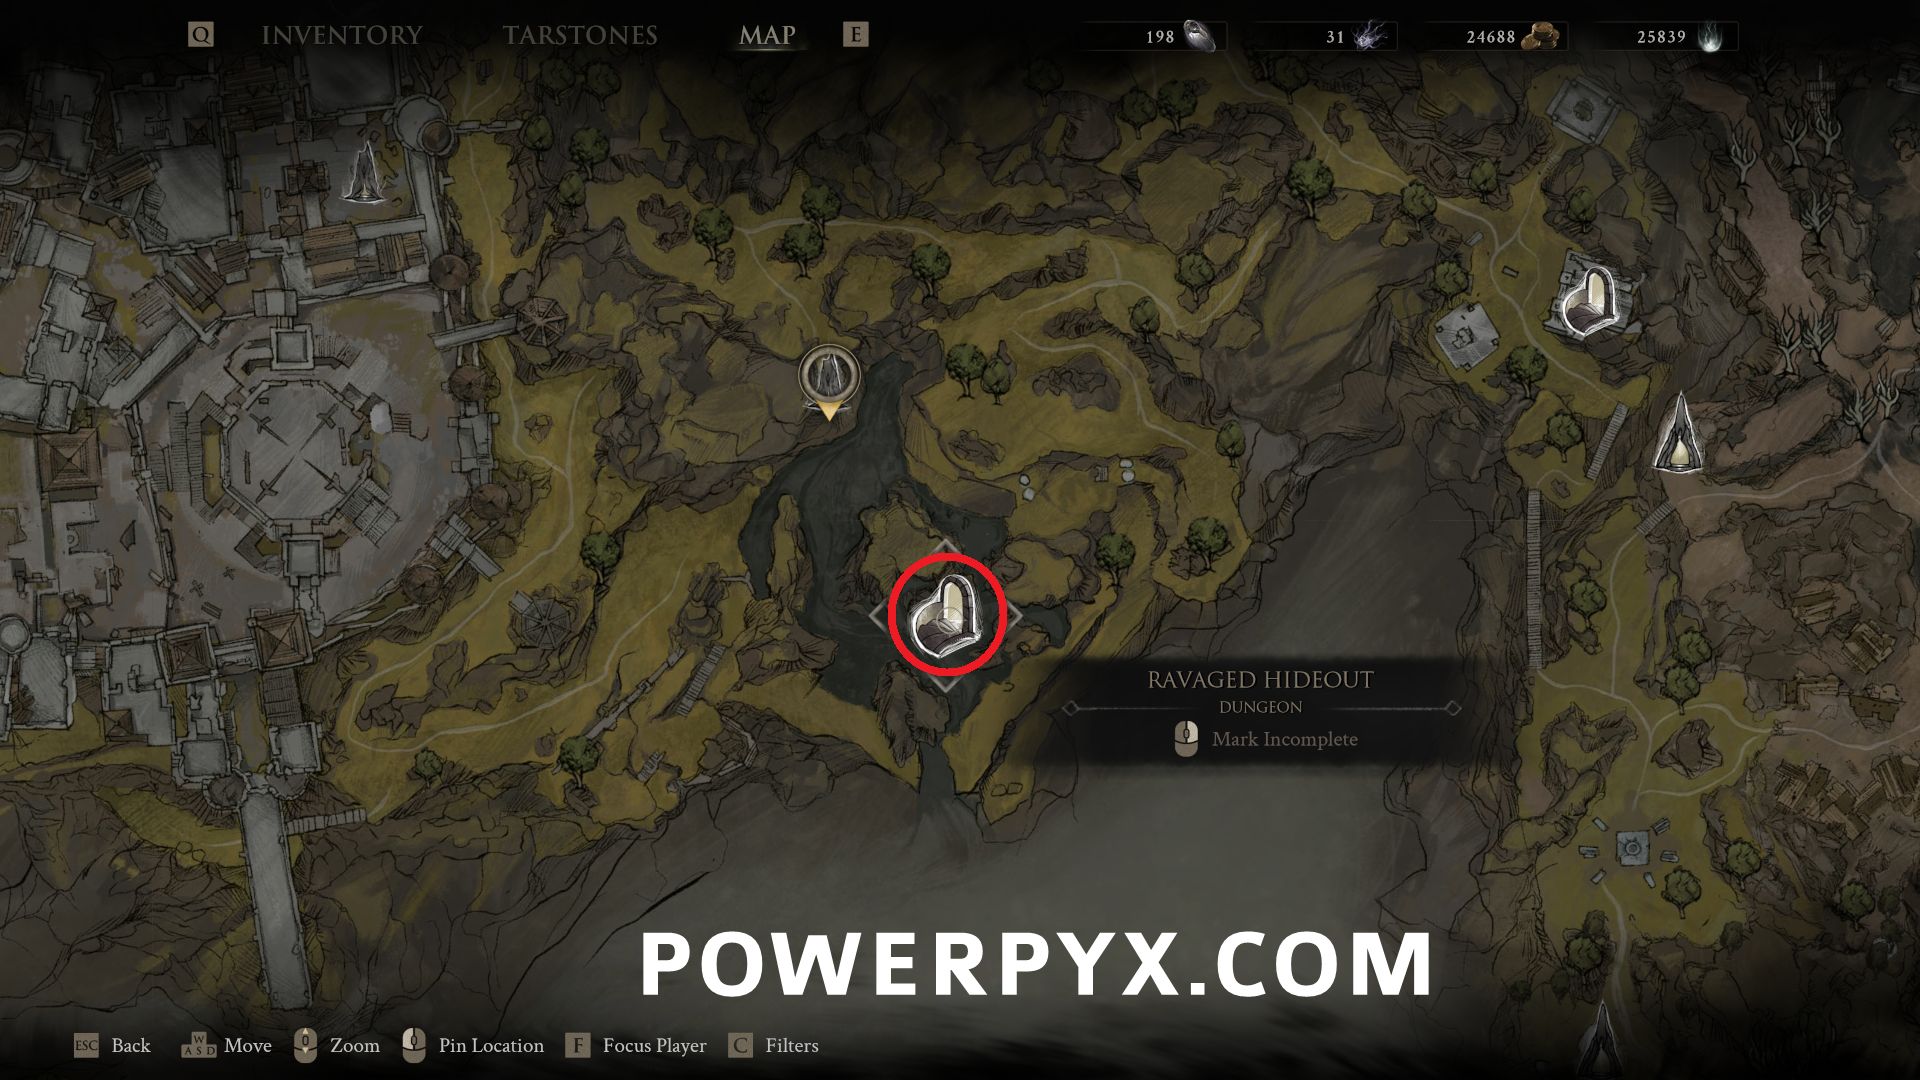
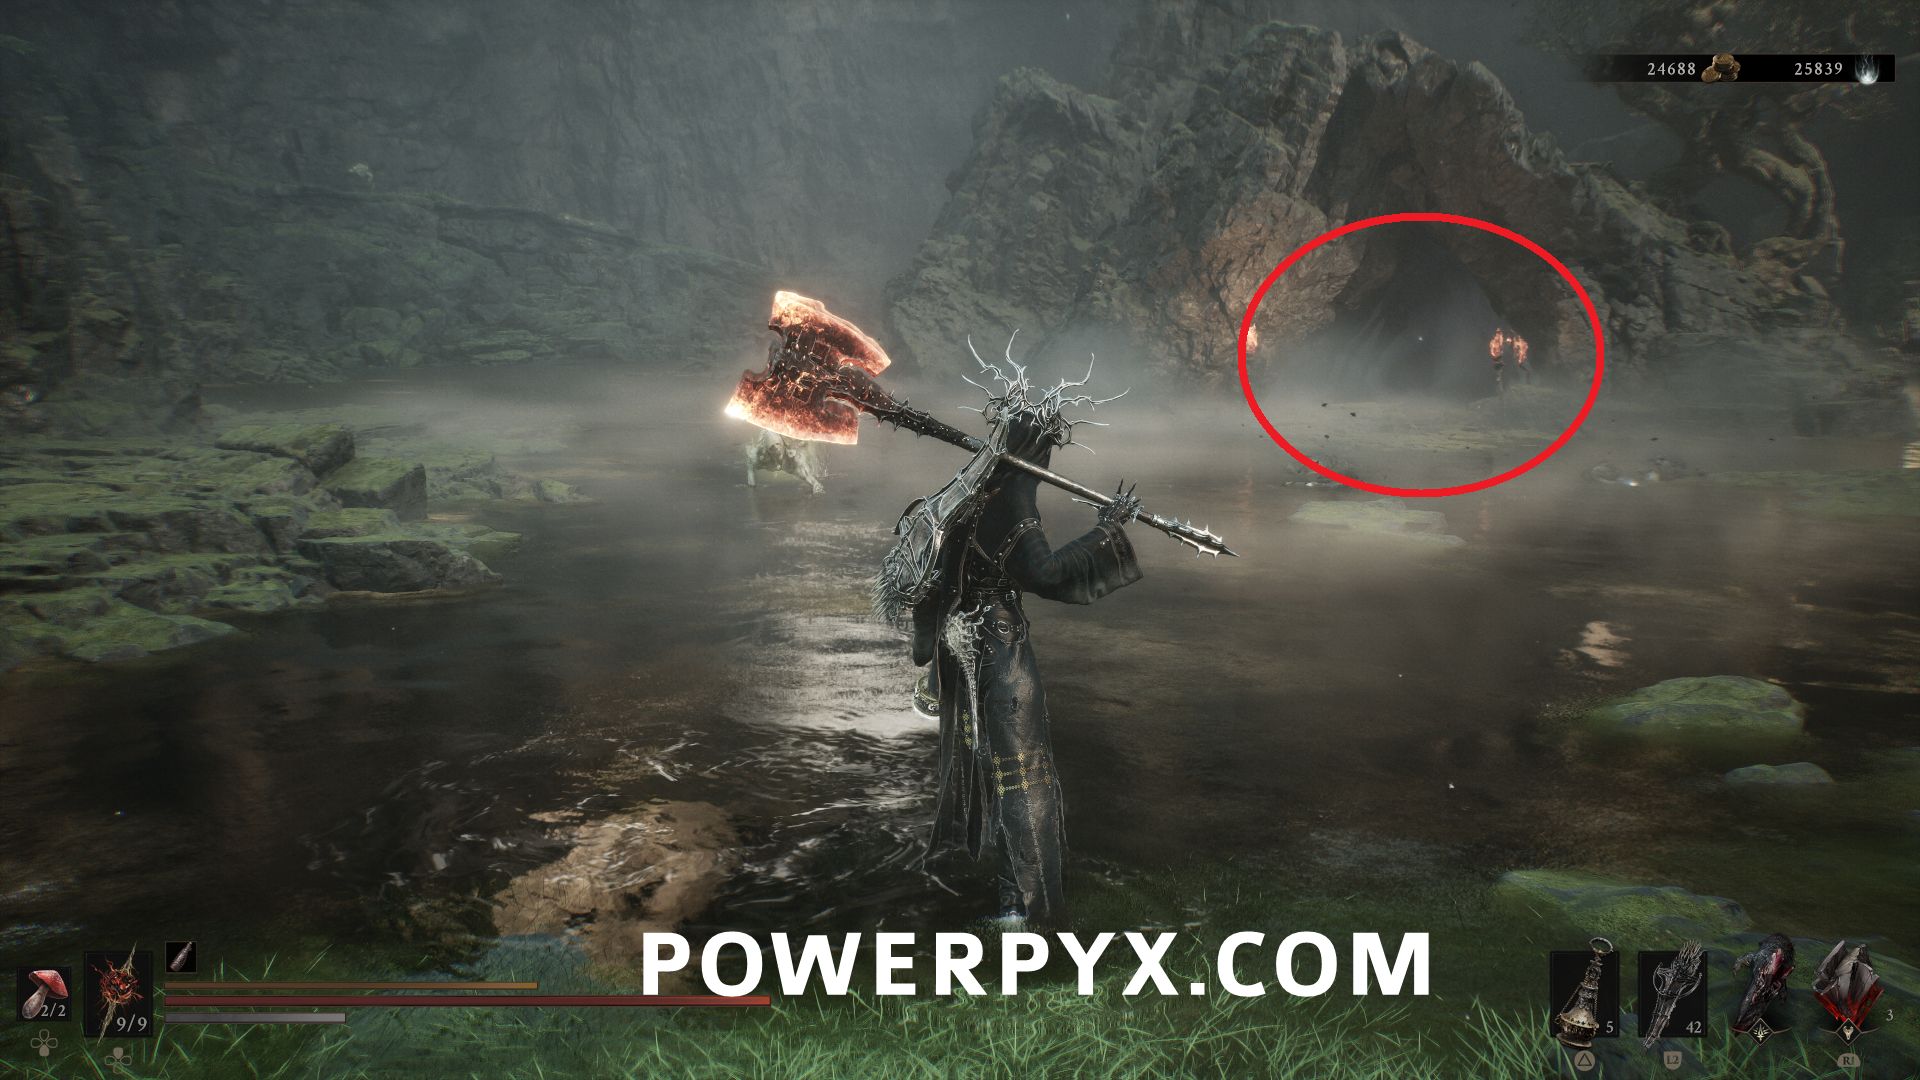
#15 – Ravaged Hideout – South of Gloomshade Grove Beacon, accessible after defeating the Bloodcursed Lithopod miniboss.
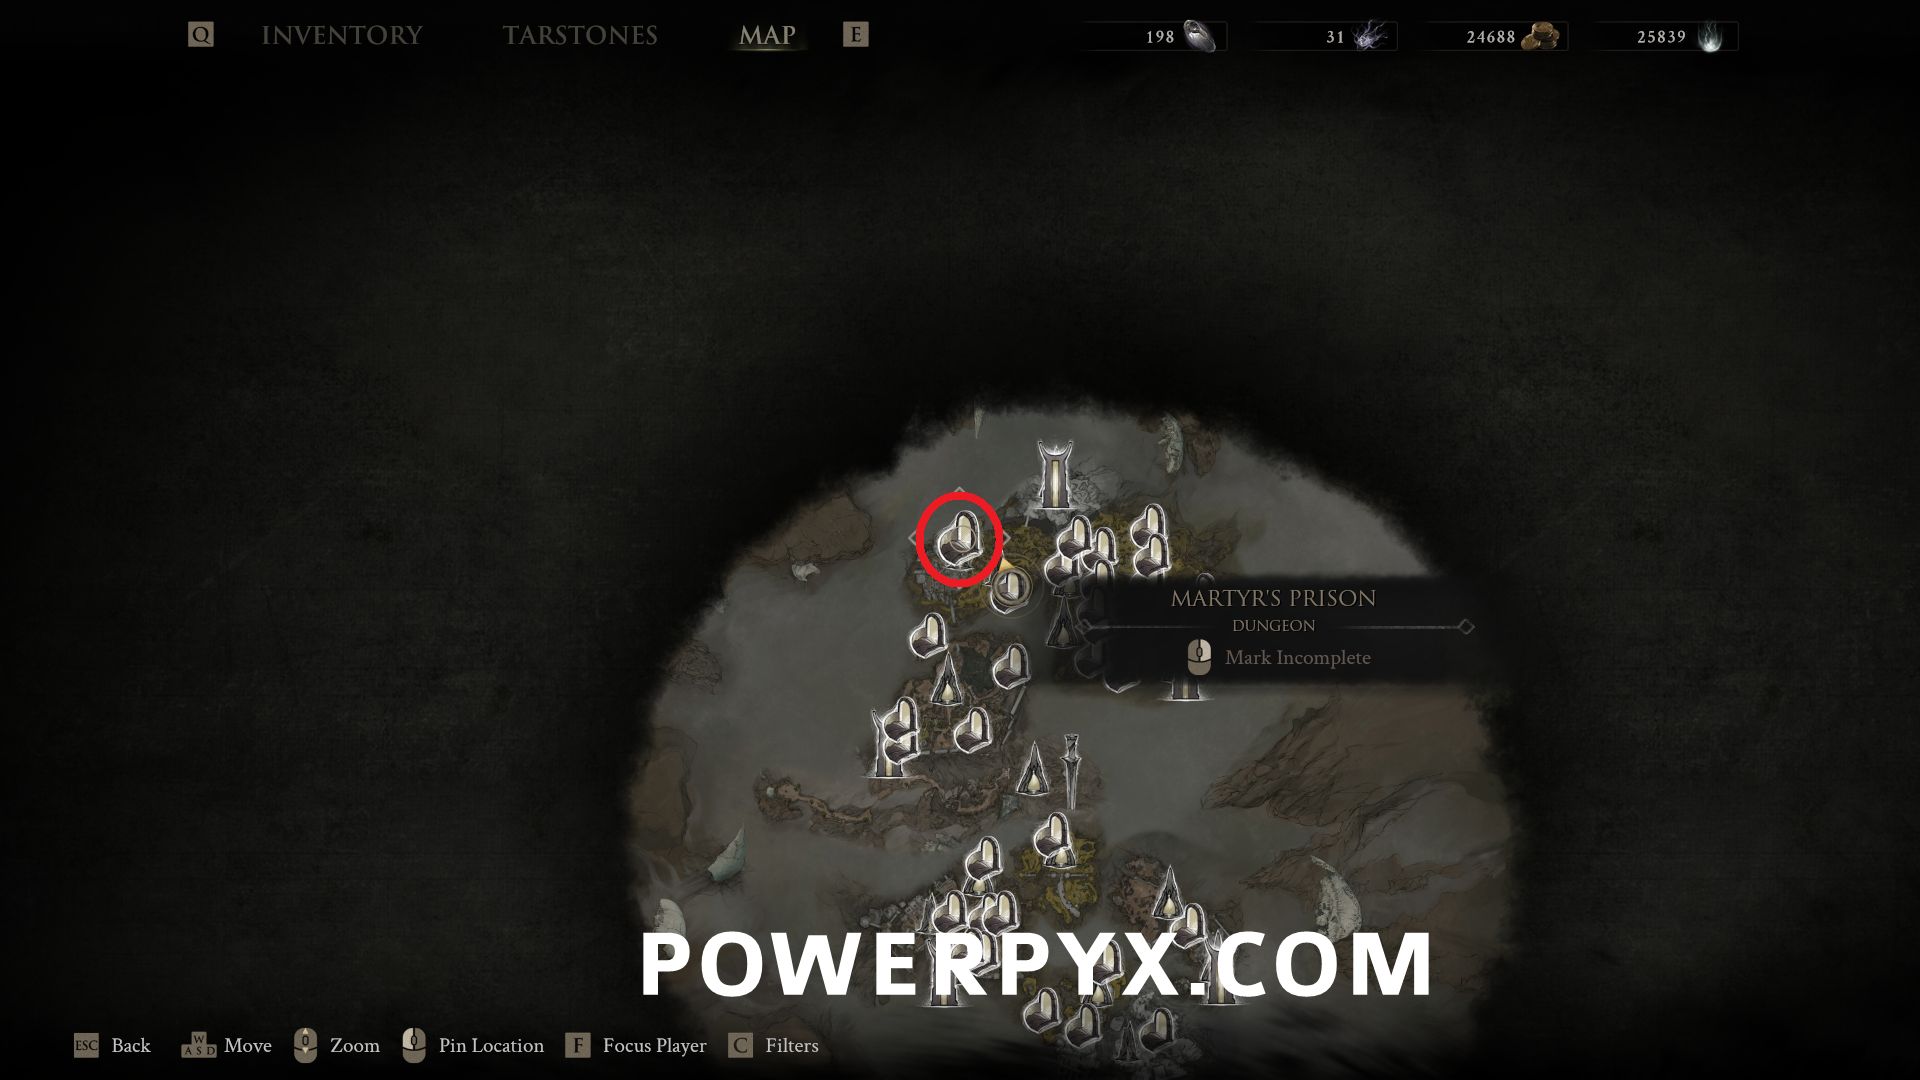
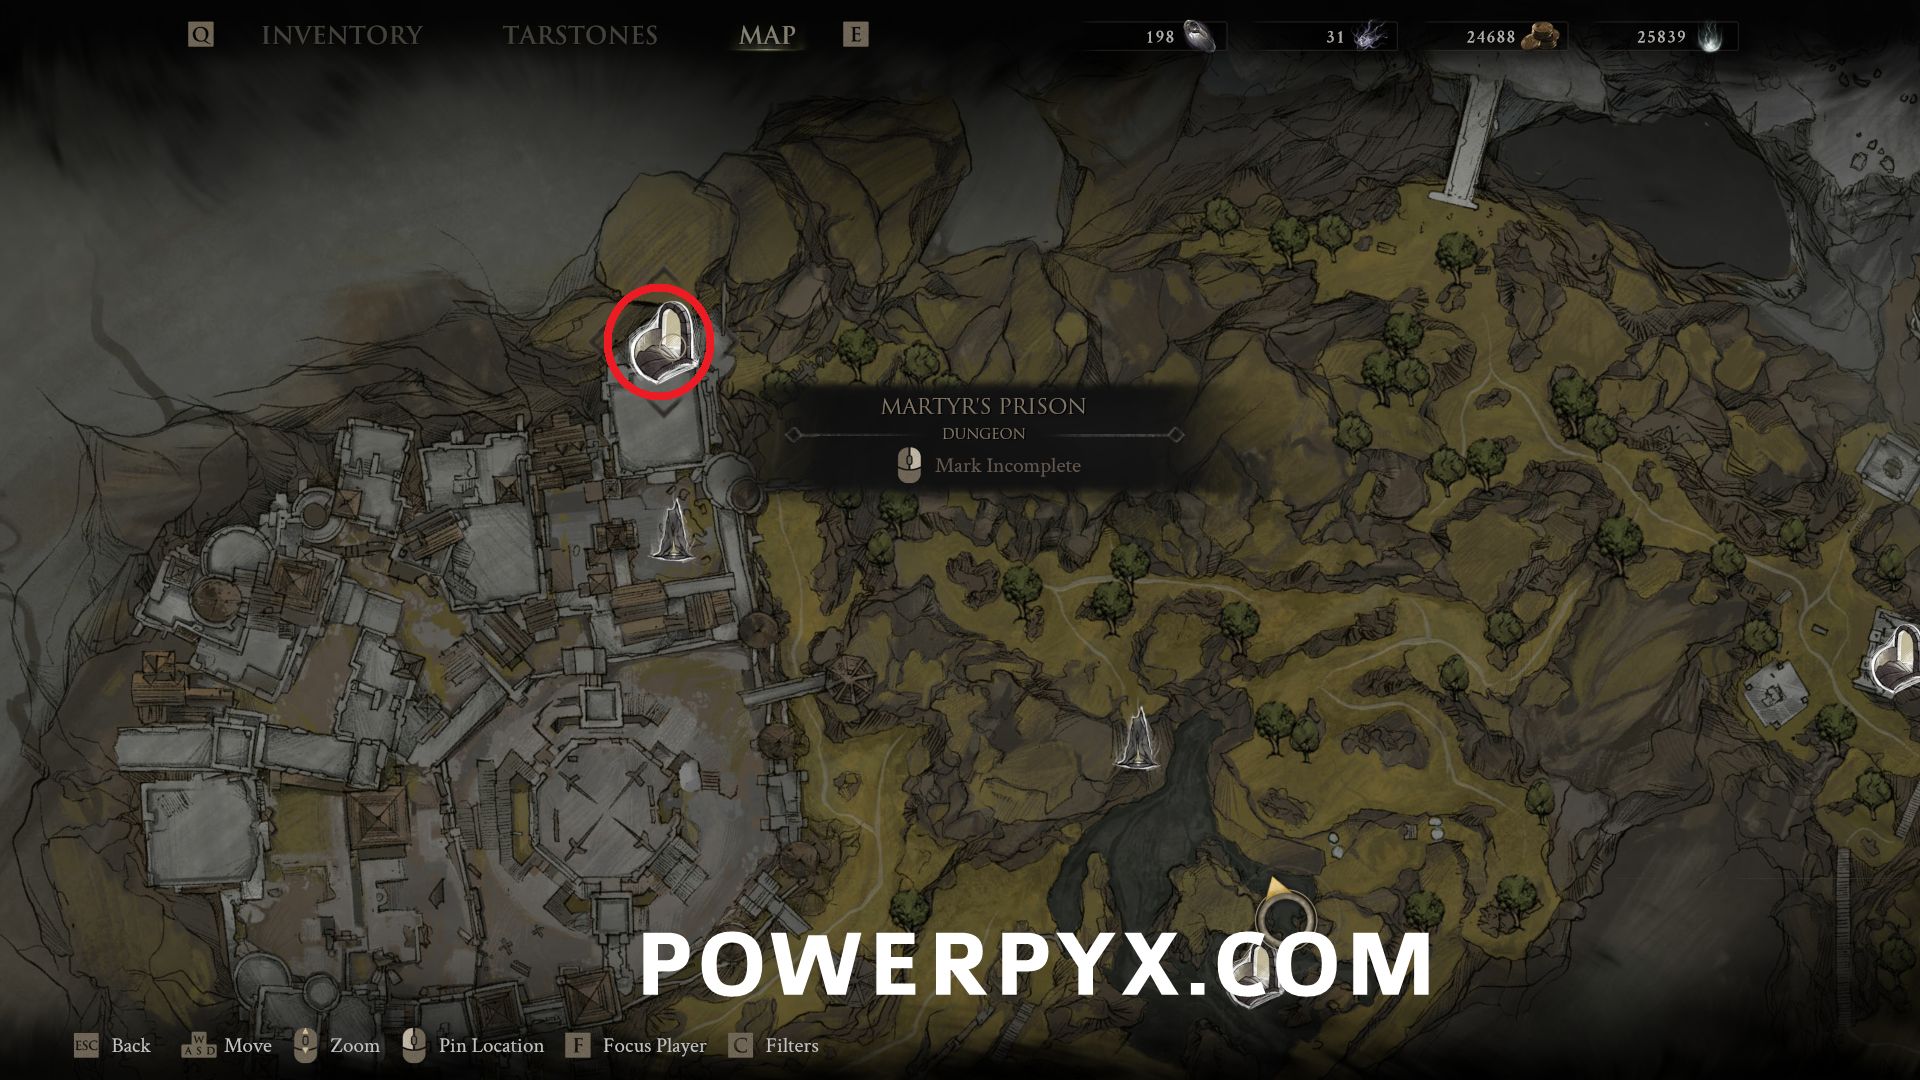
#16 – Martyr’s Prison – Northwest of Gloomshade Grove Beacon, follow the paths to the northeast outside corner of the castle, where there is a hole in the wall leading to this dungeon. You also end up at the well nearby if you take the back entrance from the Holding Cells Dungeon.
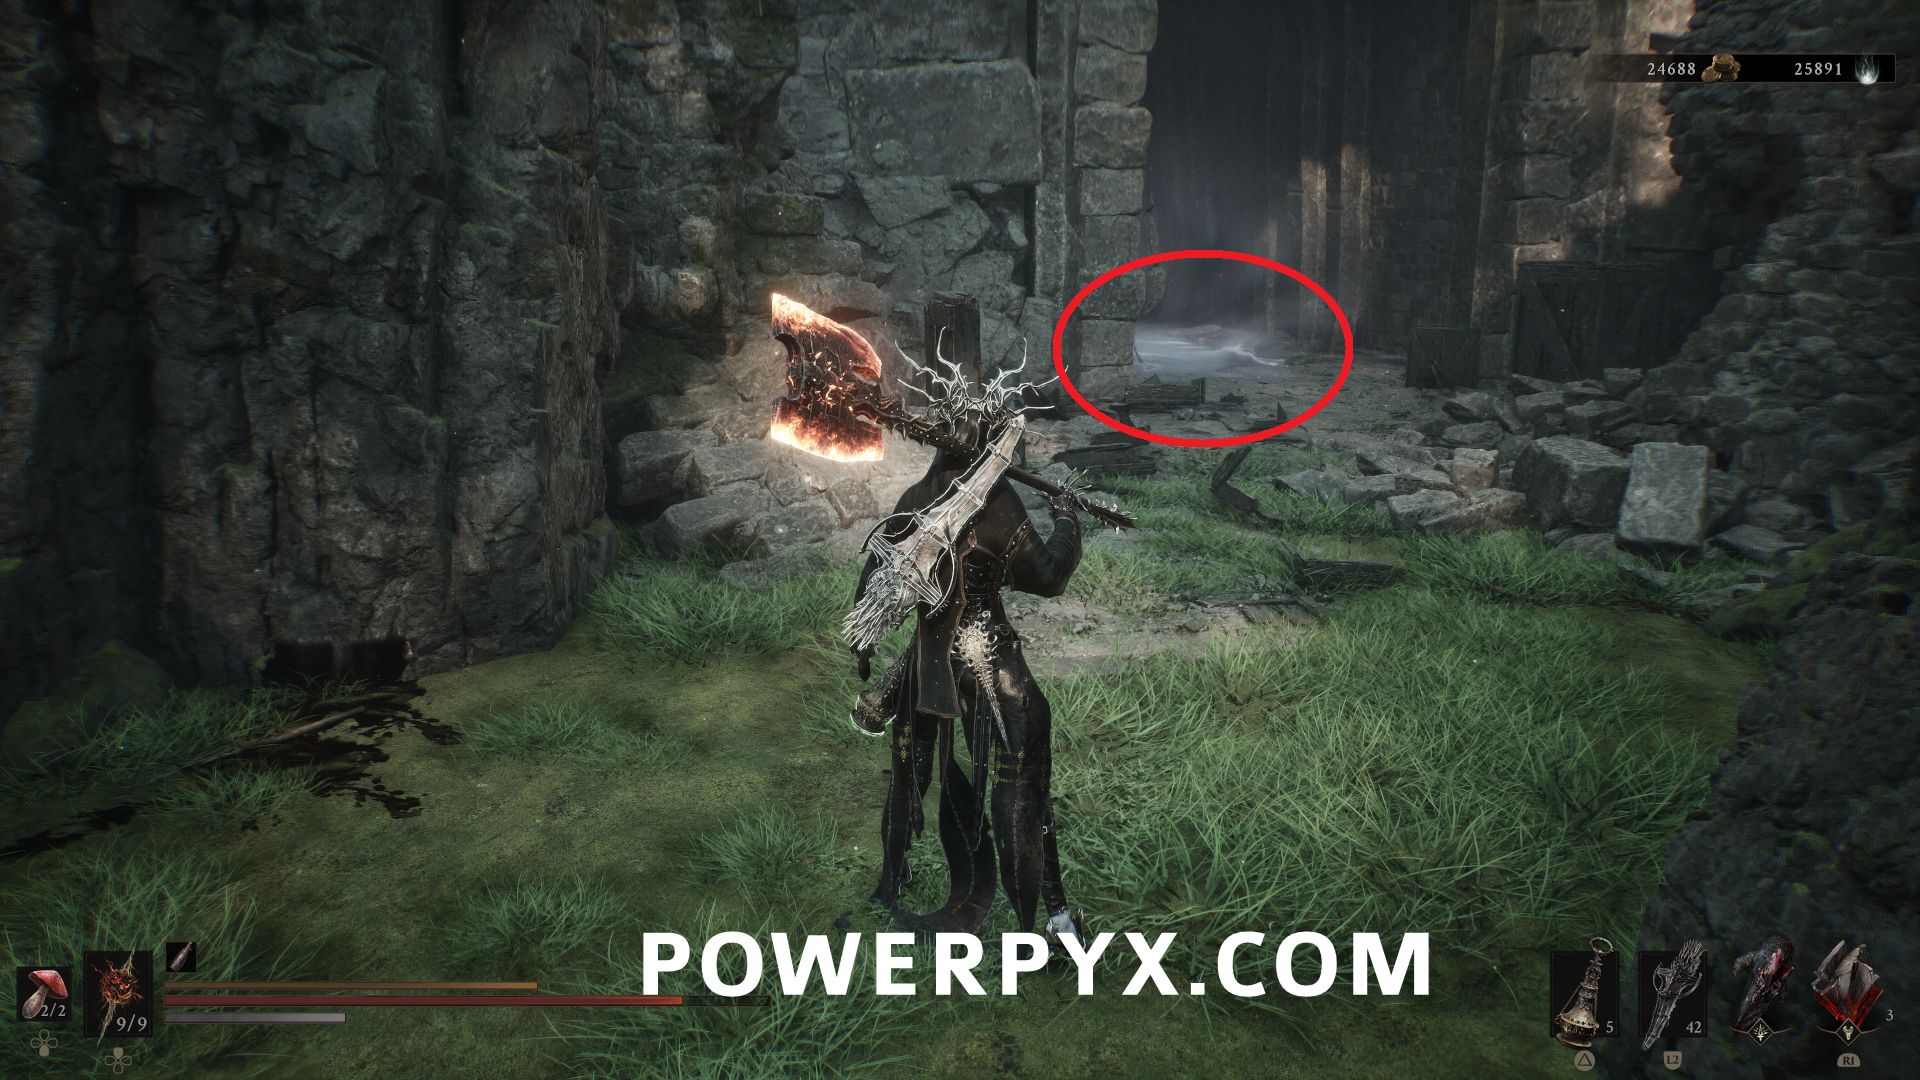
One Legged Wolf
#17 – Deserted Mine – West of One Legged Wolf Beacon, through the cave near some flags.
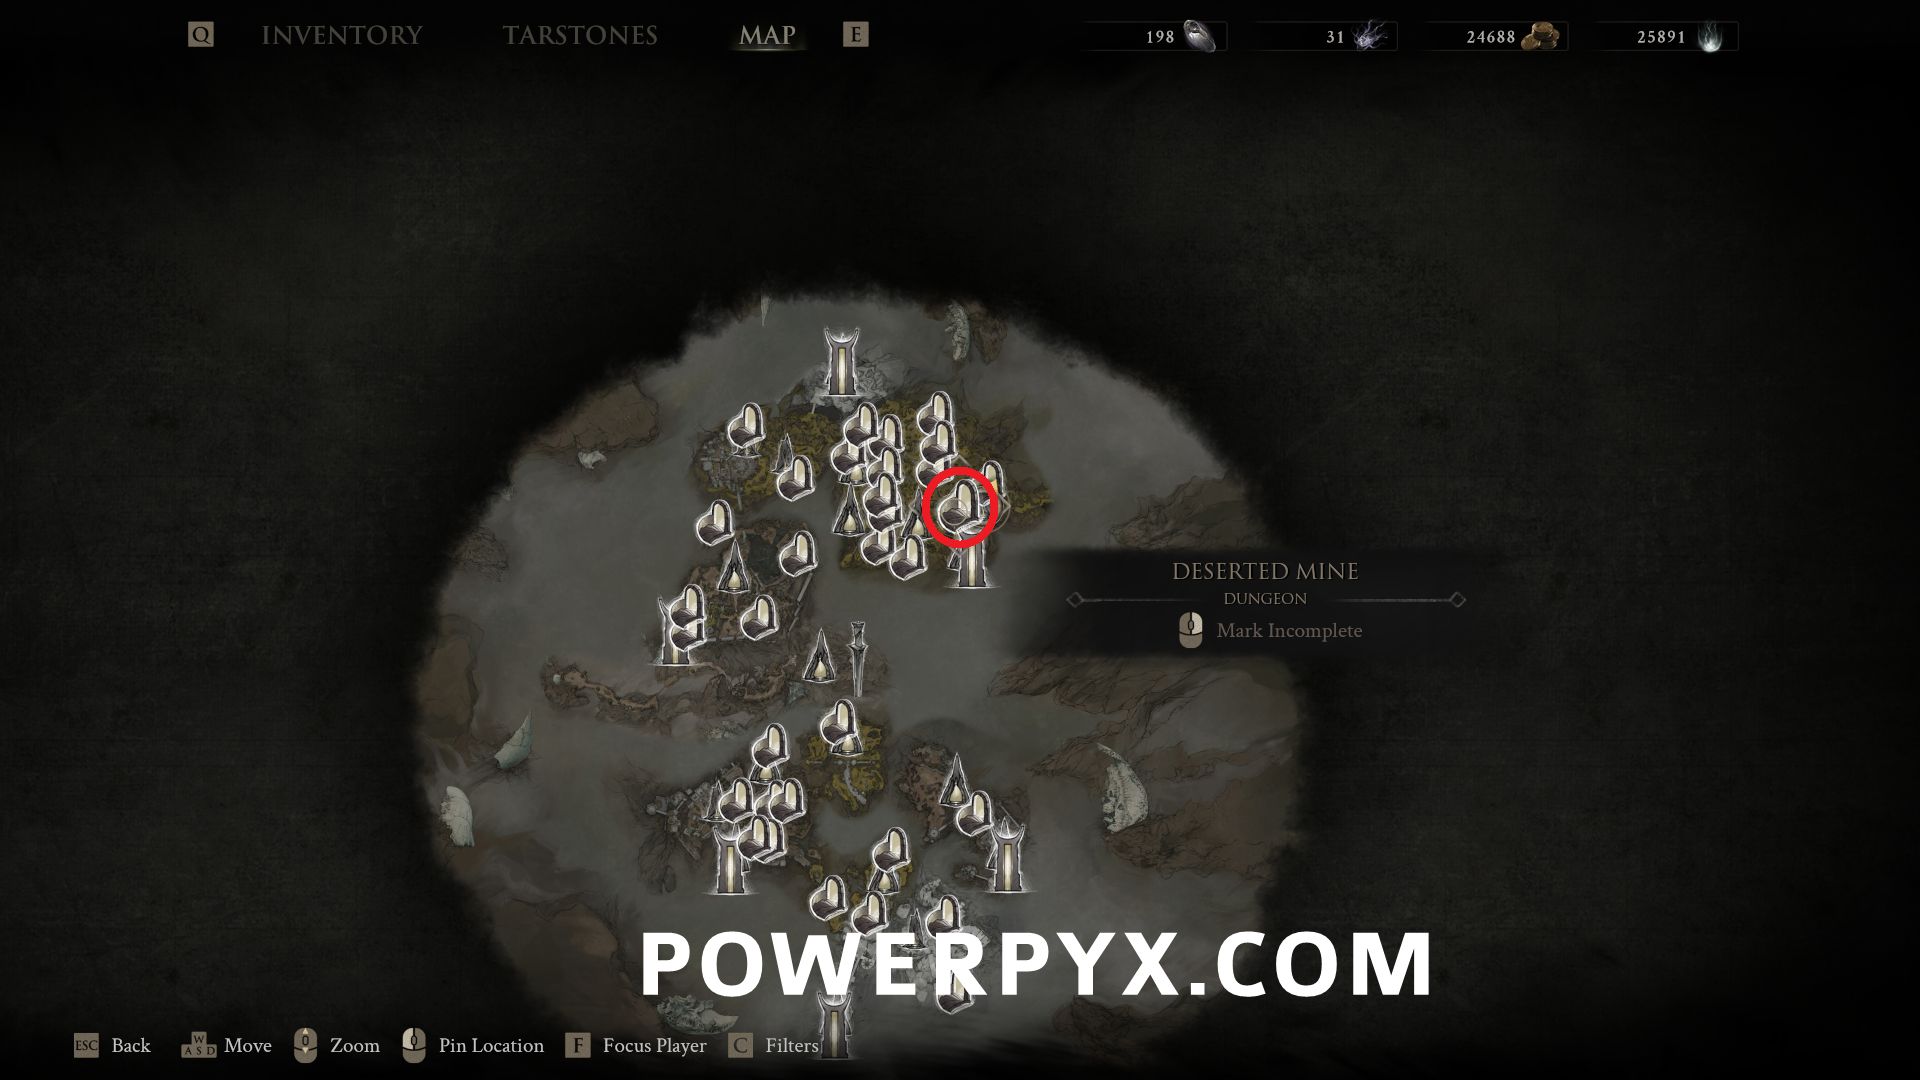
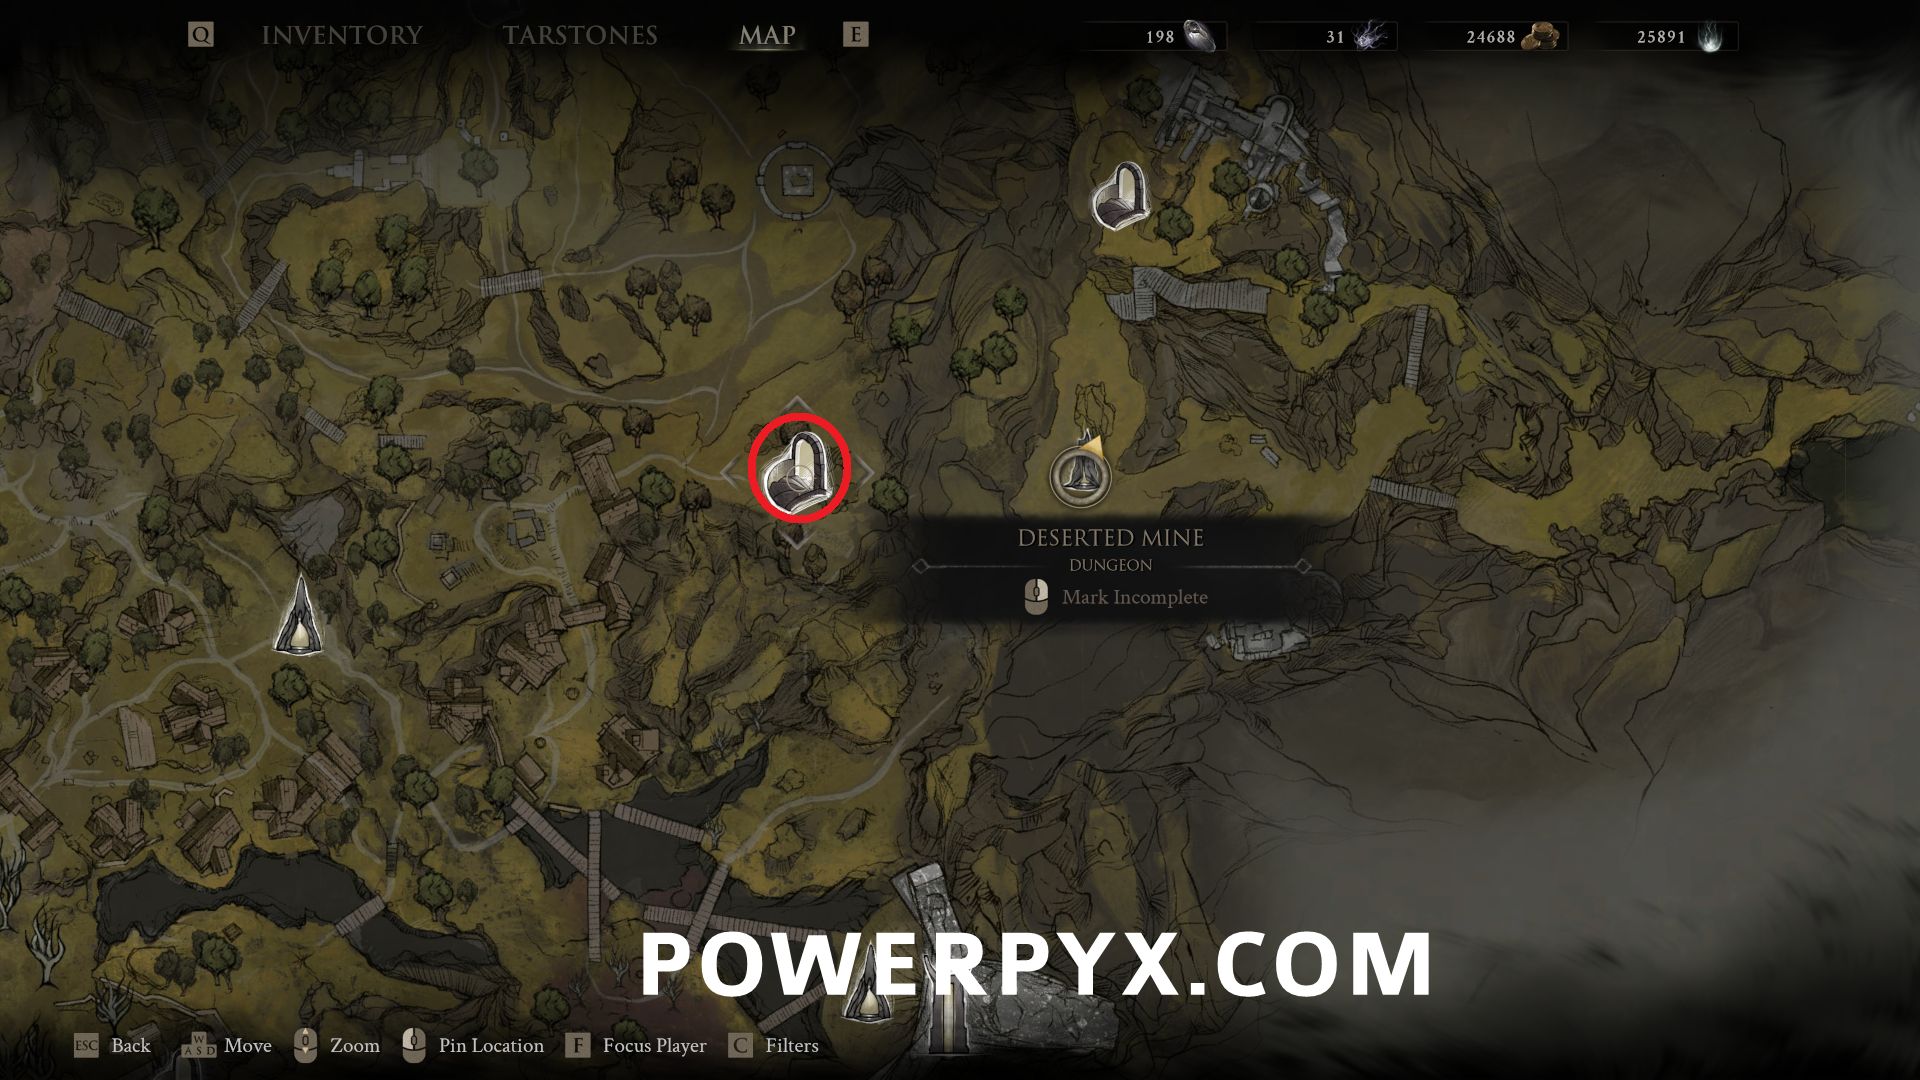
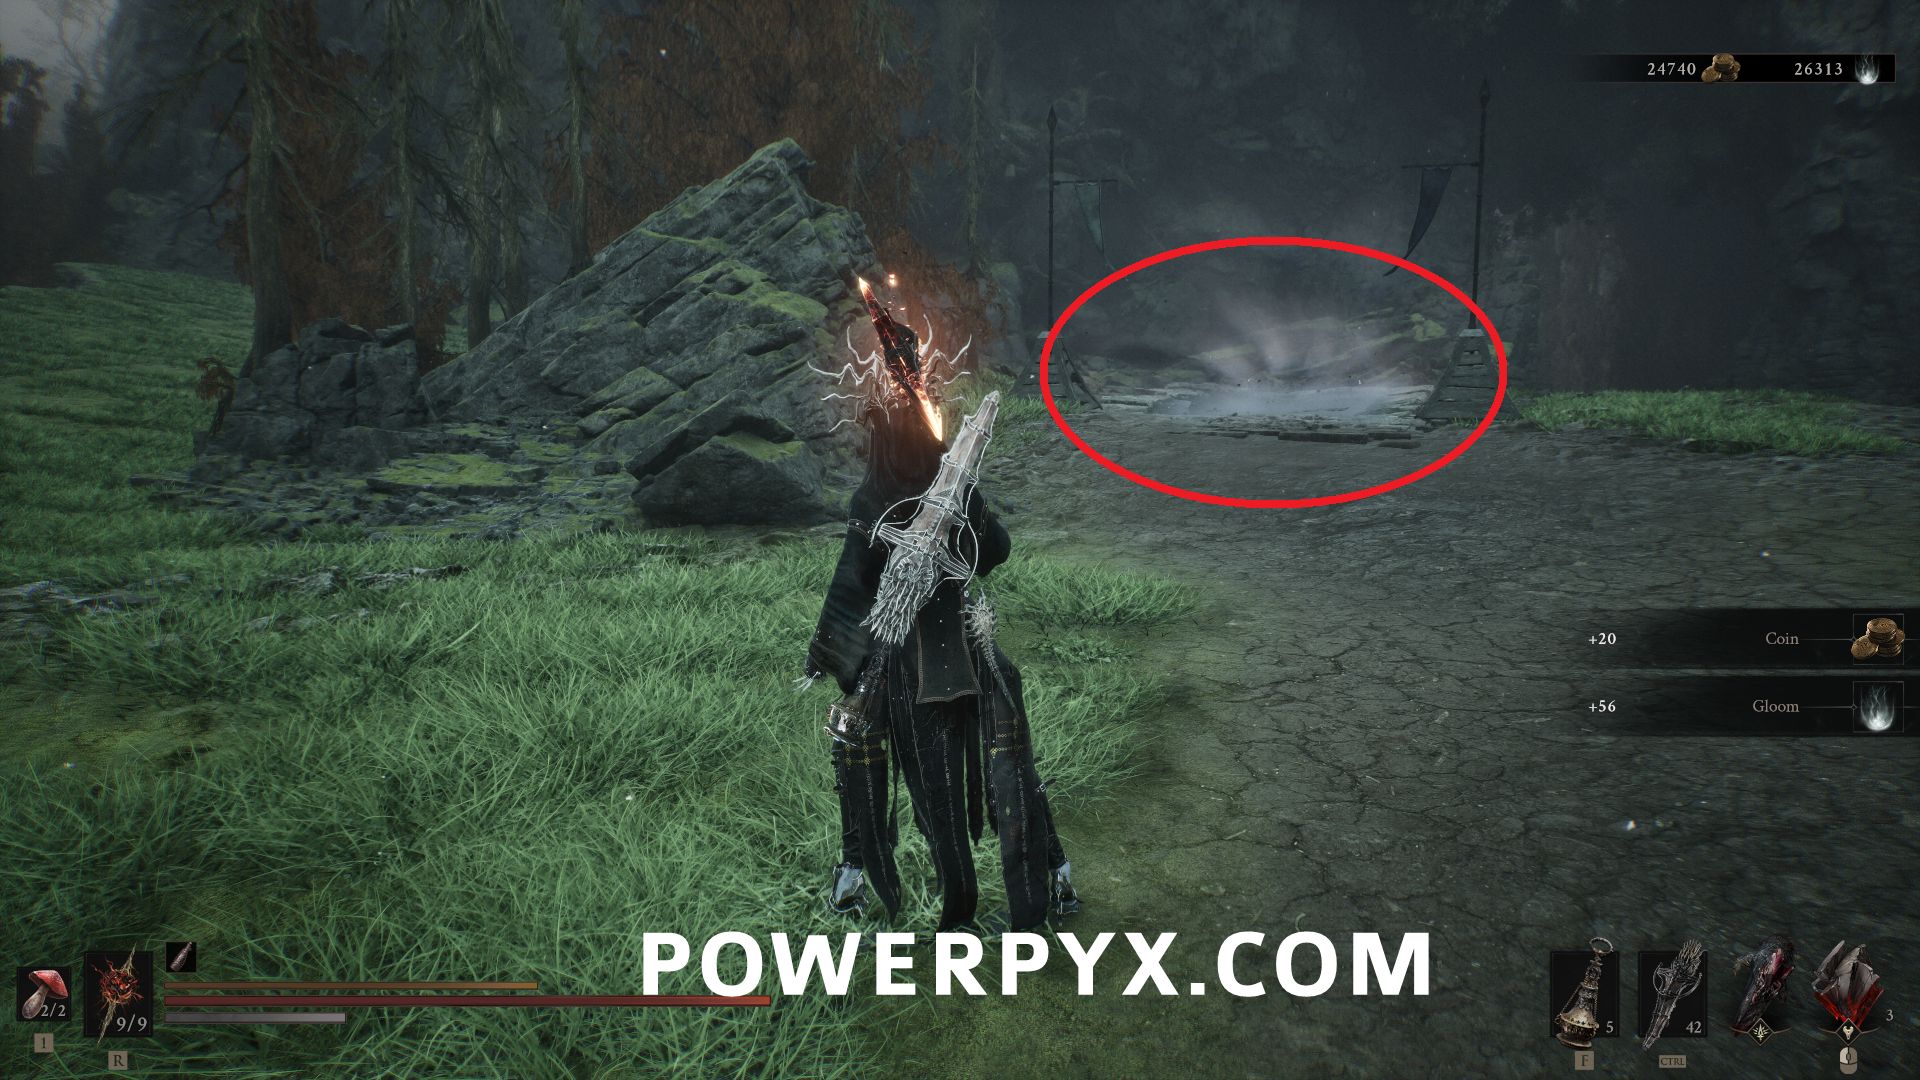
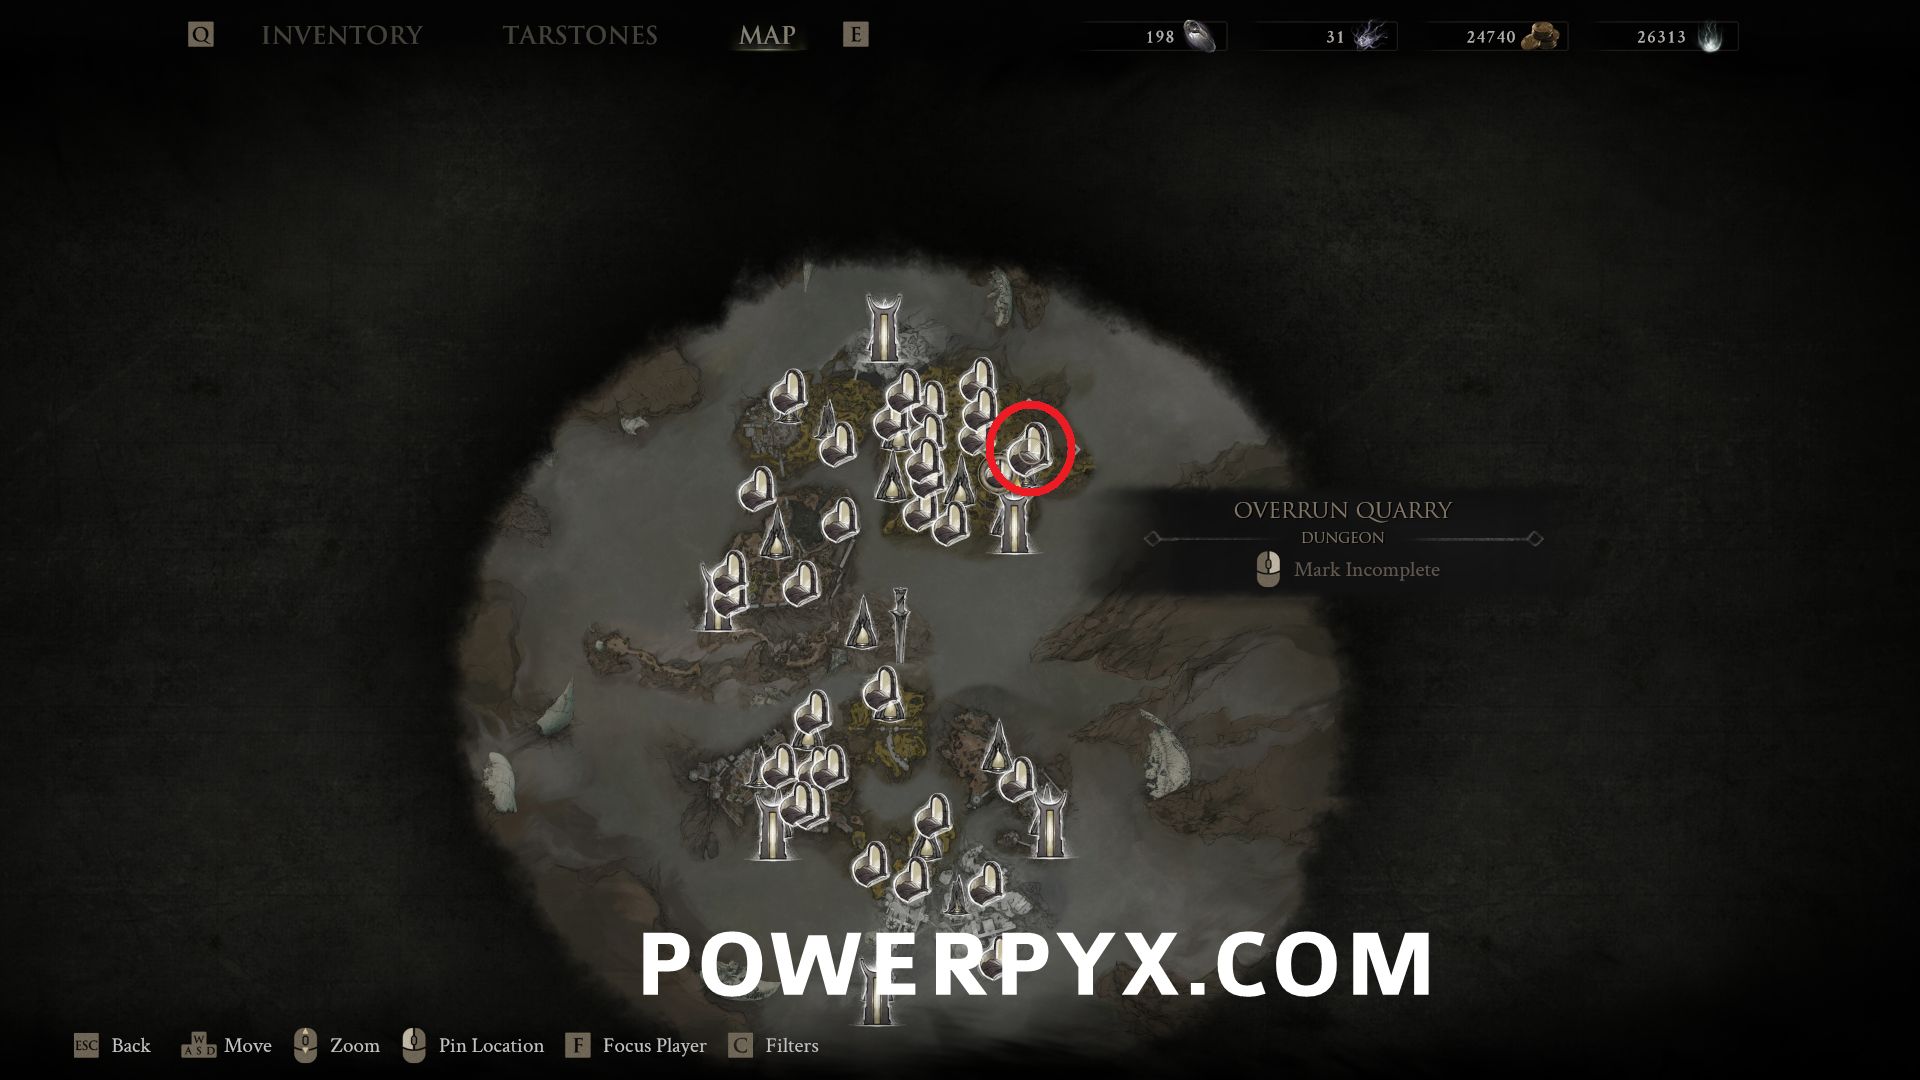
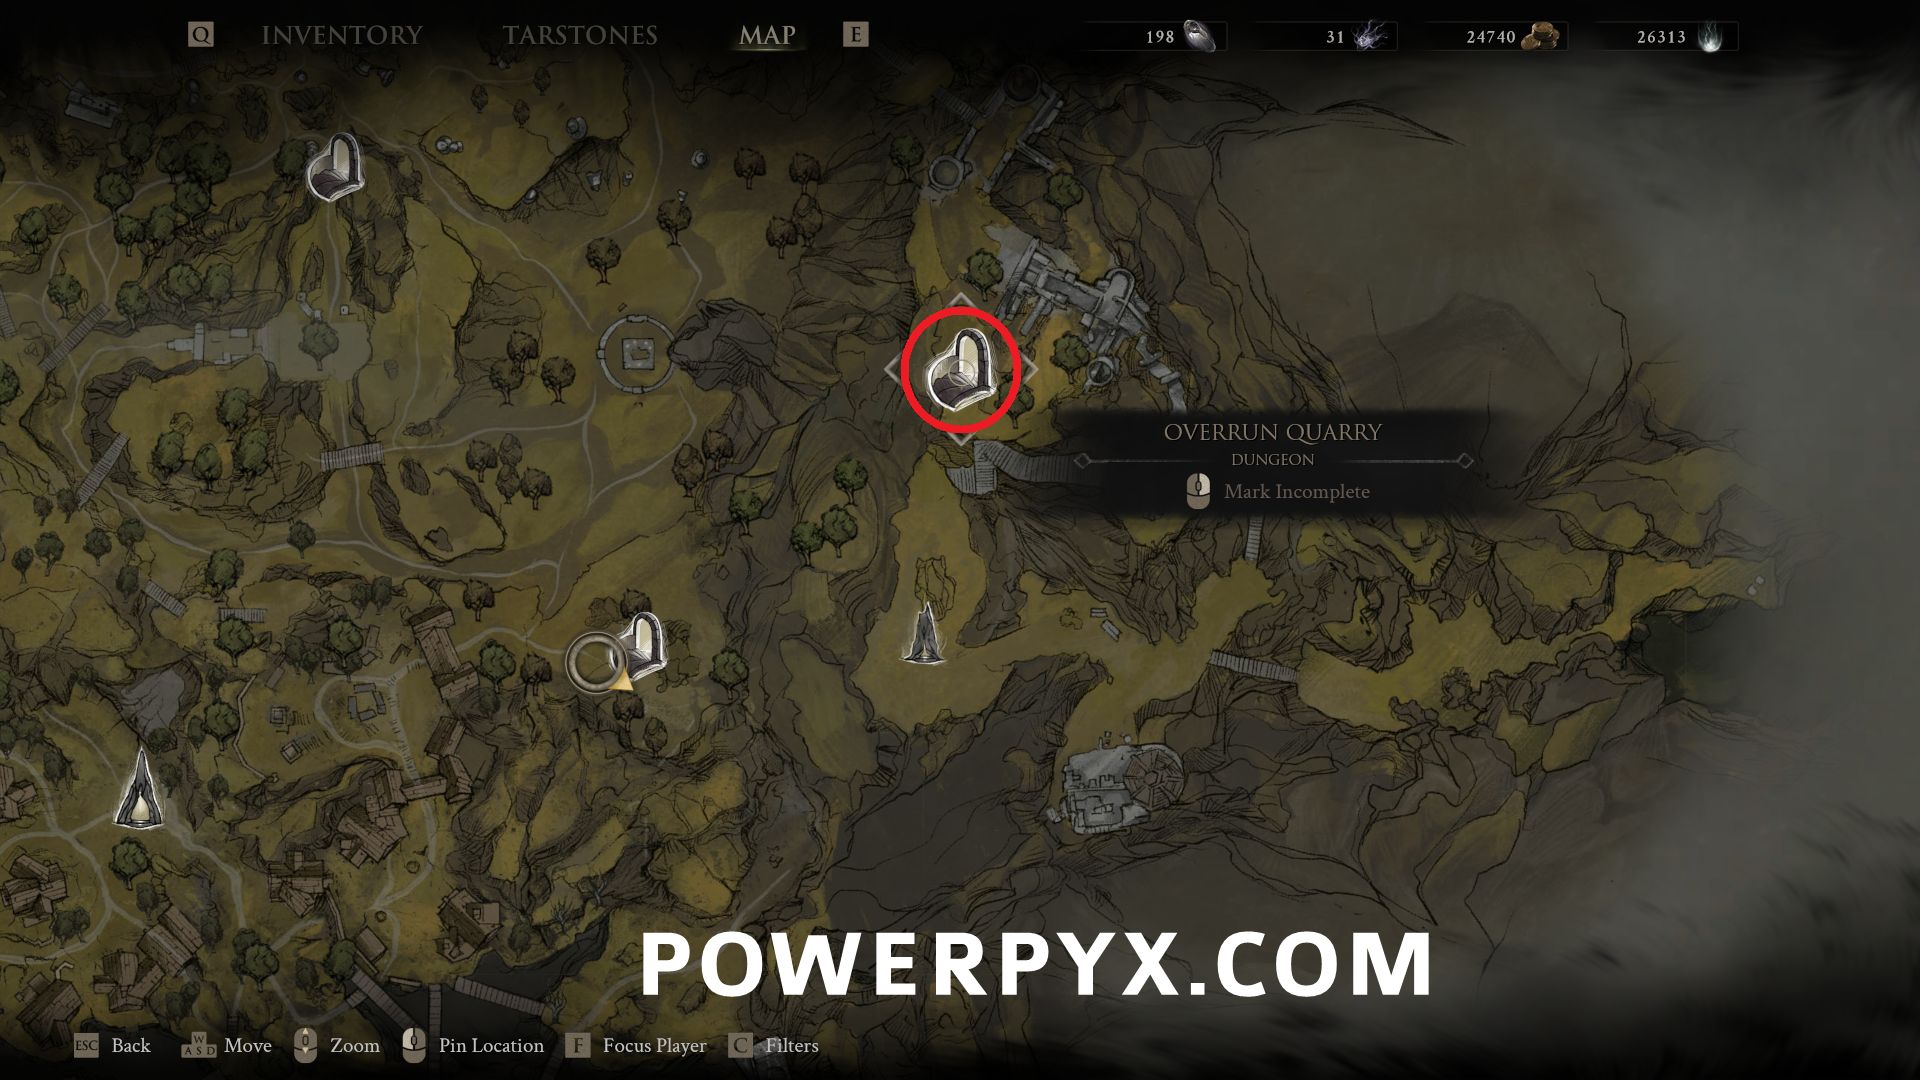
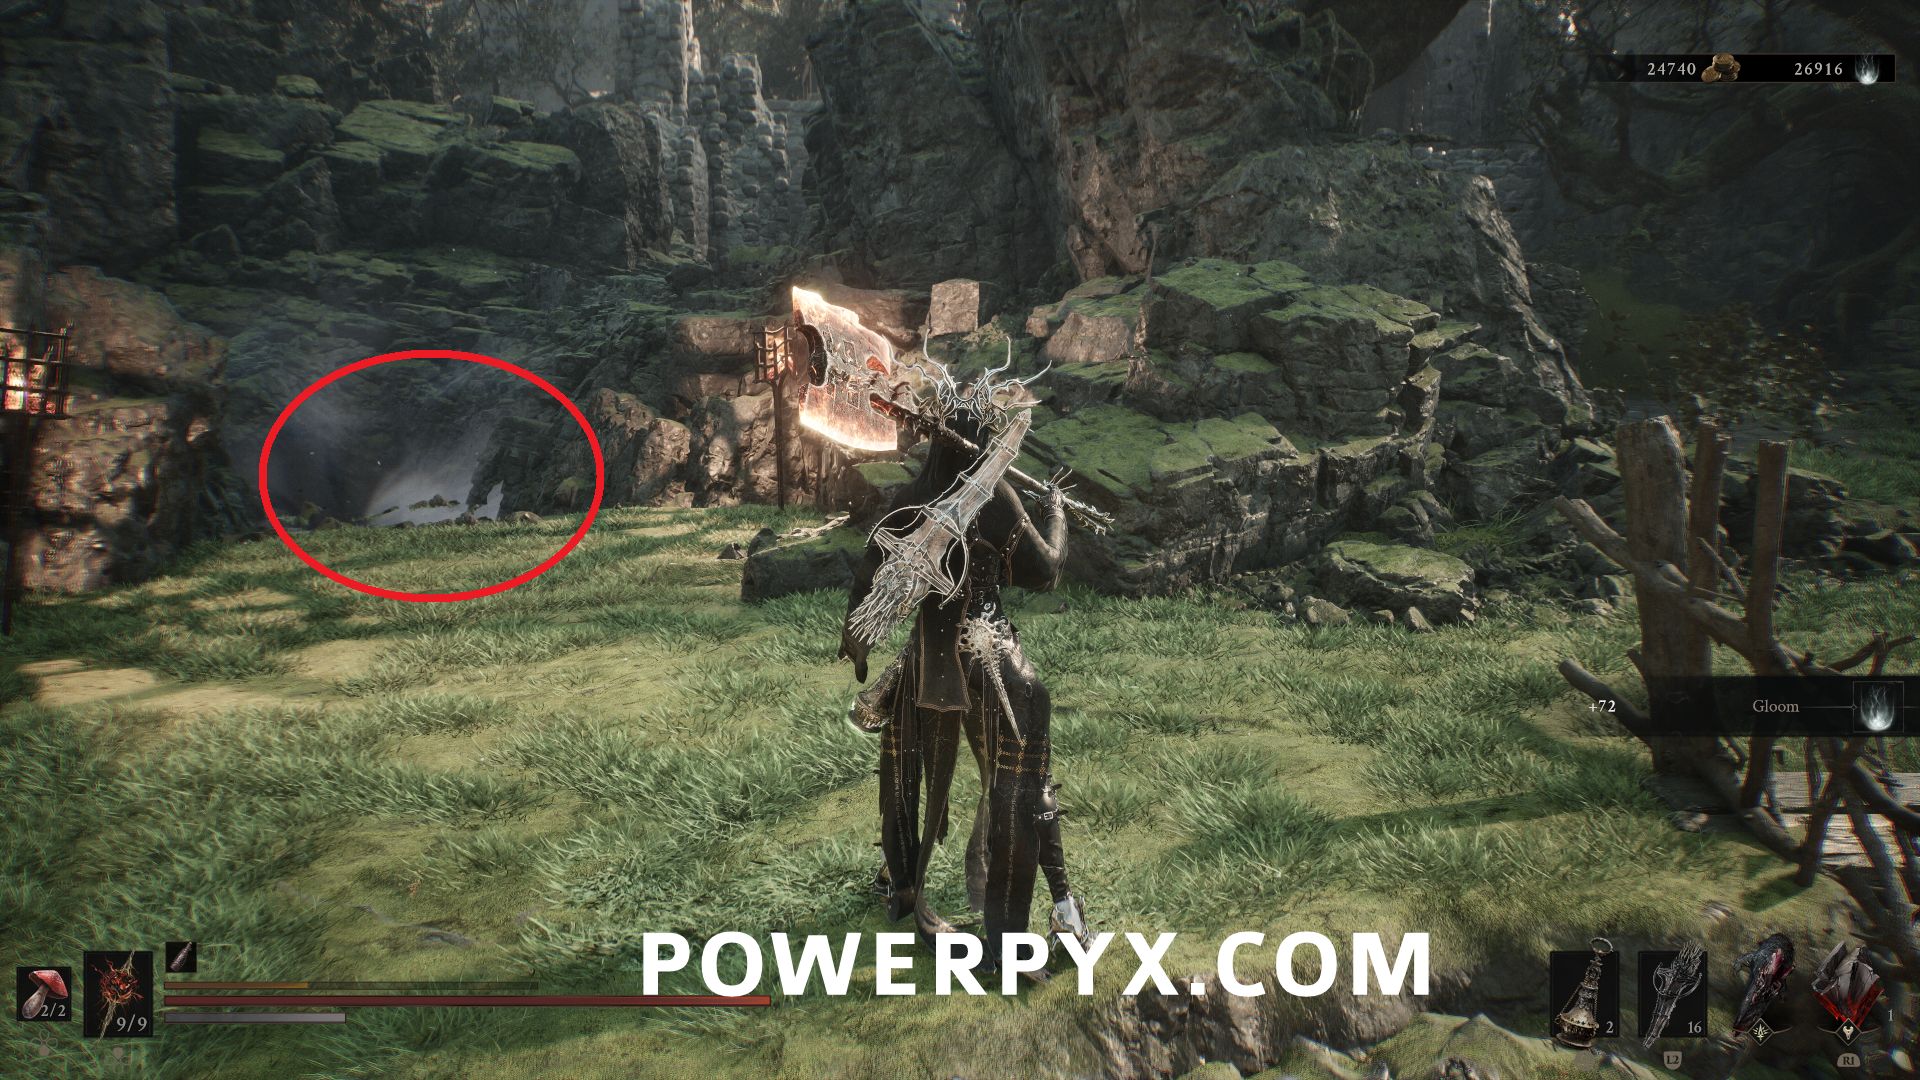
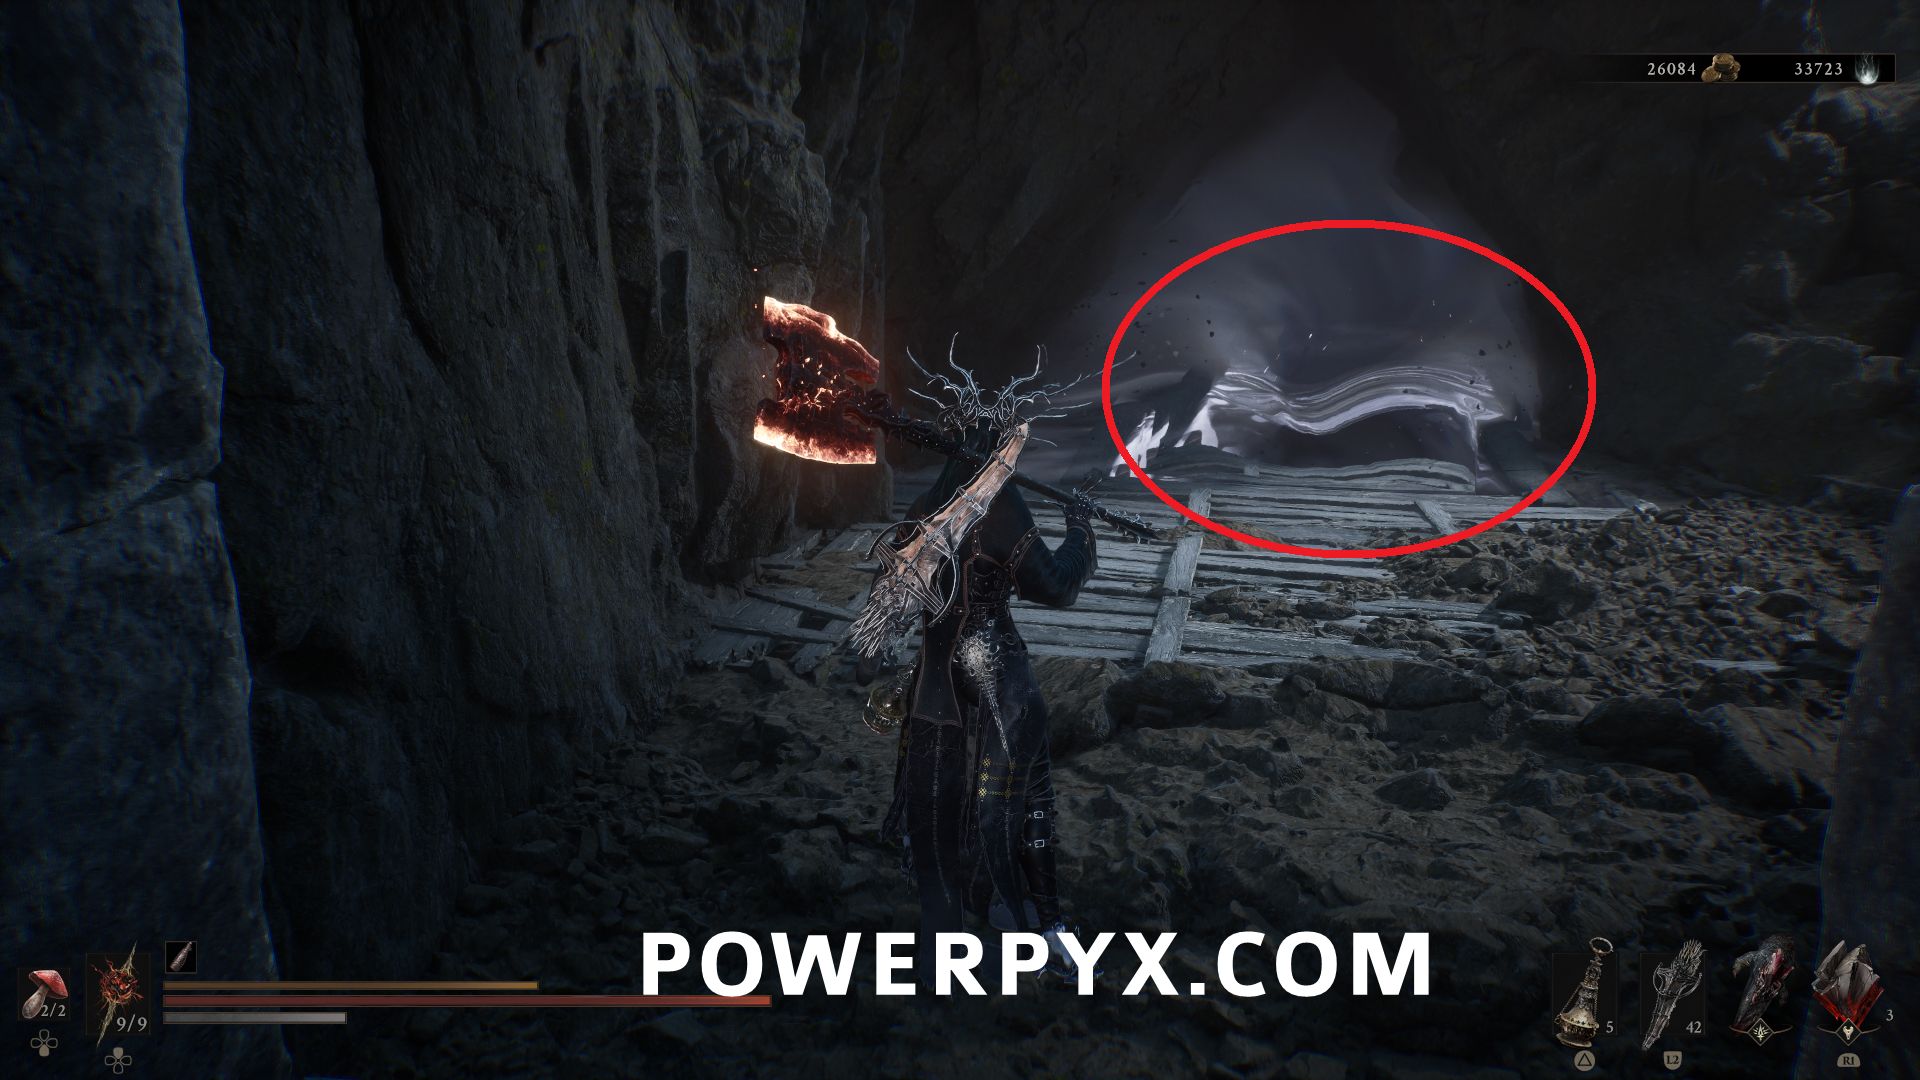
#18 – Overrun Quarry – North of One Legged Wolf Beacon, follow the path through the castle area then back to the southeast where the entrance is near the north side of the destroyed wooden bridge.
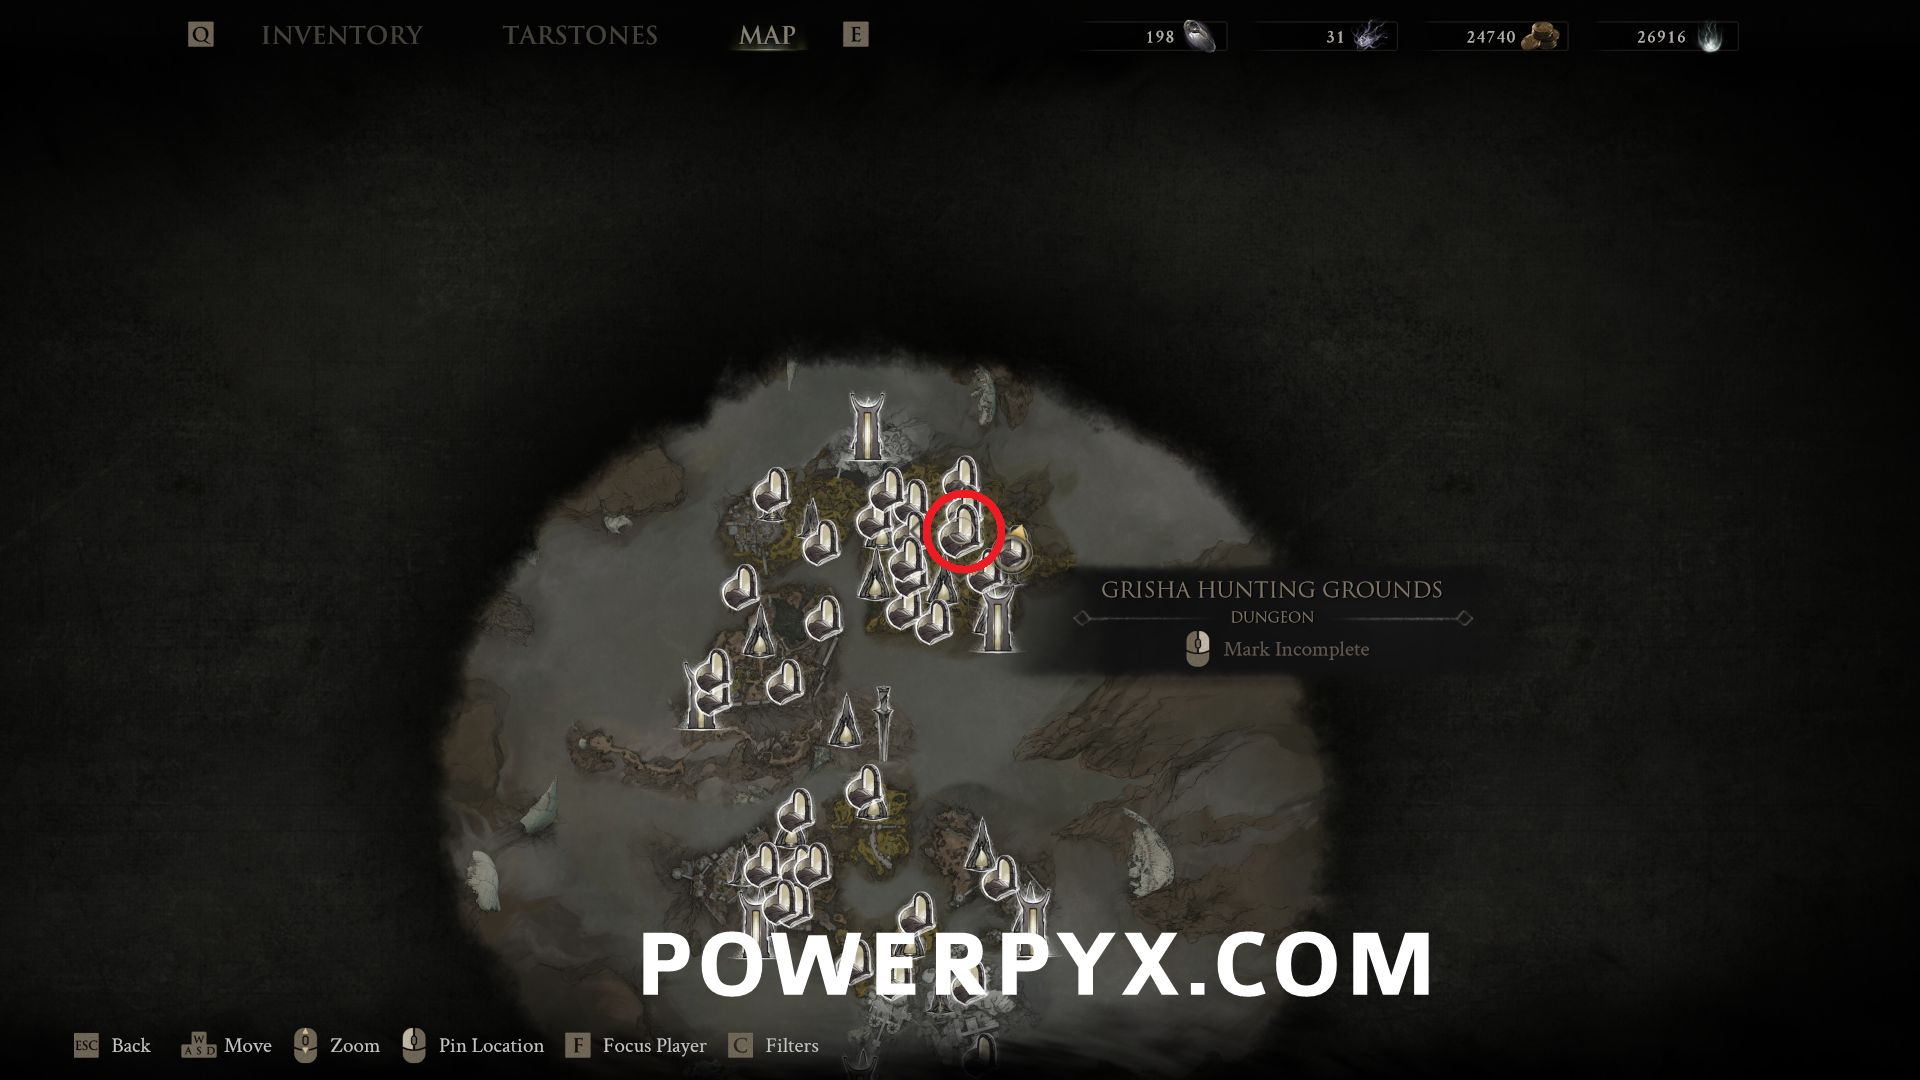
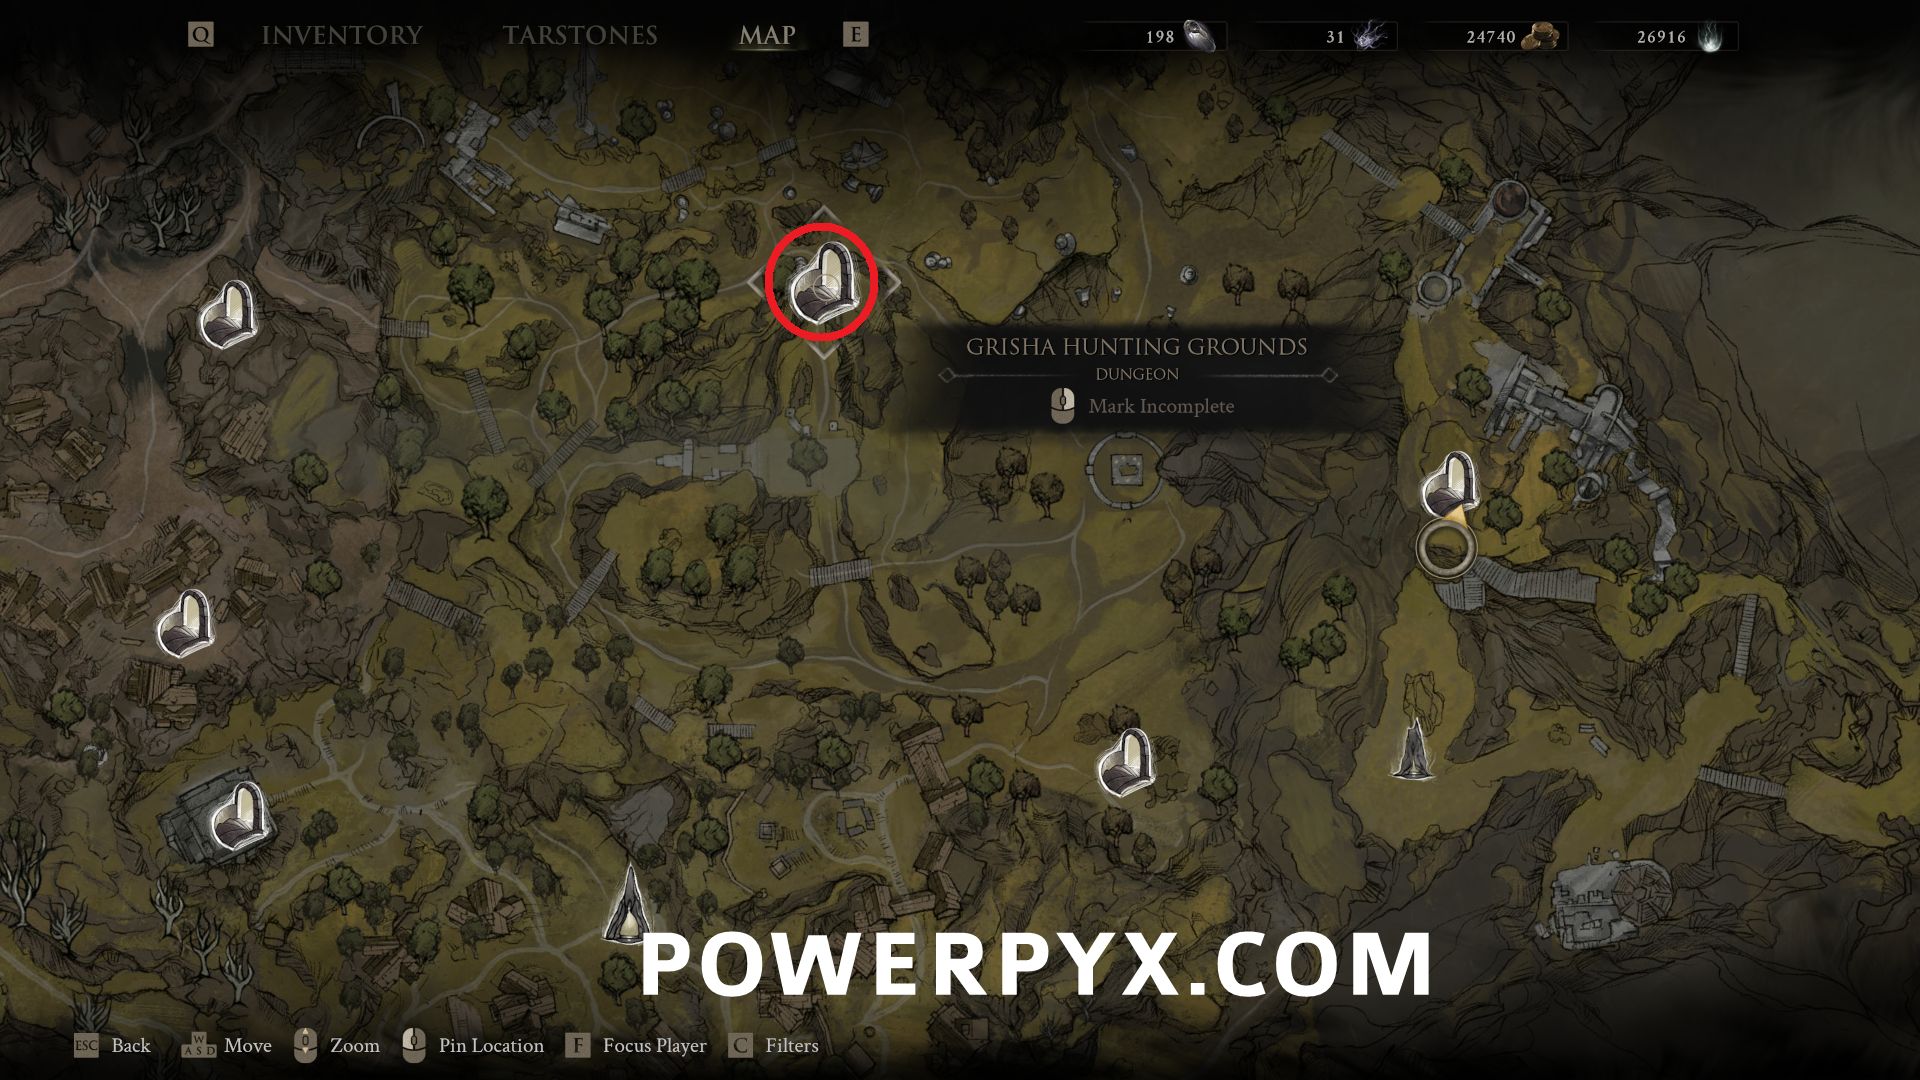
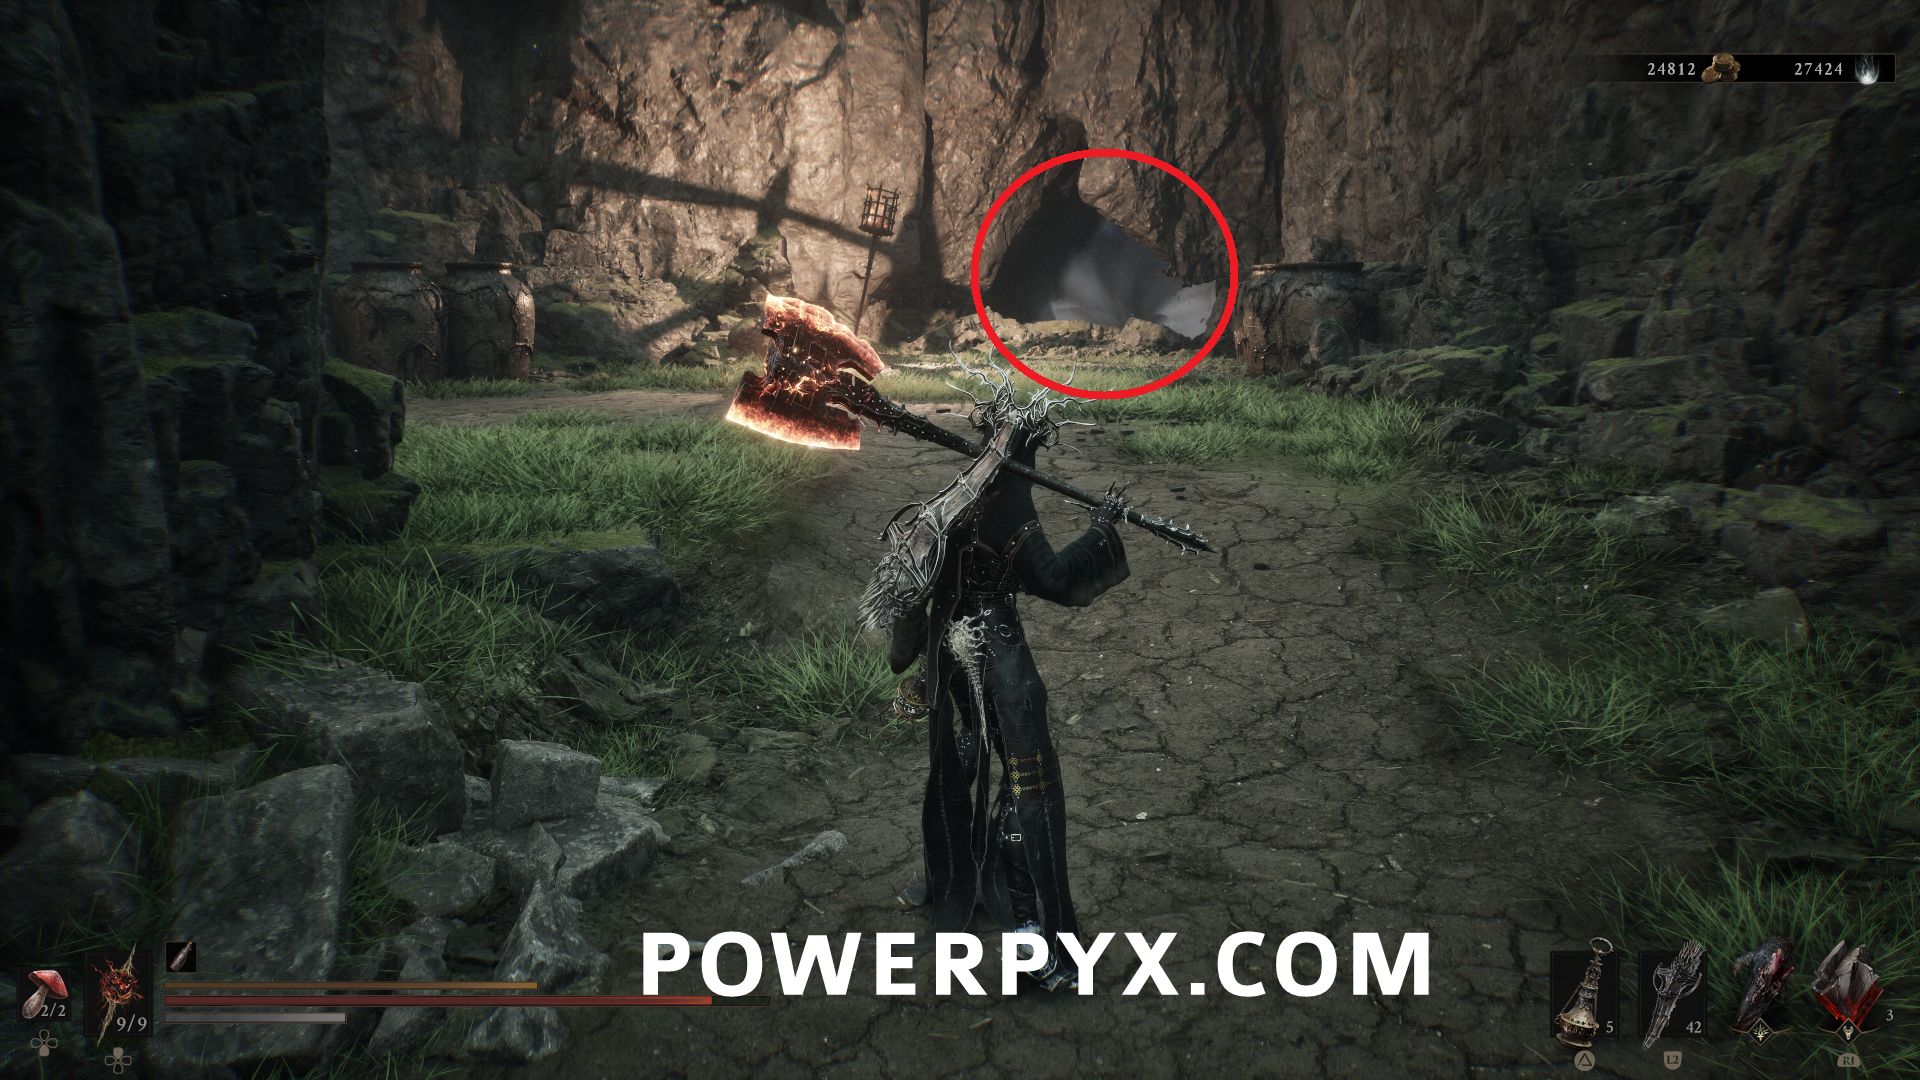
#19 – Grisha Hunting Grounds – Northwest of One Legged Wolf Beacon, in the valley area past the ruins.
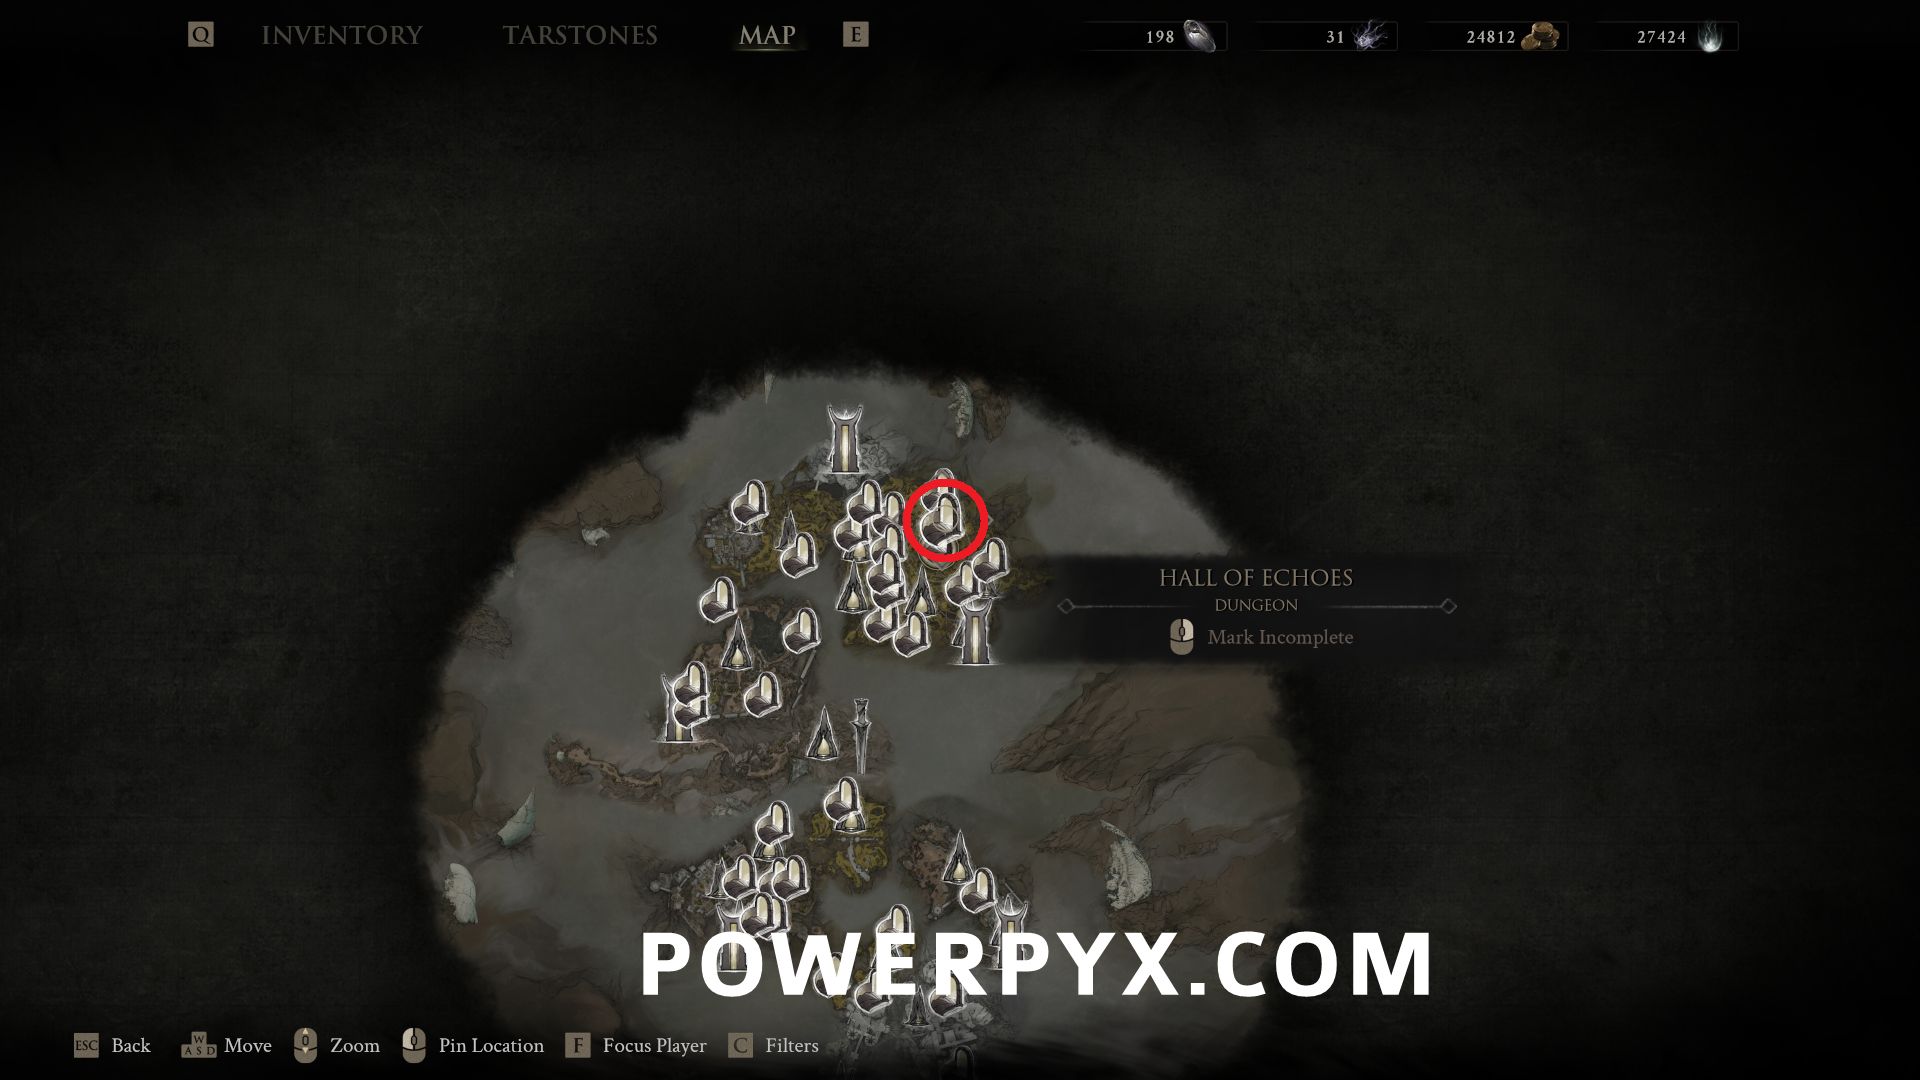
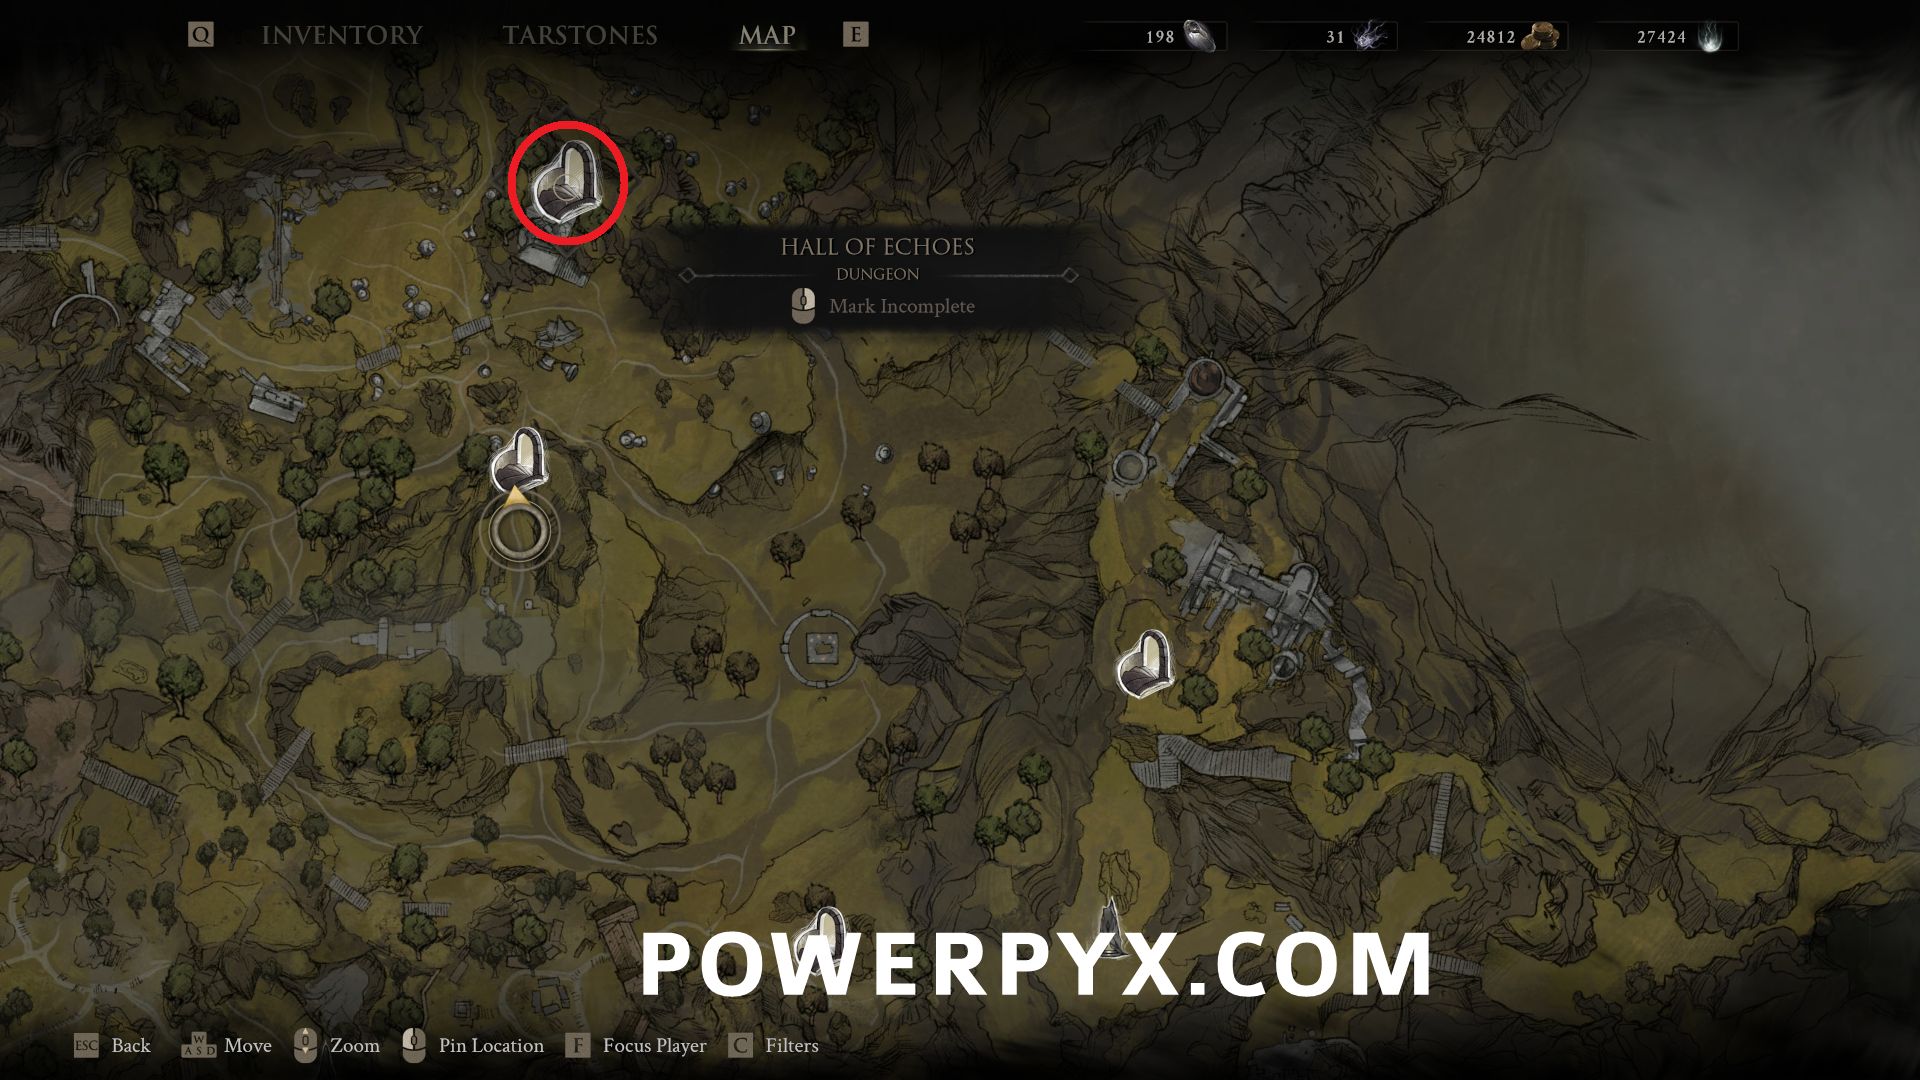
#20 – Hall of Echoes – Northwest of One Legged Wolf Beacon, go up to the building and use the Crypt Key to open the door, revealing the dungeon entrance.
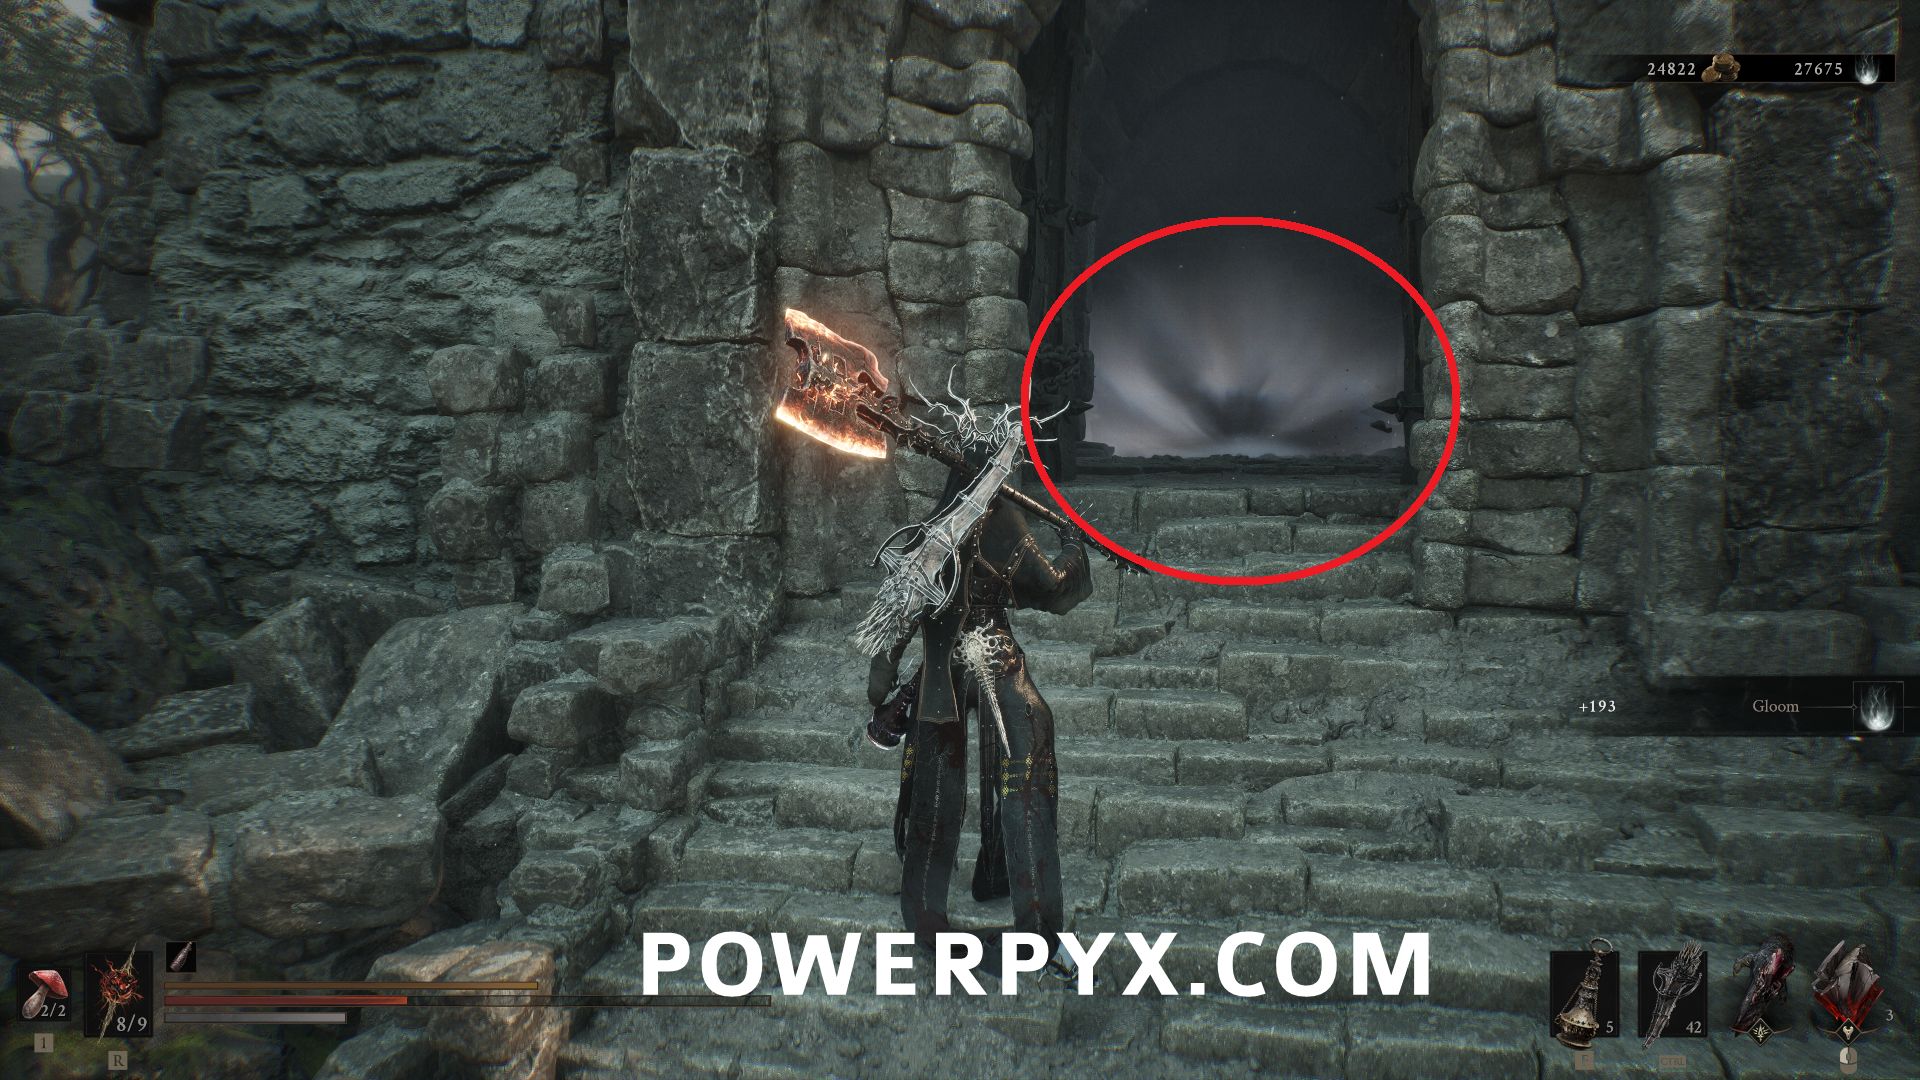
The Crypt Key is located in the building where the entrance to the Illusionist’s Cache Dungeon is, on the back counter.
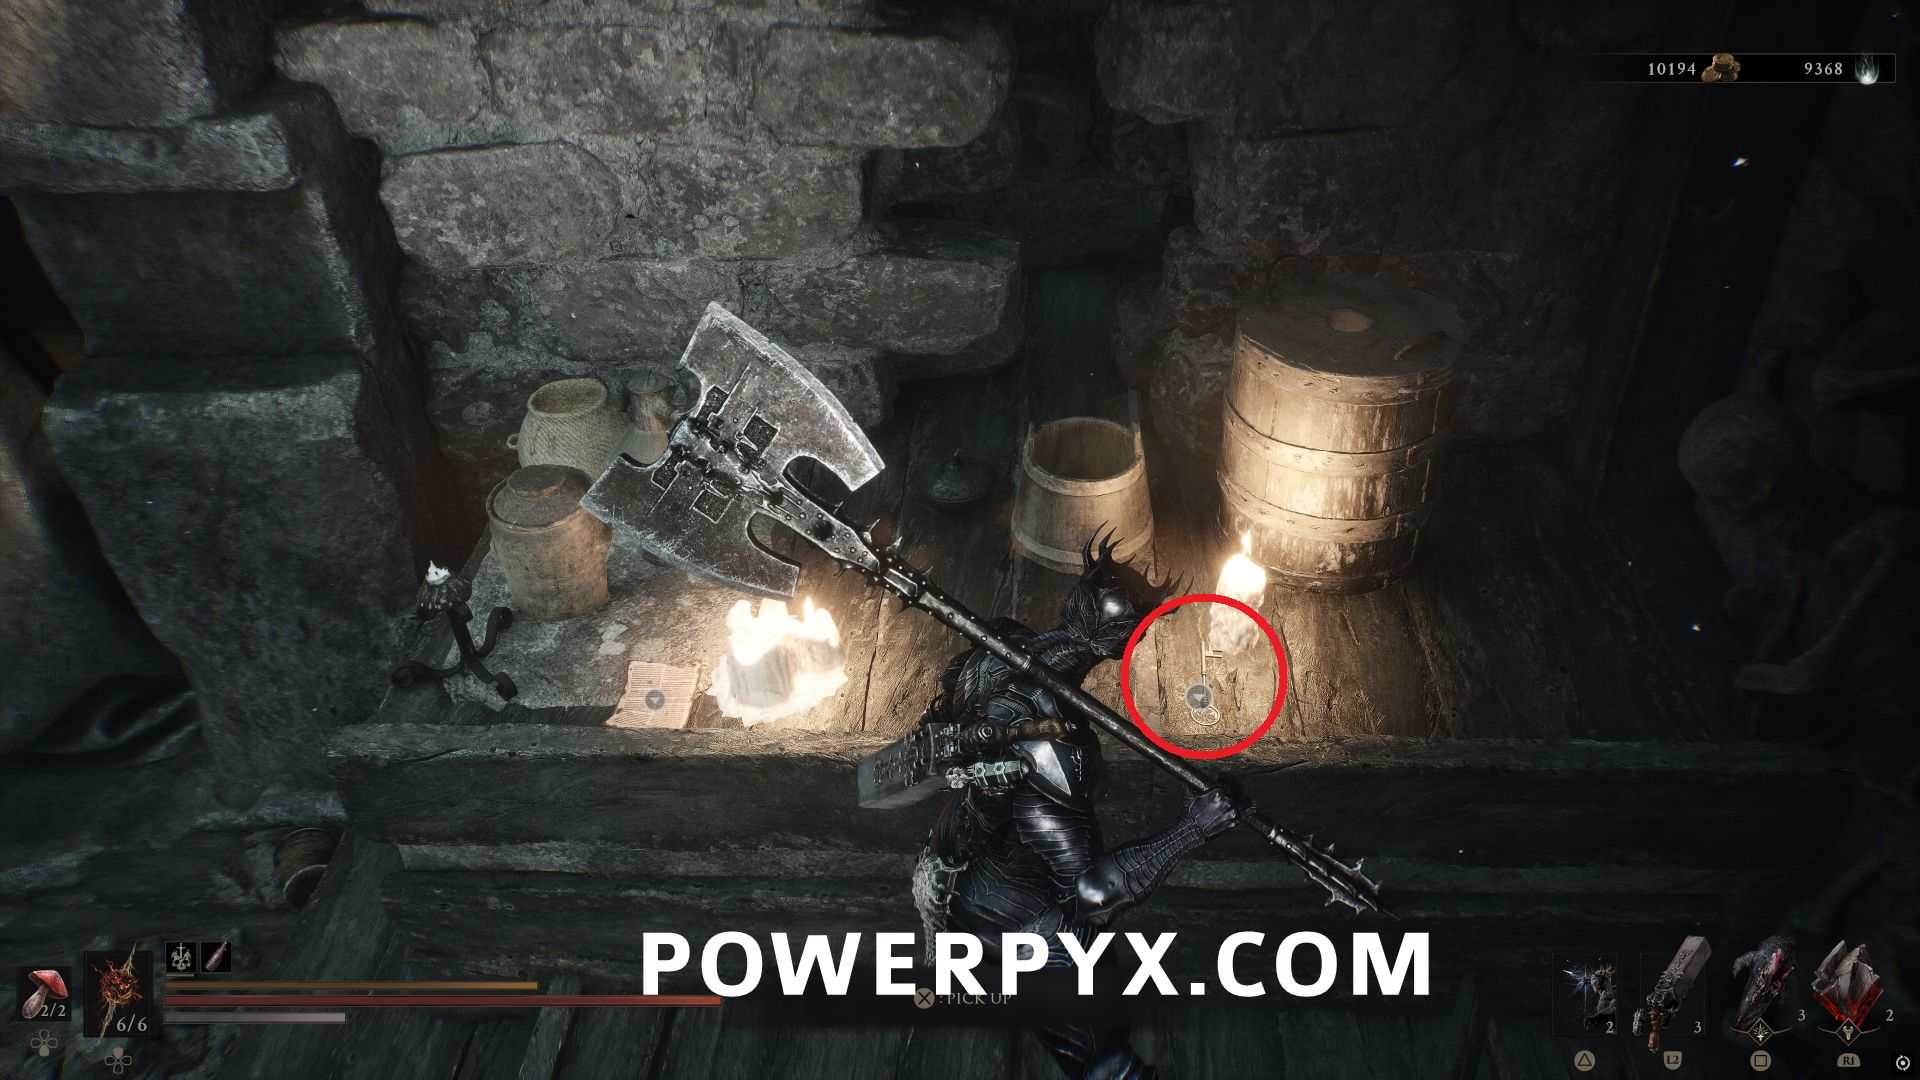
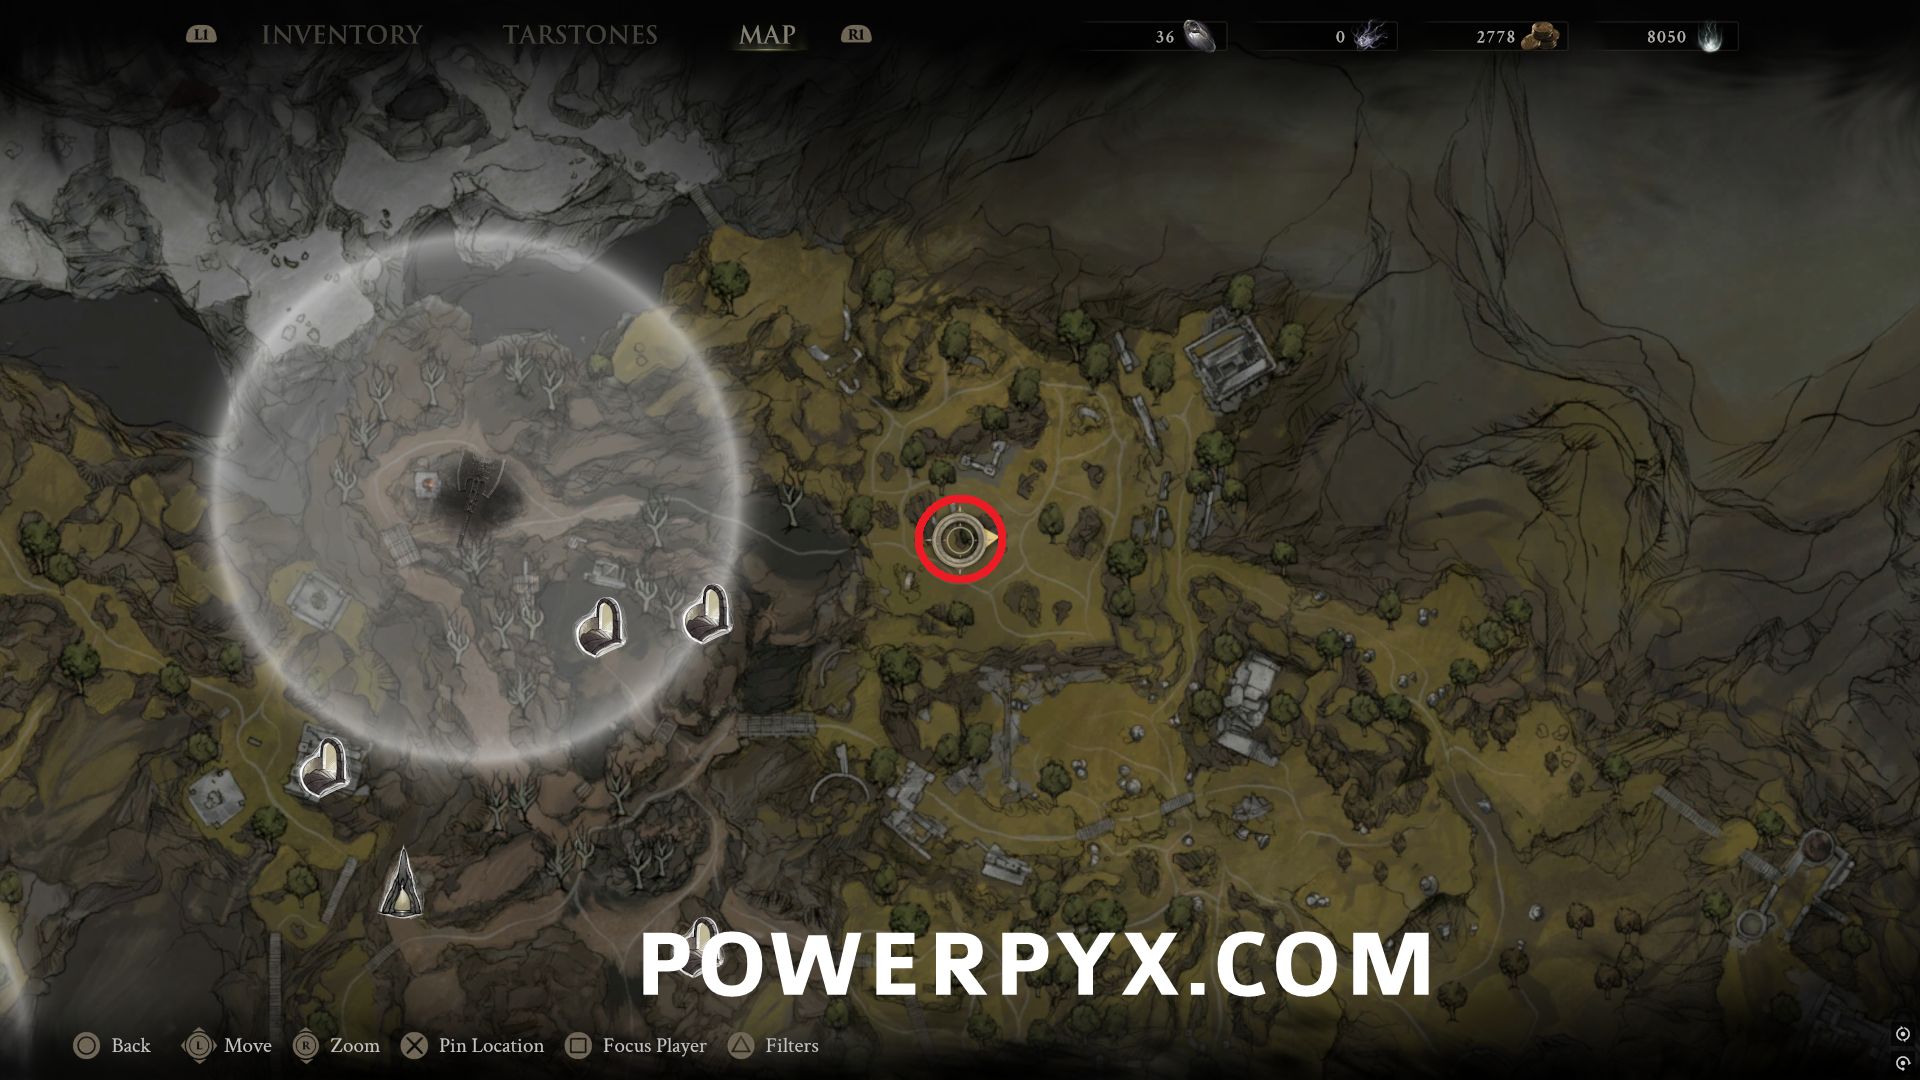
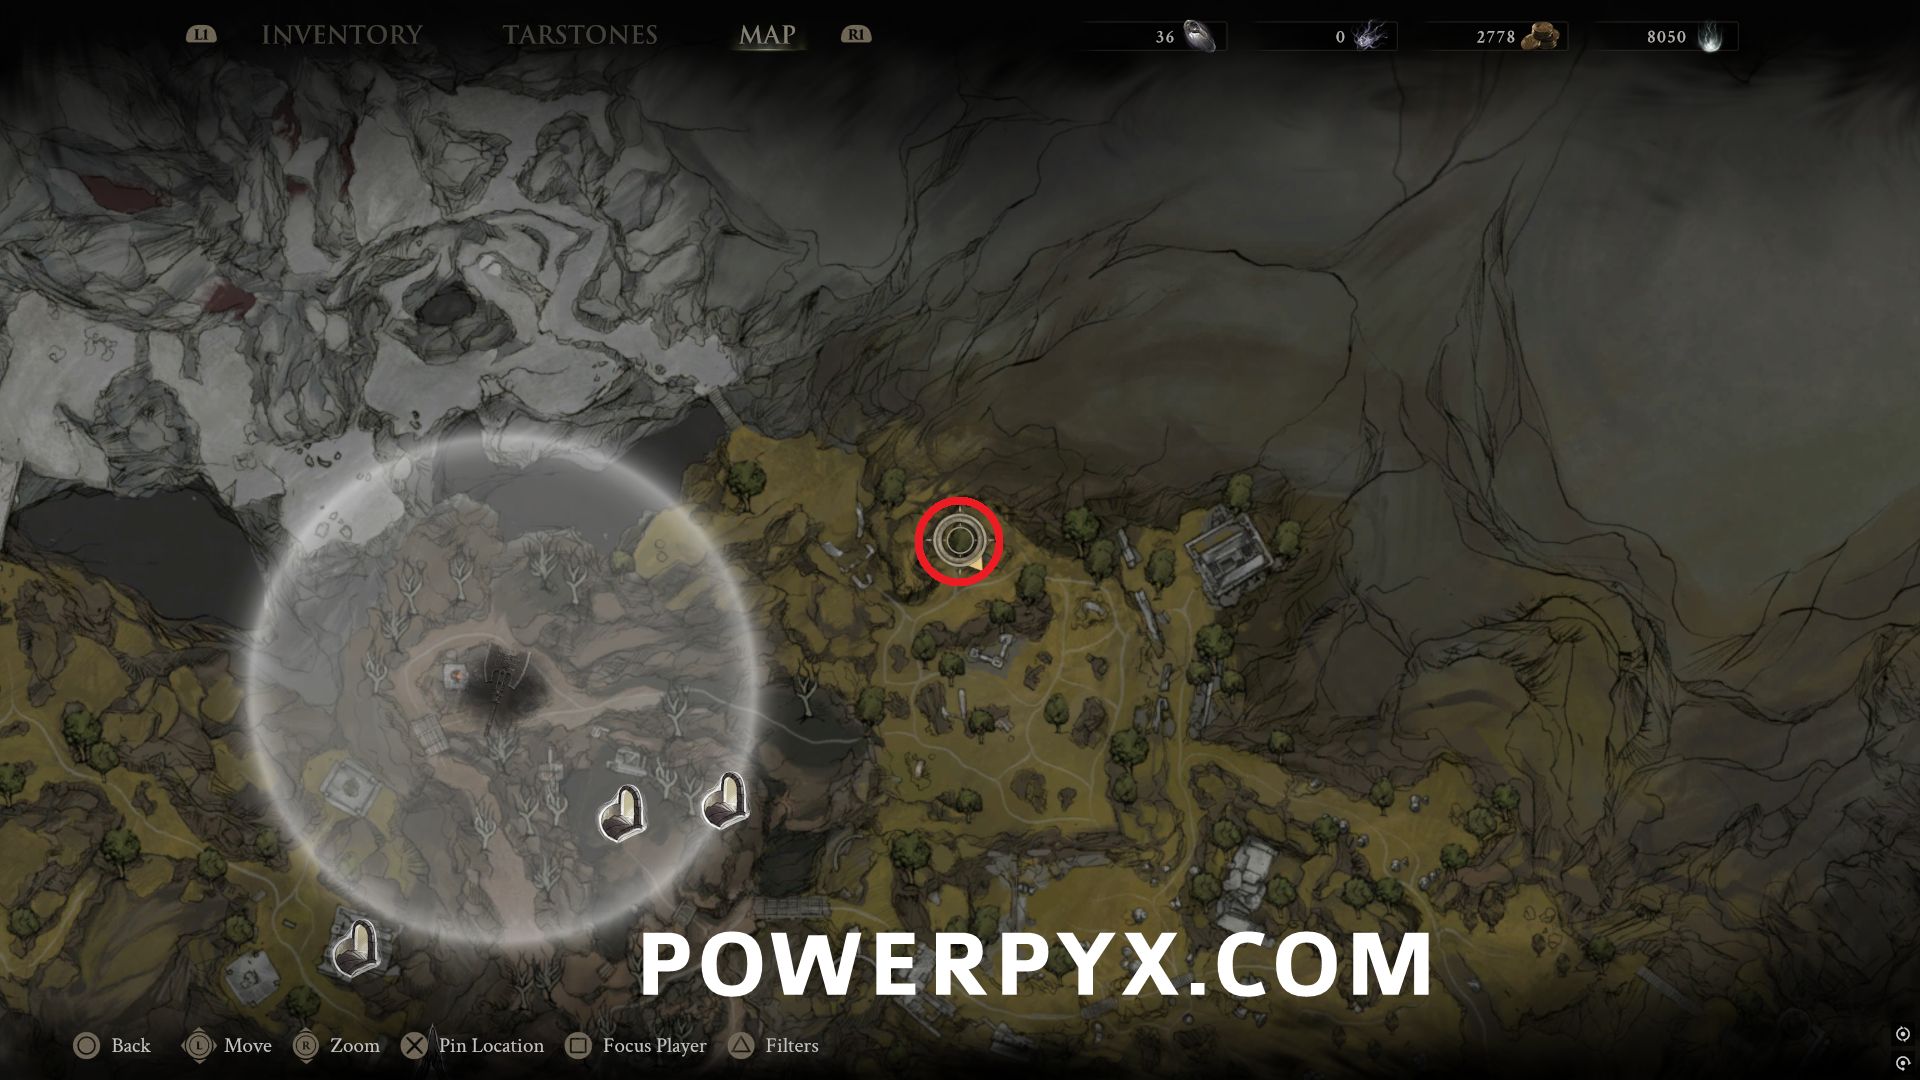
#21 – Feeding Grounds – Northeast of Blackridge Pass in the graveyard area near the map edge.
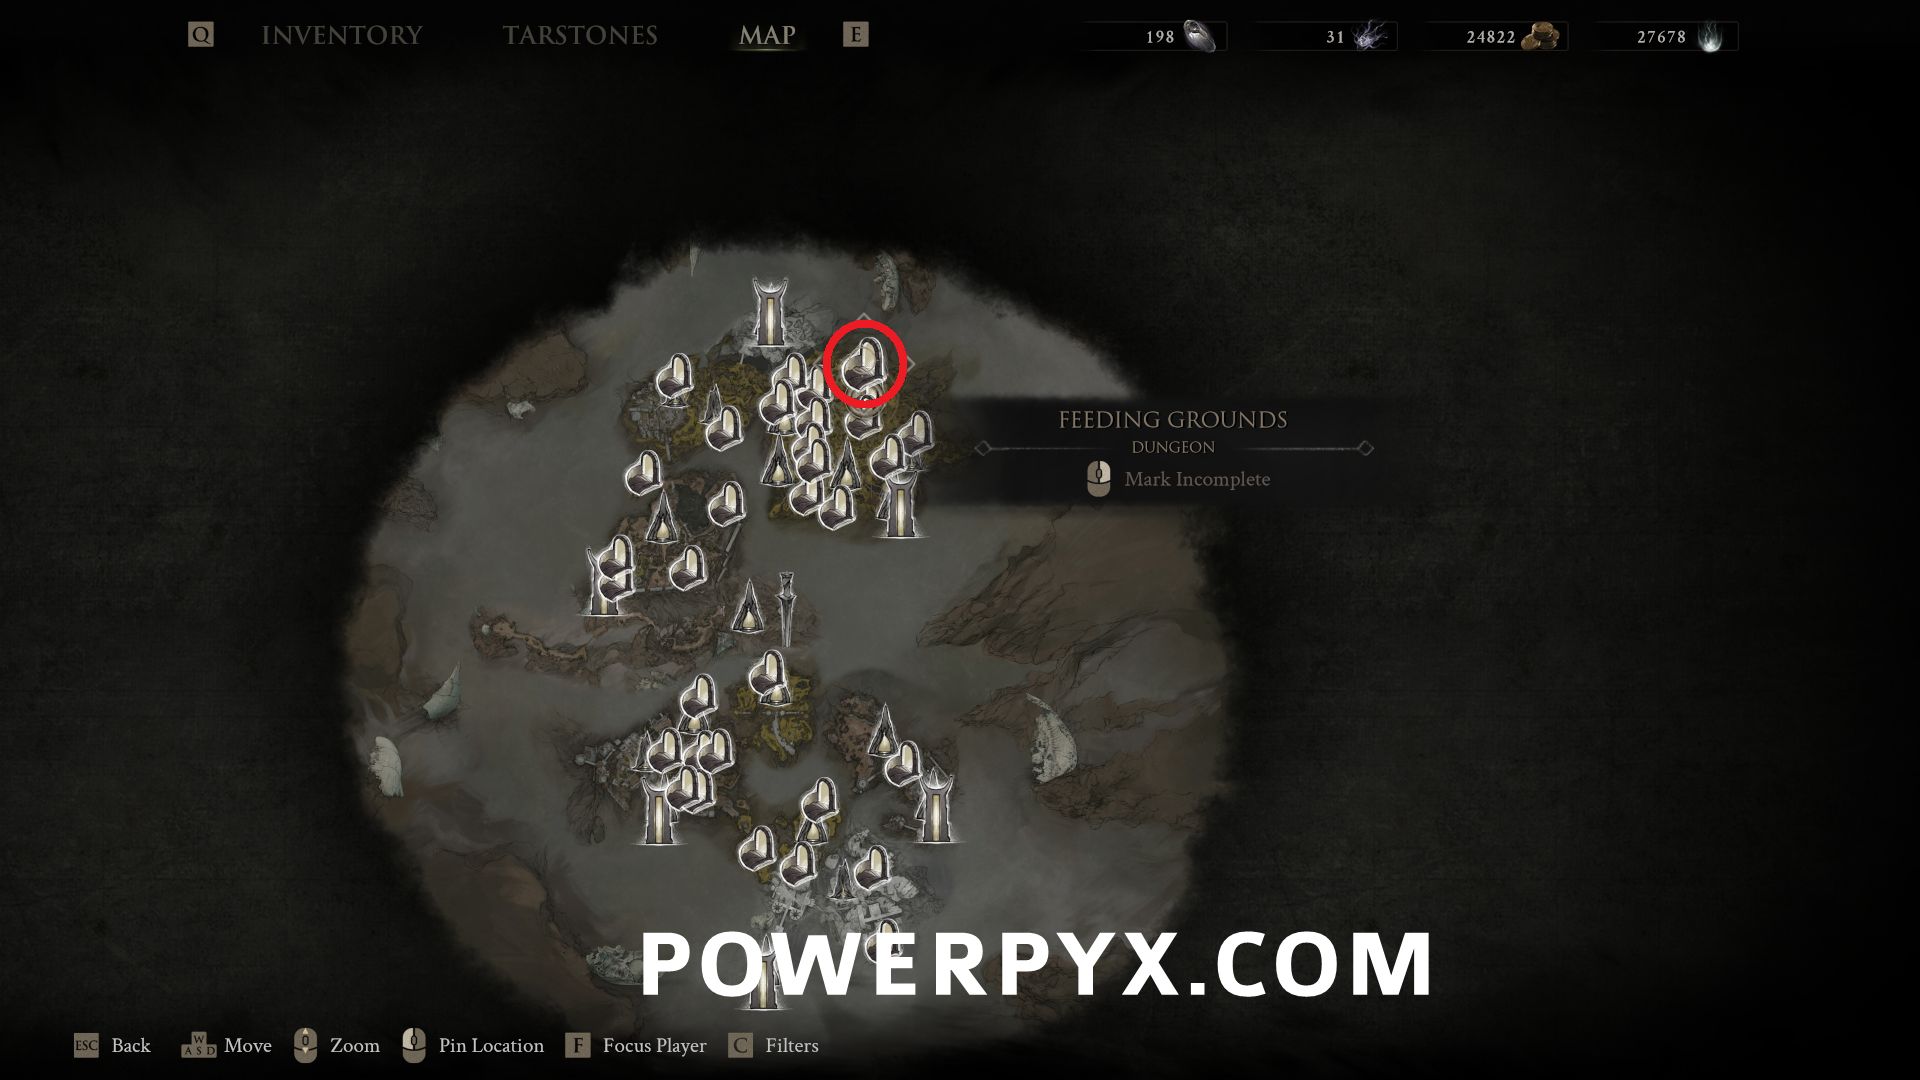
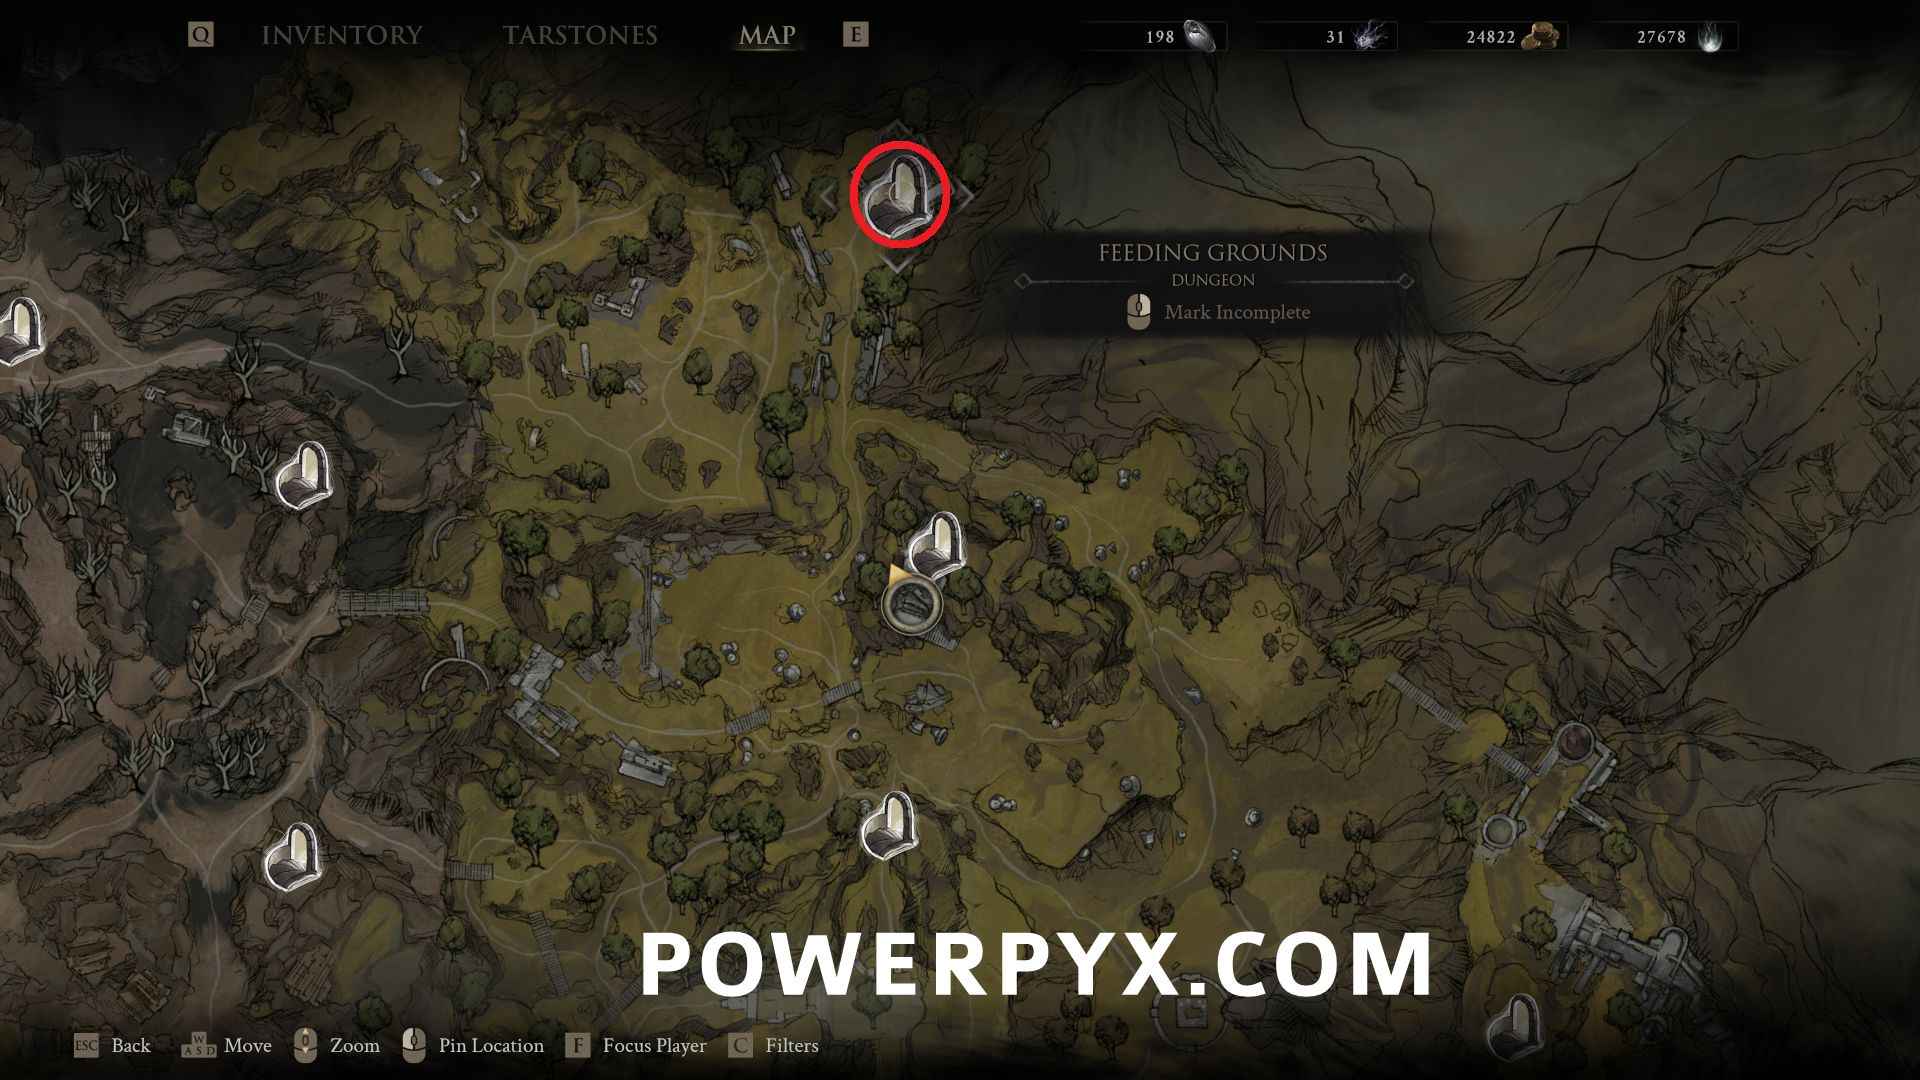
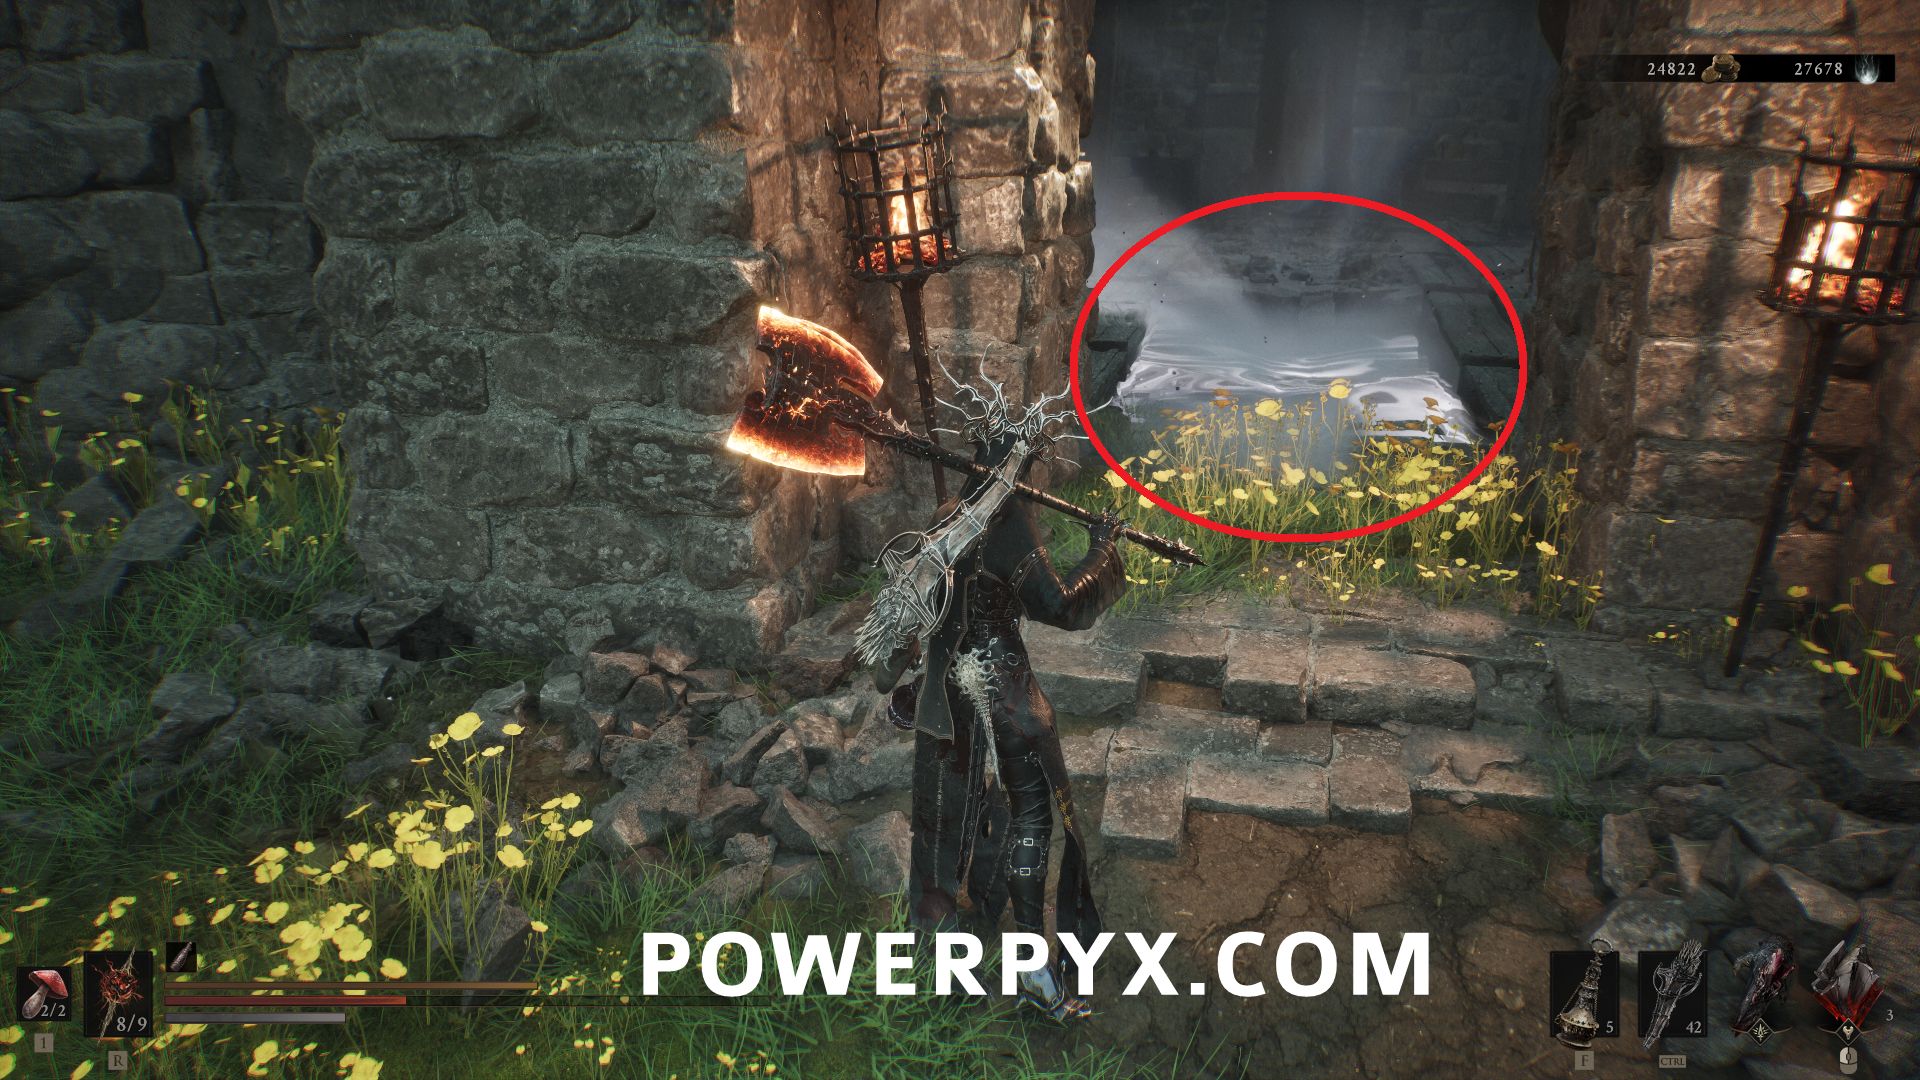
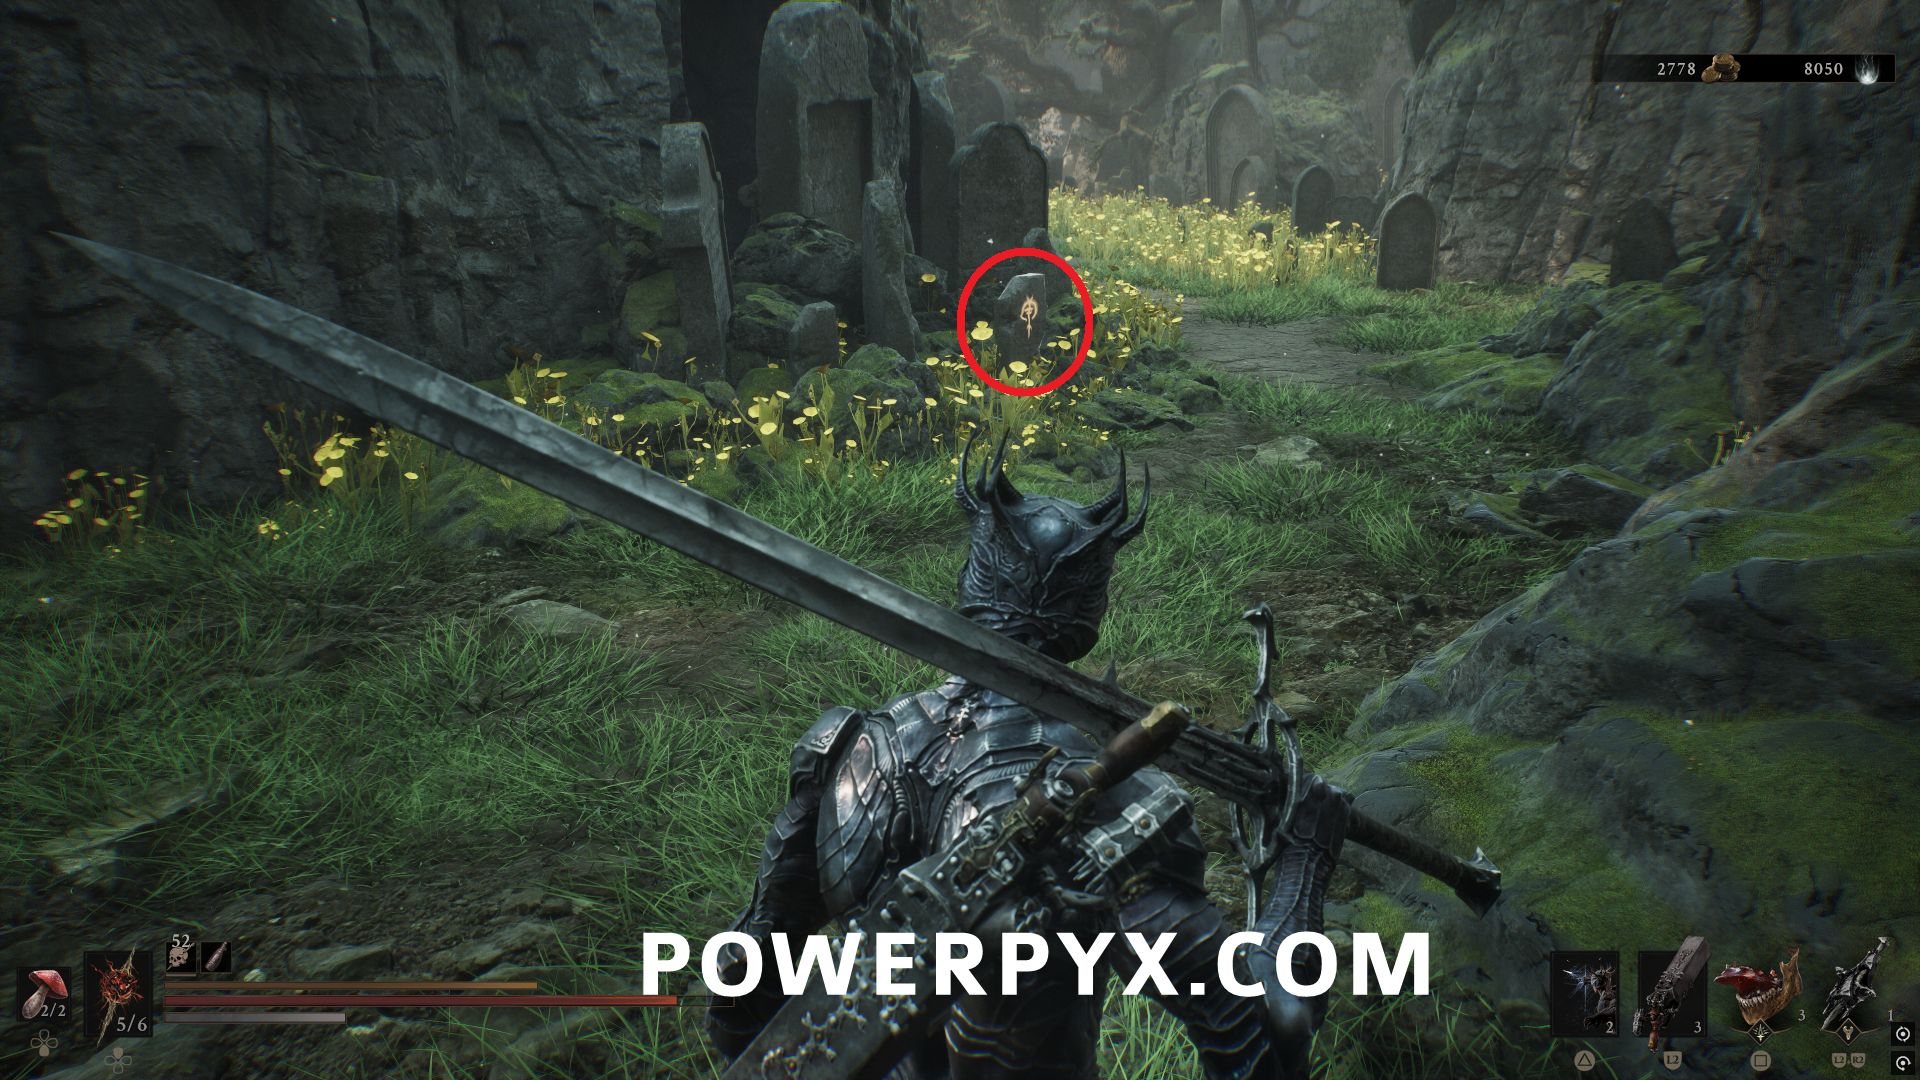
To open the door to the building, destroy the three glowing headstones in the graveyard area.
The first is in the center of the area.
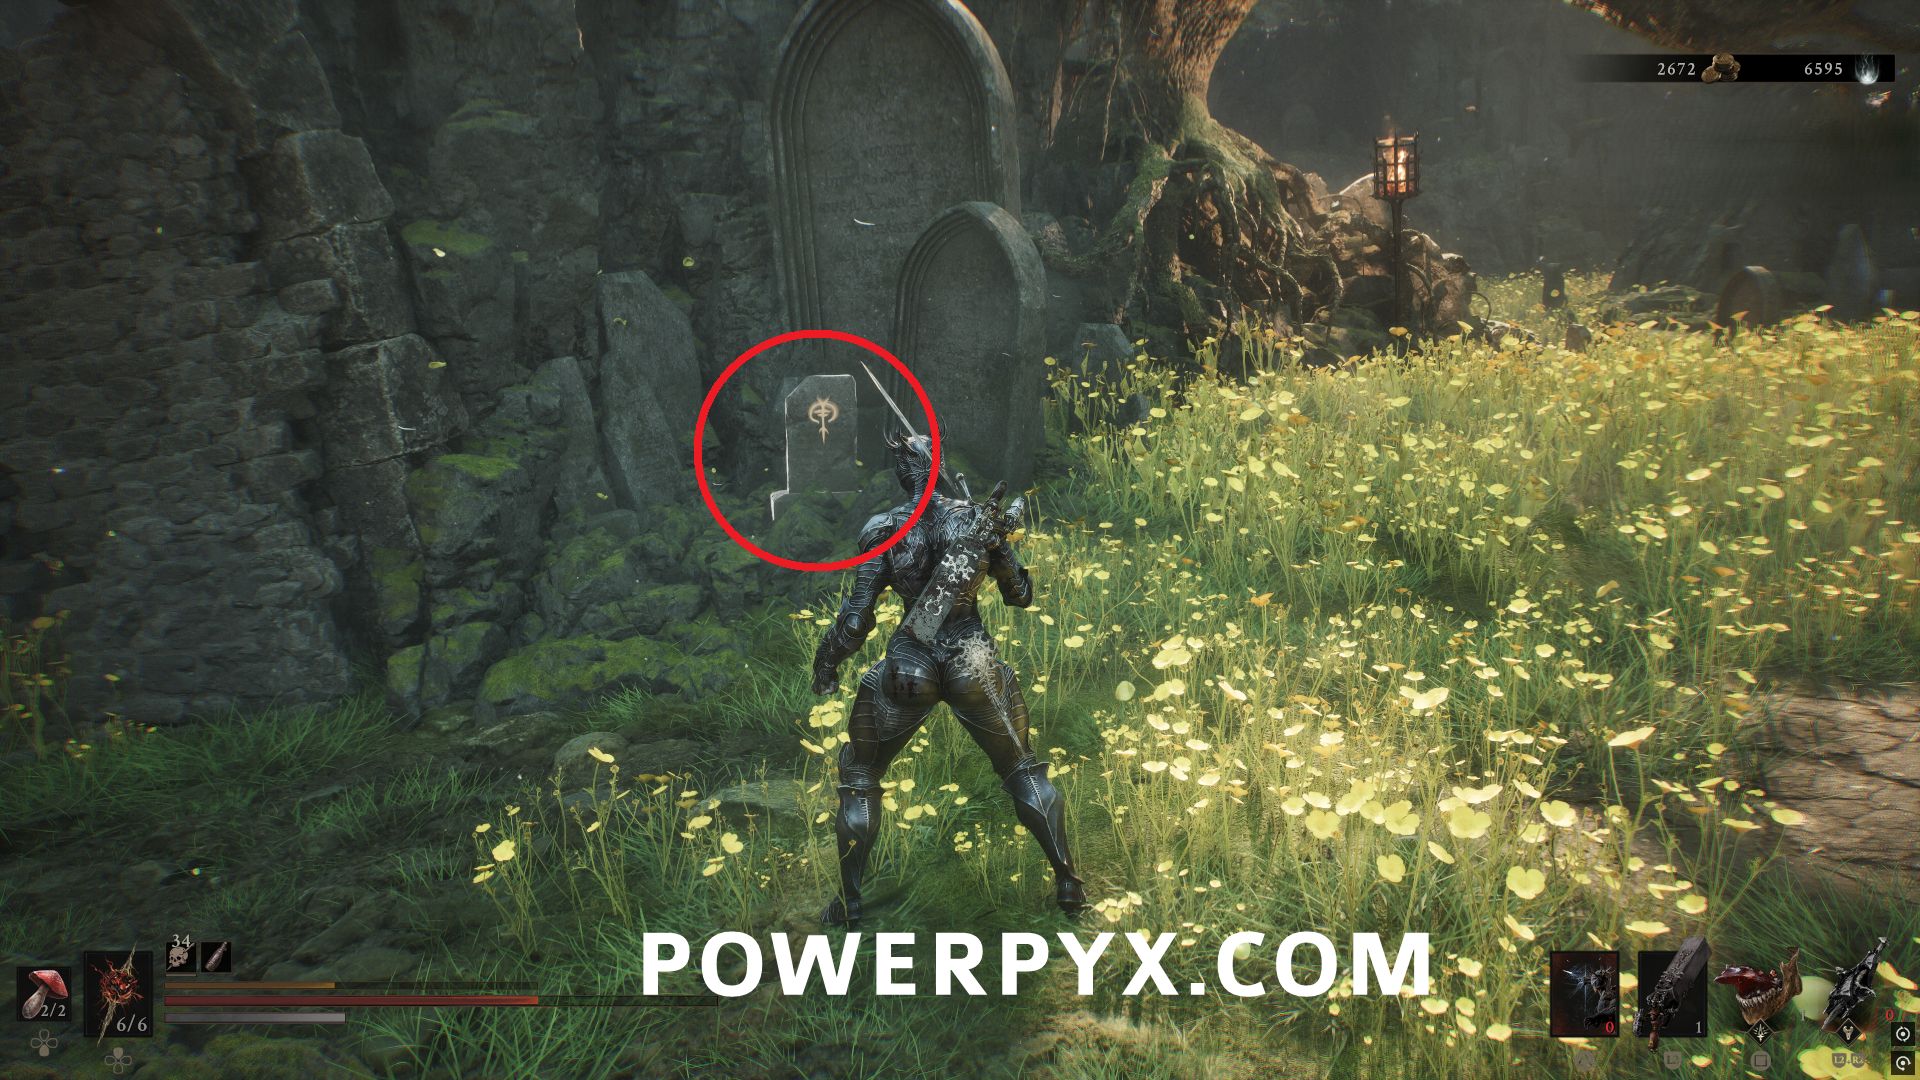
The second is left of the stairs leading to the building with the dungeon entrance.
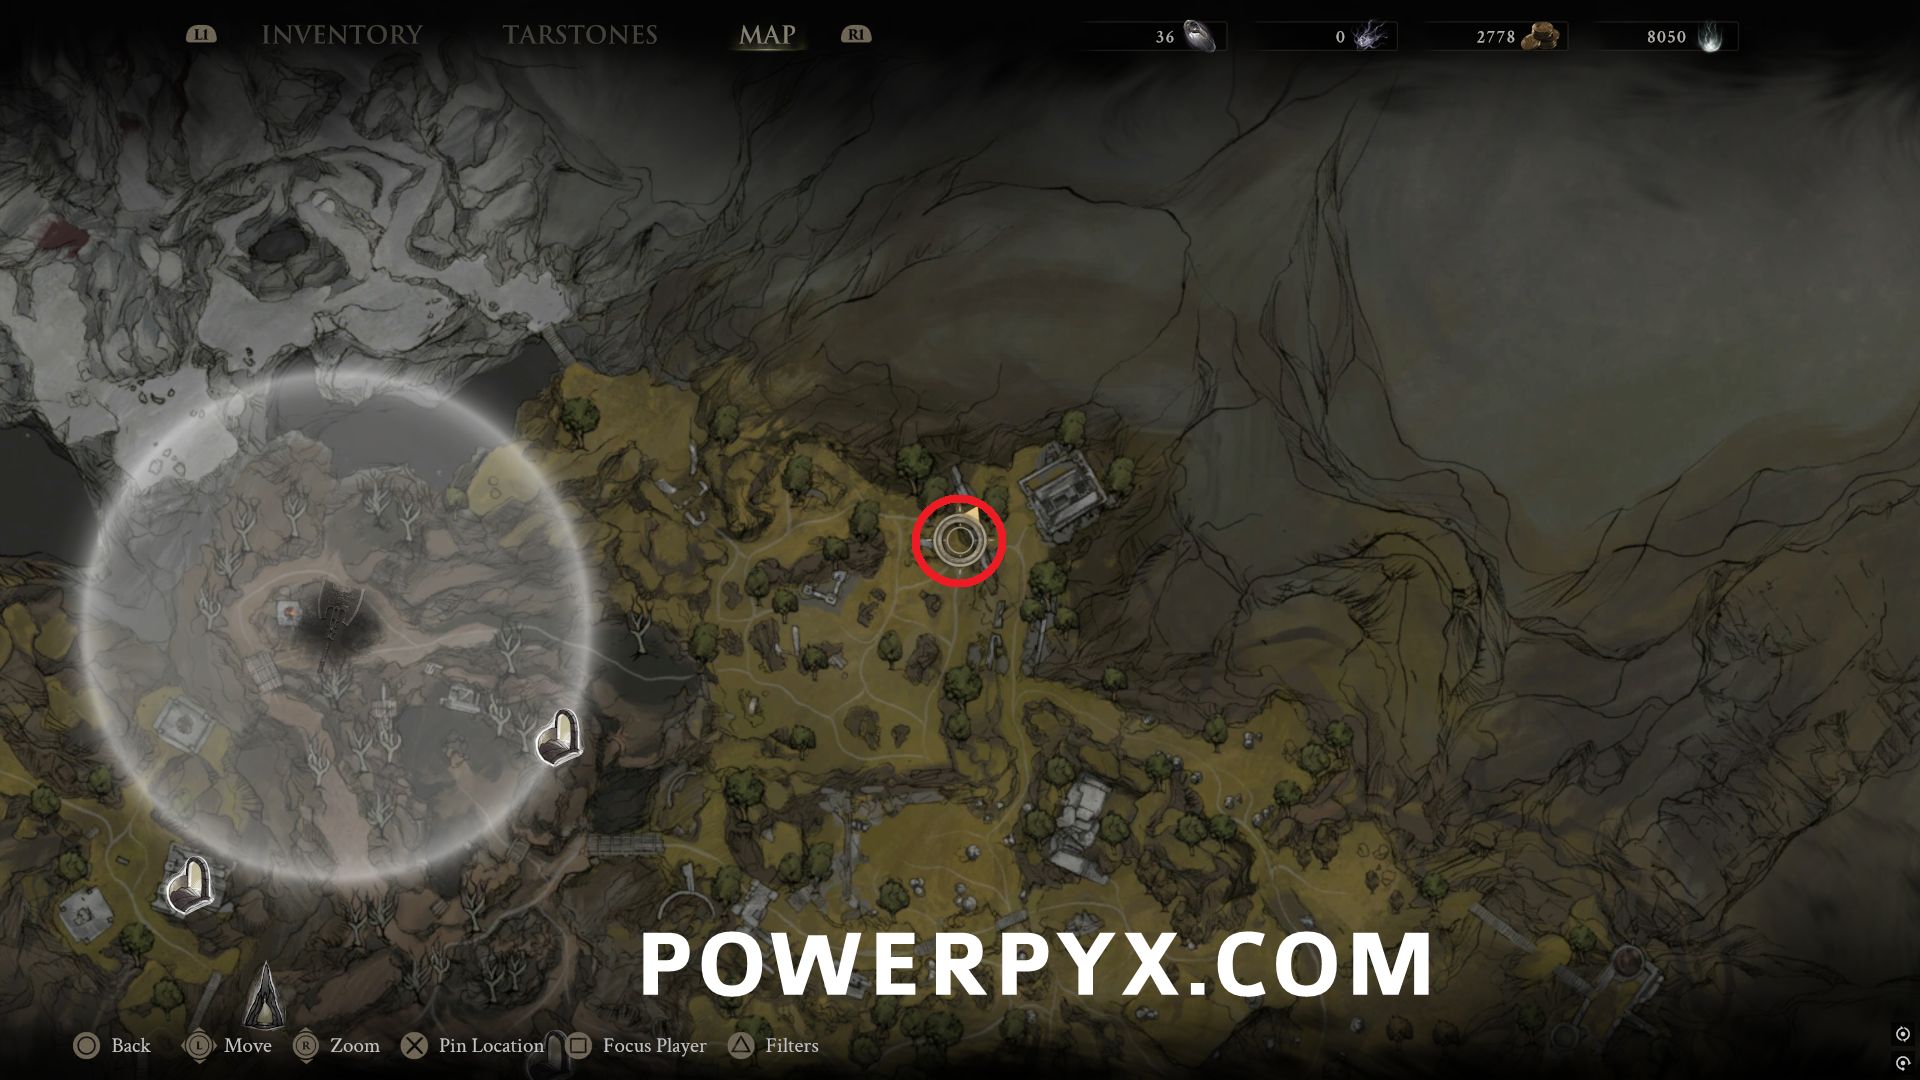
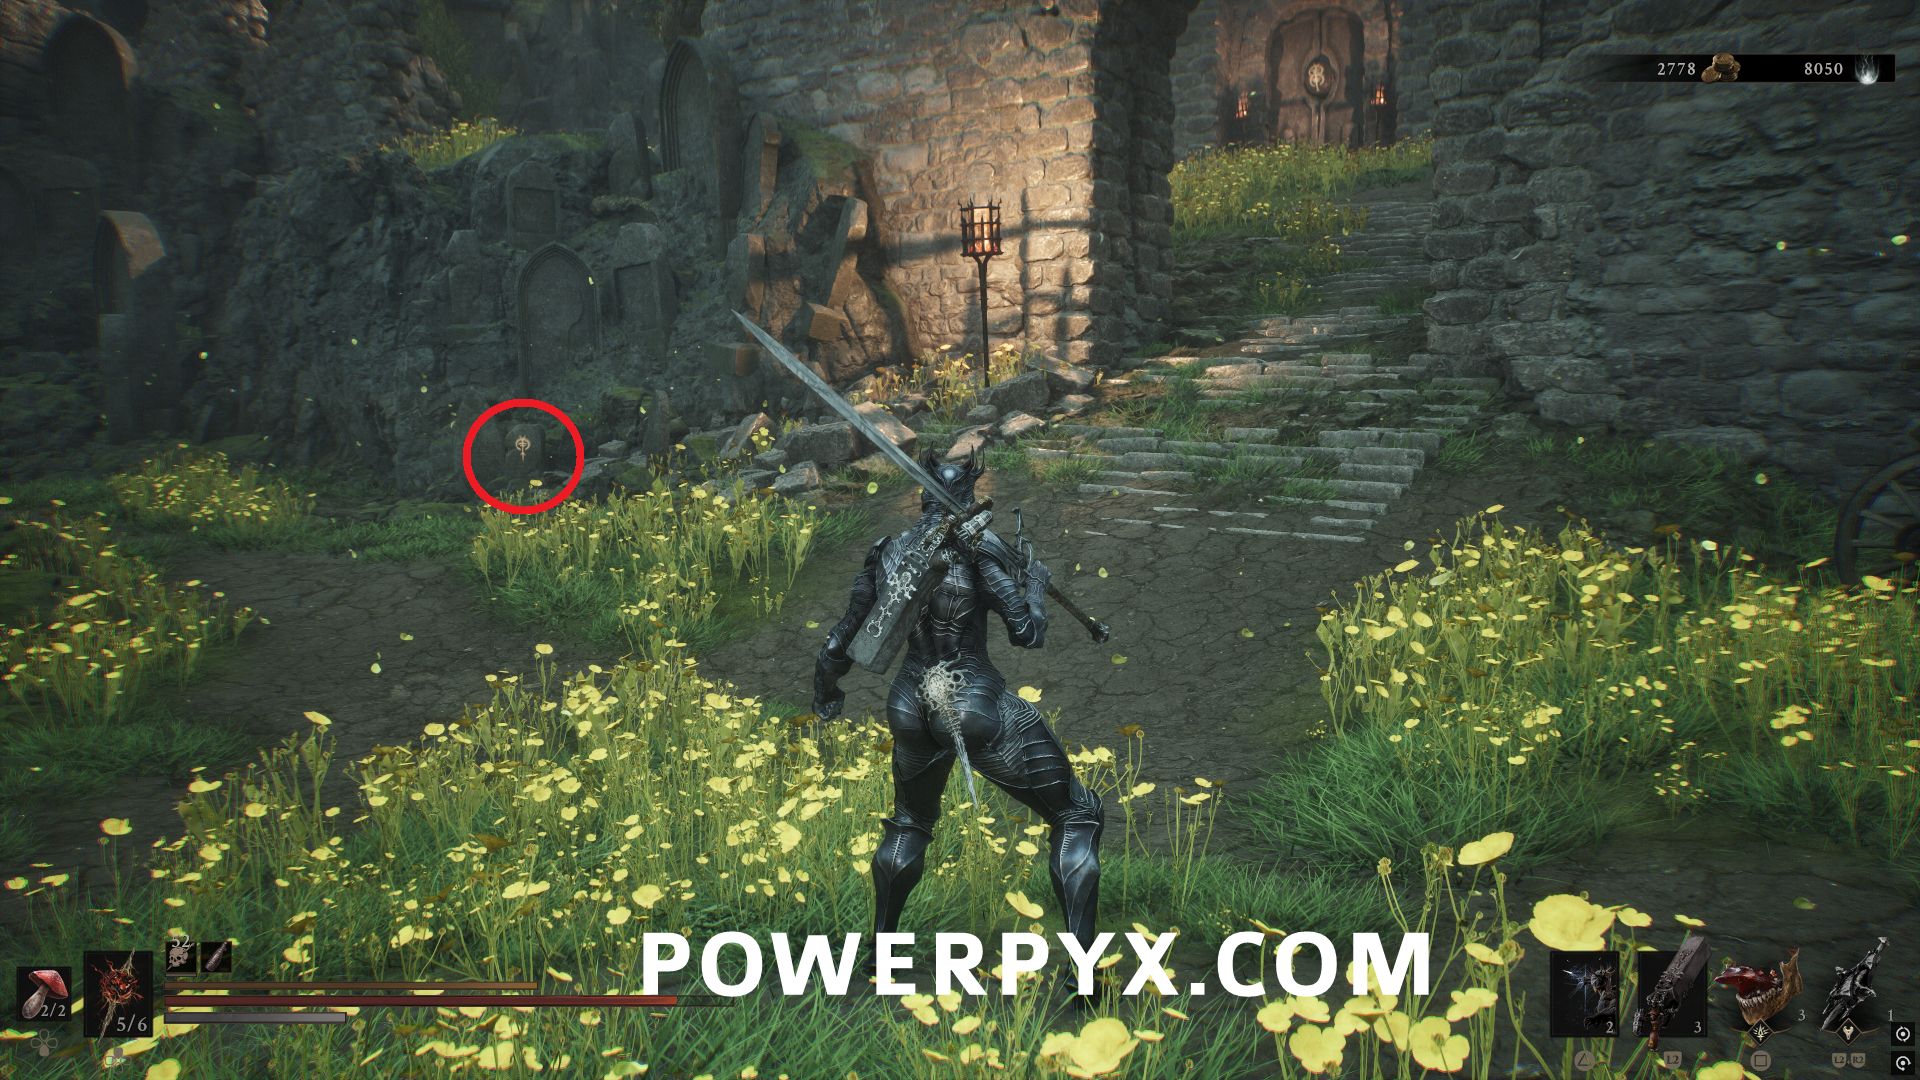
The third is on the north edge of the graveyard area on the top path.
Ruins of Mammon
Outskirts of Mammon
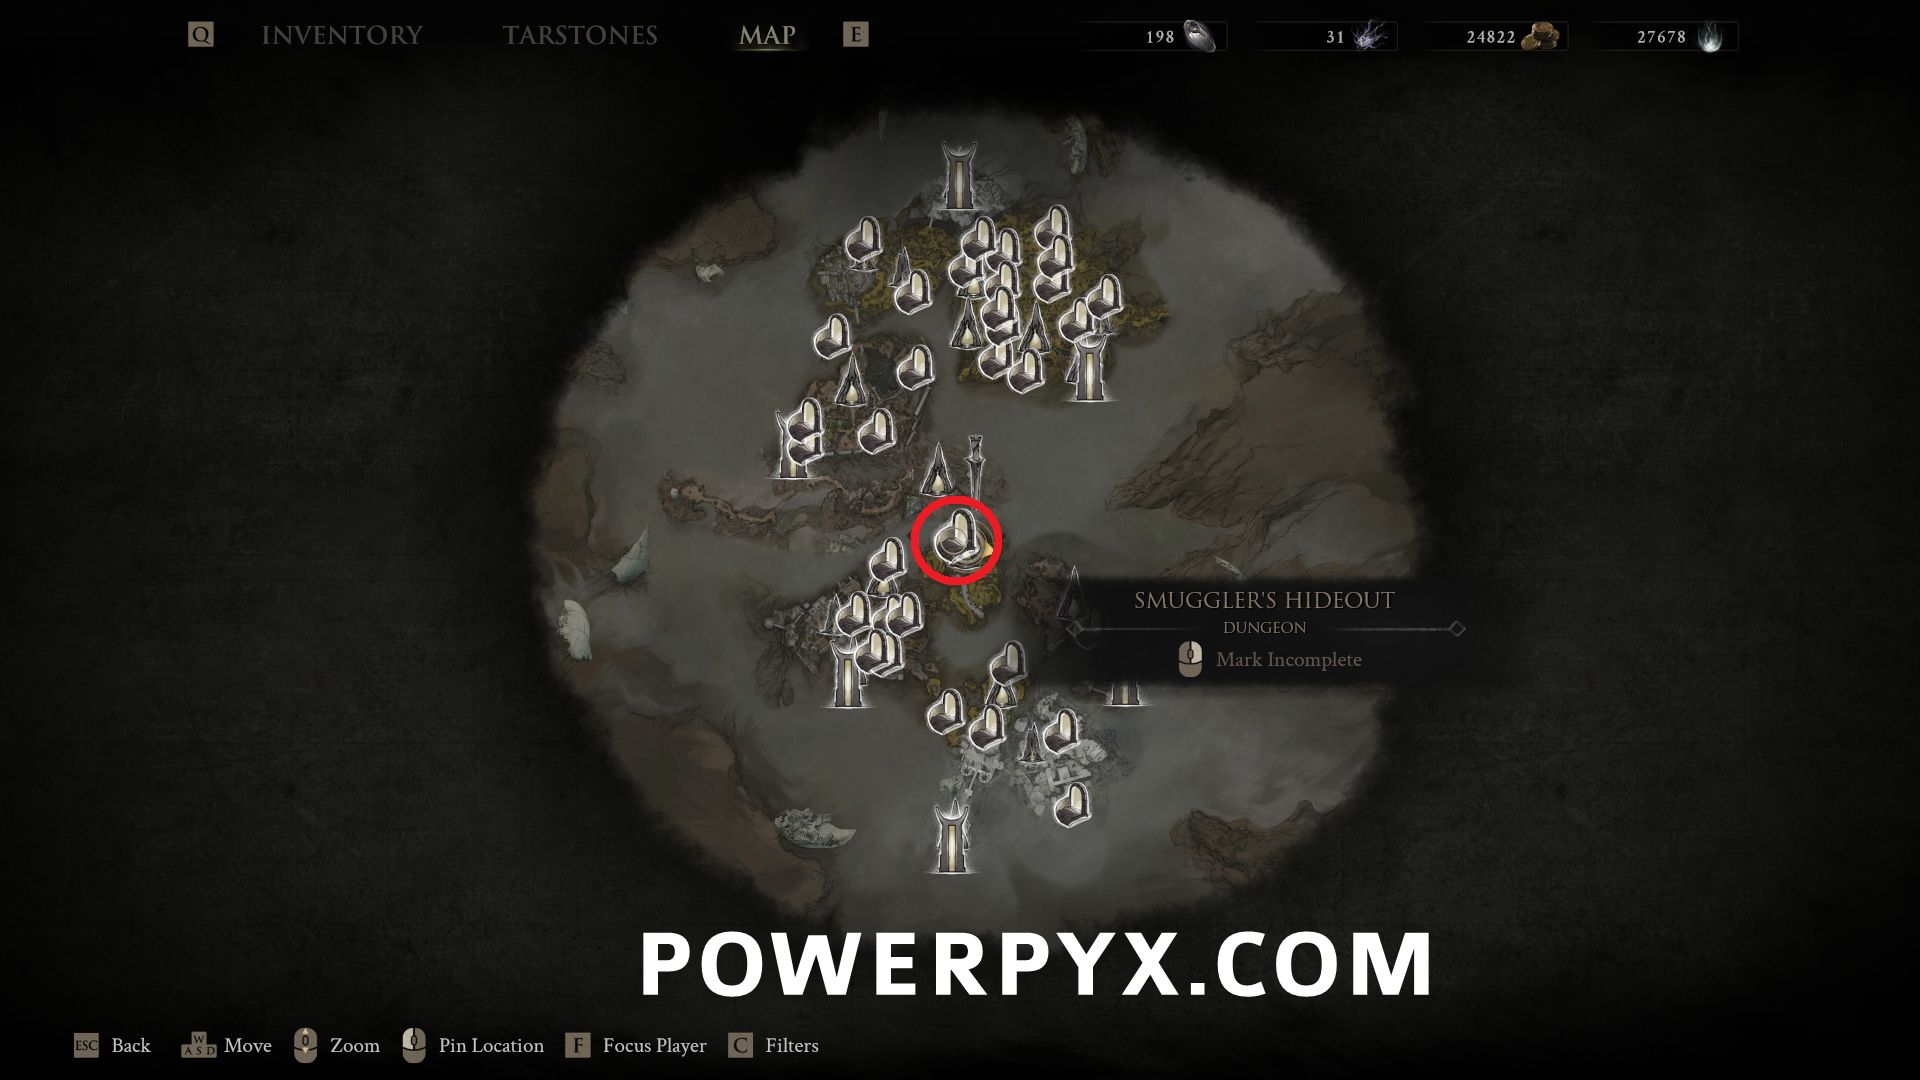
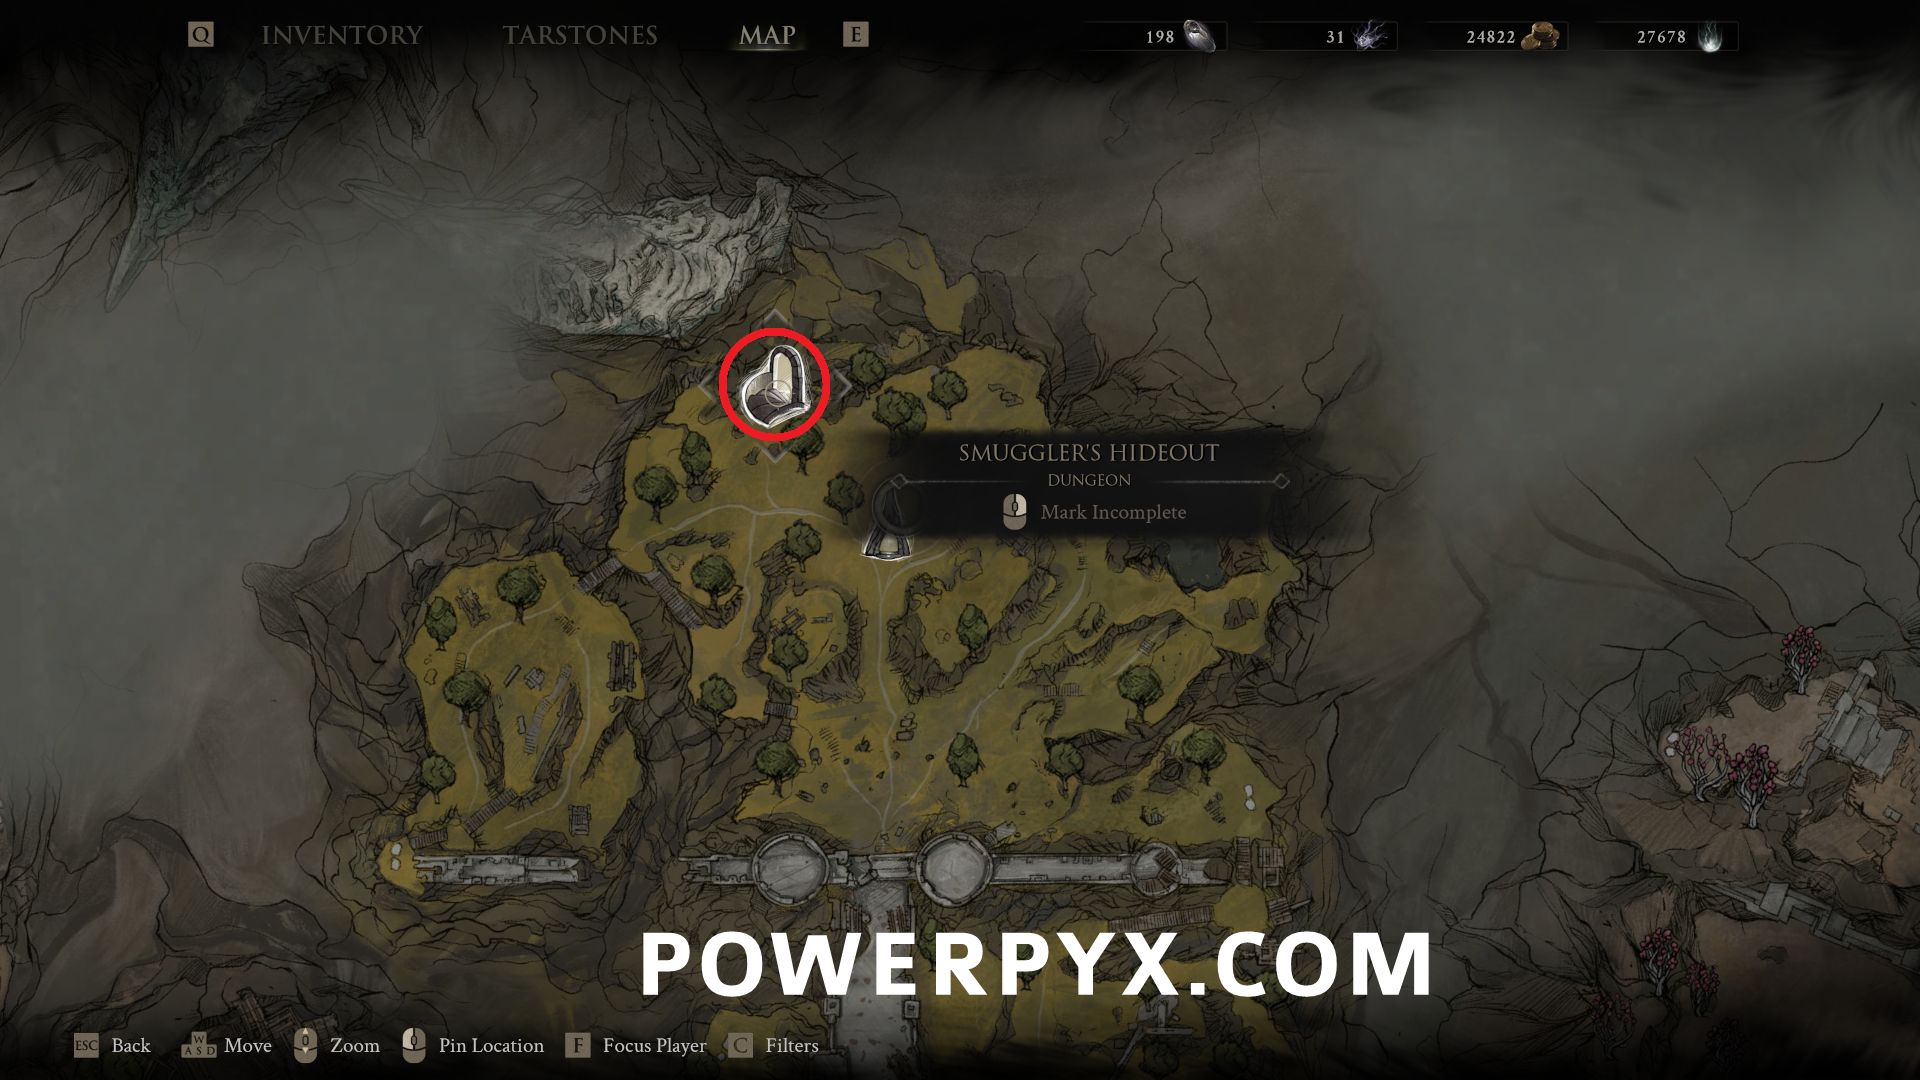
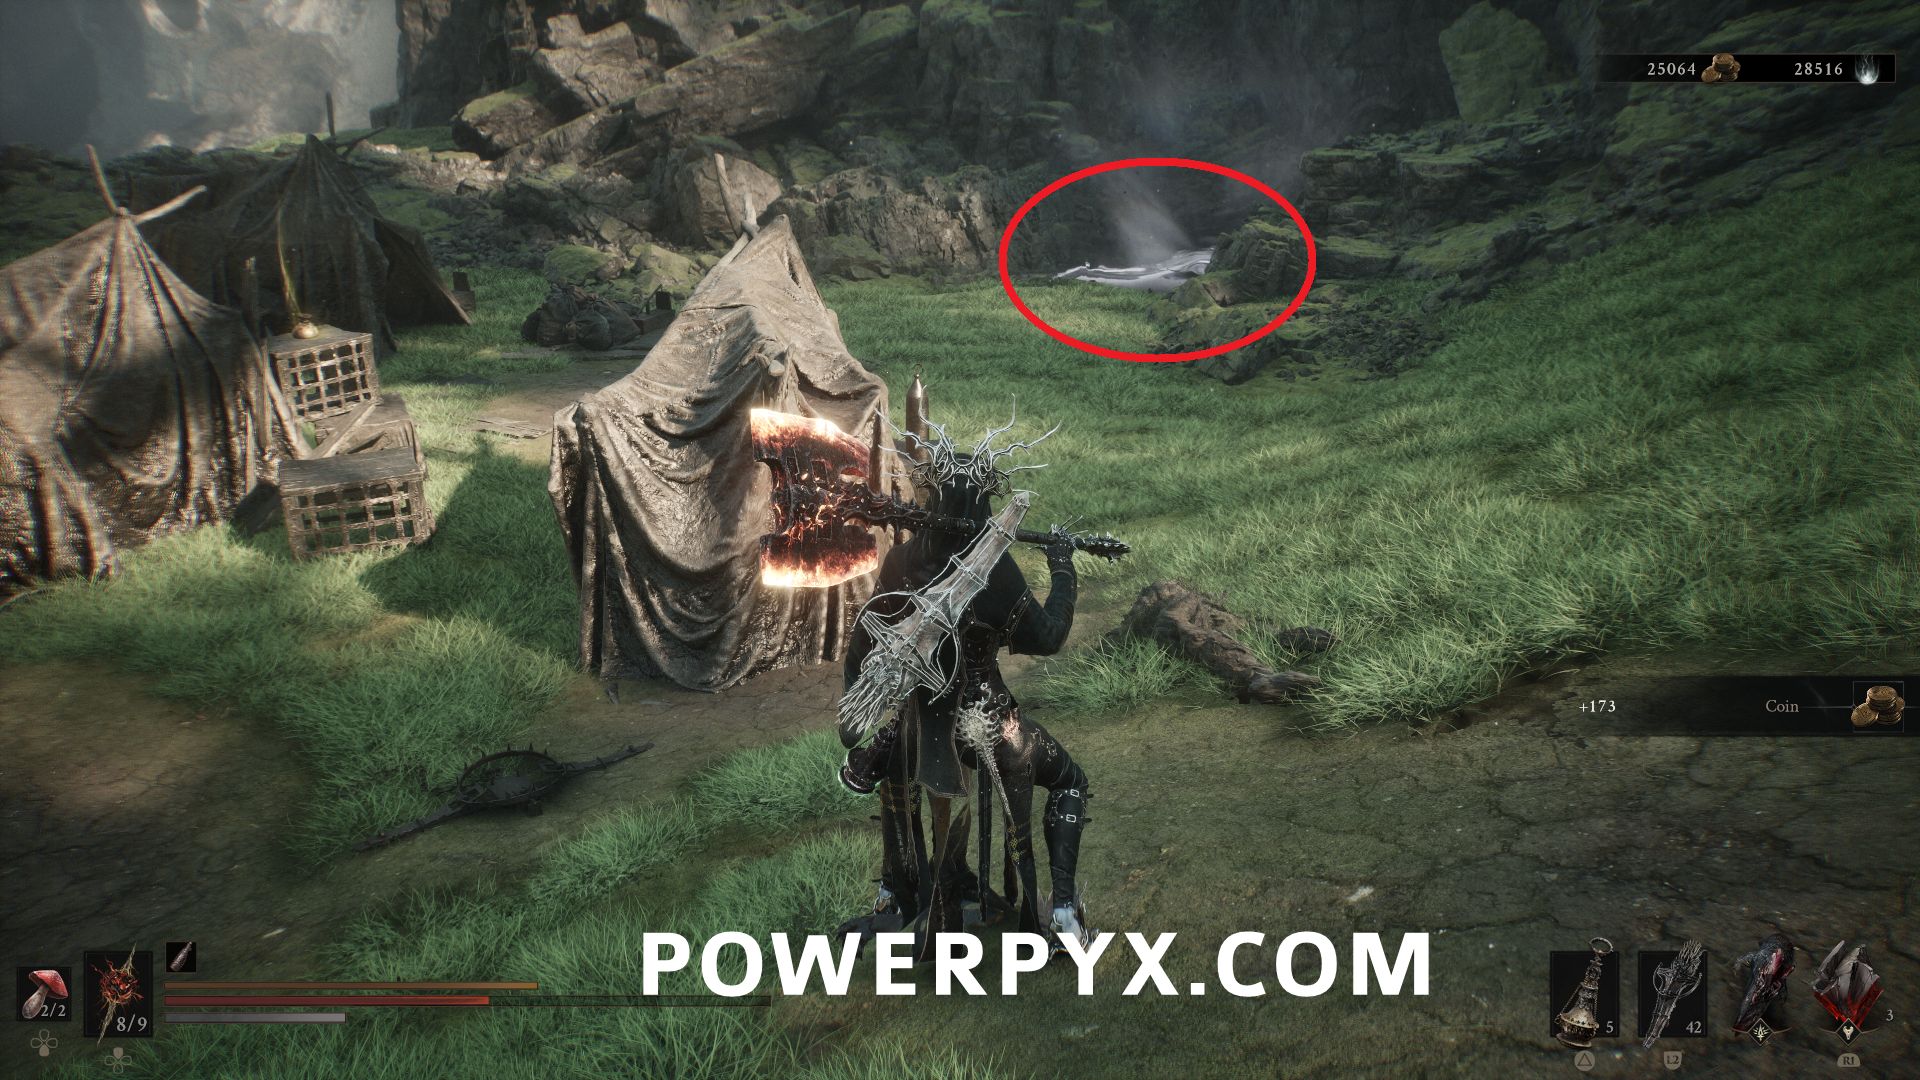
#22 – Smuggler’s Hideout – Northwest of Outskirts of Mammon Beacon, near a camp area.
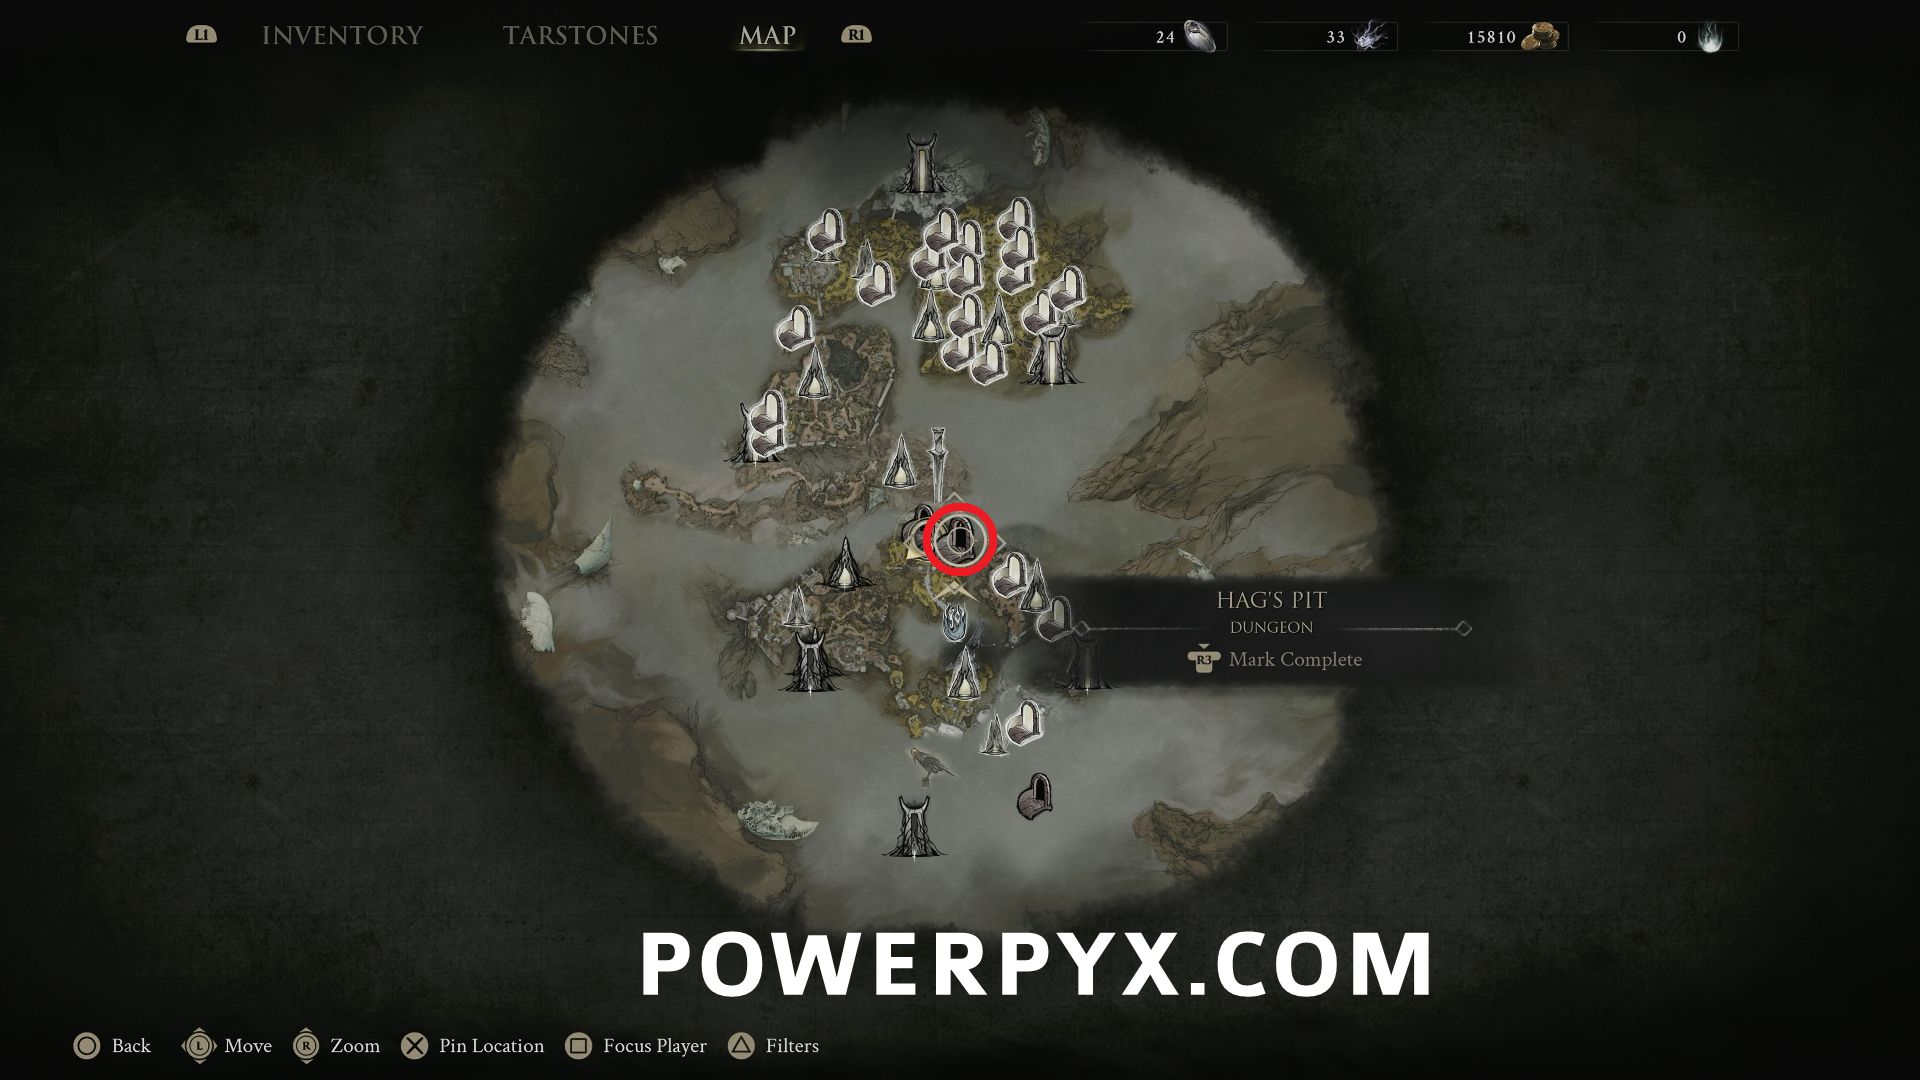
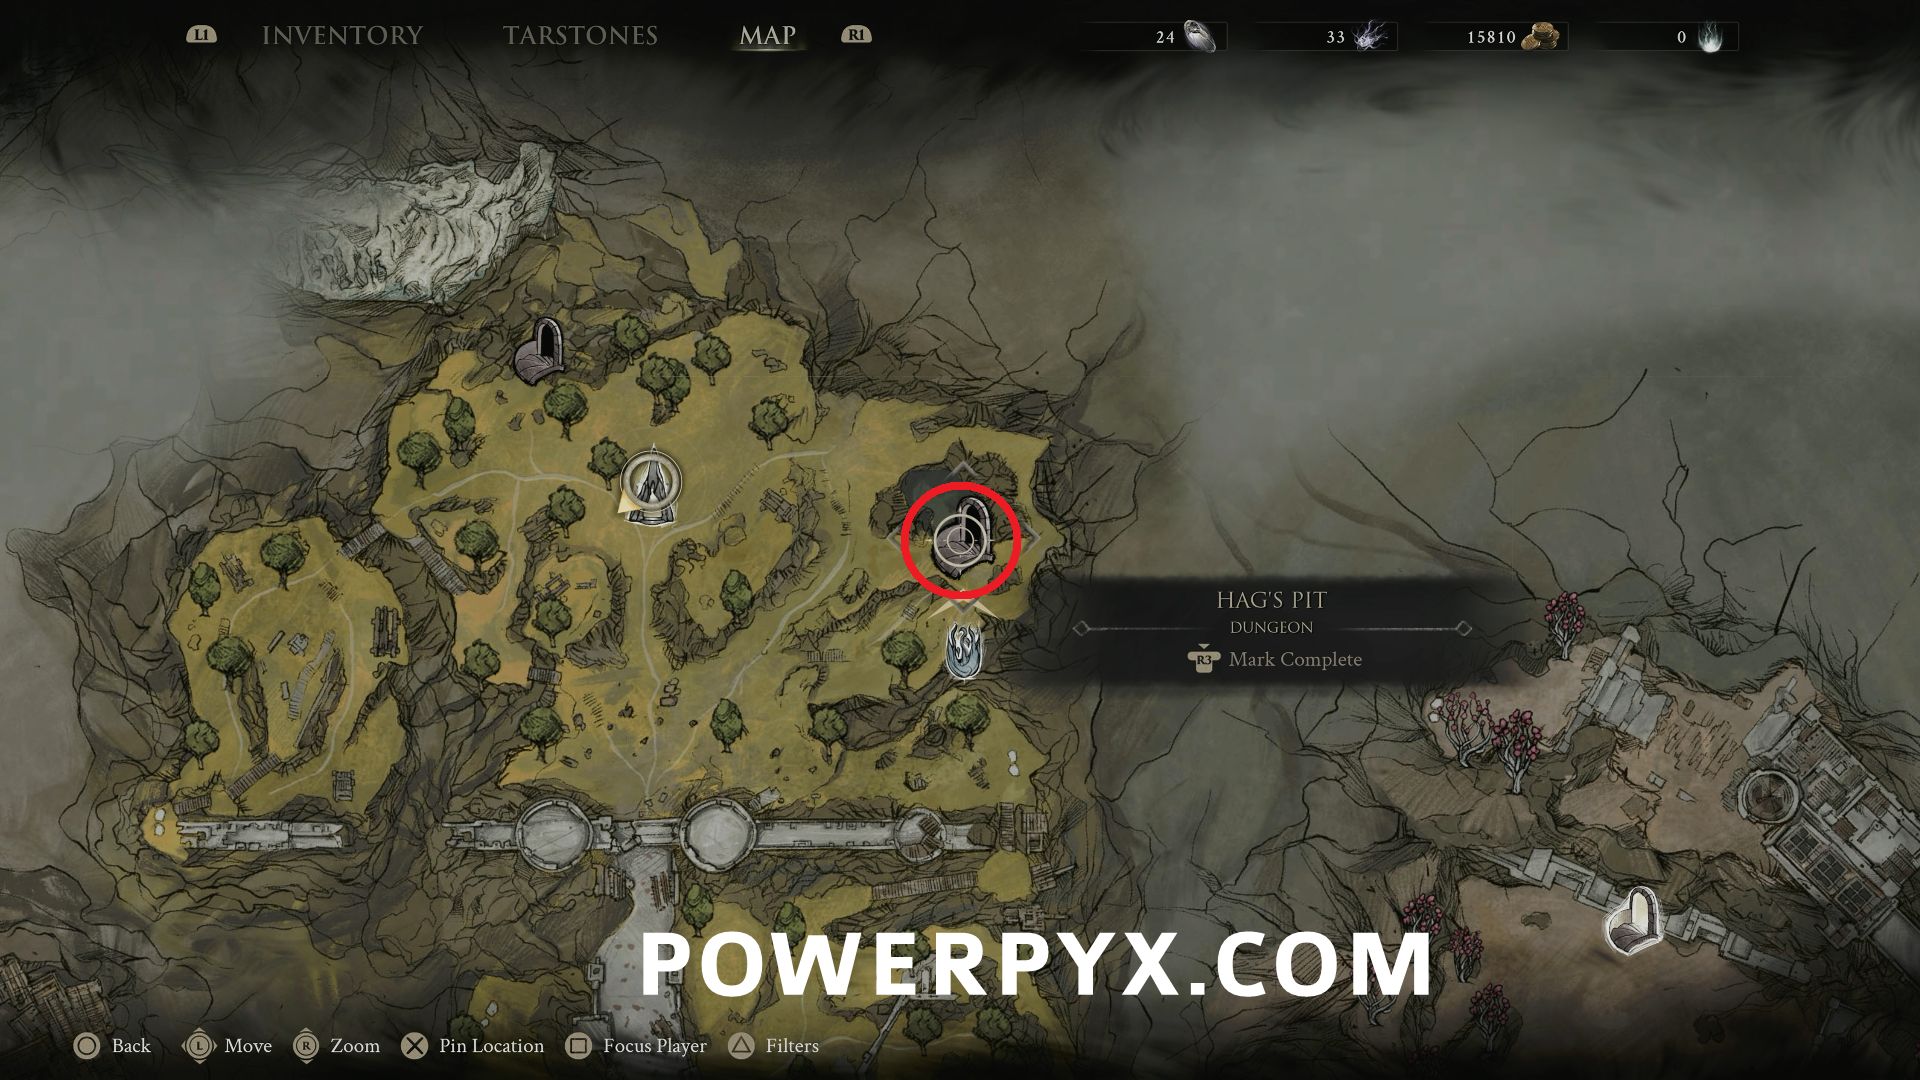
#23 – Hag’s Pit – Southeast of Outskirts of Mammon Beacon, in the side of the cliff.
Sester’s Gate
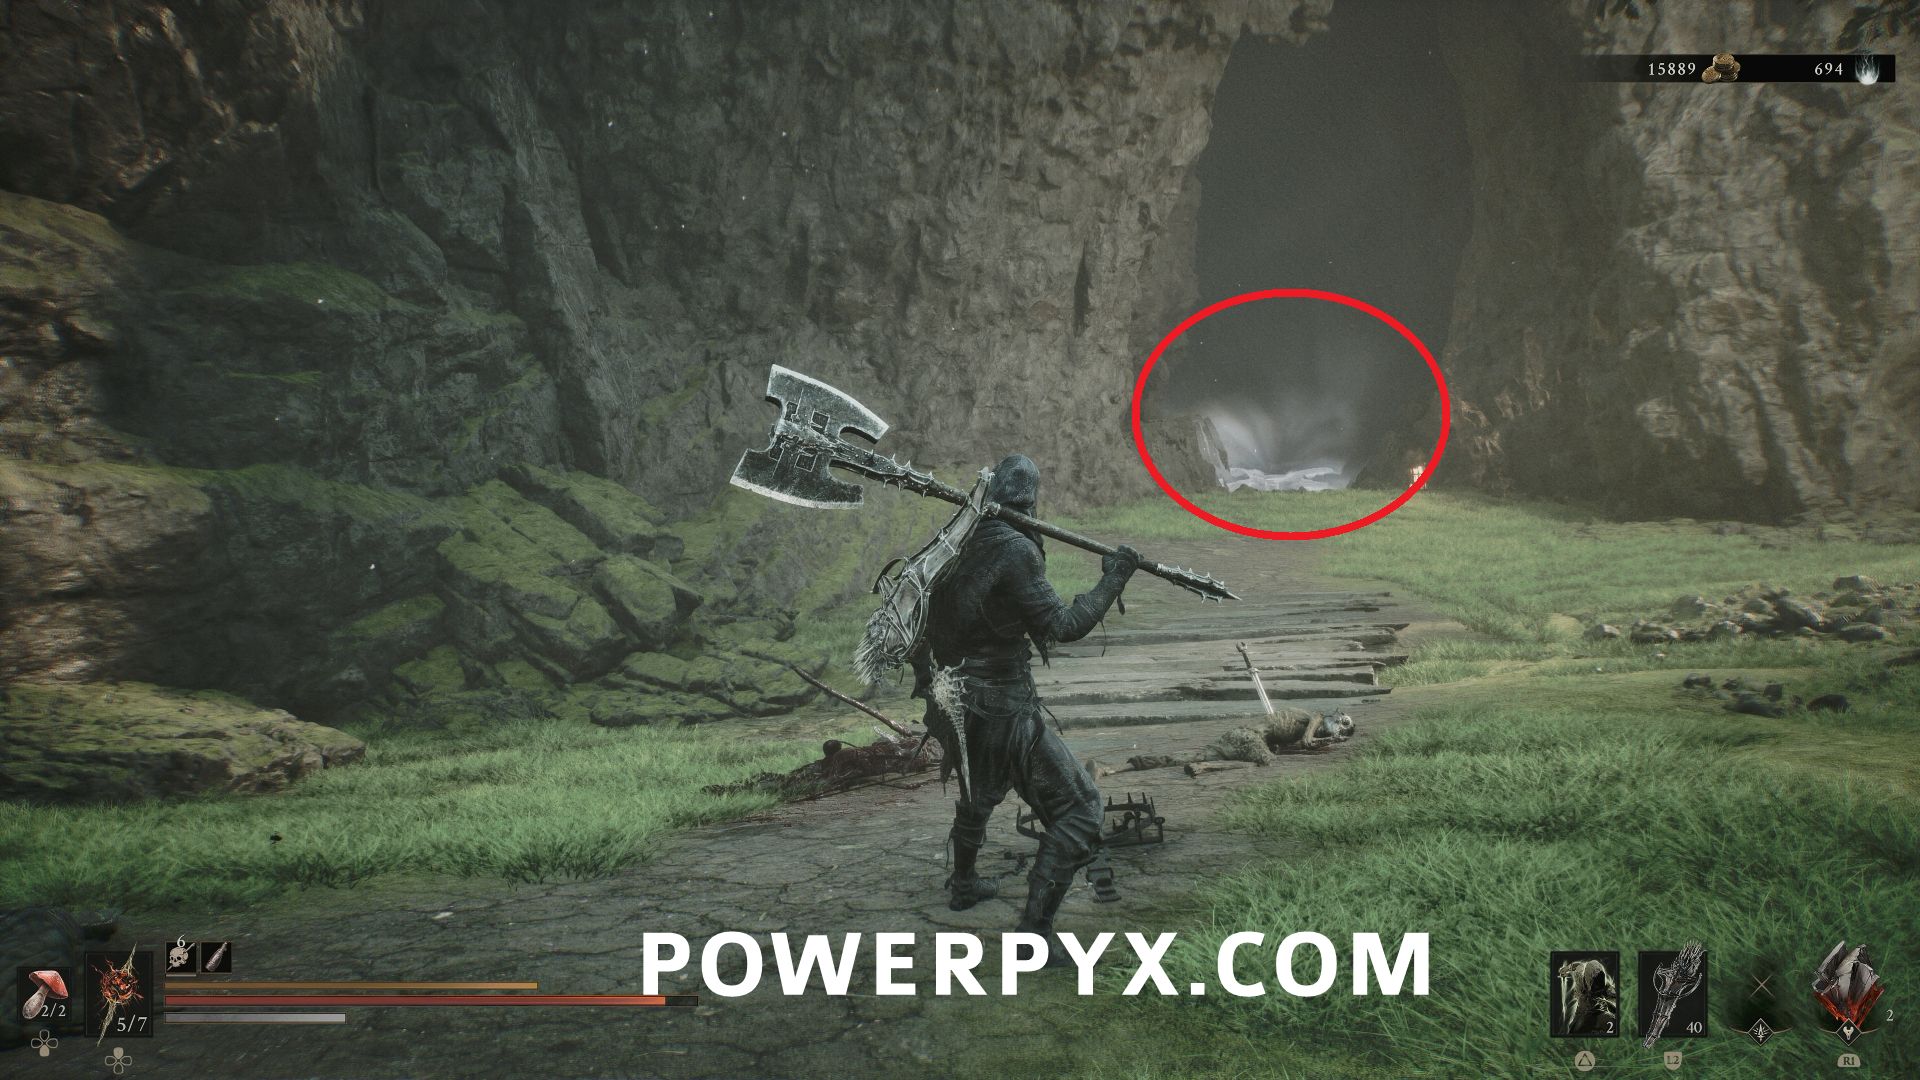
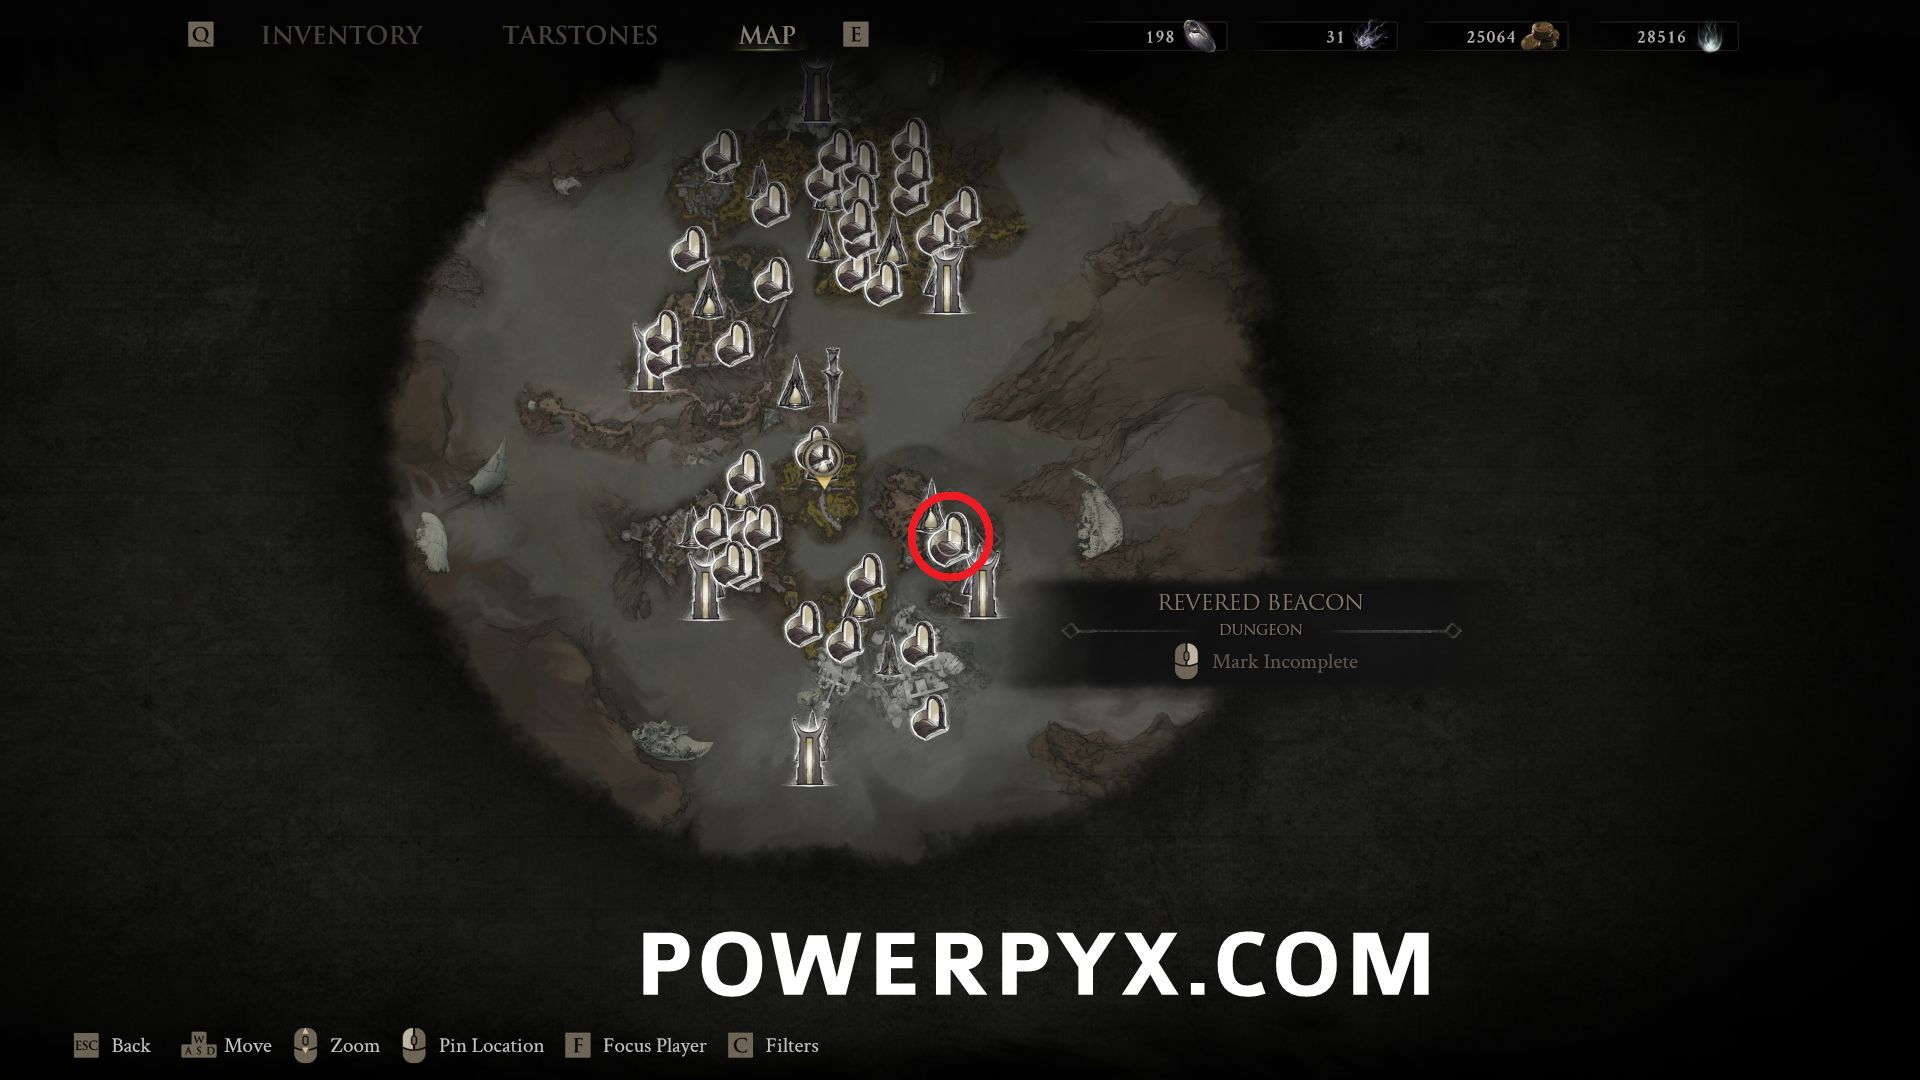
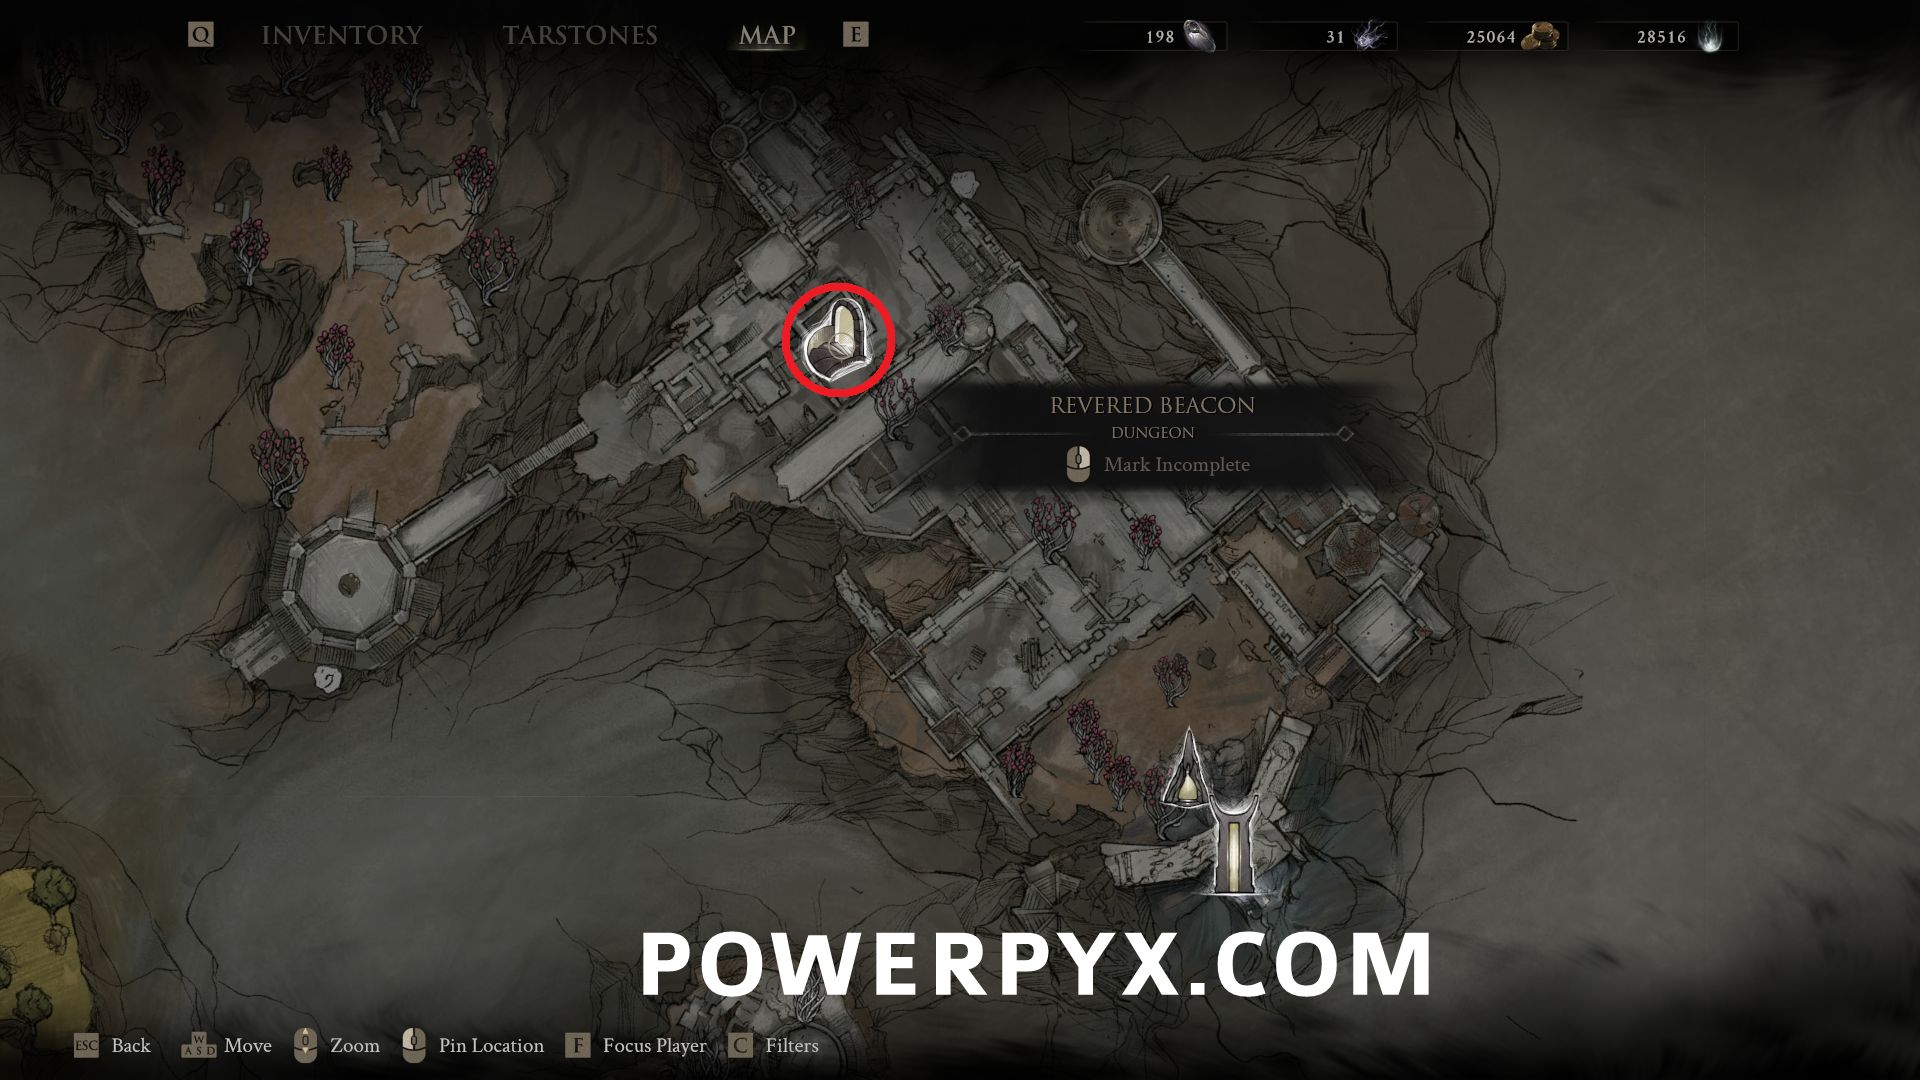
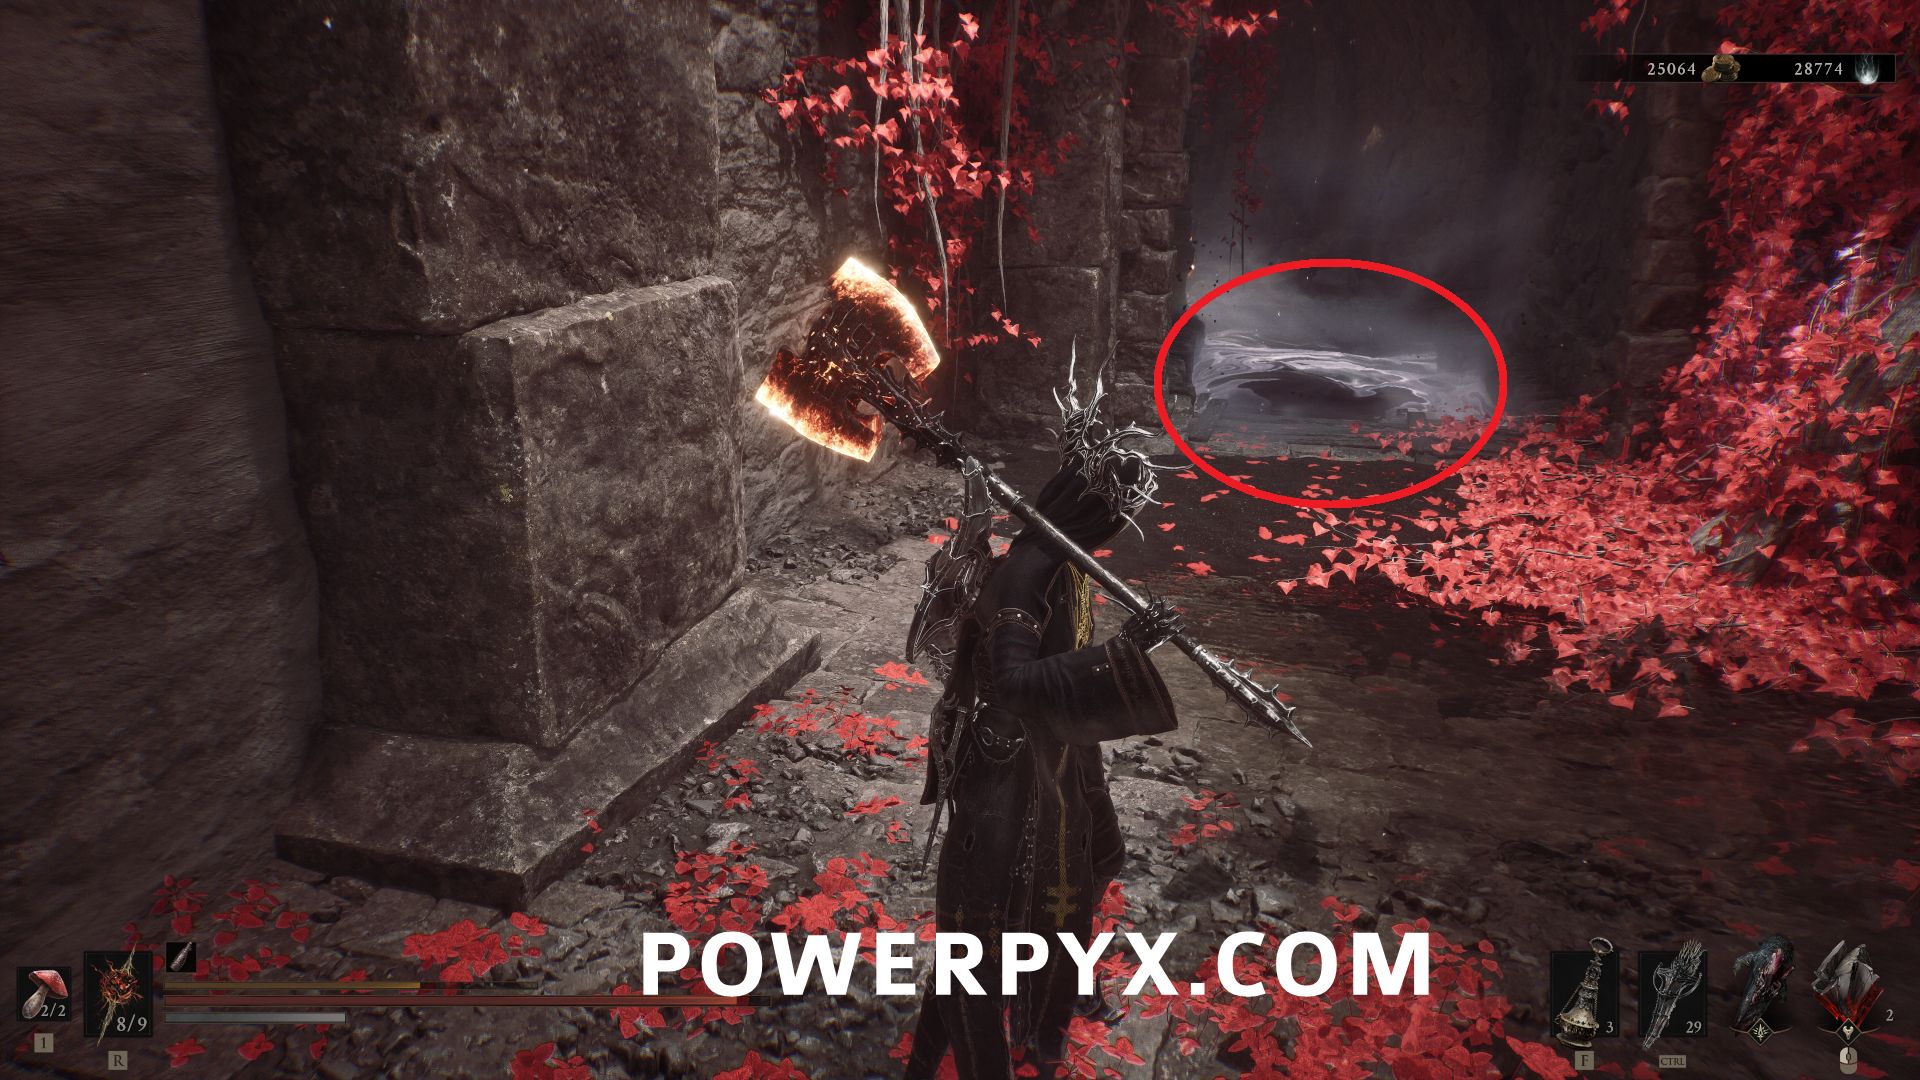
#24 – Revered Beacon – From the Sester’s Gate Beacon, go up the northwestern stairs to where the rolling enemy is, then out onto the western platform and drop to the ledge below with the Bone Gate. Follow the path north and past the hammer enemy on the right is the dungeon entrance.
Castigator’s Keep
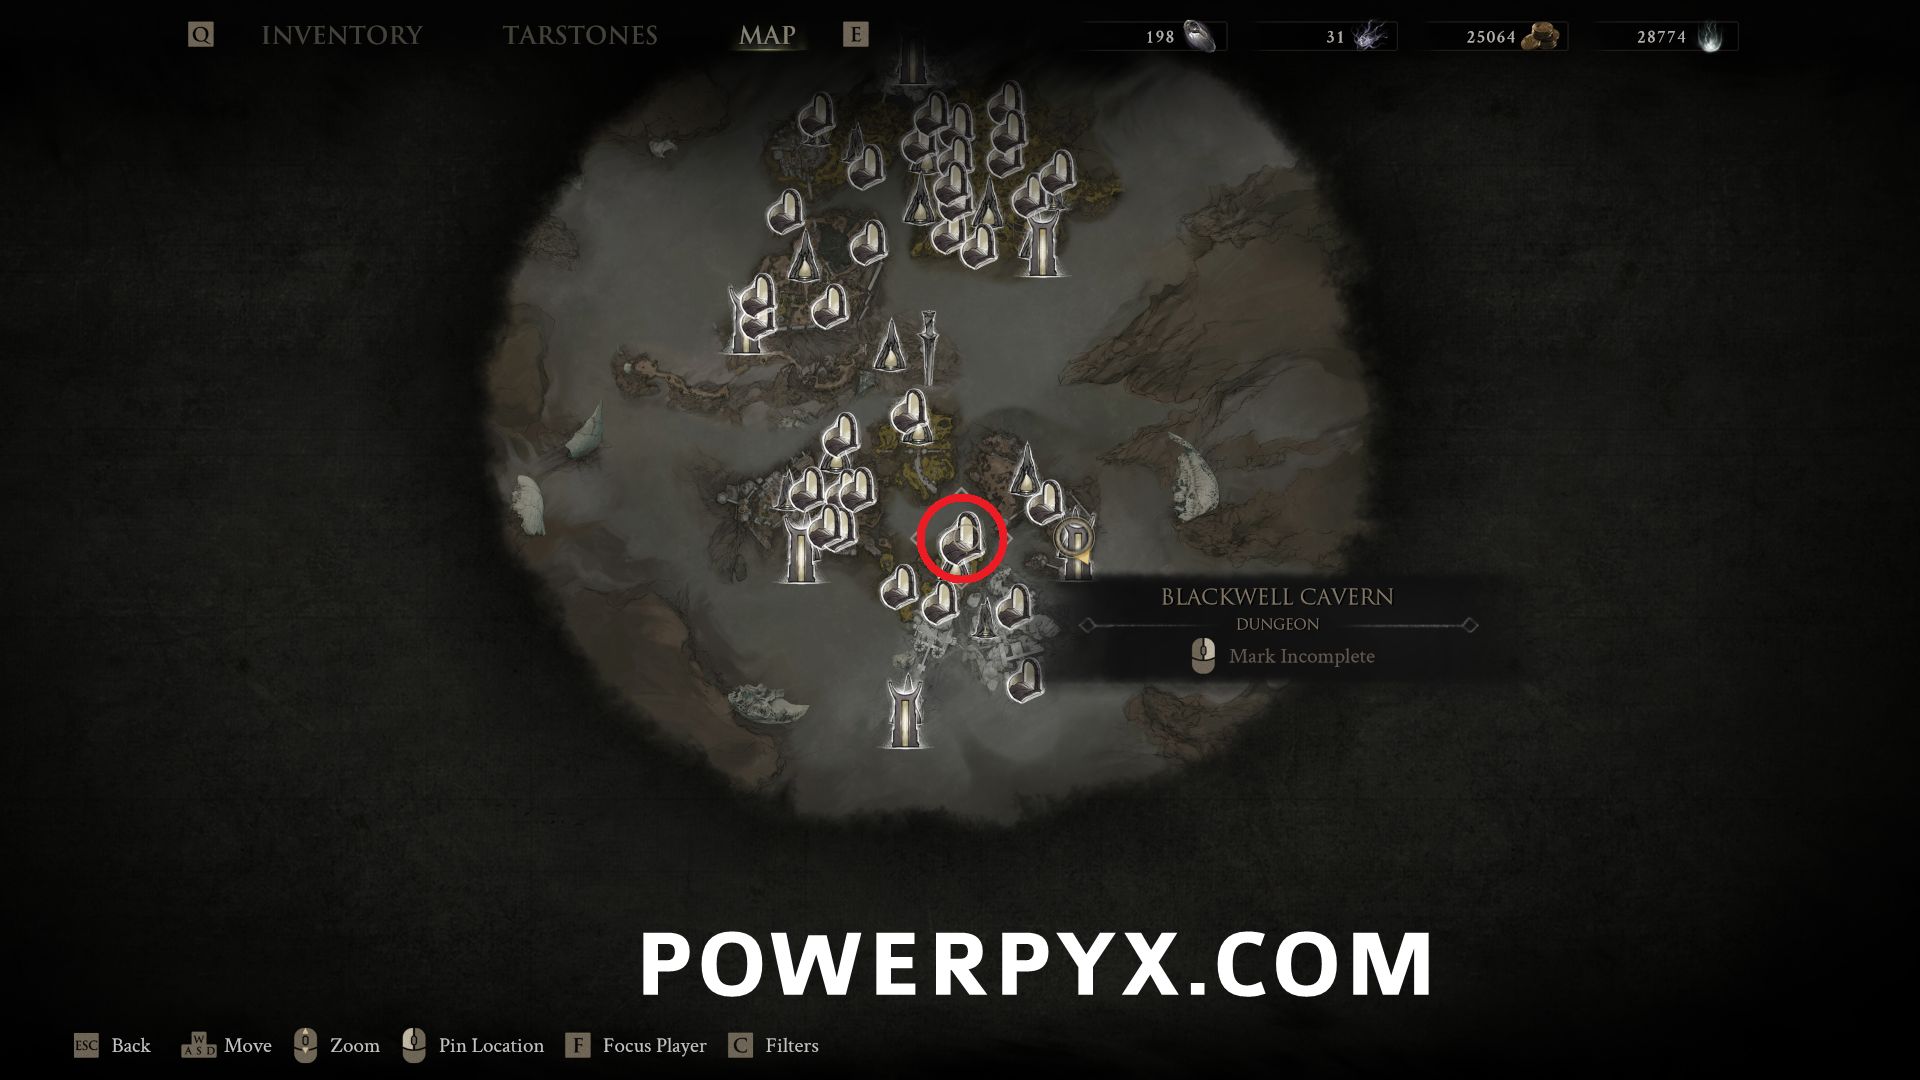
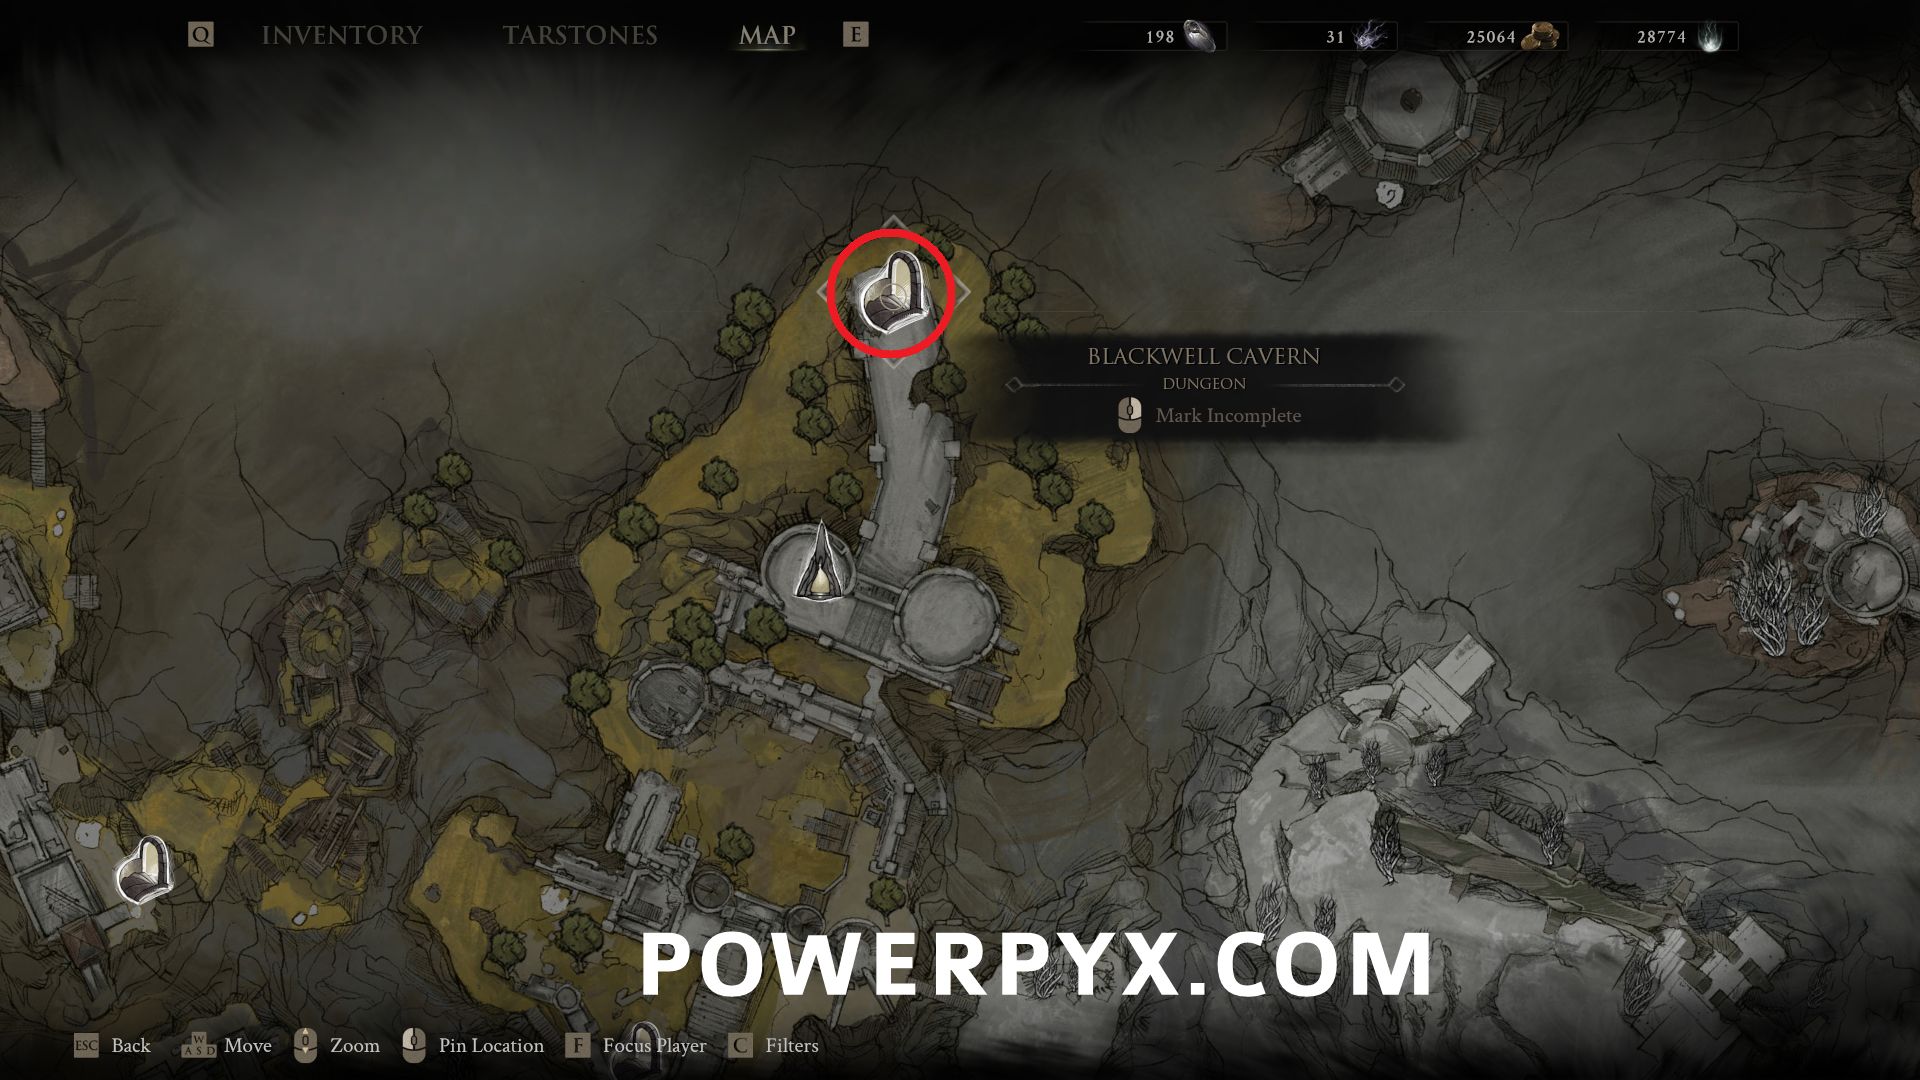
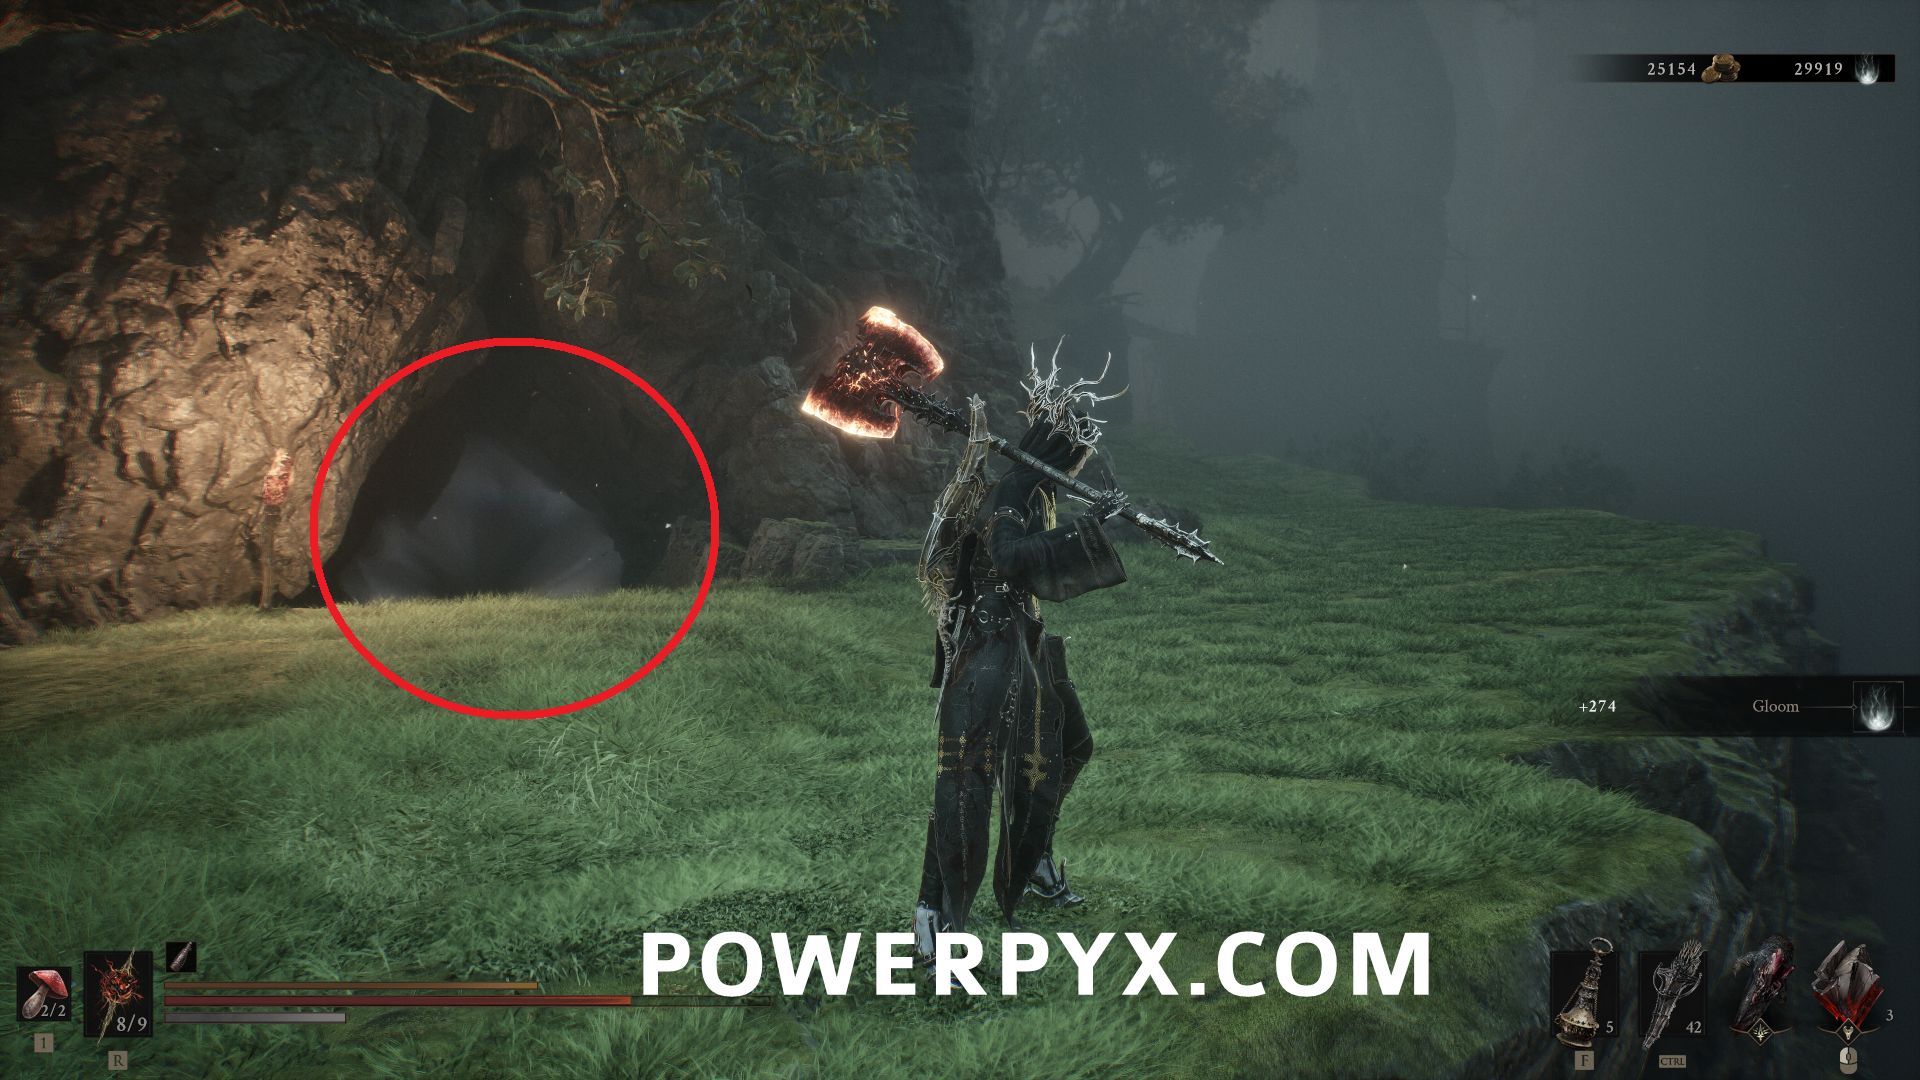
#25 – Blackwell Cavern – Follow the paths or drop down behind the Castigator’s Keep Beacon to reach the lower level of the area, follow the path to the north to find this dungeon around the corner near the cliff edge.
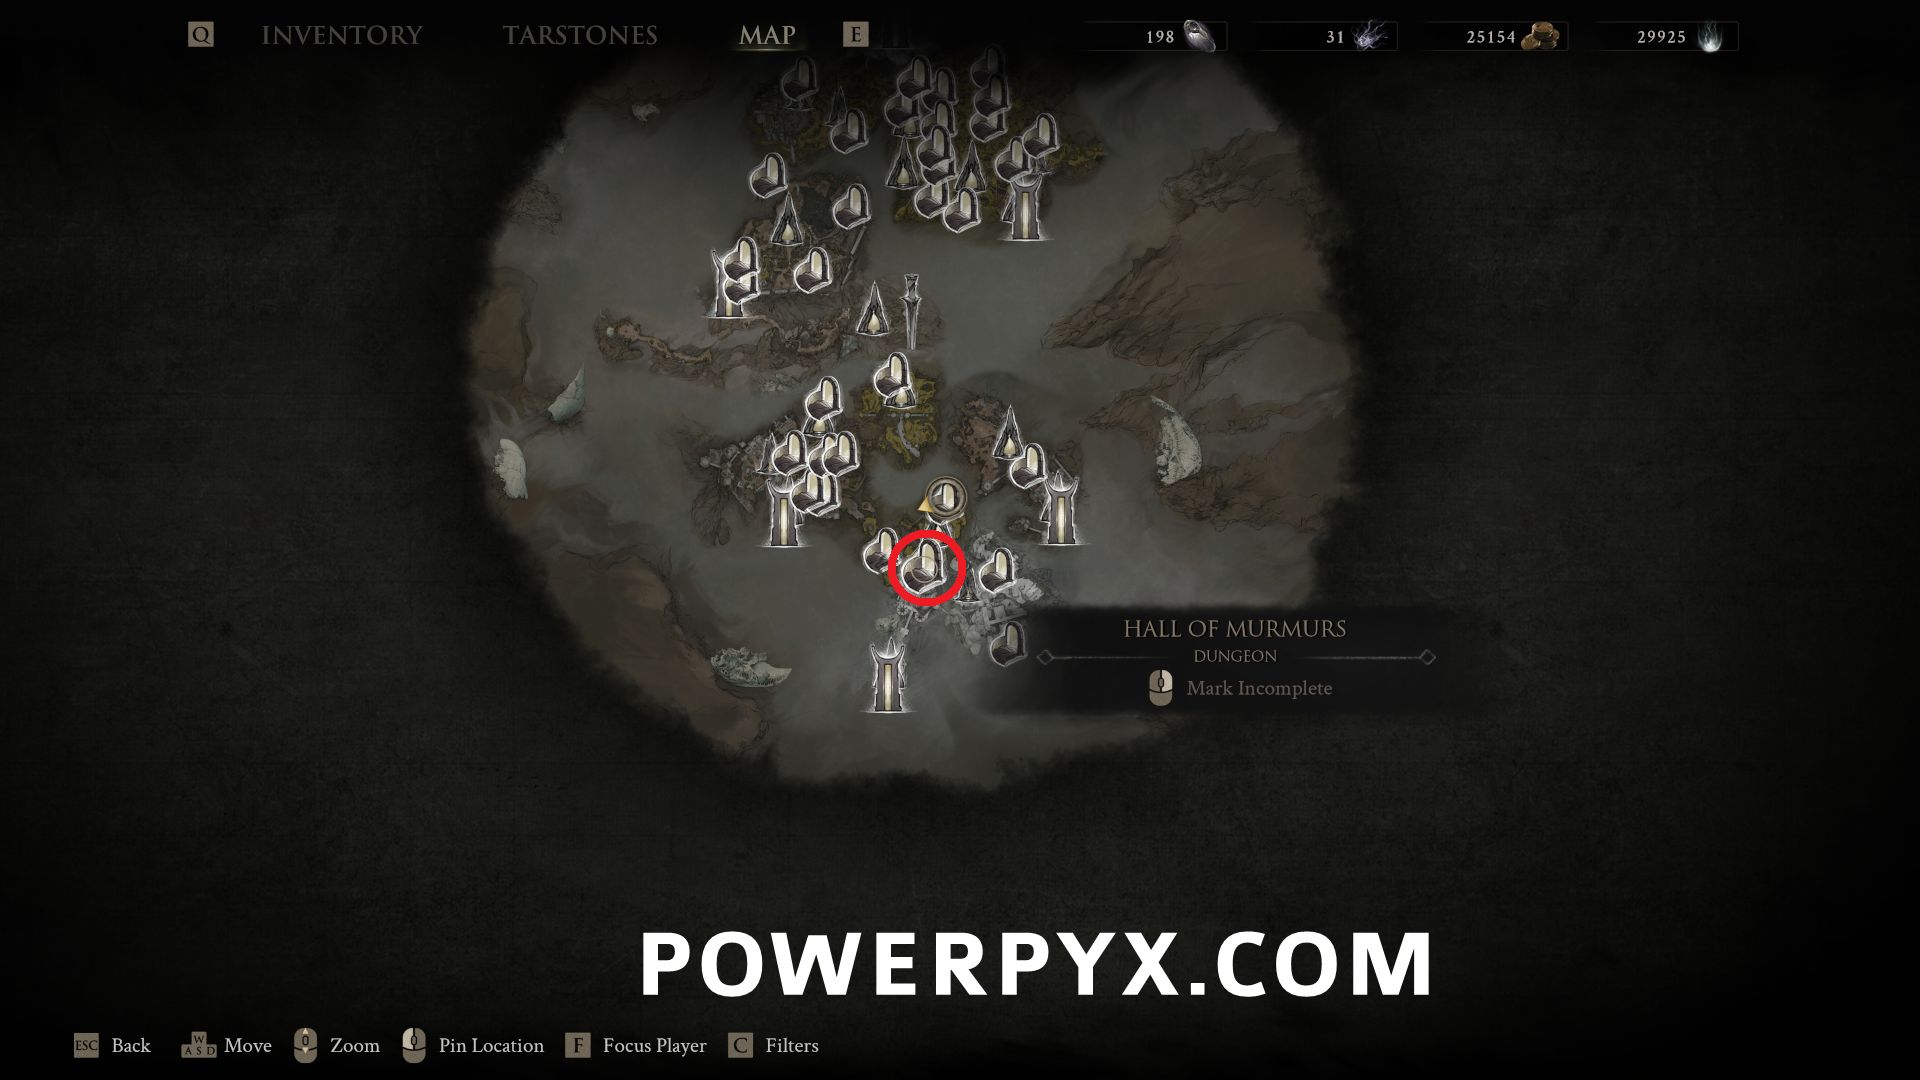
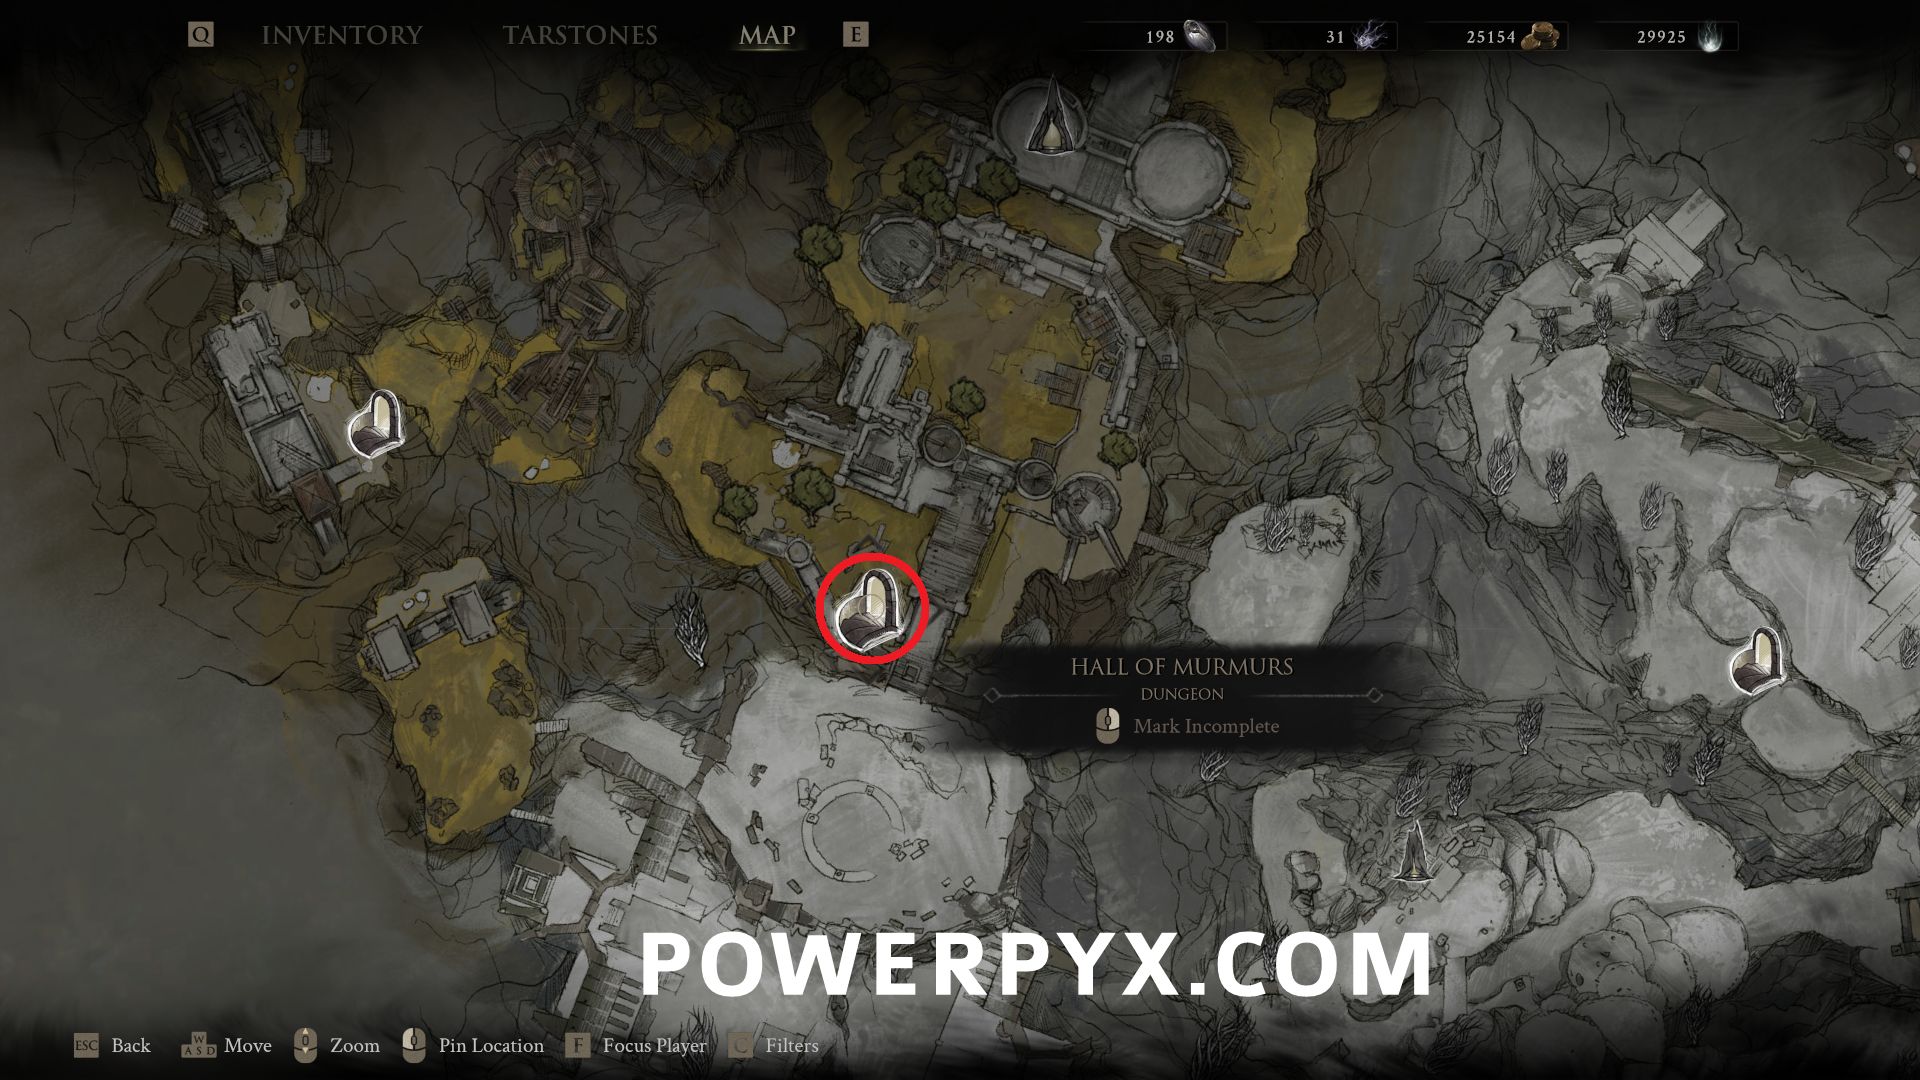
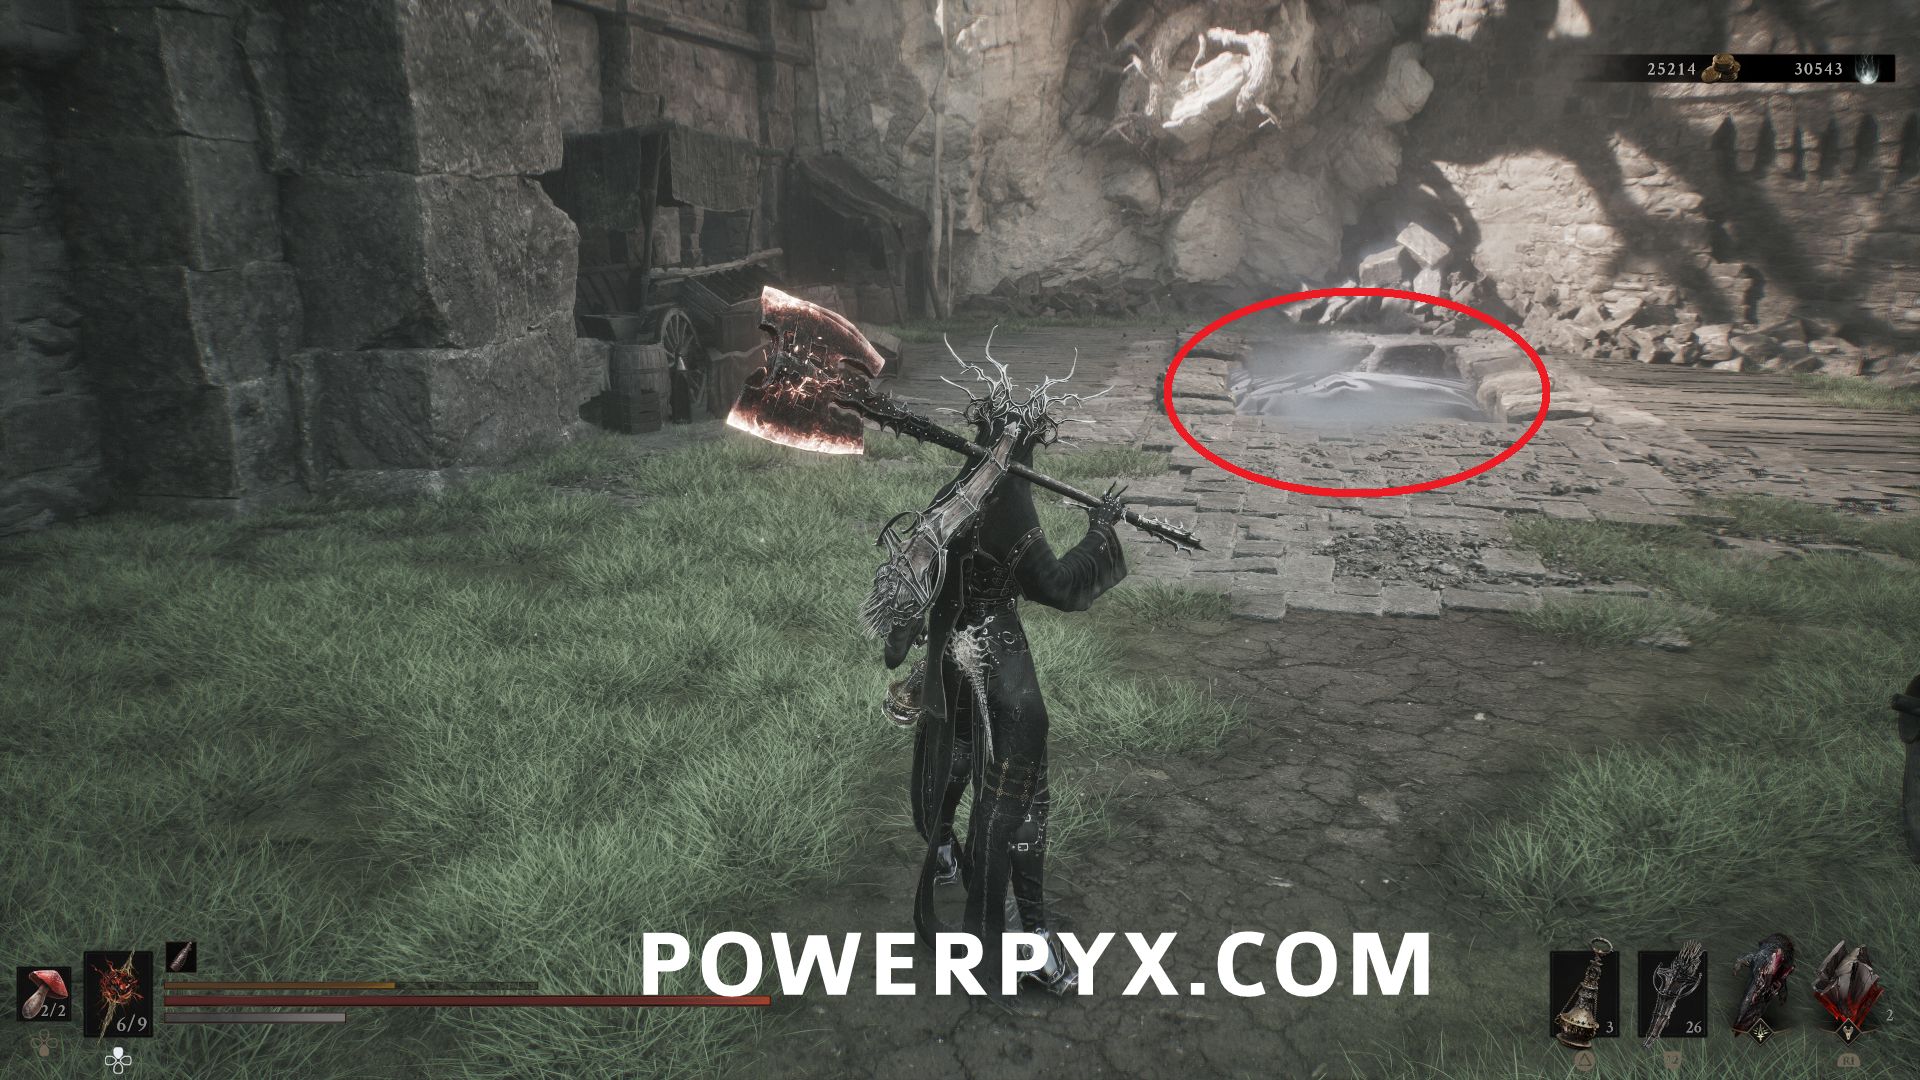
#26 – Hall of Murmurs – From Castigator’s Keep Beacon, go southwest through the center of the area, and the entrance stairs are in the ground in the outdoor area past the central courtyard.
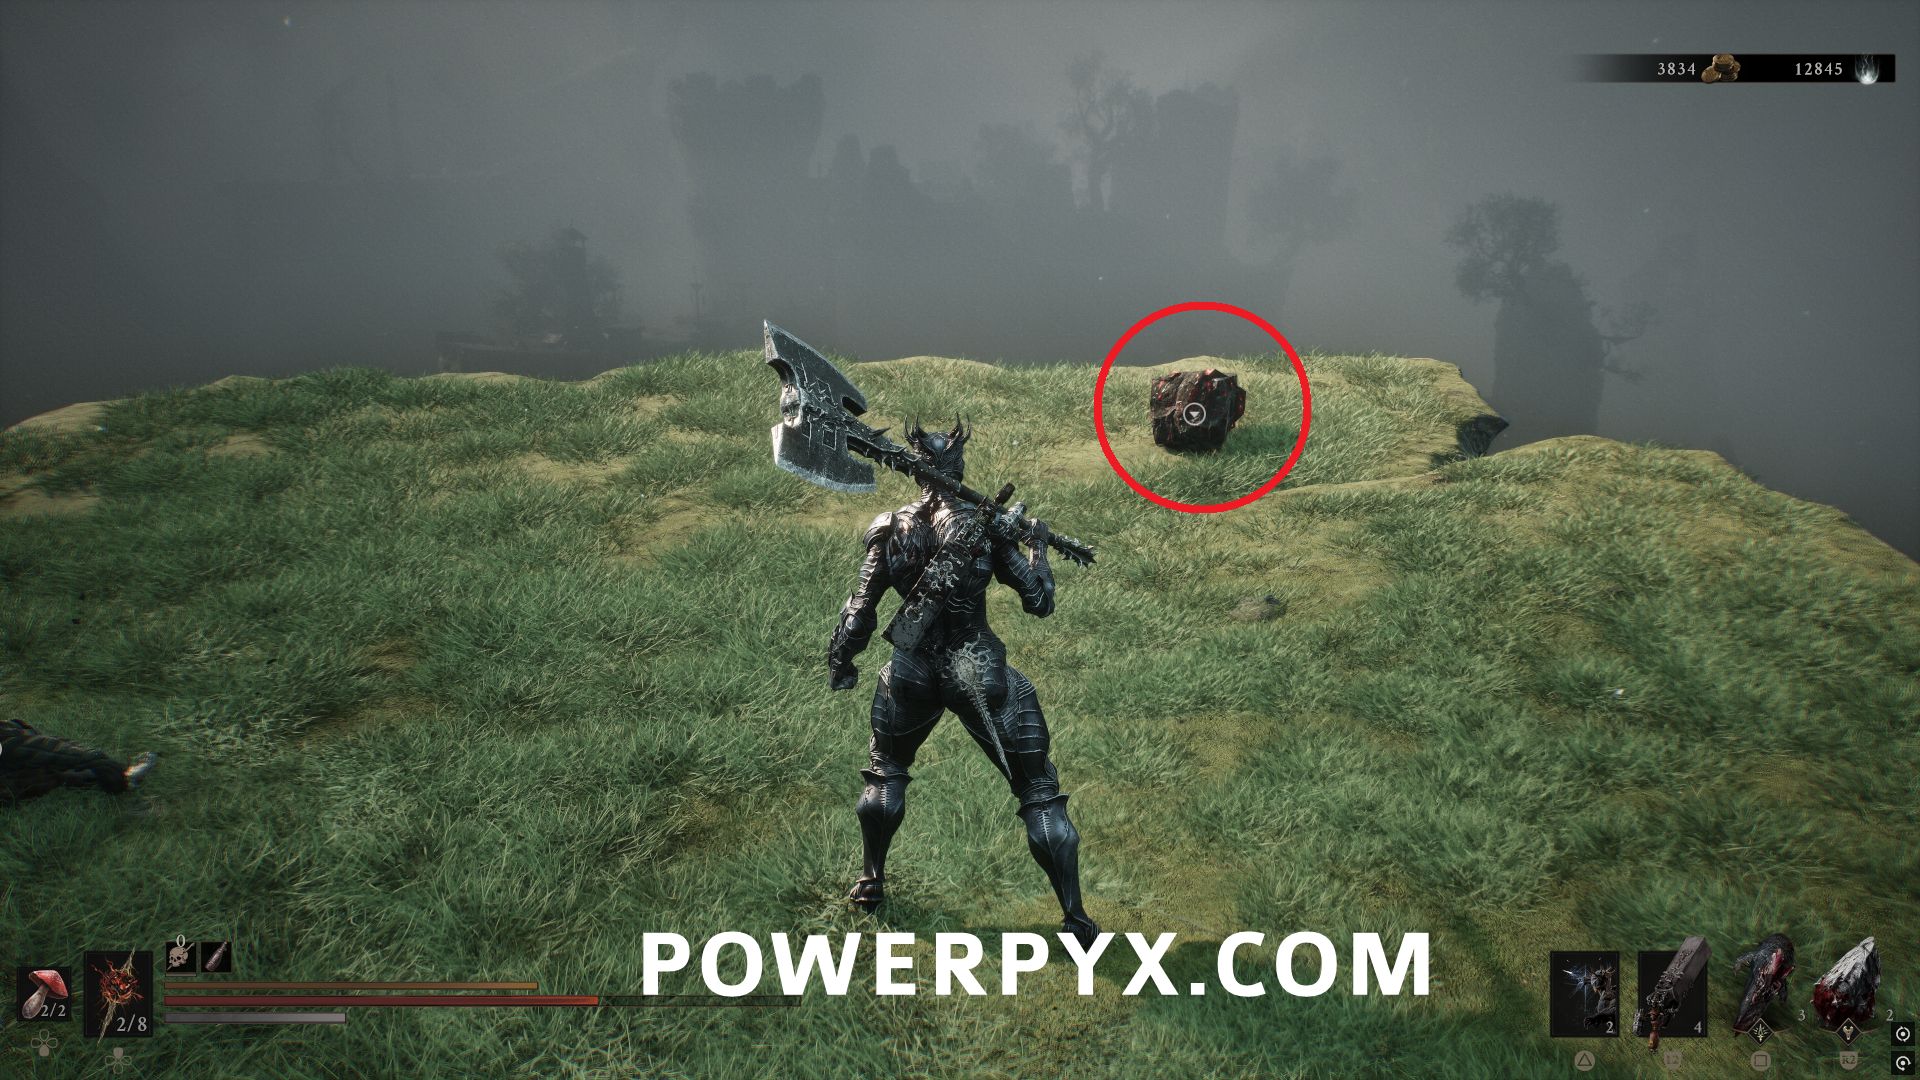
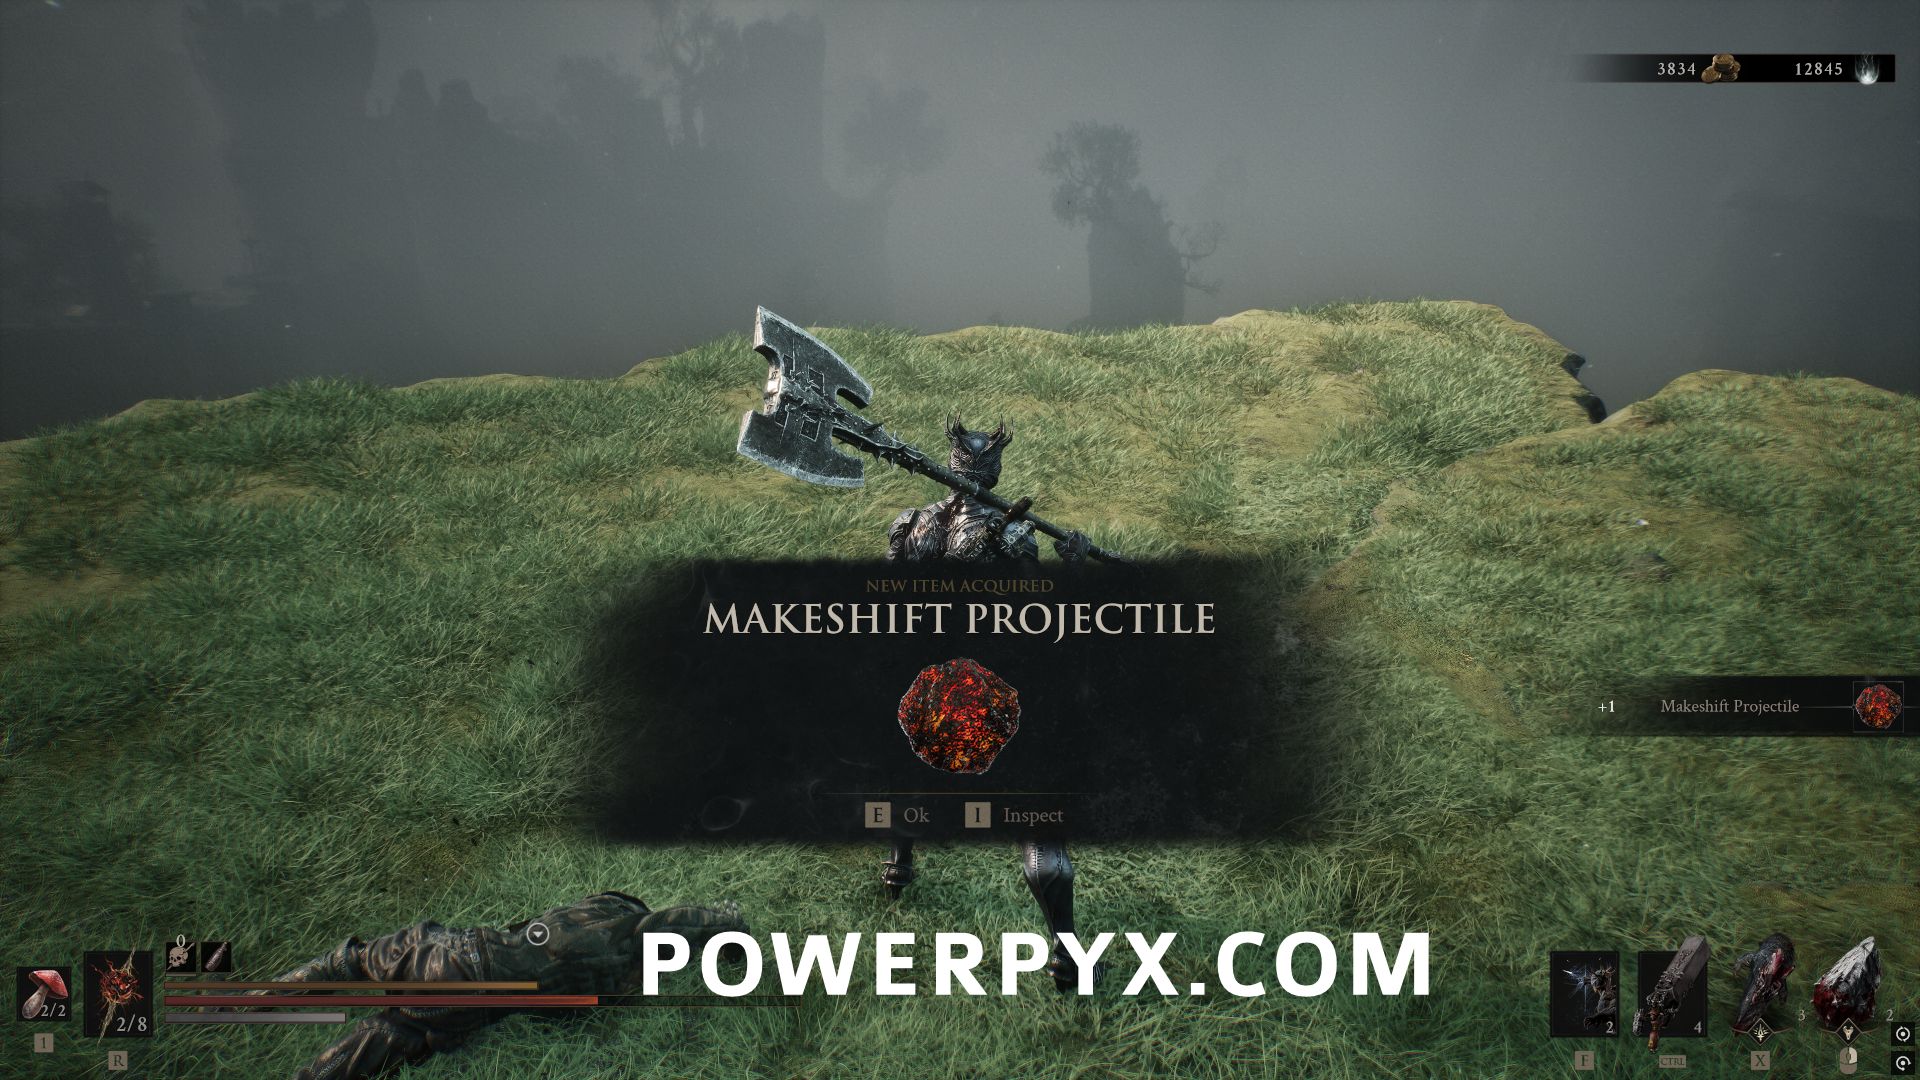
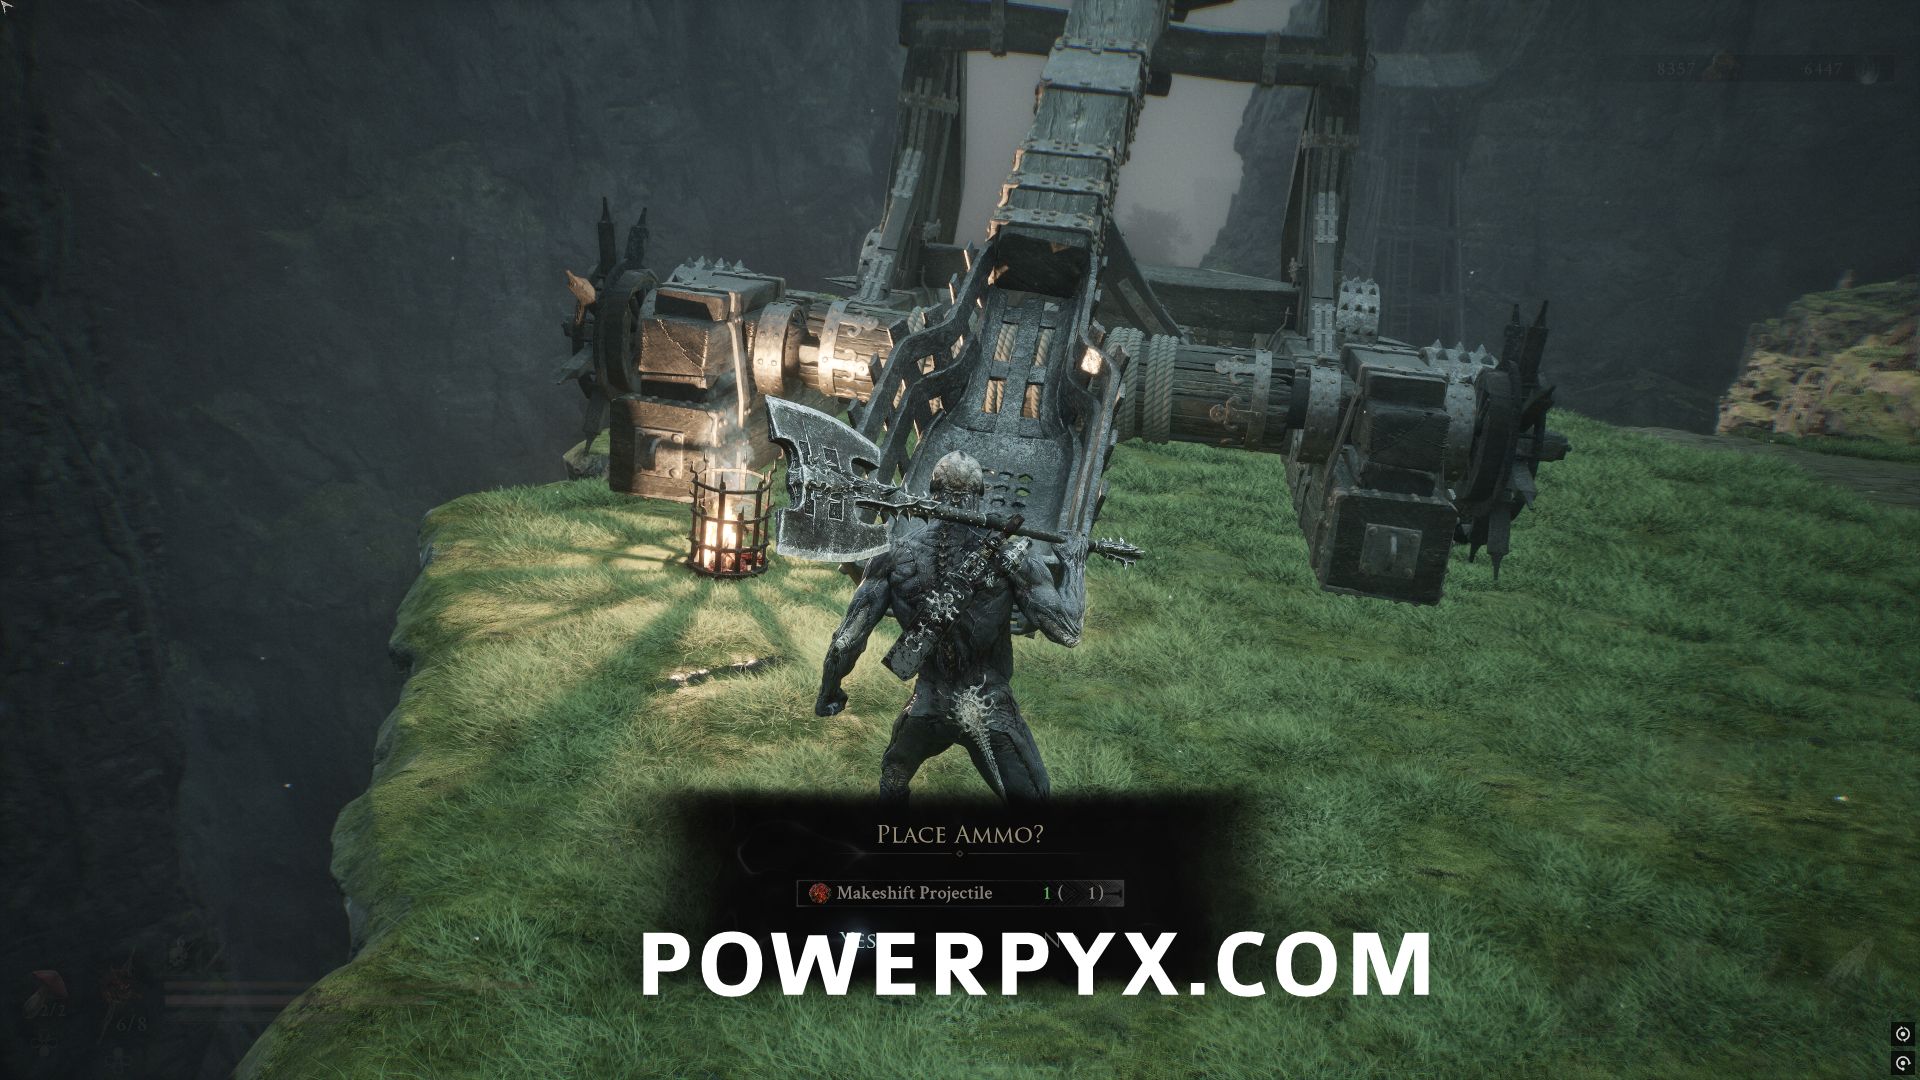
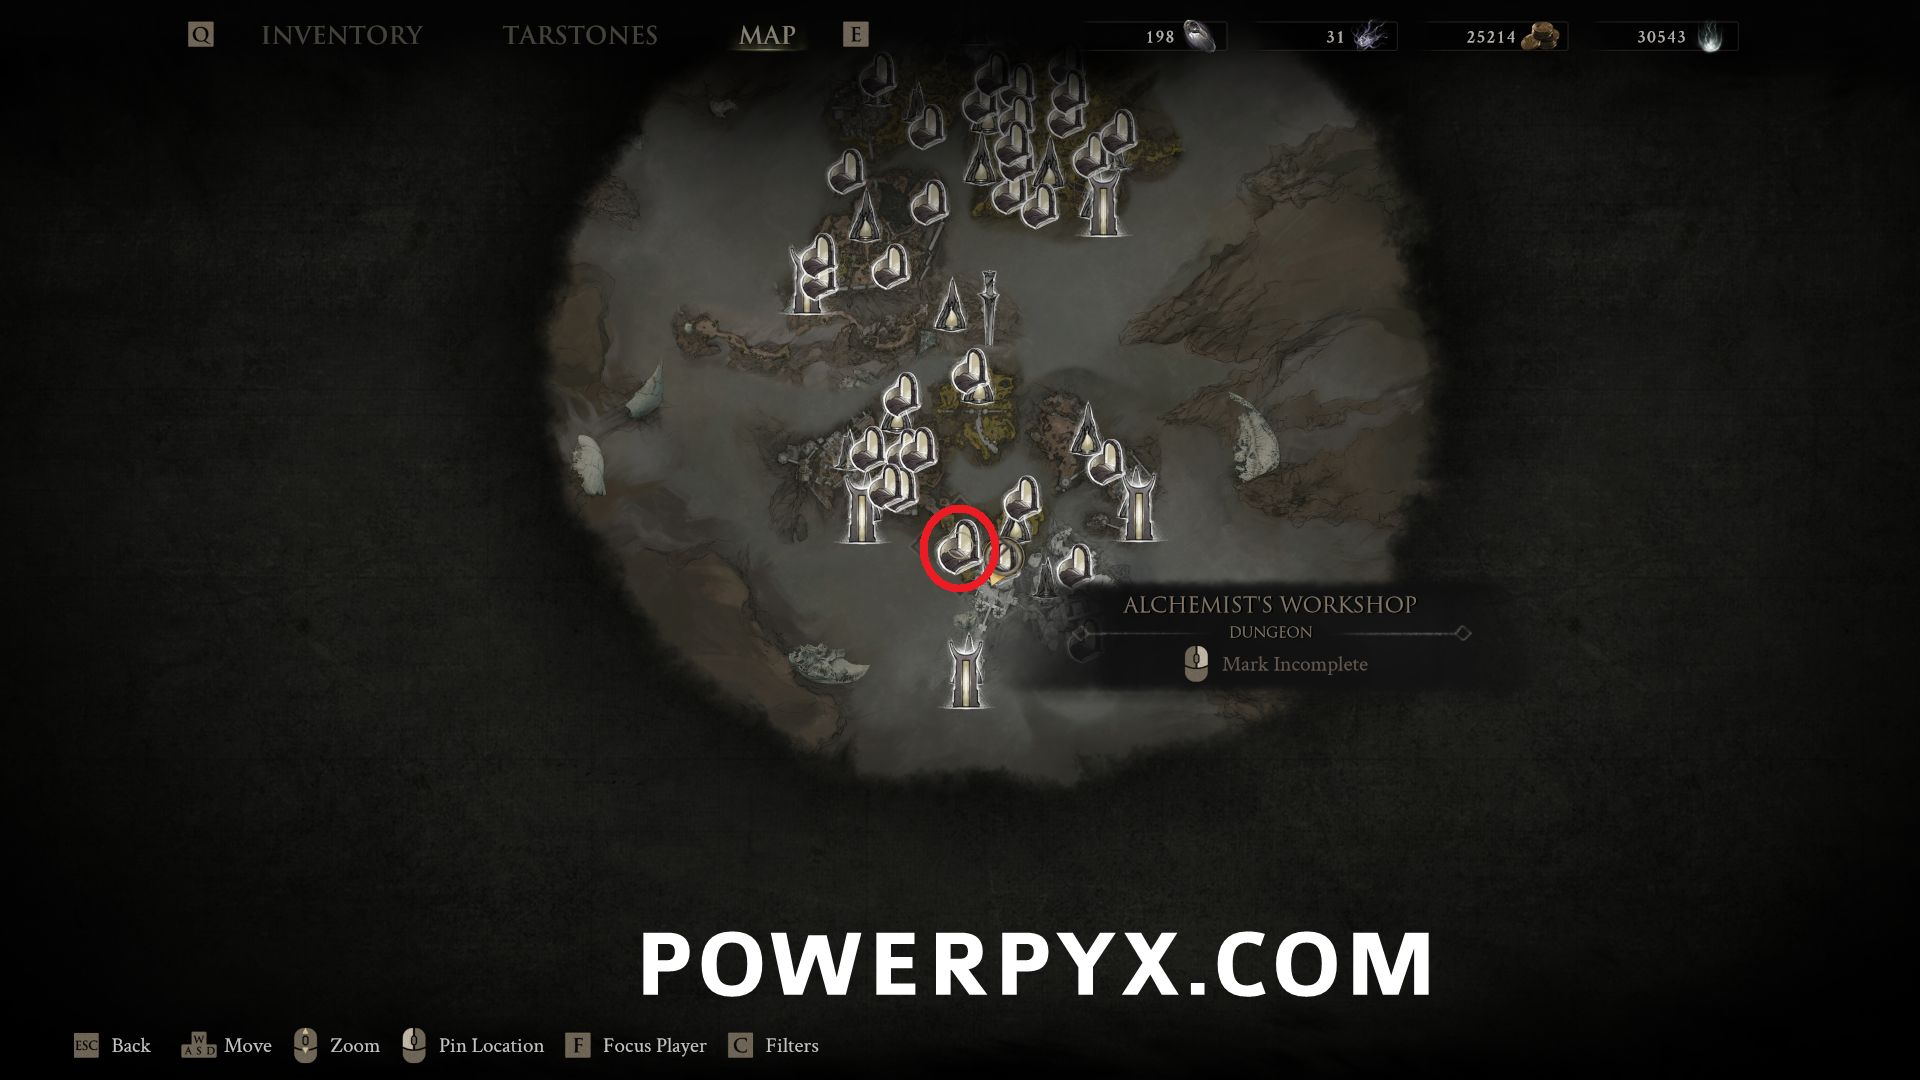
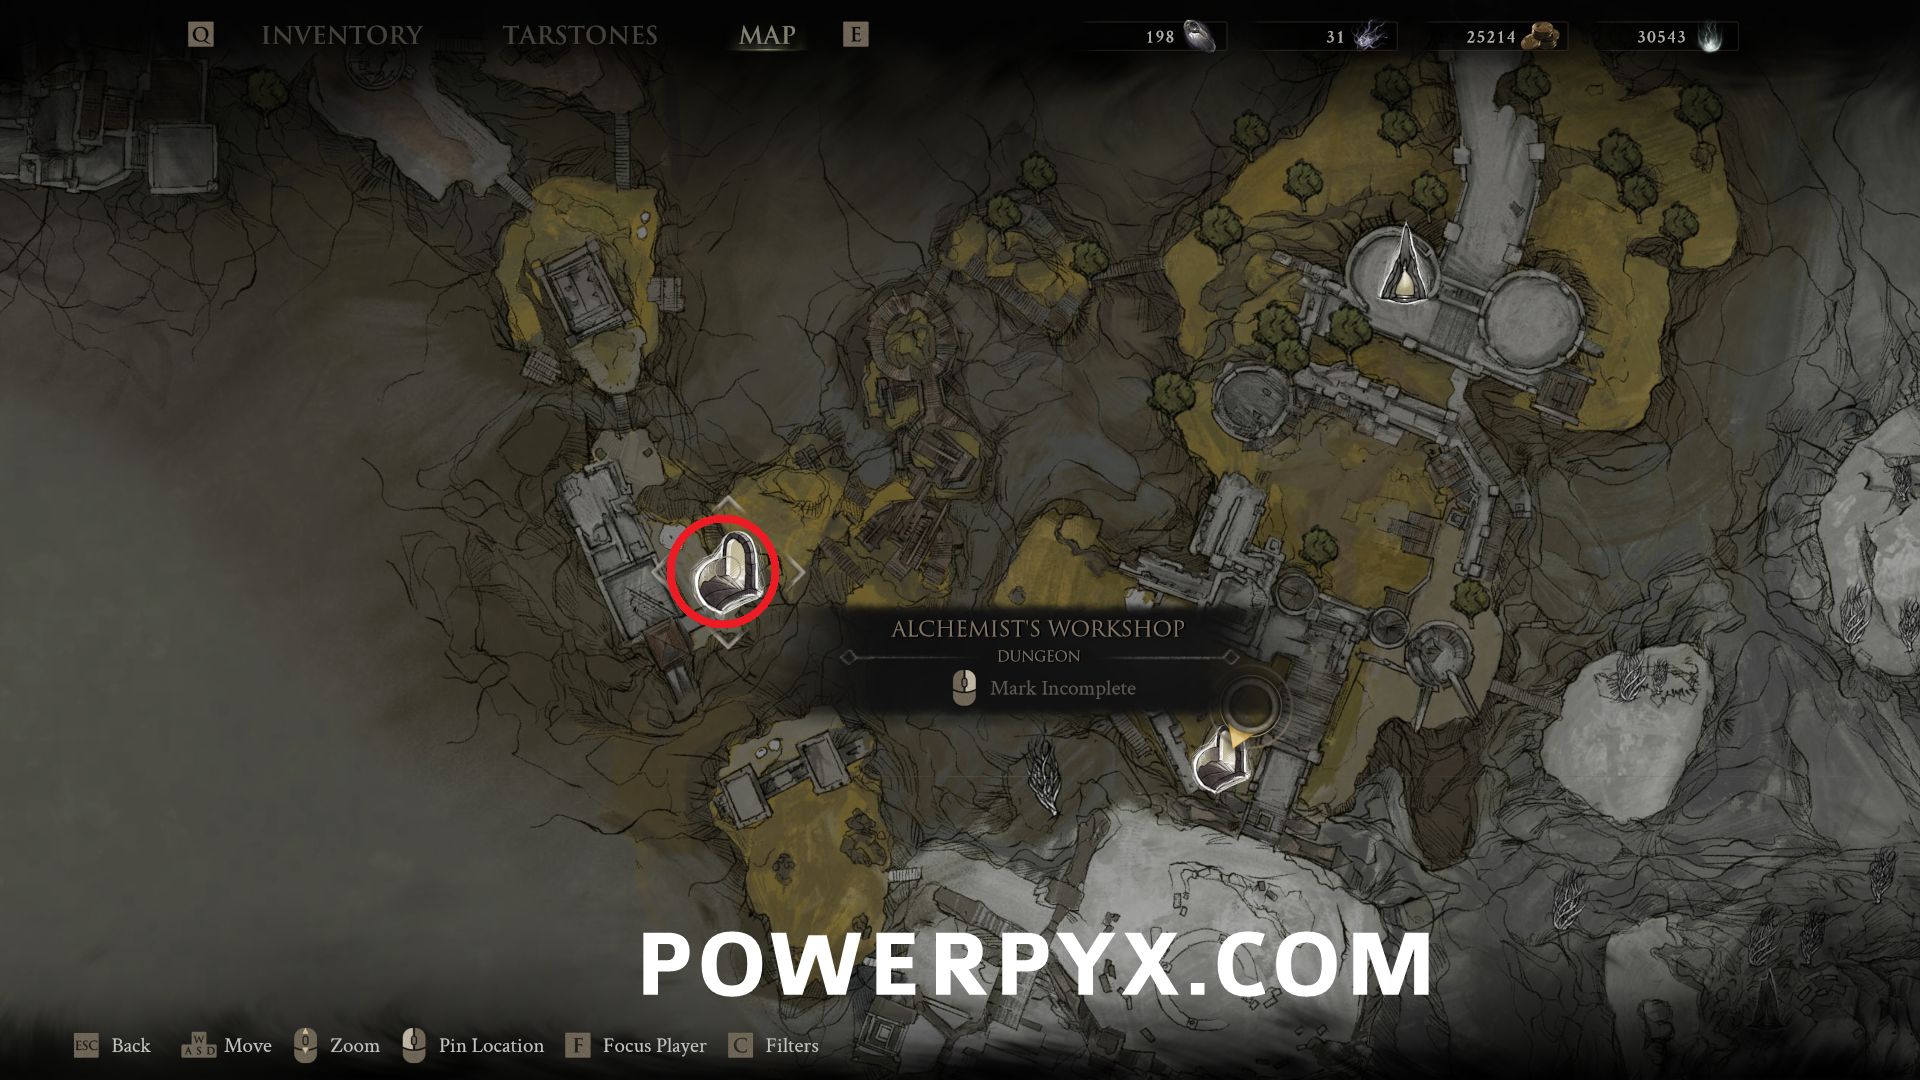
#27 – Alchemist’s Workshop – First to access the Alchemist’s Workshop Dungeon, from Outskirts of Mammon Beacon follow the paths to the very south part of this area. There is a glowing rock on the ground near a group of Grisha hunters that can be picked up, giving you the Makeshift Projectile.
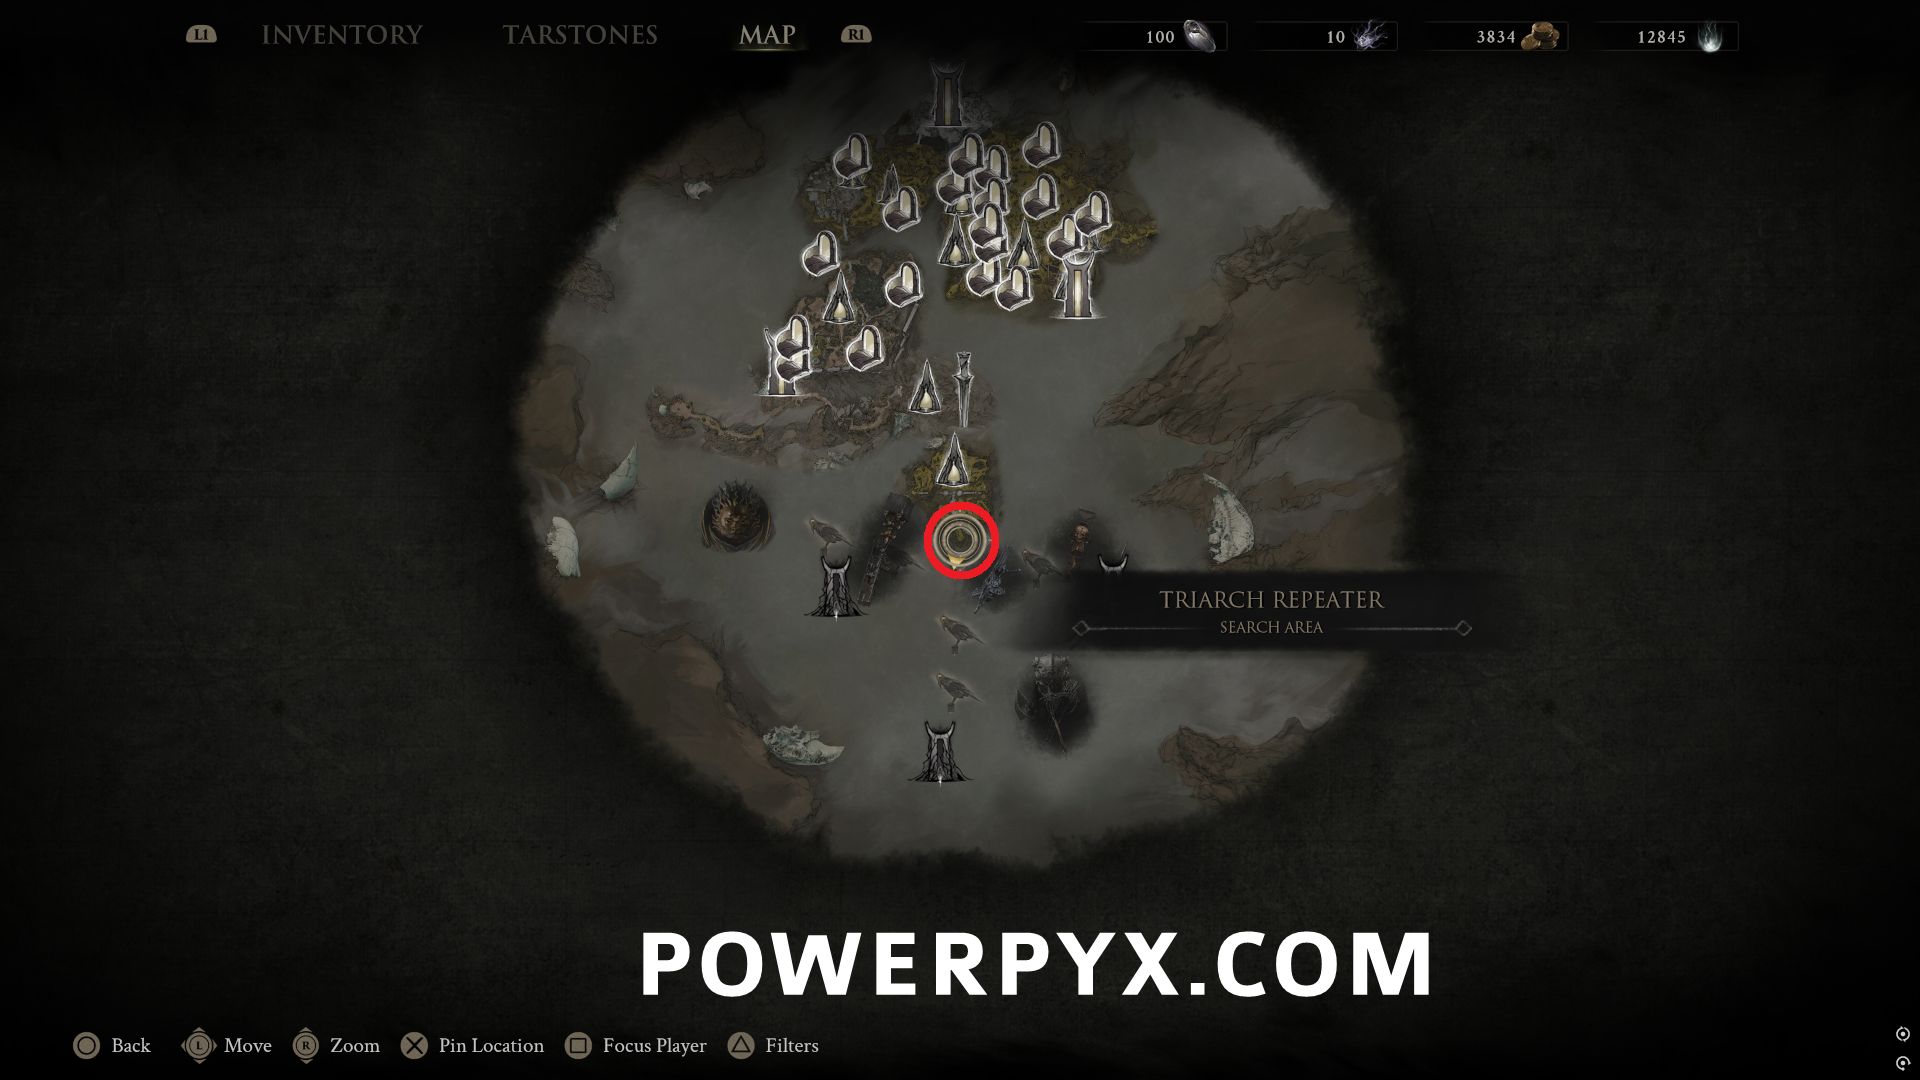
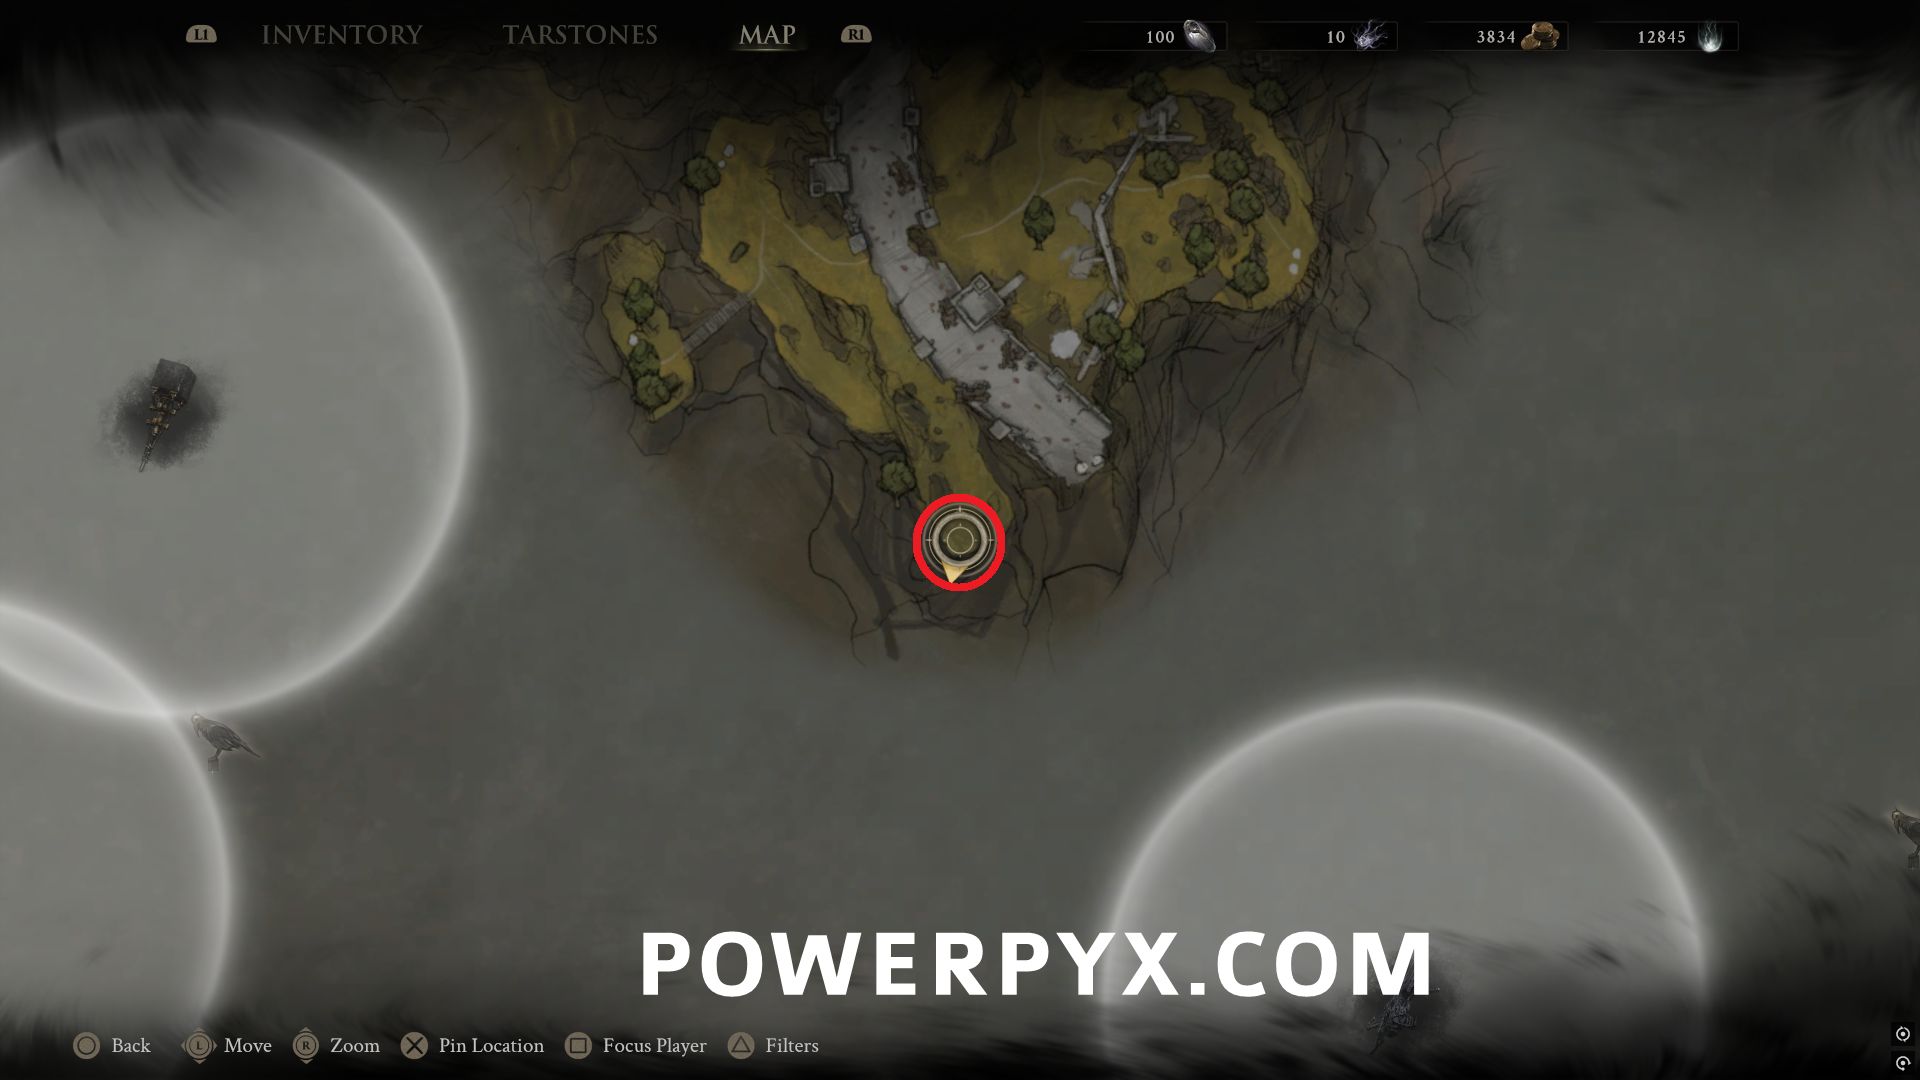
Return to the Outskirts of Mammon Beacon, then slightly east of the statue where the map fragment was located you can use the item on a catapult.
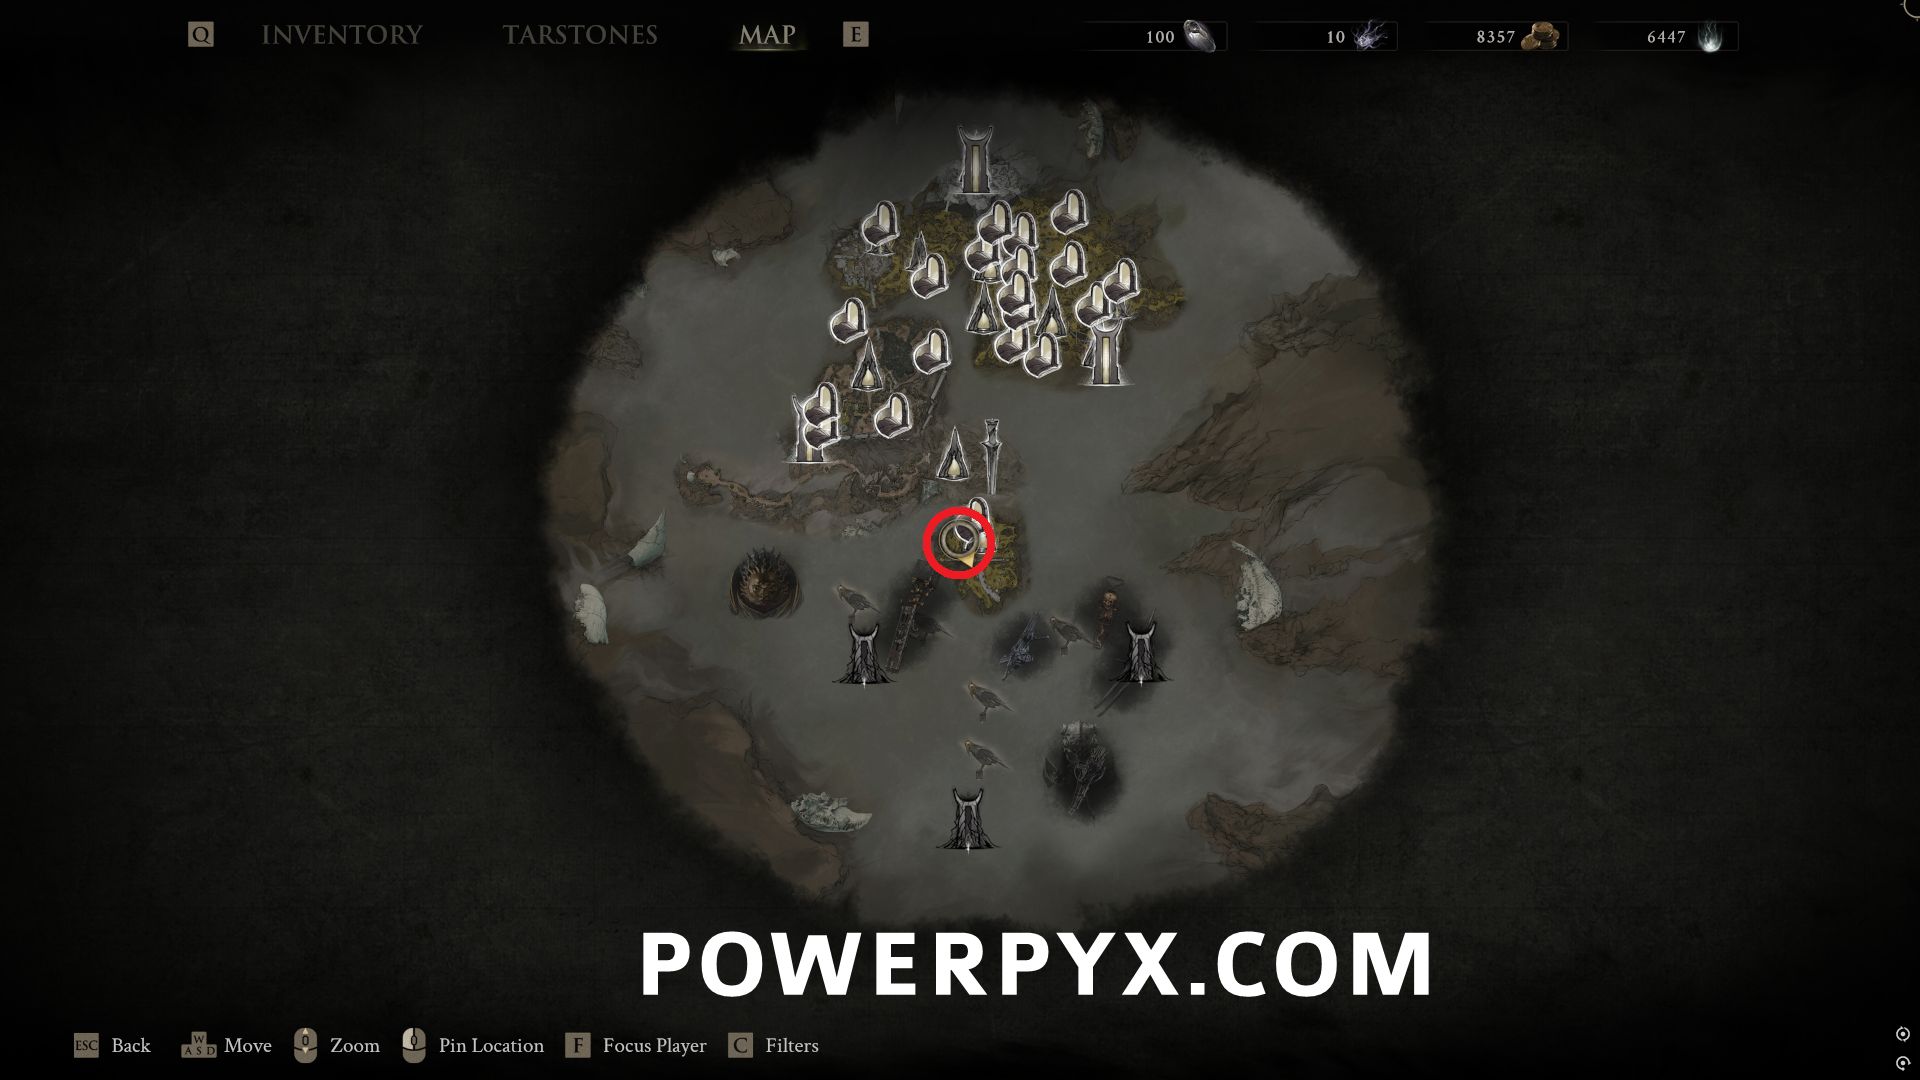
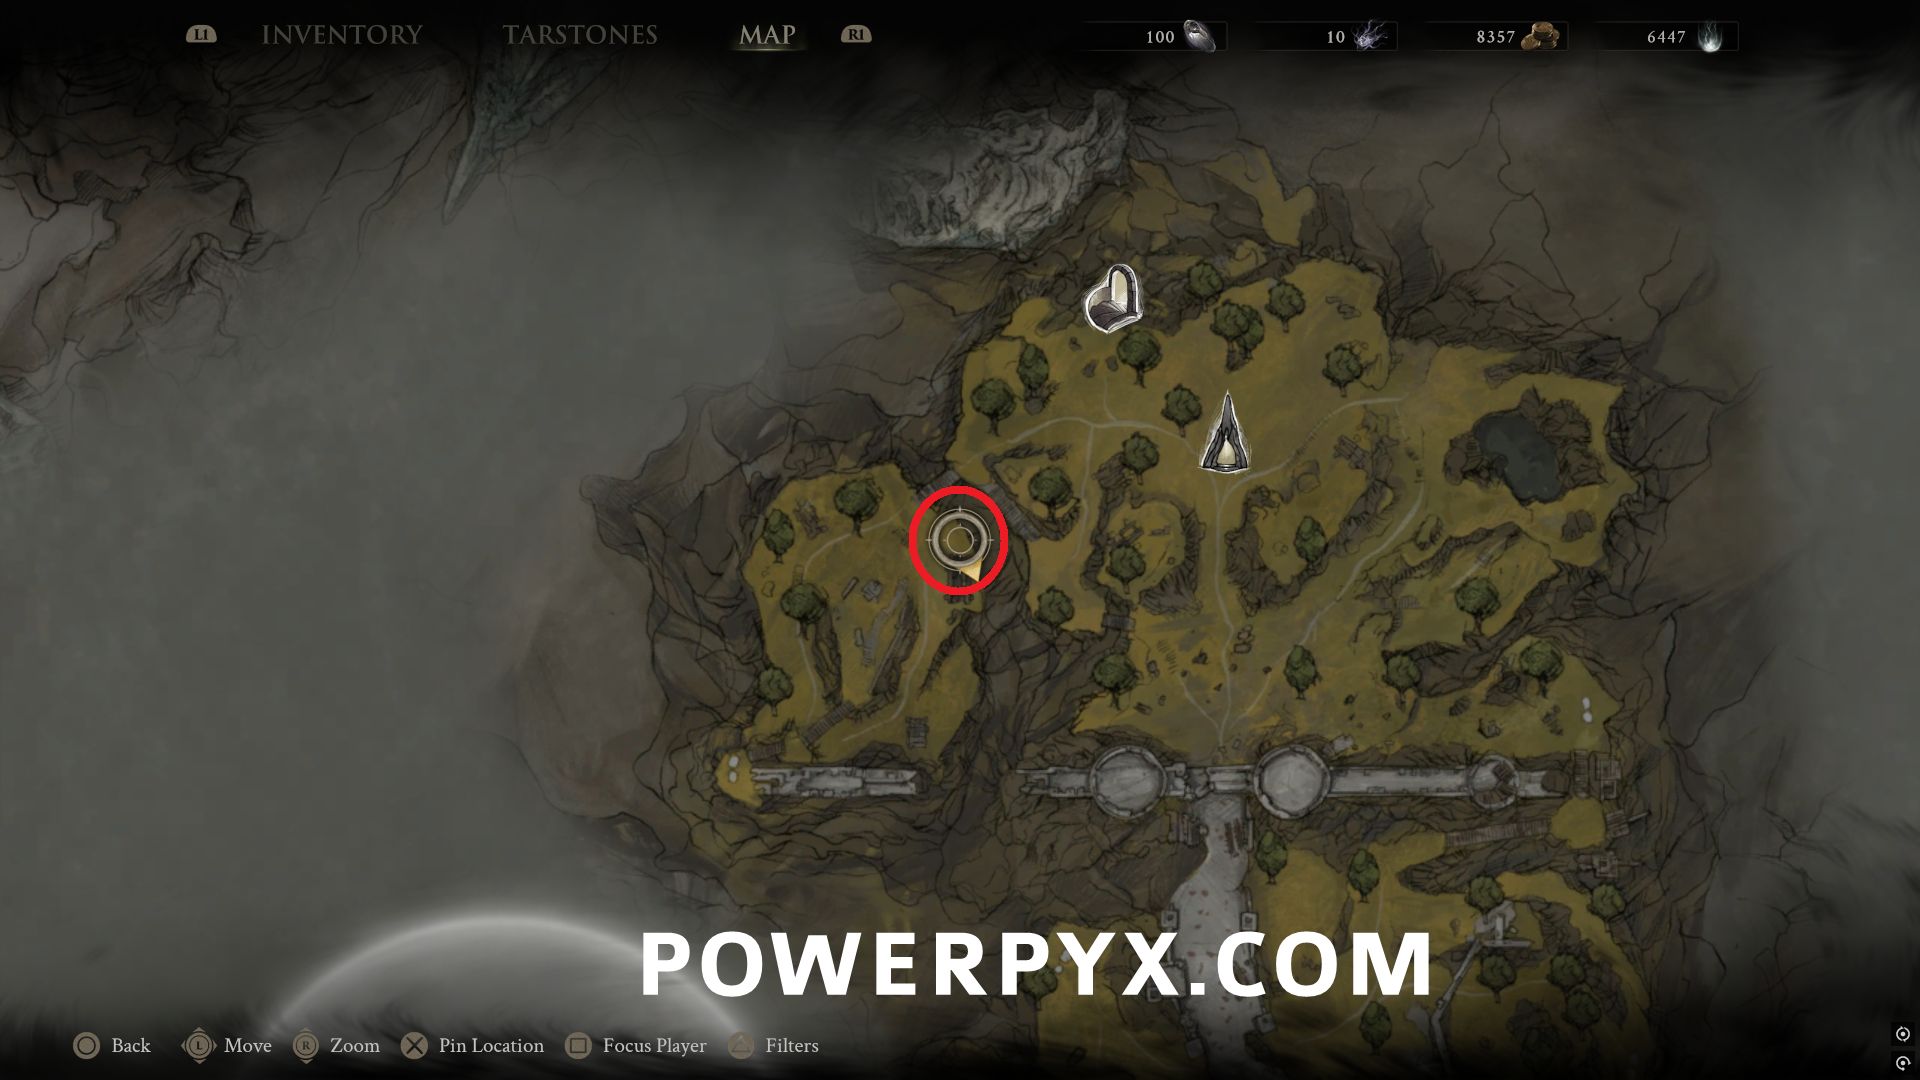
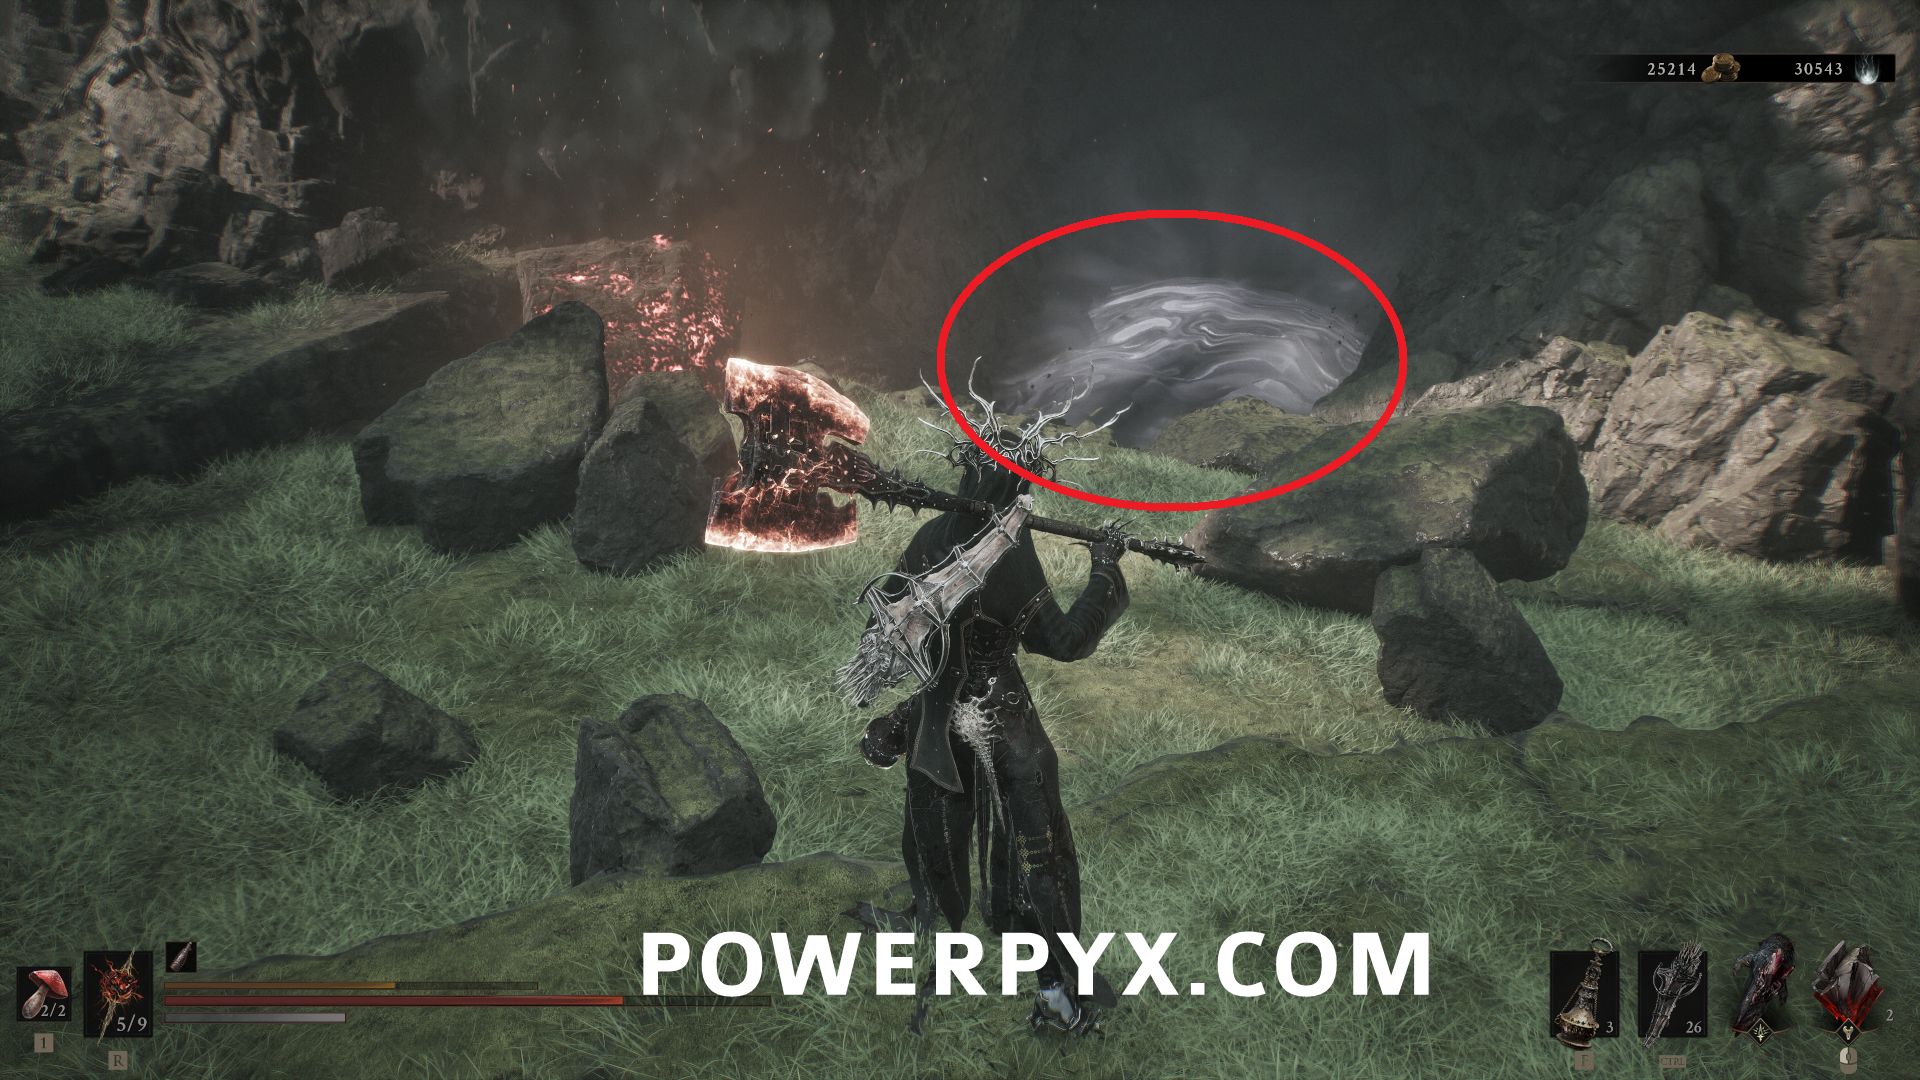
From Castigator’s Keep Beacon, drop down to the lower area and follow the wooden platforms to the southwest. At the end you can find the entrance to the Alchemist’s Workshop Dungeon
Abandoned Outpost
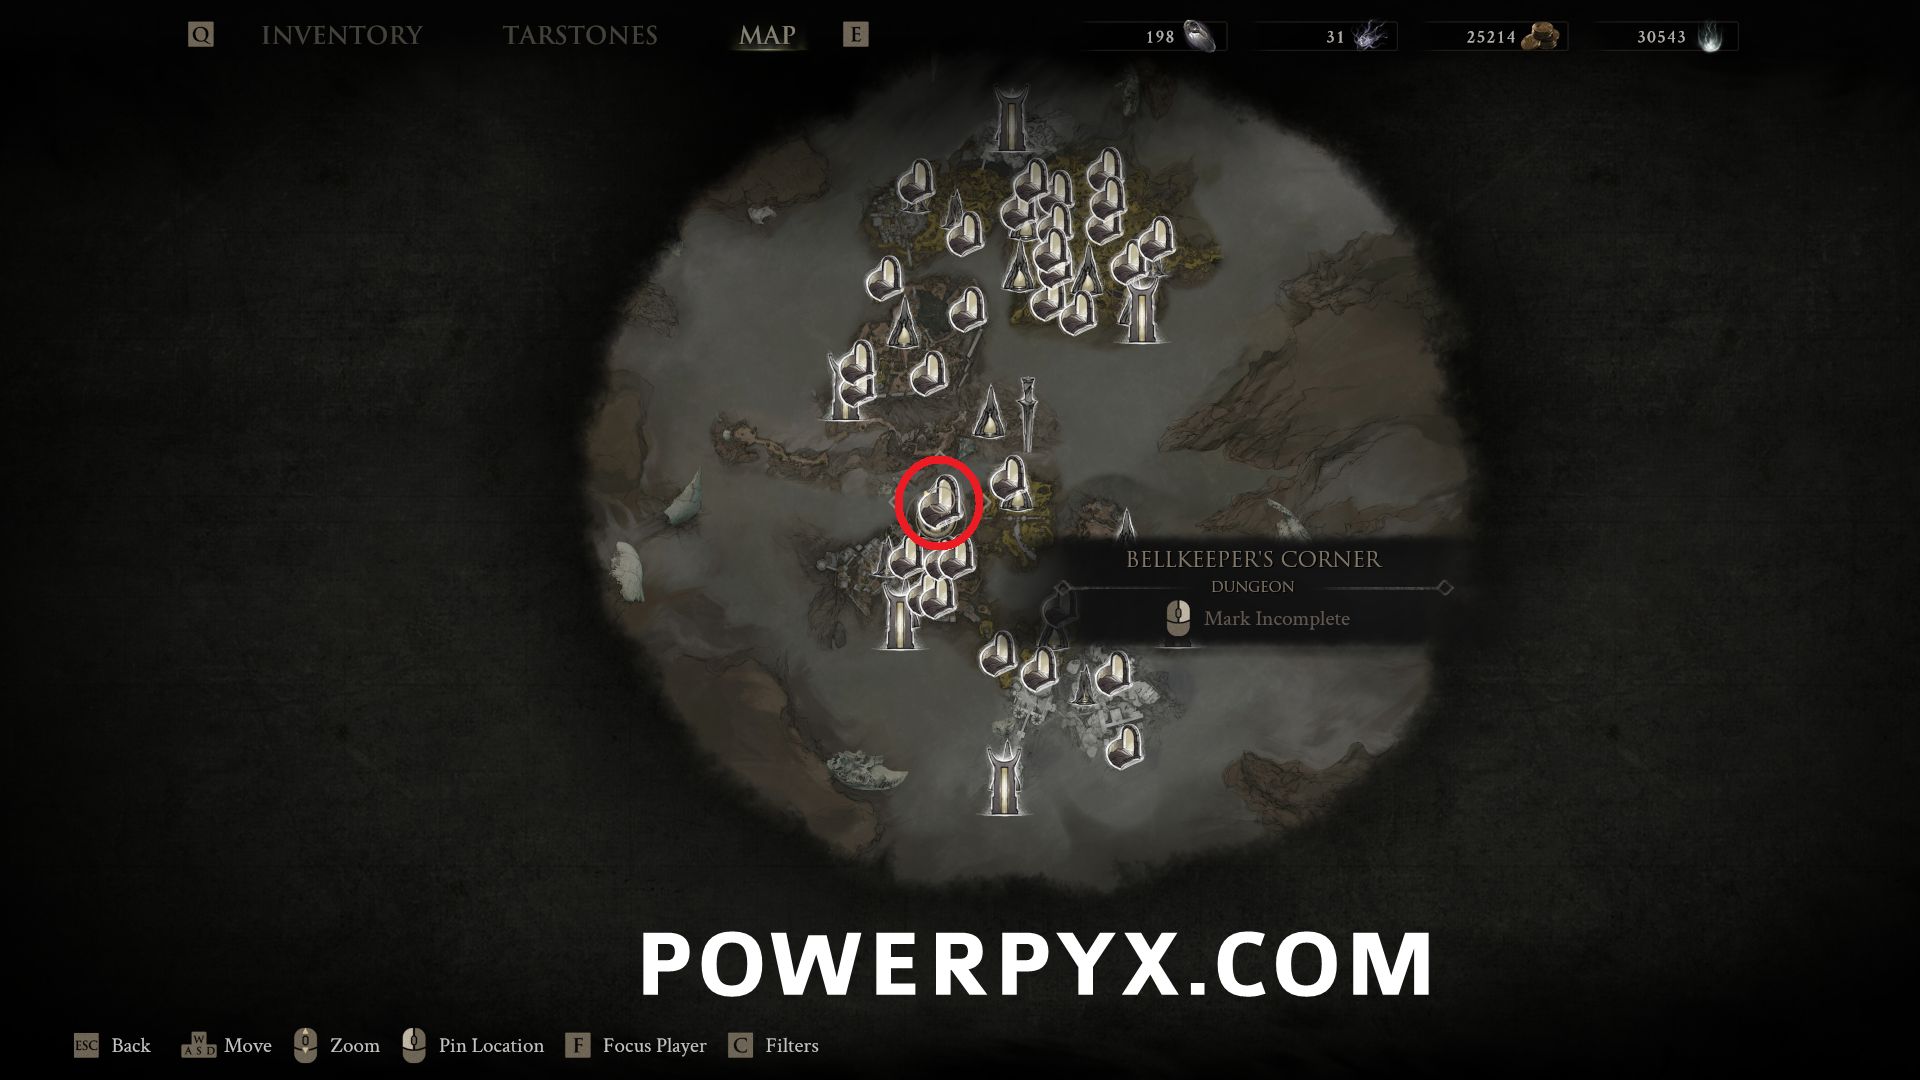
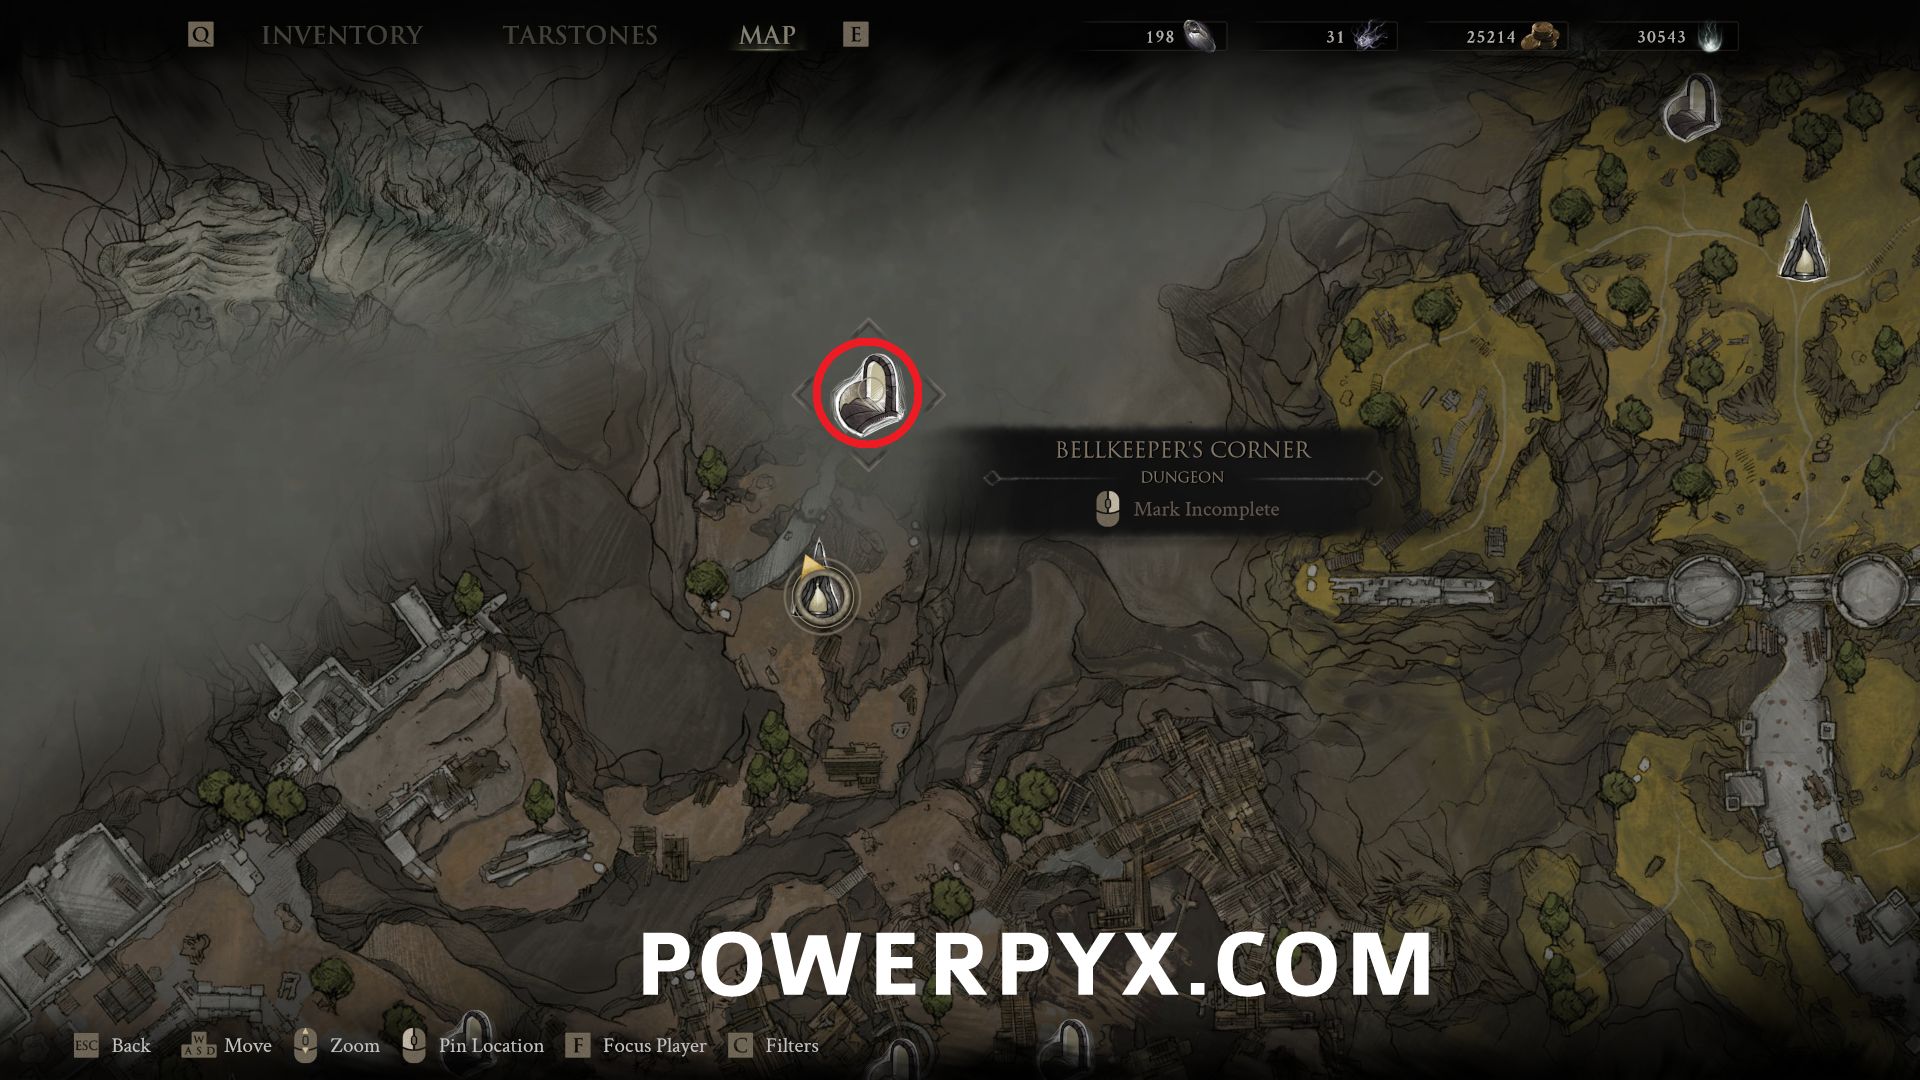
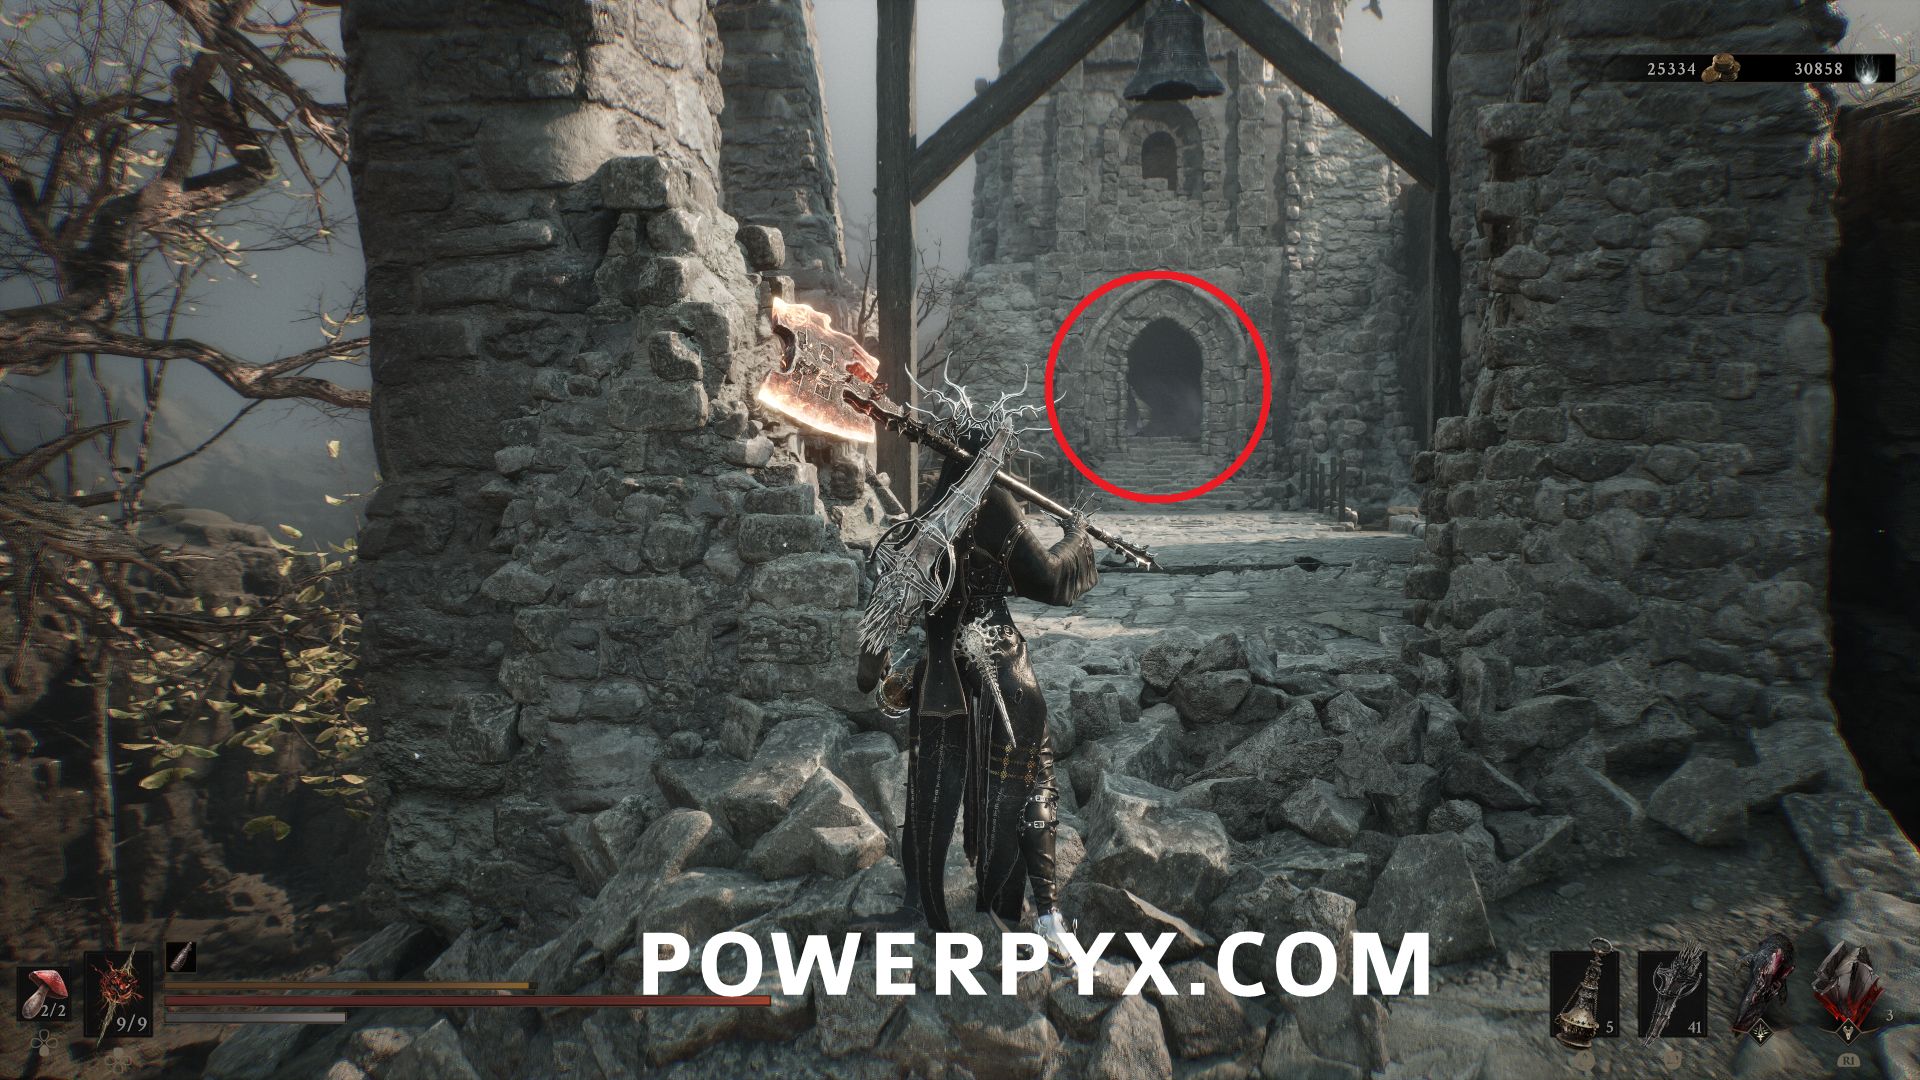
#28 – Bellkeeper’s Corner – Directly north of Abandoned Outpost Beacon, ring the bell to make a path on the bridge leading to the dungeon entrance.
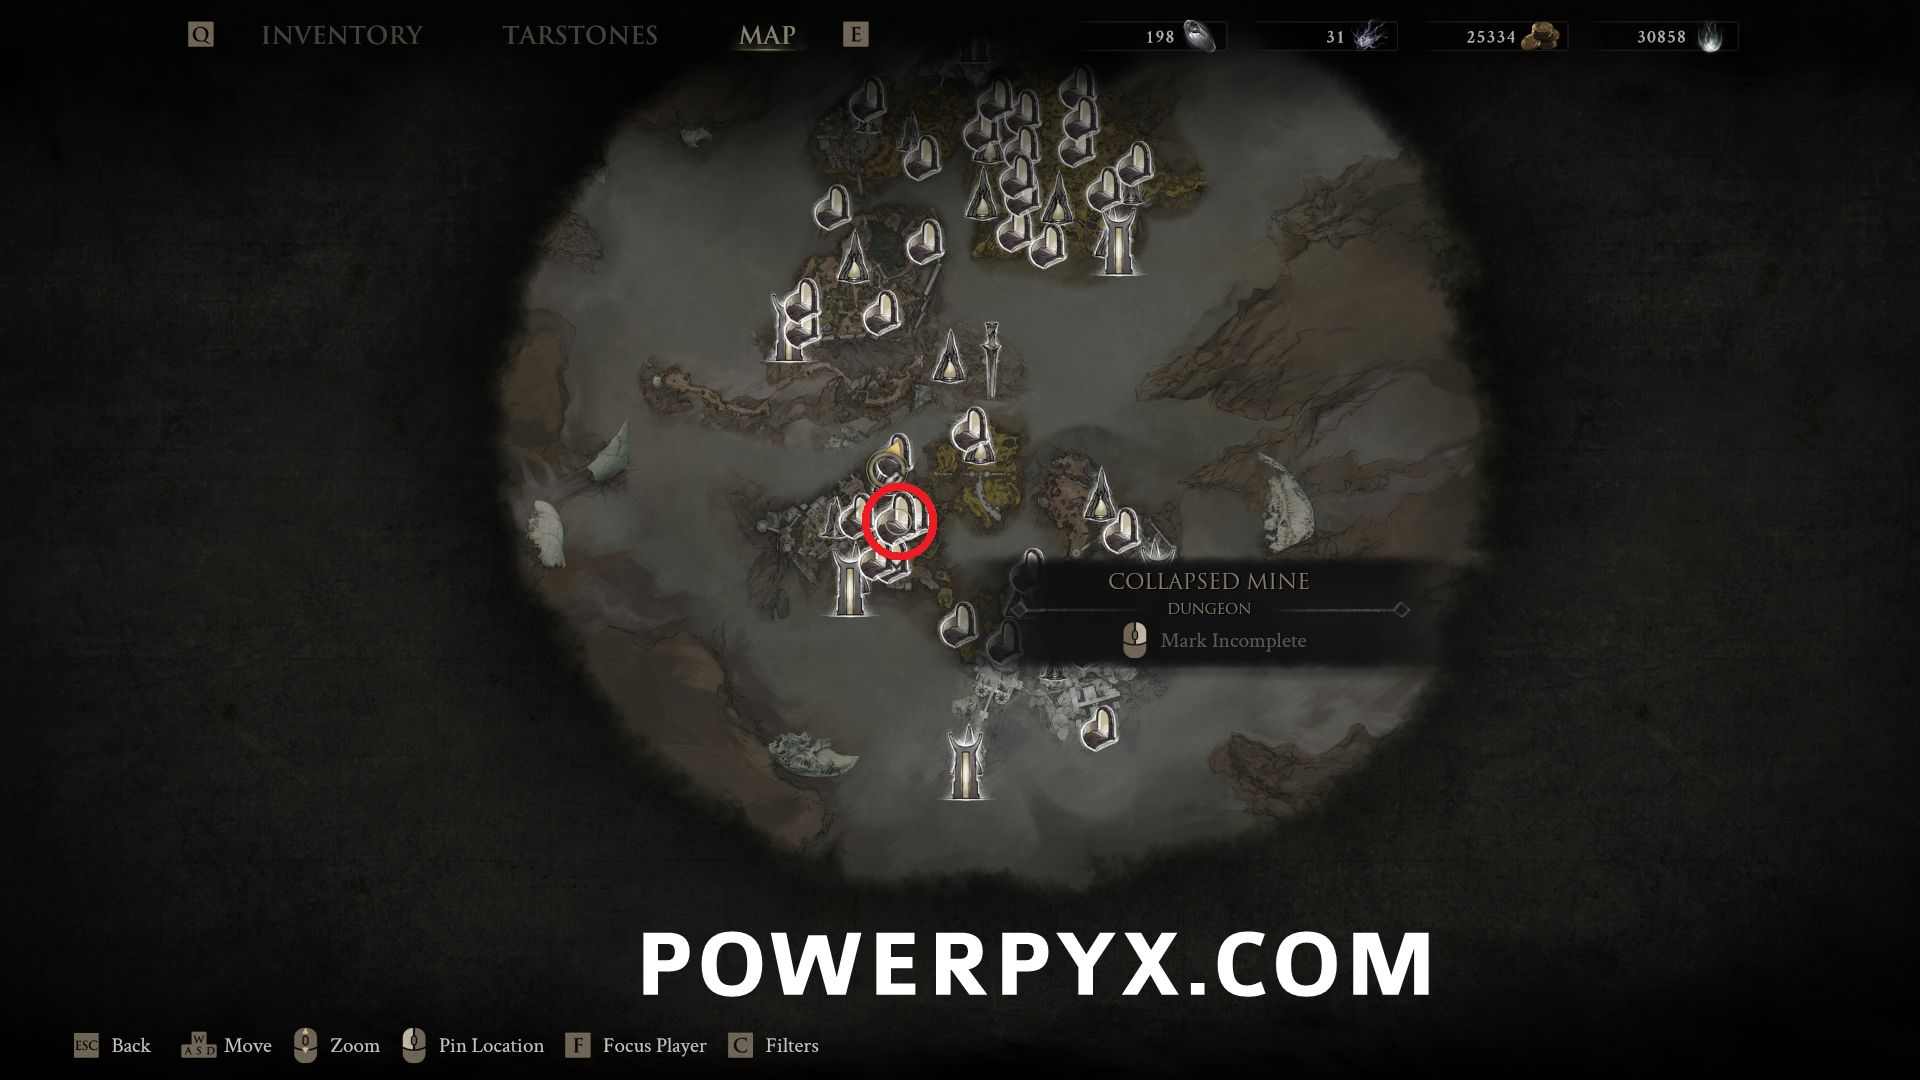
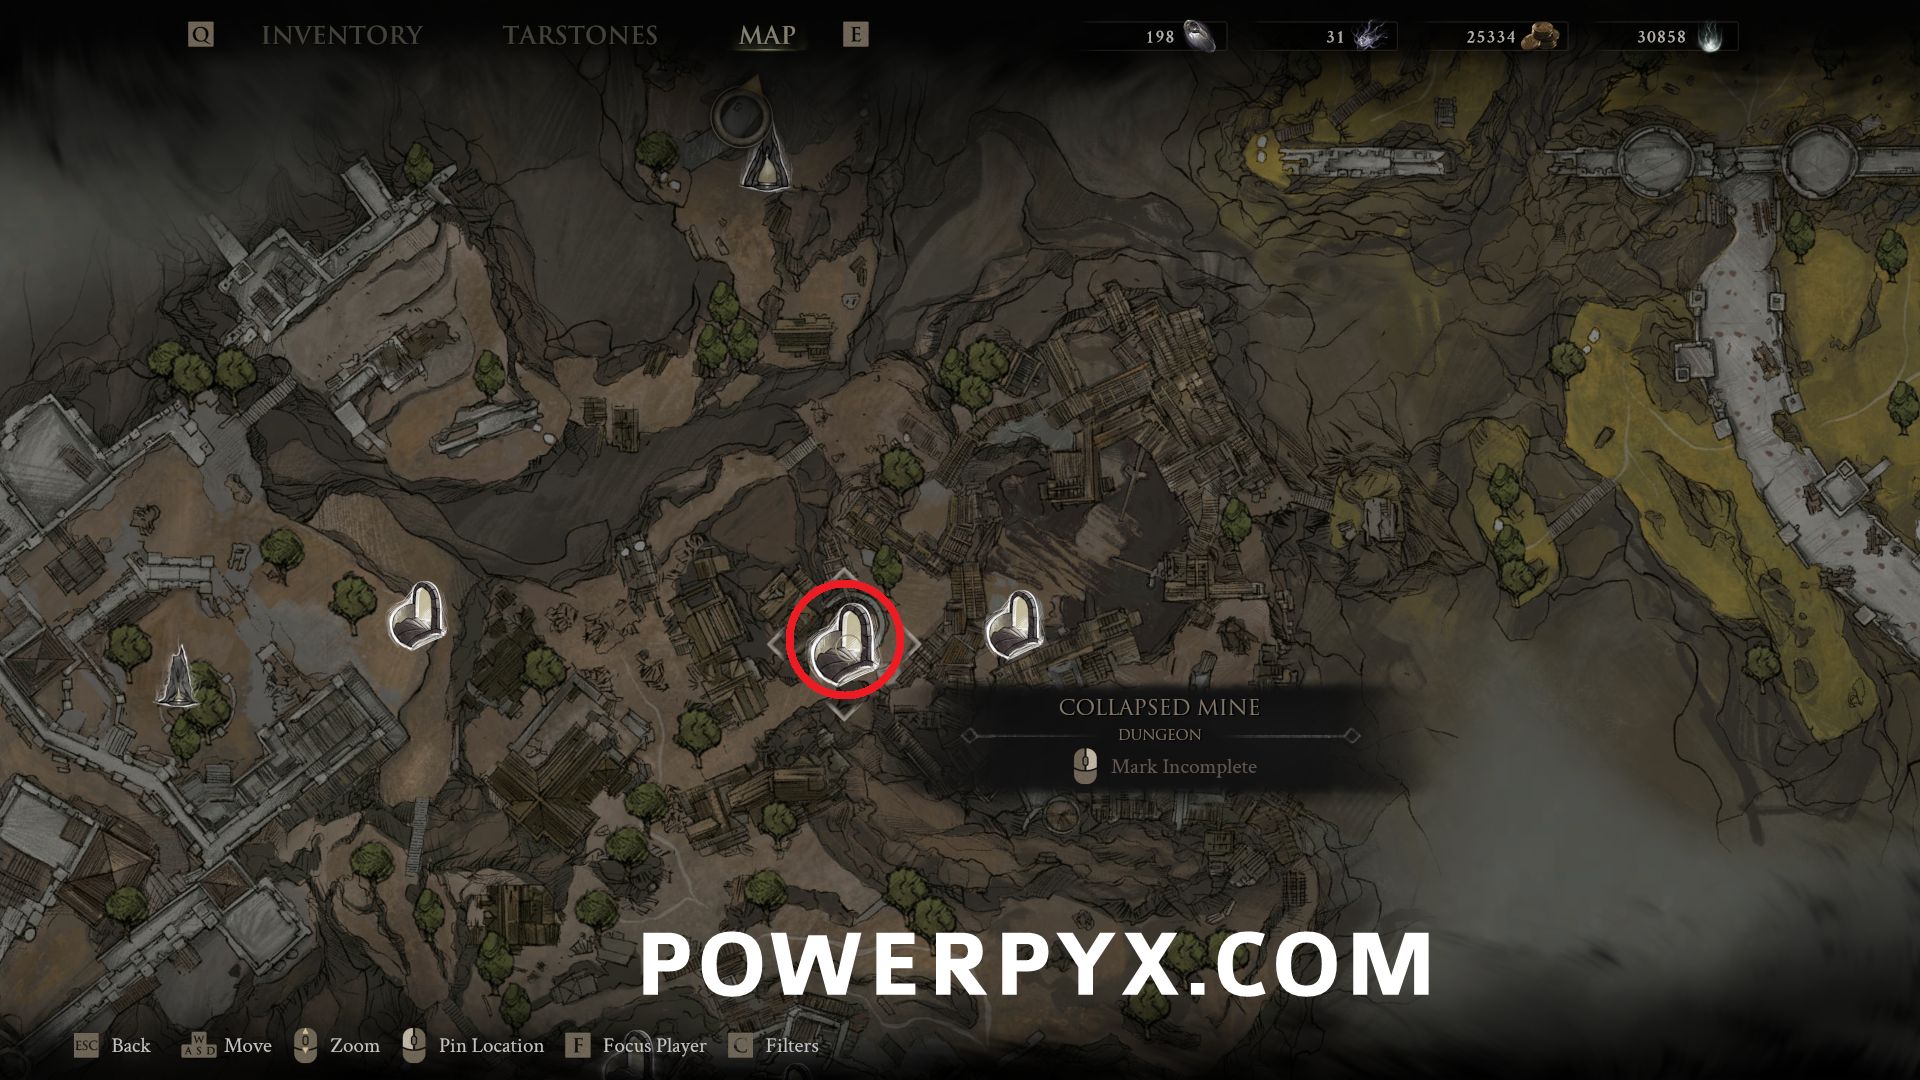
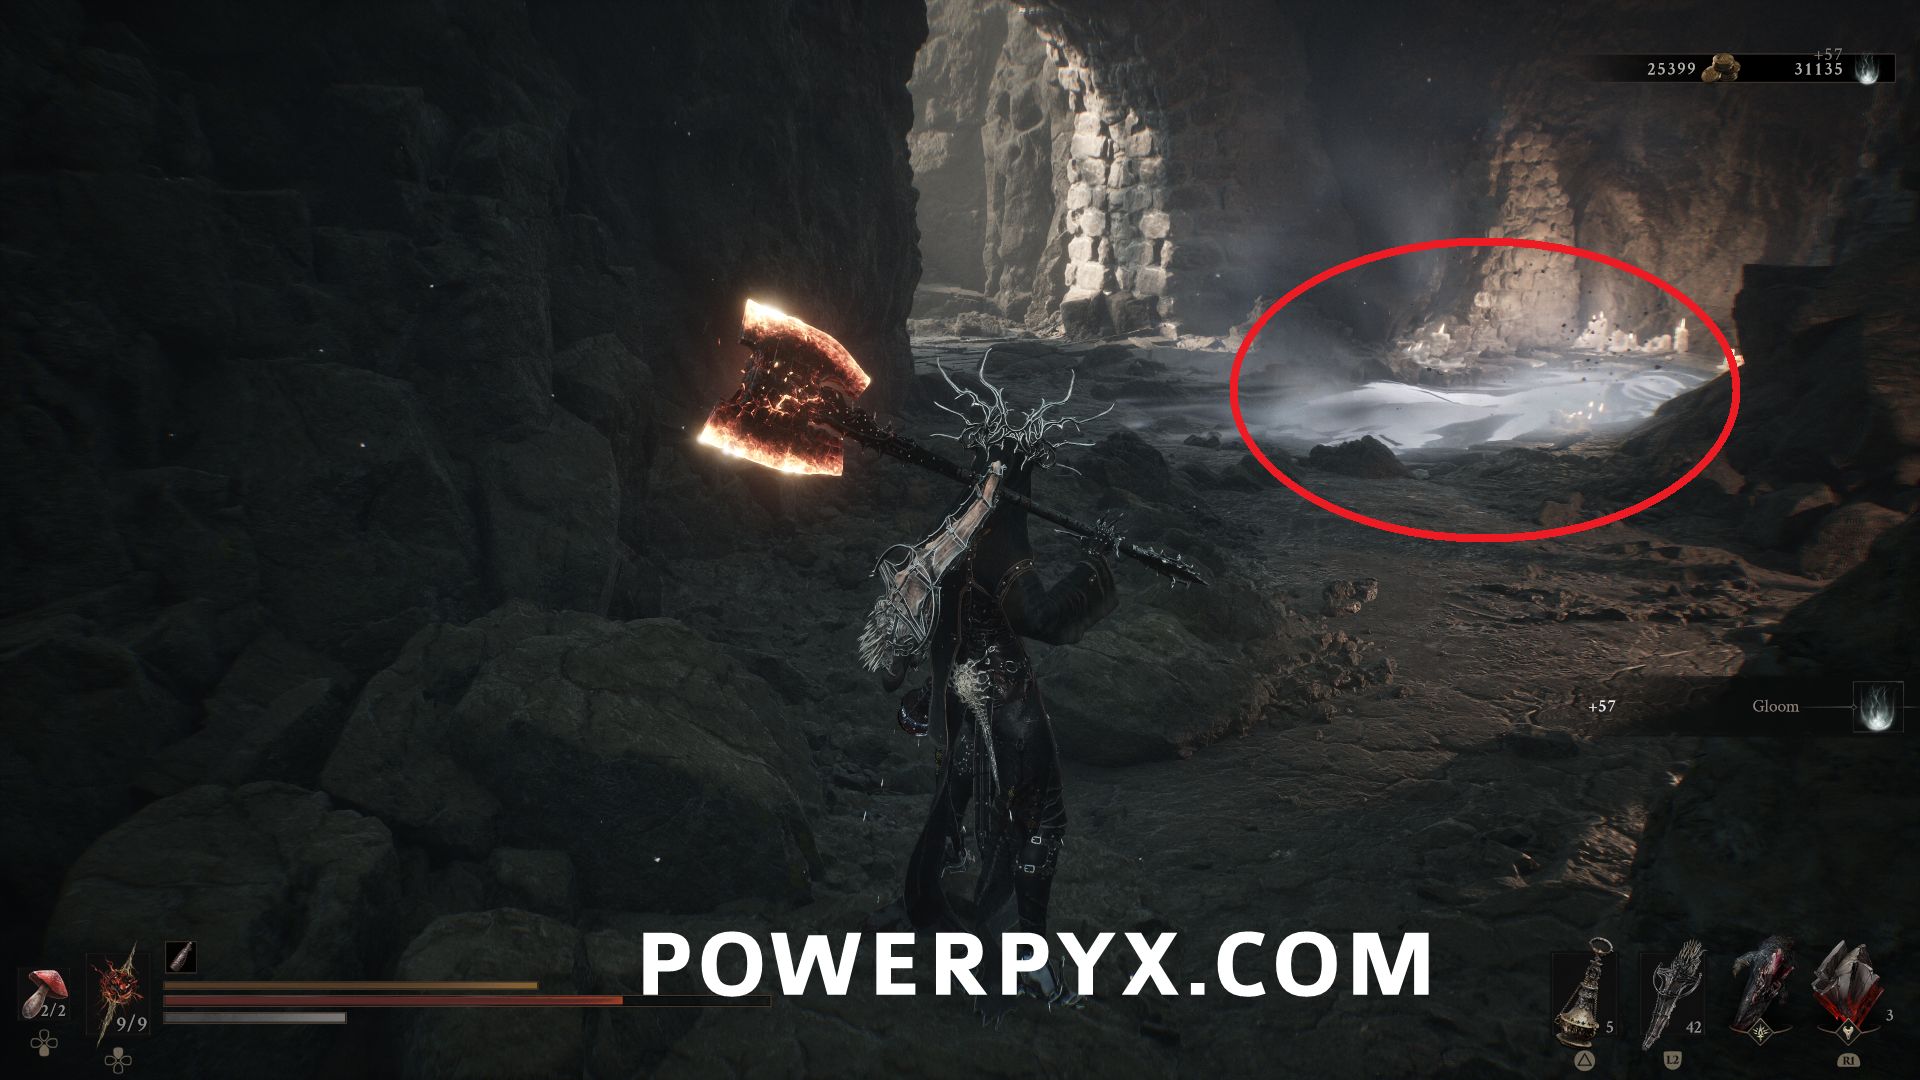
#29 – Collapsed Mine – South of the Abandoned Outpost Beacon in the slums area, follow the path to the platforms around the central pit, then follow the path to the west where this is in a cave.
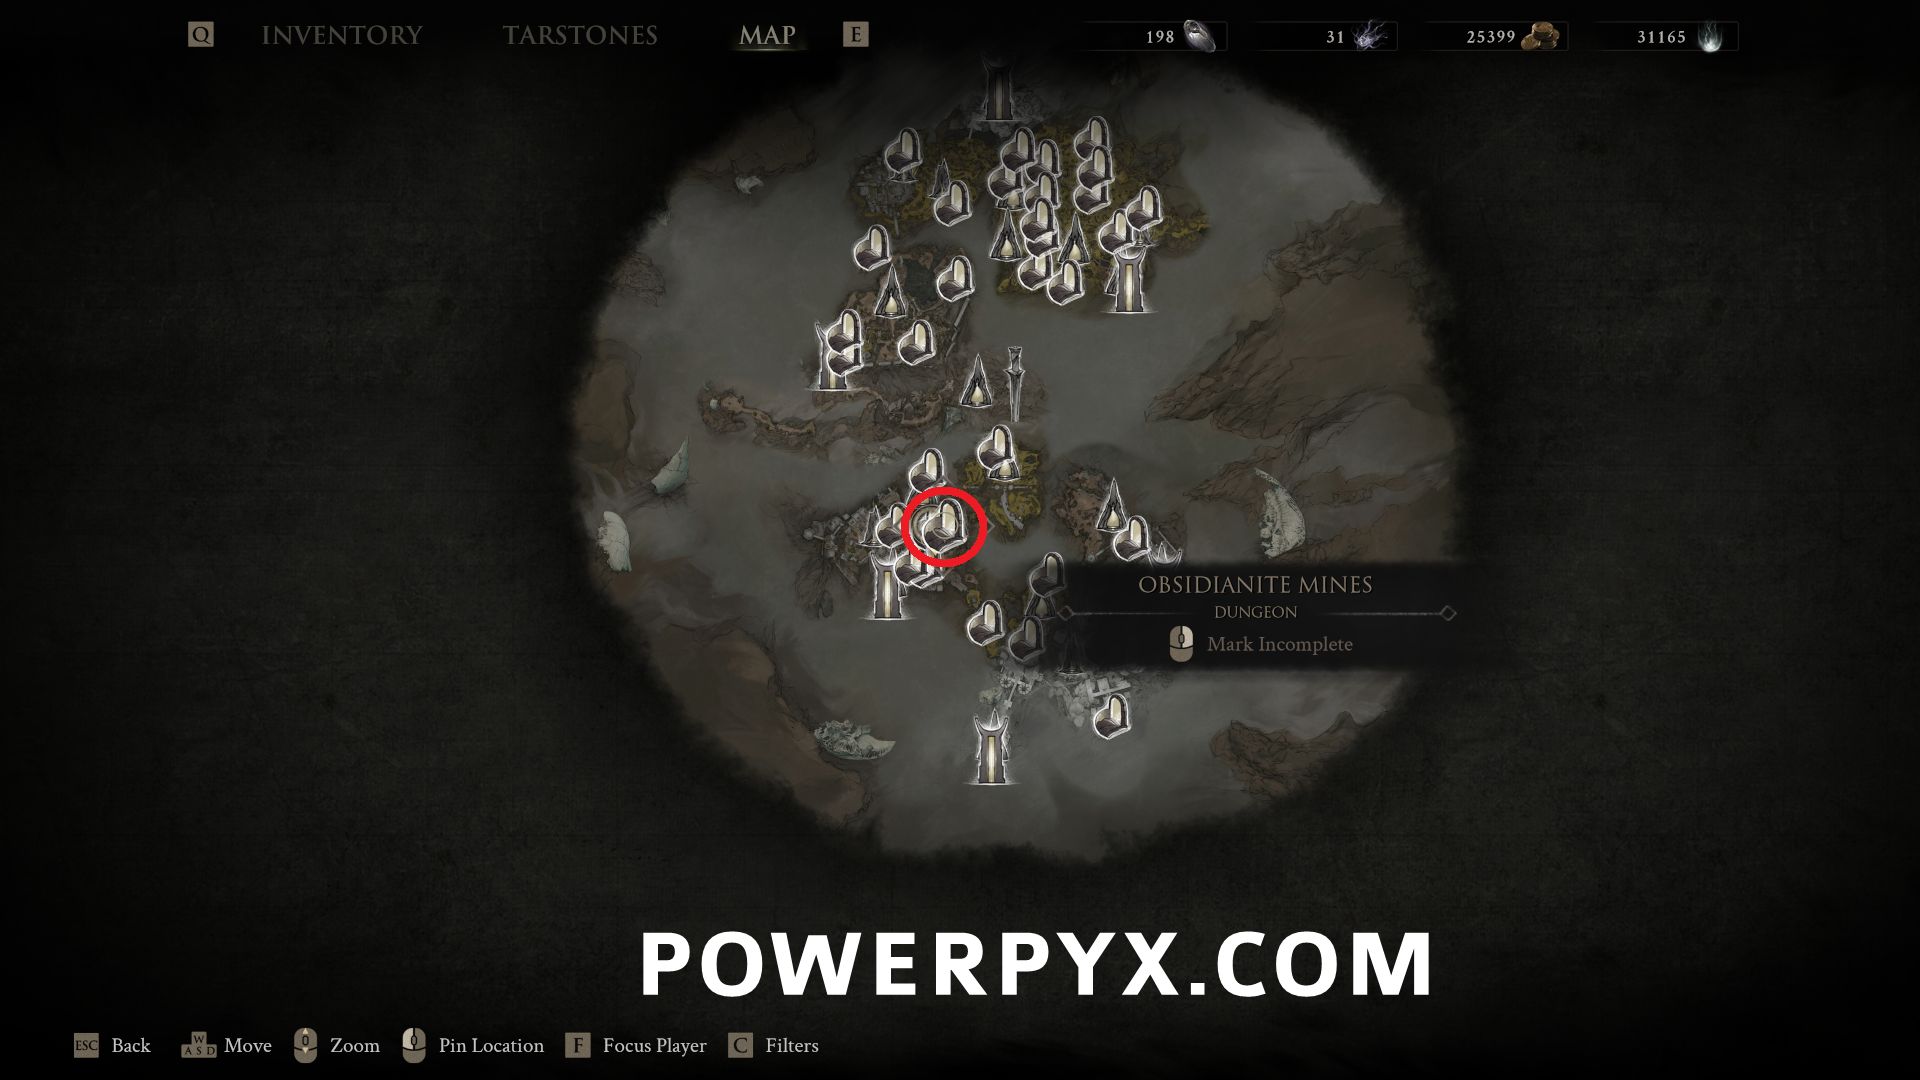
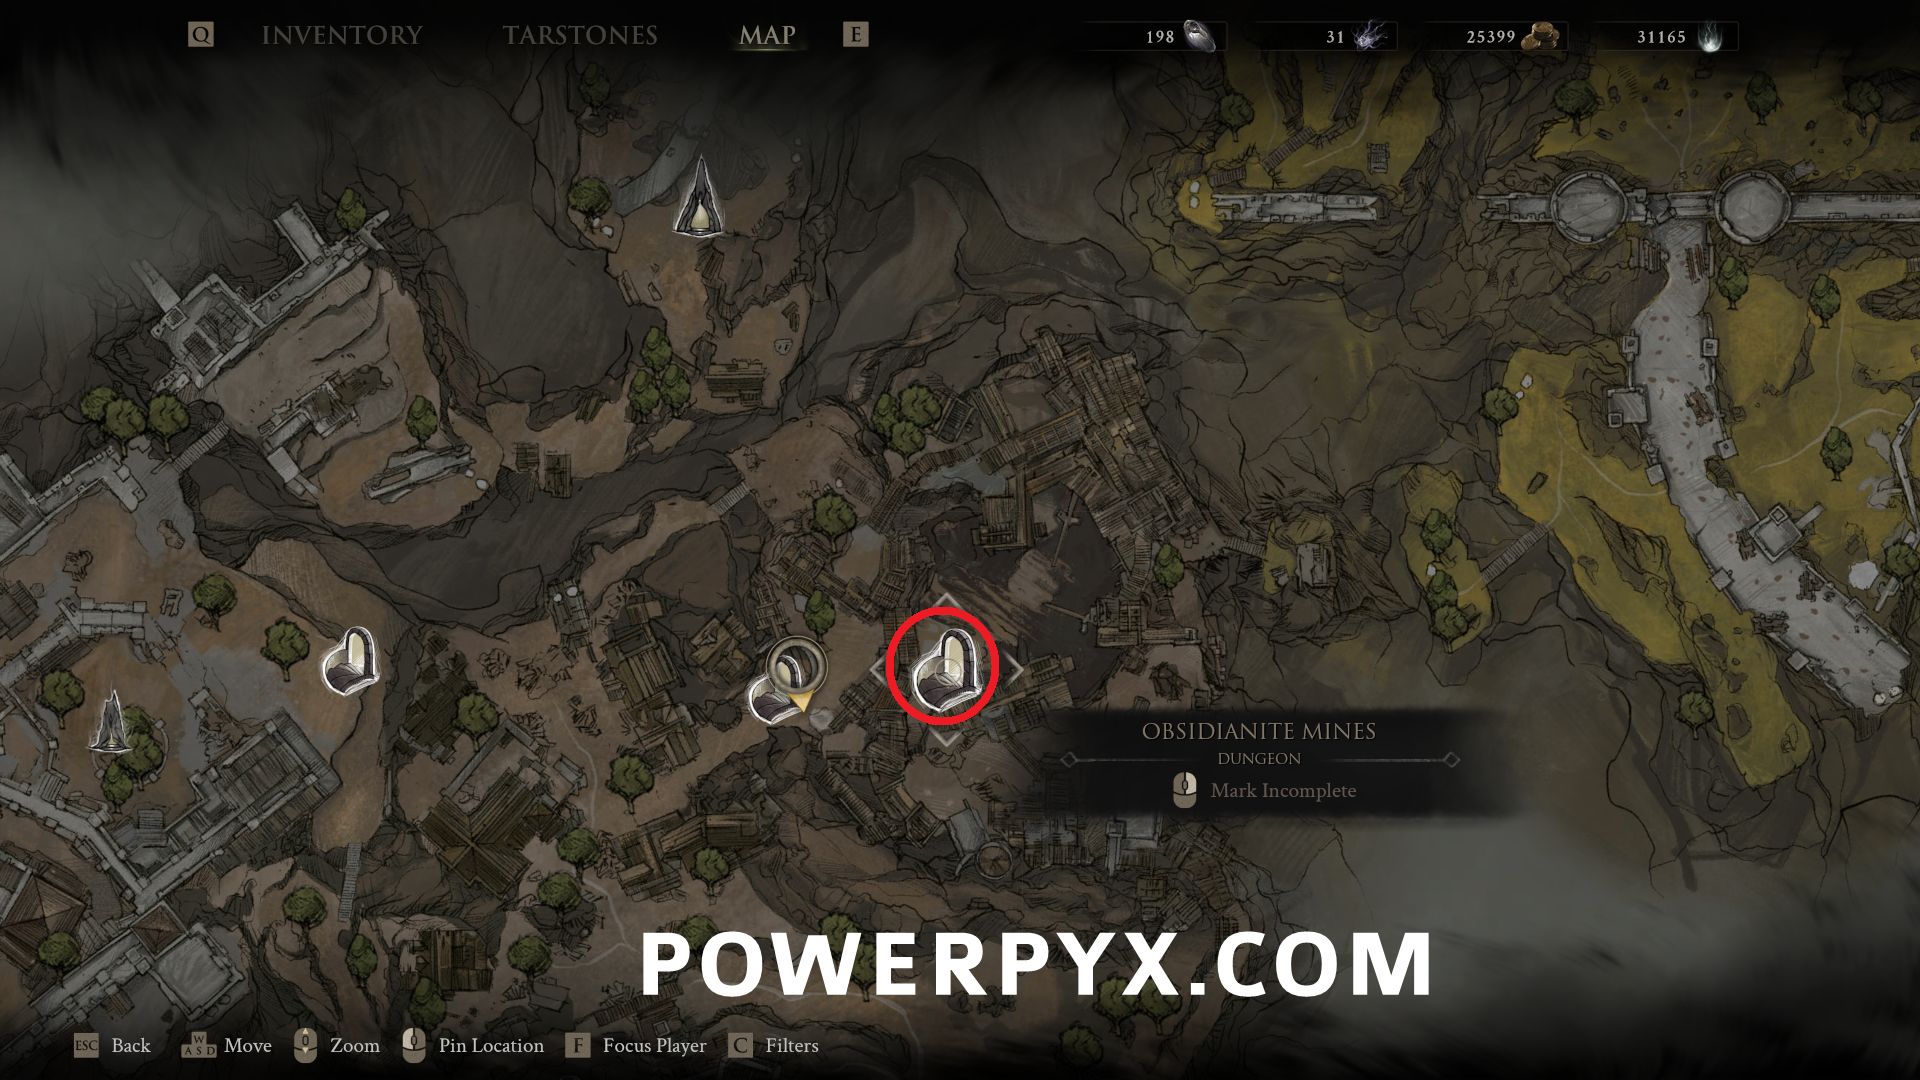
#30 – Obsidianite Mines – South of the Abandoned Outpost Beacon in the slums area, drop to the lower area in the center with the enemies mining rocks where the entrance is on the west wall.
Gate of Mammon
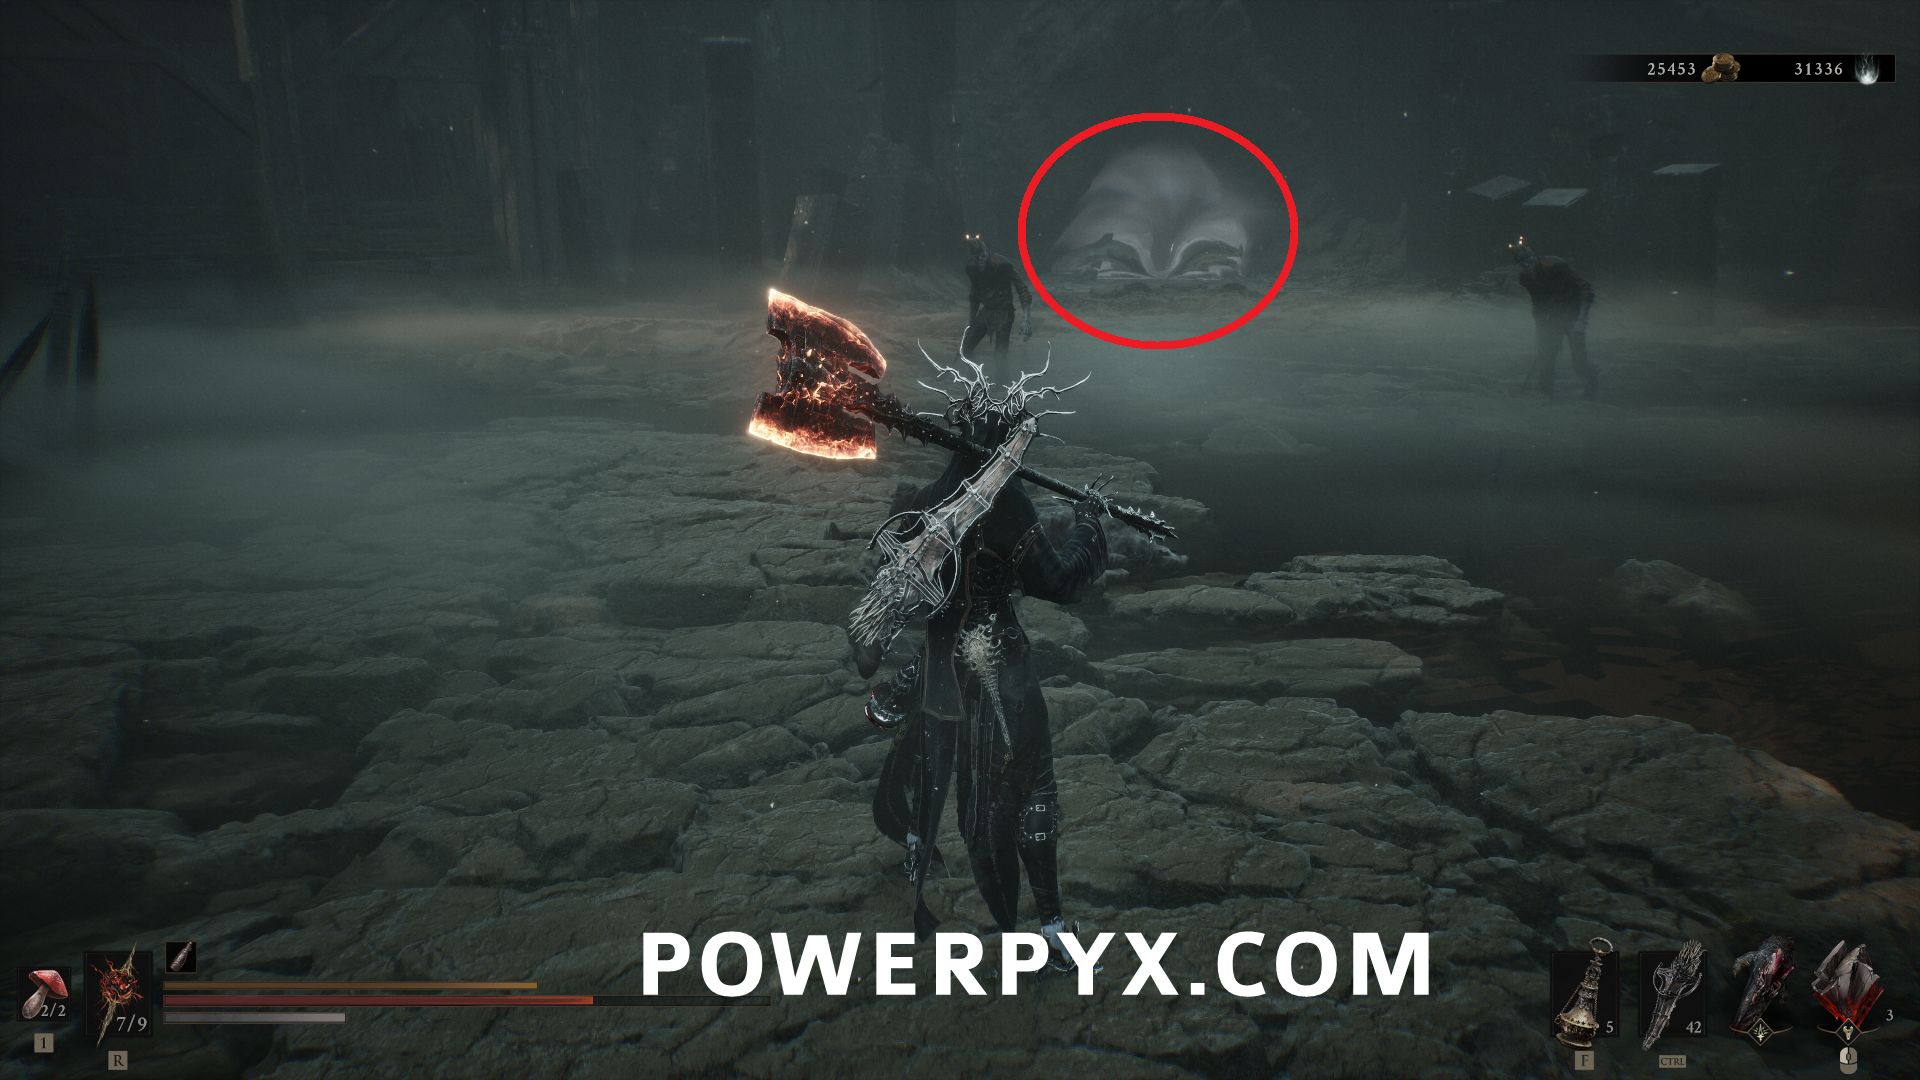
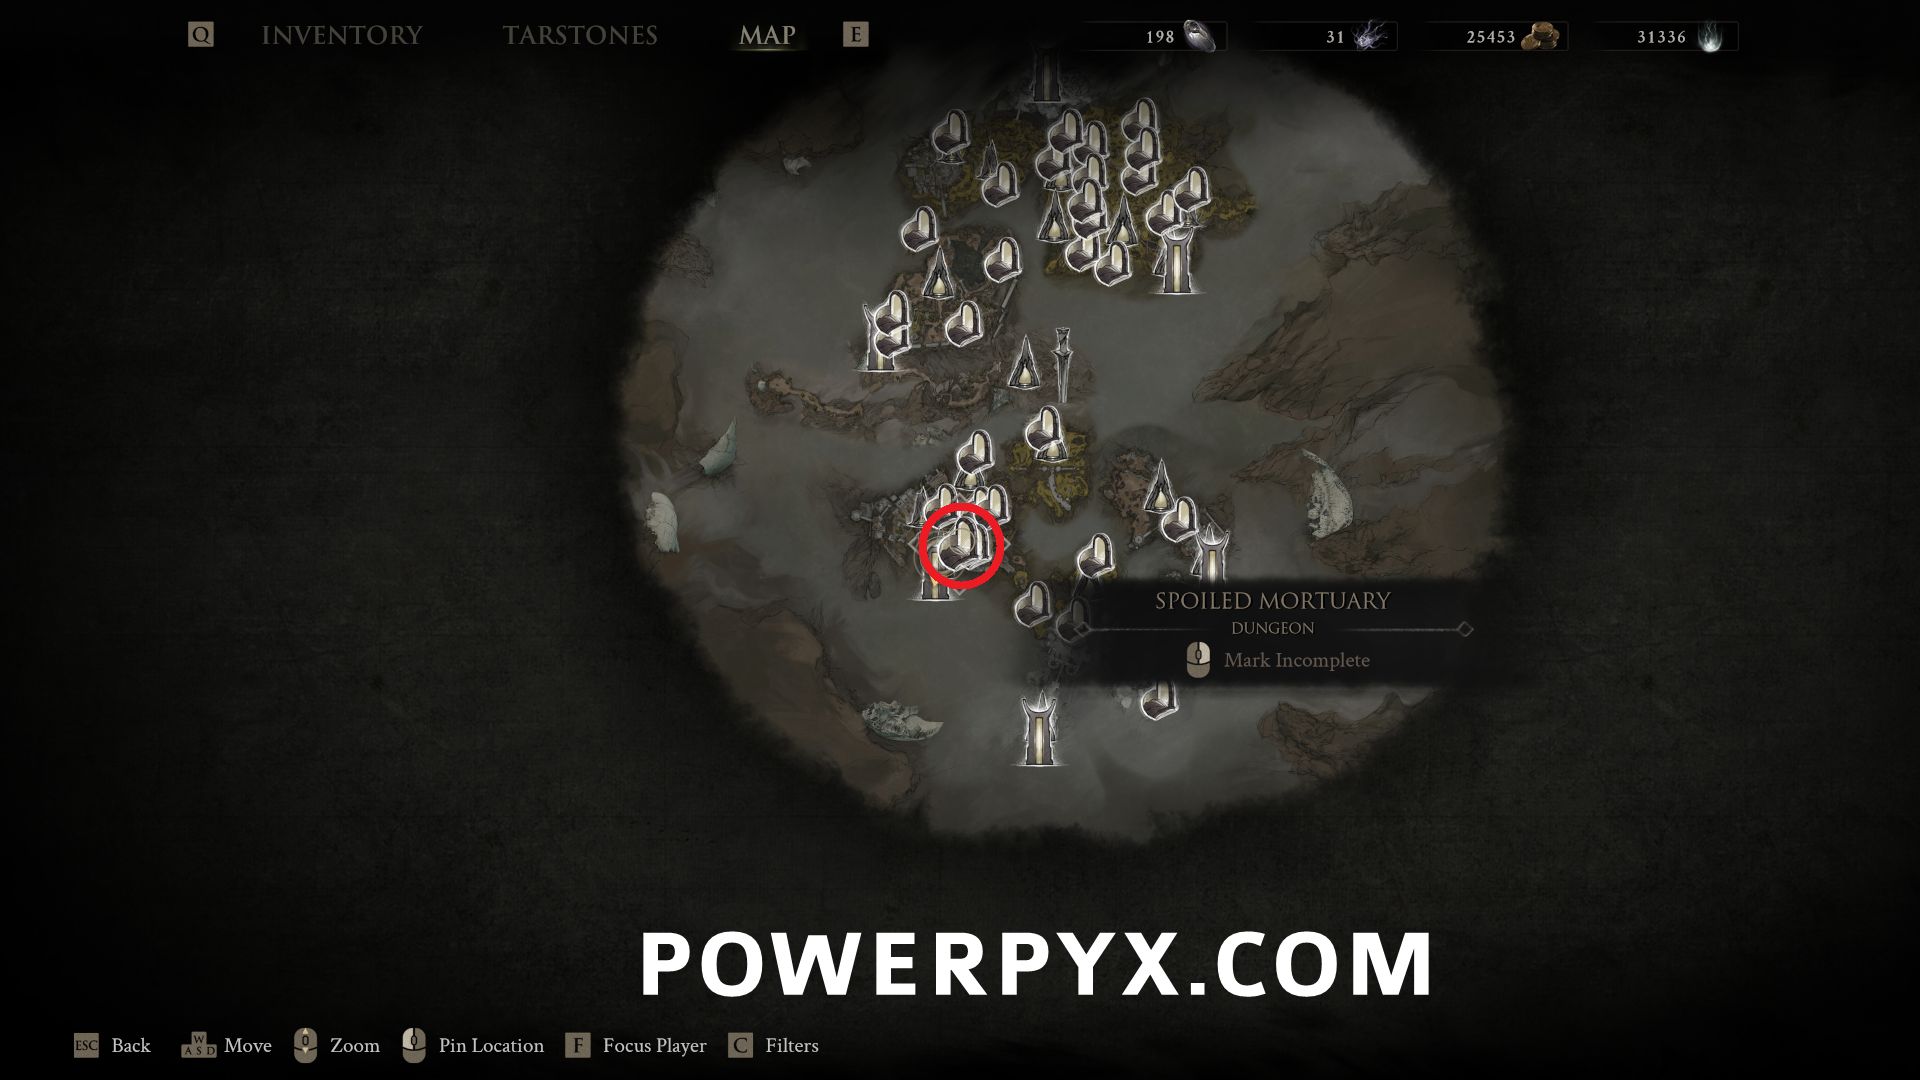
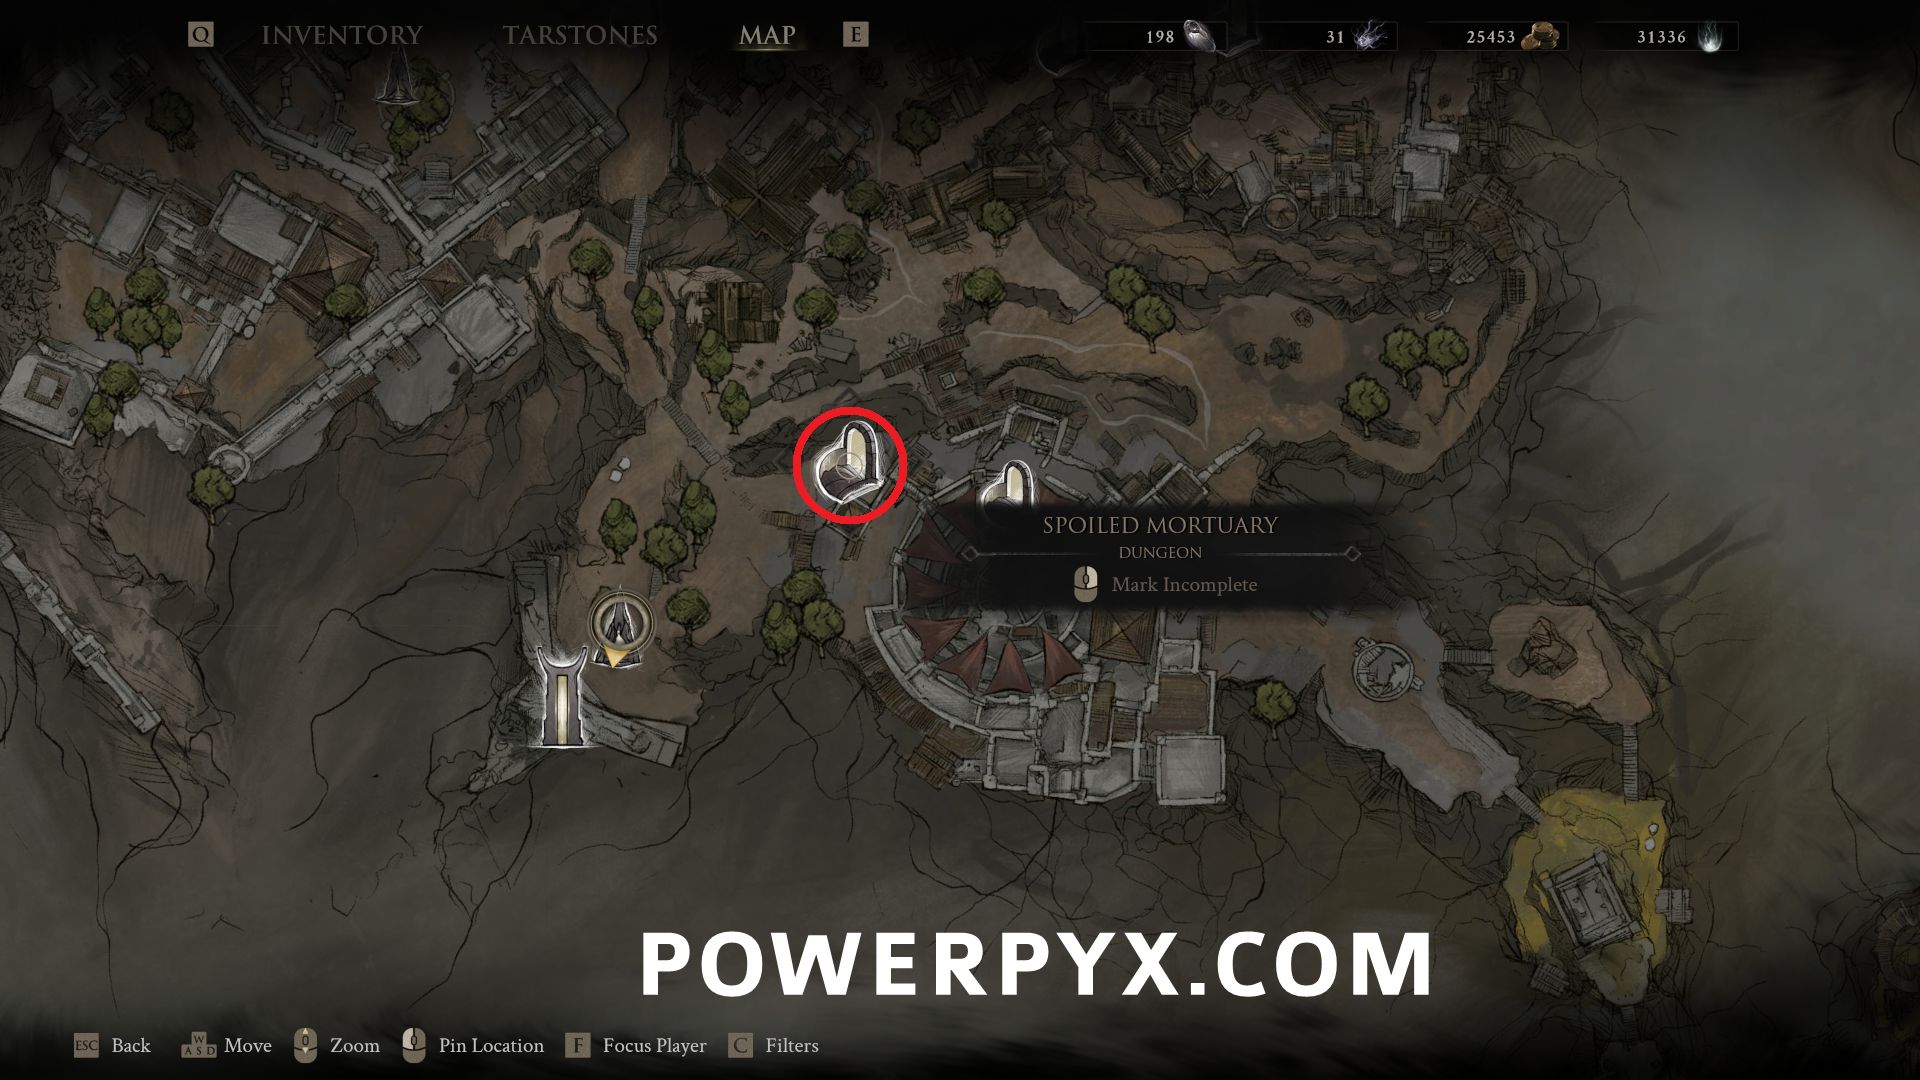
#31 – Spoiled Mortuary – Northeast of the Beacon up the path and this is in the corner past the steps that continue up the building.
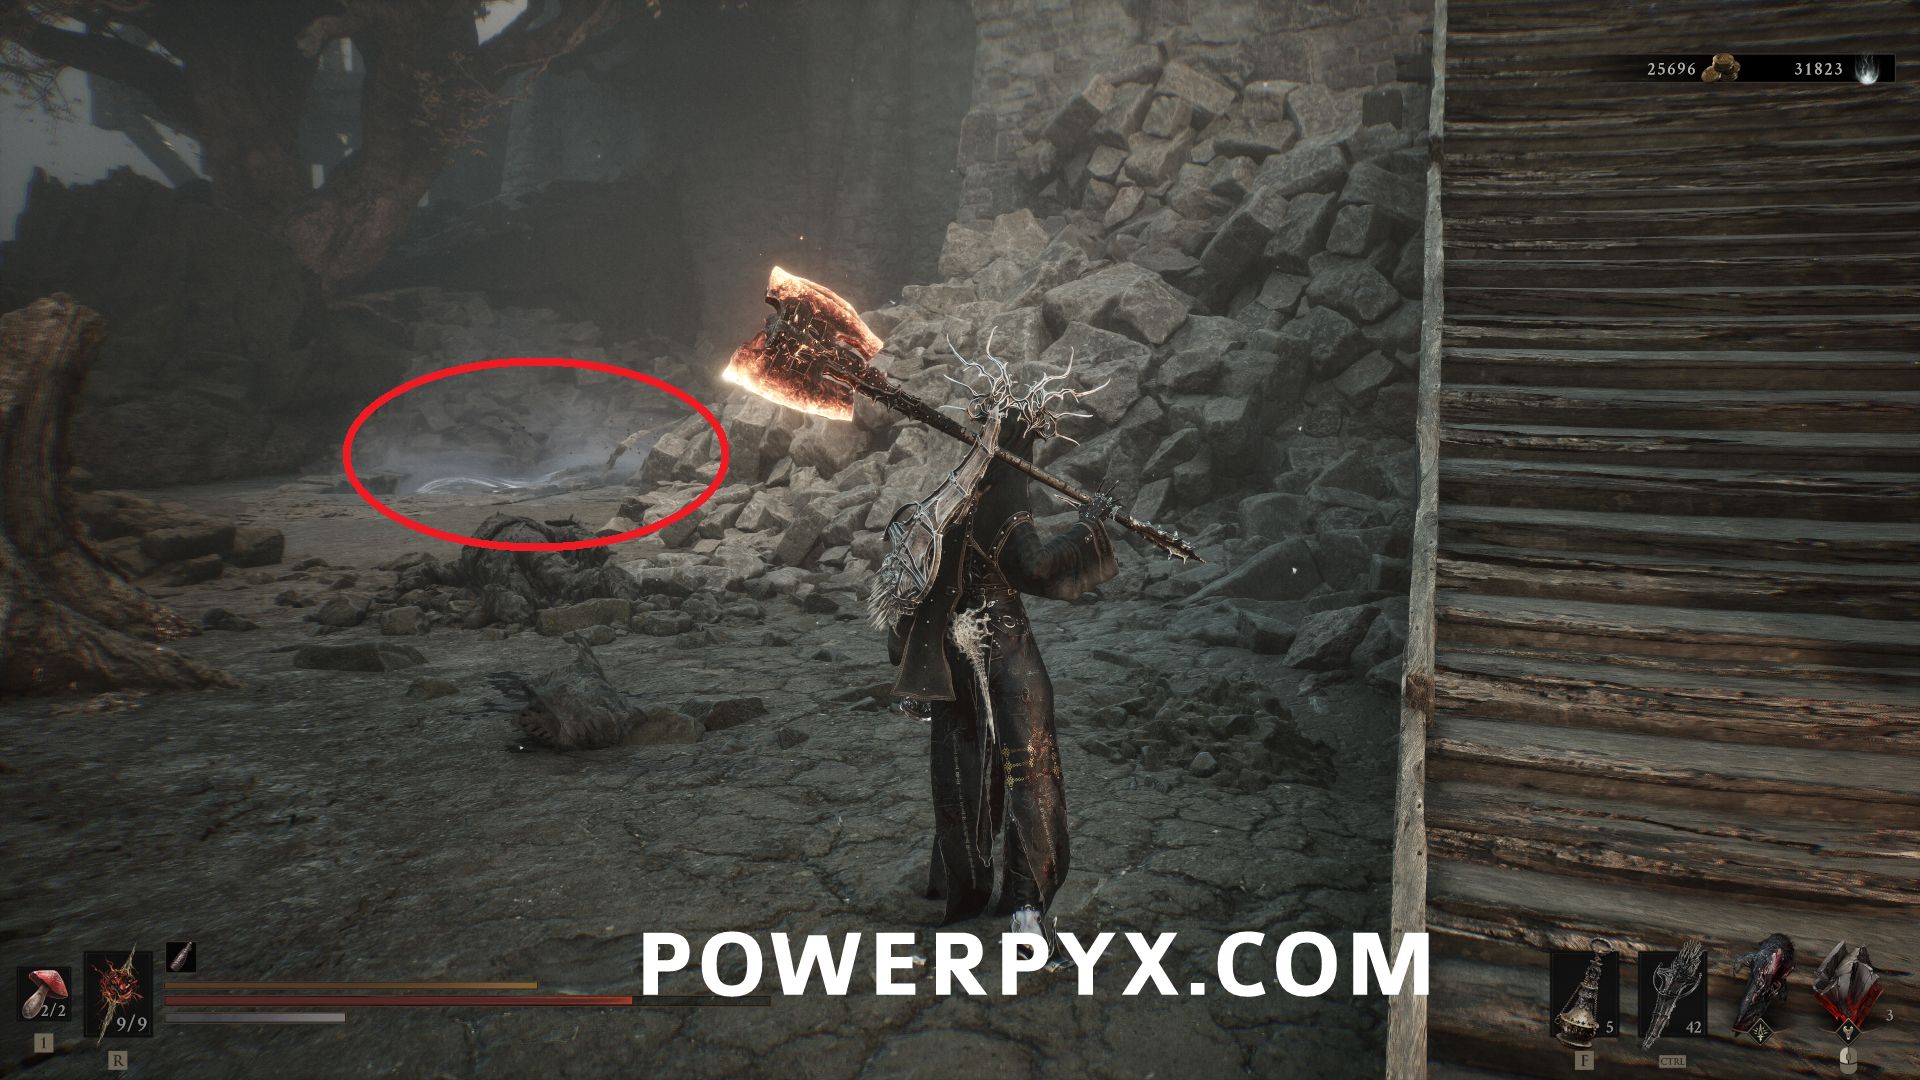
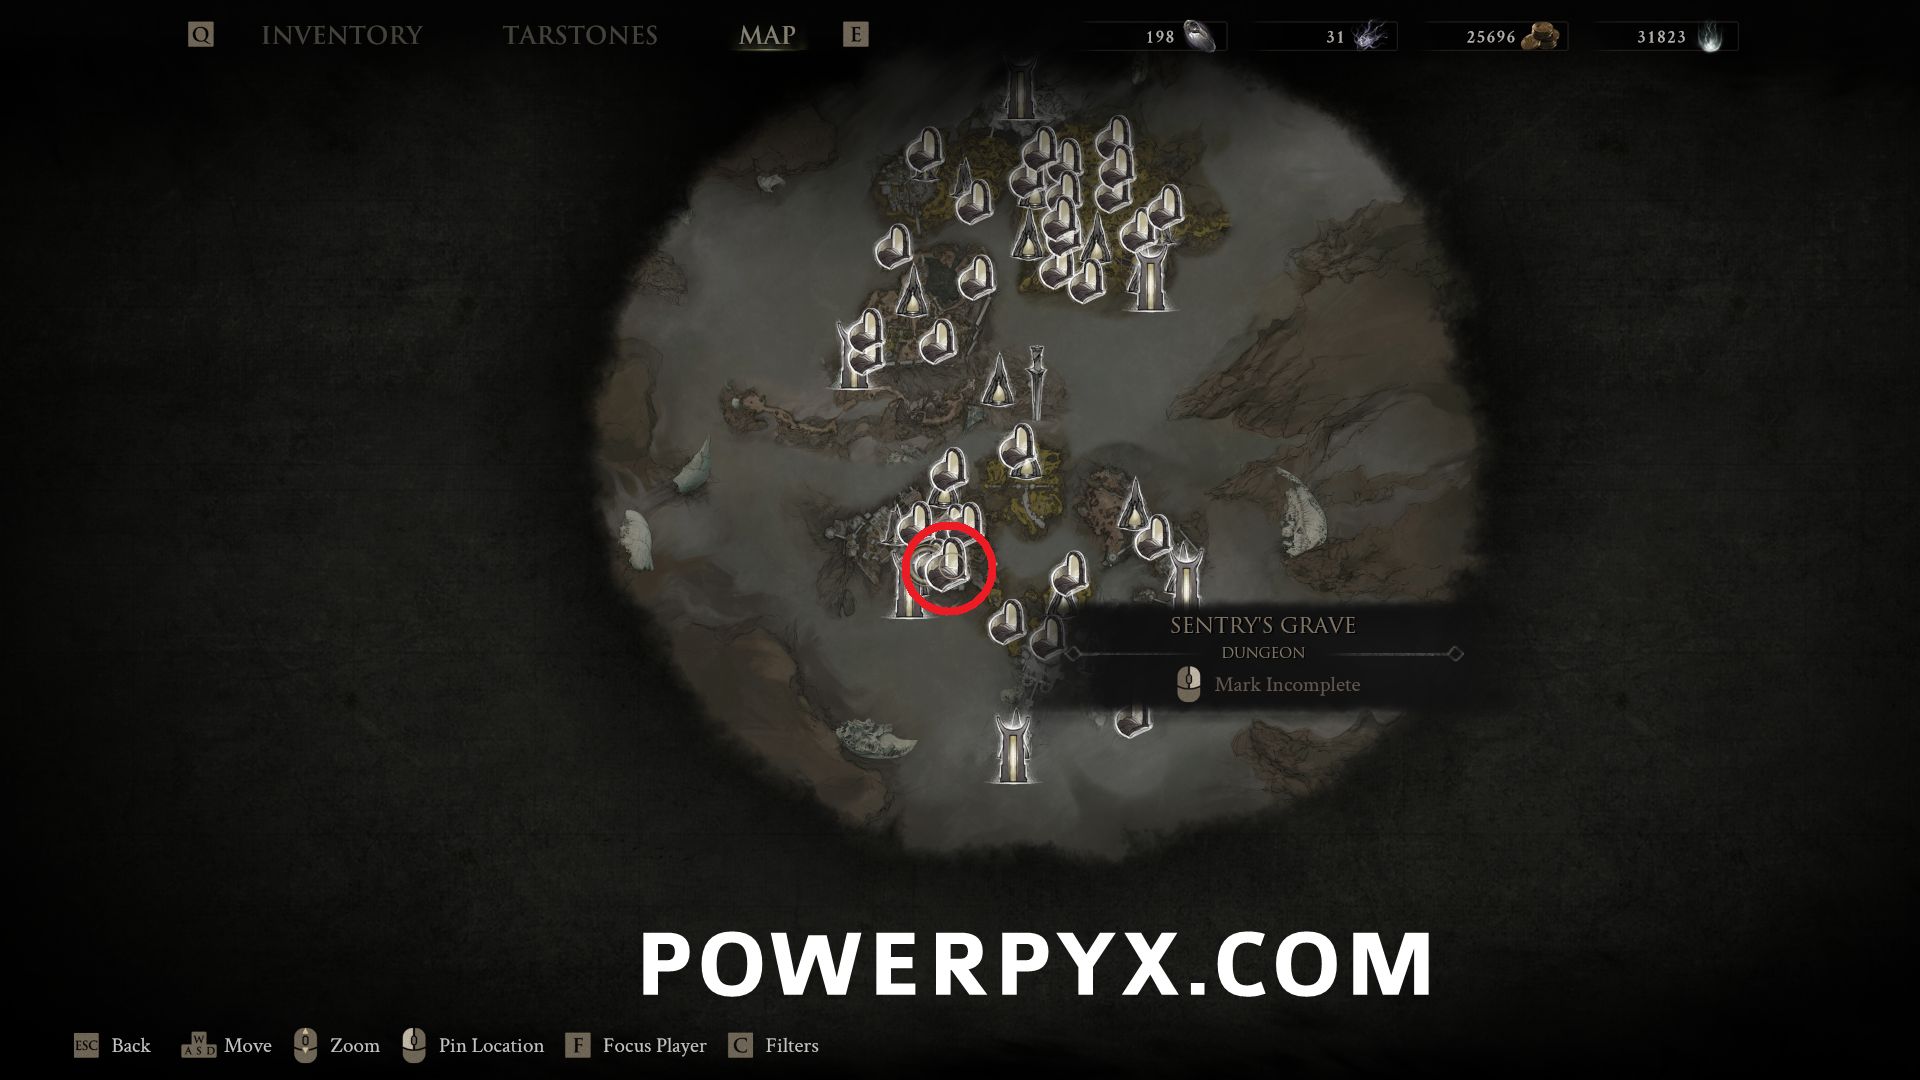
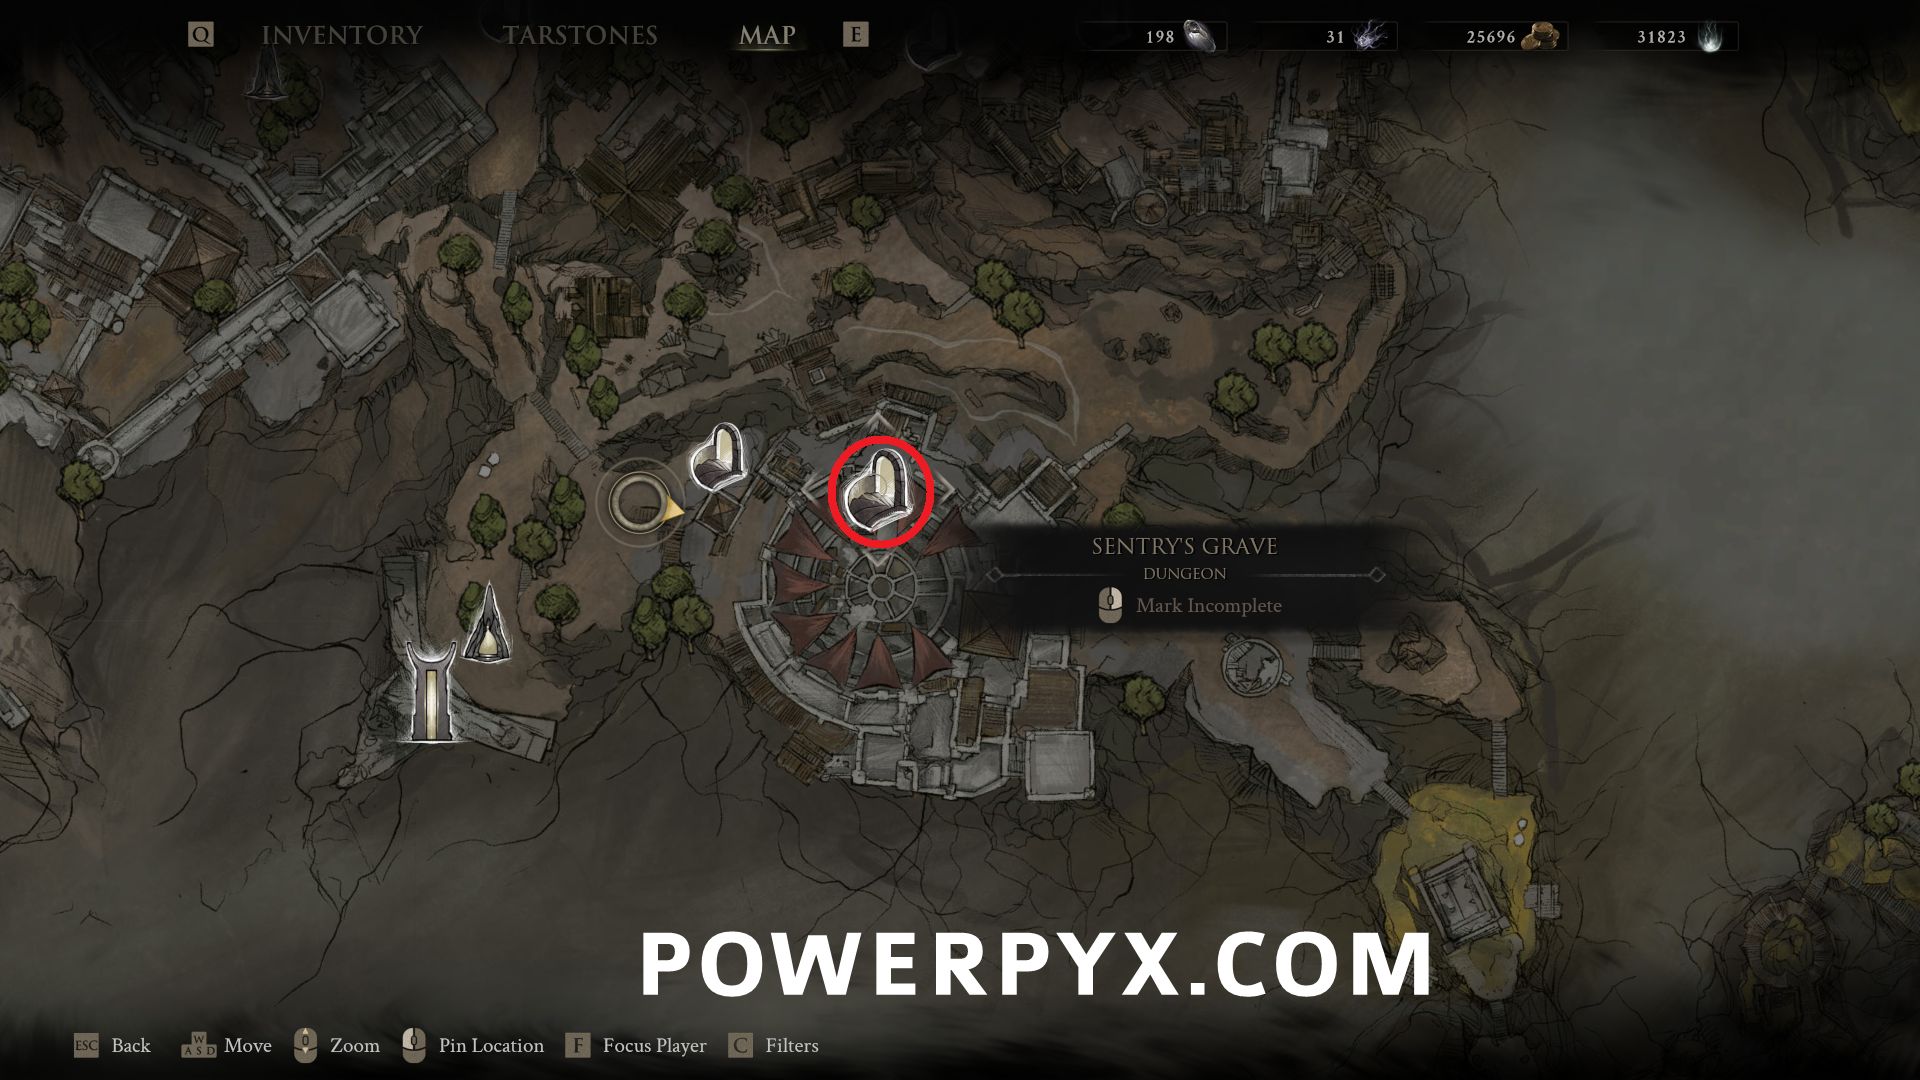
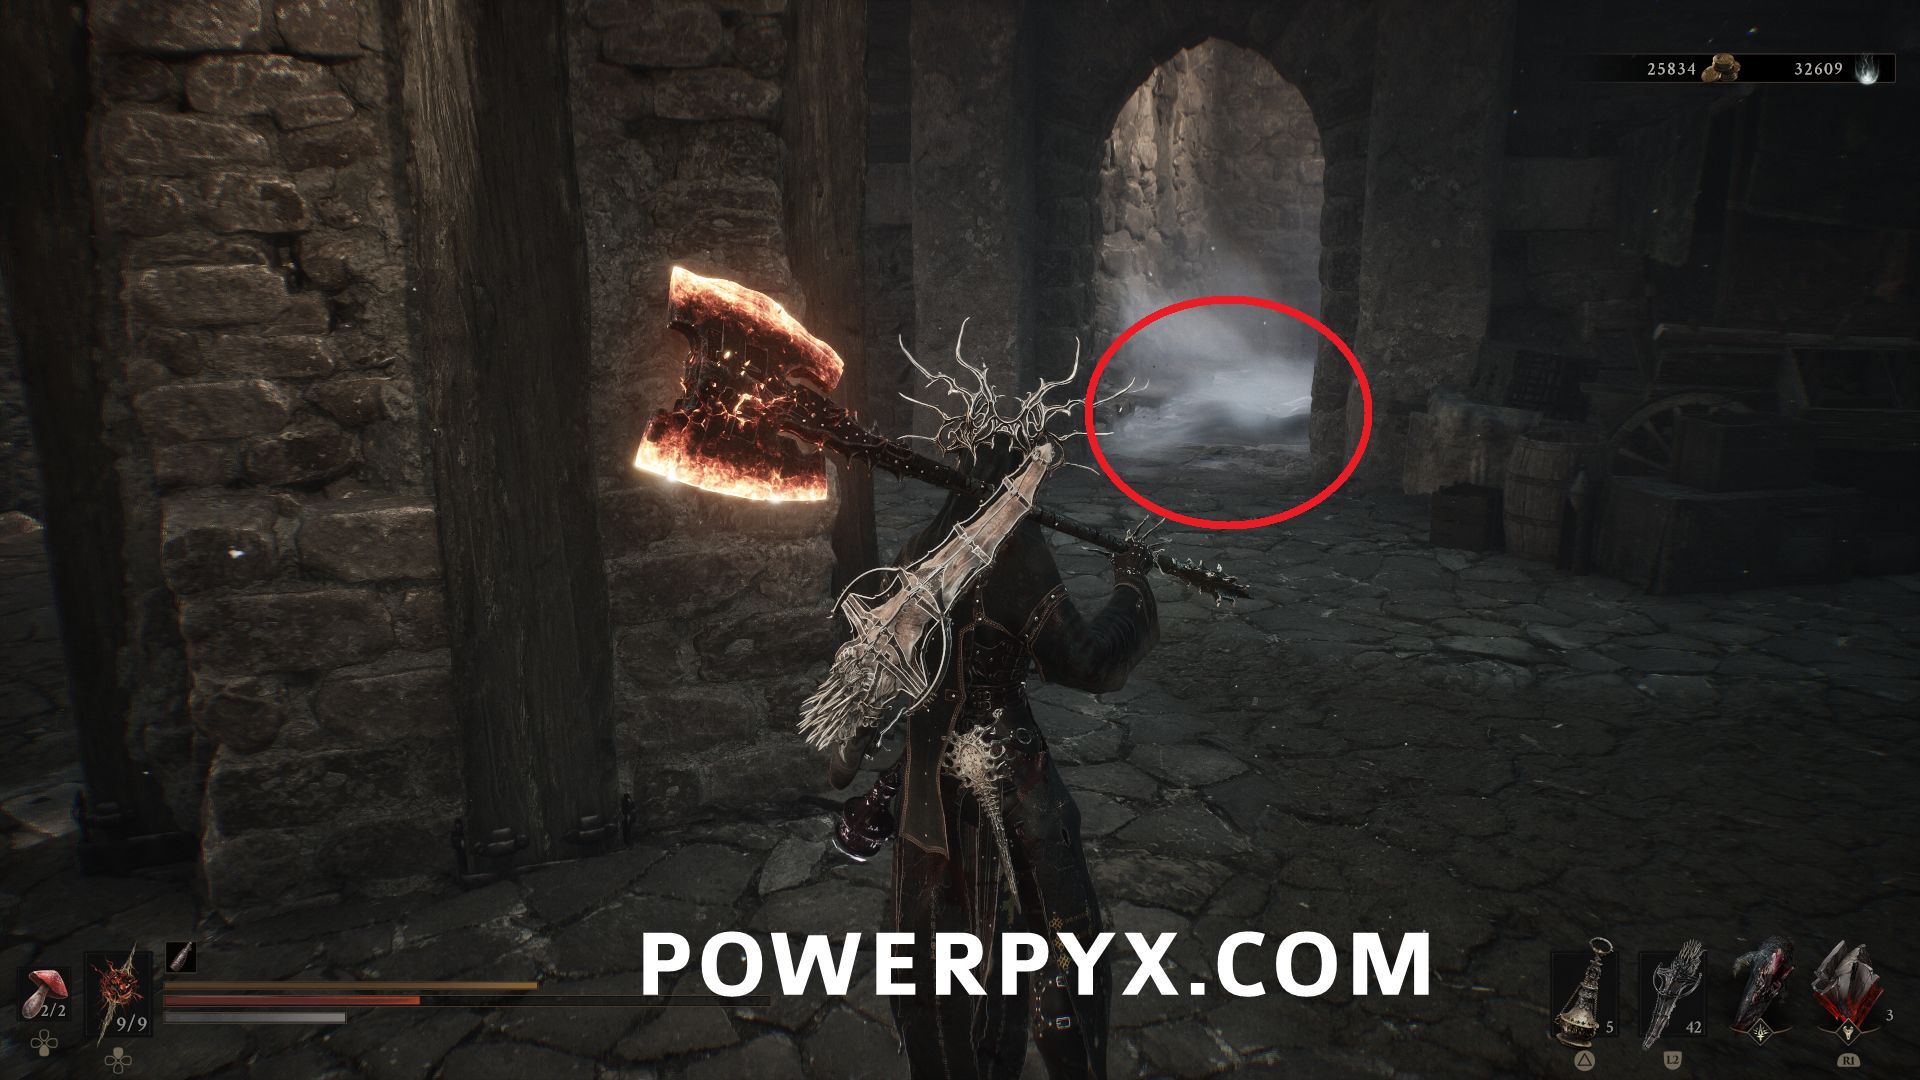
#32 – Sentry’s Grave – From the Beacon, go northeast up the first stairs to the first level of the building, then follow it around clockwise to the indoor area where you can find the stairs leading into this dungeon.
The Silent Steps
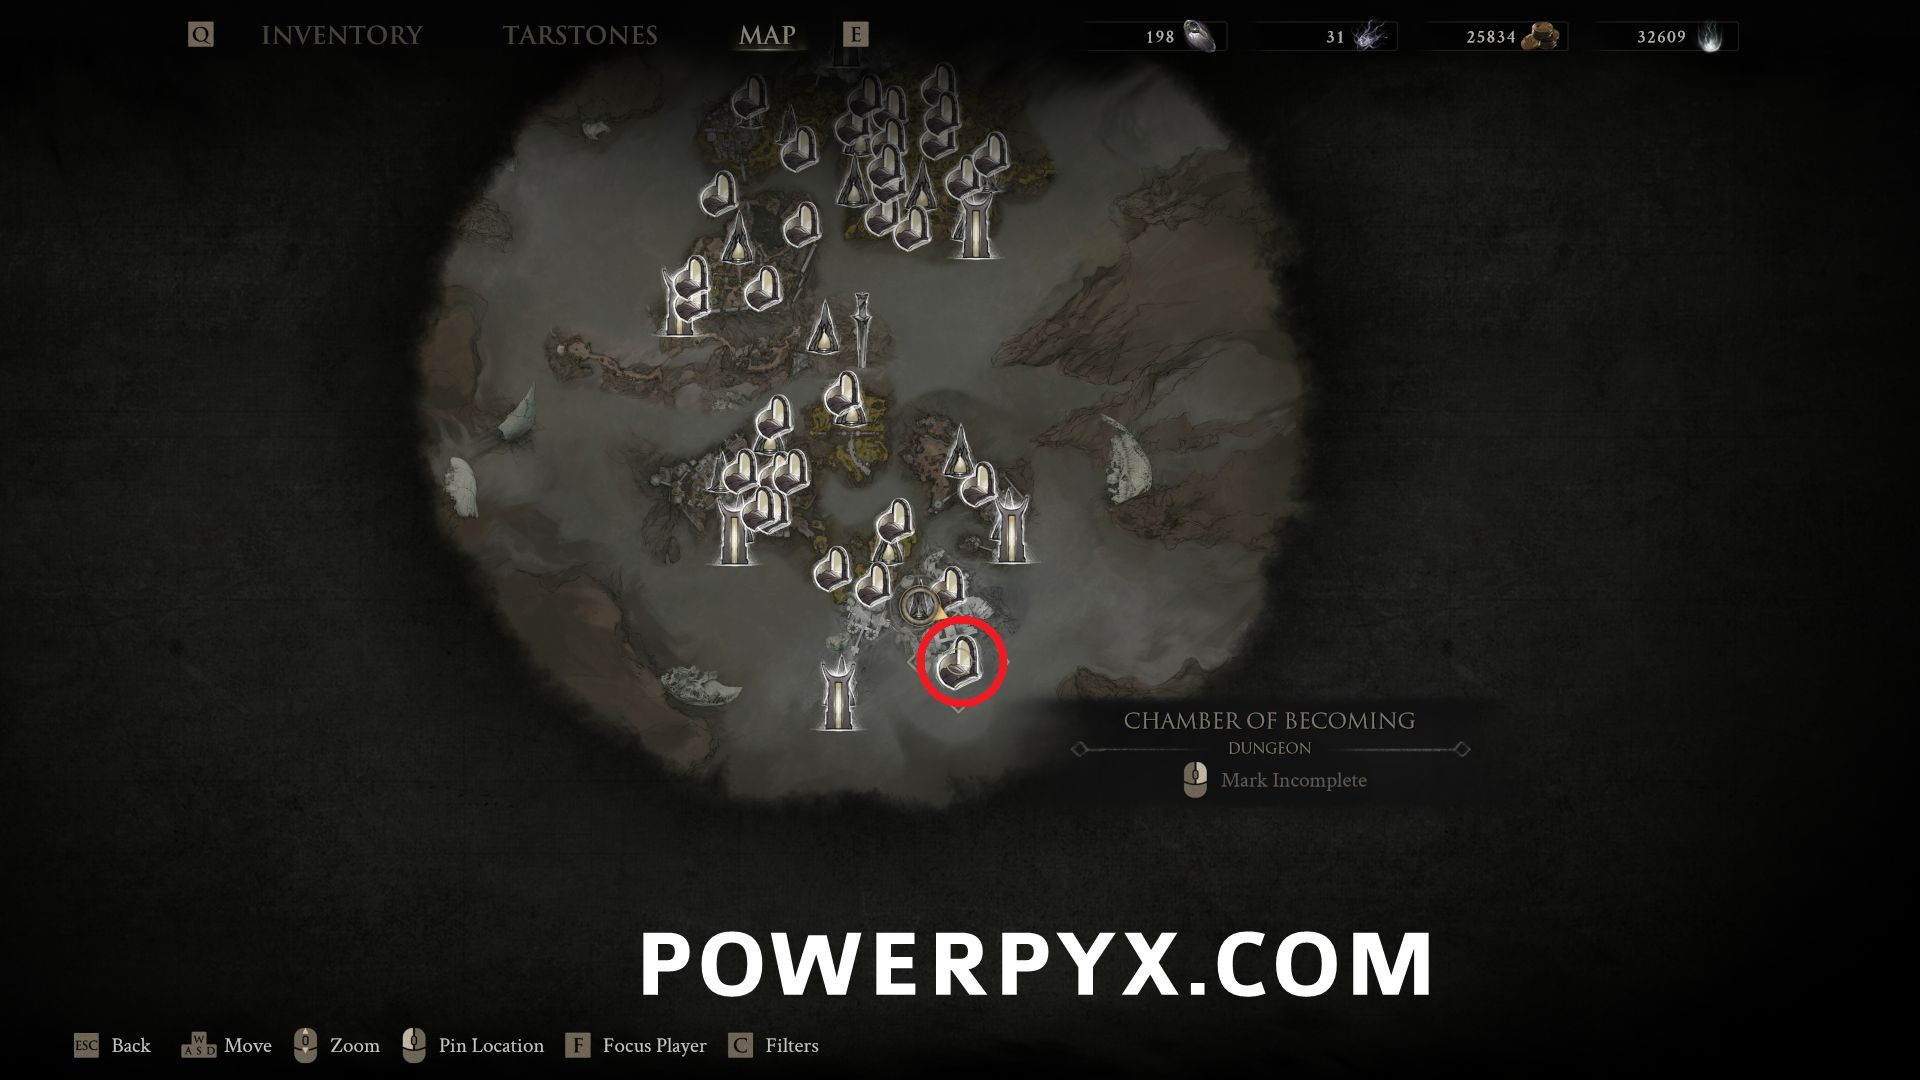
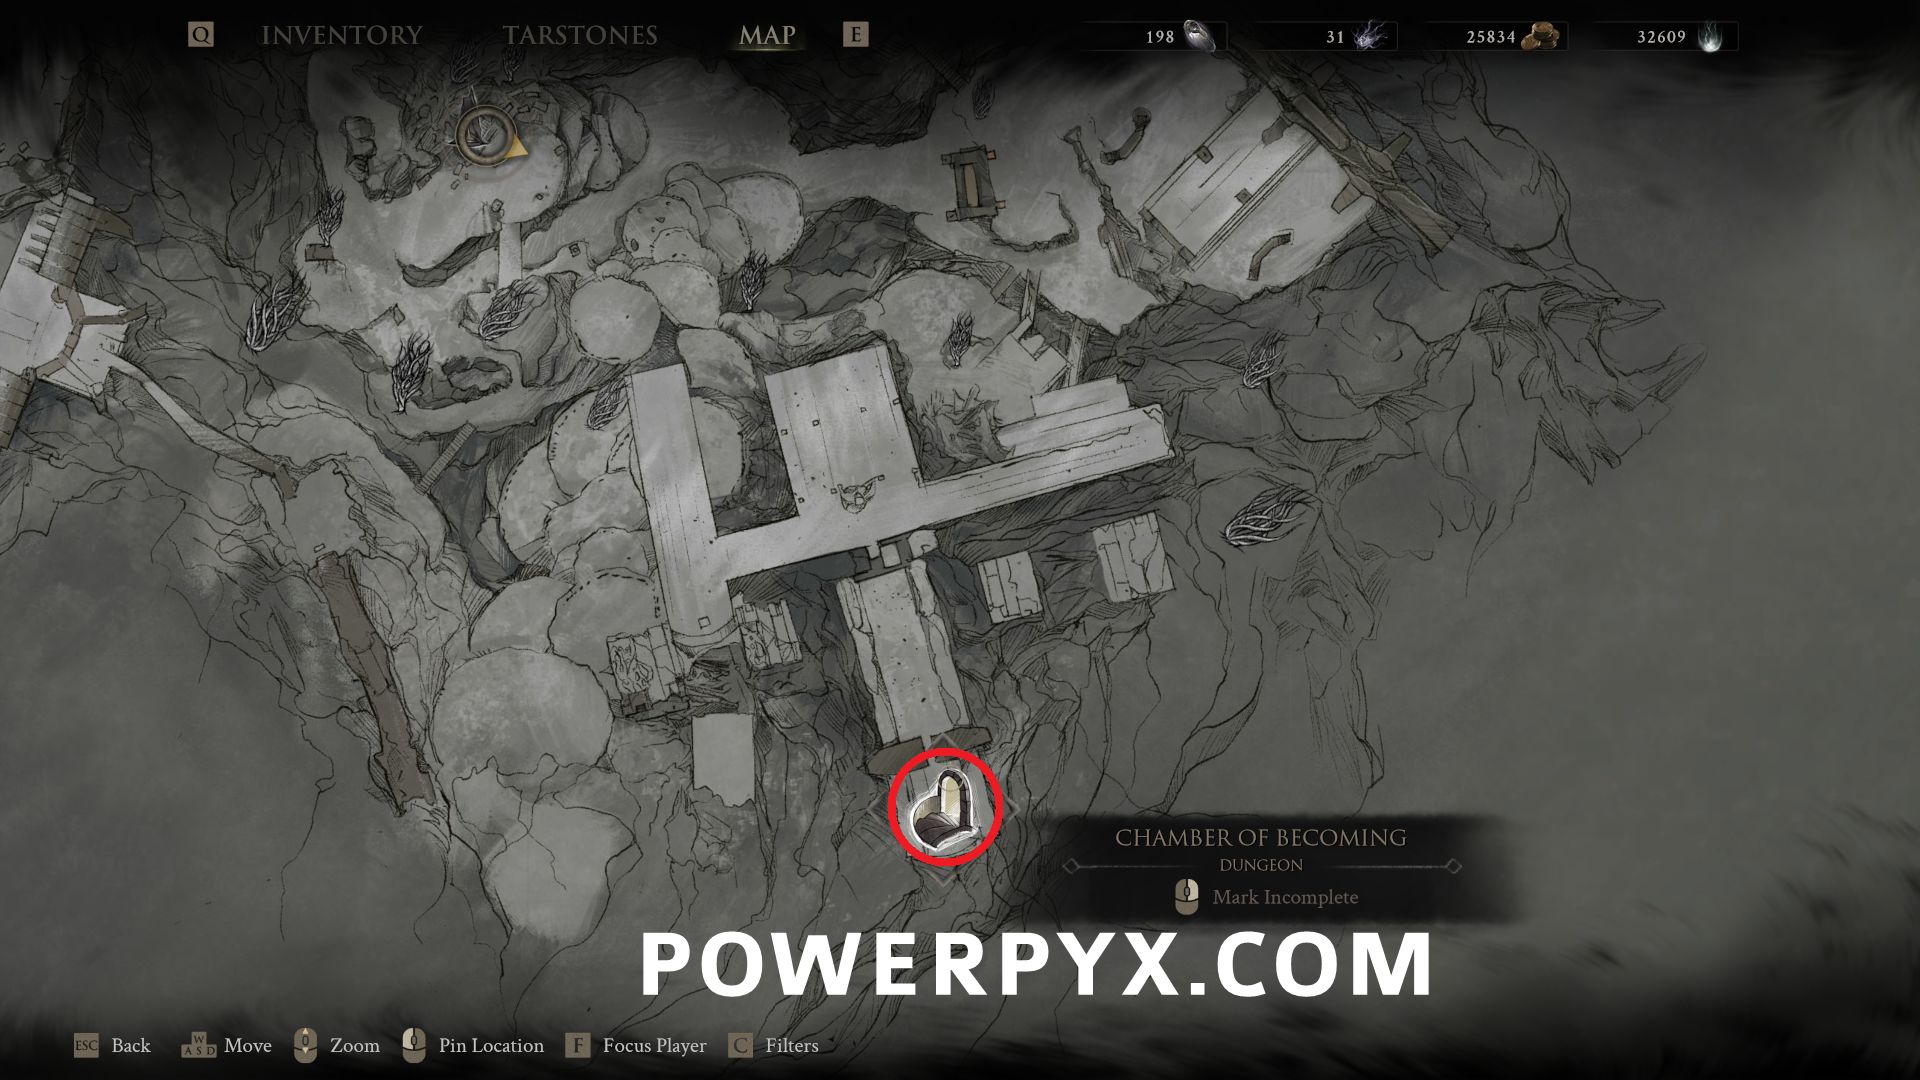
#33 – Chamber of Becoming – Southeast of The Silent Steps Beacon, go to the large stone platform where you encounter the miniboss Sariel, the Endless.
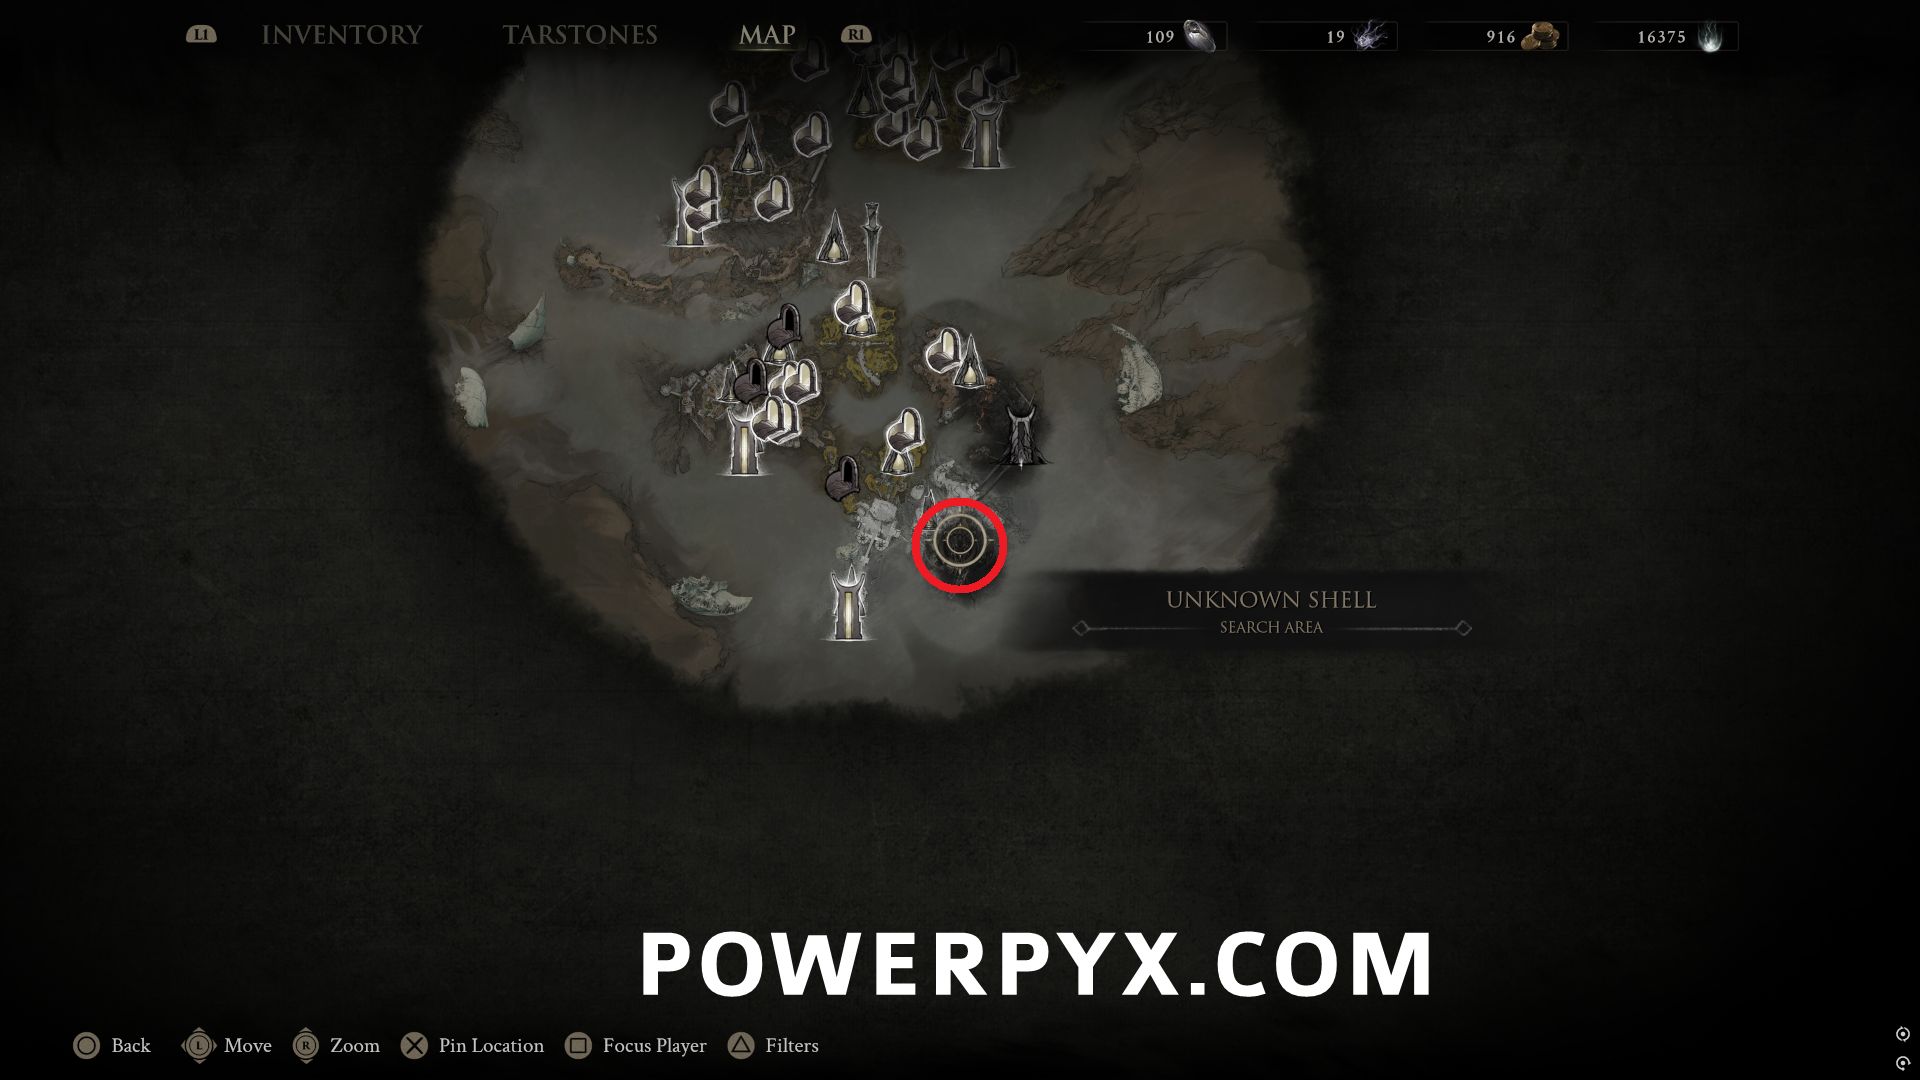
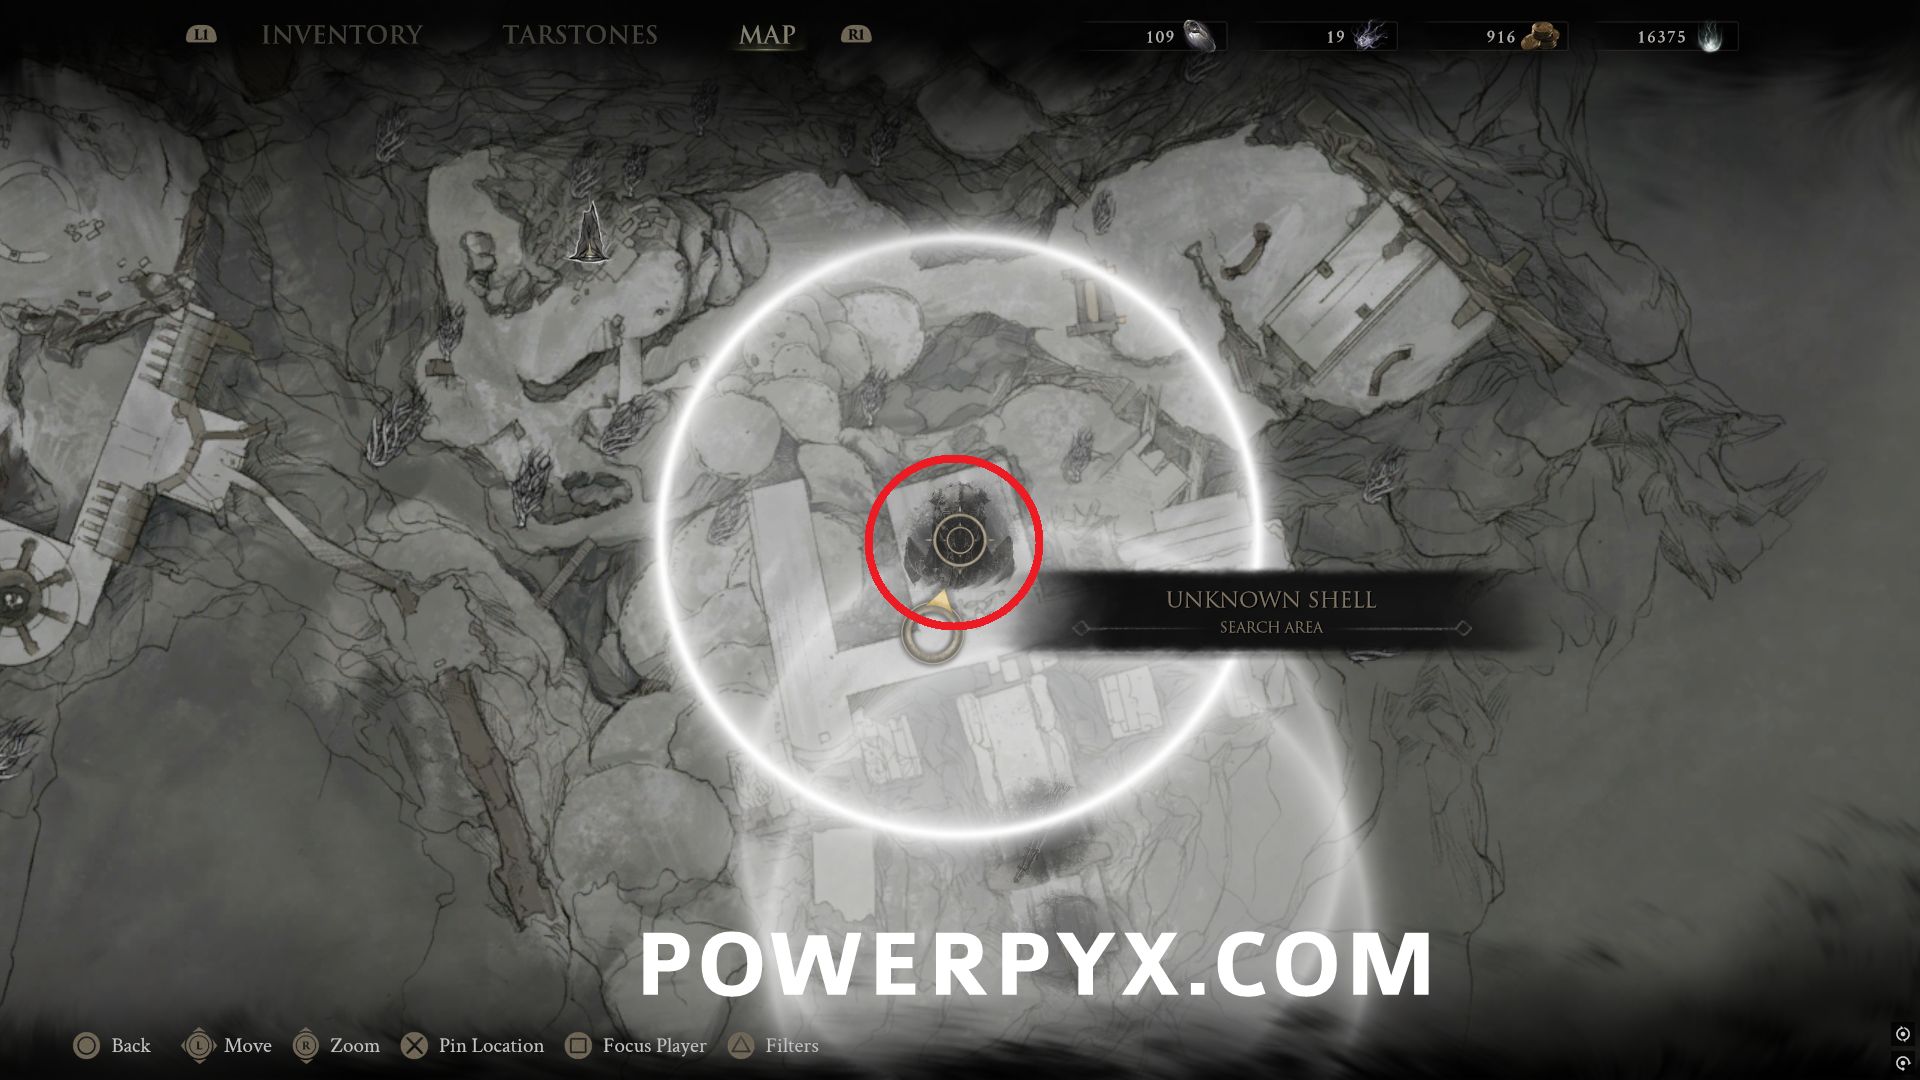
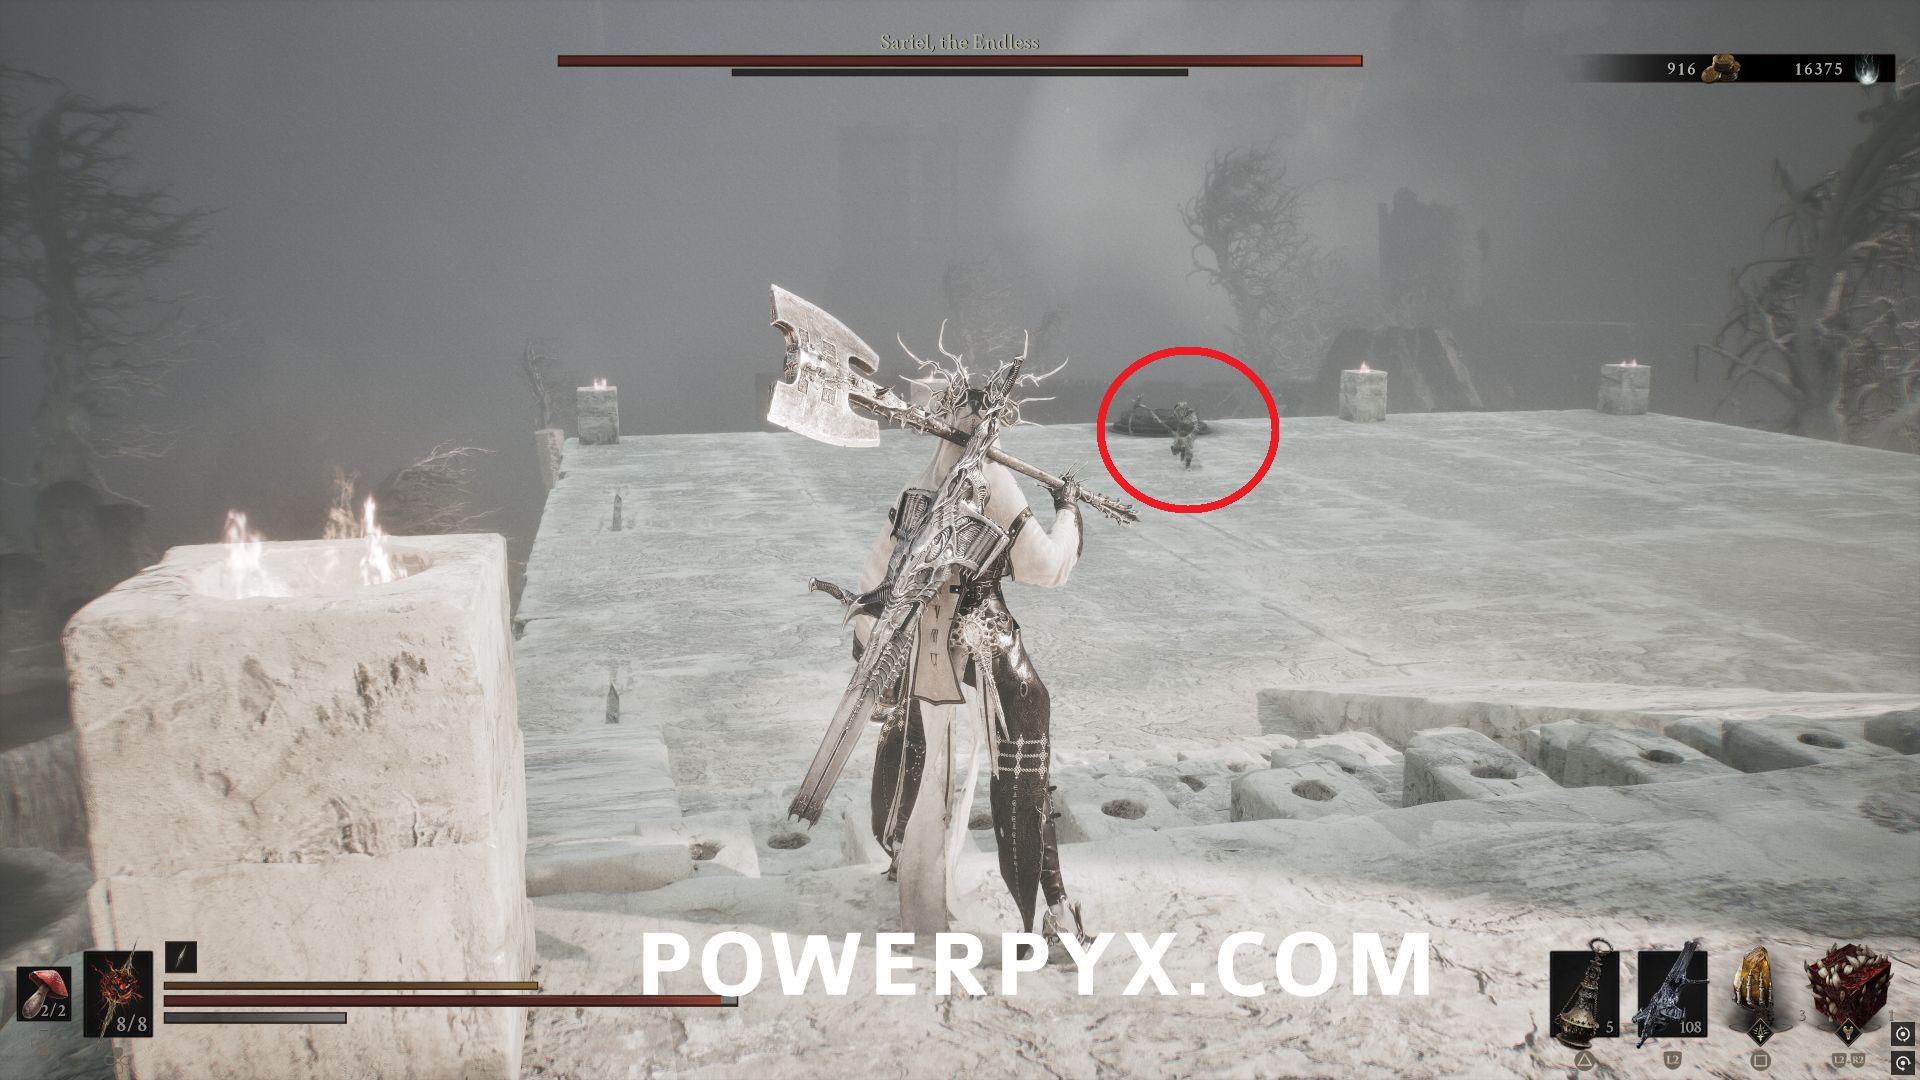
After you defeat him the first time, he will move through the walls to the south, opening them so that you can enter the Chamber of Becoming Dungeon.
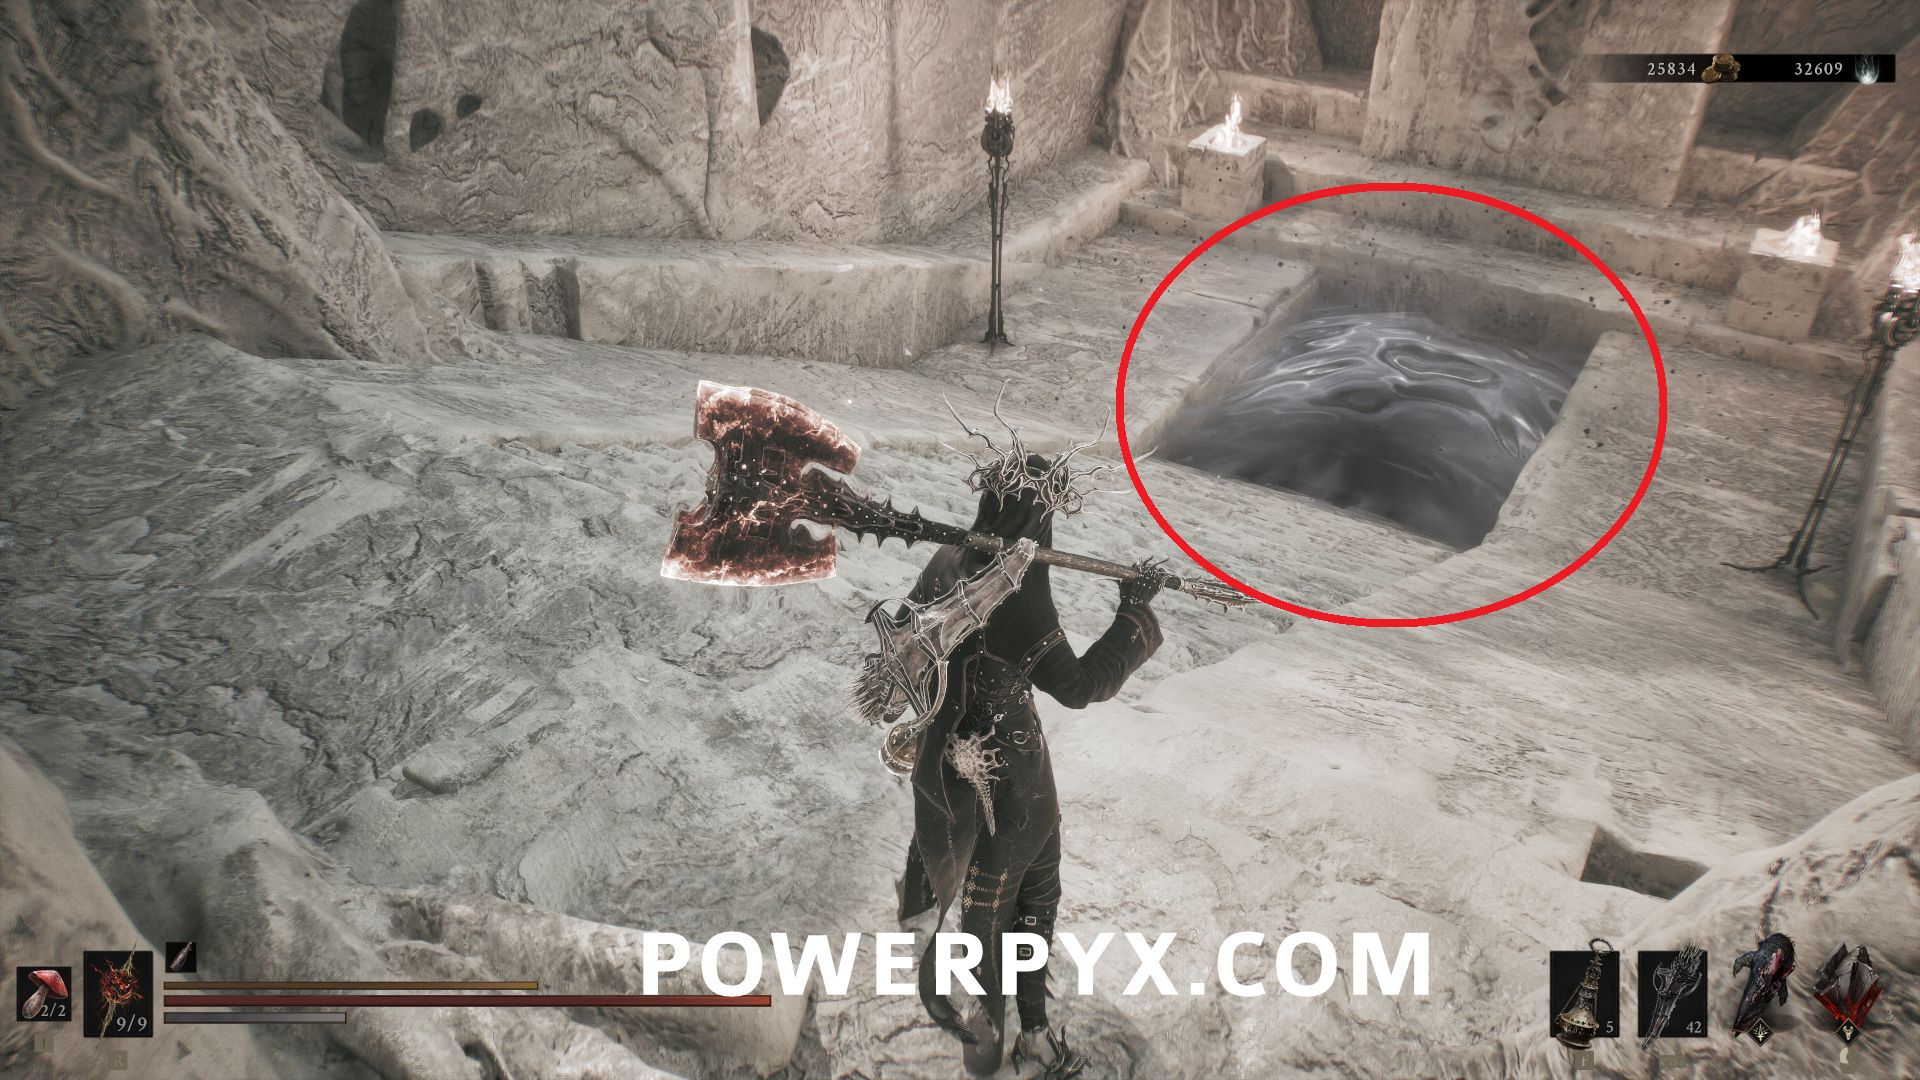
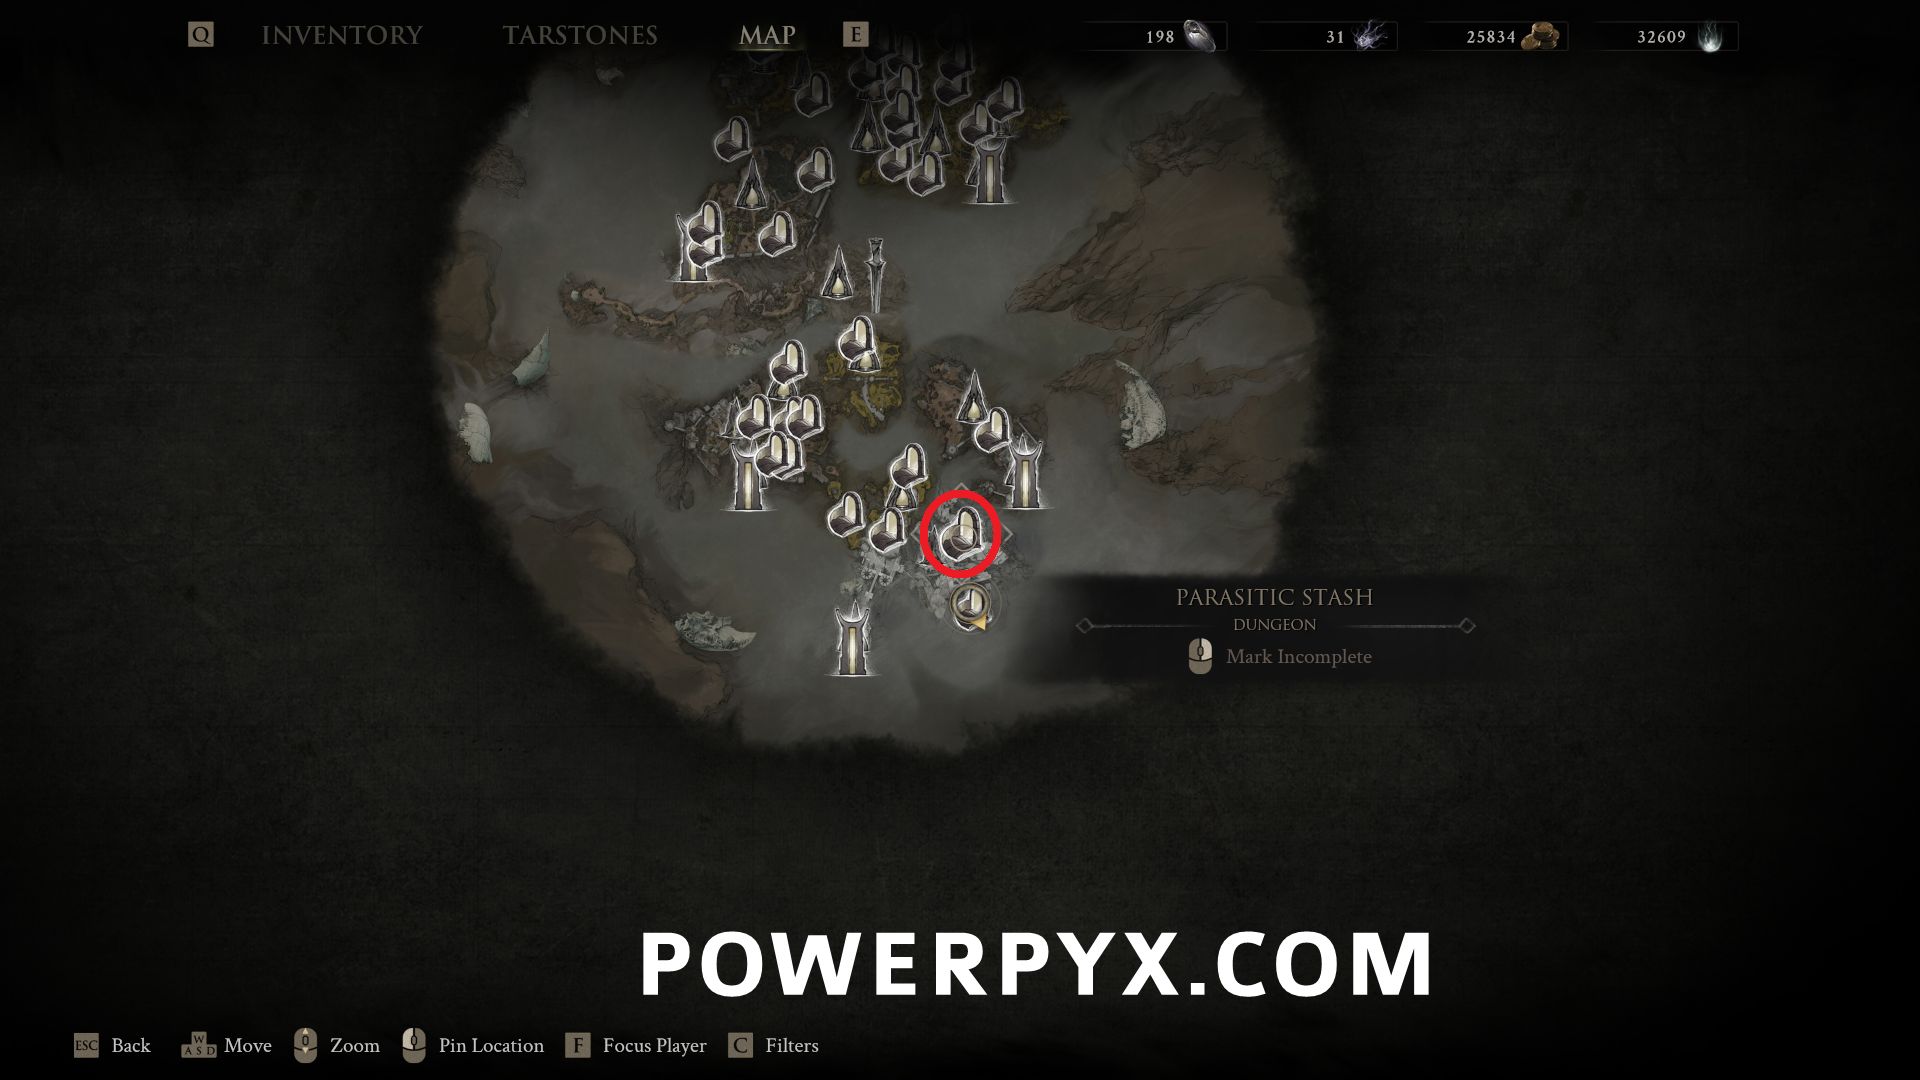
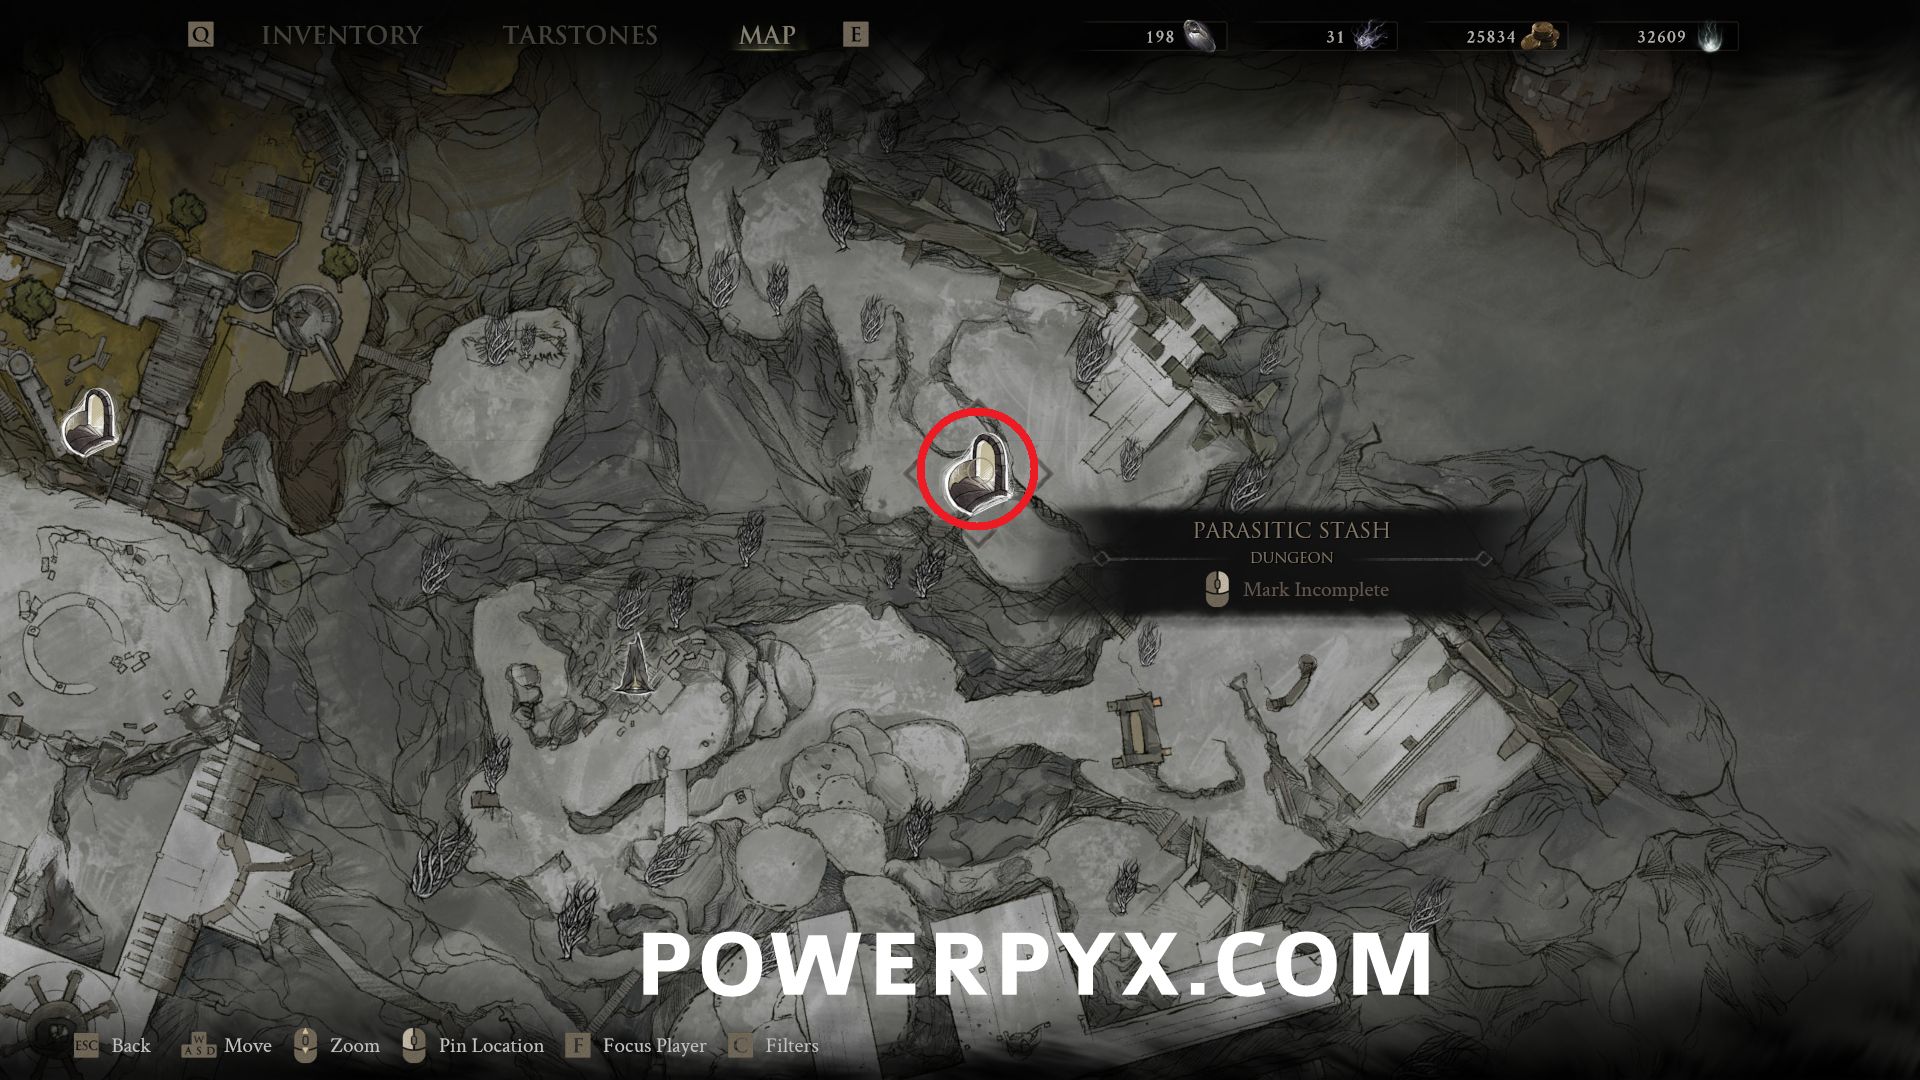
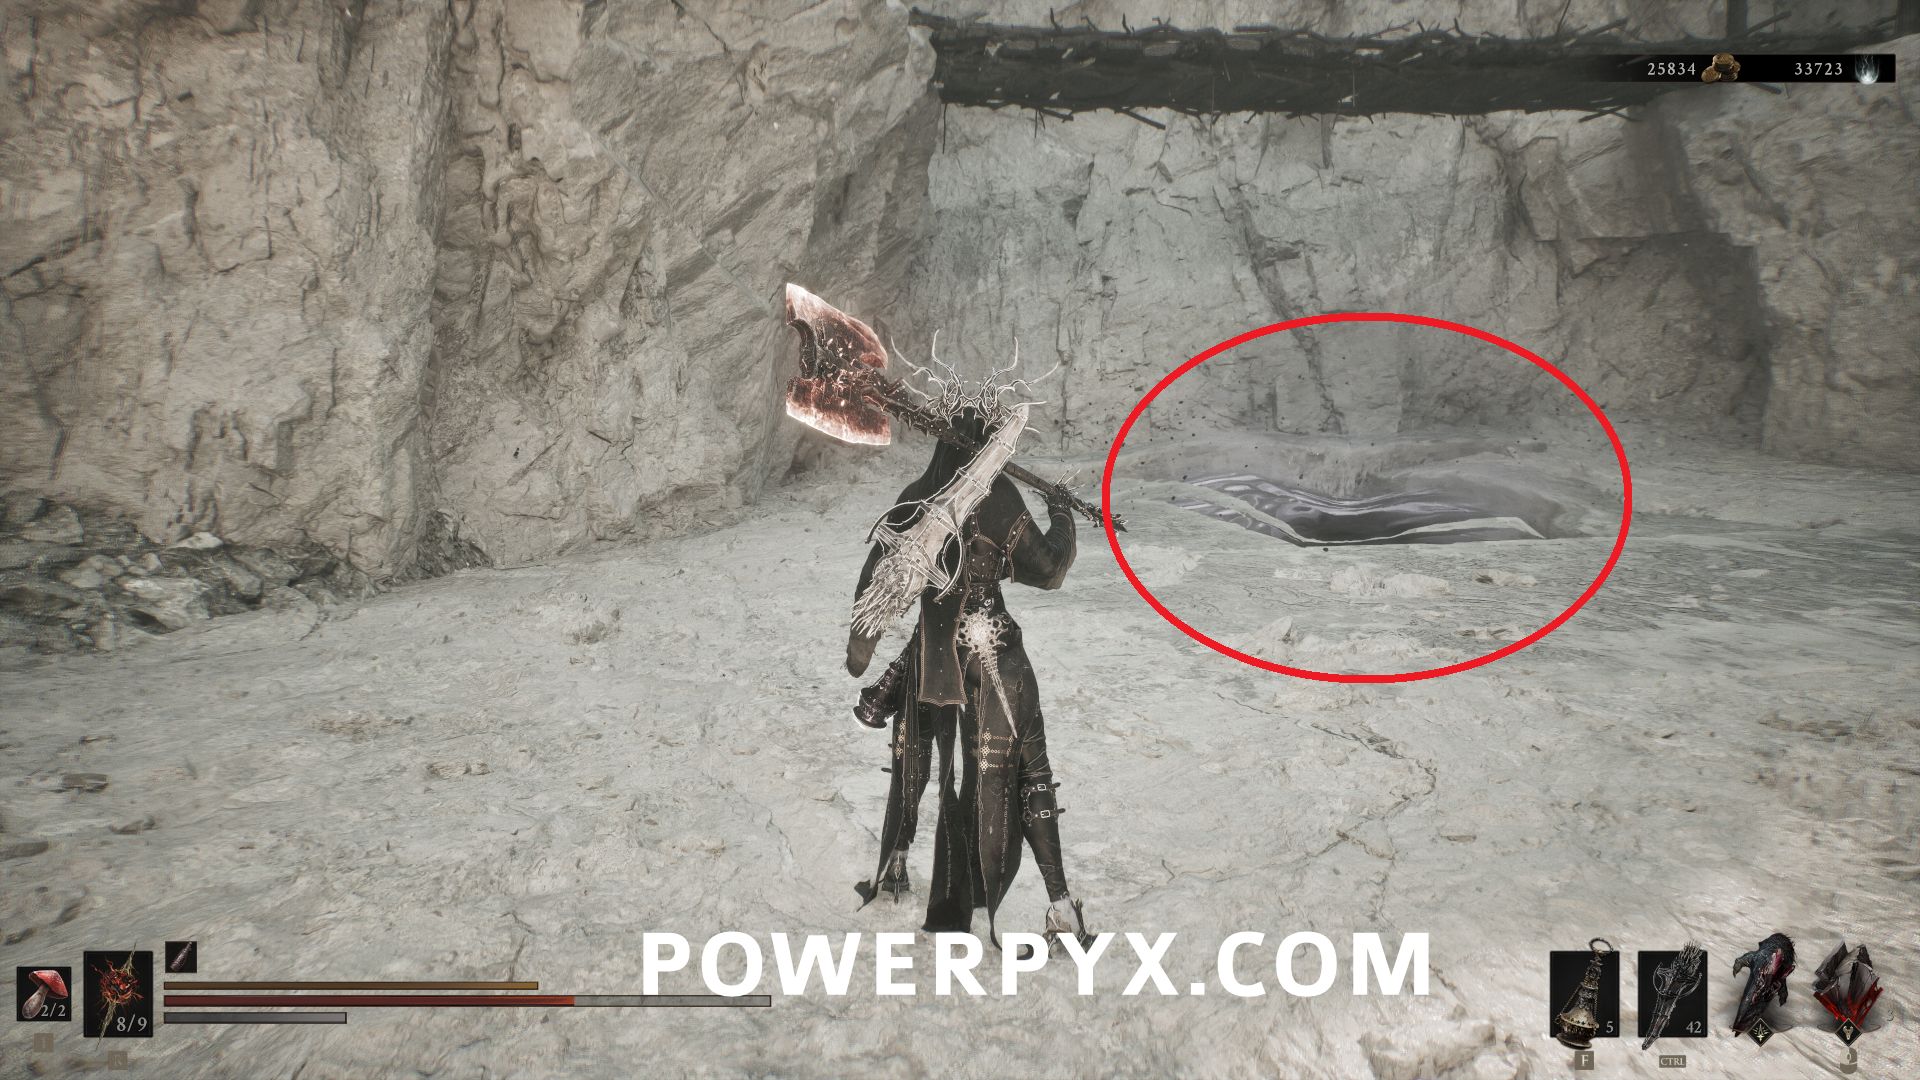
#34 – Parasitic Stash – Northwest of The Silent Steps Beacon, follow the path to the platform directly east, where this is on the lower level from the main path direction under a wooden bridge.
High Lord’s Courtyard
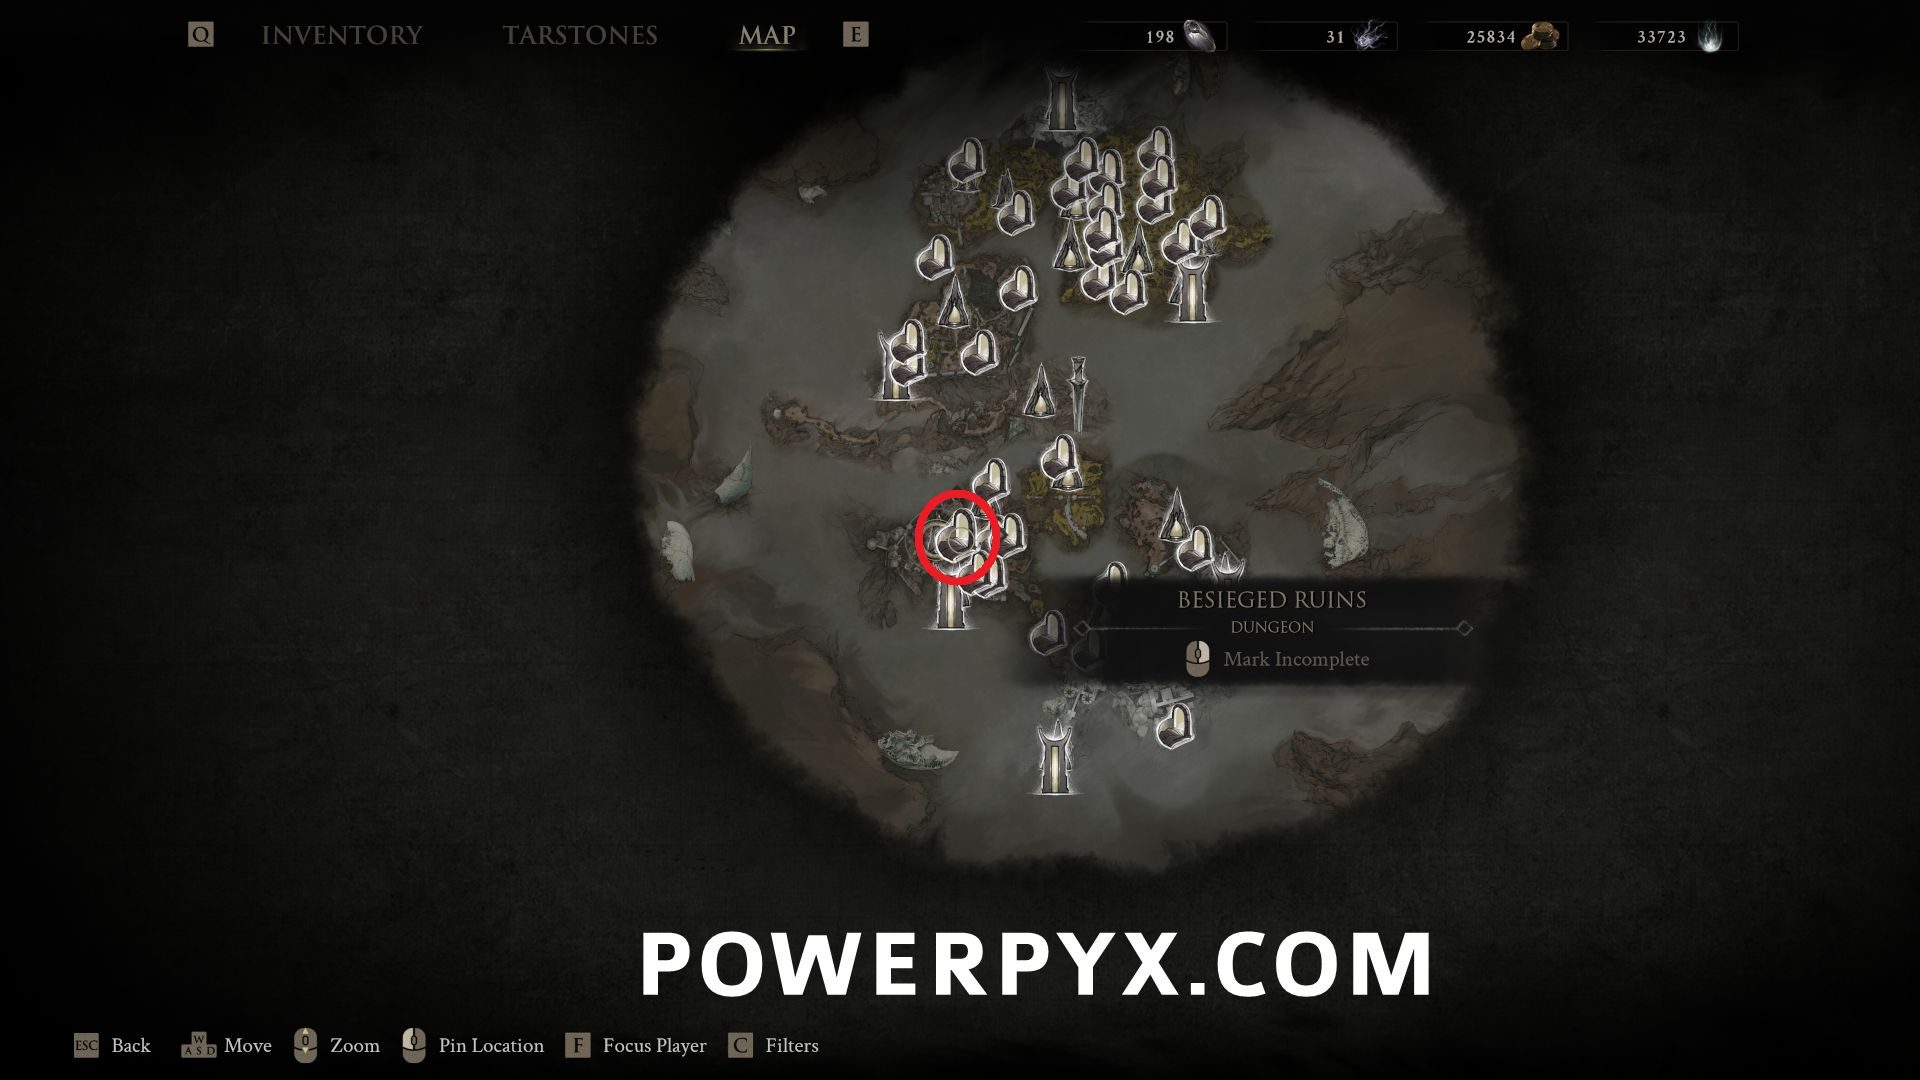
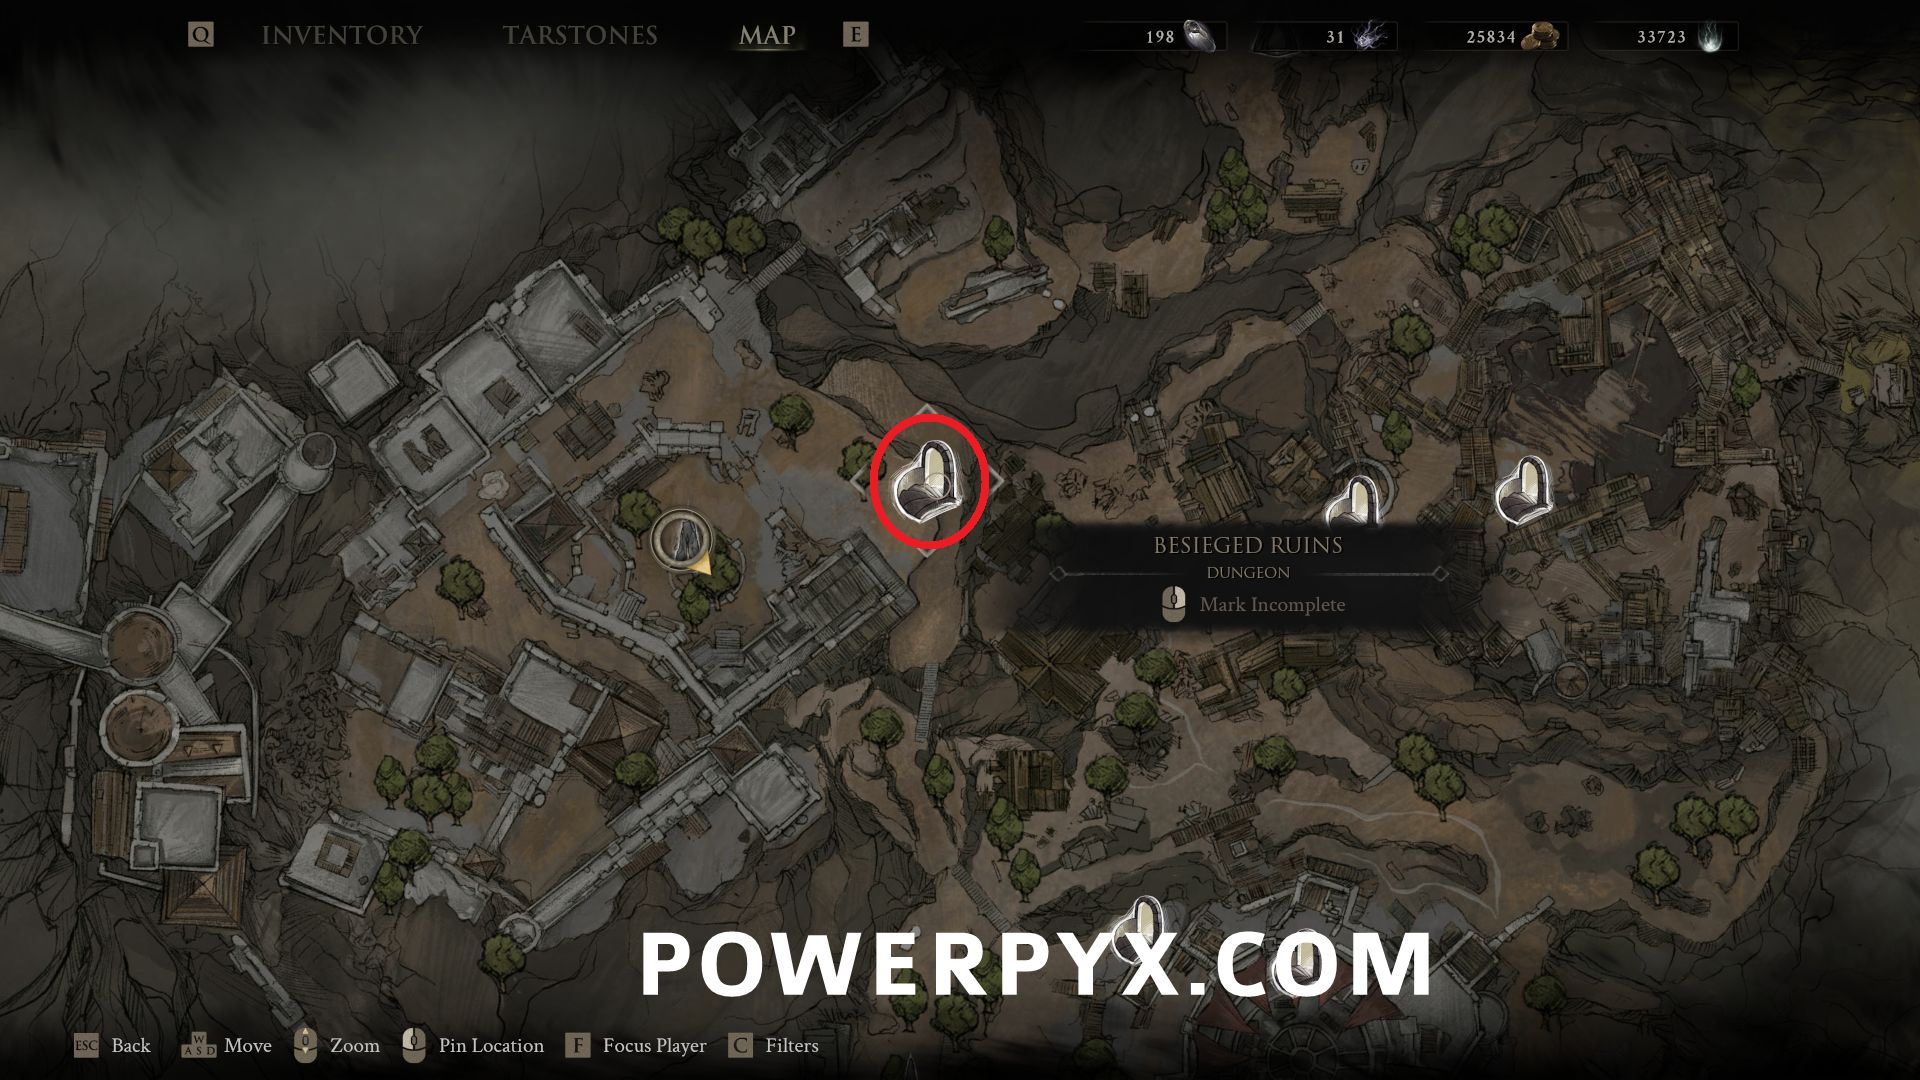
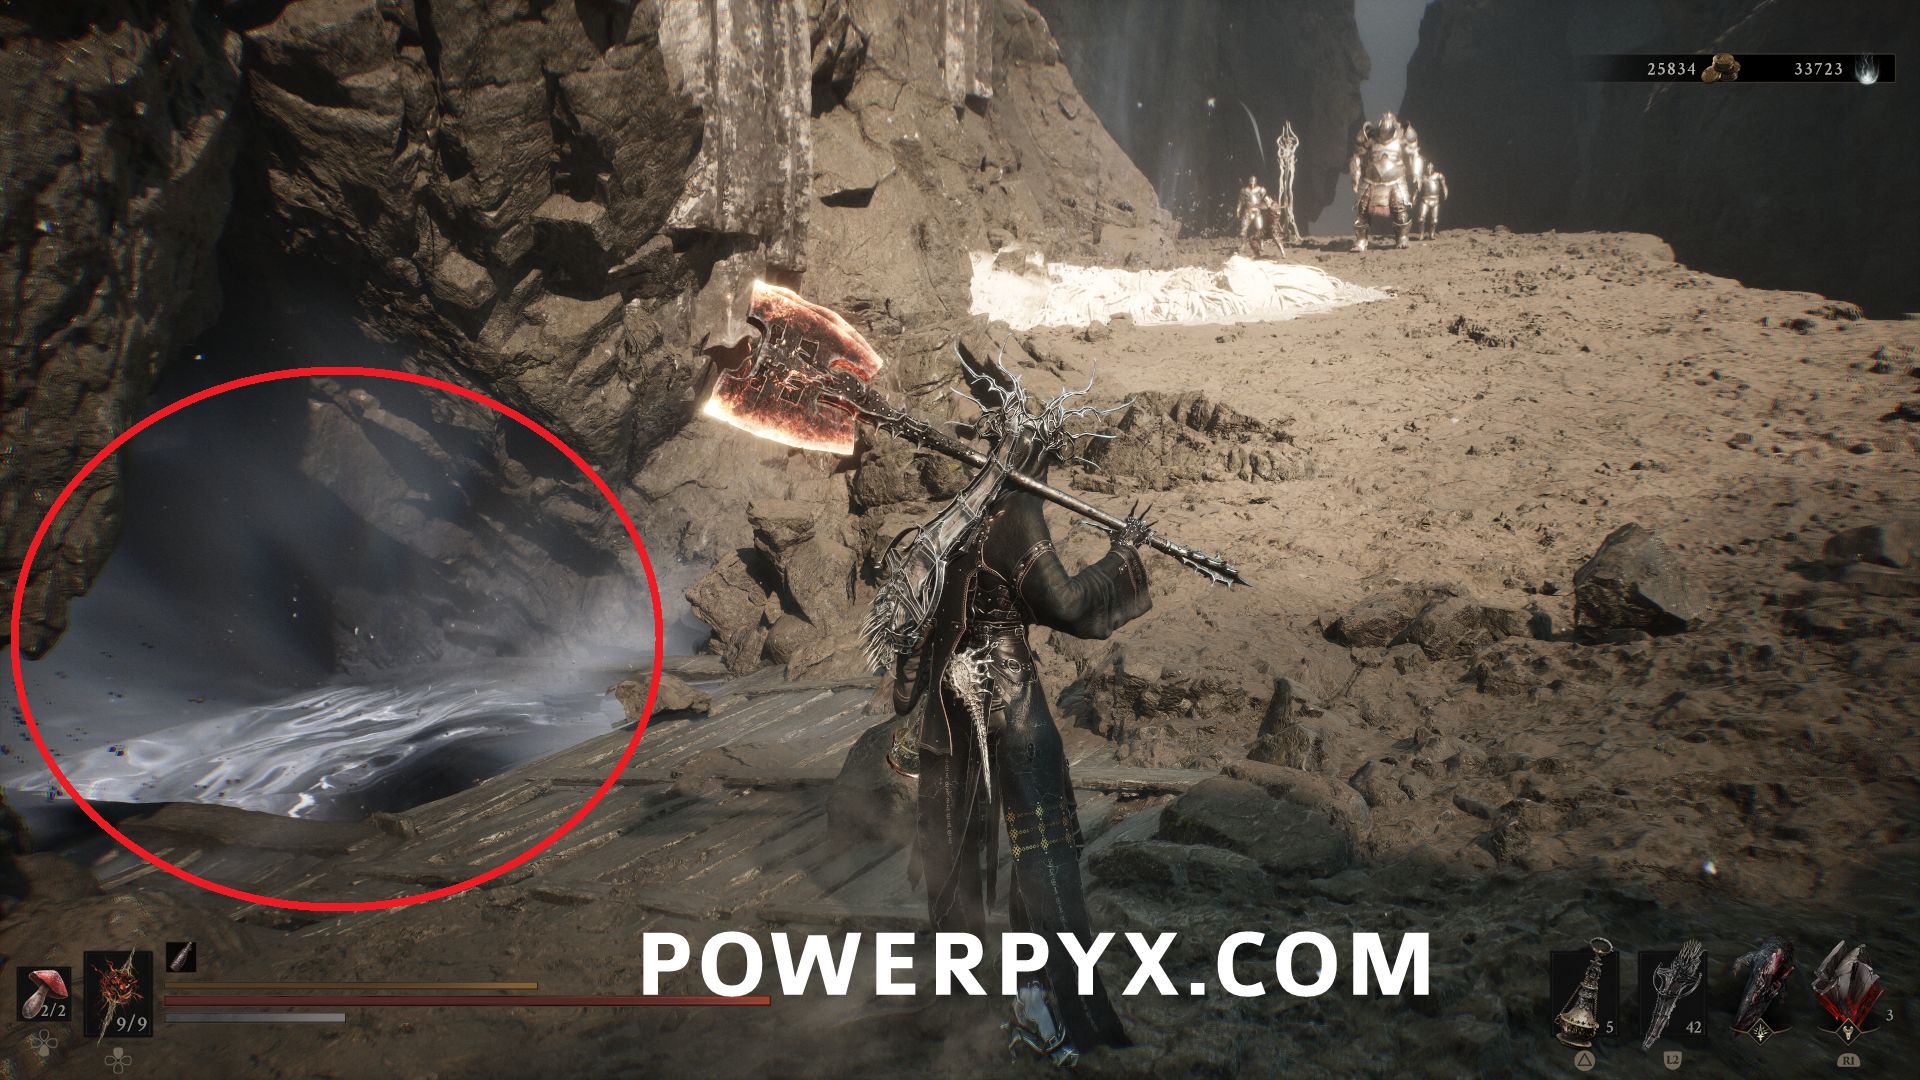
#35 – Besieged Ruins – East of the Beacon, drop down two levels to the lowest one where the enemies are by the jump pad, and the dungeon entrance is in the wall nearby.
Disciple’s Pass
Disciple’s Grotto
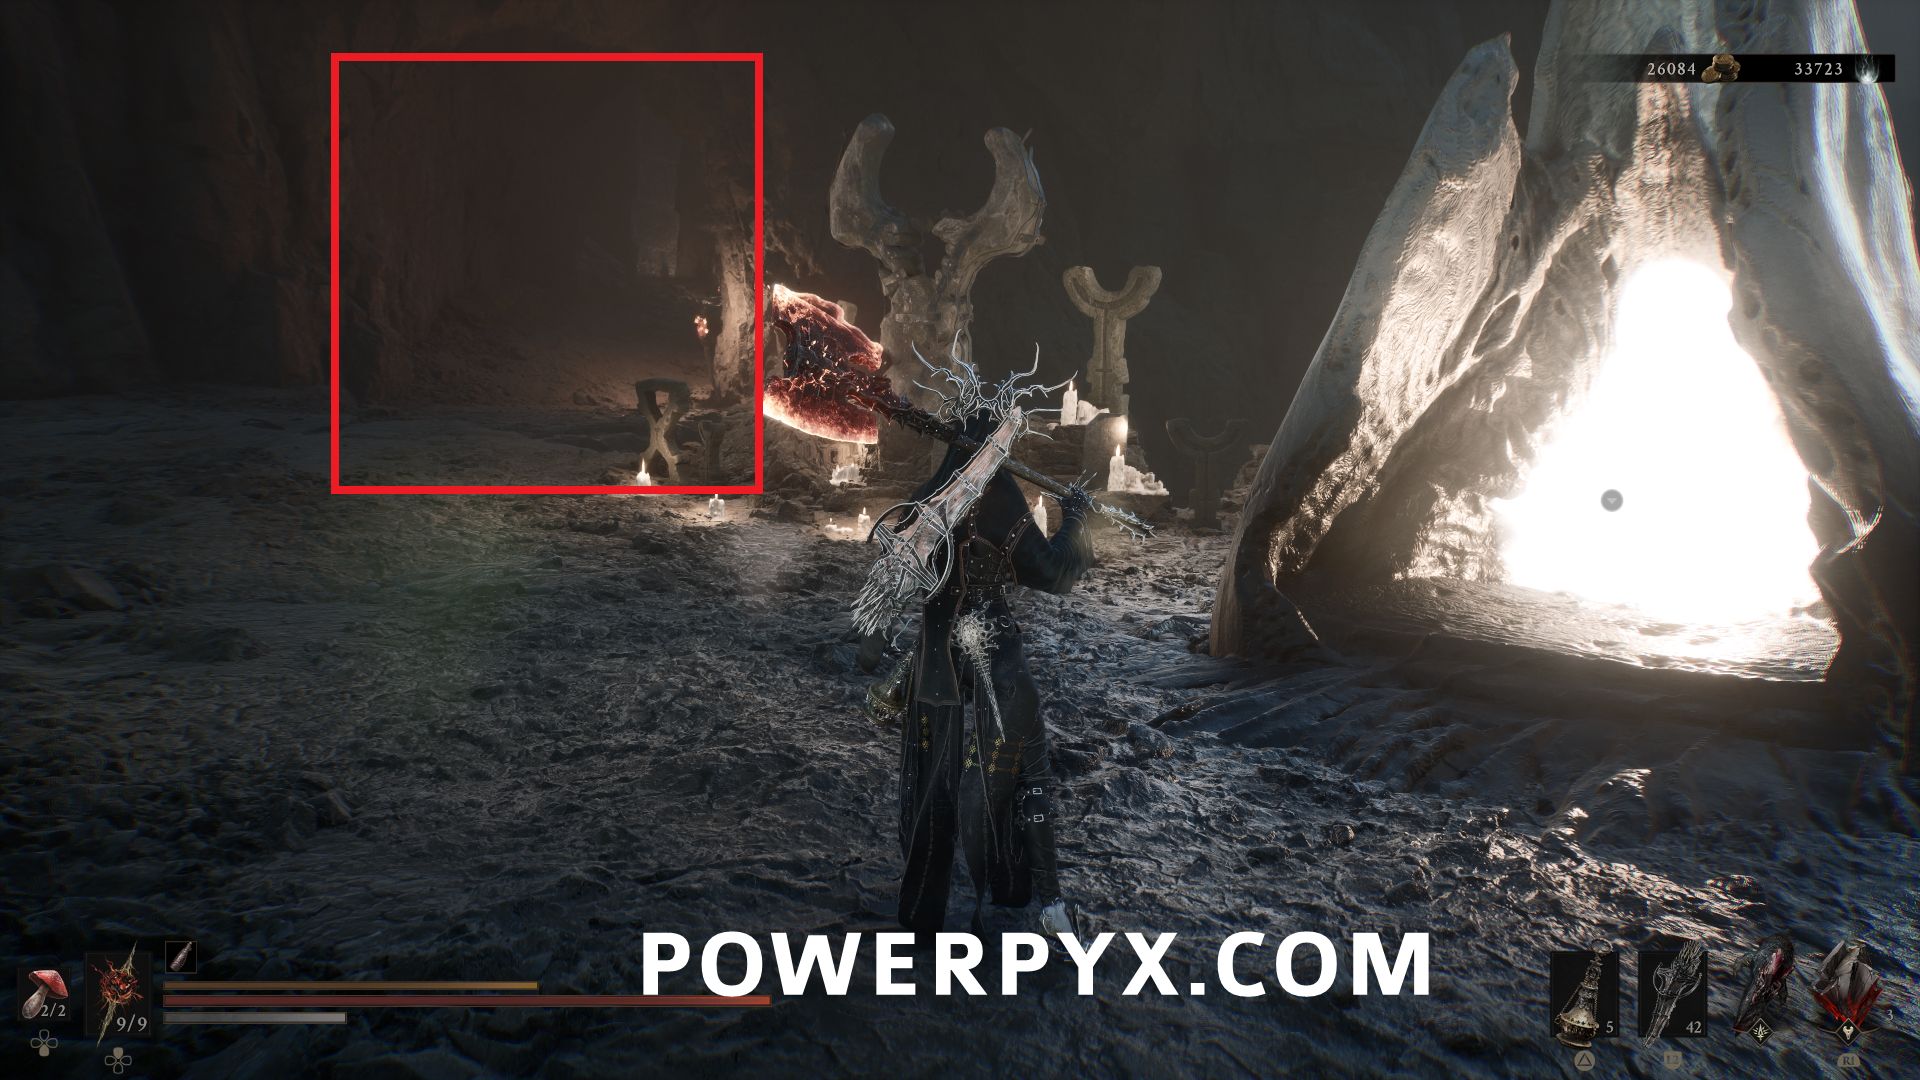
#36 – Garrick’s Den – Left of this Beacon, in a cave.
More Mortal Shell 2 Guides:
- Shell Locations
- Tarstone Locations
- Beacon Locations
- Weapon Locations
- Sidearm Locations
- Tarforge Upgrade Locations
- Dungeon Locations
- Healing Upgrade Locations
- How to Summon Night (Increase Difficulty)
Leave a Reply