
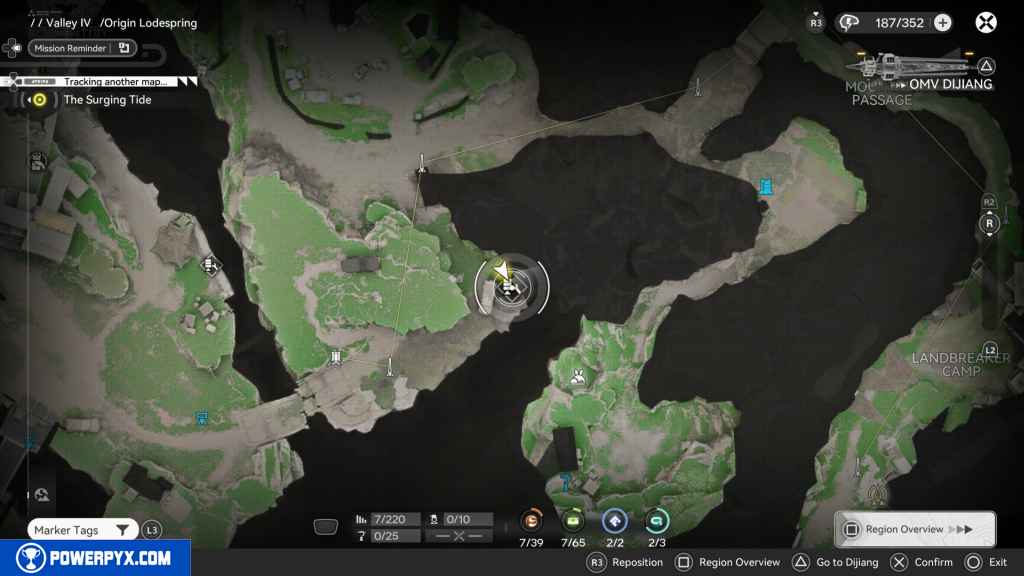
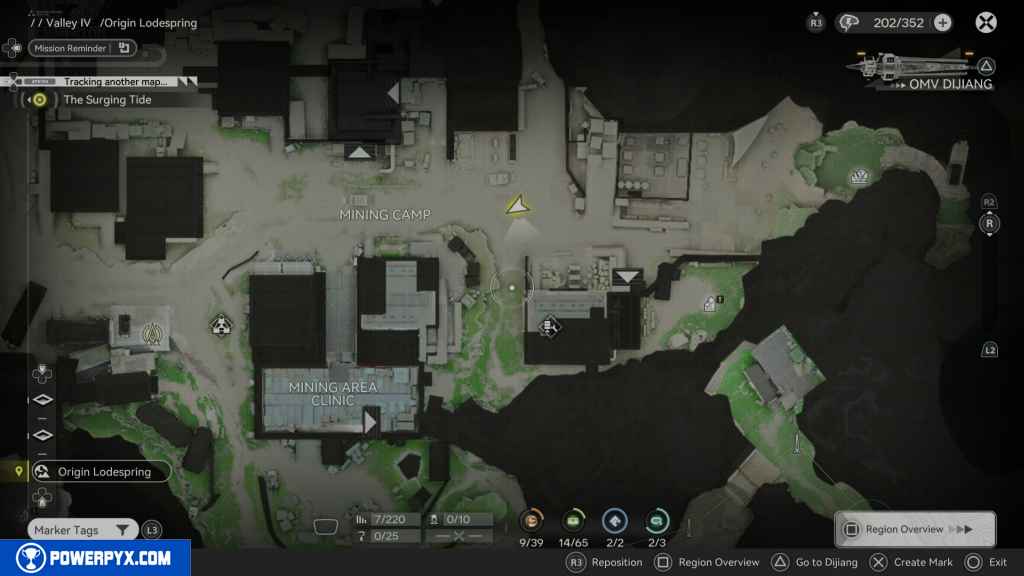
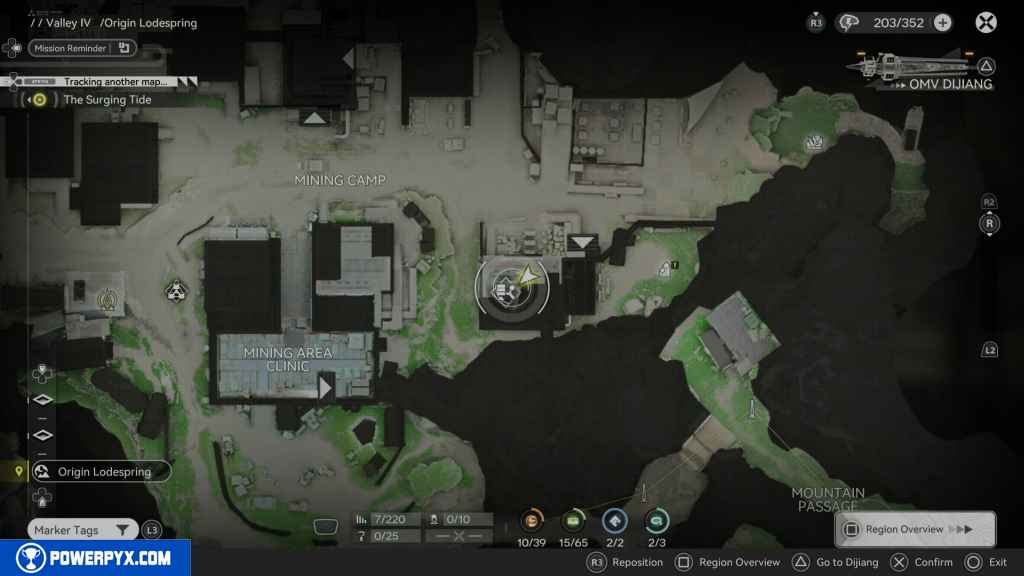
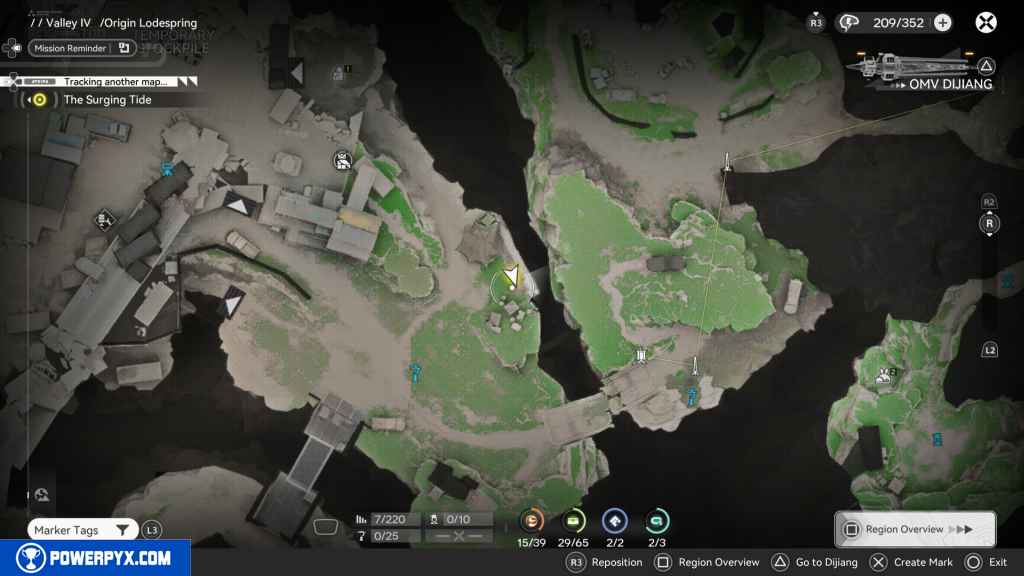
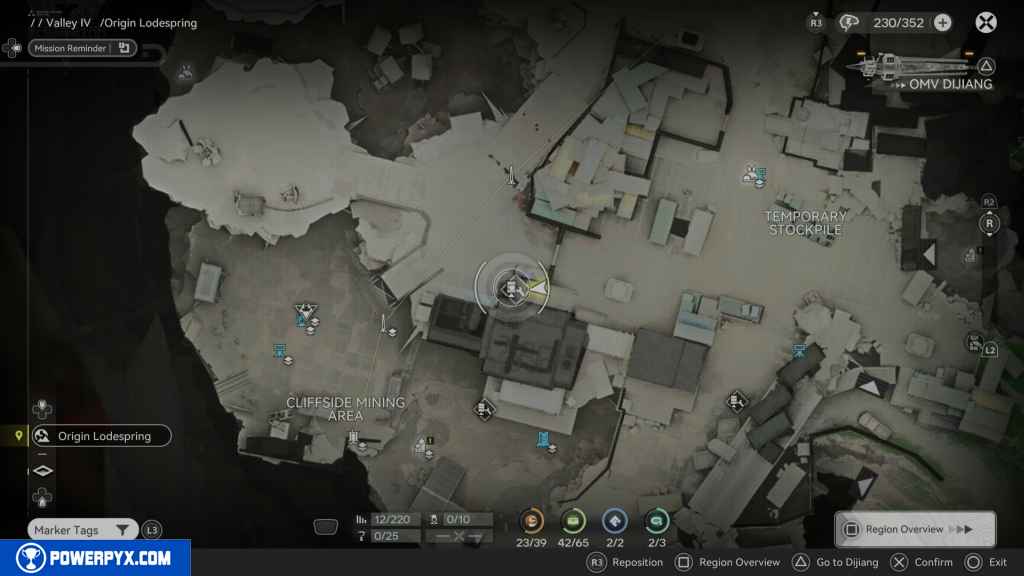
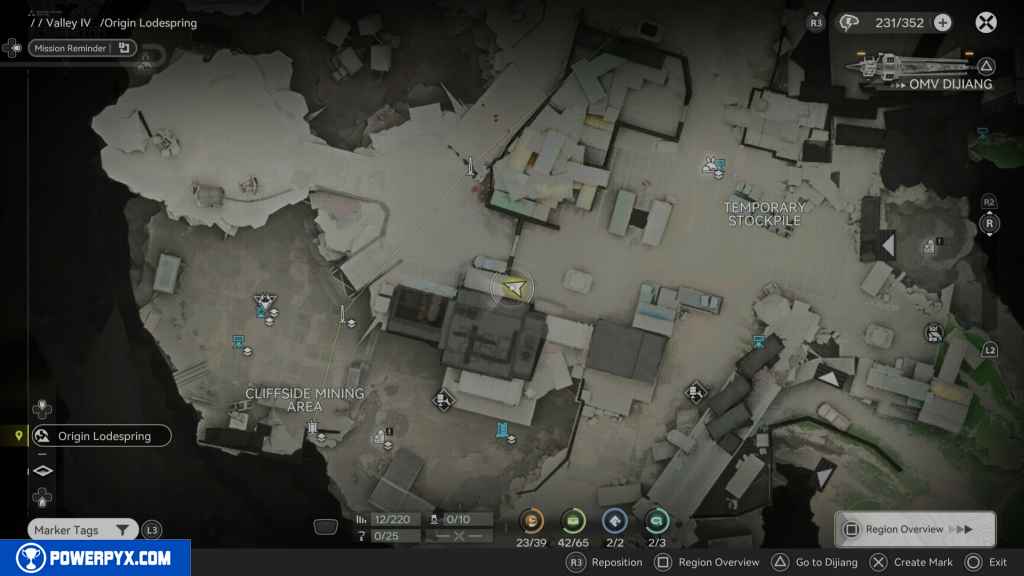
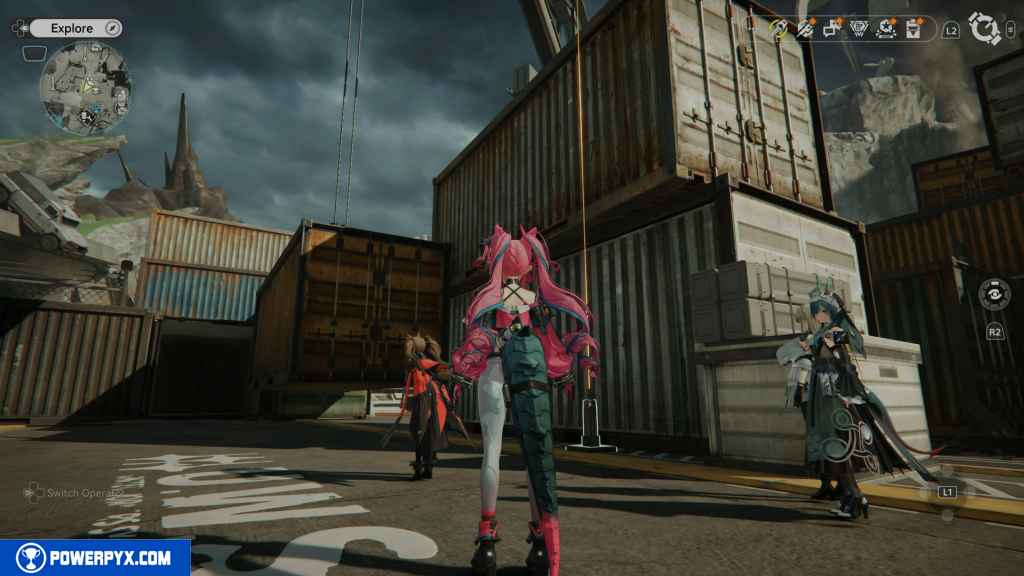
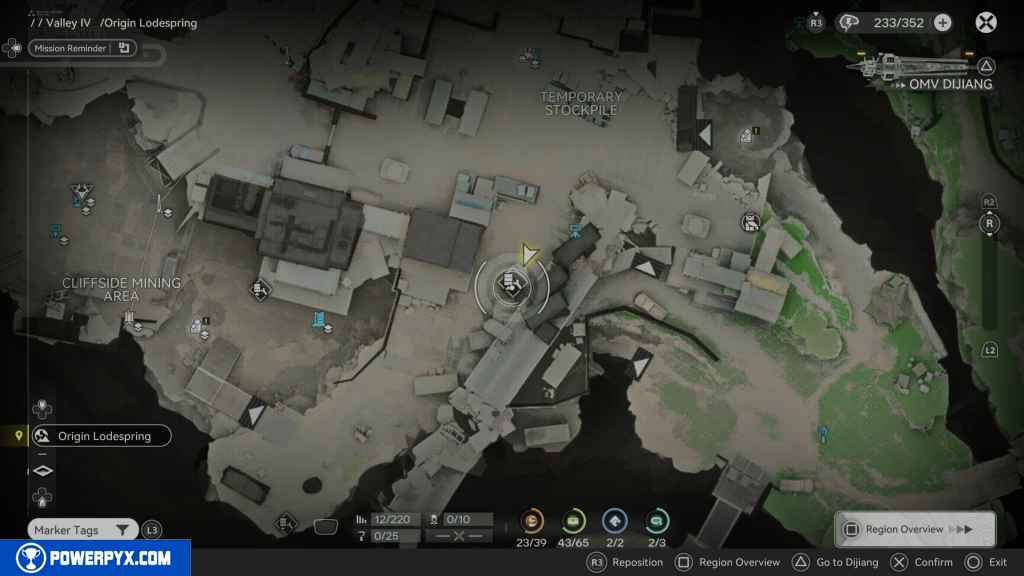
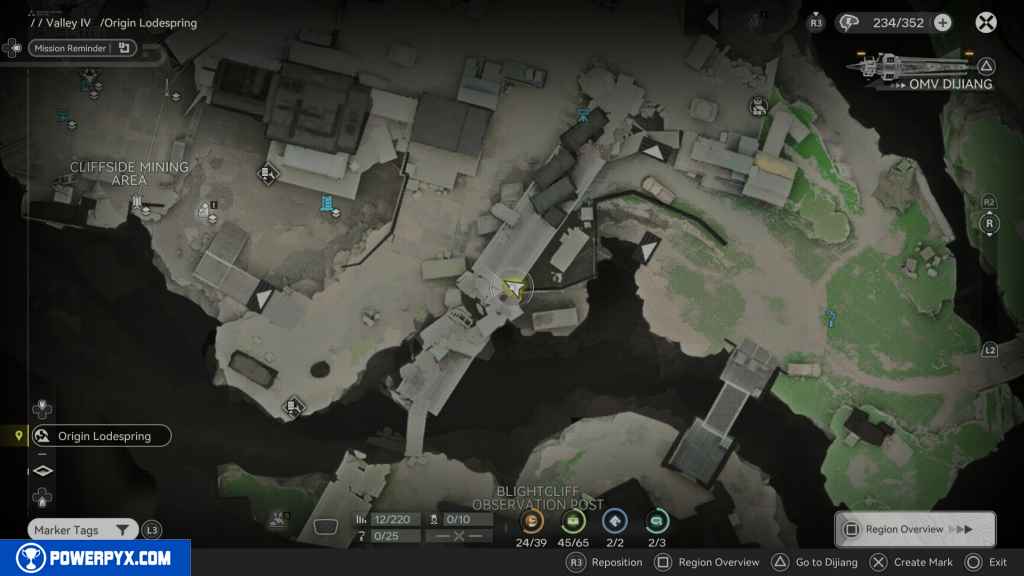
The Origin Lodespring contains 166 Collectible Locations in Arknights Endfield. This walkthrough will guide you to all the collectibles in the Origin Lodespring Region. Everything that’s needed for 100% completion is included.
- Aurylene: 39
- Crates: 65
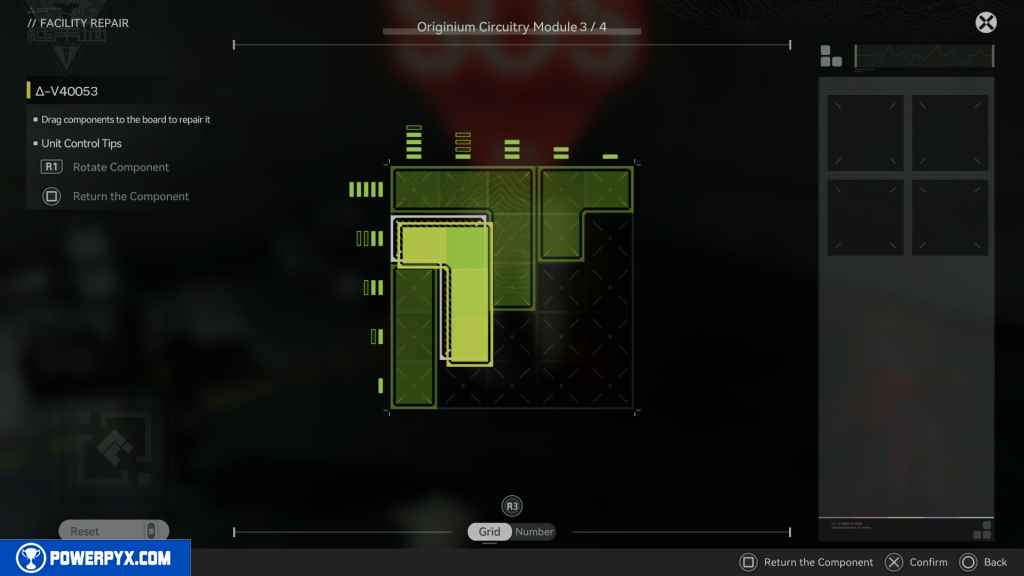
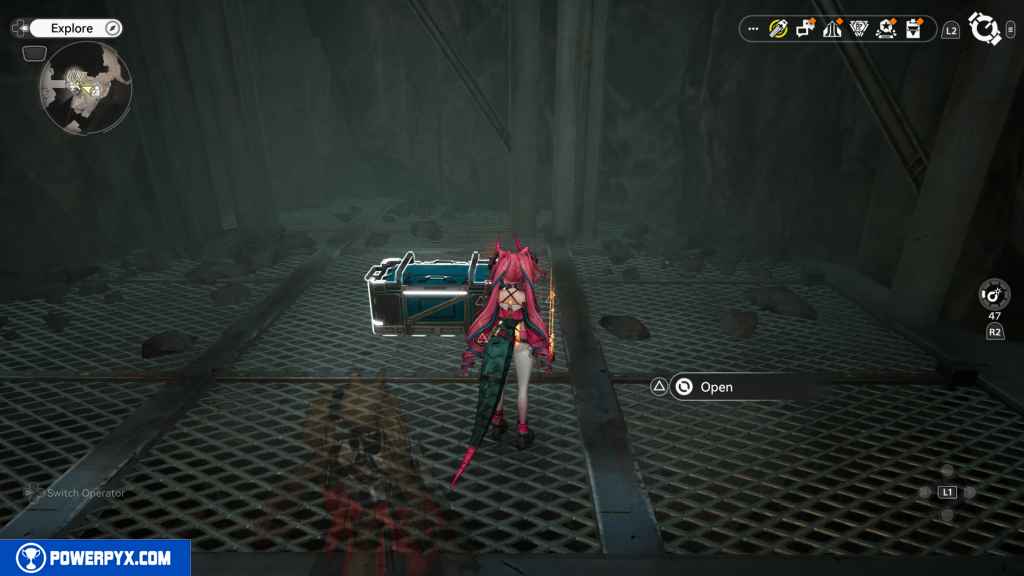
- Repair Logic: 2
- Protocol Data Logger: 3
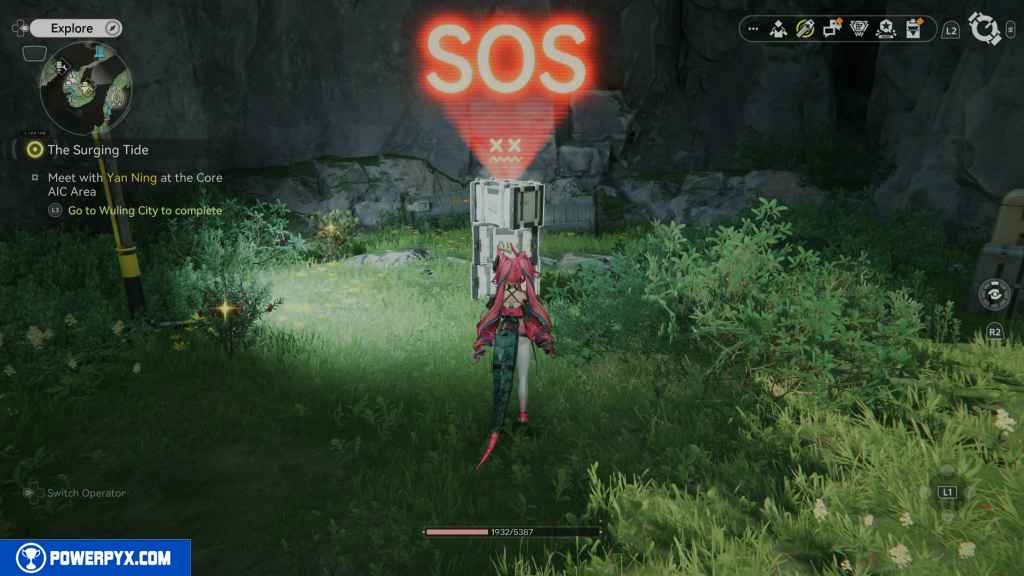
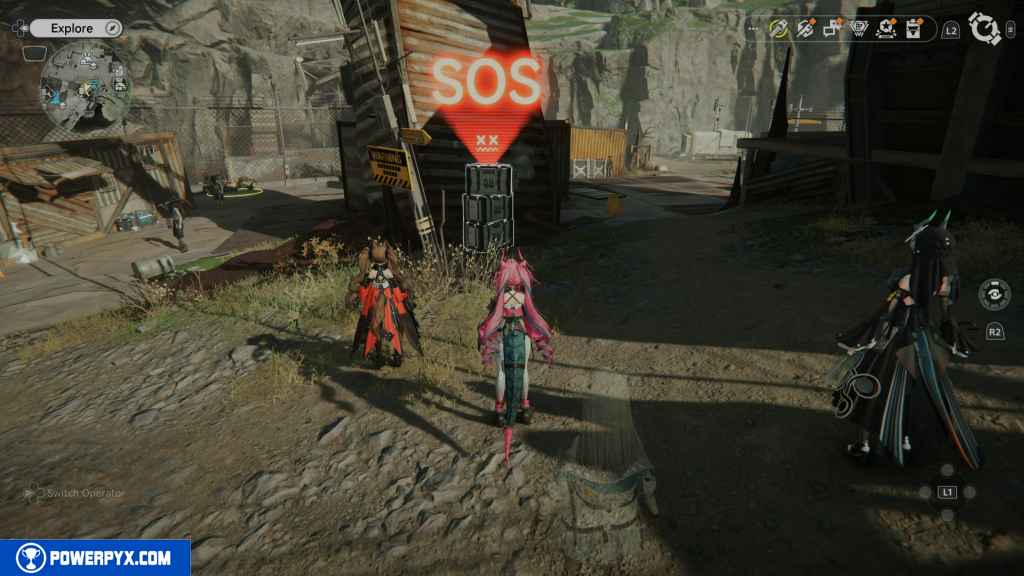
- SOS Repair Bots: 17
- Gathering Points: 35
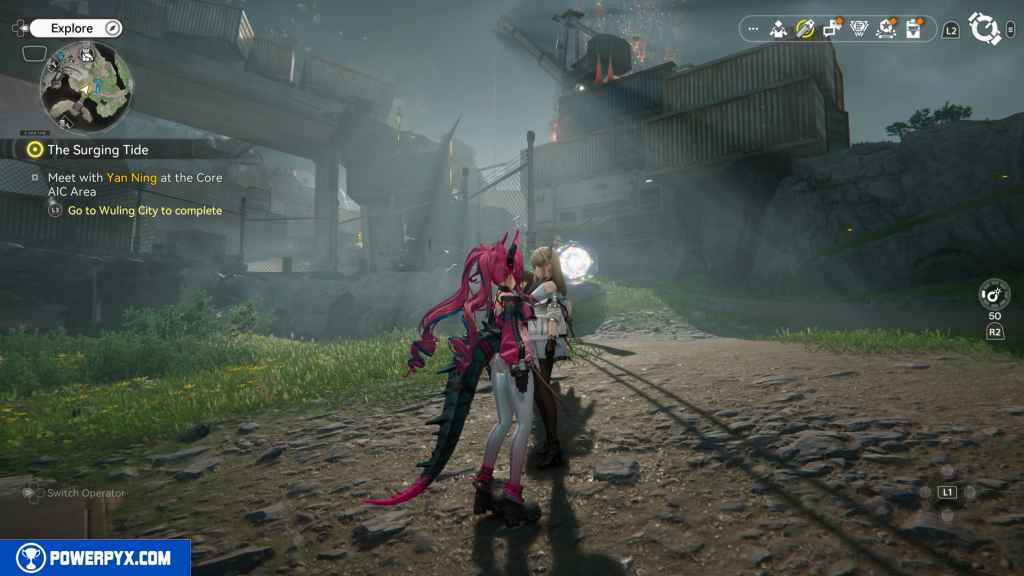
Complete These Quests To Unlock All Areas In The Origin Lodespring
- Play through the story until you complete Main Mission 28 – Mysterious Signal
- Side Mission – A Brewing Storm: Origin Lodespring
- Side Mission –Emergency Rescue
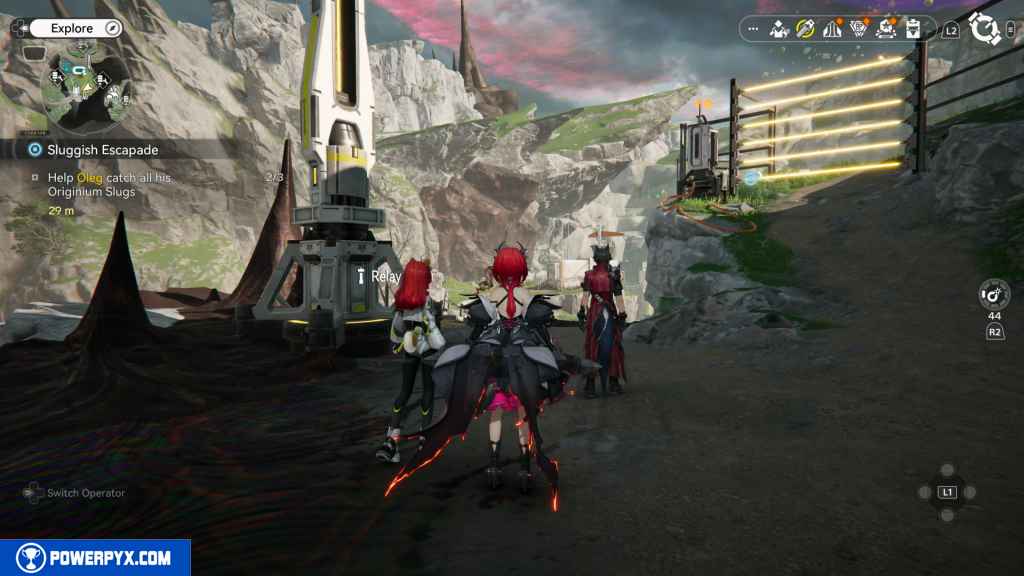
- Side Mission- Sluggish Escapade
- Side Mission – Elevated Rescue
- Side Mission – Repair Story
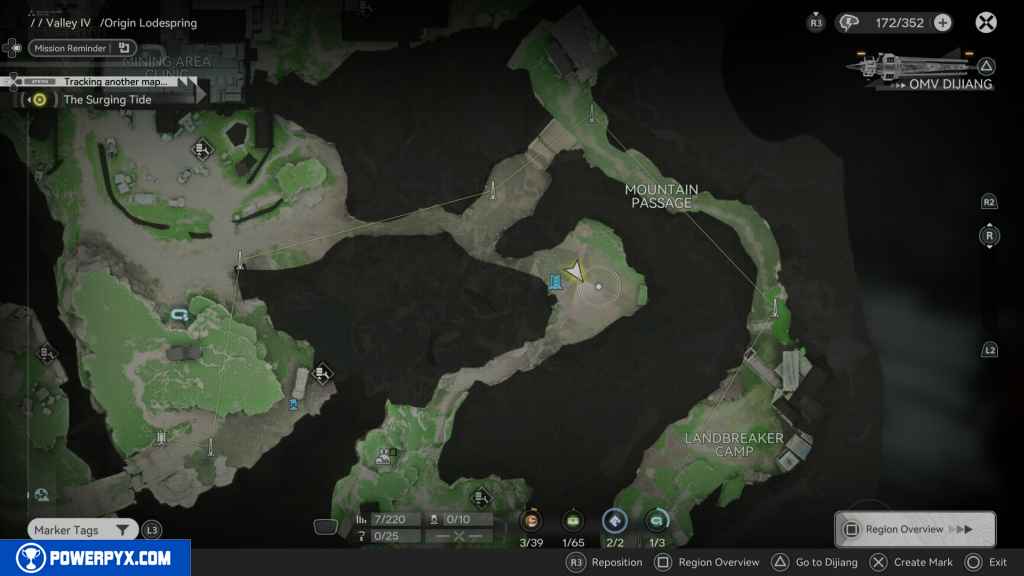
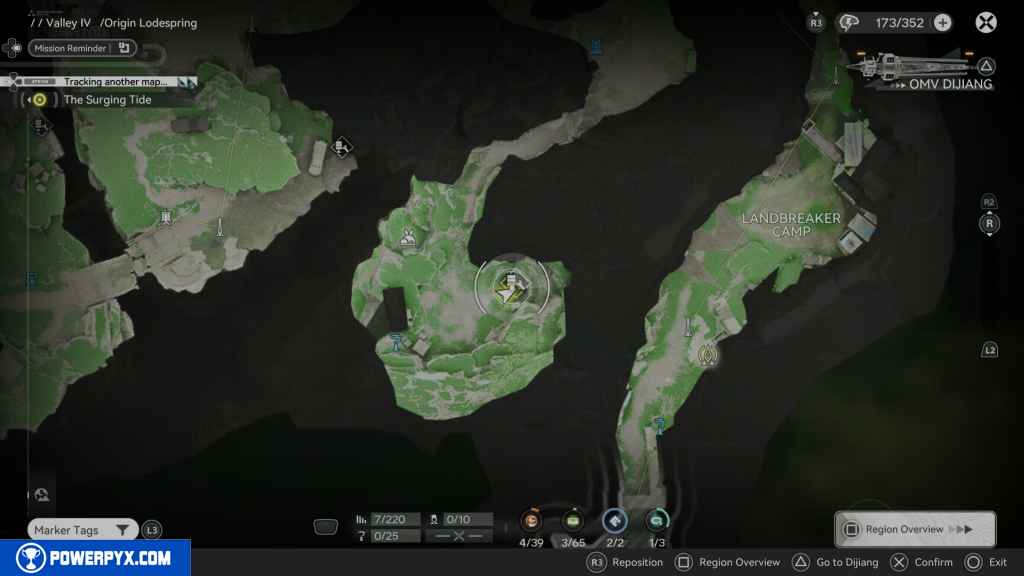
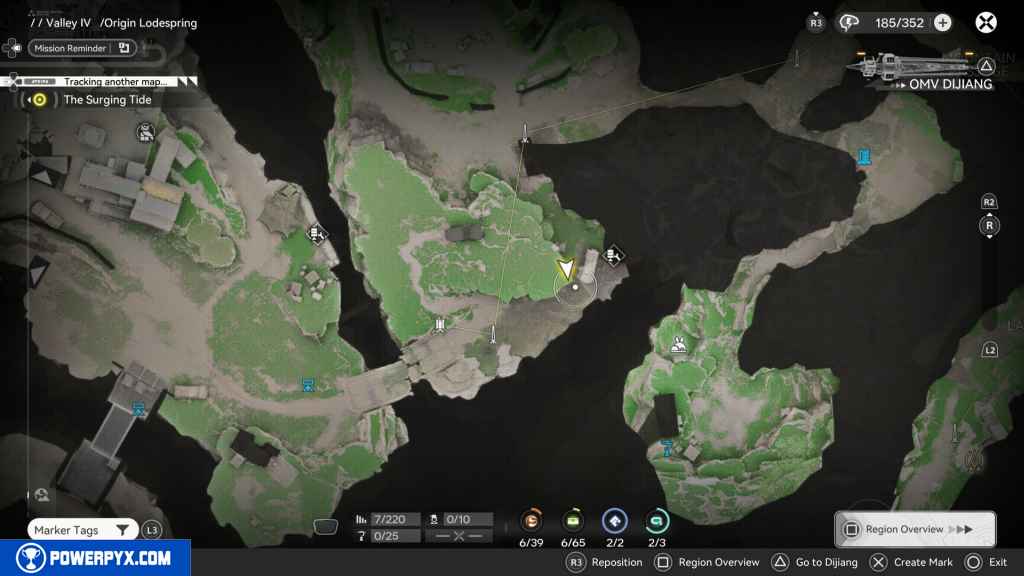
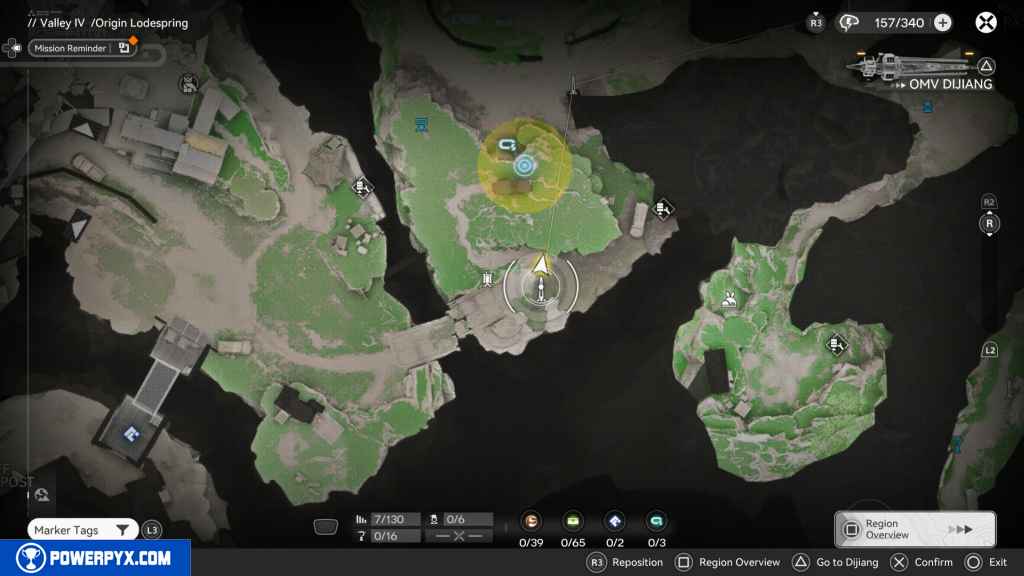
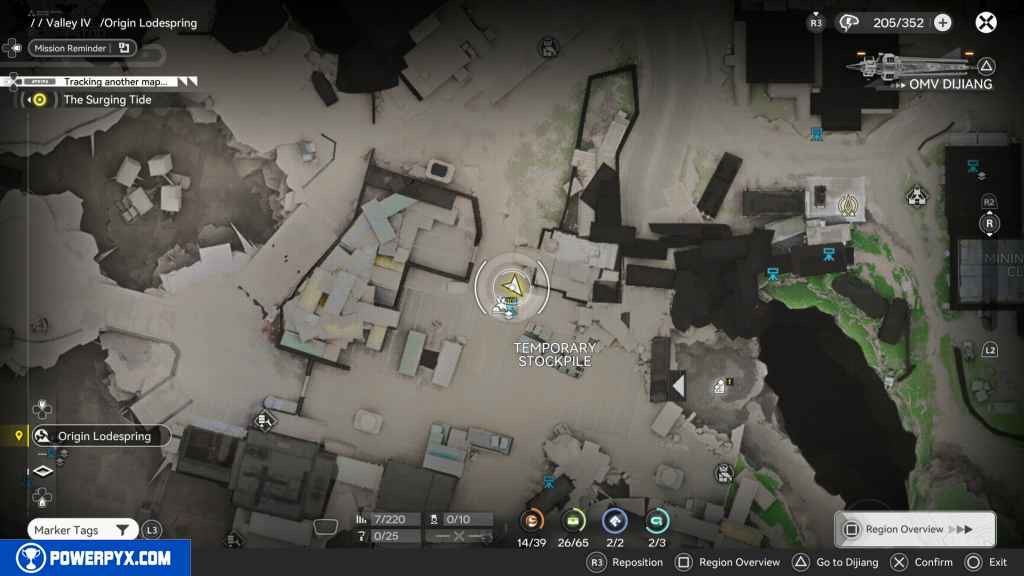
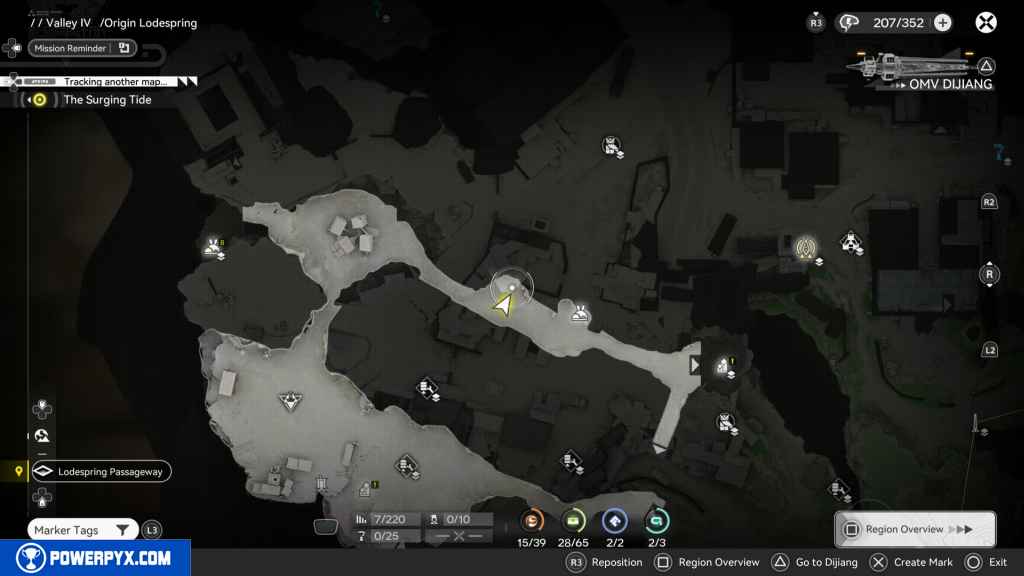
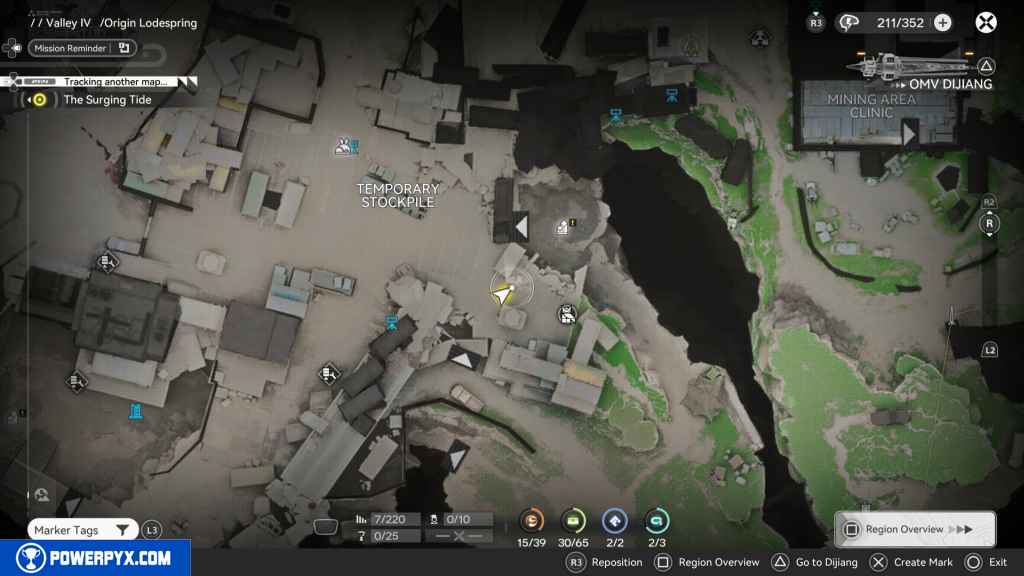
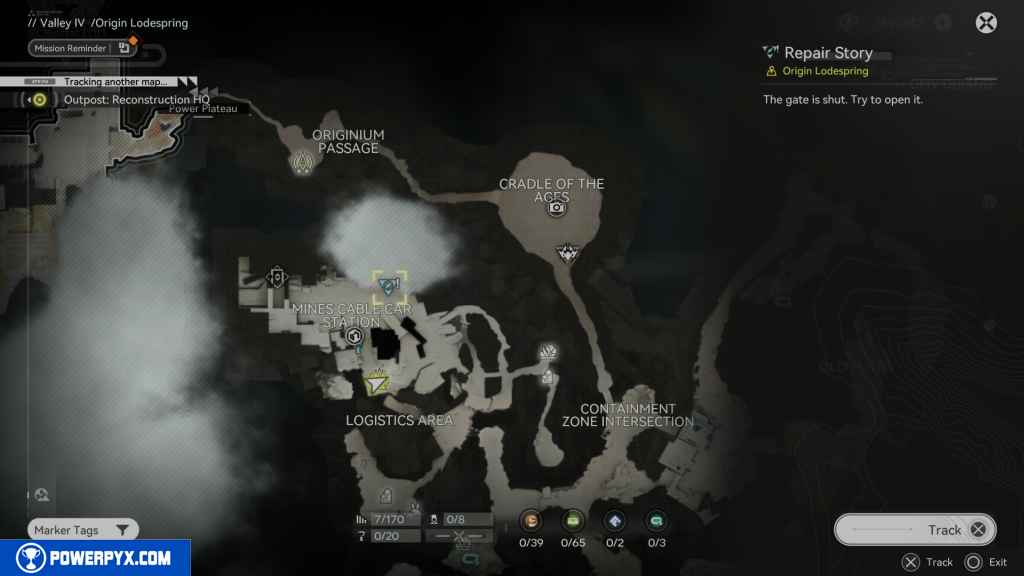
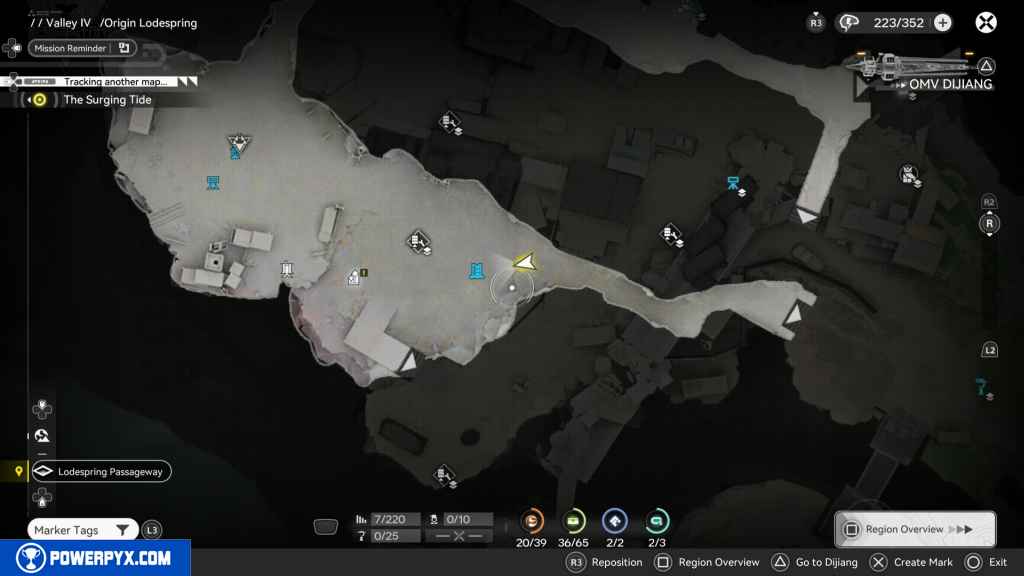
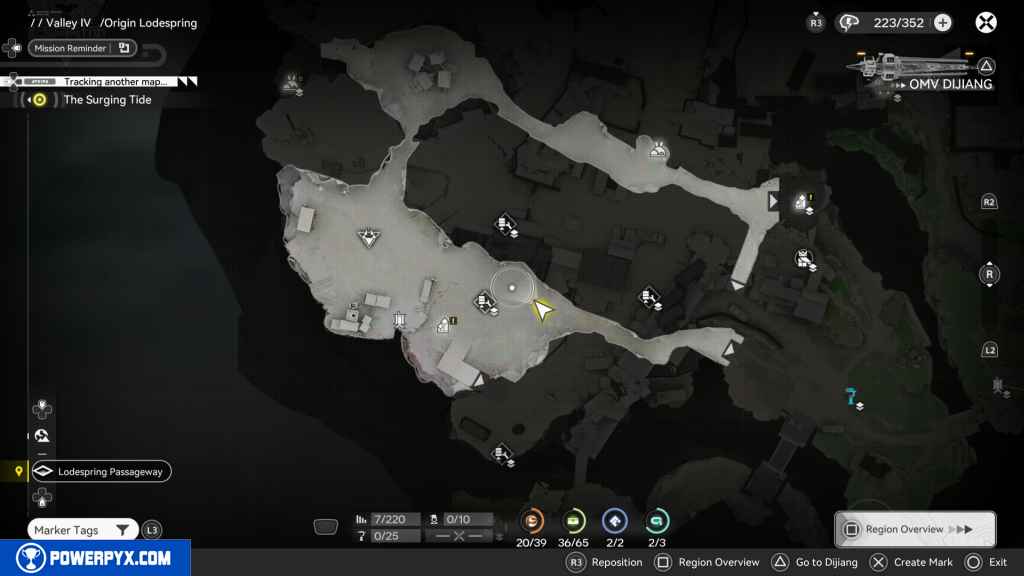
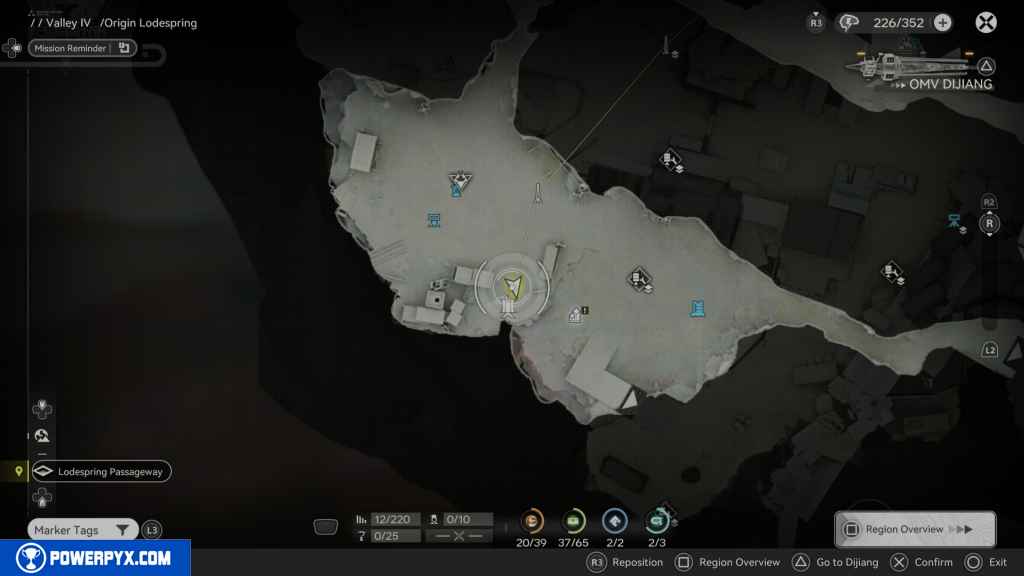
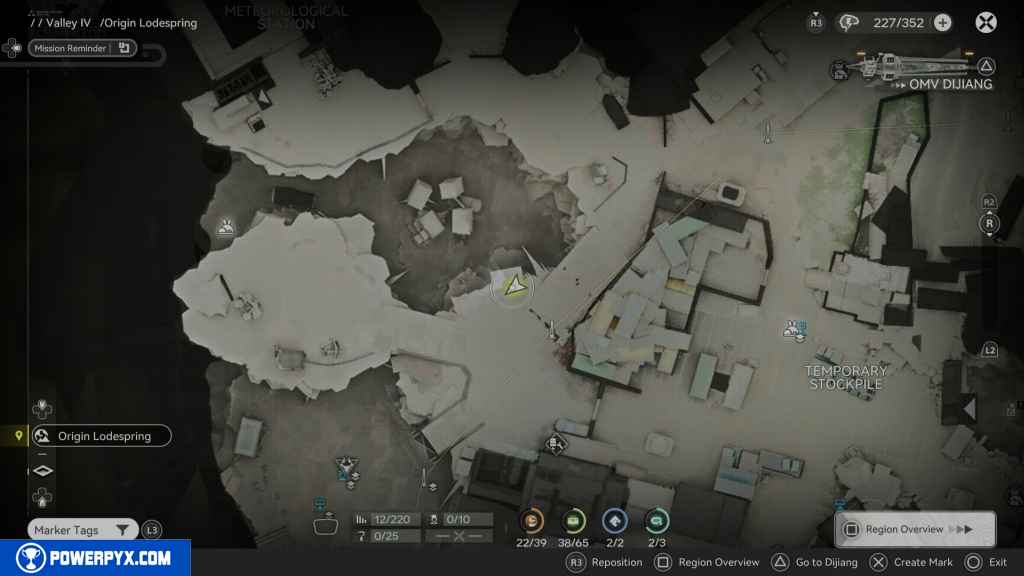
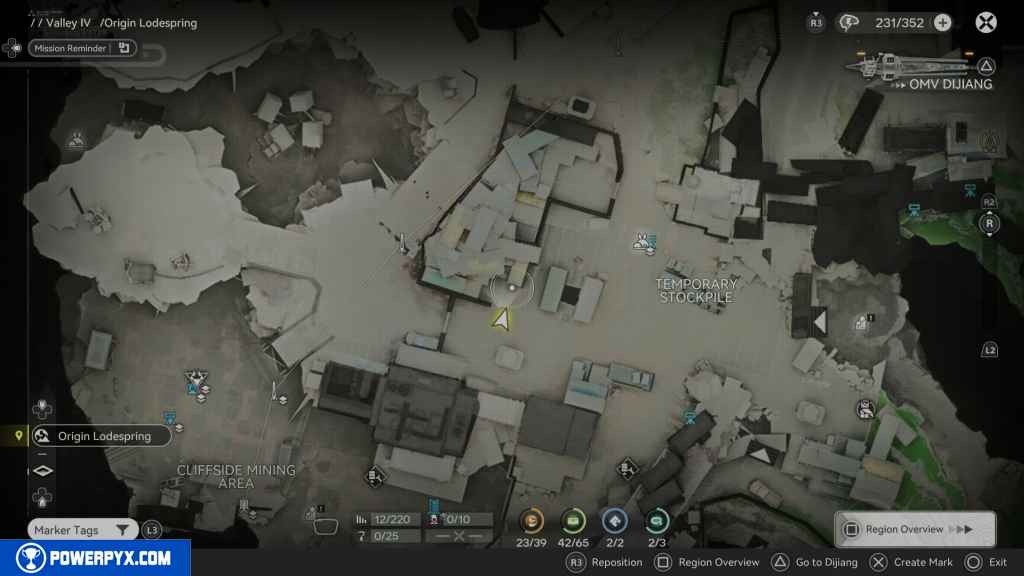
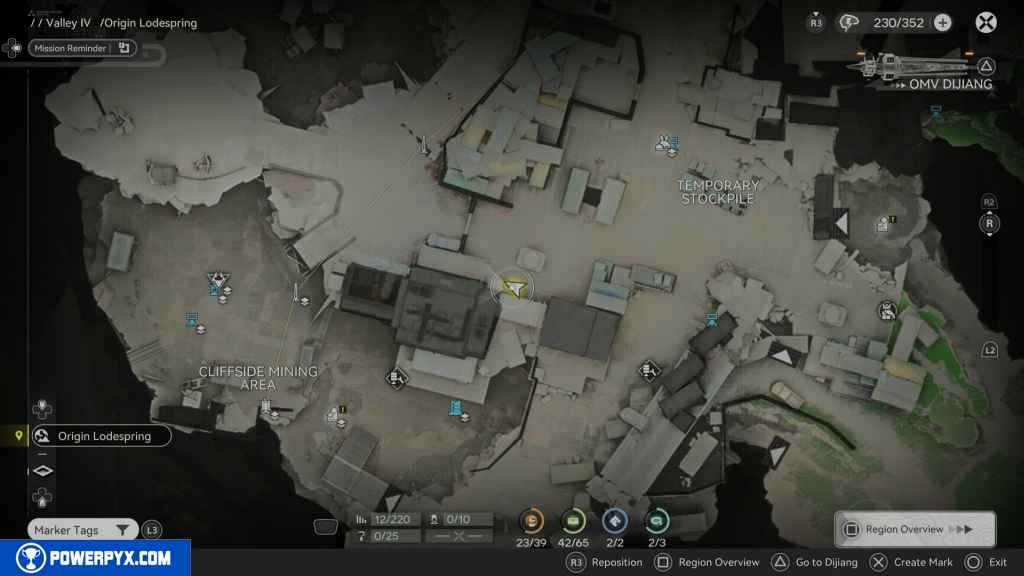
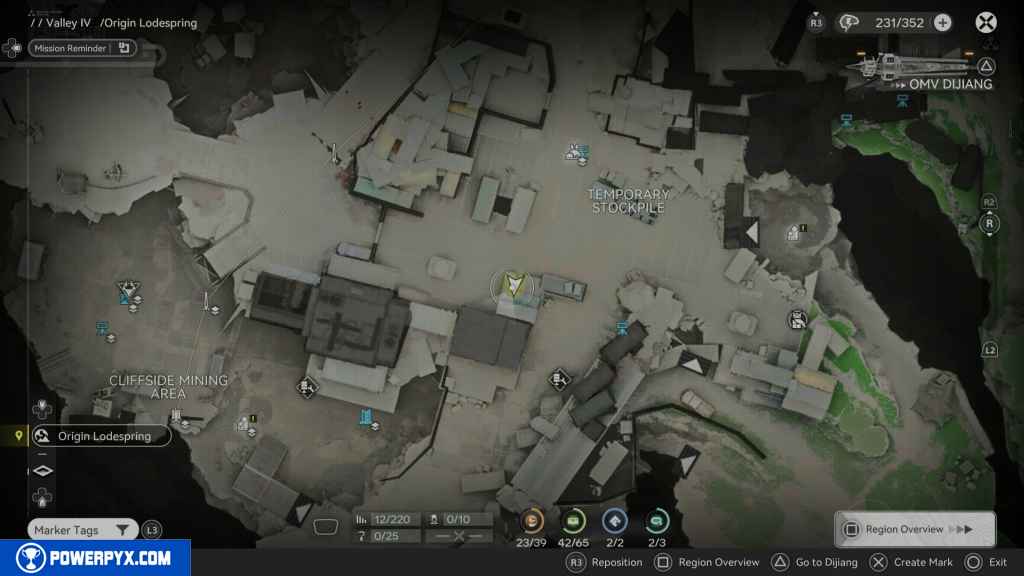
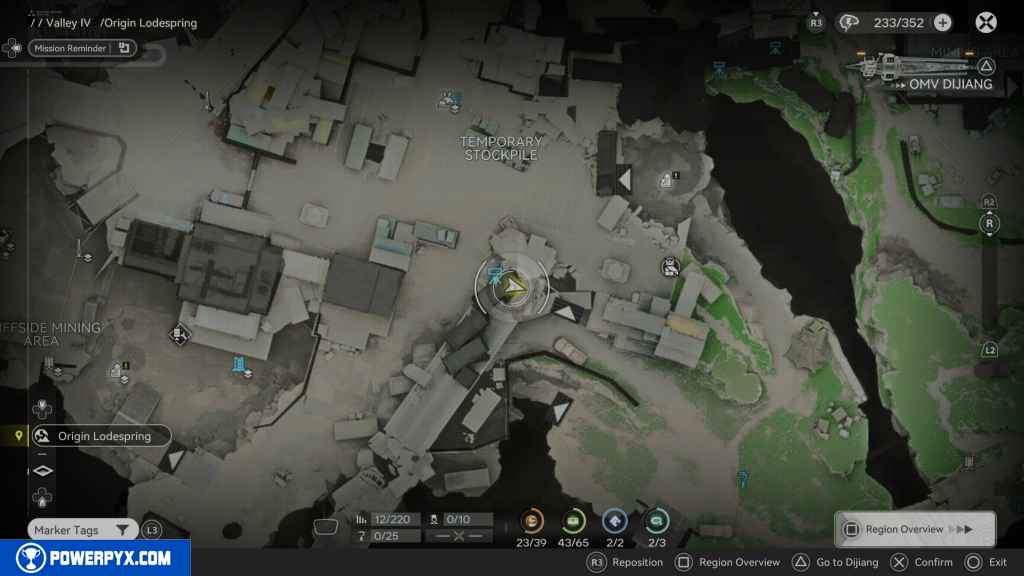
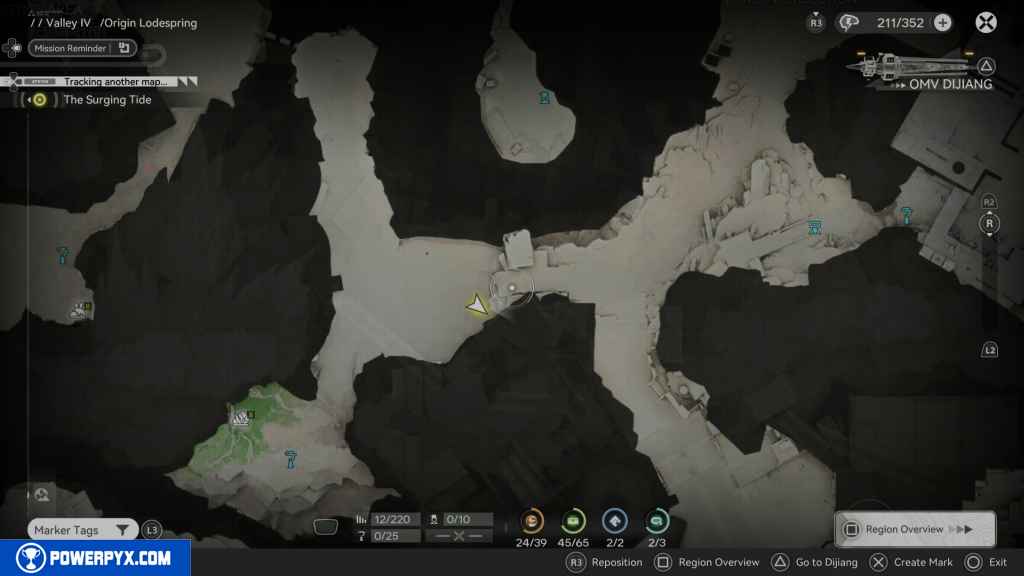
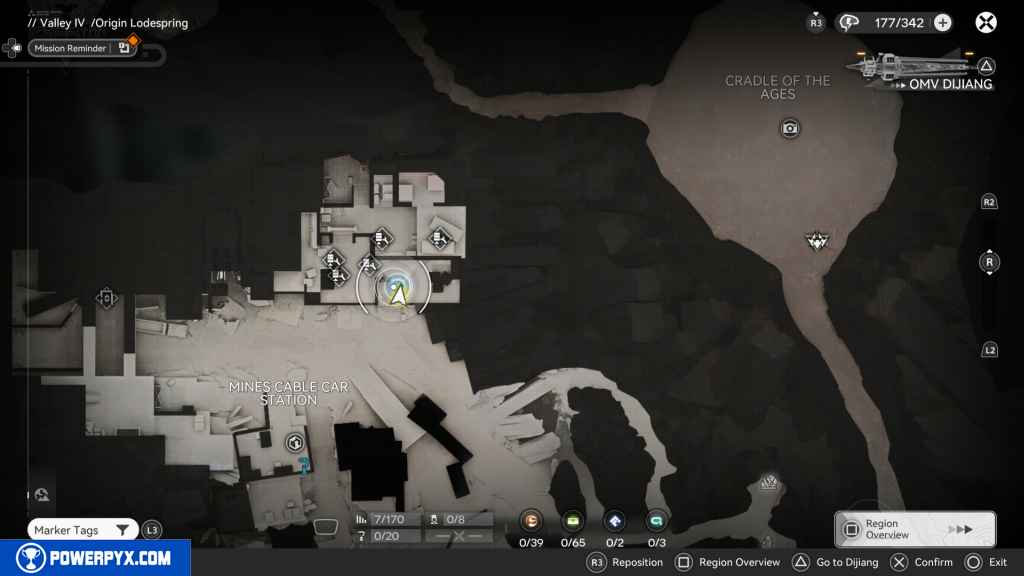
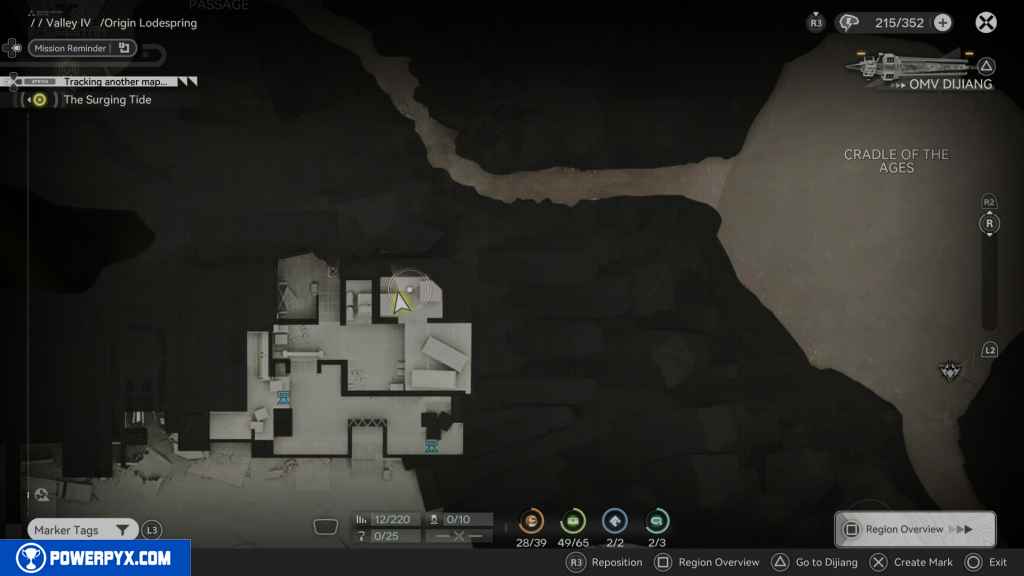
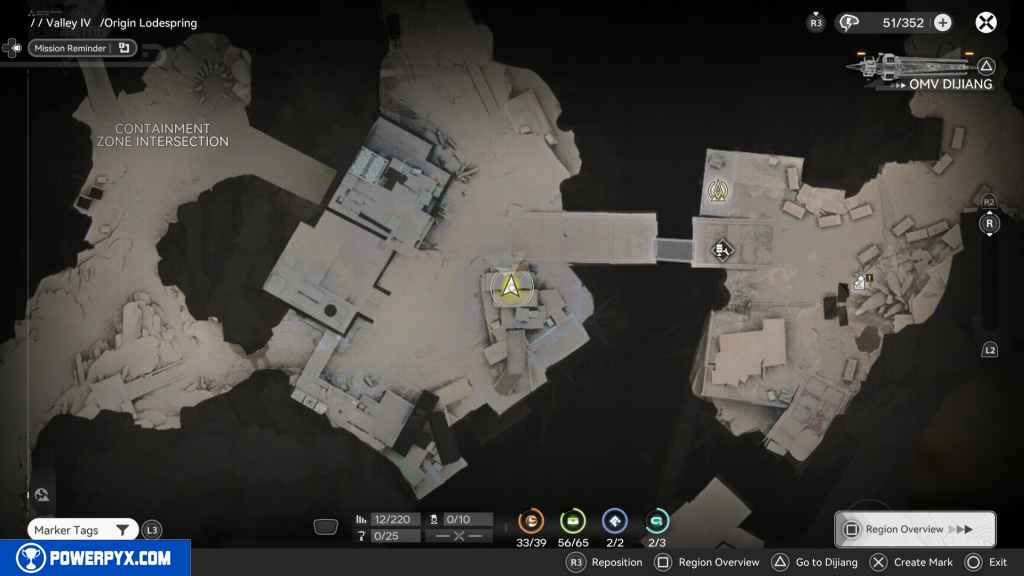
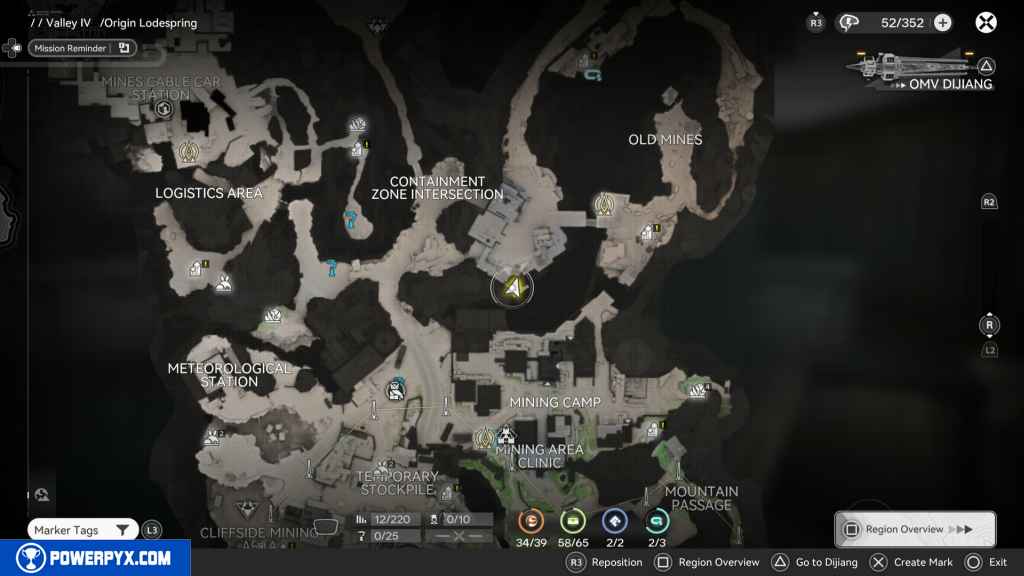
Collectibles Overview:
Collectibles
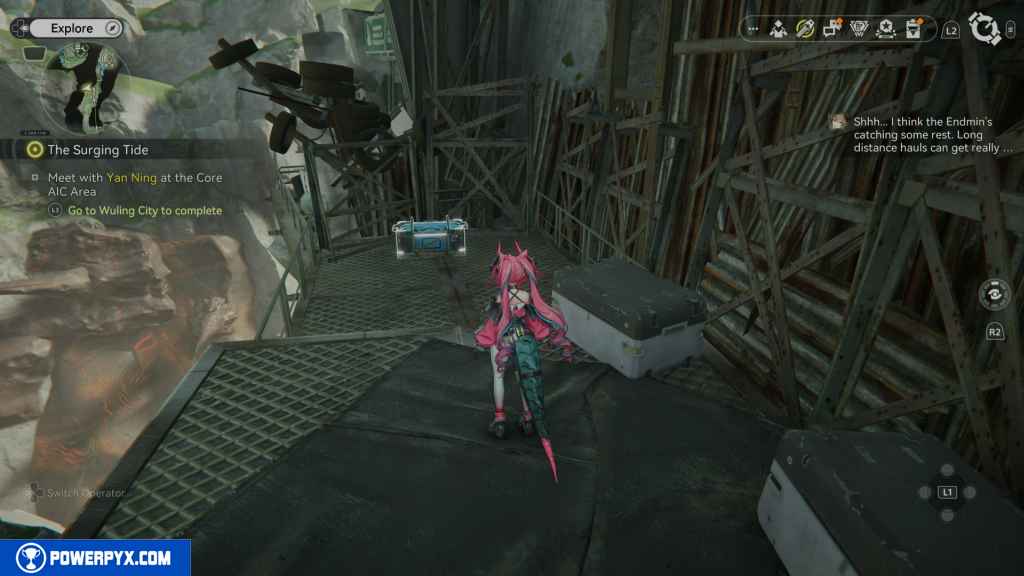
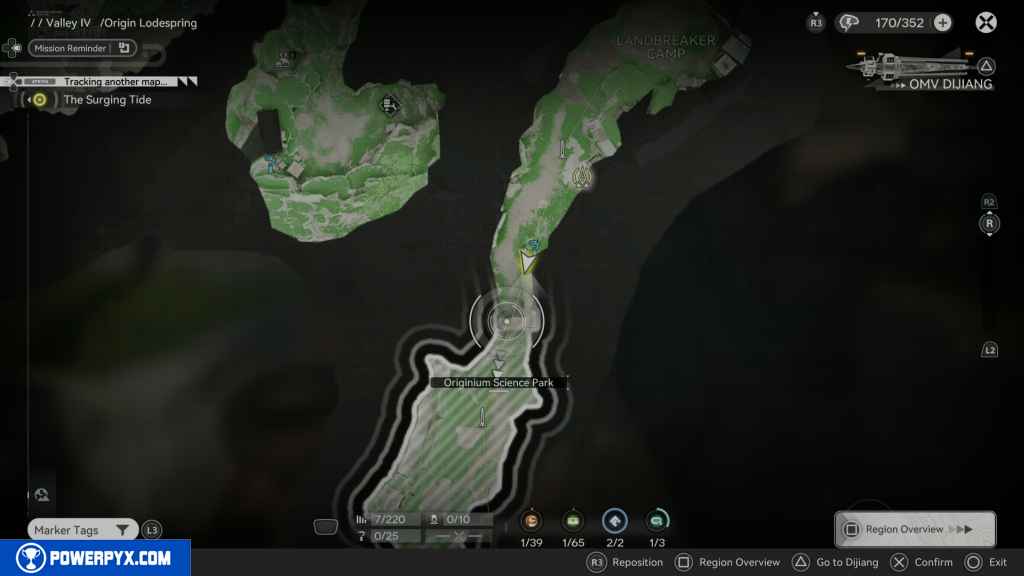
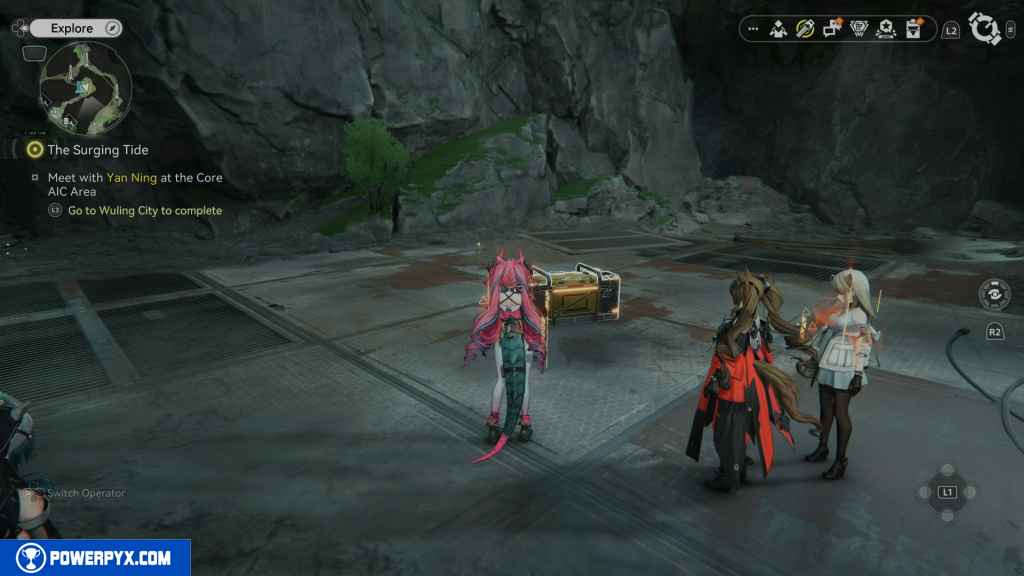
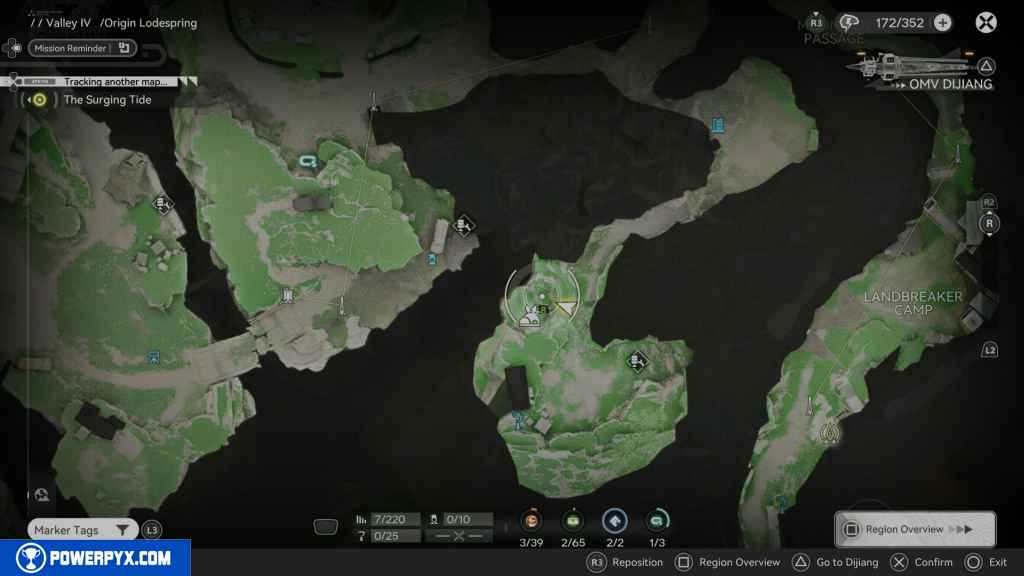
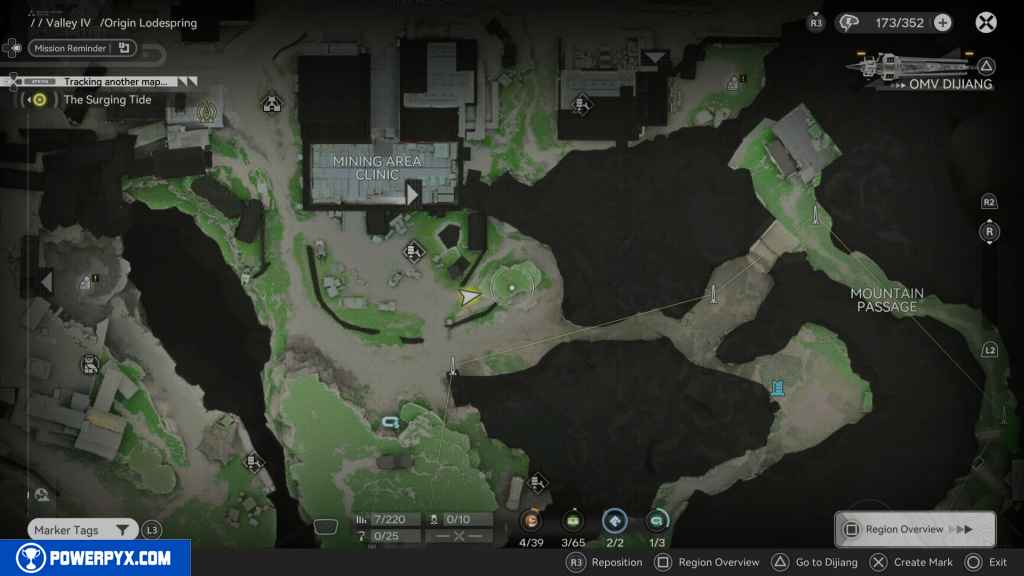
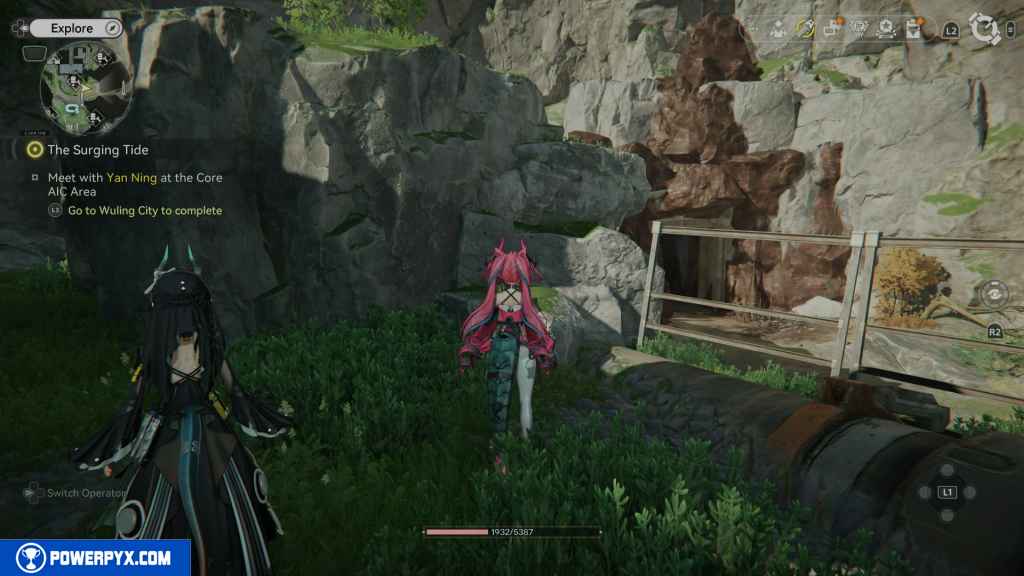
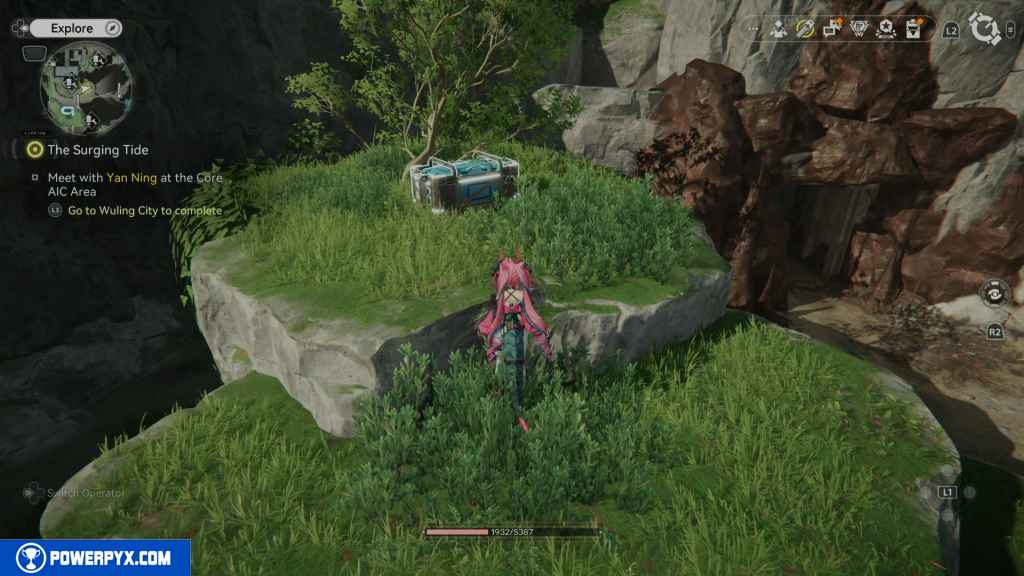
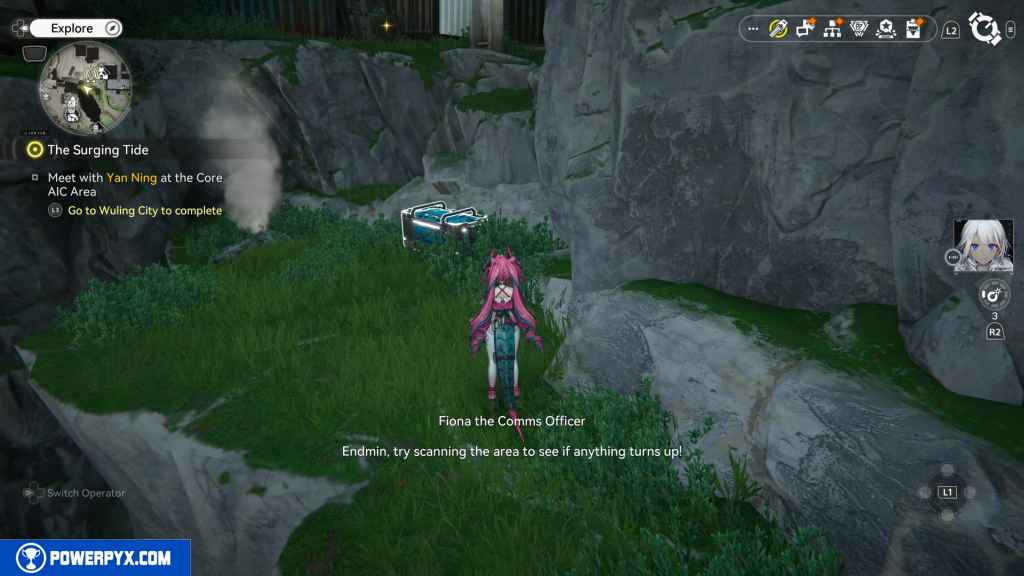
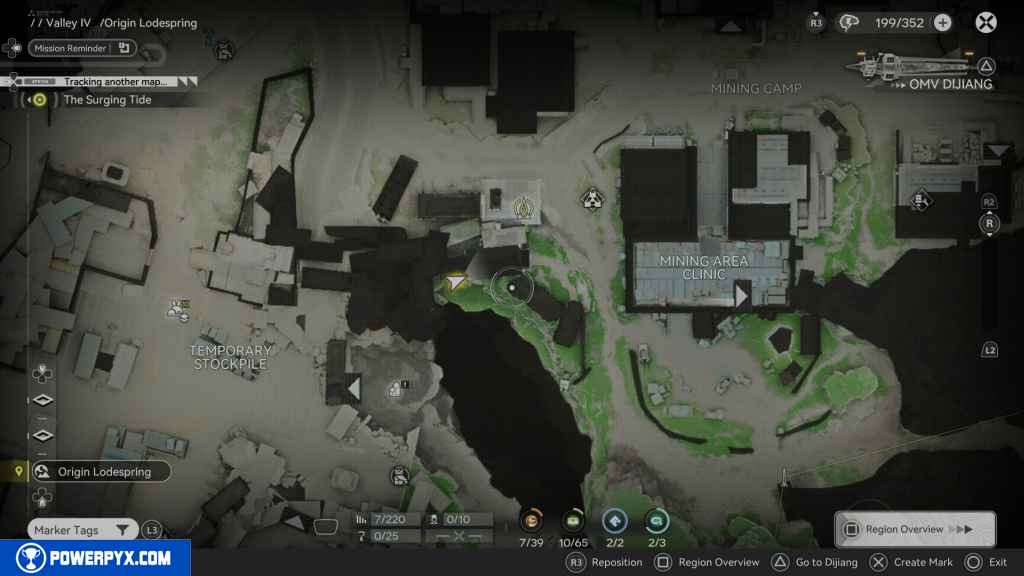
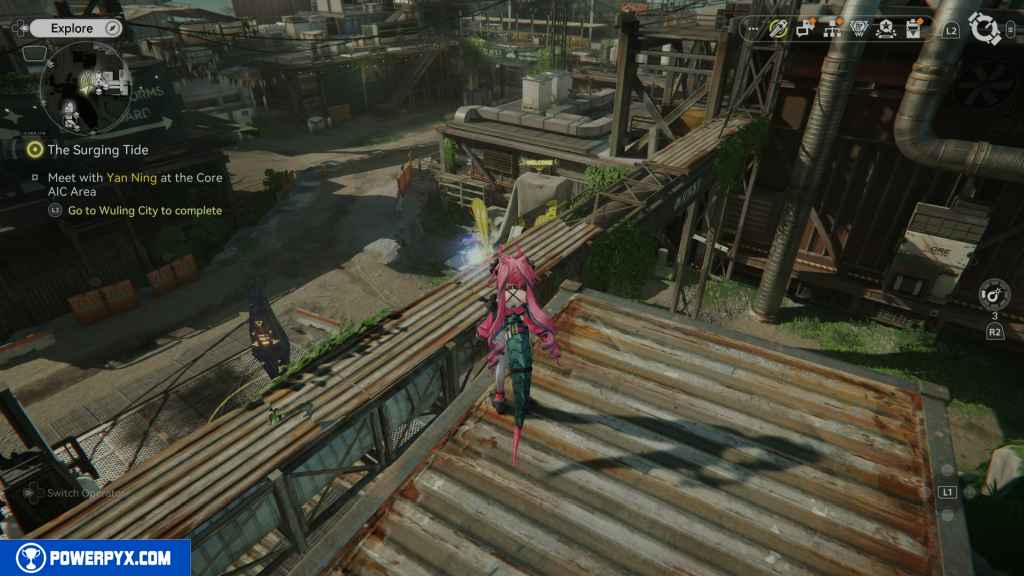
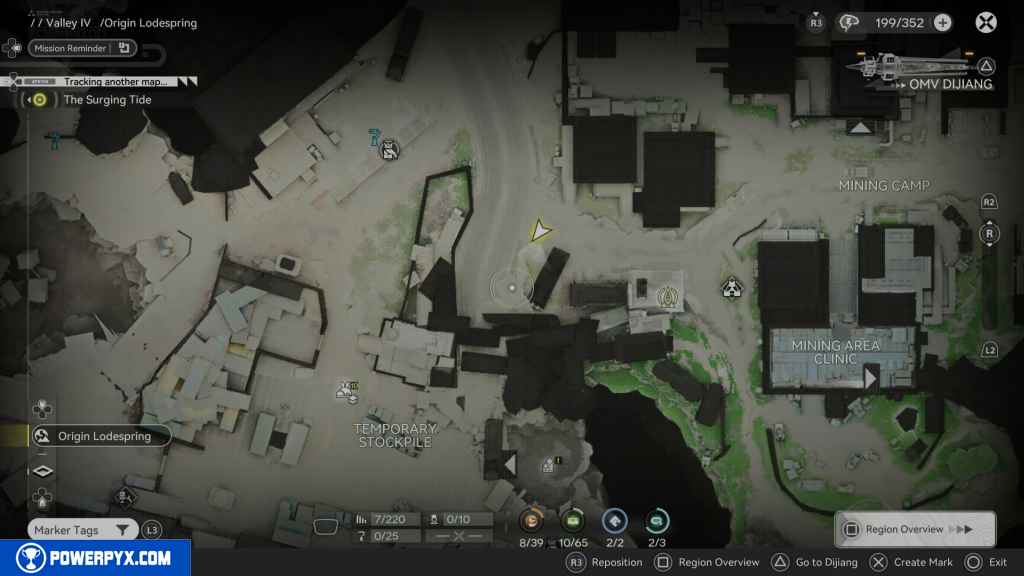
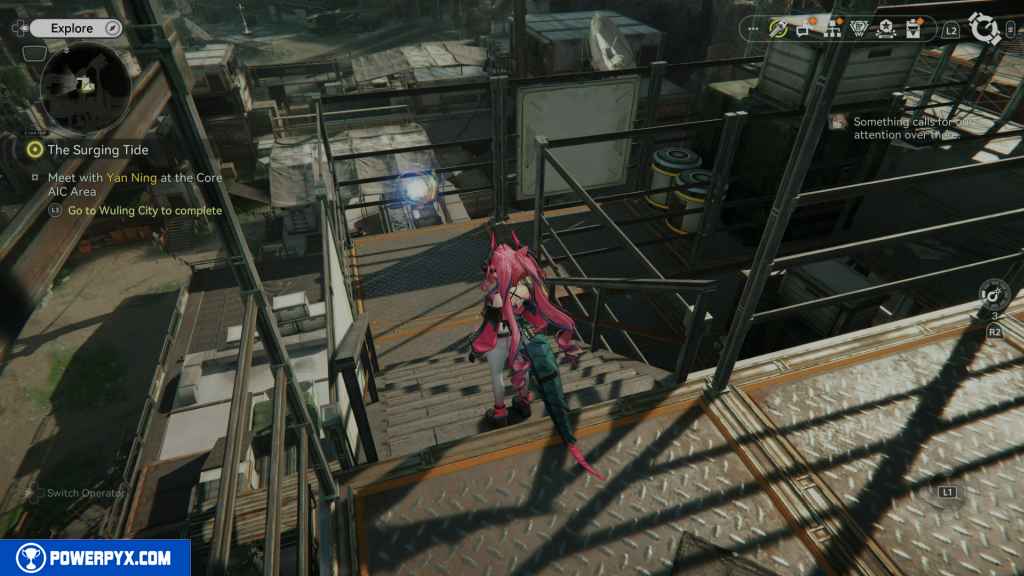
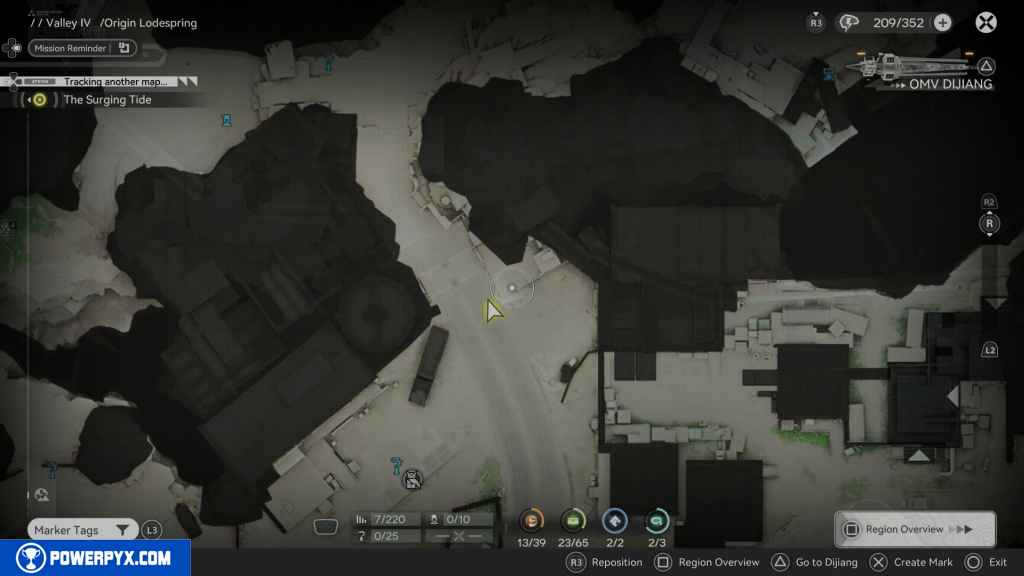
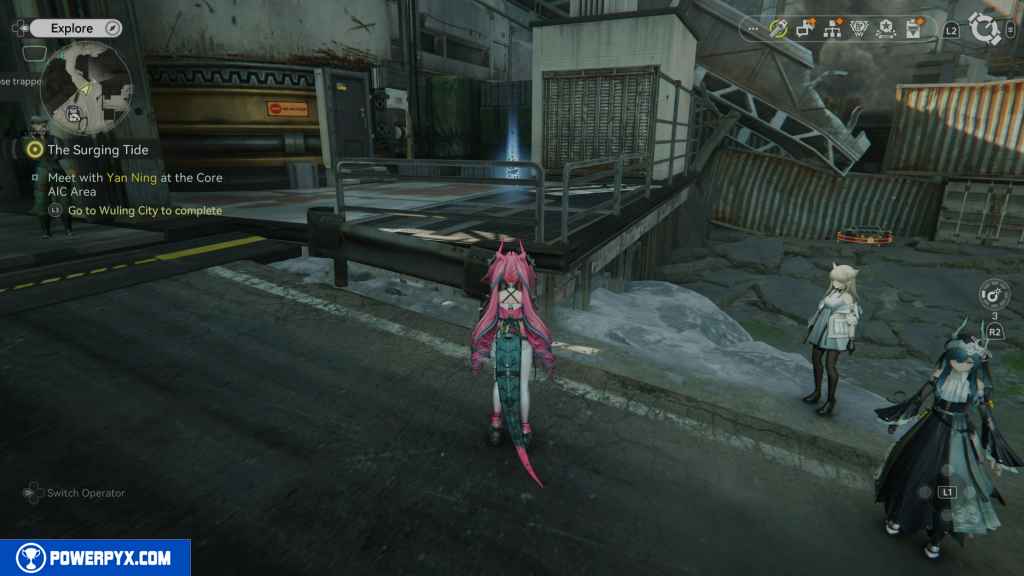
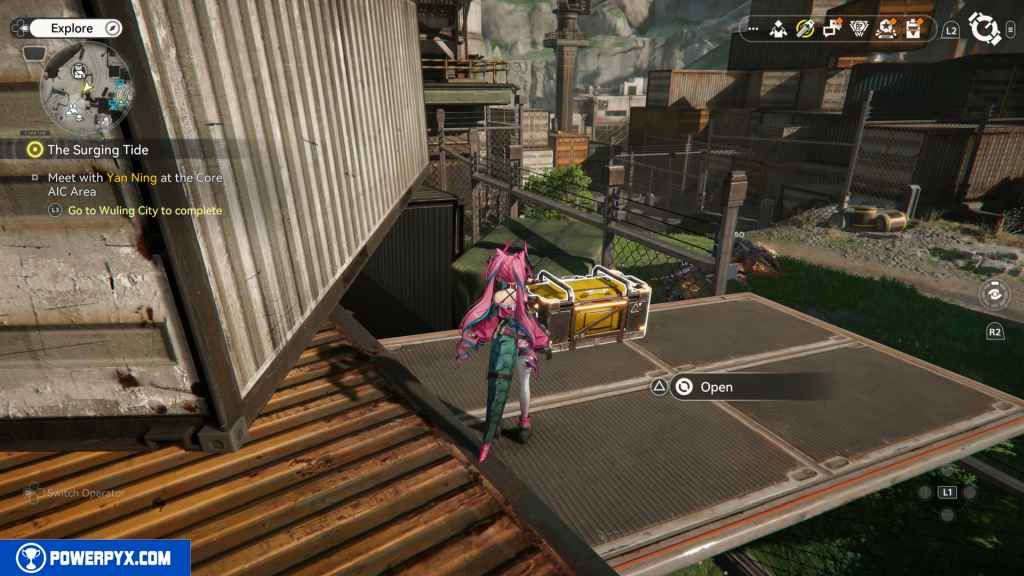
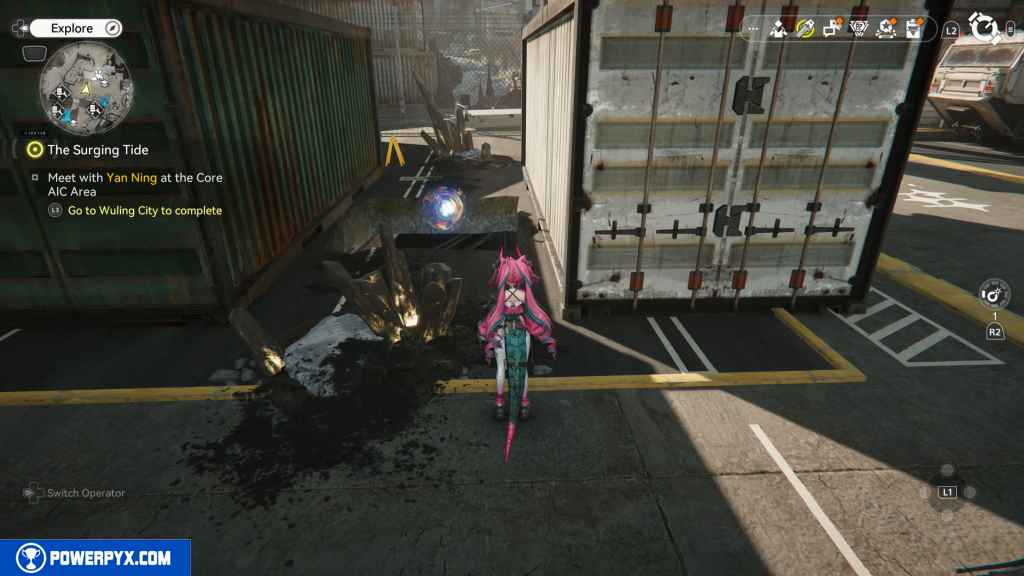
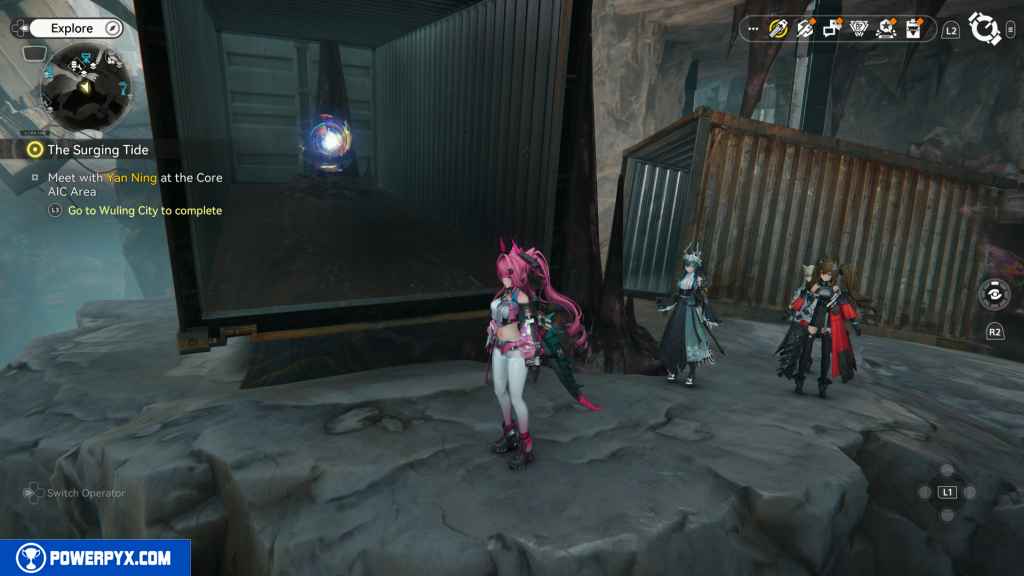
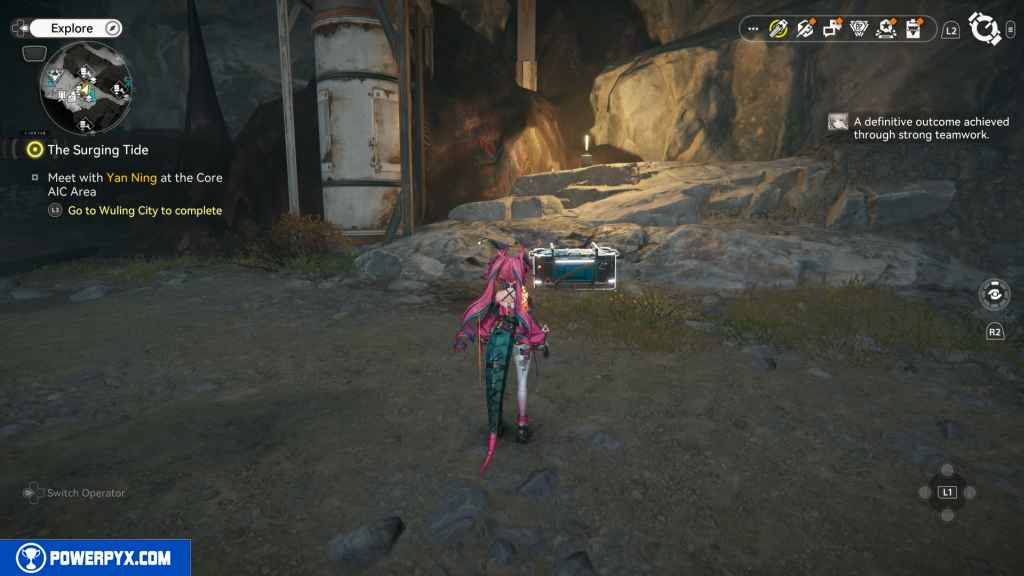
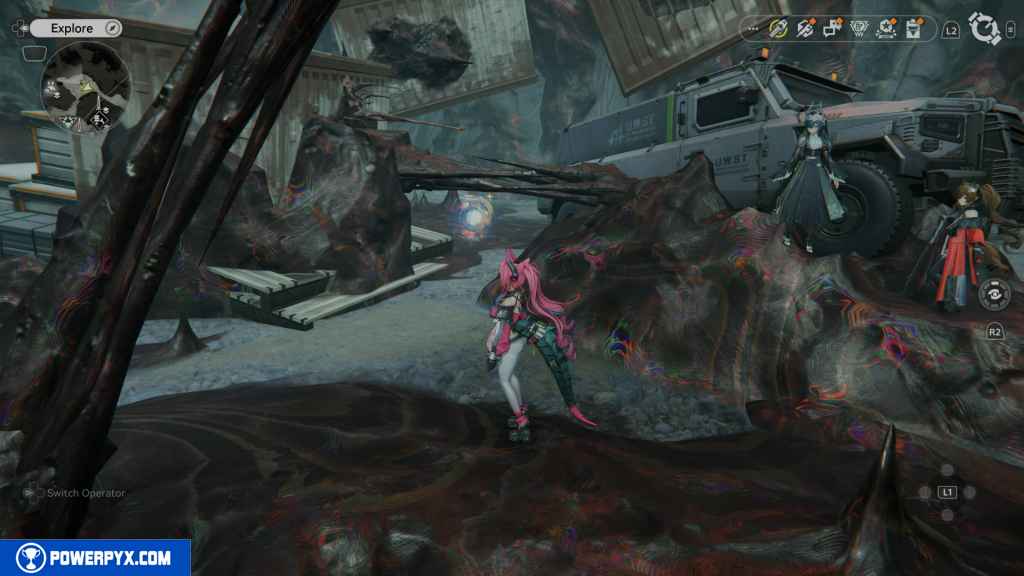
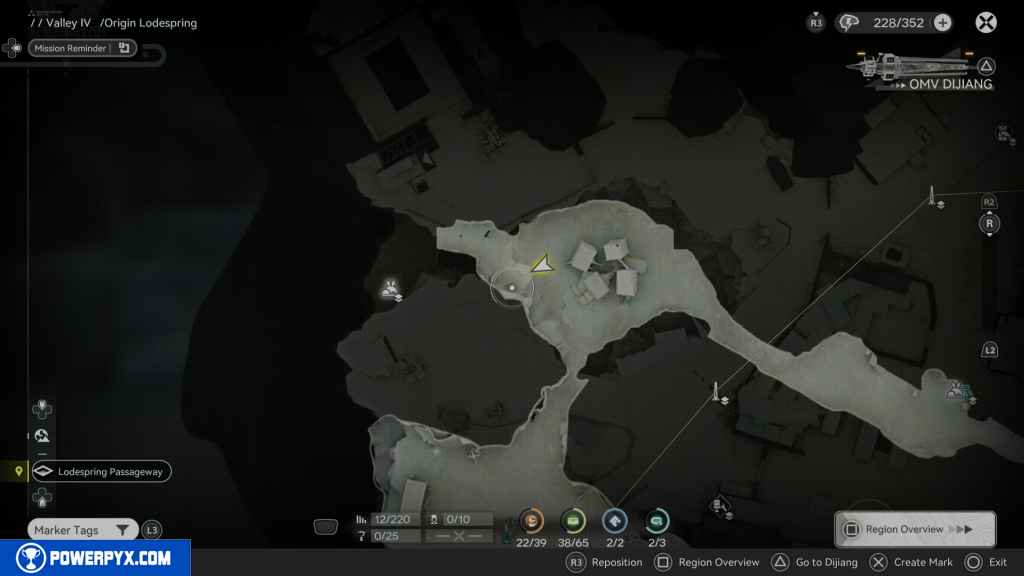
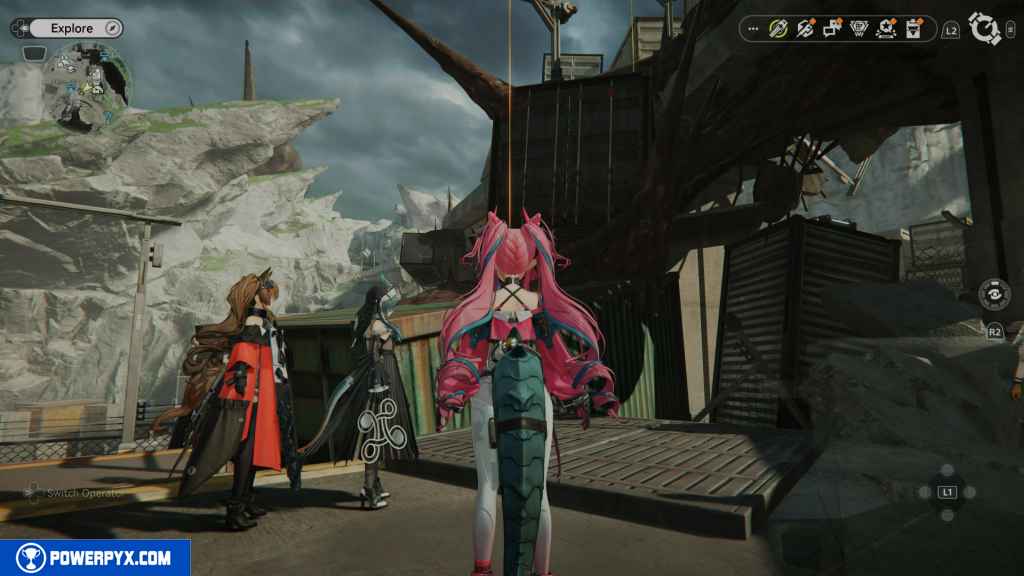
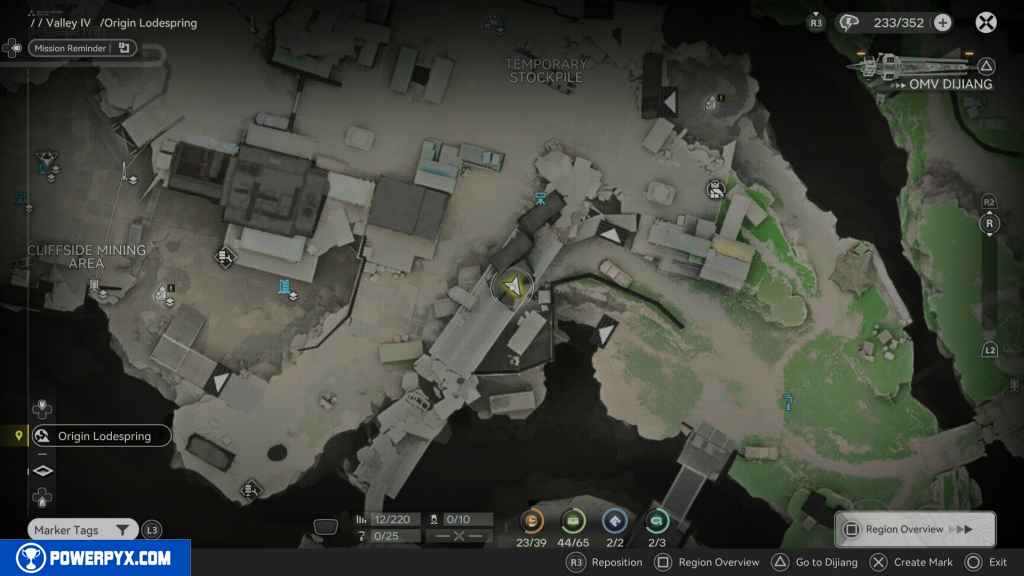
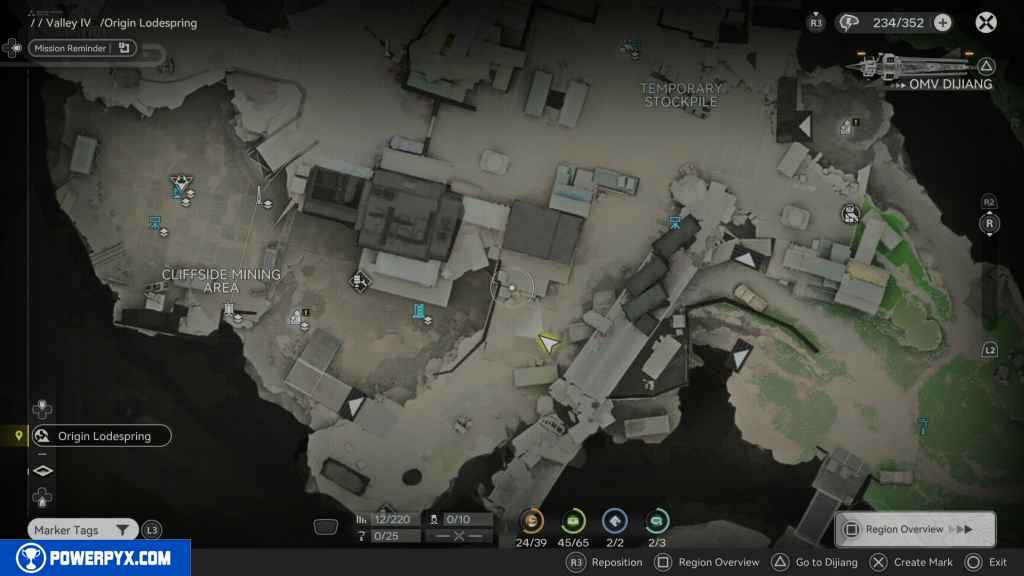
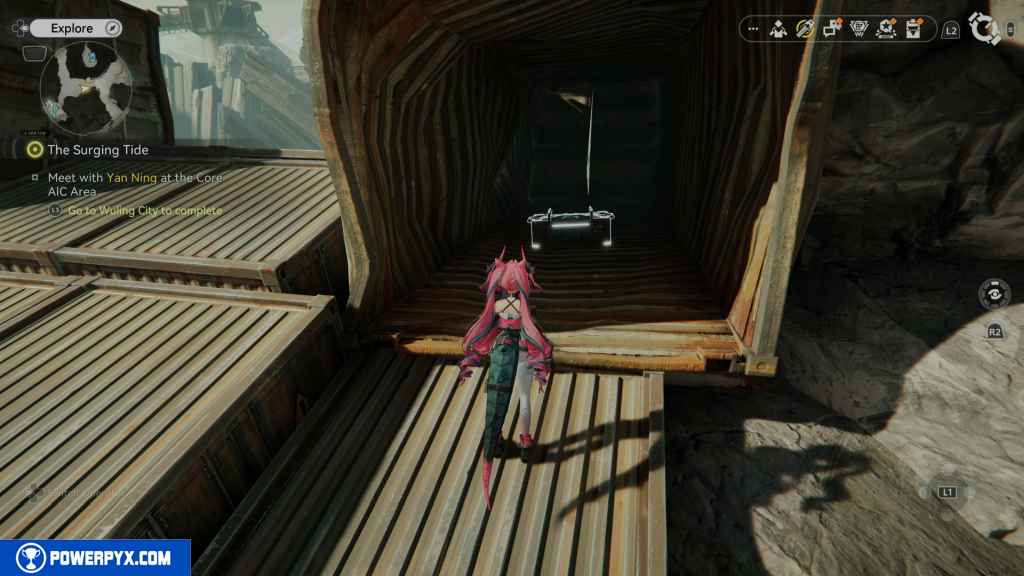
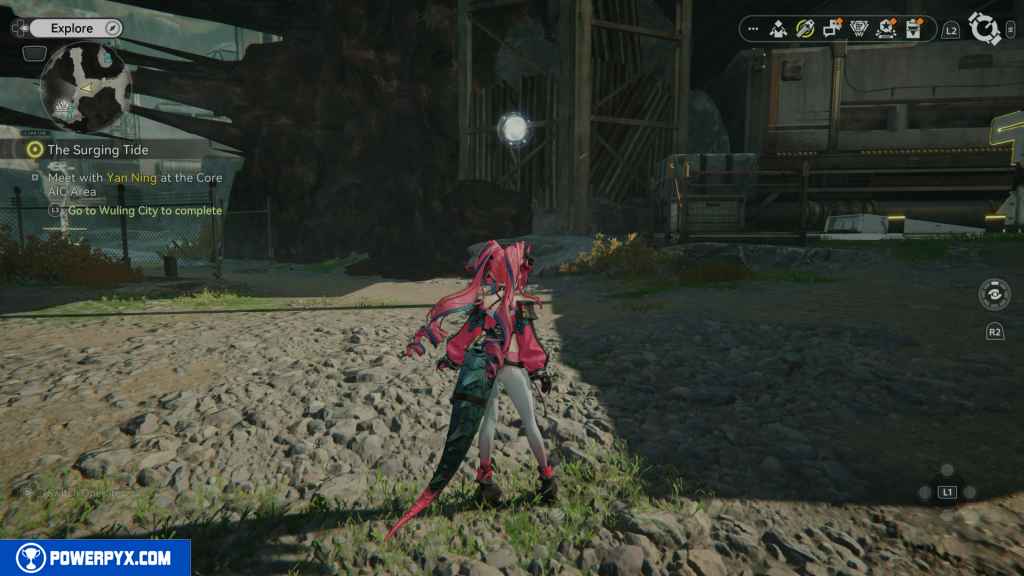
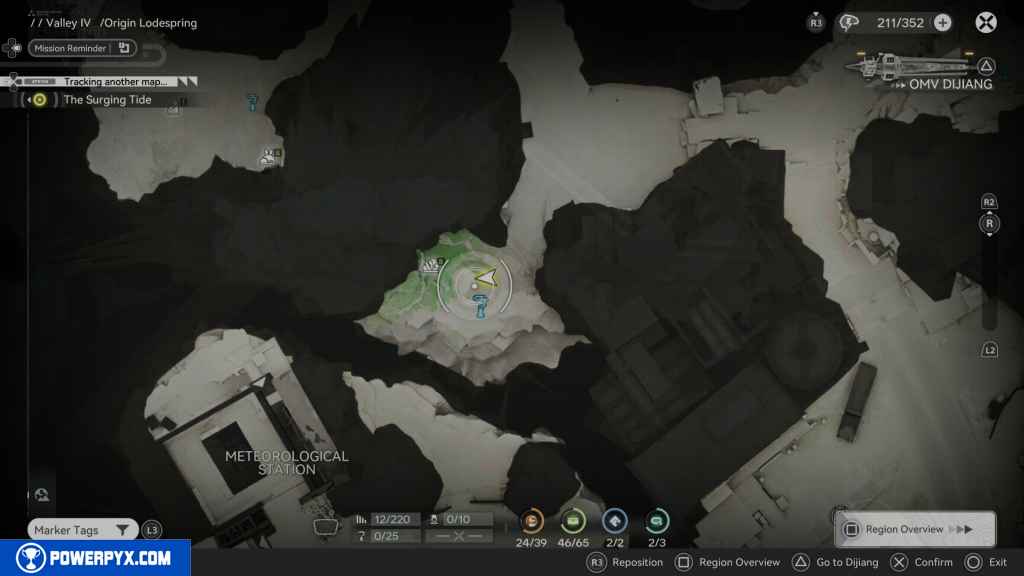
1 – Crate 1
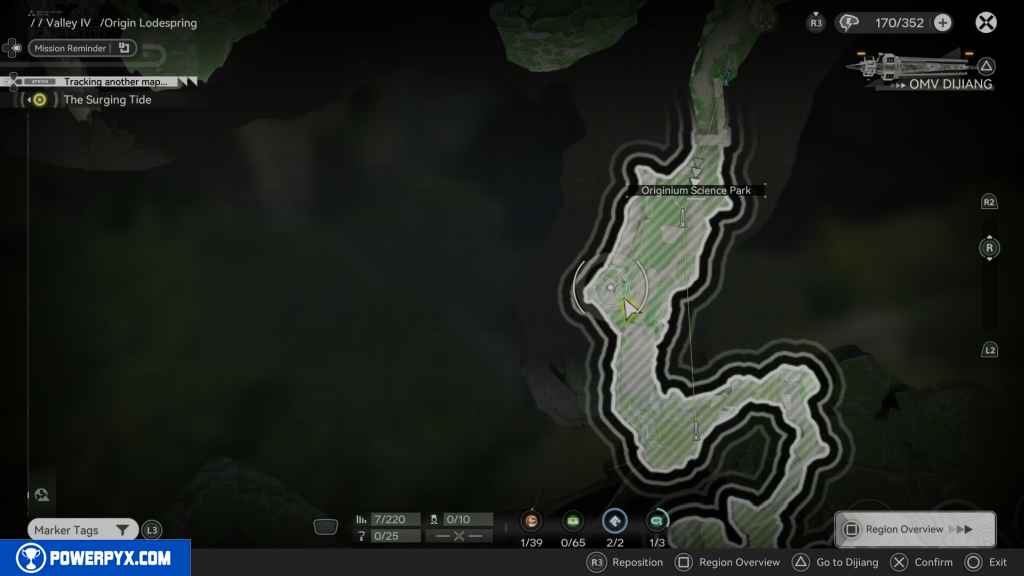
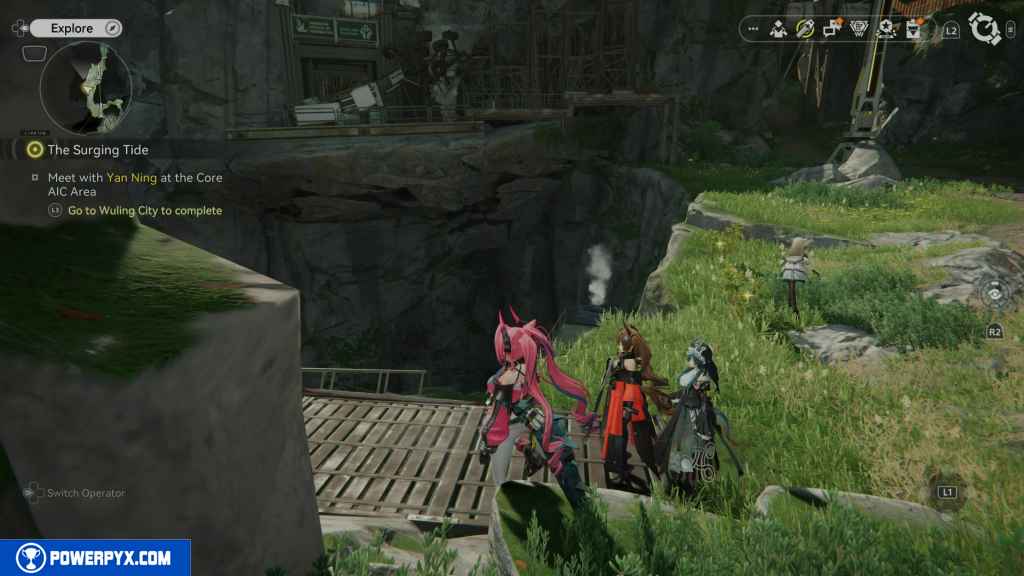
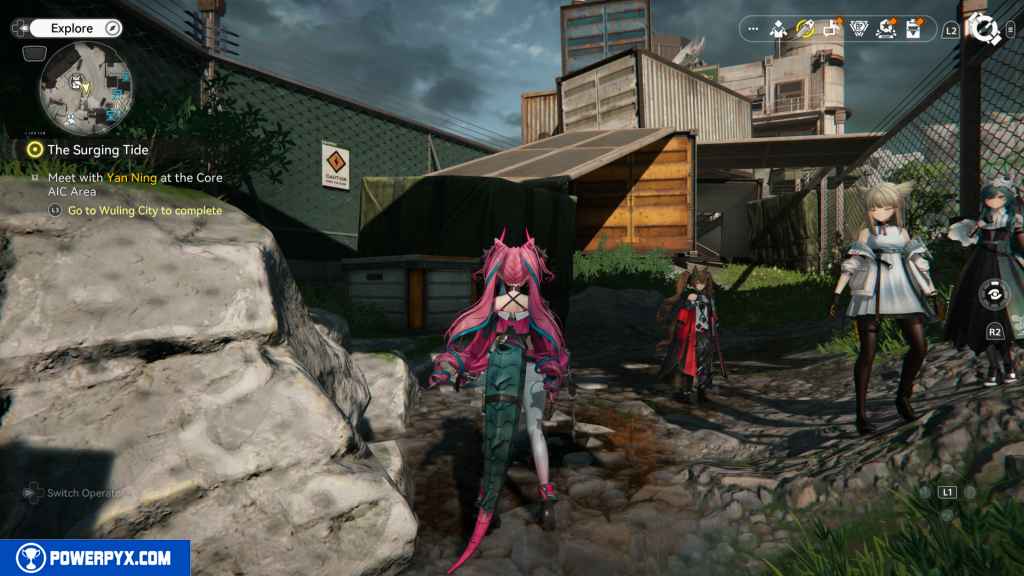
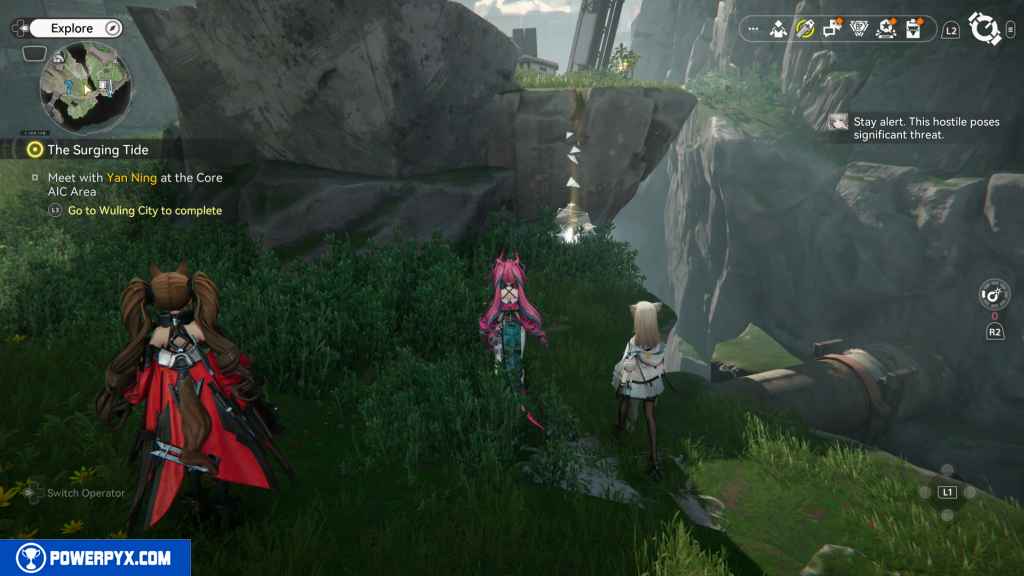
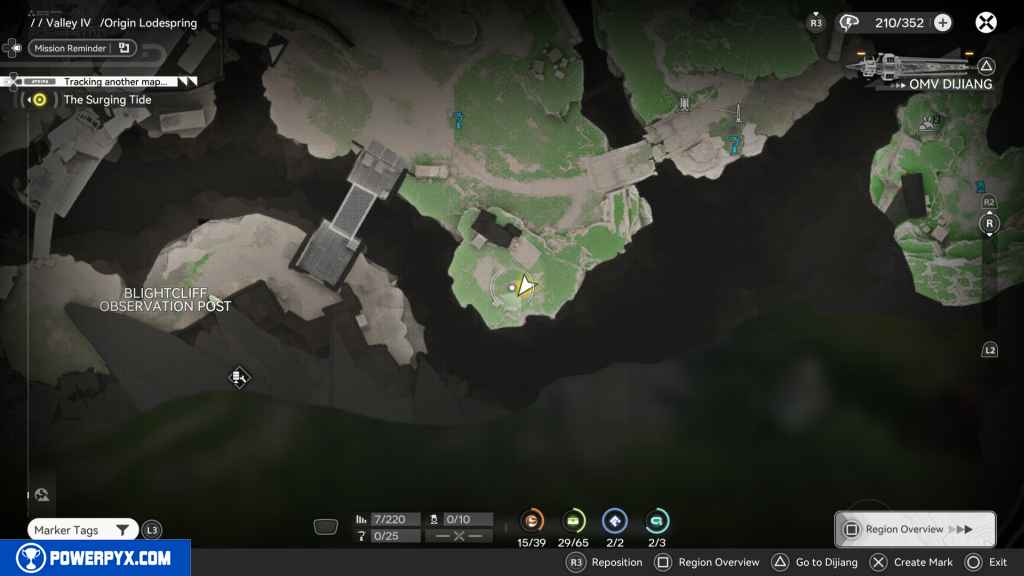
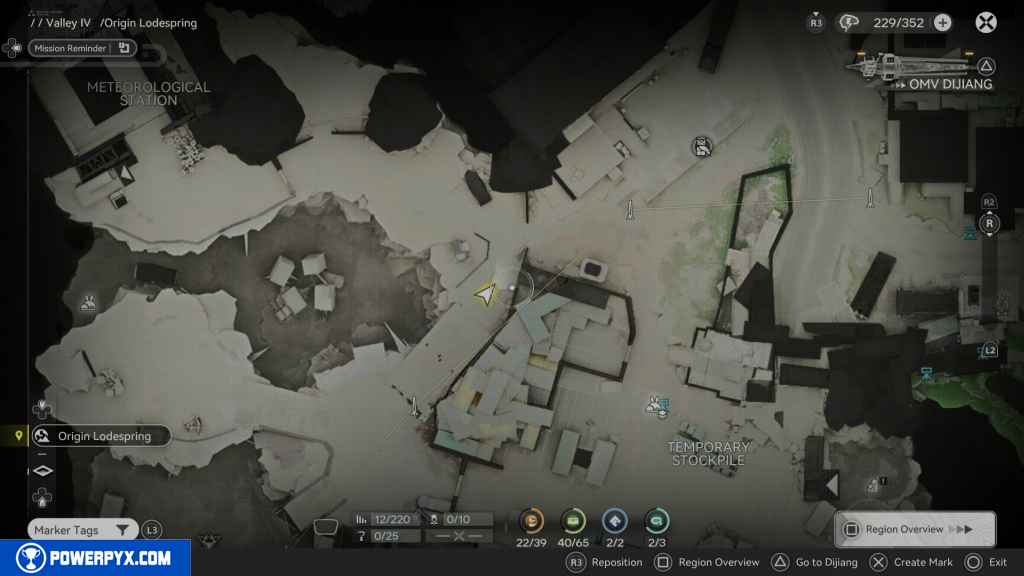
As you start in the Origin Lodespring from the southeast, coming from the Originium Science Park. Look to your left, and you should see a path heading down the mountain to the pocket of steam. Approach it, and it will send you up to the platform with the Crate.
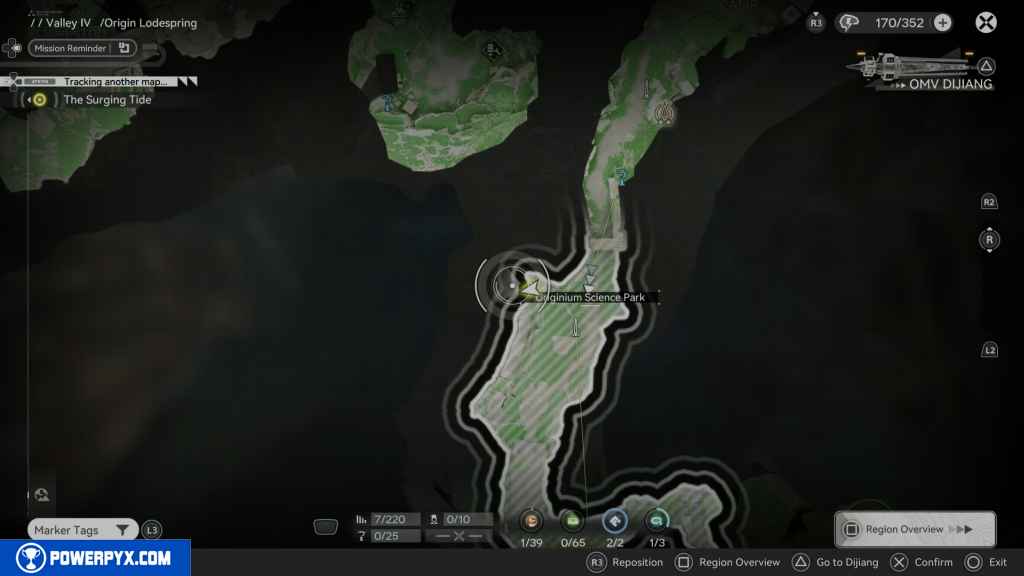
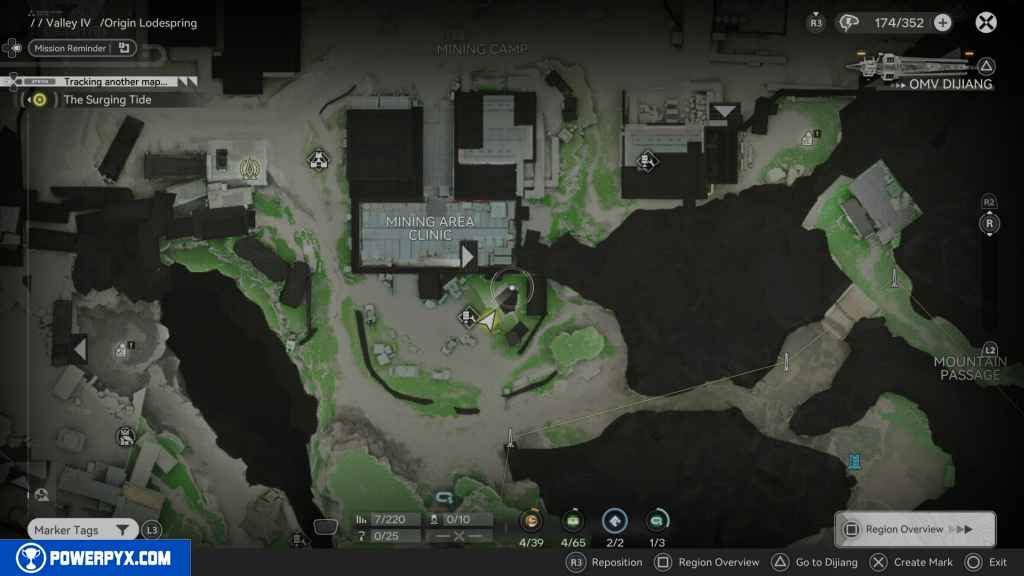
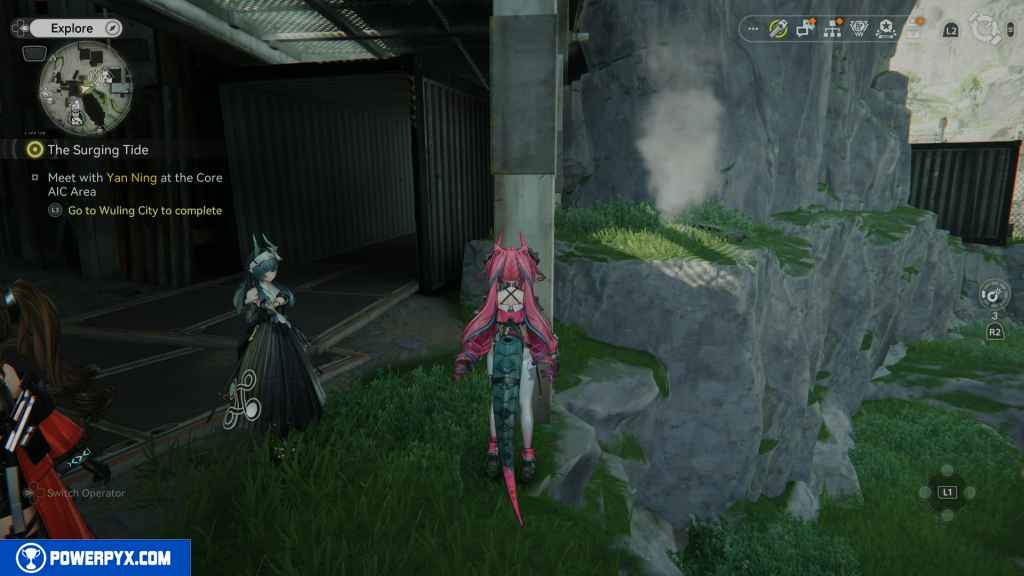
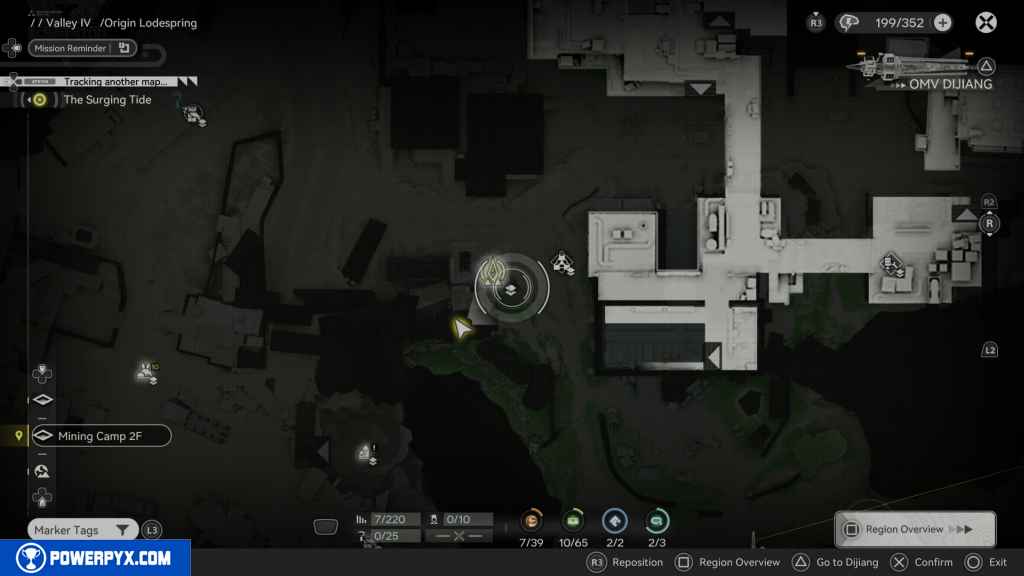
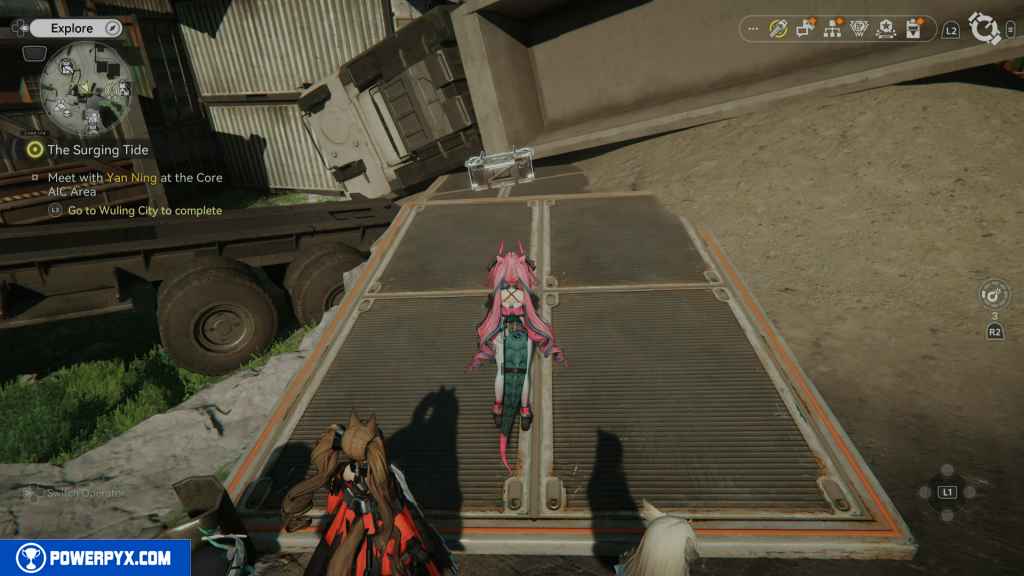
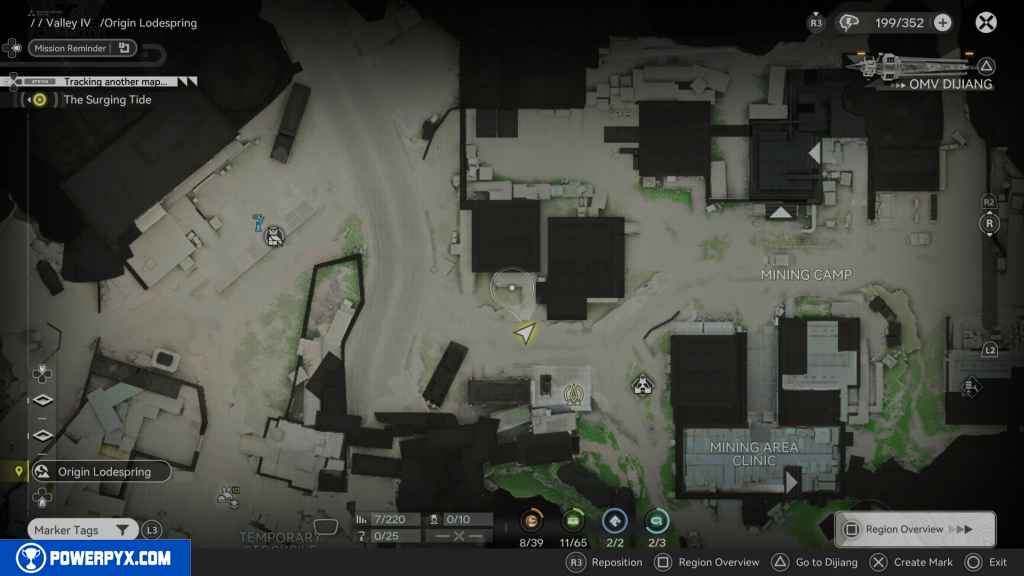
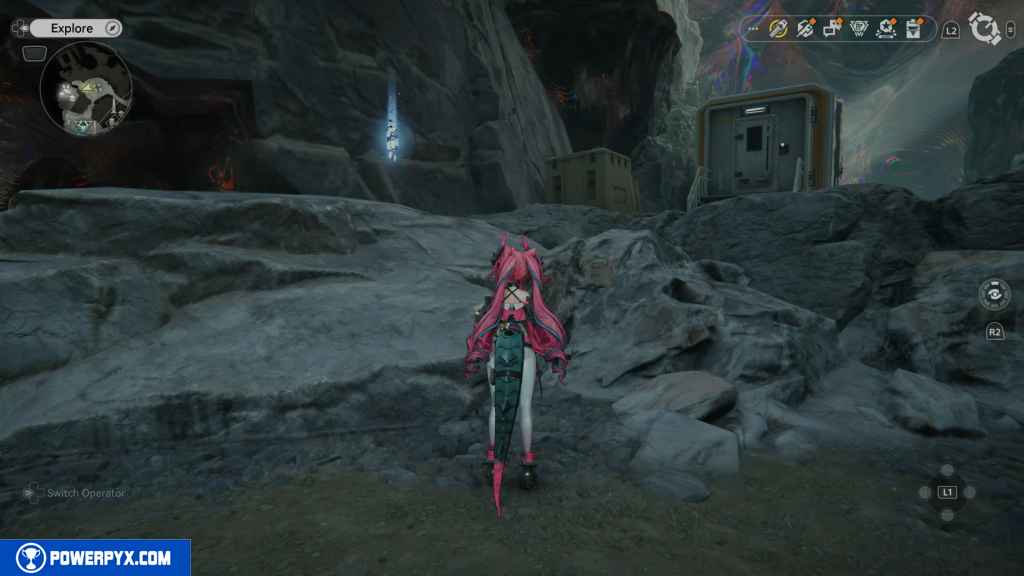
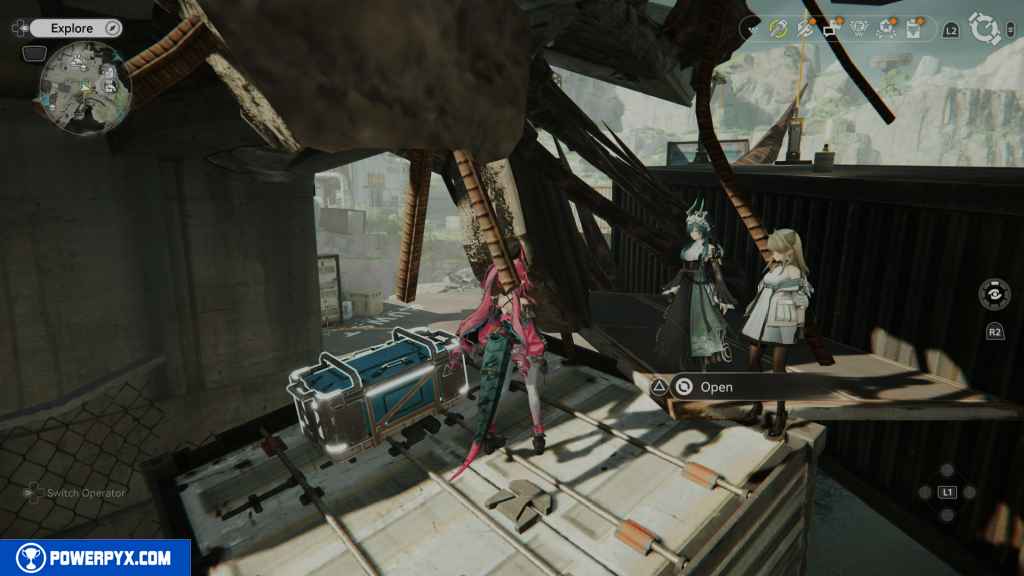
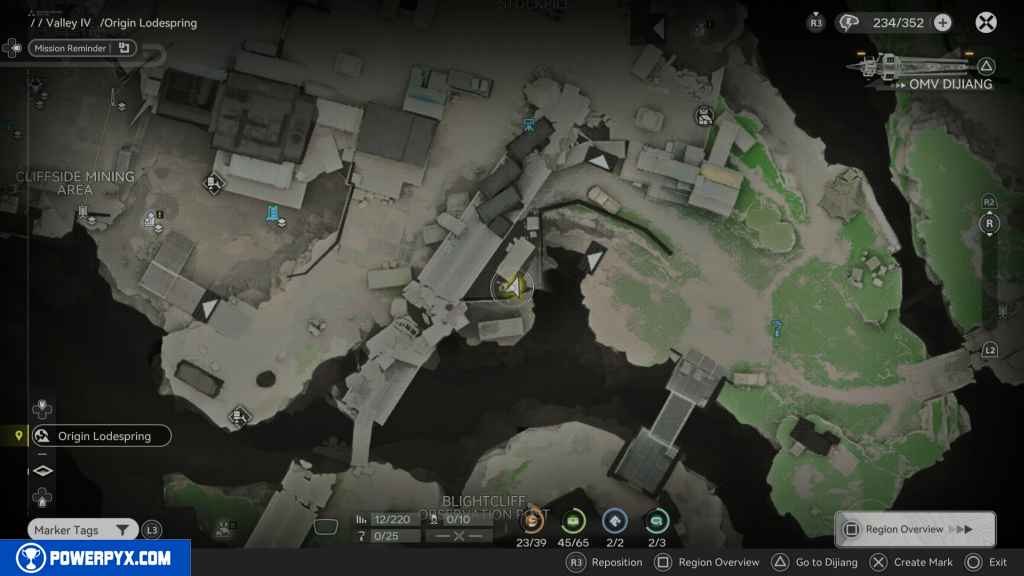
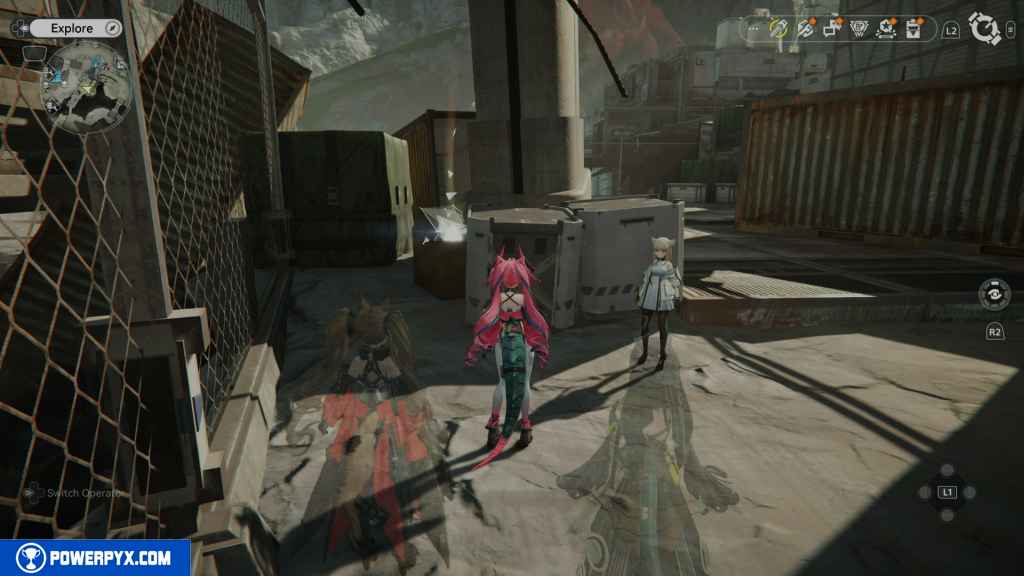
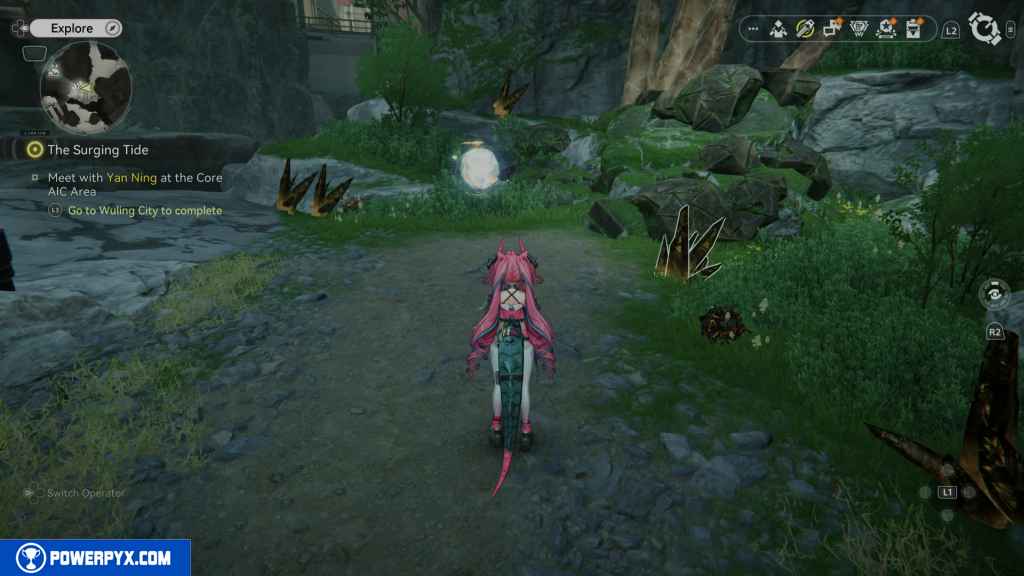
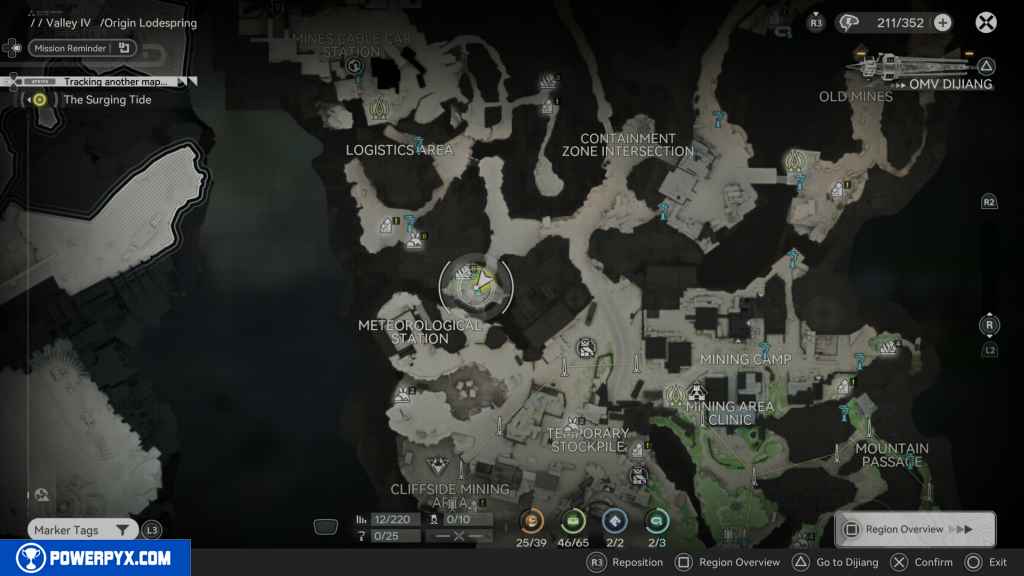
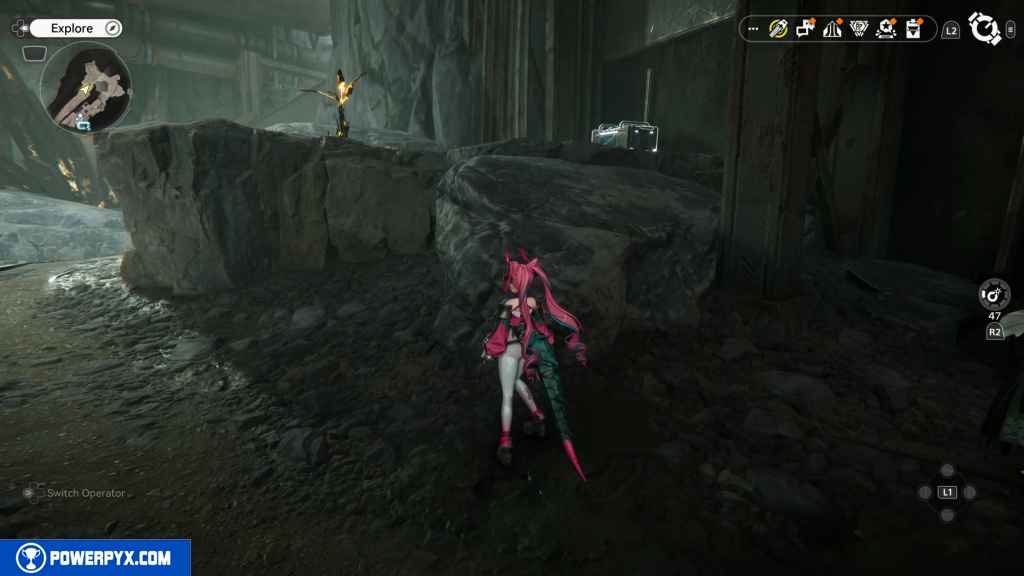
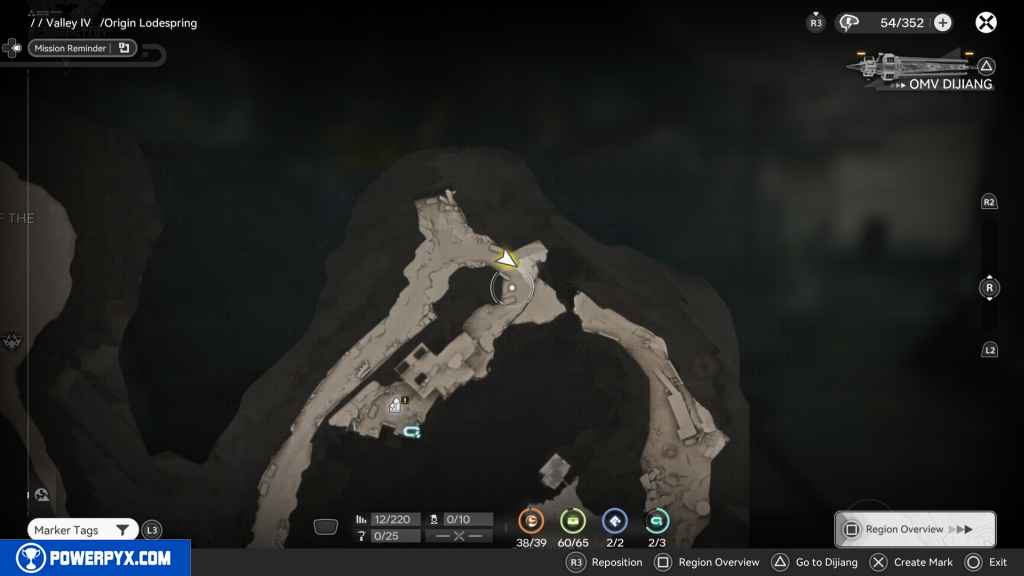
2 – Aurylen 1
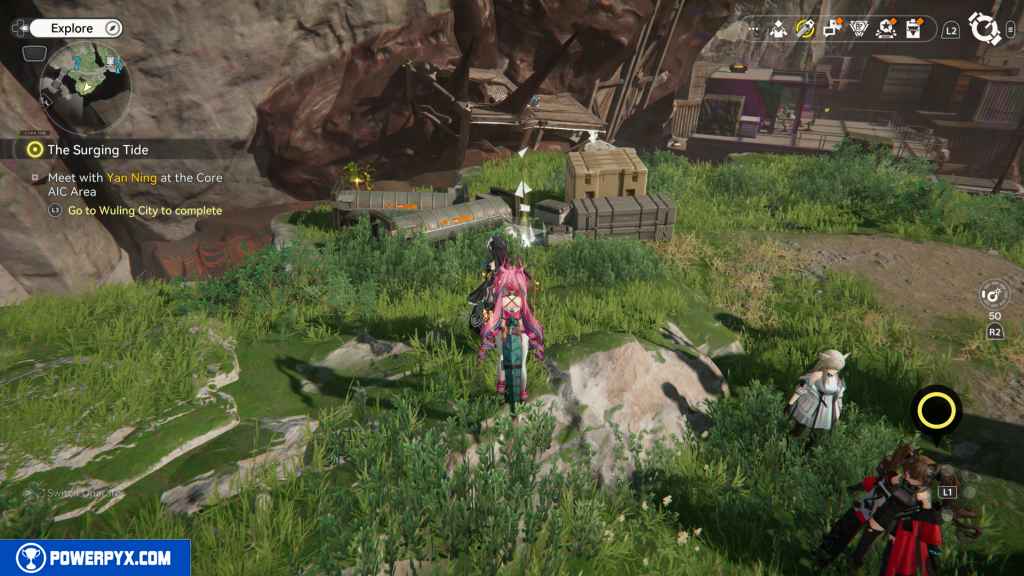
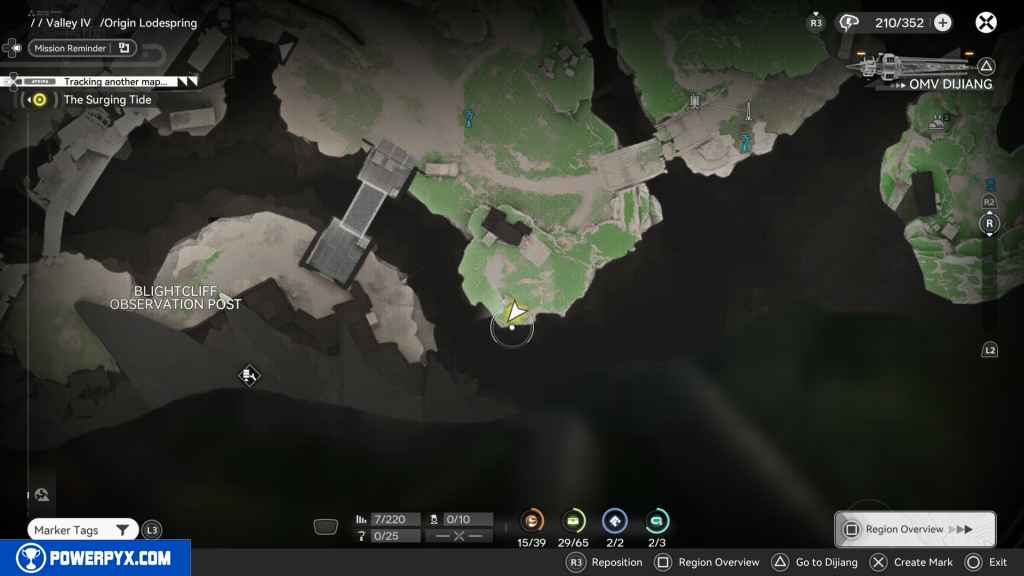
Head up the path under the bridge to the TP point. From there, turn around and go south to the bridge. You should see the Aurylen on the top of the bridge.
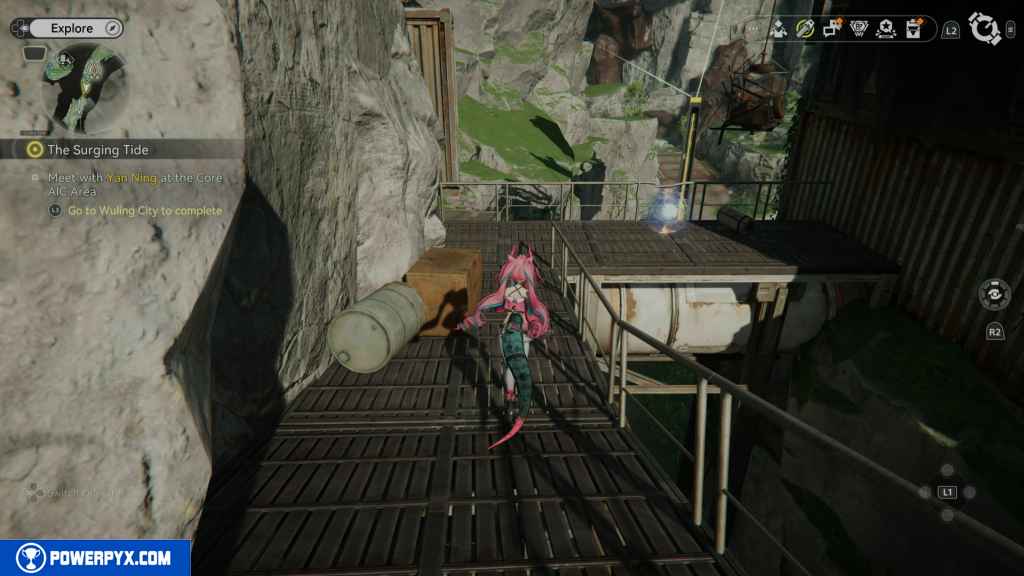
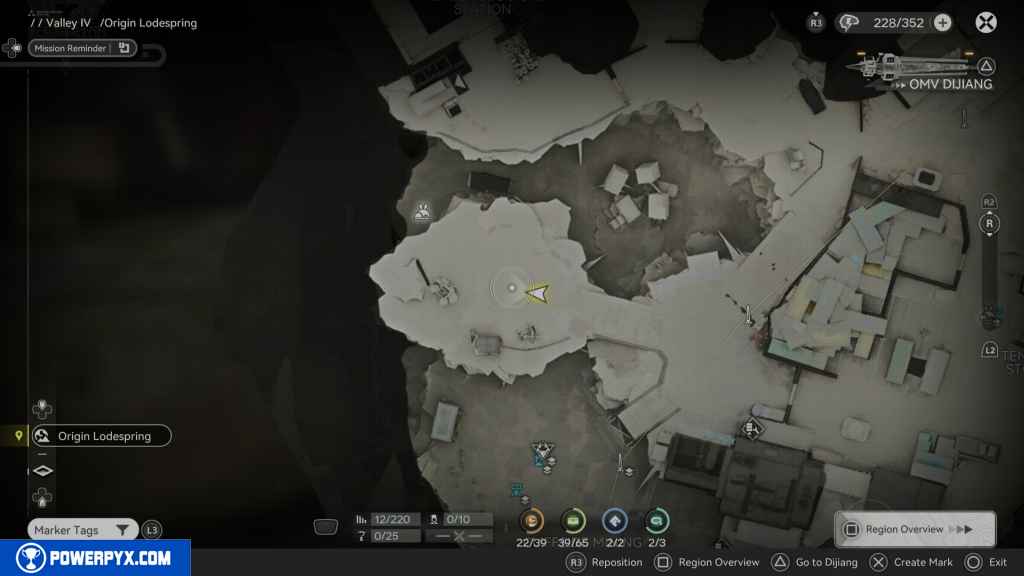
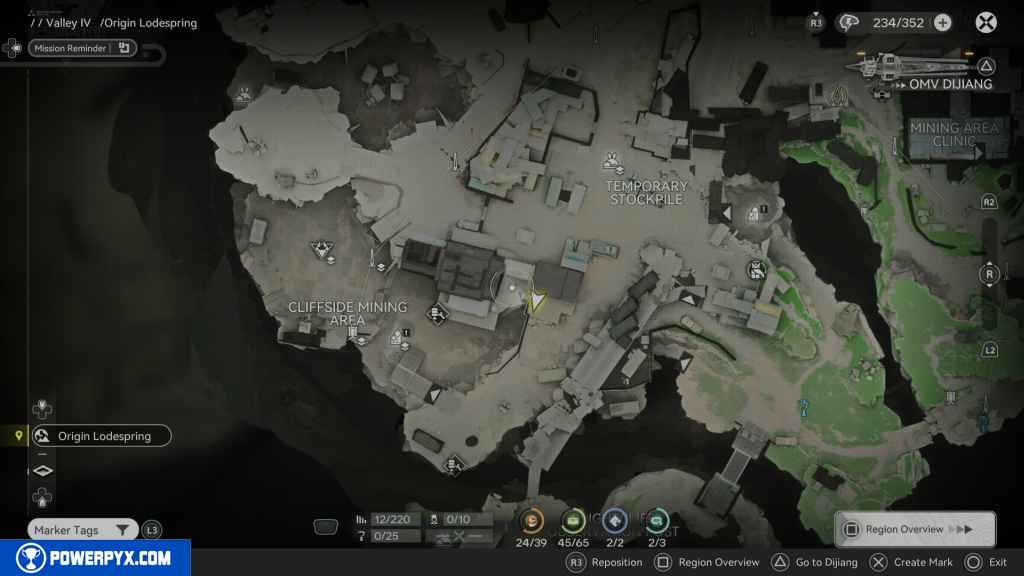
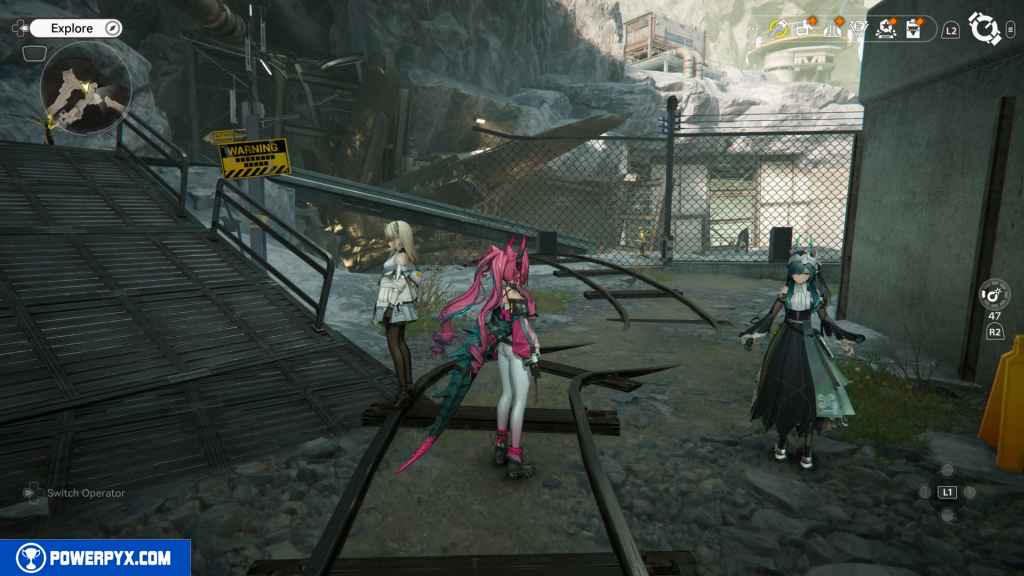
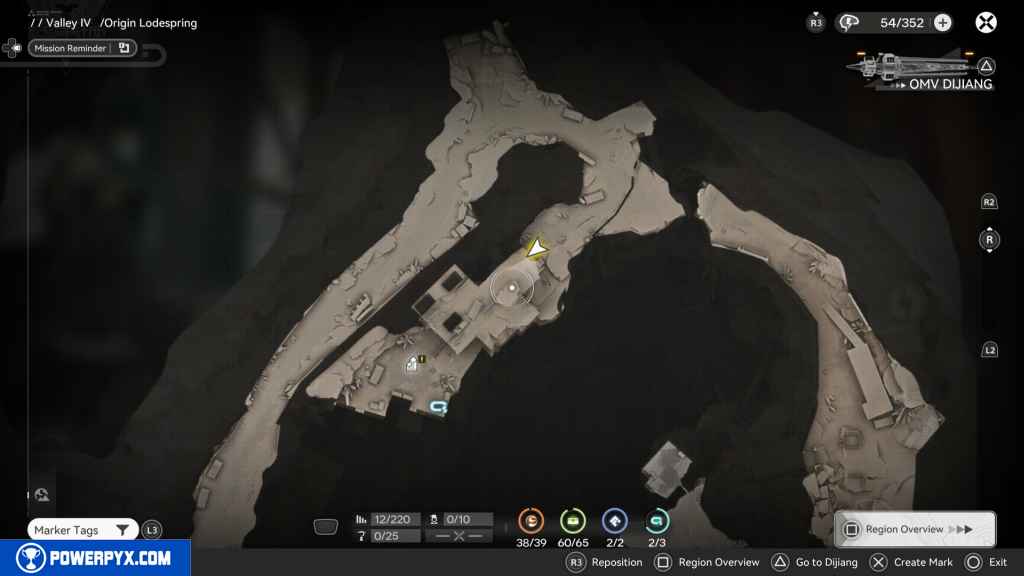
3 – Aurylen 2
Continue on the path until you reach the area with the elevator. On your right, you should see some stairs. Jump up the stairs, and you will find a movable box. Move it over to the wall on the east and use it to jump up and grab the Aurylen.

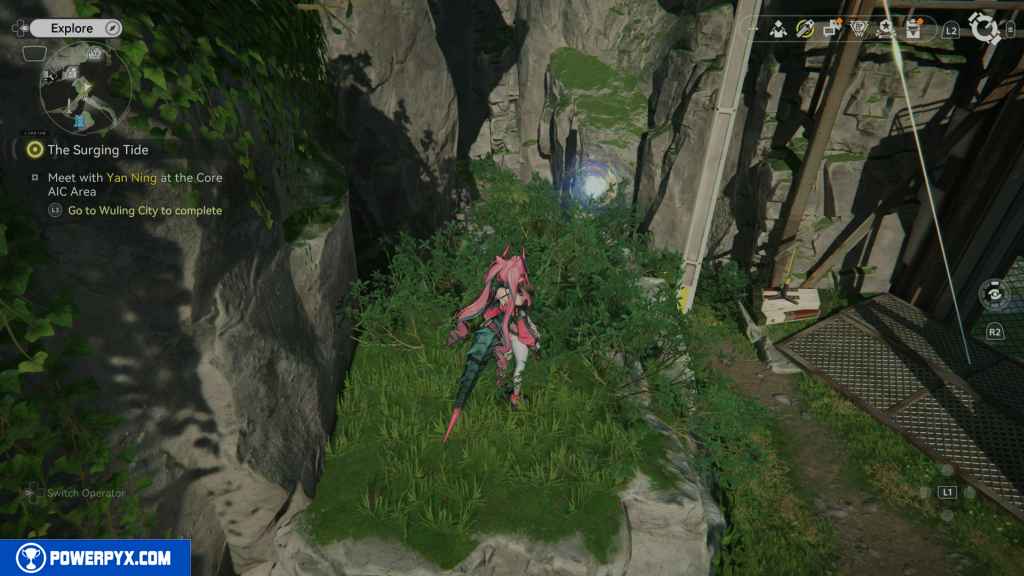
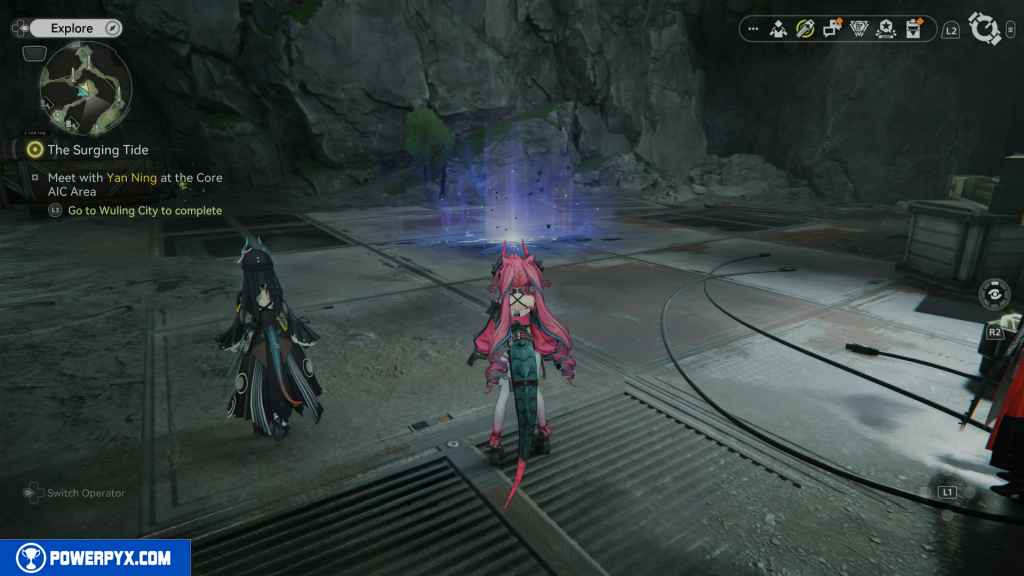
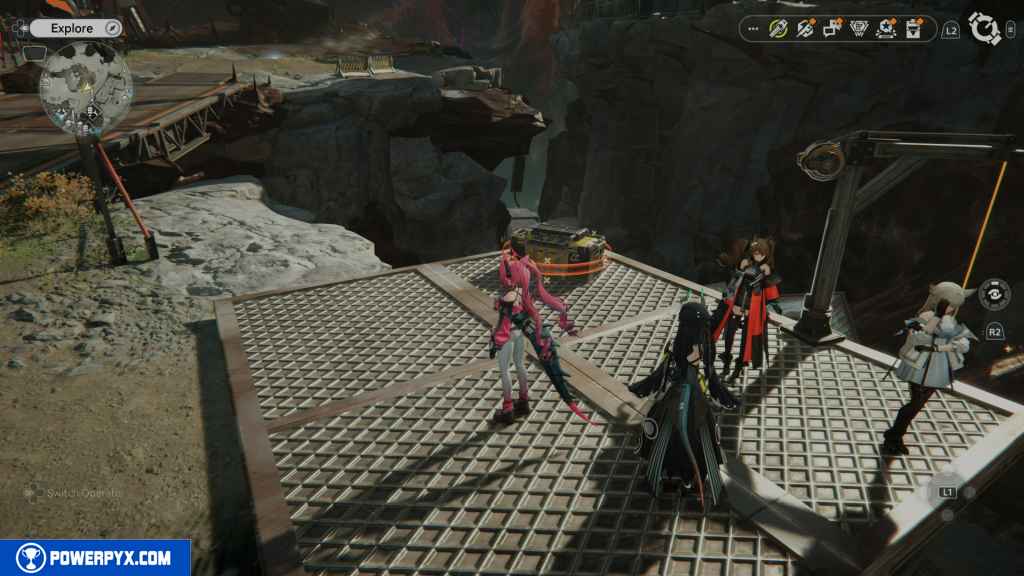
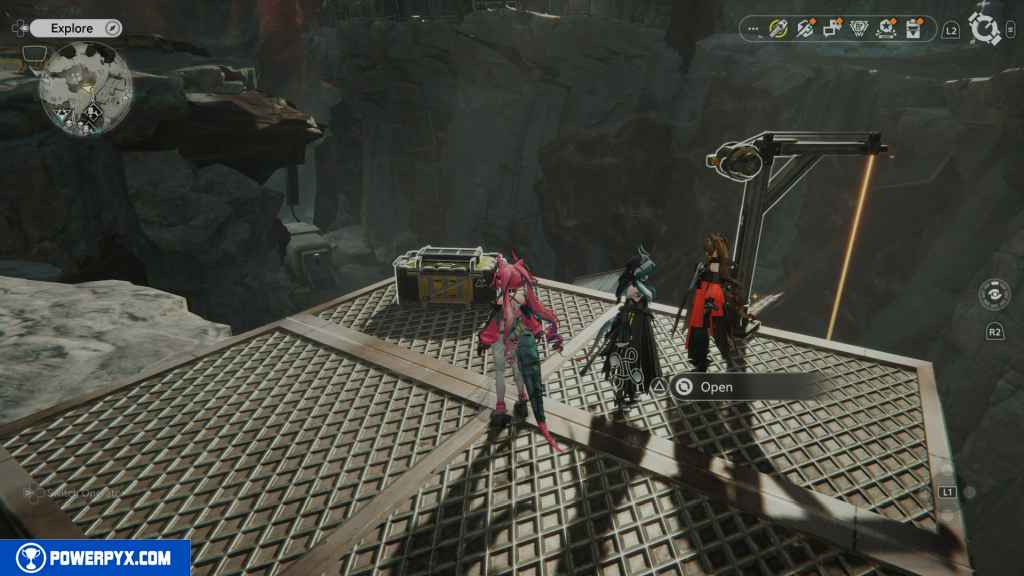
4 – Crate 2
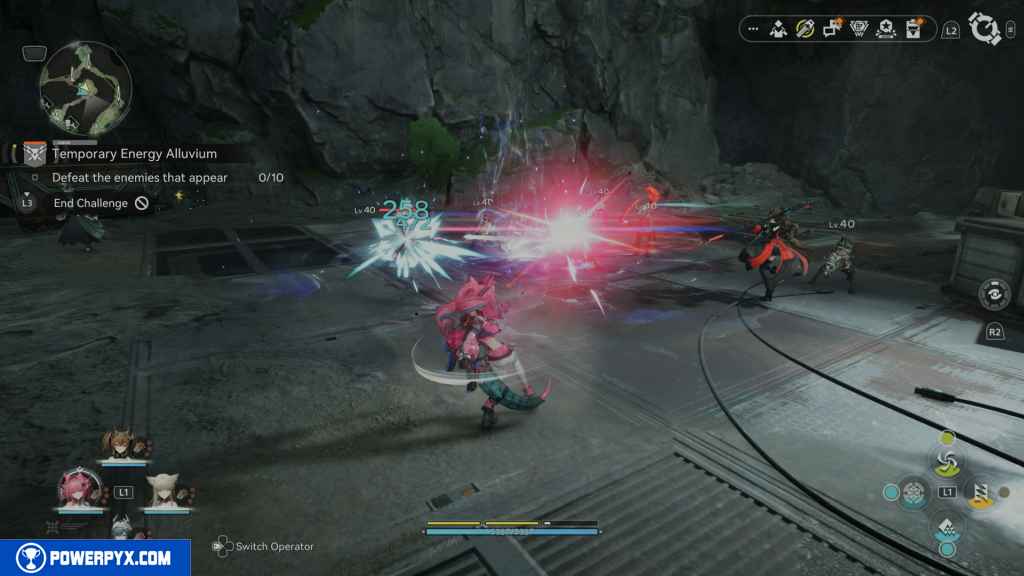
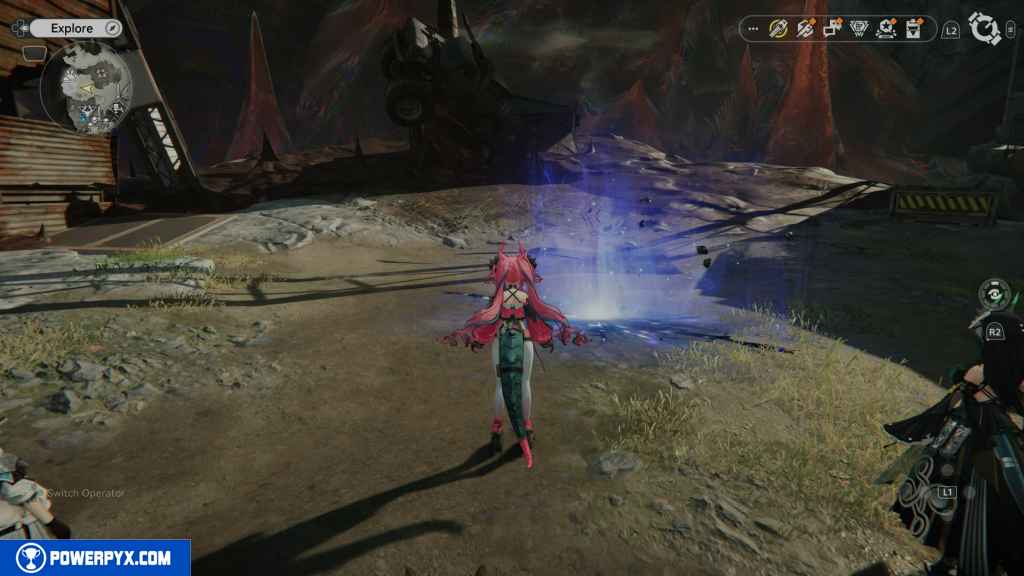
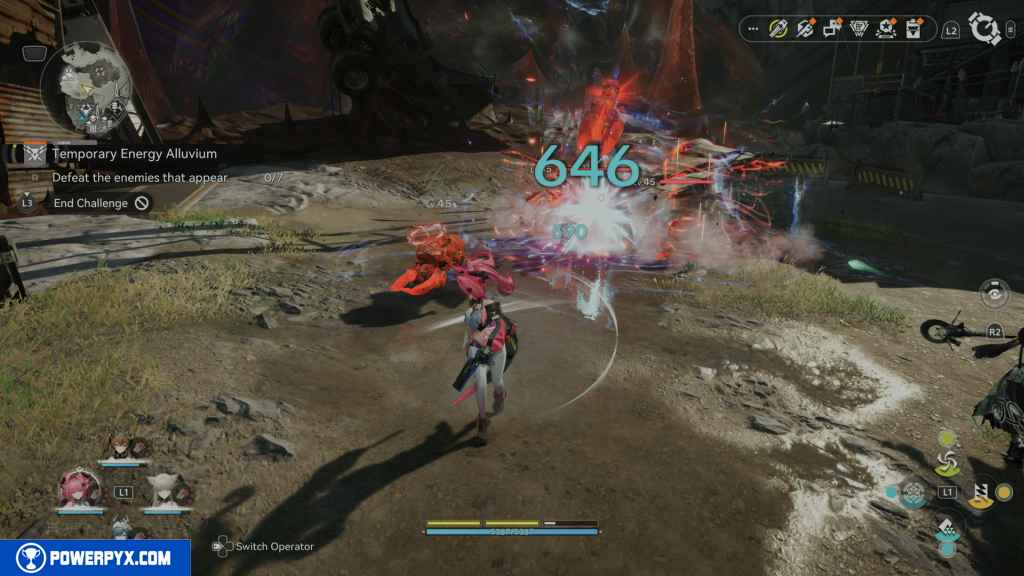
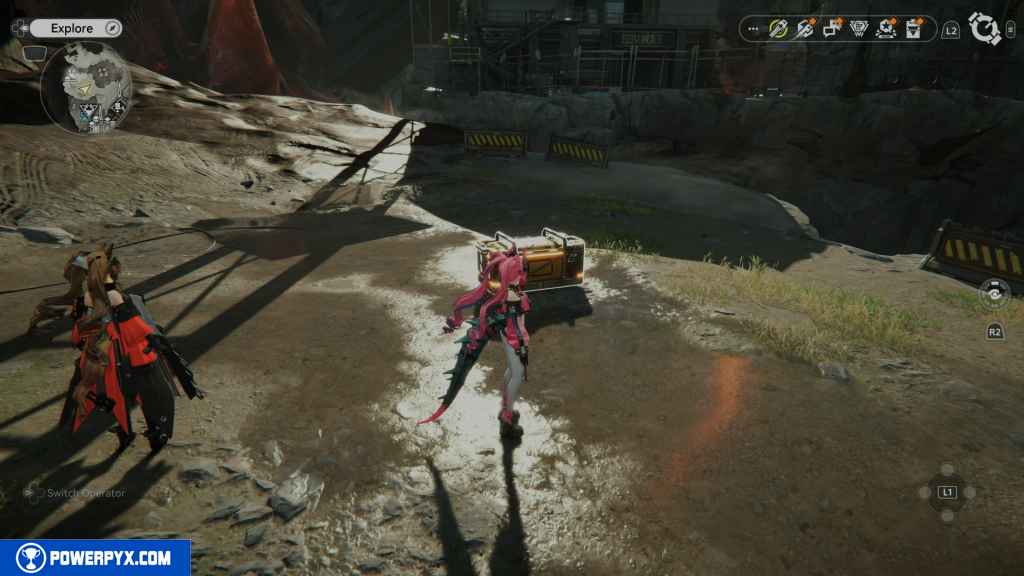
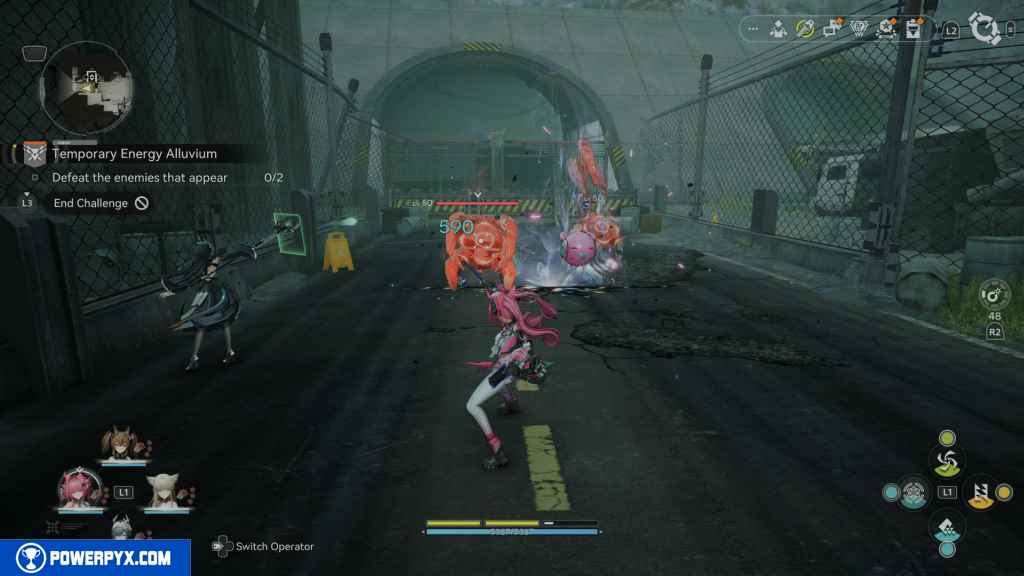
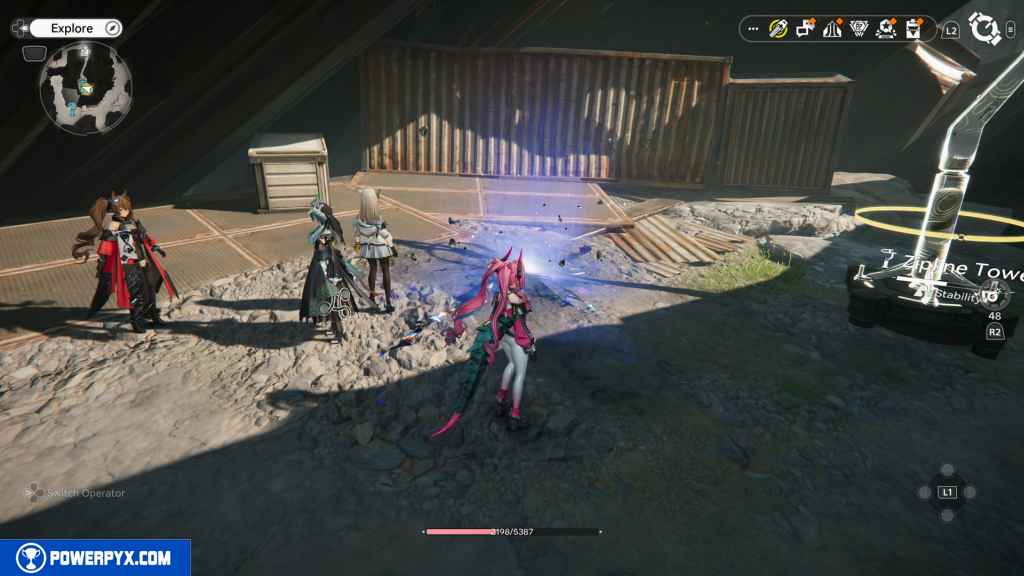
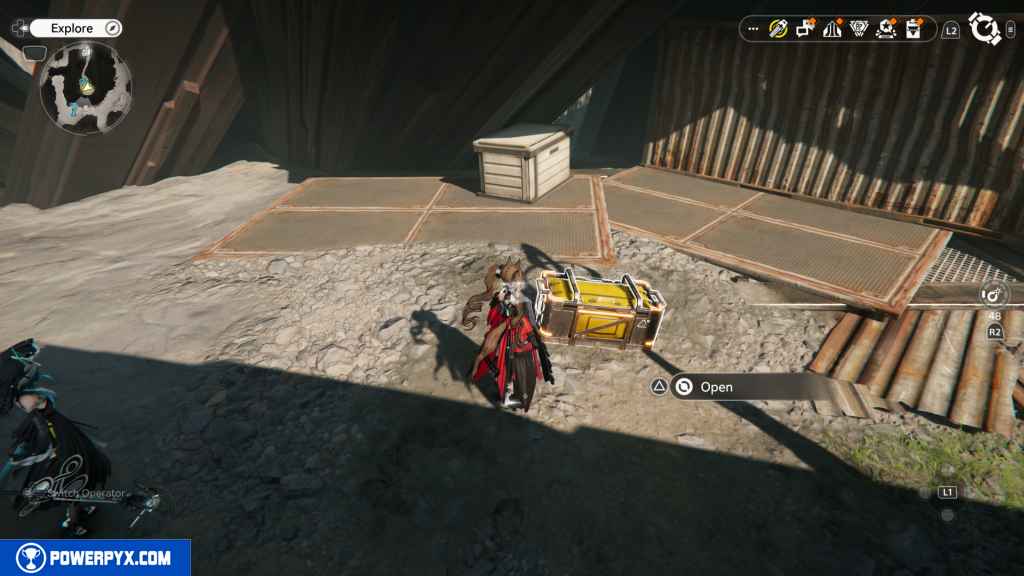
Head down the elevator and turn left at the T-Intersection. You will see a wall that you can blow up with a bomb. Do so and head through to the open area. You should see an Energy Alluvium on the ground. Activate it and defeat the enemies to earn the Crate.
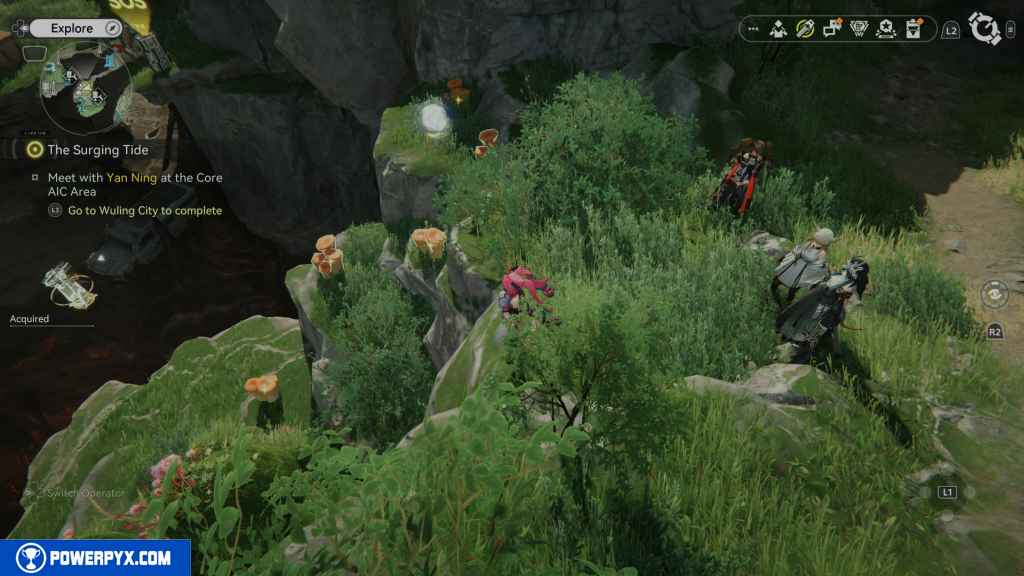
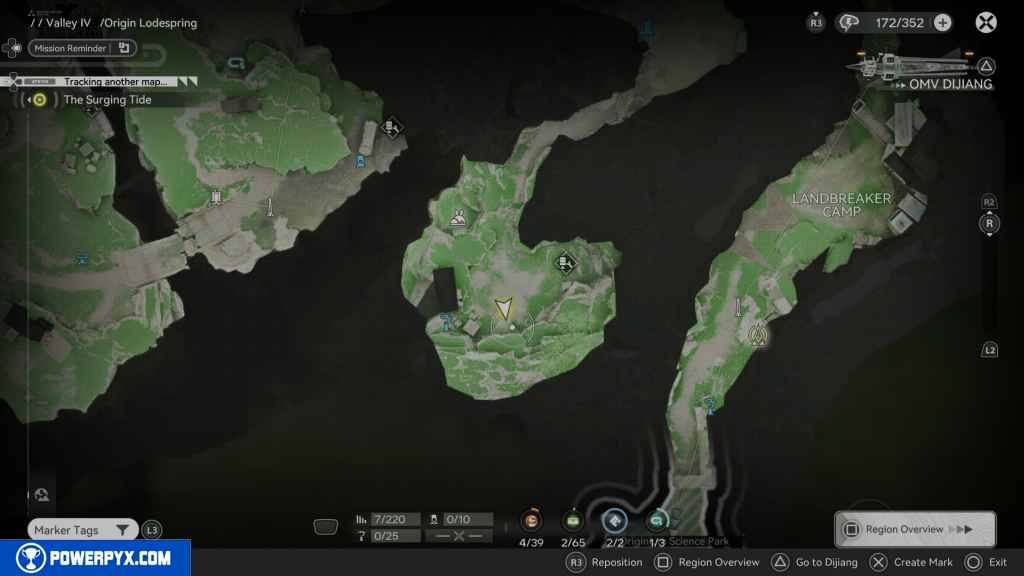
5 – Aurylen 3
Head west from the last Crate down the path until you reach an area with collectable mushrooms on your right. You should see the Aurylen here as well, and it will fly away down the hill. Follow it through to the end, then pick it up.
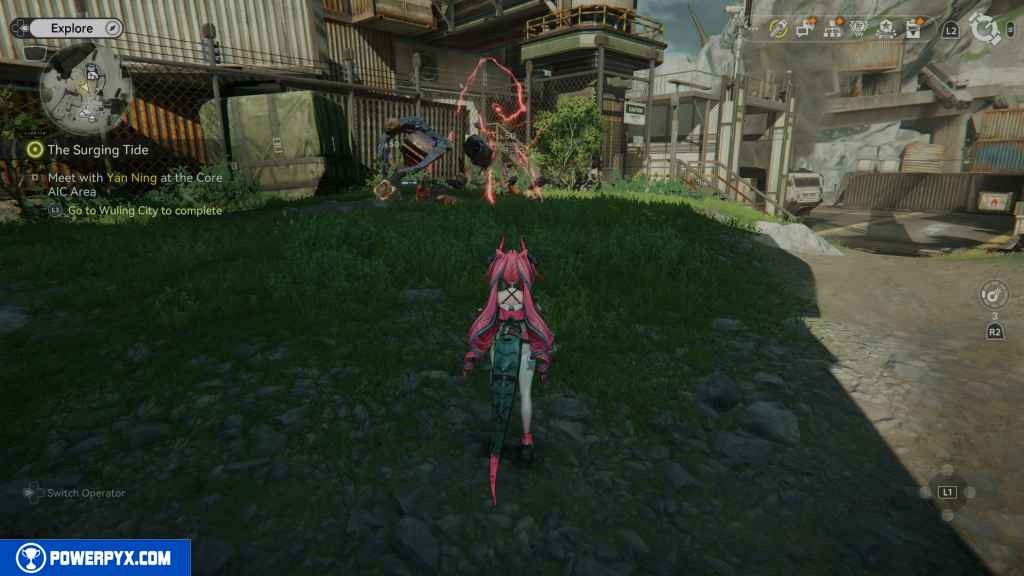
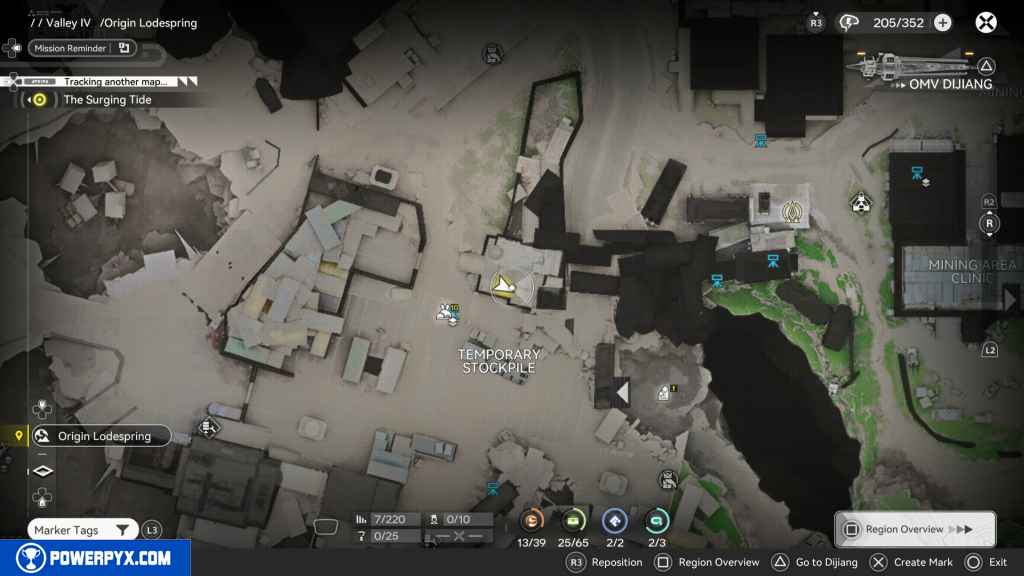
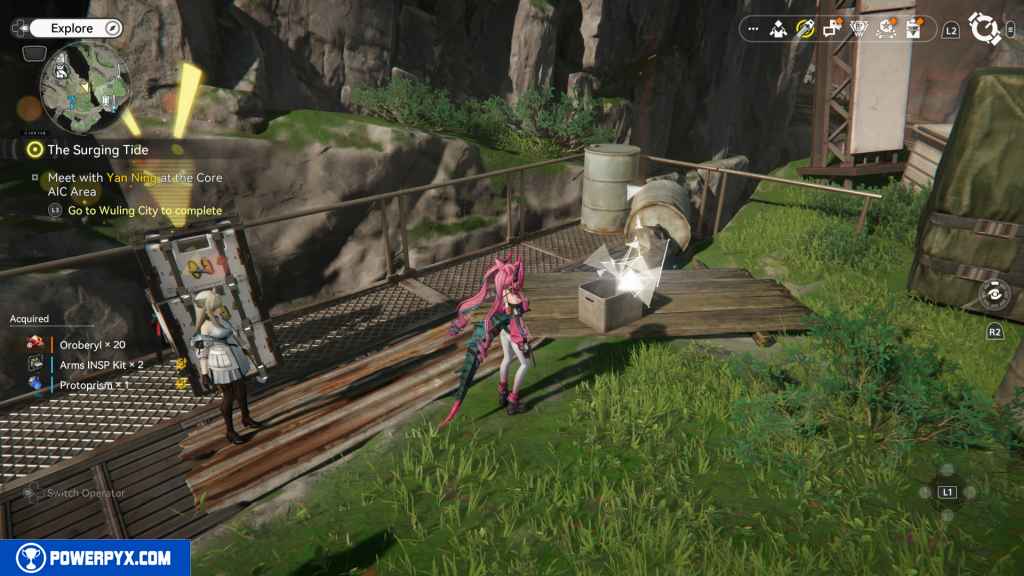
6 – Crate 3
Head south, and you should see a large enemy here. The Crate you need is behind it and is locked. To unlock it, you need to defeat this large enemy.

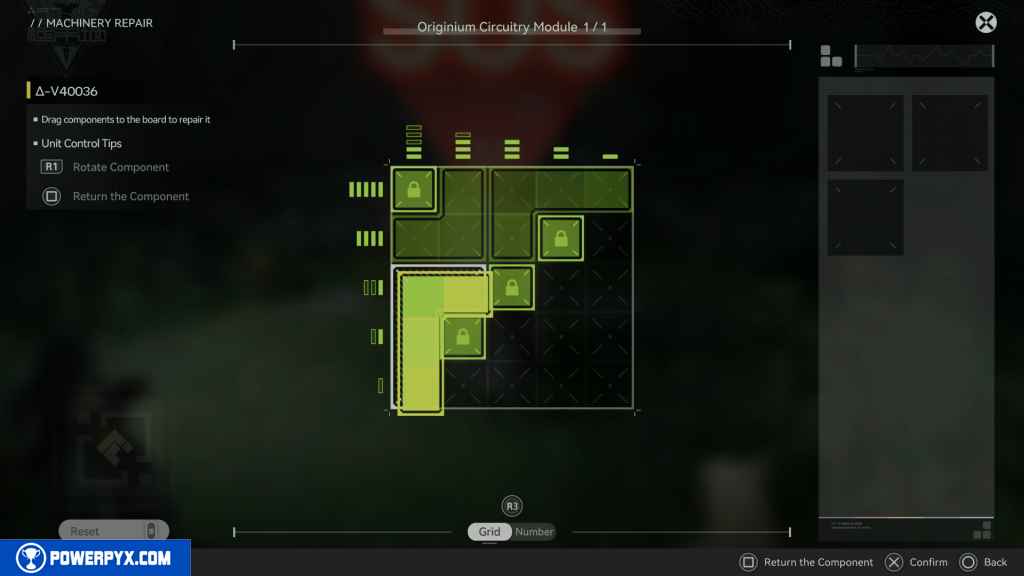
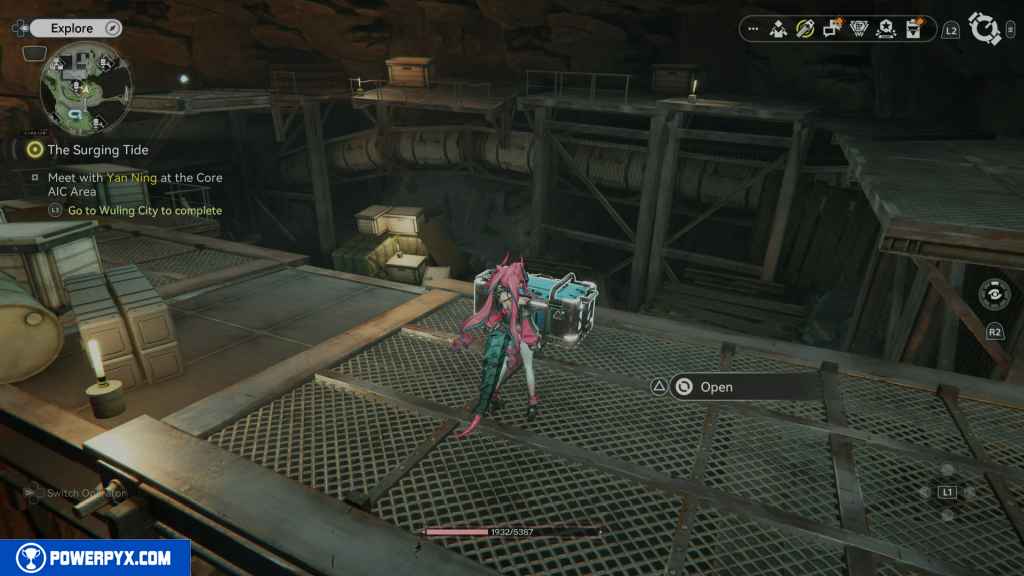
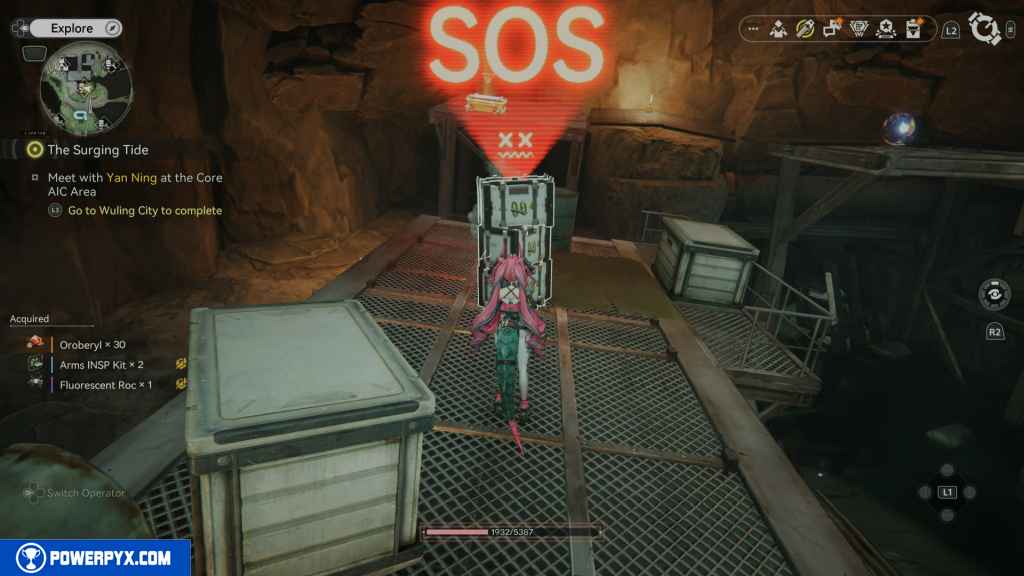
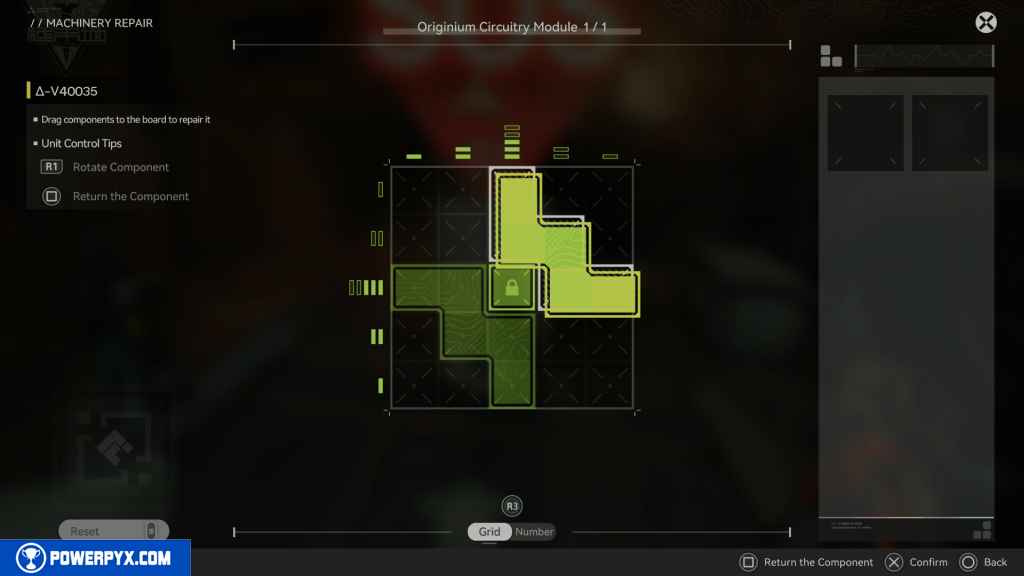
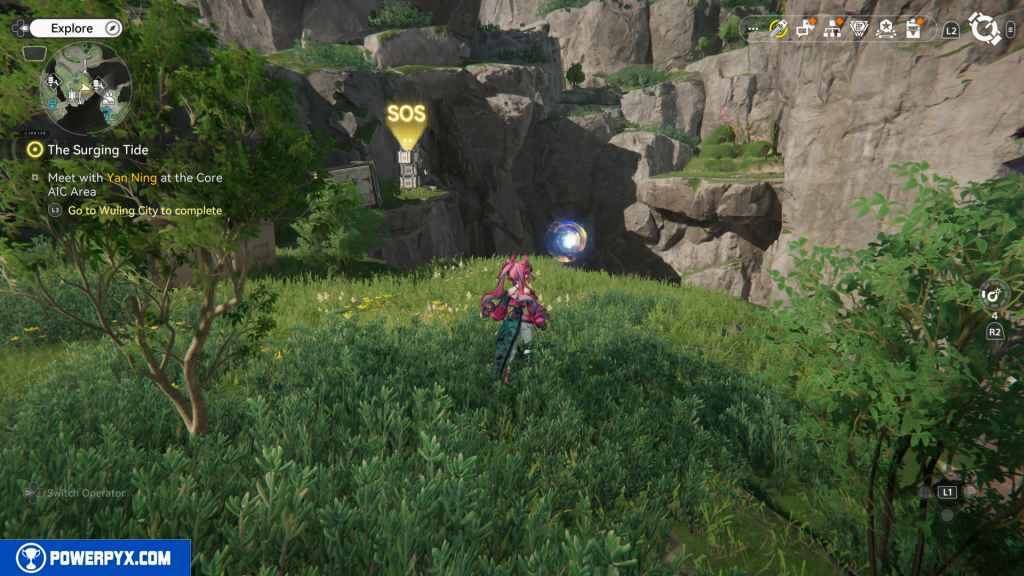
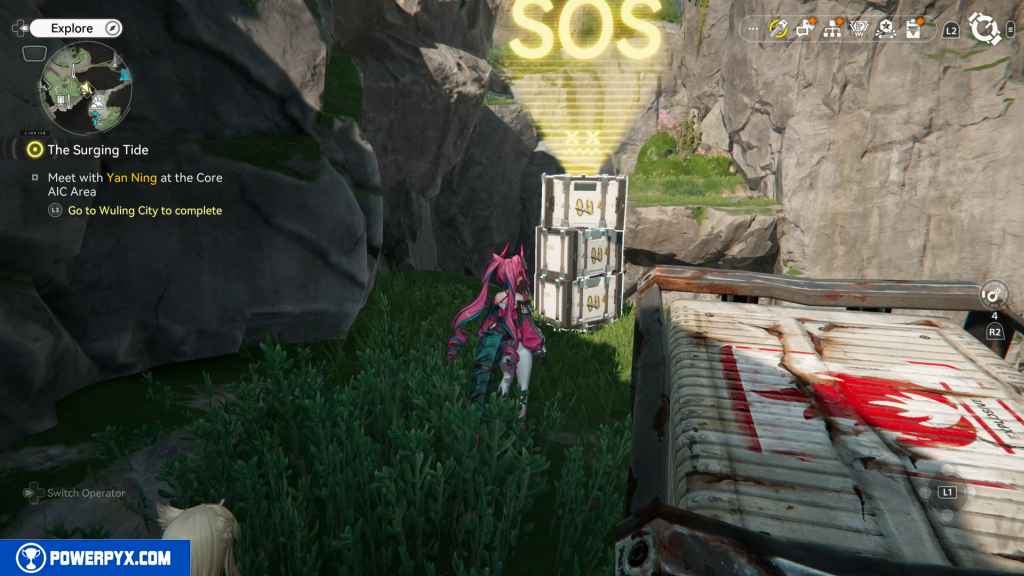
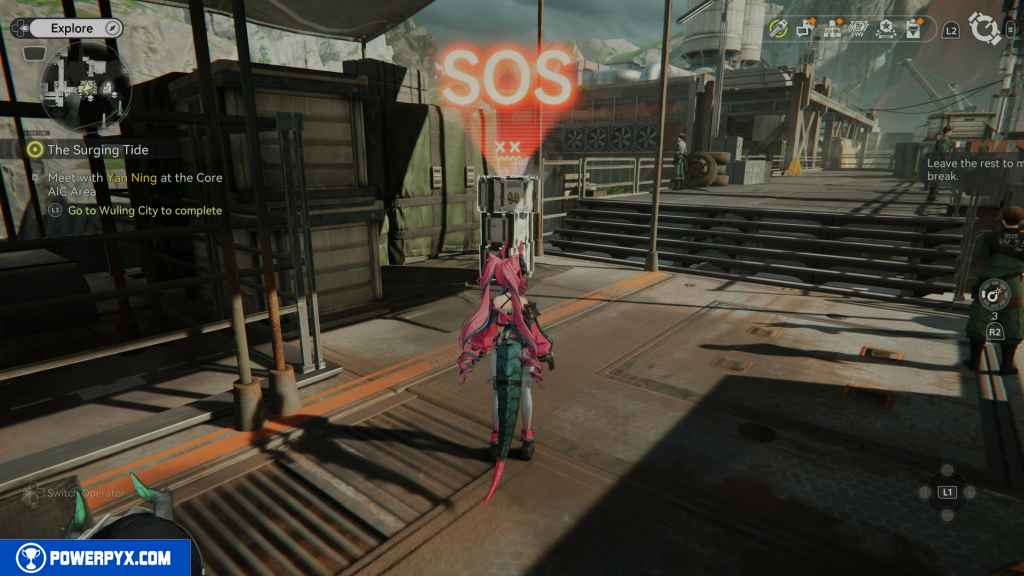
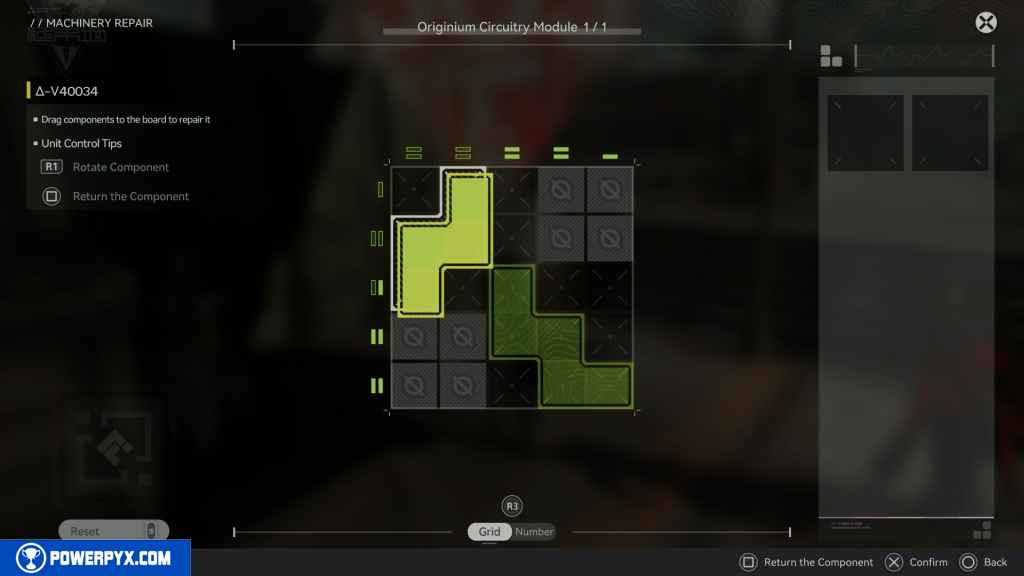
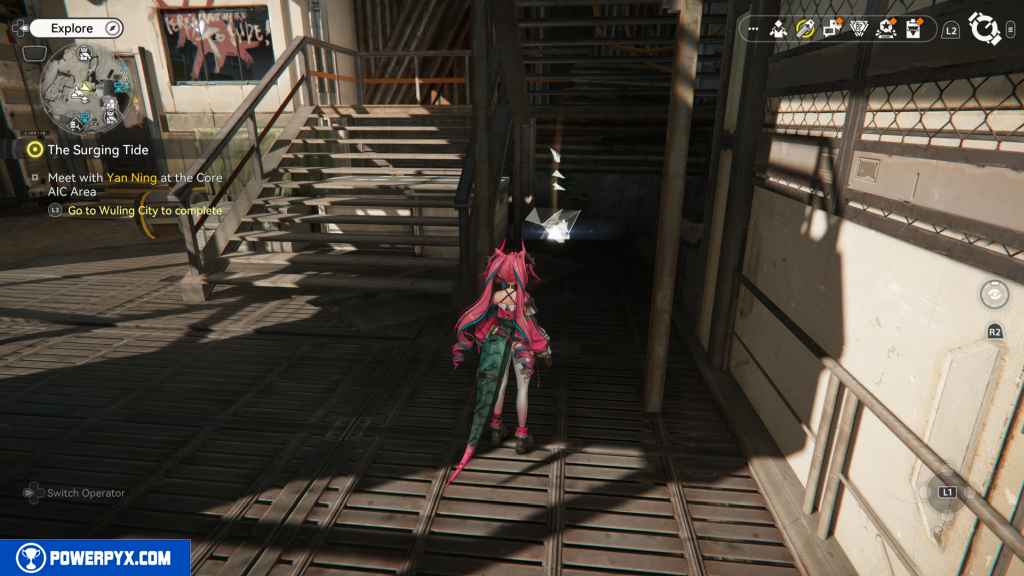
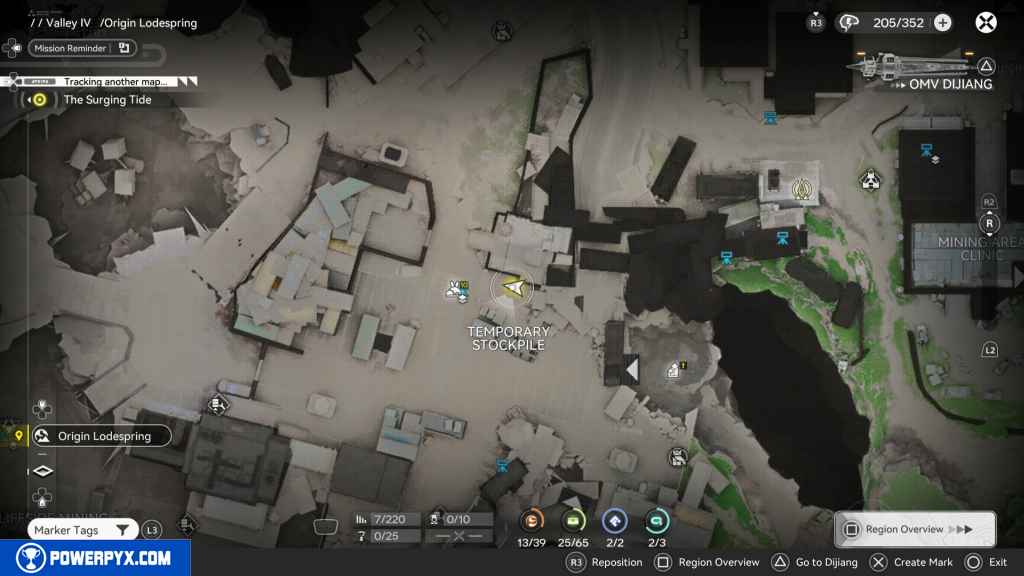
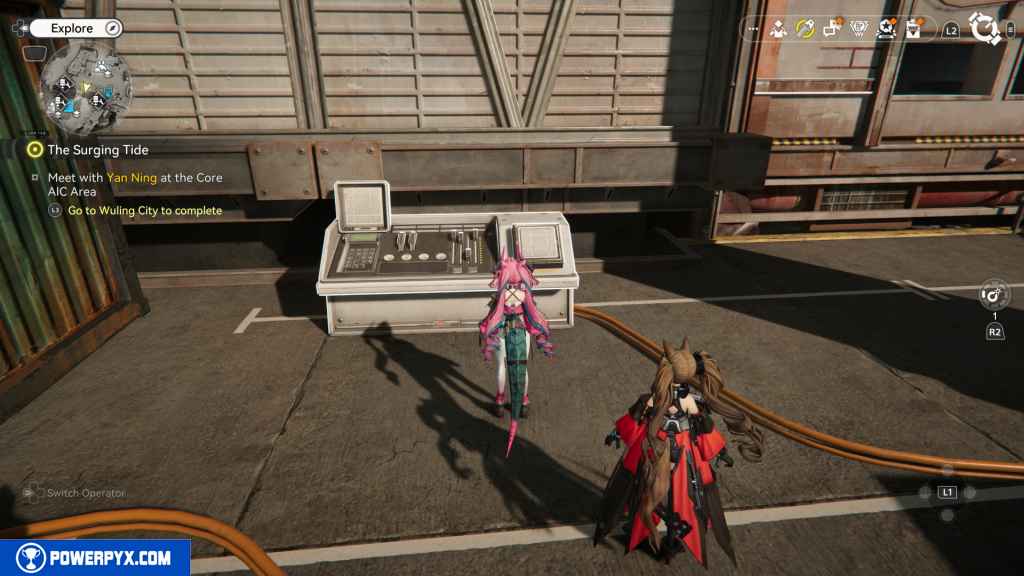
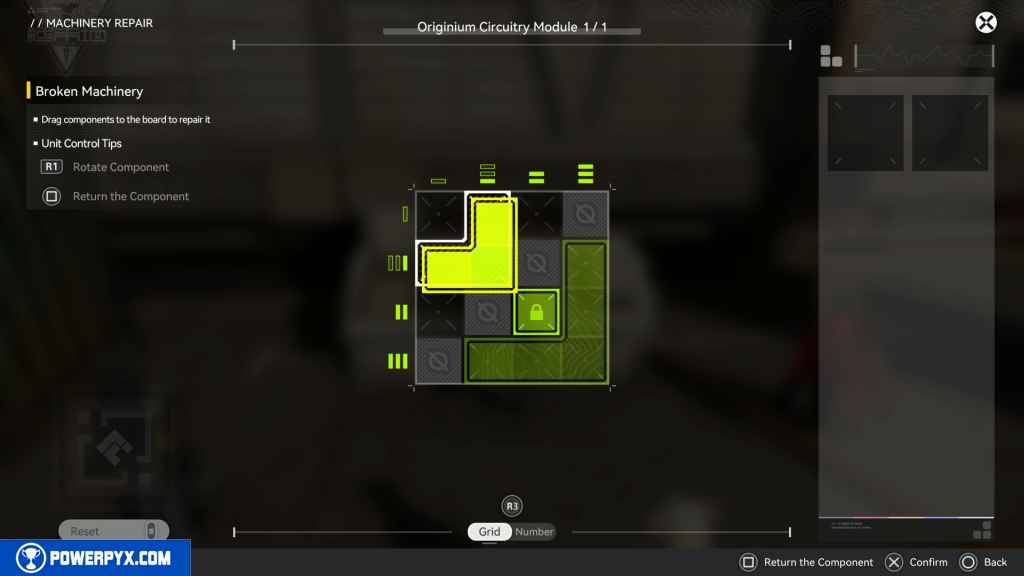
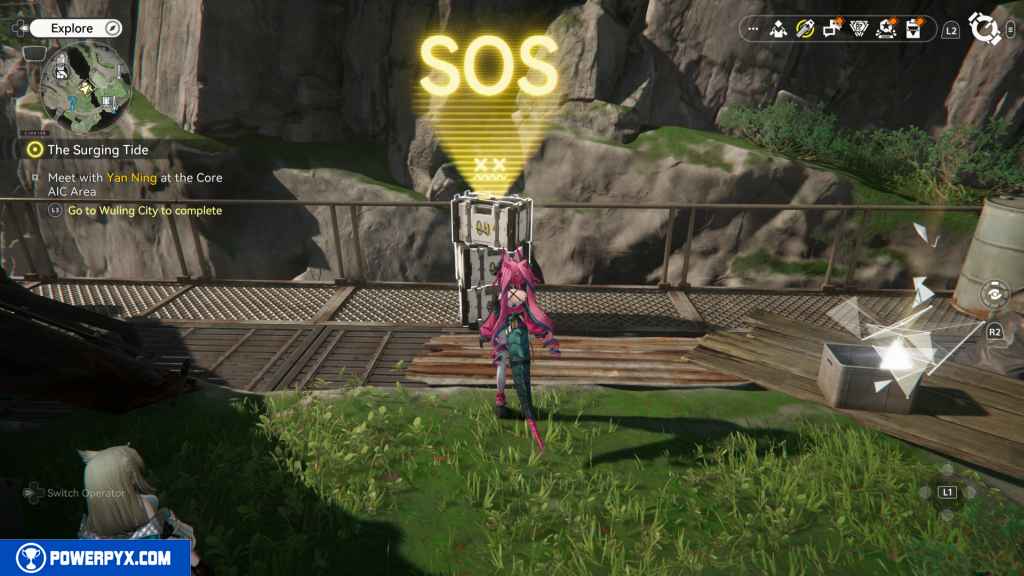
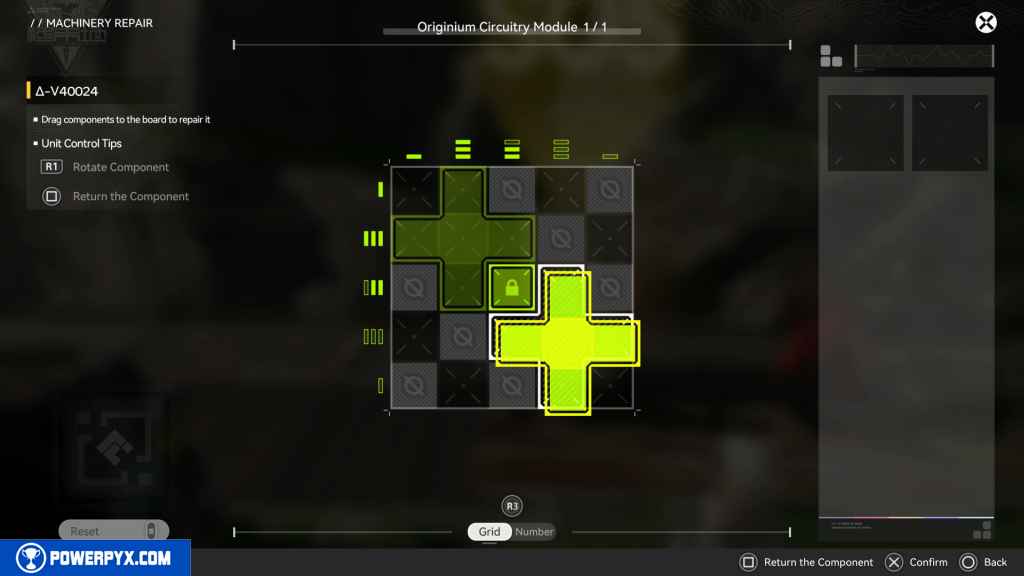
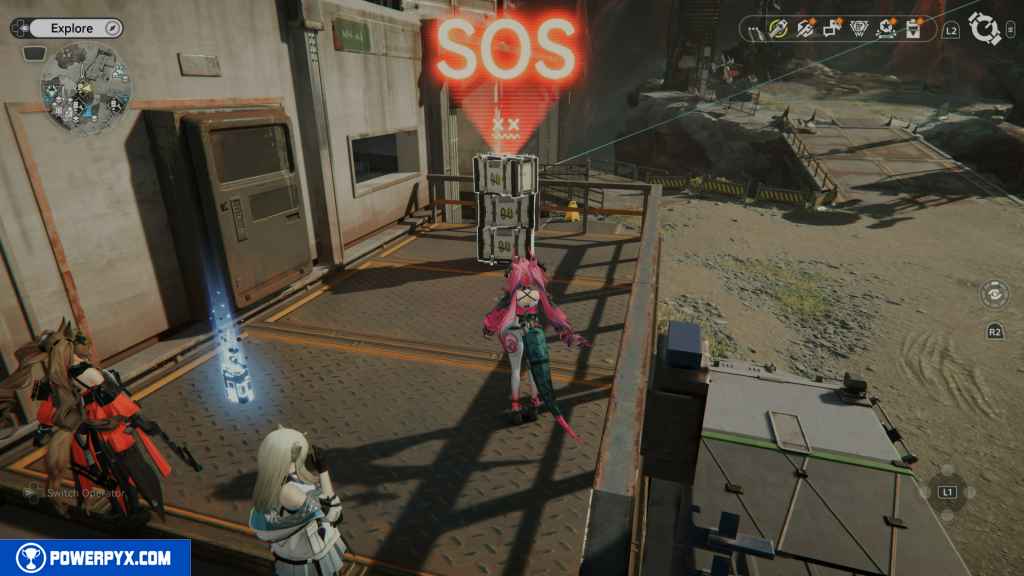
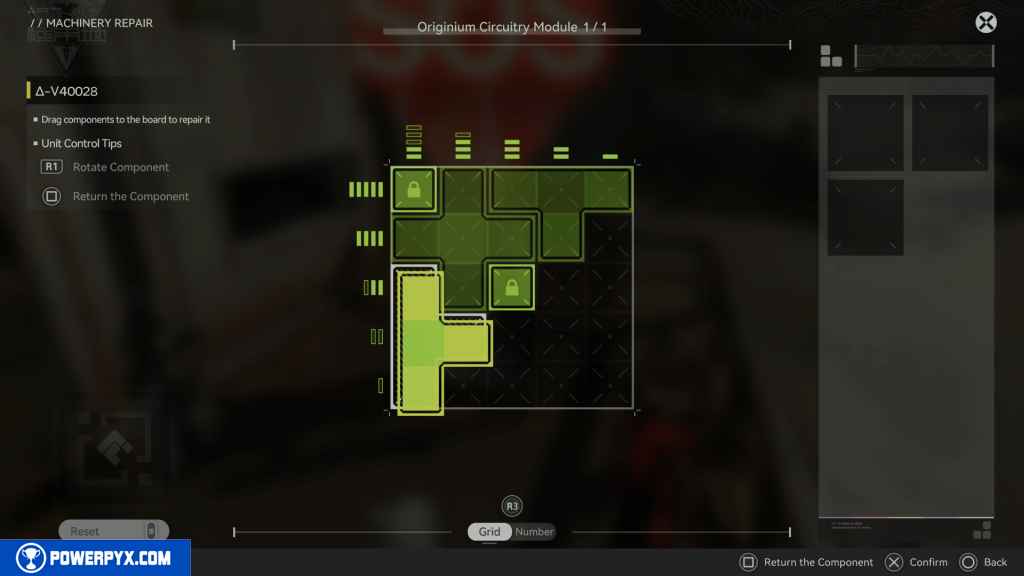
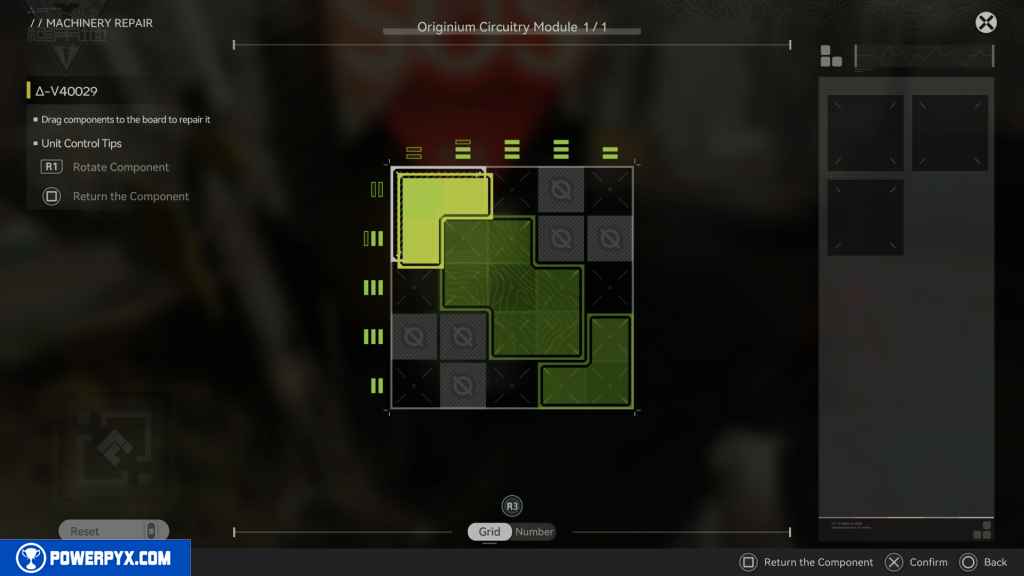
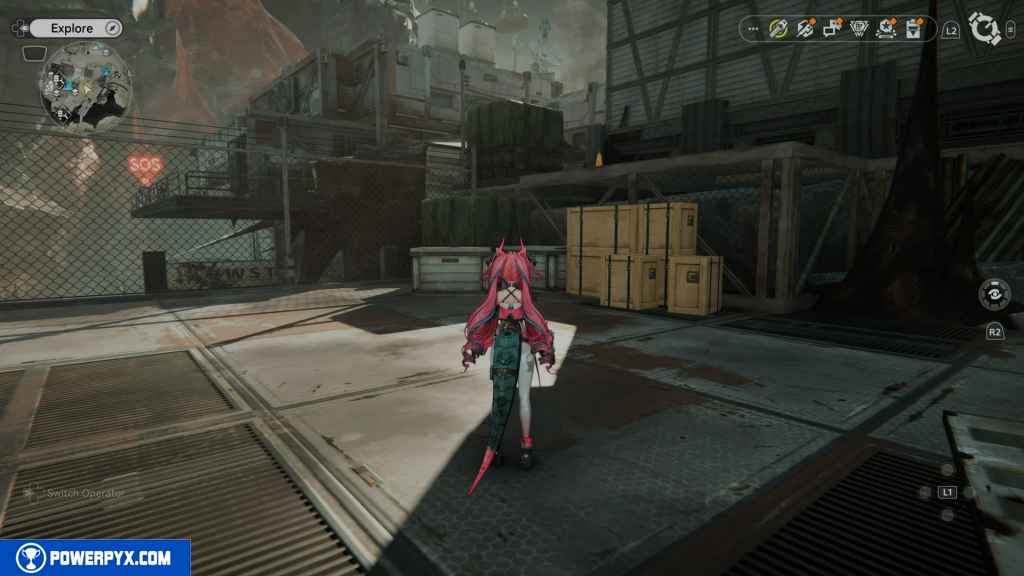
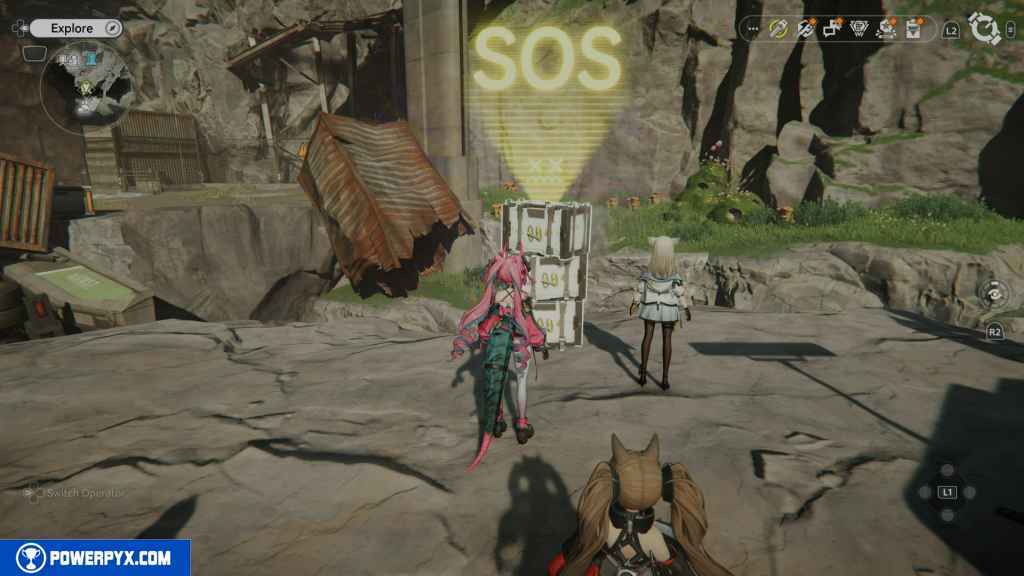
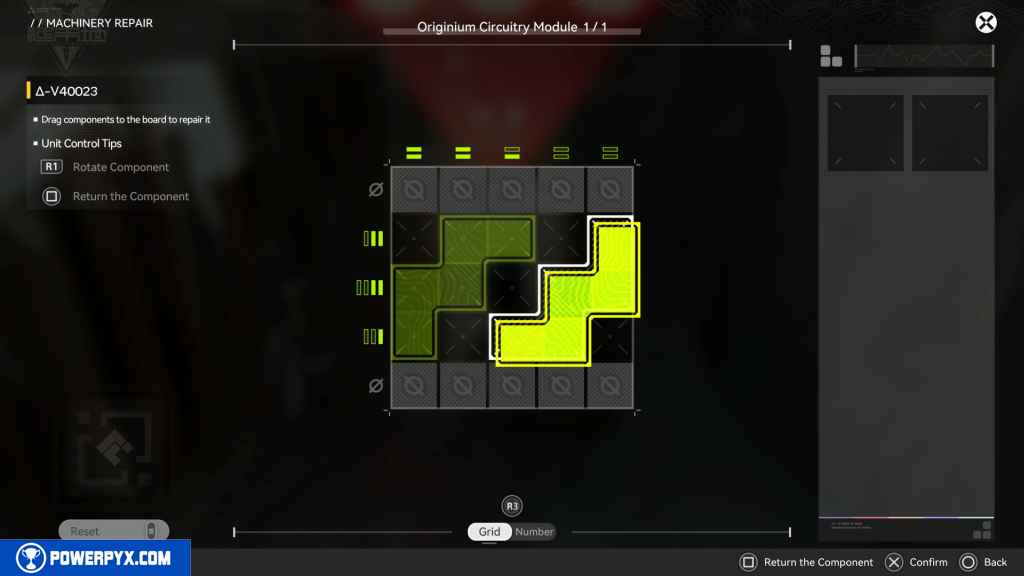
7 – SOS Repair Bot 1
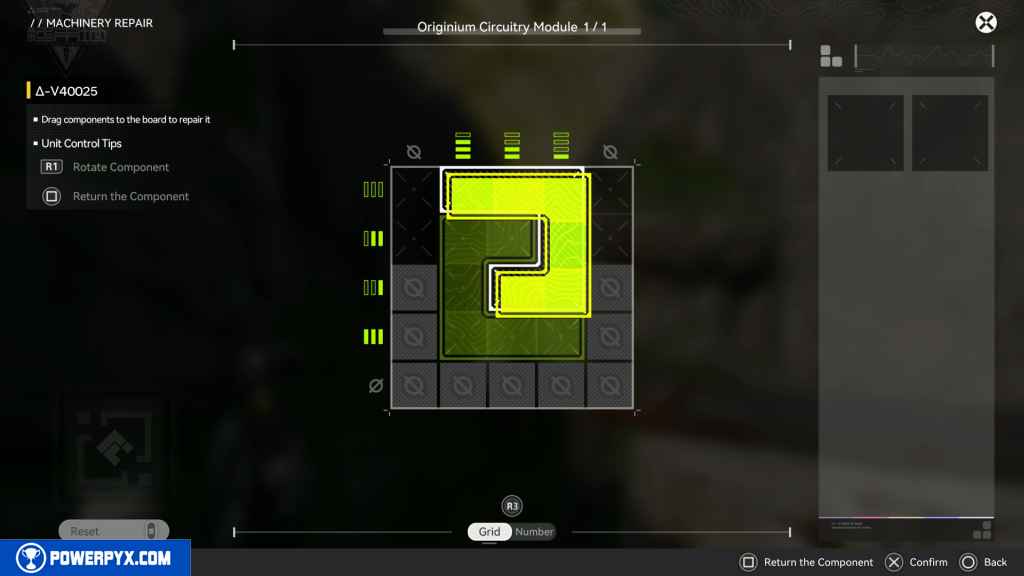
East of the Crate is the first Repair Bot of the area. Interact with it to solve the puzzle and earn rewards.
8 – Crate 4
Return to the area with the elevator, then head west to the large open area. If you look north, you should see a big rock. Go to that rock and climb up to find the Crate at the top.
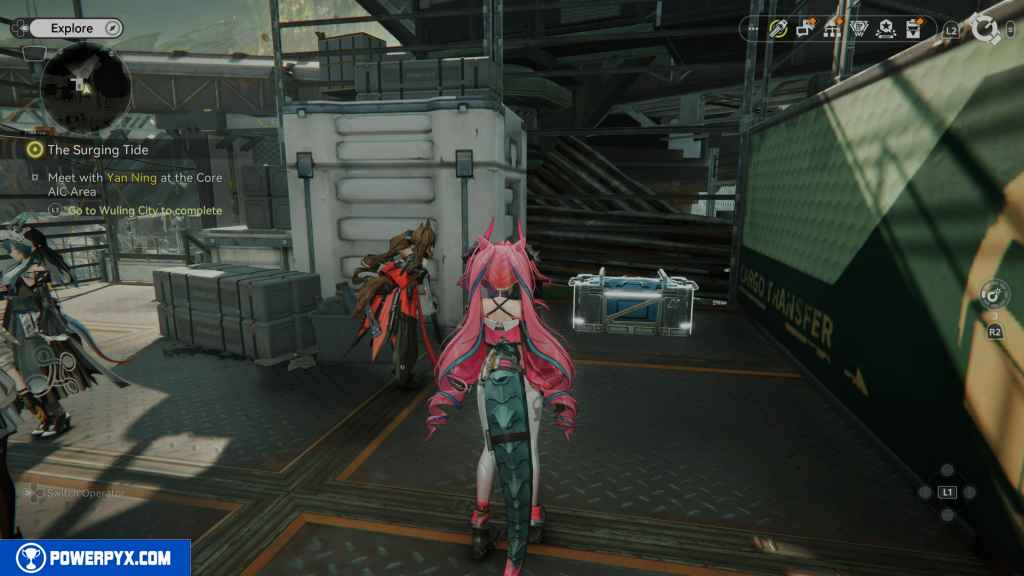
9 – Aurylen 4
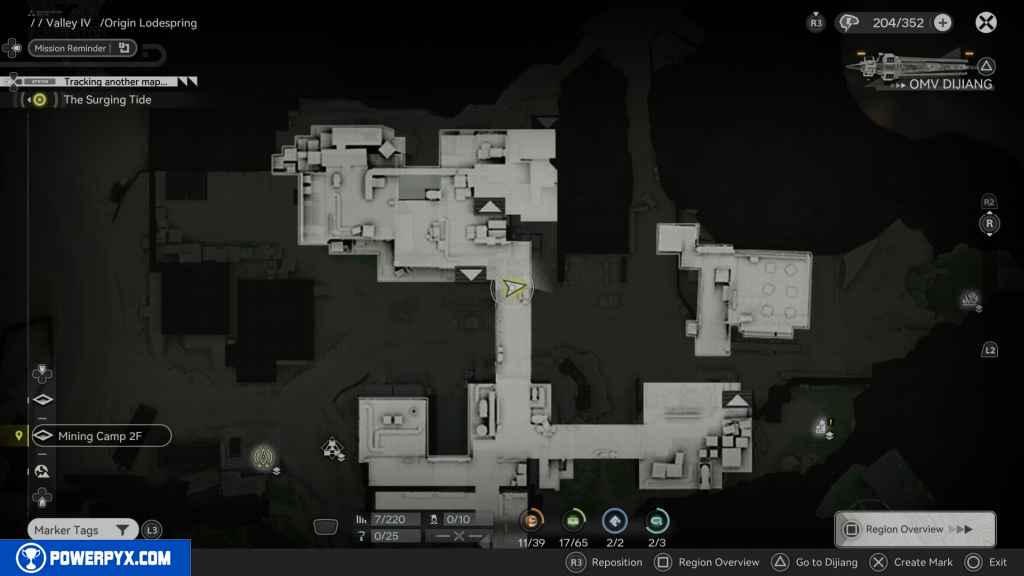
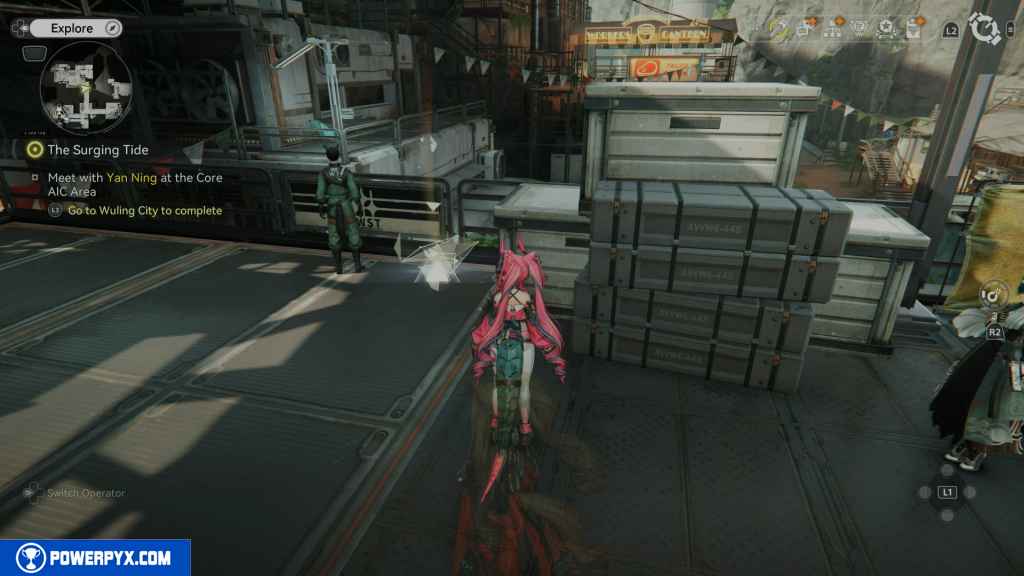
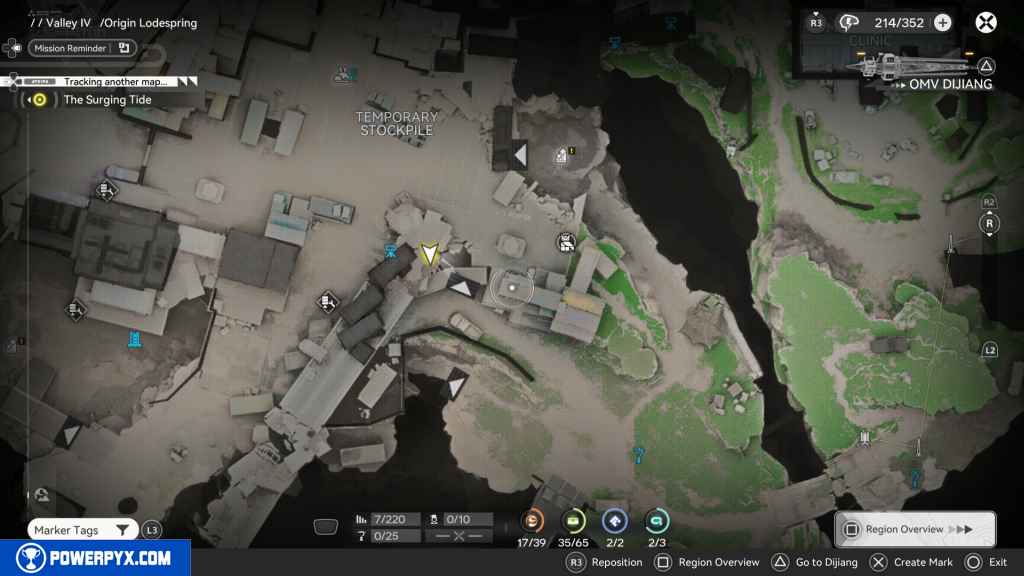
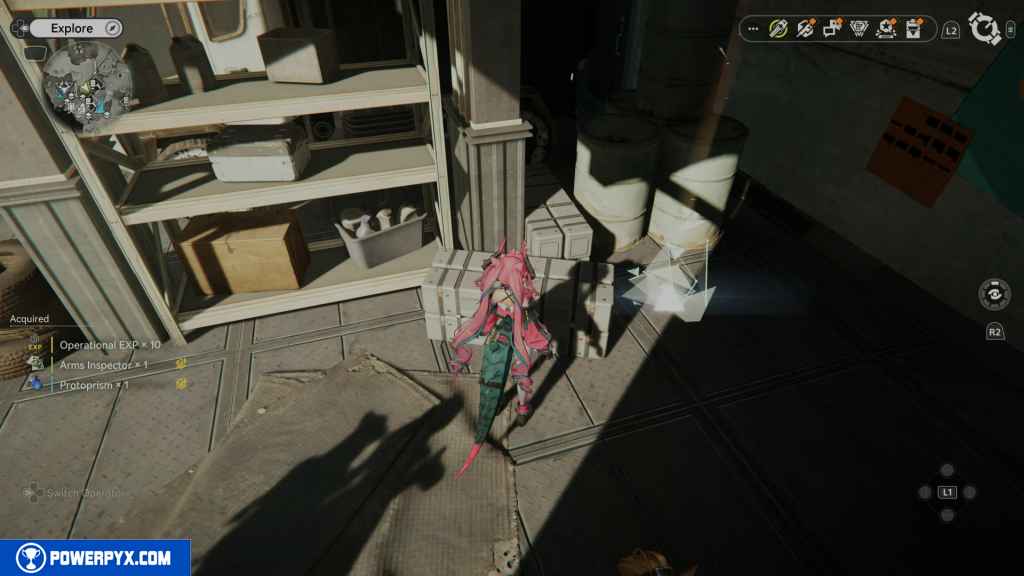
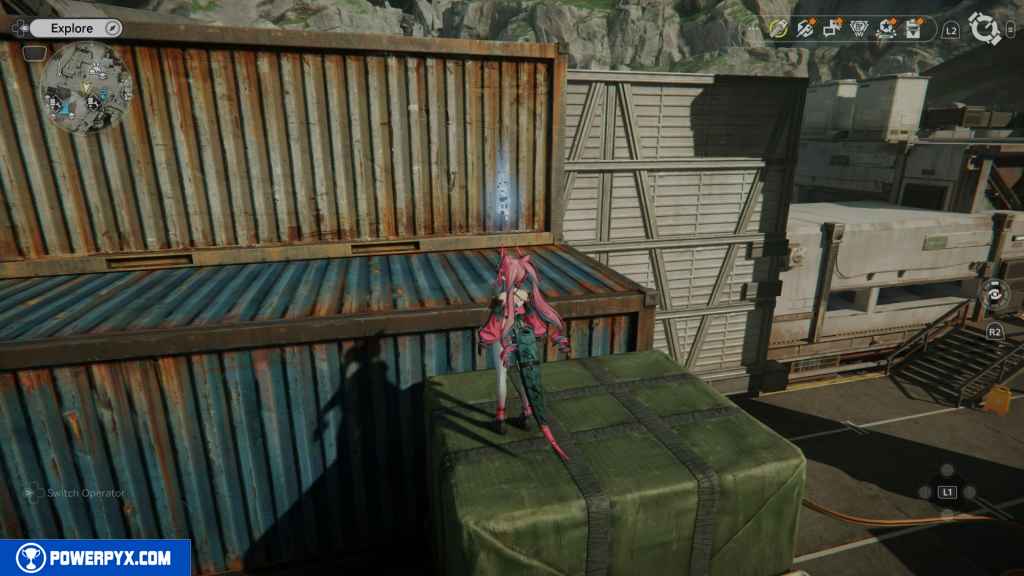
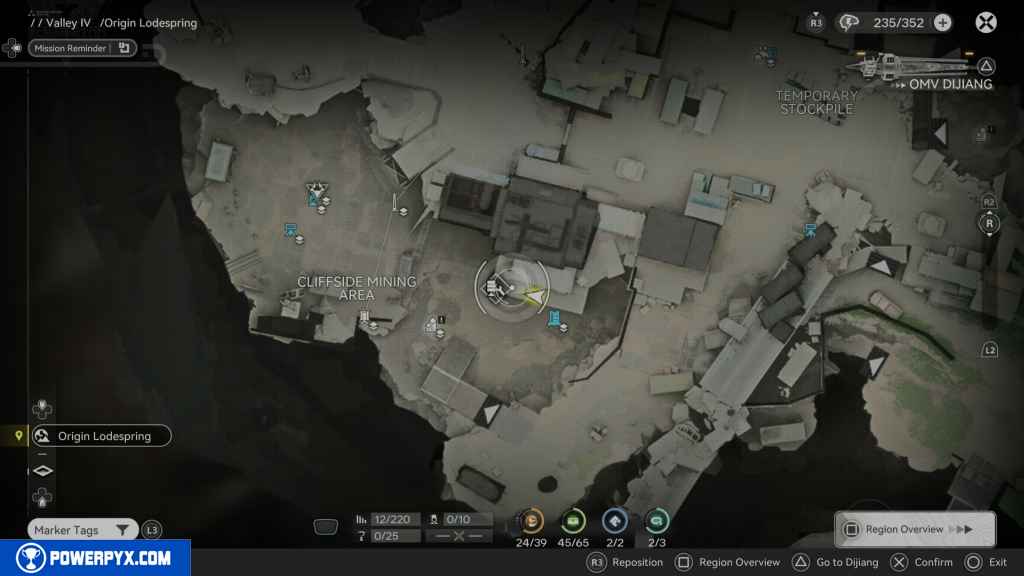
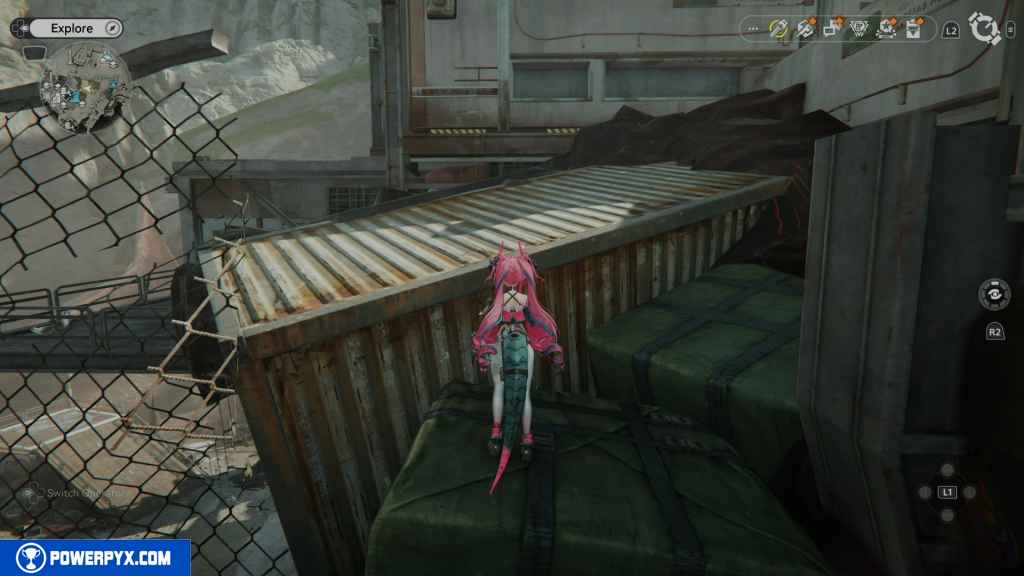
In the area with all the work equipment and workers, look to the northeast by the containers in the corner to find this Aurylen.

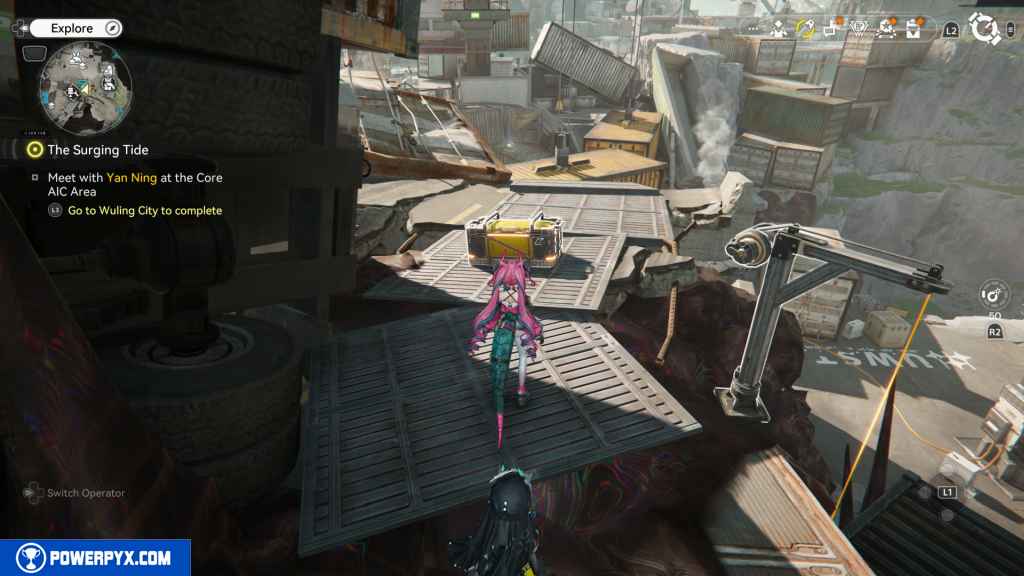
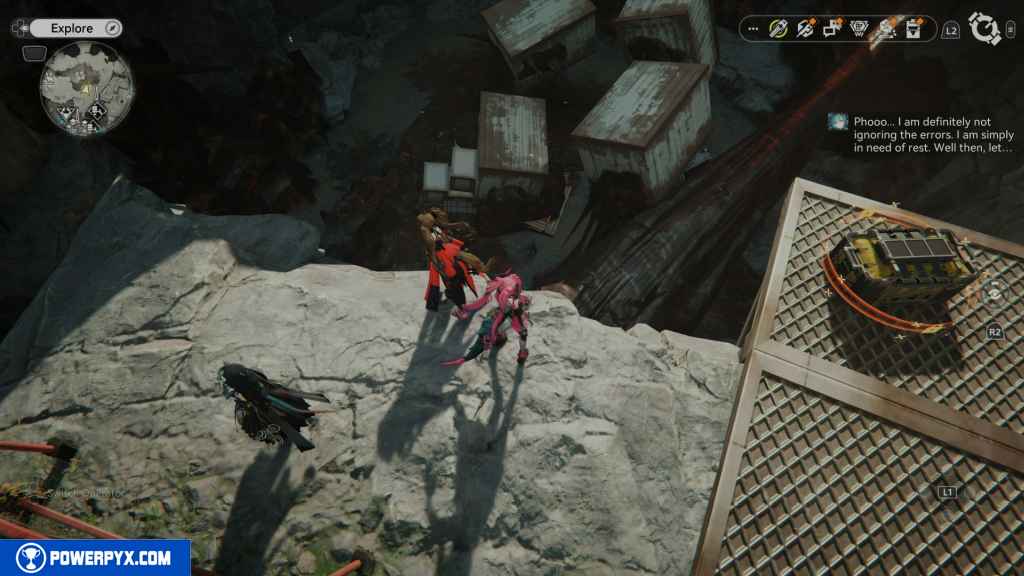
10 – Crate 5
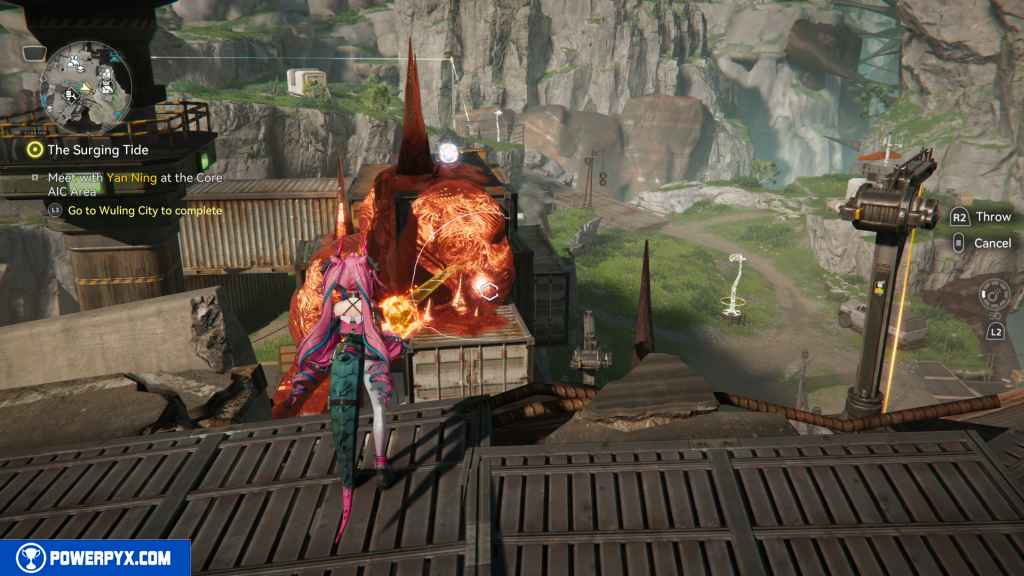
Right next to the Aurylen, you should see the ground a little broken as if you can fall through it. Go ahead and step on the ground, and it will cave in, and you will fall to the bottom.
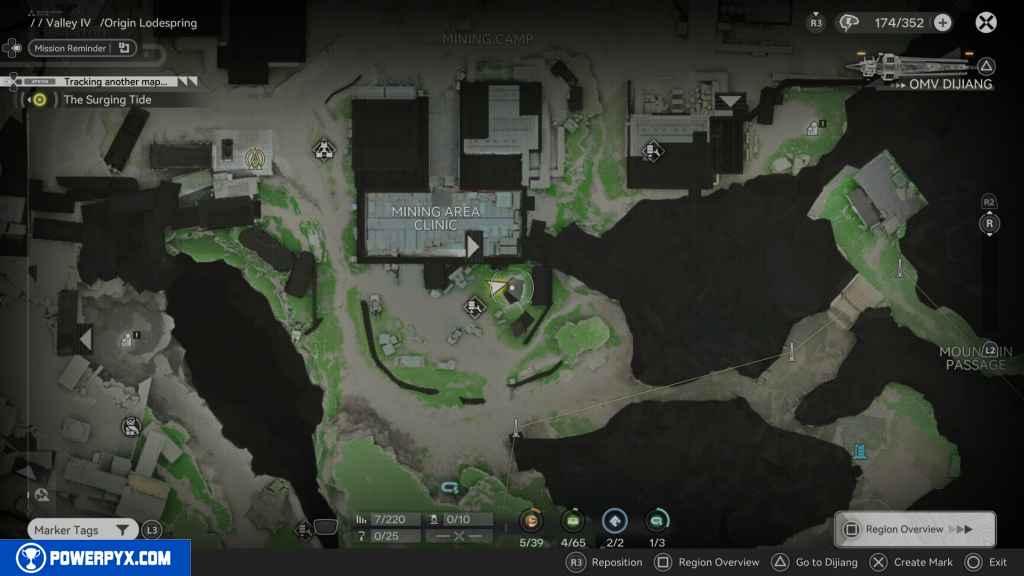
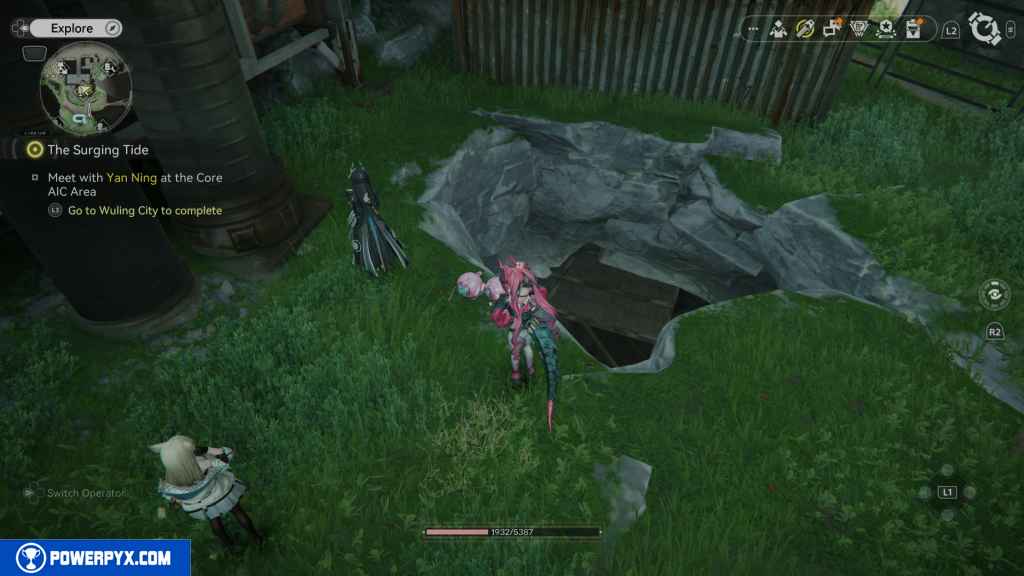

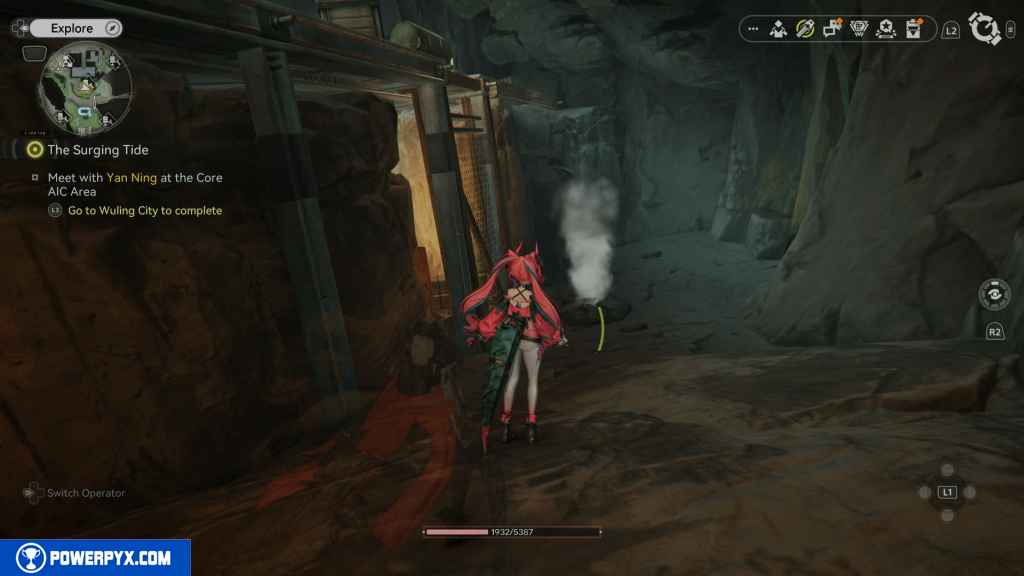
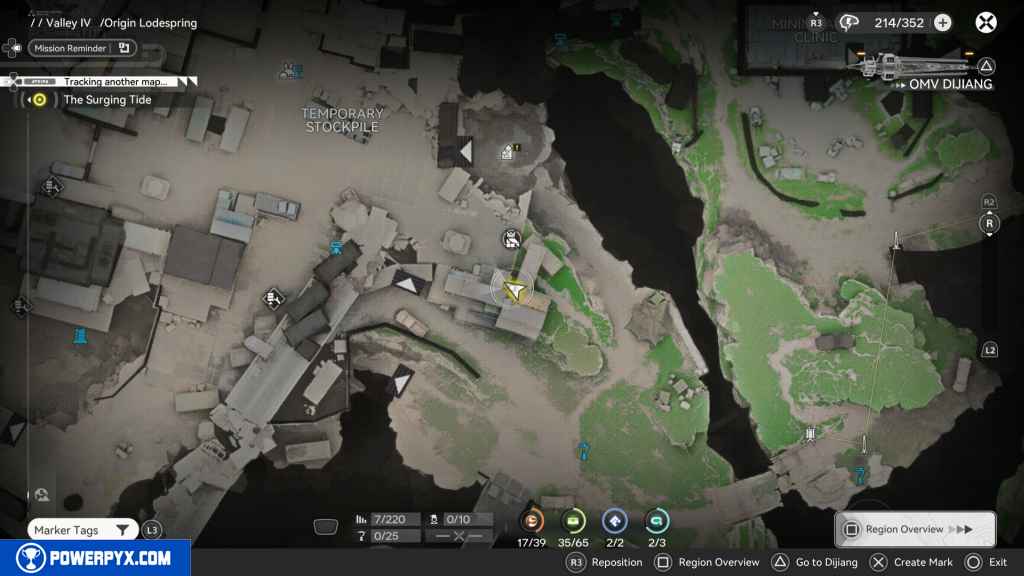
At the bottom, run around to the south, and you should see another steam jump. Approach it, and it will send you up to the scaffolding where the Crate will be right in front of you.
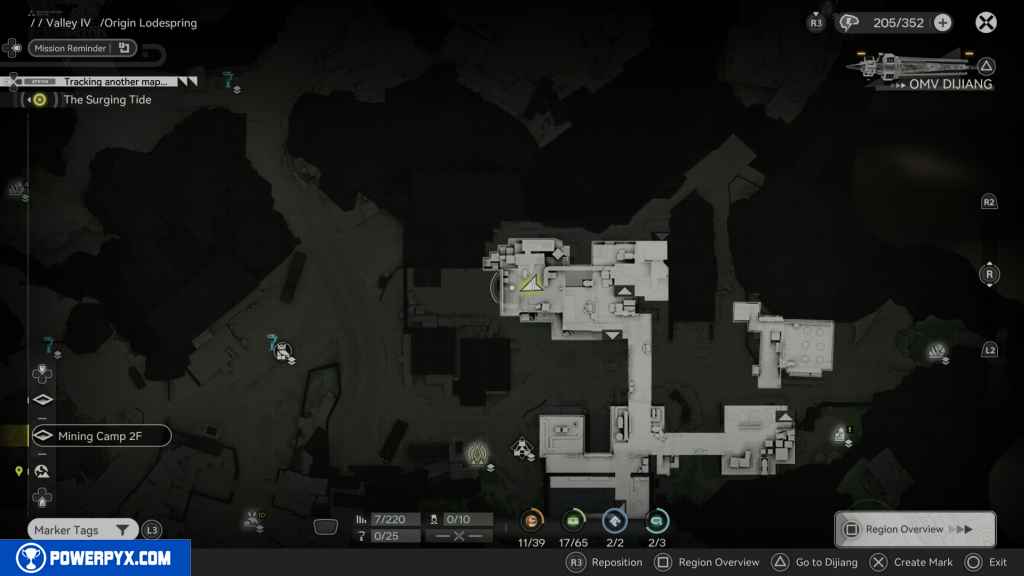
11 – SOS Repair Bot 2
To the west of the Crate is the next repair bot. Activate it and solve the puzzle.
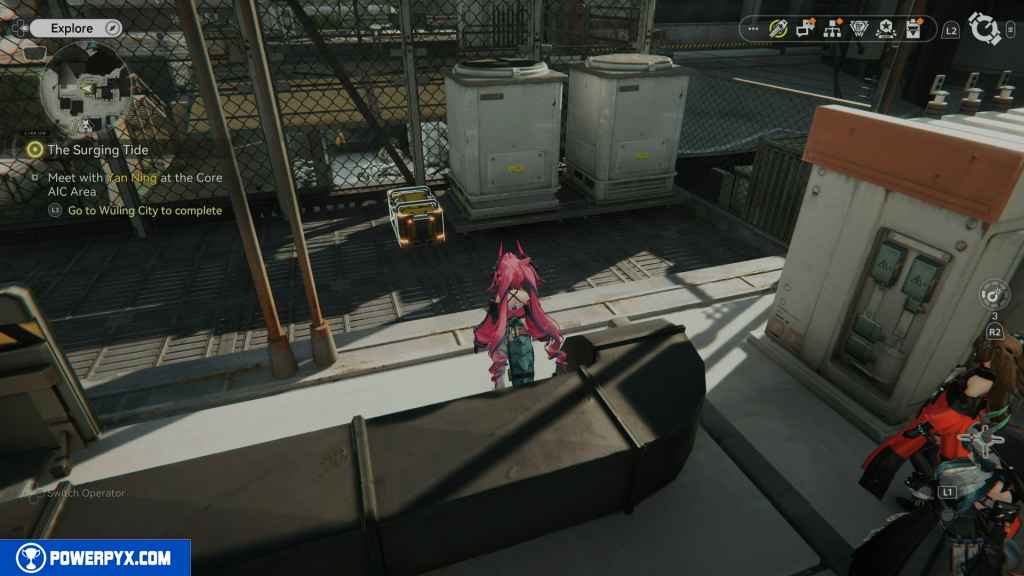
12 – Aurylen 5
Move around the scaffolding east, then north, then west to grab the next Aurylen.
13 – Crate 6
Right in front of the Aurylen is the next Crate.

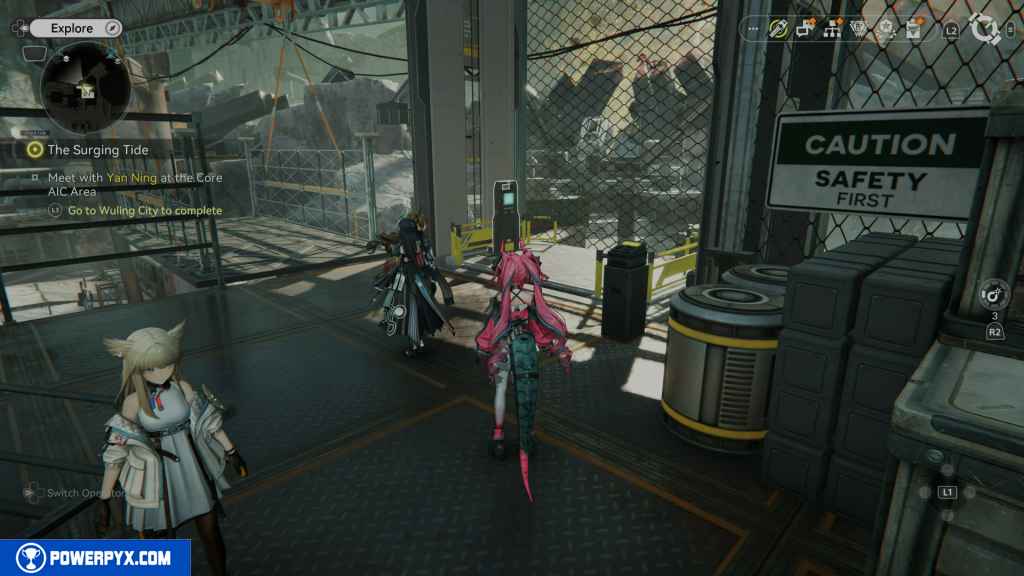
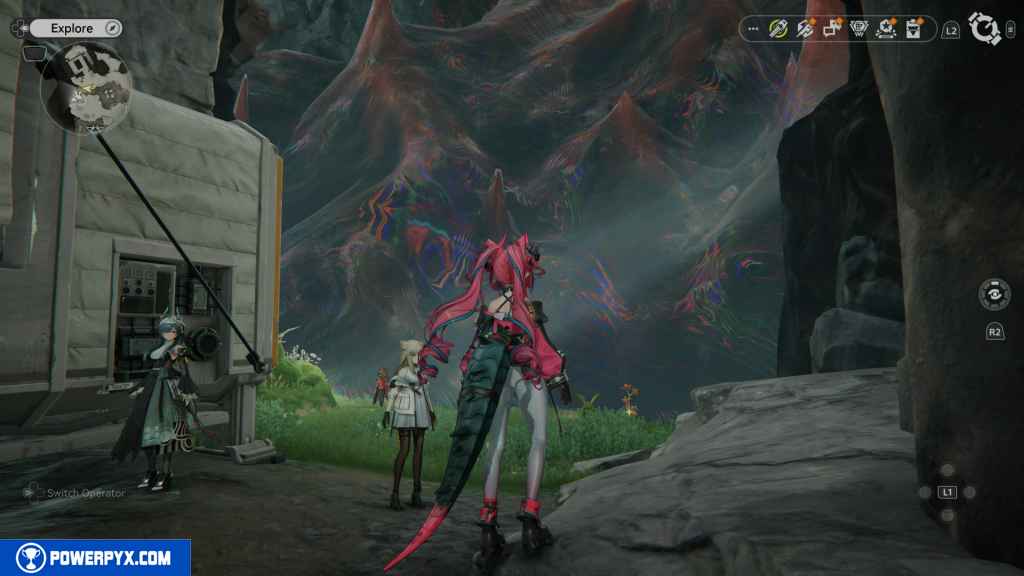
14 – Protocol Datalogger
Head back out of the cave using the steam jump. Look south from your location, and you should see the Protocol Datalogger.
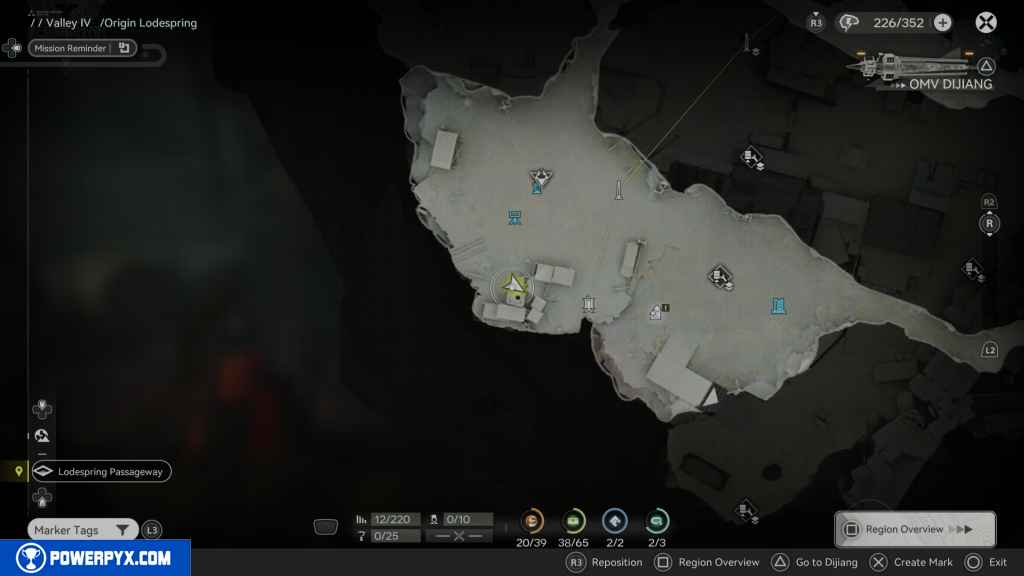
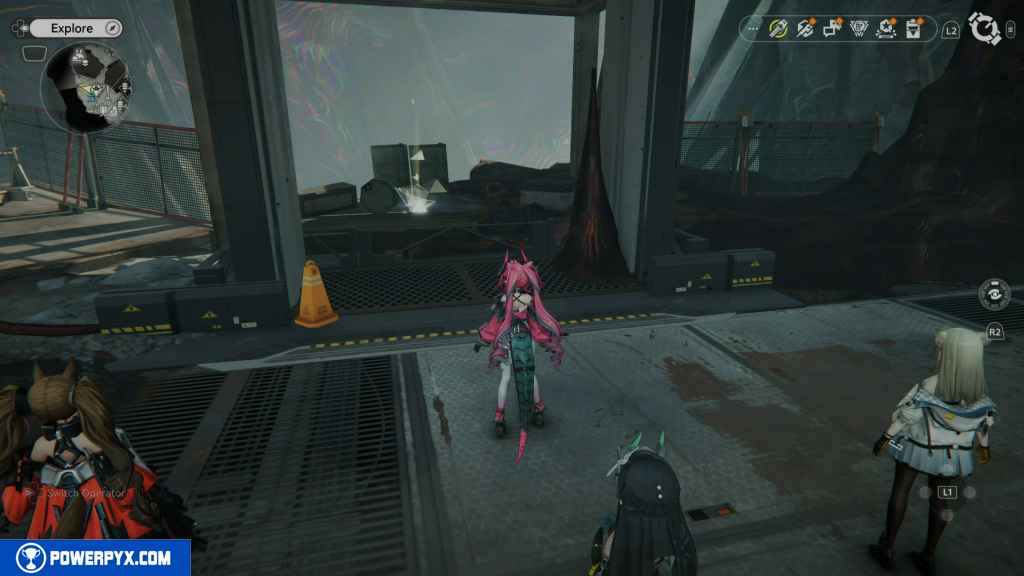
15 – Gathering Point 1
To the left of the Datalogger is some Blight you can destroy. Do so and proceed through the opening. The Gathering Point is on top of the car’s hood.
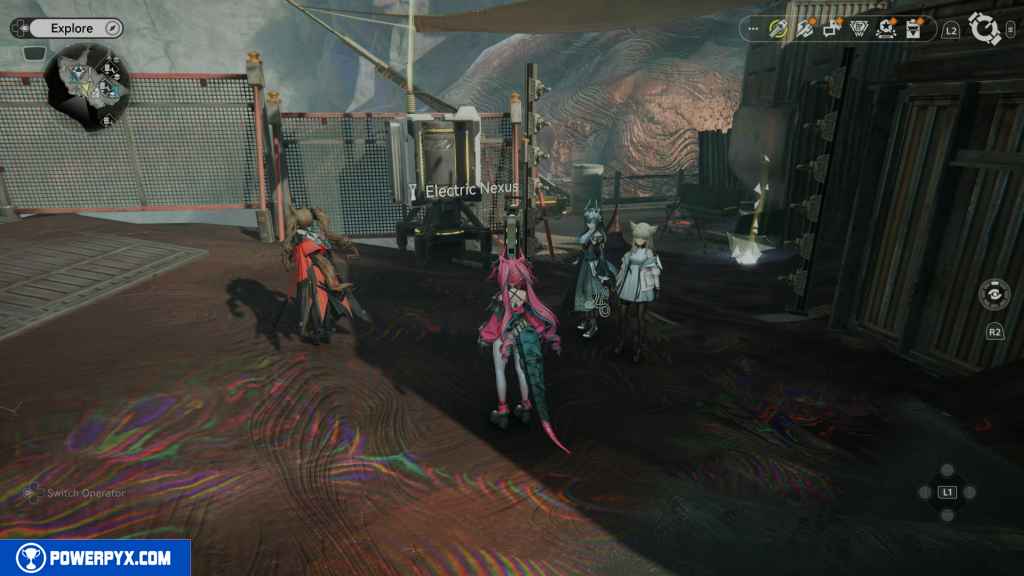
16 – Crate 7
These next few collectables require you to have finished Side Mission- Sluggish Escapade. You need to bring down the electric gate blocking your path with the Electric Nexus. You can, of course, do this without going through the Side Mission – Sluggish Escapade, but it’s better to knock out two birds with one stone.
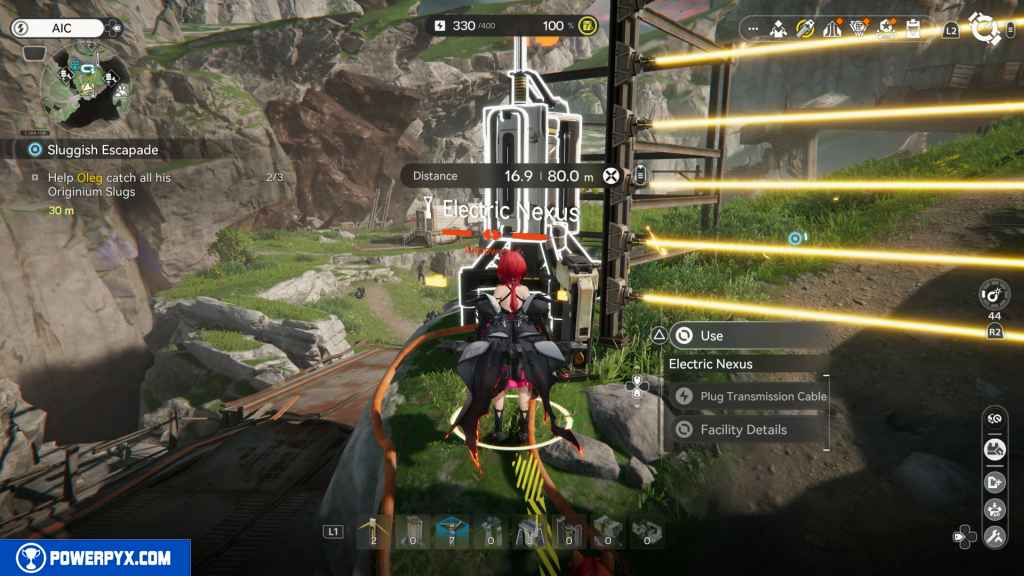
Head past the barrier gate and go up the hill. Turn right at the top, looking east, and you should see the Crate.
17 – Aurylen 6
From the Crate, look east, and you should see an explosive box on the edge of the hilltop. Blow it up with a bomb, and an Aurylen will appear.
18 – SOS Repair Bot 3
Further east, you should see an SOS Repair Bot. Activate it and solve the puzzle.
19 – Crate 8
From the SOS Repair Bot, head west to the edge of the cliff, and you should see an explosive box. Blow it up to reveal the next Crate.
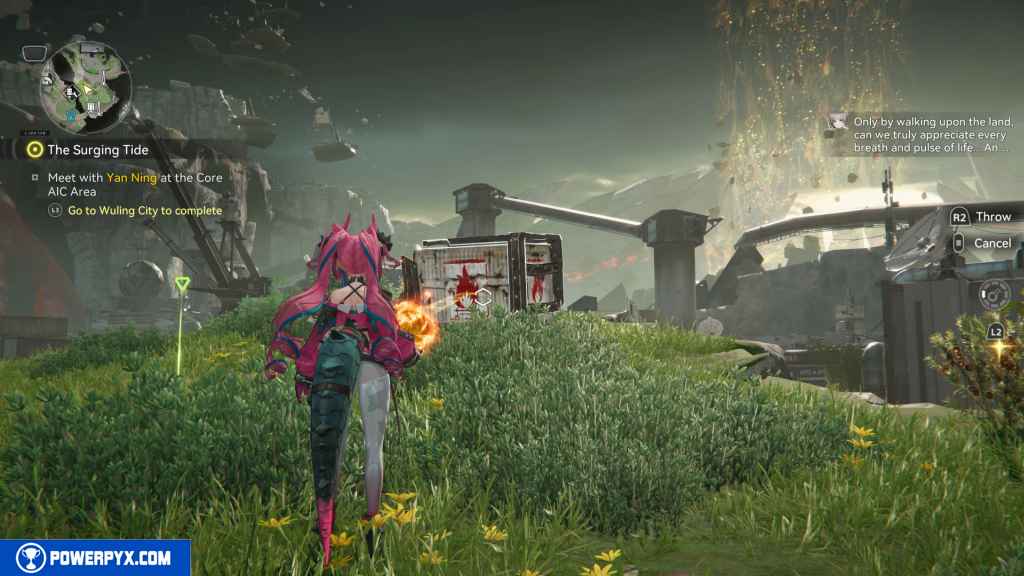
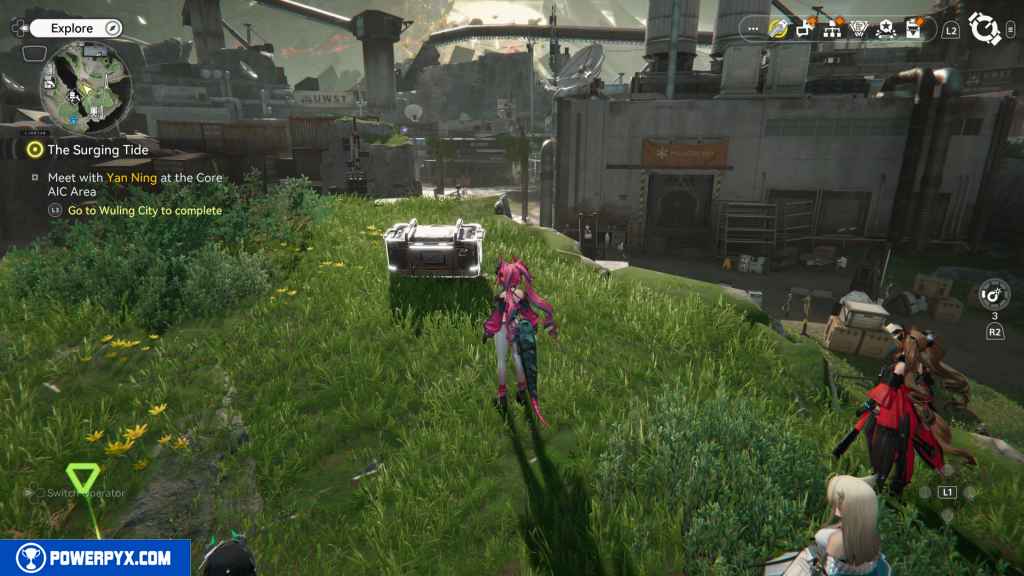
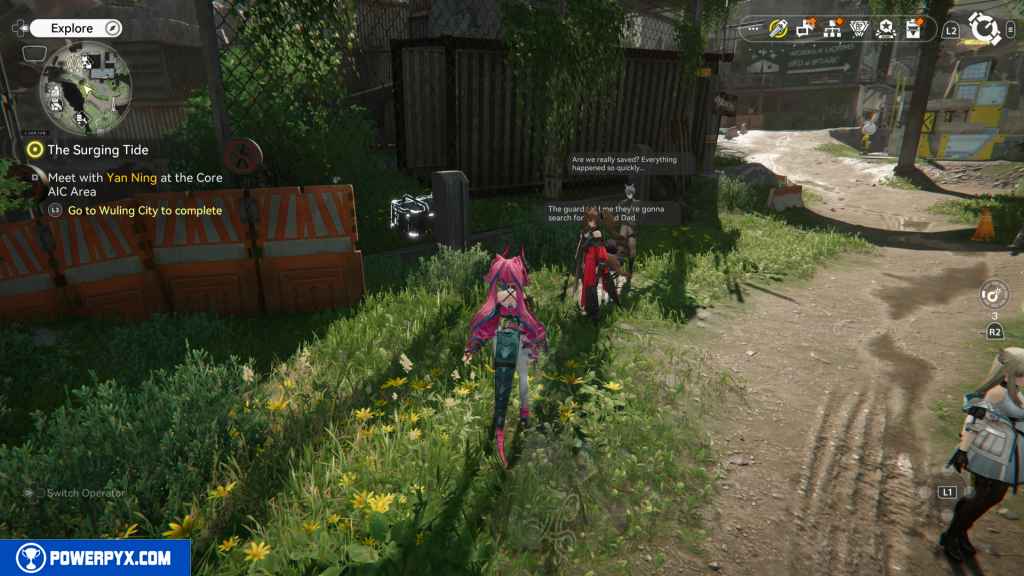
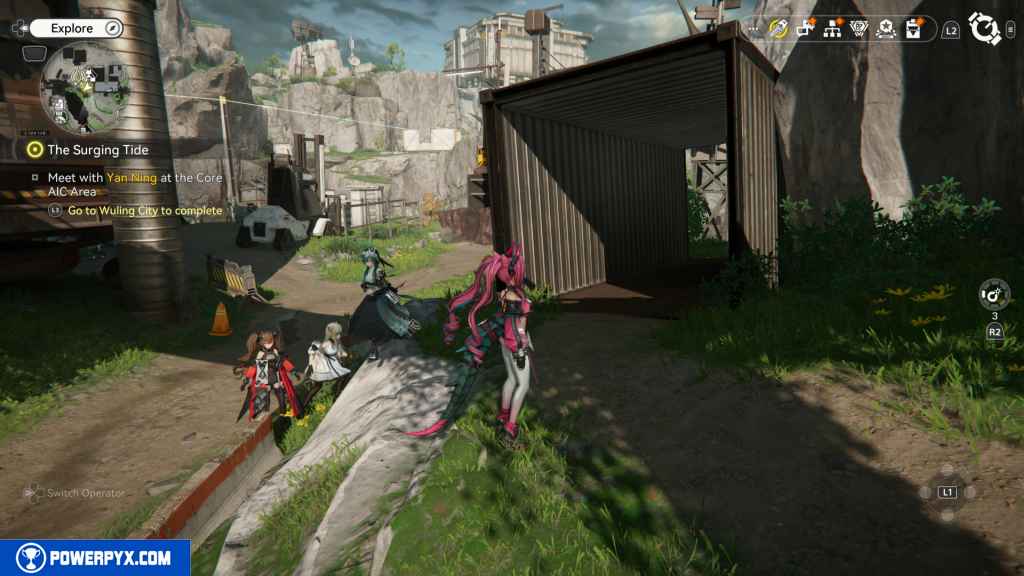
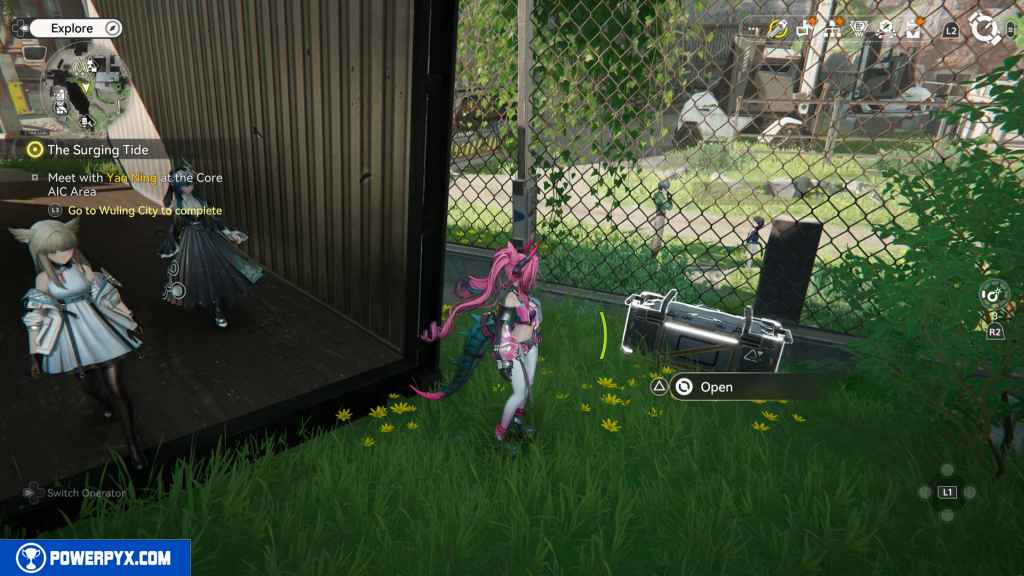
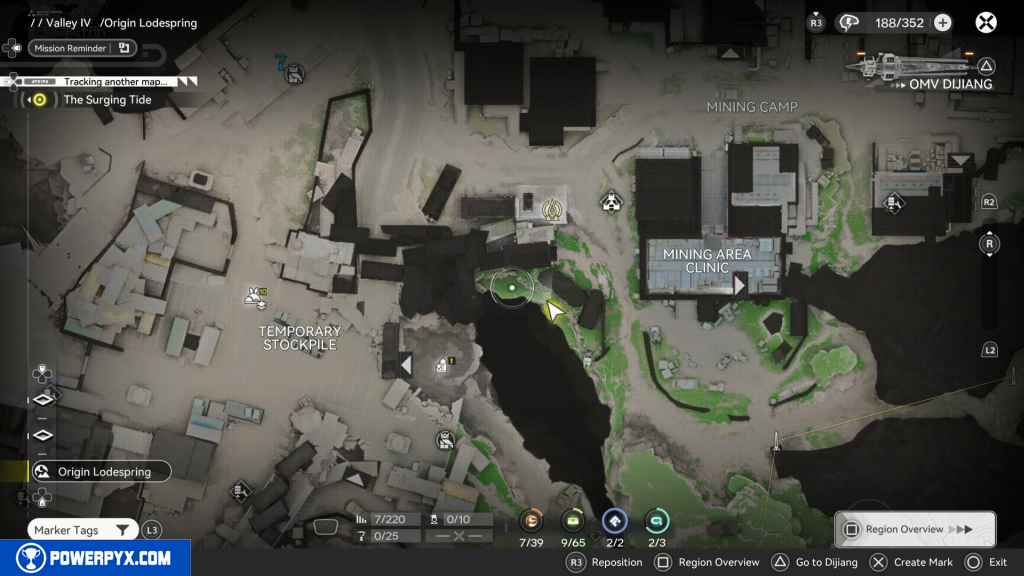
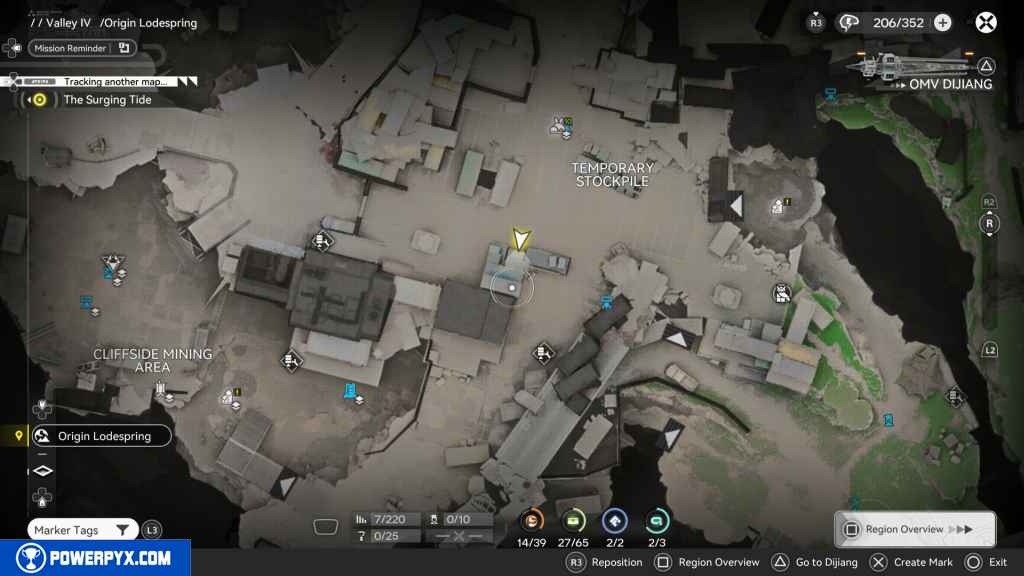
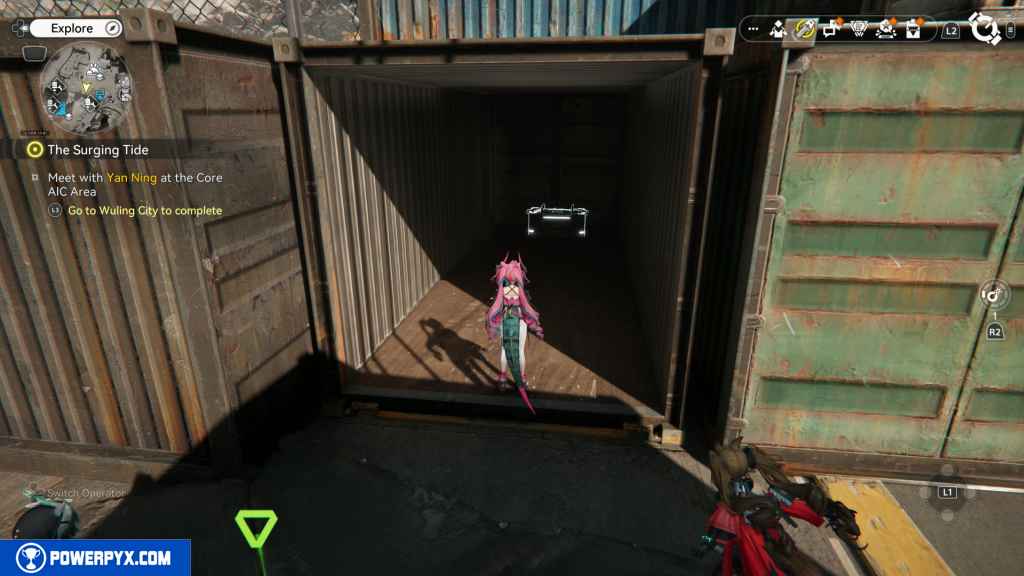
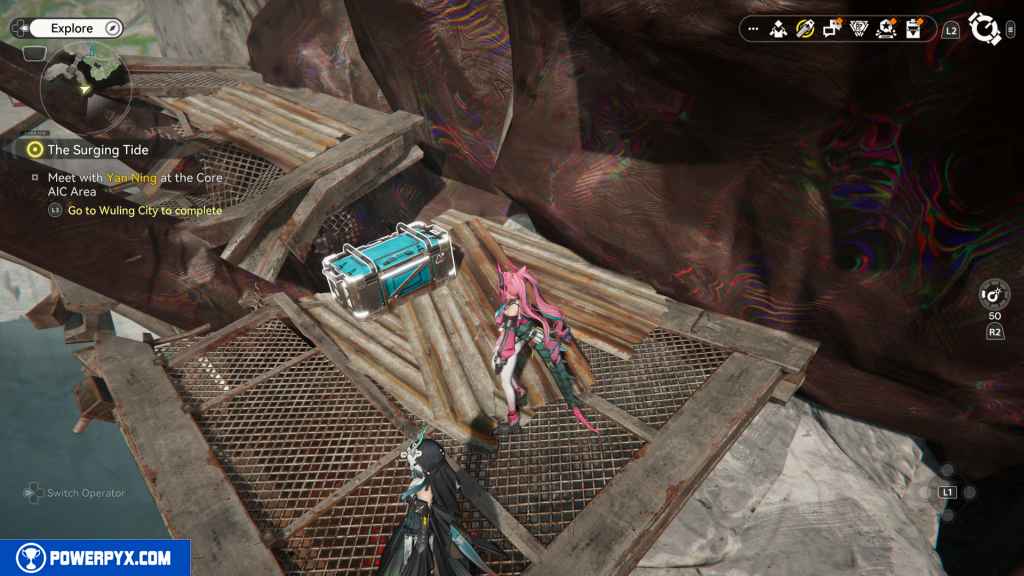
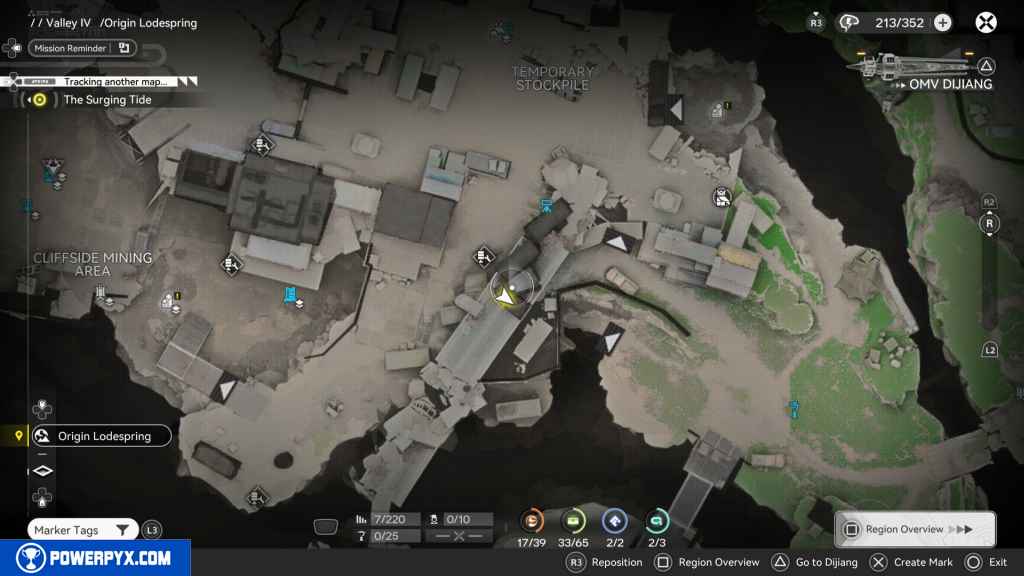
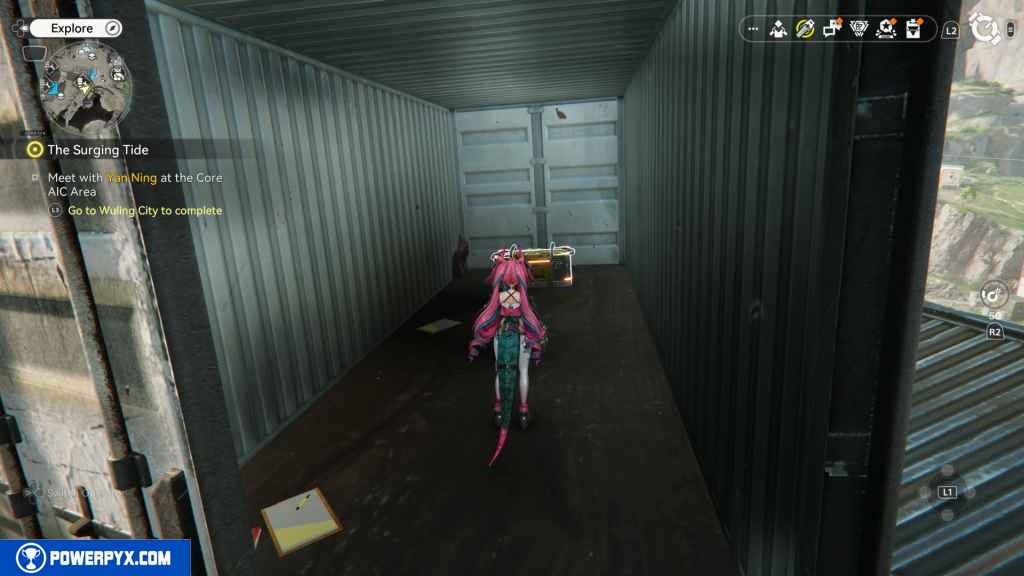
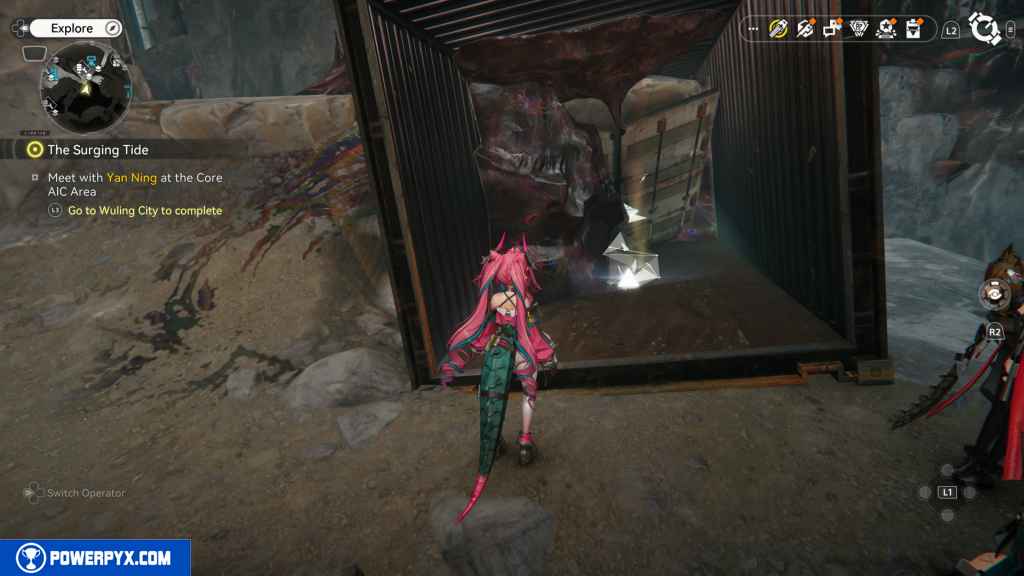
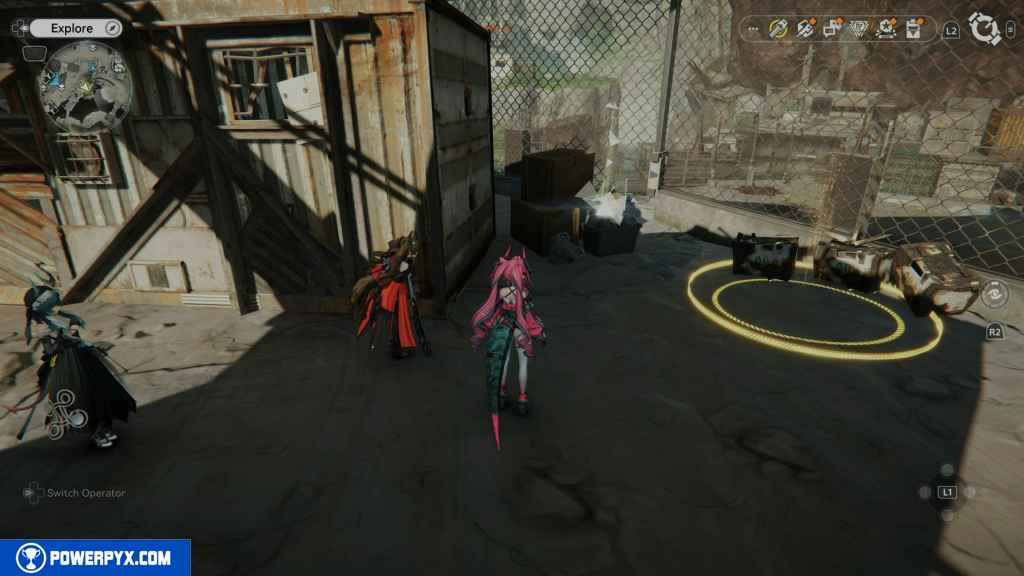
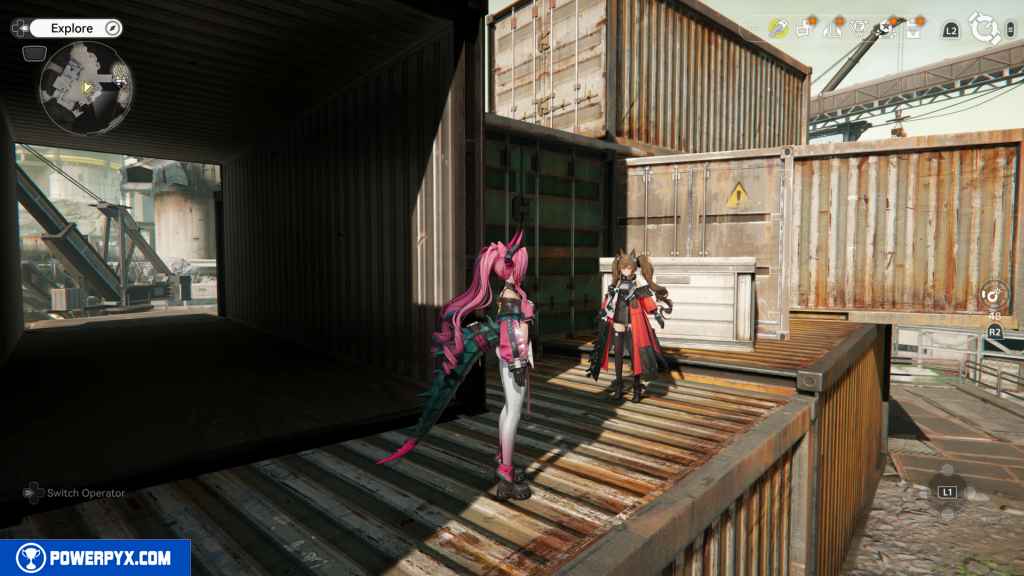
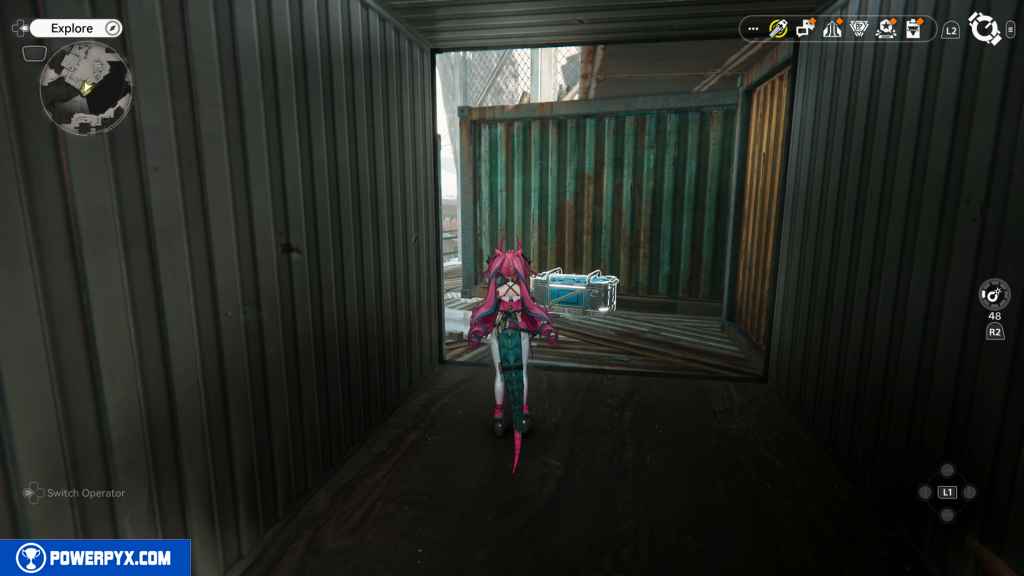
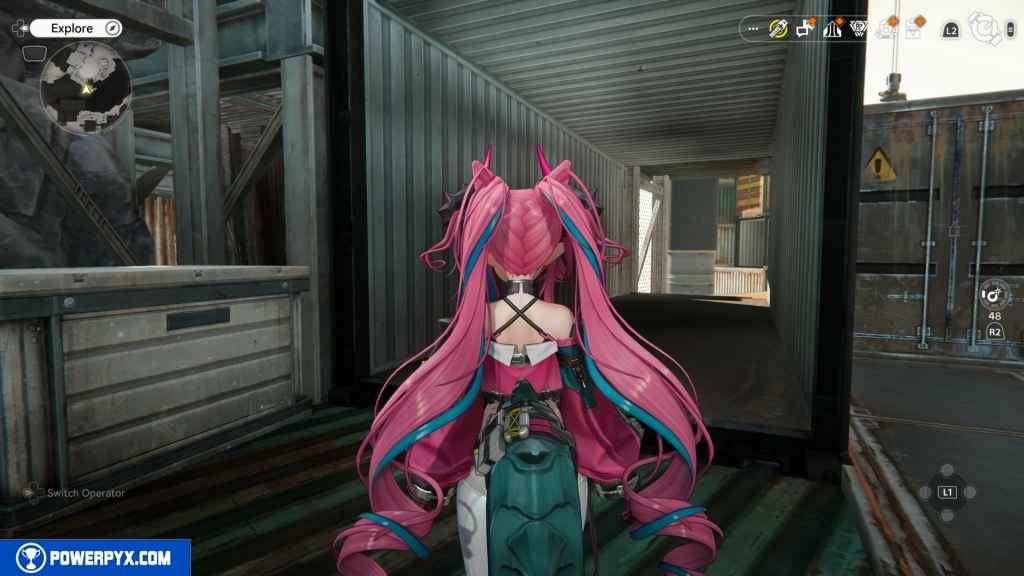
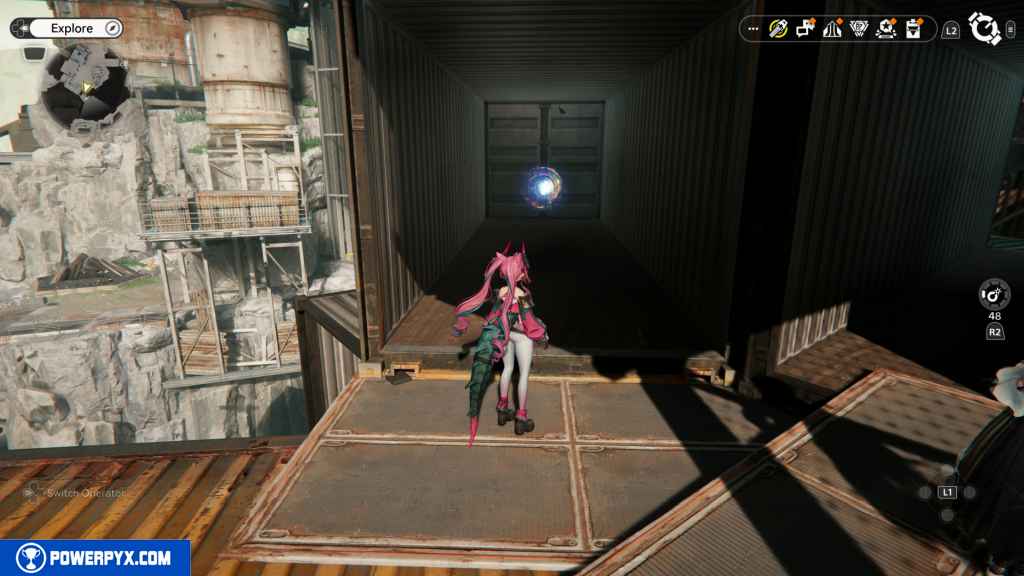
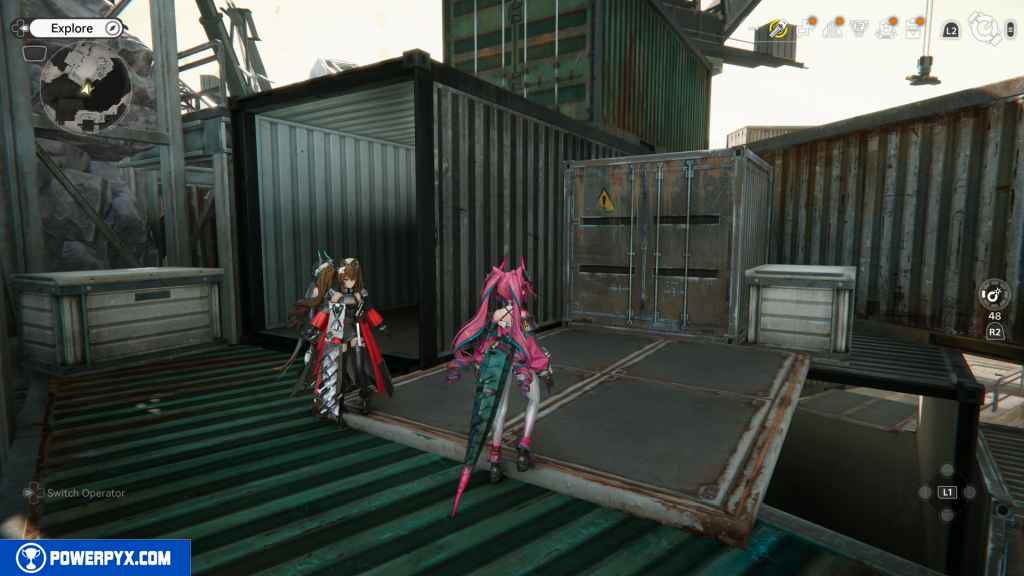
20 – Crate 9
Jump down from the cliff and run north. Before you reach the TP, you will run past a container on your left. Turn around, and you’ll see that the container is open and goes out the other side. Go through it, and the Crate will be on your left.
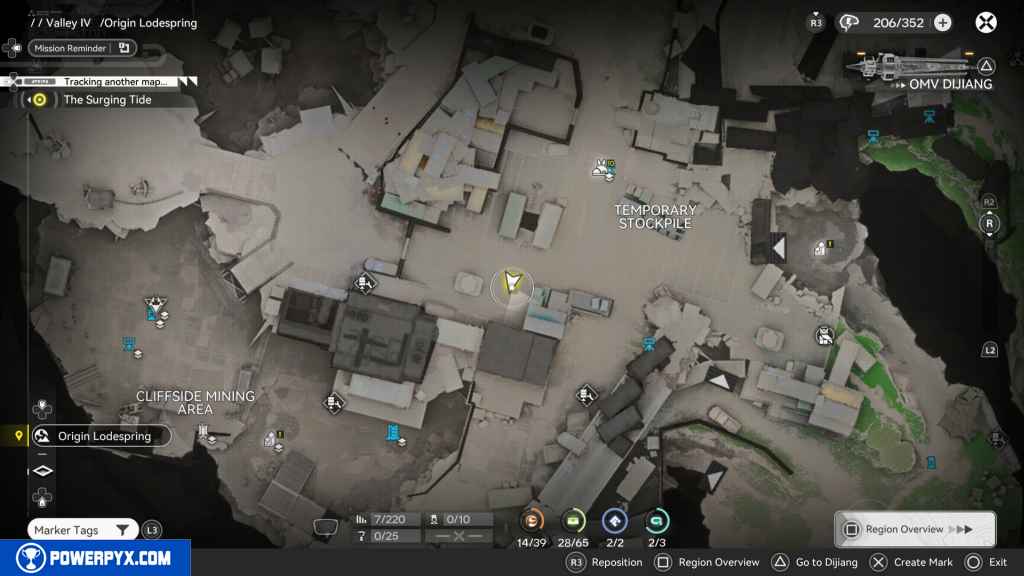
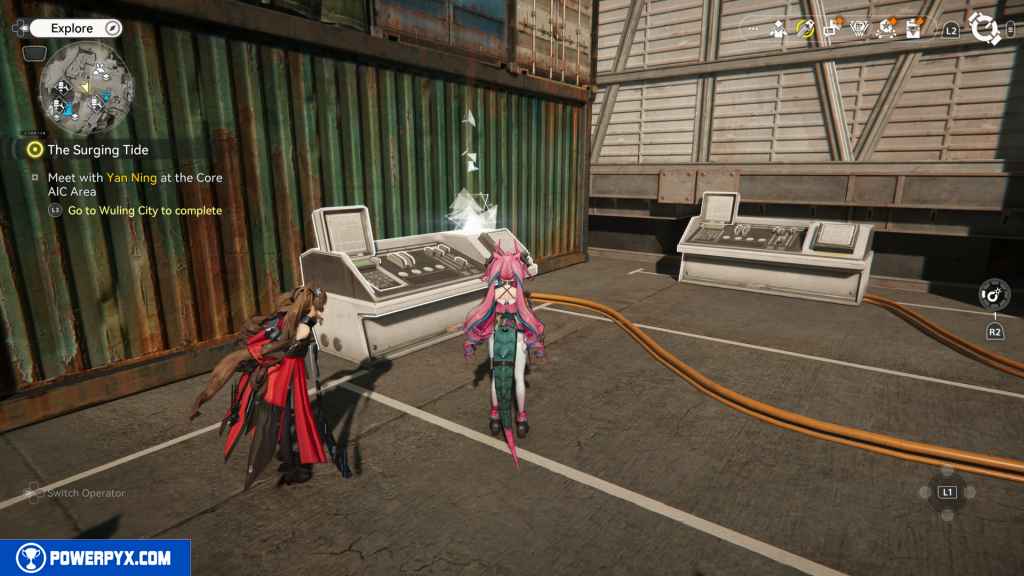
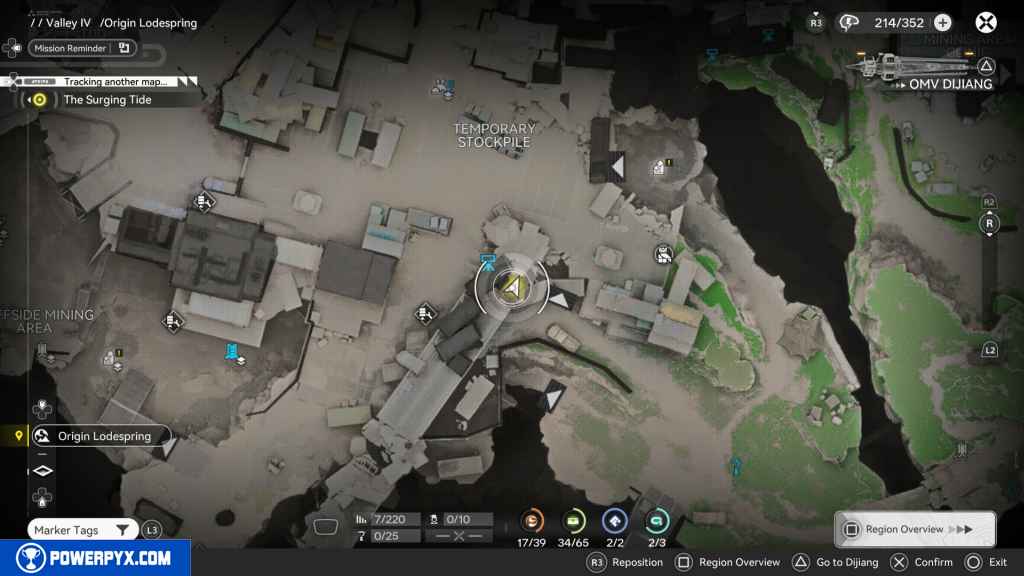
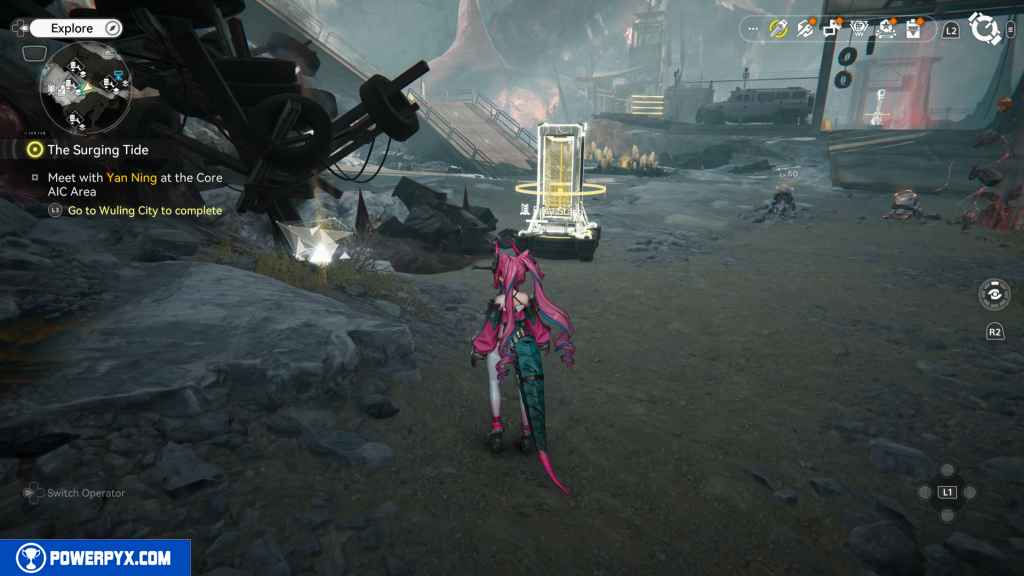
21 – Crate 10
Turn west and look northwest. You should see the next Crate next to a steam jump point.
22 – Aurylen 7
Use the steam jump to reach the top of the cliff, where you’ll find a bunch of containers. From there, you should see another steam vent to your east. Use that one, and it should land you on top of the container. IF you look northeast, you should see the Aurylen on a pipe platform. Jump on it to reach the Aurylen.
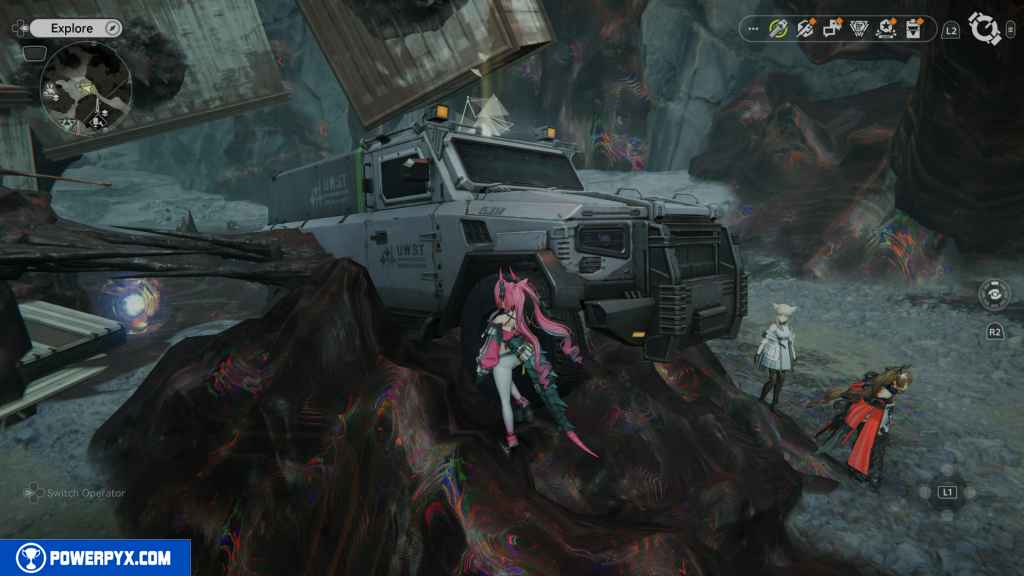
23 – Crate 11
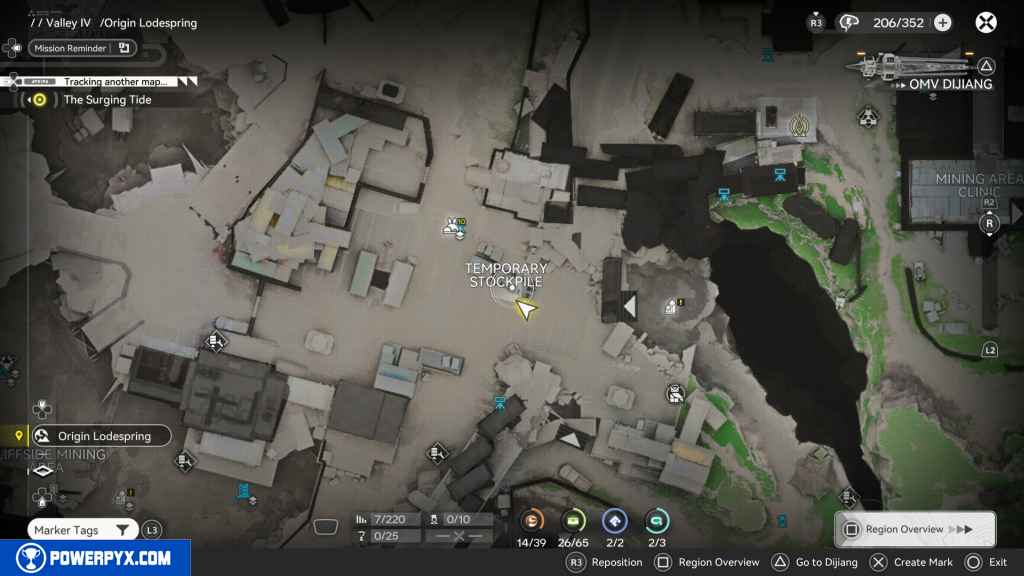
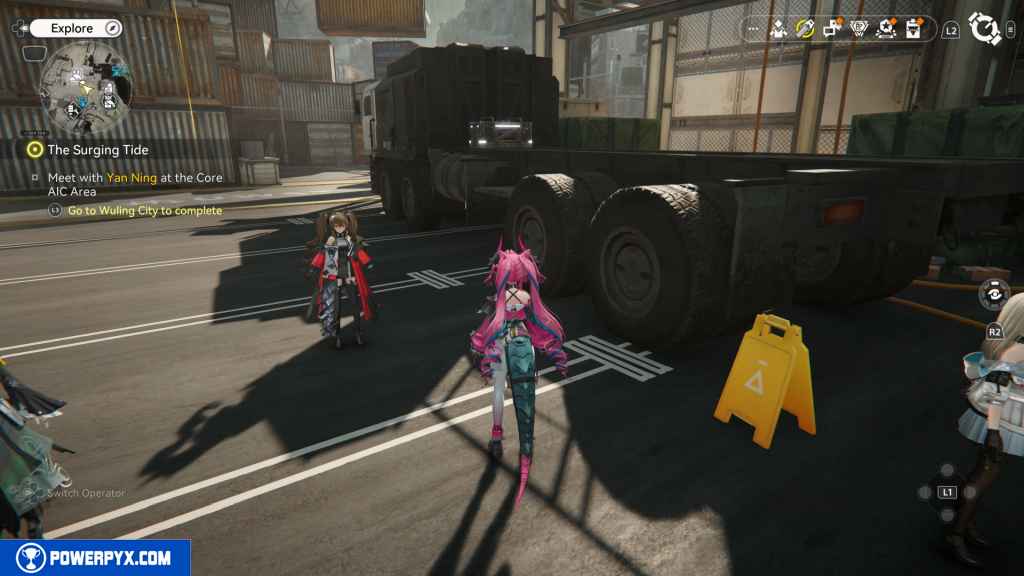
Jump down from the pipes and head west. You should see a large truck. Behind the truck is the next Crate.
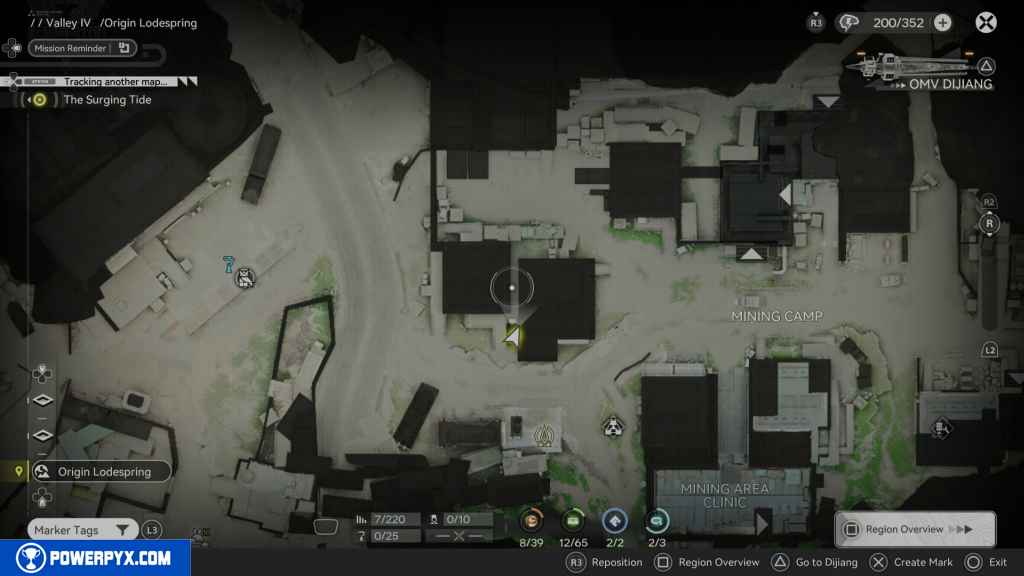
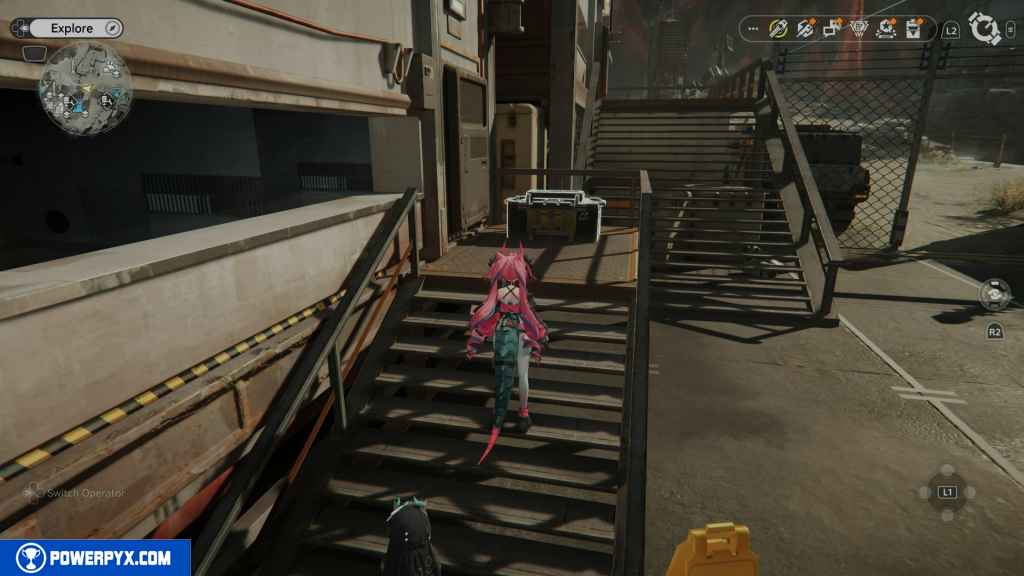
24 – Crate 12
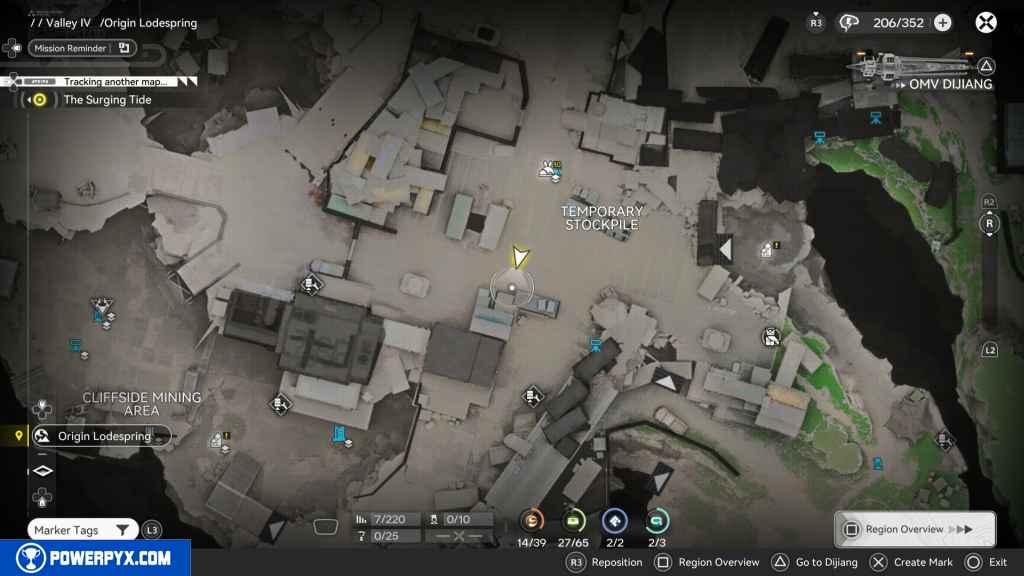
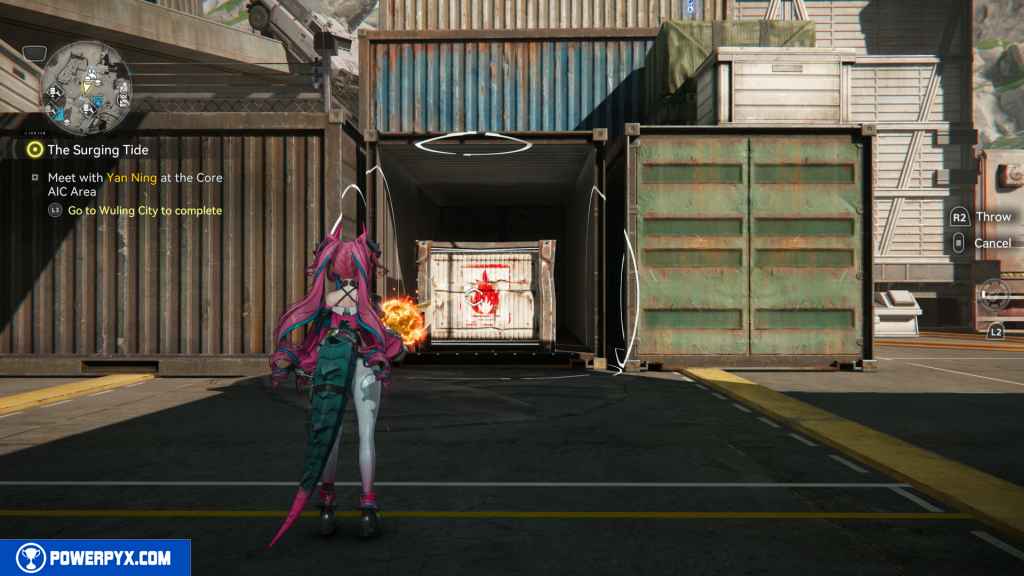
Head back east and look to the north of the TP point. You should see a building with some boxes around it. Head to the building and up the stairs to find this Crate.
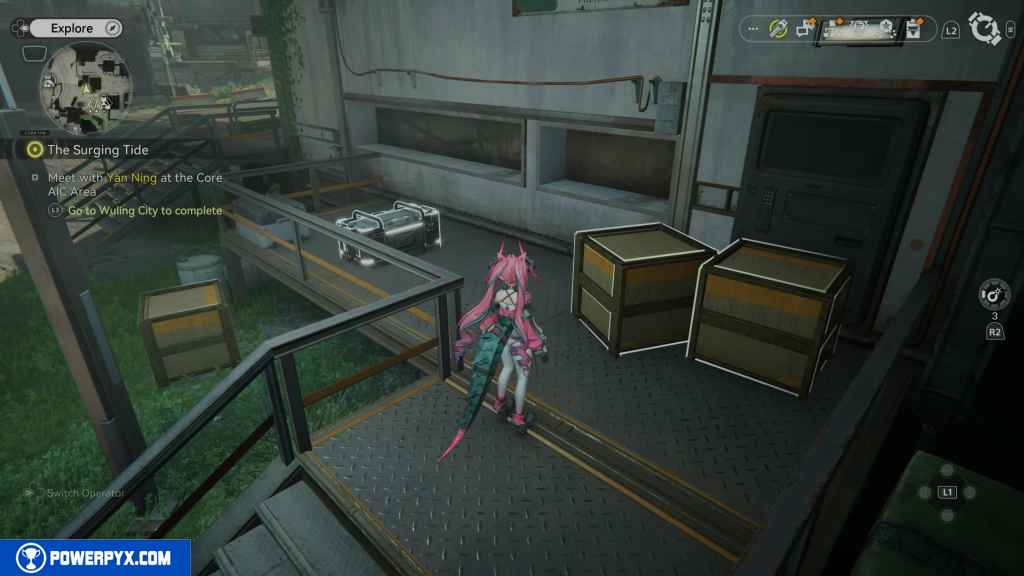
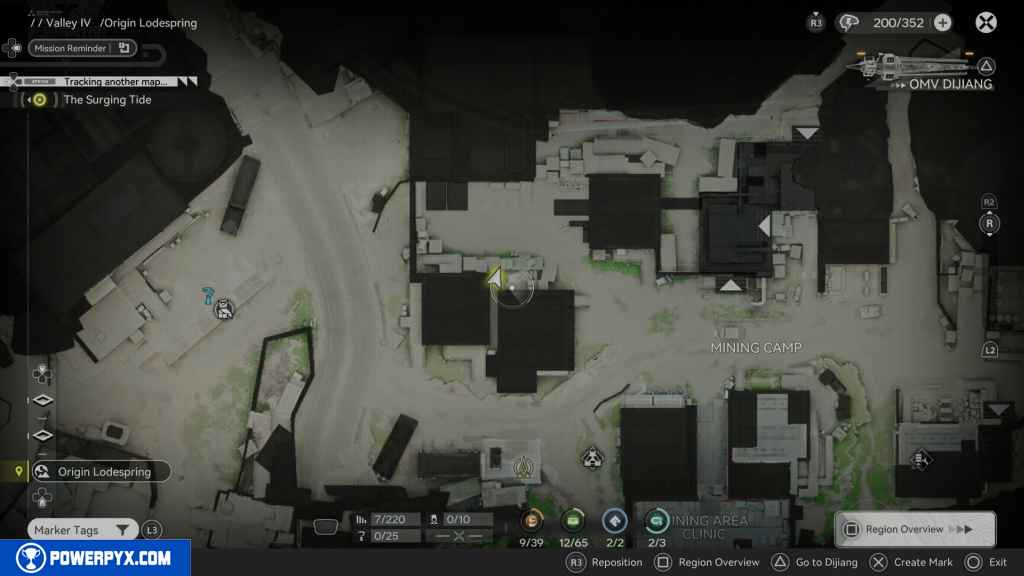
25 – Aurylen 8
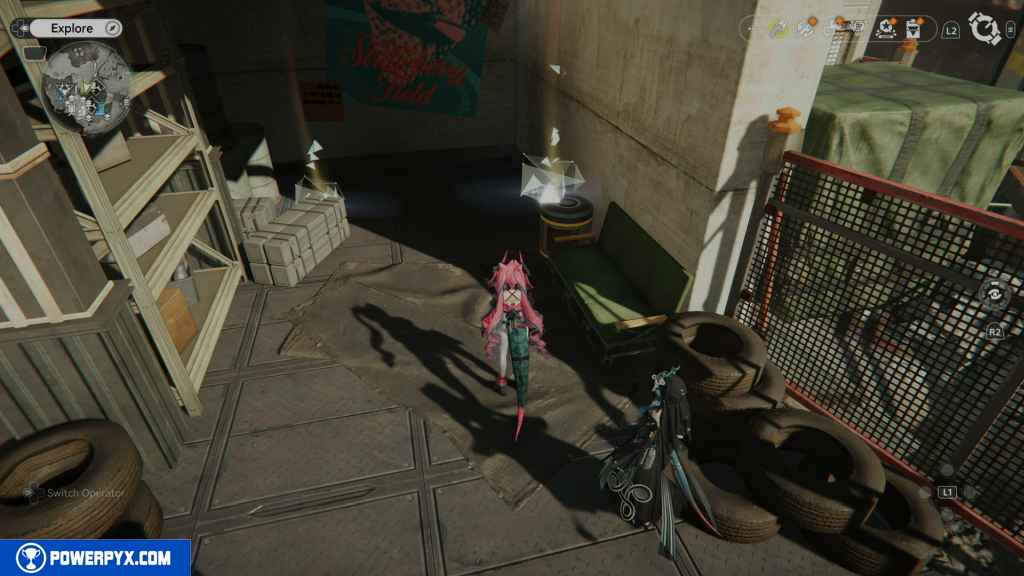
From the Crate, you should look east, and you will see some boxes covered by a green tarp separating the building where you got the last Crate and another building. Look between these two buildings, and you should see the Aurylen.
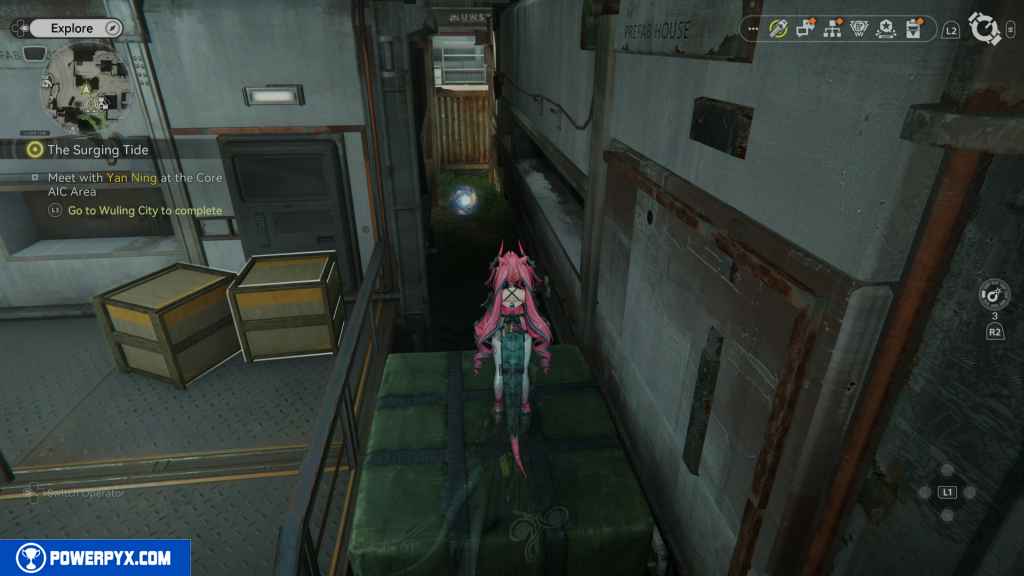
26 – Crate 13
Head north down from the Aurylen and look to your right for the next Crate.
27 – Gathering Point 2
Jump over the boxes to the east, and you should come out of the alley. Head west from there, and you should see the Gathering Point past a few motorcycles.

28 – Crate 14
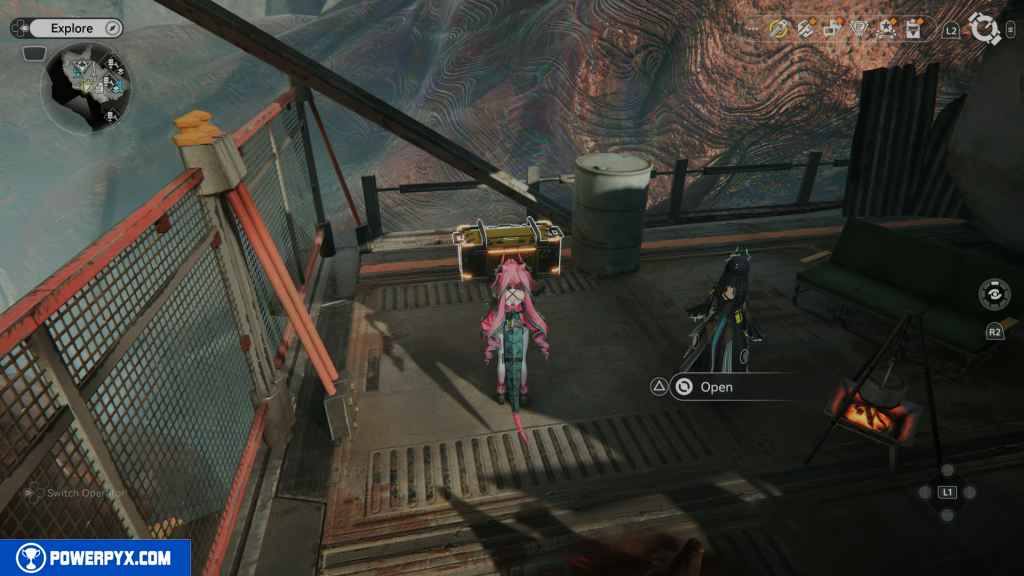
Head east all the way to the canteen. When you reach it, go into the eating area with walls. Go to the far one on the northwest to find the Crate.

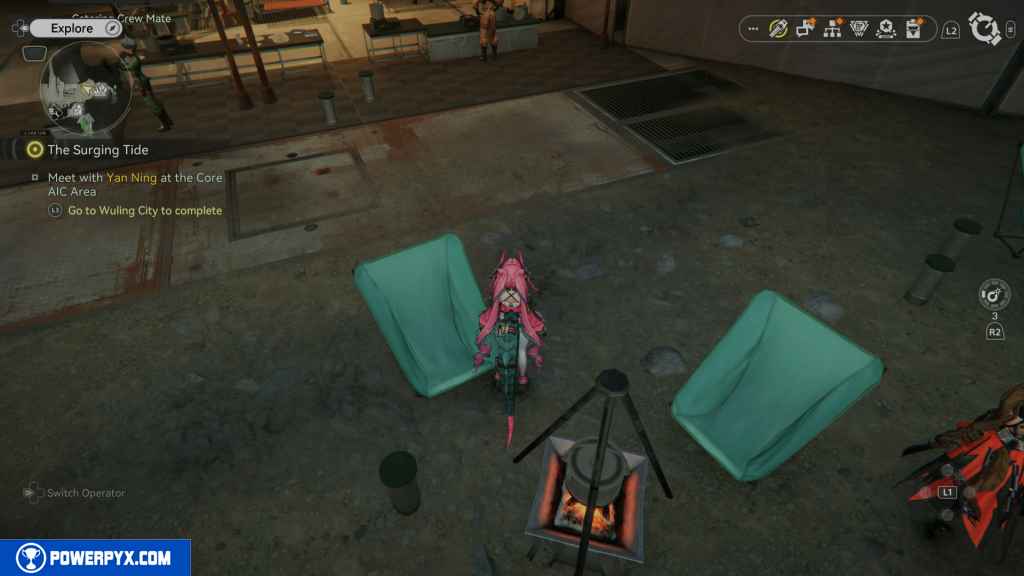
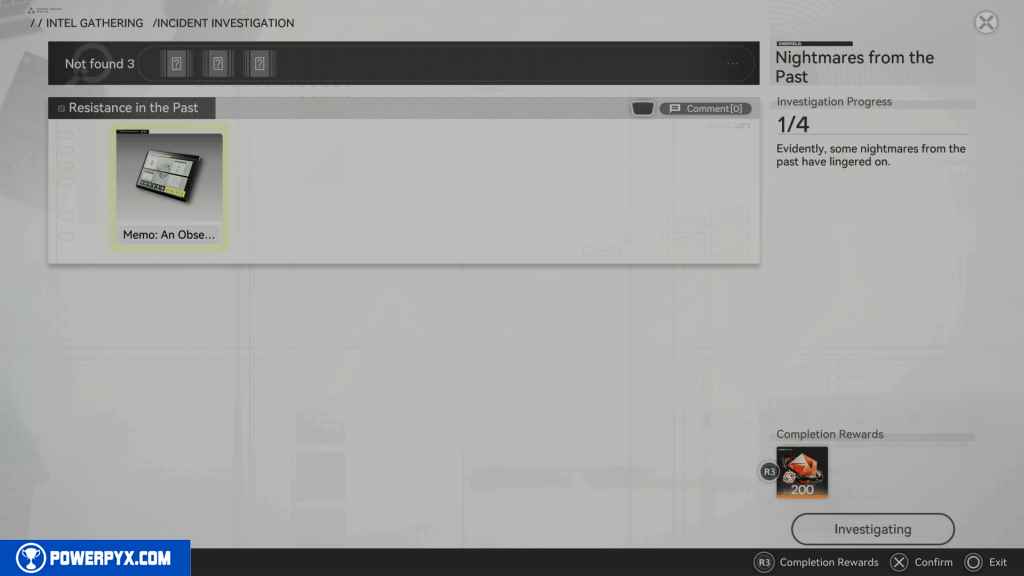
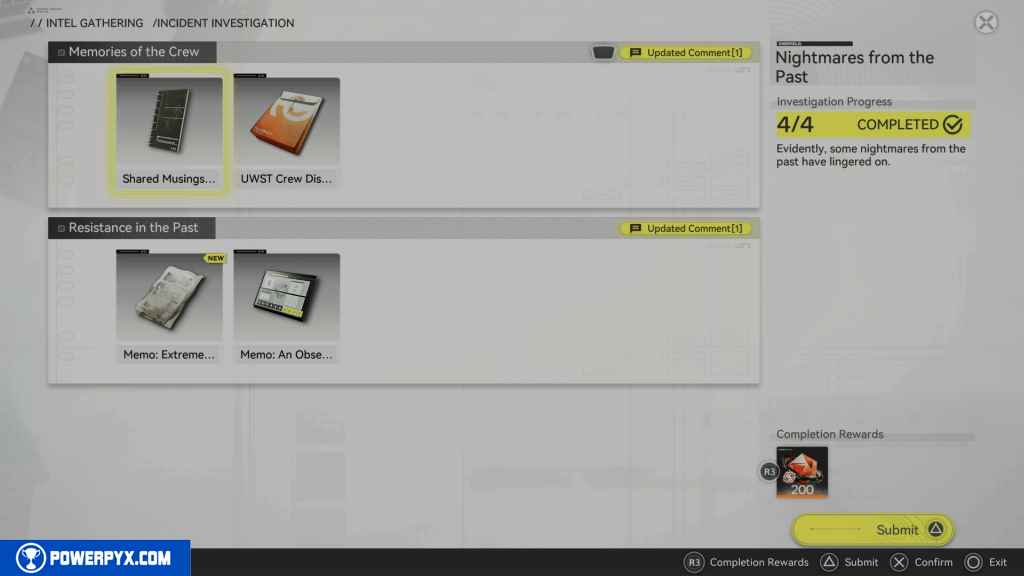
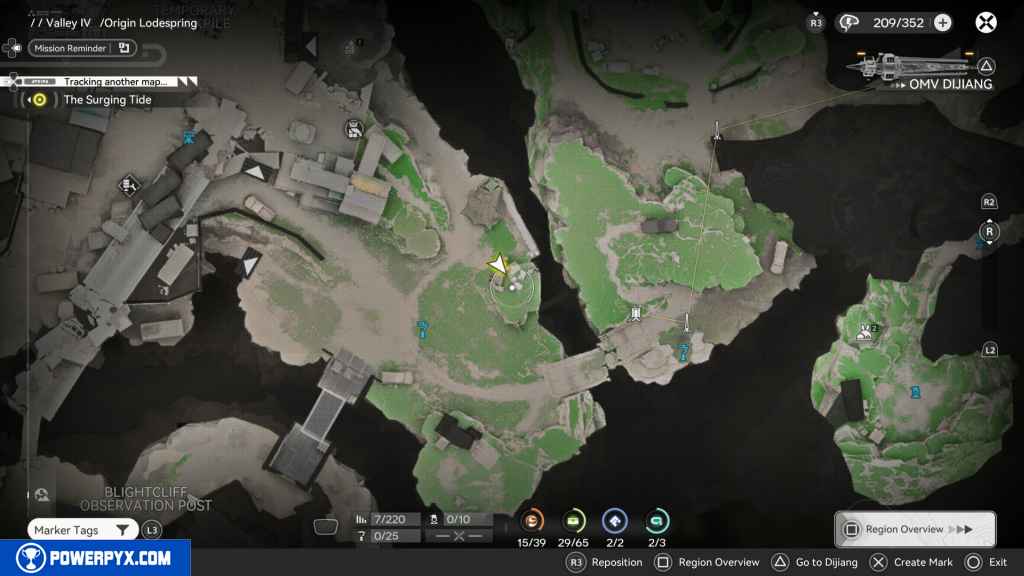
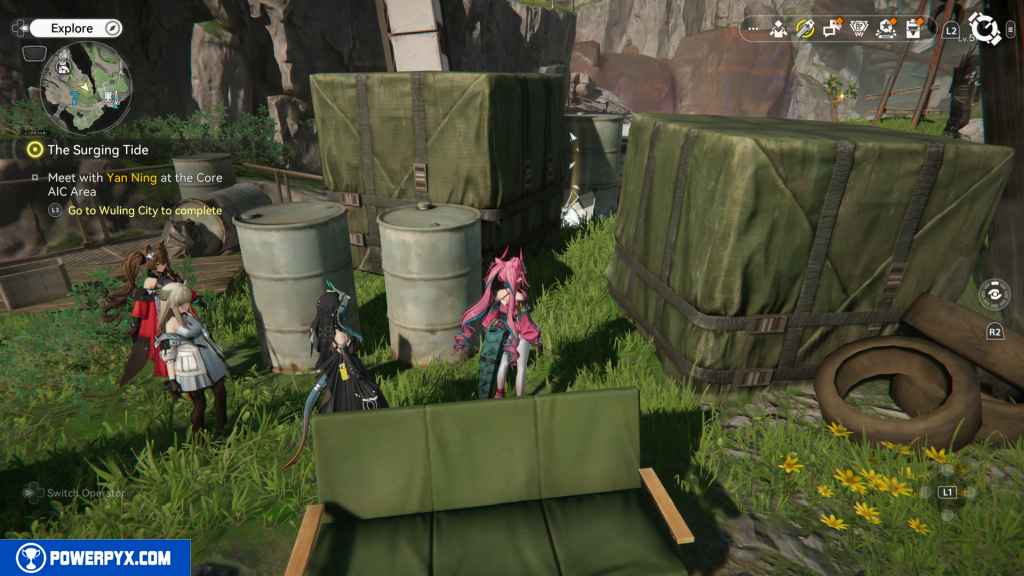
29 – Memo: An Observer (Investigation Document)
This is the first document needed for the Nightmares from the Past Investigation. Head east past the canteen to an area with many camping chairs by a campfire. Look for this document on one of the chairs.
30 – Crate 15
Head back west until you see a path heading south. Take this path, and it will lead you back around the building to the east.
Run all the way until you see the Crate by the fence to the north.
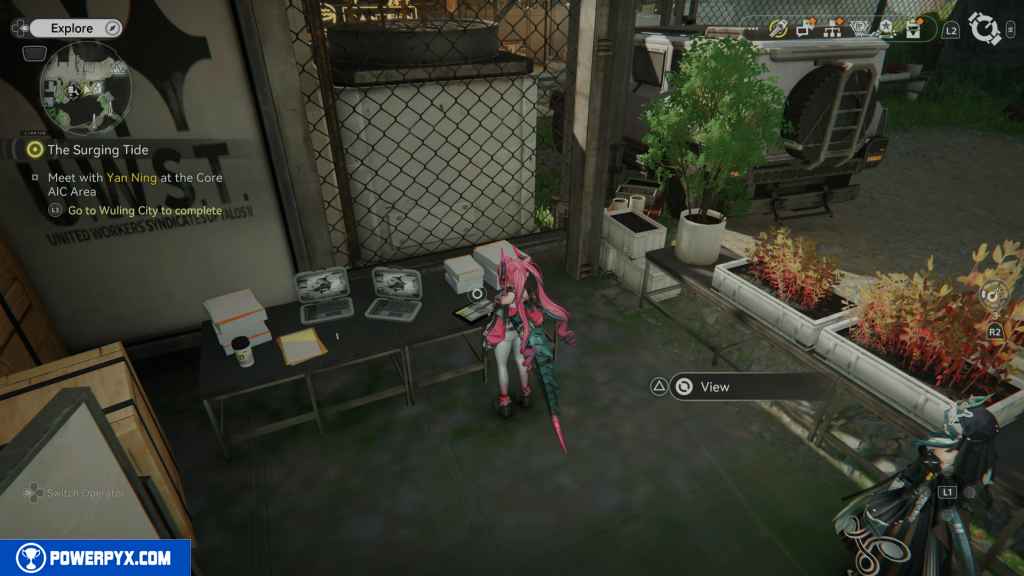
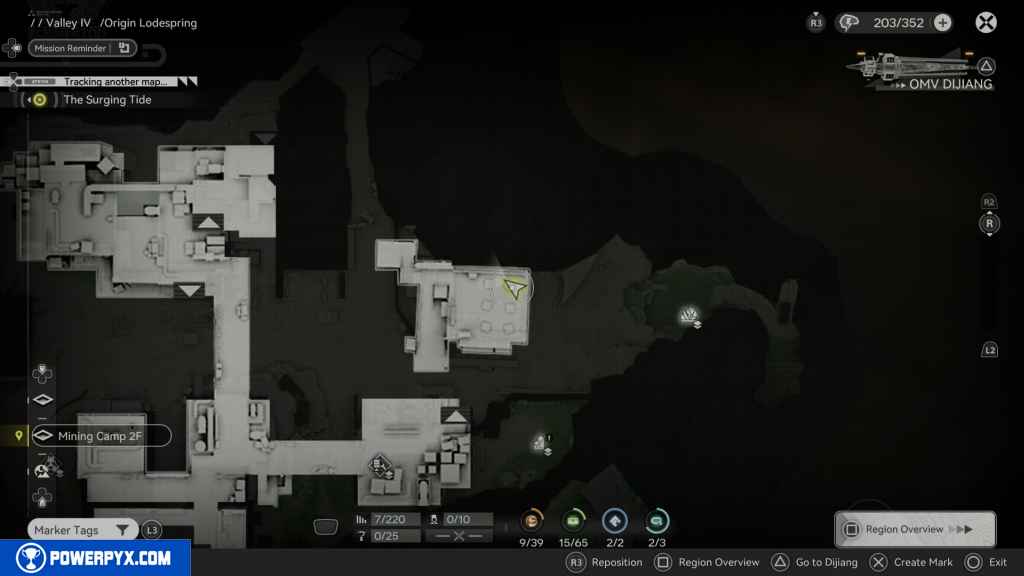
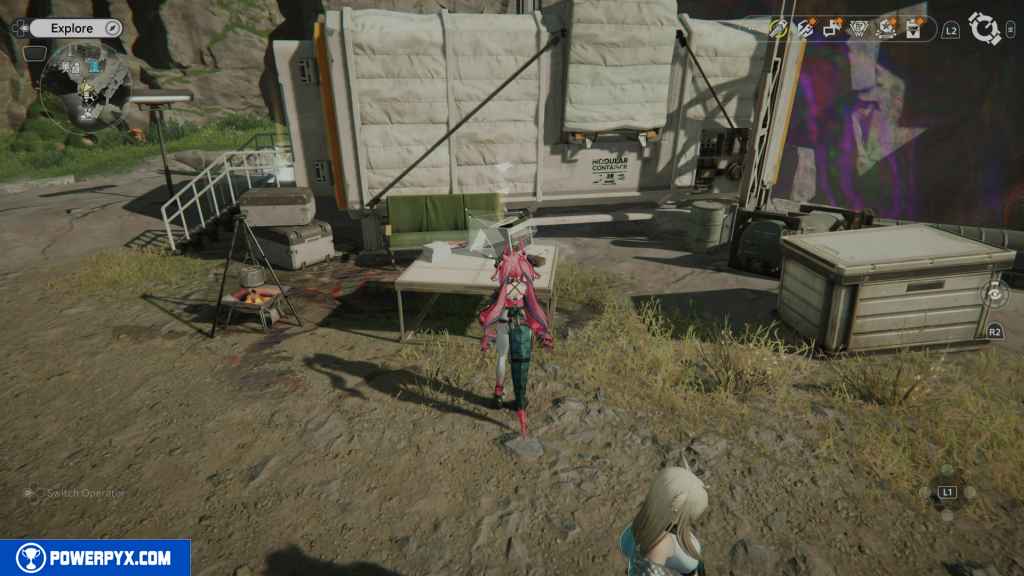
31 – UWST Crew Discussions (Investigation Document)
From the Crate, look west, and you will find a work area. In that area, the next Investigation Document is on the desk.
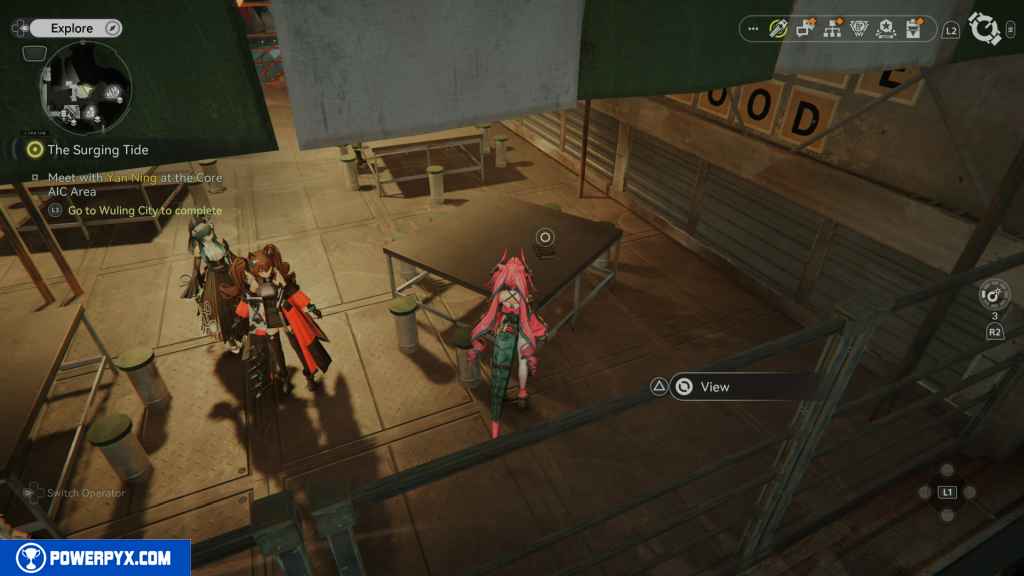
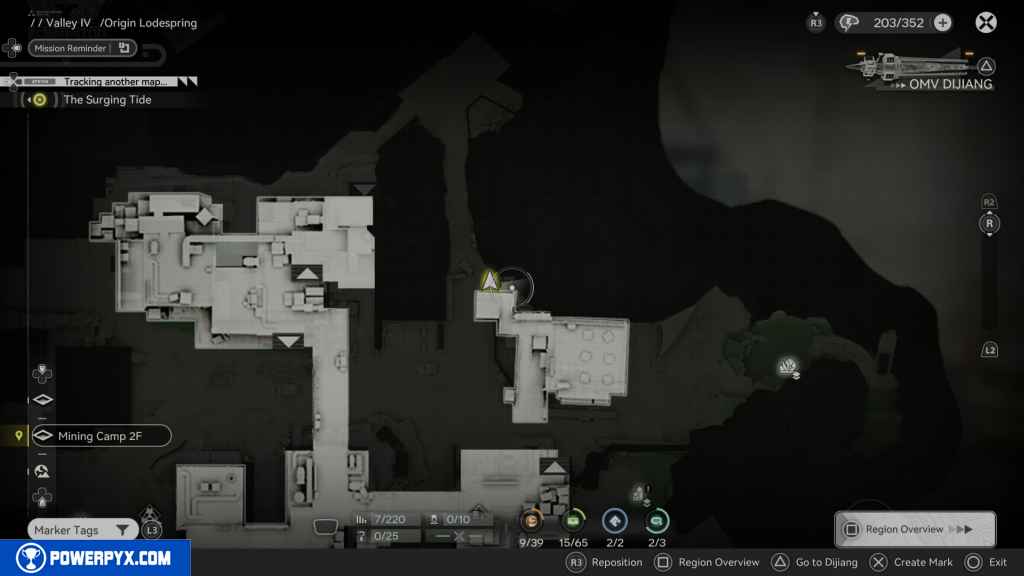
32 – Shared Musings Of A Dream (Investigation Document)
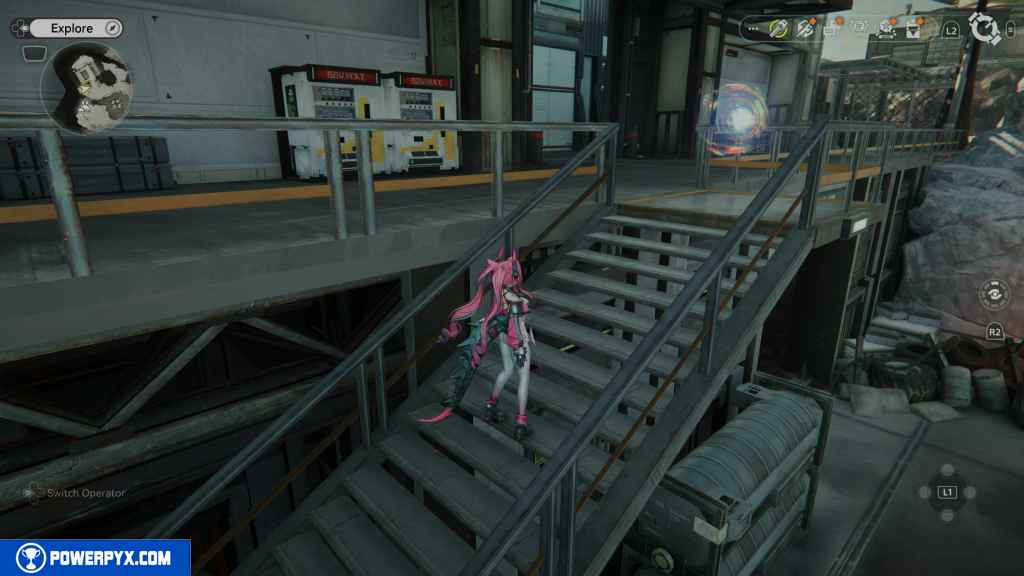
Head back the way you came. This time, to your north are some stairs leading to the second floor of the canteen. Take them, then look to the east to find more tables. On the table to the northeast is the next Investigation Document.
33 – Aurylen 9
Continue to head up the stairs as far as you can. At the end of the path will be the next Aurylen.
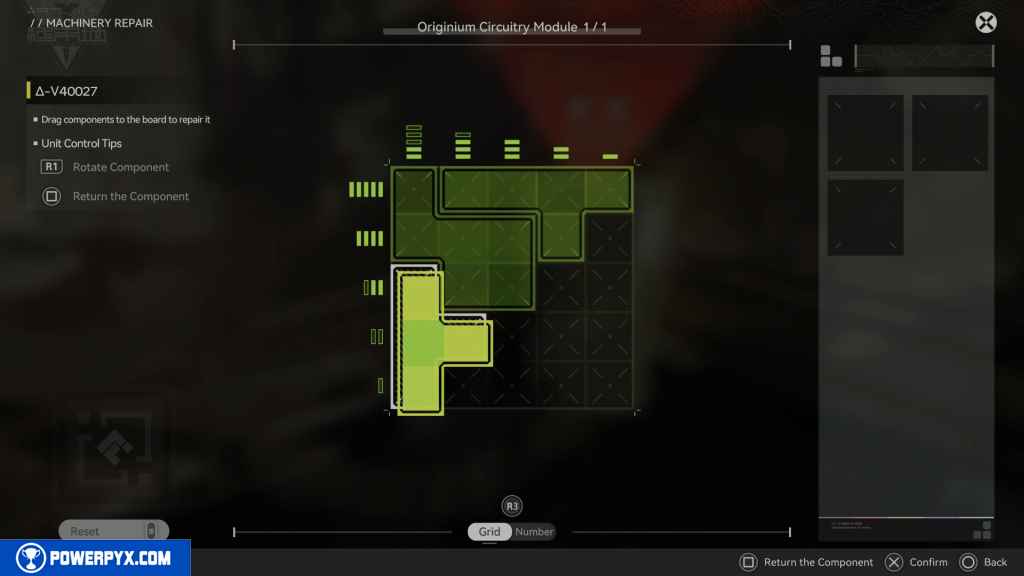
34 – SOS Repair Bot 4
Head back down the stairs, and on the opposite side is another staircase to the south. Take it up, and you should reach the next Repair Bot. Activate it and repair it.
35 – Crate 16
Head west from the Repair Bot across the bridge and look for the Crate on your right.
36 – Aurylen 10
Just further west, you should see the Aurylen on top of some vent ducts. Jump up on the vent ducts to grab it.
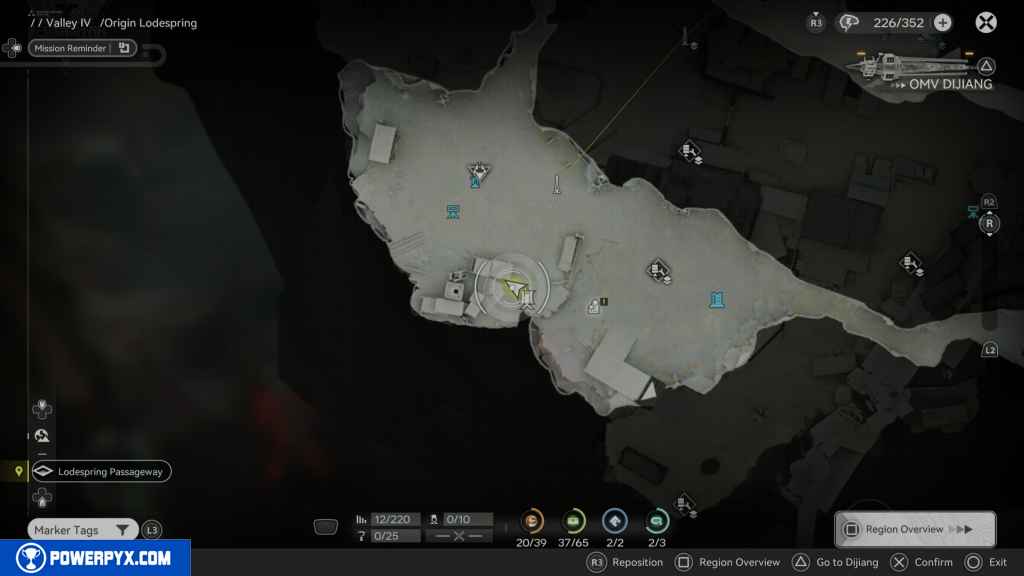
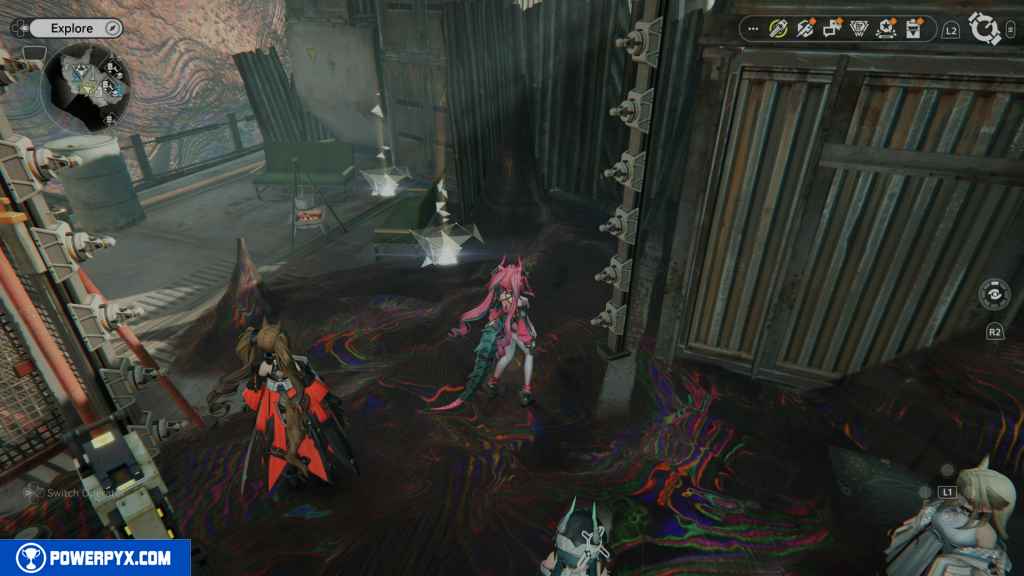
37 – Crate 17
From the Aurylen, head west again on the second floor, and you should see the Crate ahead of you.
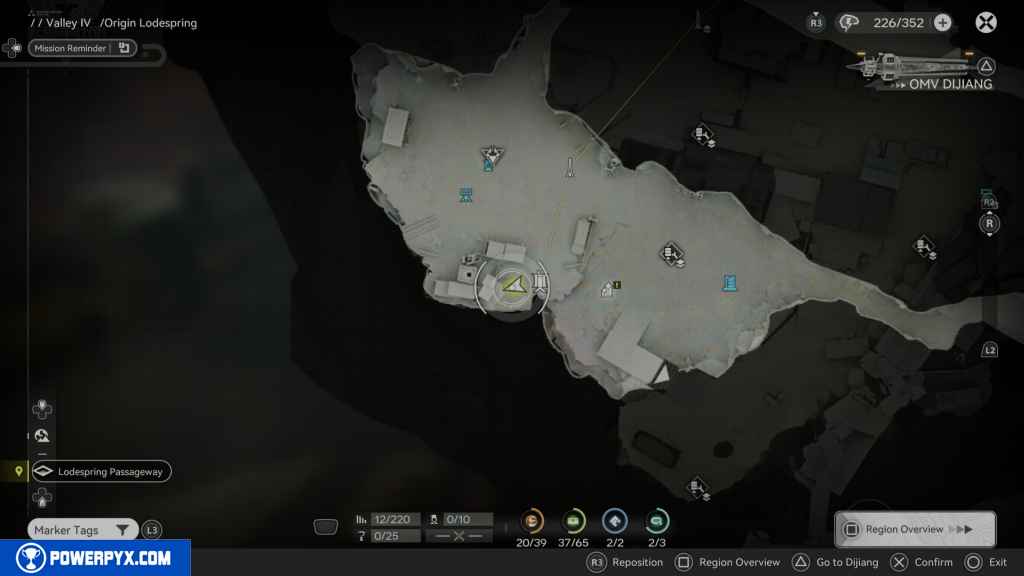
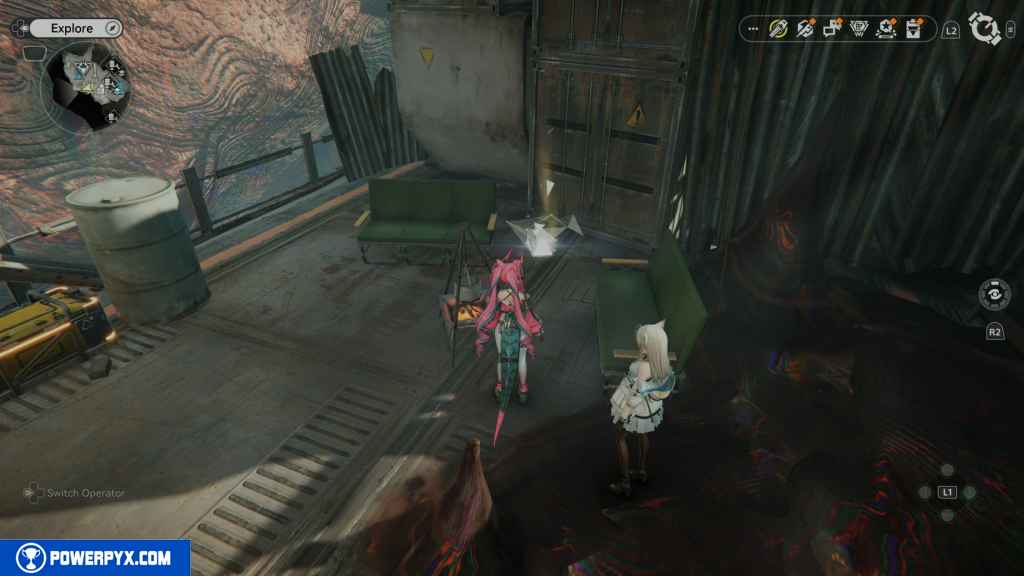
38 – Gathering Point 3
Turn around and go back to where you Aurylen was. Before going that way, look behind the yellow tarp for the Gathering Point.
39 – Gathering Point 4
Run across the bridge to the north and look to your right behind some box crates for this Gathering Point.
40 – Crate 18
From the last Gathering Point, continue west as far as you can go. When you reach the end, look for the Crate by the west fence.
41 – Gathering Point 5
Go back east, you will see an air duct on your right, and if you look left, there are some box rates and an air duct vent. Jump over the air duct to find this gathering point.
42 – Aurylen 11
Now climb the box crates going east, and you should see the Aurylen on top of a box covered in green tarp.
43 – Crate 19
When standing on the green taped box, you should see another crate in the small dark area underneath the platform. Drop down to grab it.
44 – Crate 20
Jump up the green-tarped box and onto the platform. Ahead of you is the next Crate.
45 – Aurylen 12
Continue up the path until you reach a jump pad inside a breakable box. Use it, and it will take you to another platform with another jump pad. Take that one as well to reach the top.
At the top, look south, and you should see some stairs. Take them and go around to the next set of stairs that lead to the Aurylen.
46 – Crate 21
Turn around and go back up the stairs to the east, look north, and you should see the next Crate.
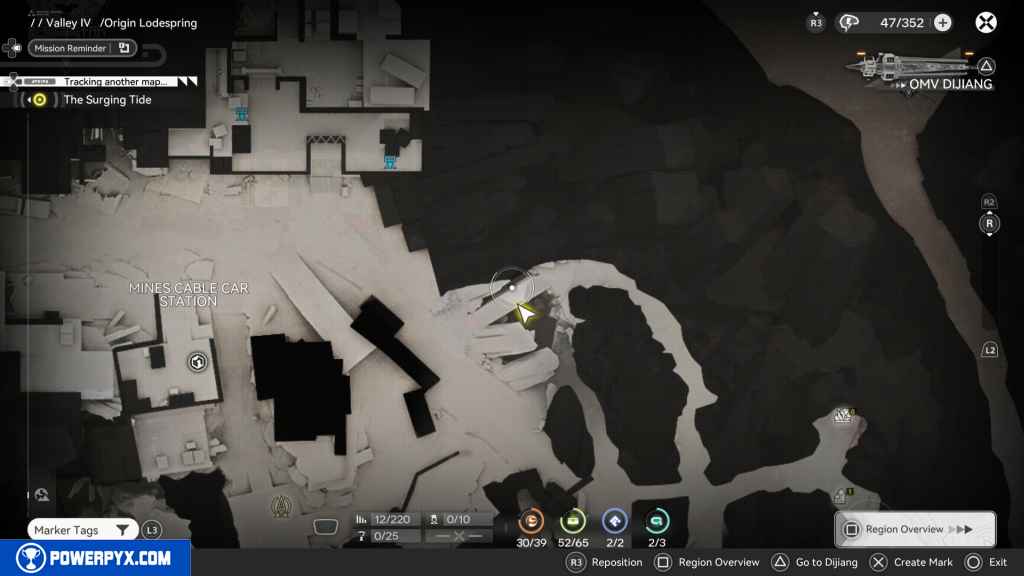
47 – Gathering Point 6
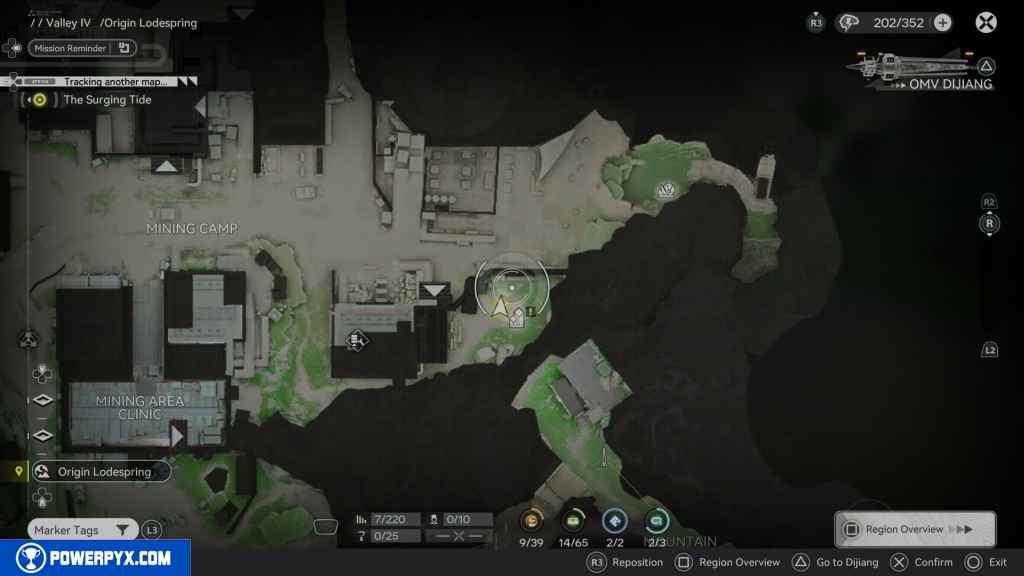
Head back down the stairs, and to the north, you should see an elevator button and an elevator. Use it to head down.

When you get to the bottom, continue west, and you should see the Gathering Point on your left.
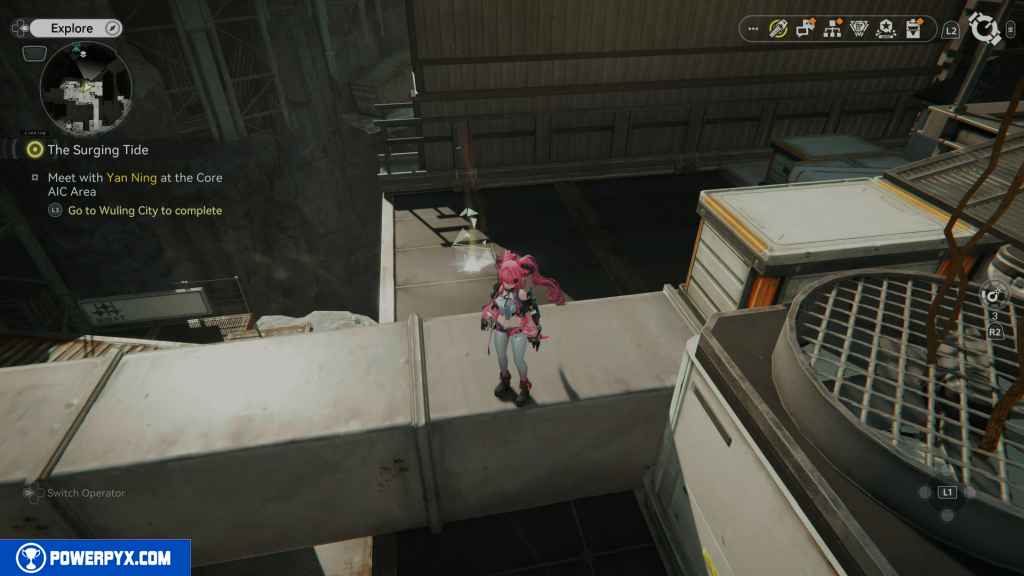
48 – Crate 22
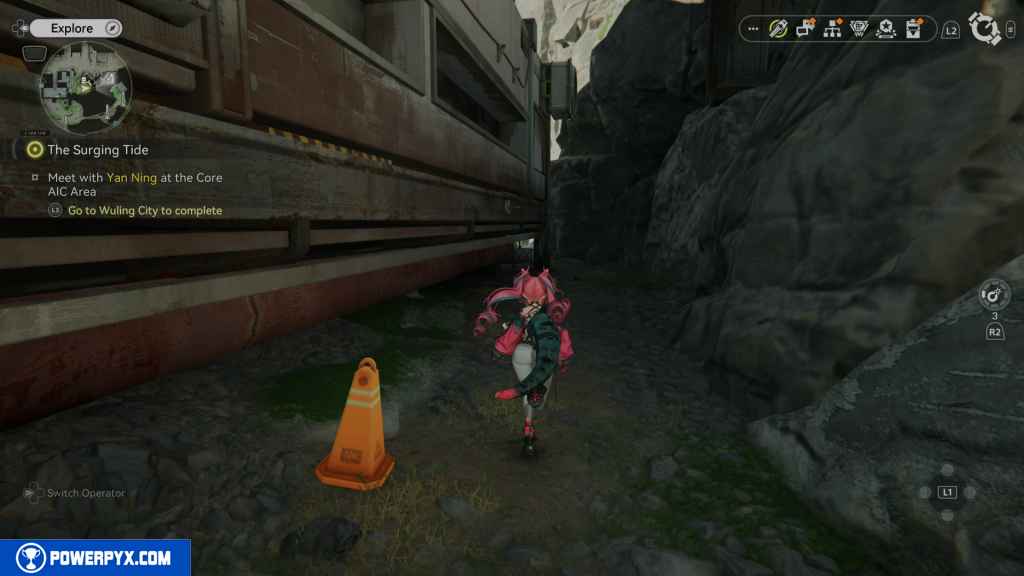
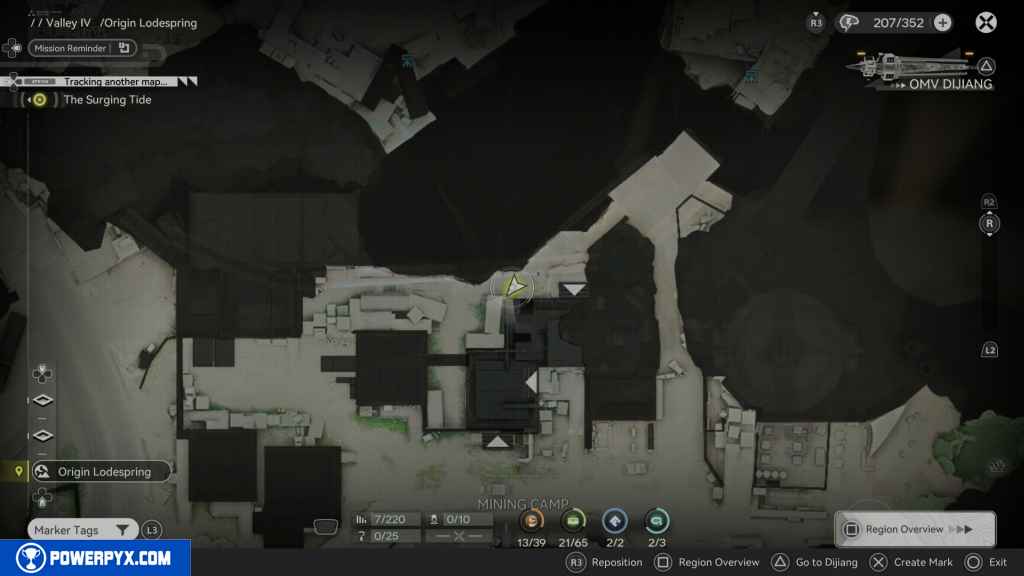
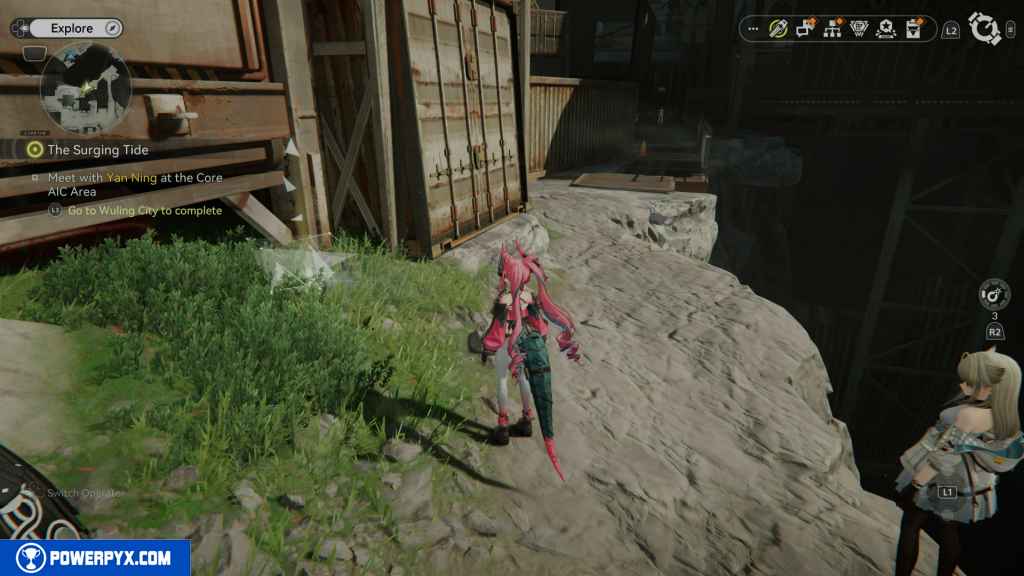
Follow the path west until you see an orange cone next to a container. On the left of that cone, between two containers, is the next Crate.
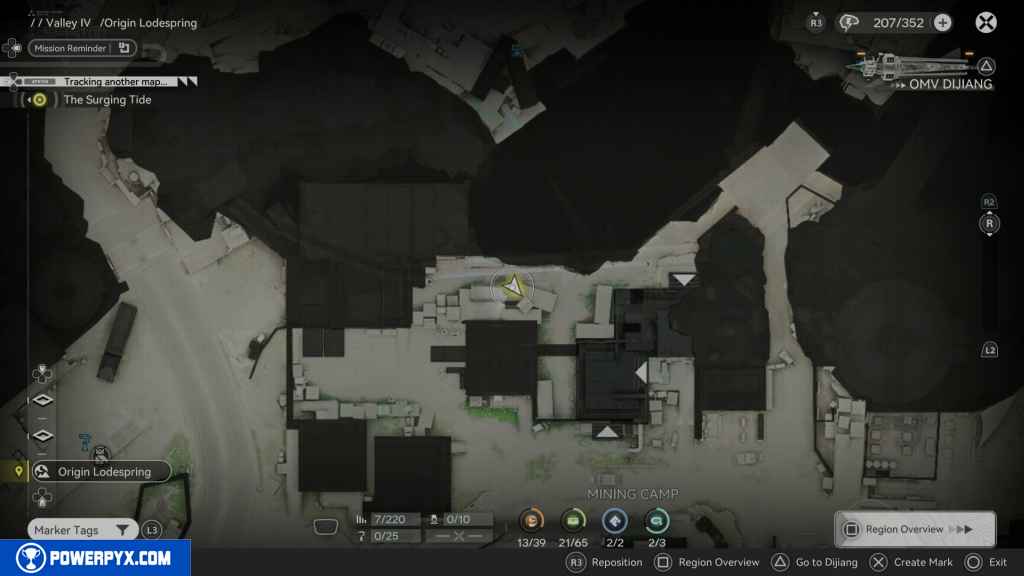
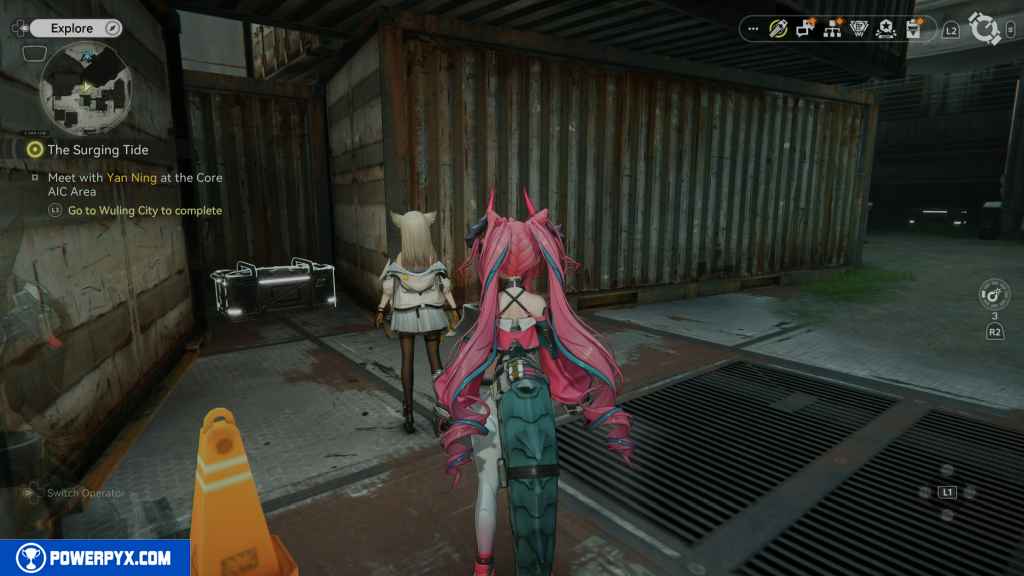
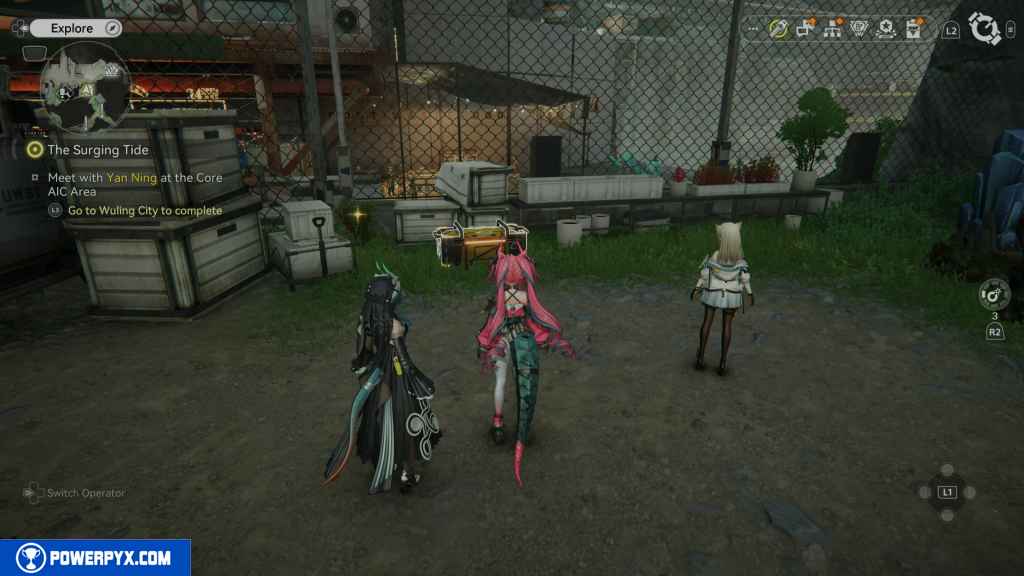
49 – Crate 23
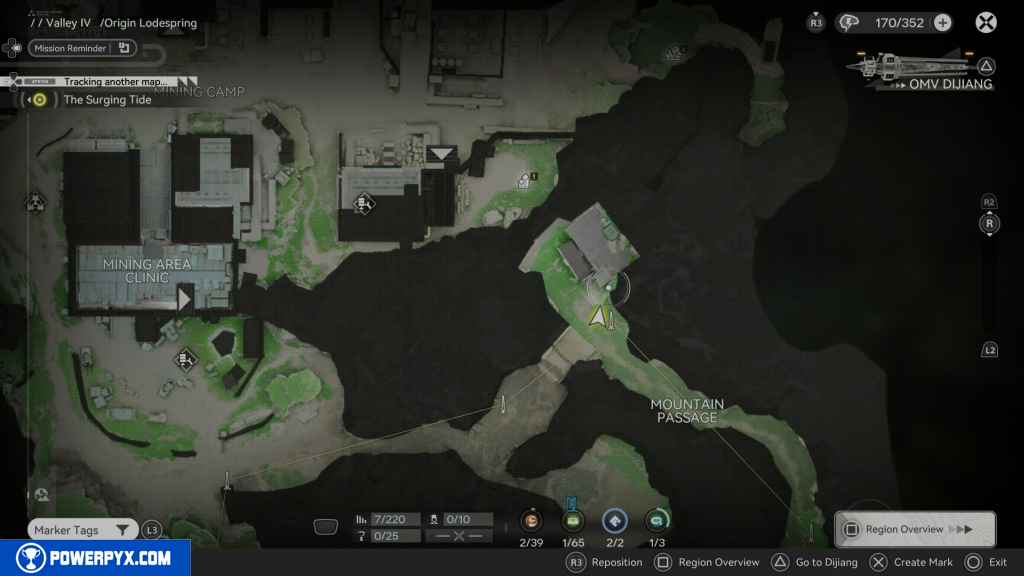
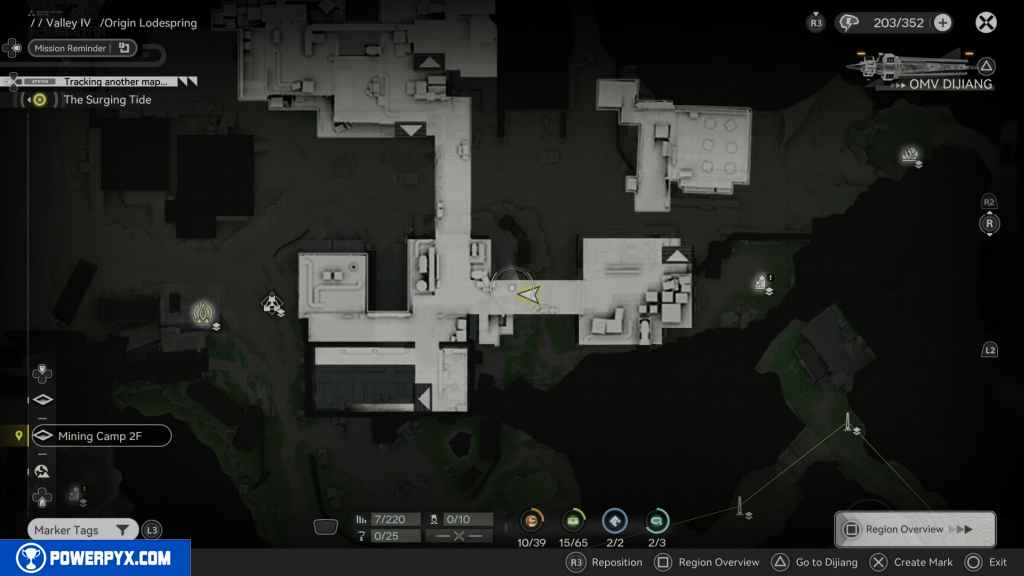
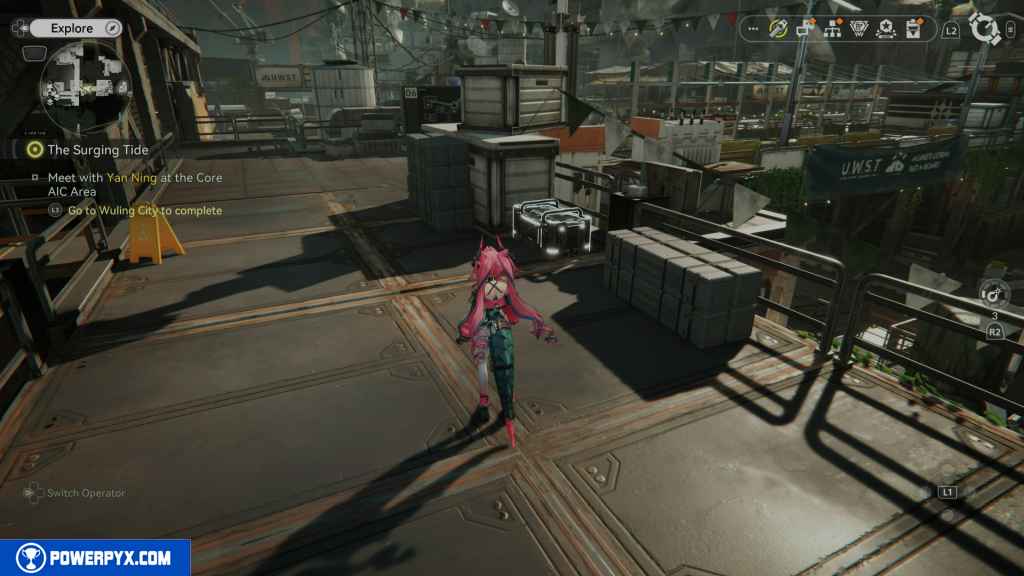
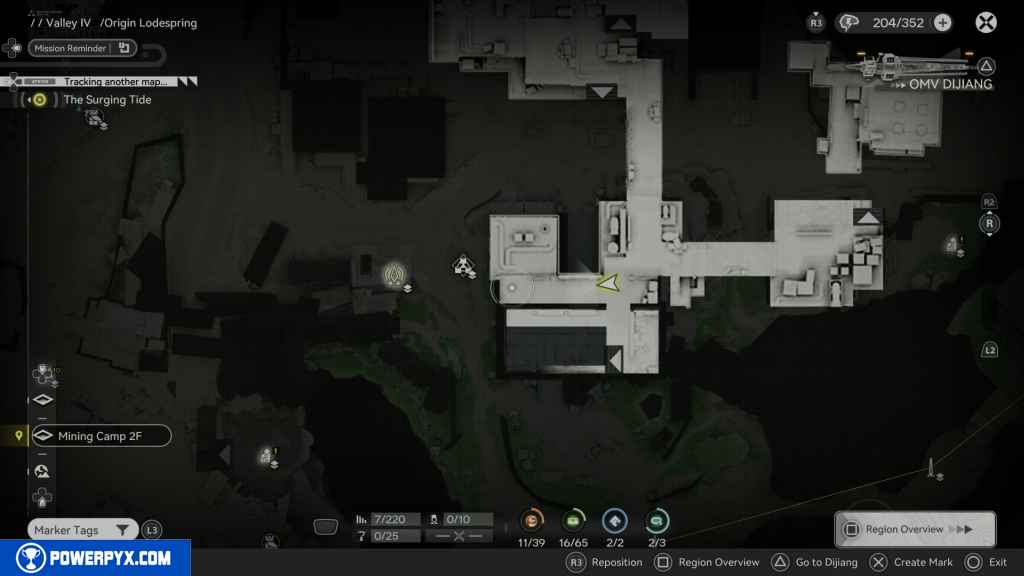
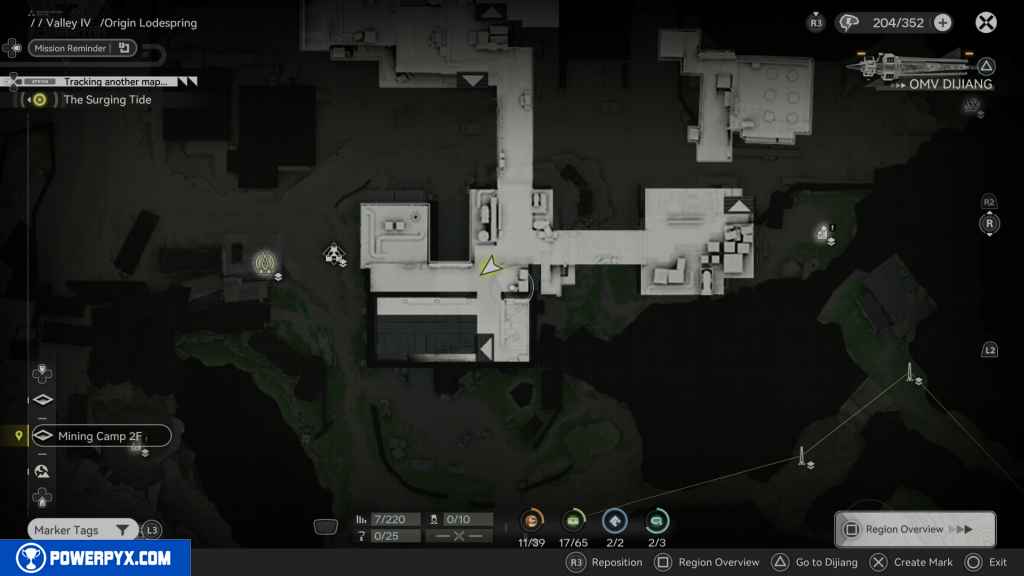
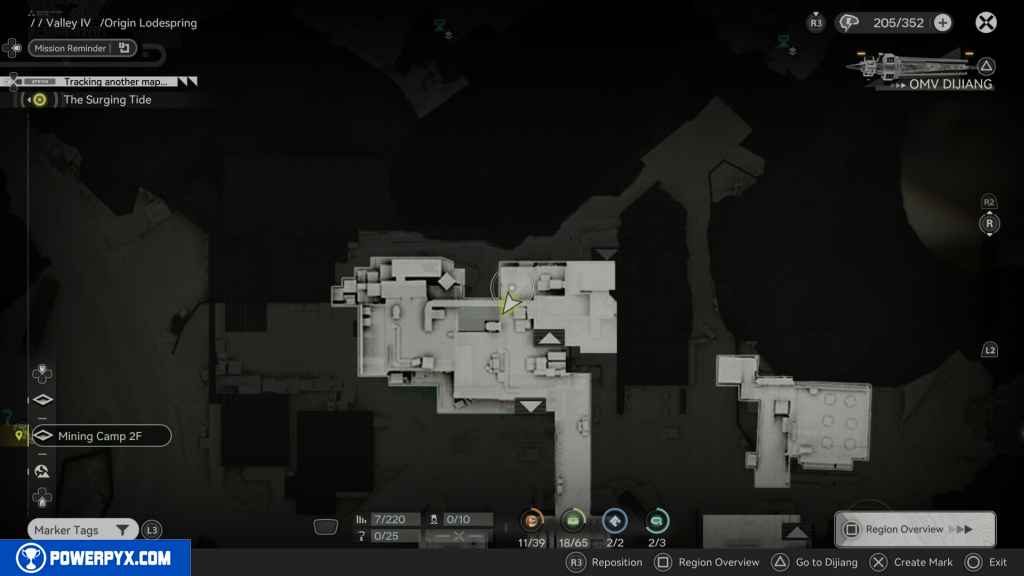
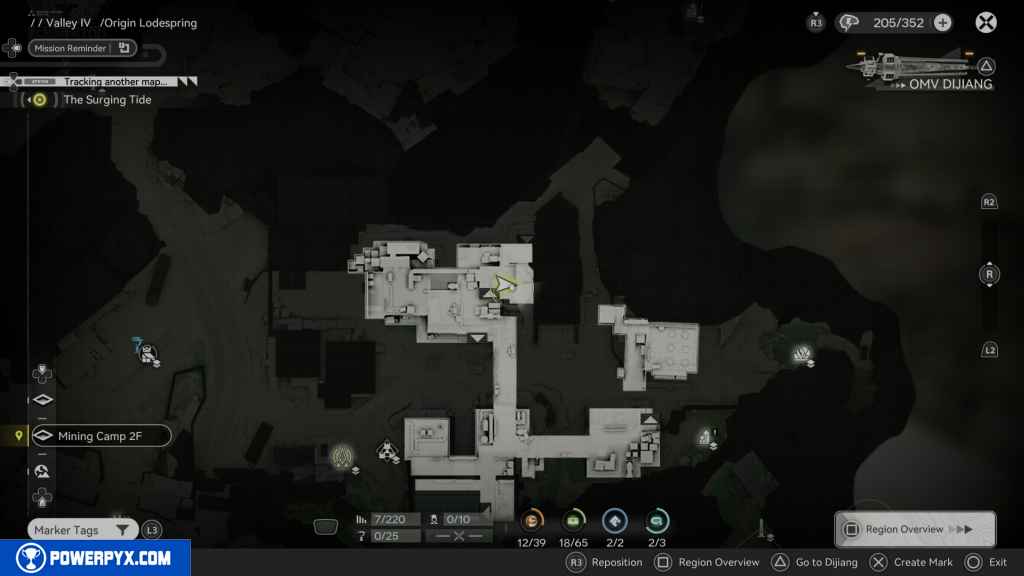
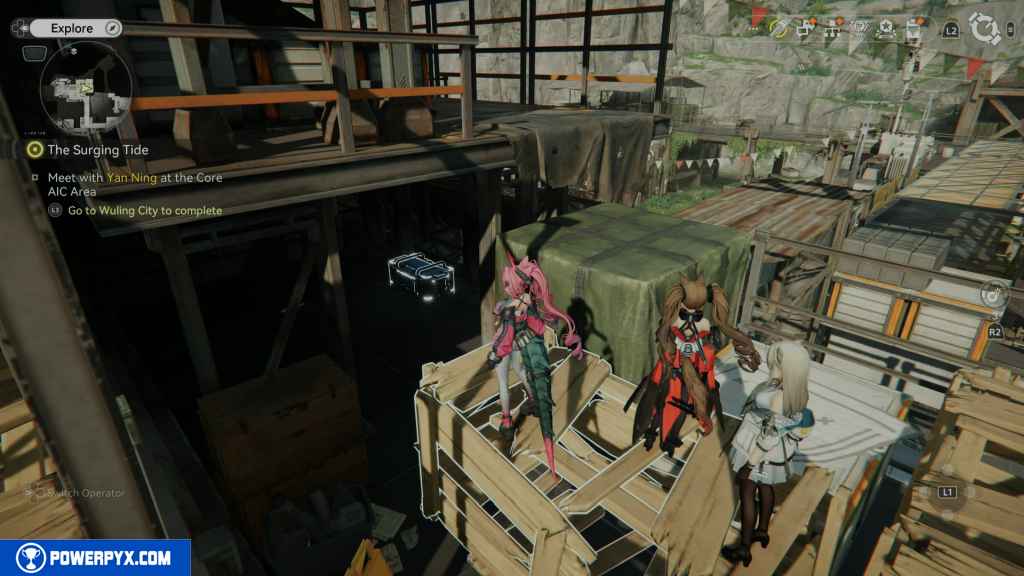
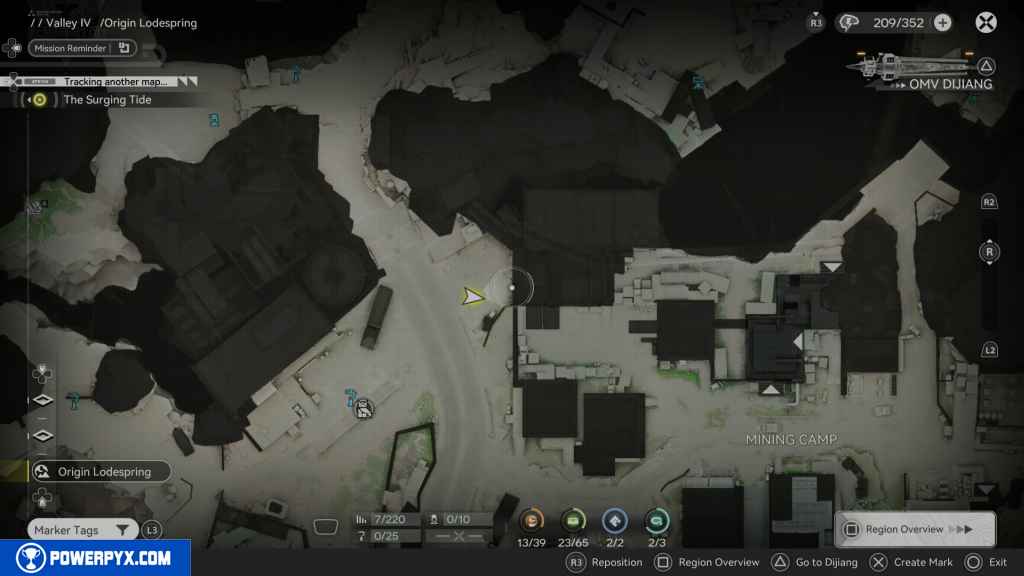
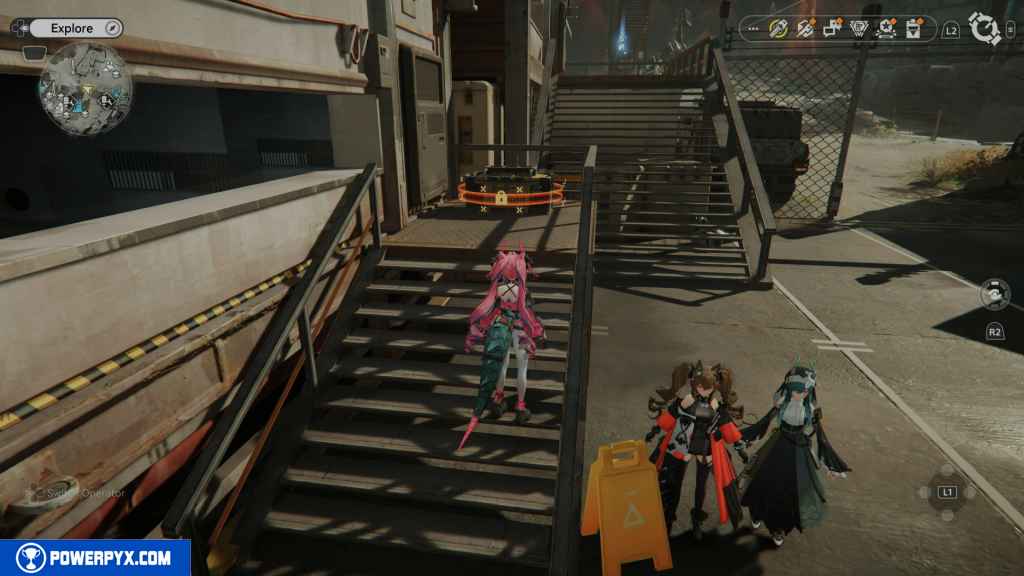
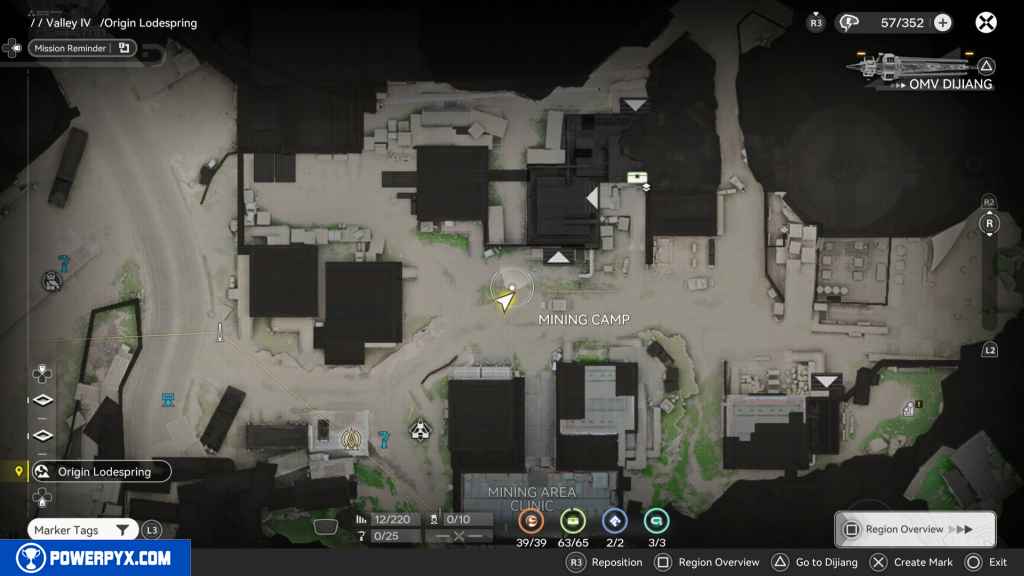
West of the last Crate is the next Crate to the left of the worker.
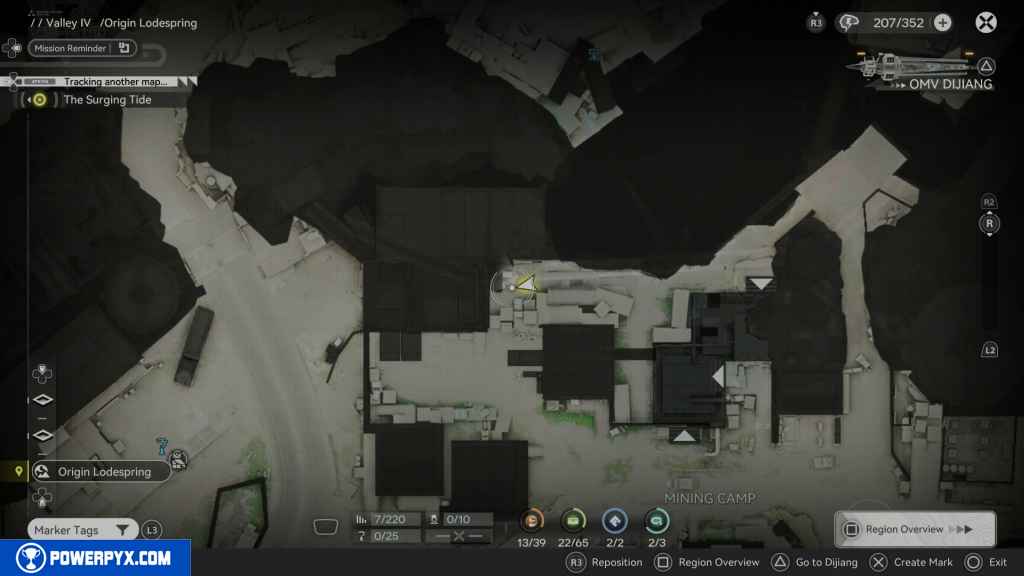
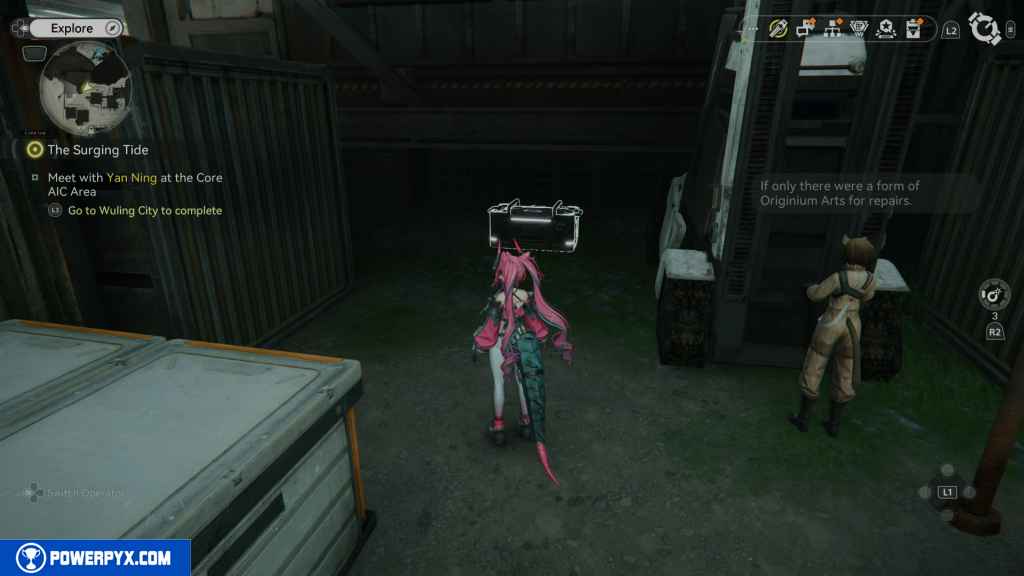
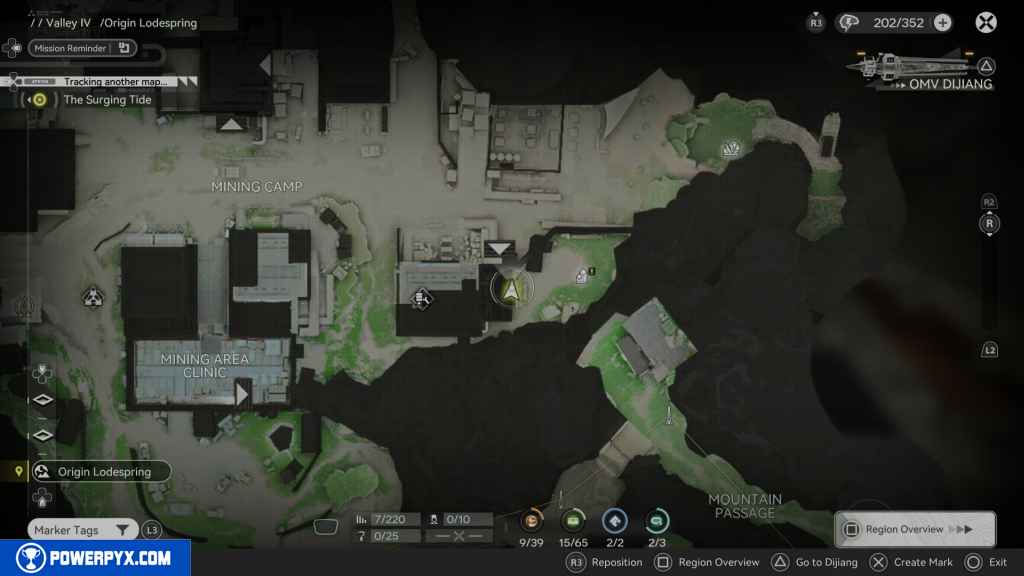
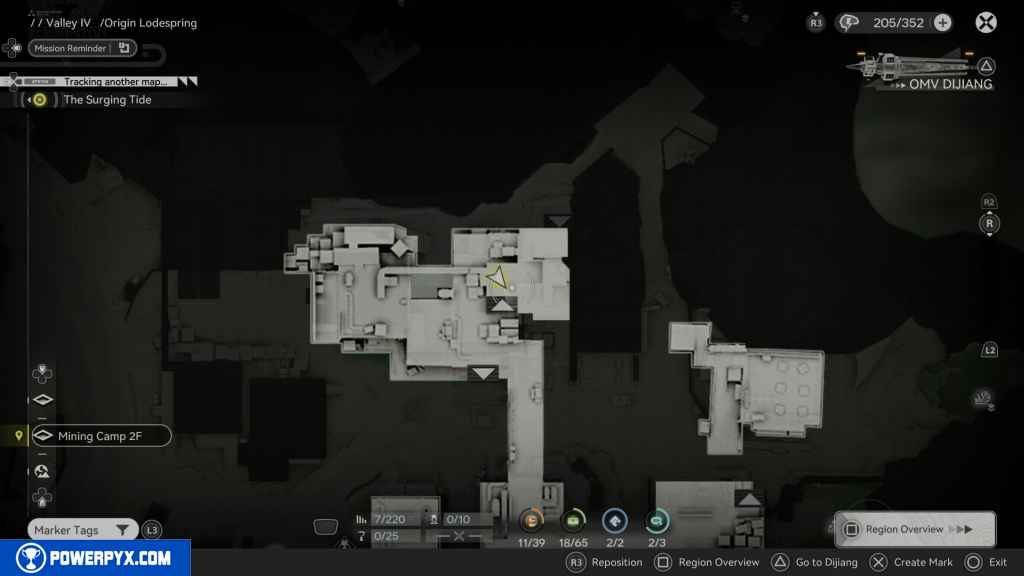
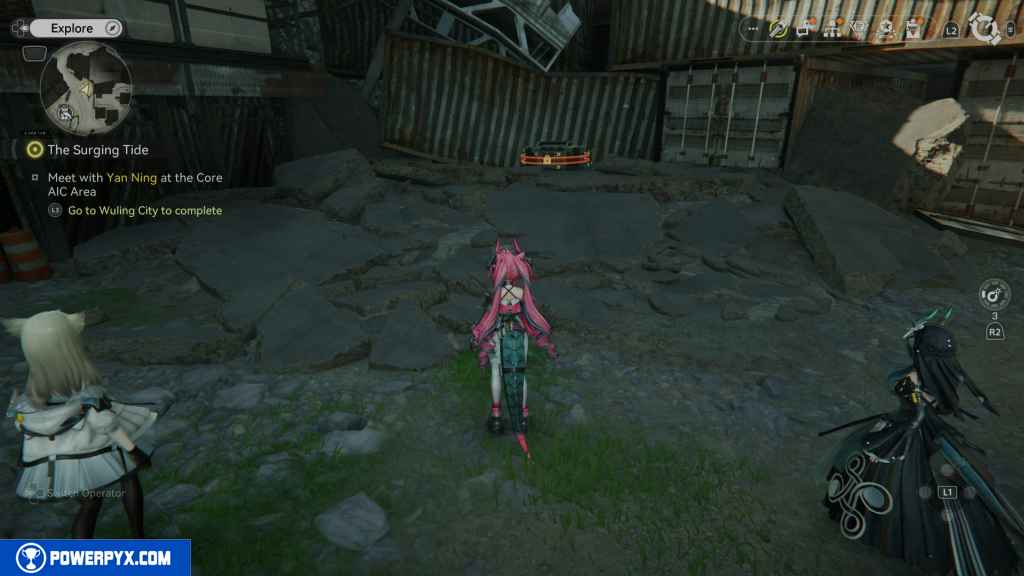
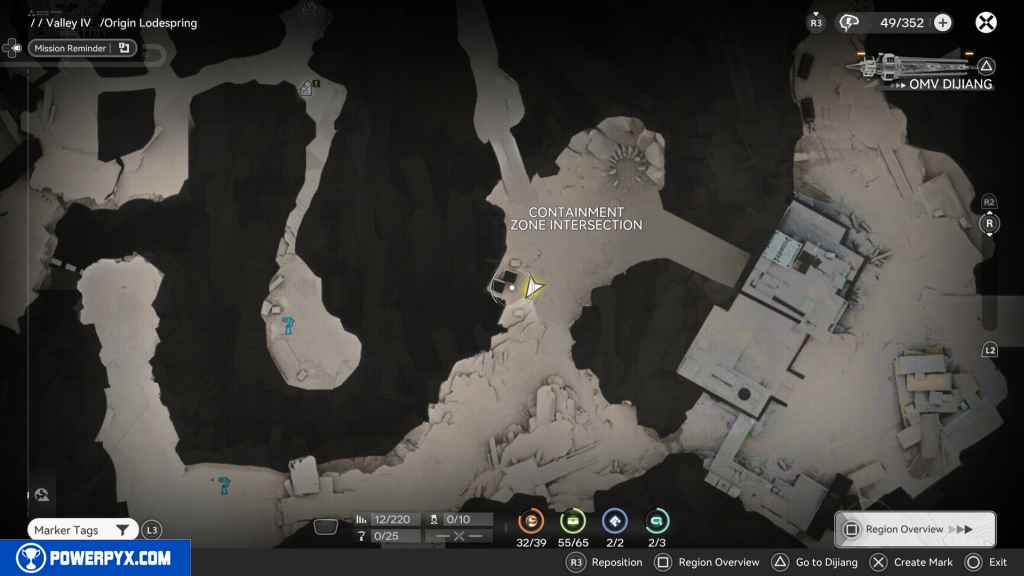
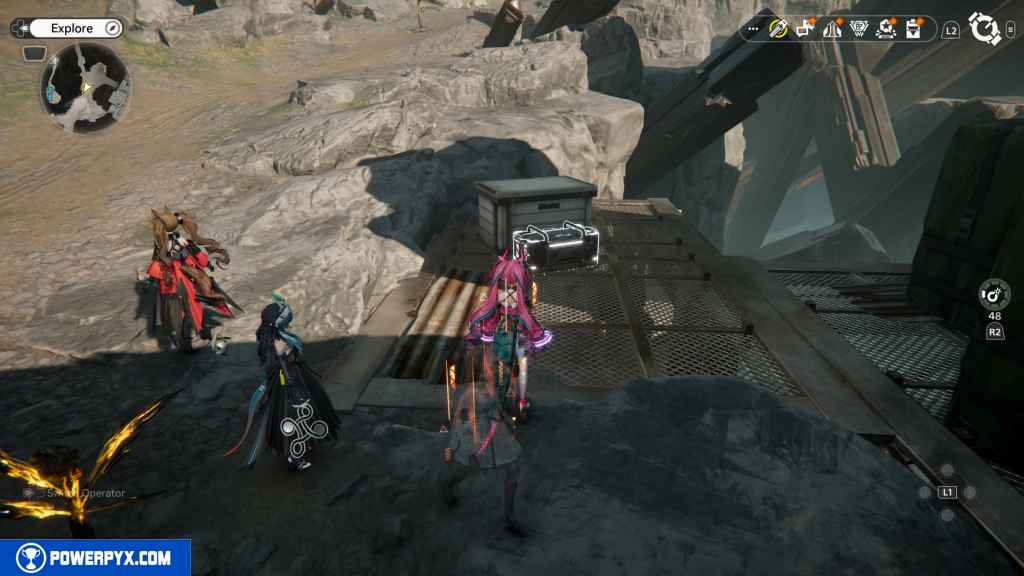
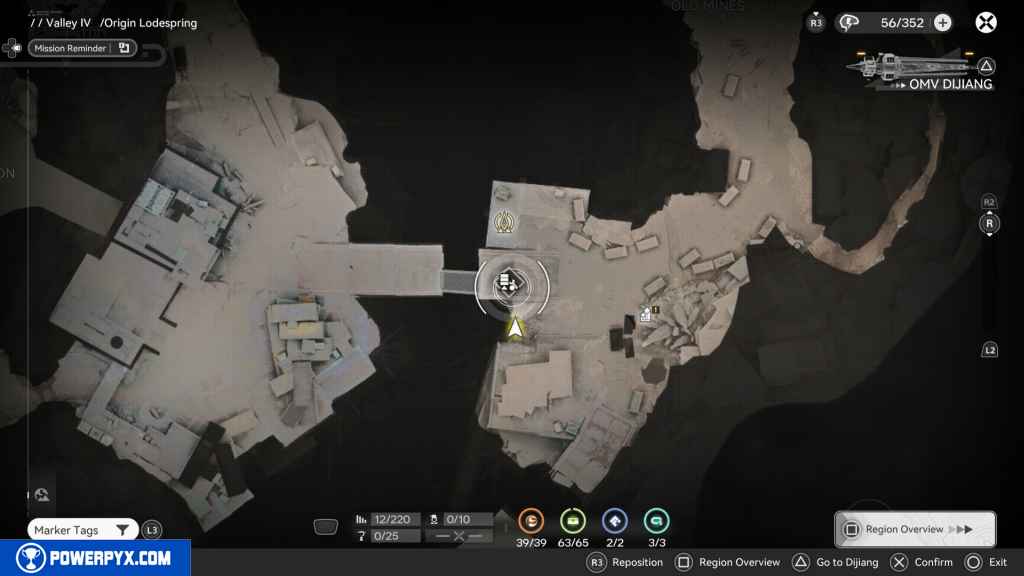
50 – Crate 24
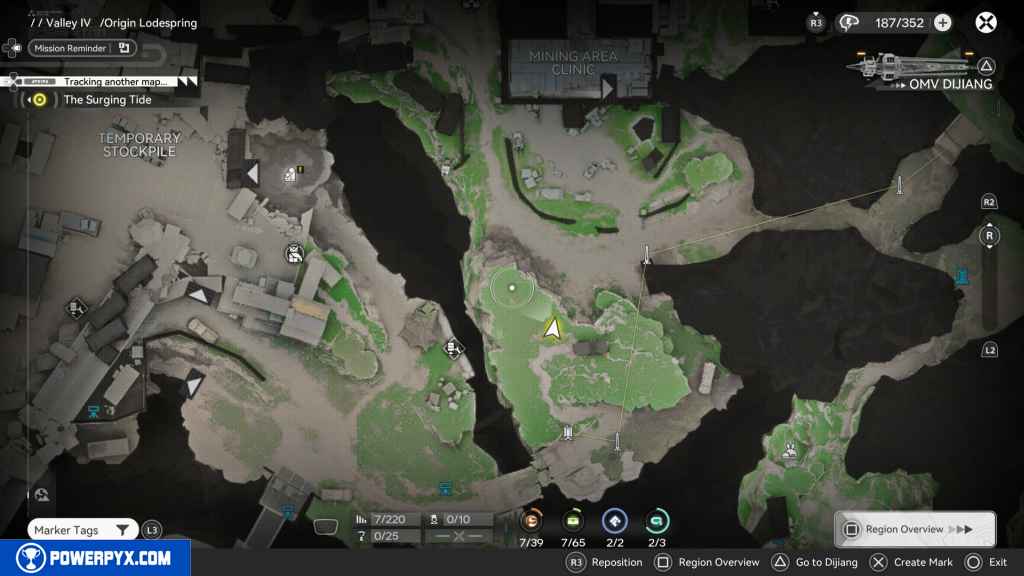
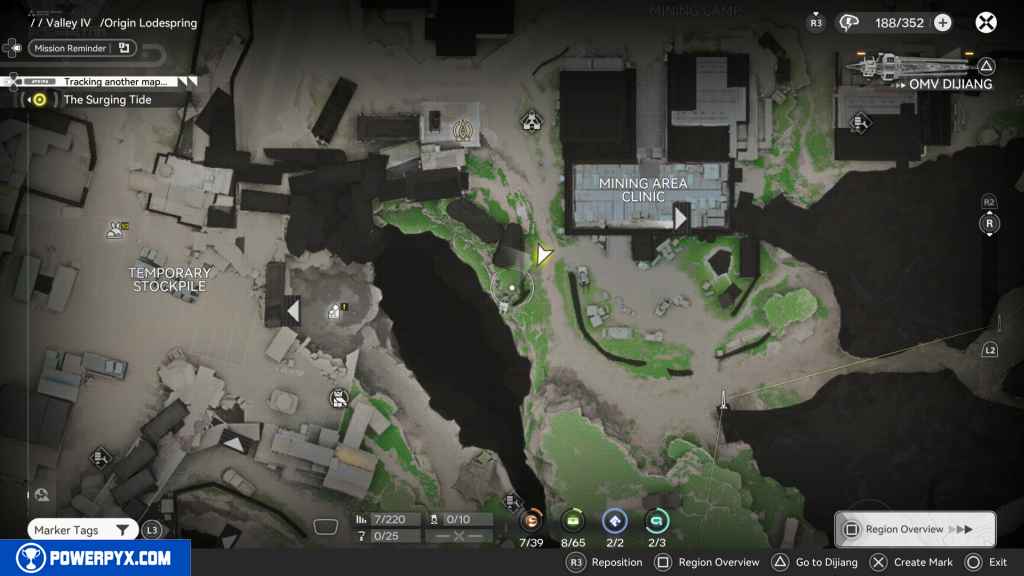
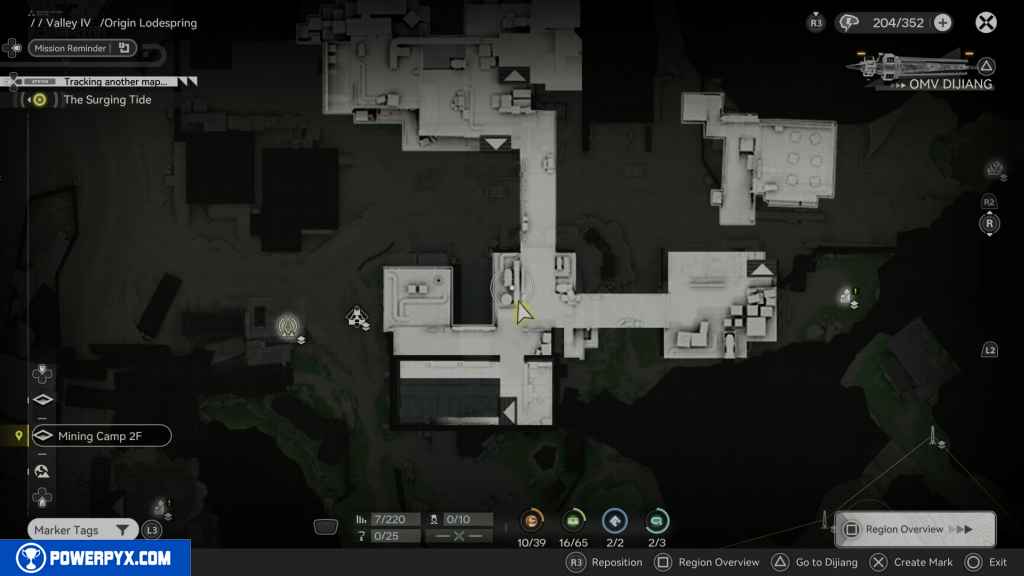
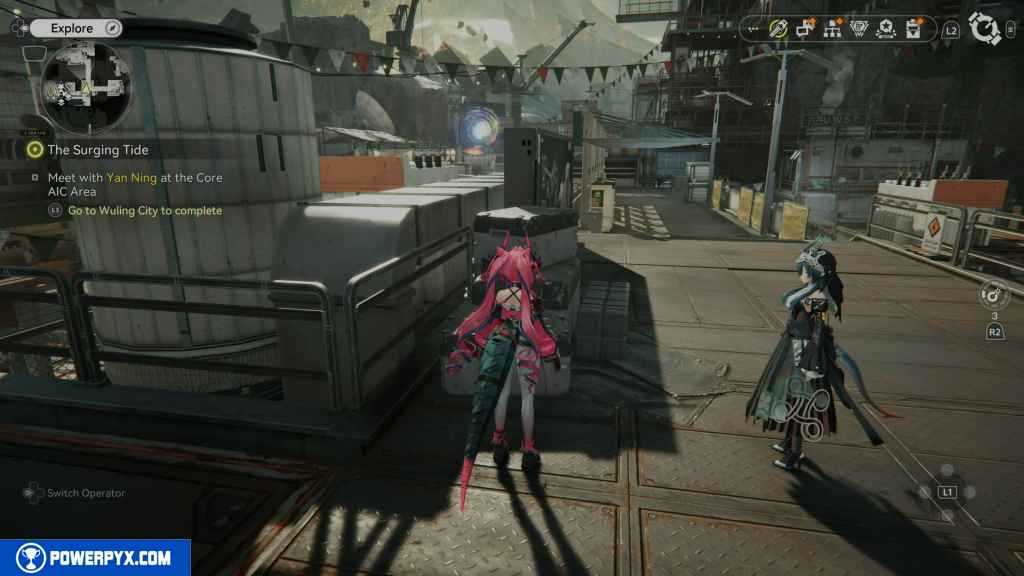
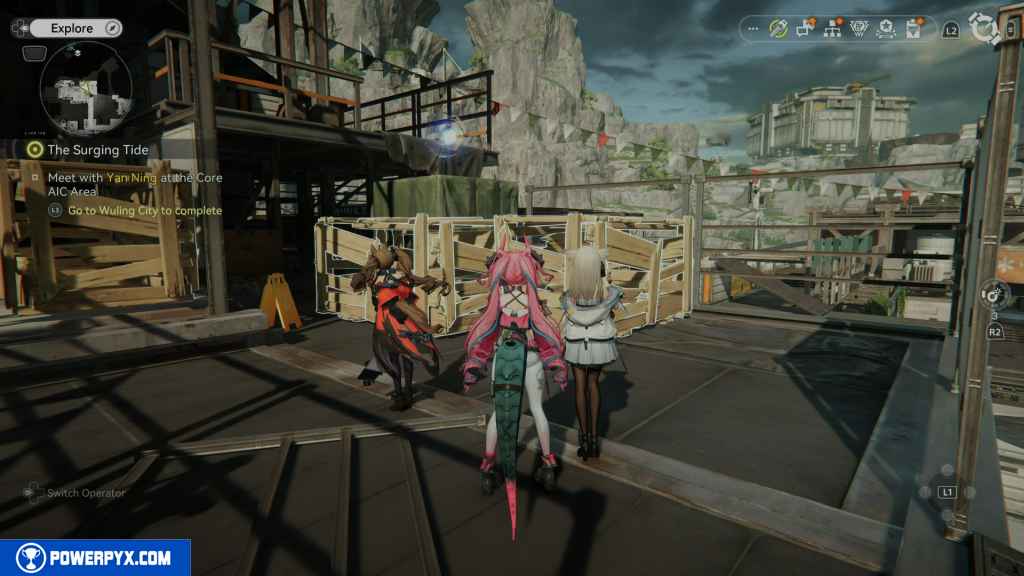
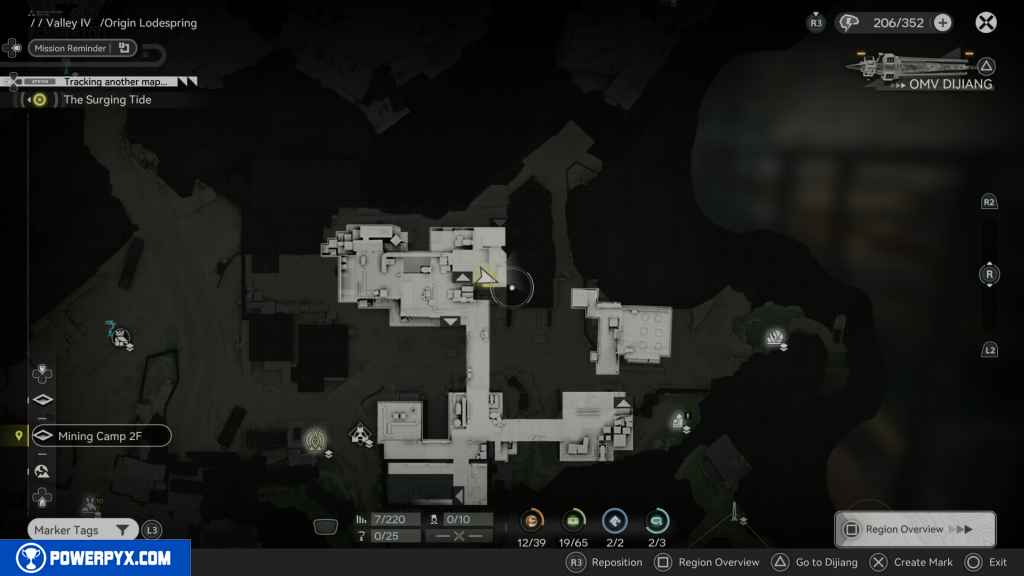
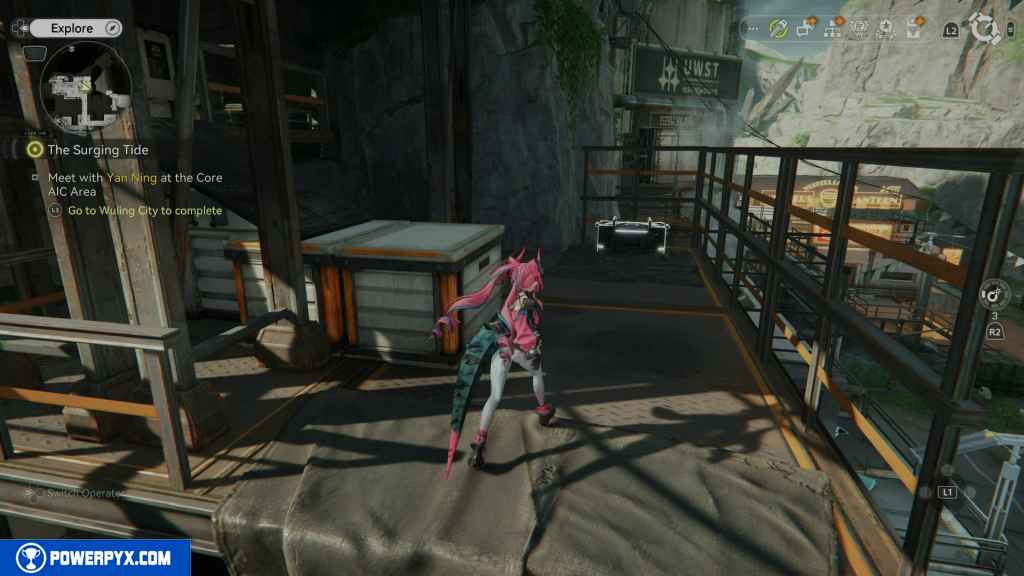
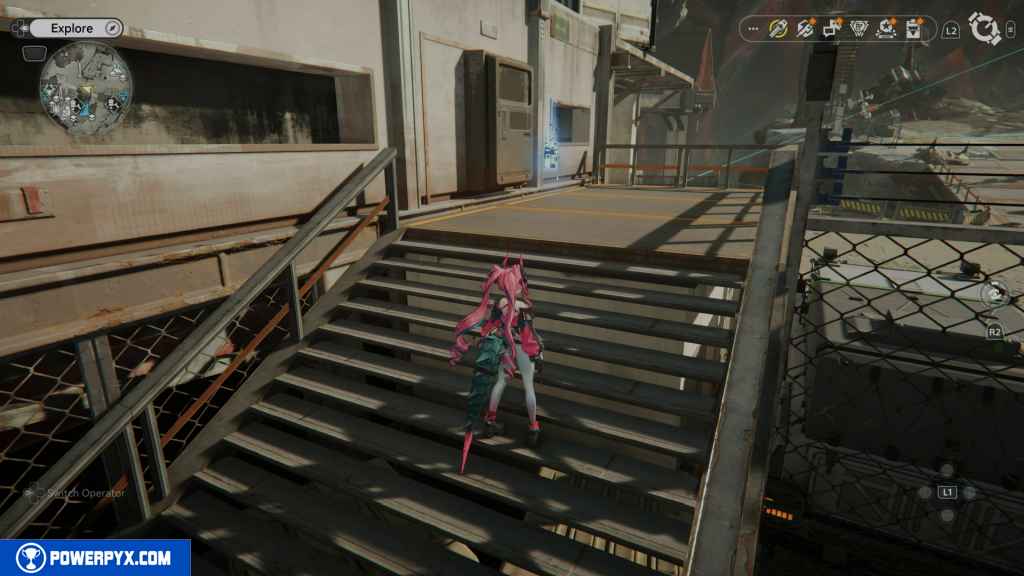
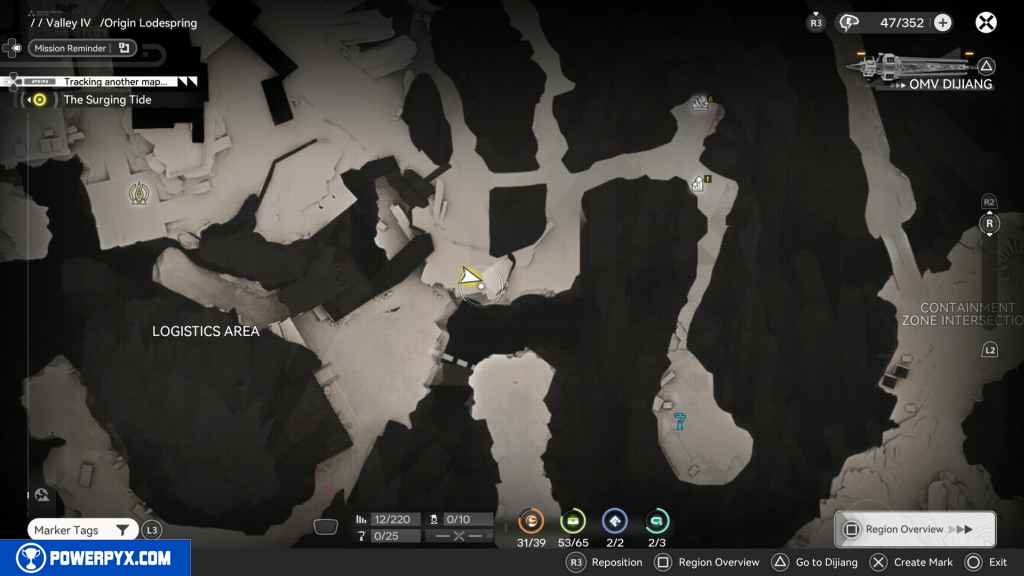
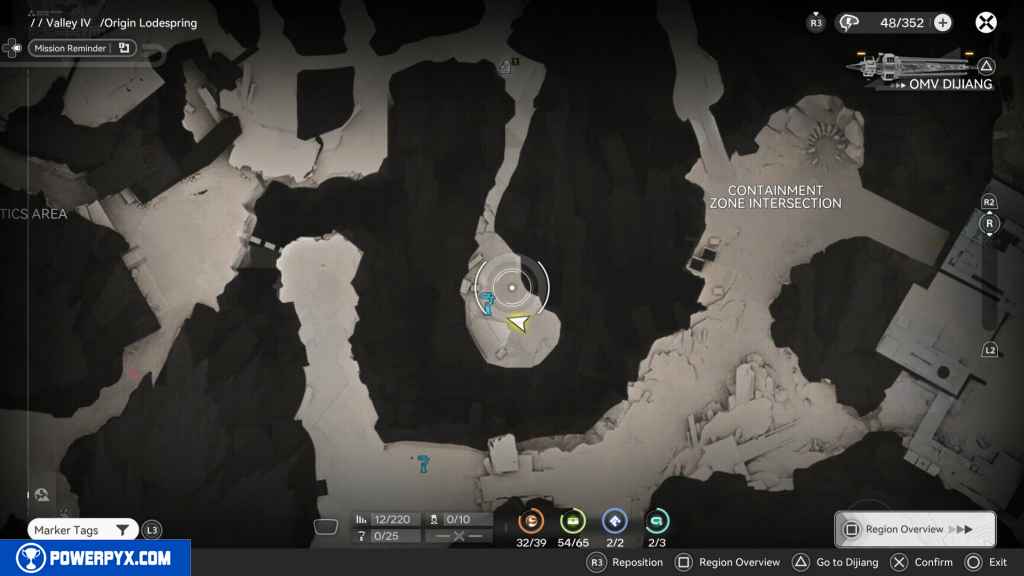
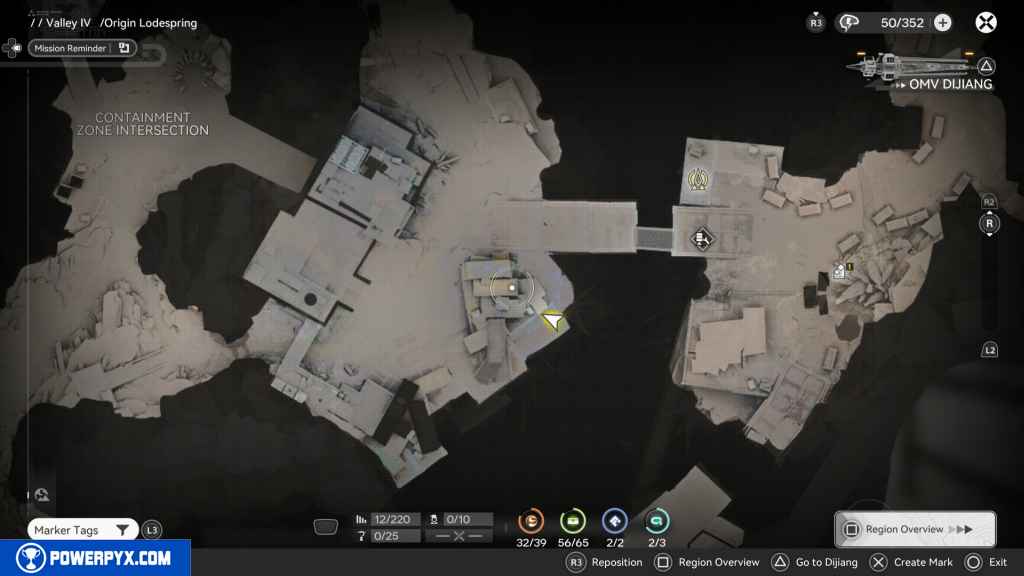
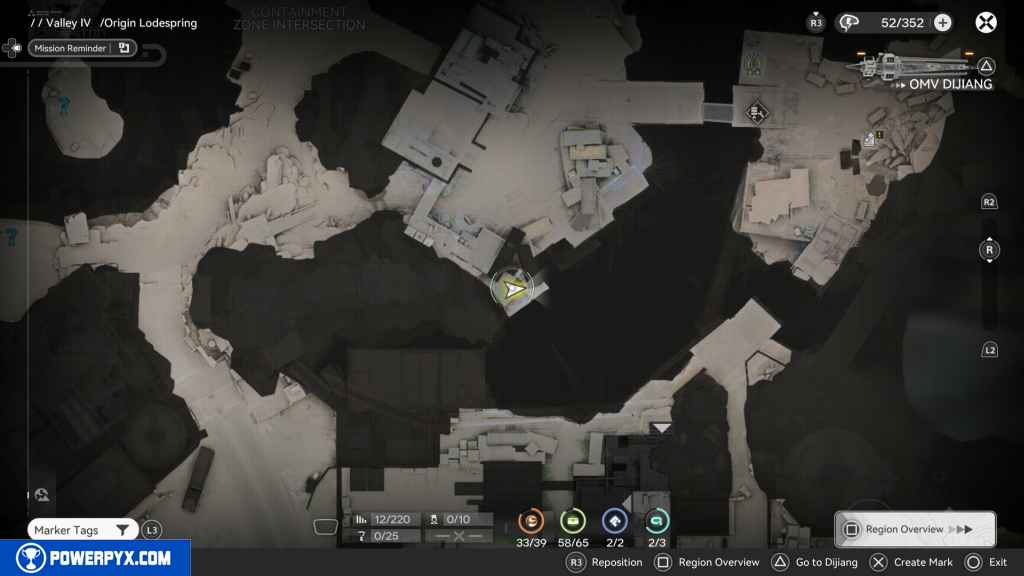
From the Mining Camp, head west and then north up the large path leading to the Containment Zone Intersection. Don’t pass the checkpoint. Instead, look to the east, and you should see a locked crate that requires three blue keys to unlock.
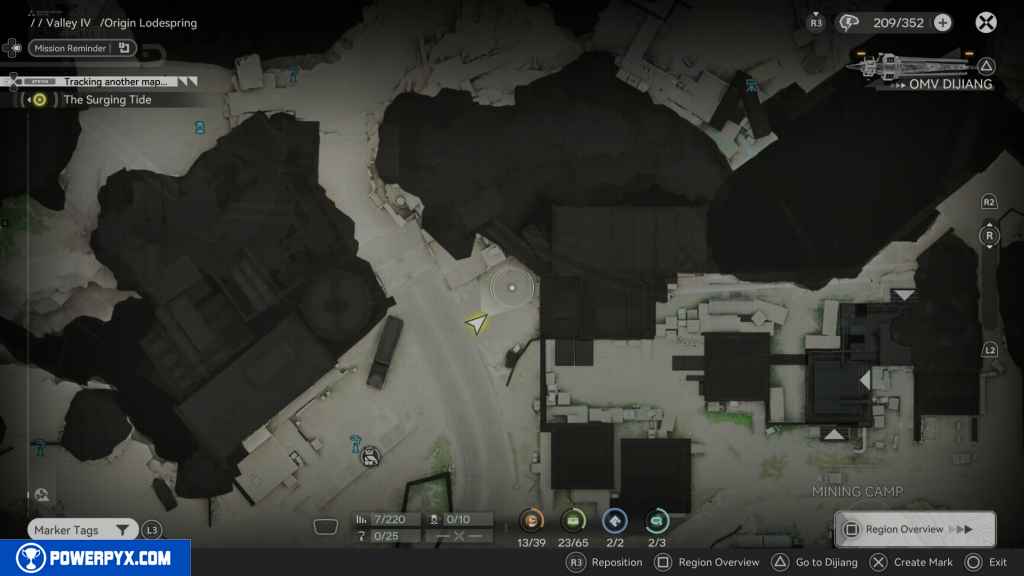
The first key is on the right side of the checkpoint on a platform 1/3.
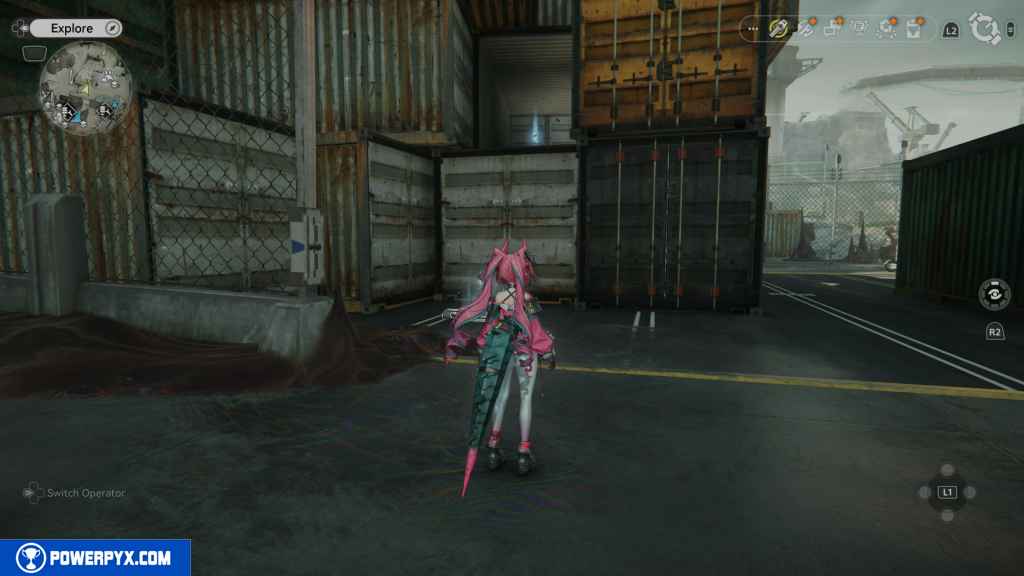
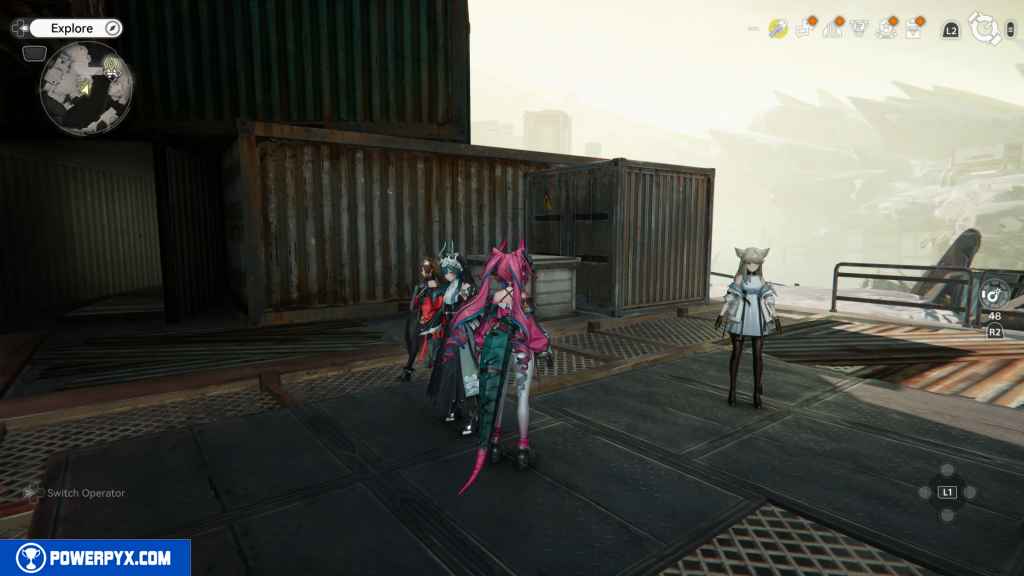
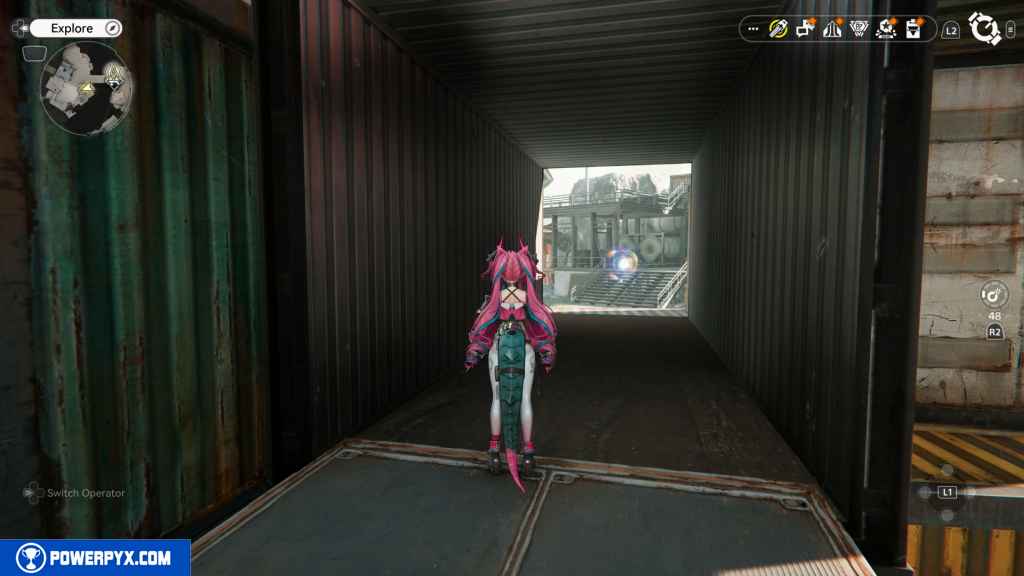
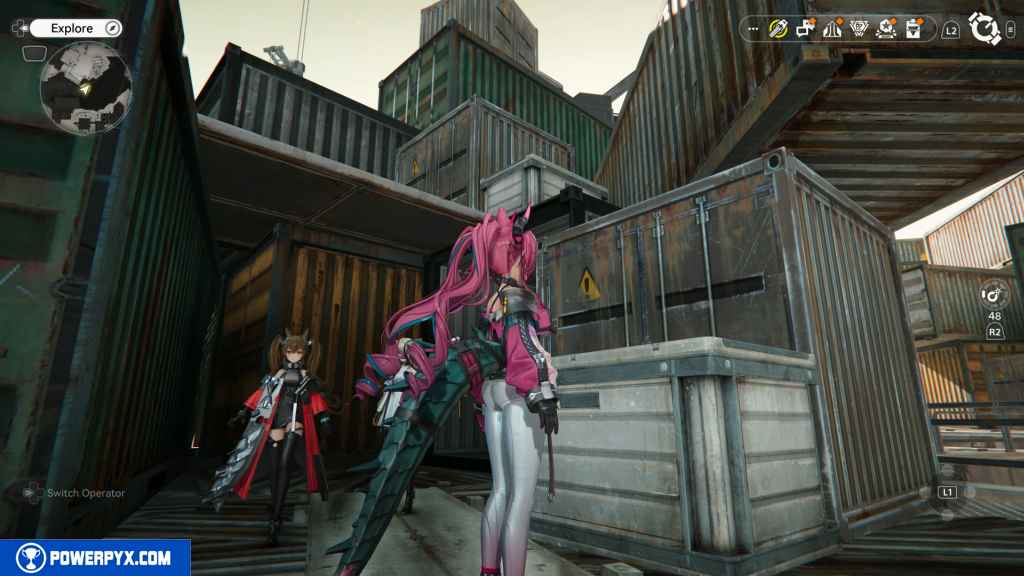
The second key is south of the Crate, inside a container, look east 2/3.
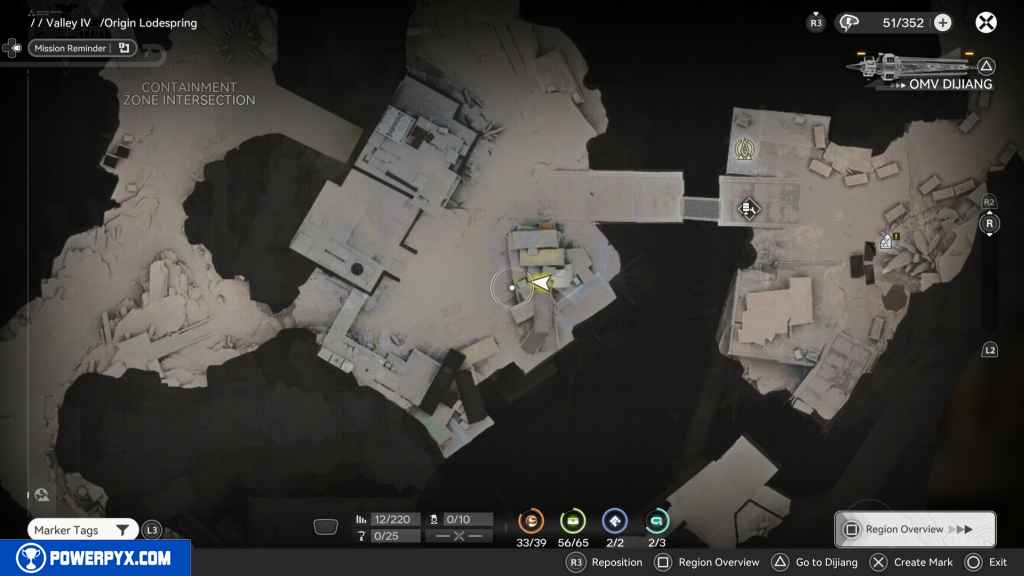
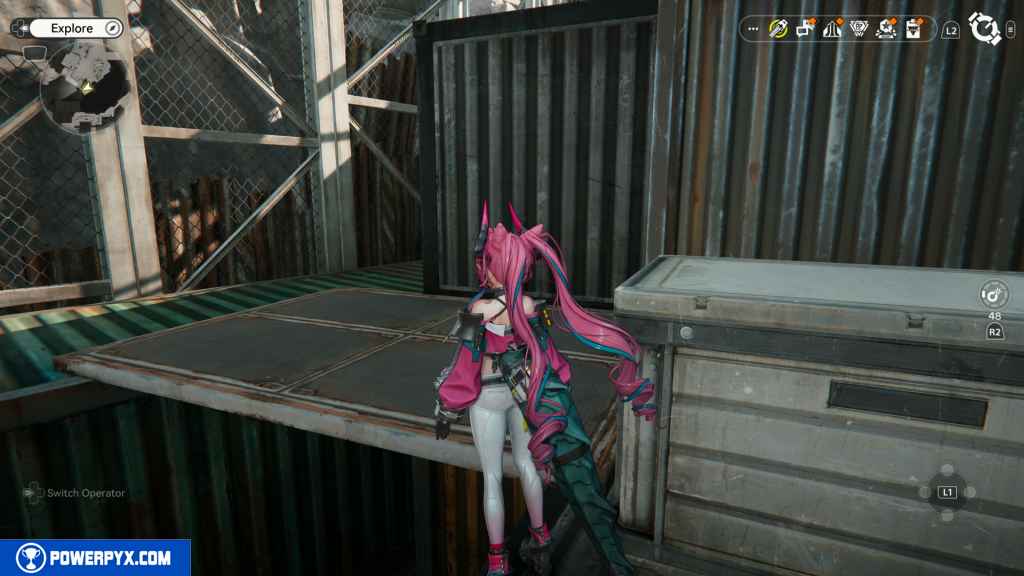
The third key is south of the container. You should see it behind a fence. Run around the fence from the south, and you should easily be able to grab it.

You can now grab the Crate.
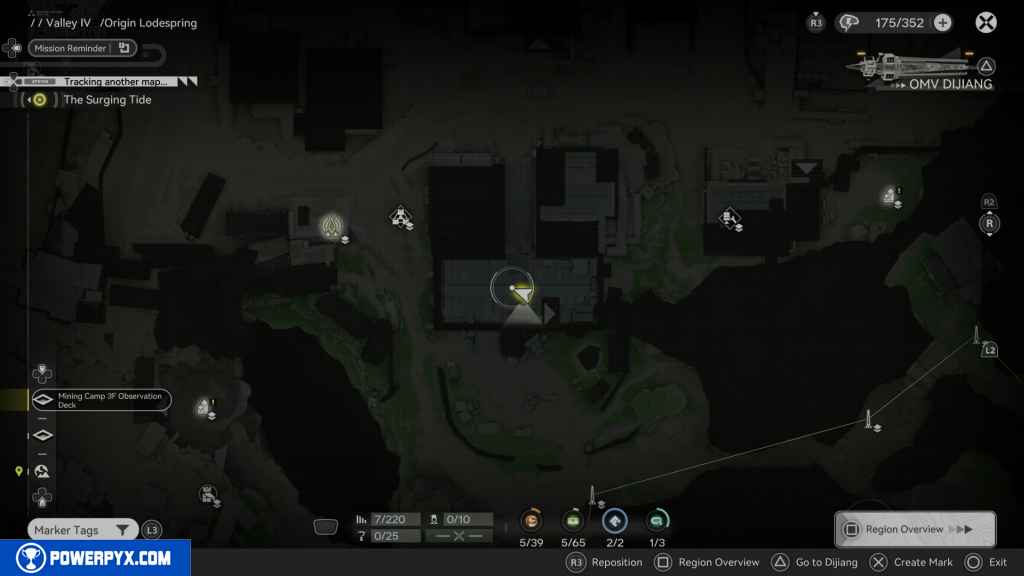
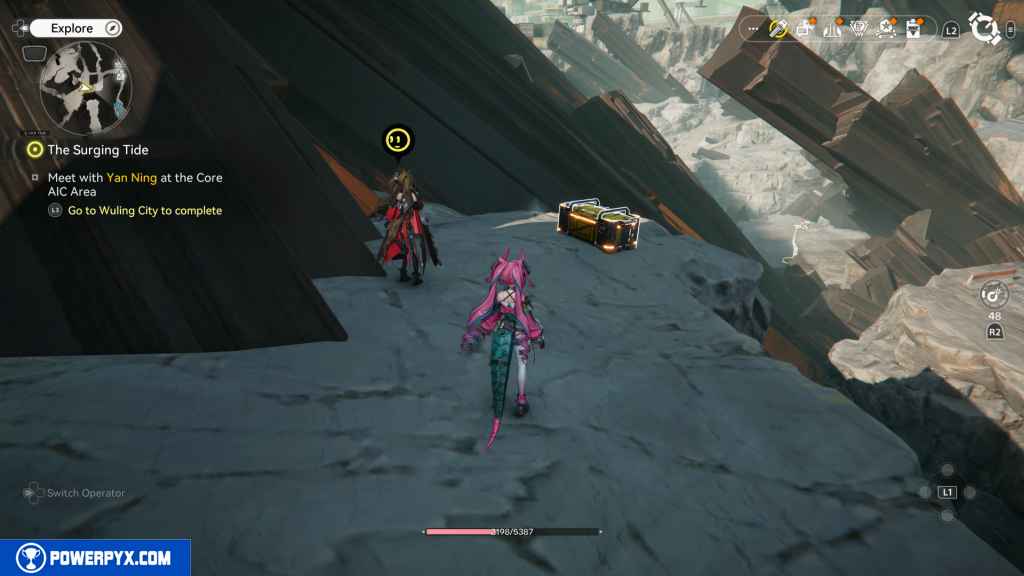
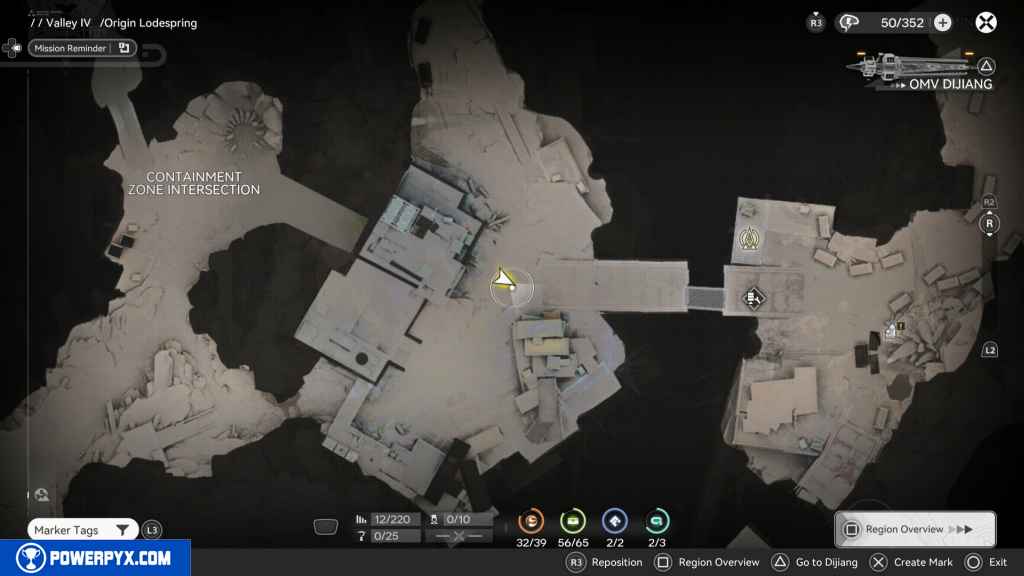
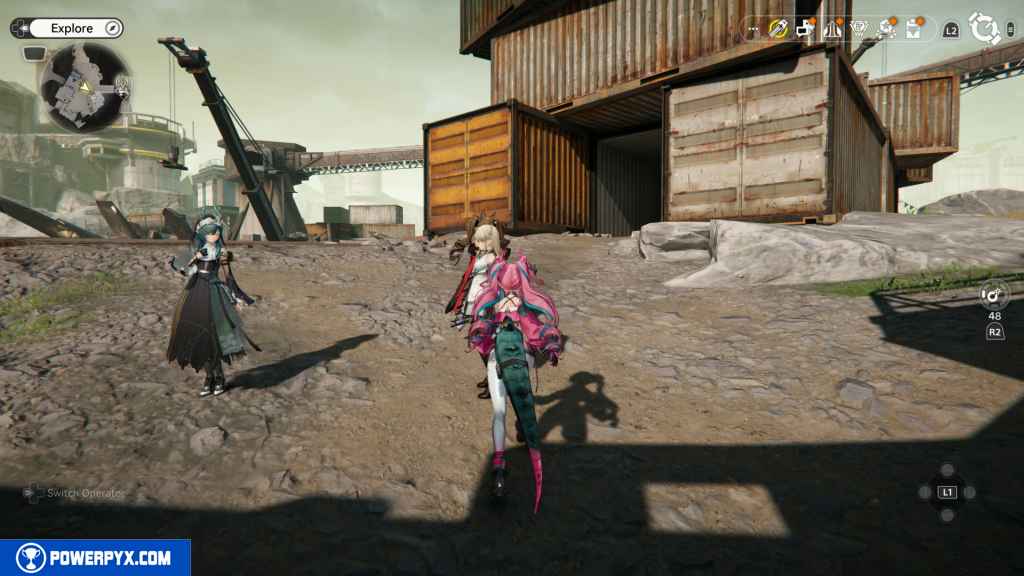
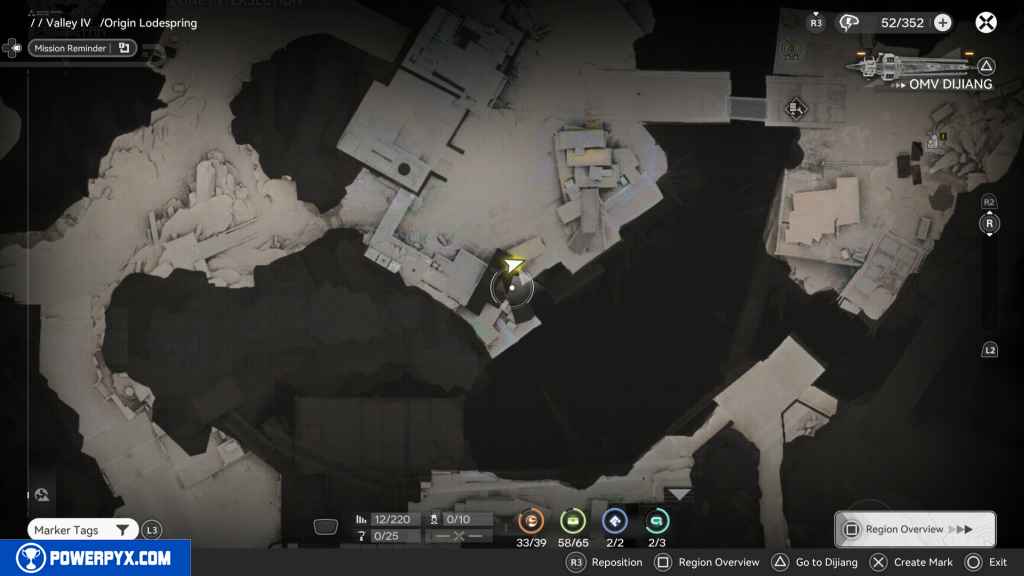
51 – Memo: Extremely Emotional (Investigation Document)
Head west from the Crate, and you should see an Owl Recycling station. There should be some stairs going up west of the station. At the top, you should see the document on the stairs to the north. Pick it up to complete the Nightmares from the Past investigation and acquire 200 Oroberyl.
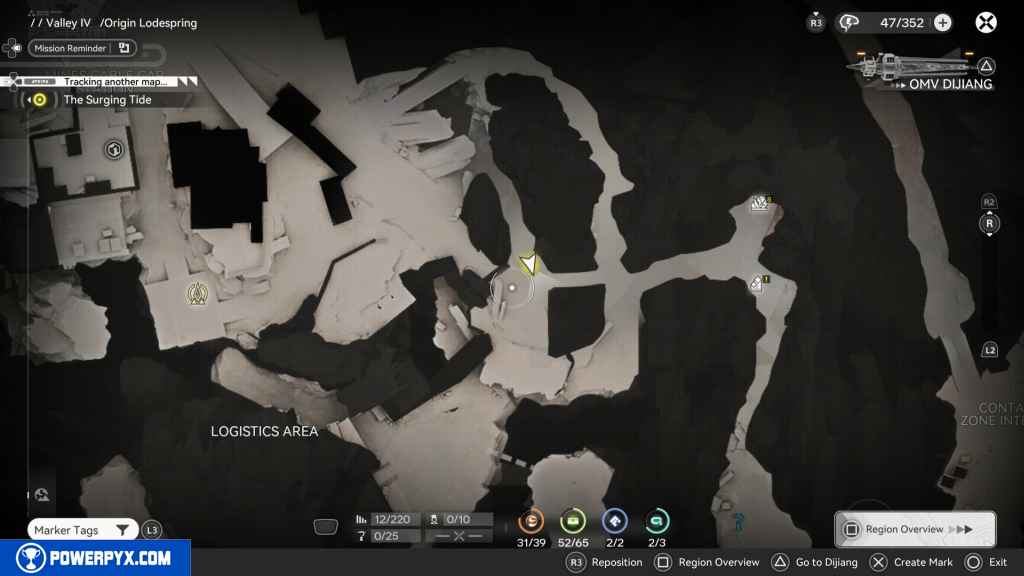
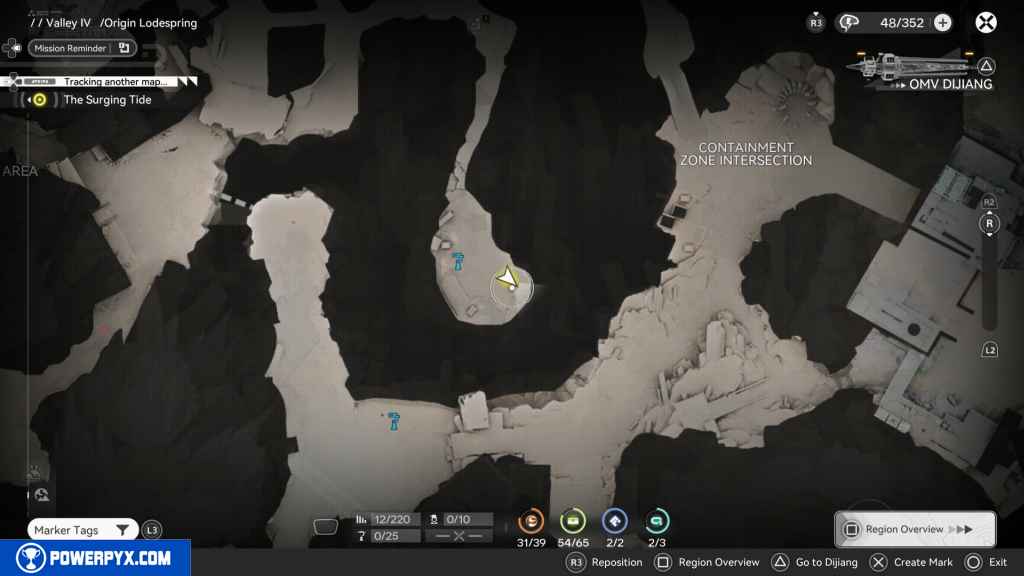
52 – Gathering Point 7
From the Document head south, and you should see the Gathering Point on your right next to a large column.
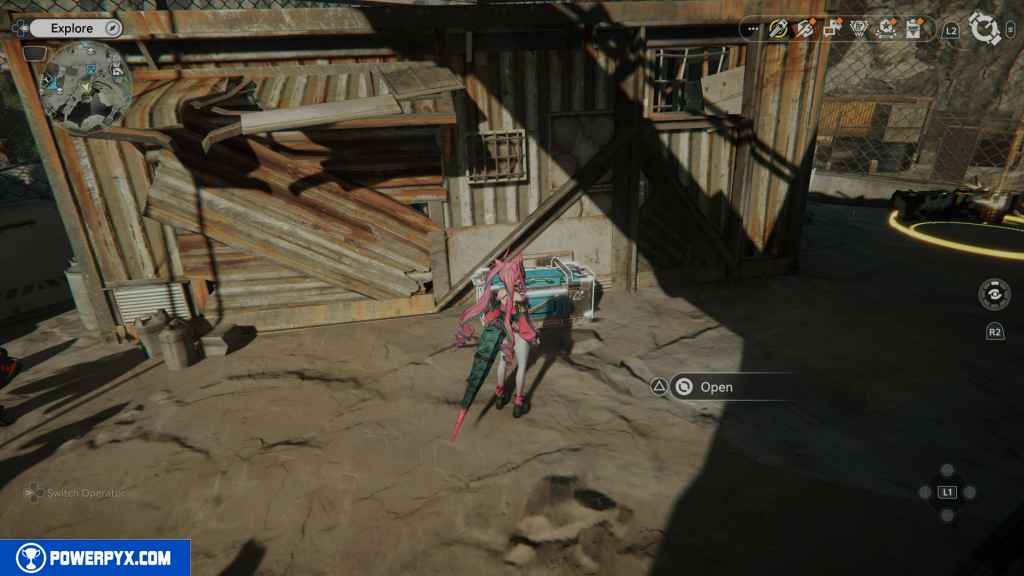
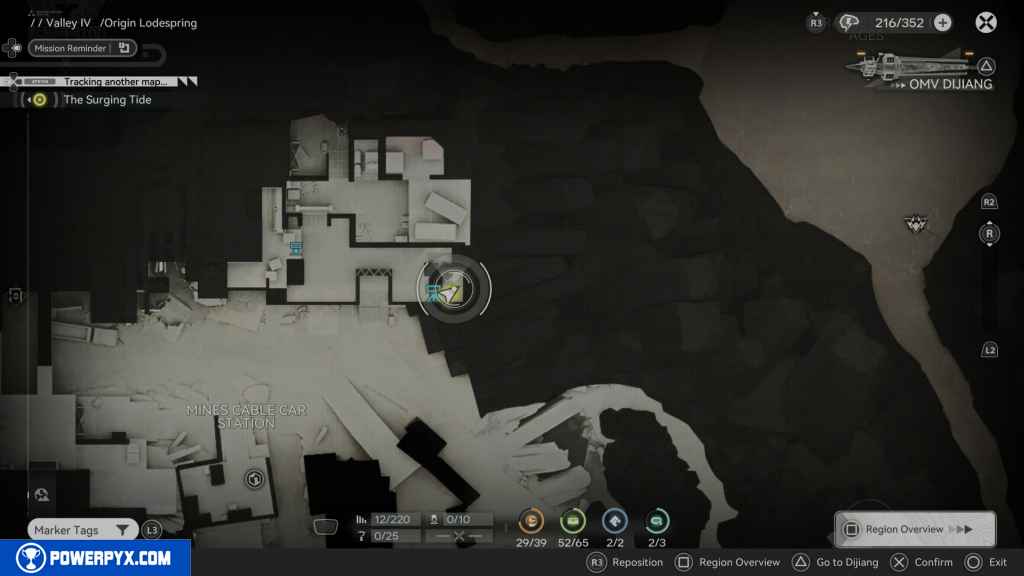
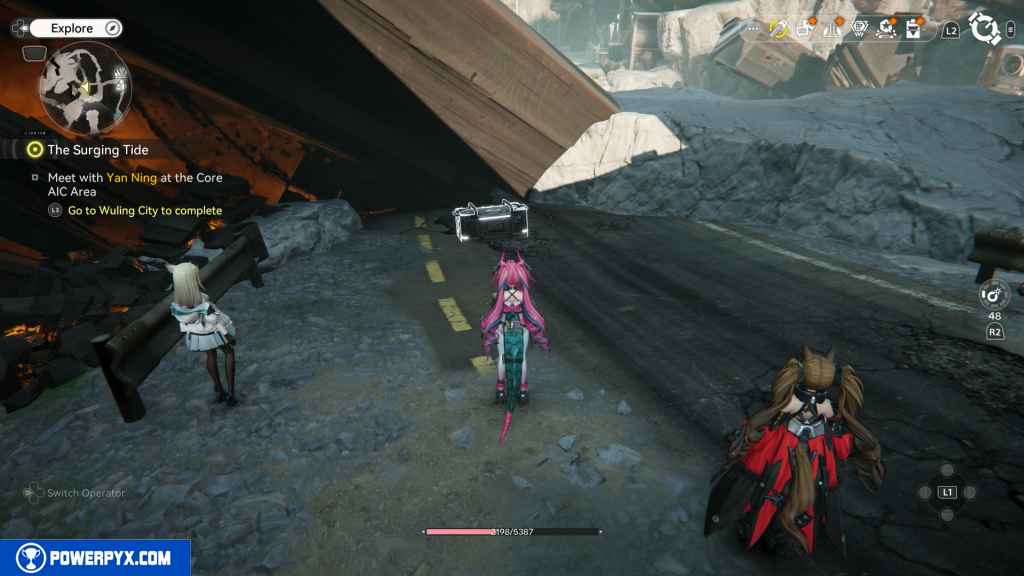
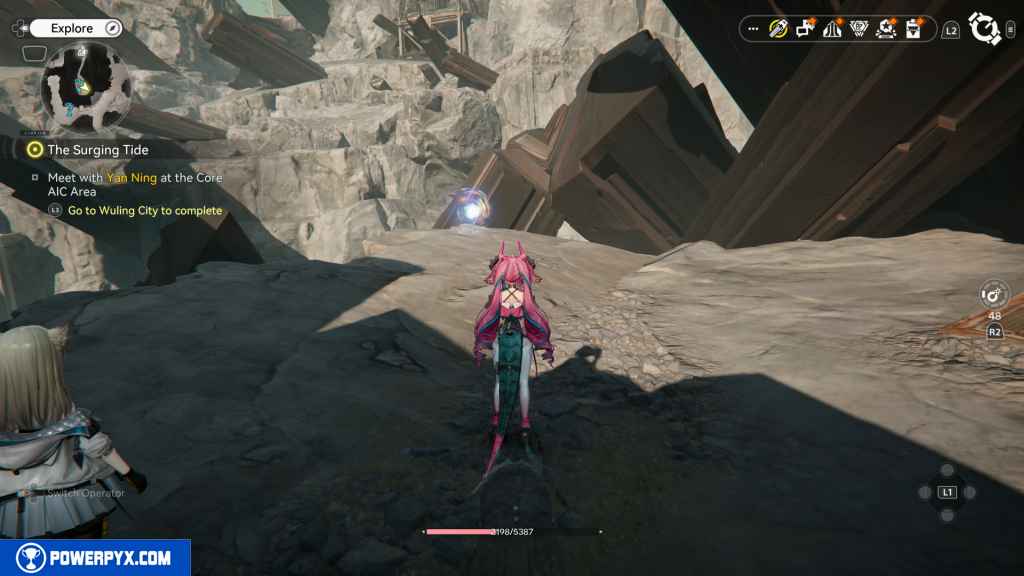
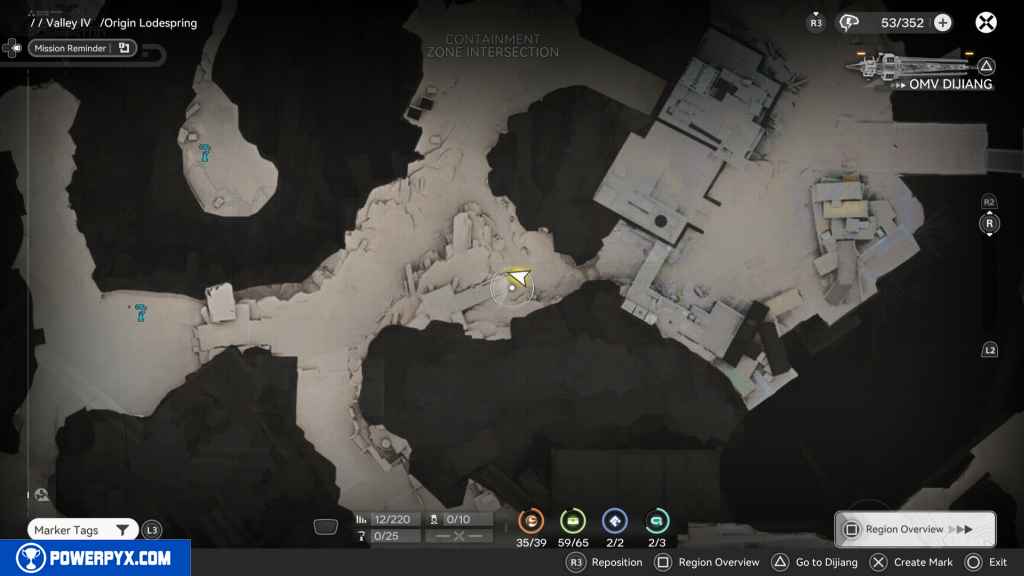
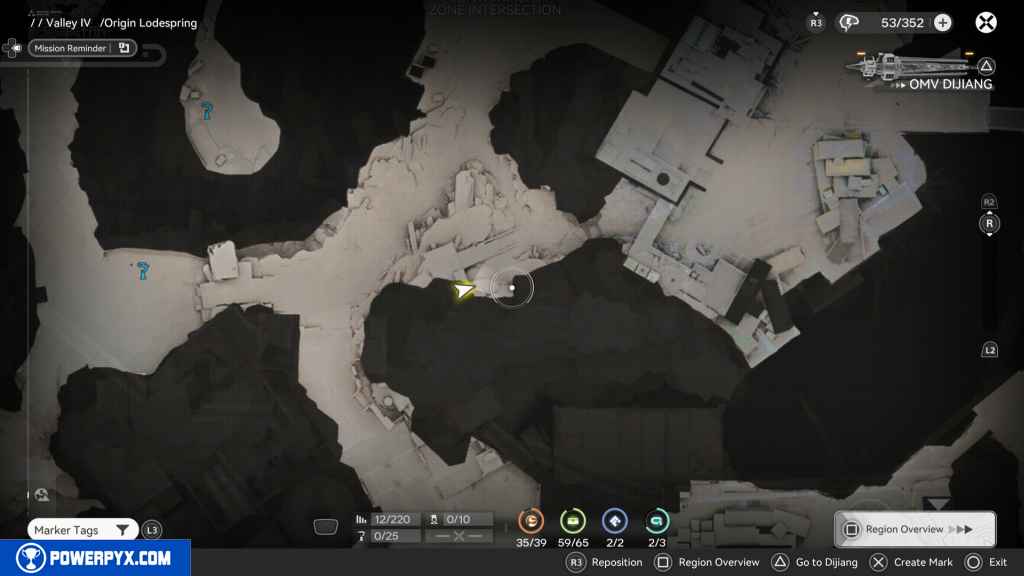
53 – Crate 25
To the east of the Gathering Point, you should see some enemies. Defeat them, and you’ll see they were guarding a crate.

54 – Gathering Point 8
From the Crate, head south, and you should see some stairs going up. Take them, and you should find the next Gathering Point under the next set of stairs on your right.
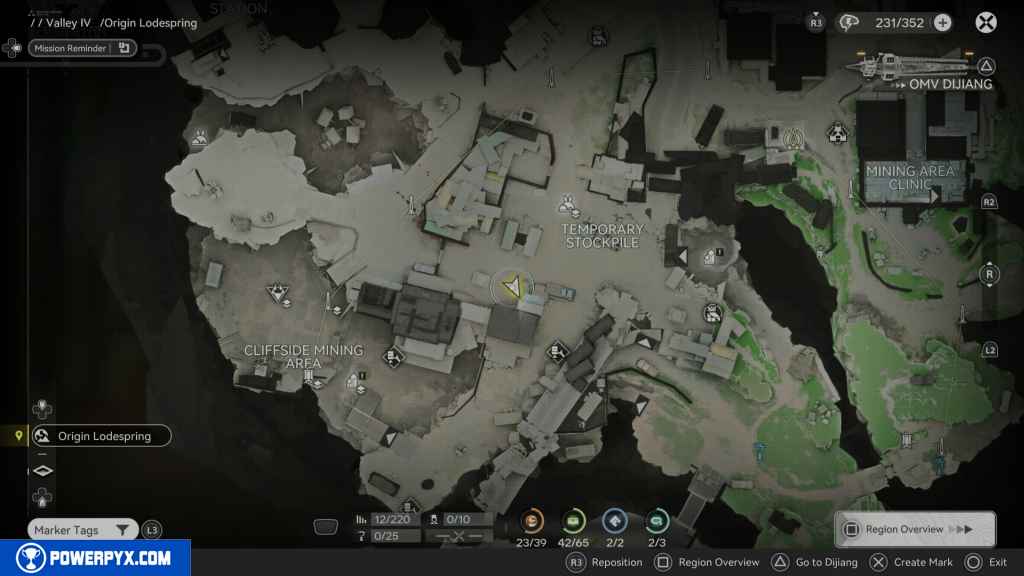
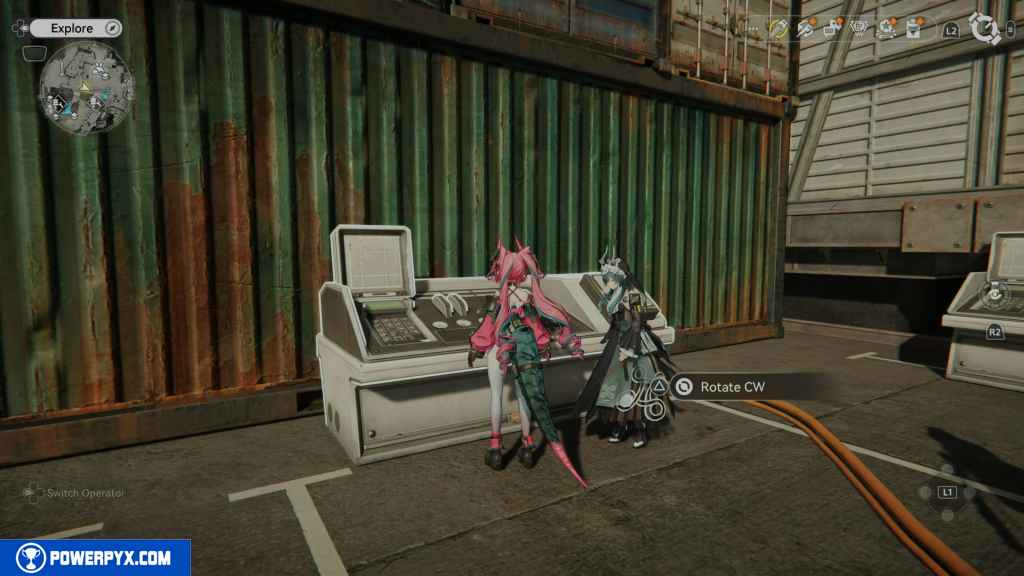
55 – Gathering Point 9
Go up the stairs to the top, and on the right side of the control panel at the top is the Gathering Point.
56 – Aurylen 13
Go back downstairs, and you should see a container to the north. Go through the container, and on the other side, you should see the Aurylen.
57 – Crate 26
From the Aurylen turn around, and you should see some box crates to jump up on the container. Do so and head up to find the next Crate.
58 – Gathering Point 10
Go back out of the area to the one you first entered, then go up the stairs. Immediately to your left, by a beam column, is the next Gathering Point.
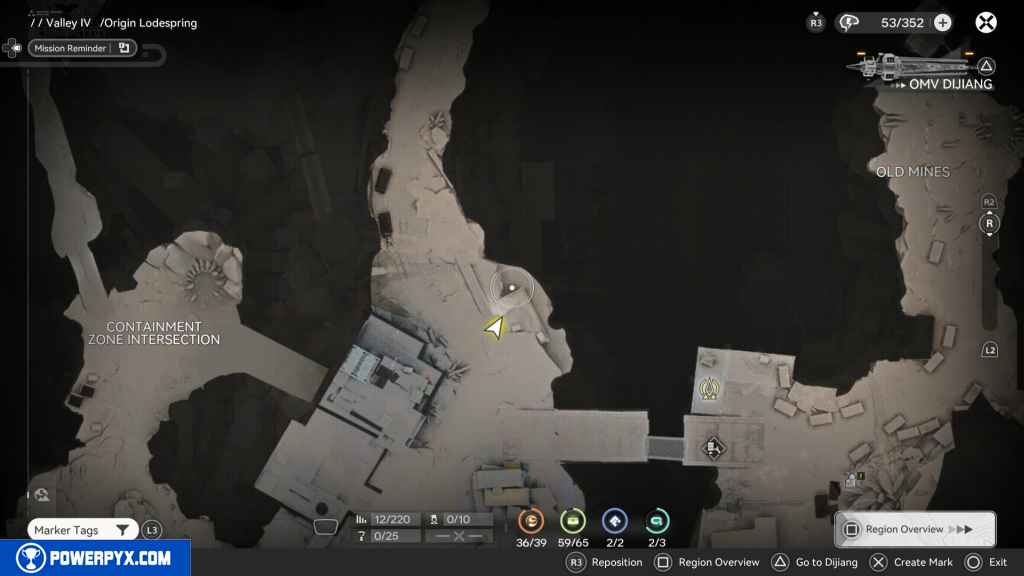
59 – Crate 27
You should see a large truck to your south. On the bed of that truck is the next Crate.
60 – Crate 28
Look south from the truck, and you should see an explosive box inside a container. Blow it up, and a Landbreaker will appear that you must defeat.

When you defeat the Landbreaker, blow up the next explosive box in the same container, and behind it will be the Crate.
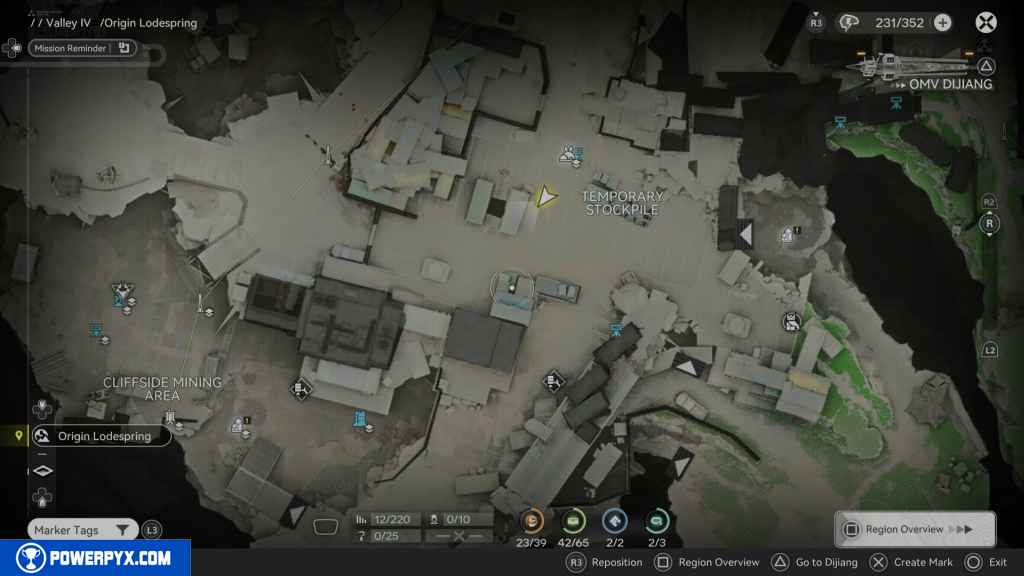
61 – Gathering Point 11
To the west of the container you got the Crate from is another control panel. On top of the control panel is the Gathering Point.
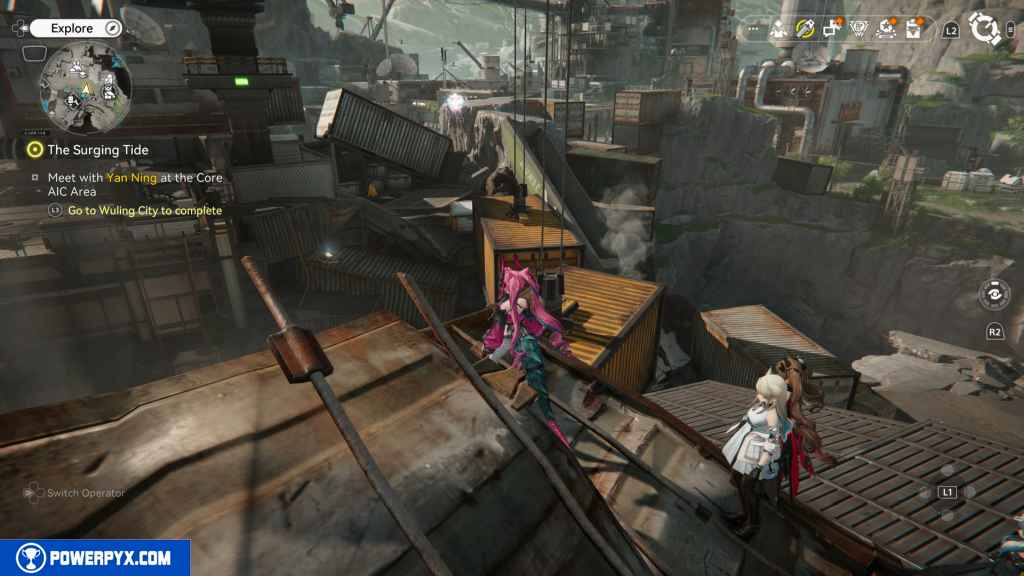
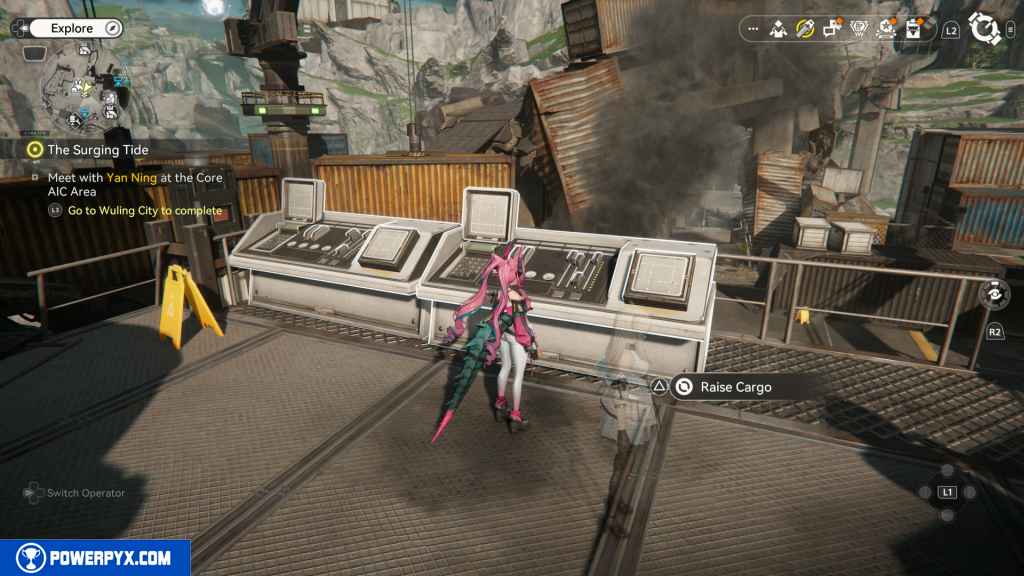
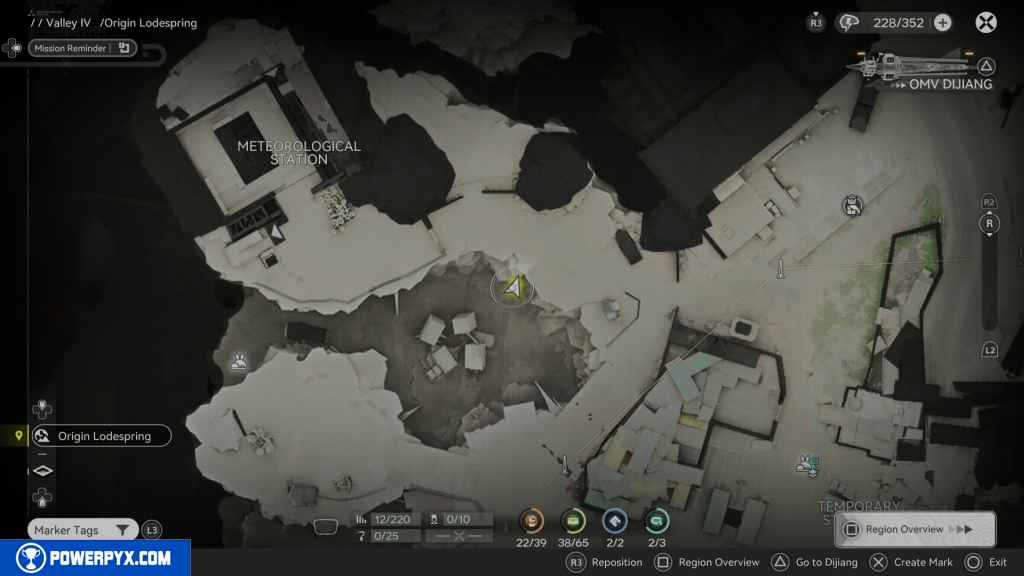
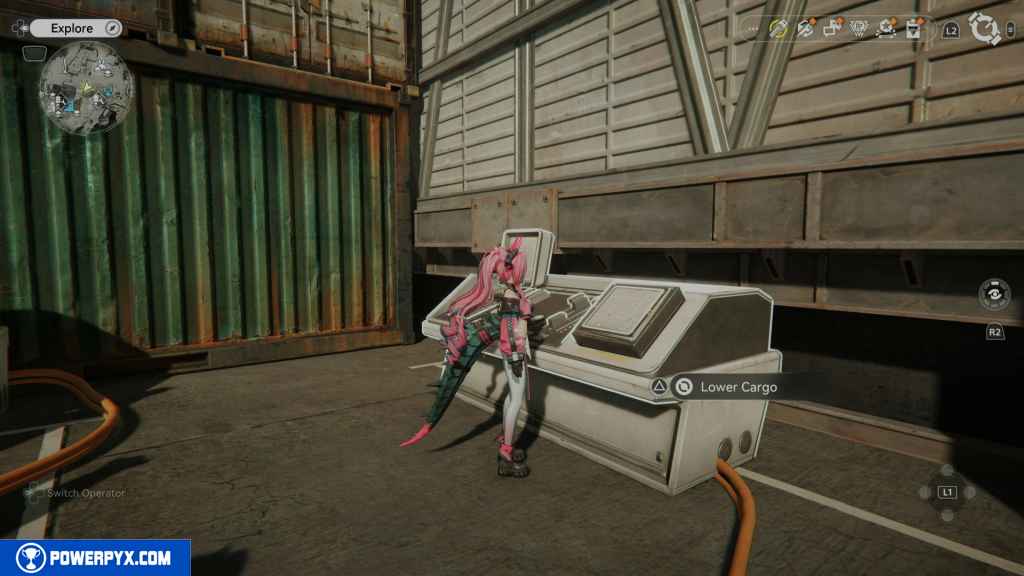
62 – Aurylen 14
Repair the control panel to your south from the last Gathering Point. Once repaired, activate it to raise the container to your north.
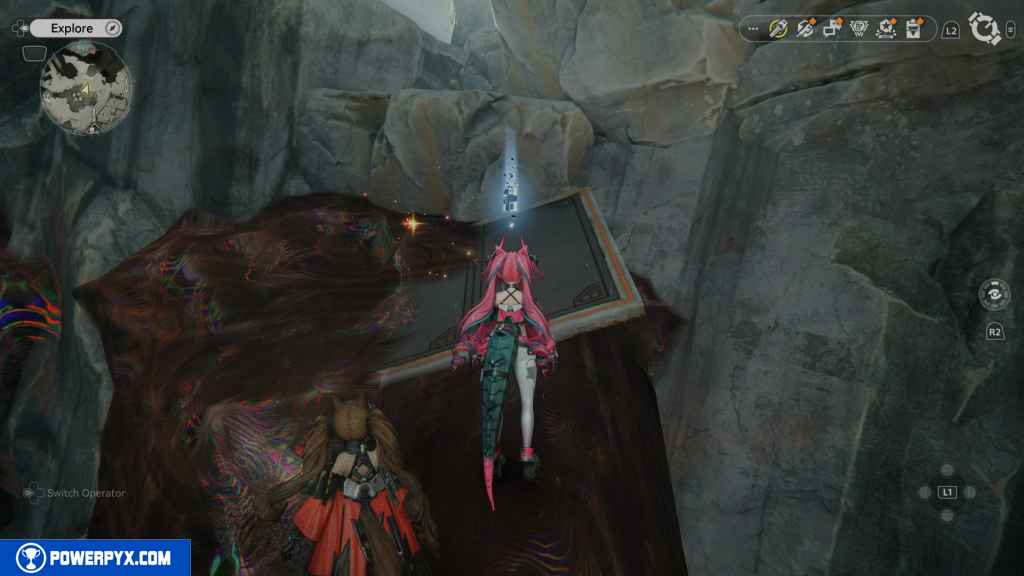
Under the container is the next Aurylen with a hole in the ground, grab it, and fall.

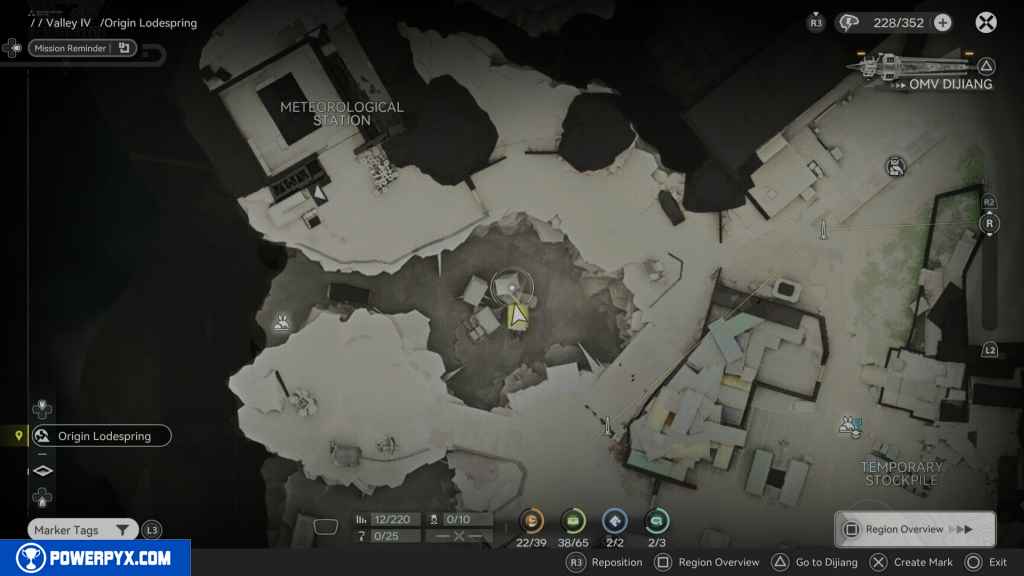
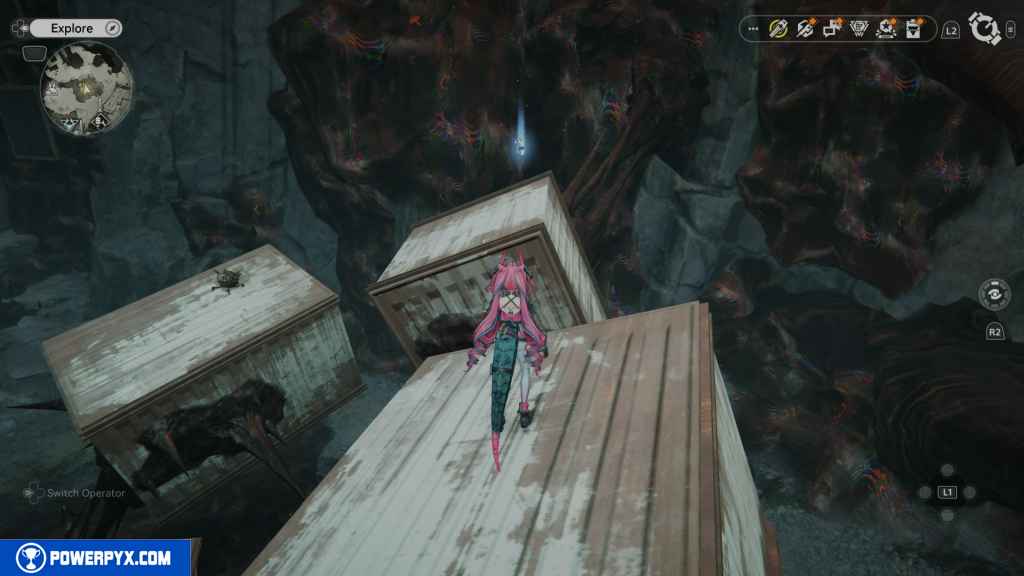
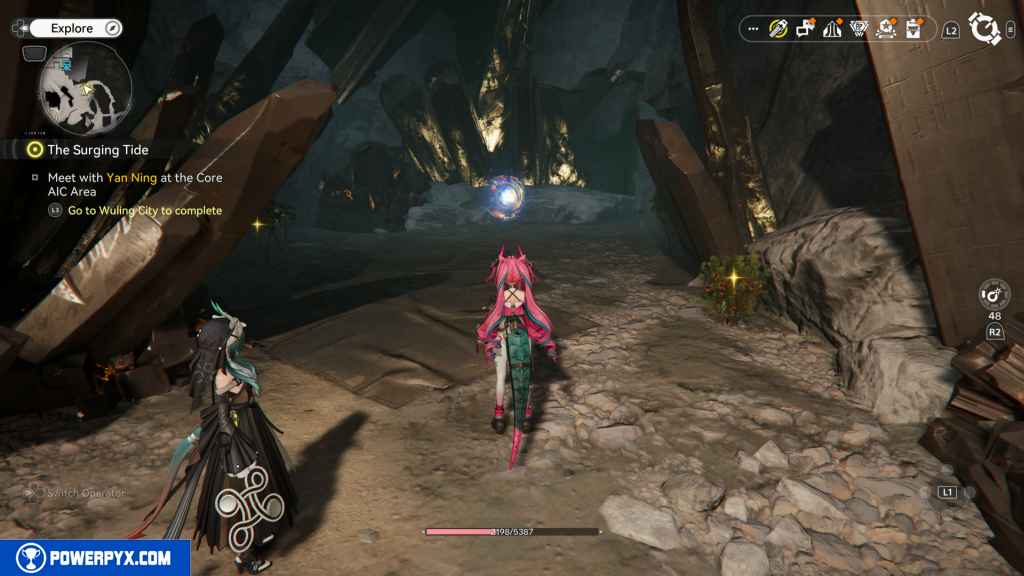
63 – Crate 29
At the bottom is a cave system. Go west and then turn right, where you should see three orange cones. In the corner is the next Crate.
64 – Gathering Point 12
From the last Crate, head east and destroy Blightlight blocking your path. Continue east past the mineral farming area and go up the hill to a campsite. Turn left, and you should see the Gathering Point.
65 – SOS Repair Bot 5
Right next to the Gathering Point is the SOS Repair Bot.
66 – Gathering Point 13
Right of the SOS Repair Bot is the next Gathering Point.
67 – Gathering Point 14
Right of the last Gathering Point is the next one between two large boxes covered by a green tarp.
68 – Gathering Point 15
South of the last Gathering Point, you should drop down a small hill. You should see a bridge. From the bridge, look north, and you should see a destructible wall. Blow it up with a bomb to reveal the Gathering Point.
69 – Gathering Point 16
Continue south to the building on the hilltop. As you go up the hill, you should see the Gathering Point next to some boxes.
70 – Gathering Point 17
Just on the other side of the tan box crate is the next Gathering Point.
71 – Crate 30
Look north to the building, and you should see the Crate.
72 – Aurylen 15
Go west and approach the gate; you should see the Aurylen floating over the control panel. When you approach it, it will float away. Follow it north up the stairs, and it should stop over a small panel.
73 – Repair Logic 1
To get the repair logic, you need to have either started or finished the Side Mission – Elevated Rescue to repair the bridge and reach it.

74 – Crate 31
Past the Repair Logic, look to the left of the truck, and you should see the Crate on a desk.
75 – Gathering Point 18
Continue up the path until you reach the point where you turn right and go west. Instead, turn around, and you should see a rope leading up to the container. Take that rope, and it should begin the Side Mission – A Brewing Storm: Origin Lodespring.
Fall down the containers and look to your right, and you should see the Gathering Point behind a cylindrical object.
76 – Gathering Point 19
West of the last Gathering Point is the next one, sitting next to some wooden boxes.
77 – SOS Repair Bot 6
Turn north from the Gathering Point, and you should see the next SOS Repair Bot.
78 – Aurylen 16
Go north from the Repair Bot, and you should see the Aurylen in between the containers with a jump pad underneath it.
79 – Crate 32
Head east and up the stairs of the building. Run around to the east, and you should find a green tarped box. Jump on it and onto the roof to find the Crate.
80 – Crate 33
From the roof, look east, and you should see the next Crate. Jump off the roof and then climb the rocks to reach the Crate.
81 – Crate 34
Return to the area where you used the rope to get onto the containers. This time, go north and jump on the boxes to the floating containers. His area is part of the Side Mission – Elevated Rescue. Make your way up until you reach the end. There should be a jump pad that takes you into a container with a crate.
82 – Crate 35
Drop down from the container and go north through the container beneath. Head to the end, and you should see the next Crate.
83 – Aurylen 17
From the Crate, look east, and you should see Blightlight covering up some containers. Use your bomb to destroy the blight core and disperse the Blight.
Head down the east side using the ropes until you reach the containers. Jump up on the jump pad and wait for the moving Aurylen to come around to you.
84 – Crate 36
Jump up the container, and on your left should be the next Crate.
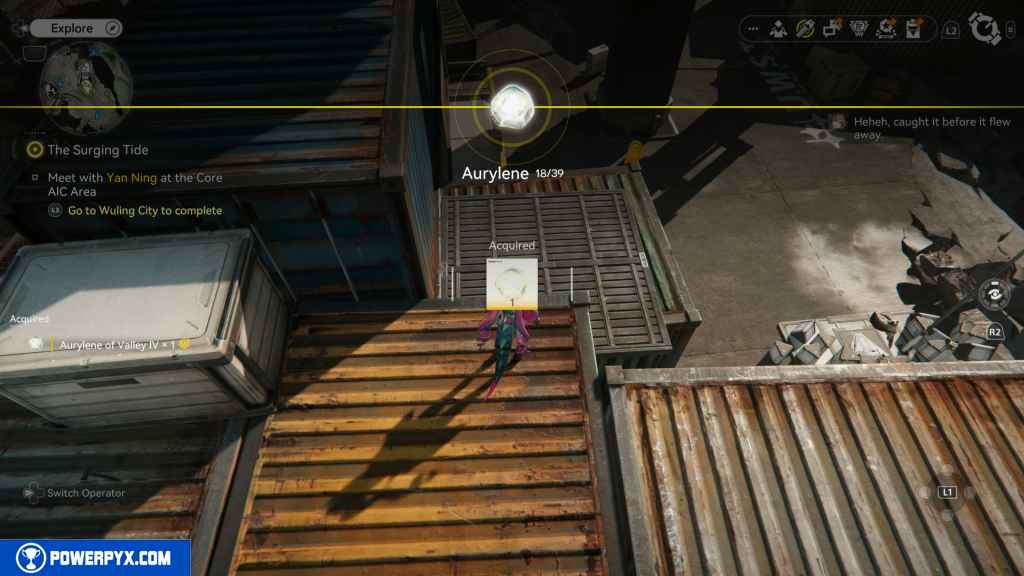
85 – Aurylen 18
You should see this Aurylen on a container to the west. Head over to it, and it will fly back up the area you used the ropes to get down from. Follow it. If the large orange container isn’t elevated, you need to head back around to the control panel to the north.

Jump onto the two containers to reach the other side, then run around to the control panels to raise them. Head back up the two ropes and onto the raised container, and make a running jump to reach it.
86 – Gathering Point 20
Head back south, go down the stairs between the containers, and at the first rope, turn left. You should see the Gathering Point.
87 – Aurylen 19
Head down the stairs and go west down the path into a cave surrounded by Blight. On your left should be a container you can walk on. Fall into the container, then approach the one in front of you. Inside it is the Aurylen.
88 – Gathering Point 21
Go back to the container you fell from, and inside that one is the Gathering Point.

89 – Gathering Point 22
Continue west to the large opening. The next Gathering Point should be on your left.
90 – Crate 37
The enemies are protecting the next Crate to your west. Defeat them and grab the Crate.
91 – Gathering Point 23
To get the next set of collectables, you need to build some Reality Points to provide power to the Electric Nexus to the southwest. Once connected, use the control panel to drop the laser barrier. The Gathering Point is on your right.
92 – Gathering Point 24
The next Gathering Point is right next to the last one you picked up.
93 – Crate 38
South of the last Gathering Point in the same area.

94 – Aurylen 20
The next Aurylen is to the west. Head west, look south past the Blight, and you should see the Aurylen between some containers.
95 – Gathering Point 25
Head west again, and you should see the Gathering Point by some barrels.
96 – Aurylen 21
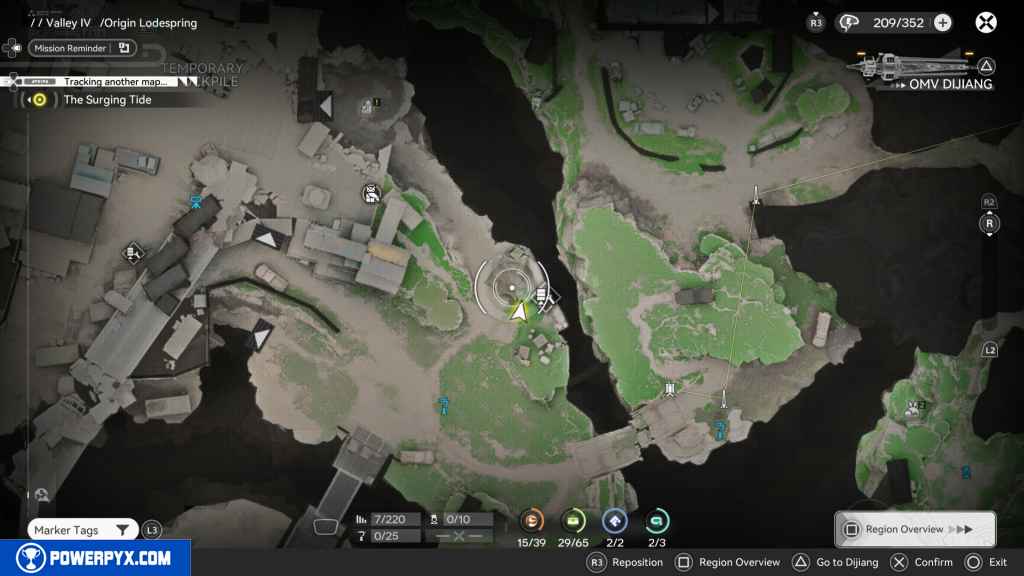
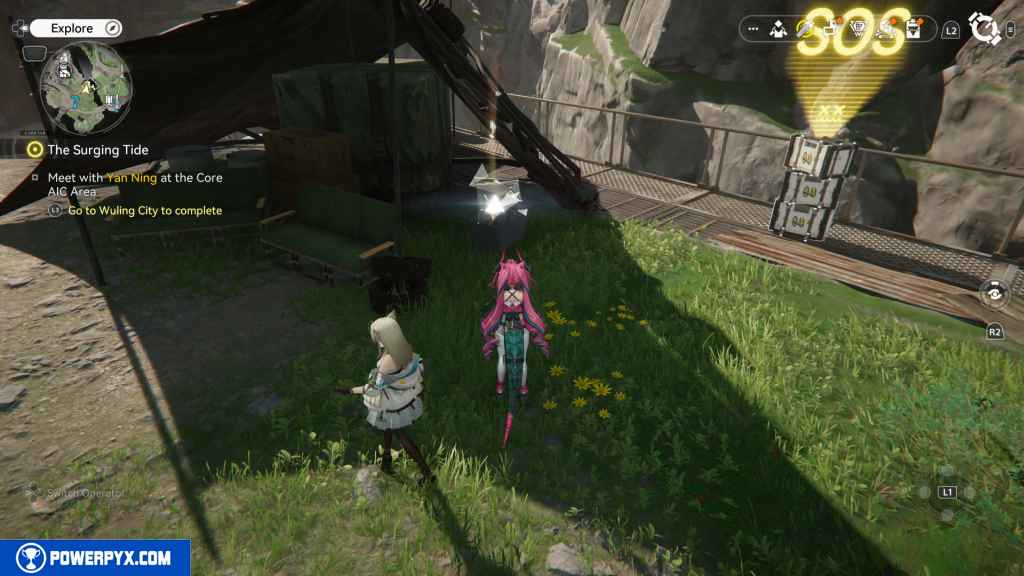
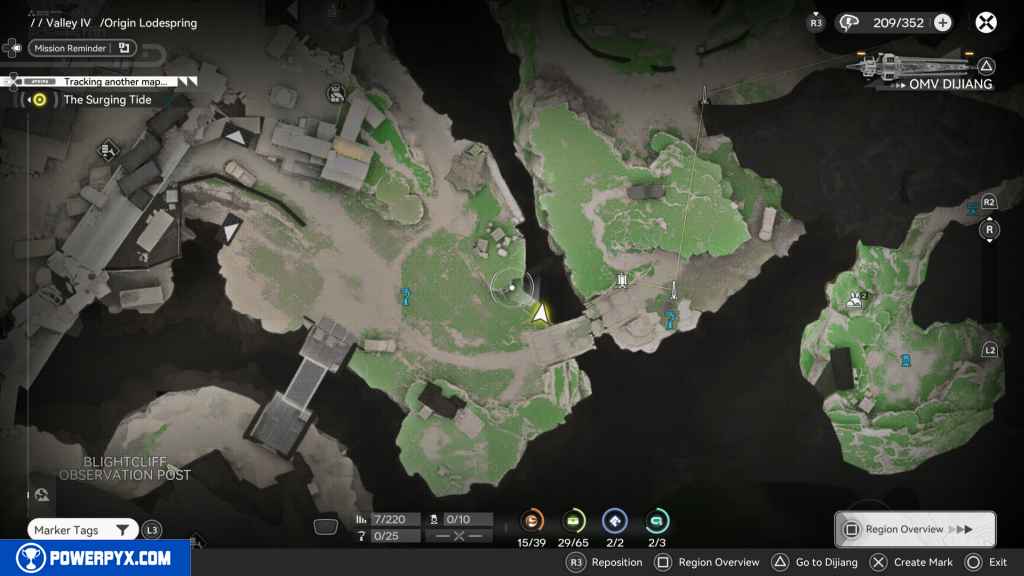
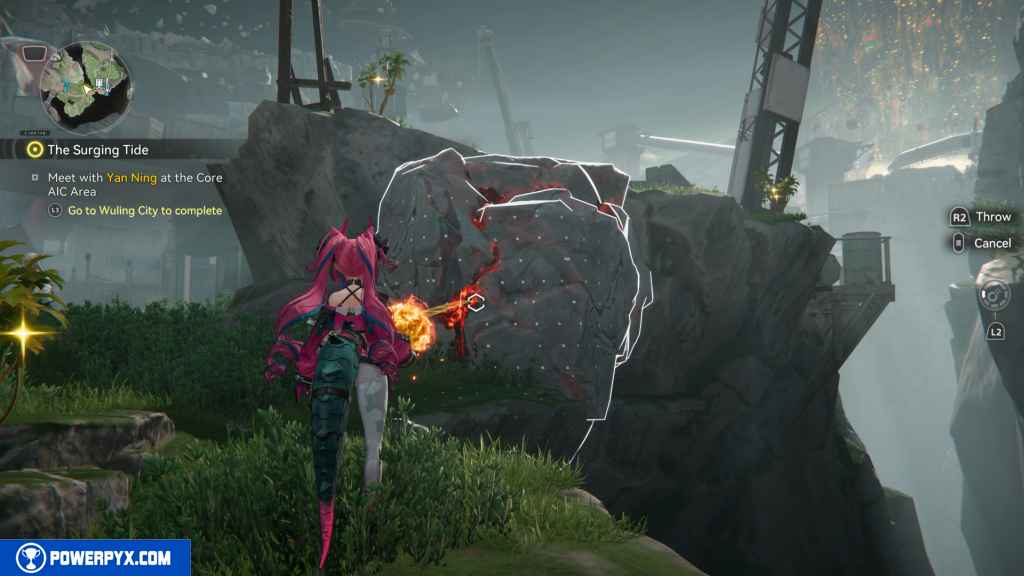
Head north past the open gate, and you should come to a large area with Blightlight and crates. Go west from here, and you will see a destructible wall. Below it, plant a bomb and see a grassy area with some flowers collect. In this area is a moving Aurylen.

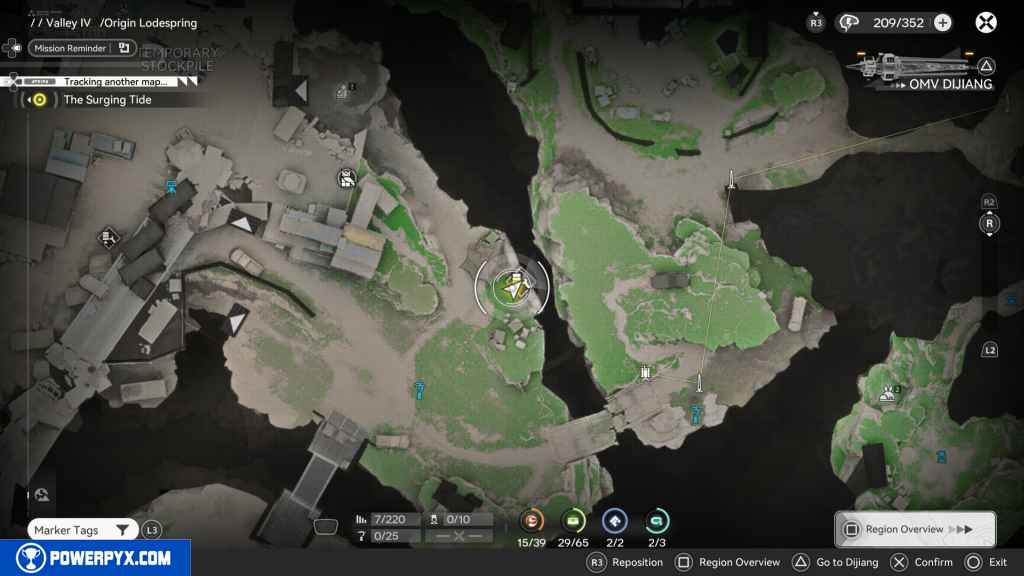
97 – Gathering Point 26
Go east to the area with all the boxes and Blight. On top of the hood of a vehicle to the north is the Gathering Point.
98 – Aurylen 22
The Aurylen is west of the Gathering Point on the ground floor.

99 – Crate 39
Head east from the Aurylen, and you should see a Rope. Take it up, and you will find a locked crate. You need three blue keys to unlock the Crate.
The first key is located to the north, which you can only reach by falling down the west side of the Crate and running up the blight bridge to reach 1/3.
The second key is on one of the containers in the center. From this blight bridge, jump onto the containers to grab ke 2/3.
The last key is on the ground floor. Go west, and you should see it on the left before reaching the small building 3/3.
Head back up to the Crate to grab the rewards.
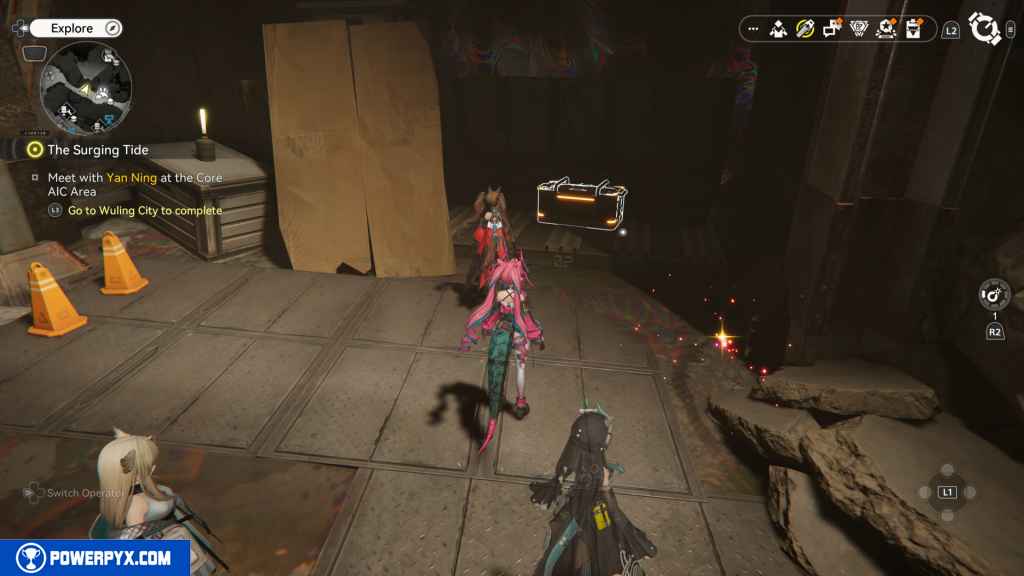
100 – Crate 40
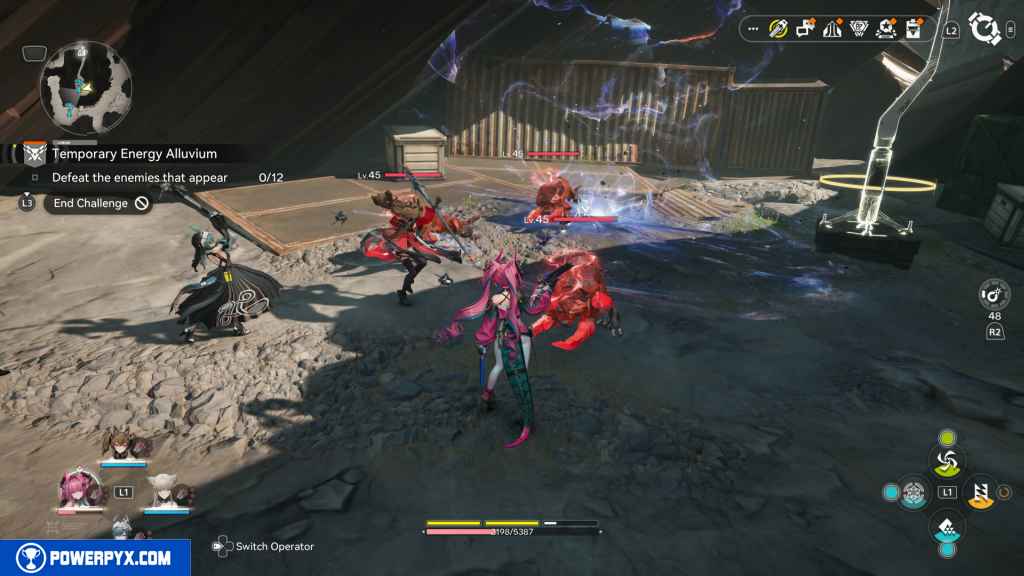
Go west from the locked Crate, and you should reach an area with an Energy Alluvium. Defeat the enemies that spawn from it to unlock the Crate.
101 – Crate 41
Head back to where the locked Crate was, and this time go north along the path to your right, where the next Crate is.
102 – Crate 42
To get the next set of collectables, you need to complete the Side Mission – Emergency Rescue. When you finish the quest, you will be in the open area where you faced off against the Landbreakers. South of you, against the fence, is the Crate.
103 – Aurylen 23
Look back at the facility, then go up the stairs to the west. At the top of the stairs is the Aurylen.
104 – Gathering Point 27
Return to the area that had the locked Crate. From there, go south, and you should see a small garage. Inside it is the Gathering Point.
105 – Gathering Point 28
Inside the same garage is another Gathering Point.
106 – SOS Repair Bot 7
Go east, and you should see some stairs on your right. Go up the stairs to find the SOS Repair Bot.
107 – Crate 43
Go east from the Repair Bot down the stairs, and you should see the Crate on your right. This Crate is locked and requires three blue keys.
The first key you already passed was right in front of the Repair Box 1/3.
The second key can be found in a container to the north. You should see a jump pad that, once activated, leads to key 2/3.
The last key requires a little more work to get. First, go to the two control panels to the east. Use the one next to the green container to move to the orange container. Then use the other control panel by the white containers to lower it.

Now run around the containers to the north, and you should see a rope hanging down from the white containers. Use it to get up. Once you run across the containers and grab the blue key 3/3.
Return to the Crate and grab its contents.
108 – SOS Repair Bot 8
Continue east until you reach an upside-down car on fire. Turn right and go south from there, and you should see the SOS Repair Bot ahead of you.
109 – Crate 44
Turn around and go back up to the burning car. Go back east to where you used the ropes to descend from the freeway up top. Use the first rope to get up the container. Don’t use the second one; instead, look north of it, and below you should be some containers you can call down on. Do so, and you should find the Crate there.
110 – Gathering Point 29
Drop down to the west and go south; you should see the gathering point southeast against a container shack.
111 – Crate 45
Right next to the Gathering Point is the next Crate.

112 – Gathering Point 30
South again around the shack that had the Crate, you should see the next Gathering Point.


113 – Aurylen 24
Go around to the back of the shack, and you should see the Aurylen floating in the air. Approach it, and it will fly away. Wait for it to come close to the fence south of its starting location, and grab it when it approaches.
115 – Gathering Point 31
Go west from the shack, and you should see the Gathering Point on a box next to the large column.
116 – SOS Repair Bot 9
Go west from the Gathering Point, and you should see some wooden boxes and two boxes with a green tarp over them. Jump up those boxes to reach the next area. From there, continue west through the broken fence and up the container to the scaffolding.
From there, run to the SOS Repair Bot and fix it.

117 – Gathering Point 32
Return to the last large area you were at. Head south down the path to the building overlooking the cliff. The Gathering Point should be on the table.
118 – Gathering Point 33
The next Gathering Point is to the left of the last one.
119 – SOS Repair Bot 10
Left from the last Gathering Point is the Repair Box.

120 – Crate 46
Return to the TP point next to the Mining Area Clinic, then head north past the checkpoint and turn west. Go west until you fall into the next area past some bent containers. Turn around, and you should see the Crate in the southern container.
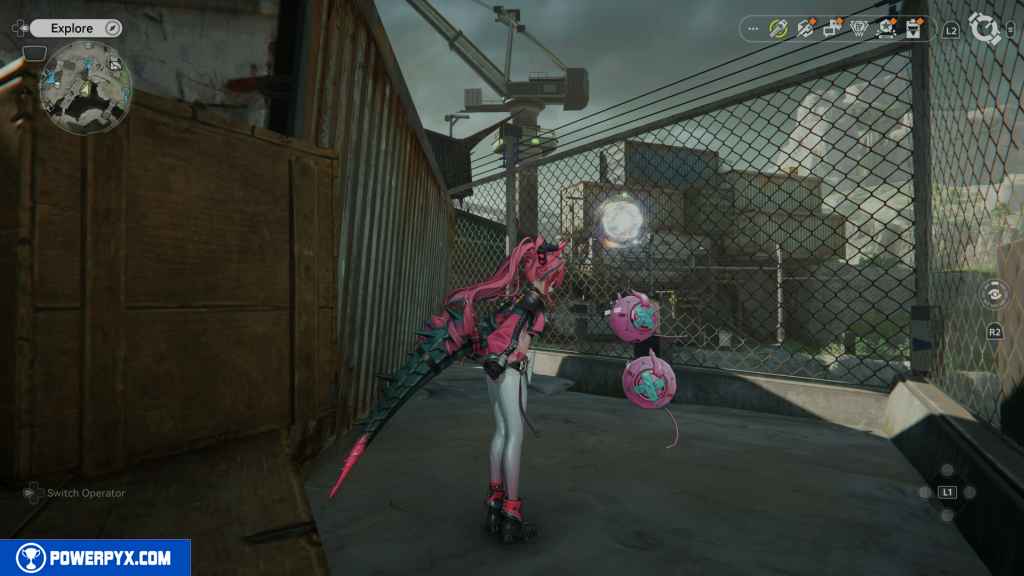
121 – Aurylen 25
Head west, and you should see the Aurylen floating in the air. Approach it, and it will move south to the gathering area. Pick it up when it stops.

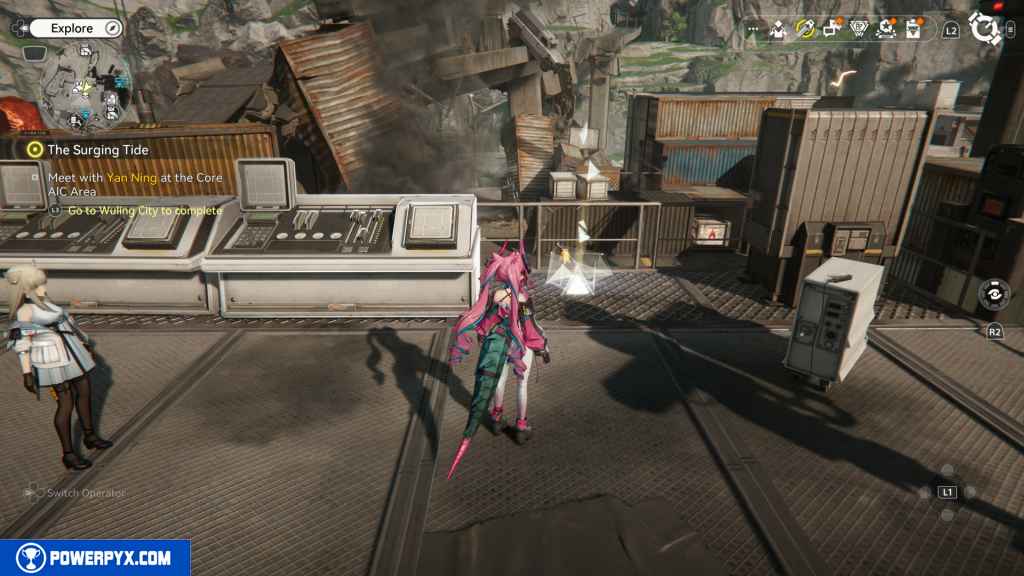
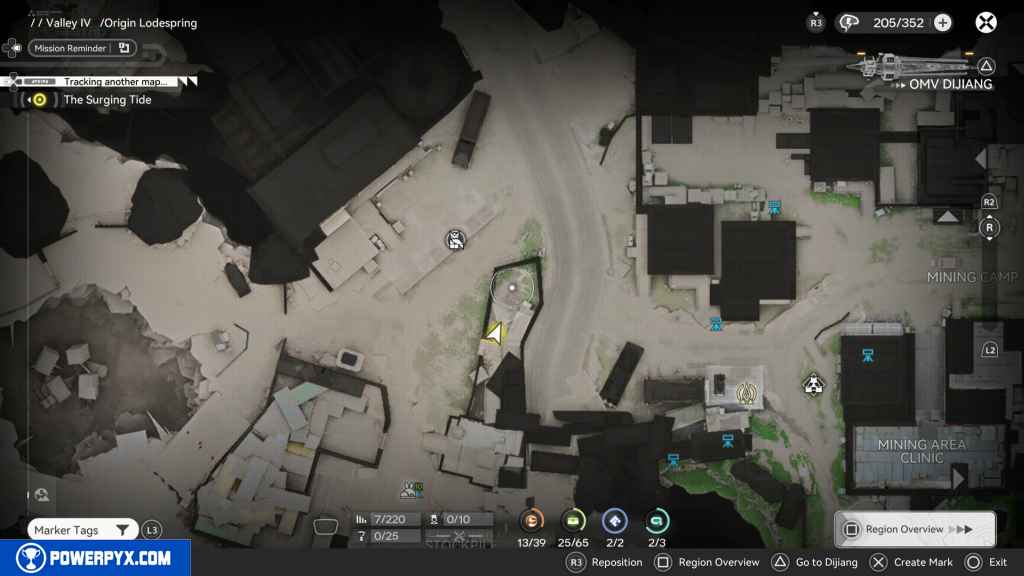
122 – Protocol Datalogger 2
In the area where you picked up the Aurylen is a Datalogger. Make sure to grab it.
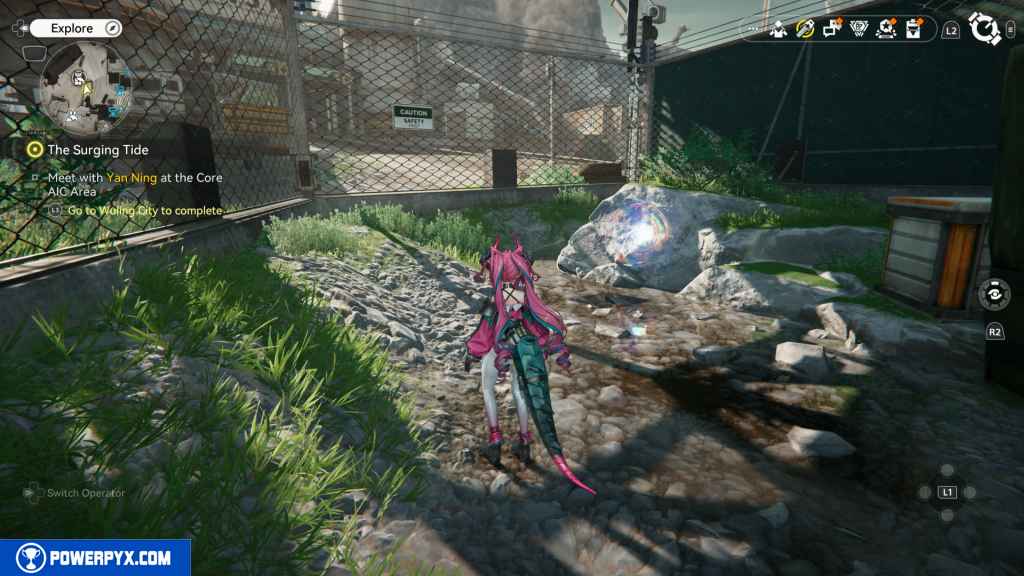
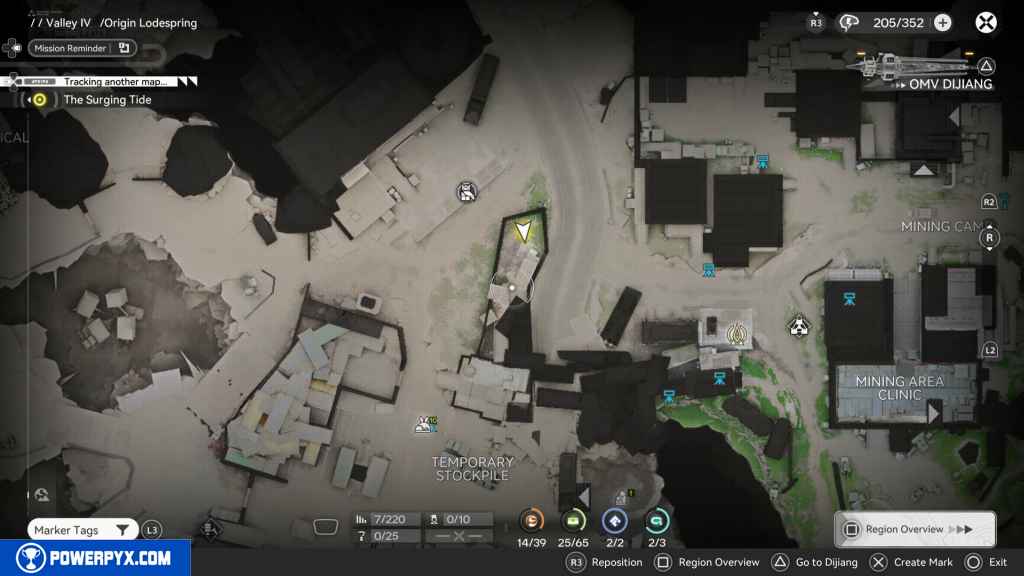
123 – Aurylen 26
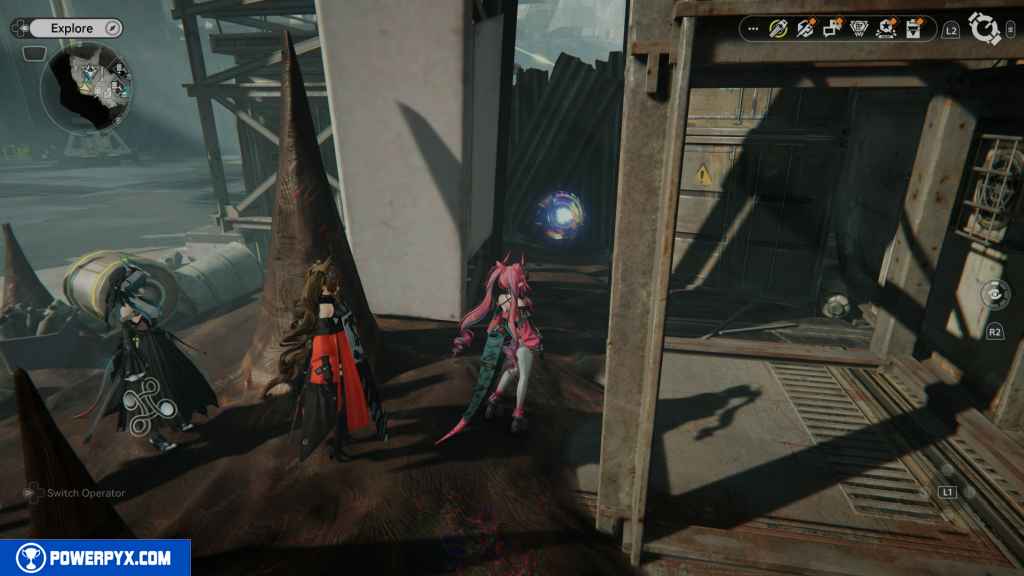
Go north until you reach a jump pad. Use it to reach the next area. From this area, head north, and you should pass some mushroom gathering and a mineral gathering area after blowing up some destructible walls using bombs.
Continue on this path, and you should reach some Blight. Destroy the Blight Core to clear it out and find an Aurylen on the other side.
124 – Crate 47
Return to the area you landed on using the jump pad. Go northwest, and you should reach a few more jump pads that eventually land you next to a TP Point. From there, go north to the Depot Node. Look to your left, and you should be able to go onto the platform with a bunch of containers. Between the two boxes covered in a green tarp is the Crate.

125 – Crate 48
Continue north, then turn west, and go up the platform south to the Depot Node. Look to the right, and you should see the next Crate.

126 – Aurylen 27
Head west from the Crate, and you should see the Aurylen over the guardrail, floating over some rocks. Jump over the rail and run up the rocks to pick it up.
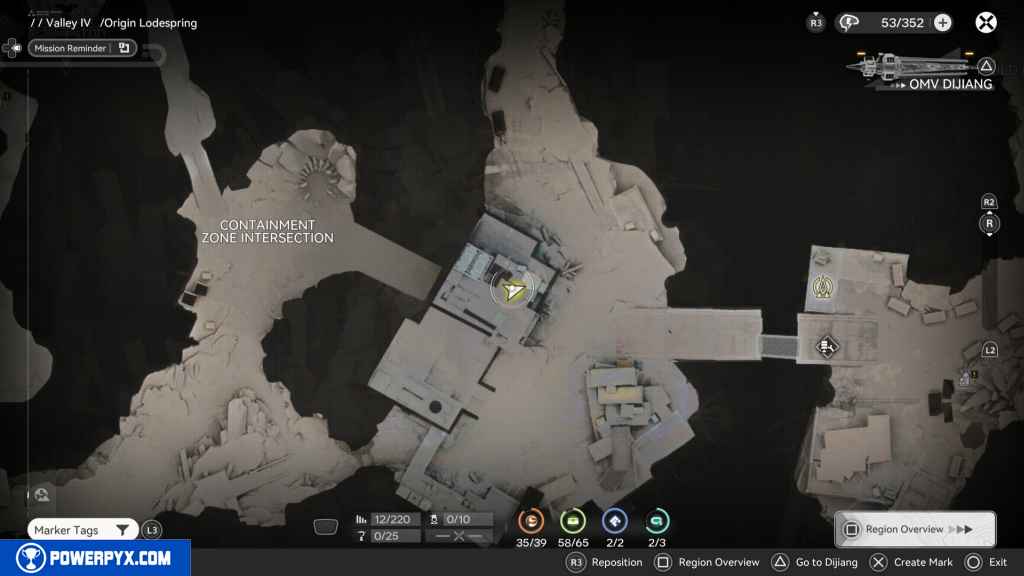
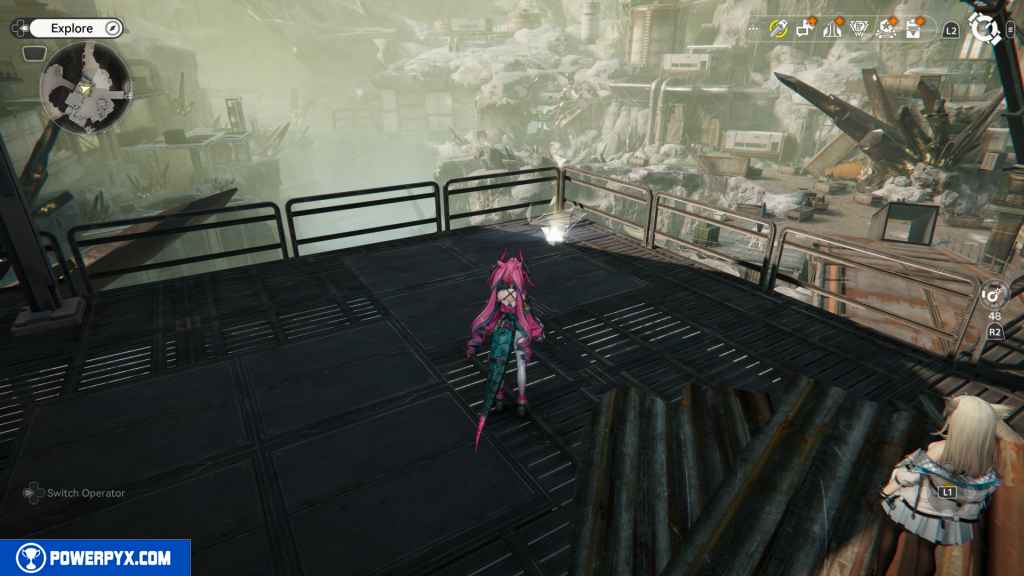
127 – Repair Logic 2
From the Aurylen, head north and then immediately turn left. You should see an elevator that takes you up to the second floor. Once there, look north, and you should see the Repair Logic in the middle path.


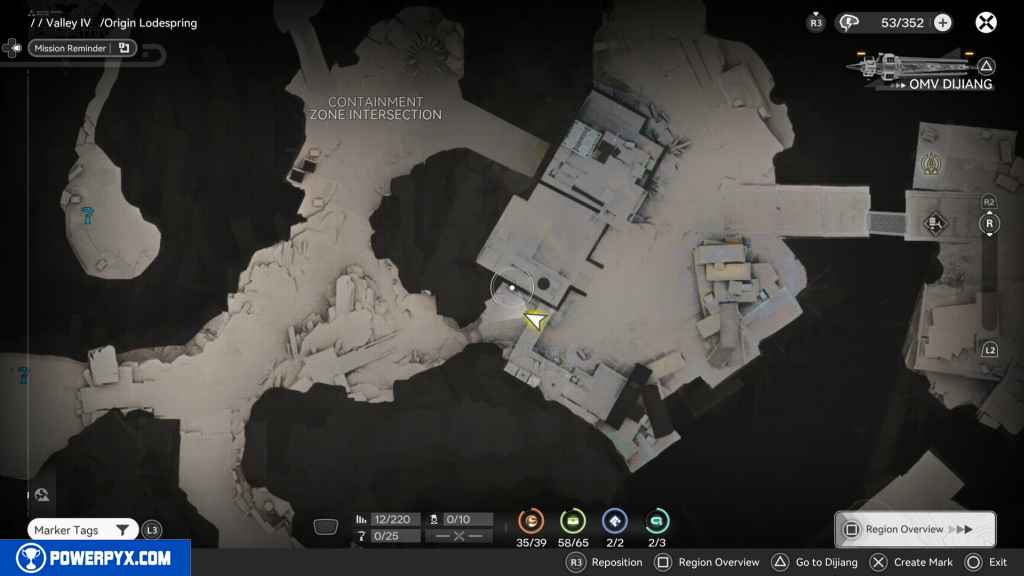
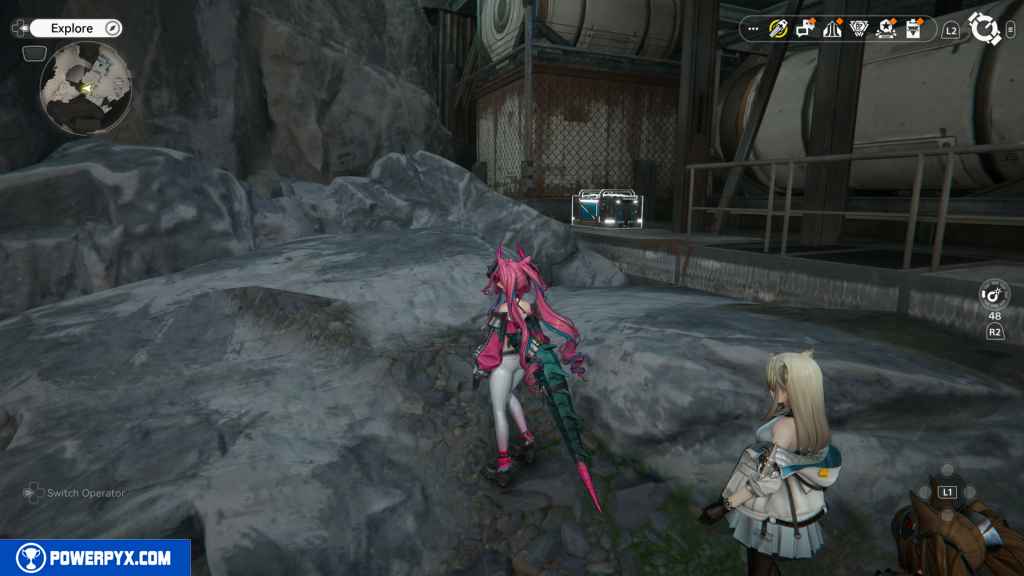
128 – Crate 49
Go back down to the ground floor and go west. You should see an Energy Alluvium on the ground. Activate it to summon some enemies and defeat them to unlock the Crate.
129 – Aurylen 28
From the Crate, look north, and you should see a path leading behind the fence. Take it and go all the way around, and you should find the Aurylen at the end of the path.

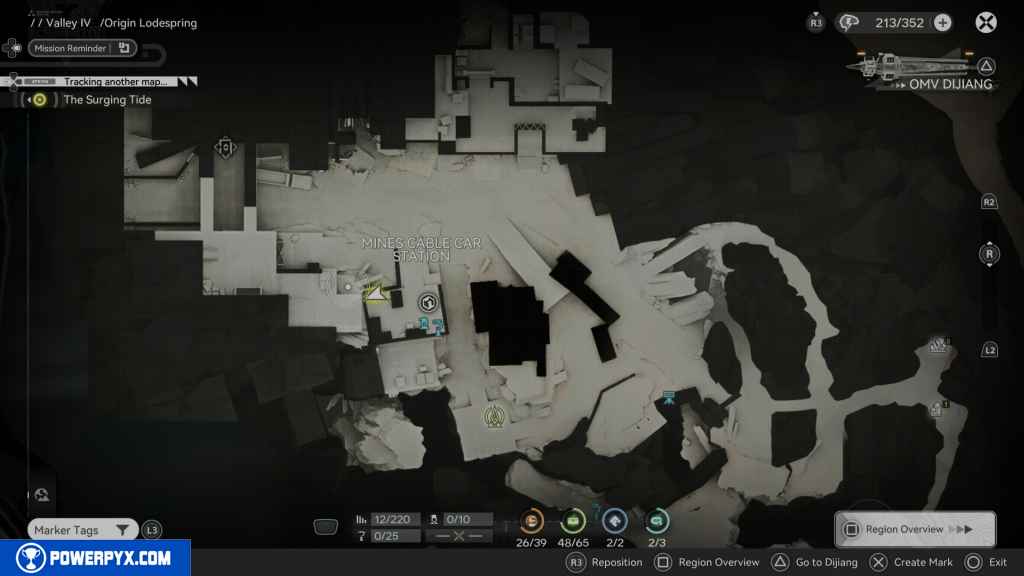
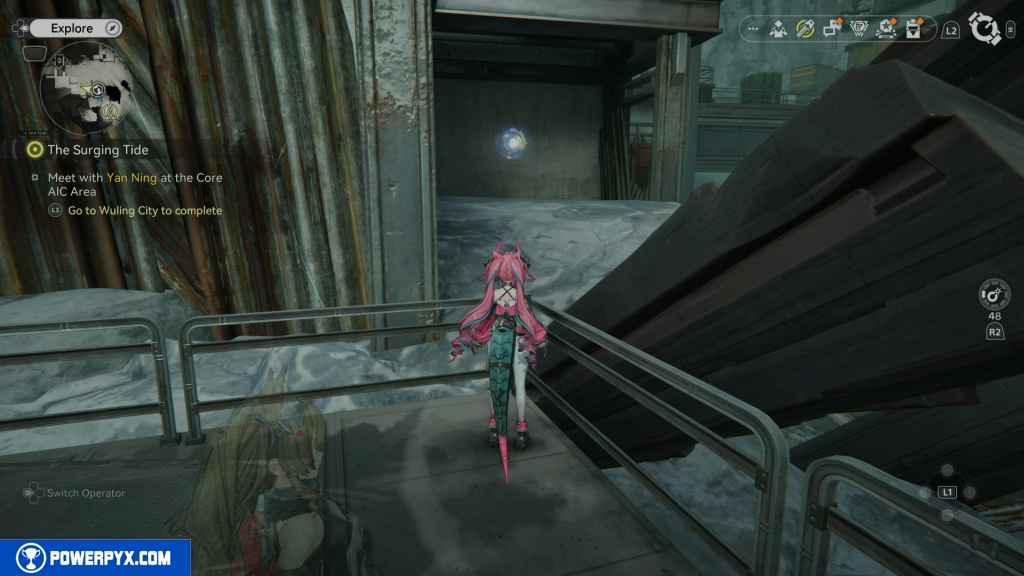
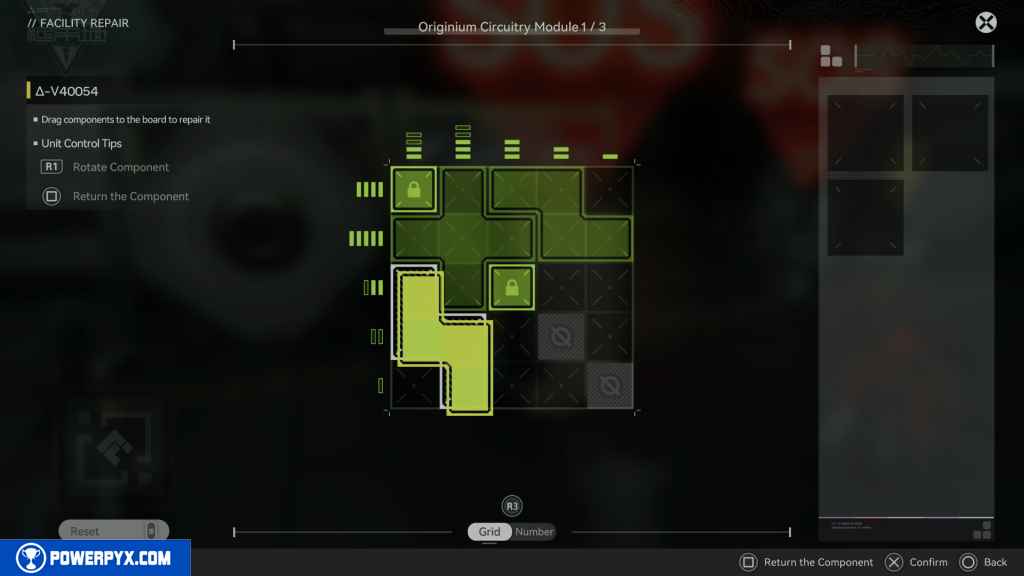
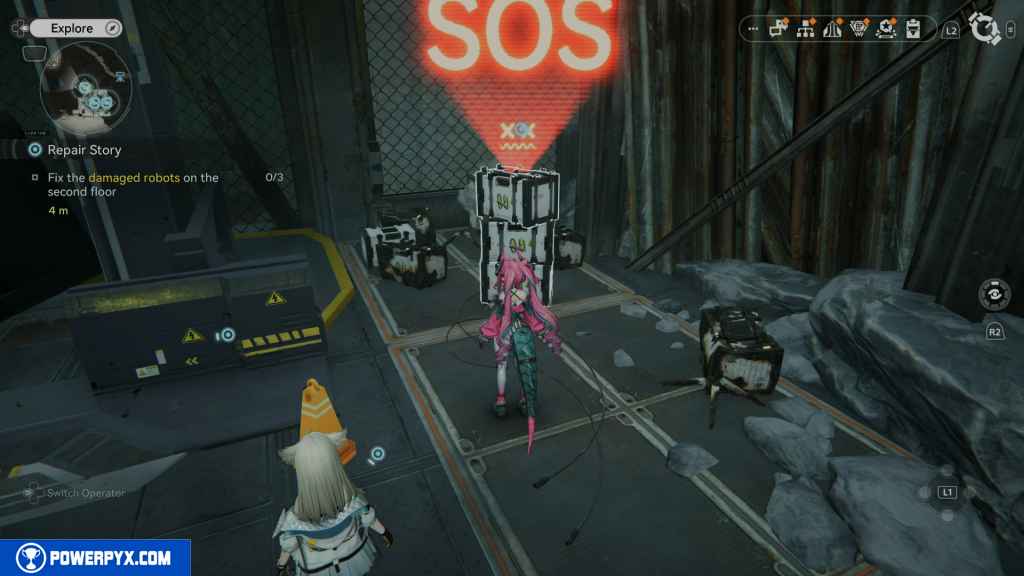
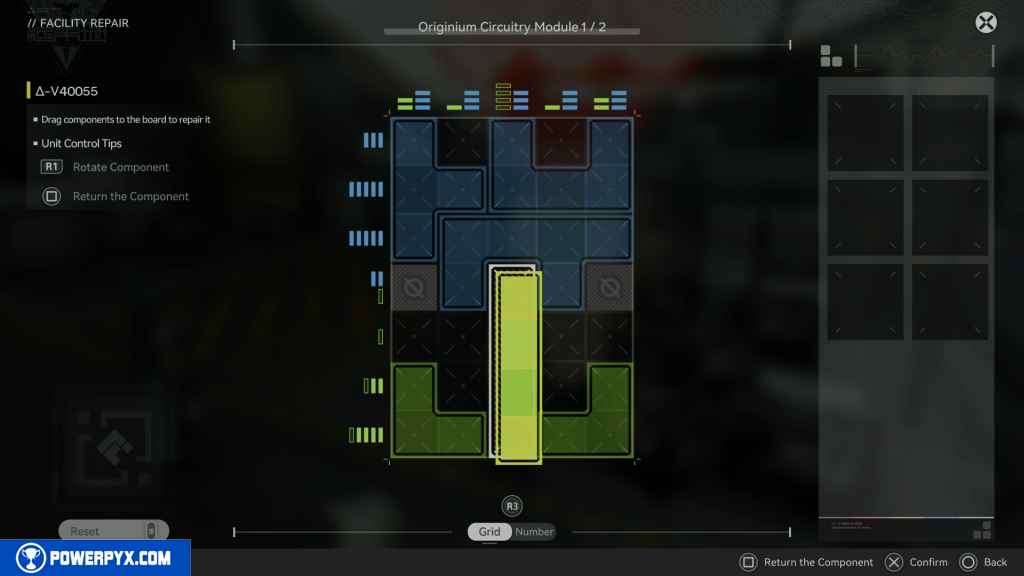
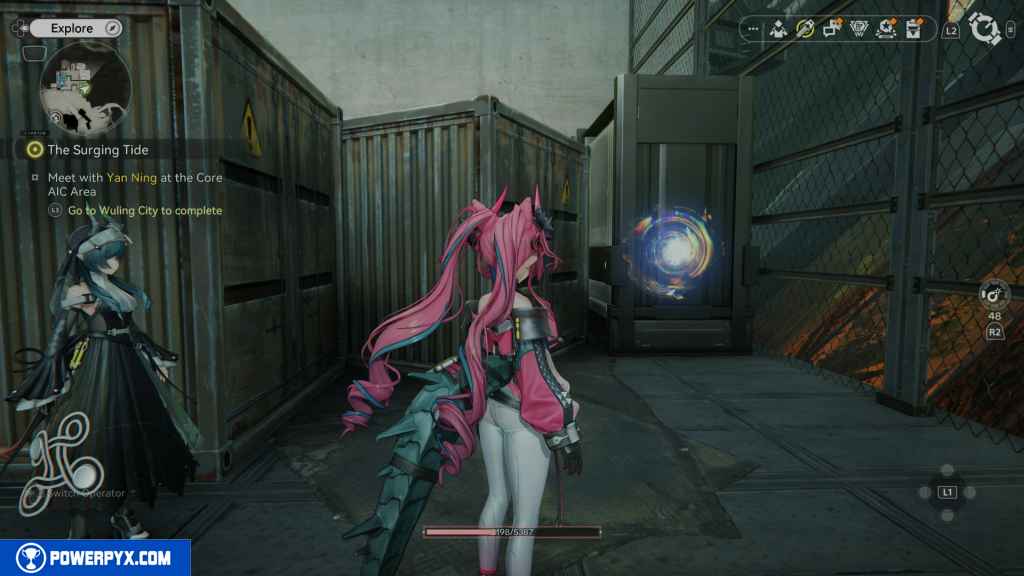
130 – SOS Repair Bot 11
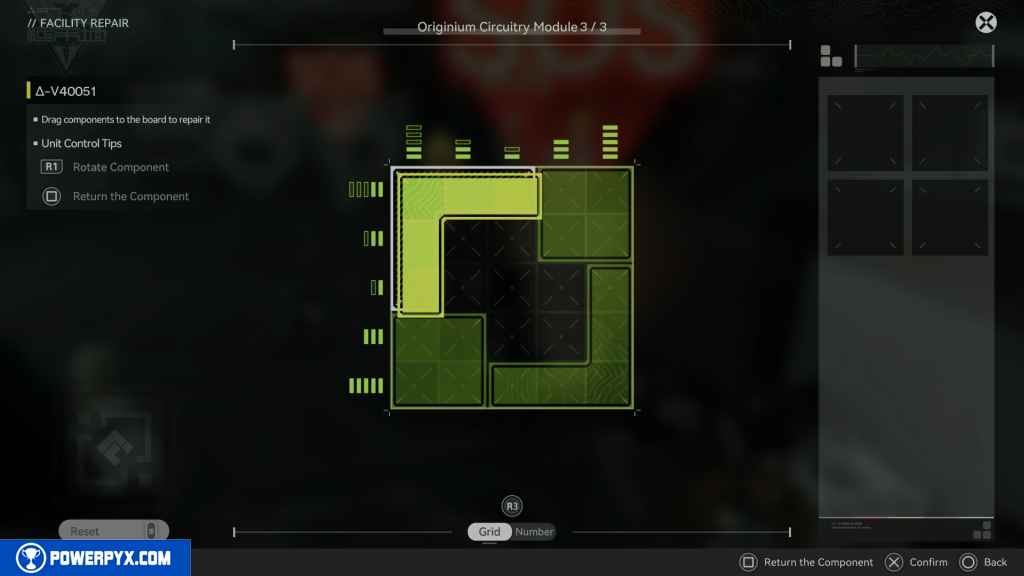
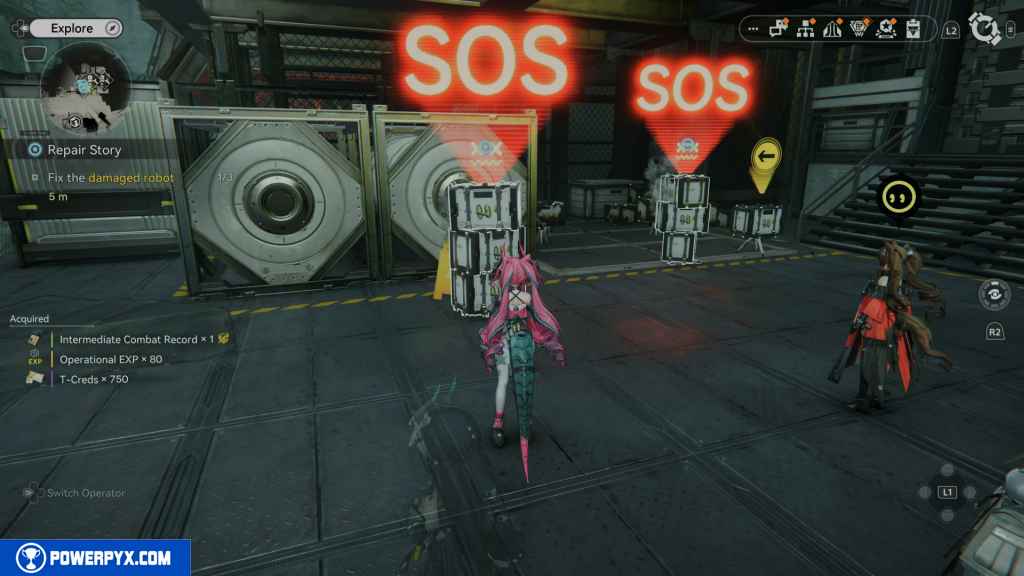
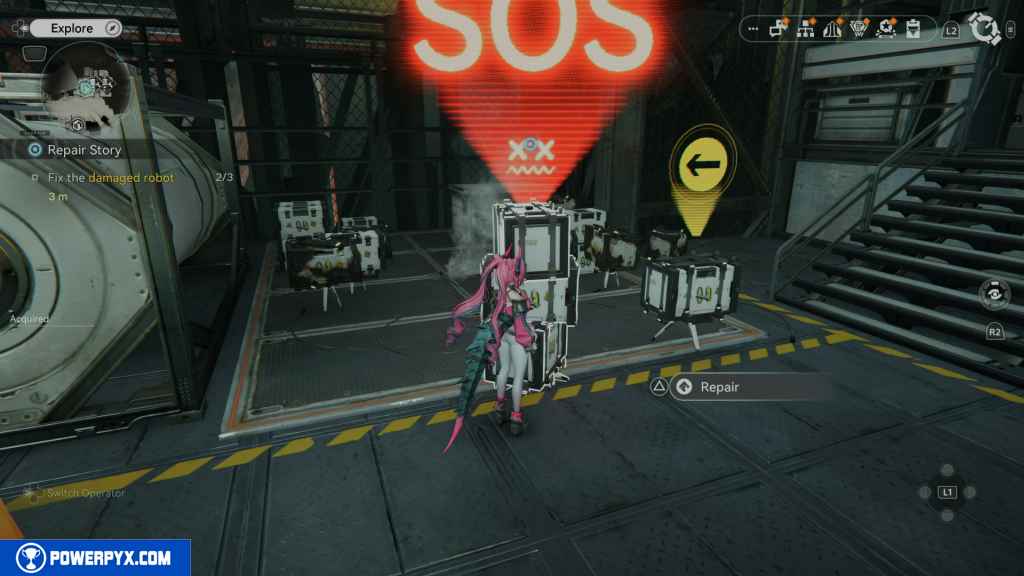
The next set of collectables can only be unlocked once you start and finish the Side Mission – Repair Story. You’ll need to have acquired both Repair Logics to access this area.

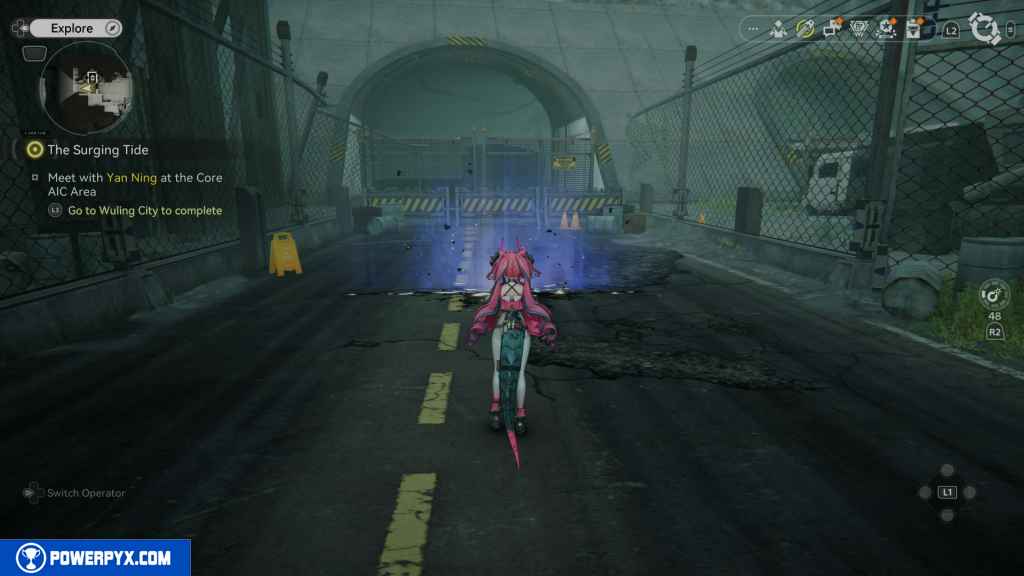
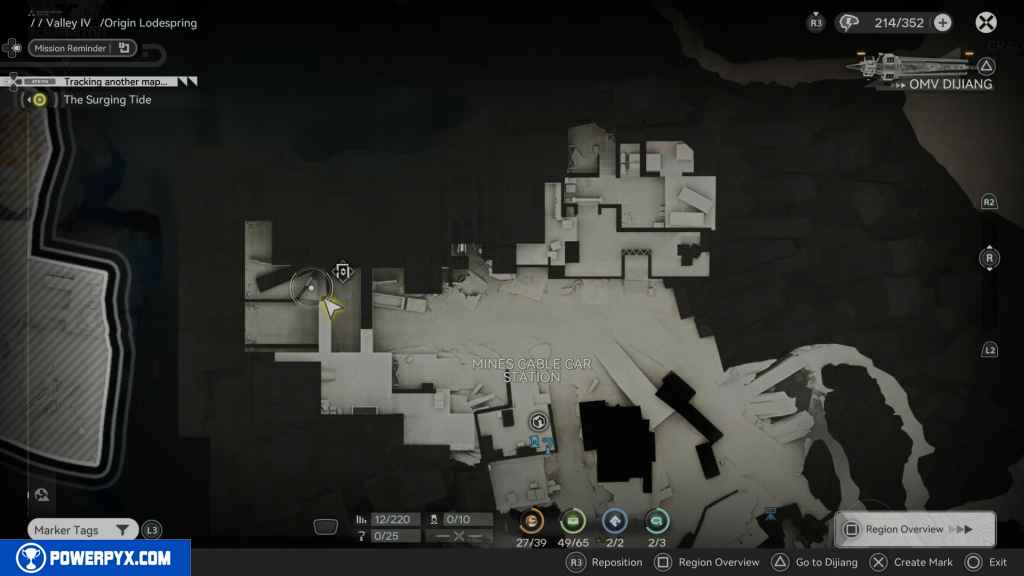
Head east in the Mines Cable Car Station, and to the north, you should see a locked gate with a Repair Bot. Approach it to start the Side Mission – Repair Story.
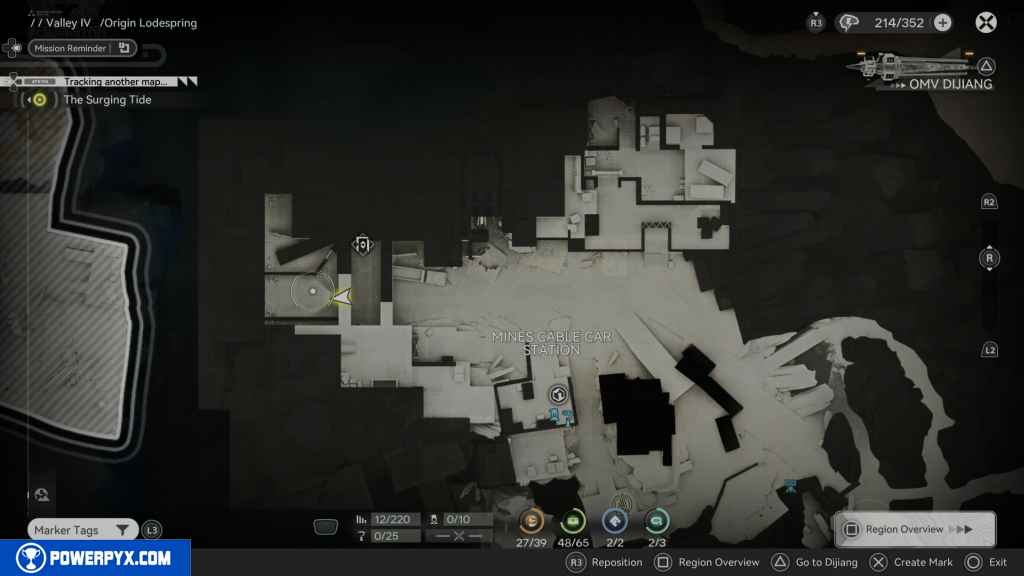
Once inside, you need to repair six SOS Repair Bots. Start with the first one on your right.


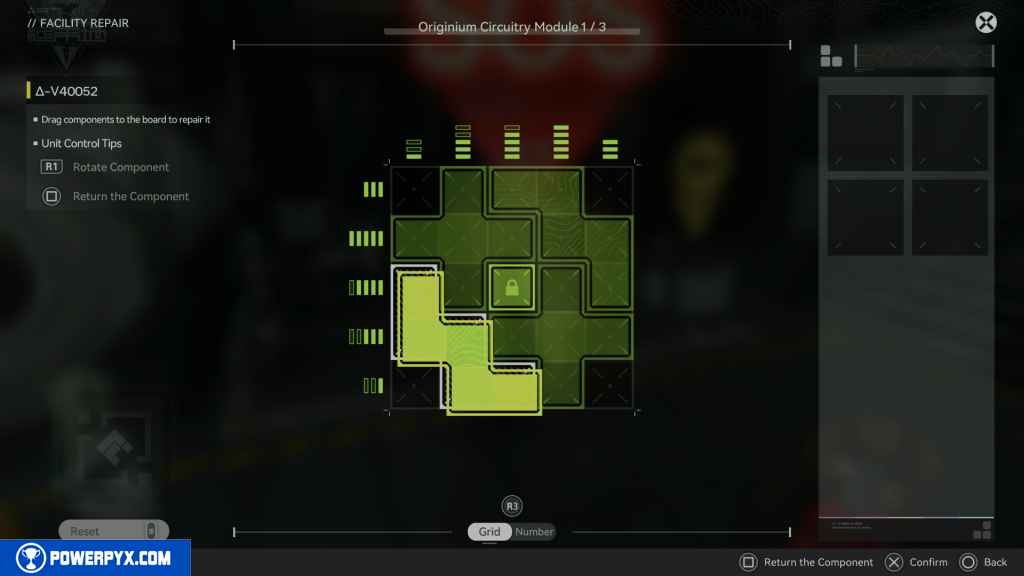
131 – SOS Repair Bot 12
Head west to tackle the next robot on your left.
132 – SOS Repair Bot 13
The last one is right next to the previous robot on your right.
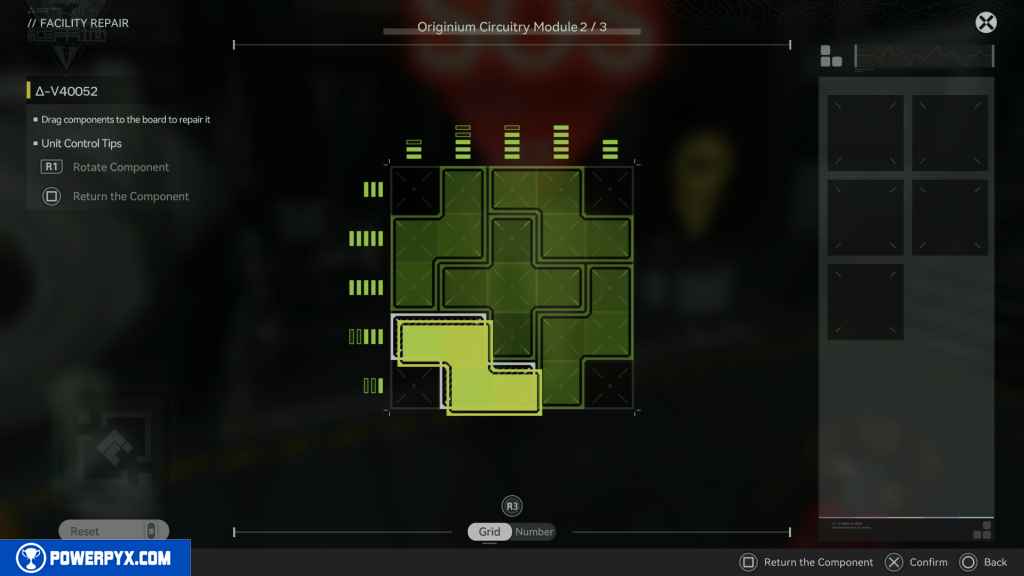
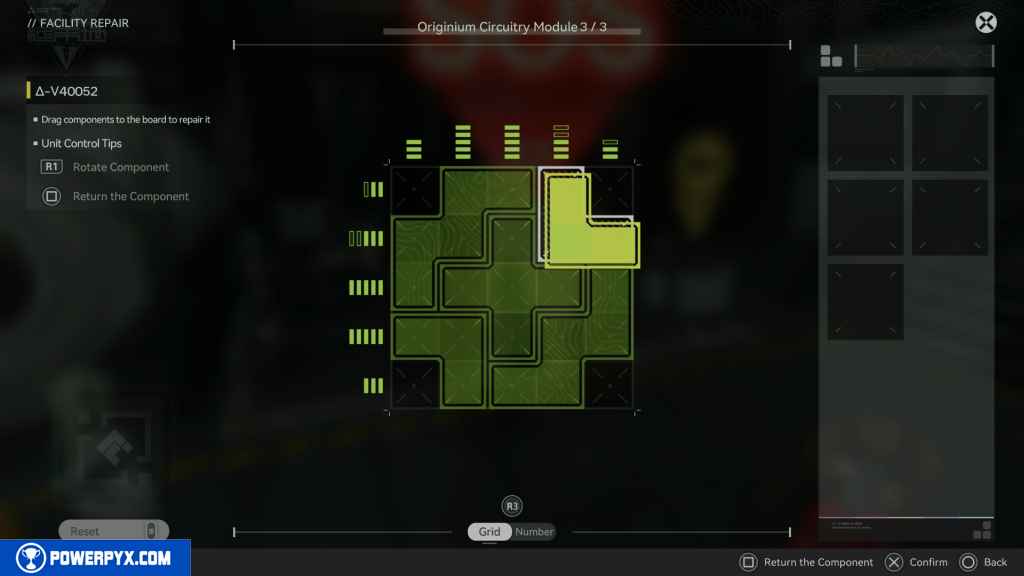
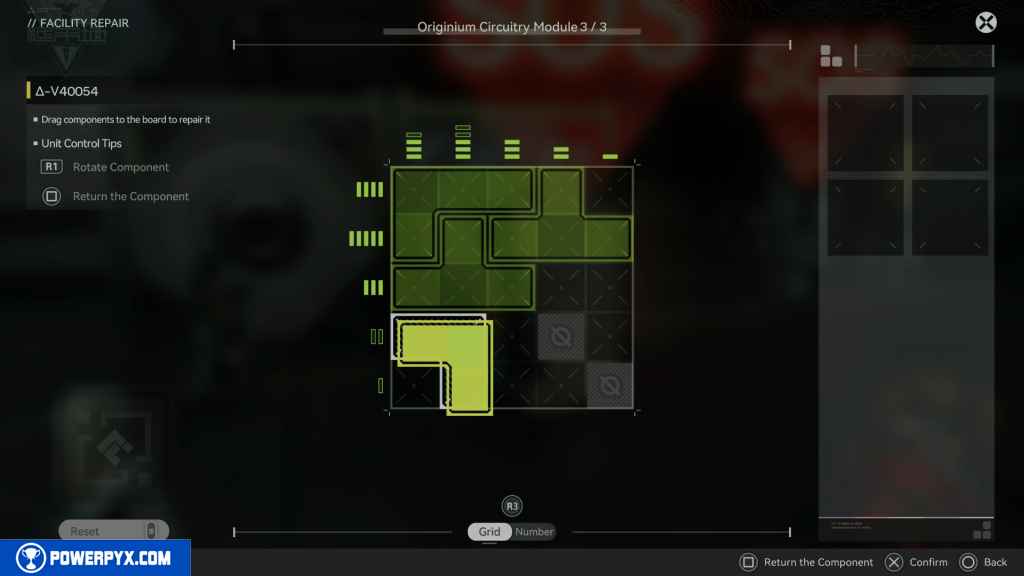
133 – SOS Repair Bot 14
Once completed, head up the stairs and you’ll have to repair three more robots.

Head to the one downstairs to the north first.
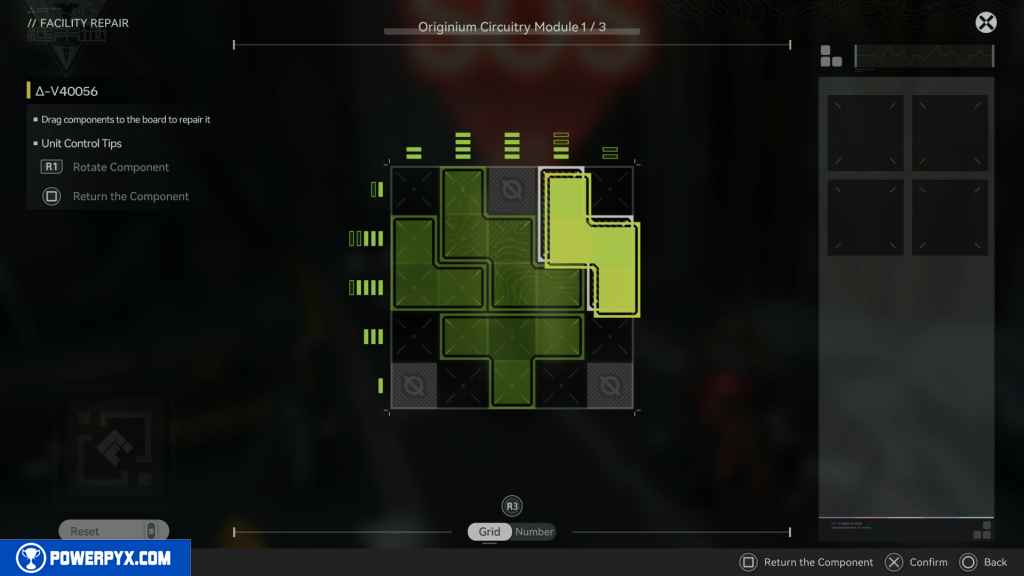


134 – SOS Repair Bot 15
Head back upstairs and repair the first robot you see on your left.
135 – SOS Repair Bot 16
The final robot to the east requires four puzzles to solve.


136 – Crate 50
Once you open the gate to the north, you should find three crates.
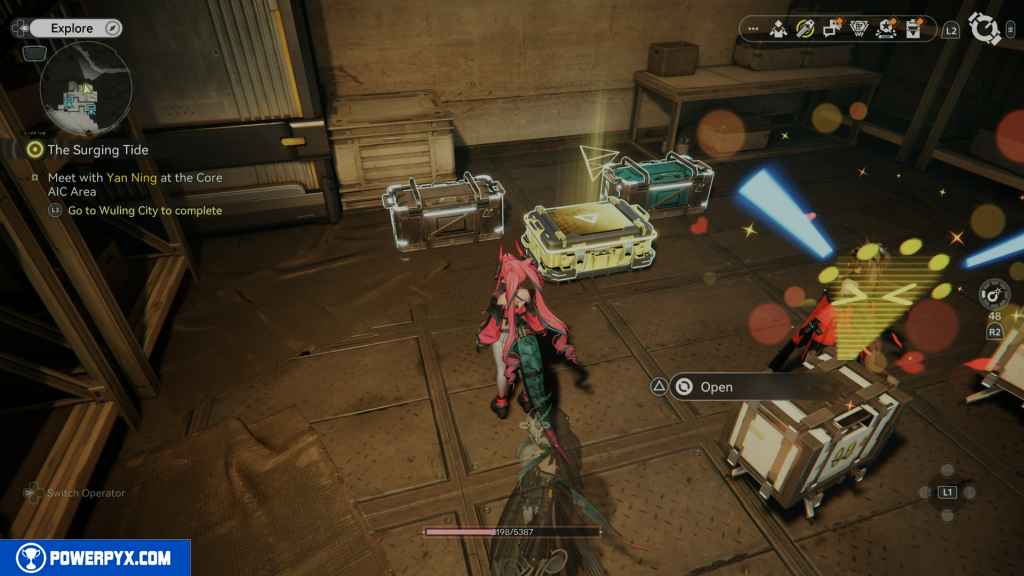
137 – Crate 51
In the room with two other crates.
138 – Crate 52
Same Room with two other crates.
139 – Aurylen 29
Before leaving the area, go back to where you solved the first two SOS Repair Bots. You should see two large cylindrical boxes. Behind these boxes is an Aurylen.

140 – Aurylen 30
Head east past the entrance, and you should see two small containers. Behind the containers to the east wall is the next Aurylen.
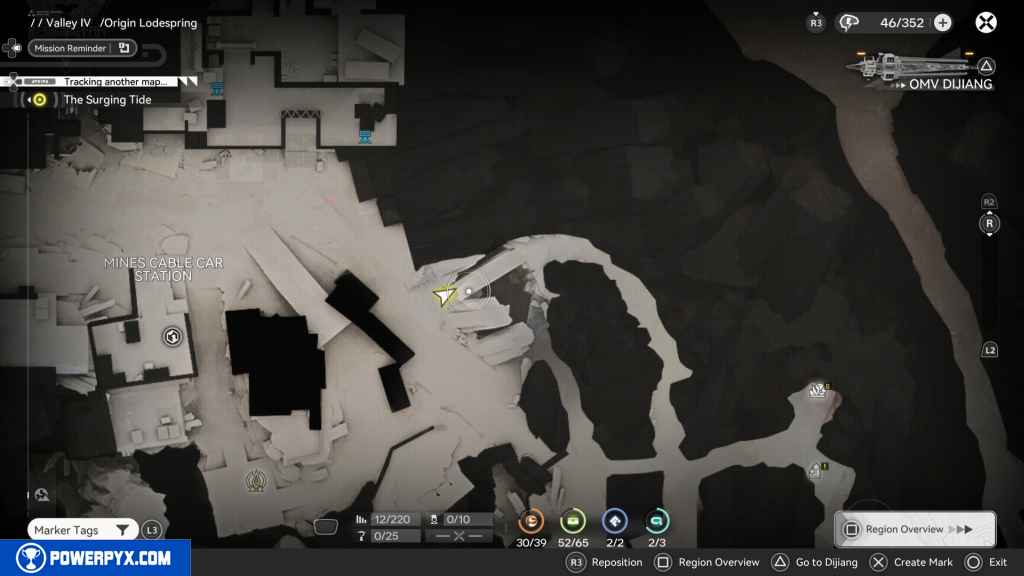
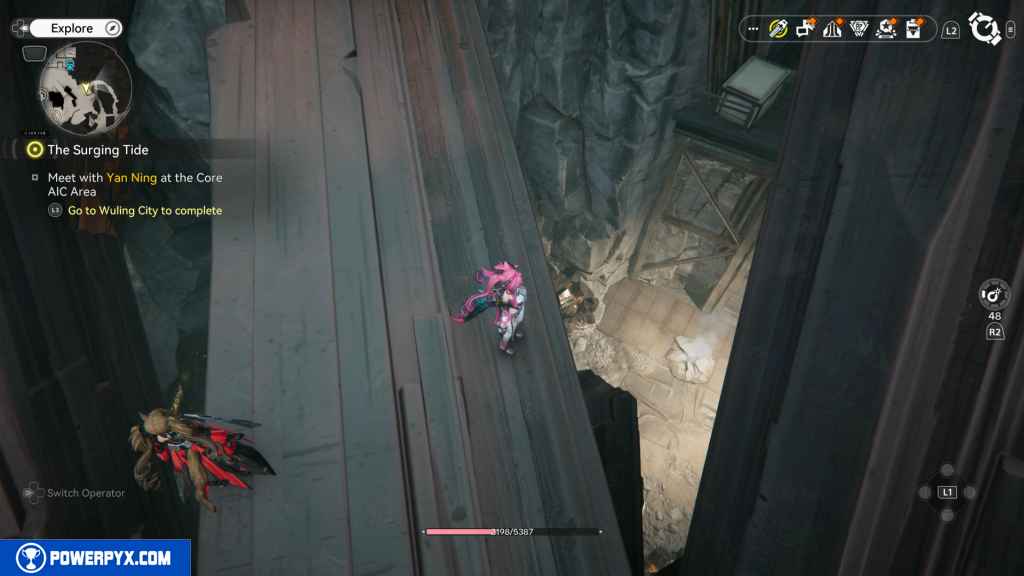
141 – Aurylen 31
Go down the south east path and turn left. You should see a large bridge made out of a large Blight spike. Walk halfway on it and look down. You should see an area where you can fall down, with a steam jump at the bottom. Drop down and you should find the Aurylen in this location.
142 – Crate 53
Use the steam jump to get to the top. Continue south until you come out to a path leading left or right. On the right path, you should see the next Crate.
143 – Crate 54
Right of the last Crate is some gray rock.s Jump up this rock and you should find the next Crate.
144 – Aurylen 32
From the last two crates, go east down the path. You should reach an area with some materials to farm. From there, head south, and you should come to an area with some containers. At the edge of the cliff is an Aurylen.
145 – Crate 55
You should see an Energy Alluvium in this area as well. Activate it and defeat the enemies to unlock the Crate.
146 – Crate 56
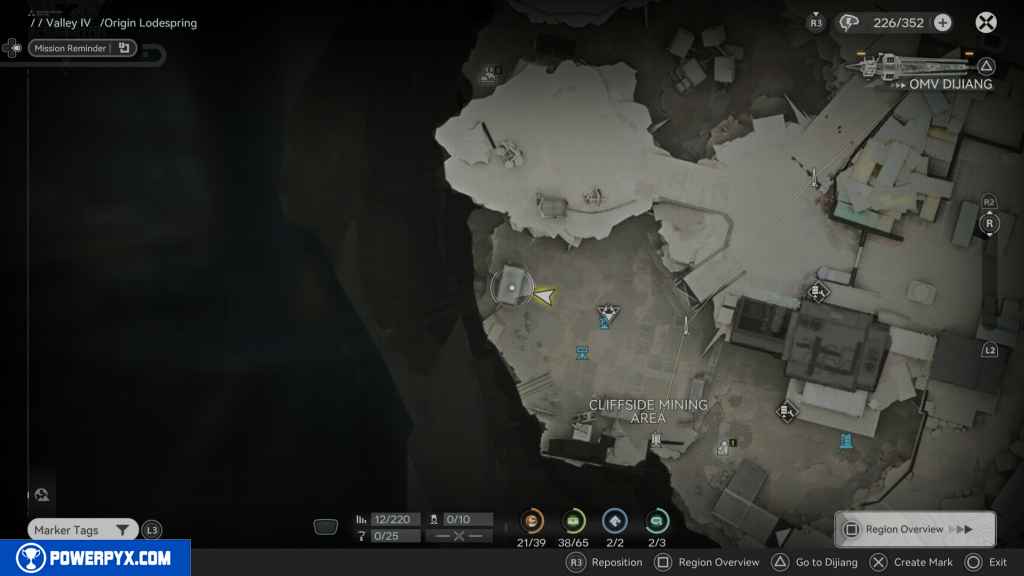
Return to where you passed through the checkpoint. This time, head east towards the Containment Zone Intersection—Head east, then north to the large red crystal area. As you approach, you should see some crates on your left. Quickly turn left, and you should see the Crate.
147 – Aurylen 33
Head east from the last Crate through the gate and up a hill. When you reach the top, you should see a bunch of containers. Go to the containers and open the one in the center.
On the other side, you should see a small box on your left that you can jump onto, then jump onto the container. Once on top of the container, look left, and you should see the Aurylen.
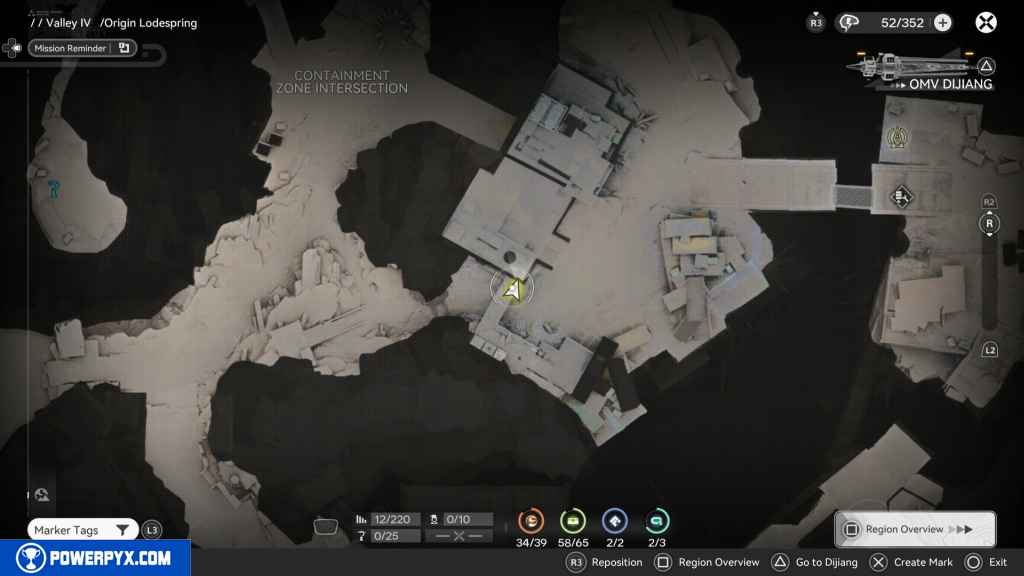
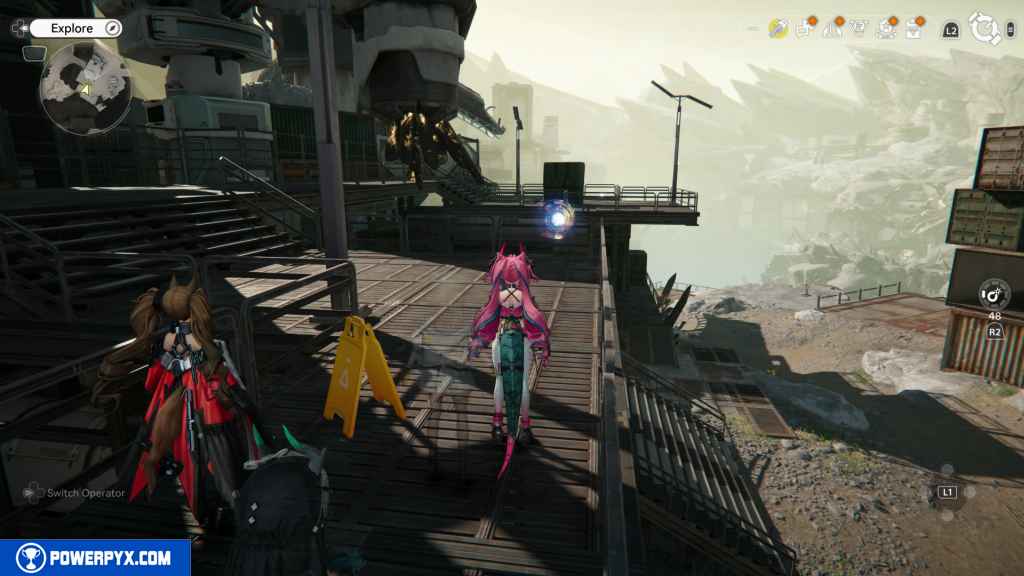
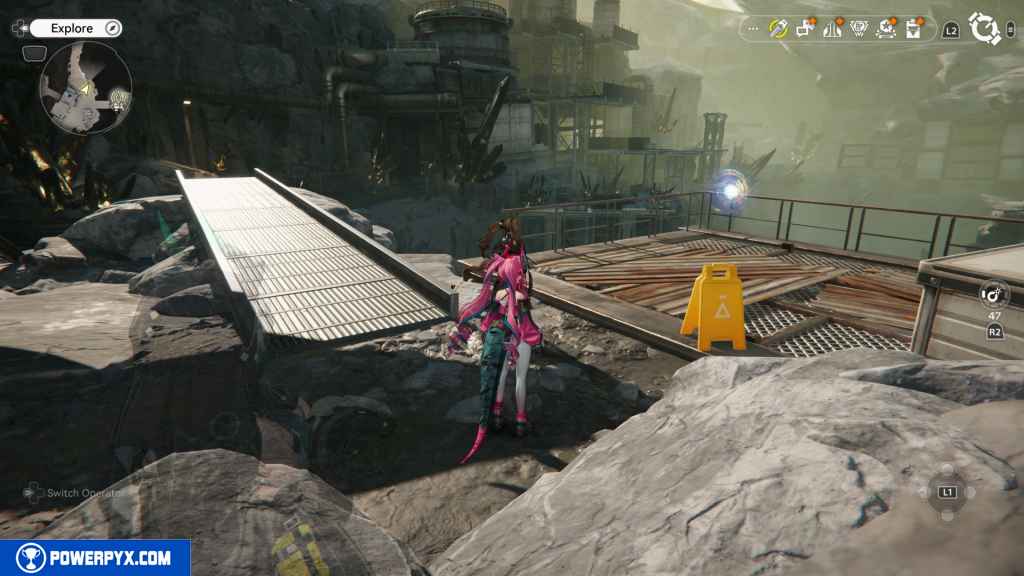
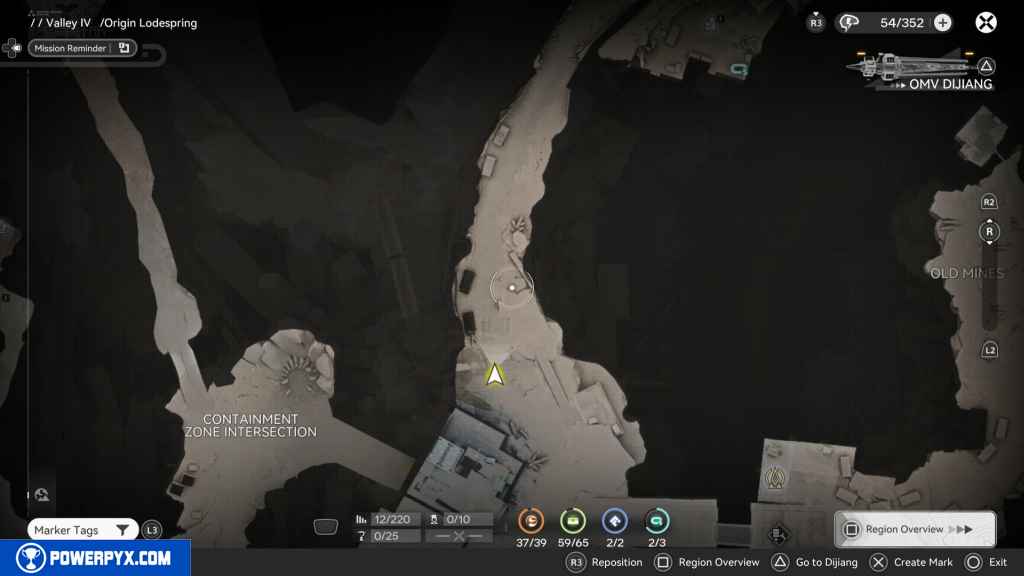
148 – Crate 57
From the Aurylen, look left, and you should see another box you can jump up and up the container.
Once on top, look left, and you will see a yellow wet floor sign. Approach the sign, then turn left to find another box to jump up to, and the containers. Make your way to the very top to find the Crate.
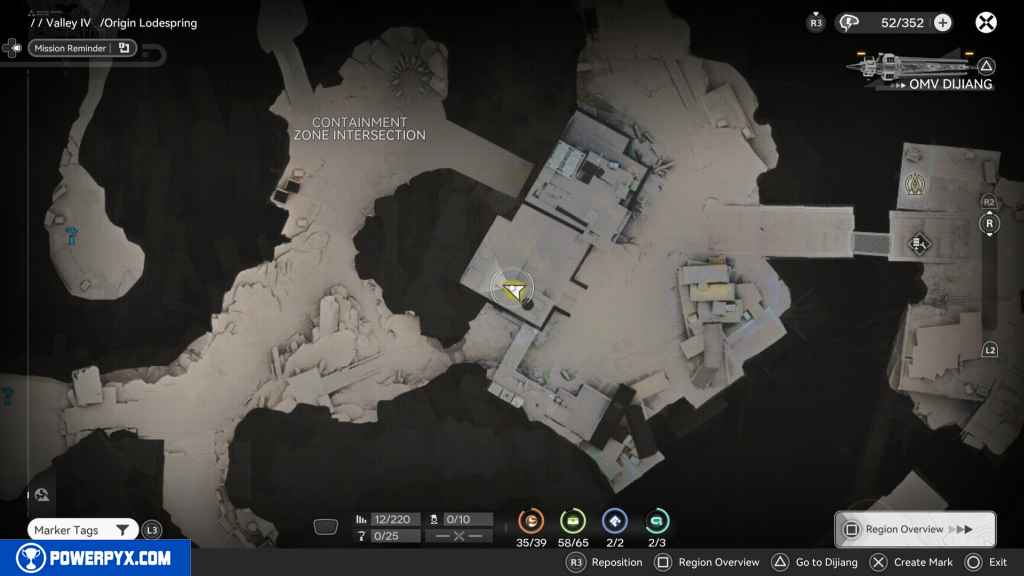
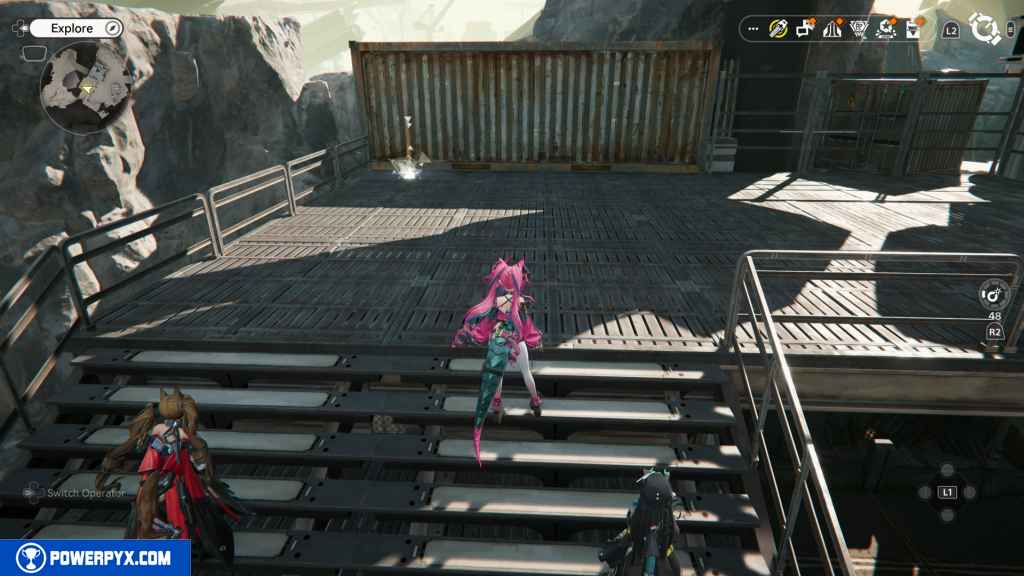
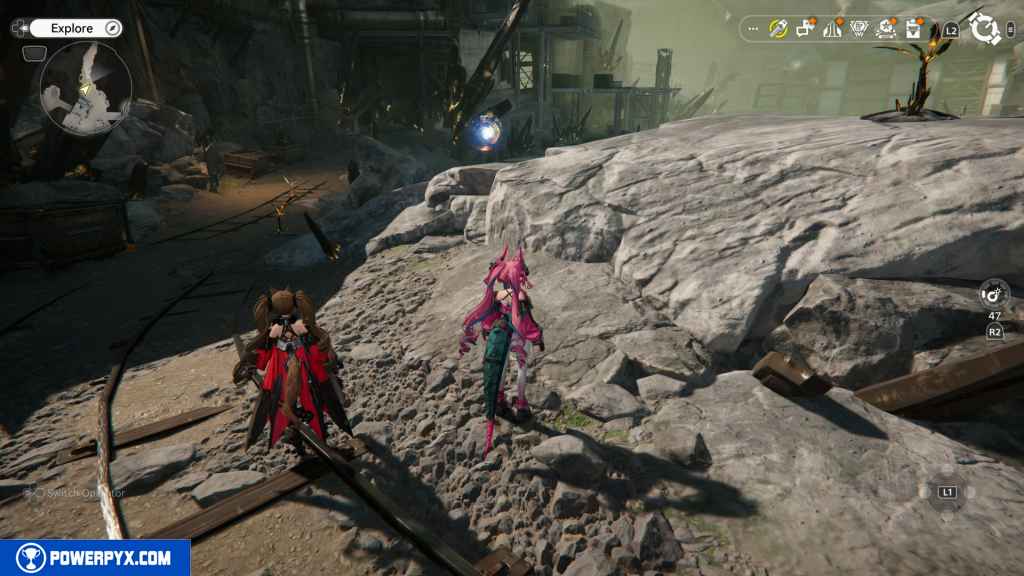
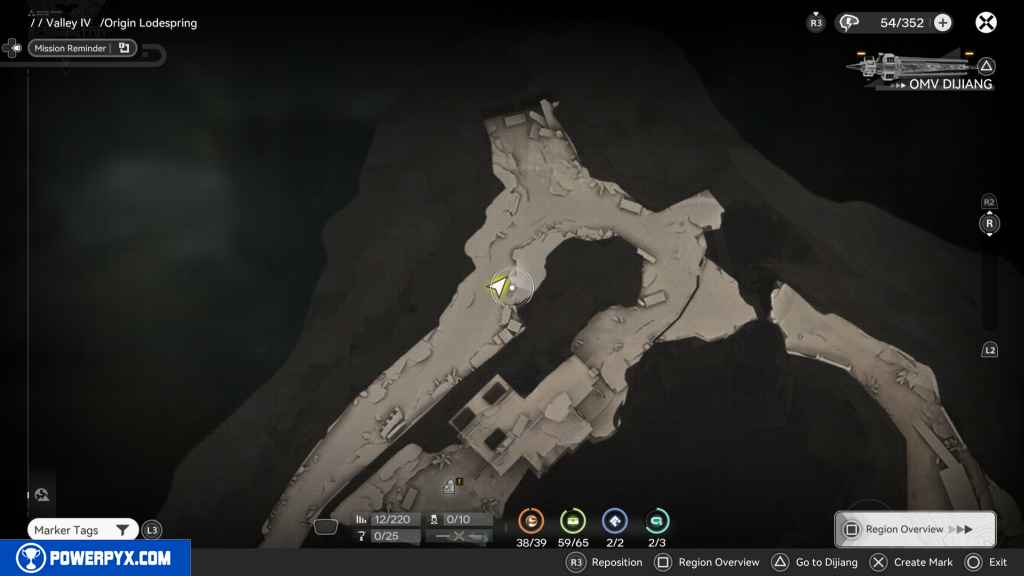
149 – Crate 58
Drop down and head to the next set of containers to the south. Move around the orange one with the wet floor sign on top of it, and you should see the next Crate inside a container behind the orange one.

150 – Aurylen 34
From the Crate, you should see a box on your left that you can jump up to reach the container. When you get up the container, you can either keep climbing or go left to a small path on top of a green container.
Take that path, and you should see another small box and an open container. Go through the container and turn right to see another open container with the Aurylen.
151 – Aurylen 35
Return to the containers and boxes you should jump on. This time, jump up to the top; it should lead you to the mining platform.
Take the path on the platform, and you should eventually run into the Aurylen.
152 – Gathering Point 34
West of the Aurylen, you should see the Gathering Point.
153 – Gathering Point 35
Go north and down the stairs to your right to find the next Gathering Point.
154 – Crate 59
Drop down to the ground floor and head south. You should see a Blight wall with a blight core. Before destroying it, look right at some rocks and jump up those rocks to find the next Crate.
155 – Aurylen 36
Use a bomb to blow up the Blight core and the wall. Head through, and you can see a platform going up. Take it, and it will lead to a steam jump. Take it up to land on the boulder. Turn east, and you should see the Aurylen on the next platform. Jump over to it to pick it up.

156 – Aurylen 37
Return to the area with the containers and this time continue north. Keep going until you see the Aurylen on your right next to a yellow caution sign.
157 – Aurylen 38
Just a few feet north of the last Aurylen, you should see the next one on your right.
158 – Crate 60
Go north into the mining tunnel. When you reach the northernmost part, jump up the rock on your right, and you should see the Crate.
159 – Crate 61
Continue on the path until it forks up the platform to the left or right. Take the right path. When you reach an area where you have to walk under a rock, instead look left and there should be an elevator. Take it.

At the top, go southwest, and you should see the next Crate.
160 – Protocol Datalogger 3
Jump down to the ground floor with all the minerals, and you should see the last Datalogger southwest.
161 – Crate 62
Continue through the mine until you reach the Old Mine. Go north past the large, orange, glowing crystal. There should be a path that keeps going north, and you should reach a platform with the Crate.
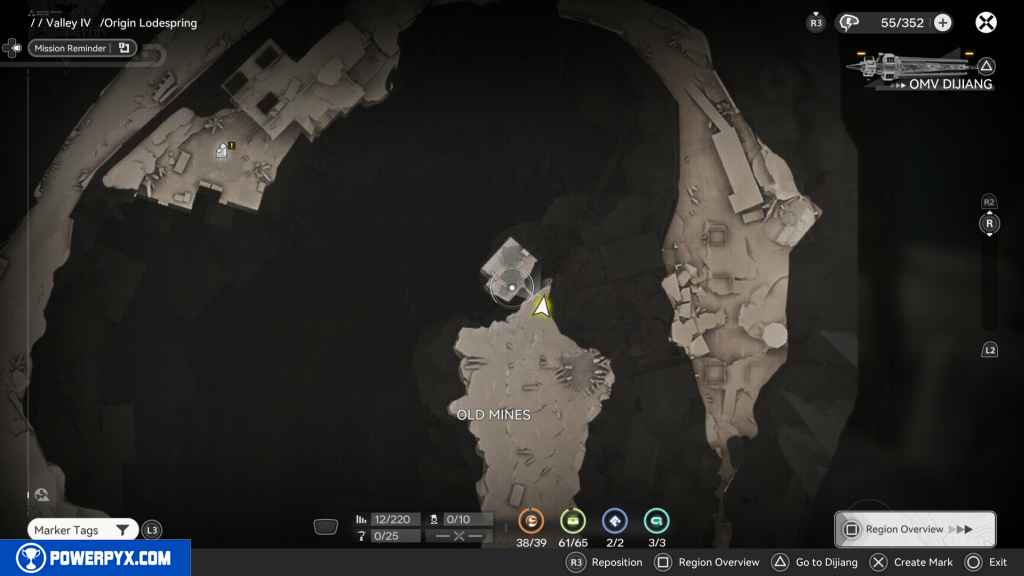

162 – Aurylen 39
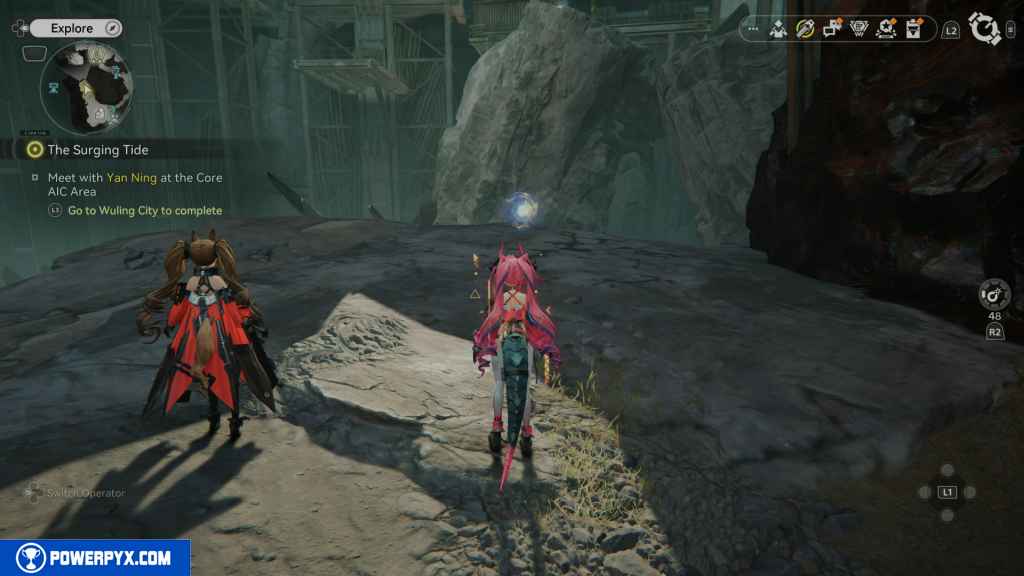
Go south from the last Crate into the large area. Continue south, and you should see the Aurylen on the left side. It’s the last one in the Origin Lodespring.
163 – Crate 63
When you pick up the Aurylen, the floor will crumble, and you will fall down. In this area, go west, and you should see the Crate up the stairs.
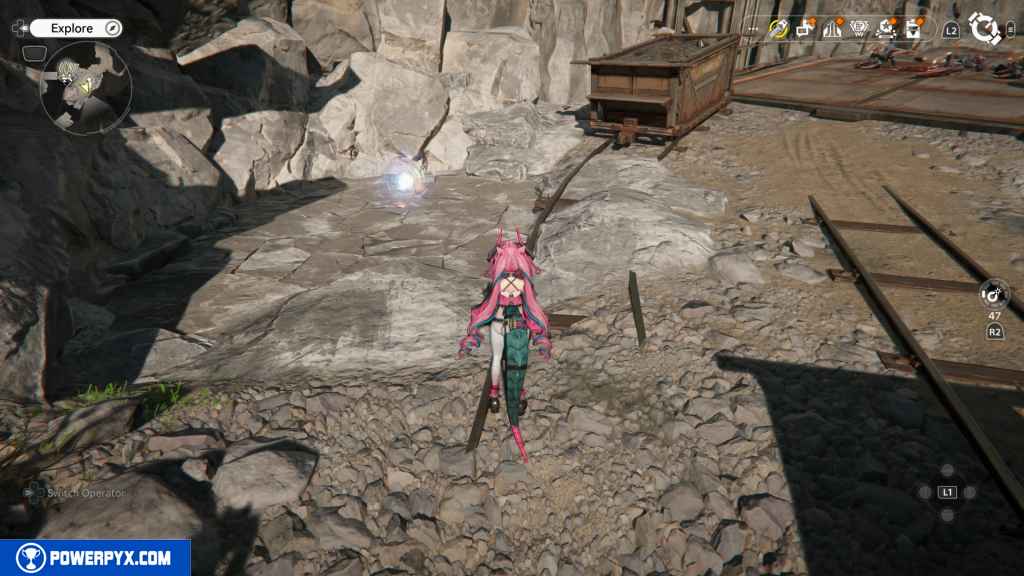
164 – SOS Repair Bot 17
Head south, and you should see a path up the rocks out of the cave. As you leave, follow the path, and you should see the Repair Bot ahead of you.

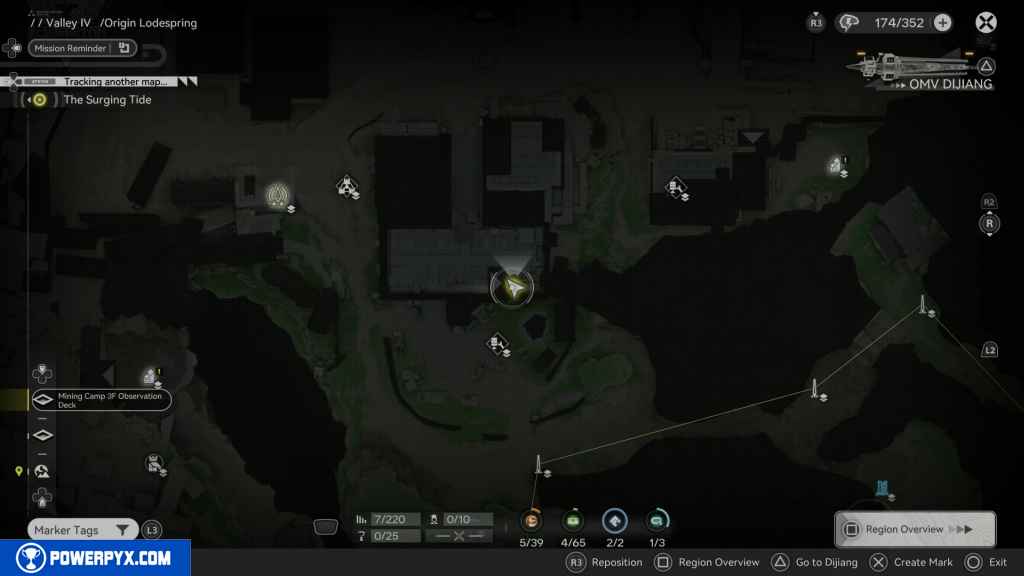
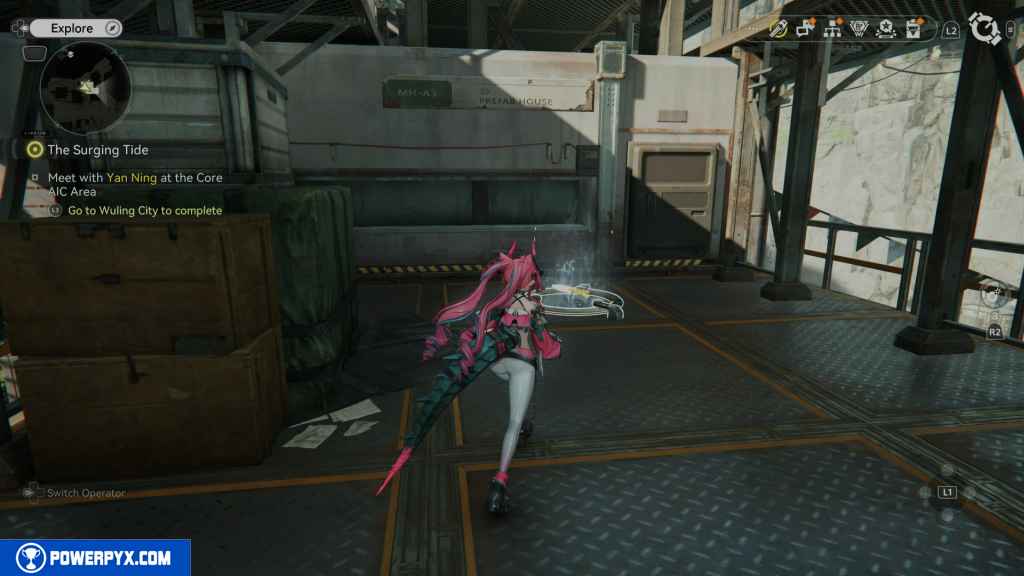
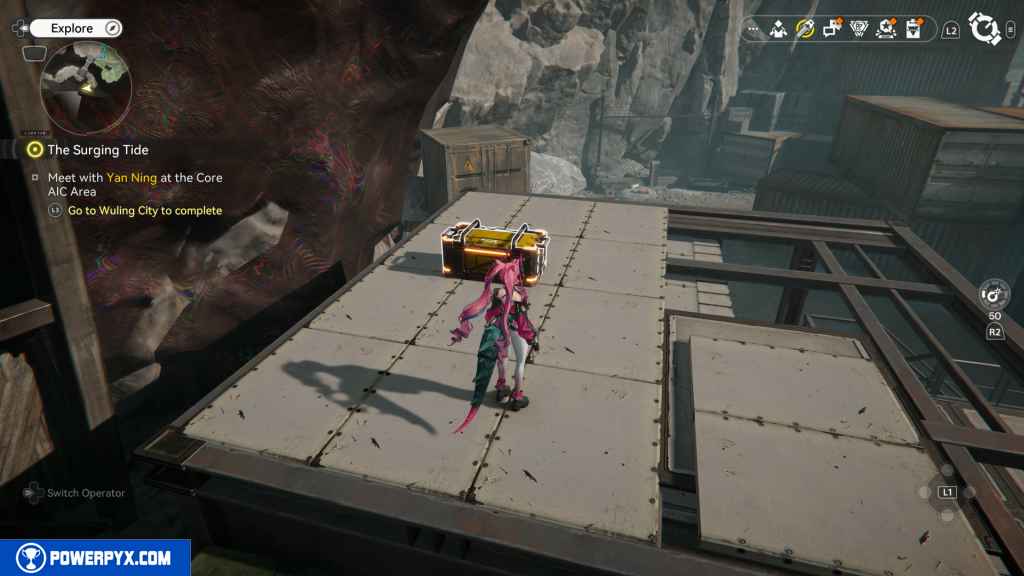
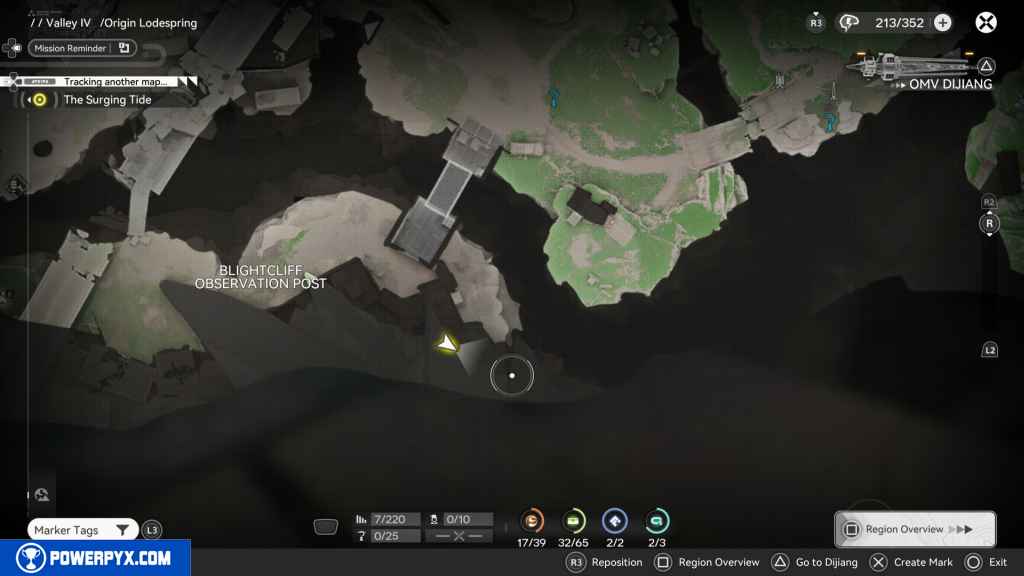
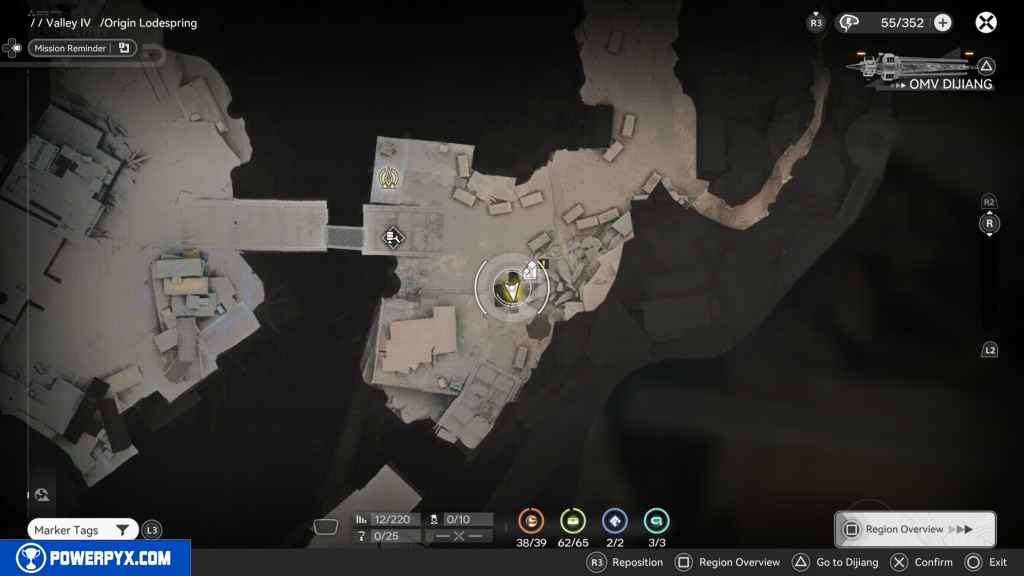
165 – Crate 64
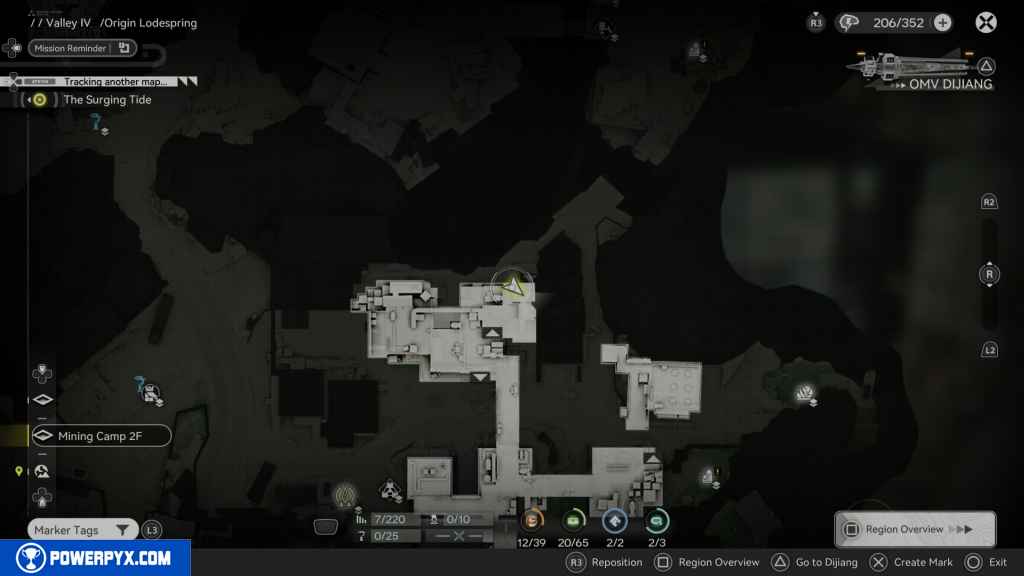
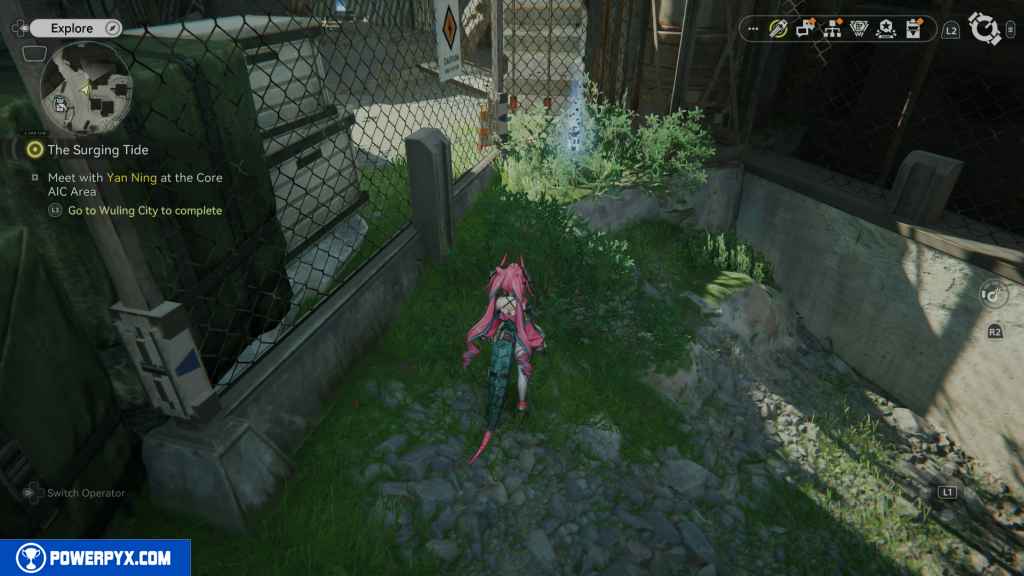
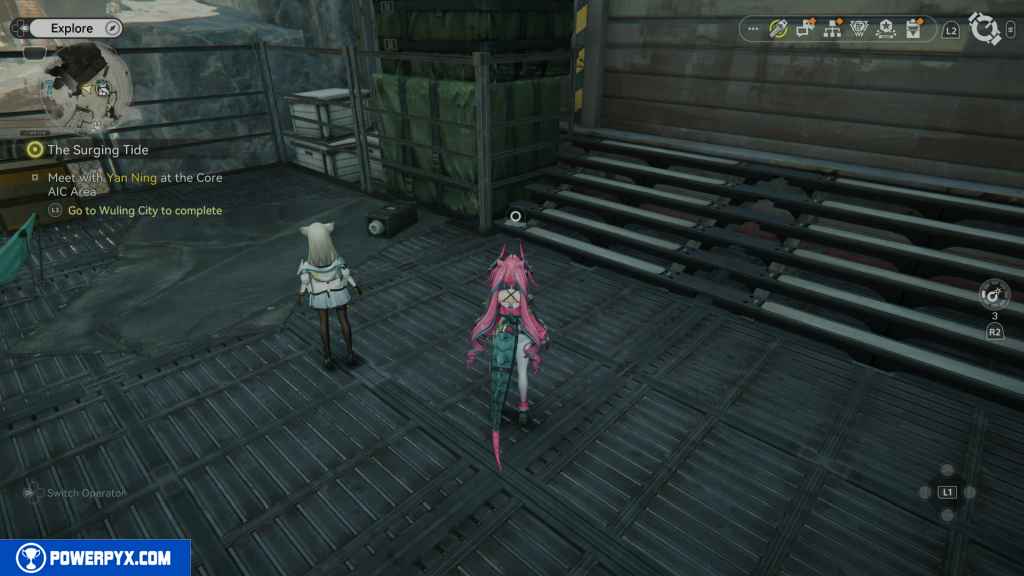
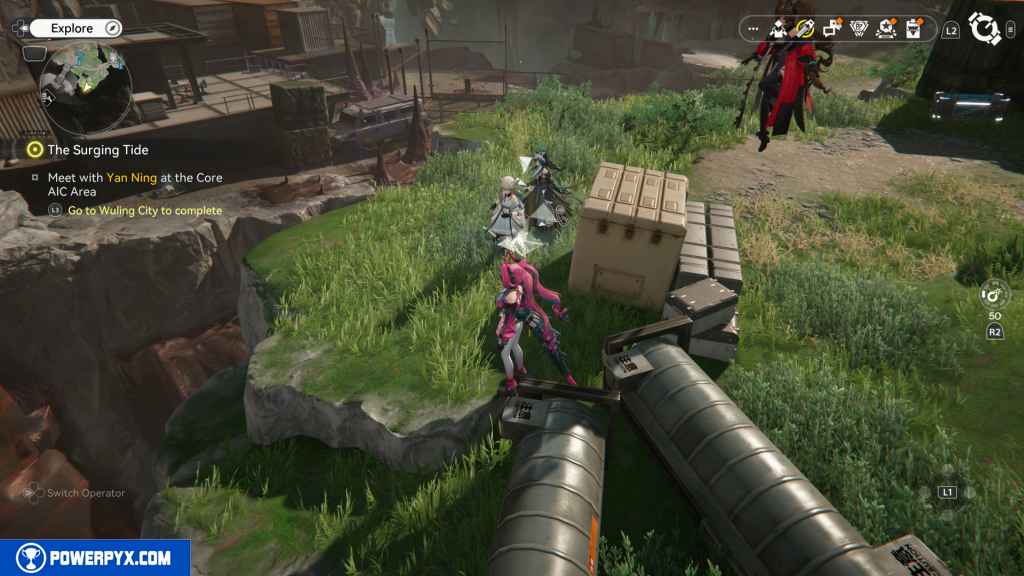
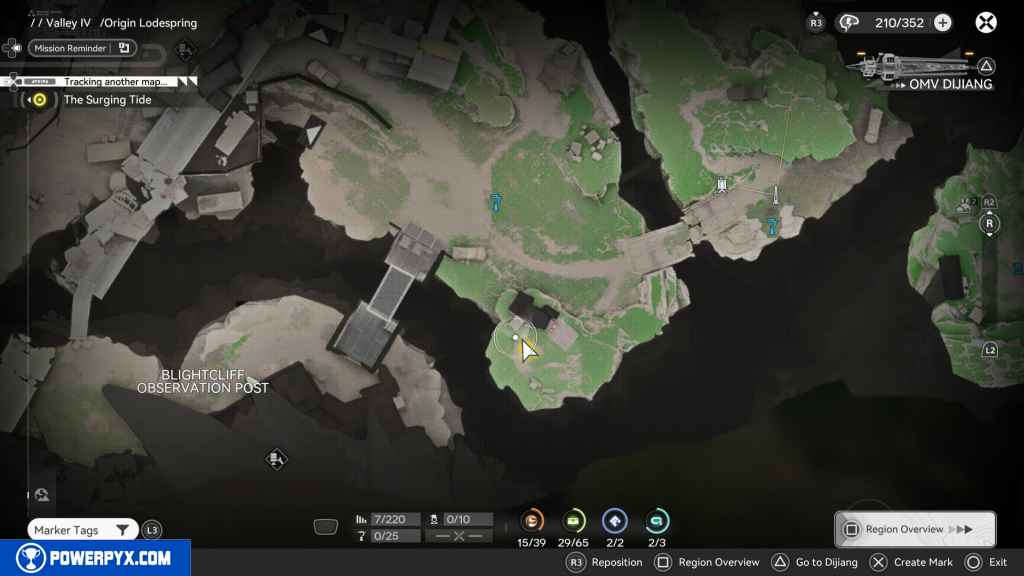
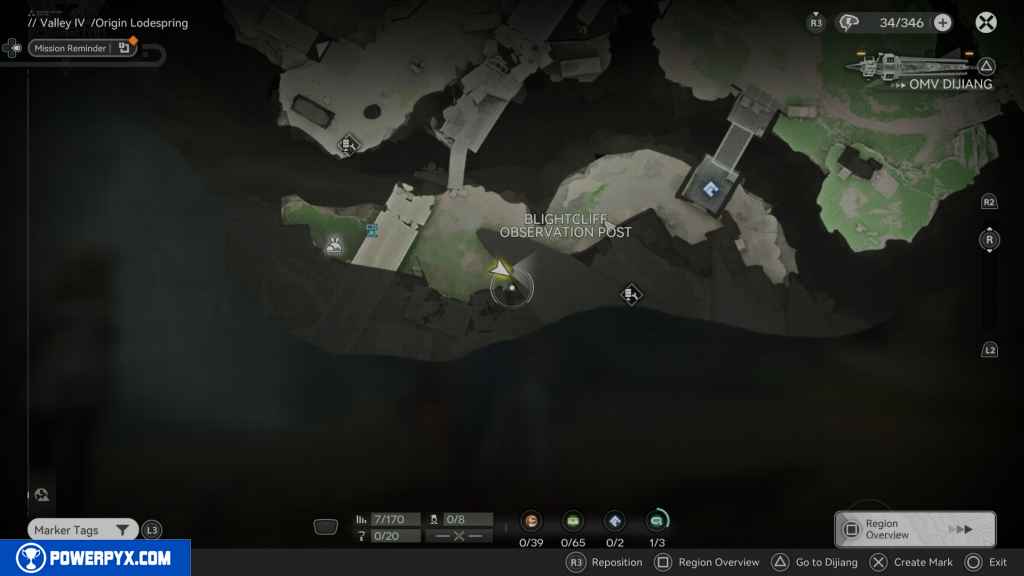
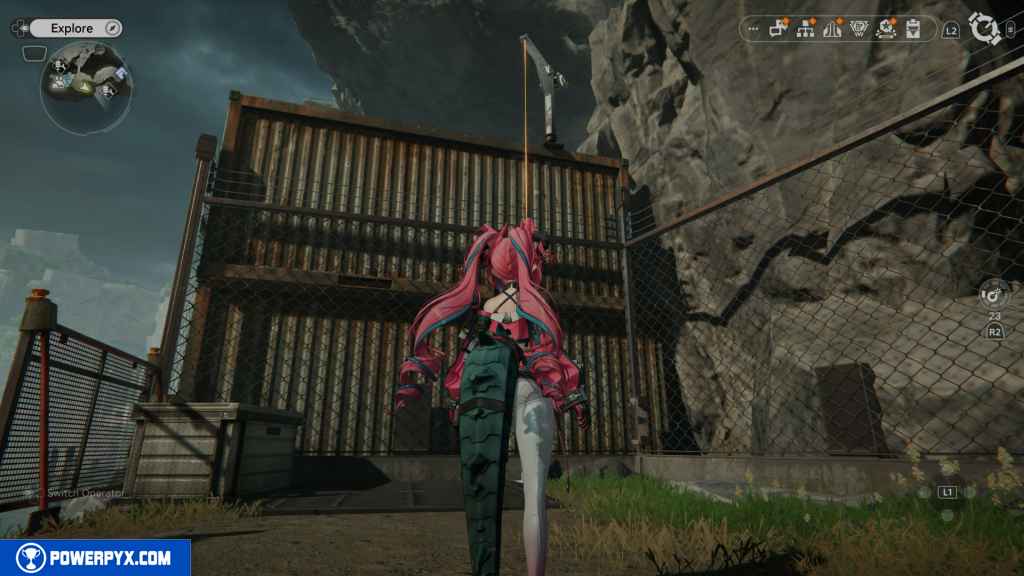
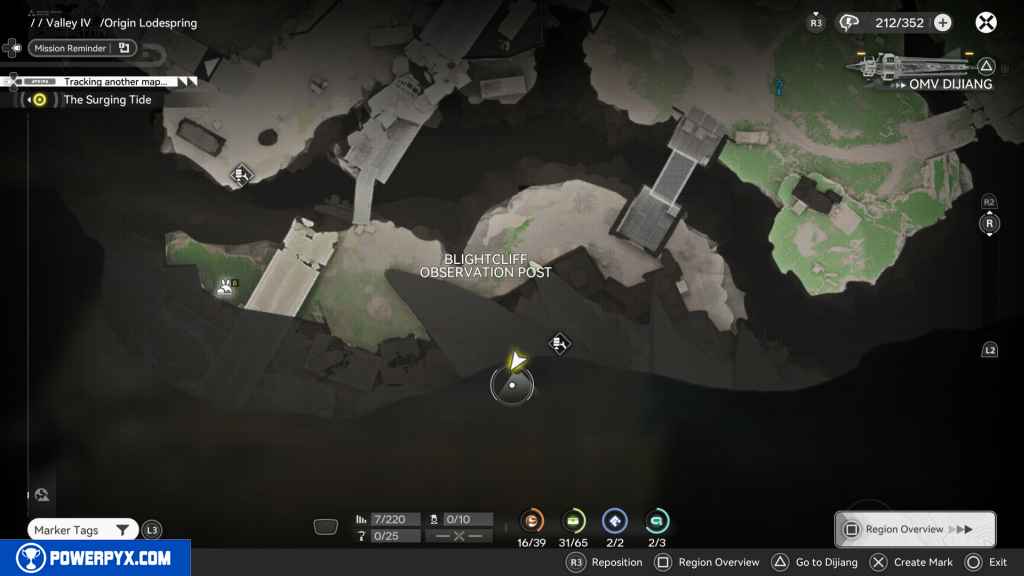
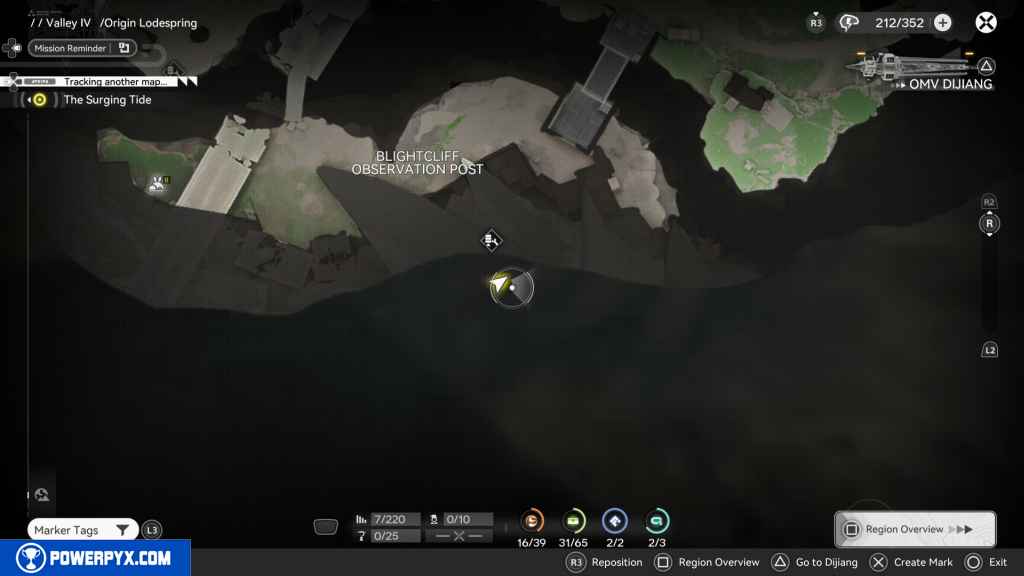
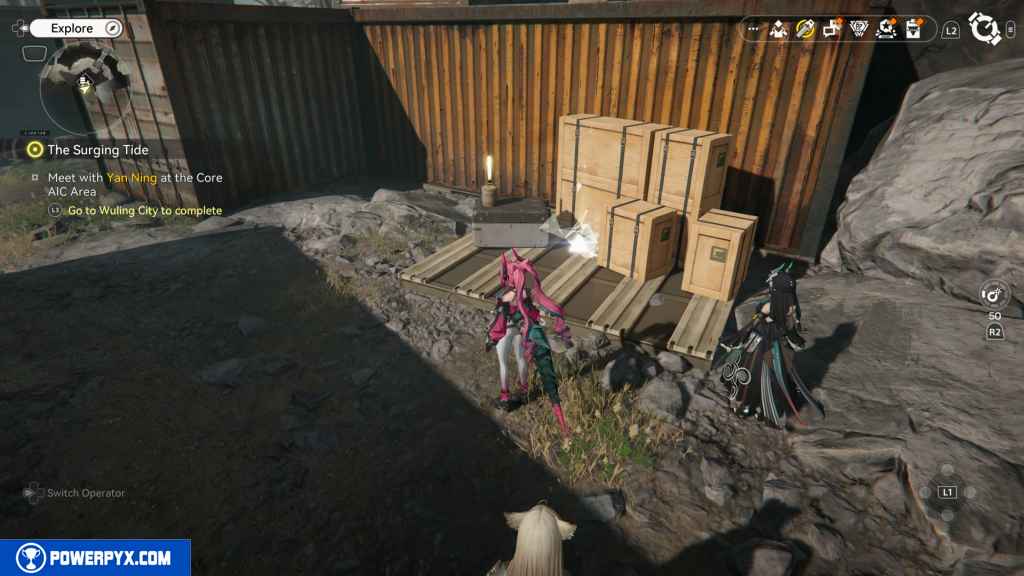
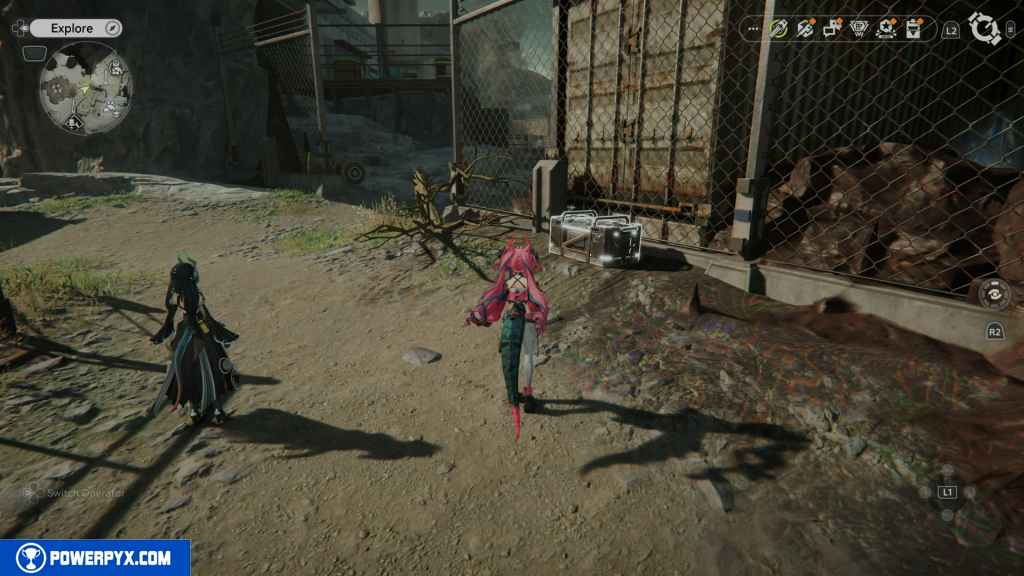
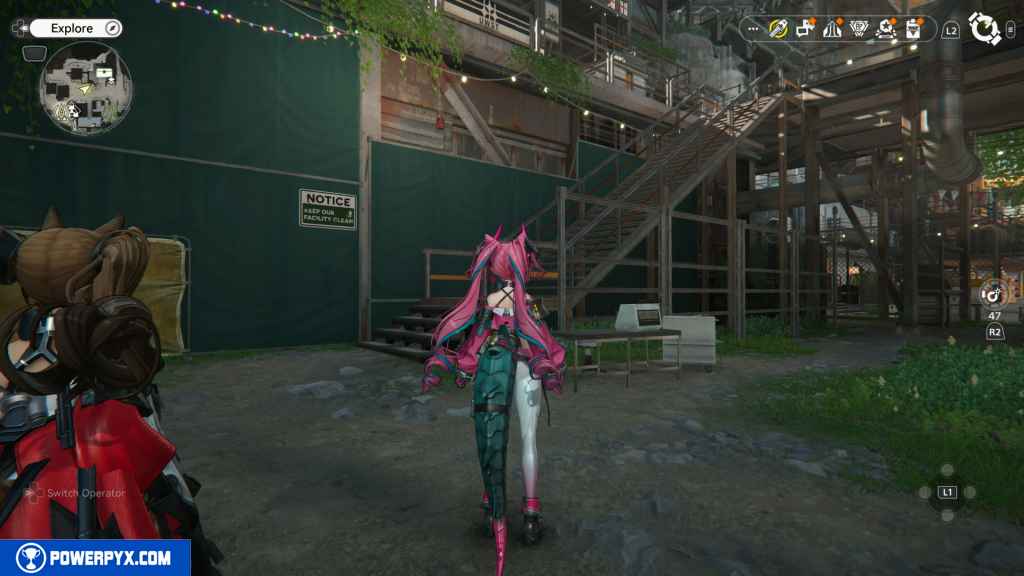
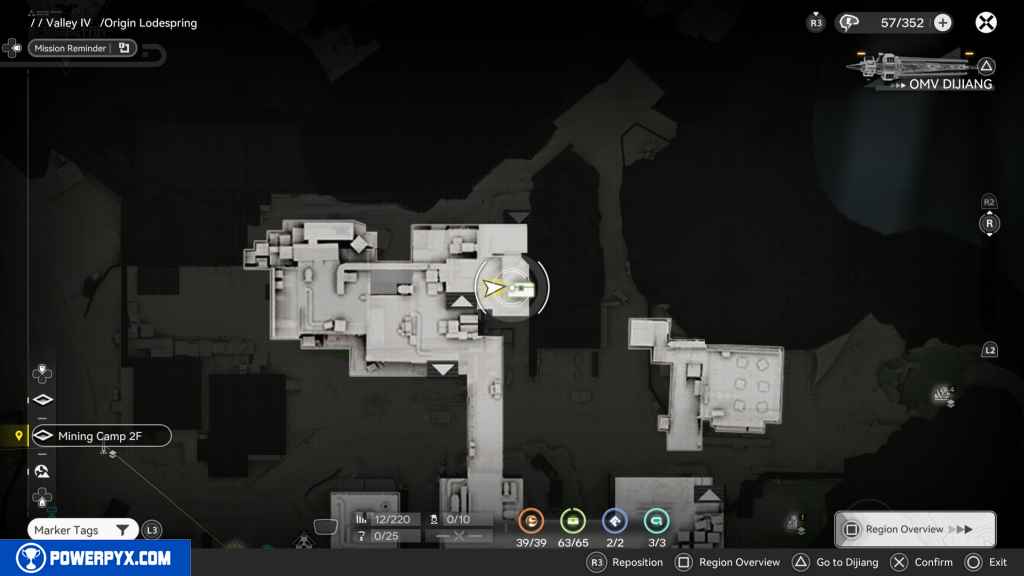
Return to the Mining Camp and go up the stairs to the north, heading east. At the top, go west, then north, and to your right, you should see a stream of blue lights. In this area, there is a small tunnel you can take to reach the Crate at the east end.
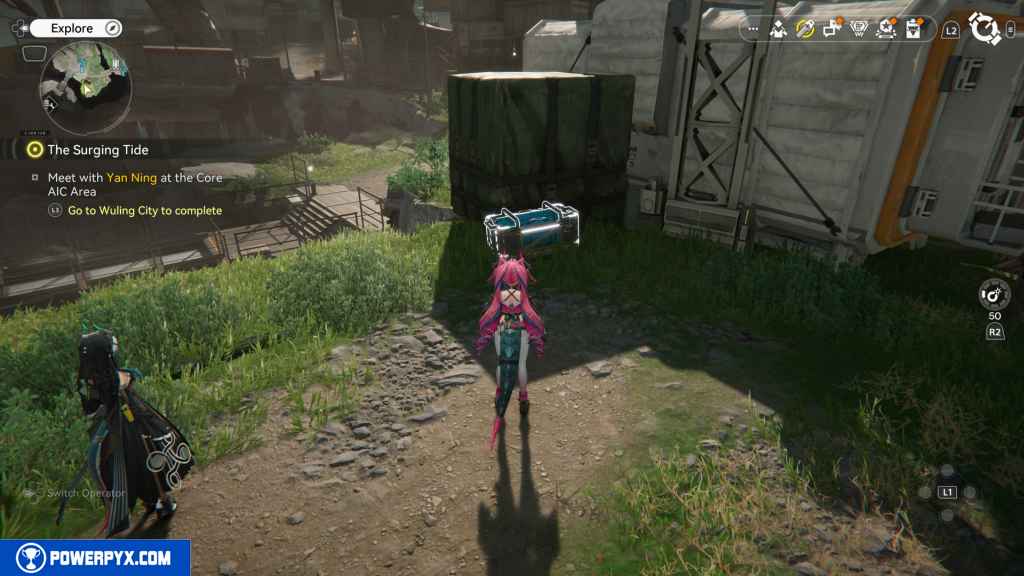
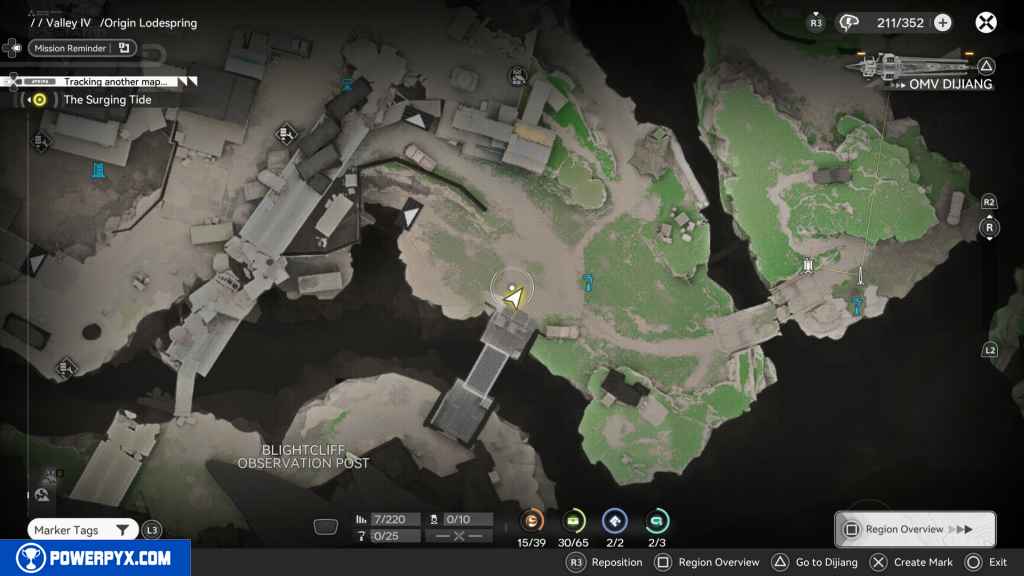
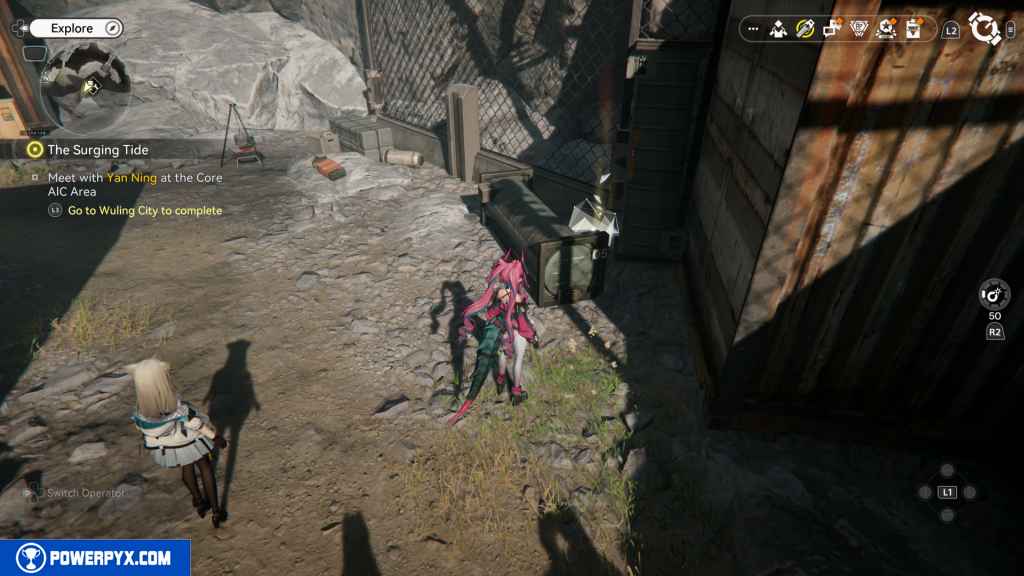
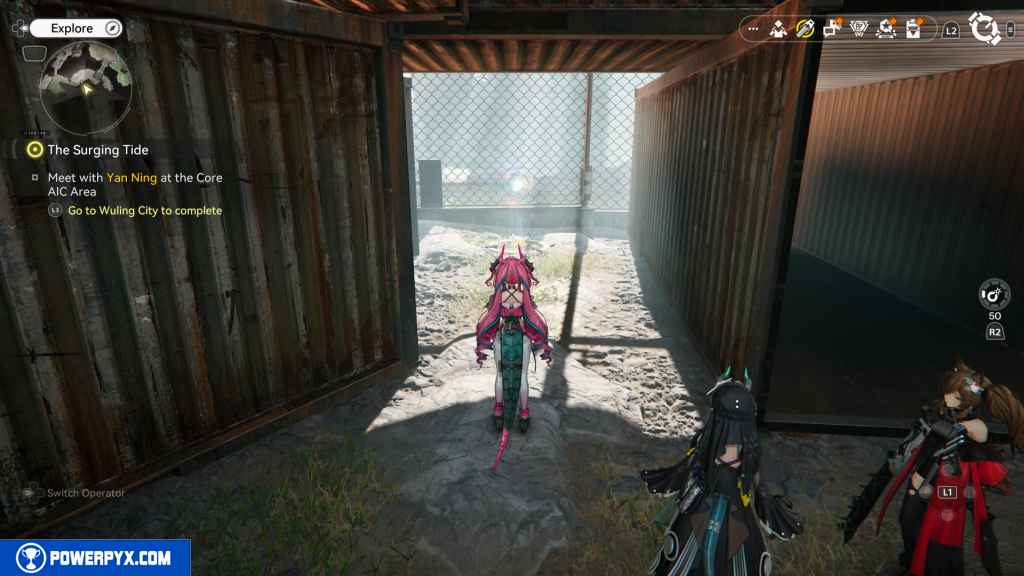
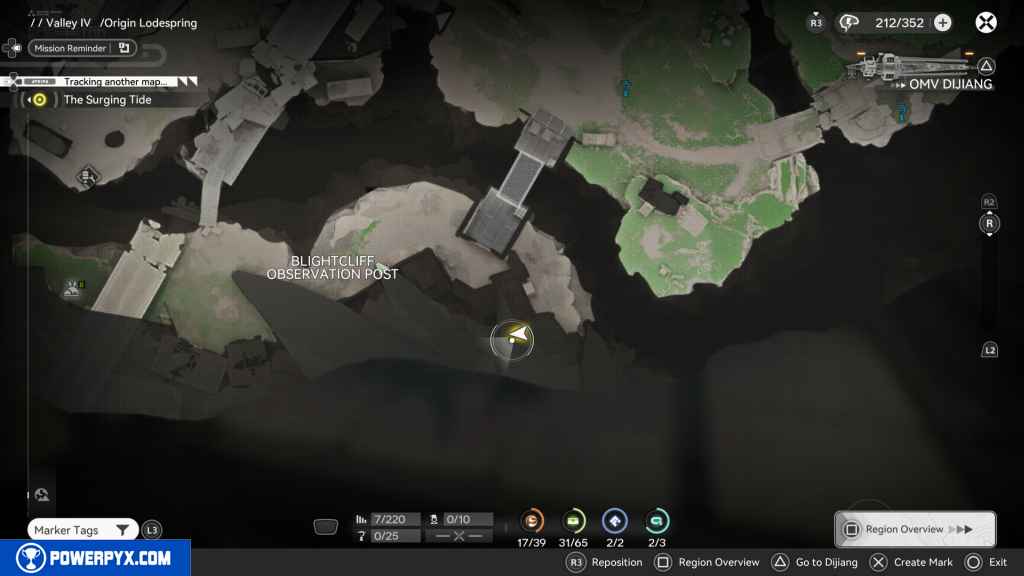
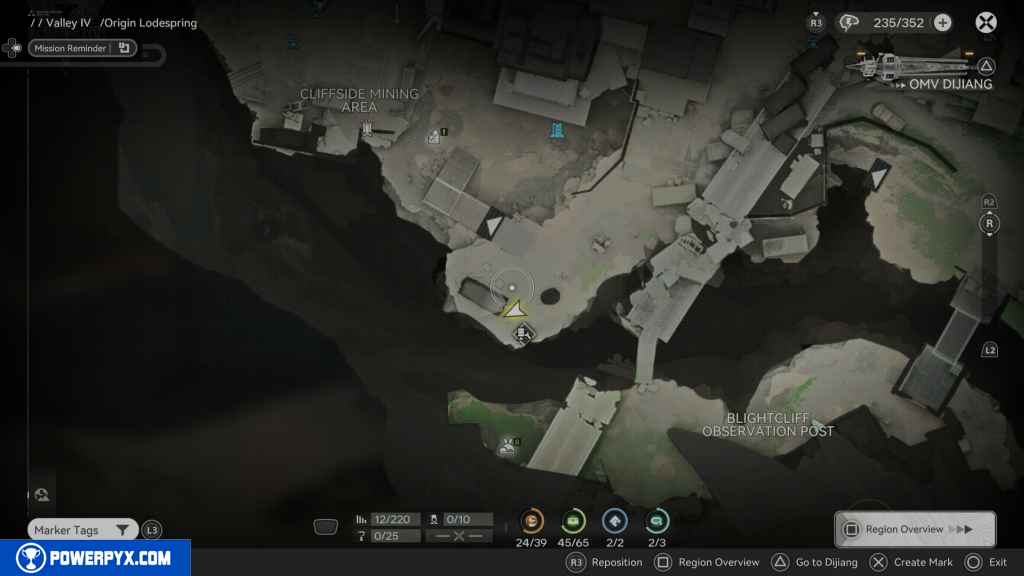
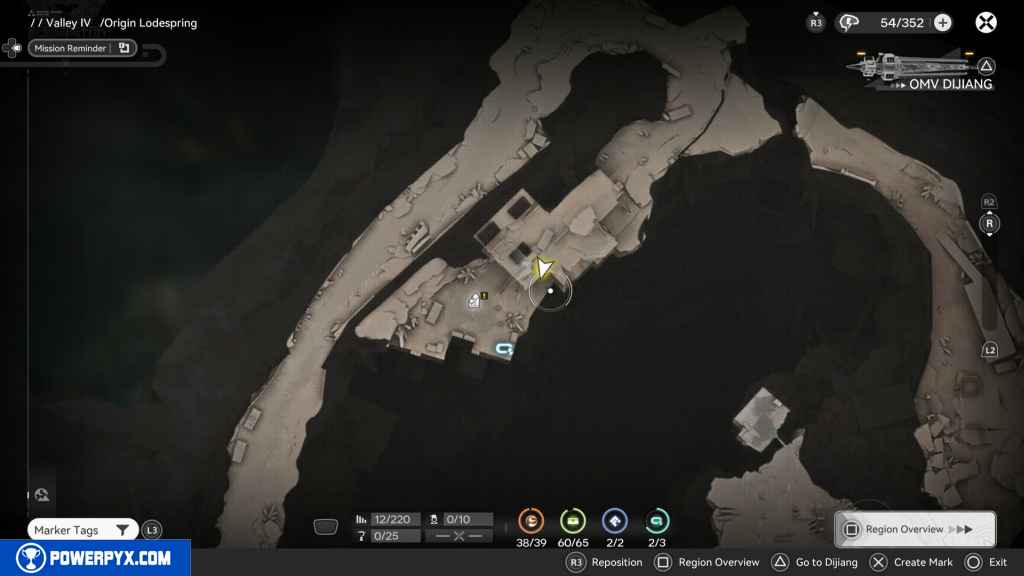
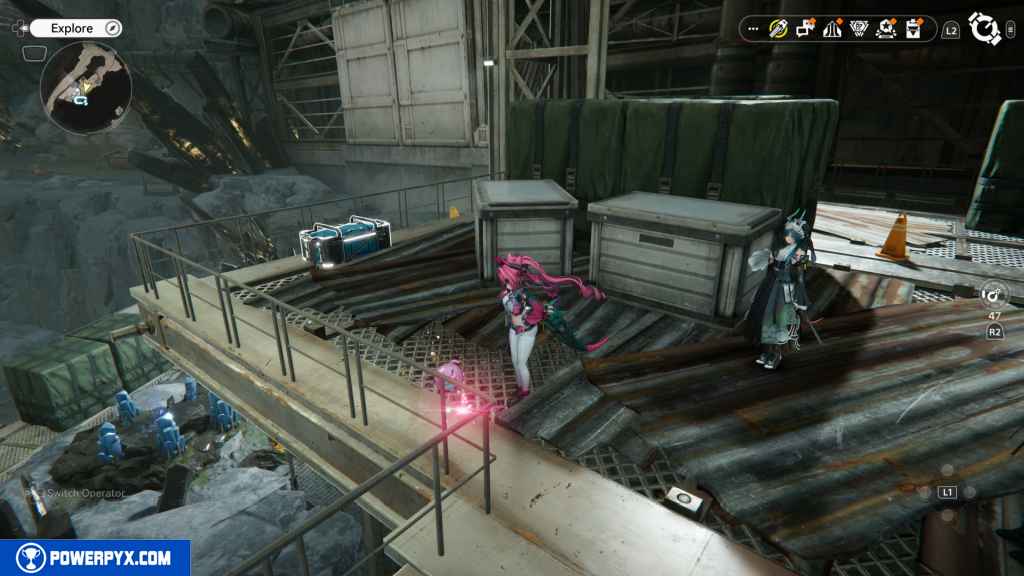
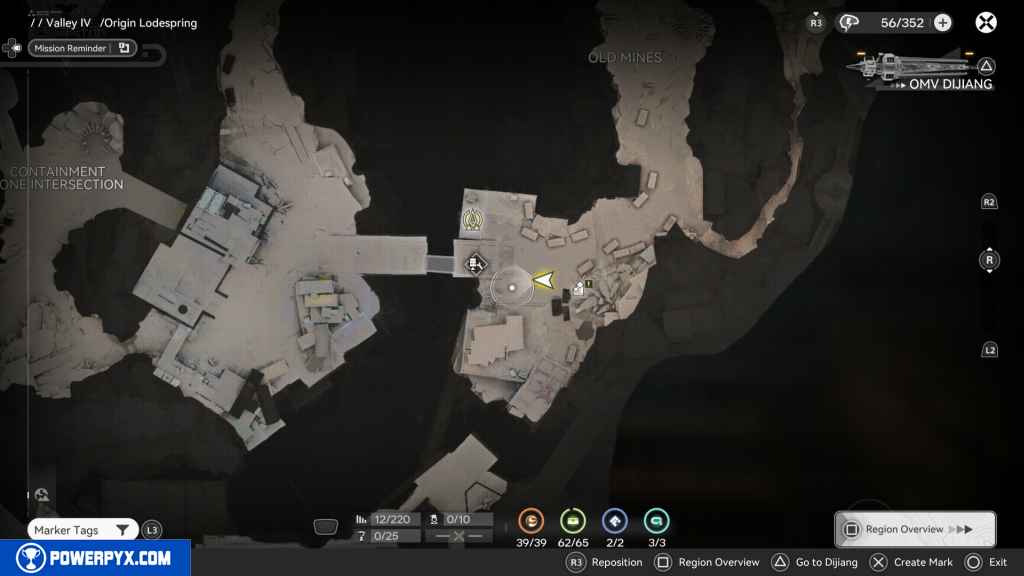
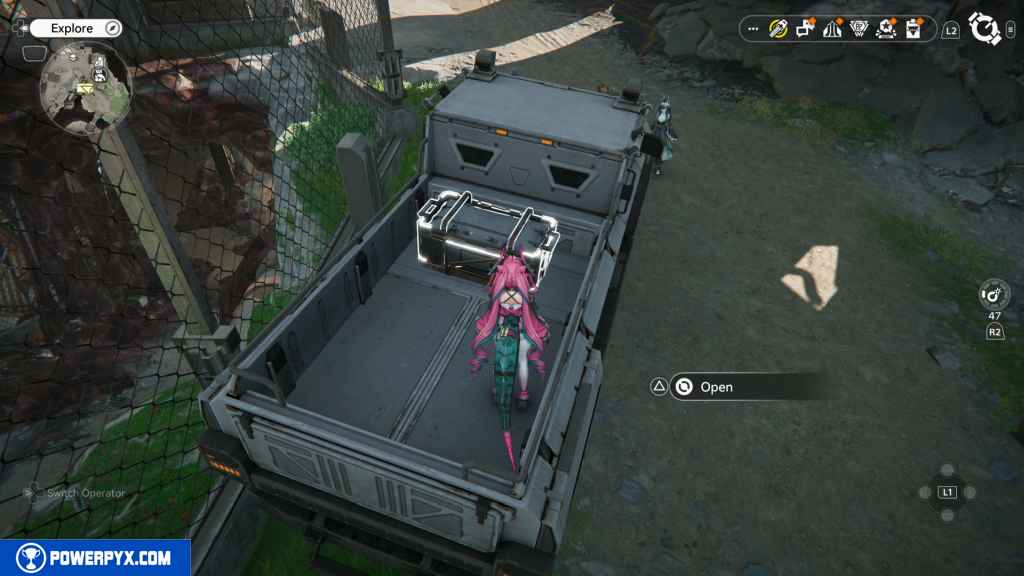
166 – Crate 65
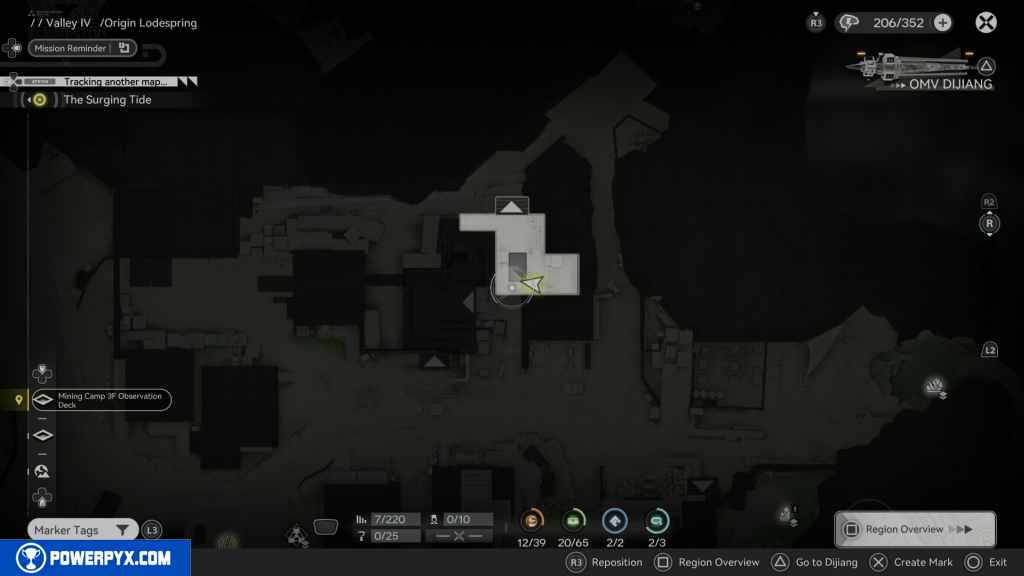
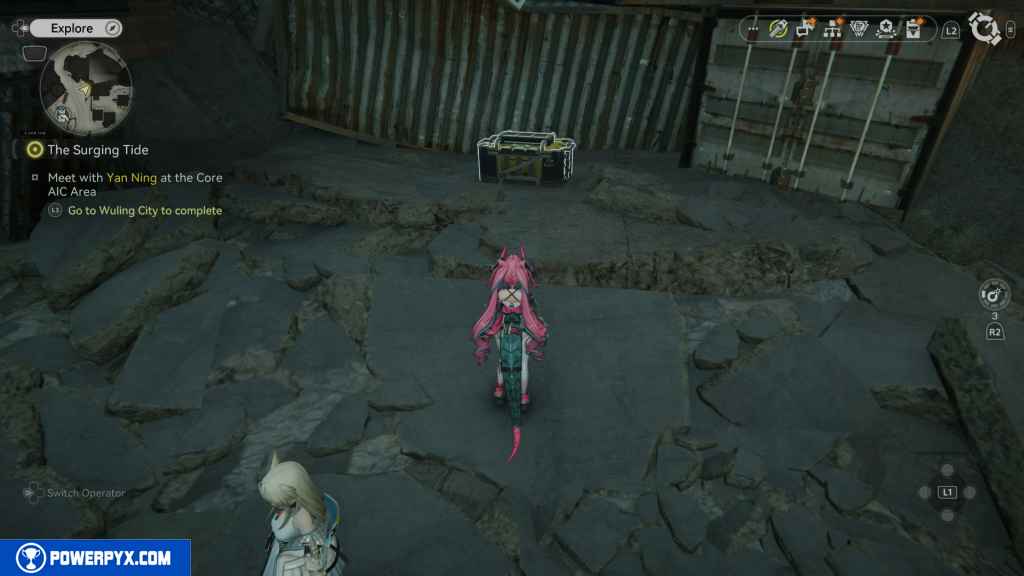
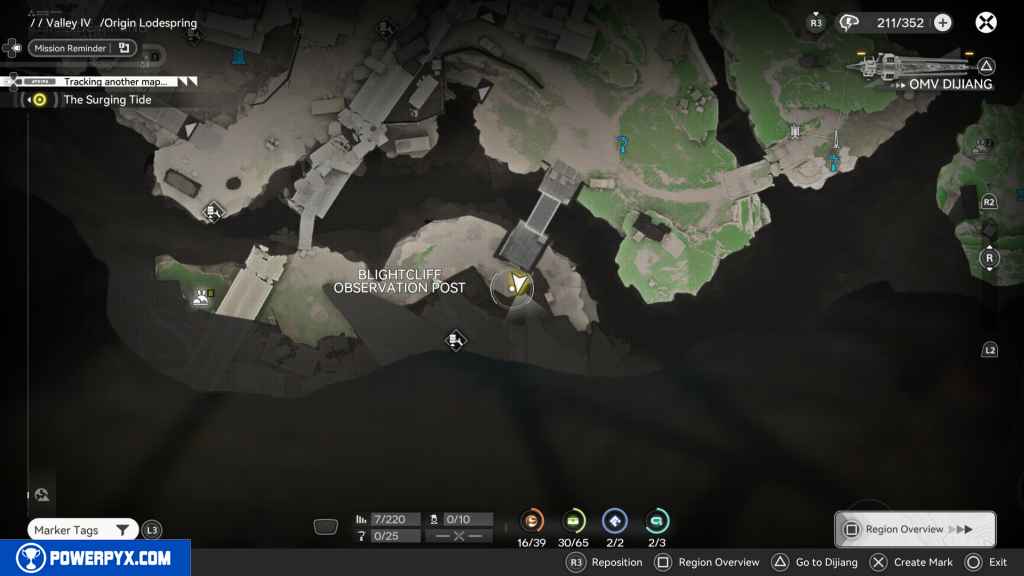
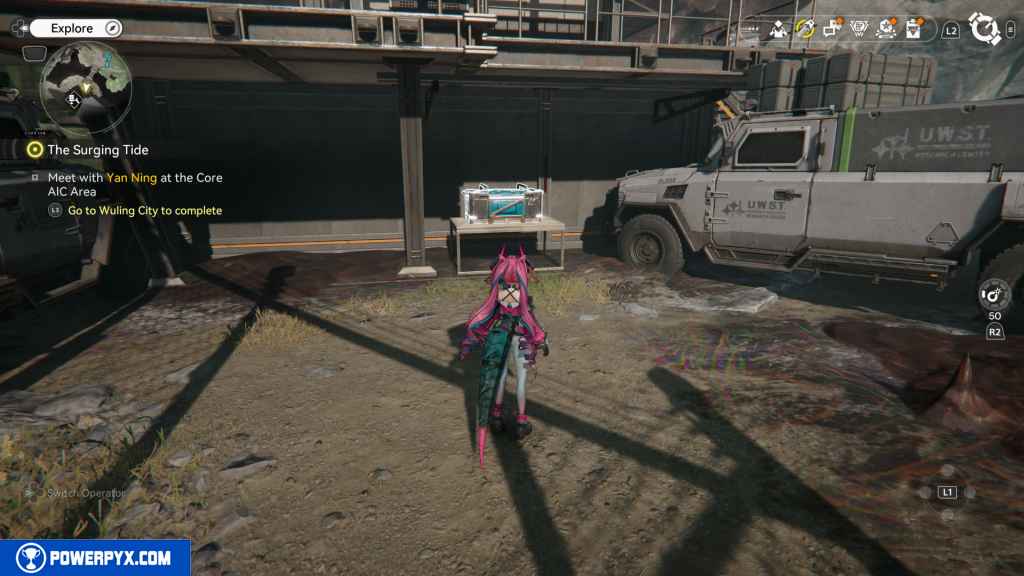
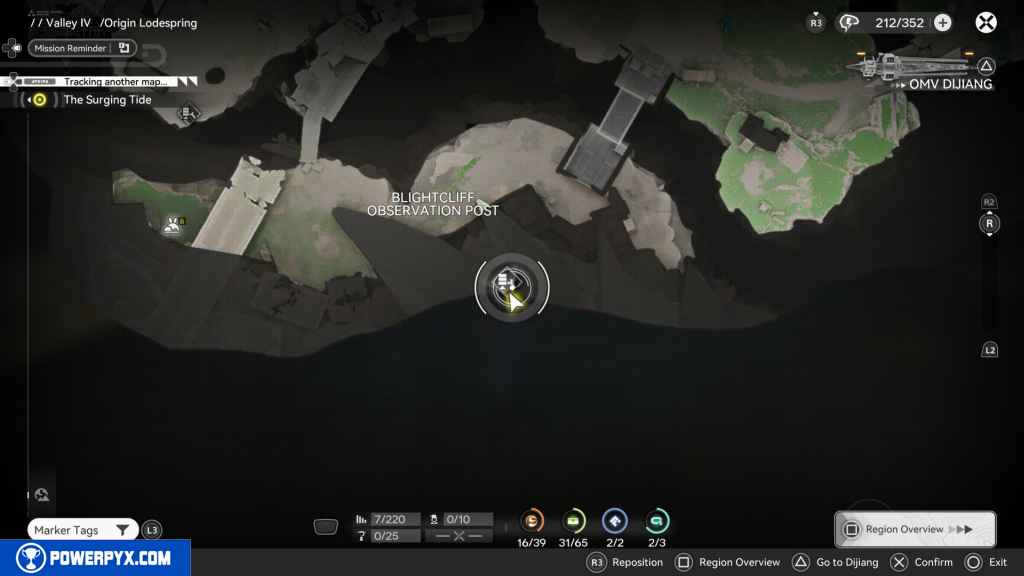
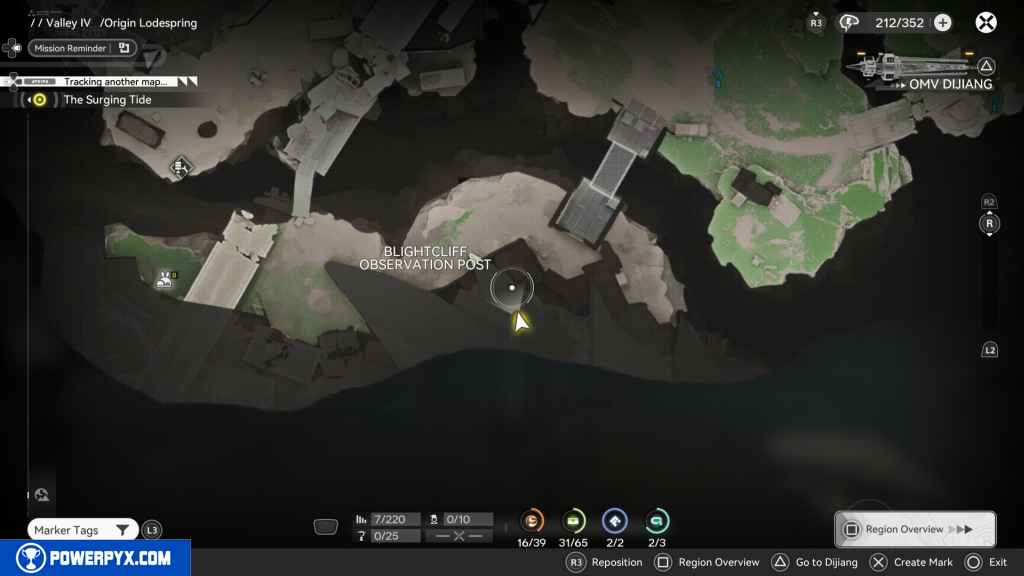
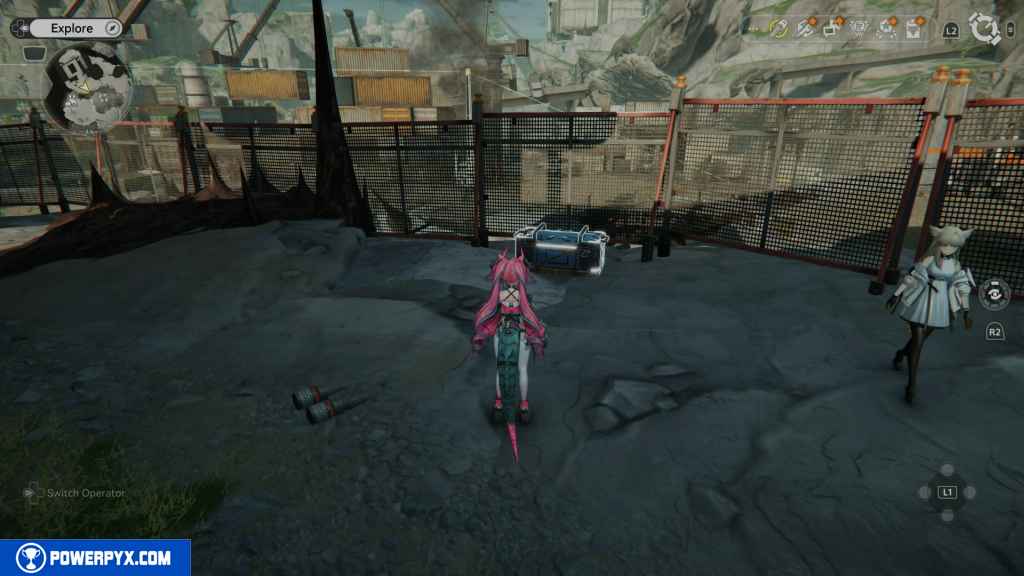
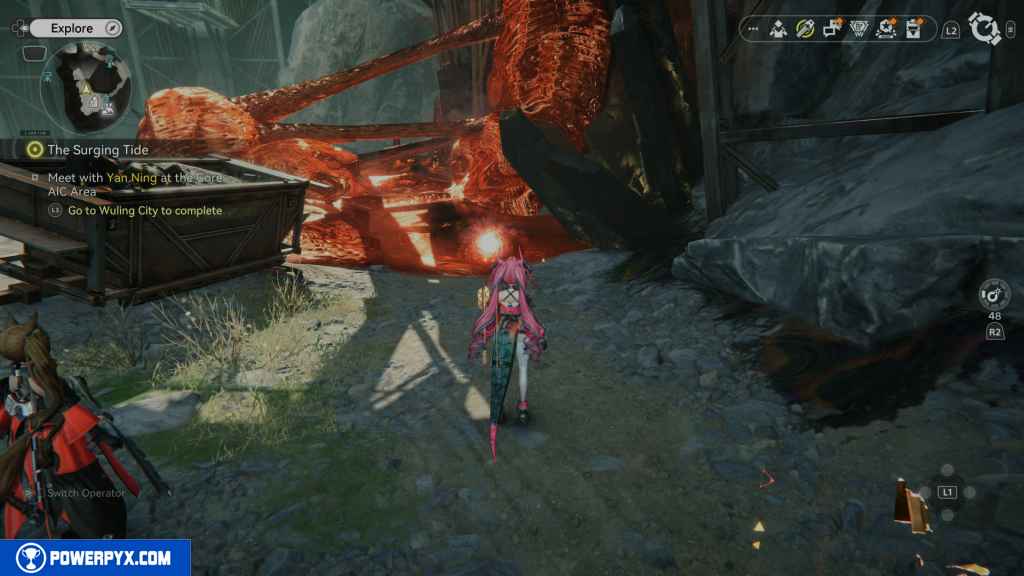
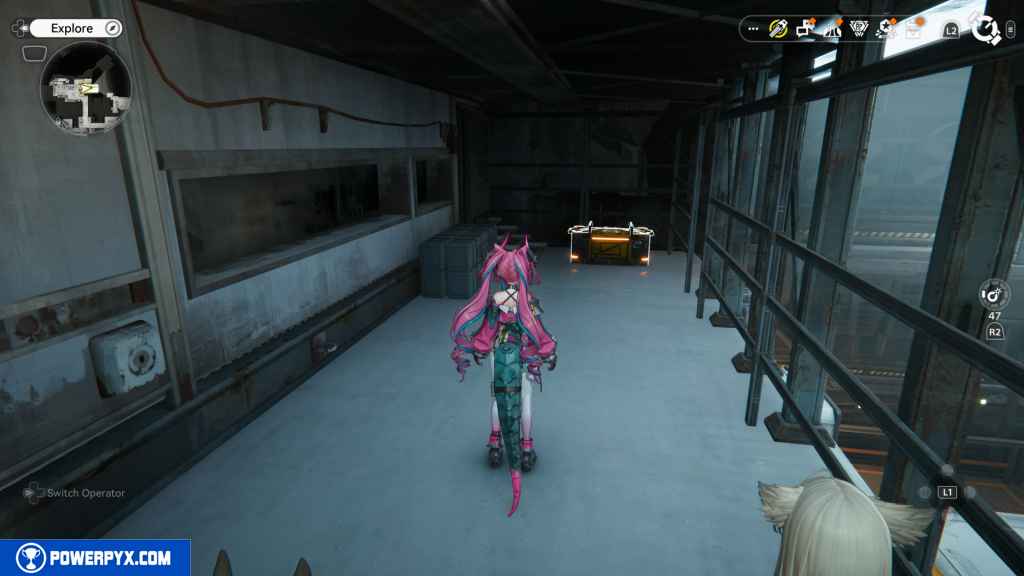
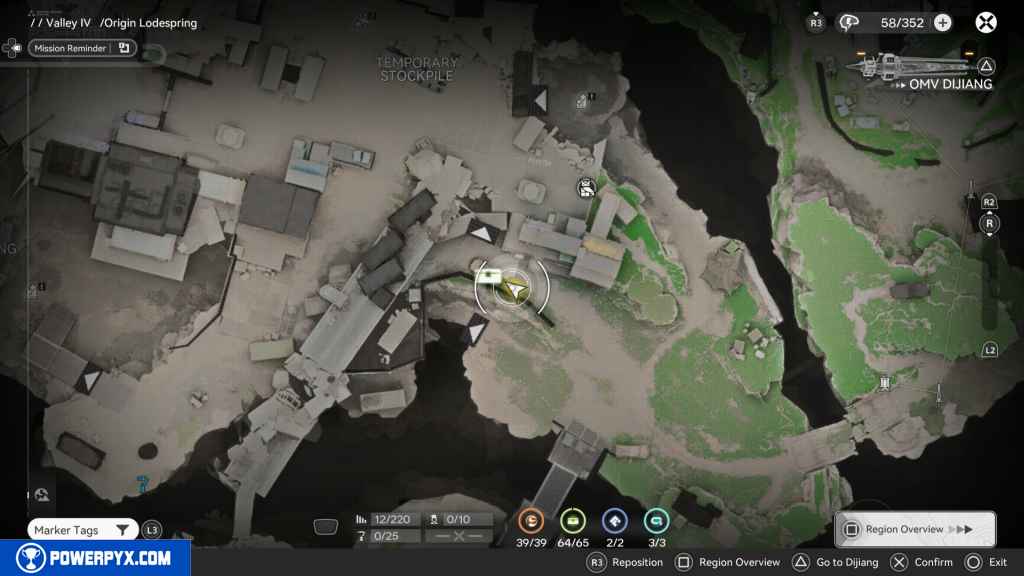
Head north of the bridge at the Blightcliff Observation Post. Take the path north west. Run past the stairs leading up, and you should see a truck on your left. In the truck’s bed is the final Crate in Origin Lodespring.
That’s 100% of the collectibles you can find in the Origin Lodespring area in Arknights Endfield.
For all other regions, refer to the Arknights Endfield Collectible Guide.
Leave a Reply