
The Helm of Urtkot is the twenty-seventh main quest in Hogwarts Legacy. This walkthrough will guide you through all objectives of The Helm of Urtkot Main Mission.
Requirement: having completed Percival Rackham’s Trial and Professor Sharp’s Assignment 1 (Depulso), Level 12
Reward: 260 XP
Quest Info: After I managed to track down the goblin named Lodgok in the Hog’s Head Inn, he told me that he wants to retrieve a sacred goblin relic stolen years ago by a witch. Rumour had it that the relic was in the witch’s tomb. Unfortunately for Lodgok, the tomb is only accessible by wizardkind. Lodgok believed that retrieving the relic could repair the rift between himself and Ranrok. I searched the witch’s tomb, but the helmet wasn’t there – Ashwinders took it. Lodgok knew of an Ashwinder camp nearby, so I went there and retrieved the helmet, then returned it to Lodgok, who was very grateful. Now it’s up to him to see what if he can calm Ranrok’s ire.
Objectives:
- Speak to Sirona in the Three Broomsticks
- Look for Lodgok at the Hog’s Head Inn
- Meet Lodgok Near the Witch’s Tomb
- Follow Lodgok to the Tomb’s Entrance
- Search the Tomb for the Helmet
- Return to Lodgok
- Recover the Helmet from the Thieves
- Return the Helmet to Lodgok
Starting Location: The Helm of Urtkot
We’ve completed Percival Rackham’s first Trial and learned Depulso. We’re now ready to meet with Sirona at the Three Broomsticks pub in Hogsmeade to learn more about the Dark magic used by goblinkind.

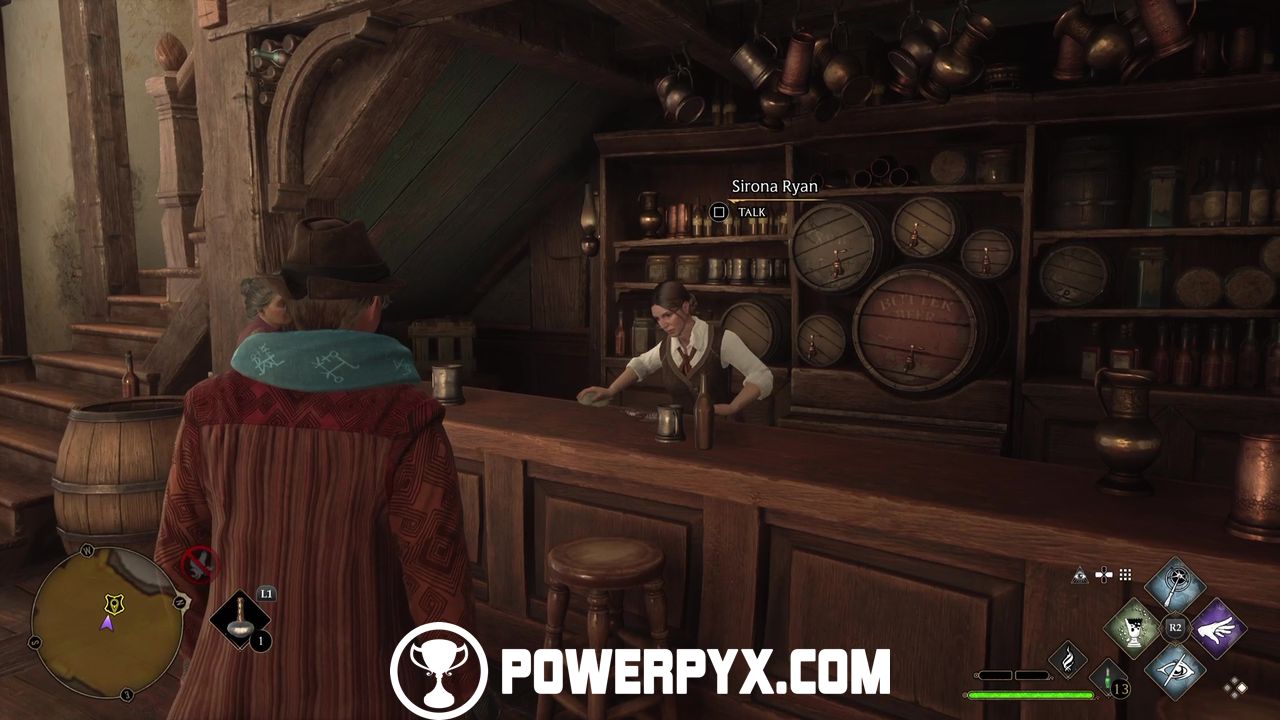
Speak to Sirona in the Three Broomsticks
Warp to South Hogsmeade floo flame and head for the quest marker inside the Three Broomsticks to speak with Sirona, the pub keeper.
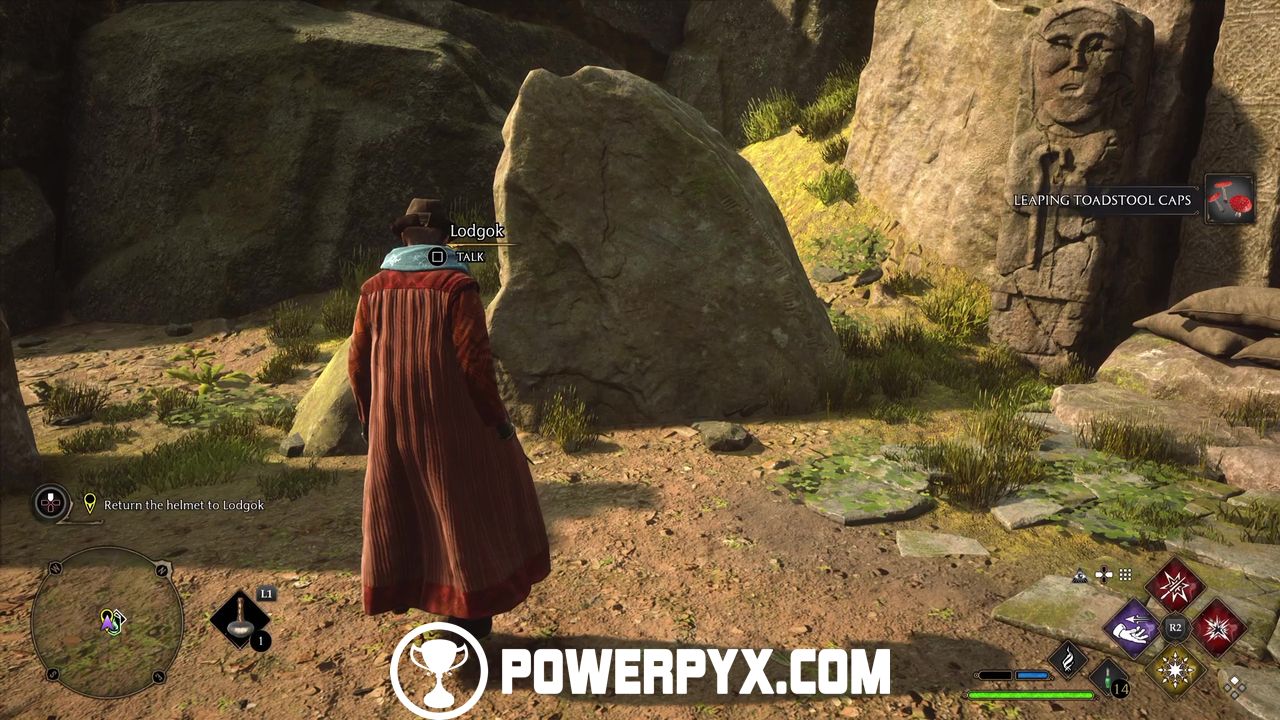
Look for Lodgok at the Hog’s Head Inn
Exit the Three Broomsticks and make your way to the next mission marker. Enter the Hog’s Head Inn and talk to Lodgok sitting at the table.

Meet Lodgok Near the Witch’s Tomb
Proceed to the next mission marker just outside of Hogsmeade.

Follow Lodgok to the Tomb’s Entrance
Follow Lodgok to the tomb’s entrance.

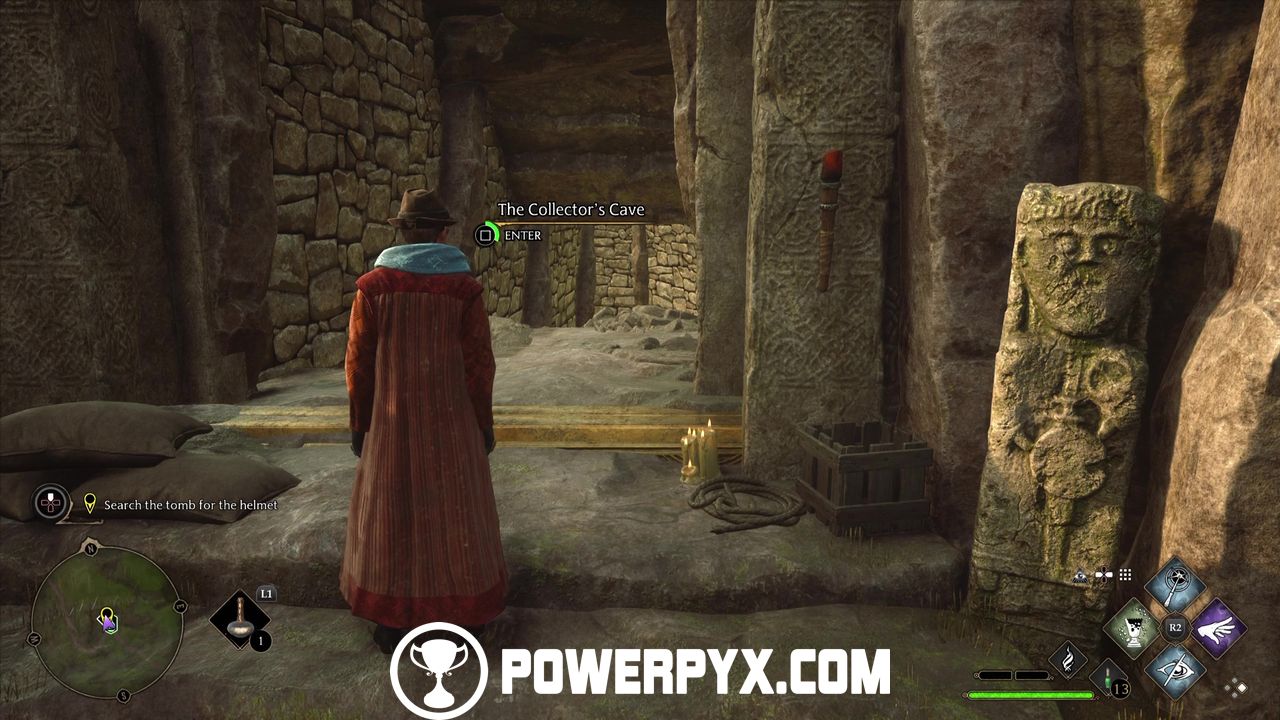
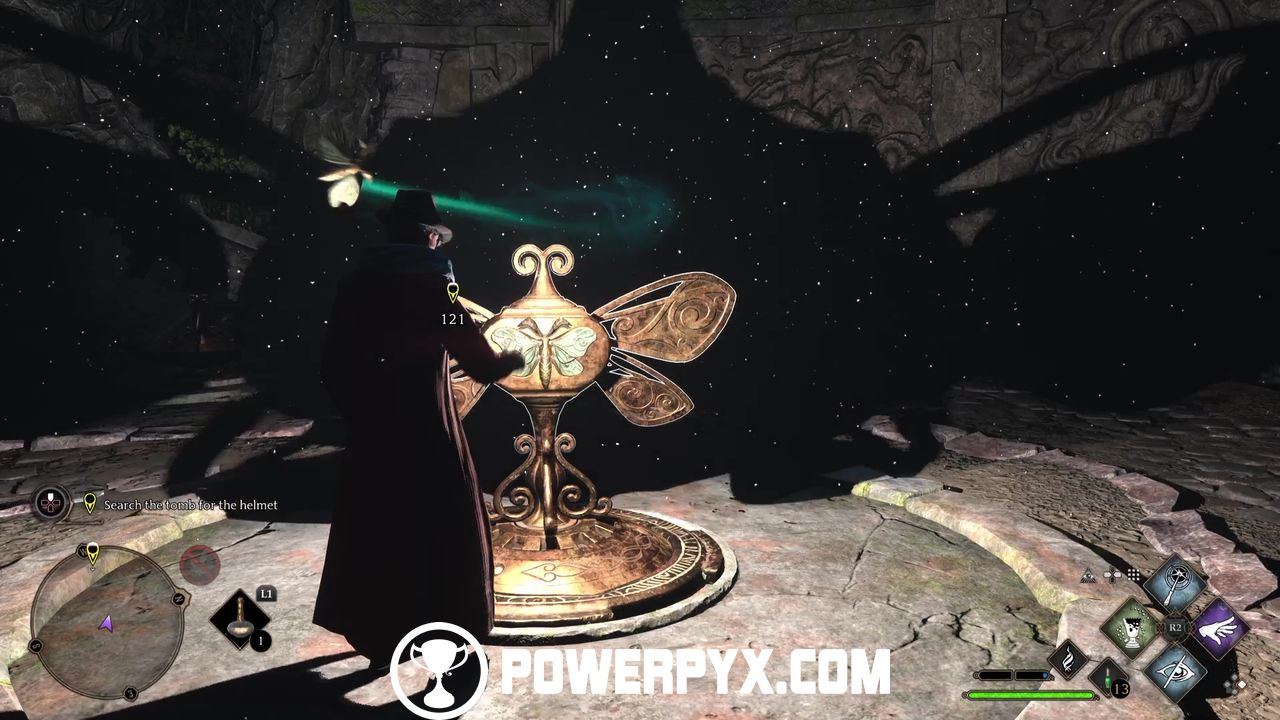
Search the Tomb for the Helmet

Press  to enter the Collector’s Cave and continue down the tunnel until you see a moth door.
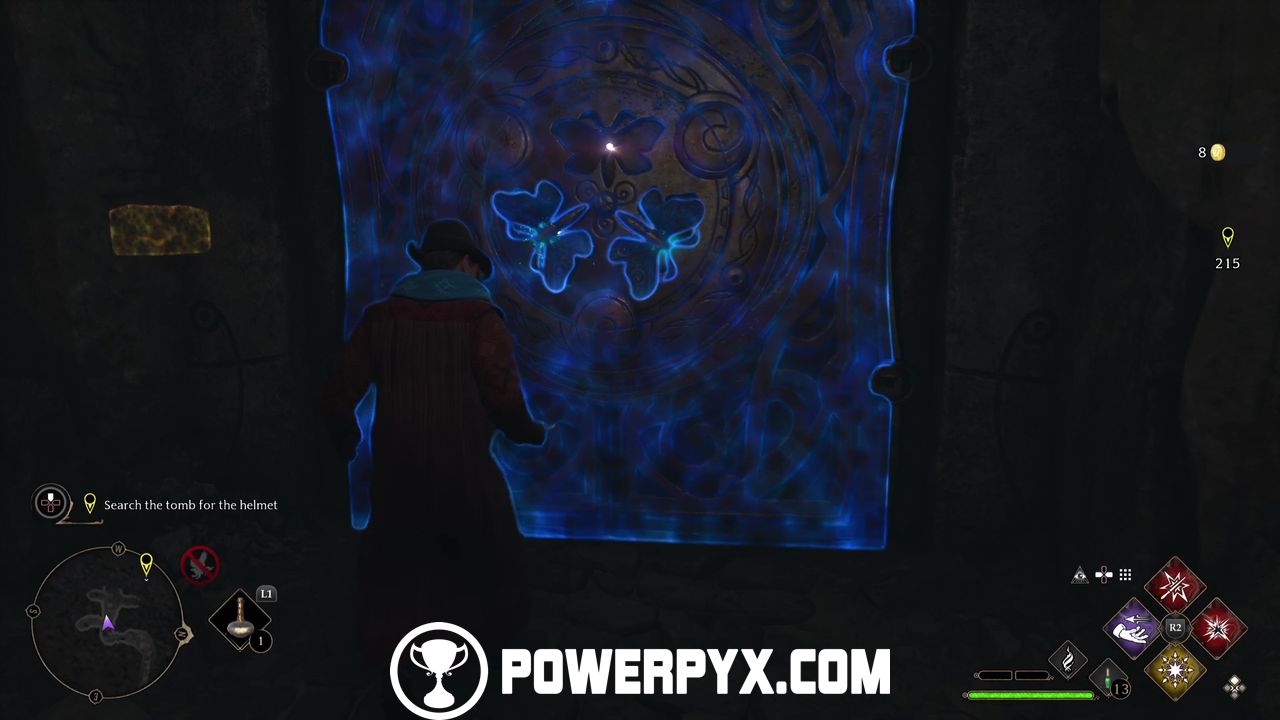
One of the moths is missing, so continue along the same tunnel and you’ll find it flying around at the end. Get close to the moth and then cast Lumos to pull it towards you.
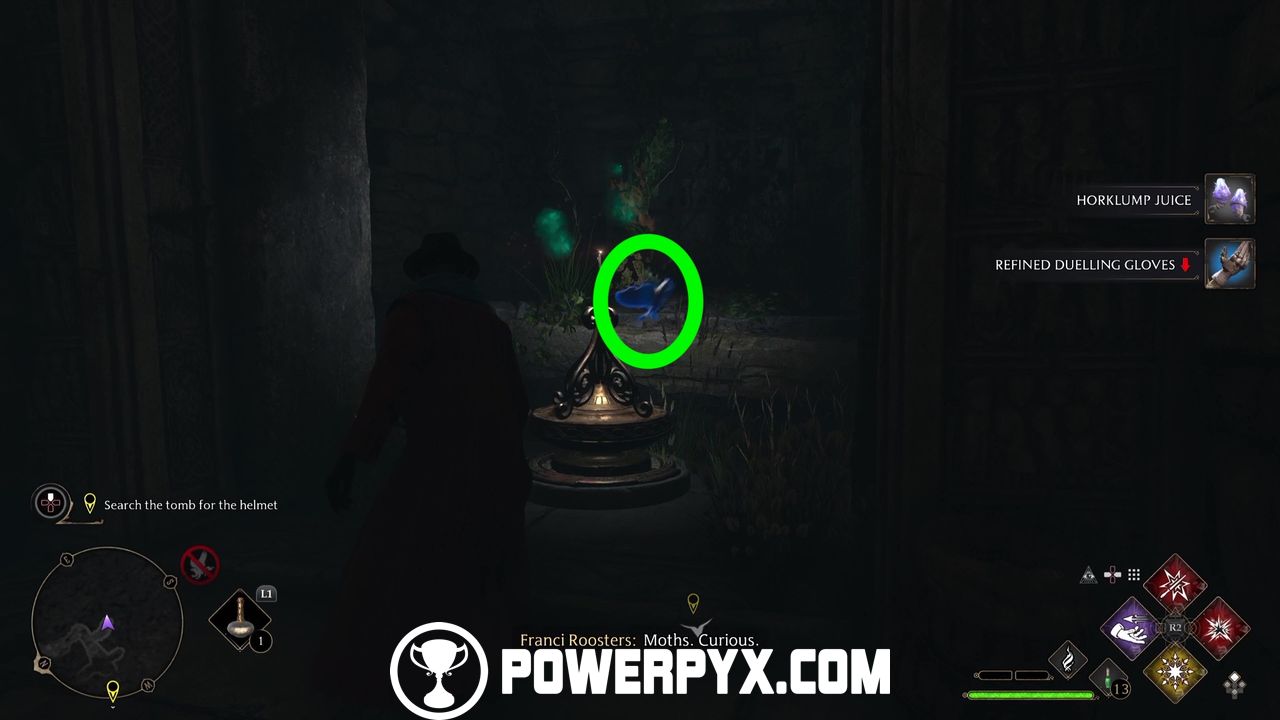
Return to the door and turn off Lumos to have the moth fill the missing slot. Continue into the next room and open the stone chest on the left.
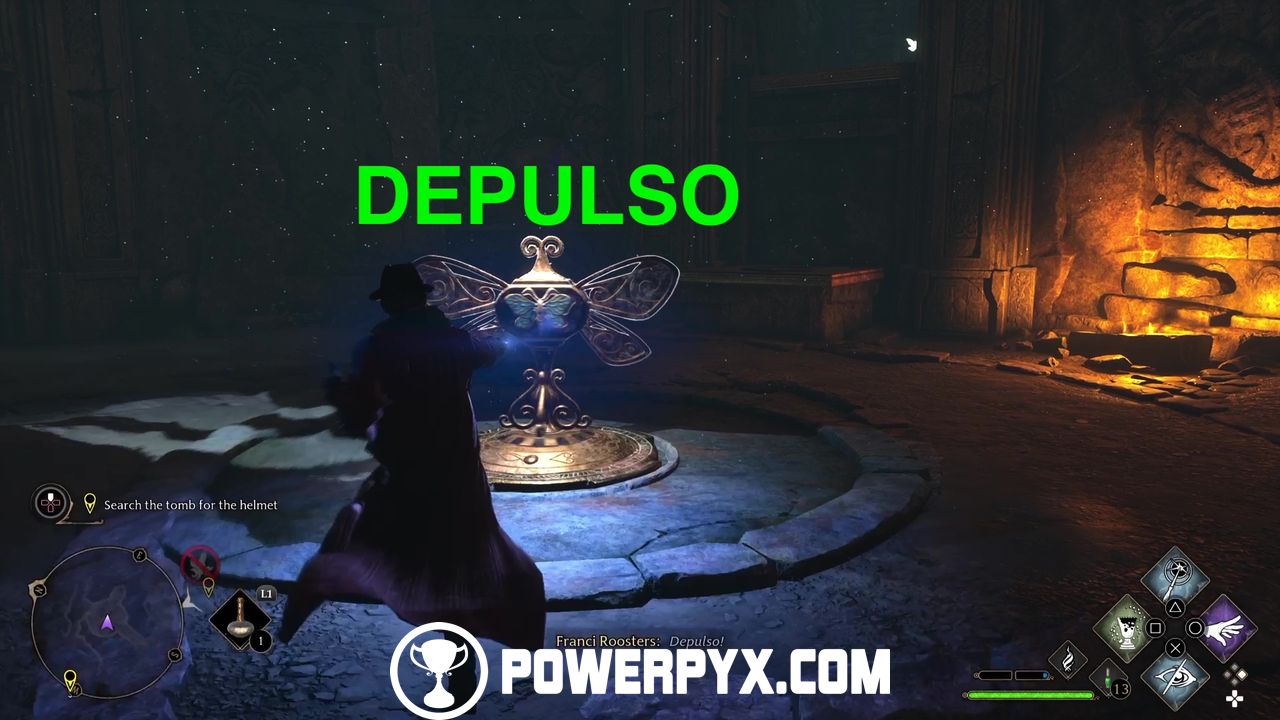
Continue down the main path and you’ll get to a round room with a tomb and another moth door. Two moths are at both sides of the room, so repeat the same process with Lumos to lure them to you and then approach the door to release them. The third moth is behind the barricade that you can push down with Depulso.

Go back to the door to slot the third moth and continue on.
In the next room you’ll meet Inferi, a new enemy type that must be first made vulnerable with fire-based spells like Confringo and Incendio. Once you’ve used either one, you can cast Basic Casts to weaken them even further. Grab the chest from the ledge here and use Depuslo on the rocks in the same room to access some loot, then continue on through the tunnels.
In the next room, you need to slot either moth in the contraption in the middle. Then, use Depulso on the contraption to spin it and reveal a platform leading you to the third moth.
Now drop back down and use Lumos to move all three moths into the door slots to proceed further into the tomb. Loot the next room, making sure you use Depulso on the barricade for two more chests on two ledges and then drop the counterweight to reveal an opening on the floor which is the way forward.

Continue to the next room and defeat all Inferi. Loot the room, making sure you open the small chest as well, and then grab either moth and place it in the contraption.
Stand on the platform behind it and cast Depulso at the contraption to raise it. Facing the contraption, once the platform stops, head left and go down the hill to find a room with two more chests. Go back up and lure the moth with Lumos to you, jump over the gap and place it on the door. If you fail the jump, use Depulso on the contraption again, then quickly grab the moth and place it on the door before the platform goes back down. One moth is now slotted. As for the second moth, drop back down and spin the contraption with Depulso again. There’s a second contraption pillar in the room that raises when you spin the contraption, to the left of the spinning contraption.

What you have to do here is grab the second moth and perch it on top of the contraption. Now stand on the raising platform again and cast Depulso the contraption in front of you to go back up. Then, quickly run to the right and cast Lumos to grab the second moth from the raised pillar, then slot it into the door.

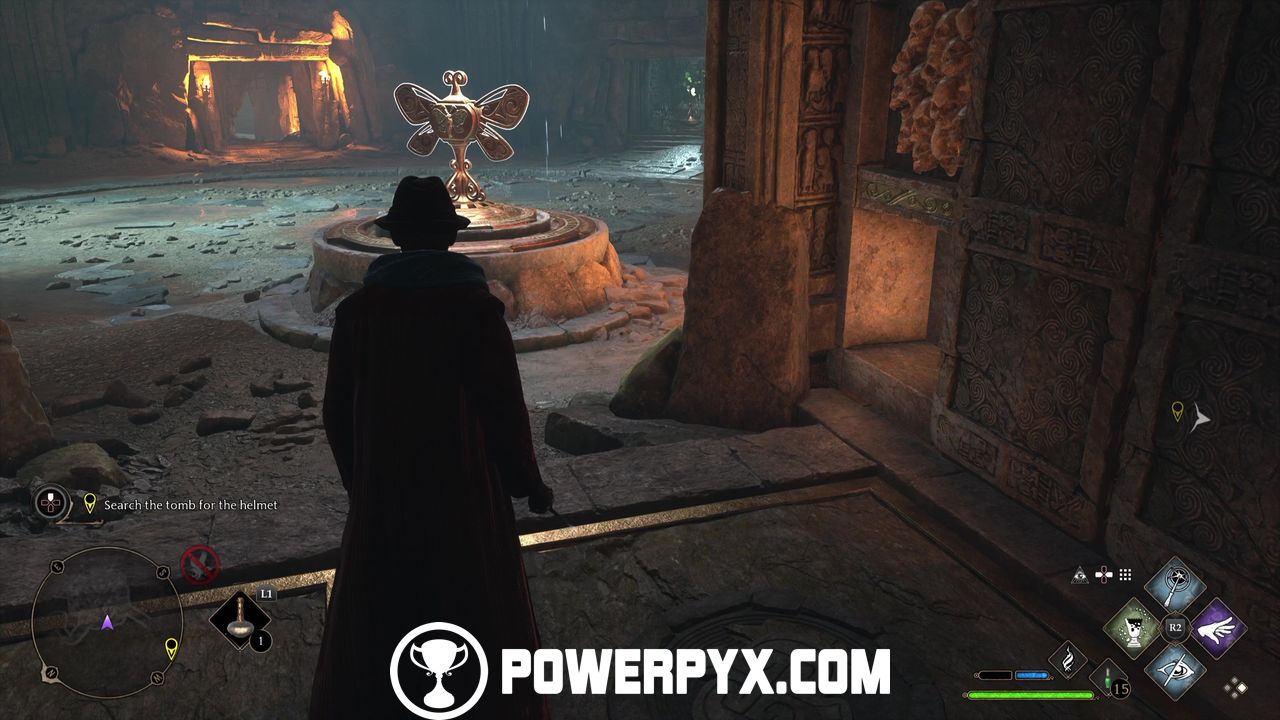
Two moths down. As for the third moth, this can be found right of the door in an alcove. Slot the third moth and continue to the final room. Loot it, including the chest, then interact with the dead Ashwinder to obtain Signet Ring.


Return to Lodgok
Exit the tomb from the secret passageway at the back and then speak with Lodgok.

Recover the Helmet from the Thieves
Mount your broomstick and fly to the next marker. At the camp, defeat all Ashwinder scouts and the troll. The helmet can be found in a chest under a tent within the purple investigation area after the small wooden walkway.

Return the Helmet to Lodgok
Fight off the enemies or ignore them and fly back to Lodgok to return the helmet to him.

This finishes The Helm of Urtkot in Hogwarts Legacy.
Next Quest: In the Shadow of the Estate
For all other quests refer to the Hogwarts Legacy Walkthrough.
TM says
I was stuck at the 3 door. Thanks for the guide.
anasterion says
Same… I thought we need to get the one from spinning statue back. Tried ussing stopping time on statue and to get it back. Didn’t seem to work. Ran out of ideas and gave up, checked here and got massive facepalm when realized that there are 4 butterflies in last room and that one extra just stays in statue =/