
Mouse P.I. For Hire has 214 Collectible Locations. This collectible guide shows all collectibles for 100% game completion. There are the following types of collectibles:
- 38 Newspapers – Required for
 Extra! Extra!.
 - 41 Baseball Cards – Required for
 Card Shark.
 - 29 Comics – Required for The Prequel.
- 10 Secret Figurines – Not required for any trophies.
- 81 Schematics – Only 72 required for
 We’ll B.A.N.G., ok?.
 - 15 Optional Clues – Required to unlock all key clue and wrap up case trophies.
If you miss a Newspaper, Baseball Card, or Comic in any of the missions, you’ll be able to buy the ones you missed from the shop either at the P.I. Office or the Roadhouse. The only exception to this is the Baseball Cards earned as a reward from completing certain Side Jobs. Secret Figurines and Schematics can’t be bought from the shop.
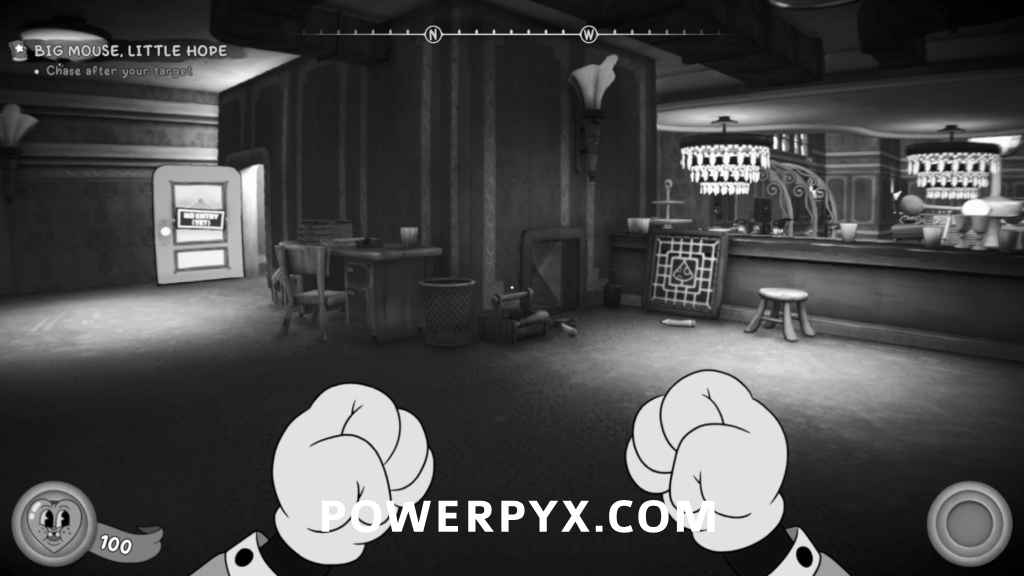
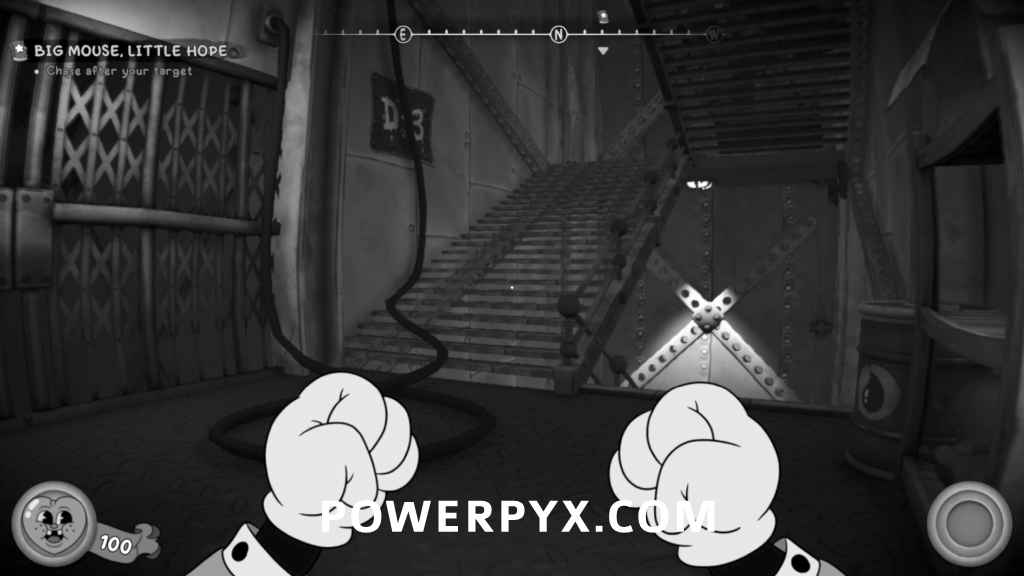
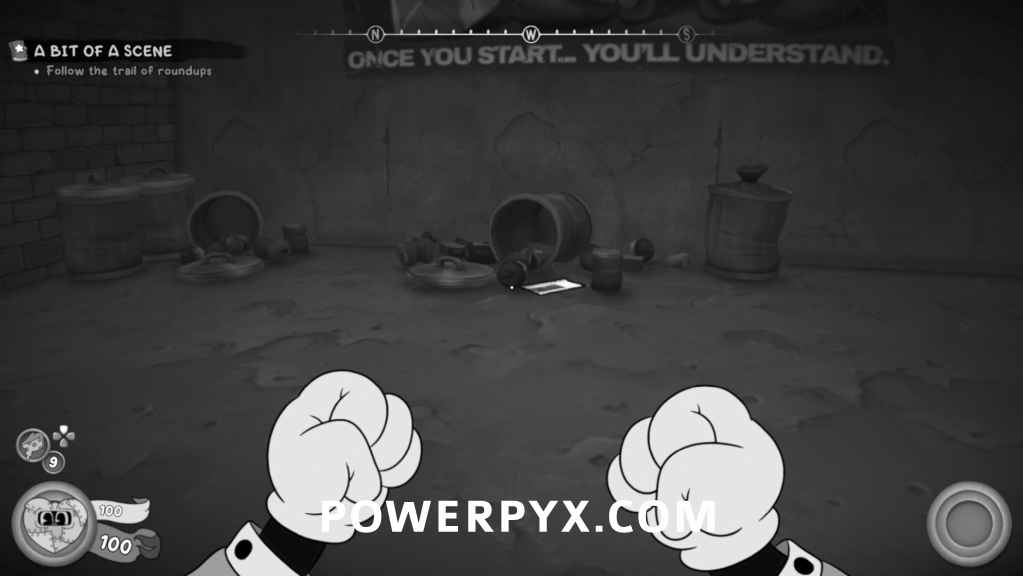
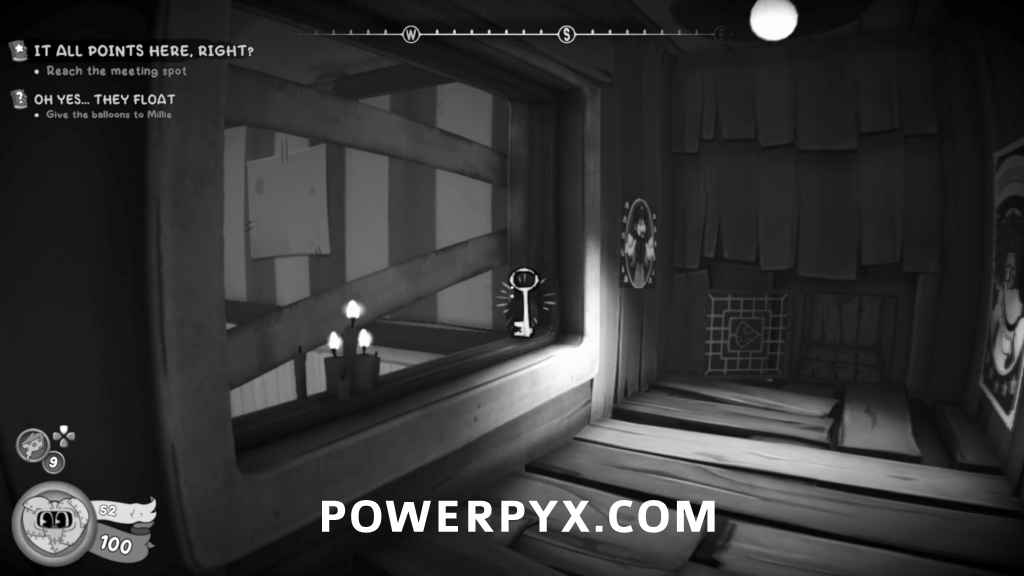
Big Mouse, Little Hope (Prologue)
Comic
From the room with the spinning floor, go up the stairs into the next room and then turn around to face the counter. Enter the open vent and pick up the collectible at the end.

Comic
After watching your target escape down an elevator, go up the stairs and the collectible will be on the floor.
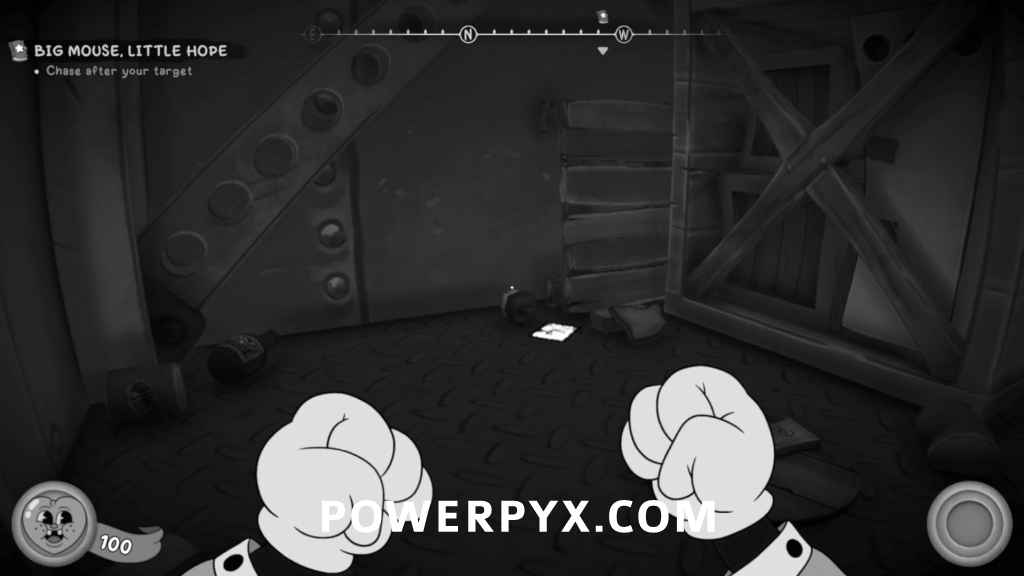
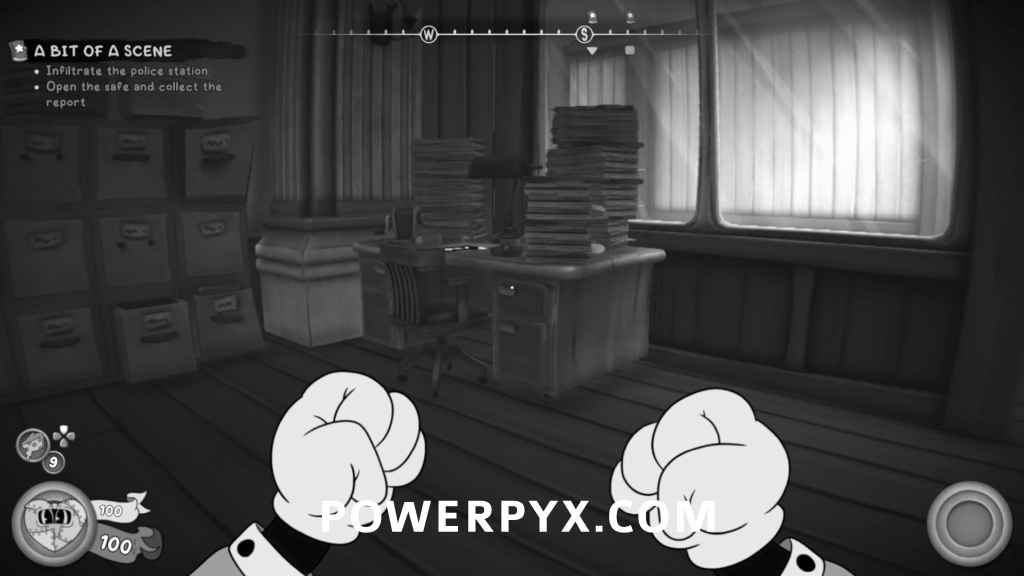
Schematic
After the previous collectible, go into the next room and the schematic will be inside the safe.
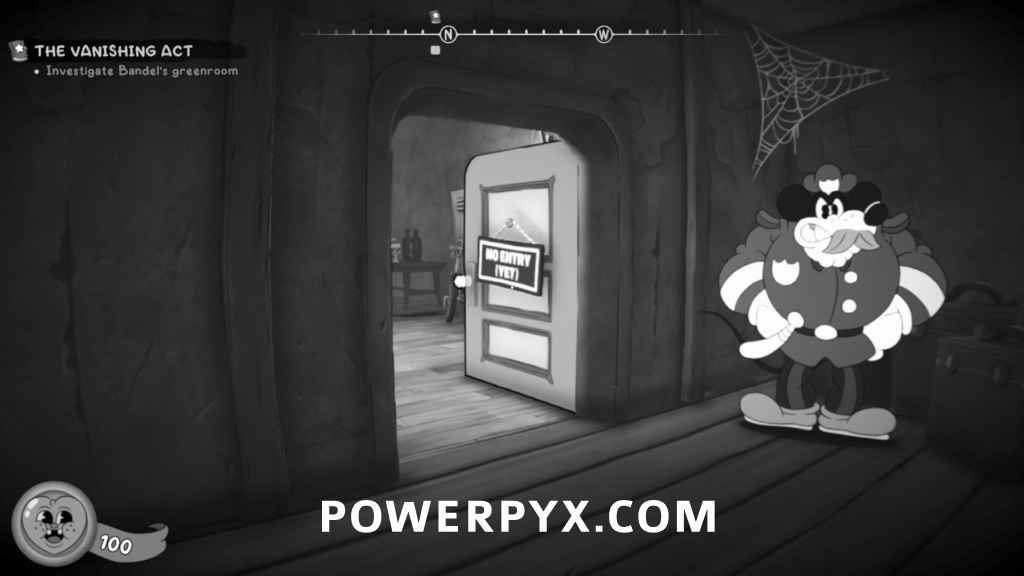
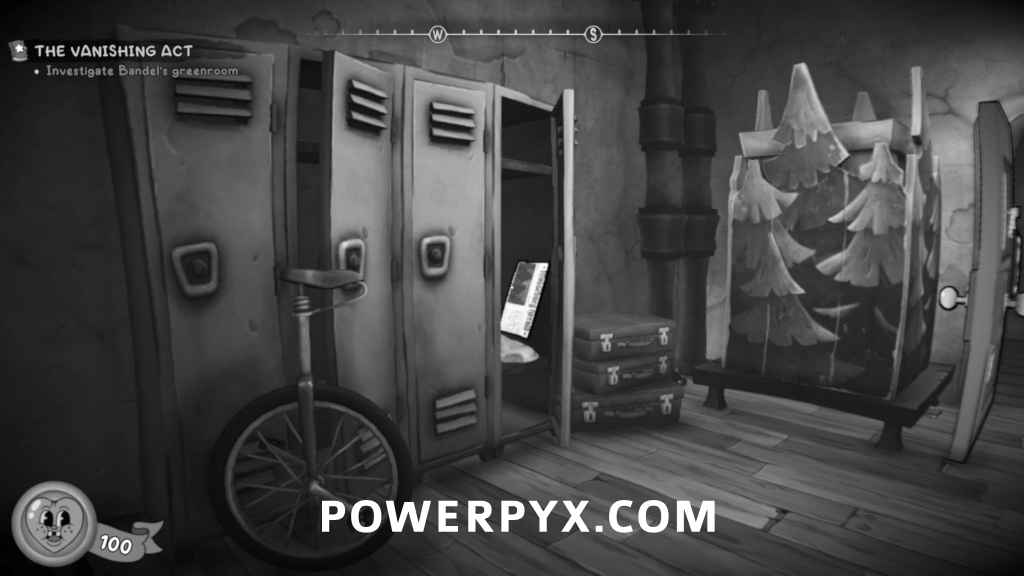
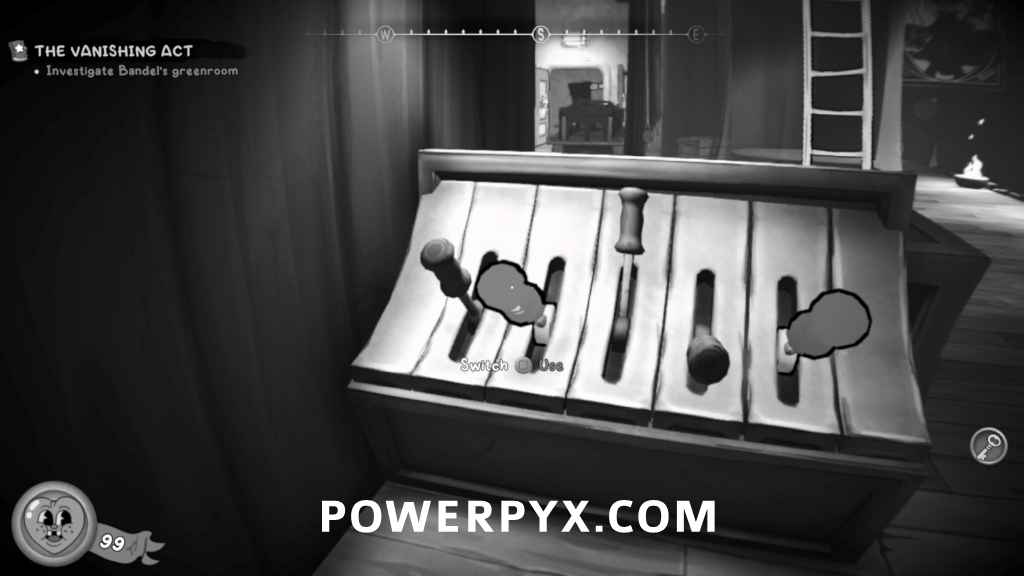
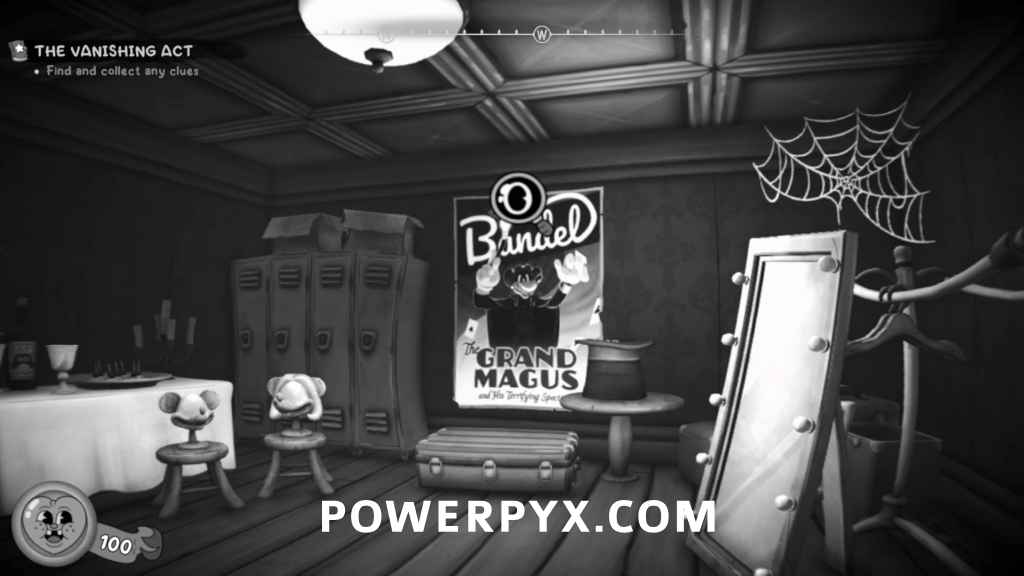
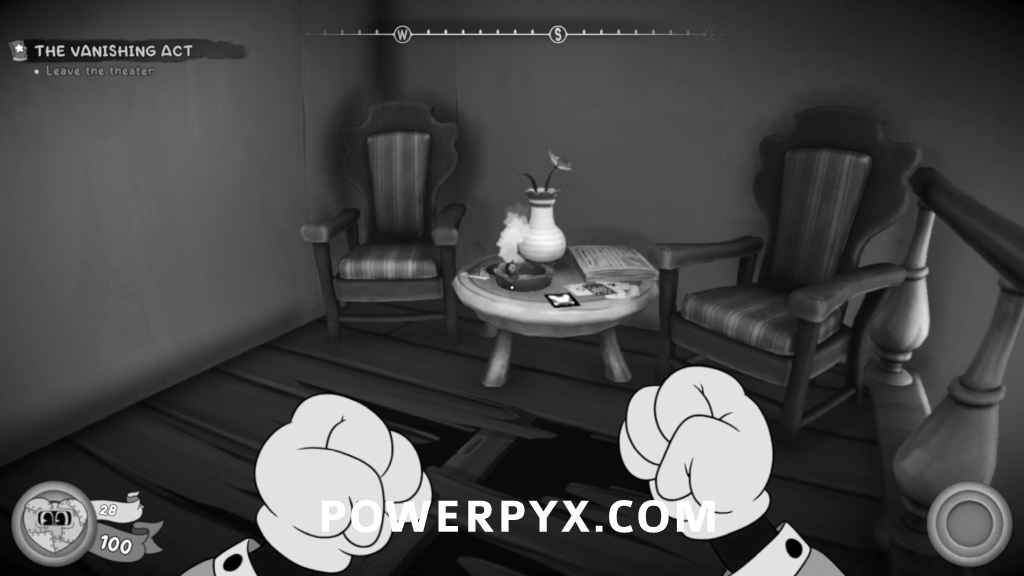
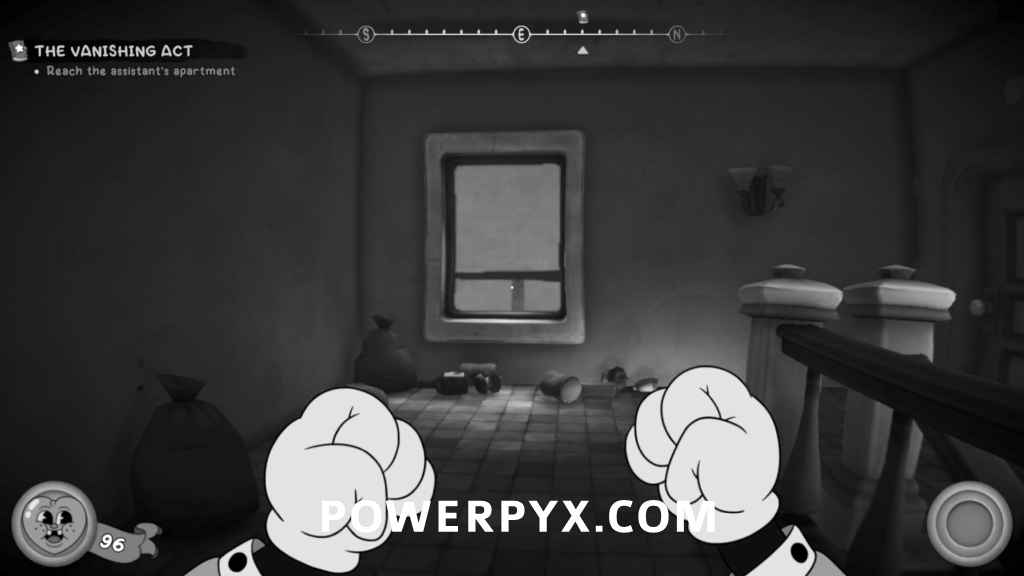
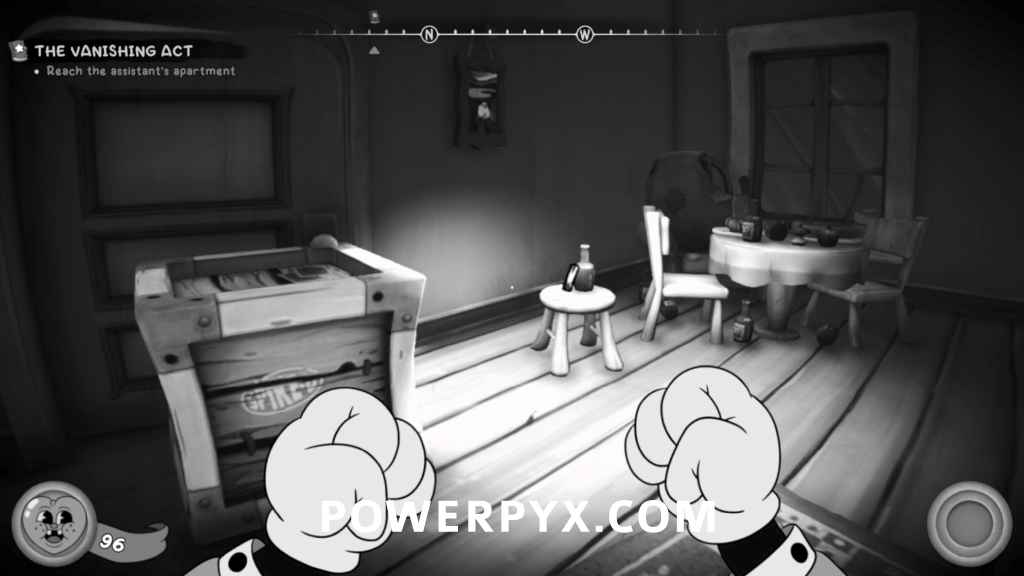
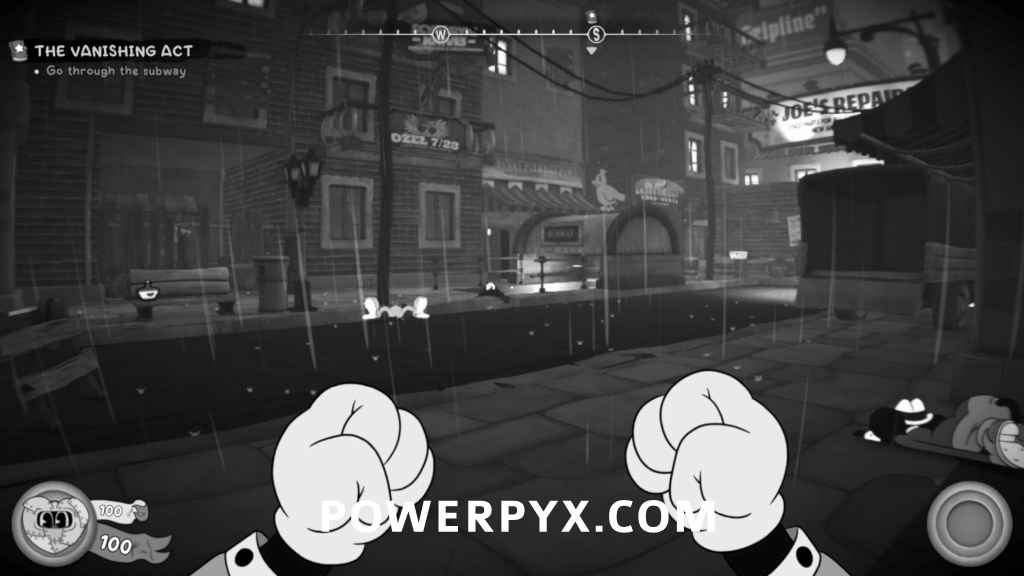
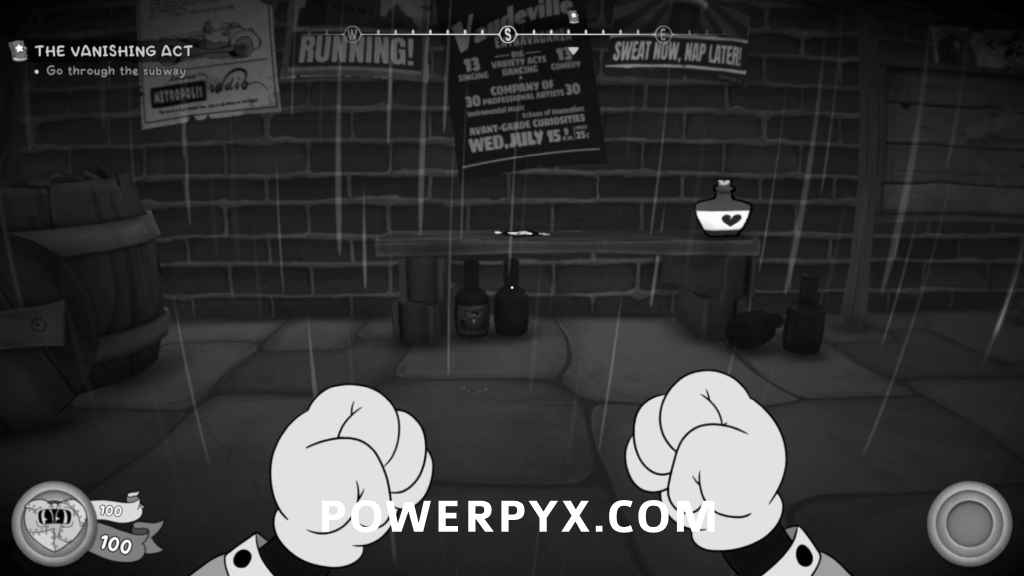
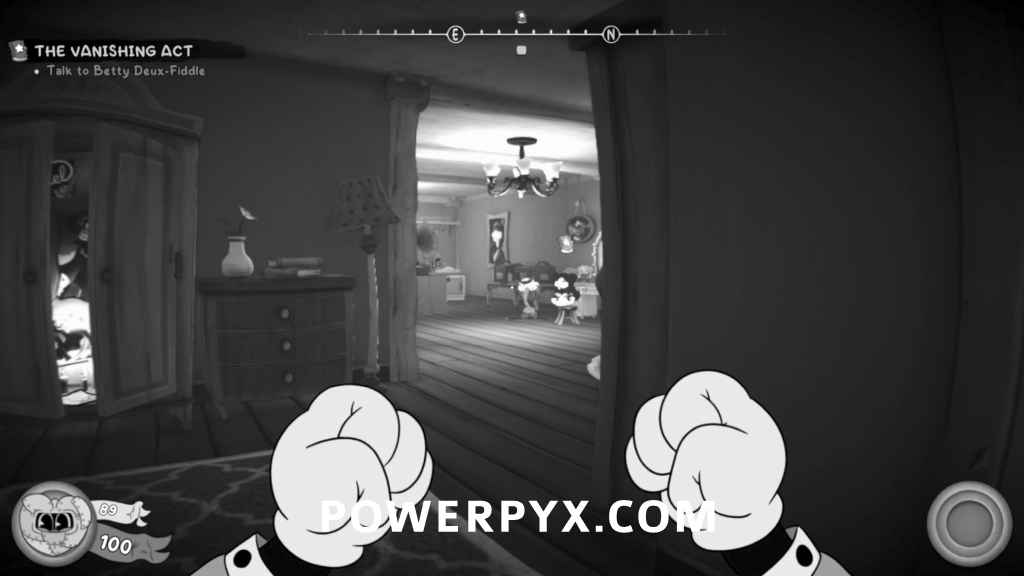
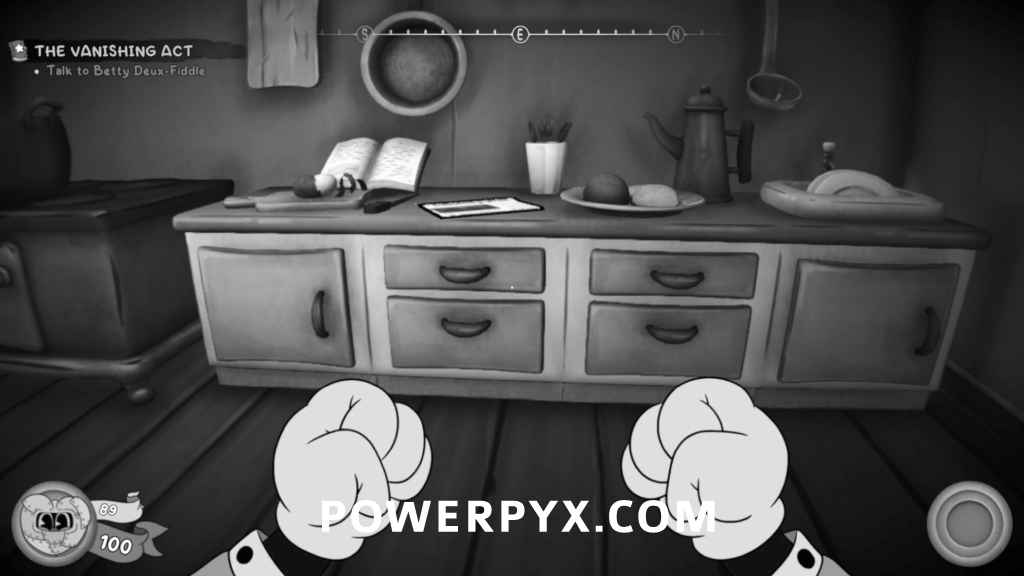
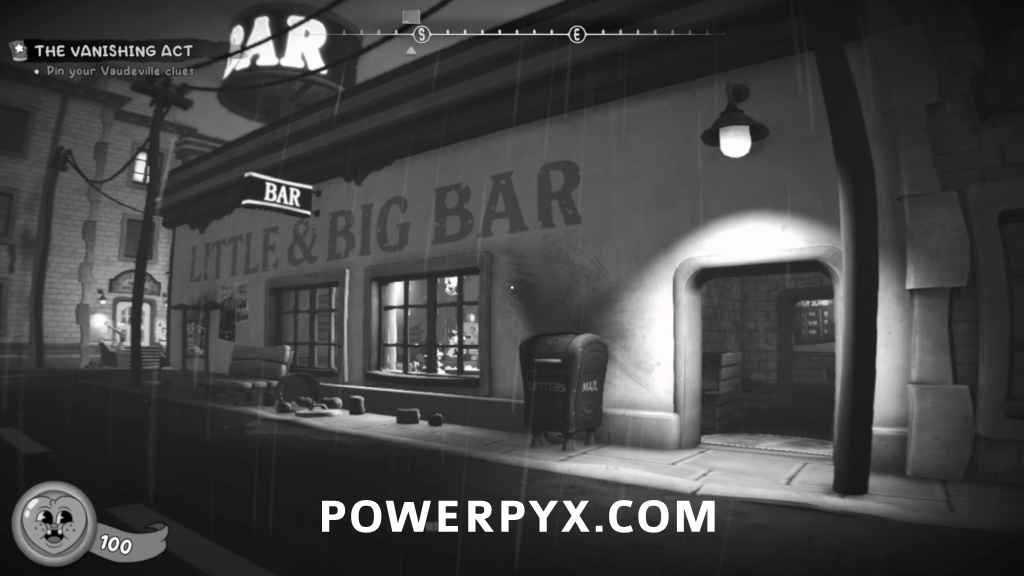
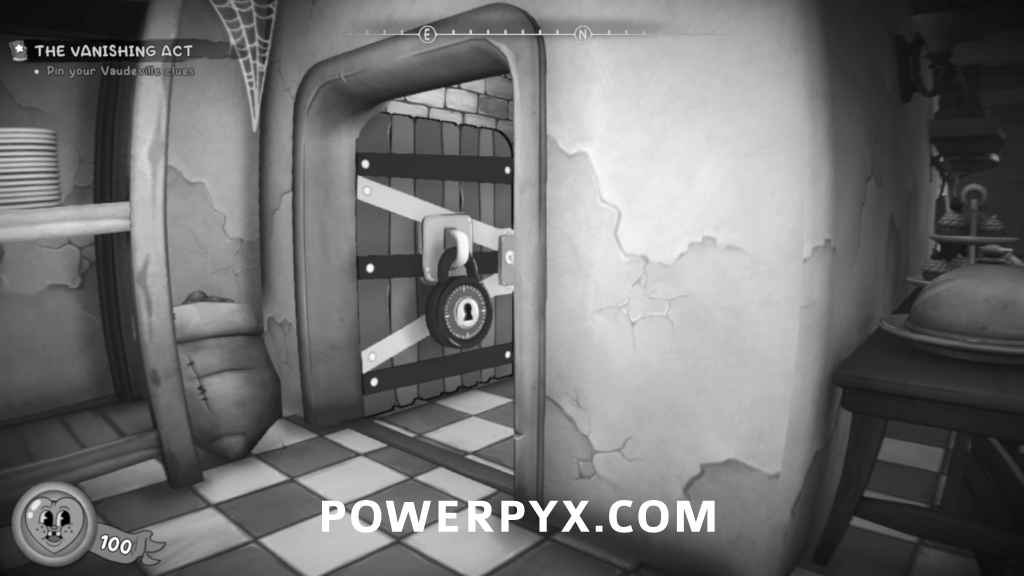
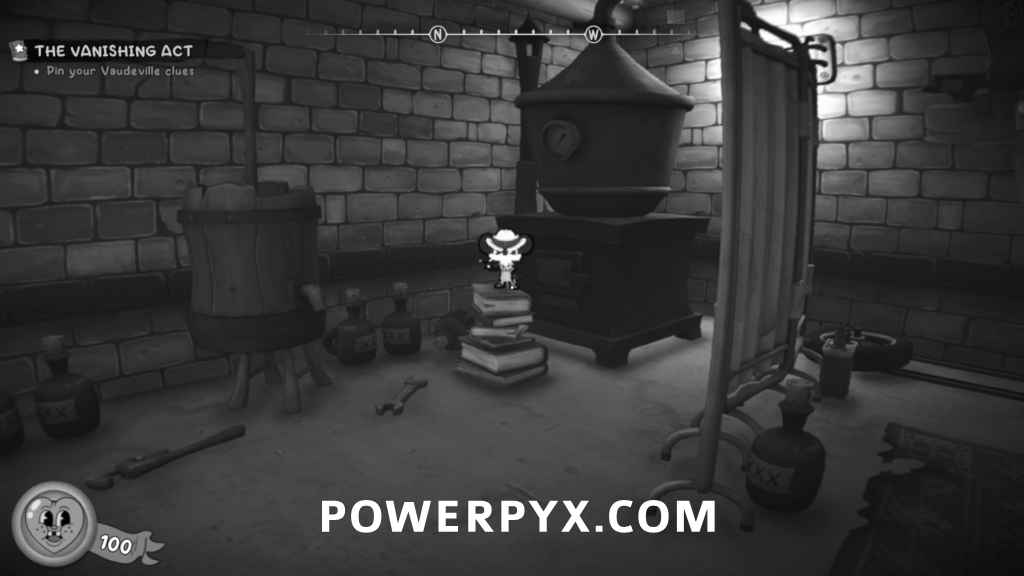
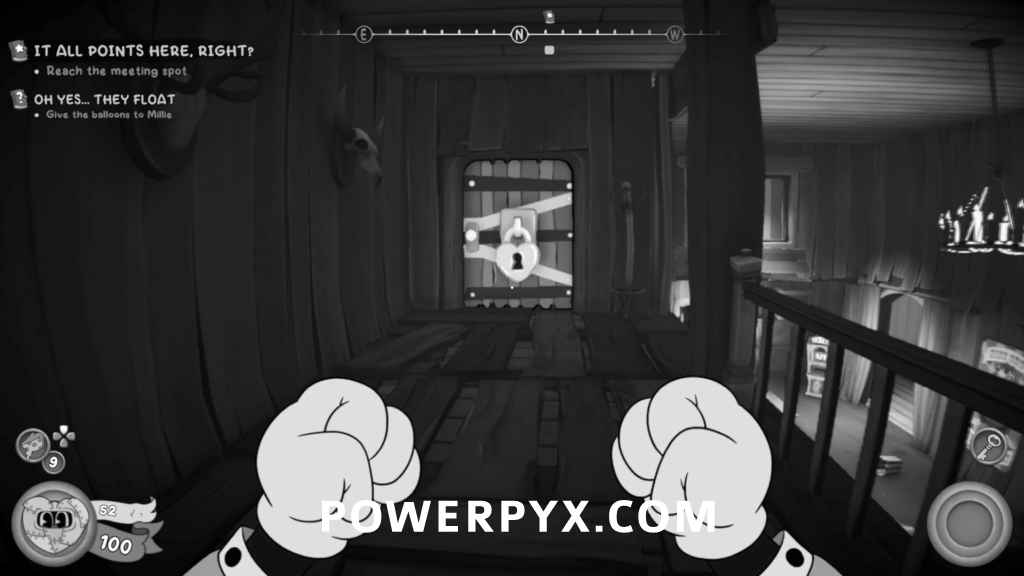
The Vanishing Act
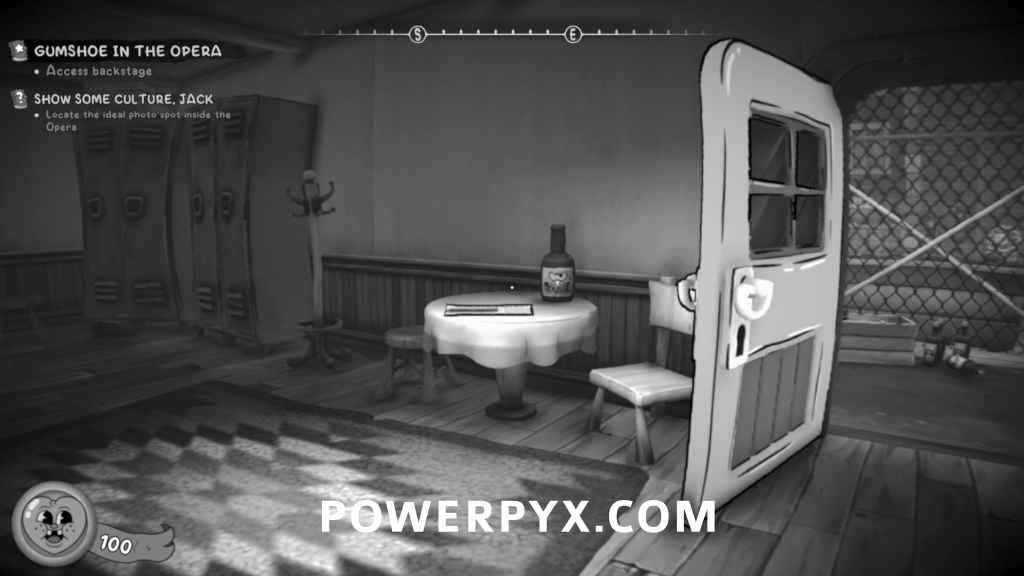
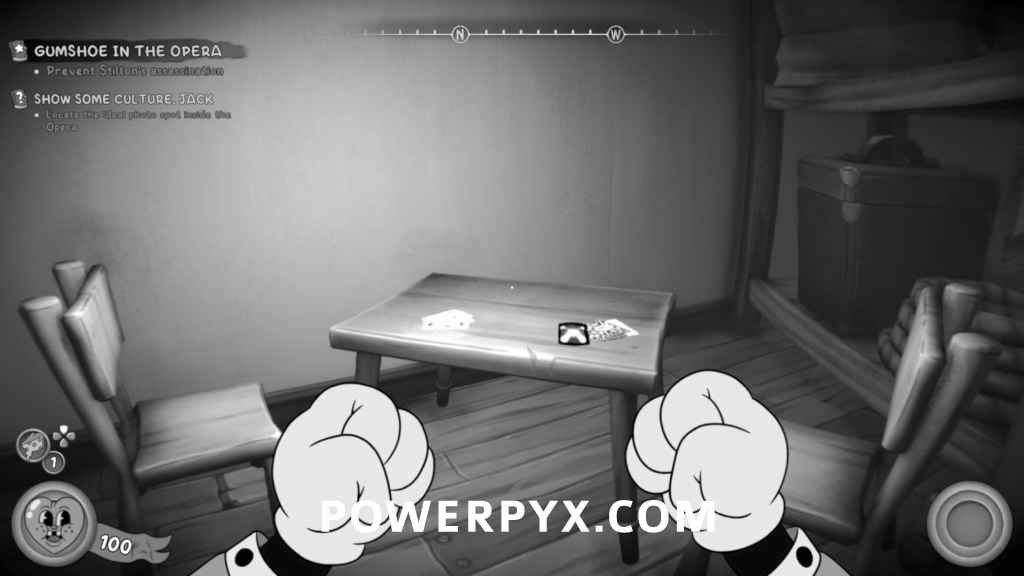
Newspaper
After showing your ID to the MPD Lieutenant, go through the door and the collectible will be in the locker on the right.
Comic
After going through the vent to the backstage, use the lever on the far left to open the curtain. The collectible will be on one of the seats near the MPD Rookie.

Bandel’s Poster Clue
Inside of Steve Bandel’s Green Room, on the wall.
Baseball Card
After encountering your first enemies of the mission, go up the stairs from where they came from and the collectible will be on the table at the top of the stairs.

Baseball Card
Once you reach the apartment building, go up the first flight of stairs and break the window to get to the balcony. Break the other window to get into one of the apartments and the collectible is on a stool by the door.
Schematic
In the apartment building, shoot the box blocking the bathroom door to get the Loft Key, then use it on the locked door where you came from to find the schematic on the table.
Comic
After exiting back onto the street from the apartments and defeating the enemies, go to the far right of the street to find the collectible on a bench.
Schematic
After going through the subway and reaching the next typewriter, it’s on a nearby table.
Schematic
As you continue through the subway, some enemies will ride a train to your location and attack you. After defeating them, go onto the train and exit through the top left doorway of the train to end up on the tracks to find a safe with the schematic.
Schematic
In the same area as the previous schematic, enter the bathroom below the stairs and the schematic is on the table.
Newspaper
Inside Betty Deux-Fiddle’s apartment, on her kitchen counter.
Figurine
After reaching the P.I. Office, enter the Little & Big Bar, then go into the kitchen. Tailpick the door and go into the basement to find the collectible on a stack of books.
Baseball Cards (8 total)
Bought from the shop at the P.I. Office, or any of the Roadhouses. You can also buy any missed collectibles here. 4 cards cost 500 coins, and the other 4 cost 1000 coins. You don’t need to buy these right now and you can slowly buy these whenever you visit the shop after each mission.
Baseball Card
At the P.I. Office, head into your actual office and the collectible will be inside your dresser in your room.
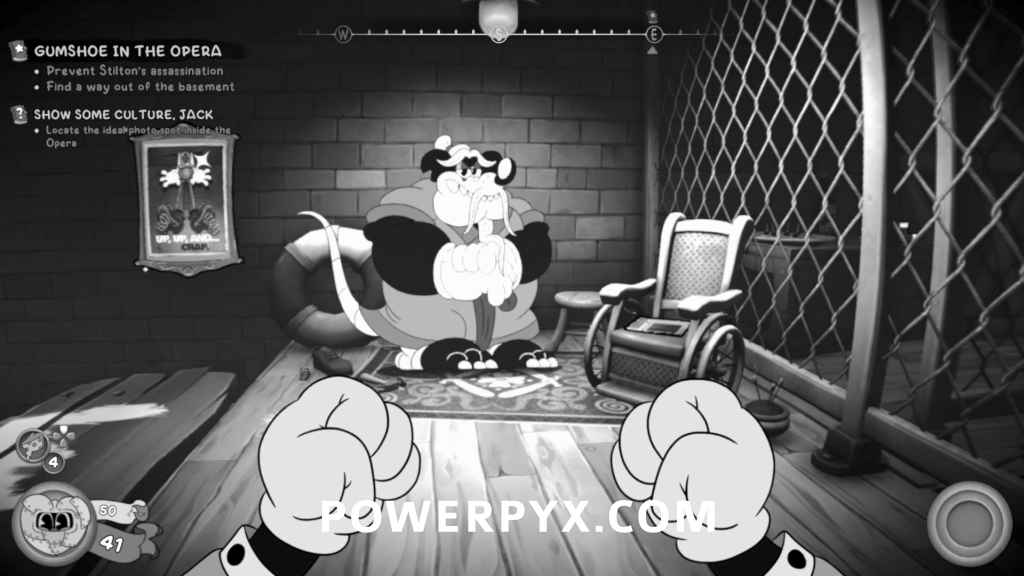
Gumshoe in the Opera
Schematic
At the start of the mission, jump on top of the vent by the garbage.
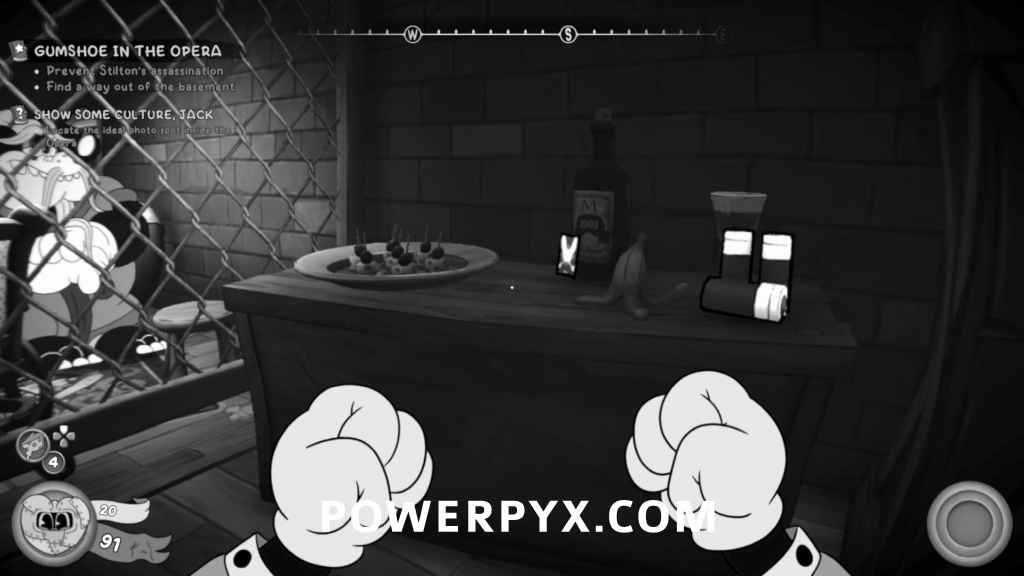
Newspaper
From the previous collectible, enter the building and the collectible is on the table directly on the right.

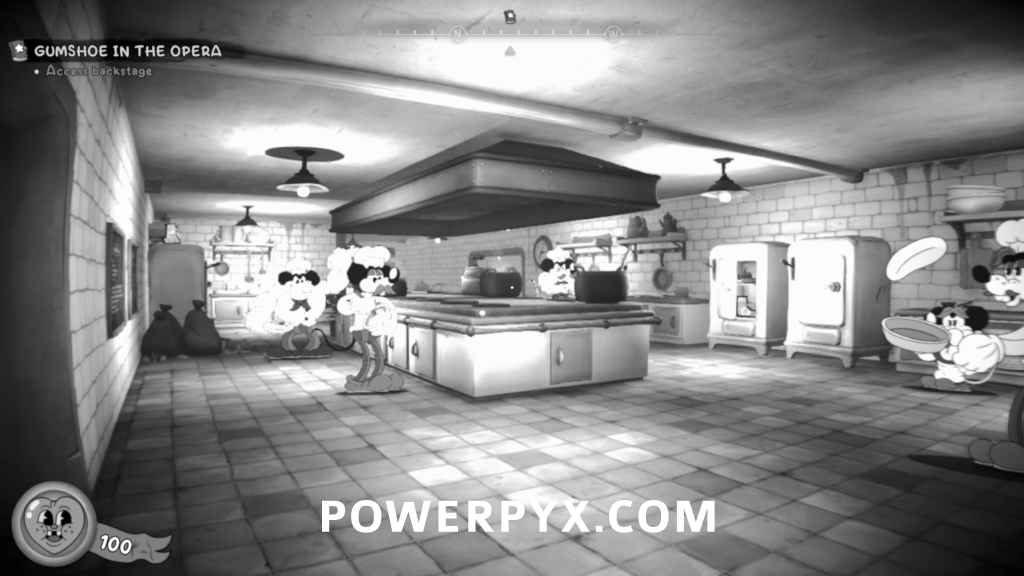
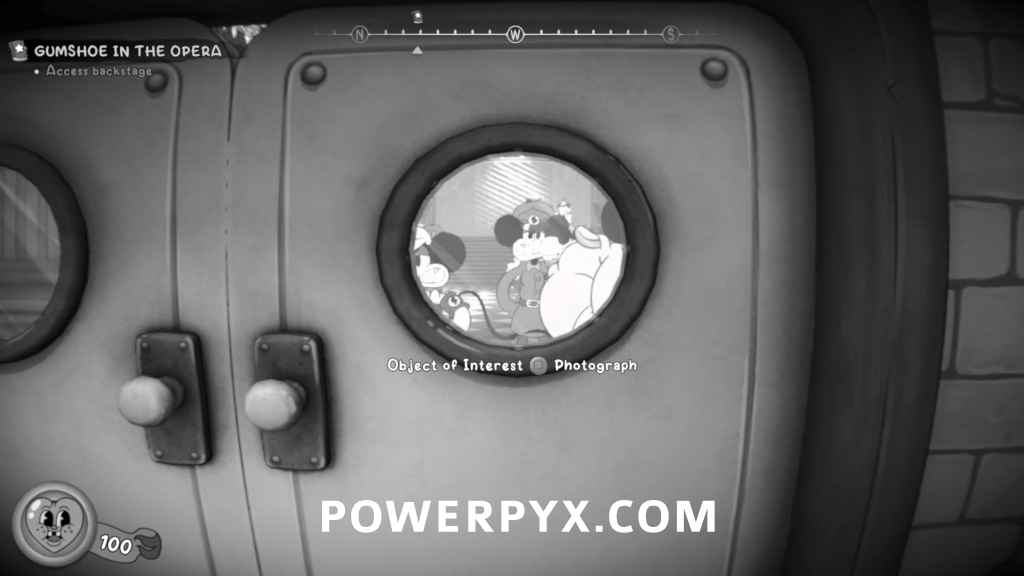
Party in the Opera Clue
From the previous collectible, go into the kitchen and going up to the double door you’ll be able to take a picture.
Baseball Card
After tailpicking the door past the Stage Designer, the collectible will be on a table to the right of the breakable wall.
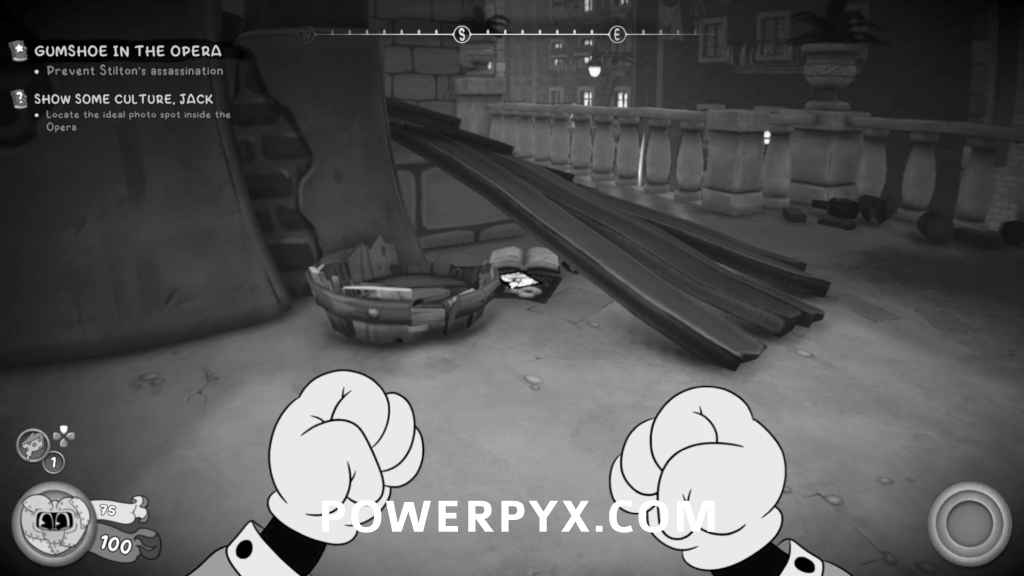
Comic
From the previous collectible, blow up the wall and drop down to the balcony. The collectible will be underneath the small plank ramp.

Newspaper
On the chair directly beside the Old Rat Stuntman that gives you the double jump.
Baseball Card
After unlocking the double jump, backtrack to the area where you fell into the basement and double jump onto the nearby ledge. The collectible will be on one of the boxes at the end.

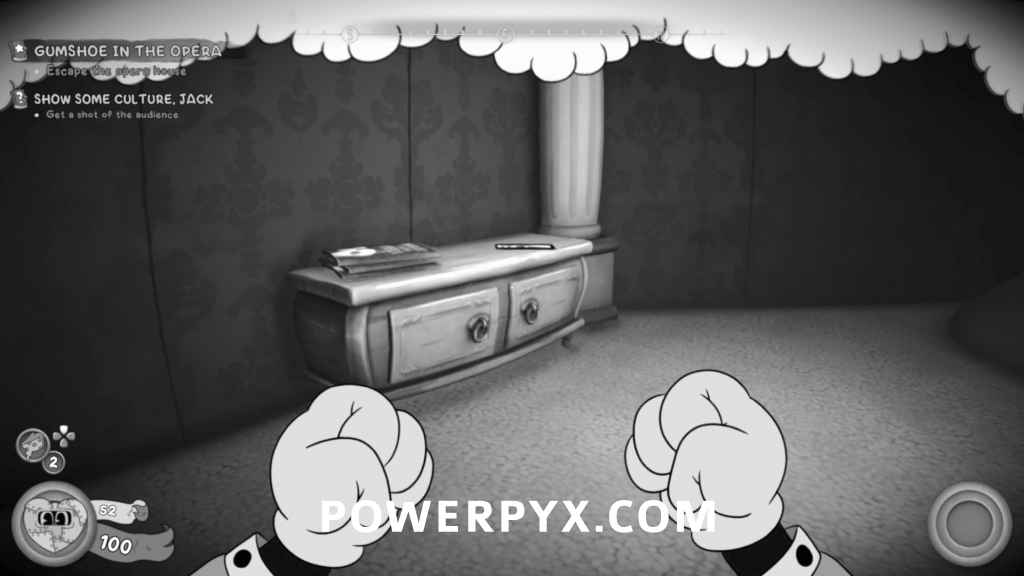
Schematic
From where you learn double jump, drop down to the platforms in the water and the schematic will be in the safe.
Schematic
After learning the double jump, follow the path over the water and once you’re on the other platform it’s on a barrel to your left.
Comic
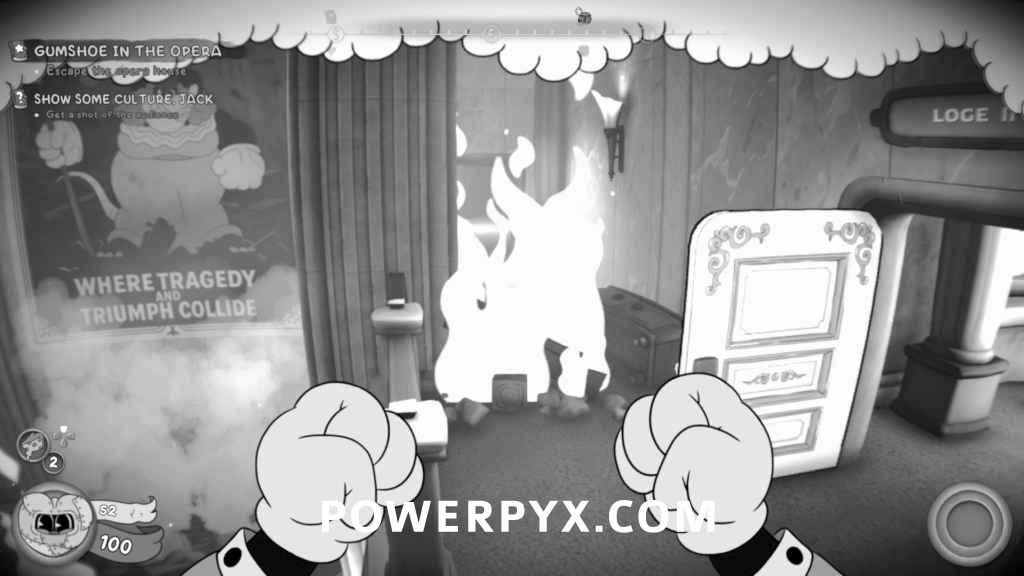
Once you’re on the the balcony seats during the escape while the building is on fire, open the door to the main hall and instantly turn to your right. Jump over the fire and you can open the door leading to a hallway. The collectible will be on one of the cabinets.
Newspaper
After getting back to the P.I. Office and pinning your clues, you can buy the collectible off the Paperboy by your office.
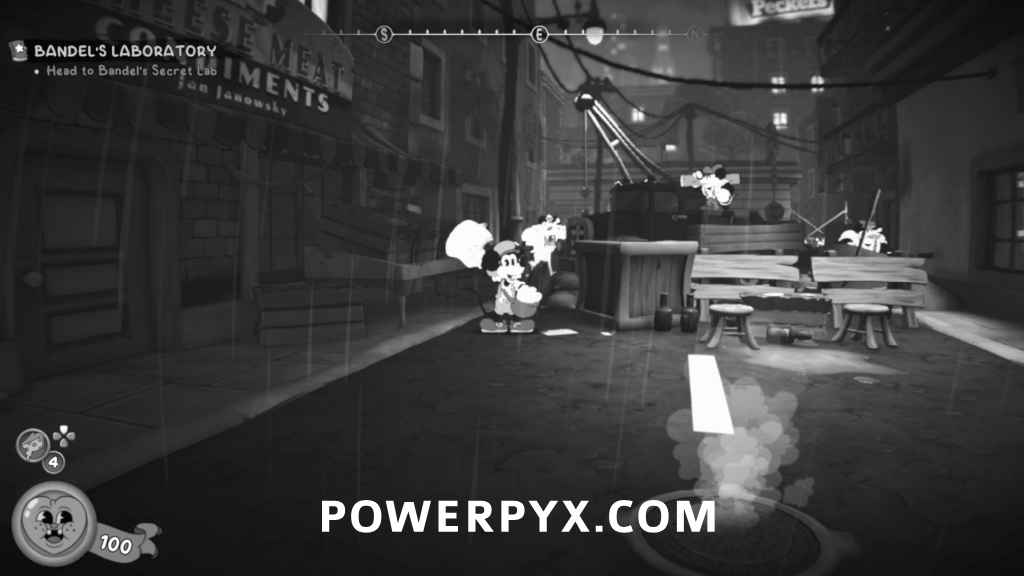
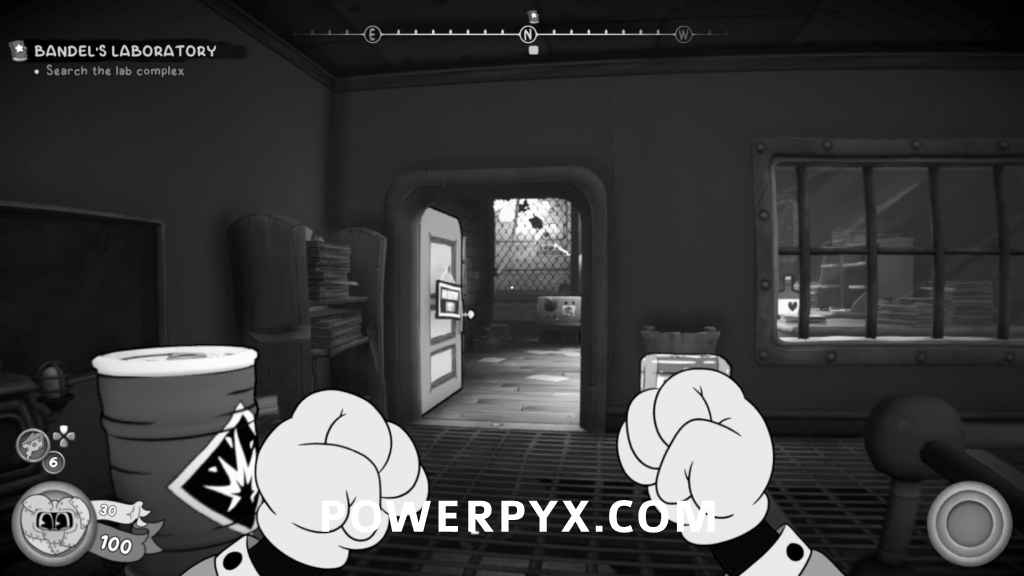
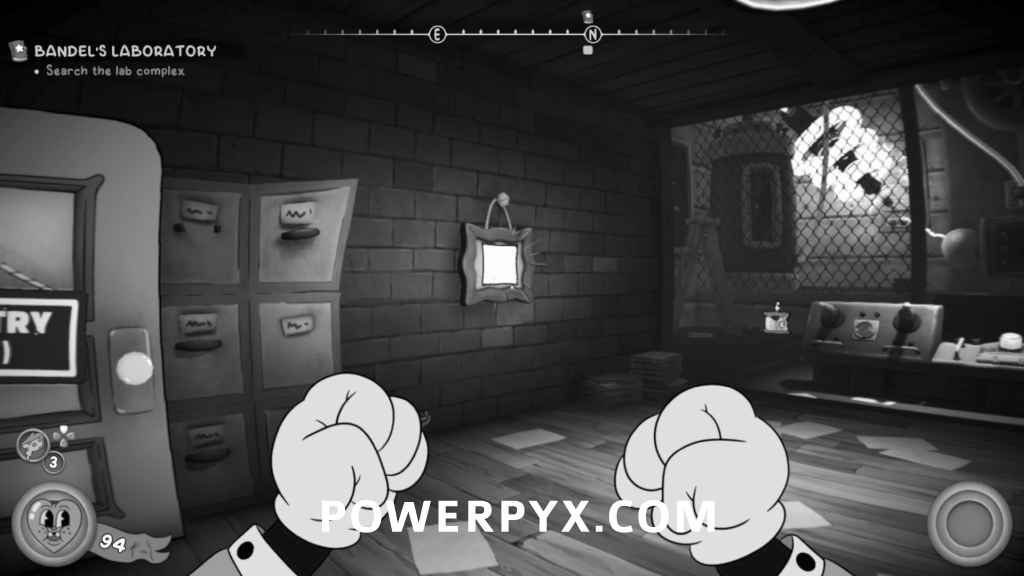
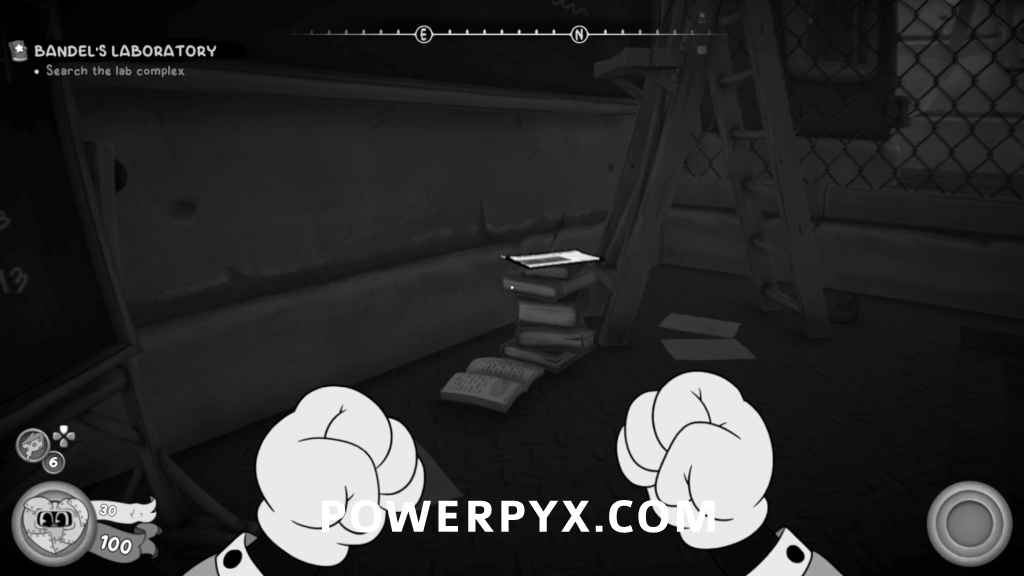
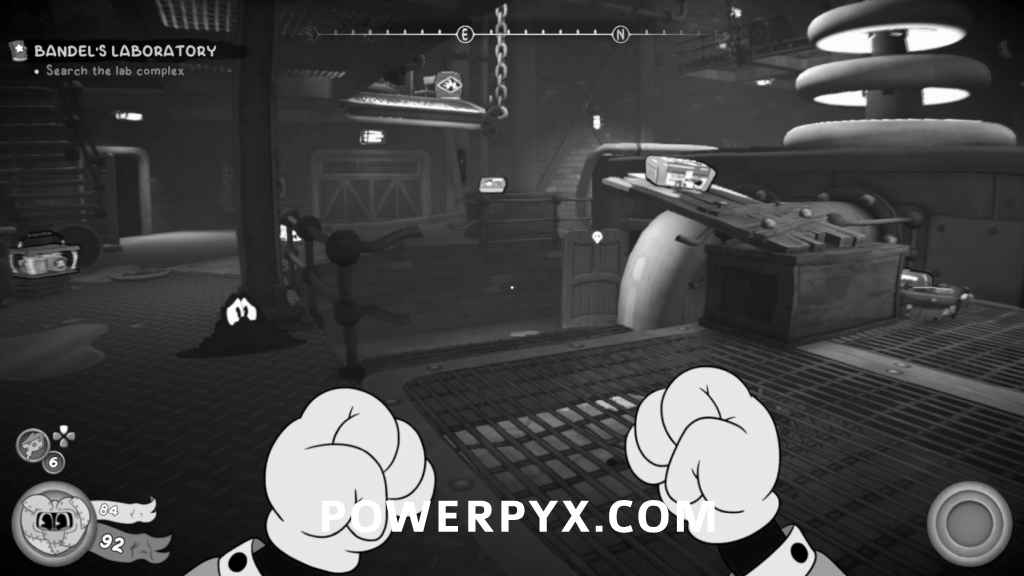
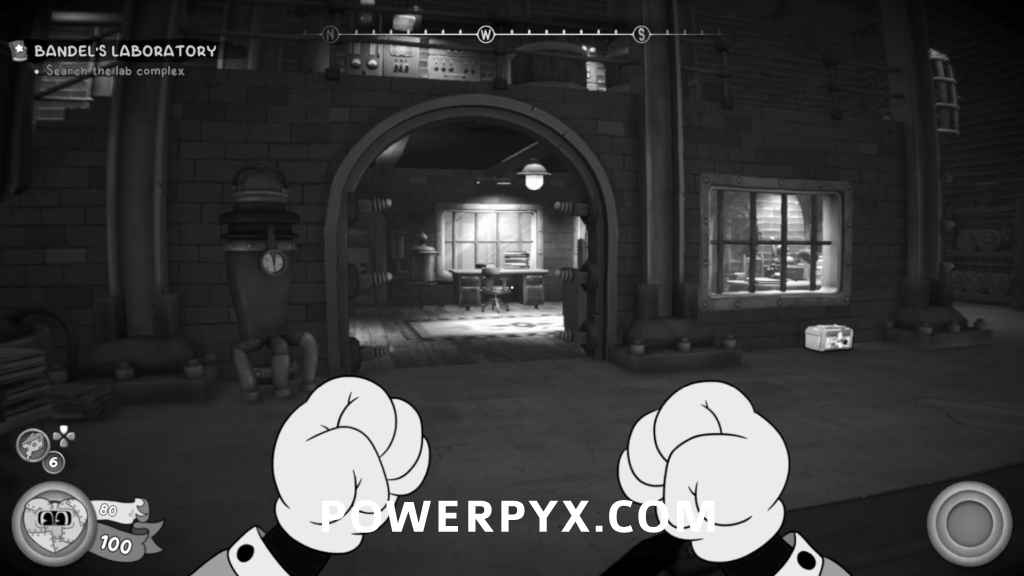
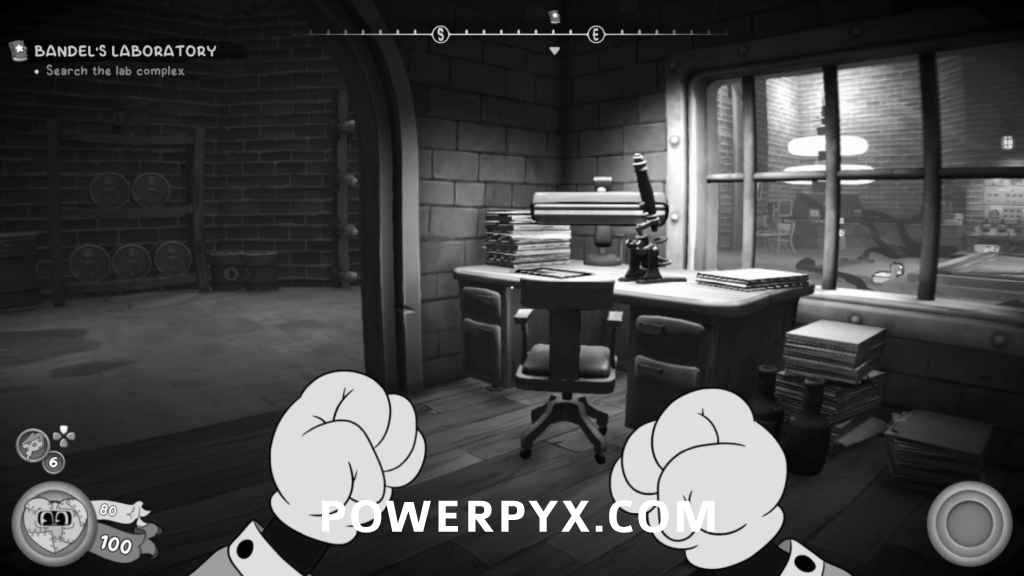
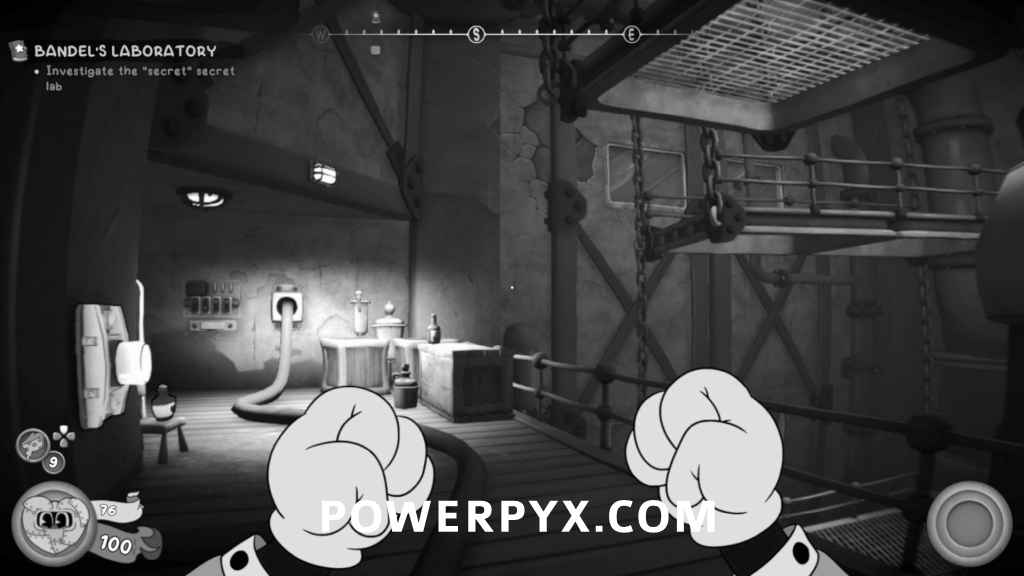
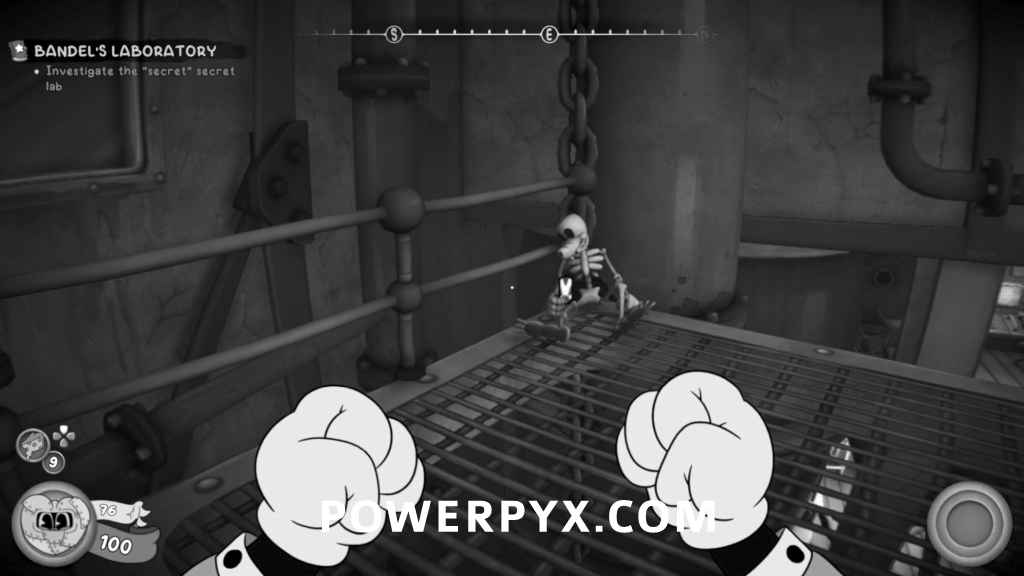
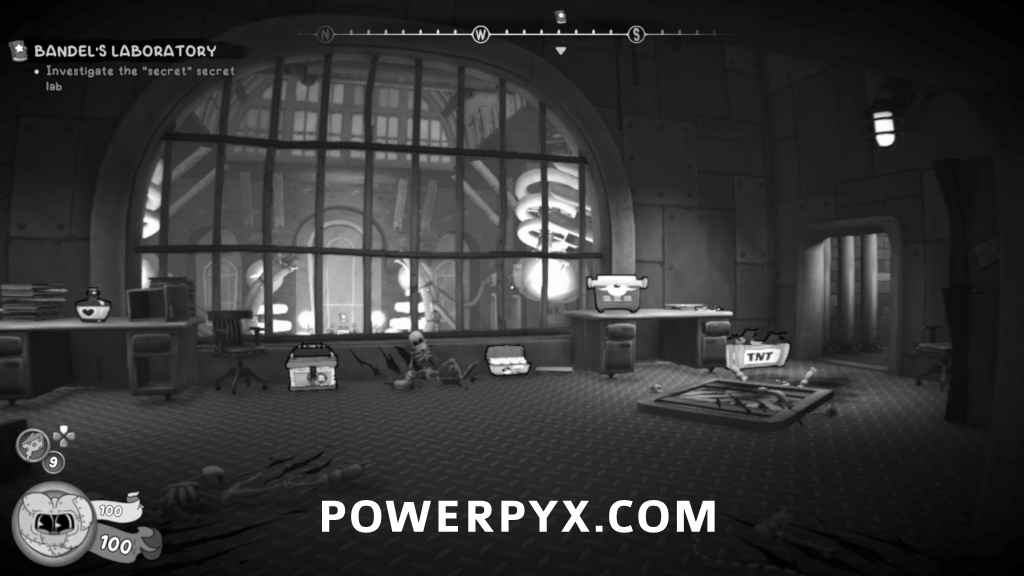
Bandel’s Laboratory
Schematic
After climbing up the ladder leading to one of the typewriters, look to your left and you’ll see the schematic under a pallet.
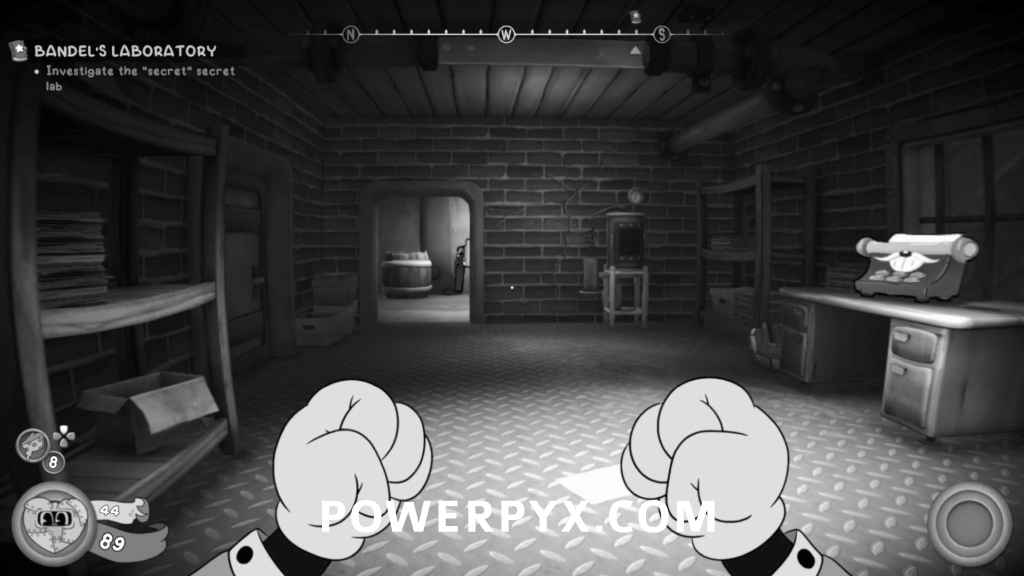
Ze Research Deal Clue / Newspaper
From the room with the giant octopus in the tank, go up the stairs and enter the only opened door. The clue will be on the wall on the left. Afterwards, the collectible will be on a stack of books on the left.
Baseball Card
In the room with the giant head, look directly at it then go down the small set of stairs on the left. Crouch under the stairs to get past the fencing and the collectible will be at the end.

Newspaper / Schematic
After defeating the first boss in the area, enter the room by the stairs and the collectible will be on the desk on the right, and the schematic will be on the table to the left.
Comic
From the lever that activates the light in the projector room, tailpick the door to the right and the collectible will be on a chair to the left.
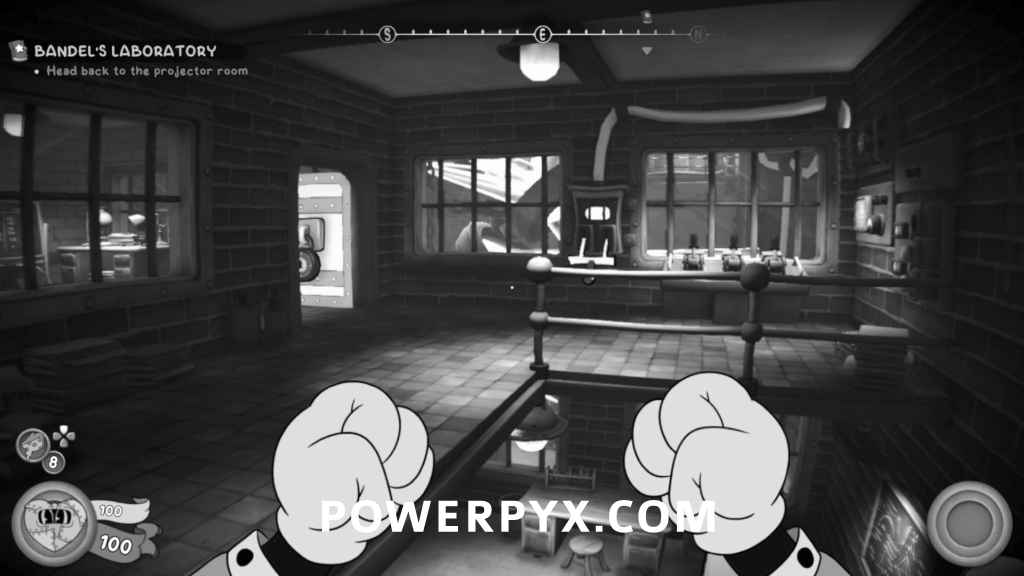

Comic
From the lever that raises the train out of the water, tailpick to door to the left and the collectible will be on a table to the right.
Baseball Card / Schematic
After climbing up the broken pathways to turn on the elevator, turn around and double jump onto another one of the broken platforms to find the collectible and schematic.
Newspaper
Directly after the previous collectible, go up the elevator and the collectible will be in a trash can to the right.

Schematic
From the previous collectible, go down the stairs. Under the stairs will be a safe with the schematic.
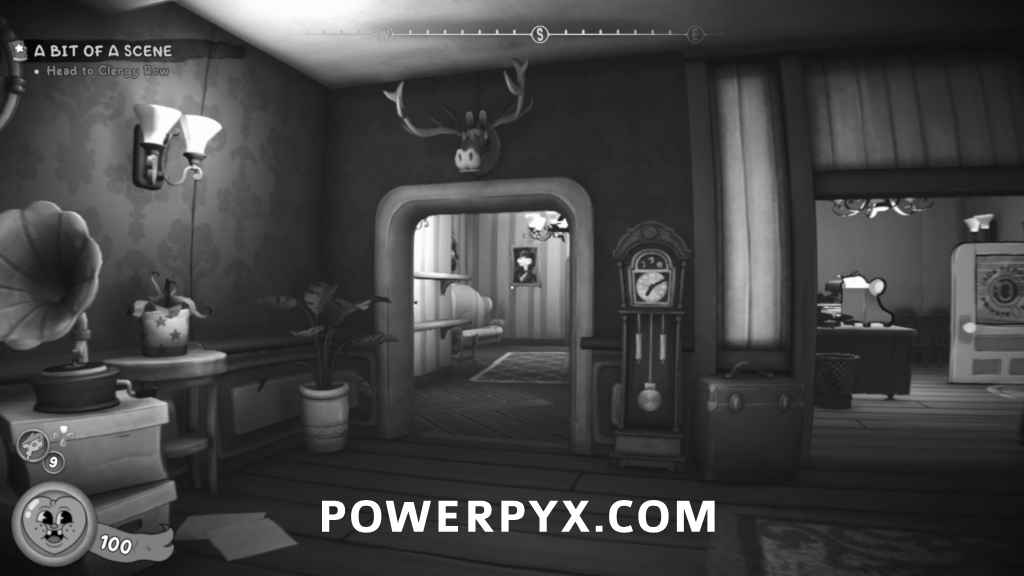
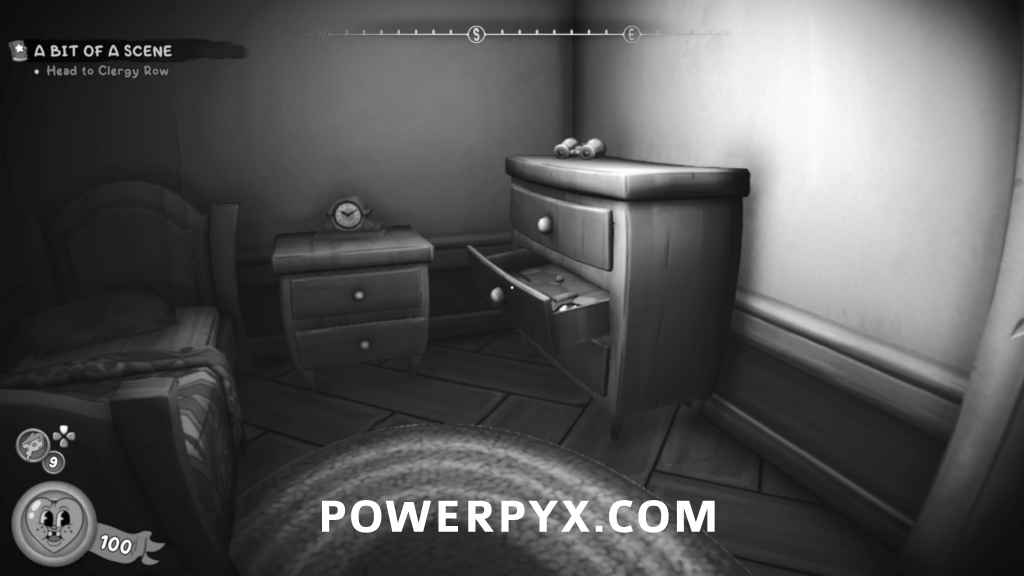
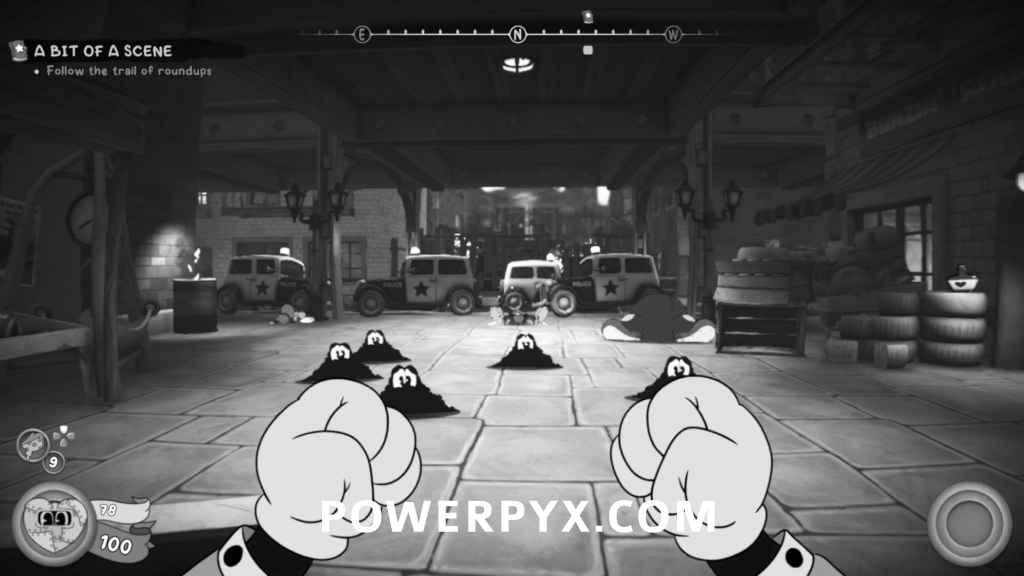
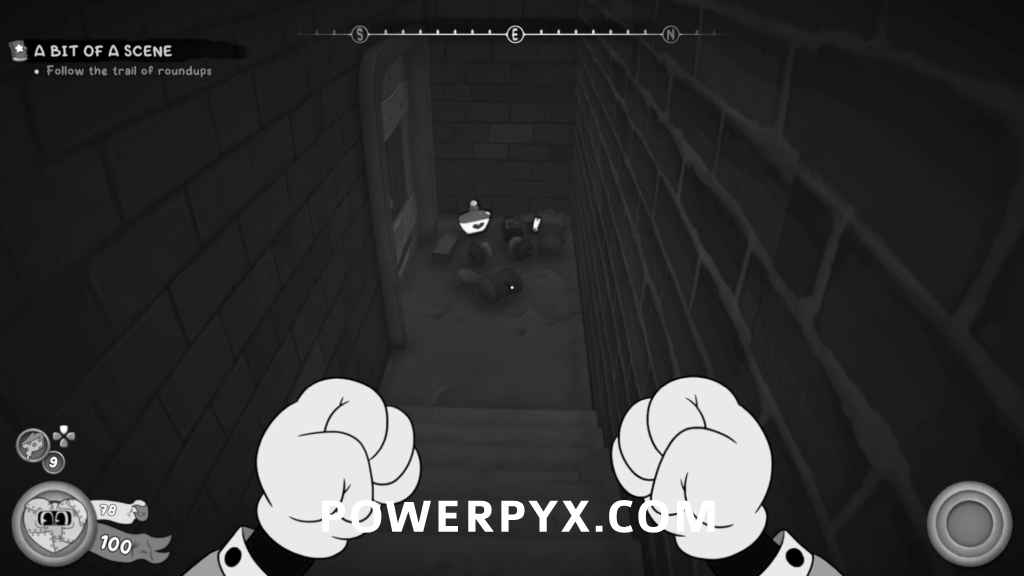
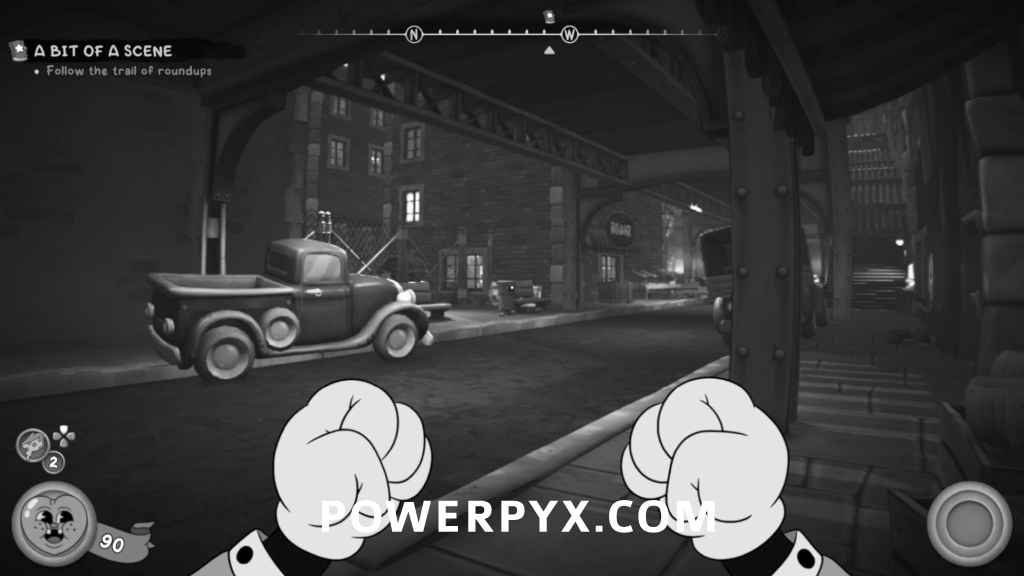
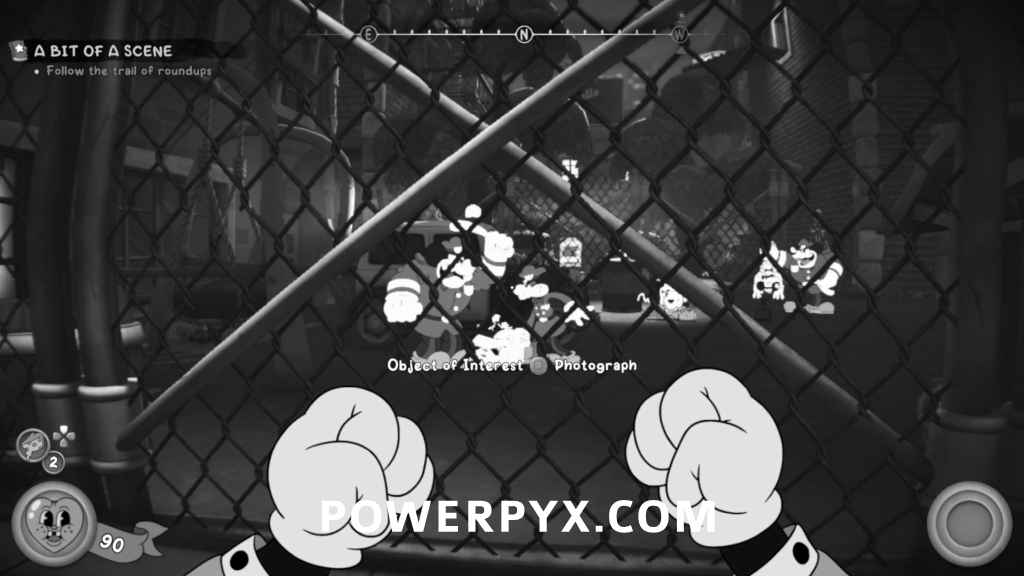
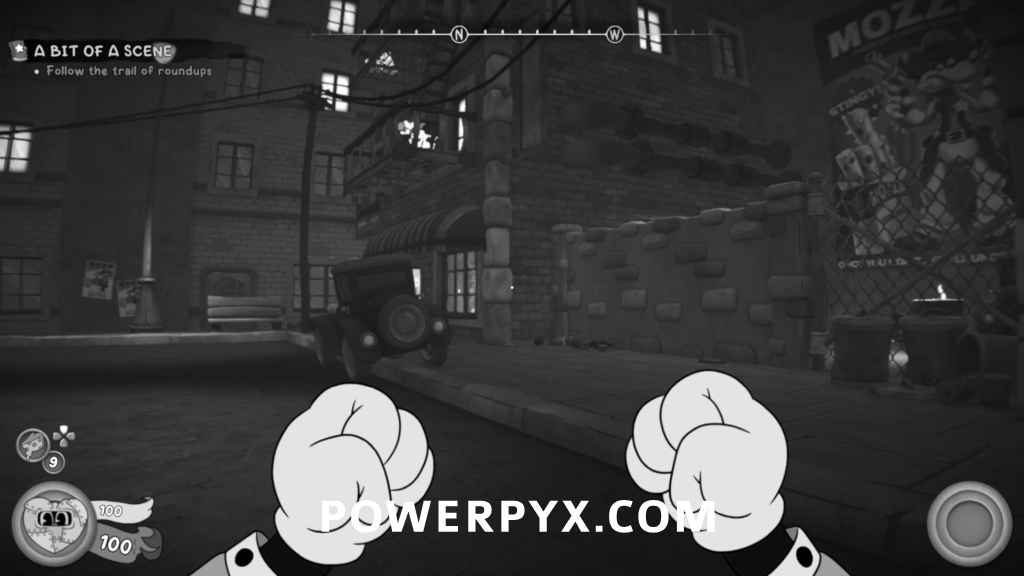
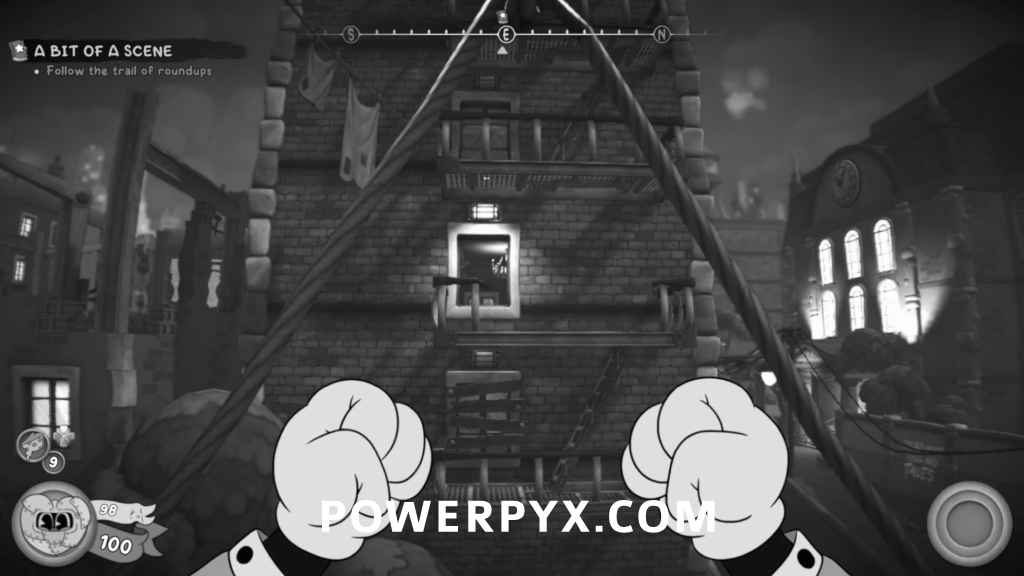
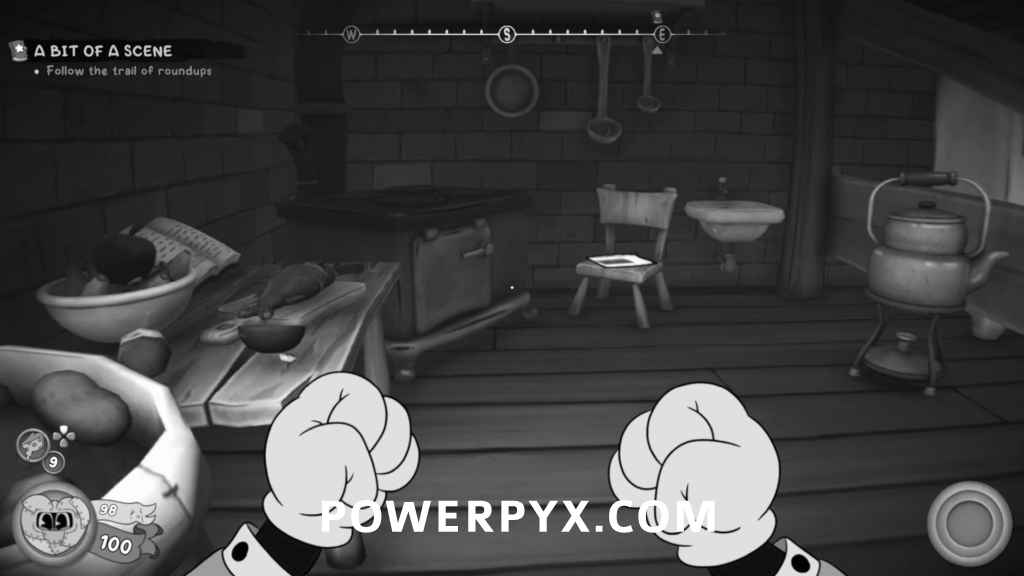
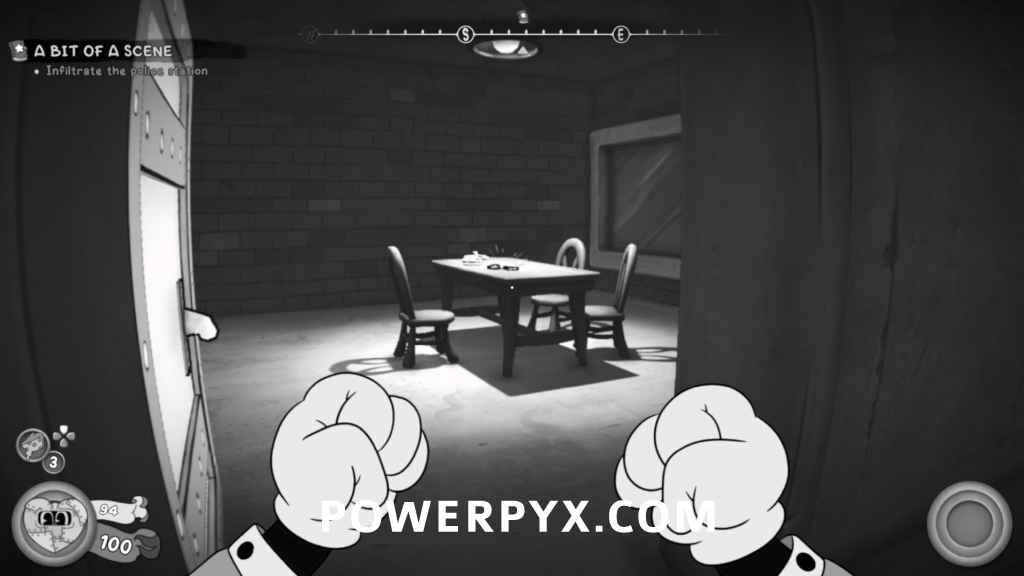
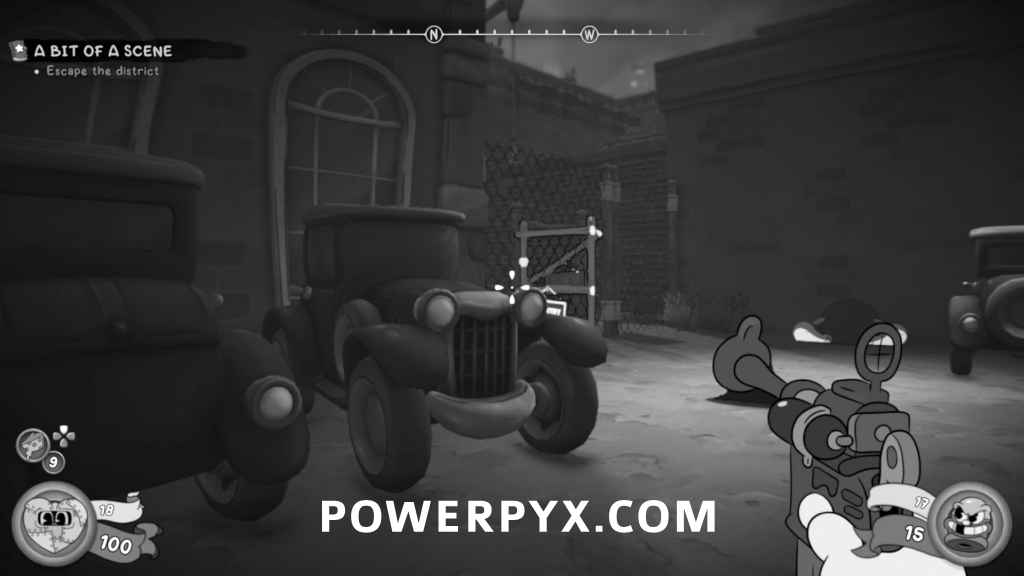
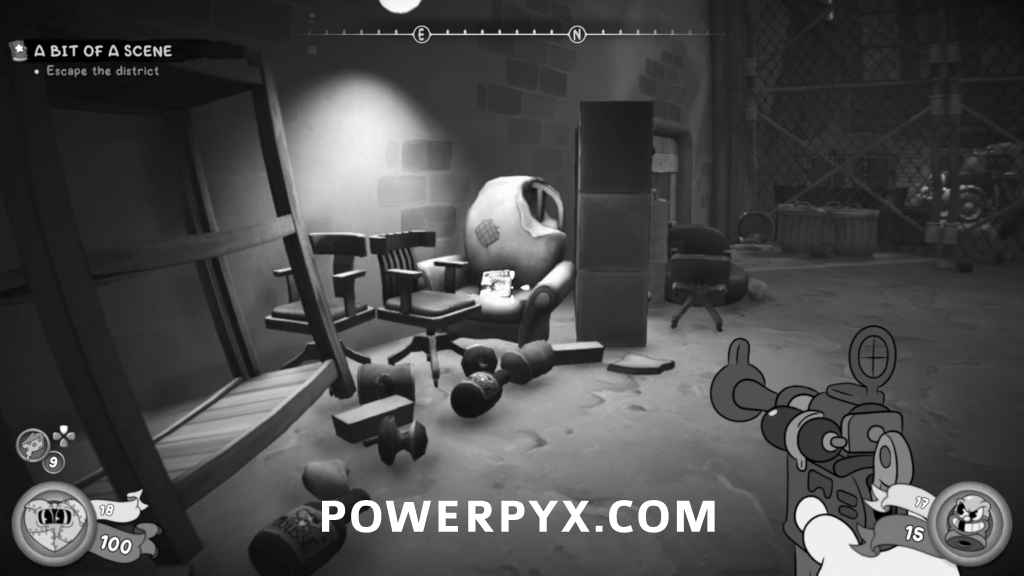
A Bit of a Scene
Schematic
After climbing up the ladder and going into the building, turn to the left and the schematic will be on the floor.
Baseball Card
After going through the very first building and getting ambushed by a bunch of cops on the street, walk towards the end of the road and go down the stairs on the left. The collectible will be at the bottom.
Police Brutality Clue
After going through the Bunzin’ ‘Round building after the police ambush, you’ll see a fence ahead slightly to the right. Go up to the fence and you’ll be able to take a picture.
Newspaper
After going back down the stairs from where the train is, you’ll see a brick wall ahead on the right. Double jump over the wall and the collectible will be in the trash ahead.
Newspaper
After taking the trampoline across to the other apartment building, go through the window and the collectible will be on a chair to the left.
Schematic
After shooting the target to lower the pipes, go across and the schematic is in the dresser.
Schematic
Once at the police station, choose to go through the vent on the left side of the police station to enter it. When at the jails, open the gate on the right side of the room. The safe inside will have the schematic.
Cops Divided? Clue / Schematic
From the previous schematic, go into one of the side rooms to get the prison key. In one of the cells you’ll see a good cop that wants to speak with you. Unlocking the cell and talking to him will get you the clue. The schematic will also be underneath the bunk in the same cell
Baseball Card
From the previous collectible, go over to the cell on the other side of the room then unlock the jail cell on the far left with the tally marks. The collectible will be in the bowl.
Comic
After reaching the offices in the police station, jump over the boxes on the left and head into the office on the left side. The collectible will be on the desk.
Comic
After exiting the police station from the front door, look to the left towards the parking lot and jump onto a car, then double jump over the fence. The collectible will be on a chair to the left.
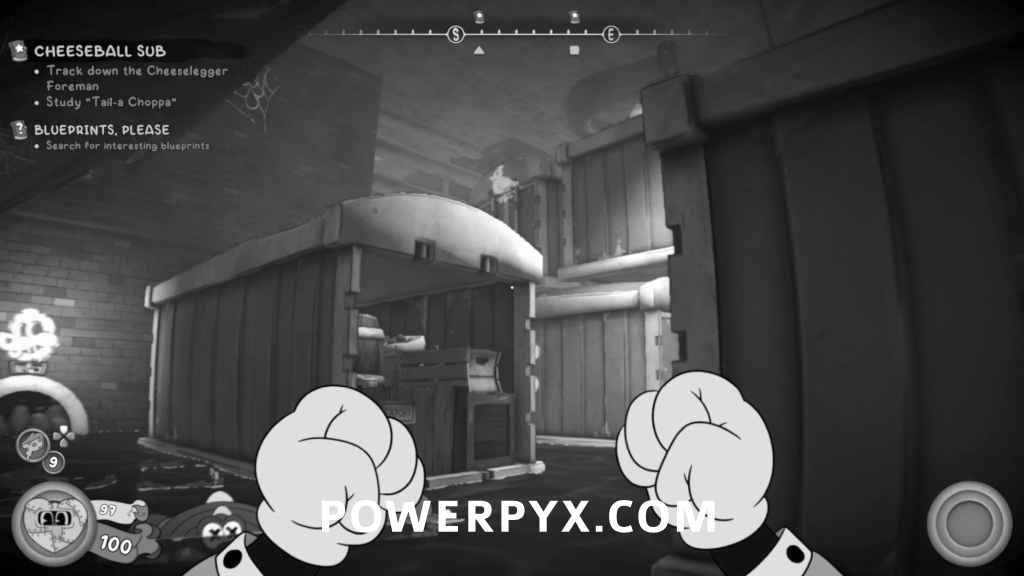
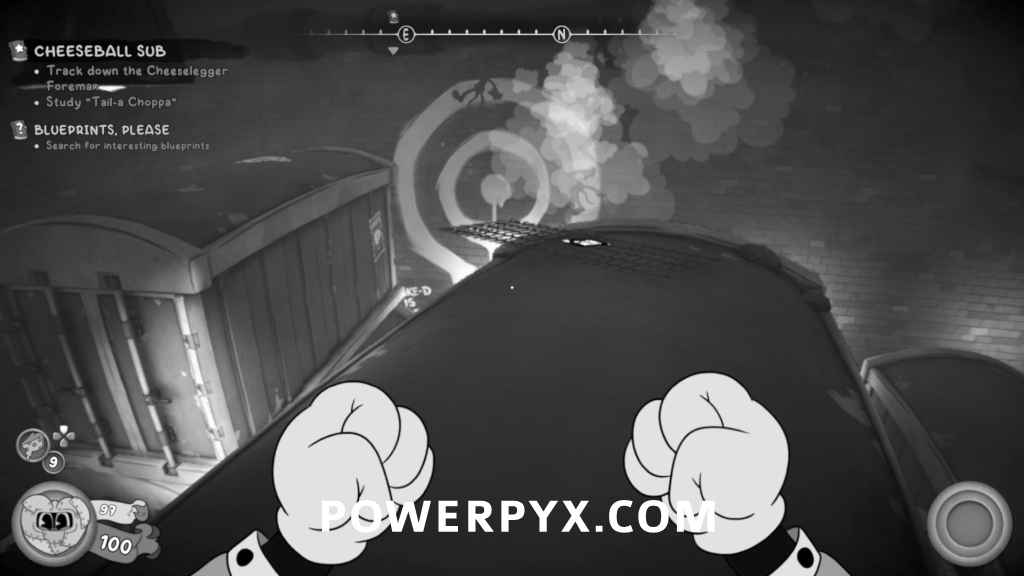
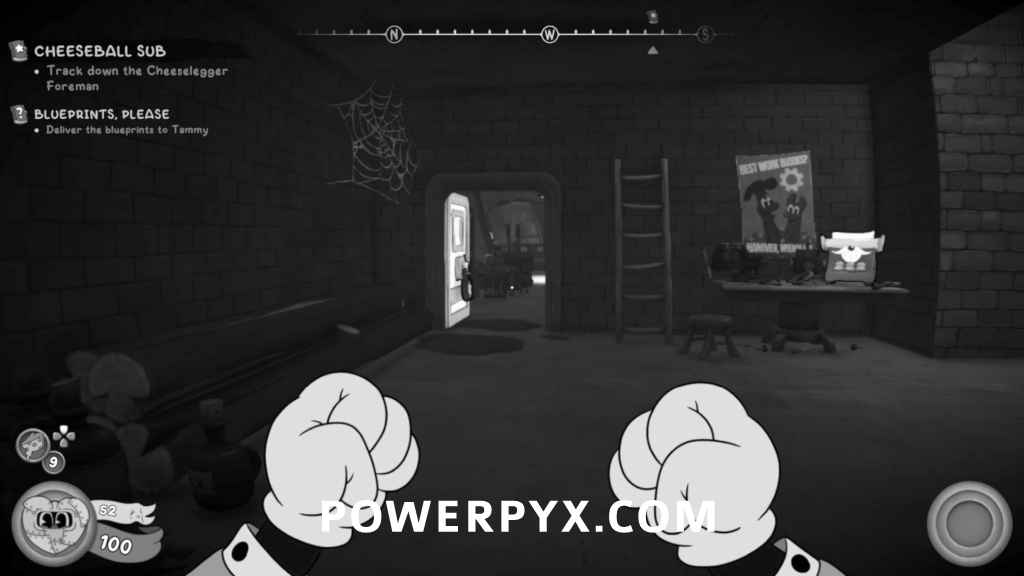
Cheeseball Sub
Newspaper / Schematic
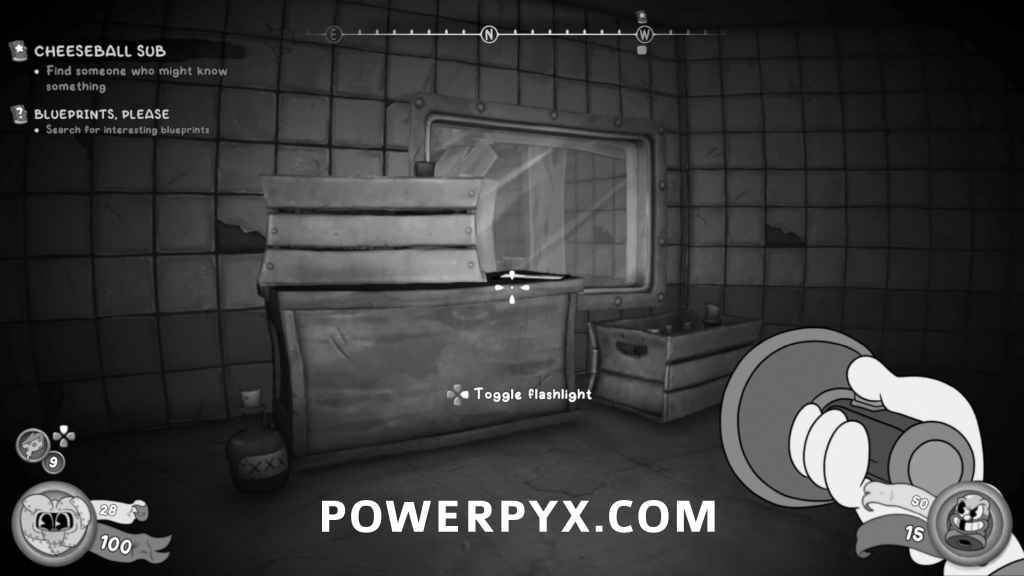
After reaching the first train, turn around and pick up the Ticket Booth key off the crate. Follow the train tracks and unlock the door on the right and head to the end of the path. The collectible will be on a table in the lit up room, and the schematic will be on the bunk bed in the room on the left.

Newspaper
Once you reach the room with the broken floor, jump up the boxes to a higher level. Go past the wooden fence and the collectible is on one of the boxes.
Baseball Card
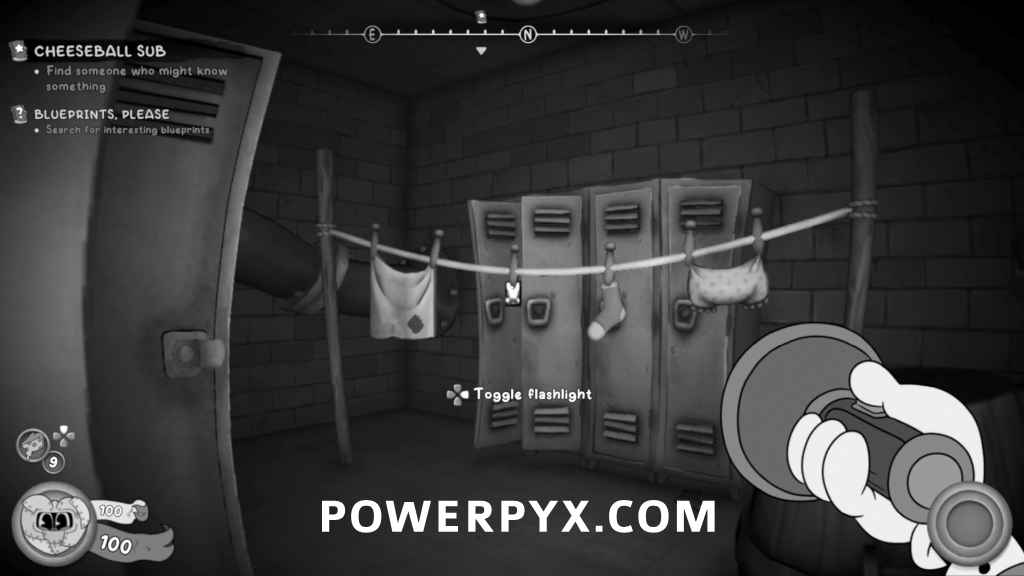
After climbing up to the second set of train tracks, turn to your left and tailpick the door. You’re on a timer for this one, so make sure you complete it in time or else the lock gets jammed and you’ll need to restart from the last save. Afterwards, go through the door and follow the path to the locker room. The collectible will be hanging on a clothesline on the right side of the room.
Schematic
From the big room with the suspended train car, you’ll see some windows to a small room in the top left of the room. Break the window and jump up, then shoot the explosive barrel in the room to break the wall. Follow the path through the train until you reach the platform, then turn left and jump into the tipped over train to find the schematic.
Newspaper
After climbing up a small ladder to progress further into the sewers, go through to the second room and the collectible will be on a box immediately to your left.

Comic
In the arena where you fight the boss, jump up to the very top of the middle cargo crate and the collectible will be on the metal grate near the edge.
Schematic
After reaching the second thing of water you need to glide over, the schematic will be on the lower section at the end. Be careful of the water as it will do a lot of damage when you’re in it. To get back up, you can double jump into the updraft and start gliding.
Schematic
After going through the vent, tailpick the door ahead of you, then jump in the water and follow the tunnel at the bottom to a hidden safe with the schematic.
Figurine
From the previous collectible, go back to the main room and activate the level to turn on an updraft. Glide up the updraft and land on one of the platforms. Go over to the explosive barrel on top of the train car and throw it at the breakable wall to reveal a secret room with the collectible on a shelf.
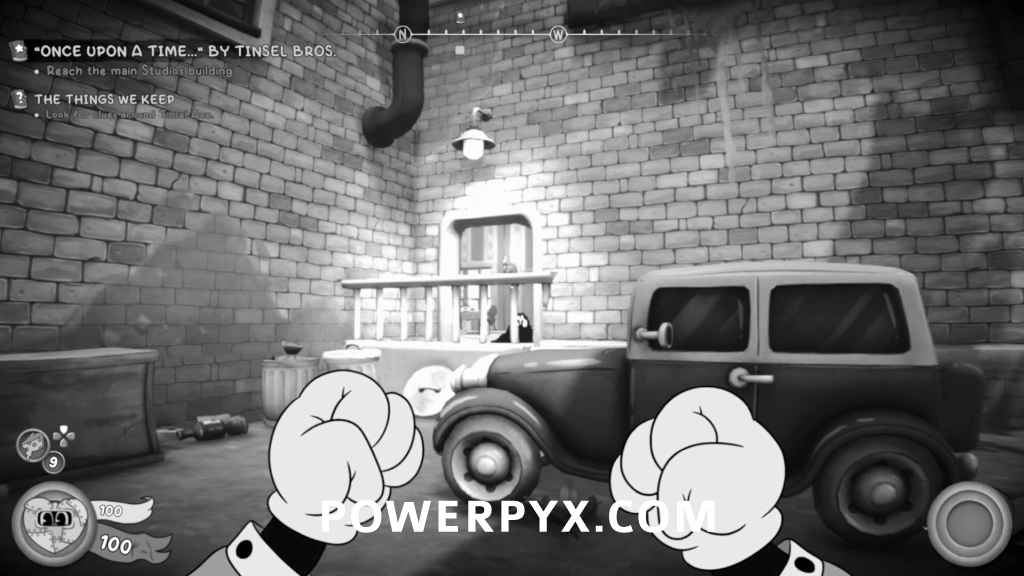
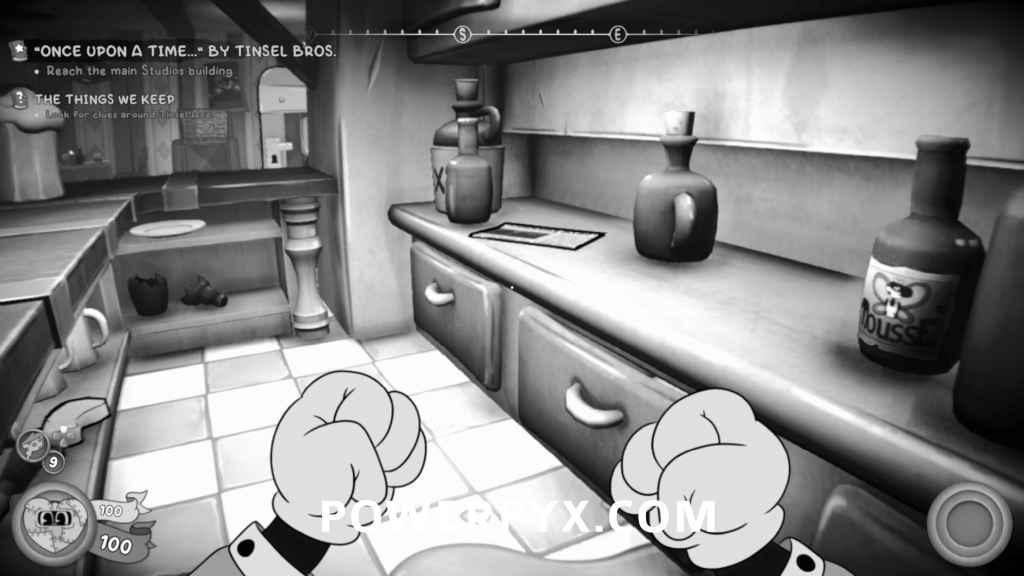
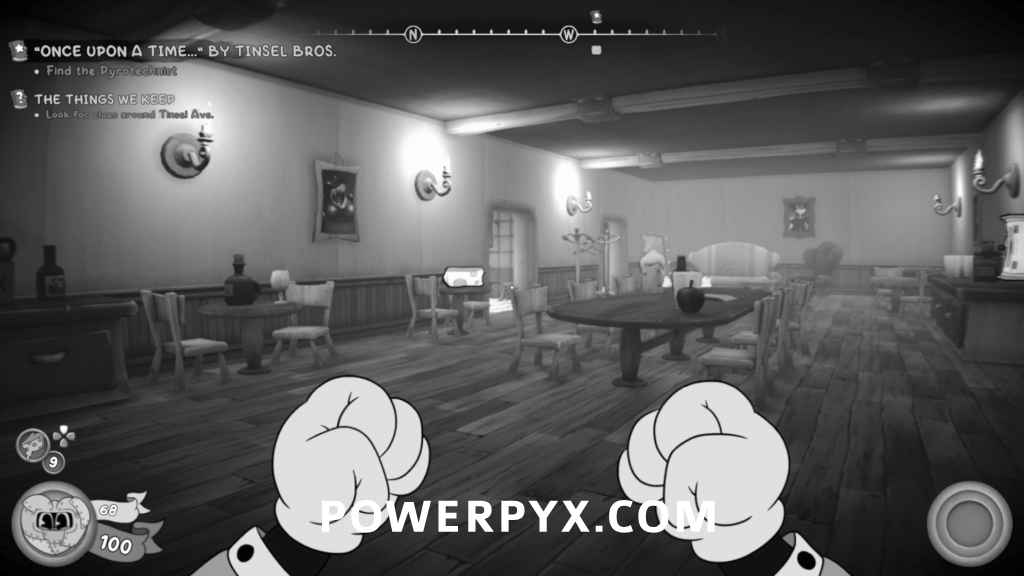
“Once Upon a Time…” By Tinsel Bros
Truckload of Blue Clue
At the very start of the mission, follow the road and you’ll see a tipped over truck at the end that you’ll be able to take a picture of.
Newspaper
After tailpicking into the bar, go behind the counter to find the collectible.
Schematic
After going across the hole in the ground, go up the stairs ahead on the left and the schematic is on a table.
Baseball Card
After talking with Gabe Clarkle, enter the next room and blow up the wall to your right. The collectible will be on top of the box in the back left of the room.

Newspaper
From the previous collectible, head outside then go into the room up the stairs. Enter the first bathroom on the left and the collectible will be in the last stall.

Baseball Card
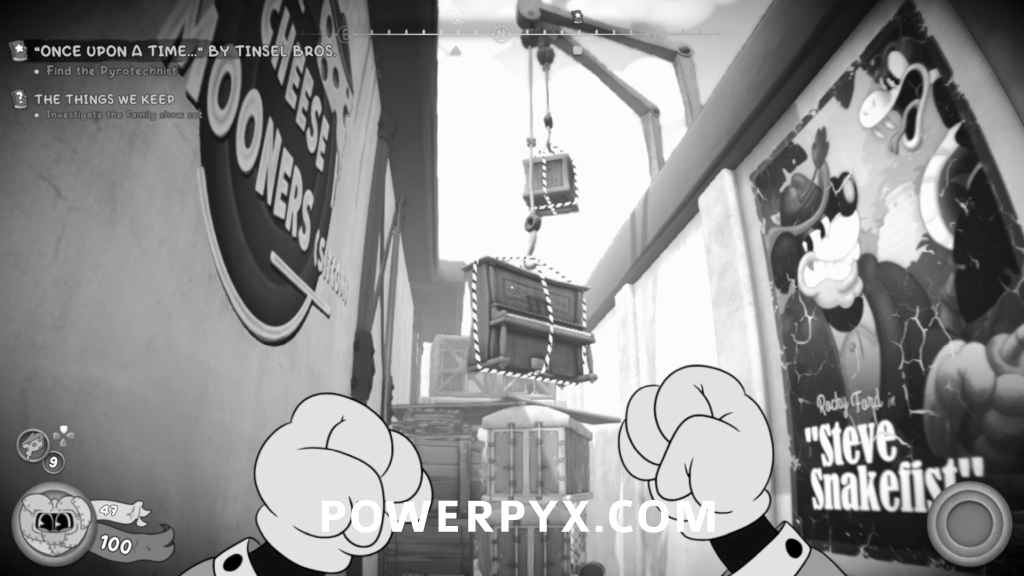
After the shootout in the sitcom set, exit out the door back outside and look up to the left. You’ll see a piano and a box being hung up by a crane. Shoot down the piano and then the box to make a small staircase, then jump over the stack of crates ahead. The collectible will be on a box.
Schematic
Once you’re at the second set, drop down below and the schematic is on one of the tables.
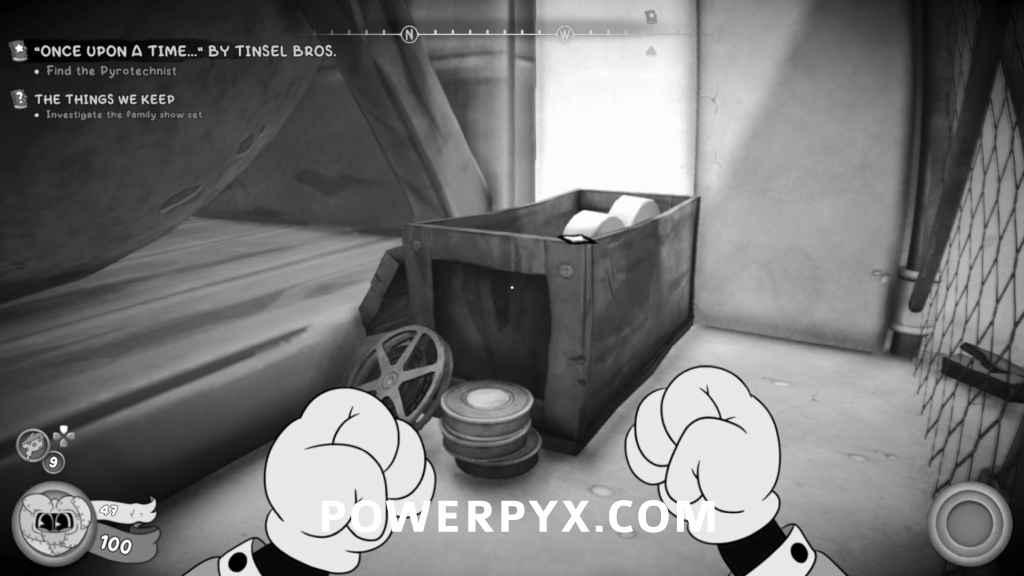
Comic
After the big shootout in the medieval set, the collectible will be pinned to the wall in one of the wooden platforms the enemies used to get to you.
Schematic
After swinging across the top of the drawing room from earlier in the mission, you’ll find the schematic on one of the tables.
Schematic
After getting the key from Betty’s dressing room, go back outside and unlock the door on the right. Tailpick the door on the left and then tailpick the safe at the bottom
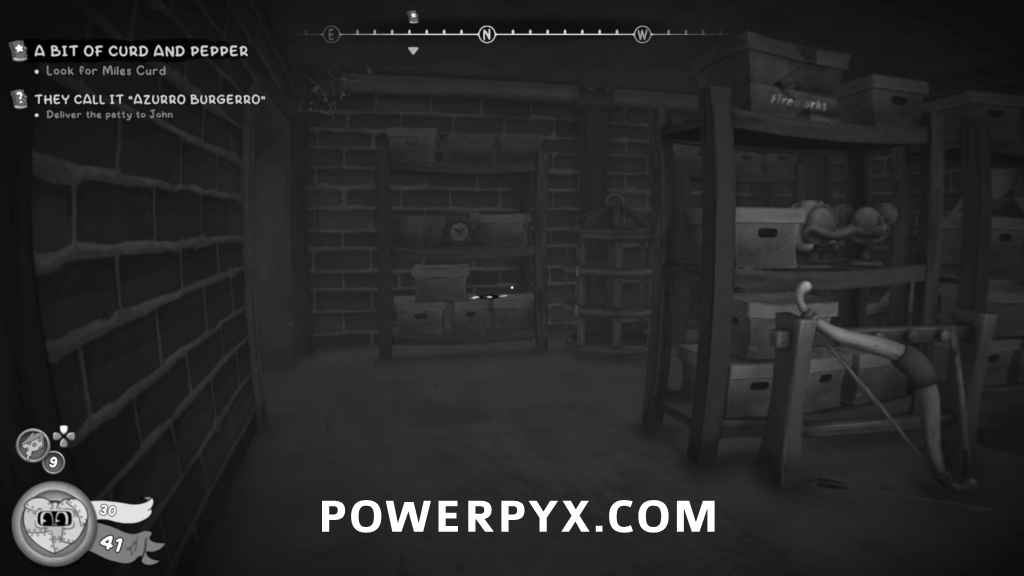
A Bit of Curd and Pepper
Schematic
At the start of the mission, there will be a safe in the top left of the room with the schematic
Comic
Head towards the locked door up the stairs, but instead of opening it swing across the hooks on the left until you reach the wooden platform leading to a hole in the wall. Once in the room, the collectible will be on a shelf to your left.

Baseball Card
From the previous collectible, turn left and go onto the balcony. Go to the end and double jump around the blockage to get to the other side of the balcony where the collectible will be in a popcorn basket.


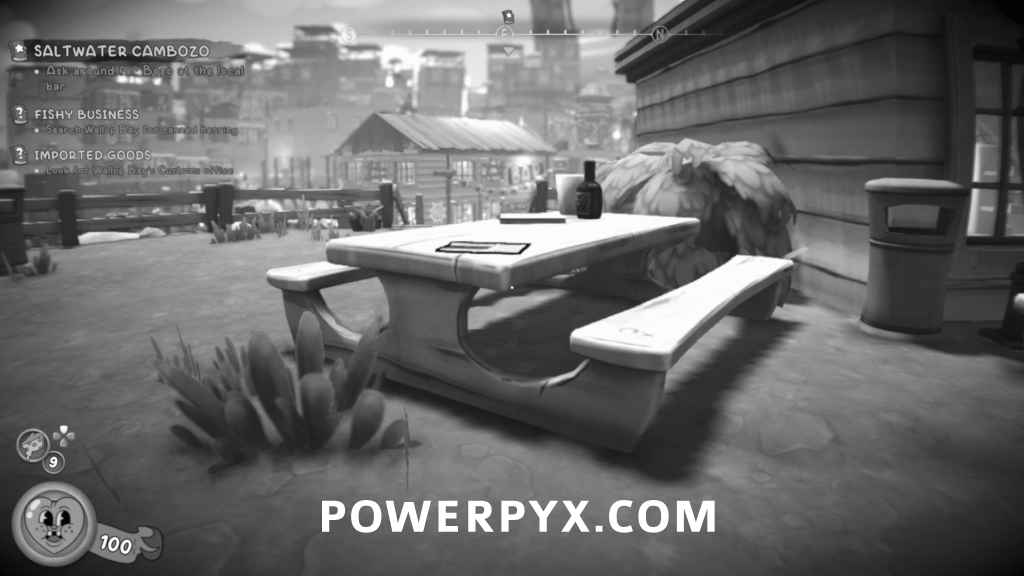
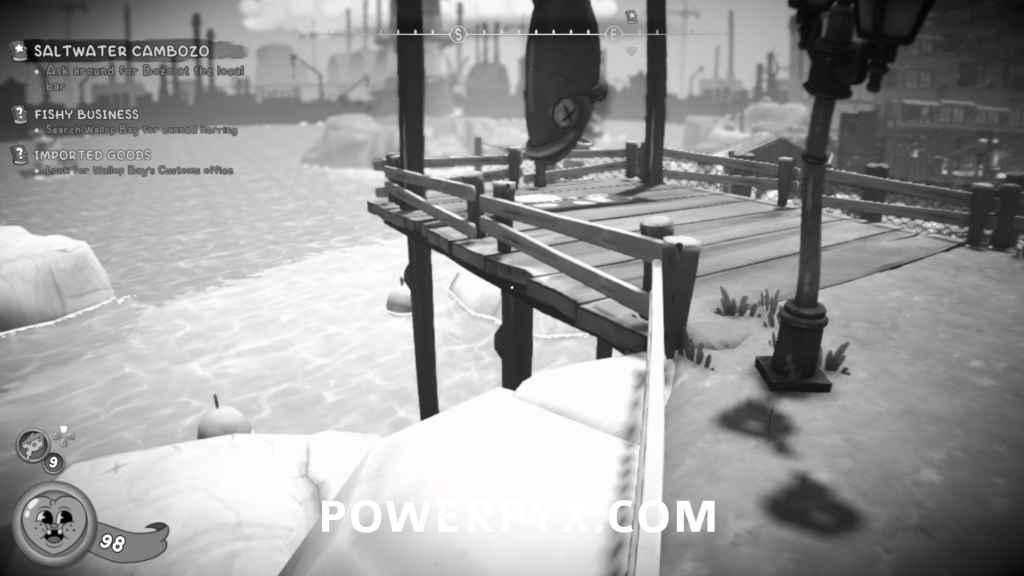
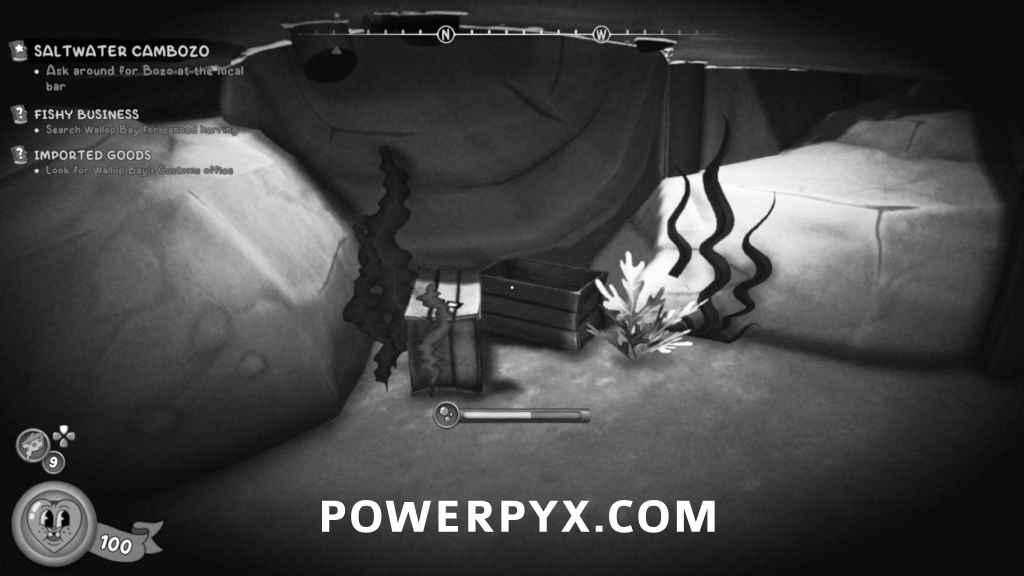
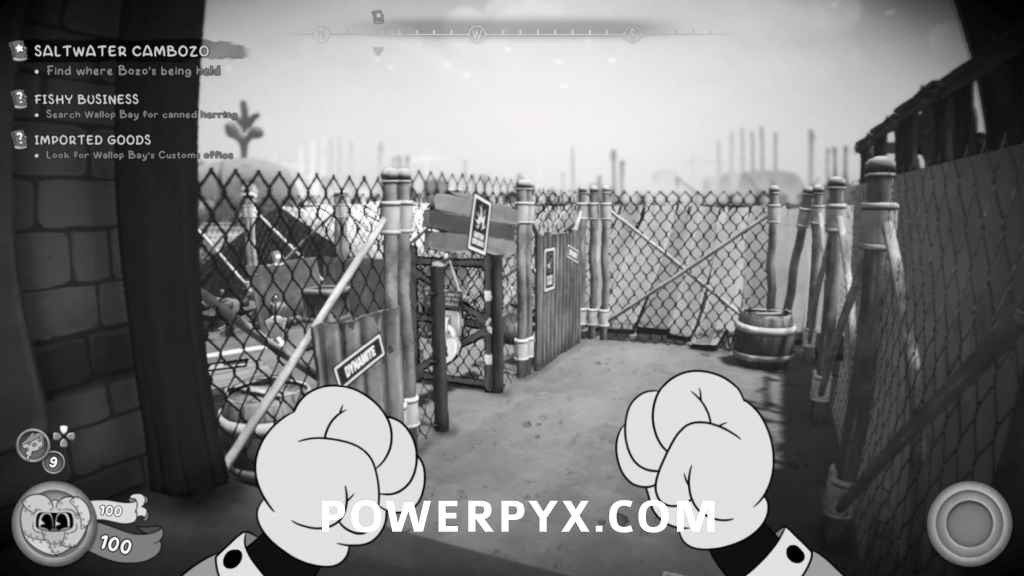
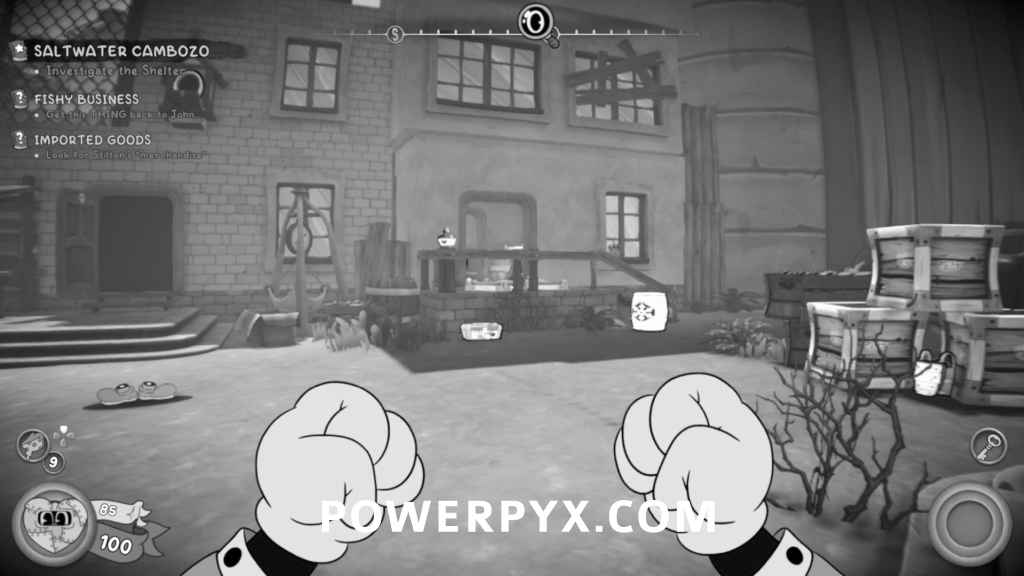
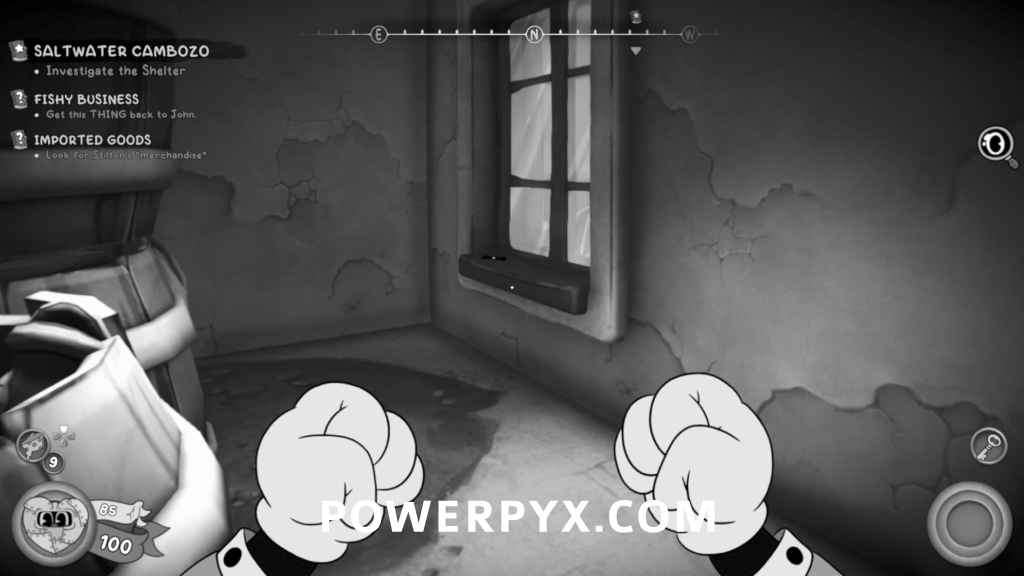
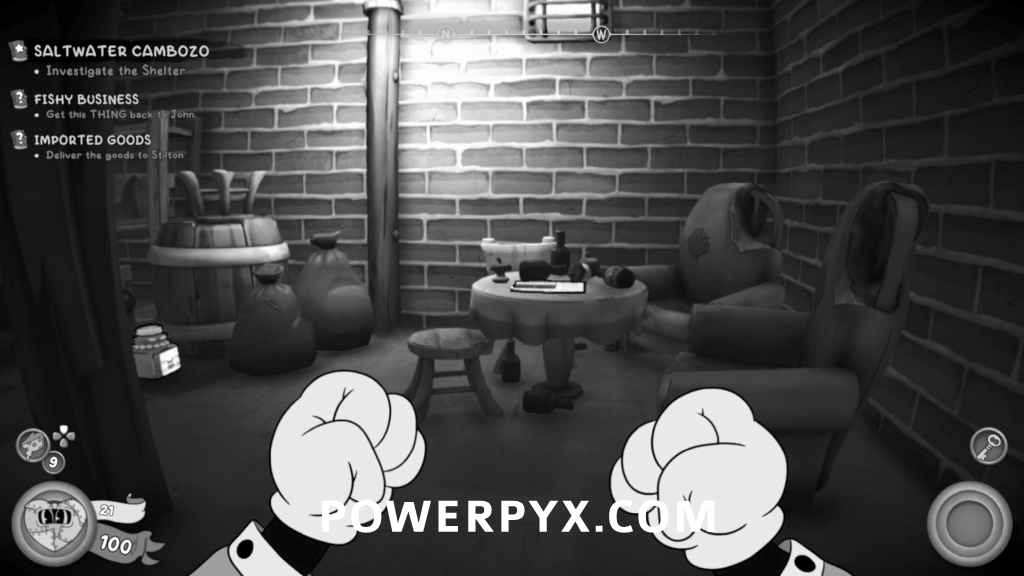
Saltwater Cambozo
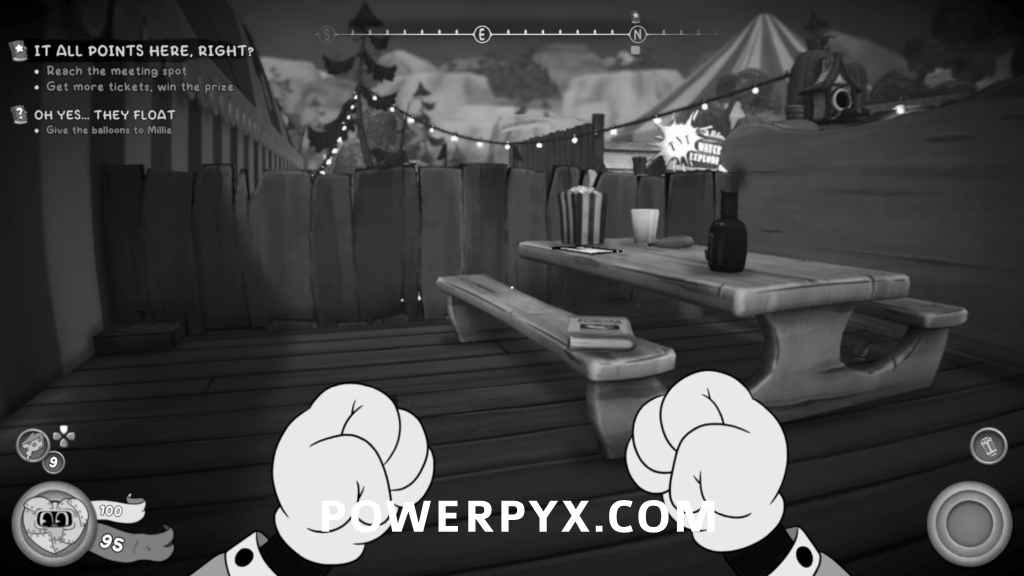
Newspaper
At the start of the mission, the collectible will be on one of the picnic tables by the stairs.

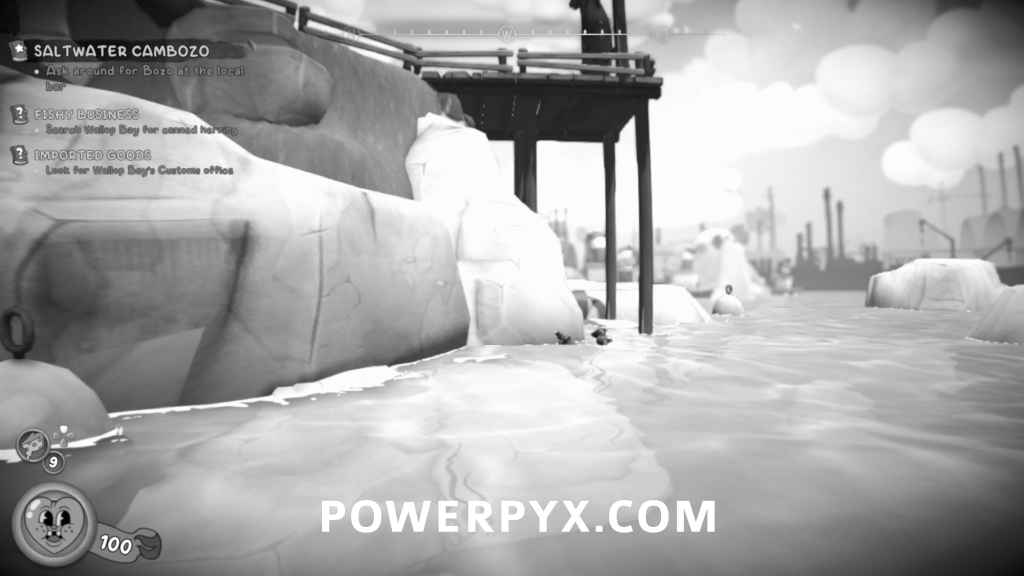
Figurine / Baseball Card
From the previous collectible, go towards the giant hanging fish and go onto the rock on the left of the dock. Directly under the dock will be a cave, so you’ll want to drop off the rock and then instantly jump and start gliding to get into the cave where you’ll find the first collectible.

Afterwards, drop down into the water directly below and there will be another collectible under the water where the floating bottles are on a box.
Schematic
After going down the stairs at the start of the level, you’ll see wooden beams going up the buildings on the right. Jump up the wooden beams until you reach an open window where you can enter the building where the schematic is.
Newspaper
After unlocking the gate with the Tower Key, the collectible will be on a box to your left.
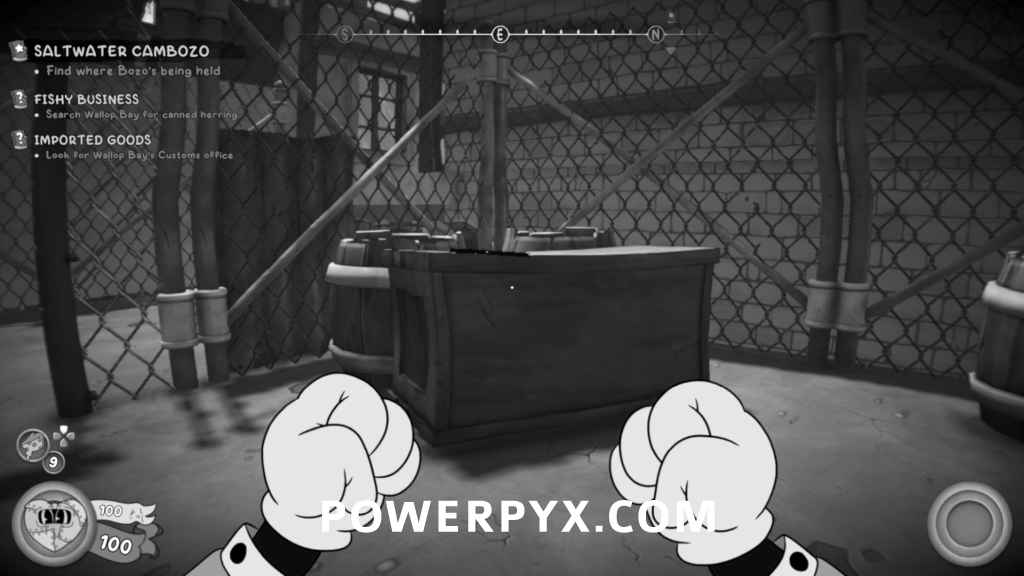
Baseball Card
After talking to Cameron Bozo and dropping into the yard, tailpick the door in the top left of the area. Go inside and the collectible is on the windowsill to the right.
Schematic
From the previous collectible, go back into the yard and you’ll see some boxes you can kick to reveal a hidden path. Climb up the ladder and the schematic is to your left.
Schematic
After breaking the power boxes to open the gate, jump over the truck directly ahead of you and break the boxes to reveal a hidden vent. The schematic will be inside the vent.
Newspaper
Once you reach the shelter, turn to your right and the collectible is on the table.
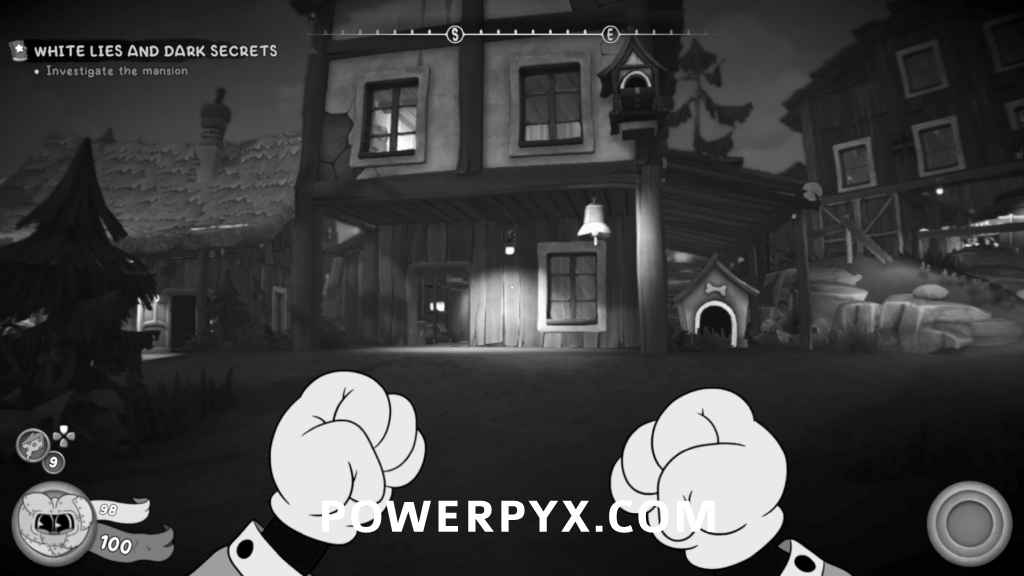
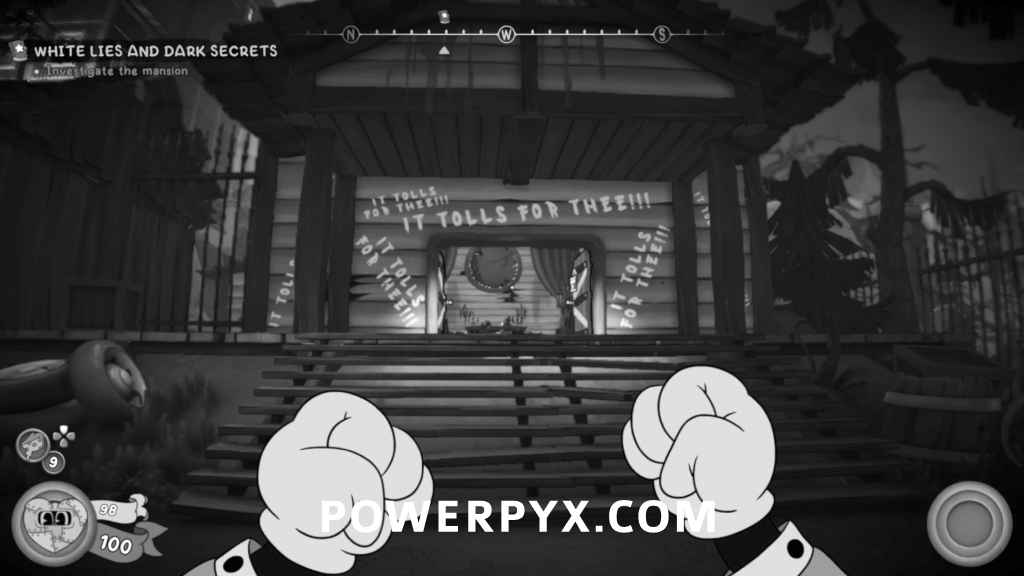
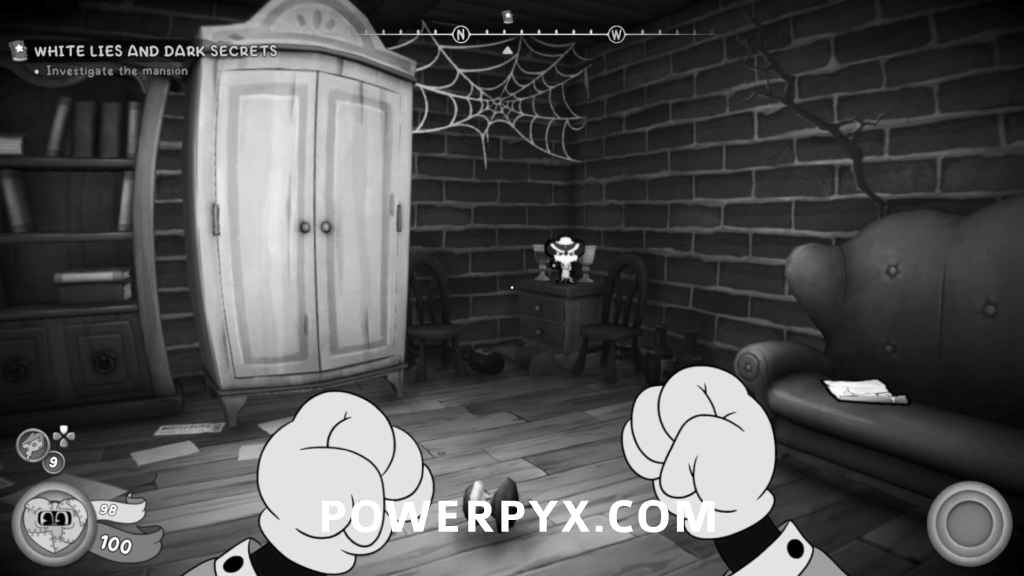
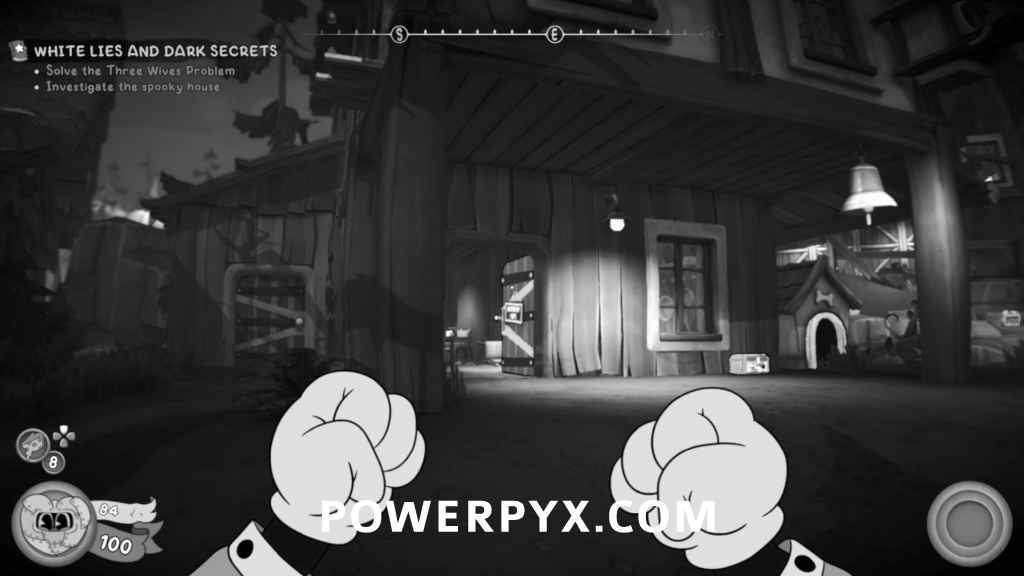
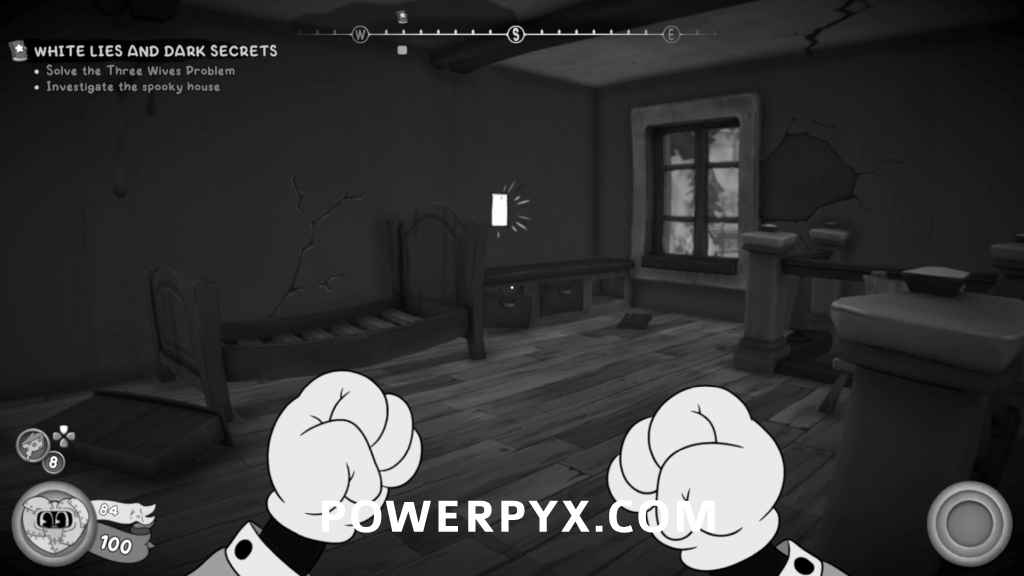
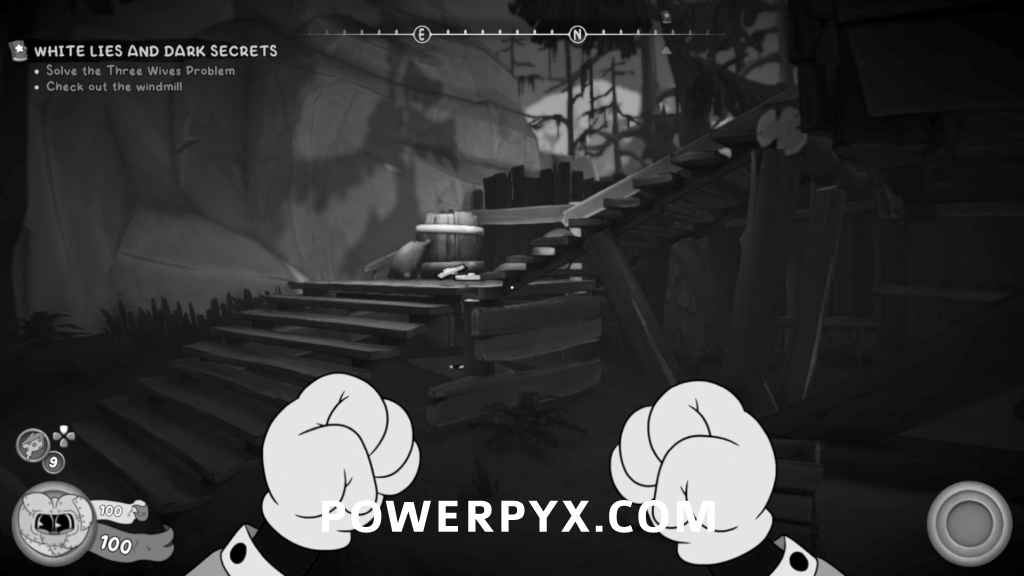
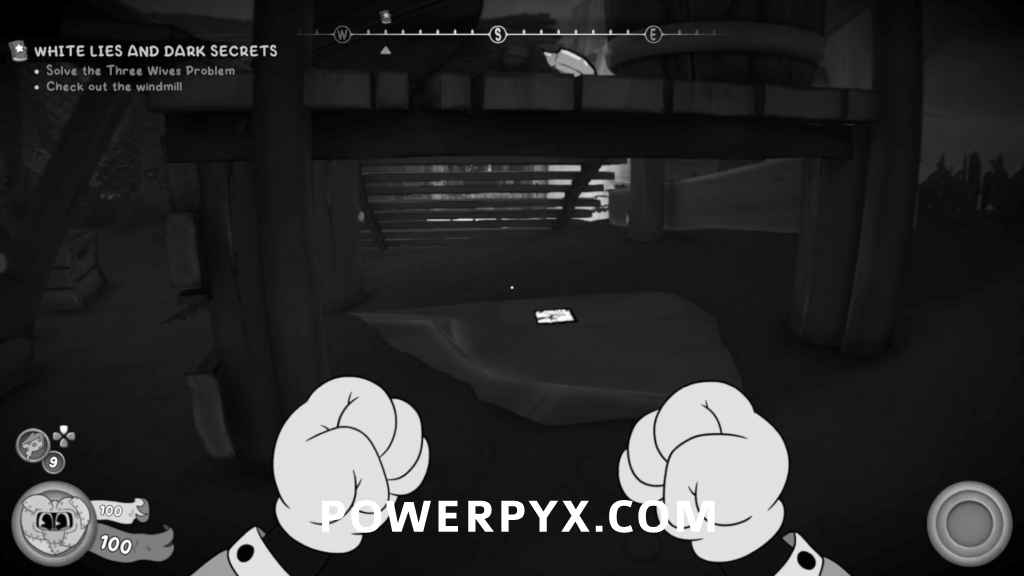
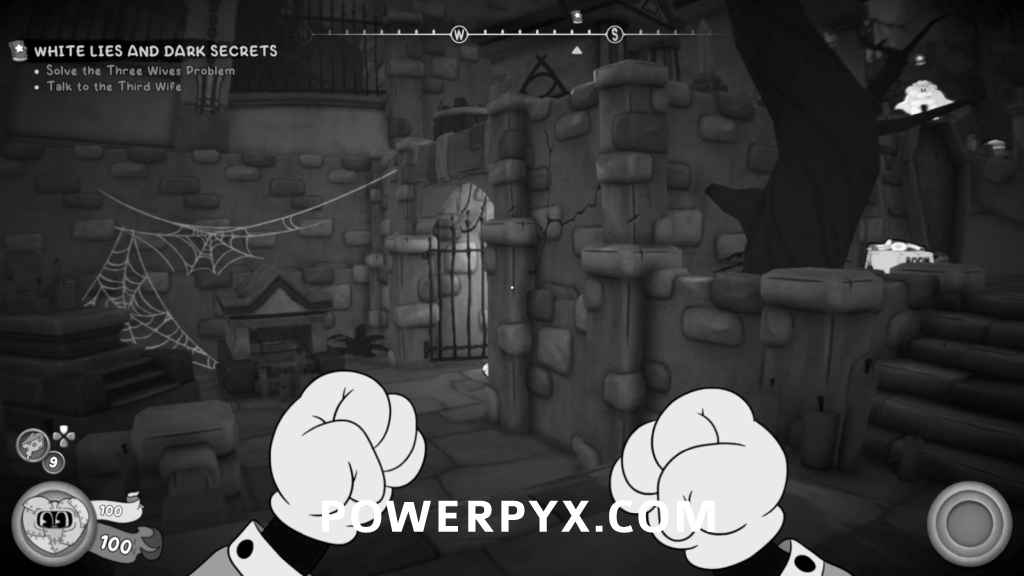
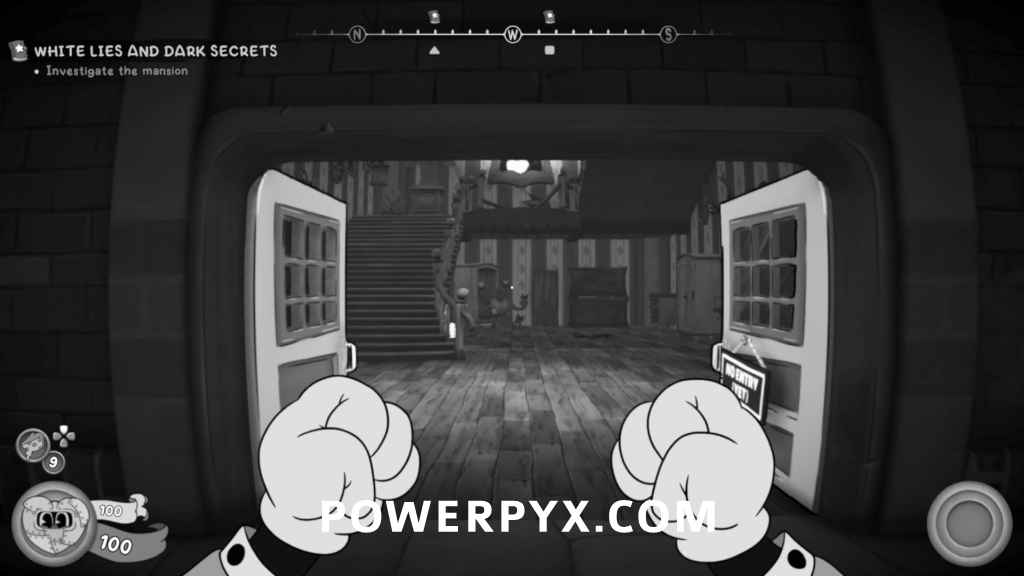
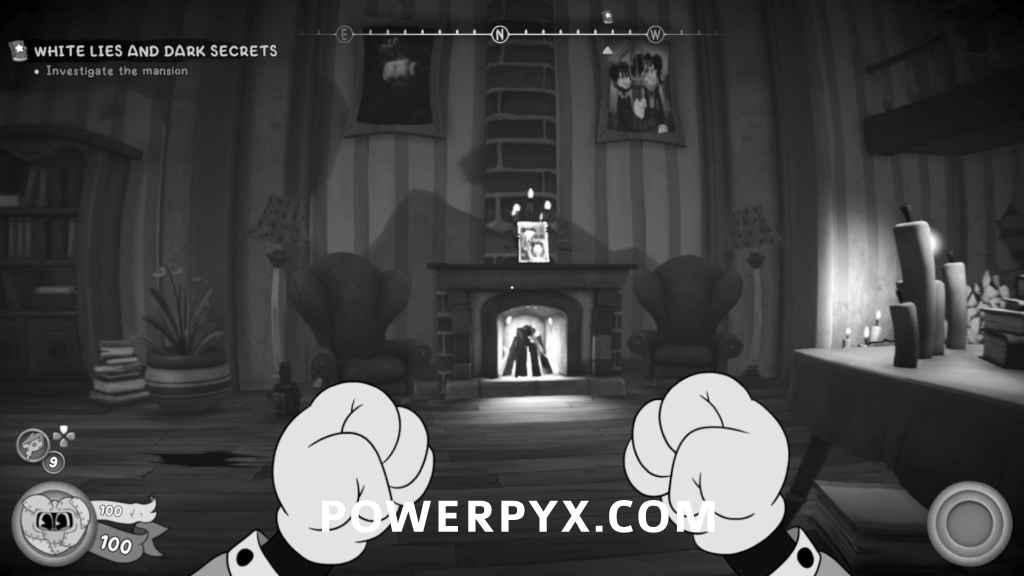
White Lies and Dark Secrets
Schematic
After getting the Kiss Kiss weapon, enter the house on the right and instead of dropping down the hole, go into the room to the right to find the schematic on the wall.
Baseball Card
After exiting the cave and reaching the outside again, go towards the barn on the right. Walk around the left side of the barn across the balcony and the collectible is on a crate at the end.

Figurine
In the same outside area, you’ll need to shoot 3 bells in order to unlock the church. The first bell is hanging in front of the house where you find one of the clues. The second is hanging on the tree in the center of the area. The third is the giant bell at the top of the church.

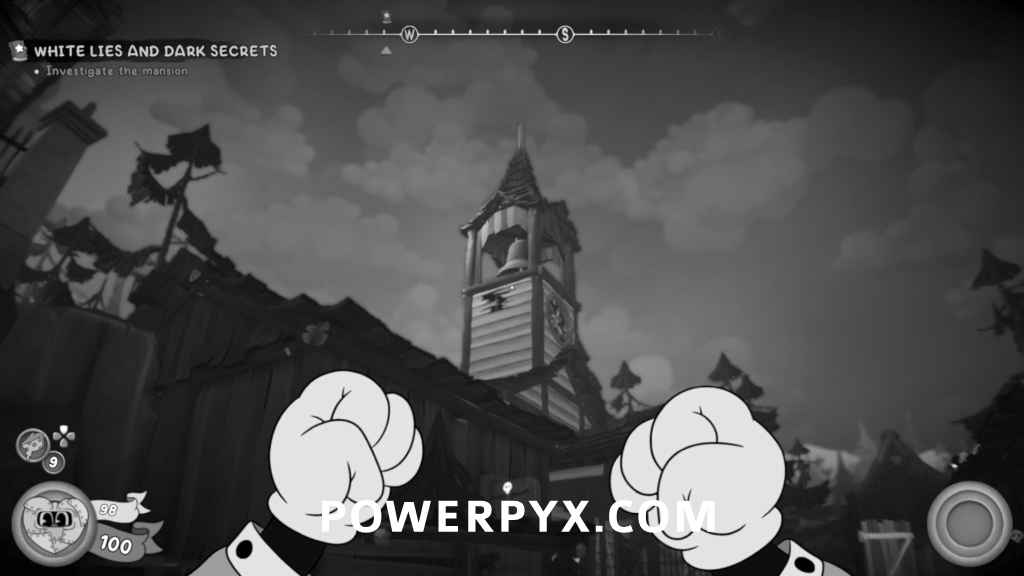
After all 3 bells have been shot, you can enter the church and pick up the collectible from the room on the left.
Berry Lynch’s Diploma Clue
After talking to the Old Shrew and she tells you to get the 3 rings, enter the building leading towards the first ring and after going up the stairs turn around and you can find the clue pinned to the wall.
Schematic
On the ground near the first wedding ring.
Comic / Schematic
After going through the barn and exiting back outside, jump across the gap and the collectible will be underneath the stairs directly ahead. Afterwards, follow the path of the fence to find the schematic pinned against a crate.
Baseball Card
After defeating the the ghost to get the 3rd ring, go through the gate underneath the main mausoleum and the collectible will be on the ledge.
Schematic
After entering the mansion, go up the stairs ahead and tailpick the door. The schematic will be in the safe in the room.
Curd: Millie’s Dad Clue
After entering the mansion, turn to the left and the clue is on top of the fireplace.
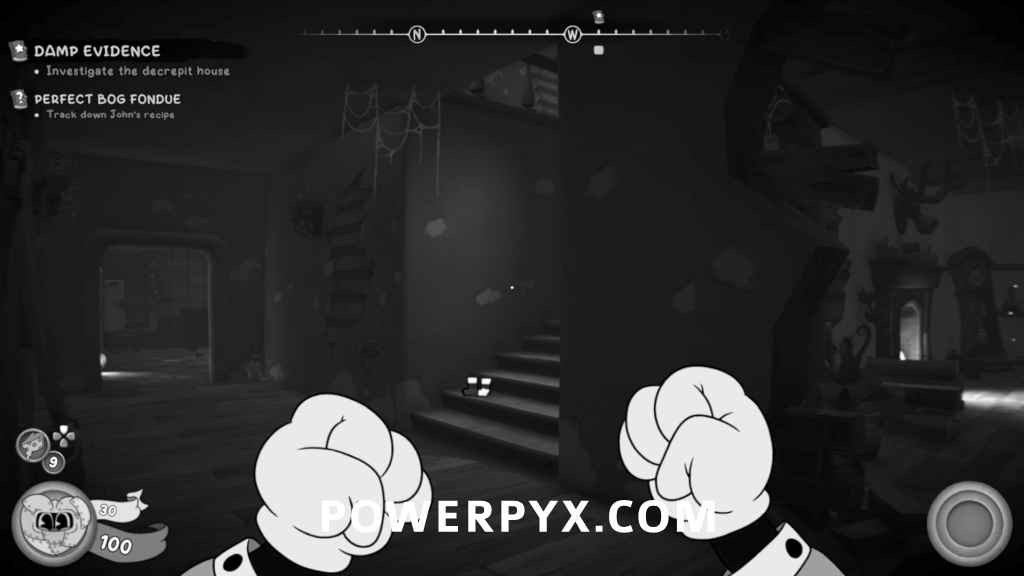
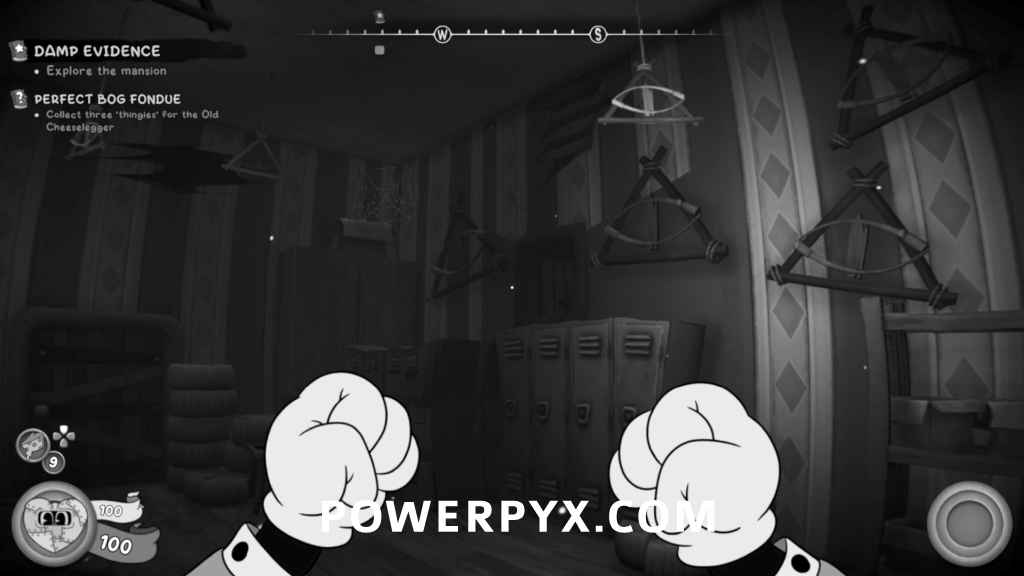
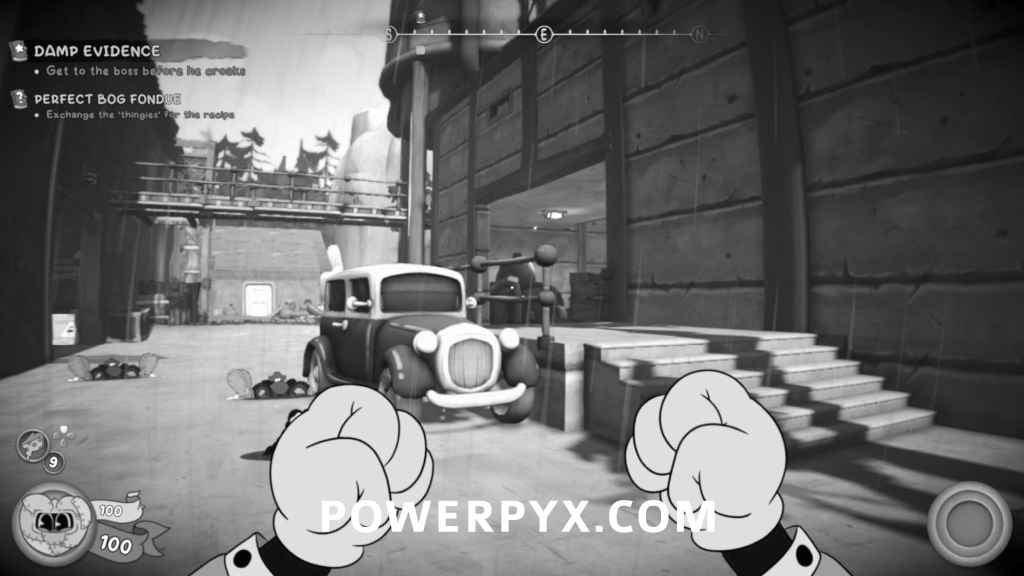
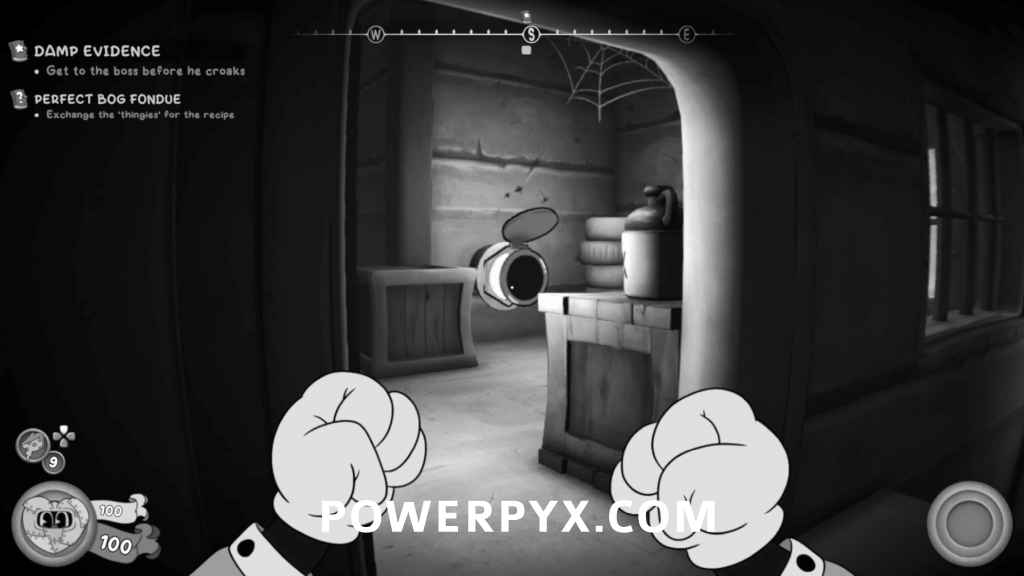
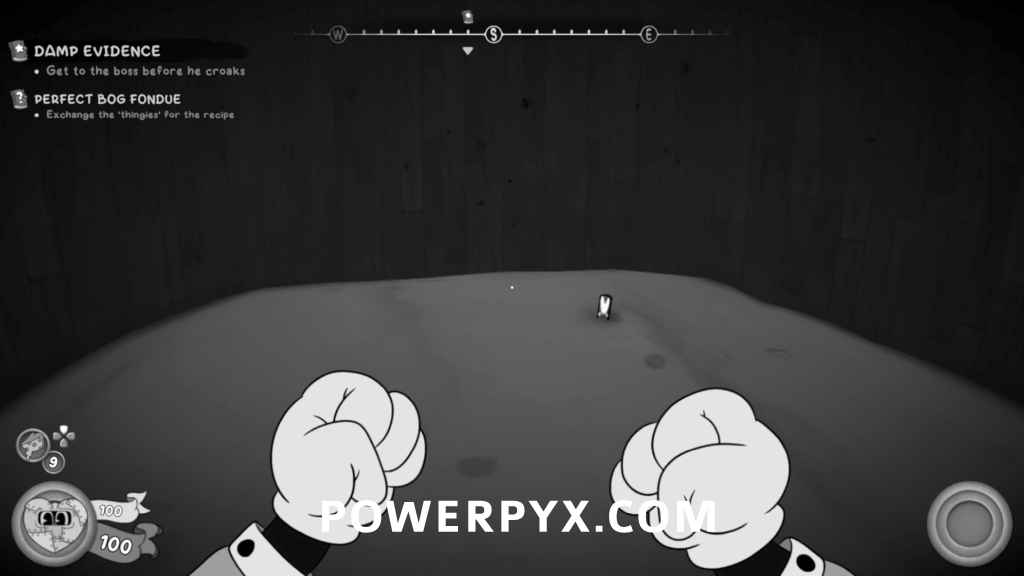
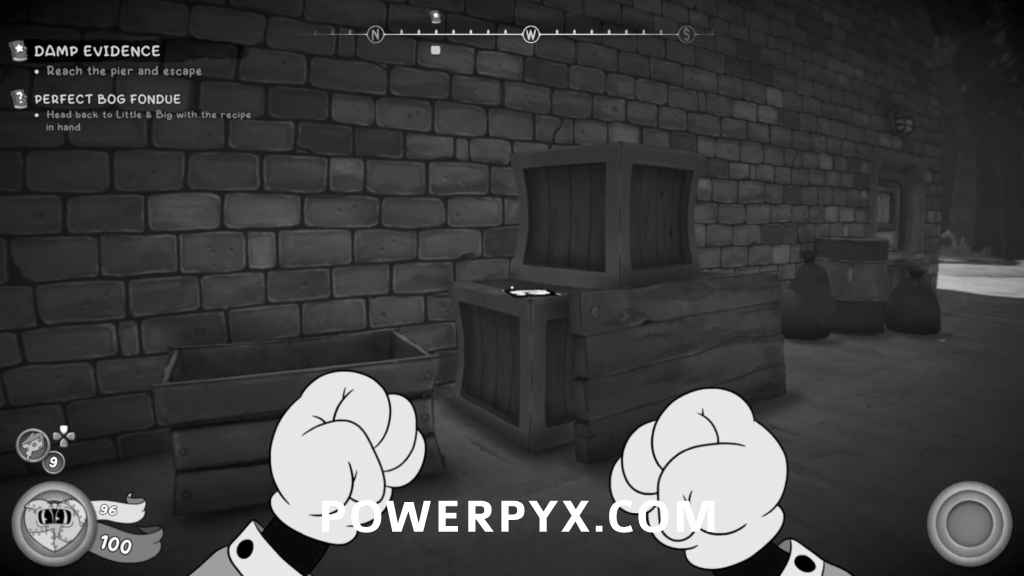
Damp Evidence
Currently missing 1 Baseball Card. This can be bought from the shop later if missed.
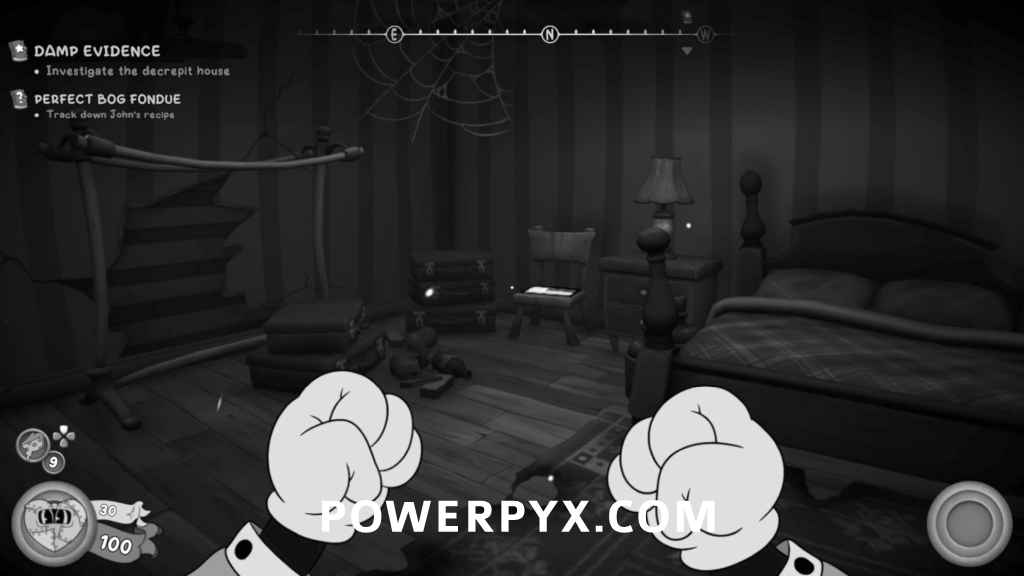
Newspaper
At the start of the level, go up the stairs and enter the room on the right. The collectible will be on a chair near the bed.
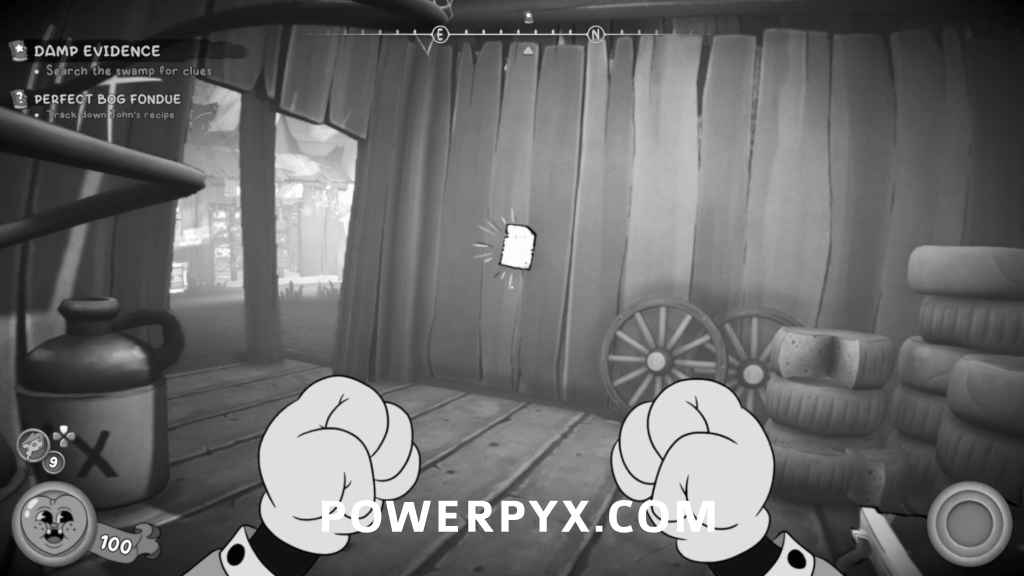
Dirty Note Clue
After reaching the broken down shacks right before the mine entrance, you’ll find the clue pinned to the wall of the shack closest to the mine entrance.

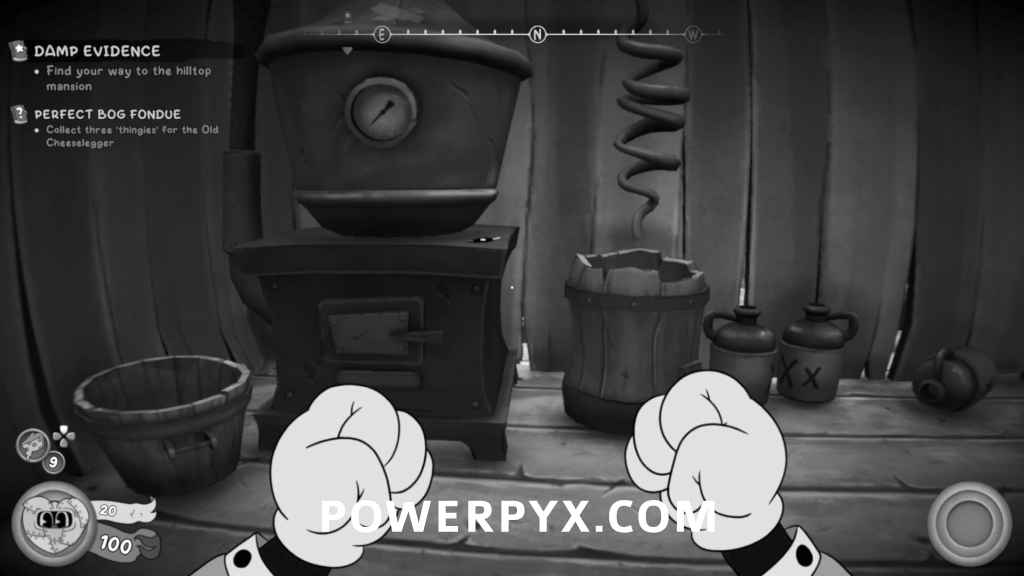
Baseball Card
After exiting the mines, enter the shack on the left and the collectible will be on top of the furnace.

Schematic
From the previous collectible, go down the hill and enter the opened building. The schematic on the wall behind the shelf.
Figurine
While in the mansion, enter the room from the balcony where you can see a key on the desk. DO NOT pick the key up yet. Jump up onto the lockers on the right and follow the vent to the end to find the collectible.

Newspaper
After defeating the boss and going back outside, instantly go left and follow the balcony. The collectible will be on a bench at the end.
Stick Figure Clue
From the previous collectible, head down the hill and you’ll see the clue on the ground of the shack through the window.

Schematic
Once in the swamp, jump onto one of the tree platforms and swing across to the next one. The schematic will be pinned to the tree
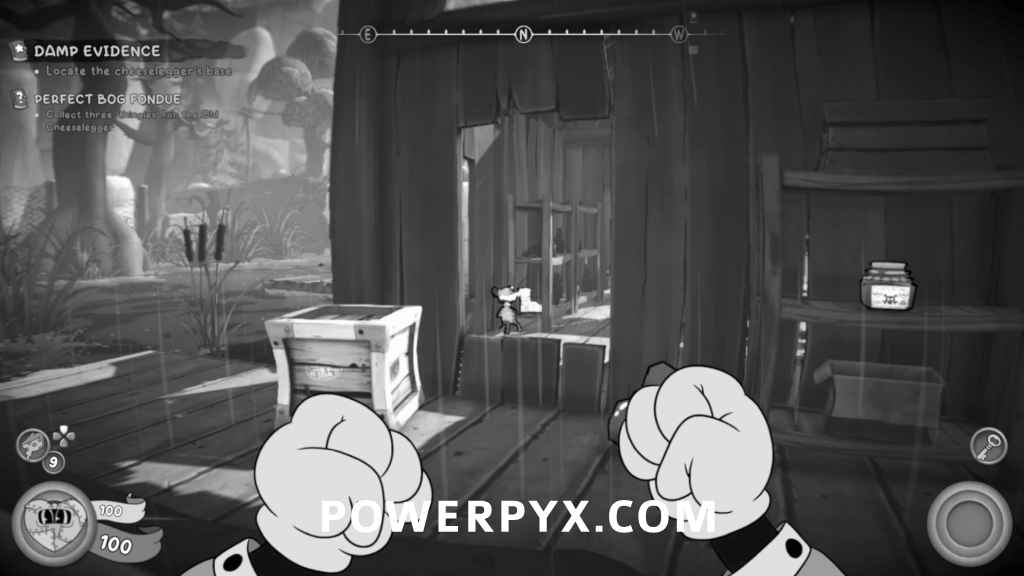
Cheese-Stained Badge Clue / Baseball Card
Once you reach the Cheeselegger’s hideout, enter the first building on the right. The clue will be on the crate on the left. Afterwards, go up the stairs and go through the warp pipe to find the collectible on the ground.
Schematic
From the previous collectible, go back outside and then turn right. Follow the wall to the right and you’ll see a safe with the schematic inside.
Comic
After escaping the Cheeselegger’s hideout and exiting back outside towards the pier, turn around to your right and the collectible will be on a crate tucked behind the building.

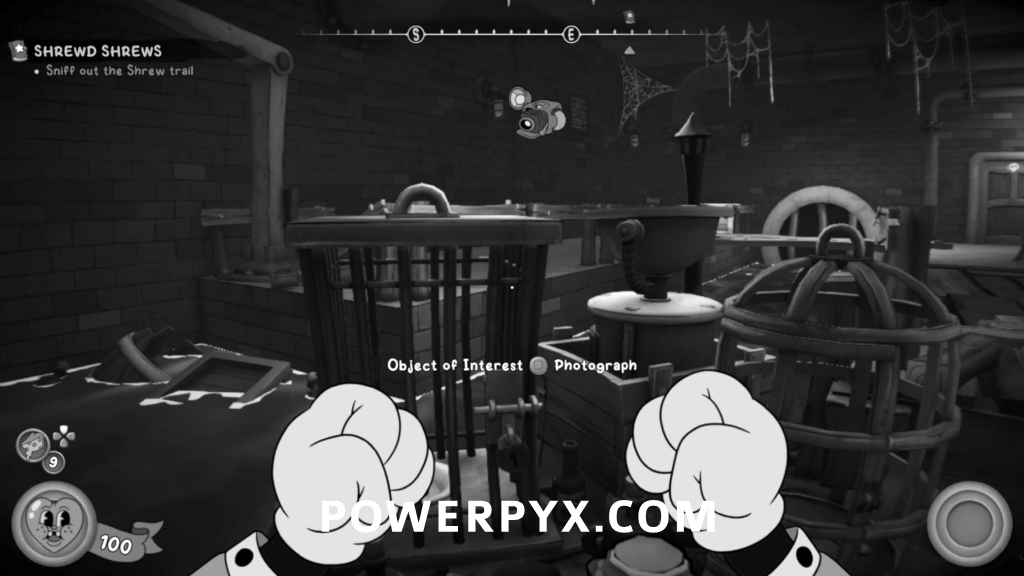
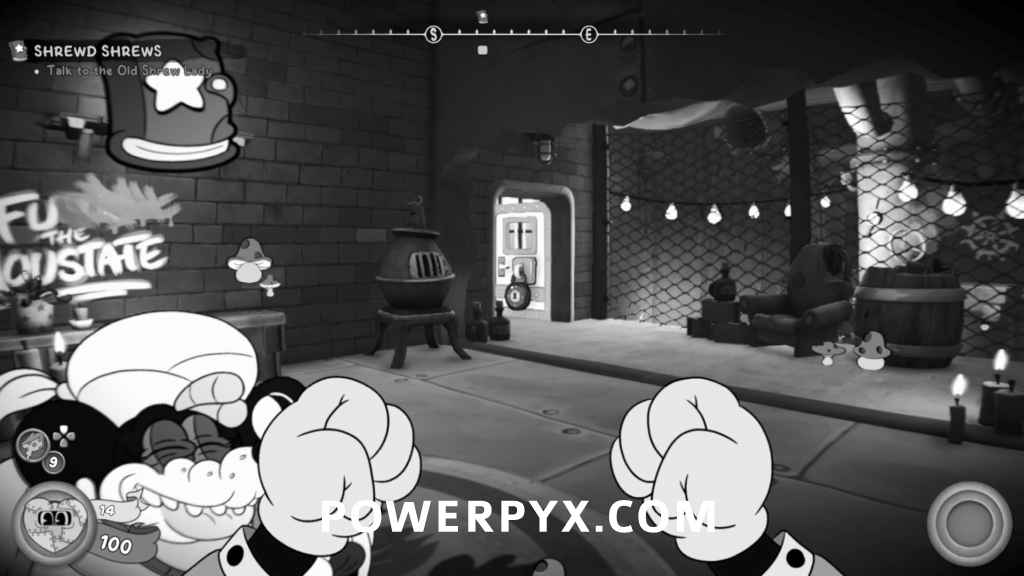
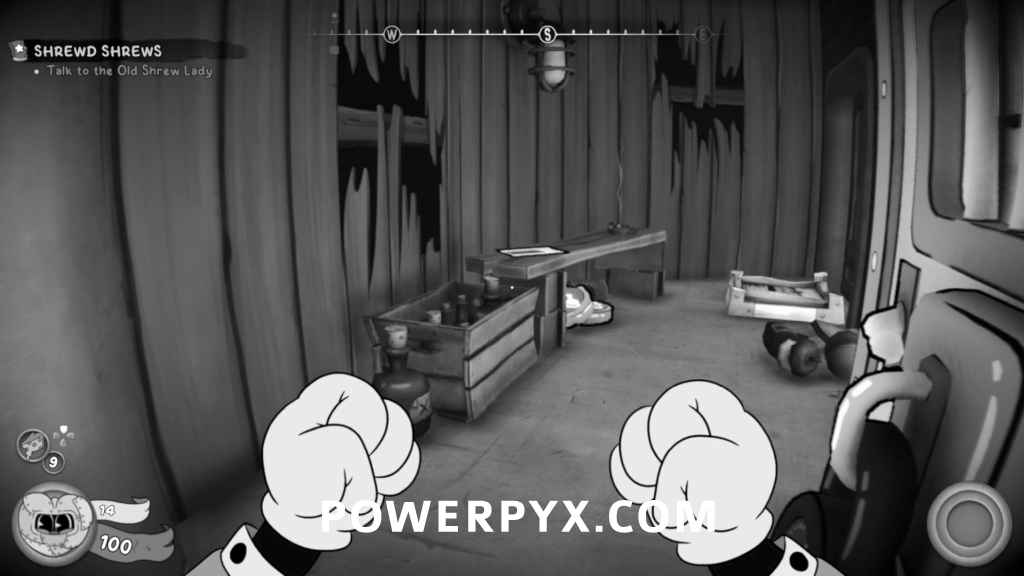
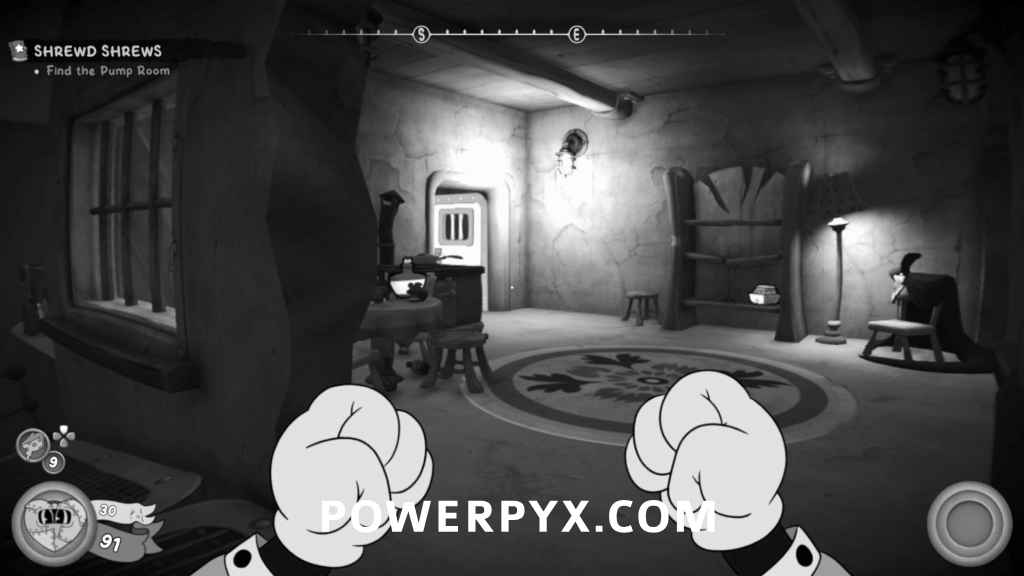
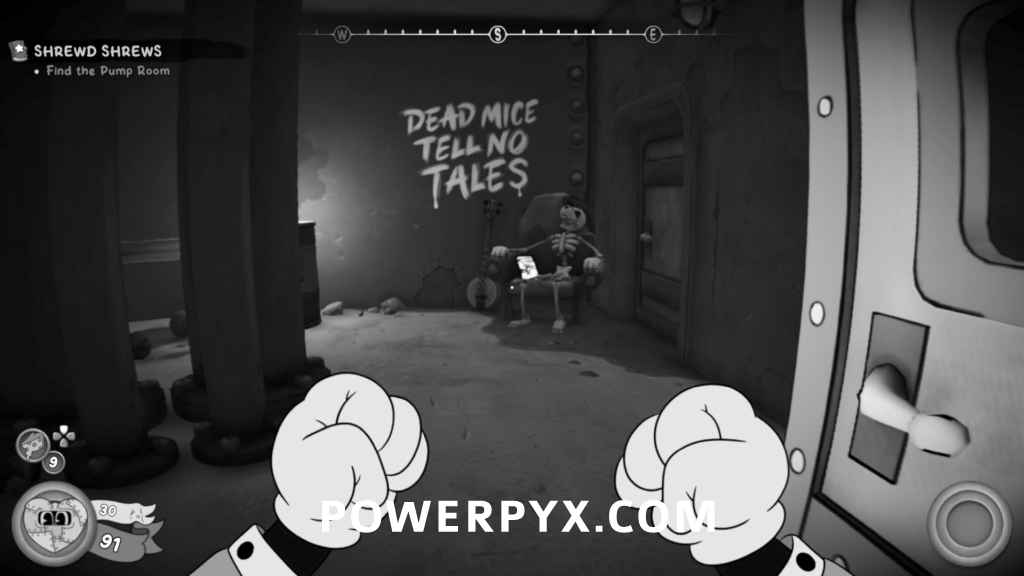
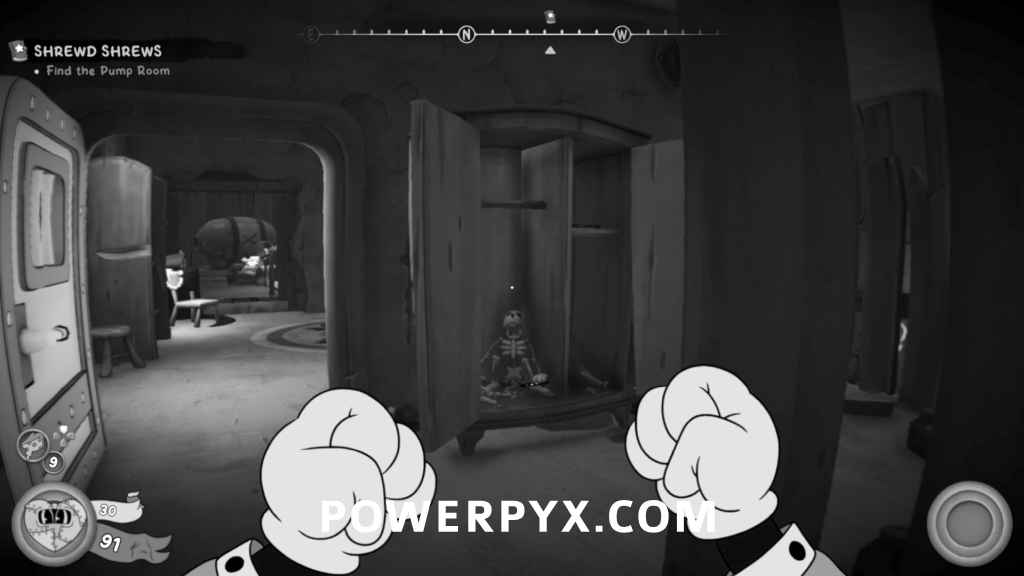
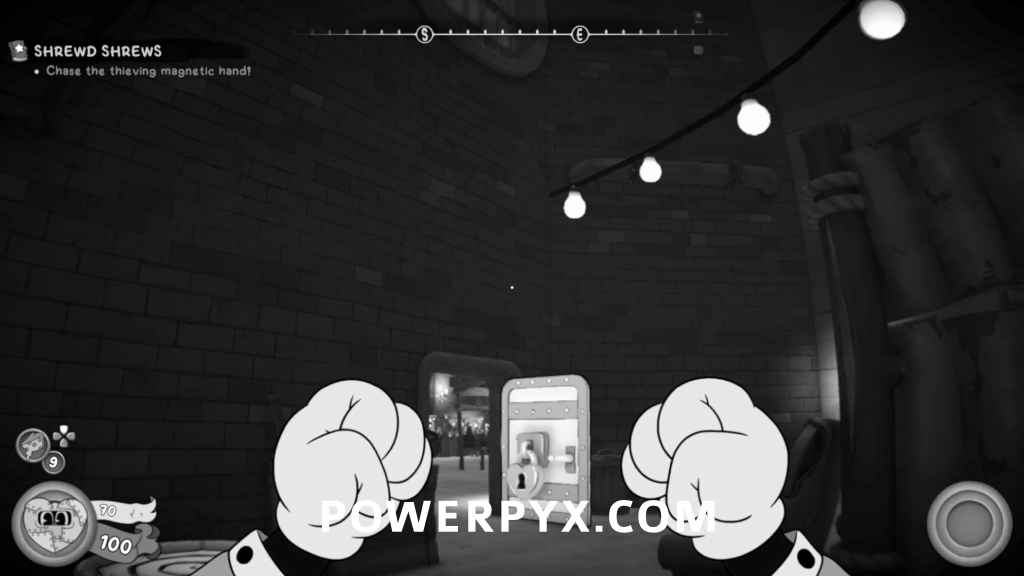
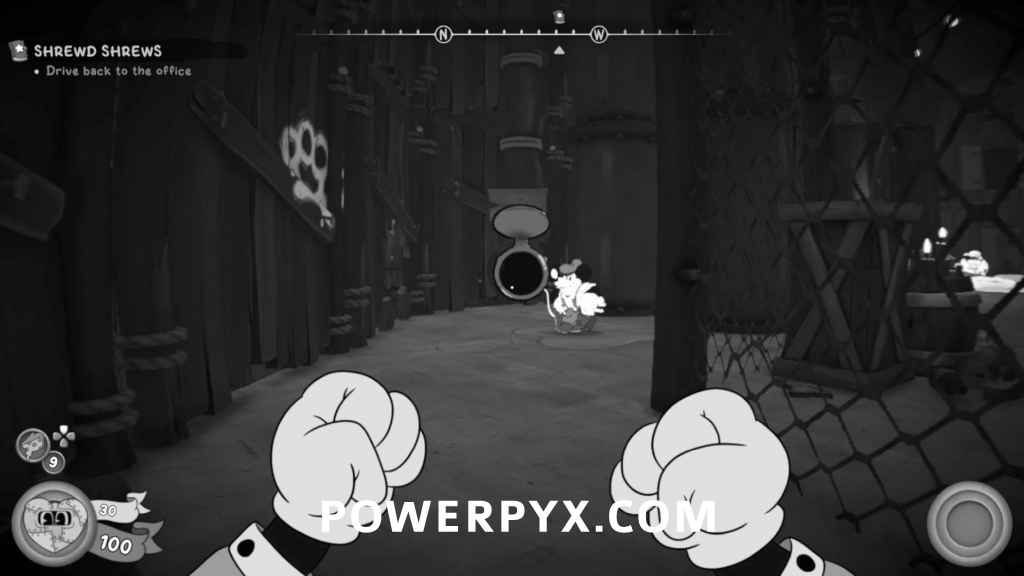
Shrewd Shrews
Lab Stuff & Cages? Clue / Schematic
After dropping down the waterfall, you can take a picture of the cages directly in front of you. Afterwards, turn around and go back through the waterfall. Follow the stairs and jump across the gap to find the schematic on a table.
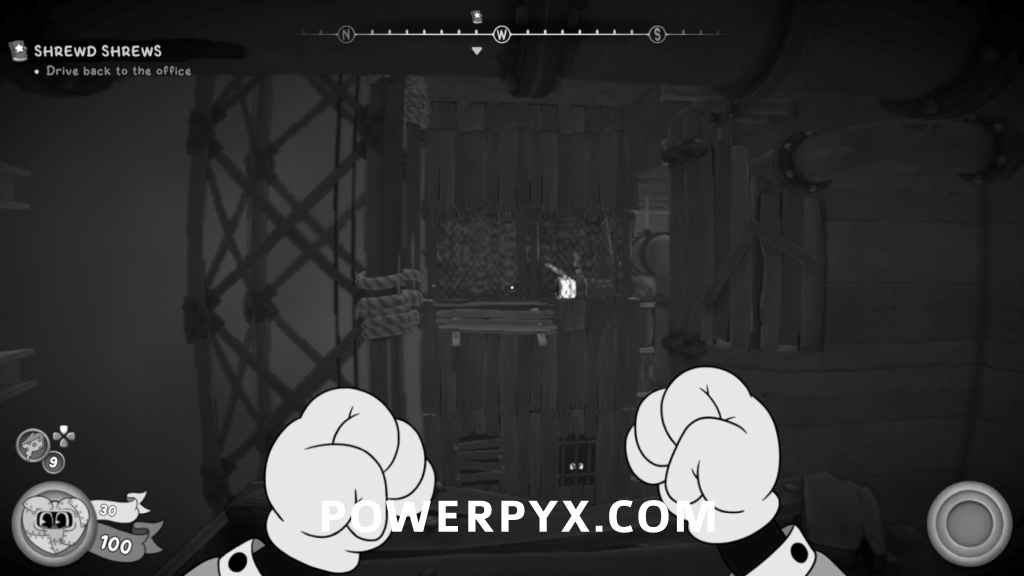
Schematic
In the room where you have to pull the levers to activate the updrafts, you can jump through the broken fence into the section with the pistons and gears. The schematic will be by the little wooden boat.
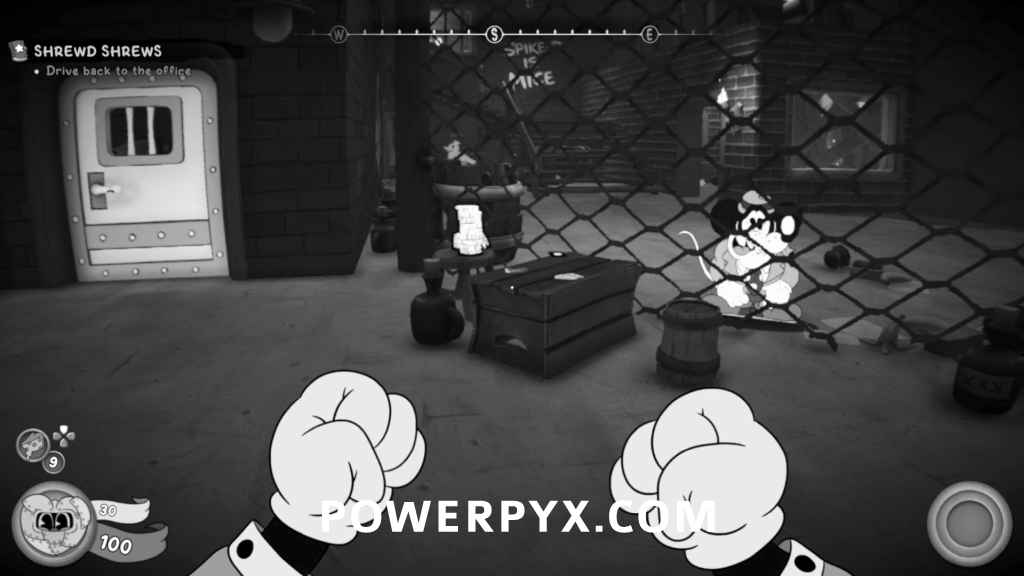
Newspaper
Tailpick the door directly next to the Old Shrew Lady in Newthicket and the collectible will be inside.
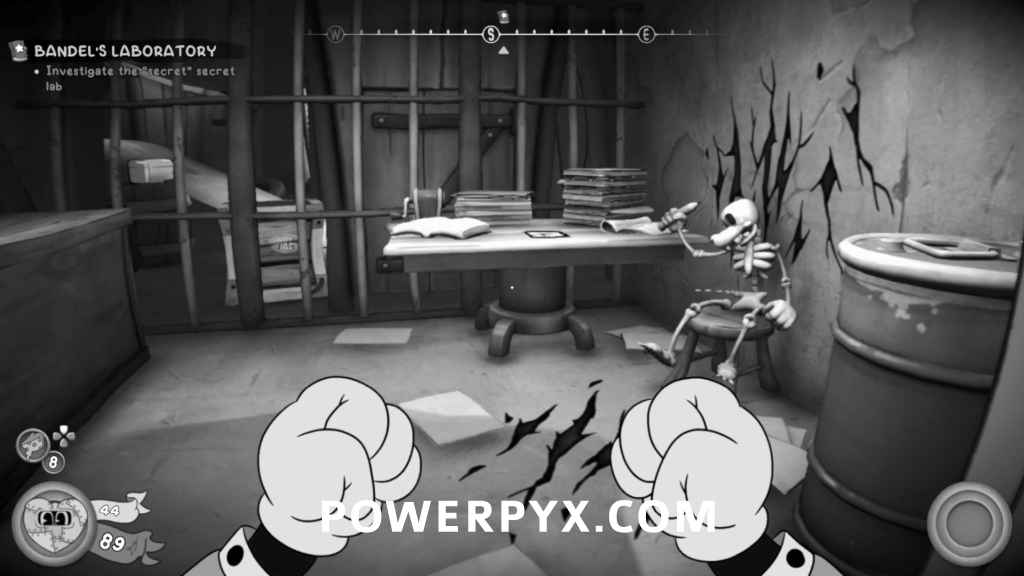
Comic / Baseball Card
After blowing up the wall to progress, go through the door on the left and the first collectible is on the chair with the skeleton. Afterwards, turn around and open the closet to find the second collectible.
Schematic
While chasing the magnet with the value on it, the schematic will be to your left after climbing one of the ladders.
Newspaper
After unlocking the door with the VIP Pass, DO NOT pick up the value yet. Use the trampoline to land on the pipe above the door, then jump over to the ledge directly across. The collectible will be on a chair there.
Newspaper / Schematic
After clearing the fighting ring, go upstairs and the collectible will be on a chair to the left. Afterwards, turn around and follow the wall on the left to find a safe with the schematic.
Baseball Card
After the elevator is fixed, go back towards the shop area and go into the now opened warp pipe behind the fence, then jump across to the other warp pipe. The collectible will be on a table in front of you afterwards.
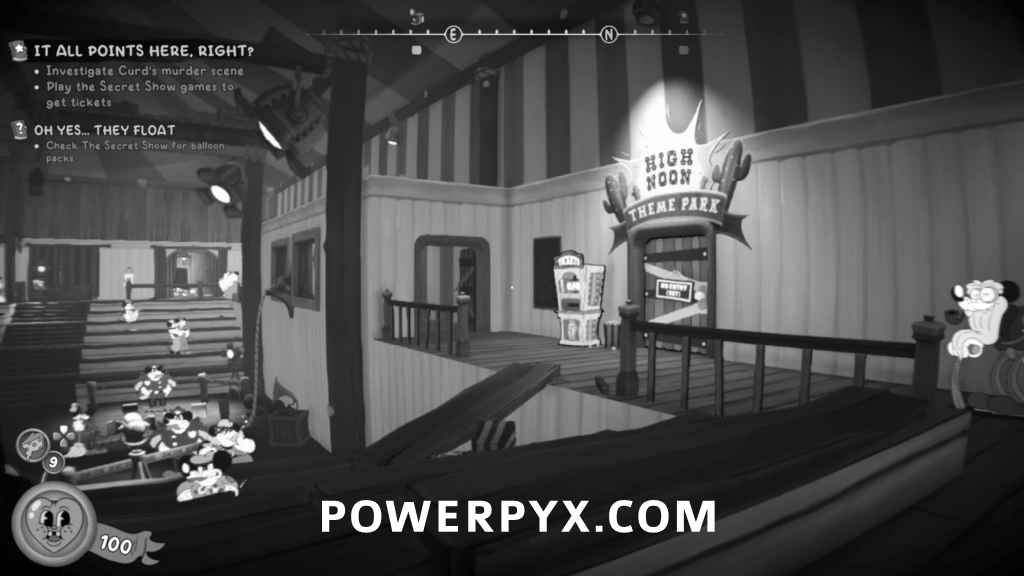
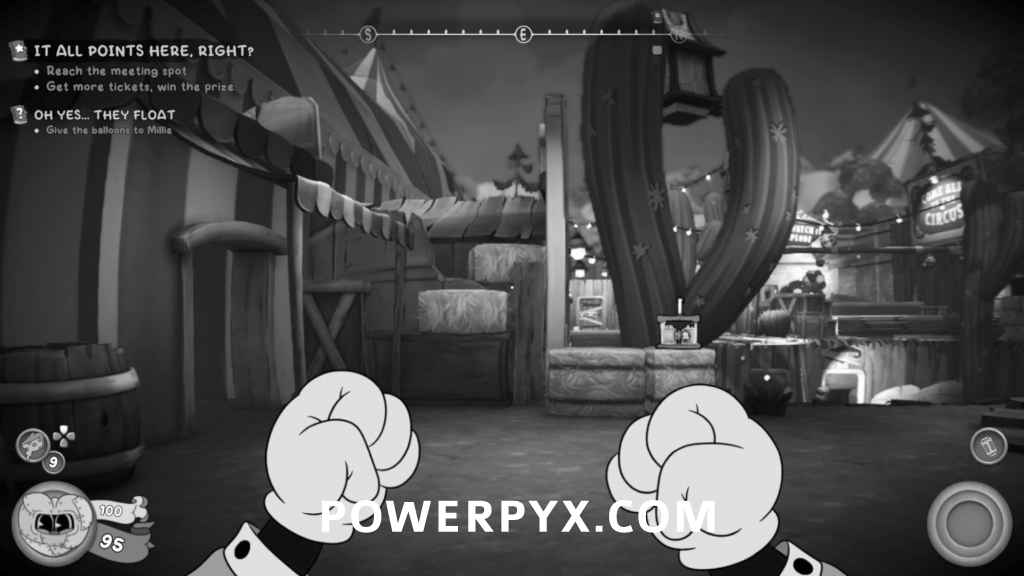
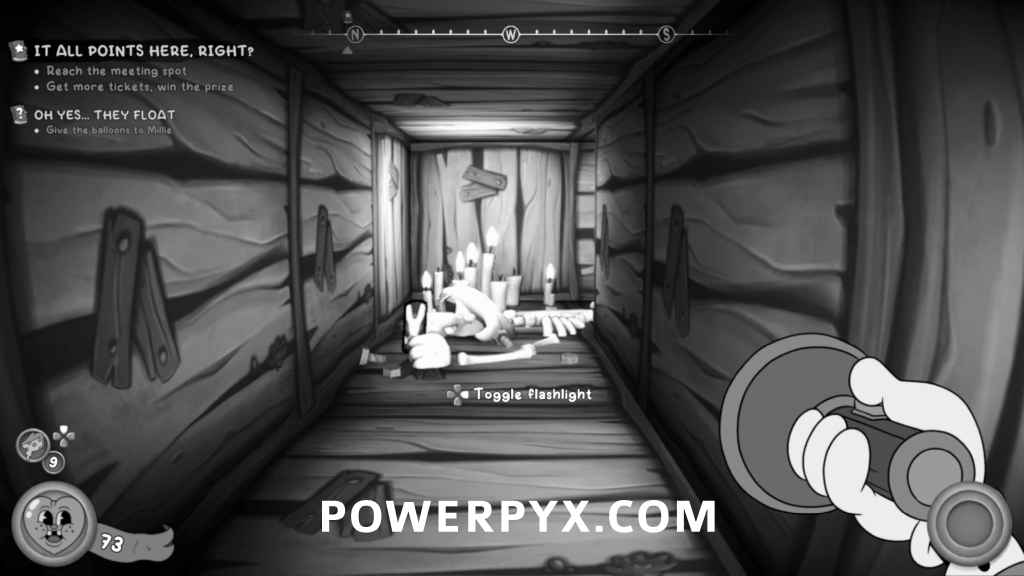
It All Points Here, Right?
Before starting the mission, make sure you accept the Oh Yes… They Float side job from Millie Curd as you get a Baseball Card as a reward for completing it.
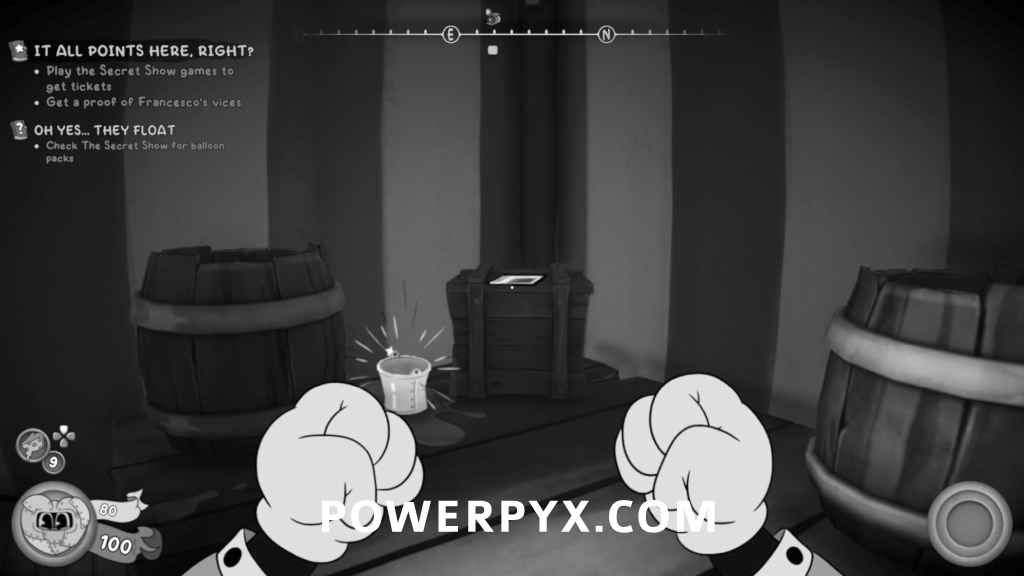
Schematic
After blowing up the wall and dropping down, jump up onto the crates in the far left corner and jump up to the small platform with the schematic.
Comic
After crawling through the vent to get to the Backstage Key, go through the next vent on the left and the collectible will be at the end.

Newspaper
From the Ticket Chopper that requires 4 tickets, enter the door immediately to the left and the collectible is on a stool.
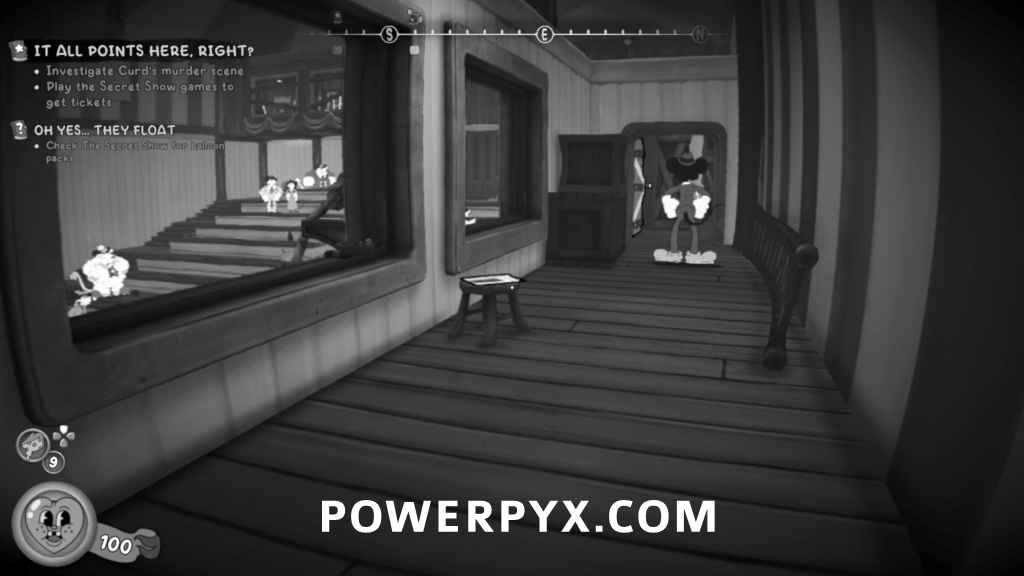
Newspaper
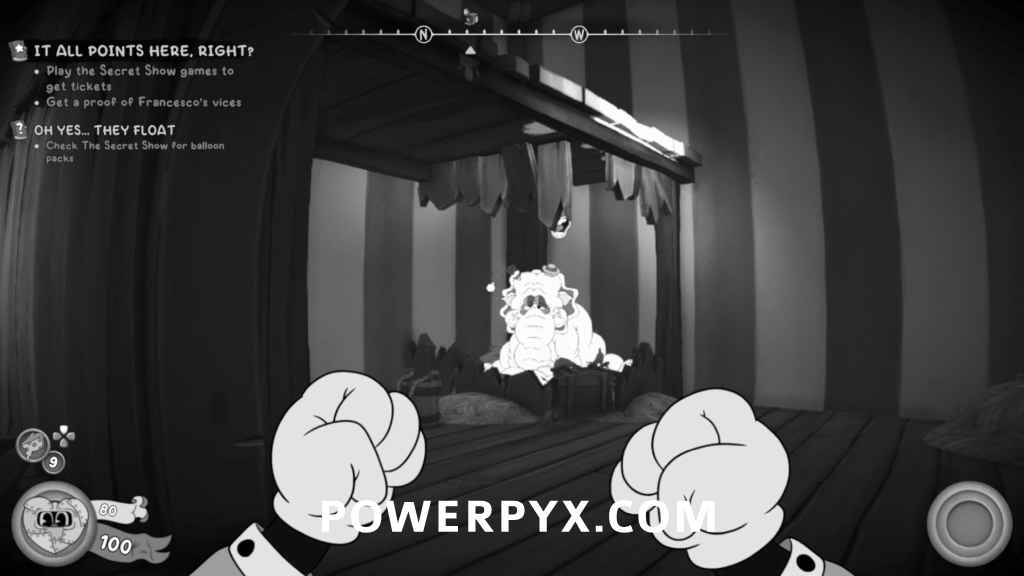
From Francesco The Elefanto, jump up to the platform directly above him and the collectible will be on a crate.
Figurine / Schematic
After crawling through the vent to the balcony seats, you’ll find a key to the Dressing Room on the windowsill. Exit back to the bar and use the key to unlock the dressing room. The collectible will be on a table inside. Afterwards, take the warp pipe and there will be a safe with the schematic.
Newspaper / Schematic
After opening the door with the 4 Secret Tickets, walk in and then jump up the crates to the left to the top of the small building. The collectible will be on the picnic table. Afterwards, go back down and the schematic will be pinned to a crate in the top right of the area.
Baseball Card
While looking at the T.N.T. Watch It Explode game, you’ll see a window in the building directly across. Jump over the gap into the window and the collectible will be on a small crate.
Baseball Card (Side Job)
From the previous collectible, look to the left and you’ll be able to buy a box of Deflated Balloons for 25 coins. This is needed for the Oh Yes… They Float side job which rewards the collectible.
Baseball Card
After using the 2 Secret Tickets to unlock the Rewards Shop, tailpick the door directly ahead and go into the room. Destroy the explosive barrels in the room to reveal a hidden vent. The collectible will be on a skeleton inside the vent.
Schematic
After opening the giant mouth and going inside, the schematic will be on one of the tables.
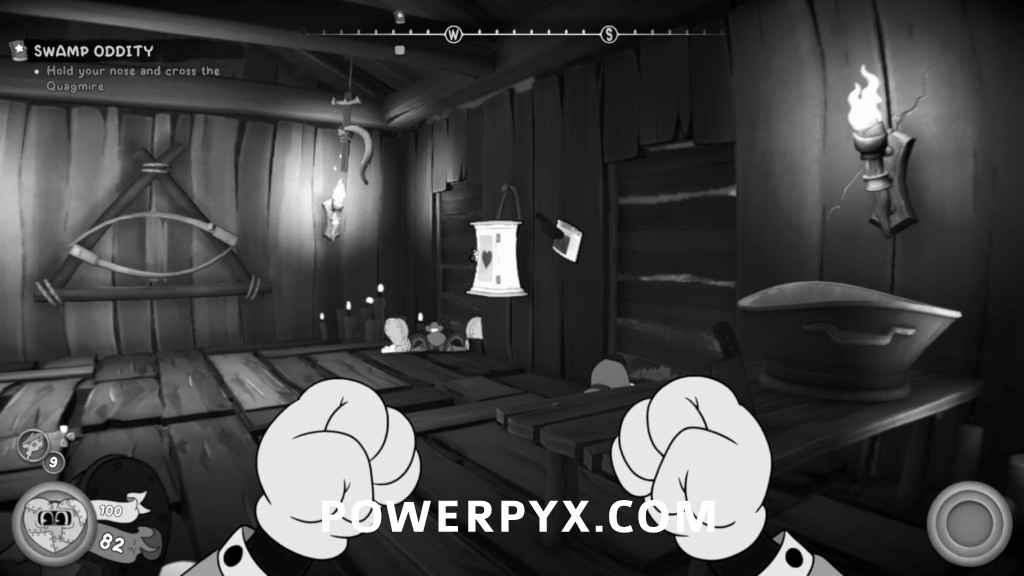
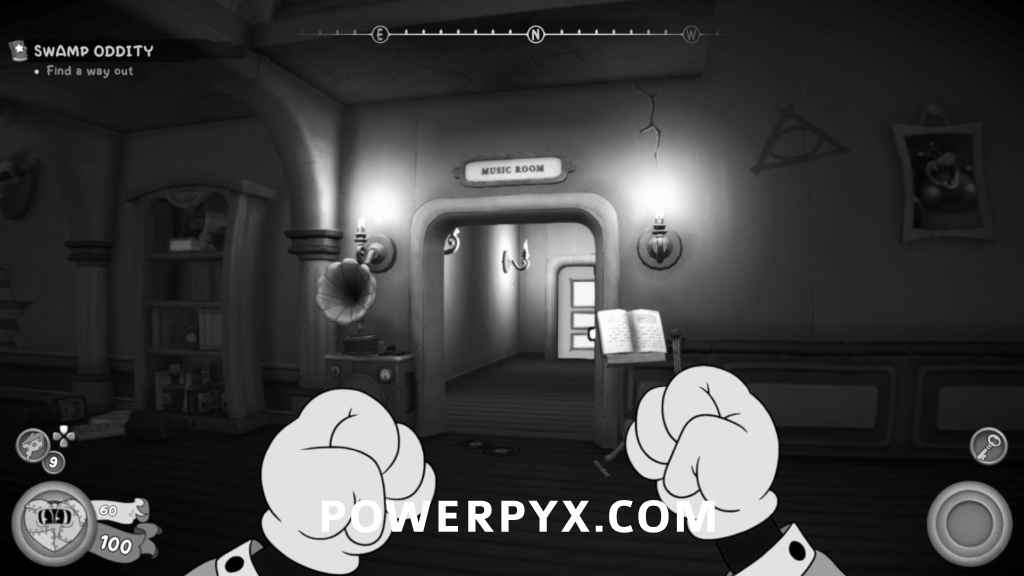
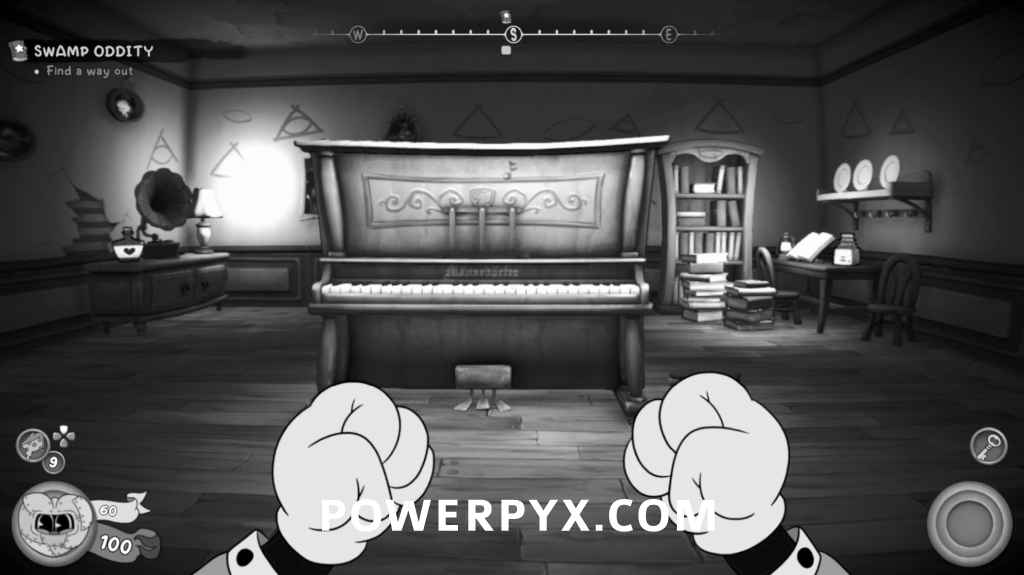
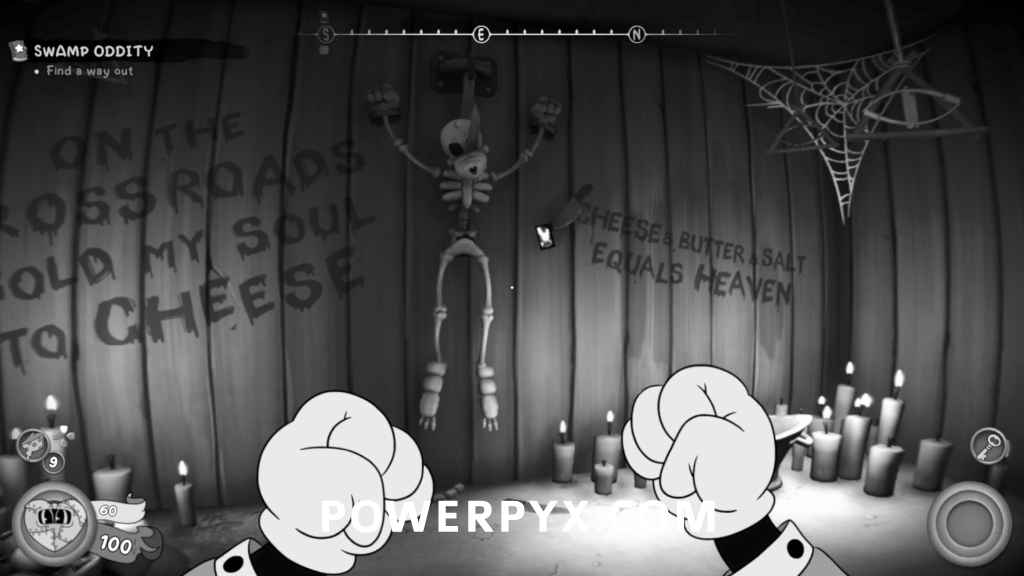
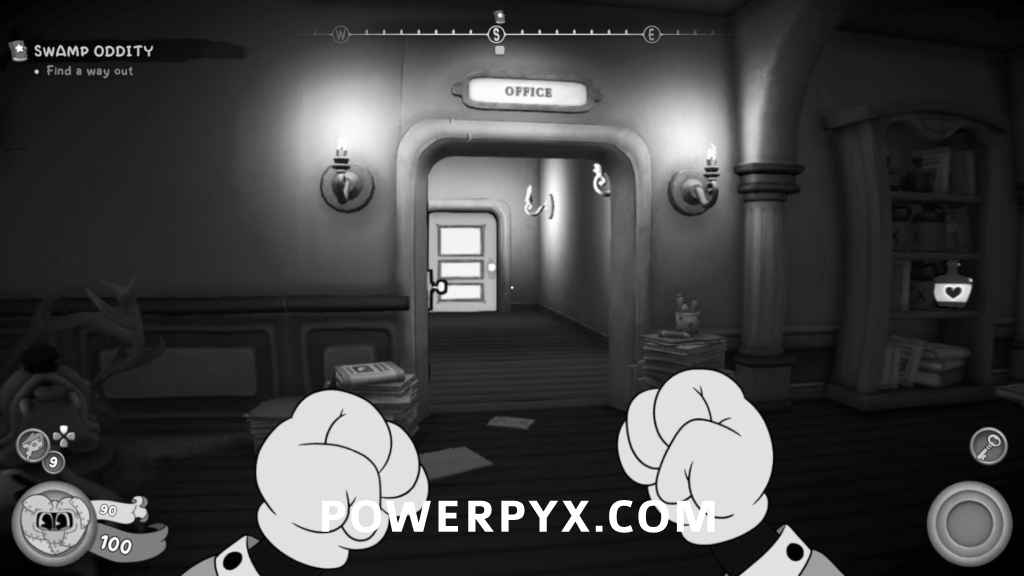
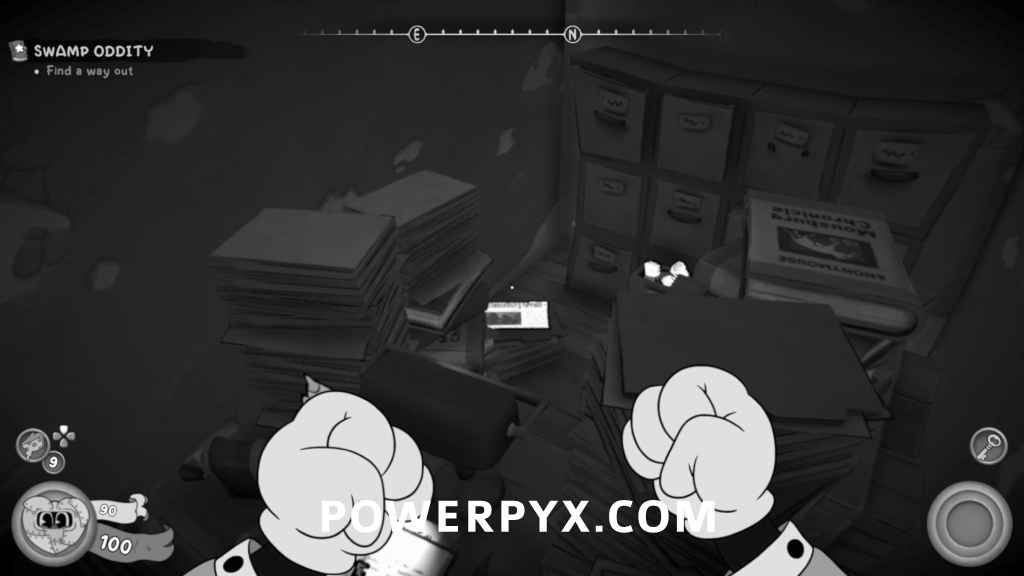
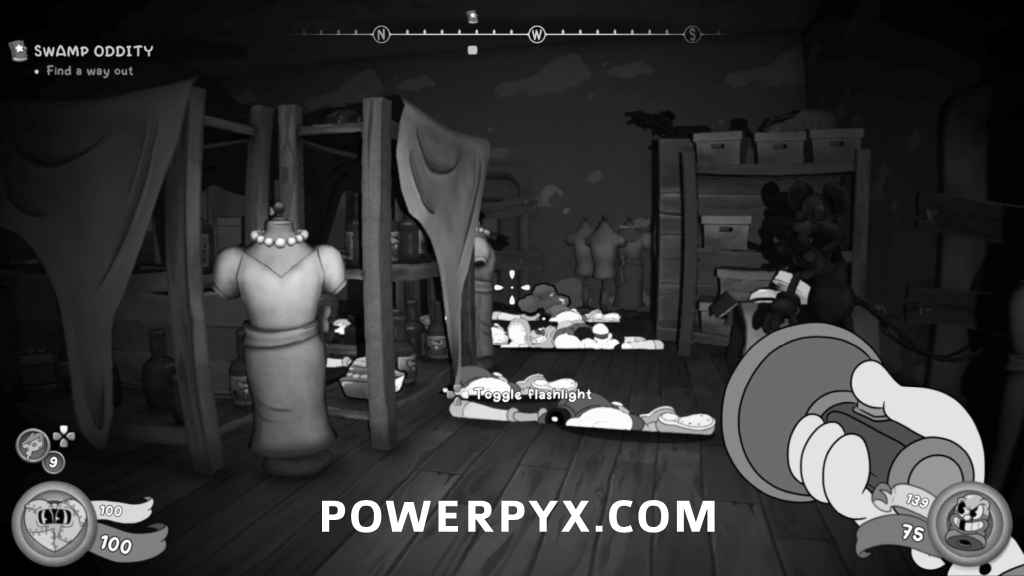
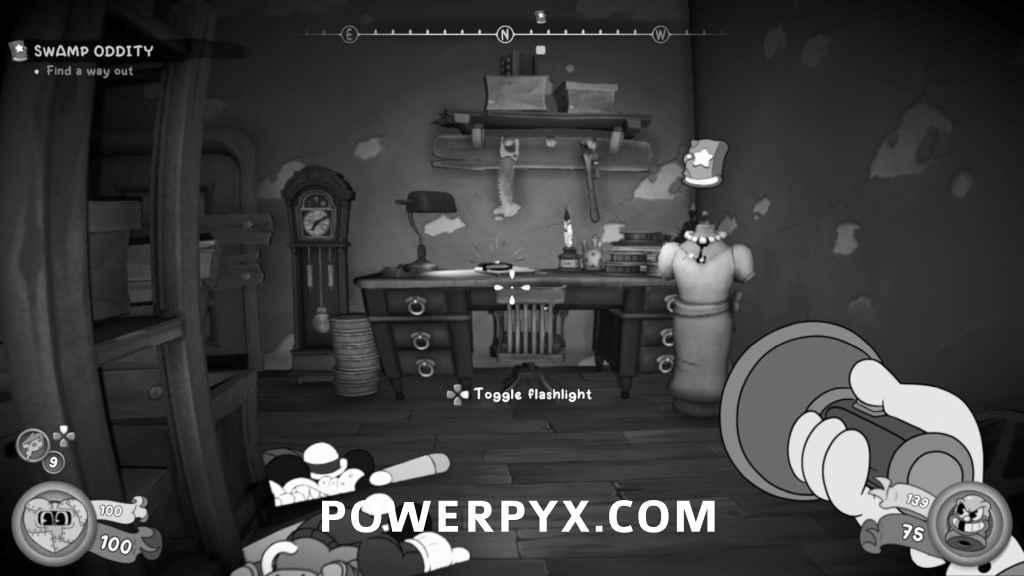
Swamp Oddity
Newspaper
After getting to the wooden platforms in the swamp, the collectible will be pinned to the wall in the shack.

Schematic
After lower the bridge, jump onto the cages on the left and jump over to the small wooden room. The schematic will be on the ground.
Comic
After talking to the Old Shrew, go into the next room then head through the door leading to the music room. The collectible will be on the piano.
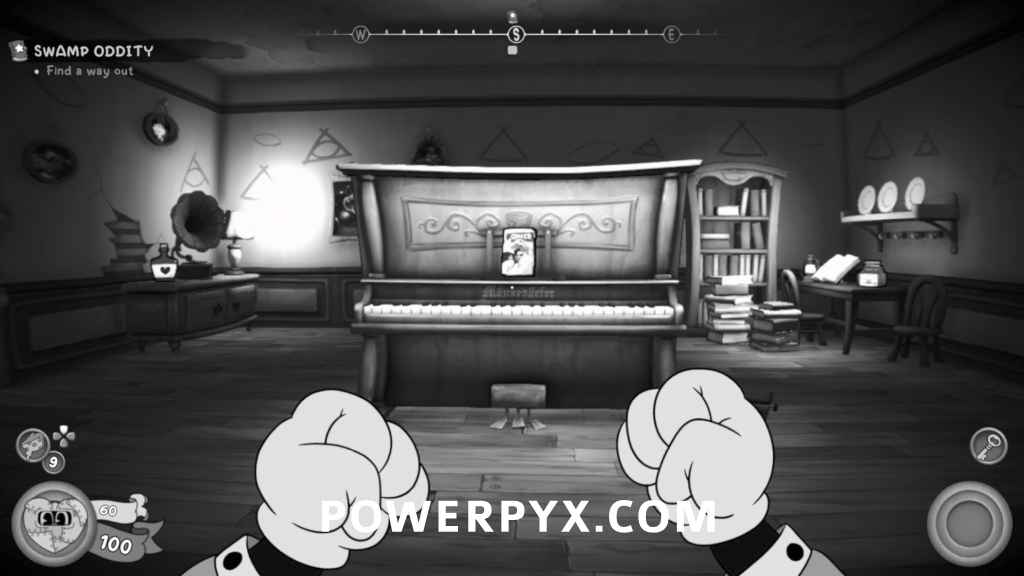
Baseball Card / Schematic
From the previous collectible, interact with the piano and press the keys “A C E G” in that order. You’ll know you did it right when Jack makes a Dark Souls 1 reference. Afterwards, turn around and exit the room and you’ll be back in the room where you talked to the Old Shrew and the dresser will open. Go inside and the collectible is pinned to the wall. The schematic will also be in the safe.
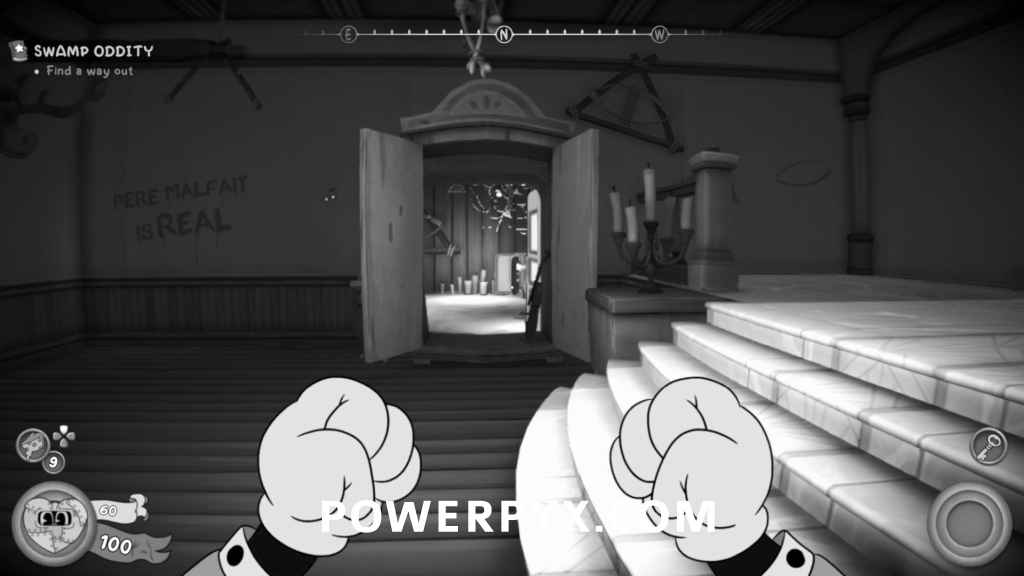
Newspaper
From the previous collectible, go back into the main hall, then head through the door to the office. Go through the hole in the wall to the left and jump over the desk to find the collectible.
Bandel’s Snuffbox Clue
Once you enter the dark room, the clue will be on the desk.
Schematic
After exiting outside through the vent, go behind the building to find the schematic pinned to the wall.
Newspaper
After getting back to the P.I. Office and pinning your clues, you can buy the collectible off the Paperboy by your office.
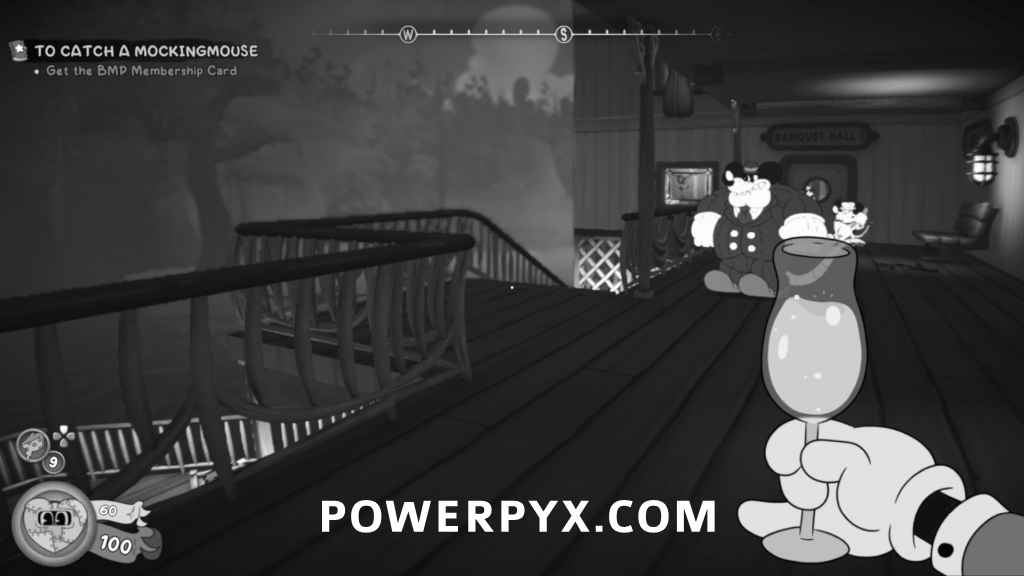
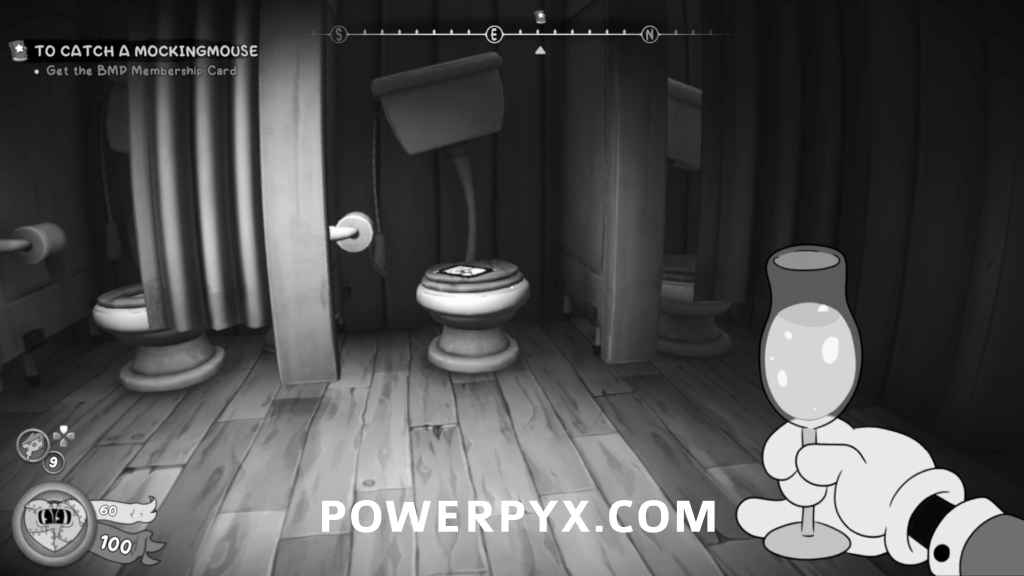
To Catch a Mockingmouse
Comic
When you’re looking at the bouncer, go to the left side of the boat and go down the stairs. Head across the wooden platform and swing across to the other side and enter the bathroom. The collectible will be on one of the toilets.

Schematic
Behind the stage of the band playing at the Banquet Hall, on a table.
Schematic
In Kitchen 2, pick up the Storage Key by the door and take the Warp Portal in the Storage Room. The schematic will be on the table.
Schematic
From the previous schematic, pick up the Cabin IX key, then use it to unlock Cabin IX. Go inside and go through the vent. Drop down the hole and pick up the Captain’s Key. Go up to the captains room and tailpick the safe inside for the schematic.
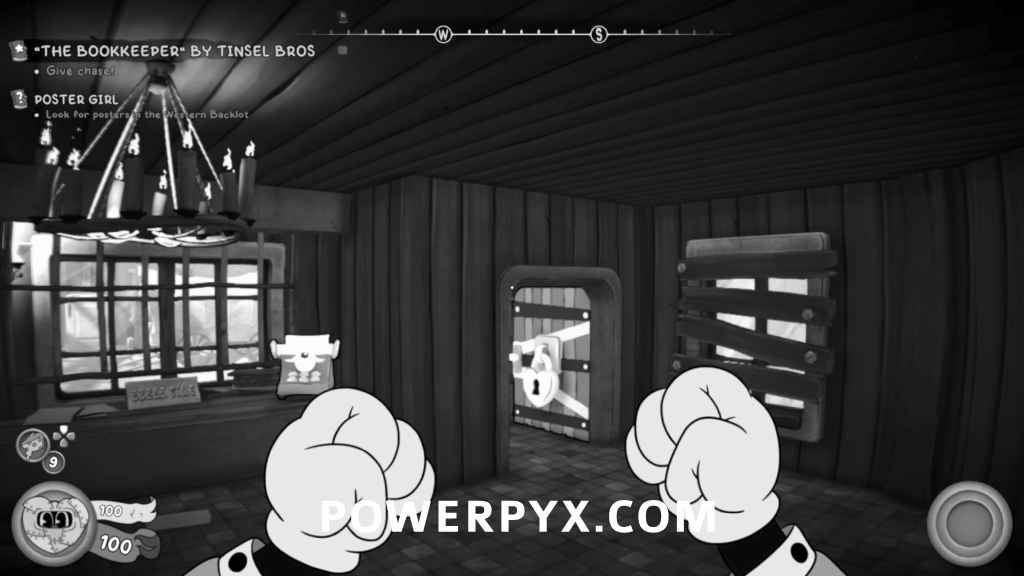
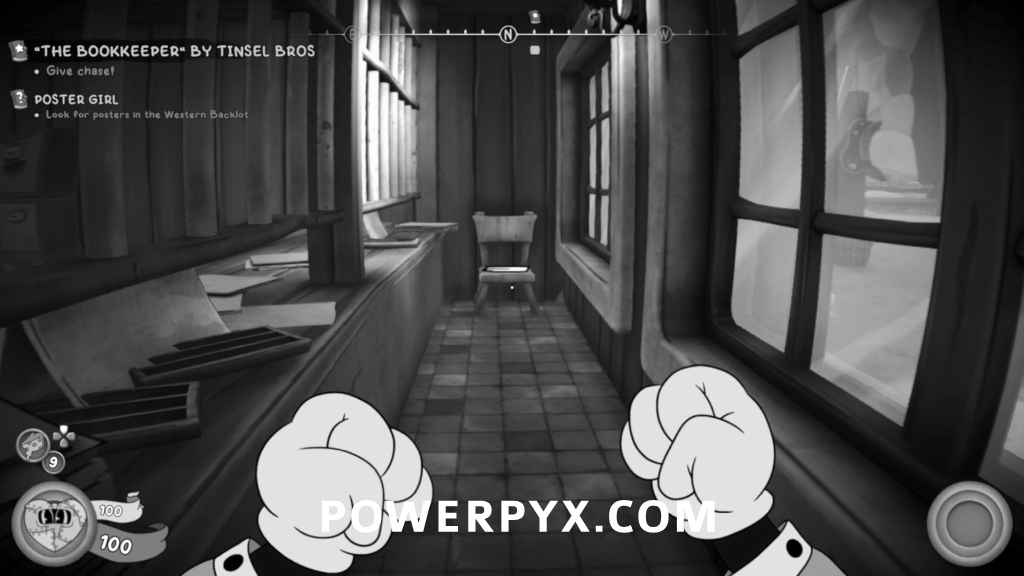
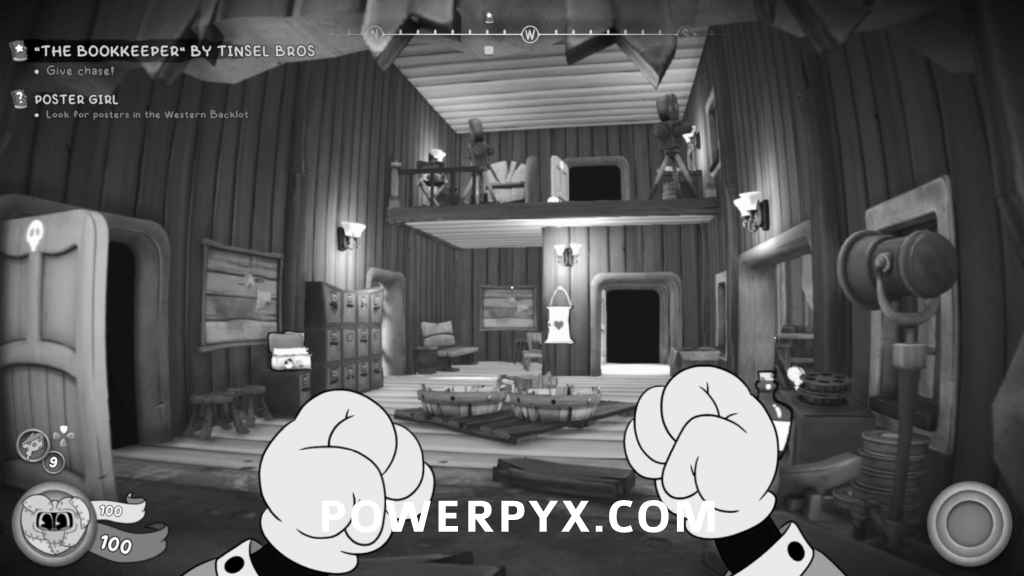
“The Bookkeeper” By Tinsel Bros
Newspaper
After unlocking the door with the Bookkeeper’s Key, the collectible will be on the chair where the Bookkeeper was sitting.
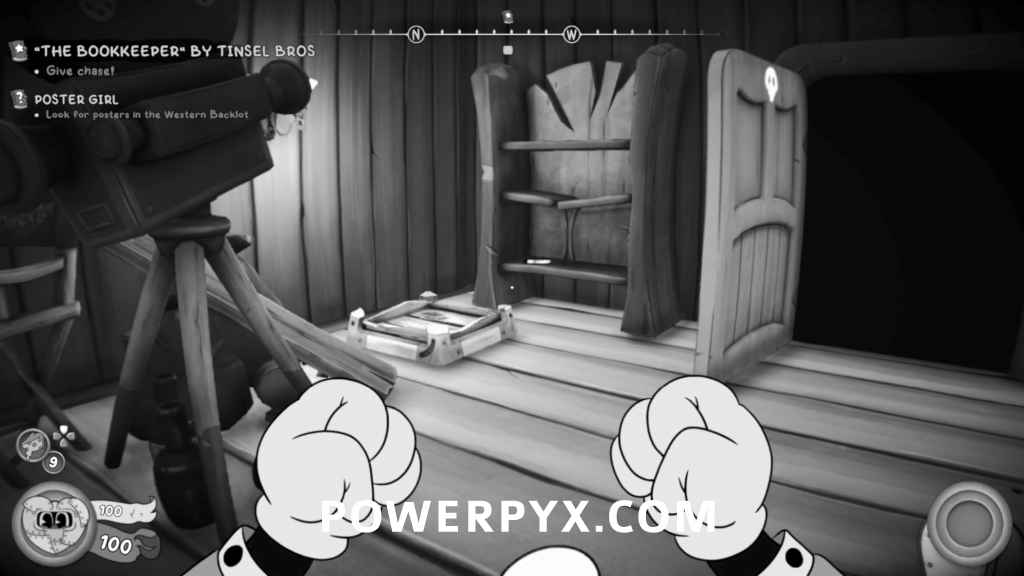
Schematic
After dropping through the floor of the building several times, break the crates on the right and go into the cave. The schematic will be in a safe.
Comic
After climbing past the train, go into the building and jump onto the locker then jump up to the balcony. The collectible will be on the shelf.
Baseball Card
After jumping on the metal beam and it moves you over to one of the trains, go through it and instead of going up the ladder, jump over the box on the right to find the collectible on the floor.
Baseball Card
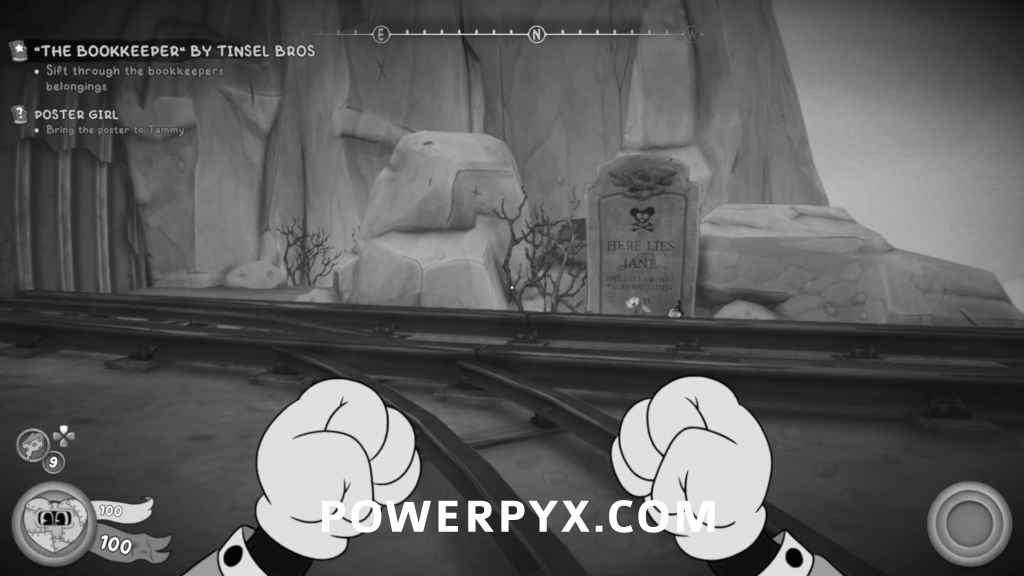
After exiting the train film scene and going back outside, look to the left and you’ll see a grave. The collectible will be behind the rocks behind the grave.
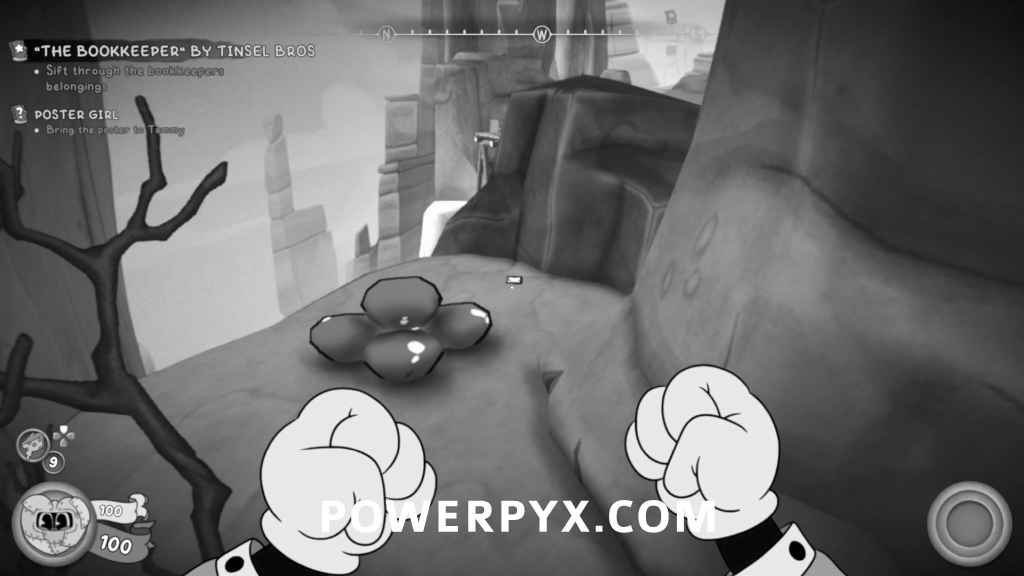
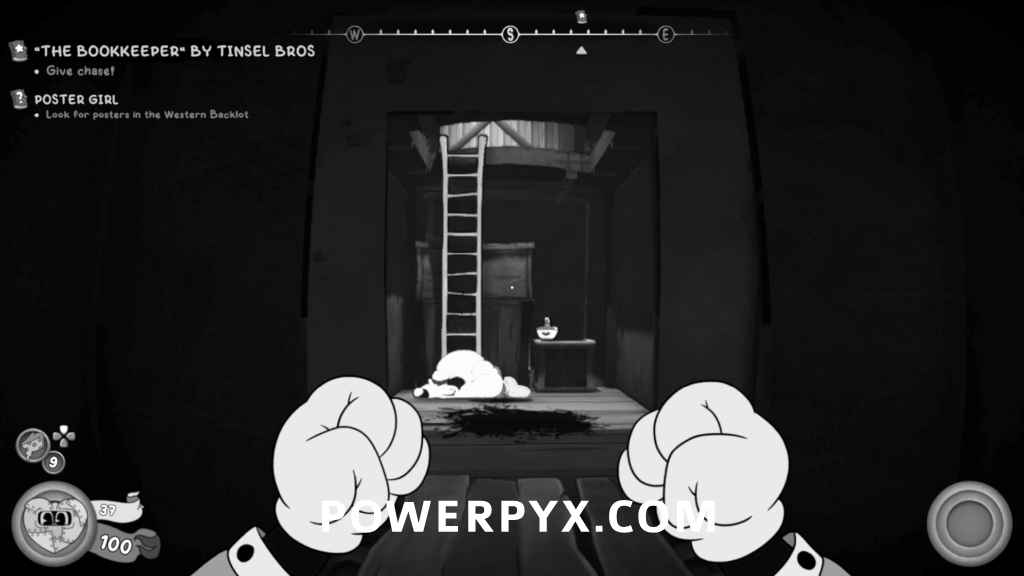
Schematic
After picking up the Bookkeeper’s Letter, look to the left and you’ll see a safe in the distance. Go up to the wooden platforms and shoot the targets to lower the hook to swing across to the safe with the schematic inside.
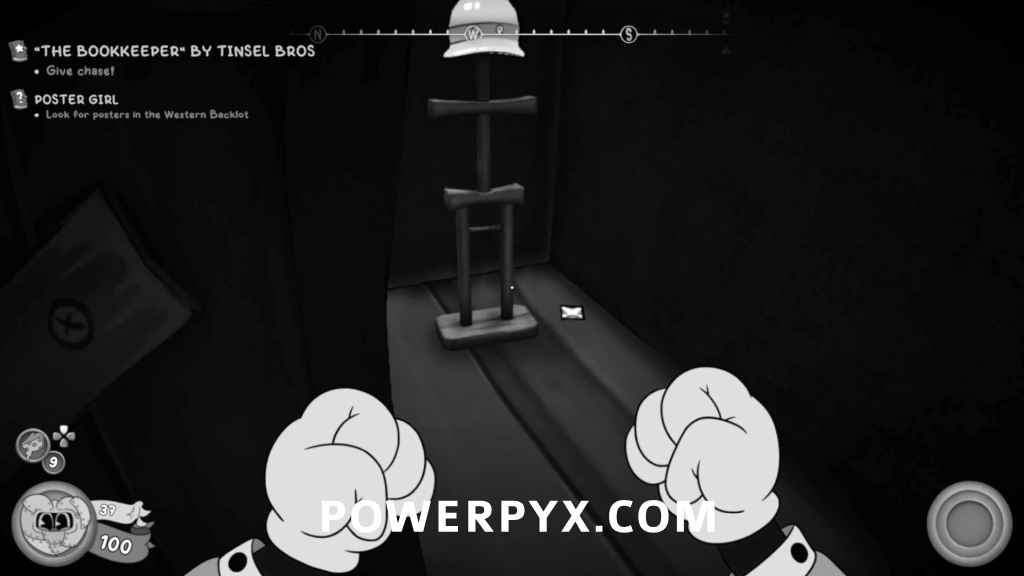
Schematic
From the previous schematic, go back to the cliff and you’ll see a small hole you can jump to in the side of the cliff. The schematic will be pinned to the wall in the cave.
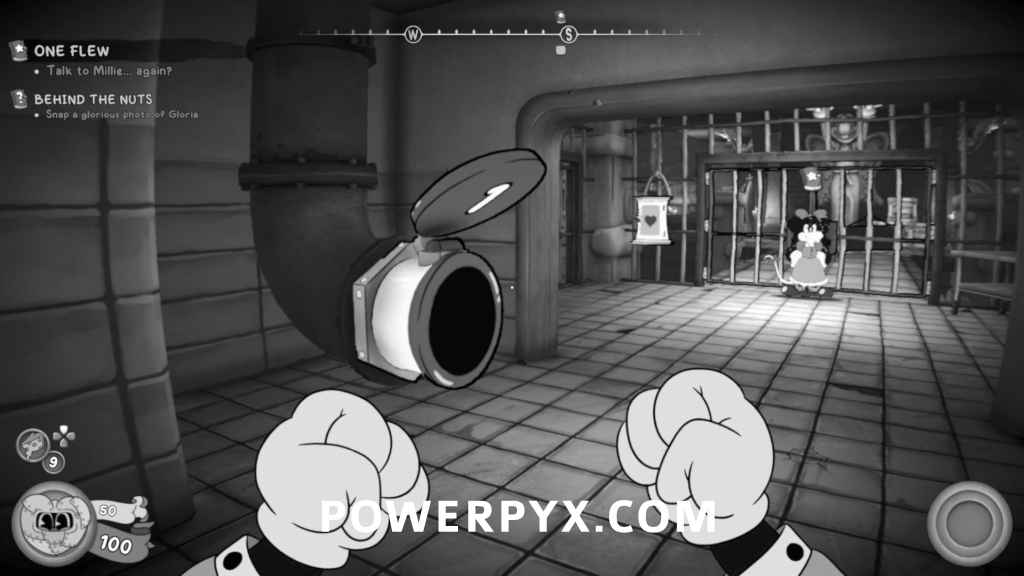
One Flew
Ze Orders Clue
After reaching the area with the cells, enter the control room and the clue will be on the desk.
Schematic
After reaching the room filled with water, jump in and underneath one of the bridges will be a way into the center area. The schematic is on one of the crates.
Schematic
Once in the room with the brain, the schematic will be on the board.
Comic / Schematic
After getting the Jar-Head gun, go through the door and you’ll see a warp pipe open. Go through the warp pipe and the collectible will be on the wheelchair. Afterwards, climb up the ladder and the schematic will be on a table by the door.
Baseball Card
After exiting the giant laundry room, go through the warp pipe and go through the door on the left. Jump up onto the pipe and parkour over to the other warp pipe. The collectible will then be in one of the cabinets near the door.
Schematic
Once you reach the top floor balcony, you can jump to the roof of the center area and the schematic will be in the safe.
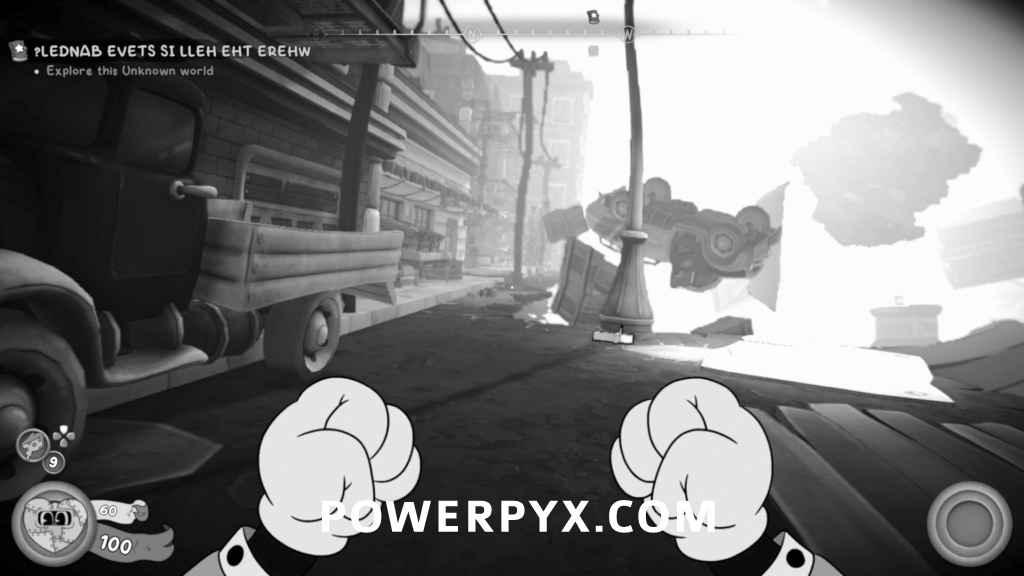
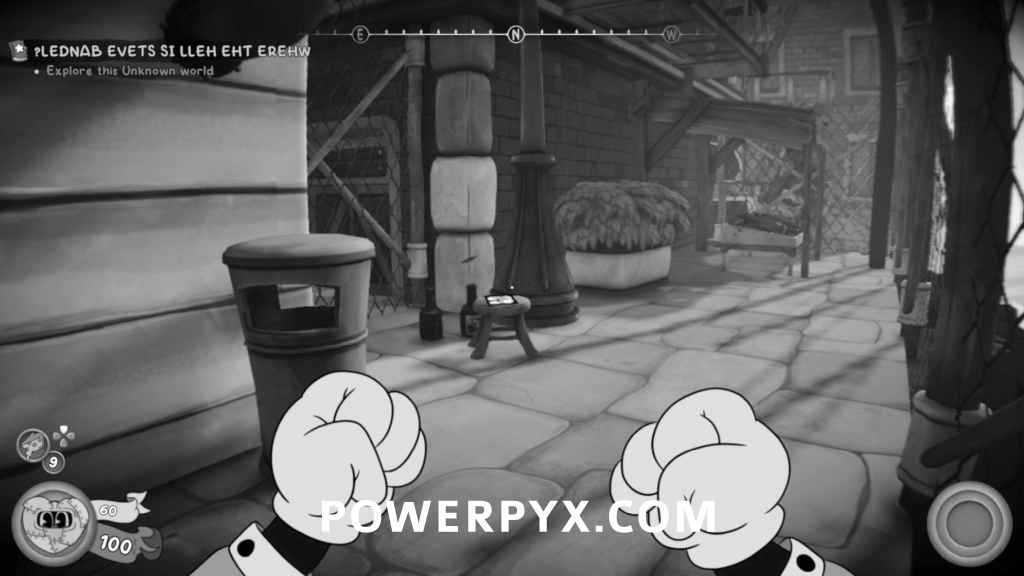
?lednaB evetS si lleH eht erehW
Schematic
After jumping onto the roof, the schematic will be on the table.
Comic
Once you get to the section with the giant fallen pillar, follow the broken road to the left and the collectible will be on a chair.
Schematic
Once you’re on the boat, go upstairs and the schematic will be on a crate.
Schematic
Once you reach hell, jump across the platforms until you reach the wall running. Look to your right and jump over to the small rock ledge and the schematic will be in the safe.
Newspaper / Figurine
After reaching the bar in hell, the collectible will be on the counter. The second collectible will be behind the counter, on the bottom shelf.


Schematic
After turning on the gears, parkour up the platform until you reach the typewriter. Turn to the left and follow the jump pads to the locked room with the schematic.
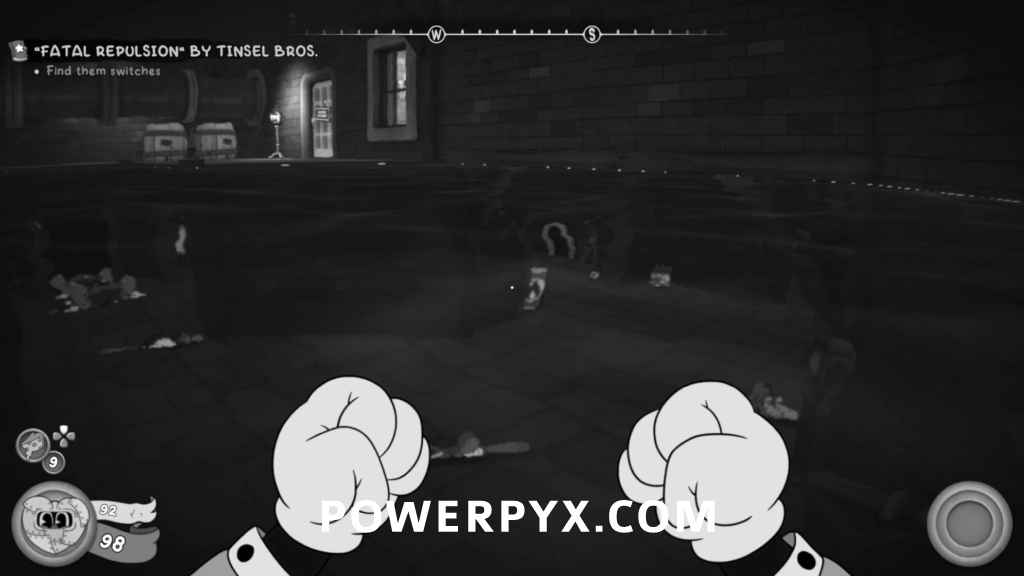
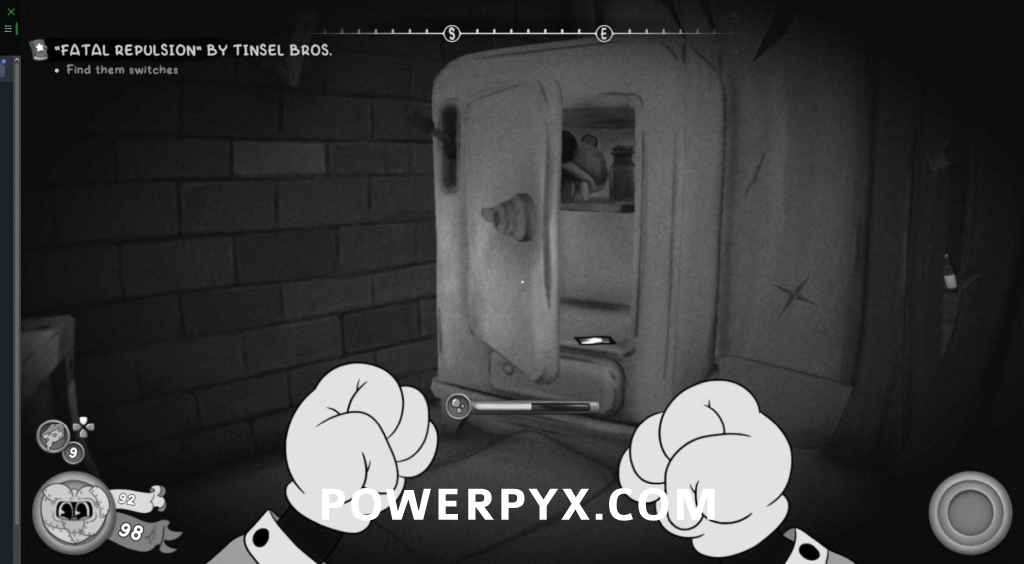
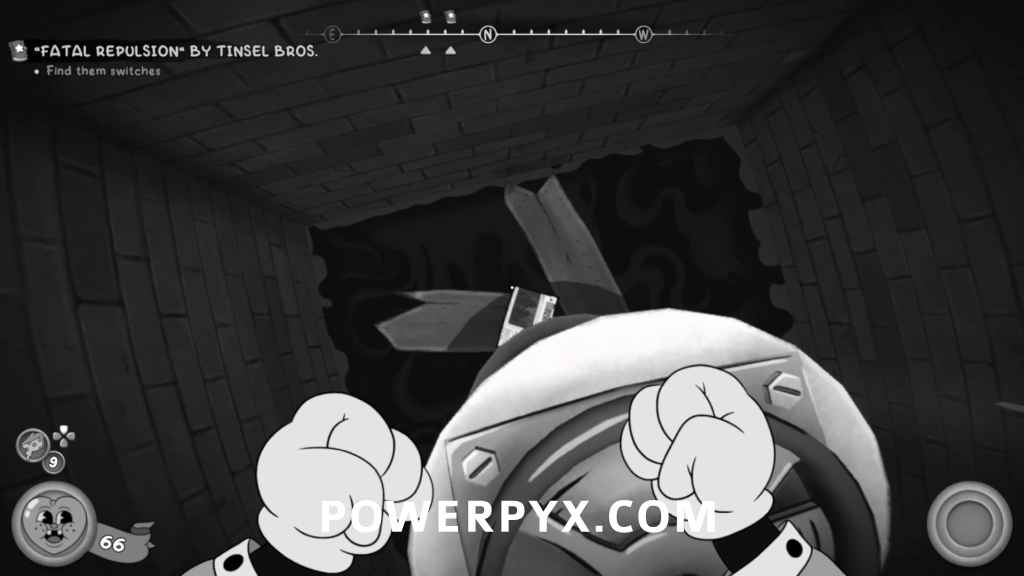
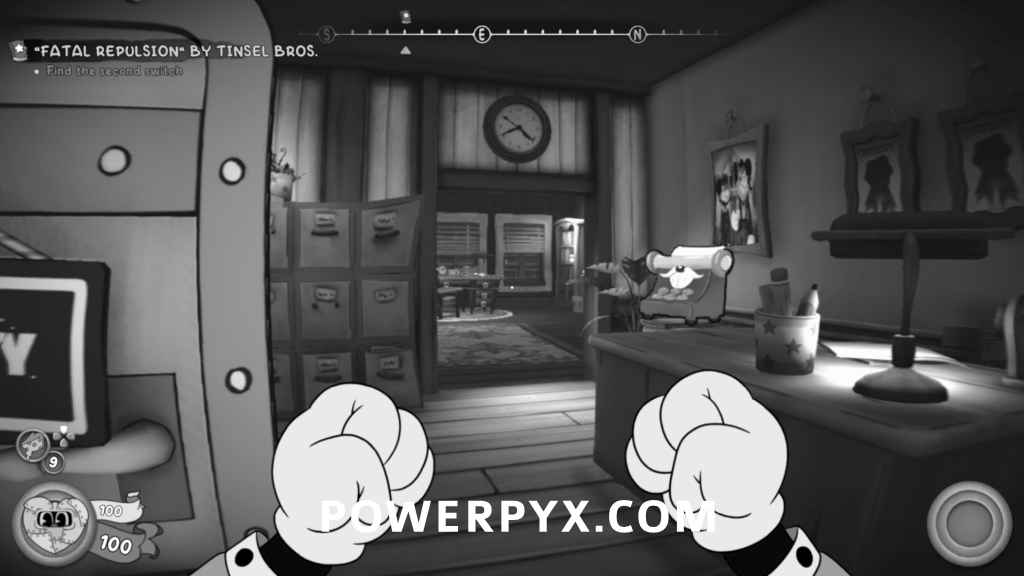
“Fatal Repulsions” By Tinsel Bros
Currently missing 1 Baseball Card. This can be bought from the shop later if missed.
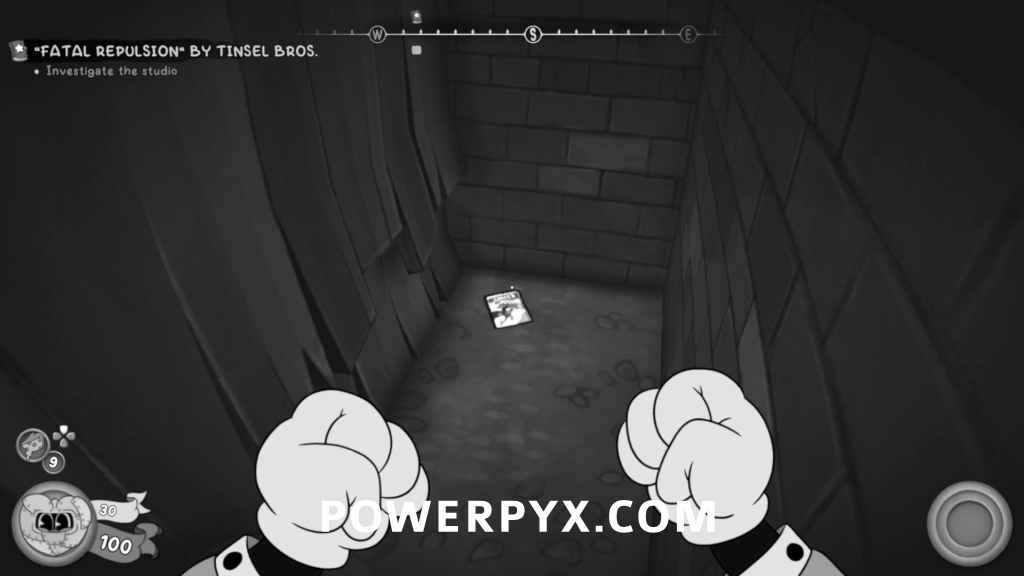
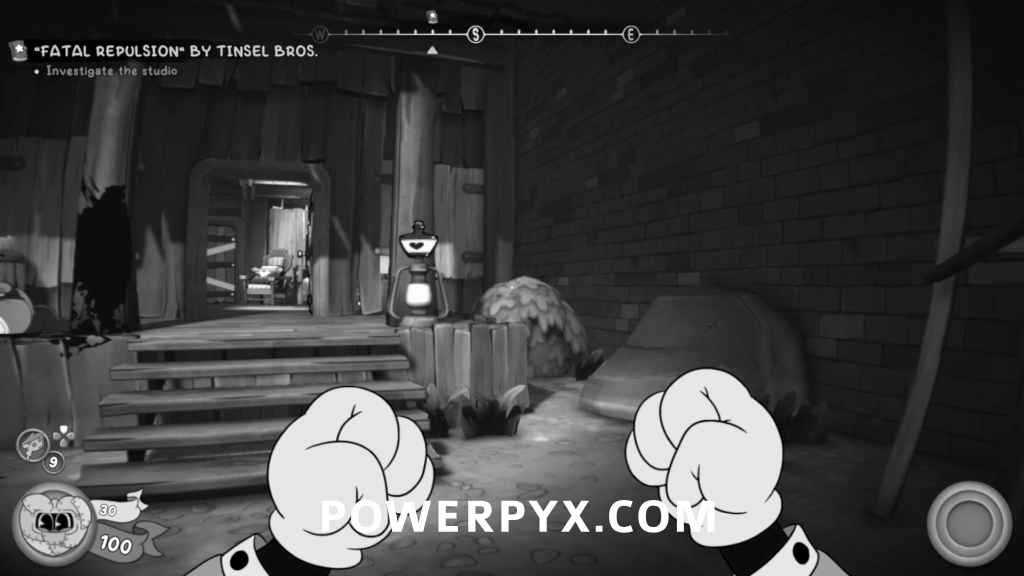
Comic
At the start of the level after reaching the house, jump over the bush to the right of the house and the collectible will be on the ground
Baseball Card
Once you reach the area with color, go to the back right corner of the area and go into the trees. The collectible will be on a crate to the left.


Baseball Card
Once the castle set, there will be a room that once you kill all the enemies, it will start to flood. Swim over to the top right corner of the room and the collectible will be inside the fridge.
Newspaper / Bad Press for BMP Clue
From the previous collectible, go up to the ledge where you have to wall run and jump onto the fan, but don’t go up yet. Look down behind the fan and the collectible will be on a plank floating in the water. This also counts as the clue.
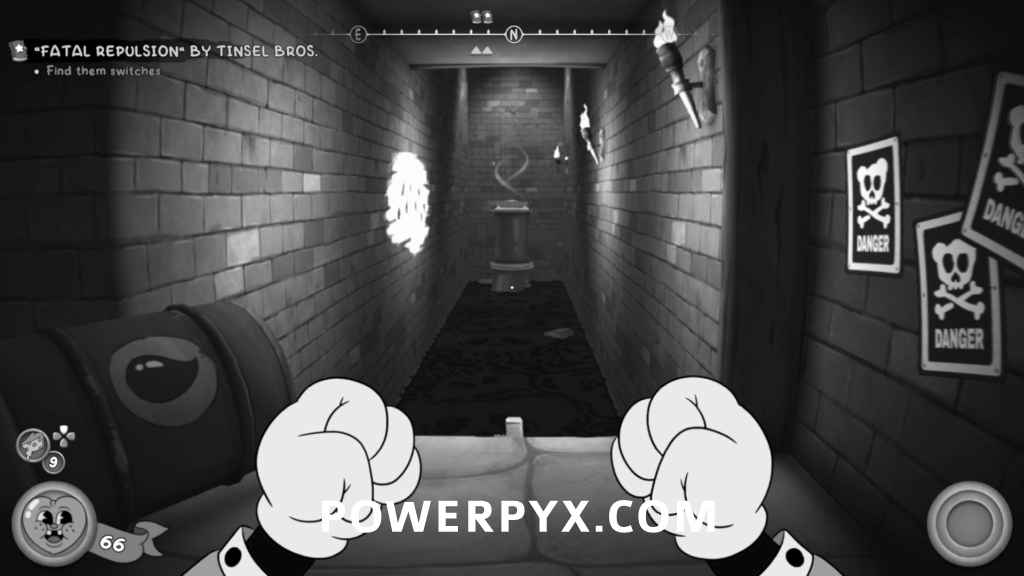
Schematic
In the castle area after the enemies kick down the giant painting, go into the room that was revealed and go into the vent. The schematic will be in the safe.
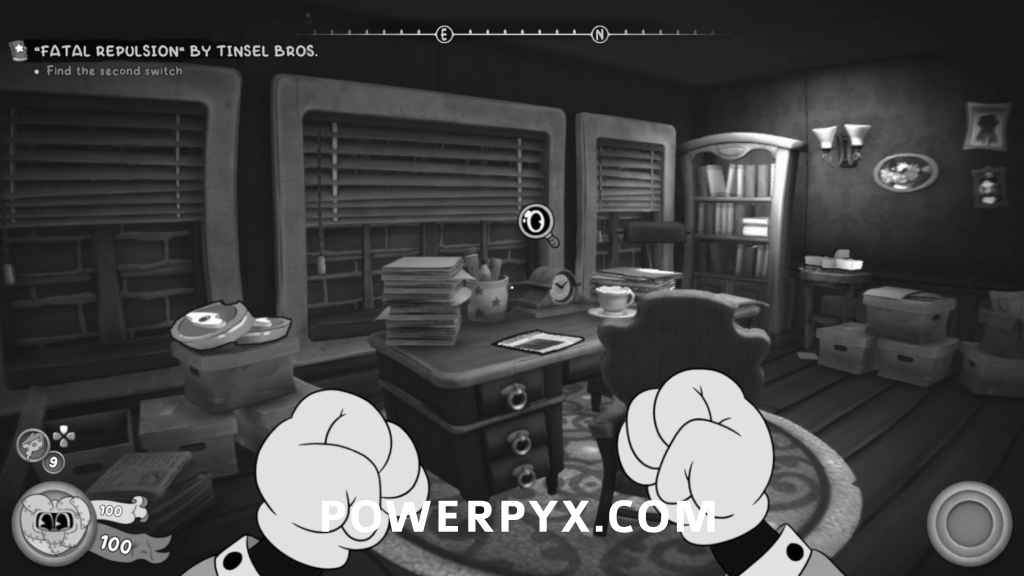
Newspaper
After entering the set that looks like your office, the collectible will be on your desk.
Schematic
After dropping from the vent into the swamp, the schematic will be pinned to the wall in the room in the top right.
Schematic
After defeating Reggie and going through the warp pipe, the schematic will be on the desk.
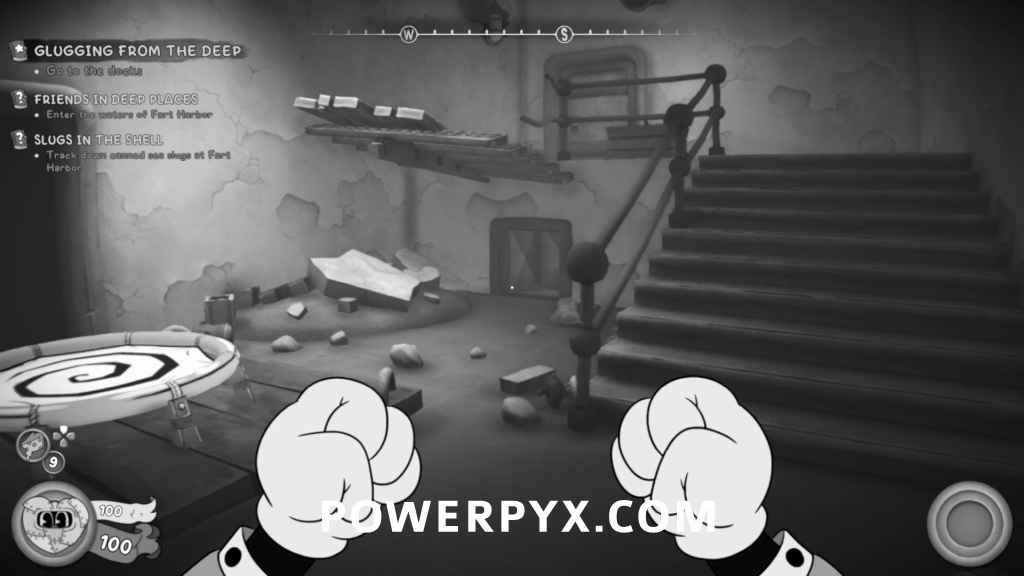
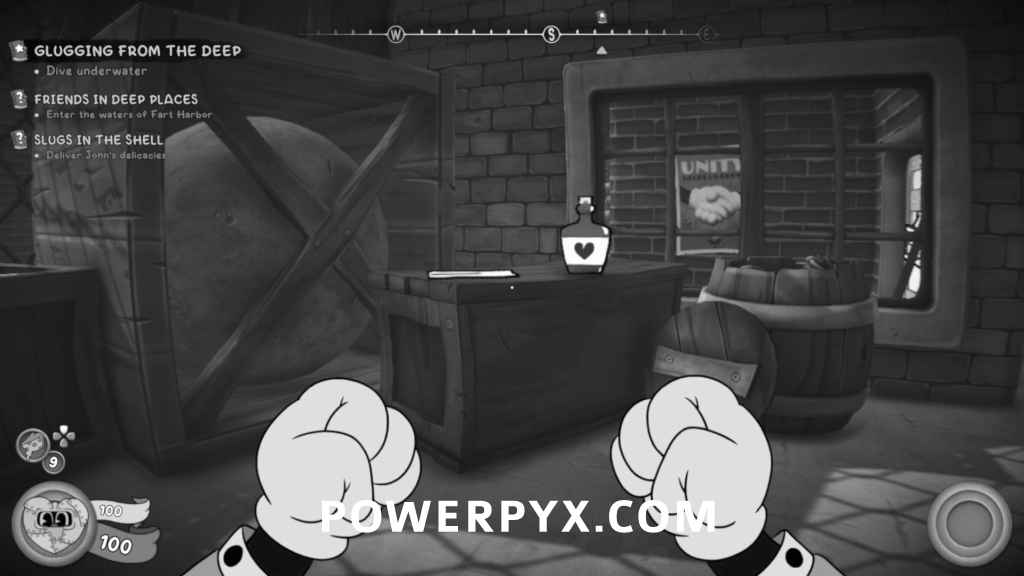
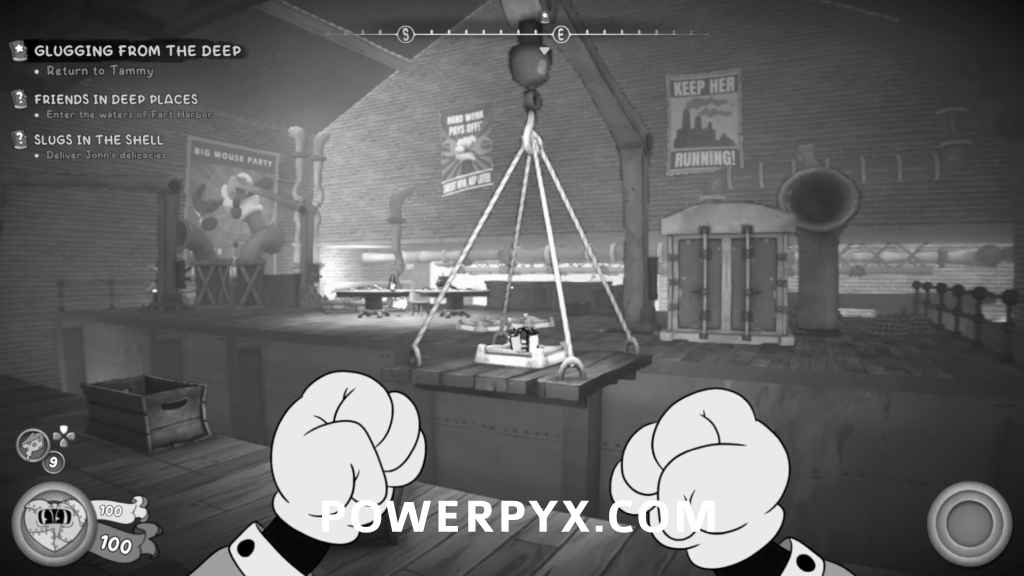
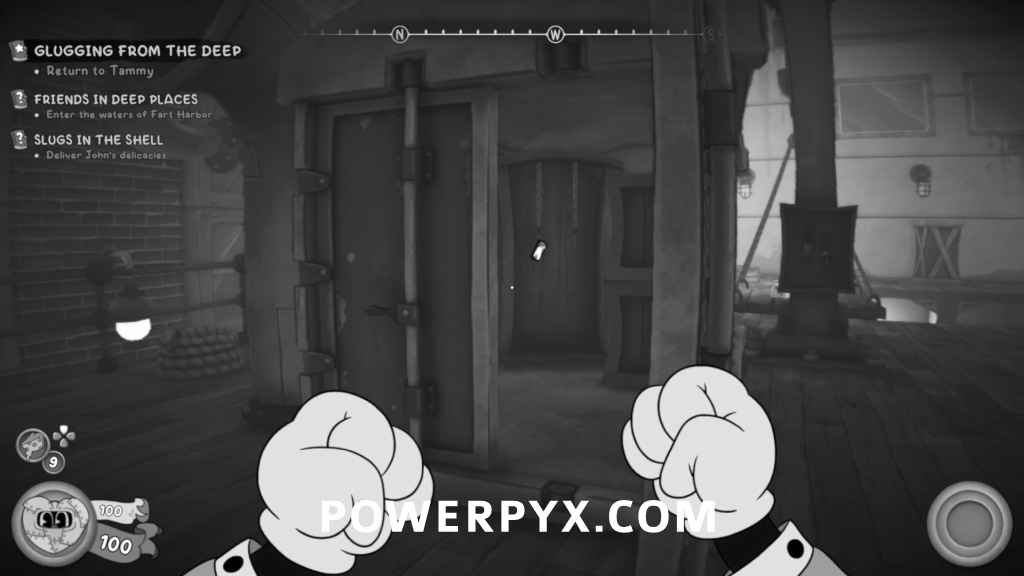
Glugging from the Deep
Before starting the mission, make sure you accept the Friends in Deep Places side job from Cameron Bozo as you get a Baseball Card as a reward for completing it.
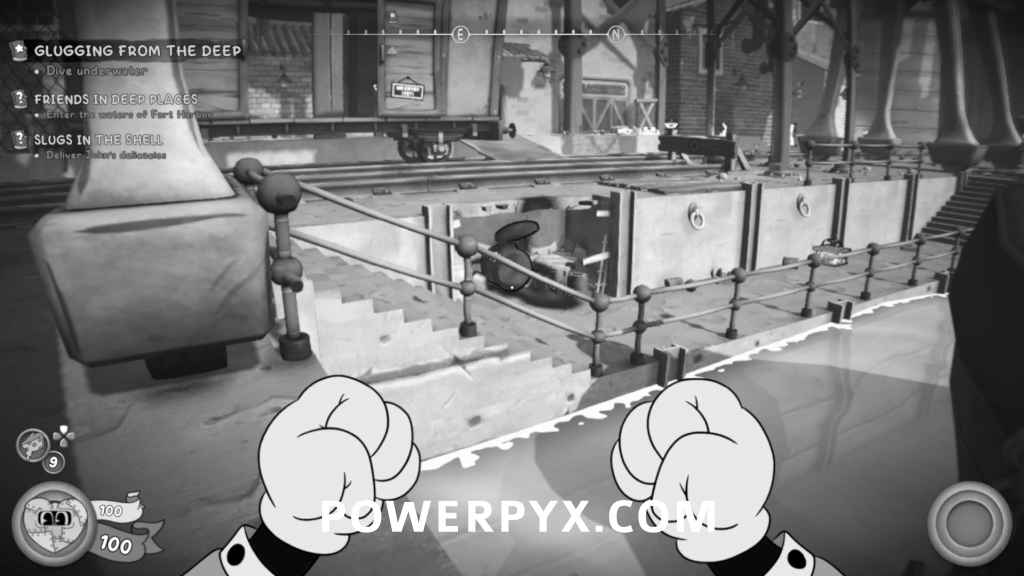
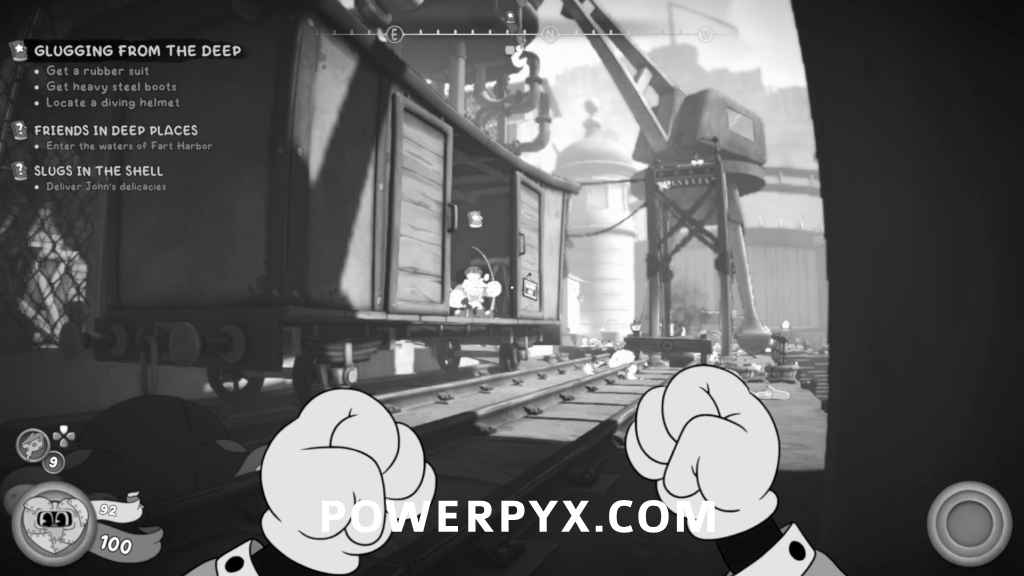
Baseball Card
At the start of the mission, go down the stairs to enter the building and then head into the next room. Go through the vent and the collectible will be on the skeleton at the end.

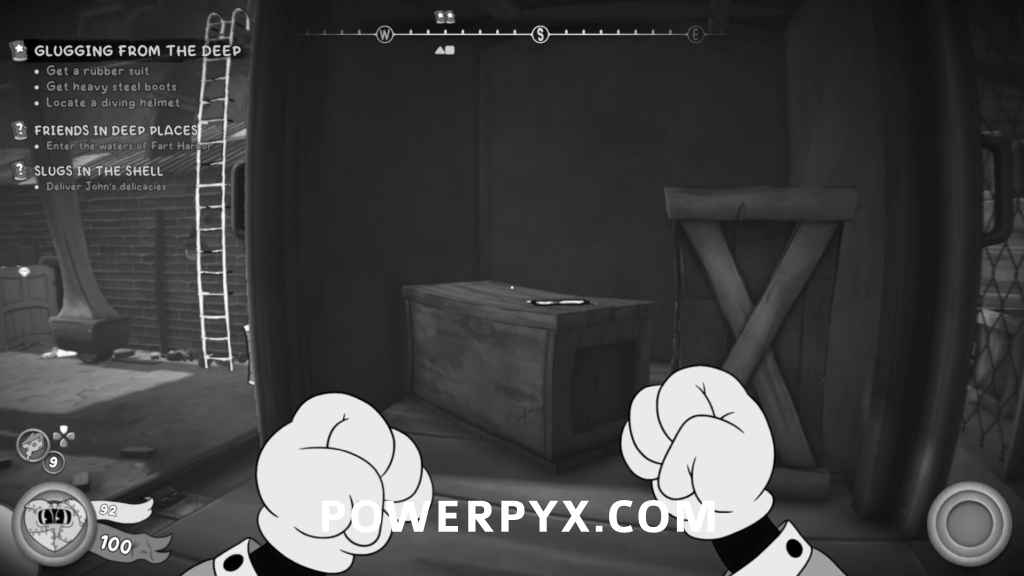
Schematic
From the previous collectible, back track to the very start and jump up to the warp pipe ahead and the schematic will be on the table.
Newspaper
Once you reach the port, go towards the water and look down towards the smaller spot of the port and you’ll see an X on the wall you can blow up to reveal a warp pipe. After taking it, the collectible will be on a crate.
Schematic
From the previous collectible, go back to the port and parkour up the right side of the roof to get on top of the fence of where the previous collectible was. Go up the incline of the roof and enter the vent. The schematic will be pinned to the wall.
Figurine
From the previous collectible, go back out to the port and climb up the ladder to where the lever is. Jump onto the roof and then jump over the fence to keep following the roof to the end and drop off into a secret room. The collectible will appear on the desk after the dialogue finishes.


Comic
In the same train car where you talk to Eddy, on one of the crates.
Baseball Card
After getting the Diving Suit, go through the large door and jump across to the other platform to the left. The collectible will be inside the container.
Schematic / Baseball Card (Side Job)
While underwater, once you reach the large area where you can see the submarine on your right, go up the nearby ladder. The schematic will be inside the safe ahead. Afterwards, keep following the path to the end and you can talk with the guy. This is needed for the Friends in Deep Places side job which rewards the collectible.
Schematic
After defeating Ze Professor and going back into the water, the schematic will be by the giant dead fish.
Jack Squat
Schematic
Pinned against the wall of Tammy’s building.
Schematic
After going to the cellar, it’ll be pinned against the wall right on the main path.
Comic
After running from the wave for the first time, keep following the main pathway until you reach the next typewriter. The collectible will be on the pallet on the left.
Schematic
After escaping the first flood, follow the main path until you have to drop down again. Don’t drop down yet, and instead jump across to the other platform and the schematic will be in the safe.
The House of the Empty Mouse
Comic
After dropping the wooden barricade to get down to the basement, you can jump onto the shelf on the right and crawl through the vent. The collectible will be in the middle of the vent.
![]()
![]()
Schematic
After exiting back outside from the cellar, go over to where you broke the metal pillar from earlier to break the wall. Crouch under the wooden boards and the schematic is on a crate.
Figurine
After opening up the mansion, you’ll be able to find 3 statues around the area. After finding each one, you’ll want to bring it to the library to put on a pedestal.
The first statue can be found on the bed in the bedroom. The second statue can be found by breaking the barrel in one of the jail cells. The last one can be found by going up to the top floor from the main staircase, and going to the end of the hall.
![]()
![]()
![]()
Which each statue, take it to the library and place them on the pedestals. After placing all 3, a secret door will open to your right. Head inside and the collectible will be on one of the tables.
![]()
![]()
![]()
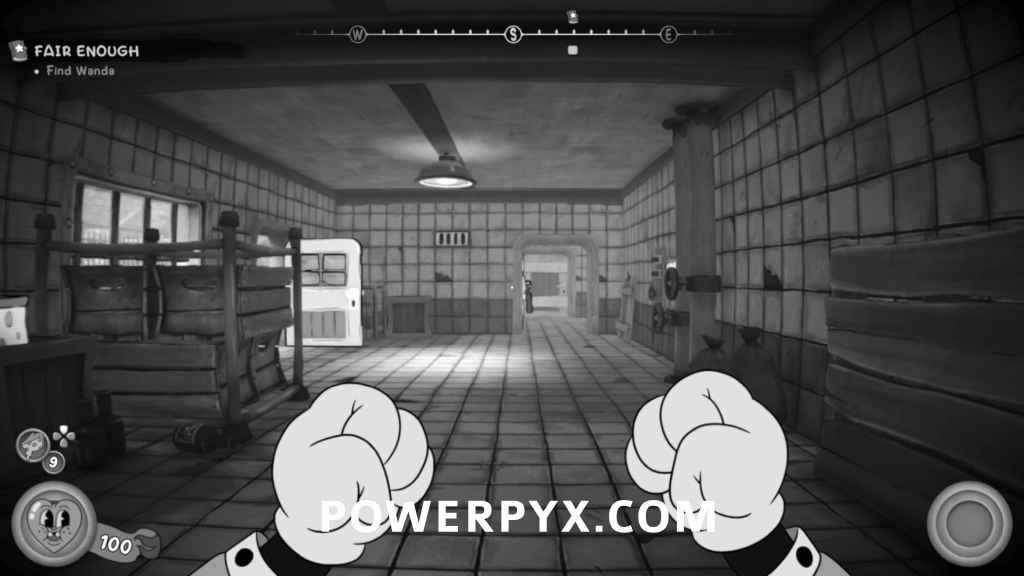
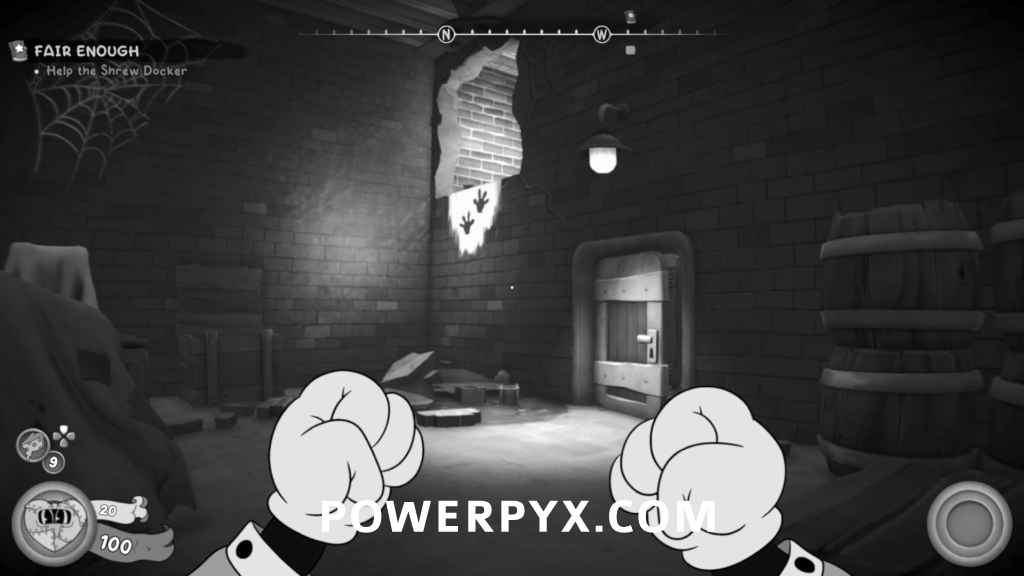
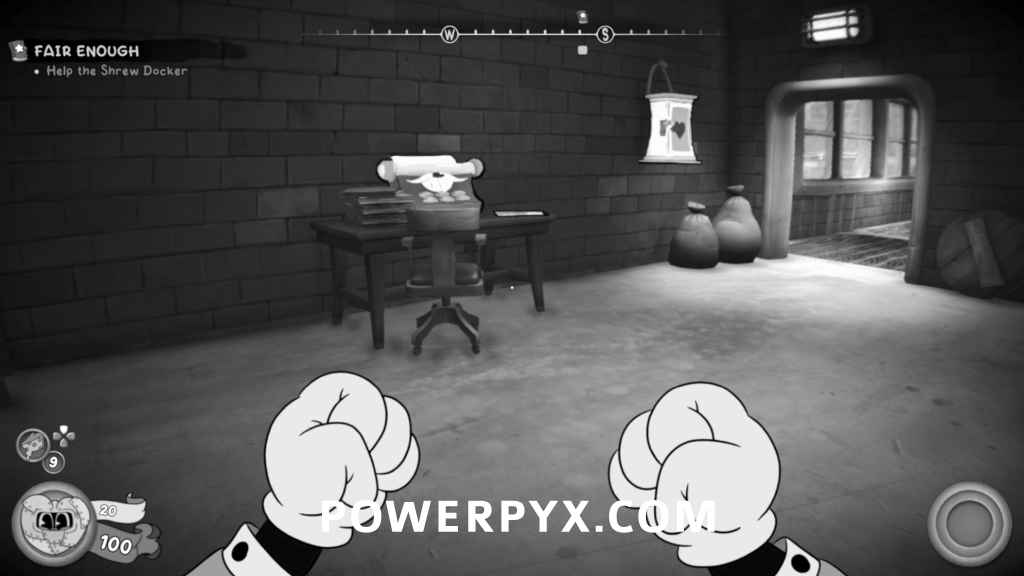
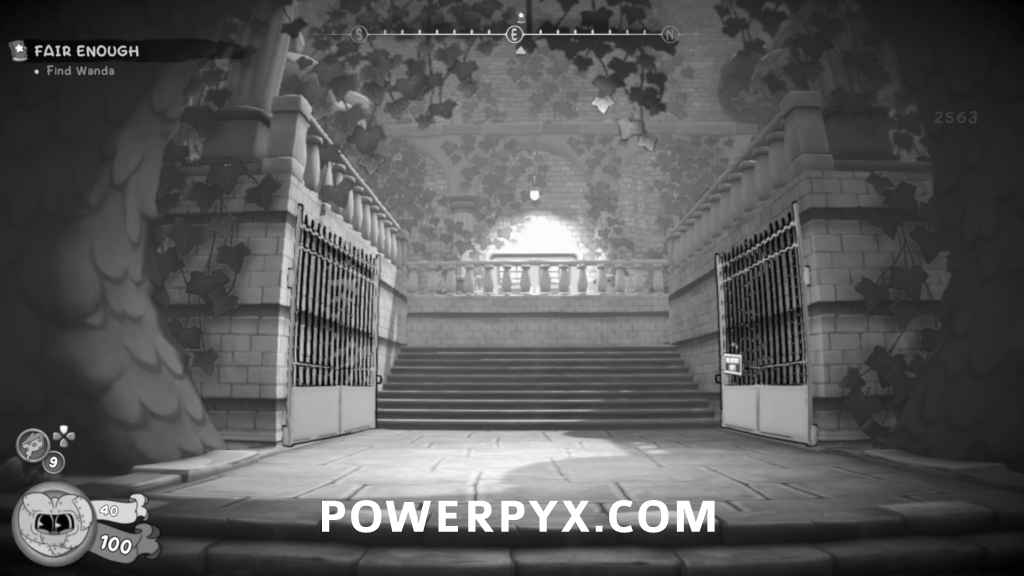
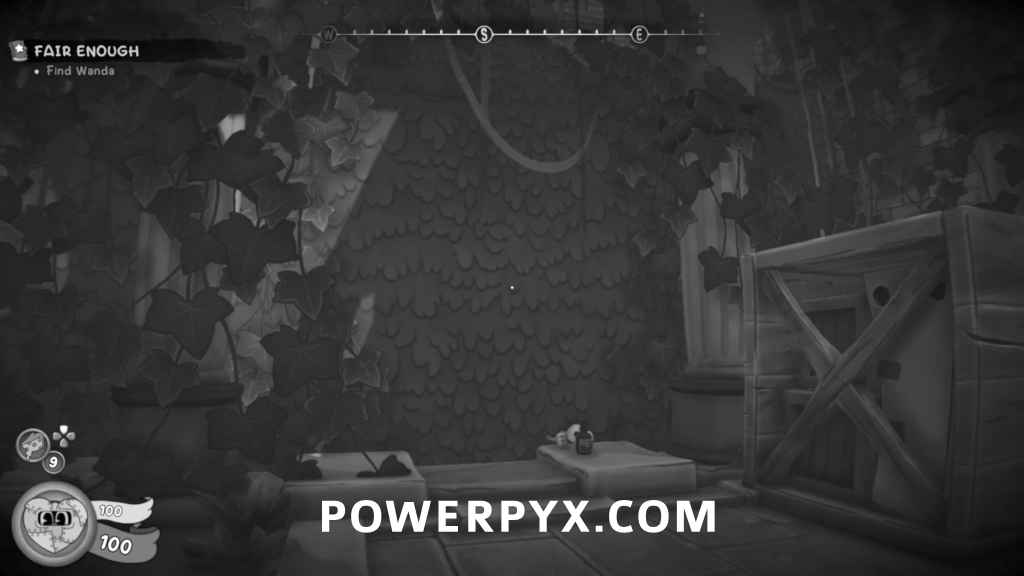
Fair Enough
Once you reach the boats, look at the building to the right. You can blow up the wall to reveal a hidden room. You can then shoot the target on top of the building to open the warp pipe leading to the schematic.
Comic
After going over the boats and entering the building on the left, you’ll see a door ahead that you can tailpick. The collectible will be inside on the floor.

Newspaper
After learning the climbing ability, follow the main path until you reach the typewriter. The collectible will be directly next to typewriter.
Newspaper
After killing the enemies in the courtyard and the gate opens up, go up the stairs and the collectible will be on a bench to the left.
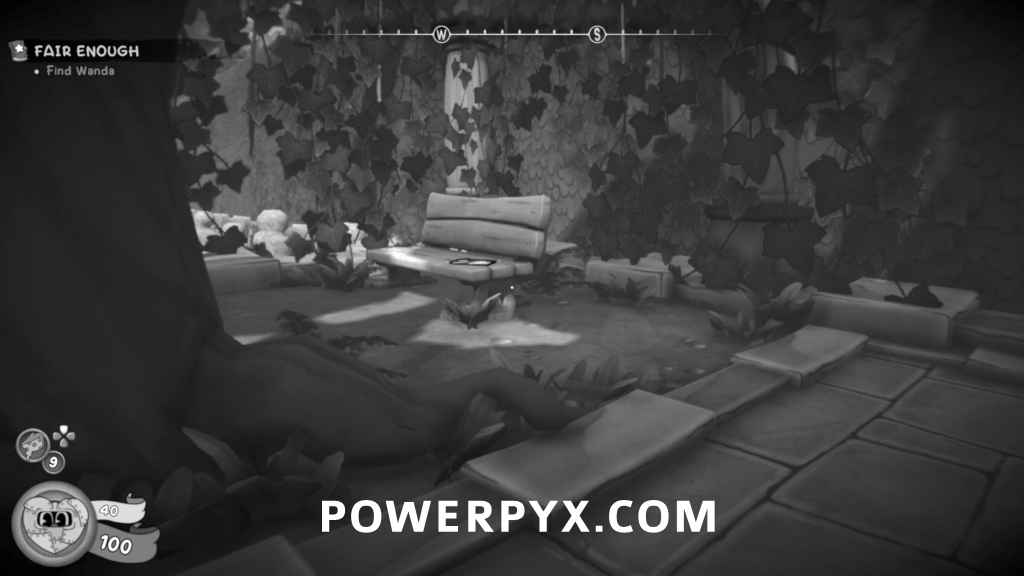
Figurine
Directly from the previous collectible, walk through the hedge to the right of the bench to find a secret area with the collectible.

Schematic
After talking to Wanda, go towards the stairs and go up the stairs on the right. The schematic will be on the nearby display on the left.
Schematic
After fighting the enemies in the statue filled courtyard, go through the gate and jump up the boxes. You’ll see a board you’ll be able to climb up to get inside the crate with the schematic.
Schematic
After going into the room with loads of crates, go to the top right corner of the area and the schematic will be in a safe.
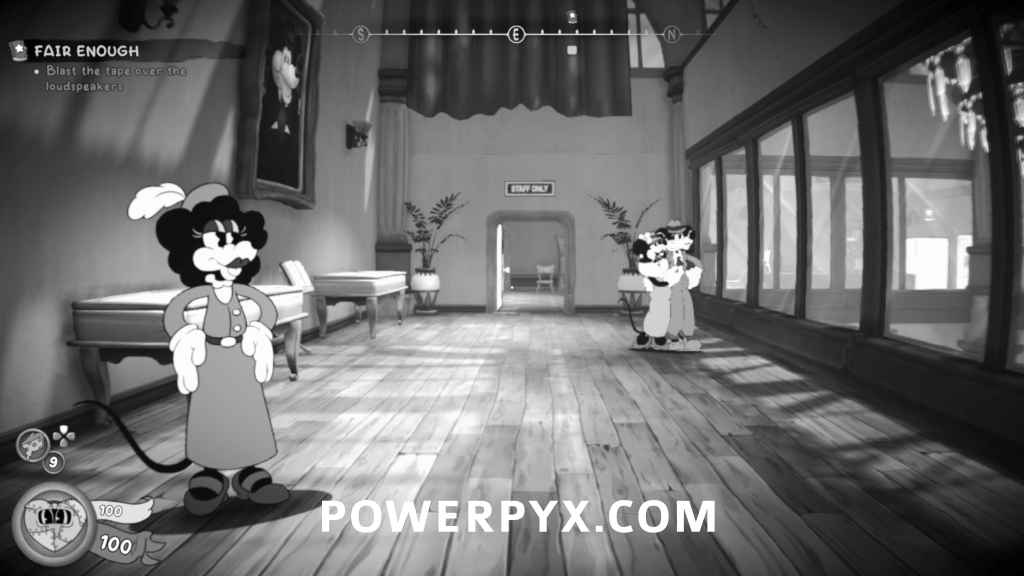
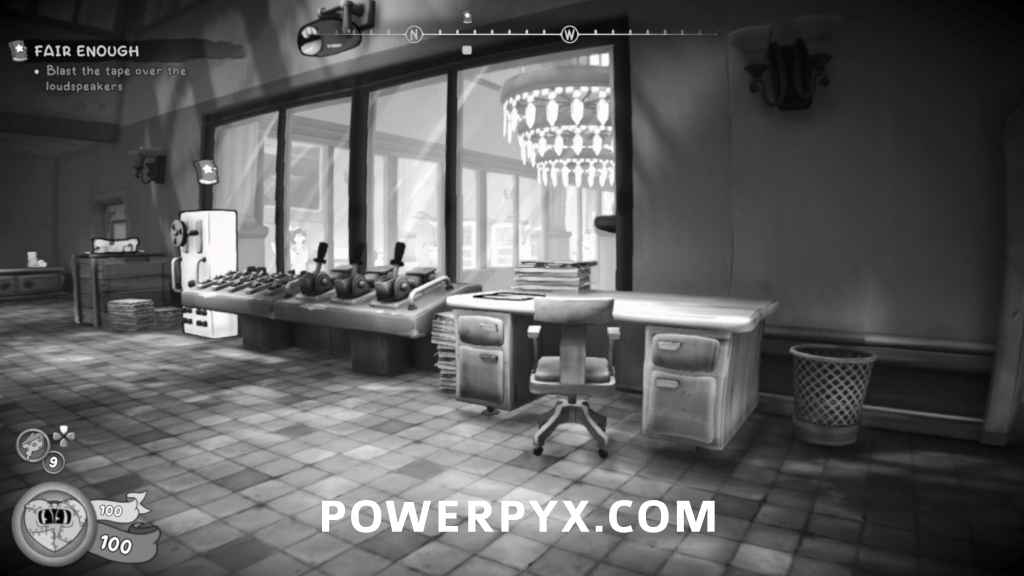
Newspaper
After reaching the room where you have to play the tape, the collectible will be on the desk.
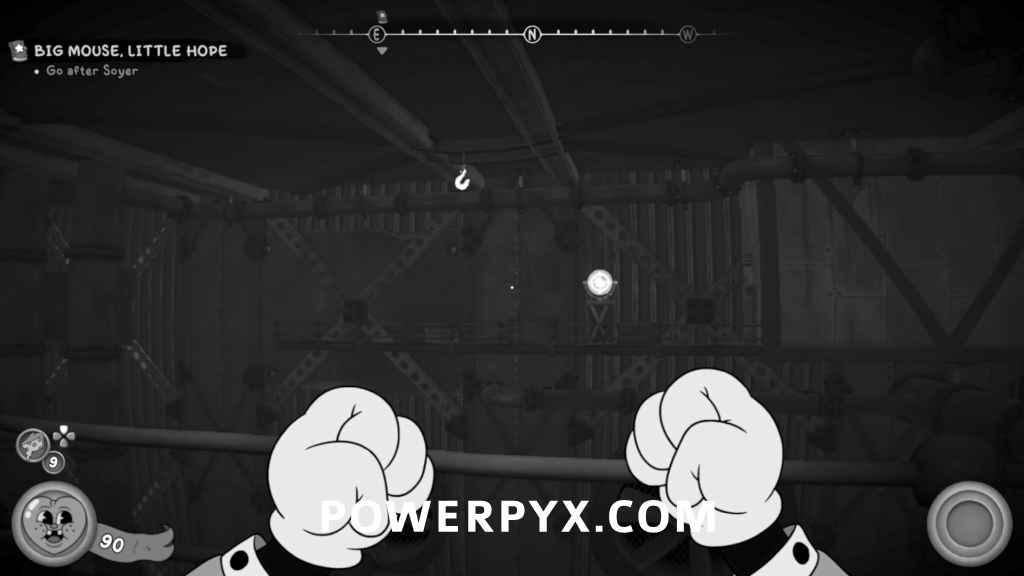
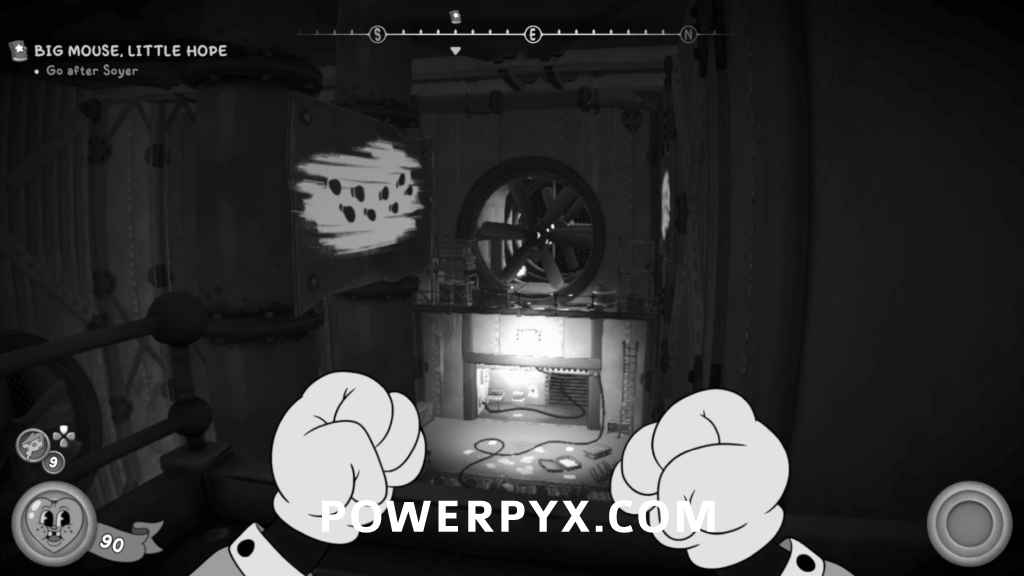
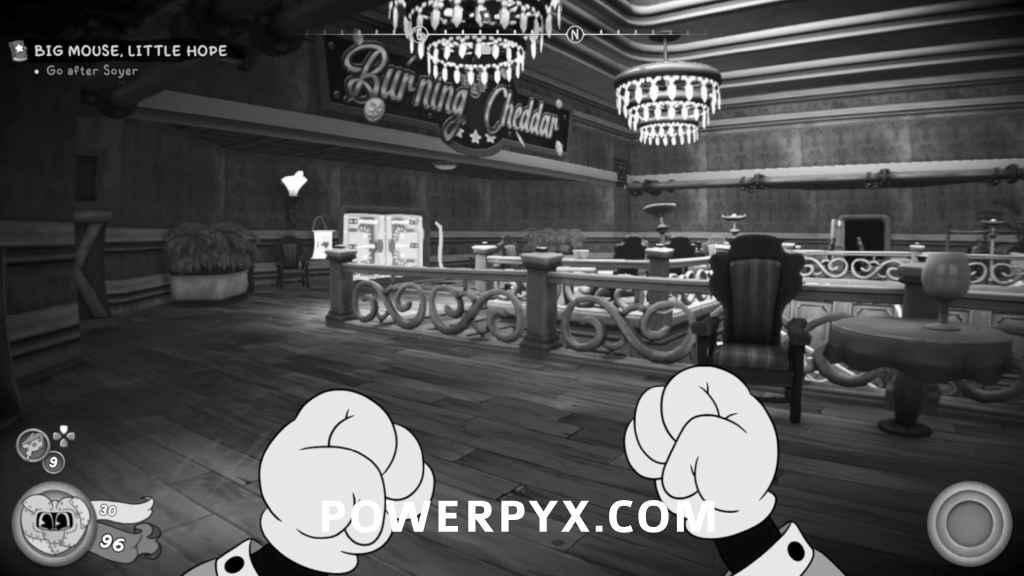
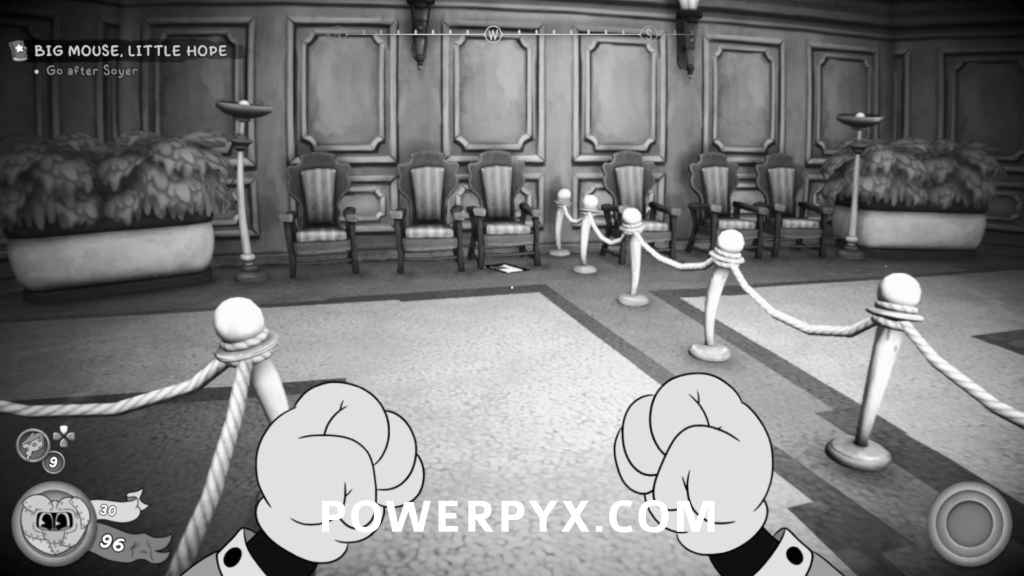
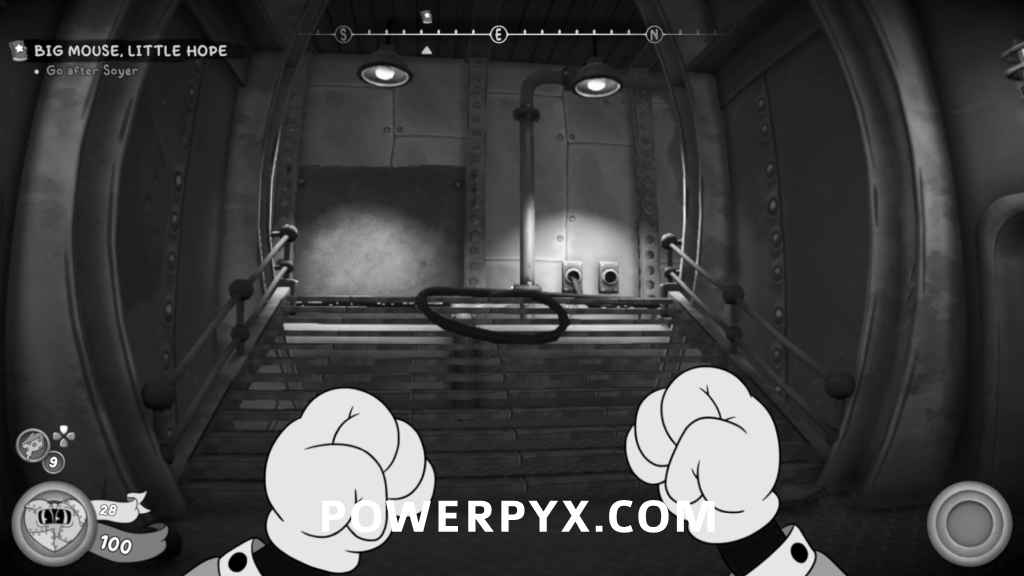
Big Mouse, Little Hope
Comic
After reaching the big hanger and climbing the ladder, look to the right and shoot the target to lower a hook. Swing across and then run across the wall to the fan. Shoot the target behind the fan and the collectible will be in front of the warp pipe.
Newspaper / Schematic
Once you reach the room with the locked mechanical door, go down the stairs and break the box by the chairs at the end of the room. The collectible will be underneath. The schematic will be in one of the center rooms on the floor. You can break the glass to enter.
Newspaper
After going through the hallway blocked by crates, go up the small flight of stairs and the collectible will be on the floor to your right.

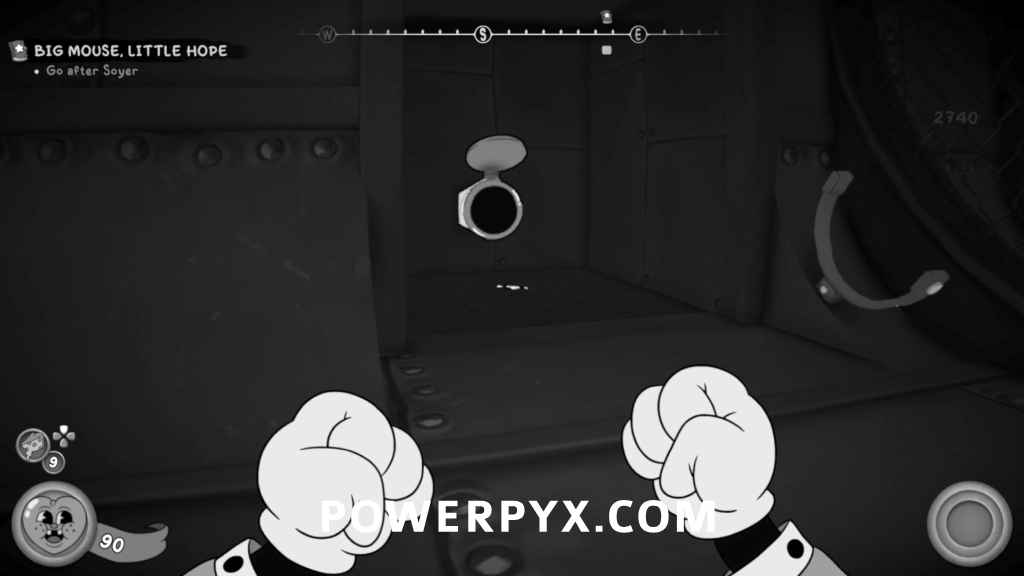
Schematic
After seeing Soyer go down the elevator, go down the stairs and you’ll see a ladder. Climb the ladder to get the schematic.
Schematic
In the same safe as the very first one you find in the prologue.
Overkill says
The “The Vanishing Act” level: after going back to the streets and into another apartment, up the stairs, there’s a window you can break (shoot), into a balcony, into another breakable window. There’s a secret room with a baseball card.
Overkill says
Also, there’s a baseball card at the P.I. Office upstairs
ObsiEez says
This is the card that we were missing to get 41/41 cards. I had assumed it was locked behind the glitched side job but it is not. Guide is being updated with this specific one right now as well as marking that trophy as no longer unobtainable.
ObsiEez says
Man, I was in that room too & was totally expecting a collectible to be there. Blended in really well. This has been added to the guide
Jakutinga says
This collectibles guide doesn’t have images of the locations where it was found?
ObsiEez says
The images were still a work in progress, but everything else was ready so we uploaded them with just the text for now. The images have now been added
Agent A says
I just guess it by location
YuriSF_HK says
I found the 2 missing Comic in Gumshoe in the Opera.
First one, after the Baseball Card (the Stage Designer’s one), jump off the window, under some wooden plank, near chimne.
The second comic is in the last area, where the opera is firing. after the last typewriter, go out the door, tuen left, jump over the fire. There is a door, go past it, the comic is in the far most cabinet, next to a cheese.
ObsiEez says
Thank you for the information. These locations have been added to the guide
MECH_Fire says
Tinsel town, there is a baseball card after you get the letter for wanda. Go out the door and shoot down the piano then shoot the smaller box it will land on the piano, jump up on the containers u can now reach and droo down card is on the rim of the box there
ObsiEez says
Thank you for the information. The location has been added to the guide
MECH_Fire says
Saltwater cambozo, baseball card at the start to the right of the haging fish by the cliff are a few bottles floating in the water the card is under water there on a create.
ObsiEez says
Thank you for the information. The location has been added to the guide
Erico360 says
Guide is still missing lot of the figurines.
I found one in Saltwater Cambozo
It’s in a secret cave under the punchable fish at the beginning of the level.
ObsiEez says
Thank you for the information. The location has been added to the guide
Erico360 says
Found another one in Damp Evidence. There is a vent in the room where you pick up the foyer key. (the one where the floor collapses)
Erico360 says
In Fair Enough at the second newspaper you can walk through the bush and find a figurine.
ObsiEez says
Thanks for the information. This has been added to the guide.
Erico360 says
?lednaB evetS si lleH eht erehW in hell there is a figurine under the counter of the bar.
ObsiEez says
Thanks for the information. This has been added to the guide.
BecomingDeath13 says
2 collectibles are out of order in Once upon a time by tinsel bros near the end of the level.
Schematic
After swinging across the top of the drawing room from earlier in the mission, you’ll find the schematic on one of the tables.
Comic
After the big shootout in the medieval set, the collectible will be pinned to the wall in one of the wooden platforms the enemies used to get to you.
These two need to be flipped. I ran around for 30 minutes thinking I was missing the schematic and trying to back track and get to the upper level of the drawing room by jumping from the desks and trying to grapple up just to hit an invisible wall because I picked up the comic first.
ObsiEez says
Apologizes for the confusions on that one. This has been updated in the guide now.
PSMAN says
I collected every baseball card they are completely out of stock followed the guide step by step but am now at 40/41 baseball cards having finished the game. What went wrong?
ObsiEez says
There are 2 possible things. Did you do the side jobs which reward you with the baseball cards? & also did you get the baseball card in your bedroom in the P.I Office? That location was added later in the guide which might be why you ended up missing it
PSMAN says
Yep it was the one in Jack’s room in his sock drawer. Phenomenal guide just me being stupid.
ObsiEez says
Don’t worry, I did the exact same thing. It was the last one I got as well
Aelinar says
The baseball card in the Bookkeeper level is right after the bookkeeper flees across the suspended metal beam and this turns as soon as you walk on it. In the train carriage, before climbing the ladder, jump over the crate with the healing bottle. The card is on the floor.
ObsiEez says
Thanks for the information. This has been added to the guide.
Nabeil13 says
Amazing guide thank you so much for making this so early in the release!
Matthew.F says
Found a schematic in the opera house, right before the comic one that requires you to enter the main hall and jump over the fire, the schematic is in a wardrobe down the hallway before the two mice get crushed by the ceiling
Bertie says
Jack Squat Level: I found a schematic on the floor in the John’s Bar just after the shoot out in the street. Face the bar, turn left, and it was on the floor to the left (near where Wanda typically stands during main gameplay)
Bertie says
Jack Squat: I think I also found your comic.
Right after the flood – run sequence, you go up through a door and see a save typewriter. Turn around when in front of this typewriter. It’s on the pallet on the floor, bottom right.
ObsiEez says
Thanks for the information. This has been added to the guide.
DrejzLV says
In “ Glugging from the Deep” in the port area there is a secret developer room, you have to jump across far side of the roof / fence go straight and drop down after some dialog with “the Veloper” you get rewarded Collectible figurine
ObsiEez says
Thanks for the information. This has been added to the guide.
Alex Sobecki says
Found out how to get to the newspaper in Glugging from the Deep. Near the water by the train car that Eddy is in, there is an X on the wall that you can blow up that has the pipe inside
ObsiEez says
Thanks for the information. This has been added to the guide.
Sora3565 says
Is there a time table when all of the optional clues will be added?
ObsiEez says
I’m currently working on it right now. Should be by the end of the day at the latest.
Overkill says
White Lies and Dark Secrets – the second baseball card lies where the third ring/boss fight is, underneath where she stays (after the boss fight), near one of the tombstones near the wall.
ObsiEez says
Thanks for the information. This has been added to the guide.
beastLakeee says
Thank you for the updated clues! Most are pretty easy to find without the guide but managed to miss one. Now I know where it is! Gonna play the game out and grab it on a second run. Awesome guide!
prats says
Are all optional clues surely required for all clue based trophies?. If Yes then I missed one till now but it is the early mission if i start new save just to collect that one missable clue, pin it to evidence board and go back to my old save to continue the game will it work for platinum?
ObsiEez says
Yes, all clues are required on a single save. Picking it up on an old save & going back to a new save will not count. You’ll have to start from that old save & keep going
SirLuckyHits says
In ‘ “Fatal Repulsion” By Tinsel Bros. ‘, the missing comic is hidden right at the beginning of the level. Once you enter the door after the first tv, where one dog and one guard are waiting for you, jump over the small bush next to the house.
ObsiEez says
Thanks for the information. This has been added to the guide.
Stijn says
Missing Paper in Fatal Repulsion
After the card in the fridge when the water has risen. Progress normally until the point where you need to do a wall run and jump onto a windstream fan. The paper is right behind the fan on some floating wood.
ObsiEez says
Thanks for the information. This has been added to the guide.
J says
Is this still in progress? Or am I able to get the platinum now with all the information already posted here ? Really don’t want to do 2 playthroughs with the amount of games on my backlog.
ObsiEez says
There are still a few Newspapers, Baseball Cards, Comics, & Figurines missing, but the ones that are missing can be bought from the shop once the level is complete & the figurines aren’t required for the platinum
Goldskarr says
I think the second to last newspaper in Fair Enough is out of place. According to the guide it’s after you find Wanda but the screenshots have the objective set as “Find Wanda.” Guess I’ll grab that on the second playthrough.
ObsiEez says
Sorry about that, this issue has been fixed now. If you have a save to fall back on, you can grab it from there
LordAgaton says
Awesome work with the collectible guide. You write at the top that there is 16 optional clues but when going through the list I seem to only find 15 of them. I even searched for the keyword “Clue”, am I just blind or is there 1 missing?
ObsiEez says
That was a mistake, you weren’t missing anything. It’s been updated to 15 now, thank you
Raffo says
Are there 39 or 38 Newspapers? I counted 39 during the levels.
pawlo says
Hey, what is Swamp Oddity? I don’t have this misson o.o. I finished circus
Lumi says
Are there any clues still missing? or are those 15 all of them?
ObsiEez says
No, all the clues are in the guide now.
Aelinar says
I’ve gained all the clues, optional included, and yet the Magician Trophy does not pop up. I see that a few % of players obtained it, so I don’t really know what could be the issue. Should I start another run?
ObsiEez says
Did you also complete all side jobs as well? This is what made it pop for me personally was collecting all the clues as well as completing all the side jobs up to that point as well
bingusbongus says
I got all the baseball cards except the shop ones, and here i am at the end of the game before jack goes to sleep and i have $4,000 when i need $6,000 for all the shop cards, i really would rather not restart the whole game just to get the cards, is there any way to farm money or something? Or am i doomed to replay the whole game?
ObsiEez says
There really isn’t sadly & you only have access to a shop one more time after that next mission, which won’t get you enough money.
Addison says
I found one, during One Flew, the part that says fill the ink well, enemies will infinitely spawn. They have a chance to drop 2, 5, or 10 money. It takes about 5 – 10 minutes to grind 100 money but there’s really no decent alternative that I’m aware of.
Ptaku says
In the western lot, when following the railway, after you break the wall there’s a schematu on the left, underneath a plank.
Addison says
I feel like the infinite money grind should be mentioned. It can potentially help people not having to regrind the entire game again basically. I feel like you get barely any money in this game, even going out of your way.
Joey says
In the opera mission, there’s another schematic in a wardrobe after the boss. Little hard to see past the fire.
Addison says
Kicking the shark in Saltwater Cambozo should be mentioned I think, otherwise you’d miss that trophy if you just use this guide.
DeathSlayer says
Side Jobs should also be included in this collectible guide.
ObsiEez says
Side Jobs have their own separate page which can be viewed Here.
Jason says
I found I think around 5 extra schematics that were not listed in the guide. Still finished with over 20 after fully upgraded the weapons.
Also theres a big mistake in the guide for the last newspaper collectable, its listed in the wrong order spot. It should be located in the guide between the Newspaper / Schematic with the room with the locked mechanical door and the Schematic after seeing Soyer go down the elevator.
Its located in the part just before you open the door to see Soyer going down the elevator. I was all the way in the area when he gets in your face already before I looked at the picture for the location and thought I seen that staircase already. Lucky had a backup save and started again just after the mechanical door and found it correctly just before opening the door to see the elevator going down. And being very last collectable for the newspaper trophy that a full playthrough if no save backup.
After seeing Soyer go down the elevator, go down the stairs and you’ll see a ladder. Climb the ladder to get the schematic.
ObsiEez says
Thank you for the information, this has been fixed.
Jason says
The newspaper one still needs to get moved up one more spot, its collected before seeing Soyer go down in the elevator.
Jason says
Perfect, tnx for correcting. Thanks for the guide worked pefectly for the trophies. Banger of a game too, highly suggest a playthrough.
Mint says
The Comic Book is missing from Saltwater Cambozo. If you are looking at the vent hidden by the crate leading to a schematic, before jumping down, there is a barrel to the left. Destroy the barrel to reveal a comic book hiding under Tommy Gun ammo.
Rabbit says
During “Damp Evidence”, there’s a schematic near the Dirty Note Clue. It’s on the destroyed staircase behind the same broken down shack where you find the clue. There’s a log acting as a ramp to get on top of the broken down shack. You can double-jump to it, opposite the mine entrance.
Rabbit says
During “‘The Bookkeeper’ by Tinsel Bros.”, there’s a schematic near the end of the mission. When you have to follow the railway, going through the vent, and coming back on the other side of the blockage. After you blow up the wall, it’s on the left under a board laying on a cardboard box.