
This walkthrough for Chapter 14 in Resident Evil 4 Remake will guide you through all objectives. This also includes Collectibles, Trophies and Key Items.
For other Chapters see Resident Evil 4 Remake Walkthrough.
Objectives:
- Make your way to the summit
- Go after Ashley
- Defeat Krauser
- Go after Ashley

Chapter 14
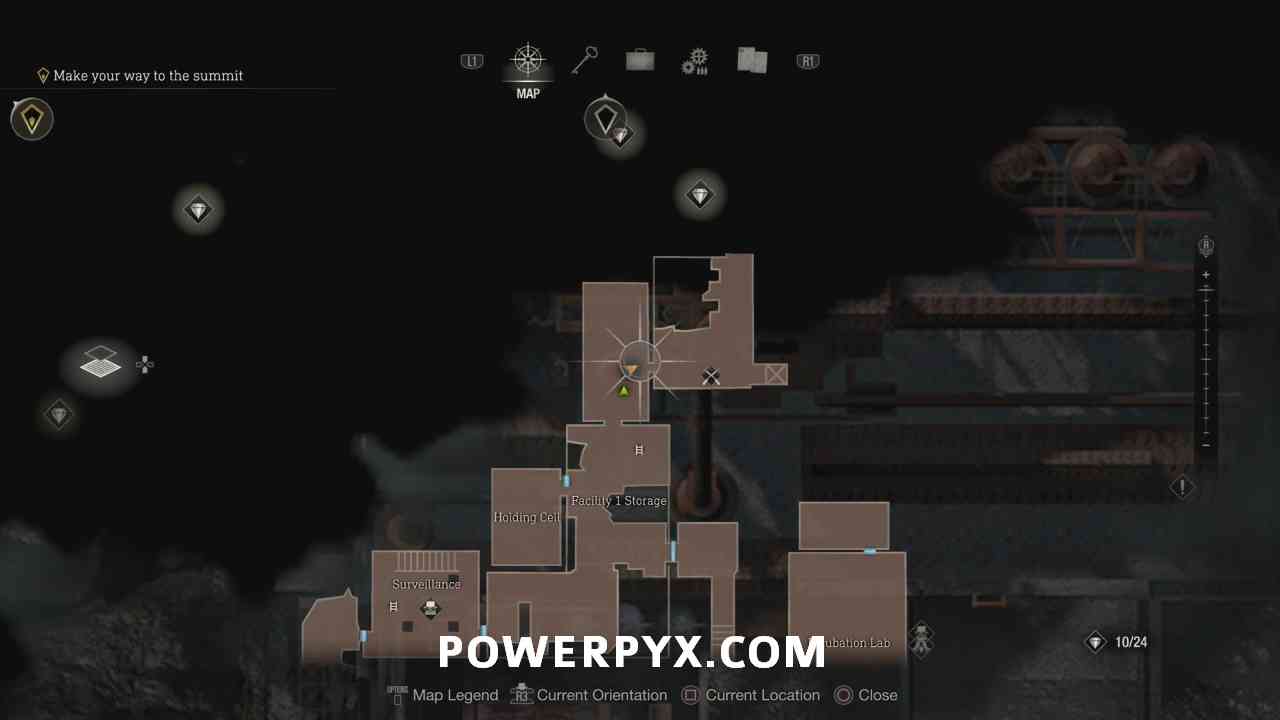
Make your way to the summit
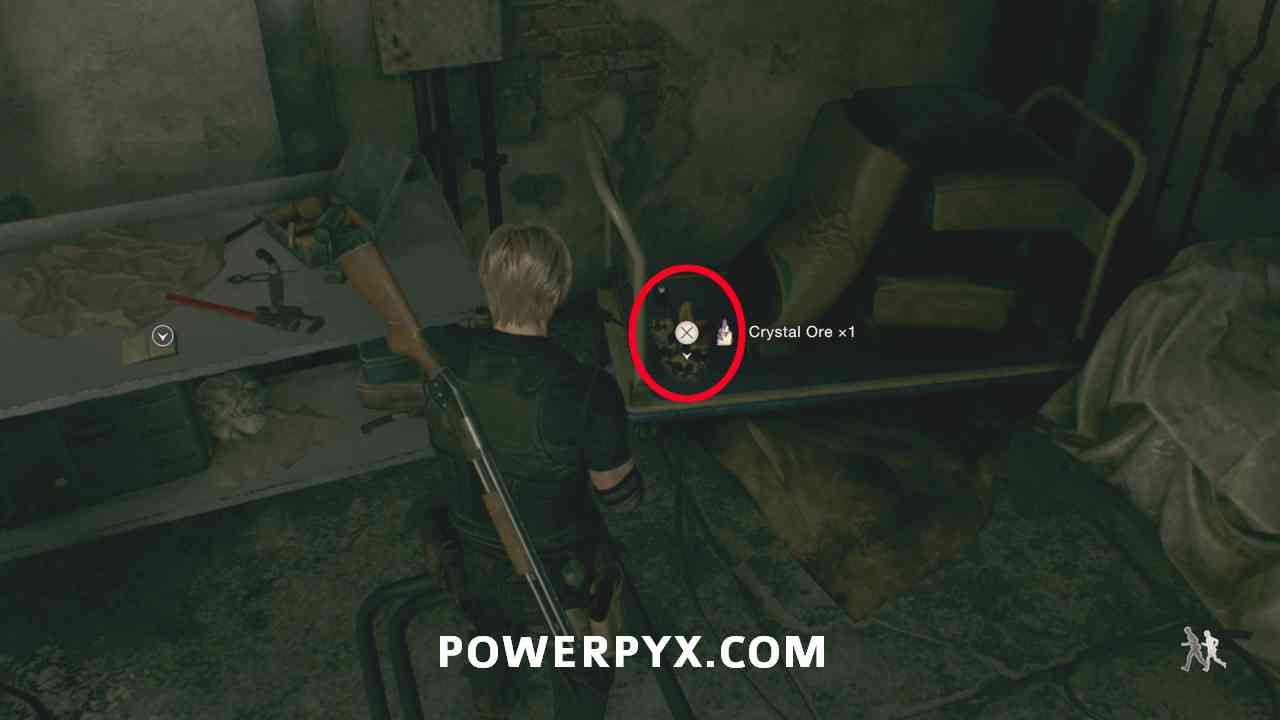
Treasure: Crystal Ore
At the start of the chapter, you’re back with Ashley. Before going anywhere, go to the corner of the holding cell to the right of the door where you can find a Crystal Ore.

Exit the cell and look to the left, where there is a spot to boost Ashley up to open the door.

Merchant Request: Destroy the Blue Medallions 5
To the left of the door leading to the next merchant shop, you can pick up this medallion request which will be for ones in the next area. They will be listed below individually.
Shooting Range (4A, 4B, 4C)
You can enter the next Shooting Range using the elevator located near this merchant. This one unlocks the final set of 3 courses, so you are now able to earn Real Deadeye  for S ranking all courses.


Treasure: Alexandrite
When you’re ready to continue, head out of the merchant room. Look directly above you to spot a metal cage hanging from the platform above. Shoot it down to obtain an Alexandrite.


Blue Medallion 1
Now turn slightly to the left looking straight above the door you came from to spot the first medallion.


Blue Medallion 2
Now turn and look to the left (right if you were exiting the door) and you can spot the next medallion off the side of the area.


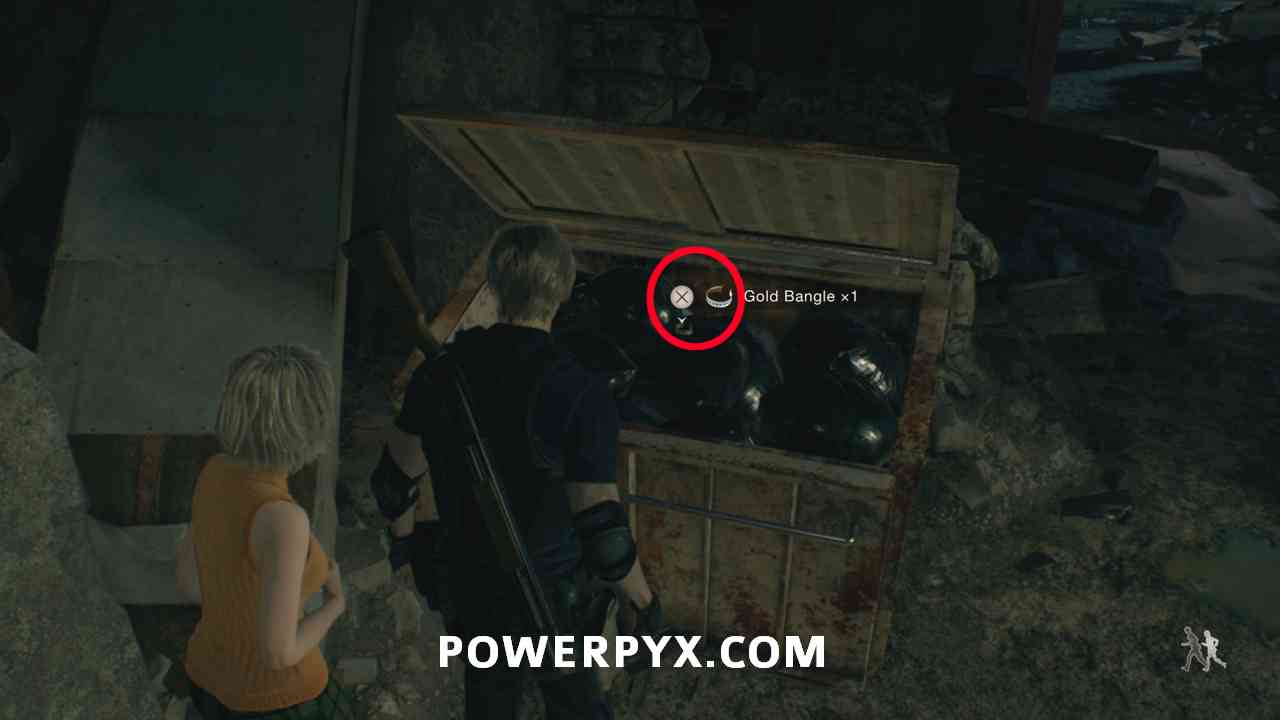
Treasure: Gold Bangle
Go up the stairs and drop down the ladder to reach “Cargo Depot”. Open the first trash container on the left to find a Gold Bangle inside.

Blue Medallion 3
Deal with the enemies that are probably coming at you, then hang a left under the structure. Turn to the right when you reach the wall to find the next medallion attached to the container.


Blue Medallion 4
Now turn right and go to the north wall of the area. You can find the next medallion hanging near some metal cages.


Blue Medallion 5
Now head up the stairs to the west to the next level to progress. Before going through the door you can look to the south to spot the medallion on the round structure to the south (you can also spot it from below like the image).


Go into the next room and stick to the left, there will be a number of enemies coming at you down this path.

Treasure: Velvet Blue
Deal with the enemies then go to the end of this path. Look up at the ceiling to spot a metal cage that will contain a Velvet Blue.


Now go up the stairs to the upper level, then in the room direct Ashley to hold the switch. This opens the door you can see out the window. Hop down and go through the door, then go left down the hall to open the door at the other end.

A number of enemies will appear in the room and go after Ashley. Quickly get up the stairs where she’ll likely be grabbed, and stop them from carrying her off.

Once the enemies are dealt with, head through the door you unlocked and keep following the path.
Treasure: Emerald
After dropping down into the sewage, you can look in the southwest corner after crouching under the grating to find an Emerald sitting on the ground.


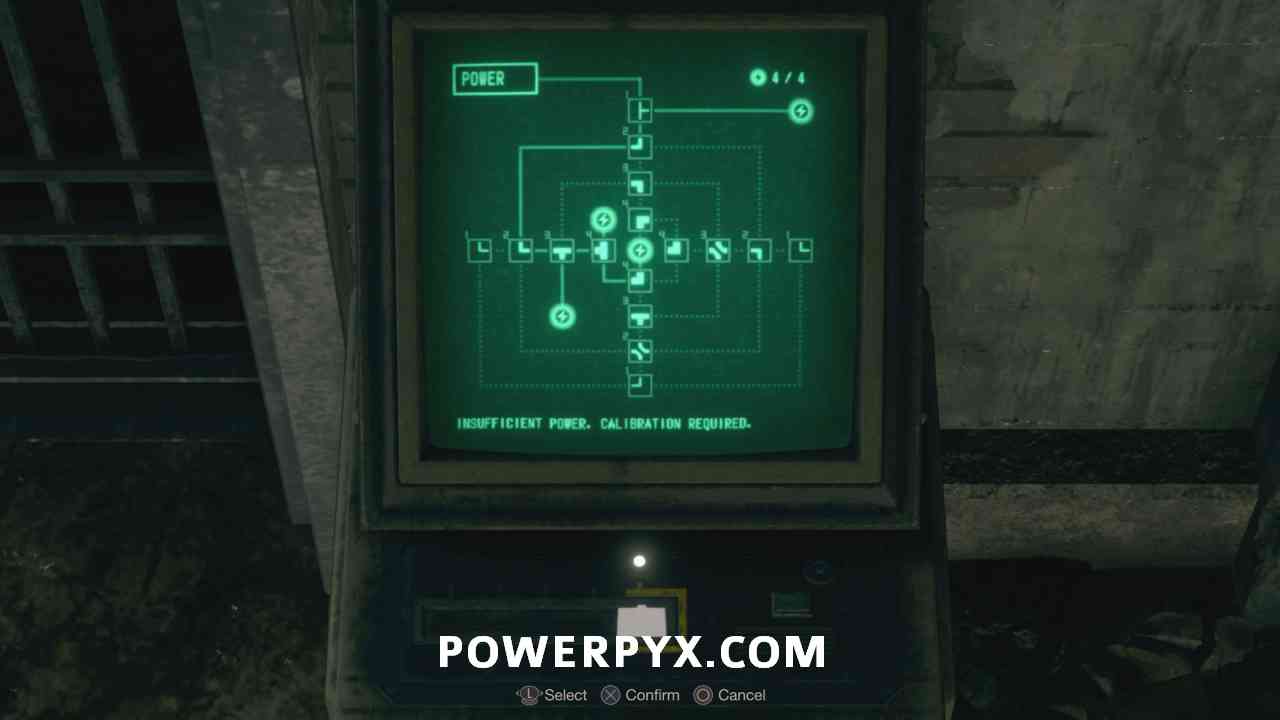
Climb up on the next platform and interact with the switch by the door. You’ll need to time your switch pull when the arrow is in the red zone. There is a bit of a delay, so you can just pull the level when the top needle is at the left edge of the red and it will stop in the middle.

In the next room, direct Ashley to stand in the locker immediately in front of you before going further.

Go into the next hallway and a Regenerador will drop out of the wall. Deal with it using the Biosensor, but this is the first one you encounter that will regenerate into an Iron Maiden. These are tougher versions of the Regenerador that only have a weak point on their head. They’re also more heavily armored and shoot spikes at you, including when they die.

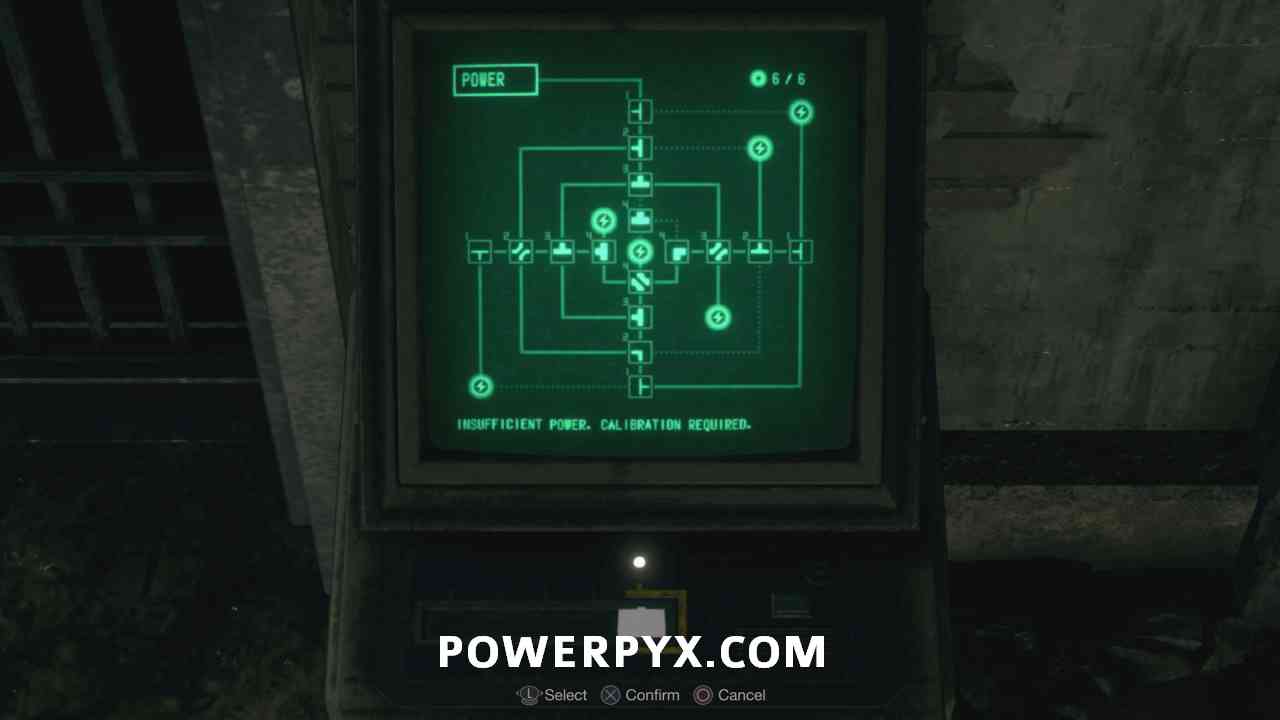
Once it’s dealt with you can call Ashley back out of the locker, then head to the end of the hallway for another switch door. The red area is smaller this time, but you can activate it basically the same by pulling the lever when the top arrow is right at the end of the red.

Follow the path into the next area and direct Ashley to use the crank. This raises the bridge allowing you to get to the other side of this area.

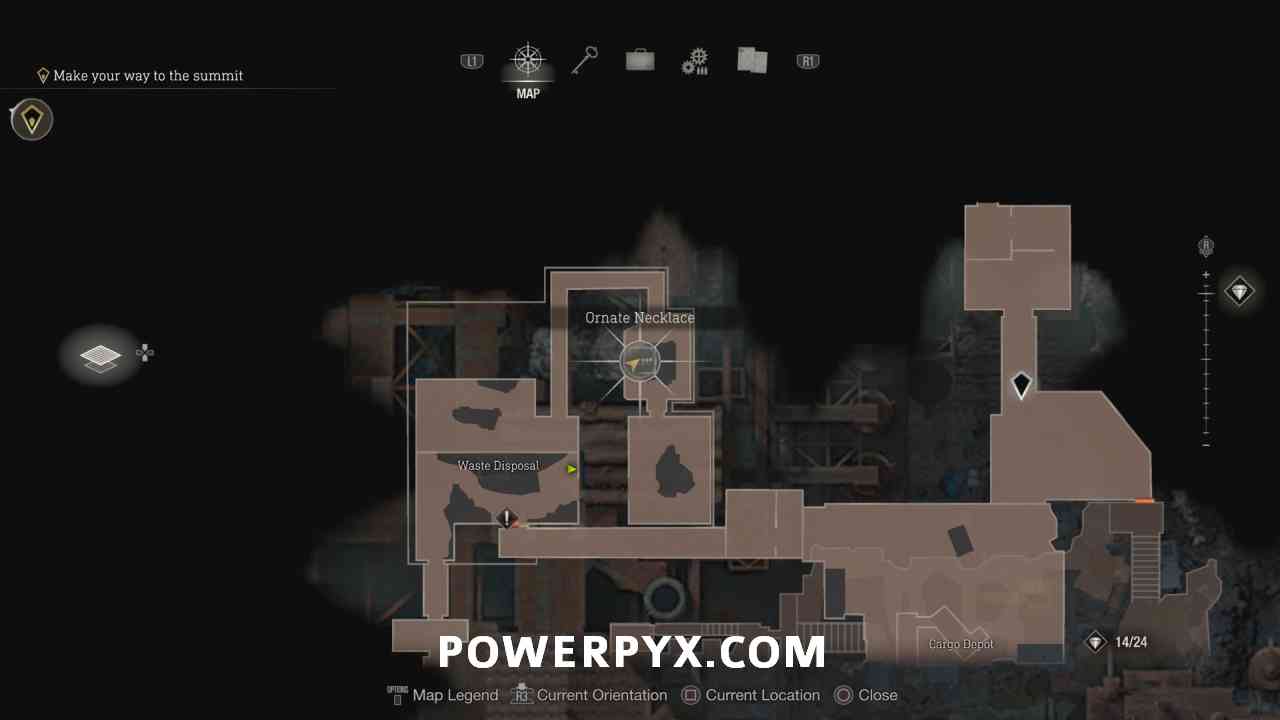
Treasure: Ornate Necklace
In the next room you enter (looks like a destroyed Control Room) you can find a silver case on the counter that contains an Ornate Necklace.

At the end of the path, there is another power switch. Pull it, but don’t go anywhere yet. You want to immediately turn left and look through the bars to where there will be 4 enemies who are now running at Ashley. If you shoot them here you can deal with them all before they get near her.

Start making your way back to Ashley. When you walk near the garbage pile another Regenador that turns into an Iron Maiden will appear. You can kill it yourself here, or run back to where Ashley is and she’ll just drop the bridge out from under it so you don’t need to fight it directly.

Back with Ashley, you can now use the control panel to open the door.
Solution for Assisted/Standard:
Solution for Hardcore/Professional:
Merchant Request: Even More Pest Control
Continue forward to the next Merchant room after leaving Waste Disposal and you can find this request sitting directly opposite him. You must kill 4 rats in the Waste Disposal area. Locations listed individually below. Make sure you backtrack to the previous room before dropping down into the next area to get the rats, or you’ll have to make a long walk all the way back around.

Rat 1
One rat is at entrance of Waste Disposal, where you originally entered this area.


Rat 2
Order Ashley to raise the bridge again. Another rat is immediately after the bridge.


Rat 3+4
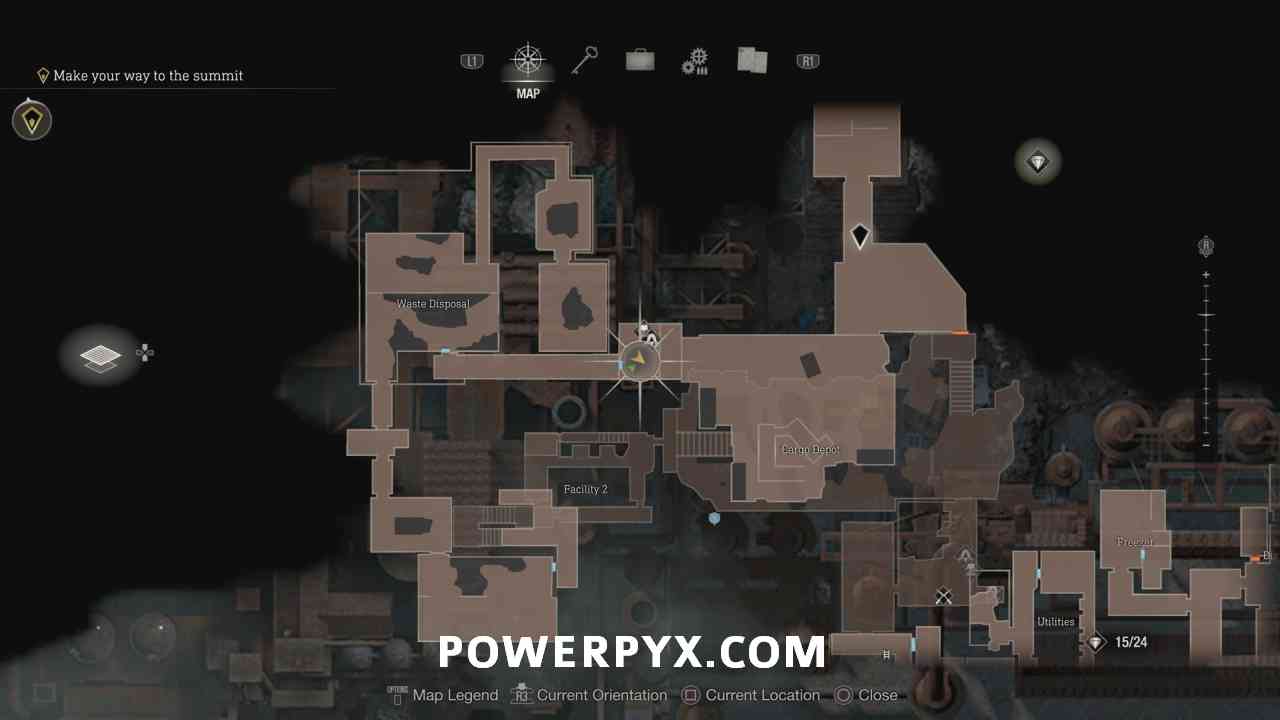
At the end of Waste Disposal where you flipped the Power-Reroute switch and where the Regenerador spawned.


You can then make your way back to the merchant, and when ready drop down to the large area below, catching Ashley so she can get down. Go over and interact with the crane to have Ashley get inside and start working on the wall.

In this section, you will need to defend the crane while Ashley uses it to smash the wall. Most enemies will attack you, but occasionally some go up to the side of the crane and will grab on to try and reach Ashley which stops her from hitting the wall. Your best bet is to basically walk back and forth in this area, as enemies either spawn from where you dropped into the area or the far side near the fence. Watch out for a Hammer Brute and Rocket Launcher that will appear, then you will be shown a scene where a large number of Plagas bugs drop in all at once. Once Ashley breaks through the wall clean up all the enemies, then go near the crane to have her exit.

Merchant Request: The Wandering Dead
Go through the cracked wall and immediately turn left to find this request sitting on a box. You must defeat a strong enemy that has now appeared back in the Incubation Lab. You can go through the large gate nearby to get back to the prior area and should go do this immediately as you can’t come back later.


When you go through the gate back to the lab there is another locker you can tell Ashley to wait in.

This enemy is basically a combination of a Regenerador and an Iron Maiden, as it has spikes and armor but its body is full of parasites you have to shoot to kill it. If you still have yourself set up with the Biosenser on the Stingray this is actually pretty easy to do. You can stand in the window outside the room and take shots at it until it comes into the hallway where you are, then run across the lab and go into the room on the other side and repeat shooting through the window. It can’t really attack you unless it’s in the same room as you, so just wait for it to crawl through the window and move away from it.


After dealing with it backtrack to where you broke through the wall and take the elevator up to the next level to continue.

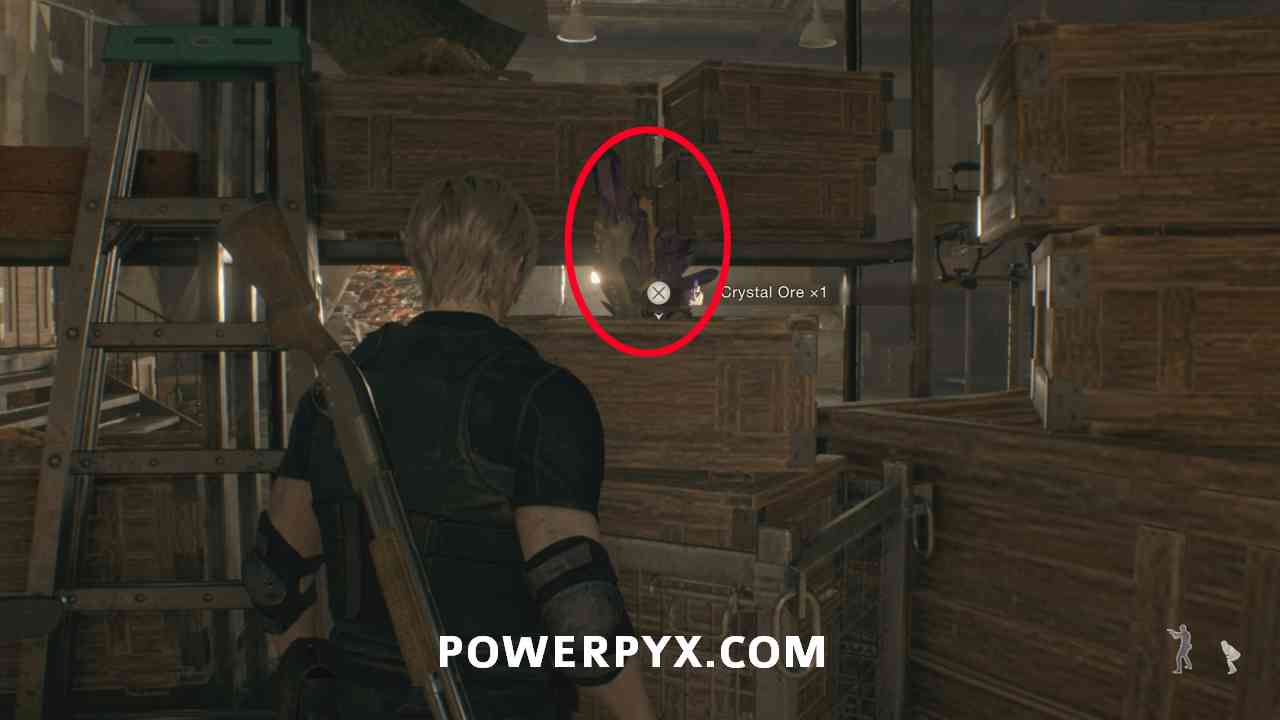
Treasure: Crystal Ore
In the next area in the Amber Storeroom (a storage area with lots of big rocks in it) you can go into the northwest corner to find a Crystal Ore sitting on some boxes. You can then interact with the big amber in the southeast corner to continue.

Go After Ashley
Castellan 14
After the cutscene in Amber Storeroom, go through the big gates to enter a tunnel. Walk south in the tunnel and keep hugging the right wall to enter a small building. You can find the Castellan sitting on top of the lockers in plain sight.


Treasure: Gold Bar (L)
Now drop down to the campsite where the enemies are, then look in the tent to find a chest that contains a Gold Bar (L).


Keep following the path ahead, then make sure you stock up at the merchant and save. Continue on the path and you’ll be dealing with Krauser again. This first section isn’t really a boss fight, but more a puzzle for how to get through to the end of the area. Right at the start he’ll be shooting at you a higher position. You can shoot back at him to make him stop, then he’ll jump down to you where you can knife-fight him for a bit (or continue shooting him). After dealing enough damage he leaves the area.

Follow the path through the ruins to the upper level where there is a crank. Turn this to open the gate you passed on the way up.

Continue into the next area, watching out for the tripmines that will be in your way. Crouch under or destroy the first one, then walk into the alcove to look back at the second one and shoot it to get by.

Continue forward watching the bear trap on the ground, along with Krauser who will shoot down at you for a moment. Hug the right-hand wall and shoot the next mine.

Carefully look further down the path where you can spot a turret attached to the ceiling. You can shoot this to destroy it while hiding behind the wall.

Go further right where there is a tunnel with another turret and a beartrap in front. Deal with them both and go to the end of the tunnel, then look left out the hole where you can shoot the tripmine blocking your path. After you shoot it loop back around and continue along the path.

Watch in the next tunnel for another bear trap and turret, then right when you reach the entrance be slow as Krauser shoots an explosive into the opening. Keep following the path to the upper level where Krauser will now be shooting arrows at you while you try to reach the end of the area. You can hide behind the debris to avoid the shots. When you reach the end don’t immediately run up the stairs, as Krauser tosses down a handful of grenades.

In the next area Krauser will be shooting down at you, you can shoot him to make him come down, then continue damaging him to push to the next part of the fight.

After a scene, you’ll be in some rubble. Here you basically just need to follow the path out of the area, only block Krauser the first time he attacks, then one  evade prompt right before exiting. Climb the ladder at the end of the path.
Defeat Krauser
Now you get to the real boss fight against Krauser. This time he is transformed and has both blade and grab attacks. Any of the blade attacks you can parry like before, then slash him back as this does good damage still. If you try to shoot him he’ll block his body with his hand, but you can actively shoot him in the feet which can stun him. If he walks close to you and pulls back his hand he’ll try to grab you, but you can avoid this by immediately moving to the right. When you are shown him jumping to the cliff above you want to immediately climb up on of the two ladders to the upper level of the platform. He’ll jump and do a slam on the ground which will damage you if you are anywhere on the lower level. You can get some shots in on him while he jumps up, then drop back to the lower level yourself. Keep repeating this until he’s defeated.
Go after Ashley
Weapon: Fighting Knife
You automatically obtain this after defeating Krauser. It’s like your combat knife, but stronger overall.

You can then head into the tower from the upper level to complete the chapter.
This finishes Chapter 14 in Resident Evil 4 Remake.
Next Chapter: Chapter 15 Walkthrough
For all other chapters refer to the Resident Evil 4 Remake Walkthrough.
Leave a Reply