
This walkthrough for Chapter 13 in Resident Evil 4 Remake will guide you through all objectives. This also includes Collectibles, Trophies and Key Items.
For other Chapters see Resident Evil 4 Remake Walkthrough.
Objectives:
- Go after Ashley
- Rescue Ashley
- Get the Level 3 keycard

Chapter 13
Go after Ashley
You’re now on the island, the final section of the game. This area has a lot more combat than prior sections, and you spend most of it by yourself. To start, follow the path ahead into the caves.
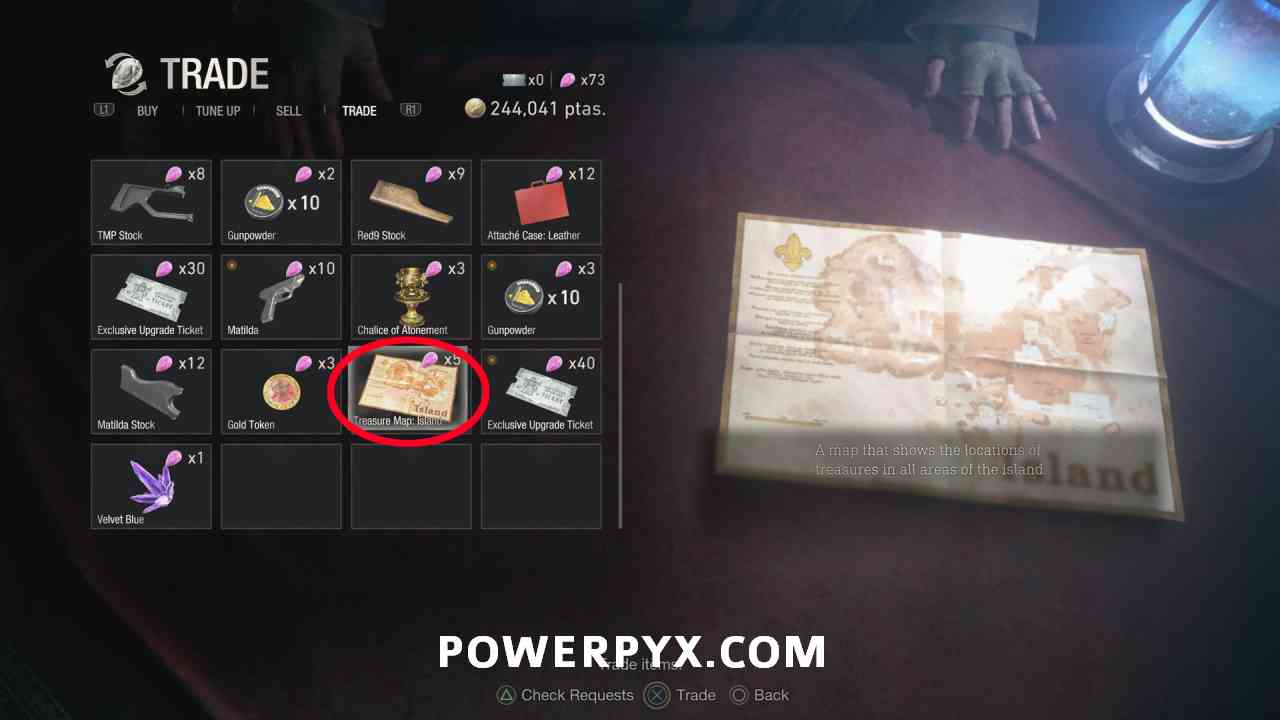
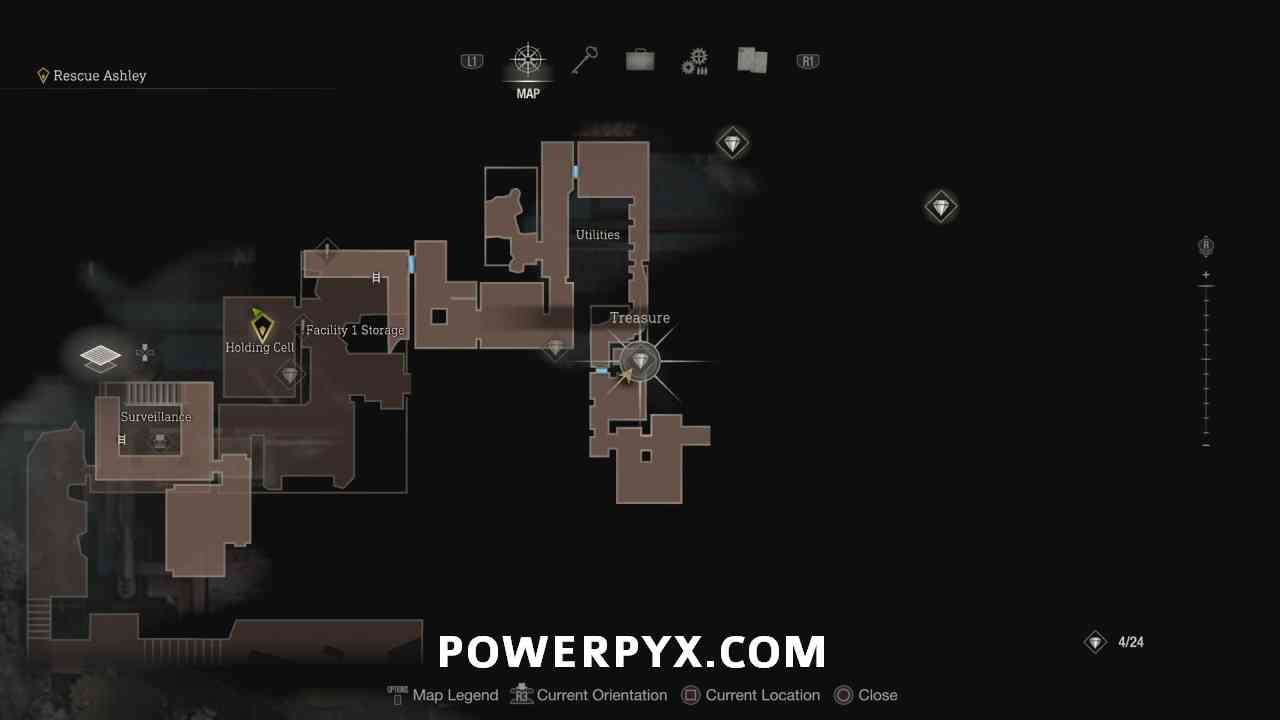
Treasure Map: Island
In the first section go right to reach the merchant and buy the Island Treasure Map from him for 5 Spinels.
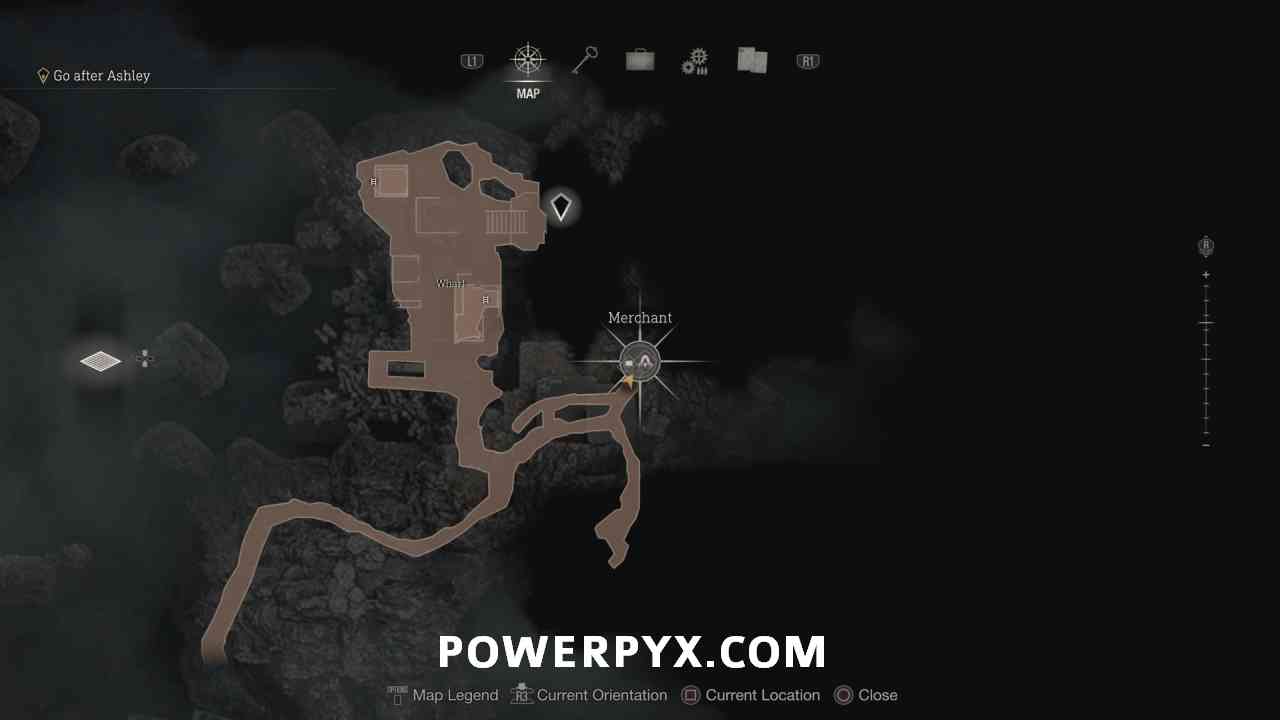
You then want to turn around and take the right path which leads you behind the turret you should have seen just before. These appear throughout the island, and you can typically interact with them from behind, which either moves them or disables them, allowing you to go past them.

Follow the path now not blocked by the turret to the first combat area. When you enter there will be an alarm, and a number of enemies will start coming after you. If you stand looking into the window of the building on the right you can take most of the enemies as they funnel towards you. They won’t go around the left as the turrets are there, so they’ll all come through this building.

Watch out for the Brute that appears during the cutscene, they have a machine crossbow stuck to their arm, but they’ll stand in one spot to shoot at you and have an obvious windup, so just stay behind cover when they’re firing.

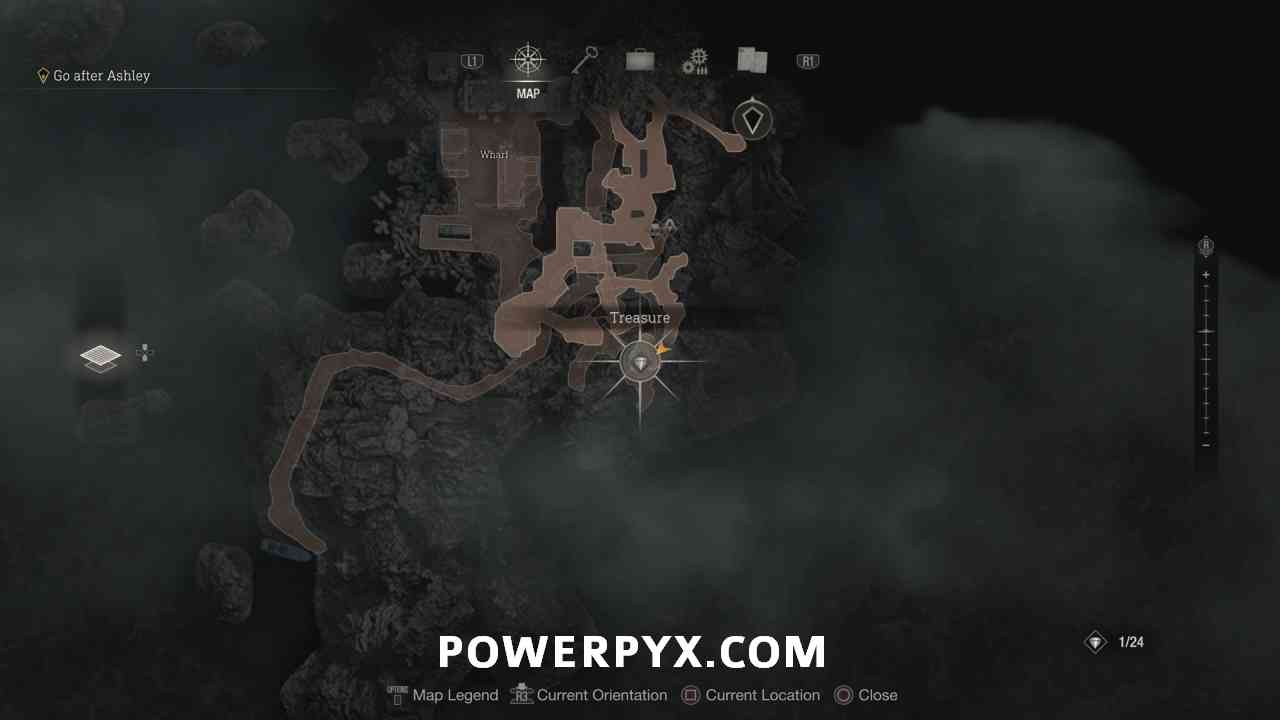
Treasure: Pearl Bangle
Once the enemies are dealt with, go into the building and turn left immediately wrapping around the wall to near where the turret is pointing. In the corner you can find a chest that contains a Pearl Bangle.

You then want to climb up the ladder in this building to reach to second floor, then activate the turret to make it switch the spot it’s facing towards.

Drop down (avoiding where the turret is pointing) and walk around the north of the area behind the third turret and activate it to also make it point away from the door. With both of those turrets moved you can now walk around back through the building and head up the stairs to proceed to the next area.

Continue following the path ahead, dealing with the enemies along the way. When you reach the cave at the end, climb the ladder up to the next level.

Treasure: Golden Lynx
On the next level up you can sneak into the building to the right, taking out the enemy in stealth. In the middle tunnel here is a red explosive barrel, shoot it to blow up the rubble to find the treasure chest behind which contains a Golden Lynx.


Continue forward and you’ll run into your first metal shield enemies. Unlike the wooden shields you ran into in the castle, these can’t be destroyed with normal gunfire, but hitting them with a shotgun does still knock the shield out of their hand. Otherwise, you can parry their melee attacks, or shoot their feet to stagger them.

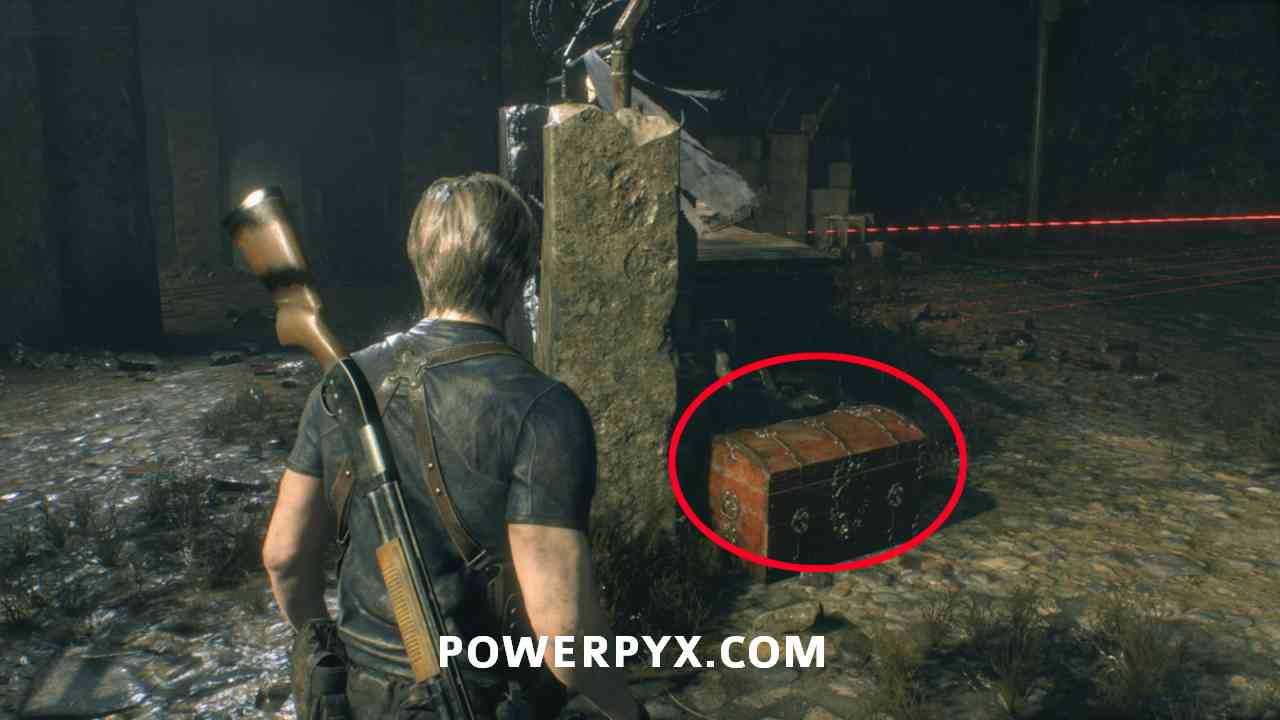
Continue past and you’ll see a short scene pointing out the enemy ahead with a rocket launcher. These enemies appear in a few spots through the island, easily spotted with the red laser sight. After a few seconds of aiming they will shoot a rocket at you, so you either want to hide behind cover or shoot the enemy to stagger them.

Deal with all the enemies here, then proceed through the door on the other side to the next area.
Castellan 13
Through the gate, you can follow the path around to the left, then go down the stairs to the right where there are more enemies, including another with a rocket launcher. Deal with them, then go to the southeast corner near a forklift. Look on the ground to the right of the forklift for the Castellan.


Treasure: Elegant Crown
Then look immediately to the right of this where there is a chest, containing an Elegant Crown.


You can then head up the stairs towards the door to the next building. Watch out in front of the door as there is a tripwire right in front you need to disarm.

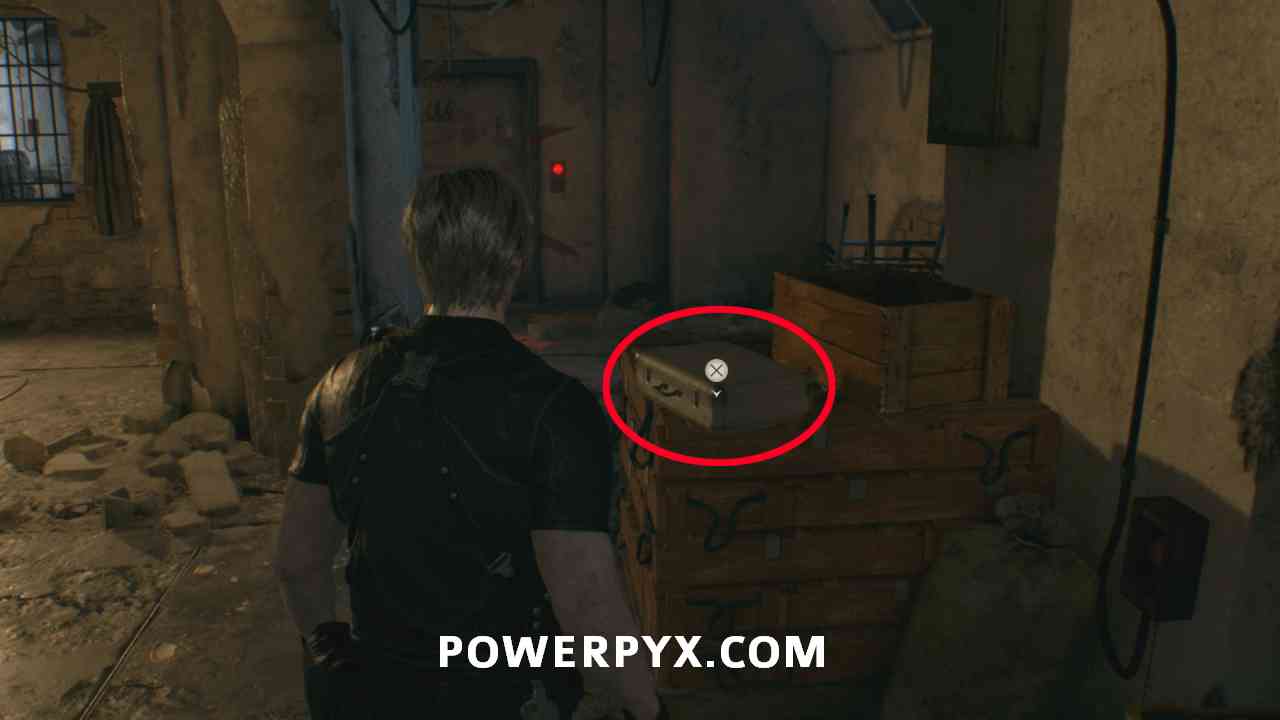
Treasure: Velvet Blue
Just inside the next room on the right you can find a silver briefcase that contains a Velvet Blue.

The door on this floor is locked, and you’ll need to go upstairs to activate it. If you want an easier time dealing with the enemies, go up the stairs nearby and wait as there is another tripwire. One of the enemies will walk down the hall and you can shoot them to alert them, which will also alert the other enemy. Wait in the corner and they’ll walk right into the tripwire.

Head into the room and go to the console at the back, then interact with the button to open the door on the lower floor.

Go after Ashley
Go into the next room and you’ll be shown Ashley is in the room nearby. Drop to the lower level and stay in stealth as there are two enemies here. If you hug the left wall you can sneak directly behind both of them for easy stealth kills.

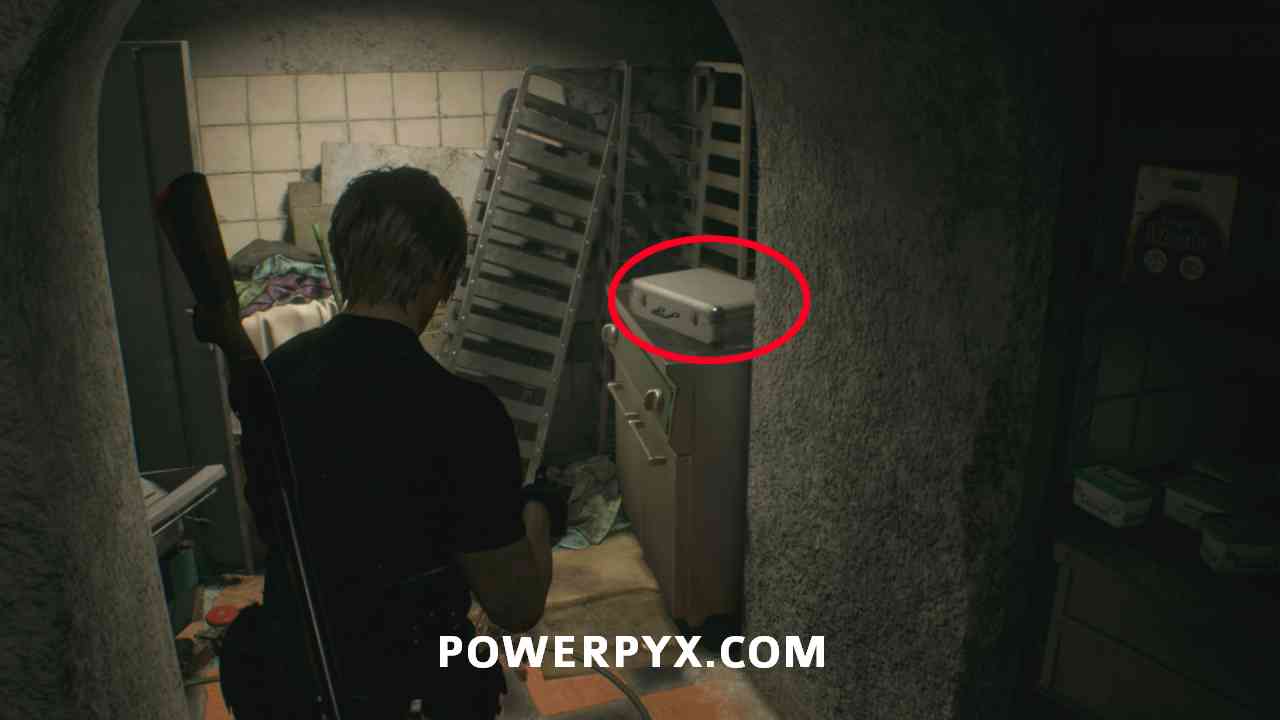
Treasure: Velvet Blue
You can then climb up the ladder in the far corner of the room and follow the linear path through the Utilities area. One room before the 2nd merchant in the chapter you can find another silver case that contains a Velvet Blue.
Continue along the linear path past the merchant to the Dissection area.
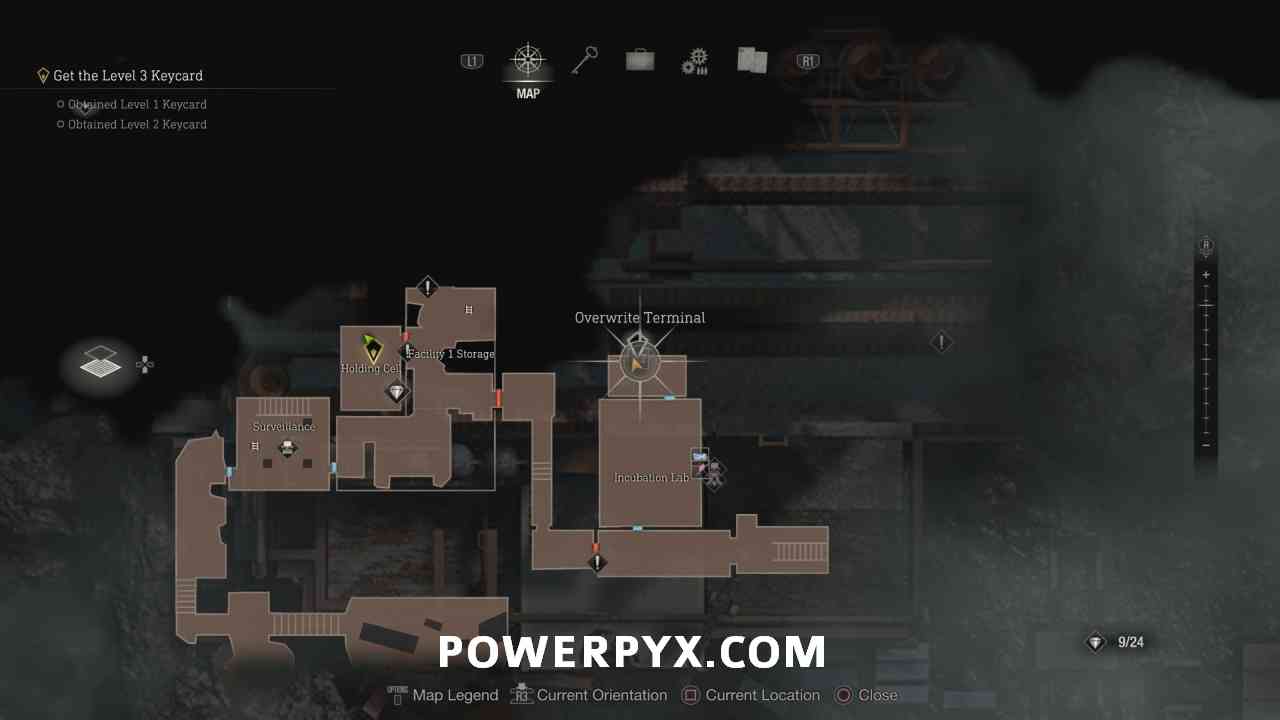
Get the Level 3 Keycard
At the end of the path, pull the switch on the left to switch which side of the area the power is routed to. You’ll then have the objective of getting the Level 3 Keycard, which involves doing some tasks here.
After switching the power but before going back towards the Dissection area, make sure to pull the switch by the large door to open it. This door stays open when you switch power again and allows you a quicker route back.

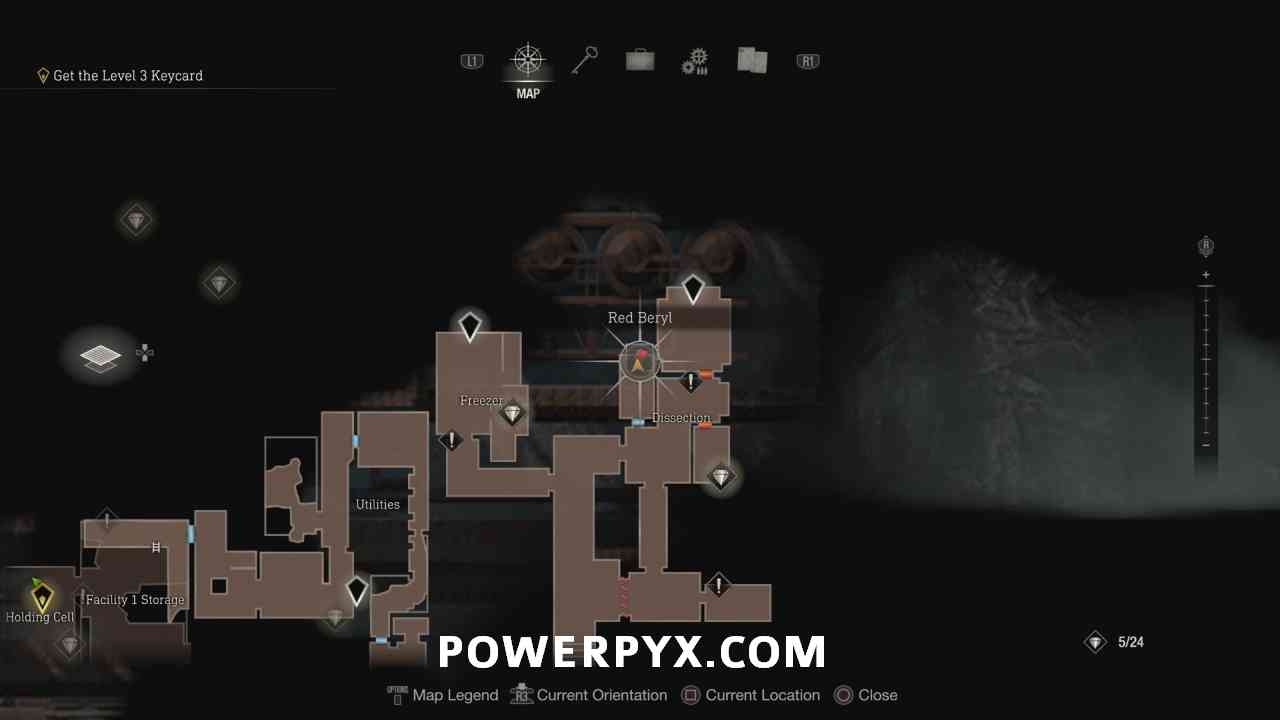
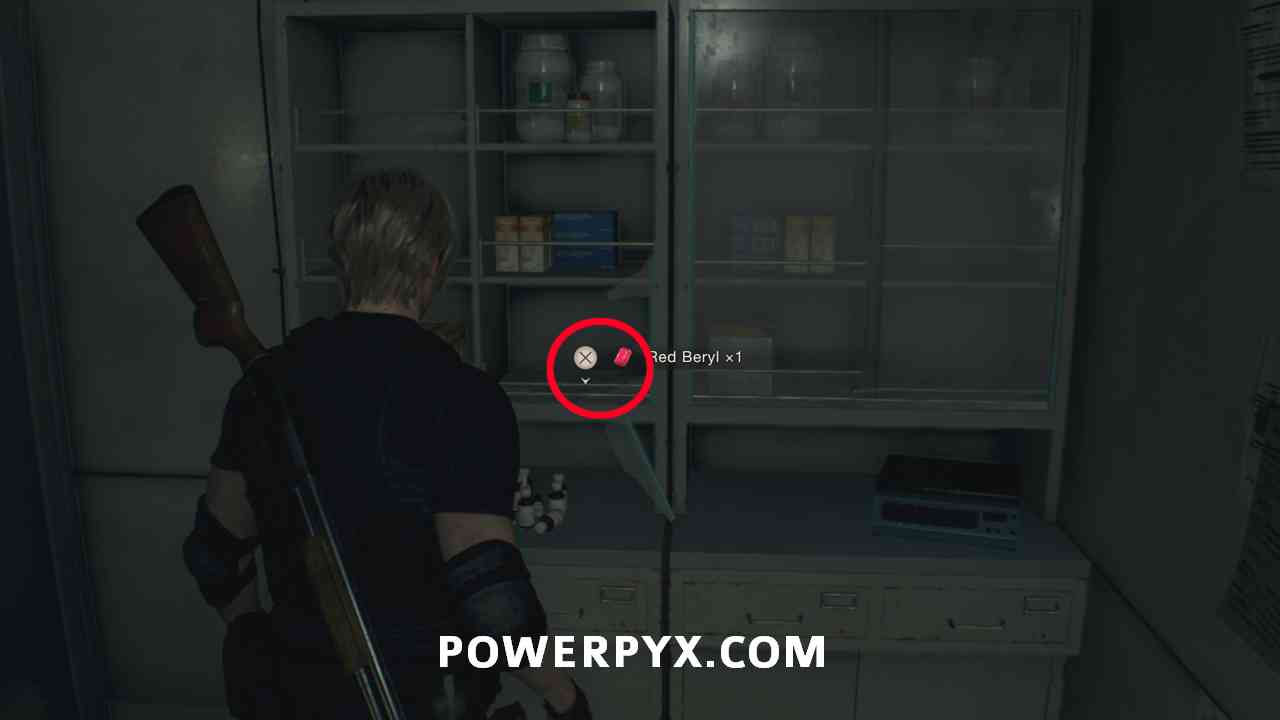
Treasure: Red Beryl
You can then go back towards Dissection and enter the door on the left side which will now open. Smash the glass shelf at the back to obtain a Red Beryl.
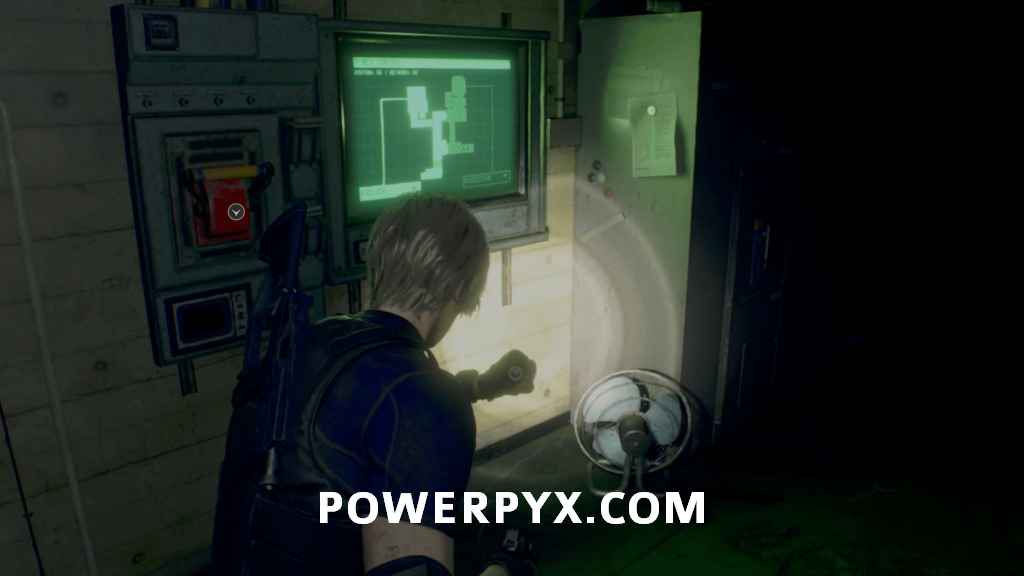
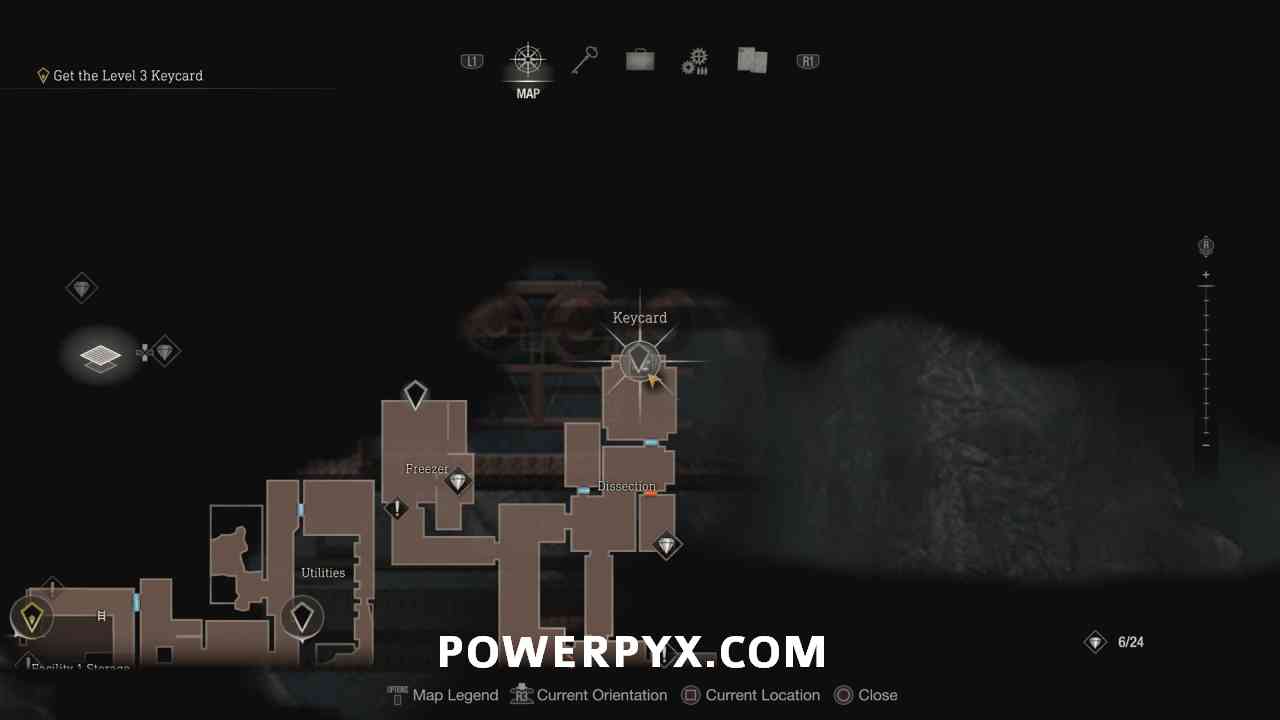
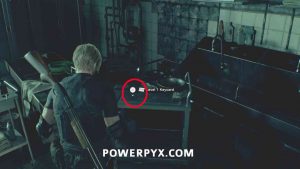
Key Item: Level 1 Keycard
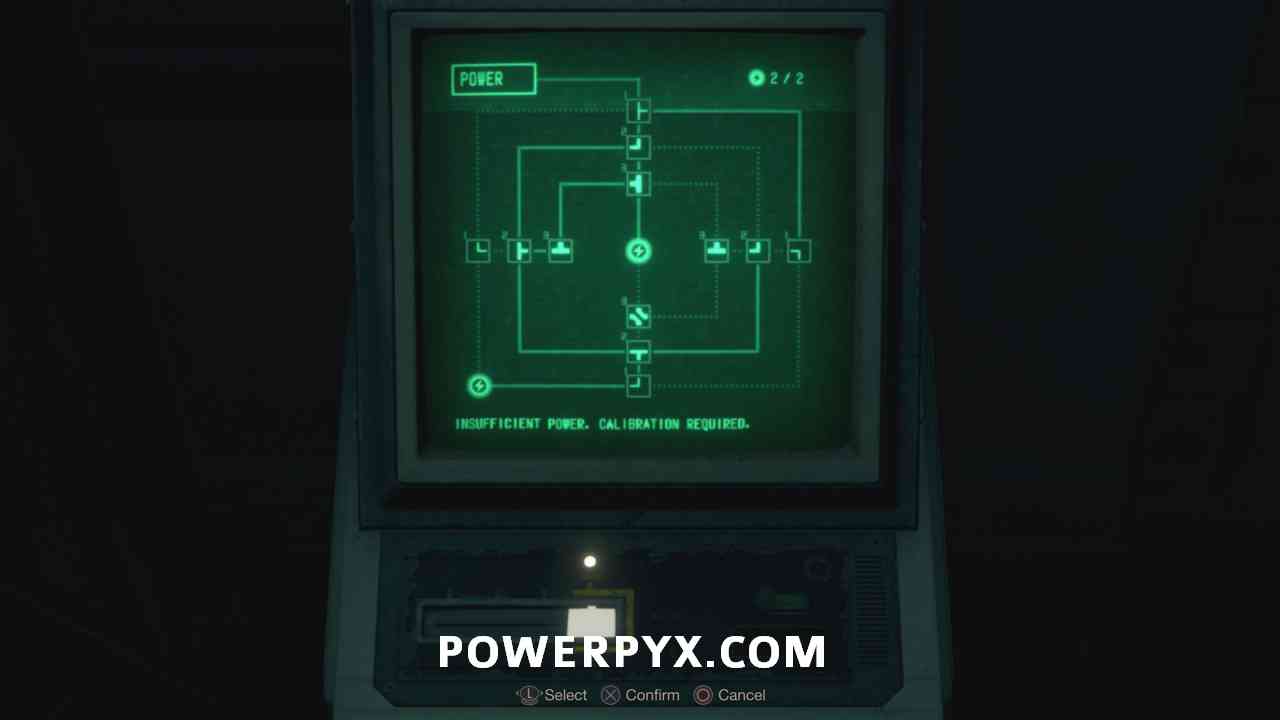
Now go to the north end of the room and interact with the power console and solve the puzzle as shown in the image below. This opens the door north of Dissection and you can pick up the Level 1 Keycard at the back of the room.
Solution for Assisted/Standard:
Solution for Hardcore/Professional:

Go to leave the room, and you will be greeted by your first Regenerador. These are an enemy you’ll face throughout the island, though right now you won’t really have a way to deal with them effectively. You need to destroy 3 specific spots in their body to kill them, but you can’t see the spots unless you put a bunch of damage into them or with an item you’ll get in about 10 minutes. If you’re not used to how these work, you can be better off avoiding this first one and coming back to kill it later if you want. You can slow them down by shooting them in the head or blowing off their legs, which makes them flop around on the floor for a while.

Treasure: Gold Ingot
Enter the room in the south-east corner of “Dissection” where the Regenador comes out of, then smash the glass in the left corner to grab a Gold Ingot.


Treasure + Weapon: LE 5
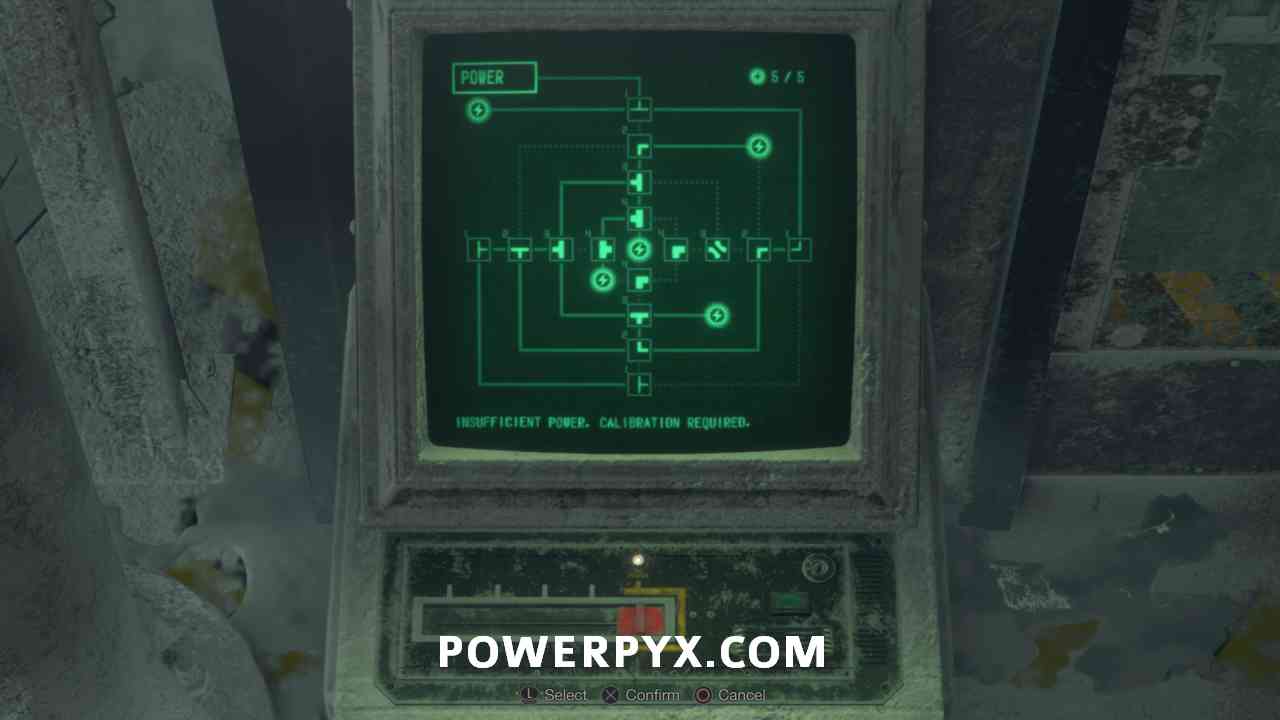
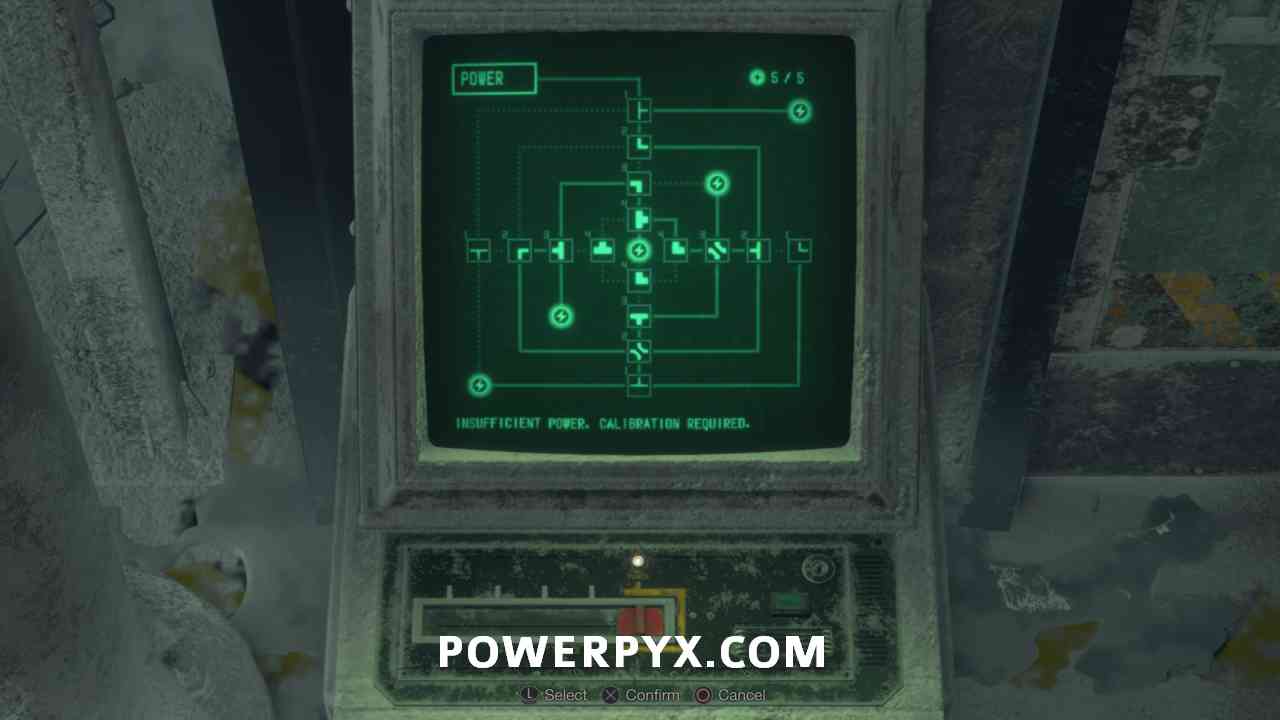
Go back to the Power Control Lever again to reroute power to the left side, then go to the left of the area to the freezer and use the Level 1 Keycard to enter. On the immediate right solve the power console puzzle to open the door and pick up the LE-5. If you don’t have room in your inventory make sure to send this to storage so it counts as collected.

Solution for Assisted/Standard:
Solution for Hardcore/Professional:
Key Item: Level 2 Keycard
Back in the main freezer room, insert the Level 1 Keycard in the console at the end. Another Regenerador will drop from the body bags in the room, which you can again either try and deal with or just avoid. Once the machine spits out the keycard make sure to go over and grab it.

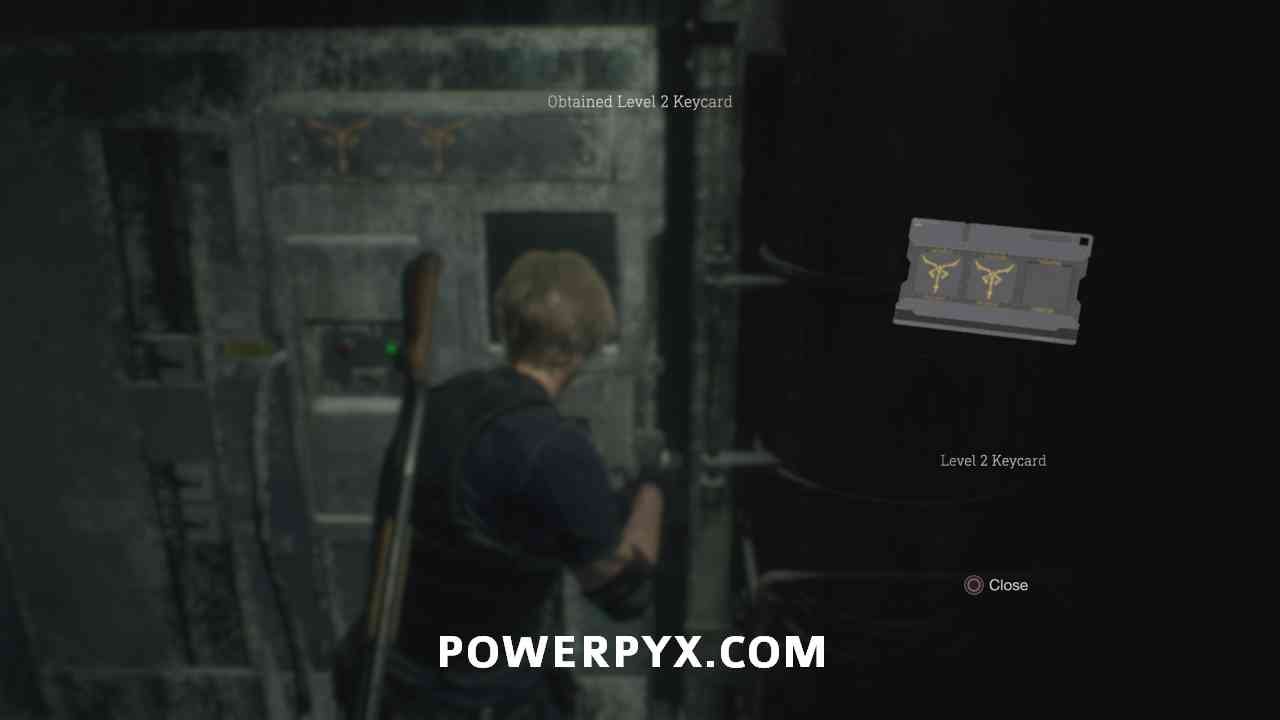
With the Level 2 card in hand, you want to leave the freezer and go directly south to the door you passed on the way in, now able to be opened with the keycard.

Follow the path ahead, dealing with the couple of enemies that appear, then enter the Incubation Lab. DO NOT SHOOT THE TANKS YET.
Treasure + Weapon Part: Biosensor Scope
Head to the back of the Incubation Lab and in the case on the left you can pick up the Biosensor Scope, extremely useful for dealing with the Regeneradors.

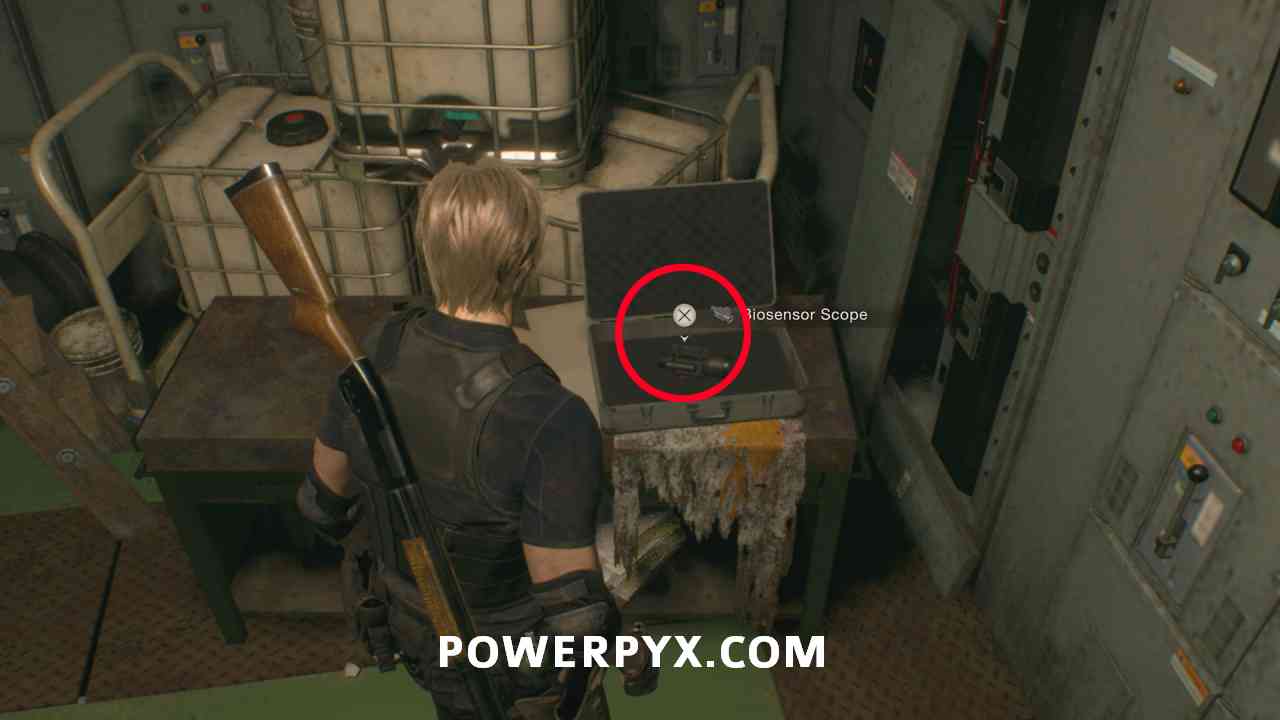
Trophy: Two Bugs, One Stone (Kill 2 parasites inside a Regenerador with a single bullet)
This is the perfect opportunity to get this trophy easily. Before proceeding, make sure you put a sniper rifle in your inventory (SR M1903 & Stingray both work, can buy them from merchant upstairs or if you already bought them retrieve them from typewriter storage). Combine the Sniper with the Biosensor. Now looking at the Regeneradors in the tanks, find one that has two Parasites lined up inside of it by aiming your gun with the Biosenser.
Fire a bullet to destroy both parasites in one hit, this will instantly kill the Regenerador. If you don’t get it first try, you can reload the last autosave to retry immediately. With the Stingray it works without any other weapon upgrades.
Key Item: Wrench
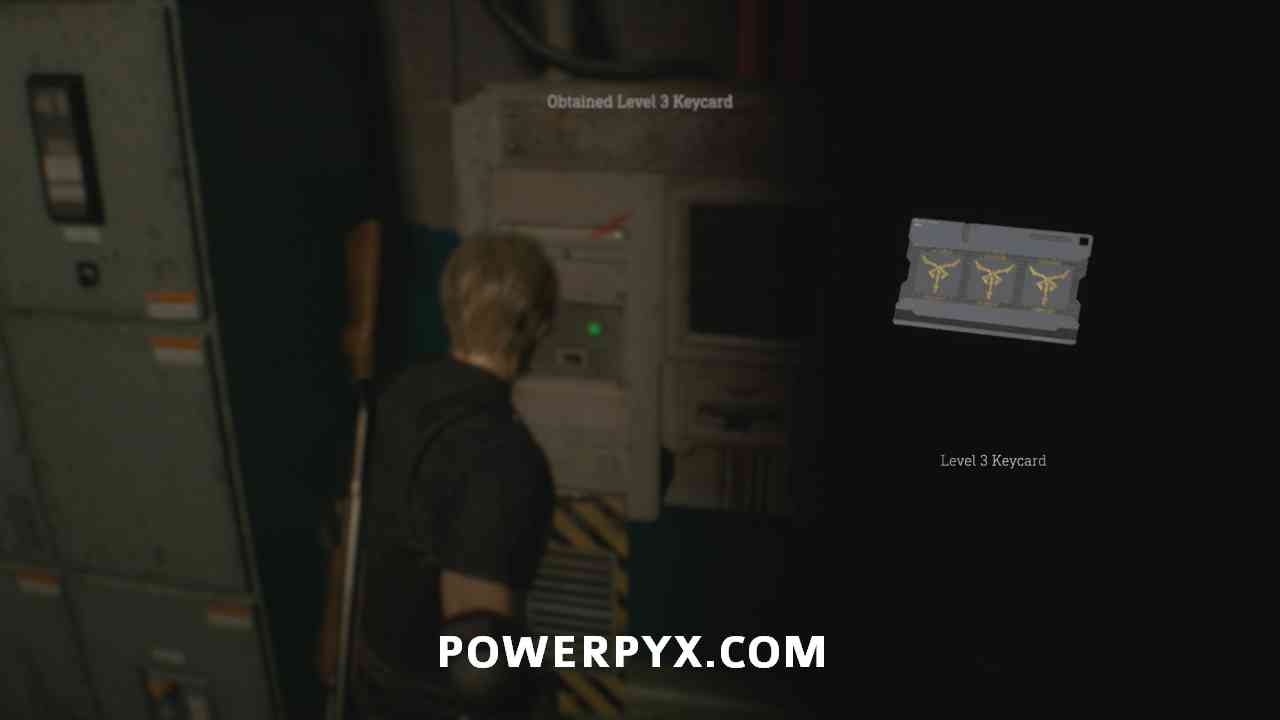
Now using the scope look around at the other tanks to spot the Regenerador with the wrench inside of it. You need to kill this one specifically to obtain the wrench, though you can use the opportunity of the Regeneradors being in the tubes to more easily take out the others for the rewards they drop. It will drop the Wrench. Use the Wrench on the Overwrite Terminal in the north of the Incubation Lab where you found the Weapon Part. Insert your level 2 keycard to upgrade it to level 3.


When you insert the keycard a number of enemies will start running into the room. You can hang out in the room with the Override machine and take out most of them fairly easily, just watch for if one of them throws dynamite into the room, or for one of the Regeneradors being released if you didn’t kill all 4 of them earlier.

Key Item: Level 3 Keycard
After a couple of minutes you can then pick up the Level 3 Keycard from the machine.
With the keycard in hand you can go through the door to the right out of the lab, then follow the path directly back to where Ashley is located. Use the keycard to open the door to complete the chapter.
This finishes Chapter 13 in Resident Evil 4 Remake.
Next Chapter: Chapter 14 Walkthrough
For all other chapters refer to the Resident Evil 4 Remake Walkthrough.
Irwynn says
It seems like Biosensor Scope also counts towards the treasure counter.