
Siren Song is a Side in Sherlock Holmes Chapter One. This walkthrough will guide you through all objectives of the Siren Song side quest.
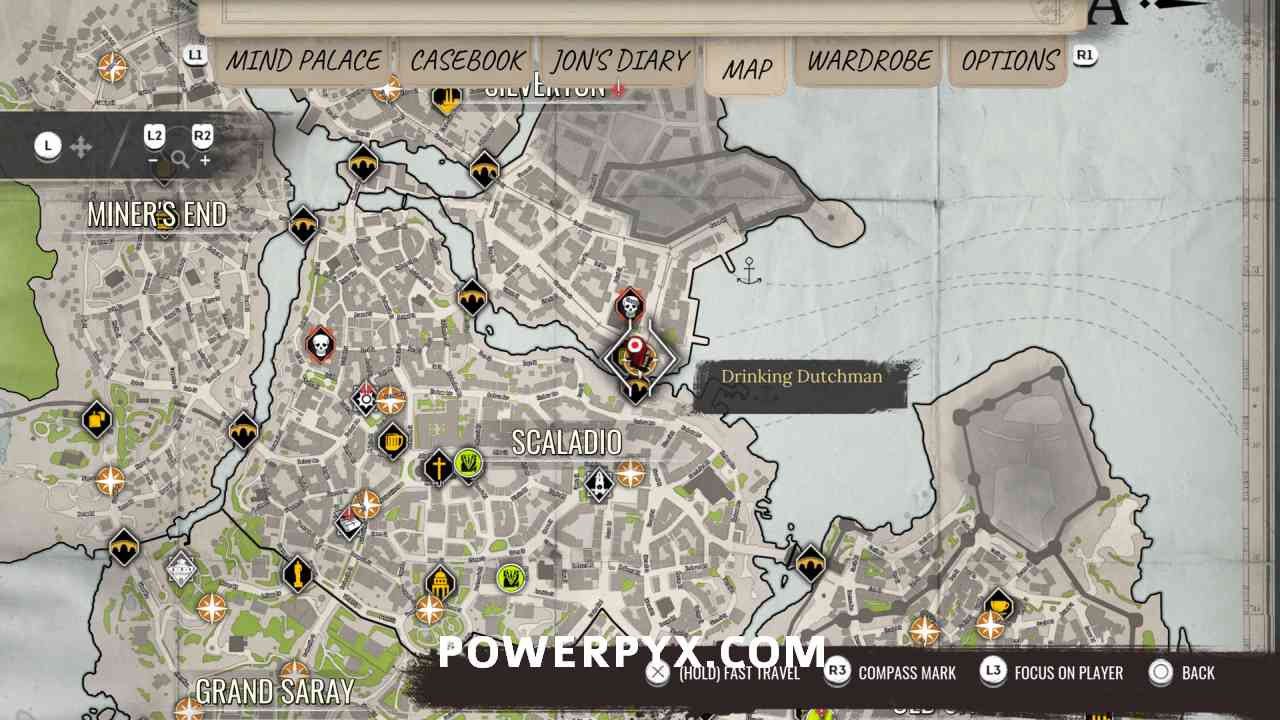
Starting Borough: Silverton
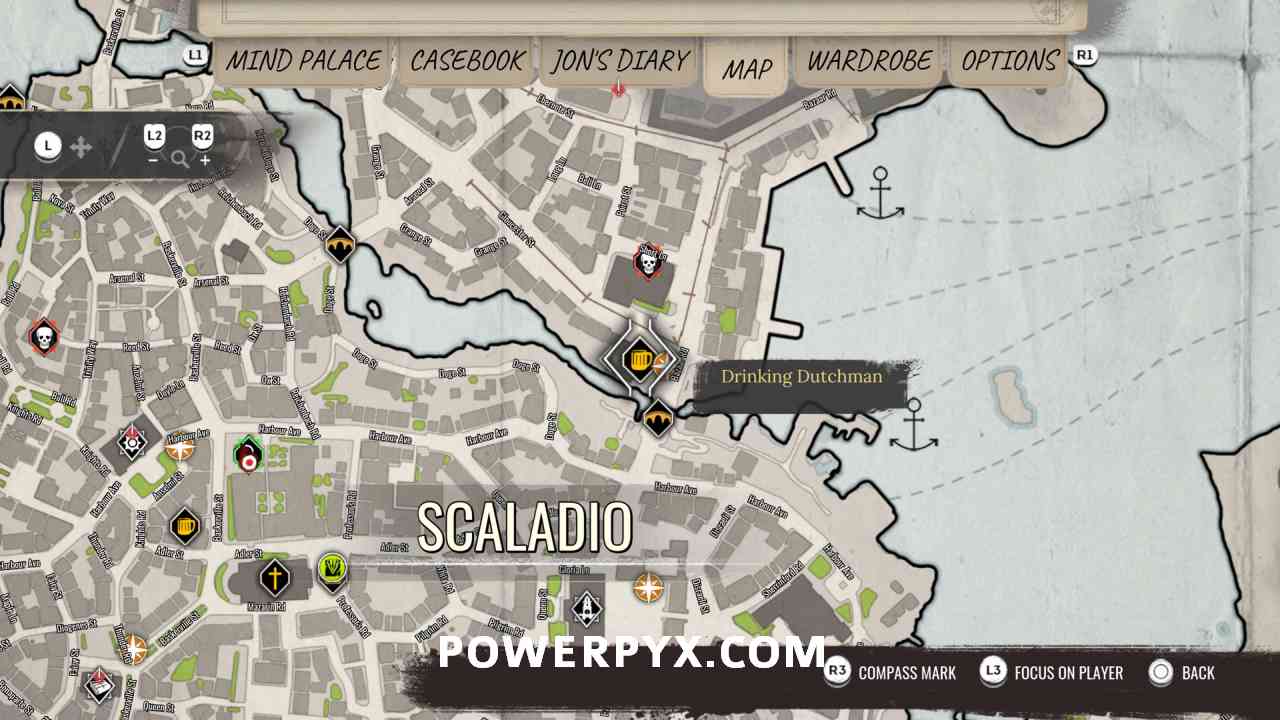
Starting Location: Drinking Dutchman fast travel point
Quest Giver: Eavesdropping on two sailors at Drinking Dutchman fast travel point
Requirement: Finished Main Case “A Gilded Cage”
Reward: 40 Money,  Curse Correction (missable)
Case Info: A sailor was found drowned on the beach by the cemetery. People are talking about Sirens, but that’s just superstition. Or is it?
Starting Location: Siren Song
Siren Song Cordona case starts in Borough: Silverton, Place: Drinking Dutchman fast travel point.
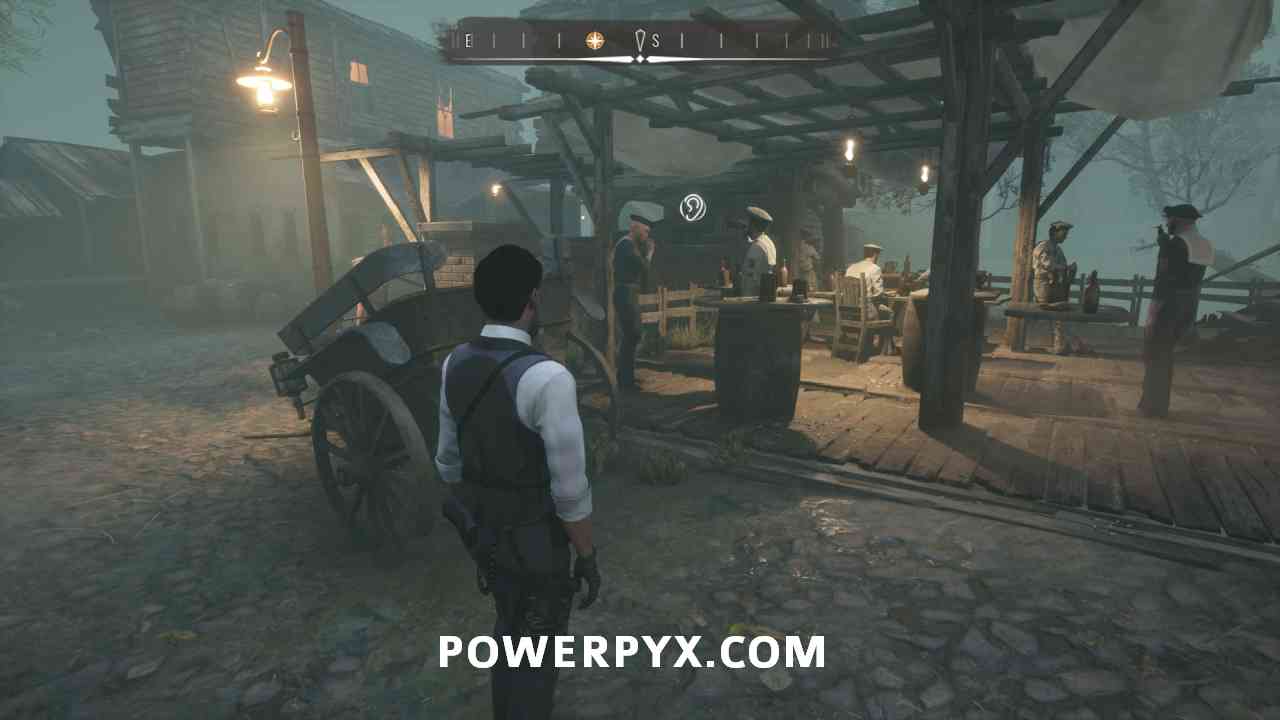
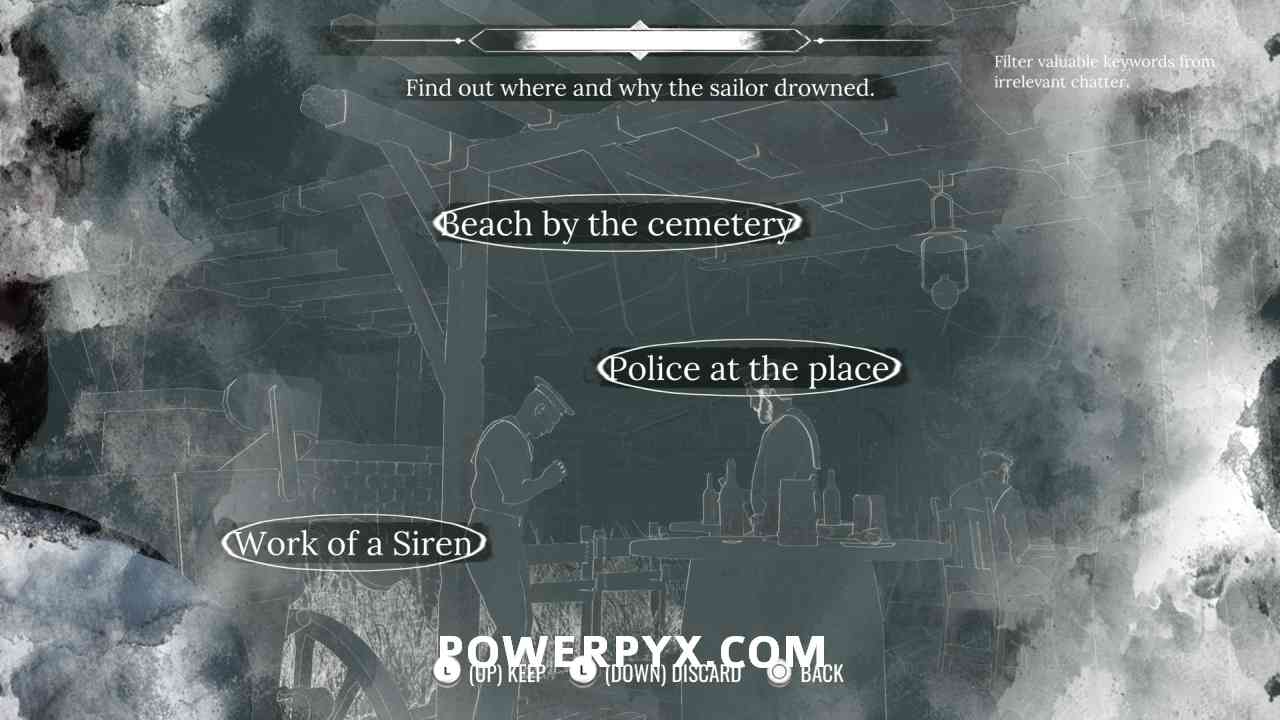
This is only available after Main Case “A Gilded Cage“. You must overhear the two sailors at the outside bar, next to the Drinking Dutchman fast travel point. The correct terms to filter out are: Beach by the cemetery, Police at the place, Work of a Siren.

Drowned Sailor at Cemetery Beach
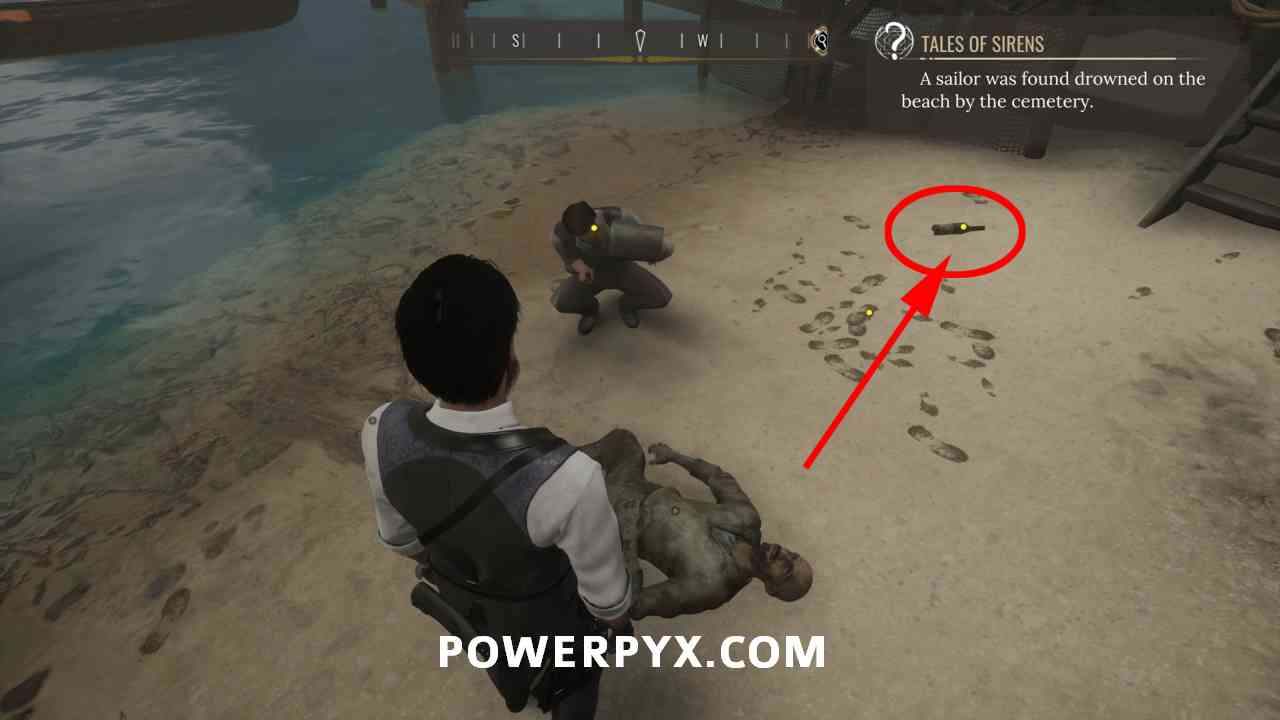
1) Pin the “Tales of Sirens” objective in the casebook. Our first task is to head to the beach south of the Cordona Cemetery. It’s at the Greek bridge between Miner’s End and Grand Saray. There you will find a policeman and the sailor’s corpse.

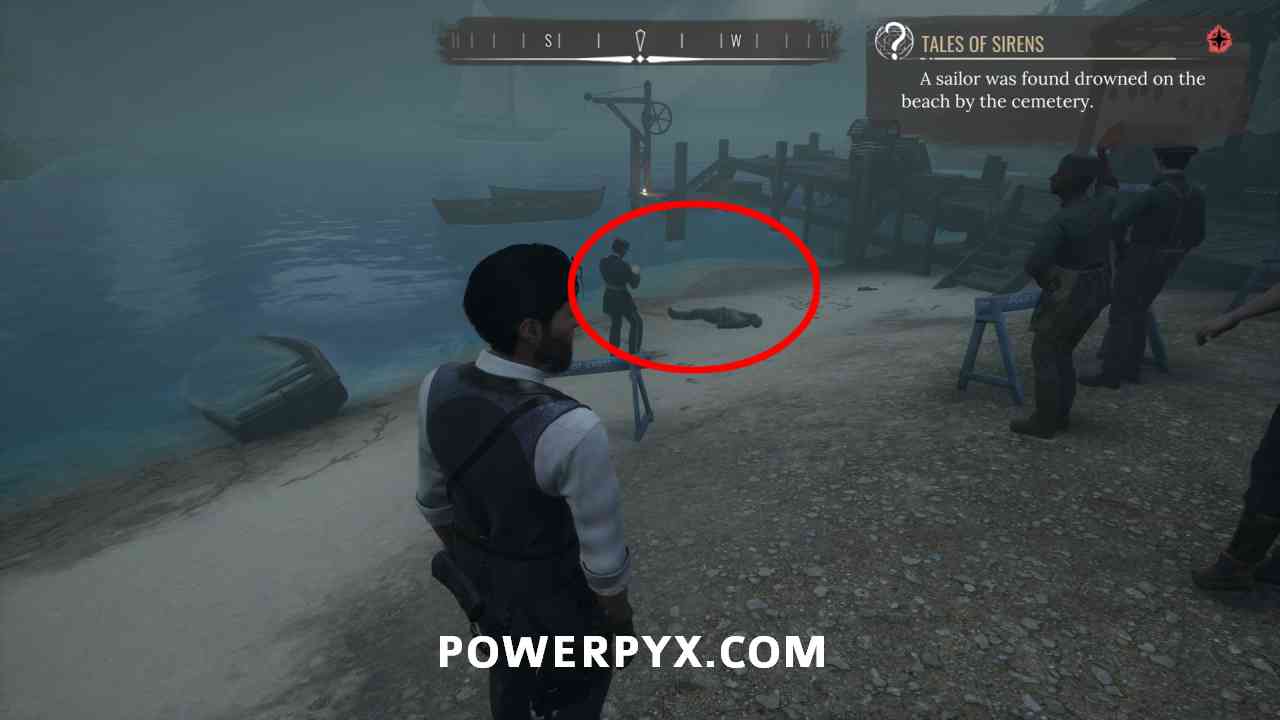
2) Upon approaching, Sherlock will automatically enter a conversation with the policeman. Exhaust all dialogues to get info from him. Now it’s time to inspect the crime scene. First up, view the drag marks between the corpse and the water. Then inspect the corpse itself, it has 4 clues (kiss on forehead, mouth, left hand, left boot – move left stick to reach it).


3) Inspect the wine bottle next to the corpse. View the label on the front of the bottle, and the neck of the bottle from above.

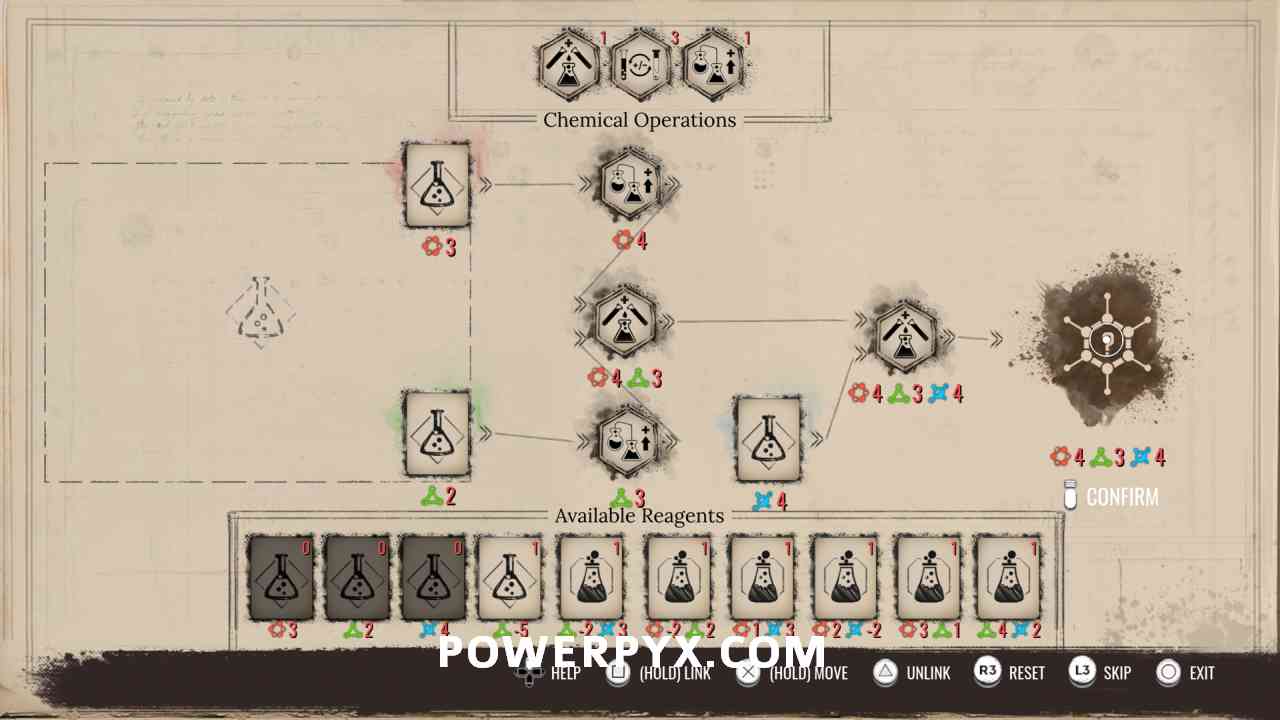
4) In your casebook, go to the “Wine Sample” objective and do a chemical analysis on it (  /
/  ). The correct solution is shown below. It reveals the wine contained poison.

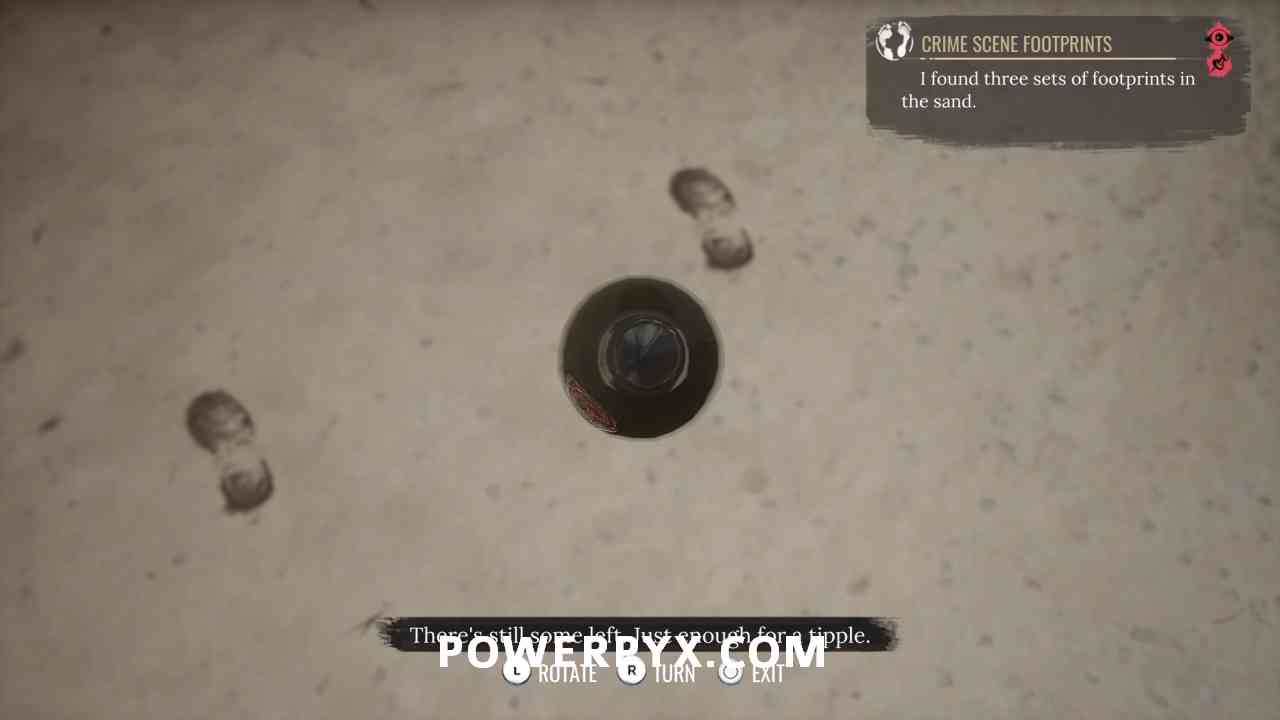
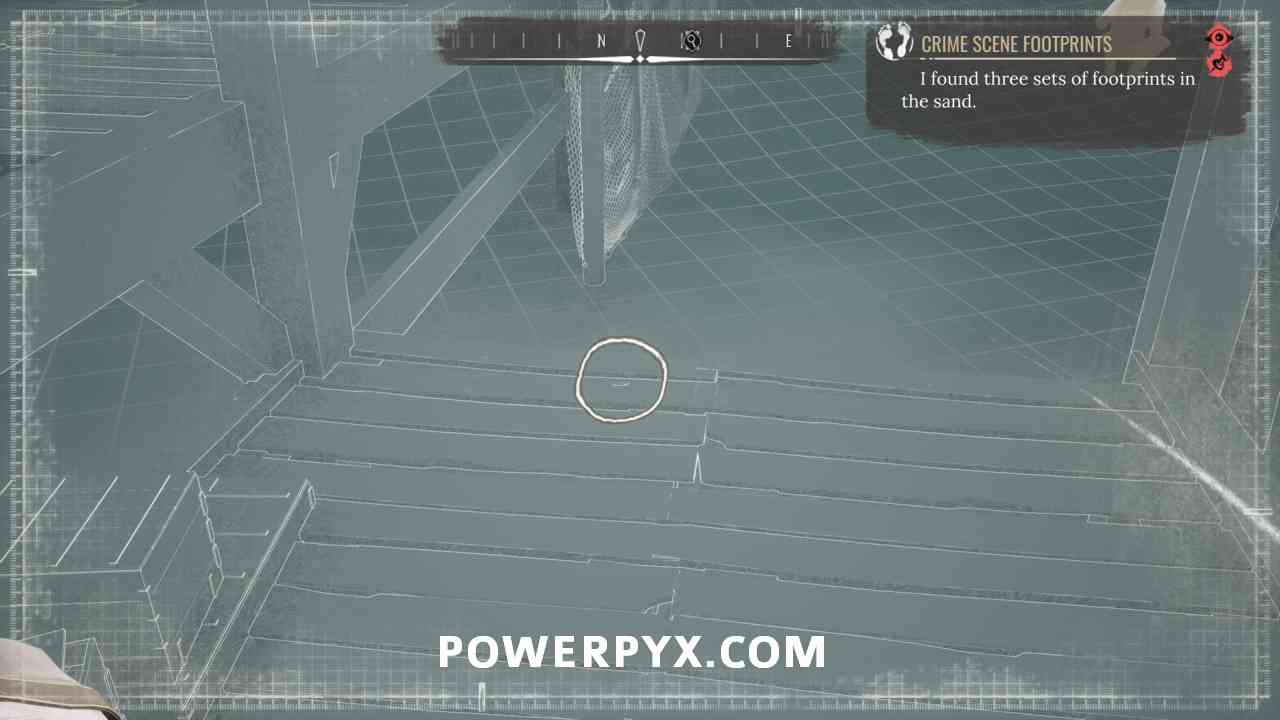
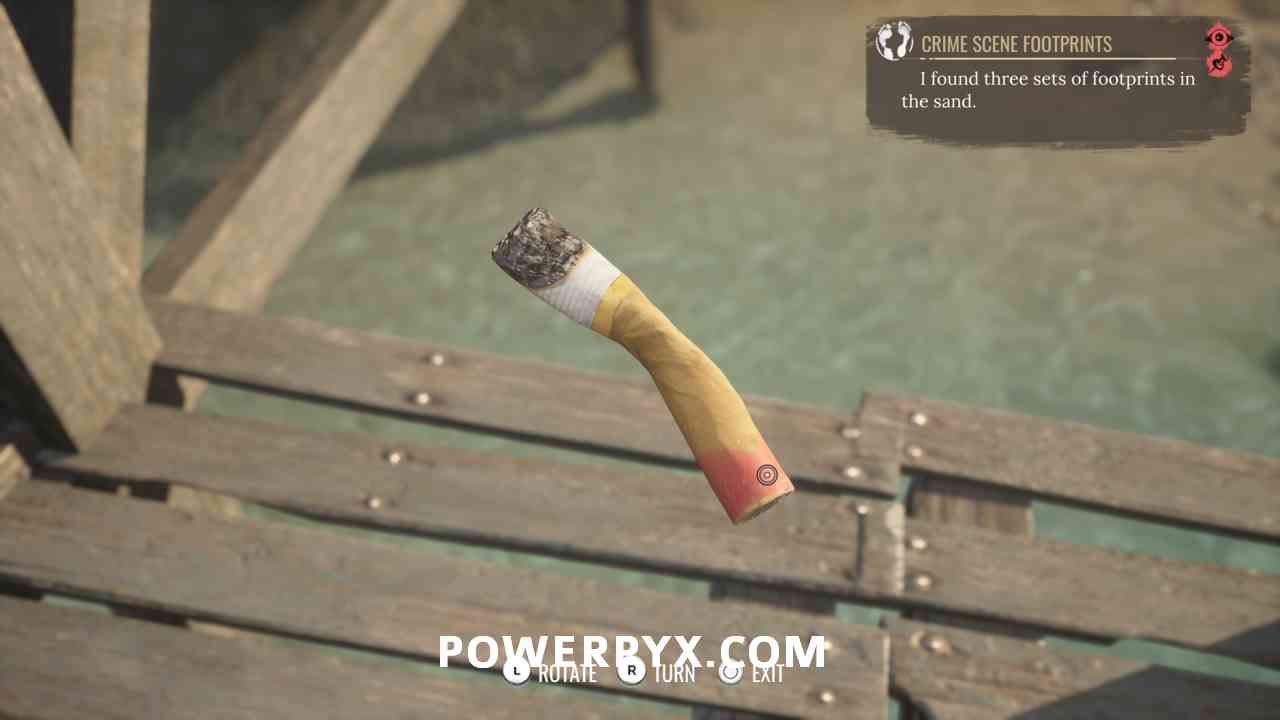
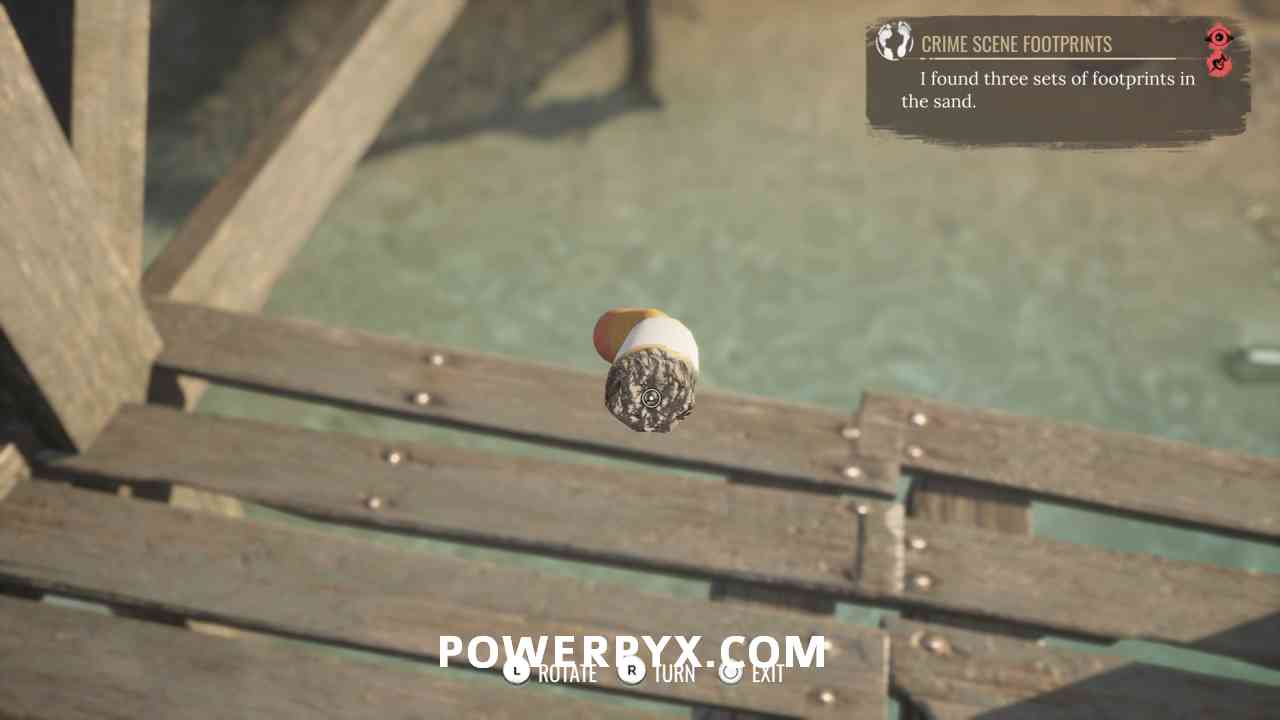
5) Inspect the footprints next to the corpse. Then pin the “Crime Scene Footprints” objective so that you can use concentration mode  /
/  to inspect them more closely (3 footprints total). You can only view them with this objective pinned.


6) Stay in concentration mode and follow the tracks to the end of the jetty. There you will find a cigarette. Inspect the start and end of the cigarette to reveal its flavor and lipstick on it.
7) Talk to the policeman again next to the corpse. Go through all dialogues with him. He’ll tell you the other corpse was found in Scaladio. That’s all we can do here.
Police Archive
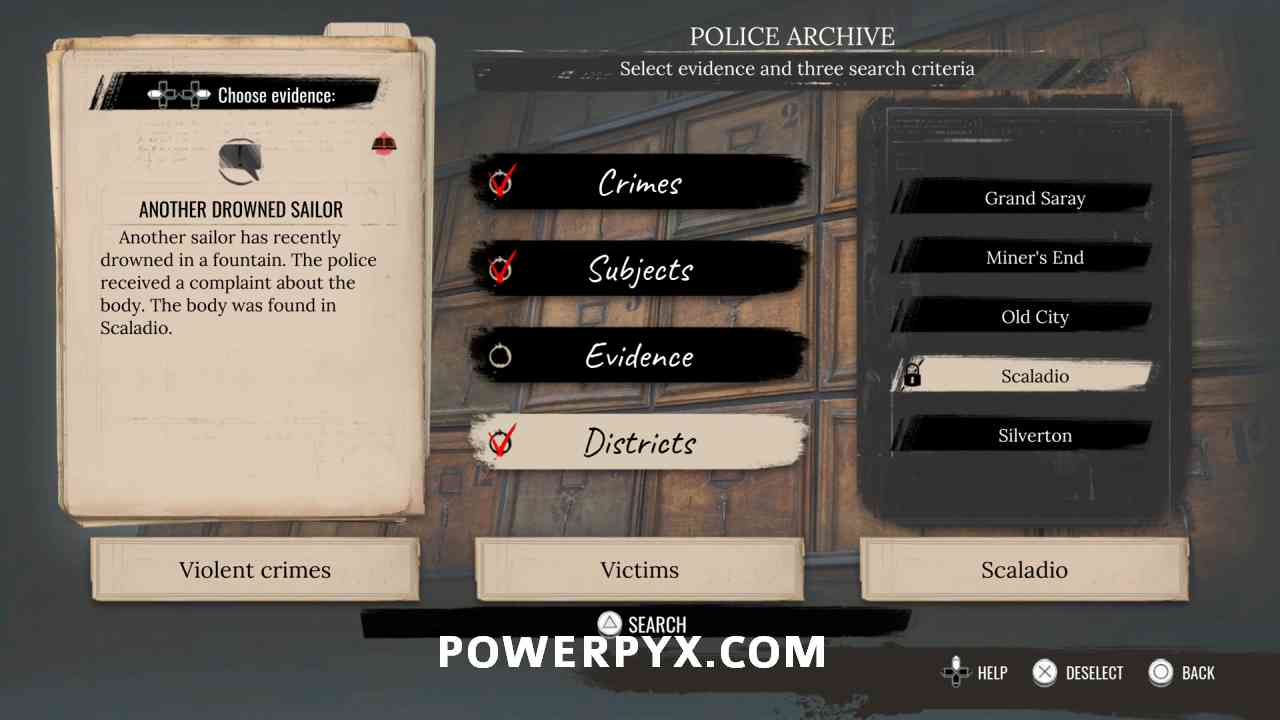
8) Pin the objective “Another Drowned Sailor” and fast travel to the Cordona Police Station. Use the Police Archive and filter for Crimes = Violent / Subjects = Victims / Districts = Scaladio (only works while objective is pinned). This will give you the police report and reveals the “Public Park” where the corpse was found.


Second Drowned Sailor
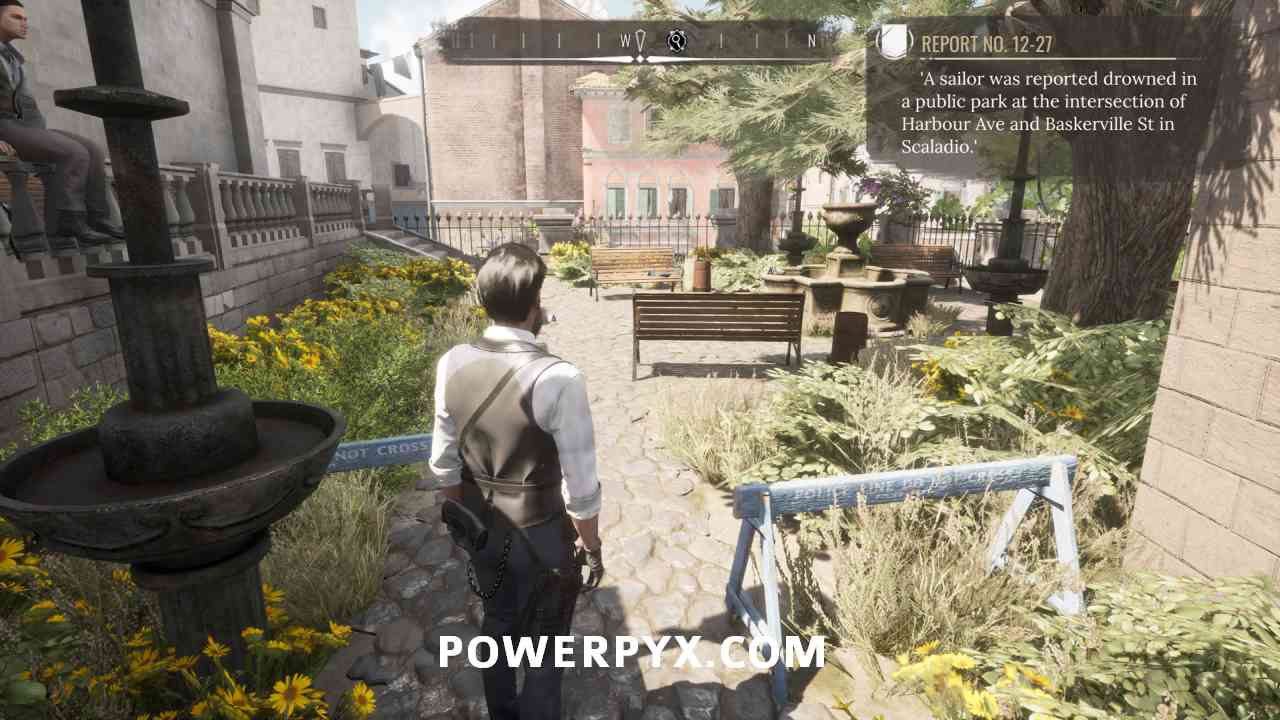
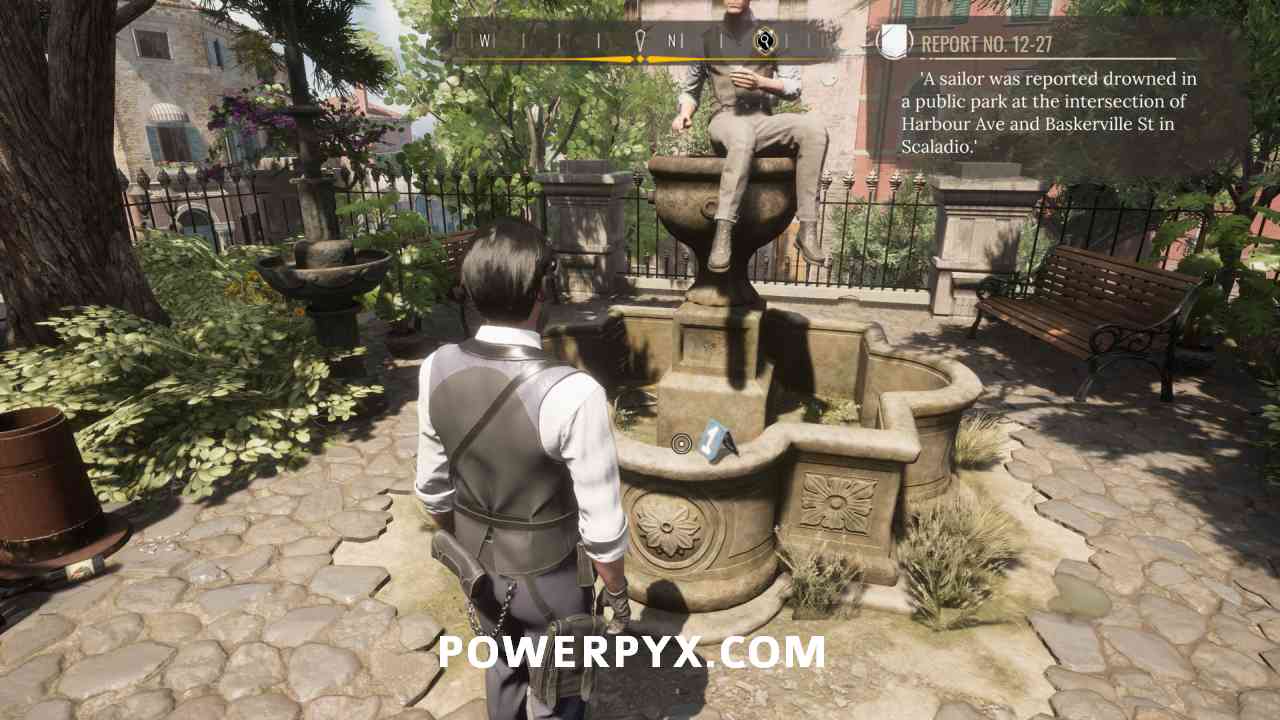
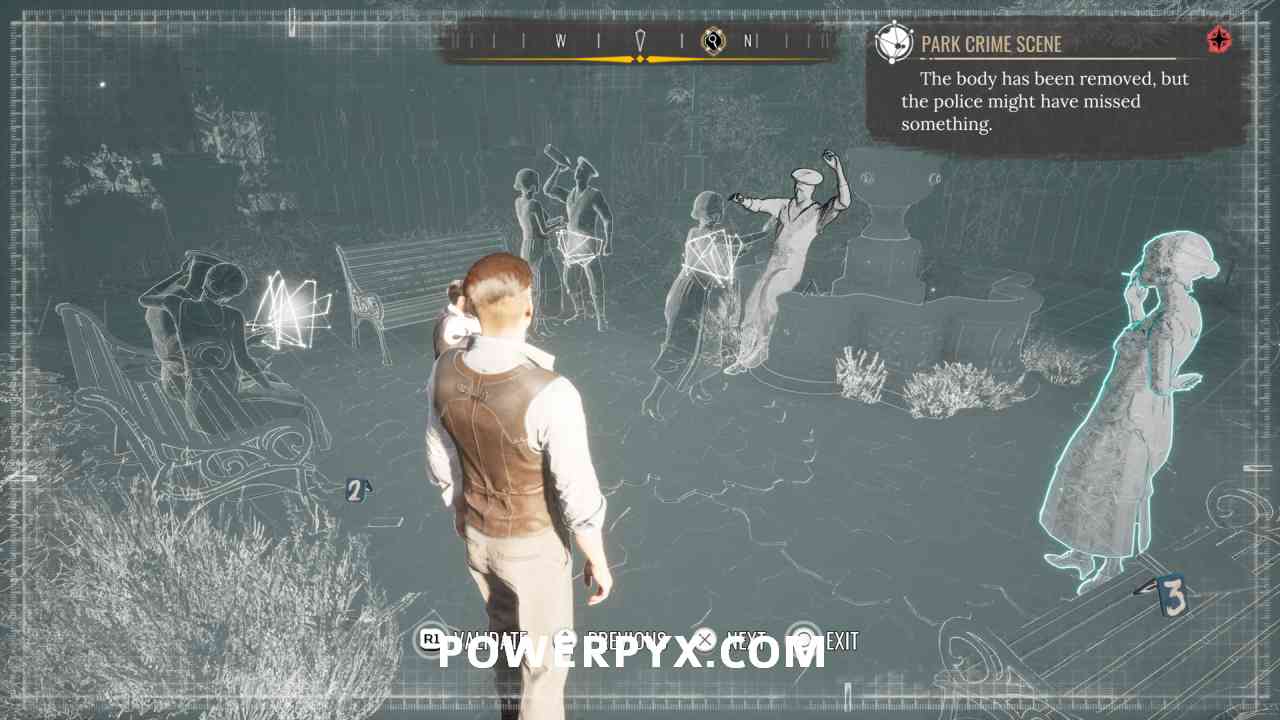
9) Pin objective “Report No. 12-27” and head to the Public Park, to the immediate east of the Police Station (just a few steps away). It will be marked on your map. In the center of the park enter the crime scene.

10) Pin the “Park Crime Scene” objective. Investigate the well (“1” marker).
11) Investigate the bench across from the well (“2” marker). It has 3 clues – leather tobacco pouch on the ground (view the front logo), cotton shawl, letter.
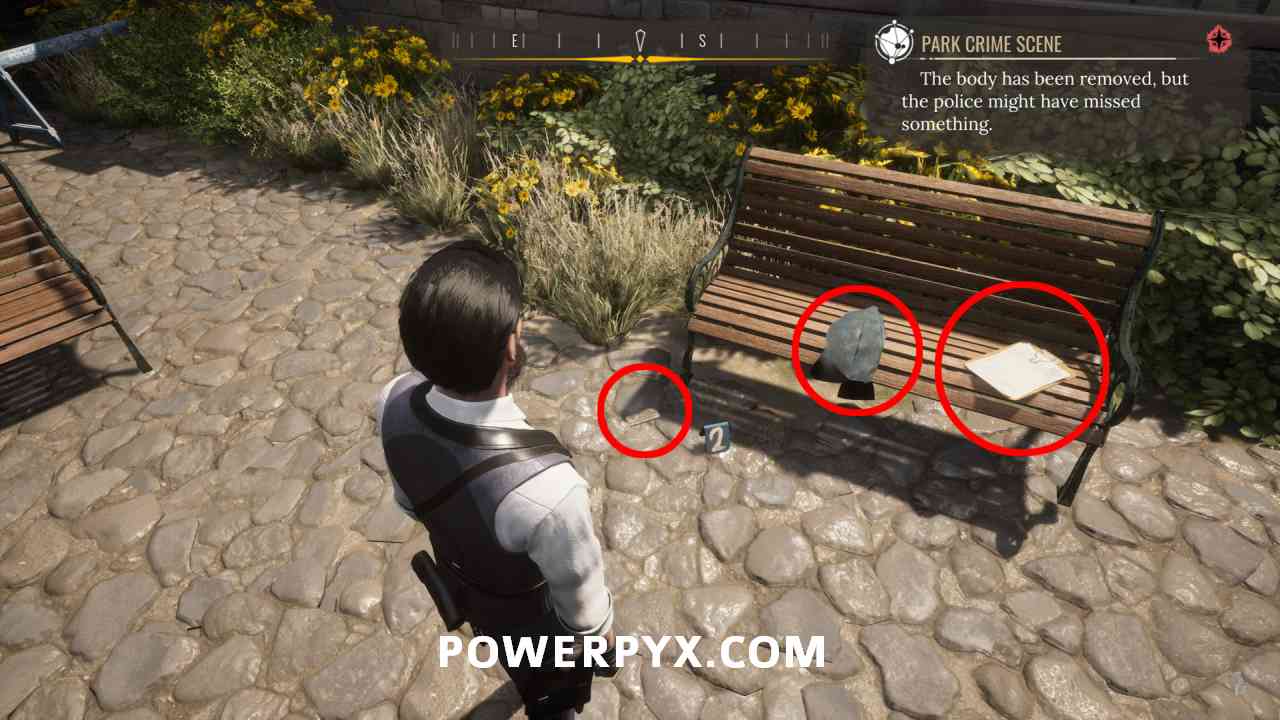
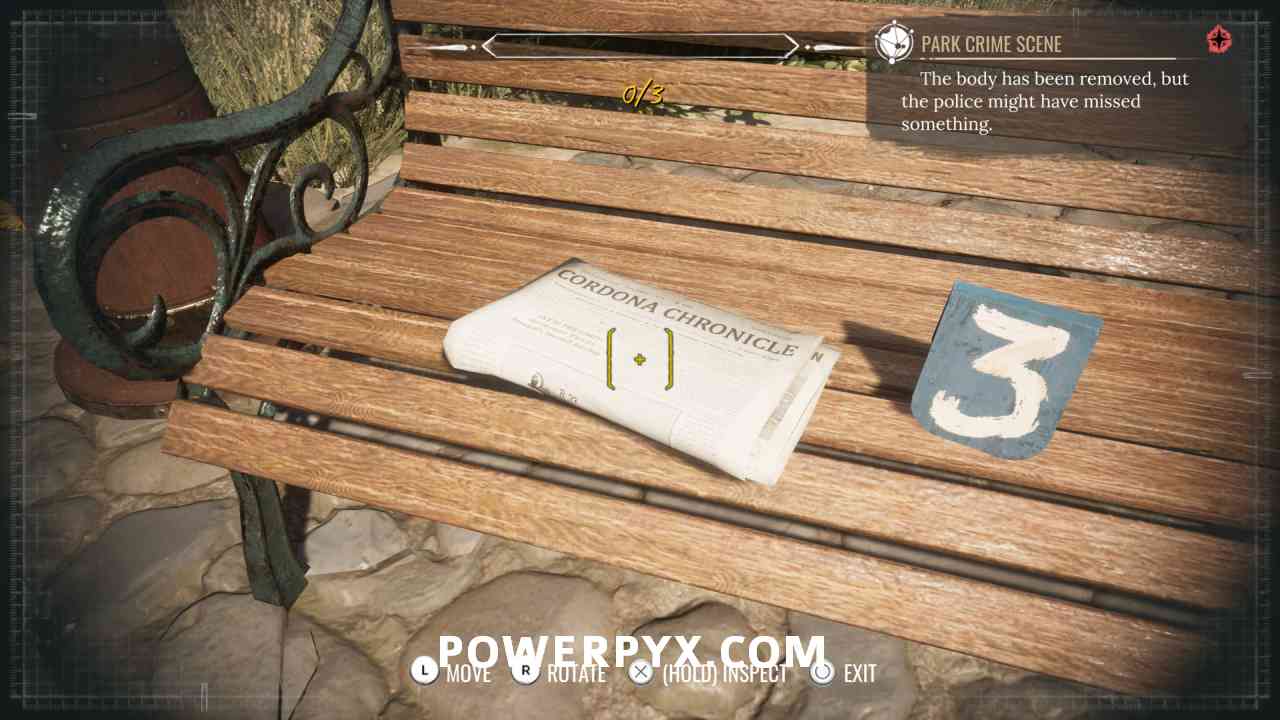
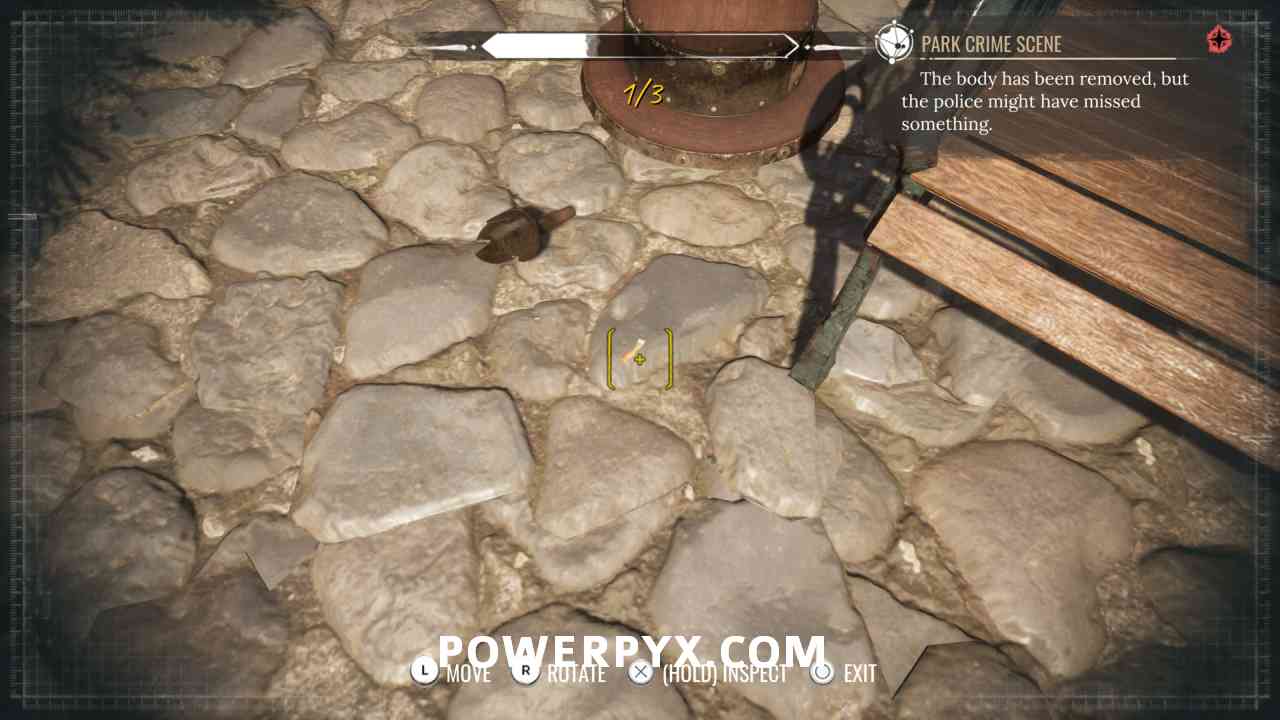
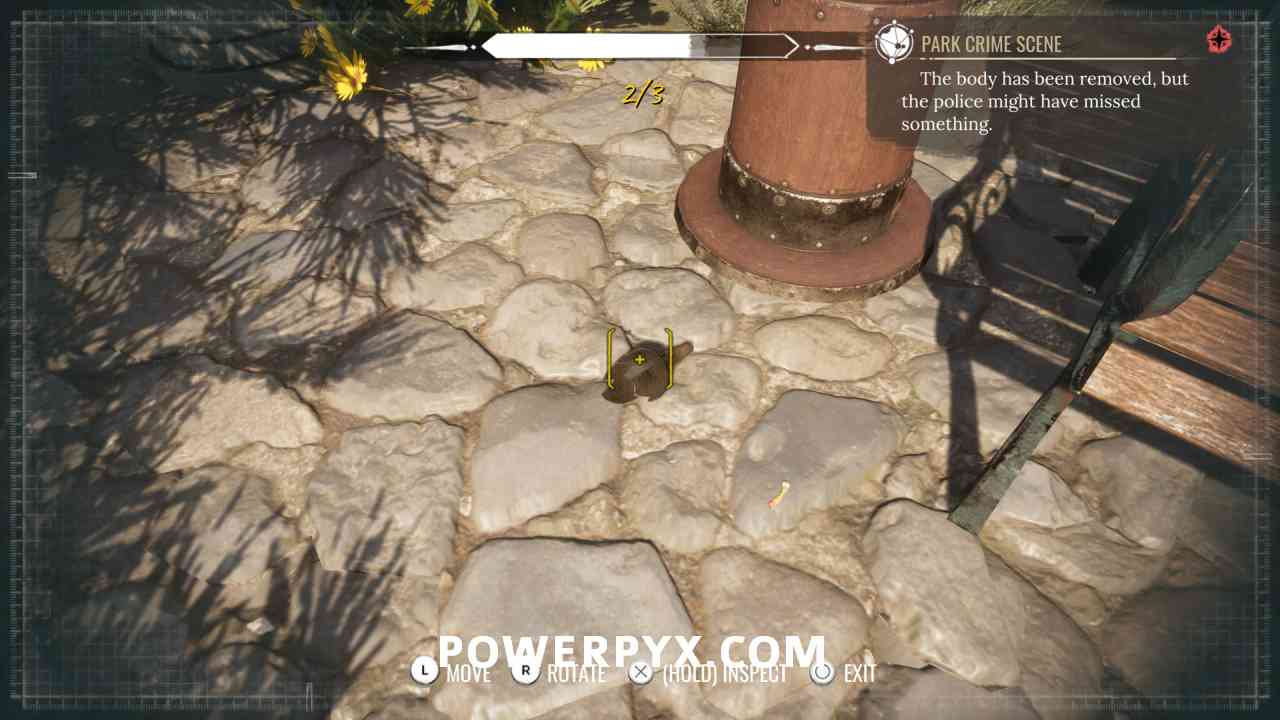
12) Investigate the bench with the “3” marker. There are 3 clues (newspaper on bench, cigarette on ground – view lipstick and stub, broken bottle on ground).

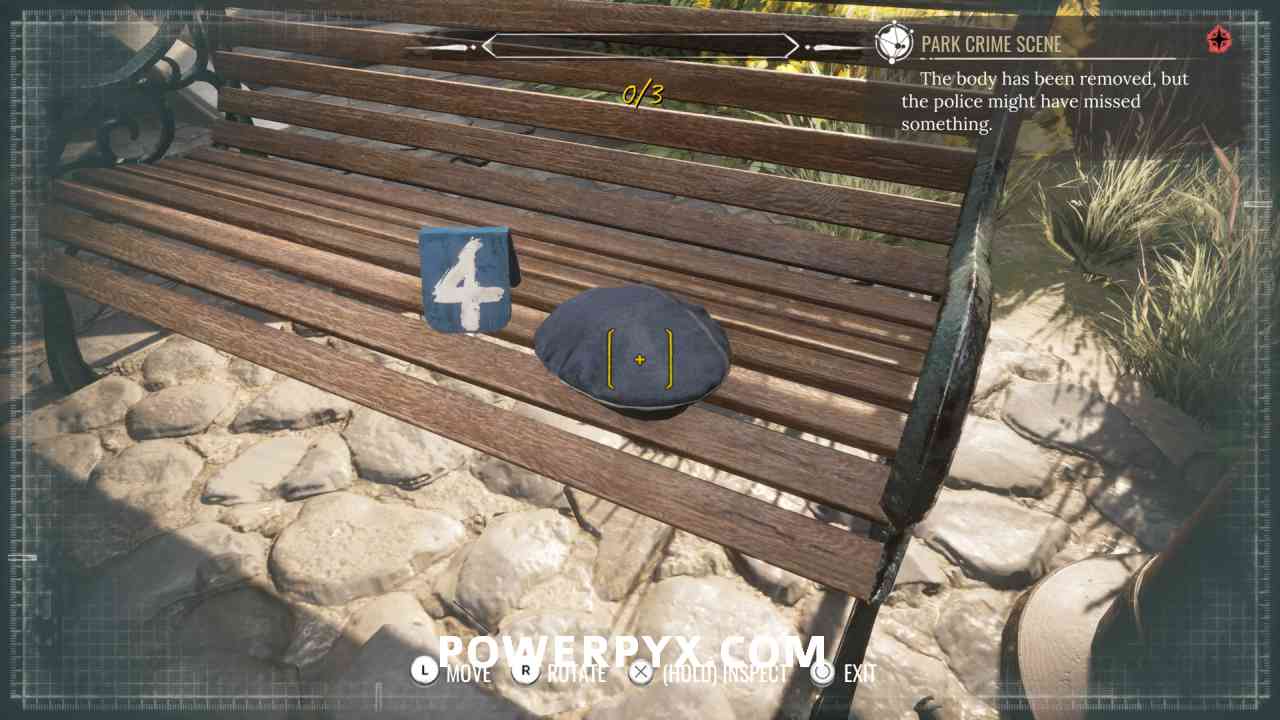
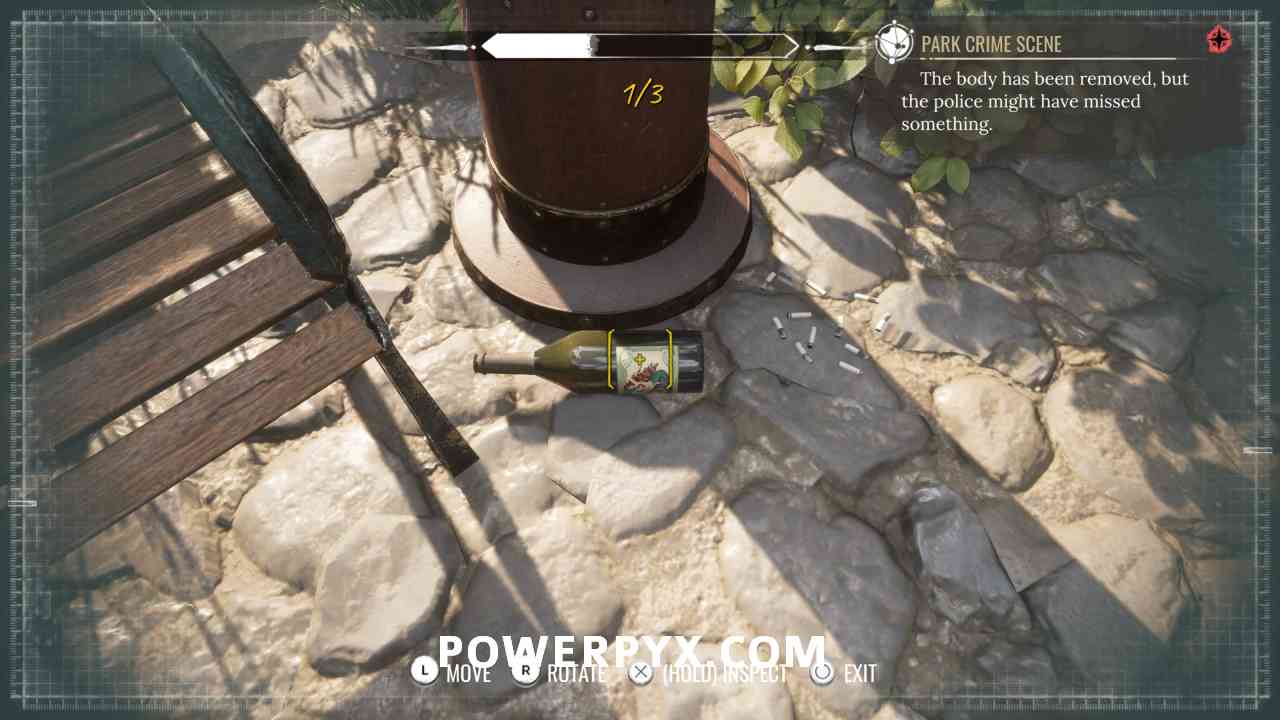
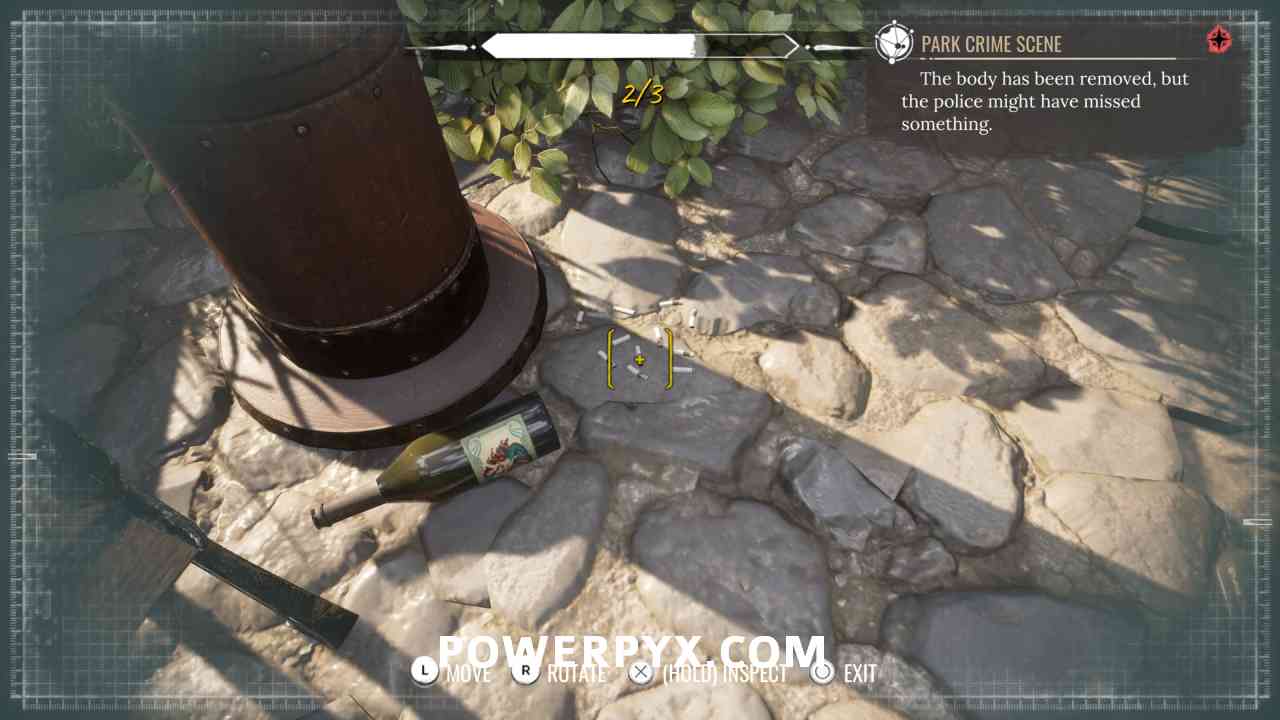
13) Investigate the bench with the “4” marker. It contains 3 clues (sailor’s cap on bench, wine bottle on ground – view label and bottleneck, cigarettes on ground). The sailor’s cap gets added to your wardrobe and can be equipped, it’s needed later in the quest.

14) Now interact with the white orb in front of the well. The correct reconstruction solution is shown below. Going by the order of the police marker numbers: 1 = Woman pushes man into well, 2 = woman kisses man on bench, 3 = woman smoking cigarette, 4 = woman claps and man drinks from bottle. After placing everyone, validate with / .

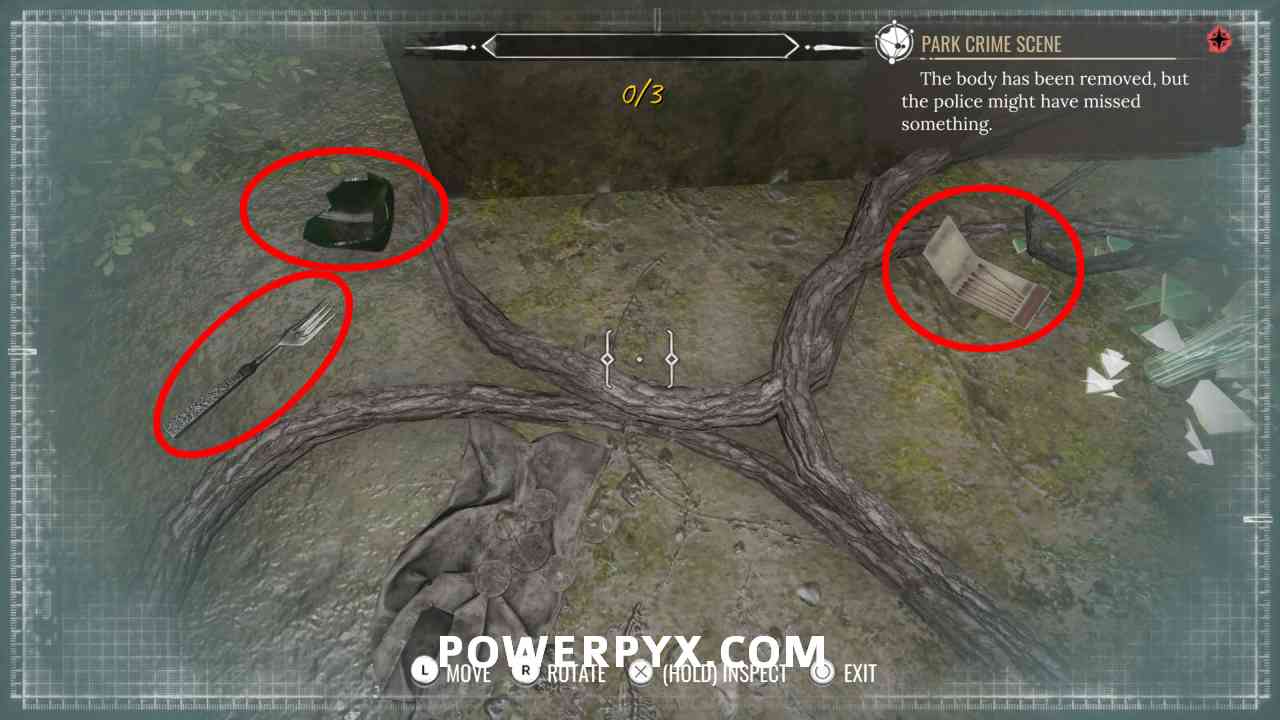
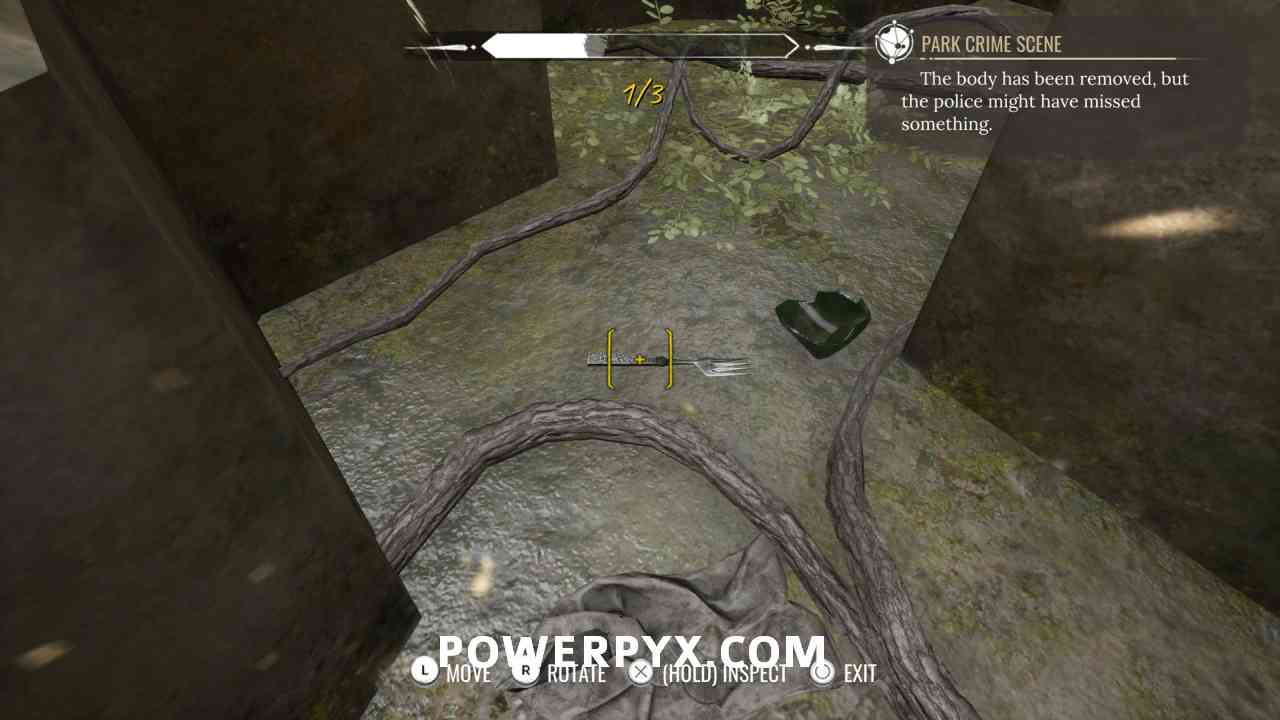
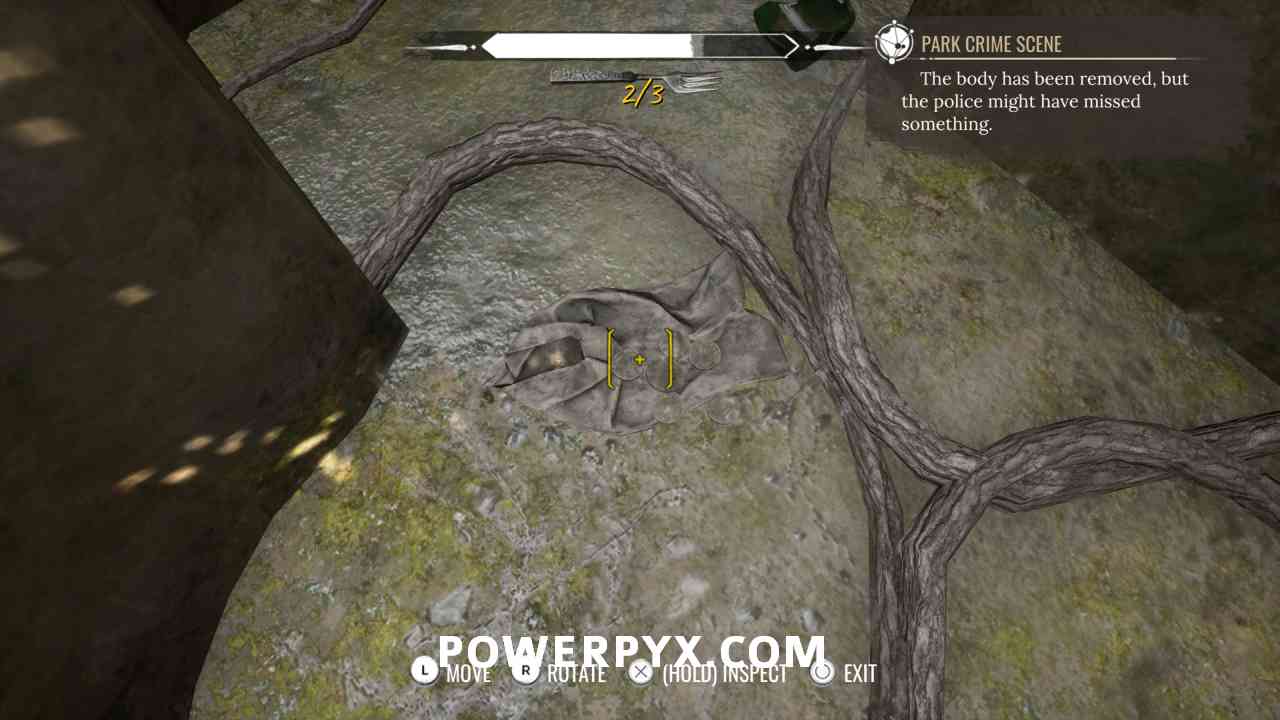
15) Afterward, interact with the well. There are 3 clues in the well: matchbox on the right (rotate to see logo), silver fork on left, cloth in the bottom center. That’s all for this crime scene.

Drinking Dutchman Location
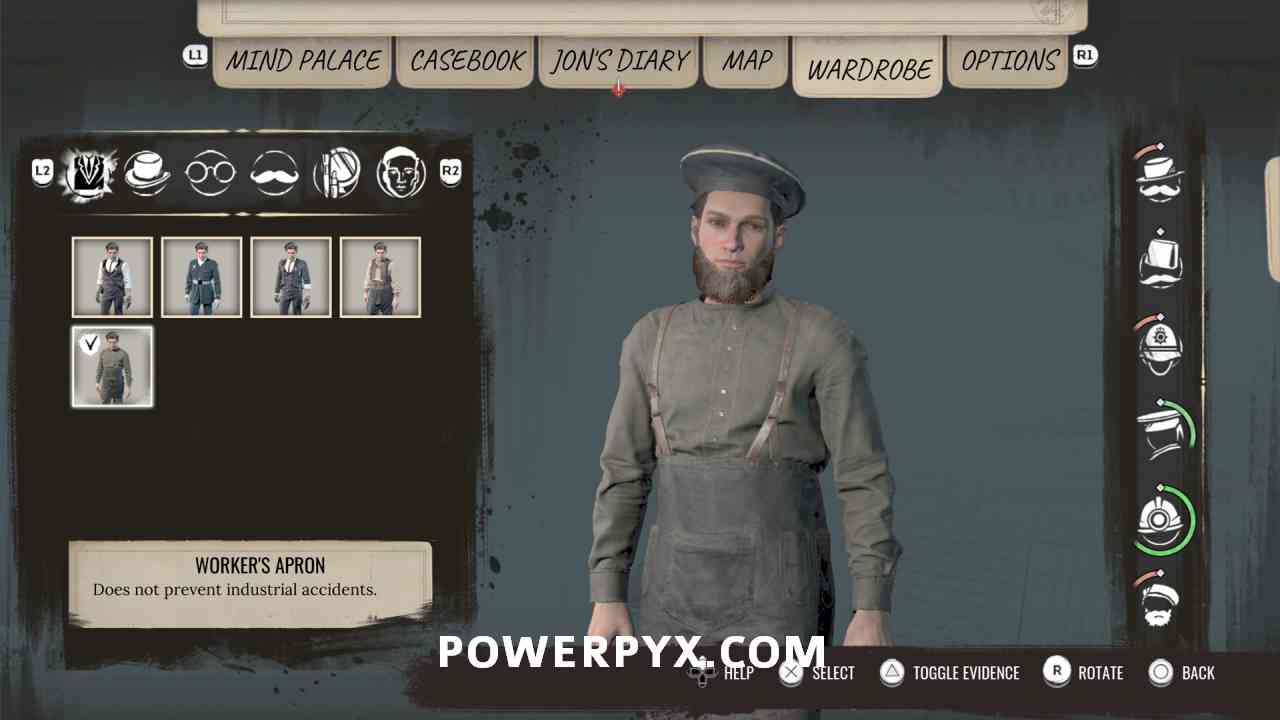
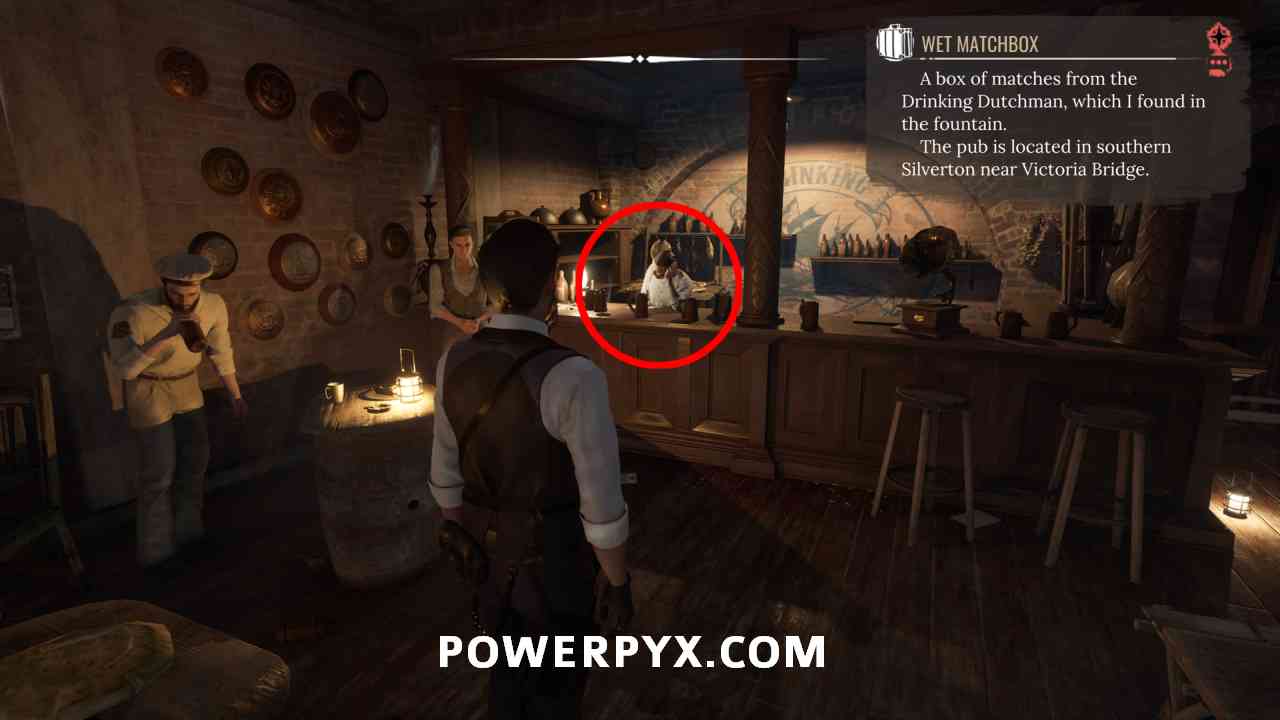
16) Track the objective “Wet Matchbox”, which you got from inspecting the matchbox in the well. It wants you to go to the Drinking Dutchman pub, the place where the quest started (1st image below). Fast travel there, head down the stairs and enter the pub (2nd image below), talk to the bartender. You need to wear a cheap outfit that sailors are sympathetic towards, such as the Worker’s Apron or Sailor Uniform, also put on the Sailor Cap and a full beard. Don’t wear suits, he won’t talk to you if you look too fancy. Clothes can be bought or rented from clothing traders marked on the map. The 3rd image below shows an outfit that works, the 4th image shows the barkeeper to talk to. Exhaust all dialogues with the barkeeper.

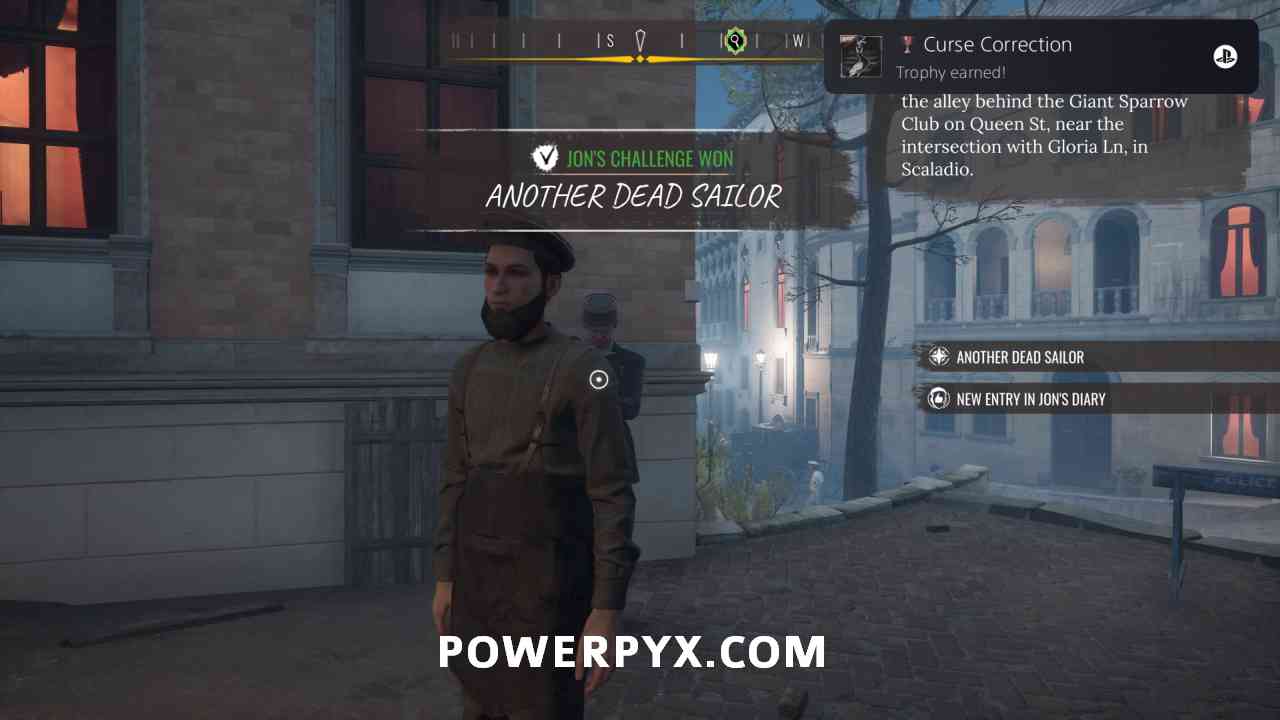
17) Missable Trophy: Curse Correction – With the barkeeper select the dialogue “Three people are dead?”. You can simply talk to him again if you didn’t pick it the first time. This gives the optional objective “Another Dead Sailor”. Completing this unlocks the trophy. Do this now before advancing with other objectives. Head to Giant Sparrow Club in Scaladio:

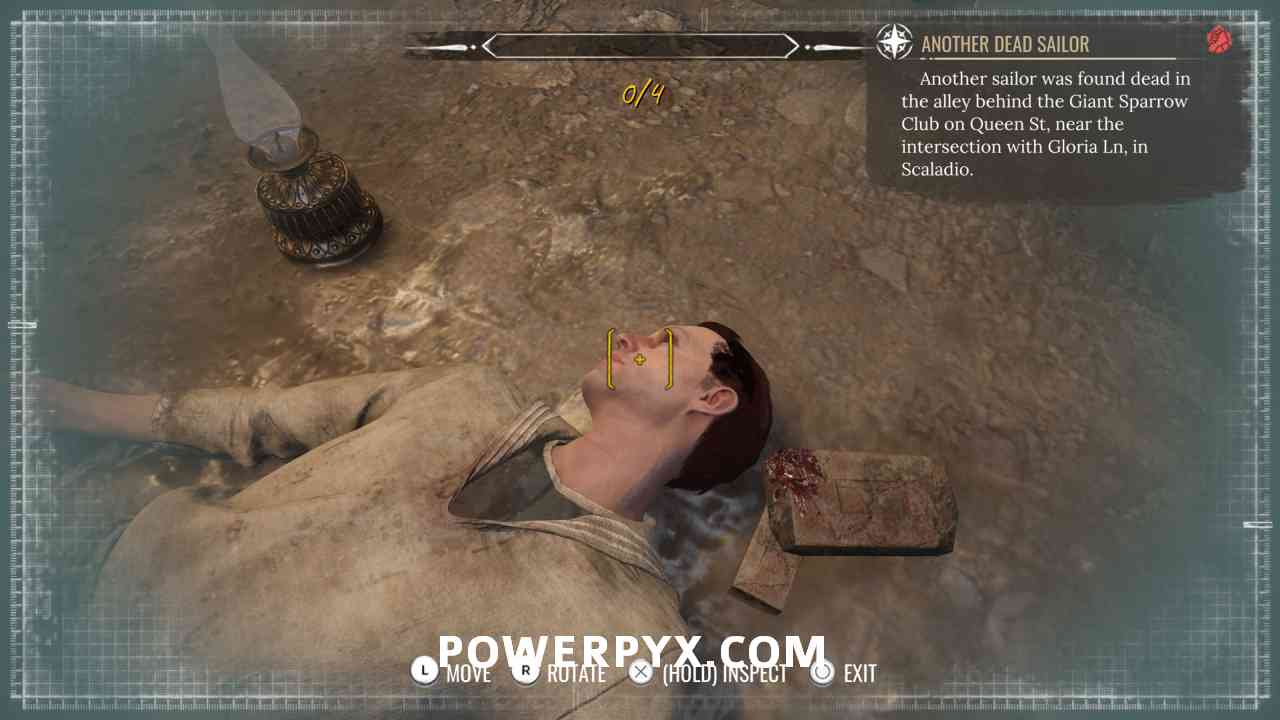
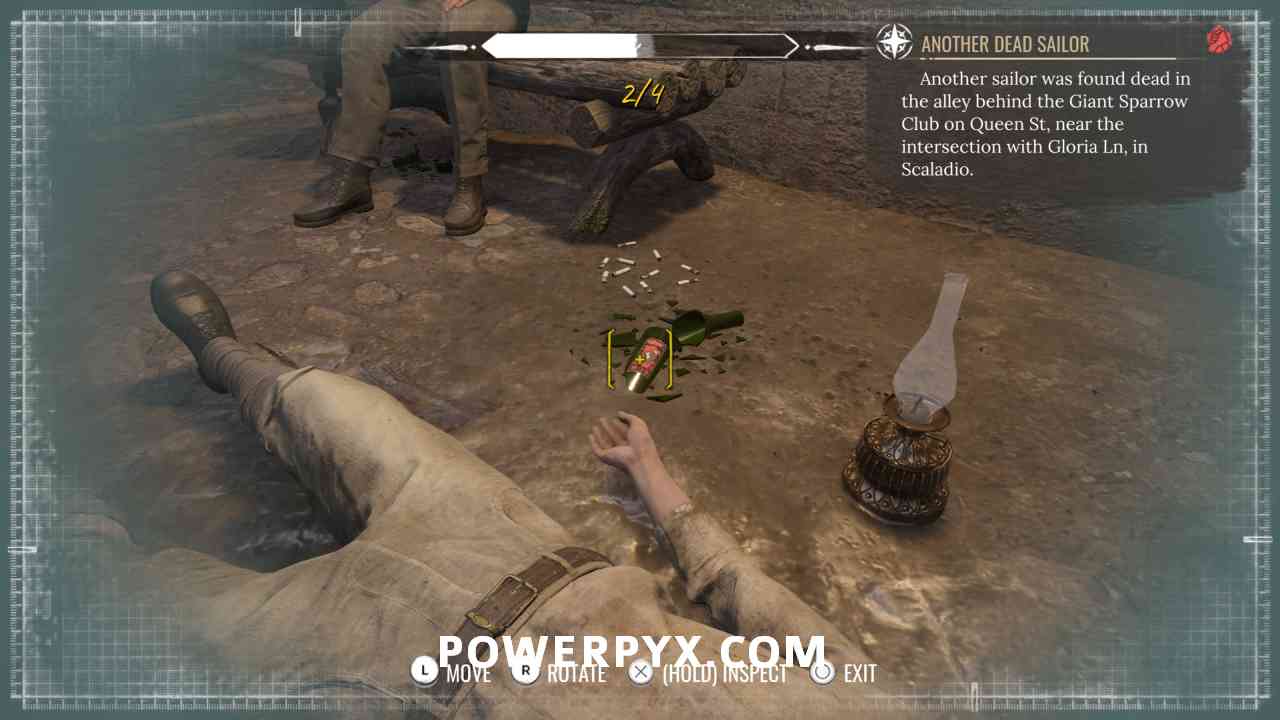
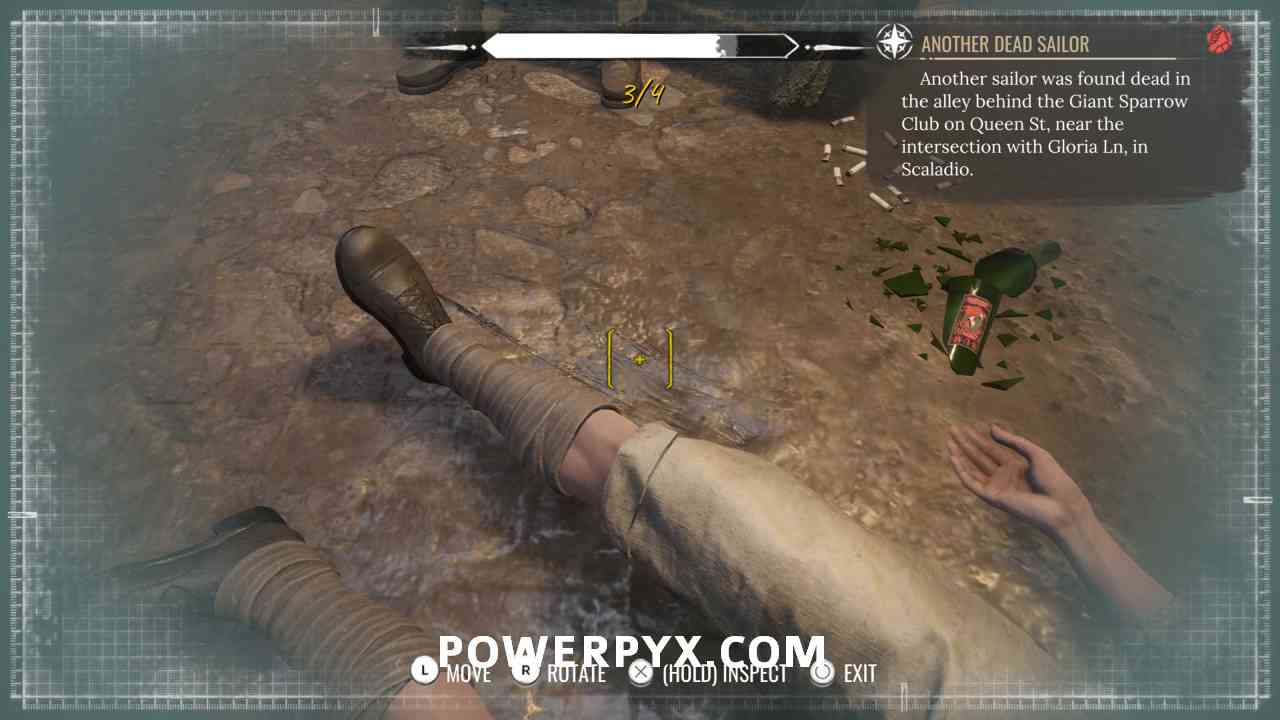
Talk to the police officer at the crime scene, then interact with the corpse for 4 clues (head wound, bloody rock, broken bottle – rotate it to see label, slip marks in mud near his legs.
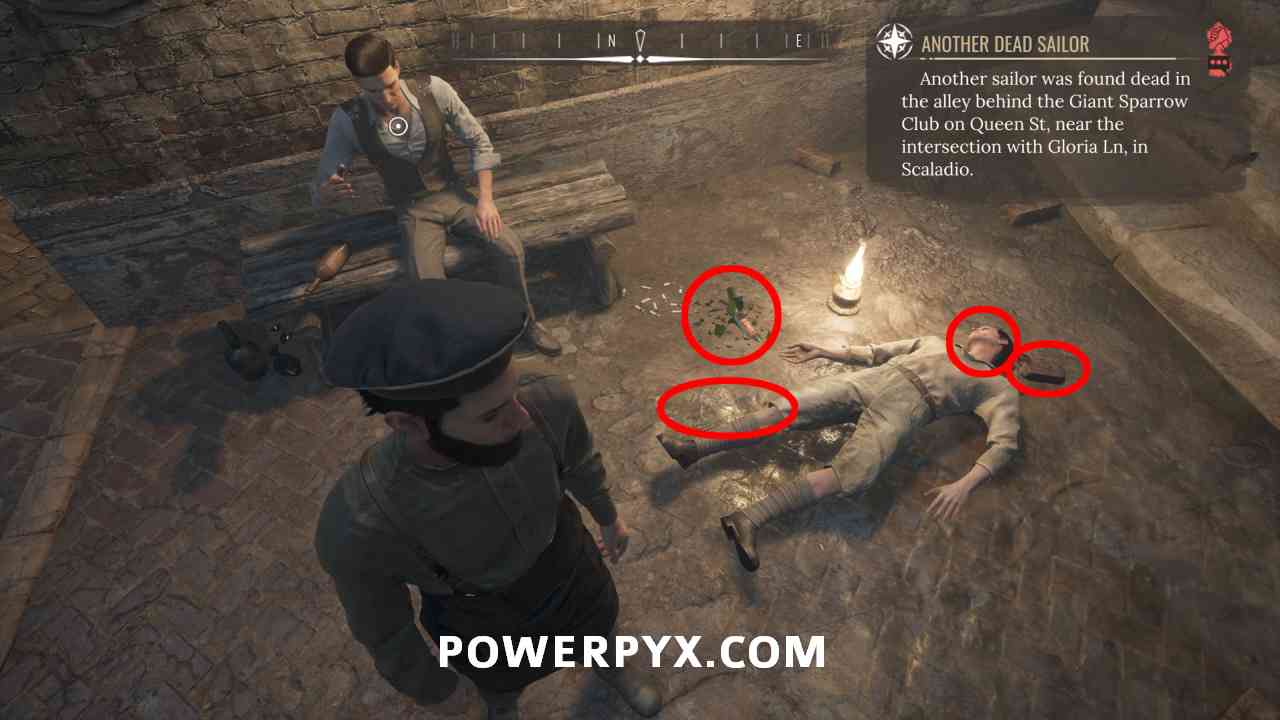

This one was a normal accident, he slipped and hit his head on a rock. Talk to the police officer again and the trophy will unlock! Now back to the other objectives.
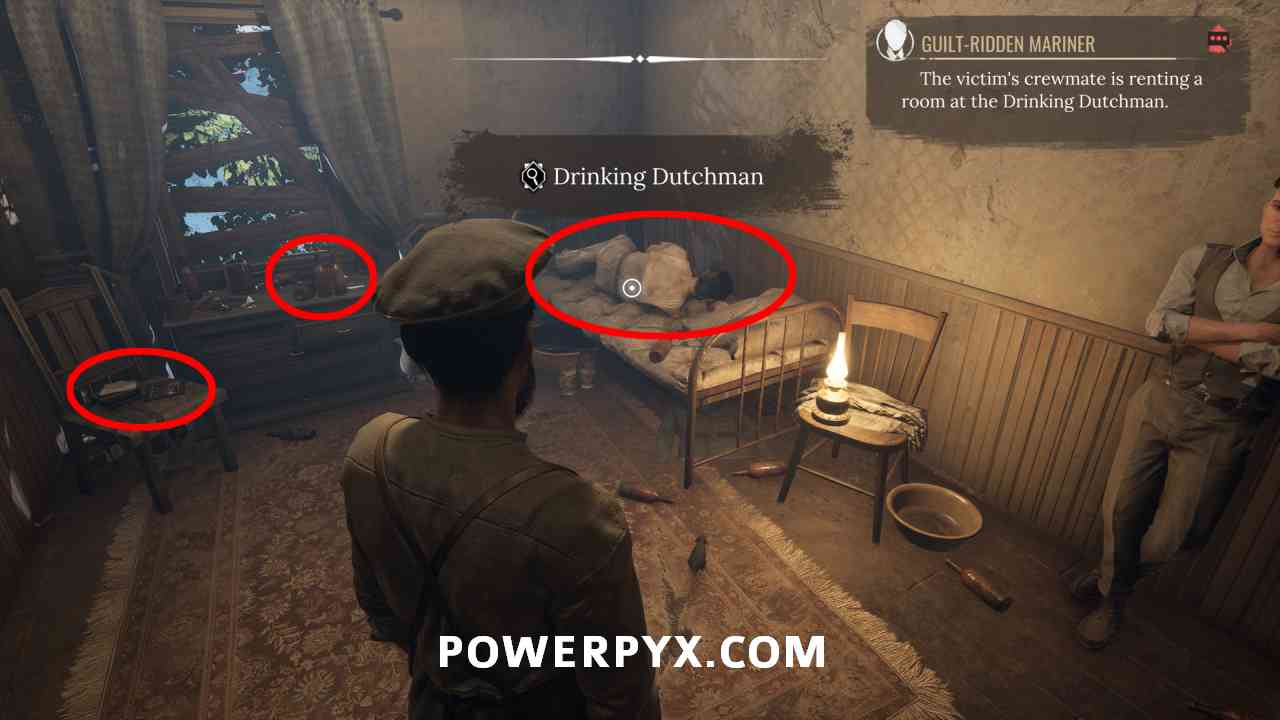
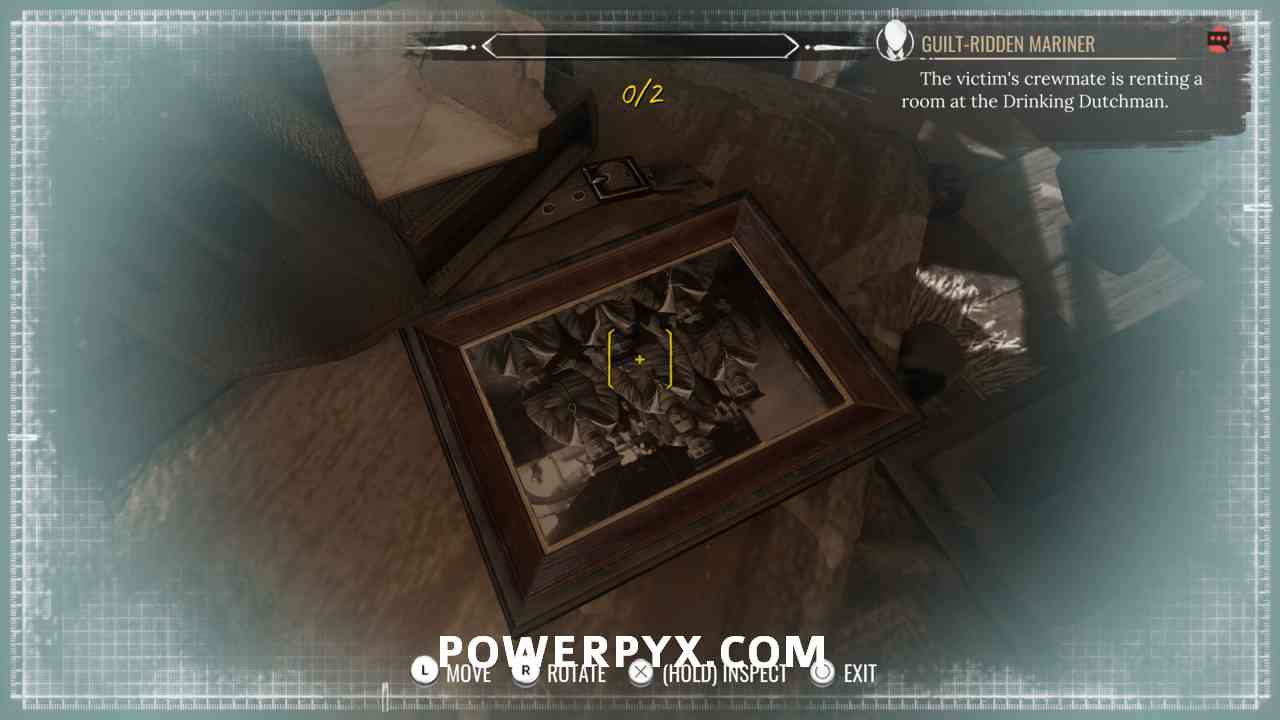
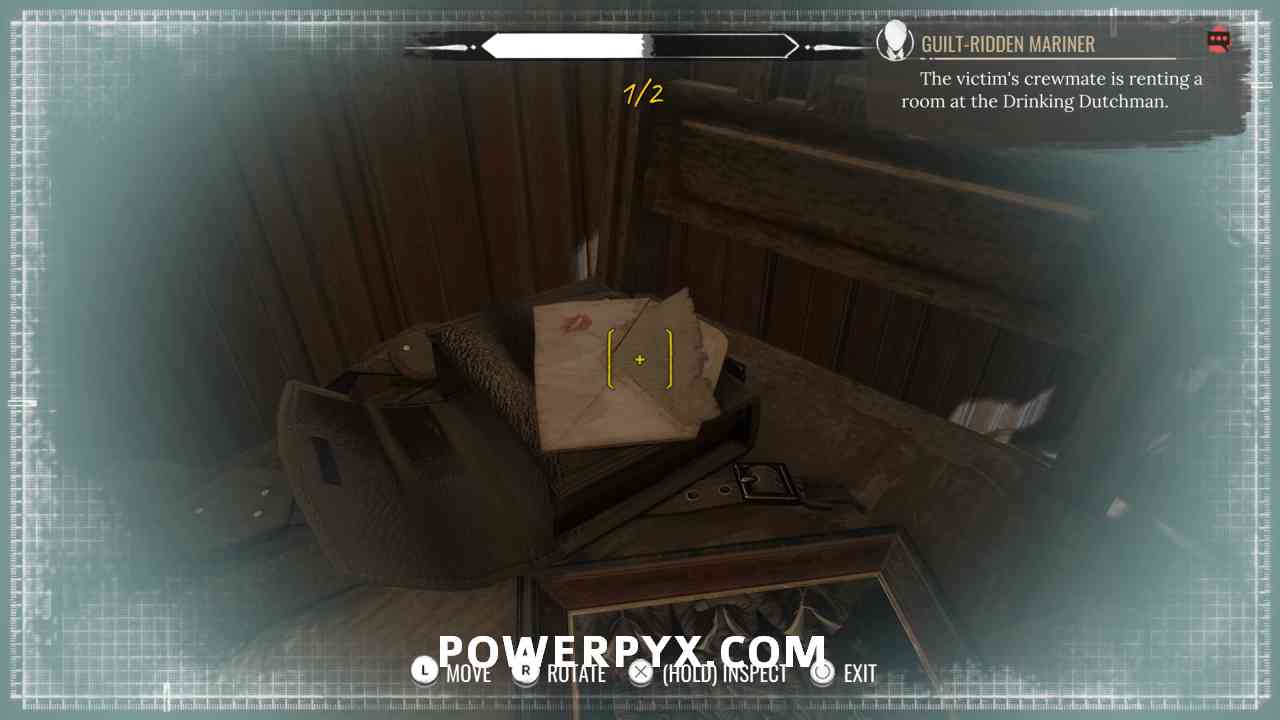
18) Go back inside Drinking Dutchman, head upstairs, enter the last room on the right. There’s a sleeping sailor inside and some evidence. On the chair, inspect with the photograph (view front and back), and the letter (rotate to see kiss mark). You can also inspect the bottles and the sleeping sailor, but he’s out cold and not in the capacity to talk to anyone.
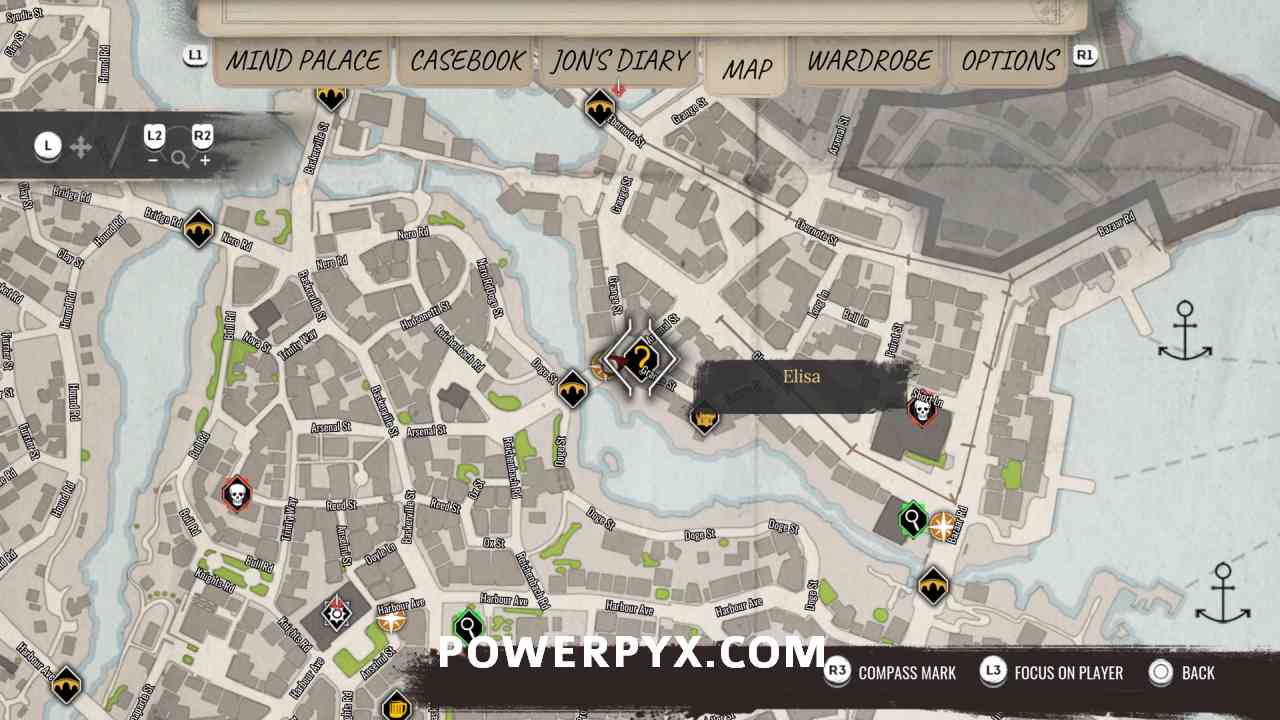
Garden of Delights Location
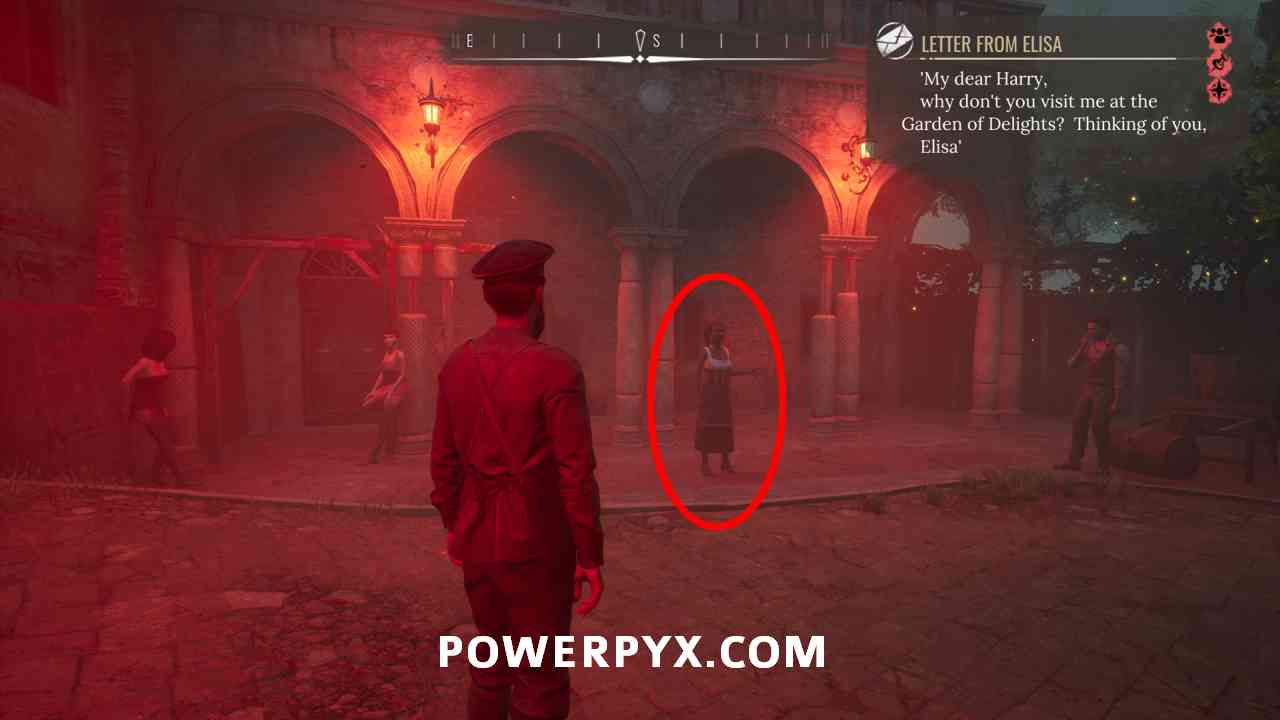
19) Track objective “Letter from Elisa”. You must find the “Garden of Delights”, which is a brothel located in Grange St, the street west of Drinking Dutchman. You can normally find out about its location by talking to people on the streets, but you can also skip this and head straight to it.

20) Talk to the woman standing outside in the middle and provide her with the evidence you collected. In particular, the cotton shawl is what will make her point you to the right girl.
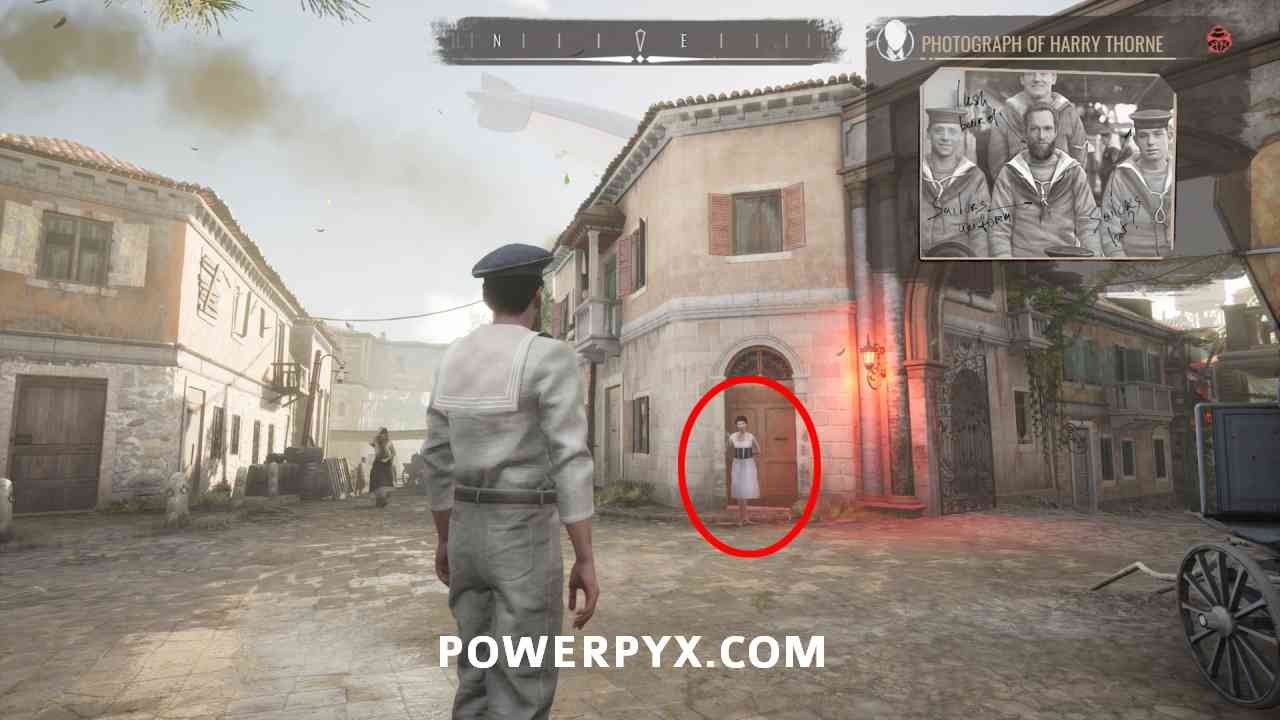
21) Go meet Elisa, a girl down the street and our prime suspect. You have to mimic the outfit from the casebook clue “Photograph of Harry Thorne”. Wear the “Marine Uniform”, “Sailor Cap”, “Shenandoah Beard”. Can buy these from the clothing traders marked by green icons on the map. Talk to her with this outfit on, otherwise you can’t proceed.

22) She’ll think you’re Harry her former lover and take you to her place. It doesn’t matter what dialogues you pick with her, just agree to go with her.
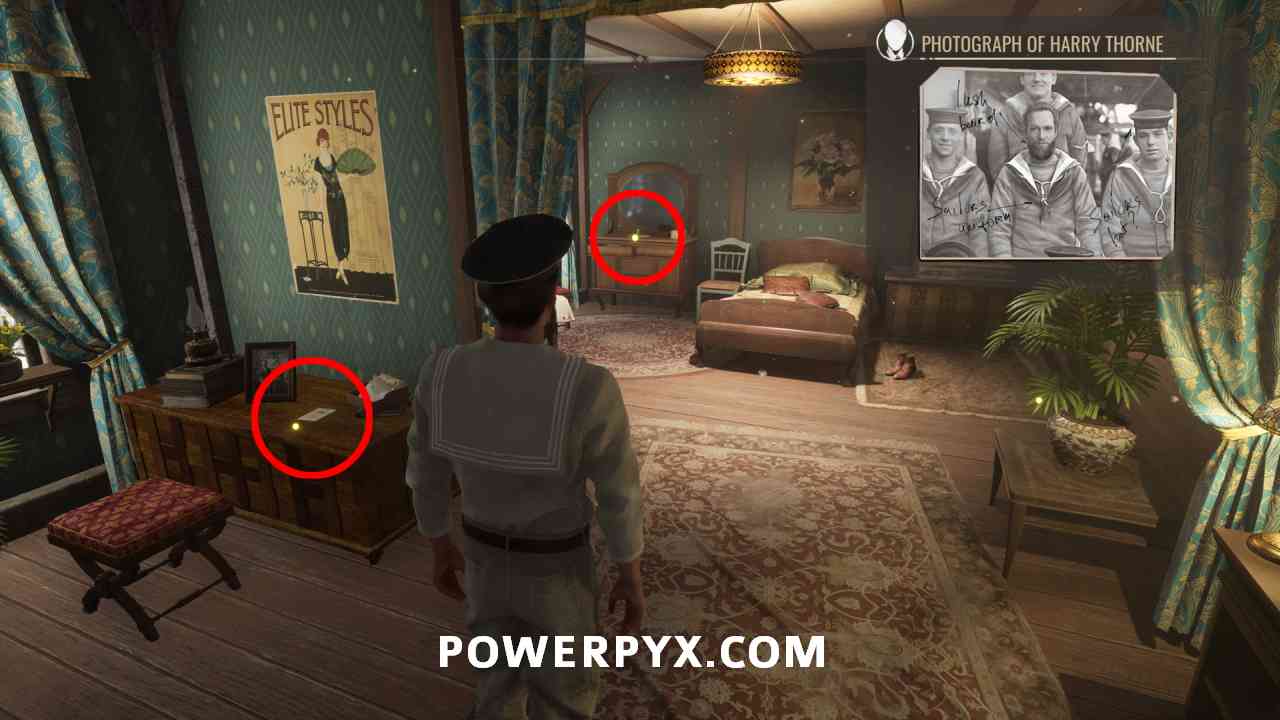
23) At her place, she’ll leave us alone in the room, the perfect time to snoop around! Inspect the wine bottle on the table (front label and bottleneck). Go through the wooden door to her room, inspect the note on the left (3 clues: note, letter, family portrait) and the cupboard left of the bed (4 clues: diary, cigarettes, white poison bottle, red lipstick).

24) After collecting the evidence she will automatically come talk to you. It doesn’t matter what dialogues you pick. If you tell her the wine was just what you needed, she will notice you didn’t drink a single drop and Sherlock reveals who he really is. If you are direct and say the wine is poisoned, Sherlock will do the same. Then you get to decide whether to turn her in to the police or let her go. If you choose to turn her in, she’ll drink the poisoned wine to escape justice and dies. If you ask her to stop killing, she’ll thank Sherlock with a kiss. Regardless, you get 40 Money as a reward and it doesn’t matter what you pick, she won’t be heard of again and it doesn’t impact any other quests or trophies / achievements.
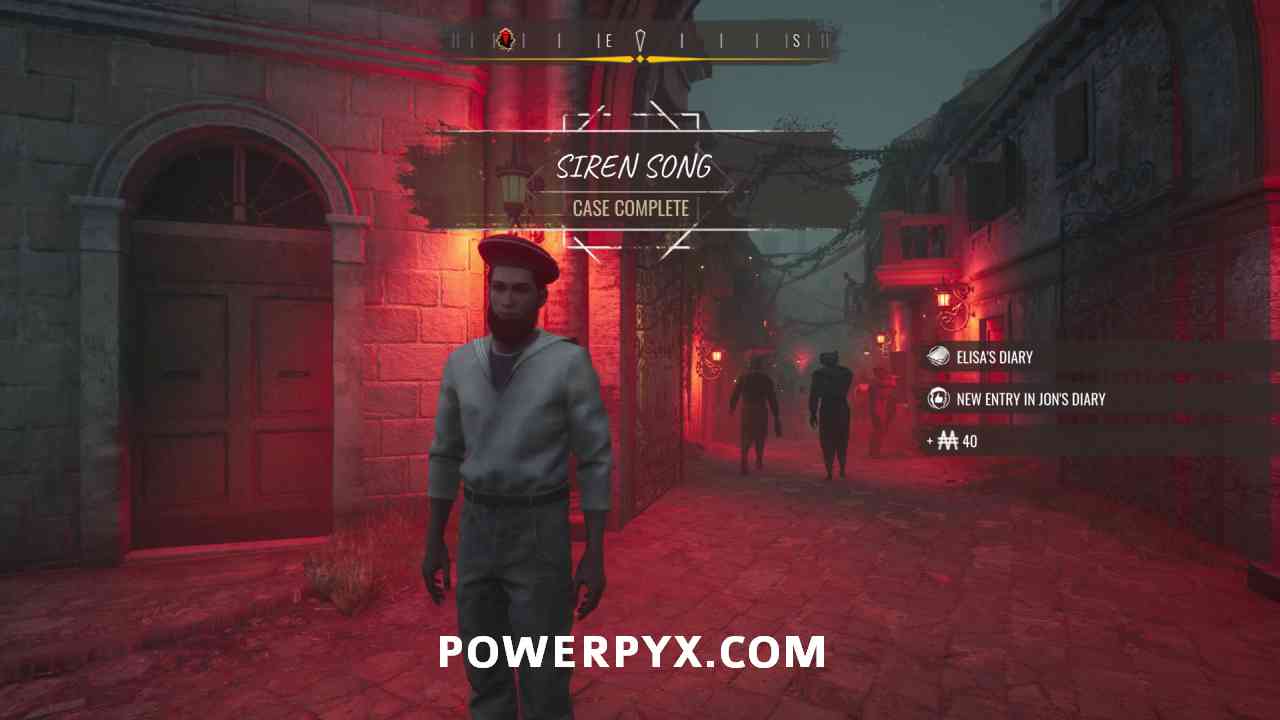
This finishes the Siren Song Cordona Story case in Sherlock Holmes Chapter One.
For all other Cases, view the full Sherlock Holmes Chapter One Walkthrough.
Kyle says
Just as an FYI, you can pour the wine out into the plant in her room to her right when you walk through the door. Sherlock puts on an entertaining act if you choose to do so.
CaptainMurica says
Totally agree, this was definitely the best choice to make here! Y’all should add it to your walkthrough it’s worth it for entertainment value alone.
SL says
Thirding. Pour the wine bottle’s content into the planter of the ficus. Stellar performances.
Cat says
I do not have the first chemical reaction. I have red -3 green -4 blue 5
Any ideas anyone? I can’t find other people having this combination anywhere else!
I followed all the steps to the first chemical reaction. I have had them in other walkthroughs not match. Have others found the same?