
Uncharted The Lost Legacy Trophy Roadmap
- Estimated trophy difficulty: 3/10
- Approximate amount of time to platinum: 10-20 hours
- Offline Trophies: 50 (36
 , 11
, 11 , 2
, 2 , 1
, 1 )
) - Online Trophies: 0
- Number of missable trophies: 1 – The Way of the Warrior (rest can be done via chapter select)
- Glitched trophies: 0
- Does difficulty affect trophies?: Yes – must beat game on Crushing difficulty for trophy “Progress Demands Sacrifice”
- Minimum Playthroughs: 1
- Do cheat codes disable trophies?: No. Cheats are unlocked after beating the game on any difficulty (infinite ammo etc.) and can be enabled to unlock all trophies.
 , 11
, 11 , 2
, 2 , 1
, 1 )
)Introduction
Welcome to the Uncharted The Lost Legacy Trophy Guide! Just like with Uncharted 4, Crushing difficulty is unlocked from the beginning. It is greyed out in the options but you can select it. You can either start on Crushing or play through it with cheats enabled on the second playthrough. There’s also an abundance of collectibles: 145 in total + 24 guns to use. The trophy list is a lot like previous Uncharted games. You have a mix of collectibles, miscellaneous trophies (which can only be done at certain story points), and combat trophies (some of which can be farmed via checkpoint restart). There’s a good collectible tracker in chapter select and the game consists of only 9 chapters, prologue and epilogue. You’ll find this to be a very enjoyable trophy list with an easy to obtain platinum.
Step 1: Beat the Story on Crushing, Get All Collectibles (Treasures, Lockboxes, Photo Opportunities, Optional Conversations, Hoysala Tokens), Keep an Eye out for Story-Related Trophies
Crushing is available from the start. It is greyed out in the difficulty options, but you can select it anyway. For Uncharted veterans this is recommended as it is the fastest way to get the Platinum and saves you another playthrough.
You should go for all collectibles along the way. See Uncharted The Lost Legacy Collectible Guide.
If you miss a collectible you can grab it via chapter select afterwards.
There are also plenty of story-related trophies that can only be done at one specific spot. Keep an eye out for these, in chapter order:
- Drop Me a Line (Chapter 2)
- Let’s Not Get Caught (Chapter 4)
- Your Prize (Chapter 4)
- Best Driver in the Business (Chapter 4)
- Quiet as a Mouse (Chapter 4)
- Flawless Gauntlet (Chapter 4)
- Shadow Theater (Chapter 5)
- Marco Po-No (Chapter 5)
- Overkill (Chapter 6)
- C-Phoria (Chapter 6)
- Cannonball! (Chapter 8)
- Shake For Your Fortune (Chapter 8)
- Right Under Your Nose (Chapter 8)
- Combat Racing (Chapter 9)
- Backseat Driver (Chapter 9)
- Here, Catch! (Chapter 9)
Follow the Uncharted The Lost Legacy Trophy Guide Playlist to get them all in chronological order. If you get stuck with a puzzle, refer to the Puzzle Solutions Guide.
You can do a playthrough on Explorer difficulty first to unlock Cheats, then use Cheats (infinite ammo, one-hit kill weapons etc.) to get through Crushing difficulty. Cheats don’t disable trophies and make Crushing difficulty a joke. After the first playthrough you also unlock weapon select. This allows you to get the trophy for using all guns without having to pick them up from enemies.
Important: The Crushing difficulty trophy unlocks after the credits (which are lengthy and unskippable). There are reports of players being locked out of the trophy when quitting the game before the credits finish playing. Be sure to let the credits play out to earn the trophy.
Step 2: Kill-related / Combat Trophy Farming
By now you will have unlocked the bulk of combat trophies through natural gameplay. The rest can be farmed quickly and easily at certain spots. Check what trophies you are missing and refer to the trophy guide for best farming spots. If you are still missing a chapter specific trophy you can get it via chapter select. In case you are missing a weapon for “Si Vis Pacem Para Bellum” (use all 24 guns), please know there’s weapon select in the bonus menu after beating the game for the first time. You can simply select your missing weapons from the bonus menu and don’t have to search for them. It’s not necessary to kill an enemy with the guns, just fire one shot with each one.
Step 3: The Way of the Warrior Trophy on Explorer Difficulty
For “The Way of the Warrior” you must start a new game, choose NO when asked if you want to carry over treasures and stats, and play from the prologue to the beginning of chapter 5 without firing a single shot and without throwing grenades or gas canisters. Explorer difficulty is recommended.
Important: Before starting, it is vital that all your stats show 0 (zero). To accomplish this, start a New Game from the main menu and do NOT carry over your stats (when asked if you want to carry over treasures etc. select “NO”). Even better: go to PS4 Settings > Application Saved Data Management > Save Data in System Storage > Delete > Uncharted: The Lost Legacy > Delete all saves of this game. Be sure to back up your saves beforehand!
Firing just a single bullet will void the trophy. You can, however, create manual saves along the way and reload them in case you ever mess up. Simply rush into the enemy groups and kill them with melee. Nadine is allowed to kill enemies with her gun and you are allowed to be spotted (don’t have to stay in stealth). The trophy is going to pop immediately after chapter 4, as soon as the text “chapter 5” fades in at the top of the screen.
After this step the platinum is yours.
Useful Tips, Tricks and Guides:
- Uncharted The Lost Legacy Trophy Guide Playlist (Chronological Order)
- Text Collectible Guide (Treasures, Lockboxes, Photos, Conversations)
- Video Collectible Guide (YouTube Playlist)
- Puzzle Solutions Guide
Uncharted The Lost Legacy Trophy Guide
 |
Don’t Ruin The Moment Collect all the Trophies |
 |
| Unlock all other Uncharted The Lost Legacy trophies to earn platinum (DLC not required). | ||
 |
Legacy Found! Complete the Game |
 |
| Awarded for beating the game for the first time on any difficulty. It does not matter what difficulty you pick for this, explorer difficulty will suffice.
The trophy unlocks after the credits. |
||
 |
Progress Demands Sacrifice Complete the Game in Crushing mode |
 |
| Crushing difficulty is unlocked from the beginning. It’s greyed out but can be selected! If you are an experienced Uncharted player there’s no reason not to start on this difficulty as it will save you another playthrough and is the fastest path to platinum. If you want to go the easy route, play through the game on a lower difficulty first to unlock cheats (infinite ammo, desert eagle etc.).
Cheats make Crushing an absolute joke and they don’t void the trophy. You can select cheats from the bonus menu on the second playthrough. Especially the infinite ammo cheat, combined with the Desert Eagle or RPG cheat make you unstoppable. You are also allowed to enable auto-aim (Options > Controls > Lock-on Aim = ON). The key difference to other difficulties is that you get less ammo and take more damage. The trophy unlocks after the credits. Warning: Do not quit out before the credits finish playing! There are reports of players being locked out of the trophy when quitting the credits. |
||
 |
Casual Treasure Hunter Find 5 treasures |
 |
| See the collectible guide: Uncharted The Lost Legacy Collectible Guide (Text & Video) | ||
 |
Hardcore Treasure Hunter Find 35 treasures |
|
| See the collectible guide: Uncharted The Lost Legacy Collectible Guide (Text & Video) | ||
 |
Collector of Antiquities Find all the treasures |
|
| See the collectible guide: Uncharted The Lost Legacy Collectible Guide (Text & Video) | ||
 |
Shake For Your Fortune Ask Skeleseer a question |
|

Chapter 8 This is an easter egg / reference to The Last of Us: Left Behind. Pick up the “Strange Skull” treasure in this spot, then view it in the treasure menu and rotate it with the right stick. This unlocks the trophy. If you’ve already found the treasure you can view it from the main menu, too. Basically, the skeleseer tells you a fortune each time you shake it / rotate it. You can zoom in with the L2 button to read the text at the bottom of the skull. |
||
 |
Token For Granted Find a Hoysala token |
|
| See the collectible guide: Uncharted The Lost Legacy Collectible Guide (Text & Video)
|
||
 |
Yas Queen Find all the Hoysala tokens and obtain the Queen’s Ruby |
|
| See the collectible guide: Uncharted The Lost Legacy Collectible Guide (Text & Video) | ||
 |
Five Finger Discount Open 5 lockboxes |
|
| See the collectible guide: Uncharted The Lost Legacy Collectible Guide (Text & Video) | ||
 |
Picks or It Didn’t Happen Open every lockbox |
|
| See the collectible guide: Uncharted The Lost Legacy Collectible Guide (Text & Video) | ||
 |
#nofilter Take a photo at 5 photo opportunities |
|
| See the collectible guide: Uncharted The Lost Legacy Collectible Guide (Text & Video) | ||
 |
Pics or It Didn’t Happen Take a photo at all the photo opportunities |
|
| See the collectible guide: Uncharted The Lost Legacy Collectible Guide (Text & Video) | ||
 |
Getting to Know You Listen to all optional conversations |
|
| See the collectible guide: Uncharted The Lost Legacy Collectible Guide (Text & Video) | ||
 |
Si Vis Pacem Para Bellum Use every gun in the game |
|
|
There are 24 different weapons in Uncharted The Lost Legacy. After beating the game for the first time (any difficulty) you unlock weapon select in the bonus menu. Here you can simply equip whatever weapon you want / whatever you are missing (Extras > Bonus > Add-Ons > Weapons). This is by far the easiest and fastest way to get all weapons and saves you the trouble of having to search for them. Ignore this trophy until after the story and then get it via weapon select. It’s not necessary to kill an enemy with the guns, just fire one shot with each one. The DShK and Mounted Turret are the only guns that you cannot select from the menu. Handguns:
Rifles:
Gold weapons:
Special Weapon (not available in weapon select):
|
||
 |
Were You Counting? Defeat an enemy with the last bullet in your handgun clip |
|
| This will probably unlock through natural gameplay. Use a handgun and weaken an enemy. Then keep one round in the clip and do a headshot to kill the enemy. | ||
 |
10 Up, 10 Down Defeat 10 enemies with headshots in a row |
|
| The easiest way to get this is with the silenced pistol and auto lock-on feature enabled. The silenced pistol ALWAYS does headshots with auto aim turned on.
After beating the story for the first time (any difficulty) you unlock weapon select in the bonus menu. Select the silenced pistol from there. Alternatively, you can find it in a lockbox in Chapter 3 (Encounter: Outskirts Ruins), on the back of a truck, right side of the area. Chapter 3, Outskirts Ruins Encounter is a great spot to get this. There are more than 10 enemies in this encounter and they don’t wear helmets. Make sure the enemies detect you to make enough reinforcements spawn, otherwise it won’t be enough enemies. |
||
 |
Frazer. Chloe Frazer. Defeat 5 consecutive enemies with the silenced pistol without being detected |
|
|
Chapter 3 During the enemy encounter at the end of Chapter 3 you can find a lockbox with a silenced pistol in it (on the right side of the area on the back of the truck). Pick it up and then kill the enemies in this area with the silenced pistol, without being seen. Alternatively, if you’ve already beaten the story (any difficulty) you will have unlocked weapon select in the bonus menu. You can simply select the silenced pistol there and get the trophy via encounter select. |
||
 |
Itchy Trigger Finger Defeat 20 enemies firing from-the-hip |
|
| To use hip-fire, press R2 without aiming (do not press L2). This is best done with automatic weapons or shotguns at close range on explorer difficulty. You can also enable auto-aim for this (Options > Controls > Lock-on-Aim = ON). | ||
 |
Stay and Pray Defeat 20 enemies blind-firing from cover |
|
| To blind-fire from cover, press R2 without aiming (do not press L2). This is best done on explorer difficulty with auto-aim turned on (Options > Controls > Lock-on-Aim = ON). | ||
 |
Tip of the Hat Stealth take-down 10 armored enemies with melee by first removing their helmets without being detected |
|
|
Chapter 8 You can load up the Helicopter fight via encounter select. At the start of the encounter, jump to the right side with your rope. Walk around the building on the far right and hide in the grass by the truck. An armored enemy will walk through the grass, stealth-kill him by pressing Can be farmed via checkpoint restart / encounter select. |
||
 |
Royal Demolitionist Defeat 20 enemies with C4 |
|
| A fast farming spot is in Chapter 6, Encounter: APC Fight.
This is the first enemy encounter of the chapter with an APC patrolling the area. There are many lockboxes with C4. Pick up some C4, go to the stairs where Nadine is waiting and destroy the APC. A truck with 4 enemies will now spawn by the stairs. Throw C4 at the truck and detonate it to kill the enemies. Then restart the checkpoint and repeat. You get 4 kills every time and it creates a checkpoint after the APC. It only takes 1 minute to farm 20 kills here. The video for the C-Phoria trophy shows the same spot:
|
||
 |
On the Grid Mark 30 enemies |
|
| Enemies are marked by aiming at them and pressing L3. This is useful to track their movements, especially if you are playing stealthily. Always mark enemies before killing them and this trophy will unlock in no time. There are lots of enemies scattered around the open world of chapter 4. Do it via chapter select in chapter 4. Hit the outpost in the south-east (around 10 enemies) and then the trident fort on top of the waterfall in the south-east (around 20 enemies if you count the reinforcements). You can also drive from one enemy outpost to the next and mark everyone. There are well over 50 enemies in chapter 4. They can still be marked during combat, it’s not necessary to be in stealth for this.
Note: NPC Marking is disabled on Crushing difficulty. Play on Explorer for this! |
||
 |
I Was Never Here Open a lockbox with enemies nearby |
|
|
Chapter 4 There are lots of lockboxes in enemy camps during chapter 4. Have at least one living enemy near you when opening a lockbox (doesn’t matter if you are in stealth or if they are shooting at you). |
||
 |
C-Phoria Defeat 4 enemies with one C4 detonation |
|
|
Chapter 6 A perfect spot for this is the first enemy encounter of chapter 6, where an APC (armored vehicle) is patrolling the area. Pick up C4 from one of the lockboxes in the area. Go to the stairs where Nadine is waiting. Only then destroy the APC using explosives, but make sure you have at least one C4 left. This will make a truck with reinforcements spawn (spawns right by the stairs near Nadine). There are 4 enemies on the back of the truck. When the trucks stops, quickly throw C4 and detonate it. This will easily kill all 4 enemies. |
||
 |
Just the Wind Stealth take-down 15 enemies in a row |
|
|
Chapter 4 A stealth-takedown is when you perform a melee kill on an enemy without being noticed (sneak up and press There are many enemy groups throughout chapter 4. The Lake Outpost (middle of the map) has 6 enemies and the Trident Fort (south-east on top of the waterfall) has 13 enemies + reinforcements spawning. Both of these camps are relatively easy to stealth. Mark all the enemies with You can keep track of the progress in the Statistics under Hand-to-Hand Combat > Enemies defeated consecutively using stealth. This trophy can NOT be farmed via checkpoint restart. |
||
 |
Now You See Me… Break stealth and re-enter stealth successfully |
|
| Let enemies see you, then run away and hide in some bushes until they lose you. For example, can be done in the first enemy encounter of chapter 6 with the patrolling APC. Get spotted by the APC or other enemies and then hide behind a building or in a bush until they stop searching for you. | ||
 |
Wingwoman Perform 10 combo partner takedowns |
|
|
Chapter 5 A combo partner takedown is when you and Nadine do a melee attack against the same enemy simultaneously. You then see a special kill animation in which you and Nadine knock out the enemy together. The combo takedowns are tracked in the statistics. Farm 10 total for the trophy. |
||
 |
The Way of the Warrior Make it to the outskirts of Halebidu in Chapter 5 without using a firearm or explosive |
|
|
For this you have to start a completely New Game from the main menu, do not carry over your stats / treasures, and play from the prologue all the way to the beginning of chapter 5 without firing a weapon of any kind and without using explosives of any kind. Also avoid gas canisters for this. They can explode and kill enemies. Firing just a single bullet will void the trophy, so keep your hand off the R2 button. Important: Before starting, it is important that all your stats show 0 (zero). To accomplish this, start a New Game from the main menu and do NOT carry over your stats (when asked if you want to carry over treasures etc. select “NO”). Pick Explorer difficulty and simply run into the enemies with melee attacks. Only press You don’t have to play stealthily. It’s okay if the enemies see you. In some sections you can simply rush past them and continue to the next area. The trophy pops at the very start of chapter 5, as soon as you see the white text “chapter 5” fade in at the top of the screen (after the cutscene of chapter 4 ends). You do not have to beat chapter 5, only reach it. If the trophy doesn’t pop, try reinstalling the game and delete all save games. Then do it all in one life without dying and without restarting checkpoints. Normally, you are allowed to die and restart checkpoints, but there are reports that doing it in one continuous run fixed the trophy for people who couldn’t obtain it before (helps with tracking). What I did when I earned this trophy:
|
||
 |
The Sampler Defeat 5 enemies, each one taking damage from a handgun, long-gun, and melee |
|
|
You can do this in any enemy encounter. Just make sure you have a pistol (D-Pad Left) and long gun, e.g. assault rifle (D-Pad Right). Shoot an enemy with the pistol and quickly switch to the assault rifle, and follow up with a melee attack. This combo will kill unarmored enemies. Do this to 5 enemies to earn the trophy. |
||
 |
Make an Entrance Defeat enemies with the vehicle, long-gun, melee, and grenade, in that order, in 20 seconds |
|
|
Chapter 3 Can be done in the enemy encounter at the end of chapter 3. There are two guys patrolling the area by the water. Ram one of them with the car, get out, kill the second one with an assault rifle (press D-Pad right), climb up the hill and melee the third guy, throw a grenade at the 4th enemy by the tower. |
||
 |
Bring in the Big Guns Defeat 30 enemies with gold weapons |
|
| Gold weapons are special weapons found in lockboxes and dropped by some enemies in the last chapters.
After beating the game for the first time (any difficulty) you unlock weapon select and can earn this trophy very quickly. There’s a good chance you’ll unlock it through natural gameplay long before then. If you always pick up the weapons from lockboxes you’ll get this in no time, they almost always contain a gold weapon. Gold Weapons:
Can be farmed via checkpoint restart / encounter select. |
||
 |
4x4x4 Defeat 4 enemies with the vehicle in 20 seconds |
|
|
Chapter 3 In the enemy area at the end of chapter 3 you will see two enemies walking in the water. Run them over with your car, then drive up the hill and ram two other enemies. You have to kill 4 total in 20 seconds or less. |
||
 |
Drop Me a Line Use all the zip-lines to traverse the city |
|
|
Chapter 2 In the second chapter you can use a total of 4 zip lines. The first one is at the start of the chapter before the first enemy, the other 3 are during the rooftop chase at the very end of the chapter. |
||
 |
Your Prize Appreciate the view at the top of the Hoysala Empire |
|
|
Chapter 4 In chapter 4 there’s a tall tower in the middle of the map. You have to climb this tower as part of the story. Near the top, there is a room with stone doors that you must open (story-related). Open all of these doors. After opening them, DO NOT interact with the lever in the middle. Instead, look for the door that is slightly broken. You can climb up the left side of this door to the very top of the tower. Do not hang off the ledges of the door room. Walk towards the ledge and look at the parts of the door that have opened up and you’ll be able to hold onto the broken piece of the door. Once you reach the very top, stand still for about a minute and listen to all of Chloe’s comments. The trophy takes a minute to unlock. Your prize is Chloe doing a Yoga session on top of the tower (cutscene). |
||
 |
Best Driver in the Business Drive from the Ganesh mountain carving to the top of the waterfall at the Trident Fort and back in under 3 minutes |
|
|
Chapter 4 The starting point “Ganesh Mountain Carving” is in the north-western corner of the map. It’s the huge gate that leads to chapter 5. You’ll have to go through it at the very end of chapter 4 after visiting all forts. The basic path: At the top of the Ganesh mountain, drive off the edge to jump down. Then over the tree bridge and in a straight line through the tower area. Drive to the bottom of the waterfalls. There are 2 muddy hills you can drive up and then drive through the water until you reach the top. Once there, take the same path to return to Ganesh.
|
||
 |
Flawless Gauntlet Get through all 3 Axe Fort trials without resetting any boards |
|
|
Chapter 4 During chapter 4, as part of the story, you come to an axe fort in the north of the map (after opening the windows in the tall tower). This is unmissable and you have to complete the Axe Fort trials to progress in the chapter. There are 3 Axe Trials. You must jump on pressure plates in the correct order. Every 3 jumps a statue will swing a big weapon. Getting hit by the weapon counts as “resetting the boards” and voids the trophy. However, you are allowed to restart checkpoints if you get hit and it will still unlock the trophy in the end! Just be sure that you restart the checkpoint immediately if you get hit. Solutions: Trial #1: Up, Up, Right, Left, Up, Down, Up, Left, Up |
||
 |
Quiet as a Mouse After entering the Trident Fort, reach the door without being seen |
|
|
Chapter 4 The Trident Fort is found in the south-east of chapter 4, on top of the big waterfall. You’ll have to go there as part of the story, this section is unmissable. It’s highly recommended you put the difficulty to explorer for this! Enemies take longer to notice you on explorer. Stick to the left side of the Trident Fort. First, climb up a grassy hill, jump down, climb around the left side of the ruins, hide in the bushes if necessary. Climb up the last hill and rush to the trident door. |
||
 |
Tarzana Perform 5 grapple swings in a row without touching the ground |
|
|
Chapter 4 There’s a super easy way to get this trophy in chapter 4. To reach the most southern Hoysala Token Location you must use the rope 5 times to swing. You can attach the rope to five different trees here. Simply jump towards a rope and press L1 in midair. Do this with all 5 ropes in a row and the trophy unlocks. |
||
 |
Stunt It! Get 30 seconds of total airtime with the vehicle |
|
| This can be farmed in chapter 4.
There are rocks that look like ramps, e.g. in the south of the map where the chapter starts. Or you can drive to the top of the waterfall in the south-east corner of the map and keep jumping off the ramp with your car. You don’t need 30 seconds airtime in one jump. This is the cumulative time you’ve spent in the air with your car. If you get 1 second of airtime with each jump you need to repeat the jump 30 times to earn the trophy. |
||
 |
Shadow Theater Complete the shadow puzzle in 10 moves or less |
|
|
Chapter 5 During chapter 5 you have to solve the “shadow puzzle” (story-related, unmissable). You must interact with levers to cast shadow figures on two walls. Once all shadows are aligned correctly a door will open. To earn this trophy the puzzle must be solved in 10 moves or less. See the video for the combination. |
||
 |
Marco Po-No Play in the water in the dam in Halebidu |
|
|
Chapter 5 In chapter 5, after solving the shadow puzzle and escaping the collapsing cave you’ll be on top of a dam and see a cutscene. Turn around after the cutscene to find a little pool of water behind you. Jump in the pool to earn the trophy. |
||
 |
Fingersmith Pick a three pin lock in under 15 seconds |
|
| There are lots of three pin lockboxes in the game (collectibles). There’s a good chance this trophy will come through natural gameplay.
A three pin lockbox can be found in Chapter 3, Encounter: Outskirts Ruins. This is the big enemy encounter at the end of the chapter. The lockbox is on the back of a truck on the right side of the area. It’s recommended that you enable controller vibration as it gives you feedback when you have the pin in the right position. There’s also a little arrow marker when you are near the correct position. You can actually get the first two positions and quit out by pressing |
||
 |
Overkill Plant multiple C4 charges on the APC at the same time and destroy it with one massive detonation |
|
|
Chapter 6 In the first enemy encounter of chapter 6 there’s an APC patrolling the area (armored vehicle). Around the same area you can find many lockboxes with C4 in them. Pick up two C4 charges, throw them at the APC (they need to stick to it) and detonate them by pressing |
||
 |
Cannonball! Perform an impressive dive from the cliff near the old railroad tracks |
|
|
Chapter 8 At the start of chapter 8 you’ll slide down a muddy path, walk along a cliff, climb through a bunker, go up a hill. Now you have to slide down another muddy path, towards a waterfall and you can see the railroad tracks in the distance. This is BEFORE having to press triangle to push some roots out of the way. |
||
 |
Right Under Your Nose Destroy the helicopter without defeating any other enemies |
|
|
Chapter 8 Before attempting this go and finish the story on any difficulty (explorer difficulty will suffice, there are 9 chapters total). Finishing the story for the first time on any difficulty unlocks cheats in the bonus menu! |
||
 |
Combat Racing Ram 10 motorcycles |
|
| Chapter 9
You can do this in the first enemy encounter of chapter 9. There will be lots of motorcycles chasing you. Ram them with your car and they will be destroyed instantly. There are way more than 10 so you can get this trophy in one go. The motorcycles only spawn at the start of the chapter and not in the later sections. If you don’t get it, simply farm it via checkpoint restart or restart the chapter. |
||
 |
Backseat Driver Commandeer 6 vehicles by jumping on them and kicking out the driver |
|
|
Chapter 9 Halfway through chapter 9, you will have to jump from a train into an enemy car. From this point forward a few more cars will spawn in this chapter. Drive near them and press X to jump over and kick out the driver. Do this to six cars. Can be farmed via checkpoint restart / encounter select. |
||
 |
Here, Catch! Destroy a vehicle in Chapter 9 with an explosive |
|
|
Chapter 9 At the start of this encounter, when the 4×4 vehicles are driving next to the train, you can find a grenade on one of the boxes. Pick up the grenade and enable auto-lock on in the control options (Options > Controls > Lock-on aim = ON). Throw the grenade and it will automatically stick to the car, trophy unlocked! Alternatively, beat the game on any difficulty to unlock weapon select in the bonus menu. Then equip the RPG and shoot the car with it. |
||
 |
Let’s Not Get Caught Drive over the edge in the Western Ghats |
|
|
Chapter 4 Very simple: at the beginning of chapter 4, drive off the cliff in front of you and the trophy will unlock. |
||


 so you can see where they are walking. Also put the game on explorer difficulty because it takes enemies much longer to see you.
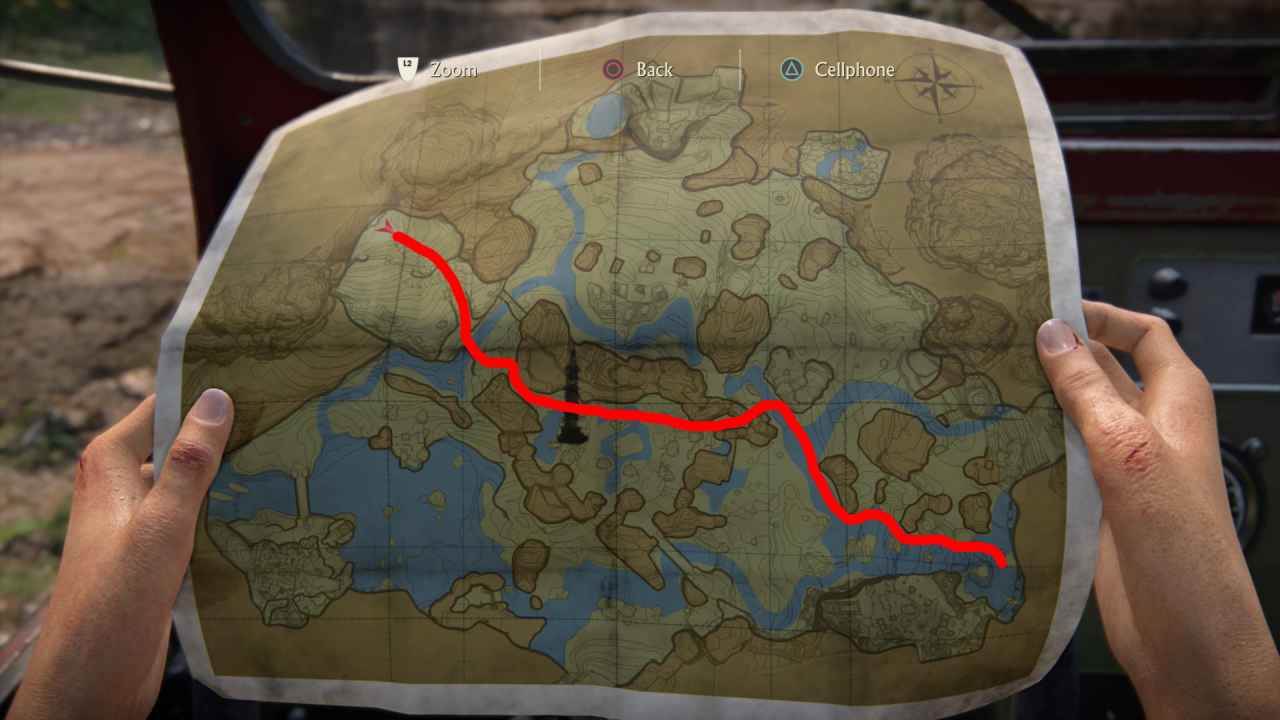
 . Then you enter the first two very quickly and just need to figure out the third lock. 15 seconds for all 3 pins is quite generous, it can be done in 6 seconds.
 .
. . Climb up the helicopter on your rope to kill the pilot. Super easy with the cheats enabled. You can also enable auto-aim and play on explorer difficulty for this.
 Special Thanks / Credits
The following people have kindly submitted tips for this trophy guide. You guys rock!:
dalailama1989
SnowNinjaRaccoon
Chromar
Brando S says
I was wondering if there is “aim assist” like in UC4 or not?
because this might make Crushing easier.
Thank you so much in advance.
DK says
I couldn’t find an aim assist on Crushing.
However, even without it, it is still easy to complete, since the game isn’t long at all.
dalailama1989 says
There is an automatic lock-on feature, which is also available on Crushing. (Options -> Controls -> Lock-on Aim)
Doing Crushing on your second playthrough with lock-on, infinite ammo and Desert 5 / RPG as weapons make it incredibly easy.
Anthony says
hi, I know this was meant to be a standalone expansion, but I’m wondering if this game will have dlc?
PowerPyx says
Probably not. It would be highly unusual for a DLC to get a sub-DLC. Never seen it and don’t think they have anything planned in that regard.
NicoFantasy PSTHC says
As Powerpyx said, probably not.
But beware. If you never played Uncharted 4 and launch the survival mode from Uncharted Lost Legacy, it will install Uncharted 4 trophy list and DLC on your profile ;)
bro says
hi this platinum trophy is harder or uncharted 4?
dalailama1989 says
They are both “equally hard”, I would say personally.
UC4 takes a bit longer due to Multiplayer and Speedrun trophies.
Machro says
Tip of the Hat trophy – any farming spot?
dalailama1989 says
Chapter 8, Helicopter Fight Encounter.
Swing over on the right side, stealth kill the one roaming guy, continue to the right and around the house over to the parked truck. An armored guy will just pass by there through the tall grass. Get him behind the truck, that is out of sight of the nearby enemies. Reload checkpoint then.
NicoFantasy PSTHC says
For 10 Up, 10 Down , i found the best way is to use the silence pistol with auto aim. It does automatic headshot.
With the ulimited ammo it’s a piece of cake 🙂
Fingersmith
Activating the vibration of the dualshock helps a lot
JohnnyFive says
I’m really struggling with way of the warrior.
Tried everything suggested but no trophy. I never shot or even aimed a gun or explosive, used stealth where possible and I got to where it says chapter 5 but got nothing. I even did it all in one run with no deaths or restarts.
PowerPyx says
It COULD potentially be buggy. I’m investigating this now / testing on a few different accounts and gathering info from people who unlocked it.
Many have reported issues with it. I can’t conclusively say that it’s buggy, but something seems off.
It’s supposed to pop at the very start of chapter 5 when you see the text “chapter 5” fade in at the top of the screen (after chapter 4 cutscenes is over).
Make sure all your stats are at zero and choose new game from the menu. Delete all your save games and reinstall the game. There was a similar bug with an Uncharted 4 stealth trophy and reinstalling the game fixed it for some people back then.
Kylehero says
You just have to start a new game, choose the option to not keep treasures and player stats, play on easiest difficulty and just go as fast as possible through all chapters, do not pick up or fire any weapons, do not use grenades, only melee/stealth kills.
Did it this way, without deleting save games or anything else.
N.E.R.E says
Thanks pyx ;)
I got my plat just now and I can confirm about ( The Way of the Warrior ) trophy that you have to delete your save data as you mentioned with RED note. Because if you start a new game it’s true that you didn’t firearm or explosive anyone but in your statistics under ( weapons used ) there will be 6/24 for example. if you delete save file it’s should be 0/24 and it’ll pop up after finished chapter 4 for sure !!!
Rohit Joshi says
Congrats on getting platinum. So are we allowed to get killed or restart checkpoints? Did you died or restarted checkpoint while going for this trophy? You did in one single sititng/session ? 🙂
PhantomBlade19 says
Thanks Pyx great job!
LOST_3500 says
I got way of the warrior first try on new game. It wasn’t buggy for me. Just don’t fire your weapons and make sure stats say 0.
paul says
wheres the spoilert tags? one of the first trophies details a character met later in game 🙁 just about to start my playthrough
Violet says
Are you serious? Have you never used a trophy guide before? ALL trophy guides contain minor or even major spoilers when describing the details on how to obtain a trophy. I have been collecting trophies for 5 years, have played almost 200 games and used a guide for like 95% of them. I have never once used a trophy guide that didn’t contain spoilers. If you don’t want to be spoiled, play the game first and then mop up trophies. Otherwise, suck it up and accept that some things are going to be spoiled for you.
Huss0406 says
I’ve just passed the game on crushing mode, for my surprise the game did not give the trophy, why did it not give? Easy, the game thought I passed that chapter on hard and I was like wtf…
Definitely this game has buggy trophies, and most of them appear too late at the point I almost tried them again…
Huss0406 says
PD: This happened to me in chapter 6 and I finished it again in crushing, didn’t work…
Huss0406 says
Nevermind, I managed to fix it, got platinum already…
NicoFantasy PSTHC says
Hi PowerPyx
Seems that since 1.02 update, crushing mode is no longer available at the launch of the game.
PowerPyx says
It’s still available for me from the start of 1.02.
I created a new user to try. It’s greyed out but was selectable.
Maybe it affects certain versions only? I have the german disc version, not sure if that makes a difference.
If anyone else has Crushing Mode locked, please report the game region / disc or digital.
Violet says
I got Way of the Warrior before Chapter 4 even ended. I started my playthrough on Crushing and when I realised I was already at Chapter 3 without ever shooting I figured I might as well continue. I died and restarted chapters A LOT, and may have gotten a car kill or two, but all the other kills were melee or Nadine. The trophy popped for me after we went through the big door at the end of Chapter 4 but before Chapter 5 started. I hadn’t played prior to this however, Crushing is my first playthrough.
Demetrius says
thought the way of the warrior was going to be hard, but to be honest it was quite easy say then done! much appreciated
Demetrius says
Awesome guide, this will be my first uncharted platinum haha :D
BodyChipper says
It seems most of the videos do not line up with their respective trophy sections on the page. Other than that: great guide as always, thanks for the tips and the collectible guide.
BodyChipper says
Of course, as soon as I submit that everything lines up and the page refreshed. Must have been just me.
Luke says
I actually get that fairly often when viewing on a mobile through this site. It seems that it doesn’t load the video in the frame on a mobile if you scroll quickly
Ashbo82 says
Great guide mate.
Does ‘tagging an enemy’ as mentioned in Chapter 3 negate the Way of the Warrior trophy, as you have to aim at them for it to tag them?
PowerPyx says
I don’t think it voids it. To be safe, create a manual safe. After marking the enemy, check that it didn’t increase any stats related to accuracy or weapons.
I’m quite sure it’s fine to mark enemies but personally I would just leave it alone and then go back into chapter 4 via chapter select to farm it. Takes only 5-10 minutes (hit the first enemy camp in south-east, then the trident fort and done).
brint says
Awesome guide! Just got my platinum thanks to you
A tip to make your life easier with trophies like Best Driver in the Business is understanding how saving works:
When you’re at the starting point, make sure to manually save into 2 different save slots. The last one will be overwritten by autosaving, but in case you mess up, you can reload the other one and save a ton of time.
Just don’t forget to save again in 2 different slots at the start if you restart
As for Way of the Warrior I simply started a new game without carrying over stats and kept my finger away from R2 and that was enough for me
JMR says
For “On the Grid” trophy you have to mark enemies by pressing holding L2 and then pressing L3. Merely pressing L3 won’t register as “marking” an enemy (i.e. they won’t have a white triangle above them).
JMR says
*by holding L2
PowerPyx says
Quite right. I changed it to “Enemies are marked by aiming at them and pressing L3”.
Baton says
Great as always ! “The Way of the Warrior” is very difficulty to do ?
PowerPyx says
It’s easy on explorer difficulty, I did it first try without dying and didn’t have any trouble with it.
Bad-Wayne says
Chapter 3 Outskirts Ruins only has 8 enemies. I’ve restarted-encounter three times and also tried the checkpoint-restart several times. Somehow progress was saved on Checkpoint-restart for “Frazer. Chloe Frazer” but it isn’t working for “10 up, 10 down”.
PowerPyx says
Did you let the enemies spot you? Then the reinforcements spawn. In the stealth section there are only 8 enemies as you say. But if they detect you a few more enemies spawn.
justsomebody1 says
The trophies in Uncharted games never disappoint. All 5 games have a great and fun set of trophies, with some challenging but none tedious.
A7mdMajed says
Hi, i’m missing the second optional conversation which is in chapter 4 in the monkey island ( after you collect all the tokens ). Now i tried the chapter select but i can’t get to it the door is closed and i can’t collect the tokens again, somehow i can’t press Triangle to take them. is there anyway i could get this conversation ?
PowerPyx says
You can (and need to) collect the Tokens again.
When you redo the chapter via chapter select they respawn.
Raham says
I’ve finished the game but the bonus menu hasn’t been unlocked for me is this a bug or something?
Mike says
For the way of the warrior trophy, in chapter 4 the western ghats how do I ring all the bells to open the door to the hosala token if I can’t shoot them?
PowerPyx says
You have to skip that part on the Way of the Warrior run.
AlexB says
Strange. I got the Way of the Warrior trophy **without resetting my stats.** I was actually trying to mop up a few things in the first few chapters, so figured I’d play them through normally. decided I’d practise doing them without guns even though it supposedly wasn’t going to get me the trophy that time, and come Chapter 5 it popped. Whether that was a glitch in my favour or what, I don’t know.
behrouz says
there is a bug for optional conversation in chapter 4 related to those monkeys
i am not able to trigger that
pls help me
Kyle says
Very helpful guide. Thanks!
John Smith says
Another platinum with your help! Thanks bro
Ti0sile says
Does playing this game put uncharted 4 in your trophy list? My friend is saying that it does. If anyone could let me know that would be great. Thank you.
Alex says
For the Crushing dificulty trophy, do I have to start a new game from scratch or will I get the trophy by playing each level through chapter select on crushing?
Chase says
Dude… seriously, what are you doing to get up that second muddy bank in the Jeep for “Best Driver in the Business”?!?
I’ve tried to get this trophy for two hours, and I’ve come up with nothing…
Every time I try to get up that bank, following the EXACT same path as your video, I hit some invisible wall that completely trashes my momentum…
Even when I’m not in a hurry, I make it up that bank “sometimes” by seemingly random chance…
Summer says
You have to go along the curves when going up the slope. There are also rocky areas that help with traction.
Starshooter says
Thank you so much for the guide!
One of the easier plat games, but enjoyed it thoroughly both first play-through, then second play-through getting trophies.
For the Way of the Warrior, I was a bit scared about half way through chapter 4, as I realized that I ran over 2 enemies with my car during the Chapter 3 encounter, but continued till the end anyways and ended up getting my plat (this was my last trophy). So running over enemies with your car is O.K. But still, try not to run anyone with your car anyways to feel completely safe.
Thank you again!
potrikberger says
Overkill trophy is a complete pig of a trophy on crushing. You need 5 C4 explosives all at once. And the worse of it is I found this out by first sneaking around and planting 2 x C4 as per the guide….that didnt work. Neither did three…and yup i did it all again with four, before finding out that 5 was the magic number.
Sigh…..a big crushing sigh….
potrikberger says
edit – I’m not actually sure if its possible on crushing to get this trophy or whether my game has glitched, even though it ‘popped’ for me as per the above, the trophy isnt awarded in the trophy list. Just to be safe I’d advise to just not bother with it in crushing mode
oli4drxx says
Yes, just do it with encounter select after completing the game on crushing
krz says
No big deal but there is typo in Step 1 trophy name: Shadow Theather (Chapter 5), should be Shadow Theater 🙂
PowerPyx says
Thanks, good spotting, fixed!
: veryeavy says
Hi Mr Powerpyx. Thanks for the awesome guides. Slight upgrade to suggest forTip of the Hat trophy. Same guy you suggest but run up the steps and jump on him with square. Kills him in one without having to rip his helmet off. I know this contradicts the wording of the trophy description but trophy popped for me.
: veryeavy says
Hi Mr Powerpyx. Further to my previous comment. I am playing the PS5 version off the combo disk also including UC4. There are only 49 trophies on this version (no plat, sob)
Marcus says
Awesome guide, once again. Thank you!