PowerPyx.com

PowerPyx

  • Trophy Guides
  • Game Guides
  • Wikis
  • Trophy Lists
  • Next Guides
  • Contact
Show SearchHide Search
Home » Trophy Guides » Arc Raiders Trophy Guide & Roadmap

Arc Raiders Trophy Guide & Roadmap

November 11, 2025 by Gage 28 Comments

Arc Raiders Trophy Roadmap

  • Estimated trophy difficulty: 7/10
  • Approximate amount of time to platinum: 60-120+ hours (highly skill and group play dependent)
  • Offline Trophies: 0 – game is online only
  • Online Trophies: 51 (1trophy, 3trophy, 5trophy, 42trophy)
  • Number of missable trophies: 1 – Legend of Speranza
  • Glitched trophies: 1 – Practice Makes Perfect (Does not unlock correctly, can be earned by going in and out of Practice Range repeatedly)
  • Does difficulty affect trophies?: No, there are no difficulty settings
  • Hardest Trophy: :gold: A Tale for the Ages
  • Minimum Playthroughs: At least 100 matches where you successfully return to Speranza
  • PS4/PS5 Crossbuy, Autopop & Save Transfer: No, game doesn’t have a PS4 version
  • Supports Manual Saves?: No, all progress is saved automatically on the online servers
  • Release Date: October 30, 2025

Introduction

Welcome to the Arc Raiders Trophy Guide! Arc Raiders is a new extraction shooter from Embark Studios, the same studio behind the competitive FPS game The Finals. Arc Raiders has a much more casual setup than most extraction shooters, having a simplified inventory system and an overall gameplay loop, so you won’t spend nearly as much time sitting in menus to prepare for matches. AI enemies consist of the ARC robots, which have adaptive AI that will actively try to flank and attack players, providing a much more dynamic experiences on top of dealing with other players.

The trophies require you to engage with most of the currently available content, reaching the max level and fully upgrading most of the workshop stations. You can play the game either solo or with other squadmates, with only one trophy requiring you to actually play with a squad (10 Squadmate revives). All other trophies are viable to earn in solo play, and depending on your personal preference, you may have a better experience in solo play as the matchmaking somewhat prioritizes placing solo players in the same lobby, and solo players are much more likely to be friendly and not just shoot on sight.

Step 1: Get Used to the Game, Earn One-Off Trophies

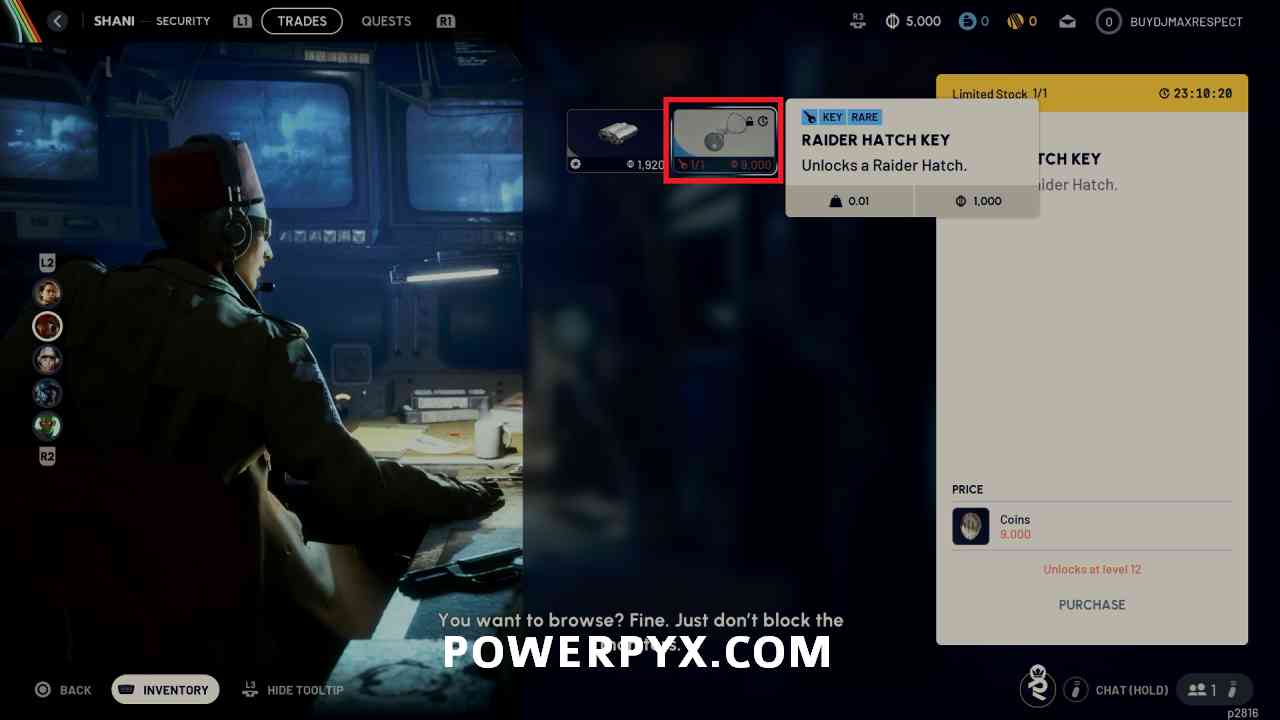
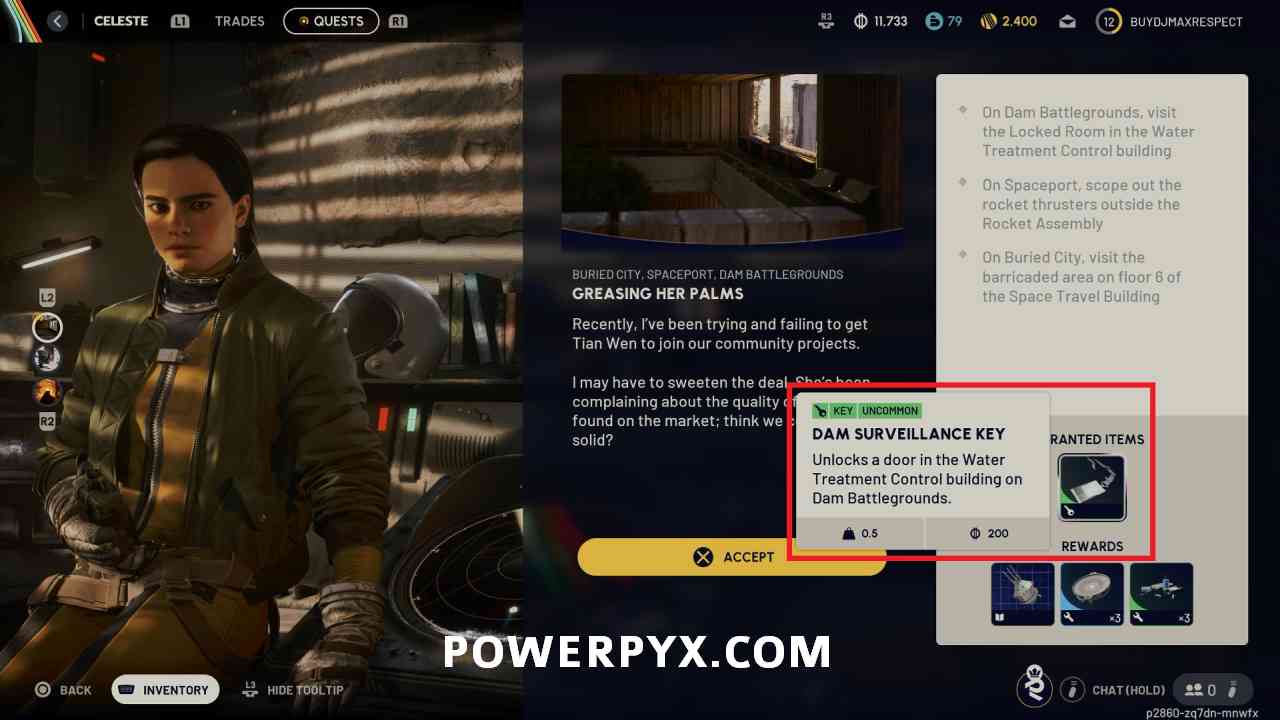
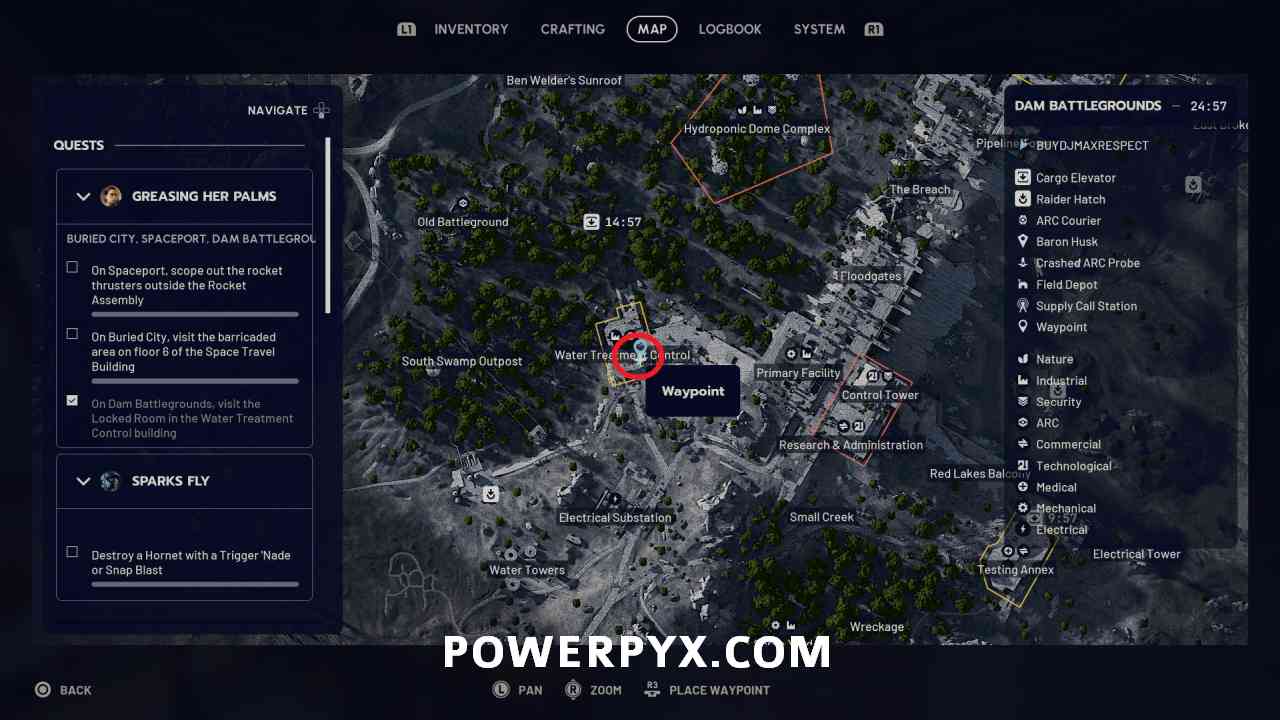
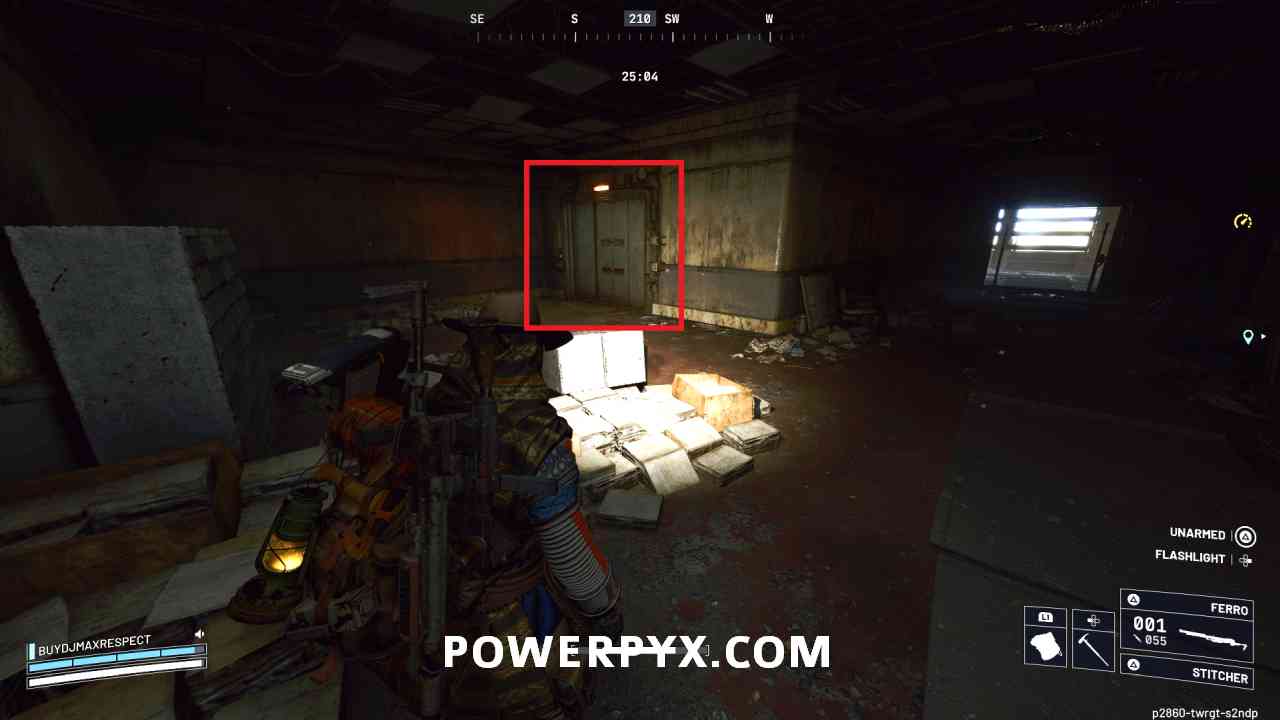
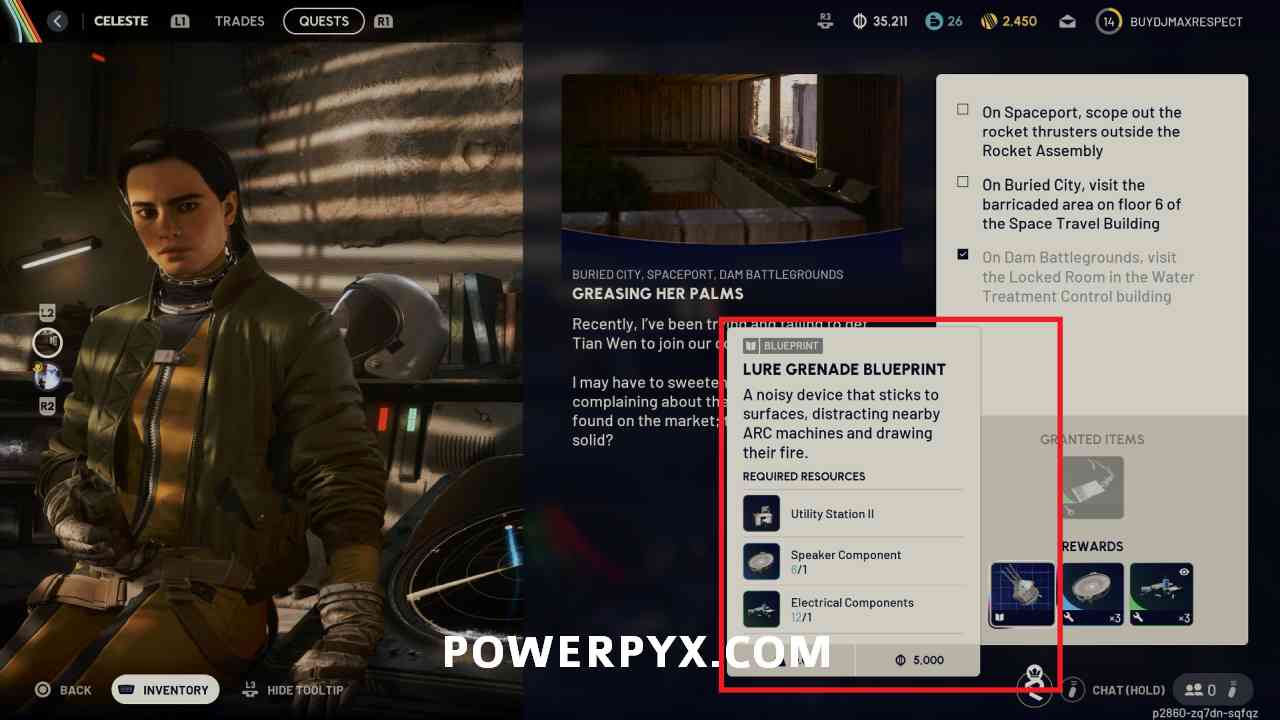
When you start the game your main goal will be learning how to play, working on quests, and start upgrading your workstations. Completing quests isn’t required for trophies, but you receive a bunch of useful blueprints and usable items from them which will give you a boost instead of needing to find everything in matches or crafting them. You can start working on most of the one-off trophies right from the start of the game and complete them at any time as long as you have access to the required items or locations.

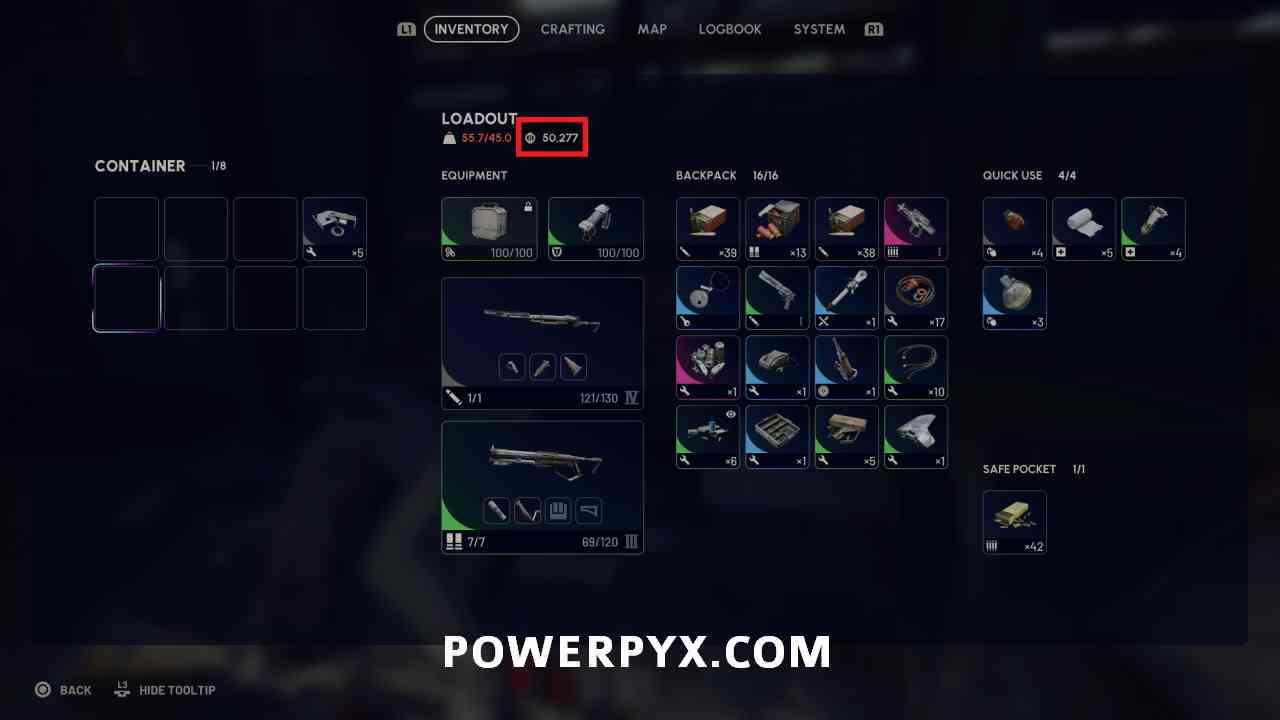
While upgrading your skill tree at the start of the game, focus primarily on the Survival tree. It is by far the best overall due to the in-round crafting abilities and the Security Breach skill. Early on you should use all of your credits to upgrade your stash size to the maximum (280 slots) which will give you much more freedom in crafting and saving items.

Step 2: Level 3 Workshop Stations, Level 75, Defeat the Queen

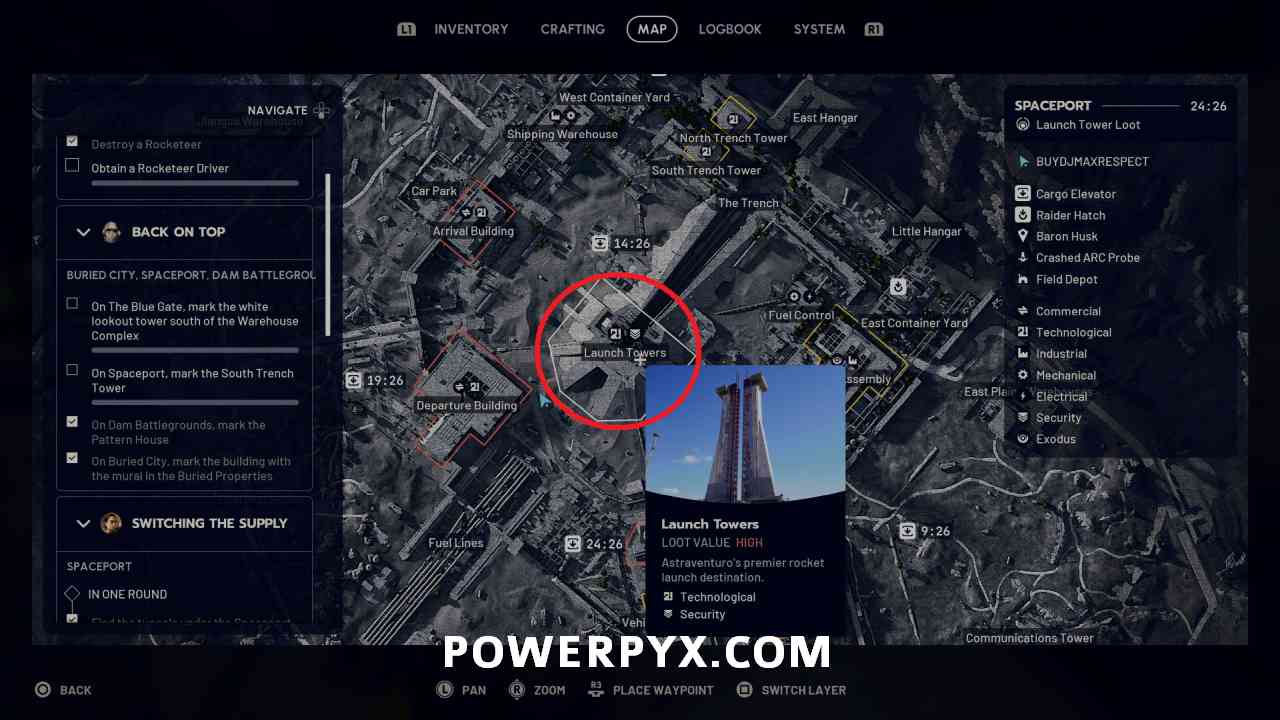
Once you’ve gotten used to the game your main goals will be working on Level 3 upgrade of your Workshop Stations, reaching Level 75, and gearing up to defeat the Queen. Make sure to track the materials for the workshop stations to have them marked during matches, and prioritize those whenever you see them until you have enough for the upgrades. You aren’t required to complete the Expedition Project for trophies, but if you do make sure you don’t complete the Departure until you hit Level 75, as your level is reset if you go through with the Departure. The hardest trophy overall in the game is defeating the Queen, so you will want to do this once you are able to be geared up with high level equipment.

General Tips

  • Most skills in the skill tree aren’t very useful and you can only gain 76 skill points while reaching Level 75 (the current max level), so you want to primarily focus on the Survival section. As soon as possible unlock the “In-Round Crafting” ability (second node on the lower line). This will allow you to craft certain things like bandages during matches, which means you can significantly increase your survivability if you run out of healing items during a match and don’t think you can safely return to Sparenza with your current health. After this keep putting points into the Survival tree with the goal of unlocking the Security Breach node at the end. This will allow you to open Security Lockers that can be found on each map and have the opportunity to find some higher tier loot during matches. In the Mobility tree put 5 points each in Marathon Runner and Youthful Lungs, then focus most of the remaining points in Conditioning and Survival.
  • Make sure to collect resources from Scrappy the Rooster in the workshop between matches, as well as watch for the needed materials to upgrade them. They will continually generate more basic resources for you, allowing you to reequip yourself with some base level items if you ever lose a lot in a bad run. When Scrappy requires the various food items the best way to obtain them is during the Lush Blooms event that will occasionally appear in each area.
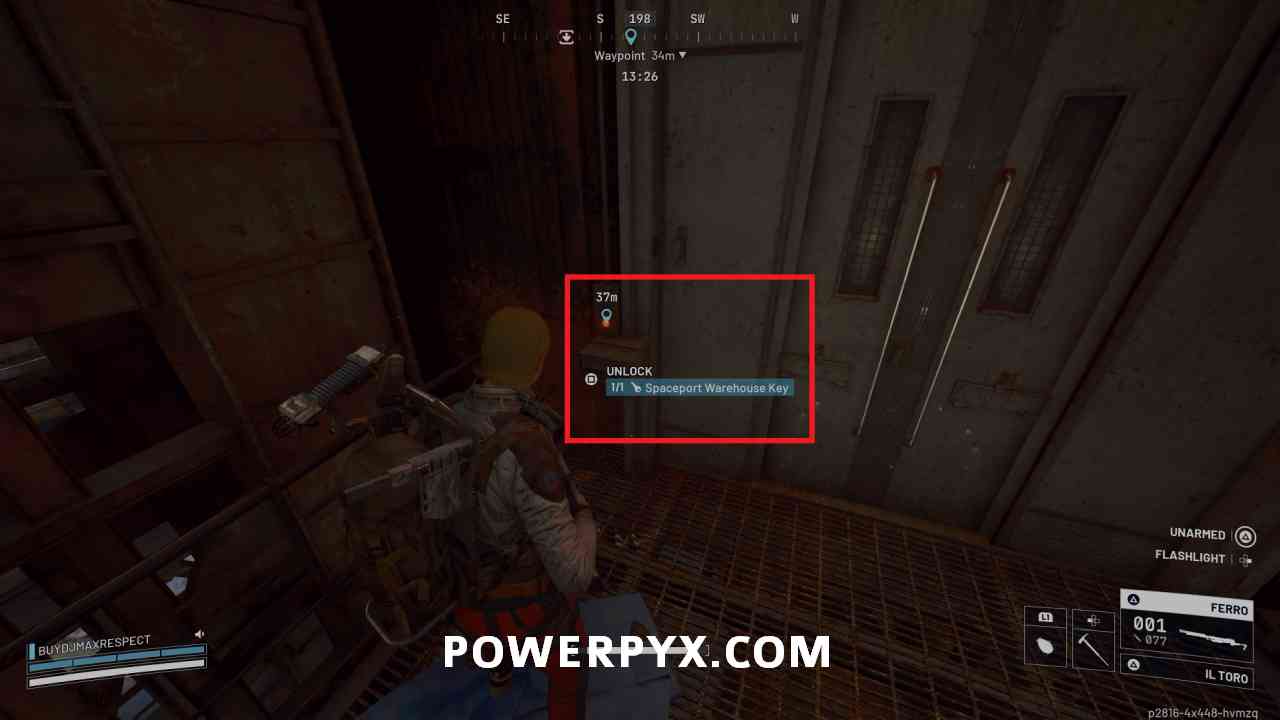
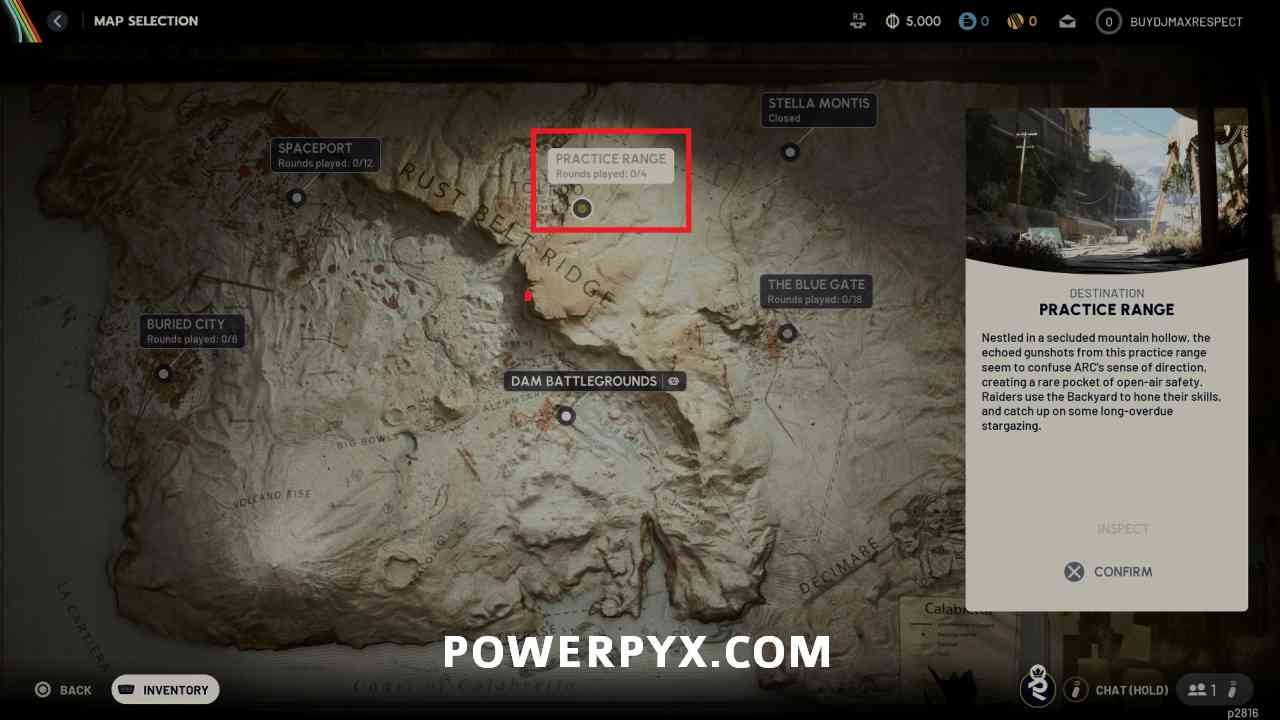
  • If you are trying to complete missions from Vendors and don’t want to take in high value items you can use the Free Loadout option after selecting which map you want to go to. This gives you a random weapon and some base level quick use items to go into a match with, so you don’t need to risk your own supplies every time if you don’t want to. When completing quests most just require you to do a thing and then not successfully extract, which makes completing them with a free loadout easier if you just rush the objective. If you are doing this pay attention to the ones that do require you to bring out specific items for Quests, as you will lose them if you are knocked out and need to pick them up again.
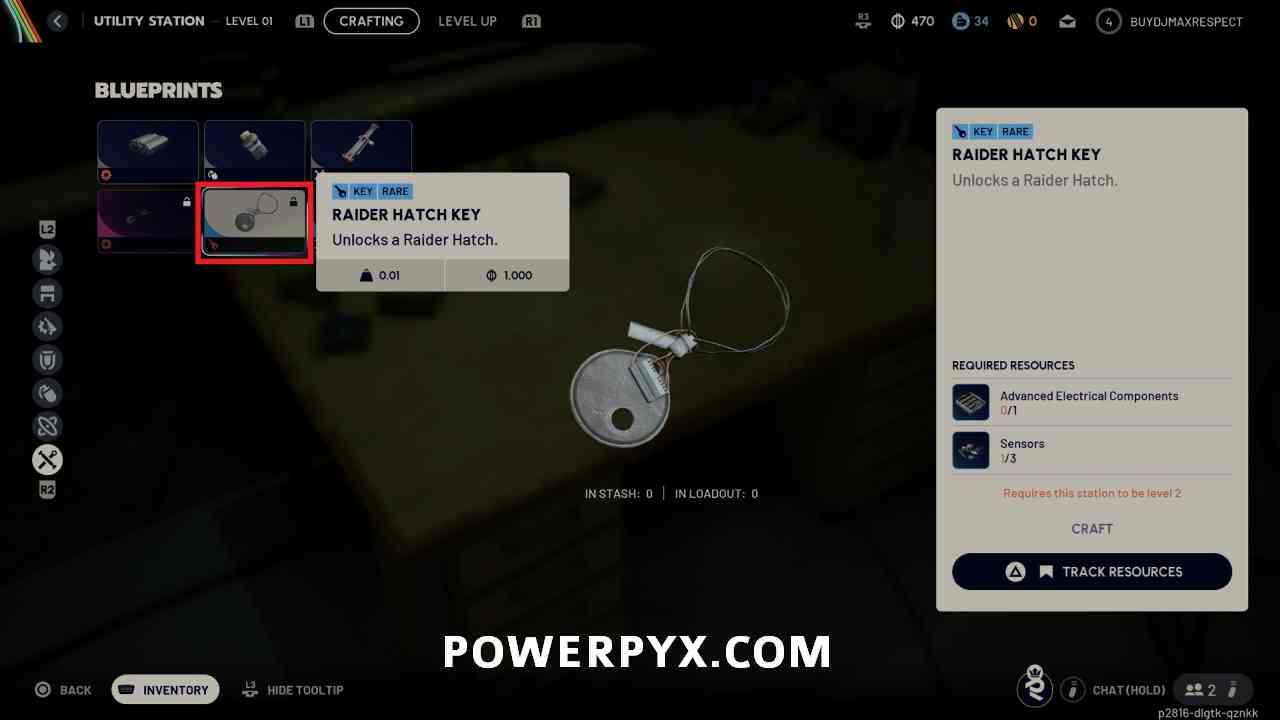
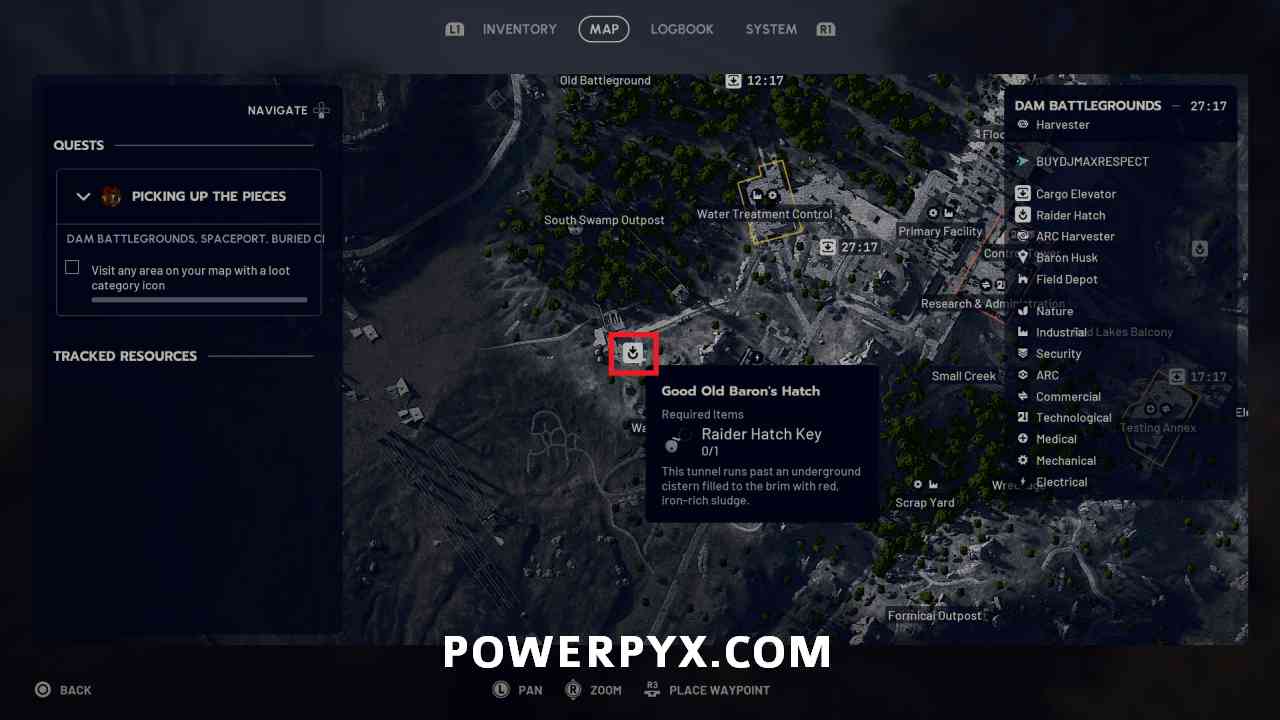
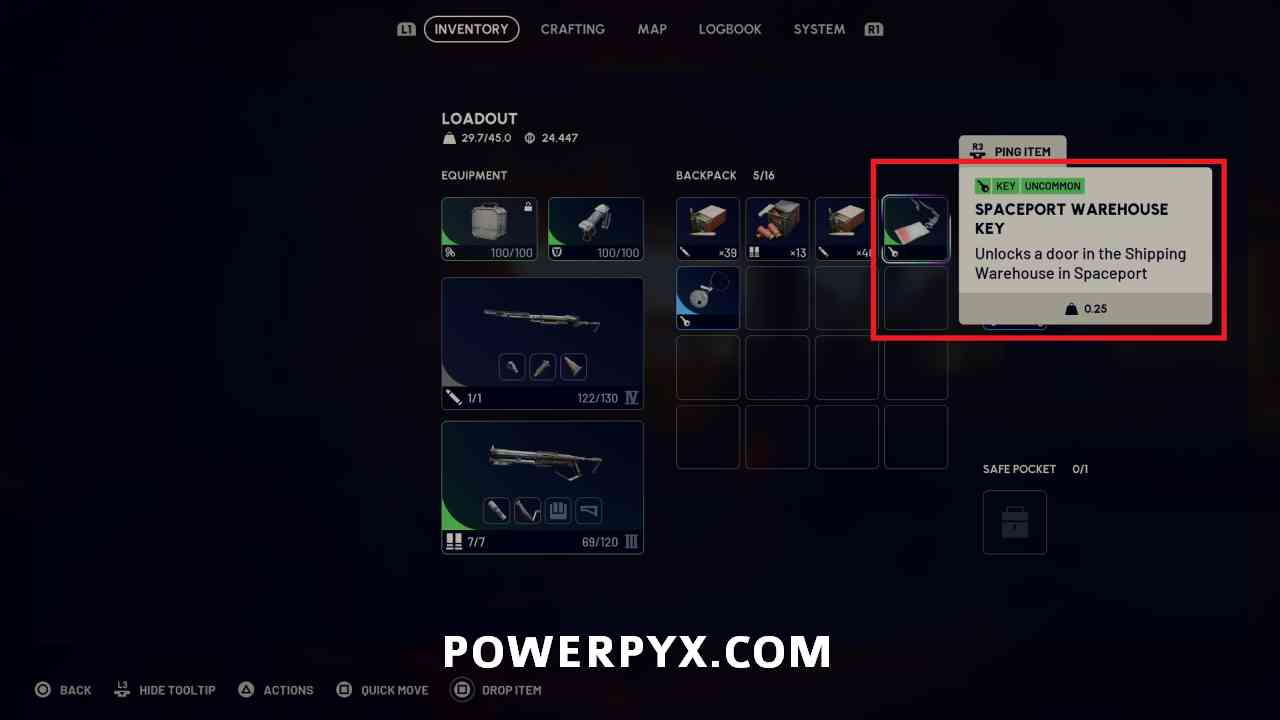
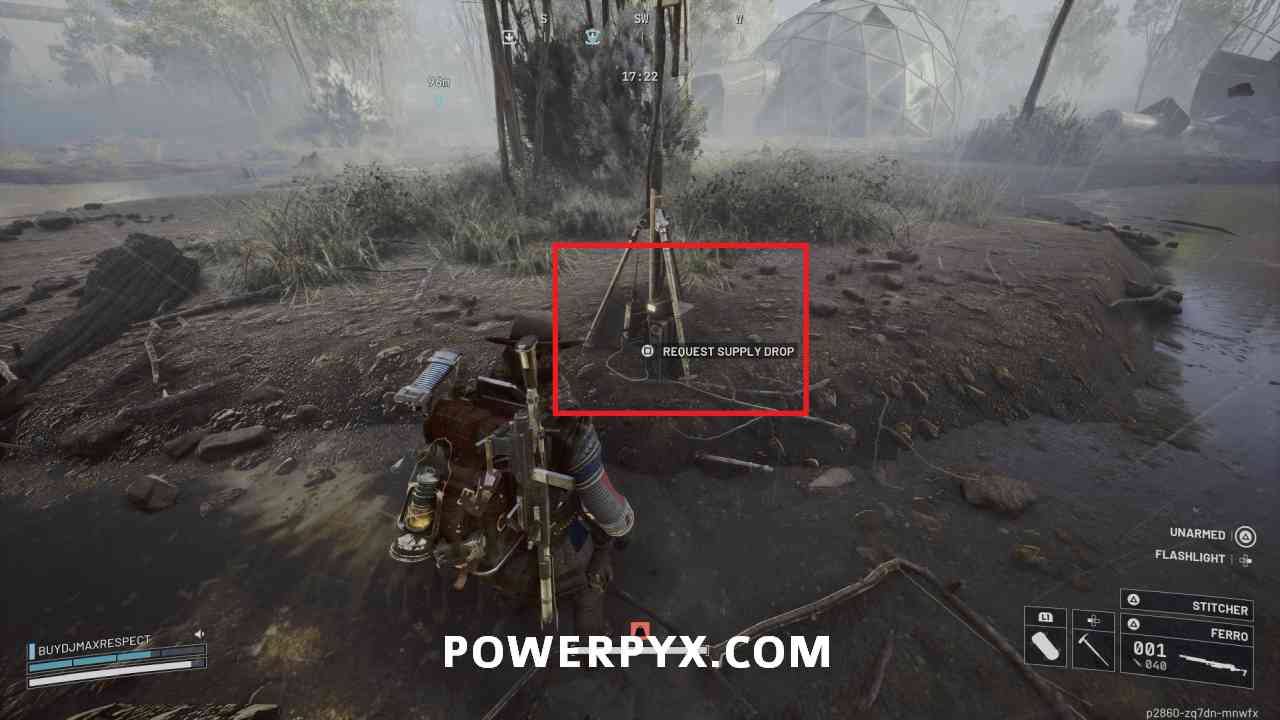
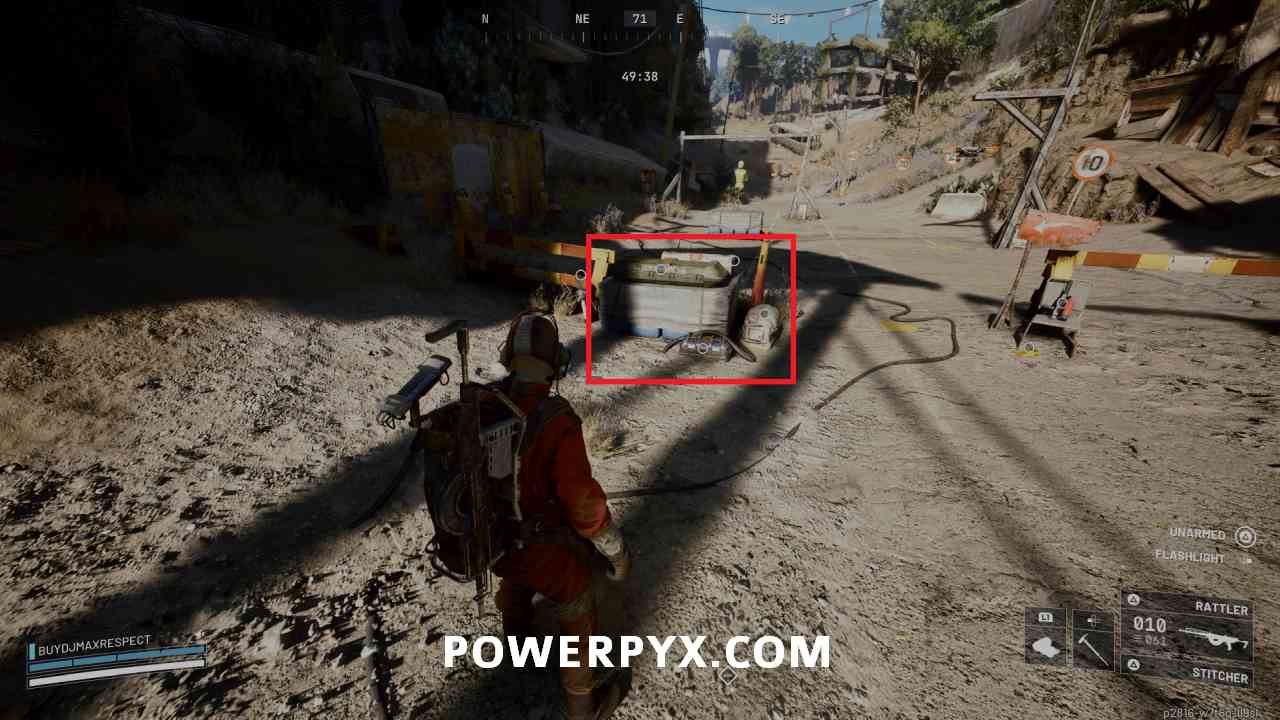
  • If you are looking for specific resources to create items or upgrade Workshop stations you can track them from within the Workshop menu. This will highlight them when you are looting them during matches. It is recommended to always track the upgrades for each Workshop station and prioritize them over most other loot during matches.
  • If you complete a match using a Free Loadout, you can then trade the Free Loadout Augment to the Clinic trader for one of the uncommon augments for free. This is a good way to work your way back up if you die during a match and lose a bunch of items: play one with a free loadout, trade for the green augment for the second and keep working from there.
  • Make use of Proximity Chat during matches. While playing Solo most players are less likely to attack you unannounced if you make your presence known and talk to them, and you might have a good experience helping out another player or having someone show you something in one of the maps. Watch if other players aren’t responding to you at all with chat or emotes and don’t let your guard down. Players in squad matches are far more likely to shoot on sight, so be much more prepared for fighting if you are in a squad.

Arc Raiders Trophy Guide

Many Tales to Tell
Collect all trophies.
Platinum
Earn all other trophies in Arc Raiders to unlock Platinum (no DLC required).
Scavenger
Search 50 loot containers.
Silver
This trophy is awarded for searching a total of 50 loot containers during games. Loot containers appear all throughout each map, and include various items such as materials and ammo. You will loot hundreds if not thousands of containers throughout your time playing the game, so this will come early during your playtime.
Well-Traveled
Safely return from Dam Battlegrounds, Buried City and Spaceport.
Bronze
This trophy is awarded for safely returning from Dam Battlegrounds, Buried City, and Spaceport for the first time. These are the three lowest difficulty maps where you will spend a lot of your time during the game. Initially Dam Battlegrounds is the only map that is available, with Buried City becoming available after you have played 6 matches, and Spaceport available after you have played 12.
Escape Artist
Safely return to Speranza 100 times.
Gold
This trophy is awarded for safely returning to Speranza through one of the main extract points or a Raider Hatch a total of 100 times. This counts either if you are standing or downed, as long as you safely return without being knocked out. While working on all other trophies it is likely you will safely return well over 100 times, but if you don’t you can enter matches and then immediately go to the nearest extract point.
Rite of Passage
Safely return to Speranza for the first time.
Bronze
This trophy is awarded for safely returning to Speranza for the first time on any map.
Into Thin Air
Safely return to Speranza through a Raider Hatch.
Bronze
This trophy is awarded for safely returning to Speranza from any map using a Raider Hatch for the first time. Raider Hatches are alternate exit points available on most maps, which require carrying a Raider Key to be able to open.

You can purchase 1 Raider Key every 24 hours from the Security trader for a cost of 9,000 coins once you reach level 12, or create one at the Workshop Utility Station with 1x Advanced Electronics and 3x Sensors once it has been upgraded to Level 2. Once you have obtained one, you will need to make sure you have it included in your inventory when you start a match. Generally it is a good idea to keep a Raider Key in a safe pocket whenever you enter a match, then keep it there unless you find something like a blueprint that you have more desire to keep in case you are knocked out.


Once you have the key in a match, look for the Raider Hatches that will be marked on the map with a circle that has an arrow pointing down into it. They have different names in each location, but all require 1 Raider Key to use. If you just want the trophy you can go directly to a hatch immediately and exit, or wait until you have some items to extract. Interact with the terminal on the hatch to open it using the key and exit the match.

Note that Night Raid and Electromagnetic Storm match types don’t include any active Raider Hatches.

Behind Closed Doors
Visit a locked room on Dam Battlegrounds, Buried City or Spaceport.
Bronze
This trophy is awarded for visiting a locked room on Dam Battlegrounds, Buried City, or Spaceport for the first time. Each map has different locked rooms that have higher level loot in them, and require a key to open and enter. Keys can be found while looting, generally for a different map than the one you are currently on. Once you find a key you will need to extract with it or stick it in your inventory safe pocket, then take it into the correct map where it can be used. Each key will tell you the building it corresponds with, which will be the same name of the building on the map. Once you reach the building, you’ll need to look for a locked door (red light) where you can interact and use the key. Once you do, open the door and enter the room to earn the trophy.

If you don’t find one earlier, you are automatically given a Dam Surveillance Key during the quest Greasing Her Palms given by Celeste early in the line of quests and are required to enter the room for the quest objective. Other later quests also give more keys, and you can receive a few from the Keyholder Pack on Page 5 of the first Raider Deck.

This opens the locked door in the Water Treatment Control building in Dam Battlegrounds. This is a common door for players to open, so even if you don’t have a key and are nearby you can check to see if the room is open and anyone has left anything behind, just watch in case another player is present and doesn’t want you coming in to take their items.

The Big Haul
Return to Speranza with 50 000 worth of loot.
Bronze
This trophy is awarded for returning to Speranza with at least 50,000 credits worth of loot. In your inventory you view the current value of all your held items at the top to the right of your current weight, and to earn this trophy you need to return to Speranza with this total at least 50,000 credits HIGHER than when you entered the match. Having the total at 50,000 won’t award the trophy unless you came in with nothing, which would be a bad idea.

If you don’t earn this during normal gameplay, an easy way to earn it is during the Lush Blooms map event that appears occasionally on all maps. This event will have woven baskets spawned around the map, particularly at Raider Camps. These baskets include fruit and the other food items, which have quite a high sell value and each stack up to 10 each. Go around and find a handful of baskets and you can easily extract with well over 50,000 credits worth of the food items.

The Long Haul
Reach a total lifetime loot value of 1 000 000.
Bronze
This trophy is awarded for extracting with a total of 1,000,000 credits of loot. This is cumulative from all matches, but like The Big Haul only counts value over what you enter the match with. As long as you are continually extracting with an inventory full of items you should end up reaching well over 1 million worth of loot value during your playtime.
Expert Weaponsmith
Upgrade a weapon to Tier IV.
Bronze
This trophy is awarded for upgrading a weapon to Tier IV for the first time. Upgrading weapons requires constructing the Gunsmith Workshop station, then you can create weapon parts and upgrade the Tier of weapons in your inventory. You don’t need to upgrade the station further to be able to upgrade weapons to Tier IV, just obtain the required materials. You can track materials for specific weapons by viewing them in the upgrade menu to highlight them in-game.

Note that if you are doing the vendor quests you automatically receive a Tier IV Ferro, but this doesn’t unlock the trophy as you need to upgrade the weapon to Tier IV yourself. If you find a Tier III weapon you can upgrade it to Tier IV to earn the trophy, you don’t need to upgrade a weapon right from Tier I.

Well-Armed
Have two weapons of Tier II or higher equipped in a round.
Bronze
This trophy is awarded for having two Tier II weapons equipped during a match. Weapons start out as Tier I whether obtained from loot, purchased from the Gun Shop Trader, or created with Gunsmith station in the workshop. You can then use the Gunsmith station to upgrade a Tier I weapon to Tier II. Once you have two Tier II weapons you can enter any map with them and you will earn the trophy once you arrive in the match. This also counts if you find weapons Tier II or above from looting or by taking them from other players.
Back from the Brink
Revive a squadmate ten times.
Bronze
This trophy is awarded for reviving another squadmate ten times total. While playing with other squadmates if they become down you can revive them by holding :sq: to slowly revive them, or by using a Defibrillator which will immediately pick them and give them a health boost. Reviving squadmates a total of 10 times with either of these methods to earn this trophy.
Legend of Speranza
Reach level 75.
Gold
MISSABLE

This trophy is awarded for reaching level 75, which is the current maximum level in the game, awarding you with a total of 76 skill points to use in the skill tree. XP is awarded during matches for all actions you take, including opening containers, damaging ARC or other Raiders, and a bonus for successfully extracting during a match. This will likely be the last trophy that you earn during you game if you are actively working on other trophy requirements.

While playing matches normally, the best way to earn XP is to make sure you loot all possible containers that you see. You are still awarded the XP for looking in containers even if they have already been opened by someone else and you don’t take anything, so even if you are full up on loot you can interact with then immediately back out of containers to earn XP for looting them.

If you are specifically trying to gain XP, the best way is to bring a Hullcracker into a match and then destroy the larger ARC enemies such as the Bastion or Bombardier. You receive a large amount of XP for damaging and then destroying these enemies, then can loot each individual part that they drop when destroyed for further bonuses. If you do this in a squad you can earn huge amounts of XP during one match if you rotate around the map as a group and keep taking out the ARC as they respawn over time. NOTE: XP for damaging ARC and from looting Bastion and Bombardier sections has been reduced in the Nov. 13, 2025 patch, but this is still a viable way to earn a lot of XP per match, just less than before.

This trophy is marked as MISSABLE as your player level is reset if you decide to finish the Expedition Project and then follow through with sending off your Raider once the departure window becomes available. This functions as an account reset, and resets most aspects of your account including your level in exchange for some bonuses such as extra skill points and XP bonuses. Unlike most other extraction shooters the reset is optional and not forced, so you don’t need to work on the Expedition Project and reset your account if you don’t want to, so if you haven’t earned this trophy yet make sure not to follow through with the reset until you earn it if you don’t want to level up to 75 again.

Dedicated to the Craft
Have five stations upgraded to level 3 or higher.
Silver
This trophy is awarded for having at least 5 of the Workshop stations updated to level 3, which is the current maximum level. This means building and then upgrading any 5 of the Gunsmith, Gear Bench, Explosives Station, Refiner, Utility Station, and Medical Lab. The Workbench cannot currently be upgraded, and Scrappy doesn’t seem to count even though they are listed in the Workshop and can be upgraded to level 5.

While working on station upgraded it is recommended that you enter the upgrade menu for each of them and then track the materials. This will highlight materials if you ever encounter them in matches, making sure that you don’t miss them. The blue topside materials can be found in the location associated with their material types, while the ARC enemy materials can be found by destroying and then looting the enemy they are associated with.

To reach level 3 on most station you will be required to get materials from the higher level ARC enemies: Leaper, Rocketeer, Bastion, and Bombardier. Each enemy has a specific weakness that makes dealing with them much easier once you know what it is.

Leapers are extremely weak to fire, and can be taken out extremely quickly if you Blaze Grenades. You can receive these while looting or make them yourself if you obtain the Blaze Grenade blueprint, but if not you can also destroy Fireball ARC and use the Fireball Burner they drop to work as a slightly weaker Blaze Grenade. Bait a Leaper into a spot where it can’t easily reach you such as the door to a building, then throw the Blaze Grenade or Fireball Burner directly at it to light it on fire. You can take out a Leaper with two direct hit Blaze Grenades, then loot each of its limbs and center to obtain at least 1 Leaper item.

Bastions and Bombardiers attack in different ways, but both have effectively the same weakness. You can shoot the yellow ball joints on their legs to destroy them, which will temporarily stun then when their legs break. You can also shoot the yellow cylinder on their back to deal more damage. Throwing explosives underneath them is also very effective to deal damage. If you want to take them down extremely quickly, you can use the Wolfpack Grenade or the Hullcracker to deal large amounts of damage. Both of these enemies drop a large number of lootable sections, so you can generally find at least 2 – 3 of each of their Epic items if you make sure to search all sections, or upwards of 8 – 9 if you destroy one during a Night Raid or Electromagnetic Storm event.

Rocketeers are the only current flying higher level ARC, and can be tough to deal with depending on your setup. Like the Bastion and Bombardier you can quickly deal with them with the Wolfpack Grenade or Hullcracker (a Wolfpack used only on a Rocketeer will almost entirely destroy it in one shot) but if you want to take on out using Heavy Ammo weapons such as the Anvil you can as well.  Get inside a building with multiple windows such as the apartments on the very north side of Dam Battlegrounds, then continually peak out and shoot the thrusters on the Rocketeer to destroy them. Once you destroy two of the thrusters the Rocketeer will fall out of the sky and explode like the other flying ARC enemies, allowing you to loot its items.

Self-Sufficient
Install a station in your Workshop.
Bronze
This trophy is awarded for installing any new station in your Workshop for the first time. Starting out you automatically have the Workbench unlocked, which allows you to create basic items. To create more specific or higher level items, you need to install the other stations and upgrade them with materials found during matches. Stations are installed using base materials, which can either be found directly in matches or by dismantling other higher level materials.
In Your Element
Reach level 10.
Bronze
This trophy is awarded for reaching level 10.
Getting Serious
Upgrade a Workshop station to level 2.
Bronze
This trophy is awarded for upgrading any Workshop station to level 2 for the first time. Aside from the Workbench, all Workshop stations can be upgraded using more materials, which allows them to create more items of a higher level. Doing this generally requires specific higher level base materials
Same Song, Same Verse
Set off two car alarms in a single round.
Bronze
This trophy is awarded for setting off two different car alarms during a single match. Around each map you can find vehicles, sometimes you can pry open the hood of a vehicle to pull out materials, whereas other times they will have lit up headlights and taillights and if you go near or touch the vehicle it will trigger the car alarm, alerting nearby players or ARC enemies to your position with the loud sound they make. This trophy requires you to activate two different vehicles during the match, it doesn’t count if you activate the same car alarm twice.

In the Nick of Time
Safely return to Speranza with less than 5 seconds left in the round.
Bronze
This trophy is awarded for successfully exiting a match with less than 5 seconds left on the in-game match timer. Matches start out with a maximum time limit of 30 minutes, then count down to 0 where anyone still left in the match immediately dies and losses all currently carried items if you aren’t standing beside an already activated return point. You could do this either on a normal return point or on a Raider Hatch, with Raider Hatch being the easier of the two.

To do this on a normal return point, you can wait at a return point until the match timer is about to run out, then activate the return point to call it in. If you are standing beside an activated return point once the match timer hits 0 you won’t be immediately killed by the explosion that occurs, and can then still extract as long as you aren’t knocked out by other means before you can exit through the extract.

To do this on a Raider Hatch, wait at the hatch until there is around 20 seconds left on the clock, then interact with the console to open the hatch. Then wait until there is 5 seconds left, and interact with the open hatch to immediately exit.

Not Over Till It’s Over
Safely return to Speranza while downed.
Bronze
This trophy is awarded for successfully returning to Speranza while in a downed state. If you are inside a return point while downed, you will still return to Speranza successfully as if you were still walking, as long as you don’t get fully knocked out before the extract occurs. You can either do this by having yourself or another player activate the terminal to immediately trigger the extract while you’re inside the area. You can still call the extract and activate the terminal yourself while downed, you just need to do this before your downed health fully depletes and you are knocked out.

If you want to try doing this yourself, you can down yourself with a grenade while inside the extract point after calling it. Standing inside and wait for the timer to reach around 15 seconds left on the terminal, then throw a grenade at your feet to down yourself, then wait out the rest of the timer to extract.

Practice Makes Perfect
Visit the Practice Range.
Bronze
GLITCHED

Currently for most players this trophy does not unlock correctly. For some players it will still unlock normally, but for most players visiting the Practice Range doesn’t currently trigger the trophy on first entry. Some player have been able to have it unlock by repeatedly entering and leaving the Practice Range, but has taken upwards of 3 hours so this would only be recommended if you are only missing this trophy and want to spend potentially a few hours trying this.

This trophy is awarded for visiting the Practice Range for the first time. The Practice Range can be accessed through the map selection menu after you have played at least 4 rounds on Dam Battlegrounds.

Bells and Whistles
Have 4 weapon mods on a single weapon.
Bronze
This trophy is awarded for equipping 4 mods on a single weapon for the first time. Weapon mods can either be found during matches, crafted at the Gunsmith Workshop station, or purchased from the Gun Shop trader. Mods have specific weapon types they can be equipped on, so you won’t be able to equip every mod you obtain on any weapon, and not all weapons have 4 available mod slots. Obtain one of each mod type for one weapon and equip them all at once in your inventory in Speranza to obtain this trophy.
Long Shot
Hit a target over 250 meters away.
Bronze
This trophy is awarded for dealing damage to any enemy from over 250 meters away. This counts against both Raiders and ARC enemies and with any amount of damage, so this is easiest to earn by shooting distant ARC enemies, such as the Snitch that is always flying around the Control Tower in Dam Battlegrounds, or one of the larger ARC enemies that you can see from quite a distance away, just be careful of them coming after you if you decide to earn this in this way. You can check the current distance to an enemy by pinging them with :r1: 
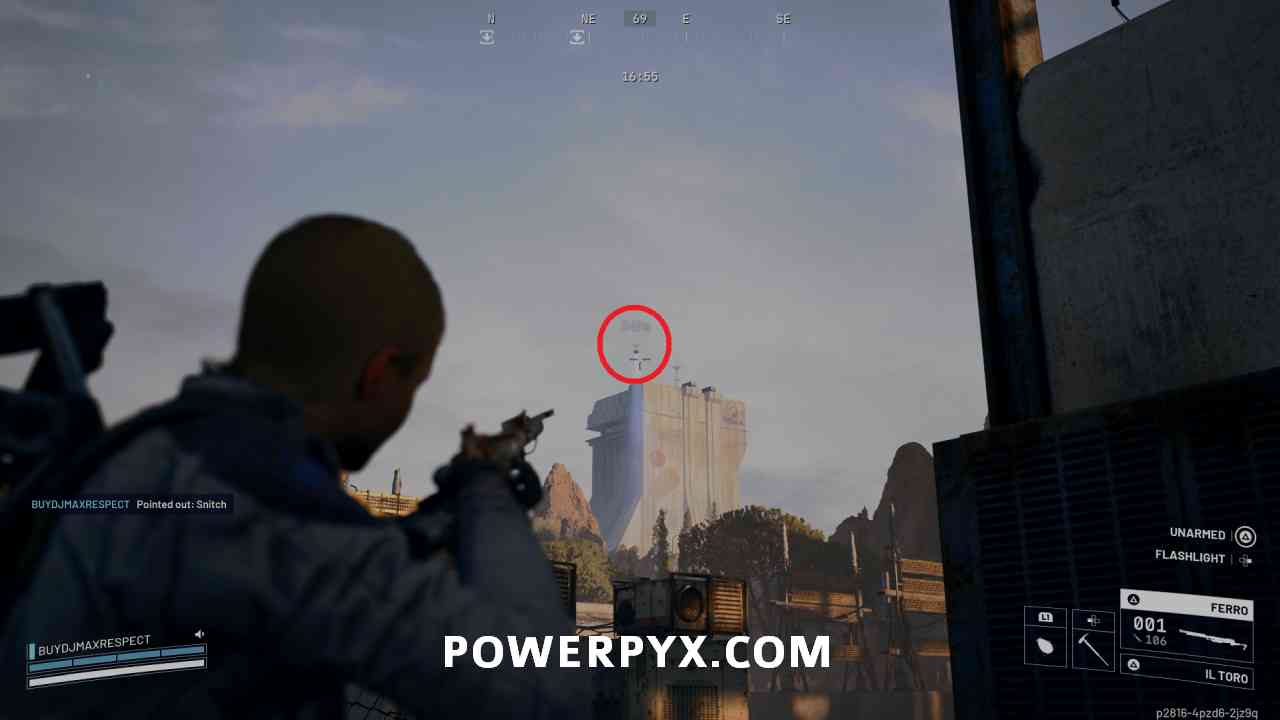
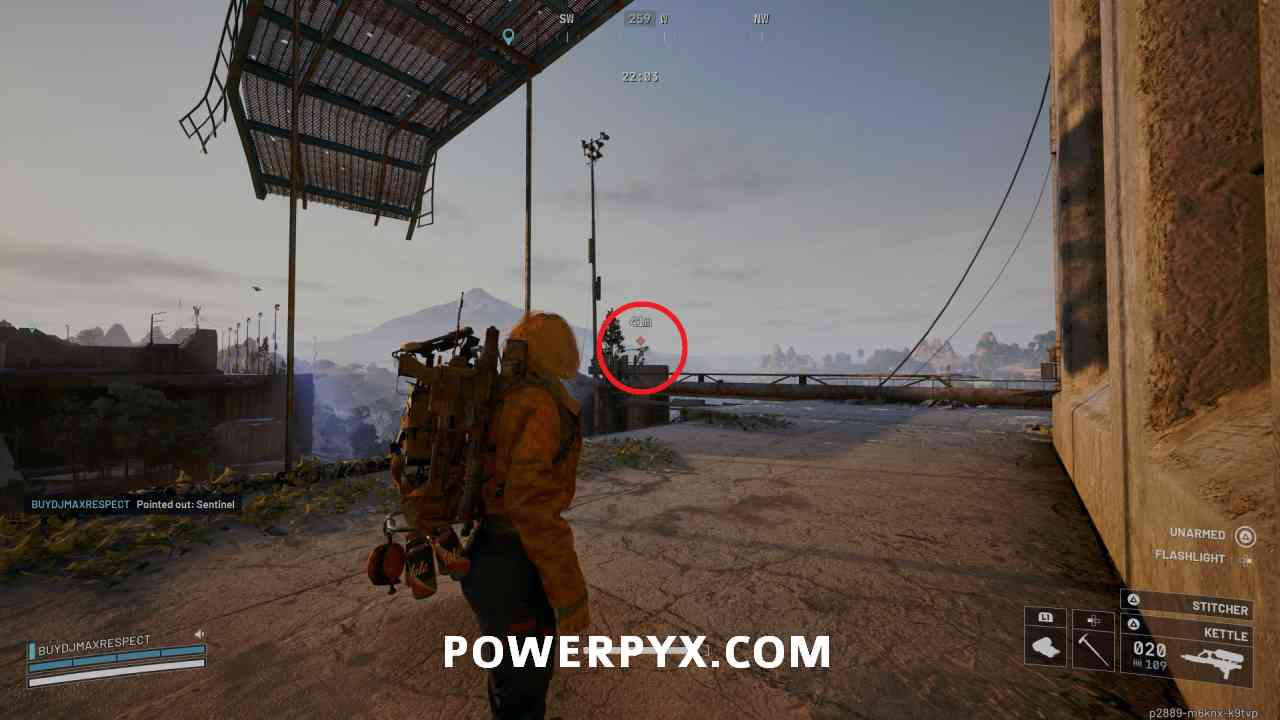
, which shows the name of the enemy and the distance they currently are away from you.

An example of pinging the Snitch that flies around the Control Tower in Dam Battlegrounds, which is 349 meters away. Note if you try it with a Snitch like this they will be alerted to you even if you miss them, and will start rapidly moving toward you until they lose track of you.

No Going Back
Be topside when the safe window closes.
Bronze
This trophy is awarded for being in any match when the match timer runs out. If you aren’t near an already activated return point this will cause you to immediately die and can’t extract the match, but if you are beside an activated return point you can still stay in the match until the extract arrives and you are able to leave.
Just Dropping In
Get hit by a Supply Drop.
Bronze
This trophy is awarded for being hit by a Supply Drop. Supply Drops are called in from Supply Drop Request stations that appear around each map, represented by a thin antenna with a yellow-white light at the top. Interact with the radio at the bottom to shoot a flare to call in the supply drop. The spawn locations for these are set, but they don’t always appear in all locations during a match. There is typically 3-4 stations spread around the maps during a match. They can only be used once per match by a player, so if you find a station but the light on top is out that means someone has called in the drop already.

Once you have interacted with the station to shoot the flare, watch where it is going above you and stand directly underneath it, as that is exactly where the Supply Drop will appear. You can stand directly under the flare and let the Supply Drop land directly on you. This doesn’t damage you, just knocks you out of the way and will award the trophy.

Most Durable Pants in Speranza
Slide 80 meters without stopping.
Bronze
This trophy is awarded for sliding a total of 80 meters in one go without stopping. During gameplay you can slide along the ground by sprinting and then tapping :o: 
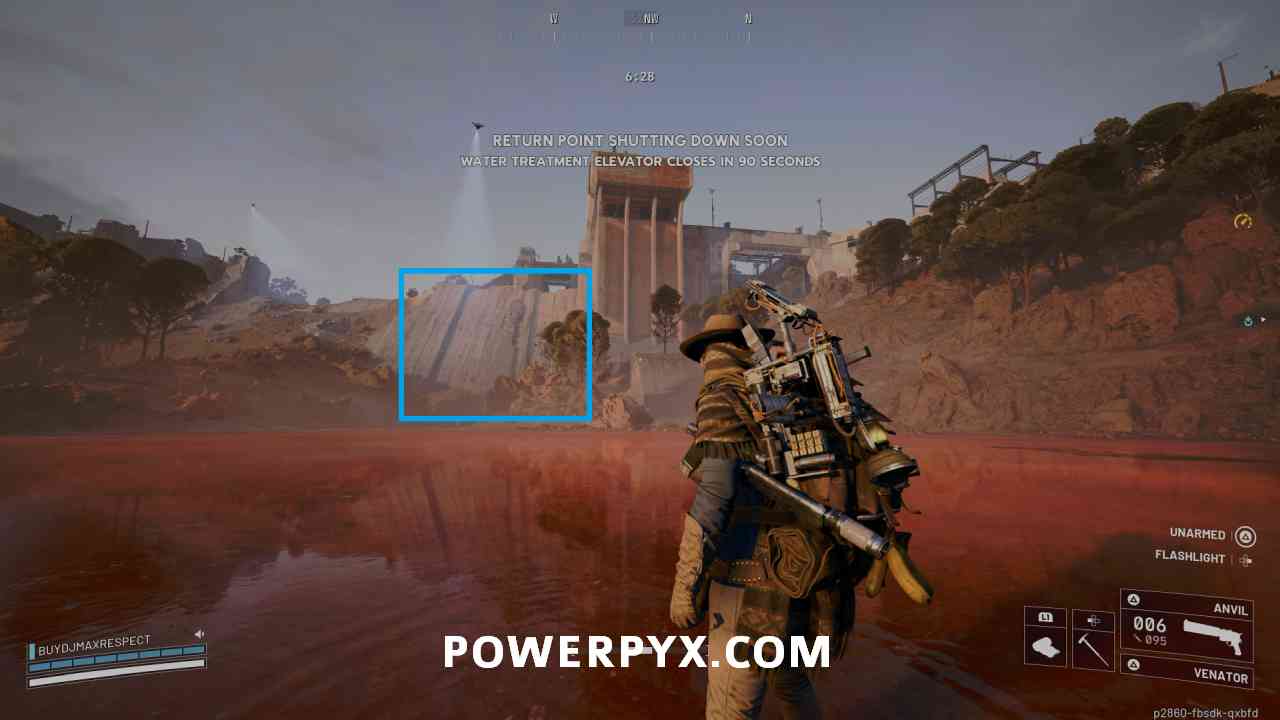
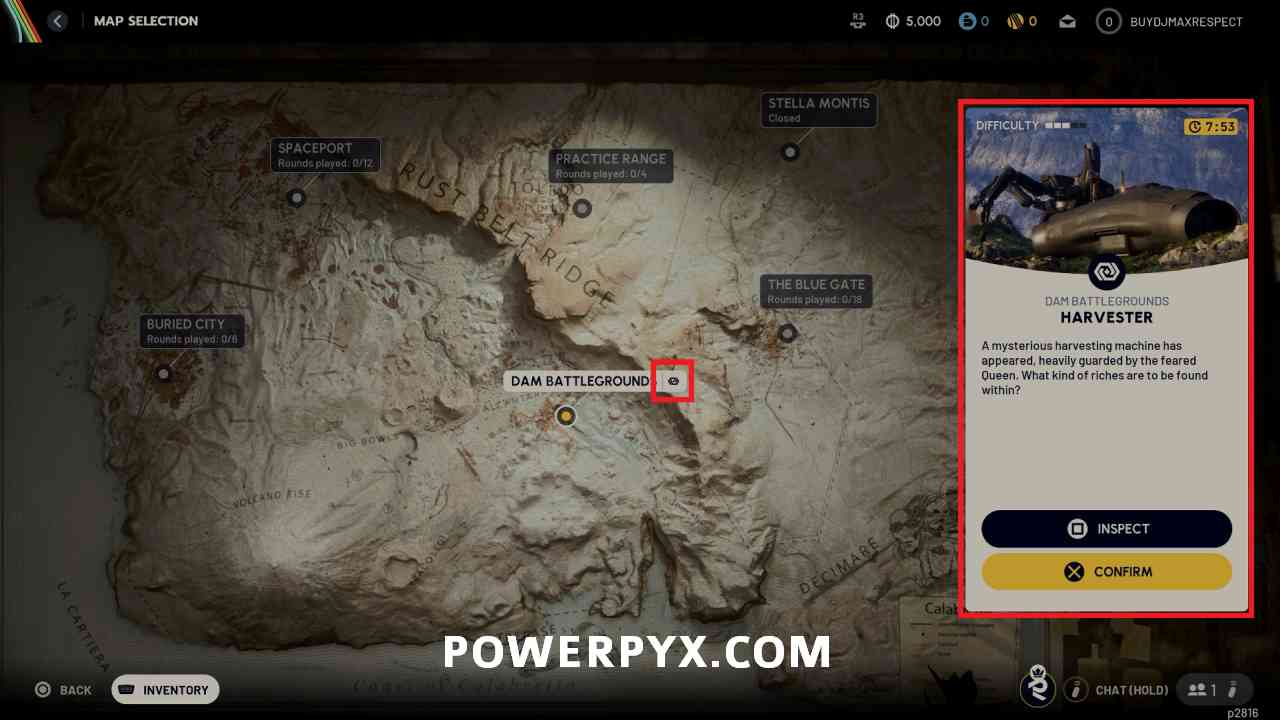
crouch, with the smoother the surface and bigger the slope allowing you to slide further. There aren’t very many locations in the game that allow this, so the easiest location to do it is on the sloped dam surface in the map Dam Battlegrounds. On the map between the Pileline Tower and Control Tower locations are steep sloped areas that you can run and then slide down, giving enough distance to reach the required 80 meters if you slide all the way to the bottom. Start sprinting at the top and then :o: crouch to start sliding, and keep holding forward until you reach the bottom.

See You Never
Return safely to Speranza while leaving a squadmate behind.
Bronze
This trophy is awarded for returning to Speranza from any map while leaving at least one of your squadmates in the match. You are able to return on your own without teammates by going to any extraction point, and you will exit the match without them and they will need to leave on their own.

This also counts if you open a Raider Hatch and go through it first before your squadmates, even if they are also exiting with you.

Today You, Tomorrow Me
Revive an encountered Raider with a Defibrillator.
Bronze
This trophy is awarded for reviving another player during a match who is not in your squad using a Defibrillator. Normally you can only revive player who are in your own squad when you enter a match, but if you bring in or find a Defibrillator you can use this to revive any downed player, even if they aren’t in your squad. Equip the Defibrillator in the consumable wheel, then run up and use it on a downed Raider to revive them and earn this trophy.

Defibrillators can be rarely found while looting, given in the Free Loadout, purchased from the Clinic trader for 3,000 Coins once you reach level 12, or created at the Medical Lab Workshop station if you obtain the Blueprint for them.

Top of the World
Reach the top of the Launch Towers in Spaceport.
Bronze
This trophy is awarded for reaching the top of the Launch Tower location on the map Spaceport. These are the towers located in the directly center of the map, and you need to complete a small puzzle to be able to enter a locked door in the rooms at the top of the exterior ramps and zipline to the top.

Around the exterior of the ramps leading to the towers you need to search for a rectangular battery. These can generally be found either beside the small bunkers with ladders leading to the tunnels around the launch pad, or inside the rocket thrusters that are sitting around the area.

Once you have the battery, carry it up the ramp and into the rooms on either tower that are underneath the walkways. In these rooms there is a generator where you can insert the battery, then pull the lever on the side. This allows you to enter the rooms on either side of the generator, which contain ziplines that take you to the top of the tower.

For Science!
Get gas, stun, and burn statuses at the same time.
Bronze
This trophy is awarded for being affected by gas, stun, and burn statuses all at the same time. While it may be possible to earn this against grenade happy players in PvP, it is much easier to do this by damaging yourself.

The easiest way to do this involves having a Jolt Mine, a Gas Grenade, and either a Blaze Grenade or Fireball Burner. The Jolt Mine and Gas Grenade can both be bought from the Grenades & Gadgets trader, whereas the Blaze Grenade or Fireball Burner you will likely need to find in a match if you don’t obtain the Blaze Grenade blueprint.

Once you have at least one of all three, enter a match with all three items and then so low level gear you don’t care about losing if you accidentally die while triggering the statuses or on the way out of the match. Find a place where you are be against some sort of wall and first place the Jolt Mine on the ground. Once the mine is set through the Gas Grenade on the wall in front of you, then quickly switch to the Blaze Grenade or Fireball Burner and throw it on the ground at the Jolt Mine. This should set off the Jolt Mine, while burning you and being inside the gas, awarding the trophy.

Shots Fired
Deal 1000 damage to ARC enemies.
Bronze
This trophy is awarded for dealing a cumulative total of 1000 damage to any ARC enemies during matches. This counts all damage from any source even if you don’t land the final blow on an ARC enemy, so you will earn this early on in your playtime.

Note if you played prior to the trophy being fixed you can now enter matches and it should correctly track any new damage.

Racking Them Up
Destroy 50 ARC enemies.
Bronze
This trophy is awarded for destroying a cumulative total of 50 ARC enemies during matches.
Trail of Destruction
Destroy 100 ARC enemies.
Silver
This trophy is awarded for destroying a cumulative total of 100 ARC enemies during matches.
Death From Above
Deal 50 damage to any enemy while atop a Rocketeer.
Silver
This trophy is awarded for dealing a total of 50 damage to any enemy (ARC or Raider) while standing on top of a Rocketeer. A Rocketeer is a specific type of flying ARC enemy that will shoot rockets at you, so you first need to jump on top of a Rocketeer.

There are two ways you can go about doing this, either by jumping on top of the Rocketeer from on top of a building while it is flying, or by stunning the Rocketeer with either a Showstopper Grenade or Hornet Driver, then climbing on top of it when it falls to the ground. While on top you can then shoot the top of the Rocketeer until the trophy unlocks.

If you want to earn this by jumping on top of a Rocketeer without stunning it, the best map to accomplish this is Buried City. On the west side of the map around the taller buildings there will normally be at least one Rocketeer slowly flying around. Wait for it to fly near the rooftop you are on and jump toward it. Be aware if you are doing it this way the Rocketeer will attempt to knock you off after around 15 – 20 seconds, so don’t do this with a bunch of items in your inventory you don’t want to lose.

Three Birds, One Stone
Destroy 3 ARC enemies with a single Wolfpack grenade.
Bronze
This trophy is awarded for destroying at least 3 ARC enemies with a single Wolfpack grenade. Wolfpack are Epic level grenades that explode into a large number of missiles that will track toward ARC enemies, destroying weak ones such as Wasps and Hornets in a single shot. Wolfpack grenades can be rarely found as loot in matches, crafted if you find the Blueprint, or most easily you can obtain a guaranteed 3 by completing the quest Out of the Shadows from Shani.

Once you have at least 1 grenade, you will need to find 3 enemies together in a match. The easiest way to do this is by triggering a Snitch so that it spots you, then will always summon 3 enemies to attack you. If you have Snitch Scanners from destroying them you can also throw these yourself to summon three enemies at the location where you throw the grenade. Once you have found a group of three enemies, wait for them to be nearby and aim and throw the Wolfpack in the air toward them. The grenade will explode in the air, releasing the rockets and tracking toward any nearby ARC enemies.

Bringing Down the Big Guns
Destroy a Rocketeer.
Bronze
This trophy is awarded for destroying a Rocketeer for the first time. Rocketeers are the only current flying higher level ARC, and can be tough to deal with depending on your setup. You can quickly deal with them with the Wolfpack Grenade or Hullcracker (a Wolfpack used only on a Rocketeer will almost entirely destroy it in one shot) but if you want to take on out using Heavy Ammo weapons such as the Anvil you can as well.  Get inside a building with multiple windows such as the apartments on the very north side of Dam Battlegrounds, then continually peak out and shoot the thrusters on the Rocketeer to destroy them. Once you destroy two of the thrusters the Rocketeer will fall out of the sky and explode like the other flying ARC enemies, allowing you to loot its items.

Note for this and the other two trophies for destroying specific enemies the trophy only unlocks for the player who deals the final blow and receive the “ARC Destroyed” XP bonus, so if you are fighting one and there is another player nearby the trophy won’t unlock if they get the final blow on it.

Into the Breach
Destroy a Bastion.
Bronze
This trophy is awarded for destroying a Bastion for the first time. Bastions are one of the two slow walking ARC enemies, along with the Bombardier. Bastions are the ones that have more grey coloring, and will attack by shooting a machine gun directly at you. To damage them, you can shoot the yellow ball joints on their legs to destroy them, which will temporarily stun them when their legs break. You can also shoot the yellow cylinder on their back to deal more damage.

Throwing explosives underneath them is also very effective to deal damage. If you want to take them down extremely quickly, you can use the Wolfpack Grenade or the Hullcracker to deal large amounts of damage quickly to them.

A Tale for the Ages
Destroy the Queen.
Gold
The Queen is a boss ARC enemy that appears on maps when the Harvester event is active, as displayed in the map selection menu. The Queen guards the Harvester location and will attack any players that try to go near. This event isn’t always present, so you will need to double check which map currently has which event and go for the map with the Harvester event active if you want to fight the Queen.

The Queen has an extraordinary amount of health, so you will need to be well prepared before entering a match where you want to attack one. It is possible to defeat one completely solo, but you will generally need a Hullcracker with 10-12 stack of ammo, along with a couple Wolfpack grenade for safety, especially if you want to try and loot the Queen Cores after as this will help you deal with the Rocketeer that will be hanging around the Harvester. You’ll likely need a purple level Augment to have enough space for all of the ammo, along with a decent amount of healing items. If you are doing this solo, you may also want to bring Barricades and Door Blockers to stop other players coming in behind you and attacking you.

The Harvester event appears on the Dam Battlegrounds, Spaceport, and Blue Gate maps, with the easier two maps to fight it on being Dam Battlegrounds and Spaceport. On Dam Battlegrounds you can stand in the room on the southeast corner of the Power Generation complex that is directly overlooking the Harvester location, whereas on Spaceport you can either standing in the tower along the wall northeast of the Harvester, or the group of buildings to the southwest. Whichever location you choose, you goal is primarily to use the Hullcracker to damage the Queen. You can target either the joints on the top of legs, or the blue lights on the face. If you put enough damage into the leg joints they will be destroyed and deal a lot of damage like the Bastion and Bombardier, though these are harder to hit than just launching the grenades at the Queen’s face. The two attacks that the Queen will use that you’ll need to avoid are a blue laser that will hit from effectively any distance, and rockets that it will launch toward you that explode into fire on the ground. The mentioned locations on the two maps are very good for this as they allow you to easily avoid the blue laser by crouching behind the walls, and move out of the way of the rockets when they are launched toward you.

Note like the other two trophies for destroying specific enemies this only unlocks for the player who deals the final blow, so if you defeat it and didn’t receive the trophy it is because another player dealt the final bit of damage. If you are working on this with a squad have the other players stop shooting when the Queen lights on fire so that the person earning the trophy can deal the last bit of damage. It may be helpful to save multiple Wolfpack grenades when doing this to put a lot of damage in at the end and guarantee the trophy.

Blindsided
Destroy a Sentinel with a Raider Tool.
Silver
This trophy is awarded for destroying a Sentinel ARC enemy with a Raider Tool, which is the melee weapon you are equipped with at all times. The Sentinel is the higher level version of the turret that can spawn on all maps, but doesn’t appear as frequently as normal turrets. They do appear more frequently during Night Right events.

Two locations where they seem to be most common are on Dam Battlegrounds on the walls on either side of the Breach, or on Spaceport on the rooftop of the Departure building. Once you find one, you can carefully sneak up behind it as long as it doesn’t spot you. If you can get within melee distance they are no longer a danger to you, as the barrel is longer than how close you can get, so if you are standing directly beside it, it cannot shoot you. Once you’re close enough take out your Raider Tool and melee it until it explodes, awarding the trophy.

Snitches get Stitches
Destroy a Snitch with a Stitcher.
Bronze
This trophy is awarded for destroying the ARC enemy Snitch with the weapon Stitcher for the first time. The Stitcher is a basic weapon that you can craft from the start of the game or be given with the Free Loadout, so they are very easy to come by. The Snitch is a weak ARC enemy that can be found in various locations around each map, and will fly around with a rotating light trying to spot Raiders. If they spot a Raider the light will turn red, and then a group of other ARC enemies will drop in to attack the Raiders spotted by the Snitch after a short time if they aren’t destroyed. To deal damage to them you can shoot the white rotor sections off the outside of them, but when using the Stitcher you should focus on putting as much damage into the center of the Snitch as quickly as possible.
Comparative Study
Use 4 different weapons to deal damage in the Practice Range.
Bronze
This trophy is awarded for dealing damage with any 4 weapons within the Practice Range. Inside the Practice Range you can find a station where you can pick up base versions of weapons to try out (you don’t get to keep them when you leave). Pick up 4 different weapons and use them to deal damage to the targets around the Practice Range to earn this trophy.

Hook, Line, and Sinker
Use a Lure Grenade to make a drone attack another drone.
Bronze
This trophy is awarded for making any ARC drone attack another drone using a Lure Grenade for the first time. This means doing something like having Wasps and Hornets attack a Rocketeer or Leaper. Even though the trophy says “drone” it doesn’t require specifically flying ARC attacking each other.

The Lure Grenade can be found as loot during matches, or created with the Lure Grenade Blueprint which is gained by completing the quest Greasing Her Palms from Celeste, and can then be crafted when you have the Utility Station at level 2. You can also obtain 3 of them from the ARC Hunter pack on page 2 of the first Raider Deck.

Once you have a Lure Grenade one of the easier ways to do this would be on the map Buried City. On the west side of the map there is typically a Rocketeer flying slowly around the apartment buildings. As long as it hasn’t spotted you, throw the Lure Grenade at it to trigger any other nearby drones to attack it.

If you prefer to try this on a Leaper you can achieve this on the Dam Battlegrounds map, which typically has a Leaper walking around either the Water Treatment Elevator or west of the Red Lakes Balcony lift.

In any situation while using the Lure Grenade, you need to make sure that there are other drones nearby when you use it. The active time of the Lure isn’t very long, so if there aren’t other drones right nearby then they likely won’t make it over in time before the Lure runs out. If you’re struggling to get other drones nearby you can use a Snitch Scanner to call some in before throwing the Lure.

Be aware that the trophy seems to require the drones put a bit of damage into the other ARC to trigger the trophy, so if it doesn’t work the first time the drones may not have done enough damage to trigger it.

Mechanical Failure
Shoot a thruster off a Wasp.
Bronze
This trophy is awarded for shooting the thruster off a Wasp for the first time. A Wasp is a specific type of ARC enemy that shoots machine guns at Raiders from the air. All flying ARC enemies you can shoot their thrusters, which will destroy them and hamper the ability for them to fly, so it is generally good to aim for at least one thruster first on flying ARC enemies to make it harder for them to attack you before you target the main body to destroy them. Shooting two thrusters off any of the flying ARC enemies will cause them to drop out of the sky, typically destroying them instantly.
Unyielding
Knock out 10 Raiders.
Bronze
This trophy is awarded for knocking out a total of 10 other players during matches. Knocking out a player is when they fully die out, either from you shooting them or approaching them and pressing :square: to finish them off with melee.
A Vendetta Is Born
Get downed and knocked out while inside a return point.
Bronze
This trophy is awarded for being downed and then knocked out while you are inside any return point during a match. This requires you be downed and then knocked out by another player, you can’t down yourself and then sit through the knock out timer, you must be finished off by a player. If you don’t manage to earn this during normal gameplay, you can wait at an extract point then ask another player using proximity chat to down you and knock you out in the elevator.
Horseshoes and Hand Grenades
Down an encountered Raider with a grenade.
Bronze
This trophy is awarded for downing another player with a grenade for the first time. Grenades in this game are quite powerful, so you should make use of them when you have them to deal damage to ARC enemies or other players. If you are fighting someone who is in a small room throwing a few Heavy Fuse Grenades it’s an almost guaranteed way to down someone because of their large explosive area.
Crossed the Threshold
Knock out a Raider.
Bronze
This trophy is awarded for knocking out another player for the first time.
Up Close and Personal
Knock out a Raider with a Raider Tool.
Bronze
This trophy is awarded for knocking out a Raider with your Raider Tool for the first time. This doesn’t require that you down and then knock them out with it, only finish them off using it, so you can down another player first using guns or explosive then run up to them while they are downed and hit them with the Raider Tool to finish them off.
The Friends We Made Along The Way
Return to Speranza together with an encountered Raider.
Bronze
This trophy is awarded for returning to Speranza at a return point with another player who isn’t in your party. Not all players in the game want to engage in combat with you, so if you see an open extract point with someone inside don’t immediately start attacking them, as they may be fine leaving with you without making a fuss.
Enemy of My Enemy
Get an encountered Raider downed by ARC enemies summoned with a Snitch Scanner.
Bronze
This trophy is awarded for getting another player downed with ARC drones summoned using a Snitch Scanner. After destroying a Snitch, you can loot the Snitch Scanner from it which when thrown will summon three ARC drones in the same way as if you were spotted by the Snitch and didn’t destroy it. You can use this to summon drones on other Raiders if you throw the Scanner nearby. You can do this with multiple Scanners at once, so this is especially effective if you get multiple Scanners and then throw them all at once to summon multiple groups of drones which is very hard to deal with.

If you don’t want to try and do it this way, you can try convincing another player during a match to help you by calling the ARC in to down them, destroying the drones, then reviving them.

Heart of Gold
Be thanked 10 times in direct response to something you did.
Bronze
This trophy is awarded for being thanked by other players 10 times for an action that you did. When you do something such as drop an item another player picks up, heal them, or use a defibrillator on them they will have a prompt to press :up: 
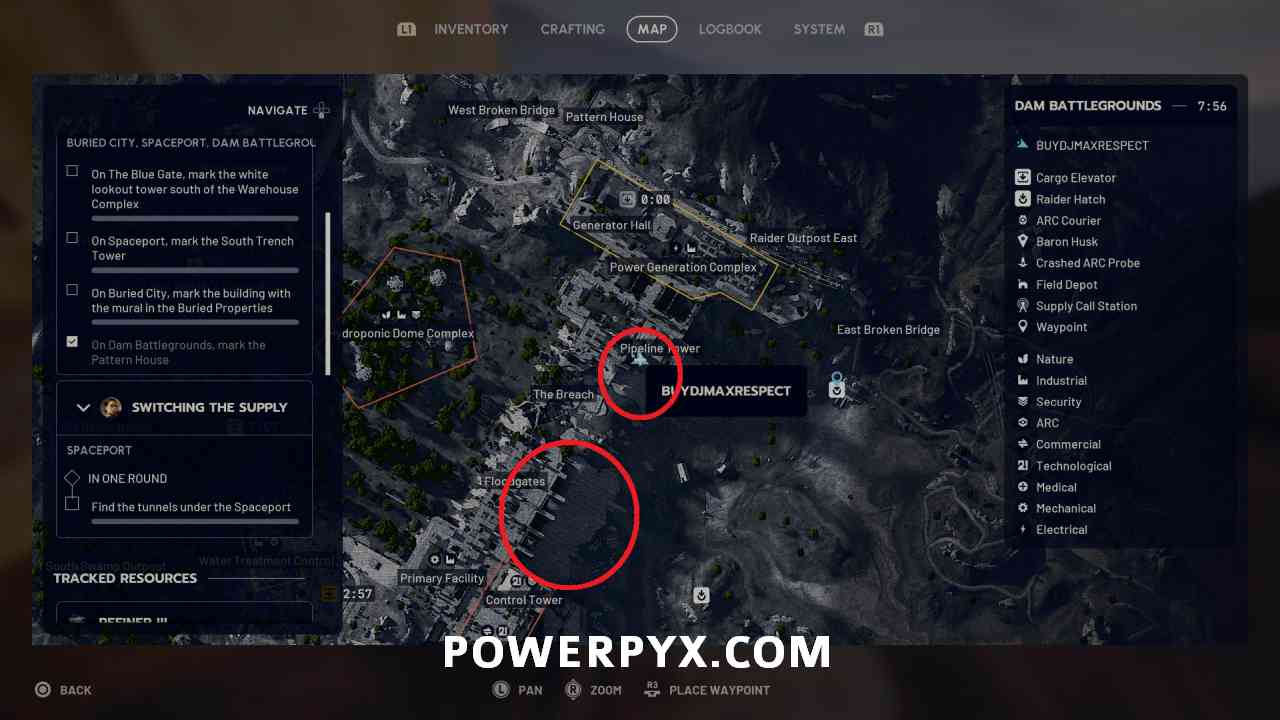
to say thanks in response. Have this occur 10 times to unlock this trophy.

If you don’t earn this during normal gameplay, you can boost this with a squadmate by dropping items from your inventory and having them pick them up and thank you each time.

Share
Tweet
Shares 0

Filed Under: Trophy Guides

Comments

  1. Robotnik1988 says

    November 11, 2025 at 9:18 pm

    Any chance you guys might still eventually do trophy guides for Outer Worlds 2 or Digimon Story Time Stranger? Especially since releases are pretty quiet now until next year.

    Reply
  2. WickdSamurai says

    November 13, 2025 at 10:58 pm

    Thanks for the guide PowerPyx!! Do you know if the games trophies will autopop if I progress on PC and then switch over to PS5?

    Reply
    • Gage says

      November 14, 2025 at 1:26 am

      Someone on PSNP tried it, nothing autopops. You can redo the one off and cumulative trophies, but stuff like level 3 on the Workshop Stations won’t pop without resetting your account.

  3. Jeremy says

    November 14, 2025 at 11:06 am

    Hi there ;) thank you so much for this guide and your gigantic work; hope Embark will update correctly these glitched trophies, that game is amazing!
    Add me on psn if you want to team up:
    Bleepx

    Reply
    • Stalker-NSDQ says

      January 13, 2026 at 1:12 pm

      I have currently a total of 7 Trophies, including the ones mentioned, that are bugged/glitched on PS5 as far as I experienced:

      -Well armed
      -Back from the Brink
      -Practice makes perfect
      -Snitches get Stitches
      -Hook, Line and Sinker
      -Shots fired
      -Enemy of my Enemy

      I hope there will be a fix 🙁

  4. fhidh says

    November 19, 2025 at 11:24 am

    Guys the easiest place to kill the queen is Blue gate inside the gas station in the checkpoint area. She will come really close to you and you can easily hit it. As long as you are in the gas station you will not get hit by anything. This might take multiple tries for a few reasons. You can be shot and killed. although if doing it solo this is unlikely but can still happen. There will be no doors to block or barricade since the gas station doesn’t have any. So your biggest threat is other players but the queen is pretty much 0 threat unless you go out of the gas station and get hit by her lazer. Use a Mic. If someone else is nearby tell them that you are just doing it for the achievement and not the loot. If someone is going to kill you it won’t be until after the queen is dead and when you are looting but you don’t need to loot it for the achievement. YOU MUST get the last shot on the queen. if you dont you won’t get the trophy. This alone can cause multiple attempts if there are other raiders shooting at the queen with you. I had to attempt it twice because the first attempt someone else got the final shot and not me. The second attempt I shot the final shot and got the trophy. (I have made multiple attempts in the past on Dam Battlegrounds and I died within a few minutes due to the Queens lazer attack. It is very hard to see while bunkered in the room and the missiles set ablaze the bunker. In the gas station on Blue gate you pretty much avoid all of this).

    Reply
  5. fhidh says

    November 20, 2025 at 8:29 pm

    They nerfed the explosives and Hullcracker making the Queen much harder to kill now.

    Reply
    • Gage says

      November 21, 2025 at 9:23 pm

      For the Hullcracker their explanation was that it deals less damage to multiple parts like if you were shooting the Bastion or Bombardier, but for the Queen you couldn’t typically hit multiple parts in the same way so it should be functionally the same as before fighting it with the Hullcracker.

  6. Matthew says

    November 26, 2025 at 3:08 pm

    Going for platinum on PS5, if anyone wants to add me so we can help each other out my PSN is: MonkeyKing4696

    Reply
    • Brad says

      December 1, 2025 at 11:00 pm

      I’m ZeroGravity198, sent you an add

    • Dee says

      December 3, 2025 at 2:14 am

      I added you, my PSN is: delamco

    • itommy says

      December 30, 2025 at 4:23 am

      My psn: itommy2484 if someone help with trophy “Back from the brink”.

  7. Ben L0nd0n says

    November 30, 2025 at 11:35 pm

    Regarding leaving through raider hatch in under 5 seconds left, I did exactly what was suggested and pressed X to exit and he didn’t leave, the hatch closed again. FFS

    Reply
    • Tibor says

      December 5, 2025 at 2:53 pm

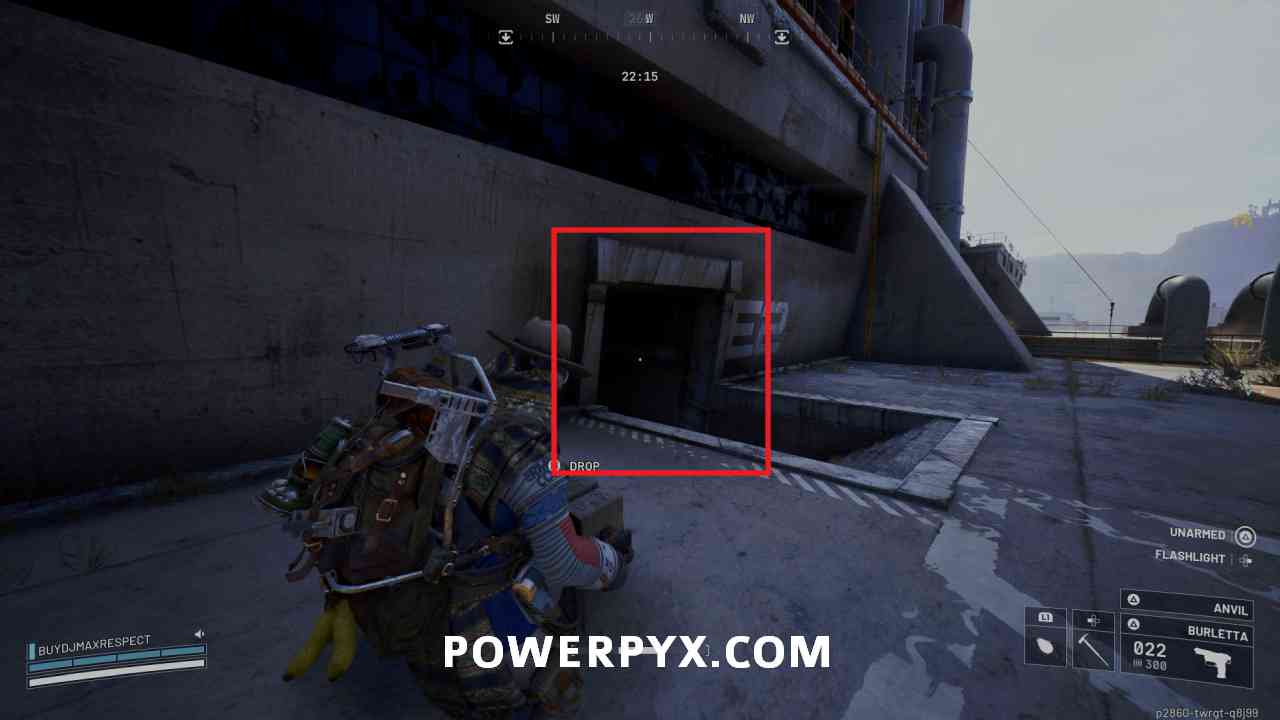
      If you mean “In the nick of time” trophy, it doesnt have to be in last 5 seconds through a raider hatch. I got it by pressing the elevator button when the timer was at 2 seconds. This way I got both trophies (this 1 & “No going back”) as the explosion after the timer reaches 0 doesnt kill you immediately if you are in or at close proximity of an activated elevator. Hope it helps.

    • Ben L0nd0n says

      December 7, 2025 at 6:12 pm

      Thank you, I just thought the information that a raider hatch closes after 15 seconds could be included in the trophy guide. Hence, one should open the raider hatch not with 20 seconds to go, but at 10-15 sec on the timer.

  8. MrMikie says

    December 4, 2025 at 11:50 am

    It is a good game but a shame the Trophies are still bugged. Once I get level 75 I will be dropping this game until they fix the last 3 trophies.

    Reply
  9. Ben L0nd0n says

    December 7, 2025 at 6:18 pm

    Down a raider with a grenade:

    The best location for this is on Blue Gate Map, the notoriously overfarmed room in the underground complex / security wing coming in from the Gate Approach. With 30 mins left at the start, rush to “outer gates” and stick to the left hand side, go past the “confiscation room” locked door up the staircase and you will always encounter some raiders that go in there completely ‘naked’ without any gear whatsoever to farm blueprints. Honestly, I had a hard time downing raiders in full gear with 3 fuse grenades even indoors or at extract points, this is by far the easiest as they won’t even defend themselves there and just accept defeat.

    Reply
  10. Future Skeletons says

    December 9, 2025 at 6:50 pm

    I killed a Sentinel with the Raider tool and the Trophy didn’t drop.

    Reply
  11. Cid-Kagenou says

    December 23, 2025 at 12:42 am

    “Practice Makes Perfect” is also buggy. I have visited the practice range several times now, but the trophy just won’t appear.

    Reply
    • itommy says

      December 30, 2025 at 4:15 am

      Yes, its buggy. I have trophy “Comparative study” in practice range, but no trophy visited practice range.

    • Estus says

      January 13, 2026 at 12:55 pm

      Same.

  12. Cid-Kagenou says

    January 8, 2026 at 10:28 am

    So, folks, and the next bug… I’ve reached level 75, but the trophy isn’t coming… The game is just a dream, great work!

    Reply
    • Erick C says

      January 14, 2026 at 4:17 am

      You got the trophy for hitting level 75? Or still bugged

  13. Mayhemeis says

    January 20, 2026 at 5:19 pm

    Shots fired trophy.. Any work around? Didint look guide first..

    Reply
  14. PartyService says

    January 28, 2026 at 1:22 am

    Hey, everyone. With today’s update, it’s finally possible to get the trophies. It worked for me. I was able to complete the buggy trophies.

    Reply
  15. Wilk_GC says

    February 10, 2026 at 11:14 pm

    Practice Makes Perfect/Well-Armed patched today and working.

    Reply
  16. Bryan says

    February 23, 2026 at 8:32 pm

    Does anyone want to get some of these trophies with me? bryanr1213 is my PSN.

    Reply
  17. Mirar says

    March 1, 2026 at 5:35 pm

    Hey Guys. I have found an easy turn around to get the Queen trophy. In my opinion you can reduce the difficulty from 7 to 4. Three steps:

    1. Make sure to be in friendly Solo PvE Lobbys. Play at least 7 to 10 rounds without killing or looting another raider.

    2. Craft a fast firing weapon with at least medium, better heavy ammo. Bettina, Renegade, Venator…

    3. Go for the Queen in Solo Lobbys. Fight the Queen with other raiders. As soon as the queen is burning (final stage) you hold with your rapide firing gun on the queen and you hope for the last bullet. I‘ve needed 6 attempts for the trophy.

    Reply

Leave a Reply Cancel reply

Your email address will not be published. Required fields are marked *

Youtube 1,210,000Subscriber
Facebook 15,000Fans
Twitter 19,200Followers

Latest Trophy Guides

Marathon Trophy Guide

Scott Pilgrim EX Trophy Guide

Resident Evil Requiem Trophy Guide

Reanimal Trophy Guide

Yakuza Kiwami 3 & Dark Ties Trophy Guide

Nioh 3 Trophy Guide

Code Vein 2 Trophy Guide

Arknights: Endfield Trophy Guide

Ghost of Yotei Trophy Guide

Silent Hill f Trophy Guide

Borderlands 4 Trophy Guide

Kingdom Come Deliverance 2 Trophy Guide

Red Dead Redemption 2 Trophy Guide

Latest Game Wikis

Resident Evil Requiem Wiki

Nioh 3 Wiki

Ghost of Yotei Wiki

Borderlands 4 Wiki

Kingdom Come Deliverance 2 Wiki

Elden Ring Wiki

Hogwarts Legacy Wiki

God of War Ragnarok Wiki

Cyberpunk 2077 Wiki

Red Dead Redemption 2 Wiki

Recent Posts

  • Marathon Trophy Guide & Roadmap
  • Resident Evil Requiem The Final Puzzle Solution
  • Scott Pilgrim EX Trophy Guide & Roadmap
  • Scott Pilgrim EX All Assist Collectible Locations
  • Scott Pilgrim EX All Event Locations
  • Terms of Service
  • Privacy Policy
  • Cookie Policy
  • YouTube
  • Facebook
  • Twitter

© 2008-2026 PowerPyx.com, all rights reserved.