
There are 12 Nero Checkpoints in Days Gone. This guide shows all Nero Checkpoint Locations in the order they can be reached. Completing all of them completes the World’s End trophy and questline.
Completing a checkpoint unlock it as a fast travel point. They also contain one Nero Injector each (used to max out your stats: health, stamina, focus). Additionally, you’ll find one Nero Intel Collectible inside each Nero Checkpoint.
The concept is always the same: there’s a generator at each Checkpoint that needs fuel to be powered on. There are always 2 fuel canisters in the Checkpoint area. Find one of them and refuel the generator. Then the doors have power again and you can enter the Nero Building. Some also require a fuse, in which case you can simply interact with the fuse box and follow the clues to be guided to the fuse location. Sometimes you must repair the generator too, which costs a little bit of scrap.
None of these are missable! After the story there’s free-roam and you can go back to all regions and finish up any side activities and collectibles you have left. It’s worth noting that there are two temporary points of no return. One at the end of 3rd region “Lost Lake” and one more at the end of 5th region “Crater Lake”. This will lock you out of some regions until the end of the story. Then after the story the whole map opens up again.
Nero Checkpoint #1: Little Bear Lake
Region: Cascade
The first Nero Checkpoint is story-related and cannot be missed. You go there during story mission “Bugged the Hell Out” (one of the first few missions). Next to the Nero building is a power generator. To power it on you must find one of the fuel canisters inside the Nero Checkpoint area. There are always multiple of these in every Nero Checkpoint. One can be found on the back of a repair truck here that’s parked at the end of the street. Bring it to the power generator and press  to fill it. Then the doors have electricity and you can enter the building. Use the big white box inside to finish this Nero Checkpoint. This will be a common theme; for every Checkpoint you must find fuel to power the generator and then open the big white box inside to get a Nero Injector upgrade.

Nero Checkpoint #2: Horse Lake
Region: Cascade
Behind this Nero building slightly up a hill stands a car. You can push this car downhill (stand in front of the car and push  ). Then you can climb the car to get on top of the Nero Checkpoint’s roof and drop down the side. There you find the generator. Fuel can be found outside the fence, where the car was that you pushed.
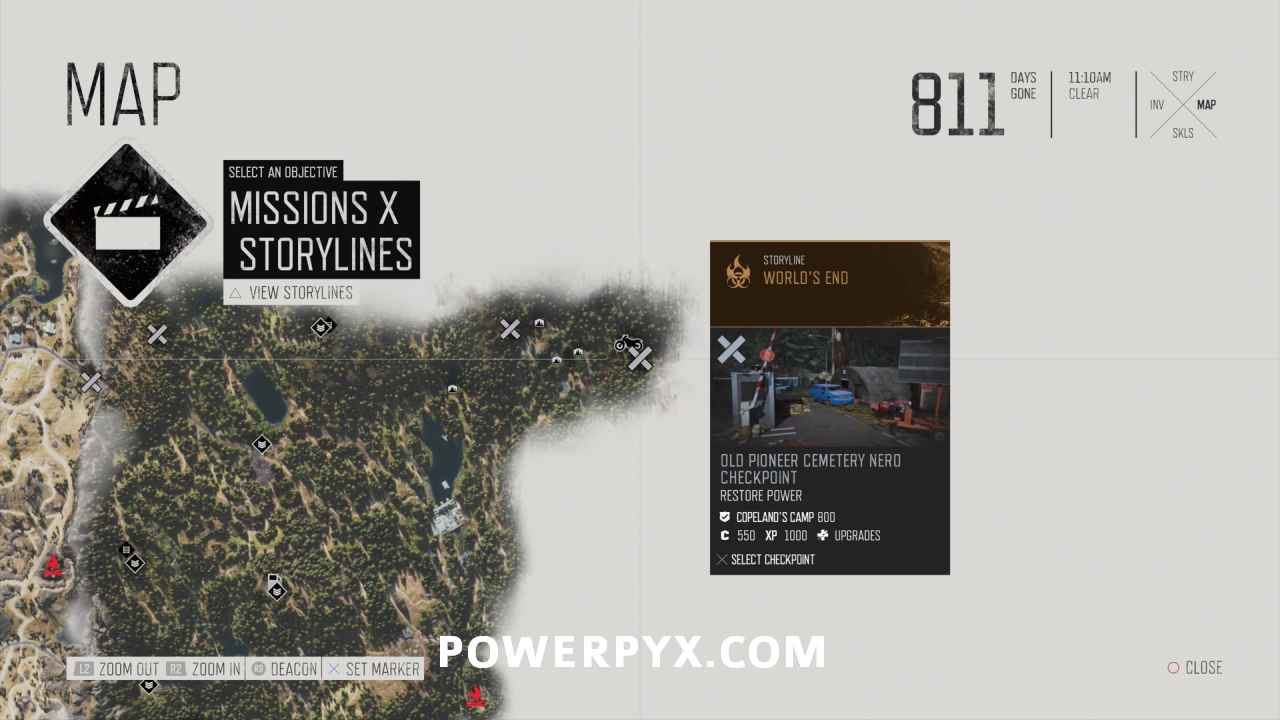
Nero Checkpoint #3: Old Pioneer Cemetery
Region: Cascade
This one is very simple. Enter the Checkpoint area and there will be a couple of Freakers feeding. Kill these freakers, they are guarding the fuel canister. Then you can use that canister on the power generator that’s next to the fence and near the Nero building itself.
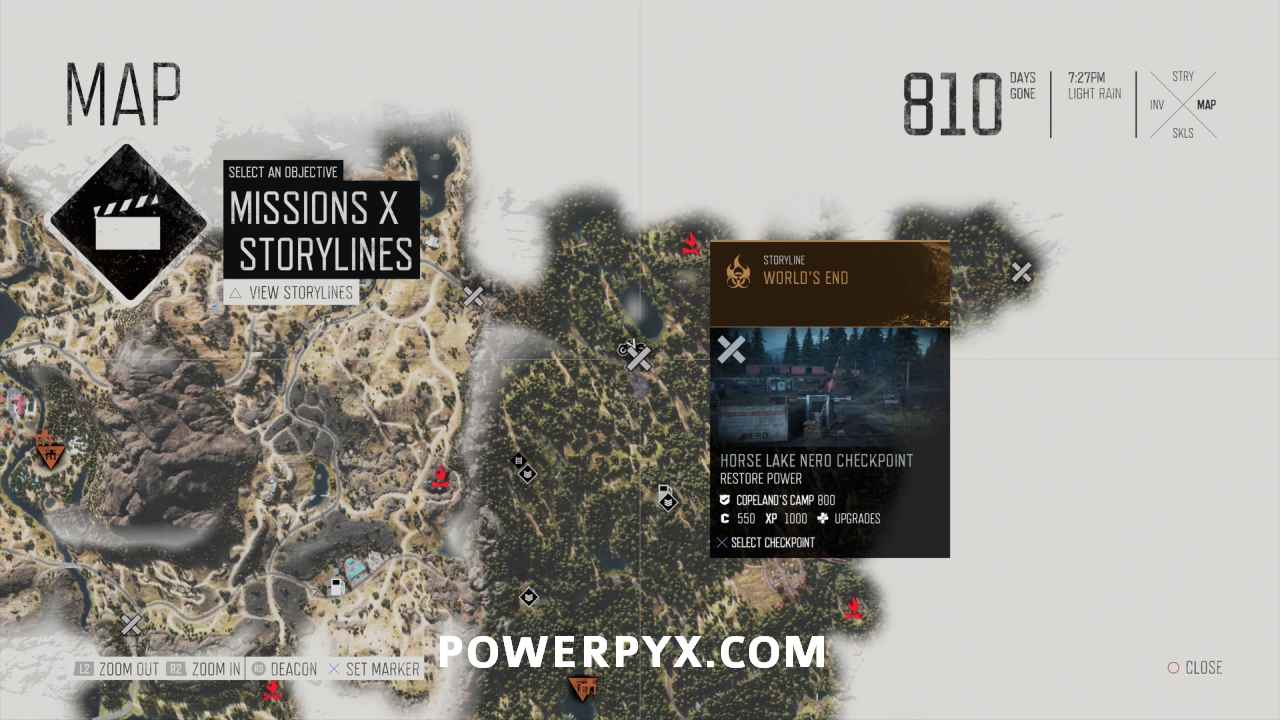
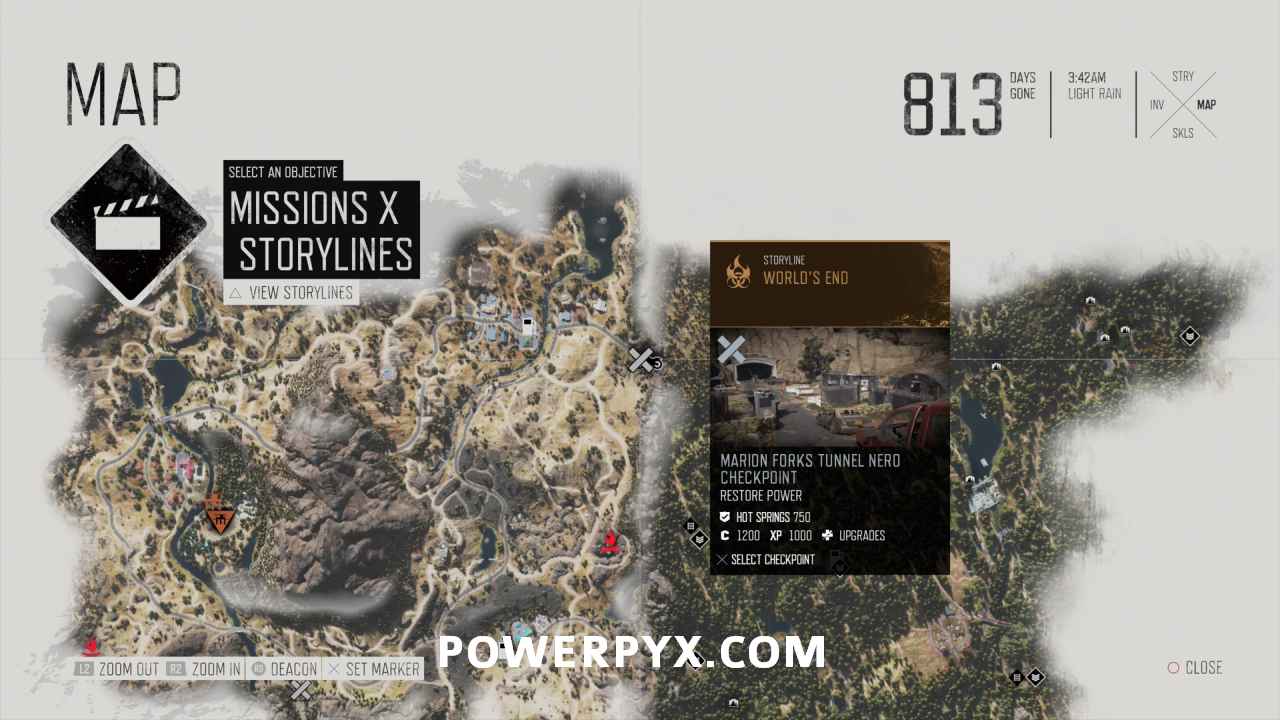
Nero Checkpoint #4: Marion Forks Tunnel
Region: Belknap
The fuel canister in this checkpoint is on the back of a military truck that’s facing the tunnel. That’s not all you have to do here though. After using the fuel you must still find a fuse to fix the door panels. You should see a blue search area on the mini-map that leads to the broken door panel. Once you investigated it, you can follow the tracks on the floor to locate the fuse in a white container near the tunnel entrance.
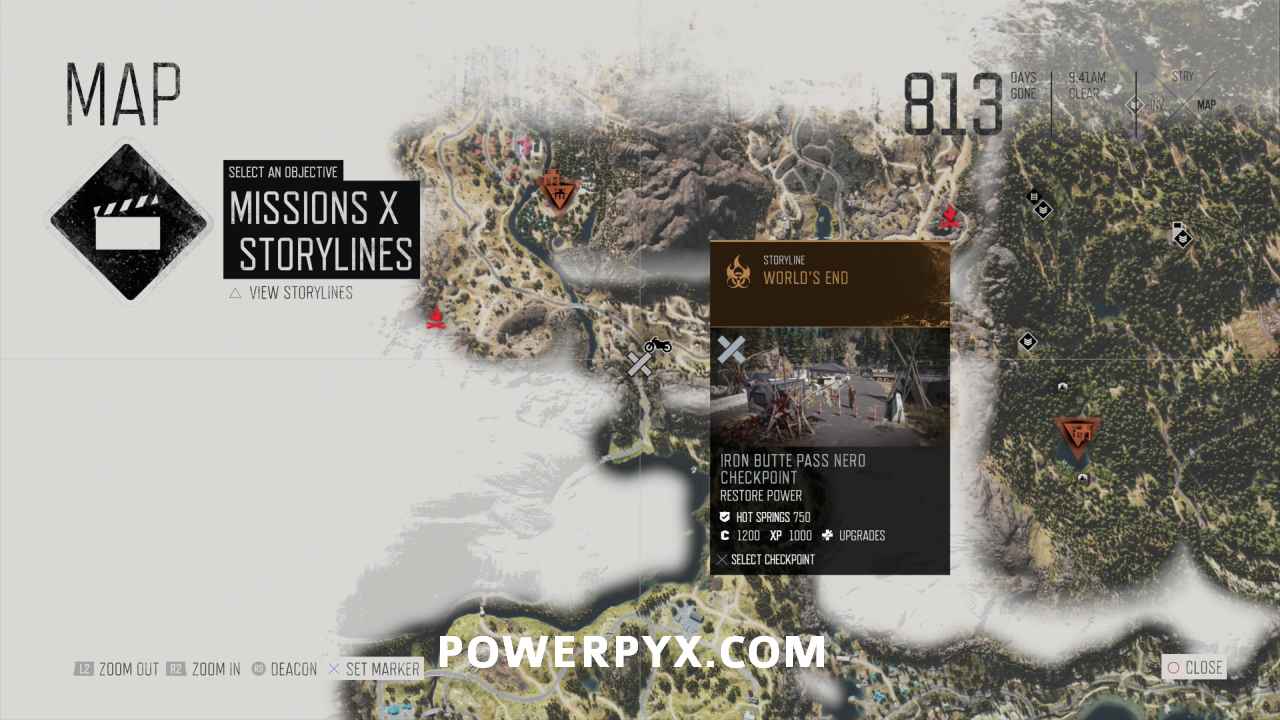
Nero Checkpoint #5: Iron Butte Pass
Region: Belknap
When facing the entrance to this Nero Checkpoint (coming from the north), you can find the fuel canister on the far left side in a pile of trash. However, this generator also needs to be repaired after refueling it. This requires a little bit of scrap.
Nero Checkpoint #6: Old Sawmill
Region: Lost Lake
Fuel for this checkpoint can be found in one of the tents on the right side. The generator is in the middle of the area by a big rock.

Nero Checkpoint #7: Santiam Tunnel
Region: Lost Lake
This Checkpoint has a few steps involved. First you must burn out the infestation nest in this checkpoint area (to the side of a dark tunnel). Inside the nest you find a fuse. Use this fuse at the fuse box of the Nero building. Then you must grab fuel (found in the tent) and carry it around the back of the checkpoint. There you can climb up and find the generator behind the Nero building.

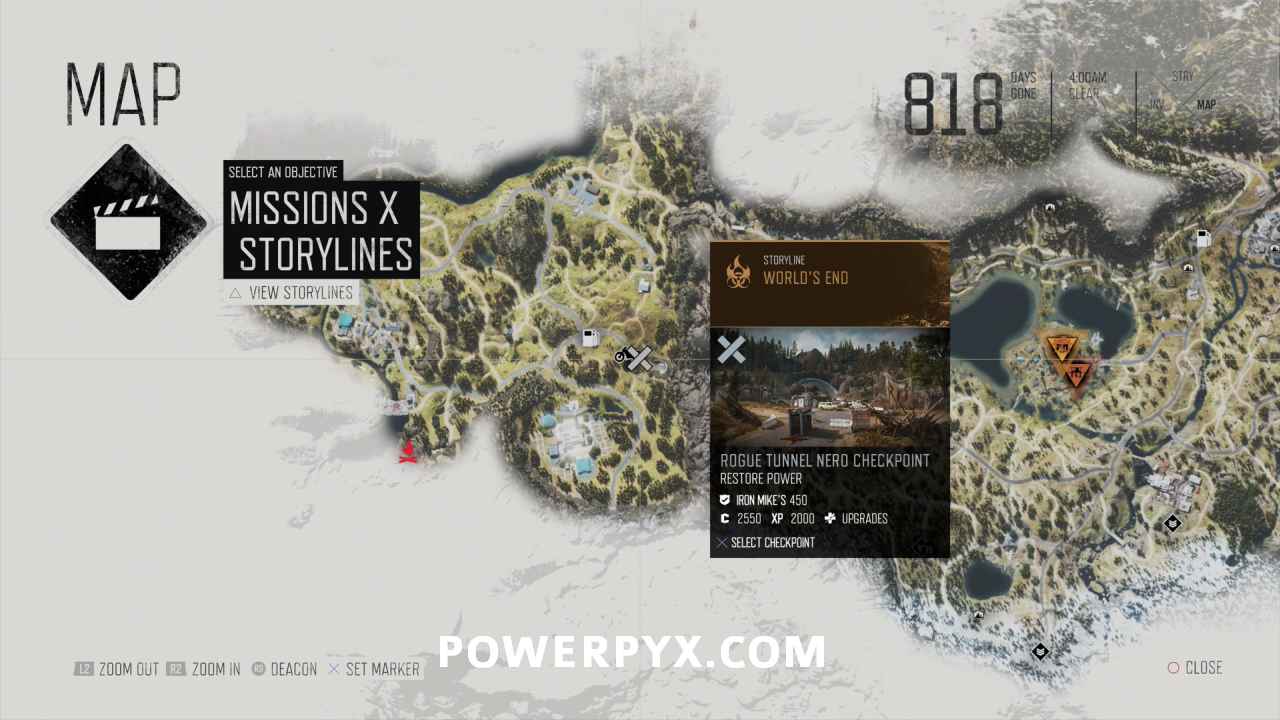
Nero Checkpoint #8: Rogue Tunnel
Region: Lost Lake
Fuel can be found on the back of a SUV next to the Nero building. The generator is on the opposite end of the Nero building.
Nero Checkpoint #9: Spruce Lake
Region: Crater Lake
Fuel is found on the right side after entering the camp or in a tent on the left side. You must also find a fuse. Follow the clues after examining the fuse box. It’s up the hill in a box.

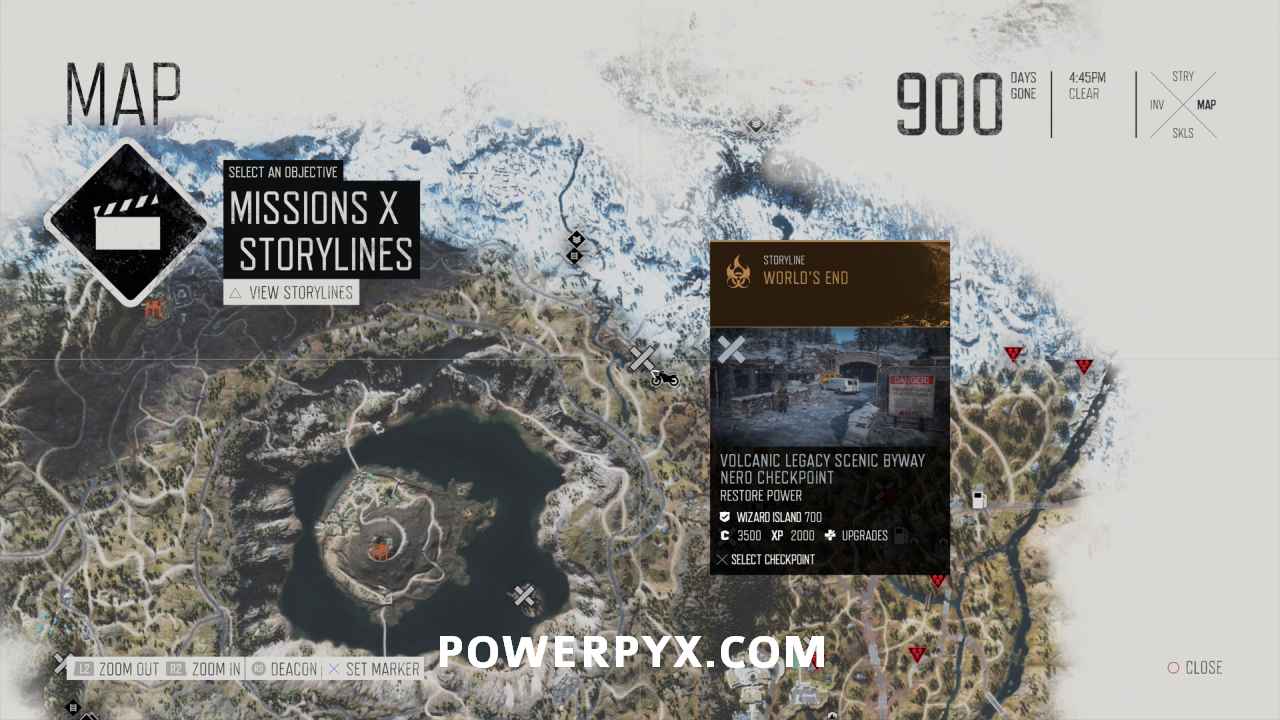
Nero Checkpoint #10: Volcanic Legacy Scenic Byway
Region: Crater Lake
Fuel is behind a yellow school bus. The generator is inside a fenced area near the Nero building.
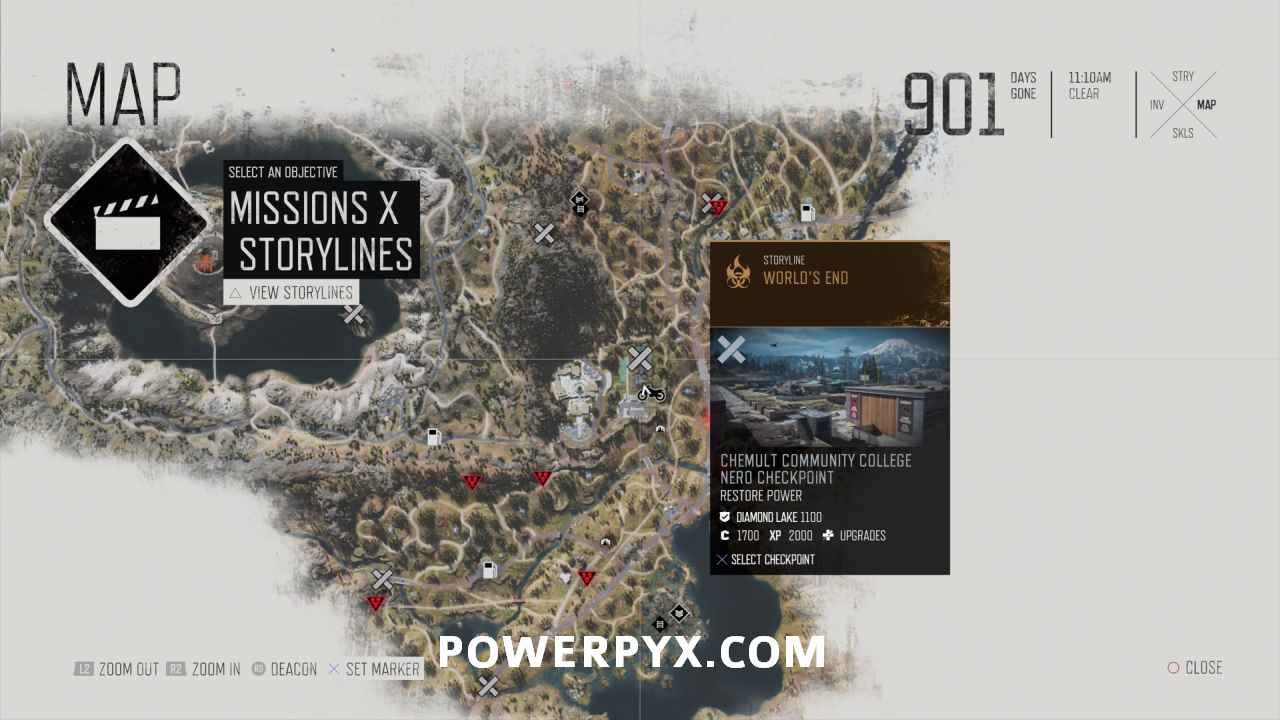
Nero Checkpoint #11: Chemult Community College
Region: Highway 97
This area is locked until you head there in the story. Simply advance the story until you come to the College area (do more missions in Crater Lake region). After you’ve been there for the first time you can return. You must find fuel and a fuse. The fuse is in one of the tents, simply follow the clues from the fuse box. Fuel can be found under a wooden roof straight in front of the Nero building.
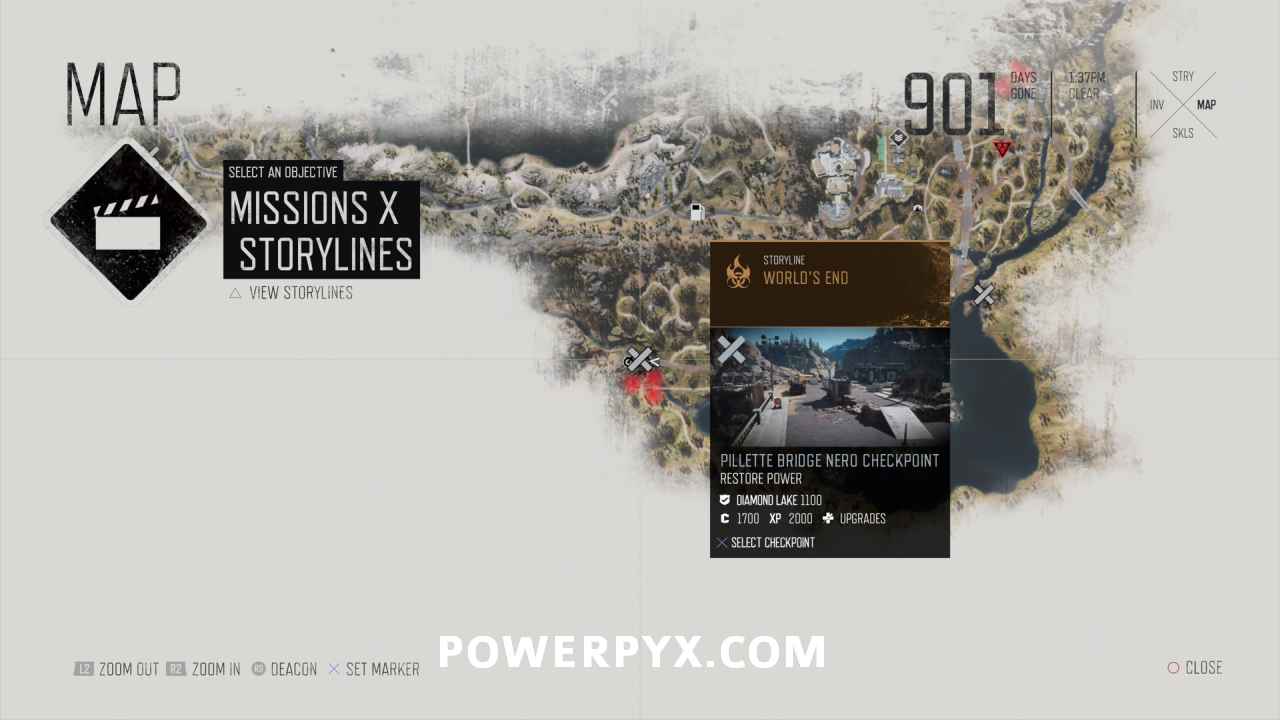
Nero Checkpoint #12: Pillette Bridge
Region: Highway 97
Fuel is found right behind the little security checkpoint building at the entrance to this area. The generator is behind the Nero building in a fenced area, must run around the fence to reach it.
That’s all the Nero Checkpoints in Days Gone! This finishes the World’s End Storyline and also unlocks the “World’s End” trophy.
For all other Days Gone Collectible Types check out the full Days Gone Collectibles Guide.
Deanbeansean says
At 11/12 i can’t find the fuse in tents . Double checked and still nothing. I cannot solve the last one. Any clue where to get another fuse?
nightshere says
same here. still searching to this very day
Amir says
You are really fascinating and beautiful
Jeff says
Amir
Lolololol
Hitting on a random person in the comments ?
Carl Glover says
Did u manage to solve Nero Checkpoint #11: Chemult Community College as I am having same issue.
RR says
Check the previous nero checkpoints that required fuses. You may have used the chemult fuse on a different check point that one already. Id start with the spruce lake one as its the well hidden one.
– Nero Checkpoint #4: Marion Forks Tunnel
The fuse you need is behind you if your standing at fuse box facing it. Turn around and walk about 30 feet its in that trailer in a chest box
– Nero Checkpoint #7: Santiam Tunnel
Inside freaker nest at tunnel entrance (on the right)
– Nero Checkpoint #9: Spruce lake – behind tent in a chest by the wall. To your left as you enter spruce lake nero checkpoint.
Deanbeansean says
Nevermind got my trophy .. guys if it happens and you open the box at the college in the mission with sarah. You will still need one more fuse and there is 4 checkpoints that requires to insert the fuse . Double check them if you miss any.. i thought this was a bug because i couldn’t interact with the fuse box at college but the fuse was in other nero checkpoint….
Carl Glover says
Hi. I have double checked all the nero checkpoints and I am only missing the college checkpoint. but cant go any further as the fuse still not there. any idea please,.
Deanbeansean says
Double check them again bro . I don’t know if this will help you but i found my last fuse in the spruce lake behind the tent up next to the crates…. this was my last fuse and last trophy for platinum 162..
Bruna says
For some reason the action button is not prompting at the old sawmill checkpoint. I couldn’t cut the speakers down, I couldn’t hold the gas can either or even interact with the generator… any ideas!?
ArfArf says
Unable to locate final fuse for Spruce Lake. All other checkpoints have their fuse and powered on. Spruce lake is the only one not powered on. And I took a picture of each of the four fuse locations to validate that the fuse is gone.
Musa says
I searched the whole tents at the Chemult Community College but couldn’t find the fuse. What happened?