
This walkthrough for Chapter 10 in Resident Evil 4 Remake will guide you through all objectives. This also includes Collectibles, Trophies and Key Items.
For other Chapters see Resident Evil 4 Remake Walkthrough.
Objectives:
- Head for the throne room
- Make your way to the surface

Chapter 10
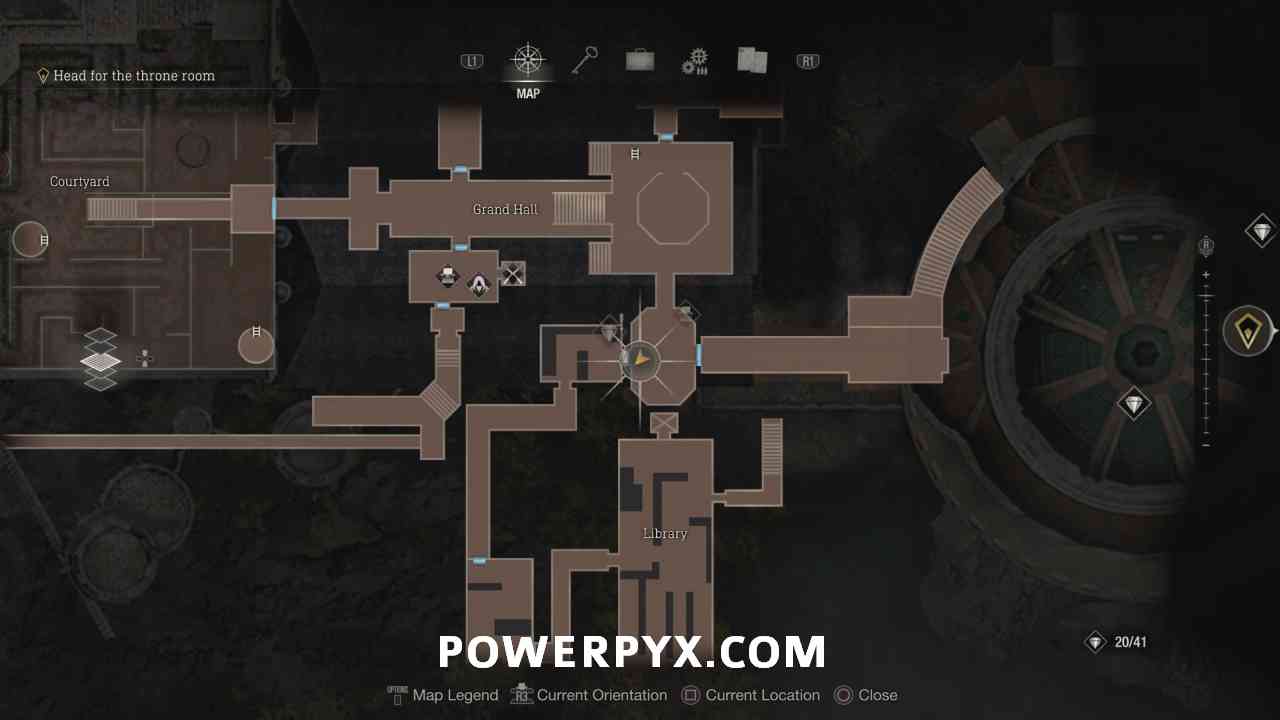
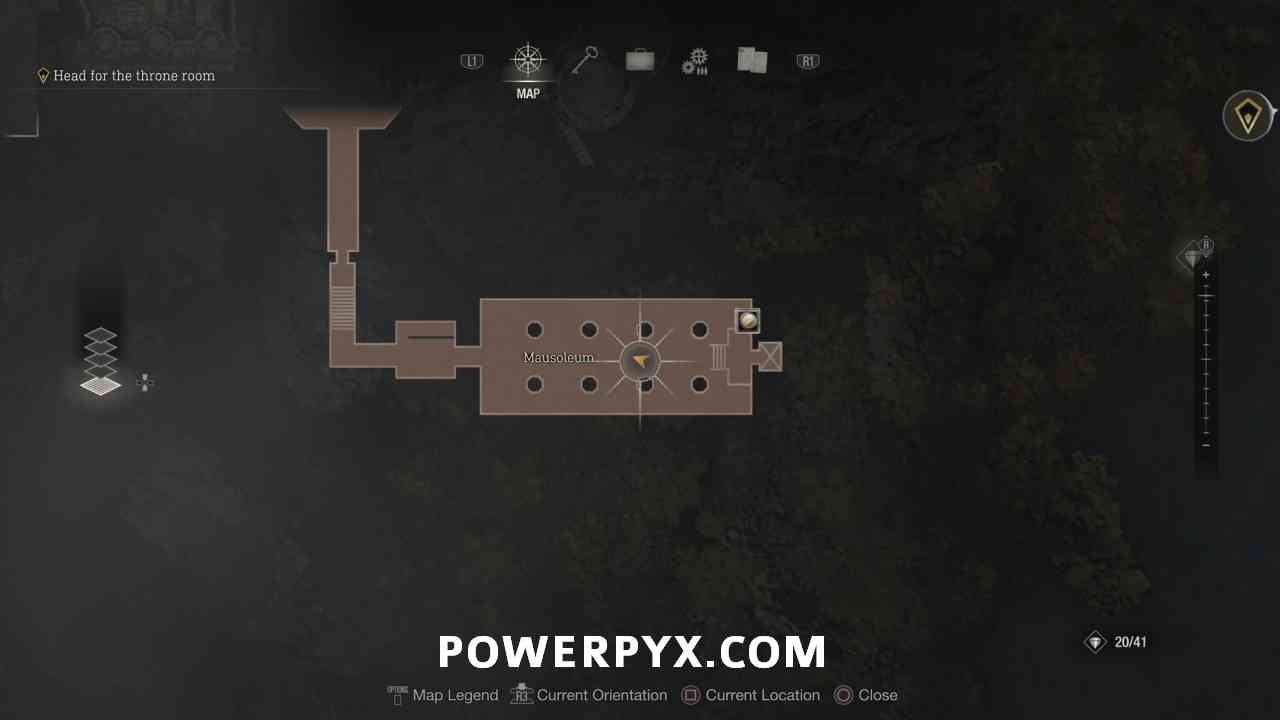
Head for the throne room
You’ll now be back playing as Leon, able to exit the cage but with Ashley having been carried off. Just beside the door you are meant to go through you can pick up the treasures you picked up as Ashley. These are already counted towards completion for the trophy/achievement, but you’re now able to take them and sell them.

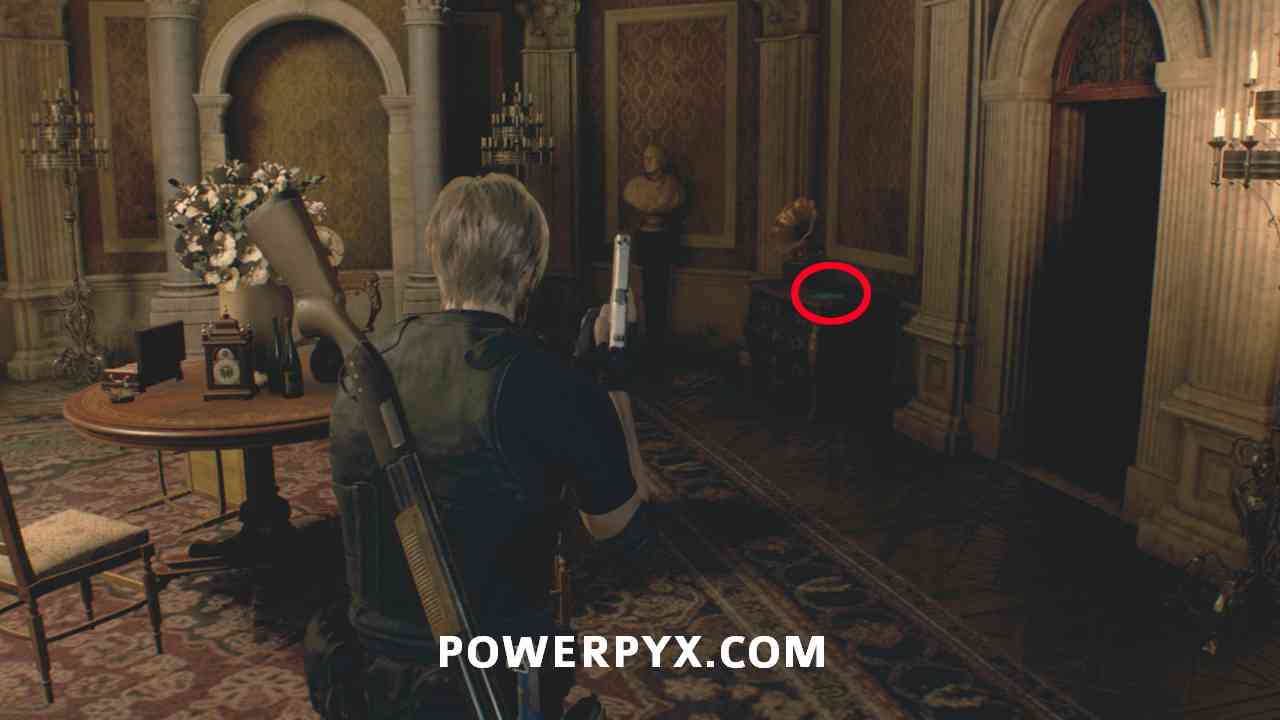
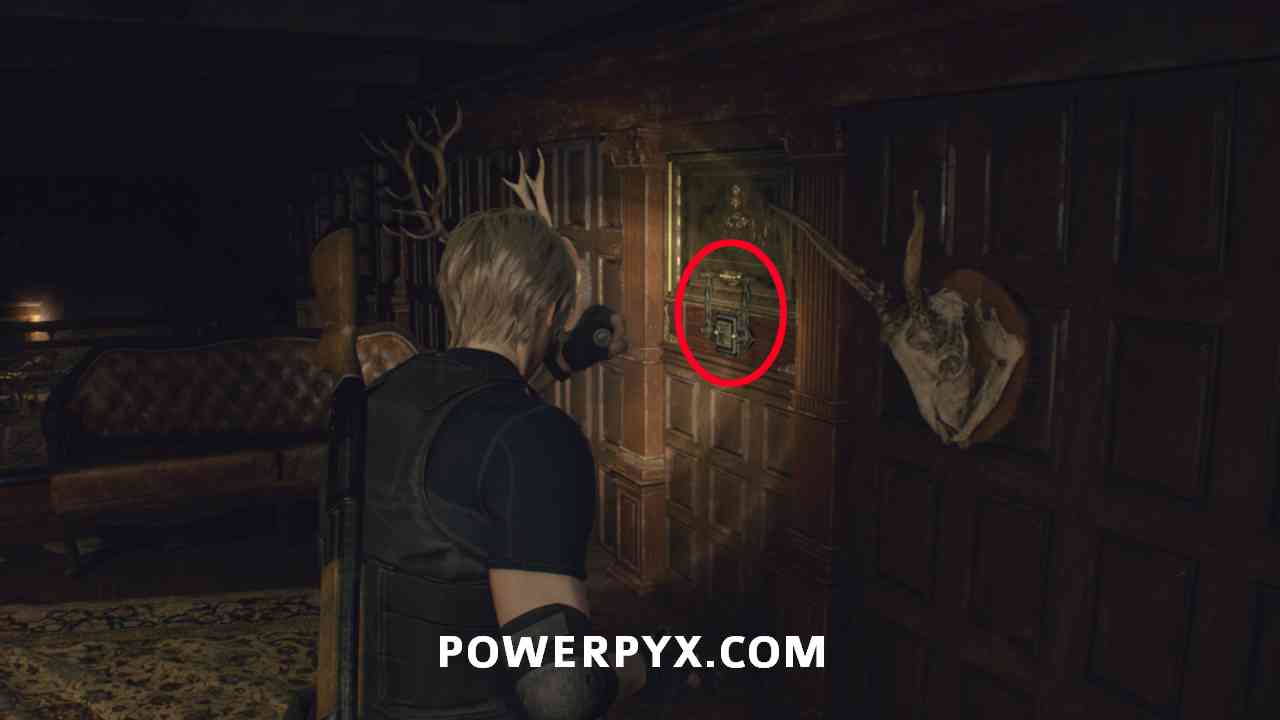
Merchant Request: Merciless Knight
Head into the room and on the right side on a cabinet you can find this request. You’ll go deal with this in a bit, as you need to backtrack to the Mausoleum area you were just in as Ashley.
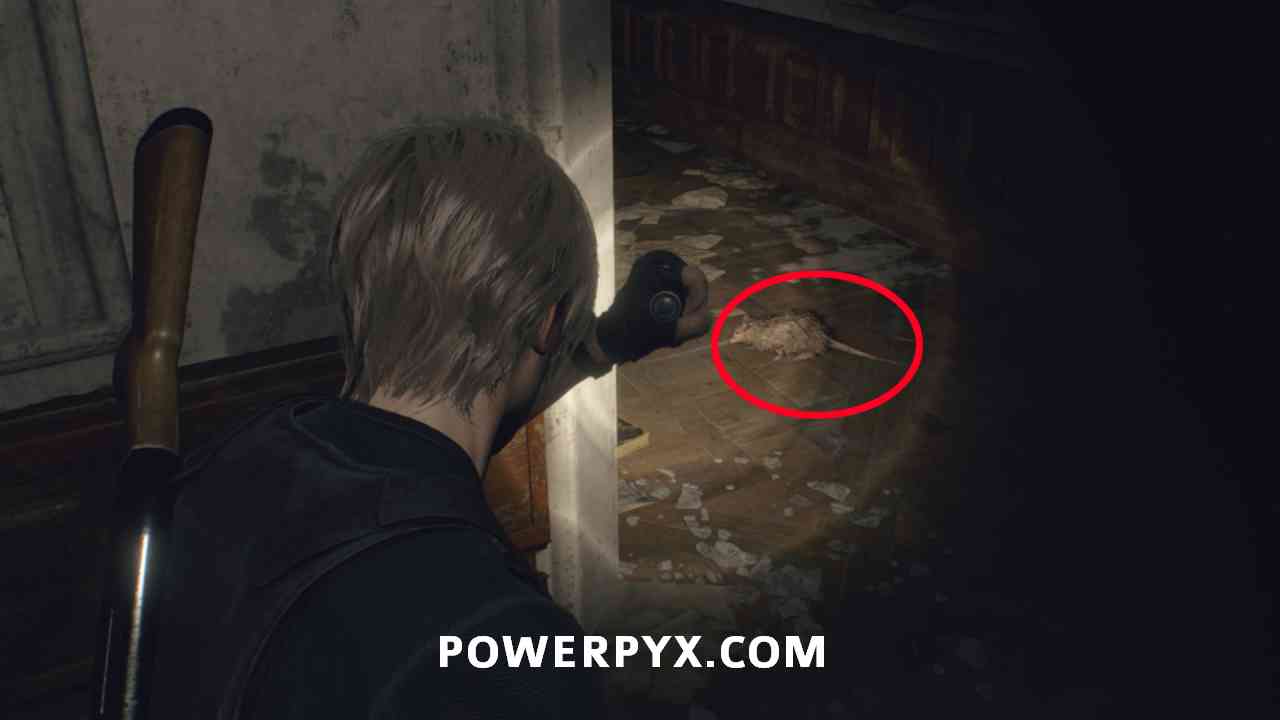
Rat 3 (for Merchant Request “More Pest Control”)
Now head through the door to the right and go along the path. In the room with all of the animal heads on the walls you can find the final rat for the Pest Control request.
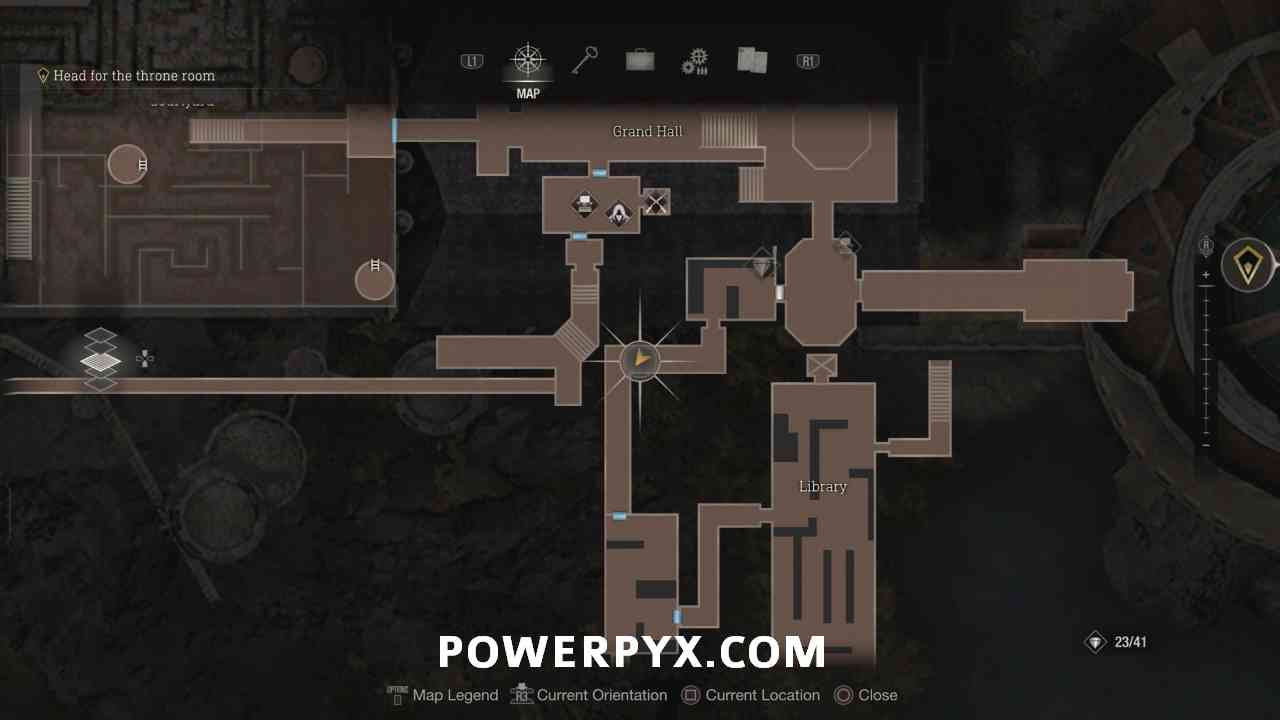
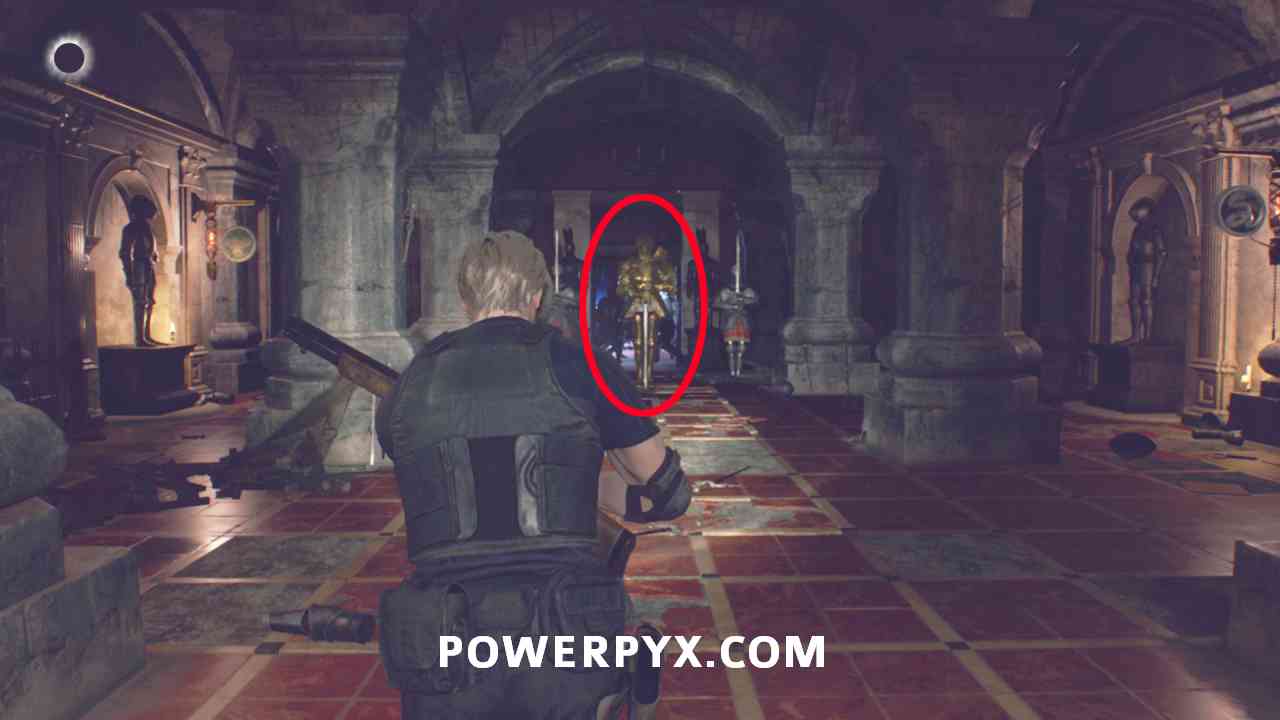
Now follow the path down into the Mausoleum and you can spot a gold suit of armor standing in the middle of the room, along with two others. Do this now before doing anything else. The gold armor is the one you are needing to defeat, and this can be a tough fight as the damage for it is on the back of its neck. If you have flash grenades you can stun the 3 knights with those, then shoot their weak spot until their tentacles are exposed. Normal grenades are also helpful if you have any to spare.
Treasure + Weapon: CQBR Assault Rifle (Weapon)
Now head back up to the library to the spot where you grabbed the set of keys as Ashley. On the opposite wall, you can use the Cubic Device on the Square Lock Box to find the CQBR Assault Rifle. If you don’t have enough inventory space, send some weapons to storage to free up space. You must pick up this weapon for it to count towards treasures and weapons. This item turns into a Gold Bar (L) if you already picked up the weapon in a previous playthrough.


Treasure: Golden Lynx
Now go to the room with the typewriter above the library where you used the Insignia in chapter 9. Use the Cubic Device on the Square Lock Box to obtain a Golden Lynx.


You can now head out the door you opened as Ashley, then follow the path around and drop a ladder down to return to the Grand Hall.
You can make a stop at the Merchant now if you want to sell your items. Note that you now have up to the 5th upgrade level available for weapons, and if you buy all upgrades you can purchase the “Exclusive” upgrade, which does different things on each weapon. The first time you buy one of these you unlock the trophy/achievement A Masterpiece  .
.

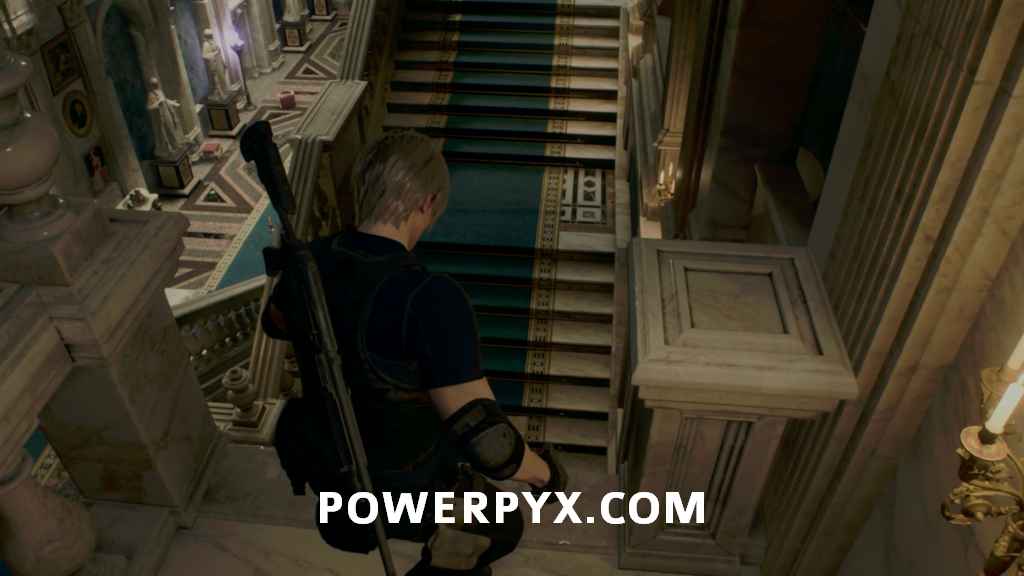
Go back through the room you went through before to reach the library, but this time go through the east door toward your objective. This will now be the first time you run into the Novistador enemies. These are flying bugs that can also sit on the ground and camouflage themselves.
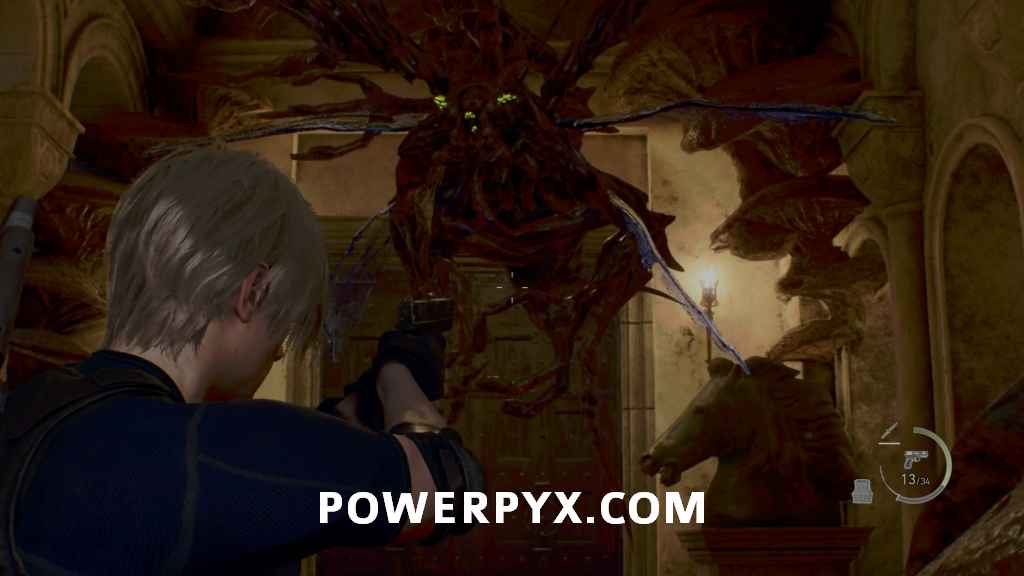
You won’t be able to go through the big doors ahead, so hop the railing to the left and go up the stairs. Follow the path and you will enter the upper balcony of the Ballroom. Here you will need to activate two switches to open the gate at the far end. Watch out as this room is full of more Novistador, some camouflaged on the ground and walls.

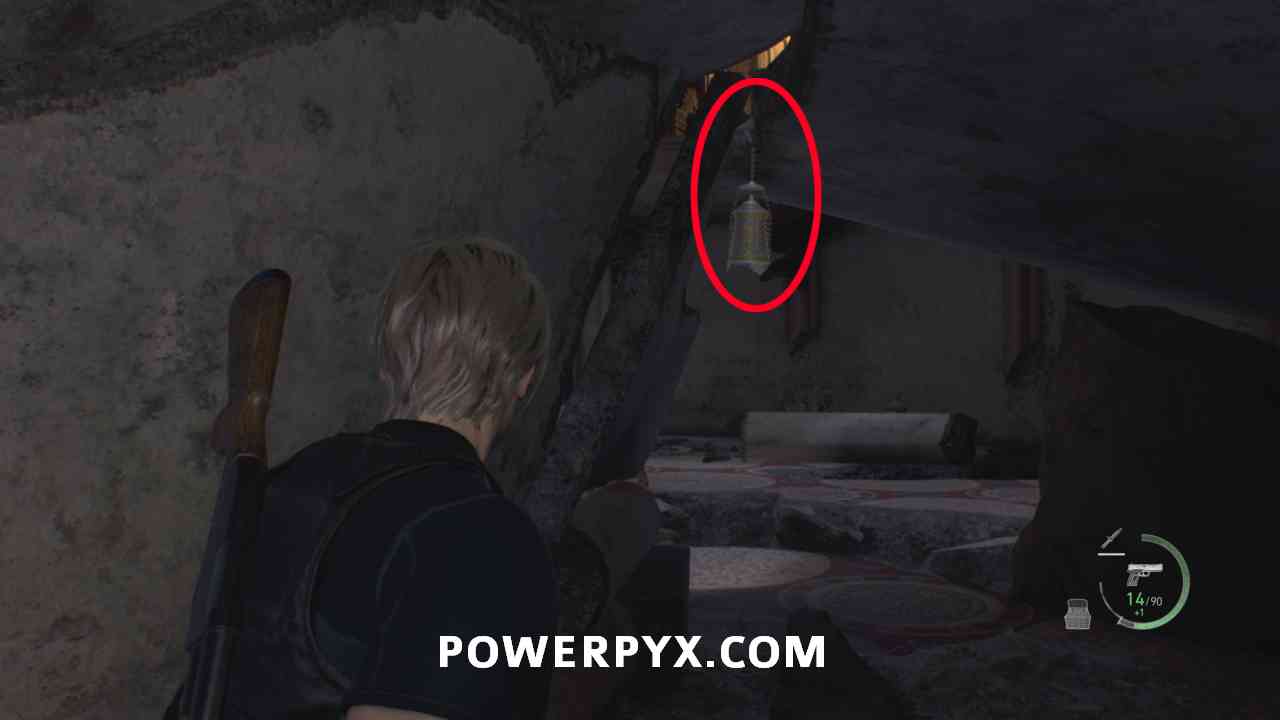
Treasure: Ruby
First, head down the stairs to the ground level and to the center of the area where a bunch of rubble is. Hanging underneath the section you can walk under there is a metal cage. Shoot it down to obtain a Ruby.

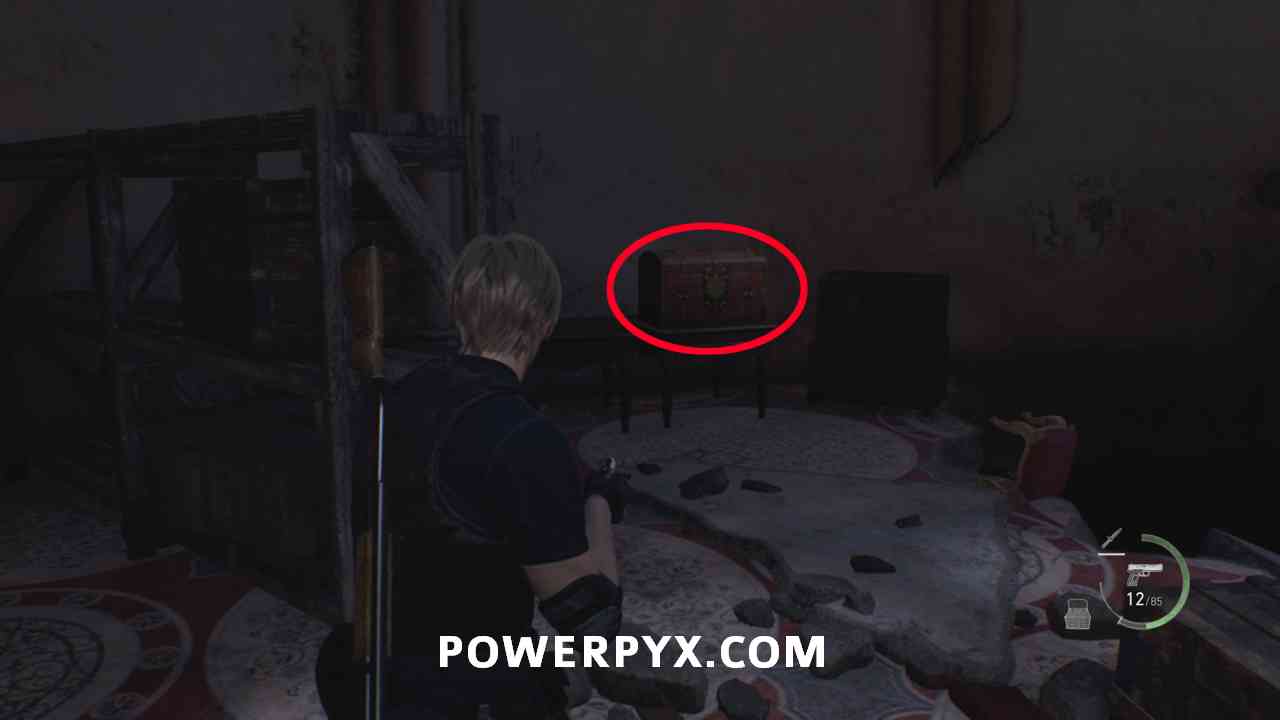
Treasure: Ornate Beetle
You can then circle around the north side of the room where some shelves are near a ladder. Walk behind them to the ledge after where you can find a chest containing an Ornate Beetle.

You can then climb the ladder nearby which leads to the upper level. Watch out for the enemies that appear, then pull the lever at the end of the balcony.

Drop down on the right, then head back to the center of the room and up the stairs leading to the south. Pull the lever on this side as well to open the gate on the east of the room and head through.

In the next area, you need to shoot some counterweights to drop the bridge. There is one on each side, and you’ll need to move out farther on the left to see that one as it is hidden behind the wall.

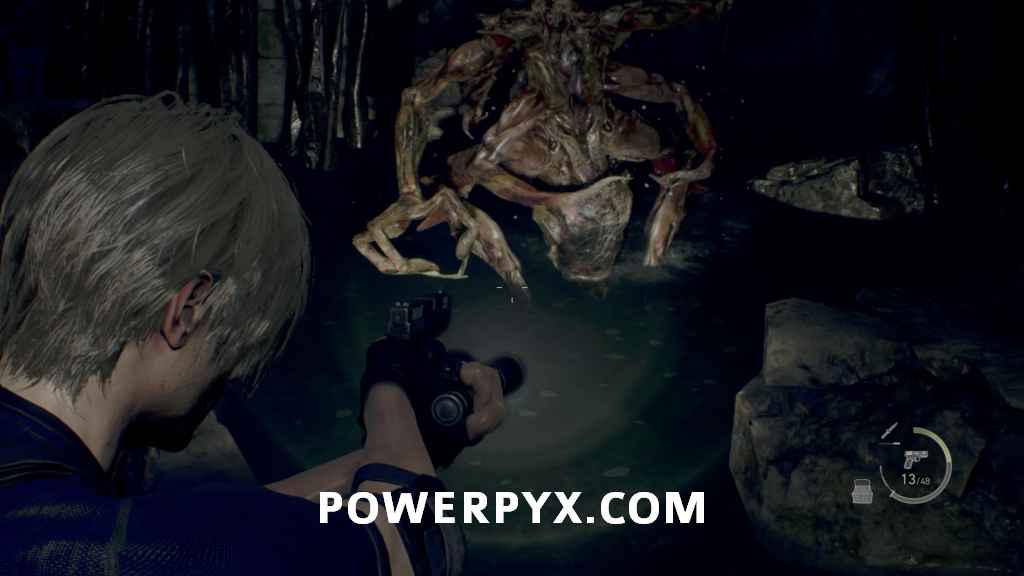
When you reach the Antechamber you will have a pair of Garrador you need to defeat, one of the more heavily armored, along with a number of other enemies that will continually spawn in the room. This fight is a lot less simple than the single Garrador you fought earlier, as you can’t just sneak around the entire time. It is slightly helpful as the Garrodor will hit and kill the regular enemies if they’re near, so you can use that to your advantage. In this room there are a number of bells in the corners, if you hit this the Garrodor will charge toward them, getting stuck in the wall after attacking them. You can use this to your advantage to shoot the Garrador or perform a backstab.

Key Item: Unicorn Horn (x2)
These items are dropped by the two Garradors after you defeat them. You then place them in the statues at the end of the room to open the door and progress.


Make your way to the surface
After going through the door there will be a scene, then you will be dropped into the depths below the castle. This next section is a very linear bit, and you just need to follow the path through the water. Watch out as you are progressing as there are more Novistador here hiding in the water. You can spot them by their movement in the water, or their green eyes when they are facing you.
Treasure: Elegant Crown
When you reach the end of the area you’ll climb into a stone building. At the end of the first path you can pick up an Elegant Crown off a body.


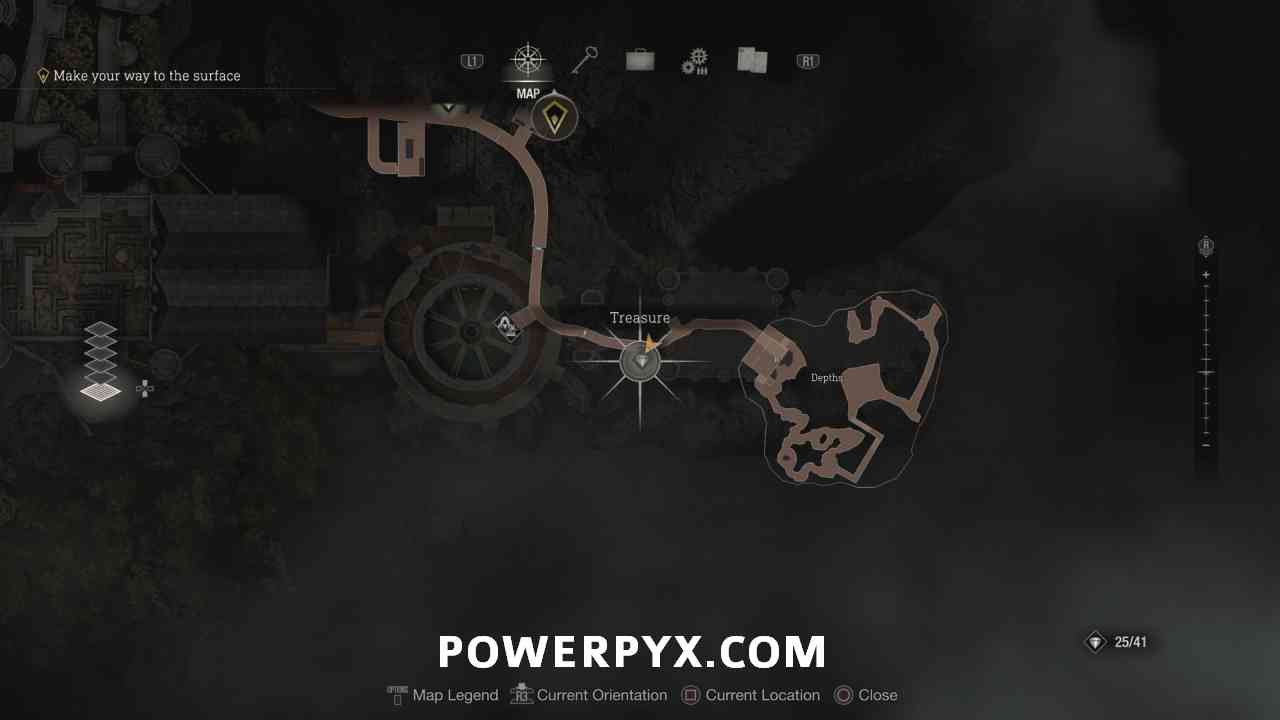
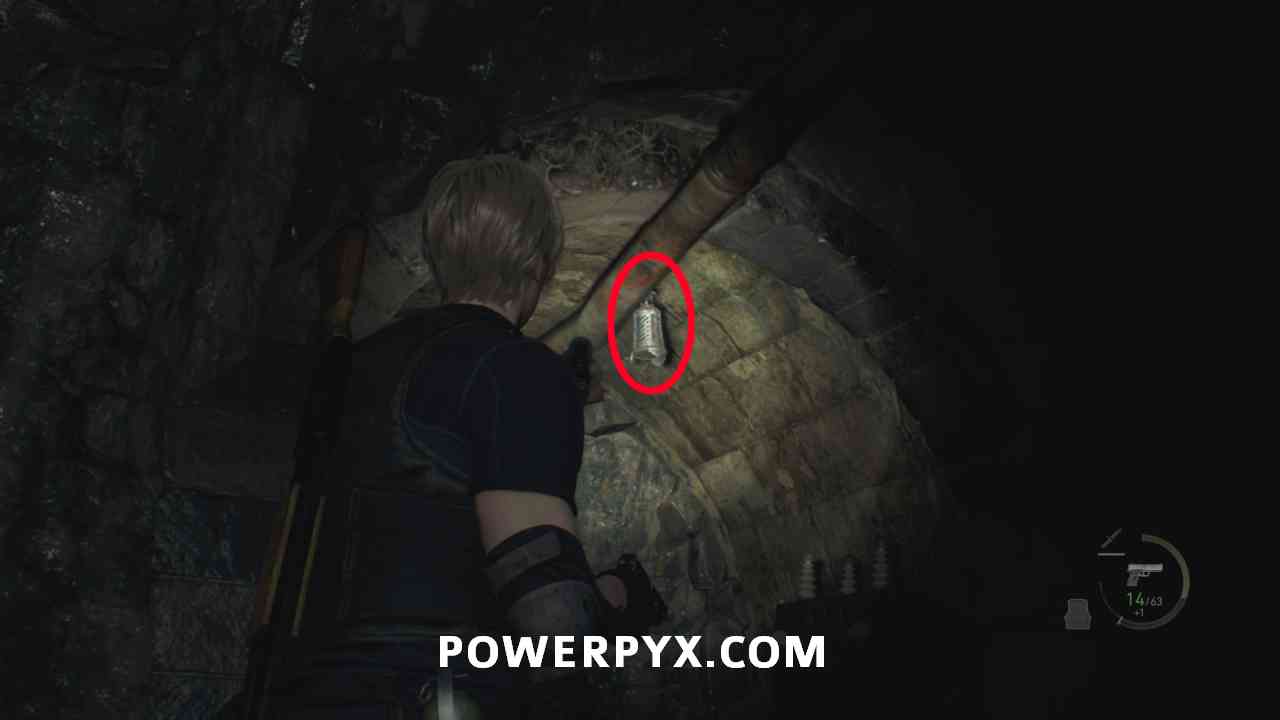
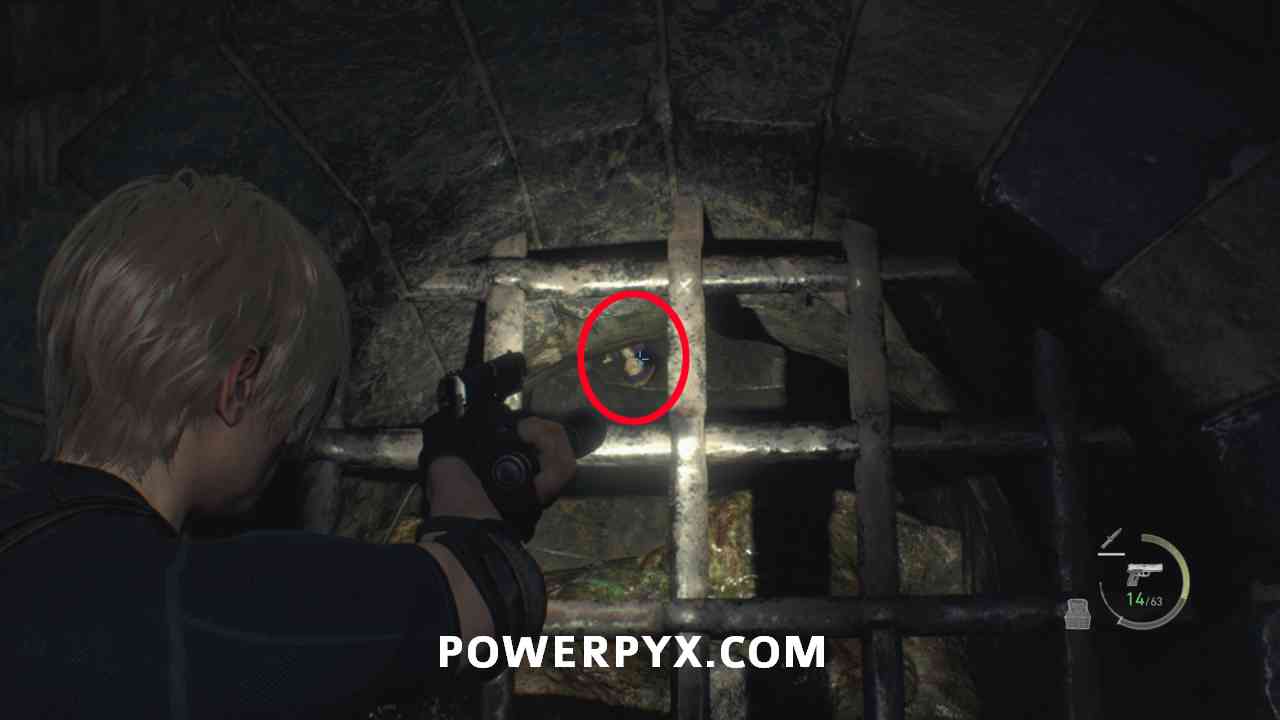
Treasure: Red Beryl
Break the wall on the left, squeeze through, and climb up the ladder and proceed down the tunnel. Watch for an alcove on the left where you can find a metal cage to shoot down, which contains a Red Beryl.
Trophy: Astute Appraiser
Now head towards the merchant. In your inventory you can combine the “Elegant Crown” treasure with 2 x Yellow Diamond + 3 x Red Beryl and sell it to the merchant for over 100,000 ptas to pop this trophy. Alternatively, it also works with 1 Sapphire (Blue), 1 Yellow Diamond, 1 Emerald (Green), 1 Alexandrite (Purple), 1 Red Beryl which gives a 5 colors bonus and comes out to exactly 100,000. If you don’t have enough of the required gemstones just keep the crown in your inventory and do it later when you got more of these gems. Note that you can also trade Spinels at the Merchant to get one Yellow Diamond and Red Beryl if you haven’t already.
Castellan 10
Just outside the merchant in the sewers, you can spot this Castellan hanging upside down behind the grate. Stand as close as possible and you can shoot it.

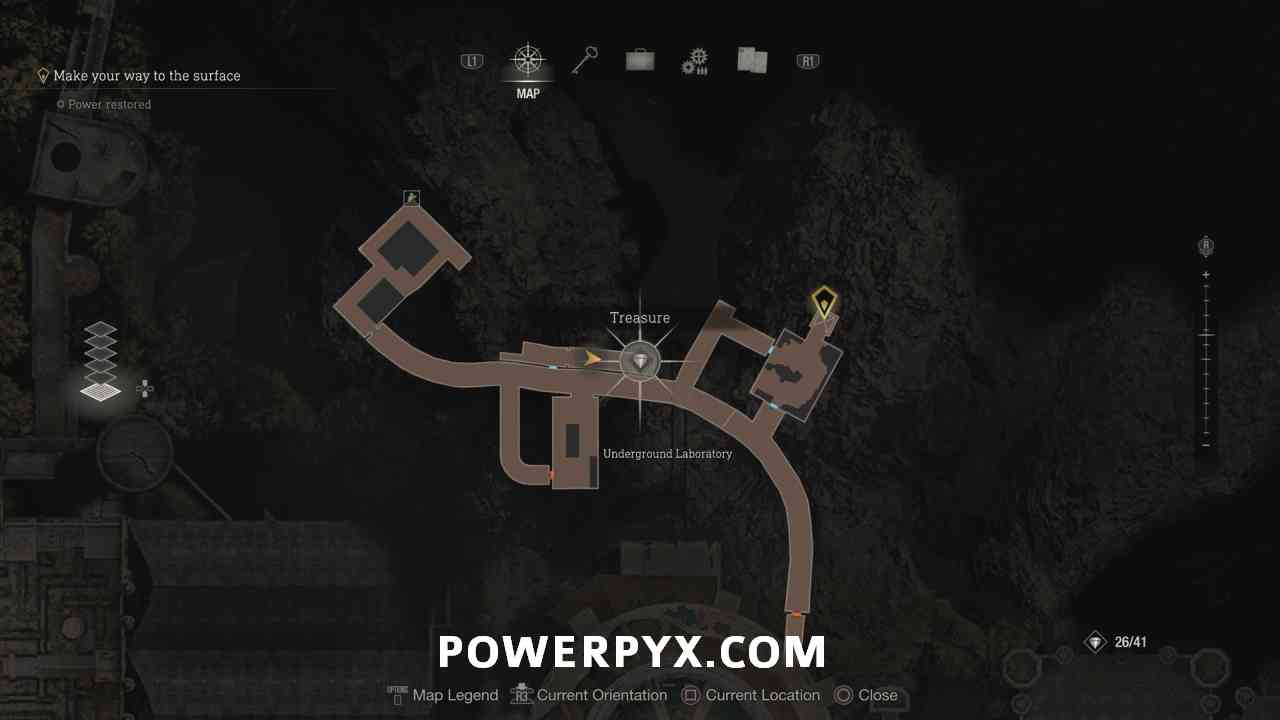
Continue down the path to reach the Underground Laboratory. You won’t be able to use the elevator as there’s no power, so need to make your way to the end of the area to turn that on. Follow the path around to where you can enter a room on the right, pulling a lever to open the door at the far end of the tunnel.

When the gate opens continue to the end of the hallway, watch out though as you will start to be attacked through the grates on the floor and ceiling. Make sure to hit the  prompt to avoid these attacks.

Go to the end of the room, then interact with the switch to turn on the power.

Trophy: Wave Goodbye, Right Hand
After turning on the power you’ll start being directly attacked by Verdugo. This trophy/achievement can be missed as you are able to basically wait out the power to the elevator and escape instead of killing the boss. The easiest way to do this is to use the panels on the walls that are now powered to freeze the boss when they are activated. When they are first frozen there will be a melee prompt you can use for extra damage, then you can continue shooting them while they have ice on them for increased damage. You can only freeze the boss with each panel once, so if you successfully freeze them start making your way back down the tunnel to a new panel after they are unfrozen. Repeat until you defeat the enemy. Grab the next treasure before stepping in the elevator!
Treasure: Yellow Diamond
Before entering the elevator, make sure to go back into the room with the first switch you pulled, and the gate opposite will now be open. Go to the end of the room for a chest that contains a Yellow Diamond.

When you’re done in the lab, head into the elevator to complete the chapter.
This finishes Chapter 10 in Resident Evil 4 Remake.
Next Chapter: Chapter 11 Walkthrough
For all other chapters refer to the Resident Evil 4 Remake Walkthrough.
Leave a Reply