
Assassin’s Creed IV Black Flag Resynced has 30 Treasure Map Locations and Buried Treasure Solutions. First you must find the Treasure Map, then you can dig up the Buried Treasure. These give various rewards including Money, Outfits, Ship Cosmetics, Ultimate Plans, Art Pieces.
Each map has two names, in the inventory it’s named after where the map is found, and in the Codex it’s named after where the buried treasure is located (listed here in brackets). They are ordered here by their starting region where the Treasure Maps are found, but the solutions will have you zig-zag across the map. It’s good to sail to all locations first to unlock fast travel. A few locations are gated behind story progress. Nothing is missable and you can still find everything after the story in free-roam.
For trophies & achievements you only need the treasures that give the 6 Ultimate Plans, 3 Art Pieces, 1 Portrait. They are marked in the overview below with trophy icons. The other treasures aren’t strictly needed for trophies.
Treasures Quick Select:
- Treasure Map from Havana (Havana)
- Treasure Map from Havana Warehouse (Anotto Bay)
- Map of Shipwreck (Dry Tortuga)
- Treasure Map from Cape Bonavista (Cape Bonavista)
- Treasure Map from Nassau Warehouse (Isla Providencia)
- Treasure Map from Andreas Island (Abaco Island) –
 Dilettante
 - Treasure Map from Abaco Island (Salt Lagoon)
- Treasure Map from Mariguana Island (Andreas Island) – Ship This
- Treasure Map from Great Inagua (Nassau)
- Treasure Map (Great Inagua)
- Treasure Map from Salt Lagoon (New Bone) – Dilettante
- Treasure Map from Tortuga (Matanzas) – Ship This
- Treasure Map from Petite Caverne (Tulum) – Ship This
- Treasure Map from Cumberland Bay (Pinos Isle)
- Treasure Map from Cayman Sound (Petite Caverne) – Ship This
- Treasure Map from Pinos Isle (Cayman Sound)
- Treasure Map from Santanillas (San Juan) – Ship This
- Treasure Map from Ambergris Key (Misteriosa) – Ship This
- Treasure Map from Corozal (Ambergris Key)
- Treasure Map from Misteriosa (Kingston)
- Treasure Map from Isla Providencia (Long Bay)
- Treasure Map from Port Royal (Princípe) – Dilettante
- Treasure Map from Kingston Warehouse (Cumberland Bay)
- Treasure Map from Ile a Vache (Jiguey) – Dilettante
- Blackbeard’s Treasure Map –
 The Memory of My Enemy
 - Restored Weathered Map
- Restored Yellowed Map
- Restored Digested Map
- Restored Tattered Map
- Restored Preserved Map
Other Collectibles:
Dry Tortuga Region
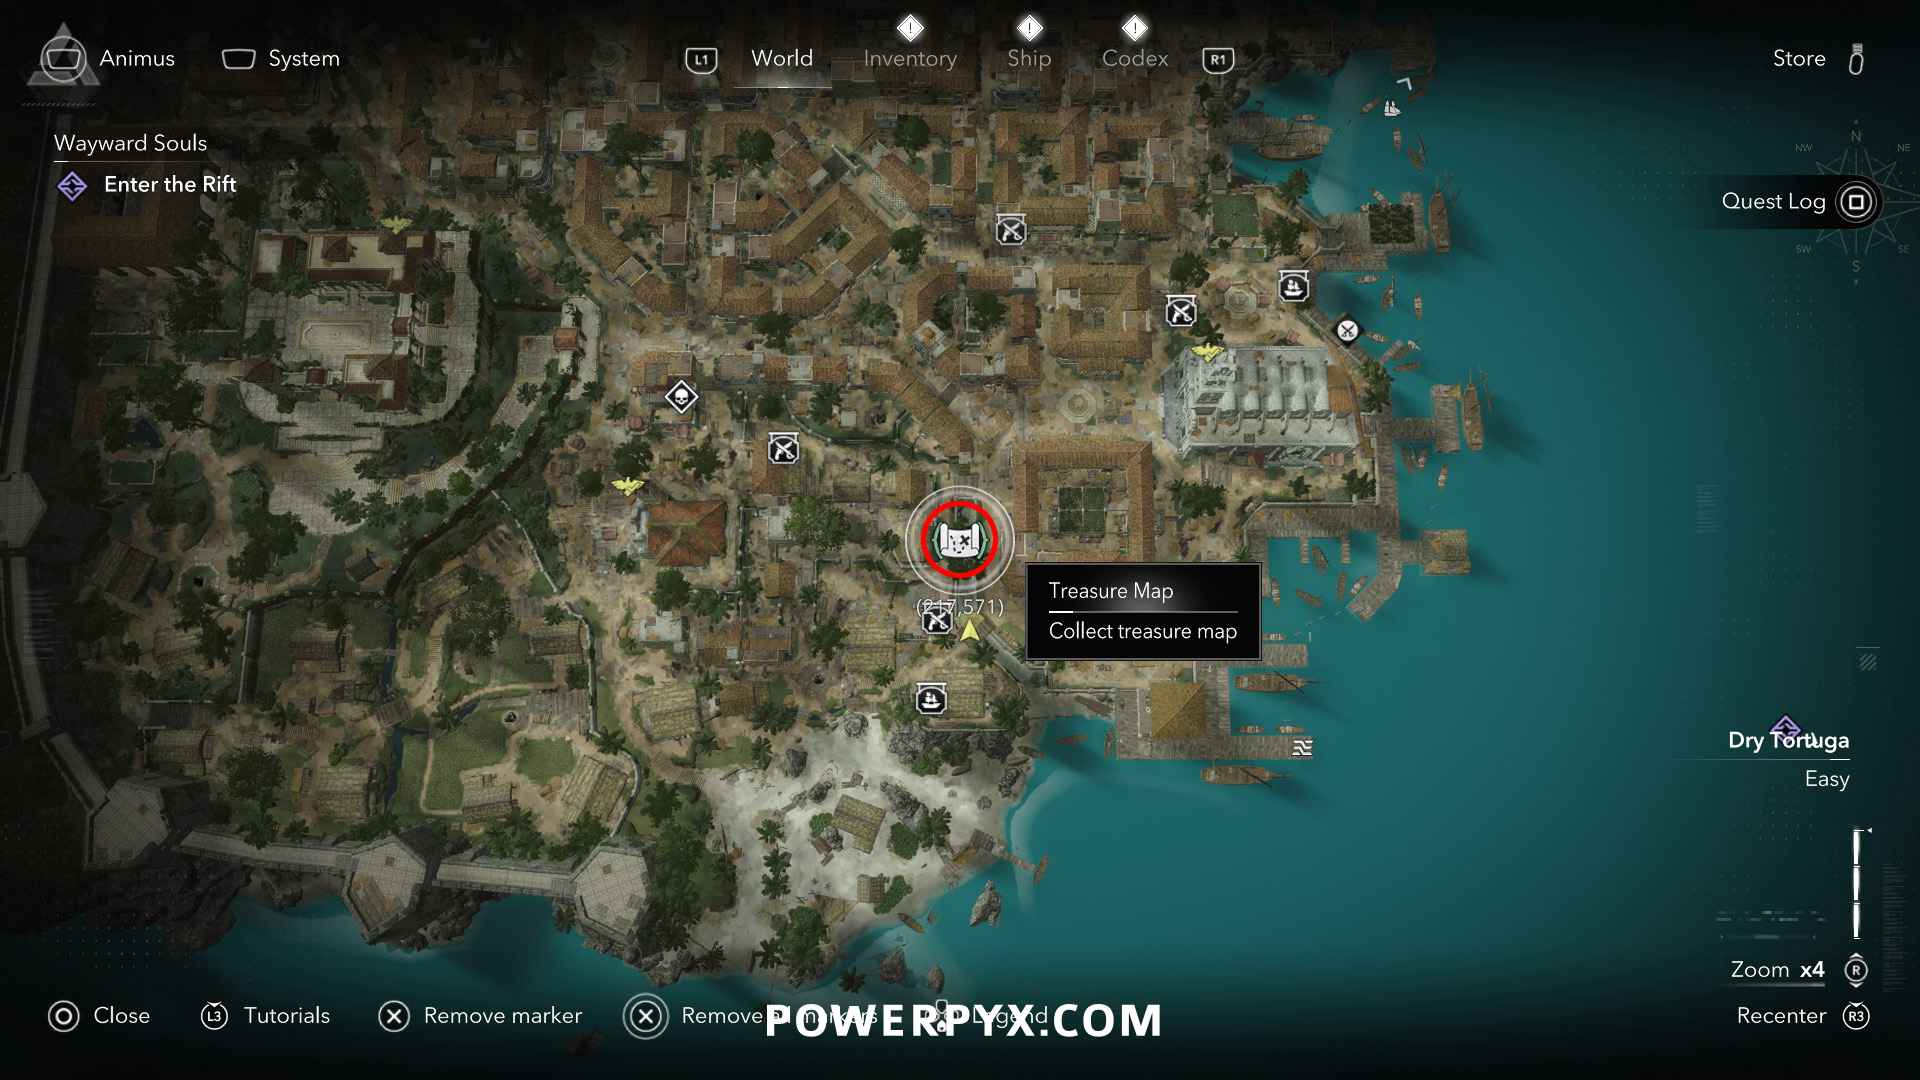
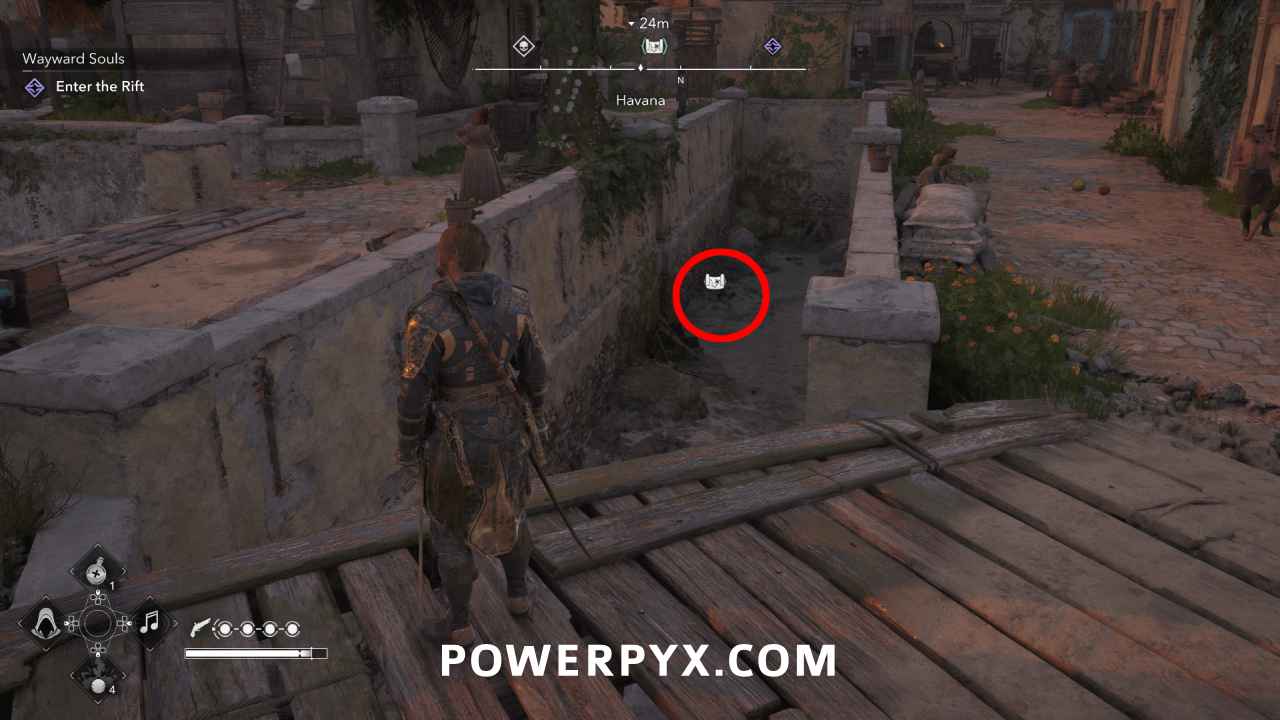
#1 – Treasure Map from Havana (Havana)
Location: Havana (217, 571) – In a gutter in the south of Havana
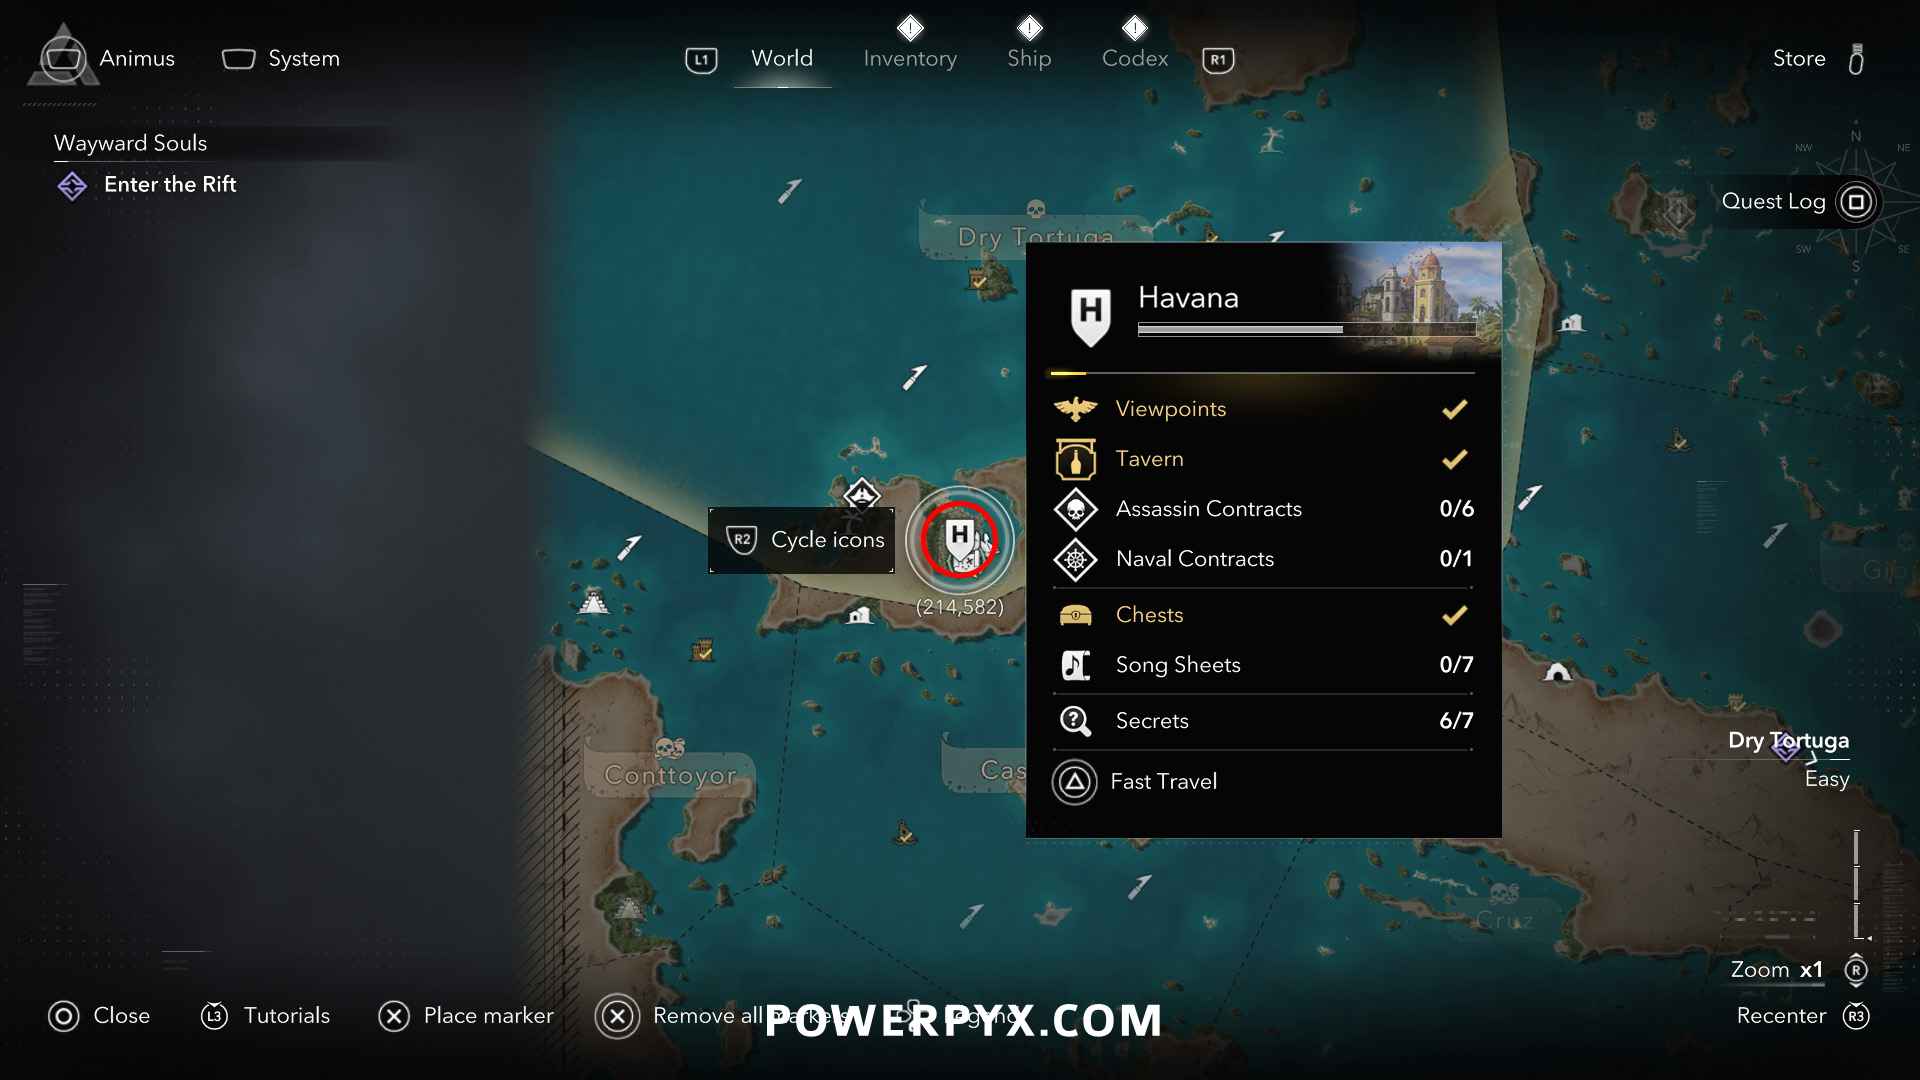
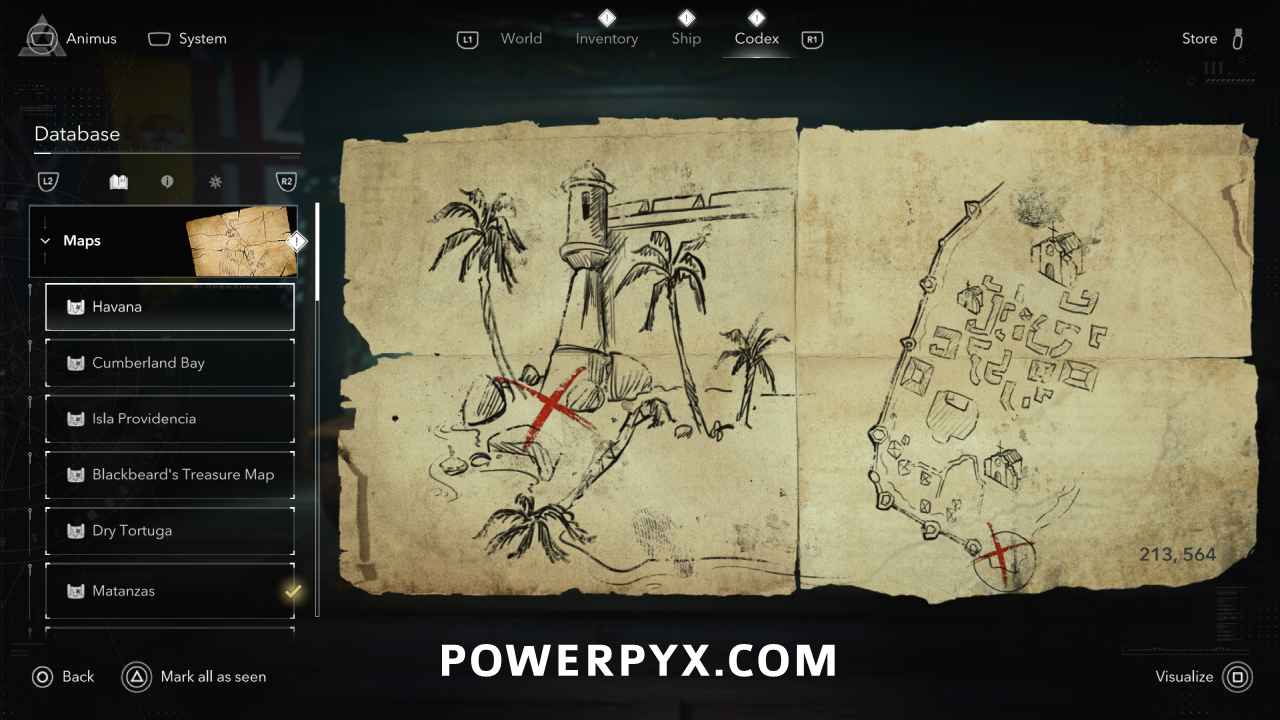
Solution: Havana (213, 564) – At the southern shore of Havana below a tower
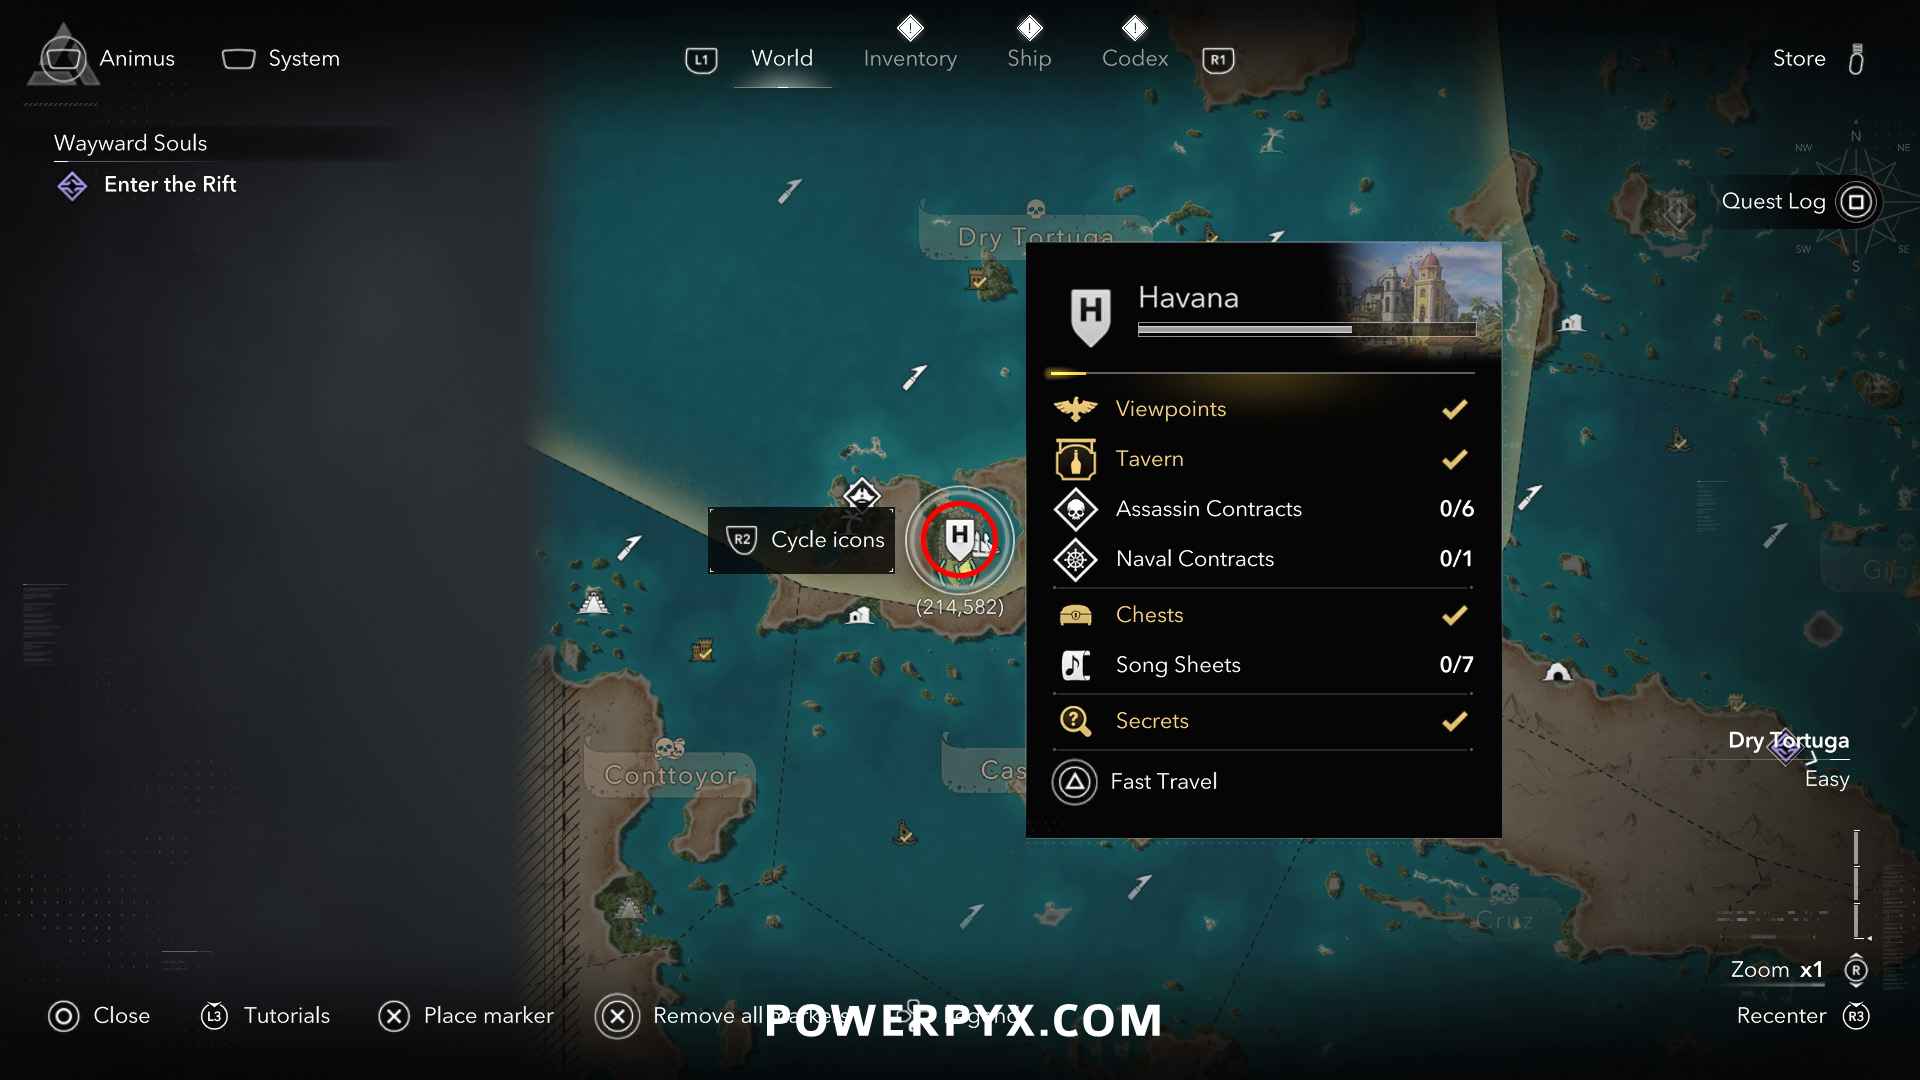
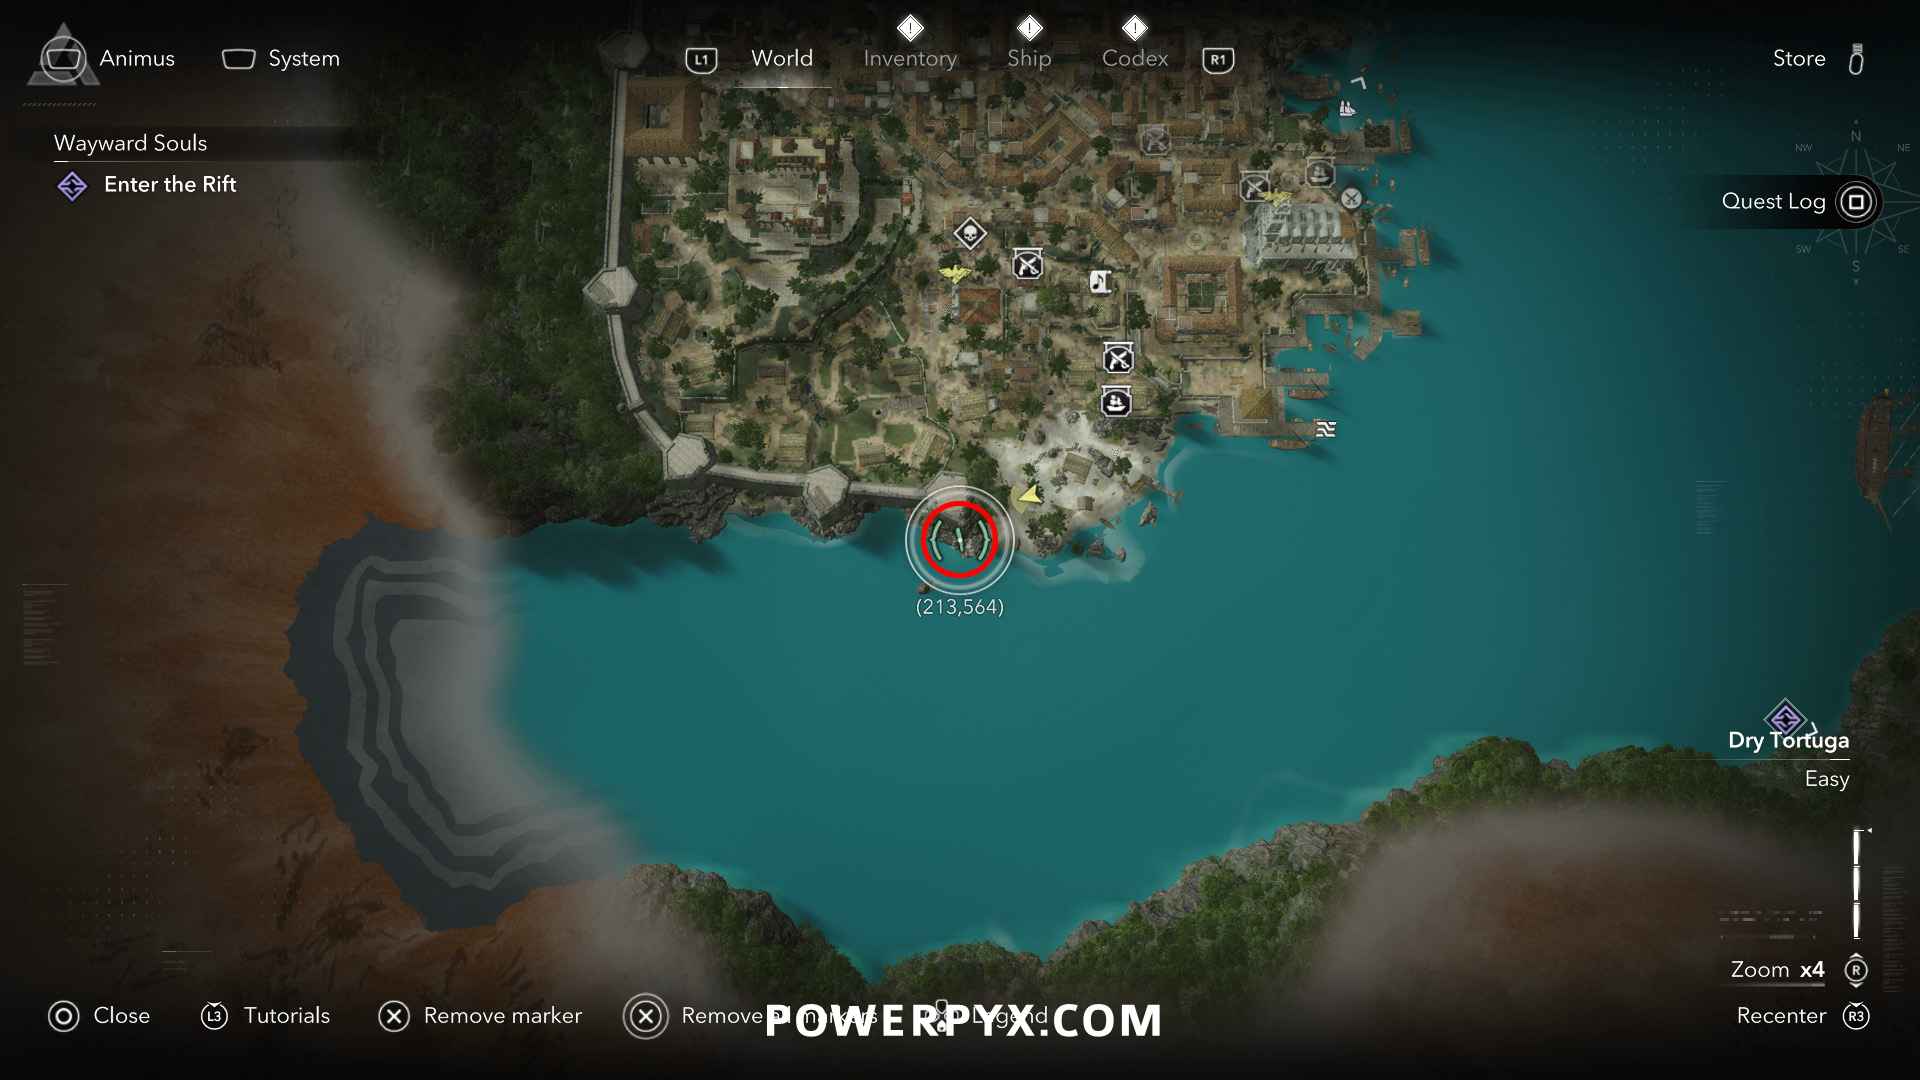
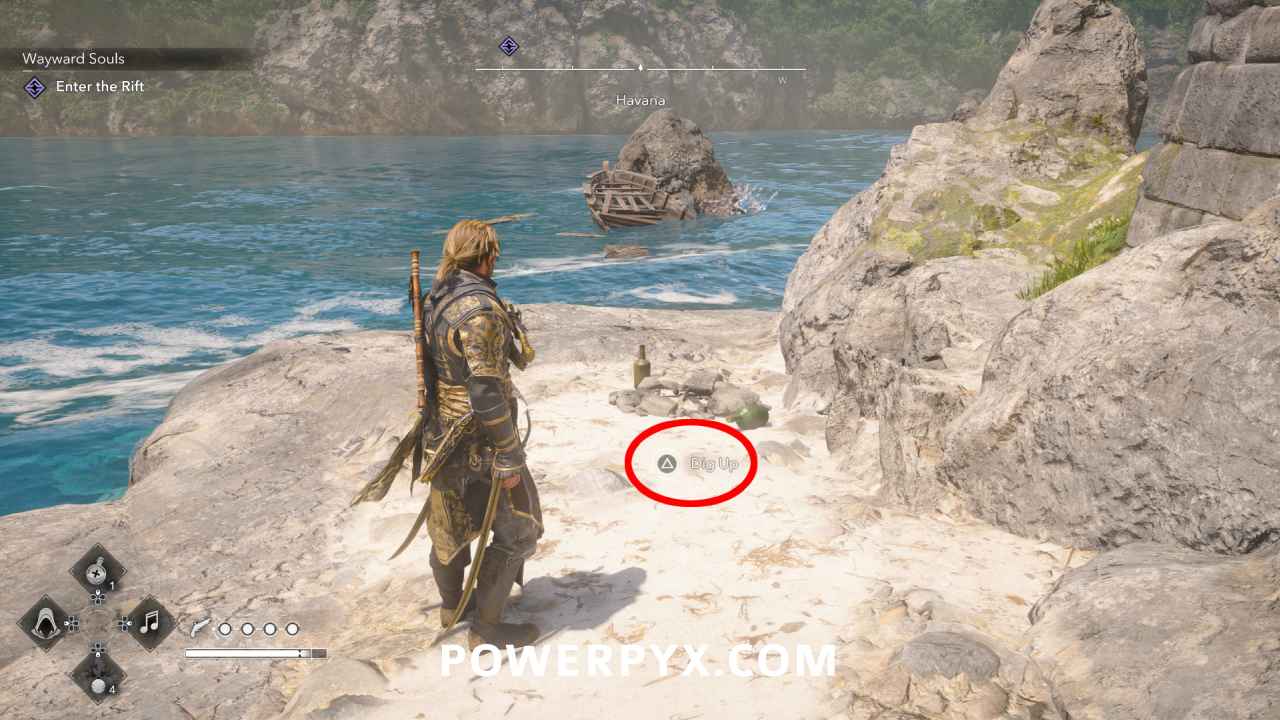
Reward: The Queen Anne’s Figurehead Design Plan (redeemable in Harbourmaster’s Shop menu), 3000 Reales
#2 – Treasure Map from Havana Warehouse (Anotto Bay)
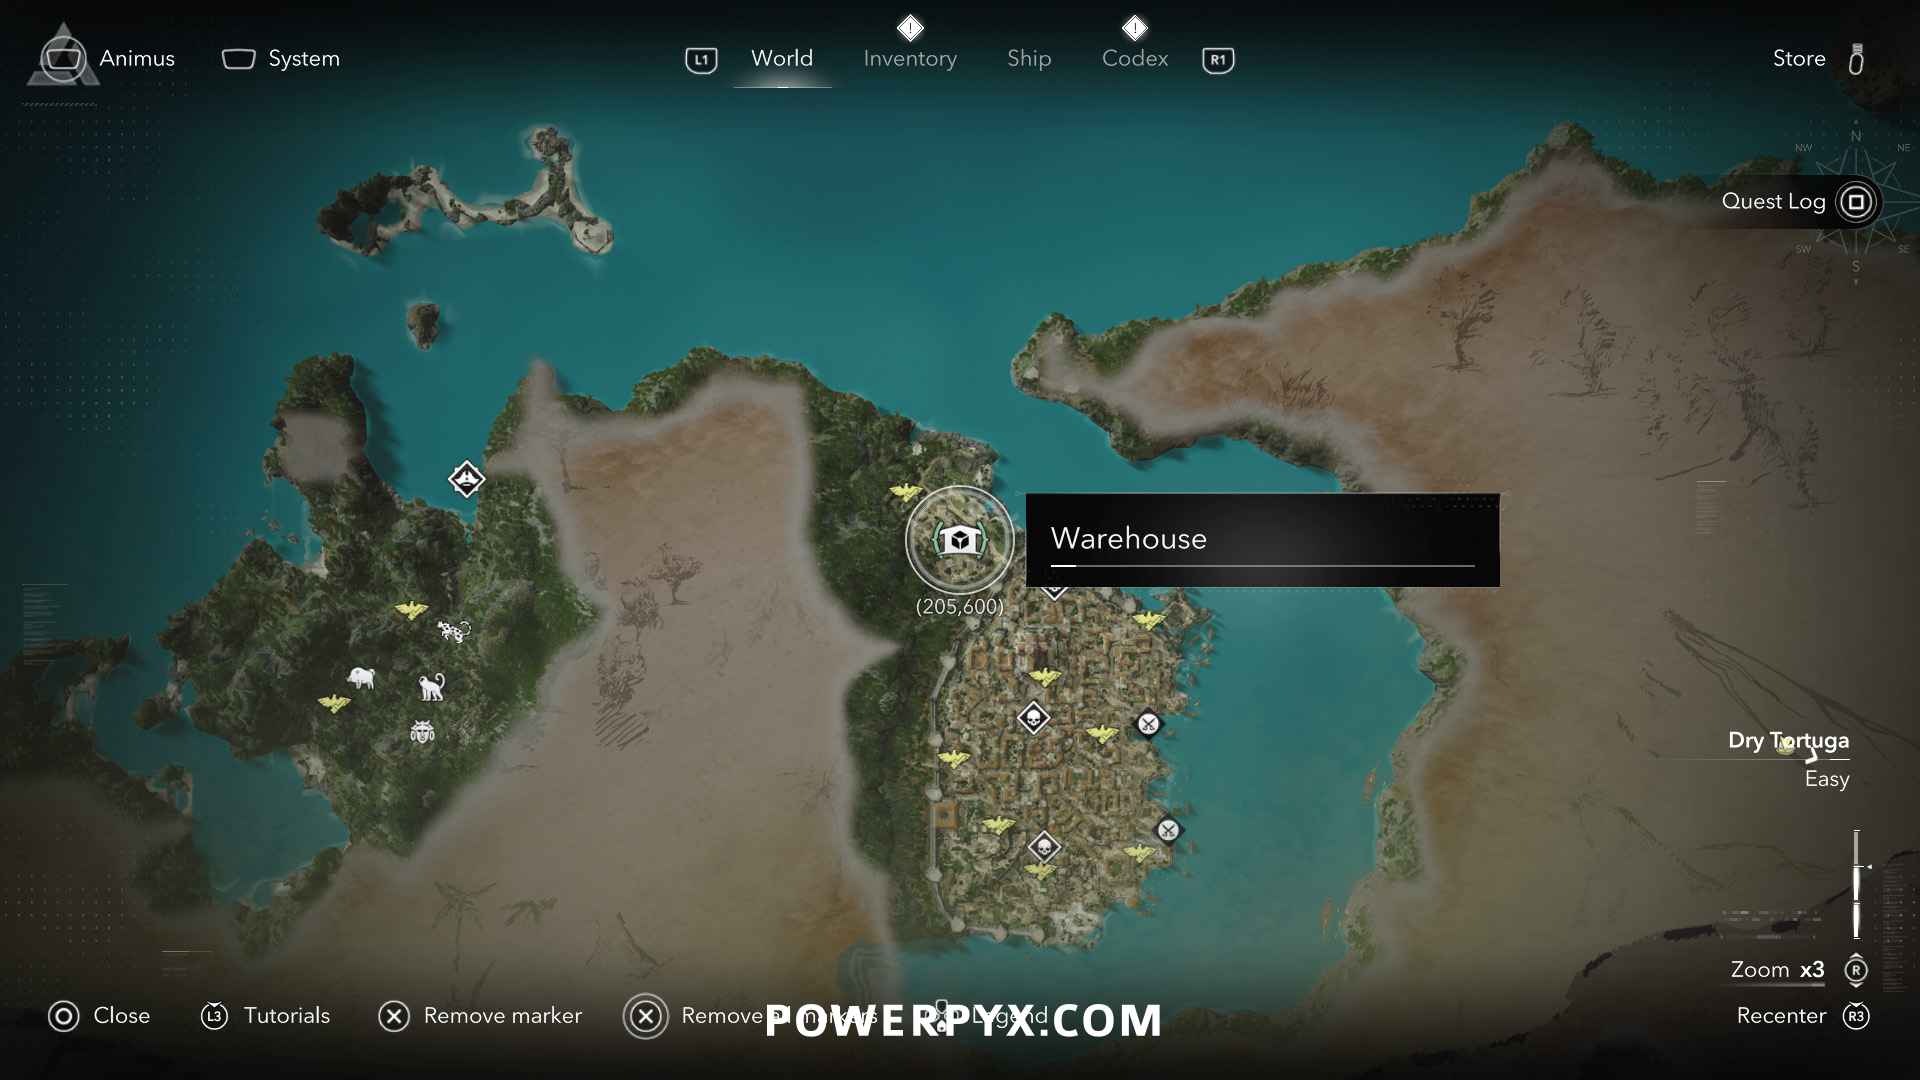
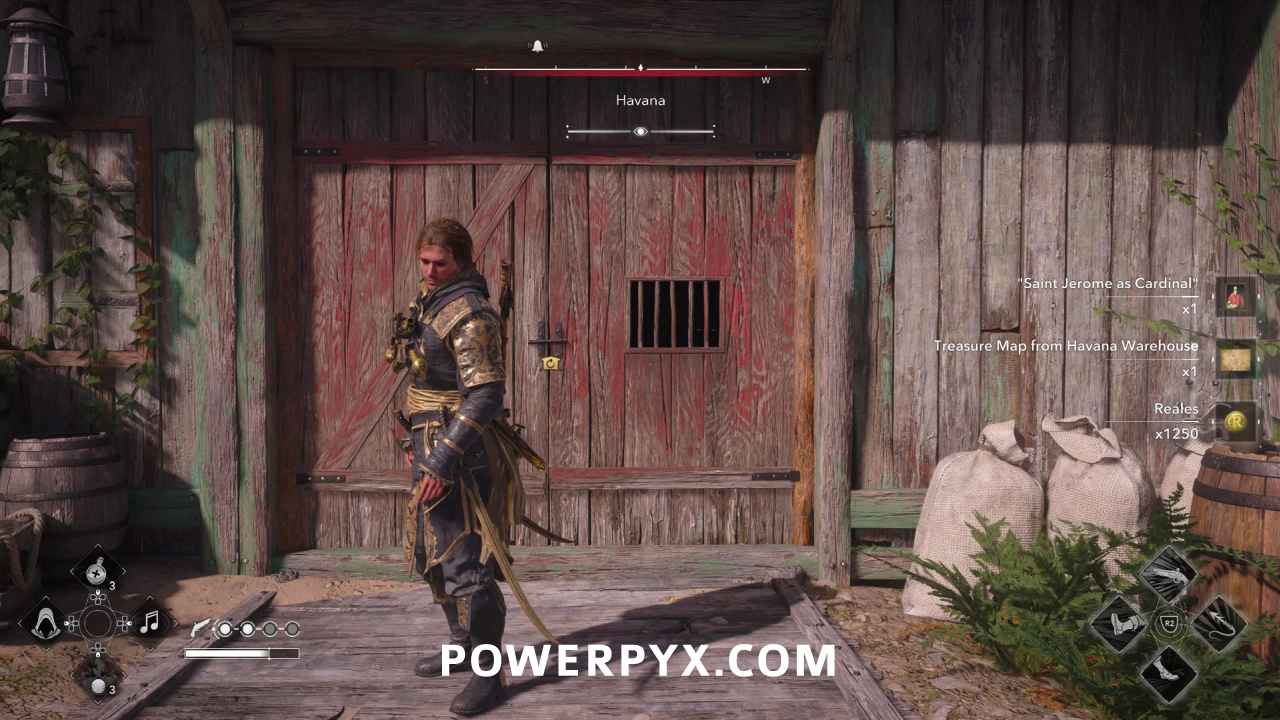
Location: Havana (205, 600) – loot the warehouse in Havana to get the map
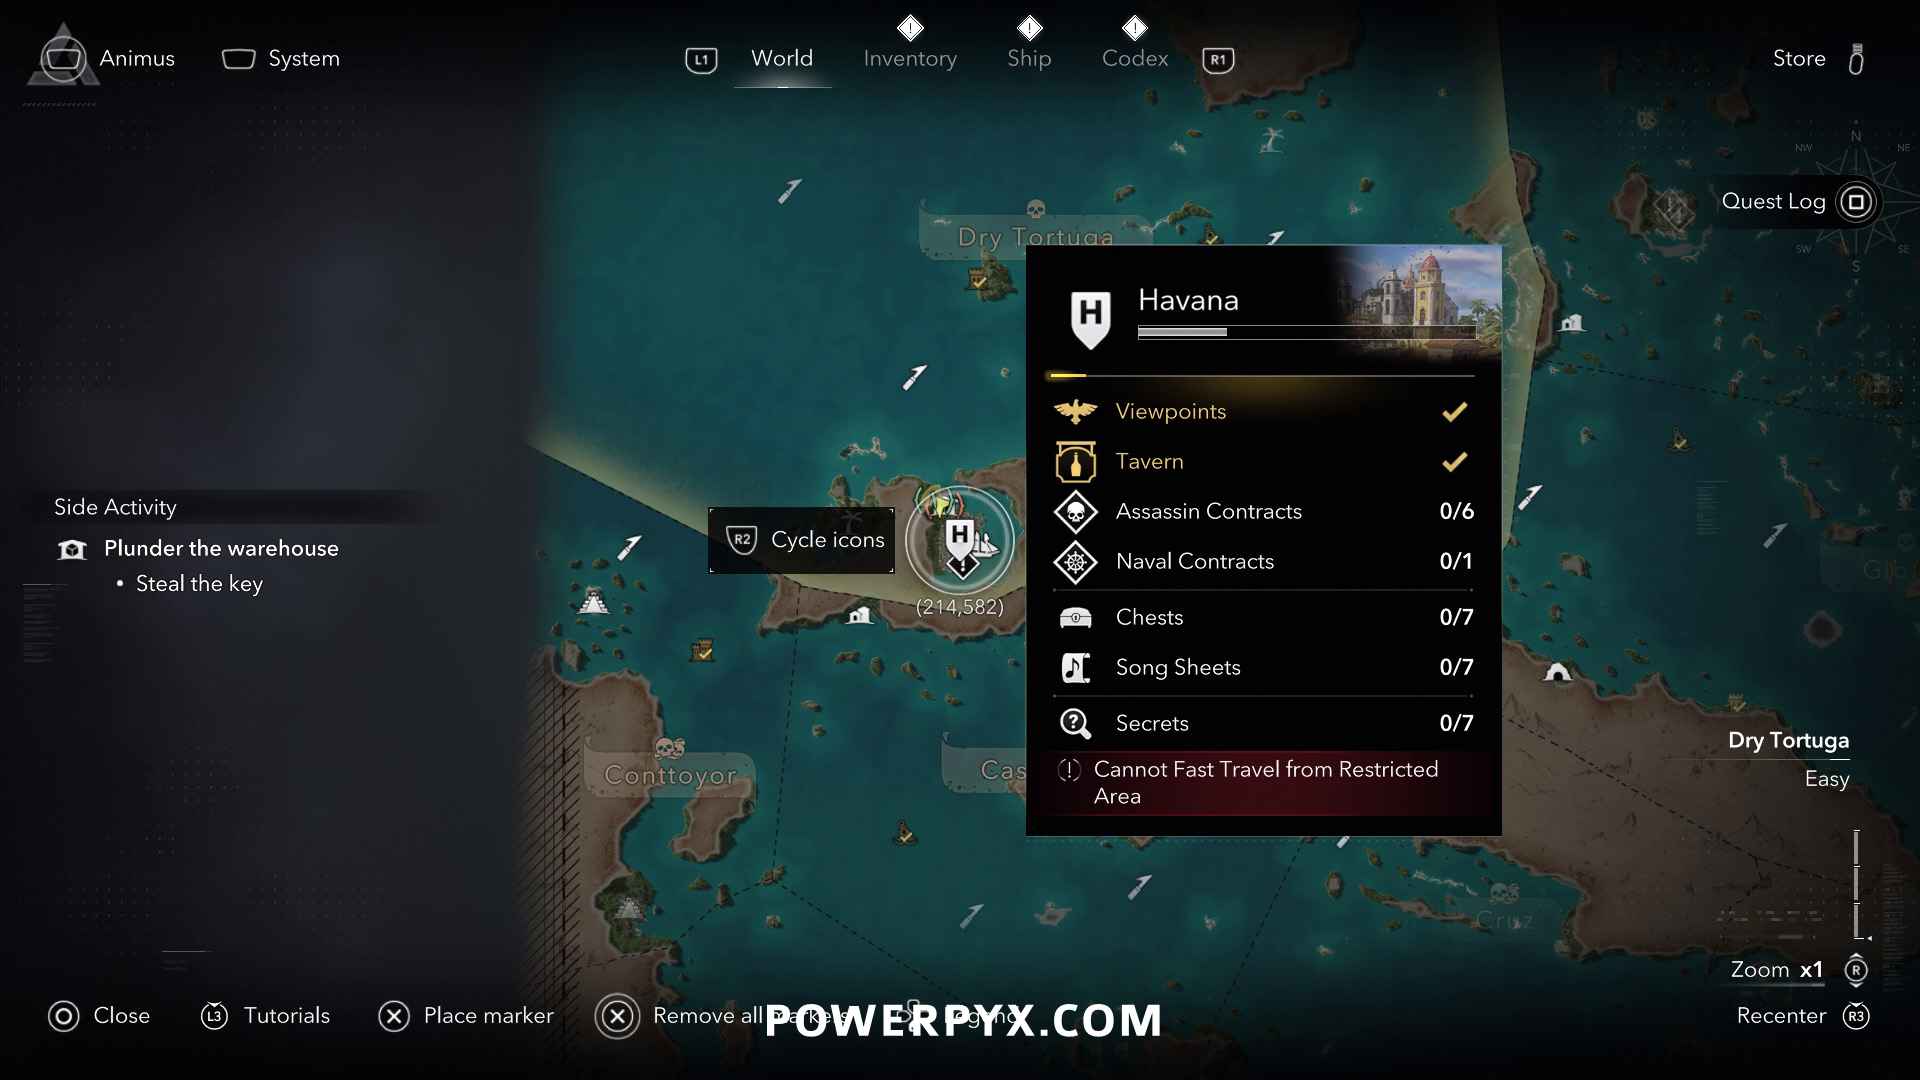
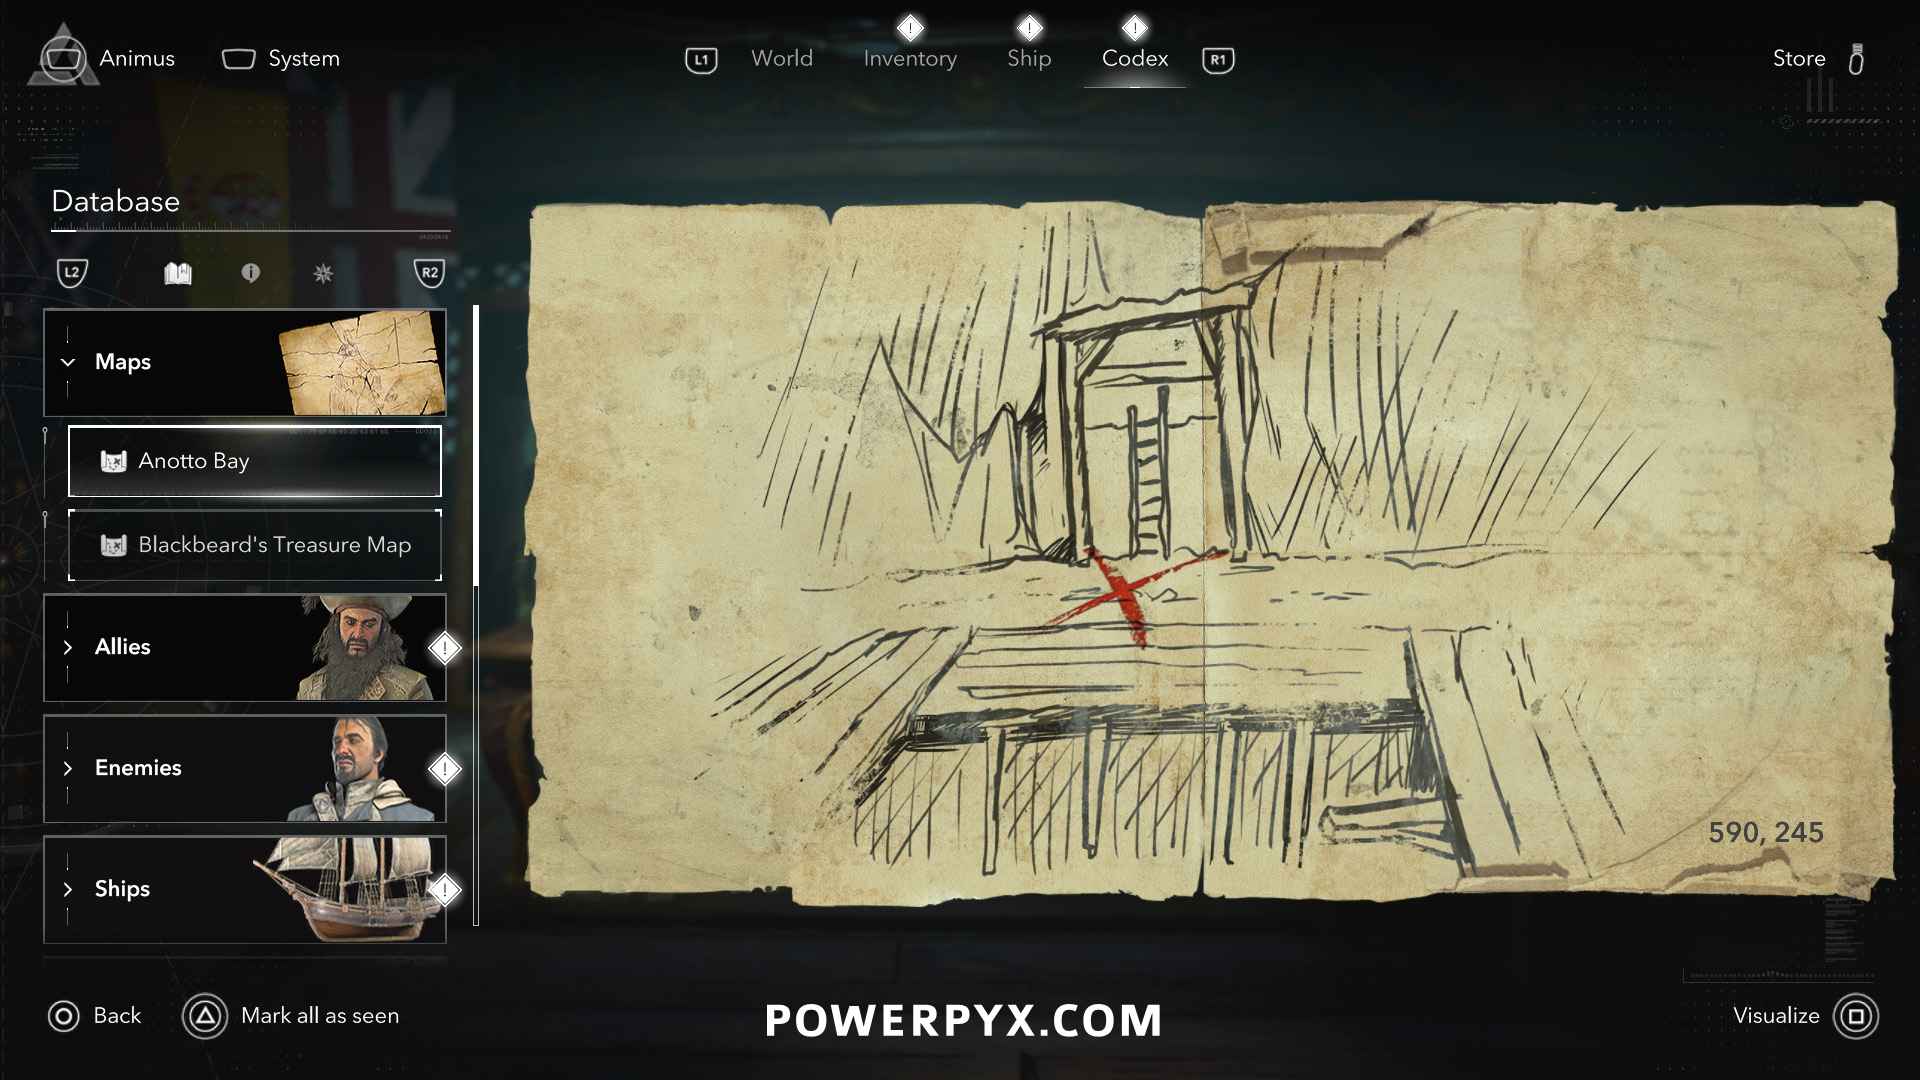
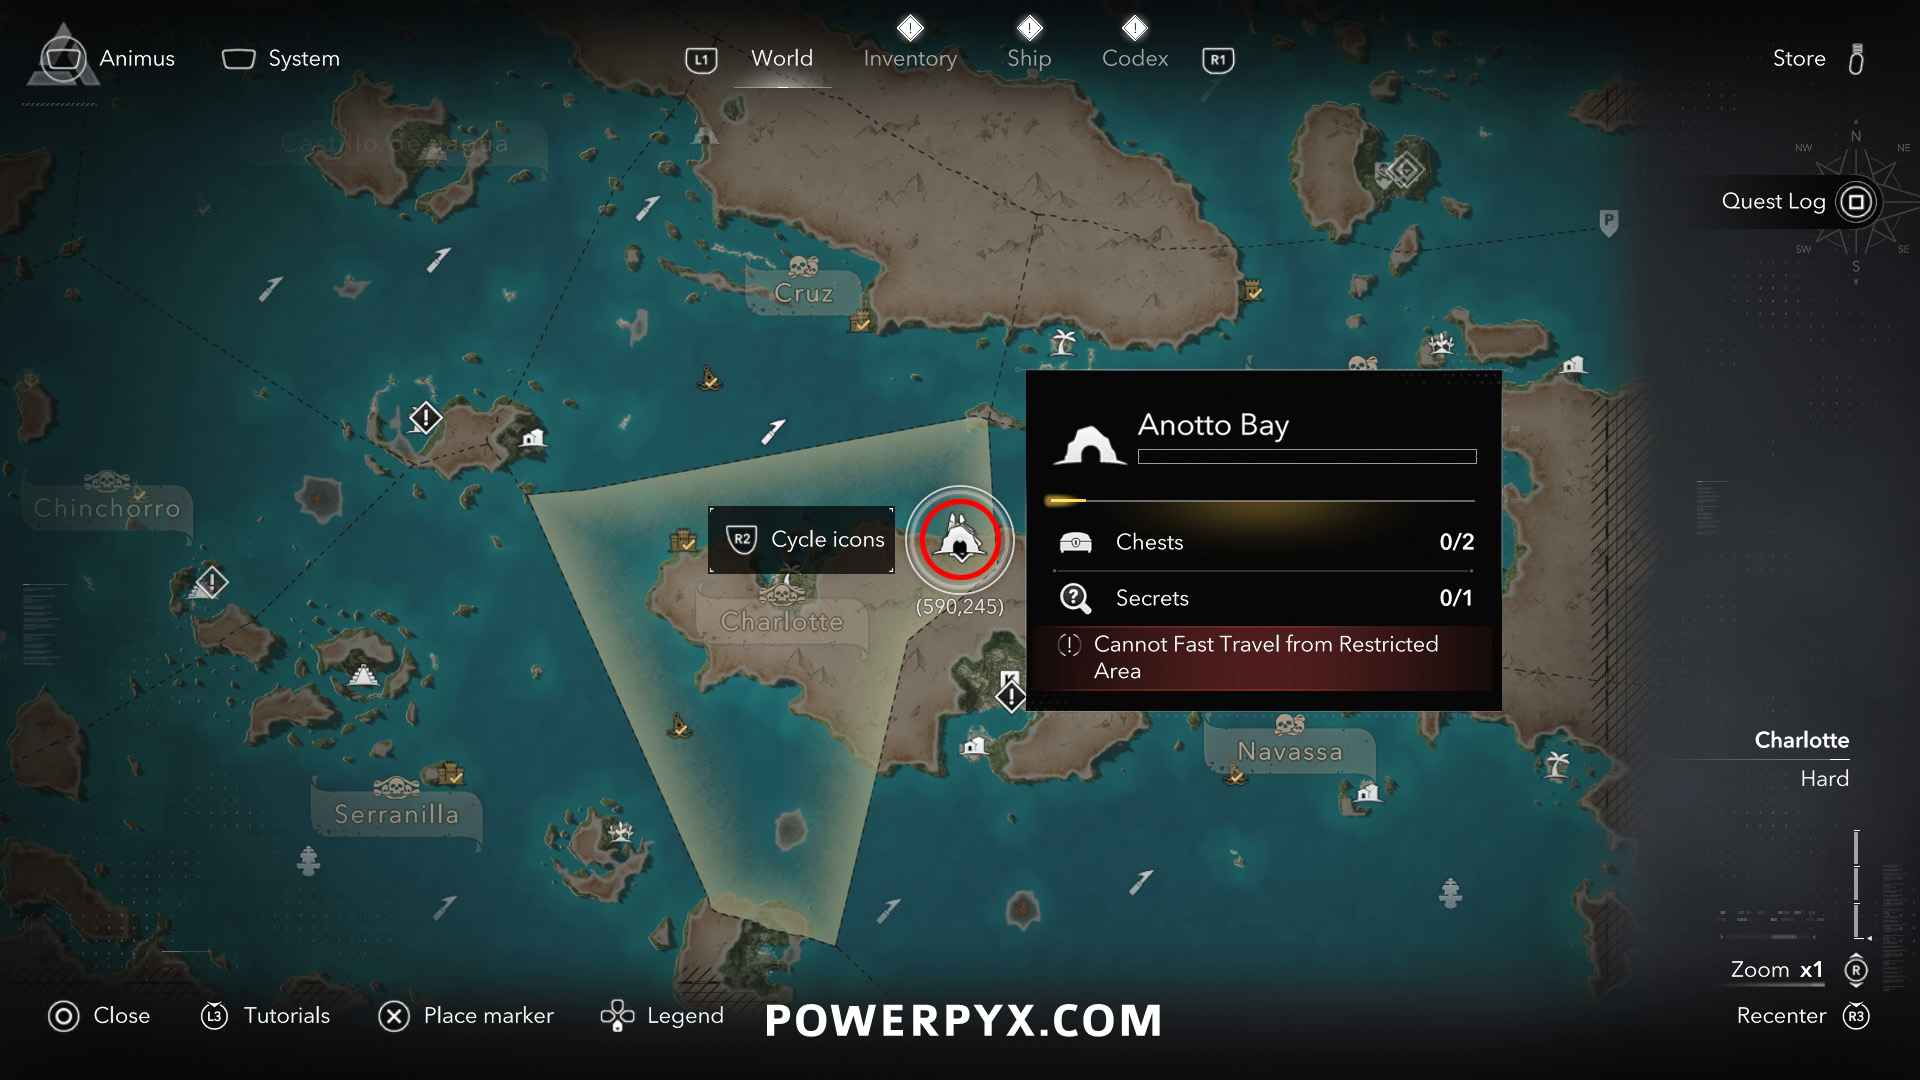
Solution: Anotto Bay (590, 245) – when you arrive at the shore of Anotto Bay, look for a destroyed diving bell in the water and dive below it to find the underwater tunnel entrance. Follow the underwater tunnel deep into the cave until you come to a room with many pirate enemies and big explosive barrels. The treasure is in the ground in front of the middle explosive barrel, directly in front of the exit that leads back outside.
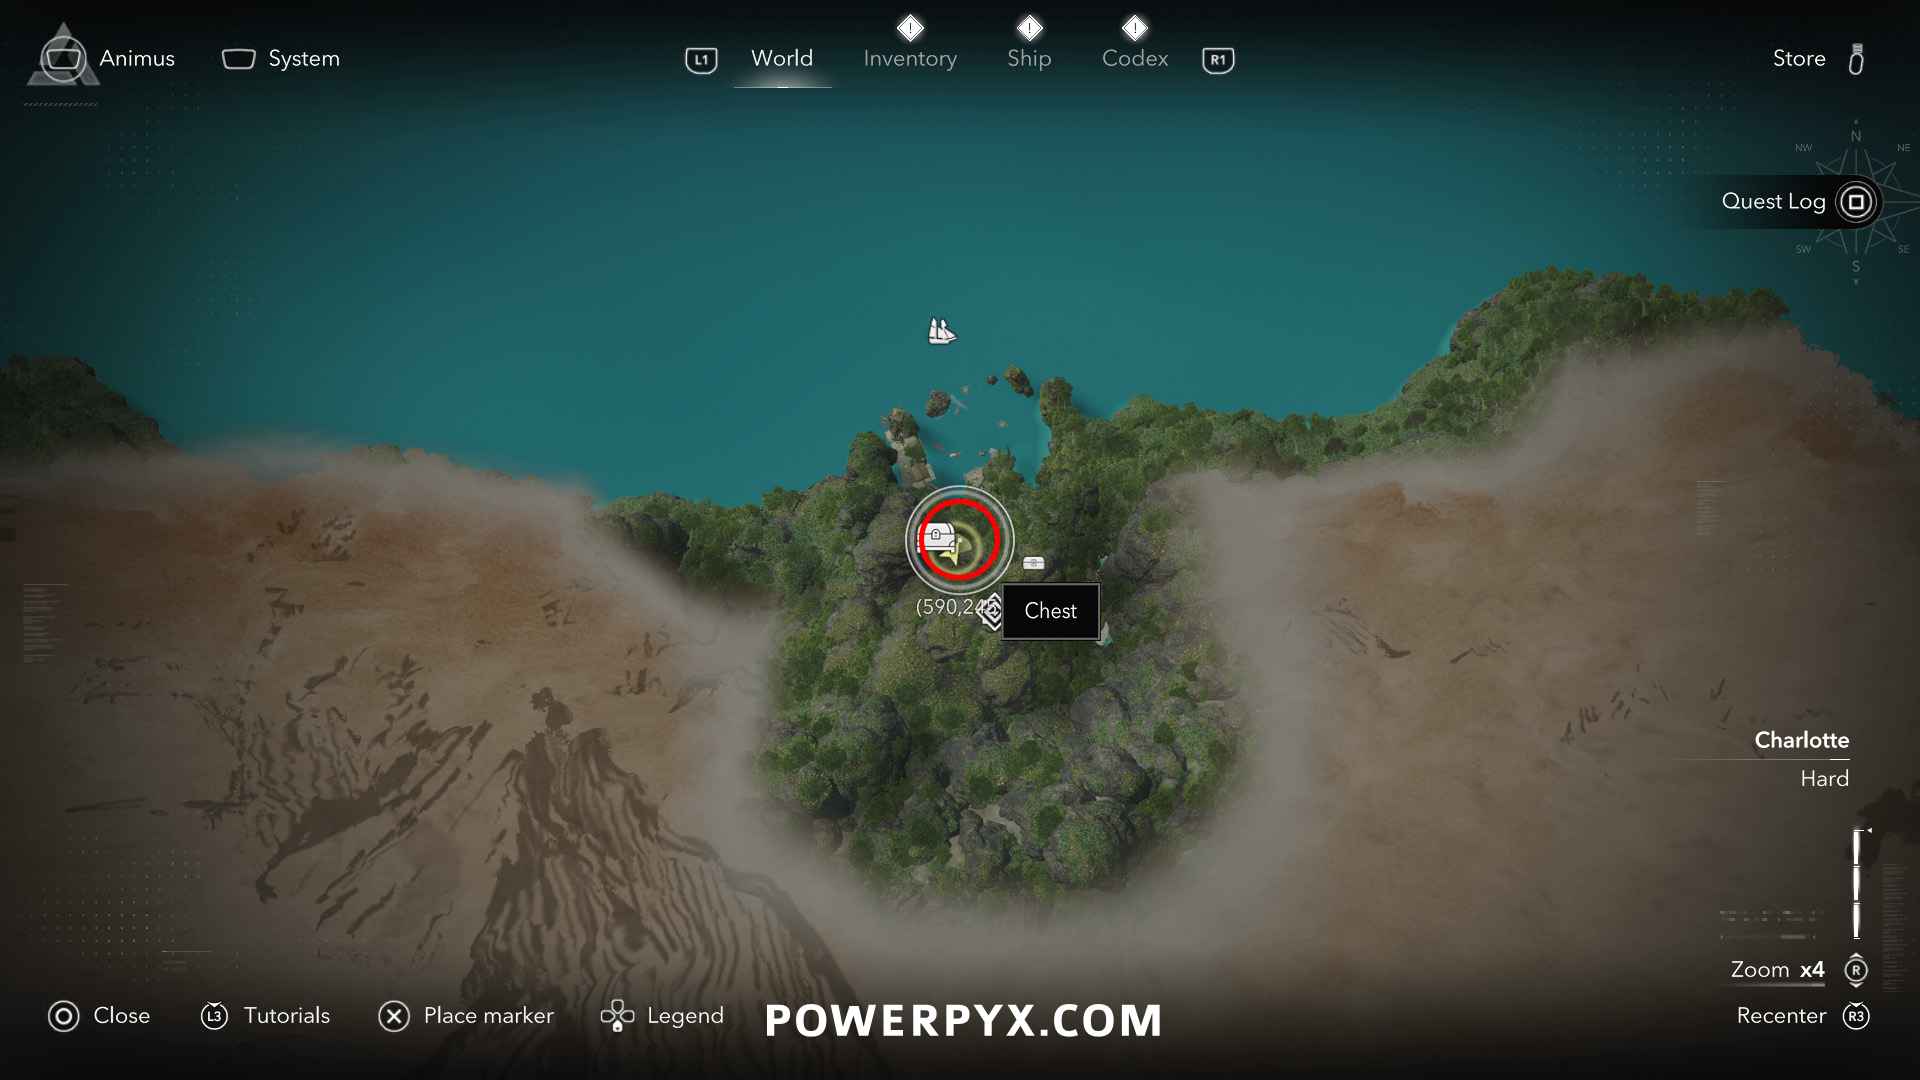
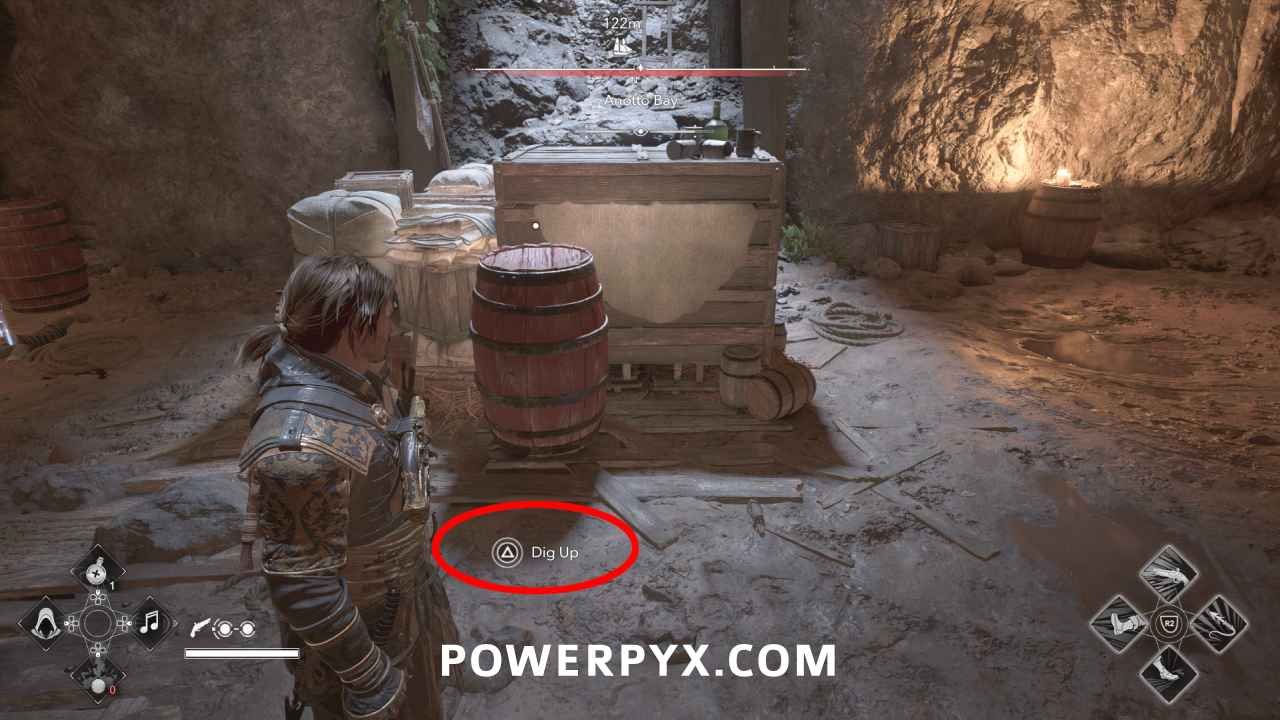
Reward: Crimson Cloak (Rare Outfit), 2000 Reales
#3 – Map of Shipwreck (Dry Tortuga)
Location: Havana (225, 573) – from the local event “Smelly Sailors”, read the note at the docks
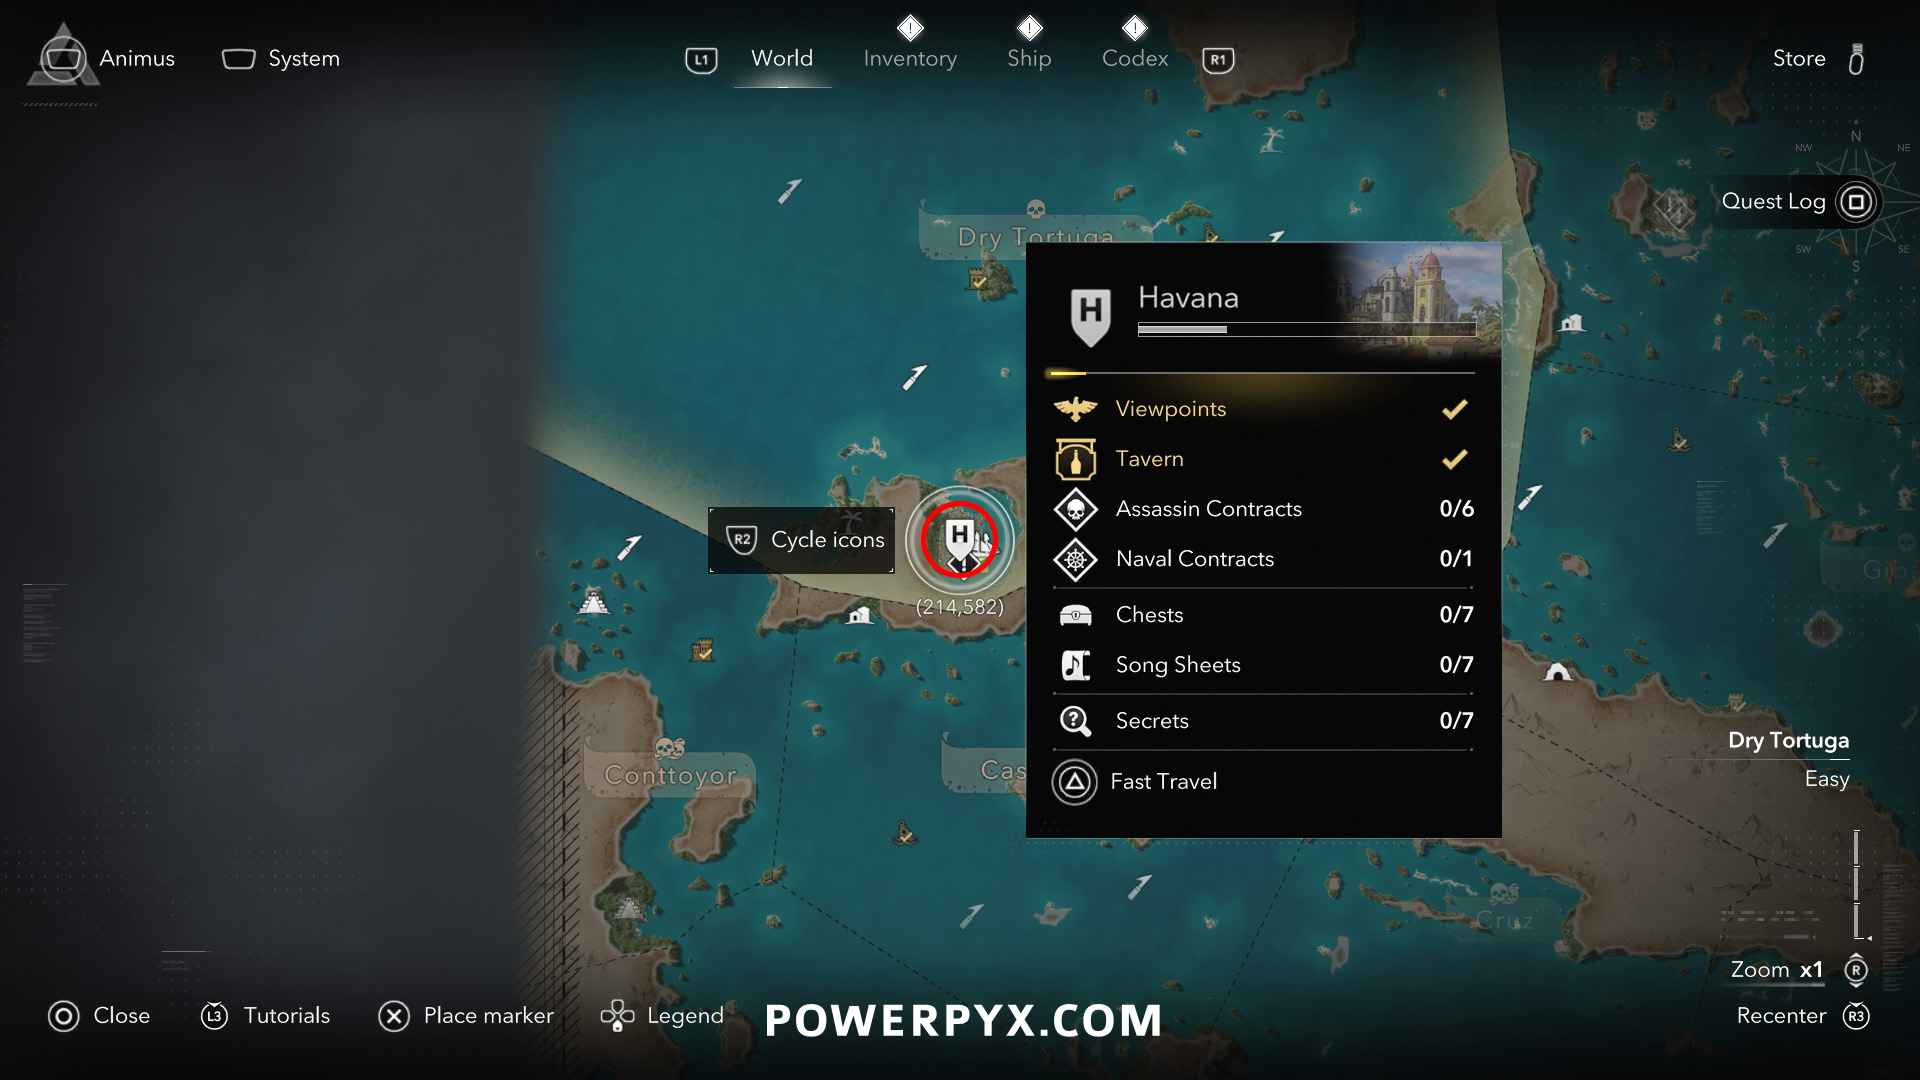
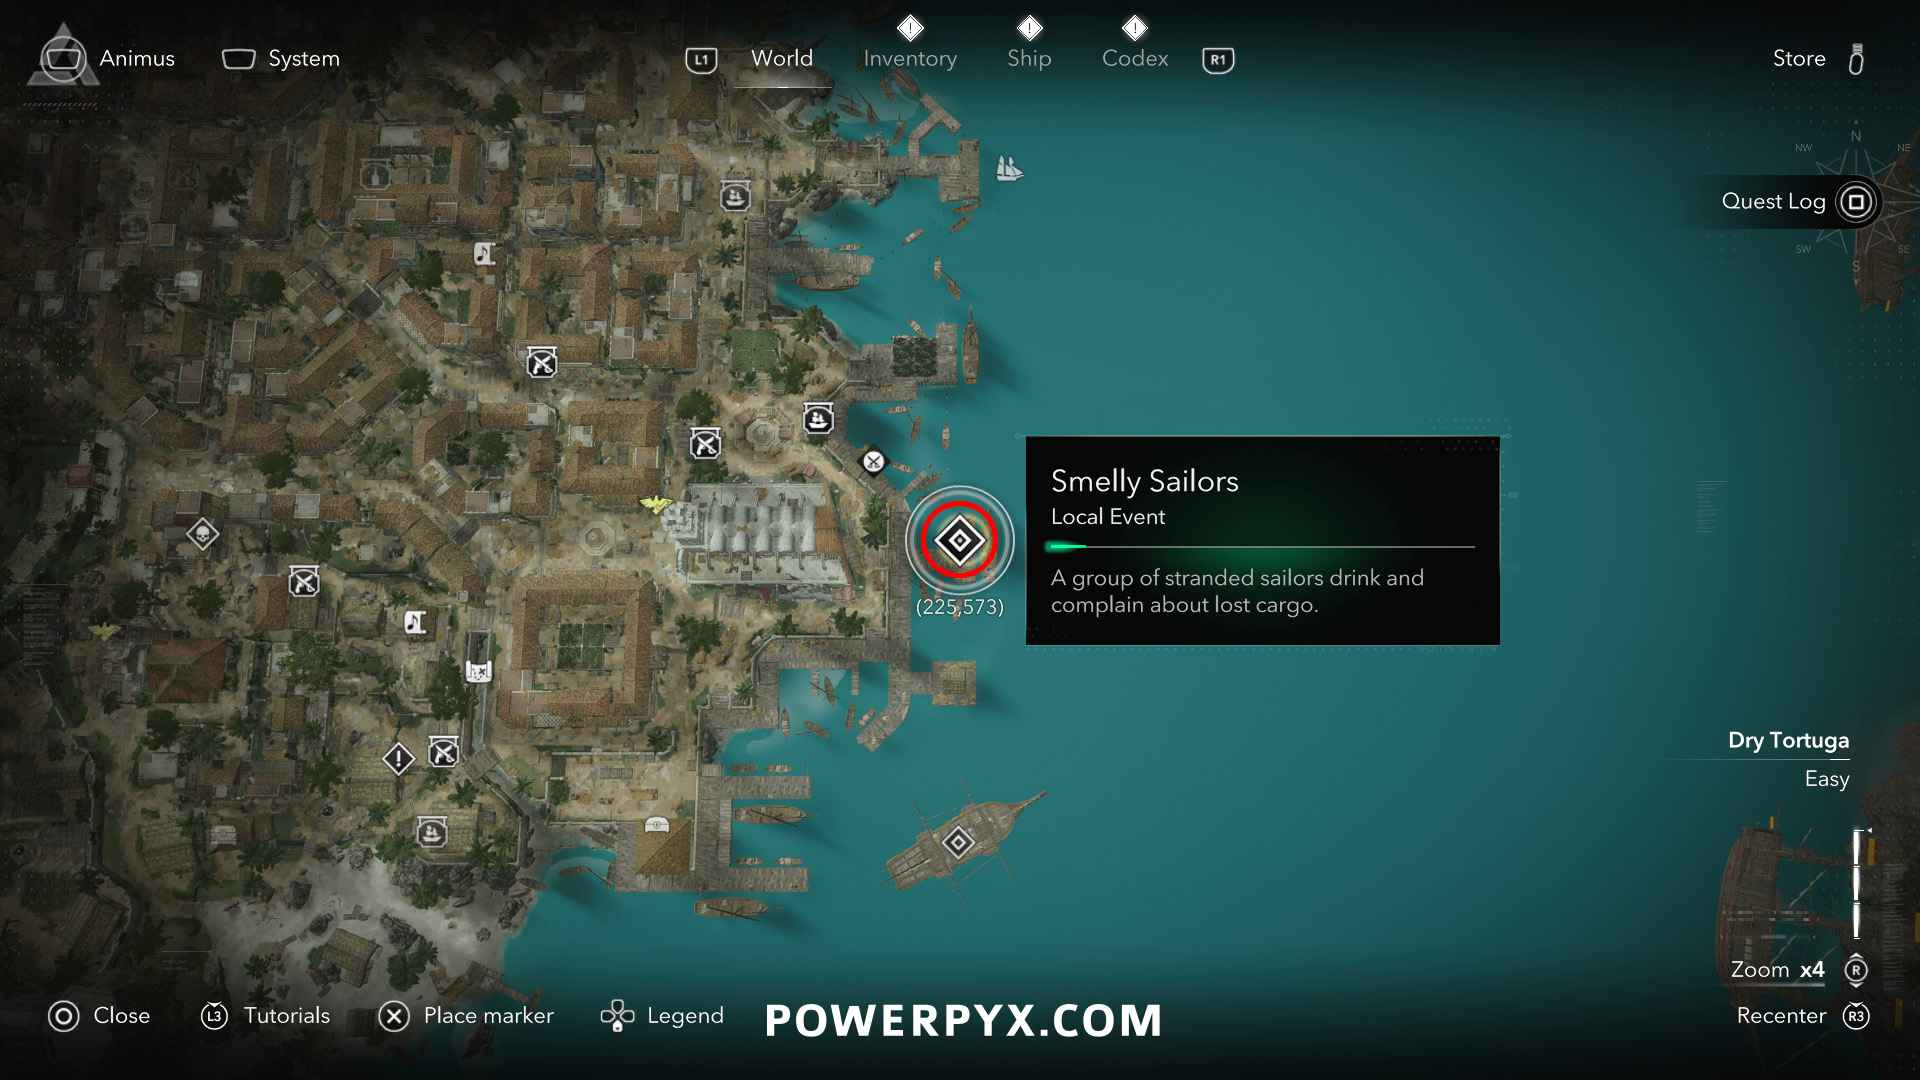
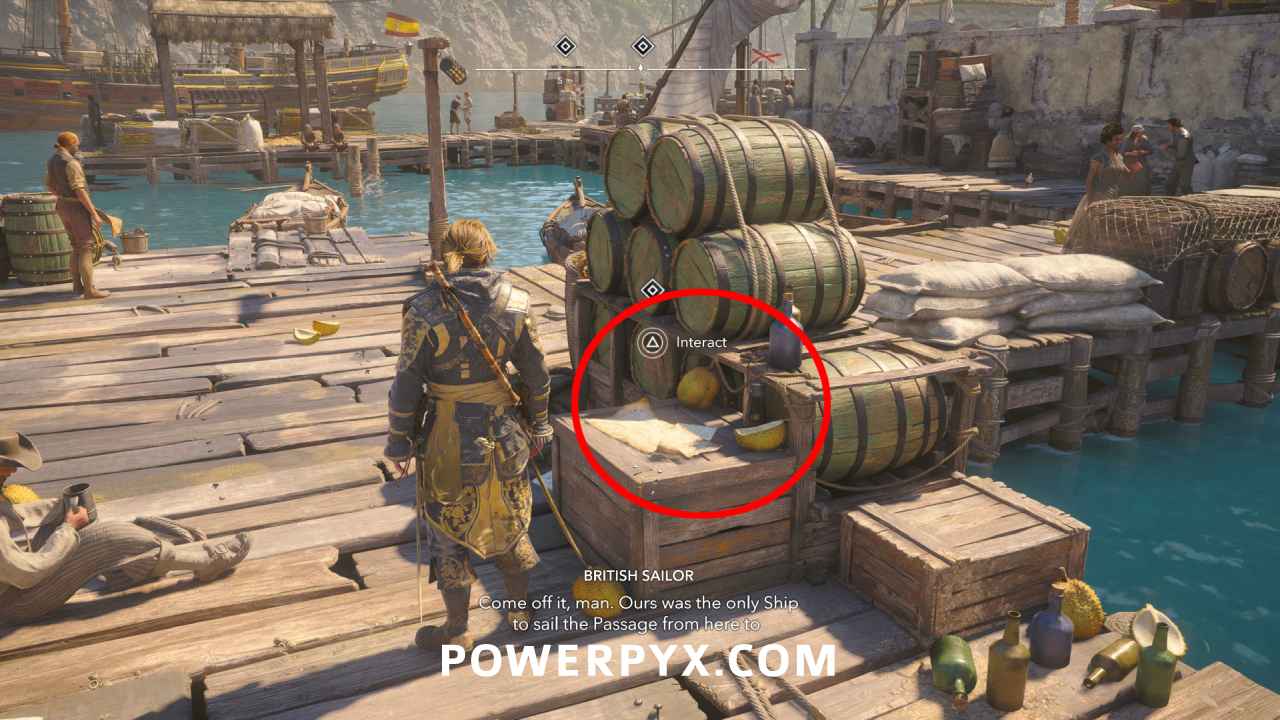
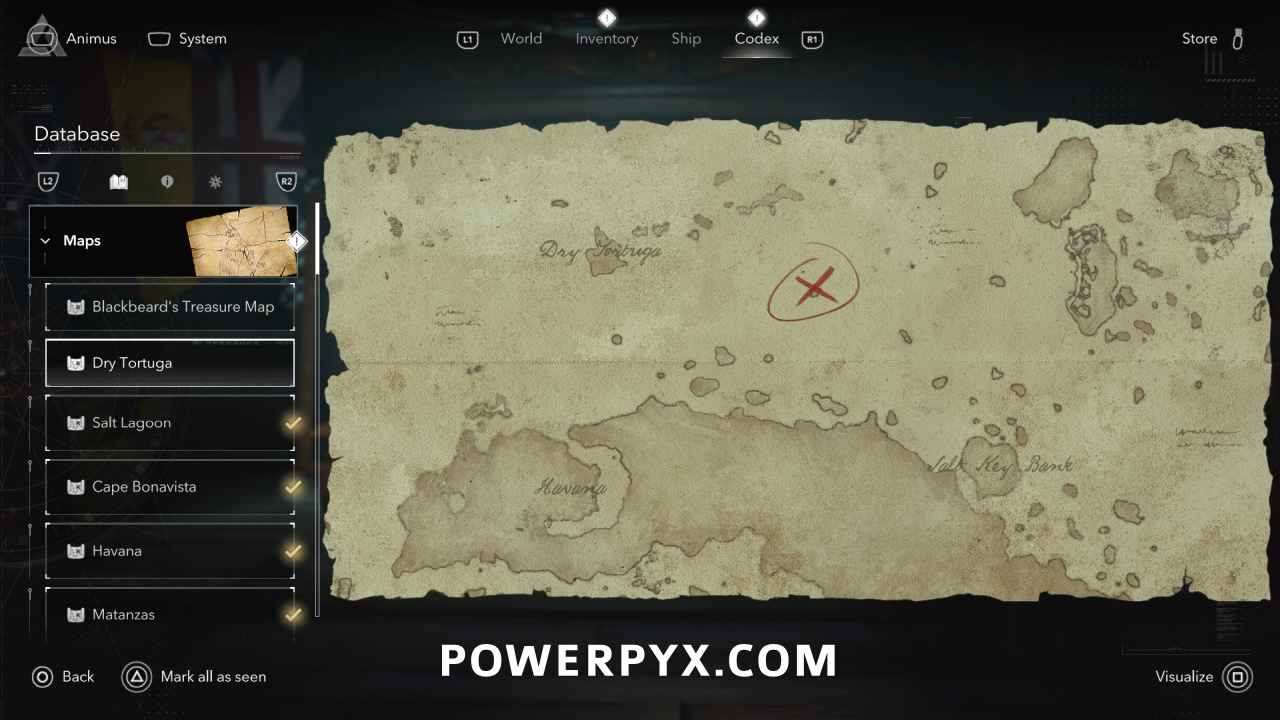
Solution: Unmarked Island in Dry Tortuga region (356, 701) – sail to the unmarked island northeast of Havana, in the middle of the island dive down to find two underwater chests. One gives a legendary charm. This is not a normal treasure you dig up, the treasure map doesn’t have coordinates on it and it remains in your inventory permanently even after looting the chests. There is nothing to dig up on this island, since it’s not from a regular treasure map.
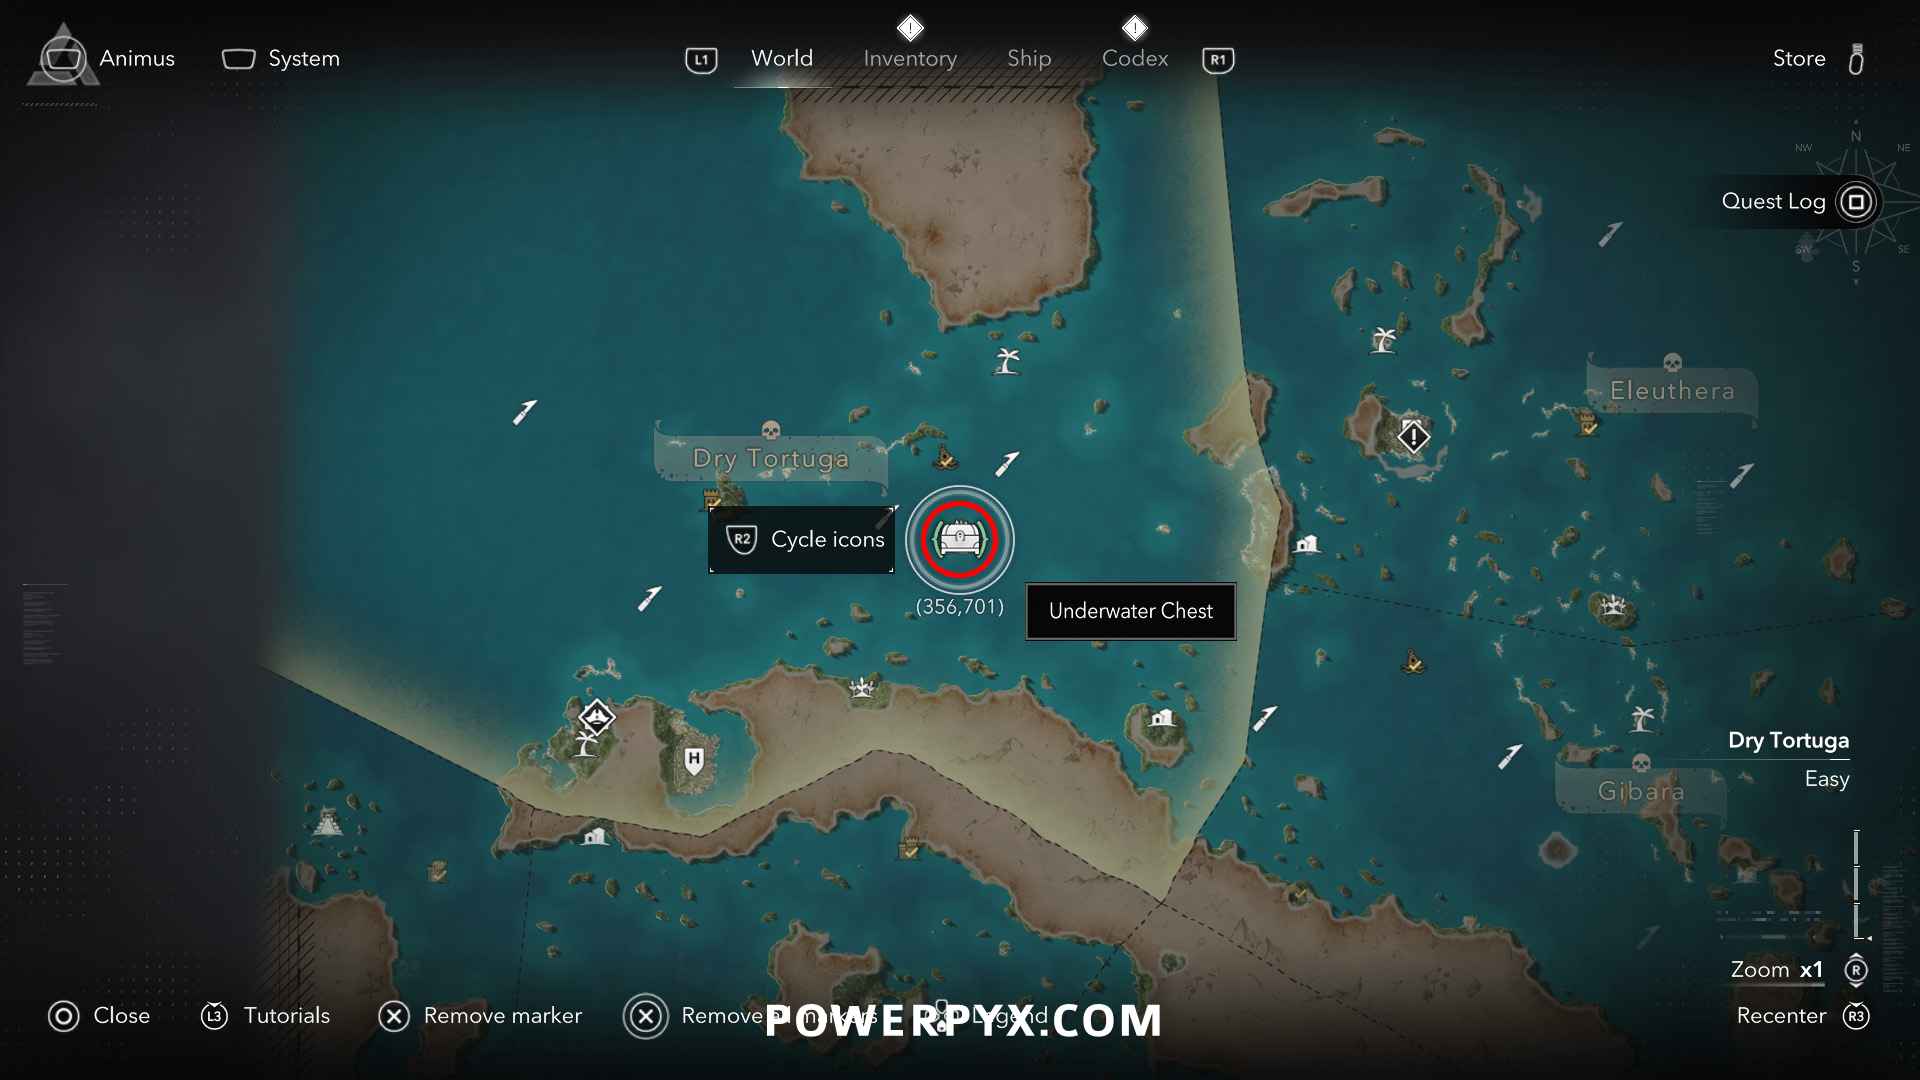
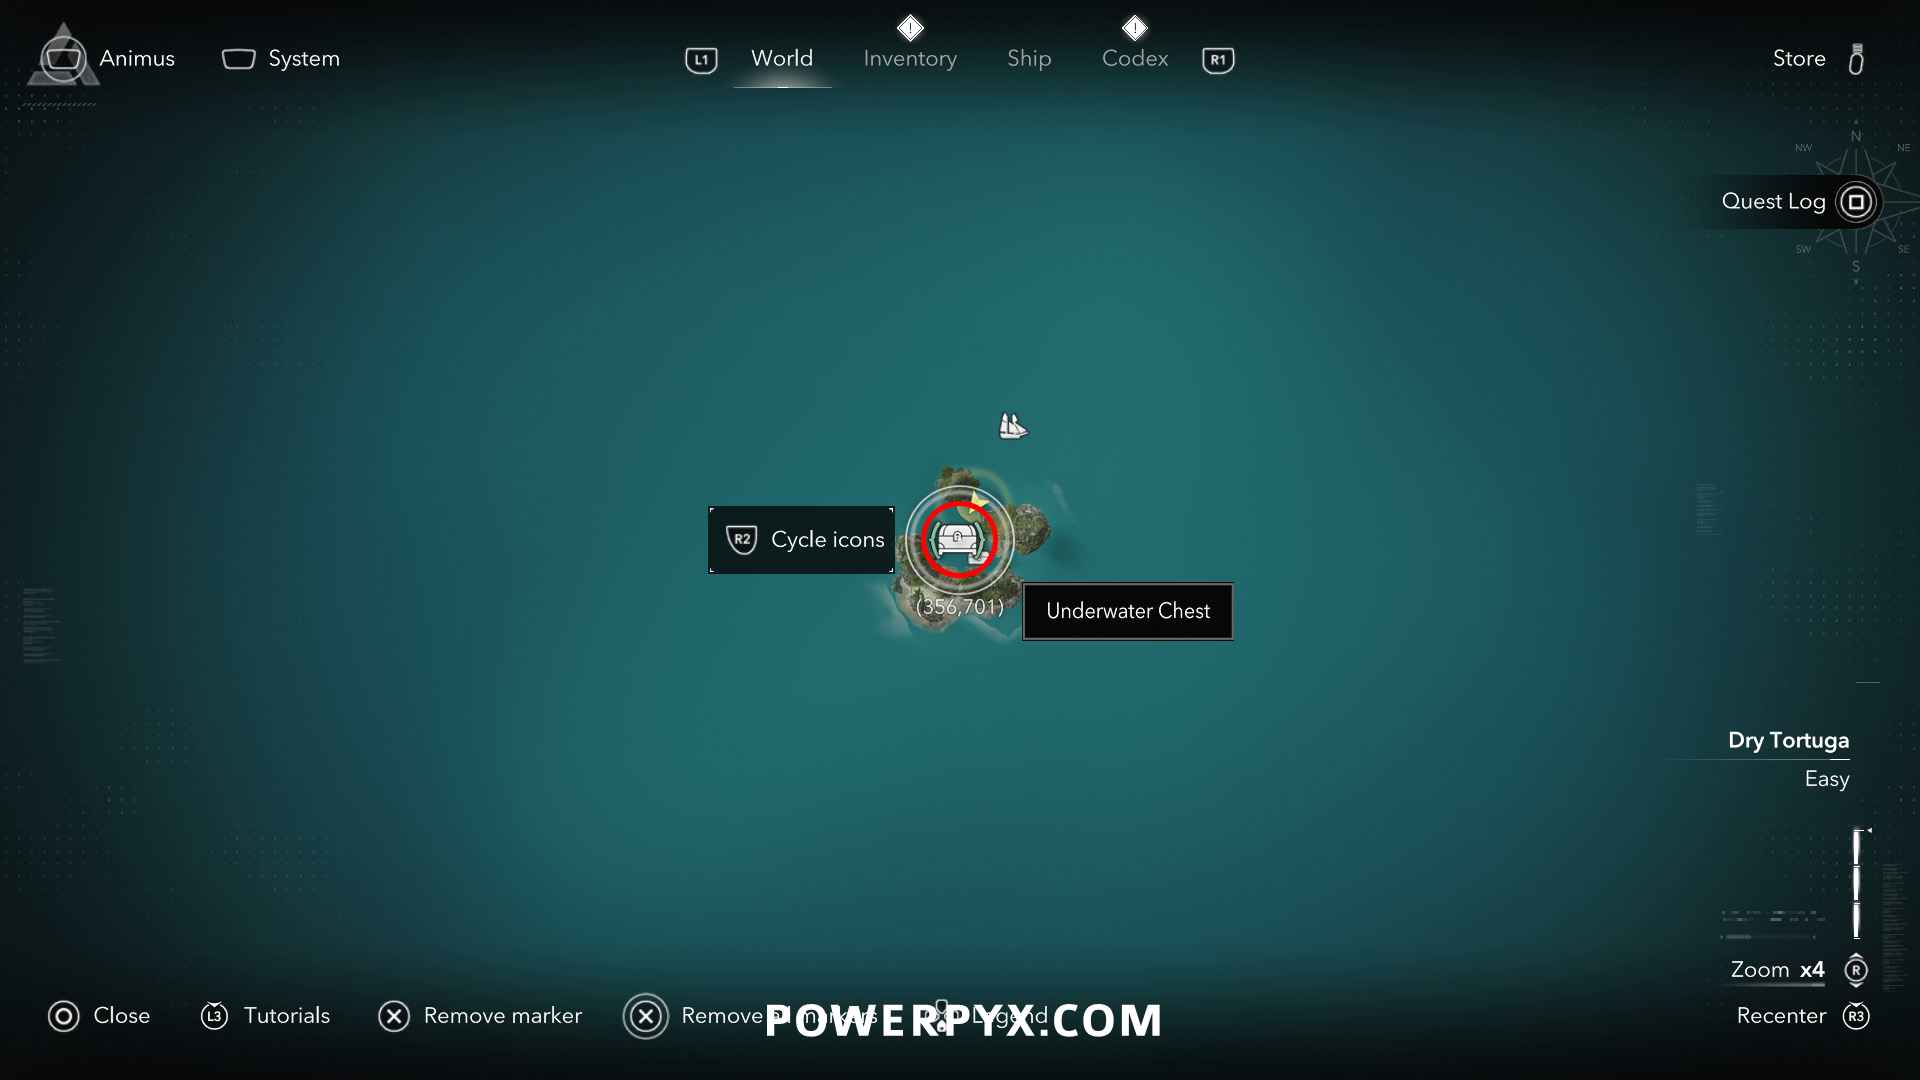
Reward: Guardian Beast Trinket (Legendary Trinket), 1000 Reales
#4 – Treasure Map from Cape Bonavista (Cape Bonavista)
Location: Cape Bonavista (161, 585) – in cave you can climb to from the scaffold slightly to the
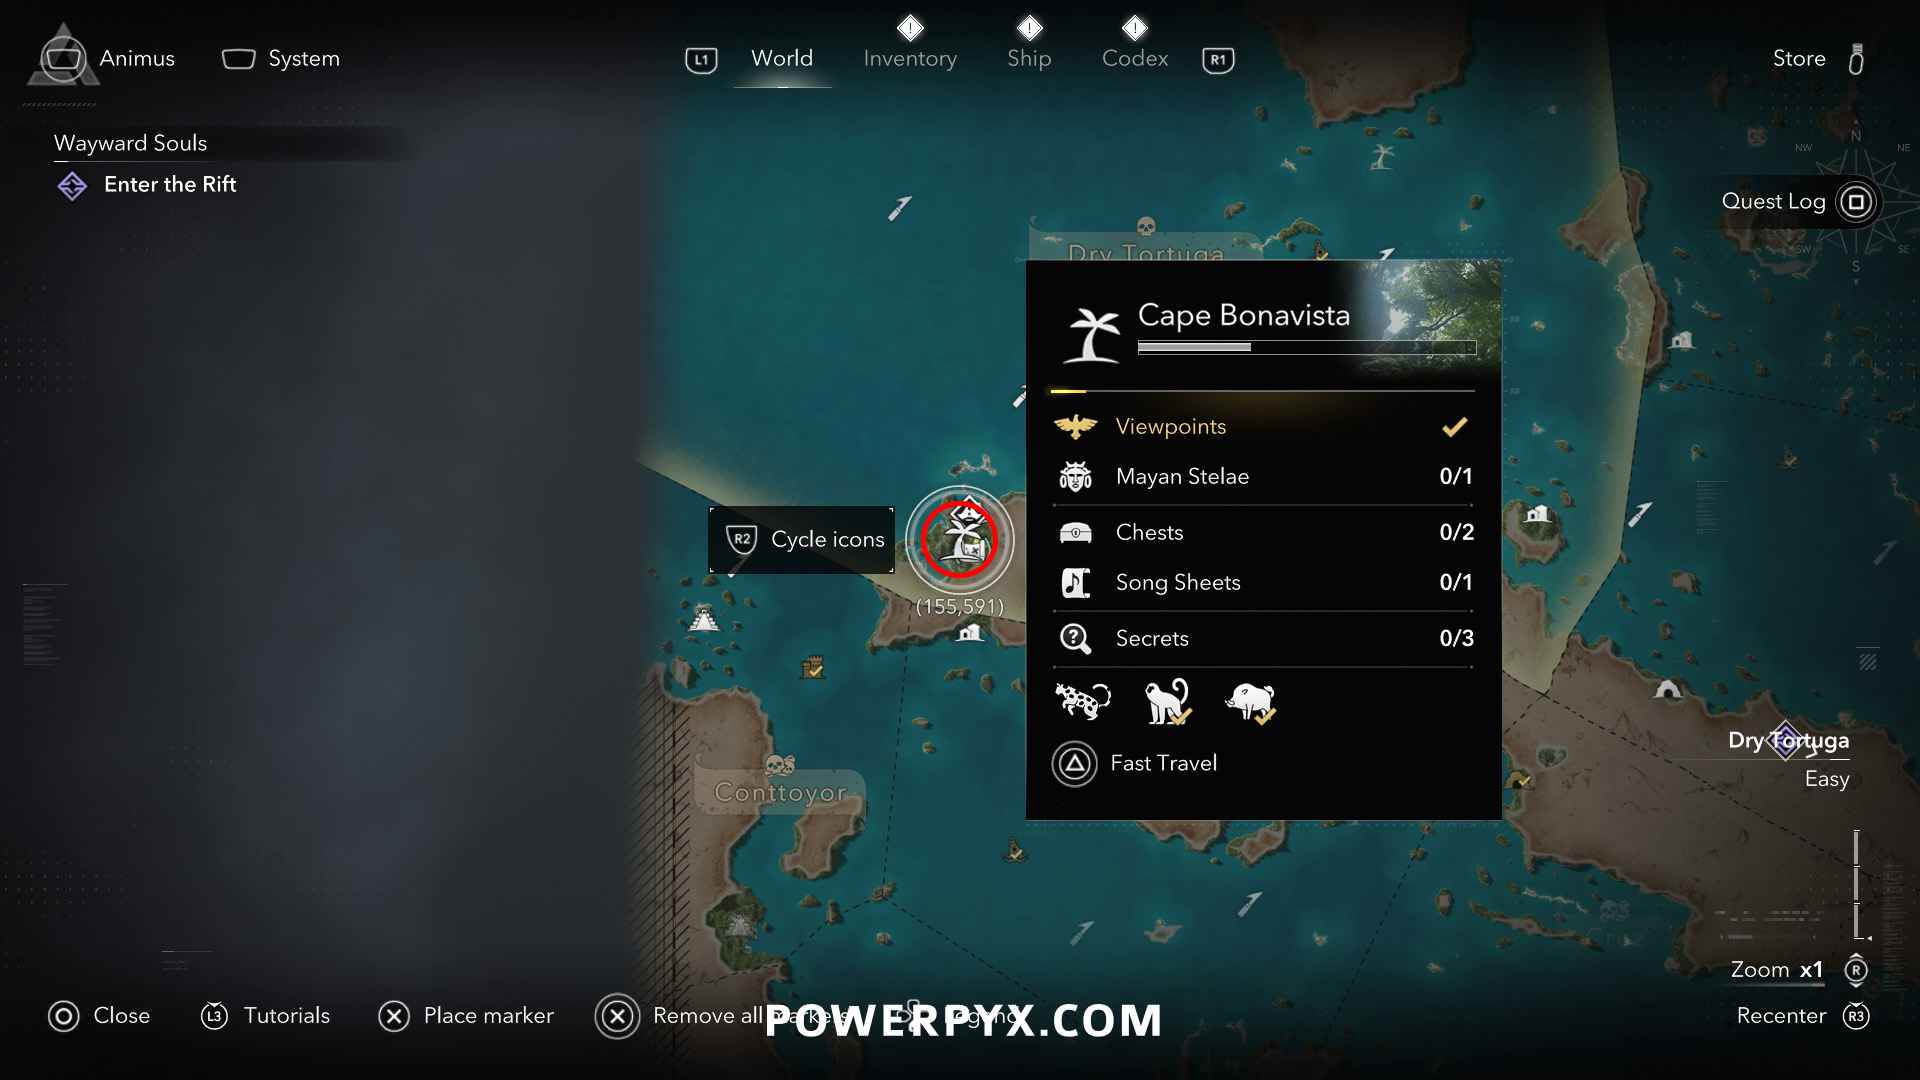
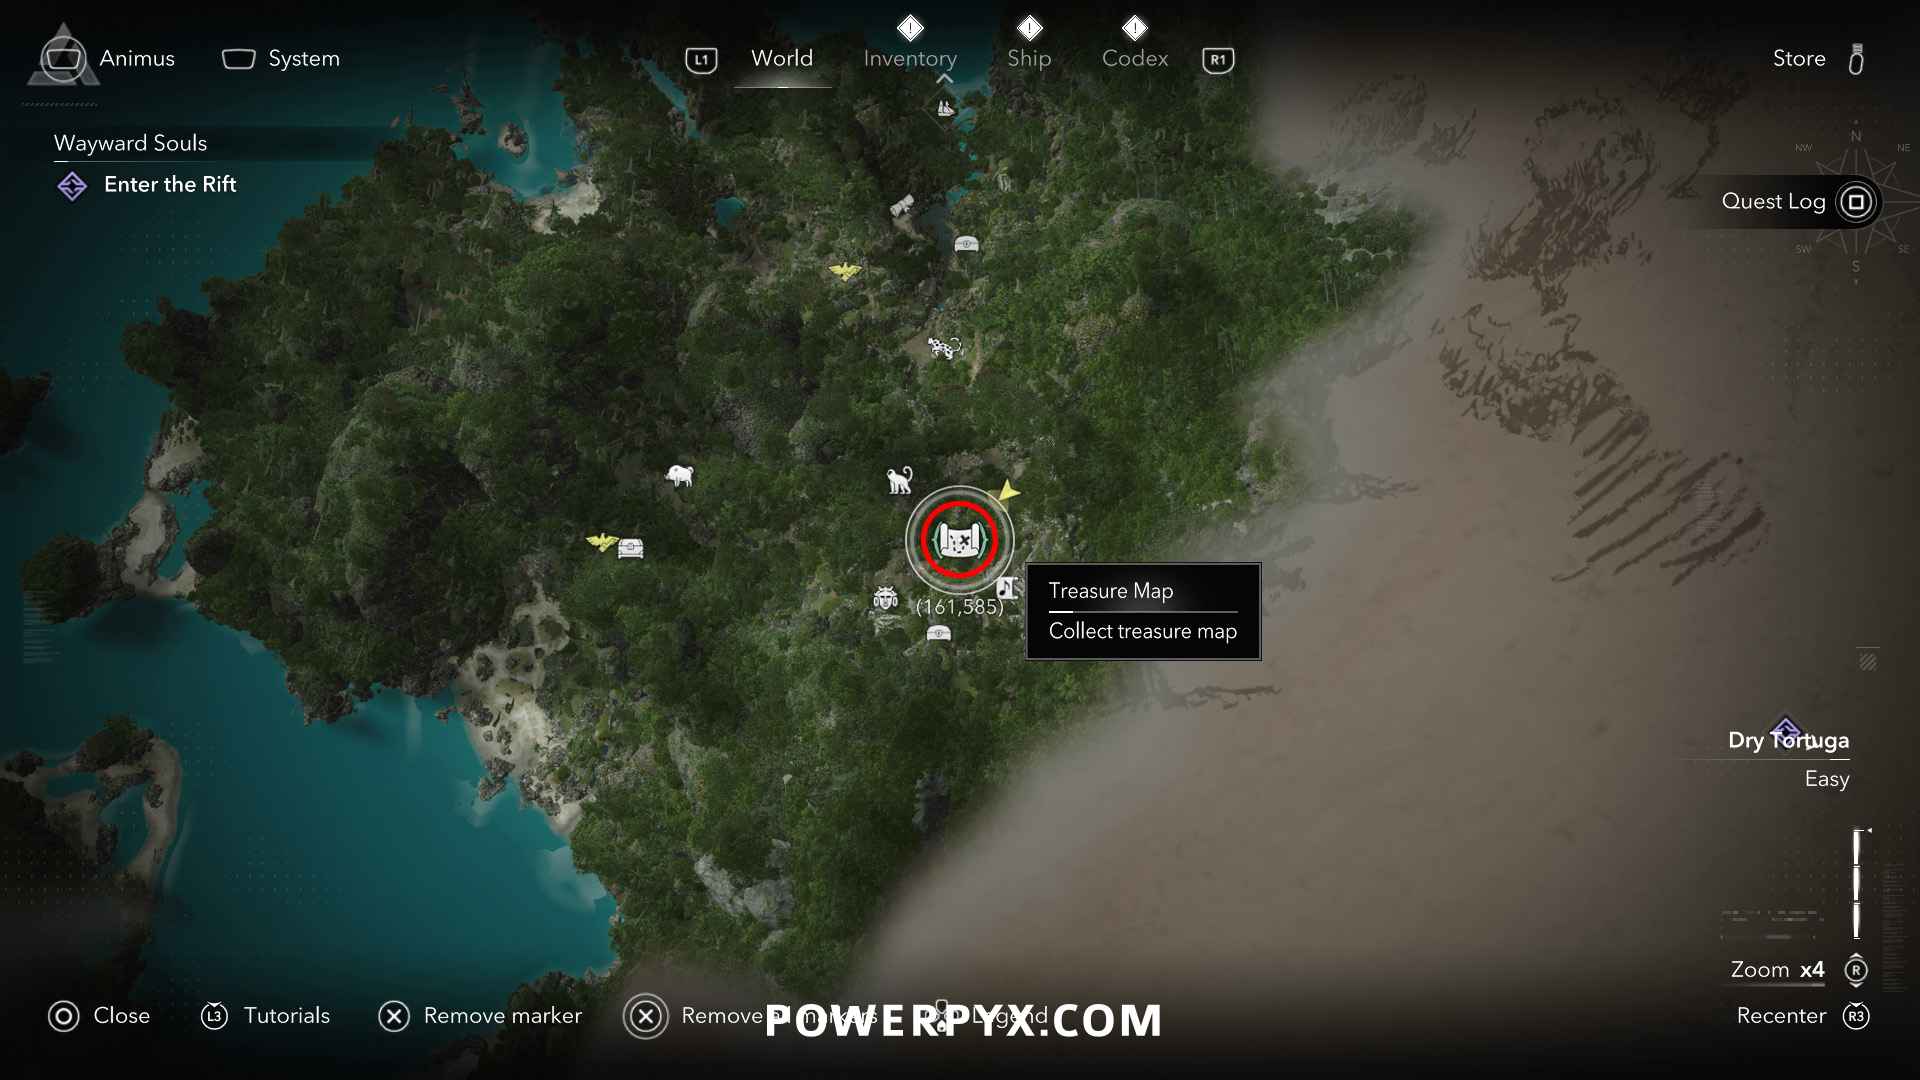
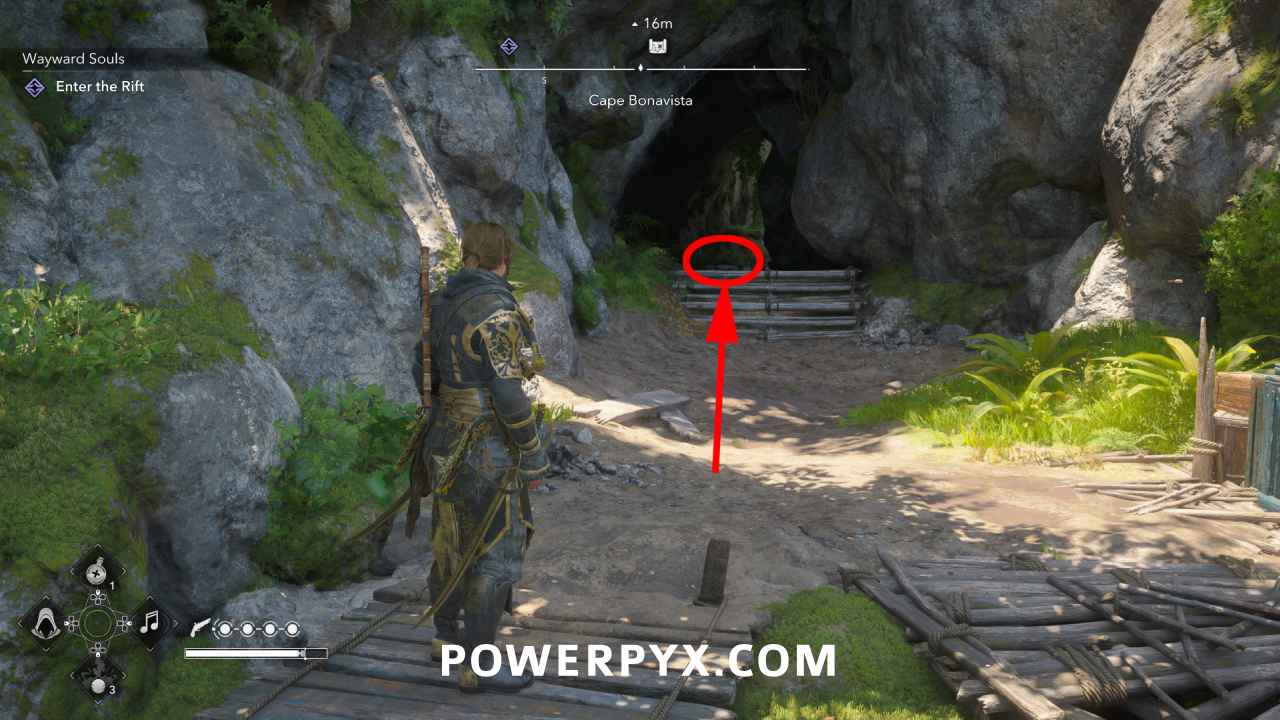
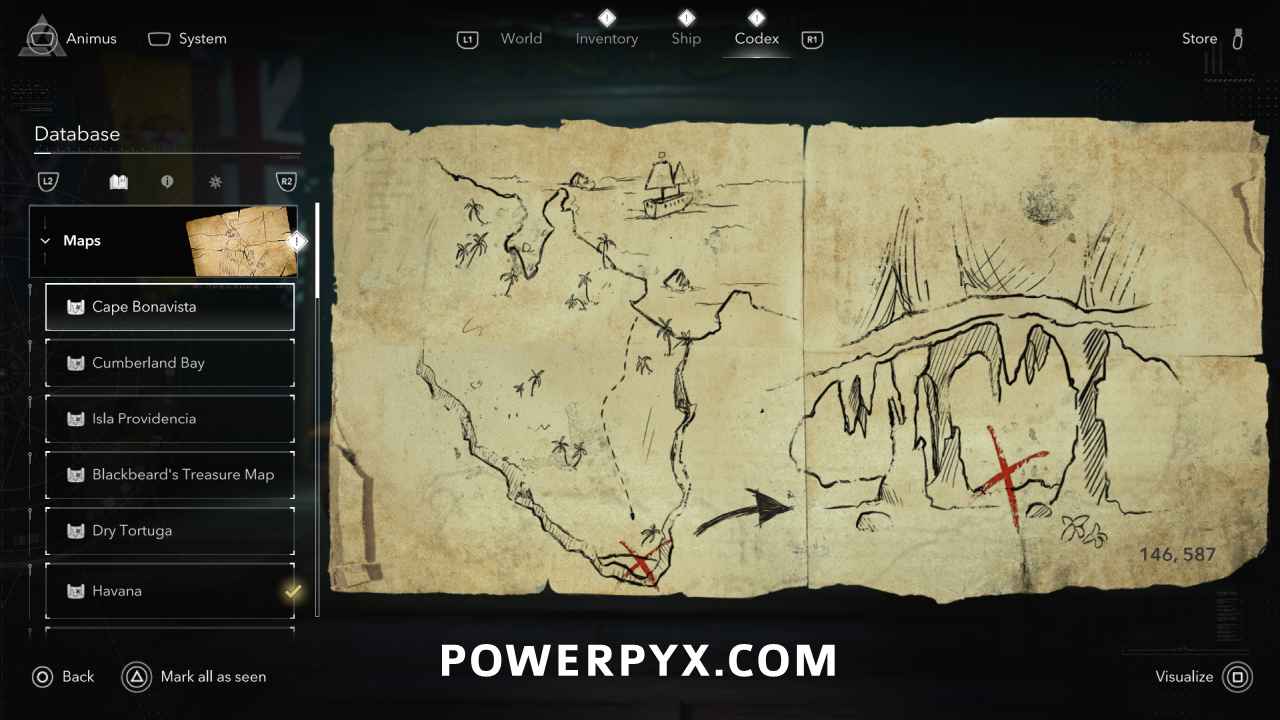
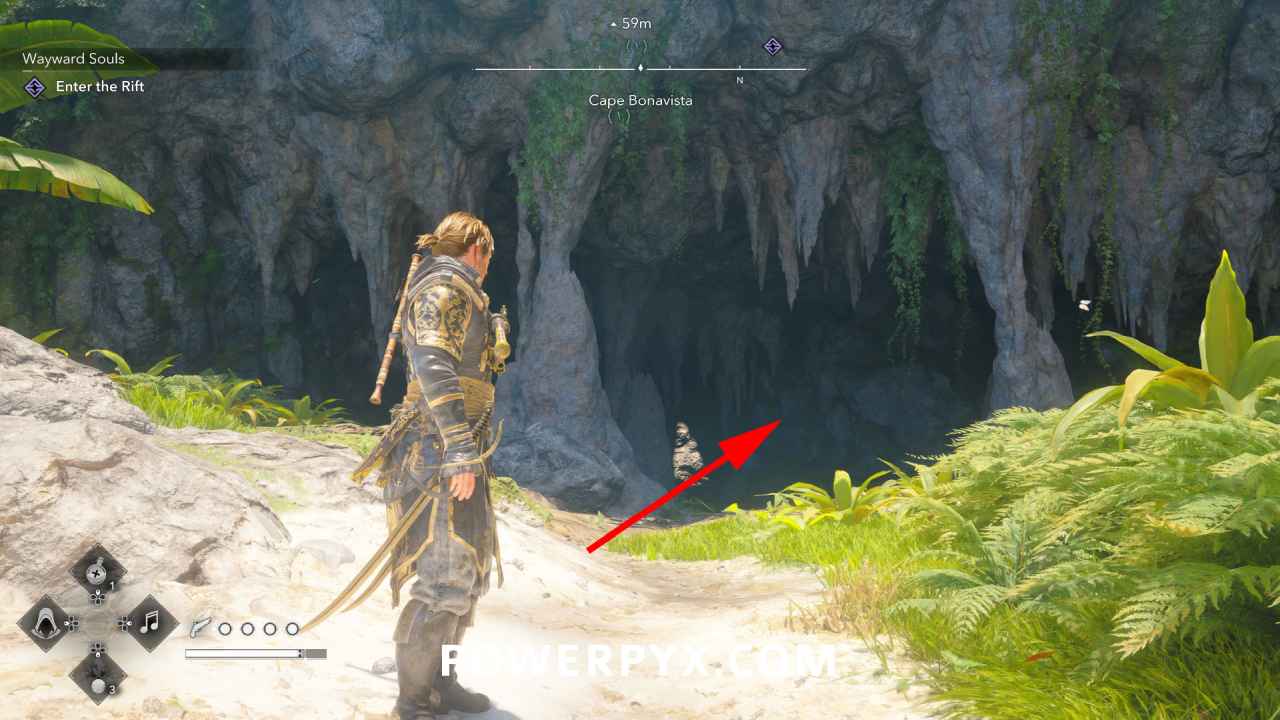
Solution: Cape Bonavista (146, 587) – from the beach in the south of Cape Bonavista you enter a big cave, the treasure is at the end of the cave in a small puddle of water
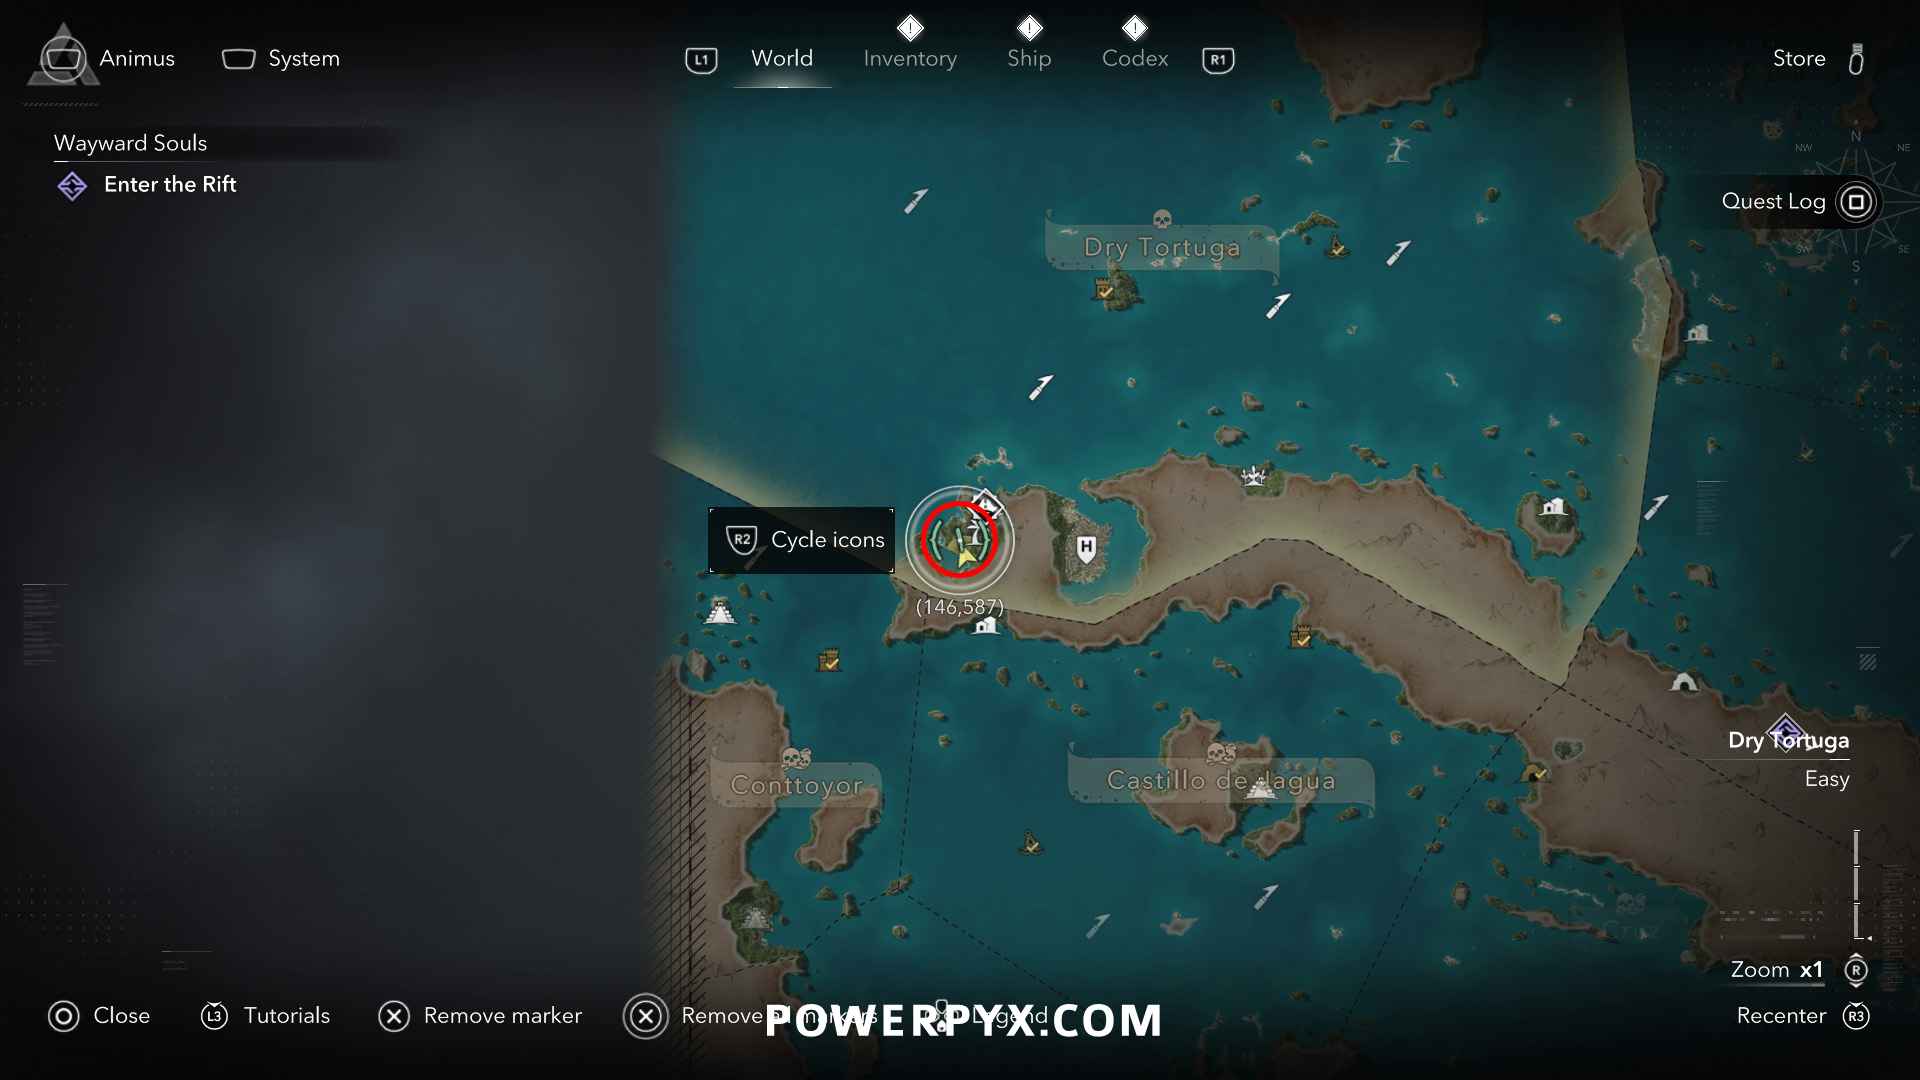
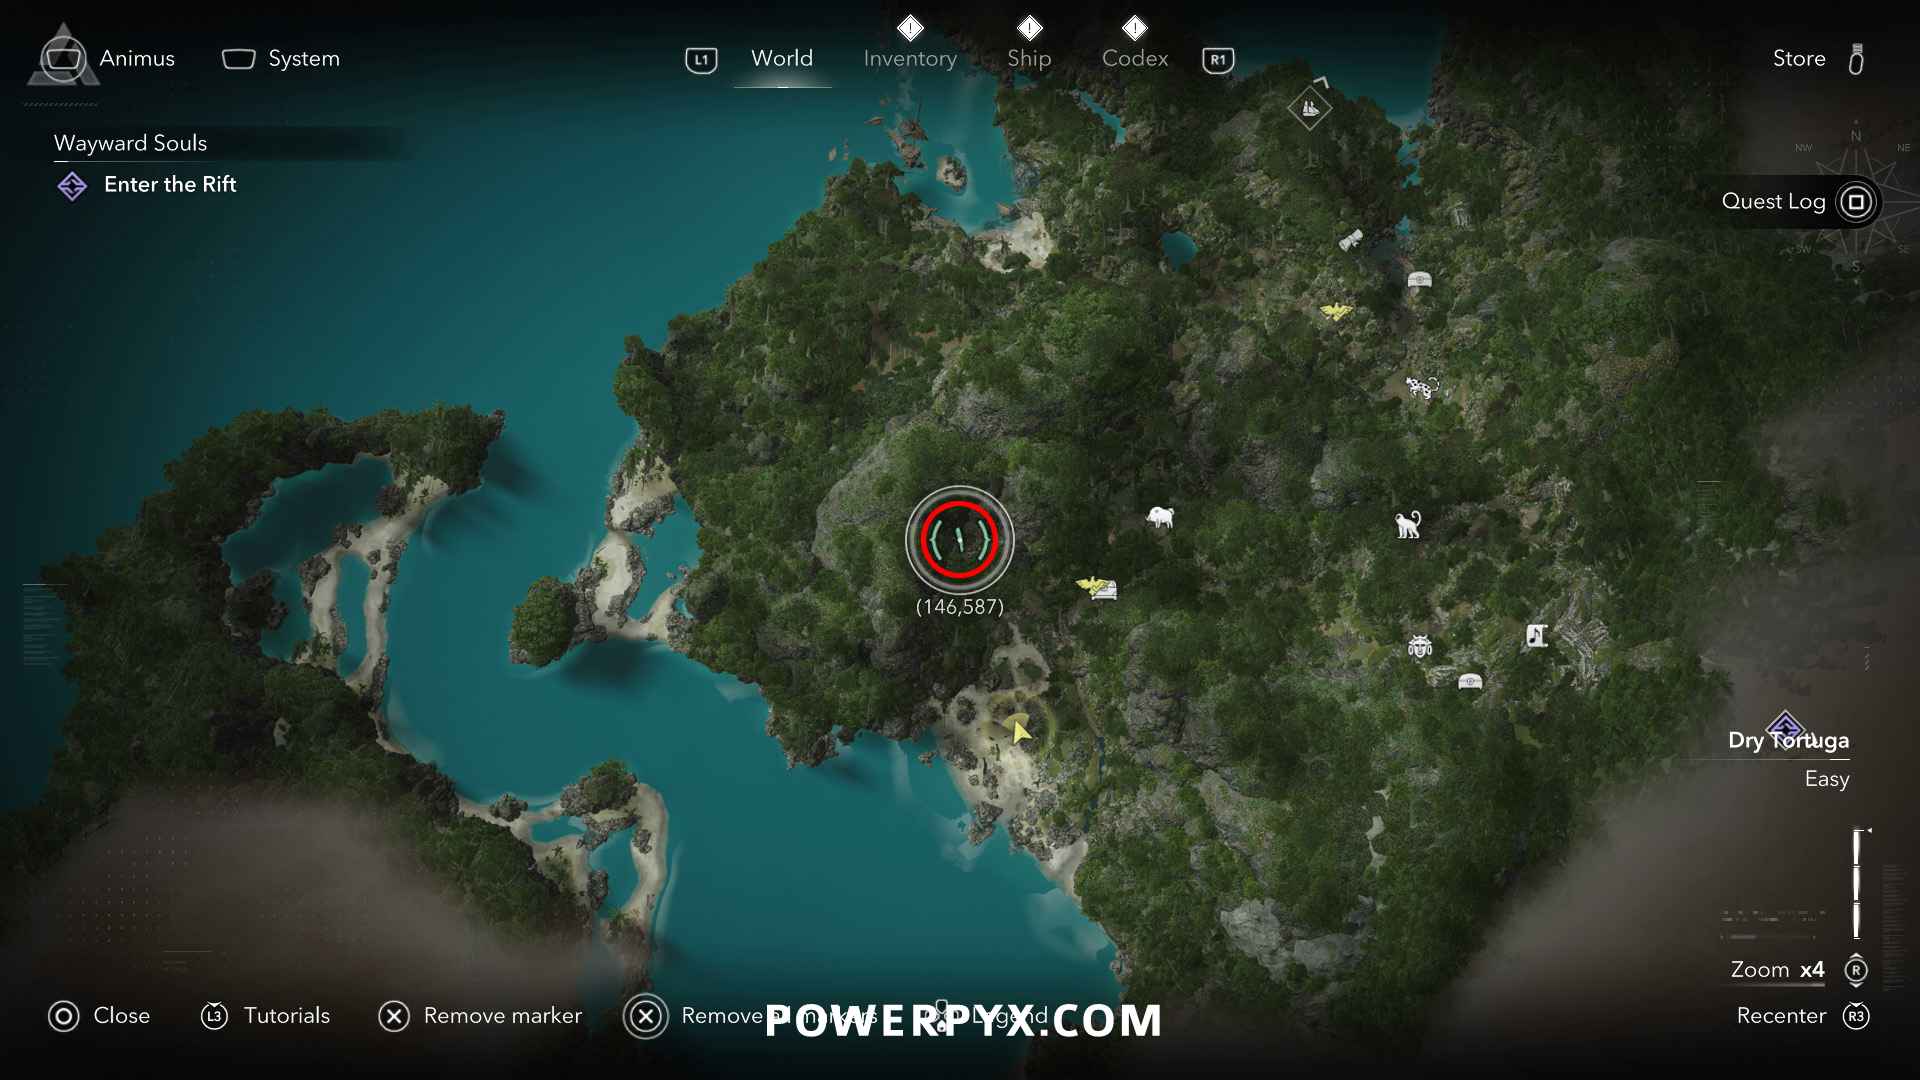
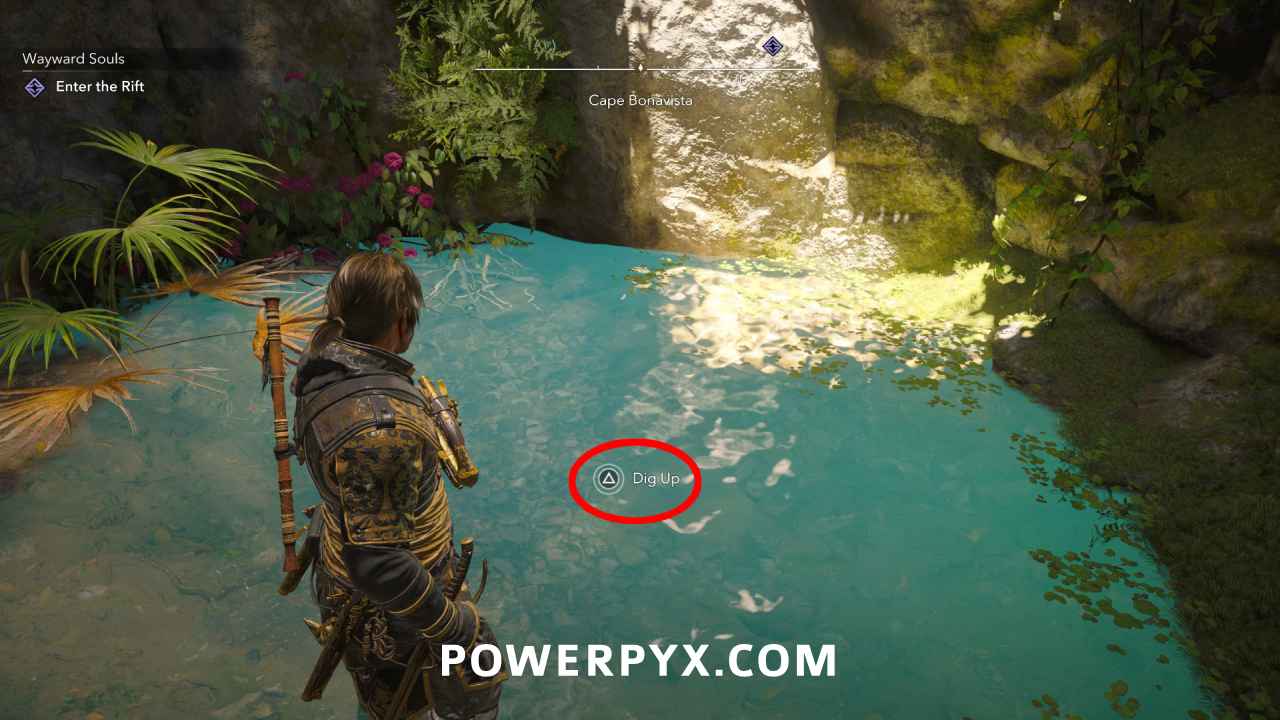
Reward: 1500 Reales
Eleuthera Region
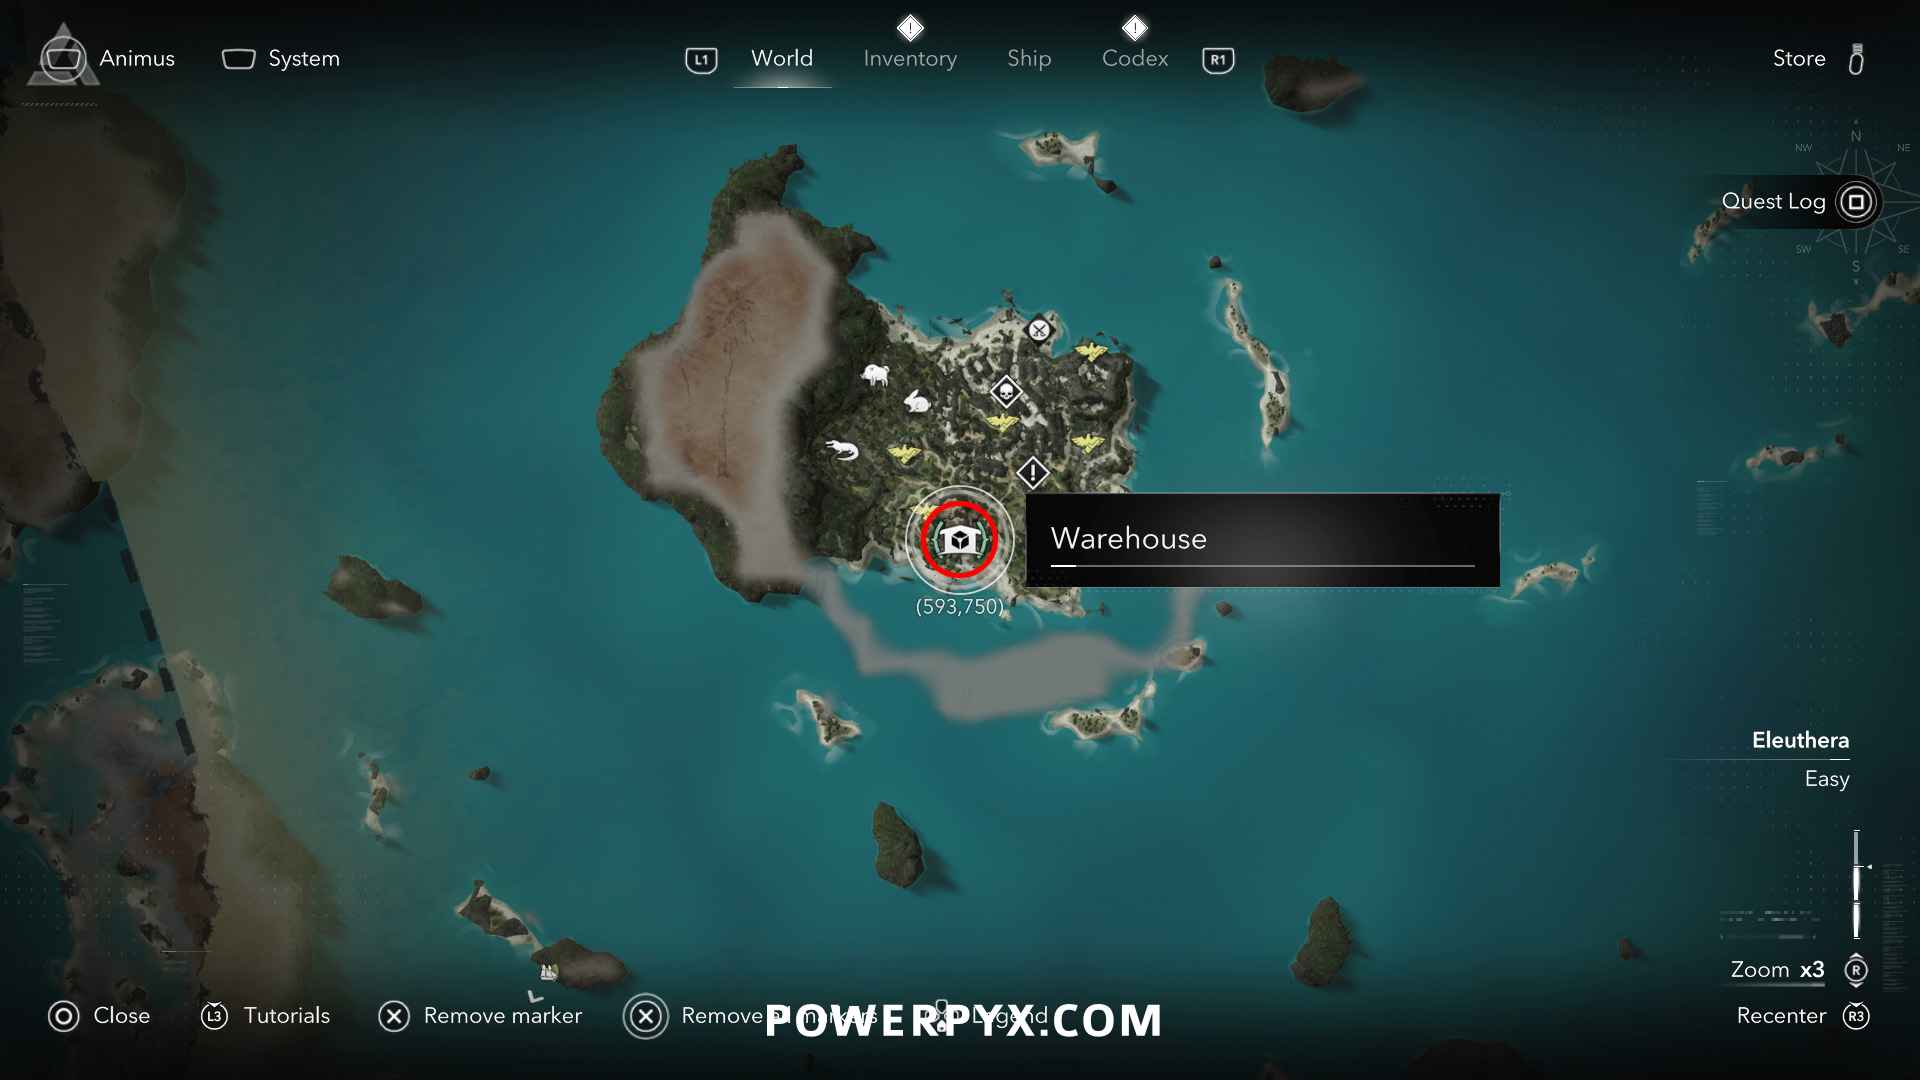
#5 – Treasure Map from Nassau Warehouse (Isla Providencia)
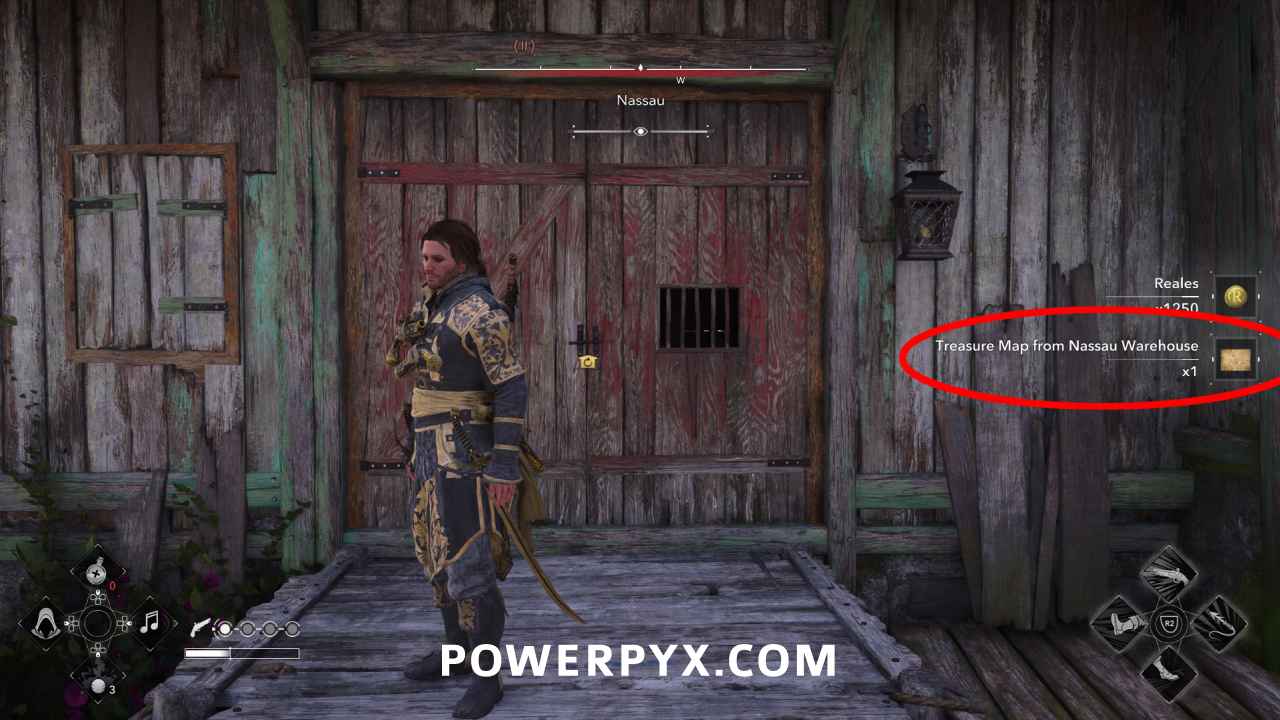
Location: Nassau (593, 750) – loot the warehouse in Nassau to get the map
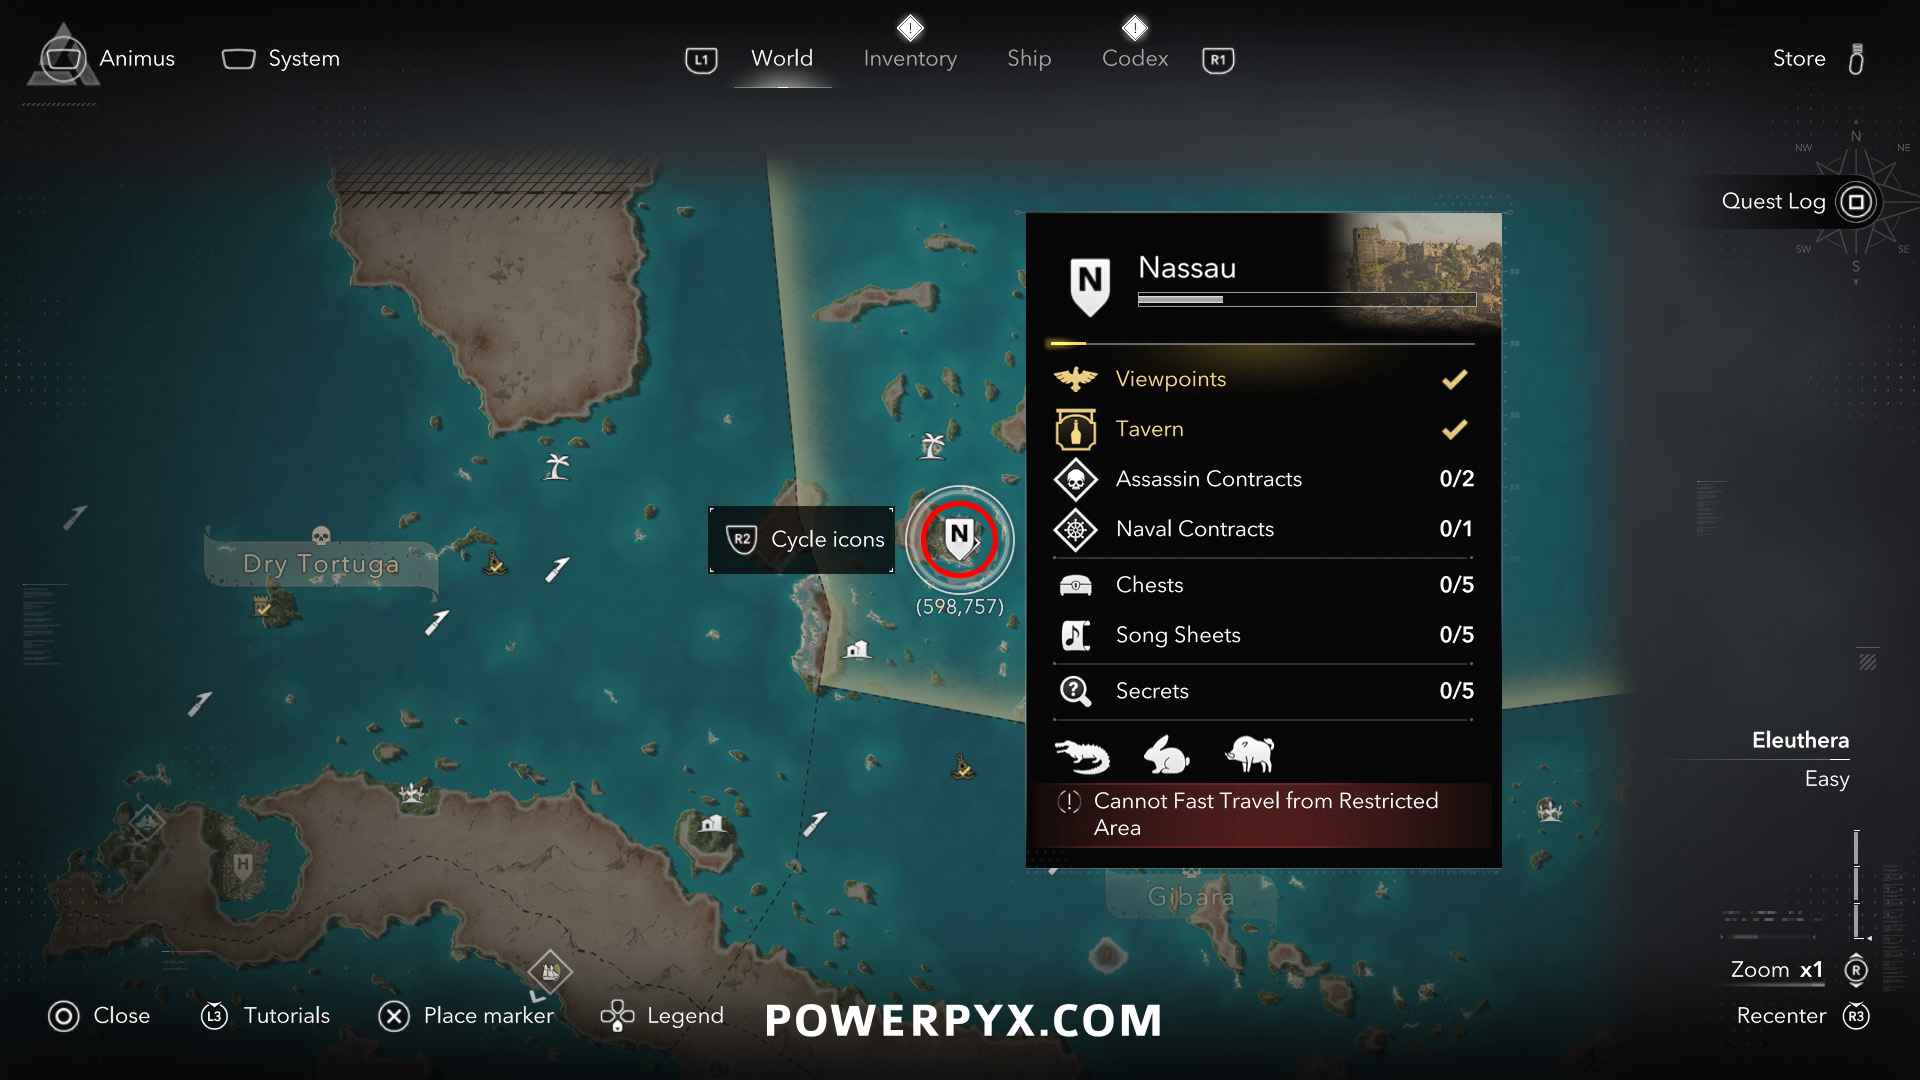
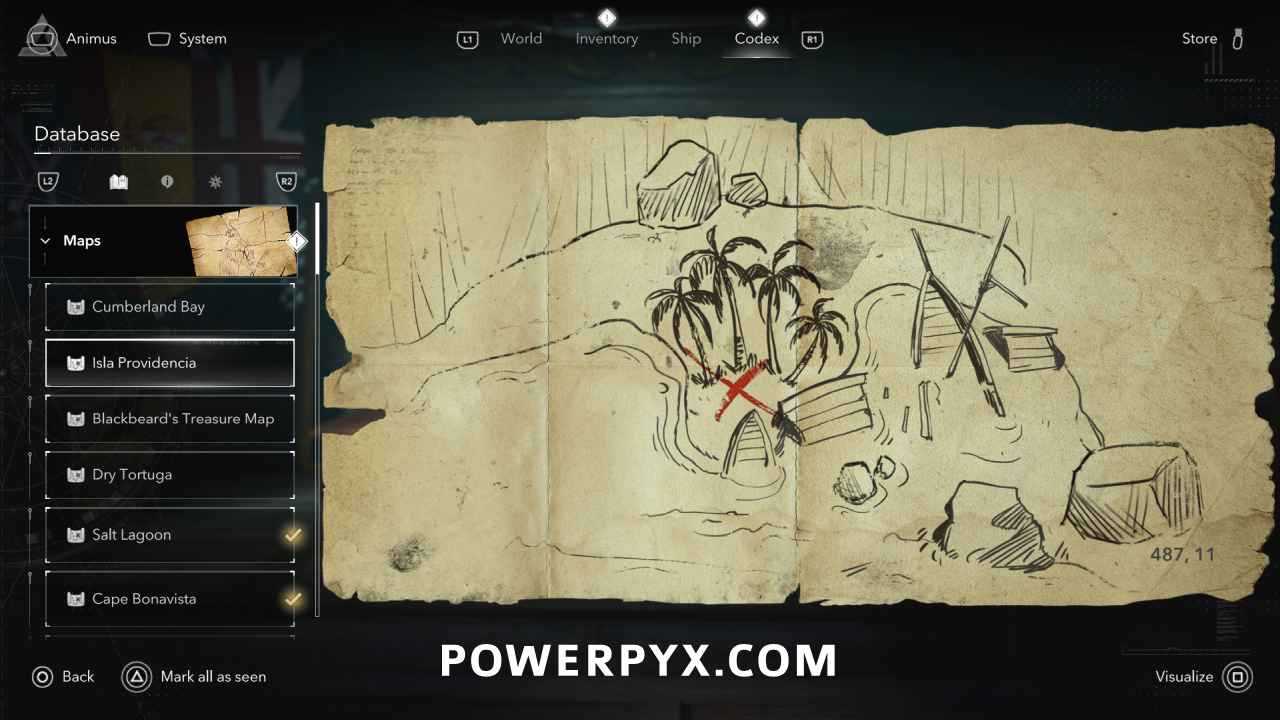
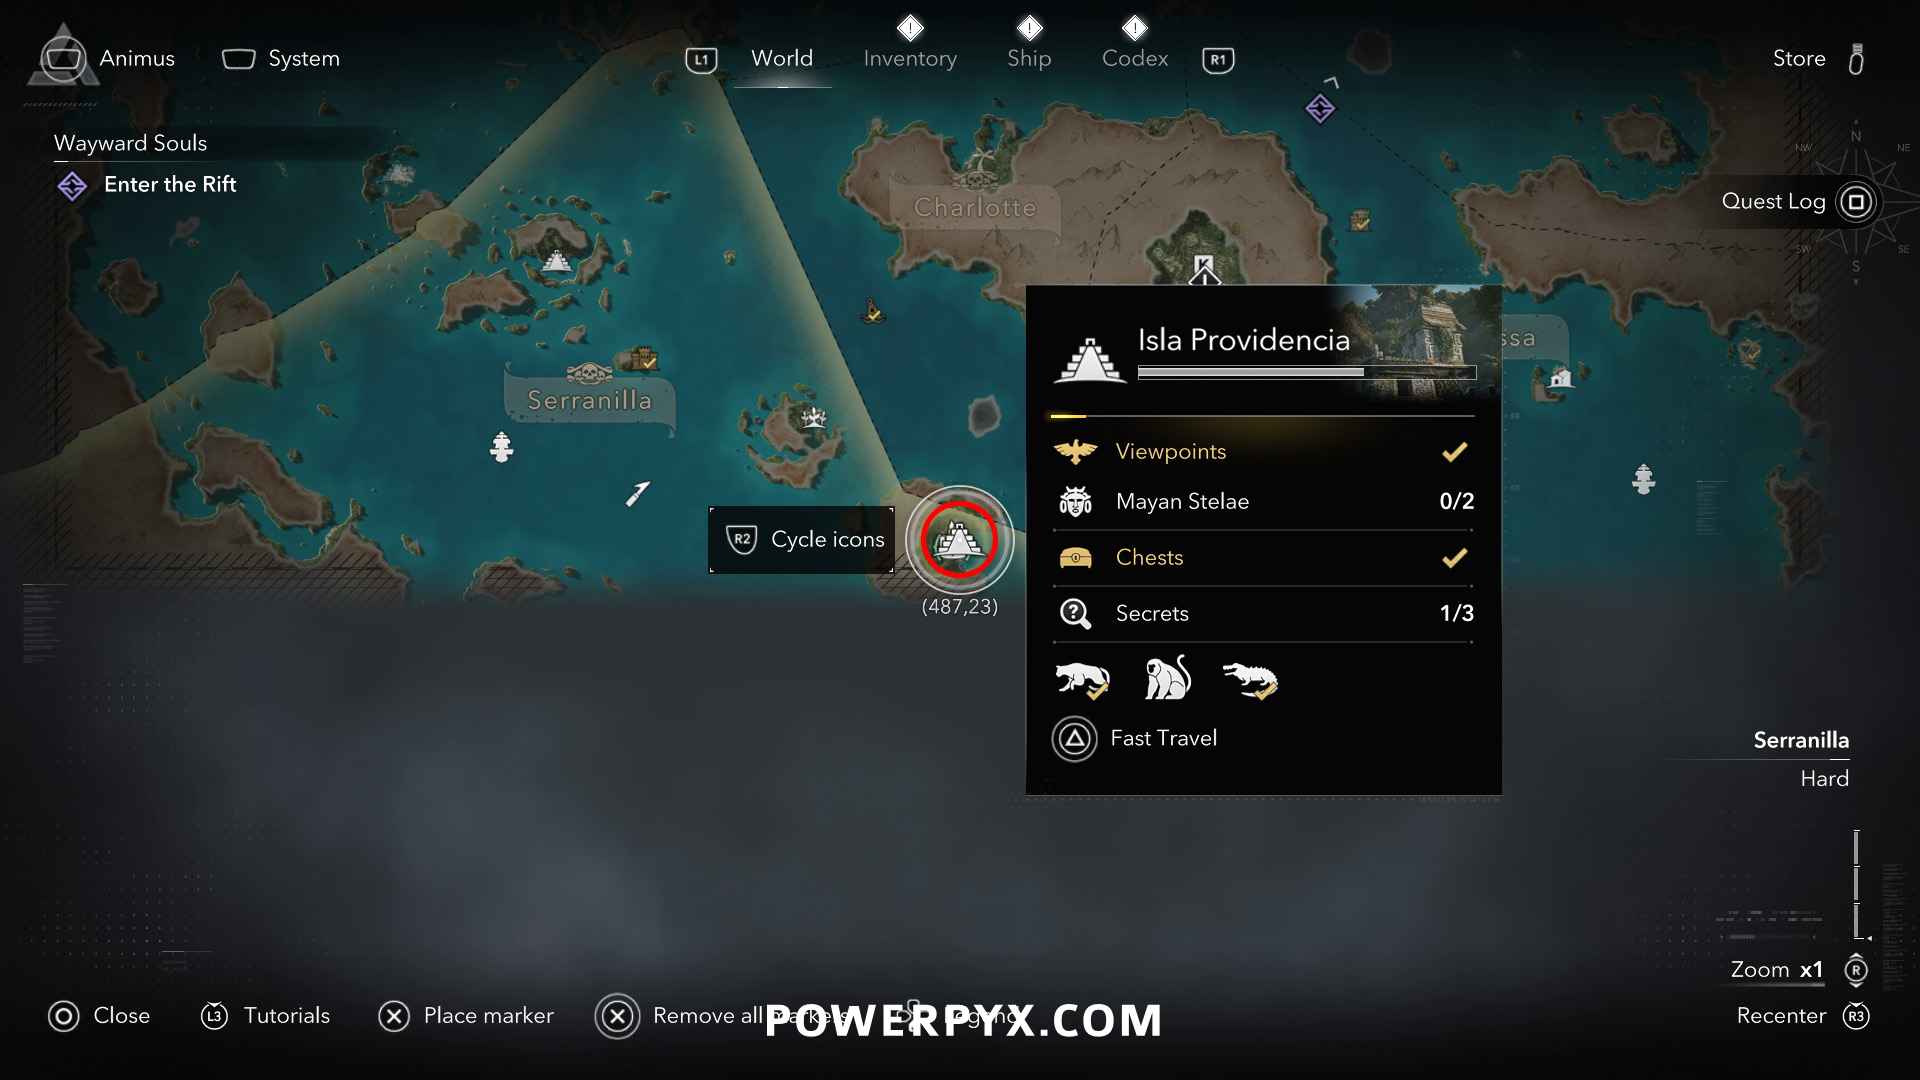
Solution: Isla Providencia (487, 11) – a little south from the southmost viewpoint, in the sand at the shoreline below 3 palm trees. Isla Providencia is only accessible after reaching Sequence 08 – Mission 03: Marooned.
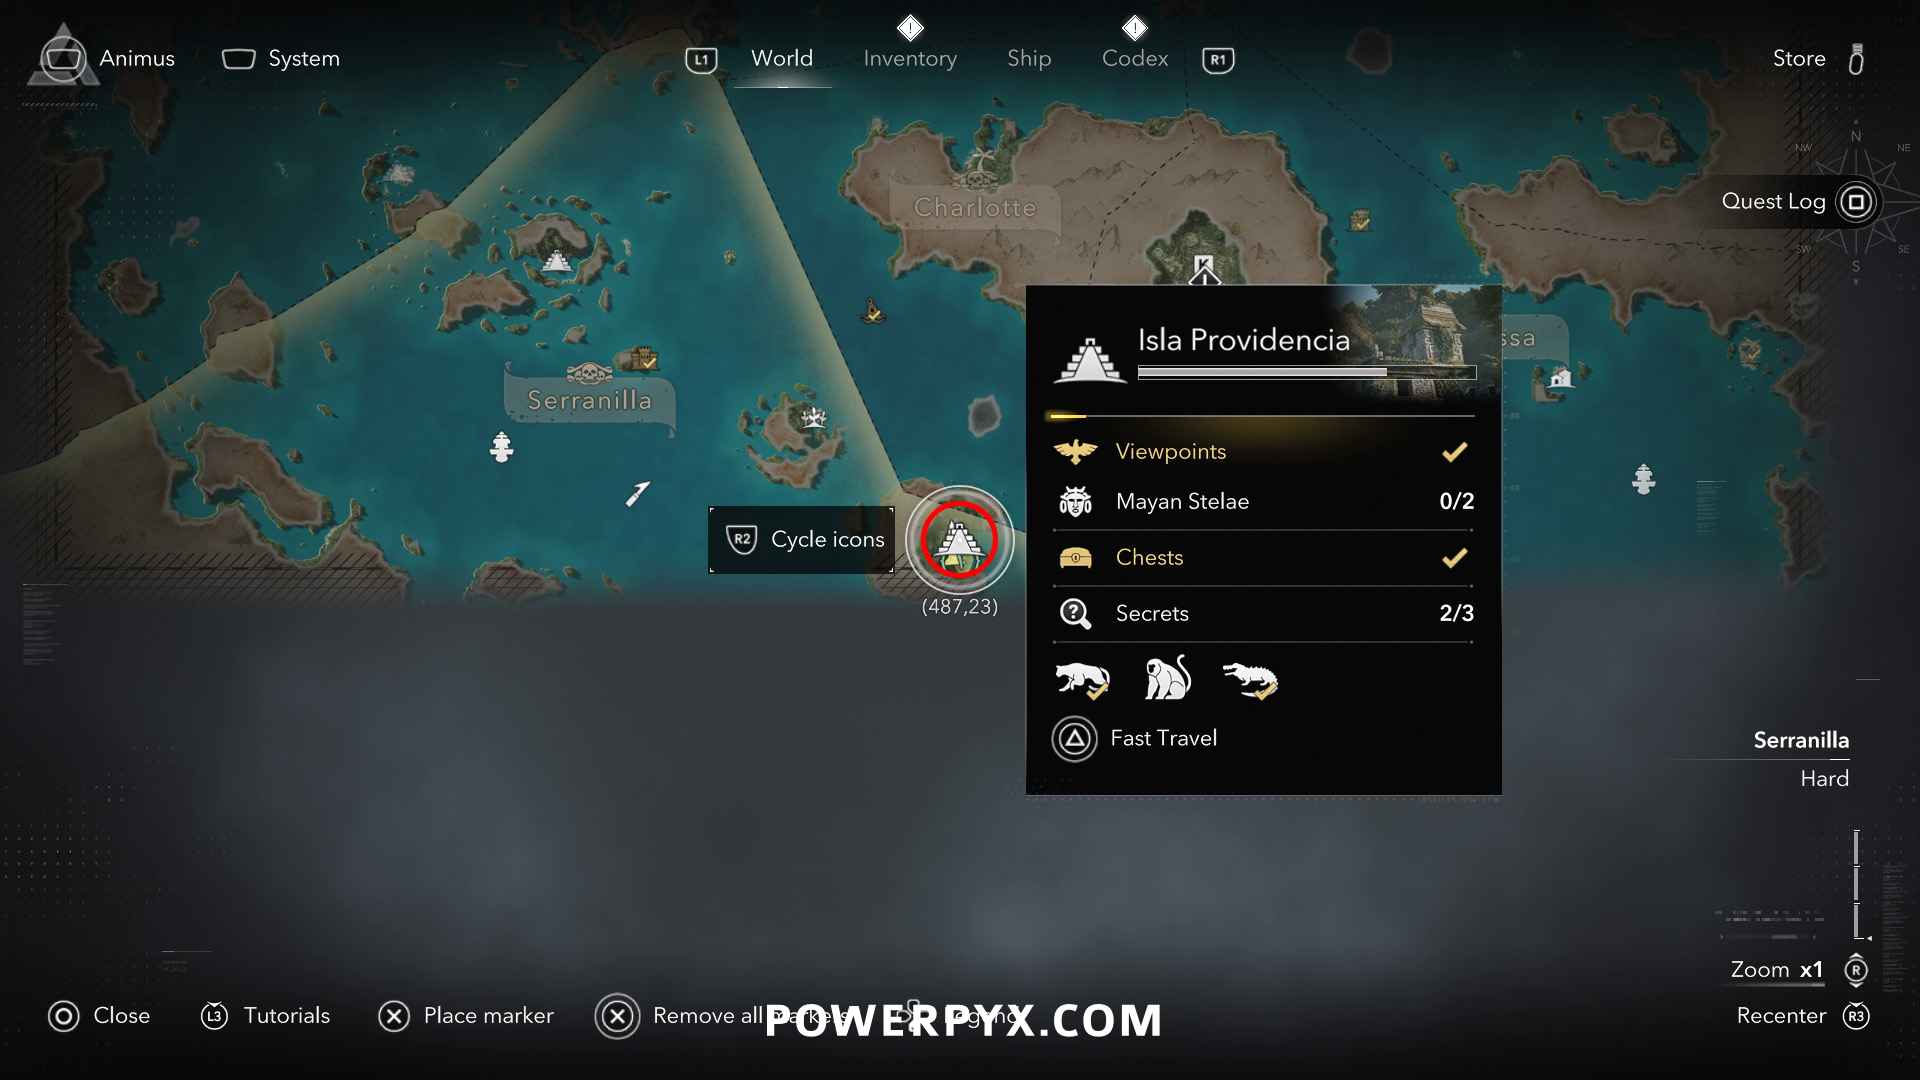
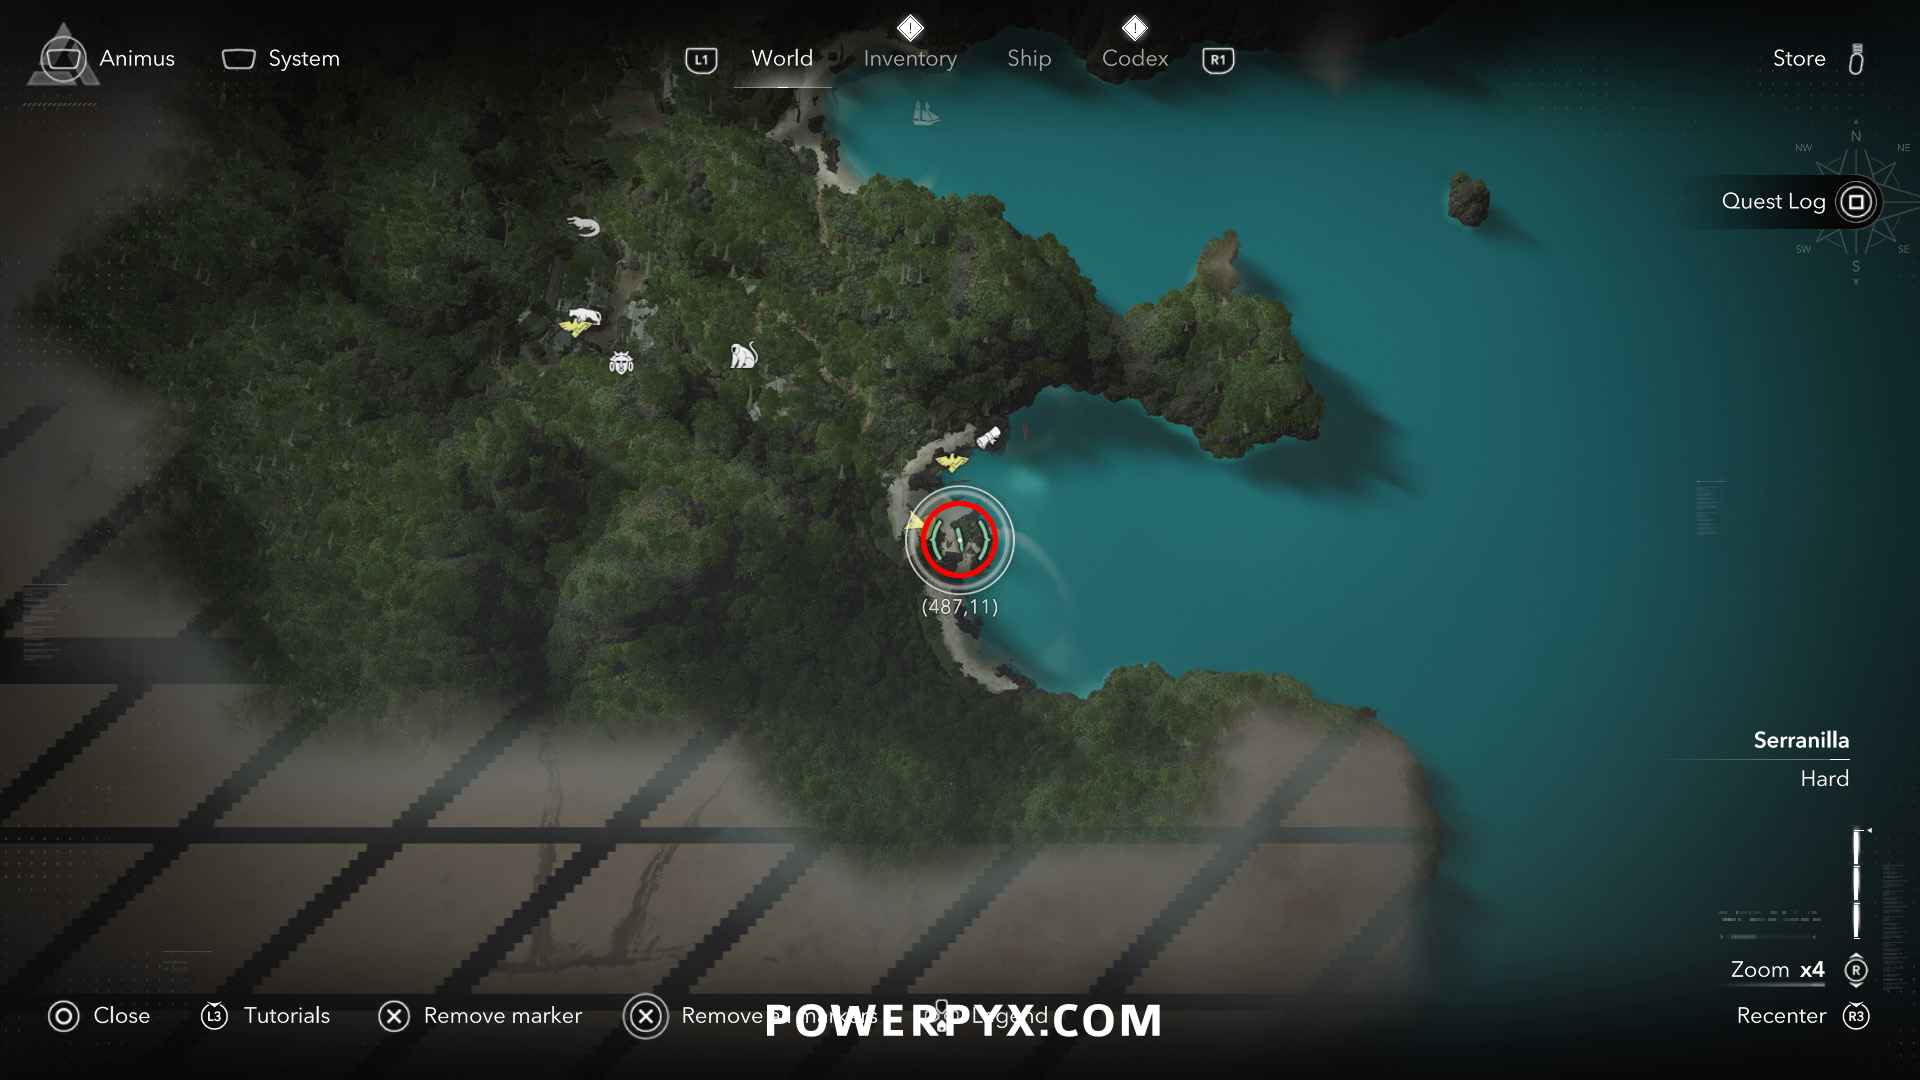
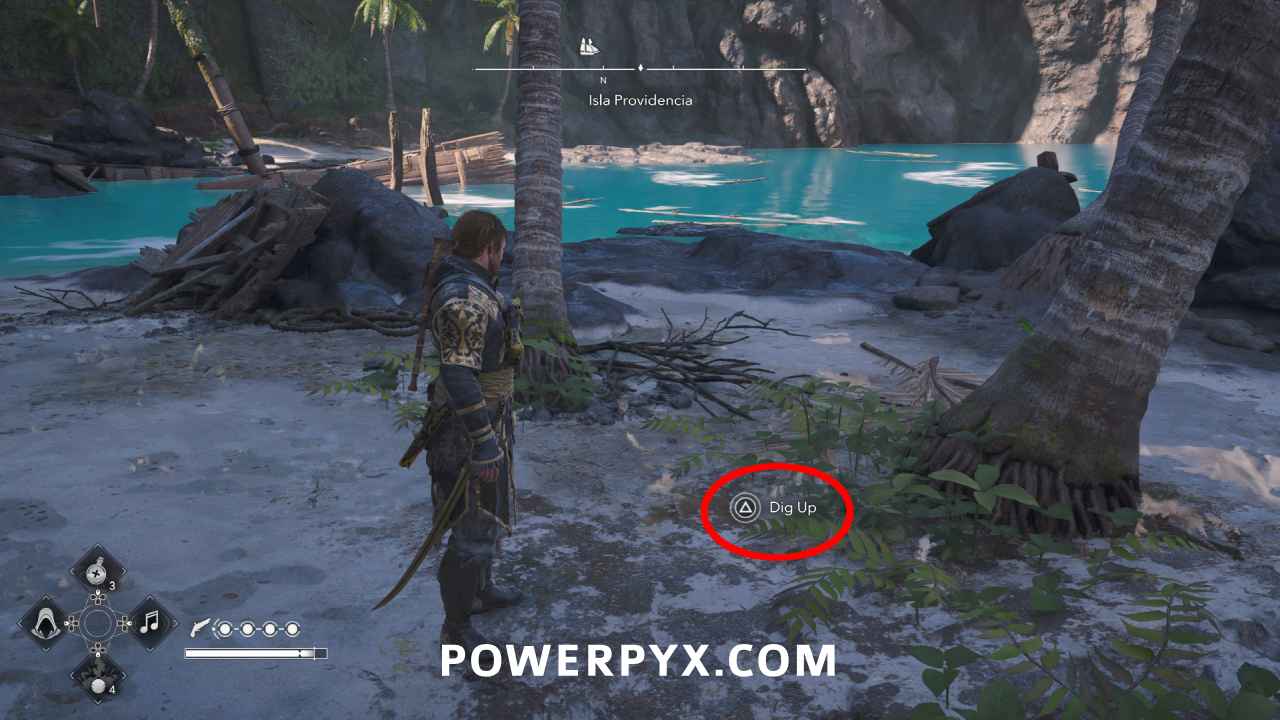
Reward: Governor’s Outfit (Rare), 2000 Reales
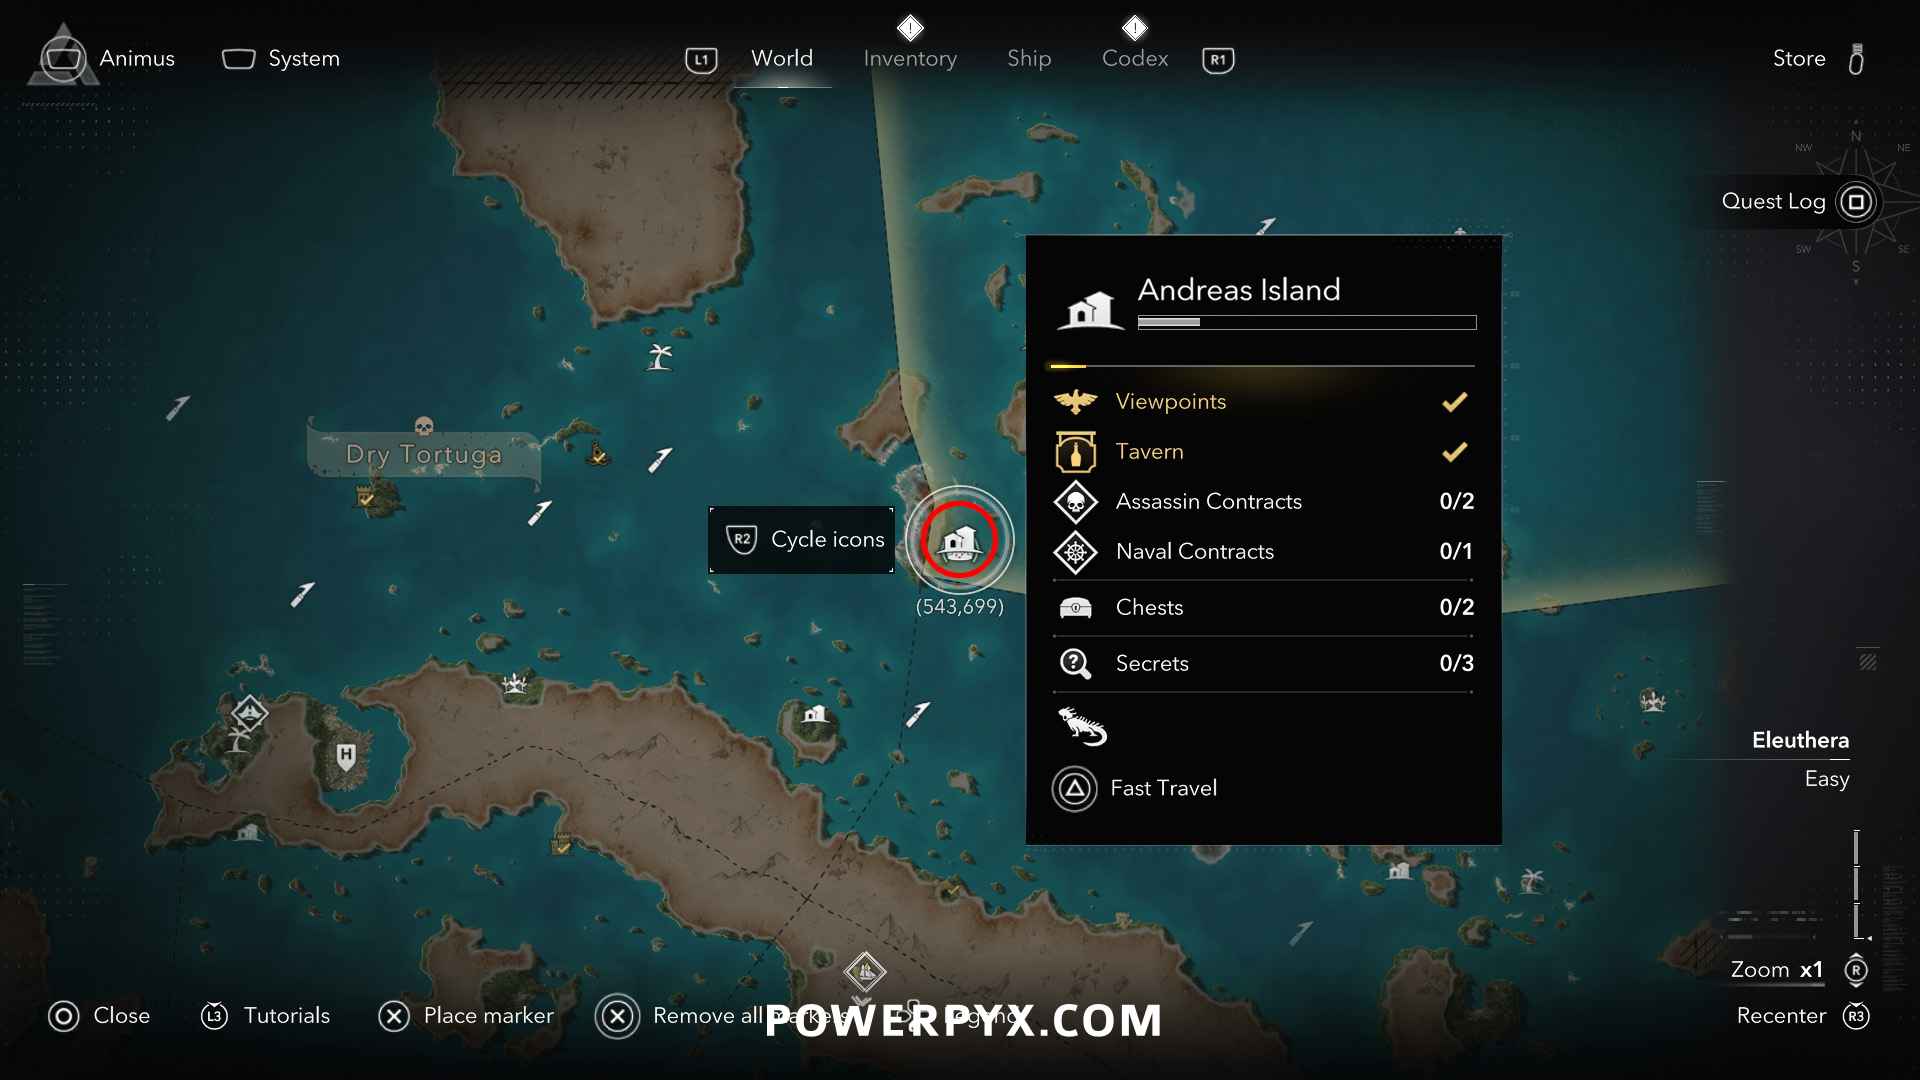
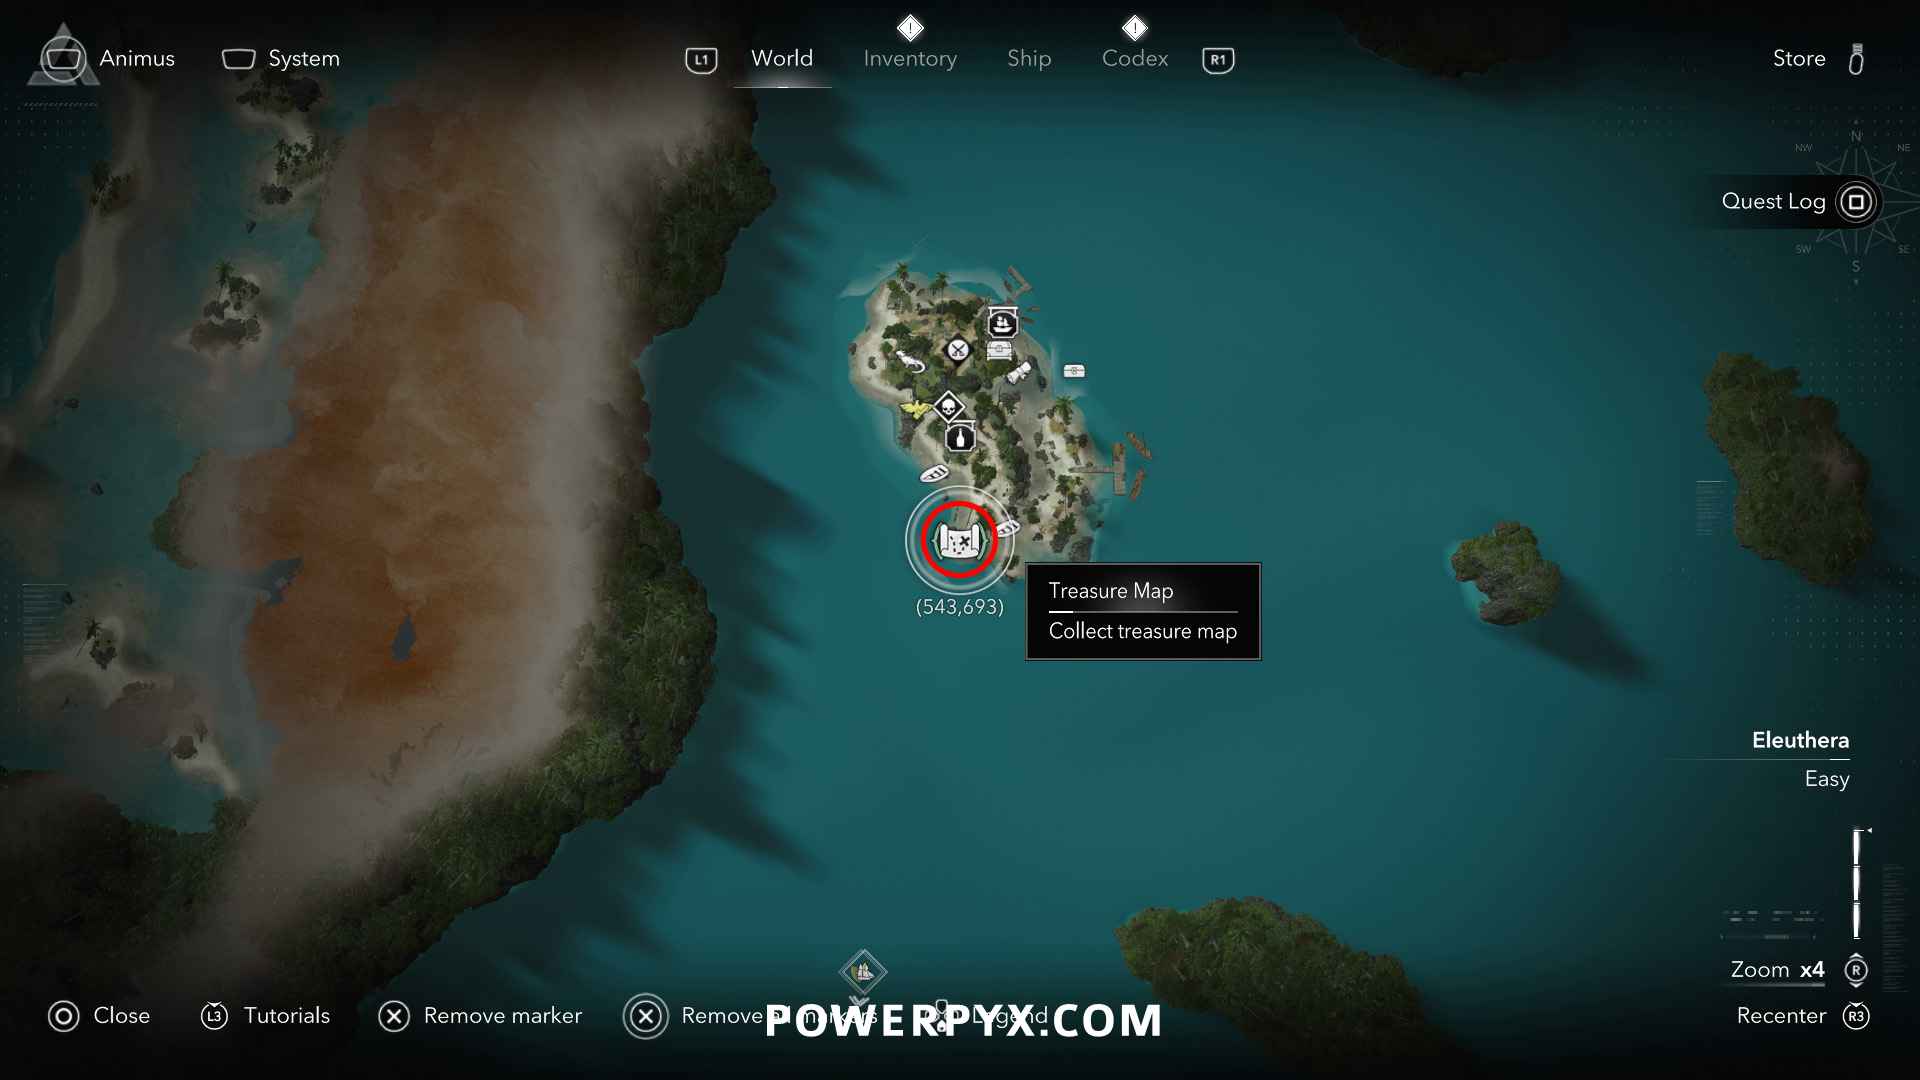
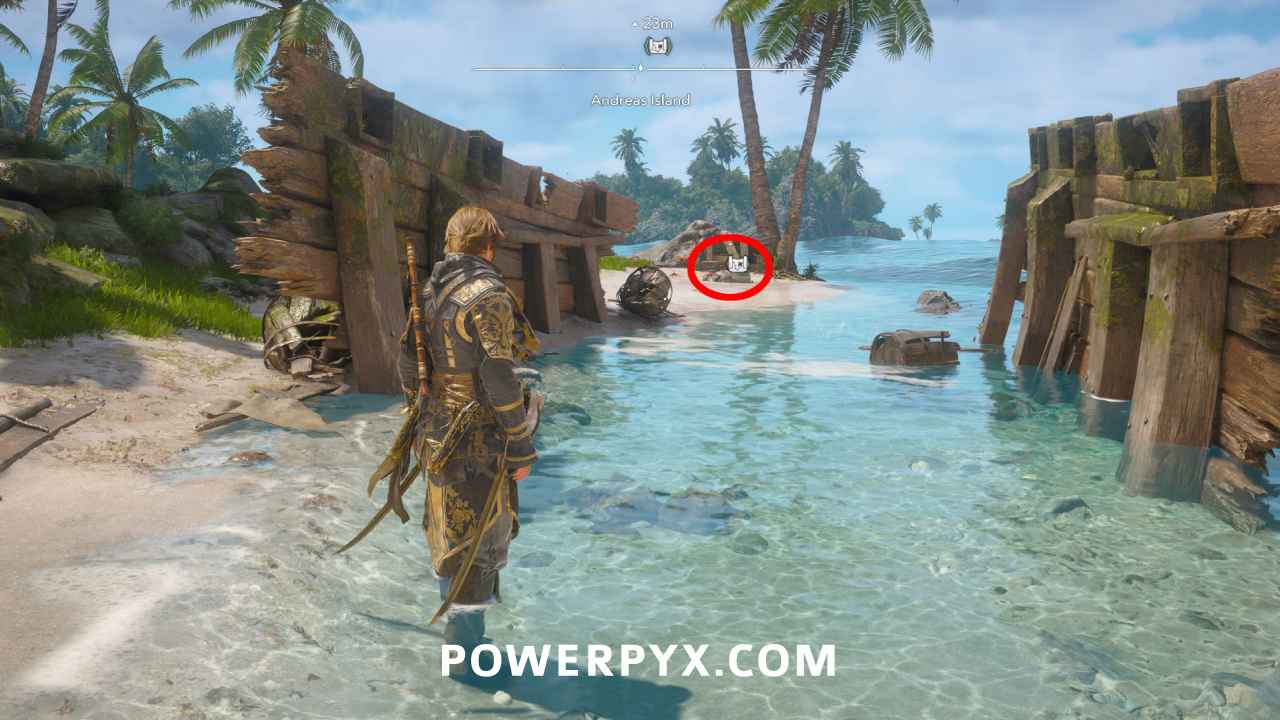
#6 – Treasure Map from Andreas Island (Abaco Island)
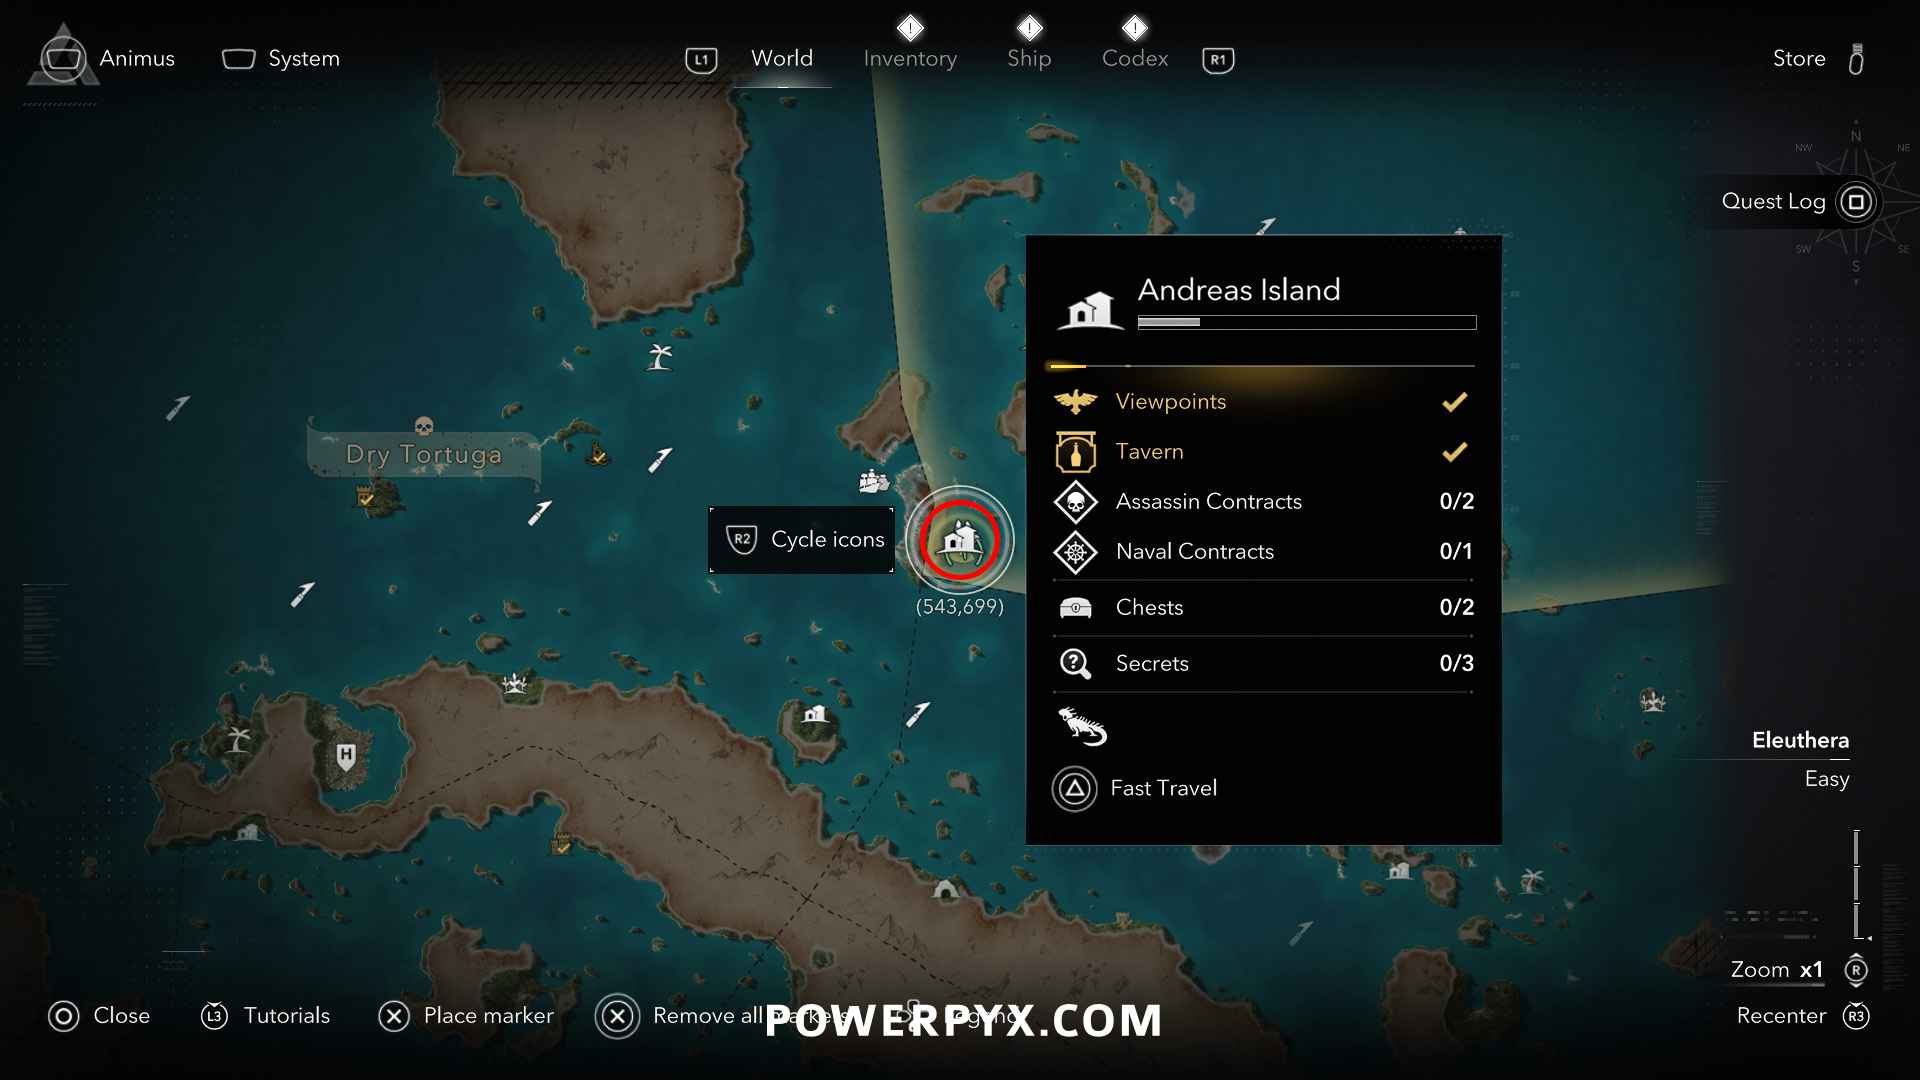
Location: Andreas Island (543, 693) – at the southern shoreline from a skeleton
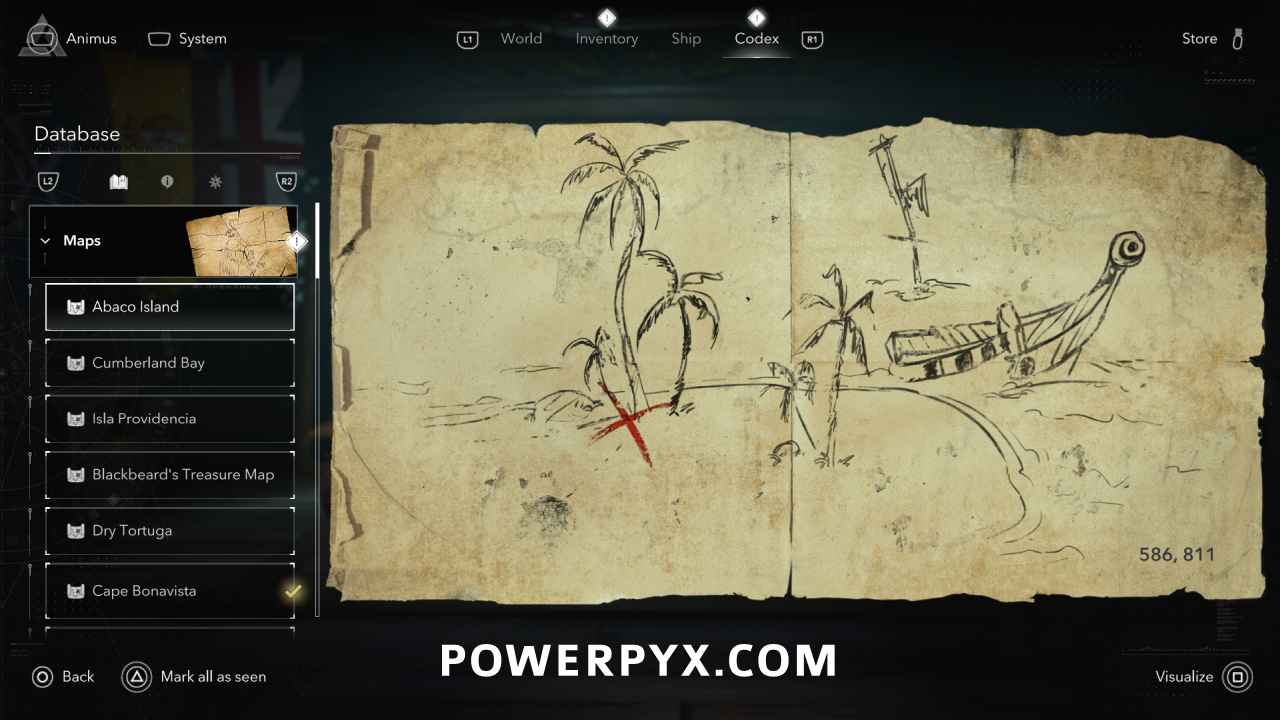
Solution: Abaco Island (586, 811) – between the palm trees next to the huge shipwreck
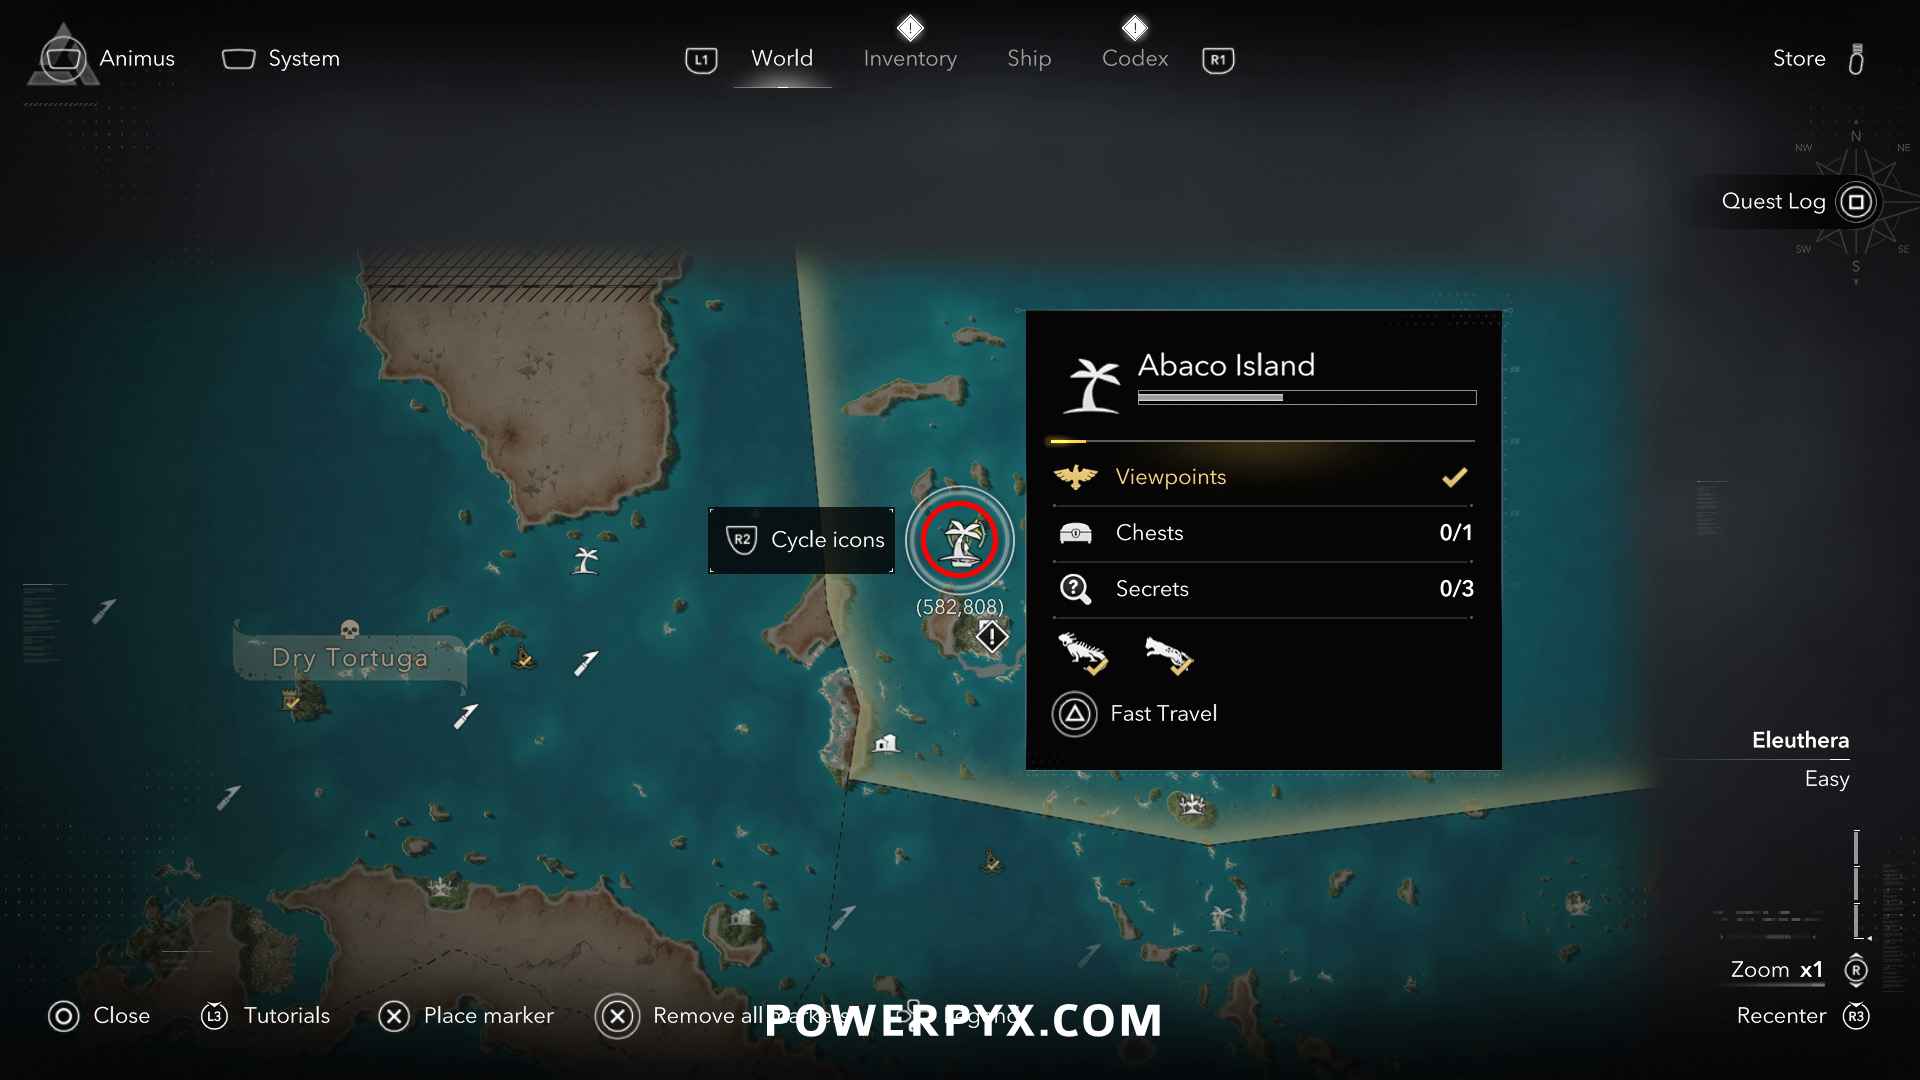
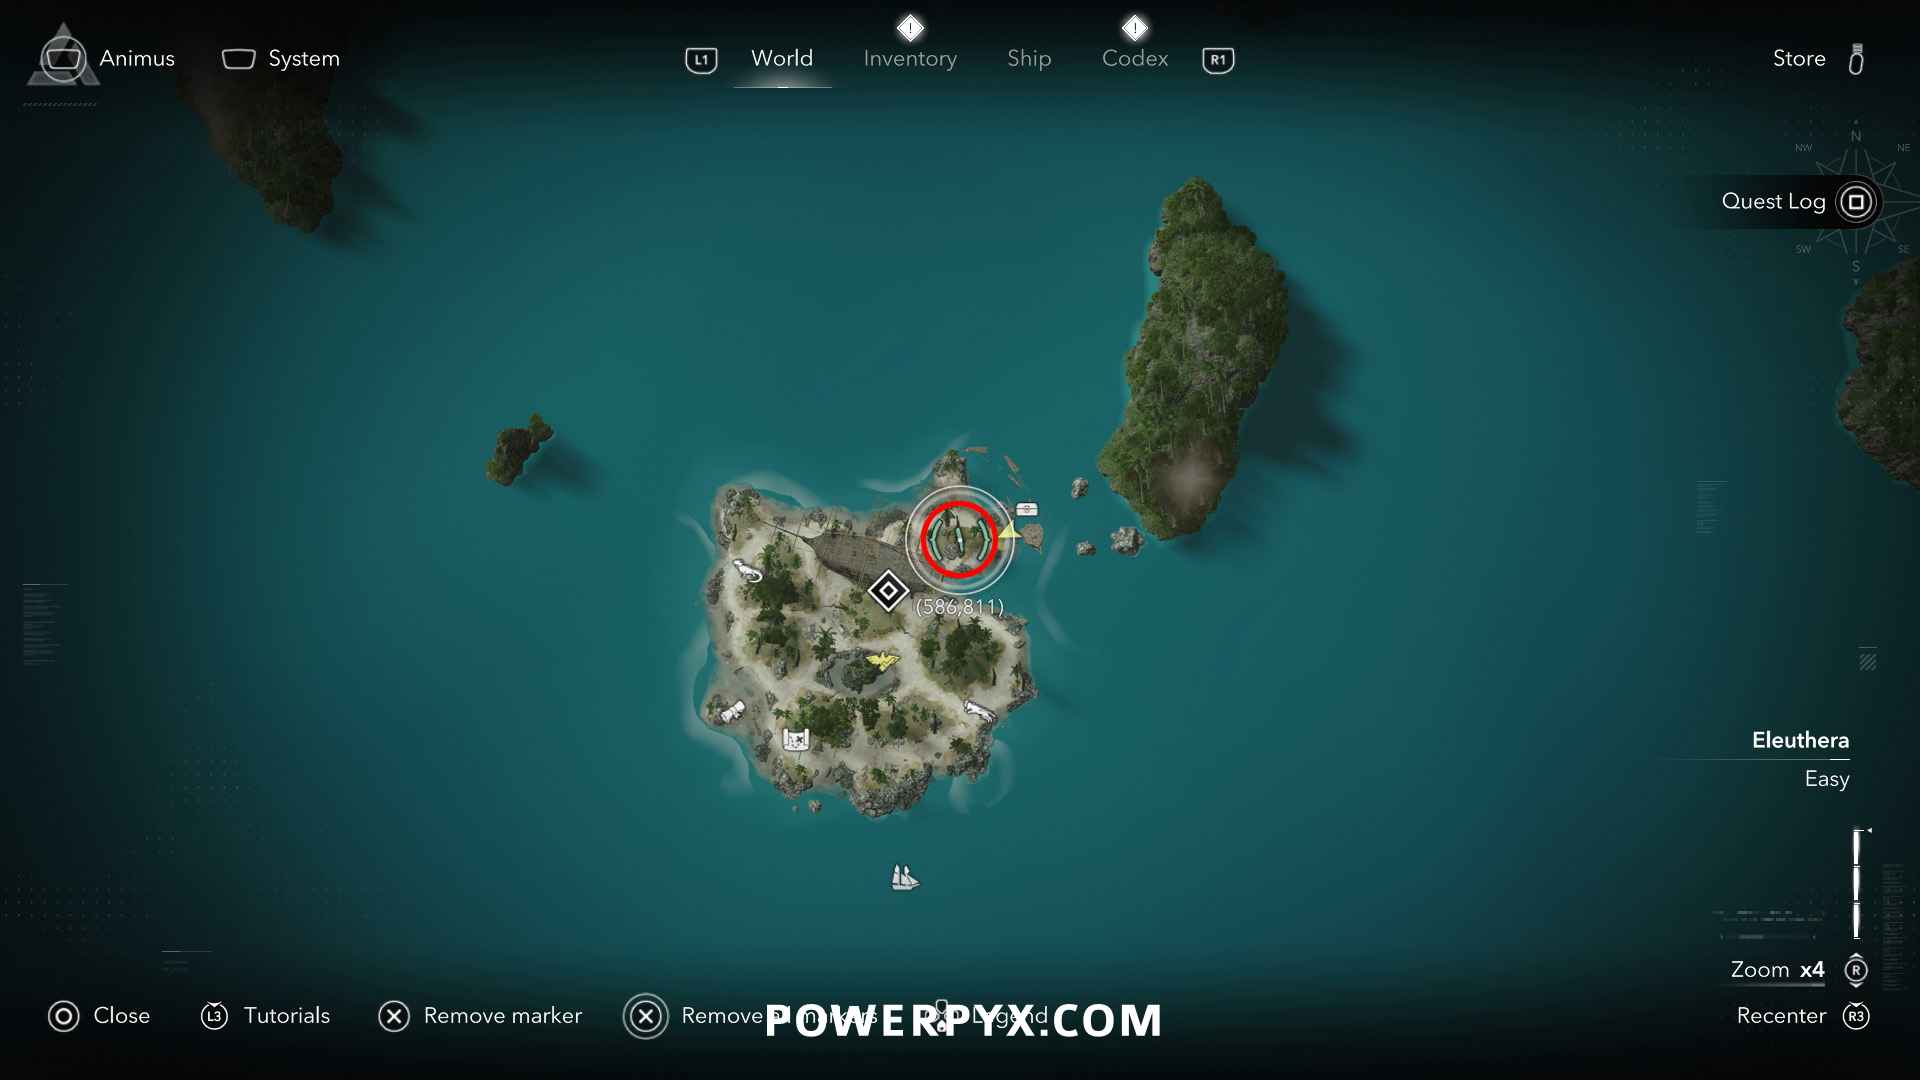
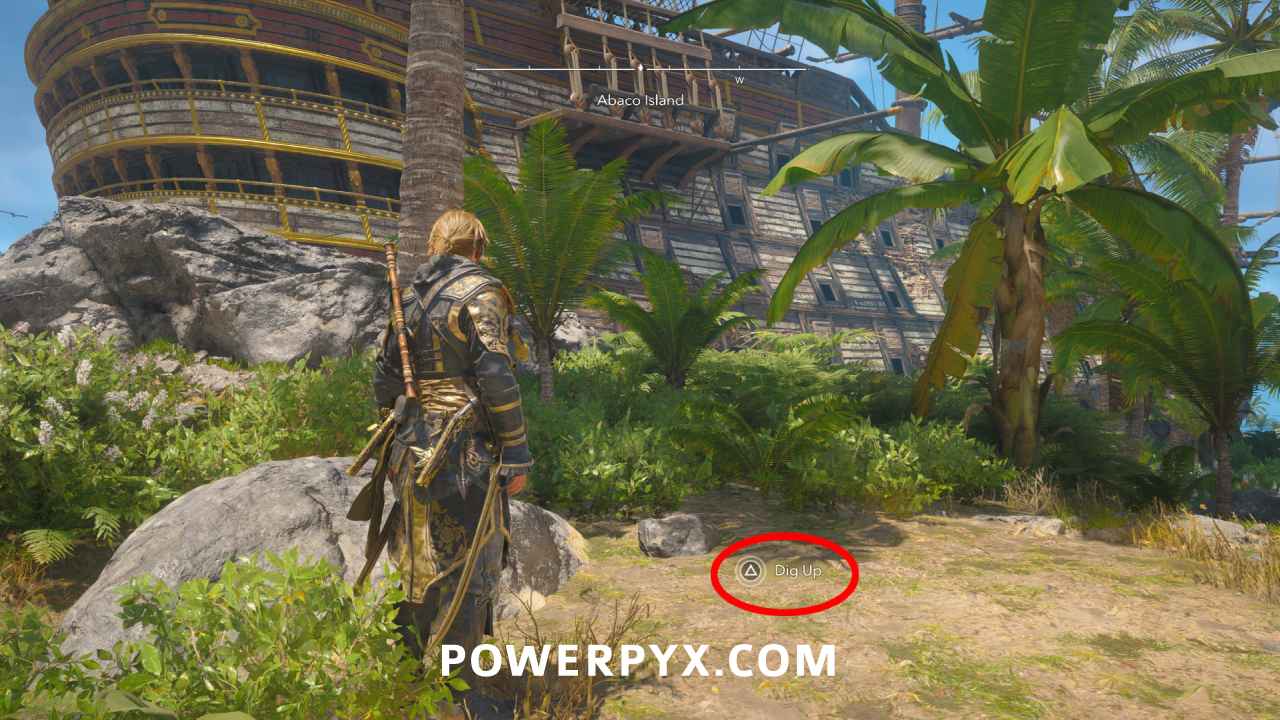
Reward: Art Collection Piece: Earth Monster Relief (needed for  Dilettante), 2500 Reales
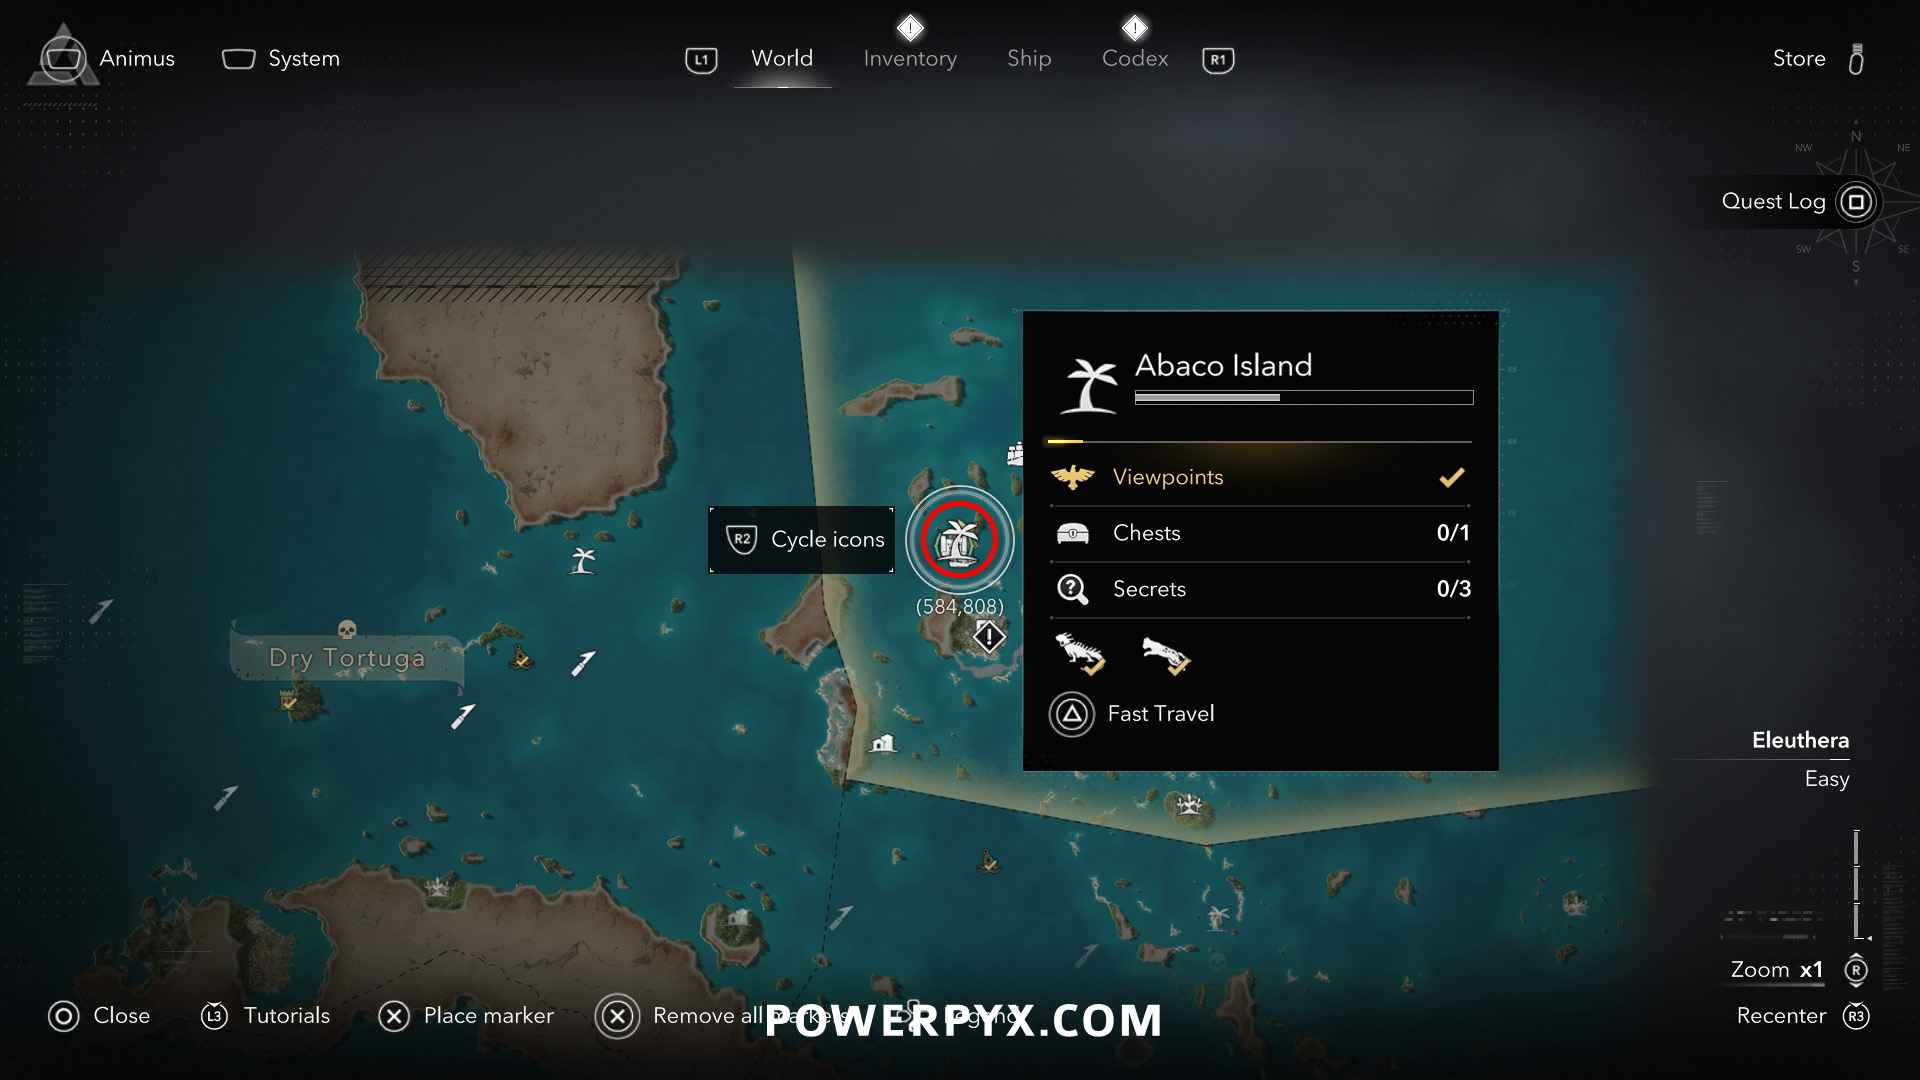
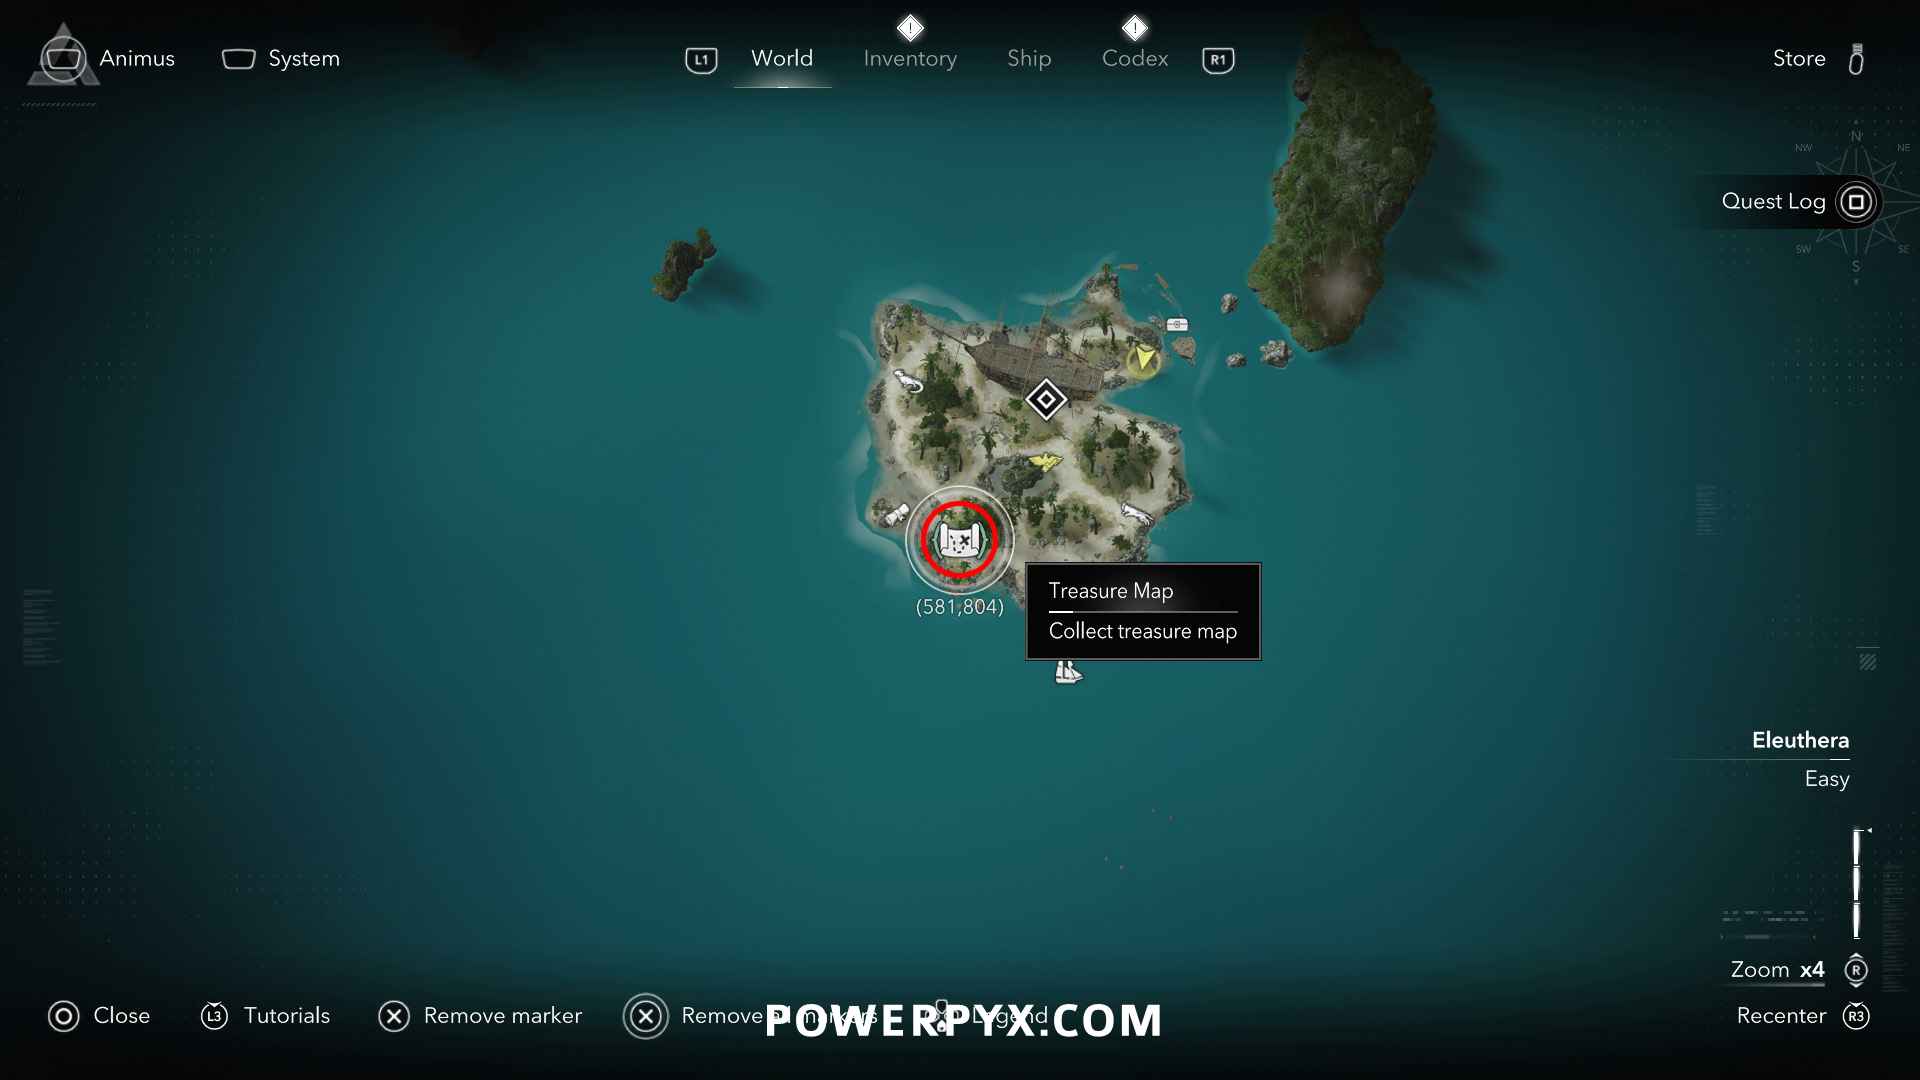
#7 – Treasure Map from Abaco Island (Salt Lagoon)
Location: Abaco Island (581, 804) – at the southwest shoreline, from a skeleton leaning against a palm tree
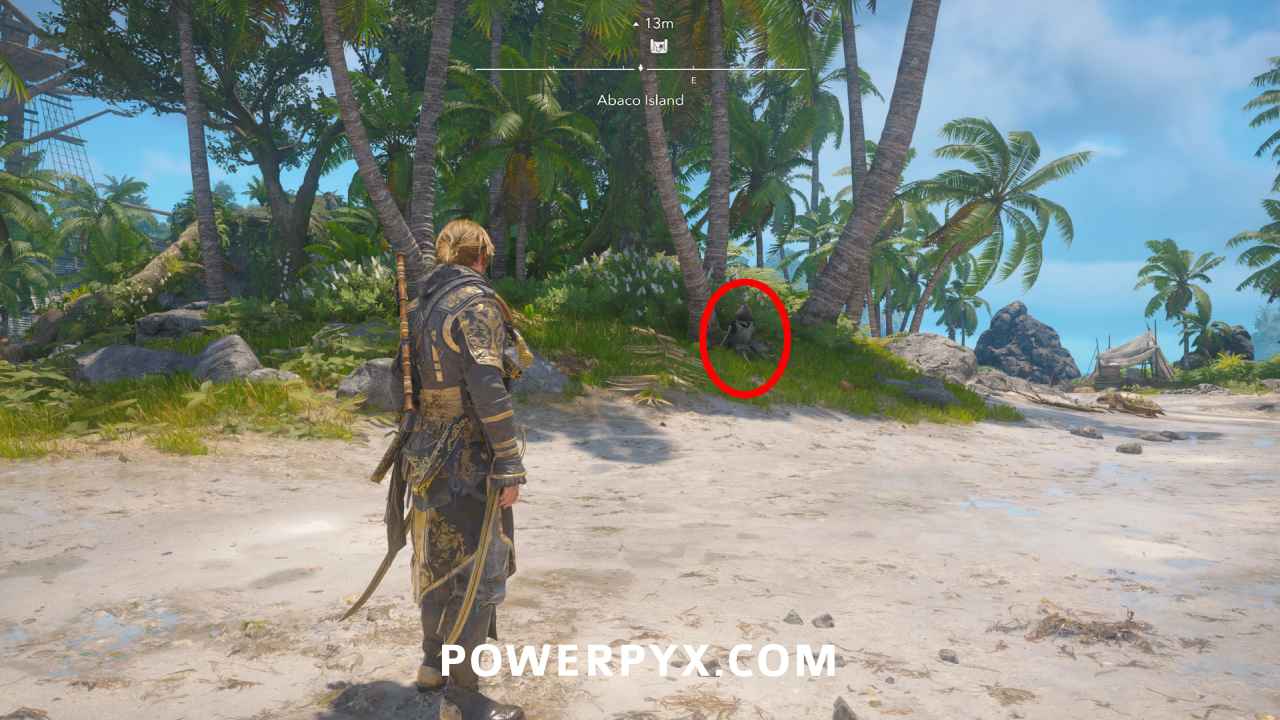
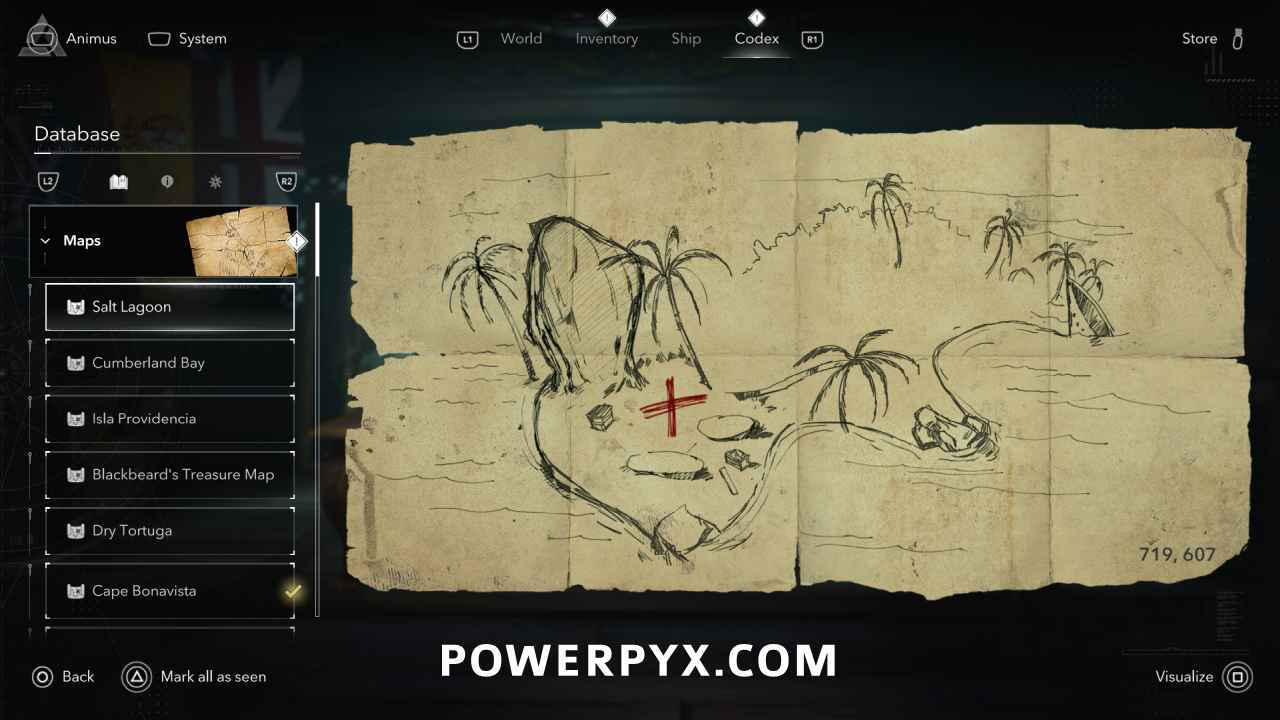
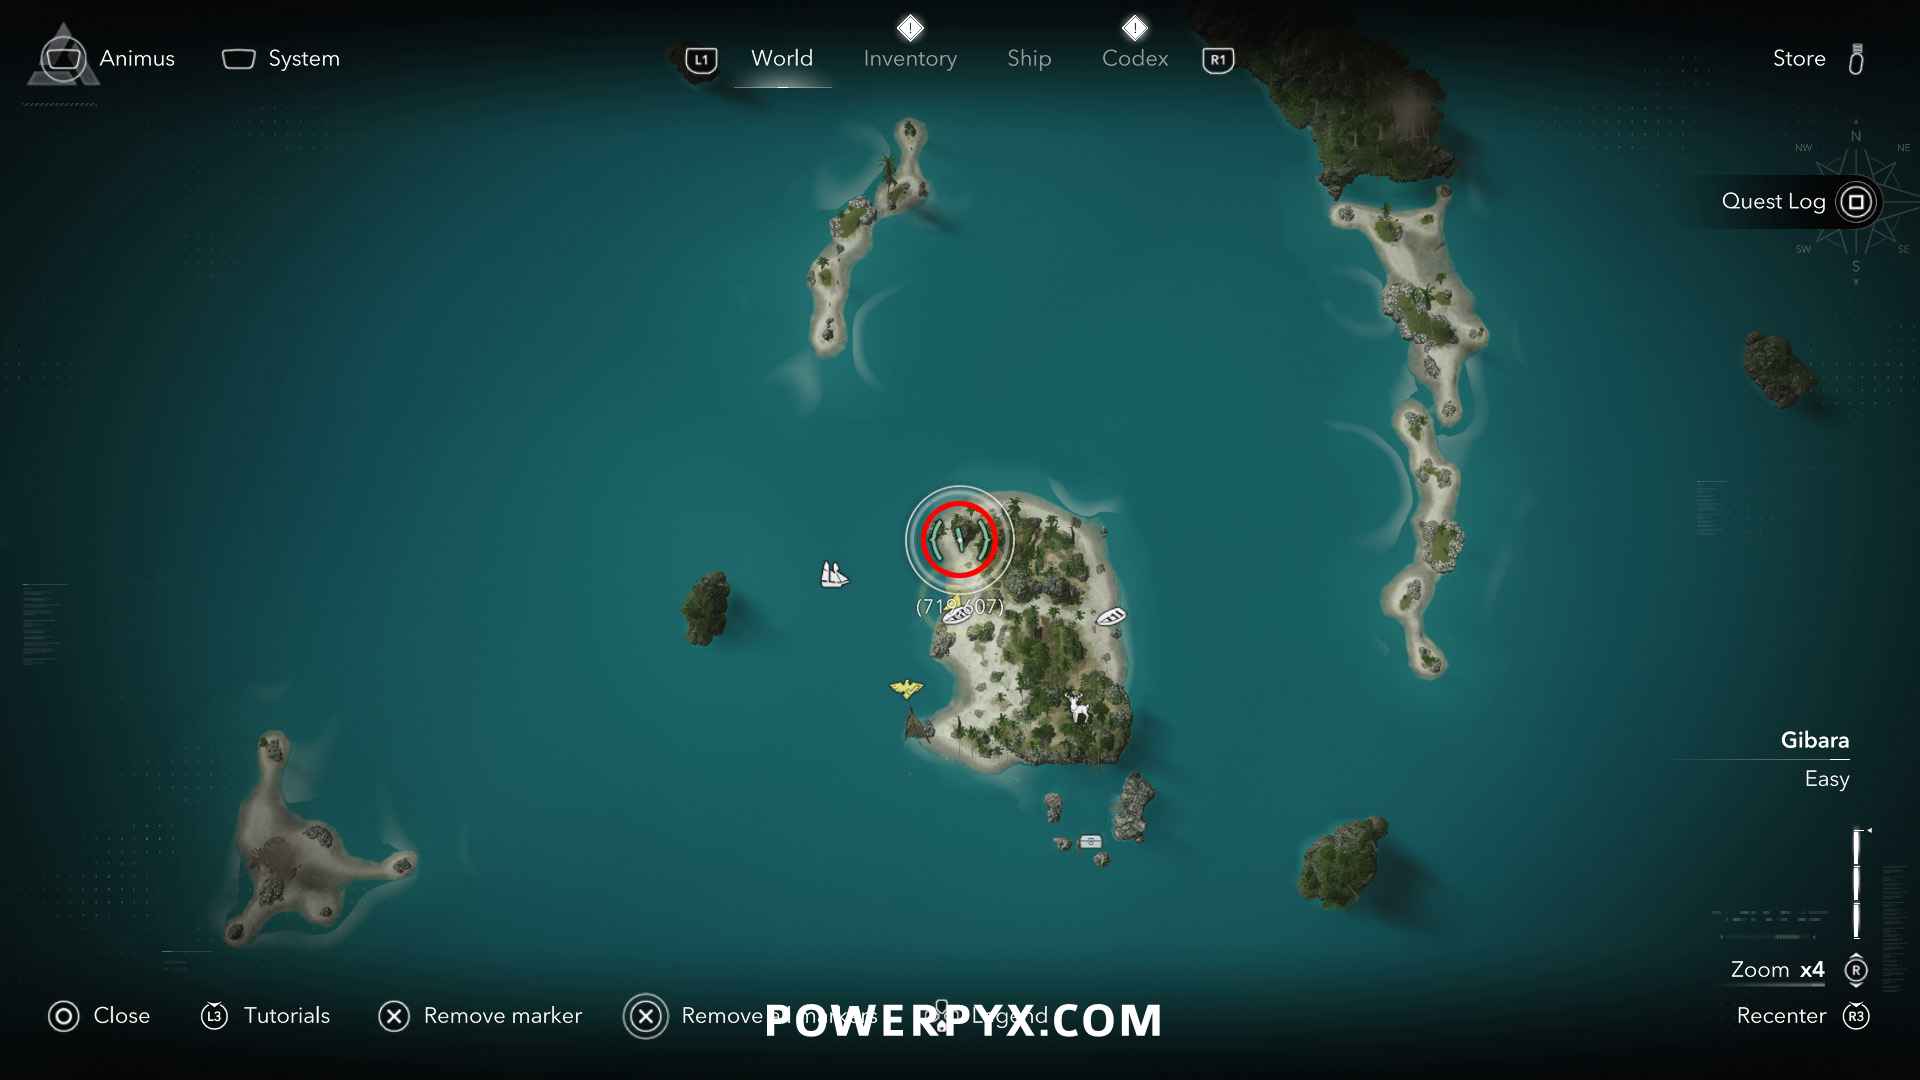
Solution: Salt Lagoon (719, 607) – in front of the tallest rock at the beach, in the sand
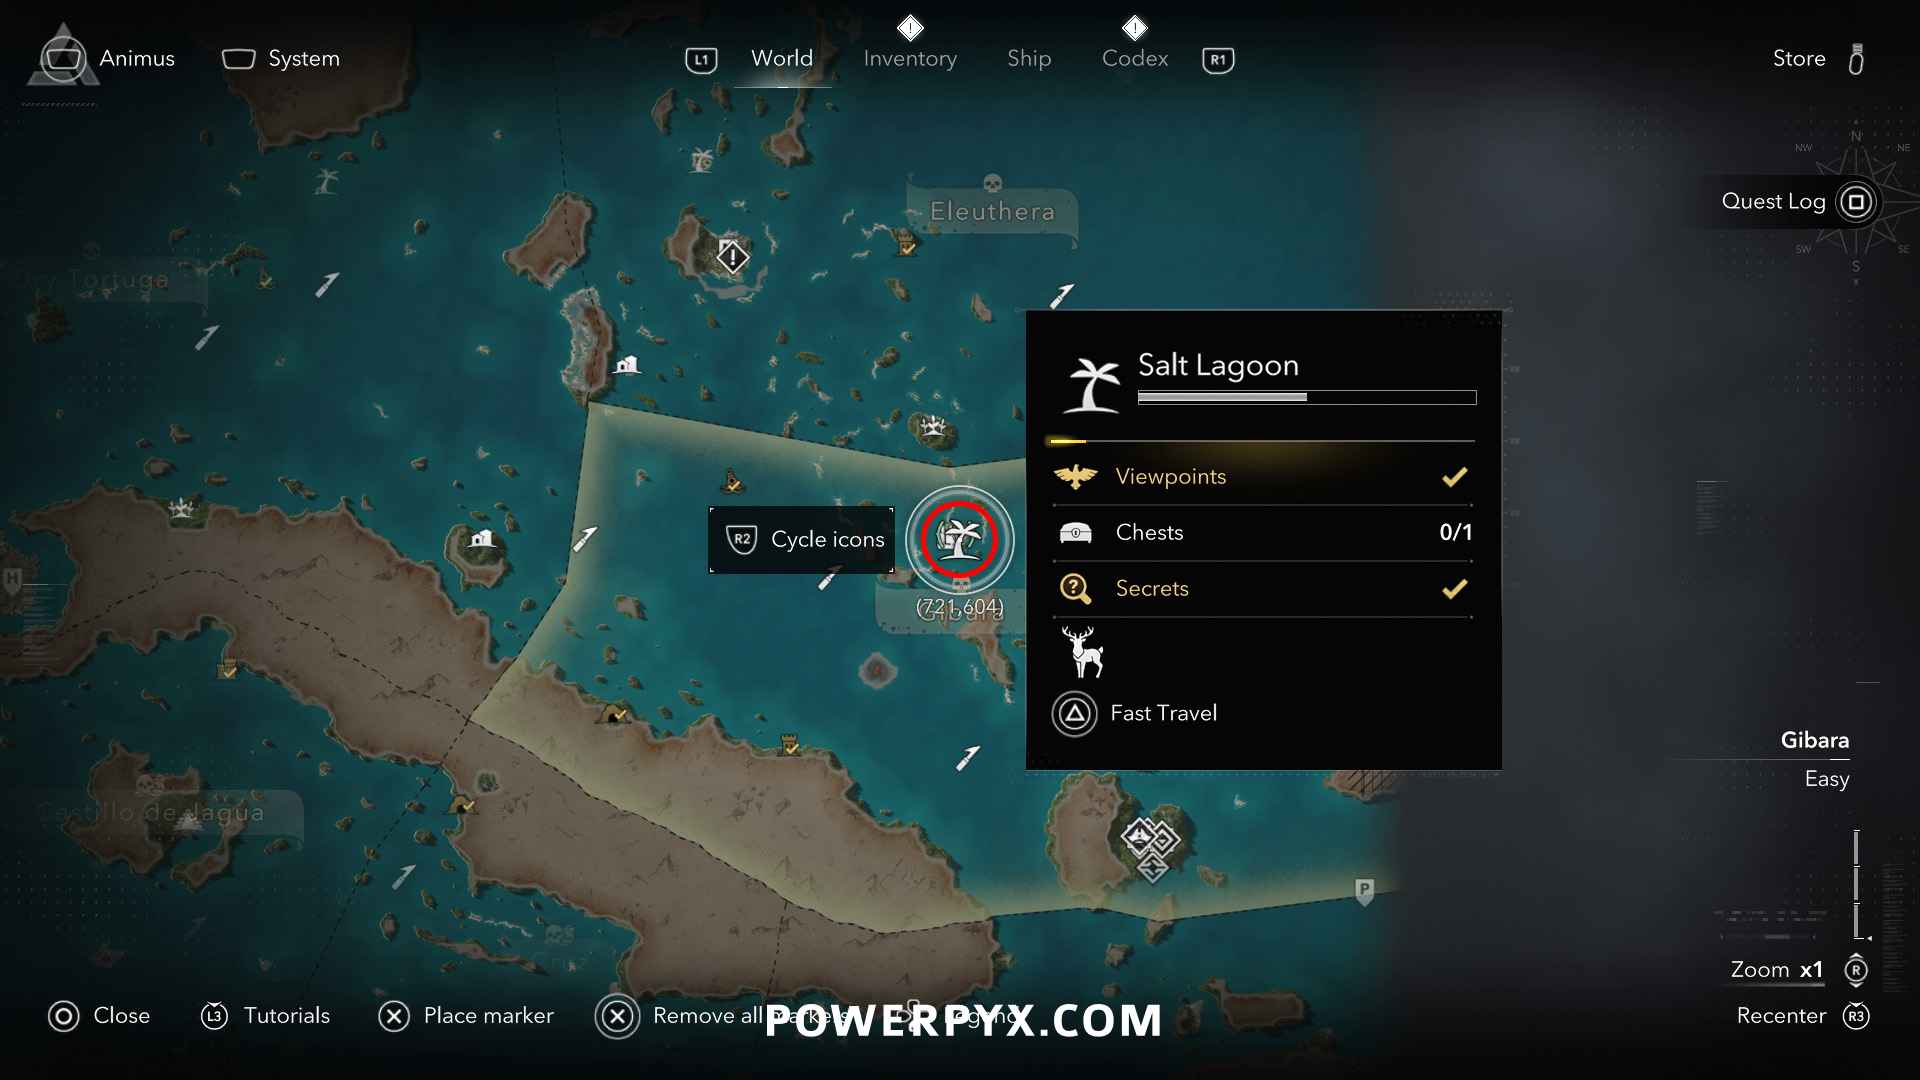
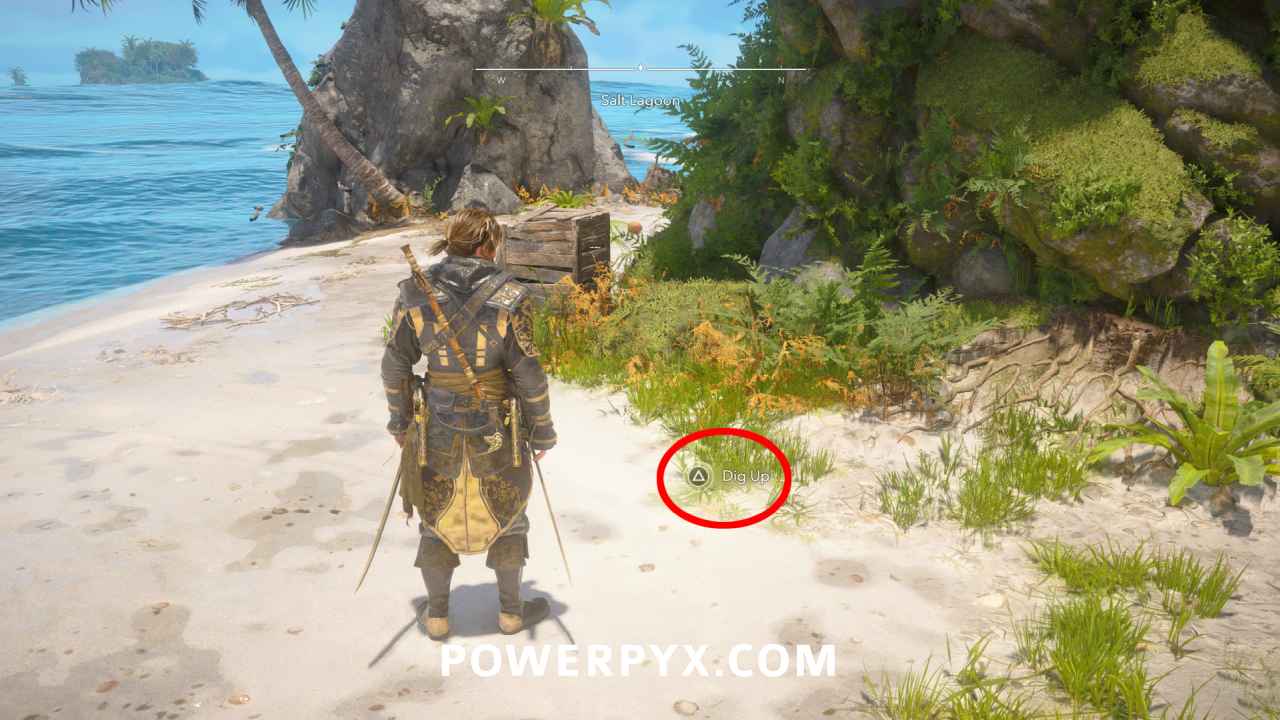
Reward: Serpent Figurehead Design Plan (redeemable in Harbourmaster’s Shop menu), 3000 Reales
Gibara Region
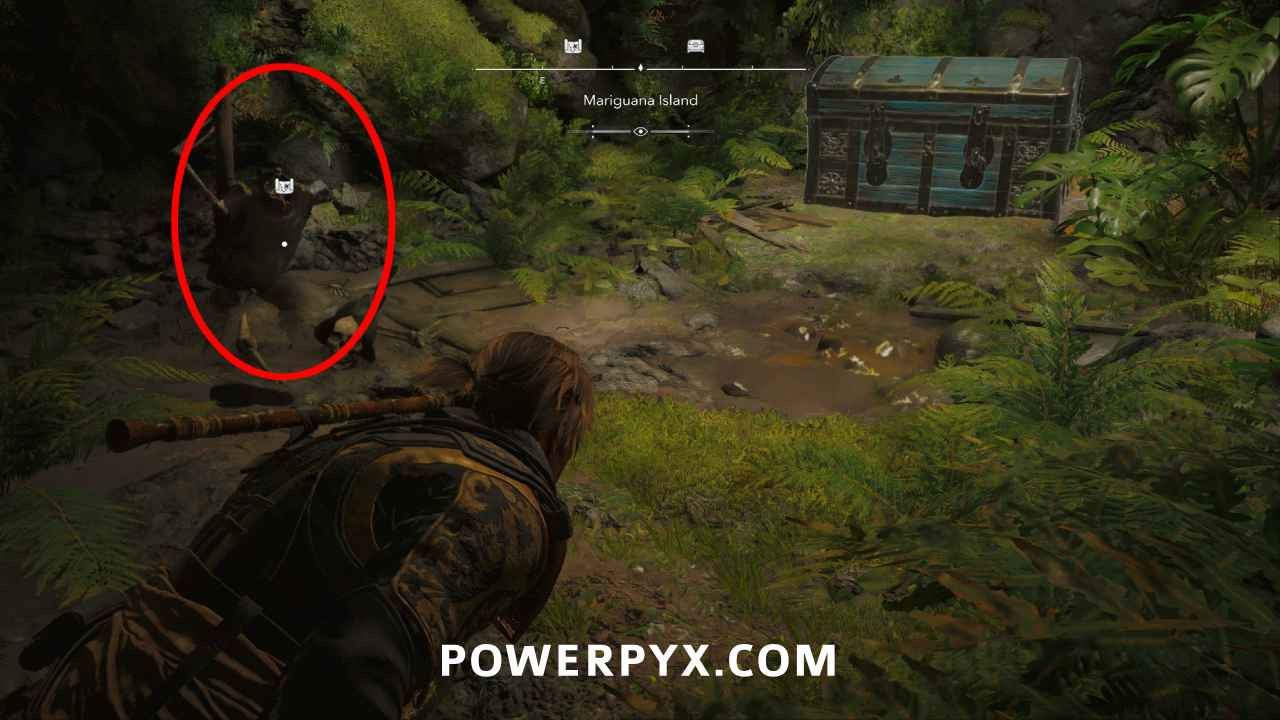
#8 – Treasure Map from Mariguana Island (Andreas Island)
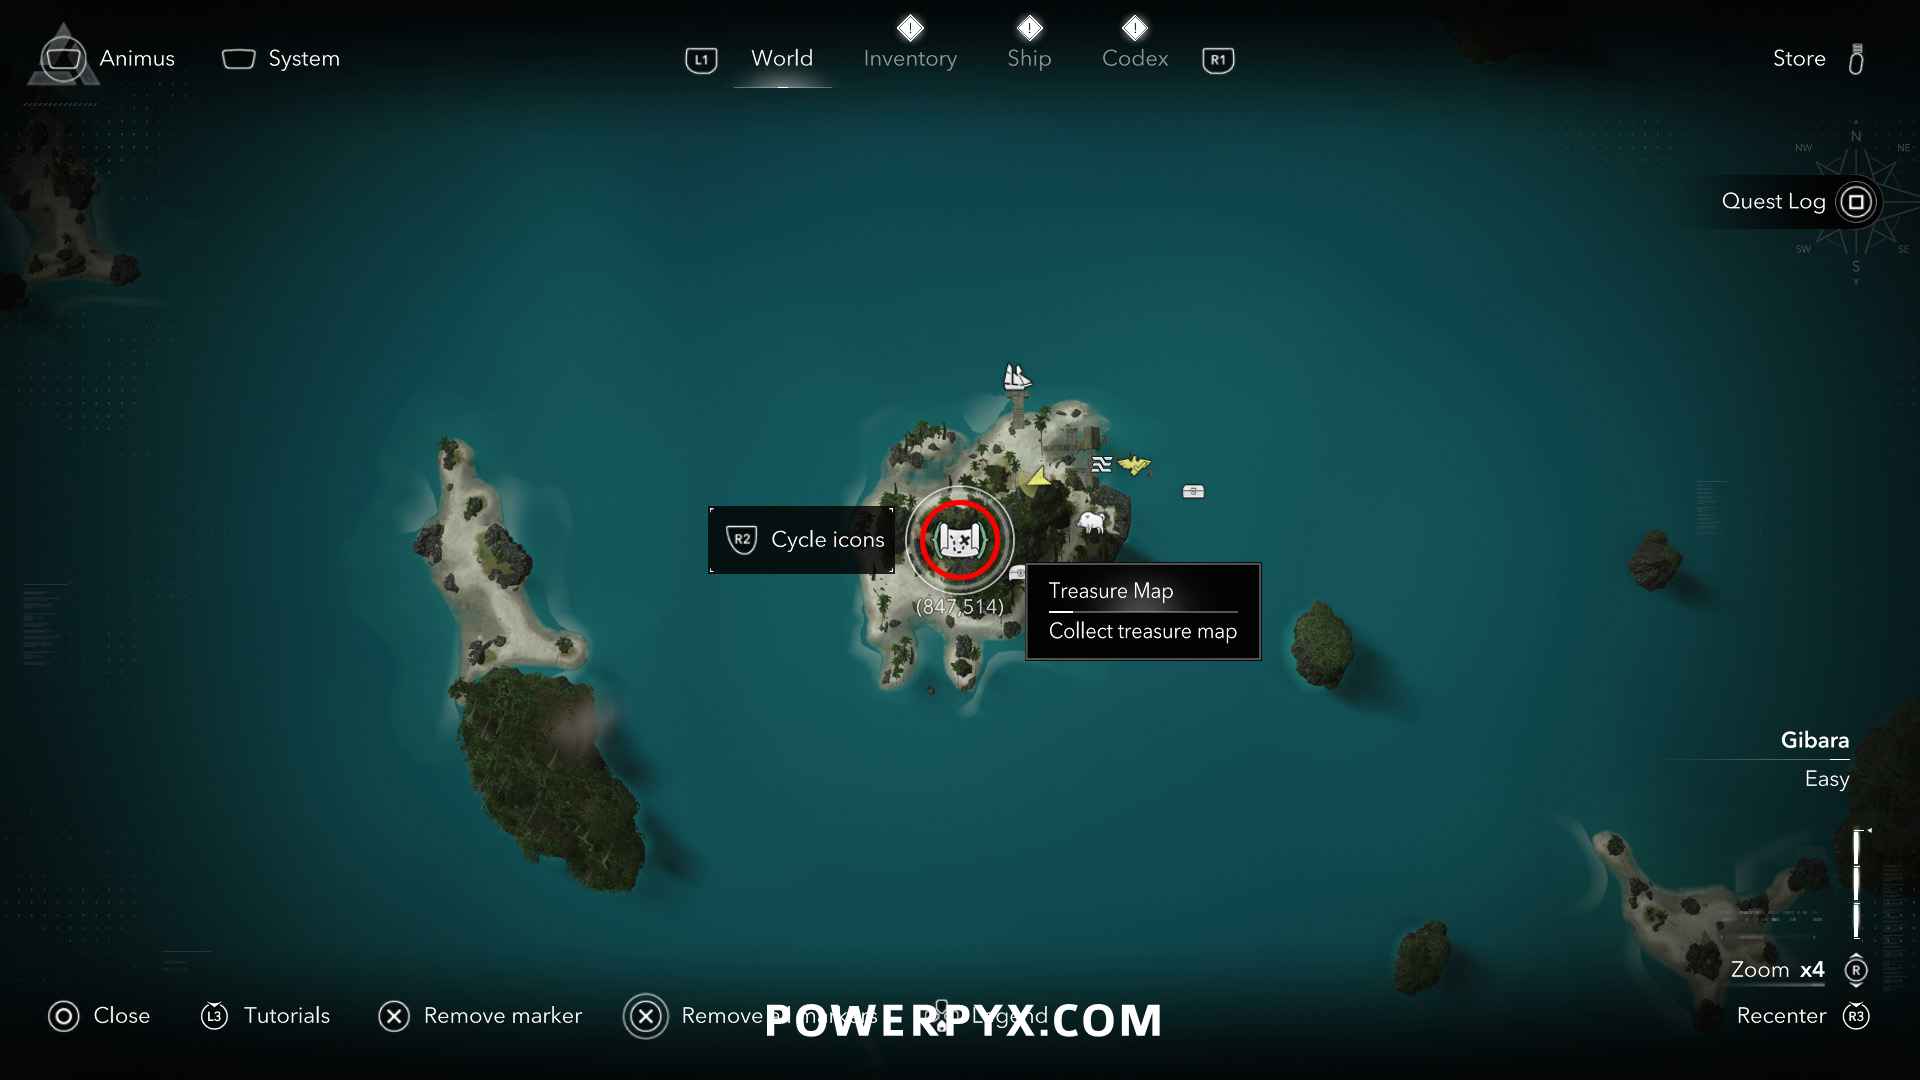
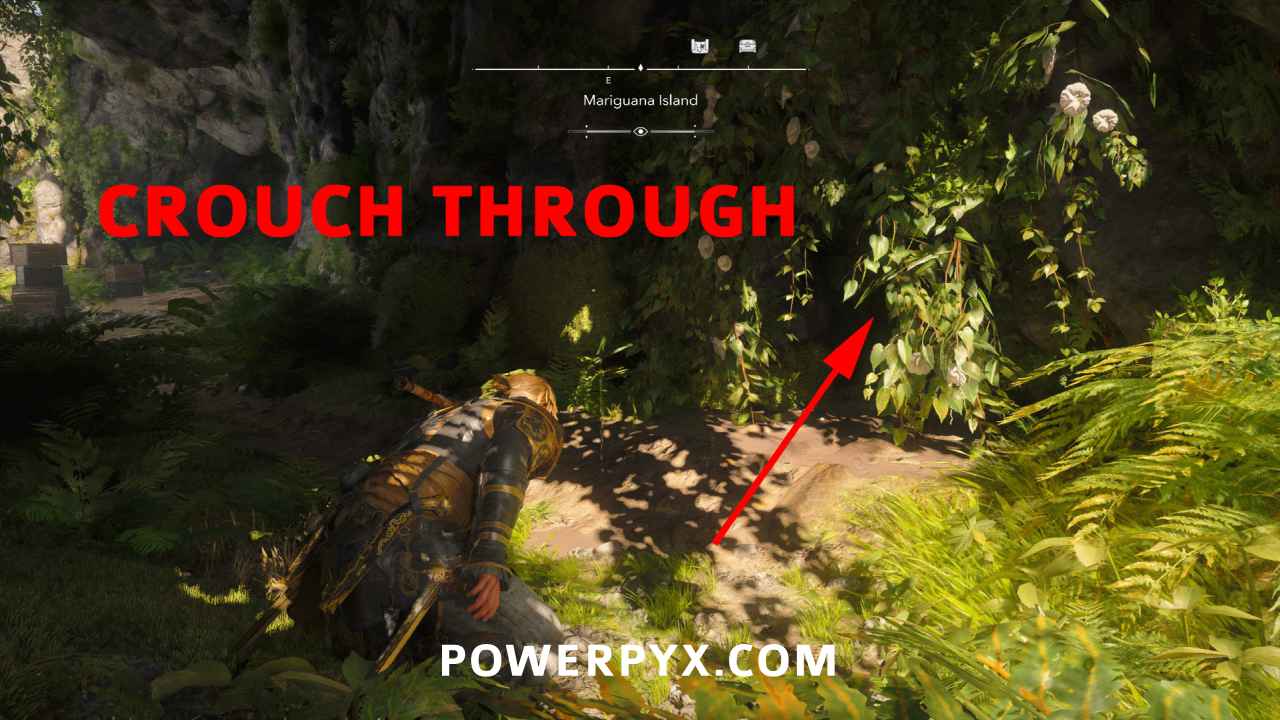
Location: Mariguana Island (847, 514) – Approach the treasure map icon from the north to find a small cave, in the middle of the cave you can crouch through a small tunnel covered by green leaves. It’s a bit hidden because the leaves camouflage the entrance, just 8 meters from the treasure map.
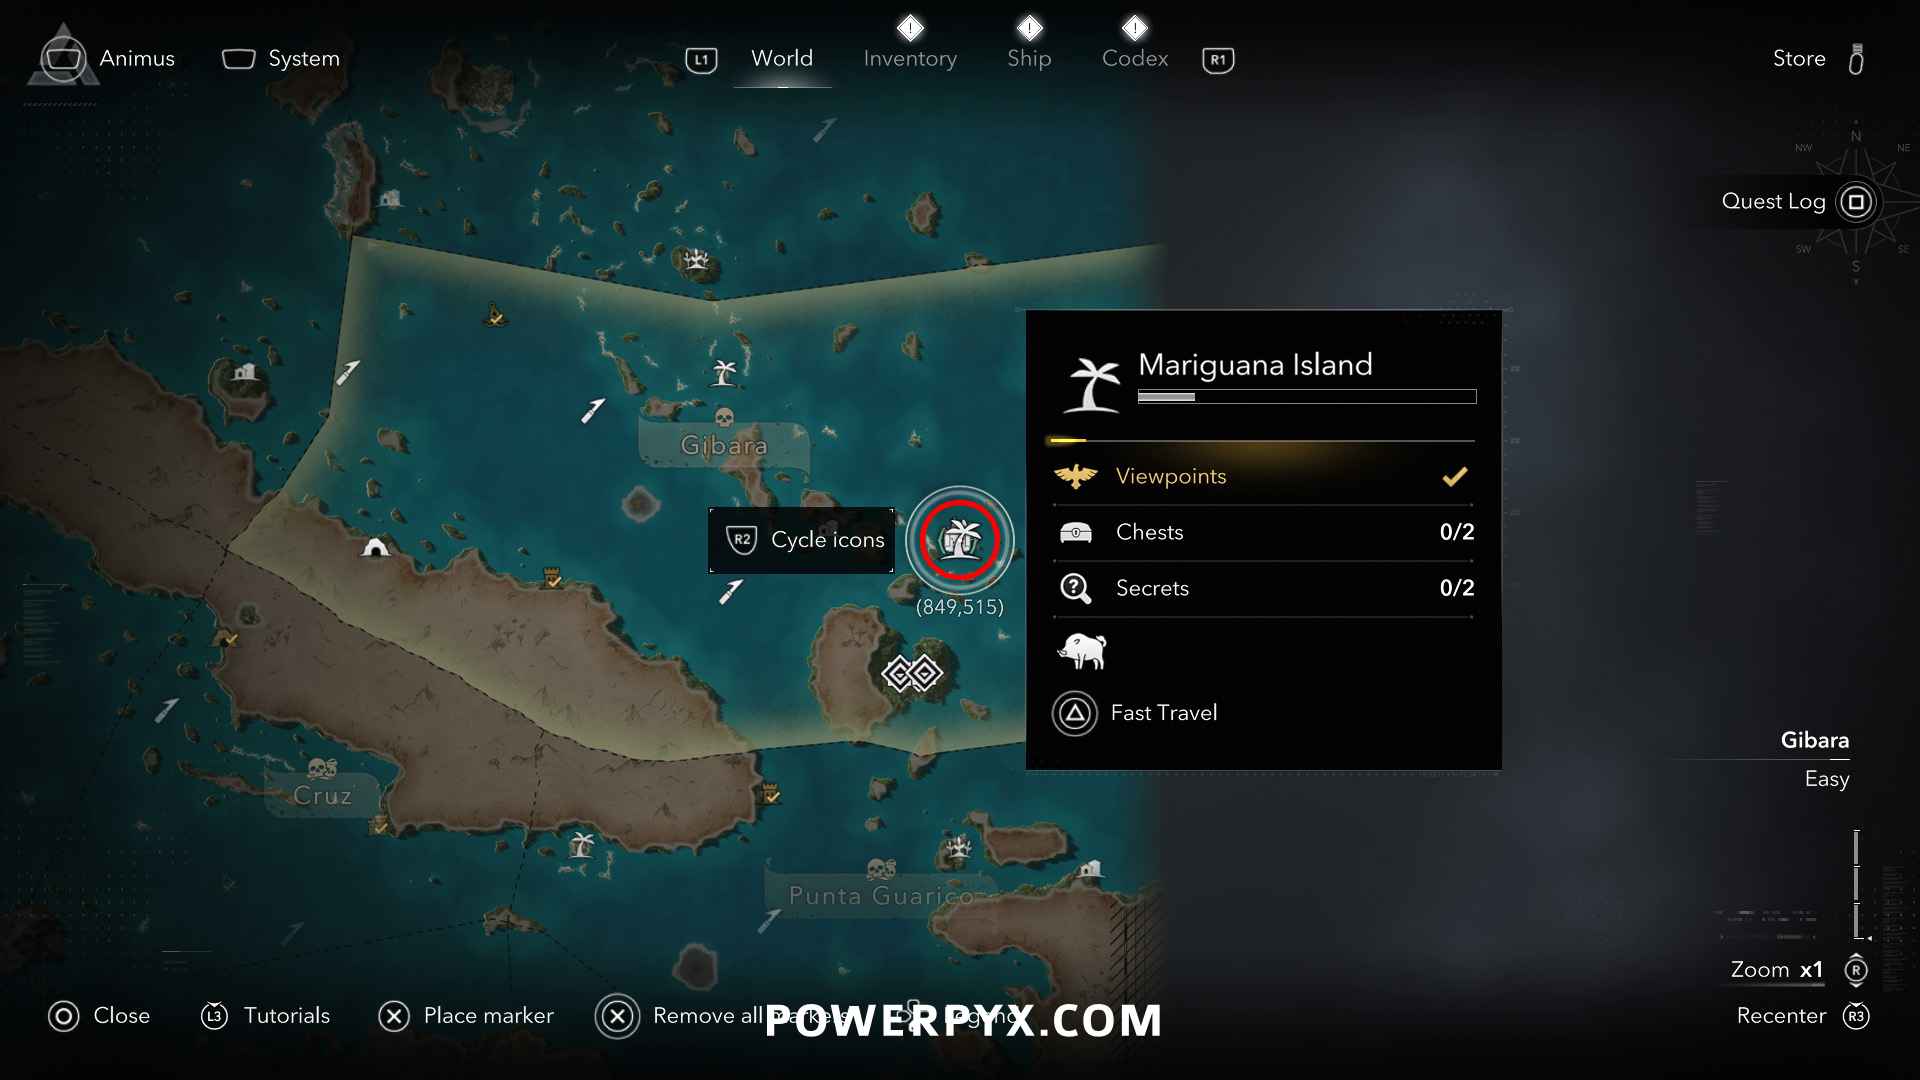
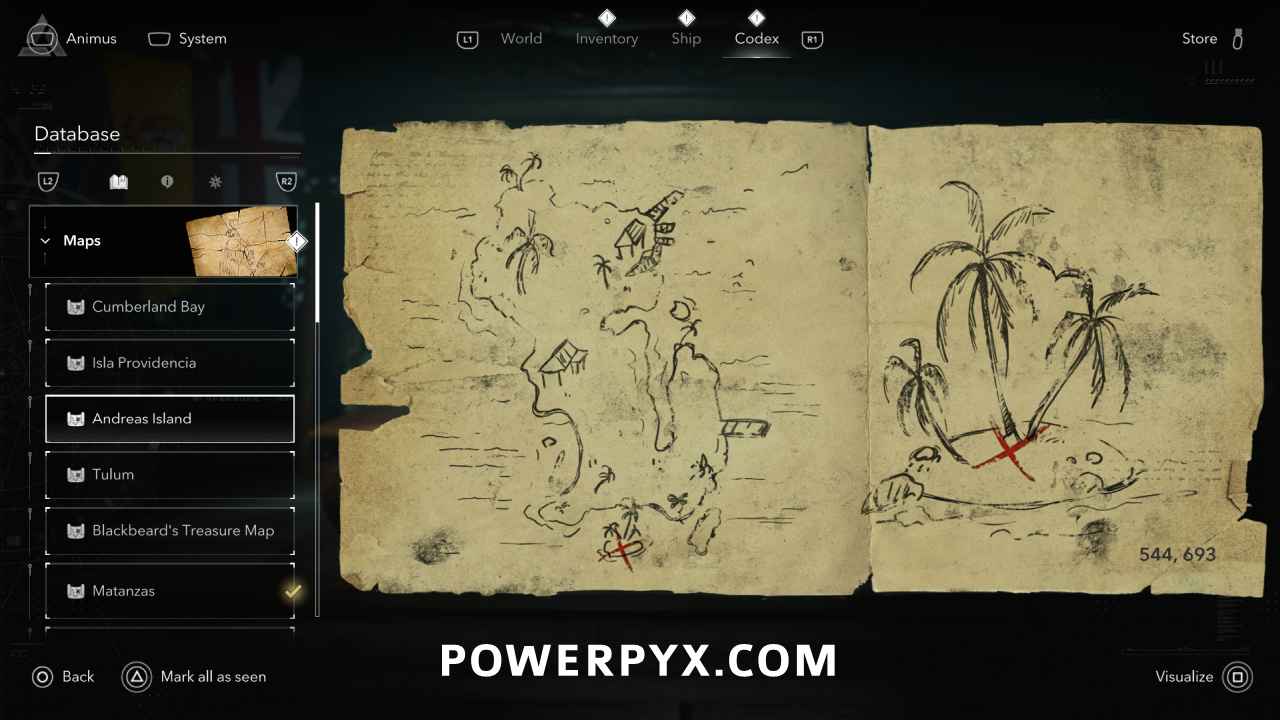
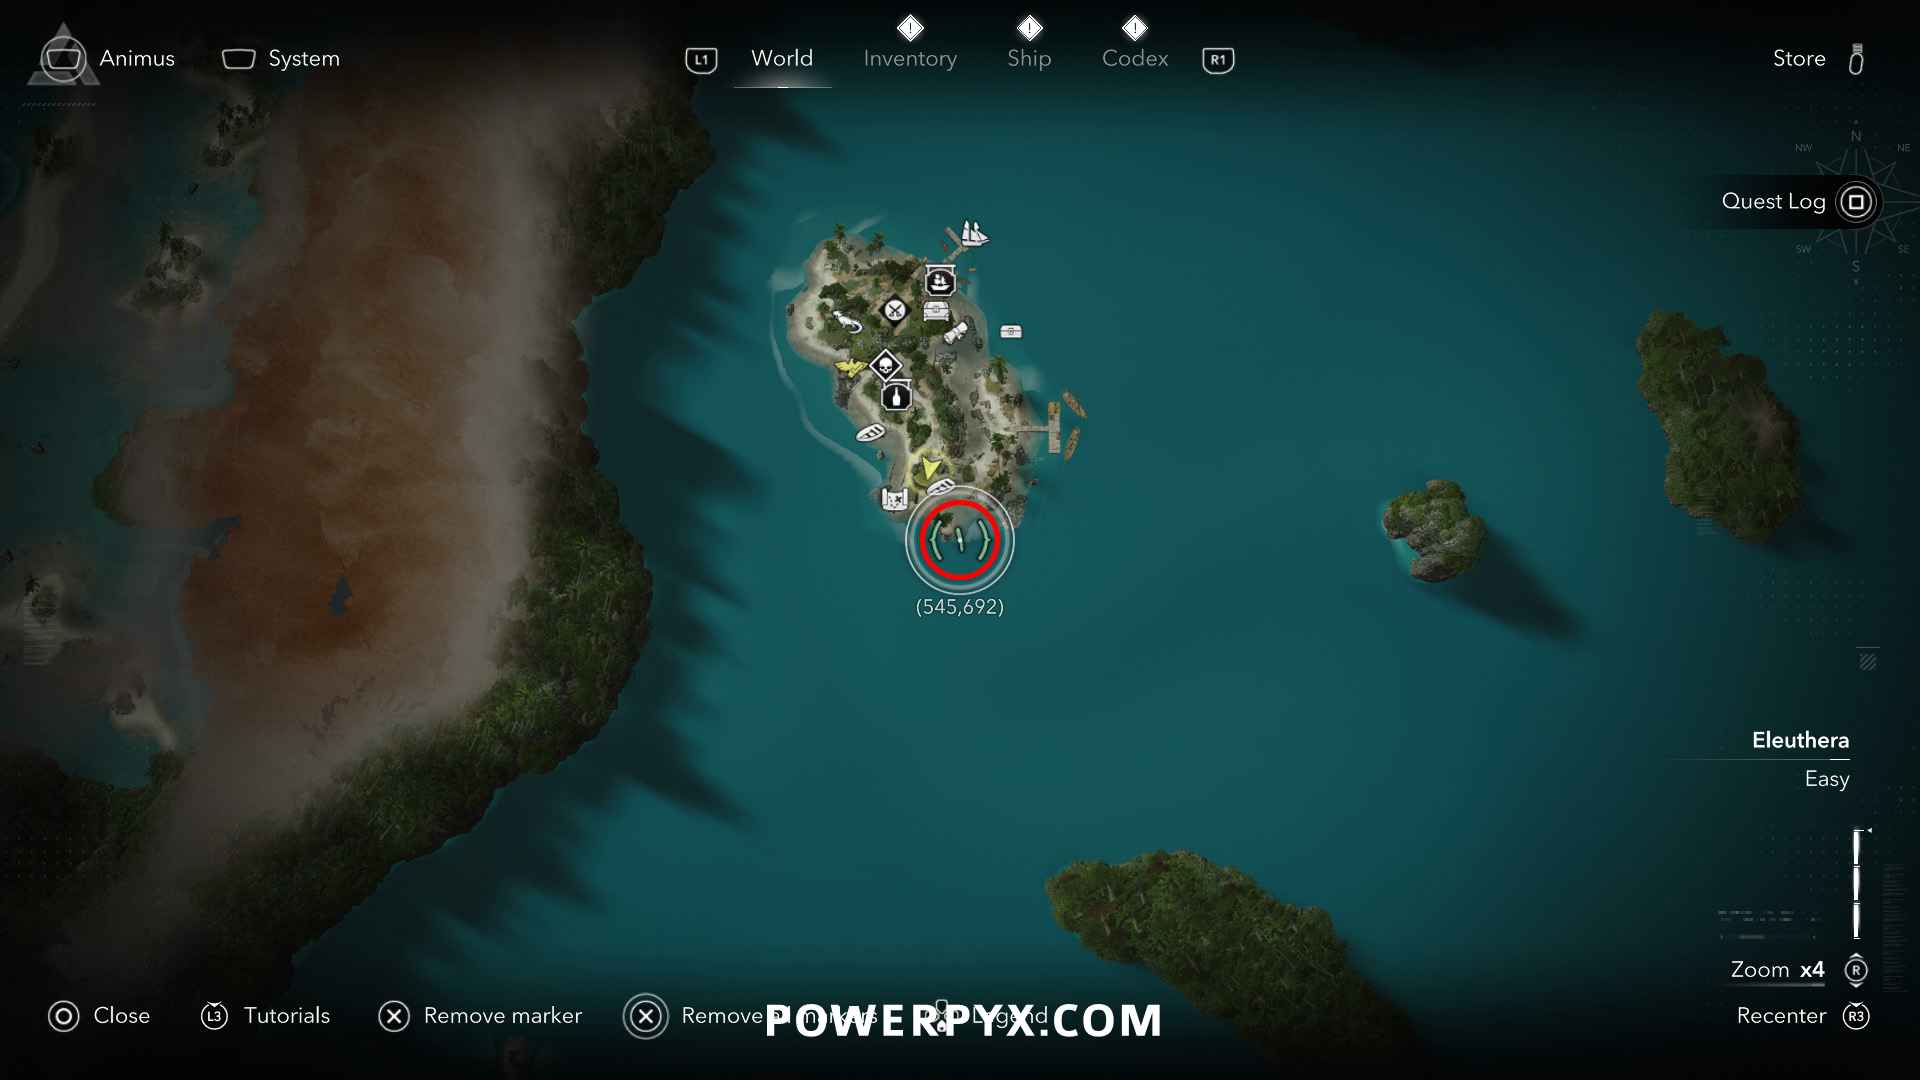
Solution: Andreas Island (544, 693) – on a small island in the south of Andreas Island
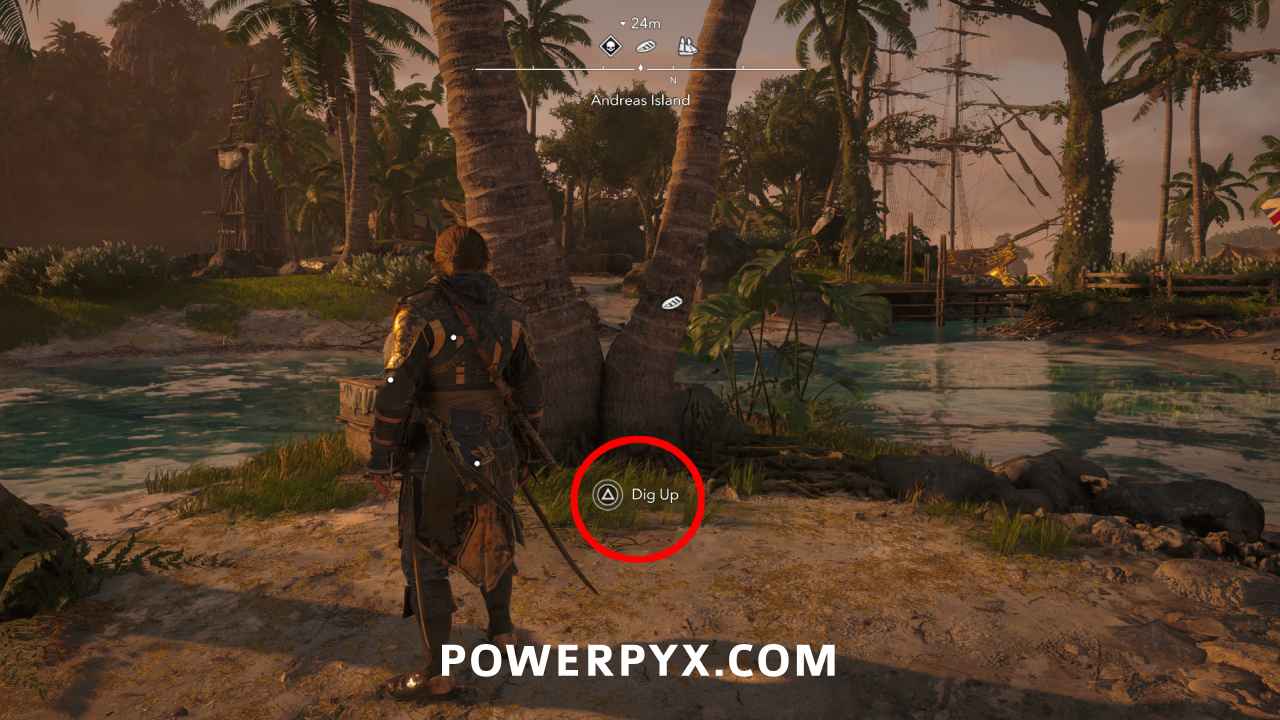
Reward: Harpoon Strength Ultimate Plan, 3000 Reales
#9 – Treasure Map from Great Inagua (Nassau)
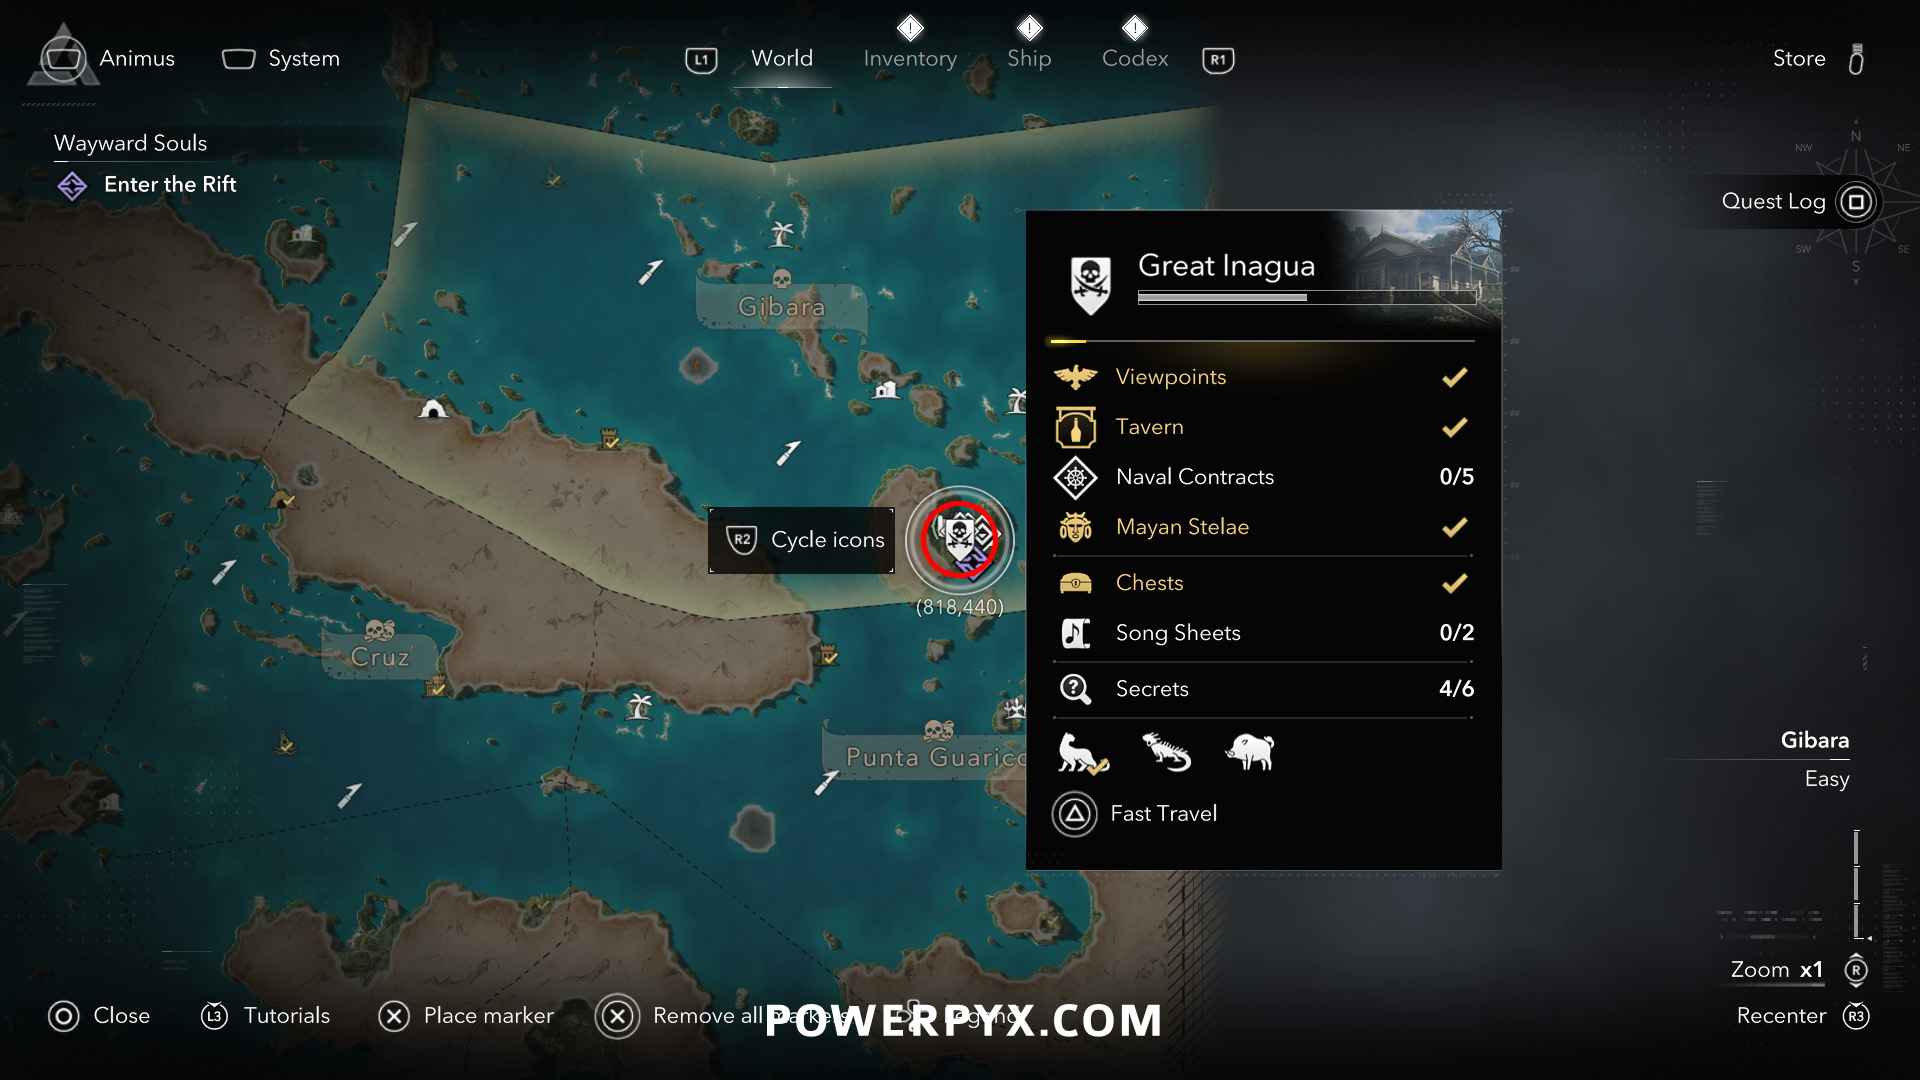
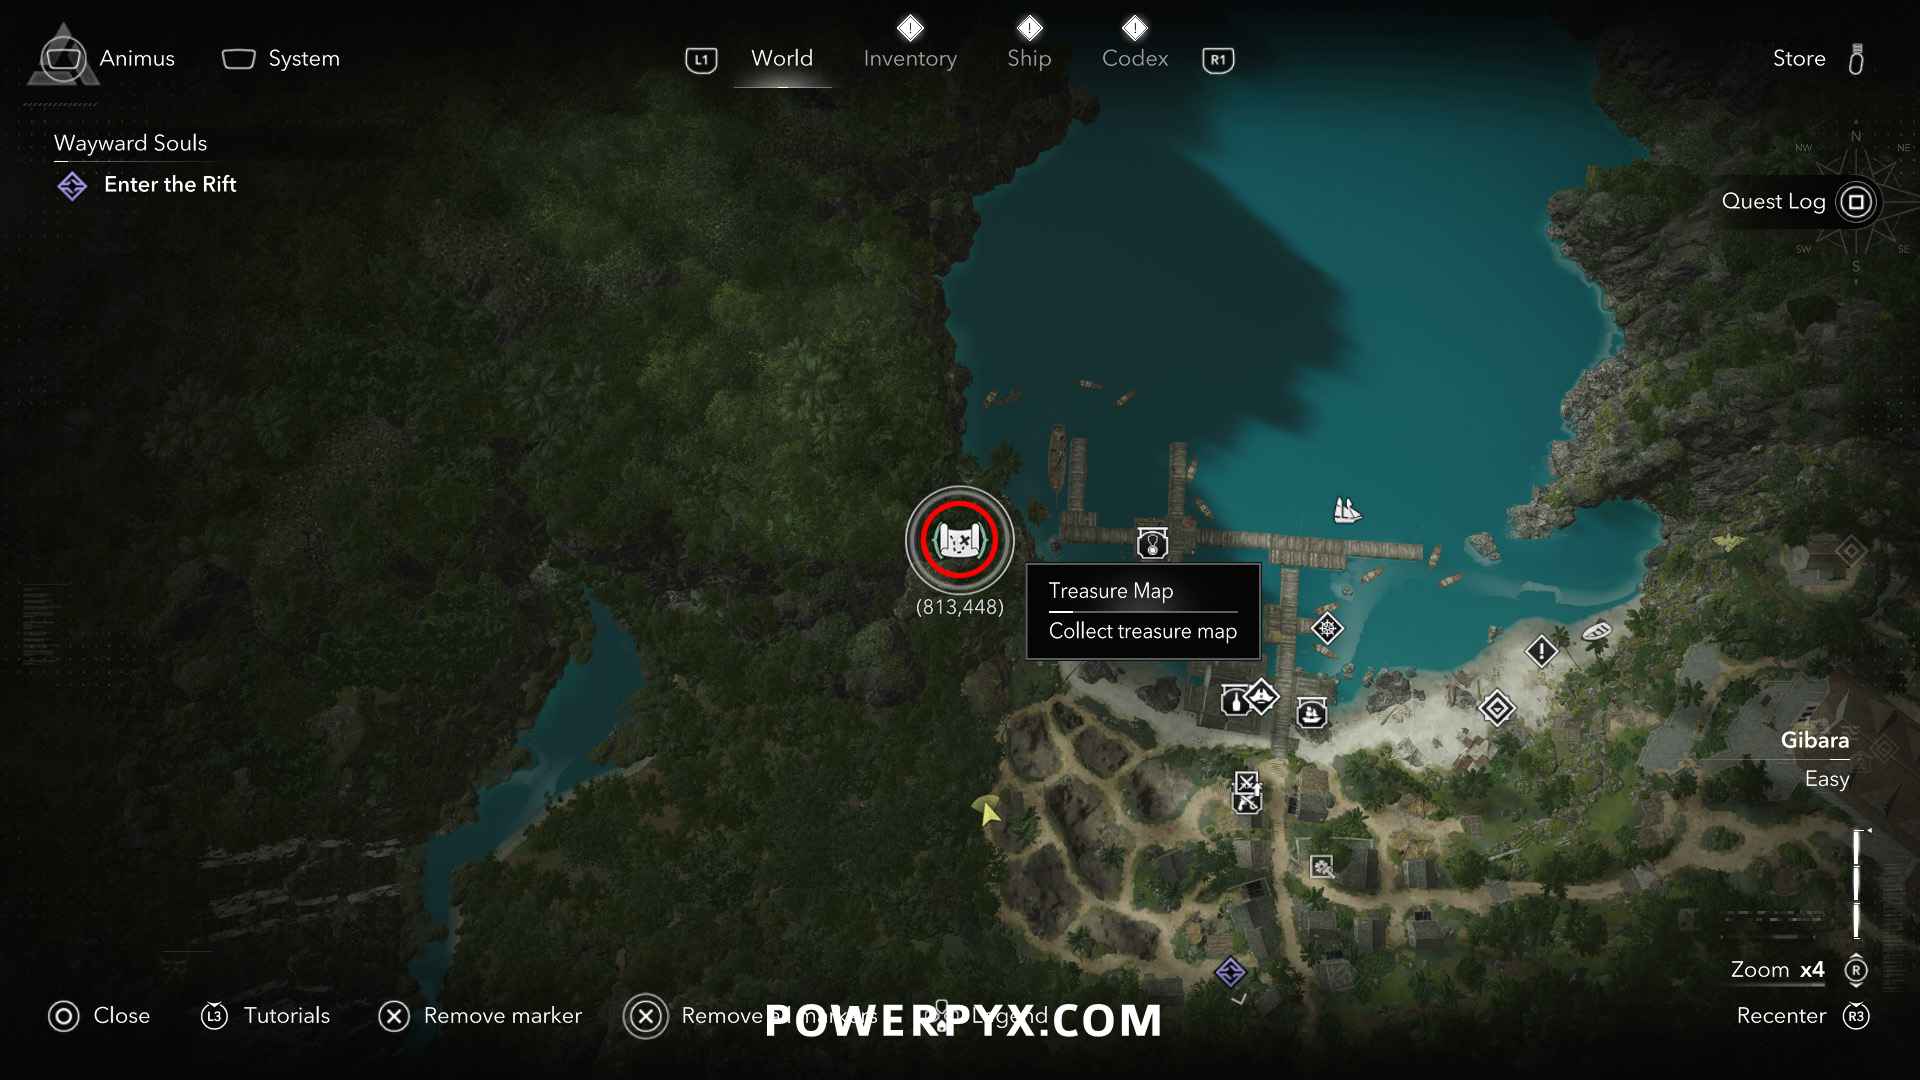
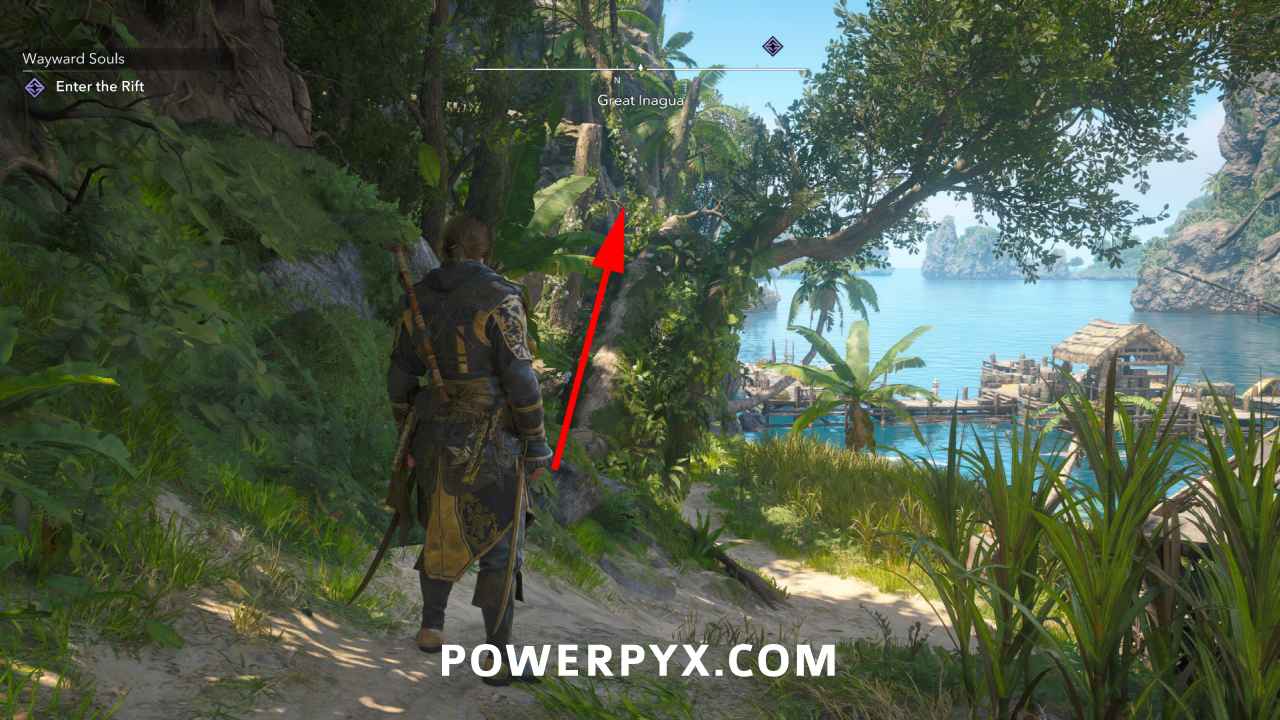
Location: Great Inagua (813, 448) – climb the trees at the beach to reach this in a cave
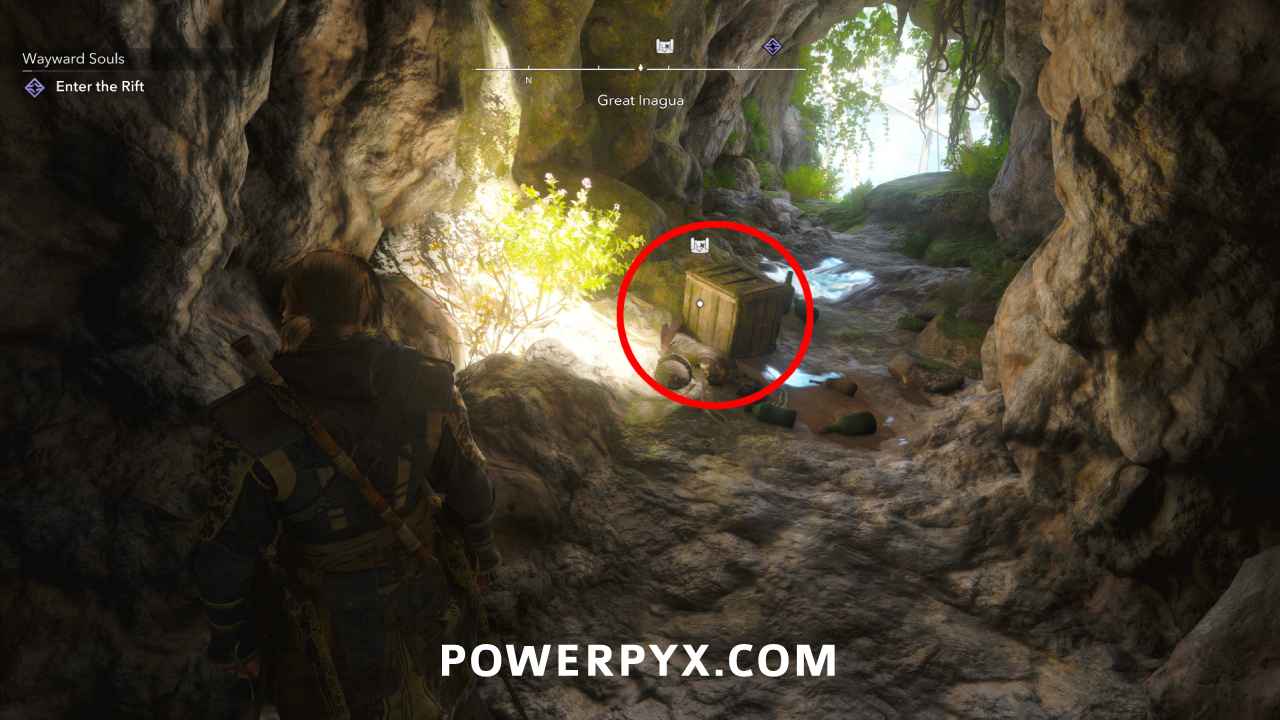
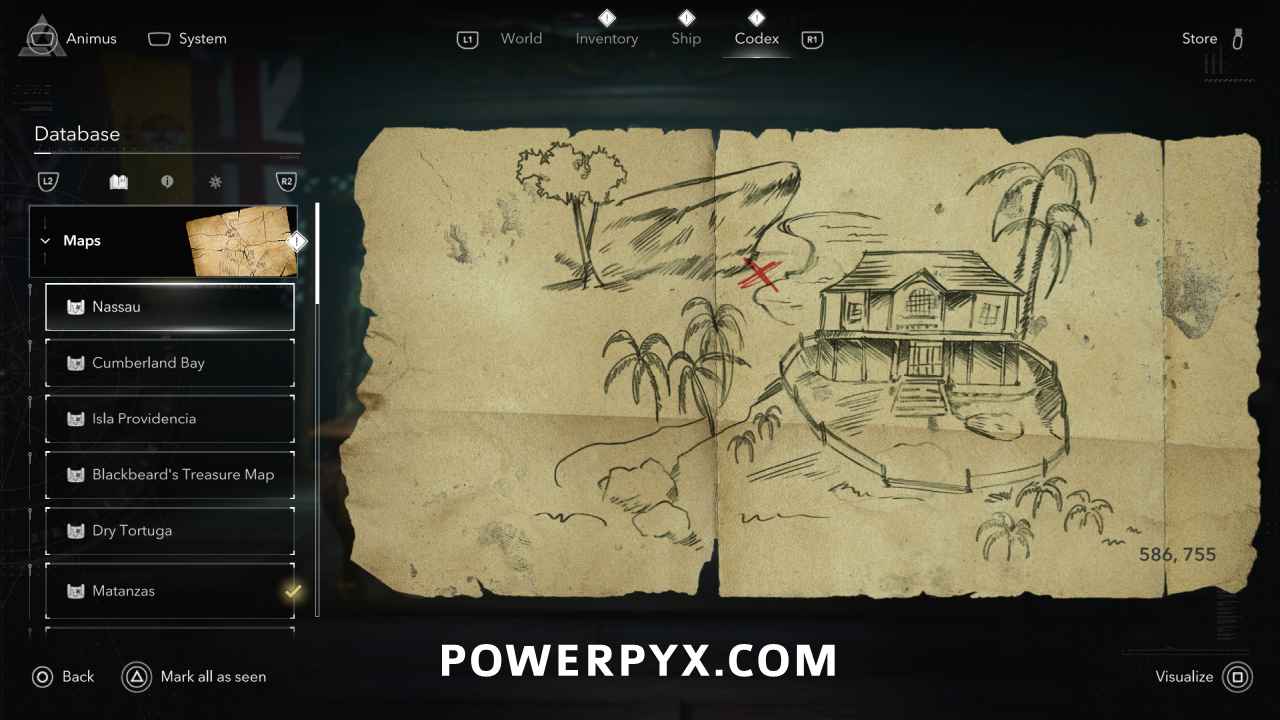
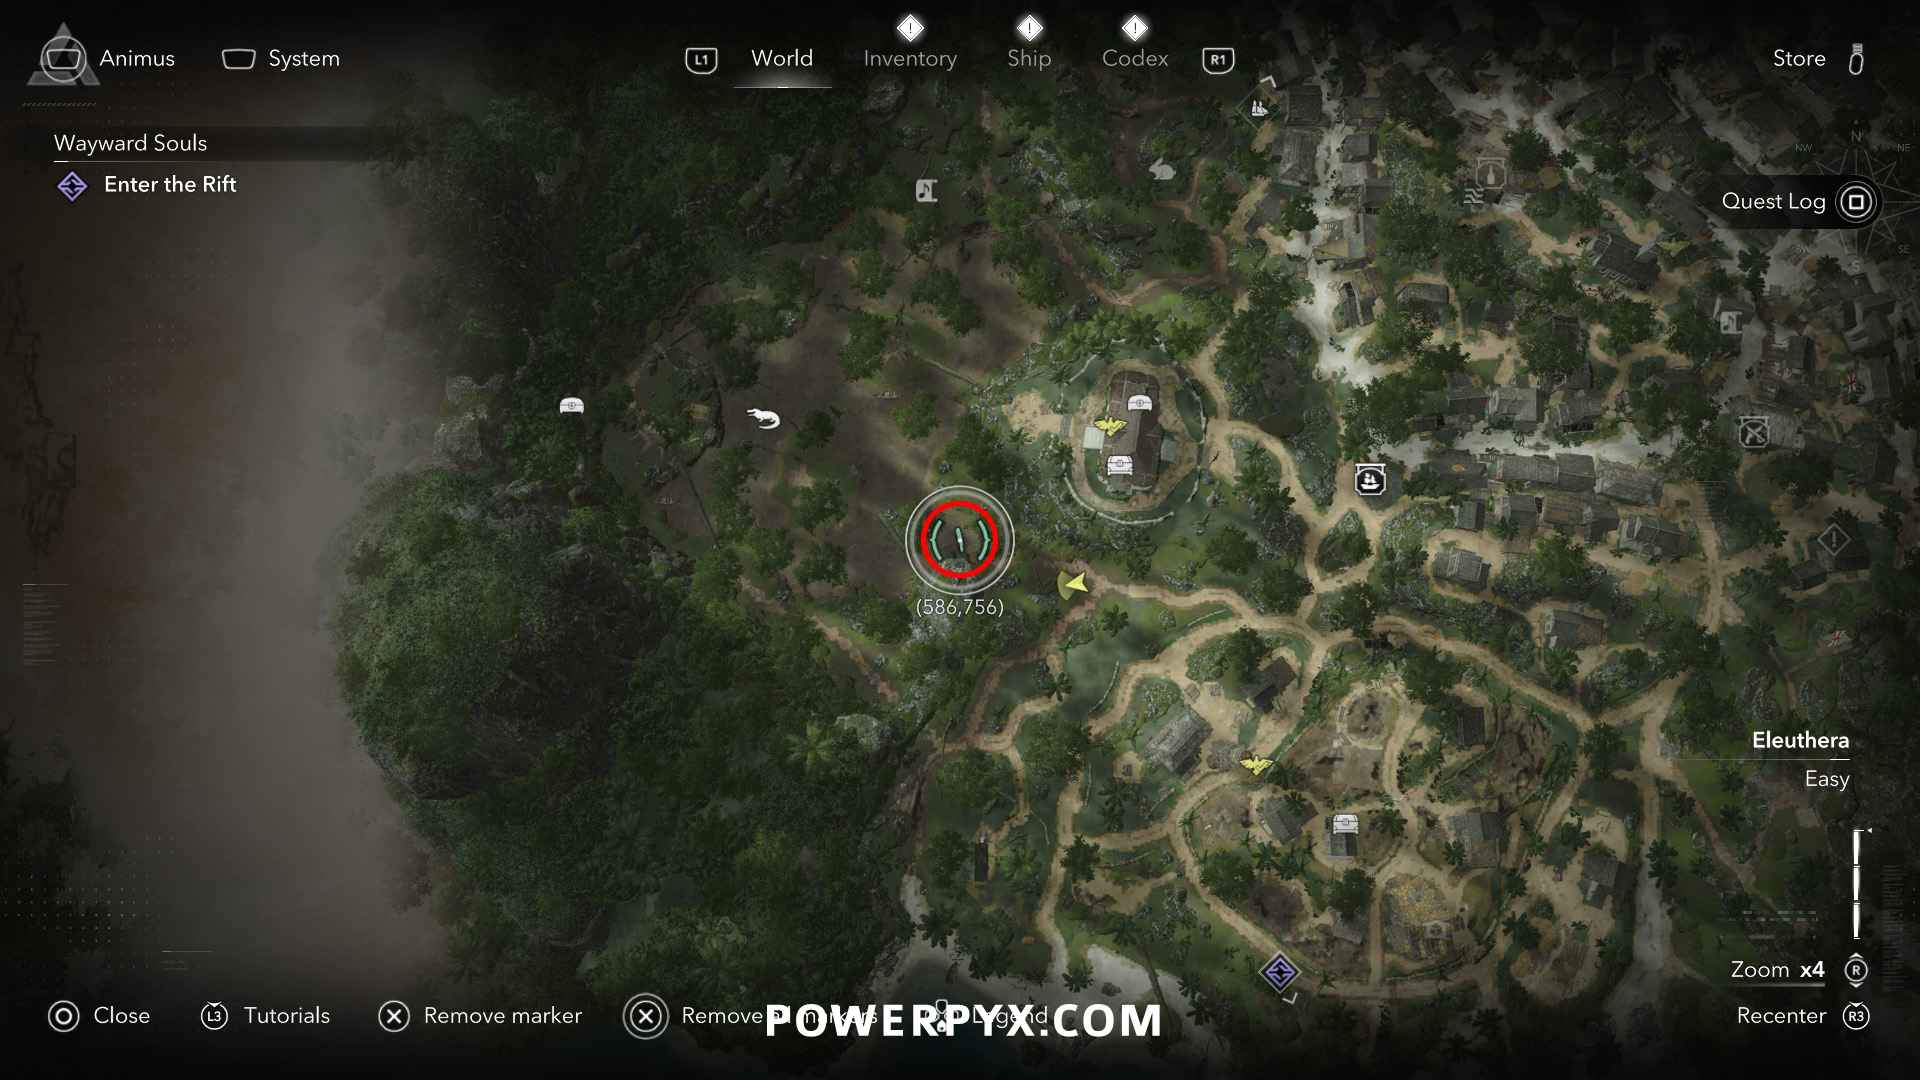
Solution: Nassau (586, 755) – on the west edge of Nassau town, directly below a long cliff that sticks out the side of the mountain
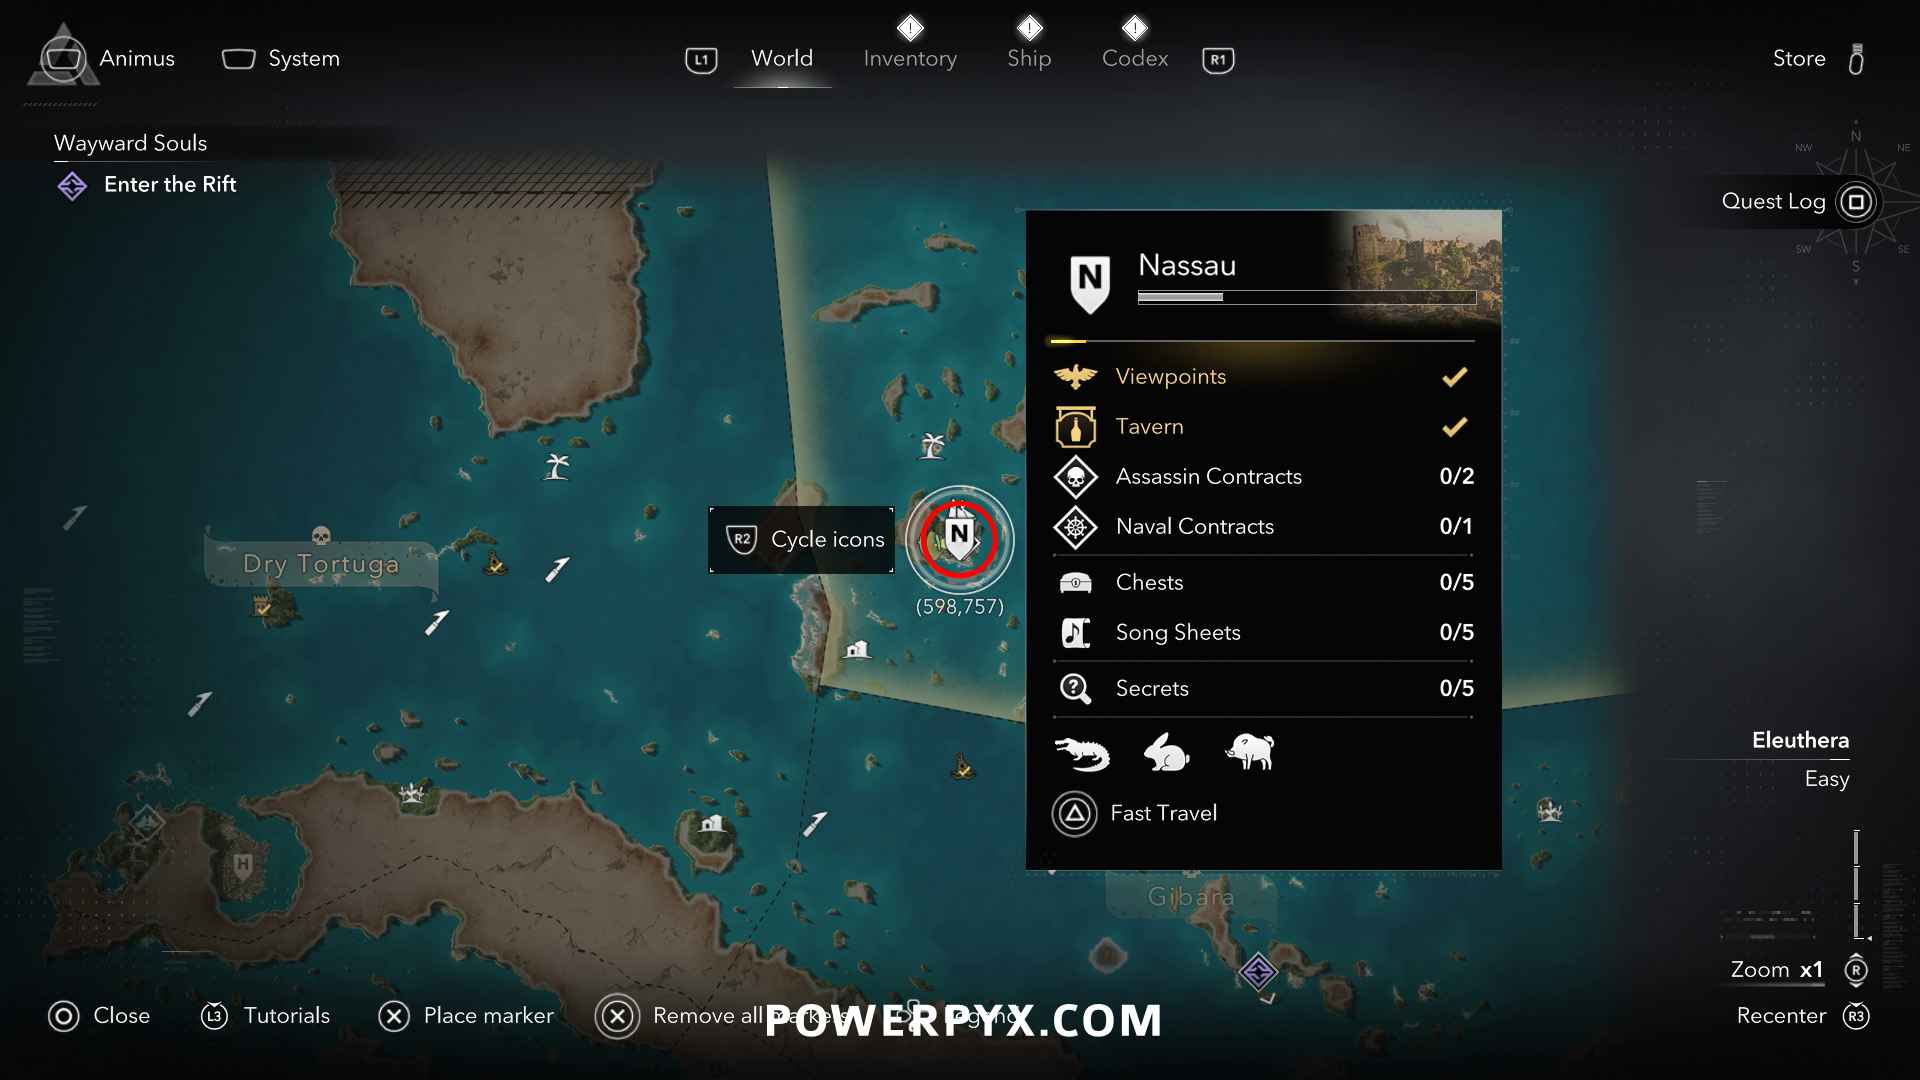
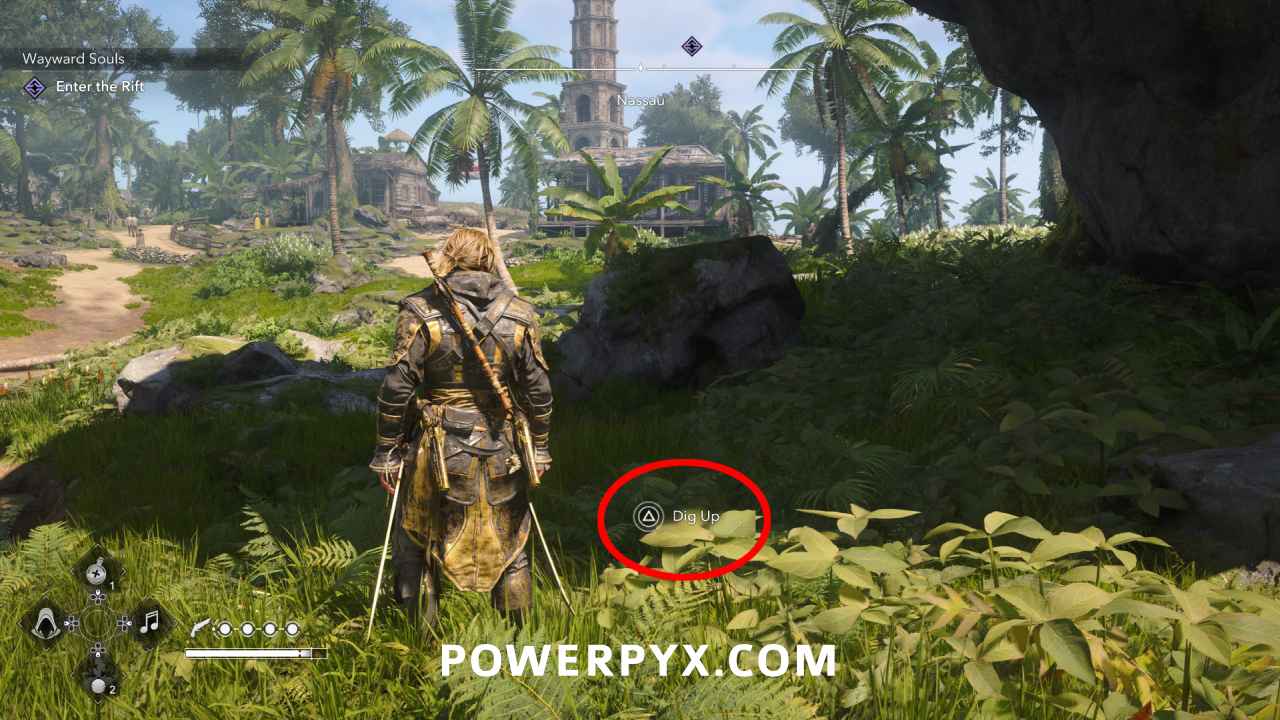
Reward: Elite Sails Design Plan (redeemable in Harbourmaster’s Shop menu), 3000 Reales
#10 – Treasure Map (Great Inagua)
Location: Reward for hanging all 11 Character Portraits in Great Inagua Manor.
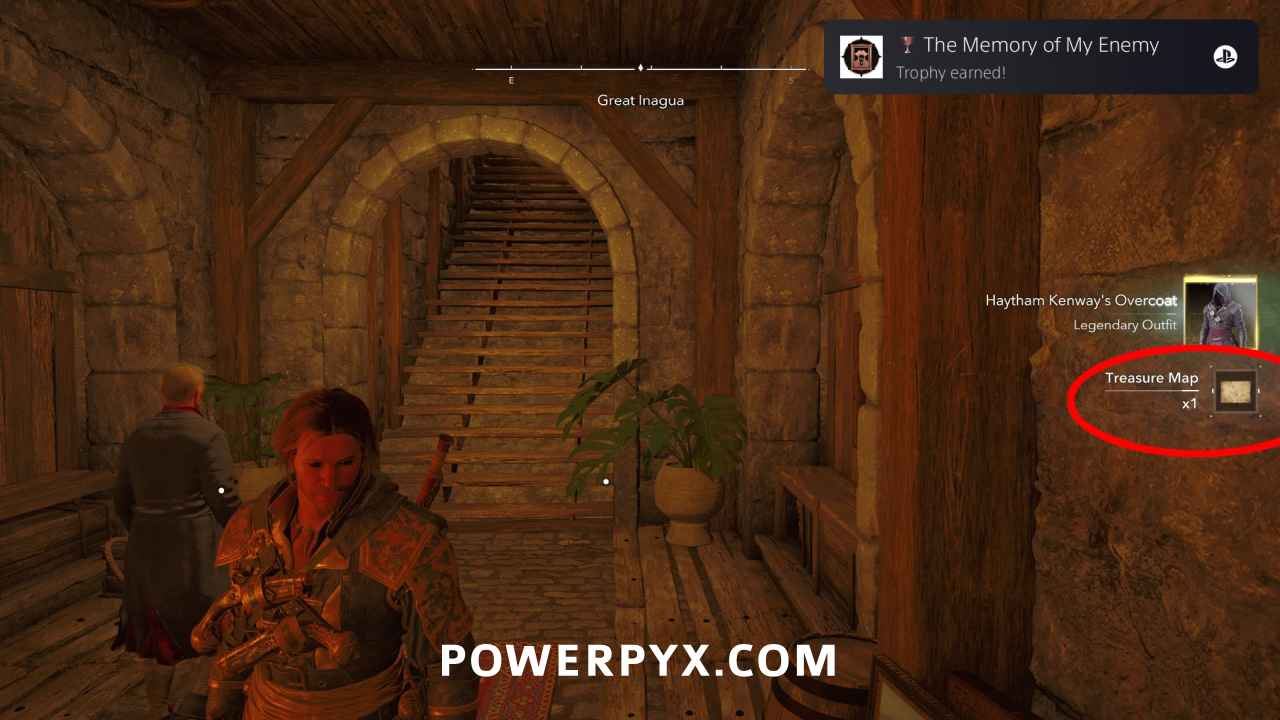
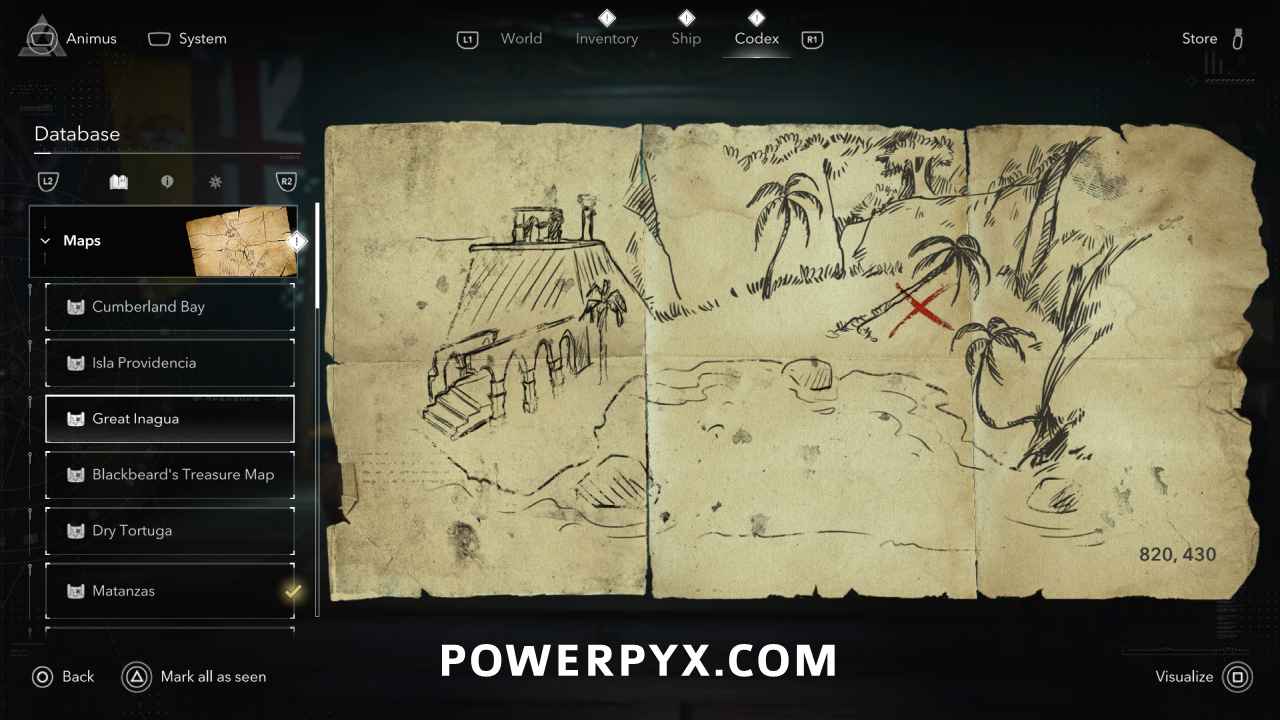
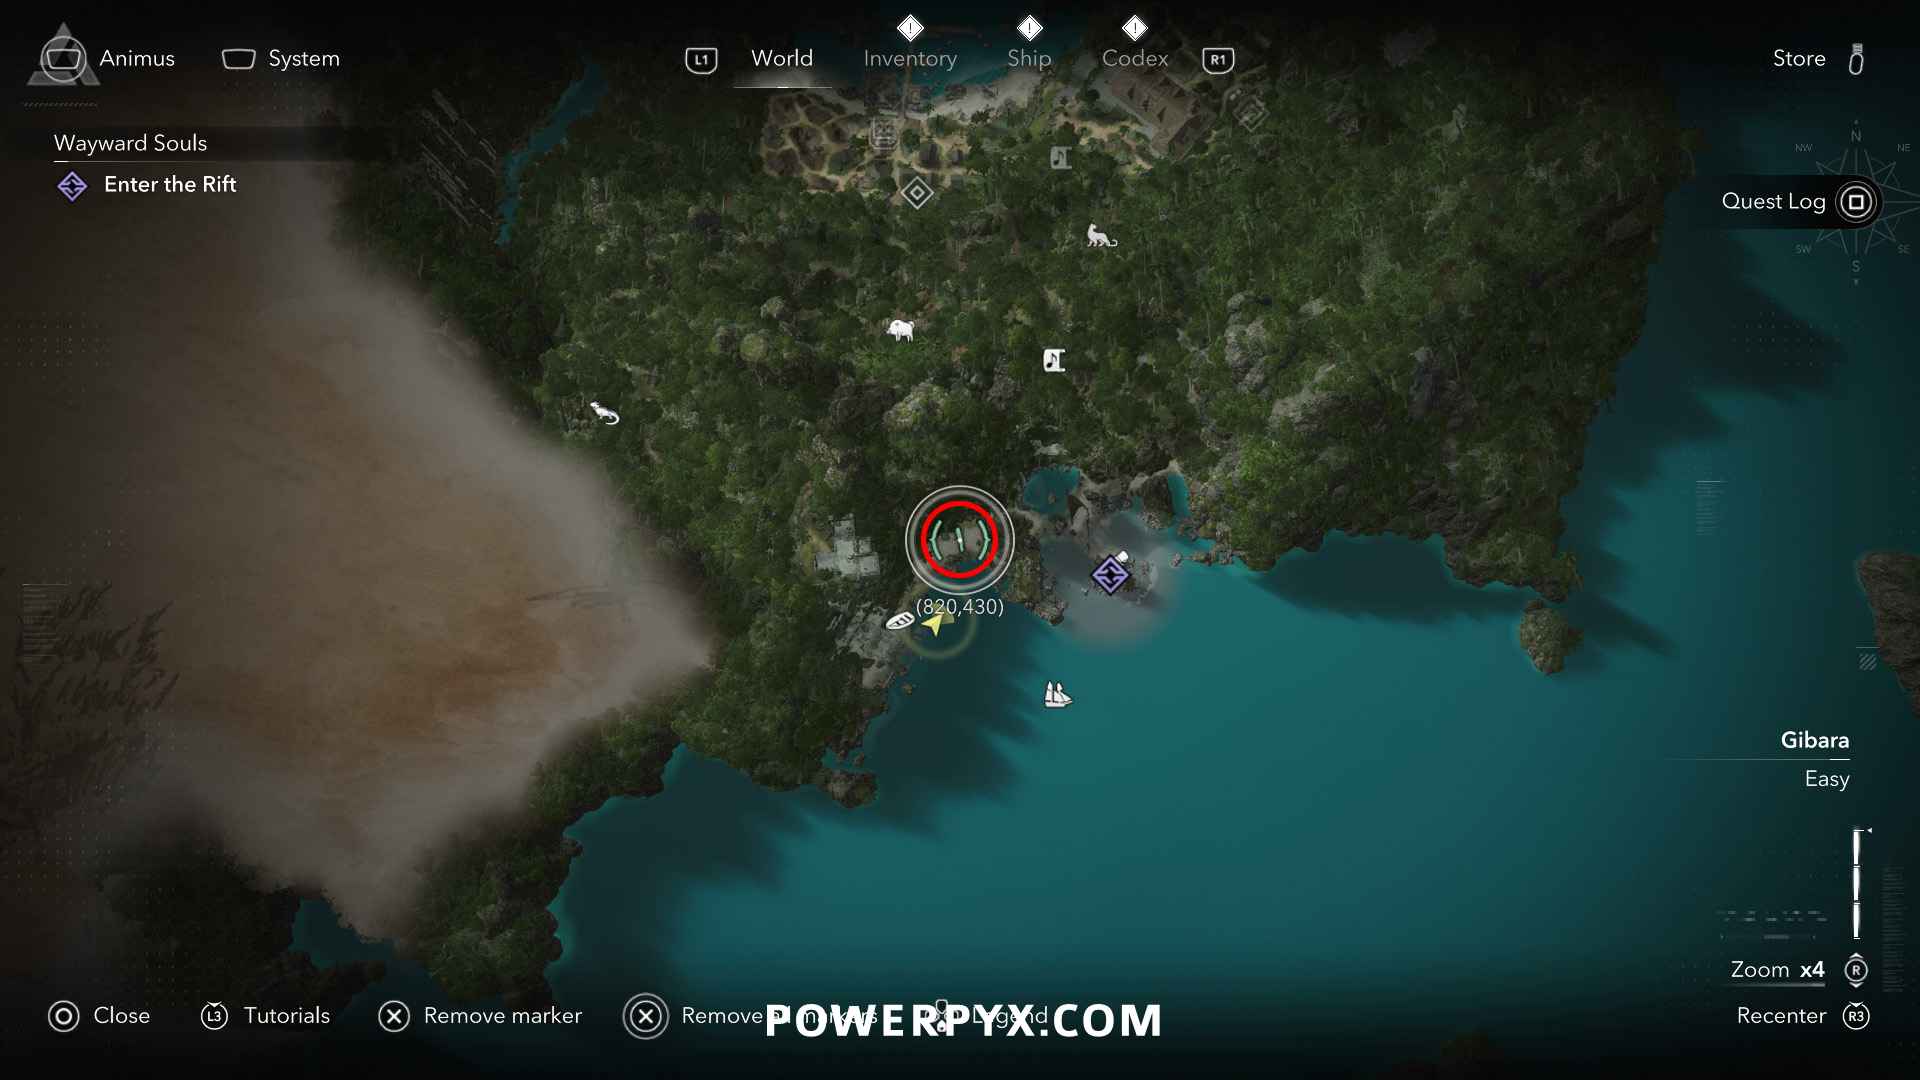
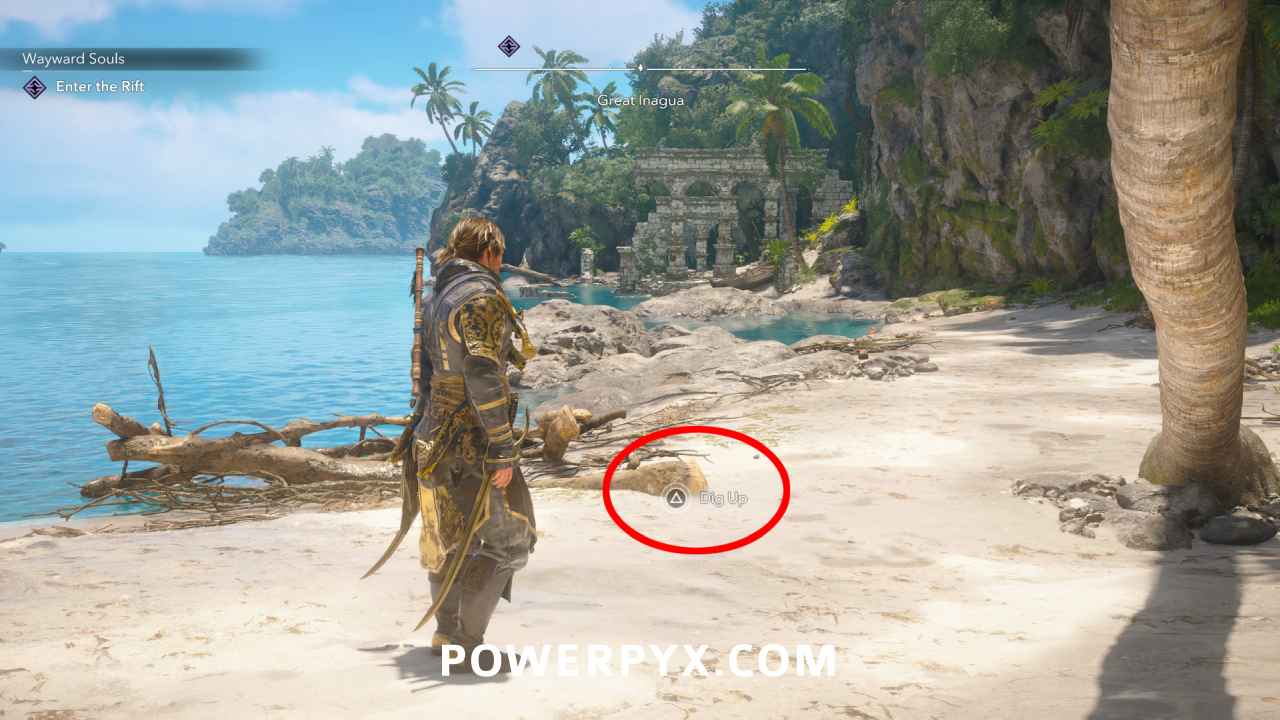
Solution: Great Inagua (820, 430) – on the southern shore of Great Inagua, below a palm tree at the beach. You can sail there with the ship or go there on foot (can use autonavigation by holding  to find the path).
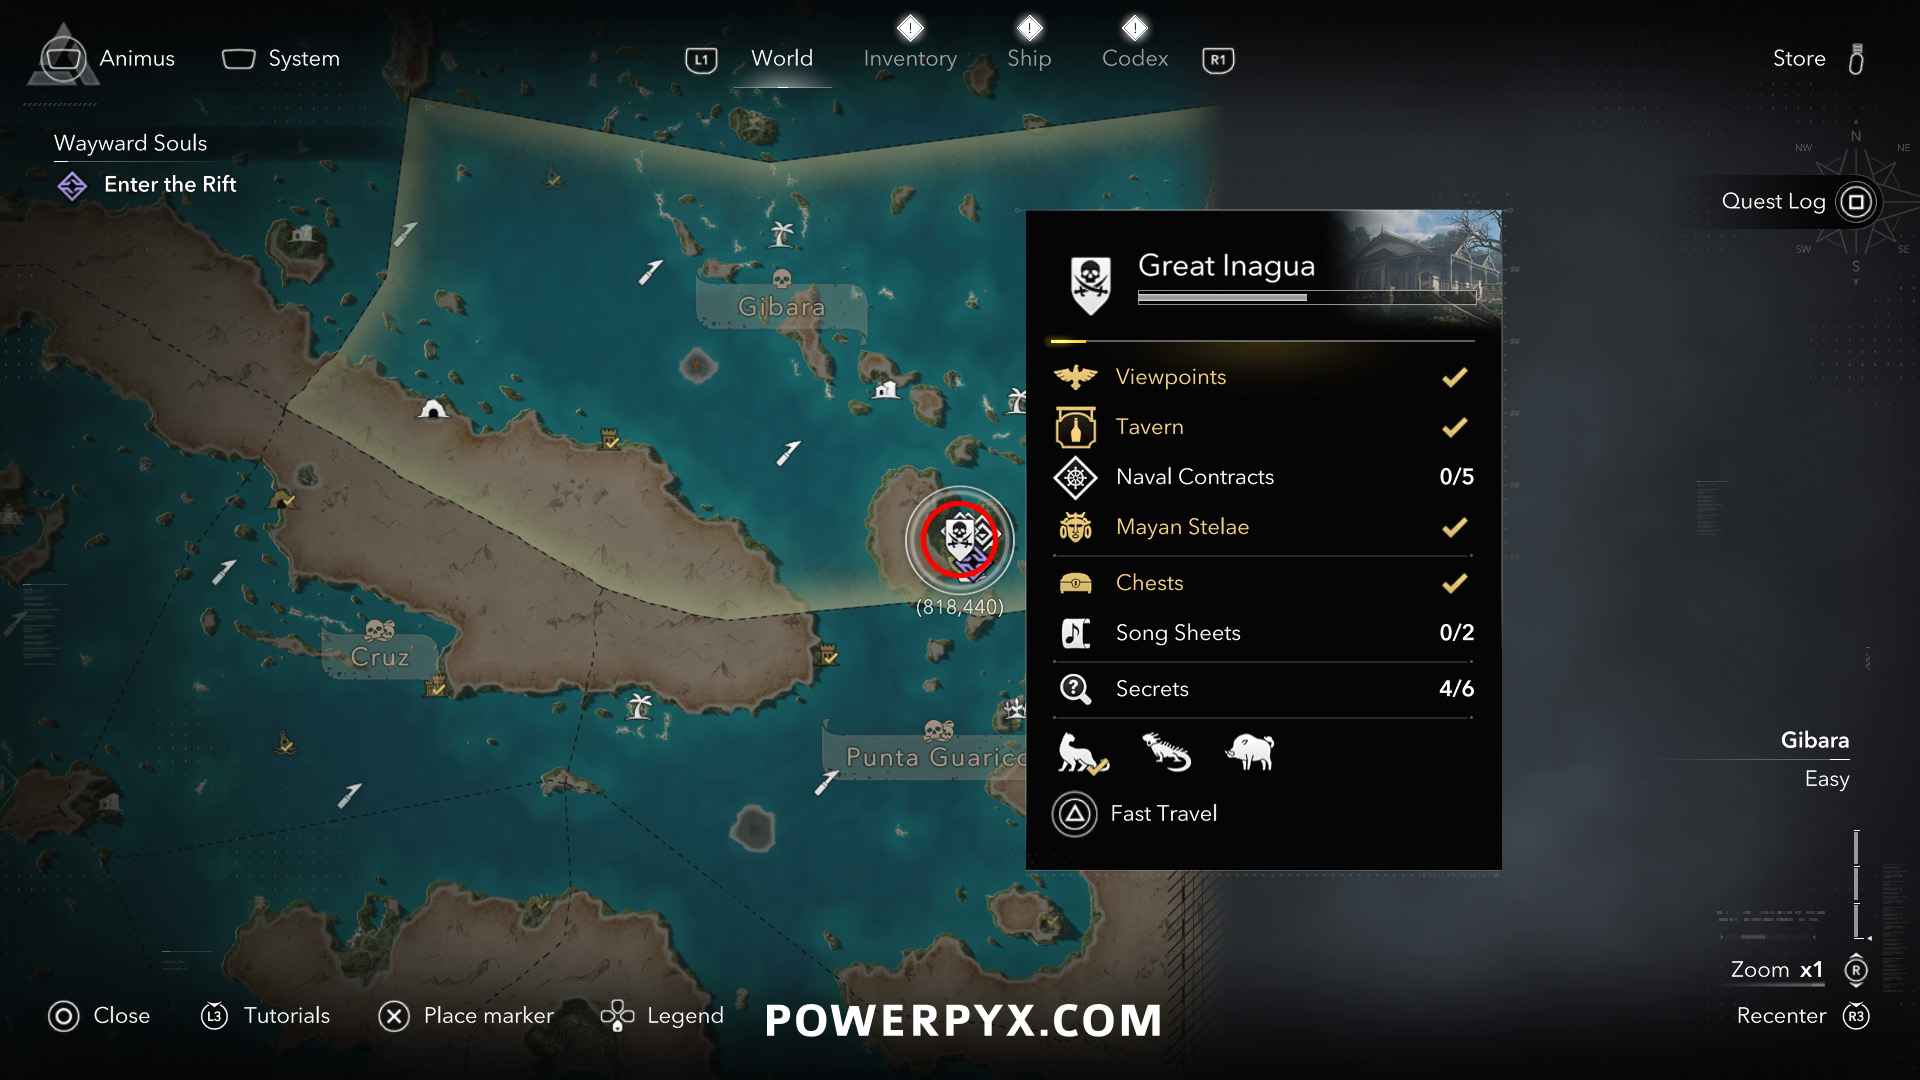
Reward: The Fortune (Legendary Cutlass)
#11 – Treasure Map from Salt Lagoon (New Bone)
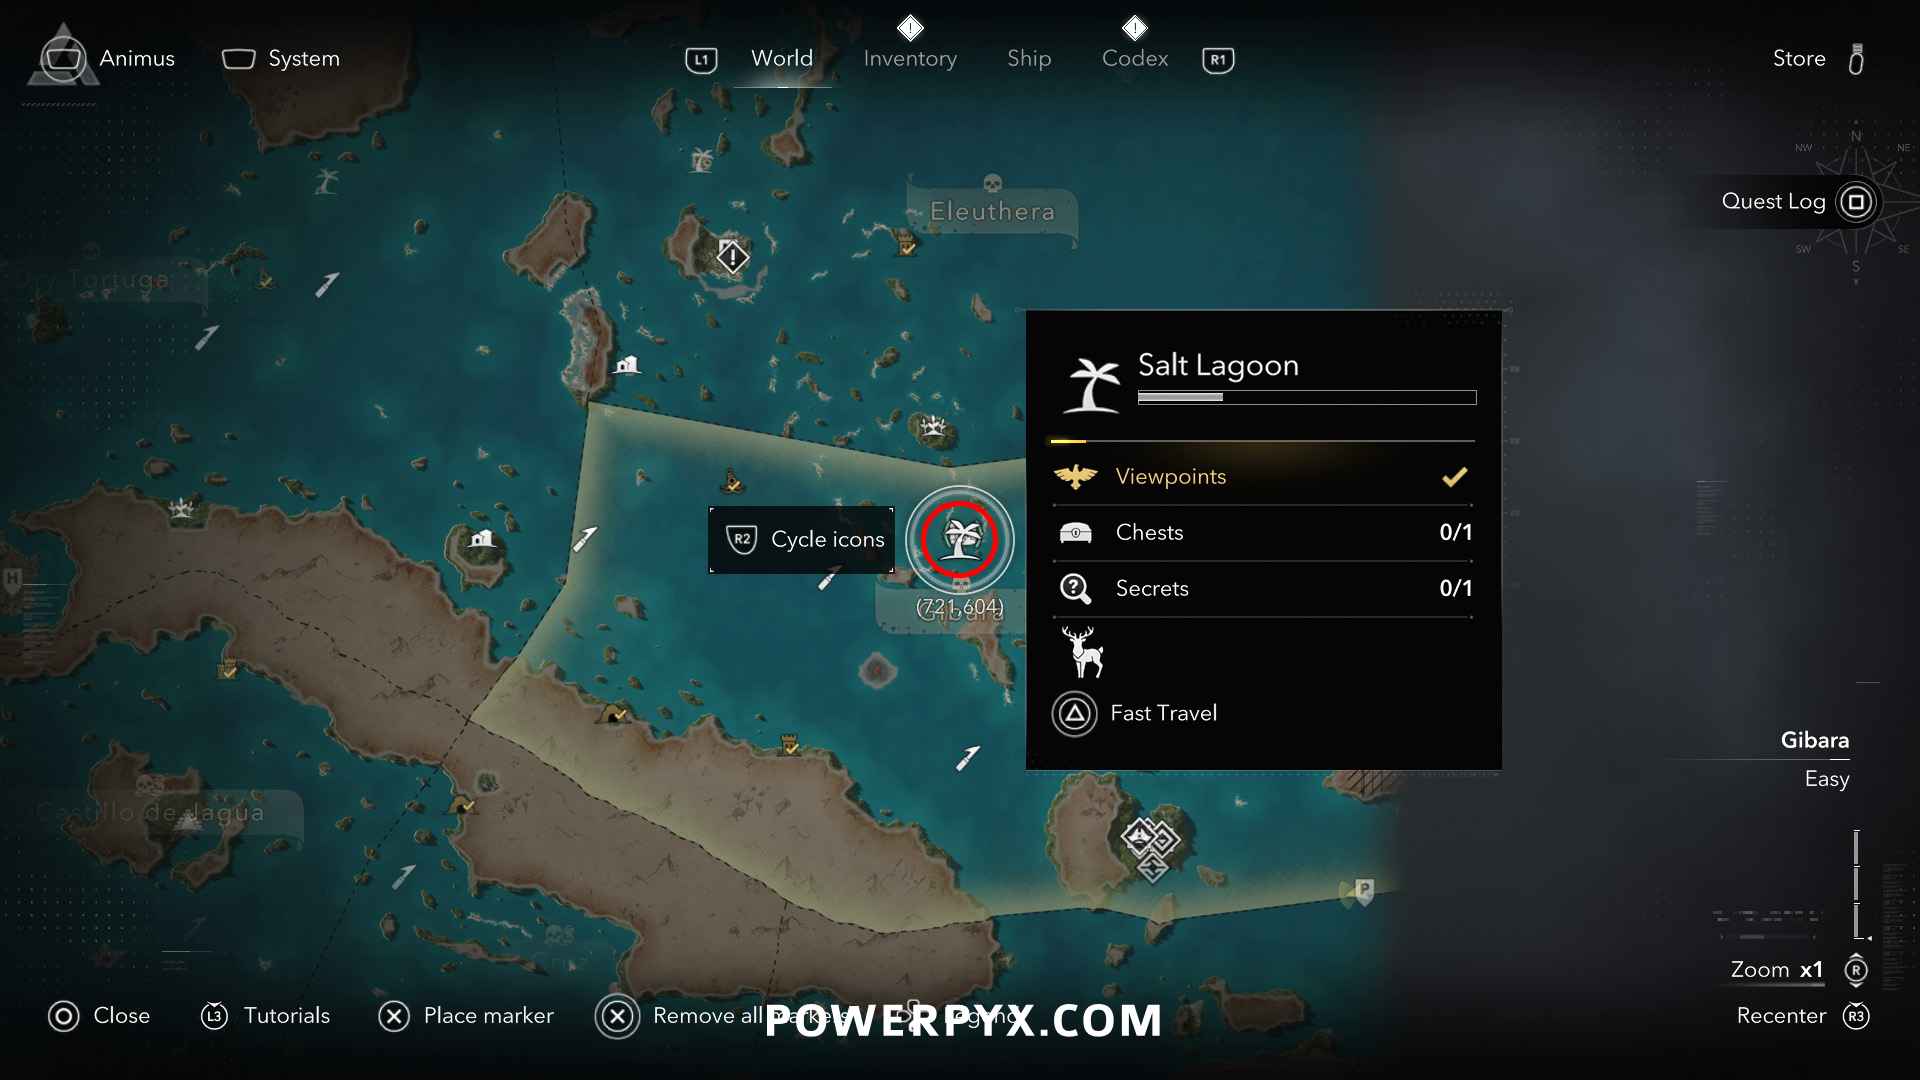
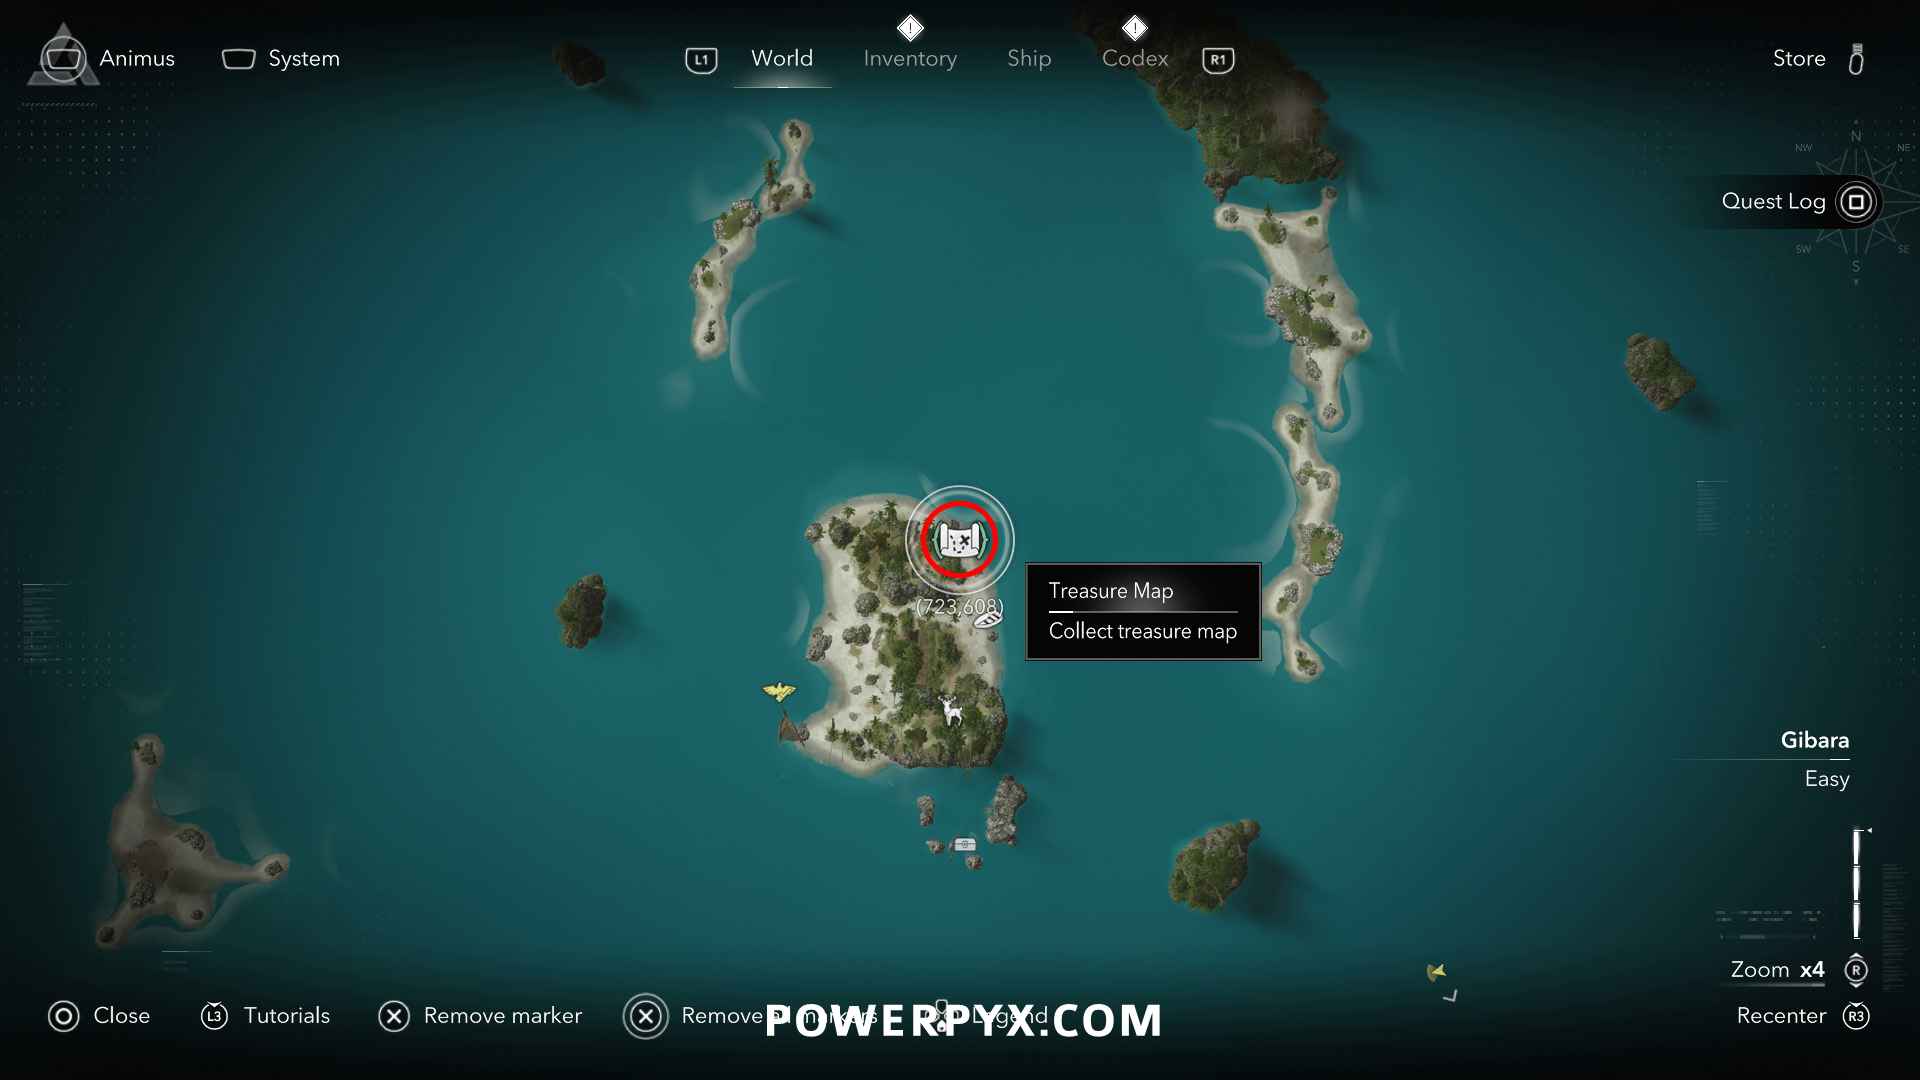
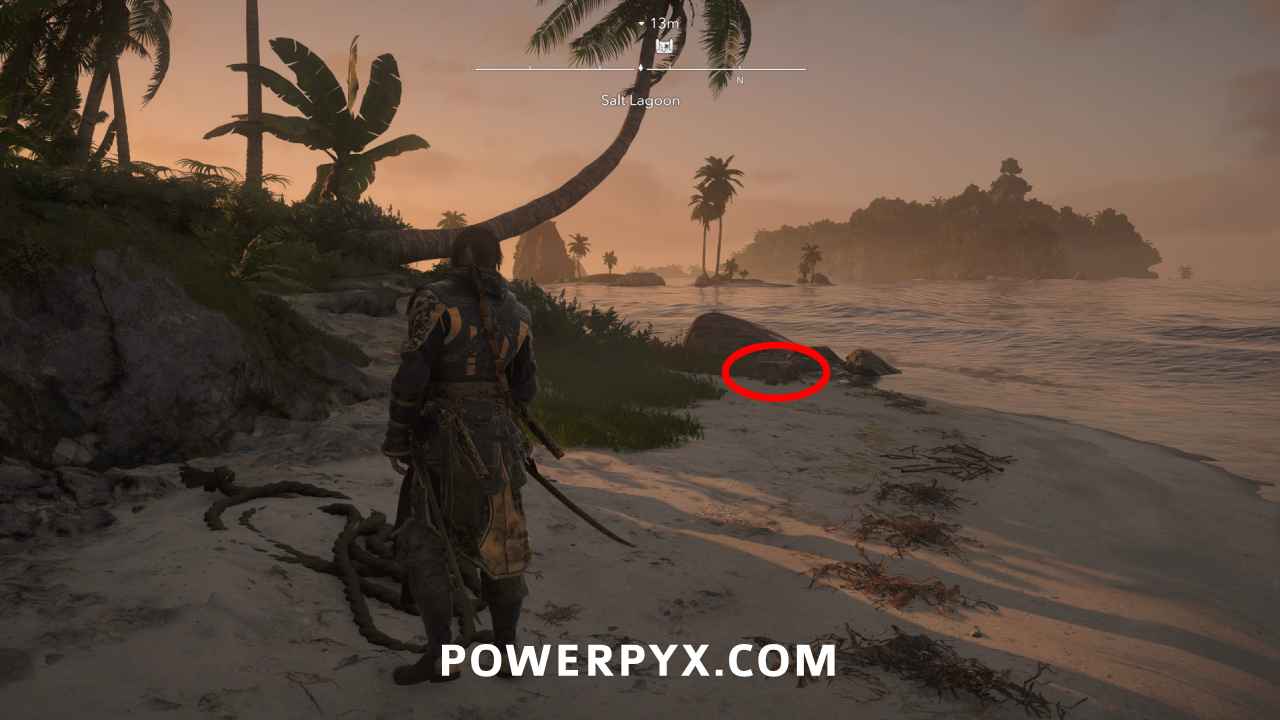
Location: Salt Lagoon (723, 608) – at the northeast shoreline from a skeleton
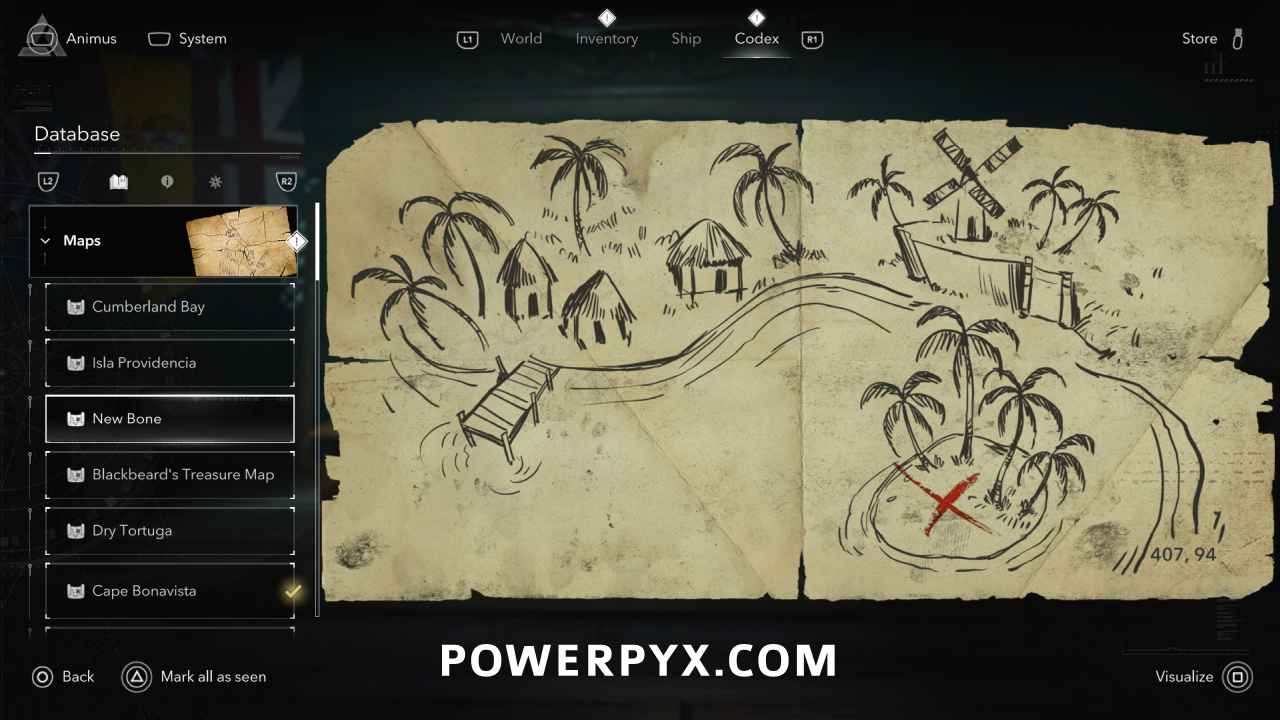
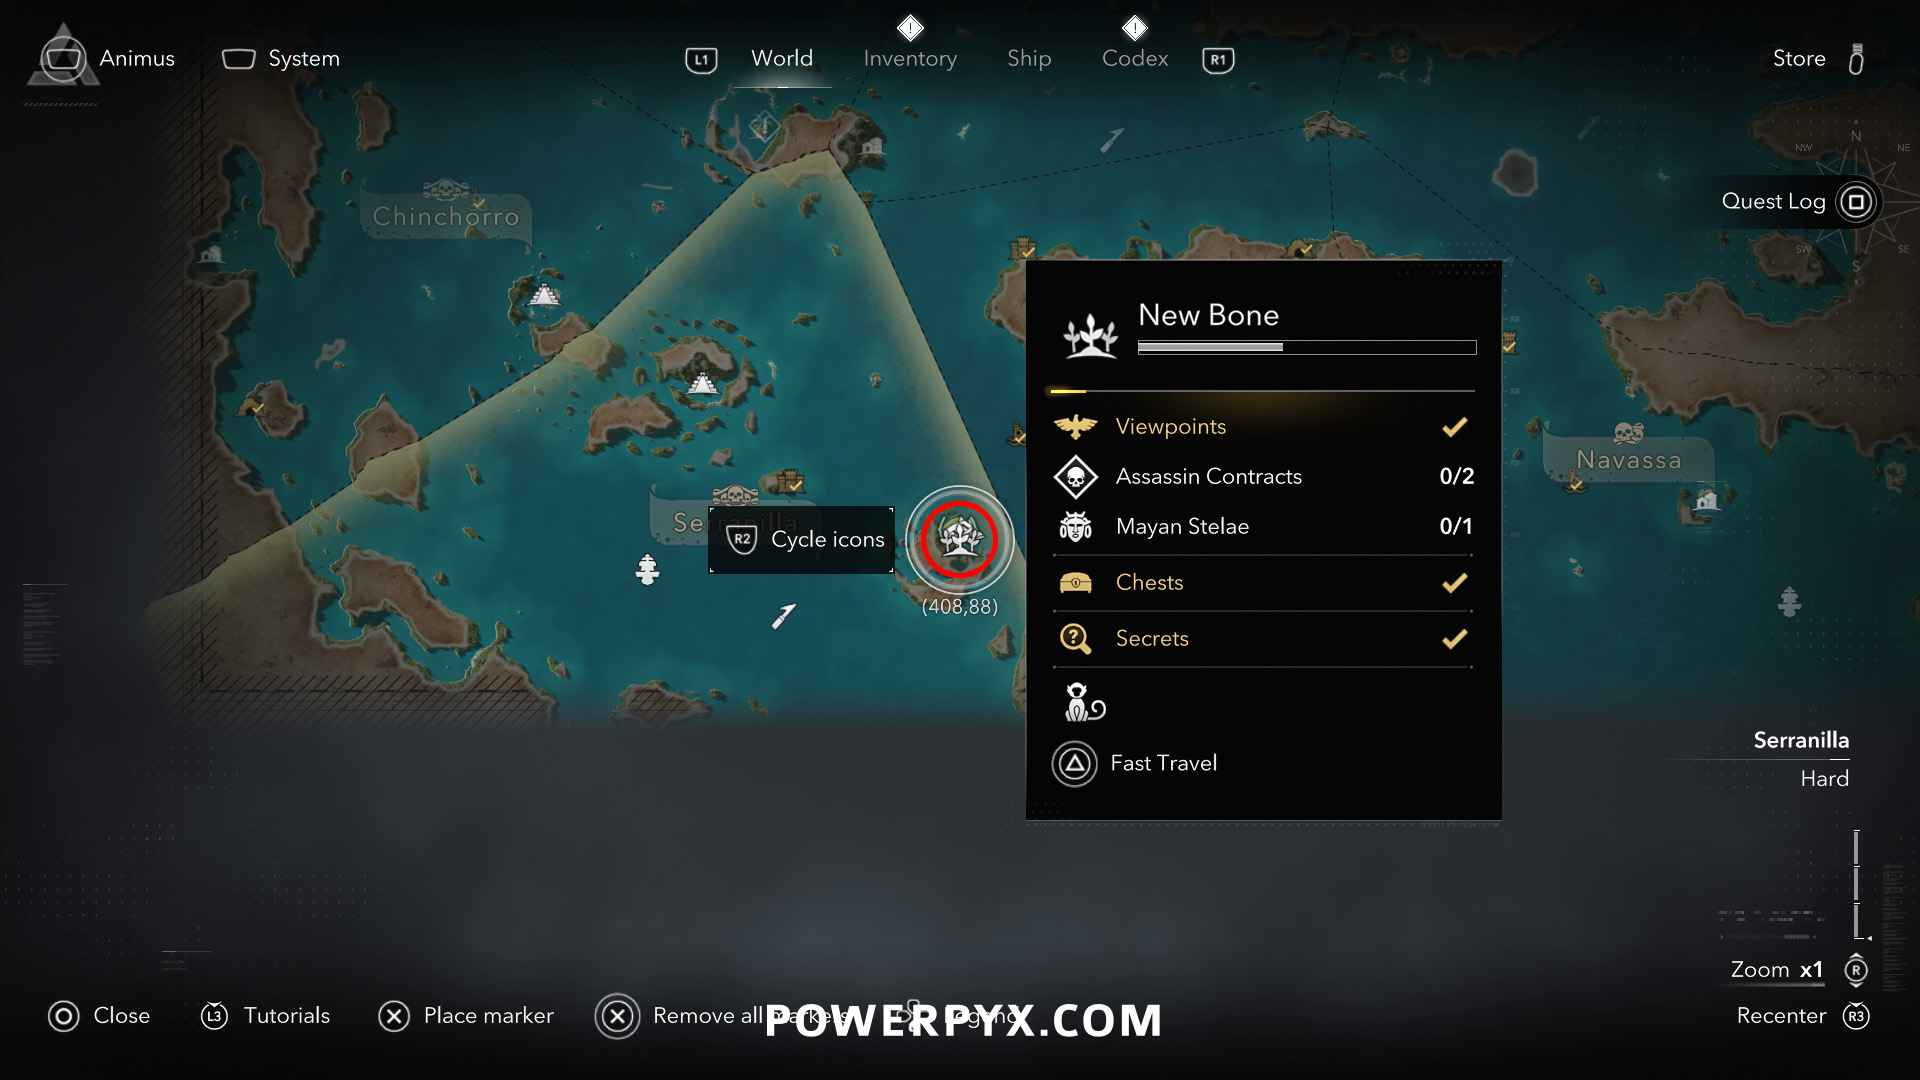
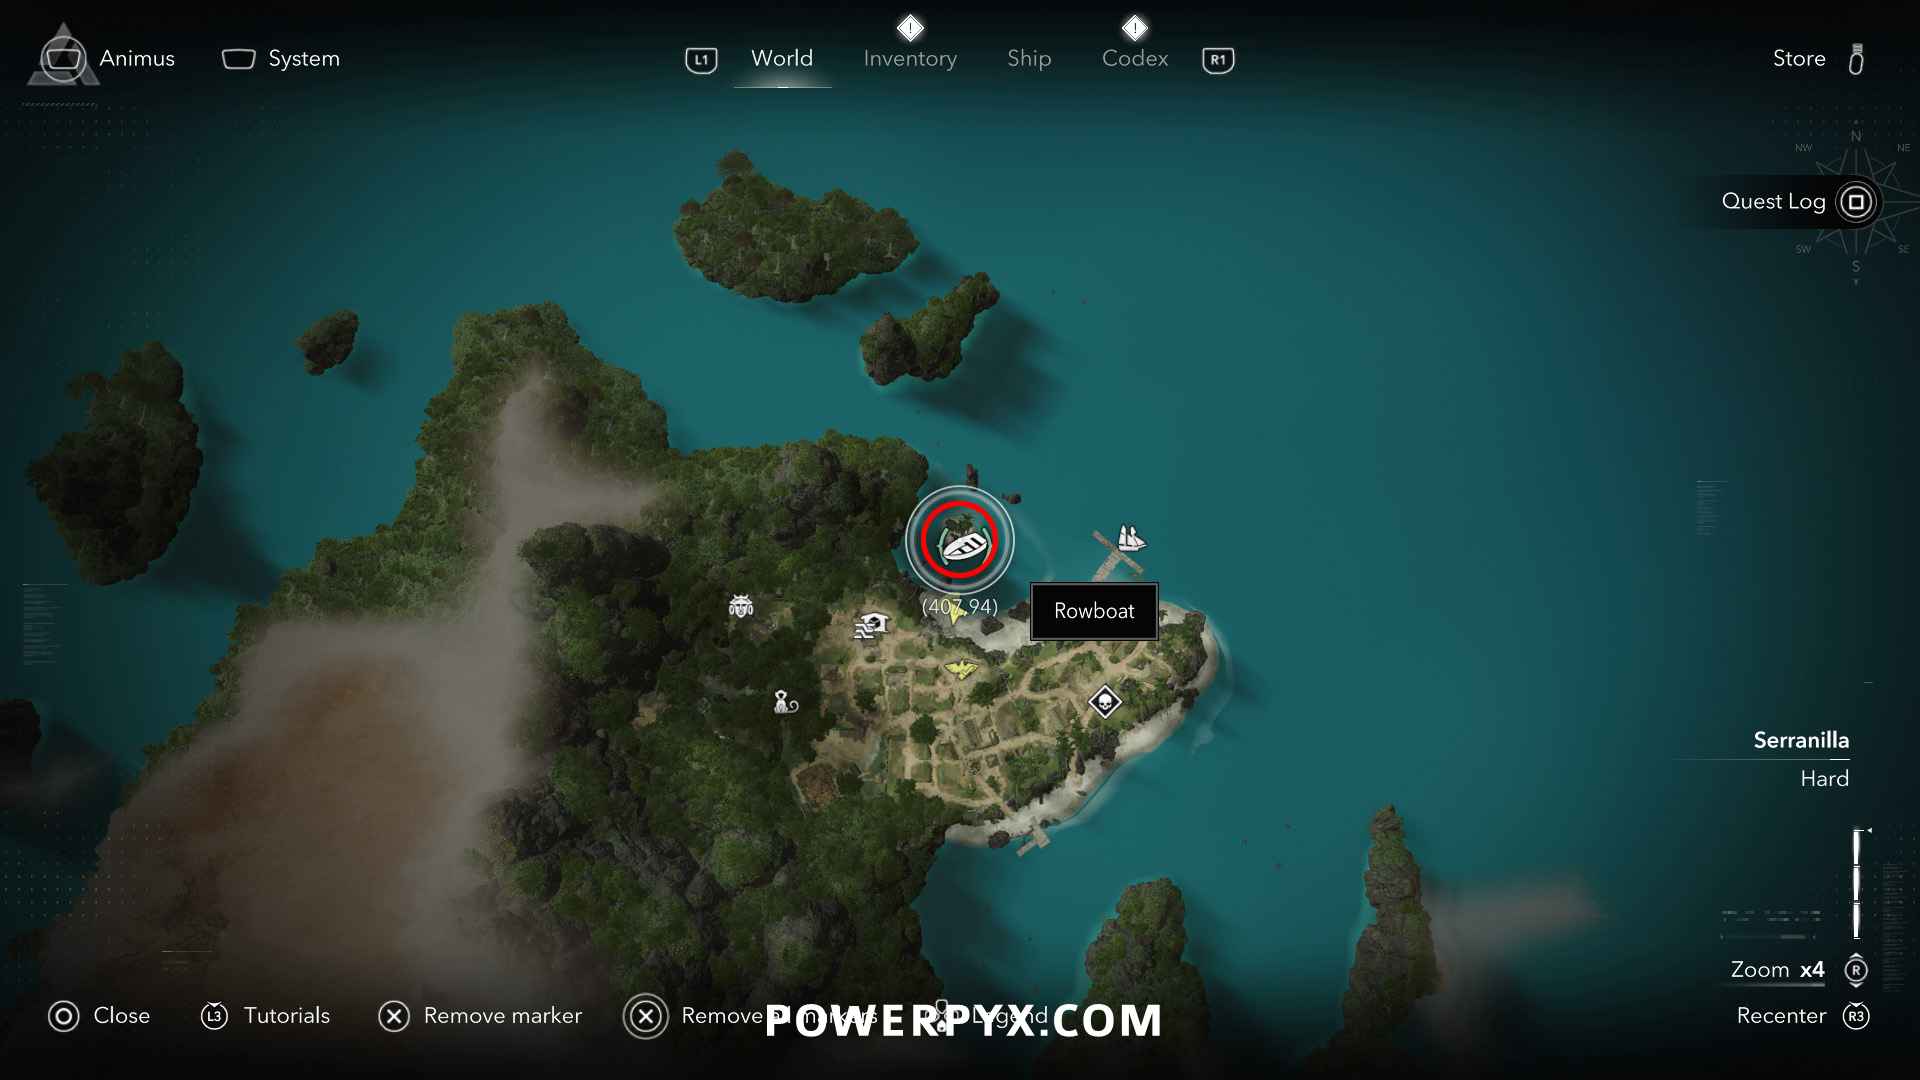
Solution: New Bone (407, 94) – on a small island in the north of New Bone
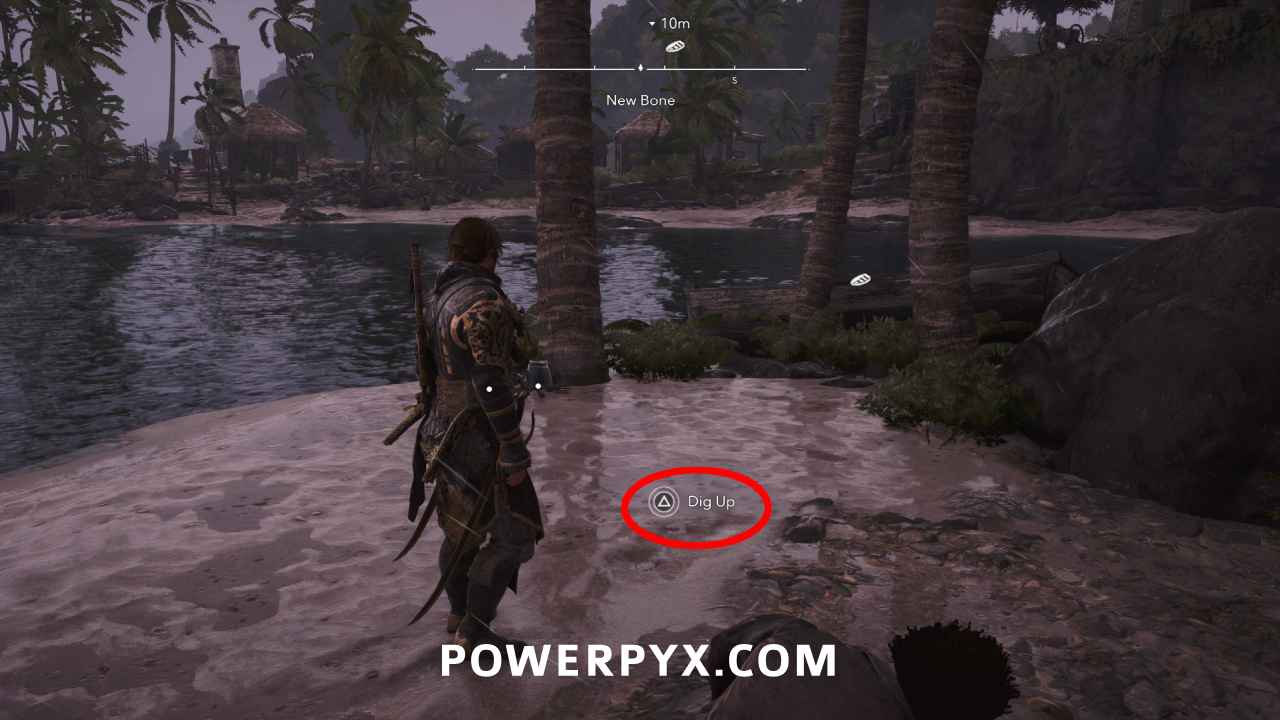
Reward: Art Collection Piece: Maize Deity (needed for Dilettante), 2500 Reales
Punta Guarico Region
#12 – Treasure Map from Tortuga (Matanzas)
Location: Tortuga (851, 352) – at the eastern shoreline of Tortuga, from a skeleton at the beach.
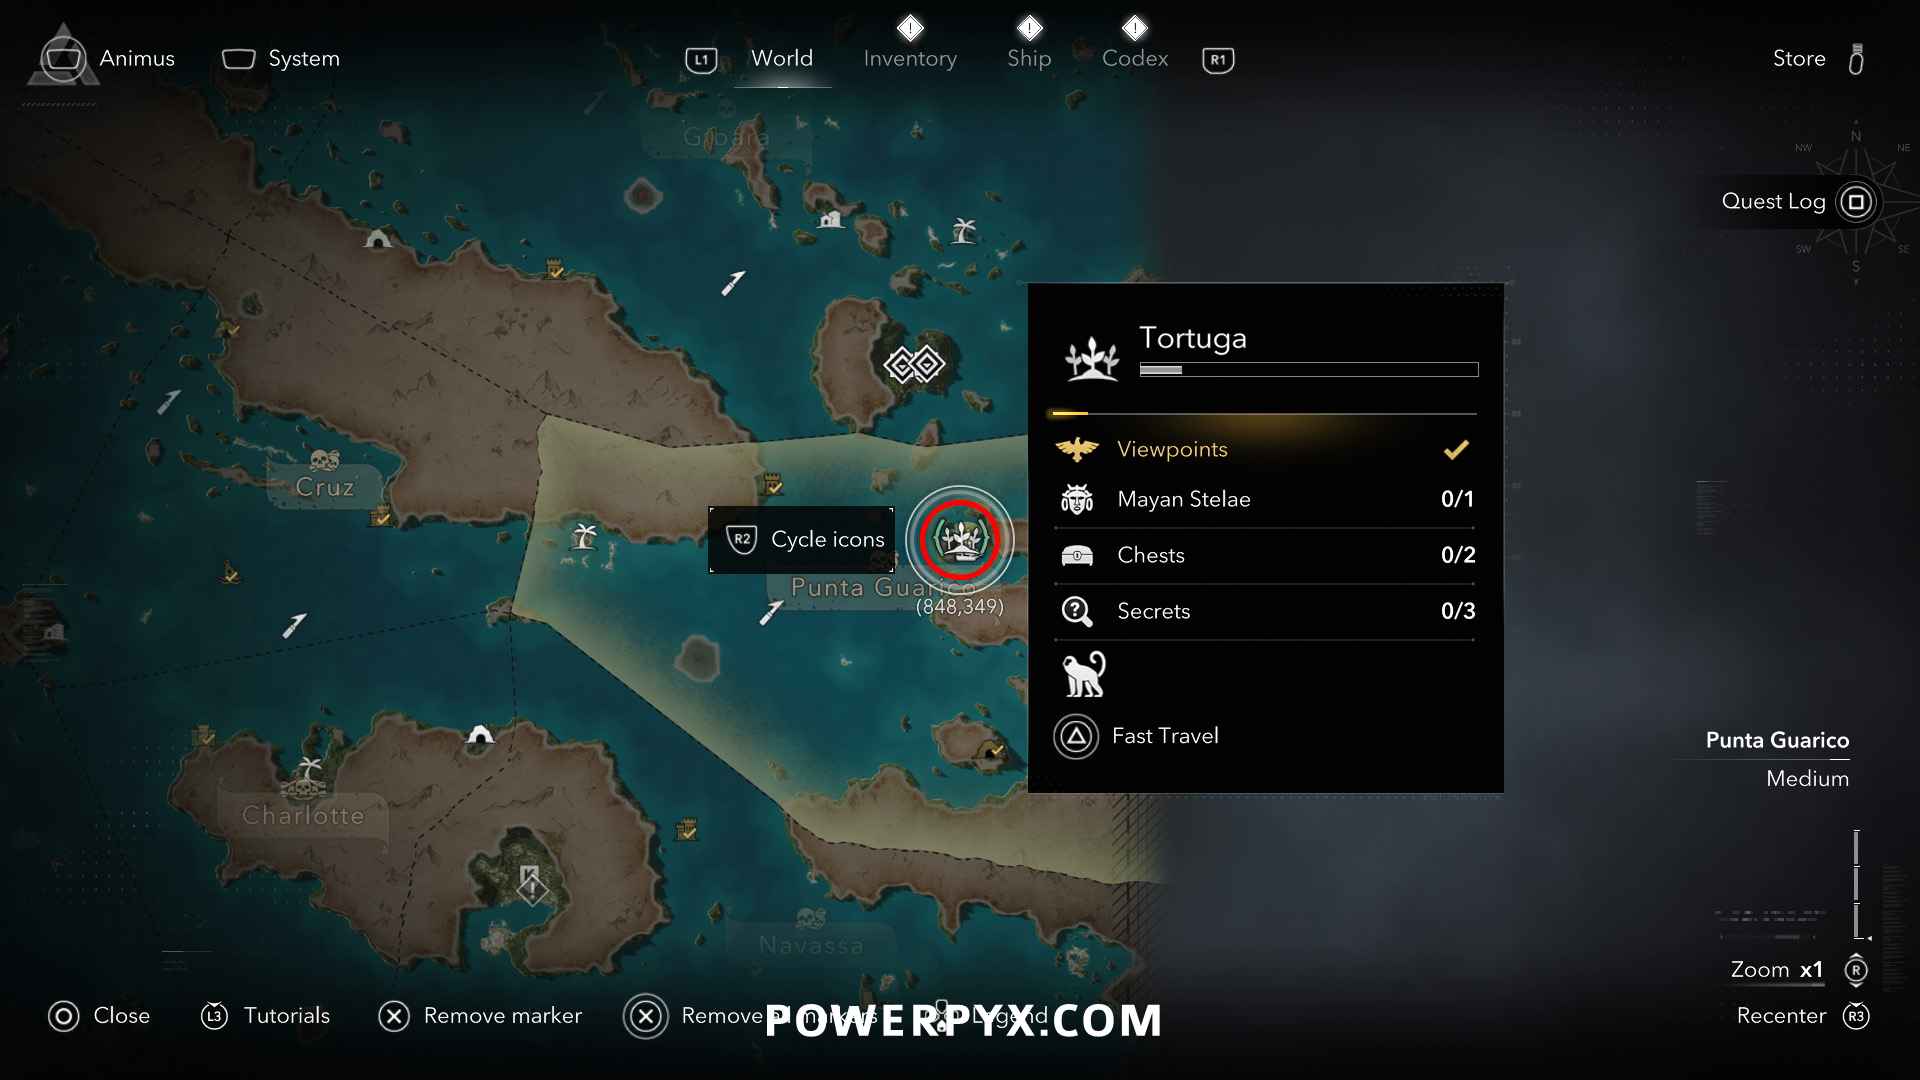
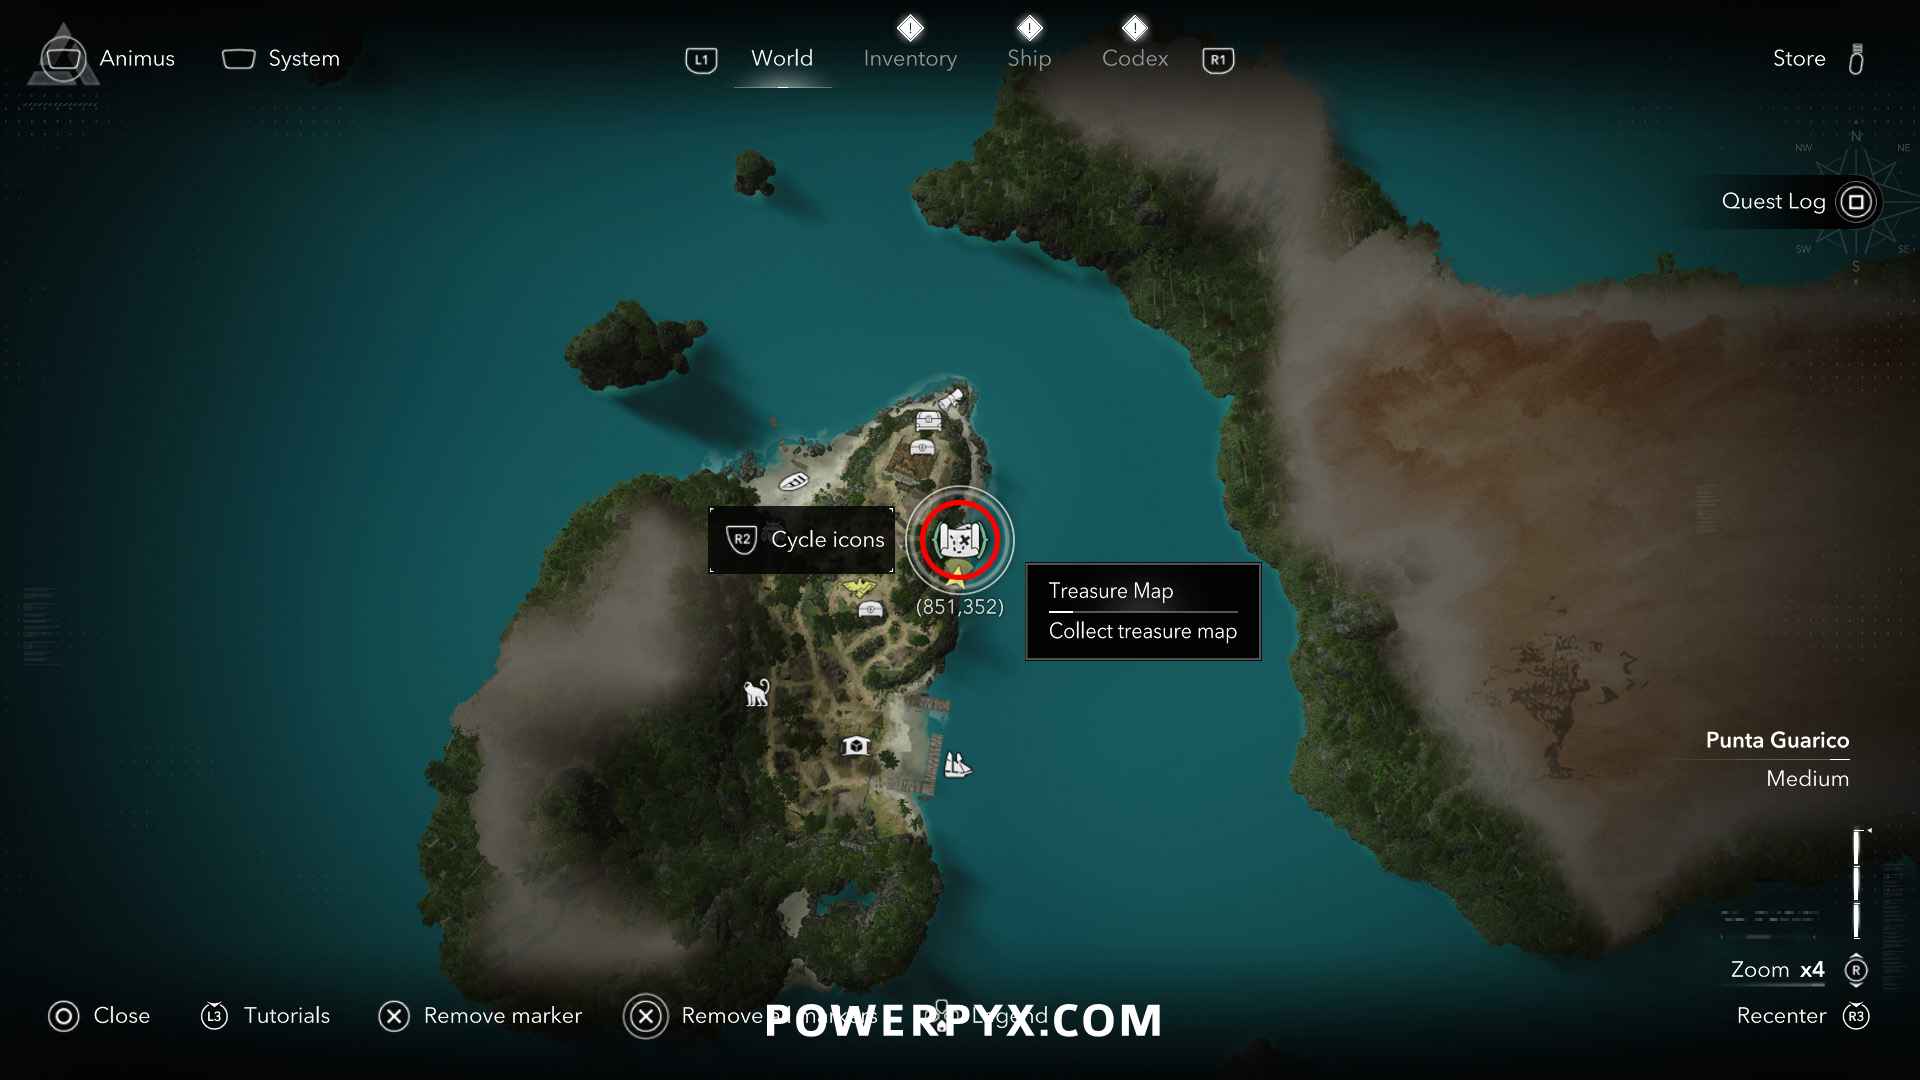
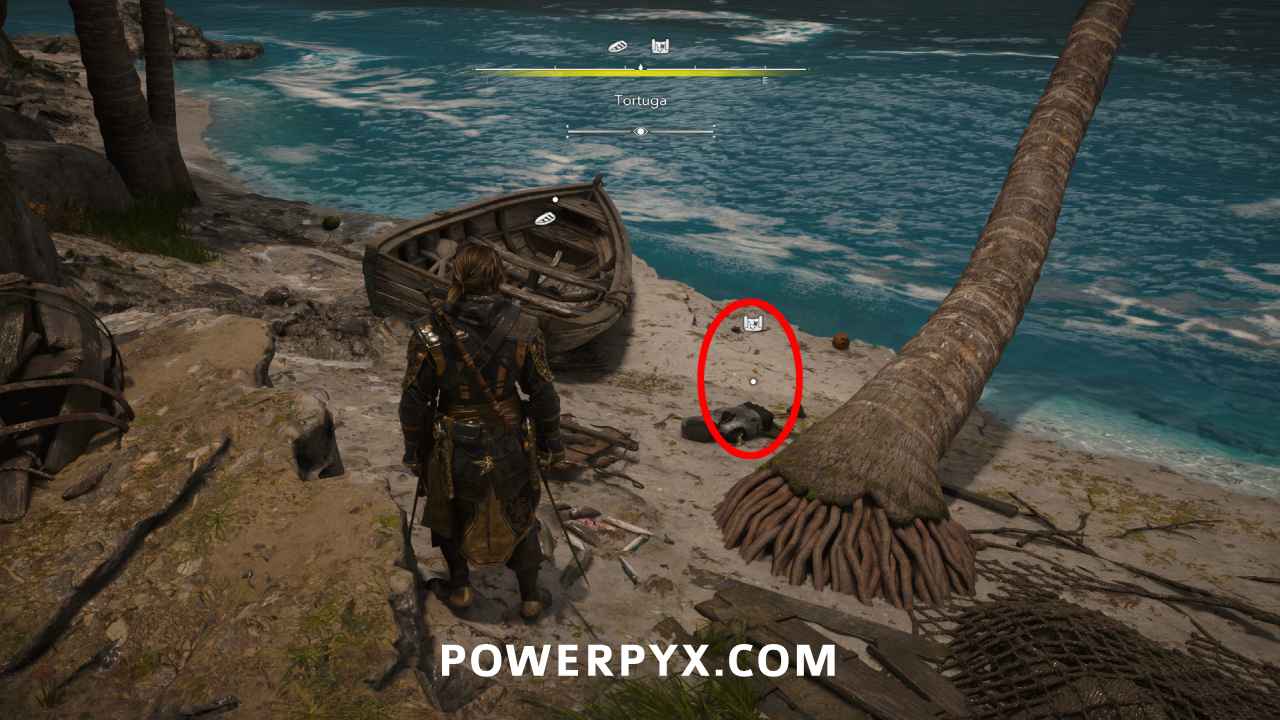
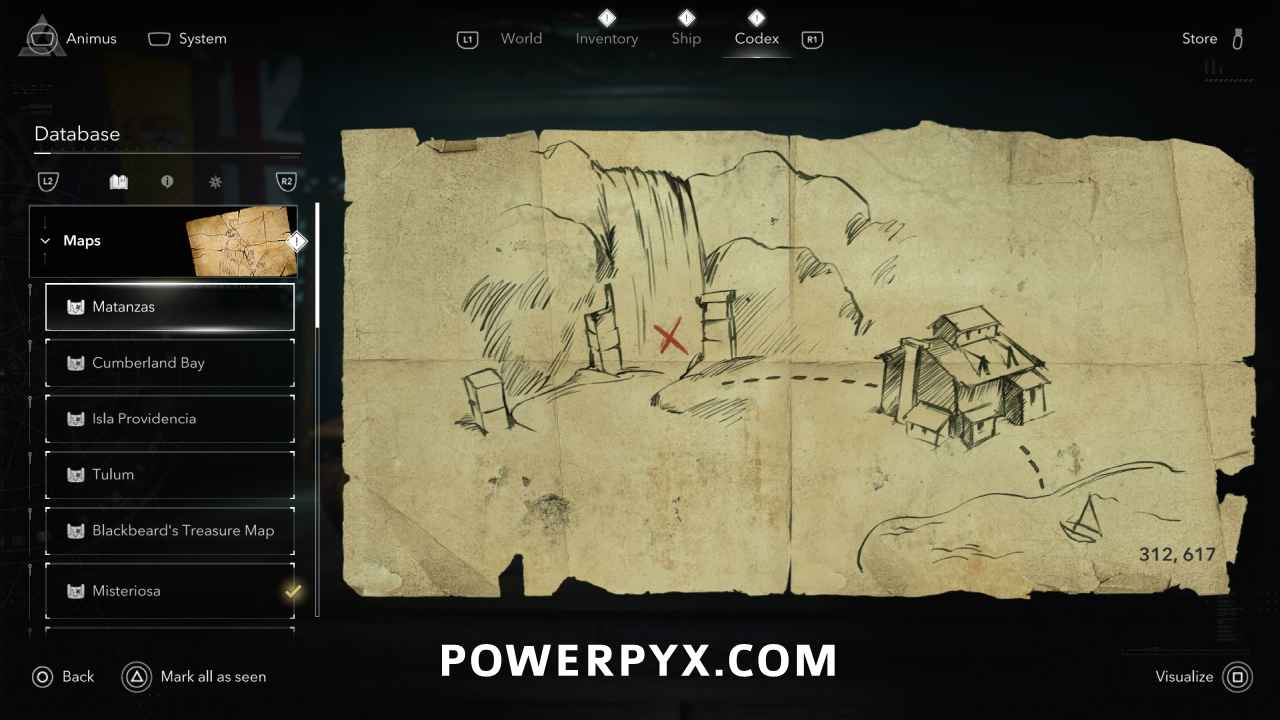
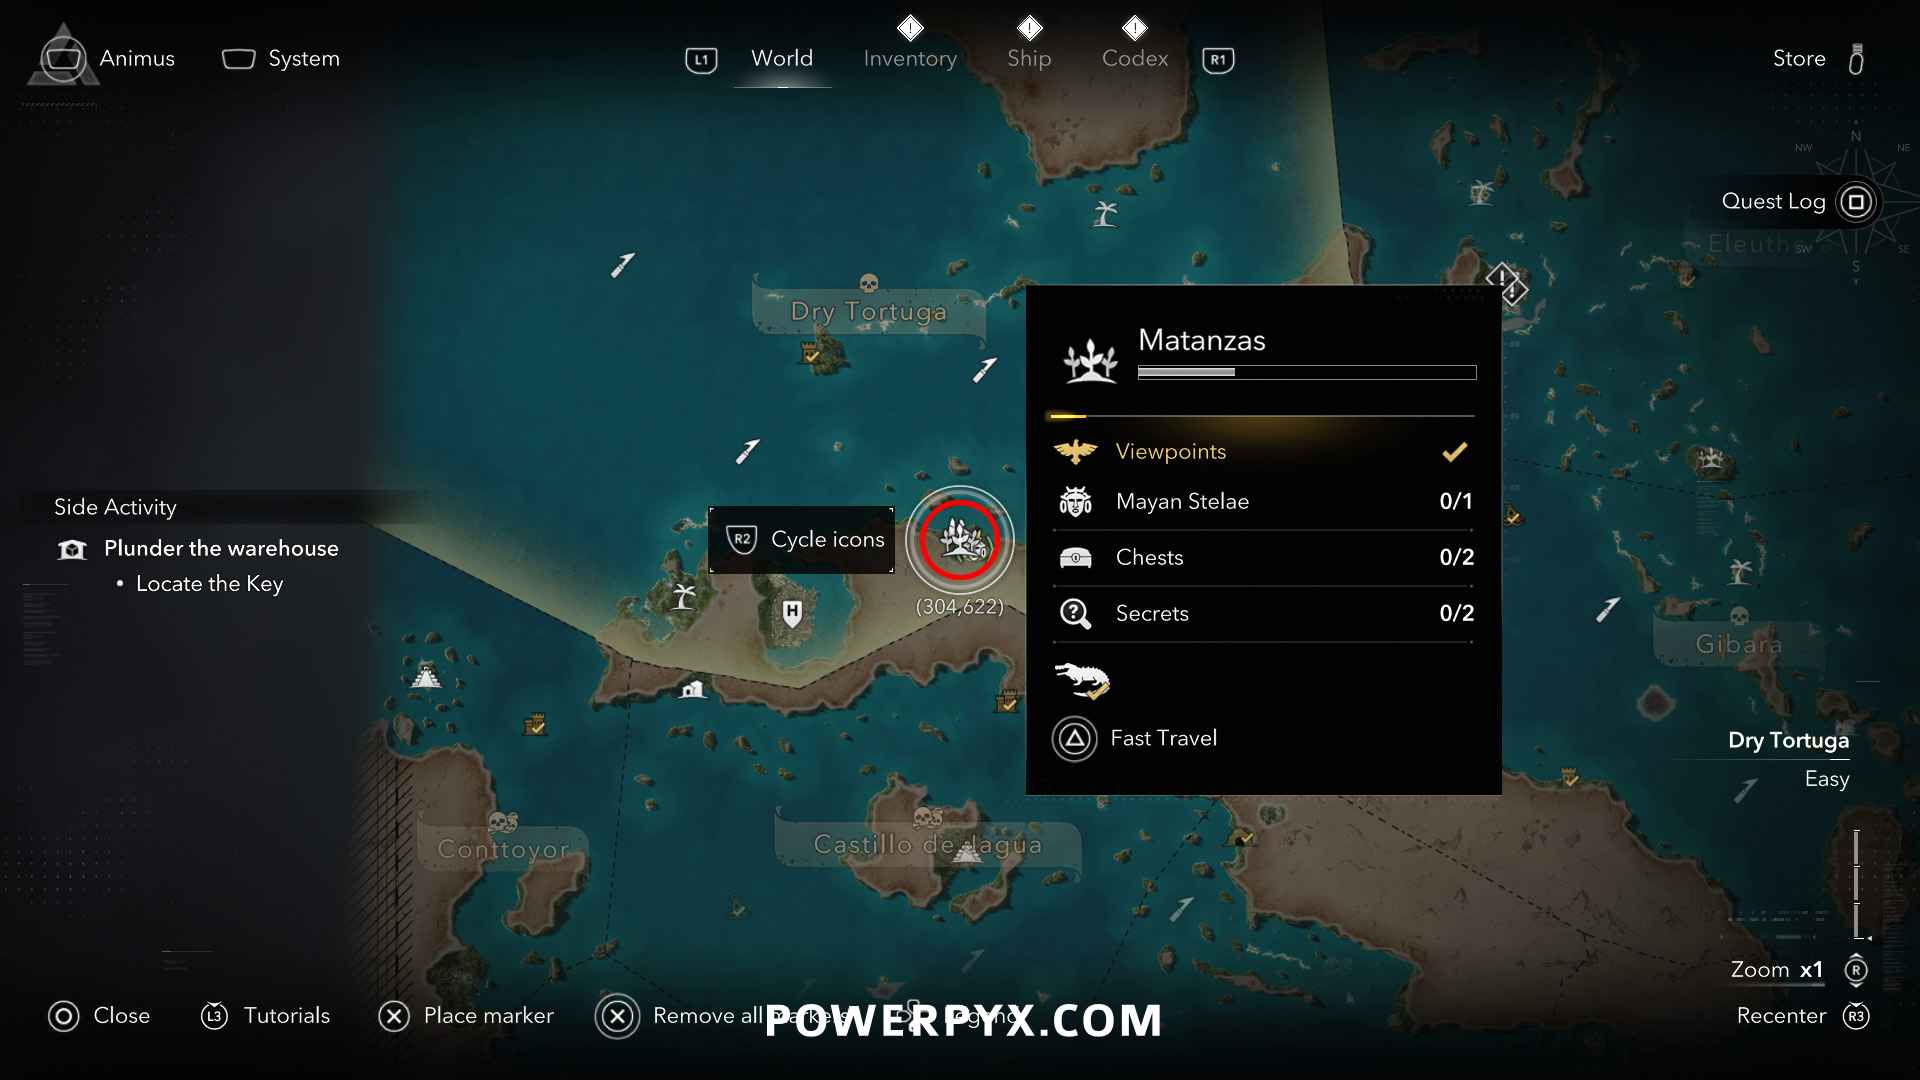
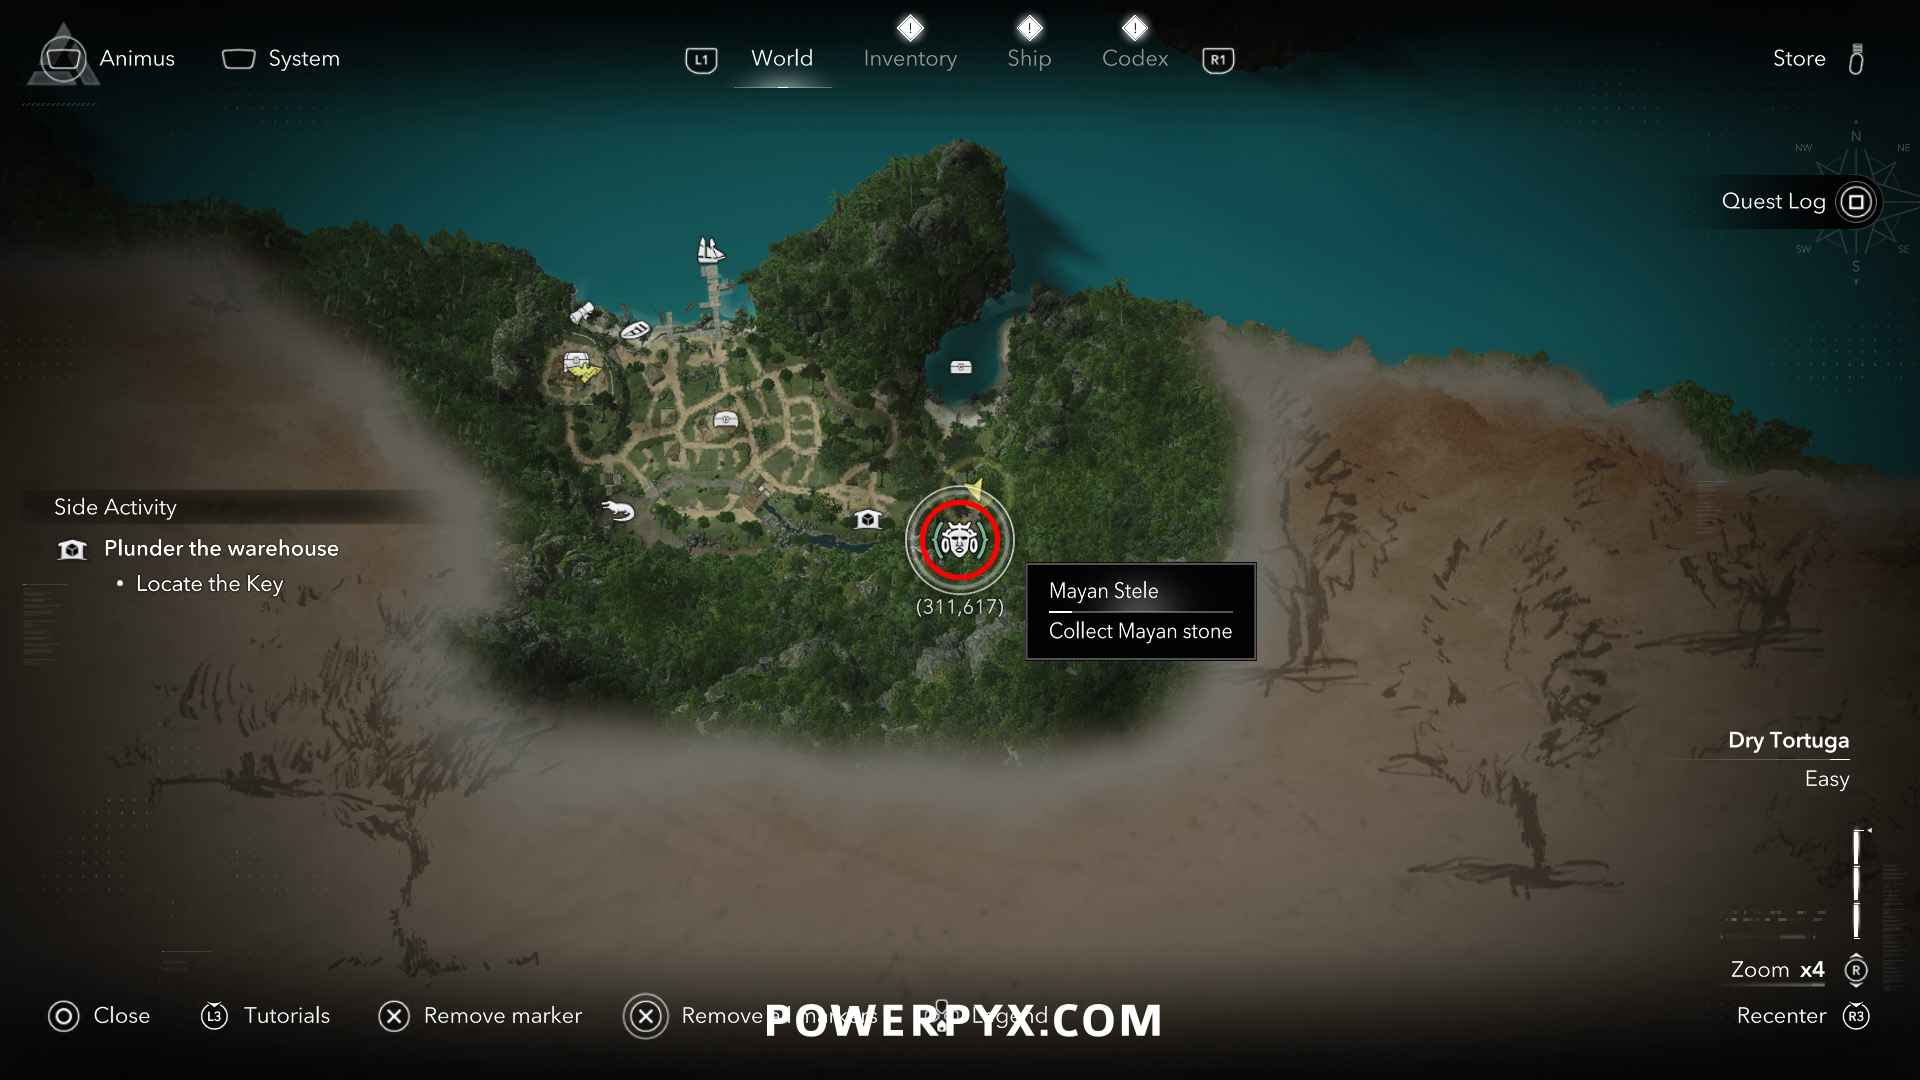
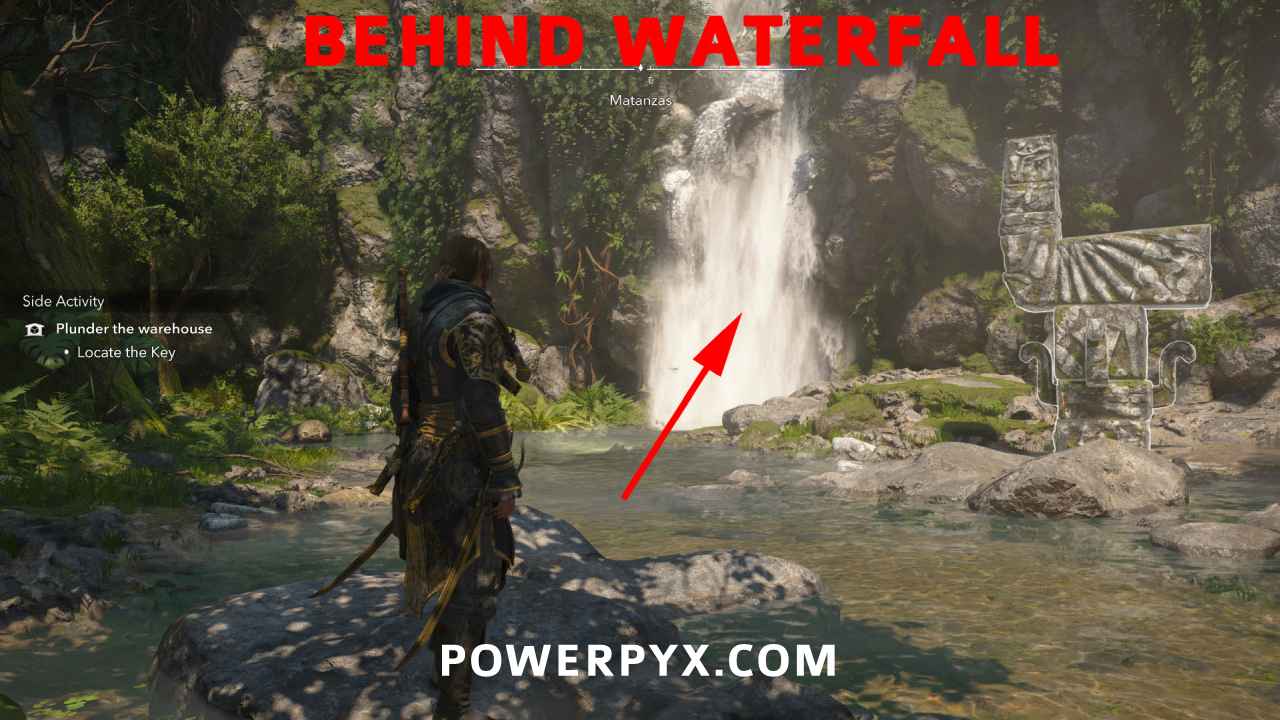
Solution: Matanzas (312, 617) – in the south-east corner of Matanzas, to the left of the Mayan Stelae behind the waterfall.
Reward: Mortar Storage Ultimate Plan, 3000 Reales
#13 – Treasure Map from Petite Caverne (Tulum)
Location: Petite Caverne (862, 237) – from a skeleton inside Petite Caverne
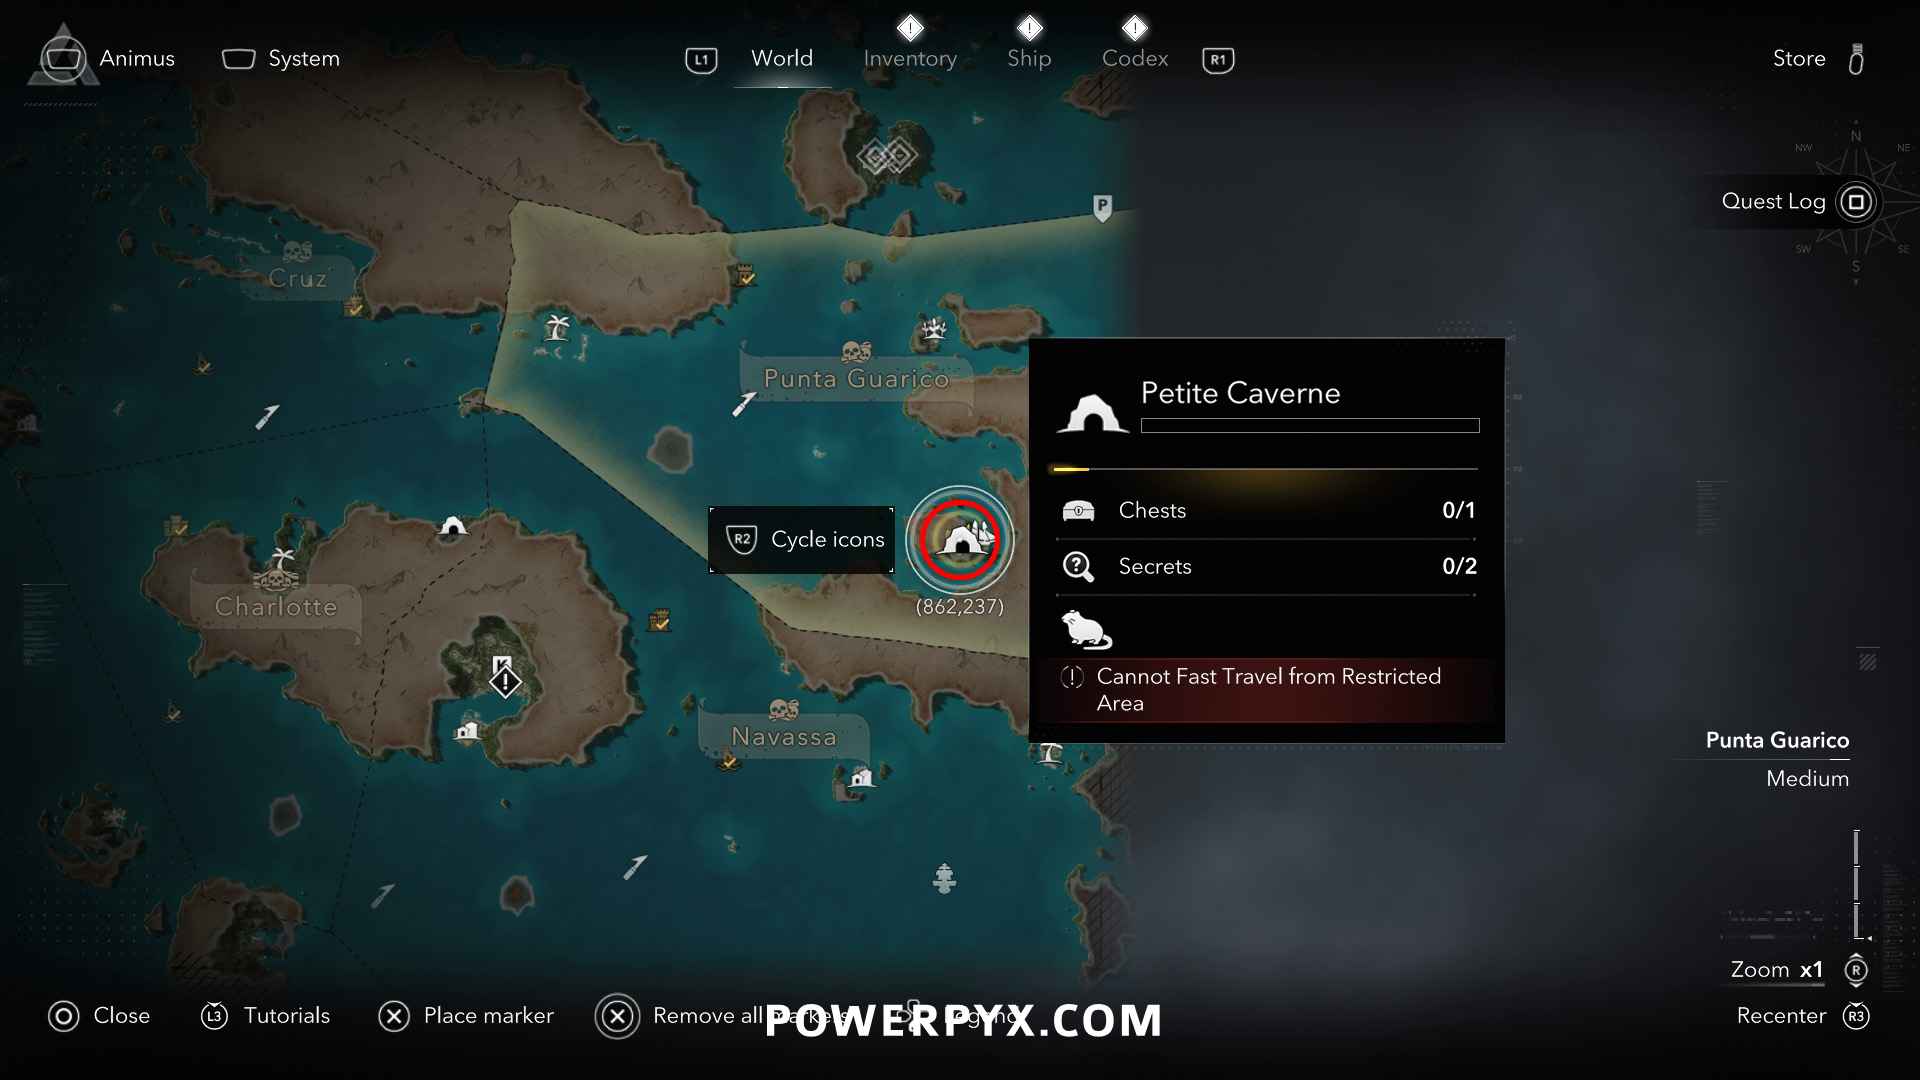
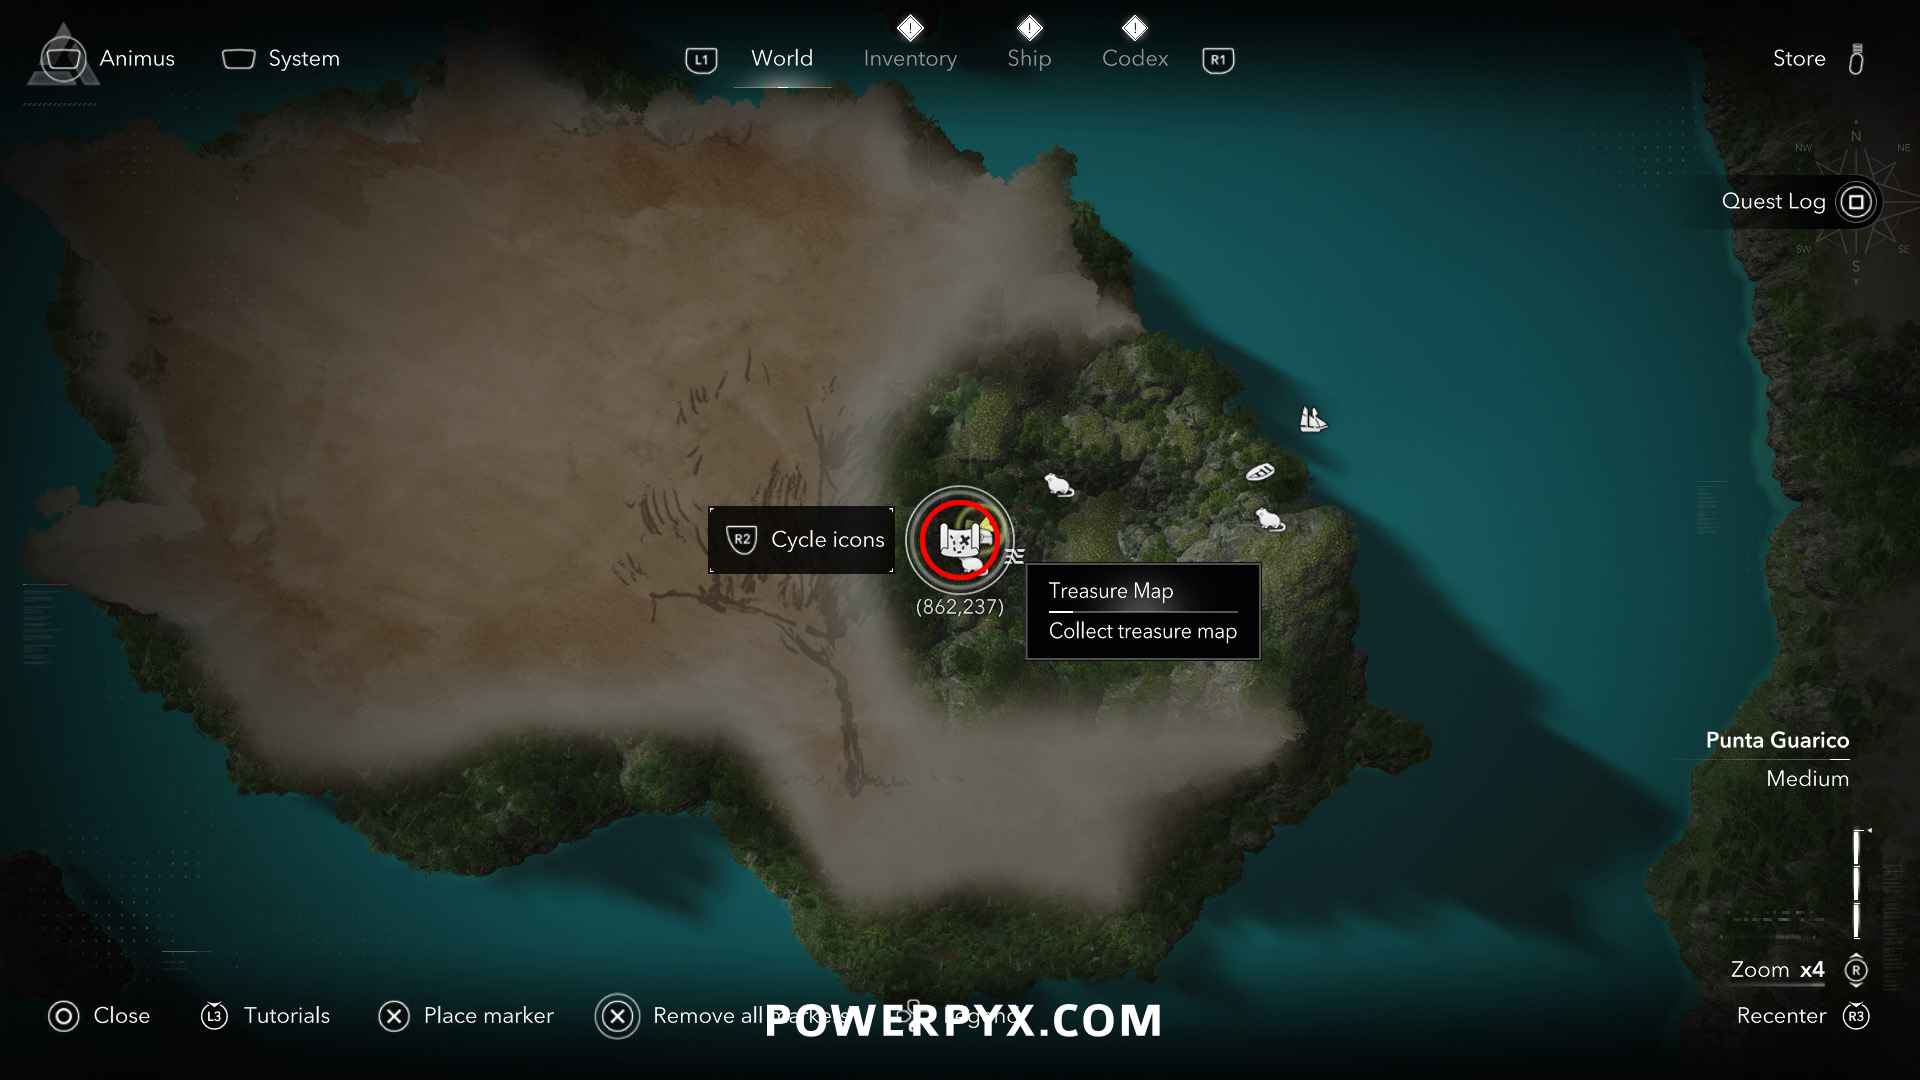
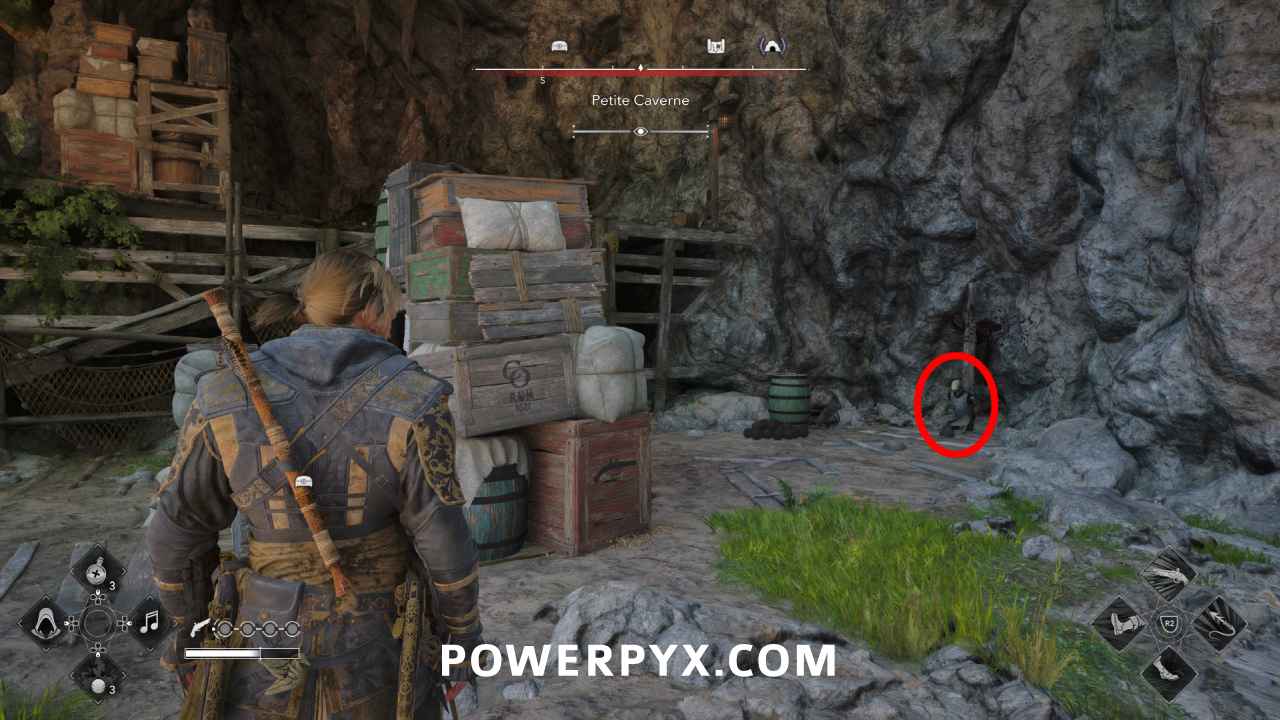
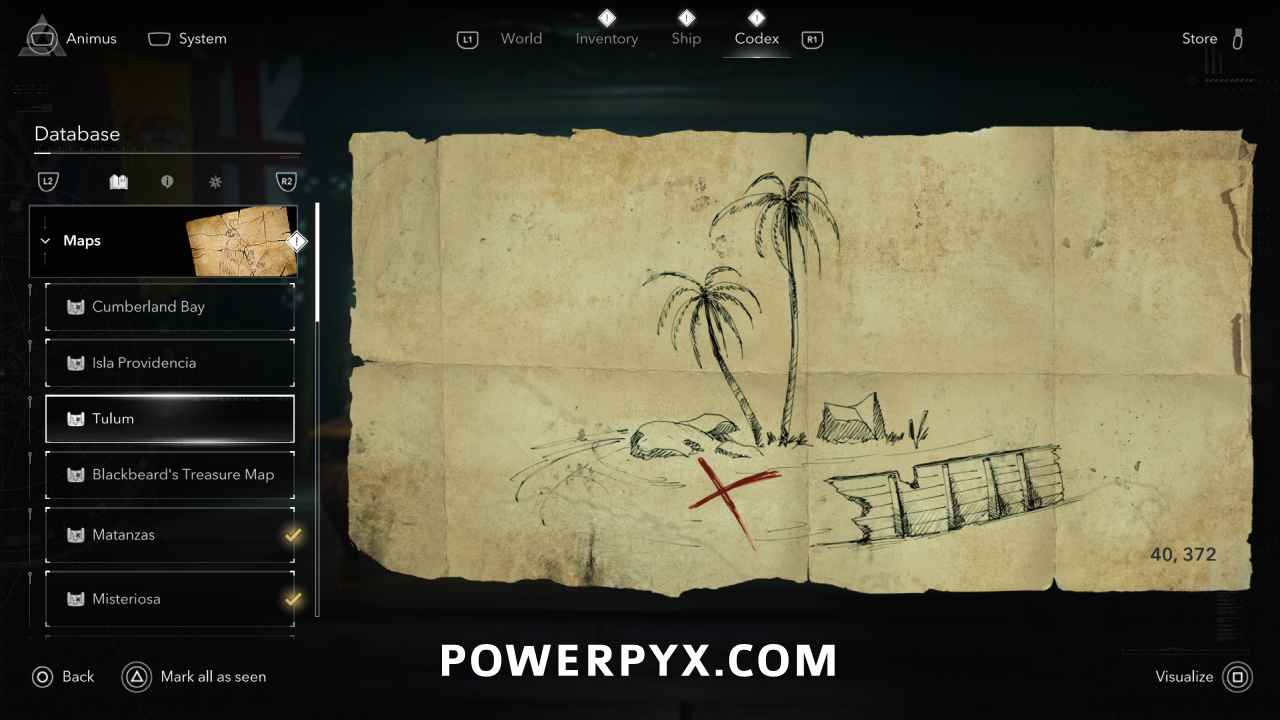
Solution: Tulum (40, 372) – at the southernmost tip of Tulum, at the beach behind a shipwreck
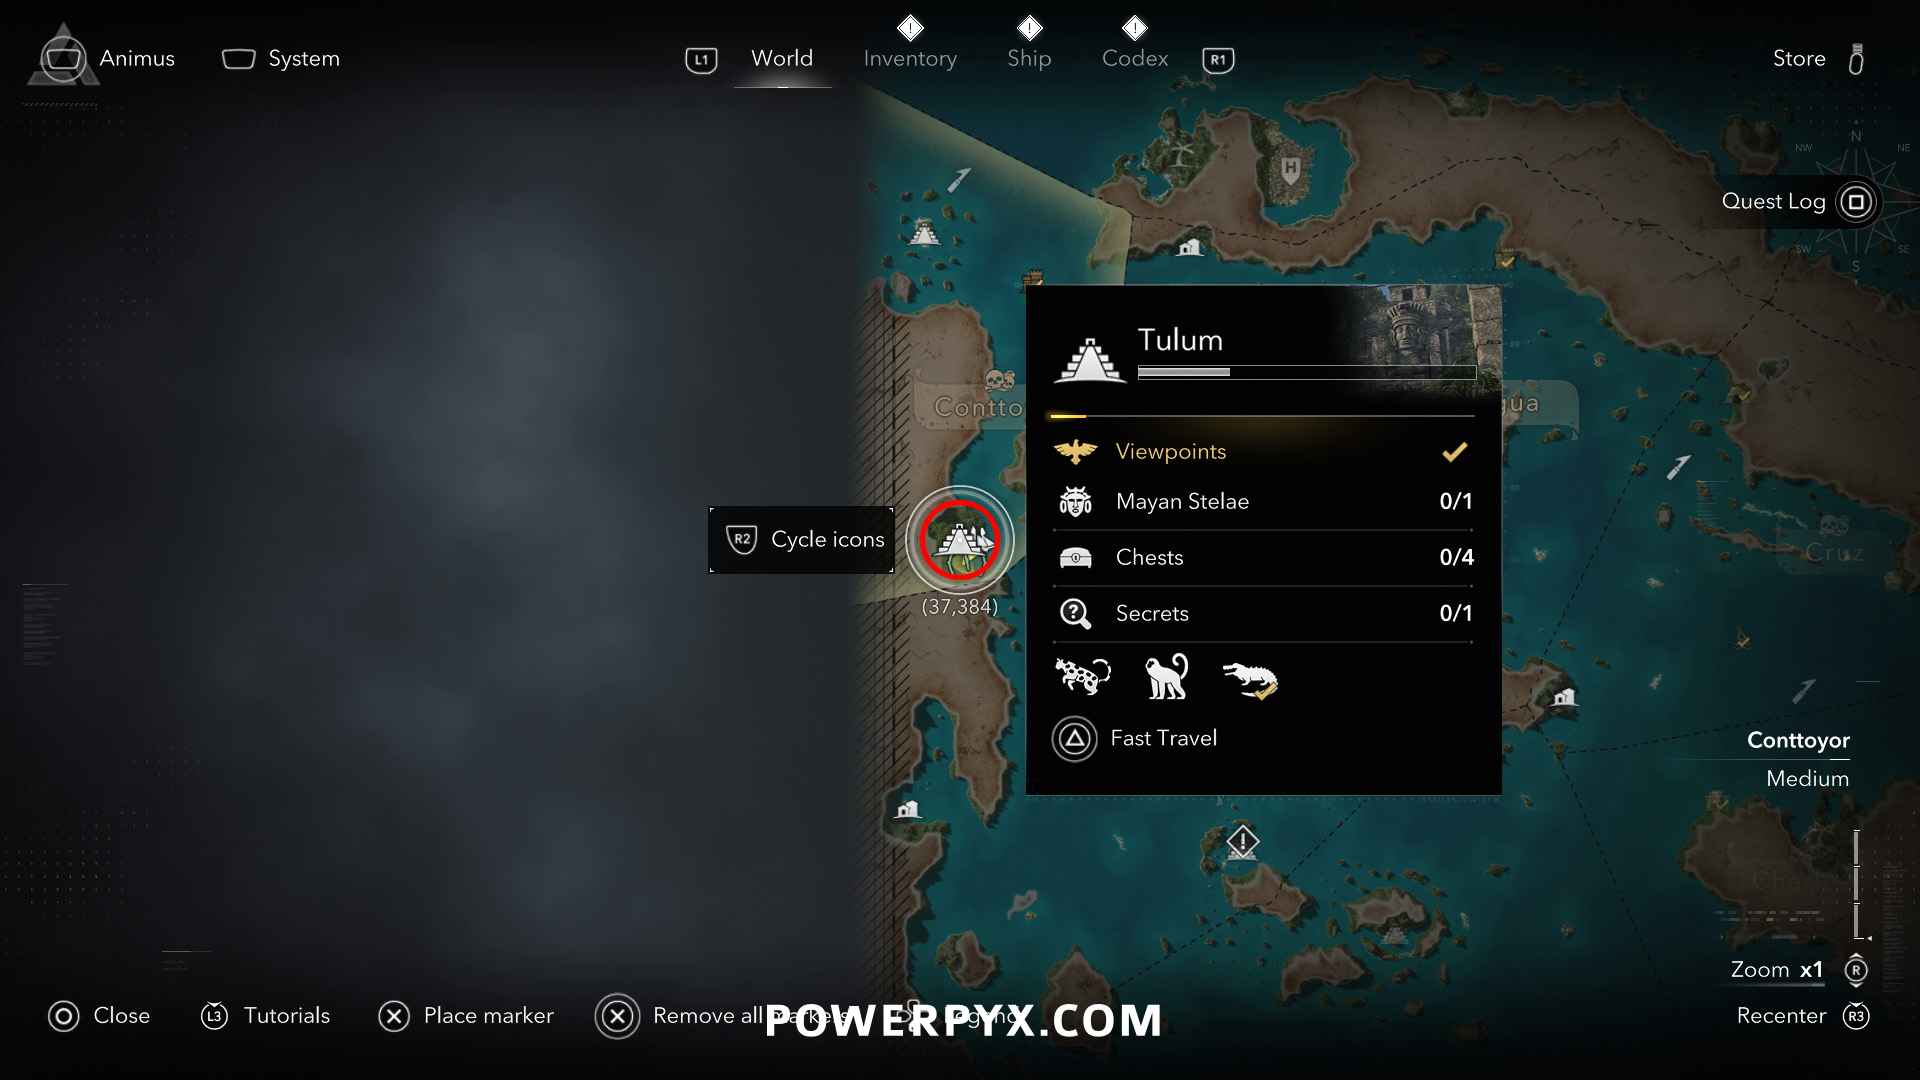
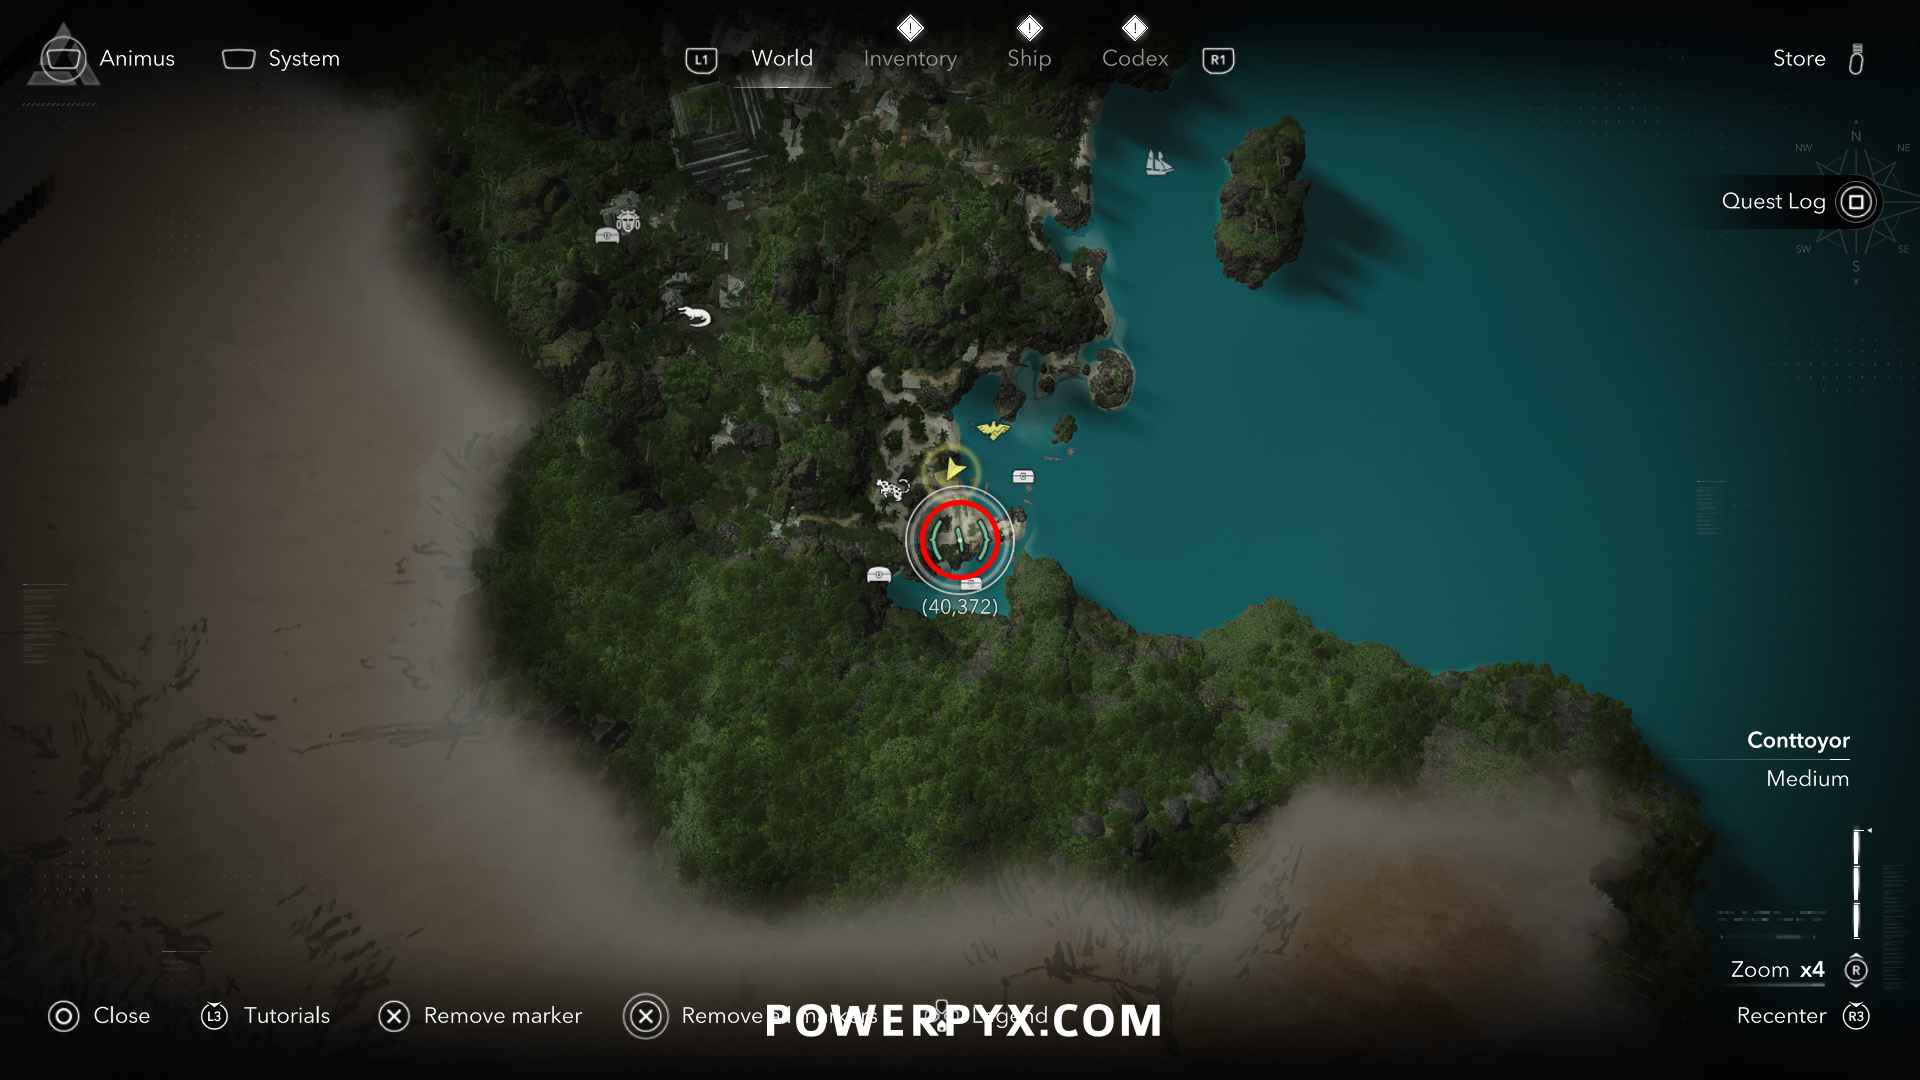
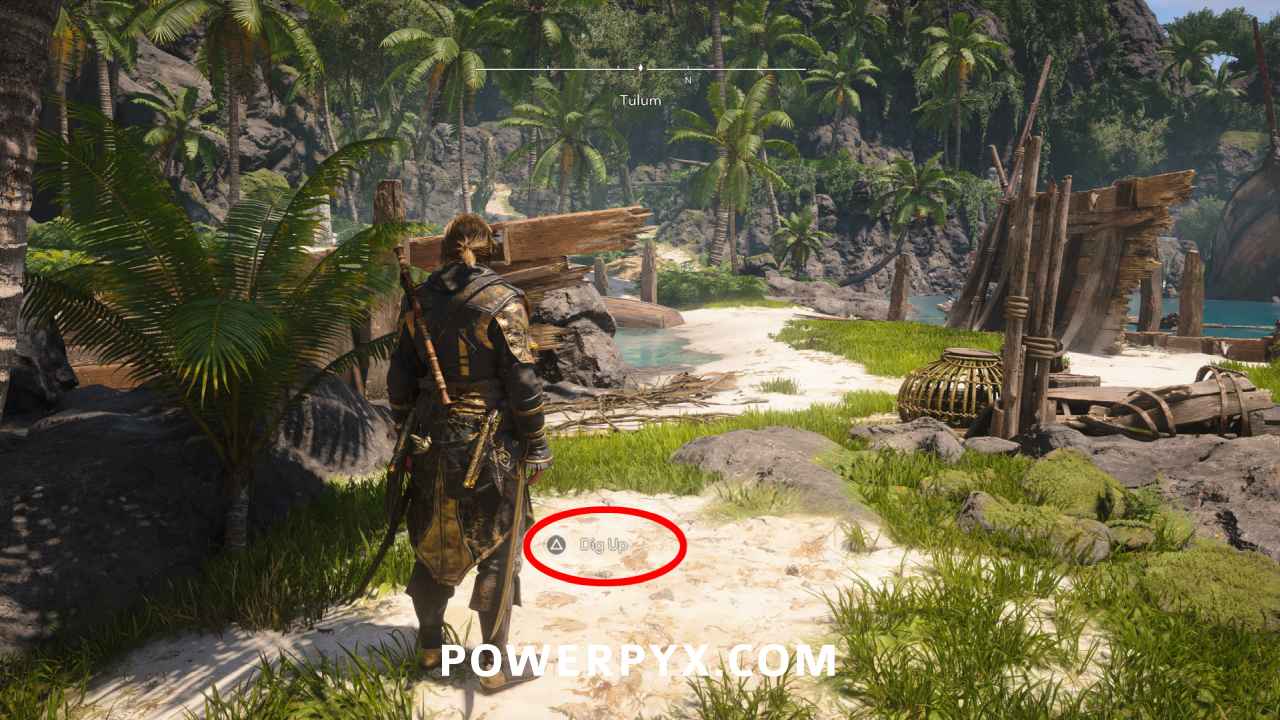
Reward: Fire Barrel Storage Ultimate Plan, 3000 Reales
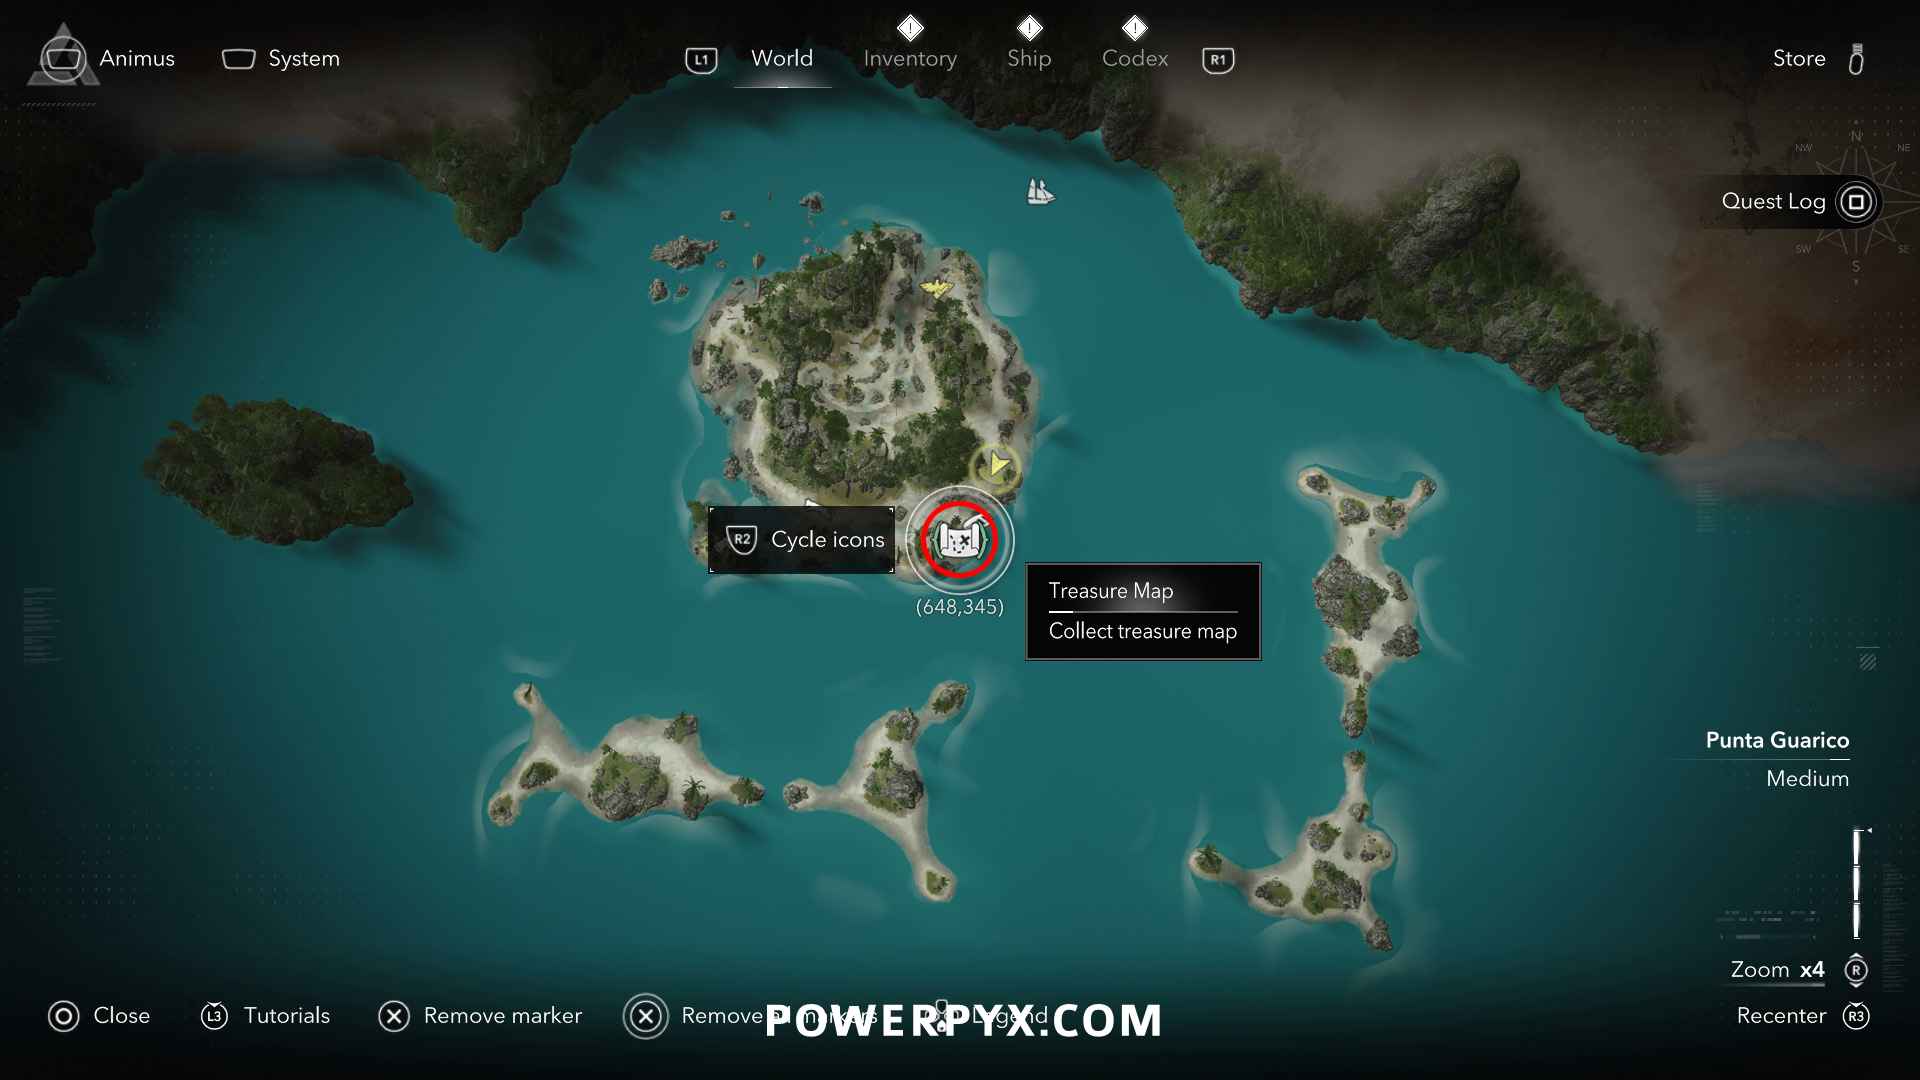
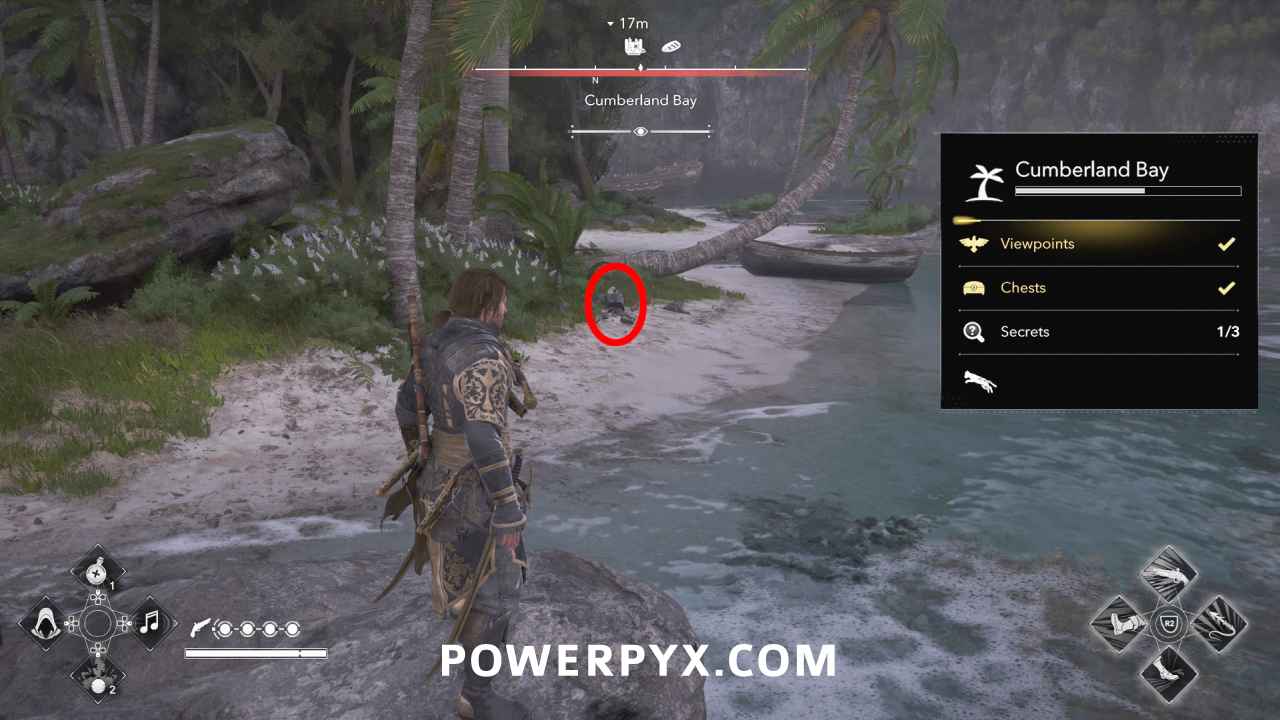
#14 – Treasure Map from Cumberland Bay (Pinos Isle)
Location: Cumberland Bay (648, 345) – at the southern shore of Cumberland Bay from a skeleton
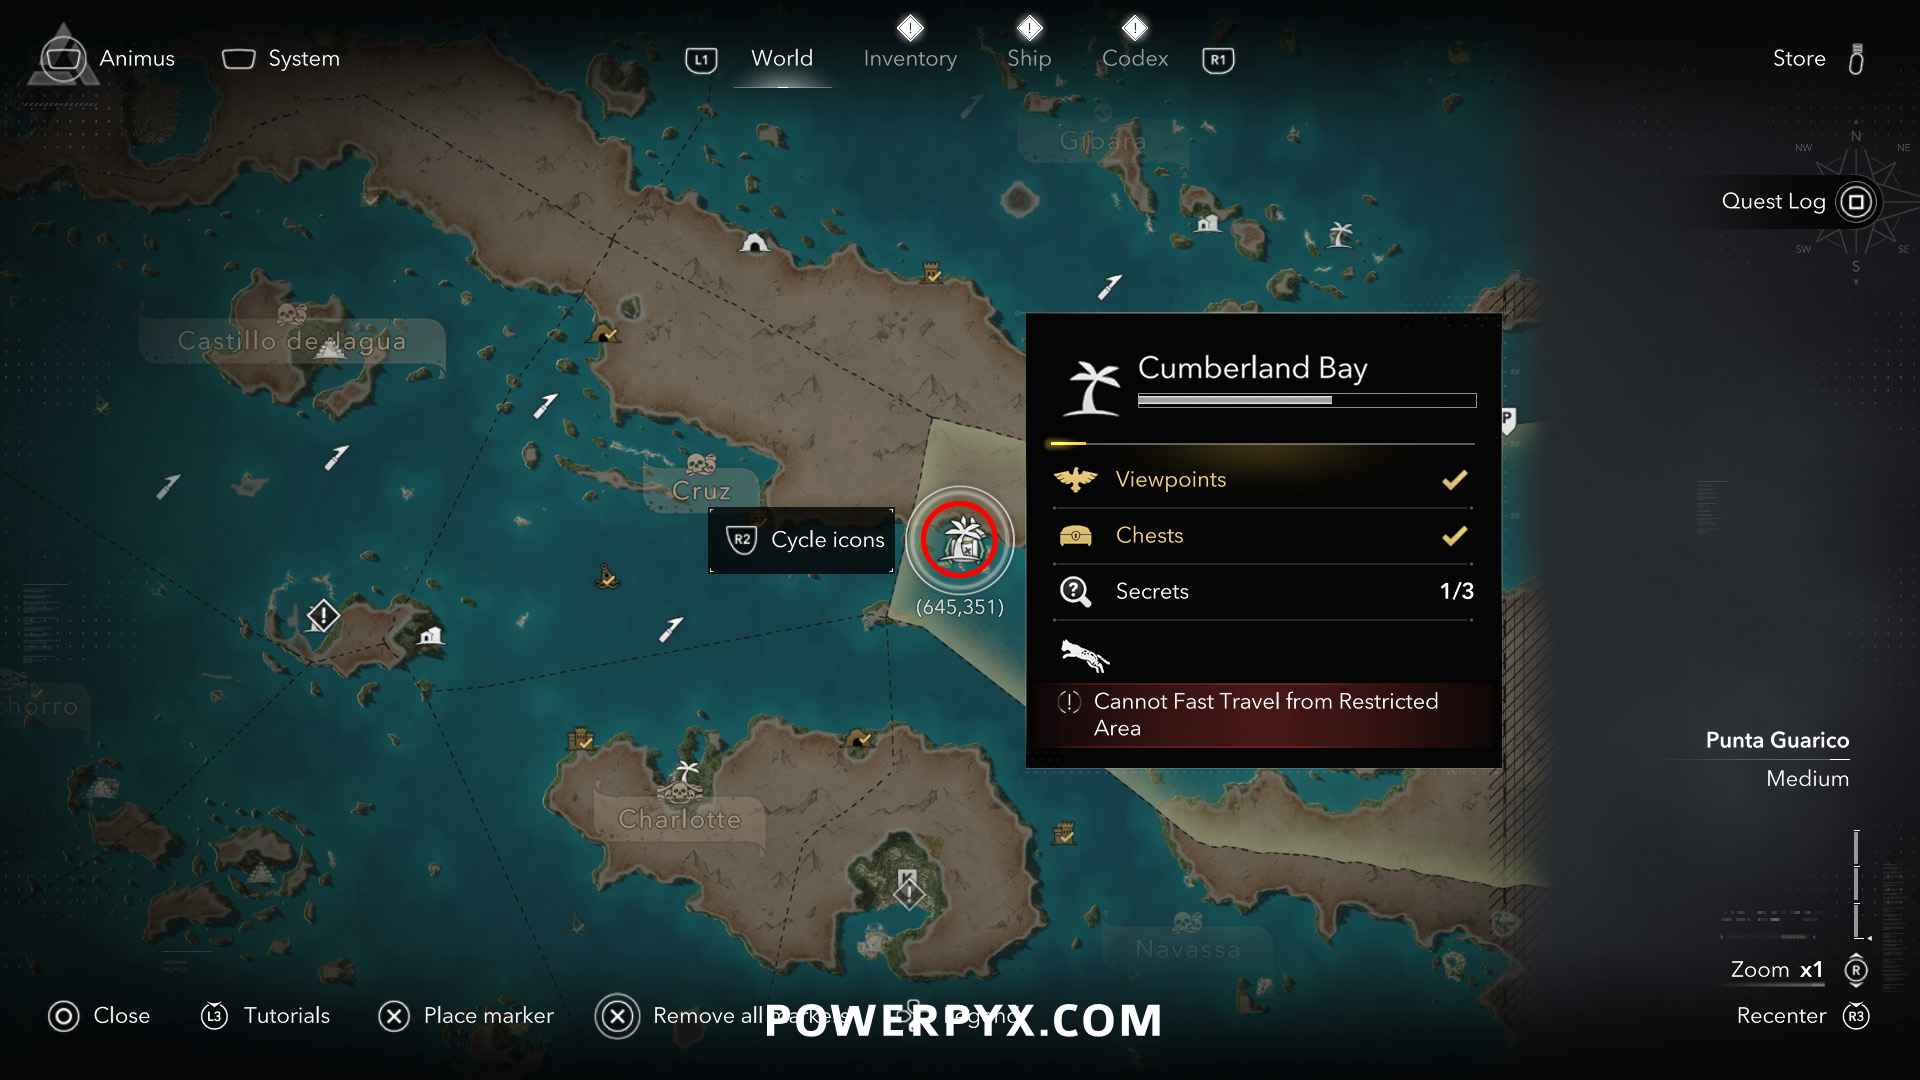
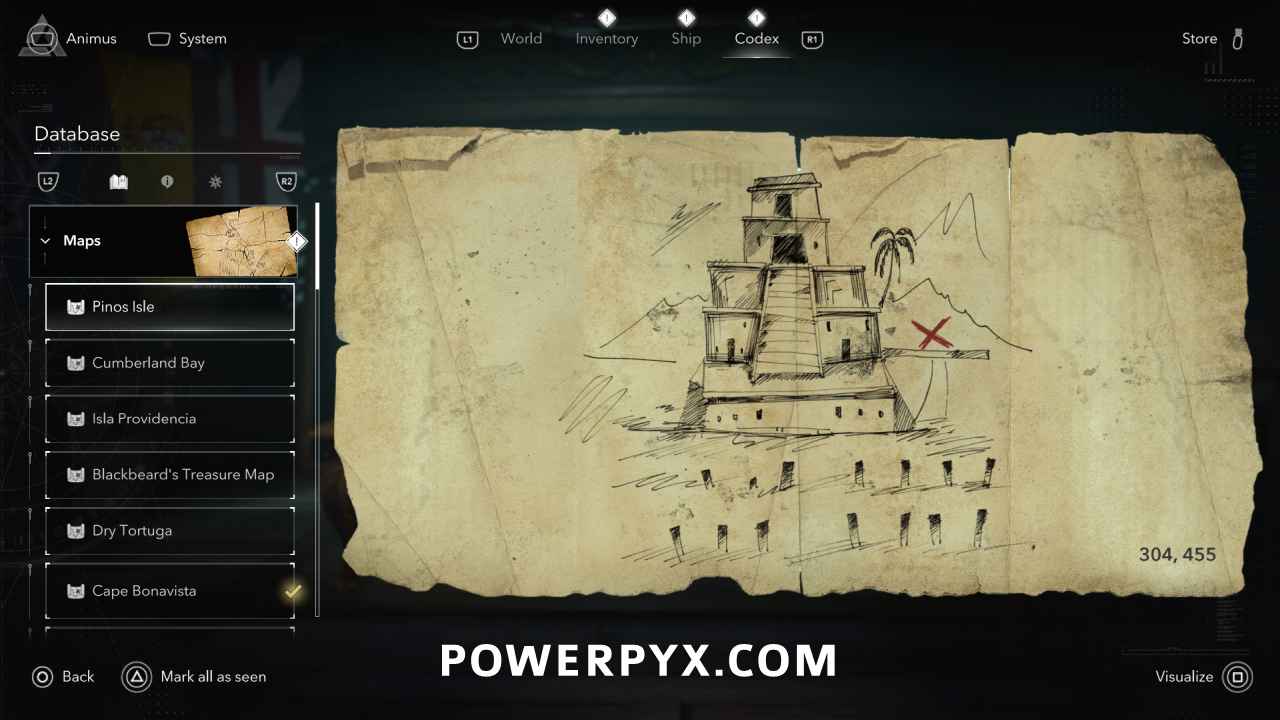
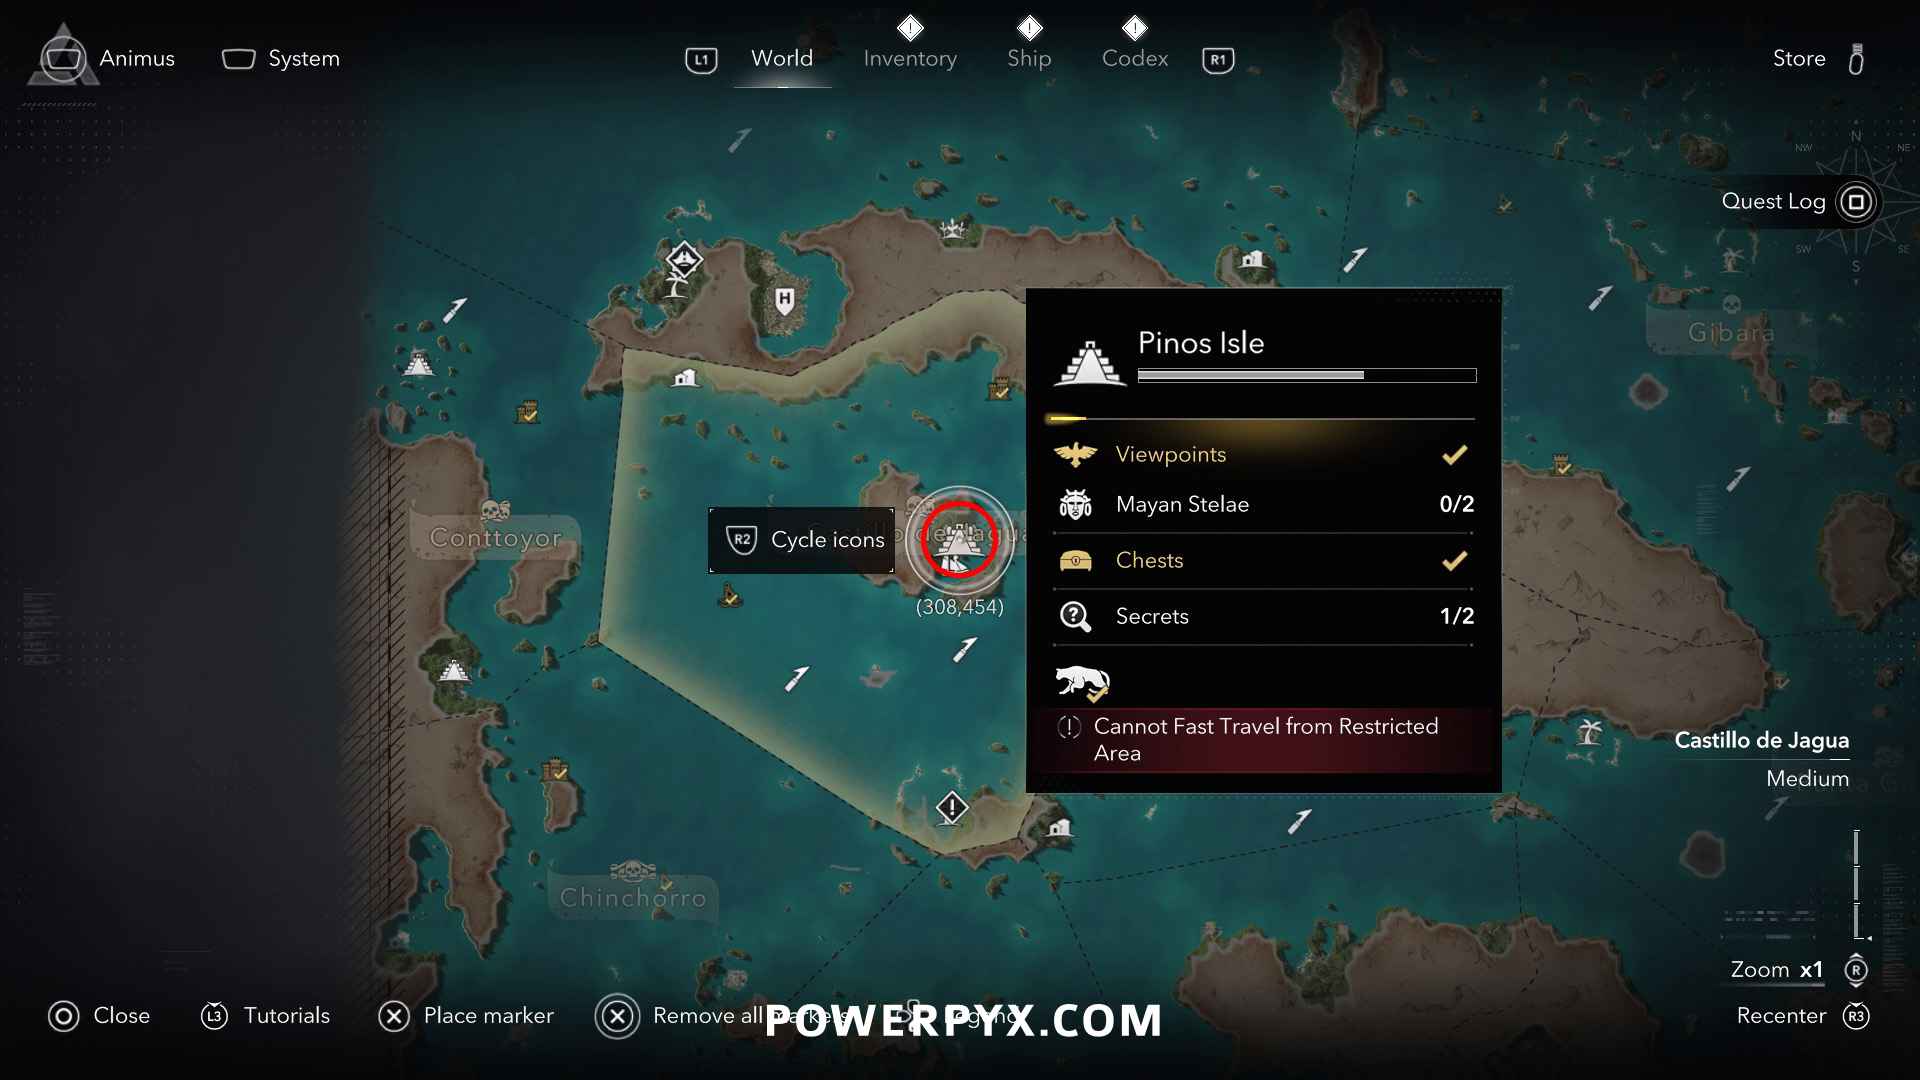
Solution: Pinos Isle (304, 455) – in the north-west corner of the temple with the viewpoint, in the grass
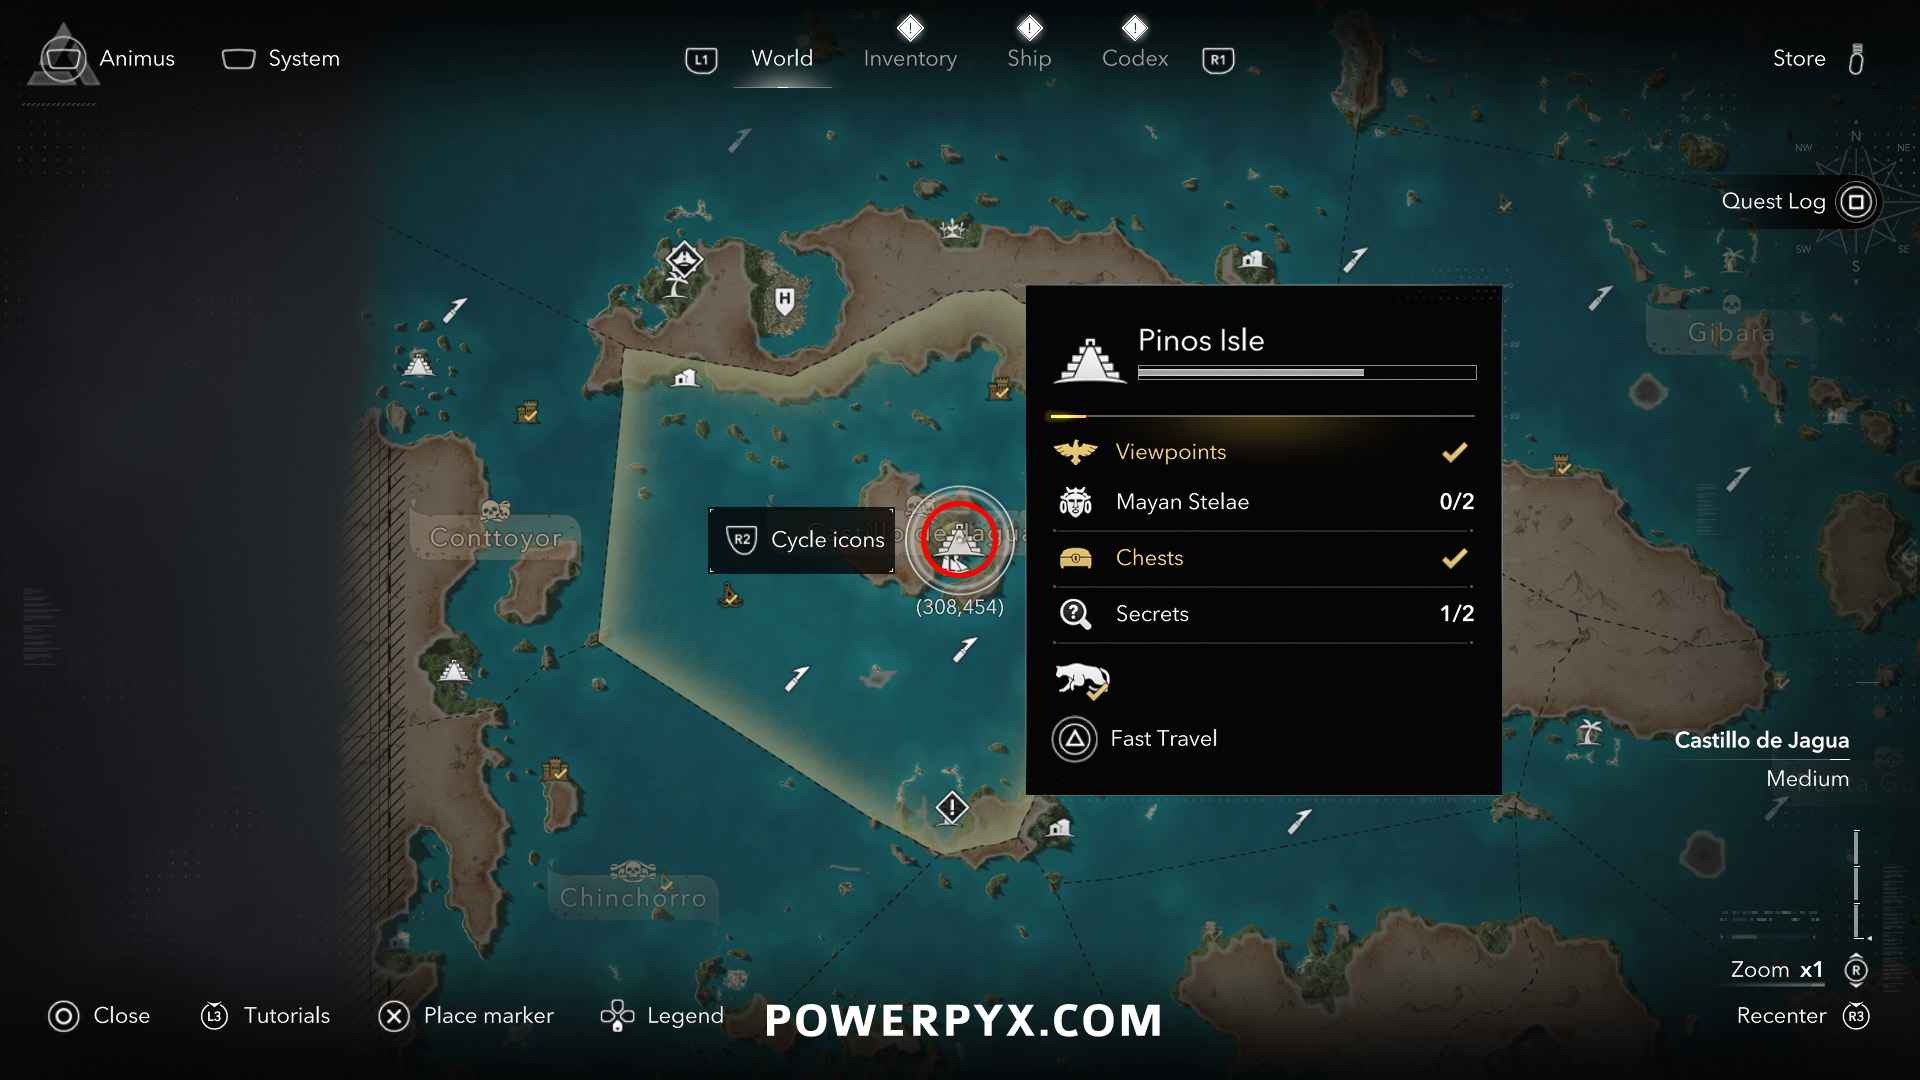
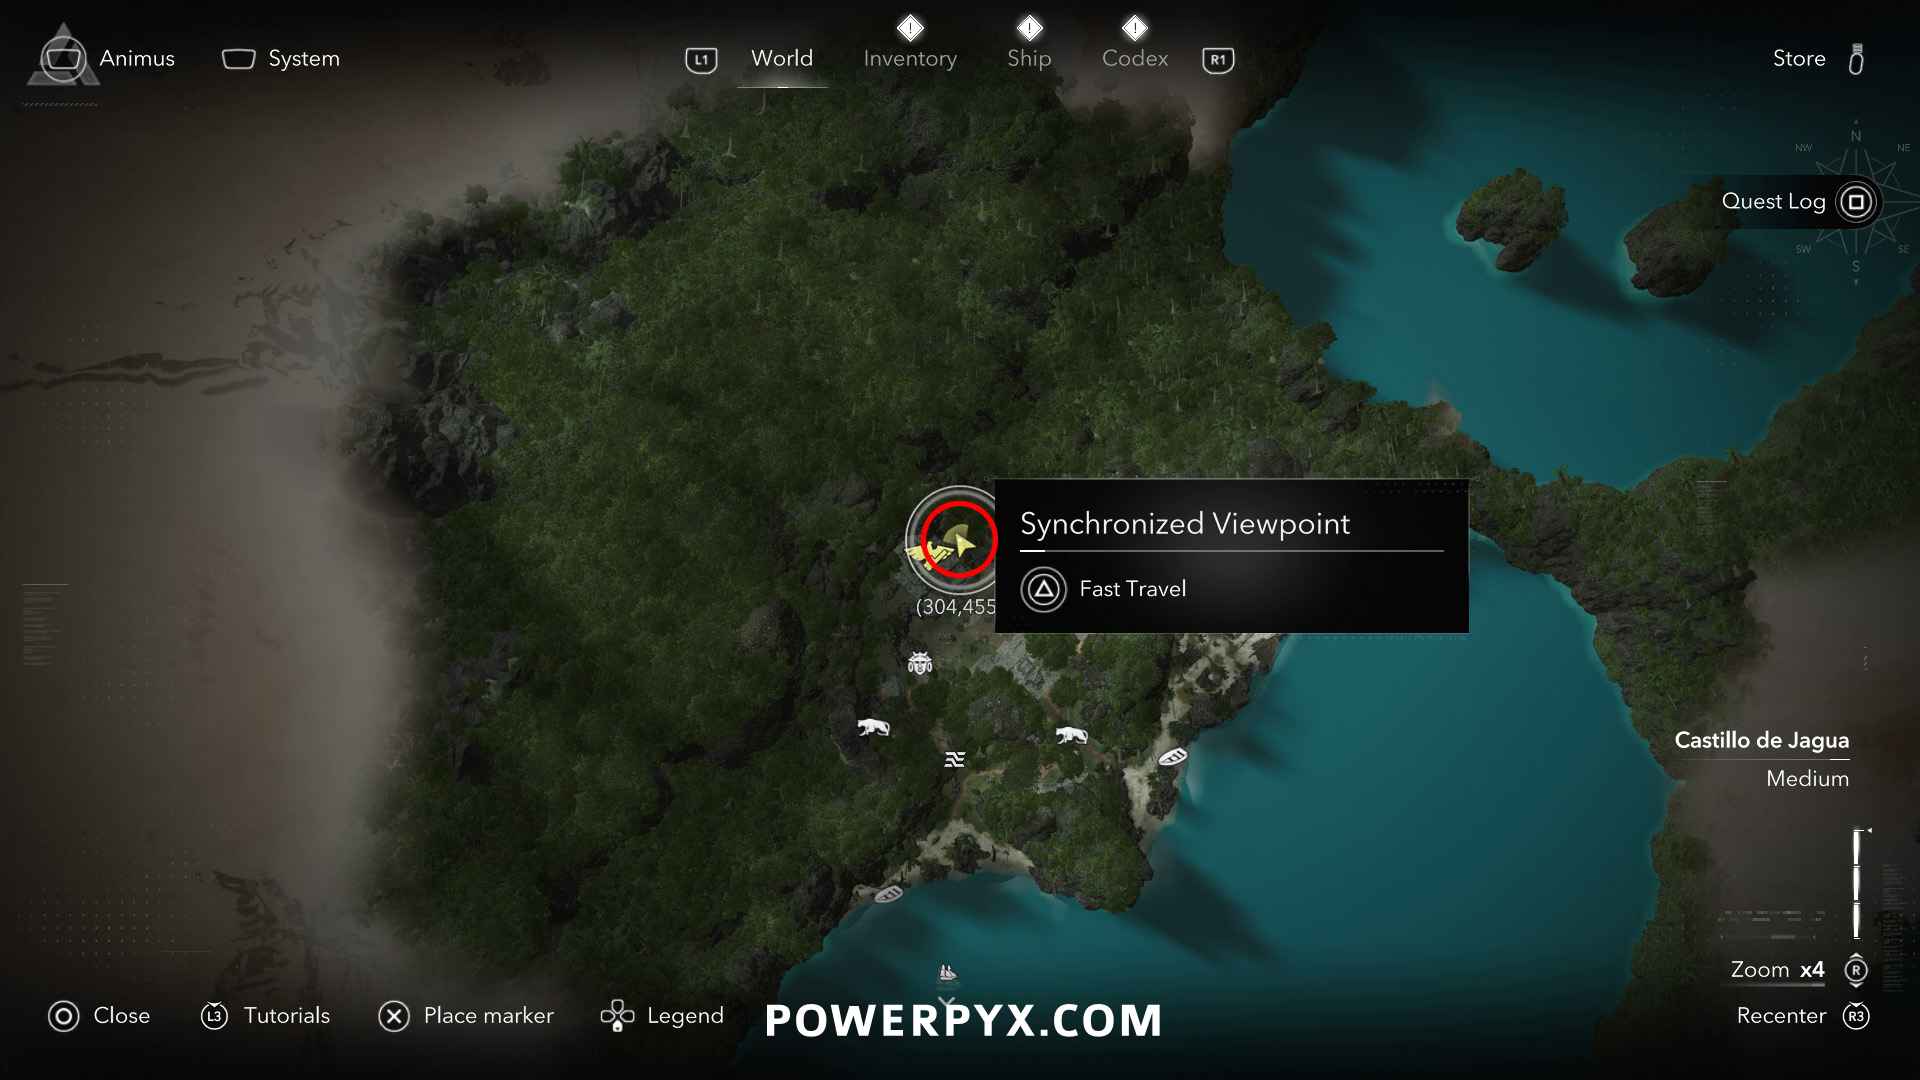
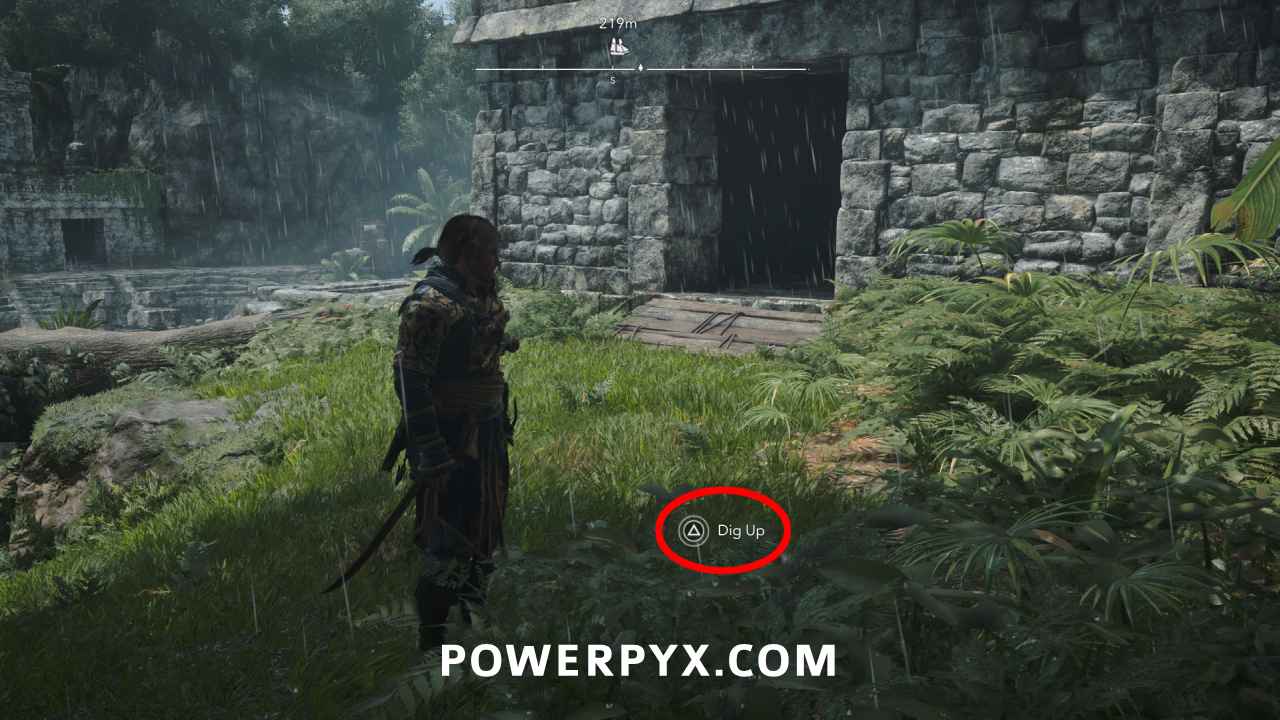
Reward: Ivory Wheel Design Plan (redeemable in Harbourmaster’s Shop menu), 3000 Reales
Castillo de Jagua Region
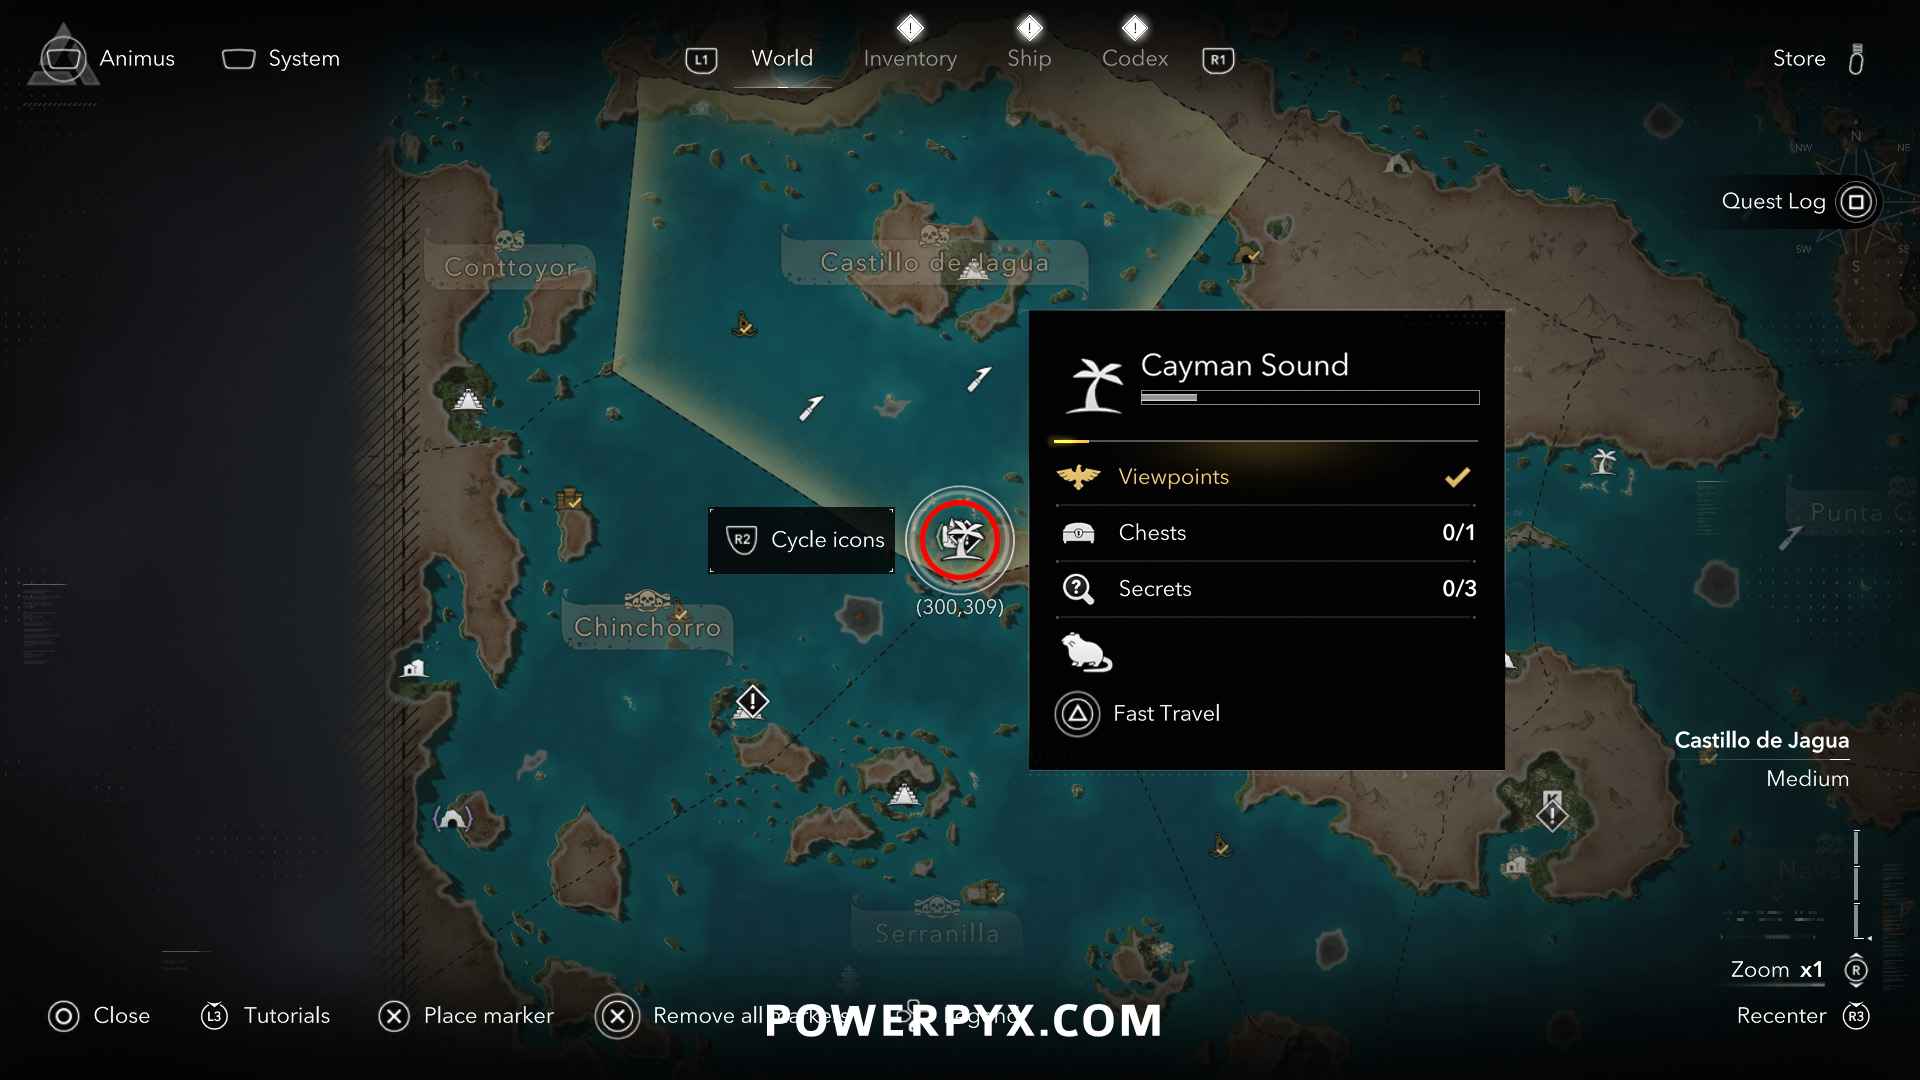
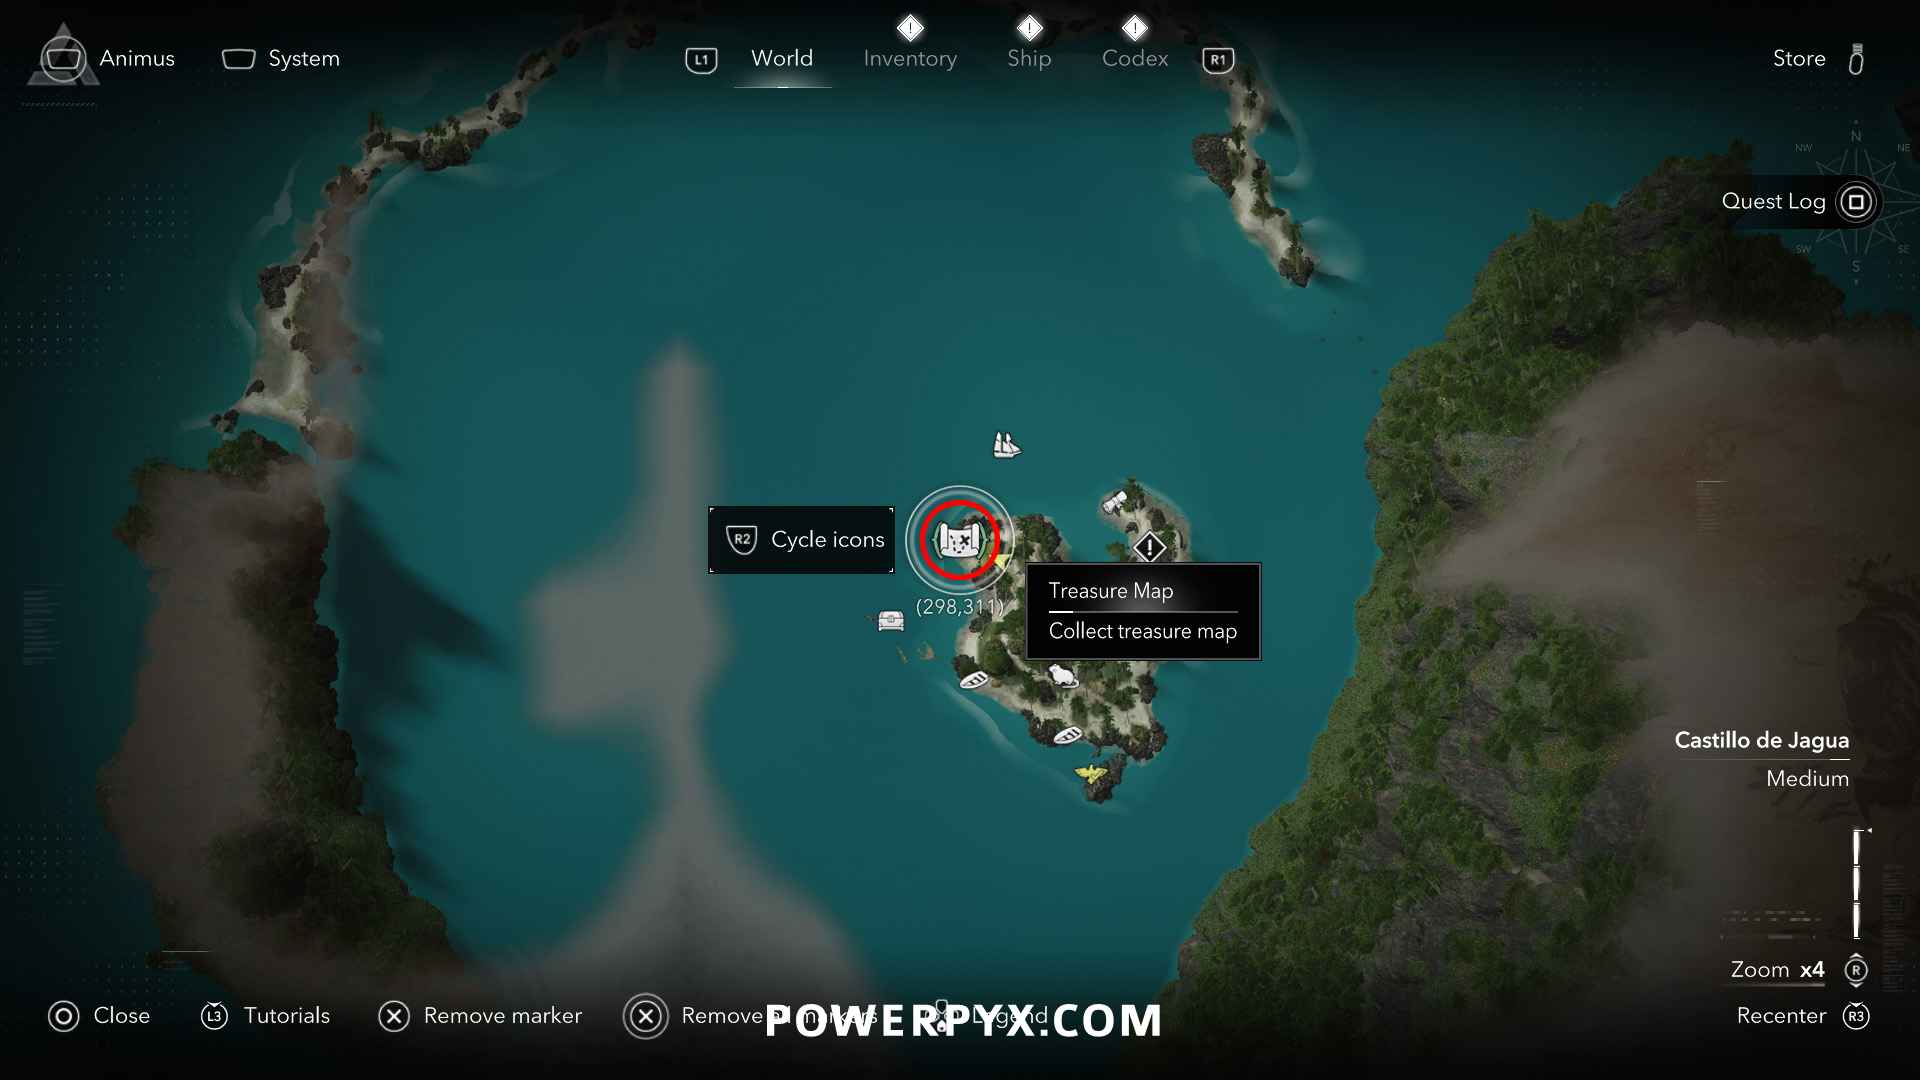
#15 – Treasure Map from Cayman Sound (Petite Caverne)
Location: Cayman Sound (298, 311) – from a skeleton at the beach
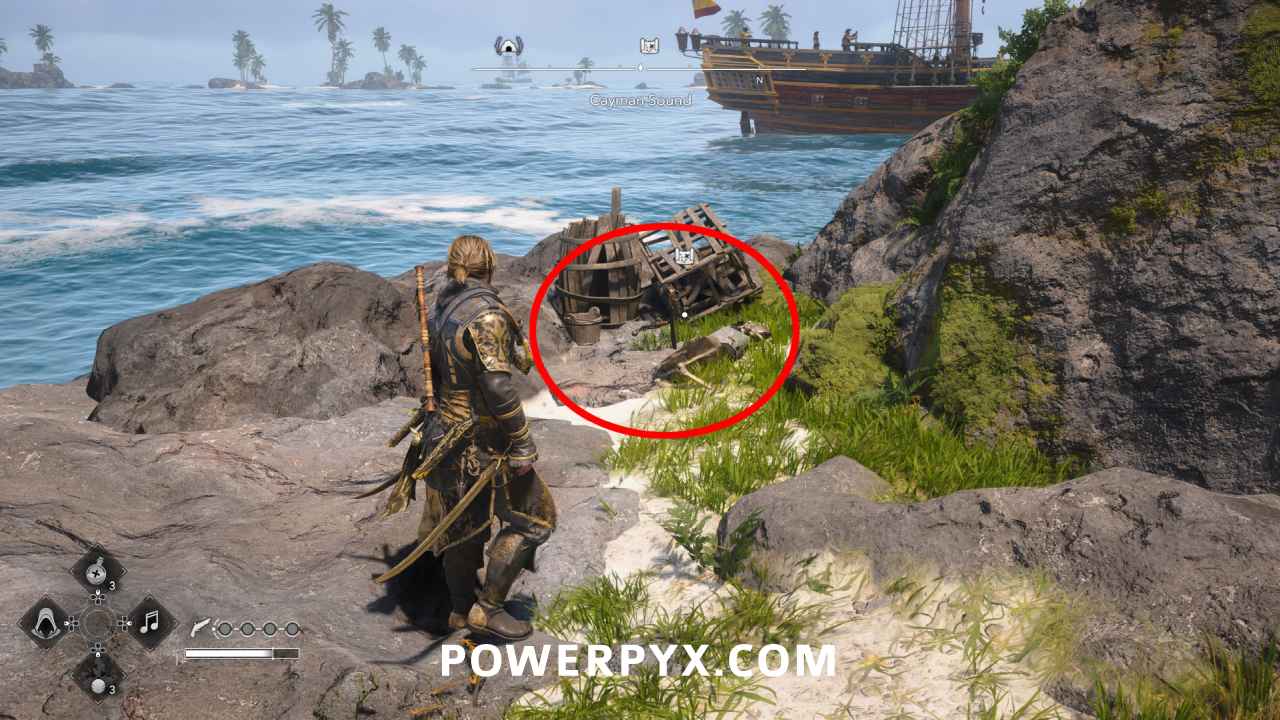
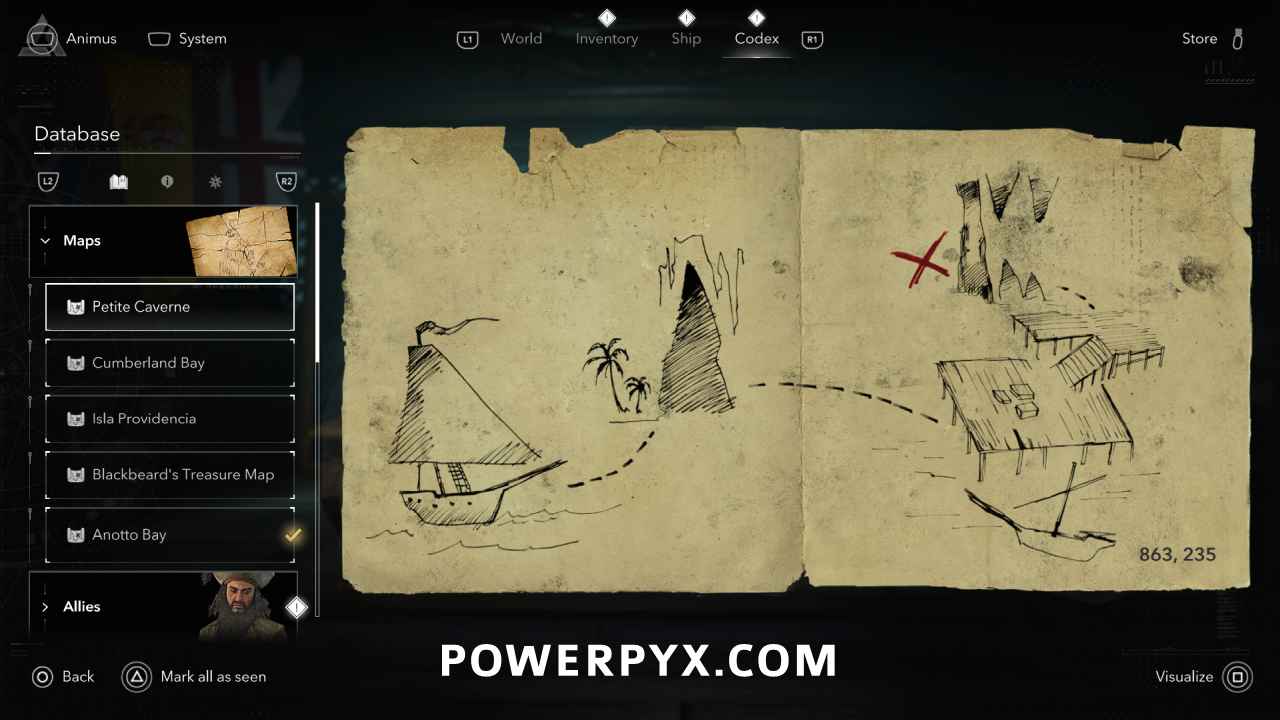
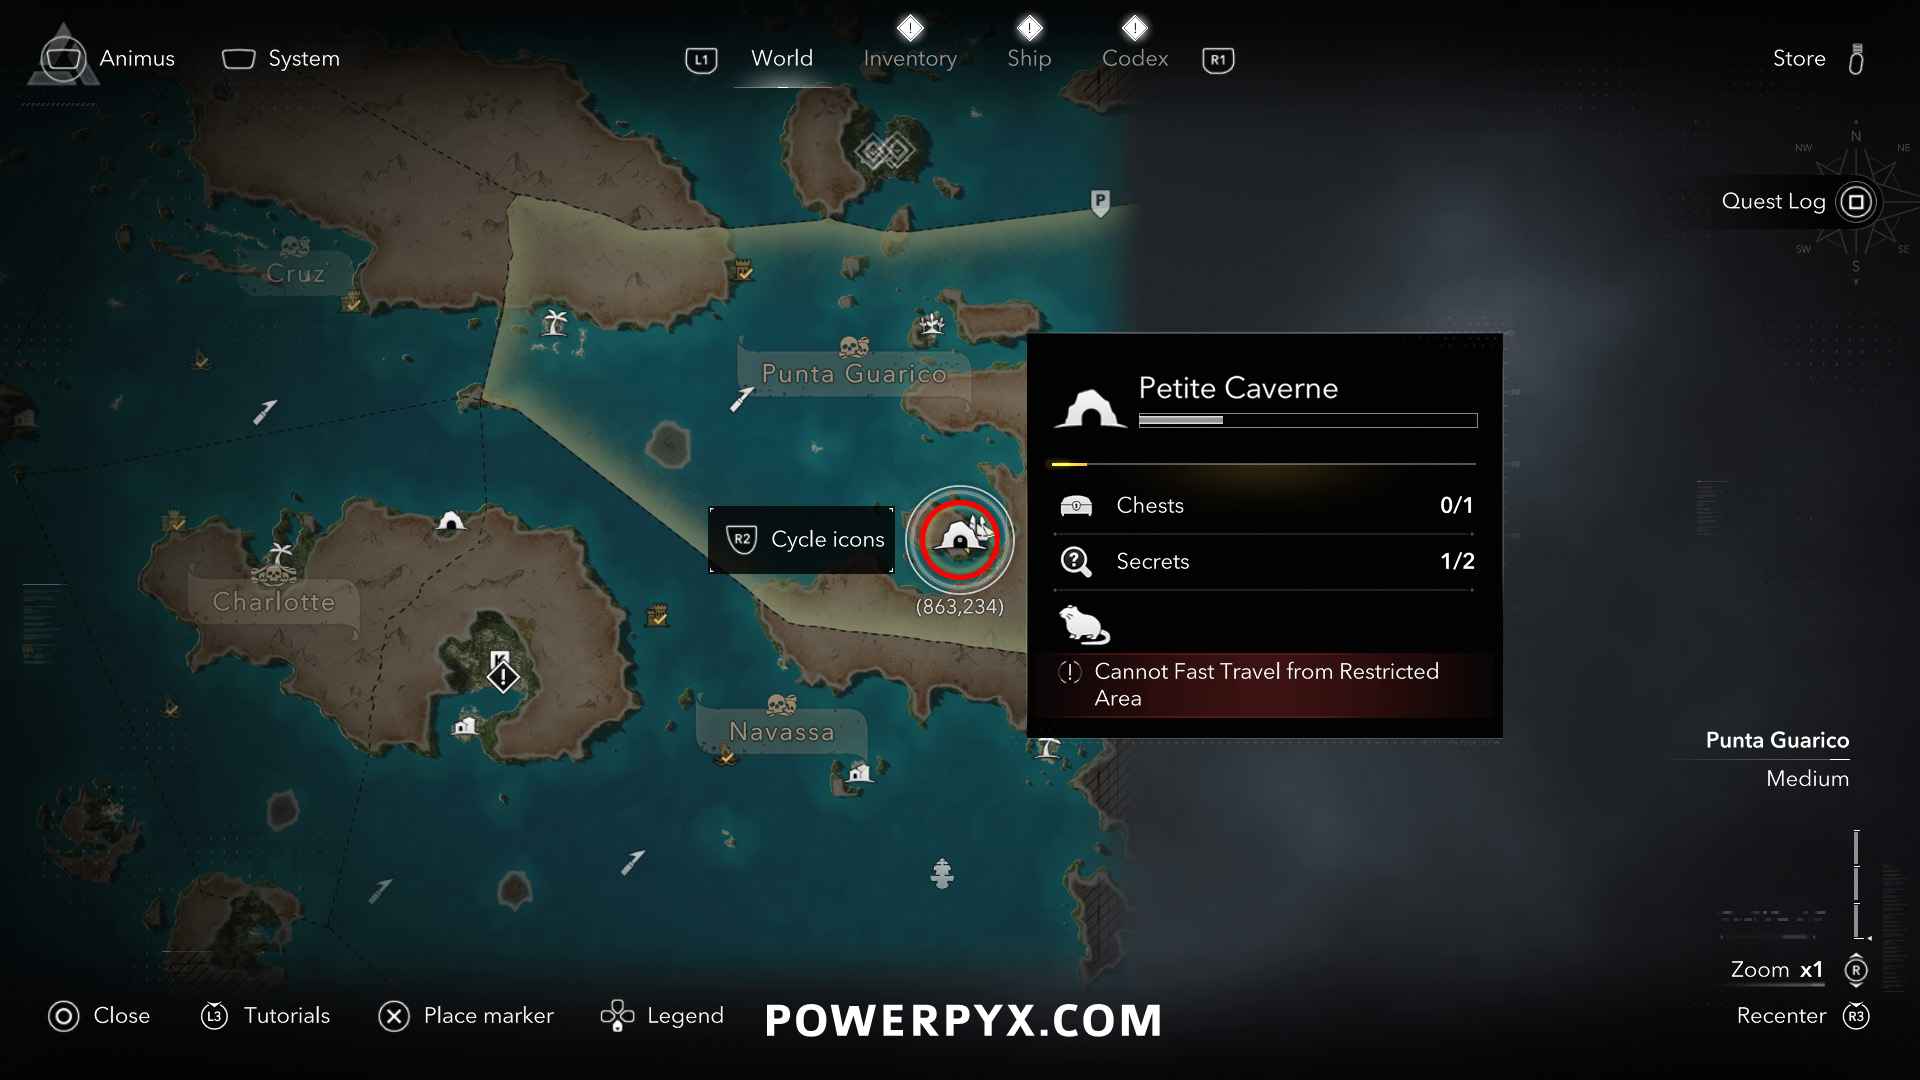
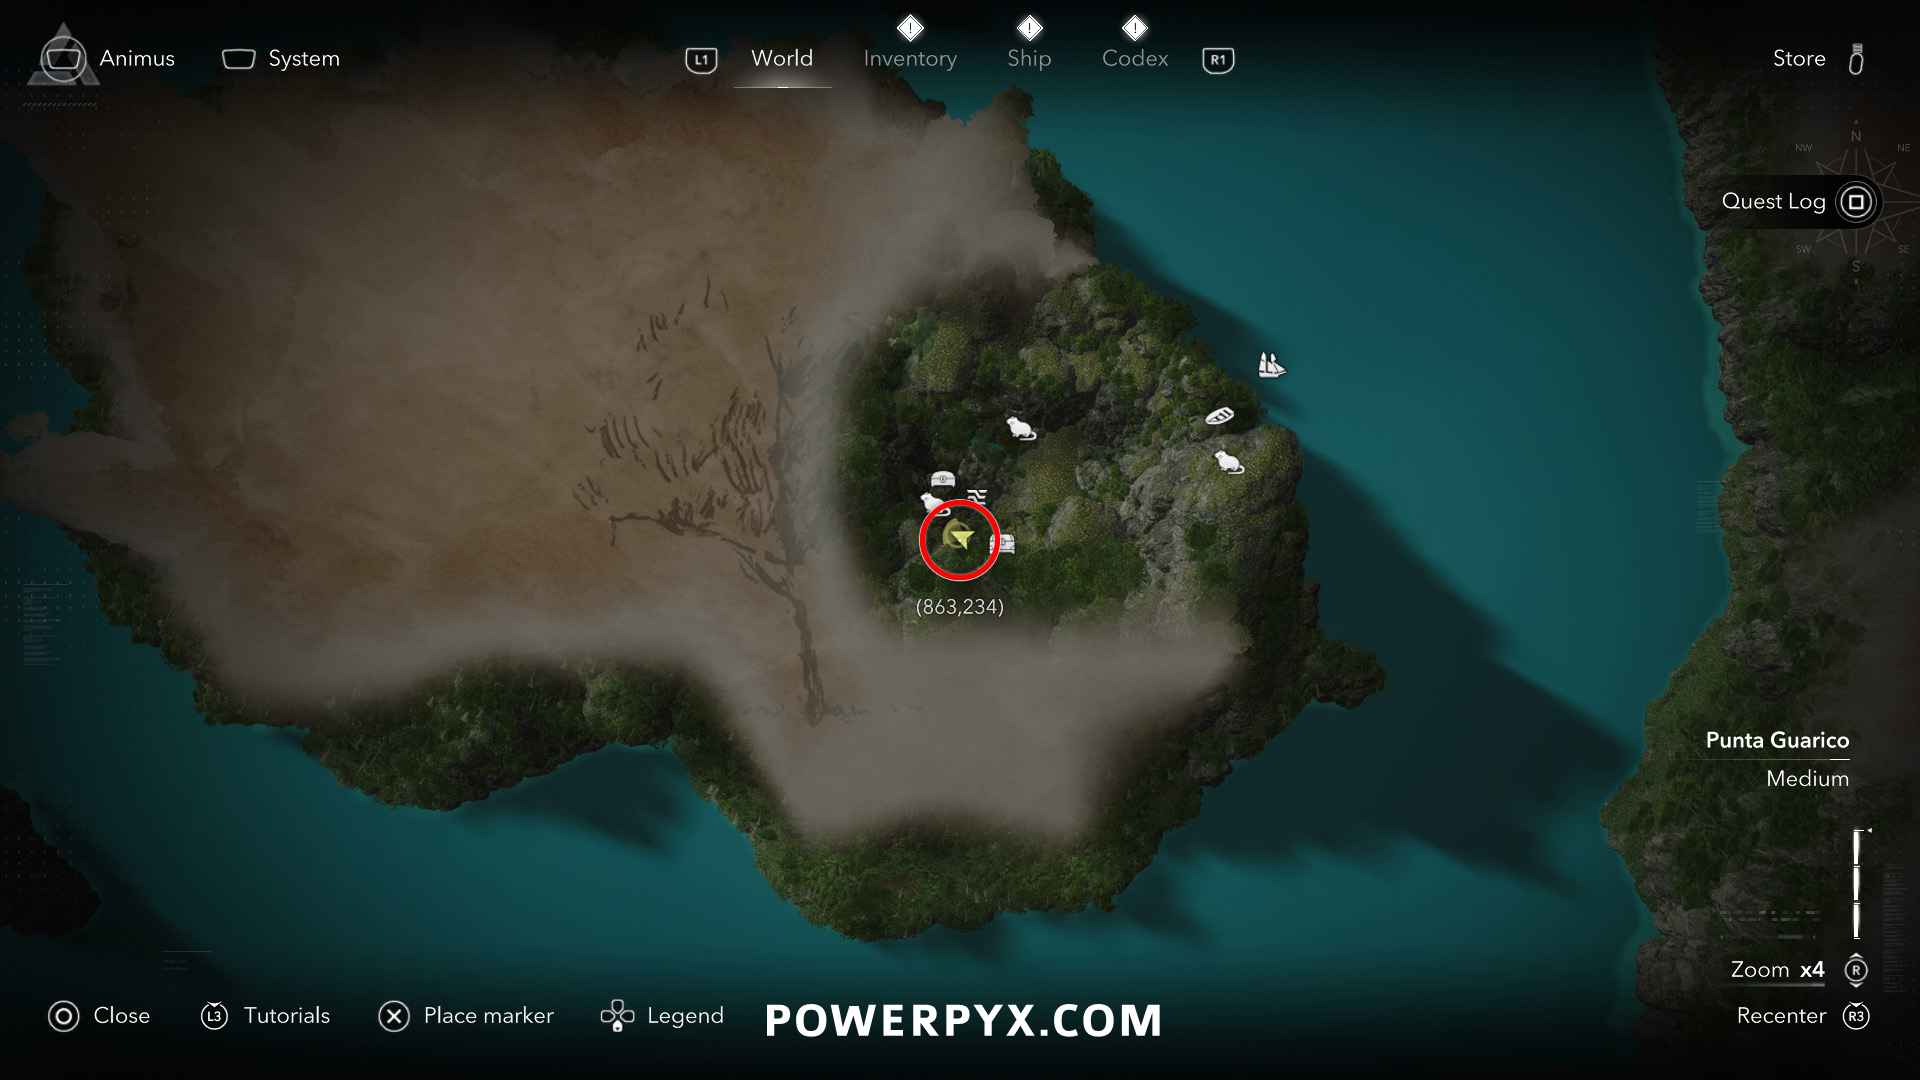
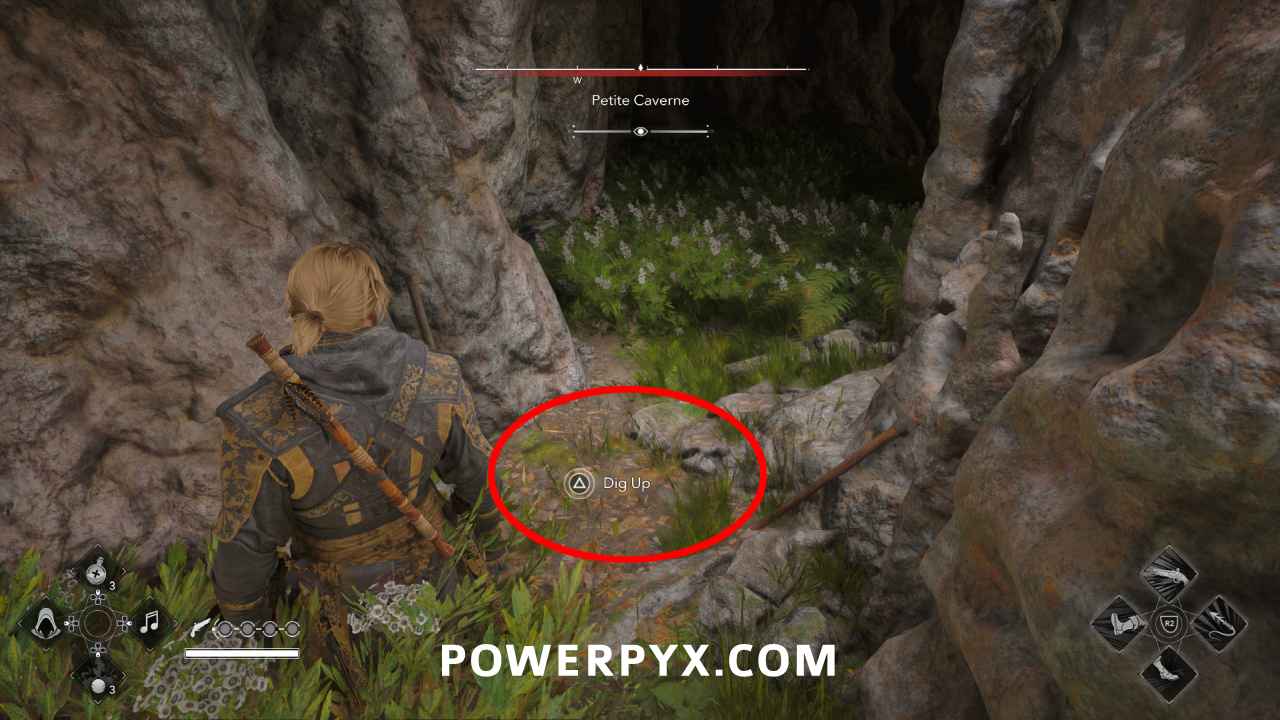
Solution: Petite Caverne (863, 235) – go to where the Hutia hunting spot (rat icon) is in the southern edge of the cave. It’s behind the rocks with a waterfall.
Reward: Heavy Shot Storage Ultimate Plan, 3000 Reales
#16 – Treasure Map from Pinos Isle (Cayman Sound)
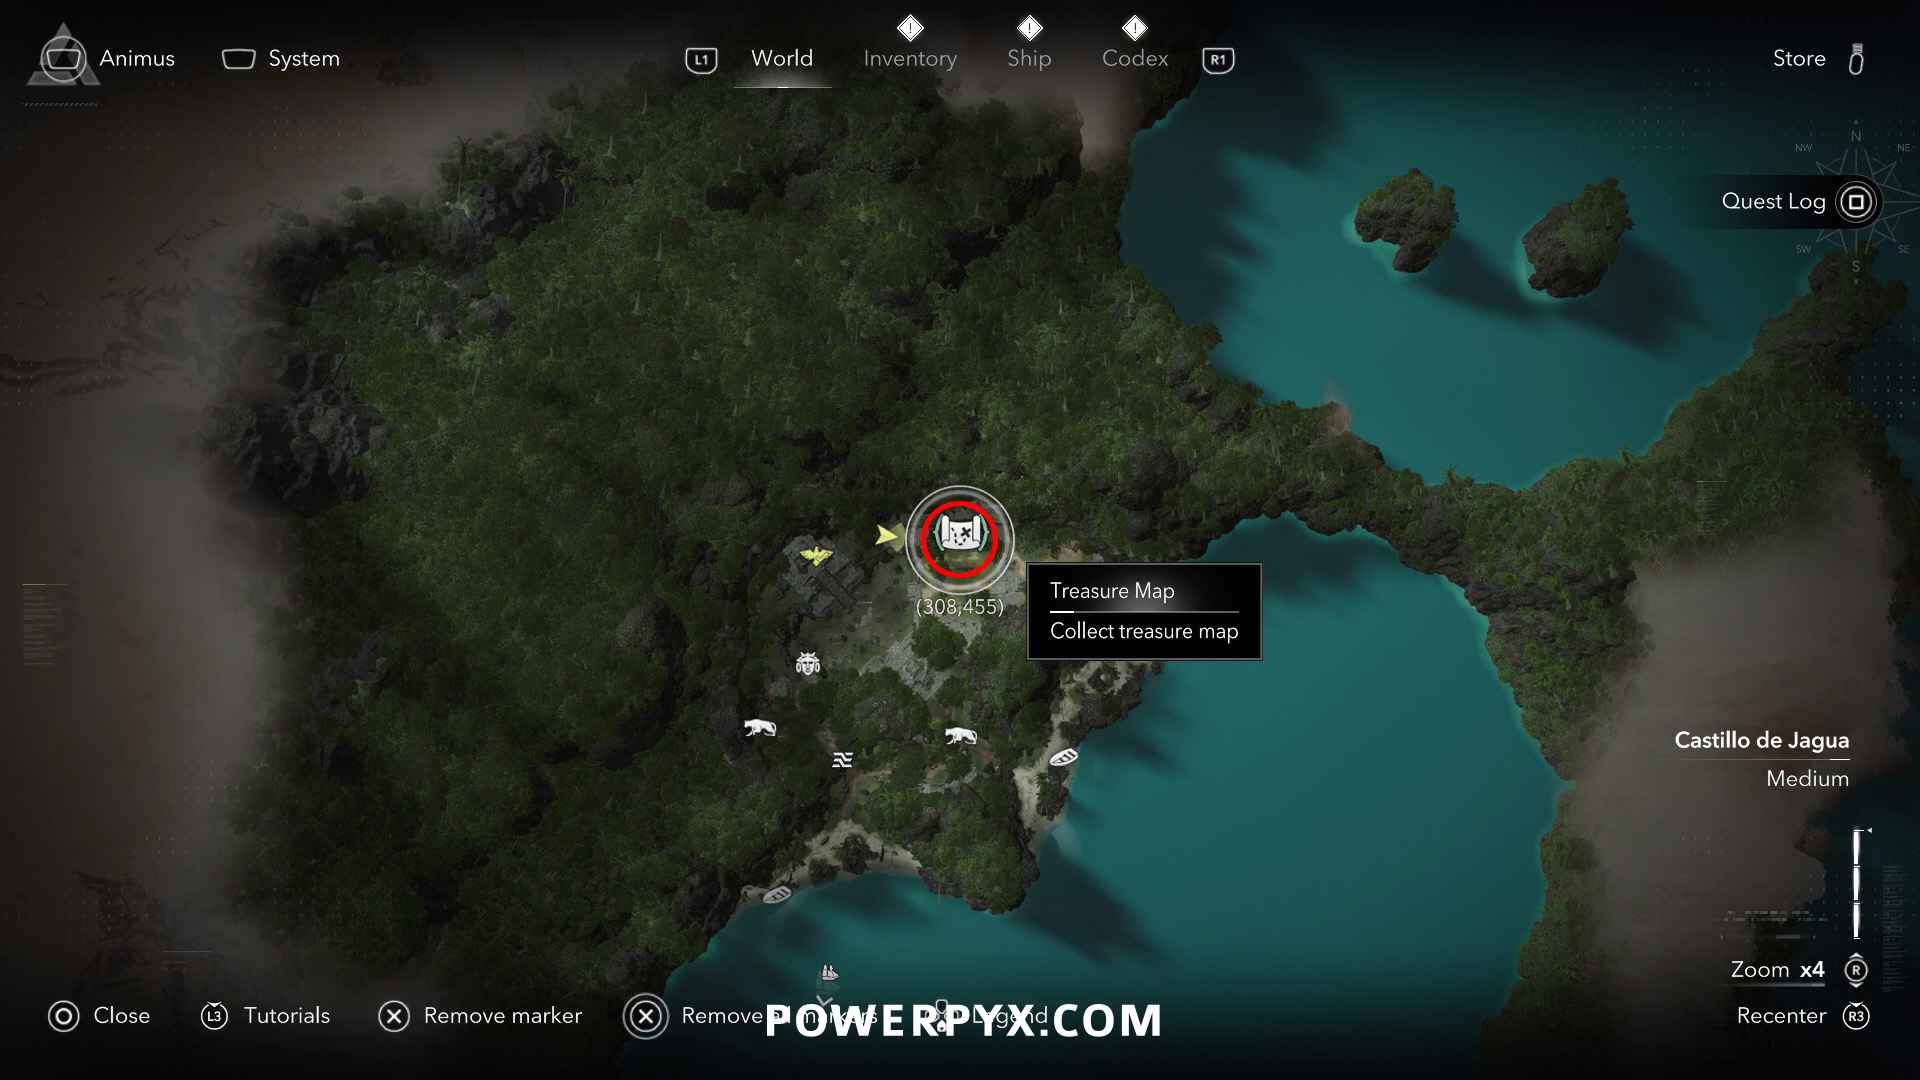
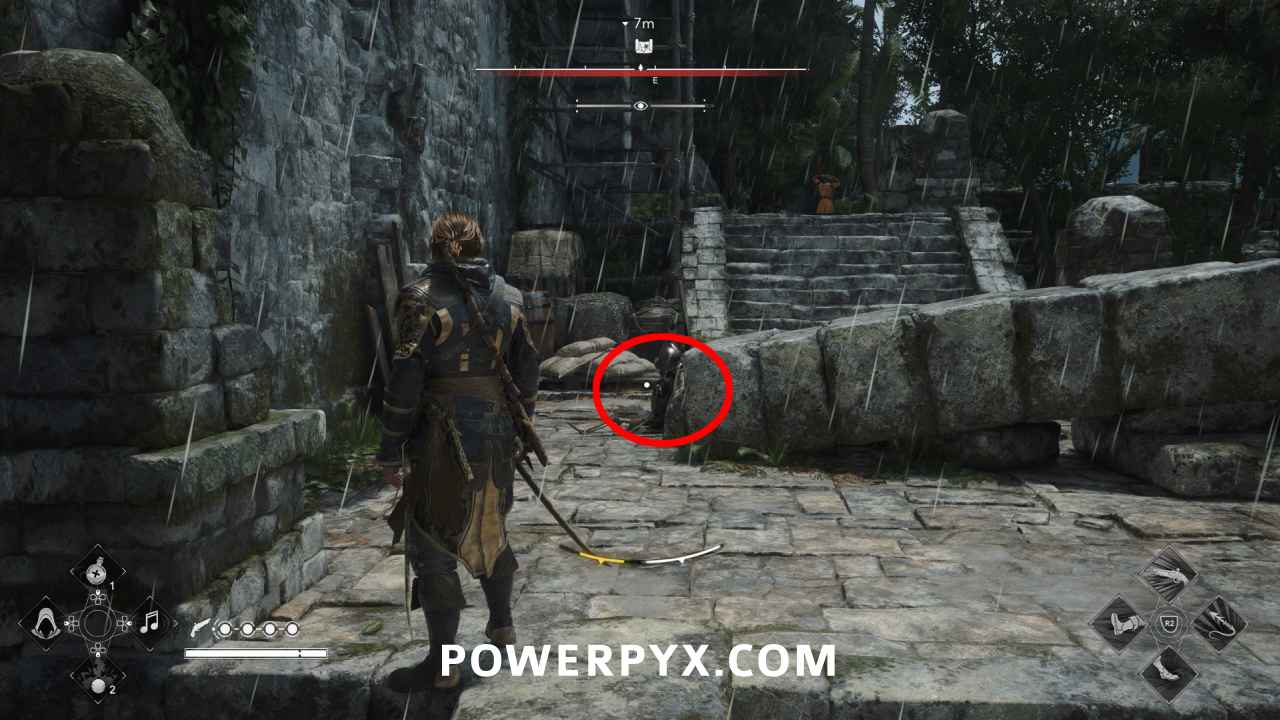
Location: Pinos Isle (308, 456) – in the northern ruins from a skeleton, where enemies are
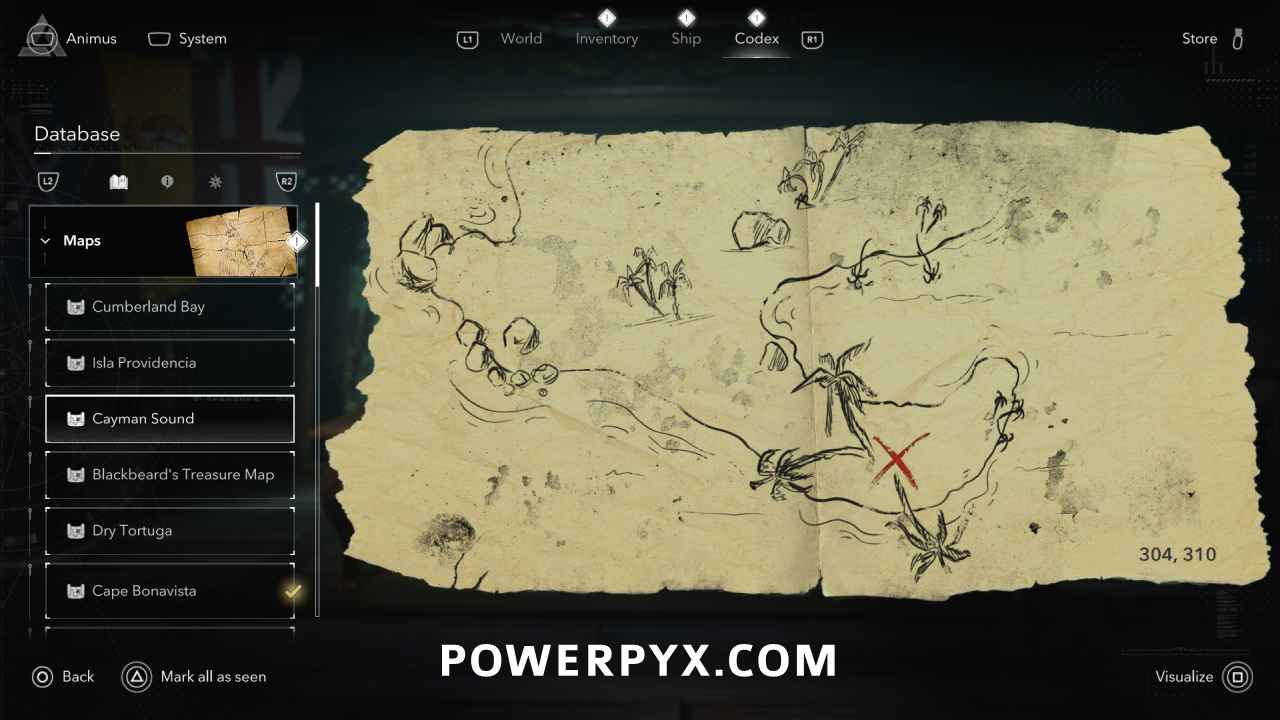
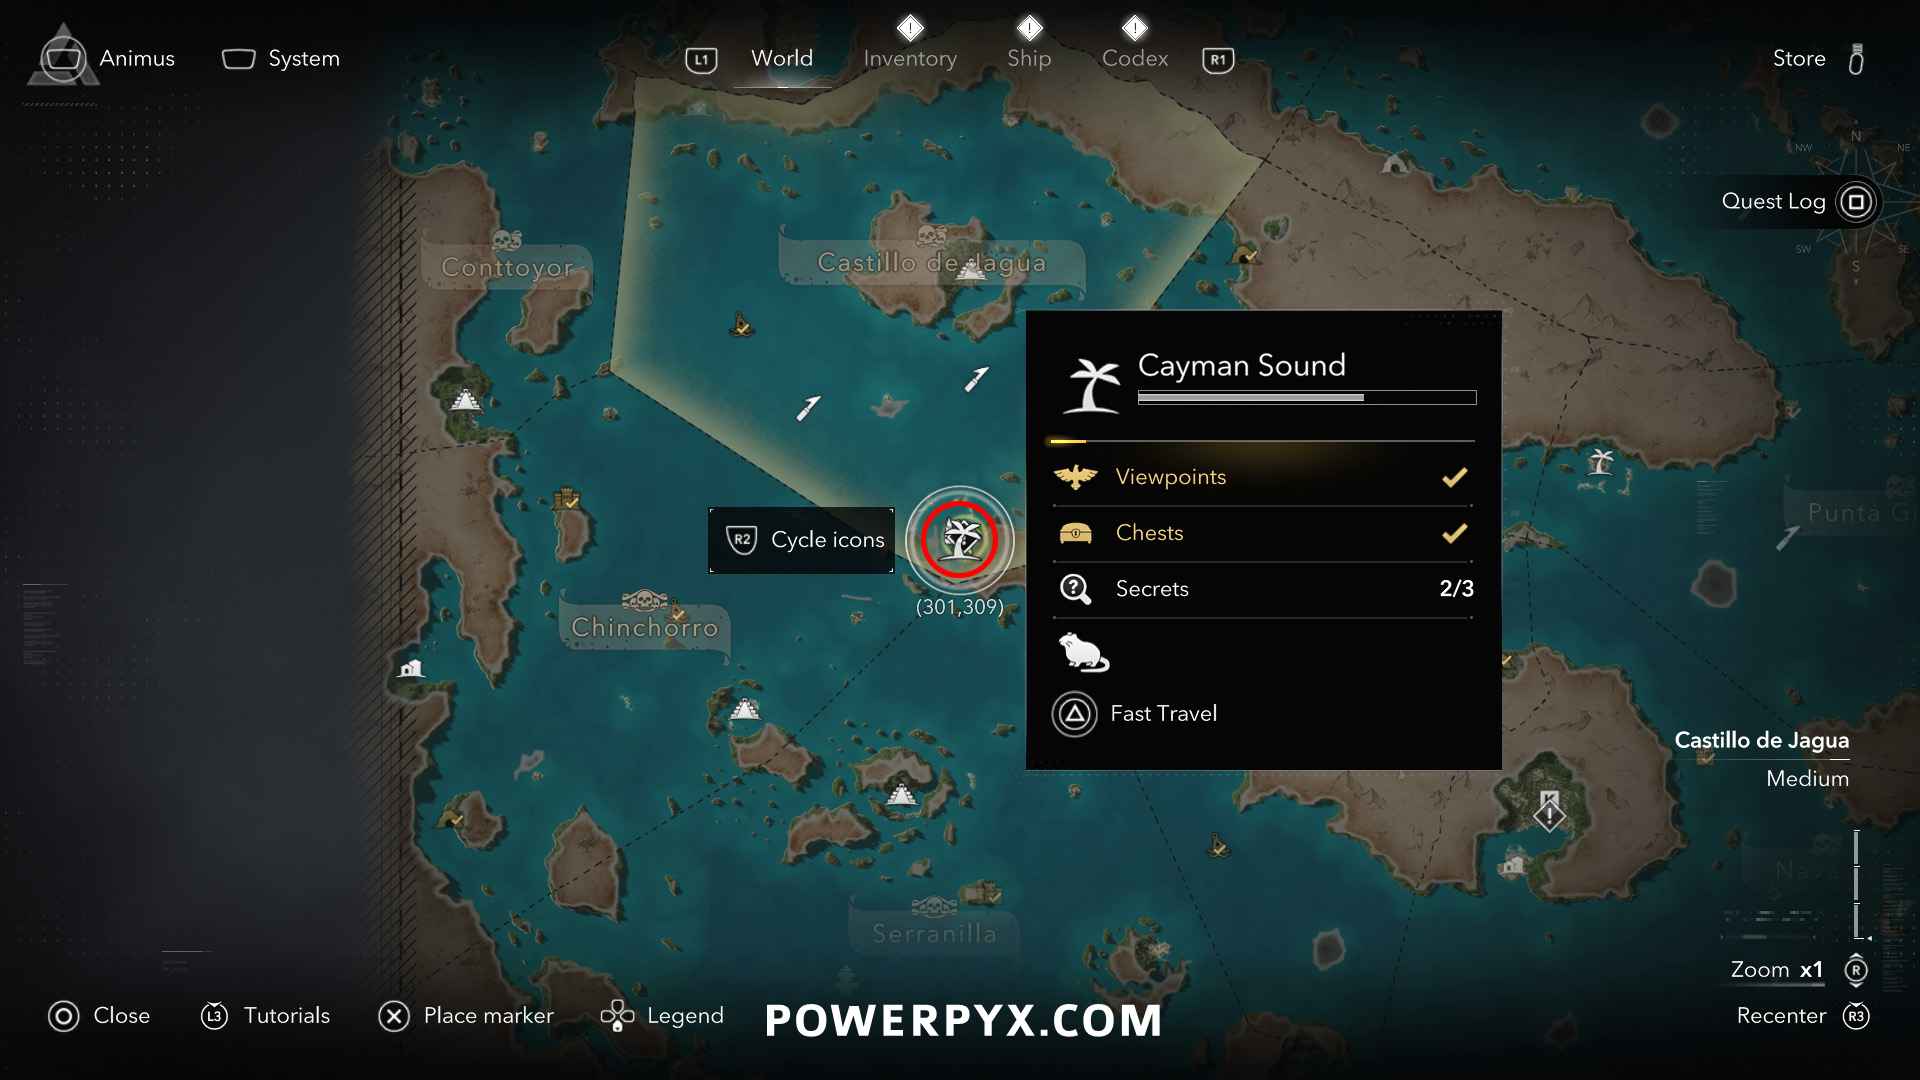
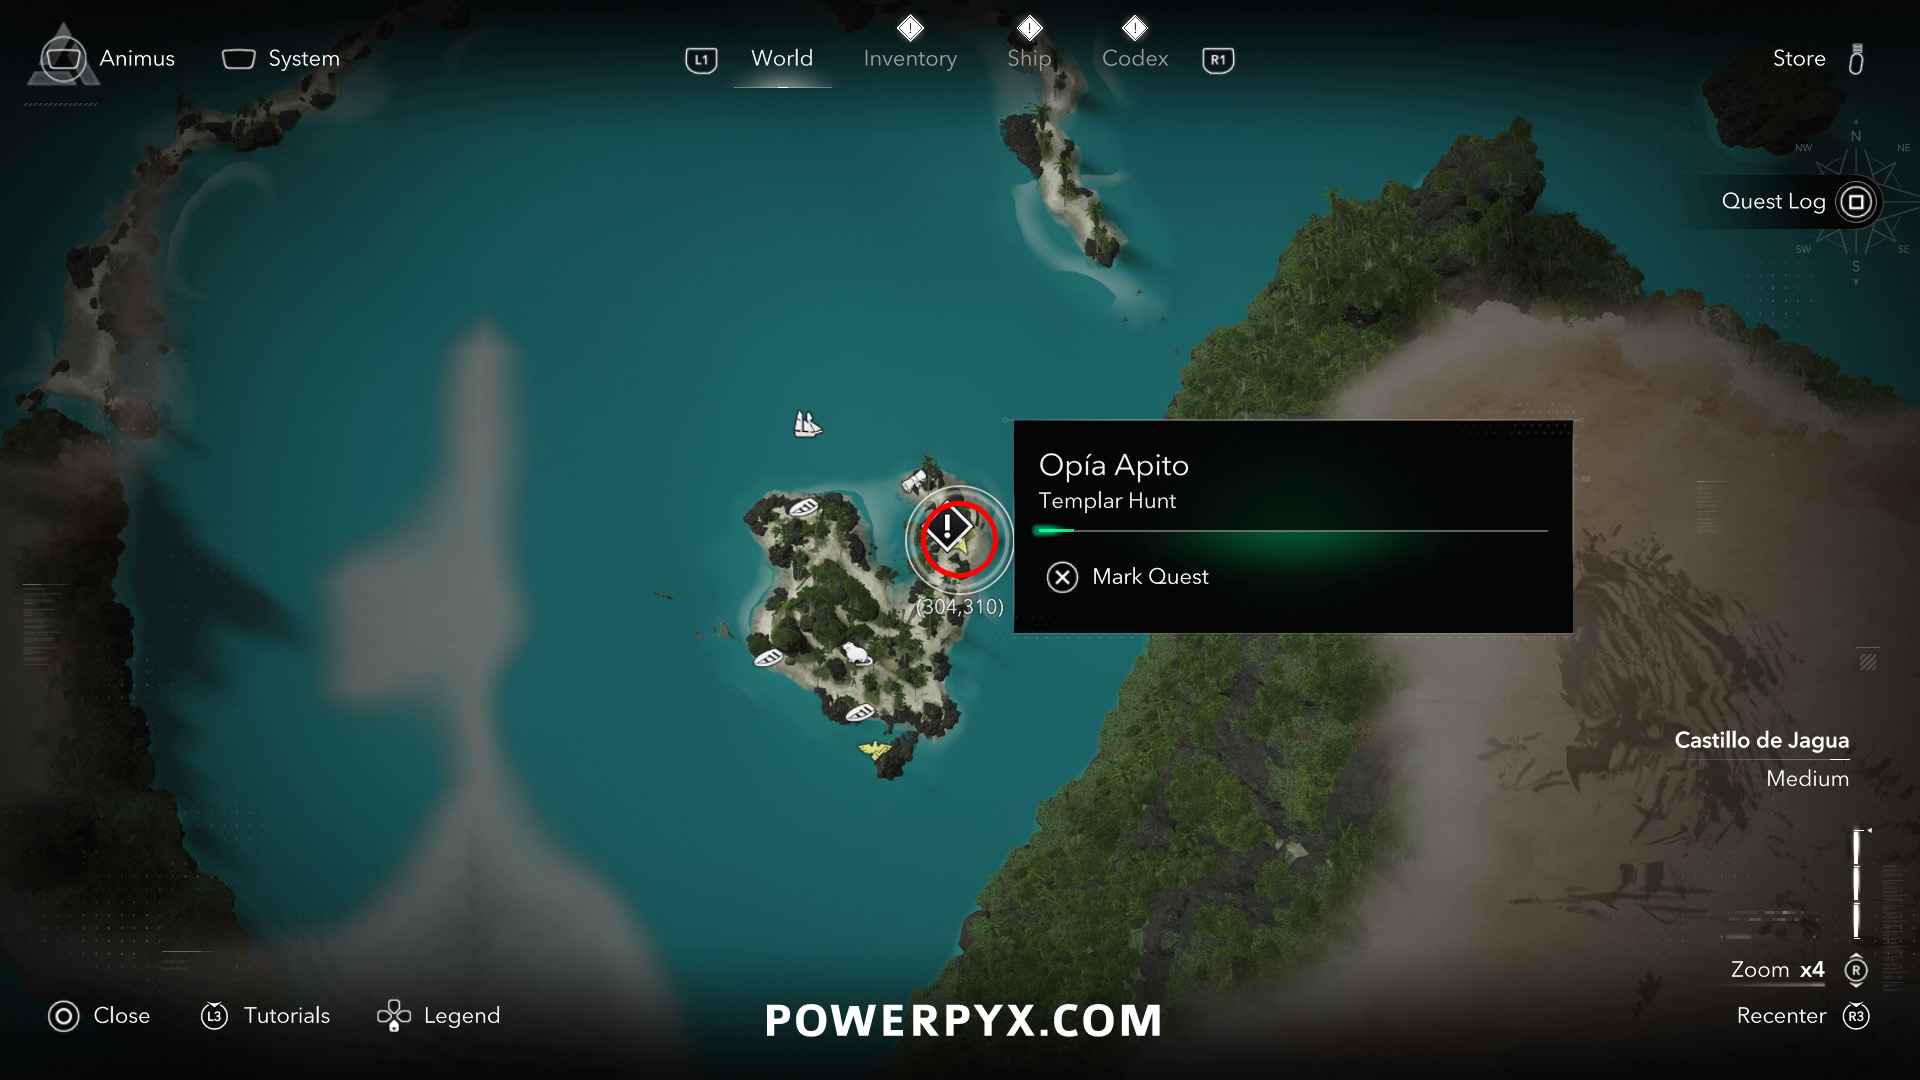
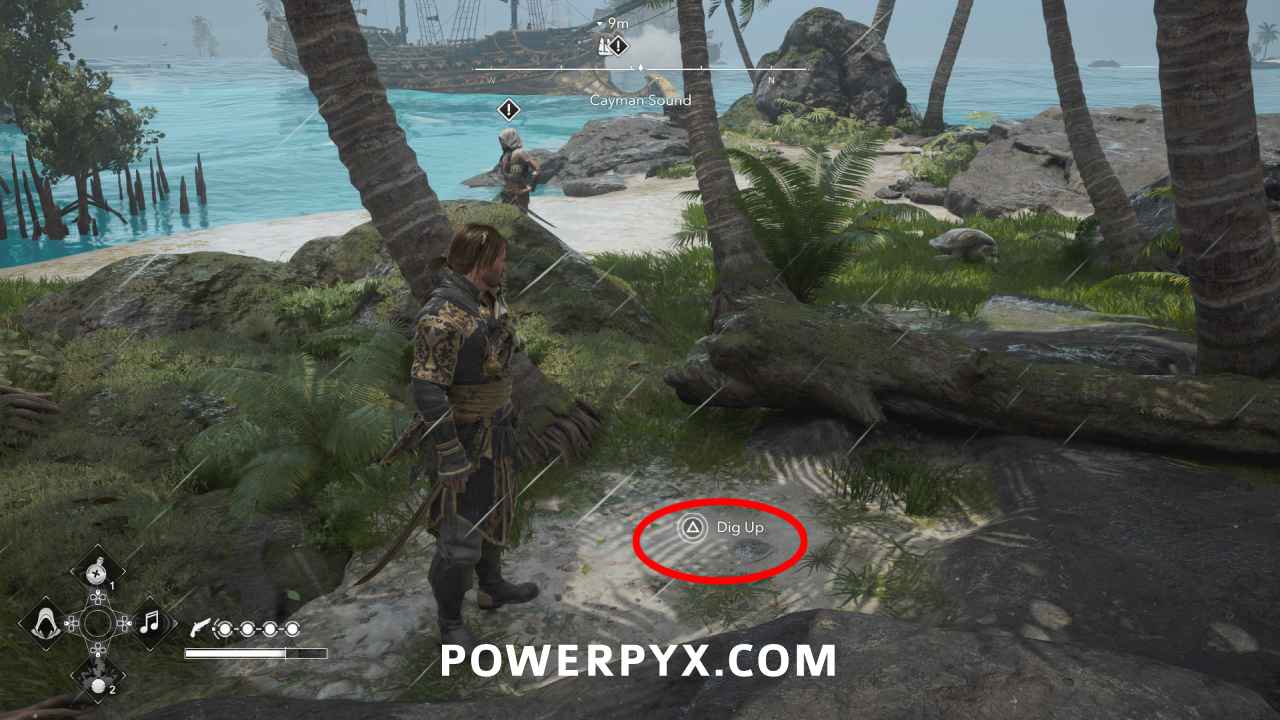
Solution: Cayman Sound (304, 310) – in the north-east shore of Cayman Sound, between the palm trees
Reward: 4000 Reales
Chinchorro Region
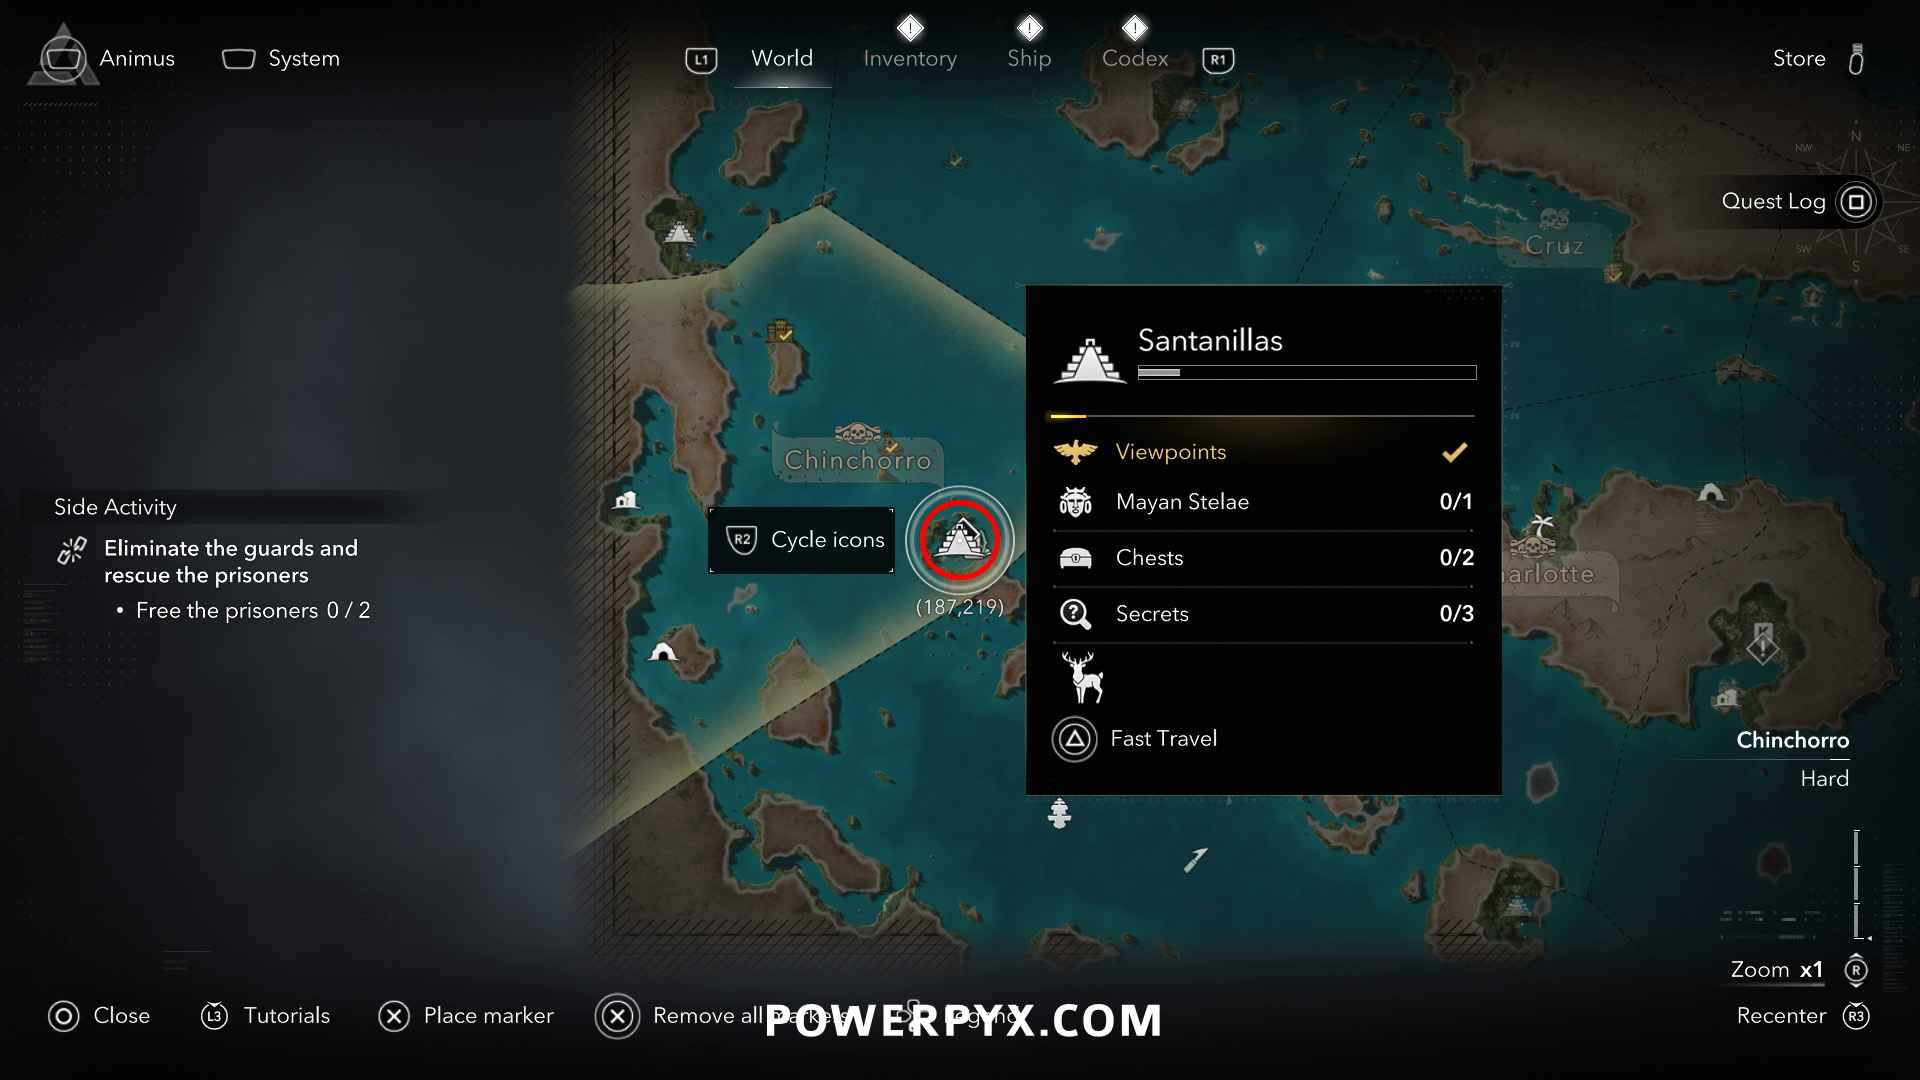
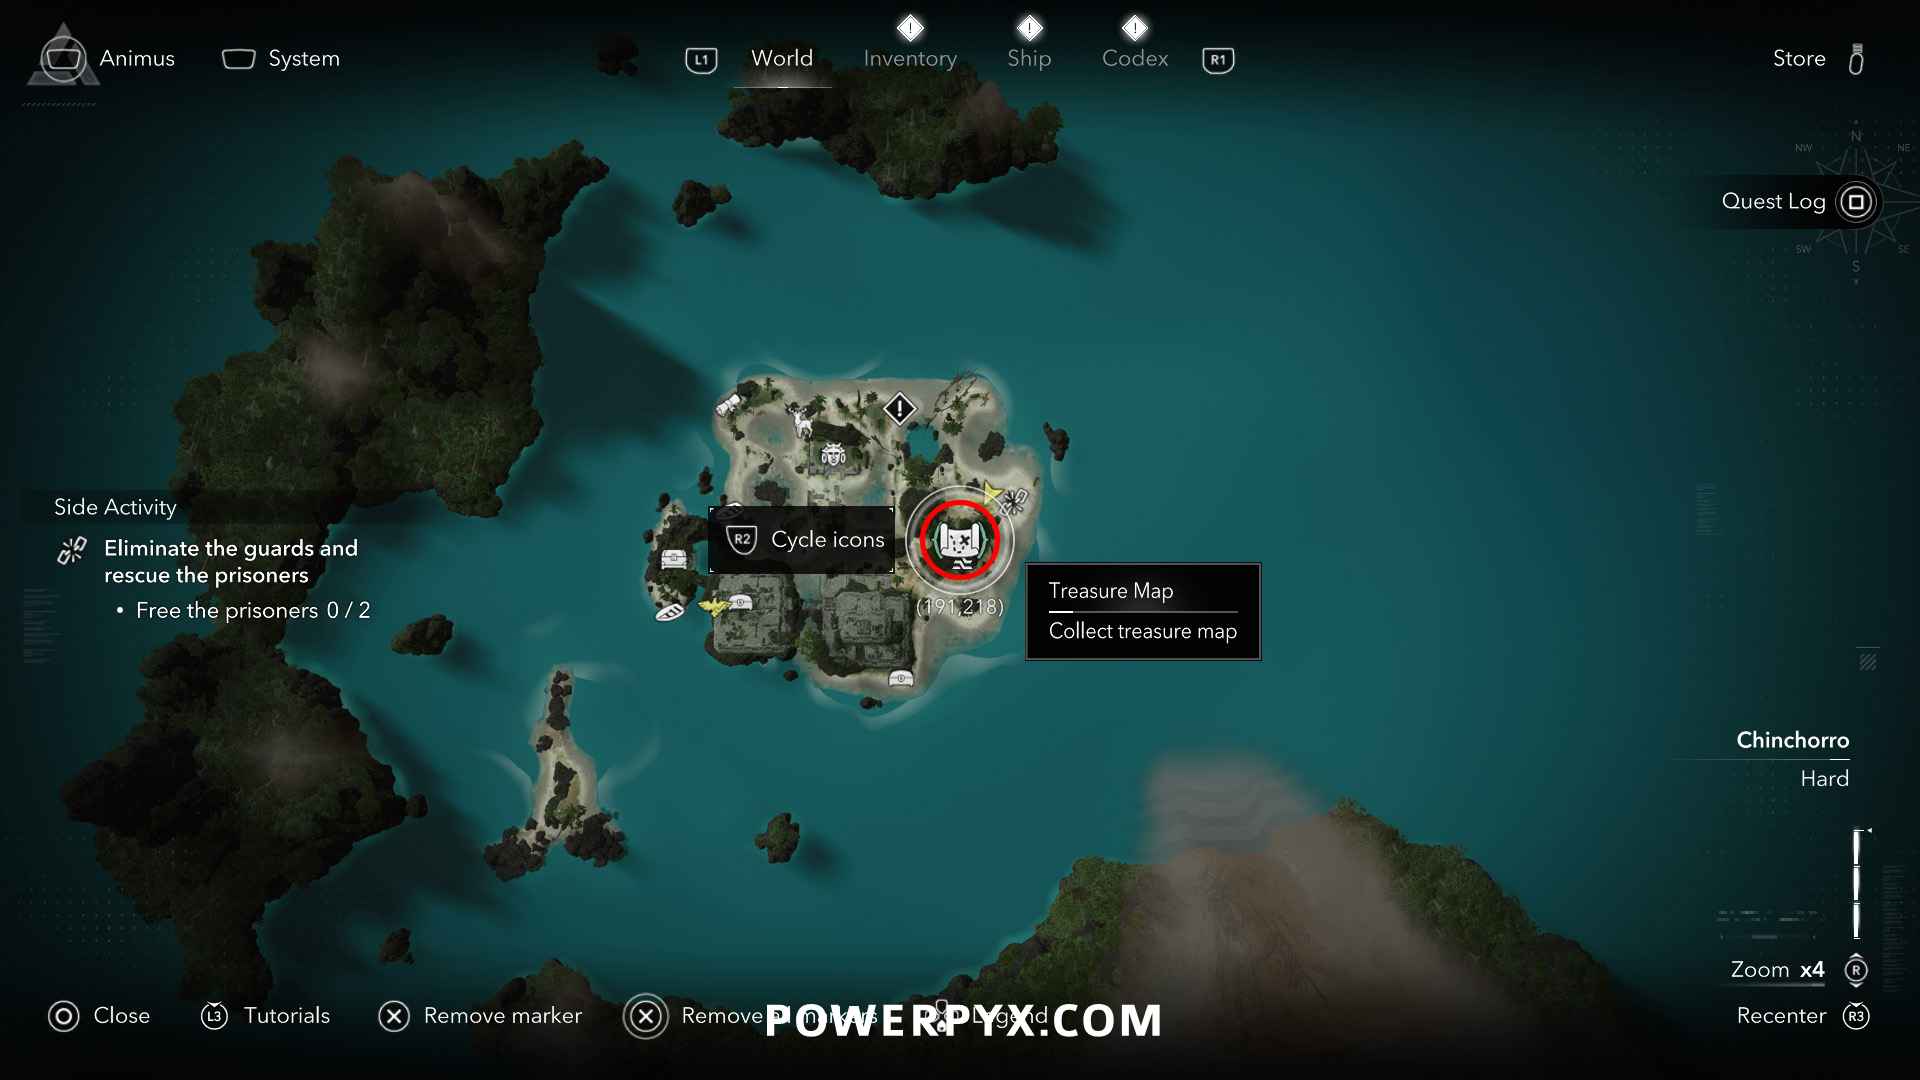
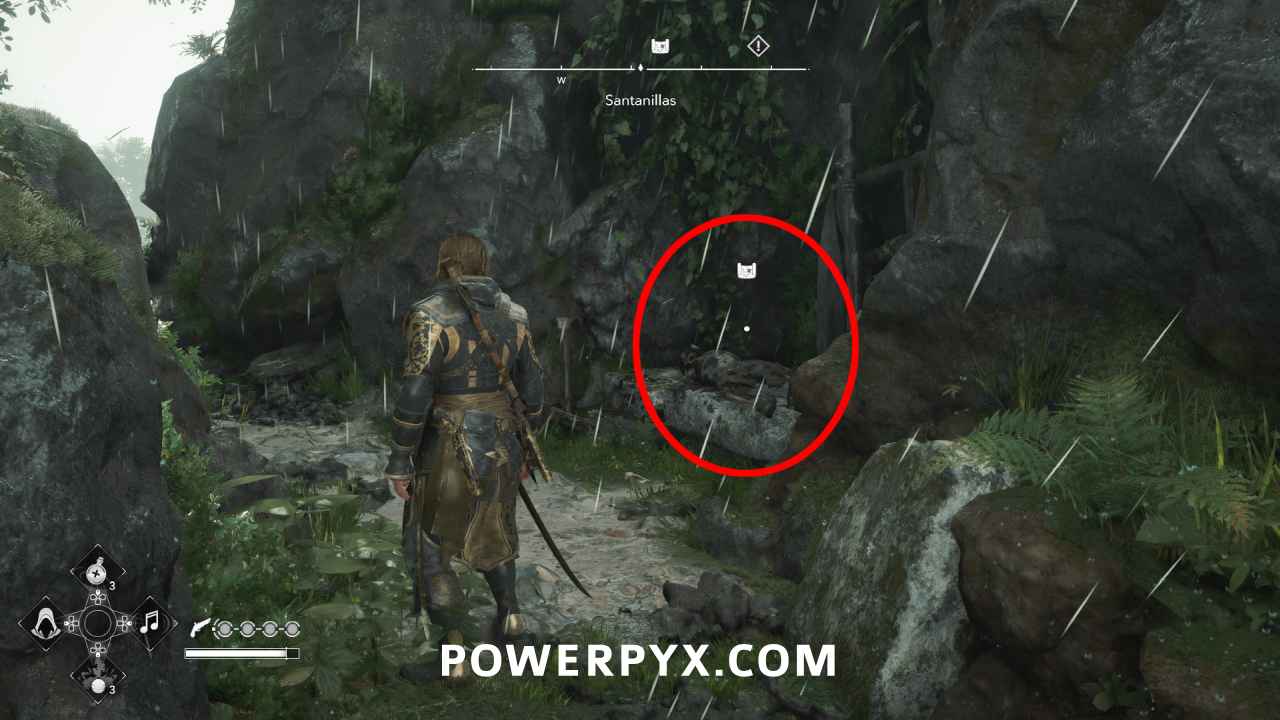
#17 – Treasure Map from Santanillas (San Juan)
Location: Santanillas (191, 218) – on a little hill, climb up via the tree branches around it
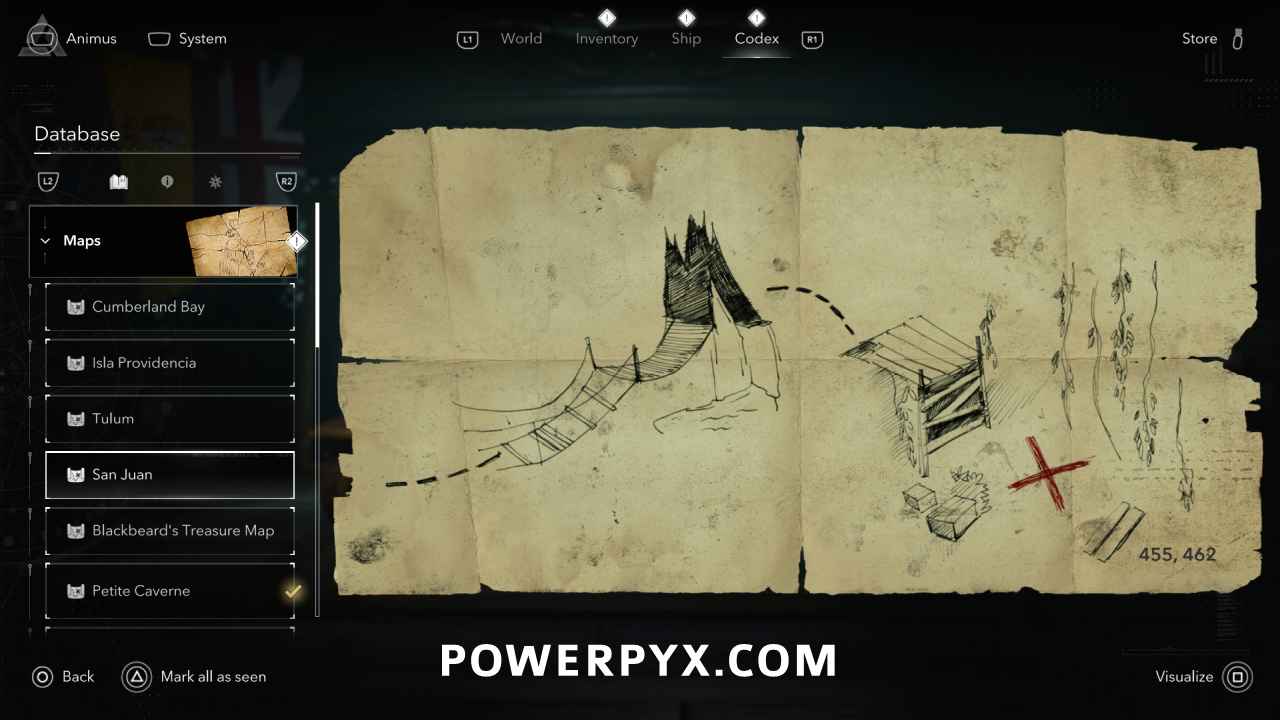
Solution: San Juan (455, 462) – swim into the cave through the underwater tunnel, as soon as you exit the water there will be a cave section with a single enemy. The treasure is there on the right, just before climbing up the wooden scaffold.
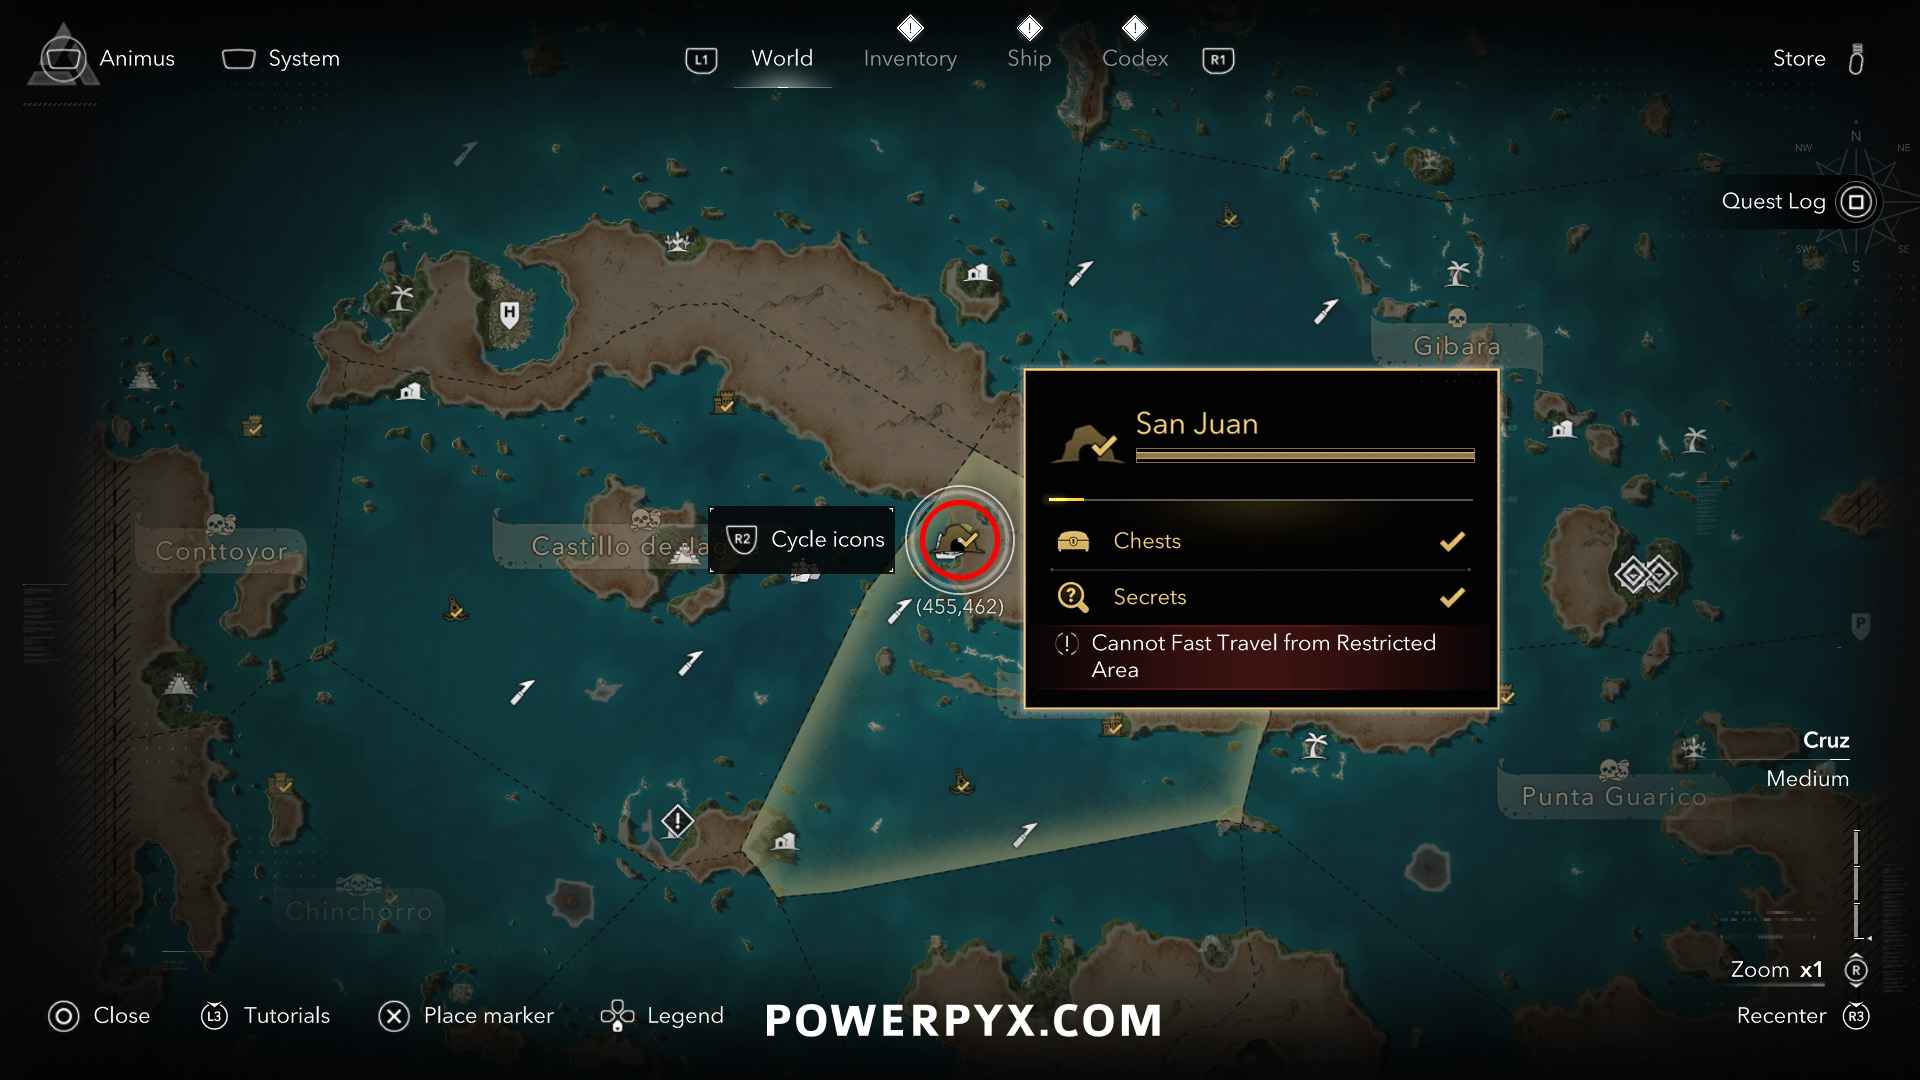
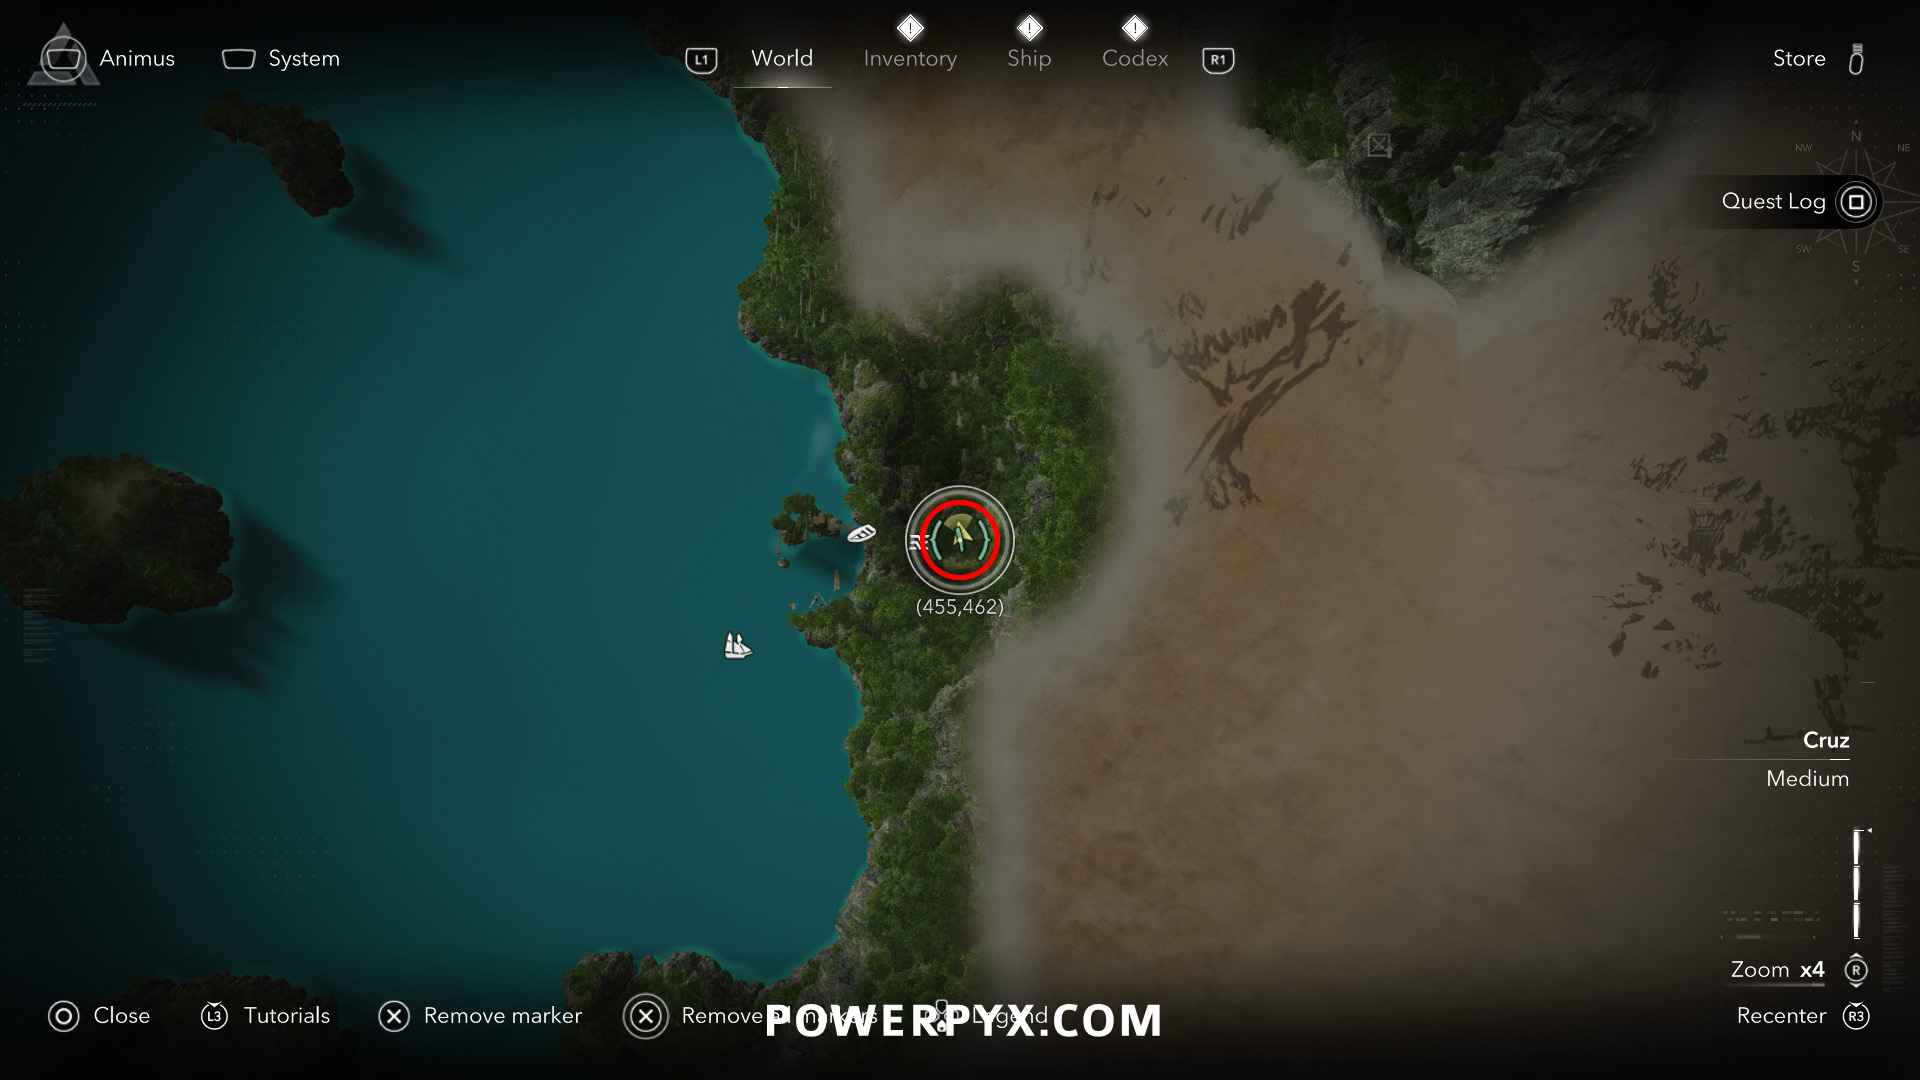
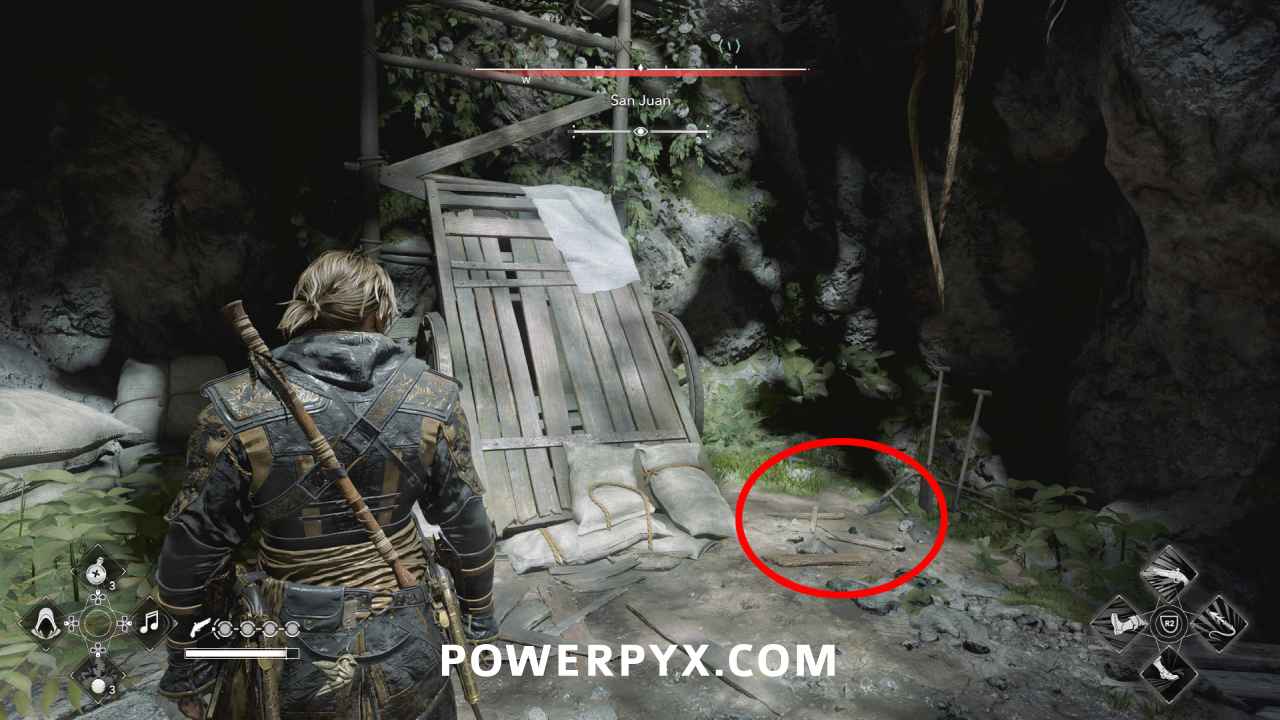
Reward: Fire Barrel Strength Ultimate Plan, 3000 Reales
#18 – Treasure Map from Ambergris Key (Misteriosa)
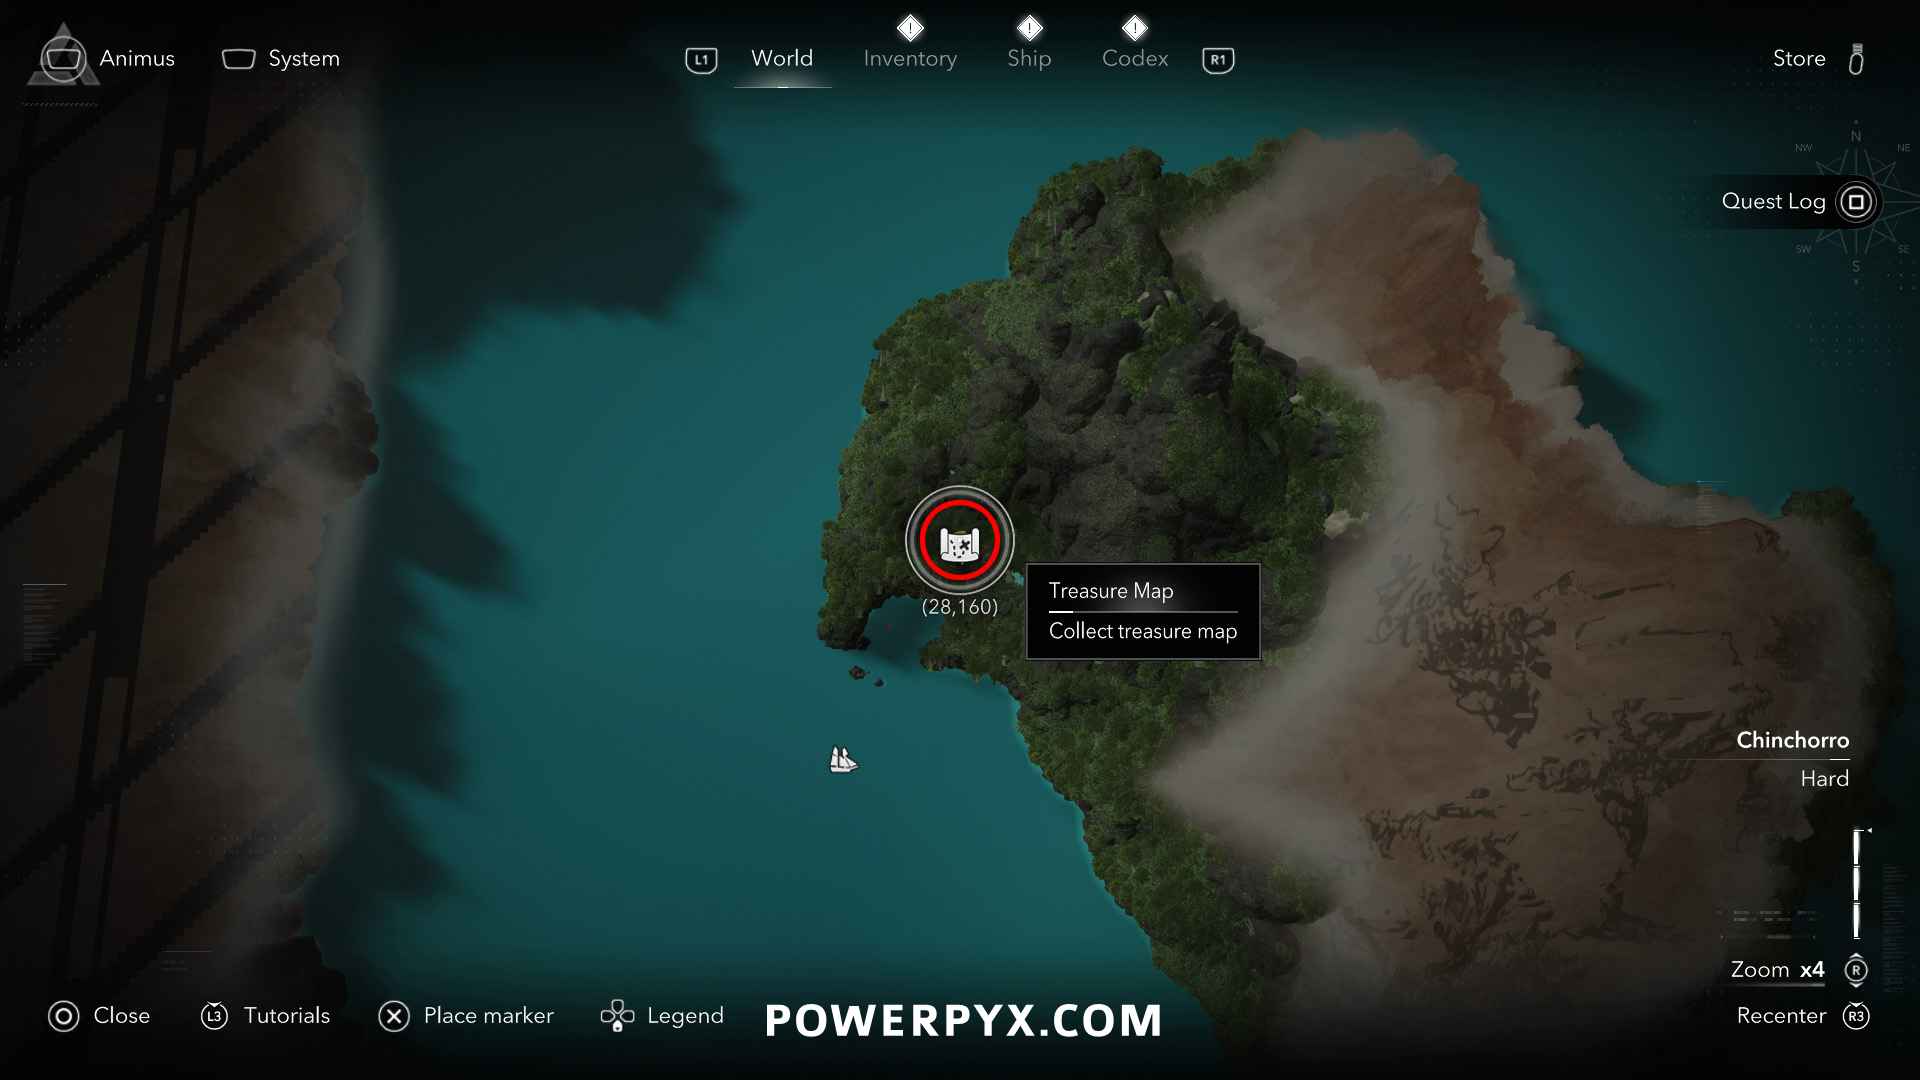
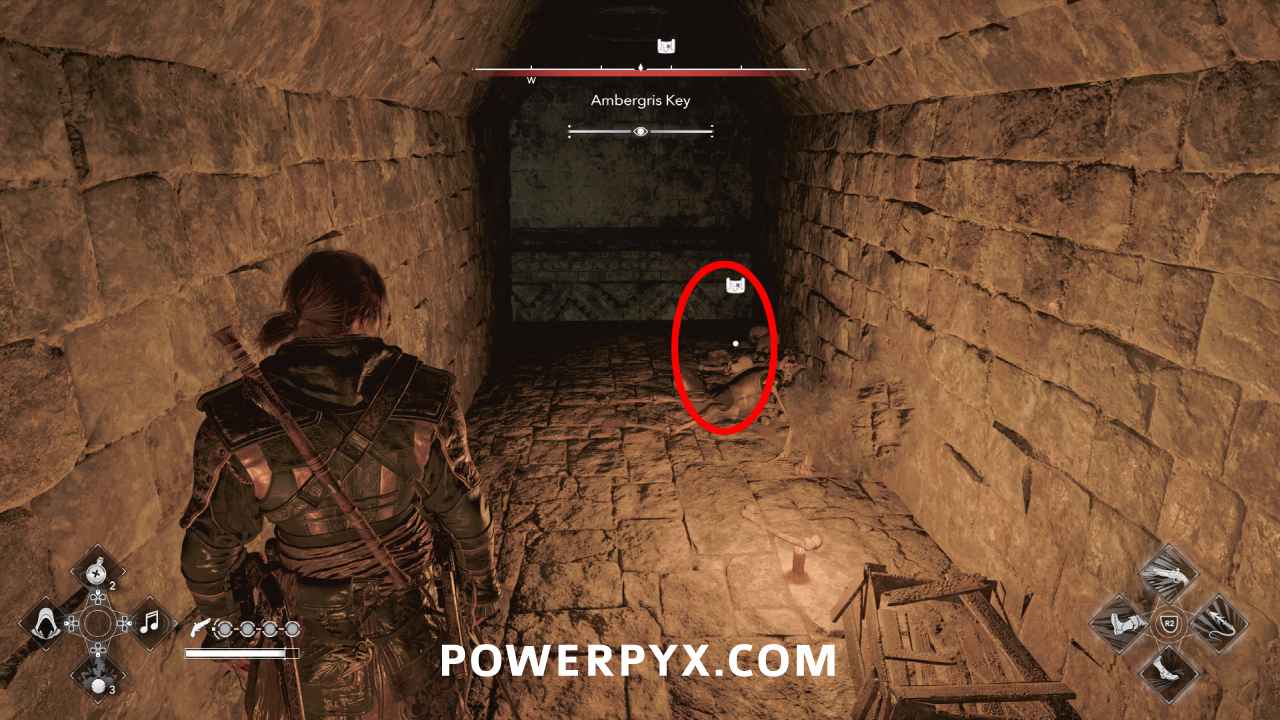
Location: Ambergris Key (28, 160) – swim into the cave through the underwater tunnel, then enter the big room with a locked chest and many enemies. Climb the pillars around the middle of the room to find it on the upper floor.
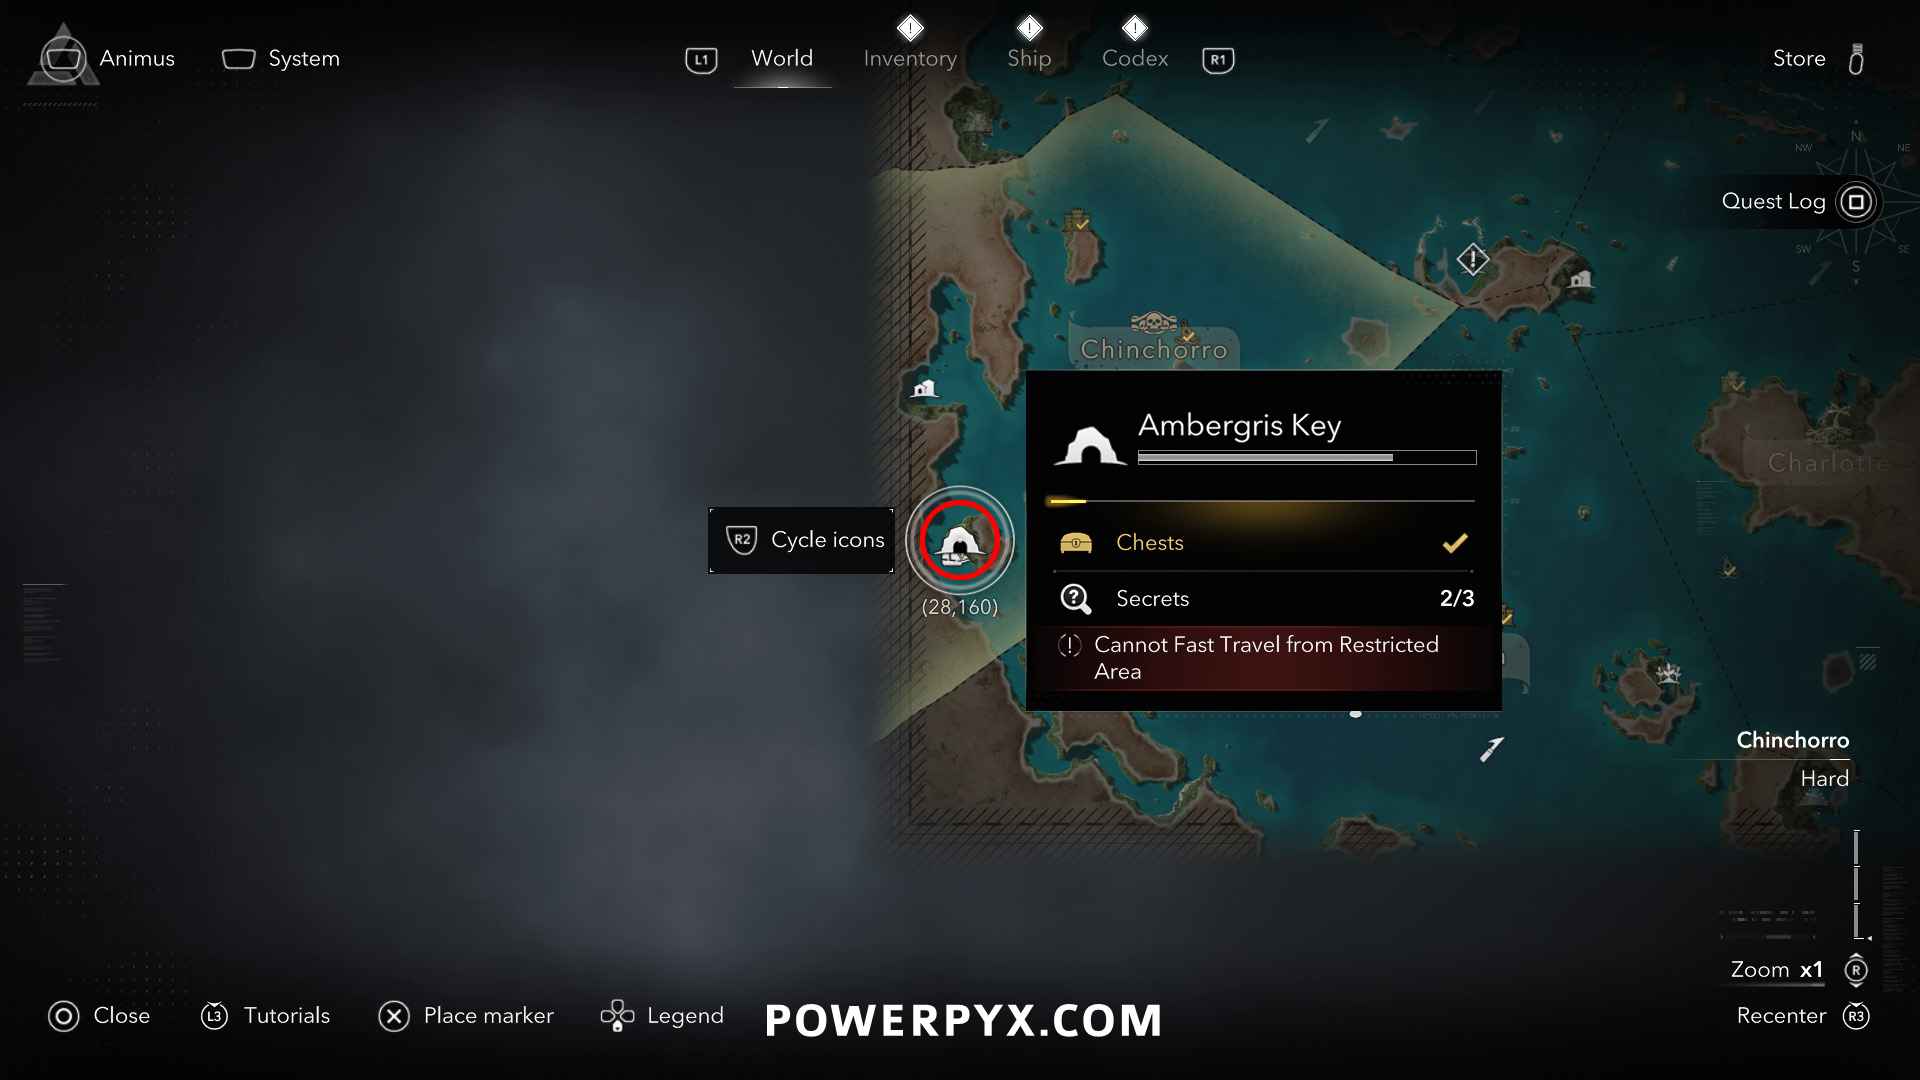
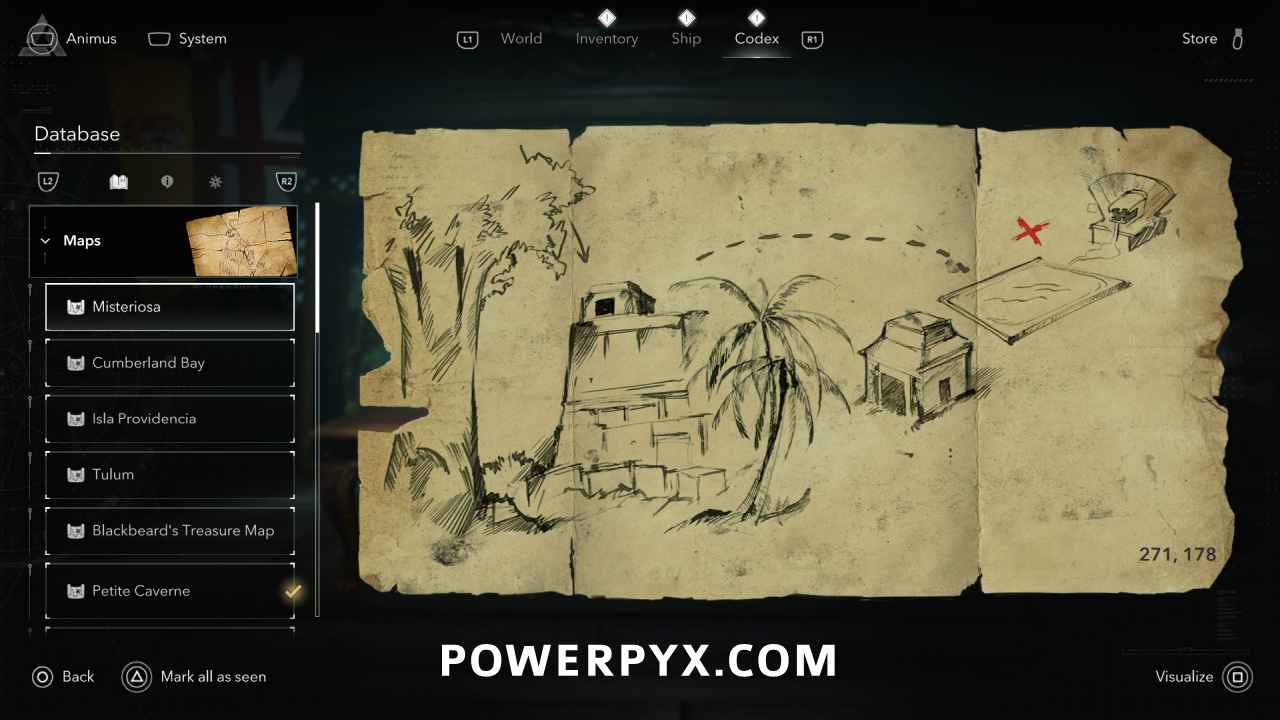
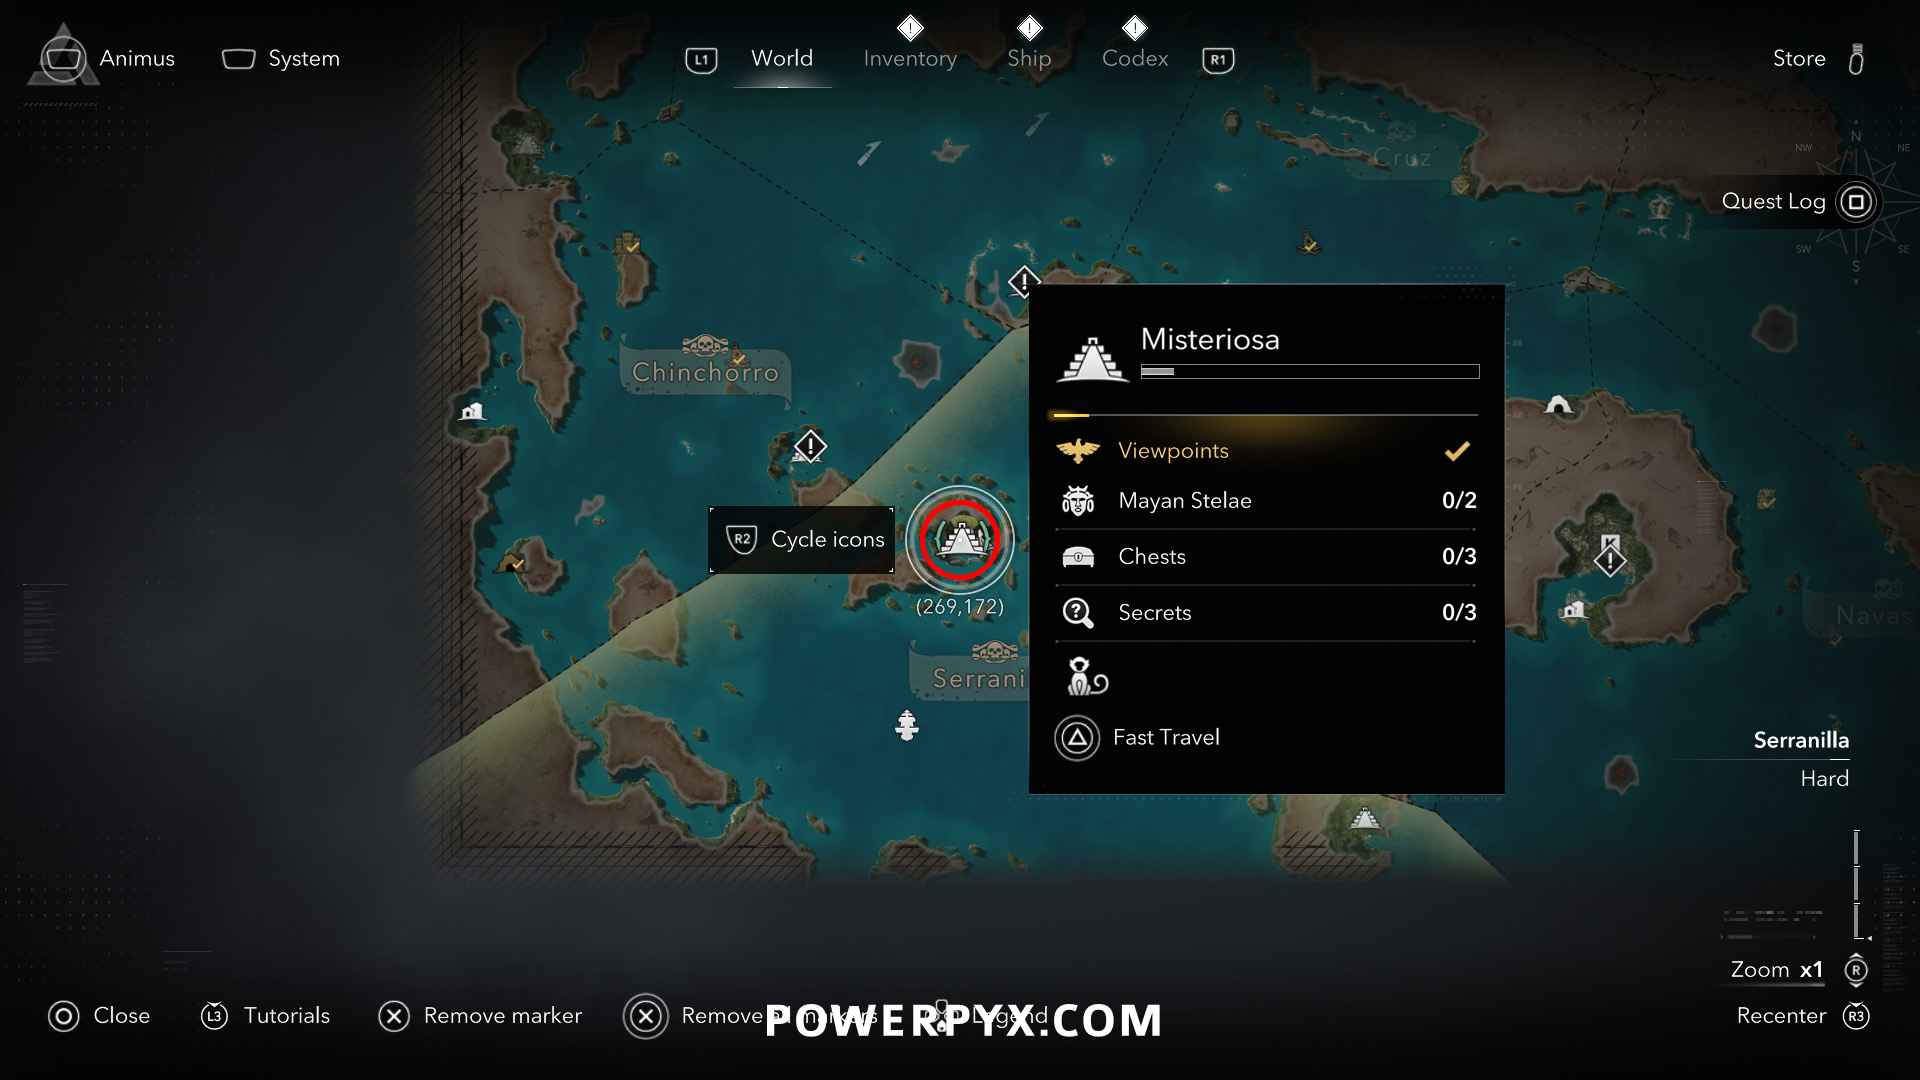
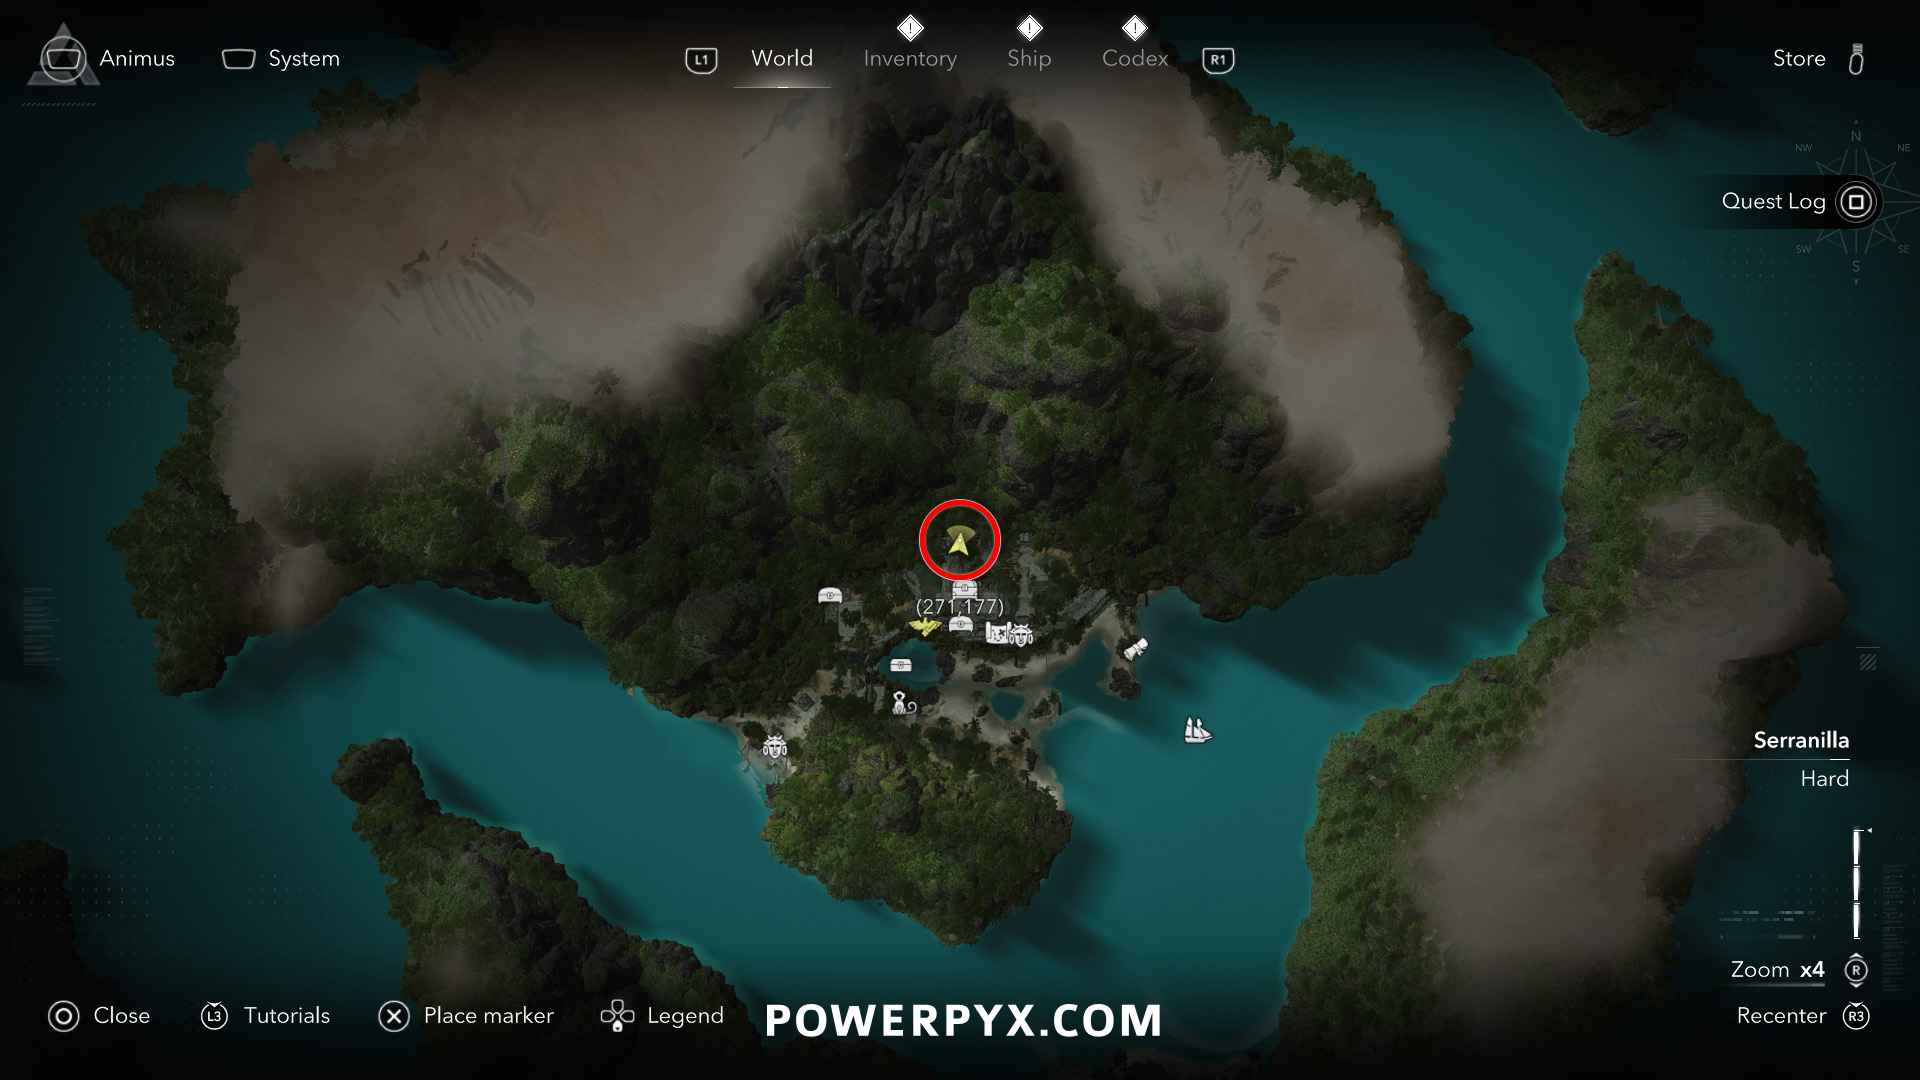
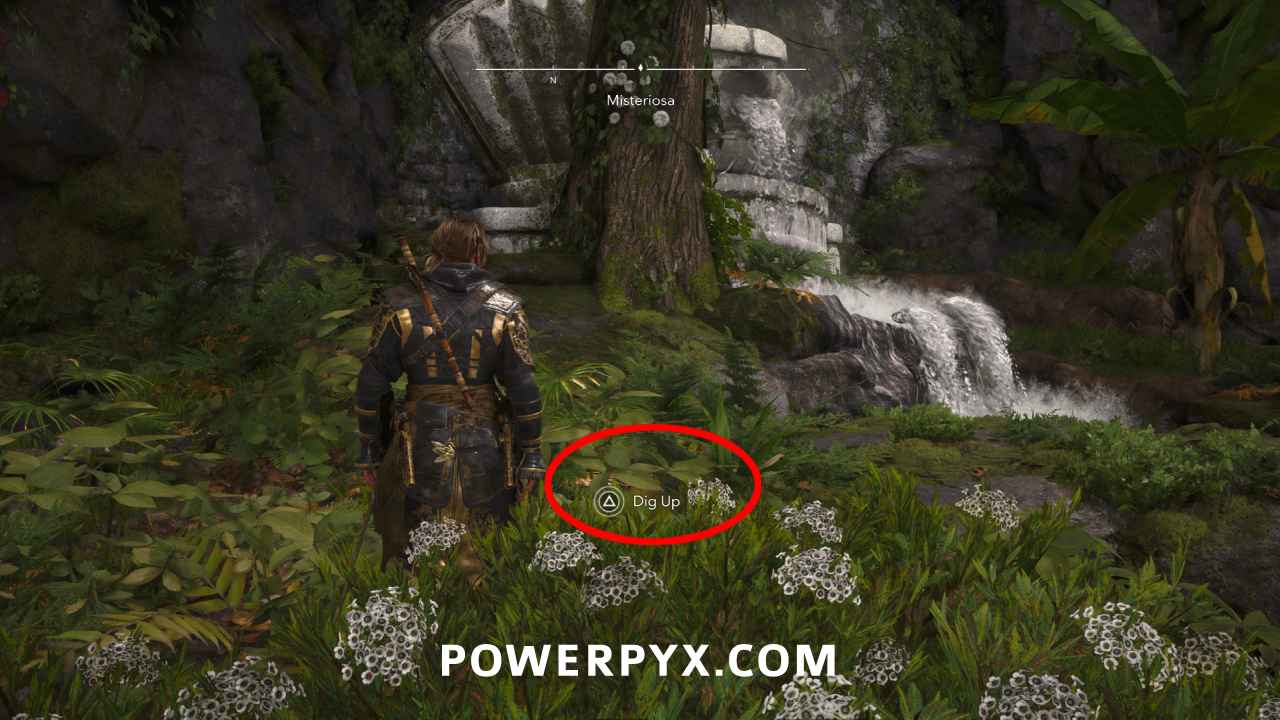
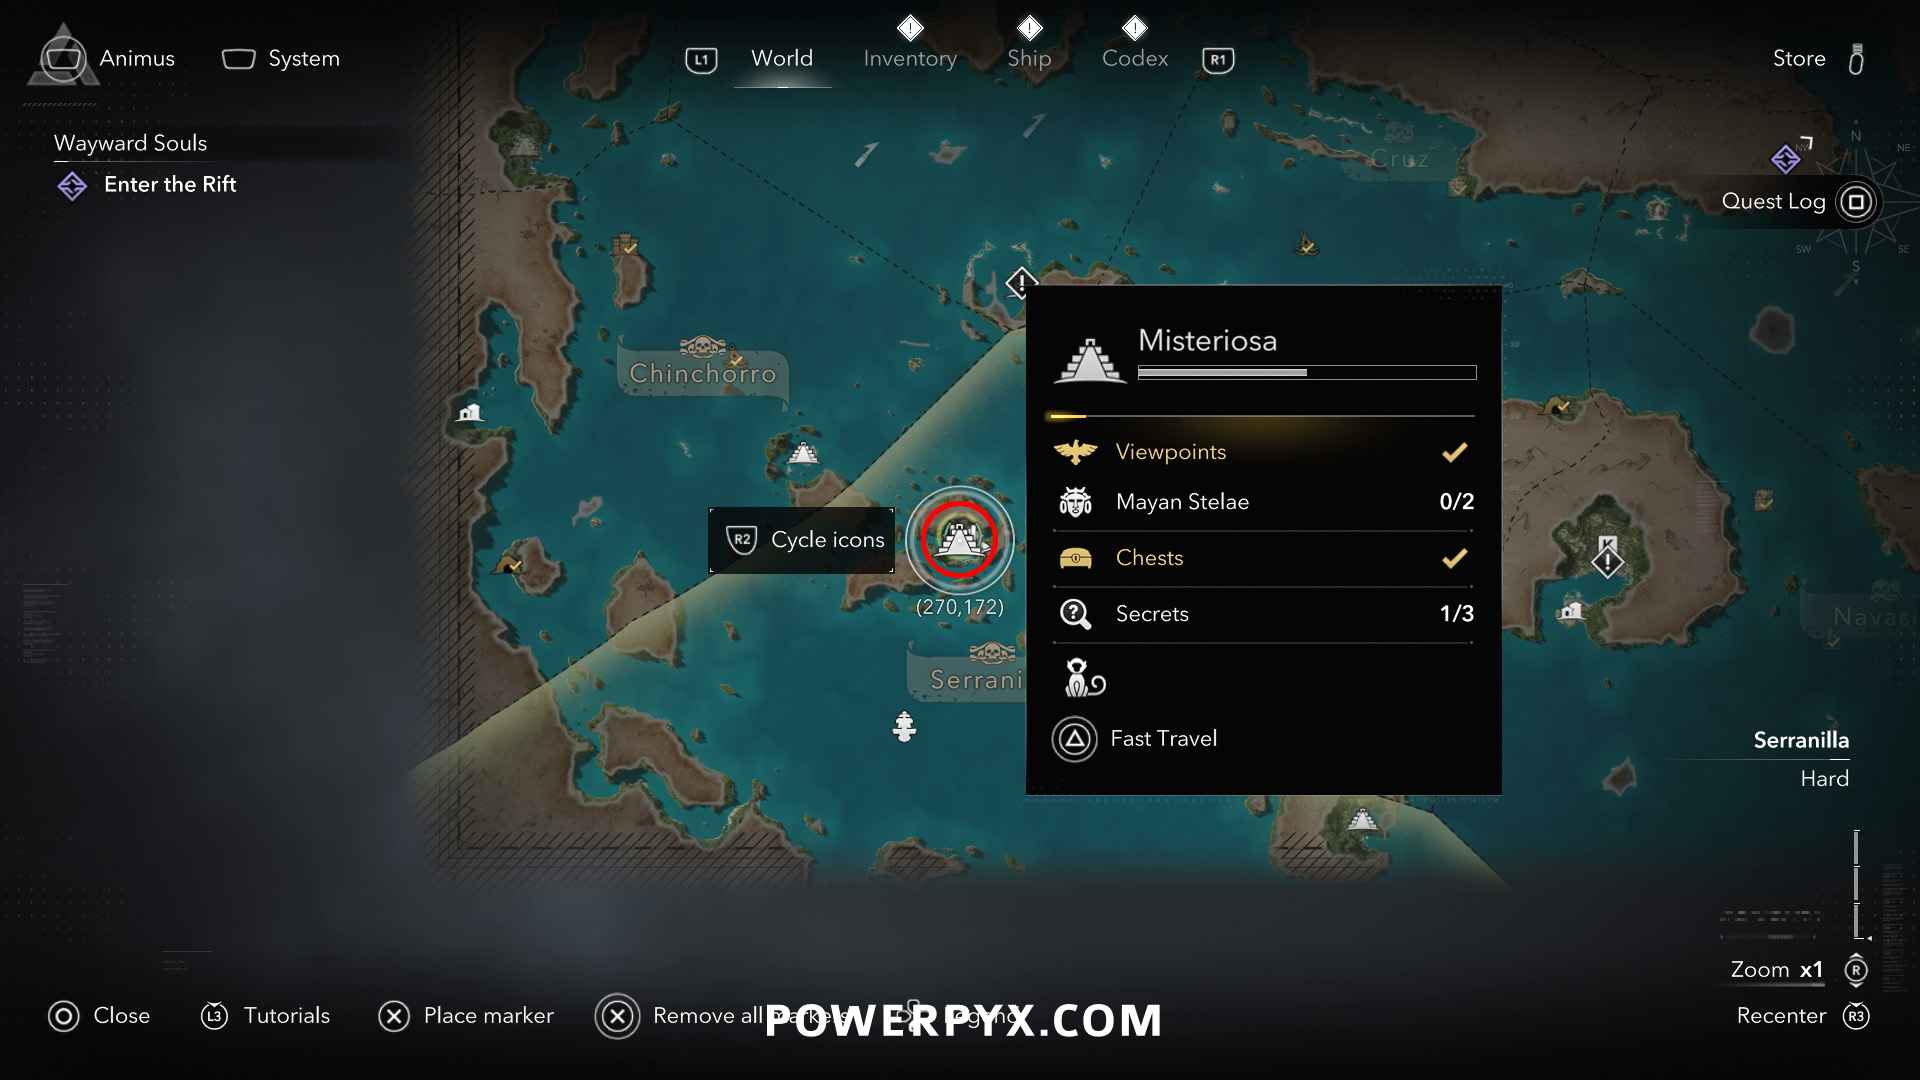
Solution: Misteriosa (271, 178) – Fast travel to the viewpoint but turn around instead of jumping down, you’ll see a water fountain behind the mayan temple (on the top level). The buried treasure is to the left of the fountain in the grass, behind tall white flowers.
Reward: Heavy Shot Strength Ultimate Plan, 3000 Reales
#19 – Treasure Map from Corozal (Ambergris Key)
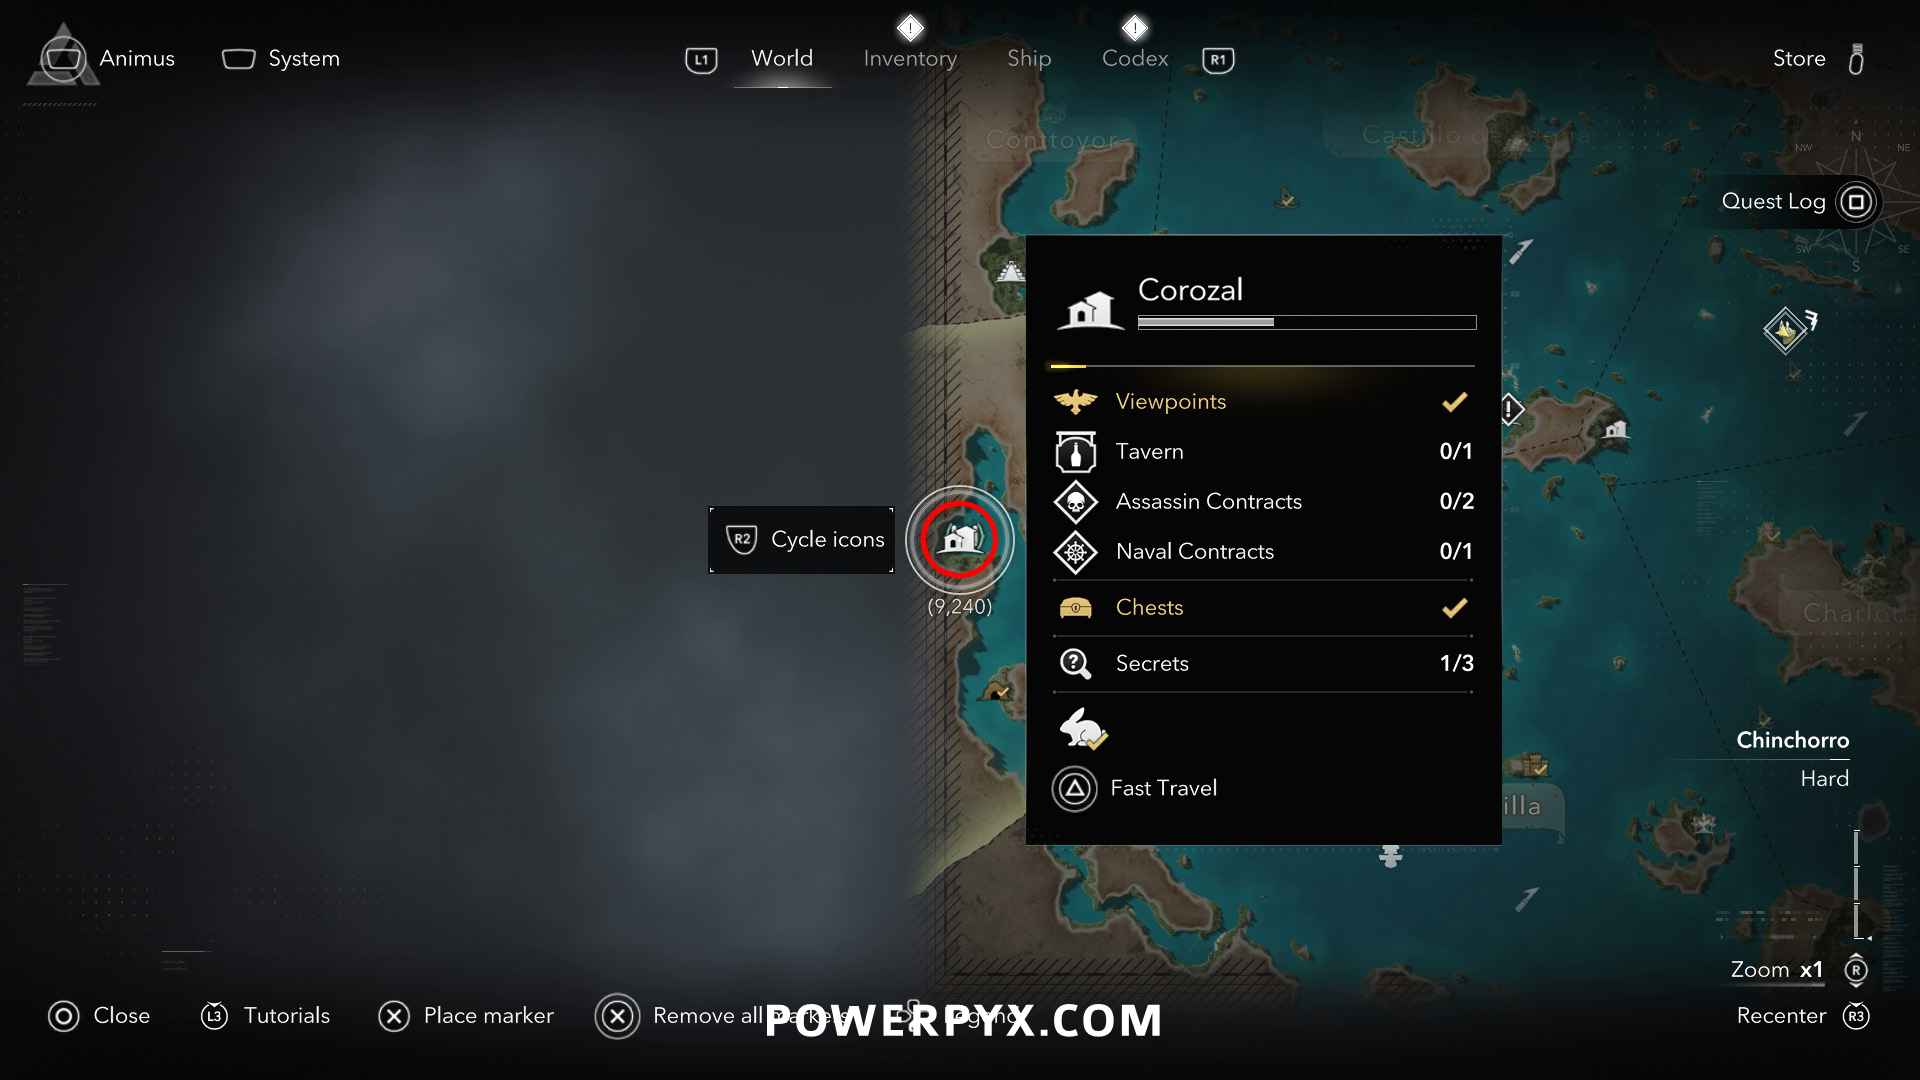
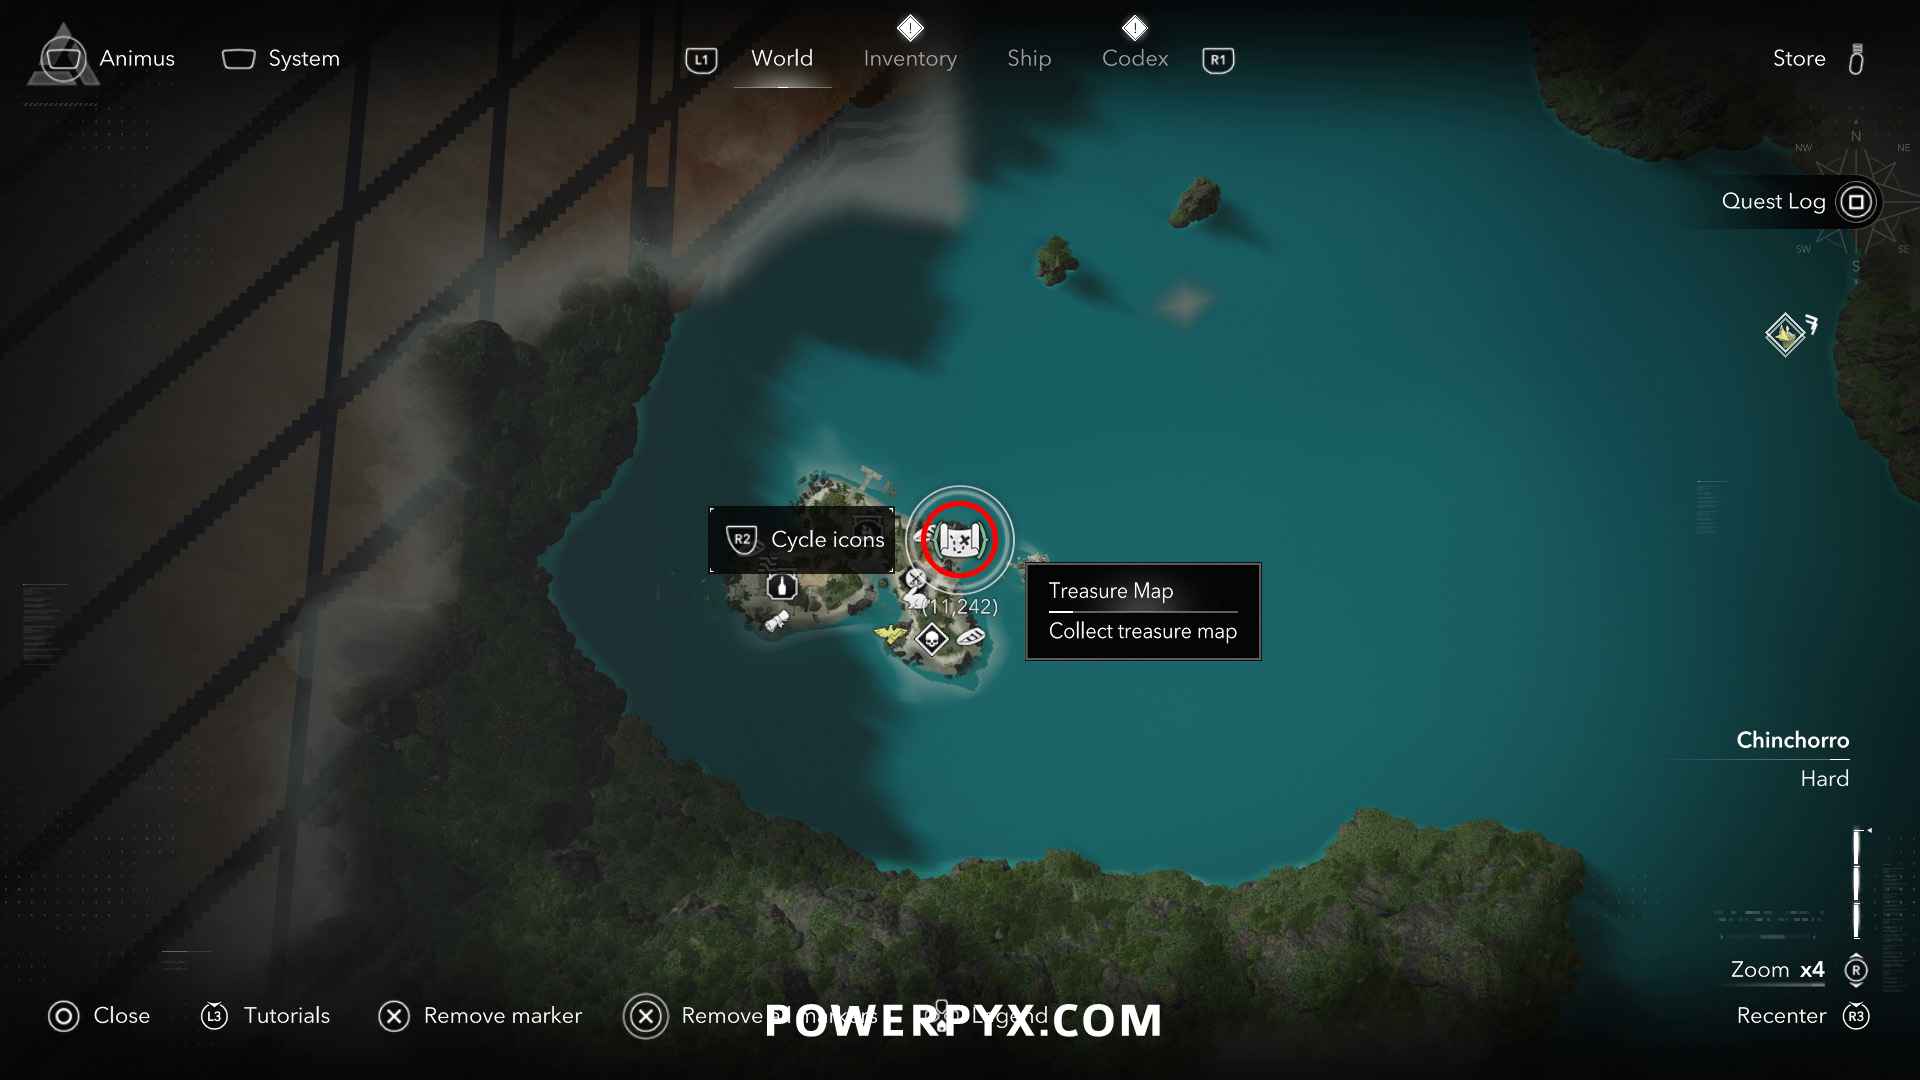
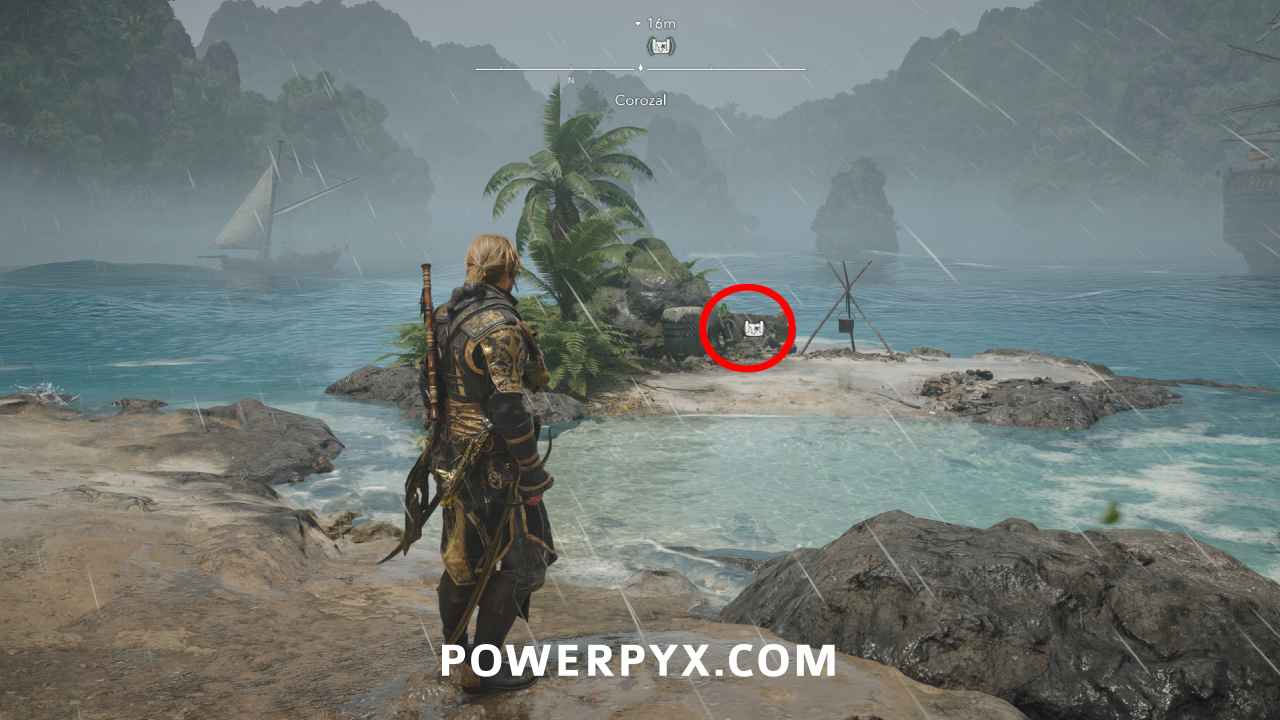
Location: Corozal (11, 242) – at the northeast shoreline on a small island, from a skeleton
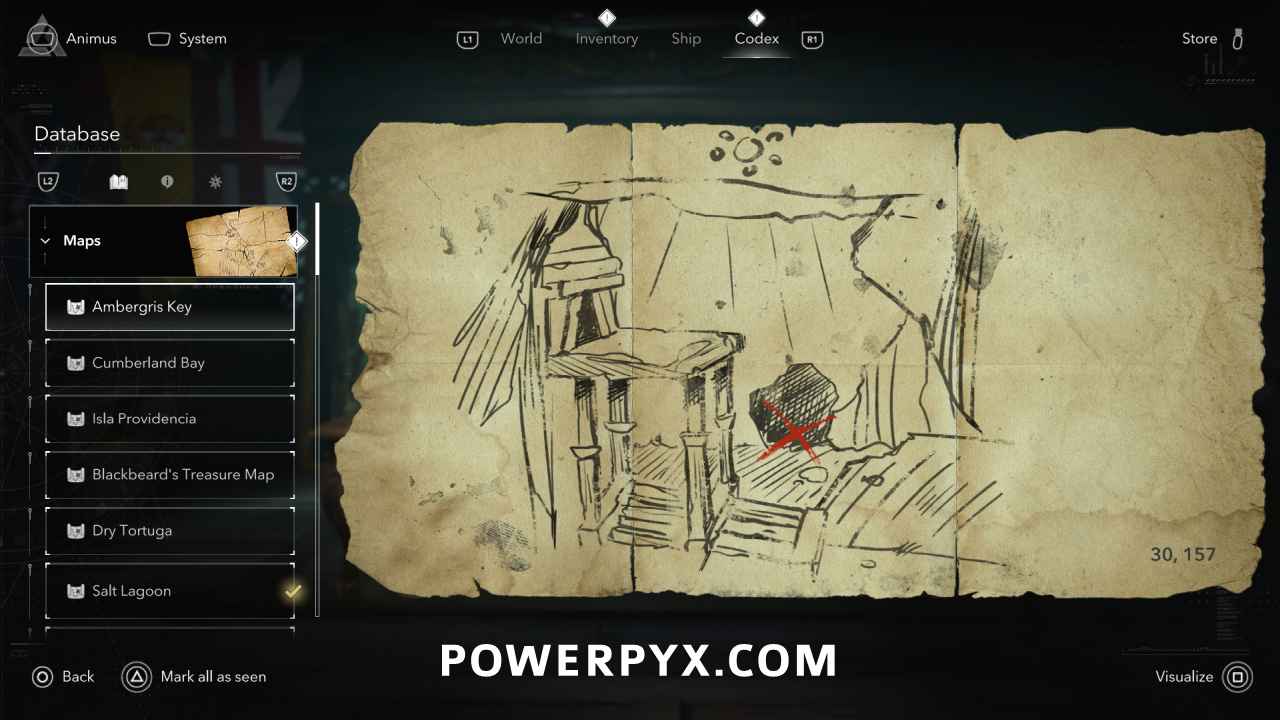
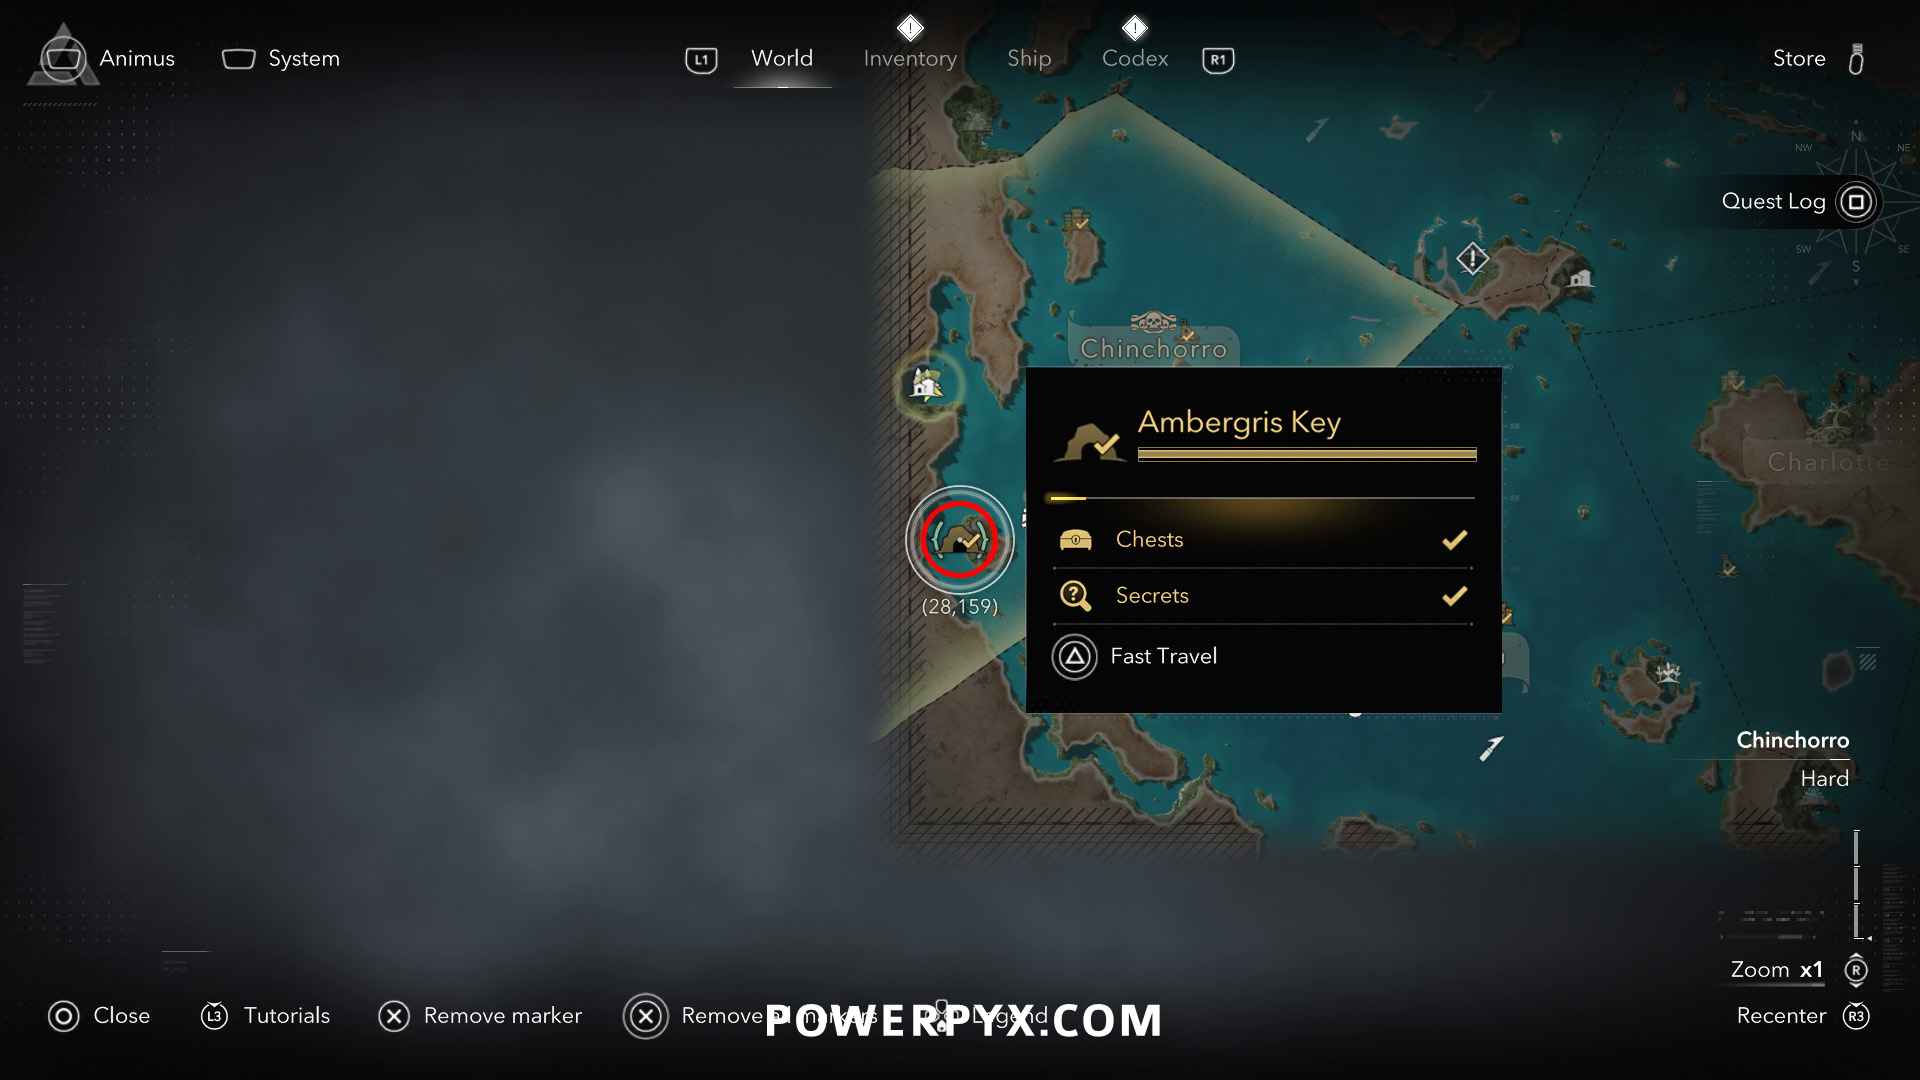
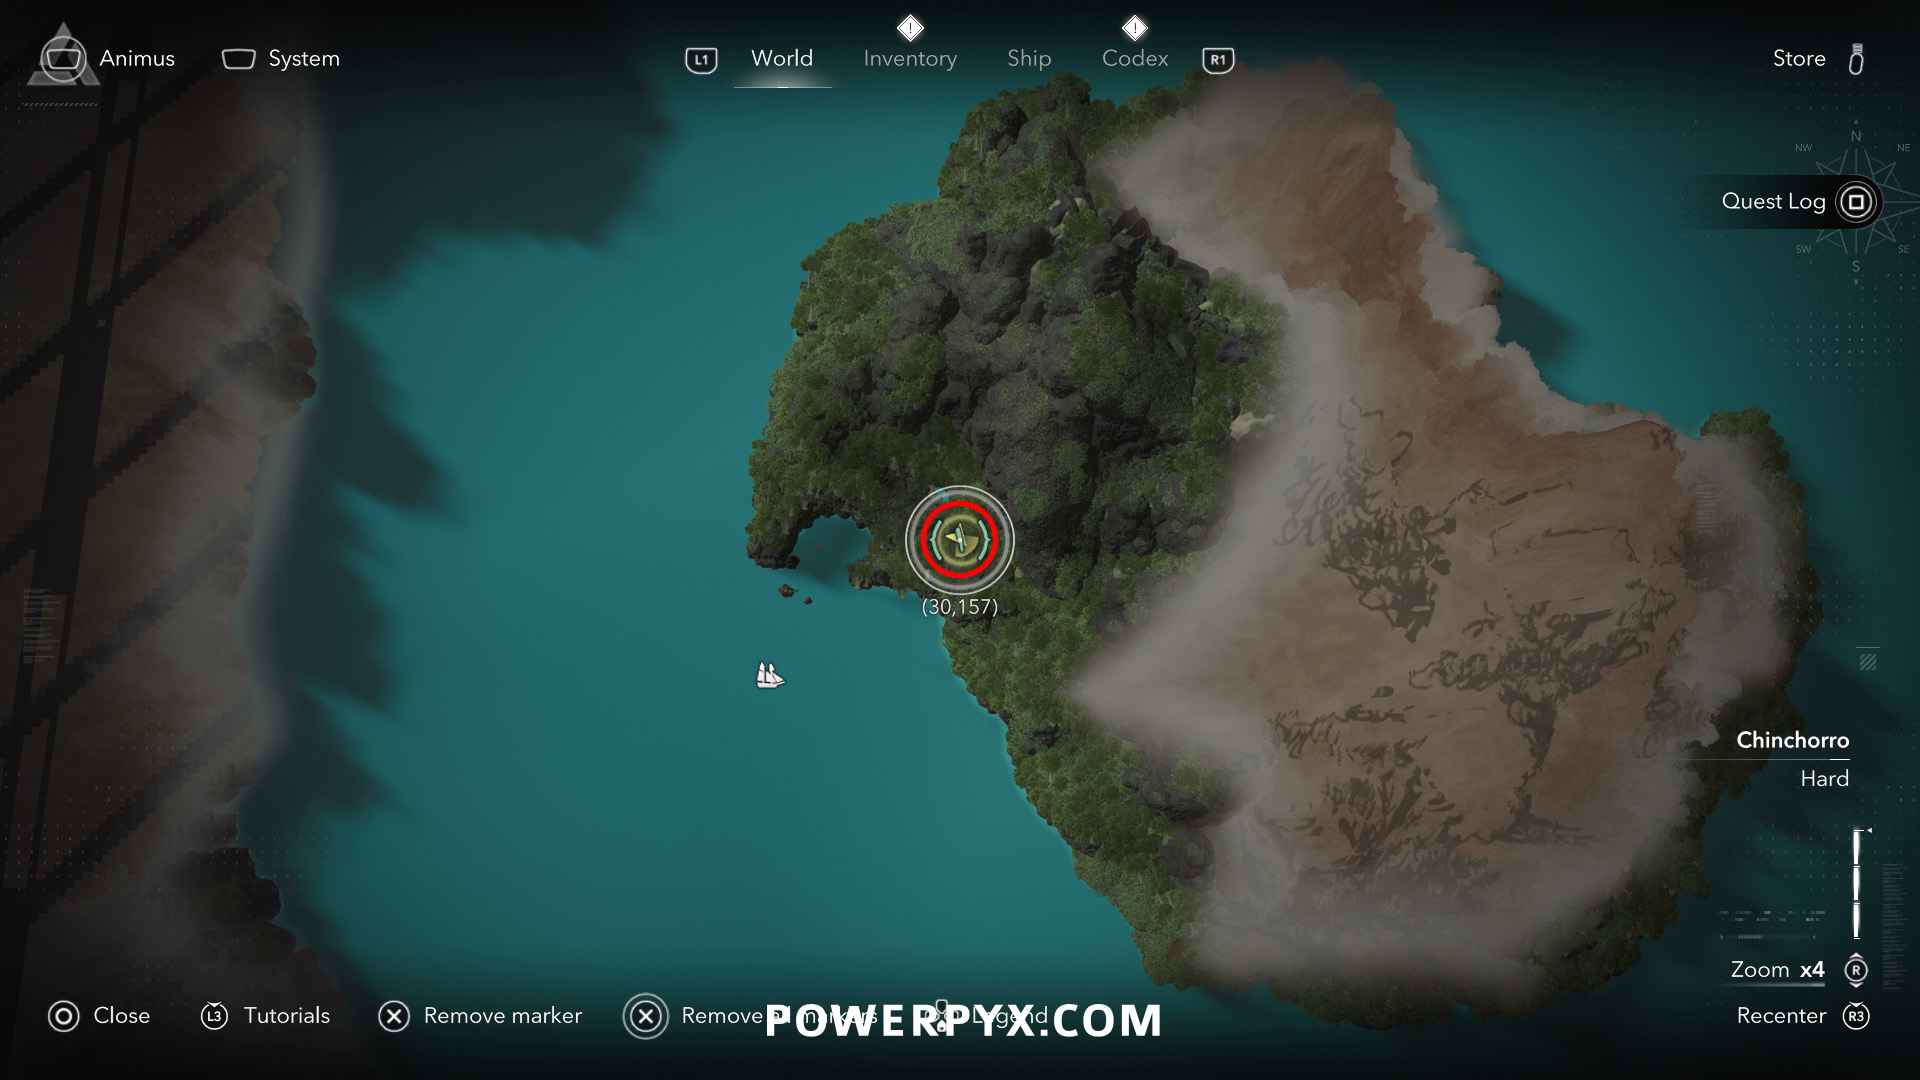
Solution: Ambergris Key (30, 157) – to enter Ambergris Key, you need to dive down at the entrance and follow the red jellyfish through the underwater tunnel. Once you reach the inside, check the left corner before climbing up.
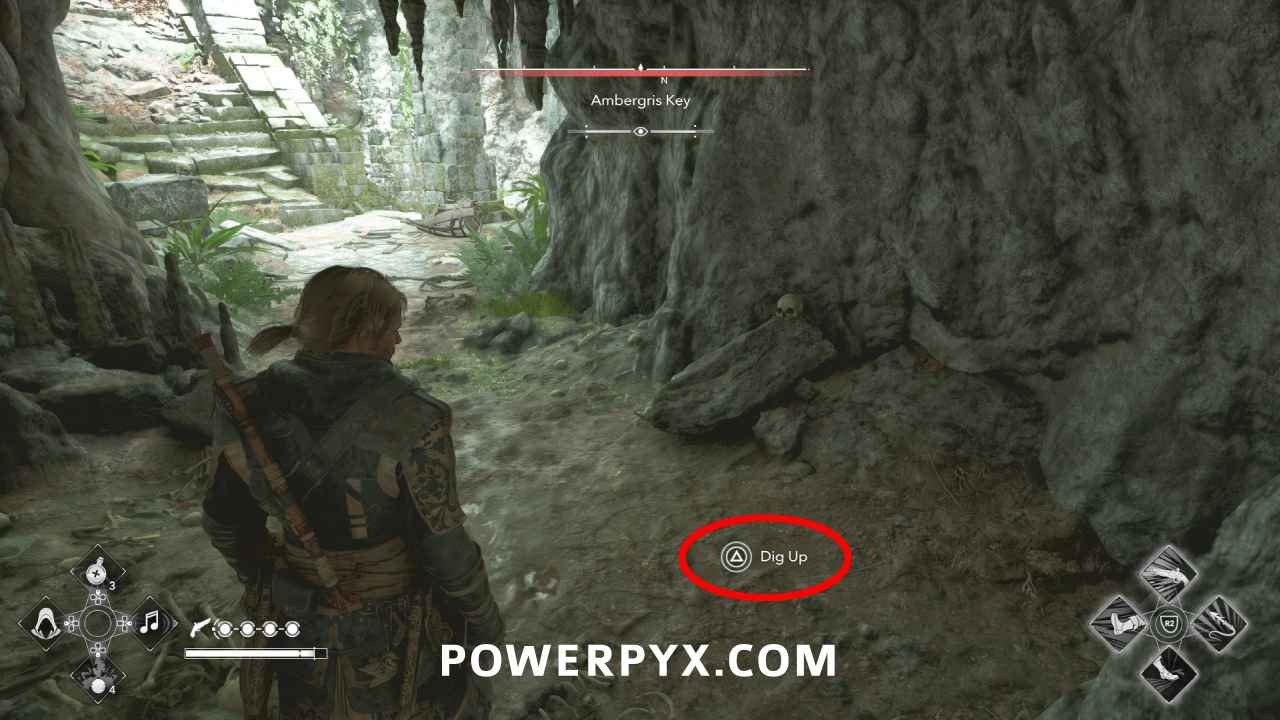
Reward: Pirate Captain Outfit (Rare), 2000 Reales
Serranilla Region
#20 – Treasure Map from Misteriosa (Kingston)
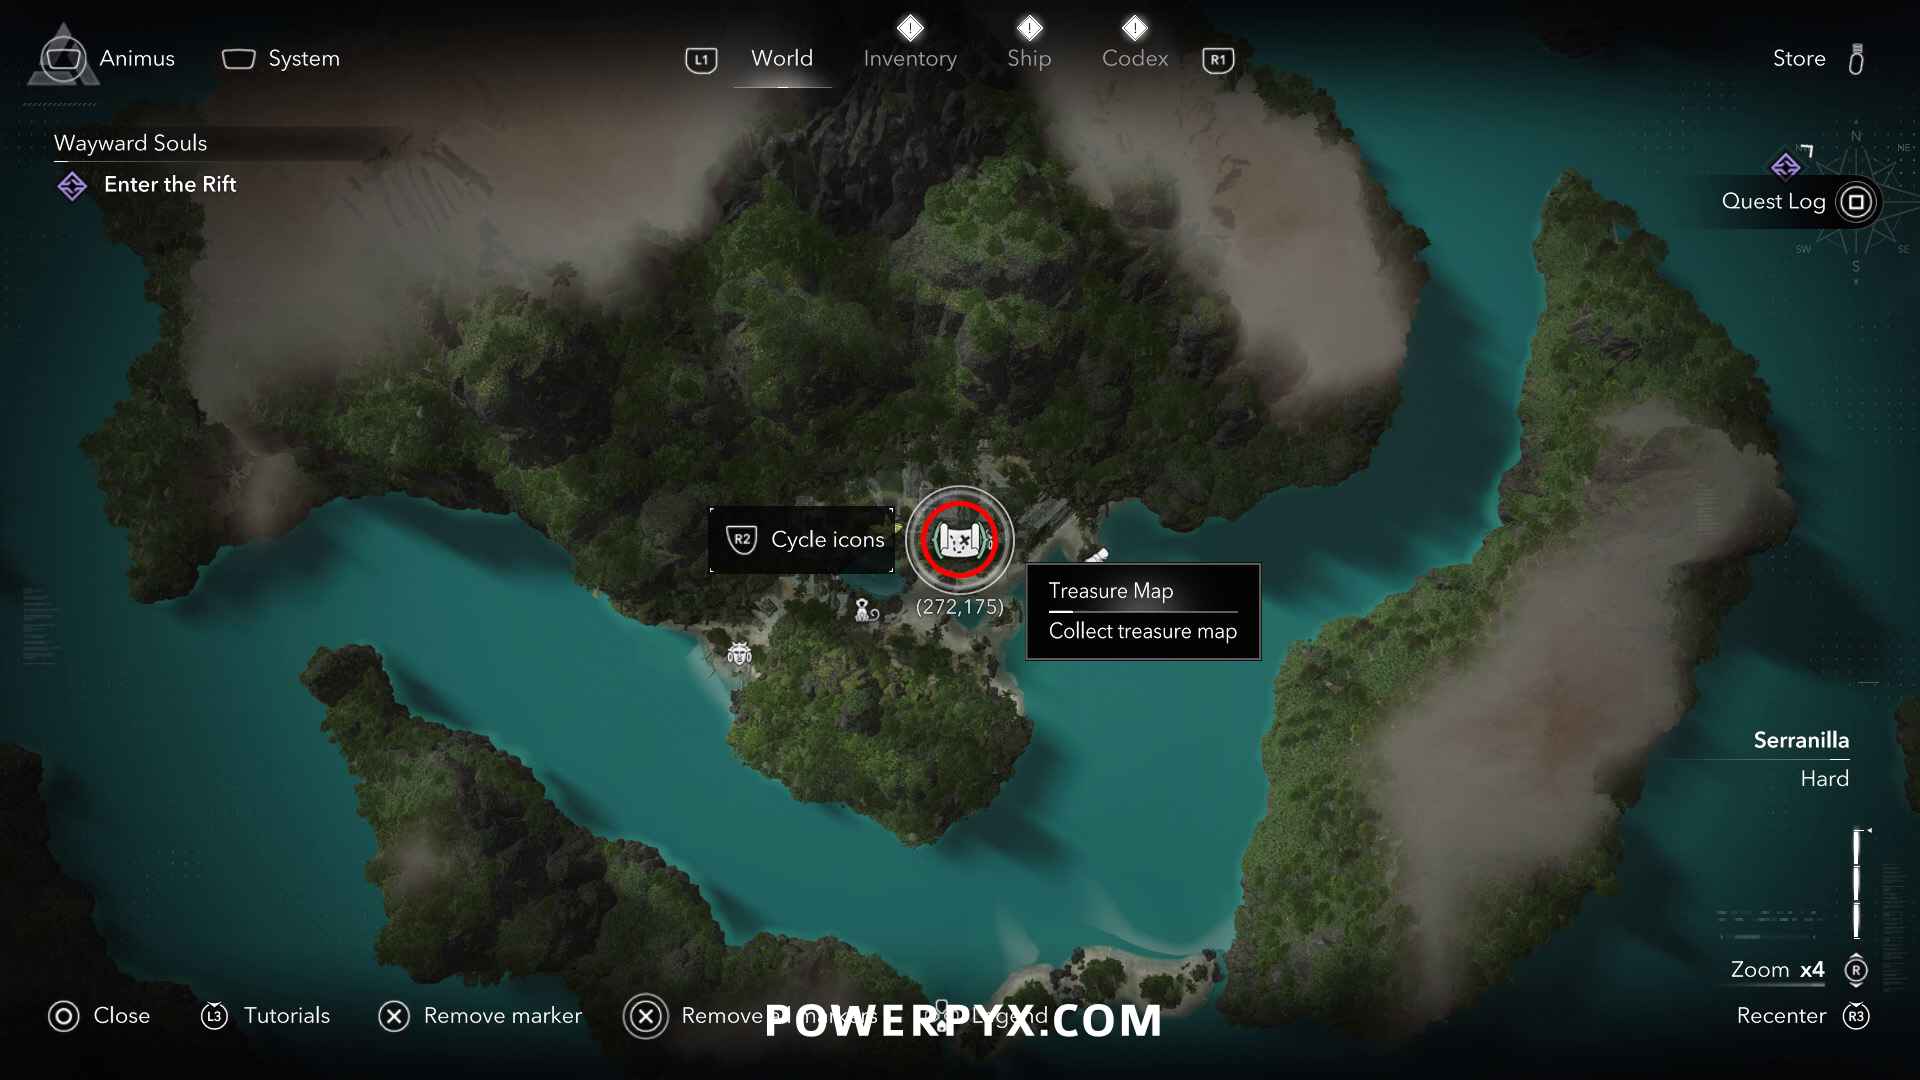
Location: Misteriosa (272, 175) – below the viewpoint from a skeleton in the ruins, can climb down from the viewpoint
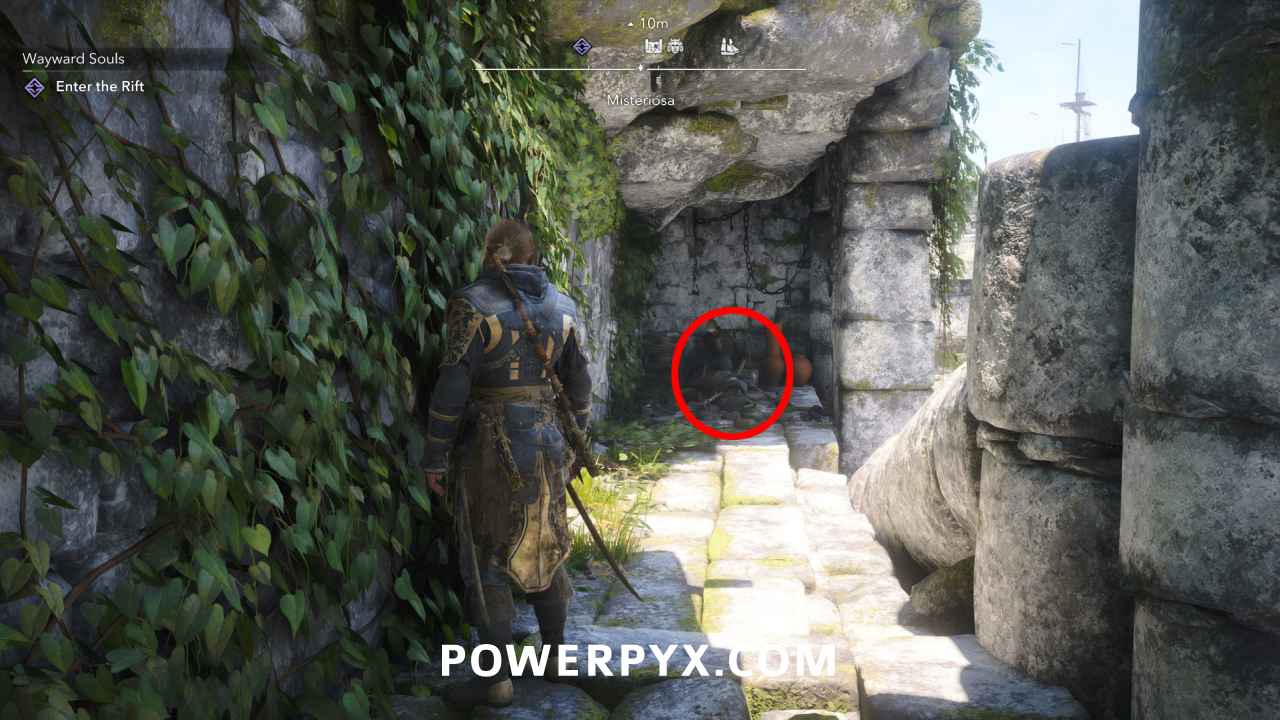
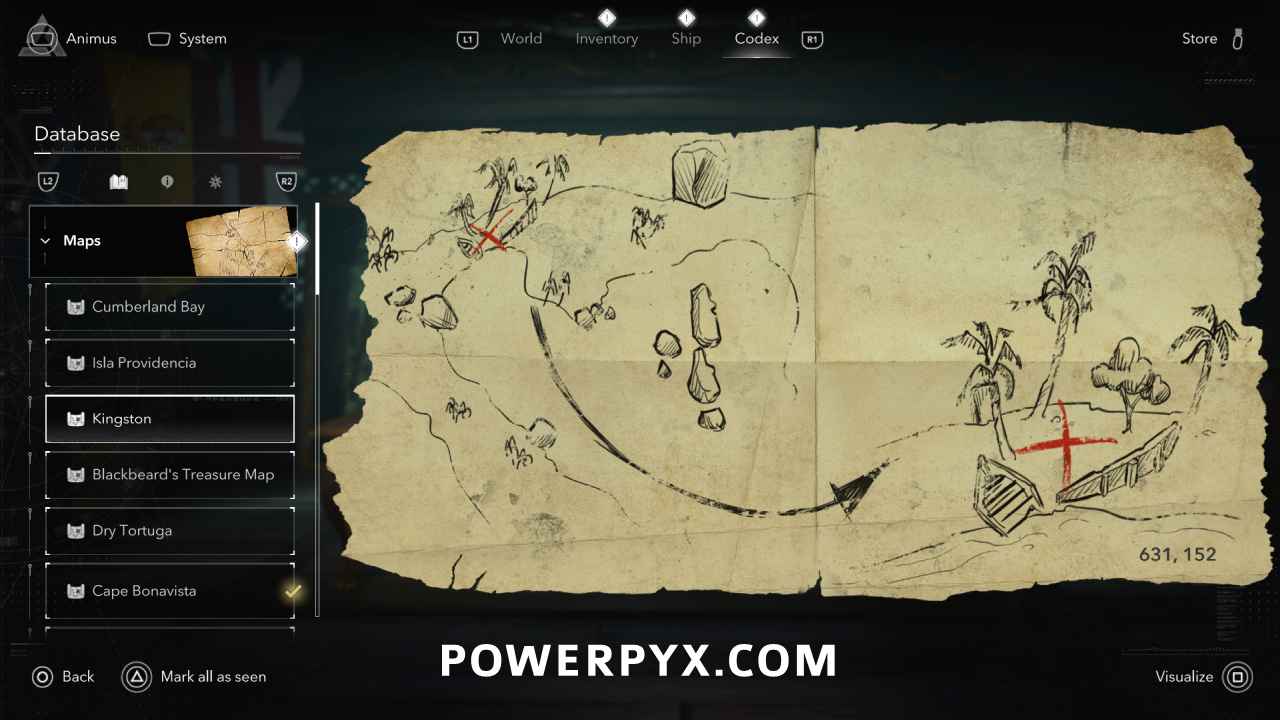
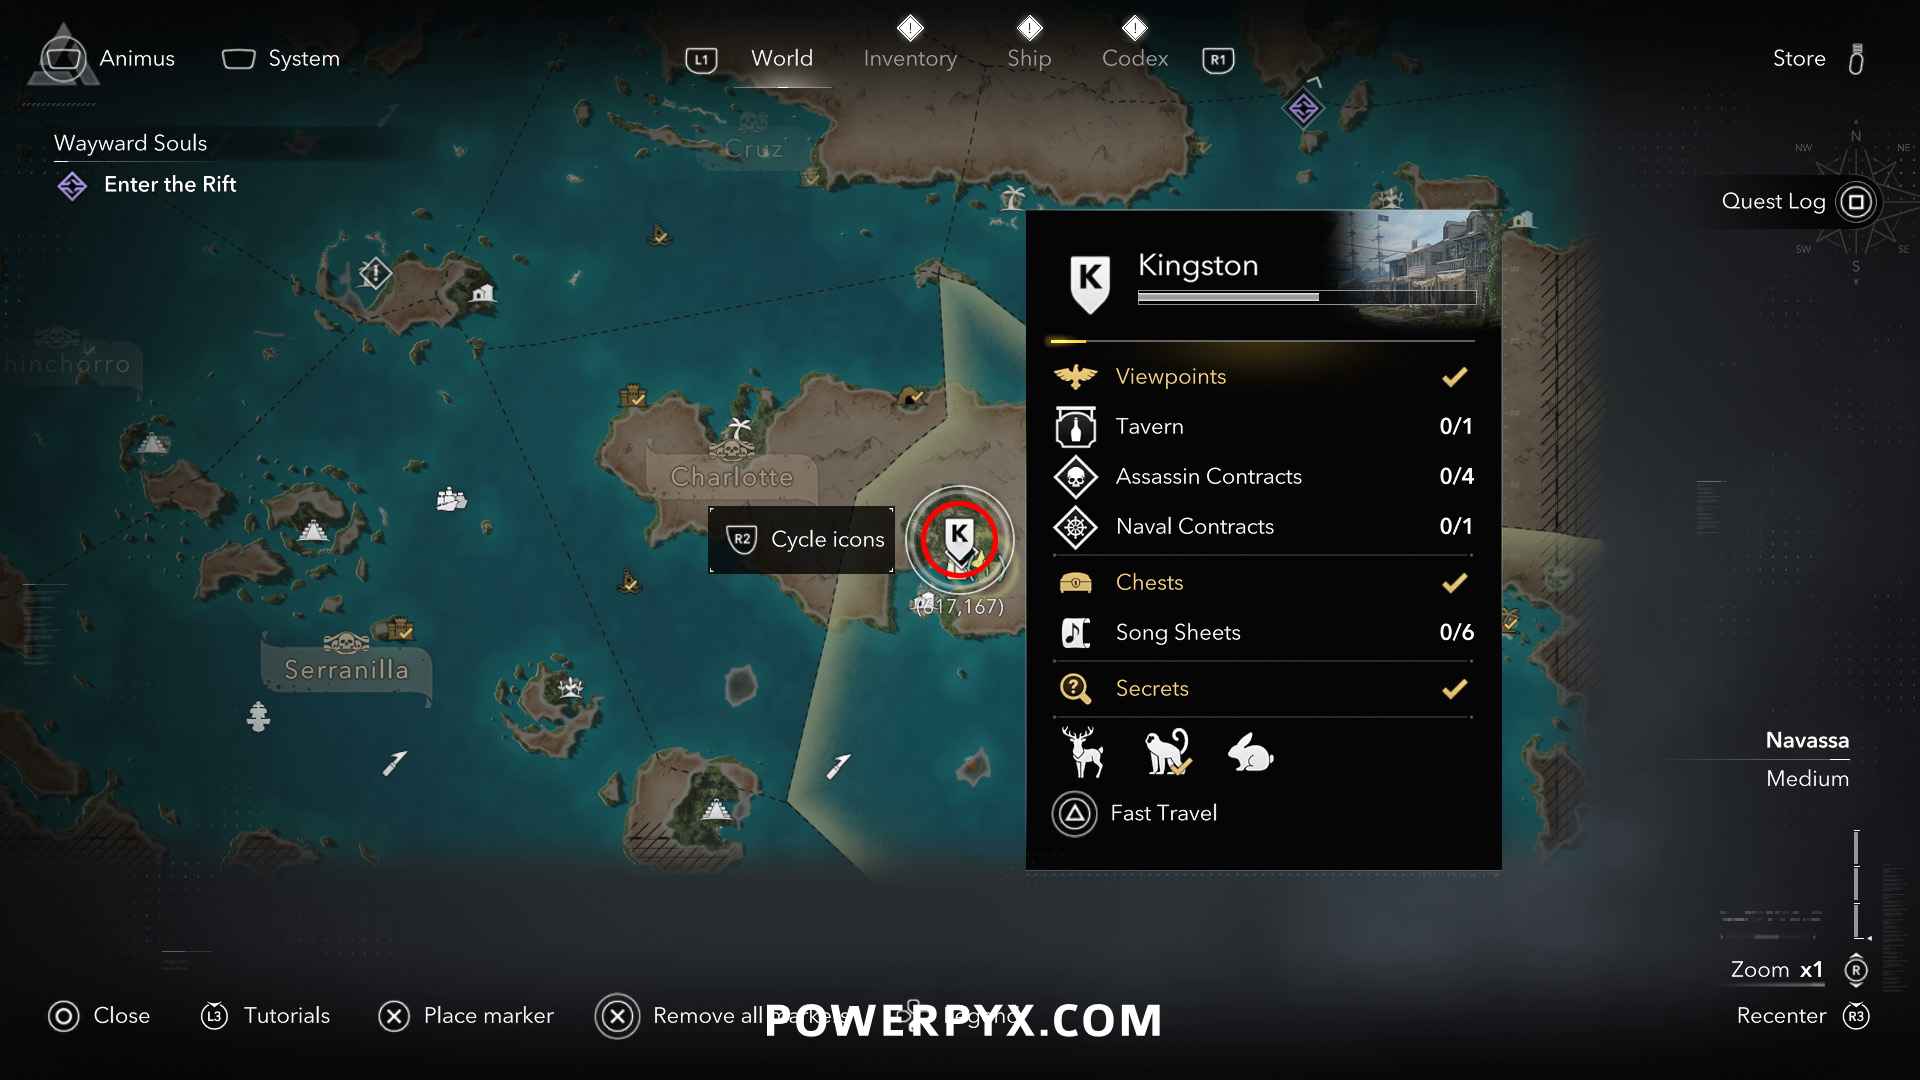
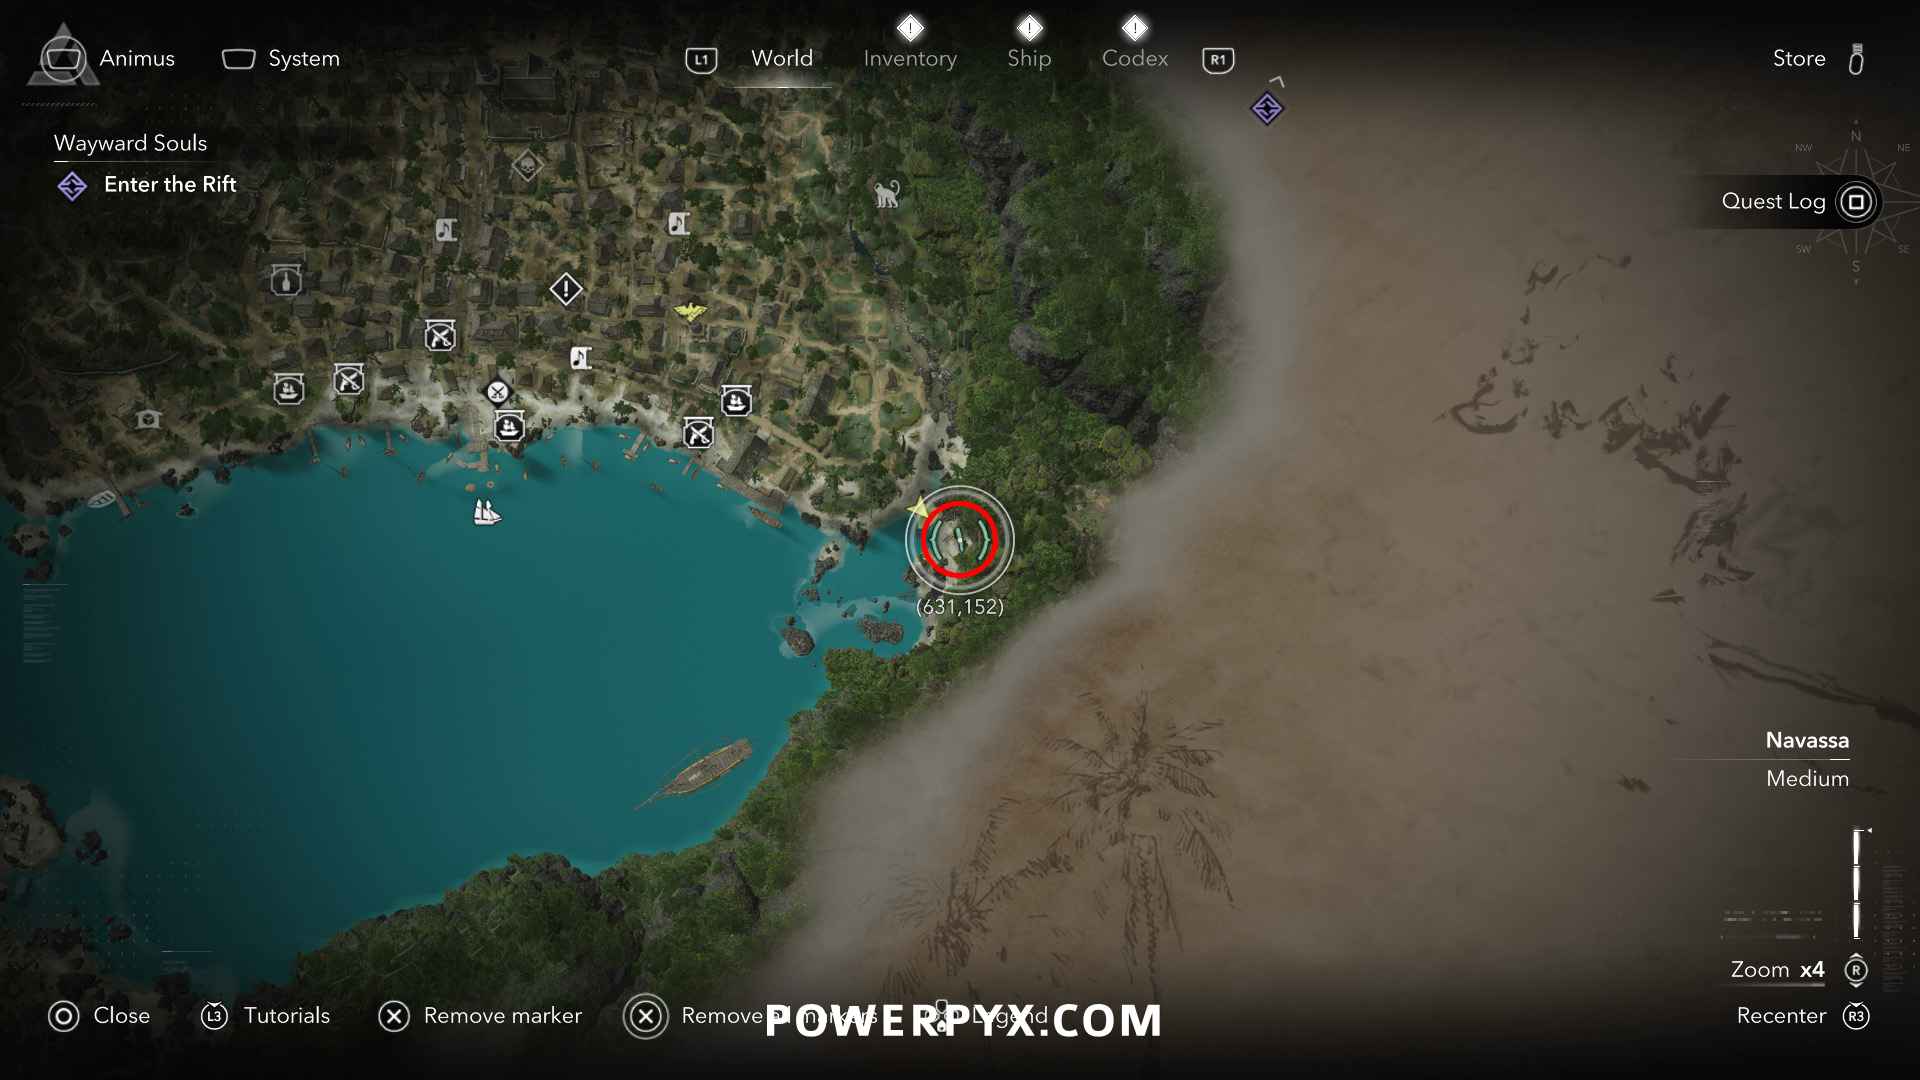
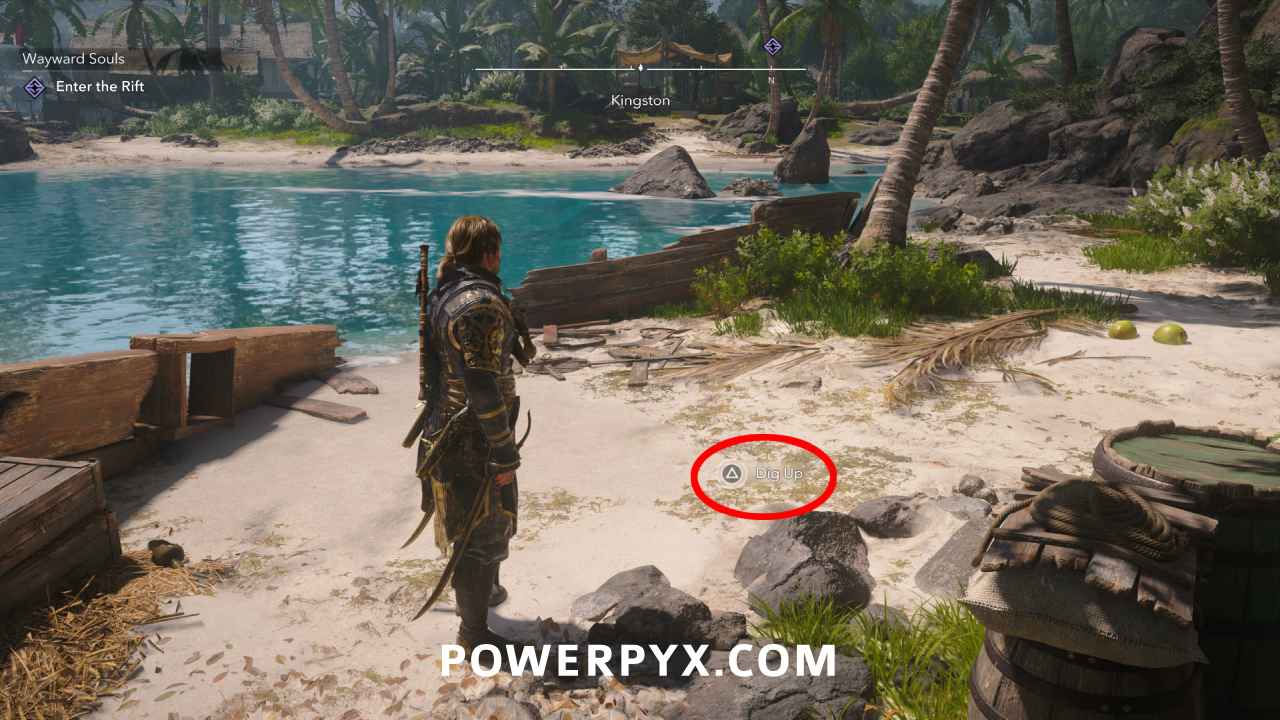
Solution: Kingston (631, 152) – on a small beach in the south-east of Kingston, between two pieces of a broken boat in the sand
Reward: Gilded Hull Design Plan (redeemable in Harbourmaster’s Shop menu), 3000 Reales
#21 – Treasure Map from Isla Providencia (Long Bay)
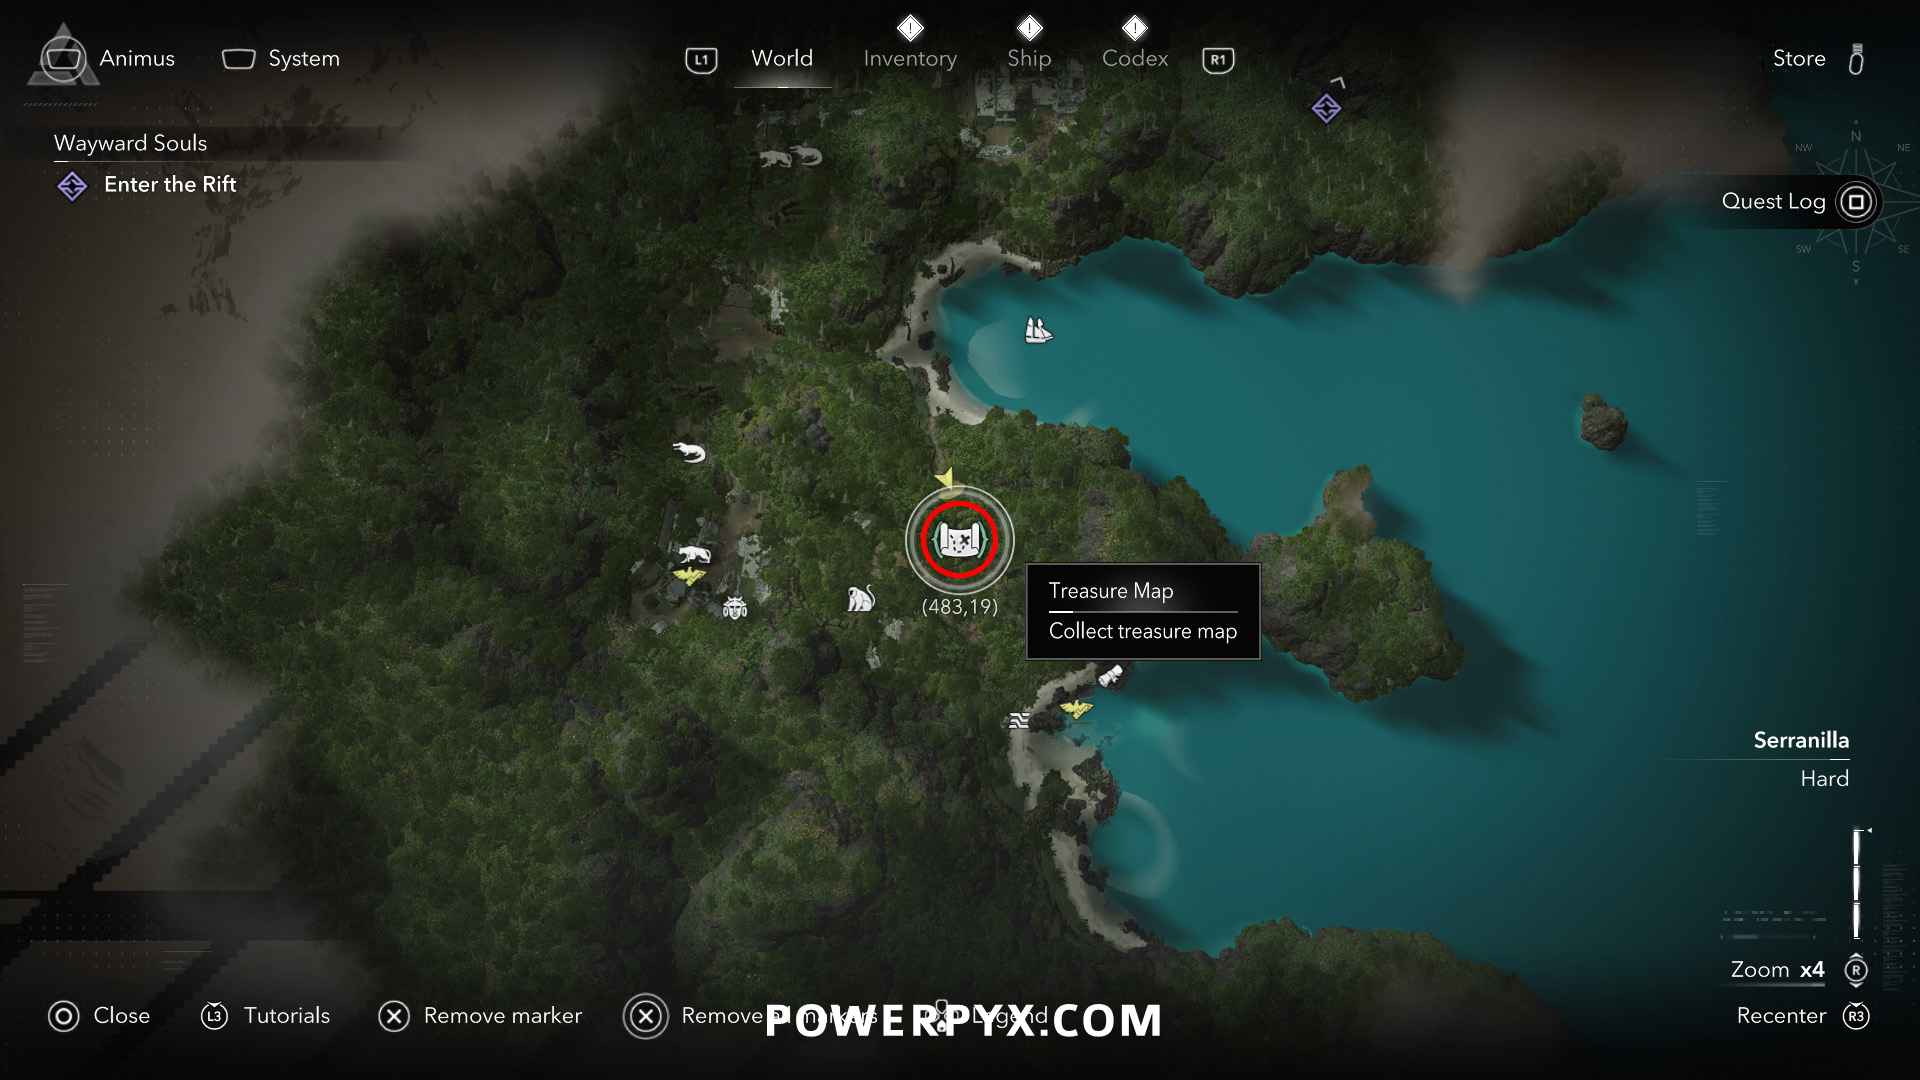
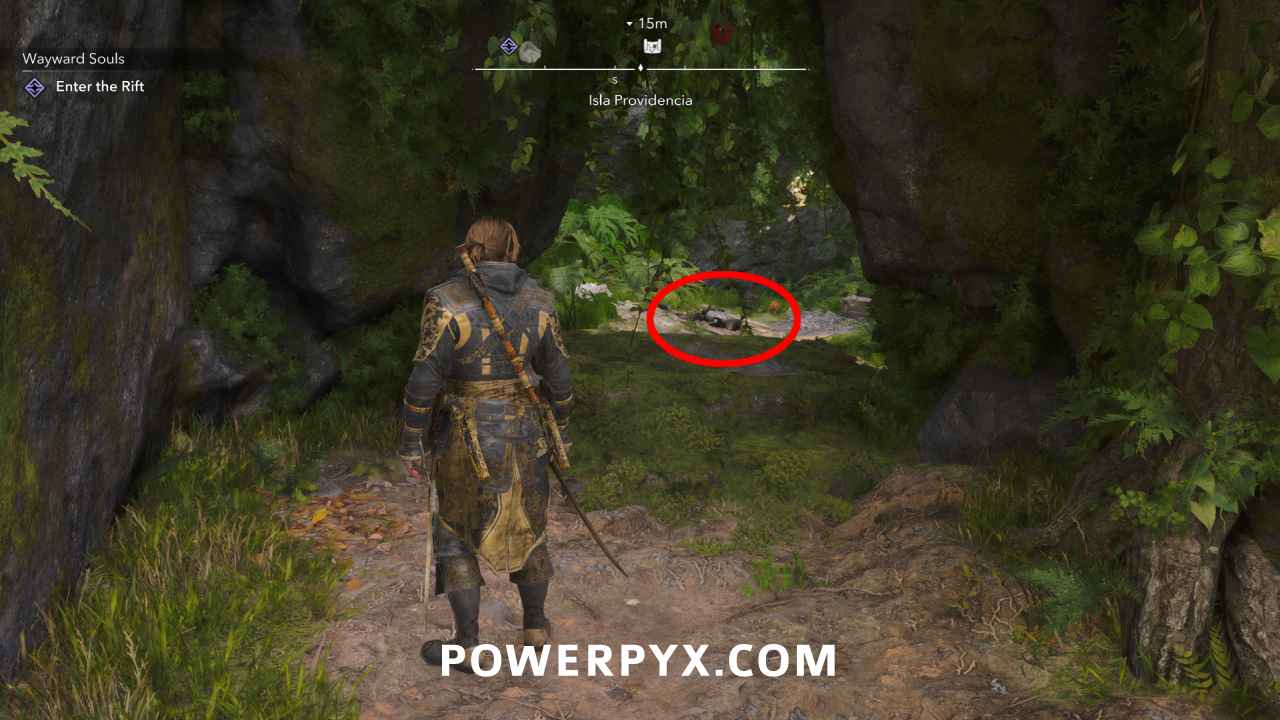
Location: Isla Providencia (483, 19) – approach the treasure map from the beach at the north. On the beach there’s a muddy path leading uphill to the treasure map, when you fully zoom in on the map you can see a small brown path between the trees that leads you there.
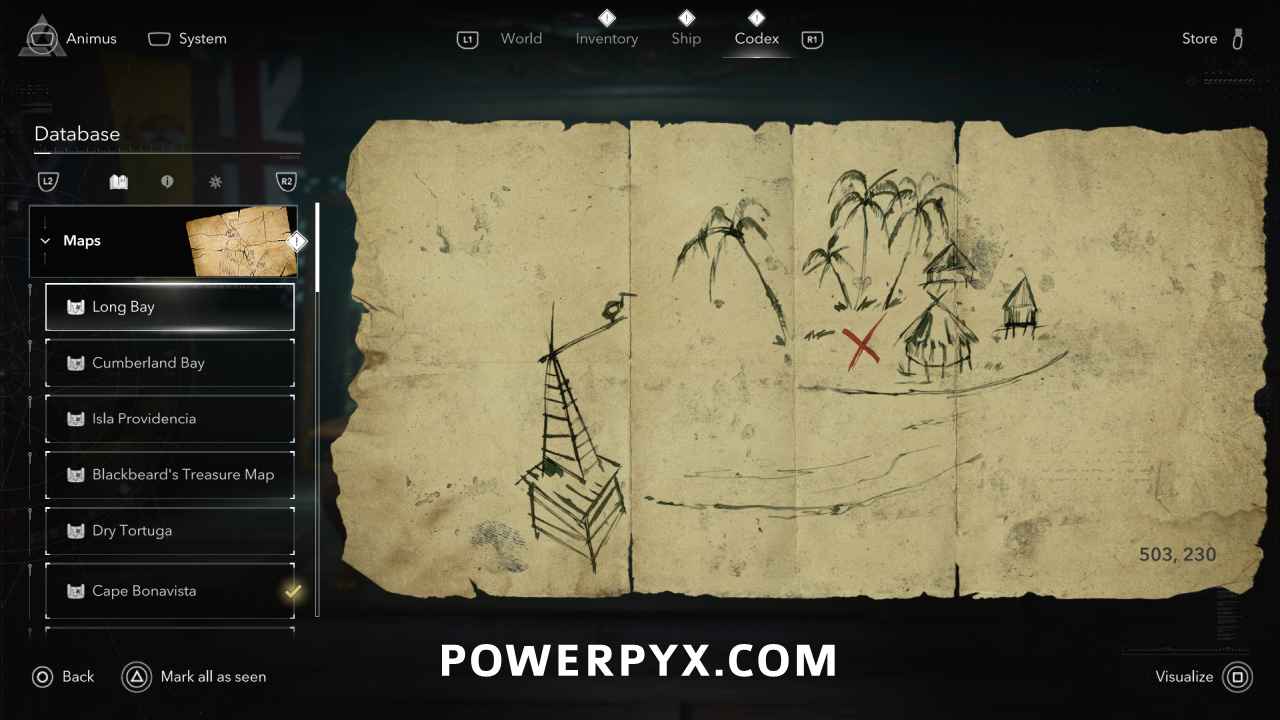
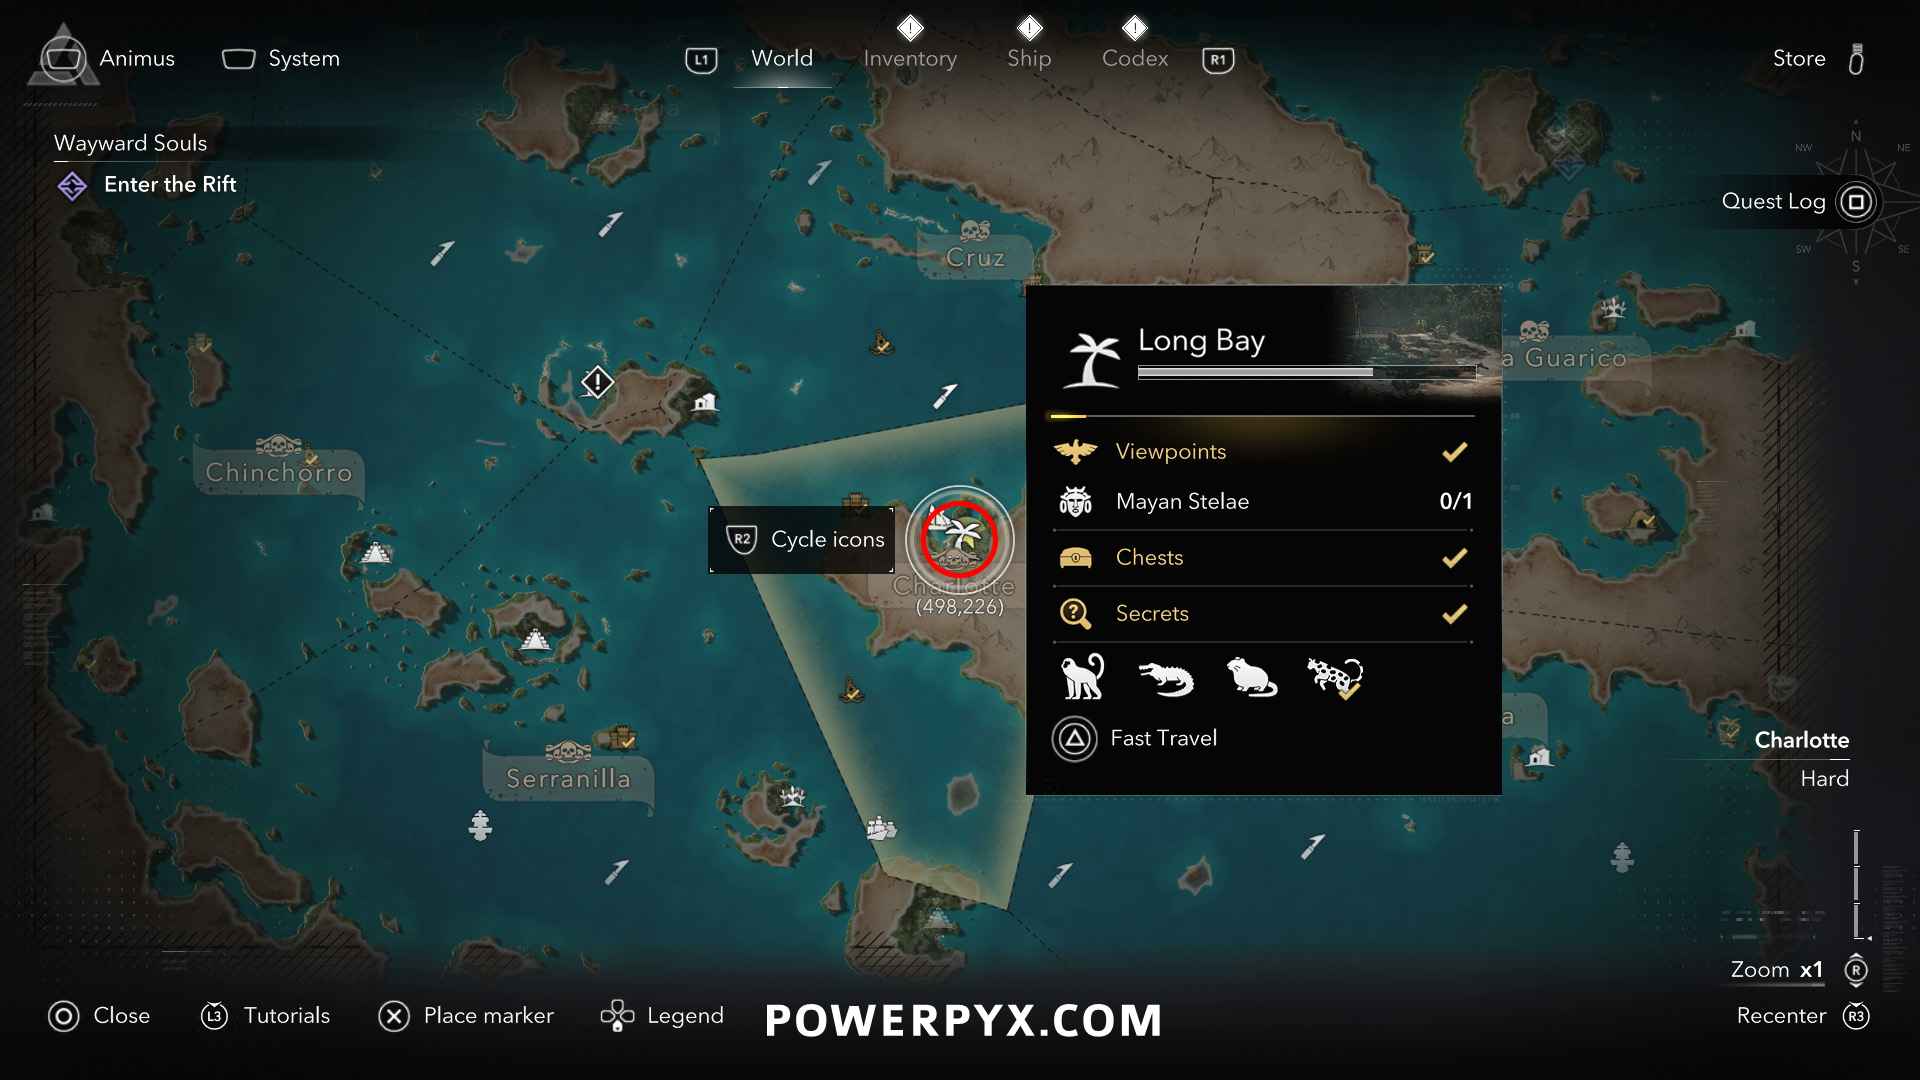
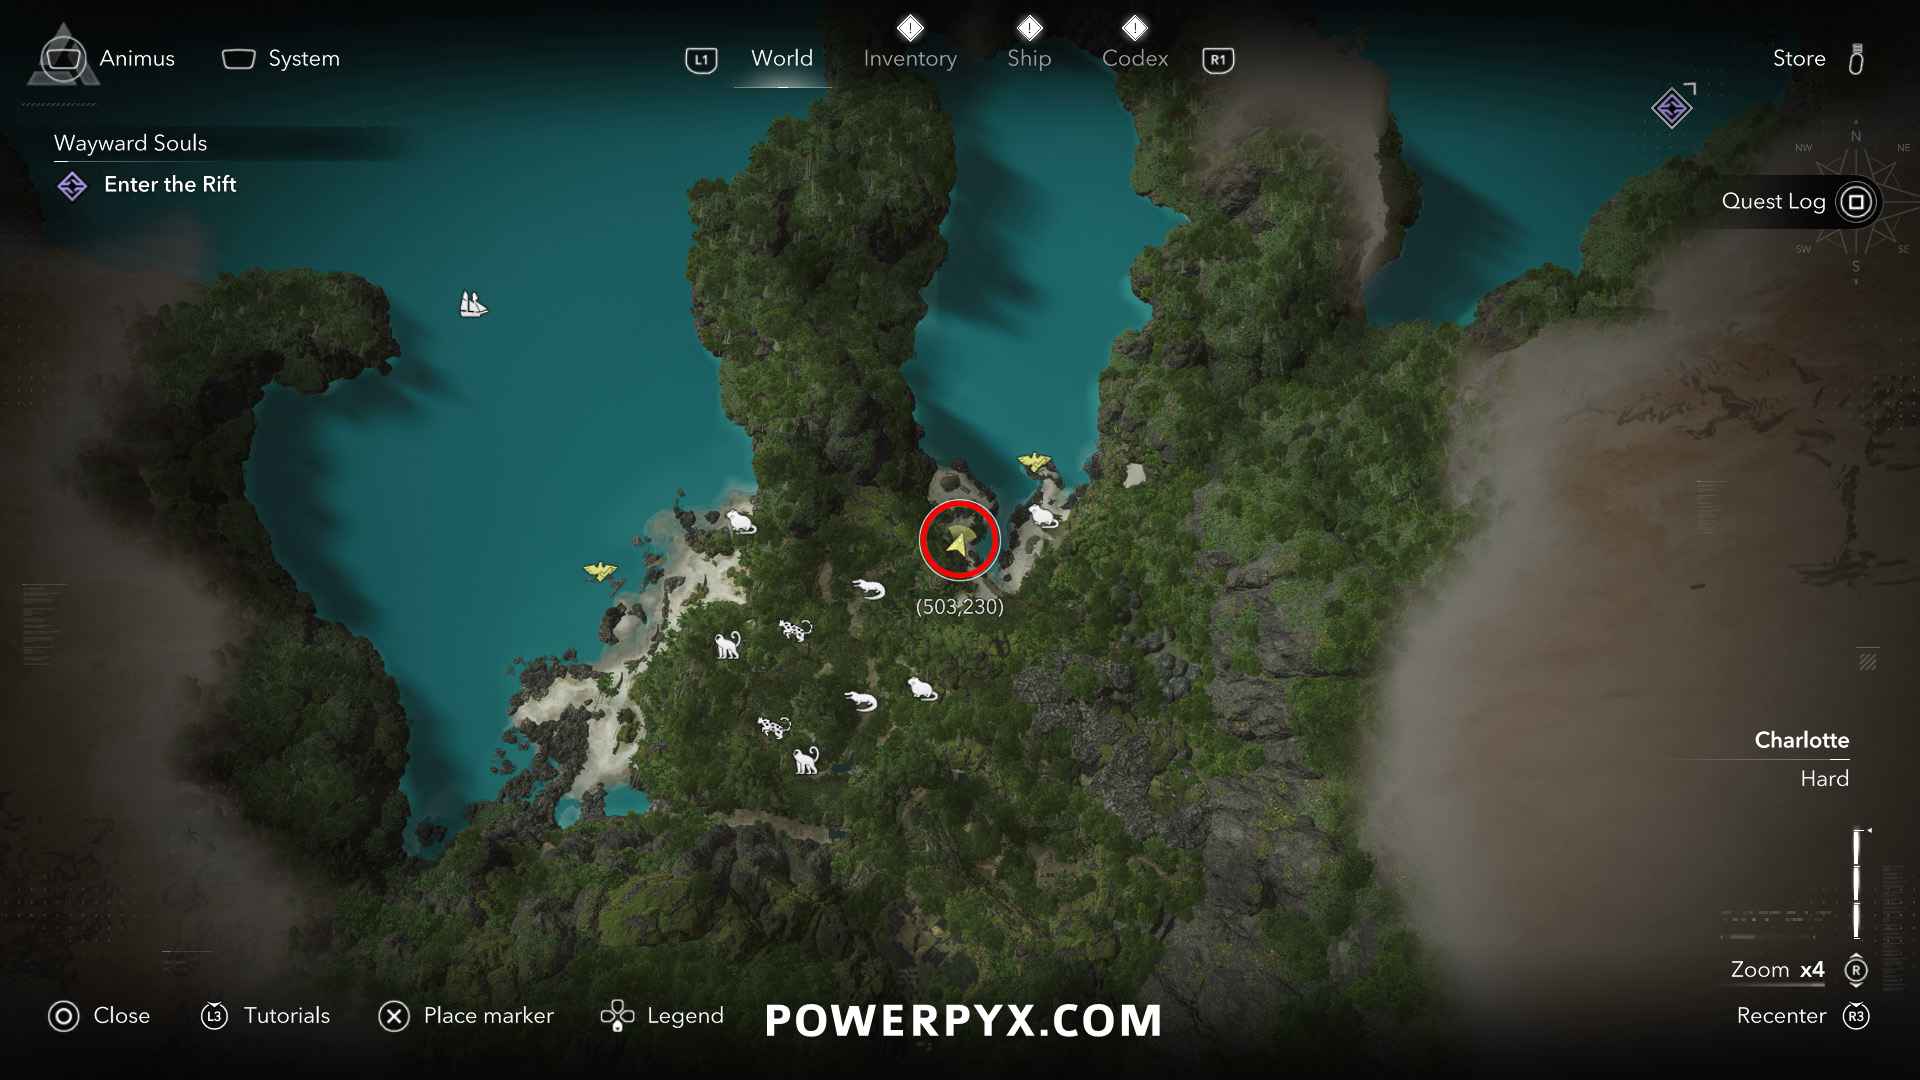
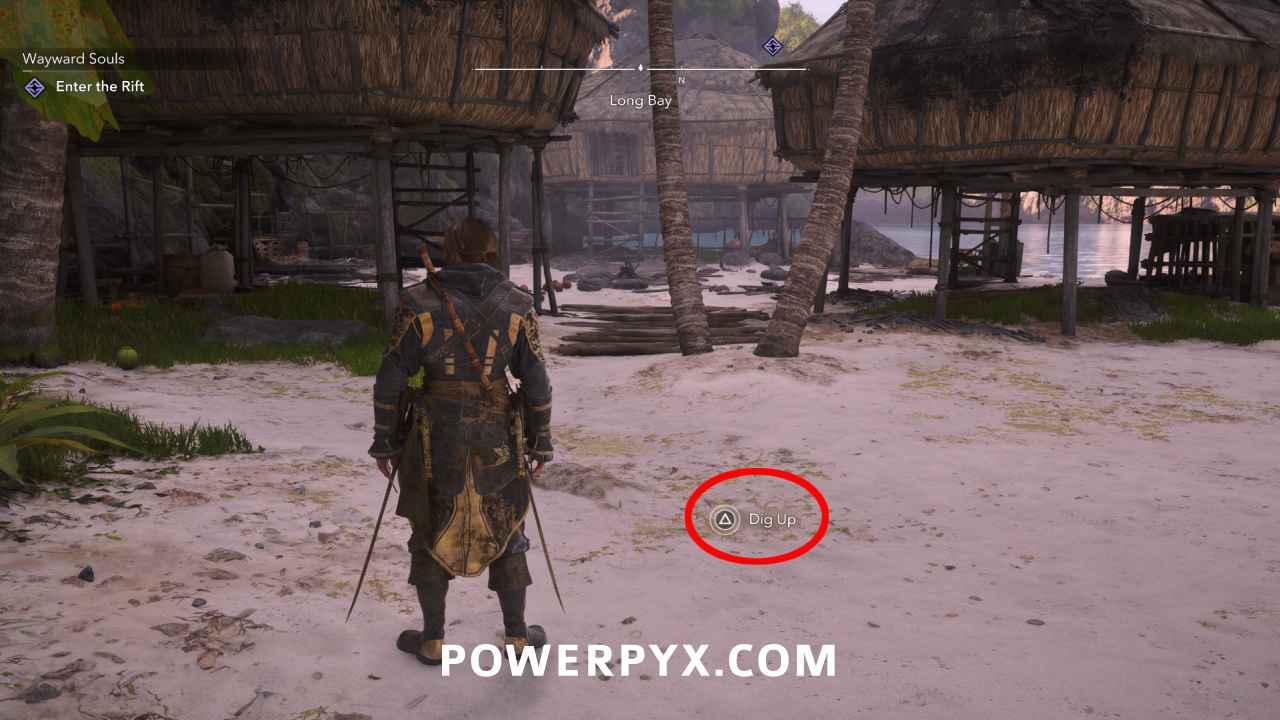
Solution: Long Bay (503, 230) – Long Bay is only accessible after advancing the story to Sequence 10 – Mission 03: The Observatory, you can’t get the treasure before then. Next to the viewpoint are 3 huts at the beach. Check the sand slightly south of the 3 huts.
Reward: Scottish Broadswords (Rare Melee Weapon)
Navassa Region
#22 – Treasure Map from Port Royal (Princípe)
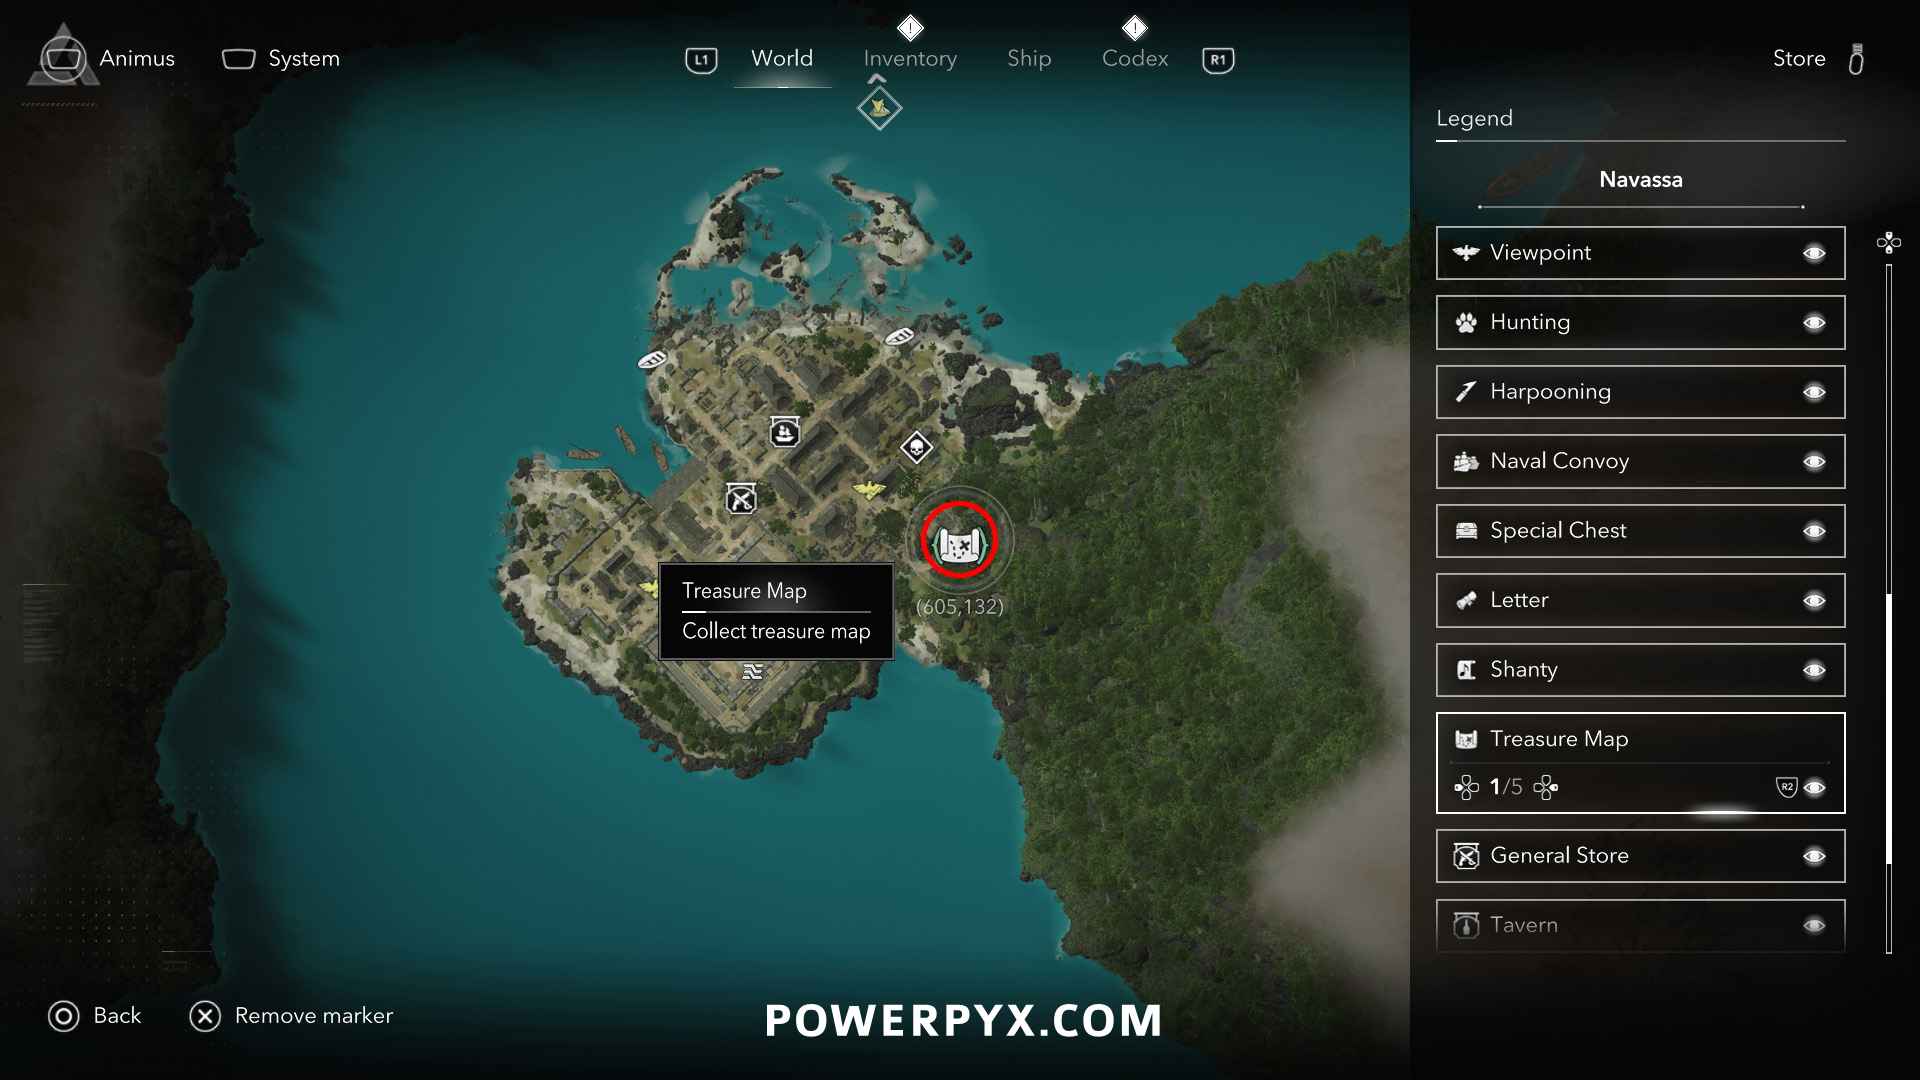
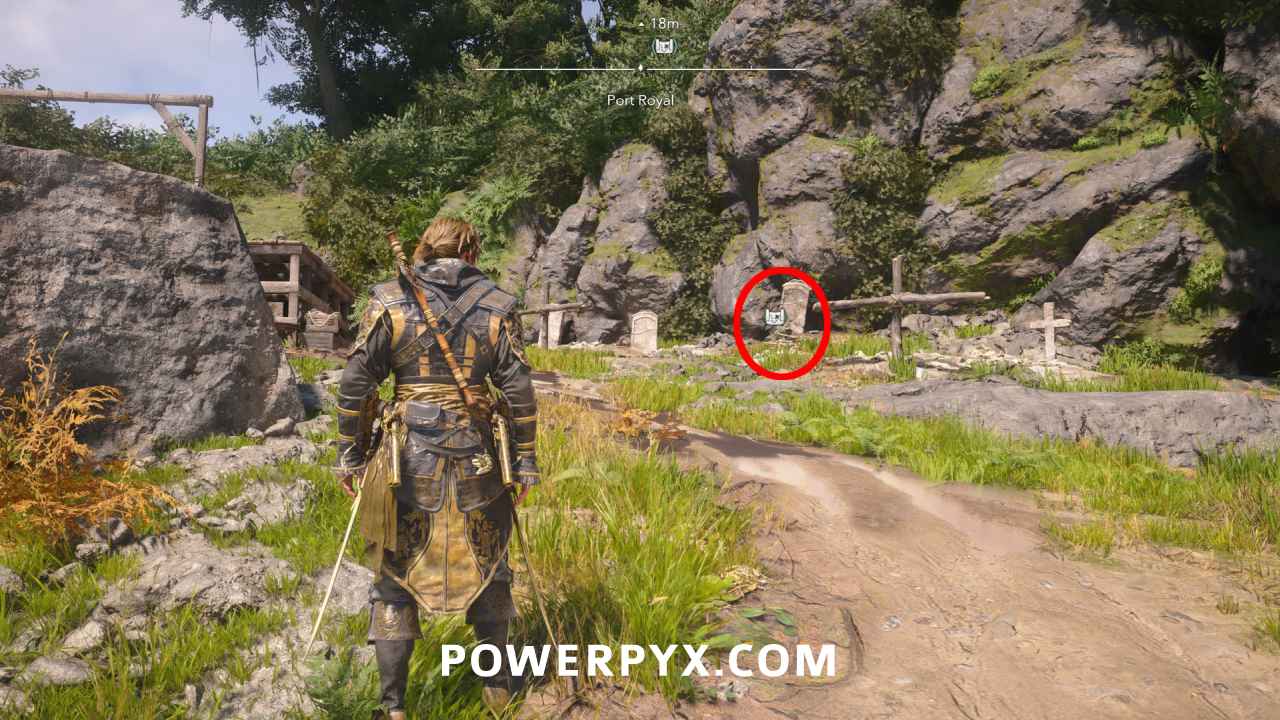
Location: Port Royal (605, 132) – from a skeleton at a grave
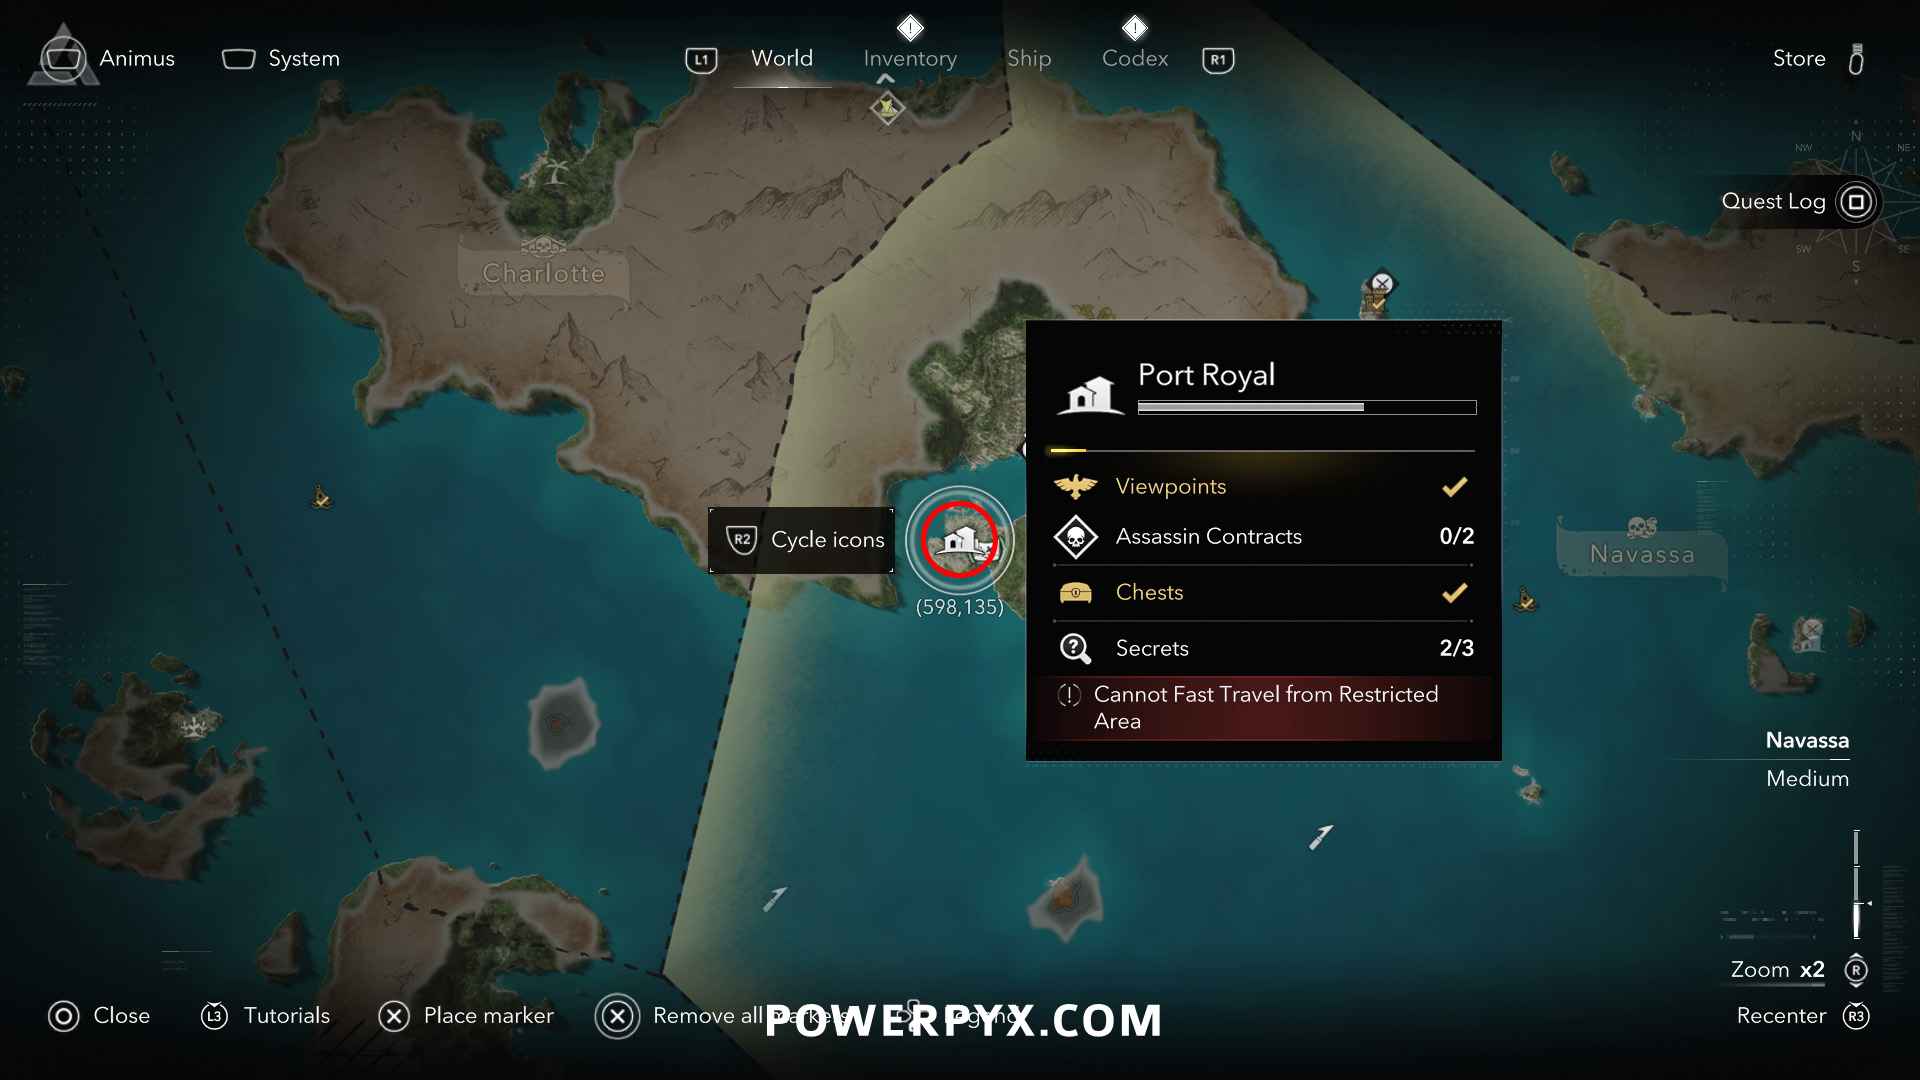
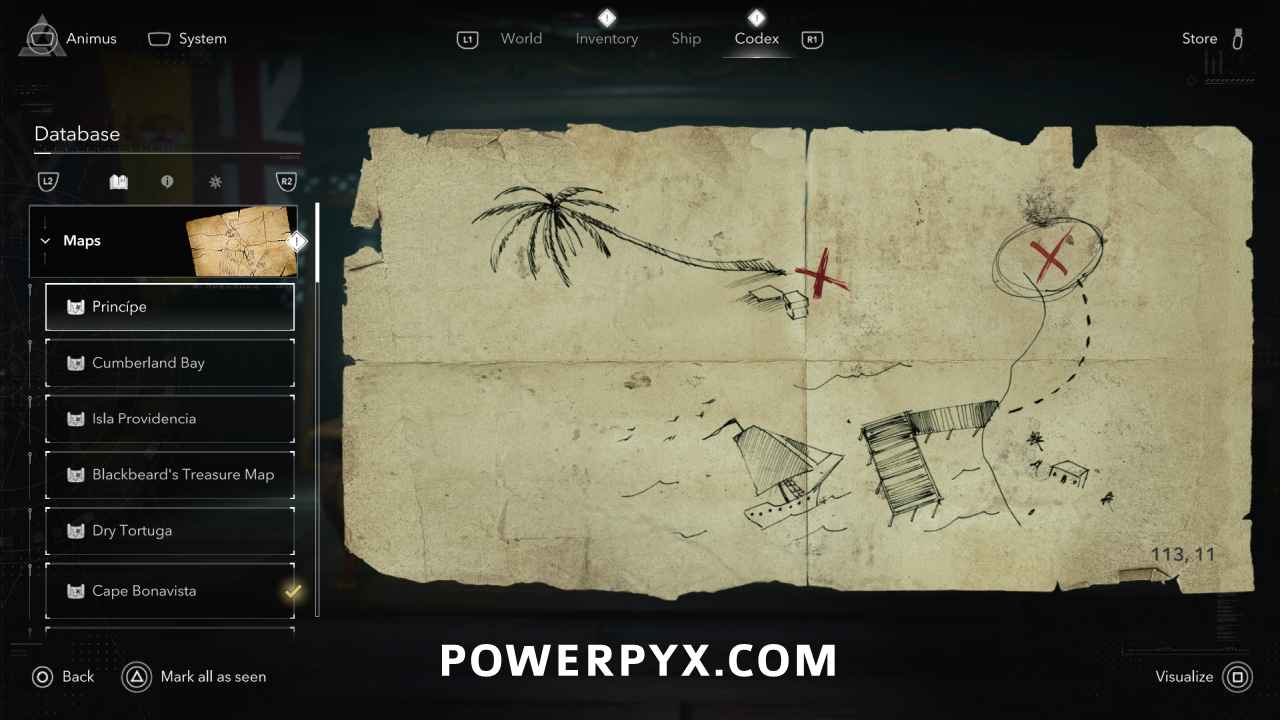
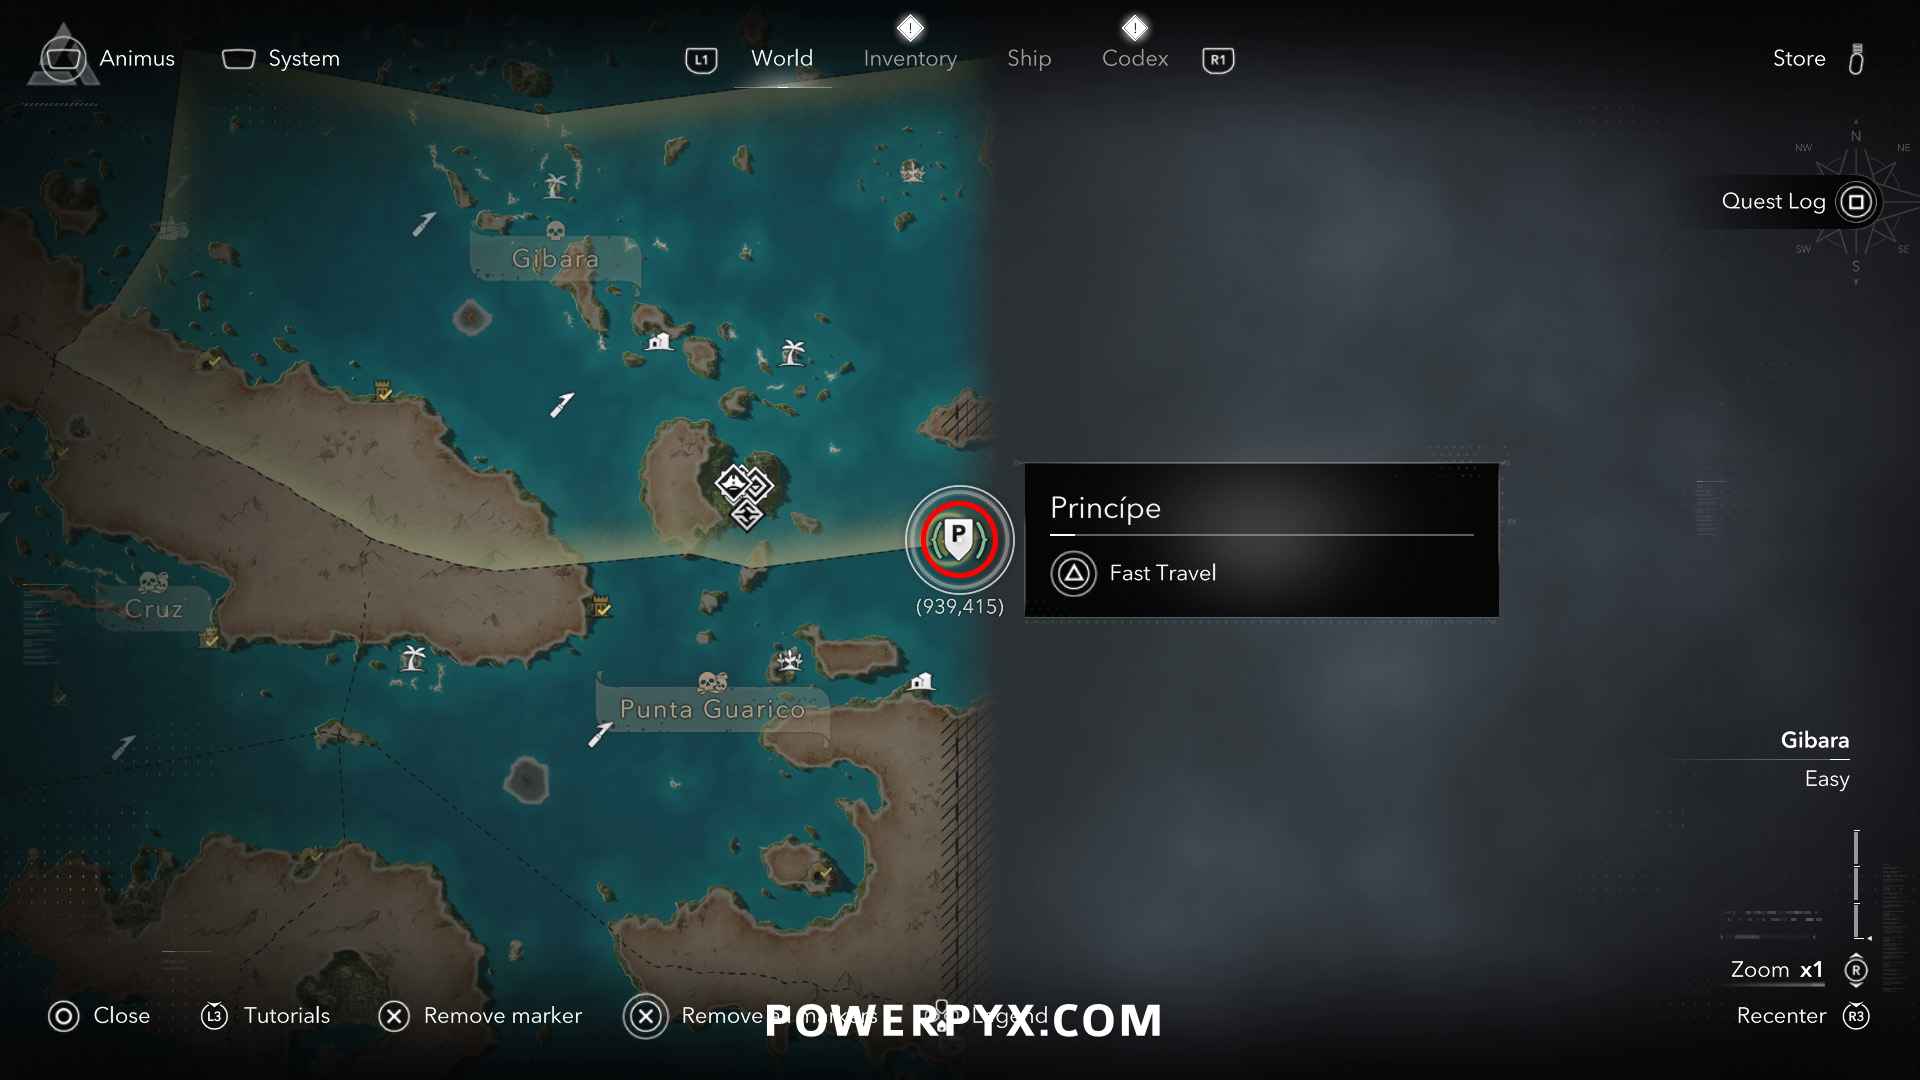
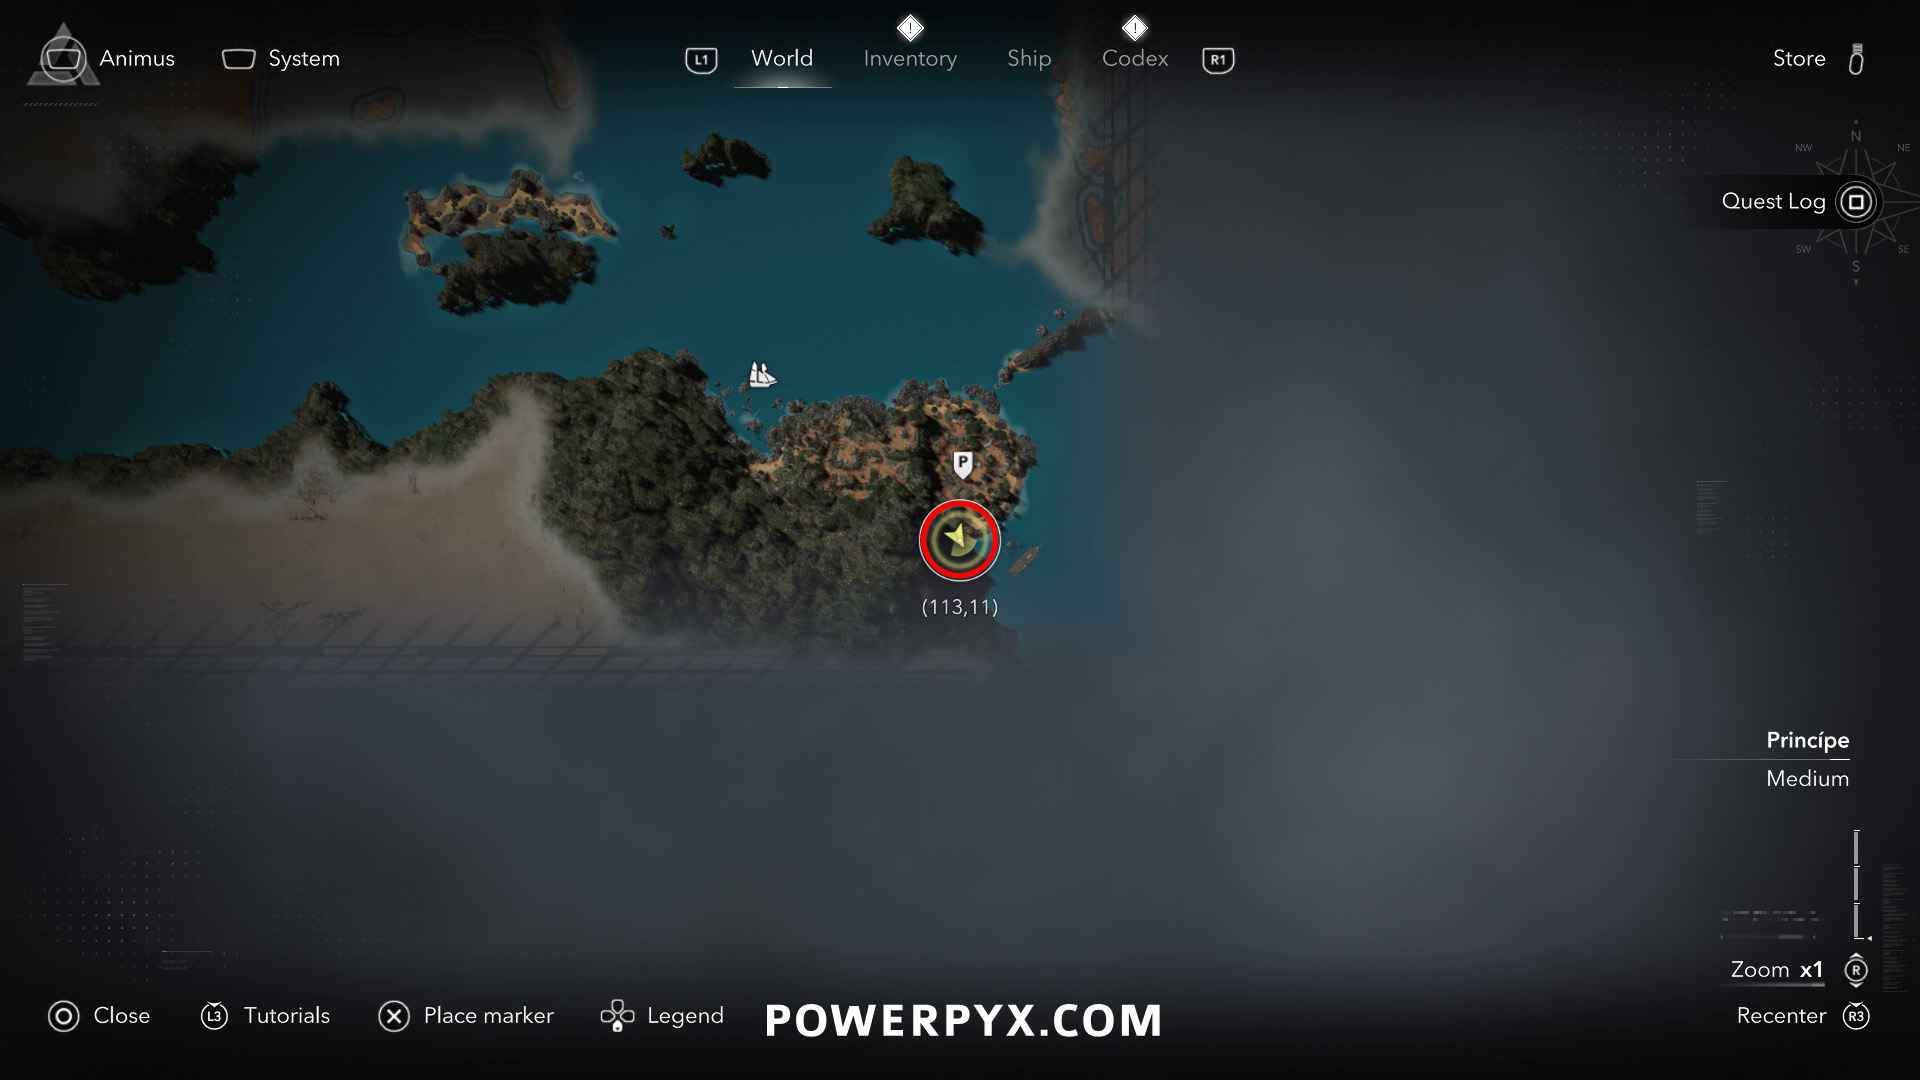
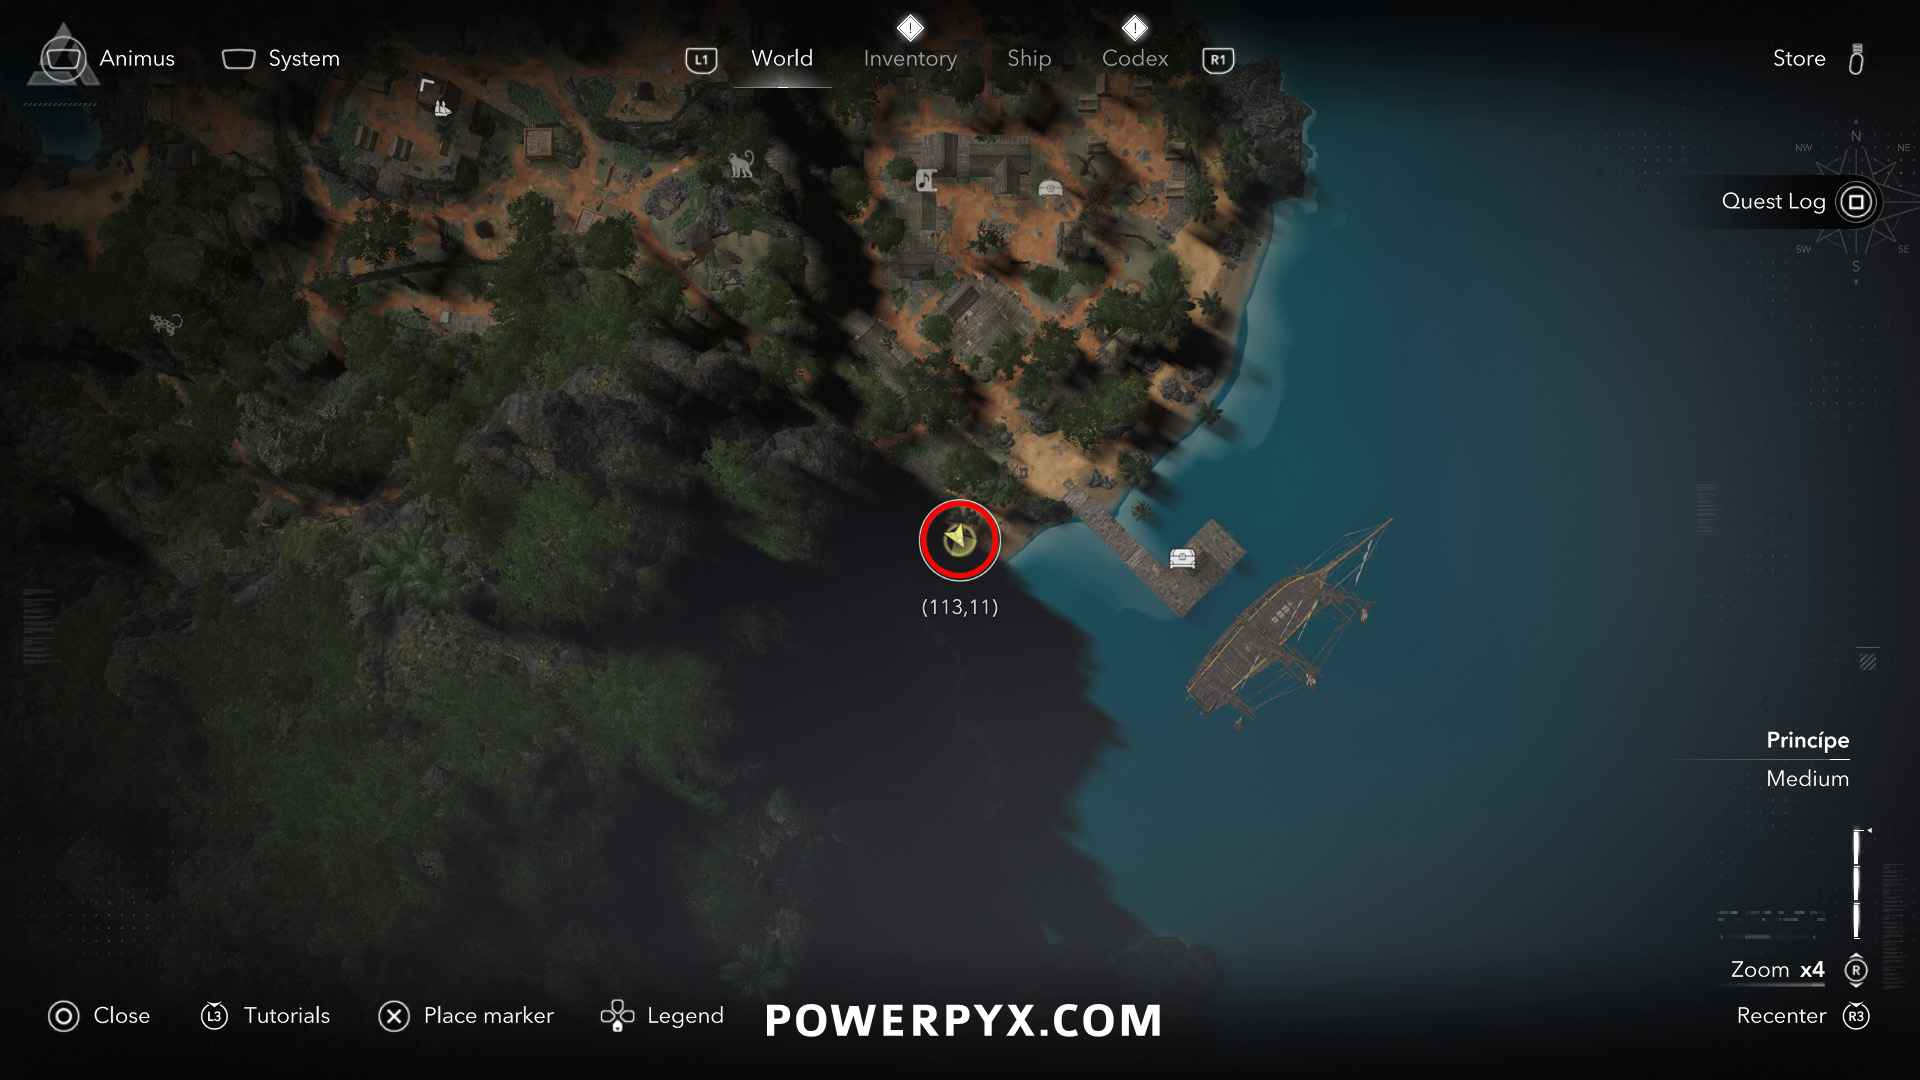
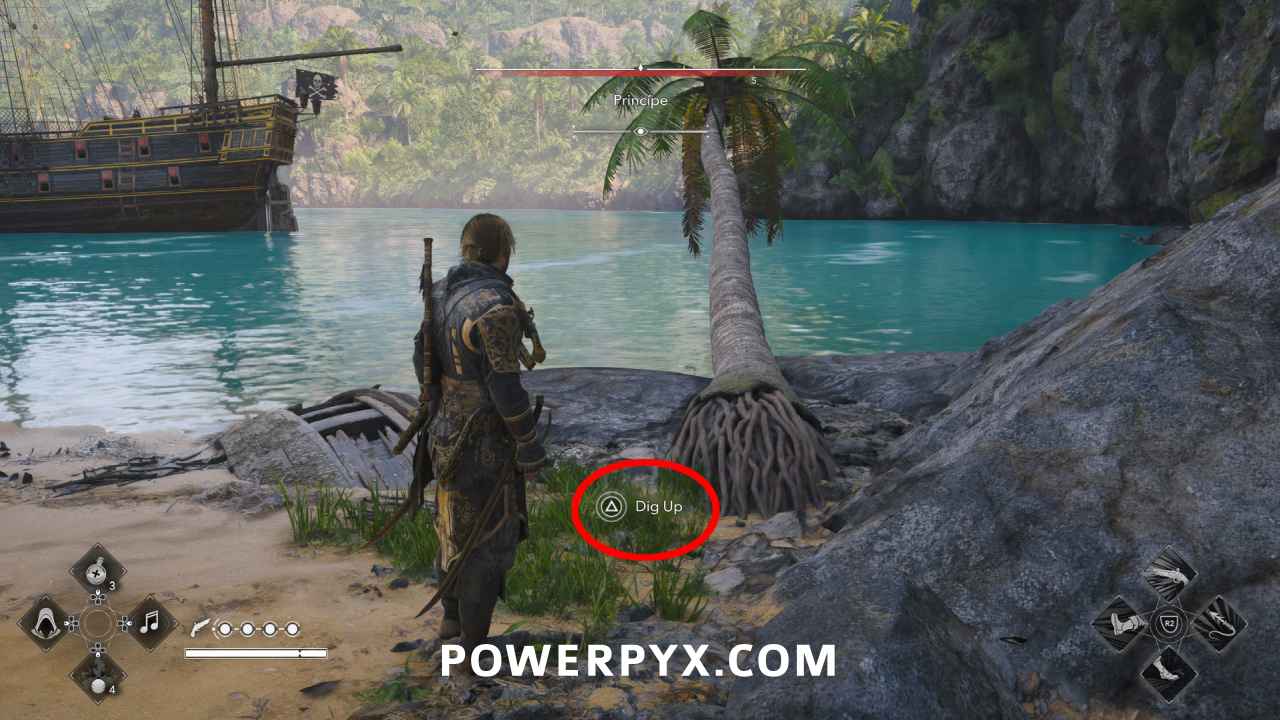
Solution: Princípe (113, 11) – at the southeast shoreline of Princípe, at a palm tree that’s leaning sideways over the water. Princípe is only reachable during/after Sequence 09 – Mission 02: Trust is Earned. You can then fast travel back here by clicking the white “P” icon in the east of the Caribbean main map (939, 415). If it doesn’t let you fast travel in Princípe, you need to run there on foot and then run all the way back to your ship and interact with its steering wheel to return to the Caribbean.
Reward: Art Collection Piece: Standard Bearer (needed for Dilettante), 2500 Reales
#23 – Treasure Map from Ile a Vache (Jiguey)
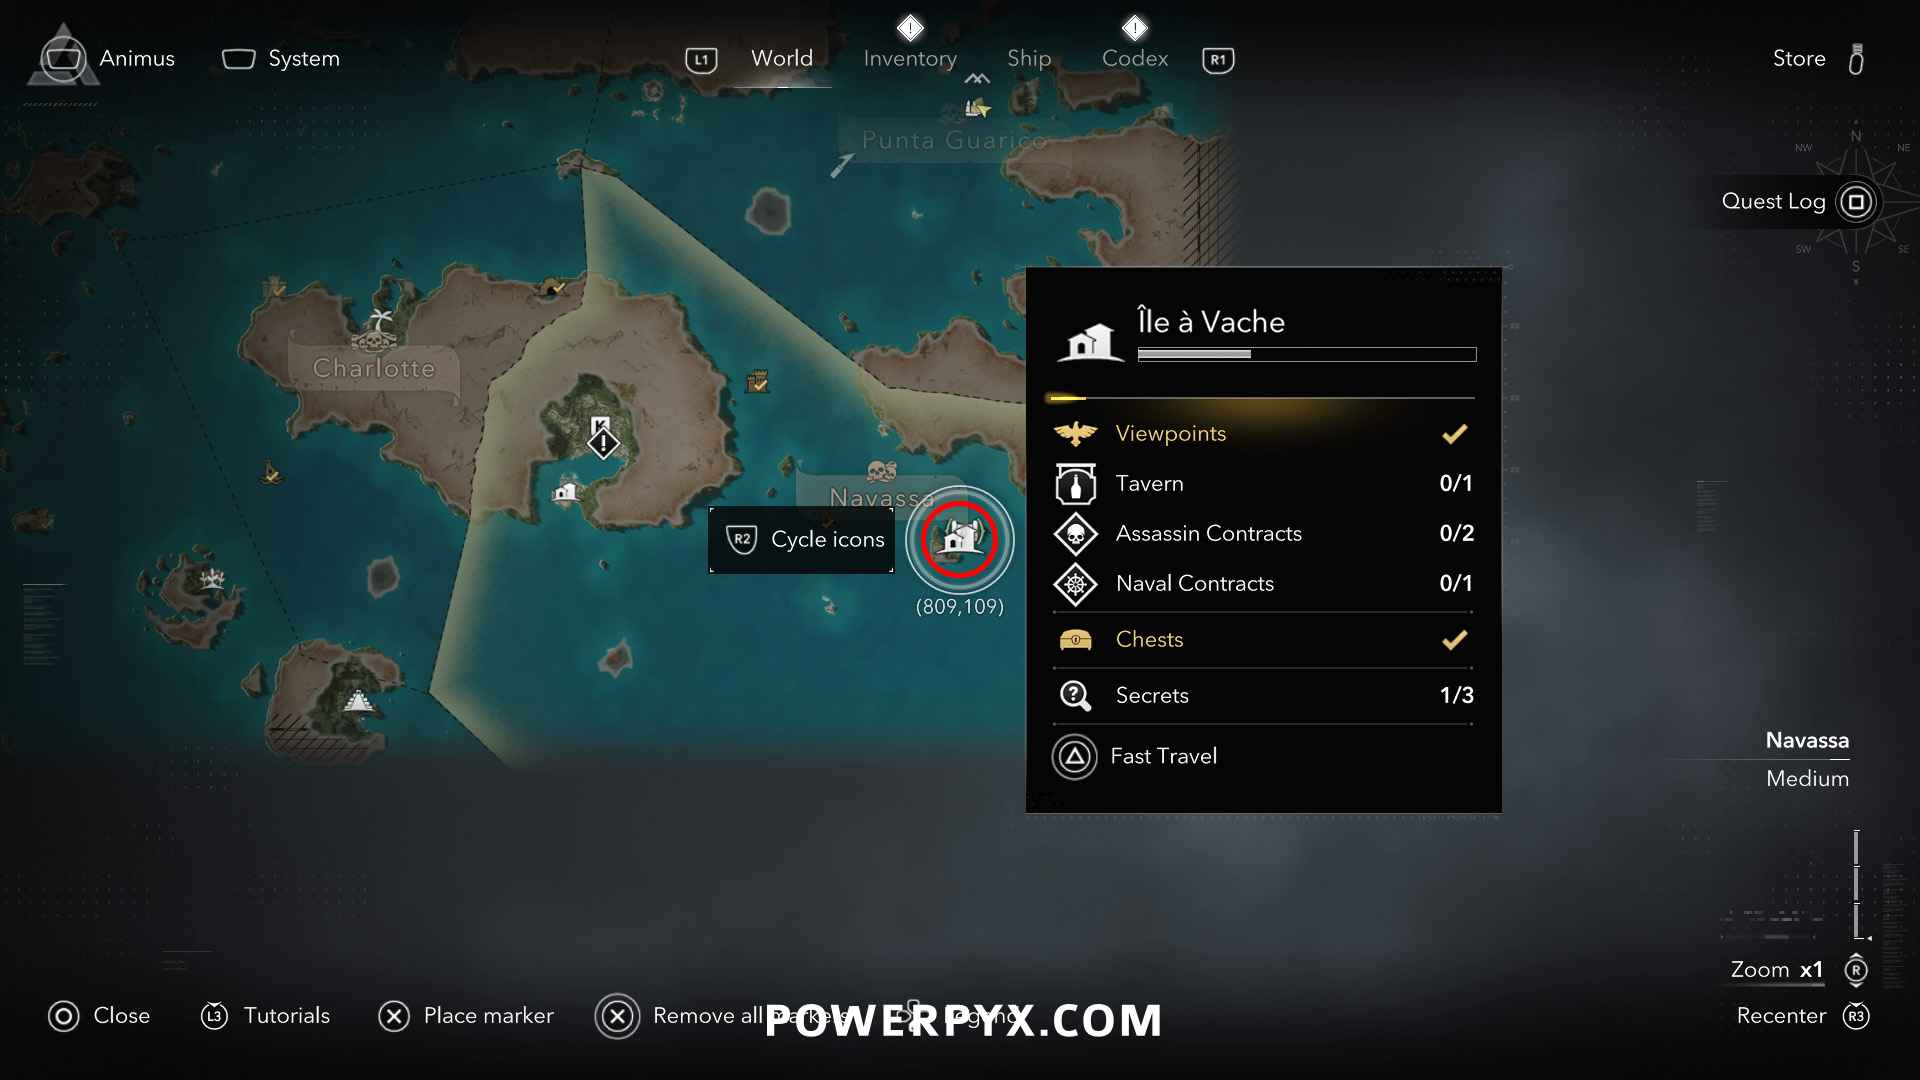
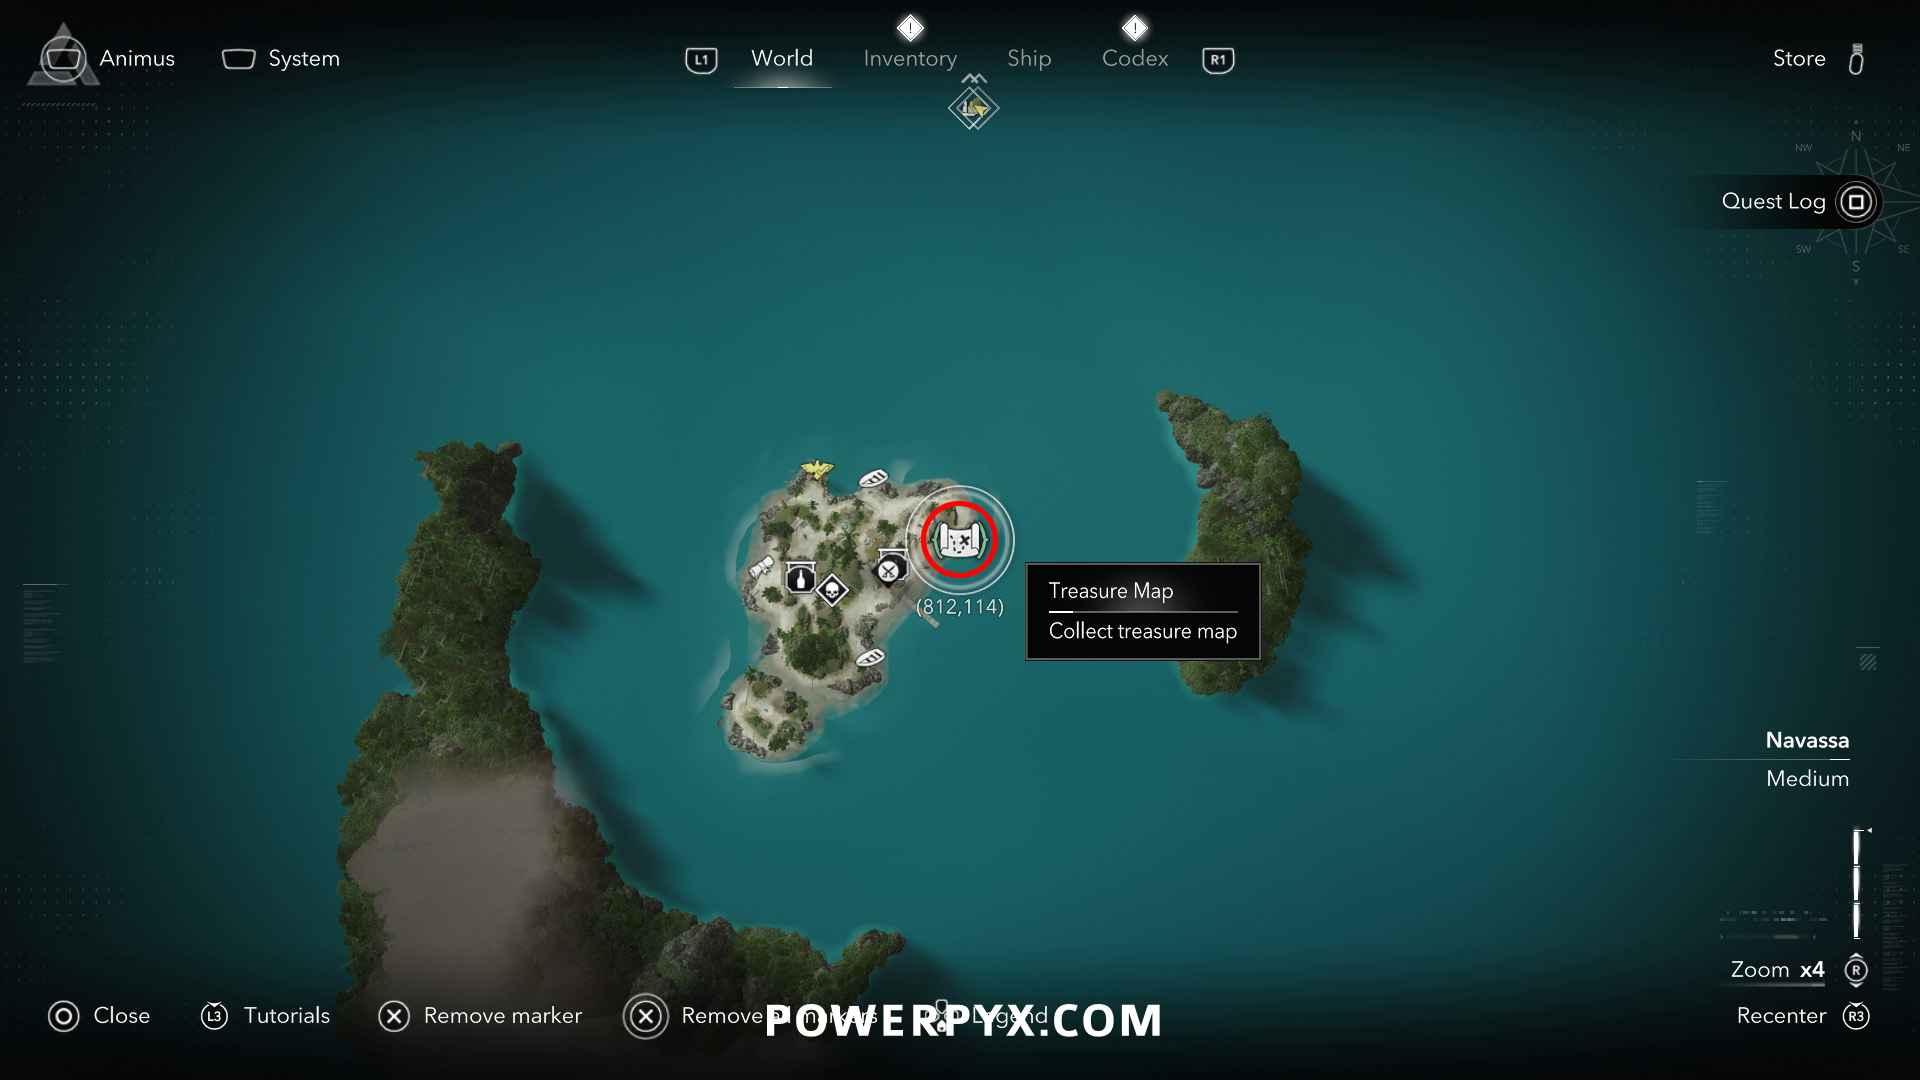
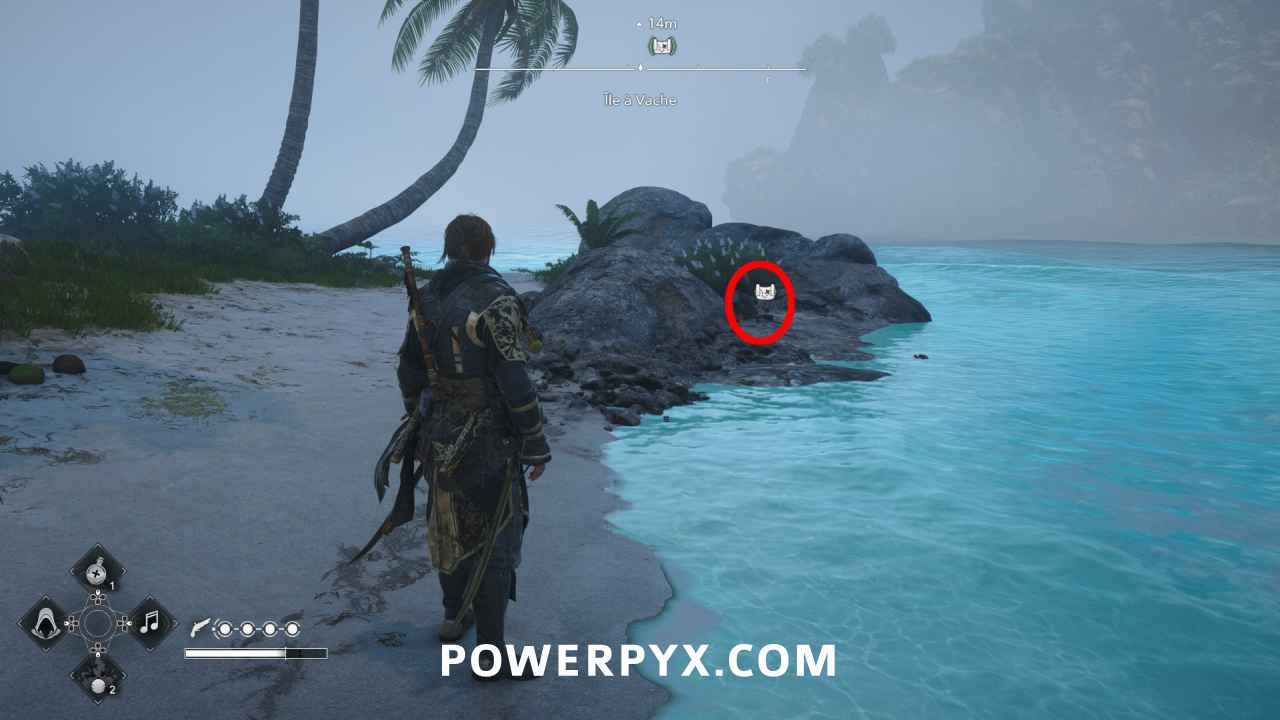
Location: Île à Vache (812, 114) – at the northeast shoreline from a skeleton
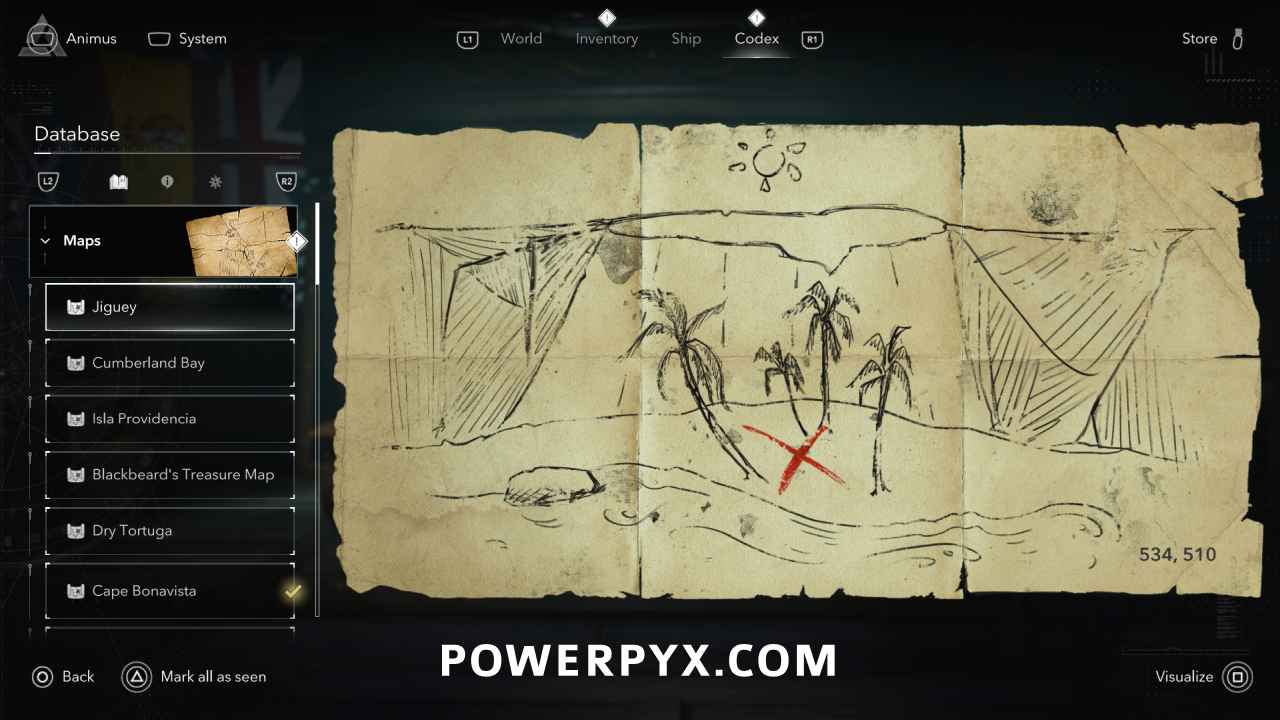
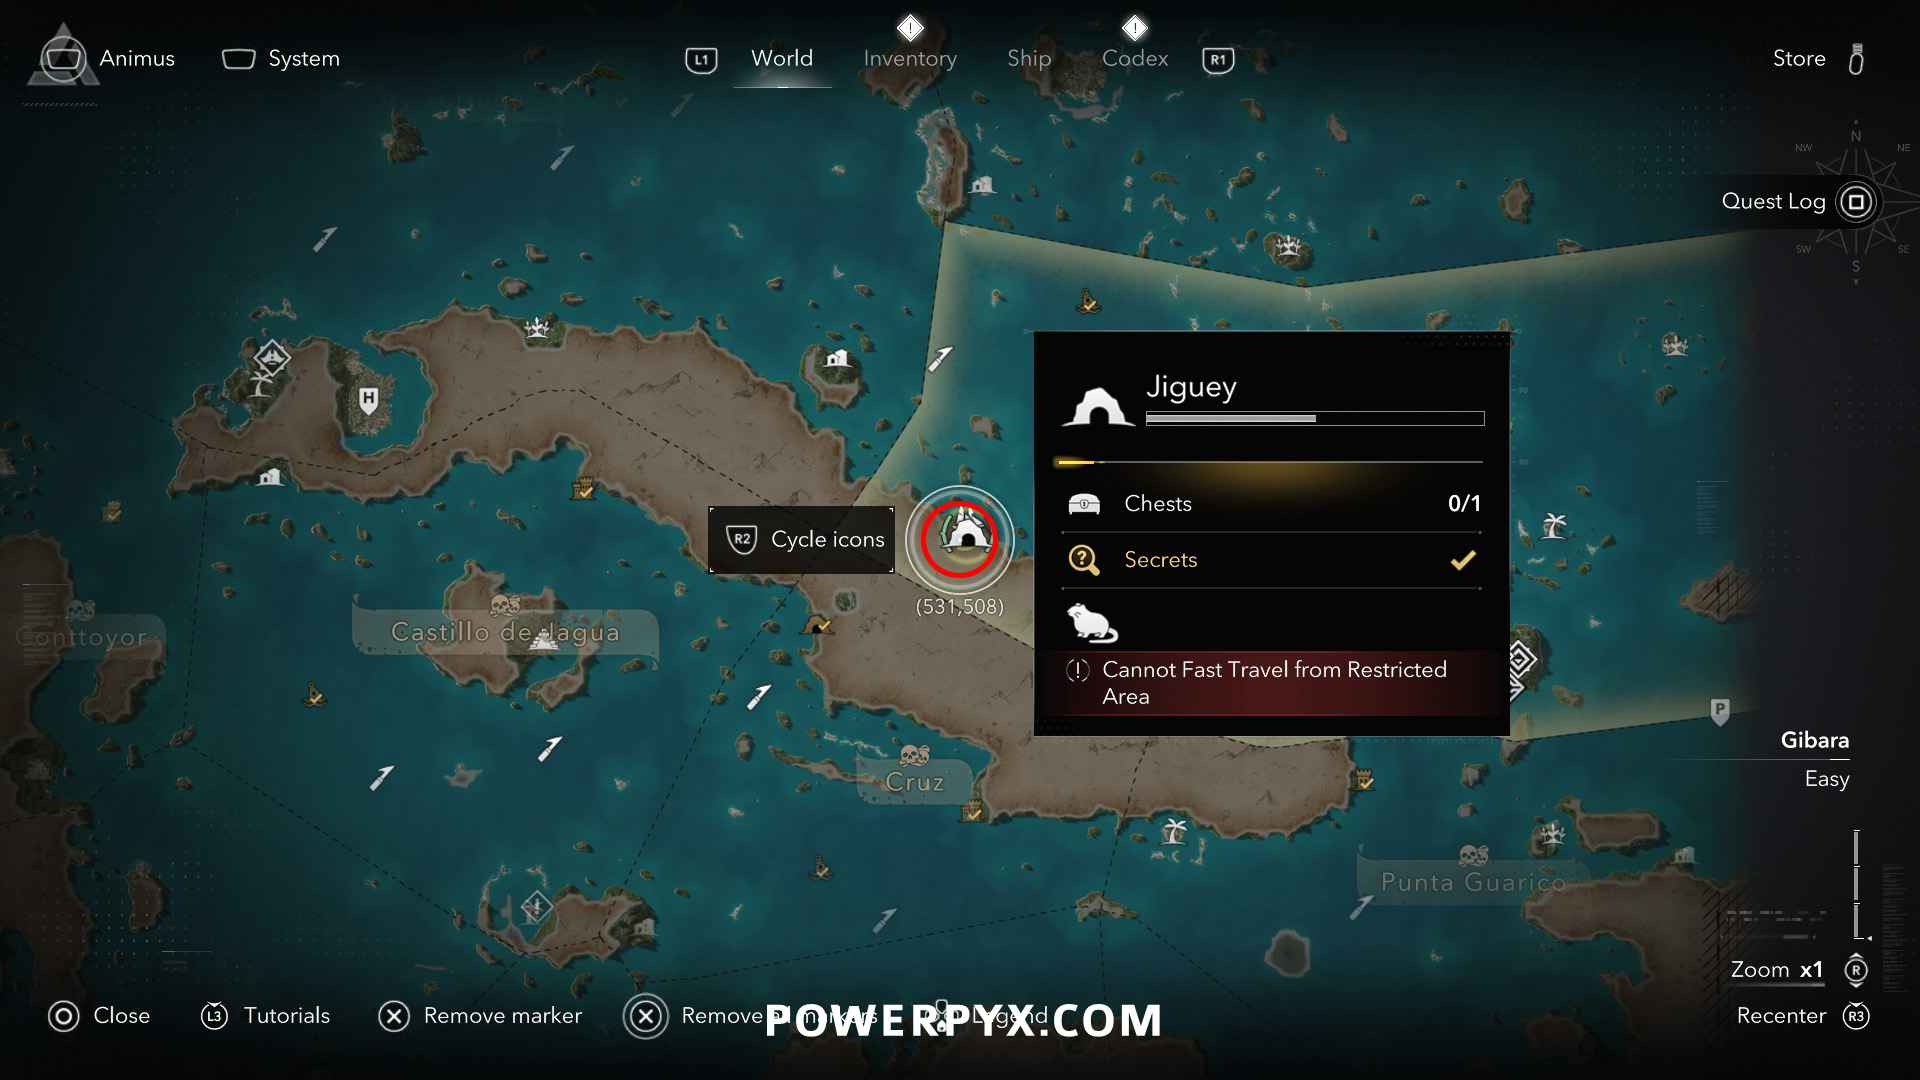
Solution: Jiguey (534, 510) – inside of Jiguey cave, in the section with pirate enemies swim forward to the beach where a brute (big enemy) is, the treasure is on the right side of the beach in the sand between the palm trees.
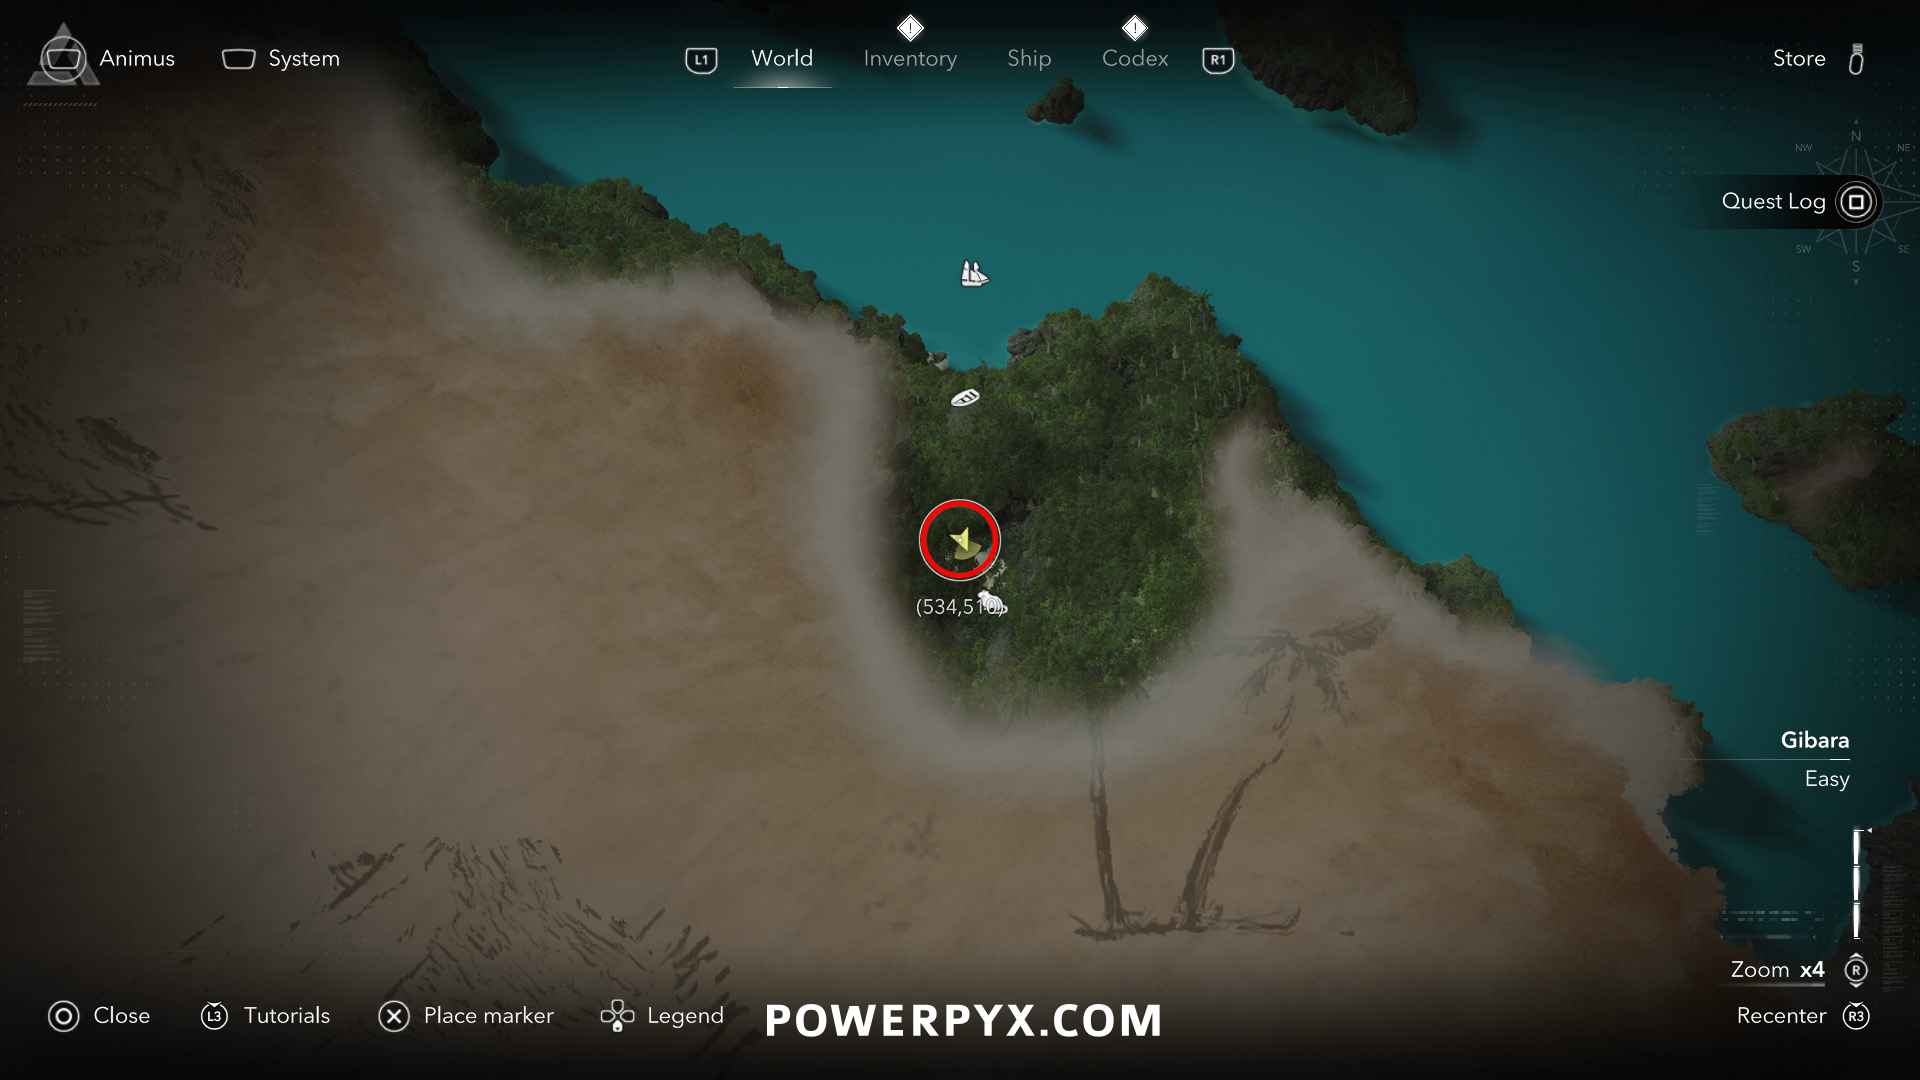
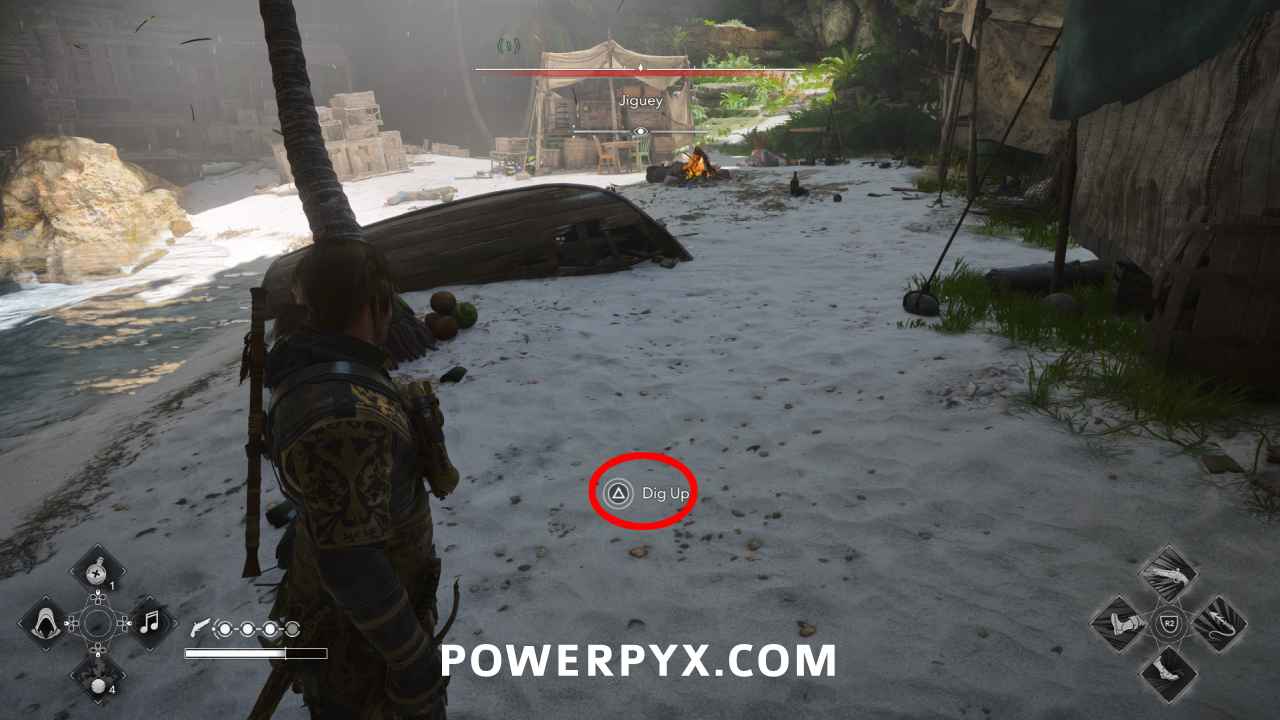
Reward: Art Collection Piece: Baroque Guitar (needed for Dilettante), 2500 Reales
#24 – Treasure Map from Kingston Warehouse (Cumberland Bay)
Location: Kingston (605, 156) – loot the warehouse in the southwest of Kingston to get the map
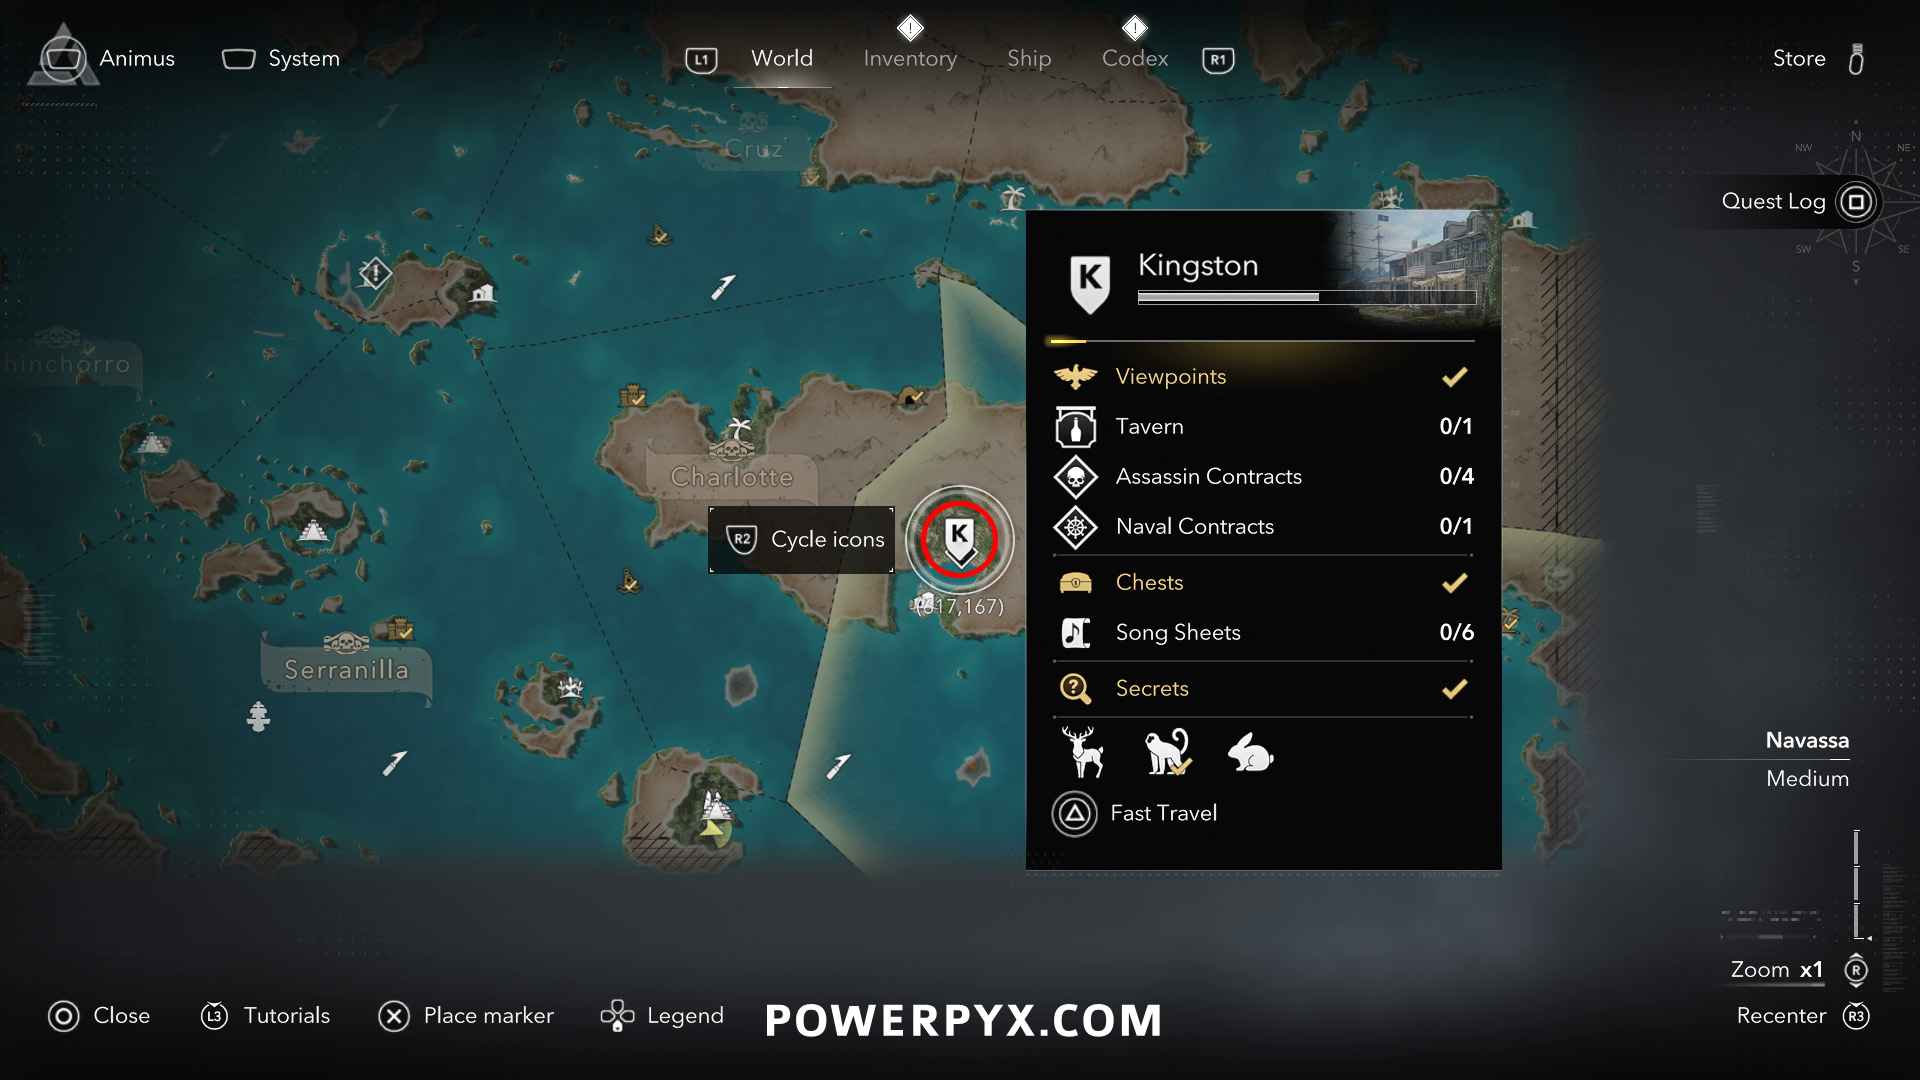
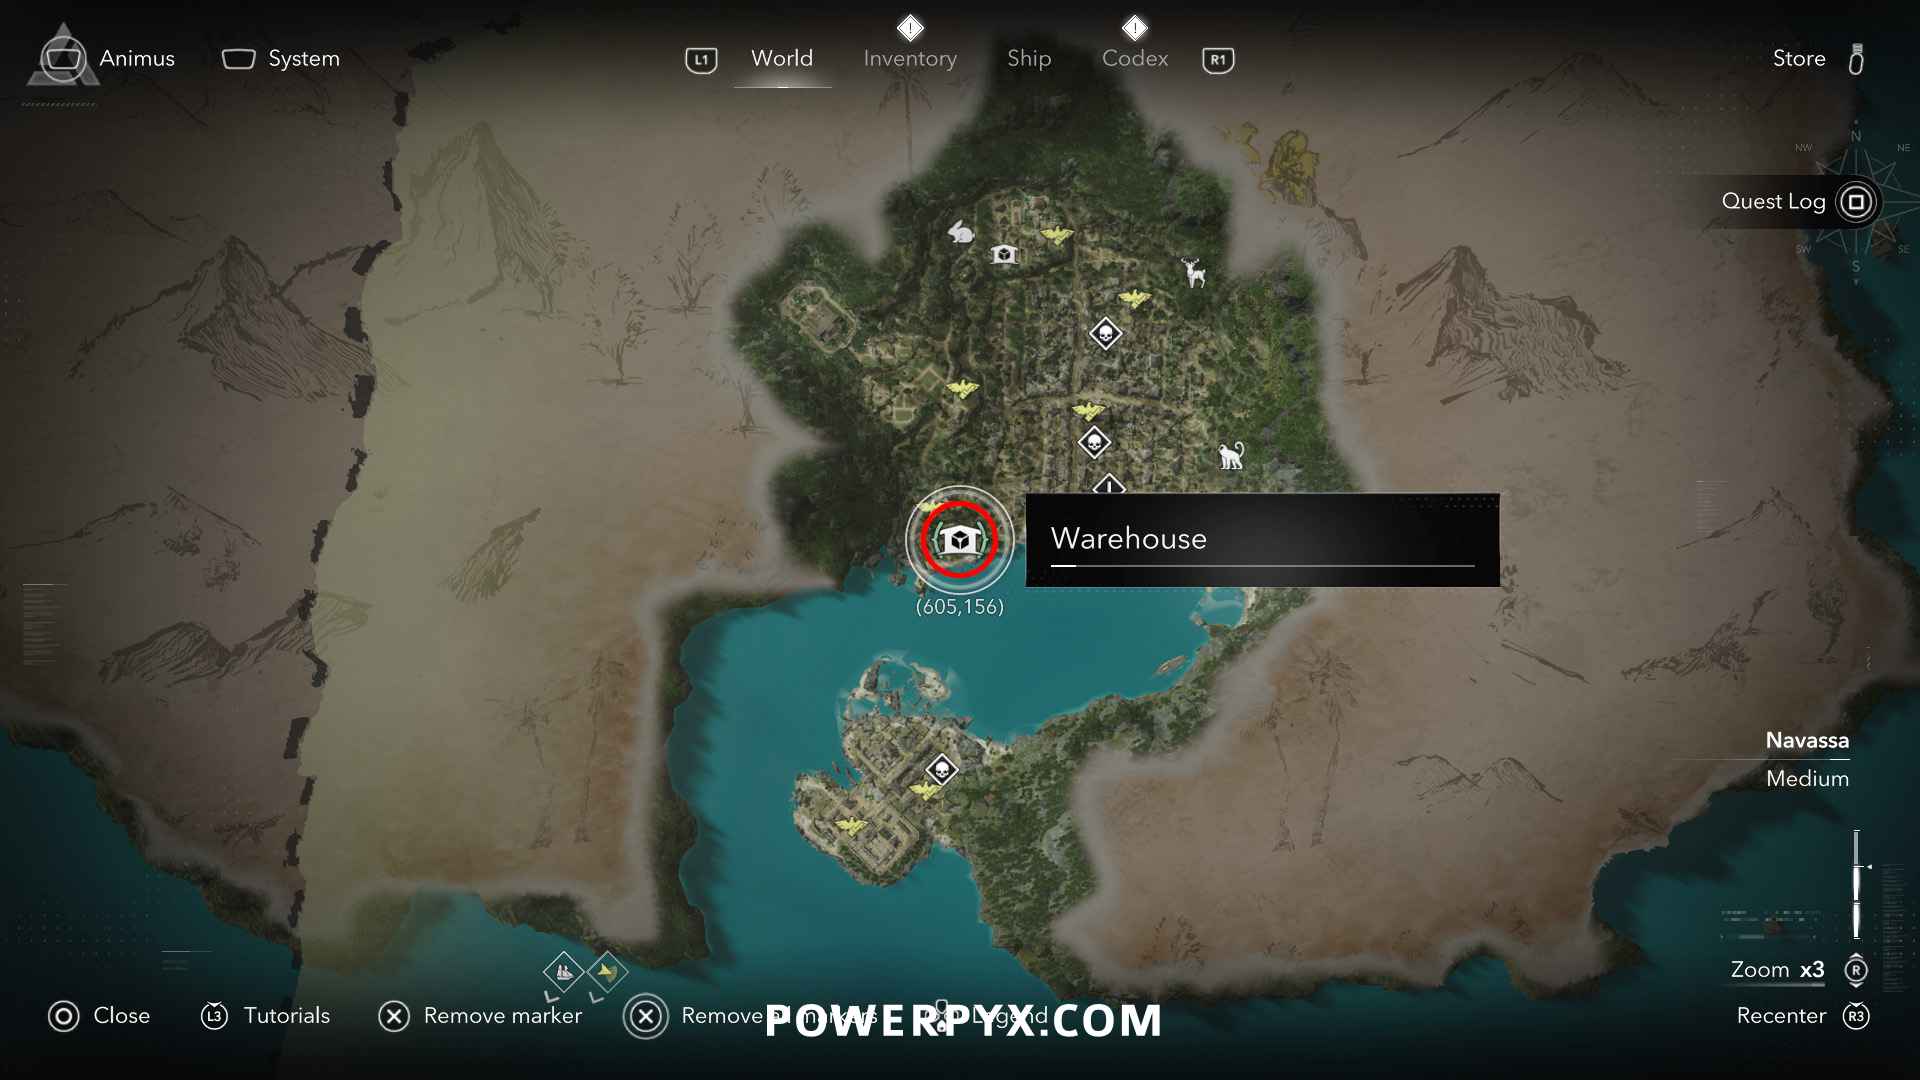
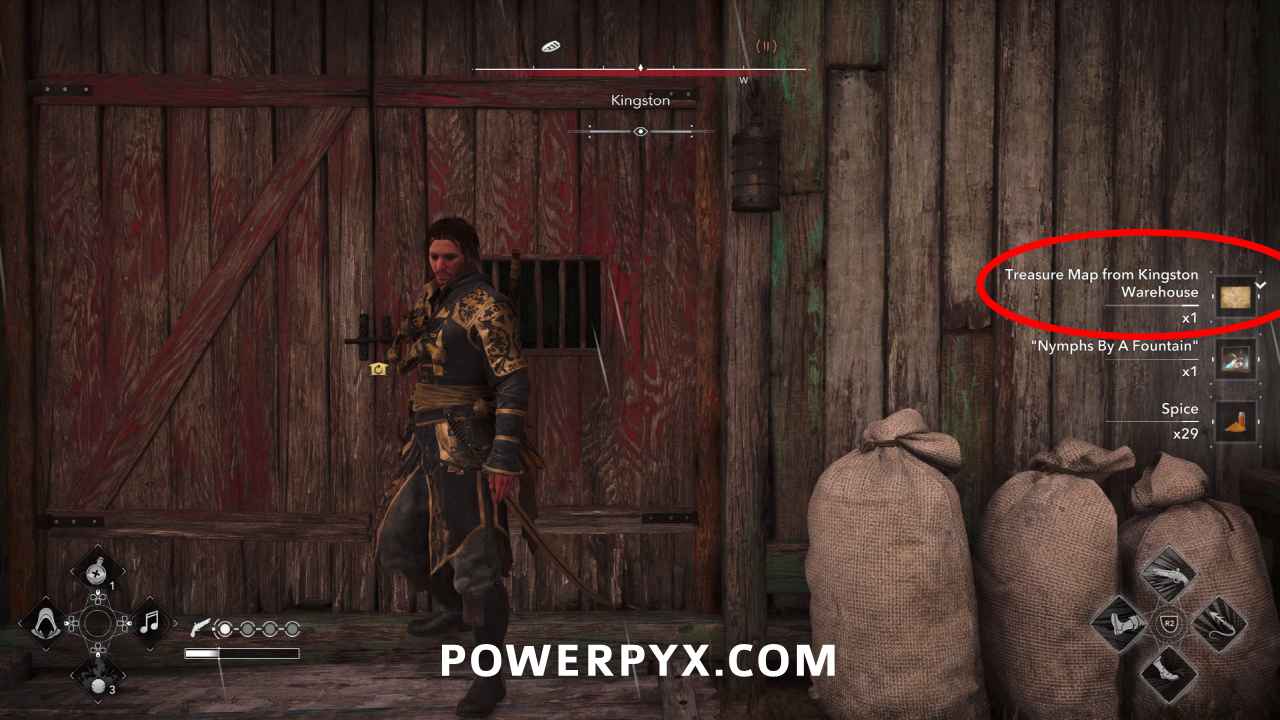
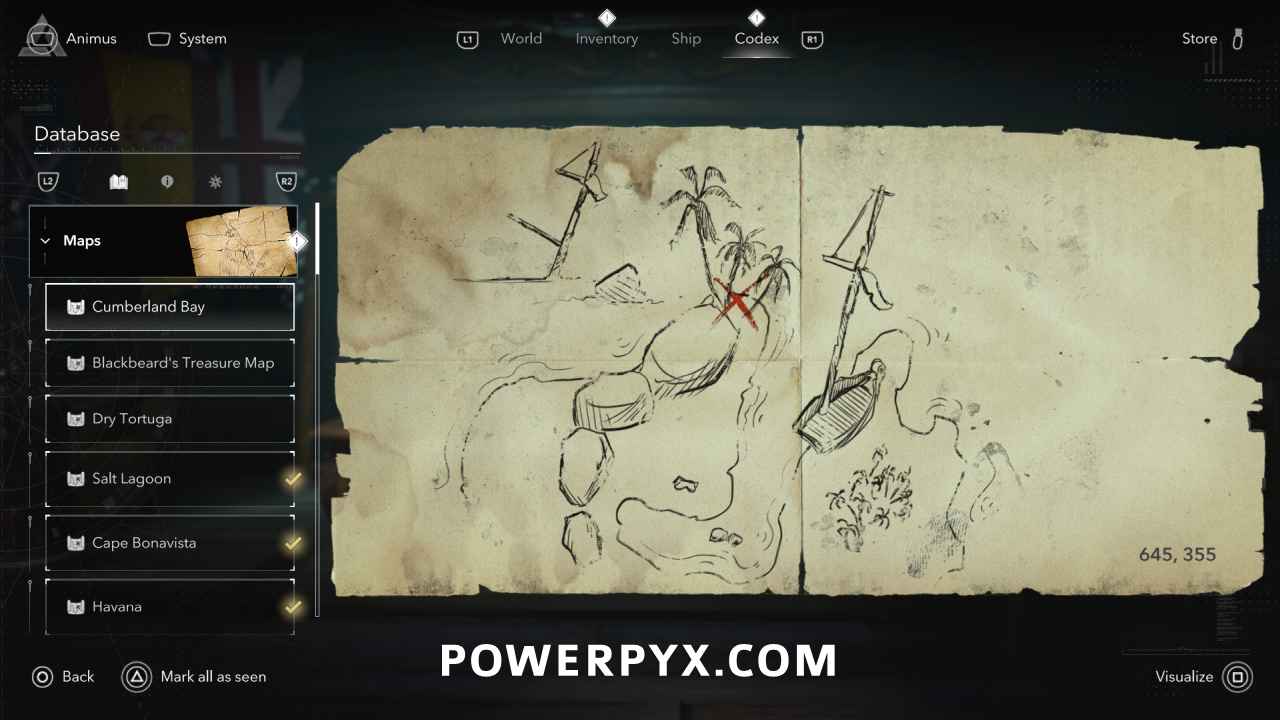
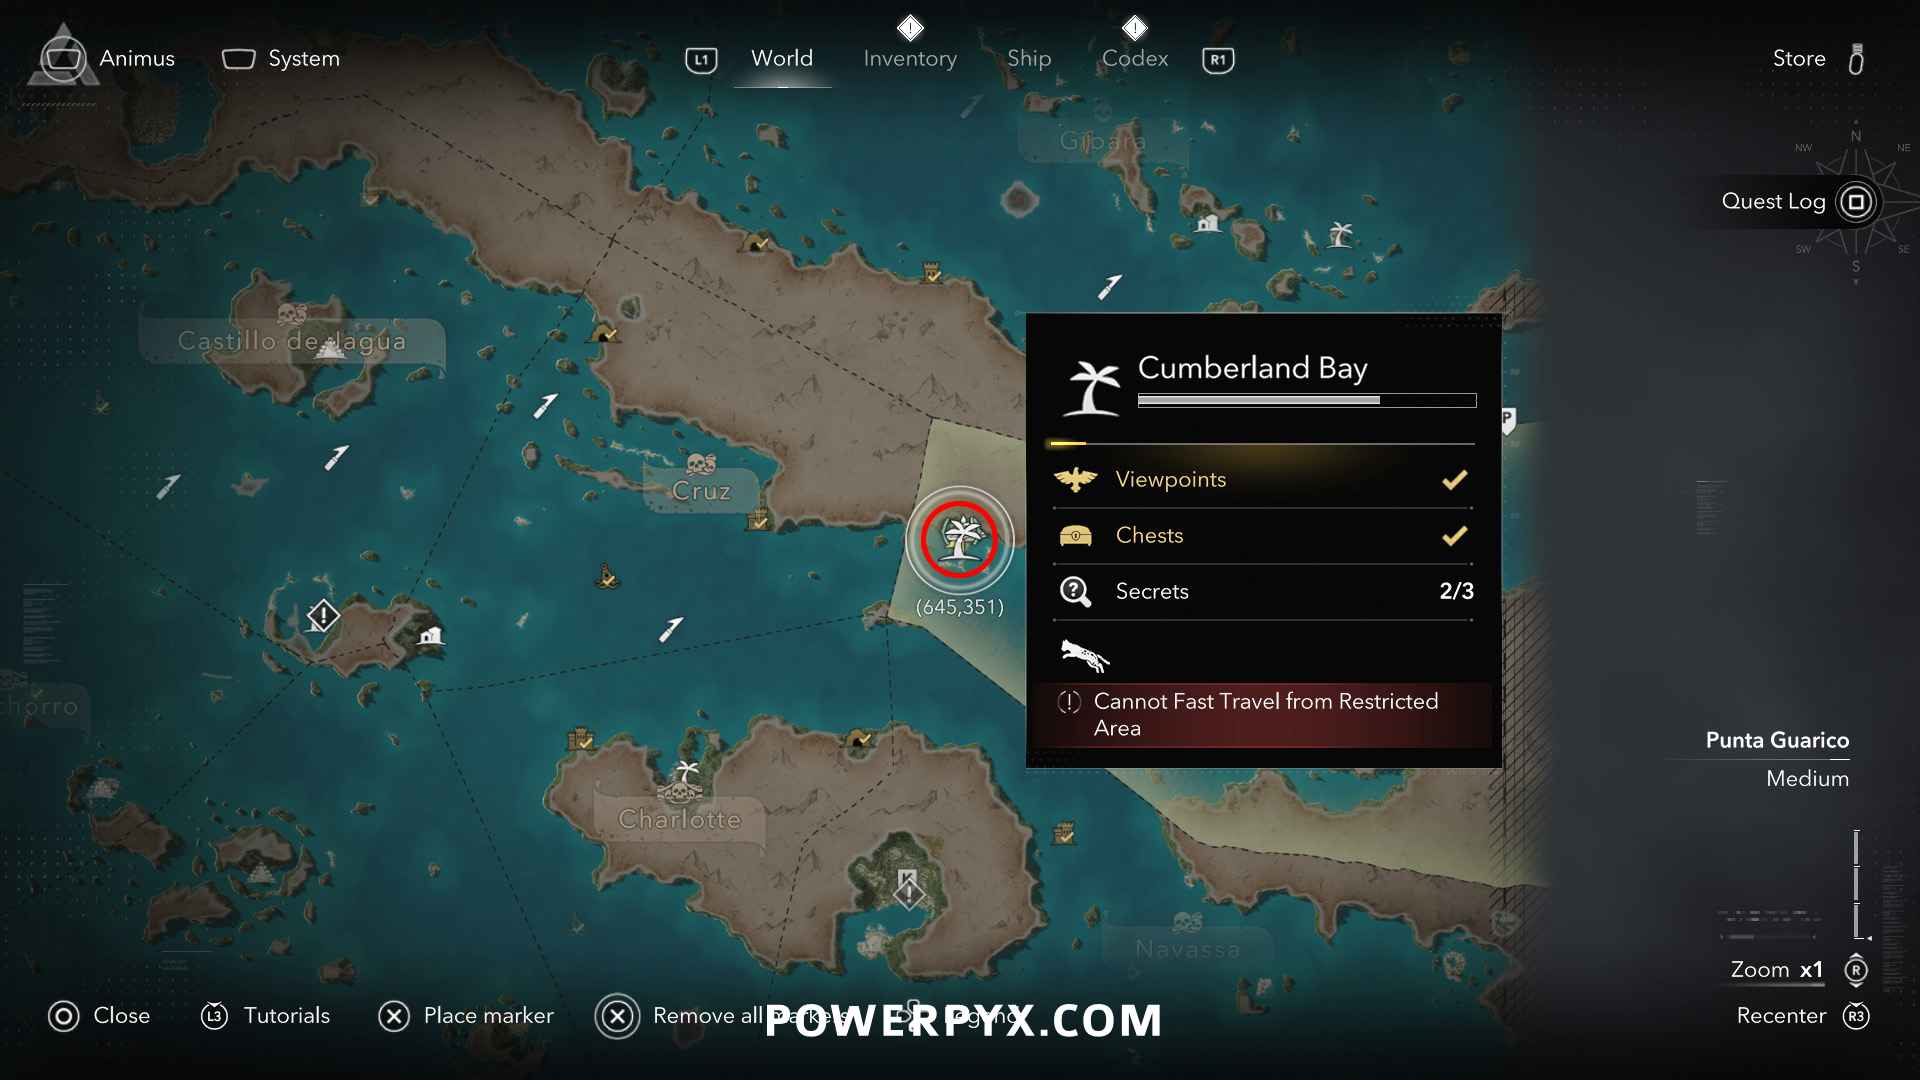
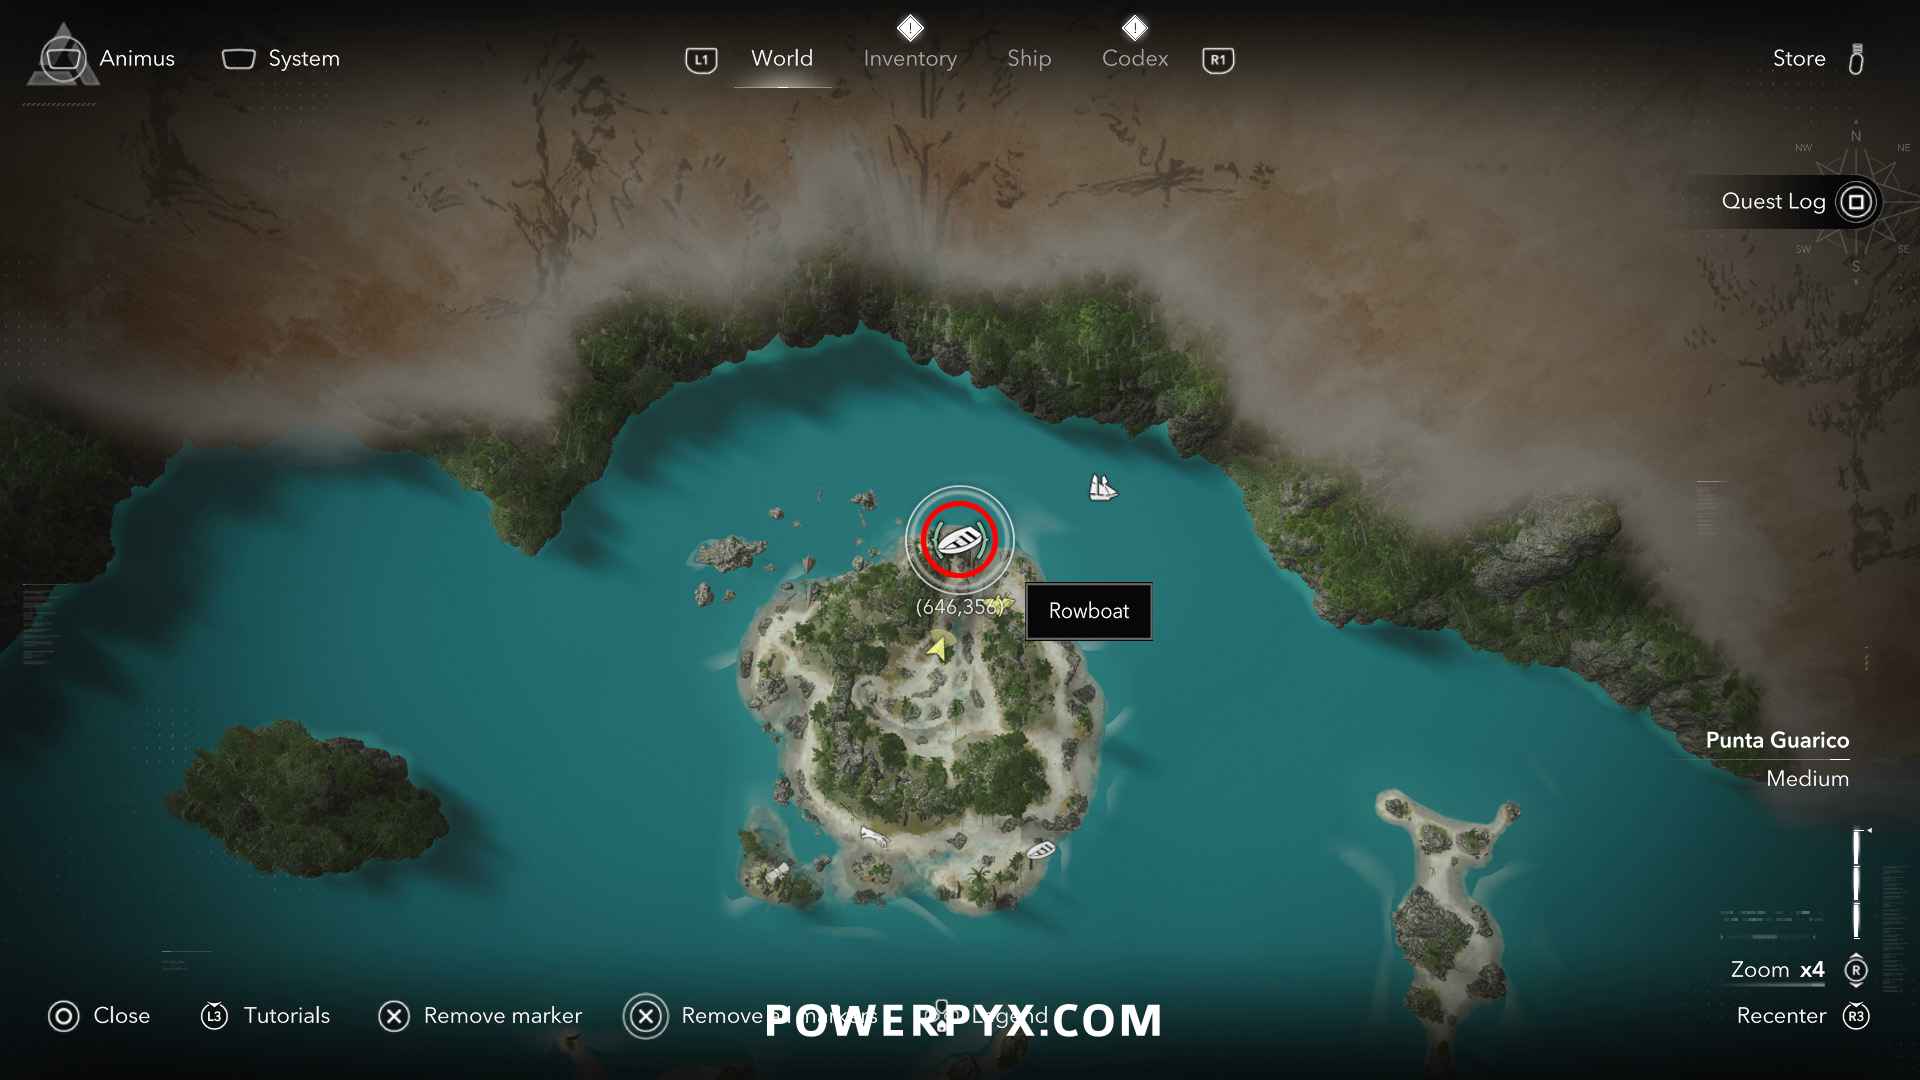
Solution: Cumberland Bay (645, 355) – next to an interactable rowboat in the sand
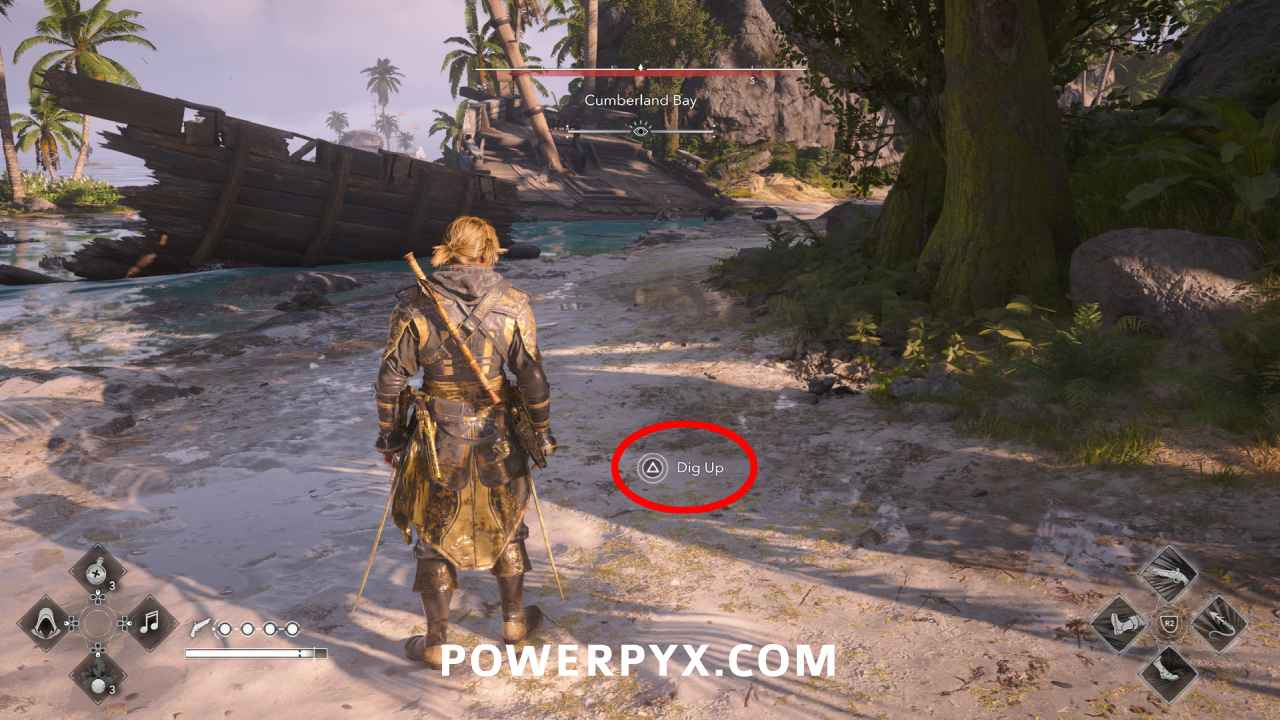
Reward: 4000 Reales
Quest-Related Treasure Maps
#25 – Blackbeard’s Treasure Map
Location: Automatically obtained from Story Sequence 08 – Mission 01: Do Not Go Gently. You get it during the cutscene at the end of that mission.
Solution: Anotto Bay (590, 245) – for this you must finish the quest “Blackbeard’s Treasure” which you get along with his treasure map. The quest will be marked on the map at Anotto Bay. At the cliffside of the sea look for a damaged diving bell, dive down from there to find an underwater cave entrance where jellyfish are. This underwater tunnel leads into Anotto Bay.
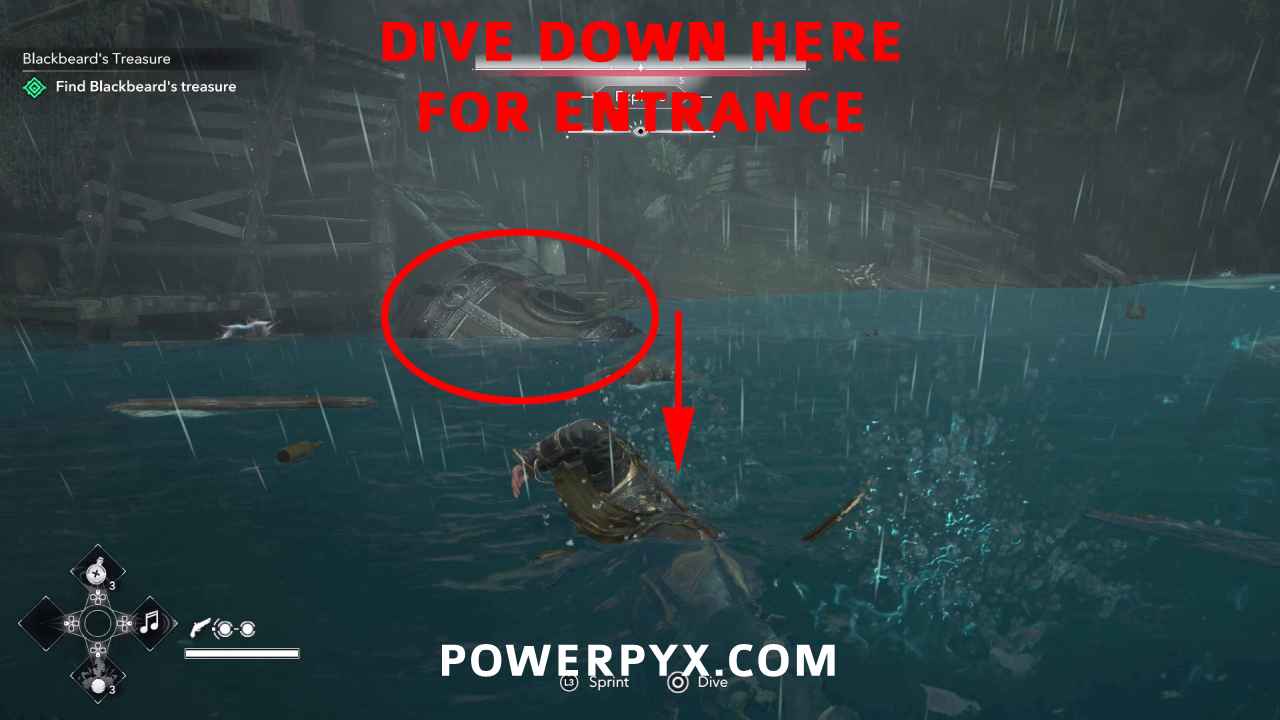
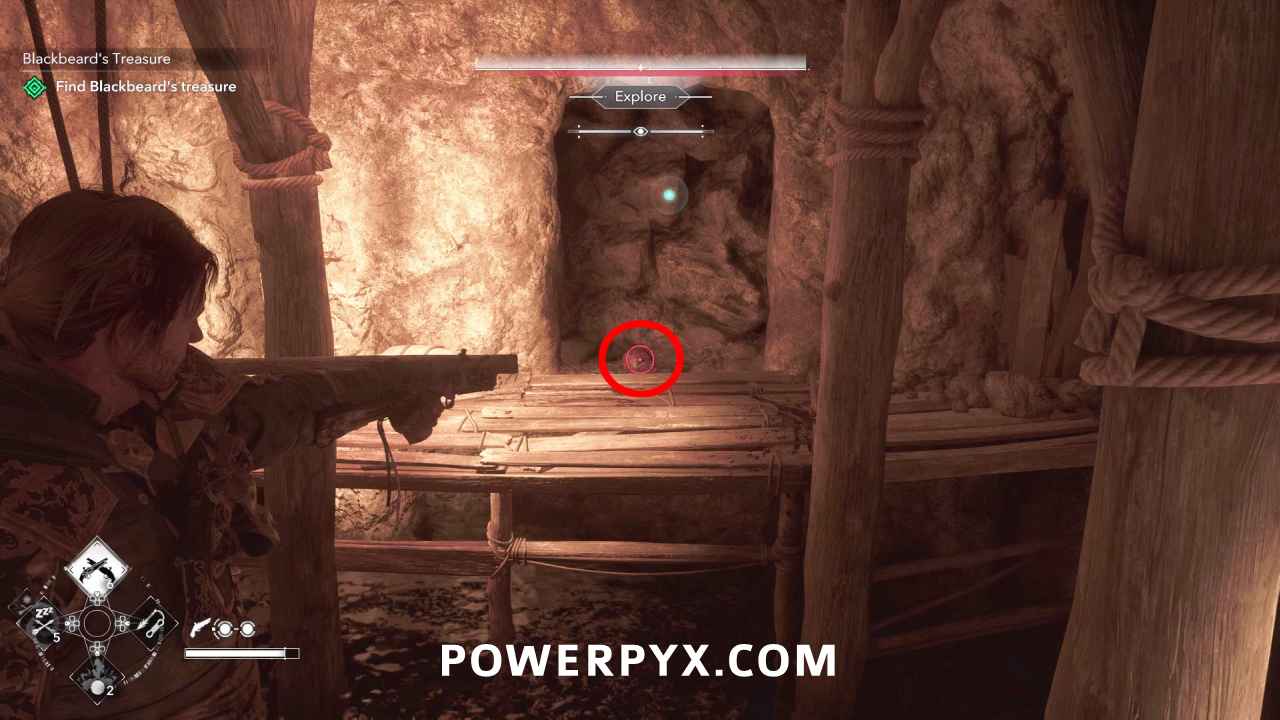
Advance until you reach a room with multiple pirates. In the room with the pirates are some small explosive barrels you can carry, place one in front of the destructible wall on the east side of the room, shoot the barrel to blow up the wall.
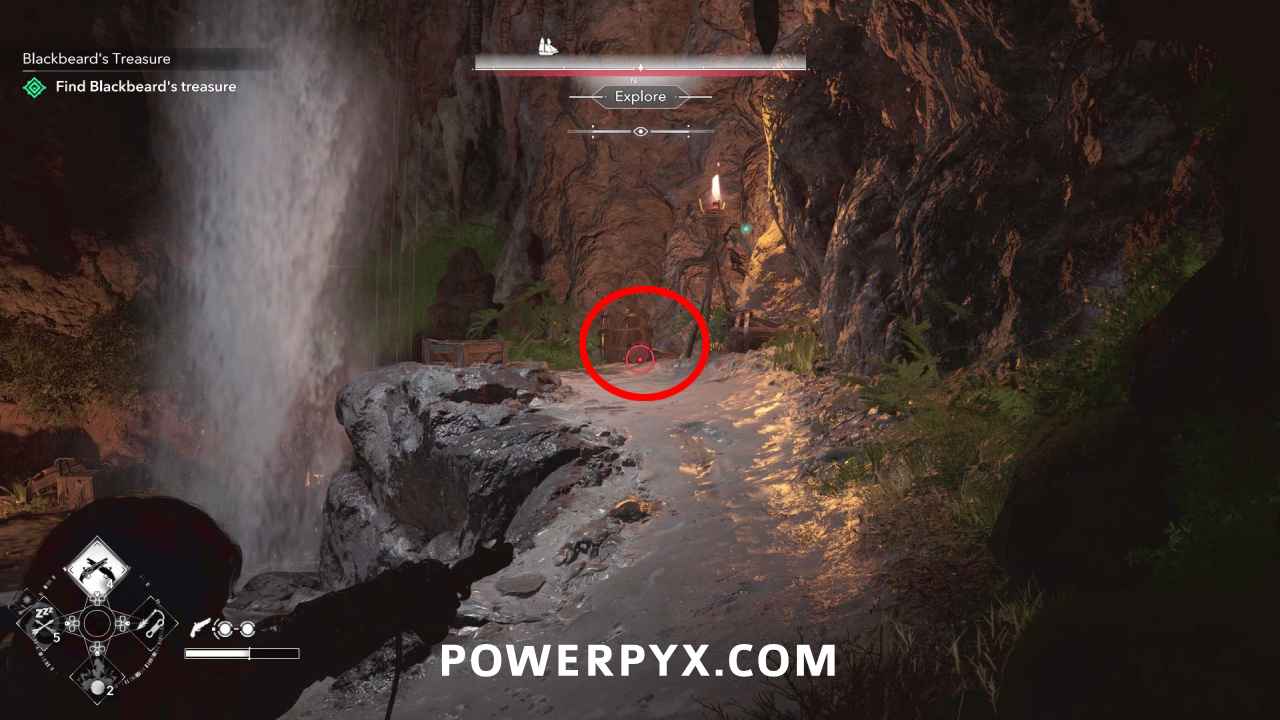
Take the path behind the wall until you reach another room with pirate enemies. There you find more small explosive barrels, again place one at the destructible wall up the slope behind the waterfall. Blackbeard’s Treasure is behind that wall.
Afterward, fast travel back to Great Inagua where the updated quest marker appears and interact with the chest. After the cutscene you get the portrait.
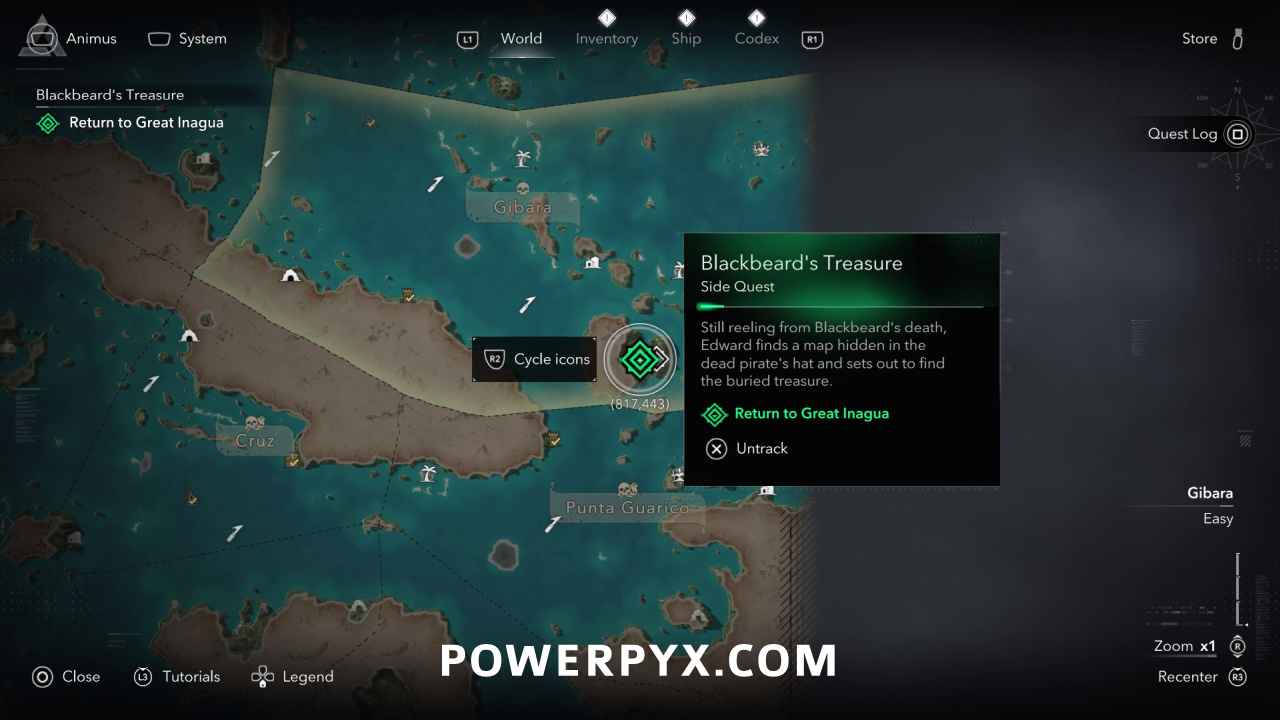
Reward: Blackbeard’s Portrait (needed for  The Memory of My Enemy).
Restored Maps (Treasure Dealer)
#26 – Restored Weathered Map
Location: Requires 6 Weathered Pieces + 350 Tobacco. Rebuild the Treasure Dealer at the docks of Great Inagua and talk to him to restore this map (becomes available in Sequence 4). The Weathered Map Pieces are obtained from the locked chests in the 5 Caves, 1 piece is bought from the treasure dealer in Great Inagua. In total this costs 350 spice to restore (200 to buy the 6th map piece, 150 to restore map). Spice is commonly looted from ships in the southern regions. After going to all “?” icons you can press  on the map to filter for the caves. In each cave you must kill the pirate leader and loot the key from his body to open the chest. The 5 caves are: Jiguey (535, 511), San Juan (454, 462), Anotto Bay (590, 245), Petite Caverne (864, 237), Ambergris Key (28, 159). The key in Anotto Bay might not spawn on the first visit, if no enemy drops it then come back after 2 hours when the enemies have respawned.
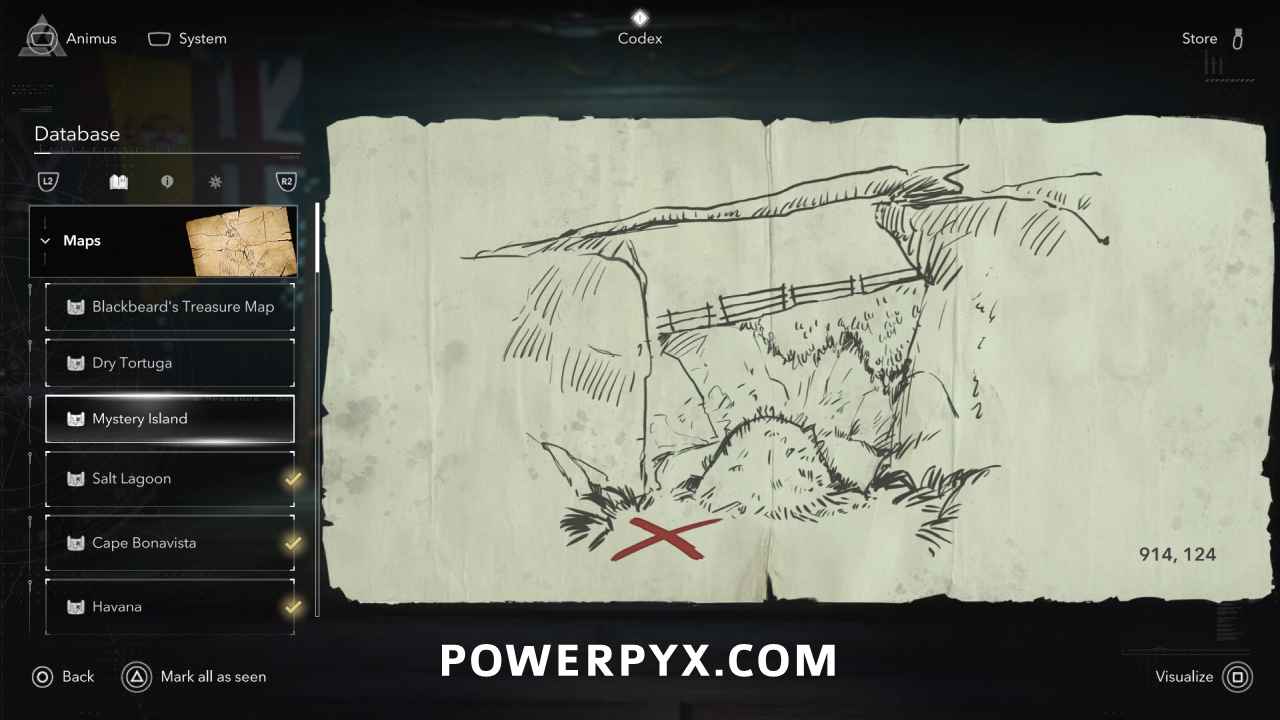
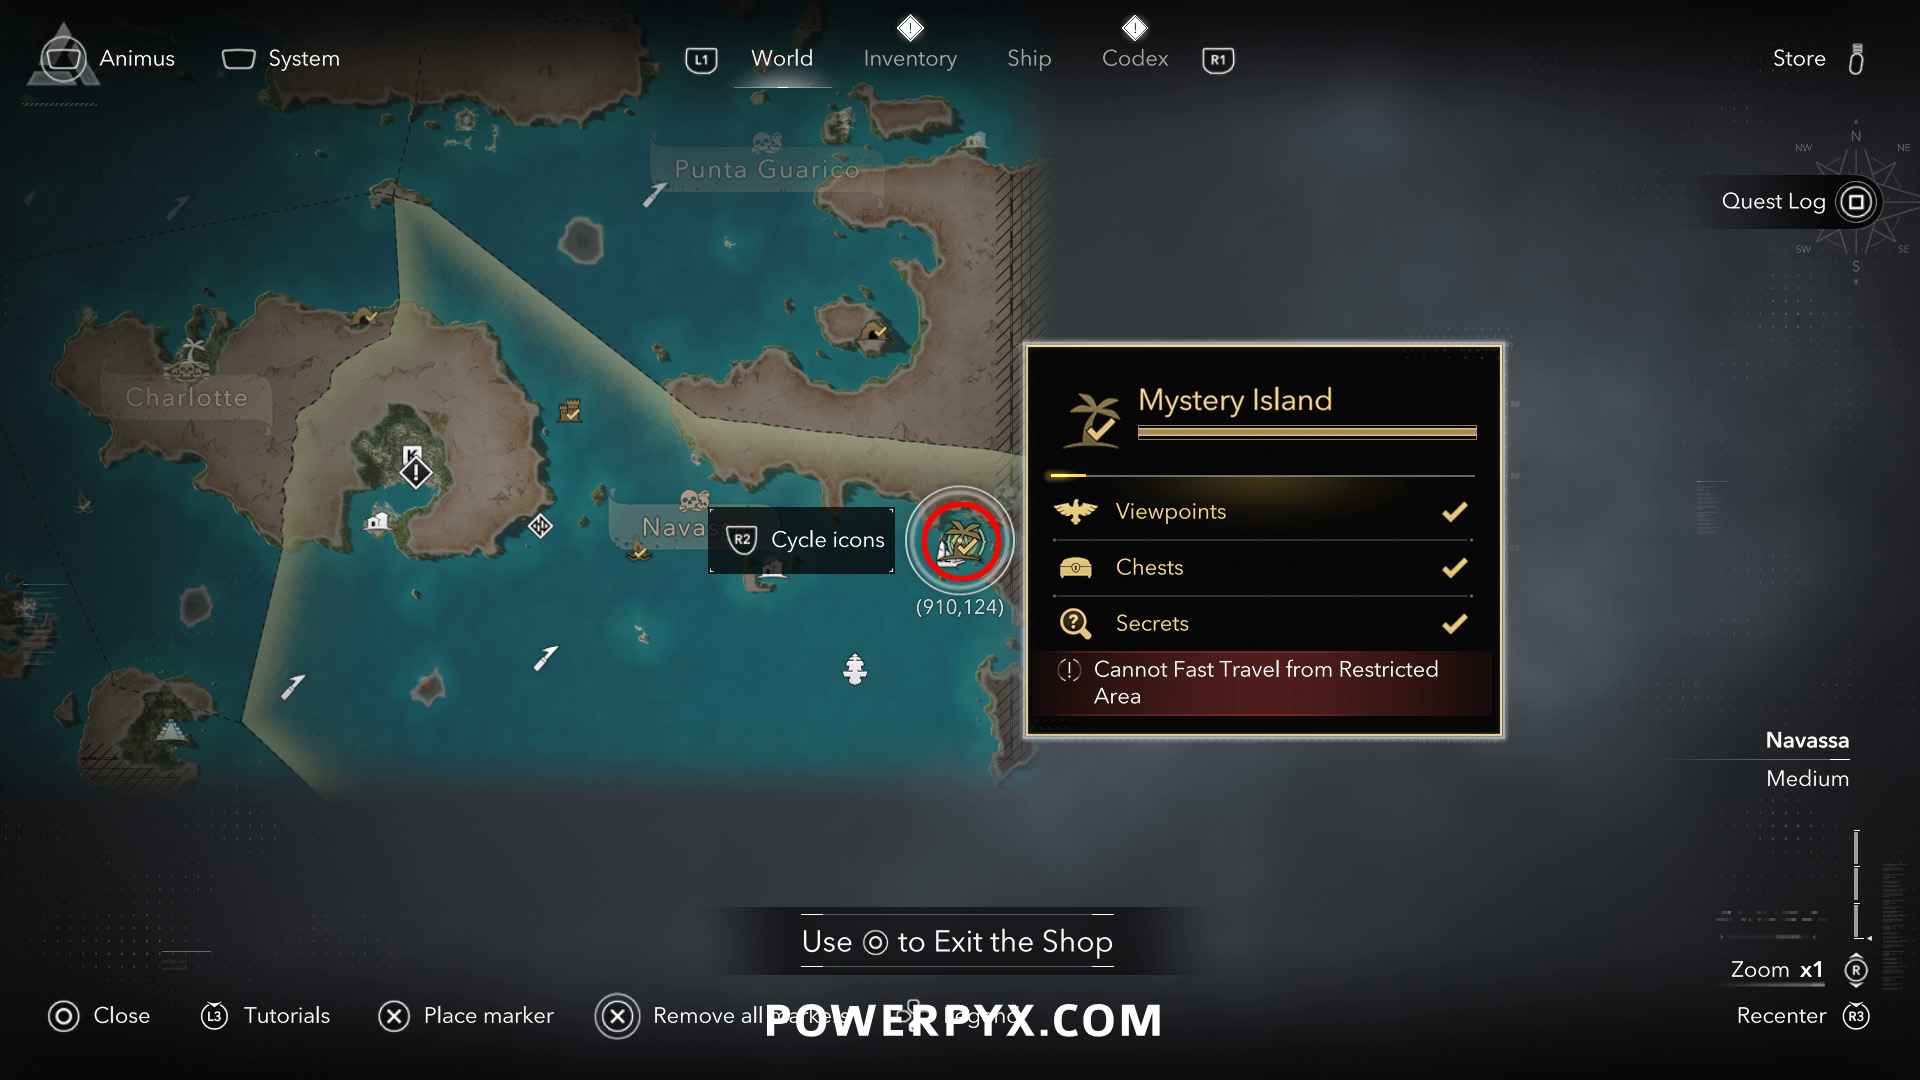
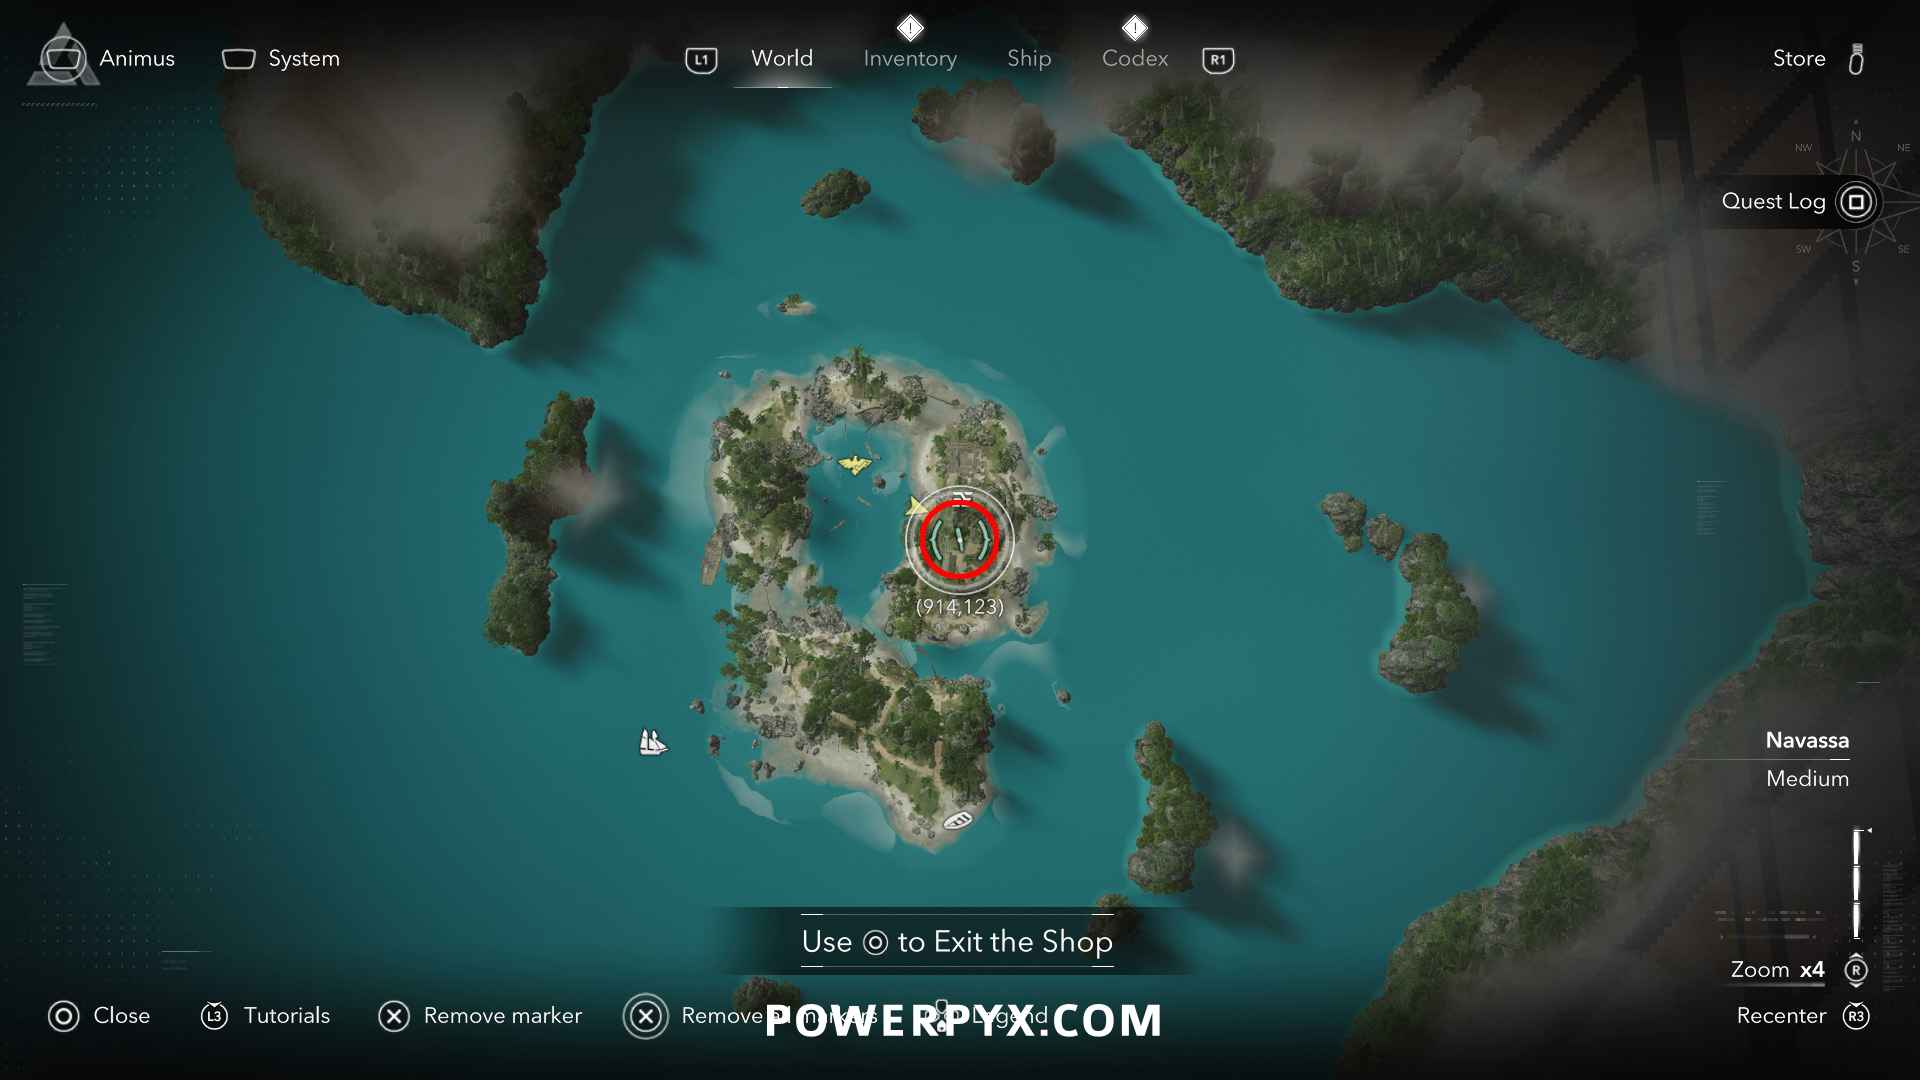
Solution: Mystery Island (914, 124) – on the eastern half of Mystery Island, in the middle of a round rock formation next to a haystack.
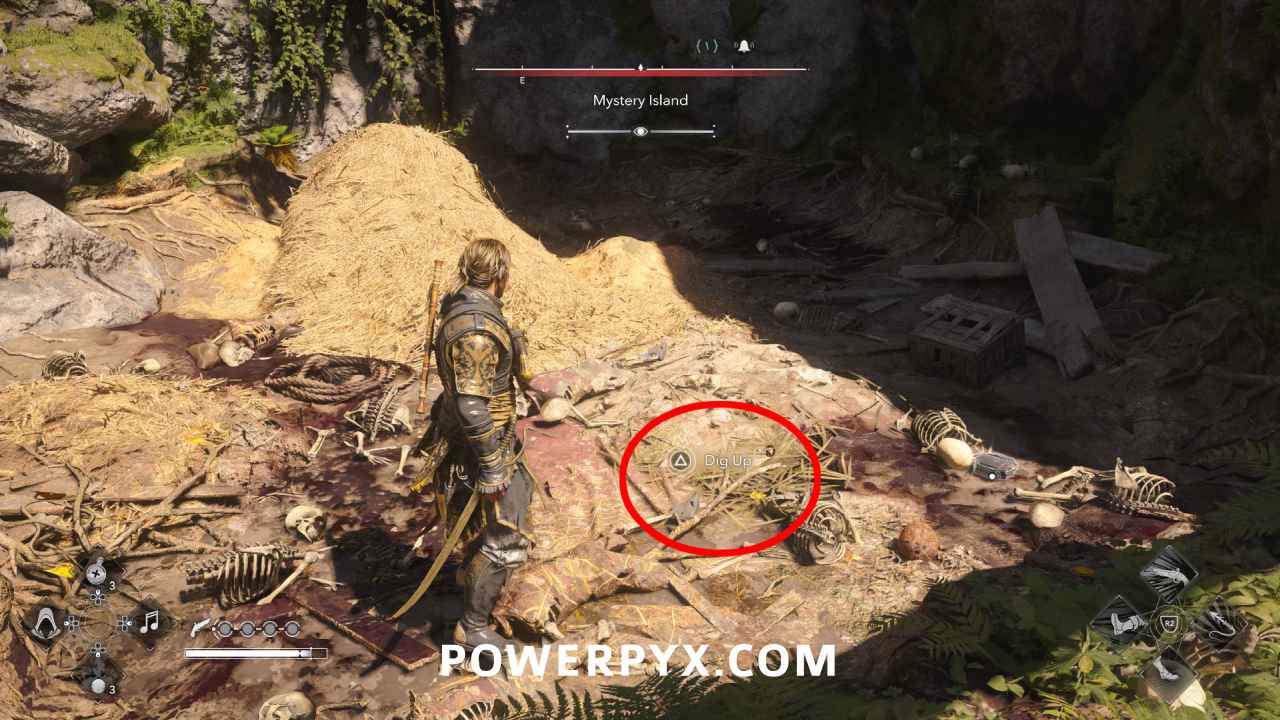
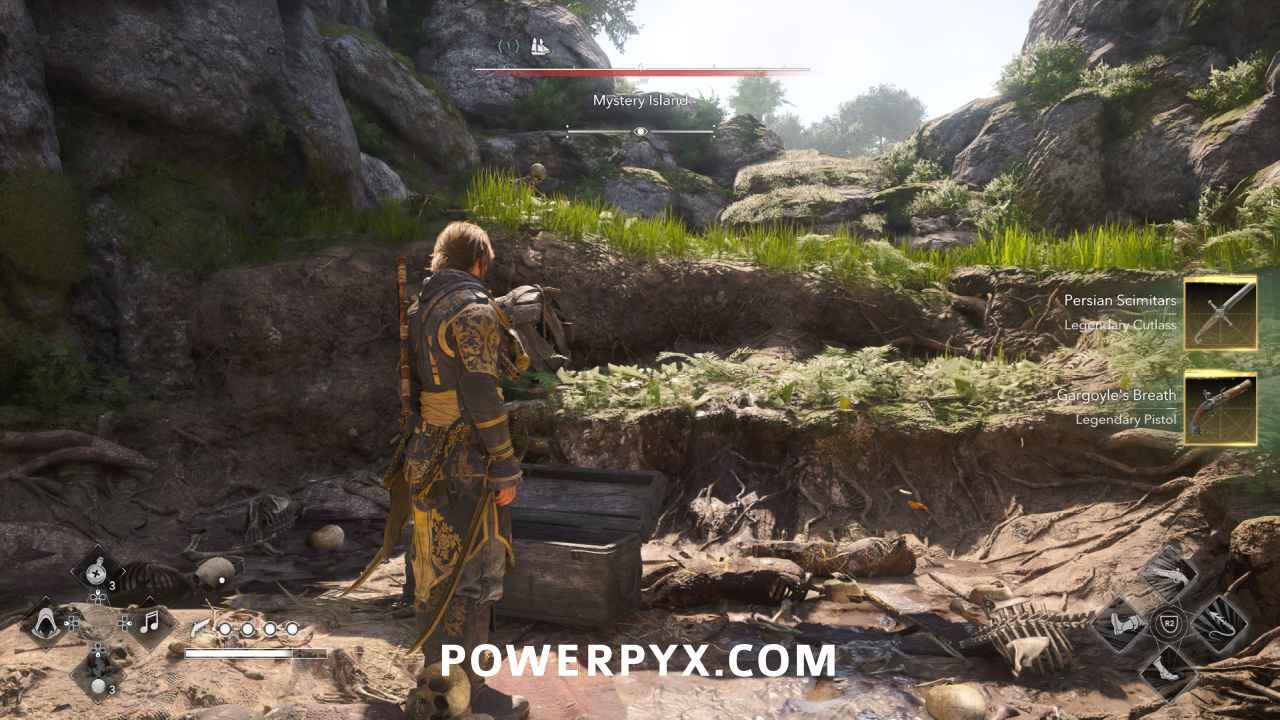
Reward: Persian Scimitars (Legendary Cutlass), Gargoyle’s Breath (Legendary Pistol)
#27 – Restored Yellowed Map
Location: Requires 10 Yellowed Map Pieces + 100 Aloe. Rebuild the Treasure Dealer at the docks of Great Inagua and talk to him to restore this map (becomes available in Sequence 4). The Yellowed Map Pieces are random rewards from Kenway’s Fleet, exclusively from sending Schooners on trade missions. This is completely random but you can see a “map” icon on the fleet map before sending a ship. This is the hardest map to get and requires the most luck. After conquering a fort in each region you can run 5 schooner missions at the same time to improve the odds. You can make a manual save before accepting the fleet reports, if the next set of missions doesn’t show a map piece as reward you can reload the save to roll a new set of quests. Aloe is sometimes obtained from Kenway’s Fleet piracy missions in the southwest region.
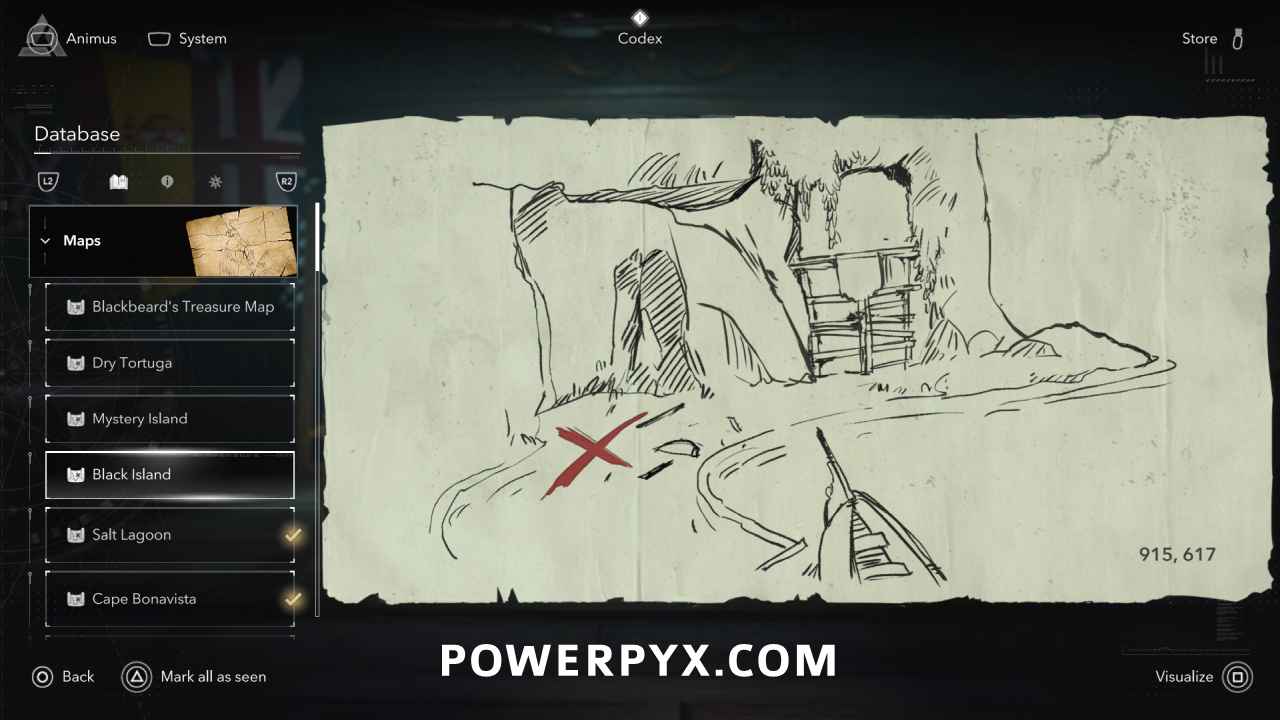
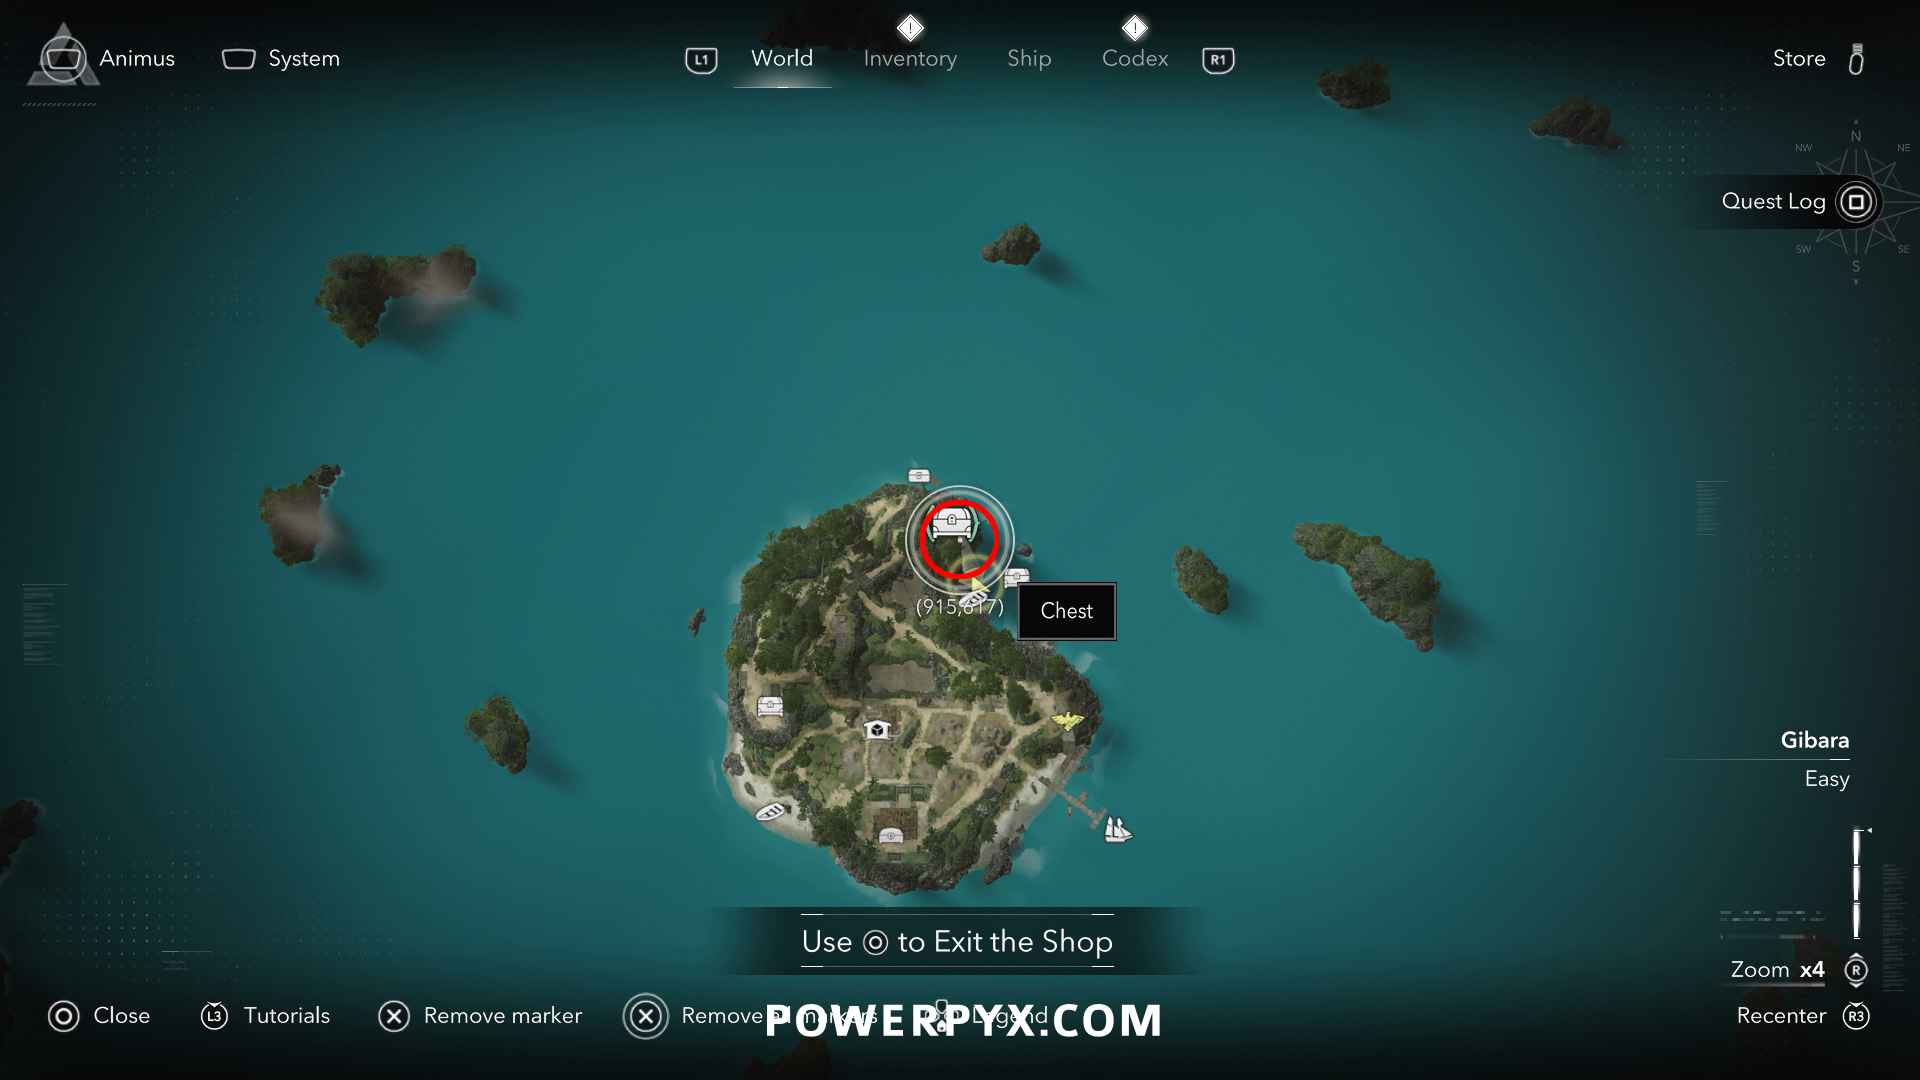
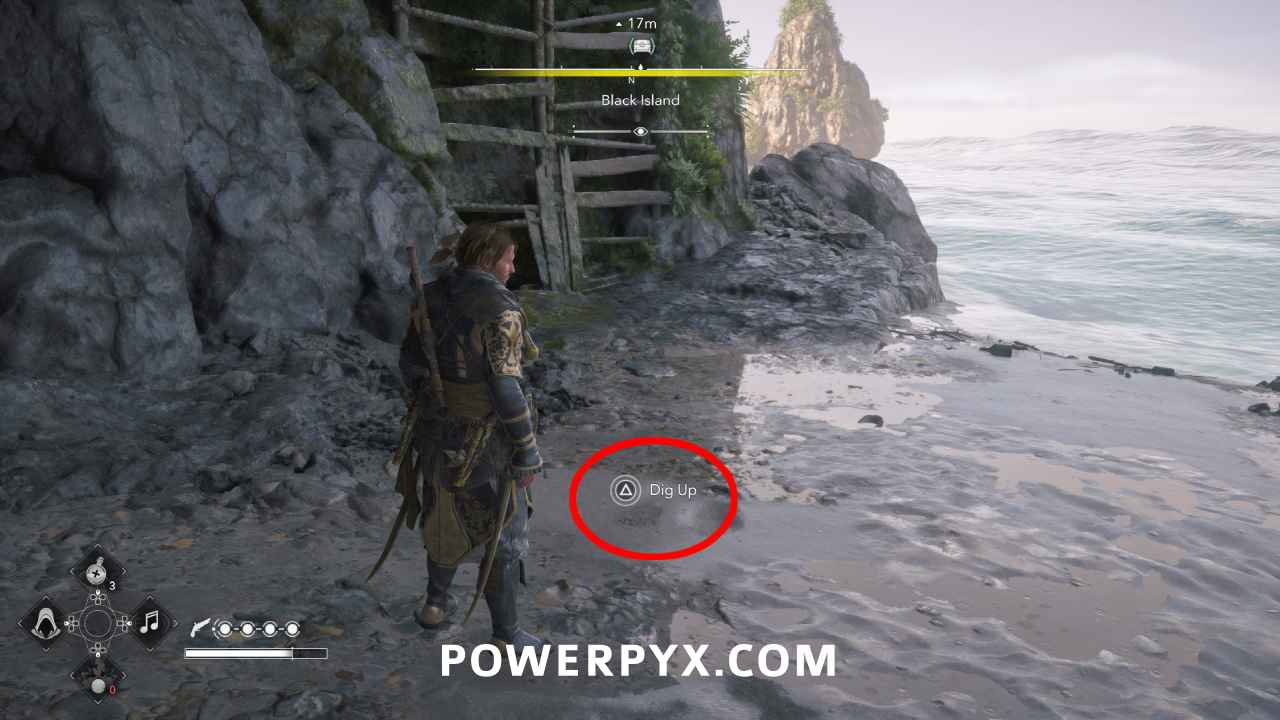
Solution: Black Island (915, 617) – on the north-east shoreline of Black Island, in the sand at the beach next to a shipwreck
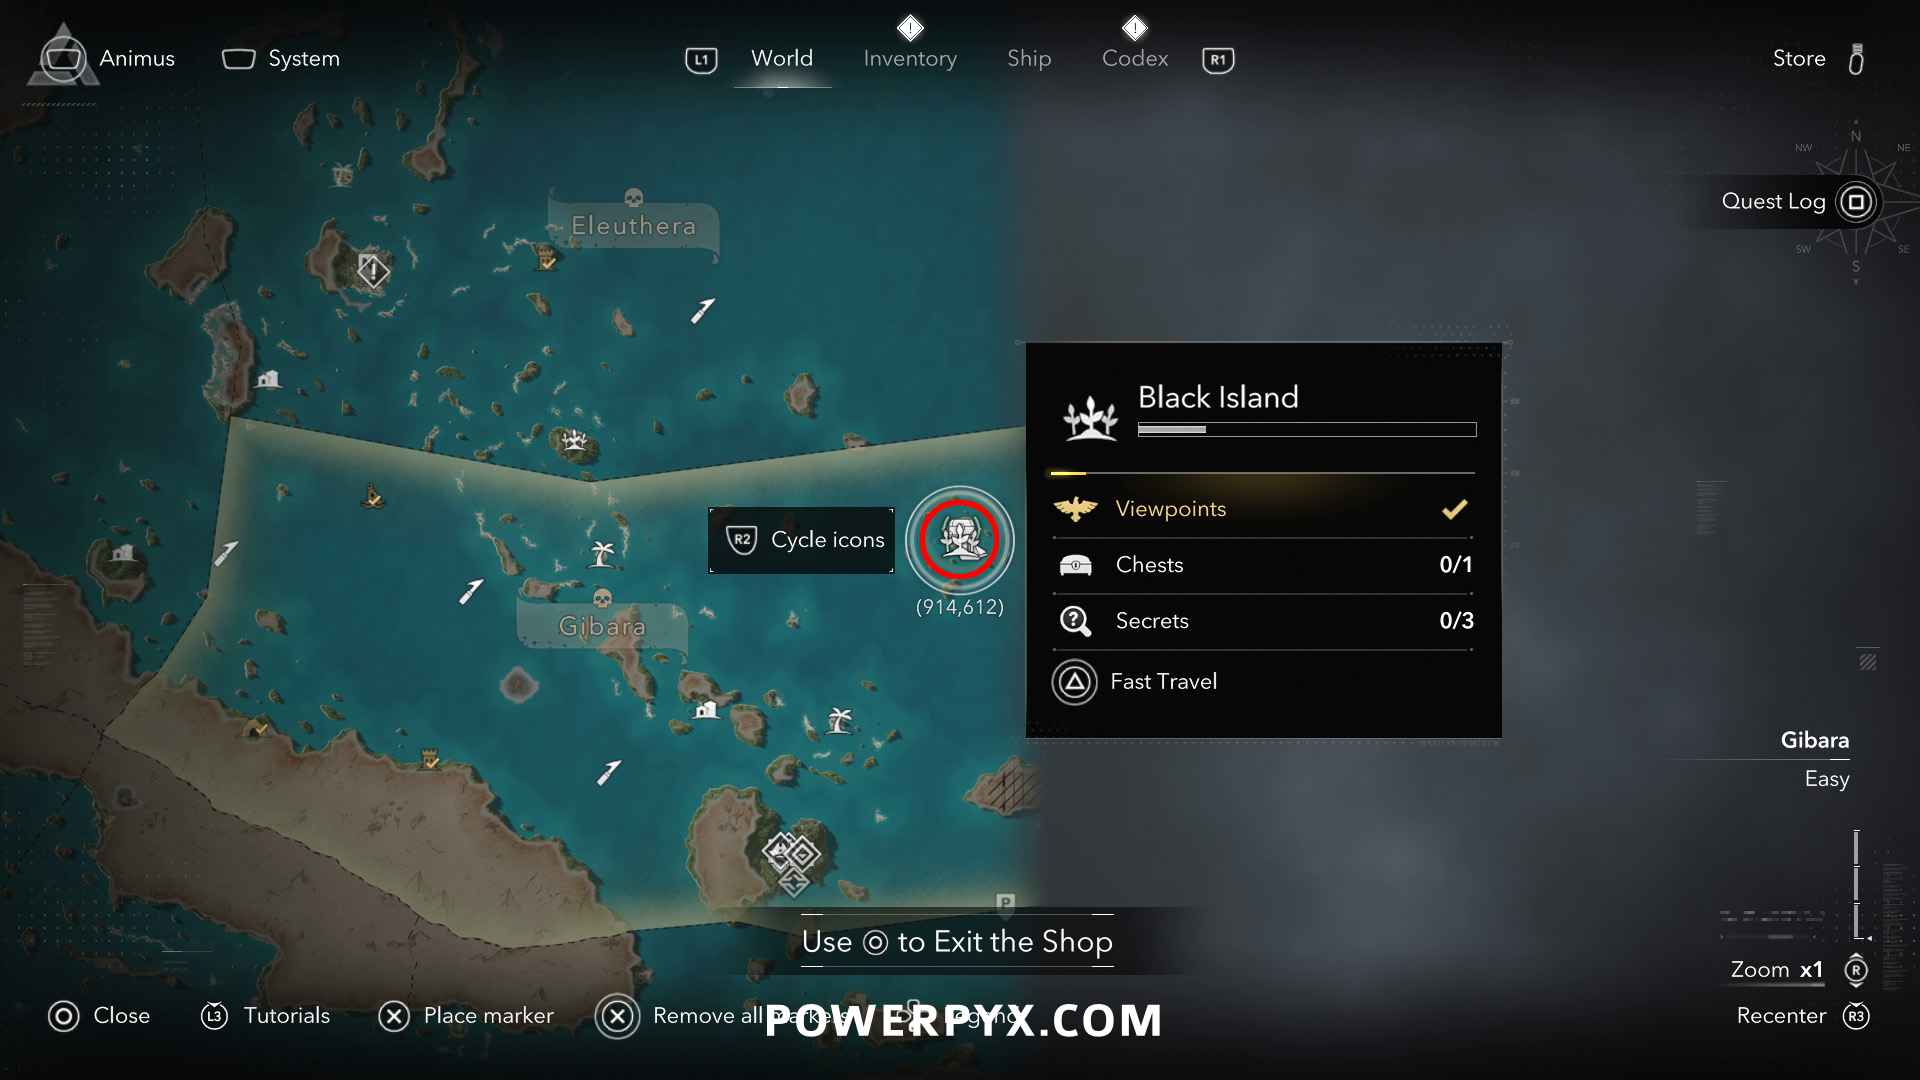
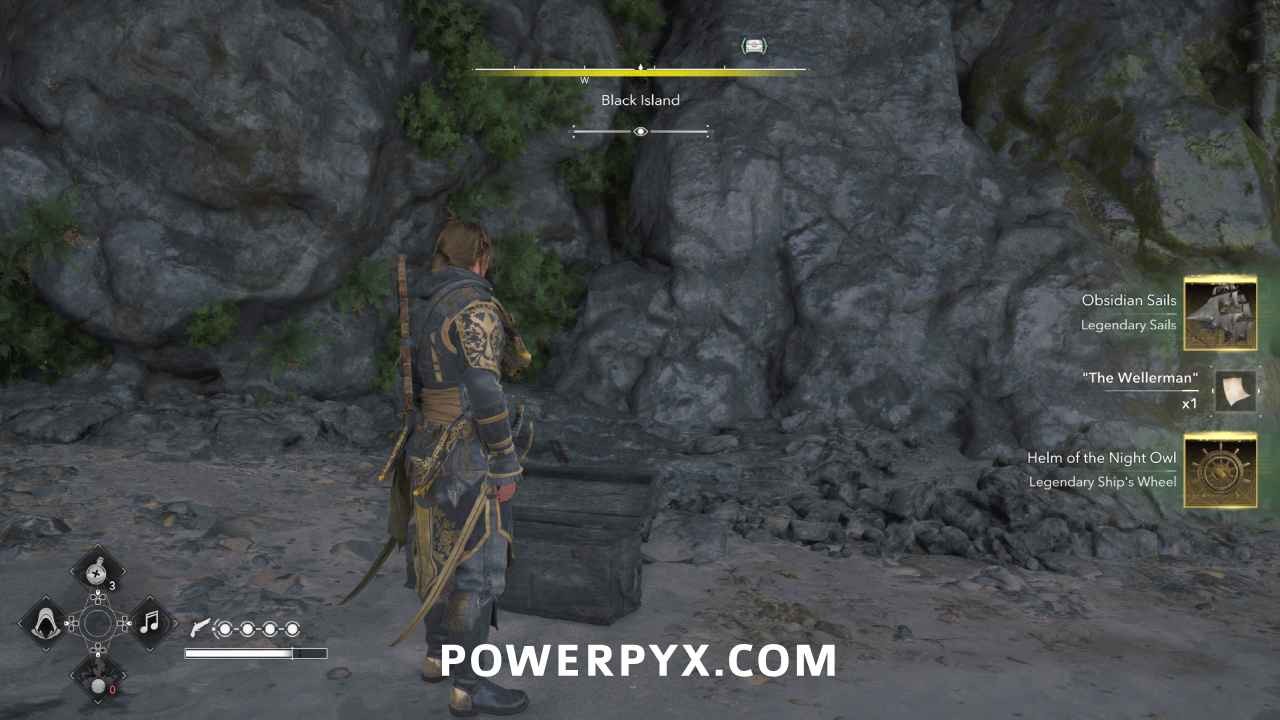
Reward: Obsidian Sails (Legendary Sails), “The Wellerman” (Shanty), Helm of the Night Owl (Legendary Ship’s Wheel)
#28 – Restored Digested Map
Location: Requires 2 Pieces Digested Map Pieces + 200 Rum. Rebuild the Treasure Dealer at the docks of Great Inagua and talk to him to restore this map (becomes available in Sequence 4). Both Digested Map pieces are randomly dropped by the White Jaguar on Great Inagua island (825, 439). It takes a long time to respawn, so check back occasionally. The jaguar icon gets marked on the map, you can mark it and use autonavigation by holding to find the spot. Just come back every 2 hours to loot the white jaguar again until you get both pieces. The same jaguar drops both pieces but only one at a time. Rum is looted from ships in Gibara region.
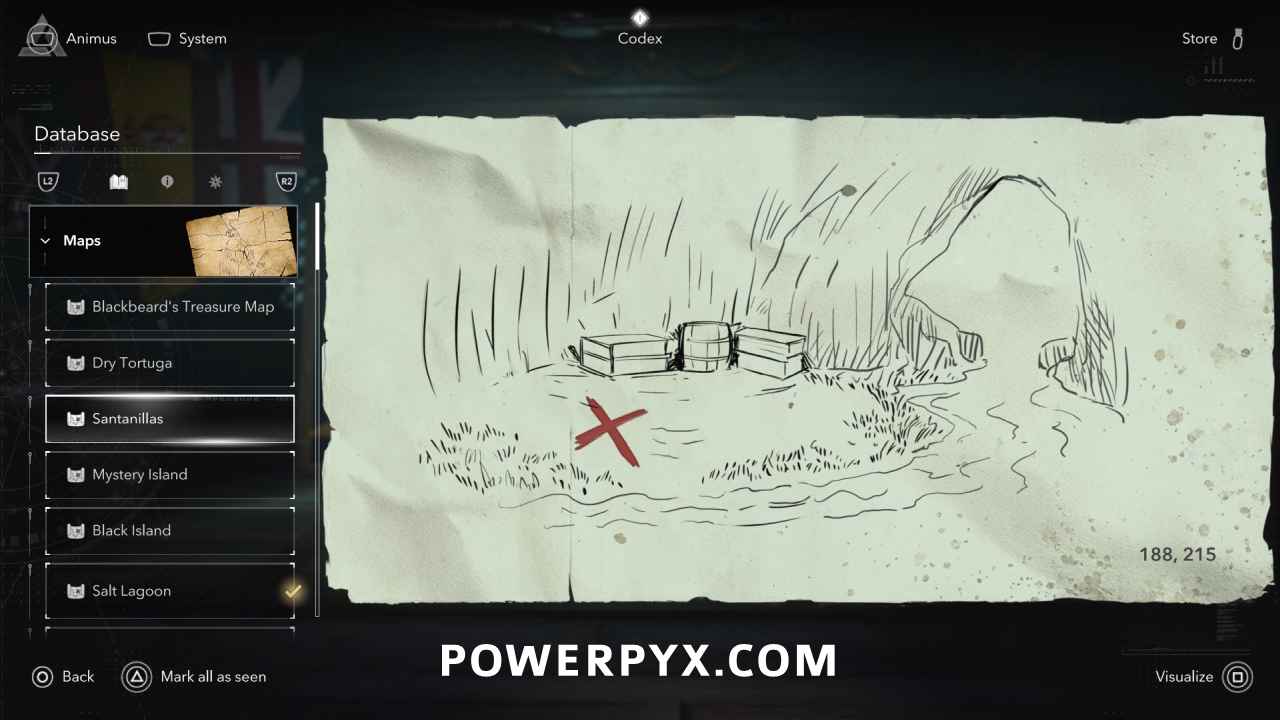
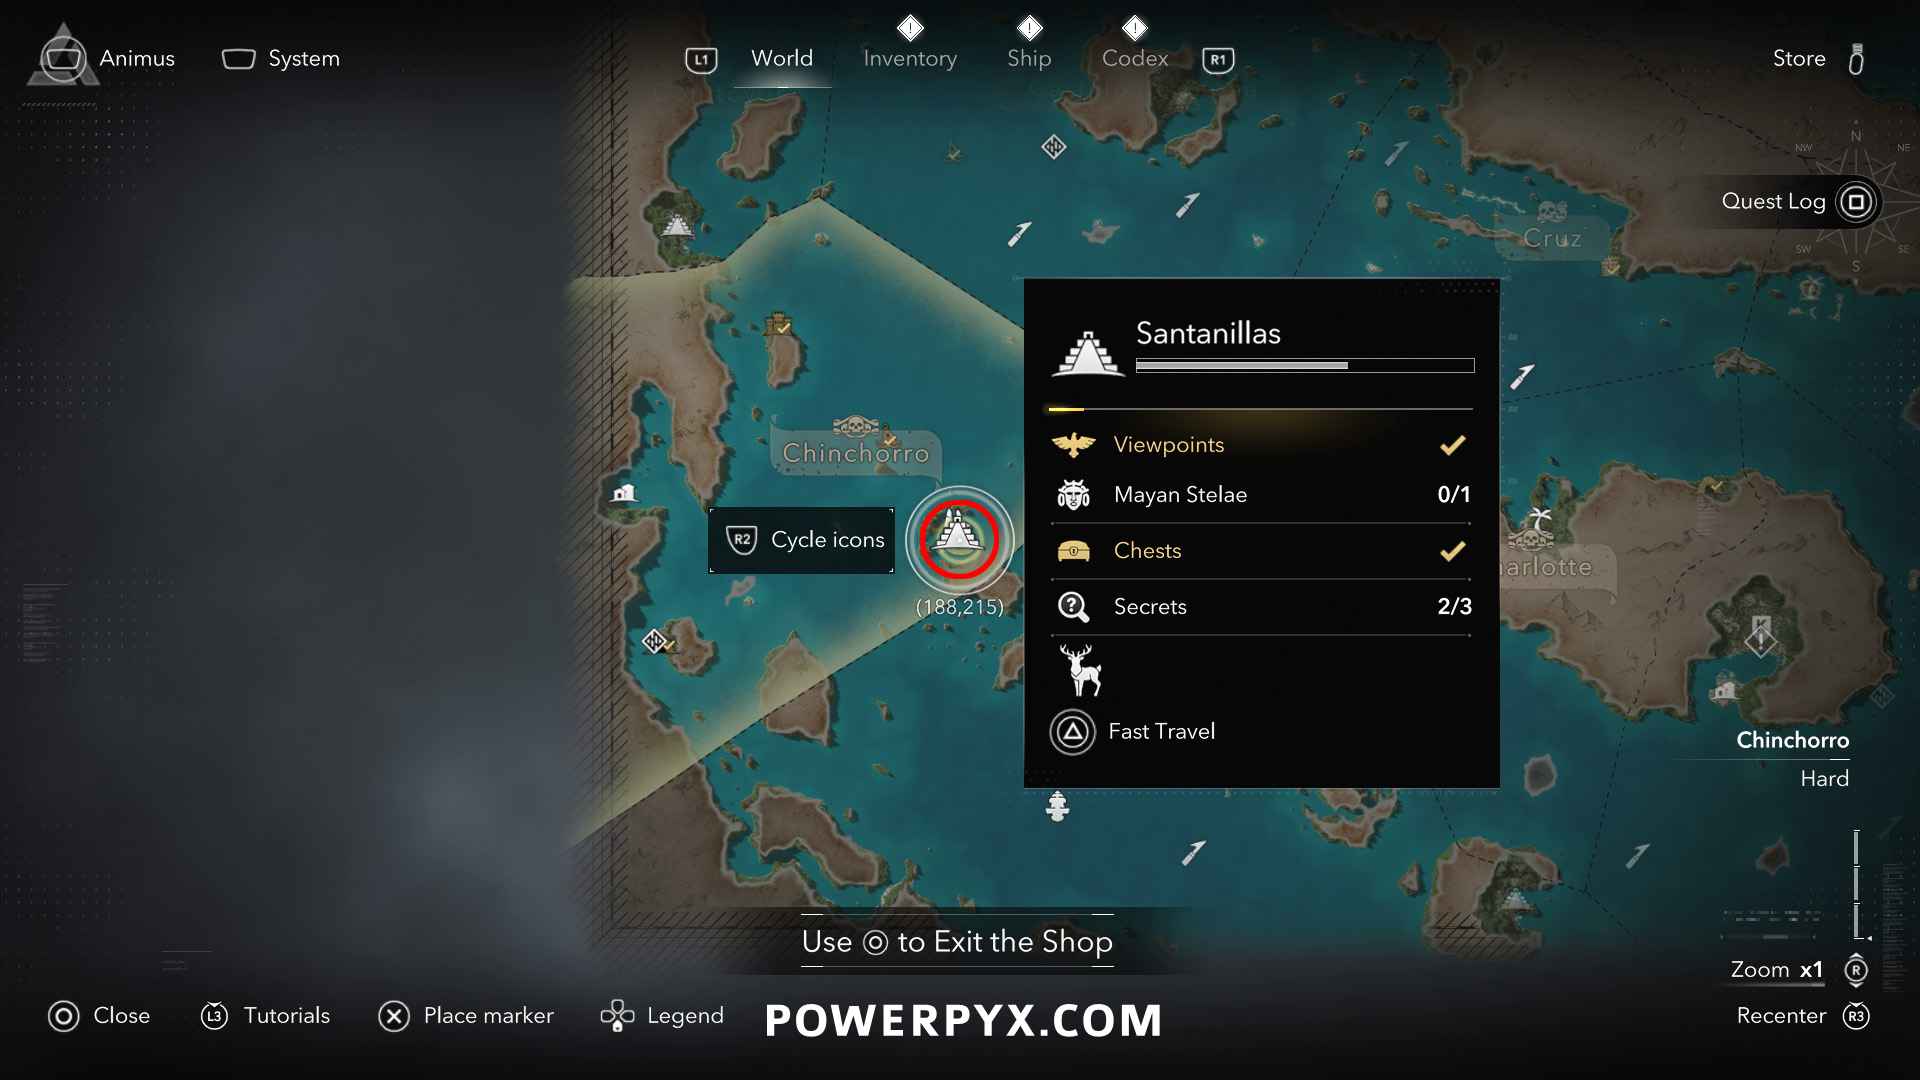
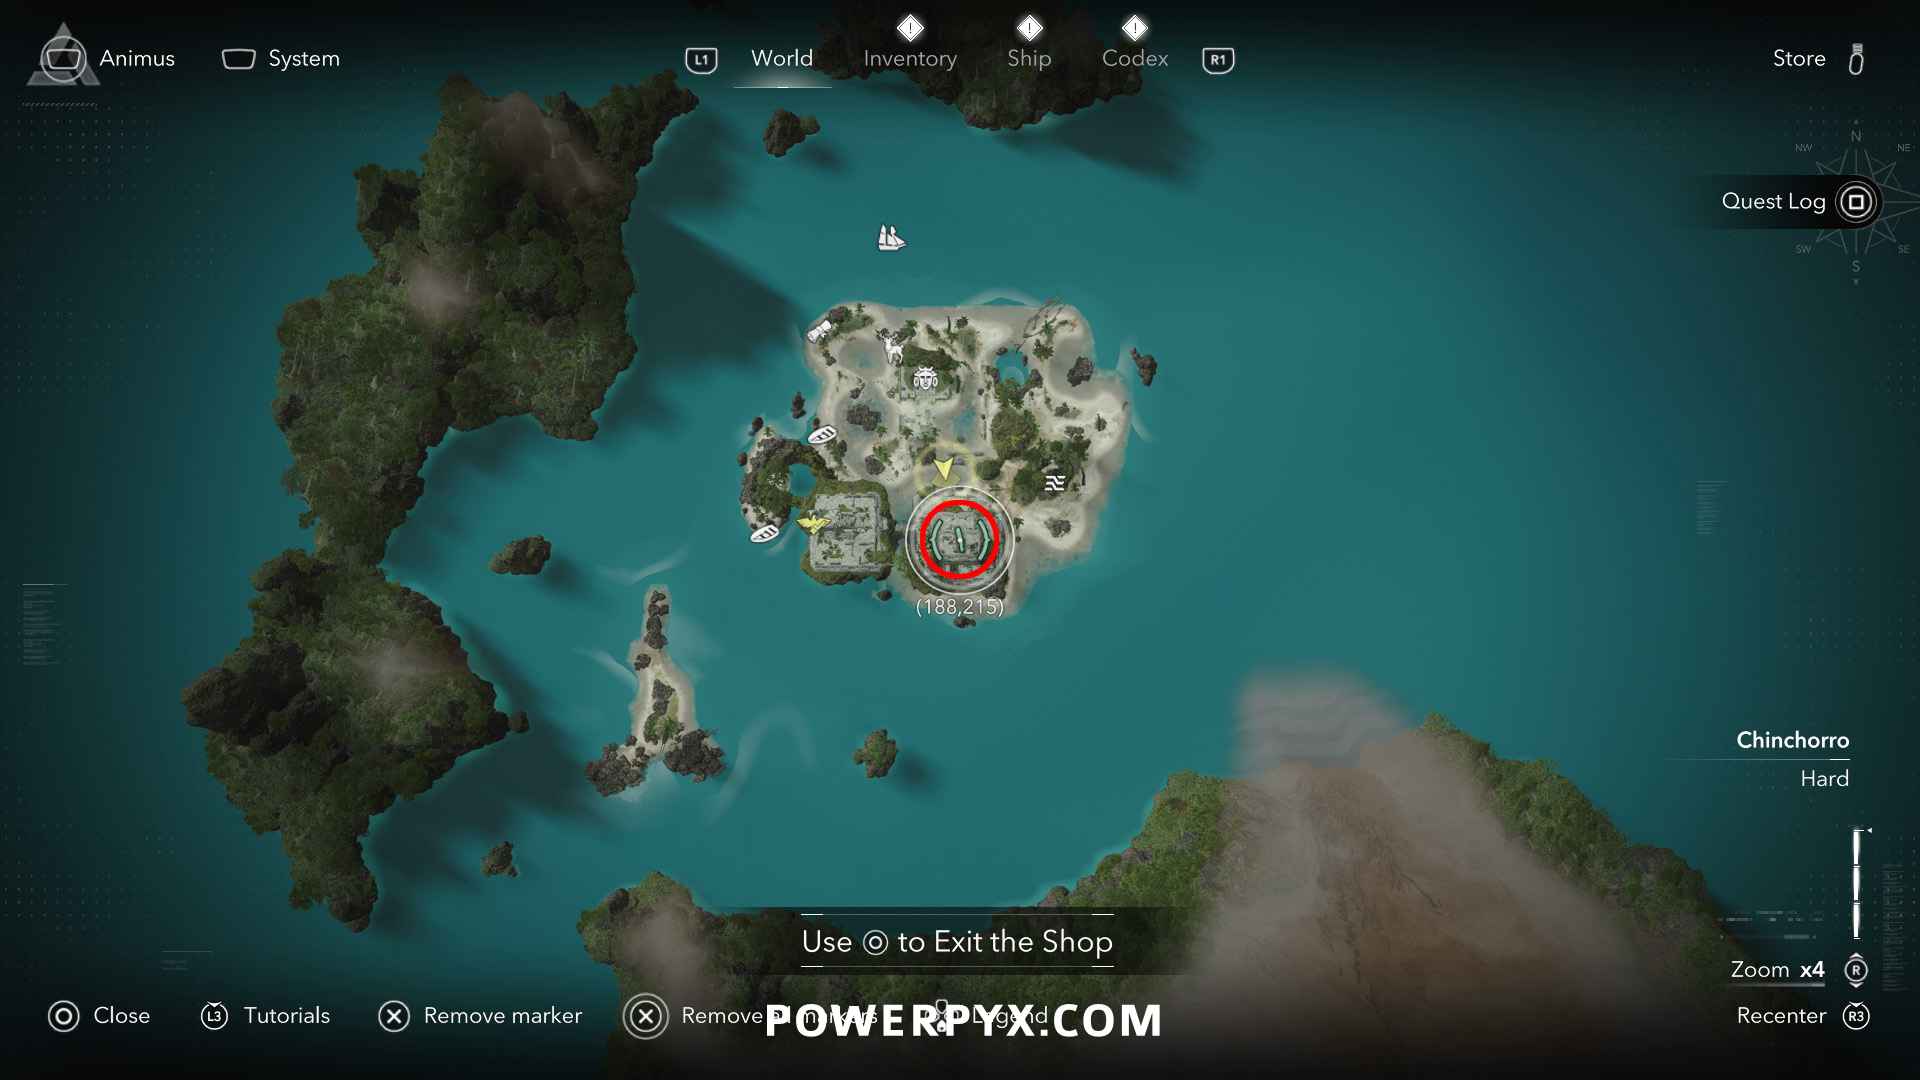
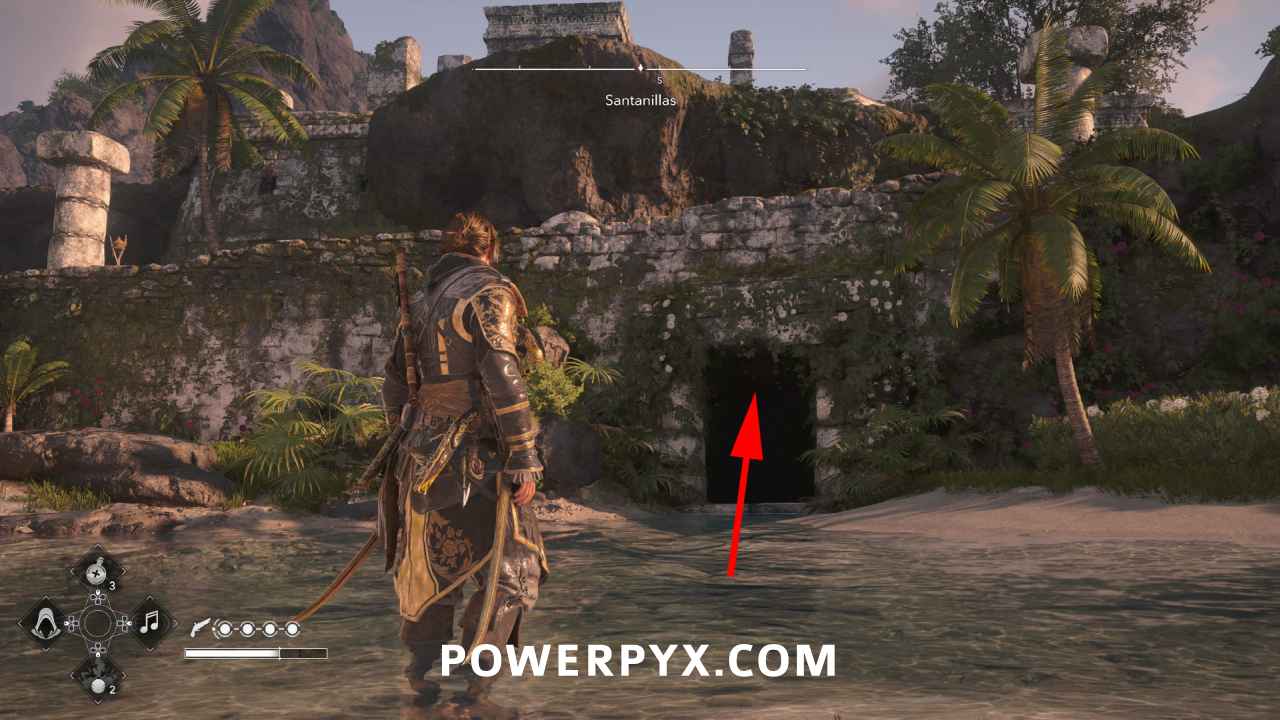
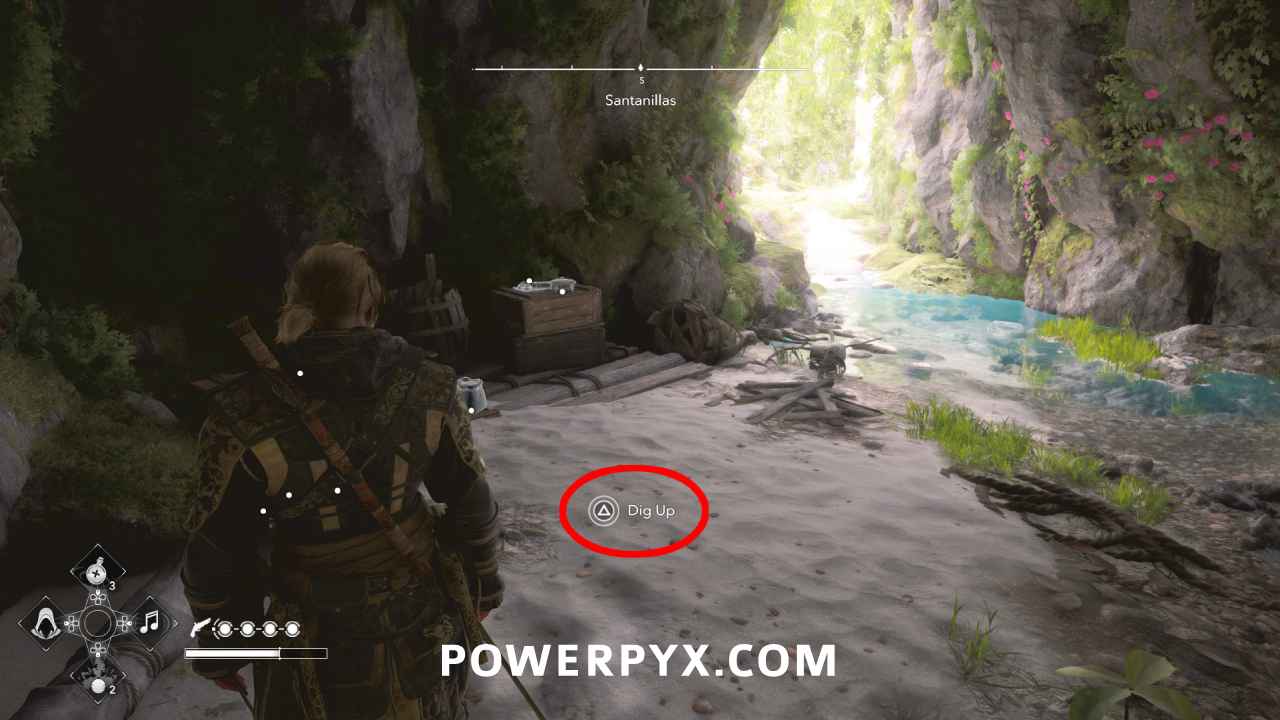
Solution: Santanillas (188, 215) – In a cave under the temple in the south of Santanillas. Enter the tunnel from the beach slightly north of the treasure location, or through the open well south of it.
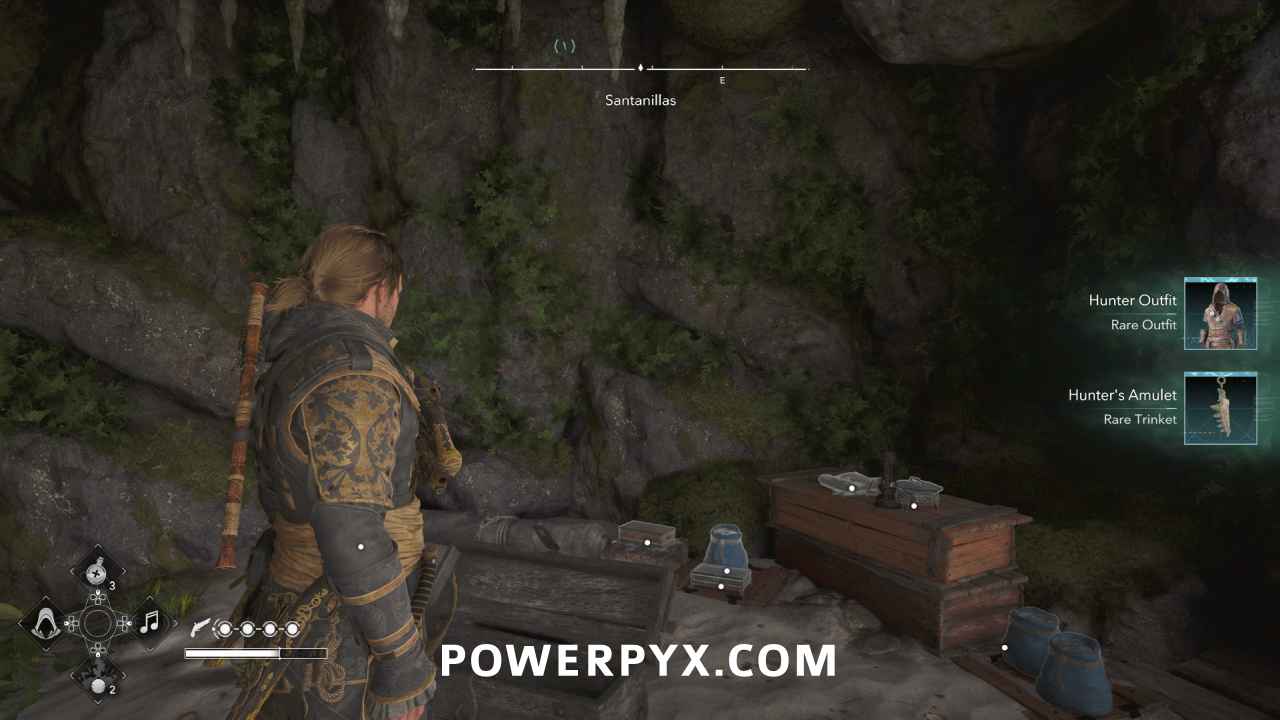
Reward: Hunter Outfit (Rare Outfit), Hunter’s Amulet (Rare Trinket)
#29 – Restored Tattered Map
Location: Requires 3 Tattered Map Pieces + 200 Sugar. Rebuild the Treasure Dealer at the docks of Great Inagua and talk to him to restore this map (becomes available in Sequence 4). The Tattered Map Pieces are rewards from boarding pirate hunter ships and taking the captain’s lockbox. Only the Frigates and Man-o-War pirate hunters can drop them, not the brigs. They are the ships that spawn at wanted level 3-4 to hunt you down (the ones with red sails). The ones at Wanted Level 1-2 don’t drop them. Board the ships, defeat the crew, pick “Captain’s Lockbox” as reward. These are less random and seem to be guaranteed drops. Sugar is looted from ships in Gibara region.
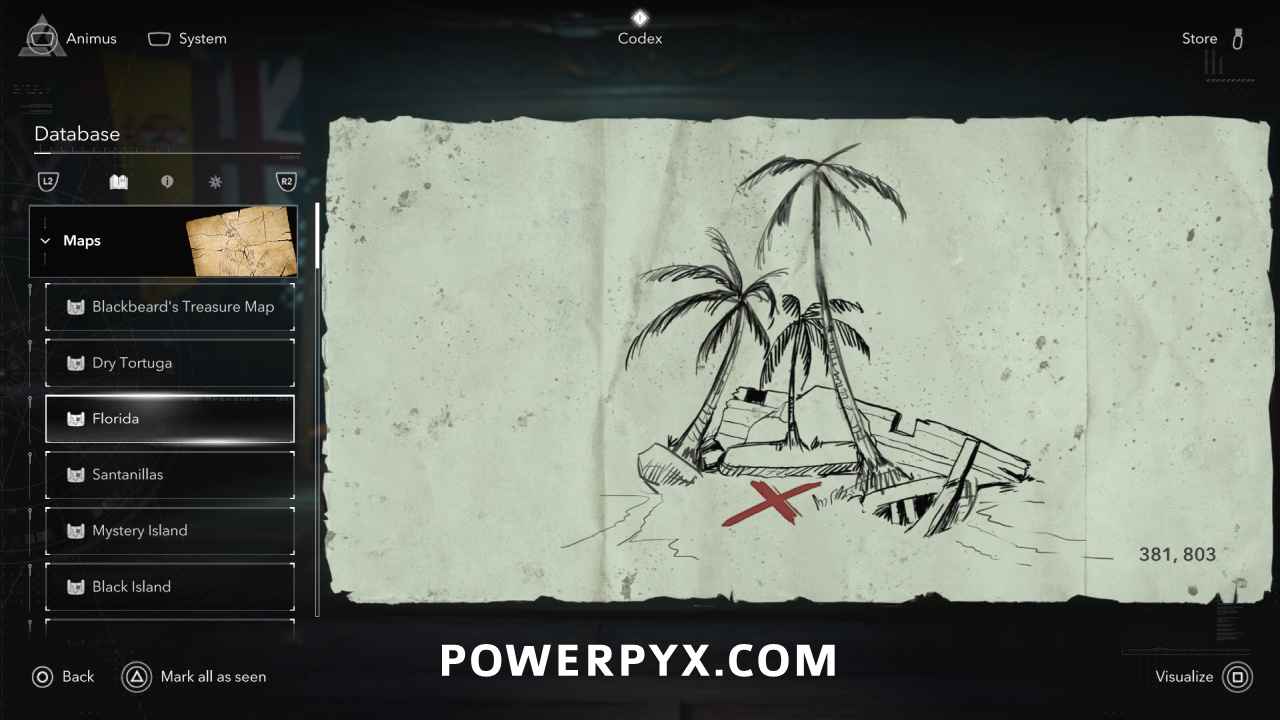
Solution: Florida (381, 803) – at the northern tip of Florida island in the sand below 3 palm trees
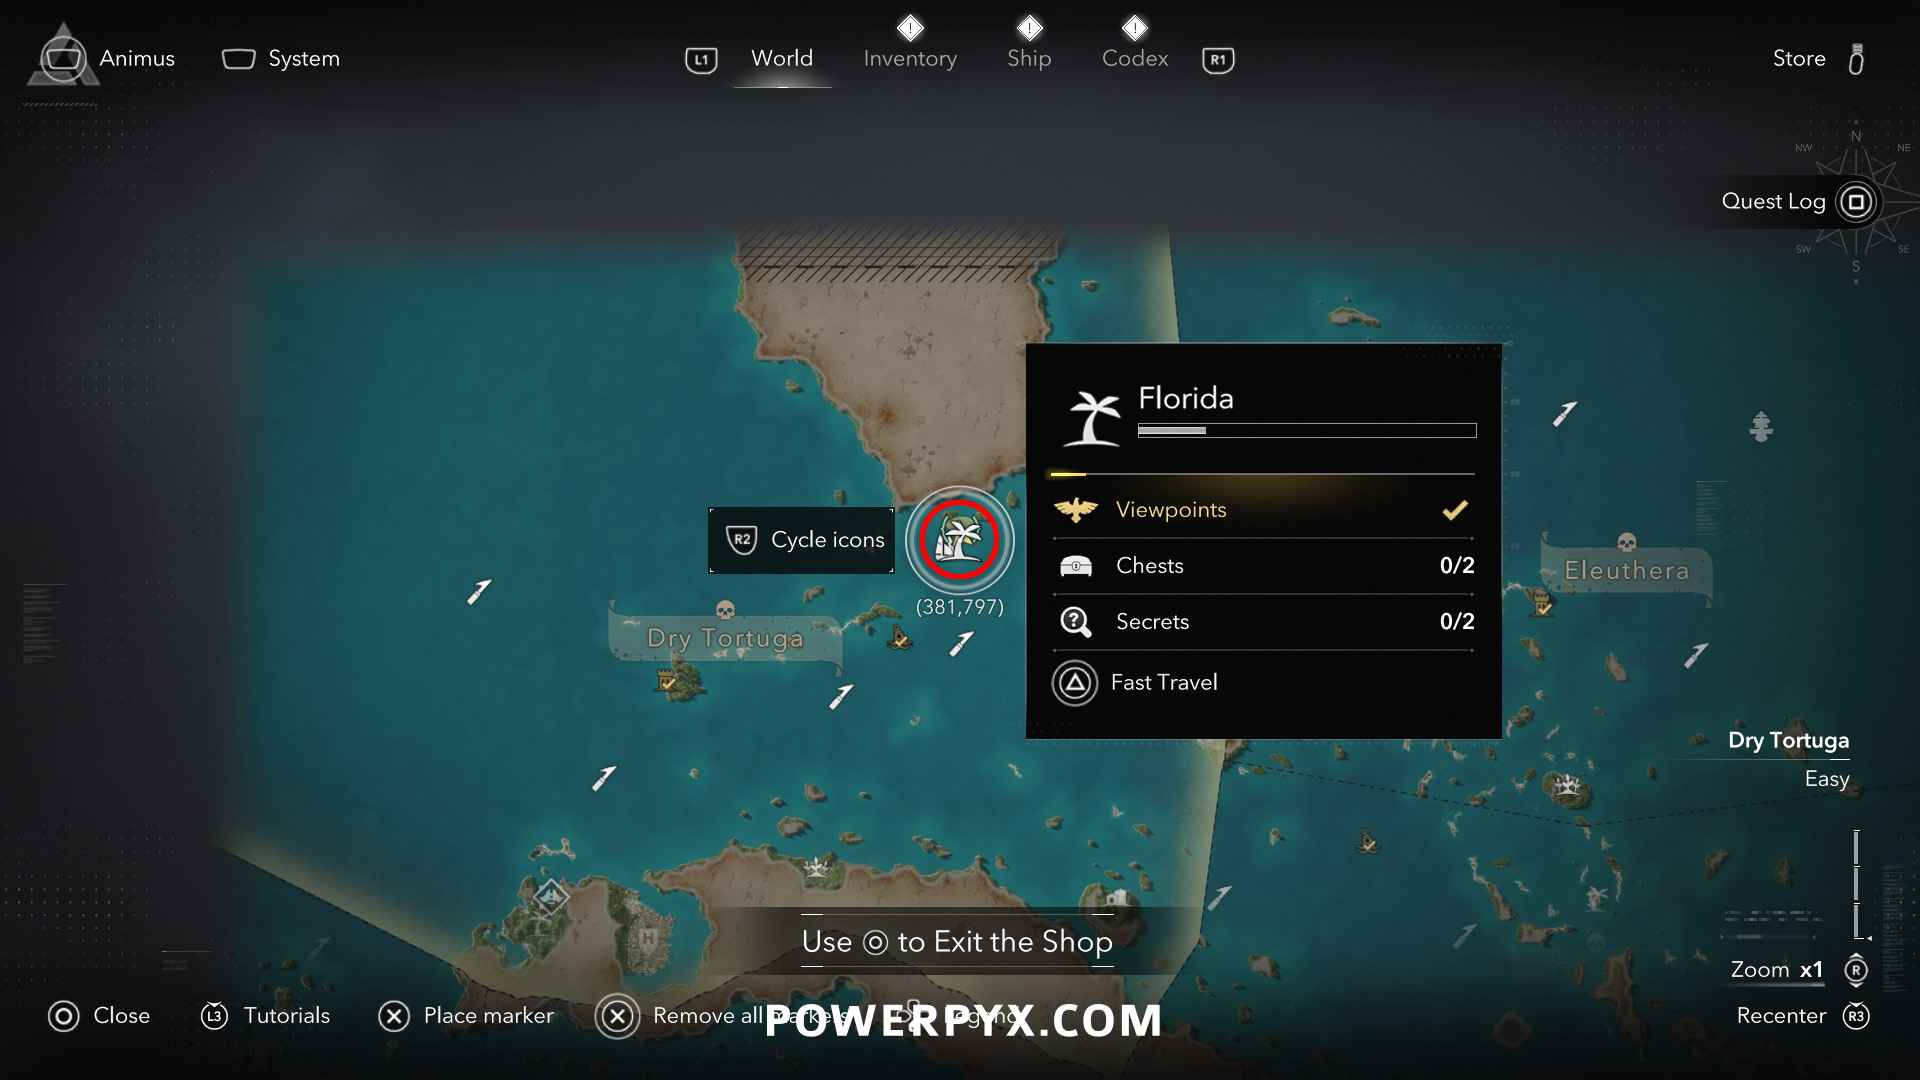
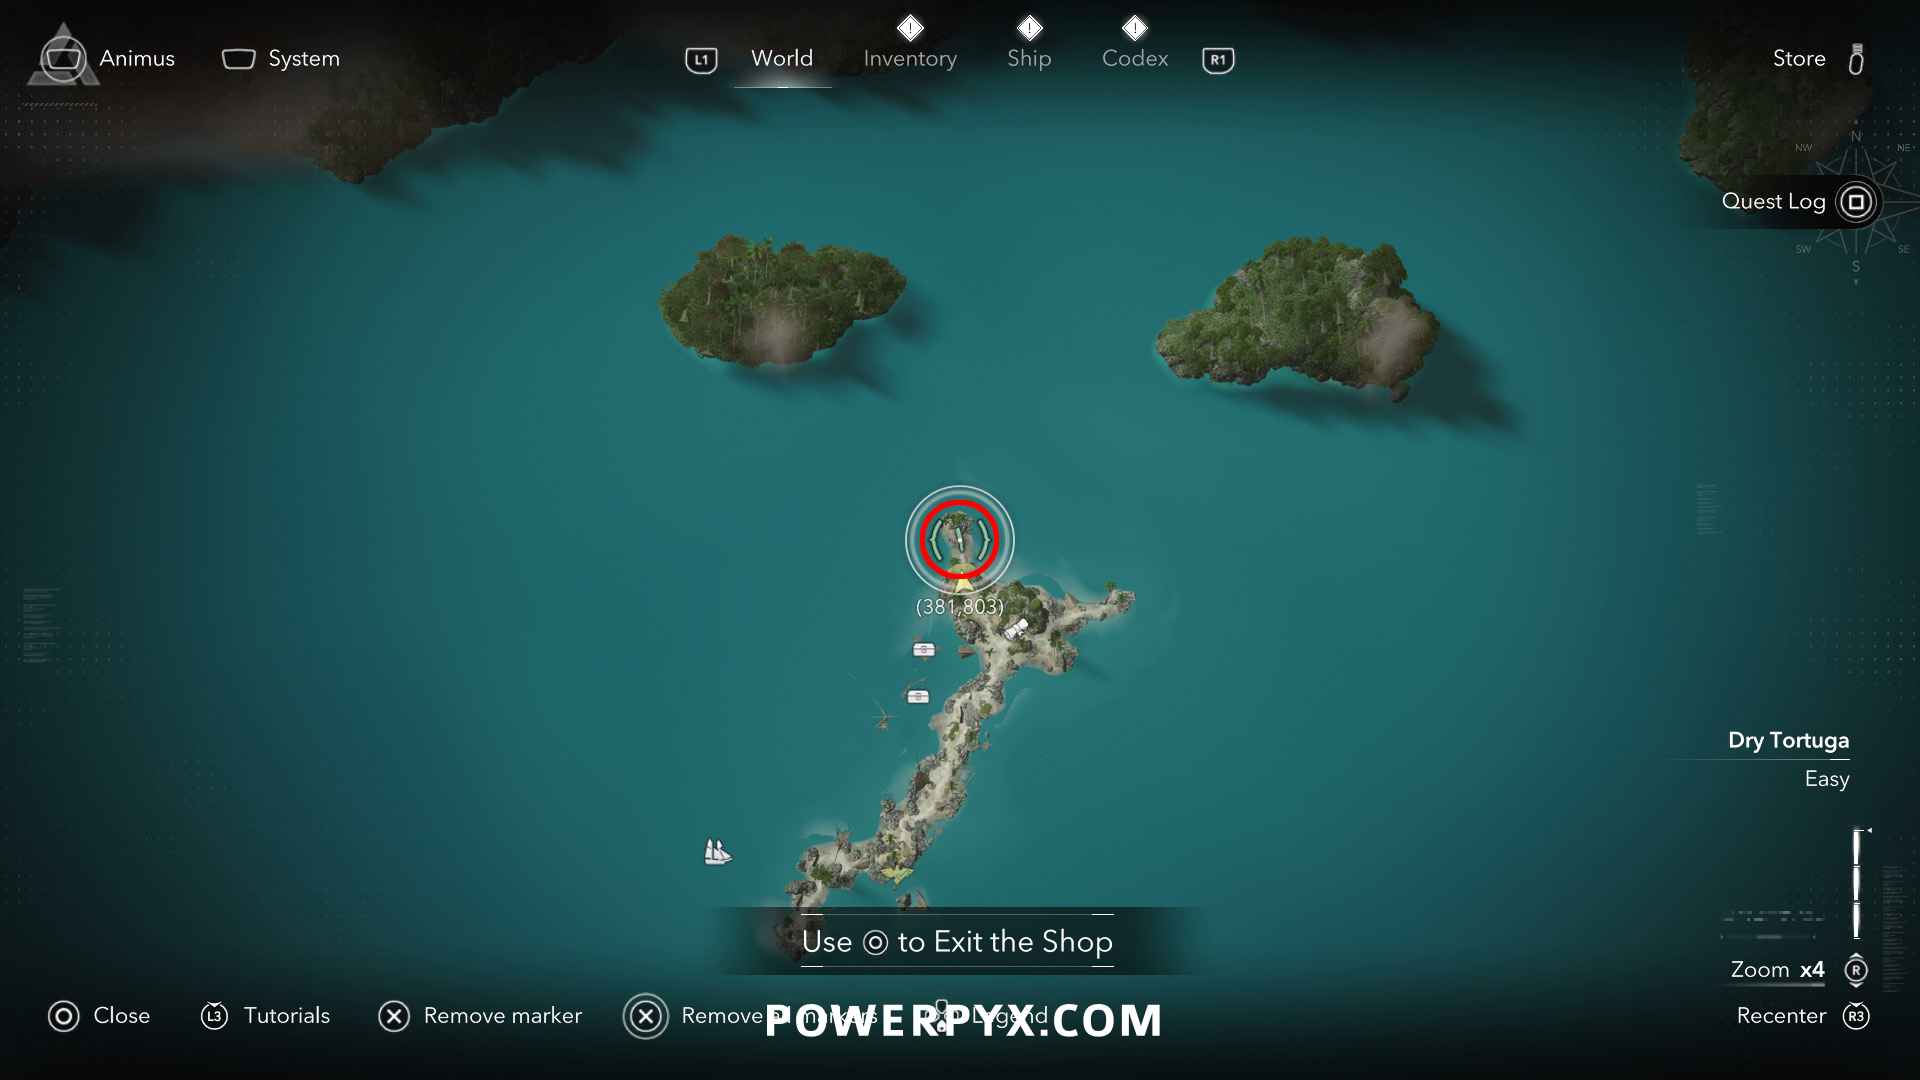
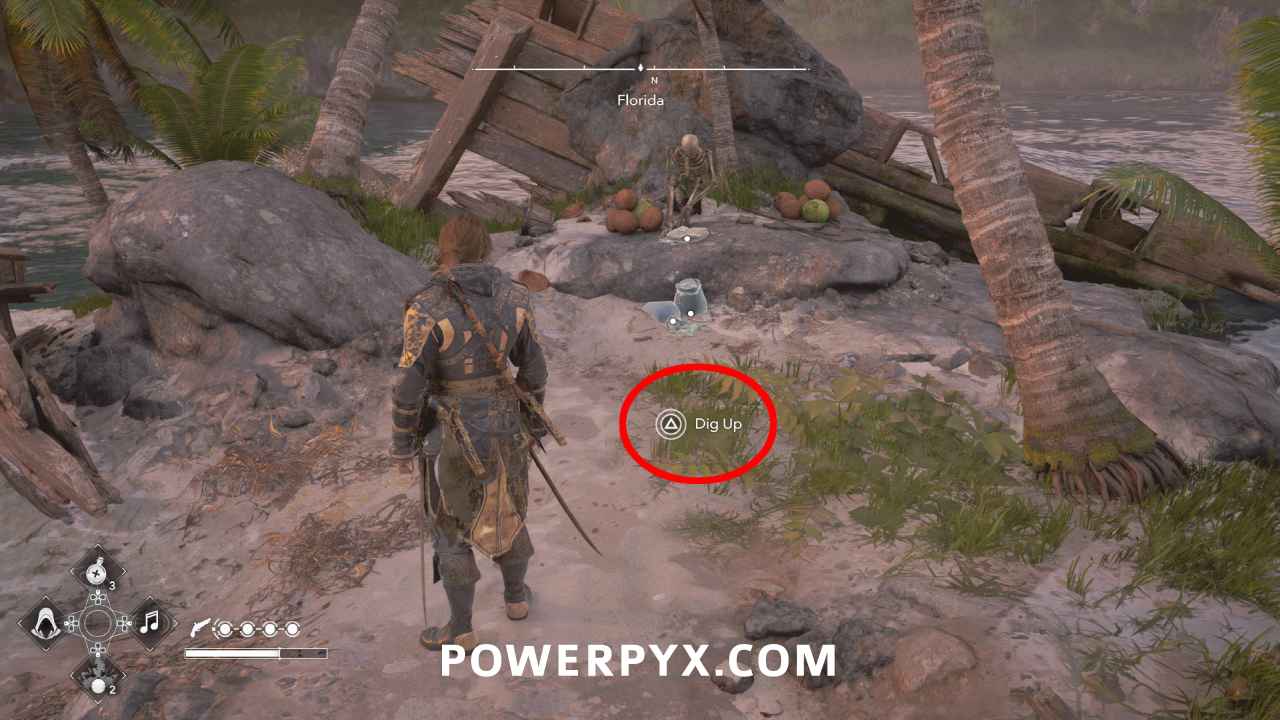
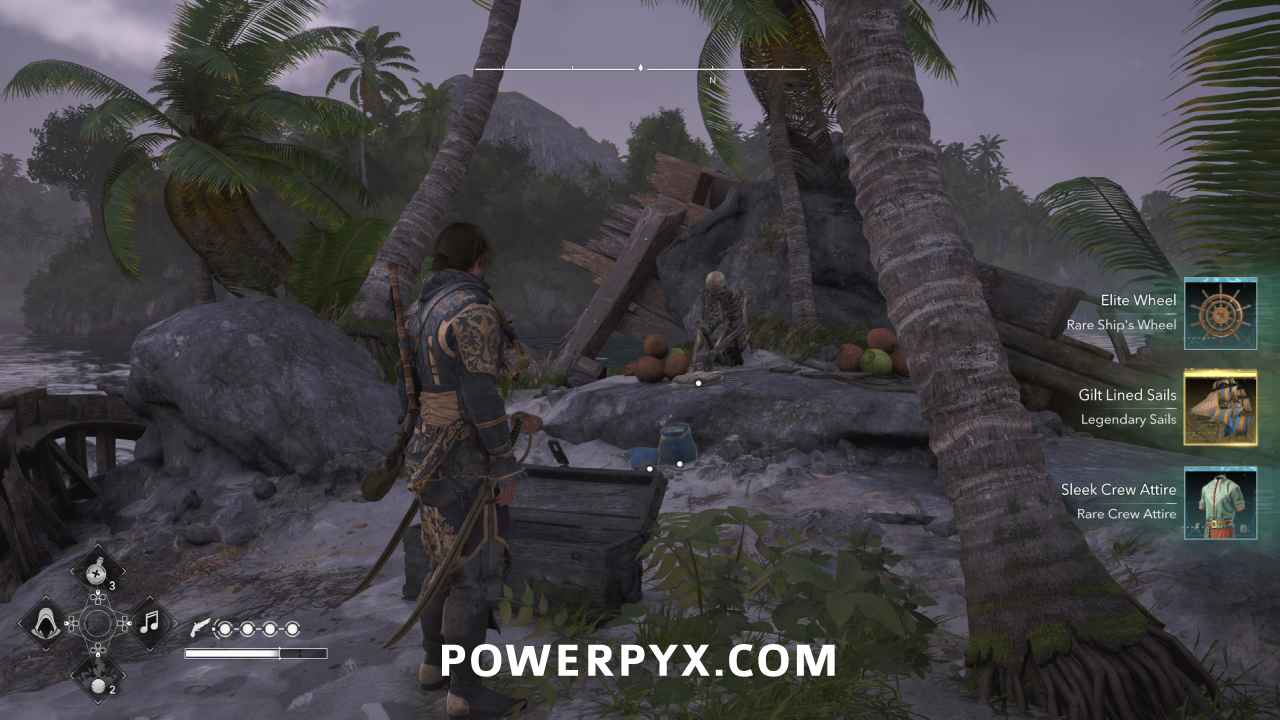
Reward: Elite Wheel (Rare Ship’s Wheel), Gilt Lined Sails (Legendary Sails), Sleek Crew Attire (Rare Crew Attire)
#30 – Restored Preserved Map
Location: Requires 4 Preserved Map Pieces + 150 Tobacco. Rebuild the Treasure Dealer at the docks of Great Inagua and talk to him to restore this map (becomes available in Sequence 4). The Preserved Map Pieces are rewards from looting Warehouses for the 2nd time. There are 9 Warehouses total. After discovering all “?” icons you can press on the map to filter for them. These have a 2 hour cooldown. The first time you loot them you only get Paintings, then on the 2nd time the key locations for the Warehouses get randomized and you get the Preserved Map pieces regardless of what Warehouse you raid, just has to be the 2nd time you raid it. You can shorten the cooldown by using Kenway’s Fleet and sending Frigates on missions. Tobacco is commonly looted from ships in the southern regions.
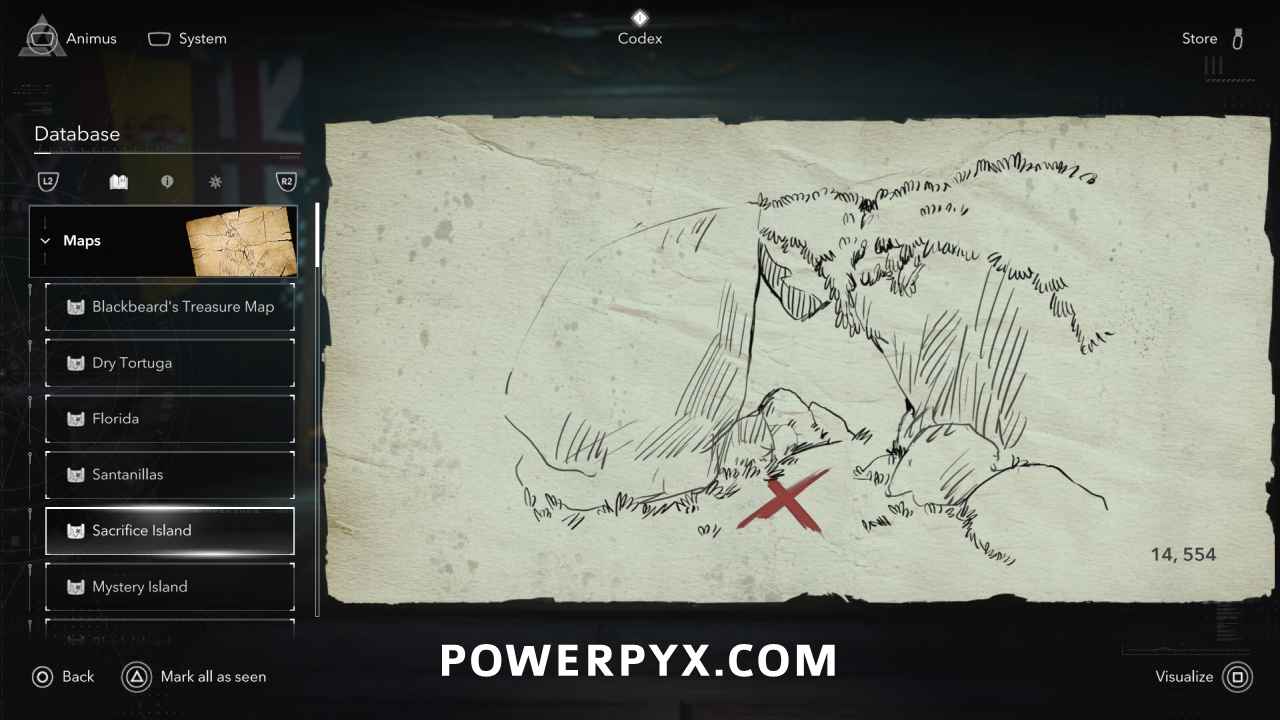
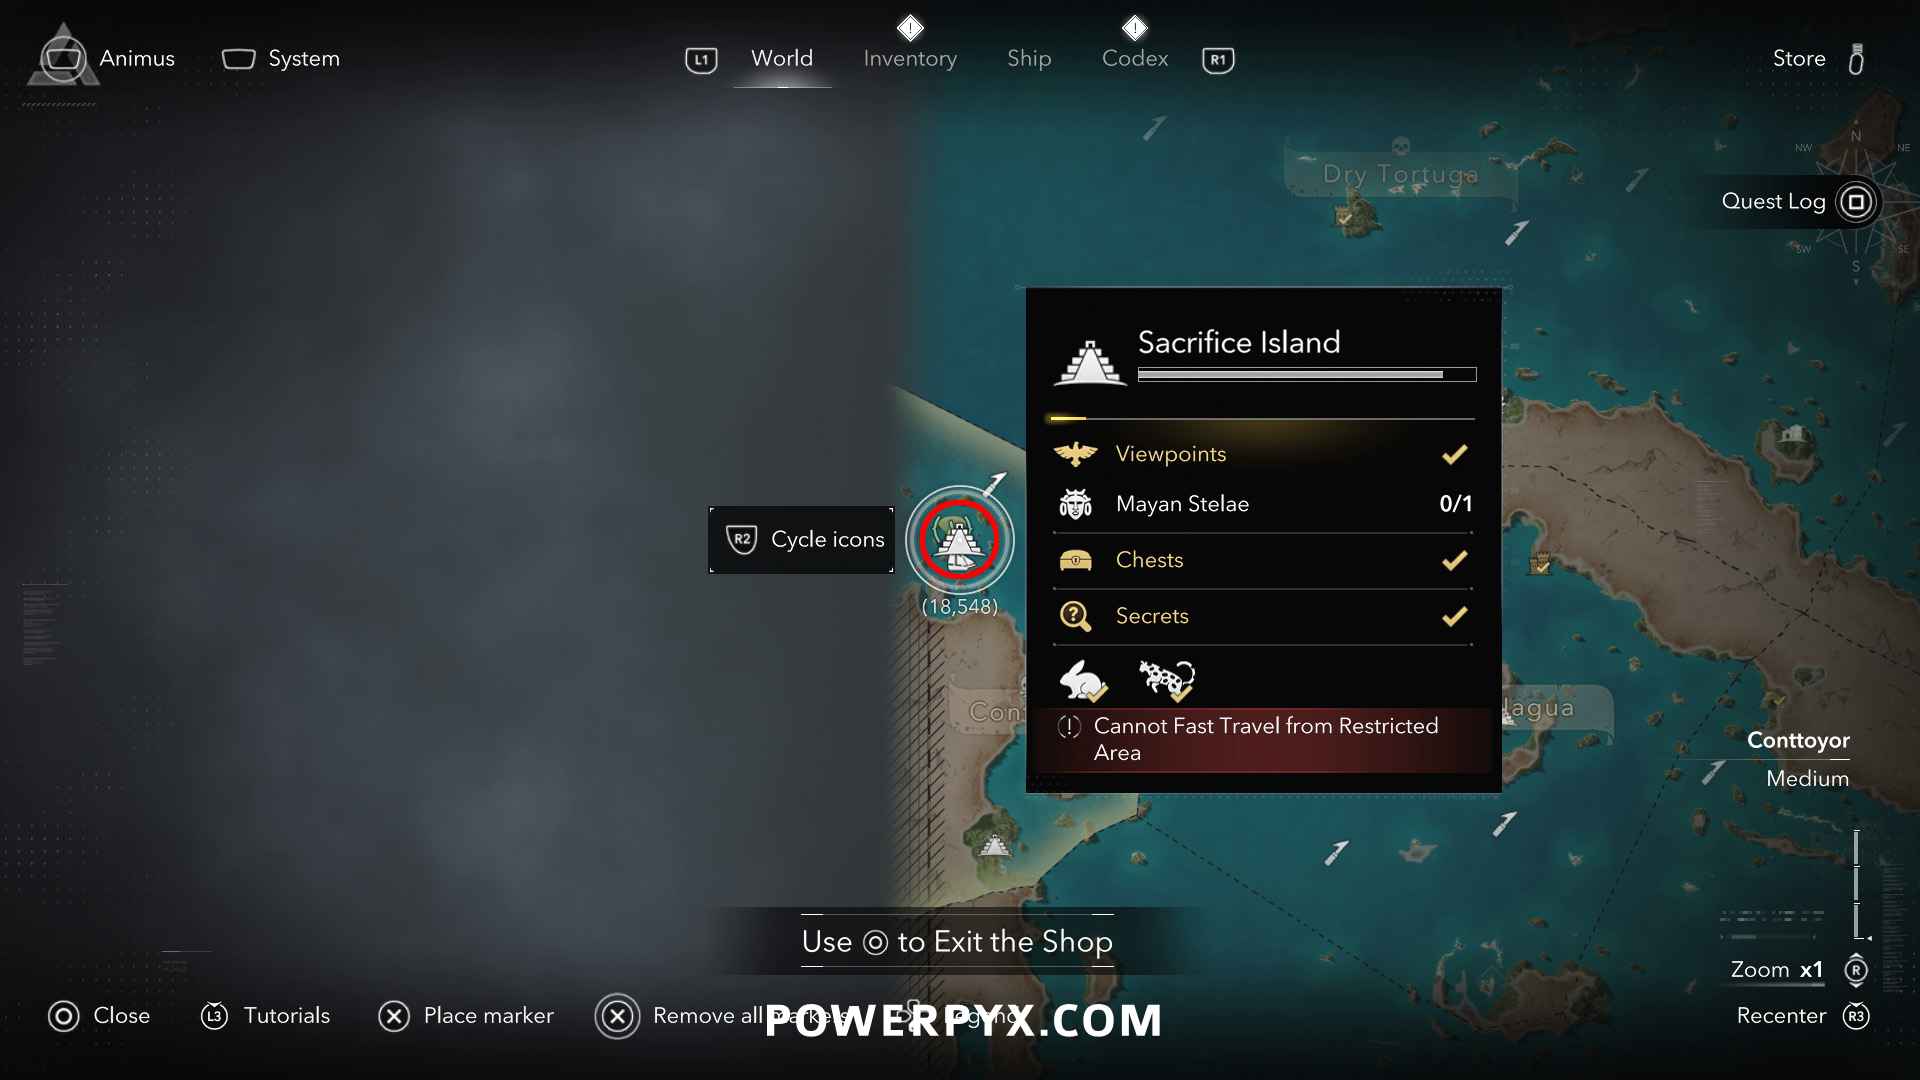
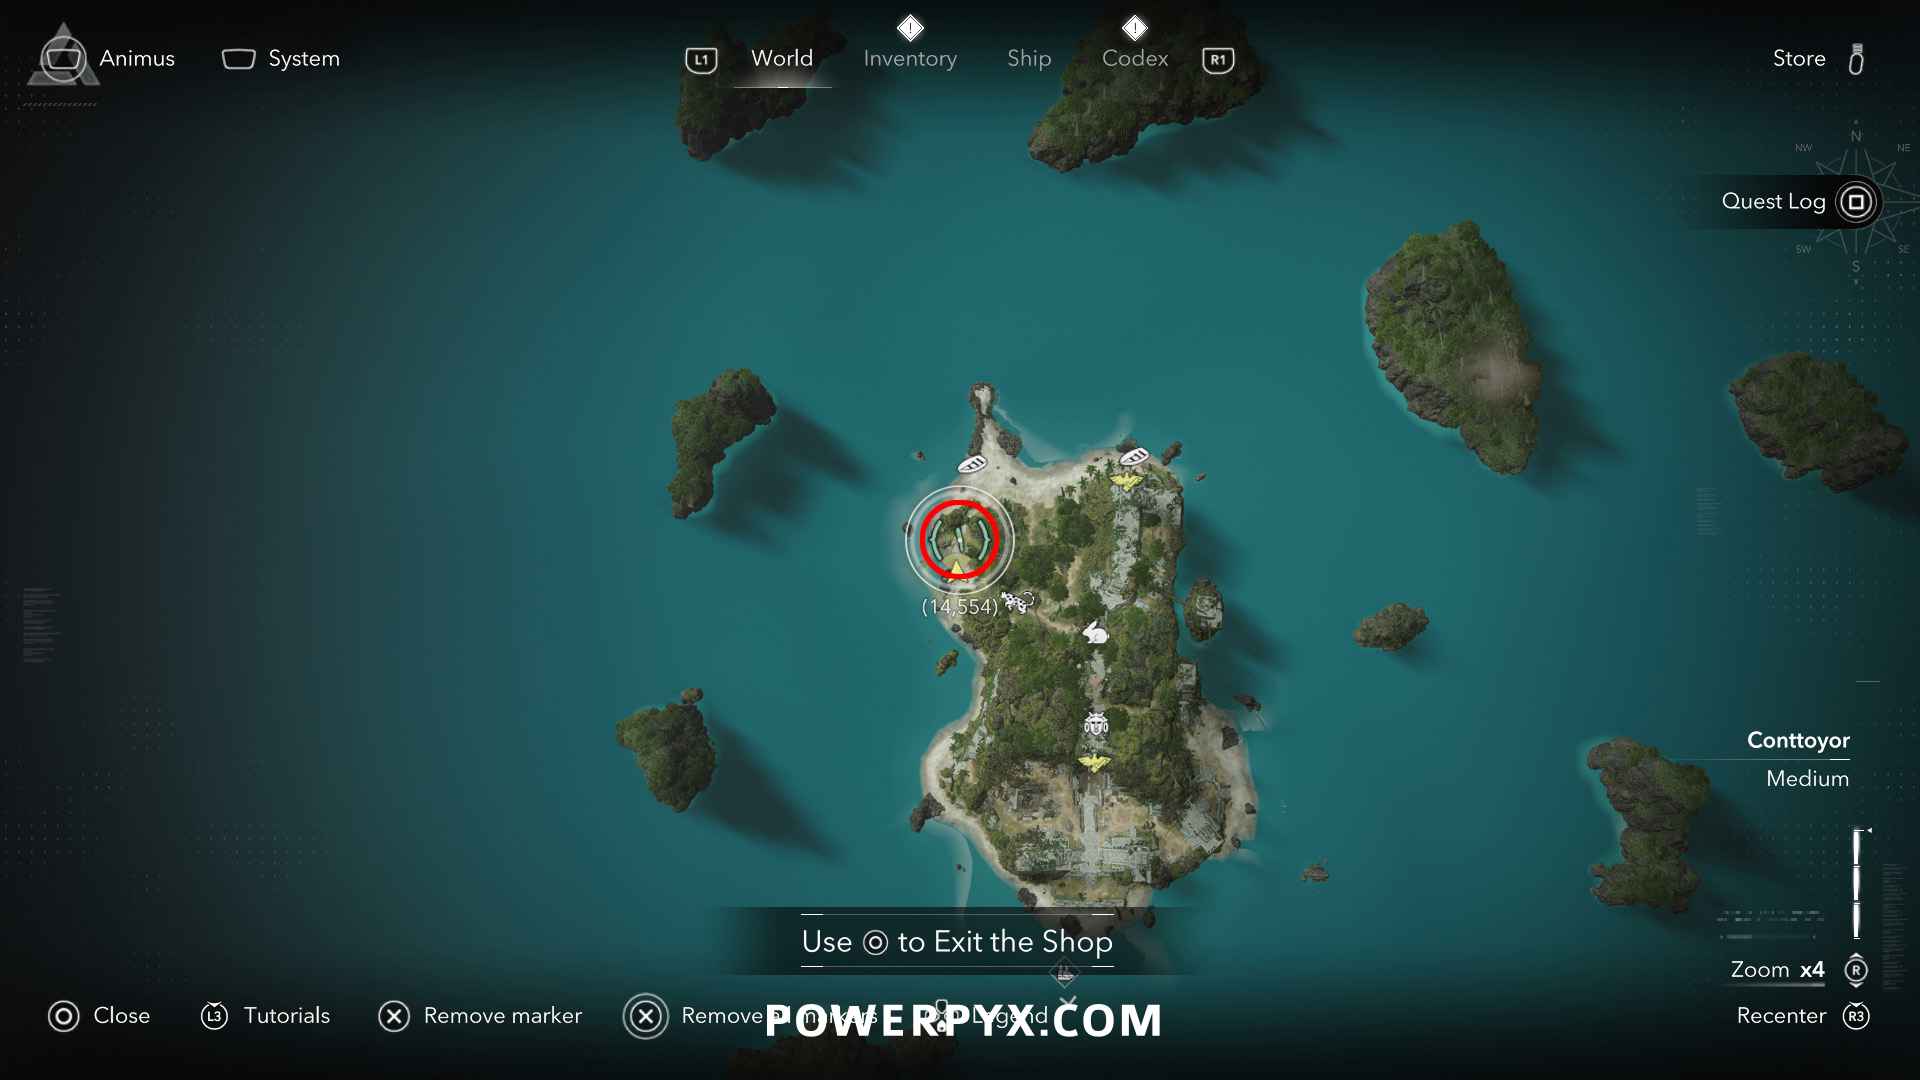
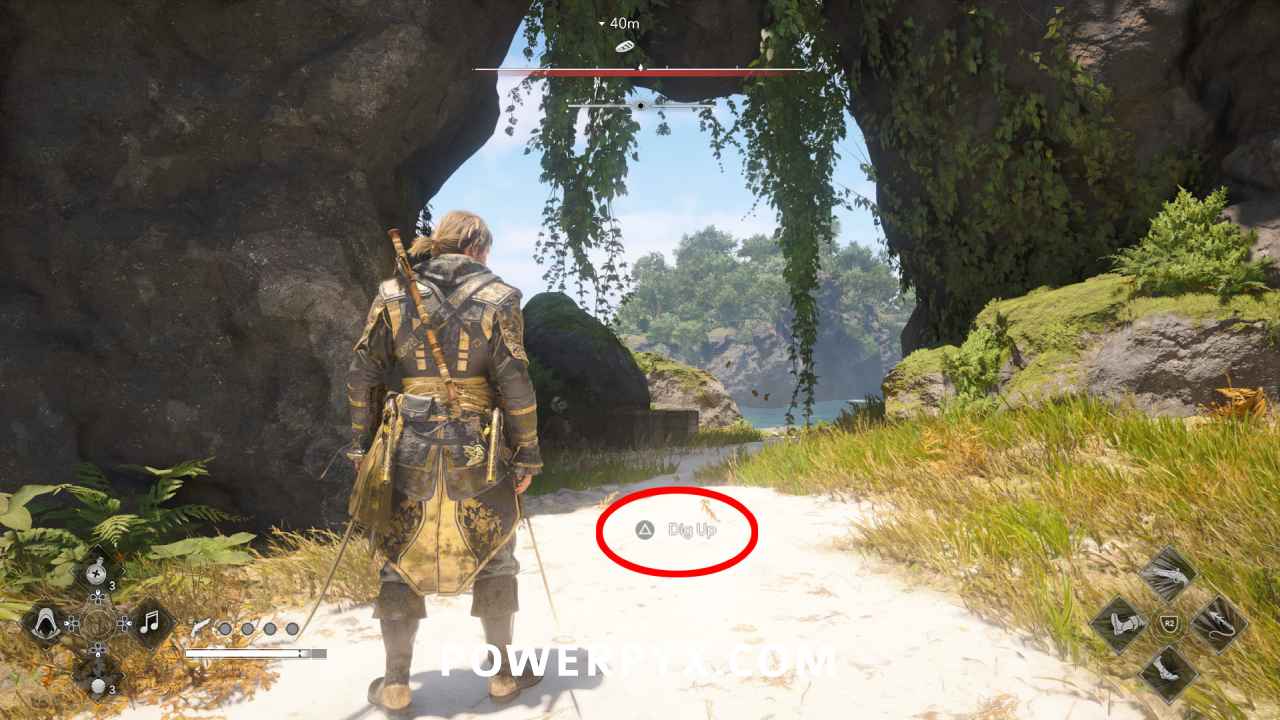
Solution: Sacrifice Island (14, 554) – on the south-west shore of Sacrifice Island under a rock arch formation in the sand
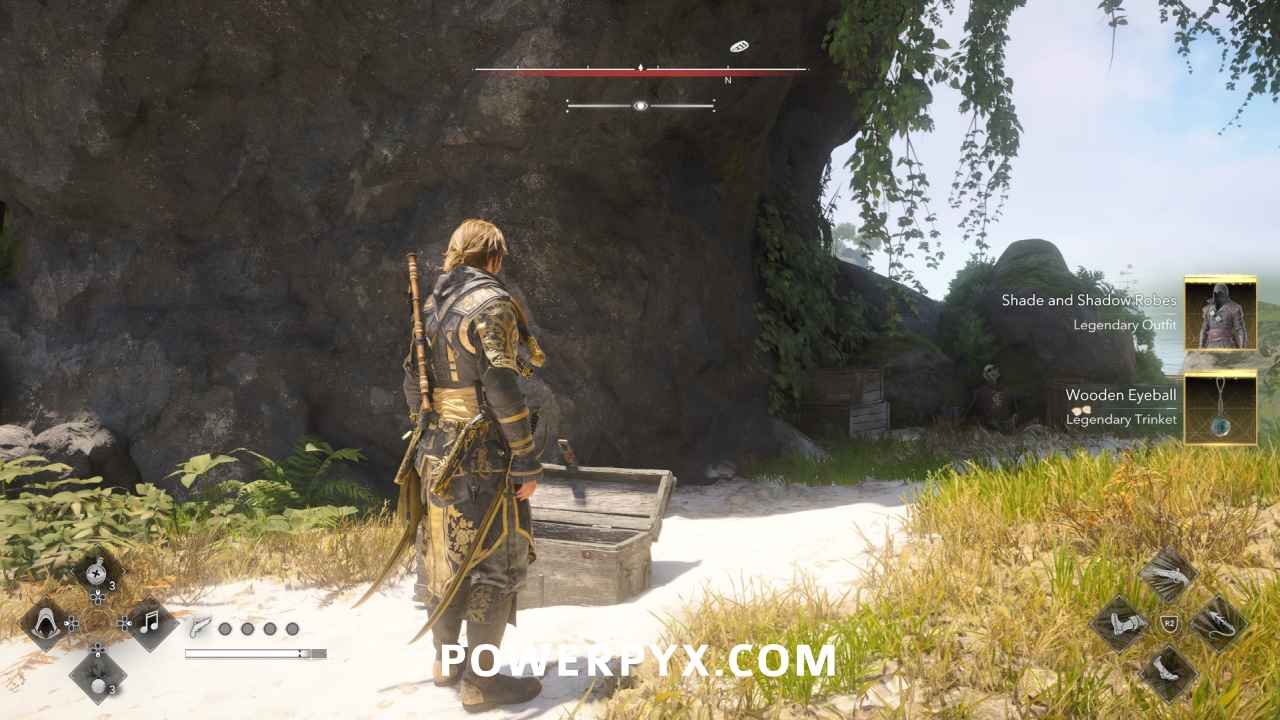
Reward: Shade and Shadow Robes (Legendary Outfit), Wooden Eyeball (Legendary Trinket)
That’s all of the Treasures in AC IV Black Flag (2026 Remake). For all other collectible types refer to the Assassin’s Creed IV: Black Flag Resynced Collectible Guide.
Christian says
Jiguey is needed, it gives a baroque guitar
PowerPyx says
Yes that’s right. I had it in the rewards as a trophy requirement but hadn’t marked it in the overview at the top, fixed now. Good spotting, thanks!