
Chapter 9: The Planet Stirs is the 9th story mission in Final Fantasy 7 (VII) Rebirth. This walkthrough will guide you through all objectives of the The Planet Stirs Main Mission.
Area: Gongaga
Objectives:
- South–Far South
- Run-Down Reactor
- Jungles of Gongaga
- The GYC’s Captain
- The Village of Gongaga
- Aerith’s Acquaintances
- Recuperation and Confusion
- The Mysterious Roar
- Shadows over the Reactor
- Cry of the Planet
- Road to the Reactor
- The Shadows Beckon
- Gate Generator
- Guided by Whispers
- Water Level
- Restoring Power
- Clash
- Crisis
- Race to the Reactor
- The Grappling Gun
- Rescue Effort
- Gate Generator
- Magnus Materia
- Out of the Frying Pan
- Where She Belongs
- State of Things
- Freeflier Pilot
- Road to the Airstrip
- Telephone Booth
- Price of the Flight
South–Far South
From the start of the chapter, you’re in the desert part of Corel, and can now use the buggy along with Cait Sith. With the buggy, you can now fully explore the rest of the Corel region and complete some prior quests that couldn’t be finished, along with new activities available in the Dustbowl and Golden Saucer.
Side Content: Corel Region
22 World Intel:
- Corel Region World Intel Locations – if you already grabbed the 6 World Intel in Chapter 7 you will have 24 left (30 total in the region). However, the last two Phenomenon Intel aren’t available until Chapter 12. So at this point you can only find another 22 World Intel, bringing you to a total of 28/30 for this region.
2 Side Quests:
- Side Quest: The Saga of the Seaside Inn – this was started in Chapter 7 but you couldn’t get the Tonberry King’s Crown back then. It’s from the Classified Intel enemy in this region, must use the Steal Materia on his crown when he drops it during the fight. Then you can complete the side quest.
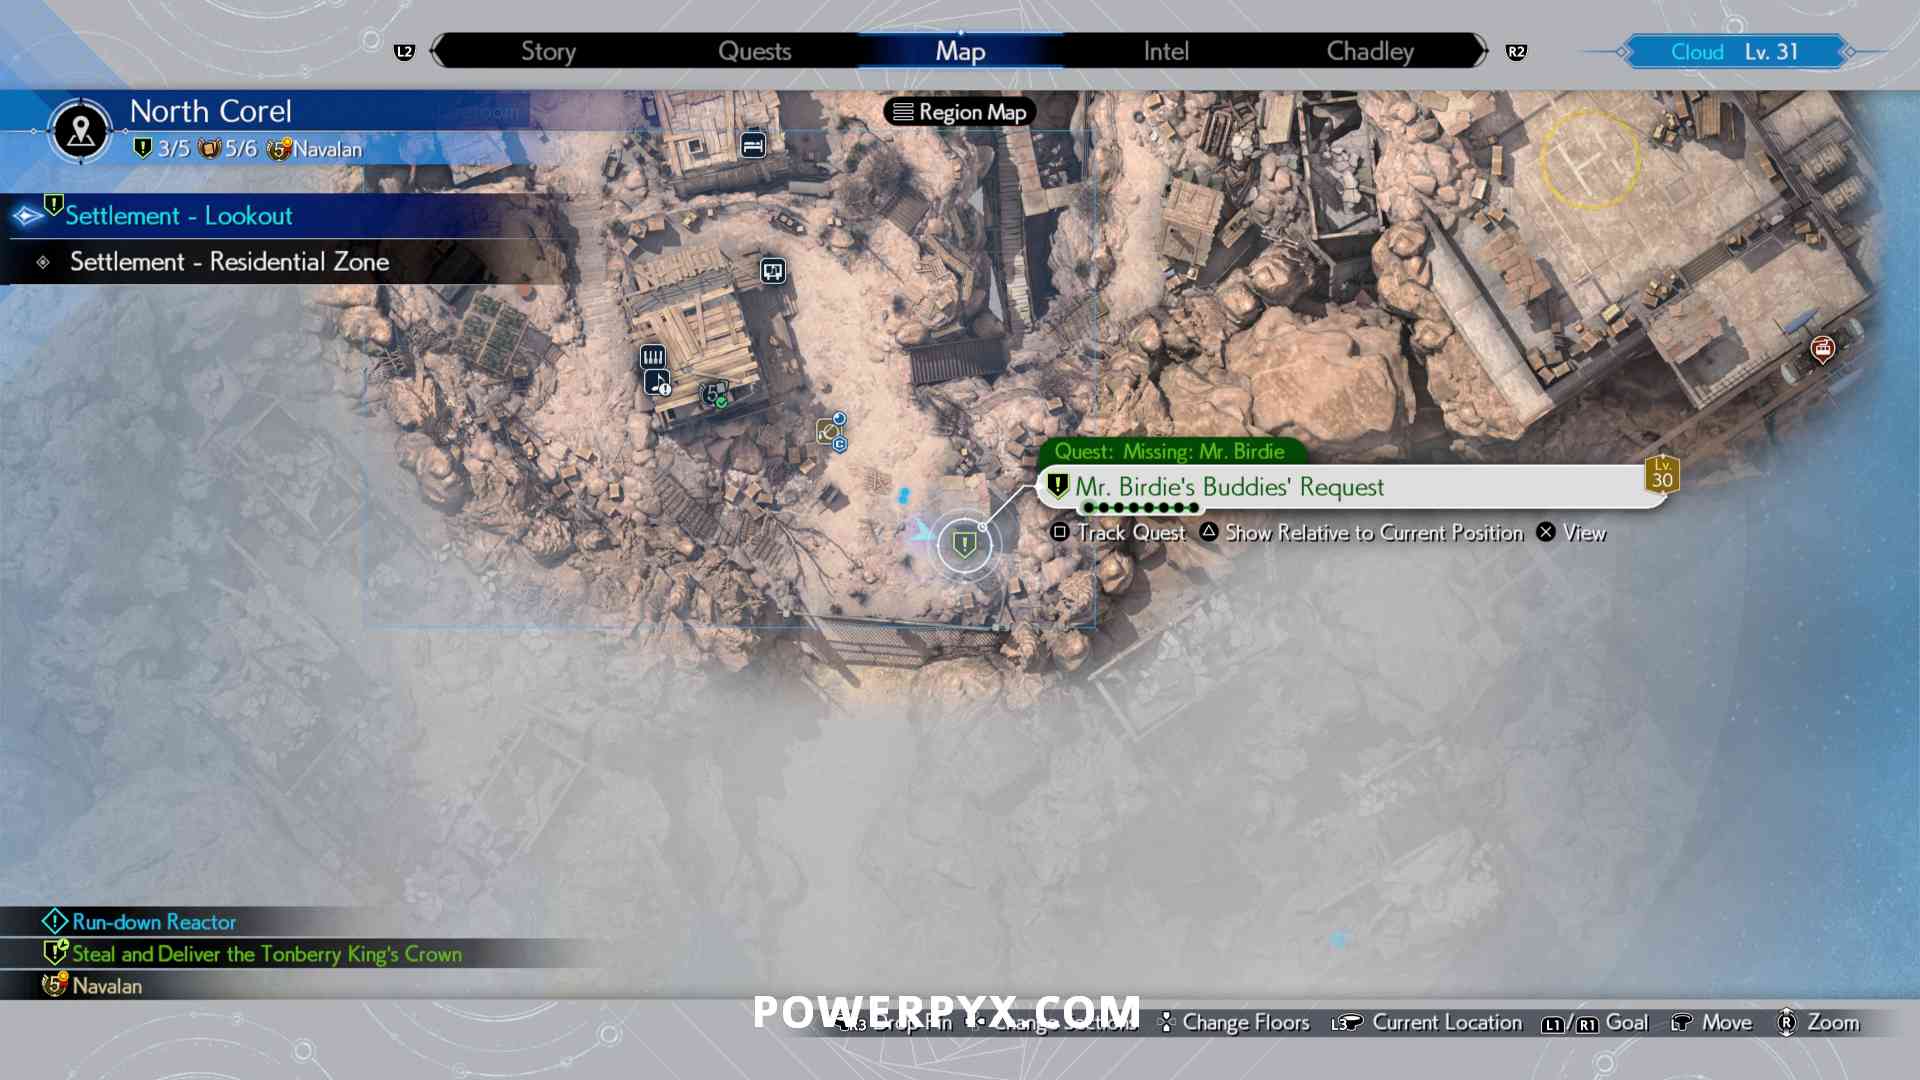
- Side Quest: Missing Mr. Birdie – unlocks at the start of the chapter in North Corel

Queen’s Blood:
- Queen’s Blood Card: 038 Bagnadrana – Won from Navalan in the lower section of North Corel. Must reach Queen’s Blood Rank 5 before you are able to challenge him.


Run-Down Reactor
When you are ready to continue the story, drive the buggy to the south of the Corel region, where you cross a large river to make your way toward Gongaga.

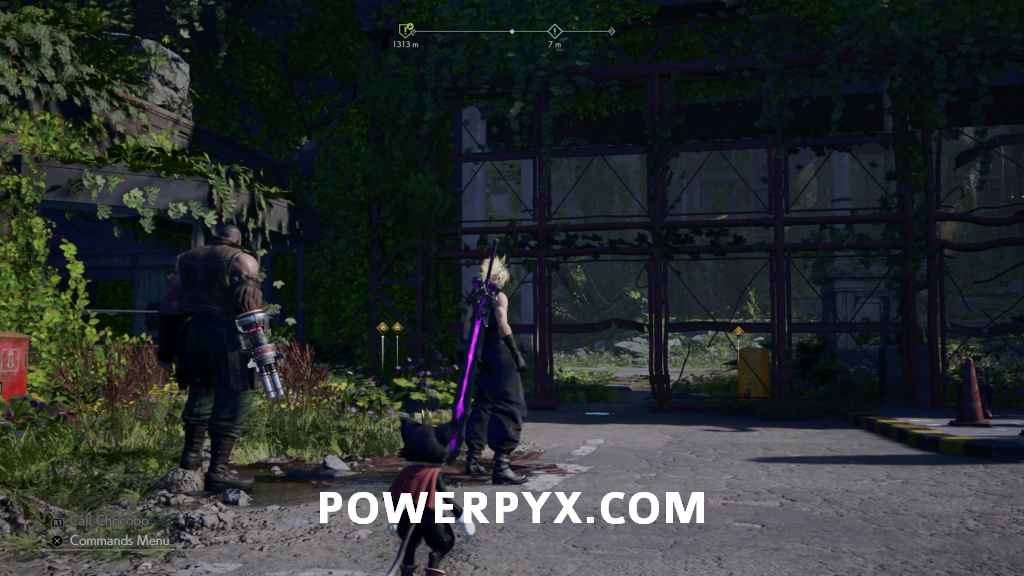
Jungles of Gongaga
You’ll automatically get out of the buggy and proceed on foot, as the buggy is only useable in the desert area of Corel. Stop at the rest point nearby if needed, then start heading into the jungle toward the objective. You can explore a fair bit of the area now if you like, but you are limited a fair bit due to the lack of Chocobos which have a heavily used movement ability in this region, so it’s better overall to wait until after most of the story section is complete to do any exploring as you will have access to the Chocobo and all activities at the same time.
The GYC’s Captain
After reaching the village you will meet Cissnei. Follow her up the hill nearby.
The Village of Gongaga
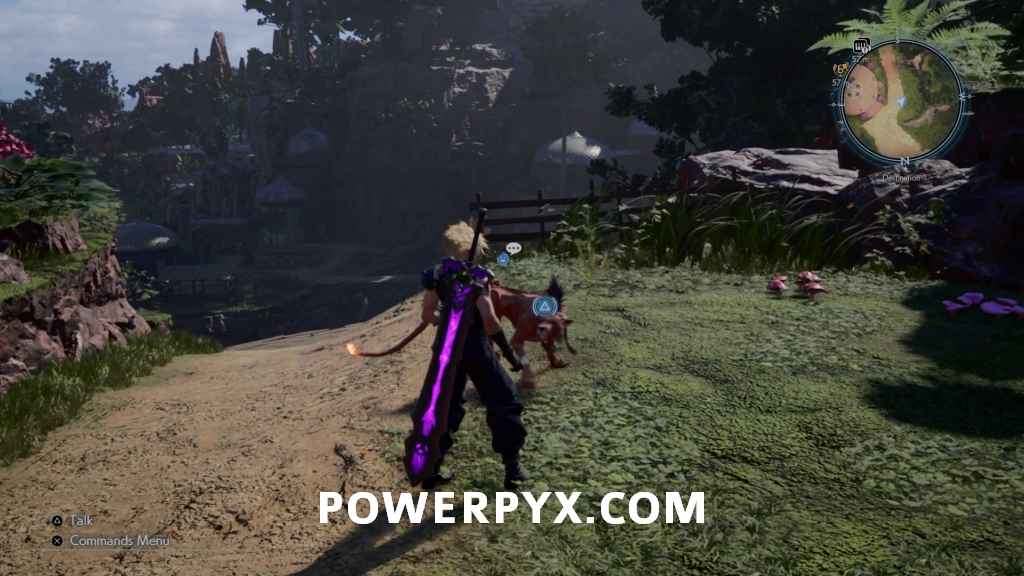
After the scene, your party will all go off on their own and you can explore the village a bit. Each of the characters (aside from Cait) has a relationship interaction. Red is first, immediately beside the monument. The correct answer to his question is the right-side mushroom patch.
Head back across the bridge to the building with the rest spot and you can find Yuffie inside sitting on the couch. You can also find a purple chest in the same building that contains the Bird of Prey weapon for Yuffie.

Barret is outside immediately to the south.

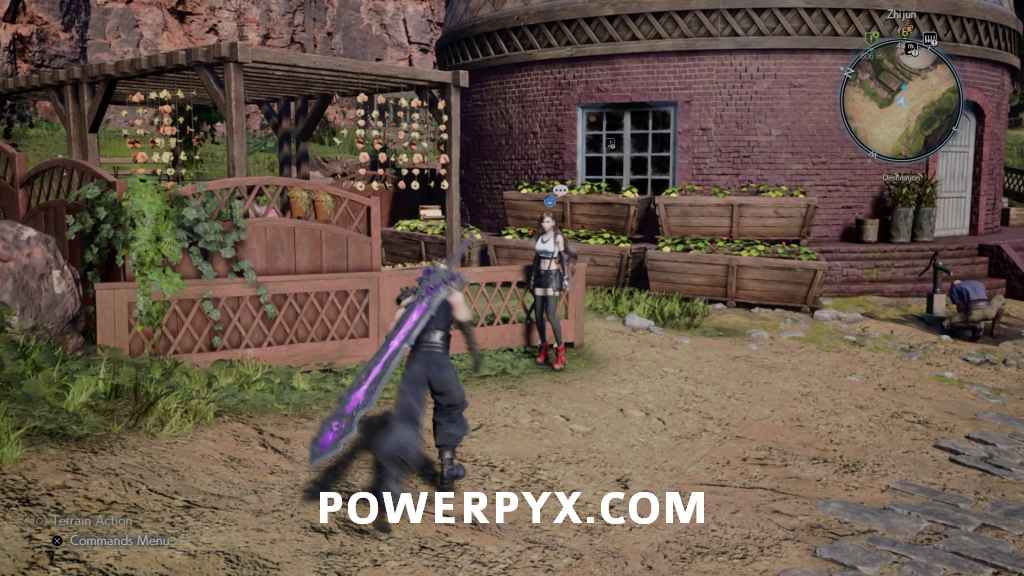
You can then head back across the river using either bridge where you can find Tifa outside the building where the piano is located.
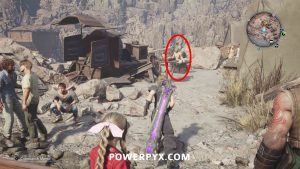
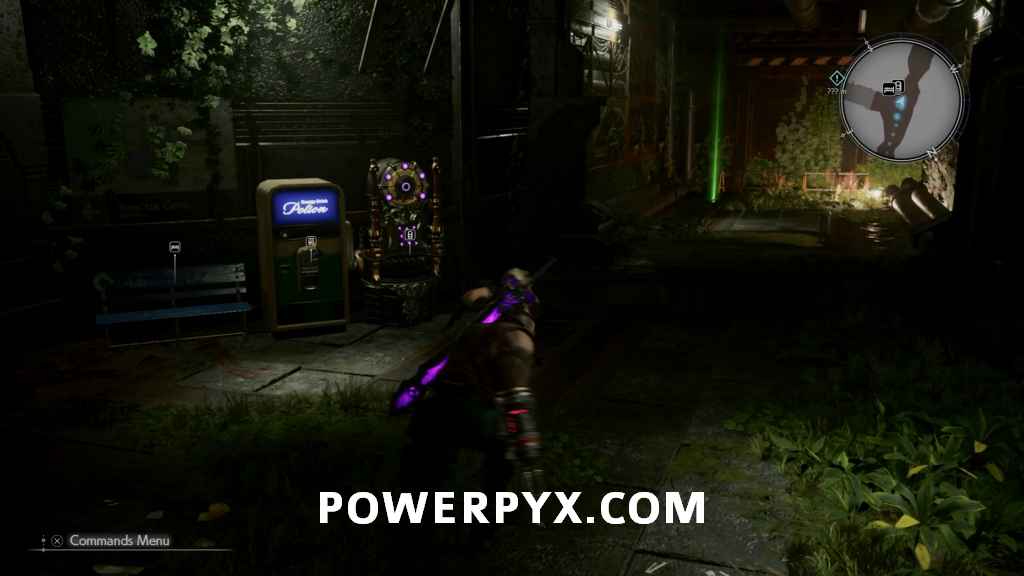
Another weapon, Cait Sith’s Red Megaphone, can be found in the very south of Gongaga village. Go to the southernmost bridge, when you face south you will see the purple chest in a water cave. Jump down the cliffs to the left of the bridge into the water and swim to the cave.


Aerith’s Acquaintances
From Tifa follow the path directly south, and after crossing a small bridge you will see Aerith going into a house. Go over and interact with the door for a scene and Aerith’s relationship interaction occurs automatically when you are required to speak with her outside.
Recuperation and Confusion
After speaking with Aerith you are required to head back to Cissnei’s to rest. You can explore again outside Gongaga now if you wish, but still don’t have access to Chocobos so it is still recommended to wait until after the next story section. When you’re done in Gongaga and are ready to continue the story interact with the bed and specifically choose the “Until it’s time to leave” option.

The Mysterious Roar
Shadows over the Reactor
Yuffie barges in when Cloud wakes up, follow her back up the hill to the monument.
Cry of the Planet
Road to the Reactor
The girls are left behind, while Cloud and the boys now go off to check the reactor. Follow the closer objective to reach the southern gate of the town, which will allow you to progress to into the southern part of the Gongaga open world.

You still don’t have access to Chocobos, so follow the main path on the ground and water to reach the reactor area, dealing with any enemies along the way. When you reach the parking lot, you can enter the facility first by going through the small gap in the metal fence.
The Shadows Beckon
You can use the nearby rest point to get prepared, then follow the stairs below into the reactor facility. Follow the linear path ahead through the first group of enemies. Instead of squeezing through the door to progress, first, go into the small side room where you can find a purple chest that contains the Crystal Sword weapon for Cloud.

Go through into the next hallway. The correct path to progress is left, but you can first crawl through a gap on the ground on the far right to reach a side room. In here you’ll encounter a new enemy called a Grangalan. These orbs will continually produce copies of themself if you don’t defeat them quickly. When they start trying to eject a copy you can pressure them by attacking during the Replicate move.

Go through the small gap leading into the next room, where you can find a chest containing a Sapphire.

You can then climb out the nearby hole and follow the path toward the objective. In the large room ahead you’ll need to drop to the lower floor, then swim across the two pools of water to reach the far side of the room to continue.

Gate Generator
At the end of the room, you’ll need to power the door using the nearby generator. Follow the cord to the end up the small slope, then hold  to pick it up. You can then walk it over to the terminal and press
  to plug it in, opening the door.


Keep following the path ahead until you reach a hallway with a split. You can go down the northeast hallway to find a chest that contains 3 x Hazardous Materials.

Go back to the split and take the other path to reach a large room full of water at the bottom. Climb up then drop underneath the large platform, where you can climb up to the northeast where there is a chest that contains a Sage Armband.

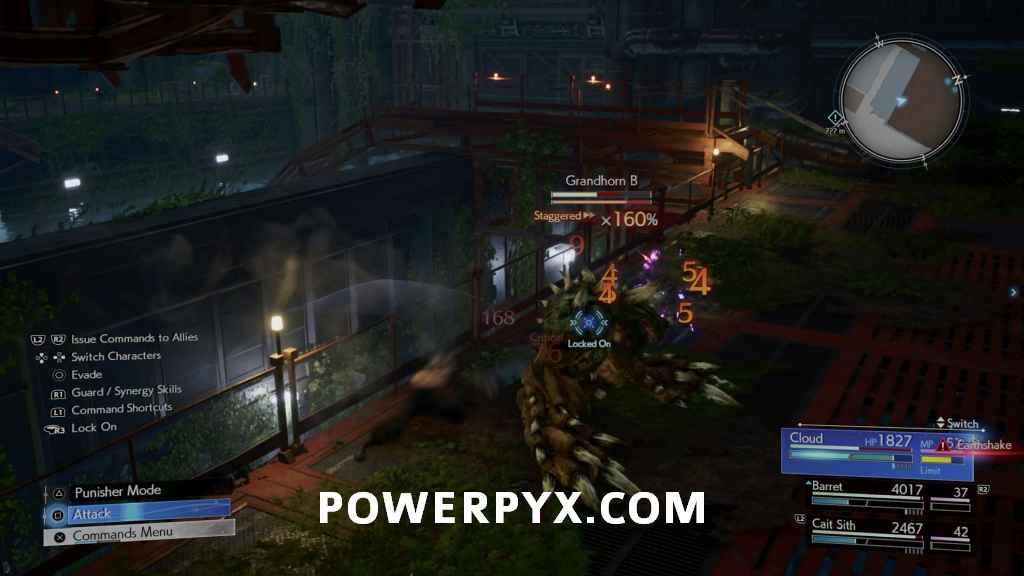
Climb up to the large main platform to encounter a new enemy, a Grandhorn. These monsters will guard against your attacks and then counterattack if you hit them too many times. They are weak to Fire, and you can pressure them by using ATB attacks while they are guarding or counterattacking.
Guided by Whispers
After the enemies are defeated, go to the edge of the platform where you will see some Whispers fly into a nearby corridor where you are aiming to head as well.
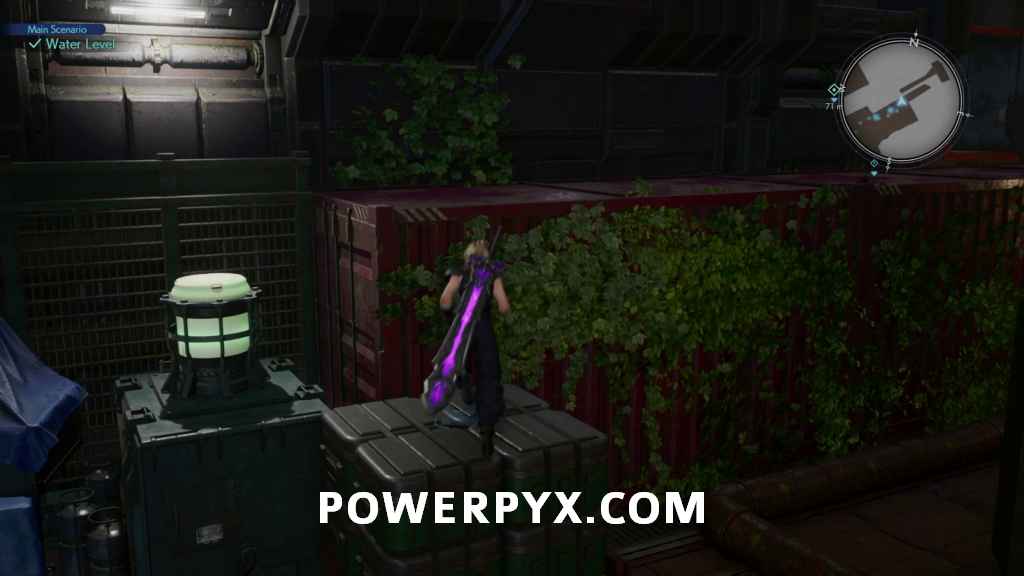
Water Level
You will need to raise the water level to reach the other corridor. Jump down into the water and then climb the ladder up to the higher platform.

Go up to the top floor and squeeze through the door into the side room.
Restoring Power
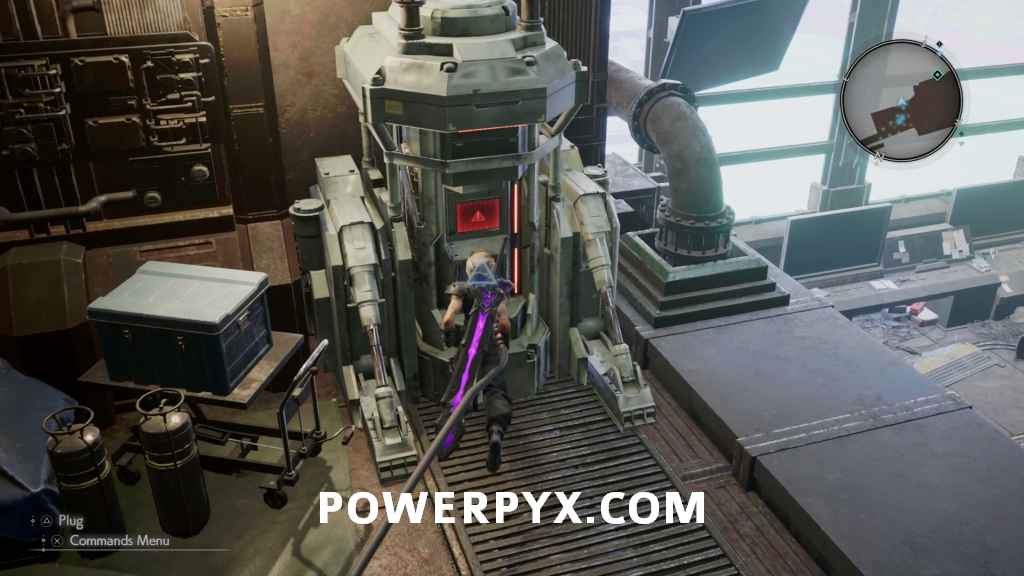
You need to restore power in here as well to be able to raise the water level using the console. To be able to plug in the power you need to move the cart that’s blocking the cable. so pull it all the way to the end of the path for something you will grab on the way out.

Once the cable is free you can plug in the same as you did before, then interact with the panel to the right.
Instead of going back out the way you came, climb up on top of the cart you moved earlier. Follow the path here to reach the platform you might have spotted earlier with the purple chest that contains the Golden Collar weapon for Red.
Drop down from this platform where you will need to defeat a couple of Grandhorns again, then you can swim across the water to reach the corridor where the Whispers went prior. After crawling under some rubble there will be another side room with some more Grangalans, and after defeating them you can pick up a chest containing a Remedy.

Continue down the hallway to where you reach a rest point, along with a Subversion Materia at the end of the path. Make sure you’re healed up and prepared before continuing.
Clash
After dropping into the reactor area you’ll first be fighting a new enemy, called an Amalgam. These are weak to Fire, and you want to make sure you’ve applied this in some form to them before they are defeated, as they will revive if they aren’t currently burning when they reach 0 HP. Hitting them with Fire also helps stagger them quickly, so making sure to hit each one with some form of Fire attack is the quickest way to deal with them.

After defeating the first two jump across to the next platform, where you will fight another 3 at once before being the boss fight starts.
Boss Fight: Specimen H1024

- Weaknesses / Status Ailments: Ice
- Lesser Resistances: Stop, Sleep
- Greater Resistances:
- Immunities: Proportional Damage, Fire, Lightning, Slow, Poison, Silence, Stone, Morphable Items
- Absorbed Elements: —
- Items Dropped: —
- Rare Items Dropped: —
- Stealable Items: —
- Assess Info: Strengthens itself by ingesting mako, then unleashes a powerful attack after a certain amount of time has passed. Inflicting enough damage after Mako Ingestion will both interrupt the subsequent attack and pressure it.
This is one of the simplest boss fights yet and should pose no trouble. Despite its imposing figure, Specimen H1024 holds no surprises or even extra appendages. Its attacks are easy to dodge and it will regularly use Mako Ingestion which does not damage you and is preparation for a powerful attack. Save your ATB charges for when it does this, then use them to cancel the subsequent attack and pressure it. This should build Stagger quickly and you can then use your most powerful abilities like the recently-learned Infinity Edge from Cloud’s Crystal Sword, Blizzaga if you have it and Limit Breaks.
When it has about a third of its health left, it will use Mako Inhalation which will turn it purple and give it abilities such as Barrier and Manaward as well as significantly boosting the power of its attacks. Conveniently, the game just gave you a Subversion Materia at the previous rest stop (you could have also gotten one earlier) so use the Breach ability to remove these shields. Then carry on as normal until it goes down.
Hard Tips: Nothing much to this one, put Elemental-Ice in everyone’s weapons to exploit its weakness and use ATB after Mako Ingestion to pressure it. Use Moogle Knuckle with Cait Sith when it’s staggered to increase the stagger damage by 50%. Feel free to use as much MP as you want here.
Crisis
After a scene, you will switch to playing as Tifa with Aerith and Yuffie back in the village. Swap over any materia or equipment you need now, then head over to the south gate of the village.
Race to the Reactor
On the way out Cissnei sets the group up with Chocobos, which will allow you to reach the reactor much faster. Using the Chocobo you can now bounce off the large mushrooms, which send the Chocobo through the air to specific farther locations.

The Grappling Gun
Once you reach the reactor it will be crawling with Shinra troops who you need to take out to progress. Like before all of them are weak to Fire, so you can quickly deal with them using this in whichever form you choose. Using the grapple you can then aim at specific spots on the environment and press to grapple to them, allow you to jump over the wall and progress.

Rescue Effort
Inside you are going to be taking a similar route to the reactor that you did prior, but before going past the rest point you can grapple to another point outside to reach a chest that contains 10 x Exquisite Beast Hides.

When ready you can use the rest point, then head down the stairs you went through earlier. Follow the path until you reach the long room you opened a door with the generator before. This time the room is full of water, and you need to swim to the middle platform where you can grapple to the floor above.

Here you can immediately turn around to spot a chest. To reach it grapple to the beam on the side of the room, then over to the chest where you can then obtain the Tiger Fangs weapon for Tifa.

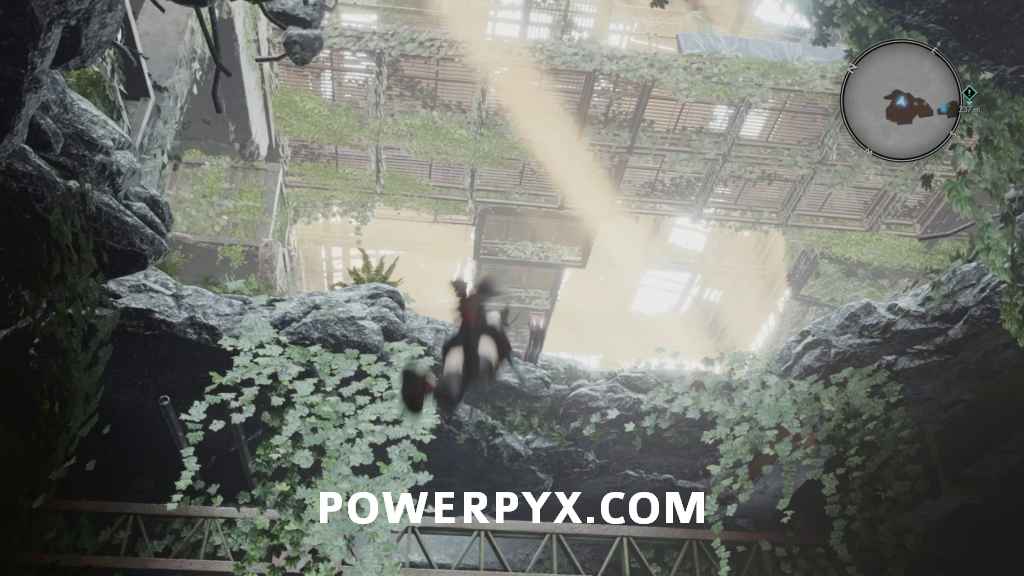
Drop back down and deal with the Chimera Mimics that are in your way. From where they are you need to grapple directly upward to the higher levels until you can grapple into the large opening leading to the building above with lots of sunlight.
Gate Generator
Deal with the enemies here, then you are going to need to find another generator to open another gate. Before grappling higher though you can climb up to the platform with the generator plug spot, then go directly right to find a chest that contains a Sapphire.

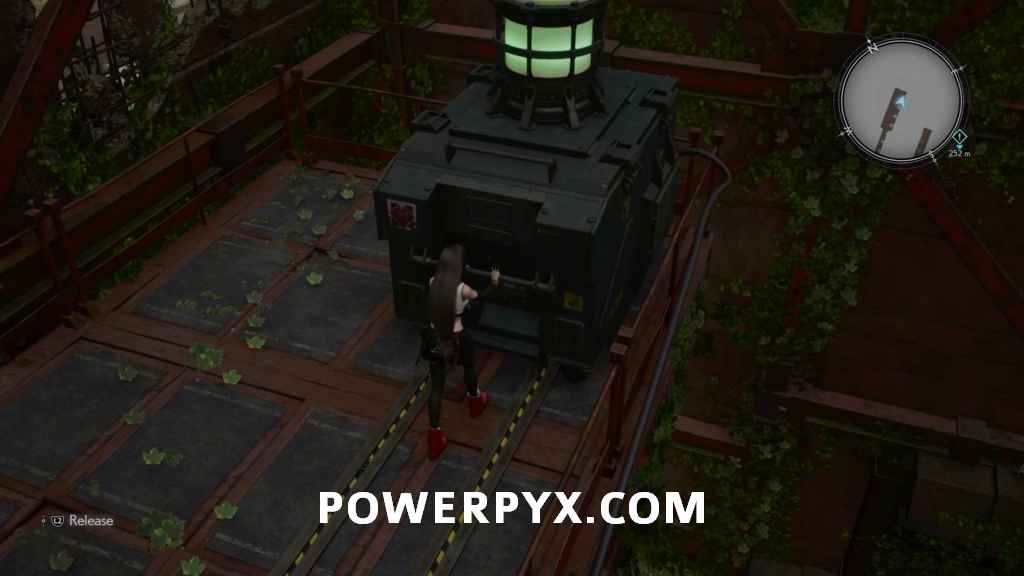
Grapple up to the platform directly above this chest, then across to the walkway in the middle of the room. Keep following the grapple path around until you reach the pushable generator unit on the corner platform. You can’t get the generator lower, but you can push it to the end of the platform it is on. This moves the hanging cord right beside the plug spot which is what you need. Take the pole in the center of the area back to the lower level and plug in the generator to open the gate.

Continue up the next grapple where you will be in a large area with a bunch more Shinra soldiers. Deal with them, then follow the path past the helicopter to what looks like a dead end where you can grapple up to a platform on the left.

Keep following the linear path ahead through a couple of groups of Slug-Ray enemies. On the second platform is a rest spot, where you should make sure you are healed up and ready for the boss fight ahead. When you are ready use the grapple point immediately to the right, then follow the linear path ahead to reach the reactor.
Boss Fight: Crimson Mare Mk. II
- Weaknesses / Status Ailments: Lightning
- Lesser Resistances:
- Greater Resistances: Stop
- Immunities: Proportional Damage, Berserk, Deprotect, Deshell, Debrave, Defaith, Slow, Poison, Silence, Sleep, Petrify, Stone, Morphable Items
- Absorbed Elements: —
- Items Dropped: —
- Rare Items Dropped: —
- Stealable Items: —
- Assess Info: Destroying the weapons on both of its arms will allow you to target Scarlet. Knocking her out with presure the battle armour.
Crimson Mare is definitely a step up from the last couple of boss fights. Firstly, in order to pressure it, you need to take out the Left and Right Sabers, which will then expose Scarlet. You then have to hit her to pressure the rest of the armour and you don’t have a particularly long window. Lightning is the best way to do this, so put a Lightning Materia on your characters. Hopefully at least one is Thundaga by now, but Thundara will do. For best result, use Arcane Ward with Aerith and get two casts for one ATB charge while using Lightning Ninjutsu with Yuffie to damage Mare while keeping distance from the sword swipes. Unfortunately, Tifa can’t do much from a distance except cast Lightning magic, so it might be worth making her the healer for this fight.
After you defeat the Sabers and pressure Mare, it will regenerate with two Makocannons instead, which changes the dynamics of the fight in the sense that these will fire plasma rays at you from distance rather than getting up close and slashing with the swords. You can block these attacks to minimise damage, but it wll be much harder to avoid completely. Again, do what you were doing before in terms of focusing on the arms first, and try to save your Synergy Abilities and Limits for when the main armour is pressured.
Finally, for the third stage Mare will spawn Gauntlets in each hand which are like huge fists, doing more damage than the blades did but swithing the fight back to how it was in the first stage in terms of dodging and blocking melee attacks rather than ranged one. At this stage, Mare should nearly be defeated anyway so just focus on taking away its last bit of health with your strongest attacks.
Hard Tips: Equip everyone with Elemental-Lightning in their weapons to buff your regular attacks, but for the most part in this fight you’ll just want to use Arcane Ward with Aerith and pummel with double Thundagas. Do note that while using the Gauntlets it won’t be weak to lightning, so when using these weapons just use regular attacks and abilities, rather than wasting MP on Thundaga.
Magnus Materia
After the boss fights Tifa is separated from the others. Quickly grapple to the two nearby points to reach the crane Scarlet is using.

Out of the Frying Pan
The next part is a mostly hands-off scene with a small amount of interaction. When prompted hold and  to progress, then use the right stick and select the spots with .
Where She Belongs
After the interaction part, you will have another scene in the reactor.
State of Things
After Tifa wakes up, head out of the room to speak with the others about what happened.
Freeflier Pilot
Your next objective is to head to Cosmo Canyon which will complete the chapter, but now is also the best time to start working on the side activities in Gongaga as you now have free use of the Chocobos and all side quests available to start.
Side Content: Gongaga
28 World Intel:
- Gongaga Region World Intel Locations – you can now grab all world intel in the region
4 Side Quests:
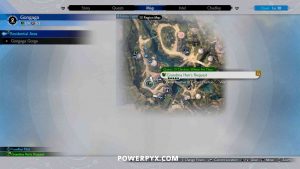
- Side Quest: The Pursuit of Perfection – can be accepted from the quest board in Gongaga Village – unlocks Weapon: Fafnir Rifle (Barret)

- Side Quest: O Chicken, Where Art Thou – can accept it from Gongaga Village notice board.
- Side Quest: Teach Me, Great Warrior – can accept it from Gongaga Village notice board.

- Side Quest: The Spice of Life – unlocked after Side Quest: Teach Me, Great Warrior, can accept it from Gongaga Village notice board.


Queen’s Blood:
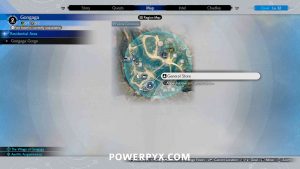
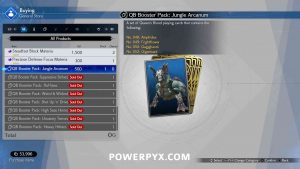
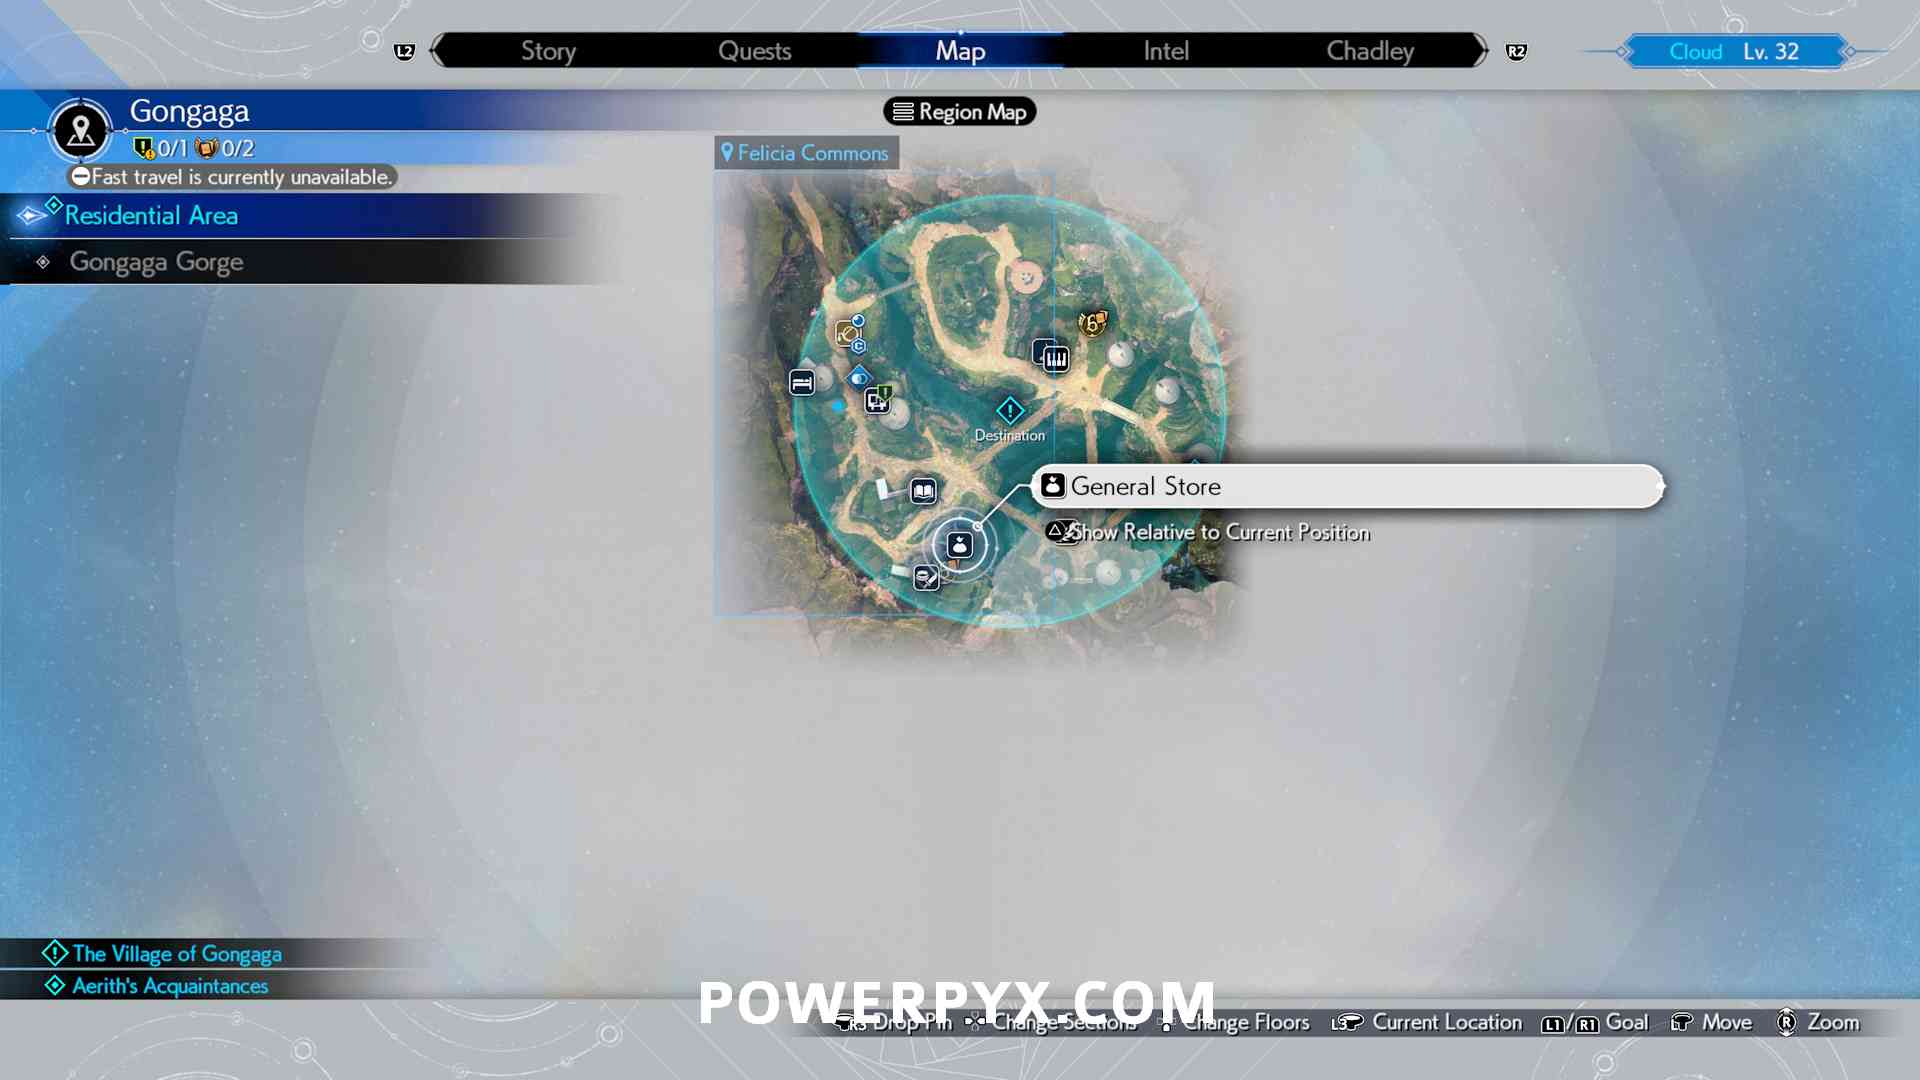
- Queen’s Blood Booster Pack: Jungle Arcanum (048 Amphidex, 049 Frightflower, 050 Gagighandi, 052 Gigantoad) – purchasable at General Store in Gongaga for 500 gil (contains 4 cards).
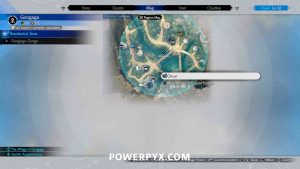
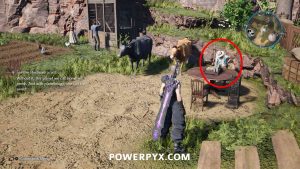
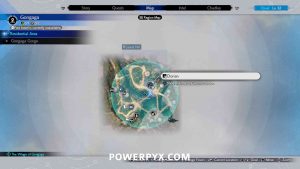
- Queen’s Blood Card: 059 Griffon – Won from Oscar in Gongaga.

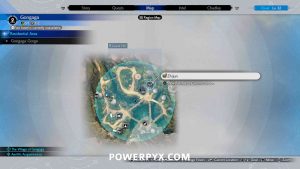
- Queen’s Blood Card: 055 Great Malboro – Won from Zhijun in Gongaga.


Piano Song:
- Music Sheet: Cinco de Chocobo – Objective: The Village of Gongaga – Location: Laurel Hill – on the piano in the building south of Memorial Hill in Gongaga.


Road to the Airstrip
When you are ready to progress, head out the south side of town where you will now be able to go through the previously locked gate, which leads to the airstrip.

Telephone Booth
Before interacting with the Telephone booth, check behind it for Cait Sith’s weapon Resounding Megaphone.


Now interact with the telephone booth.
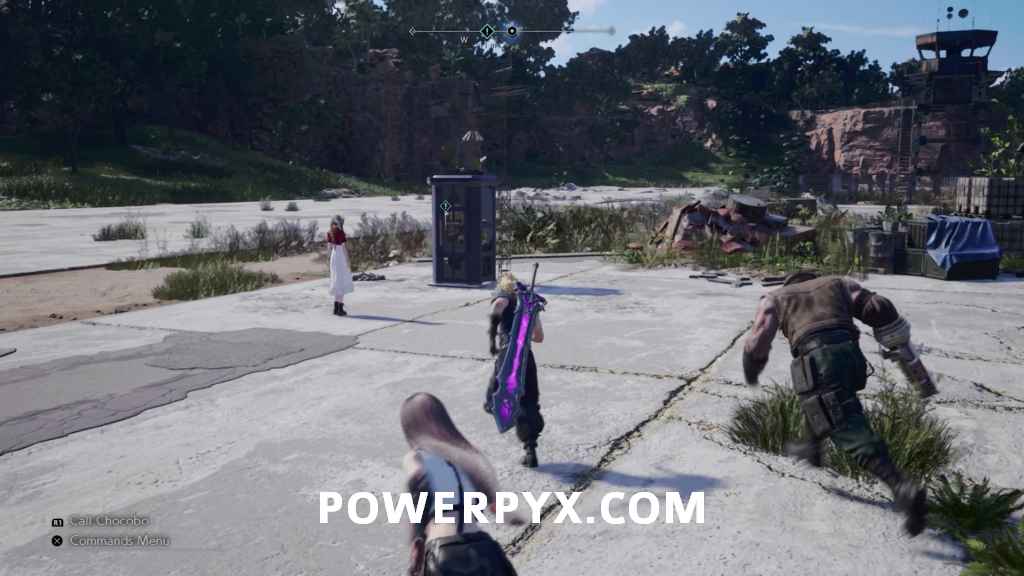
Price of the Flight
Cid requires 1,000 Gil to take you to Cosmo Canyon, which you’ll need to obtain if you somehow don’t have it at this point. Once you pay Cid the Gil he’ll fly the party to Cosmo Canyon, completing the chapter. Note you can come back immediately if you want, but at the moment you will need to pay Cid to fly between regions.

This finishes Chapter 9: The Planet Stirs in Final Fantasy VII Rebirth.
Next Up: Chapter 10: Watcher of the Vale
For all other Mission Walkthroughs, check out our complete Final Fantasy 7 (VII) Rebirth Walkthrough.
Leave a Reply